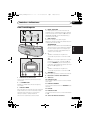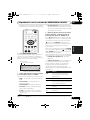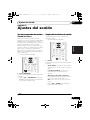
1
XW-NAC3_CUZXTSM.book 1 ページ 2010年4月6日 火曜日 午後1時18分 XW-NAC3-K Digital Speaker System for iPod Sistema digital de parlantes para iPod Register your product at: http://www.pioneerelectronics.com (US) http://www.pioneerelectronics.ca (Canada) • Protect your new investment The details of your purchase will be on file for reference in the event of an insurance claim such as loss or theft. • Receive free tips, updates and service bulletins on your new product • Improve product development Your input helps us continue to design products that meet your needs. • Receive a free Pioneer newsletter Registered customers can opt in to receive a monthly newsletter. http://www.pioneerelectronics.com (US) http://www.pioneerelectronics.ca (Canada) Operating Instructions Manual de instrucciones XW-NAC3_CUZXTSM.book 2 ページ 2010年4月6日 火曜日 午後1時18分 IMPORTANT NOTICE THE SERIAL NUMBER FOR THIS EQUIPMENT IS LOCATED IN THE BOTTOM. PLEASE WRITE THIS SERIAL NUMBER ON YOUR ENCLOSED WARRANTY CARD AND KEEP IN A SECURE AREA. THIS IS FOR YOUR SECURITY. D1-4-2-6-1*_A1_En NOTE: This equipment has been tested and found to comply with the limits for a Class B digital device, pursuant to Part 15 of the FCC Rules. These limits are designed to provide reasonable protection against harmful interference in a residential installation. This equipment generates, uses, and can radiate radio frequency energy and, if not installed and used in accordance with the instructions, may cause harmful interference to radio communications. However, there is no guarantee that interference will not occur in a particular installation. If this equipment does cause harmful interference to radio or television reception, which can be determined by turning the equipment off and on, the user is encouraged to try to correct the interference by one or more of the following measures: — Reorient or relocate the receiving antenna. — Increase the separation between the equipment and receiver. — Connect the equipment into an outlet on a circuit different from that to which the receiver is connected. — Consult the dealer or an experienced radio/TV technician for help. D8-10-1-2_A1_En This Class B digital apparatus complies with Canadian ICES-003. D8-10-1-3_A1_En Information to User Alterations or modifications carried out without appropriate authorization may invalidate the user’s right to operate the equipment. D8-10-2_A1_En CAUTION This product satisfies FCC regulations when shielded cables and connectors are used to connect the unit to other equipment. To prevent electromagnetic interference with electric appliances such as radios and televisions, use shielded cables and connectors for connections. D8-10-3a_A1_En WARNING: Handling the cord on this product or cords associated with accessories sold with the product may expose you to chemicals listed on proposition 65 known to the State of California and other governmental entities to cause cancer and birth defect or other reproductive harm. D36-P4_A_En Wash hands after handling. WARNING Before plugging in for the first time, read the following section carefully. The voltage of the available power supply differs according to country or region. Be sure that the power supply voltage of the area where this unit will be used meets the required voltage (e.g., 230 V or 120 V) written on the rear panel. D3-4-2-1-4*_A1_En VENTILATION CAUTION When installing this unit, make sure to leave space around the unit for ventilation to improve heat radiation (at least 10 cm at top, 10 cm at rear, and 10 cm at each side). WARNING Slots and openings in the cabinet are provided for ventilation to ensure reliable operation of the product, and to protect it from overheating. To prevent fire hazard, the openings should never be blocked or covered with items (such as newspapers, table-cloths, curtains) or by operating the equipment on thick carpet or a bed. D3-4-2-1-7b*_A1_En WARNING This equipment is not waterproof. To prevent a fire or shock hazard, do not place any container filled with liquid near this equipment (such as a vase or flower pot) or expose it to dripping, splashing, rain or moisture. D3-4-2-1-3_A1_En WARNING To prevent a fire hazard, do not place any naked flame sources (such as a lighted candle) on the equipment. D3-4-2-1-7a_A1_En Operating Environment Operating environment temperature and humidity: +5 °C to +35 °C (+41 °F to +95 °F); less than 85 %RH (cooling vents not blocked) Do not install this unit in a poorly ventilated area, or in locations exposed to high humidity or direct sunlight (or strong artificial light) D3-4-2-1-7c*_A1_En XW-NAC3_CUZXTSM.book 3 ページ 2010年4月6日 火曜日 午後1時18分 IMPORTANT CAUTION RISK OF ELECTRIC SHOCK DO NOT OPEN The lightning flash with arrowhead symbol, within an equilateral triangle, is intended to alert the user to the presence of uninsulated “dangerous voltage” within the product’s enclosure that may be of sufficient magnitude to constitute a risk of electric shock to persons. CAUTION: TO PREVENT THE RISK OF ELECTRIC SHOCK, DO NOT REMOVE COVER (OR BACK). NO USER-SERVICEABLE PARTS INSIDE. REFER SERVICING TO QUALIFIED SERVICE PERSONNEL. The exclamation point within an equilateral triangle is intended to alert the user to the presence of important operating and maintenance (servicing) instructions in the literature accompanying the appliance. D3-4-2-1-1_A1_En NOTE: THE NO USER-SERVICEABLE PARTS COMPARTMENT WARNING IS LOCATED ON THE APPLIANCE BOTTOM. 1) 2) 3) 4) 5) 6) 7) Read these instructions. Keep these instructions. Heed all warnings. Follow all instructions. Do not use this apparatus near water. Clean only with dry cloth. Do not block any ventilation openings. Install in accordance with the manufacturer’s instructions. 8) Do not install near any heat sources such as radiators, heat registers, stoves, or other apparatus (including amplifiers) that produce heat. 9) Do not defeat the safety purpose of the polarized or grounding-type plug. A polarized plug has two blades with one wider than the other. A grounding type plug has two blades and a third grounding prong. The wide blade or the third prong are provided for your safety. If the provided plug does not fit into your outlet, consult an electrician for replacement of the obsolete outlet. 10) Protect the power cord from being walked on or pinched particularly at plugs, convenience receptacles, and the point where they exit from the apparatus. 11) Only use attachments/accessories specified by the manufacturer. 12) Use only with the cart, stand, tripod, bracket, or table specified by the manufacturer, or sold with the apparatus. When a cart is used, use caution when moving the cart/apparatus combination to avoid injury from tip-over. 13) Unplug this apparatus during lightning storms or when unused for long periods of time. 14) Refer all servicing to qualified service personnel. Servicing is required when the apparatus has been damaged in any way, such as power-supply cord or plug is damaged, liquid has been spilled or objects have fallen into the apparatus, the apparatus has been exposed to rain or moisture, does not operate normally, or has been dropped. D3-7-13-69_En CAUTION The STANDBY/ON switch on this unit will not completely shut off all power from the AC outlet. Since the power cord serves as the main disconnect device for the unit, you will need to unplug it from the AC outlet to shut down all power. Therefore, make sure the unit has been installed so that the power cord can be easily unplugged from the AC outlet in case of an accident. To avoid fire hazard, the power cord should also be unplugged from the AC outlet when left unused for a long period of time (for example, when on vacation). If the AC plug of this unit does not match the AC outlet you want to use, the plug must be removed and appropriate one fitted. Replacement and mounting of an AC plug on the power supply cord of this unit should be performed only by qualified service personnel. If connected to an AC outlet, the cut-off plug can cause severe electrical shock. Make sure it is properly disposed of after removal. The equipment should be disconnected by removing the mains plug from the wall socket when left unused for a long period of time (for example, when on vacation). This product is for general household purposes. Any failure due to use for other than household purposes (such as long-term use for business purposes in a restaurant or use in a car or ship) and which requires repair will be charged for even during the warranty period. (Symbol examples for batteries) D3-4-2-2-2a*_A1_En K041_A1_En D3-4-2-2-1a_A1_En These symbols are only valid in the European Union. Pb K058c_A1_En XW-NAC3_CUZXTSM.book 4 ページ 2010年4月6日 火曜日 午後1時18分 We Want You Listening For A Lifetime Selecting fine audio equipment such as the unit you’ve just purchased is only the start of your musical enjoyment. Now it’s time to consider how you can maximize the fun and excitement your equipment offers. This manufacturer and the Electronic Industries Association’s Consumer Electronics Group want you to get the most out of your equipment by playing it at a safe level. One that lets the sound come through loud and clear without annoying blaring or distortion-and, most importantly, without affecting your sensitive hearing. Sound can be deceiving. Over time your hearing “comfort level” adapts to higher volumes of sound. So what sounds “normal” can actually be loud and harmful to your hearing. Guard against this by setting your equipment at a safe level BEFORE your hearing adapts. To establish a safe level: • Start your volume control at a low setting. • Slowly increase the sound until you can hear it comfortably and clearly, and without distortion. Once you have established a comfortable sound level: • Set the dial and leave it there. Used wisely, your new sound equipment will provide a lifetime of fun and enjoyment. Since hearing damage from loud noise is often undetectable until it is too late, this manufacturer and the Electronic Industries Association’s Consumer Electronics Group recommend you avoid prolonged exposure to excessive noise. This list of sound levels is included for your protection. Decibel Level Example 30 40 50 60 70 80 Quiet library, soft whispers Living room, refrigerator, bedroom away from traffic Light traffic, normal conversation, quiet office Air conditioner at 20 feet, sewing machine Vacuum cleaner, hair dryer, noisy restaurant Average city traffic, garbage disposals, alarm clock at two feet. THE FOLLOWING NOISES CAN BE DANGEROUS UNDER CONSTANT EXPOSURE 90 Subway, motorcycle, truck traffic, lawn mower 100 Garbage truck, chain saw, pneumatic drill 120 Rock band concert in front of speakers, thunderclap 140 Gunshot blast, jet plane 180 Rocket launching pad Information courtesy of the Deafness Research Foundation. Taking a minute to do this now will help to prevent hearing damage or loss in the future. After all, we want you listening for a lifetime. S001_A1_En POWER-CORD CAUTION Handle the power cord by the plug. Do not pull out the plug by tugging the cord and never touch the power cord when your hands are wet as this could cause a short circuit or electric shock. Do not place the unit, a piece of furniture, etc., on the power cord, or pinch the cord. Never make a knot in the cord or tie it with other cords. The power cords should be routed such that they are not likely to be stepped on. A damaged power cord can cause a fire or give you an electrical shock. Check the power cord once in a while. When you find it damaged, ask your nearest PIONEER authorized service center or your dealer for a replacement. S002*_A1_En This product contains mercury. Disposal of this material may be regulated due to environmental considerations. For disposal or recycling information, please contact your local authorities or the Electronics Industries Alliance : www.eiae.org. K057_A1_En When using this product, confirm the safety information shown on the bottom of the unit. D3-4-2-2-4_B1_En WARNING Store small parts out of the reach of children and infants. If accidentally swallowed, contact a doctor immediately. XW-NAC3_CUZXTSM.book 5 ページ 2010年4月6日 火曜日 午後1時18分 Thank you for buying this Pioneer product. Please read through these operating instructions so that you will know how to operate your model properly. After you have finished reading the instructions, put them in a safe place for future reference. English Contents 02 Controls and displays Remote control . . . . . . . . . . . . . . . . . . . . . . . . . 9 Front/top panel . . . . . . . . . . . . . . . . . . . . . . . . 11 03 iPod/iPhone playback Confirm what iPod/iPhone models are supported . . . . . . . . . . . . . . . . . . . . . . . . . . . . . . . . . . . . 12 Connecting your iPod/iPhone . . . . . . . . . . . . . 12 Connecting your TV . . . . . . . . . . . . . . . . . . . 13 Playing your iPod/iPhone . . . . . . . . . . . . . . . . 13 SHUFFLE2 . . . . . . . . . . . . . . . . . . . . . . . . . . 15 HI-LITE Scan. . . . . . . . . . . . . . . . . . . . . . . . . 15 04 Bluetooth® AUDIO for Wireless Enjoyment of Music Wireless music play . . . . . . . . . . . . . . . . . . . . 17 Remote control operation. . . . . . . . . . . . . . . 17 About Bluetooth wireless technology . . . . . . 17 Setting the PIN code. . . . . . . . . . . . . . . . . . . . 18 Pairing this unit and Bluetooth wireless technology device . . . . . . . . . . . . . . . . . . . . . . 18 Listening to Music Contents of Bluetooth wireless technology device with Your System . . . . . . . . 19 Radio wave caution. . . . . . . . . . . . . . . . . . . . . 19 Scope of operation . . . . . . . . . . . . . . . . . . . . 20 Radio wave reflections . . . . . . . . . . . . . . . . . 20 Precautions regarding connections to products supported by this unit. . . . . . . . . . . . . . . . . . 20 05 Playback with HOME MEDIA GALLERY inputs Enjoying the Home Media Gallery . . . . . . . . . . 21 Steps to enjoy the Home Media Gallery. . . . . . 22 About playable file formats . . . . . . . . . . . . . . . 23 Connecting to the network through LAN interface . . . . . . . . . . . . . . . . . . . . . . . . . . . . . . . . . . . . 24 Playback with Home Media Gallery. . . . . . . . . 24 About the playback screen . . . . . . . . . . . . .26 About the Favorites folder . . . . . . . . . . . . . . .26 Registering audio files and Internet radio stations in the Favorites folder . . . . . . . . . .26 Deleting audio files and Internet radio stations from the Favorites folder . . . . . . . . . . . . . . .26 Registering broadcast stations not on the vTuner list from the special Pioneer site . . . .27 Advanced operations for Internet radio . . . . .28 Saving Internet radio stations . . . . . . . . . . .28 Retrieving saved Internet radio stations . . .28 Setting up the network . . . . . . . . . . . . . . . . .28 Checking the network settings . . . . . . . . . .29 Ext. Vol Limit . . . . . . . . . . . . . . . . . . . . . . . . .30 About network playback . . . . . . . . . . . . . . . .31 Windows Media Player . . . . . . . . . . . . . . . .31 Windows Media DRM . . . . . . . . . . . . . . . . .31 DLNA . . . . . . . . . . . . . . . . . . . . . . . . . . . . .31 Content playable over a network . . . . . . . . .31 About playback behavior over a network . . .32 Authorizing this unit . . . . . . . . . . . . . . . . . .32 aacPlus. . . . . . . . . . . . . . . . . . . . . . . . . . . .32 FLAC. . . . . . . . . . . . . . . . . . . . . . . . . . . . . .32 Español Features . . . . . . . . . . . . . . . . . . . . . . . . . . . . . . 6 What’s in the box . . . . . . . . . . . . . . . . . . . . . . . 6 Before using the remote control . . . . . . . . . . . . 7 Replace the battery . . . . . . . . . . . . . . . . . . . . 7 Using the remote control . . . . . . . . . . . . . . . . 8 Installing the unit . . . . . . . . . . . . . . . . . . . . . . . 8 Plugging in . . . . . . . . . . . . . . . . . . . . . . . . . . . . 8 Français 01 Before you start 06 Other connections Connecting auxiliary components . . . . . . . . .34 07 Sound settings Using the Sound Retriever . . . . . . . . . . . . . .35 Using the sound effects . . . . . . . . . . . . . . . .35 Adjusting the bass and treble . . . . . . . . . . . .36 08 Using the timer Setting the clock . . . . . . . . . . . . . . . . . . . . . .37 Changing the clock’s display mode . . . . . .37 Setting the wake-up timer . . . . . . . . . . . . . . .38 Turning the wake-up timer on/off . . . . . . . .38 Using the sleep timer . . . . . . . . . . . . . . . . . .38 09 Additional information Troubleshooting . . . . . . . . . . . . . . . . . . . . . .39 Resetting the system. . . . . . . . . . . . . . . . . . .42 About Sound Retriever . . . . . . . . . . . . . . . . .42 About iPod/iPhone . . . . . . . . . . . . . . . . . . . .42 Specifications . . . . . . . . . . . . . . . . . . . . . . . .43 Cleaning the unit. . . . . . . . . . . . . . . . . . . . . .43 5 En XW-NAC3_CUZXTSM.book 01 6 ページ 2010年4月6日 火曜日 午後1時18分 Before you start Chapter 1: Before you start 4. High Fidelity Sound Design Features 1. Alternating mix playback using two iPod/iPhone units with SHUFFLE2 function Alternating mix playback (SHUFFLE2) can be enjoyed by merely connecting two Apple iPod/iPhone units to this unit’s connector, and by pressing on the unit or remote control. In addition to the automated SHUFFLE2 playback, you can also manually operate and switch between two iPod/ iPhone units, or play a digest of the music on the two iPod/iPhone units (HI-LITE SCAN). 2. Wireless Playback Using Bluetooth wireless technology Since this speaker system is equipped with Bluetooth wireless technology, you can listen to other Bluetooth-enabled devices (cell phones, digital music players, etc.) without the need for a cable connection. Even when using a wireless connection, high quality sound is assured by means of the Sound Retriever Air function, which helps prevent signal deterioration. 3. Network Multimedia Function This unit can be used to listen to the newest kinds of digital content, including music libraries stored within a networkconnected computer, Internet radio, or music files stored on USB memory devices. 6 En In addition to its 2-channel full-range speaker, this unit also features a low-range passive radiator speaker, producing powerful, high-quality sound. In addition, the Sound Retriever function augments sound quality lost in compression, allowing rich sound like that produced by conventional CDs. 5. Enjoy iPod/iPhone Images Since this unit is equipped with a video output connector, the unit can be connected to a TV in order to view photographs and music videos stored in your iPod/iPhone. What’s in the box Please confirm that the following accessories are in the box when you open it. • Remote control • Lithium battery (CR2025) (The lithium battery has been factory installed in the remote control unit.) • Power cord • USB terminal cover (included with product) • Operating instructions (This document) XW-NAC3_CUZXTSM.book 7 ページ 2010年4月6日 火曜日 午後1時18分 Before you start 01 Caution When using lithium batteries, please observe the following: • Dispose of used battery cells immediately after replacement. Keep away from children. • Remove the protective seal from the battery casing. When you notice a decrease in the operating range, replace the battery (see below). Replace the battery When replacing the battery, use a commercially available Lithium CR2025 battery. 1 1 3 2 1 While pushing the release tab, pull out the battery casing. 2 Remove the battery from the casing. • Store lithium batteries, out of the reach of children and infants. If accidentally swallowed, please contact a doctor immediately. Español The battery supplied with this unit is stored in the battery casing. Français • There is danger of explosion if the battery is incorrectly replaced. Make sure to replace only with the same or equivalent type recommended by the manufacturer. English Before using the remote control • Lithium batteries may present a fire or chemical burn hazard if misused. Do not disassemble, heat above 100 °C, or incinerate. • Remove the battery if the unit isn’t going to be used for a month or more. • When disposing of used batteries, please comply with governmental regulations or environmental public instruction’s rules that apply in your country or area. • WARNING Do not use or store batteries in direct sunlight or other excessively hot place, such as inside a car or near a heater. This can cause batteries to leak, overheat, explode or catch fire. It can also reduce the life or performance of batteries. “Perchlorate Material – special handling may apply. See www.dtsc.ca.gov/hazardouswaste/ perchlorate. (Applicable to California, U.S.A.) ” 3 Place a new battery in the casing. Make sure the side of the battery is facing up when you place it in the space provided. 7 En XW-NAC3_CUZXTSM.book 01 8 ページ 2010年4月6日 火曜日 午後1時18分 Before you start Using the remote control The remote has a range of about 7 m (23 ft.) at an angle of about 30º from the remote sensor. 30° 30° 7 m (23 ft.) Keep in mind the following when using the remote control: • Make sure that there are no obstacles between the remote and the remote sensor on the unit. • Remote operation may become unreliable if strong sunlight or fluorescent light is shining on the unit’s remote sensor. Installing the unit • When installing this unit, make sure to put it on a level and stable surface. Don’t install it on the following places: – on a color TV (the screen may distort) – near a cassette deck (or close to a device that gives off a magnetic field). This may interfere with the sound. – in direct sunlight – in damp or wet areas – in extremely hot or cold areas – in places where there is vibration or other movement – in places that are very dusty – in places that have hot fumes or oils (such as a kitchen) Plugging in After you’ve finished making all connections, plug the unit into an AC outlet. • Remote controllers for different devices can interfere with each other. Avoid using remotes for other equipment located close to this unit. AC IN • Replace the batteries when you notice a fall off in the operating range of the remote. 1 Plug the supplied power cord into the AC IN socket on the back of the unit. 2 Plug the other end into a power outlet. Important • Before making or changing any connections, switch off the power and disconnect the power cord from the AC outlet. 8 En XW-NAC3_CUZXTSM.book 9 ページ 2010年4月6日 火曜日 午後1時18分 Controls and displays 02 Controls and displays English Remote control Français Chapter 2: iPod b Switches the input to the iPod/iPhone connected to the iPod b connector port. 9 1 10 2 3 4 5 15 16 17 6 7 8 18 BT A Switches the input to Bluetooth AUDIO. AUX Switches the input to external input. Español 11 12 13 14 3 CLASS Switches between the three banks (classes) of radio station presets (page 28). 4 T.EDIT (TUNER EDIT) Use to save Internet radio stations (page 28). 5 MENU Press to make various settings. /// Use these to select items, change settings. ENTER Use this to implement the selected item or enter a setting that you have changed. 19 20 21 22 23 1 STANDBY/ON Switches the unit between standby and on. 2 iPod a Switches the input to the iPod/iPhone connected to the iPod a connector port. When iPod/iPhone are connected to both connector ports iPod a and iPod b, the SHUFFLE2 function can be used to alternately play tracks on iPod a and iPod b (page 15). RETURN Use to return to the previous menu or the category list screen. 6 PLAYLIST < / > Use these to select playlists to be played on iPod/iPhone. 7 SHUFFLE Perform shuffle play of tracks on the selected iPod/iPhone or USB memory device (page 14). 8 REPEAT Perform repeat play of tracks on the selected iPod/iPhone or USB memory device (page 14). 9 En XW-NAC3_CUZXTSM.book 02 10 ページ 2010年4月6日 火曜日 午後1時18分 Controls and displays 9 HOME MEDIA GALLERY Switches the input to internet radio, a USB storage device or server components on the network (page 22). 10 HI-LITE If an iPod/iPhone is connected to the connector port, the HI-LITE function can be used to playback part of the track (page 15). 11 SLEEP Use to put the unit in sleep mode and select the amount of time before sleep (page 38). 12 Use to turn the wake-up timer function ON/OFF (page 38). Also use to switch the clock display functions (page 37). 13 CLEAR Use to delete audio files and Internet radio stations from the Favorites folder (page 26). 14 PGM Use to register audio files and Internet radio stations in the Favorites folder (page 26). 15 Playback control buttons Use when operating an iPod/iPhone, Bluetooth wireless technology device, USB storage device, internet radio and the music files stored in PC’s with this remote control (page 13, 19, 24). 16 ALBUM < / > Use these to select albums to play on iPod/ iPhone. 17 DISPLAY Switches the track information (artist name/ album name) each time the button is pressed during playback. 18 VOLUME +/– Use to set the listening volume. 19 S.RETRIEVER Use to turn the Sound Retriever function ON/ OFF (page 35). 10 En 20 BASS/TREBLE Use the bass and treble controls to adjust the overall tone (page 36). 21 SOUND Switches Sound modes (page 35). 22 MUTE Press to temporarily silence the sound. 23 DISP OFF Turns the display off except when pressing the buttons. XW-NAC3_CUZXTSM.book 11 ページ 2010年4月6日 火曜日 午後1時18分 Controls and displays 02 1 2 USB STANDBY/ON TIMER WAKE UP(GREEN) SLEEP(ORANGE) a b VOLUME 5 USB terminal When no USB storage device is connected, install the USB terminal cover. INPUT SELECTOR 3 4 6 7 WARNING Store the USB terminal cover out of the reach of children and infants. If accidentally swallowed, contact a doctor immediately. 9 6 a b iPod a Switches the input to the iPod/iPhone connected to the iPod a connector port. When iPod/iPhone are connected to both connector ports iPod a and iPod b, the SHUFFLE2 function can be used to alternately play tracks on iPod a and iPod b (page 15). 14 iPod Español 8 Français 4 INPUT SELECTOR Use to select an input source. Press repeatedly to switch between iPod a, iPod b, Bluetooth AUDIO (BT AUDIO), Home Media Gallery and external input (AUX). 5 English Front/top panel b Switches the input to the iPod/iPhone connected to the iPod b connector port. 7 VOLUME +/– Use to set the listening volume. 10 11 12 13 1 Power Indicator Lights when the power is on. 2 STANDBY/ON Switches the unit between standby and on. 3 TIMER indicator When the wake-up timer is set to ON, this indicator lights green. When the sleep timer is set to ON, this indicator lights orange. 8 iPod/iPhone connector ports 9 Speaker units 10 iPod a indicator Lights when the iPod a input is selected. 11 SHUFFLE2 indicator Lights when the SHUFFLE2 function is on. 12 Display 13 iPod b indicator Lights when the iPod b input is selected. 14 Remote control sensor 11 En XW-NAC3_CUZXTSM.book 03 12 ページ 2010年4月6日 火曜日 午後1時18分 iPod/iPhone playback Chapter 3: iPod/iPhone playback Merely by connecting your iPod/iPhone to this speaker system, you can enjoy high-quality sound from your iPod/iPhone. This unit can also be connected to a television set, letting you view images from your iPod/iPhone. Playback and volume level setting for iPod/ iPhone music and images can be performed from this unit or the iPod/iPhone itself. Confirm what iPod/iPhone models are supported Audio Control 2 Select ’About’. The software version will be displayed. • Consult the Apple website regarding the newest software versions and instructions on how to update your version. Tip • When using an iPod/iPhone not supported by this unit, use a commercially available cable to connect the iPod/iPhone to the AUX IN connector of this unit. The iPod/iPhone playable on this unit are shown below.1 iPod/iPhone iPod nano 1/2G iPod nano 3/4/5G iPod 5G iPod classic 2007 iPod classic 2008 iPod classic 2009 iPod touch 1G iPod touch 2G iPod touch 2G 2009 iPhone iPhone 3G/3GS 1 Select ’Settings’ from the top menu. When using iPod touch or iPhone, select ‘General’ after selecting ‘Settings’. Video Always use the most recent version of iPod/ iPhone software available. Operation compatibility may vary depending on the version of the software used. You can confirm your software version by operating your iPod/ iPhone as follows: Connecting your iPod/iPhone Caution • When connecting one or two iPod/iPhone units, always use the dock adapter provided with your iPod/iPhone, or a commercially adapter designed to support iPod/iPhone. The iPod/iPhone cannot be connected without a dock adapter; attempting to connect an iPod/iPhone without a dock adapter will cause damage or malfunction. Note 12 En 1 • Pioneer does not guarantee that this unit plays iPod/iPhone other than the ones specified. • Some functions may be restricted depending on the model or software version. • iPod/iPhone is licensed for reproduction of non-copyrighted materials or materials the user is legally permitted to reproduce. • Features such as the equalizer cannot be controlled using this system, and we recommend switching the equalizer off before connecting. • Pioneer cannot under any circumstances accept responsibility for any direct or indirect loss arising from any inconvenience or loss of recorded material resulting from the iPod/iPhone failure. • For detailed instructions on using the iPod/iPhone, please refer to the manual supplied with the iPod/iPhone. XW-NAC3_CUZXTSM.book 13 ページ 2010年4月6日 火曜日 午後1時18分 iPod/iPhone playback 03 Caution • Before making or changing the connections, switch off the power and disconnect the power cord from the power outlet. Plugging in should be the final step. Français MENU MENU Dock adapter TV English iPod nano/ iPod classic/ iPod touch/ iPhone Español 1 Attach the Dock adapter to iPod/iPhone connector port on the top panel of this unit. • An iPod/iPhone Dock adapter is not supplied with this unit. When attaching the Dock adapter, be sure to orient the front-back directions of the Dock adapter correctly. To attach, first place the protruding tabs on the front side of the adapter into the depressions on the iPod/iPhone connector port and press into position. When attaching the adapter, be careful not to strike the connectors. 2 Connect your iPod/iPhone. Connecting your TV To watch iPod/iPhone images on a television, perform connections using a composite video cable. • When an iPod/iPhone is connected to this unit, the iPod/iPhone’s TV output setting is automatically set to ON.1 Composite video cable (commercially available) VIDEO OUT AUX IN Playing your iPod/iPhone Caution • When your iPod is connected to this unit and you wish to operate the iPod/iPhone by touching it directly, be sure to hold the iPod/iPhone steady with the other hand to prevent malfunctions due to faulty contacts. When the iPod/iPhone function is selected, if an iPod/iPhone is connected to the connector port iPod a or b, ‘iPod a/b Connecting’ will be displayed while the device is being confirmed.2 Playback and volume level setting for iPod/ iPhone music and images can be performed from this unit or the iPod/iPhone itself. Note 1 • Some iPods allow the TV output setting to be changed while connected. • When the iPod/iPhone is disconnected from this unit, the iPod/iPhone’s TV output setting returns to its original state. 2 If an iPod/iPhone is connected when the iPod/iPhone is in playback mode and this unit is in standby mode, the power will turn on and playback of the iPod/iPhone will begin. 13 En XW-NAC3_CUZXTSM.book 03 14 ページ 2010年4月6日 火曜日 午後1時18分 iPod/iPhone playback • When using the iPod/iPhone to adjust sound volume, the adjustment will be applied only to the sound produced from this unit’s speakers.1 If the iPod/iPhone is disconnected from this unit, the iPod’s sound volume will return to its original setting. When playing a single iPod/iPhone, press iPod a or iPod b to switch to the respective mode. The following operations are possible for iPod/ iPhone, using the remote control. Button What it does / Starts normal playback and pauses/ unpauses playback. Pauses playback. Press to skip to the start of the current file, then previous files. Press and hold to start fast reverse scanning. Press to skip to the next file. Press and hold to start fast forward scanning. VOLUME Use to set the listening volume. +/– SHUFFLE The currently selected iPod/iPhone tracks are played back in random order (shuffle play). REPEAT The currently selected iPod/iPhone tracks are played back repeatedly.a MENU Use to access the iPod/iPhone menu. // Use to control the iPod/iPhone menu. ENTER PLAYLIST Use these to select playlists to be </> played on iPod/iPhone. ALBUM </> Use these to select albums to be played on iPod/iPhone. Note 1 These adjustments are applied to all inputs to the unit. 14 En Button What it does DISPLAY Switches the track information (artist name/album name) each time the button is pressed during playback. DISP OFF Turns the display off except when pressing the buttons. a Press repeatedly to switch between repeat play options. ‘Repeat’ plays the currently playing file repeatedly. ‘Repeat ALL’ plays all the files repeatedly. When no device is connected to the selected iPod/iPhone connector ports (iPod a or iPod b) and this unit is not operated for 30 minutes or more after the respective function is selected, power will automatically turn OFF. While playing an iPod/iPhone unit, the track information is displayed on this unit’s display. Function Song name i P o d a S o n g n a m e A r t i s t n a m e 0 : 0 0 Time Artist name/Album name Play mode : Repeat 1 : Repeat all : Shuffle When playing two iPod/iPhone units alternately, press to perform SHUFFLE2 play. XW-NAC3_CUZXTSM.book 15 ページ 2010年4月6日 火曜日 午後1時18分 iPod/iPhone playback 03 During the SHUFFLE2 operation, the order of track playback is set by the shuffle function. Each track is played back for a few seconds at a certain time from the track beginning, thus allowing desired tracks to be found quickly. 1 Connect an iPod/iPhone to the iPod/ iPhone connector ports, then press iPod a or iPod b. 2 Press MENU to access the iPod/iPhone menu. 3 Select the track area that you want to play back, then press ENTER. 2 Press MENU to access the iPod/iPhone menu. 4 Press HI-LITE. HI-LITE scan function will begin from the first track on the selected iPod/iPhone. 3 Select the track area that you want to play back, then press ENTER. If playback was already underway, the HI-LITE scan will begin from the currently playing track. 4 Press . The SHUFFLE2 mode is set, and the SHUFFLE2 indicator lights; the unit connected to the iPod a connector port will playback. A bit before the currently playing iPod/iPhone track ends, the other iPod/iPhone unit begins cross fade playback. The same operation is repeated thereafter until all tracks on both units have been played.1 • To cancel the SHUFFLE2 mode, press either once again, or . • The SHUFFLE mode will also be canceled if the function is switched to any another input (including iPod a or iPod b). 2 Español 1 Connect two iPod/iPhone units to the iPod/iPhone connector ports (iPod a, iPod b), then press iPod a or iPod b. Français Two iPod/iPhone units can be played alternately with no break in sound (SHUFFLE2). A bit before the currently playing iPod/iPhone track ends, playback begins on the other iPod/ iPhone track and the volume is gradually raised to fade in seamlessly (Cross fade). English HI-LITE Scan SHUFFLE2 After a track is played for a few seconds, the next track will be found and a certain time2 from the track beginning will be played for a few seconds. When two iPod/iPhone units are connected simultaneously, the first track on the alternate iPod/iPhone will be found and a certain time from the track beginning will be played for a few seconds. Thereafter, the same process will be repeated until all tracks have been found and played for a few seconds each. • To cancel the HI-LITE Scan operation, press HI-LITE once more. • The HI-LITE Scan mode will also be canceled if the function is switched to any another input (including iPod a or iPod b). Note 1 During Cross Fade operation, /, and / are deactivated. 2 If a track’s total length is too short, the track will be played back from the track beginning for a few seconds. 15 En XW-NAC3_CUZXTSM.book 03 16 ページ 2010年4月6日 火曜日 午後1時18分 iPod/iPhone playback Important If the power indicator and iPod/iPhone indicator flash simultaneously, a connection fault is indicated. Perform the following troubleshooting checks: • Check whether the iPod/iPhone was supported by this unit. • Reconnect the iPod/iPhone to the unit. If this doesn’t seem to work, try resetting your iPod/iPhone. • Update the iPod/iPhone software to the latest version. If the iPod/iPhone cannot be operated, check the following items: • Is the iPod/iPhone connected correctly? Reconnect the iPod/iPhone to the unit. • Is the iPod/iPhone experiencing a hangup? Try resetting the iPod/iPhone, and reconnect it to the unit. Tip • iPod/iPhone recharging occurs whenever an iPod/iPhone is connected to this unit. (This function is supported in standby mode as well.) • If an iPod/iPhone unit is connected to this unit when it is already in play mode, turning the unit’s power ON or switching input to iPod will cause iPod/iPhone playback to automatically begin. • When this unit’s power is turned ON with another function is selected, even if an iPod/iPhone in play mode is connected, playback will not automatically begin. • When input is switched from iPod to another function, the iPod/iPhone’s power will be turned OFF automatically. • If the unit is set to standby when an iPod/ iPhone is connected, the iPod/iPhone’s power will be turned OFF automatically. 16 En XW-NAC3_CUZXTSM.book 17 ページ 2010年4月6日 火曜日 午後1時18分 Bluetooth ® AUDIO for Wireless Enjoyment of Music Bluetooth ® AUDIO for Wireless Enjoyment of Music Remote control operation Español Bluetooth wireless technology enabled device: Digital music player Français This unit Bluetooth wireless technology enabled device: Cell phone English Chapter 4: 04 Device not equipped with Bluetooth wireless technology: Digital music player + Bluetooth audio transmitter (sold commercially) Remote control operation Wireless music play This unit is furnished with a built-in Bluetooth® ADAPTER (Pioneer Model No. AS-BT100); as a result, any product equipped with Bluetooth wireless technology (portable cell phone, digital music player, etc.) can be used to listen to music wirelessly.1 Also, by using a commercially available transmitter supporting Bluetooth wireless technology, you can listen to music on a device not equipped with Bluetooth wireless technology. This unit supports SCMS-T contents protection, so music can also be enjoyed on devices equipped with SCMS-T type Bluetooth wireless technology. The remote control supplied with this unit allows you to play and stop media, and perform other operations.2 About Bluetooth wireless technology The Bluetooth word mark and logos are owned by the Bluetooth SIG, Inc. and any use of such marks by Pioneer Corporation is under license. Other trademarks and trade names are those of their respective owners. Note 1 • It must be necessary that the Bluetooth wireless technology enabled device supports A2DP profiles. • Pioneer does not guarantee proper connection and operation of this unit with all Bluetooth wireless technology enabled devices. 2 • It must be necessary that the Bluetooth wireless technology enabled device supports AVRCP profiles. • Remote control operations cannot be guaranteed for all Bluetooth wireless technology enabled devices. 17 En XW-NAC3_CUZXTSM.book 04 18 ページ 2010年4月6日 火曜日 午後1時18分 Bluetooth ® AUDIO for Wireless Enjoyment of Music Setting the PIN code Set this unit’s PIN code to the same setting as that for the Bluetooth wireless technology device used. Supported PIN code setting values include 0000, 1234 or 8888. • Default setting: 0000 USB STANDBY/ON TIMER WAKE UP(GREEN) SLEEP(ORANGE) a b VOLUME INPUT SELECTOR 1 Press BT A. When the Bluetooth wireless technology device is not connected, ‘Device Disconnected’ is displayed. If the Bluetooth wireless technology device is connected, disconnect it. 2 When ’Device Disconnected’ is displayed, press and hold VOLUME – on the top panel, and then press and hold STANDBY/ON for three seconds. The PIN code will be changed, and the newly set PIN code will be displayed. Choose between ‘0000’, ‘1234’ and ‘8888’. Repeat step 2 until the PIN code is reset to the value desired. These settings are preserved in memory even when the power is turned OFF. When resetting the PIN code, turn the power ON, and perform step 2 without any unit connected. Pairing this unit and Bluetooth wireless technology device “Pairing” must be done before you start playback of Bluetooth wireless technology content using Bluetooth AUDIO. Make sure to perform pairing first time you operate the system or any time pairing data is cleared. “Pairing” is the step necessary to register Bluetooth wireless technology device to enable Bluetooth communications.1 For more details, see also the operating instructions of your Bluetooth wireless technology device. 1 Press BT A. When the Bluetooth wireless technology device is not connected, ‘Device Disconnected’ is displayed. If the Bluetooth wireless technology device is connected, disconnect it. 2 When ’Device Disconnected’ is displayed, press . ‘Pairing’ will be displayed, and the unit will enter the pairing standby mode. 3 Switch on the Bluetooth wireless technology device that you want to perform pairing with, place the device within 1 meter of the system, and set it to the pairing mode. Pairing begins. 4 Check to see that the Bluetooth AUDIO is detected by the Bluetooth wireless technology device. ‘Device Connected’ is displayed when Bluetooth wireless technology device is connected. Then the connected device name is displayed. Note 1 • Pairing is required when you first use Bluetooth wireless technology device and this unit. • To enable Bluetooth communication, pairing should be done with both of your system and Bluetooth wireless technology device. 18 En XW-NAC3_CUZXTSM.book 19 ページ 2010年4月6日 火曜日 午後1時18分 Bluetooth ® AUDIO for Wireless Enjoyment of Music 2 Connect the Bluetooth wireless technology device to the Bluetooth AUDIO. 3 Start playback of music contents stored in Bluetooth wireless technology device. The following operations are now possible for Bluetooth wireless technology devices, using the remote control.1 • Cordless phones • Cordless facsimiles • Microwave ovens • Wireless LAN devices (IEEE802.11b/g) • Wireless AV equipment • Wireless controllers for game systems • Microwave-based health aids • Some baby monitors Other, less common, equipment that may operate on the same frequency: • Anti-theft systems • Amateur radio stations (HAM) Button What it does • Warehouse logistic management systems / Starts normal playback and pauses/ unpauses playback. • Discrimination systems for train or emergency vehicles Stops playback. Press to skip to the start of the current file, then previous files. Press and hold to start fast reverse scanning. Press to skip to the next file. Press and hold to start fast forward scanning. VOLUME Use to set the listening volume. +/– When no Bluetooth wireless technology device is connected and this unit is not operated for 30 minutes or more after the Bluetooth AUDIO function is selected, power will automatically turn OFF. Español 1 Press BT A to switch to Bluetooth AUDIO input mode. ‘Device Disconnected’ is displayed. This unit uses a 2.4 GHz radio wave frequency, which is a band used by other wireless systems (see list below). To prevent noise or interrupted communication, do not use this unit nearby such devices, or make sure these devices are switched off during use. Français Listening to Music Contents of Bluetooth wireless technology device with Your System Radio wave caution English ‘Device Disconnected’ is displayed when Bluetooth wireless technology device is not connected. In this case, perform the connection operation from the side of the Bluetooth wireless technology device. 04 Note • In the event noise appears in your television image, there is the possibility that a Bluetooth wireless technology enabled device or this unit (including products supported by this unit) are causing signal interference with the antenna input connector of your television, video, BS tuner, CS tuner, etc. In this event, increase the distance between the antenna input connector and the Bluetooth wireless technology enabled device or this unit (including products supported by this unit). Note 1 • Bluetooth wireless technology device should be compatible with AVRCP profile. • Depending on Bluetooth wireless technology device you use, operation may differ from what is shown in this table. 19 En XW-NAC3_CUZXTSM.book 04 20 ページ 2010年4月6日 火曜日 午後1時18分 Bluetooth ® AUDIO for Wireless Enjoyment of Music • If there is something obstructing the path between this unit (including devices supported by this unit) and the device equipped with Bluetooth wireless technology (such as a metal door, concrete wall, or insulation containing tinfoil), you may need to change the location of your system to prevent signal noise and interruptions. Scope of operation Use of this unit is limited to home use. (Transmission distances may be reduced depending on communication environment). In the following locations, poor condition or inability to receive radio waves may cause the audio to be interrupted or stopped: • In reinforced concrete buildings or steel framed or iron-framed buildings. • Near large metallic furniture. • In a crowd of people or near a building or obstacle. • In a location exposed to the magnetic field, static electricity or radio wave interference from radio communication equipment using the same frequency band (2.4 GHz) as this unit, such as a 2.4 GHz wireless LAN device (IEEE802.11b/g) or microwave oven. • If you live in a heavily populated residential area (apartment, townhouse, etc.) and if your neighbor’s microwave is placed near your system, you may experience radio wave interference. If this occurs, move your unit to a different place. When the microwave is not in use, there will be no radio wave interference. 20 En Radio wave reflections The radio waves received by this unit include the radio wave coming directly from the device equipped with Bluetooth wireless technology (direct wave) and waves coming from various directions due to reflections by walls, furniture and building (reflected waves). The reflected waves (due to obstacles and reflecting objects) further produce a variety of reflected waves as well as variation in reception condition depending on locations. If the audio cannot be received properly due to this phenomenon, try moving the location of the device equipped with Bluetooth wireless technology a little. Also note that audio may be interrupted due to the reflected waves when a person crosses or approaches the space between this unit and the device equipped with Bluetooth wireless technology. Precautions regarding connections to products supported by this unit • Complete connections for all devices supported by this unit, including all audio cords and power cables before connecting them to this unit. • After completing connections to this unit, check the audio and power cables to confirm that they not twisted together. • When disconnecting this unit, confirm that you have sufficient working space in the surrounding area. • When changing connections of audio or other cables for products supported by this unit, confirm that you have sufficient working space in the surrounding area. XW-NAC3_CUZXTSM.book 21 ページ 2010年4月6日 火曜日 午後1時18分 Playback with HOME MEDIA GALLERY inputs Playback with HOME MEDIA GALLERY inputs Important • The Home Media Gallery allows you to play music on media servers connected on an identical Local Area Network (LAN) as the receiver. This unit allows for the playing of files stored on the following: - PCs running Microsoft Windows Vista or XP with Windows Media Player 11 installed - PCs running Microsoft Windows 7 with Windows Media Player 12 installed - DLNA-compatible digital media servers (on PCs or other components) Español This unit’s Home Media Gallery function allows you to listen to audio files or listen to Internet radio stations on a computer or other component connected to this unit’s LAN terminal. This chapter describes the connection, setup, and playback procedures required to enjoy these features. It is advisory that you also refer to the operation manual supplied with your network component. Français Enjoying the Home Media Gallery - Files stored in a PC or DMS (Digital Media Server) as described above can be played via command from an external Digital Media Controller (DMC). The device used to play files under the control of the DMC is called a Digital Media Renderer (DMR*). The XW-NAC3 unit supports the use of such DMR components. When selecting a DMC or DMS, use only those that have received DLNA certification. English Chapter 5: 05 *: DMR is a device class certified by DLNA. - During use of a DMR, an external controller can be used to start and stop playback of files. Control of sound volume and the MUTE function are also possible1. - When a DMR is in use, if the XW-NAC3’s remote control is operated, DMR operation will be canceled (this excludes the use of certain buttons including VOLUME, MUTE, and DISPLAY). • To play back audio files stored on components on the network or listen to Internet radio stations, you must turn on the DHCP server function of your router. In case your router does not have the builtin DHCP server function, it is necessary to set up the network manually. Otherwise, you cannot play back audio files stored on components on the network or listen to Internet radio stations. See page 28. Note 1 Depending on the external controller used, playback may be interrupted when the controller is used to adjust the sound volume. In this event, perform sound volume adjustments from the main unit or the remote control unit. 21 En XW-NAC3_CUZXTSM.book 05 22 ページ 2010年4月6日 火曜日 午後1時18分 Playback with HOME MEDIA GALLERY inputs Steps to enjoy the Home Media Gallery 1 Connect to the network through LAN interface. See page 24. 2 Configure the network settings. The setup is necessary only when the router to be connected does not have the built-in DHCP server function. See page 28. 3 Playback with Home Media Gallery. See page 24. • Playback the music files stored in USB storage devices or PCs1 You can playback a lot of music stored in USB storage devices or your PCs using this unit. See page 23. • Listening to Internet radio stations You can select and listen to your favorite Internet radio station from the list of Internet radio stations created, edited, and managed by the vTuner database service exclusively for use with the Pioneer products. See page 27. Note 1 Besides a PC, you can also play back audio files stored on your other components with the built-in media server function based on DLNA 1.0 and 1.5 framework and protocols (i.e. network-capable hard disks and audio systems). 22 En XW-NAC3_CUZXTSM.book 23 ページ 2010年4月6日 火曜日 午後1時18分 Playback with HOME MEDIA GALLERY inputs 05 English About playable file formats Category Extension MP3 a .mp3 Stream MPEG-1 Audio Layer-3 LPCM WAV .wav LPCM WMA .wma WMA2/7/8 WMA9 AAC .m4a .aac .3gp .3g2 MPEG-4 AAC LC MPEG-4 HE AAC (aacPlus v1/2) FLAC .flac FLAC 16 bit Channel 2 ch Bitrate VBR/CBR Sampling frequency Quantization bitrate Channel Sampling frequency Quantization bitrate Channel Sampling frequency Quantization bitrate Channel Bitrate VBR/CBR Sampling frequency Quantization bitrate Channel Bitrate VBR/CBR Sampling frequency Quantization bitrate Channel Bitrate VBR/CBR Sampling frequency 8 kbps to 320 kbps Not supported/Supported 8 kHz to 48 kHz 16 bit, 20 bit, 24 bit 2 ch 8 kHz to 48 kHz 16 bit, 20 bit, 24 bit 2 ch 8 kHz to 48 kHz 16 bit 2 ch 5 kbps to 320 kbps Not supported/Supported 8 kHz to 48 kHz 16 bit 2 ch 5 kbps to 320 kbps Not supported/Supported 32 kHz to 48 kHz 16 bit 2 ch 16 kbps to 320 kbps Not supported/Supported 8 kHz, 16 kHz, 22 kHz, 32 kHz, 44.1 kHz, 48 kHz Quantization bitrate Channel 8 bit, 16 bit 2 ch (8-bit monaural audio is not supported) Bitrate VBR/CBR Not supported/Supported Español _b 8 kHz to 48 kHz Français LPCM Sampling frequency Quantization bitrate a “MPEG Layer-3 audio decoding technology licensed from Fraunhofer IIS and Thomson multimedia.” b Only streaming data from servers is concerned, so there is no extension. 23 En XW-NAC3_CUZXTSM.book 05 24 ページ 2010年4月6日 火曜日 午後1時18分 Playback with HOME MEDIA GALLERY inputs By connecting this unit to the network via the LAN terminal, you can play back audio files stored on components on the network, including your PC or USB storage device, and listen to Internet radio stations.1 Connecting to the network through LAN interface Caution Before making or changing the connections, switch off the power and disconnect the power cord from the power outlet. Plugging in should be the final step. Internet Modem LAN cable (sold separately) PC1 Connect the LAN terminal on this unit to the LAN terminal on your router (with or without the built-in DHCP server function) with a straight LAN cable (CAT 5 or higher). Turn on the DHCP server function of your router. In case your router does not have the built-in DHCP server function, it is necessary set up the network manually. For details, see page 28. Playback with Home Media Gallery Important LAN 3 2 1 WAN Router PC2 USB storage device • When you play back audio files, ‘Connecting...’ is displayed before playback starts. The display may continue for several seconds depending on the type of file. • In case a domain is configured in a Windows network environment, you cannot access a PC on the network while you are logged onto the domain. Instead of logging onto the domain, log onto the local machine. USB terminal This unit Note 1 • To listen to Internet radio stations, you must sign a contract with an ISP (Internet Service Provider) beforehand. • Photo or video files cannot be played back. • With Windows Media Player 11or 12, you can even play back copyrighted audio files on this unit. • In order to connect to the Internet, you must conclude a contract with an Internet Service Provider (ISP). 24 En XW-NAC3_CUZXTSM.book 25 ページ 2010年4月6日 火曜日 午後1時18分 Playback with HOME MEDIA GALLERY inputs • Setup**- Allows the user to perform various network settings and confirm information. • Recently played**- Internet Radio listening history (most recent 20 incidents) English • There are cases where the time elapsed may not be correctly displayed. 05 *: Is only displayed when connected. 1 Press HOME MEDIA GALLERY. It may take several seconds for this unit to access the network. The following screen appears when the Home Media Gallery is selected as the input function. • Favorites folder - See page 26. Selected Input function > U S B I n t e r n e t S e r v e r 1 Only audio files with can be played. When you press ENTER, playback starts with the playback screen being displayed for the selected item. To return to the list screen, press RETURN. In case of the folders with , use / and or ENTER to select the desired folder and audio files. For detailed operating instructions, refer to the section shown below. • Playback screen - See page 26. Español 3 Use / to select the folder, music files or Internet radio station, and then press , ENTER or /. Press / to scroll up and down the list and select the desired item. Français **: Is displayed at all times. R a d i 1 / 6 Current page/Total pages You can perform the following operations with the remote control of this unit. Note that some buttons are not available for operation depending on the category currently being played back. Button What it does / Starts normal playback and pauses/ unpauses playback. Stops playback. • USB* - the USB storage device • Server Name* - Server components on the network Press to skip to the start of the current file, then previous files. Press to skip to the next file. 2 Use / to select the category, and then press or ENTER. Select a category from the following list1: • Internet Radio**- Internet radio • Favorites**- Favorite songs currently being registered VOLUME Use to set the listening volume. +/– Note 1 When RETURN is pressed from this menu, the last internet radio station listed to will be selected. 25 En XW-NAC3_CUZXTSM.book 05 26 ページ 2010年4月6日 火曜日 午後1時18分 Playback with HOME MEDIA GALLERY inputs Button What it does SHUFFLE The currently selected tracks are played back in random order (shuffle play). REPEAT The currently selected tracks are played back repeatedly. DISPLAY Switches the track information (artist name/album name) each time the button is pressed during playback. DISP OFF Turns the display off except when pressing the buttons. When the top menu is displayed on this unit’s display and this unit is not operated for 30 minutes or more after the Home Media Gallery function is selected, power will automatically turn OFF. About the playback screen The following screen appears when you play back audio files. Note that some items may not be displayed depending on the type of file. Input source 0 : 0 0 Time Artist name/Album name Play mode : Repeat 1 : Repeat all : Shuffle • During playback, each time DISPLAY is pressed, the displayed information (artist name/album name) alternates. En Song name Radio station name I n t e r n e t R a d i o S o n g n a m e 1 . R a d i o s t a t i o n 0 : 0 0 The list of Internet radio stations on this unit is created, edited, and managed by the vTuner database service exclusively for use with this unit. See page 27. About the Favorites folder You can register up to 20 of your favorite songs or Internet radio stations in the Favorites folder. Note that only the audio files stored on components on the network can be registered. Song name U S B S o n g n a m e A r t i s t n a m e 26 The following screen appears when audio streams from an Internet radio station are received. Registering audio files and Internet radio stations in the Favorites folder • Press PGM while a song or an Internet radio station is being played back or stopped. Deleting audio files and Internet radio stations from the Favorites folder • Use / to select the folder, music files or Internet radio station, and then press CLEAR. XW-NAC3_CUZXTSM.book 27 ページ 2010年4月6日 火曜日 午後1時18分 Playback with HOME MEDIA GALLERY inputs • Show Your WebID/PW - After registering on the special Pioneer Internet radio site, the registered ID and password are displayed. • Reset Your WebID/PW - Resets all the information registered on the special Pioneer Internet radio site. When reset, all the registered broadcast stations are also cleared. If you want to listen to the same stations, re-register after resetting. Español http://www.radio-pioneer.com • Get access code - The access code required for registration on the special Pioneer Internet radio site is displayed. Français With this unit, broadcast stations not included on the list of station distributed by vTuner can be registered and played. Check the access code required for registration on this unit, use this access code to access the special Pioneer Internet radio site and register the desired broadcast stations in your favorites. The address of the special Pioneer Internet radio site is: The following can be checked on the Help screen: English Registering broadcast stations not on the vTuner list from the special Pioneer site 05 4 Access the special Pioneer Internet radio site from your computer and perform the registration process. Access the above site and use the access code in step 3 to perform user registration, following the instructions on the screen. 5 Register the desired broadcast stations as your favorites, following the instructions on the computer’s screen. Both broadcast stations not on the vTuner list and stations on the vTuner list can be registered. In this case they are registered on the unit as favorite broadcast stations and can be played. 1 Display the Internet Radio list screen. To display the Internet Radio list screen, perform steps 1 to 3 at Playback with Home Media Gallery on page 24. 2 Use / to select ’Help’, then press ENTER. 3 Use / to select ’Get access code’, then press ENTER. The access code required for registration on the special Pioneer Internet radio site is displayed. Make a memo of this address. 27 En XW-NAC3_CUZXTSM.book 05 28 ページ 2010年4月6日 火曜日 午後1時18分 Playback with HOME MEDIA GALLERY inputs Advanced operations for Internet radio Saving Internet radio stations Retrieving saved Internet radio stations You need to save Internet radio stations first before retrieving them. If there are no Internet radio stations currently being saved, see Saving Internet radio stations above and save at least one Internet radio station before proceeding with the following steps. 1 Press CLASS. Each time you press CLASS, the class switches to A to C in turn. 2 Use / to select the station number. ’No Preset’ appears when you select an Internet radio station currently not being saved. This unit can remember the Internet radio stations that you often listen to in three classes (A to C) with up to ten stations in each class to make the total of 30 stations at its maximum capacity. Before proceeding with the following steps, check whether you have followed Steps 1 to 3 at Playback with Home Media Gallery on page 24. 1 Tune into the Internet radio station. Tune into the desired Internet radio station by following Steps 1 to 3 at Playback with Home Media Gallery on page 24. Setting up the network In case the router connected to the LAN terminal on this unit is a broadband router (with the built-in DHCP server function), simply turn on the DHCP server function, and you will not need to set up the network manually. You must set up the network as described below only when you have connected this unit to a server without the DHCP server function.1 2 Press T.EDIT to switch to the station saving mode. 3 Press CLASS. Select the desired class from A to C. 4 Use / to select the number, and then press ENTER. Select the desired number from 0 to 9. Note 1 In case you make changes to the network configuration without the DHCP server function, make the corresponding changes to the network settings of this unit. Before you set up the network, consult with your ISP or the network manager for the required settings. It is advisory that you also refer to the operation manual supplied with your network component. 28 En XW-NAC3_CUZXTSM.book 29 ページ 2010年4月6日 火曜日 午後1時18分 Playback with HOME MEDIA GALLERY inputs 2 Select ’SETUP’ and press ENTER. The SETUP screen appears. Either ‘Network Found‘ or ‘No Network Found‘ appears on the Network Setup screen. • No Network Found - Not connected to a component on the network. 4 Check the network connection status and press ENTER. The Network IP Settings screen appears. 5 Select ‘Automatic (DHCP) ‘or ‘Static IP‘ and press ENTER. • Automatic (DHCP) - The network is automatically set up. • Static IP1 - The network is manually set up. Proceed with the following steps. 1 Select ’Change’ and press ENTER. The Edit IP address screen appears. 2 Enter the IP address. Press / to select a number and / to move the cursor. After you select the last number, press or ENTER. The Proxy Server screen appears. 1 Select ’Change’ and press ENTER. The Edit Proxy Name screen appears. 2 Enter the address of your proxy server or the domain name. After entry, press or ENTER. The Proxy Port screen appears. 3 Select ’Change’ and press ENTER. The Edit Proxy Port screen appears. 4 Enter the address of your proxy server or the domain name. Press / to select a number and / to move the cursor. After you select the last number, press or ENTER. The Settings OK? screen appears. 5 Press ENTER to complete the network setup procedure. The Top Menu screen appears. Español • Network Found - Connected to a component on the network. • Yes - The Proxy Name screen appears. Proceed with the following steps. Français 3 Select ’Network Setup’ and press ENTER. The Network Setup screen appears. 6 Select ‘No‘ or ‘Yes‘ for the proxy server setting to deactivate or activate the proxy server, and press ENTER. • No - The Top Menu screen appears. English 1 Press HOME MEDIA GALLERY to select ‘Home Media Gallery‘ as the input function. It may take several seconds for this receiver to access the network. 05 Checking the network settings You can check the following network settings of this unit: the MAC address, the IP address, the gateway IP address, the proxy server, the Subnet mask, and the firmware version (for the Home Media Gallery of this unit). Before proceeding with the following steps, check whether you have followed Steps from 1 to 2 at Setting up the network on page 28. Note 1 IP Address The IP address to be entered must be defined within the following ranges. If the IP address defined is beyond the following ranges, you cannot play back audio files stored on components on the network or listen to Internet radio stations. Class A: 10.0.0.1 to 10.255.255.254 / Class B: 172.16.0.1 to 172.31.255.254 / Class C: 192.168.0.1 to 192.168.255.254 Subnet Mask In case an xDSL modem or a terminal adapter is directly connected to this unit, enter the subnet mask provided by your ISP on paper. In most of the cases, enter 255.255.255.0. Gateway IP In case a gateway (router) is connected to this unit, enter the corresponding IP address. DNS (1st)/DNS (2nd) In case there is only one DNS server address provided by your ISP on paper, enter ‘DNS (1st)’. In case there are more than two DNS server addresses, enter ‘DNS (2nd)’ in the other DNS server address field. Proxy Name/Proxy Port This setting is required when you connect this receiver to the Internet via a proxy server. Enter the IP address of your proxy server in the ‘Proxy Name’ field. Also, enter the port number of your proxy server in the ‘Proxy Port’ field. 29 En XW-NAC3_CUZXTSM.book 05 30 ページ 2010年4月6日 火曜日 午後1時18分 Playback with HOME MEDIA GALLERY inputs 1 Select ‘Information‘ and press ENTER to confirm your selection. The Firmware Version (for the Home Media Gallery of this unit) screen appears. 2 Check the network settings. Press / to switch the display. Each time you press /, the display switches as follows. Ext. Vol Limit “Ext. Vol Limit” controls the maximum value when adjusting the sound volume from an external controller (Digital Media Controller1 (DMC)). The maximum of volume is changed from ‘50’ into ‘30’. Firmware Ver. MAC Address IP Address Gateway IP Proxy Server Subnet Mask 3 Press RETURN. The Setup screen appears. To return to the Top Menu screen, press RETURN again. Important • When Home Media Gallery function is selected and both the iPod/iPhone connector ports is not connected, Ext. Vol Limit works. 1 Press HOME MEDIA GALLERY. 2 Disconnect iPod/iPhone units from the iPod/iPhone connector ports. 3 Press , and then STANDBY/ON for three seconds to switch Ext. Vol Limit between on and off. When Ext. Vol Limit is on, ‘Ext. Vol Limit On’ is displayed on this unit’s display. Note 1 Refer to Enjoying the Home Media Gallery on page 21. 30 En XW-NAC3_CUZXTSM.book 31 ページ 2010年4月6日 火曜日 午後1時18分 Playback with HOME MEDIA GALLERY inputs The network playback function of this unit uses the following technologies: Windows Media Player is software to deliver music, photos and movies from a Microsoft Windows computer to home stereo systems and TVs. This software can be downloaded from Microsoft’s website. Windows Media Player 11 (for Windows XP, Vista) Windows Media Player 12 (for Windows 7) For more information check the official Microsoft website. Windows Media DRM Microsoft Windows Media Digital Rights Management (WMDRM) is a platform to protect and securely deliver content for playback on computers, portable devices and network devices. Home Media Gallery functions as a WMDRM 10 for networked devices. WMDRM protected content can only be played on media servers supporting WMDRM. Content owners use WMDRM technology to protect their intellectual property, including copyrights. This device uses WMDRM software to access WMDRM protected content. If the WMDRM software fails to protect the content, content owners may ask Microsoft to revoke the software’s ability to use WMDRM to play or copy protected content. Revocation does not affect unprotected content. When you download licenses for protected content, you agree that Microsoft may include a revocation list with the licenses. Content owners may require you to upgrade WMDRM to access their content. If you decline an upgrade, you will not be able to access content that requires the upgrade. This product is protected by certain intellectual property rights of Microsoft. Use or distribution of such technology outside of this product is prohibited without a license from Microsoft. The Digital Living Network Alliance (DLNA) is a cross industry organization of consumer electronics, computing industry and mobile device companies. Digital Living provides consumers with easy sharing of digital media through a wired or wireless network in the home. The DLNA certification logo makes it easy to find products that comply with the DLNA Interoperability Guidelines. This unit complies with DLNA Interoperability Guidelines v1.5. When a PC running DLNA server software or other DLNA compatible device is connected to this player, some setting changes of software or other devices may be required. Please refer to the operating instructions for the software or device for more information. Español With this software, you can play back files stored on the PC through various devices wherever you like in your home. DLNA CERTIFIED™ Audio Player Français Windows Media Player English DLNA About network playback 05 DLNA and DLNA CERTIFIED are trademarks and/or service marks of the Digital Living Network Alliance. Content playable over a network • Even when encoded in a compatible format, some files may not play correctly. • Movie or Photo files cannot be played back. • There are cases where you cannot listen to an Internet radio station even if the station can be selected from a list of radio stations. • Some functions may not be supported depending on the server type or version used. • Supported file formats vary by server. As such, files not supported by your server are not displayed on this unit. For more information, check with the manufacturer of your server. 31 En XW-NAC3_CUZXTSM.book 05 32 ページ 2010年4月6日 火曜日 午後1時18分 Playback with HOME MEDIA GALLERY inputs About playback behavior over a network • Playback may stall when the PC is switched off or any media files stored on it are deleted while playing content. • If there are problems within the network environment (heavy network traffic, etc.) content may not be displayed or played properly (playback may be interrupted or stalled). For best performance, a 100BASETX connection between player and PC is recommended. • If several clients are playing simultaneously, as the case may be, playback is interrupted or stalled. • Depending on the security software installed on a connected PC and the setting of such software, network connection may be blocked. Pioneer is not responsible for any malfunction of the player and/or the Home Media Gallery features due to communication error/ malfunctions associated with your network connection and/or your PC, or other connected equipment. Please contact your PC manufacturer or Internet service provider. ‘Windows Media™’ is a trademark of Microsoft Corporation. This product includes technology owned by Microsoft Corporation and cannot be used or distributed without a license from Microsoft Licensing, Inc. Microsoft®, Windows®7, Windows®Vista, Windows®XP, Windows®2000, Windows®Millennium Edition, Windows®98, and WindowsNT® are either registered trademarks or trademarks of Microsoft Corporation in the United States and/or other countries. Authorizing this unit In order to be able to play with Home Media Gallery, this unit must be authorized. This happens automatically when the unit makes a connection over the network to the PC. If not, please authorize this unit manually on the PC. The authorization (or permission) method for 32 En access varies depending on the type of server currently being connected. For more information on authorizing this unit, refer to the instruction manual of your server. aacPlus The AAC decoder uses aacPlus developed by Coding Technologies (www.codingtechnologies.com). FLAC FLAC Decoder Copyright © 2000, 2001, 2002, 2003, 2004, 2005, 2006, 2007 Josh Coalson Redistribution and use in source and binary forms, with or without modification, are permitted provided that the following conditions are met: • Redistributions of source code must retain the above copyright notice, this list of conditions and the following disclaimer. • Redistributions in binary form must reproduce the above copyright notice, this list of conditions and the following disclaimer in the documentation and/or other materials provided with the distribution. • Neither the name of the Xiph.org Foundation nor the names of its contributors may be used to endorse or promote products derived from this software without specific prior written permission. THIS SOFTWARE IS PROVIDED BY THE COPYRIGHT HOLDERS AND CONTRIBUTORS “AS IS” AND ANY EXPRESS OR IMPLIED WARRANTIES, INCLUDING, BUT NOT LIMITED TO, THE IMPLIED WARRANTIES OF MERCHANTABILITY AND FITNESS FOR A XW-NAC3_CUZXTSM.book 33 ページ 2010年4月6日 火曜日 午後1時18分 Playback with HOME MEDIA GALLERY inputs English Français Español PARTICULAR PURPOSE ARE DISCLAIMED. IN NO EVENT SHALL THE FOUNDATION OR CONTRIBUTORS BE LIABLE FOR ANY DIRECT, INDIRECT, INCIDENTAL, SPECIAL, EXEMPLARY, OR CONSEQUENTIAL DAMAGES (INCLUDING, BUT NOT LIMITED TO, PROCUREMENT OF SUBSTITUTE GOODS OR SERVICES; LOSS OF USE, DATA, OR PROFITS; OR BUSINESS INTERRUPTION) HOWEVER CAUSED AND ON ANY THEORY OF LIABILITY, WHETHER IN CONTRACT, STRICT LIABILITY, OR TORT (INCLUDING NEGLIGENCE OR OTHERWISE) ARISING IN ANY WAY OUT OF THE USE OF THIS SOFTWARE, EVEN IF ADVISED OF THE POSSIBILITY OF SUCH DAMAGE. 05 33 En XW-NAC3_CUZXTSM.book 06 34 ページ 2010年4月6日 火曜日 午後1時18分 Other connections Chapter 6: Other connections • Before making or changing the connections, switch off the power and disconnect the power cord from the AC outlet. Connecting auxiliary components Connect the rear panel AUX IN mini-plug jack to your auxiliary playback component. • This method can be used to play music on this unit from iPod/iPhones that do not support use of an iPod Dock. Digital audio player, etc. Stereo mini-plug cable (commercially available) VIDEO OUT AUX IN • Press AUX to switch to AUX input mode. ‘AUX’ is displayed on this unit’s display. When no device is connected to the AUX IN connector and this unit is not operated for 30 minutes or more after the AUX function is selected, power will automatically turn OFF. 34 En XW-NAC3_CUZXTSM.book 35 ページ 2010年4月6日 火曜日 午後1時18分 Sound settings 07 English Chapter 7: Sound settings Using the sound effects When audio data is removed during the WMA/ MP3/MPEG-4 AAC compression process, sound quality often suffers from an uneven sound image. The Sound Retriever feature employs new DSP technology that helps bring CD quality sound back to compressed by restoring sound pressure and smoothing jagged artifacts left over after compression. You can add exciting effects to audio sources. • Default setting: OFF Français Using the Sound Retriever Español • Default setting: ON 1 Press SOUND. The newly set value displays for 5 seconds. Vivid1 – Produces a sharpened effect similar to that experienced at a live concert. 1 Press S.RETRIEVER. The newly set value displays for 5 seconds. Lo-Fi (Low Fidelity) – Produces a retrofeel to music play. • Use / or S.RETRIEVER to set the Sound Retriever to ON/OFF as desired. ALC (Auto Level Control) – This unit equalizes playback sound levels. OFF – Revert sound to its natural state. • Use / or SOUND to switch Sound modes. Note 1 When Bluetooth AUDIO function is selected, ‘Vivid’ is not displayed. 35 En XW-NAC3_CUZXTSM.book 07 36 ページ 2010年4月6日 火曜日 午後1時18分 Sound settings Adjusting the bass and treble Use the bass and treble controls to adjust the overall tone. 1 Press BASS/TREBLE. 2 Use / to select ’Bass’ or ’Treble’, then press ENTER. 3 Use / to adjust the bass or treble, then press ENTER. You can adjust low and high sounds on a scale of –6 to +6. 36 En XW-NAC3_CUZXTSM.book 37 ページ 2010年4月6日 火曜日 午後1時18分 Using the timer 08 English Chapter 8: Using the timer Changing the clock’s display mode Setting the clock allows you to use the timer.1 You can choose to display the clock in 12-hour mode or 24-hour mode. • Default setting: 12H (12-hour mode) 2 Press again. The Timer Setup screen is displayed. 1 With the power turned ON, press . The current time and day are displayed. • If the clock is not set, the Timer Setup screen will be displayed. Proceed with Step 3. 2 Press again. The Timer Setup screen is displayed. 3 Use / to select ’Hour Display’, then press ENTER. The Hour Display screen is displayed. Español 1 With the power turned ON, press . The current time and day are displayed. Français Setting the clock 4 Use / to select ’12H’ or ’24H’, then press ENTER. When the setting is completed, the newly set value flashes for 2 seconds. 3 Use / to select ’Clock Adjust’, then press ENTER. The Clock Adjust screen is displayed. 4 Use / to set the day, then press ENTER. 5 Use / to set the hour, then press ENTER. 6 Use / to set the minute, then press ENTER. When the setting is completed, the newly set value displays for 2 seconds. Note 1 You’ll need to set the clock again if you unplug the unit (or in case of a power failure). 37 En XW-NAC3_CUZXTSM.book 08 38 ページ 2010年4月6日 火曜日 午後1時18分 Using the timer Turning the wake-up timer on/off Setting the wake-up timer Use the wake-up timer to set the unit to switch on at any time and start playing iPod or AUX. If iPod is selected as the timer sound, when the wake-up timer operates, the iPod’s power will automatically turn ON and playback will begin. 1 With input set to iPod or AUX, press The current time and day are displayed. . 2 Press again. The Timer Setup screen is displayed. 3 Use / to select ’Wake-up’, then press ENTER. The Wake-up screen is displayed. 4 Use / to select ’Timer On’, then press ENTER. When the timer is set to ON, ’Timer Off’ is displayed. 1 With input set to iPod or AUX1, press The current time and day are displayed. . 2 Press again. The Timer Setup screen is displayed. Using the sleep timer The sleep timer switches off the unit after a specified time so you can fall asleep without worrying about it. 3 Use / to select ’Wake-up’, then press ENTER. The Wake-up screen is displayed. 4 Use / to select ’Timer Edit’, then press ENTER. The Timer Edit screen is displayed. 5 Set the desired time for the wake-up timer. Use / to set the hour, then press . Set the minute in the same way, pressing when you’re done. • Press SLEEP repeatedly to select a switch off time. Choose between 5 min, 15 min, 30 min, 60 min, 90 min or Off. During operation of the sleep timer, the TIMER indicator will light orange. • If you press SLEEP while the sleep timer is set, the remaining time will be displayed.2 6 Use / to select the day. Use / to set the wake-up timer to ON/OFF as desired, then press ENTER. The wake-up timer is set to OFF on days marked with ‘*’. 7 Press ENTER. The Timer Check screen is displayed. When the wake-up timer is set to ON, the TIMER indicator lights green. Note 1 In order to use the wake-up timer when the AUX function is selected, you must first begin playback on the connected device. 2 The sleep timer can be reset by pressing SLEEP while the remaining time is displayed. 38 En XW-NAC3_CUZXTSM.book 39 ページ 2010年4月6日 火曜日 午後1時18分 Additional information Additional information English Troubleshooting Français Chapter 9: 09 • If the unit does not operate normally due to external effects such as static electricity disconnect the power plug from the outlet and insert again to return to normal operating conditions. Problem Remedy The power does not turn on. • Disconnect the power plug from the outlet, and insert again. • If the power shuts off automatically, take the unit to your nearest Pioneer authorized service center or your dealer for servicing. Power automatically switches to standby without user action. • When no device is connected to the selected iPod/iPhone connector ports (iPod a or iPod b), the built-in Bluetooth ADAPTER or the AUX IN connector, and this unit is not operated for 30 minutes or more after the respective function is selected, power will automatically turn OFF. Also, when the top menu is displayed on this unit’s display and this unit is not operated for 30 minutes or more after the Home Media Gallery function is selected, power will automatically turn OFF. No sound is output when a function is selected. • Make sure the component is connected correctly (refer to Connecting auxiliary components on page 34). Español Incorrect operations are often mistaken for trouble and malfunctions. If you think that there is something wrong with this component, check the points below. Sometimes the trouble may lie in another component. Investigate the other components and electrical appliances being used. If the trouble cannot be rectified even after exercising the checks listed below, ask your nearest Pioneer authorized service center or your dealer to carry out repair work. Can’t operate the remote control. • Replace the battery (refer to Replace the battery on page 7). • Operate within 7 m (23 ft.), 30° of the remote sensor on the front panel (refer to Using the remote control on page 8). • Remove the obstacle or operate from another position. • Avoid exposing the remote sensor on the front panel to direct light. • Make sure the iPod/iPhone is connected correctly (refer to Connecting your iPod/iPhone on page 12). Can’t operate the iPod/iPhone. • Make sure the iPod/iPhone is connected correctly (refer to Connecting your iPod/iPhone on page 12). • If the iPod/iPhone is experiencing a hangup, try resetting the iPod/ iPhone, and reconnect it to the unit. 39 En XW-NAC3_CUZXTSM.book 09 40 En 40 ページ 2010年4月6日 火曜日 午後1時18分 Additional information Problem Remedy Cannot access the network. • The LAN cable is not firmly connected. Firmly connect the LAN cable (see page 24). • The router is not switched on. Switch on the router. • The corresponding IP address is not properly set. Switch on the built-in DHCP server function of your router, or set up the network manually according to your network environment (see page 28). • The IP address is being automatically configured. The automatic configuration process takes time. Please wait. • Internet security software is currently installed in the connected component. There are cases where a component with Internet security software installed cannot be accessed. The audio files stored on components on the network, such as a PC, cannot be played back. • Install Windows Media Player 11 or 12 on your PC (see page 31). • Play back audio files recorded in MP3, WAV (LPCM only), MPEG-4 AAC, FLAC, or WMA. Note that some audio files recorded in these formats may not be played back on this unit. • Audio files recorded in MPEG-4 AAC or FLAC are being played back on Windows Media Player 11 or 12. Try using another server. Refer to the operation manual supplied with your server. • The component connected to the network is not properly operated. Check whether the component is affected by special circumstances or is in the sleep mode. Try rebooting the component if necessary. • The component connected to the network does not permit file sharing. Try changing the settings for the component connected to the network. • The folder stored on the component connected to the network has been deleted or damaged. Check the folder stored on the component connected to the network. Cannot access the component connected to the network. • The component connected to the network is not properly set. If the client is automatically authorized, you need to enter the corresponding information again. Check whether the connection status is set to “Do not authorize”. • There are no playable audio files on the component connected to the network. Check the audio files stored on the component connected to the network. • The audio component on the network which has been switched off is switched on. Switch on the audio component on the network before switching on this unit. XW-NAC3_CUZXTSM.book 41 ページ 2010年4月6日 火曜日 午後1時18分 Additional information Cannot access Windows Media Player 11 or 12. • You are currently logged onto the domain through your PC with Windows XP, Vista or Windows 7 installed. Instead of logging onto the domain, log onto the local machine. Cannot listen to Internet radio stations. • The firewall settings for components on the network are currently in operation. Check the firewall settings for components on the network. • You are currently disconnected from the Internet. Check the connection settings for components on the network, and consult with your network service provider if necessary. • There are cases where you cannot listen to some Internet radio stations even when they are listed in the list of Internet radio stations on this unit. Español • Check whether the audio file was recorded in a format supported by this unit (see page 23). • Check whether the folder has been damaged or corrupted. • Note that there are cases where even the audio files listed as playable on this receiver cannot be played back or displayed. • There is heavy traffic on the network with the Internet being accessed on the same network. • When in the DMR mode, and depending on the external controller used, playback may be interrupted when the controller is used to adjust the sound volume. In this event, perform sound volume adjustments from the main unit or the remote control unit (see page 21). Français Remedy Audio playback is undesirably stopped or disturbed. English Problem 09 The folders/files stored on a USB • The folders/files are currently stored in a region other than the FAT (File memory device are not displayed. Allocation Table) region. Store the folders/files in the FAT region. • Limit the maximum number of levels in a folder to 8. • Limit the maximum number of folders/files stored in a single folder to 2000. • Copyrighted audio files stored on a USB memory device cannot be played back. A USB memory device is not recognized. • The USB memory device does not support the mass storage class specifications. Try using a USB memory device compatible with the mass storage class specifications. Note that there are cases where even the audio files stored on a USB memory device compatible with the mass storage class specifications are not played back on this unit. • This unit does not support a USB hub. • This unit recognizes the USB memory device as a fraud. Switch off and on again this unit. A USB memory device is • Check whether the format of your USB memory device is either FAT 16 or connected and displayed, but the FAT 32. Note that the FAT 12, NTFS, and HFS formats cannot be played audio files stored on the USB back on this unit. memory device cannot be played • The files may be subjected to DRM copy protection. WMA and MPEG-4 back. AAC files subjected to DRM copy protection cannot be played back. When using a computer to load music data from a CD or other device, digital rights management copy protection may be applied, depending on the settings involved. • See the list of file formats that can be played back on this unit. 41 En XW-NAC3_CUZXTSM.book 09 42 ページ 2010年4月6日 火曜日 午後1時18分 Additional information Problem Remedy The track name, artist name, or album name is not displayed. • When playing network audio, the network server used may not support display of name information for artists and albums. Or, when playing music from a USB memory device, the version of ID3 tags is not supported. Playing network audio relies on the support of the server used. For details, consult the operating manual for the server. Also, when playing music from USB memory devices, only ID3 tag version 2.x or WMA metatags are supported. The Bluetooth wireless technology device cannot be connected or operated. Sound from the Bluetooth wireless technology device is not emitted or the sound is interrupted. • Check that no object that emits electromagnetic waves in the 2.4 GHz band (microwave oven, wireless LAN device or Bluetooth wireless technology apparatus) is near the unit. If such an object is near the unit, set the unit far from it. Or, stop using the object emitting the electromagnetic waves. • Check that the Bluetooth wireless technology device is not too far from the unit and that obstructions are not set between the Bluetooth wireless technology device and the unit. Set the Bluetooth wireless technology device and the unit so that the distance between them is less than about 10 m (32 ft.)* and no obstructions exist between them. • The Bluetooth wireless technology device may not be set to the communication mode supporting the Bluetooth wireless technology. Check the setting of the Bluetooth wireless technology device. • Check that pairing is correct. The pairing setting was deleted from this unit or the Bluetooth wireless technology device. Reset the pairing. • Check that the profile is correct. Use a Bluetooth wireless technology device that supports A2DP profile and AVRCP profile. * The line-of-sight transmission distance is an estimate. Actual transmission distances supported may differ depending on surrounding conditions. Resetting the system About Sound Retriever Use this procedure to reset all system settings to the factory default. The “Sound Retriever” function utilized in this unit has been uniquely developed by Pioneer. This function enhances sound data lost during compression of MP3 and other file types, allowing the user to enjoy sound quality closer to that of the original signal data. In the case of Bluetooth AUDIO, the “Sound Retriever Air” function is used to enhance data lost by compression during Bluetooth transmission. • When performing reset, first disconnect all components connected to this unit. 1 Switch the unit on. 2 Press and hold INPUT SELECTOR on the top panel, and then press and hold STANDBY/ON for three seconds. Power is set to standby mode. The next time you switch on, all the system settings should be reset. 42 En About iPod/iPhone XW-NAC3_CUZXTSM.book 43 ページ 2010年4月6日 火曜日 午後1時18分 Additional information 09 Dimensions . . . . . . 410 mm (W) x 135 mm (H) x 153 mm (D) 16 3/16 in. (W) x 5 6/16 in. (H) x 6 1/16 in. (D) Weight (without package) . . . . . . . 2.9 kg (6.4 lb) “Works with iPhone” means that an electronic accessory has been designed to connect specifically to iPhone and has been certified by the developer to meet Apple performance standards. Remote control . . . . . . . . . . . . . . . . . . . . . . . . . . Lithium battery (CR2025) . . . . . . . . . . . . . . . . . . Power cord . . . . . . . . . . . . . . . . . . . . . . . . . . . . . USB terminal cover (included with product) . . Operating instructions (This document) 1 1 1 1 Note • Specifications and the design are subject to possible modifications without notice, due to improvements. Español iPod is a trademark of Apple Inc., registered in the U.S. and other countries. iPhone is a trademark of Apple Inc. Accessories Français Apple is not responsible for the operation of this device or its compliance with safety and regulatory standards. • English “Made for iPod” means that an electronic accessory has been designed to connect specifically to iPod and has been certified by the developer to meet Apple performance standards. Cleaning the unit Specifications • Amplifier section RMS Power Output: Front Left/Right . . . . . . . . . . . . . .10 W + 10 W (1 kHz, 10 %, T.H.D., 8 Ω) • Speaker section Enclosure . . . . . . . . . . . . . . . . . . Passive radiater System . . . . . . . . . . . . . . . . . . . . . . .1-way system Speakers: Fullrange . . . . . . . . . . 6.6 cm (2 10/16 in.) cone Passive radiator . . . . . . . 7.7 cm (3 1/16 in.) cone Frequency range . . . . . . . . . . . . . 60 Hz to 20 kHz • Network section LAN terminal . . . . . . . . . . . . . . . . . .Ethernet jack 10BASE-T/100 Bse-TX • • Use a polishing cloth or dry cloth to wipe off dust and dirt. • When the surface is dirty, wipe with a soft cloth dipped in some neutral cleanser diluted five or six times with water, and wrung out well, and then wipe again with a dry cloth. Do not use furniture wax or cleansers. • Never use thinners, benzine, insecticide sprays or other chemicals on or near this unit, since these will corrode the surface. Published by Pioneer Corporation. Copyright © 2010 Pioneer Corporation. All rights reserved. Miscellaneous iPod a . . . . . . . . . . . . . . . . . . . . . . . . . 5 V, 500 mA iPod b . . . . . . . . . . . . . . . . . . . . . . . . . 5 V, 500 mA USB. . . . . . . . . . . . . . . . . . . . . . . . . . . 5 V, 500 mA Bluetooth Adapter . . . . . . . . . . . . . . . 5 V, 100 mA Power requirements . . . . . . . . . . . . . . . . . . . . . . . . . . . . AC 120 V/60 Hz Power consumption . . . . . . . . . . . . . . . . . . .24 W In standby. . . . . . . . . . . . . . . . . . . . . . . . . 0.5 W 43 En 03_XW-NAC3_CUXZTSM_Es.book 2 ページ 2010年4月5日 月曜日 午後6時30分 AVISO IMPORTANTE – EL NÚMERO DE SERIE PARA ESTE EQUIPO SE ENCUENTRA EN EL PANEL TRASERO. SÍRVASE ESCRIBIR ESTE NÚMERO DE SERIE EN SU TARJETA DE GARANTÍA ADJUNTA Y GUÁRDELA EN UN LUGAR SEGURO. ESTO ES PARA SU SEGURIDAD. D1-4-2-6-1_Es NOTA : Este equipo ha sido probado y se ha comprobado que cumple con los límites para un dispositivo digital de clase B, de acuerdo con la Parte 15 de las Reglas de FCC. Esos límites están concebidos para proveer una protección razonable contra interferencias prejudiciales en una instalación residencial. Este equipo genera, utiliza, y puede radiar energía de frecuencia de radio y, si no se instala y se utiliza de acuerdo con las instrucciones, puede causar interferencias prejudiciales a las comunicaciones de radio. Sin embargo, no hay ninguna garantía de que no ocurrirá interferencia en una instalación particular. Si este equipo causa interferencia perjudicial a la recepción de radio o televisión, que se puede determinar mediante el encendido y apagado del equipo, se recomienda al usuario que intente corregir la interferencia a través de una o más de las medidas siguientes: - Reoriente o reubique la antena de recepción. Aumente la separación entre el equipo y el receptor. Conecte el equipo a una toma de corriente en un circuito diferente del cual el receptor está conectado. Consulte su revendedor o un técnico experimentado de radio/TV para ayuda. PRECAUCIÓN : Este producto satisface los reglamentos de la FCC cuando se utilizan cables o conectores blindados para conectar el producto a otro equipo. Para impedir las interferencias electromagnéticas con aparatos eléctricos tales como radios y televisores, utilice conectores y cables blindados para hacer las conexiones. D8-10-3a_Es ADVERTENCIA Este aparato no es impermeable. Para evitar el riesgo de incendio y de descargas eléctricas, no ponga ningún recipiente lleno de líquido (como pueda ser un vaso o un florero) cerca del aparato ni lo exponga a goteo, salpicaduras, lluvia o humedad. D8-10-1-2_Es PRECAUCIÓN PARA LA VENTILACIÓN Cuando instale este aparato, asegúrese de dejar espacio en torno al mismo para la ventilación con el fin de mejorar la disipación de calor (por lo menos 10 cm encima, 10 cm detrás, y 10 cm en cada lado). ADVERTENCIA Las ranuras y aberturas de la caja del aparato sirven para su ventilación para poder asegurar un funcionamiento fiable del aparato y para protegerlo contra sobrecalentamiento. Para evitar el peligro de incendio, las aberturas nunca deberán taparse ni cubrirse con nada (como por ejemplo, periódicos, manteles, cortinas) ni ponerse en funcionamiento el aparato sobre una alfombra gruesas o una cama. D3-4-2-1-7b*_A1_Es D3-4-2-1-3_A1_Es ADVERTENCIA Para evitar el peligro de incendio, no ponga nada con fuego encendido (como pueda ser una vela) encima del aparato. D3-4-2-1-7a_A1_Es ADVERTENCIA Antes de enchufar el aparato a la corriente, lea la sección siguiente con mucha atención. La tensión de la red eléctrica es distinta según el país o región. Asegúrese de que la tensión de la alimentación de la localidad donde se proponga utilizar este aparato corresponda a la tensión necesaria (es decir, 230 V ó 120 V) indicada en el panel posterior. D3-4-2-1-4*_A1_Es Entorno de funcionamiento Temperatura y humedad del entorno de funcionamiento +5 °C a +35 °C; menos del 85 % de humedad relativa (rejillas de refrigeración no obstruidas) No instale este aparato en un lugar mal ventilado, ni en lugares expuestos a alta humedad o a la luz directa del sol (o de otra luz artificial potente). D3-4-2-1-7c*_A1_Es 03_XW-NAC3_CUXZTSM_Es.book 3 ページ 2010年4月5日 月曜日 午後6時30分 IMPORTANTE CAUTION RISK OF ELECTRIC SHOCK DO NOT OPEN La luz intermitente con el símbolo de punta de flecha dentro un triángulo equilátero. Está convenido para avisar el usuario de la presencia de “voltaje peligrosa” no aislada dentro el producto que podría constituir un peligro de choque eléctrico para las personas. ATENCIÓN : PARA PREVENIR EL PELIGRO DE CHOQUE ELÉCTRICO NO REMOVER LA TAPA NI LAS PARTES DENTRO NO UTILIZADAS, LLAMAR UNA PERSONA CUALIFICADA. El punto exclamativo dentro un triángulo equilátero convenido para avisar el usuário de la presencia de importantes instrucciones sobre el funcionamiento y la manutención en la libreta que acompaña el aparato. D3-4-2-1-1_A1_Es NOTA: LA ADVERTENCIA DE QUE NO HAY COMPONENTES QUE PUEDAN SER REPARADOS POR EL USUARIO ESTÁ SITUADA EN LA PARTE INFERIOR DEL APARATO. P1-4-2-2_Es PRECAUCIÓN El interruptor de la alimentación STANDBY/ON de este aparato no corta por completo toda la alimentación de la toma de corriente de CA. Puesto que el cable de alimentación hace las funciones de dispositivo de desconexión de la corriente para el aparato, para desconectar toda la alimentación del aparato deberá desenchufar el cable de la toma de corriente de CA. Por lo tanto, asegúrese de instalar el aparato de modo que el cable de alimentación pueda desenchufarse con facilidad de la toma de corriente de CA en caso de un accidente. Para evitar correr el peligro de incendio, el cable de alimentación también deberá desenchufarse de la toma de corriente de CA cuando no se tenga la intención de utilizarlo durante mucho tiempo seguido (por ejemplo, antes de irse de vacaciones). D3-4-2-2-2a*_A1_Es Si la clavija del cable de alimentación de CA de este aparato no se adapta a la toma de corriente de CA que usted desea utilizar, deberá cambiar la clavija por otra que se adapte apropiadamente. El reemplazo y montaje de una clavija del cable de alimentación de CA sólo deberá realizarlos personal de servicio técnico cualificado. Si se enchufa la clavija cortada a una toma de corriente de CA, puede causar fuertes descargas eléctricas. Asegúrese de que se tira de la forma apropiada después de haberla extraído. El aparato deberá desconectarse desenchufando la clavija de la alimentación de la toma de corriente cuando no se proponga utilizarlo durante mucho tiempo (por ejemplo, antes de irse de vacaciones). D3-4-2-2-1a_A1_Es 03_XW-NAC3_CUXZTSM_Es.book 4 ページ 2010年4月5日 月曜日 午後6時30分 PRECAUCIONES CONCERNIENTES A LA MANIPULACIÓN DEL CABLE DE ALIMENTACIÓN Tome el cable de alimentación por la clavija. No extraiga la clavija tirando del cable. Nunca toque el cable de alimentación cuando sus manos estén mojadas, ya que esto podría causar cortocircuitos o descargas eléctricas. No coloque la unidad, algún mueble, etc., sobre el cable de alimentación. Asegúrese de no hacer nudos en el cable ni de unirlo a otros cables. Los cables de alimentación deberán ser dispuestos de tal forma que la probabilidad de que sean pisados sea mínima. Una cable de alimentación dañado podrá causar incendios o descargas eléctricas. Revise el cable de alimentación está dañado, solicite el reemplazo del mismo al centro de servicio autorizado PIONEER más cercano, o a su distribuidor. S002*_A1_Es ADVERTENCIA Guarde las partes pequeñas fuera del alcance de los niños pequeños y bebés. En caso de que alguien se trague una por accidente, póngase inmediatamente en contacto con un médico. Este producto es para tareas domésticas generales. Cualquiera avería debida a otra utilización que tareas domésticas (tales como el uso a largo plazo para motivos de negocios en un restaurante o el uso en un coche o un barco) y que necesita una reparación hará que cobrarla incluso durante el período de K041_A1_Es garantía. (Ejemplos de símbolos para baterías) Estos símbolos sólo son válidos en la Unión Europea. K058c_A1_Es Pb Cuando utilice este producto, confirme la información de seguridad mostrada en la parte inferior de la unidad. D3-4-2-2-4_B1_Es 03_XW-NAC3_CUXZTSM_Es.book 5 ページ 2010年4月5日 月曜日 午後6時30分 Gracias por comprar un producto Pioneer. Le sugerimos que lea atentamente estas manual de instrucciones a fin de que aprenda a utilizar su equipo de manera adecuada. Después de leer las instrucciones, guárdelas en un lugar seguro para consultarlas en el futuro. 01 Antes de comenzar 02 Controles e indicaciones 03 Reproducción del iPod/iPhone Confirme que los modelos de iPod/iPhone sean compatibles . . . . . . . . . . . . . . . . . . . . . . . . . .12 Conexión de un iPod/iPhone . . . . . . . . . . . . . .12 Conexión de un televisor. . . . . . . . . . . . . . . .13 Reproducción de un iPod/iPhone . . . . . . . . . .13 SHUFFLE2 . . . . . . . . . . . . . . . . . . . . . . . . . . .15 Exploración HI-LITE. . . . . . . . . . . . . . . . . . . .15 04 Bluetooth ® AUDIO para el disfrute inalámbrico de la música Reproducción inalámbrica de música. . . . . . .17 Funcionamiento con mando a distancia . . . .17 Acerca de la tecnología inalámbrica Bluetooth . . . . . . . . . . . . . . . . . . . . . . . . . . .17 Ajuste del código PIN . . . . . . . . . . . . . . . . . . .18 Cómo aparear esta unidad y el dispositivo de tecnología inalámbrica Bluetooth . . . . . . . . . .18 Audición de contenidos musicales de un dispositivo con tecnología inalámbrica Bluetooth con su sistema . . . . . . . . . . . . . . . .19 Precauciones con las ondas de radio . . . . . . .19 Alcance de funcionamiento . . . . . . . . . . . . .20 Reflejos de ondas de radio . . . . . . . . . . . . . .20 Precauciones relacionadas con los productos compatibles con esta unidad . . . . . . . . . . . .20 05 Reproducción con las entradas de HOME MEDIA GALLERY Entretenimiento con Home Media Gallery . . . .21 Pasos para el entretenimiento con Home Media Gallery . . . . . . . . . . . . . . . . . . . . . . . . .22 Acerca de los formatos de archivo reproducibles . . . . . . . . . . . . . . . . . . . . . . . . .23 Conexión a la red mediante la interfaz LAN . . .24 Reproducción con Home Media Gallery . . . . .24 Acerca de la pantalla de reproducción . . . . .26 Español Mando a distancia. . . . . . . . . . . . . . . . . . . . . . .9 Panel frontal/superior . . . . . . . . . . . . . . . . . . .11 Français Características . . . . . . . . . . . . . . . . . . . . . . . . .6 Contenido de la caja . . . . . . . . . . . . . . . . . . . . .6 Antes de emplear del mando a distancia. . . . . .7 Reemplace la pila . . . . . . . . . . . . . . . . . . . . . .7 Utilización del mando a distancia . . . . . . . . . .8 Instalación de la unidad . . . . . . . . . . . . . . . . . .8 Para enchufarlo. . . . . . . . . . . . . . . . . . . . . . . . .8 Acerca de la carpeta Favorites . . . . . . . . . . . . 26 Registro de archivos de audio y emisoras de radio de Internet en la carpeta Favorites . . . 26 Borrado de archivos de audio y emisoras de radio de Internet de la carpeta Favorites . . . 26 Registro de emisoras de radio que no están en la lista de vTuner desde el sitio especial de Pioneer . . . . . . . . . . . . . . . . . . . . . . . . . . . . . 27 Operaciones avanzadas para radio de Internet . . . . . . . . . . . . . . . . . . . . . . . . . . . . . 28 Para guardar emisoras de radio de Internet . . . . . . . . . . . . . . . . . . . . . . . . . . . . 28 Recuperación de las emisoras de radio de Internet guardadas . . . . . . . . . . . . . . . . . . . 28 Configuración de la red . . . . . . . . . . . . . . . . . 28 Comprobación de los ajustes de la red . . . . 30 Límite del volumen externo (Ext. Vol Limit). . . 30 Acerca de la reproducción de la red . . . . . . . 31 Windows Media Player . . . . . . . . . . . . . . . . 31 Windows Media DRM . . . . . . . . . . . . . . . . . 31 DLNA . . . . . . . . . . . . . . . . . . . . . . . . . . . . . 31 Contenido reproducible en una red . . . . . . . 31 Acerca de la reproducción en una red . . . . 32 Autorización para esta unidad. . . . . . . . . . . 32 aacPlus . . . . . . . . . . . . . . . . . . . . . . . . . . . . 32 FLAC . . . . . . . . . . . . . . . . . . . . . . . . . . . . . . 32 English Índice 06 Otras conexiones Conexión de componentes auxiliares. . . . . . . 34 07 Ajustes del sonido Uso del recuperador de sonido Sound Retriever) . . . . . . . . . . . . . . . . . . . . . . 35 Empleo de los efectos de sonido . . . . . . . . . . 35 Ajuste de los graves y agudos . . . . . . . . . . . . 36 08 Uso del temporizador Ajuste del reloj . . . . . . . . . . . . . . . . . . . . . . . . Cambio del modo de visualización de la hora. . . . . . . . . . . . . . . . . . . . . . . . . . . . . . . Uso del temporizador de conexión automática . . . . . . . . . . . . . . . . . . . . . . . . . . Encendido y apagado del temporizador de conexión automática . . . . . . . . . . . . . . . . . . Cómo utilizar el temporizador de desconexión automática . . . . . . . . . . . . . . . . . . . . . . . . . . 37 37 37 38 38 09 Información adicional Solución de problemas . . . . . . . . . . . . . . . . . Reposición del sistema . . . . . . . . . . . . . . . . . Acerca del recuperador de sonido . . . . . . . . . Acerca del iPod/iPhone . . . . . . . . . . . . . . . . . Especificaciones . . . . . . . . . . . . . . . . . . . . . . Limpieza de la unidad . . . . . . . . . . . . . . . . . . 39 42 42 43 43 43 5 Es 03_XW-NAC3_CUXZTSM_Es.book 01 6 ページ 2010年4月5日 月曜日 午後6時30分 Antes de comenzar Capítulo 1: Antes de comenzar 4. Diseño de sonido de alta fidelidad Características 1. Reproducción de mezcla alternada empleando dos unidades iPod/iPhone con la función SHUFFLE2 La reproducción de mezcla alternada (SHUFFLE2) puede realizarse conectando meramente dos unidades Apple iPod/ iPhone al conector de esta unidad y pulsando en la unidad o en el mando a distancia. Además de la reproducción automatizada SHUFFLE2, también podrá realizar la operación manual y cambiar entre las dos unidades iPod/iPhone, o reproducir un extracto de la música de las dos unidades iPod/iPhone (HI-LITE SCAN). 2. Reproducción inalámbrica empleando la tecnología inalámbrica Bluetooth Puesto que este sistema de altavoces está equipado con tecnología inalámbrica Bluetooth, podrá escuchar el sonido de otros dispositivos habilitados con Bluetooth (teléfonos móviles, reproductores de música digitales, etc.) sin tener que conectar ningún cable. Aunque utilice una conexión inalámbrica, podrá estar seguro de obtener un sonido de alta calidad mediante la función del recuperador de sonido “Sound Retriever Air”, que ayuda a evitar el deterioro de la señal. 3. Función de multimedia de la red Podrá utilizar esta unidad para escuchar los tipos más nuevos de contenido digital, incluidas las hemerotecas musicales almacenadas en un ordenador conectado a la red, radio por Internet o archivos de música guardados en dispositivos de memoria USB. 6 Es Además de su altavoz de gama completa de 2 canales, esta unidad también incorpora un altavoz de radiador pasivo para bajas frecuencias para producir un sonido potente y de alta calidad. Adicionalmente, la función del recuperador de sonido alza la calidad del sonido que se pierde durante la compresión para poder obtener el rico sonido que ofrecen los discos CD convencionales. 5. Entretenimiento con las imágenes del iPod/iPhone Puesto que esta unidad está provista de un conector de salida de vídeo, la unidad puede conectarse a un televisor para poder mirar fotografías y vídeos musicales guardados en un iPod/iPhone. Contenido de la caja Verifique que los siguientes accesorios están en la caja al abrirla. • Mando a distancia • Pila de litio (CR2025) (La pila de litio se ha instalado en el mando a distancia en la fábrica.) • Cable de alimentación • Cubierta del terminal USB (incluida con este producto) • Manual de instrucciones (este manual) 03_XW-NAC3_CUXZTSM_Es.book 7 ページ 2010年4月5日 月曜日 午後6時30分 Antes de comenzar 01 Antes de emplear del mando a distancia Precaución • Elimine las pilas usadas inmediatamente después de haberlas recambiado. Manténgalas alejadas de los niños. • En caso de ingestión, póngase en contacto con su médico inmediatamente. • Saque la lámina de protección del portapilas. Cuando observe una disminución en la distancia operativa, recambie la pila (véase más abajo). • Las pilas de litio pueden representar un peligro de incendio o de quemadura química si se utilizan mal. No las desmonte, no las caliente a más de 100 °C ni las queme. Reemplace la pila • Quite la pila si la unidad no va a utilizarse durante un mes o más. Cuando reemplace la pila, emplee una pila de litio CR2025 de venta en los establecimientos del ramo. 1 1 3 2 1 Mientras empuja la pestaña de liberación, extraiga el portapilas. 2 Saque la pila del portapilas. 3 Coloque una nueva pila en el portapilas. Asegúrese de que el lado de la pila queda mirando hacia arriba cuando lo coloque en el espacio previsto para ello. Español La pila que se suministra con esta unidad está guardada en el portapilas. Français • Existe un peligro de explosión si se reemplaza incorrectamente la pila. Recuerde que sólo puede recambiar pilas por otras del mismo tipo o equivalente, de acuerdo con las recomendaciones del fabricante. English Recuerde las siguientes recomendaciones cuando utilice pilas de litio: • Cuando tenga que desechar las pilas gastadas, hágalo conforme a las normativas gubernamentales o a las normas medioambientales de instrucción publica que se apliquen en su país o zona. • ADVERTENCIA No utilice o almacene las pilas bajo la luz solar directa ni en otros lugares excesivamente calientes, como el interior de un coche o cerca de una estufa. Esto puede ocasionar que las pilas goteen, se sobrecalienten, exploten o se incendien. También se puede reducir la vida de servicio o el rendimiento de las mismas. “Material de perclorato - es posible que se aplique una manipulación especial. Véase www.dtsc.ca.gov/hazardouswaste/perchlorate. (Aplicable en California, EE.UU.)“ 7 Es 03_XW-NAC3_CUXZTSM_Es.book 01 8 ページ 2010年4月5日 月曜日 午後6時30分 Antes de comenzar Utilización del mando a distancia El mando a distancia tiene un alcance de unos 7 metros en un ángulo de 30º desde el sensor remoto. 30° 30° 7m Cuando utilice el mando a distancia, tenga en cuenta lo siguiente: • Asegúrese de que no haya obstáculos entre el mando a distancia y el sensor de control remoto de la unidad. • La operación con el mando a distancia puede no ser fiable si la luz solar o la iluminación incandescente están incidiendo en el sensor de control remoto de la unidad. • Los mandos a distancia de dispositivos diferentes pueden interferir entre sí. Evite el uso de otros mandos a distancia situados cerca de esta unidad. Instalación de la unidad • Cuando instale este equipo, asegúrese de colocarlo sobre una superficie nivelada y estable. No lo coloque en los siguientes lugares: – sobre un televisor en color (puede distorsionar la pantalla) – cerca de una grabadora de casetes (o cerca de un dispositivo que produzca un campo magnético). Podría interferir en el sonido. – expuesto a la luz directa del sol – en zonas húmedas – en zonas extremadamente frías o calientes – en lugares donde esté expuesto a vibraciones u otros movimientos – en lugares con mucho polvo – en lugares que tengan humos calientes o aceites (como una cocina) Para enchufarlo Después de haber terminado todas las conexiones, enchufe la unidad a una toma de corriente de CA. AC IN • Cambie las pilas si observa una disminución en el alcance de funcionamiento del mando a distancia. 1 Conecte el cable de alimentación suministrado a la toma AC IN de la parte posterior de la unidad. 2 Enchufe el otro extremo a una toma de corriente. Importante • Antes de hacer o cambiar cualquier conexión, apague la unidad y desenchufe el cable de alimentación de la toma de CA. 8 Es 03_XW-NAC3_CUXZTSM_Es.book 9 ページ 2010年4月5日 月曜日 午後6時30分 Controles e indicaciones 02 Capítulo 2: Controles e indicaciones English Mando a distancia 1 10 2 3 4 5 15 16 17 6 7 8 18 AUX Cambia la entrada a la entrada externa. 3 CLASS Sirve para cambiar entre las tres memorias (clases) de presintonización de emisoras de radio (página 28). Español 11 12 13 14 Français BT A Cambia la entrada a la de Bluetooth AUDIO. 9 4 T.EDIT (TUNER EDIT) Se emplea para memorizar emisoras de radio de Internet (página 28). 5 MENU Pulse para efectuar diversos ajustes. /// Empléelos para seleccionar elementos y cambiar ajustes. ENTER Empléelo para aplicar el elemento seleccionado o para introducir un ajuste que usted haya cambiado. 19 20 21 22 23 1 STANDBY/ON Cambia la unidad entre modo de espera y encendido. 2 iPod a Cambia la entrada del iPod/iPhone conectado al puerto de conexión iPod a. Cuando se conectan iPod/iPhone a los dos puertos de conexión, iPod a e iPod b, la función SHUFFLE2 puede utilizarse para reproducir alternadamente pistas del iPod a y del iPod b (página 15). iPod b Cambia la entrada del iPod/iPhone conectado al puerto de conexión iPod b. RETURN Empléelo para volver a la pantalla del menú anterior de la lista de categorías. 6 PLAYLIST < / > Se emplean para seleccionar las listas de reproducción que se desean reproducir en el iPod/iPhone. 7 SHUFFLE Efectúa la reproducción en orden aleatorio de las pistas del iPod/iPhone o dispositivo de memoria USB seleccionado (página 14). 8 REPEAT Efectúa la reproducción repetida de las pistas del iPod/iPhone o dispositivo de memoria USB seleccionado (página 14). 9 Es 03_XW-NAC3_CUXZTSM_Es.book 10 ページ 02 2010年4月5日 月曜日 午後6時30分 Controles e indicaciones 9 HOME MEDIA GALLERY Cambia la entrada a la radio de Internet, a un dispositivo de memoria de almacenamiento USB o a componentes del servidor de la red (página 22). 10 HI-LITE Si se ha conectado un iPod/iPhone al puerto de conexión, podrá utilizarse la función HI-LITE para reproducir parte de la pista (página 15). 11 SLEEP Utilice este botón para poner la unidad en el modo de desconexión automática y seleccionar el tiempo que debe transcurrir antes de que la unidad entre en este modo (página 38). 12 Se emplea para activar/desactivar la función del temporizador de conexión automática (página 37). También se emplea para cambiar las funciones de visualización del reloj (página 37). 13 CLEAR Se emplea para borrar archivos de audio y emisoras de radio de Internet de la carpeta Favorites (página 26). 14 PGM Se emplea para registrar archivos de audio y emisoras de radio de Internet en la carpeta Favorites (página 26). 15 Botones de control de reproducción Se emplean para operar con este mando a distancia un dispositivo de tecnología inalámbrica iPod/iPhone o Bluetooth, un dispositivo de memoria de almacenamiento USB, la radio de Internet y archivos de música guardados en un PC (página 13, 19, 24). 16 ALBUM < / > Se emplean para seleccionar álbumes para su reproducción en el iPod/iPhone. 17 DISPLAY La información de la pista (nombre del artista/ nombre del álbum) cambia cada vez que que pulsa el botón durante la reproducción. 10 Es 18 VOLUME +/– Utilícelos para ajustar el volumen de audición. 19 S.RETRIEVER Se emplea para activar/desactivar la función del recuperador de sonido (página 35). 20 BASS/TREBLE Utilice los controles de graves y agudos para ajustar el tono general (página 36). 21 SOUND Cambia los modos de sonido (página 35). 22 MUTE Púlselo para silenciar temporalmente el sonido. 23 DISP OFF Apaga la visualización excepto cuando se pulsan botones. 03_XW-NAC3_CUXZTSM_Es.book 11 ページ 2010年4月5日 月曜日 午後6時30分 Controles e indicaciones 02 Panel frontal/superior USB STANDBY/ON TIMER WAKE UP(GREEN) SLEEP(ORANGE) a b VOLUME INPUT SELECTOR 3 4 6 7 8 9 4 INPUT SELECTOR Se emplea para seleccionar una fuente de entrada. Púlselo repetidamente para cambiar entre las fuentes de iPod a, iPod b, Bluetooth AUDIO (BT AUDIO), Home Media Gallery y entrada externa (AUX). 5 USB terminal Cuando no tenga conectado ningún dispositivo de almacenamiento USB, instale la cubierta del terminal USB. Français 5 English 1 2 6 14 a b iPod iPod Español ADVERTENCIA Guarde la cubierta del terminal USB fuera del alcance de los niños pequeños y bebés. En caso de que alguien se la trague por accidente, póngase inmediatamente en contacto con un médico. a Cambia la entrada del iPod/iPhone conectado al puerto de conexión iPod a. Cuando se conectan iPod/iPhone a los dos puertos de conexión, iPod a e iPod b, la función SHUFFLE2 puede utilizarse para reproducir alternadamente pistas del iPod a y del iPod b (página 15). b Cambia la entrada del iPod/iPhone conectado al puerto de conexión iPod b. 10 11 12 13 1 Indicador de la alimentación Se enciende cuando la alimentación está conectada. 2 STANDBY/ON Cambia la unidad entre modo de espera y encendido. 3 Indicador TIMER Este indicador se enciende en verde cuando el temporizador de conexión automática está activado. Este indicador se enciende en naranja cuando el temporizador de desconexión automática está activado. 7 VOLUME +/– Utilícelos para ajustar el volumen de audición. 8 Puertos de conexión de iPod/iPhone 9 Altavoces 10 Indicador iPod a Se enciende cuando se selecciona la entrada del iPod a. 11 Indicador SHUFFLE2 Se enciende cuando la función SHUFFLE2 está activada. 12 Pantalla 13 Indicador iPod b Se ilumina cuando se selecciona la entrada del iPod b. 14 Sensor del mando a distancia 11 Es 03_XW-NAC3_CUXZTSM_Es.book 12 ページ 03 2010年4月5日 月曜日 午後6時30分 Reproducción del iPod/iPhone Capítulo 3: Reproducción del iPod/iPhone Conectando simplemente su iPod/iPhone a este sistema de altavoces, podrá escuchar el sonido de alta calidad de su iPod/iPhone. Esta unidad también puede conectarse a un televisor para poder mirar las imágenes de su iPod/iPhone. La reproducción y el ajuste del nivel del volumen para la música y las imágenes del iPod/iPhone pueden efectuarse desde esta unidad o en el mismo iPod/iPhone. Confirme que los modelos de iPod/iPhone sean compatibles Los iPod/iPhone que pueden reproducirse en esta unidad se muestran a continuación.1 iPod/iPhone iPod nano 1/2G iPod nano 3/4/5G iPod 5G iPod classic 2007 iPod classic 2008 iPod classic 2009 iPod touch 1G iPod touch 2G iPod touch 2G 2009 iPhone iPhone 3G/3GS Audio Control 1 Seleccione ’Settings’ en el menú inicial. Cuando utilice un iPod touch o iPhone, seleccione ‘General’ después de haber seleccionado ‘Settings’. 2 Seleccione ’About’. Se visualizará la versión del software. • Para ver si hay alguna versión de software nueva y para leer las instrucciones para la actualización de su versión, visite el sitio Web de Apple. Sugerencia • Cuando emplee un iPod/iPhone que no sea compatible con esta unidad, utilice un cable de venta en los establecimientos del ramo para conectar el iPod/iPhone al conector AUX IN de esta unidad. Vídeo Emplee siempre la versión más reciente que haya disponible del software del iPod/iPhone. La compatibilidad del funcionamiento puede variar según la versión del software utilizado. Podrá confirmar la versión de su software operando su iPod/iPhone de la forma siguiente: Conexión de un iPod/iPhone Precaución • Cuando conecte una o dos unidades de iPod/iPhone, emplee siempre el adaptador de la base de control suministrado con el iPod/iPhone, o un adaptador de base de control diseñado para iPod/iPhone adquirido por separado en el mercado. El iPod/iPhone no puede conectase sin un adaptador de base de control; si se intenta conectar un iPod/iPhone sin un adaptador de base de control se ocasionarán daños o mal funcionamiento. Nota 12 Es 1 • Pioneer no garantiza que esta unidad pueda reproducir otros iPod/iPhone que no sean los especificados. • Dependiendo del modelo o de la versión del software, es posible que algunas funciones estén restringidas. • El iPod/iPhone tiene licencia para reproducir material sin derechos de autor o materiales cuya reproducción está legalmente permitida. • Algunas funciones, como el ecualizador, no se pueden controlar con este sistema, por lo que le recomendamos apagar el ecualizador antes de la conexión. • Pioneer no acepta ninguna responsabilidad, bajo ninguna circunstancia, por las pérdidas directas o indirectas debidas a inconveniencias o pérdidas de materiales grabados resultantes de fallos en el iPod/iPhone. • Para obtener instrucciones detalladas sobre el uso del iPod/iPhone, consulte el manual que acompaña al iPod/iPhone. 03_XW-NAC3_CUXZTSM_Es.book 13 ページ 2010年4月5日 月曜日 午後6時30分 Reproducción del iPod/iPhone iPod nano/ iPod classic/ iPod touch/ iPhone Precaución MENU Cuando conecte el adaptador de la base de control, tenga cuidado y oriente correctamente las direcciones frontal-trasera de la base de control. Para conectarlo, primero ponga los apéndices del lado frontal del adaptador en los huecos del puerto del conector del iPod/ iPhone y empújelo en esta posición. Cuando conecte el adaptador deberá tener cuidado para no golpear los conectores. Conecte el iPod/iPhone. Conexión de un televisor Para mirar las imágenes del iPod/iPhone en un televisor, lleve a cabo las conexiones empleando un cable de vídeo compuesto. • Cuando se ha conectado un iPod/iPhone a esta unidad, el ajuste de salida de TV del iPod/iPhone se establece automáticamente en el estado activado.1 Cable de vídeo compuesto (de venta en los establecimientos del ramo) Español 1 Conecte el adaptador de la base de control al puerto del conector del iPod/iPhone que hay en el panel superior de esta unidad. • Con esta unidad no se suministra ningún adaptador de base de control para iPod/ iPhone. Televisor Français 2 English • Antes de establecer o modificar las conexiones, desconecte la alimentación y desenchufe el cable de alimentación de la toma de corriente. La conexión del cable de alimentación debe ser el último paso. MENU Adaptador de la base de control 03 VIDEO OUT AUX IN Reproducción de un iPod/iPhone Precaución • Cuando tenga el iPod conectado a esta unidad y desee operar el iPod/iPhone accionándolo directamente, asegúrese de tener el iPod/iPhone en una posición estable con la otra mano para evitar mal funcionamiento debido a contactos defectuosos. Cuando se selecciona al función del iPod/ iPhone, si se ha conectado un iPod/iPhone al puerto de conexión iPod a o b, se visualizará ‘iPod a/b Connecting’ mientras se está confirmando el dispositivo.2 Nota 1 • Algunos iPod permiten cambiar el ajuste de salida de TV mientras están conectados. • Cuando el iPod/iPhone se desconecta de esta unidad, el ajuste de salida de TV del iPod/iPhone se repondrá a su estado original. 2 Si se conecta un iPod/iPhone cuando el iPod/iPhone está en el modo de reproducción y esta unidad está en el modo de espera, se conectará la alimentación y se iniciará la reproducción del iPod/iPhone. 13 Es 03_XW-NAC3_CUXZTSM_Es.book 14 ページ 03 2010年4月5日 月曜日 午後6時30分 Reproducción del iPod/iPhone La reproducción y el ajuste del nivel del volumen para la música y las imágenes del iPod/iPhone pueden efectuarse desde esta unidad o en el mismo iPod/iPhone. • Cuando emplee el iPod/iPhone para ajustar el volumen del sonido, el ajuste sólo se aplicará al sonido producido por los altavoces de esta unidad.1 Si el iPod/ iPhone se desconecta de esta unidad, el volumen del sonido del iPod se repondrá a su ajuste original. Cuando reproduzca con un solo iPod/iPhone, pulse iPod a o iPod b para cambiar al modo respectivo. Las operaciones siguientes pueden llevarse a cabo para el iPod/iPhone empleando el mando a distancia. Botón Función / Inicia la reproducción normal y activa y desactiva la pausa de la reproducción. Pausa la reproducción. Púlselo para saltar al principio del archivo actual, y después al principio de los archivos anteriores. Púlselo y reténgalo para iniciar la exploración en retroceso rápido. Púlselo para saltar al archivo siguiente. Púlselo y reténgalo para iniciar la exploración en avance rápido. VOLUME Utilícelos para ajustar el volumen +/– de audición. SHUFFLE Las pistas del iPod/iPhone que se hayan seleccionado se reproducirán en orden aleatorio (reproducción en orden aleatorio). REPEAT Las pistas del iPod/iPhone que se hayan seleccionado se reproducirán repetidamente.a Nota 1 Estos ajustes se aplican a todas las entradas de la unidad. 14 Es Botón Función MENU Se emplean para seleccionar los álbumes que se desean reproducir en el iPod/iPhone. // Se emplea para controlar el menú del iPod/iPhone. ENTER PLAYLIST Se emplean para seleccionar las </> listas de reproducción que se desean reproducir en el iPod/ iPhone. ALBUM </> Use these to select albums to be played on iPod/iPhone. DISPLAY La información de la pista (nombre del artista/nombre del álbum) cambia cada vez que que pulsa el botón durante la reproducción. DISP OFF Apaga la visualización excepto cuando se pulsan botones. a Púlselo repetidamente para cambiar entre las opciones de repetición de la reproducción. ‘Repeat’ sirve para reproducir repetidamente el archivo que ahora se está reproduciendo. ‘Repeat ALL’ sirve para reproducir repetidamente todos los archivos. Cuando no se ha conectado ningún dispositivo a los puertos de conexión del iPod/iPhone seleccionado (iPod a o iPod b) y no se opera esta unidad durante 30 o más minutos después de haber seleccionado la función respectiva, la alimentación se desconectará automáticamente. 03_XW-NAC3_CUXZTSM_Es.book 15 ページ 2010年4月5日 月曜日 午後6時30分 Reproducción del iPod/iPhone Mientras reproduce desde una unidad iPod/ iPhone, la información de las pistas se visualizará en la pantalla de esta unidad. Nombre de la canción 0 : 0 0 La hora Nombre del artista/Nombre del álbum Modo de reproducción : Repetir todo : Reproducción aleatoria • Para cancelar el modo SHUFFLE2, pulse o pulse . otra vez • El modo SHUFFLE2 también se cancelará si se cambia la función a cualquier otra entrada (incluyendo iPod a o iPod b). Exploración HI-LITE Cuando reproduzca alternadamente dos unidades de iPod/iPhone, pulse s para efectuar la reproducción SHUFFLE2. Se reproduce cada pista durante algunos segundos desde cierto tiempo desde el principio de la pista para poder encontrar con facilidad las pistas que se desean escuchar. SHUFFLE2 1 Conecte un iPod/iPhone a los puertos de conexión de iPod/iPhone, y luego pulse iPod a o iPod b. Pueden reproducirse alternadamente dos unidades de iPod/iPhone sin interrupciones del sonido (SHUFFLE2). Un momento antes de terminar la pista que se está reproduciendo en un iPod/iPhone, comienza la reproducción de la pista del otro iPod/iPhone y el volumen se incrementa gradualmente para crear una aparición gradual perfecta (fundido cruzado). 2 Pulse MENU para acceder al menú del iPod/iPhone. 3 Seleccione el lugar de la pista que desee reproducir y luego pulse ENTER. Durante la operación de SHUFFLE2, el orden de reproducción de las pistas lo establece la función de mezcla aleatoria. 4 Pulse HI-LITE. La función de exploración HI-LITE empieza desde la primera pista del iPod/iPhone seleccionado. 1 Conecte dos unidades de iPod/iPhone a los puertos de conexión de iPod/iPhone (iPod a, iPod b), y luego pulse iPod a o iPod b. Si ya se está efectuando la reproducción, la exploración HI-LITE empezará desde la pista que actualmente se esté reproduciendo. 2 Pulse MENU para acceder al menú del iPod/iPhone. 3 Seleccione el lugar de la pista que desee reproducir y luego pulse ENTER. Español : Repetir 1 Un momento antes de terminar la pista que se está reproduciendo en un iPod/iPhone, comienza la reproducción con fundido cruzado en la otra unidad de iPod/iPhone. Se repite la misma operación hasta que se han reproducido todas las pistas de las dos unidades.1 Français i P o d a S o n g n a m e A r t i s t n a m e 4 Pulse . Se ajusta el modo SHUFFLE2 y se enciende el indicador SHUFFLE2; se reproducirá la unidad conectada al puerto de conexión iPod a. English Función 03 Después de haberse reproducido una pista durante algunos segundos, se buscará la pista siguiente y desde cierto tiempo2 desde el principio de la pista se iniciará la reproducción durante algunos segundos. Nota 1 Durante la operación de fundido cruzado, se desactivan / y /. 2 Si la duración total de una pista es demasiado corta, la pista se reproducirá desde el principio de la pista durante algunos segundos. 15 Es 03_XW-NAC3_CUXZTSM_Es.book 16 ページ 03 2010年4月5日 月曜日 午後6時30分 Reproducción del iPod/iPhone Cuando haya dos unidades iPod/iPhone simultáneamente conectadas, se buscará la primera pista del iPod/iPhone alternativo y desde cierto tiempo desde el principio de la pista se reproducirá durante algunos segundos. A partir de entonces se repetirá el mismo proceso hasta haberse encontrado y reproducido algunos segundos de todas las pistas. • Para cancelar la operación de exploración HI-LITE, pulse HI-LITE una vez más. • Cuando se conecta la alimentación de esta unidad con otra función seleccionada, aunque se conecte un iPod/iPhone en el modo de reproducción, no comenzará automáticamente la reproducción. • El modo de exploración HI-LITE también se cancelará si se cambia la función a cualquier otra entrada (incluyendo iPod a o iPod b). • Cuando se cambia la entrada desde la de iPod a otra función, la alimentación del iPod/iPhone se desconectará automáticamente. Importante Si el indicador de la alimentación y el indicador del iPod/iPhone parpadean simultáneamente, indican un error de conexión. Efectúe las siguientes comprobaciones para la solución de problemas: • Verifique si el iPod/iPhone es compatible con esta unidad. • Vuelva a conectar el iPod/iPhone a la unidad. Si esto no funciona, pruebe a reiniciar el iPod/iPhone. • Actualice el software del iPod/iPhone a la versión más reciente. Si no puede operar el iPod/iPhone, compruebe los puntos siguientes: • ¿Se ha conectado correctamente el iPod/ iPhone? Vuelva a conectar el iPod/iPhone a la unidad. • ¿Se ha parado inesperadamente el iPod/ iPhone? Efectúe la reposición del iPod/ iPhone y vuélvalo a conectar a la unidad. Sugerencia • La recarga del iPod/iPhone se lleva a cabo siempre que se conecta el iPod/iPhone a esta unidad. (Esta función también está disponible en el modo de espera.) 16 Es • Si se conecta una unidad de iPod/iPhone a esta unidad cuando se ya encuentra en el modo de reproducción, al conectar la alimentación de la unidad o al cambiar su entrada a la de iPod causará el inicio automático de la reproducción del iPod/ iPhone. • Si la unidad se ajusta al modo de espera cuando hay un iPod/iPhone conectado, la alimentación del iPod/iPhone se desconectará automáticamente. 03_XW-NAC3_CUXZTSM_Es.book 17 ページ 2010年4月5日 月曜日 午後6時30分 Bluetooth ® AUDIO para el disfrute inalámbrico de la música 04 Capítulo 4: Français Dispositivo habilitado de tecnología Bluetooth inalámbrica: Teléfono móvil English Bluetooth ® AUDIO para el disfrute inalámbrico de la música Esta unidad Español Dispositivo habilitado de tecnología Bluetooth inalámbrica: Reproductor de música digital Dispositivo no equipado con tecnología Bluetooth inalámbrica: Reproductor de música digital + Transmisor de audio Bluetooth (de venta en los establecimientos del ramo) Funcionamiento con mando a distancia Funcionamiento con mando a distancia Reproducción inalámbrica de música ® Esta unidad se suministra con un Bluetooth ADAPTER (Modelo de Pioneer N.º AS-BT100); por lo tanto, puede utilizarse cualquier producto equipado con tecnología inalámbrica Bluetooth (teléfono móvil, reproductor de música digital portátil, etc.) para escuchar música de forma inalámbrica.1 Además, utilizando un transmisor disponible en tiendas con tecnología inalámbrica Bluetooth, puede escuchar música en un dispositivo no equipado con tecnología inalámbrica Bluetooth. Esta unidad es compatible con la protección del contenido SCMS-T, por lo que también podrá escuchar la música en dispositivos equipados con tecnología inalámbrica Bluetooth del tipo SCMS-T. El mando a distancia suministrado con esta unidad le permite reproducir y detener medios y realizar otras operaciones.2 Acerca de la tecnología inalámbrica Bluetooth La marca literal y los logotipos Bluetooth son propiedad de Bluetooth SIG, Inc., y cualquier uso de dichas marcas por Pioneer Corporation se hace bajo licencia. Otras marcas y nombres comerciales son propiedad de sus respectivos propietarios. Nota 1 • Es posible que sea necesario que el dispositivo con tecnología inalámbrica Bluetooth sea compatible con perfiles A2DP. • Pioneer no garantiza la conexión y la operación correctas de esta unidad con todos los dispositivos con tecnología inalámbrica Bluetooth. 2 • Es posible que sea necesario que el dispositivo con tecnología inalámbrica Bluetooth sea compatible con perfiles AVRCP. • No pueden garantizarse las operaciones con mando a distancia para todos los dispositivos con tecnología inalámbrica Bluetooth. 17 Es 03_XW-NAC3_CUXZTSM_Es.book 18 ページ 04 2010年4月5日 月曜日 午後6時30分 Bluetooth ® AUDIO para el disfrute inalámbrico de la música Ajuste del código PIN Ajuste el código PIN de esta unidad al mismo ajuste que para el dispositivo de tecnología Bluetooth inalámbrica utilizado. Los valores del ajuste del código PIN compatibles incluyen los 0000, 1234 y 8888. • Ajuste predeterminado: 0000 AUDIO. Asegúrese de realizar el apareamiento la primera vez que opere con el sistema o cada vez que se eliminen los datos de emparejamiento. “El apareamiento” es el paso necesario para registrar el aparato con tecnología inalámbrica Bluetooth para permitir las comunicaciones mediante Bluetooth.1 Para más información, consulte las instrucciones de funcionamiento de su dispositivo con tecnología inalámbrica Bluetooth. USB STANDBY/ON TIMER WAKE UP(GREEN) SLEEP(ORANGE) a b VOLUME INPUT SELECTOR 1 Pulse BT A. Se visualiza ‘Device Disconnected’ cuando no hay conectado ningún dispositivo con tecnología inalámbrica Bluetooth. Si hay conectado un dispositivo con tecnología inalámbrica Bluetooth, desconéctelo. 2 Cuando se visualice ’Device Disconnected’, pulse y mantenga pulsado VOLUME – en el panel superior y luego pulse y mantenga pulsado STANDBY/ON durante tres segundos. Se cambiará el código PIN y se visualizará el nuevo código PIN ajustado. Seleccione entre ‘0000’, ‘1234’ y ‘8888’. Repita el paso 2 hasta que el código PIN se reponga al valor deseado. 1 Pulse BT A. Se visualiza ‘Device Disconnected’ cuando no hay conectado ningún dispositivo con tecnología inalámbrica Bluetooth. Si hay conectado un dispositivo con tecnología inalámbrica Bluetooth, desconéctelo. 2 Cuando se visualice ’Device Disconnected’, pulse . Se visualizará ‘Pairing’ y la unidad se establecerá en el modo de espera de apareamiento. 3 Encienda el dispositivo con tecnología inalámbrica Bluetooth que quiera aparear, colóquelo a menos de 1 metro del sistema y ajústelo al modo de apareamiento. Comienza el apareamiento. Estos ajustes se conservarán en la memoria aunque desconecte la alimentación. Para reponer el código PIN, conecte la alimentación y lleve a cabo el paso 2 sin haber conectado ninguna unidad. 4 Compruebe que el Bluetooth AUDIO haya sido detectado por el dispositivo con tecnología inalámbrica Bluetooth. Se visualizará ‘Device Connected’ cuando se conecte un dispositivo con tecnología inalámbrica Bluetooth. Entonces se visualiza el nombre del dispositivo conectado. Cómo aparear esta unidad y el dispositivo de tecnología inalámbrica Bluetooth Se visualizará ‘Device Disconnected’ cuando no haya conectado ningún dispositivo con tecnología inalámbrica Bluetooth. En este caso, efectúe la operación de conexión desde el lado del dispositivo con tecnología inalámbrica Bluetooth. “Debe aparearlos” antes de que comience la reproducción del contenido de la tecnología inalámbrica Bluetooth utilizando el Bluetooth Nota 18 Es 1 • Se requiere el apareamiento la primera vez que se utiliza el dispositivo de tecnología inalámbrica Bluetooth y esta unidad. • Para permitir la comunicación mediante Bluetooth, el apareamiento debe realizarse tanto con su sistema como con el dispositivo de tecnología inalámbrica Bluetooth. 03_XW-NAC3_CUXZTSM_Es.book 19 ページ 2010年4月5日 月曜日 午後6時30分 Bluetooth ® AUDIO para el disfrute inalámbrico de la música 2 Conecte el dispositivo de tecnología inalámbrica Bluetooth al Bluetooth AUDIO. Botón Función / Inicia la reproducción normal y activa y desactiva la pausa de la reproducción. Detiene la reproducción. Púlselo para saltar al principio del archivo actual, y después al principio de los archivos anteriores. Púlselo y reténgalo para iniciar la exploración en retroceso rápido. Púlselo para saltar al archivo siguiente. Púlselo y reténgalo para iniciar la exploración en avance rápido. VOLUME Utilícelos para ajustar el volumen +/– de audición. Cuando no haya ningún dispositivo con tecnología inalámbrica Bluetooth conectado y no se opere esta unidad durante 30 o más minutos después de haber seleccionado la función Bluetooth AUDIO, la alimentación se desconectará automáticamente. • Teléfonos inalámbricos • Facsímiles inalámbricos • Hornos de microondas • Dispositivos LAN inalámbricos (IEEE802.11b/g) • Equipos audiovisuales inalámbricos Español 3 Comience la reproducción de contenidos musicales almacenados en el dispositivo con tecnología inalámbrica Bluetooth. Las operaciones siguientes pueden entonces llevarse a cabo para los dispositivos con tecnología inalámbrica Bluetooth empleando el mando a distancia.1 Esta unidad emplea una frecuencia de onda de radio de 2,4 GHz, que es una banda utilizada por otros sistemas inalámbricos (consulte la lista siguiente). Para evitar ruidos o interrupciones de la comunicación, no emplee esta unidad cerca de estos dispositivos, o compruebe que tales dispositivos estén apagados durante la utilización. Français 1 Pulse BT A para cambiar al modo de entrada Bluetooth AUDIO. Se visualizará ‘Device Disconnected’. Precauciones con las ondas de radio English Audición de contenidos musicales de un dispositivo con tecnología inalámbrica Bluetooth con su sistema 04 • Controladores inalámbricos para sistemas de juegos • Equipos médicos por microondas • Algunos monitores para niños Otros equipos menos comunes que puedan utilizar la misma frecuencia: • Sistemas antirrobo • Emisoras de radioaficionados (HAM) • Sistemas de gestión logística de almacenes • Sistemas de discriminación para trenes o vehículos de emergencia Nota • Si aparece ruido en la imagen del televisor, existirá la posibilidad de que un dispositivo habilitado con tecnología inalámbrica Bluetooth o esta unidad (incluyendo los productos compatibles con esta unidad) estén causando interferencias de la señal en el conector de entrada de antena de su televisor, vídeo, sintonizador BS, sintonizador CS, etc. En este caso, incremente la distancia entre Nota 1 • El dispositivo con tecnología inalámbrica Bluetooth deberá ser compatible con el perfil AVRCP. • Según el dispositivo con tecnología Bluetooth que utilice, el funcionamiento puede diferir del mostrado en esta tabla. 19 Es 03_XW-NAC3_CUXZTSM_Es.book 20 ページ 04 2010年4月5日 月曜日 午後6時30分 Bluetooth ® AUDIO para el disfrute inalámbrico de la música el conector de entrada de la antena y el dispositivo habilitado con tecnología inalámbrica Bluetooth o esta unidad (incluyendo los productos compatibles con esta unidad). • Si hay algo que obstruya el paso entre esta unidad (incluyendo los productos compatibles con esta unidad) y el dispositivo habilitado con tecnología inalámbrica Bluetooth (como pueda ser una puerta metálica, un muro de hormigón o papel de aluminio aislante), es posible que tenga que cambiar la ubicación del sistema para evitar ruidos en la señal e interrupciones. Alcance de funcionamiento Esta unidad está diseñada para un uso doméstico. (Es posible que se reduzcan las distancias de transmisión dependiendo de los entornos de comunicación.) En los lugares siguientes, las malas condiciones o la incapacidad de recibir ondas de radio puede que interrumpan o detengan el sonido: • En edificios de hormigón reforzado o en edificios de estructura de metal o hierro. • Muebles metálicos grandes cercanos. • En una multitud de personas o cerca de un edificio u obstáculo. • En un lugar expuesto a un campo magnético, electricidad estática o interferencias de ondas de radio por parte de equipos de radiocomunicaciones que usen la misma banda de frecuencia (2,4 GHz) que esta unidad, tales como dispositivos LAN inalámbricos de 2,4 GHz (IEEE802.11b/g) u hornos de microondas. • Si usted vive en una zona residencial muy poblada (apartamentos, ciudades residenciales, etc.) y si el horno microondas de su vecino está colocado cerca de su sistema, es posible que note interferencias de ondas de radio. Si esto sucede, cambie la unidad de sitio. Cuando el microondas no está en uso, no habrá interferencias de ondas de radio. 20 Es Reflejos de ondas de radio Las ondas de radio que recibe esta unidad incluyen la onda de radio que proviene directamente del dispositivo equipado con tecnología inalámbrica Bluetooth (onda directa) y las ondas procedentes de varias direcciones por los reflejos en paredes, muebles y edificios (ondas reflejadas). Las ondas reflejadas (por los obstáculos y los objetos reflectores) producen además una serie de ondas reflejadas, así como una variación del estado de la recepción según los lugares. Ni no se puede recibir el sonido correctamente debido a este fenómeno, trate de cambiar un poco la ubicación del dispositivo equipado con tecnología inalámbrica Bluetooth. Asimismo, observe que el sonido podría interrumpirse debido a las ondas reflejadas cuando una persona cruza o se acerca al espacio que hay entre esta unidad y el dispositivo equipado con tecnología inalámbrica Bluetooth. Precauciones relacionadas con los productos compatibles con esta unidad • Complete las conexiones de todos los dispositivos compatibles con esta unidad, incluyendo todos los cables de audio y cables de alimentación antes de conectarlos a esta unidad. • Después de haber completado las conexiones con esta unidad, compruebe los cables de audio y de alimentación y confirme que no estén enredados entre sí. • Cuando desconecte esta unidad, confirme que dispone de suficiente espacio para trabajar en el área circundante. • Cuando cambie las conexiones de los cables de audio u otros cables de productos compatibles con esta unidad, confirme que dispone de suficiente espacio para trabajar en el área circundante. 03_XW-NAC3_CUXZTSM_Es.book 21 ページ 2010年4月5日 月曜日 午後6時30分 Reproducción con las entradas de HOME MEDIA GALLERY 05 Capítulo 5: Importante • Home Media Gallery le permite reproducir música en servidores de medios conectados a una Red de área local (LAN) idéntica a la que está conectada la unidad. Esta unidad permite reproducir los archivos guardados en lo siguiente: - Ordenadores que operan con Microsoft Windows Vista o XP con Windows Media Player 11 instalado - Ordenadores que operan con Microsoft Windows 7 con Windows Media Player 12 instalado - Servidores de medios digitales compatibles con DLNA (en ordenadores o en otros componentes) - Los archivos guardados en un ordenador o DMS (Servidor de medios digitales) como se ha descrito anteriormente, pueden reproducirse *: DMR es una clase de dispositivo certificada por DLNA. Español La función Home Media Gallery de esta unidad le permitirá escuchar archivos de audio o radioemisoras de Internet en un ordenador u otro componente conectado al terminal LAN de esta unidad. Este capítulo describe los procedimientos de conexión, ajuste y reproducción necesarios para disfrutar de estas características. Se le recomienda consultar también el manual de instrucciones suministrado con su componente de red. Français Entretenimiento con Home Media Gallery mediante un comando de un Controlador de medios digitales (DMS). El dispositivo utilizado para reproducir archivos bajo control del DMC se denomina Suministrador de medios digitales (DMR*). La unidad XW-NAC3 es compatible con la utilización de tales componentes DMR. Cuando seleccione un DMC o DMS, emplee sólo uno que haya recibido la certificación de DLNA. English Reproducción con las entradas de HOME MEDIA GALLERY - Mientras se emplea un DMR, podrá emplearse un controlador externo para iniciar y detener la reproducción de los archivos. También es posible controlar el volumen del sonido y emplear la función MUTE.1 - Cuando se emplea un DMR, si se opera el mando a distancia del XW-NAC3, se cancelará la operación del DMR (excluyendo el empleo de ciertos botones entre los que se encuentran los de VOLUME, MUTE, y DISPLAY). • Para reproducir archivos de audio guardados en componentes de la red o para escuchar emisoras de radio de Internet, usted tendrá que activar la función del servidor DHCP en su enrutador. En el caso de que su enrutador no tenga la función del servidor DHCP incorporada, será necesario preparar manualmente la red. De lo contrario no podrá reproducir archivos de audio guardados en componentes de la red ni escuchar emisoras de radio de Internet. Consulte página 28. Nota 1 Dependiendo del controlador externo utilizado, es posible que se interrumpa la reproducción cuando se emplea el controlador para ajustar el volumen del sonido. En este caso, efectúe los ajustes del volumen desde la unidad principal o con el mando a distancia. 21 Es 03_XW-NAC3_CUXZTSM_Es.book 22 ページ 05 2010年4月5日 月曜日 午後6時30分 Reproducción con las entradas de HOME MEDIA GALLERY Pasos para el entretenimiento con Home Media Gallery 1 Conecte a la red mediante la interfaz LAN. Consulte página 24. 2 Configure los ajustes de la red. El ajuste sólo es necesario cuando el enrutador que va a ser conectado no tiene función de servidor DHCP incorporada. Consulte página 28. 3 Reproducción con Home Media Gallery. Consulte página 24. • Reproducción de archivos de música guardados en dispositivos de almacenamiento USB u ordenadores1 Con esta unidad puede reproducir mucha música guardada en dispositivos de almacenamiento USB o en sus ordenadores. Consulte página 23. • Recepción de emisoras de radio de Internet Puede seleccionar y escuchar su emisora de radio de Internet favorita que se encuentra en la lista de emisoras de radio de Internet creada, editada y administrada por el servicio de base de datos vTuner para uso exclusivo con productos Pioneer. Consulte página 27. Nota 1 Además de un ordenador, también puede reproducir archivos de audio guardados en otros componentes empleando para ello la función del servidor de medios incorporada basada en los protocolos y en el marco de DLNA 1.0 y 1.5 (es decir, sistemas de audio y discos duros compatibles con red). 22 Es 03_XW-NAC3_CUXZTSM_Es.book 23 ページ 2010年4月5日 月曜日 午後6時30分 Reproducción con las entradas de HOME MEDIA GALLERY 05 Acerca de los formatos de archivo reproducibles MP3a .mp3 Stream MPEG-1 Audio Frecuencia de muestreo 8 kHz a 48 kHz Velocidad en bits de cuantificación 16 bits _b LPCM 8 kbps a 320 kbps No soportado/Soportado 8 kHz a 48 kHz 16 bits, 20 bits, 24 bits 2 canales 8 kHz a 48 kHz 16 bits, 20 bits, 24 bits 2 canales 8 kHz a 48 kHz 16 bits 2 canales 5 kbps a 320 kbps No soportado/Soportado 8 kHz a 48 kHz 16 bits 2 canales 5 kbps a 320 kbps No soportado/Soportado 32 kHz a 48 kHz 16 bits 2 canales 16 kbps a 320 kbps No soportado/Soportado 8 kHz, 16 kHz, 22 kHz, 32 kHz, 44,1 kHz, 48 kHz Velocidad en bits de cuantificación WAV .wav LPCM Canal Frecuencia de muestreo Velocidad en bits de cuantificación WMA .wma WMA2/7/8 Canal Frecuencia de muestreo Velocidad en bits de cuantificación WMA9 Canal Velocidad de bits VBR/CBR Frecuencia de muestreo Velocidad en bits de cuantificación AAC .m4a .aac .3gp .3g2 FLAC .flac Canal Velocidad de bits VBR/CBR Frecuencia de muestreo MPEG-4 AAC LC MPEG-4 HE AAC Velocidad en bits de cuantificación (aacPlus v1/2) Canal Velocidad de bits VBR/CBR FLAC Frecuencia de muestreo Español 2 canales Velocidad de bits VBR/CBR Frecuencia de muestreo Français LPCM Canal English Categoría Extensión Velocidad en bits de cuantificación 8 bits, 16 bits Canal 2 canales (no se soporta el audio monofónico de 8 bits) Velocidad de bits VBR/CBR No soportado/Soportado a “Tecnología de decodificación de audio MPEG Layer-3 bajo licencia de Fraunhofer IIS y Thomson multimedia.” b Sólo con relación a la reproducción de datos en tiempo real, por lo que no hay extensión. 23 Es 03_XW-NAC3_CUXZTSM_Es.book 24 ページ 05 2010年4月5日 月曜日 午後6時30分 Reproducción con las entradas de HOME MEDIA GALLERY Conexión a la red mediante la interfaz LAN Precaución Antes de establecer o modificar las conexiones, desconecte la alimentación y desenchufe el cable de alimentación de la toma de corriente. La conexión del cable de alimentación debe ser el último paso. Internet Conectando esta unidad a la red mediante el terminal LAN, usted podrá reproducir los archivos de audio guardados en componentes de la red, incluyendo su ordenador o dispositivo de almacenamiento USB, y escuchar emisoras de radio de Internet.1 Conecte el terminal LAN de esta unidad al terminal LAN de su enrutador (con o sin la función del servidor DHCP incorporada) con un cable LAN recto (CAT 5 o mejor). Active la función del servidor DHCP en su enrutador. En el caso de que su enrutador no tenga la función del servidor DHCP incorporada, será necesario preparar manualmente la red. Para conocer detalles, consulte página 28. Módem Reproducción con Home Media Gallery Cable LAN (se vende por separado) LAN 3 2 1 WAN Enrutador PC2 PC1 Dispositivo de almacenamiento USB Terminal USB Importante • Cuando reproduce archivos de audio se visualiza ‘Connecting...’ antes de empezar la reproducción. La visualización puede continuar varios segundos según el tipo de archivo. • En el caso de un dominio configurado en el entorno de red de Windows, usted no podrá acceder a un ordenador de la red mientras esté conectado al dominio. En lugar de conectarse al dominio, conéctese a la máquina local. Esta unidad Nota 1 • Para escuchar emisoras de radio de Internet tendrá que firmar primero un contrato con un ISP (proveedor de servicios de Internet). • Los archivos de fotos o de vídeo no se pueden reproducir. • Con Windows Media Player 11 ó 12, en esta unidad podrá reproducir hasta archivos de audio protegidos por derechos de autor. • Para poder conectarse a Internet tendrá que firmar primero un contrato con un proveedor de servicios de Internet (ISP). 24 Es 03_XW-NAC3_CUXZTSM_Es.book 25 ページ 2010年4月5日 月曜日 午後6時30分 Reproducción con las entradas de HOME MEDIA GALLERY • En algunos casos, es posible que el tiempo transcurrido no se visualice correctamente. 05 • Recently played**- Historial de audición de radio de Internet (las últimas 20 veces) *: Sólo se visualiza cuando está conectado. Sólo pueden reproducirse archivos de audio • Carpeta de Favoritos - Consulte página 26. Seleccionado Función de entrada > U S B I n t e r n e t S e r v e r 1 Español 1 Pulse HOME MEDIA GALLERY. Esta unidad puede tardar varios segundos en tener acceso a la red. Aparece la pantalla siguiente cuando se selecciona Home Media Gallery como la función de entrada. . Cuando pulsa ENTER, la reproducción empieza con la pantalla de reproducción que está siendo visualizada para el elemento seleccionado. Para volver a la pantalla de listas, pulse RETURN. En el caso de las carpetas con , utilice / y o ENTER para seleccionar la carpeta y los archivos de audio deseados. Para encontrar instrucciones más detalladas de la operación, consulte la sección siguiente. • Pantalla de reproducción - Consulte página 26. Français 3 Emplee / para seleccionar la carpeta, archivos de música o emisora de radio de Internet y luego pulse , ENTER o /. Pulse / para desplazar la lista hacia arriba y hacia abajo y seleccionar el elemento deseado. English **: Siempre se visualiza. R a d i 1 / 6 Página actual/Total de páginas 2 Utilice / para seleccionar la categoría y, a continuación, pulse o ENTER. Seleccione una categoría en la lista siguiente1: • USB* - El dispositivo de almacenamiento USB Con el mando a distancia de esta unidad puede realizar las operaciones siguientes. Tenga presente que, dependiendo de la categoría que esté siendo reproducida, algunos botones no estarán disponibles para la operación. Botón Función / Inicia la reproducción normal y activa y desactiva la pausa de la reproducción. Detiene la reproducción. Púlselo para saltar al principio del archivo actual, y después al principio de los archivos anteriores. Púlselo para saltar al archivo siguiente. • Server Name* - Componentes del servidor en la red • Internet Radio**- Radio de Internet • Favorites**- Canciones favoritas que están siendo registradas • Setup**- Permite al usuario efectuar diversos ajustes de la red y confirmar la información. VOLUME Utilícelos para ajustar el volumen +/– de audición. Nota 1 Cuando se pulsa RETURN desde este menú, se selecciona la última emisora de radio por Internet que se había escuchado. 25 Es 03_XW-NAC3_CUXZTSM_Es.book 26 ページ 05 2010年4月5日 月曜日 午後6時30分 Reproducción con las entradas de HOME MEDIA GALLERY Botón Función SHUFFLE Las pistas que se hayan seleccionado se reproducirán en orden aleatorio (reproducción en orden aleatorio). REPEAT DISPLAY Las pistas que se hayan seleccionado se reproducirán repetidamente. La información de la pista (nombre del artista/nombre del álbum) cambia cada vez que que pulsa el botón durante la reproducción. DISP OFF Apaga la visualización excepto cuando se pulsan botones. Cuando se visualice el menú inicial en la pantalla de esta unidad y no se opere la unidad durante 30 o más minutos después de haber seleccionado la función Home Media Gallery, la alimentación se desconectará automáticamente. Acerca de la pantalla de reproducción La pantalla siguiente aparece cuando usted reproduce archivos de audio. Tenga presente que, dependiendo del tipo de archivo, es posible que algunos elementos no se visualicen. • La información visualizada (nombre del artista/nombre del álbum) se alterna cada vez que que se pulsa el botón DISPLAY durante la reproducción. La pantalla siguiente aparece cuando se reciben los streams de audio de una emisora de radio de Internet. Nombre de la canción Nombre de la emisora de radio I n t e r n e t R a d i o S o n g n a m e 1 . R a d i o s t a t i o n 0 : 0 0 La lista de emisoras de radio de Internet de esta unidad es creada, editada y administrada por el servicio de base de datos vTuner para uso exclusivo con esta unidad. Consulte página 27. Acerca de la carpeta Favorites En la carpeta Favorites podrá registrar hasta 20 de sus canciones preferidas o emisoras de radio de Internet. Tenga presente que sólo se pueden registrar archivos de audio guardados en componentes de la red. Fuente de entrada Nombre de la canción U S B S o n g n a m e A r t i s t n a m e 0 : 0 0 La hora Nombre del artista/Nombre del álbum Modo de reproducción : Repetir 1 : Repetir todo : Reproducción aleatoria Registro de archivos de audio y emisoras de radio de Internet en la carpeta Favorites • Pulse PGM mientras se está reproduciendo o está parada una canción o una emisora de radio de Internet. Borrado de archivos de audio y emisoras de radio de Internet de la carpeta Favorites • Emplee / para seleccionar la carpeta, archivos de música o emisora de radio de Internet y luego pulse CLEAR. 26 Es 03_XW-NAC3_CUXZTSM_Es.book 27 ページ 2010年4月5日 月曜日 午後6時30分 Reproducción con las entradas de HOME MEDIA GALLERY En la pantalla de Ayuda podrá verificarse lo siguiente: • Get access code - Se visualizará el código de acceso que es necesario para registrarse en el sitio de radio de Internet especial de Pioneer. • Show Your WebID/PW - Después de haberse registrado en el sitio de radio de Internet especial de Pioneer se visualizará la ID y la contraseña registradas. Español http://www.radio-pioneer.com 3 Utilice / para seleccionar ’Get access code’ y, a continuación, pulse ENTER. Se visualizará el código de acceso que es necesario para registrarse en el sitio de radio de Internet especial de Pioneer. Anote esta dirección. Français Con esta unidad pueden registrarse y reproducirse emisoras de radio que no constan en la lista de emisoras distribuida por vTuner. Mire el código de acceso necesario para registrar esta unidad, emplee este código de acceso para entrar en el sitio de radio de Internet especial de Pioneer y registre las emisoras de radio que desee en sus favoritos. La dirección del sitio de radio de Internet especial de Pioneer es: 2 Utilice / para seleccionar ’Help’ y, a continuación, pulse ENTER. English Registro de emisoras de radio que no están en la lista de vTuner desde el sitio especial de Pioneer 05 • Reset Your WebID/PW - Repone al estado predeterminado toda la información registrada en el sitio de radio de Internet especial de Pioneer. Cuando se efectúa la reposición al estado predeterminado, también se borran todas las emisoras de radio registradas, Si desea escuchar las mismas emisoras, vuelva a registrarlas después de la reposición. 1 Visualice la pantalla de la lista de emisoras de radio de Internet. Para visualizar la lista de emisoras de radio de Internet, efectúe los pasos 1 a 3 de Reproducción con Home Media Gallery en la página 24. 4 Acceda al sitio de radio de Internet especial de Pioneer desde su ordenador y lleve a cabo el proceso de registro. Acceda al sitio arriba indicado y emplee el código de acceso del paso 3 para llevar a cabo el registro de usuario siguiendo las indicaciones que aparecen en la pantalla. 5 Registre las emisoras de radio que desee como sus favoritas siguiendo las indicaciones que aparecen en la pantalla del ordenador. Pueden registrarse emisoras de radio que no se encuentran en la lista de vTuner y emisoras de la lista de vTuner. En este caso, se registran en la unidad como emisoras de radio favoritas y pueden escucharse. 27 Es 03_XW-NAC3_CUXZTSM_Es.book 28 ページ 05 2010年4月5日 月曜日 午後6時30分 Reproducción con las entradas de HOME MEDIA GALLERY Operaciones avanzadas para radio de Internet Para guardar emisoras de radio de Internet Recuperación de las emisoras de radio de Internet guardadas Antes de recuperar las emisoras de radio de Internet tiene que guardarlas. Si no hay actualmente emisoras de radio de Internet guardadas, consulte el apartado Para guardar emisoras de radio de Internet y guarde al menos una de ellas antes de proseguir con los pasos siguientes. 1 Pulse CLASS. Cada vez que pulse CLASS, la clase irá cambiando A a C. 2 Utilice / para seleccionar el número de emisora. ’No Preset’ aparece cuando usted selecciona una emisora de radio de Internet que no está guardada. Esta unidad puede recordar las emisoras de radio de Internet que usted escucha con frecuencia en tres clases (A a C), con un máximo de diez emisoras en cada clase, lo que supone un máximo de 30 emisoras. Antes de empezar con los pasos siguientes, verifique si ha seguido los pasos 1 a 3 en Reproducción con Home Media Gallery en la página 24. 1 Sintonice la emisora de radio de Internet. Sintonice la emisora de radio de Internet deseada siguiendo los pasos 1 a 3 en Reproducción con Home Media Gallery en la página 24. Configuración de la red En el caso de que el enrutador conectado al terminal LAN de esta unidad sea de banda ancha (con función de servidor DHCP incorporada), active simplemente la función del servidor DHCP y no tendrá que configurar manualmente la red. Deberá configurar la red como se describe abajo sólo cuando haya conectado esta unidad a un servidor sin la función de servidor de DHCP.1 2 Pulse T.EDIT para cambiar al modo para guardar emisoras. 3 Pulse CLASS. Seleccione la clase deseada de A a C. 4 Utilice / para seleccionar el número y, a continuación, pulse ENTER. Seleccione el número deseado del 0 al 9. Nota 1 En el caso de que haga cambios en la configuración de la red sin la función de servidor DHCP, haga los cambios correspondientes en los ajustes de red de esta unidad. Antes de configurar la red, consulte a su ISP o al administrador de la red para conocer los ajustes necesarios. Se le recomienda consultar también el manual de instrucciones suministrado con su componente de red. 28 Es 03_XW-NAC3_CUXZTSM_Es.book 29 ページ 2010年4月5日 月曜日 午後6時30分 Reproducción con las entradas de HOME MEDIA GALLERY 2 Seleccione ’SETUP’ y pulse ENTER. Aparecerá la pantalla de SETUP. • Network Found - Conectado a un componente de la red. • No Network Found - No conectado a un componente de la red. 4 Compruebe el estado de la conexión a la red y pulse ENTER. Aparecerá la pantalla de configuración del IP de la red (Network IP Settings). 5 Seleccione ‘Automatic (DHCP) ‘o ‘Static IP‘ y pulse ENTER. • Automatic (DHCP) - La red se configurará automáticamente. • Static IP1 - La red se configurará manualmente. Efectúe a continuación los pasos siguientes. 6 Seleccione ‘No‘ o ‘Yes‘ para el ajuste del servidor proxy, para desactivar o activar el servidor proxy, y pulse ENTER. • No - Aparecerá la página del menú inicial (Top Menu). • Yes - Aparecerá la página del nombre del anfitrión proxy (Proxy Name). Efectúe a continuación los pasos siguientes. 1 Seleccione ’Change’ y pulse ENTER. Aparecerá la pantalla de edición del nombre del anfitrión proxy (Edit Proxy Name). 2 Introduzca la dirección de su servidor proxy en el nombre del dominio. Después de la introducción, pulse o ENTER. Aparecerá la pantalla del puerto proxy (Proxy Port). 3 Seleccione ’Change’ y pulse ENTER. Aparecerá la pantalla de edición del puerto proxy (Edit Proxy Port). 4 Introduzca la dirección de su servidor proxy en el nombre del dominio. Español Aparecerá ‘Network Found‘ o ‘No Network Found‘ en la pantalla de configuración de la red (Network Setup). 2 Introduzca la dirección IP. Pulse / para seleccionar un número y / para mover el cursor. Después de seleccionar el último número, pulse o ENTER. Aparecerá la pantalla de habilitación del servidor proxy (Proxy Server). Français 3 Seleccione ’Network Setup’ y pulse ENTER. Aparecerá la pantalla de configuración de la red (Network Setup). Aparecerá la pantalla de edición de la dirección IP (Edit IP). English 1 Pulse HOME MEDIA GALLERY para seleccionar ‘Home Media Gallery‘ como la función de entrada. Esta unidad puede tardar varios segundos en tener acceso a la red. 05 1 Seleccione ’Change’ y pulse ENTER. Nota 1 Dirección IP (IP Address) La dirección IP que vaya a introducirse deberá definirse dentro de los márgenes siguientes. Si la dirección IP definida sobrepasa los márgenes siguientes, usted no podrá reproducir archivos de audio guardados en componentes de la red ni escuchar emisoras de radio de Internet. Clase A: 10.0.0.1 a 10.255.255.254 / Clase B: 172.16.0.1 a 172.31.255.254 / Clase C: 192.168.0.1 a 192.168.255.254 Máscara de subred (Subnet Mask) En el caso de que un adaptador de terminal o un módem xDSL esté conectado directamente a esta unidad, introduzca la máscara de subred provista por su ISP en papel. En la mayoría de los casos, introduzca 255.255.255.0. IP de puerta de enlace (Gateway IP) En el caso de que haya una puerta de enlace (enrutador) conectada a esta unidad, introduzca la dirección IP correspondiente. DNS (1.°)/DNS (2.°) [DNS (1st)/DNS (2nd)] En el caso de que sólo haya una dirección de servidor DNS provista por su ISP en papel, introduzca ‘DNS (1st)’. En el caso de que haya más de dos direcciones de servidor DNS, introduzca ‘DNS (2nd)’ en el otro campo de dirección de servidor DNS. Nombre de anfitrión proxy/puerto proxy (Proxy Name/Proxy Port) Este ajuste se requiere cuando usted conecta esta unidad a Internet mediante un servidor proxy. Introduzca la dirección IP de su servidor proxy en el campo ‘Proxy Name’. Además, introduzca el número de puerto de su servidor proxy en el campo ‘Proxy Port’. 29 Es 03_XW-NAC3_CUXZTSM_Es.book 30 ページ 05 2010年4月5日 月曜日 午後6時30分 Reproducción con las entradas de HOME MEDIA GALLERY Pulse / para seleccionar un número y / para mover el cursor. Después de seleccionar el último número, pulse o ENTER. Aparecerá la pantalla de confirmación de los ajustes (Settings OK?). 5 Pulse ENTER para completar la configuración de la red. Aparecerá la página del menú inicial (Top Menu). Límite del volumen externo (Ext. Vol Limit) “Ext. Vol Limit” controla el valor máximo para ajustar el volumen del sonido de un controlador externo (Digital Media Controller1 (DMC)). El volumen máximo cambia de ‘50’ a ‘30’. Importante Comprobación de los ajustes de la red Puede comprobar los ajustes de red siguientes de esta unidad: las direcciones MAC, IP e IP de puerta de enlace, el servidor proxy, la máscara de subred y la versión de firmware (para Home Media Gallery de esta unidad). Antes de empezar con los pasos siguientes, verifique si ha seguido los pasos del 1 al 2 en Configuración de la red en la página 28. 1 Seleccione ‘Information‘ y pulse ENTER para confirmar su elección. Aparece la pantalla de la versión del Firmware (Firmware Version) (para Home Media Gallery de esta unidad). • Cuando se selecciona la función Home Media Gallery y no se ha conectado nada a ninguno de los puertos del conector de iPod/iPhone, Ext. Vol Limit funcionará. 1 Pulse HOME MEDIA GALLERY. 2 Desconecte las unidades de iPod/iPhone de los puertos del conector de iPod/iPhone. 3 Pulse , y luego STANDBY/ON durante tres segundos para activar y desactivar Ext. Vol Limit. Cuando Ext. Vol Limit está activado, se visualiza ‘Ext. Vol Limit On’ en la pantalla de esta unidad. 2 Compruebe los ajustes de la red. Pulse / para cambiar la visualización. Cada vez que pulse /, la visualización cambiará de la forma siguiente. Firmware Ver. MAC Address IP Address Gateway IP Proxy Server Subnet Mask 3 Pulse RETURN. Aparecerá la pantalla de configuración (Setup). Para volver a la pantalla inicial (Top Menu), pulse de nuevo RETURN. Nota 1 Consulte el apartado de Entretenimiento con Home Media Gallery en la página 21. 30 Es 03_XW-NAC3_CUXZTSM_Es.book 31 ページ 2010年4月5日 月曜日 午後6時30分 Reproducción con las entradas de HOME MEDIA GALLERY Acerca de la reproducción de la red por ciertos derechos de propiedad intelectual de Microsoft. El empleo o la distribución de esta tecnología fuera de este producto están prohibidos si no se dispone de una licencia de Microsoft. DLNA English La función de reproducción de la red de esta unidad usa las tecnologías siguientes: 05 Windows Media Player Este software puede descargarse desde el sitio Web de Microsoft. Windows Media Player 11 (para Windows XP, Vista) Windows Media Player 12 (para Windows 7) Consulte el sitio Web oficial de Microsoft para obtener más información. Windows Media DRM Microsoft Windows Media Digital Rights Management (WMDRM) es una plataforma para proteger y enviar con seguridad contenido para reproducirlo en ordenadores, aparatos portátiles y aparatos de red. Home Media Gallery funciona como una WMDRM 10 para dispositivos de red. El contenido protegido por WMDRM sólo se puede reproducir en servidores de medios compatibles con WMDRM. Los propietarios del contenido usan la tecnología WMDRM para proteger su propiedad intelectual, incluyendo derechos de autor. Este dispositivo utiliza software WMDRM para acceder al contenido protegido por WMDRM. Si el software WMDRM no protege el contenido, los propietarios del mismo podrán pedir a Microsoft que revoque la facultad del software para usar WMDRM para reproducir o copiar contenido protegido. La revocación no afecta al contenido sin protección. Cuando descarga licencias para el contenido protegido acepta que Microsoft pueda incluir una lista de revocaciones con las licencias. Los propietarios del contenido pueden pedirle que mejore la WMDRM para acceder a su contenido. Si usted rechaza la actualización, no podrá acceder al contenido que requiere la actualización. Este producto está protegido La Digital Living Network Alliance (DLNA) es una organización industrial de compañías de la electrónica para el consumidor, ordenadores y dispositivos móviles. Digital Living permite que los consumidores compartan fácilmente en casa medios digitales mediante una red alámbrica o inalámbrica. El logotipo con el certificado DLNA permite encontrar fácilmente los productos que cumplen las directrices de interoperabilidad de DLNA. Esta unidad cumple con las directrices de interoperabilidad v1.5 de DLNA. Cuando un ordenador que use software de servidor DLNA u otro dispositivo compatible con DLNA se conecte a este reproductor, puede que sea necesario hacer algunos cambios de software o de otros dispositivos. Consulte el manual de instrucciones que acompaña al software o dispositivo para tener más información. Español Con este software puede reproducir archivos guardados en un ordenador en varios dispositivo ubicados donde usted quiera en su casa. DLNA CERTIFIED™ Audio Player Français Windows Media Player es un software para enviar música, fotos y películas desde un ordenador con Microsoft Windows a televisores y sistemas estéreo. DLNA y DLNA CERTIFIED son marcas comerciales y/o marcas de servicio de Digital Living Network Alliance. Contenido reproducible en una red • Puede que algunos archivos no se reproduzcan correctamente a pesar de estar codificados con un formato compatible. • Los archivos de películas y fotos no se pueden reproducir. • Hay casos en los que usted no podrá oír una emisora de radio de Internet aunque la emisora haya sido seleccionada de una lista de emisoras de radio. 31 Es 03_XW-NAC3_CUXZTSM_Es.book 32 ページ 05 2010年4月5日 月曜日 午後6時30分 Reproducción con las entradas de HOME MEDIA GALLERY • Dependiendo del tipo de servidor o versión que se use puede que algunas funciones no sean soportadas. • Los formatos de archivos soportados cambian según el servidor. Por lo tanto, los archivos no soportados por su servidor no se visualizan en esta unidad. Para más información, consulte al fabricante de su servidor. Acerca de la reproducción en una red • La reproducción se puede detener cuando se apaga el ordenador o cuando se borra cualquier archivo de medios mientras se reproduce el contenido. • Si hay problemas dentro del entorno de la red (mucho tráfico de red, etc.) es posible que el contenido no se visualice ni reproduzca correctamente (la reproducción puede interrumpirse o detenerse). Para obtener el mejor rendimiento se recomienda una conexión 100BASE-TX entre el reproductor y el ordenador. • Si reproducen simultáneamente varios clientes puede que la reproducción se interrumpa o se detenga. • Dependiendo del software de seguridad instalado en un ordenador conectado y del ajuste de tal software puede que la conexión de red se bloquee. Pioneer no se hace responsable de ningún fallo de funcionamiento del reproductor o de Home Media Gallery debido a errores de comunicación/fallos de funcionamiento asociados con su conexión de red y/o su ordenador, u otros equipos conectados. Póngase en contacto con el fabricante de su ordenador o con el proveedor de servicios de Internet. ‘Windows Media™’ es una marca comercial de Microsoft Corporation. Este producto incluye tecnología propiedad de Microsoft Corporation, y no se puede usar ni distribuir sin una licencia de Microsoft Licensing, Inc. Microsoft®, Windows®7, Windows®Vista, Windows®XP, Windows®2000, Windows®Millennium Edition, Windows®98, y WindowsNT® son marcas registradas o marcas comerciales de Microsoft Corporation en Estados Unidos y/o en otros países. 32 Es Autorización para esta unidad Para poder reproducir con Home Media Gallery, esta unidad debe estar autorizada. Esto se hace automáticamente cuando la unidad se conecta al ordenador a través de la red. Si no, autorice manualmente a esta unidad en el ordenador. El método de autorización (o permiso) para el acceso varía dependiendo del tipo de servidor que esté siendo conectado. Para más información sobre la autorización de esta unidad, consulte el manual de instrucciones de su servidor. aacPlus El codificador de AAC emplea la tecnología aacPlus desarrollada por Coding Technologies (www.codingtechnologies.com). FLAC Decodificador FLAC Copyright © 2000, 2001, 2002, 2003, 2004, 2005, 2006, 2007 Josh Coalson La redistribución y uso en formas de fuente y binaria, con o sin modificación, están permitidas siempre que se cumplan las condiciones siguientes: • Las redistribuciones del código fuente deben mantener el aviso de derechos de autor indicado más arriba, esta lista de condiciones y el descargo de responsabilidad siguiente. • Las redistribuciones en forma binaria deben reproducir el aviso de derechos de autor indicado más arriba, esta lista de condiciones y el descargo de responsabilidad en los documentos y/o en los materiales provistos con la distribución. 03_XW-NAC3_CUXZTSM_Es.book 33 ページ 2010年4月5日 月曜日 午後6時30分 Reproducción con las entradas de HOME MEDIA GALLERY Français Español THIS SOFTWARE IS PROVIDED BY THE COPYRIGHT HOLDERS AND CONTRIBUTORS “AS IS” AND ANY EXPRESS OR IMPLIED WARRANTIES, INCLUDING, BUT NOT LIMITED TO, THE IMPLIED WARRANTIES OF MERCHANTABILITY AND FITNESS FOR A PARTICULAR PURPOSE ARE DISCLAIMED. IN NO EVENT SHALL THE FOUNDATION OR CONTRIBUTORS BE LIABLE FOR ANY DIRECT, INDIRECT, INCIDENTAL, SPECIAL, EXEMPLARY, OR CONSEQUENTIAL DAMAGES (INCLUDING, BUT NOT LIMITED TO, PROCUREMENT OF SUBSTITUTE GOODS OR SERVICES; LOSS OF USE, DATA, OR PROFITS; OR BUSINESS INTERRUPTION) HOWEVER CAUSED AND ON ANY THEORY OF LIABILITY, WHETHER IN CONTRACT, STRICT LIABILITY, OR TORT (INCLUDING NEGLIGENCE OR OTHERWISE) ARISING IN ANY WAY OUT OF THE USE OF THIS SOFTWARE, EVEN IF ADVISED OF THE POSSIBILITY OF SUCH DAMAGE. English • Ni el nombre de la Fundación Xiph.org ni los nombres de sus contribuidores podrán usarse para promocionar productos derivados de este software sin el permiso previo por escrito específico. 05 33 Es 03_XW-NAC3_CUXZTSM_Es.book 34 ページ 06 2010年4月5日 月曜日 午後6時30分 Otras conexiones Capítulo 6: Otras conexiones • Antes de hacer o cambiar las conexiones, apague la unidad y desenchufe el cable de alimentación de la toma de CA. Conexión de componentes auxiliares Conecte la toma de miniclavija AUX IN del panel posterior al componente auxiliar de reproducción. • Este método puede utilizarse para reproducir música de unidades iPod/ iPhone que no estén preparadas para emplear una base de control de iPod. Reproductor de audio digital, etc. Cable de miniclavija estéreo (de venta en los establecimientos del ramo) VIDEO OUT AUX IN • Pulse AUX para cambiar al modo de entrada AUX. Se visualizará ‘AUX’ en la pantalla de esta unidad. Cuando no haya ningún dispositivo conectado al conector AUX IN y no se opere esta unidad durante 30 o más minutos después de haber seleccionado la función AUX, la alimentación se desconectará automáticamente. 34 Es 03_XW-NAC3_CUXZTSM_Es.book 35 ページ 2010年4月5日 月曜日 午後6時30分 Ajustes del sonido 07 Capítulo 7: Ajustes del sonido Podrá añadir efectos emocionantes a las fuentes de audio. • Ajuste predeterminado: OFF Français Español Cuando se han extraído datos de audio durante el proceso de compresión WMA/MP3/ MPEG-4 AAC, la calidad del sonido resulta frecuentemente en una imagen del sonido con falta de uniformidad. La función Sound Retriever emplea nueva tecnología DSP que ayuda a recuperar la calidad del sonido de CD para el audio comprimido restaurando la presión sonora y uniformando el nivel de las aberraciones rasgadas que quedan después de la compresión. Empleo de los efectos de sonido English Uso del recuperador de sonido (Sound Retriever) • Ajuste predeterminado: ON 1 Pulse SOUND. El nuevo valor ajustado se visualizará durante 5 segundos. Vivid1 (Vívido) – Produce un efecto agudo similar al que se siente en un concierto en directo. 1 Pulse S.RETRIEVER. El nuevo valor ajustado se visualizará durante 5 segundos. • Utilice / o S.RETRIEVER para ajustar ON/OFF (activar/desactivar) el recuperador de sonido (Sound Retriever). Lo-Fi (Baja fidelidad) – Produce una sensación retro en la reproducción musical. ALC (Control automático del nivel) – Esta unidad efectúa la ecualización de los niveles del sonido de reproducción. OFF – Hacer retornar el sonido a su estado natural. • Utilice / o SOUND para cambiar los modos de sonido (Sound). Nota 1 Cuando seleccione la función AUDIO Bluetooth, no se visualizará ‘Vivid’. 35 Es 03_XW-NAC3_CUXZTSM_Es.book 36 ページ 07 2010年4月5日 月曜日 午後6時30分 Ajustes del sonido Ajuste de los graves y agudos Utilice los controles de graves y agudos para ajustar el tono general. 1 Pulse BASS/TREBLE. 2 Utilice / para seleccionar ’Bass’ o ’Treble’ y, a continuación, pulse ENTER. 3 Utilice / para seleccionar los graves o los agudos y, a continuación, pulse ENTER. Podrá ajustar los sonidos graves y los agudos en una escala de –6 a +6. 36 Es 03_XW-NAC3_CUXZTSM_Es.book 37 ページ 2010年4月5日 月曜日 午後6時30分 Uso del temporizador 08 Capítulo 8: Uso del temporizador Podrá seleccionar para que la hora se muestre en el modo de 12 o en el modo de 24 horas. • Ajuste predeterminado: 12H (Modo de 12 horas) 1 Con el interruptor de la alimentación conectado, pulse . Aparecerán la hora y el día actuales. • Si el reloj no está ajustado, se visualizará la pantalla de configuración del temporizador (Timer Setup). Prosiga con el paso 3. 2 Pulse otra vez. Se visualizará la pantalla de configuración del temporizador (Timer Setup). 3 Utilice / para seleccionar ’Hour Display’ y, a continuación, pulse ENTER. Se visualizará la pantalla de visualización de la hora (Hour Display). 2 Pulse otra vez. Se visualizará la pantalla de configuración del temporizador (Timer Setup). 4 Utilice / para seleccionar ’12H’ o ’24H’ y, a continuación, pulse ENTER. Cuando complete el ajuste, el nuevo valor ajustado parpadeará durante 2 segundos. 3 Utilice / para seleccionar ’Clock Adjust’ y, a continuación, pulse ENTER. Se visualizará la pantalla de ajuste del reloj (Clock Adjust). Uso del temporizador de conexión automática 4 Utilice / para ajustar el día y luego pulse ENTER. 5 Utilice / para ajustar la hora, y, a continuación, pulse ENTER. 6 Utilice / para ajustar los minutos, y, a continuación, pulse ENTER. Cuando complete el ajuste, el nuevo valor ajustado se visualizará durante 2 segundos. Español 1 Con el interruptor de la alimentación conectado, pulse . Aparecerán la hora y el día actuales. Français Para utilizar el temporizador, es necesario ajustar el reloj.1 English Ajuste del reloj Cambio del modo de visualización de la hora Emplee el temporizador de conexión automática para ajustar la unidad para que se encienda a la hora deseada y reproduzca el iPod o AUX. Si se selecciona el iPod como sonido de temporizador, cuando opere el temporizador de conexión automática, se conectará automáticamente la alimentación del iPod y comenzará la reproducción. Nota 1 Será necesario volver a ajustar la hora después de haber desenchufado el cable de la unidad (o en caso de un apagón). 37 Es 03_XW-NAC3_CUXZTSM_Es.book 38 ページ 08 2010年4月5日 月曜日 午後6時30分 Uso del temporizador Encendido y apagado del temporizador de conexión automática 1 Con la entrada ajustada a la de iPod o AUX, pulse . Aparecerán la hora y el día actuales. 1 Con la entrada ajustada a la de iPod o AUX1, pulse . Aparecerán la hora y el día actuales. 2 Pulse otra vez. Se visualizará la pantalla de configuración del temporizador (Timer Setup). 2 Pulse otra vez. Se visualizará la pantalla de configuración del temporizador (Timer Setup). 3 Utilice / para seleccionar ’Wake-up’ y, a continuación, pulse ENTER. Se visualizará la pantalla de conexión automática (Wake-up). 3 Utilice / para seleccionar ’Wake-up’ y, a continuación, pulse ENTER. Se visualizará la pantalla de conexión automática (Wake-up). 4 Utilice / para seleccionar ’Timer Edit’ y, a continuación, pulse ENTER. Se visualizará la pantalla de edición del temporizador (Timer Edit). 5 Ajuste la hora deseada para el temporizador de conexión automática. Utilice / para ajustar la hora, y, a continuación, pulse . Ajuste los minutos de la misma manera y pulse cuando haya terminado. 6 Utilice / para seleccionar el día. Utilice / para ajustar en ON/OFF (activar/ desactivar) el temporizador de conexión automática como desee y, a continuación, pulse ENTER. El temporizador de conexión automática se ajusta en OFF (desactivado) los días marcados con ‘*’. 7 Pulse ENTER. Se visualizará la pantalla de comprobación del temporizador (Timer Check). El indicador TIMER se enciende en verde cuando el temporizador de conexión automática está activado. 4 Utilice / para seleccionar ’Timer On’ y, a continuación, pulse ENTER. El indicador ‘Timer On’ se visualiza cuando el temporizador está activado. Cómo utilizar el temporizador de desconexión automática El temporizador de desconexión automática apaga la unidad después de un tiempo especificado para poder irse a dormir sin tener que preocuparse del mismo. • Pulse repetidamente SLEEP para seleccionar un tiempo hasta la desconexión. Seleccione uno de los ajustes de 5 min, 15 min, 30 min, 60 min, 90 min o desactivación. Durante la operación del temporizador de desconexión automática, el indicador TIMER se encenderá en naranja. • Si pulsa SLEEP mientras está ajustado el temporizador de desconexión automática, se visualizará el tiempo remanente.2 Nota 1 Para poder emplear el temporizador de conexión automática cuando tenga seleccionada la función AUX, primero deberá empezar a reproducir en el componente conectado. 2 El temporizador de desconexión automática puede reponerse a cero presionando SLEEP mientras se visualiza el tiempo remanente. 38 Es 03_XW-NAC3_CUXZTSM_Es.book 39 ページ 2010年4月5日 月曜日 午後6時30分 Información adicional 09 Capítulo 9: Información adicional Problema Solución La unidad no se enciende. • Desenchufe la unidad de la red y vuelva a enchufarla. • Si la unidad se apaga automáticamente, llévela al centro de servicio Pioneer más cercano o a su establecimiento que realicen un servicio. La alimentación cambia automáticamente al modo de espera sin que el usuario tenga que tocar nada. • Cuando no se ha conectado ningún dispositivo a los puertos de conexión del iPod/iPhone seleccionado (iPod a o iPod b), al ADAPTADOR Bluetooth o al conector AUX IN y no se opera esta unidad durante 30 o más minutos después de haber seleccionado la función respectiva, la alimentación se desconectará automáticamente. Además, cuando se visualiza el menú inicial en la pantalla de esta unidad y no se opera la unidad durante 30 o más minutos después de haber seleccionado la función Home Media Gallery, la alimentación se desconectará automáticamente. Español • Si la unidad no funciona con normalidad debido a factores externos tales como la electricidad estática, desenchufe la unidad de la red y vuelva a enchufarla para restablecer las condiciones normales de funcionamiento. Français Algunas operaciones incorrectas se suelen confundir con problemas o fallos de funcionamiento. Si piensa que algo funciona mal en este componente, compruebe los puntos siguientes. Algunas veces, el problema puede estar en otro componente. Inspeccione los otros componentes y los aparatos eléctricos que esté utilizando. Si el problema no se puede solucionar después de comprobar los puntos indicados abajo, solicite al centro de servicio autorizado por Pioneer o a su distribuidor que le haga los trabajos de reparación necesarios. English Solución de problemas Al seleccionar una función, no se • Asegúrese de que el componente está conectado correctamente oye nada. (consulte Conexión de componentes auxiliares en la página 34). El mando a distancia no funciona. • Cambie la pila (consulte Reemplace la pila en la página 7). • Utilícelo a una distancia máxima de 7 m, 30° del sensor remoto del panel delantero (consulte Utilización del mando a distancia en la página 8). • Retire cualquier obstáculo o úselo desde otra posición. • Evite exponer el sensor del panel frontal de la unidad a la luz directa del sol. • Asegúrese de que el iPod/iPhone esté correctamente conectado (consulte Conexión de un iPod/iPhone en la página 12). El iPod/iPhone no funciona. • Asegúrese de que el iPod/iPhone esté correctamente conectado (consulte Conexión de un iPod/iPhone en la página 12). • Si el iPod/iPhone se ha parado inesperadamente, pruebe efectuar la reposición del iPod/iPhone y vuélvalo a conectar a la unidad. 39 Es 03_XW-NAC3_CUXZTSM_Es.book 40 ページ 09 2010年4月5日 月曜日 午後6時30分 Información adicional Problema Solución No se puede acceder a la red. • El cable LAN no está conectado firmemente. Conecte firmemente el cable LAN (vea página 24). • El enrutador no está encendido. Encienda el enrutador. • La dirección IP correspondiente no está bien ajustada. Active la función de servidor DHCP incorporada de su enrutador, o configure manualmente la red según el ambiente de su red (consulte página 28). • La dirección IP está siendo configurada automáticamente. El proceso de configuración automática toma tiempo. Espere. • El componente conectado tiene instalado software de seguridad de Internet. Hay casos en los que no se puede acceder a un componente que tiene instalado software de seguridad de Internet. Los archivos de audio guardados • Instale Windows Media Player 11 ó 12 en su ordenador (vea página 31). en componentes de la red como, • Reproduzca archivos de audio grabados en MP3, WAV (sólo LPCM), por ejemplo, un ordenador no se MPEG-4 AAC, FLAC o WMA. Tenga presente que es posible que algunos pueden reproducir. archivos de audio grabados en estos formatos no puedan reproducirse en esta unidad. • Archivos de audio grabados en MPEG-4 AAC o FLAC están siendo reproducidos con Windows Media Player 11 ó 12. Pruebe usando otro servidor. Consulte el manual de instrucciones suministrado con su servidor. • El componente conectado a la red no se utiliza correctamente. Verifique si al componente lo afectan circunstancias especiales o está en el modo de espera. Intente reiniciar el componente si es necesario. • El componente conectado a la red no permite compartir archivos. Intente cambiar los ajustes del componente conectado a la red. • La carpeta guardada en el componente conectado a la red ha sido eliminada o dañada. Verifique la carpeta guardada en el componente conectado a la red. No se puede acceder al • El componente conectado a la red no están bien ajustado. Si el cliente es componente conectado a la red. autorizado automáticamente, usted necesitará introducir de nuevo la información correspondiente. Compruebe si el estado de la conexión está en “Do not authorize” (No autorizar). • No hay archivos de audio reproducibles en el componente conectado a la red. Verifique los archivos de audio guardados en el componente conectado a la red. • Se enciende el componente de audio de la red que ha sido desconectado. • Encienda el componente de audio de la red antes de encender esta unidad. La reproducción de audio se detiene sin querer o se altera. 40 Es • Compruebe si el archivo de audio fue grabado en un formato compatible con esta unidad (consulte página 23). • Compruebe si la carpeta ha sido dañada. • Tenga presente que hay casos en los que los archivos de audio listados como reproducibles en esta unidad no se pueden reproducir ni visualizar. • Hay mucho tráfico en la red debido al acceso a Internet en la misma red. • Cuando esté en el modo DMR y dependiendo del controlador externo utilizado, es posible que se interrumpa la reproducción cuando se emplea el controlador para ajustar el volumen del sonido. En este caso, efectúe los ajustes del volumen desde la unidad principal o con el mando a distancia (consulte la página 21). 03_XW-NAC3_CUXZTSM_Es.book 41 ページ 2010年4月5日 月曜日 午後6時30分 Información adicional Problema 09 Solución Español Las carpetas/archivos guardados • Las carpetas/archivos están actualmente guardados en una zona en un dispositivo de memoria diferente de la zona FAT (tabla de asignación de archivos). Guarde las USB no se pueden visualizar. carpetas/archivos en la zona FAT. • Limite el máximo número de niveles de una carpeta a 8. • Limite el máximo número de carpetas/archivos guardados en una sola carpeta a 2000. • Los archivos de audio protegidos por derechos de autor y guardados en un dispositivo de memoria USB no se pueden reproducir. Français No se pueden oír las emisoras de • Los ajustes del servidor de seguridad para los componentes de la red radio de Internet están activados. Compruebe los ajustes del servidor de seguridad para . los componentes de la red. • Está actualmente desconectado de Internet. Compruebe los ajustes de conexión para los componentes de la red, y consulte con su proveedor de servicios de la red si es necesario. • Hay casos en los que usted no podrá oír alguna emisora de radio de Internet aunque la emisora esté en la lista de emisoras de radio de Internet de esta unidad. English No se puede acceder a Windows • Está conectado al dominio a través de su ordenador con Windows XP, Media Player 11 ó 12. Vista o Windows 7 instalado. En lugar de conectarse al dominio, conéctese a la máquina local. No se reconoce un dispositivo de • El dispositivo de memoria USB no es compatible con las especificaciones memoria USB. de la clase para guardar datos en masa. Intente usar un dispositivo de memoria USB compatible con las especificaciones de la clase para guardar datos en masa. Tenga presente que hay casos en los que hasta los archivos de audio guardados en un dispositivo de memoria USB compatible con las especificaciones de la clase para guardar datos en masa no pueden reproducirse en esta unidad. • Esta unidad no soporta el concentrador USB. • Esta unidad reconoce que el dispositivo de memoria USB es un fraude. Apague y encienda de nuevo esta unidad. Se ha conectado, y se visualiza, un dispositivo de memoria USB, pero los archivos de audio guardados en ese dispositivo no se pueden reproducir. • Compruebe si el formato de su dispositivo de memoria USB es FAT 16 ó FAT 32. Tenga presente que los formatos FAT 12, NTFS y HFS no se pueden reproducir en esta unidad. • Los archivos pueden estar dotados de protección contra copias DRM. Los archivos WMA y MPEG-4 AAC que están dotados de protección contra copias DRM no pueden reproducirse. Cuando emplee un ordenador para cargar datos musicales de un CD o de otro dispositivo, es posible que se aplique la protección contra copias de la gestión de derechos digitales, dependiendo de los ajustes implicados. • Consulte la lista de formatos de archivos que se pueden reproducir en esta unidad. No se visualiza el nombre de pista, nombre de artista o nombre de álbum. • Cuando se reproduce audio de la red, es posible que el servidor utilizado no soporte la visualización de la información de nombres de artistas y álbumes. O, cuando se reproduce música de un dispositivo de memoria USB, no se soporte la versión de las etiquetas ID3. La reproducción de audio de la red depende del soporte del servidor utilizado. Con respecto a los detalles, consulte el manual de instrucciones del servidor. Además, cuando se reproduce música de un dispositivo de memoria USB, sólo se soportan las etiquetas ID3 versión 2.x o las metatags WMA. 41 Es 03_XW-NAC3_CUXZTSM_Es.book 42 ページ 09 2010年4月5日 月曜日 午後6時30分 Información adicional Problema Solución El dispositivo de tecnología • Compruebe que no haya ningún objeto que emita ondas inalámbrica Bluetooth no puede electromagnéticas en la banda de 2,4 GHz (horno microondas, dispositivo conectarse ni manejarse. El inalámbrico LAN o un aparato de tecnología inalámbrica Bluetooth) cerca de la unidad. Si dicho objeto está cerca de la unidad, configure la dispositivo de tecnología unidad lejos de él. O deje de utilizar el objeto que emite ondas inalámbrica Bluetooth no emite sonido o el sonido se interrumpe. electromagnéticas. • Compruebe que el dispositivo de tecnología inalámbrica Bluetooth no está demasiado lejos de la unidad y que no hay obstáculos entre el dispositivo de tecnología inalámbrica Bluetooth y la unidad. Ajuste el dispositivo de tecnología inalámbrica Bluetooth y la unidad de modo que la distancia entre ambos sea inferior a 10 m* y no exista ningún obstáculo entre ellos. • Es posible que el dispositivo de tecnología inalámbrica Bluetooth no esté ajustado en el modo de comunicación compatible con la tecnología inalámbrica Bluetooth. Compruebe la configuración del dispositivo de tecnología inalámbrica Bluetooth. • Compruebe que el apareamiento se haya realizado correctamente. La configuración del apareamiento se ha borrado de esta unidad o del dispositivo de tecnología inalámbrica Bluetooth. Reinicie el apareamiento. • Compruebe que el perfil sea correcto. Utilice un dispositivo de tecnología inalámbrica Bluetooth que sea compatible con los perfiles A2DP y AVRCP. * La distancia de transmisión en la línea de visión es una estimación. Las distancias de transmisión reales compatibles pueden ser distintas dependiendo de las condiciones del entorno. Reposición del sistema Use este procedimiento para reponer todos los valores del sistema a los predeterminados de fábrica. • Cuando desee llevar a cabo la reposición, primero desconecte todos los componentes que estén conectados a esta unidad. 1 Encienda la unidad. 2 Pulse y mantenga pulsado INPUT SELECTOR en el panel superior, y luego pulse y mantenga pulsado STANDBY/ON durante tres segundos. La alimentación se establece en el modo de espera. La próxima vez que encienda la unidad, todos los valores estarán restablecidos. 42 Es Acerca del recuperador de sonido La función del “Sound Retriever” utilizada en esta unidad ha sido desarrollada exclusivamente por Pioneer. Esta función mejora la pérdida de datos de sonido durante la compresión de los tipos de archivos MP3 y otros, y permite al usuario disfrutar de una calidad muy semejante a la de los datos de la señal original. En el caso de Bluetooth AUDIO, se emplea la función el recuperador de sonido “Sound Retriever Air” para mejorar la pérdida de datos durante la transmisión Bluetooth. 03_XW-NAC3_CUXZTSM_Es.book 43 ページ 2010年4月5日 月曜日 午後6時30分 Información adicional 09 • Acerca del iPod/iPhone iPod es una marca comercial de Apple Inc., registrada en los EE.UU. y en otros países. iPhone es una marca comercial de Apple, Inc. 1 1 1 1 Español Apple no es responsable del funcionamiento de este aparato ni de que cumpla con las normas de seguridad y reguladoras. Accesorios Mando a distancia . . . . . . . . . . . . . . . . . . . . . . . Pila de litio (CR2025) . . . . . . . . . . . . . . . . . . . . . Cable de alimentación . . . . . . . . . . . . . . . . . . . . Cubierta del terminal USB (incluida con este producto) . . . . . . . . . . . . . . . Manual de instrucciones (este manual) Français “Works with iPhone” significa que un accesorio electrónico ha sido diseñado para poder ser conectado específicamente a un iPhone y ha sido homologado por el fabricante para cumplir con las normas de funcionamiento de Apple. • English “Made for iPod” significa que un accesorio electrónico ha sido diseñado para ser conectado específicamente a un iPod y ha sido homologado por el fabricante para cumplir con las normas de funcionamiento de Apple. Otros iPod a. . . . . . . . . . . . . . . . . . . . . . . . . 5 V, 500 mA iPod b. . . . . . . . . . . . . . . . . . . . . . . . . 5 V, 500 mA USB . . . . . . . . . . . . . . . . . . . . . . . . . . 5 V, 500 mA Adaptador Bluetooth . . . . . . . . . . . . 5 V, 100 mA Alimentación. . . . . . . . . . . . . . . . CA 120 V, 60 Hz Consumo de energía . . . . . . . . . . . . . . . . . . 24 W En estado de espera. . . . . . . . . . . . . . . . .0,5 W Dimensiones . . . . . 410 mm (An) x 135 mm (Al) x 153 mm (Pr) Peso (sin paquete) . . . . . . . . . . . . . . . . . . . 2,9 kg Nota • Las características técnicas y el diseño están sujetos a modificaciones sin previo aviso, debido a mejoras. Limpieza de la unidad • Utilice un paño de pulir o uno seco para limpiar el polvo y la suciedad. Especificaciones • Características del amplificador Potencia de salida RMS: Delantero izquierdo/derecho . . .10 W + 10 W (1 kHz, 10 %, T.H.D., 8 Ω) • Sección de altavoces Alojamiento . . . . . . . . . . . . . . . . Radiador pasivo Sistema. . . . . . . . . . . . . . . . . . . Sistema de 1 vías Altavoces : Altavoz de gama completa . . .Cono de 6,6 cm Radiador pasivo . . . . . . . . . . . . . .Cono de 7,7 cm Banda de frecuencias . . . . . . . . . 60 Hz a 20 kHz • Sección de la red Terminal LAN . . . . . . . . . . . . . Conector Ethernet 10BASE-T/100BASE-TX • Cuando la superficie esté sucia, límpiela con un paño suave mojado con un limpiador neutro, diluido con cinco o seis partes de agua, y bien escurrido, y limpie después con un paño seco. No utilice cera para muebles ni detergentes. • No utilice nunca disolventes, benceno, pulverizadores insecticidas ni otros productos químicos en esta unidad o cerca de ella, puesto que corroen la superficie. Publicado por Pioneer Corporation. Copyright © 2010 Pioneer Corporation. Todos los derechos reservados. 43 Es 03_XW-NAC3_CUXZTSM_Es.book 44 ページ 09 44 Es 2010年4月5日 月曜日 午後6時30分 Información adicional 03_XW-NAC3_CUXZTSM_Es.book 45 ページ Información adicional 2010年4月5日 月曜日 午後6時30分 09 English Français Español 45 Es 03_XW-NAC3_CUXZTSM_Es.book 46 ページ 2010年4月5日 月曜日 午後6時30分 PIONEER ELECTRONICS (USA) INC. PIONEER ELECTRONICS OF CANADA, INC. LIMITED WARRANTY WARRANTY VALID ONLY IN COUNTRY OF PRODUCT PURCHASE WARRANTY Pioneer Electronics (USA) Inc. (PUSA), and Pioneer Electronics Of Canada, Inc. (POC), warrant that products distributed by PUSA in the U.S.A., and by POC in Canada that fail to function properly under normal use due to a manufacturing defect when installed and operated according to the owner’s manual enclosed with the unit will be repaired or replaced with a unit of comparable value, at the option of PUSA or POC, without charge to you for parts or actual repair work. Parts supplied under this warranty may be new or rebuilt at the option of PUSA or POC. THIS LIMITED WARRANTY APPLIES TO THE ORIGINAL OR ANY SUBSEQUENT OWNER OF THIS PIONEER PRODUCT DURING THE WARRANTY PERIOD PROVIDED THE PRODUCT WAS PURCHASED FROM AN AUTHORIZED PIONEER DISTRIBUTOR/DEALER IN THE U.S.A. OR CANADA. YOU WILL BE REQUIRED TO PROVIDE A SALES RECEIPT OR OTHER VALID PROOF OF PURCHASE SHOWING THE DATE OF ORIGINAL PURCHASE OR, IF RENTED, YOUR RENTAL CONTRACT SHOWING THE PLACE AND DATE OF FIRST RENTAL. IN THE EVENT SERVICE IS REQUIRED, THE PRODUCT MUST BE DELIVERED WITHIN THE WARRANTY PERIOD, TRANSPORTATION PREPAID, ONLY FROM WITHIN THE COUNTRY OF PURCHASE AS EXPLAINED IN THIS DOCUMENT. YOU WILL BE RESPONSIBLE FOR REMOVAL AND INSTALLATION OF THE PRODUCT. PUSA OR POC, AS APPROPRIATE, WILL PAY TO RETURN THE REPAIRED OR REPLACEMENT PRODUCT TO YOU WITHIN THE COUNTRY OF PURCHASE. PRODUCT WARRANTY PERIOD Home Audio and Video ......................................................................................................................................................... Microphones, Headphones, Phono Cartridges and Styluses ................................................................................................ Parts Labor 1 Year 90 Days 1 Year 90 Days Shorter limited warranty periods apply to some models. Please refer to the limited warranty document enclosed with the product for a definitive statement of the warranty period. The warranty period for retail customers who rent the product commences upon the date product is first put into use (a) during the rental period or (b) retail sale, whichever occurs first. WHAT IS NOT COVERED IF THIS PRODUCT WAS PURCHASED FROM AN UNAUTHORIZED DISTRIBUTOR, THERE ARE NO WARRANTIES, EXPRESS OR IMPLIED, INCLUDING THE IMPLIED WARRANTY OF MERCHANTABILITY AND THE IMPLIED WARRANTY OF FITNESS FOR A PARTICULAR PURPOSE AND THIS PRODUCT IS SOLD STRICTLY “AS IS” AND “WITH ALL FAULTS". PIONEER SHALL NOT BE LIABLE FOR ANY CONSEQUENTIAL AND/OR INCIDENTAL DAMAGES. PIONEER DOES NOT WARRANT ANY PRODUCT LISTED ABOVE WHEN IT IS USED IN A TRADE OR BUSINESS OR IN ANY INDUSTRIAL OR COMMERCIAL APPLICATION. THIS WARRANTY DOES NOT APPLY IF THE PRODUCT HAS BEEN SUBJECTED TO POWER IN EXCESS OF ITS PUBLISHED POWER RATING. THIS WARRANTY DOES NOT COVER TELEVISION OR DISPLAY SCREENS DAMAGED BY STATIC, NON-MOVING, IMAGES APPLIED FOR LENGTHY PERIODS (BURN-IN). THIS WARRANTY DOES NOT COVER THE CABINET OR ANY APPEARANCE ITEM, USER ATTACHED ANTENNA, ANY DAMAGE TO RECORDS OR RECORDING TAPES OR DISCS, ANY DAMAGE TO THE PRODUCT RESULTING FROM ALTERATIONS, MODIFICATIONS NOT AUTHORIZED IN WRITING BY PIONEER, ACCIDENT, MISUSE OR ABUSE, DAMAGE DUE TO LIGHTNINGORTOPOWERSURGES,SUBSEQUENTDAMAGEFROMLEAKING,DAMAGEFROMINOPERATIVEBATTERIES,ORTHEUSEOFBATTERIESNOTCONFORMINGTOTHOSE SPECIFIED IN THE OWNER’S MANUAL. THIS WARRANTY DOES NOT COVER THE COST OF PARTS OR LABOR WHICH WOULD BE OTHERWISE PROVIDED WITHOUT CHARGE UNDER THIS WARRANTY OBTAINED FROM ANYSOURCEOTHERTHANAPIONEERAUTHORIZEDSERVICECOMPANYOROTHERDESIGNATEDLOCATION. THISWARRANTYDOESNOTCOVERDEFECTSORDAMAGECAUSED BY THE USE OF UNAUTHORIZED PARTS OR LABOR OR FROM IMPROPER MAINTENANCE. ALTERED, DEFACED, OR REMOVED SERIAL NUMBERS VOID THIS ENTIRE WARRANTY NO OTHER WARRANTIES IN THE U.S.A. - PIONEER LIMITS ITS OBLIGATIONS UNDER ANY IMPLIED WARRANTIES INCLUDING, BUT NOT LIMITED TO, THE IMPLIED WARRANTIES OF MERCHANTABILITY AND FITNESS FOR A PARTICULAR PURPOSE, TO A PERIOD NOT TO EXCEED THE WARRANTY PERIOD. NO WARRANTIES SHALL APPLY AFTER THE WARRANTY PERIOD. SOME STATES DO NOT ALLOW LIMITATIONS ON HOW LONG AN IMPLIED WARRANTY LASTS AND SOME STATES DO NOT ALLOW THE EXCLUSIONS OR LIMITATIONS OF INCIDENTAL OR CONSEQUENTIAL DAMAGES, SO THE ABOVE LIMITATIONS OR EXCLUSIONS MAY NOT APPLY TO YOU. THIS WARRANTY GIVES YOU SPECIFIC LEGAL RIGHTS AND YOU MAY HAVE OTHER RIGHTS WHICH MAY VARY FROM STATE TO STATE. IN CANADA - EXCEPT AS EXPRESSLY PROVIDED HEREIN, THERE ARE NO REPRESENTATIONS, WARRANTIES, OBLIGATIONS OR CONDITIONS, IMPLIED, STATUTORY OR OTHERWISE, APPLICABLE TO THIS PRODUCT. TO OBTAIN SERVICE PUSA and POC have appointed a number of Authorized Service Companies throughout the U.S.A. and Canada should your product require service. To receive warranty service you need to present your sales receipt or, if rented, your rental contract showing place and date of original owner’s transaction. If shipping the unit you will need to package it carefully and send it, transportation prepaid by a traceable, insured method, to an Authorized Service Company. Package the product using adequate padding material to prevent damage in transit. The original container is ideal for this purpose. Include your name, address and telephone number where you can be reached during business hours. On all complaints and concerns in the U.S.A. call Customer Support at 1-800-421-1404, or, in Canada, call Customer Satisfaction at 1-877-283-5901. IN THE U.S.A. For hook-up and operation of your unit or to locate an Authorized Service Company, please call or write: PIONEER ELECTRONICS SERVICE, INC. P.O. BOX 1760 LONG BEACH, CALIFORNIA 90801 1-800-421-1404 http://www.pioneerelectronics.com IN CANADA For additional information on this warranty, please call or write: CUSTOMER SATISFACTION GROUP PIONEER ELECTRONICS OF CANADA, INC. 300 ALLSTATE PARKWAY MARKHAM, ON L3R 0P2 (905) 479-4411 1-877-283-5901 http://www.pioneerelectronics.ca DISPUTE RESOLUTION IN THE U.S.A. - Following our response to any initial request to Customer Support, should a dispute arise between you and Pioneer, Pioneer makes available its Complaint Resolution Program to resolve the dispute. The Complaint Resolution Program is available to you without charge. You are required to use the Complaint Resolution Program before you exercise any rights under, or seek any remedies, created by Title I of the Magnuson-Moss Warranty-Federal Trade Commission Improvement Act, 15 U.S.C. 2301 et seq. To use the Complaint Resolution Program call 1-800-421-1404 and explain to the customer service representative the problem you are experiencing, steps you have taken to have the product repaired during the warranty period and the name of the authorized Distributor/Dealer from whom the Pioneer product was purchased. After the complaint has been explained to the representative, a resolution number will be issued. Within 40 days of receiving your complaint, Pioneer will investigate the dispute and will either: (1) respond to your complaint in writing informing you what action Pioneer will take, and in what time period, to resolve the dispute; or (2) respond to your complaint in writing informing you why it will not take any action. IN CANADA - Call the Customer Satisfaction Manager at (905) 946-7446 to discuss your complaint and to obtain a prompt resolution. RECORD THE PLACE AND DATE OF PURCHASE FOR FUTURE REFERENCE Model No. ____________________________________________ Serial No. _________________________________________ Purchase Date _______________________ Purchased From _______________________________________________________________________________________________________________________________ KEEP THIS INFORMATION AND YOUR SALES RECEIPT IN A SAFE PLACE 03_XW-NAC3_CUXZTSM_Es.book 48 ページ 2010年4月5日 月曜日 午後6時30分 To register your product, find the nearest authorized service location, to purchase replacement parts, operating instructions, or accessories, please go to one of following URLs : Pour enregistrer votre produit, trouver le service après-vente agréé le plus proche et pour acheter des pièces de rechange, des modes d’emploi ou des accessoires, reportez-vous aux URL suivantes : In the USA/Aux Etats-Unis http://www.pioneerelectronics.com In Canada/Aux Canada http://www.pioneerelectronics.ca S018_B1_EnFr Published by Pioneer Corporation. Copyright © 2010 Pioneer Corporation. All rights reserved. Publication de Pioneer Corporation. © 2010 Pioneer Corporation. Tous droits de reproduction et de traduction réservés. PIONEER CORPORATION 1-1, Shin-ogura, Saiwai-ku, Kawasaki-shi, Kanagawa 212-0031, Japan PIONEER ELECTRONICS (USA) INC. P.O. BOX 1540, Long Beach, California 90801-1540, U.S.A. TEL: (800) 421-1404 PIONEER ELECTRONICS OF CANADA, INC. 300 Allstate Parkway, Markham, Ontario L3R 0P2, Canada TEL: 1-877-283-5901, 905-479-4411 PIONEER EUROPE NV Haven 1087, Keetberglaan 1, B-9120 Melsele, Belgium TEL: 03/570.05.11 PIONEER ELECTRONICS ASIACENTRE PTE. LTD. 253 Alexandra Road, #04-01, Singapore 159936 TEL: 65-6472-7555 PIONEER ELECTRONICS AUSTRALIA PTY. LTD. 178-184 Boundary Road, Braeside, Victoria 3195, Australia, TEL: (03) 9586-6300 PIONEER ELECTRONICS DE MEXICO S.A. DE C.V. Blvd.Manuel Avila Camacho 138 10 piso Col.Lomas de Chapultepec, Mexico, D.F. 11000 TEL: 55-9178-4270 K002_B1_En Printed in Thailand / Imprimé en Thaïlande