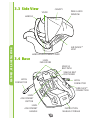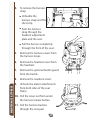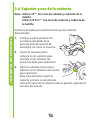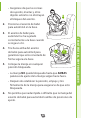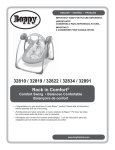
1
INSTRUCTION MANUAL
INFANT CAR SEAT
Keep this manual for future use. It is very important to
read, understand, and follow this manual before using
your infant car seat. Store this manual in your infant car
seat base.
CS_PD000013_ING112014
© 2015 Ingenuity | ingenuitybaby.com
Welcome to the Ingenuity family
Thank you for choosing Ingenuity, where all our products are
born from the question: How can this meet baby’s needs and make
life easier for parents? We work hard to ensure every Ingenuity
product includes clever features selected specifically to help
you in your daily life as a parent…from bouncers that bounce
automatically to play yards that zip off for machine-washing.
Not only are our design teams some of the best and brightest in
the industry, they’re also parents with first-hand experience.
We hope you’ll enjoy this product and that you’ll benefit from
the features we’ve added. Please visit ingenuitybaby.com to
learn more about us and our other products that are Designed
with parenthood in mind™.
Keep this manual for future use. It is very important
to read, understand, and follow this manual before
using your infant car seat. Store this manual in your
infant car seat base.
This child restraint system conforms to all applicable Federal motor
vehicle safety standards. This restraint is certified for use in motor
vehicles and aircraft.
No car seat can guarantee protection from injury in every situation,
but proper use helps reduce the risk of serious injury or death.
MANUFACTURED FOR
® • ©2015 KIDS II, INC. • www.kidsii.com/customerservice
KIDS II, INC., ATLANTA, GA USA 30305 • 1-800-230-8190
KIDS II US MÉXICO S.A. DE C.V. AVE. VASCO DE QUIROGA NO. 3900 – 905A COL. LOMAS DE SANTA FE
CUAJIMALPA DE MORELOS, MÉXICO D.F. • C.P. 05300 • (55) 5292-8488
© 2015 Kids II, Inc. • InTrust35_IS_112014 • Printed in China
1
CONTENTS
1.0 – Registration and Contact Information . . . . . . 5
1.1 Registering Your Infant Car Seat. . . . . . . . . . . . 5
1.2 Recall Information . . . . . . . . . . . . . . . . . . . . 6
1.3 If You Need Assistance . . . . . . . . . . . . . . . . . . 6
2.0 Warnings. . . . . . . . . . . . . . . . . . . . . . . . . . 7
2.1
2.2
2.3
2.4
2.5
2.6
2.7
Instruction Manual Use and Storage. . . . . . . . . 7
Proper Use Warning . . . . . . . . . . . . . . . . . . . 7
Height and Weight Limit Warnings. . . . . . . . . . 8
General Warnings . . . . . . . . . . . . . . . . . . . . . 9
Warnings for Use as an Infant Car Seat. . . . . . . 11
Warnings for Use as a Carrier. . . . . . . . . . . . . 14
Warning for Use with a Stroller . . . . . . . . . . . .16
3.0 – Features and Components. . . . . . . . . . . . . 17
3.1 Front View . . . . . . . . . . . . . . . . . . . . . . . . .17
3.2 Rear View. . . . . . . . . . . . . . . . . . . . . . . . . .18
3.3 Side View. . . . . . . . . . . . . . . . . . . . . . . . . .19
3.4Base . . . . . . . . . . . . . . . . . . . . . . . . . . . . .19
3.5 Handle Adjustment and Use. . . . . . . . . . . . . .20
3.6 Attaching and Using the Canopy. . . . . . . . . . .21
4.0 – Choosing an Appropriate
Vehicle Seat Location. . . . . . . . . . . . . . . . 22
4.1
4.2
4.3
4.4
4.5
Vehicle Seat Belt Requirements. . . . . . . . . . . .22
UNSAFE Vehicle Belt Systems . . . . . . . . . . . . .23
SAFE Vehicle Belt Systems . . . . . . . . . . . . . . .24
LATCH Locations . . . . . . . . . . . . . . . . . . . . .25
Vehicle Seating Requirements . . . . . . . . . . . . 27
2
5.0 – Installing/Removing the Base . . . . . . . . . . . . 30
5.1Warnings. . . . . . . . . . . . . . . . . . . . . . . . . . . . . . . . . . . 30
5.2 Installing and Adjusting the Base
with Vehicle Belts. . . . . . . . . . . . . . . . . . . . . . . . . . . 31
5.3 Installing and Adjusting the Base
with LATCH Belts. . . . . . . . . . . . . . . . . . . . . . . . . . . . 34
5.4 Installing and Adjusting the
Infant Car Seat on an Airplane . . . . . . . . . . . . . . 37
5.5 Removing the Base. . . . . . . . . . . . . . . . . . . . . . . . . 38
6.0 – Using the Seat with the Base . . . . . . . . . . . . . 41
6.1 Attaching the Seat to the Base . . . . . . . . . . . . . . 41
6.2 Removing the Seat from the Base . . . . . . . . . . . 43
7.0 – Installing and Adjusting the
Seat without the Base. . . . . . . . . . . . . . . . . . . . 44
7.1 Installing the Seat in a Vehicle. . . . . . . . . . . . . . . 44
7.2 Installing and Adjusting the Infant Car Seat on
an Airplane (without a Base) . . . . . . . . . . . . . . . . 47
8.0 – Securing Your Child. . . . . . . . . . . . . . . . . . . . . . 48
8.1 Using and Removing the Newborn Insert. . . . 48
8.2 Securing Your Child in the Infant Car Seat. . . . 49
8.3 Removing Your Child from the Infant
Car Seat. . . . . . . . . . . . . . . . . . . . . . . . . . . . . . . . . . . . 52
9.0 – Child Safety Check. . . . . . . . . . . . . . . . . . . . . . . 53
10.0 – Seat Safety Check . . . . . . . . . . . . . . . . . . . . . . 54
3
11.0 – Maintenance and Storage. . . . . . . . . . . . . . . 56
11.1Maintenance and Cleaning. . . . . . . . . . . . . . . . . . 56
11.2Replacement Parts. . . . . . . . . . . . . . . . . . . . . . . . . . 61
11.3Proper Storage . . . . . . . . . . . . . . . . . . . . . . . . . . . . . 61
11.4Proper Disposal. . . . . . . . . . . . . . . . . . . . . . . . . . . . . 61
12.0 – Warranty. . . . . . . . . . . . . . . . . . . . . . . . . . . . . . . 62
4
1.0 – REGISTRATION AND CONTACT
INFORMATION
WARNINGS & INFORMATION
1.1 Registering Your Infant Car Seat
Fill out the prepaid registration postcard attached to the infant
car seat or base and mail it today. You can find the model
number and manufacturing information on a label on the
bottom of the infant car seat.
Child restraints could be recalled for safety reasons. You must
register this restraint to be reached in a recall. Send your name,
address, email address if available, and the restraint’s model
number and manufacturing date to:
Child Restraint Registration Program
Kids II, Inc.
3333 Piedmont Rd NE #1800
Atlanta, GA 30305-9911
or
Call 1-800-230-8190 (U.S.)
(55) 5292-8488 (Mexico)
or
Register online at
https://www.ingenuitybaby.com/productregistration
5
1.2 Recall Information
U.S. Government’s Vehicle Safety Hotline:
1-888-327-4236 (TTY:1-800-424-9153)
or http://www.NHTSA.gov
■■
Ingenuity: 1-800-230-8190 or www.ingenuitybaby.com
For future reference, please fill in the following information:
Model Number: _______________________
Manufactured In: _______________________
Purchase Date:
_______________________
1.3 If You Need Assistance
U.S. customers can contact our Customer Service Department
with any questions about products, use, or maintenance. When
you contact us, please have your product’s model number and
manufacturing information ready so we can help you effectively.
These numbers appear on a label on the bottom of your infant
car seat or on the base.
1-800-230-8190 or www.ingenuitybaby.com
6
WARNINGS & INFORMATION
■■
2.0 WARNINGS
WARNINGS & INFORMATION
2.1 Instruction Manual Use and Storage
Keep this manual for future use. It is very important
to read, understand, and follow this manual before
using your infant car seat. Store this manual in your
infant car seat base.
2.2 Proper Use Warning
The Ingenuity InTrust 35 infant car seat can be used as a car
ep this manual for future use. It is very important to read, understand, and
seat,using
a carrier,
or with
a compatible
stroller.
Each infant car seat
ow this manual before
your infant
car seat.
Store this manual
in your
ant car seat base. use has a different set of safety requirements. Ensure that you
understand the following safety warnings before using the
infant car seat.
Inspect the infant car seat for damage before use. Missing or
damaged parts can prevent the seat from protecting your child.
7
2.3 Height and Weight Limit Warnings
WARNING
Your child MUST meet the following requirements:
•WEIGHT: 4–35 lbs. (1.8–15.9 kg)
• You MUST use the newborn insert for children weighing
between 4–11 lbs. (1.8 and 5 kg)
• Remove the newborn insert for children who weigh more
than 11 lbs. (5.0 kg).
•HEIGHT: 32 inches (81.3 cm) or less
• The top of your child’s head must be at least 1 inch (2.5 cm)
below the top of the infant car seat and headrest.
Using this car seat for children outside of this range increases
the risk for serious injury or death.
8
WARNINGS & INFORMATION
Do not use the infant car seat with a child that does not
meet the weight and height restrictions listed below.
2.4 General Warnings
WARNINGS & INFORMATION
WARNING
•READ, UNDERSTAND, AND FOLLOW THE INSTRUCTION
MANUAL.
• Read all instructions before use of the infant car seat.
• Keep instructions for future use.
• Read your vehicle owner’s manual to ensure safe use of
the infant car seat.
• No infant car seat can guarantee complete protection
from injury in every situation. Correctly using this infant
car seat can reduce your child’s risk of serious injury or
death.
• Failure to properly use this infant car seat increases your
child’s risk of serious injury or death in a sharp turn,
sudden stop, or crash.
• Do not use infant car seat if it is damaged or broken.
• You MUST replace your infant car seat if it has been
involved in a crash. A crash can cause damage that
may not be visible. A damaged infant car seat may
not protect your child.
•NEVER remove any WARNING LABELS from the infant
car seat or base.
9
WARNING
•Secure the infant car seat properly in the vehicle.
• The infant car seat is designed for rear-facing
installation only.
• Only use a vehicle seat belt that is designed to restrain
an infant car seat. Many seat belts that fit through the
vehicle belt path are NOT safe to use with infant car
seats. Check your vehicle owner’s manual to ensure
compatibility.
• The vehicle seat belt or LATCH belt MUST be properly
routed to ensure a secure installation.
•Secure your child properly in the infant car seat.
• The infant car seat offers no protection if your child
is not properly secured. DO NOT secure your child
dressed in bulky clothing or wrapped in a blanket.
• ALWAYS use the restraint straps and ensure that they
are snug. A snug strap should not allow any slack. It
lies in a relatively straight line without sagging. It
does not press on the child’s flesh or push the child’s
body into an unnatural position. Ensure that restraint
straps are not twisted.
10
WARNINGS & INFORMATION
• Choose a suitable location in your vehicle for the
infant car seat. Some seating positions, such as those
equipped with air bags, may not be safe locations.
2.5 Warnings for Use as an Infant Car Seat
WARNINGS & INFORMATION
WARNING
• BEFORE ATTEMPTING TO USE THIS INFANT CAR SEAT,
READ AND UNDERSTAND:
• The instructions in this manual
• Your vehicle owner’s manual
• DO NOT let others install or use the infant car seat unless
they understand how to use it.
• USING THIS INFANT CAR SEAT AND BASE IMPROPERLY
INCREASES YOUR CHILD’S RISK OF SERIOUS INJURY
OR DEATH.
• NEVER LEAVE CHILD UNATTENDED.
• ALWAYS recline the infant car seat properly. An improperly
reclined infant car seat can cause breathing difficulties or
make your child uncomfortable.
• DO NOT MODIFY YOUR INFANT CAR SEAT OR BASE.
• NEVER use other manufacturers’ accessories, pads, or
products with this infant car seat. Items not tested with
this infant car seat could injure your child.
11
WARNING
• DO NOT use a cut, frayed, or damaged infant car seat
harness restraint, vehicle seat belt, or LATCH belt.
• THE INFANT CAR SEAT CAN BECOME HOT IN THE SUN.
Before putting your child in the infant car seat, touch
metal and plastic parts to test their temperature. Use
caution as hot parts could result in burns.
• SOME SPECIAL NEEDS CHILDREN ARE AT INCREASED
RISK. Some children, such as preterm babies or those
who have tested positive for positional apnea, may
be at increased risk of breathing or other difficulties in
an infant car seat. If your child has special needs, have
your physician or hospital staff evaluate your child and
recommend the proper infant car seat or car bed before
using this product.
• DO NOT PLACE THIS INFANT CAR SEAT IN A VEHICLE
SEATING LOCATION WITH A FRONT AIR BAG. If the
air bag inflates, it can cause serious injury or death to
your child. Front passenger side air bags may also be
dangerous. Check your vehicle owner’s manual for more
information. The back seat is the safest place for children
12 and under.
12
WARNINGS & INFORMATION
• NEVER use the infant car seat if it is damaged, broken,
or missing parts. Call 1-800-230-8190 to find out if the
damaged or missing parts can be replaced.
WARNING
WARNINGS & INFORMATION
• PLACE THIS INFANT CAR SEAT IN A REAR-FACING
POSITION IN YOUR VEHICLE.
• REAR VEHICLE SEATING POSITIONS ARE SAFER.
According to accident statistics, children are safer when
properly restrained in rear vehicle seating positions than
in front seating positions.
• Your child can be injured in a vehicle even if you are not
in a crash. Sudden braking and sharp turns can injure
your child if the infant car seat is not properly installed or
if your child is not properly secured.
• DO NOT USE THE INFANT CAR SEAT AND BASE AFTER
AN ACCIDENT. An accident can cause damage to the
infant car seat that you may not be able to see. This can
prevent the infant car seat from protecting your child.
Replace the infant car seat and base after any automobile
accident.
• NEVER allow anything to interfere with or to impede the
ability of the car seat to change adjustment positions.
• NEVER LEAVE AN INFANT CAR SEAT OR BASE
UNSECURED IN YOUR VEHICLE. A loose infant car seat or
base may move and injure occupants in a sharp turn, sudden
stop, or crash. Remove an unused infant car seat from the
vehicle, or ensure that it is securely belted. An unsecurred
child restraint system may injure other occupants. If not
using LATCH connectors, ensure that LATCH connectors are
properly stowed in the base of the infant car seat.
13
WARNING
2.6 Warnings for Use as a Carrier
WARNING
• Read all instructions before use of the infant carrier.
• Keep instructions for future use.
• DO NOT use the infant carrier if it is damaged or broken.
• NEVER leave child unattended.
• FALL HAZARD: Child’s activity can move carrier. NEVER
place carrier on counter tops, tables, or any other elevated
surface.
• ONLY place carrier on level ground.
• ALWAYS ensure carrier is level on the ground when on
non-elevated surfaces.
• ENSURE that the handle locks into position before
moving the carrier. When lifting the carrier by the handle,
ensure that the handle is in the upright position.
• NEVER place the carrier in the child’s seat compartment
of a shopping cart.
14
WARNINGS & INFORMATION
• YOUR INFANT CAR SEAT AND BASE HAS AN
EXPIRATION DATE. Stop using the infant car seat after
the expiration (“do not use after”) date printed on the
backside of the infant car seat and base.
WARNINGS & INFORMATION
WARNING
• SUFFOCATION HAZARD: Infant carrier can roll over on
soft surfaces and suffocate child. NEVER place carrier on
beds, sofas, or other soft surfaces.
• STRANGULATION HAZARD: Children have strangled in
loose or partially buckled harness straps. Fully restrain
the child even when carrier is used outside the vehicle.
• ALWAYS use the restraint straps and ensure that they
are snug. A snug strap should not allow any slack. It lies
in a relatively straight line without sagging. It does not
press on the child’s flesh or push the child’s body into an
unnatural position. Ensure that the restraint straps are
not twisted.
• KEEP STRINGS AND CORDS AWAY FROM YOUR CHILD.
Strings and cords can cause strangulation.
• DO NOT place the carrier near window cords, blinds,
or drapes.
15
2.7 Warning for Use with a Stroller
WARNING
• NEVER use this infant car seat with other manufacturers’
strollers. This may result in SERIOUS INJURY OR
DEATH.
16
WARNINGS & INFORMATION
• USE THE INTRUST 35 INFANT CAR SEAT ONLY WITH
COMPATIBLE INGENUITY TRAVEL SYSTEMS AND
STROLLERS. Refer to the stroller owner’s manual for
stroller warnings and details about how to attach the
infant car seat to the stroller. If you do not have an owner’s
manual, please call toll-free at 1-800-230-8190 (U.S.) or
(55) 5292-8488 (Mexico) to obtain one, or visit our website
at www.ingenuitybaby.com.
3.0 – FEATURES AND COMPONENTS
3.1 Front View
Note: InTrust 35™: Without Canopy Visor and Buckle Guard
InTrust 35 Pro™: With Canopy Visor and Buckle Guard
CANOPY
PEEK-A-BOO
WINDOW
VISOR
FEATURES, USE, & INSTALLATION
HANDLE
HEADREST
HARNESS
RESTRAINT
STRAPS
HARNESS
COVERS
NEWBORN
INSERT
CHEST
CLIP
BUCKLE
RELEASE
VEHICLE
BELT ROUTING
PATH
HARNESS
RELEASE
HARNESS
BUCKLE
HARNESS
ADJUSTMENT
STRAP
BUCKLE
GUARD
17
3.2 Rear View
SEAT RELEASE
HANDLE
AIR
INFUSE™
VENT
AIR INFUSE™
VENT
SURECLICK™
CONNECTION
HARNESS
SPLITTER PLATE
18
FEATURES, USE, & INSTALLATION
SURECLICK™
CONNECTION
3.3 Side View
CANOPY
VISOR
FEATURES, USE, & INSTALLATION
HANDLE
PEEK-A-BOO
WINDOW
AIR INFUSE™
VENT
HANDLE ADJUSTMENT LEVER
3.4Base
LEVEL
INDICATORS
VEHICLE
BELT PATH
VEHICLE BELT
POSITIONER
LATCH
CONNECTOR
LATCH
CONNECTOR
SURECLICK™
CONNECTION
LEVEL
ADJUSTMENT
BUTTON
LEVEL
ADJUSTMENT
HANDLE
INSTRUCTION
MANUAL STORAGE
19
3.5 Handle Adjustment and Use
To change the infant car seat handle position:
1. Press the handle adjustment
levers on both sides of the handle.
2. Rotate the handle until you hear
an audible “click.” This indicates
that it has locked into one of the
three positions:
• Position “B”, mid, is a
convenience position for easy
access to your child and for use in
your vehicle.
A
B
C
• Position “C”, down, is the sitting position, which stabilizes
the infant car seat when resting on a level surface.
THE HANDLE IS NOT LOCKED UNTIL
BOTH HANDLE ADJUSTMENT
LEVERS POP BACK OUT.
3. After setting the position, push
and pull firmly on the handle to
ensure that it is locked.
20
FEATURES, USE, & INSTALLATION
• Position “A”, upright, MUST be
used when carrying the infant car
seat by the handle.
3.6 Attaching and Using the Canopy
Note: InTrust 35™: Without Canopy Visor and Buckle Guard
InTrust 35 Pro™: With Canopy Visor and Buckle Guard
The infant car seat includes a detachable
canopy.
1. Place the rear of the canopy around
the back of the car seat as shown.
FEATURES, USE, & INSTALLATION
2. Insert the canopy bow into the mounting brackets on the
sides of the infant car seat.
3. Secure the canopy with the elastic loops to
the sides of the car seat.
Note: To keep canopy secure, it’s
recommended to place the canopy loops
on the hook first followed by the seat
loops.
4. Rotate to the desired position.
The canopy includes a fold-out visor and a Peek-a-Boo window.
• Pull the fold-out visor to extend the length of the canopy
• View your child from behind the infant car seat by lifting the
window flap to expose the Peek-a-Boo window.
• To remove the canopy, follow the steps above in reverse order.
21
4.0 – CHOOSING AN APPROPRIATE
VEHICLE SEAT LOCATION
4.1 Vehicle Seat Belt Requirements
WARNING
MANY SEAT BELT SYSTEMS ARE NOT SAFE FOR THE
INFANT CAR SEAT.
Refer to your vehicle owner’s manual for detailed
information about vehicle belts and which belts are safe to
secure the infant car seat in your vehicle. If you are unsure,
consult your vehicle owner’s manual or call Ingenuity at
1-800-230-8190.
The following vehicle seat belt systems are NOT safe for use
with the infant car seat.
If your vehicle uses one of these systems, you may still be able
to secure the infant car seat with Lower Anchors and Tethers
for Children (LATCH).
LATCH can be used IN PLACE OF the vehicle belt system.
Please refer to your vehicle owner’s manual for approved
LATCH locations. Your infant car seat can be installed in the
vehicle using lower anchors only.
22
FEATURES, USE, & INSTALLATION
You MUST use a compatible seat belt system to secure the
infant car seat.
4.2 UNSAFE Vehicle Belt Systems
DO NOT use motorized (automatic) vehicle belts, door-mounted
vehicle belts, or any of the following systems to secure the
infant car seat:
FEATURES, USE, & INSTALLATION
• Lap Belts with Emergency Locking
Retractor (ELR)—This lap belt will not
tighten quickly enough in a sudden stop or
crash.
• Combination Lap/Shoulder Belt with
Retractor—In this system, each strap has a
retractor at one end and attaches to the latch
plate at the other end.
• Lap belts forward of seat crease—This
lap belt placement does not allow secure
installation.
• Passive Restraint—This system uses a lap
belt and a motorized shoulder belt.
• Passive Restraint—These systems have lap
or shoulder belts mounted to the door.
DO NOT use vehicle belts that are attached to
the door in any way.
DO NOT use vehicle belts that move along a
track to automatically surround the passenger when the door is
closed.
23
DO NOT use any seating position that contains an inflatable
seat belt.
4.3 SAFE Vehicle Belt Systems
THE FOLLOWING BELT SYSTEMS CAN BE USED WITH YOUR
INFANT CAR SEAT. These systems allow secure installation if the
seat location meets all other requirements. Ensure that the seat
location meets requirements in your vehicle owner’s manual
and in these instructions.
• Seat Belts with Switchable
Retractor—A switchable retractor
is the most common type of seat belt retractor and must
be switched to locked mode before using with your infant
car seat. Lock the seat belt by pulling the shoulder belt out
all the way slowly. The seat belt is locked when you hear
an audible click when feeding the seat belt back in to the
retractors and you are unable to pull the belt out further.
• Seat Belts with Locking Latch Plate—
There are two types of locking latch
plates. One type is found on lap only
belts; the other type is found on lap/
shoulder belts. For lap belts only, pull
the free end of the belt to tighten and
lock. For lap/shoulder belts, pull the
shoulder belt and the lap portion of
the belt will tighten and lock.
24
FEATURES, USE, & INSTALLATION
See Sections 5, 6, and 7 for detailed instructions for installing
the infant car seat.
FEATURES, USE, & INSTALLATION
• Lap Belts with Automatic Locking Retractor (ALR):—
The ALR locks automatically when
buckled. To tighten, feed the belt into
the retractor.
• Combination Lap/Shoulder Belt with Locking Latch
Plate—
This type of belt has a latch plate that
does not allow the lap portion of
the belt to loosen after it is buckled.
Tighten the belt by pulling firmly on the shoulder portion of
the vehicle belt while pushing down firmly on the infant car
seat.
Some vehicle lap/shoulder seat belts have a plastic button on
the belt. DO NOT allow the button to interfere with routing the
belt through the vehicle belt path of the seat or base.
LATCH can also be used in place of the vehicle belt system.
Please refer to vehicle owner’s manual for your vehicle’s
acceptable LATCH locations.
4.4 LATCH Locations
United States Federal Motor Vehicle Safety Standards define
Lower Anchors and Tethers for Children (LATCH) as a system for
installing car seats in vehicles.
LATCH provides an alternative to the vehicle seat belt for
securing the infant car seat. Newer vehicles may have one or
more seating positions with LATCH anchorage systems. These
25
will be visible at the vehicle seat crease or indicated by the
LATCH symbol.
• Refer to your vehicle owner’s manual for exact LATCH
locations and for requirements for use with infant
car seats.
• Standard LATCH systems separate anchor points by 11 inches
(280 mm). Ingenuity does not recommend using the LATCH
system if the spacing is not the standard 11 inches (280 mm).
VEHICLE ANCHOR POINTS
VEHICLE
SEAT BIGHT
26
FEATURES, USE, & INSTALLATION
This image shows a typical seat in a passenger vehicle. Other
vehicle types may have different LATCH locations or markings.
Consult your vehicle owner’s manual for information about
LATCH locations.
4.5 Vehicle Seating Requirements
WARNING
IMPROPER PLACEMENT OF THIS INFANT CAR SEAT
INCREASES THE RISK OF SERIOUS INJURY OR DEATH.
• Some seating positions in your vehicle may not be safe for
this infant car seat.
FEATURES, USE, & INSTALLATION
• Some vehicles do not have any safe seating positions for
this infant car seat.
• If you are not sure where to install this infant car seat in
your vehicle, consult your vehicle owner’s manual or call
Ingenuity at 1-800-230-8190.
WARNING
DO NOT place rear-facing child seat on front seat with air
bag. DEATH OR SERIOUS INJURY can occur. The back seat
is the safest place for children 12 and under.
• According to accident statistics, children are safer when
properly restrained in a rear-seating position than in
front-seating positions.
• Owners of vehicles with front passenger side air bags
should refer to their vehicles’ owner’s manual for car seat
installation instructions.
27
• It is recommended to secure the infant car seat in the middle
seating position behind the driver and passenger seats when
a middle seat is present. If you want to use LATCH, check your
vehicle owner’s manual for LATCH locations.
• ONLY use in forward facing vehicle seats.
28
FEATURES, USE, & INSTALLATION
• NEVER place this infant car seat in a vehicle seating location
with a front air bag.
• DO NOT use the infant car seat on vehicle seats that have the
following features:
• Seat backs that do not lock in an upright position.
• Seats that can fold down without having to release a lock
or latch.
In the event of an accident or sudden stop, these types of
vehicle seats can slide forward and harm your child.
FEATURES, USE, & INSTALLATION
Using an incompatible location prevents the infant car seat from
protecting your child.
29
5.0 – INSTALLING/REMOVING THE BASE
To reduce risk of injury or death, use the following steps to
install the infant car seat base in your vehicle.
5.1Warnings
WARNING
• You MUST correctly tighten the vehicle belt to securely
install the infant car seat. Refer to your vehicle owner’s
manual and the following warnings and instructions while
installing the base.
• Ensure that the seat belt buckle tongue goes into the
correct buckle. The seat belt should not be twisted or
turned.
• Ensure that the seat location provides enough room for the
infant car seat:
• If vehicle manual allows installation in a front passenger
seat (see air bag warning, Section 2.5), slide the
vehicle seat as far back from the dashboard as possible
and follow the vehicle manufacturer’s procedure for
deactivating air bag.
30
FEATURES, USE, & INSTALLATION
• Observe and follow the instructions provided by your
vehicle manufacturer and in this manual. Before beginning,
ensure that you have read and understood Section 4 –
Choosing an Appropriate Vehicle Seat Location.
WARNING
• For a rear seat, ensure that the seat in front of the rear seat
allows sufficient room for the infant car seat.
FEATURES, USE, & INSTALLATION
5.2 Installing and Adjusting the Base
with Vehicle Belts
WARNING
• You MUST recline the infant car seat base according to the
following instructions.
• Failure to properly recline the infant car
seat base on the vehicle seat increases the
risk of serious injury or death.
• If the infant car seat base is too upright:
Your child’s head may drop forward,
and your child may suffer breathing
problems or asphyxiate.
• If the infant car seat is too reclined:
A crash could put too much force on your child or cause
ejection from the seat, resulting in serious injury or
death.
31
You can secure the base of the infant car seat using the vehicle
belt system. Ensure that this system meets all requirements for a
safe installation before installing the base. See Sections 4.1–4.5
for more information about choosing a vehicle seat location and
for seat belt requirements.
1. Ensure that your vehicle is on
level ground before beginning
installation.
2. Place the base on the vehicle in the
direction indicated by the front of
vehicle labels.
3. Ensure that no vehicle seats or doors interfere with the
installation of the base.
4. View the level indicators on the base to determine if the
base is properly reclined. The level
indicators can be viewed from either
the top or the side of the base.
• The base is leveled when the
bubbles are between the indicator
lines.
• If the base is not properly reclined:
• Press the Recline Adjustment Button to deploy the recline
adjustment foot.
32
FEATURES, USE, & INSTALLATION
Note: Installing on unlevel ground
will cause the infant car seat to be
positioned incorrectly.
• There are three (3) recline adjustment positions.
FEATURES, USE, & INSTALLATION
• Place the recline adjustment foot
in the position that allows the
bubbles of the level indicators to
be between the indicator lines.
• If the bubbles are still not
between the indicator lines,
place a rolled towel or pool
noodle under the base against
the back of the vehicle seat. The
recline foot must be in the lowest
position. Ensure that the towel or
pool noodle does not interfere
with any other step of the base
installation process.
LAP BELT
LAP-SHOULDER BELT
5. Lift the vehicle belt positioner.
6. Thread the vehicle belt through the
vehicle belt path opening in the base.
7. Buckle the vehicle belt.
8. Ensure that the vehicle seat belt
is locked. See Section 4.3 and
your vehicle owner’s manual for
information on locking your seat belt.
9. Tighten the belt to create a secure installation. While pushing
down on the base, pull the free end of the lap belt or the
shoulder portion of the lap/shoulder belt to tighten it.
33
10. The base should sit flat.
• If the base is tilting, restart the installation process in
another seating location.
11. Close the vehicle belt positioner. Do not store the excess
LATCH belt strap underneath the vehicle belt positioner door.
12. Ensure the base is still level.
• If it is not level, readjust the recline angle.
14. Ensure no vehicle seats or doors interfere with the operation
or alter the position of the infant car seat or base. If
interference exists, start installation process over at step #1 of
this section.
5.3 Installing and Adjusting the Base
with LATCH Belts
LATCH systems provide a secure method for installing the infant
car seat base without using the vehicle seat belt. Consult your
vehicle owner’s manual to see if LATCH is available in your
34
FEATURES, USE, & INSTALLATION
13. Always ensure the installation is secure by attempting to move
the base (or seat if used without the base) by firmly pushing
and pulling the base at the location of the belt path. The base
or seat should not move more than 1 inch (2.5 cm) from sideto-side and back-to-front at the location of the belt path. If
the base or seat moves more than 1 inch and/or the seatbelt
loosens or lengthens, try the installation again or utilize an
alternative method as detailed in your instruction manual.
vehicle and recommendations for using it. See Sections 4.4 and
4.5 for more information about LATCH location and choosing a
vehicle seat location.
1. Ensure that your vehicle is on
level ground before beginning
installation.
FEATURES, USE, & INSTALLATION
Note: Installing on unlevel ground
will cause the infant car seat to be
positioned incorrectly.
2. Place the base on the vehicle seat in
the direction indicated by the front
of vehicle labels.
3. Ensure that no vehicle seats or doors
interfere with the installation of the
base.
4. View the level indicators on the base
to determine if the base is properly
reclined. The level indicators can be
viewed from either the top or side of
the base.
• The base is leveled when the bubbles are between
the indicator lines.
• If the base is not properly reclined:
• Press the Recline Adjustment Button to deploy the recline
adjustment foot.
35
• There are three (3) recline adjustment positions.
• Place the recline adjustment foot in the position that
allows the bubbles of the level indicators to be between
the indicator lines.
• If the bubbles are still not between the indicator lines,
place a rolled towel or pool noodle under the base
against the back of the vehicle seat. The recline foot must
be in the lowest position. Ensure that the towel or pool
noodle does not interfere with any other step of the base
installation process.
6. To lengthen the LATCH belt adjustment strap, press the
button on the adjuster and loosen.
7. Hook the LATCH connectors from the
base to the vehicle’s lower anchors.
Push the connectors onto the anchors
until you hear an audible “click.”
8. Pull firmly on the LATCH connectors
to ensure that they are attached.
NEVER put two LATCH connectors on
one vehicle LATCH anchor. Ingenuity
does not recommend using the
LATCH system if the spacing is not 11
inches (280 mm).
9. Tighten the LATCH connection by
36
FEATURES, USE, & INSTALLATION
5. Remove the LATCH belt connectors from the storage slots
in the base.
pushing down firmly on the base and pulling up on the
adjustment belt.
10. The base should sit flat.
• If the base is tilting, restart the installation process in
another seating location.
11. Ensure the vehicle belt positioner door is closed.
12. Ensure the base is still level.
FEATURES, USE, & INSTALLATION
• If it is not level, readjust the recline angle.
13. Always ensure the installation is secure by attempting
to move the base (or seat if used without the base) by
firmly pushing and pulling the base at the location of the
belt path. The base or seat should not move more than 1
inch (2.5 cm) from side-to-side and back-to-front at the
location of the belt path. If the base or seat moves more
than 1 inch and/or the LATCH belt loosens or lengthens, try
the installation again or utilize an alternative method as
detailed in your instruction manual.
14. Ensure no vehicle seats or doors interfere with the
operation or alter the position of the infant car seat or base.
If interference exists, start the installation process over at
step #1 of this section.
37
5.4 Installing and Adjusting the Infant
Car Seat on an Airplane
The infant car seat base is compatible with most airplane seats.
Follow the instructions for installing in an automobile with a
lap-only belt to secure the base (see Section 5.2). For installation
in airplane seats, if the belt positioner door is interfering with
the seat belt buckle then it is acceptable to place the seat belt
over the top of the belt positioner door to obtain a proper
installation.
• Install the base in a rear-facing position only in a forwardfacing aircraft seat. Consult your flight attendant regarding
proper placement of the infant car seat.
• DO NOT use this infant car seat if the airplane seat belt does
not hold the infant car seat base securely.
5.5 Removing the Base
Remove the infant car seat from the base before uninstalling the
base from the vehicle. DO NOT leave the unsecured seat or base
in the vehicle.
REMOVING VEHICLE AND AIRPLANE BELT
INSTALLATION
1. Lift the vehicle belt positioner.
38
FEATURES, USE, & INSTALLATION
• Notify the airline ahead of time that you intend to bring the
seat on board.
2. Release the vehicle belt.
3. Pull the vehicle belt back through the belt path on the
base.
4. Close the vehicle belt positioner.
5. Remove the base from the vehicle
seat or airplane seat.
FEATURES, USE, & INSTALLATION
REMOVING LATCH INSTALLATION
2
1
1. Push and hold the LATCH
connector button.
2. Pull the LATCH connector while
holding the button to release the connector from the
vehicle anchor.
3. Repeat these steps with the other LATCH connector.
4. Store the LATCH connectors in the base.
WARNING
Loose LATCH connectors can strangle your child.
STORING LATCH CONNECTORS
Store LATCH connectors properly when they are not securing
the base.
1. Place each LATCH connector in its storage compartment in
39
the rear of the base.
2. Tighten the LATCH adjustment strap to secure loose straps.
3. Remove the base from the vehicle.
Correctly stored LATCH connections should resemble this image.
FEATURES, USE, & INSTALLATION
40
6.0 – USING THE SEAT WITH THE BASE
Prior to installing the infant car seat with the base, read and fully
understand Sections 4 and 5.
The car seat is secure only if:
• You correctly install the base in the vehicle.
• You correctly attach the seat to the base.
FEATURES, USE, & INSTALLATION
6.1 Attaching the Seat to the Base
WARNING
If the infant car seat does not securely snap into the base,
the infant car seat provides NO protection for your child.
Ensure that there are no foreign objects between the car
seat and the base. DO NOT use the infant car seat or base if
the infant car seat does not securely “click” into the base.
41
1. The connection between the
base and the car seat MUST be
clear to create a secure lock.
• Ensure that restraint straps,
blankets, and other foreign
objects do not obstruct the
locking of the seat.
2. Set the infant car seat down
into the base.
4. Pull up on the infant car seat
to ensure that it is connected
securely into the base.
CLICK
1
2
CHECK
B
5. Place the handle into any
locked position.
• The handle is NOT locked until BOTH handle adjustment
levers pop back out.
• After setting the position, push and pull firmly on the
handle to ensure that it is locked.
6. Do not allow anything to interfere with or impede the
infant car seat handle from changing adjustment positions.
42
FEATURES, USE, & INSTALLATION
3. The infant car seat is properly
latched to the base when you
hear an audible “click.”
6.2 Removing the Seat from the Base
1. Ensure that the handle is in
Position “A”, upright, if you are
using it to lift the carrier.
2. Squeeze the green seat release
handle on the rear of the car
seat.
FEATURES, USE, & INSTALLATION
3. Lift the seat straight up from
the base.
43
7.0 – INSTALLING AND ADJUSTING THE
SEAT WITHOUT THE BASE
The infant car seat can be installed in the vehicle without the
base. DO NOT attempt to use these installation instructions
while the base is connected to the seat.
Prior to installing the infant car seat without the base, read and
fully understand Sections 4.1, 4.2, 4.3, and 4.5.
7.1 Installing the Seat in a Vehicle
• You MUST recline the infant car seat according to the
following instructions.
• Failure to properly recline the infant car seat on the vehicle
seat increases the risk of serious injury or death.
• If the infant car seat is too upright:
Your child’s head may drop forward,
and your child may suffer breathing
problems or asphyxiate.
• If the infant car seat is too reclined:
A crash could put too much force on
your child or cause ejection from the
seat, resulting in serious injury or
death.
44
FEATURES, USE, & INSTALLATION
WARNING
The infant car seat includes a level indicator label to ensure
proper installation. The
indicator is located on the
warning label on the side
of the seat shell and is
indicated by a leveling line
on the label.
FEATURES, USE, & INSTALLATION
The leveling line on the
warning label MUST be
level with the ground.
1. Before placing the infant car seat in
the vehicle, ensure that the vehicle is
on level ground.
2. Place the infant car seat on the
vehicle seat in the direction indicated
by the front of vehicle labels.
3. Using the leveling line located on the warning label directly
above the wording “THIS LINE MUST BE LEVEL WITH
GROUND,” CHECK that the infant car seat is level with the
ground.
4. If the infant car seat is resting on the vehicle seat and is still
not level, place a rolled towel or pool noodle underneath
the infant car seat against the back of the vehicle seat.
Ensure that the towel or pool noodle does not interfere
with any other step of the seat installation process.
When using the infant car seat without the base, install the seat
in the vehicle before securing your child.
45
1. Place the infant car seat in a rear-facing
position in a vehicle seat.
LAP & SHOULDER BELT
2. Thread the vehicle belt through the
closest vehicle belt hook on the side of
the car seat. Move the belt underneath
the hook and across the seat.
3. Thread the vehicle belt through the
opposite vehicle belt hook.
4. Buckle the vehicle belt.
LAP BELT
6. Push down firmly with your free hand
LAP & SHOULDER BELT
on the infant car seat, and pull the
free end of the lap belt or the shoulder portion of the lap/
shoulder belt to tighten it.
7. Ensure that the vehicle seat belt
does not cause the seat to be
unlevel. Readjust the vehicle seat
belt as necessary to secure the infant
car seat firmly in the vehicle seat.
8. Ensure the belt is tight. Attempt to move the seat by firmly
pushing and pulling. The base or seat should not move
more than 1 inch (2.5 cm) from side-to-side and back-tofront at the location of the belt path. If the belt loosens or
lengthens, reinstall the seat.
46
FEATURES, USE, & INSTALLATION
5. Ensure that the vehicle belt is locked.
For information on locking the belt, see
Section 4.3 and your vehicle owner’s
manual.
9. Place the handle into any locked position.
• The handle is NOT locked until BOTH handle adjustment
levers pop back out.
• After setting the position, push and pull firmly on the
handle to ensure that it is locked.
FEATURES, USE, & INSTALLATION
10. Do not allow anything to interfere with or impede
the infant car seat handle from changing adjustment
positions.
7.2 Installing and Adjusting the Infant
Car Seat on an Airplane
(without a Base)
The infant car seat is compatible with most airplane seats.
Follow the instructions for installing in an automobile to secure
the infant car seat (see Section 7.1).
• Notify the airline ahead of time that you intend to bring
the seat on board.
• Install the infant car seat in a rear-facing position only in a
forward-facing aircraft seat. Consult your flight attendant
regarding proper placement of the infant car seat.
•DO NOT use this infant car seat if the airplane seat belt
does not hold it securely.
47
8.0 – SECURING YOUR CHILD
8.1 Using and Removing
the Newborn Insert
If your child weighs more than 11 lbs. (5.0 kg), remove the
newborn insert:
1. Unbuckle the harness buckle.
2. Pull the buckle through the slot in the newborn insert.
3. Remove the newborn insert.
Reverse these steps to install the newborn insert.
48
FEATURES, USE, & INSTALLATION
You MUST use the newborn insert for
children weighing between 4–11 lbs.
(1.8–5.0 kg). Failure to use the insert could
increase your child’s risk of injury or death.
For your convenience, the Ingenuity
InTrust 35 comes with the newborn insert
already installed.
8.2 Securing Your Child in the Infant Car
Seat
You MUST prepare your child and the harness straps before
securing your child in the infant car seat. This ensures the
harness straps provide adequate protection when your child is
secured.
FEATURES, USE, & INSTALLATION
• Remove bulky clothing or blankets before placing your
child in the seat.
• Never place blankets underneath or behind your child or
inside the infant car seat.
• Do not allow anything to interfere with or impede the
infant car seat from changing adjustment positions.
1. Loosen the harness by pressing
the harness release button while
pulling out on the shoulder straps.
This will lengthen the harness,
allowing
the headrest to move.
1.
2. Raise the headrest.
2.
49
3. Disconnect chest clip halves and buckle
tongues by pressing chest clip and
buckle buttons.
4. Place your child in the infant car seat,
as shown.
5. Insert each buckle tongue into the buckle until you hear an
audible “click.”
•DO NOT use the infant car seat if the buckle tongues do
not “click” in place. If they do not
click, call Ingenuity at 1-800-2308190 (U.S.) or (55) 5292-8488
(Mexico).
6. Snap the chest clip halves together
until you hear an audible “click.”
• Ensure the chest clip is secure by pulling outward on it. The
chest clip halves should be fully engaged and not separate.
50
FEATURES, USE, & INSTALLATION
• Ensure that your child’s body makes full contact with the
infant car seat without slouching.
WARNING
Children have STRANGLED in loose or partially
buckled harness straps. Fully restrain the child
even when carrier is used outside the vehicle.
FEATURES, USE, & INSTALLATION
7. Pull the harness adjustment strap, as shown. The
SmartAdjust Headrest will move
down and the harness will tighten.
8. Continue pulling the harness
adjustment strap until the:
Bottom of the headrest and harness
straps are at or below the shoulders
of your child.
CHECK: Your child’s head should be
at least 1 inch (2.5 cm) below the top
of the infant car seat and headrest.
Harness straps are snug, straight, and
flat against your child’s shoulders.
CHECK: Harness is snug when you
cannot pinch excess harness between
fingers.
9. Position the chest clip in the middle of your child’s chest
and level with their armpits.
51
10. Ensure the infant car seat handle is in a locked into position.
See Section 3.5 for Handle Adjustment and Use.
WARNING
ALWAYS use the restraint straps and ensure that they are
snug. A snug strap should not allow any slack. It lies in a
relatively straight line without sagging. It does not press on
the child’s flesh or push the child’s body into an unnatural
position. Ensure that restraint straps are not twisted.
1. Press the harness release button.
2. Pull the harness straps outward and away from the seat to
loosen them.
3. Raise the headrest.
4. Disconnect the chest clip halves and buckle tongues by
pressing the chest clip and buckle buttons.
5. Place shoulder harness straps to the sides of the seat.
6. Remove your child.
52
FEATURES, USE, & INSTALLATION
8.3 Removing Your Child from the Infant
Car Seat
9.0 – CHILD SAFETY CHECK
WARNINGS
& INFORMATION
SAFETY
CHECK
Inspect the fit of the restraint after securing your child.
EVERY TIME YOU SECURE YOUR
CHILD, ENSURE:
1. Top of your child’s head is at
least 1 inch (2.5 cm) below the
top of the infant car seat and
headrest.
2. Bottom of the headrest and
harness straps are at or below
the shoulders of your child.
3. Chest clip is:
• In the middle of your child’s chest.
• Level with your child’s armpits.
4. The harness is:
• Snug. You should not
be able to pinch excess
harness between your
fingers.
• Without any slack or sag.
• Not putting excessive pressure on your child.
• Straight and flat against your child’s shoulders.
53
10.0 – SEAT SAFETY CHECK
WARNING
EVERY TIME YOU DRIVE WITH YOUR CHILD:
■■
Always ensure the installation is secure by attempting to
move the base (or seat if used without the base) by firmly
pushing and pulling the base or seat at the location of the
belt path.
• The base or seat should not move
more than 1 inch (2.5 cm) from
side-to-side and back-to-front
at the location of the belt path.
If the base or seat moves
more than 1 inch and/
or the seatbelt loosens
or lengthens, try the
installation again or utilize
an alternative method as
detailed in your instruction
manual.
54
SAFETY CHECK
Children have STRANGLED in loose or partially
buckled harness straps. Fully restrain the child
even when carrier is used outside the vehicle.
Ensure the infant car seat is secure to reduce your child’s risk of
serious injury or death.
WARNINGS
& INFORMATION
SAFETY
CHECK
• Ensure that the vehicle belt or LATCH belt does not
lengthen or loosen.
■■
Ensure no vehicle seats or doors interfere with the operation
or alter the position of the infant car seat or base.
■■
Ensure the infant car seat handle is in a locked position. See
Section 3.5 for Handle Adjustment and Use.
55
11.0 – MAINTENANCE AND STORAGE
11.1 Maintenance and Cleaning
CLEANING THE INFANT CAR SEAT PAD
1. Remove the canopy from the
car seat.
2. Flip the car seat over.
Harness splitter plate
Harness splitter plate
56
MAINTENANCE & STORAGE
3. Remove the harness strap from the
harness splitter plate.
4. To remove the harness
strap:
■■ Unbuckle the
harness strap and the
chest clip.
■■ Push the harness
strap through the
headrest adjustment
plate and the seat.
■■ Pull the harness completely through the front of the seat.
5. Remove the harness covers from
the harness straps.
6. Remove the headrest cover from
the headrest.
7. Remove the optional buckle guard
from the buckle.
MAINTENANCE & STORAGE
8. Remove the newborn insert.
9. Unhook the elastic attachments
from both sides of the seat
frame.
10. Pull the cover out from under
the harness release button.
11. Pull the harness buckles
through the seat pad.
57
12. Remove the seat pad from the frame.
Note: To assist in removing the seat pad from the headrest,
start at the bottom of the headrest and pull upward.
13. Feed the harness straps with chest clip and buckle tongues
through the openings in the seat pad fabric.
14. Machine-wash the seat pad on a delicate cycle, and dripdry. DO NOT use bleach. See care tag attached to softgoods
for instructions.
REINSTALLING THE INFANT CAR SEAT PAD
Reverse the steps to reinstall the infant car seat pad and harness.
After reinstalling the seat pad:
1. Check that the harness system is not twisted.
2. Pull on the harness system to be sure that the harness is
securely reinstalled.
WARNING
58
MAINTENANCE & STORAGE
Failure to place the restraint anchor through the slot in the
infant car seat could result in DEATH OR SERIOUS INJURY
to your child.
DO NOT use the infant car seat without the seat pad.
CLEANING THE NEWBORN INSERT
1. Remove the newborn insert per the instructions in Section
8.1.
2. Machine-wash the seat pad on a delicate cycle, and dripdry. DO NOT use bleach. See the care tag attached to the
softgoods for instructions.
3. Reinstall the newborn insert per the instructions in Section
8.1.
CLEANING HEADREST SOFTGOODS
1. Remove the softgoods.
2. Machine-wash the headrest pad on a delicate cycle, and
drip-dry. DO NOT use bleach. See the care tag attached to
softgoods for instructions.
3. Reinstall the headrest softgoods.
MAINTENANCE & STORAGE
CLEANING THE METAL AND PLASTIC PARTS
• Wipe the metal and plastic parts with a mild soap-and-water
solution.
• DO NOT use bleach or detergent, which may weaken the
plastic parts.
CLEANING THE HARNESS STRAPS
• Spot-clean or replace the harness straps.
59
• DO NOT immerse the harness straps in water.
• DO NOT iron the harness straps. This may weaken the harness
straps.
• Replace the harness straps under the following conditions:
• The straps have cuts.
• The straps are fraying.
• The straps have become severely twisted.
CLEANING THE BUCKLE
• The buckle should fasten with an audible “click.” If it does not,
rinse the buckle with warm water.
• DO NOT use soaps or lubricants on the buckle.
WARNING
• NEVER use a second-hand infant car seat or base.
• NEVER use an infant car seat with a history you do not
know.
MAINTENANCE & STORAGE
60
11.2 Replacement Parts
For U.S. customers, contact us through the following
ways to purchase parts or accessories or for warranty
information:
Replacement Parts or Accessories:
www.ingenuitybaby.com
Warranty Information:
www.ingenuitybaby.com/warranty
or
1-800-230-8190
11.3 Proper Storage
Store the infant car seat and base in a cool, dry place that is
not exposed to direct sunlight.
MAINTENANCE & STORAGE
11.4 Proper Disposal
When disposing of the infant car seat, cut the harness
straps. This will prevent potentially defective car seats from
being salvaged and reused.
61
12.0 – WARRANTY
Kids II Ingenuity Limited Warranty
Kids II is dedicated to creating quality products for babies and young
children around the world. We warrant that this product will be free
from defects in material and workmanship (the “Limited Warranty”)
for a period of one year from the date of original purchase (sales
receipt is required for proof of purchase) (the “Limited Warranty
Period”). This Limited Warranty applies to single family use only for
the original purchaser/gift recipient (with gift receipt) of the product
and is not transferable. This Limited Warranty does not apply to
re-sold merchandise. Claims resulting from misuse, failure to follow
the instructions (assembly, installation, maintenance, and use), abuse,
alteration, involvement in an accident and normal wear and tear are
expressly excluded from coverage under this Limited Warranty. If any
covered defect is discovered during the Limited Warranty Period, we
will, at our sole option, repair or replace the product at no cost to you.
This is the sole remedy available to you.
THIS LIMITED WARRANTY IS EXCLUSIVE, AND IN LIEU OF ALL OTHER
WARRANTIES INCLUDING, WITHOUT LIMITATION, THE WARRANTIES OF
MERCHANTABILITY AND FITNESS FOR A PARTICULAR PURPOSE. ANY
IMPLIED WARRANTIES THAT CANNOT BE DISCLAIMED ARE LIMITED IN
DURATION TO THE LIMITED WARRANTY PERIOD.
62
WARRANTY
IN NO EVENT SHALL KIDS II BE LIABLE FOR ANY INDIRECT, INCIDENTAL,
CONSEQUENTIAL, SPECIAL OR PUNITIVE DAMAGES, NO MATTER HOW
ARISING.
Some states do not allow the exclusion of incidental or
consequential damages or a limitation on the duration of implied
warranties, so the foregoing limitations may not apply to you. In
addition, you may have other legal rights, which vary by state.
WARRANTY
To obtain warranty service, contact the Kids II Consumer Services
Department at
1-800-230-8190 or [email protected], or write to Kids
II Consumer Services at 3333 Piedmont Rd. NE, Suite 1800, Atlanta,
GA 30305.
63
NOTES
NOTES
64
MANUAL DE INSTRUCCIONES
ASIENTO DE BEBÉ PARA AUTOMÓVIL
Guarde este manual para utilizarlo en el futuro. Es
muy importante leer, entender y seguir este manual
antes de utilizar el asiento de bebé para automóvil.
Guarde este manual en la base del asiento de bebé
para automóvil.
CS_PD000013_ING112014
© 2015 Ingenuity | ingenuitybaby.com
Bienvenido a la familia Ingenuity
Gracias por elegir Ingenuity, donde todos nuestros productos
tienen su origen en la pregunta: ¿cómo puede esto satisfacer
las necesidades de un bebé y facilitarle la vida a los padres?
Trabajamos duro para asegurarnos de que todos los productos
Ingenuity incluyan características ingeniosas seleccionadas
específicamente para ayudarle en su vida diaria como padre:
con productos como saltadores que saltan automáticamente o
corrales que se cierran y que se pueden desmontar con un cierre
para lavarlos en la lavadora. Nuestros equipos de diseñadores no
solo son algunos de los mejores y más brillantes de la industria
sino que también son padres con experiencia de primera mano.
Esperamos que disfrute este producto y se beneficie con las
características que le hemos agregado. Visite ingenuitybaby.
com para aprender más acerca de nosotros y del resto de
nuestros productos Designed with parenthood in mind™.
1
Guarde este manual para utilizarlo en el futuro.
Es muy importante leer, entender y seguir este
manual antes de utilizar el asiento de bebé para
automóvil. Guarde este manual en la base del
asiento de bebé para automóvil.
Este sistema de sujeción para niños cumple con todas las normas
federales de seguridad aplicables para vehículos motores. Este
sistema de sujeción está certificado para usarse en vehículos
motores y aeronaves.
Ningún asiento de automóvil puede garantizar la protección
contra lesiones en todas las situaciones, pero el uso correcto
ayuda a reducir el riesgo de sufrir lesiones graves o la muerte.
nual para utilizarlo en el futuro. Es muy importante leer,
ir este manual antes de utilizar el asiento de bebé para
de este manual en la base del asiento de bebé para automóvil.
FABRICADO PARA
® • ©2015 KIDS II, INC. • www.kidsii.com/customerservice
KIDS II, INC., ATLANTA, GA EE. UU. 30305 • 1-800-230-8190
KIDS II US MÉXICO S.A. DE C.V. AVE. VASCO DE QUIROGA N.º 3900 – 905A COL. LOMAS DE SANTA FE
CUAJIMALPA DE MORELOS, MÉXICO D. F. • C. P. 05300 • (55) 5292-8488
© 2015 Kids II, Inc. • InTrust35_IS_112014 • Impreso en China
2
ÍNDICE
1.0 Registro e información de contacto. . . . . . . . . 6
1.1 Registro de su asiento de bebé para automóvil. . . 6
1.2 Información sobre productos retirados del mercado . 7
1.3 Si necesita ayuda . . . . . . . . . . . . . . . . . . . . . . 7
2.0 Advertencias . . . . . . . . . . . . . . . . . . . . . . . 8
2.1
2.2
2.3
2.4
2.5
Uso y almacenamiento del manual de instrucciones. . 8
Advertencia sobre el uso correcto . . . . . . . . . . . 8
Advertencias sobre límites de estatura y peso . . . . 9
Advertencias generales. . . . . . . . . . . . . . . . . .10
Advertencias para el uso como asiento de bebé
para automóvil. . . . . . . . . . . . . . . . . . . . . . . 12
2.6 Advertencias para el uso como portabebés . . . . .16
2.7 Advertencias para el uso con un coche. . . . . . . .18
3.0 Características y componentes. . . . . . . . . . . 19
3.1 Vista frontal. . . . . . . . . . . . . . . . . . . . . . . . . 19
3.2 Vista posterior. . . . . . . . . . . . . . . . . . . . . . . .20
3.3 Vista lateral. . . . . . . . . . . . . . . . . . . . . . . . . .21
3.4Base . . . . . . . . . . . . . . . . . . . . . . . . . . . . . .21
3.5 Ajuste y uso de la manija. . . . . . . . . . . . . . . . .22
3.6 Sujeción y uso de la cubierta . . . . . . . . . . . . . . 23
4.0 Elección de un lugar adecuado en el asiento del
vehículo . . . . . . . . . . . . . . . . . . . . . . . . . 25
4.1 Requisitos para el cinturón de seguridad del
vehículo. . . . . . . . . . . . . . . . . . . . . . . . . . . .25
4.2 Sistemas de cinturones de seguridad del
vehículo INSEGUROS . . . . . . . . . . . . . . . . . . . 26
3
4.3 Sistemas de cinturones de seguridad del
vehículo SEGUROS. . . . . . . . . . . . . . . . . . 27
4.4 Ubicaciones del sistema LATCH. . . . . . . . . . 29
4.5 Requisitos para el asiento del vehículo. . . . . 31
5.0 Instalación/Extracción de la base . . . . . . . 35
5.1Advertencias. . . . . . . . . . . . . . . . . . . . . . 35
5.2 Instalación y ajuste de la base con los
cinturones de seguridad del vehículo. . . . . . 36
5.3 Instalación y ajuste de la base con los
cinturones del sistema LATCH. . . . . . . . . . . 39
5.4 Instalación y ajuste del asiento de
bebé para automóvil en un avión . . . . . . . . 42
5.5 Extracción de la base . . . . . . . . . . . . . . . . 43
6.0 Uso del asiento con la base . . . . . . . . . . . 45
6.1 Sujeción del asiento a la base. . . . . . . . . . . 45
6.2 Extracción del asiento de la base. . . . . . . . . 47
7.0 Instalación y ajuste del asiento sin la base. 48
7.1 Instalación del asiento en un vehículo . . . . . 48
7.2 Instalación y ajuste del asiento de bebé para
automóvil en un avión (sin una base). . . . . . 52
8.0 Sujeción del niño. . . . . . . . . . . . . . . . . . 53
8.1 Uso y extracción del soporte para
recién nacidos. . . . . . . . . . . . . . . . . . . . . 53
8.2 Sujeción del niño en el asiento de
bebé para automóvil . . . . . . . . . . . . . . . . 53
8.3 Cómo retirar al niño del asiento de
bebé para automóvil . . . . . . . . . . . . . . . . 57
4
9.0 Control de seguridad del niño . . . . . . . . . 58
10.0 Control de seguridad del asiento. . . . . . . 60
11.0 Mantenimiento y almacenamiento. . . . . . . . 62
11.1Mantenimiento y limpieza . . . . . . . . . . . . . . . . . . 62
11.2Piezas de repuesto. . . . . . . . . . . . . . . . . . . . . . . . . . 67
11.3Almacenamiento correcto . . . . . . . . . . . . . . . . . . 67
11.4Eliminación correcta. . . . . . . . . . . . . . . . . . . . . . . . 67
12.0 Garantía. . . . . . . . . . . . . . . . . . . . . . . . . . . . . . . . . 68
5
1.0 REGISTRO E INFORMACIÓN DE CONTACTO
Complete la tarjeta postal de suscripción prepagada adjunta
al asiento de bebé para automóvil o a la base, y envíela por
correo postal hoy mismo. En una etiqueta en la parte inferior
del asiento de bebé para automóvil encontrará el número de
modelo y la información de fabricación.
Los sujetadores para niños pueden retirarse del mercado por
razones de seguridad. Debe registrar este sujetador para que se
le pueda informar en caso del retiro del producto del mercado.
Envíe su nombre, dirección, dirección de correo electrónico,
en caso de tener una, y el número de modelo y la fecha de
fabricación del sujetador a:
Child Restraint Registration Program
Kids II Inc.
3333 Piedmont Rd NE n.° 1800
Atlanta, GA 30305-9911
o
Llame al 1-800-230-8190 (EE. UU.),
(55) 5292-8488 (México)
o
Regístrese en línea en
https://www.ingenuitybaby.com/productregistration
6
ADVERTENCIAS E INFORMACIÓN
1.1 Registro de su asiento de bebé para
automóvil
WARNINGS & EINFORMATION
ADVERTENCIAS
INFORMACIÓN
1.2 Información sobre productos
retirados del mercado
■■
Línea directa de seguridad vehicular del
gobierno de los EE. UU.:
1-888-327-4236 (TTY: 1-800-424-9153)
o http://www.NHTSA.gov
■■
Ingenuity: 1-800-230-8190 o www.ingenuitybaby.com
Para referencia futura, complete la siguiente información:
Número de modelo: _______________________
Fabricado en:
_______________________
Fecha de compra:
_______________________
1.3 Si necesita ayuda
Los clientes de los EE. UU. pueden comunicarse con nuestro
Departamento de Servicio de Atención al Cliente si tienen
preguntas acerca de los productos, su uso o mantenimiento.
Cuando se comunique con nosotros, tenga a mano el número
de modelo y la información de fabricación de su producto
para que podamos ayudarlo de forma efectiva. Estos números
aparecen en una etiqueta en la parte inferior de su asiento de
bebé para automóvil o en la base.
1-800-230-8190 o www.ingenuitybaby.com
7
2.0 ADVERTENCIAS
Guarde este manual para utilizarlo en el futuro. Es
muy importante leer, entender y seguir este manual
antes de utilizar el asiento de bebé para automóvil.
Guarde este manual en la base del asiento de bebé
para automóvil.
2.2 Advertencia sobre el uso correcto
El asiento de bebé para automóvil Ingenuity InTrust 35 puede
utilizarse como un asiento de automóvil, un portabebés o
ual para utilizarlo en el futuro. Es muy importante leer,
un coche
Cada
usopara
del asiento de bebé para
estecon
manual
antes decompatible.
utilizar el asiento
de bebé
e este
manual en la
base un
del asiento
de bebé
para automóvil.
automóvil
tiene
conjunto
distinto
de requisitos de seguridad.
Asegúrese de comprender las siguientes advertencias de
seguridad antes de usar el asiento de bebé para automóvil.
Antes del uso, inspeccione el asiento de bebé para automóvil
para verificar que no tenga daños. Las partes faltantes o
dañadas pueden impedir que el asiento proteja al niño.
8
ADVERTENCIAS
WARNINGS & INFORMATION
E INFORMACIÓN
2.1 Uso y almacenamiento del manual
de instrucciones
WARNINGS &EINFORMATION
ADVERTENCIAS
INFORMACIÓN
2.3 Advertencias sobre límites de
estatura y peso
ADVERTENCIA
No utilice el asiento de bebé para automóvil con un
niño que no cumpla con los requisitos de peso y altura
que se describen a continuación:
El niño DEBE cumplir los siguientes requisitos:
•PESO: 1,8 a 15,9 kg (4 a 35 lb)
•DEBE usar el soporte para recién nacidos con niños
que pesen entre 1,8 y 5 kg (4 y 11 lb).
• Extraiga el soporte para recién nacidos si el niño pesa
más de 5 kg (11 lb).
•ALTURA: 81,3 cm (32 pulgadas) o menos
• La parte superior de la cabeza del niño debe estar,
como mínimo, 2,5 cm (1 pulgada) por debajo de la
parte superior del asiento de bebé para automóvil y el
apoyacabeza.
El uso de este asiento de automóvil con niños con una
estatura o un peso fuera de este rango aumenta el riesgo de
sufrir lesiones graves o la muerte.
9
2.4 Advertencias generales
ADVERTENCIA
• Lea todas las instrucciones antes de usar el asiento de
bebé para automóvil.
• Conserve las instrucciones para consultarlas en el futuro.
• Lea el manual del propietario del vehículo para garantizar
el uso seguro del asiento de bebé para automóvil.
• Ningún asiento de bebé para automóvil puede garantizar
la protección total contra lesiones en todas las situaciones.
El uso correcto de este asiento de bebé para automóvil
puede reducir el riesgo del niño de sufrir lesiones graves o
la muerte.
• El uso incorrecto de este asiento de bebé para automóvil
aumenta el riesgo del niño de sufrir lesiones graves o la
muerte en una curva pronunciada, una parada repentina
o un choque.
• No utilice el asiento de bebé para automóvil si está
dañado o roto.
•DEBE reemplazar el asiento de bebé para automóvil
si este estuvo involucrado en un choque. Un choque
puede provocar daños que podrían no ser visibles.
Un asiento de bebé para automóvil dañado podría no
proteger al niño.
•NUNCA quite ninguna ETIQUETA DE ADVERTENCIA del
asiento de bebé para automóvil
10 ni de su base.
ADVERTENCIAS
WARNINGS & INFORMATION
E INFORMACIÓN
•LEA, COMPRENDA Y SIGA EL MANUAL DE
INSTRUCCIONES.
WARNINGS &EINFORMATION
ADVERTENCIAS
INFORMACIÓN
ADVERTENCIA
•NUNCA quite ninguna ETIQUETA DE ADVERTENCIA del
asiento de bebé para automóvil ni de su base.
ADVERTENCIA
• Sujete el asiento de bebé para automóvil
adecuadamente en el vehículo.
• Elija una ubicación adecuada en su vehículo para el
asiento de bebé para automóvil. Algunas posiciones de
asientos, como aquellas equipadas con bolsas de aire,
quizás no sean lugares seguros.
• El asiento de bebé para automóvil está diseñado
para que se instale apuntando hacia la parte trasera
únicamente.
• Solo use un cinturón de seguridad del vehículo que esté
diseñado para sujetar un asiento de bebé para automóvil.
Muchos cinturones de seguridad que encajan a través
del pasaje del cinturón del vehículo NO son seguros para
usarse con asientos de bebé para automóvil. Consulte el
manual del propietario de su vehículo para garantizar la
compatibilidad.
• El cinturón de seguridad del vehículo o el cinturón del
sistema LATCH DEBE estar correctamente direccionado
para garantizar una instalación segura.
• Sujete adecuadamente al niño en el asiento de bebé
para automóvil.
• El asiento de bebé para automóvil no ofrece protección si
el niño no está correctamente sujetado. NO sujete al niño
con ropa gruesa o envuelto en una manta.
• SIEMPRE use las correas de
11sujeción y asegúrese de que
estén ceñidas. Una correa ceñida no debería permitir
ADVERTENCIA
2.5 Advertencias para el uso como
asiento de bebé para automóvil
ADVERTENCIA
• ANTES DE INTENTAR USAR ESTE ASIENTO DE BEBÉ PARA
AUTOMÓVIL, LEA Y COMPRENDA LO SIGUIENTE:
• Las instrucciones contenidas en este manual
• El manual del propietario de su vehículo
• NO permita que otras personas instalen o usen el asiento de
bebé para automóvil, salvo que comprendan cómo usarlo.
• EL USO INCORRECTO DE ESTE ASIENTO DE BEBÉ PARA
AUTOMÓVIL Y SU BASE AUMENTA EL RIESGO DE QUE EL
NIÑO SUFRA LESIONES GRAVES O LA MUERTE.
• NUNCA DEJE AL NIÑO SOLO.
• SIEMPRE recline el asiento de bebé para automóvil de manera
adecuada. Un asiento de bebé para automóvil reclinado de
forma incorrecta puede provocar dificultades para respirar o
hacer que el niño se sienta incómodo.
12
ADVERTENCIAS
WARNINGS & INFORMATION
E INFORMACIÓN
• SIEMPRE use las correas de sujeción y asegúrese de que
estén ceñidas. Una correa ceñida no debería permitir
ningún tipo de holgura. Debe extenderse en una línea
relativamente recta sin combarse. No debe presionar la
piel del niño ni empujar su cuerpo hacia una posición
poco natural. Asegúrese de que las correas de sujeción
no estén dobladas.
WARNINGS & EINFORMATION
ADVERTENCIAS
INFORMACIÓN
ADVERTENCIA
• NO MODIFIQUE EL ASIENTO DE BEBÉ PARA AUTOMÓVIL
NI SU BASE.
• NUNCA utilice accesorios, almohadillas o productos
de otros fabricantes con este asiento de bebé para
automóvil. Los artículos no probados con este asiento de
bebé para automóvil podrían lesionar al niño.
• NUNCA utilice el asiento de bebé para automóvil si
tiene partes dañadas, rotas o faltantes. Para saber si las
partes dañadas o faltantes se pueden reemplazar, llame
al 1-800-230-8190.
• NO utilice una sujeción de arnés de asiento de bebé para
automóvil, un cinturón de seguridad del vehículo o un
cinturón del sistema LATCH que estén cortados, desgastados
o dañados.
ADVERTENCIA
• EL ASIENTO DE BEBÉ PARA AUTOMÓVIL PUEDE
CALENTARSE EN EL SOL. Antes de colocar al niño en el
asiento de bebé para automóvil, toque las piezas metálicas y
plásticas para verificar su temperatura. Tenga cuidado, ya que
las piezas calientes pueden provocar quemaduras.
13
ADVERTENCIA
14
ADVERTENCIAS
WARNINGS & INFORMATION
E INFORMACIÓN
• ALGUNOS NIÑOS CON NECESIDADES ESPECIALES
CORREN UN MAYOR RIESGO. Algunos niños, como los
bebés prematuros o aquellos que tuvieron un resultado
positivo para apnea posicional, podrían correr un mayor
riesgo con la respiración o experimentar otras dificultades
en un asiento de bebé para automóvil. Si el niño tiene
necesidades especiales, pida a su médico o al personal
hospitalario que evalúe al niño y le recomiende una
cama de automóvil o un asiento de bebé para automóvil
adecuado antes de usar este producto.
• NO COLOQUE ESTE ASIENTO DE BEBÉ PARA AUTOMÓVIL
EN UN LUGAR DEL ASIENTO DEL VEHÍCULO CON UNA
BOLSA DE AIRE FRONTAL. Si la bolsa de aire se infla, el
niño podría sufrir lesiones graves o la muerte. Las bolsas de
aire laterales del asiento del acompañante también pueden
ser peligrosas. Para obtener más información, consulte el
manual del propietario de su vehículo. El asiento trasero es
el lugar más seguro para los niños menores de 12 años.
• COLOQUE ESTE ASIENTO DE BEBÉ PARA AUTOMÓVIL
EN UNA POSICIÓN QUE APUNTE HACIA ATRÁS EN SU
VEHÍCULO.
• LAS POSICIONES EN LOS ASIENTOS TRASEROS
DEL VEHÍCULO SON MÁS SEGURAS. De acuerdo con
estadísticas de accidentes, los niños están más seguros
cuando se encuentran correctamente sujetados en las
posiciones de los asientos traseros del vehículo que en
las posiciones de los asientos delanteros.
WARNINGS &EINFORMATION
ADVERTENCIAS
INFORMACIÓN
ADVERTENCIA
• El niño puede sufrir lesiones en un vehículo aunque no
participe en un choque. El frenado brusco y las curvas
pronunciadas pueden provocar lesiones al niño si el
asiento de bebé para automóvil no está correctamente
instalado o si el niño no está bien sujetado.
• REEMPLACE EL ASIENTO DE BEBÉ PARA AUTOMÓVIL
Y SU BASE DESPUÉS DE UN ACCIDENTE. Un accidente
puede provocar daños al asiento de bebé para automóvil
que probablemente usted no pueda ver. Esto puede
impedir que el asiento de bebé para automóvil proteja al
niño. Reemplace el asiento de bebé para automóvil y su
base después de un accidente.
• NUNCA permita que algo interfiera con la capacidad del
asiento del automóvil de cambiar de posiciones de ajuste o
la dificulte.
• NO DEJE NUNCA UN ASIENTO DE BEBÉ PARA AUTOMÓVIL
O SU BASE SIN SUJECIÓN EN EL VEHÍCULO. Un asiento de
bebé para automóvil o una base sueltos pueden moverse
y lesionar a los ocupantes en una curva pronunciada, una
parada repentina o un choque. Retire el asiento de bebé
para automóvil del vehículo si no va a usarlo o asegúrese de
que esté correctamente sujetado. Un sistema de sujeción
para niños no amarrado puede lesionar a otros ocupantes.
Si no utiliza los conectores del sistema LATCH, guárdelos
adecuadamente en la base del asiento de bebé para
automóvil.
15
ADVERTENCIA
2.6 Advertencias para el uso como
portabebés
ADVERTENCIA
• Lea todas las instrucciones antes de usar el portabebés.
• Conserve las instrucciones para consultarlas en el futuro.
• NO use el portabebés si está dañado o roto.
• NUNCA deje al niño solo.
• PELIGRO DE CAÍDAS: La actividad del niño puede
mover el portabebés. NUNCA coloque el portabebés en
superficies de trabajo, mesas ni otras superficies elevadas.
• SOLO coloque el portabebés al nivel del suelo.
• SIEMPRE asegúrese de que el portabebés está
nivelado sobre el suelo cuando se trate de superficies
no elevadas.
• ASEGÚRESE de que la manija se bloquee en su
posición antes de mover el portabebés. Cuando
levante el portabebés con la manija, controle que la
manija esté en posición vertical.
16
ADVERTENCIAS
WARNINGS & INFORMATION
E INFORMACIÓN
• SU ASIENTO DE BEBÉ PARA AUTOMÓVIL Y LA BASE
TIENEN UNA FECHA DE VENCIMIENTO. Suspenda el uso
del asiento de bebé para automóvil después de la fecha
de vencimiento (“no usar después de”) impresa en la parte
posterior del asiento de bebé para automóvil y la base.
WARNINGS &EINFORMATION
ADVERTENCIAS
INFORMACIÓN
ADVERTENCIA
• NUNCA coloque el portabebés en el compartimento del
asiento para niños del carrito de compras.
• PELIGRO DE ASFIXIA: En superficies blandas, el
portabebés puede darse vuelta y asfixiar al bebé. NUNCA
lo coloque sobre camas, sofás u otras superficies blandas.
• RIESGO DE ESTRANGULAMIENTO: Algunos niños se
han ESTRANGULADO con correas del arnés sueltas o
parcialmente abrochadas. Sujete completamente al niño
incluso cuando el portabebés se utilice fuera del vehículo.
ADVERTENCIA
• SIEMPRE utilice las correas de sujeción y asegúrese de
que estén ceñidas. Una correa ceñida no debería permitir
ningún tipo de holgura. Debe extenderse en una línea
relativamente recta sin combarse. No debe presionar la
piel del niño ni empujar su cuerpo hacia una posición
poco natural. Asegúrese de que las correas de sujeción
no estén dobladas.
• MANTENGA LOS CORDONES Y LAS CUERDAS
ALEJADOS DEL NIÑO. Los cordones y las cuerdas
pueden provocar estrangulamiento.
• NO coloque el portabebés cerca de cordones, cortinas o
persianas de una ventana.
17
2.7 Advertencias para el uso con un
coche
• USE EL ASIENTO DE BEBÉ PARA AUTOMÓVIL
INTRUST 35 SOLO CON SISTEMAS DE VIAJE Y COCHES
COMPATIBLES INGENUITY. Consulte el manual del
propietario del coche para conocer las advertencias sobre
el coche y los detalles sobre cómo sujetar el asiento de
bebé para automóvil al coche. Si no tiene el manual del
propietario, llame sin cargo al 1-800-230-8190 (EE. UU.) o
al (55) 5292-8488 (México) para obtener uno, o bien visite
nuestro sitio web en www.ingenuitybaby.com.
• NUNCA use este asiento de bebé para automóvil con
coches de otros fabricantes. Esto podría ocasionar
LESIONES GRAVES O LA MUERTE.
18
ADVERTENCIAS
WARNINGS & INFORMATION
E INFORMACIÓN
ADVERTENCIA
3.0 CARACTERÍSTICAS Y COMPONENTES
3.1 Vista frontal
Note: InTrust 35™: Sin visor de cubierta y cubierta de la
hebilla
InTrust 35 Pro™: Con visor de cubierta y cubierta
de la hebilla
CARACTERÍSTICAS, USO Y DE INSTALACIÓN
CUBIERTA
VISOR
VENTANA CUCÚ
APOYACABEZA
MANIJA
CORREAS DE
SUJECIÓN DEL
ARNÉS
CUBIERTAS
DEL ARNÉS
SOPORTE
PARA RECIÉN
NACIDOS
BOTÓN DE
LIBERACIÓN
DE LA
HEBILLA
BROCHE
PARA EL
PECHO
PASAJE DEL
CINTURÓN
DEL
VEHÍCULO
MONTAJE DEL
SISTEMA LATCH
EN LA BASE
HEBILLA
DEL ARNÉS
CORREA DE
AJUSTE DEL
ARNÉS
CUBIERTA DE
LA HEBILLA
19
3.2 Vista posterior
MANIJA DE LIBERACIÓN
DEL ASIENTO
SISTEMA DE
VENTILACIÓN
AIR INFUSE™
CONEXIÓN
SURECLICK ™
CONEXIÓN
SURECLICK ™
PLACA SEPARADORA
DEL ARNÉS
20
CARACTERÍSTICAS, USO Y DE INSTALACIÓN
SISTEMA DE
VENTILACIÓN
AIR INFUSE™
3.3 Vista lateral
VISOR
CUBIERTA
VENTANA
CUCÚ
CARACTERÍSTICAS,
FEATURES, USE, & INSTALLATION
USO Y DE INSTALACIÓN
MANIJA
SISTEMA DE
VENTILACIÓN
AIR INFUSE™
PALANCA DE AJUSTE DE LA MANIJA
3.4Base
INDICADORES
DE NIVEL
PASAJE DEL CINTURÓN
DEL VEHÍCULO
POSICIONADOR DEL
CINTURÓN DEL VEHÍCULO
CONECTOR DEL
SISTEMA LATCH
CONECTOR
DEL SISTEMA
LATCH
CONEXIÓN
SURECLICK ™
BOTÓN DE AJUSTE
DE NIVEL
MANIJA DE
AJUSTE DE NIVEL
COMPARTIMIENTO DE ALMACENAMIENTO
DEL MANUAL DE INSTRUCCIONES
21
3.5 Ajuste y uso de la manija
Para cambiar la posición de la manija del asiento de bebé para
automóvil:
1. Presione las palancas de ajuste de la
manija a ambos lados de la manija.
A
• Posición “A”: Posición vertical que
se DEBE usar cuando se utiliza la
manija para transportar el asiento
de bebé para automóvil.
B
C
• Posición “B”: Posición intermedia que es práctica para el
fácil acceso al niño y para el uso en el vehículo.
• Posición “C”: Posición hacia abajo; es la posición de
asiento y estabiliza el asiento de bebé para automóvil
cuando descansa sobre una superficie nivelada.
LA MANIJA NO QUEDA BLOQUEADA
HASTA QUE AMBAS PALANCAS DE
AJUSTE DE LA MANIJA SALEN HACIA
FUERA.
3. Después de establecer la posición,
empuje y tire firmemente de la
manija para asegurarse de que está bloqueada.
22
CARACTERÍSTICAS,
FEATURES,USO
USE,Y&DEINSTALLATION
INSTALACIÓN
2. Gire la manija hasta que oiga un clic.
Esto indica que se ha bloqueado en
una de las tres posiciones:
3.6 Sujeción y uso de la cubierta
Note: InTrust 35™: Sin visor de cubierta y cubierta de la
hebilla
InTrust 35 Pro™: Con visor de cubierta y cubierta de
la hebilla
CARACTERÍSTICAS,
FEATURES, USE, & INSTALLATION
USO Y DE INSTALACIÓN
El asiento de bebé para automóvil incluye una cubierta
desmontable.
1. Coloque la parte posterior de
la cubierta alrededor de la
parte de atrás del asiento de
automóvil, tal como se muestra.
2. Inserte la curvatura de la
cubierta en los soportes para
montaje en los laterales del
asiento de bebé para automóvil.
3. Sujete la cubierta con los lazos
elásticos en los laterales del asiento
para automóvil.
Nota: Para mantener sujeta la
cubierta, primero se recomienda
colocar los lazos de la cubierta sobre el gancho seguido por
los lazos del asiento.
23
4. Gire hasta la posición deseada.
24
CARACTERÍSTICAS,
FEATURES,USO
USE,Y&DEINSTALLATION
INSTALACIÓN
La cubierta incluye un visor plegable y una ventana de
visualización.
• Tire del visor plegable para prolongar la longitud de la
cubierta.
• Puede ver al niño desde atrás del asiento de bebé para
automóvil si levanta la aleta de la ventana para dejar
expuesta la ventana de visualización.
• Para extraer la cubierta, repita los pasos anteriores en el
orden inverso.
4.0 ELECCIÓN DE UN LUGAR ADECUADO
EN EL ASIENTO DEL VEHÍCULO
4.1 Requisitos para el cinturón de
seguridad del vehículo
CARACTERÍSTICAS,
FEATURES, USE, & INSTALLATION
USO Y DE INSTALACIÓN
ADVERTENCIA
MUCHOS SISTEMAS DE CINTURÓN DE SEGURIDAD
NO SON SEGUROS PARA EL ASIENTO DE BEBÉ PARA
AUTOMÓVIL.
DEBE usar un sistema de cinturón de seguridad compatible
para sujetar el asiento de bebé para automóvil.
Consulte el manual del propietario de su vehículo para obtener
información detallada sobre los cinturones del vehículo y
cuáles cinturones son seguros para sujetar el asiento de bebé
para automóvil en su vehículo. Si no está seguro, consulte el
manual del propietario del vehículo o llame a Ingenuity al
1-800-230-8190.
Los siguientes sistemas de cinturón de seguridad del vehículo
NO son seguros para usarse con el asiento de bebé para
automóvil.
Si su vehículo usa uno de estos sistemas, aún podría sujetar
el asiento de bebé para automóvil con el sistema de anclaje
inferior y anclaje superior para correas para niños (Lower
Anchors and Tethers for Children, LATCH).
El sistema LATCH puede usarse EN LUGAR DEL sistema de
cinturón de seguridad del vehículo. Para conocer las ubicaciones
aprobadas del sistema LATCH, consulte el manual del
25
propietario de su vehículo. Su asiento de bebé para automóvil
puede instalarse en el vehículo usando solo el anclaje inferior.
4.2 Sistemas de cinturón de seguridad
del vehículo INSEGUROS
• Cinturón de regazo/hombro combinado
con retractor: En este sistema, cada correa
tiene un retractor en un extremo y se sujeta a
la placa de cierre en el otro extremo.
• Cinturones de regazo por delante
del pliegue del asiento: Esta ubicación
del cinturón de regazo no permite una
instalación segura.
• Sujeción pasiva: Este sistema usa un
cinturón de regazo y un cinturón de hombro
motorizado.
26
CARACTERÍSTICAS,
FEATURES,USO
USE,Y&DEINSTALLATION
INSTALACIÓN
NO utilice cinturones de vehículo motorizados (automáticos),
cinturones de vehículo montados en la puerta
ni ninguno de los siguientes sistemas para
sujetar el asiento de bebé para automóvil:
• Cinturones de regazo con retractor de
bloqueo de emergencia (Emergency
Locking Retractor, ELR): Este cinturón de
regazo no ajustará el asiento con la rapidez
suficiente en una parada repentina o un
choque.
CARACTERÍSTICAS,
FEATURES, USE, & INSTALLATION
USO Y DE INSTALACIÓN
NO use cinturones de vehículo que se sujetan a la puerta de
ninguna manera.
NO use cinturones de seguridad que se mueven por una vía
para rodear automáticamente al pasajero cuando se cierra la
puerta.
NO use ninguna posición del asiento que contenga un cinturón
de seguridad inflable.
4.3Sistemas de cinturón de seguridad
del vehículo SEGUROS
LOS SIGUIENTES SISTEMAS DE CINTURÓN DE SEGURIDAD PUEDEN
USARSE CON SU ASIENTO DE BEBÉ PARA AUTOMÓVIL. Estos
sistemas permiten una instalación segura si la ubicación del asiento
cumple con el resto de los requisitos. Para asegurarse de que la
ubicación del asiento cumpla con los requisitos necesarios, consulte el
manual del propietario de su vehículo y estas instrucciones.
Consulte las secciones 5, 6 y 7 para leer instrucciones detalladas sobre
cómo instalar el asiento de bebé para automóvil.
• Cinturones de seguridad con retractor conmutable:
Un retractor conmutable es el tipo más
común de retractor de cinturón de
seguridad y debe conmutarse al modo
bloqueado antes de utilizarlo con el asiento de automóvil para
bebés. Bloquee el cinturón de seguridad tirando del cinturón de
hombro completamente y lentamente. El cinturón de seguridad
está bloqueado al escuchar un clic cuando se pasa el cinturón de
seguridad de vuelta en los retractores y no se lo puede tirar más.
• Cinturones de seguridad con placa de cierre de bloqueo:
Existen dos tipos de placas de cierre
de bloqueo. Un tipo se encuentra en
los cinturones solo para regazo; el otro
tipo se encuentra en los cinturones
de regazo / hombro. Solo para cinturones de regazo, tire del
27
Algunos cinturones de seguridad de regazo/hombro tienen un botón
plástico en el cinturón. NO permita que el botón interfiera al dirigir el
cinturón a través del pasaje del cinturón de seguridad del vehículo del
asiento o la base.
El sistema LATCH también puede usarse en lugar del sistema de
cinturón de seguridad. Para conocer las ubicaciones aceptables del
sistema LATCH en su vehículo, consulte el manual del propietario de su
vehículo.
28
CARACTERÍSTICAS,
FEATURES,USO
USE,Y&DEINSTALLATION
INSTALACIÓN
extremo libre del cinturón para
ajustarlo y bloquearlo. Para cinturones
de regazo / hombro, tire del cinturón
de hombro y la parte del regazo del
cinturón se ajustará y se bloqueará.
• Cinturones de seguridad de regazo con retractor de bloqueo
automático (Automatic Locking Retractor, ALR):
El ALR se bloquea automáticamente
cuando se abrocha. Para ajustarlo, pase
el cinturón por dentro del retractor.
• Cinturón de regazo/hombro combinado
con placa de cierre de bloqueo:
Este tipo de cinturón tiene una placa de
cierre que no permite que la porción del
regazo del cinturón se afloje después de
abrocharse. Para ajustar el cinturón, tire firmemente en la parte del
hombro del cinturón de seguridad del vehículo mientras empuja
hacia abajo con firmeza en el asiento de bebé para automóvil.
4.4
Ubicaciones del sistema LATCH
CARACTERÍSTICAS,
FEATURES, USE, & INSTALLATION
USO Y DE INSTALACIÓN
Las normas federales de seguridad para vehículos motorizados de
los Estados Unidos definen el sistema de anclaje inferior y anclaje
superior para correas para niños (LATCH) como un sistema para
instalar asientos de automóvil en los vehículos.
El sistema LATCH ofrece una alternativa al cinturón de seguridad
del vehículo para sujetar el asiento de bebé para automóvil. Los
vehículos más nuevos pueden tener una o más posiciones del
asiento con los sistemas de anclaje del sistema LATCH. Esto será
visible en el pliegue del asiento del vehículo o estará indicado por el
símbolo del sistema LATCH.
29
• Para conocer las ubicaciones exactas del sistema LATCH
y los requisitos para el uso con asientos de bebé para
automóvil, consulte el manual del propietario de su
vehículo.
• Los sistemas LATCH estándares separan los puntos de anclaje hasta
280 mm (11 pulgadas). Ingenuity no recomienda usar el sistema
LATCH si el espaciado no es el estándar de 280 mm
(11 pulgadas).
PUNTOS DE ANCLAJE DEL VEHÍCULO
LAZO DEL ASIENTO
DEL VEHÍCULO
30
CARACTERÍSTICAS,
FEATURES,USO
USE,Y&DEINSTALLATION
INSTALACIÓN
Esta imagen muestra un asiento típico en un vehículo de pasajeros.
Otros tipos de vehículo pueden tener distintas ubicaciones o
señalizaciones del sistema LATCH. Para obtener información sobre las
ubicaciones del sistema LATCH, consulte el manual del propietario de
su vehículo.
4.5 Requisitos para el asiento del
vehículo
CARACTERÍSTICAS,
FEATURES, USE, & INSTALLATION
USO Y DE INSTALACIÓN
ADVERTENCIA
LA COLOCACIÓN INCORRECTA DE ESTE ASIENTO DE
BEBÉ PARA AUTOMÓVIL AUMENTA EL RIESGO DE
SUFRIR LESIONES GRAVES O LA MUERTE.
• Algunas posiciones del asiento en su vehículo pueden no
ser seguras para este asiento de bebé para automóvil.
• Algunos vehículos no tienen ninguna posición de asiento
segura para este asiento de bebé para automóvil.
• Si no está seguro de dónde instalar este asiento de bebé
para automóvil en su vehículo, consulte el manual del
propietario de su vehículo o llame a Ingenuity al
1-800-230-8190.
31
ADVERTENCIA
NO coloque el asiento de bebé apuntando hacia atrás en
un asiento delantero con bolsa de aire. Pueden producirse
LESIONES GRAVES O LA MUERTE. El asiento trasero es el
lugar más seguro para los niños menores de 12 años.
• Los propietarios de vehículos con bolsas de aire frontales
del lado del pasajero deben consultar el manual del
propietario de su vehículo para conocer las instrucciones
de instalación del asiento para automóvil.
• Se recomienda sujetar el asiento de bebé para automóvil
en el centro del asiento detrás del conductor o del
acompañante cuando haya un asiento central. Si desea usar
el sistema LATCH, consulte el manual del propietario de su
vehículo para conocer las ubicaciones del sistema LATCH.
32
CARACTERÍSTICAS,
FEATURES,USO
USE,Y&DEINSTALLATION
INSTALACIÓN
• De acuerdo con estadísticas de accidentes, los niños
están más seguros cuando se encuentran correctamente
sujetados en una posición de los asientos traseros que en
las posiciones de los asientos delanteros.
FEATURES, USE, & INSTALLATION
CARACTERÍSTICAS,
USO Y DE INSTALACIÓN
• NUNCA coloque este asiento de bebé para automóvil en un
asiento del vehículo que cuente con una bolsa de aire frontal.
• SOLO úselo en los asientos del vehículo que miren hacia
adelante.
NO use el asiento de bebé para automóvil en los asientos
del vehículo que tengan las características descritas a
continuación:
• Respaldos de asientos que no se bloquean en una posición
vertical.
• Asientos que pueden plegarse sin tener que liberar un
bloqueo o pestillo.
33
En el caso de un accidente o una parada repentina, estos tipos
de asientos de vehículo pueden deslizarse hacia adelante y
lastimar al niño.
Colocar el asiento de bebé para automóvil en un lugar
incompatible hace que este no brinde máxima la protección al
niño.
CARACTERÍSTICAS,
INSTALACIÓN
FEATURES,USO
USE,Y&DEINSTALLATION
34
5.0 INSTALACIÓN/EXTRACCIÓN DE LA BASE
Para reducir el riesgo de sufrir lesiones o la muerte, siga los
pasos a continuación para instalar la base del asiento de bebé
para automóvil en su vehículo.
CARACTERÍSTICAS,
FEATURES, USE, & INSTALLATION
USO Y DE INSTALACIÓN
5.1Advertencias
ADVERTENCIA
• Observe y siga las instrucciones proporcionadas por
el fabricante de su vehículo y contenidas en este
manual. Antes de comenzar, asegúrese de haber leído y
comprendido la Sección 4: Elección de un lugar adecuado
en el asiento del vehículo.
• DEBE ajustar correctamente el cinturón de seguridad del
vehículo a fin de instalar de forma segura el asiento de
bebé para automóvil. Consulte el manual del propietario
de su vehículo y las siguientes advertencias e instrucciones
cuando instale la base.
• Asegúrese de que la lengüeta de la hebilla del cinturón
de seguridad entre en la hebilla correcta. El cinturón de
seguridad no debe torcerse ni doblarse.
• Verifique que la ubicación en el asiento ofrezca espacio
suficiente para el asiento de bebé para automóvil:
• Si el manual del vehículo permite la instalación en un
asiento de pasajero delantero (consulte la advertencia
sobre bolsas de aire, Sección 2.5), deslice el asiento
del vehículo lo más lejos posible del tablero de
instrumentos y siga el procedimiento del fabricante de
su vehículo para desactivar la bolsa de aire.
• Para la instalación en un asiento trasero, asegúrese de
35
que el asiento que está adelante
del asiento trasero
ADVERTENCIA
• Para la instalación en un asiento trasero, asegúrese de
que el asiento que está adelante del asiento trasero
proporcione el espacio suficiente para el asiento de
bebé para automóvil.
ADVERTENCIA
• DEBE reclinar la base del asiento de bebé para automóvil
según las siguientes instrucciones.
• Si no reclina correctamente la base del asiento de bebé
para automóvil en el asiento del vehículo, aumentará el
riesgo lesiones graves o la muerte.
• Si la base del asiento de bebé para
automóvil está demasiado vertical:
la cabeza del niño podría deslizarse
hacia adelante y el niño podría sufrir
problemas respiratorios o asfixiarse.
• Si el asiento de bebé para automóvil
está muy reclinado: si se produce un
accidente, se ejercería demasiada
fuerza sobre el niño o este podría salir
expulsado del asiento, lo que causaría
lesiones graves o la muerte.
36
CARACTERÍSTICAS,
FEATURES,USO
USE,Y&DEINSTALLATION
INSTALACIÓN
5.2 Instalación y ajuste de la base con los
cinturones de seguridad del vehículo
FEATURES, USE, & INSTALLATION
CARACTERÍSTICAS,
USO Y DE INSTALACIÓN
Puede sujetar la base del asiento de bebé para automóvil
mediante el sistema de cinturón de seguridad del vehículo.
Antes de instalar la base, asegúrese de que este sistema cumpla
con todos los requisitos para una instalación segura. Consulte
las secciones 4.1 a 4.5 para obtener más información sobre
cómo elegir un lugar adecuado en el asiento del vehículo y para
conocer los requisitos del cinturón de seguridad.
1. Verifique que su vehículo esté sobre
suelo nivelado antes de comenzar la
instalación.
Nota: La instalación sobre suelo
desnivelado hará que el asiento de
bebé para automóvil se coloque
incorrectamente.
2. Coloque la base en una posición
apuntando hacia atrás en un asiento
del vehículo.
3. Asegúrese de que ningún asiento ni puerta del vehículo
interfiera con la instalación de la base.
4. Visualice los indicadores de nivel
en la base para determinar si esta
está correctamente reclinada. Los
indicadores de nivel pueden verse
desde la parte superior o desde el
lateral de la base.
• La base se nivela cuando las burbujas se encuentran entre las
líneas del indicador.
• Si la base no está correctamente reclinada:
• Presione el botón de ajuste de reclinación para utilizar
el pedal de ajuste de reclinación.
• Hay tres (3) posiciones de ajuste de reclinación.
37
38
CARACTERÍSTICAS,
INSTALACIÓN
FEATURES,USO
USE,Y&DEINSTALLATION
• Coloque el pedal de ajuste de
CINTURÓN
DE REGAZO
reclinación en una posición
que permita que las burbujas
de los indicadores de nivel se
encuentren entre las líneas del
indicador.
• Si las burbujas no están en
CINTURÓN DE REGAZO-HOMBRO
el centro, coloque una toalla
enrollada o un tubo de espuma
para piscina debajo de la base
contra el respaldar del asiento
del vehículo. El pie de reclinación
debe estar en la posición más
baja. Asegúrese de que la toalla o
el tubo de espuma para piscina no interfiera con ningún otro
paso del procedimiento de la instalación de la base.
5. Levante el posicionador del cinturón del vehículo.
6. Pase el cinturón de seguridad del vehículo por la apertura del
pasaje para cinturón de seguridad en la base.
7. Abroche el cinturón de seguridad del vehículo.
8. Asegúrese de que el cinturón de seguridad del vehículo está
bloqueado. Consulte la Sección 4.3 y el manual del propietario
de su vehículo para obtener información sobre cómo bloquear
el cinturón de seguridad.
9. Ajuste el cinturón para lograr una instalación segura. Mientras
empuja hacia abajo en la base, tire del extremo libre del
cinturón de regazo o de la parte del hombro del cinturón de
regazo/hombro para ajustarlo.
10. La base debe asentarse sobre una superficie plana.
11. Cierre el posicionador del cinturón del vehículo. No guarde
la correa del cinturón LATCH exceso de debajo de la puerta
posicionador del cinturón del vehículo.
FEATURES, USE, & INSTALLATION
CARACTERÍSTICAS,
USO Y DE INSTALACIÓN
12. Verifique que la base todavía esté
nivelada.
• Si no lo está, vuelva a ajustar el
ángulo de reclinación.
13. Asegúrese siempre de que la
instalación sea segura; para
ello, intente mover la base (o el
asiento, si se lo utiliza sin la base)
empujando y tirando con firmeza
de la base en el lugar por donde pasa el cinturón. La base o
el asiento no deben moverse más de 2,5 cm (1 pulgada) de
un lado a otro y desde atrás hacia delante en el lugar por
donde pasa el cinturón. Si la base o el asiento se mueven más
de 2,5 cm (1 pulgada) y/o el cinturón de seguridad se afloja
o estira, intente instalarlo nuevamente o utilice un método
alternativo tal como se detalla en el manual de instrucciones.
14. Asegúrese de que ningún asiento ni puerta del vehículo
interfiera con la operación o altere la posición del asiento de
bebé para automóvil ni de la base. Si hay alguna interferencia,
vuelva a comenzar con el proceso de instalación en el paso
n.º 1 de esta sección.
5.3 Instalación y ajuste de la base con los
cinturones del sistema LATCH
Los sistemas LATCH ofrecen un método seguro para la instalación
de la base del asiento de bebé para automóvil sin usar el cinturón
de seguridad del vehículo. Consulte el manual del propietario de
su vehículo para saber si el sistema LATCH está disponible en su
vehículo y cuáles son las recomendaciones para usarlo. Consulte
las secciones 4.4 y 4.5 para obtener más información sobre las
ubicaciones del sistema LATCH y la elección de un lugar en el
asiento del vehículo.
1. Verifique que su vehículo esté sobre suelo nivelado antes de
39
40
CARACTERÍSTICAS,
INSTALACIÓN
FEATURES,USO
USE,Y&DEINSTALLATION
comenzar la instalación.
Nota: La instalación sobre suelo
desnivelado hará que el asiento de
bebé para automóvil se coloque
incorrectamente.
2. Coloque la base en el asiento del
vehículo en la dirección indicada por
la parte delantera de etiquetas de
vehículos.
3. Asegúrese de que ningún asiento
ni puerta del vehículo interfiera con la
instalación de la base.
4. Visualice los indicadores de nivel en
la base para determinar si esta está
correctamente reclinada. Los indicadores
de nivel pueden verse desde la parte
superior o desde el lateral de la base.
• La base se nivela cuando las burbujas se encuentran entre las
líneas del indicador.
• Si la base no está correctamente reclinada:
• Presione el botón de ajuste de reclinación para utilizar el
pedal de ajuste de reclinación.
• Hay tres (3) posiciones de ajuste de reclinación.
• Coloque el pedal de ajuste de reclinación en una posición
que permita que las burbujas de los indicadores de nivel se
encuentren entre las líneas del indicador.
• Si las burbujas no están en el centro, coloque una toalla
enrollada o un tubo de espuma para piscina debajo de la
base contra el respaldar del asiento del vehículo. El pie de
reclinación debe estar en la posición más baja. Asegúrese de
FEATURES, USE, & INSTALLATION
CARACTERÍSTICAS,
USO Y DE INSTALACIÓN
que la toalla o el tubo de espuma para piscina no interfiera
Si no lo con ningún otro paso del procedimiento de la
instalación de la base.
5. Extraiga los conectores de cinturón del sistema LATCH de las
ranuras de almacenamiento en la base.
6. Para alargar la correa de ajuste del
cinturón del sistema LATCH, presione
el botón en el regulador y tire.
7. Enganche los conectores del sistema
LATCH de la base en el anclaje inferior
del vehículo. Empuje los conectores
en el anclaje hasta que oiga un clic.
8. Tire firmemente de los conectores del
sistema LATCH para confirmar que
están sujetados. NUNCA coloque
dos conectores del sistema LATCH
en un anclaje del sistema LATCH del
vehículo. Ingenuity no recomienda
usar el sistema LATCH si el espaciado
no es de 280 mm (11 pulgadas).
9. Ajuste la conexión del sistema LATCH
empujando hacia abajo firmemente
en la base y tirando hacia arriba del
cinturón de ajuste.
10. La base debe asentarse sobre una superficie plana.
• Si la base se inclina, vuelva a comenzar con el proceso de
instalación en otro lugar del asiento.
11. Compruebe que la puerta de bloqueo del cinturón del
vehículo esté cerrada.
12. Verifique que la base todavía esté nivelada.
41
5.4 Instalación y ajuste del asiento de
bebé para automóvil en un avión
La base del asiento de bebé para automóvil es compatible con
la mayoría de los asientos de avión. Para sujetar la base, siga las
instrucciones para la instalación en un automóvil con un cinturón
de seguridad solo para regazo (consulte la Sección 5.2). Para la
instalación en asientos de avión, si la abertura del colocador del
cinturón interfiere con la hebilla del cinturón de seguridad, se
puede ubicar el cinturón de seguridad por encima de la parte
superior de la abertura del colocador del cinturón para lograr una
instalación adecuada.
• Notifique a la aerolínea con anticipación que usted llevará el
asiento a bordo.
• Instale la base en una posición que apunte hacia atrás solo en
un asiento de avión que apunte hacia adelante. Consulte a su
42
CARACTERÍSTICAS,
INSTALACIÓN
FEATURES,USO
USE,Y&DEINSTALLATION
• Si no lo está, vuelva a ajustar el ángulo de reclinación.
13. Asegúrese siempre de que la instalación sea segura; para ello,
intente mover la base (o el asiento, si se lo utiliza sin la base)
empujando y tirando con firmeza de la base en el lugar por
donde pasa el cinturón. La base o el asiento no deben moverse
más de 2,5 cm (1 pulgada) de un lado a otro y desde atrás
hacia delante en el lugar por donde pasa el cinturón. Si la
base o el asiento se mueven más de 2,5 cm (1 pulgada) y/o el
cinturón del sistema LATCH se afloja o estira, intente instalarlo
nuevamente o utilice un método alternativo tal como se
detalla en el manual de instrucciones.
14. Asegúrese de que ningún asiento ni puerta del vehículo
interfiera con la operación o altere la posición del asiento de
bebé para automóvil ni de la base. Si hay interferencia, vuelva
a comenzar con el proceso de instalación en el paso n.º 1 de
esta sección.
auxiliar de vuelo para conocer la ubicación correcta del asiento
de bebé para automóvil.
• NO use este asiento de bebé para automóvil si el cinturón de
seguridad del avión no sostiene la base del asiento de bebé para
automóvil de forma segura.
FEATURES, USE, & INSTALLATION
CARACTERÍSTICAS,
USO Y DE INSTALACIÓN
5.5 Extracción de la base
Extraiga el asiento de bebé para automóvil de la base antes de
desinstalar la base del vehículo. NO deje el asiento o la base sin
sujetar en el vehículo.
EXTRACCIÓN DE LA INSTALACIÓN DEL CINTURÓN DEL
VEHÍCULO Y DEL AVIÓN
1. Levante el posicionador del cinturón del vehículo.
2. Libere el cinturón de seguridad del vehículo.
3. Retire el cinturón de seguridad del vehículo por el pasaje
del cinturón en la base.
4. Cierre el posicionador del cinturón del vehículo.
5. Extraiga la base del asiento del vehículo o del asiento del
avión.
EXTRACCIÓN DE LA
INSTALACIÓN DEL SISTEMA
LATCH
1. Mantenga presionado el botón
del conector del sistema LATCH.
2. Tire del conector del sistema
LATCH mientras presiona el
botón para liberar el conector del anclaje del vehículo.
3. Repita estos pasos con el otro conector del sistema LATCH.
2
1
43
4. Almacene los conectores del sistema LATCH en la base.
ADVERTENCIA
Si quedan conectores del sistema LATCH flojos, estos pueden
estrangular al niño.
44
CARACTERÍSTICAS,
INSTALACIÓN
FEATURES,USO
USE,Y&DEINSTALLATION
ALMACENAMIENTO DE LOS CONECTORES DEL SISTEMA
LATCH
Almacene los conectores del sistema LATCH adecuadamente
cuando no los use para sujetar la base.
1. Coloque cada conector del sistema LATCH en su
compartimento de almacenamiento en la parte posterior
de la base.
2. Tense la correa de ajuste del sistema LATCH para sujetar las
correas flojas.
3. Extraiga la base del vehículo.
Las conexiones del sistema LATCH almacenadas correctamente
deben asemejarse a esta imagen.
6.0 USO DEL ASIENTO CON LA BASE
Antes de instalar el asiento de bebé para automóvil sin la base,
lea y comprenda en su totalidad las secciones 4 y 5.
El asiento para automóvil está seguro solo si cumple con lo
siguiente:
CARACTERÍSTICAS,
FEATURES, USE, & INSTALLATION
USO Y DE INSTALACIÓN
• Instala correctamente la base en el vehículo.
• Sujeta correctamente el asiento a la base.
6.1 Sujeción del asiento a la base
ADVERTENCIA
Si el asiento de bebé para automóvil no se engancha de
forma segura en la base, el producto NO ofrece protección
para el niño.
Asegúrese de que no haya objetos extraños entre el asiento
del automóvil y la base. NO use el asiento de bebé para
automóvil ni la base si el asiento no se engancha de forma
segura con un clic en la base.
1. La conexión entre la base y el asiento para automóvil DEBE
estar libre de interferencias para crear un bloqueo seguro.
45
• Asegúrese de que las correas
de sujeción, mantas y otros
objetos extraños no obstruyan
el bloqueo del asiento.
2. Posicione el asiento de bebé
para automóvil en la base.
4. Tire hacia arriba del asiento
de bebé para automóvil para
garantizar que está conectado de
forma segura a la base.
CLIC
1
2
COMPRUÉBELO
5. Coloque la manija en cualquier
posición bloqueada.
• La manija NO queda bloqueada hasta que AMBAS
palancas de ajuste de la manija salgan hacia fuera.
• Después de establecer la posición, empuje y tire
firmemente de la manija para asegurarse de que está
bloqueada.
6. No permita que nada impida o dificulte que la manija del
asiento de bebé para automóvil cambie de posiciones de
ajuste.
46
B
CARACTERÍSTICAS,
FEATURES,USO
USE,Y&DEINSTALLATION
INSTALACIÓN
3. El asiento de bebé para
automóvil se ha sujetado
correctamente a la base cuando
se oiga un clic.
6.2 Extracción del asiento de la base
CARACTERÍSTICAS,
USO Y DE INSTALACIÓN
FEATURES, USE, & INSTALLATION
1. Asegúrese de que la manija esté
en la posición “A”, vertical, si la
usa para levantar el portabebés.
2. Apriete la manija verde de
liberación del asiento en la
parte posterior del asiento para
automóvil.
3. Levante el asiento en línea recta
de la base.
47
7.0 INSTALACIÓN Y AJUSTE DEL
ASIENTO SIN LA BASE
El asiento de bebé para automóvil puede instalarse en el
vehículo sin la base. NO intente usar estas instrucciones de
instalación mientras la base está conectada al asiento.
Antes de instalar el asiento de bebé para automóvil sin la base,
lea y comprenda en su totalidad las secciones 4.1, 4.2, 4.3 y 4.5.
48
CARACTERÍSTICAS, USO Y DE INSTALACIÓN
7.1 Instalación del asiento en un
vehículo
ADVERTENCIA
• DEBE reclinar el asiento de bebé para automóvil de acuerdo
con las siguientes instrucciones.
CARACTERÍSTICAS,
FEATURES, USE, & INSTALLATION
USO Y DE INSTALACIÓN
• Si no reclina correctamente el asiento de bebé para
automóvil en el asiento del vehículo, aumentará el riesgo de
lesiones graves o la muerte.
• Si el asiento de bebé para automóvil
está demasiado vertical: la cabeza del
niño podría deslizarse hacia adelante
y el niño podría sufrir problemas
respiratorios o asfixiarse.
• Si el asiento de bebé para automóvil
está muy reclinado: si se produce un
accidente, se ejercería demasiada
fuerza sobre el niño o este podría salir
expulsado del asiento, lo que causaría
lesiones graves o la muerte.
El asiento de bebé para automóvil incluye una etiqueta con un
indicador de nivel para
garantizar la instalación
correcta. El indicador está
ubicado en la etiqueta de
advertencia en el lateral
del armazón del asiento
y está señalizado con una
línea de nivelación en la
etiqueta.
49
y a través del asiento.
50
CARACTERÍSTICAS,
FEATURES,USO
USE,Y&DEINSTALLATION
INSTALACIÓN
La línea de nivelación la etiqueta de advertencia DEBE estar
nivelada con el suelo.
1. Antes de colocar el asiento de bebé
para automóvil en el vehículo,
asegúrese de que el vehículo esté
sobre suelo nivelado.
2. Coloque el asiento de seguridad
infantil en el asiento del vehículo en la
dirección indicada por la parte frontal
de las etiquetas de los vehículos.
3. Con la línea de nivelación ubicada en la etiqueta de
advertencia directamente arriba del texto “ESTA LÍNEA
DEBE ESTAR NIVELADA CON EL SUELO,” VERIFIQUE que
el asiento de bebé para automóvil esté nivelado con el
suelo.
4. Si el asiento de bebé para automóvil descansa en el asiento
del vehículo y todavía no está nivelado, coloque una toalla
enrollada o un tubo de espuma para piscina debajo del
asiento de bebé para automóvil y contra el asiento del
vehículo. Asegúrese de que la toalla o el tubo de espuma
para piscina no interfiera con ningún otro paso del
procedimiento de la instalación del asiento.
Cuando utilice el asiento de bebé para automóvil sin la base,
instale el asiento en el vehículo antes de colocar al niño.
1. Coloque el asiento de bebé para automóvil en una posición
que apunte hacia atrás en un asiento del vehículo.
2. Pase el cinturón de seguridad del vehículo por el gancho
para cinturón de seguridad más cercano en el lateral del
asiento del vehículo. Mueva el cinturón por debajo del gancho
FEATURES, USE, & INSTALLATION
CARACTERÍSTICAS,
USO Y DE INSTALACIÓN
3. Pase el cinturón de seguridad del
CINTURÓN DE
REGAZO/HOMBRO
vehículo a través del gancho para
cinturón de seguridad opuesto.
4. Abroche el cinturón de seguridad del
vehículo.
5. Asegúrese de que el cinturón del
vehículo esté bloqueado. Para obtener
información sobre cómo bloquear el
cinturón, consulte la sección 4.3 y el
manual del propietario de su vehículo.
6. Empuje hacia abajo con firmeza con
la mano libre sobre el asiento de bebé
para automóvil y tire del extremo libre
del cinturón de regazo o de la parte del
hombro del cinturón de regazo/hombro CINTURÓN DE REGAZO
para ajustarlo.
7. Asegúrese de que el cinturón de
seguridad del vehículo no haga que
el asiento quede desnivelado. Vuelva
a ajustar el cinturón de seguridad del
CINTURÓN DE
vehículo según sea necesario para
REGAZO/HOMBRO
sujetar el asiento de bebé para
automóvil con firmeza en el asiento
del vehículo.
8. Asegúrese de que el cinturón está
ajustado. Intente mover el asiento
empujando y tirando con firmeza.
El asiento no debe moverse más de
2,5 cm (1 pulgada) de su ubicación de instalación cuando se
sostiene con el pasaje del cinturón en ambos lados del asiento
de bebé para automóvil. Si el cinturón se suelta o se alarga,
vuelva a instalar el asiento.
51
9. Coloque la manija en cualquier posición bloqueada.
• La manija NO queda bloqueada hasta que AMBAS palancas
de ajuste de la manija salgan hacia fuera.
• Después de establecer la posición, empuje y tire firmemente
de la manija para asegurarse de que está bloqueada.
10. No permita que nada impida o dificulte que la manija del
asiento de bebé para automóvil cambie de posiciones de
ajuste.
El asiento de bebé para automóvil es compatible con la mayoría de
los asientos de avión. Siga las instrucciones para instalar y sujetar
el asiento de bebé para automóvil en un automóvil (consulte la
Sección 7.1).
• Notifique a la aerolínea con anticipación que usted llevará el
asiento a bordo.
• Instale el asiento de bebé para automóvil en una posición que
apunte hacia atrás solo en un asiento de avión que apunte
hacia adelante. Consulte a su auxiliar de vuelo para conocer la
ubicación correcta del asiento de bebé para automóvil.
• NO use este asiento de bebé para automóvil si el cinturón de
seguridad del avión no lo sostiene de forma segura.
52
CARACTERÍSTICAS,
INSTALACIÓN
FEATURES,USO
USE,Y&DEINSTALLATION
7.2 Instalación y ajuste del asiento de
bebé para automóvil en un avión
(sin una base)
8.0 SUJECIÓN DEL NIÑO
CARACTERÍSTICAS,
FEATURES, USE, & INSTALLATION
USO Y DE INSTALACIÓN
8.1 Uso y extracción del soporte para
recién nacido
DEBE usar el soporte para recién nacidos con
niños que pesen entre 1,8 y 5 kg (4 a 11 lb). Si
no usa el soporte, los riesgos de que el niño
sufra lesiones o la muerte podrían aumentar.
Para su conveniencia, Ingenuity InTrust 35
viene con un soporte para recién nacido ya
instalado.
Si el niño pesa más de 5 kg (11 lb), quite el soporte para recién
nacido:
1. Desabroche la hebilla del arnés.
2. Pase la hebilla por la ranura en el soporte para recién
nacidos.
3. Quite el soporte para recién nacidos.
Invierta estos pasos para instalar el soporte para recién nacido.
8.2 Sujeción del niño en el asiento de
bebé para automóvil
DEBE preparar el niño y las correas del arnés antes de sujetar
al niño en el asiento de bebé para automóvil. Esto garantiza
que las correas del arnés proporcionen la protección adecuada
cuando el niño esté sujetado.
53
• Extraiga la ropa gruesa o las mantas antes de colocar al
niño en el asiento.
• No coloque nunca mantas debajo o detrás del niño ni
dentro del asiento de bebé para automóvil.
• No permita que nada impida o dificulte que la manija del
asiento de bebé para automóvil cambie de posiciones de
ajuste.
2. Eleve el apoyacabeza.
2.
3. Desconecte las mitades del broche
para el pecho y abroche las lengüetas
presionando el broche para el pecho y
el botón de la hebilla.
54
CARACTERÍSTICAS,
FEATURES,USO
USE,Y&DEINSTALLATION
INSTALACIÓN
1. Afloje el arnés apretando el botón de
liberación del arnés a la vez que tira
de las correas para hombros. Esto
alargará el arnés y permitirá que el 1.
apoyacabeza se mueva.
CARACTERÍSTICAS,
FEATURES, USE, & INSTALLATION
USO Y DE INSTALACIÓN
4. Coloque al niño en el asiento de bebé para automóvil,
como se muestra.
• Verifique que el cuerpo del niño esté en contacto total con
el asiento de bebé para automóvil sin inclinarse.
5. Inserte las lengüetas de las hebillas en las hebillas hasta
que oiga un clic.
•NO use el asiento de bebé para automóvil si no oye un clic
cuando inserta las lengüetas de la hebilla en su lugar. Si no
oye un clic, llame a Ingenuity al 1-800-230-8190 (EE. UU.) o
al (55) 5292-8488 (México).
6. Una las mitades del broche para el pecho hasta que oiga un
clic.
• Para confirmar que el boche para
el pecho está bien colocado, tire
de él hacia fuera. Las mitades del
broche para el pecho deben estar
completamente enganchadas y no
deben separarse.
7. Tire de la correa de ajuste del arnés,
como se muestra. El apoyacabeza SmartAdjust bajará y el
arnés se ajustará.
55
ADVERTENCIA
Algunos niños se han ESTRANGULADO con
correas del arnés sueltas o parcialmente
abrochadas. Sujete completamente al niño incluso
cuando el portabebé se utilice fuera del vehículo.
56
CARACTERÍSTICAS,
FEATURES,USO
USE,Y&DEINSTALLATION
INSTALACIÓN
8. Siga tirando de la correa de ajuste del
arnés hasta que suceda lo siguiente:
La parte inferior del apoyacabeza y las
correas del arnés están a la altura de
los hombros del niño o por debajo de
estos.
CONTROLE LO SIGUIENTE: La cabeza
del niño debe estar, como mínimo,
2,5 cm (1 pulgada) por debajo de la
parte superior del asiento de bebé para
automóvil y el apoyacabeza.
Las correas del arnés están ceñidas, rectas y planas contra
los hombros del niño.
CONTROLE LO SIGUIENTE: El arnés
está ceñido cuando no se puede
pellizcar el exceso de arnés entre los
dedos.
9. Ubique el broche para el pecho en el
medio del pecho del niño, de modo
que quede nivelado con sus axilas.
10. Asegúrese de que la manija del asiento de bebé para
automóvil esté en una posición bloqueada. Consulte la
Sección 3.5 para el Ajuste y uso de la manija.
ADVERTENCIA
CARACTERÍSTICAS,
FEATURES, USE, & INSTALLATION
USO Y DE INSTALACIÓN
SIEMPRE utilice las correas de sujeción y asegúrese de que
estén ceñidas. Una correa ceñida no debería permitir ningún
tipo de holgura. Debe extenderse en una línea relativamente
recta sin combarse. No debe presionar la piel del niño
ni empujar su cuerpo hacia una posición poco natural.
Asegúrese de que las correas de sujeción no estén dobladas.
8.3 Cómo retirar al niño del asiento de
bebé para automóvil
1. Presione el botón de liberación del arnés.
2. Tire de las correas del arnés hacia afuera para aflojarlas.
3. Eleve el apoyacabeza.
4. Desconecte las mitades del broche para el pecho y abroche
las lengüetas presionando el broche para el pecho y los
botones de las hebillas.
5. Coloque las correas para los hombros del arnés en los
laterales del asiento.
6. Retire al niño.
57
9.0 CONTROL DE SEGURIDAD DEL NIÑO
• En el medio del pecho del niño.
• Nivelado con las axilas del niño.
4. El arnés:
• Está ceñido. No debería
poder pellizcar el exceso de
arnés entre los dedos.
• No está flojo ni se comba.
• No ejerce presión excesiva en el niño.
• Está recto y plano contra los hombros del niño.
58
77
2,5 cm (1")
CONTROL DE SEGURIDAD DEL NIÑO
Después de sujetar al niño, inspeccione cuán segura es la
sujeción.
CADA VEZ QUE COLOQUE AL NIÑO
EN EL ASIENTO, ASEGÚRESE DE LO
SIGUIENTE:
1. La parte superior de la cabeza del
niño debe estar, como mínimo,
2,5 cm (1 pulgada) por debajo de la
parte superior del asiento de bebé
para automóvil y el apoyacabeza.
2. La parte inferior del apoyacabeza
y las correas del arnés están a la
altura de los hombros del niño o
por debajo de estos.
3. El broche para el pecho se encuentra:
CONTROL
WARNINGS
DE SAFETY
SEGURIDAD
& INFORMATION
CHECK
DEL NIÑO
ADVERTENCIA
Algunos niños se han ESTRANGULADO con
correas del arnés sueltas o parcialmente
abrochadas. Sujete completamente al niño incluso
cuando el portabebé se utilice fuera del vehículo.
59
10.0 CONTROL DE SEGURIDAD DEL ASIENTO
CADA VEZ QUE CONDUZCA CON EL NIÑO:
■■
Asegúrese de que el cinturón del vehículo o del sistema
LATCH esté ajustado. Intente mover el asiento o la base
empujando y tirando con firmeza.
• El asiento de bebé para
automóvil y la base no deben
moverse más de 2,5 cm (1
pulgada) de un lado a otro y
desde atrás hacia adelante en
el pasaje del cinturón. Verifique
que el cinturón del vehículo o
el cinturón del sistema
LATCH no se alargue ni
afloje.
■■
Asegúrese de que ningún
asiento ni puerta del
vehículo interfiera con
la operación o altere la
posición del asiento de bebé
para automóvil ni de la base.
60
75
CONTROL
WARNINGS
DE &SEGURIDAD
INFORMATION
DEL ASIENTO
Asegúrese de que el asiento de bebé para automóvil sea seguro
para reducir el riesgo de que el niño sufra lesiones graves o la
muerte.
Asegúrese de que la manija del asiento de bebé para
automóvil esté en una posición bloqueada. Consulte la
Sección 3.5 para el Ajuste y uso de la manija.
& INFORMATION
CONTROLWARNINGS
DE SEGURIDAD
SAFETY
CHECK
DEL ASIENTO
■■
61
11.0 MANTENIMIENTO Y ALMACENAMIENTO
11.1 Mantenimiento y limpieza
LIMPIEZA DE LA ALMOHADILLA DEL ASIENTO DE BEBÉ
PARA AUTOMÓVIL
1. Quite la cubierta del asiento
del automóvil.
2. Voltee el asiento del automóvil.
3. Quite la correa del arnés de la placa
separadora del arnés.
Placa separadora
del arnés
62
MANTENIMIENTO Y ALMACENAMIENTO
Placa separadora
del arnés
4. Para quitar la correa
del arnés:
■■
Desabroche la correa
del arnés y el broche
para el pecho.
■■
Empuje la correa del
arnés a través de la placa de ajuste del apoyacabezas y el
asiento.
■■
Tire del arnés completamente a
través del frente del asiento.
5. Quite las cubiertas del arnés de las
correas del arnés.
6. Quite la cubierta del apoyacabezas
del apoyacabezas.
MANTENIMIENTO
Y ALMACENAMIENTO
MAINTENANCE & STORAGE
7. Quite el protector opcional de la
hebilla de la hebilla.
8. Quite el soporte para recién nacidos.
9. Desenganche los accesorios
elásticos de ambos lados del
armazón del asiento.
10. Tire la cubierta desde debajo del
botón de liberación del arnés.
11. Tire de las hebillas del arnés
a través de la almohadilla del
asiento.
63
12. Quite la almohadilla del asiento del armazón.
Nota: Para ayudar a quitar la almohadilla del asiento
del apoyacabezas, comience en la parte inferior del
apoyacabezas y tire hacia arriba.
13. Pase las correas del arnés con el broche para el pecho y las
lengüetas de la hebilla a través de las aberturas en la tela
de la almohadilla del asiento.
14. Lave a máquina la almohadilla del asoemtp en un ciclo
delicado y seque sin escurrir. NO use cloro. Para leer las
instrucciones, consulte la etiqueta de cuidado sujetada a
los materiales textiles.
REINSTALAR LA ALMOHADILLA EN EL ASIENTO DE
AUTOMÓVIL PARA BEBÉS
Invierta los pasos para reinstalar la almohadilla y el arnés del
asiento de automóvil para bebés. Despues de reinstalar la
almohadilla en el asiento:
2. Tire del sistema del arnés para asegurarse de haber
reinstalado el arnés firmemente.
64
MANTENIMIENTO Y ALMACENAMIENTO
1. Verifique que el sistema del arnés no esté doblado.
ADVERTENCIA
Si no coloca el anclaje de sujeción a través de la ranura
en el asiento de bebé para automóvil, podrían producirse
LESIONES GRAVES O LA MUERTE del niño.
NO use el asiento de bebé para automóvil sin la almohadilla del
asiento.
LIMPIEZA DEL SOPORTE PARA RECIÉN NACIDOS
MANTENIMIENTO
Y ALMACENAMIENTO
MAINTENANCE & STORAGE
1. Extraiga el soporte para recién nacidos según las
instrucciones en la Sección 8.1.
2. Lave a máquina la almohadilla del asiento en un ciclo
delicado y seque sin escurrir. NO use cloro. Para leer las
instrucciones, consulte la etiqueta de cuidado sujetada a
los materiales textiles.
3. Vuelva a instalar el soporte para recién nacidos según las
instrucciones en la Sección 8.1.
LIMPIEZA DE LOS MATERIALES TEXTILES DEL
APOYACABEZA
1. Extraiga los materiales textiles.
2. Lave a máquina la almohadilla del asiento en un ciclo
delicado y seque sin escurrir. NO use cloro. Para leer las
instrucciones, consulte la etiqueta de cuidado sujetada a
los materiales textiles.
3. Vuelva a instalar los materiales textiles del apoyacabeza.
65
LIMPIEZA DE LAS PIEZAS METÁLICAS Y PLÁSTICAS
• Limpie las piezas metálicas y plásticas con una solución con
agua y jabón suave.
• NO use cloro ni detergente, ya que podrían debilitar las piezas
plásticas.
LIMPIEZA DE LAS CORREAS DEL ARNÉS
• Limpie solo las manchas o reemplace las correas del arnés.
• NO sumerja las correas del arnés en agua.
• Reemplace las correas del arnés en los siguientes casos:
• Las correas tienen cortes.
• Las correas están deshilachadas.
• Las correas se han doblado demasiado.
ADVERTENCIA
• NUNCA utilice un asiento de bebé para automóvil o una
base de segunda mano.
• NUNCA use un asiento de bebé para automóvil con un
historial que desconozca.
66
69
MANTENIMIENTO Y ALMACENAMIENTO
LIMPIEZA DE LA HEBILLA
• La hebilla está abrochada cuando se oye un clic. Si no lo oye,
limpie la hebilla con agua tibia.
• NO use jabones ni lubricantes en la hebilla.
11.2 Piezas de repuesto
Si es un cliente de los EE. UU., comuníquese con nosotros
a través de los siguientes medios para comprar piezas o
accesorios o para obtener información sobre la garantía:
Piezas de repuesto o accesorios:
www.ingenuitybaby.com
Información sobre la garantía:
www.ingenuitybaby.com/warranty
o
1-800-230-8190
MANTENIMIENTO
MAINTENANCE & STORAGE
Y ALMACENAMIENTO
11.3 Almacenamiento correcto
Almacene el asiento de bebé para automóvil y la base en un
lugar fresco y seco que no esté expuesto a la luz solar directa.
11.4 Eliminación correcta
Cuando deseche el asiento de bebé para automóvil, corte las
correas del arnés. Esto evitará que los asientos de automóvil
potencialmente defectuosos se rescaten y reutilicen.
67
12.0 GARANTÍA
Garantía limitada de Kids II Ingenuity
Kids II se dedica a crear productos de calidad para bebés y niños
pequeños en todo el mundo. Le garantizamos que este producto
no tendrá defectos en sus materiales ni en su fabricación (lo que
llamamos “garantía limitada”) por un período de un año desde la
fecha de la compra original (el “período de garantía limitada”). Se
requiere un recibo de venta como comprobante de la compra. Esta
garantía limitada se aplica solo al uso familiar, únicamente para el
comprador/receptor del regalo original (con el recibo de compra)
del producto y no es transferible. Esta garantía limitada no se aplica
a productos que se revendan. Las reclamaciones que surjan por un
uso inapropiado, por no seguir las instrucciones (armado, instalación,
mantenimiento y uso), por abuso, alteración, participación en un
accidente y por el desgaste ocasionado por el uso normal quedan
expresamente excluidas de la cobertura de esta garantía limitada. Si
se descubre algún defecto durante el período de garantía limitada,
repararemos o reemplazaremos, a nuestra entera discreción, el
producto sin ningún costo para usted. Esta es la única solución con la
que cuenta.
ESTA GARANTÍA LIMITADA ES EXCLUSIVA Y REEMPLAZA A TODAS
LAS DEMÁS GARANTÍAS, LO QUE INCLUYE, SIN LIMITACIÓN, LAS
GARANTÍAS DE COMERCIALIZACIÓN Y ADECUACIÓN PARA UN
FIN PARTICULAR. CUALQUIER GARANTÍA A LA QUE NO SE PUEDA
RENUNCIAR SE LIMITA A LA DURACIÓN DEL PERÍODO DE GARANTÍA.
68
GARANTÍA
EN NINGÚN CASO KIDS II SERÁ RESPONSABLE DE ALGÚN DAÑO
INDIRECTO, INCIDENTAL, CONSECUENCIAL, ESPECIAL O PUNITIVO, SIN
IMPORTAR CÓMO SE PRODUZCA.
Algunos estados no permiten la exclusión de daños incidentales
o consecuenciales ni la limitación de la duración de las garantías
implícitas, por lo que las limitaciones precedentes pueden no
aplicarse a usted. Además, puede que usted tenga otros derechos
legales, que varían de un estado a otro.
GARANTÍA
Para obtener el servicio de garantía, comuníquese con el
Departamento de Servicios para el Consumidor de Kids II al 1-800230-8190 o mediante [email protected], o escriba a los
servicios para los consumidores de Kids II a 3333 Piedmont Rd. NE,
Suite 1800, Atlanta, GA 30305.
69
NOTAS
NOTAS
70