1
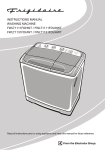
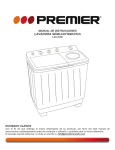
MANUAL DE INSTRUCCIONES
LAVADORA SEMI-AUTOMÁTICA
LAV-5007
ESTIMADO CLIENTE
Con el fin de que obtenga el mayor desempeño de su producto, por favor lea este manual de
instrucciones cuidadosamente antes de comenzar a utilizarlo, y guárdelo para su futura referencia.
Si necesita soporte adicional, no dude en escribir a: [email protected]
PRECAUCIÓN
RIESGO DE CHOQUE
ELÉCTRICO , NO ABRA
Precaución: Para reducir el riesgo de choque eléctrico, no
retire la cubierta, no hay partes manipulables por el usuario al
interior de la unidad.
Refiera todo mantenimiento o
intervención técnica a personal técnico calificado.
Este símbolo indica la existencia de voltaje peligroso al
interior de esta unidad, que constituye un riesgo de choque
eléctrico.
Este símbolo indica que hay importantes instrucciones de
operación y mantenimiento en la literatura que acompaña a
esta unidad.
LÍNEAS DE SERVICIO AL CLIENTE PREMIER
Venezuela:
Panamá:
Sitio Web:
E-mail:
0800 – ELECTRIC (353-2874)
300-5185
www.premiermundo.com
[email protected]
NOTA
Nos reservamos el derecho de modificar las especificaciones, características y/u operación de esta
unidad sin previo aviso, con el fin de continuar las mejoras y desarrollo del mismo.
P-1
ÍNDICE
INSTRUCCIONES DE SEGURIDAD ......................................................................................................... 3 DESCRIPCIÓN DE LA UNIDAD ................................................................................................................ 3 PANEL DE CONTROL ........................................................................................................................... 4 ACCESORIOS ........................................................................................................................................ 4 CARACTERÍSTICAS PRINCIPALES ......................................................................................................... 4 PREPARACIÓN ......................................................................................................................................... 4 PRECAUCIONES DE LAVADO ............................................................................................................. 5 INSTRUCCIONES DE LAVADO ................................................................................................................ 5 INSTRUCCIONES DE CENTRIFUGADO .................................................................................................. 5 INSTRUCCIONES DE ENJUAGUE ........................................................................................................... 6 MANTENIMIENTO Y LIMPIEZA DE LA UNIDAD ...................................................................................... 6 SOLUCIÓN DE PROBLEMAS ................................................................................................................... 8 ESPECIFICACIONES TÉCNICAS ............................................................................................................. 8 DIAGRAMA DE CIRCUITOS DE LA UNIDAD ........................................................................................... 9 DIAGRAMA DE CIRCUITOS ..................................................................................................................... 9 P-2
INSTRUCCIONES DE SEGURIDAD
•
•
•
•
•
•
•
•
•
•
•
•
•
•
•
•
Mantenga la unidad alejada de los rayos del sol, de la humedad y la lluvia.
Esta unidad debe ser colocada sobre una superficie estable y nivelada.
La línea de energía de la unidad esta conectada en tipo Y, por favor no abra la línea de energía de
lo contrario se pueden general efectos negativos en la unidad.
La unidad debe tener una adecuada conexión a tierra.
Después de usar la unidad desconéctela del tomacorriente.
No intente reparar la unidad usted mismo. Todo servicio de reparación y revisión técnica debe ser
realizada por un técnico de servicio autorizado.
No bloquee la entrada de aire de la base mientras la unidad este funcionando.
No toque la conexión a tierra y la línea media.
No toque las prendas ni la tina de centrifugado mientras la unidad se encuentre en funcionamiento.
Ubique la unidad en zonas secas con el fin de evitar corrosión en sus partes.
No moje el panel de control con agua.
Mantenga esta unidad alejada de los niños.
No lave prendas que tengan pintura o gasolina con el fin de evitar incendios.
Siempre cierre la tapa de la tina de centrifugado.
Use agua caliente inferior a 50ºC.
Mantenga la unidad alejada de Fuentes de calor.
DESCRIPCIÓN DE LA UNIDAD
1.
2.
3.
4.
5.
6.
Panel de control
Placa de filtro de desbordamiento
Tapa de lavado
Filtro de pelusas
Pulsador
Base
7. Agujero de drenaje
8. Gabinete
9. Enchufe de potencia
10. Marco
11. Tapa de seguridad
12. Tapa de centrifugado
P-3
PANEL DE CONTROL
Selector de lavado
– Drenaje
Entrada de Agua Temp.
Temp.de
delavado
lavado
Temp. de centrifugado
ACCESORIOS
1. Tapa interior de la tina de drenaje
2. Manguera de entrada de agua
CARACTERÍSTICAS PRINCIPALES
•
•
•
•
•
•
Gran capacidad: puede lavar 9kg de ropa en una sola carga!
Bajo nivel de ruido gracias a su tecnología de silenciador actualizada.
Excelente lavado, ya que adopta una tecnología de flujo de agua “lavado a mano”, no solo para
lavar prendas ordinarias sino también para mantas, jeans, etc.
Todas las funciones y operación fácil.
Buena estabilidad en lavado y centrifugado
Diseño elegante. Cubierta plástica y base plástica para evitar corrosión y óxido.
PREPARACIÓN
•
•
•
•
•
•
•
•
Inserte la manguera de entrada de agua en el agujero de entrada de agua ubicado en el panel de
control.
Coloque la manguera de drenaje en el área de drenaje de agua.
Inserte la manguera de entrada de agua de manera segura en la entrada de agua superior.
Retire los objetos de los bolsillos de las prendas y retire el exceso de suciedad antes de colocar las
prendas en el interior de la unidad.
Separe las prendas por color, grado de suciedad y tipo de tela.
Lave piezas pequeñas en una red (por ejemplo medias).
Utilice la siguiente tabla como referencia para lavar y centrifugar las prendas
Conecte la unidad al tomacorriente (Tenga en cuenta que el voltaje del área debe coincidir con el
voltaje marcado en la unidad).
P-4
PRECAUCIONES DE LAVADO
•
•
•
•
Revise los bolsillos de las prendas para evitar que hayan monedas, clips, etc.
Para evitar que las prendas se enreden, crúcelas anticipadamente.
Cierre las cremalleras antes de colocar las prendas dentro de la unidad.
Separe las prendas por colores, para evitar daños en las mismas.
Capacidad de lavado, temporizador y consumo de energía
Tipo de tela
Sintéticos, seda,
materiales delicados
Algodón o Lino
Material pesado
Capacidad
(kg)
2.0
2.0 – 4.0
2.5
2.5 – 7.5
2.5
2.5 – 7.5
Nivel de
agua (L)
Flujo de agua
<bajo 39
Suave
<bajo 39
<bajo 50
<bajo 39
<bajo 50
Normal
Normal
Tiempo de
lavado (min)
3
3-5
7
7-10
10
10-15
Cantidad de
detergente (g)
57 Apróx.
63 Apróx.
63 Apróx.
69 Apróx.
63 Apróx.
69 Apróx.
INSTRUCCIONES DE LAVADO
Agregue agua hasta el nivel deseado (No sobrepase el nivel máximo, ya que el agua se puede
rebasar). Luego, apague el agua agregue detergente y mézclelo en el agua.
• Ajuste el “Selector de Lavado – Drenaje” a “Normal” ó “Suave” de acuerdo al tipo de tela. Ajuste el
selector de lavado al ajuste de tiempo deseado y la unidad empezara a funcionar.
• Al final del lavado, ajuste el “Selector de Lavado – Drenaje” a “Drenado” para vaciar el agua.
• Siga las indicaciones dadas a continuación para las prendas que tengan la etiqueta “Lavar a mano”:
1. Puede lavar hasta 4kg
2. Diluir el detergente en agua caliente (Menor a 50ºC) y agregue la mezcla a la lavadora.
3. Doble las prendas como se indica a continuación y colóquelas en el interior de la unidad:
•
Dóblela a la
mitad
Dóblela 1/3
Enrolle la prenda
Coloque la prenda en la unidad
con el extremo hacia abajo
INSTRUCCIONES DE CENTRIFUGADO
•
•
•
•
Pase las prendas de la tina de lavado a la tina de centrifugado.
Coloque las prendas uniformemente en el fondo de la tina.
Coloque la tapa de seguridad y cierre la tapa de centrifugado superior.
Ajuste el Temporizador de Centrifugado a la posición deseada y la unidad empezara a funcionar.
P-5
Tapa interna de la
Tina de centrifugado
Tina de centrifugado
Soportes
Tiempo de
centrifugado
(min)
Tipo de
prenda
0.5
1
1-2
Hilo
Sintético
Delicado
Material de
punto
(Sintético)
2-3
3-4
Ropa interior
Chaquetas
(Algodón)
(Algodón/Lino)
5
Algodón
pesado
Atención!
Si la tina de centrifugado se sacude fuertemente, revise que la unidad se encuentre sobre una
superficie nivelada y que las prendas estén distribuidas uniformemente.
Si el drenaje y centrifugado se realizan al mismo tiempo, drene la unidad después que el centrifugado
se ha hecho.
INSTRUCCIONES DE ENJUAGUE
El enjuague se realiza en la tina de lavado. Y es usado después que medio ciclo de centrifugado se ha
completado. Esto ayudara a ahorrar tiempo, agua y energía.
• Coloque las prendas que han sido deshidratadas en la tina de lavado.
• Ajuste el “Selector de Lavado – Drenaje” a “Normal” ó “Suave” de acuerdo al tipo de tela.
• Ajuste el nivel de agua según la cantidad de prendas.
• Inicie el flujo de agua hasta que este alcance el nivel deseado, luego apague el agua.
• Ajuste el temporizador de lavado a 3-5 minutos para enjuagar.
• El indicador sonara una vez se ha cumplido el ciclo de enjuague.
• Coloque las prendas en la tina de centrifugado de 1-3 minutos.
• Drene el agua de la tina de lavado.
• Repita los pasos dados anteriormente en caso de necesitar repetir el proceso.
Cuadro de referencia de peso de lavado
Camisetas de algodón (150g
Camisetas de material sintético
Apróx)
(200g Apróx)
Medias de material sintético (50g
Pantis de algodón (50g Apróx)
Apróx)
MANTENIMIENTO Y LIMPIEZA DE LA UNIDAD
Después de usar la unidad, siga los pasos dados a continuación:
1. Desconecte la unidad del tomacorriente.
2. Retire la manguera de entrada de agua.
P-6
Chaleco sin mangas de algodón
(500g Apróx)
Bufanda de algodón (300g
Apróx)
Gabinete
Para limpiar el gabinete, use un paño suave ligeramente humedecido. No use detergentes ni productos
abrasivos que puedan dañar el acabado de la unidad.
Filtro de pelusas
• Mientras presiona el botón, hale suavemente el filtro hacia fuera.
• Retire el filtro y enjuáguelo con agua.
• Después de limpiarlo, inserte el borde del filtro en el lugar presionando el botón hacia abajo.
Gancho
Filtro de
pelusas
Limpiar la válvula de drenaje
• Retire la tapa del filtro de desbordamiento, afloje la correa y el tornillo de la cubierta de la válvula
para retirar la varilla de la válvula y otras partes y poder limpiar la suciedad.
• Repita los pasos dados anteriormente a la inversa para colocar de nuevo todas las partes.
Prevención de congelamiento
• Cierre el grifo del agua, quite la manguera de entrada y vacíe toda el agua de la manguera de
entrada.
• Ponga la manguera de desagüe y active el indicador a la posición "Drenar" para vaciar toda el agua
de la tina de lavado.
Si hay congelación
• Coloque la manguera de entrada en agua caliente (50ºC).
• Deje alrededor de 2 litros de agua tibia a menos de 50ºC en la tina de lavado durante 10 minutos.
• Instale la manguera de entrada y encienda el grifo de agua para asegurarse que la entrada y la
salida de agua funcionan normalmente.
Cuando la ropa cae por la parte exterior de la tina de centrifugado
• Afloje todos los tornillos alrededor del marco.
• Retire el marco con las dos manos.
• Tome la ropa que esta en el exterior de la tina.
• Coloque el marco nuevamente.
• Atornille los tornillos de nuevo.
Gabinete
Marco
P-7
Limpiar la bomba
• Saque la tapa posterior de la lavadora, presione el clip en el orificio de drenaje de la bomba y saque
la manguera de desagüe.
• Limpie la bomba del orificio de drenaje de la bomba.
SOLUCIÓN DE PROBLEMAS
Problema
La unidad no funciona
La unidad no drena
La unidad hace ruidos
extraños
La unidad hace un ruido
extraño y se sacude
fuertemente
Posible causa y solución
Hay una falla de energía
El enchufe no esta conectado completamente al tomacorriente
El temporizador de lavado o centrifugado esta en la posición 0
Asegúrese que la manguera de drenaje este en la posición correcta
Revise que la manguera o la tubería interior no estén congeladas
Revise que el tubo interno de la manguera de desagüe no este bloqueado
Revise que no hayan monedas u otros objetos en el interior de la tina de
lavado o centrifugado
Asegúrese que la unidad esta ubicada en un lugar nivelado
Revise que la cubierta interior de centrifugado este bien presionada
Revise que no hayan prendas en la parte exterior de la tina de centrifugado
ESPECIFICACIONES TÉCNICAS
Especificaciones
Capacidad (Máx.):
Fuente de potencia:
Potencia de entrada
Temporizador (Máx.)
Cantidad de agua
Modos de Lavado / Centrifugado
Dimensiones
Voltaje
P-8
Lavado
Centrifugado
9kg (Prendas secas)
5.5kg (Prendas secas)
Voltaje Local
400V
150V
15 Minutos
5 minutos
Bajo: 64L, Alto: 73L
Reversa automática/Frotado manual
Centrifugo
90x73x43cm (Con patas)
AC110V/60Hz
AC220V/60Hz
DIAGRAMA DE CIRCUITOS DE LA UNIDAD
Rosado
Rojo / Blanco
Verde
Amarillo
Temporizador de
cenrifugado
Rosado
Interruptor de seguridad
Rojo
Fusible
Café
Normal
suave
Temp.
de
lavado
Purpura
Café
Interruptor de
drenado
Café
Amarillo / Verde
Amarillo
Amarillo
Gris
Rojo
Amarillo Gris
Motor
de lavado
Café
Blanco
Motor
de centrifugado
Azul
Azul
Azul
P-9
DIAGRAMA DE CIRCUITOS
Interruptor Verde
de seguridad
Temp. de
centrifugado
Verde
Rojo / Blanco
Rosado
Motor de
centrifugado
Gris
Blanco
Azul
Azul
Rojo
Purpura
Azul
Amarillo
Café
Verde
Fusible
Café
Amarillo /
Verde
Azul
Motor de
lavado
Amarillo / Verde
Interruptor
de drenaje lavado
P-10
Azul
Amarillo / Verde
Temp. de lavado
INSTRUCTION MANUAL
SEMI-AUTOMATIC WASHING MACHINE
LAV-5007
DEAR CUSTOMER
In order to achieve the best performance of your product, please read this instruction manual carefully
before using, and keep it for future reference.
If you need extra support, please write to [email protected]
CAUTION
RISK OF ELECTRIC
SHOCK, DO NOT
OPEN
Caution: To reduce the risk of electric shock do not open
this device, there are not serviceable parts for customers.
Please refer any maintenance or repair to qualified
personnel.
This sign means the existence of dangerous voltage at
the inside of the unit, which states a risk of electric shock.
This sign means that there are important instructions of
operation and handling in the manual that comes with this
device.
PREMIER CUSTOMER SERVICE
Venezuela:
Panama:
Website
E-mail:
0800 – ELECTRIC (353-2874)
300-5185
www.premiermundo.com
[email protected]
NOTE
This unit may be submitted to changes in specifications, characteristics and/or operation without prior
notice to the user, in order to continue improving and developing its technology.
P-1
Main Feature and Technical Data
- Big Capacity: 9kg of Clothing can be washed in a single operation
- Low noise: adopting the updated squelch technology
- Sufficient Cleaning: adopting acetabuliform pulastor, hand work water flow, not
only for washing ordinary clothing but also for blanket, jean, etc…..
- All function and easy operation: Filtering thrum and other multiple functions
- Good stability in washing and spinning
- Beautiful design of outlook, plastic coating and plastic base for preventing rust and
corrosion.
P-2
Diagram 4. Operation Part
P-3
Preparation instructions:
- Insert the water inlet hose into the water inlet mouth
- Put the drain hose down into the water drain area
- Insert the water inlet hose securely into the top water inlet
- Remove all items and clean out sands or mud from the clothing , which should not be
laundered in the washing machine
Separate clothes by color, dirty degree and fabric type
For small pieces such as socks, wash tem in a net bag
Please refer to the following charts for guidelines on washing and spin-drying laundry
Plug in power
Precaution to washing:
- Checking pocket of clothes to avoid coins, clips and etc…
- Reversing the clothes which is easy teaseled
- To resist clothes crossing, please cross their sleeves or the ties in advance.
- Zipping the clothes if they have in advance.
- Separating clothes if they have easily fading color.
- To put clothes of puff into washing net bag.
Attachment : Wash capacity, Wash time and Detergent consumption:
Washing instruction:
- Add water until level reaches halfway to the desired water level, then turn off the water,
-
P-4
add detergent and mix it in the water.
Set the “ wash-drain selector “ to “ normal “ or “ gentle “ according to the fabric type. Set
the wash timer to the desired time and the machine will begin washing.
At the end of washing, set the “ wash-drain selector “ to “ drain “ to empty the water.
Blankets marked for “ hand washing “ up to 4 kgs can be washed
1, Dilute the detergent in warm water (under 50ºC) and pour the mixture into the tub.
2. Fold blanket as shown in following diagram and then put blanket into the wash tub.
Spinning-dryer instructions:
1. Transfer laundry from the washer to the spin-dryer, place clothes evenly in bottom of the tub.
2. Place the inner cover of the spin-dryer on top of the laundry and make sure it is place evenly.
3. Close the safety lid and the upper spin-dryer lid.
4. Set the “spin timer” to the desired time and the spin-dryer will start.
Attention
If the spin tub shakes heavily, check and make sure the washing machine is placed evenly and the
clothes are put equally.
If the draining and spinning are done at the same time, do drain after spinning has done.
Rinsing instructions
Ordinary rinsing is done in the wash tub. It is used after half of the spin-dryer cycle is complete, and can
save times, water and power usage.
1. Put laundries which have already been dehydrated into the wash tub.
2. Set the “ wash-drain selector “ to “normal” or “ gentle “ position.
3. Set the water level as per laundry capacity.
4. Start the flow of water level until it reaches desired level and then turn off water.
5. Set the “wash timer’ for 3-5 minutes rinsing.
6. Buzzer will sound when rinsing cycle is complete.
7. Put the laundries into the spin-dryer tub for 1-3 minutes dehydrating.
8. Drain the water from wash tub.
9. Repeat the above steps as needed for additional rinsing.
Attachment: washing weight reference
P-5
Maintaining:
After using the machine, please take care of the following steps:
1. Pull out the power plug.
2. pull off the water inlet hose
Cabinet care:
-
To clean the cabinet off the water and dirt with soft cloth, no detergent, volatile and other chemicals
used to avoid surface destroying.
Cleaning the lint filter
-
While pressing down on the button, pull the lint filter out.
Turn the filter net inside out and rinse with water.
After Cleaning, insert edge of filter into place while pressing
the button down.
Cleaning dirty drain valve:
-
Take off the overflow filter cover, loose the belt and screw off the valve cover in counter-clockwise, to
take valve rod and other parts out then remove dirt inside.
Reverse the above steps to make all parts reverting.
Freezing prevention:
1. Turn off the water faucet, pull off the inlet hose and empty all water from the inlet hose.
2. Put down drain hose and switch the indicator to “ drain “ position to empty all water from wash tub.
3.
If Freezing happens to:
1. Put the inlet hose in warm water of 50ºC.
2. Have about 2 liter or warm water less than 50ºC into the wash tub for 10 minutes.
3. Install inlet hose and turn on the water faucet to ensure inlet and outlet of water are working normally.
How about laundry clothing outside of spin-dryer:
1.
2.
3.
4.
5.
Loose all of the screws around fame.
Pull up frame by two hands.
Take out the laundry clothing from the outside of spin-dryer.
Press down the frame to make it reverting.
Screw all of screws
P-6
How to clean dirty pump
-
Take off the back cover off the washer, press the clip at the drain hole of pump, and pull out the drain
hose.
Clean the pump from the drain hole of pump.
Where to put the washing machine
-
Keep the washing machine away from heavy sun shine
Keep the washing machine away from moisture and rain
Avoid uneven and elastomeric ground.
Cautions
The machine’s power line are connected in Y type, please do not open the power line otherwise it may
call some bad effects to the machine.
Maintenance of Power line is referred to special technicians
The machine’s grounding wire must be connected the earth.
- After using, please pull off the power plug for sure.
- According to the type of the plug, please use a corresponding electrical socket
- More then 2 degrees of sliding surface are not allowed.
- No departing electrical motor by yourself.
- Do not block the air intake of the base while the machine working.
- Absolutely avoid connection of earth and midline.
- Do not touch laundry and spin-dryer while the dryer spinning.
- Do not place the machine in bathing room for prevention of rusting and corrosion
- Do not brush the control panel with water
- Do not allow children get near to the machine
- Do not wash laundries of paint and gasoline to avoid fire risk.
- Do not forget to cover the spin lid.
- Do not use hot water more than 50ºC
- Get away from fire and heat.
Inspection when meeting the following problems:
? The machine does not work
-
if power failure
if power plug loose
if “ wash timer “ or Spin timer “ in “ 0 “ position
? The machine can not drain
-
if drain hose place down
if drain hose or inner pipe freezed
if drain hose inner pipe blacked
? The machine has special noise
P-7
-
if coins or other sundries inside the wash tub
? The machine has special noise and strong shaking
-
if the machine place evenly
if spin-dryer inner cover pressed well
if some laundry outside the spin-dryer
Voltage: AC110V/60Hz
Voltage: AC220V/60Hz
P-8