Transcript
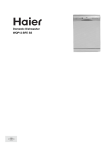
1 - Presentación / Presentation
Felicitaciones ! Usted compró la solución para bañarse.
En este manual están las informaciones detalladas necesárias para aprovechar al máximo su
Jet Turbo 4x4 o Jet Master 4 temperaturas y Ducha Jet Turbo / Master Blindada
Congratulations ! You have just acquired: The solution for your shower.
This manual contains detailed information as to better make use of your Jet Turbo 4x4 or Jet
Master 4 temperatures , and shielded electronic models.
Ducha Presurizada
Presurizer Shower Head
Coloque el anillo de vedación O'Ring en el codo y
Anillo de vedación
engánchelo en el codo ya instalado en la pared. Fije
O'RING
los dos codos con la traba y deje el codo con la
apertura mirando para abajo (Fig. 9)
Put the sealing ring on the elbow and join it to the
elbow fixed on the wall. Fix both elbows with the
lock and the elbow should have the opening facing
downwards (Pict.: 9)
2 - Atención / Attention
Lea atentamente las instrucciones de instalacion antes de instalar el producto. La instalación de
este producto debe ser efectuada por personas calificadas.
Nunca conecte dispositivos o accesorios no indicados en este manual en la salida del aparato.
Usar solamente ducha manual (con manguera fabricada en aislante eléctrico) original de
Lorenzetti.
Este producto fue desarrollado para ser usado con agua previamente tratada por las distribuidora
publica de agua. Conserve este manual para futuras consultas.
Read the instructions carefully before installing the product.
The installation should be performed by a qualified technician.
Do not connect any devices or accessories that have not been indicated in this manual. Use a hand
shower (hose made of insulating material) original from Lorenzetti.
This product was developed to operate with water previously treated by the public supplier. Keep
this manual for further reference.
Multitemperatures
3 - Características Tecnicas/ Technical Characteristics
Especificaciones/ Specifications
Modelo/Model
Tensión/ Tension (V~)
máx.
Multitemperatures
instalación
Manual de instrucciones de instalacion
Instructions and installation manual
Grado de protección/ Protection Degree: IP24
JET TURBO*
127
220
Potencia
Desc/OFF
Selector de
0
0
Power
Temperatura
Medio/Medium ** 2200
2300
(Watios
Temperature
Watts)
selector
Máximo/Maximum
5400
7500
Disyuntor/Circuit breaker (amperios/ampers)
50
40
Cables/Wires (mm/ AWG)***
10/6
6/8
7 kPa (0,7 mca)
Presión de funcionamiento Mínima/Minimum
Working Pressure
Maxima/Maximum
25 kPa (2,5 mca)
Conexión Hidráulica/ Hydraulic connection
Conexión Eléctrica
Electric Connection
JET MASTER*
127
220
0
0
2200
2300
5400
7500
50
40
10/6
6/8
25 kPa (2,5 mca)
400 kPa (40 mca)
Coloque la canopla (1) en el codo (2) de la entrada del agua del
producto, pase el mismo por el orificio del diseño que
acompaña el producto para conseguir marcar donde deberán
ser hechos los agujeros para fijación del producto, y enrosque
el codo sin apretar, en la pared (Fig 4)
Put the canopy (1) on the elbow (2) of water inlet of the shower,
put it through the hole of the model for marking, drilling and
fixing the product, slightly, screw the elbow on the wall.( Pict. 4)
TURBO
MASTER
6
7 kPa
mm² 0,7 ou 25 kPa ou
mca. 2,5
mca.
Open the water valve and let the water flow through the pipe, to remove any dirt.(Pict.6)
Abra el registro y deje correr bastante agua para eliminar todas las suciedades del caño (Fig 6)
A SOLUÇÃO PARA SEU BANHO
Bujes
Sleeve
GABARITO PARA MARCAÇÃO DA FURAÇÃO PARA FIXAÇÃO DO PRODUTO
Jato i
ANTES DE INSTALAR O APARELHO, POSICIONE O FURO DO GABARITO COM O
COTOVELO (2) NA SAÍDA DE ÁGUA.
NIVELE O GABARITO PARA POSICIONAR CORRETAMENTE A MARCAÇÃO DOS FUROS.
FIXE O GABARITO COM FITA ADESIVA.
USE BROCA DE 5 mm.
RETIRE O GABARITO E PROCEDA A INSTALAÇÃO CONFORME O MANUAL DE
INSTRUÇÕES QUE ACOMPANHA O PRODUTO.
H
/A
ole
jer
gu
os
177 mm
Nivele el diseño para posicionar correctamente la marcación de los agujeros y
fíjelo en la pared con cinta adhesiva. Haga los agujeros con broca de 5mm
coloque los bujes y los tornillos (Fig 5)
Level the model to place precisely the whole markings, fix it with adhesive tape.
Use a 5 mm ( milimiter ) drill to make the holes, put the bushing and the screws
(Pict.:5 )
Desenrosque el codo , retire el diseño y pase cinta veda rosca en la
rosca del codo (Fig 6)
Solamente para el Jet Master, colocar el reductor de presión en el codo
cuando la altura de la caja de agua hasta el punto de instalación del
aparato es superior a 8mca. o cuando el agua es proveniente de la calle
(Distribuidora) (Fig 6)
Unscrew the elbow , remove the model and put a seal thread ribbon on
the elbow. (Pict.: 6)
For Jet Master only: Place the pressure reducer on the elbow when
the height from the reservoir to the installation point is greater than 8
mca (water column meter ) or when the water is supplied by public
distribution. (Pict.: 6)
Cinta veda-rosca
Sealing
Codo
ELbow
Canopla
Canopy
Con el mismo esquema, verifique si la altura del codo esta a una
distancia correcta de la pared (Fig8)
Caso necesario, gire el codo dando más una vuelta hacia delante
y para atrás de manera a no comprometer su vedación.
Be careful not to affect the seal. (Pict.7)
Using the same scheme, check if the elbow is in a correct position
on the wall (Pic 8)
If necessary, turn the elbow to the left and to the rigth in order not
to damage the sealing.
Pared/ wall
ATENÇÃO
Nunca instale la Ducha Jet Turbo 4x4 temperaturas en puntos
Drawing/ Diseño 07
donde la presión de agua sea superior a 2,5 mca. Haga el
ajuste apropiado en la altura de los tornillos, usando el
Codo/ Elbow
esquema en la caja del producto. (Fig. 07).
Instale el codo de entrada del agua del producto en la salida del
agua de manera a vedar y ajustar la posición, dejandólo en la
posición horizontal mirando hacia la derecha.
Do not install the Jet Turbo 4x4 temperatures in places where
Tornillo
Water pressure is greater than 2,5 m.c.a.
Screw AZULEJO
Make the necessary adjustments near the screws,
using the model printed on the lid of the package. Install the elbow on the water exit, to seal it
and adjust it. It should be in a horizontal position to the right. Use the model provided with the
package to check if the height of the elbow is placed on the wall . If necessary, turn the elbow
clockwise anticlockwise.
Canopy/ Canopla
08
Cuidado para no afectar la vedación (Fig 7)
PARAFUSOS
AZULEJO
AZULEJO
Diseño/ Drawing
PARAFUSOS
Codo / Elbow
PARAFUSOS
AZULEJO
PARAFUSOS
Pino
central
Central Pine
Abierto
Open
13
Cerrado
Close
Ducha
Manual
Hand Shower
6 - Intalación Eléctrica / Electric Intallation
06
Reductor de presión
Pressure Reducer
GABARITO PARA INSTALAÇÃO DO
E AJUSTE DA ALTURA DOS PARAFUS
DO PRODUTO
03
The height from the water exit where the shower will be
Tanque/ Tank
Presión
Presión
Installed, to the floor or bathtub should be approximately
minima
Maxima
Producto
Minimum Maximum
Product
of 2 meters. (Pict.: 3)
mca
Pressure
Pressure
Jet Turbo 0,7 mca 2,5 mca
Check if the water exit of ½", is leveled with the tile. If it
Master 2,5 mca
40 mca
is more than 3 mm inwards, use a galvanized iron, brass
Salida Jet
de agua (mca = metro de coluna de agua/water meter column)
or plastic prolonger.
Water
This prolonger is not supplied. (Pict.: 4). If the pipe does
Outlet 2 metros/meters
not match with the thread of ½", use an adaptor (Pict.: 5).
Piso/Floor
This adaptor is not Supplied.
La altura del punto de salida del agua (adonde será instalada 10 kPa = 1 mca =1 metro linear/linear meter
la ducha hasta el piso del box o bañadera debe ser de 2 metros aproximadamente. (Figura 3)
Verifique si la salida del agua de ½" (pulgada) está nivelada con el azulejo. En el caso que esté
más de 3mm para adentro, utilice un prolongador de hierro galvanizado, latón o plástico. Este
prolongador no acompaña la ducha (Figura 4). En el caso de que la cañería no coincida con la
rosca de ½" BSP, use un adaptador (Figura 5). Este adaptador no acompaña la ducha.
Codo/Elbow
Chorro
Multidirecional
Multi-Directional
Flow
5.3 - Funcionamiento de la ducha manual/ Hand Shower Working
Para abrir la ducha manual, empuje el pino central.
Para cerrar la ducha manual, estire el pino centrall (Fig.
13).
ANTES DE INSTALAR O APARELHO, POSICIONE O FURO DO GABARITO COM O
COTOVELO (2) NA SAÍDA DE ÁGUA.
GABARITO PARA I
E AJUSTE DA ALTUR
DO PRODUTO
5 - Instalación Hidraulica/ Hidraulic Installation
Flecha para Colocar el
aparato en el tornillo
Arrow used to place
the equipment
in the screw
To open, push the central pin of the hand shower
To close, pull the central pin of the hand shower (Pic 13)
A SOLUÇÃO PARA SEU BANHO
GABARITO PARA MARCAÇÃO DA FURAÇÃO PARA FIXAÇÃO DO PRODUTO
05
04
Retire la traba del codo de la base y deslice el producto hacia abajo apoyándolo en los tornillos. Para
liberación del producto deslicelo para izquierda.
Para que no ocurra quema de la resistencia, deje correr agua para llenar la cámara de calentamiento,
antes de conectar el producto a la energía eléctrica.
Verifique se existe algun escape de agua y cierre el registro.
Este procedimiento deberá ser realizado cuando el producto es instalado, cuando cambie la
resistencia y siempre que el producto es retirado por algun motivo.
Remove the lock of the base’s elbow and slide the product downwards leaning it over the screws. To
release the product, slide it to the left.
Avoid the burning of the heating element when using the product for the first time, let the water flow to fill
the heating chamber before connecting the appliance to the electricity.
Check for leaks and close the water tap next. This procedure should be done when installation occurs,
the heating element needs to be changed everytime the product is detacched from the wall for any
reason.
For new constructions, make sure to provide the derivative box
13 centimeters of distance above the water exit. (Picture 14)
Turn off the main switch and the circuit breaker that feeds your
14 shower head. Connect the shower cables to the wires of the
electric network, use the connectors as indicated in the
technical characteristics table.
Attention! Do not use plugs nor socket for the product
installation.
1) Uncover the tip of the wires. The length should have the
same lenght of the groove of the connectors .
2) Put the wires into the connector without twisting them.
3) Hold the wires and turn the connectors clockwise until the
wires become firm.
En el caso de construcciones nuevas, providencie la caja de derivación a 13cm de distancia,
arriba de la salida del agua (Fig 14). Desconecte la llave general o disyuntor del circuito que
alimentará su ducha.
Connector Hendiduras/ Split15
Conecte los cables de conexión de la ducha
a los cables de la red eléctrica, utilizando los 1
2
3
conectores para garantizar una perfecta
conexión (Fig. 14)
Atención! No use ningún tipo de toma o
interruptor para la instalación de este aparato.
1) Pele las pontas de los cables, teniendo
3
como medida la largura de las hendiduras
del conector .
2) Sin torcer los cables, introdúzcalos con fuerza.
3) Sostenga los cables y gire el conector en el sentido horario hasta que los mismos esten
seguros sin moverse
AZULEJO
Tornillo/ Screw
Azulejo/ Tile
Para fijar el soporte (Fig 12) , perfore la
pared utilizando una broca de 5mm (1/4") a
una altura adecuada al alcance de las
manos. Coloque los bujes en los tornillos y
fije el soporte con los tornillos. Obs:
Certifíquese de la localización de los caños
Tubo de
del agua empotrados en la pared para no
salida del
perforarlos.
agua
Coloque la ducha manual en la otra
Water exit
extremidad de la manguera y posicionela
tube
en el soporte
Manguera/Hose
Ducha
To fix the support (Pic 12), make a hole
Manual
Hand Shower using a 5 mm drill (1/4") at hand’s reach.
Put the bushing into the holes and fix the
support with the screws. Obs.: Before
drilling make sure where
the
Soporte/Support
water pipes are.
Place the hand shower on the other end
of the hose and hang it on the support.
Chorro12
MultiDirecional
Water Flow
Pino Central
Central Pine
Acoplador/Coupler
Perforación Canopla/ Canopy 04
del diseño
Drawing Hole
Pared/ Wall
10 7 kPa
mm² 0,7 ou 25 kPa ou
mca. 2,5
mca.
Coloque el otro anillo de vedación O'Ring en la entrada del agua de la base del producto (Figura
10) . Coloque el producto sobre los dos tornillos, guiándolo por el lado derecho en el local
indicado por la felcha grabada en la lateral derecha de la base (Fig. 11)
Put the other seal ring on the water inlet of the base of the product .(Pict.: 10) . Place the product
on the two screws by the right side where an arrow is printed on the base. Make sure that the left
side is also on the wall and that both screws fit in.(Picture 11)
Entrada de agua/Water Inlet - Rosca/ Thread 1/2” BSP
ATENÇÃO
220 7500
40
V~
W
A
Red de
Contención
Blocking Net
Deslice el producto para la derecha y después para arriba, hasta la unión de la entrada del agua del
productocon el codo . Posicione y presione la traba para encastrarlo en el codo Coloque la arandela
de vedación, suministrada con el producto, en el acoplador y atornille el chorro Multidireccional (Fig
11)
Observación: caso sea necesário desarmar el producto para lmpieza y mantenimiento, desconecte
el disyuntor en el cuadro de distribución de energia eléctrica en el cual está instalda su ducha.
Slide the product to the right then upwards, until the water inlet joins the elbow . Place it and press
the lock to connect it to the elbow.
Place the sealing washer, that comes with the product in the cover and screw the multidirection jet
(Pic 11).
Important: In case the product needs to be disarmed for maintenance and cleaning, disconnect the
cicruit breaker in the electric switchboard where the shower head is installed.
5.2 - Instalación de la ducha manual/ Hand Shower intallation
Cables blancos/ White wire: Fase /Phase- Fase Phase
o Fase Neutro / Phase neutral
Cable verde-amarillo: Puesta a tierra
Yellow/ Green wire : Grounding
GABARITO PARA INSTALAÇÃO DO COTOVELO
E AJUSTE DA ALTURA DOS PARAFUSOS DE FIXAÇÃO
DO PRODUTO
127 5400
50
V~
W
A
Traba
Lock
Entrada
de agua en la
Base del
Producto
Product base
water inlet
11 Traba/Lock
5.1 - Fijación del producto en la pared/ Wall Product fixing
4 - Preparación para instalación/ Preparing to Install
Traba
Lock
Certifiquese que el lado izquierdo también esté nivelado en la pared y los dos tornillos encastrados
Make sure the left side is also leveled with the wall and that the two screws are fitted properly.
* La resistividad del agua suministrada a este producto, a 22ºC, no debe ser inferior a 1300
ohms x cm.
** Potencia economica - *** Para distancias mayores que 30 m, use cables de calibre mayor.
The minimum water resistivity at 22ºC must not be less than 1300 ohms x cm.
** Economic Power - ***For distances greater than 30 meters, use bigger conductors wires
Verifique o providencie una línea directa del cuadro de distribución
01
(Figura 2) usando conductores (cables) y protección (disyuntor o fusible),
Llevando en cuenta los valores de tensión, potencia y distancia de
la ducha hasta el cuadro de distribución, conforme tabla de características
técnicas.
Certifiquese de que la tensión (voltaje) del producto, grabada en la
tapa trasera corresponde a la tensión (voltaje) de la línea de instalación
(127V~o 220V~) (Fig. 1)
Tapa Trasera
Make sure the voltage indicated in the back cover matches with the
Back cover
Voltage in the installation line (127V~ 220V~) (Pic.1)
Verify or provide a direct line from the switchboard ( Pict.: 2) using conductors (wires) and
appropriate circuit breaker or fuse, considering the tension, power rating and distance from the
shower head to the switchboard, according to the table of technical characteristics.
Use disyuntor bipolar para 220V ~(fase - fase) y disyuntor
Barra tierra 02
Barra de
monopolar en el conductor Fase para 127V ~y 220V ~
Heart bar
Neutro
Ducha
(Fase - neutro)
Neutral Bar
Shower head
Desconecte el disyuntor o llave fusible del cuadro de
distribución de energia eléctrica del circuito en el cual
será instalada la ducha, antes de iniciar la instalación (Fig 2)
Importante: Esta ducha proporciona mas un importante
recurso: Puede ser utilizada en circuitos con dispositivo
diferencial residual ( DR ). En las duchas Jet Master y
Jet Turbo version electrónica, para beneficio de este
recurso, la resistividade del agua no puede ser inferior
a 2000 W.cm.
Use two poles circuit breaker for 220V~(Phase-Phase) and a single pole circuit breaker in the phase
conductor for 127V~and 220V~ ( Neutral Phasel). Disconnect the circuit breaker or fuse at the main
electric switchboard where the shower will be installed, before starting the installation. (Pict.: 2)
Important: This shower can be used by circuits with residual dispositive ( DR ). When using Jet.
Master and Jet Turbo electronic model, the water resistivity should not be less than 2000 W.cm.
Codo de la base
Base elbow
10
Anel de vedación
O'RING
13 cm
máx.
09
1) Pele las pontas de los cables, teniendo como medida la largura de las hendiduras del conector .
2) Sin torcer los cables, introduzcalos con fuerza.
3) Sostenga los cables y gire el conector en el sentido horario hasta que los mismos esten
seguros sin moverse
6.1 - Puesta a tierra / Grounding Wire
Important for your safety / Importante para su seguridad:
In order to avoid the risk of electric shocks, make sure to connect the grounding wire
from the product to a grounding system. Do not use the Neutral Wire as the grounding
one.
The grounding system guarantees your safety while home appliances are used. To a
maximum efficiency the grounding system should be done by a qualified professional.
A good grounding system is obtained with the installation of copper ground rods in the
floor with a maximum impedance of 10 ohms (10W)
Para que no haya riesgos de choques eléctricos, conecte el cable de tierra del
producto a un sistema de puesta a tierra eficaz. No utilice el cable neutro como puesta
a tierra.
El sistema de puesta a tierra garantiza su seguridad durante la utilización de aparatos
electrodomésticos.
Para que se llege a la máxima eficiencia, el sistema de puesta a tierra debe ser
efectuado por profesional capacitado. Un buen sistema de puesta a tierra es obtenido
con la colocación de jabalinas metálicas en el suelo, obteniendose una impedancia
máxima de 10ohms (10W)
7 - Utilización/ Usage
Para el producto funcionar, precisa solamente abrir el registro del agua. El
accionamiento de la Ducha es hecho automáticamente.
En el modelo Jet Turbo 4x4 , el presurizador (que esta dentro del producto) también es
accionado automáticamente con la apertura del registro del agua. Es normal después
del accionamiento durante 5 segundos, debido las caracteristicas constructivas, puede
existir una trepidacion o ruido en el presurizador .
To start the product, open the water tap. Its activation is automatic
The Jet Turbo model 4x4, the pressurizer is also activated automatically by opening the
water valve. It is usual to tremble or shake, after its activation, during 5 seconds due to
its characteristics.
Importante: Este aparato puede calentar el agua a una temperatura superior a la
adecuada al uso. Por lo tanto, durante el uso, sera necesario regular la temperatura del
agua adecuadamente. Niños, personas de edad, enfermos o fisicamente debilitados,
debem ser supervisionadas durante la utilizacion del producto.
Important: This equipment can heat the water at a temperature above the one
adequate for use. Therefore before and during its use, special care should be taken so
that temperature can be adequately adjusted.
7.1 - Control de la temperatura/ Temperature control
Esta Ducha posee comando de temperaturas en botón que permite variar la temperatura del agua.
This shower head has a button that allows gradual control of water temperature.
JET TURBO
16
Jet Turbo 4X4 Temperaturas:
No Presurizada/Not Presurizer
Para opción de agua caliente en las 4 temperaturas no presurizadas,Boton de
gire el botón en el sentido horario, eligiendo la temperatura que mas Control de
máx.
le agrade, conforme indicado en la graduación (color rojo) grabada en Temperaturas
0
Temperature
la parte superior del botón.
Control
Para opción de agua caliente en las 4 temperaturas presurizadas,
gire el botón en el sentido antihorário, eligiendo la temperatura
Presurizada/ Presurizer
que mas le agrade,conforme indicado en la graduación (color
rojo y azul), grabada en la parte inferior del botón (Fig. 16).
JET MASTER
17
Jet Master 4 Temperaturas:
Boton de
Para opción de agua caliente, gire el botón en el sentido horário,
Control de
Eligiendo la temperatura que mas le agrade. En dias mas calientes, Temperaturas
este producto le permite una gran economia de energía eléctrica.
Temperature
máx.
Para esto, gire el botón en el sentido antihorário y obtenga una
control
0
confortable temperatura en el agua. (Fig. 17).
Jet Turbo 4x4 Temperature
For non pressurized hot water, you may choose from 4 temperatures
by turning the button in the clockwise direction. Choose the
temperature that pleases you most following the scale in red indicated in the upper side of the
button.
For pressurized hot water, you may choose from 4 temperatures by turning the button in the
anticlockwise dierction. Choose the temperature that pleases you most following the scale in
red/blue indicated in the bottom part of the button (Pic 16).
Jet Master 4 Temperatures
For hot water, turn the button in the clockwise direction, choosing the temperature, that pleases you
most. In warmer days, this product allows a great economy of electric energy. For this turn the
button in the anticlockwise direction and obtain a nice water temperature (Pict 17).
7.2 - Chorro inteligente y Multidireccional/ Inteligent an Multidirectional Water flow
Para que no ocurran gotas inconvenientes cuando se utiliza la ducha manual, Lorenzetti
creo el chorro Inteligente.
Este nuevo sistema, que integra el producto, permite la elección del agua solo con chorri
multidireccional o en la ducha manual.
The stop those inconvenient drops when the hand shower is operating, Lorenzetti created
the smart jet. This new system that integrates this product allows you to choose the water
flow in the multidirection jet or in the hand shower.
El chorro multidireccional es un sistema que permite mayor comodidad en la
elección de la dirección del chorro de agua durante el baño.
Es normal después del cierre del registro o apertura de la ducha manual, existir
unas gotas por algunos segundos, hasta que toda el agua del interior del chorro
multidireccional se agote.
The multi direction water flow provides comfort to your shower. It directs the water
flow according to your convenience
Water may continue dropping after the water valve is closed or the hand shower is
open due to an excess of water in the muliti direction chamber.
8 - Limpieza y mantenimiento/ Cleaning and Maintenance
Antes de iniciar la limpieza del producto, desconecte el disyuntor o la llave fusible del cuadro
de distribución de energía eléctrica del circuito en el cual la ducha está instalada.
Utilice solamente un paño húmedo para la limpieza, pues el uso de productos químicos
pueden perjudicar el aparato.
Para la limpieza del esparcidor (Fig11), desenrosquelo moviendolo del cuerpo y utilice un
cepillo para retirar las suciedades. Certifiquese de la limpieza total, observando la
desobstrucción de todos los orificios, lo que le proporcionará un baño mucho más agradable.
Después de la limpieza recoloque el esparcidor enroscandolo nuevamente en el cuerpo de la
ducha.
En el caso de dudas, entre en contacto con personal especializado.
Suciedades que pueden venir en el agua pueden perjudicar el funcionamiento del producto
causando entupimientos en el tejido de contención de residuos (item 8.1) Si el agua
suministrada presenta estas caracteristicas, providencie la instalación de dispositivos/ filtros
capaces de evitar que las suciedades lleguen al producto. Certifiquese que estos dispositivos
sean adecuados y no comprometan la presión minima de funcionamiento.
Before cleaning the product, disconnect the circuit breaker or fuse key in the main switchbox
from the circuit which the shower head is installed.
Use a damp cloth only for cleaning, chemical products may damage the product.
To clean the multi direction water flow chamber (Pic 11) unscrew and remove it. Use a brush to
clean the holes and remove all the dirt. Make sure the orifices are cleaned, it will provide a
more pleasant shower.
After cleaning, replace the spreader by screwing it in the shower head. In case of doubts
contact a qualified person.
Dirt antd particles that may be in the water may damage the product operation blocking the
residues net (Item 8.1). IF the water supplied present such characteristics, install devices/
filters that avoid the dirt from entering the product. Make sure devices are adequate and do not
jeopardize the minimum working pressure.
Av. Presidente Wilson, 1230 - CEP 03107-901
São Paulo - BRASIL
8.1 - Tela bloqueadora de residuos/ Particles Blocking net
Este producto es provisto de una red de contención de residuos, cuya función se
hace necesaria para que no ocurran acúmulos de suciedades en el interior del
producto las cuales pueden perjudicar su funcionamiento.
Para la limpieza de esta red, retire la traba del codo de la base (Fig. 09). Deslice
el producto hacia abajo hasta su total liberación. Retire la traba del codo de la
entrada del agua y retire el codo de la base juntamente con el anillo de vedación
o´ring.
Ubique la entrada del agua del codo de la base por el lado interno, la red de
contención de suciedades(Fig. 09). Limpie la red debajo de un chorro del agua en
el sentido contrario del funcionamiento para desobstruir los orificios. Recoloque el
anillo de vedación o´ring en la entrada del agua del codo.
Para una perfecta vedación de los codos, observe atentamente la posición
correcta del anillo de vedación o’ring, en el lugar del codo. El anillo debera ser
posicionado en el primer apoyo conforme indicado en la Fig. 09.
This product is provided with a residues blocking net, which is necessary in order
not to keep dirt in the inner part of the product that can damage its operation.
Clean the net by removing the blocking device of the elbow’s base (Pict 9). Slide
the product downwards so that is released. Remove the blocking device of the
elbow of the water entry and remove the elbow together with the o’ring.
Find the water entry of the elbow’s base through the innser side the blocking net
(Pict9). Clean the net to unblock the orificie. Replace the o’ring in the water entry.
For perfect sealing of the elbow, watch for the correct position of the o’ring in the
elbow. The o’ring must be near the first support according to indication in Pic09.
9 - Eventuales problemas y sus soluciones/ Frequent questions and answers
Observe el cuadro abajo antes de llamar personal especializado
Read the table below, before request especciallized technical support
Problema
Problem
La ducha no
conecta
automaticamente
.
The shower does
not turn ON
automatically
No sale agua
por la ducha
The water does
not flow from the
shower head
Disminución del
flujo de agua.
Water flow reducer
Probable causa
Probably reason
Accione el disyuntor /Turn the cricuit breaker key ON
O boton de comando
esta en la posicion
desligado
The temperature button
is on OFF position
Posicionar el boton del comando de temperaturas en la
que mas le agradar.
Press the selector button in the temperature that please you most.
El registro esta
cerrado o existe
aire en la cañeria
The bathroon register
is closed or there is
air in the pipes
Abra el registro principal y/o as canillas que pertenecen al
mismo circuito hidraulico, hasta retirar todo el aire.
Open the register and/or the taps and let the water flow to
remove the air.
Resíduos en la red
Waste in the
water system
Haga limpieza en la red para desobstruir
el pasaje del agua. (item 8.1).
Clean the net to unblock the water flow (item 8.1)
Cableado inadecuado
La ducha no
Inadequate hardwired
calienta o
caliente poco
aun que el boton
este en la
posiciónmaximo.
Tensión electrica
The shower is
not heating
baja
enough even
Low Tension
when the
button is on the
hottest position
La ducha
Jet Turbo 4x4
Temperaturas
no aumenta
la presión.
The Jet
Turbo shower
does not
increase
the pressure
El disyuntor
diferencial
Residual (DR)
está desarmado.
Circuit breaker
(DR) OFF
Ruido
exagerado.
Noises
Solución / Solution
Disyuntor desconectado
Circuit breaker is turned OFF
La ducha Jet Turbo 4x4
temperaturas puede
estar instalada en una
cañeria con presión
superior a la indicada
para este producto.
It may have been
installed in a pipe
system with a pressure
greater than the one
recommended for this
product.
Consulte un profesional para verificar si el cableado
esta de acuerdo con las espeficicaciones del manual
Contact a professional to check the hardwire are proper
Consulte un profesional para verificar si la tensión electrica
esta abajo de los valores nominales de suministro (127V~ o
220V~). En este caso, comunique a la proveedora de su
región.
Contact a qualified technician, to verify your electrical
system. If the nominal voltage of your system is under the
values specified by your electrical supplier (127V~or
220V~), contact the utility responsible for your electrical
supply
Verifique si la presión esta correcta conforme
especificaciones de este manual. La ducha Jet Turbo
4x4 temperaturas no debe ser
instalada en puntos con presión de agua superior a la
maxima recomendada o con agua proveniente
directamente de la calle.
Check if the pressure is as especified in this manual. The
Jet Turbo 4x4 temperatures should not be installed in
places with higher pressure than the one recommended
or with water supplied directly from the public system.
Sistema de puesta a
tierra no adecuado
Grounding wire is not
adapted
Adecuar el sistema de puesta a tierra
Adapt the grounding wire system
Mais de un aparato
conectado al mismo
circuito electrico
More than one product
installed of the same
electrical system
Providenciar un circuito eléctrico exclusivo para la
Ducha.
Provide a circuit breaker only for the shower head.
El producto puede
estar con los tornillos
de fijacion sueltos.
The product may
present loosen screws
Verifique la fijación y proceda de acuerdo con las
instrucciones del manual de instalación (Item 5.1)
Check the installation and follow the installation
instructions (Item 5.1)
Importante: Ocurriendo quema de la resistencia, substituyala por originales Lorenzetti para este
producto.
En caso de defectos en los cables de alimentación del aparato, no los substituya, retire el
aparato y llevelo a personal especializado.
Important: Replace the heating element for originals Lorenzetti.
In case there are defects in the feeding wires do not replace them, remove the equipment and
take to qualified technician.
www.lorenzetti.com.br