1
1P77 manual de instrucciones Thermochef 1_Maquetación 1 03/02/12 12:59 Página 1
ROBOT DE COCINA MULTIFUNCIÓN
THERMO CHEF
1P77
N AT U R A
MANUAL DE INSTRUCCIONES
1P77 manual de instrucciones Thermochef 1_Maquetación 1 03/02/12 12:59 Página 2
SERVICIO TÉCNICO
• Garantía durante el período establecido por la norma general de garantía de
piezas y mano de obra.
CONTENIDO
• Servicio gratuito de entrega y recogida en su domicilio en caso de avería
durante el período de garantía.
1. SU
ROBOT DE COCINA
2. DATOS
TÉCNICOS
3. CONSEJOS
THERMOCHEF NATURA . . . . . . . . 3
............................4
PARA SU SEGURIDAD
4. INSTRUCCIONES
..................4
ANTES DE SU UTILIZACIÓN
En caso de que tenga que hacer uso de su garantía,
le rogamos que llame al
Servicio de Atención al Cliente
902 051 353
...........7
5. ACCESORIOS . . . . . . . . . . . . . . . . . . . . . . . . . . . . . . . 8
6. INSTRUCCIONES
7. OTROS
. . . . . . . . . . . . . . . . . . . . . . 12
DATOS DE INTERÉS
8. LIMPIEZA
9. NOTAS
DE USO
DEL APARATO
. . . . . . . . . . . . . . . . . . . . . 18
. . . . . . . . . . . . . . . . . . . . . . . 19
PARA LA PREPARACIÓN DE SUS PROPIAS RECETAS
10. RESOLUCIÓN
11. NORMATIVA
DE AVERÍAS
LEGAL
. 20
. . . . . . . . . . . . . . . . . . . . 20
. . . . . . . . . . . . . . . . . . . . . . . . . 22
12. GARANTÍA . . . . . . . . . . . . . . . . . . . . . . . . . . . . . . 22
23
1P77 manual de instrucciones Thermochef 1_Maquetación 1 03/02/12 12:59 Página 3
RIESGO DE DESCARGA ELÉCTRICA
Por favor, compruebe regularmente el cable de alimentación, la jarra de mezclado
y el resto de los accesorios de su ThermoChef Natura. Deje de utilizar el electrodoméstico si encuentra cualquier desperfecto en él y contacte con el Servicio de
Atención al Cliente para cualquier reparación que necesite realizar.
11. NORMATIVA
LEGAL
Todas las imágenes presentadas en este manual son orientativas y pueden estar
sujetas a pequeños cambios de color y forma.
Para aquellos clientes que residan en Estados Miembros de la UE:
Separación de residuos
Si reside usted en un país perteneciente al ámbito europeo, esperamos que no
deseche el electrodoméstico o sus accesorios de manera arbitraria. [Directiva UE
2002/96/CE, de 27 de enero de 2003, sobre desecho de electrodomésticos y accesorios]. A este respecto, le sugerimos que deseche y recicle su electrodoméstico
antiguo y sus accesorios conforme a la normativa actualmente en vigor.
COPYRIGHT
Los derechos de adaptación y traducción del manual de instrucciones son propiedad de CIL, Marketing Directo S.L., así como los derechos de propiedad intelectual de los recetarios, incluidos los textos, sus fotografías y su diseño.
Asimismo está prohibido modificar, copiar, reutilizar, explotar, reproducir, comunicar públicamente, hacer segundas o posteriores publicaciones, enviar por correo,
transmitir, usar, tratar o distribuir de cualquier forma la totalidad o parte de los contenidos incluidos en estos manuales para propósitos públicos o comerciales, si no se
cuenta con la autorización expresa y por escrito de CIL, Marketing Directo S.L.
12. GARANTÍA
1. SU
ROBOT DE COCINA
THERMOCHEF NATURA
Gracias por adquirir el robot de cocina ThermoChef Natura. Antes de utilizar el
electrodoméstico por primera vez, lea detenidamente este manual de instrucciones
y consérvelo para futuras consultas.
Cuando abra la caja, extraiga todos los accesorios que se incluyen y aprenda a
reconocerlos consultando la siguiente lista de componentes:
1
2
3
4
5
6
7
8
9
10
11
12
13
14
15
16
17
18
19
Base
Báscula
Panel de control
Jarra
1
Tapa de la jarra
Cesta
Vaso medidor o vasito
Veleta
Espátula
Cabeza de la espátula
Mango de la espátula
Cuchillas
Base de fijación de las cuchillas
Anillo de fijación de las cuchillas
Soporte de fijación de las cuchillas
Steamer Set
Steamer
Bandeja del steamer
Tapa del steamer
Por la presente certificamos que el Robot de Cocina ThermoChef Natura ha sido
producido con los más altos controles de calidad y sometido a los más estrictos
exámenes para asegurar su óptimo funcionamiento y resistencia.
2
3
6
5
Esta garantía cubre cualquiera de los defectos o falta de conformidad relativos
a su fabricación y ejecución según el período obligatorio fijado por ley desde la
recepción del bien. No cubre los daños originados por robo, incendio o aquellos
derivados de accidente, incorrecta instalación, negligencias deliberadas o involuntarias, así como por el no seguimiento de las instrucciones del manual de uso.
8
7
La garantía se considerará nula e invalidada si el producto se somete a cualquier
reparación y/o intervención no autorizada.
4
12
Todas las imágenes de este Manual son orientativas y no tienen valor contractual.
9
10
Tope de
seguridad de
la espátula
13
14
15
11
22
3
1P77 manual de instrucciones Thermochef 1_Maquetación 1 03/02/12 12:59 Página 4
19
CÓDIGOS DE FALLO Y MÉTODOS DE RESOLUCIÓN
Código
de fallo
18
Significado
del código
• Jarra o tapa no
instalados
• Se ha olvidado de poner • Coloque la tapa en la
la tapa. La tapa de la
jarra y asegúrese de
jarra o el steamer no
que ambas están bien
están instalados correcinstaladas.
tamente en la jarra.
E2
• Sobrecalentamiento
de la jarra
• No hay agua o el agua
• Espere a que baje la
ha hervido hasta evapotemperatura de la jarra
rarse en la jarra durante
hasta igualar la
el calentamiento.
temperatura ambiente.
E3
• Sobrecalentamiento
del motor
• Sobrecalentamiento del • Espere a que baje la
motor provocado por un temperatura del motor
uso prolongado o por
hasta igualar la
exceso de comida en la
temperatura ambiente.
jarra.
E4
• Sobrepeso
electrónico
• Los ingredientes deposi- • Retire parte de los ingretados sobre la báscula
dientes de la báscula.
superan los 3 Kg de
peso
E5
• Atasco o sobrecarga
del motor
• El motor está bloqueado debido a una sobrecarga causada por un
exceso de comida en la
jarra.
E6
• Aviso del sensor de
temperatura del
motor
• El sensor de temperatura • Contacte con nuestro
del motor está dañado.
Servicio de Atención al
Cliente.
E7
• Asegúrese de que la
• Error de conexión de • No se ha instalado
la jarra.
jarra está bien instalada.
la jarra
La jarra no está correctaDesenchufe el aparato
mente instalada.
y después vuelva a
El sensor de temperatura conectarlo a la red.
de la jarra está dañado.
TÉCNICOS
1. Voltaje de entrada: 220-240V AC; 50/60Hz
2. Potencia total 1550W. Potencia del motor: 550W. Placa de calor: 1000W
3. Voltaje de funcionamiento del panel de control: 5V-12VDC
4. Parámetros técnicos de la máquina eléctrica principal:
• Voltaje de funcionamiento: 220-240V AC; 50/60Hz
• Velocidad máxima de rotación: 8700 RPM/Min
5. Tipo de display: monitor LCD con luz de fondo
6. Tipo de calentamiento: por resistencia en el fondo de la jarra
• Incluye dispositivo de protección contra sobrecalentamiento
7. Báscula electrónica: peso máximo 3 kg
8. Base: plástico ABS de alta calidad
9. Jarra: acero inoxidable, capacidad máxima 2 litros
10. Longitud del cable de alimentación: 1,2 m
3. CONSEJOS
PARA SU SEGURIDAD
Este aparato no debería ser utilizado por personas que padezcan algún tipo de
deficiencia o discapacidad mental, salvo que se hallen bajo la supervisión de otras
personas.
El robot de cocina ThermoChef Natura puede emplearse en el hogar o bien se
le puede dar un uso profesional. Este electrodoméstico cumple con los más avanzados requisitos de seguridad, sin embargo, es importante que lea atentamente
los siguientes consejos para evitar accidentes domésticos o averías en el aparato:
RIESGO DE DESCARGA ELÉCTRICA
• Desenchufe el electrodoméstico cuando vaya a limpiarlo o si tiene pensado
guardarlo durante un tiempo prolongado.
• No sumerja en agua la base de su ThermoChef Natura ni la lave con gran cantidad de agua. Simplemente límpiela con un trapo húmedo y evite que el
agua u otros elementos extraños penetren en ella.
4
Métodos de resolución
E0
17
2. DATOS
Posibles fallos
• Reduzca la cantidad de
comida del interior de la
jarra. Desenchufe el
aparato y después vuelva a conectarlo a la red.
21
1P77 manual de instrucciones Thermochef 1_Maquetación 1 03/02/12 12:59 Página 5
AVISO:
Evite riesgos de descarga eléctrica
- Desenchufe el aparato de la red cuando vaya a limpiarlo o a guardarlo durante
un periodo de tiempo prolongado.
- No sumerja su ThermoChef Natura en agua ni la lave con gran cantidad de
agua ya que podría dañar el aparato.
INFORMACIÓN ADICIONAL SOBRE LA LIMPIEZA DEL ELECTRODOMÉSTICO
El color de algunos utensilios de plástico puede ver ligeramente disminuida su
intensidad. Si hay suciedad en el vaso medidor o la tapa, podrá eliminarla a la vez
que limpia la jarra y las cuchillas como se explica más arriba.
Para mejorar la ventilación cuando no esté usando el aparato, no tape la jarra
con el vaso medidor.
9. NOTAS
PARA LA PREPARACIÓN DE SUS PROPIAS RECETAS
Le aconsejamos que consulte el recetario que acompaña a su ThermoChef
Natura y que siga sus indicaciones para preparar una gran variedad de recetas,
paso a paso. De esta forma, cocinar le resultará mucho más sencillo. Si desea preparar
sus propios platos, por favor siga las siguientes indicaciones:
EN QUÉ ORDEN SE DEBEN AÑADIR LOS INGREDIENTES
Cuando vaya a preparar sus propias recetas, piense en primer lugar en qué
orden va a utilizar los ingredientes y si es necesario calentarlos o no.
PESAR LOS ALIMENTOS
Antes de pesar el primer ingrediente, pulse el botón “Selector de Báscula
Electrónica” en el panel de control y ponga a cero la báscula.
NOTA: No exceda la capacidad máxima de la jarra (2 litros).
TIEMPO DE CALENTAMIENTO
El tiempo de cocción depende de los siguientes factores:
a. La temperatura inicial de los ingredientes que se van a cocinar.
b. La cantidad, peso y volumen de los ingredientes.
AVISO:
El volumen total de ingredientes no debería exceder nunca la capacidad de
la jarra o del steamer.
c. La conductividad o absorción de calor de los ingredientes que se van a cocinar.
d. El grado de calentamiento.
e. La velocidad de mezclado.
f. El uso de los accesorios (incluido el steamer).
10. RESOLUCIÓN
DE AVERÍAS
El robot de cocina ThermoChef Natura cuenta con una función de autodiagnóstico; es decir, si se produce un fallo, la pantalla digital mostrará la información relativa a ese fallo. Si esto sucede, apague el aparato y desconéctelo de la red. Si al
volverlo a conectar el fallo persiste, le rogamos contacte con nuestro Servicio de
Atención al Cliente, indicando el código de fallo que aparece en pantalla.
20
• Compruebe regularmente si la base, el steamer u otros componentes están
dañados. Si encuentra algún fallo, deje de utilizar el aparato y contacte con el
Servicio de Atención al Cliente.
• El robot de cocina ThermoChef Natura, incluyendo el cable de alimentación,
sólo puede ser reparado por las personas designadas por nuestra compañía.
Cualquier reparación indebida o no autorizada podría poner en riesgo la seguridad del usuario. La garantía gratuita quedará invalidada si se utilizan
componentes de otros fabricantes, por lo que le instamos a usar componentes
originales.
RIESGO DE LESIONES CON LAS CUCHILLAS
• No toque el borde de las cuchillas. Tenga la precaución de sujetarlas por la
parte superior cuando vaya a montarlas o a desmontarlas.
RIESGO DE QUEMADURAS POR SALPICADURAS DE COMIDA
• No rebase la marca de capacidad indicada en la jarra. Los alimentos no deberían
exceder la capacidad máxima de 2 litros.
• No abra la tapa hasta que los alimentos introducidos en la jarra dejen de rotar,
especialmente a partir de la velocidad 4.
• No intente forzar la tapa de la jarra para abrirla.
• Cuando los alimentos de la jarra estén cocinándose a alta temperatura o hiervan,
no utilice la velocidad 4 ni las velocidades superiores.
• Al abrir la tapa de la jarra, tenga cuidado si la máquina ha estado funcionando
a alta temperatura ya que podría quemarse con salpicaduras de alimentos cocinados. Coloque correctamente el vaso medidor en el orificio de respiración
de la tapa de la jarra cuando esté cocinando alimentos como salsa o sopa a
velocidad media (3-6) y a velocidad alta (7-10).
• No toque la jarra cuando esté cocinando alimentos calientes a más de 60º C.
• Adopte la opción de velocidad baja (1-2) cuando utilice el steamer, a fin de
evitar que el líquido salga disparado a gran velocidad.
• Coloque el robot de cocina sobre una mesa limpia, estable y de superficie
uniforme, especialmente cuando utilice el steamer.
• Asegúrese de que el steamer y la jarra estén bien conectados cuando los utilice.
RIESGO DE QUEMADURAS POR EXCESO DE VAPOR O DE AGUA
CONDENSADA
• Tenga cuidado con el vapor o el agua caliente condensada que salga a través
de la parte superior o por los lados de la tapa.
• Cuando el aparato esté en funcionamiento, recuerde que no debe tocar ninguna
parte del steamer excepto las asas recubiertas de material aislante al calor.
• No utilice el steamer sin que esté colocada la tapa.
• Cuando abra la tapa del steamer, tenga cuidado de no quemarse con el vapor.
• Cuando termine de cocinar con el steamer y vaya a retirarlo, tenga cuidado
con el vapor caliente que seguirá saliendo por la boca de la jarra.
• Cuando utilice el steamer, mantenga a los niños alejados del electrodoméstico
y adviértales del peligro de quemaduras por el vapor o por las salpicaduras de
agua caliente.
5
1P77 manual de instrucciones Thermochef 1_Maquetación 1 03/02/12 12:59 Página 6
• Compruebe que el orificio de ventilación de la tapa del steamer no esté
bloqueado. En caso contrario, podría haber un escape no controlado de
vapor.
RIESGO DE QUEMADURAS DEBIDO AL CALENTAMIENTO DE LAS PIEZAS
• Coloque el electrodoméstico en un lugar que esté fuera del alcance de los
niños y advierta a éstos de que la unidad se calentará y no deberán tocarla.
RIESGO DE LESIONES POR SALPICADURAS DE ALIMENTOS
• Cuando utilice su ThermoChef Natura para triturar o trocear alimentos congelados a velocidad media (3-6), velocidad alta (7-10) o en función Turbo, sujete
la jarra con firmeza y no olvide colocar el vaso medidor en la boca de la jarra.
RIESGOS DEBIDOS AL USO DE ELEMENTOS EXTRAÑOS O DE PIEZAS SIN
GARANTÍA
• Utilice sólo las piezas y componentes proporcionados con su ThermoChef
Natura.
• El vaso medidor es la única pieza que puede utilizarse para cubrir el orificio de
ventilación o boca situado en la tapa de la jarra mientras se está cocinando.
No utilice paños de cocina para tapar el orificio.
• Para mezclar el contenido de la jarra utilice sólo la espátula que acompaña a
la ThermoChef Natura, ya que otros utensilios como cucharas u otros cubiertos
pueden golpear las cuchillas con el consiguiente riesgo.
POSIBLE DESPLAZAMIENTO DEL ROBOT DE COCINA THERMOCHEF NATURA
• Coloque el robot de cocina sobre una mesa estable, de superficie uniforme
que no se caliente. Cuando lo utilice para amasar o triturar alimentos, la
unidad se moverá debido a la vibración, por lo que debe asegurarse de que
se halla a suficiente distancia del borde a fin de evitar que caiga al suelo. En
general, asegúrese de no dejar la máquina funcionando sin supervisión.
DAÑOS DEBIDOS AL VAPOR CALIENTE
• Cuando esté utilizando el steamer, asegúrese de que haya una distancia apropiada entre el electrodoméstico y cualquier armario o estantería a fin de evitar
daños debidos al vapor caliente.
RIESGO POR OTRAS FUENTES DE CALOR
• Mantenga el aparato alejado de otros electrodomésticos y cocinas de inducción. No coloque el equipo ni el cable de alimentación sobre fuentes de calor,
como placas eléctricas calientes, cocinas eléctricas u hornos.
FILTRACIONES DE ALIMENTOS
• Asegúrese de que el anillo de fijación de goma esté bien colocado cuando
instale las cuchillas ya que éste garantiza la estanqueidad de la jarra. Cualquier fallo en su instalación causará filtraciones de alimentos, lo que dañaría el
electrodoméstico.
DAÑOS POR MALA REFRIGERACIÓN DE THERMOCHEF NATURA
COCINAR ALIMENTOS SIN MEZCLAR
ThermoChef Natura le permitirá calentar los ingredientes que tenga en la jarra
sin que giren las cuchillas. Para ello, deberá realizar los ajustes de tiempo y temperatura que desee y después presionar el botón On.
SOBRECARGA DEL SISTEMA
Si el motor se sobrecarga durante la preparación de la comida, el programa
de protección del motor hará que el aparato se apague automáticamente. Aún
así, es posible que usted note un olor anormal debido al sobrecalentamiento.
Esto no debe preocuparle, el olor desaparecerá tan pronto como el aparato se
enfríe.
8. LIMPIEZA
DEL APARATO
Al igual que todo nuevo electrodoméstico, su ThermoChef Natura debería limpiarse antes de su utilización, especialmente la jarra, la tapa de la jarra, el vaso
medidor, la espátula, la cesta y el steamer.
AVISO:
Algunos ingredientes como el curry, los cítricos, tomates o zanahorias pueden
causar manchas. Para evitarlo, limpie lo antes posible los residuos de estos
ingredientes.
CÓMO LIMPIAR LA JARRA Y LAS CUCHILLAS
Para limpiar la jarra y las cuchillas, ponga 1 litro de agua caliente en el interior
de la jarra y añada jabón líquido del que utilice habitualmente para lavar los platos.
Después, pulse varias veces el botón “Función Turbo” o bien deje que la máquina
funcione a velocidad 5 ó 6 durante unos segundos.
Si la comida se pega en el interior de la jarra, puede utilizar un limpiador especial
para acero inoxidable.
En caso de que necesite lavar las cuchillas por separado, primero debe
desmontarlas del interior de la jarra. Para ello, siga los pasos indicados en la
página 6. Una vez extraídas del interior de la jarra, sostenga las cuchillas cuidadosamente por su base y póngalas debajo del grifo con las cuchillas mirando
hacia arriba. También puede utilizar un cepillo para eliminar mejor los residuos
de comida.
AVISO:
No lave la jarra en el lavavajillas ni use objetos afilados para su limpieza, ya
que podría dañar el aparato o reducir la seguridad del mismo.
CÓMO LIMPIAR EL STEAMER
Lave el steamer, su bandeja y su tapa con agua templada y jabón, utilizando un
trapo suave; o bien en el lavavajillas con un detergente no abrasivo. No utilice
utensilios afilados ni cepillos de acero.
CÓMO LIMPIAR LA BASE
Desenchufe el aparato de la red antes de proceder a su limpieza con un trapo
suave ligeramente humedecido o un detergente no abrasivo.
• Asegúrese de que el respiradero situado detrás de la base del aparato no
queda bloqueado. En caso contrario, el equipo resultará dañado.
6
19
1P77 manual de instrucciones Thermochef 1_Maquetación 1 03/02/12 12:59 Página 7
• Apagado automático
a) Si usted ha utilizado el temporizador para programar un tiempo de cocinado,
el aviso End aparecerá en la pantalla digital acompañado de una señal acústica
para indicar el fin de la operación una vez se haya terminado la cuenta atrás
del tiempo programado.
b) Si usted no ha programado el tiempo, como medida de seguridad, el aparato
se apagará solo una vez transcurridos 15 minutos sin que se haya realizado
ninguna operación. En pantalla aparecerá el aviso End acompañado de una
señal acústica para mostrar el fin de la operación.
7. OTROS
DATOS DE INTERÉS
MODO “STAND BY”
Si el robot de cocina ThermoChef Natura está encendido pero no realiza ninguna
operación, el propio aparato se pondrá en modo “Stand by” a fin de ahorrar energía. En
este momento, la luz de fondo de la pantalla digital se apagará y sólo indicará la hora
local. El consumo de electricidad del aparato en modo “Stand by” es inferior a 1W.
Para salir del modo “Stand by” es necesario que pulse cualquier tecla del panel
de control. Si no va a utilizar su ThermoChef Natura durante un tiempo prolongado,
le sugerimos que apague el aparato y lo desenchufe de la red.
FUNCIÓN PAUSE + BÁSCULA
Usted puede detener su robot de cocina en cualquier momento durante el proceso de cocinado pulsando el botón On / Pause. Dispondrá de 15 minutos de pausa durante los cuales ThermoChef Natura guardará todos los parámetros que usted
haya programado o, si lo desea, podrá modificar cualquiera de estos parámetros.
Durante la pausa, también podrá pesar ingredientes pulsando el botón . Para
reanudar el proceso de cocinado, vuelva a pulsar el botón On / Pause.
PROGRAMA DE PROTECCIÓN DEL MOTOR
El programa de protección del motor controla el estado de funcionamiento del
motor y hace que éste deje de funcionar si en algún momento algo pudiera dañar
el aparato.
Junto a su ThermoChef Natura usted ha recibido un recetario. Por lo general, si
sigue las indicaciones de las recetas, el programa de protección del motor no se
activará. Pero si los alimentos que van a cocinarse exceden la cantidad requerida,
este programa de protección se activará inmediatamente y detendrá el motor. En
este caso, el código de error “E5” aparecerá en la pantalla digital y a continuación
tendrá que seguir los siguientes pasos:
1) Apague el interruptor de potencia situado en la parte posterior del electrodoméstico.
2) Abra la tapa de la jarra para ver si hay comida bloqueando las cuchillas.
3) Extraiga comida de la jarra o añada algo de líquido.
4) Cierre la jarra y encienda el interruptor de potencia.
5) Ajuste los parámetros adecuados y continúe el proceso de cocinado.
NOTA: Es conveniente esperar entre 3 y 5 minutos para que el electrodoméstico
se enfríe totalmente antes de volver a encenderlo. Si vuelve a aparecer el código
de error “E5” en la pantalla digital una vez que el aparato se haya enfriado, contacte
con nuestro Servicio de Atención al Cliente.
18
4. INSTRUCCIONES
ANTES DE SU UTILIZACIÓN
ANTES DE HACER FUNCIONAR EL APARATO
Coloque el robot de cocina sobre una mesa limpia, estable y de superficie uniforme. Antes de utilizarlo por primera vez deberá lavar todos sus componentes.
Para evitar que los alimentos tengan un sabor extraño durante los primeros
usos, introduzca en la jarra medio litro de agua, añada un limón cortado en varios
trozos y seleccione temperatura 100ºC durante 30 minutos. Según vaya aumentando el número de veces de su utilización, este sabor anormal disminuirá e irá
desapareciendo gradualmente.
MONTAJE DE LA JARRA
Para insertar la jarra en la base, siga los siguientes pasos:
1. Con el mango hacia delante (en dirección al panel de control), coloque la 1
jarra en la base hasta que escuche un
sonido que indicará que ambas piezas
se han conectado correctamente, tal y
como se muestra en la figura 1. De
otro modo, su ThermoChef Natura no
podrá ponerse en funcionamiento.
2. Añada los ingredientes en el interior
de la jarra y, a continuación, coloque
la tapa sobre la misma (figura 2).
3. Gire la tapa de la jarra en el sentido de las agujas del reloj
hasta llegar al tope (posición candado cerrado), como se
muestra en la figura 3.
Por razones de seguridad, la jarra no puede quitarse de la
base cuando el aparato está en funcionamiento. Para quitar la
jarra, espere a que la máquina termine de funcionar y gire la
tapa hasta desbloquearla. En la pantalla aparecerá el icono
. Presione el botón cuadrado que se encuentra en la base
bajo la jarra y extráigala con cuidado (figura 4).
2
3
4
AVISO:
Riesgo de quemaduras por salpicaduras de comida
No intente abrir la tapa de la jarra forzándola. Cuando haya cocinado a alta
temperatura, sea especialmente precavido al retirar la tapa, ya que podría
quemarse con salpicaduras de alimento.
MONTAJE DE LAS CUCHILLAS
• Desmontar las cuchillas: introduzca una mano en la
jarra y sostenga la mitad superior de las cuchillas (es
mejor envolver las cuchillas con un paño o toalla para
evitar cortarse). A continuación, sujete con la otra mano
el soporte de fijación de las cuchillas que se encuentra
en el exterior de la jarra y gírelo 30º en el sentido contrario
a las agujas del reloj (ver figura 5). Extraiga con cuidado
las cuchillas y su base de fijación, tal y como se muestra
en la figura 6.
5
6
7
1P77 manual de instrucciones Thermochef 1_Maquetación 1 03/02/12 12:59 Página 8
• Montar las cuchillas: asegúrese de que el anillo de fijación de goma está
correctamente situado en la parte superior de la base de fijación de las cuchillas. Al introducir las cuchillas en la jarra, compruebe que las dos pestañas que
sobresalen de la parte inferior de su base de fijación coinciden con la abertura
que se encuentra en el fondo de la jarra. A continuación, coloque el soporte de
fijación exterior y gírelo en el sentido de las agujas del reloj hasta llegar al tope.
AVISO:
Tenga cuidado de no cortarse
Las cuchillas están muy afiladas. Le aconsejamos que las envuelva con un
trapo cuando vaya a montarlas o a desmontarlas. Sostenga las cuchillas con
firmeza y extráigalas cuidadosamente. Tome precauciones para que no se le
caigan accidentalmente.
AVISO:
Peligro de escape de comida en la base
Al montar las cuchillas, asegúrese de colocar correctamente el anillo de
fijación de goma en su base. En caso contrario, los alimentos que se estén
mezclando o cocinando podrían filtrarse por la parte inferior de la jarra y
dañar el aparato.
Antes de comenzar a utilizar su ThermoChef Natura, le rogamos que lea con
atención las peculiaridades de sus accesorios y aprenda a usarlos correctamente:
JARRA
7
AVISO:
Riesgo de quemaduras por salpicaduras de comida
La cantidad de comida introducida en la jarra no
debe exceder nunca los 2 litros ya que los alimentos
podrían salir por el orificio de respiración de la tapa
con el riesgo de salpicar o quemar.
VASO MEDIDOR O VASITO
El vaso medidor puede utilizarse de muchas maneras:
puede emplearse para evitar que se pierda calor o que los
alimentos que se están mezclando o cocinando causen
salpicaduras. Para ello, colóquelo sobre el orificio de respiración de la tapa de la jarra (figura 8). Al mismo tiempo,
puede utilizarse para medir los ingredientes. La capacidad del vaso medidor
cuando está lleno es de 100 ml, y cuan100 ml
do se halla a la mitad de su capacidad es
de 50 ml. Si desea añadir ingredientes a 50 ml
través de la boca de la jarra, utilice el
vaso medidor para hacerlo.
8
• Paso 1: Puesta en Marcha. En modo “Stand by” o “Configuración” puede
usar la báscula incorporada en la base de la ThermoChef Natura para pesar
ingredientes. Para ello, pulse el botón “Selector de Báscula Electrónica”
:
el aparato pasará inmediatamente al modo Báscula. El peso aparecerá en la
pantalla expresado en gramos, en formato “00 00”.
• Paso 2: Empezar a pesar. Para empezar a pesar, es muy importante que coloque la comida en el centro de la báscula. El peso aparecerá indicado en la
pantalla digital.
NOTA: Mientras la máquina esté cocinando, no se podrá utilizar la función Báscula.
• Paso 3: Sumar pesos parciales. Si desea pesar un ingrediente que necesita
estar en un recipiente (leche, harina, azúcar...), usted podrá pesar primero el
recipiente y después “descontar” su peso. Para ello, coloque el recipiente en
el centro de la báscula y, una vez mostrado su peso en la pantalla, vuelva a
pulsar el botón “Selector de Báscula Electrónica”
. La báscula se pondrá a
cero aunque tenga el recipiente encima, y podrá empezar a pesar. Esto también
le será útil si desea ir añadiendo ingredientes y pesarlos por separado.
NOTA: El peso máximo de la báscula es de 3 kg. Si se excede este peso, en la
pantalla aparecerá el código de error “E4”.
5. ACCESORIOS
A cada lado de la jarra hay marcas graduadas que indican la capacidad del recipiente. Cada marca representa
0,5 litros. La máxima capacidad de la jarra es de 2 litros
(figura 7).
7. BÁSCULA ELECTRÓNICA
8. AJUSTE DE LA HORA LOCAL
Para ajustar la hora local siga los siguientes pasos:
• Paso 1: Entrar en modo “Stand by”. Con el aparato apagado, pulse el botón
rojo de encendido que se encuentra en la parte trasera de la máquina. La
ThermoChef Natura se encenderá en modo “Stand by”.
Con el aparato encendido, no realice ninguna operación durante unos segundos
y la ThermoChef Natura se pondrá sola en modo “Stand by”.
Sabrá que está en modo “Stand by” porque la pantalla mostrará la hora en
formato “00:00” (“hora:minutos”).
• Paso 2: Seleccionar la hora y los minutos. Pulse el botón On del Panel de
Control durante 5 segundos para comenzar a configurar la hora local. Pulse
los botones + o – para seleccionar la hora. Una vez configurada la hora, pulse
de nuevo el botón On para configurar los minutos. Ajuste los minutos mediante
las teclas + o –.
8
NOTA: Mientras la máquina esté cocinando, no se podrá realizar ajustes de hora.
• Paso 3: Confirmar el ajuste de hora local. Una vez configurada la hora, pulse
On para confirmar el ajuste realizado. El aparato volverá al modo “Stand by” y
la pantalla indicará la hora que usted haya programado.
9. APAGAR EL ELECTRODOMÉSTICO
• Apagado manual
Para detener el aparato pulse el botón Off del Panel de Control. La ThermoChef Natura dejará de funcionar inmediatamente y volverá al modo “Stand by”.
NOTA: Si pulsa el botón “Off” en modo “Configuración”, el sistema anulará los
ajustes configurados hasta el momento.
17
1P77 manual de instrucciones Thermochef 1_Maquetación 1 03/02/12 12:59 Página 9
NOTA: Los 7 niveles de temperatura que puede seleccionar son: 37º C, 50º C, 60º C,
70º C, 80º C, 90º C y 100º C. La temperatura seleccionada por defecto es 37º C.
• Paso 2: Puesta en Marcha. Una vez pulsado el botón On, el aparato comienza
a funcionar a la temperatura seleccionada. El icono
permanecerá fijo en la
pantalla así como el ajuste que usted haya realizado.
NOTA: Cuando la temperatura de la jarra sobrepase los 60º C, con una velocidad de mezclado superior al nivel 5, el aparato bajará automáticamente la velocidad a fin de evitar quemaduras o salpicaduras de alimentos.
4. FUNCIÓN AMASADO
• Paso 1: Configurar la Función Amasado. En modo “Stand by” o “Configuración” pulse el botón “Función Amasado”. El icono de función
parpadeará
en la pantalla digital. En este momento el aparato se encuentra en modo configuración Amasado.
• Paso 2: Puesta en Marcha. Una vez pulsado el botón On, el aparato comienza a
funcionar según los ajustes configurados. El icono de función
permanecerá
fijo en la pantalla para indicar que el aparato se encuentra en modo Amasado.
NOTA: Como máximo, esta función se podrá utilizar 5 ciclos seguidos de 2 minutos cada uno y descansando 1 minuto entre ellos. Si se cumplen los 5 ciclos, la
máquina tendrá que descansar durante 1 hora antes de volver a usarla.
5. FUNCIÓN STEAMER
• Paso 1: Configurar la Función Steamer. En modo “Stand by” o “Configuración” pulse el botón “Función Steamer”. El icono de función
parpadeará en
la pantalla digital. En este momento el aparato se encuentra en modo configuración Steamer. Ahora puede seleccionar la velocidad (de 1 a 5) pulsando + o –
. La velocidad de rotación elegida parpadeará en el display.
NOTA: La velocidad predeterminada es la del nivel 1. Por seguridad, la velocidad nunca será superior a 5.
• Paso 2: Puesta en Marcha. Una vez pulsado el botón On, el aparato comienza a
funcionar según los ajustes configurados. El icono de función
permanecerá
fijo en la pantalla para indicar que el aparato se encuentra en modo Steamer.
NOTA: Durante el funcionamiento de la función Steamer, la velocidad se puede
reajustar en el modo Ajuste de Velocidad.
6. FUNCIÓN TURBO
• Paso 1: Puesta en Marcha. En modo “Stand by” o “Configuración” puede usar
la “Función Turbo” para mezclar el contenido de la jarra a máxima velocidad
(por ejemplo, para picar hielo). Para ello, mantenga pulsado el botón “Función Turbo”
: el aparato pasará inmediatamente al modo Turbo, y comenzará a mezclar a la máxima velocidad que permite la cuchilla. El tiempo de
funcionamiento se acumulará en la pantalla en formato “00: 00” (minutos :
segundos).
• Paso 2: Detener la Marcha. Deje de pulsar el botón “Función Turbo” y el
aparato se detendrá inmediatamente.
AVISO:
Riesgo de quemaduras por salpicaduras de comida
El vaso medidor es la única pieza que puede utilizarse para tapar el orificio
de respiración de la tapa. No utilice un trapo de cocina para cubrirlo, ya que
los alimentos que se estén cocinando podrían salpicar con el consiguiente
riesgo de quemaduras.
CESTA
La cesta de su ThermoChef Natura está fabricada en acero inoxidable de alta
calidad. Al igual que el vaso medidor, la cesta también cumple varias funciones:
• Le servirá para colar zumos de frutas y verduras. Después de triturar la fruta o
la verdura, coloque la cesta en el interior de la jarra y utilícela como colador.
Cuando realice esta operación, use el mango de la espátula para sostener la
cesta y verter el zumo con facilidad.
• Por regla general, los alimentos blandos como las albóndigas deberían colocarse en la cesta para guisarlos.
• La cesta también se utiliza para cocinar platos de guarnición, como arroz y patatas.
Cómo desmontar la cesta con facilidad: separe la
espátula en dos piezas (mango y cabeza). Coloque el
mango de la espátula en la ranura que se encuentra en el
borde superior de la cesta (figura 9) y haga palanca para
extraerla sin mancharse ni quemarse.
Cómo reducir el líquido de algunos alimentos: para
reducir la cantidad de líquido de algunos alimentos (por
ejemplo al cocinar salsa de tomate), retire el vaso medidor de la tapa de la jarra y coloque en su lugar la cesta
boca abajo. De esta forma, el agua se evaporará más
fácilmente.
9
ESPÁTULA
La espátula es otro utensilio diseñado especialmente para el robot de cocina
multifunción ThermoChef Natura.
• La espátula es el único utensilio que usted necesita para mezclar o remover
alimentos en la jarra. Así pues, la espátula puede utilizarse durante el proceso
de cocinado, filtrado y mezclado.
• La espátula también puede utilizarse para rascar la 10
comida adherida a las paredes de la jarra, ya que su
forma se adapta al hueco existente entre las cuchillas
y dichas paredes.
• Puede introducir la espátula en la jarra a través del
orificio de respiración de la tapa sin miedo a que
toque las cuchillas: su tope redondo de seguridad
evitará que esto suceda (figura 10).
• Es fácil extraer la cesta con ayuda del mango de la espátula. También puede utilizar el mango para sostener
la cesta cuando vaya a colar zumo de frutas o verduras.
NOTA: No dejar pulsado el botón más de 30 segundos.
16
9
1P77 manual de instrucciones Thermochef 1_Maquetación 1 03/02/12 12:59 Página 10
AVISO:
Riesgo de daños por uso de utensilios inadecuados
Para mezclar o remover alimentos en el interior de la jarra utilice siempre la
espátula. No utilice cucharas ni cualquier otro utensilio distinto, ya que
podría chocar con las cuchillas y averiar el aparato. Cierre bien la tapa de la
jarra antes de introducir la espátula por el orificio de ventilación.
VELETA
La veleta es un utensilio especial para mezclar alimen11
tos a velocidad constante, de forma que no se peguen en
el interior de la jarra. Resulta muy práctico para montar
nata o claras de huevo, así como para cocinar pudín o
cualquier receta a base de nata o leche, como postres cremosos o salsas.
Montaje de la veleta: (ver figura 11). Introduzca la
veleta en la jarra como ve en la imagen, acople su orificio
central con el tornillo situado en la base de la cuchilla
y haga presión hacia abajo. Gire la veleta en el sentido
contrario a las agujas del reloj hasta que quede bloqueada
en la cuchilla.
AVISO:
- No haga funcionar el aparato hasta haber colocado la veleta correctamente.
- No use la espátula cuando esté utilizando la veleta.
- No añada ingredientes a la jarra cuando el aparato esté en funcionamiento
con la veleta puesta, ya que la veleta podría sufrir daños o bloquearse.
- Cuando la jarra tenga más de 0,5 L de alimentos sin cocinar este accesorio
puede ralentizarse. Retomará su velocidad constante pasados unos minutos.
STEAMER
El steamer se compone de tres piezas:
• Tapa del steamer (parte superior).
• Bandeja del steamer (parte central).
• Steamer (parte inferior).
Una vez programada la máquina, pulse el botón On para que empiece a funcionar.
Verá que desaparecen de la pantalla todas las opciones de su menú salvo los
parámetros que usted haya seleccionado.
Antes de pulsar el botón On, asegúrese de que la jarra y la tapa de la jarra están
bien colocadas, para lo cual el icono
aparecerá en la pantalla digital.
El robot de cocina ThermoChef Natura no funcionará si escucha una señal acústica
y aparece el icono
en la pantalla.
Cuando la máquina termine de cocinar, aparecerá en la pantalla el icono END
acompañado de una señal acústica.
1. TEMPORIZADOR
El Temporizador sirve para establecer el tiempo de funcionamiento del aparato.
El formato que aparece en la pantalla al pulsar el botón “Temporizador” es “00:00”
(minutos: segundos). El tiempo máximo de configuración es de 60 minutos.
El Temporizador sólo puede utilizarse combinado con alguna de estas cuatro
funciones: Temperatura, Velocidad, Amasado o Steamer.
• Paso 1: Configurar el Tiempo. En modo “Stand by” o “Configuración”, pulse
el botón “Temporizador” y los minutos parpadearán en la pantalla digital.
Pulse + o – para ajustar los minutos. Para ajustar los segundos, pulse de nuevo
el botón “Temporizador”. Los segundos empezarán a parpadear y podrá
ajustarlos pulsando + o –.
• Paso 2: Puesta en Marcha. Una vez pulsado el botón On, el electrodoméstico
comienza a funcionar según los ajustes configurados. El Temporizador irá descontando el tiempo preseleccionado hasta llegar a 00:00, momento en el que
la máquina emitirá una señal acústica de aviso. Si usted no realiza ningún ajuste de tiempo, el Temporizador le indicará el tiempo de funcionamiento de la
máquina hasta que usted la detenga o hayan pasado 15 minutos.
2. AJUSTE DE VELOCIDAD
• Paso 1: Configurar la Velocidad. En modo “Stand by” o “Configuración”
pulse el botón “Ajuste de Velocidad”. El icono de función
parpadeará en la
pantalla digital. En este momento usted puede configurar el nivel de velocidad
de mezclado (10 niveles en total) pulsando los botones + o –. Cada vez que
pulse + o –, la velocidad de mezclado aumentará o disminuirá un nivel.
NOTA: La velocidad seleccionada por defecto es la 1.
• Paso 2: Puesta en Marcha. Una vez pulsado el botón On, el electrodoméstico
comienza a funcionar según los ajustes configurados; la pantalla mostrará el
icono
así como el ajuste que usted haya realizado.
NOTA: Durante el cocinado, la velocidad de mezclado se puede reajustar en el
modo Ajuste de Velocidad.
3. AJUSTE DE TEMPERATURA
AVISO:
- Cuando no lo vaya a utilizar, guarde siempre el steamer con la tapa cerrada.
- El steamer de su ThermoChef Natura no puede utilizarse en hornos microondas u otros electrodomésticos.
10
• Paso 1: Configurar la Temperatura. En modo “Stand by” o “Configuración”
pulse el botón “Ajuste de Temperatura”. El icono de función
parpadeará
en la pantalla digital. En este momento usted puede configurar la temperatura a la que desea cocinar (7 niveles en total) pulsando los botones + o –. Cada
vez que pulse + o –, el ajuste de la temperatura aumentará o disminuirá un nivel.
15
1P77 manual de instrucciones Thermochef 1_Maquetación 1 03/02/12 12:59 Página 11
• Función Turbo: Pulsando el botón
se selecciona la función Turbo que le
servirá para mezclar a la máxima velocidad.
• Ajuste de Temperatura: Pulsando el botón
se selecciona la función
Temperatura. A continuación, con los botones + y – podrá configurar la
temperatura a la que desea cocinar los ingredientes de 37º C a 100º C.
• Función Steamer: Pulsando el botón
se selecciona la función Steamer que le
servirá para cocinar al vapor, colocando encima de la jarra el recipiente steamer.
• Temporizador: Pulsando el botón
se selecciona la función Temporizador. A
continuación, con los botones + y – podrá configurar durante cuántos minutos desea que funcione la máquina. Para introducir los segundos, pulse de
nuevo el botón Temporizador.
• Selector de Báscula Electrónica: Pulsando el botón
podrá usar la báscula
que incorpora su ThermoChef Natura. Presione de nuevo el botón para poner
a cero las mediciones.
• Botón +: Este botón le servirá para moverse en sentido ascendente por los
menús de Temperatura y Velocidad, así como para fijar el Tiempo y hacer los
ajustes de hora.
• Botón –: Este botón le servirá para moverse en sentido descendente por los
menús de Temperatura y Velocidad, así como para fijar el Tiempo y hacer los
ajustes de hora.
• Off:
Botón de apagado, le servirá tanto para poner el aparato en “Stand
by” como para cancelar la selección que haya realizado.
Selector de báscula
eléctronica
Función turbo
Ajuste de velocidad
Ajuste de temperatura
Función steamer
Función amasado
Botón +
Botón –
Temporizador
INSTRUCCIONES DE MANEJO DE LAS FUNCIONES
Al encender el aparato, la pantalla se encontrará en modo “Stand by” y mostrará
la hora local. Para ajustar la hora local siga los pasos que se indican en la página 15.
En el panel de control, pulse el botón deseado para empezar a programar la
máquina. La pantalla cambiará a modo “Configuración” y el parámetro que haya
seleccionado parpadeará. Si no realiza ninguna operación, transcurridos unos
segundos la máquina volverá sola al modo “Stand by”.
14
Uso del steamer
Usted podrá utilizar el steamer combinando sus elementos de dos formas:
1. Steamer + bandeja del steamer + tapa del steamer (figura 12). Ésta es la
mejor combinación para cocinar diferentes alimentos al mismo tiempo. Por
ejemplo, podrá preparar carne o pescado en el steamer y su guarnición de
verduras en la bandeja.
2. Steamer + tapa del steamer (figura 13). Esta combinación le permitirá cocinar
grandes cantidades del mismo tipo de alimentos ya que, al prescindir de la
bandeja, dispondrá de más espacio. Por ejemplo, podrá preparar verduras,
patatas, piezas grandes de carne o salchichas.
12
13
AVISO:
Riesgo de quemaduras debidas al vapor o a la condensación de agua
caliente.
Coloque siempre la tapa del steamer cuando lo esté utilizando.
Importante:
Si la tapa no está correctamente colocada, puede salir vapor y los alimentos
no se cocinarán adecuadamente.
Pasos para usar correctamente su steamer
Usar su steamer es muy sencillo. Sólo tiene que seguir los siguientes pasos:
1. Coloque la jarra en la base de su ThermoChef Natura sin la tapa.
2. Ponga en el steamer los alimentos que desee cocinar al vapor, cúbralo con su
tapa y colóquelo sobre la jarra. Para ello, póngalo ligeramente girado hacia
la izquierda (figura 14) y muévalo en el sentido de las agujas del reloj hasta
que el gancho de su parte delantera quede totalmente sujeto en la abrazadera oculta tras el mango de la jarra, de forma que no se pueda girar más
(figura 15). Compruebe, además, que la pestaña ubicada en la parte trasera
haya encajado en el saliente de la jarra.
3. Comprobará que el steamer ha quedado bien colocado porque en la pantalla
digital aparecerá el icono de candado cerrado
. Para programar la Función
Steamer, siga las indicaciones de la página 15.
14
15
11
1P77 manual de instrucciones Thermochef 1_Maquetación 1 03/02/12 13:00 Página 12
Otros consejos de uso del steamer
• Para cocinar al vapor con su steamer, en el interior de la jarra debe introducir al
menos 0,5 litros (500 gr) de agua para una cocción al vapor de 30 minutos. Por
cada 15 minutos adicionales, tendrá que añadir 0,25 litros de agua (250 gr).
• Si lo desea, puede aprovechar el tiempo de cocción para hacer una sopa, una
salsa o una guarnición, o bien añadir un poco de vino al agua: en todos estos
casos, logrará potenciar el sabor de los alimentos que vaya a preparar en el
steamer.
• Para obtener mejores resultados, ponga los alimentos que requieran mayor
tiempo de cocción en la parte inferior del steamer (por ejemplo, la guarnición
de verduras en la parte inferior, y el pescado en la bandeja).
• Si va a utilizar la bandeja microperforada del steamer, coloque los alimentos
de forma que no tapen todas las ranuras para que el vapor pueda distribuirse
uniformemente.
• La tapa del steamer puede ponerse al revés sobre una superficie lisa para
apoyar el steamer una vez que lo retiremos de la jarra y recoger el vapor de
agua del mismo y de la bandeja. También puede usarse como bandeja para
servir la comida en la mesa (figuras 16 y 17) .
EXPLICACIÓN DE LOS CARACTERES DE LA PANTALLA DIGITAL
Icono termómetro
Significa: función Temperatura.
Parpadea: modo Temperatura configurable.
Icono cuchillas/flechas
Significa: función Turbo.
Icono cuchillas
Significa: función Velocidad.
Parpadea: modo Velocidad configurable.
Icono reloj
Significa: Temporizador.
Parpadea: modo Temporizador
configurable.
Icono báscula
Significa: Báscula Electrónica.
Icono candado cerrado
Significa: la tapa está cerrada.
Icono steamer
Significa: función Steamer.
Parpadea: modo Steamer configurable.
Icono candado abierto
Significa: la tapa está abierta.
Icono rodillo
Significa: función Amasado.
Parpadea: modo configuración de
Amasado.
Display (00:00)
Significa: display de tiempo o de peso.
Parpadea: modo Tiempo configurable.
17
16
Temperatura
Candado
Temporizador
Display
Velocidad
Báscula
6. INSTRUCCIONES
DE USO
CÓMO EMPEZAR A UTILIZAR EL APARATO
Antes de utilizar el robot de cocina ThermoChef Natura, colóquelo sobre una superficie estable y uniforme para que la báscula electrónica pueda pesar con exactitud.
Asegúrese de situarlo suficientemente lejos del borde para evitar que pueda caerse, y
de que esté alejado de armarios o estantes para evitar daños por el vapor.
Saque el cable de alimentación y conecte un extremo a la base de su ThermoChef
Natura y otro a la toma de corriente. Para encender el aparato, pulse el interruptor circular rojo situado en la parte trasera de la base. Oirá una señal acústica y se encenderá la
pantalla digital. Para conectar y desconectar el aparato, utilice siempre este interruptor.
En muchos casos, usted tendrá que realizar una serie de ajustes (temperatura,
velocidad, tiempo...) para que el robot comience a cocinar. Para ello tendrá que
utilizar los botones del panel de control y fijarse en los datos que aparecen en la
pantalla. A continuación encontrará una detallada explicación de cómo realizar
estos ajustes.
12
Steamer Amasado Turbo
NOTA: Al seleccionar el modo Báscula, la pantalla mostrará el peso expresado
en gramos.
Al seleccionar el modo Temporizador, usted podrá introducir un tiempo de
preparación establecido y, al empezar a funcionar, la máquina irá descontándolo
segundo a segundo. Si usted no selecciona ningún tiempo de preparación, la
pantalla le mostrará el tiempo de funcionamiento transcurrido contando desde cero.
EXPLICACIÓN DE LOS BOTONES DEL PANEL DE CONTROL
Al presionar los distintos botones del panel de control, una señal acústica le indicará
que esa función se ha activado. El panel de control incluye los siguientes botones:
• On/Pause:
Botón de puesta en marcha, pausa y configuración de hora local.
• Ajuste de Velocidad: Pulsando el botón
se selecciona la función Velocidad. A continuación, con los botones + y – podrá configurar la velocidad a la
que desea mezclar los ingredientes del 1 (velocidad más baja) al 10 (velocidad
más alta) .
• Función Amasado: Pulsando el botón
se selecciona la función de Amasado
que le servirá para preparar masas de todo tipo.
13
MULTIFUNCTIONAL FOOD PROCESSOR
THERMO CHEF
1H50
N AT U R A
INSTRUCTION MANUAL
CONTENTS
1. YOUR
THERMOCHEF NATURA MULTIFUNCTIONAL
FOOD PROCESSOR . . . . . . . . . . . . . . . . . . . .
2. TECHNICAL
SPECIFICATIONS
......3
....................4
..............................4
3. SAFETY
TIPS
4. BEFORE
USING THE APPLIANCE
.................7
5. ACCESSORIES . . . . . . . . . . . . . . . . . . . . . . . . . . . . . 8
6. HOW
TO USE THE APPLIANCE
7. THINGS
TO REMEMBER
. . . . . . . . . . . . . . . . . 12
. . . . . . . . . . . . . . . . . . . . . . 18
8. CLEANING . . . . . . . . . . . . . . . . . . . . . . . . . . . . . . 19
9. TIPS
FOR YOUR OWN RECIPES
SHOOTING
. . . . . . . . . . . . . . . . . . . . . . . 20
REGULATIONS
. . . . . . . . . . . . . . . . . . . . . . . 22
10. TROUBLE
11. LEGAL
. . . . . . . . . . . . . . . . . 20
12. GUARANTEE . . . . . . . . . . . . . . . . . . . . . . . . . . . . . 22
RISK OF ELECTRIC SHOCK
Please check regularly the power supply cord, the bowl and the remaining
accessories provided with your ThermoChef Natura. Stop using the appliance if
you find it damaged or faulty and contact our Customer Service Center for
repairing.
11. LEGAL
REGULATIONS
All the images depicted in this instruction manual are for guidance only and
can be subject to slight colour and shape modifications.
For customers living in EU-Member States:
Waste segregation sign
If you are a European country resident, we hope that you will not
discard the appliance or its accessories as regular waste [EU directive
2002/96/EC, 27th January, 2003 on wasted appliances and accessories].
We suggest that you deal with and recycle your old appliance and its
accessories according to current regulations.
COPYRIGHT
S.A. de Promoción y Ediciones owns the adaptation and translation rights to
this instruction manual into English, Spanish and Portuguese, as well as the
intellectual property rights of the recipe books attached, including the texts,
photographs and design therein contained.
Also, no part or the whole of the contents included in these instruction manual
may be modified, copied, reused, exploited, reproduced, publicly communicated,
reprinted or rehashed, sent by ordinary post or email, transmitted, used, treated
or distributed in any form or by any means for public or commercial purposes,
without the prior written consent of the copyright owner, S.A. de Promoción y
Ediciones.
12. GUARANTEE
We hereby certify that Club Natura ThermoChef multifunctional food
processor has been manufactured in accordance with the highest quality control
standards and has been rigorously tested to ensure its maximum performance
and resistance.
This international guarantee covers any defect or lack of conformity regarding
the manufacture and assembly of the product for a period of 2 years from the
date of receipt of the item. Damage caused by theft, fire or resulting from
accident, improper installation, deliberate or unintentional negligence and failure
to comply with the instructions provided in this manual is not covered by the
guarantee.
Unauthorized repair and/or alteration to the product will render the guarantee
null and void.
All the images included in this Instruction Manual are for guidance only and
have no contractual value.
TECHNICAL SUPPORT
2 year guarantee on parts and labour.
Guarantee for a period of time as stipulated in the general regulations
concerning guarantee on parts and labour.
22
1. YOUR
THERMOCHEF NATURA MULTIFUNCTIONAL
FOOD PROCESSOR
Thanks for buying ThermoChef Natura multifunctional food processor.
Before using the appliance for the first time, please read this instruction
manual carefully and keep it for future reference.
When you open the packing box, take out all the accessories included and
learn to recognize them by checking them against the following components list:
1
2
3
4
5
6
7
8
9
10
11
12
13
14
15
16
17
18
19
Main body
Electronic scale
Control panel
Bowl
Bowl lid
Filter basket
Measuring cup
Butterfly bar
Scraper
Scraper head
Scraper handle
Blades
Blade base
Blade fixing ring
Blade fixing bracket
Steamer Set
Steamer
Steamer pan
Steamer lid
2
1
3
6
5
8
7
4
9
12
10
Scraper
safety plate
13
14
15
11
3
19
16
FAULT CODES AND SOLUTION METHODS
Fault
code
18
Code meaning
1.
2.
3.
4.
• Bowl or lid not
installed
• You forgot to put the lid • Put the lid on the bowl
on. The bowl lid or the
and make sure that both
steamer are not
parts are properly
correctly installed on
connected.
the bowl.
E2
• Bowl overheating
• There is no water or the • Wait until the
water has boiled away
temperature in the bowl
in the bowl during
falls to room
heating.
temperature.
E3
• Motor overheating
• Motor overheating due • Wait until the motor
to prolonged use of the
temperature falls to
appliance or excessive
room temperature.
quantity of food in the
bowl.
5.
6.
E4
• Electronic overweight • The ingredients on the
scale plate weigh over
3 Kg.
7.
8.
9.
10.
E5
• Motor stall or
overload
• The motor is blocked
because of overload
due to an excessive
quantity of food in the
bowl.
• Reduce the food
proportion inside the
bowl. Unplug the
appliance and then plug
it again into the main
outlet.
E6
• Motor temperature
sensor warning
• The motor temperature
sensor is damaged.
• Contact our Customer
Service Center.
E7
• Bowl connection
error
• The bowl is not
• Make sure that the bowl
installed.
is properly installed.
The bowl is not correctly Unplug the appliance
installed.
and then plug it again
The bowl temperature
into the main outlet.
sensor is damaged.
SPECIFICATIONS
Voltage input: 220-240V AC; 50/60Hz
Rated power: 1550W. Motor power: 550W. Heating plate: 1000W
Working voltage of the control panel: 5V-12VDC
Technical parameters of the main electrical machine:
• Working voltage: 220-240V AC; 50/60Hz
• Maximum rotation speed: 8700 RPM/Min
Display type: LCD display + white backlight
Heating system: Resistance heating in the bottom of the bowl
• Includes overheating protection device
Electronic scale: maximum weight 3 Kg
Main body: high-quality ABS plastic
Bowl: stainless steel, maximum capacity 2 Litres
Length of supply cord: 1,2 M
3. SAFETY
TIPS
The appliance should not be used by mentally retarded or disabled persons,
except under the supervision of adults.
ThermoChef Natura multifunctional food processor can be used at home or
for professional purposes. This appliance complies with the highest safety
standards. However, it is very important for you to read the following safety tips in
order to avoid the risk of domestic accidents or malfunctioning of the appliance:
RISK OF ELECTRIC SHOCK
• Unplug the appliance before cleaning it or if you intend to put it away for a
long time.
• Do not immerse the ThermoChef Natura main body in water or wash it with
a great amount of water. Just clean it with a wet cloth and avoid water or
other foreign elements from getting into the main body.
4
Solution methods
E0
17
2. TECHNICAL
Possible reasons
• Remove some
ingredients from the
scale plate.
21
ADDITIONAL CLEANING INFORMATION
The colour of some plastic utensils may fade lightly. If there is dirt on the
measuring cup or the bowl lid, you can eliminate it at the same time that you
clean the bowl and the blades, as explained above.
For better ventilation purposes, please do not cover the bowl with the
measuring cup when you are not using the appliance.
9. TIPS
FOR YOUR OWN RECIPES
We advise you to consult ThermoChef Natura accompanying recipe book and
follow the instructions provided in it to prepare a wide range of step-by-step
recipes. This will make your cooking much simpler. If you wish to cook your own
dishes, please follow the instructions below indicated:
ORDER OF INGREDIENTS
When preparing your own recipes, bear in mind the order in which ingredients
must be added and if they need to be heated or not.
WEIGHING THE INGREDIENTS
Before weighing the first ingredient, press the Electronic Scale button on the
control panel to reset the weight to zero.
WARNING: Do not exceed the maximum capacity of the bowl (2 litres).
HEATING TIME
The heating time depends on the following factors:
a. The initial temperature of the ingredients to be processed.
b. The quantity, weight and volume of the ingredients.
WARNING:
The total volume of the ingredients should never exceed the capacity of
the bowl or the steamer.
c. The thermal conductivity or heat absorption of the ingredients to be
processed.
d. The heating degree.
e. The blending speed.
f. The use of accessories (including the steamer).
10. TROUBLE
SHOOTING
ThermoChef Natura food processor has a self-diagnosis function; that is, if
failure occurs, the appropriate failure information will be shown on the LCD
screen. If this happens, switch the appliance off and unplug it from the main
outlet. Should the failure reoccur when you plug the unit into the mains again,
please contact our Customer Service Center, quoting the fault code displayed on
the screen.
20
• Regularly check whether the main body, the steamer or other components
are damaged or not. Should you find any fault, please stop using the
appliance and contact Club Natura Customer Service Center.
• ThermoChef Natura multifunctional food processor, including the supply
cord, can only be repaired by staff appointed by our company. Any
inappropriate or unauthorized repair might put the user’s safety at risk. Free
warranty will be invalid if components from other manufacturers are used,
so we urge you to use the original components.
RISK OF BLADE INJURY
• Do not touch the edge of the blades. Please be careful and hold the blades
by its upper part when reassembling or dismantling them.
RISK OF BURN INJURIES BY HOT FOOD SPLASHES
• Do not fill the bowl above the capacity mark. The food quantity should not
exceed the maximum capacity of 2 L.
• Do not open the lid until the food in the bowl stops rotating, especially
from speed 4 upwards.
• Do not try to force the lid open.
• When the food in the bowl is cooking at a high-temperature or boiling,
please do not use speed 4 or higher speeds.
• If the appliance has been cooking at high temperature, be careful when you
open the bowl lid, as you could get burnt by hot food splashing. Set the
measuring cup properly on the air hole of the bowl lid when processing
food such as sauces or soups at medium speed (3-6) and high speed (7-10).
• Do not touch the bowl when processing hot food at over 60ºC.
• Adopt low speed (1-2) when using the steamer in order to avoid the liquid
from splashing out at high speed.
• Please set the food processor on a clean, stable and flat table, especially
when using the steamer.
• Make sure that the steamer and the bowl are well connected when you use
them.
RISK OF BURN INJURIES BY OUTFLOWING VAPOR OR CONDENSED WATER
• Pay attention to the vapor or condensed hot water outflowing through the
top or the sides of the lid.
• When the appliance is operating, remember not to touch any part of the
steamer except the handles, made from a heat insulating material.
• Do not use the steamer if the lid is not on.
• When opening the steamer lid, be careful not to get burnt by the vapor.
• When you finish steaming and are going to remove the steamer, please pay
attention to the vapor outflowing through the bowl’s mouth.
• When using the steamer, keep the children away from the appliance and
warn them of the risk of getting burnt by hot vapor or hot water splashing
out.
• Check that the air hole on the steamer lid is unblocked. Otherwise it might
result in an uncontrolled vapor outflow.
5
RISK OF BURN INJURIES BY HEATED SPARE PARTS
• Please put the appliance in a safe place which is out of the children’s reach
and warn them that the unit will become hot and accordingly must not be
touched.
RISK OF PERSONAL INJURIES THROUGH FOOD SPLASHING
• When you use ThermoChef Natura to grind or chop frozen food at medium
speed (3-6), high speed (7-10) or Turbo function, please hold the bowl firmly
and do not forget to place the measuring cup on the bowl mouth.
RISK OF USING FOREIGN ELEMENTS OR UNWARRANTABLE PARTS
• Use only spare parts and components provided with your ThermoChef
Natura.
• The measuring cup is the only part which can be used to cover the air hole
or mouth situated at the bowl lid while cooking. Do not use a dishcloth to
cover the hole.
• Only the scraper bar included with ThermoChef Natura can be used for
blending the bowl contents, since other tools such as spoons or other
articles of cutlery might clash with the blades and put the user’s safety at
risk.
POSSIBLE SHIFT OF THERMOCHEF NATURA MULTIFUNCTIONAL FOOD
PROCESSOR
• Place the processor on a stable, flat table which will not become hot. When
it is used to knead dough or grind food the unit will move because of the
vibration, so you should make sure that it is within safe distance from the
edge to keep it from falling on to the floor. As a rule, do not operate the
appliance without adult supervision.
DAMAGE CAUSED BY HOT STEAM
• When using the steamer, make sure that there is an appropriate distance
between the appliance and any cupboard or shelf in order to avoid damage
caused by hot steam.
RISK CAUSED BY OTHER HEAT SOURCES
• Keep the appliance away from other electrical appliances and induction
cookers. Do not place the unit or the supply cord on top of heat sources
such as electrical hot plates, stoves or ovens.
FOOD LEAKAGE
• Make sure that the rubber fixing ring is duly placed when setting up the
blades since it is a leak-proof device. Any failure in the installation of the
rubber fixing ring will cause food leakage, which might damage to the
appliance.
DAMAGE DUE TO BAD COOLING OF THERMOCHEF NATURA
• Ensure that the vent situated on the back of the main body of the appliance
is not blocked. Otherwise, the unit will be damaged.
6
COOKING UNBLENDED FOOD
ThermoChef Natura will allow you to heat the ingredients in the bowl without
rotating the blades. To do so, you should make the desired time and temperature
adjustments and then press ON.
SYSTEM OVERLOAD
If the motor is overloaded during the preparation of food, the motor
protection program will automatically shut off the appliance. Even so, there might
be an abnormal smell due to overheating. Do not worry, as the smell will
disappear as soon as the appliance cools down.
8. CLEANING
Just like every new appliance, your ThermoChef Natura food processor should
be thoroughly cleaned before using, especially the bowl, the bowl lid, the
measuring cup, the scraper, the basket filter and the steamer.
WARNING:
Some ingredients such as curry, citrus fruits, tomatoes or carrots may stain
the appliance. To avoid this, clean the food residues as soon as possible.
HOW TO CLEAN THE BOWL AND THE BLADES
To clean the bowl and the blades, pour 1 litre of warm water into the bowl and
add liquid soap of the kind you normally use for washing the dishes. Then press
the Turbo function button several times or let the processor work at speed 5 or 6
for a few seconds.
If food sticks to the inner walls of the bowl, you can use a specific stainless
steel detergent to help clean it.
In case you need to wash the blades separately, first you must remove them
from inside the bowl. To do so, follow the instructions provided on page 7. Once
you have taken them out of the bowl, hold them carefully by the base and wash
them under the water with the blades facing up. You can also use a brush to
eliminate food residues completely.
WARNING:
Do not wash the bowl in the dishwasher or use sharp tools to clean it, as
this could damage the appliance and compromise its safety.
HOW TO CLEAN THE STEAMER
Clean the steamer, the steamer pan and the steamer lid with warm water and
soap, using a soft cloth, or in the dishwasher using a mild non abrasive detergent.
Do not use sharp tools or steel brushes.
HOW TO CLEAN THE MAIN BODY
Unplug the appliance from the main outlet before cleaning it with a lightly
moistened soft cloth or a mild non abrasive detergent.
WARNING:
Avoid risk of electric shock
- Unplug the appliance from the main outlet before cleaning it or if you
intend to put it away for a long time.
- Do not immerse ThermoChef Natura in water or wash it with a great
amount of water, as this could damage the appliance.
19
• Automatic turn-off
a) If you have used the Timer function to set a cooking time, the End icon will
appear on the LCD screen along with a warning sound to signal the end of
the operation once the countdown of the set cooking time is over.
b) If you haven’t set any cooking time, the appliance will automatically turn off
as a precautionary measure if no operation is performed for the next 15
minutes. The End icon will be shown on the LCD screen, along with a
warning sound, to signal the end of the operation.
7. THINGS
TO REMEMBER
STANDBY MODE
If ThermoChef Natura multi-functional food processor is in On position but
without performing any operation, it will automatically enter into Standby mode
in order to save electricity. At this moment, the backlight on the LCD screen will
turn off and only local time will be displayed. The power consumption of the
appliance in Standby mode is under 1W.
To quit Standby mode, you only need to press any button on the control
panel. If you do not intend to use your ThermoChef Natura for a long time, we
suggest that you switch off the appliance and unplug it from the main outlet.
PAUSE + ELECTRONIC SCALE FUNCTION
You can stop the appliance at any time during the cooking process by
pressing On/Pause. This will allow you to put the machine on pause for 15
minutes, during which time the appliance will save all the settings you have
selected or, if you wish, you will be able to modify any of these settings. During
the pause time you can also weigh ingredients by pressing the
button. To
resume the cooking process, press On/Pause again.
ELECTRONIC MOTOR PROTECTION
The motor protection program monitors the working condition of the motor
and causes the motor to stop working when it detects something which might
damage the appliance.
Along with your ThermoChef Natura you also get a recipe book. As a rule, if
you follow the guidance provided in the recipes, the motor protection program
will not start. However, if the food to be processed exceeds the quantity required,
the protection program will become active immediately and stop the motor. In
this case, error code “E5” will appear on the LCD screen and you will need to
follow the steps below:
1) Turn off the power switch at the back of the appliance.
2) Lift the bowl lid to see if there is food blocking the blades.
3) Remove some food from the bowl or add some liquid.
4) Close the bowl and turn on the power switch.
5) Select the right settings and resume the cooking process.
WARNING: It is better to wait 3 to 5 minutes for the appliance to cool down before restarting it. If error code “E5” reappears on the screen once the appliance
has cooled down, please contact our Customer Service Center.
18
4. BEFORE
USING THE APPLIANCE
BEFORE STARTING THE APPLIANCE
Place the food processor on a clean, stable and flat table. Before using it for
the first time, you should wash all its accesories.
To avoid food from tasting abnormally during initial usage, pour half a litre of
water into the bowl and add a lemon cut into slices at 100º C for 30 minutes.
As you increasingly use the appliance, such abnormal taste will gradually
diminish and disappear.
ASSEMBLY OF THE BOWL
To insert the bowl on to the main body of the appliance, just follow the steps
below:
1. With the handle facing the front (in
1
2
the direction of the control panel),
place the bowl on the main body
until you hear a click which ensures
that both parts have been properly
connected, as shown in picture 1.
Otherwise, ThermoChef Natura
cannot be started.
2. Add the ingredients into the bowl
3
and then put the lid on it (picture 2).
3. Turn the bowl lid clockwise until it
reaches its limit (closed padlock position), as shown in
picture 3.
For safety purposes, you are not allowed to remove the
bowl from the main body when the appliance is in
4
operation. To remove the bowl, wait for the appliance to
stop operating and then turn it until it unblocks. The LCD
screen will show the open padlock icon. Press the square
button at the main body under the bowl and take it out
carefully (picture 4).
WARNING:
Risk of burn injuries by food splashing out
Do not try to force open the bowl lid. If you have been cooking at high
temperature, be extremely careful when removing the lid, as you could get
burnt by food splashing.
ASSEMBLY OF THE BLADES
• Dismantling the blades: Put one hand into the bowl
and hold the upper half of the blades (it is better to
wrap up the blades in a dishcloth or towel to keep
your hands from getting hurt). Next, hold the blade
fixing bracket situated outside the bowl and turn it 30º
counterclockwise (see picture 5) with the other hand.
Then carefully remove both the blades and their fixing
base, as shown in picture 6.
5
6
7
• Assembling the blades: make sure that the rubber fixing ring is properly
set on the top of the blade fixing base. When you put the blades into the
bowl, always check that the two flanges sticking out of the bottom of the
fixing base fit in the opening situated at the bottom of the bowl. Then place
the external fixing bracket and turn it clockwise until it reaches its limit.
WARNING:
Be careful not to get hurt
The blades are very sharp. We advise you to wrap them in a dishcloth
when dismantling or assembling them. Hold the blades firmly and remove
them with extreme caution. Be careful not to drop them accidentally.
WARNING:
Risk of food leakage at the bottom of the bowl
When assembling the blades, make sure that the rubber fixing ring is
properly set at the blade base. Otherwise, the food being blended or
cooked might leak at the bottom of the bowl and damage the appliance.
5. ACCESSORIES
Before you start using ThermoChef Natura food processor, we advise you to
read carefully the features of its accessories and learn to use them correctly:
7. ELECTRONIC SCALE
• Step 1: Start-up. In Standby or Setting modes, you can use ThermoChef
built-in electronic scale to weigh the desired ingredients. To do so, press
the Electronic Scale button. The appliance will immediately go into
Electronic Scale mode. The weight will be shown in grams on the screen
in “00 00” format.
• Step 2: Starting to weigh. To start weighing ingredients, it is very
important that you place the food in the centre of the weighing plate.
The weight will be shown on the LCD screen.
You can use the Electronic Scale function while the food processor is operating.
To do so, just check the Pause + Electronic Scale function on page 18.
• Step 3: Adding up successive weights. If you wish to weigh an ingredient
which requires a container (milk, flour, sugar, etc.), you can weigh the
container first and then subtract its weight. To do so, place the container
in the centre of the scale and, as soon as its weight is shown on the LCD
screen, press the Electronic Scale button again. The weight will be cleared
to zero, even though the container is still on the scale, and you will be able
to start weighing. This is also useful in case you wish to add other
ingredients and weigh them separately.
WARNING: The maximum weighing load of the scale is 3 Kg. Error code “E4”
will appear on screen if the weight exceeds this quantity.
BOWL
There are graduated marks on each side of the bowl which show the
container’s capacity. Each graduation represents 0.5 litres. The maximum capacity
of the bowl is 2 litres (picture 7).
WARNING:
Risk of burn injuries by food splashing
The quantity of food put into the bowl should not
exceed 2 litres. Otherwise the food might splash
through the air hole on the lid and put the user at
risk of sustaining burn injuries.
7
MEASURING CUP
The measuring cup can be used in many ways: it can
be used to avoid heat loss or to keep the food which
is blending or cooking from splashing out. To do so,
place it on top of the air hole situated at the bowl lid
(picture 8). At the same time, it can also be used to
measure the ingredients. A full measuring cup is 100 ml
and half of it is 50ml.
If you wish to add ingredients into the bowl through
the mouth, use the measuring cup.
100 ml
50 ml
8
8. LOCAL TIME SETTING
To set the local time, just follow the steps below:
• Step 1: Go into “Standby mode”. With the unit in Off position, press the
red On button at the back of the appliance. ThermoChef will automatically
turn on in Standby mode.
With the appliance in On position, if you do not perform any operation in a
few seconds ThermoChef will automatically go into Standby mode.
You will notice that the appliance is in Standby mode as the LCD screen will
display the time in “00:00” (“hour:minutes”) format.
• Step 2: Set the hour and the minutes. Press the ON button on the control
panel for 5 seconds to set the local time. Press + or – to select the hour.
After setting the hour, press ON again to enter into minute setting. Set the
minutes by pressing + or –.
WARNING: While the food processor is operating, no time adjustments are allowed.
• Step 3: Confirm local time setting. Once you have set the time, then press
ON to confirm the local time setting. The appliance will return to Standby
mode and the LCD screen will show the time you have set.
9. TURNING OFF THE APPLIANCE
• Manual turn-off
To stop the appliance, just press the Off button on the control panel.
ThermoChef will stop working immediately and return to Standby mode.
WARNING: If you press Off in Setting mode, the selected settings will automatically be cleared.
8
17
• Step 2: Start-up. After pressing ON, the appliance wil start operating at the
set temperature. Both the
icon and the selected setting will be displayed
permanently on the LCD screen.
WARNING: When the temperature in the bowl exceeds 60º C, with a blending
speed above level 5, the appliance will automatically decrease the speed to
avoid burns caused by hot food splashing out.
4. KNEADING FUNCTION
• Step 1: Setting the Kneading function. In Stand-by or Setting mode, press
the Kneading button. The
function icon will start blinking on the LCD
screen. Now the appliance is in Kneading mode.
• Step 2: Start-up. After pressing ON, the appliance will start operating
according to the desired settings. The
function icon will be displayed
permanently on the LCD screen to show that the appliance is in Kneading
mode.
WARNING: This function can be used for a maximum of 5 successive cycles,
each of 2 minutes’ duration, with 1-minute rest in between. If all 5 cycles are
completed, the appliance will have to remain inactive for 1 hour before resuming
operation.
5. STEAMER FUNCTION
• Step 1: Setting the Steamer function. In Stand-by or Setting mode, press
the Steamer button. The
function icon will start blinking on the LCD
screen. Now the appliance is in Steamer mode. You can select the rotation
speed (from 1 to 5) by pressing + or –. The selected rotation speed will
start blinking on the display.
WARNING: The default rotation speed is level 1. For safety purposes, the rotation speed will never exceed level 5.
• Step 2: Start-up. After pressing On, the appliance will start operating
according to the desired settings. The
function icon will be displayed
permanently on the LCD screen to show that the appliance is in Steamer
mode.
WARNING: When the Steamer function is on, the rotation speed can be reset in
Speed Adjustment mode.
6. TURBO FUNCTION
• Step 1: Start-up. In Stand-by or Setting modes, you can use the Turbo
function to blend the contents of the bowl at maximum speed (for instance,
for crushing ice). To do so, keep the Turbo button
pressed: the appliance
will go into Turbo mode immediately and start blending at the highest
speed which the blade allows. The cooking time will appear on the screen
in “00: 00” (minutes: seconds) format.
• Step 2: Stop. Stop pressing the Turbo button. The appliance will stop the
blending process at once.
WARNING: Do not keep the button pressed for more than 30 seconds.
16
WARNING
Risk of burn injuries by food splashing
The measuring cup is the only part which can be used to cover the air hole
on the lid.
Do not use a dishcloth to cover the hole, since it might result in food
splashing out and put the user at risk of sustaining burn injuries.
BASKET FILTER
ThermoChef Natura basket filter is made of high quality stainless steel. Just
like the measuring cup, the basket filter is also a multifunctional component:
• It can be used as a filter for fruit and vegetable juices. After grinding fruit or
vegetables, put the basket filter into the bowl and use it as a sieve. When
you do this, use the scraper handle to hold the basket and pour the juice
easily.
• As a rule, soft food such as meatballs should be put in the basket filter to stew.
• The basket filter can also be used to cook side dishes such as rice and
potatoes.
How to dismantle the basket filter easily: separate
9
the scraper into two different pieces (handle and head).
Put the scraper handle into the notch on the upper part
of the basket filter (picture 9) and remove it carefully
from the jar so as not to get stained or burnt.
How to reduce the water quantity of some food: if
you want to decrease the water quantity of some food
(for instance, when cooking tomato sauce), remove the
measuring cup out of the bowl lid and replace it with the
basket filter upside down. That way, the water will easily
evaporate.
SCRAPER
The scraper is another tool specifically designed for ThermoChef Natura
multifunctional food processor.
• The scraper is the only utensil which can be used to mix or blend food in
the bowl. Accordingly, the scraper can be used during the processes of
cooking, filtering and blending.
• The scraper can also be used to scrape the food
10
stuck to the walls of the bowl, since its shape fits
into the gap between the blades and the bowl
walls.
• You can stick the scraper into the bowl through the
air hole on the lid. Don’t be afraid to touch the
blades with it: its round safety plate will prevent this
from happening (picture 10).
• It is easy to remove the basket filter with the help
of the scraper handle. The latter can also be used
to hold the basket filter when filtering fruit or
vegetable juice.
9
WARNING
Risk of damage through using unsuitable tools
Always use the scraper handle for blending and stirring food into the bowl.
Do not use spoons or other utensils, since these might clash with the
rotating blades and damage the appliance. Close the bowl lid tightly
before sticking the scraper through the air hole.
BUTTERFLY BAR
The butterfly bar is a tool specifically designed for
blending food at constant speed so that it won’t get
stuck to the inside walls of the bowl. It’s a very practical
tool for whipping cream or egg white, as well as for
cooking puddings and any whipped cream or milk-based
recipes, such as creamy desserts or sauces.
Assembly of the butterfly bar: (see picture 11). Put
the butterfly bar into the bowl, as shown in the picture,
connect the central hole of the butterfly bar with the
screw on the blade base and press downwards. Turn the
butterfly bar counterclockwise until it is blocked on the
blade.
11
WARNING:
- Do not start the appliance until the butterfly bar is fixed in its right position.
- Do not use the scraper when using the butterfly bar.
- Do not add ingredients into the bowl when the appliance is operating
with the butterfly bar set up, as the butterfly bar might be damaged or
blocked.
- When the bowl contains over 0,5 L of uncooked food, this accessory may
slow down. It will resume its constant speed within a few minutes.
STEAMER
The steamer is made up of three parts:
• Steamer lid (top).
• Steamer pan (middle).
• Steamer (bottom).
Once the appliance has been programmed, press ON to start it operating.
You will notice that all the menu options disappear from the screen except the
settings you have selected.
Before pressing the ON button, make sure that the bowl and the bowl lid are
properly connected. If so, the
icon will be displayed on the LCD screen.
ThermoChef Natura food processor will not work if a warning sound is heard
and the
icon is shown on the LCD screen.
When the appliance finishes cooking, the END icon will be displayed on the
screen along with a beep sound.
1. TIMER
The Timer allows you to set the working time of the appliance. The format
displayed on the LCD screen when pressing the Timer button is “00: 00”
(minutes: seconds). The maximum setting time is 60 minutes.
The Timer can only be used in combination with any of these four functions:
Temperature, Speed, Kneading or Steamer.
• Step 1: Setting the Time. In Standby or Setting mode, press Timer and the
minutes will start blinking on the LCD screen. Press + or – to set the
minutes. Press Timer again to set the seconds. The seconds will start
blinking and you will be able to adjust them by using the + or – buttons.
• Step 2: Start-up. After pressing ON, the appliance will start operating
according to the desired settings. The Timer will start counting down the
set time until it reaches 00:00, by which time a warning sound will be heard.
If no time adjustment is made, the Timer will show the working time of the
appliance until you stop it or after 15 minutes have lapsed.
2. SPEED ADJUSTMENT
• Step 1: Setting the speed. In Stand-by or Setting mode, press the Speed
Adjustment button. The
function icon will start blinking on the LCD
screen. Now, you can set the blending speed level (10 levels in total) by
pressing + or –. Every time you press + or –, the blending speed will
increase or decrease one level.
WARNING: The default blending speed is level 1.
• Step 2: Start-up. After pressing On, the appliance will start operating
according to the desired settings; both the
icon and the selected
setting will be displayed on the LCD screen.
WARNING: During the cooking process, the blending speed can be readjusted
in Speed Adjustment mode.
3. TEMPERATURE ADJUSTMENT
• Step 1: Setting the temperature. In Stand-by or Setting mode, press the
Temperature Adjustment button. The
function icon will start blinking on
the LCD screen. Now, you can set the desired cooking temperature (7 levels
in total) by pressing + or –. Every time you press + or –, the temperature
adjustment will increase or decrease one level.
WARNING:
-If you are not using the steamer, always put it away with the lid on.
-The steamer provided with ThermoChef Natura cannot be used in
microwave ovens or other electric appliances.
10
WARNING: There are 7 temperature levels to choose from: 37º C, 50º C, 60 ºC,
70º C, 80º C, 90º C and 100º C. The default temperature is 37ºC.
15
• Turbo function: By pressing the
button, the appliance will go into Turbo
mode, a function which will allow you to blend food at maximum speed.
• Temperature Adjustment: By pressing the
button, the appliance will go
into Temperature Adjustment mode.Then, by using the + – buttons you can
select the desired temperature setting for cooking the ingredients (from
37ºC to 100ºC).
• Steamer function: By pressing the
button, the appliance will go into
Steamer mode, a function which will allow you to steam by placing the
steamer pan on top of the bowl.
• Timer function: By pressing the
button, the appliance will go into Timer
mode.Then, by using the + – buttons you can select the desired minutes
setting. To select the seconds settings press Timer again.
• Electronic Scale function: By pressing the
button, you can use the builtin ThermoChef electronic scale. Press the button again and the weight will
clear to zero.
• + Button: By pressing the button, you can scroll up through the
Temperature and Speed menus. You can also use it to set the Time and
make time adjustments.
• – Button: By pressing the button, you can scroll down through the
Temperature and Speed menus. You can also use it to set the Time and
make time adjustments.
• Off: If you press this button , the appliance will shut off. You can use it
both to go into Standby mode and to cancel the settings you have
previously selected.
Turbo function
Electronic scale
Speed adjustment
Temperature
adjustment
Kneading
function
Steamer function
+ Button
– Button
Timer
Use of the steamer
You can use the steamer by combining its elements in two ways:
1. Steamer + steamer pan + steamer lid (picture 12).
This is the best combination for cooking several dishes at the same time.
For example, you will be able to cook meat or fish on the steamer and a
vegetable garnish on the steamer pan.
2. Steamer + steamer lid (picture 13).
This combination will allow you to cook large amounts of the same type of
food, as you will have more space available by leaving the steamer pan out.
For example, you will successfully prepare vegetables, potatoes, large
pieces of meat or sausages.
12
13
WARNING:
Risk of burn injuries by outflowing vapor or condensed hot water.
Always put the steamer lid on when using the steamer.
Warning:
If the lid isn’t correctly placed steam may come out through it, which will
cause food not to be cooked properly.
Steps for using your steamer properly
Using your steamer is very simple. You only need to follow the steps below:
1. Place the bowl on the main body of the appliance with the lid off.
2. Pour the food that you intend to steam into the steamer, cover it with the
lid and place it on the bowl. To do so, tilt it slightly to the left (picture 14)
and turn it clockwise until you tightly fasten on the hook situated at its front
with the clamp at the back of the bowl handle in such a way as to stop it
from turning any further (picture 15). Please check that the flange at the
back properly fits in the bowl’s overhanging end.
3. The closed padlock icon
will flash on the LCD screen to show that the
steamer has been properly installed. To set the Steamer Function, follow the
instructions provided on page 14.
HOW TO USE THE FUNCTIONS
When you turn on the appliance, the screen will be in Standby mode and show
the local time. To set the local time, just follow the steps indicated on page 19.
Press the desired button on the control panel to start programming the
appliance. The display will go into Setting mode and the selected setting will
start blinking. If no operation is performed, the unit will return to Standby mode
within a few seconds.
14
14
15
11
Additional tips on how to use your steamer
• To steam cook with your steamer you need to pour at least 0.5 litres (500 g) of
water into the bowl to allow for 30-minute steam cooking. For every additional 15 minutes you will need to add 0.25 litres of water (250 g).
• If you wish, you can take advantage of the cooking time by making a soup, a
sauce or a garnish or by adding some wine to the water. By doing this you will
effectively highlight the flavour of the food being cooked on the steamer.
• For better results, place the food which requires a longer cooking time at the
bottom of the steamer (for example, vegetable garnish at the bottom and fish
on the steamer pan).
• If you intend to use the micro-perforated steamer pan, place the food on it in
such a way as not to obstruct all the holes so that the vapor spreads evenly.
• The steamer lid can be placed upside down on a flat surface to rest the steamer on it once we have removed it from the bowl, as well as to collect the vapor
gathered both inside it and in the steamer pan. It can also be used as a tray to
serve food at the table (pictures 16, 17).
EXPLANATION OF THE SYMBOLS ON THE LCD SCREEN
Thermometer icon
Meaning: Temperature function.
If blinking: adjustable Temperature mode.
Blade icon
Meaning: Speed function.
If blinking: adjustable Speed mode.
Scale icon
Meaning: Electronic Scale.
Steamer icon
Meaning: Steamer function.
If blinking: adjustable Steamer mode.
Rolling pin icon
Meaning: Kneading function.
If blinking: adjustable Kneading mode.
Blade/arrow icon
Meaning: Turbo function.
Clock icon
Meaning: Timer function.
If blinking: adjustable Timer mode.
Closed padlock icon
Meaning: the lid is locked.
Open padlock icon
Meaning: the lid is unlocked.
Display (00:00)
Meaning: Time or weight display.
If blinking: adjustable Time mode.
17
16
Temperature
Padlock
Timer
Display
Speed
6. HOW
TO USE THE APPLIANCE
STARTING TO USE THE APPLIANCE
Before using the ThermoChef Natura multifunctional food processor, place the
appliance safely on a stable and flat surface so that its built-in electronic scale can
weigh accurately. Make sure that you place it far enough from the edge in order
to prevent it from falling on to the floor and always keep it at a distance from
closets or shelfs so as to avoid burn injuries as a result of vapor.
Take out the supply cord and connect one terminal to the main body of your
ThermoChef Natura and the other terminal to the power outlet. To start the
appliance, press the red round switch at the back of the main body. You will hear
a beep sound and the LCD display will switch on. Always use this switch to turn
on and off the appliance.
More often than not, you will have to make a series of adjustments
(temperature, speed, time...) to start the food processor working. To do so, use
the buttons on the control panel and pay attention to the data displayed on the
LCD screen. Check below a detailed explanation of how to make these
adjustments.
12
Scale Steamer
Kneading Turbo
WARNING:
In Scale mode, the display will show the weight expressed in grams.
By selecting Timer mode, you will be able to enter a preset cooking time.
That way, when it starts working, the clock will initiate a second-by-second
countdown. If no cooking time is selected, the screen will show the
working time lapsed counting from zero.
EXPLANATION OF THE CONTROL PANEL BUTTONS
By pressing the different buttons on the control panel, a beep sound will show
that the function has been activated. The control panel includes the following
buttons:
• On: By pressing this button , the appliance starts working and goes into
local time setting mode.
• Speed adjustment: By pressing the
button, the appliance will go into
Speed mode. Then, by using the + – buttons you can select the desired
blending speed setting choosing from levels 1 (lowest speed) to 10 (highest
speed).
• Kneading function: By pressing the
button, the appliance will go into
Kneading mode, a function which will allow you to prepare all kinds of dough.
13


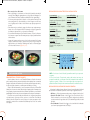


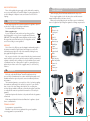


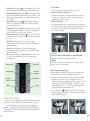
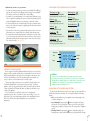


![[es] Instrucciones de uso . . . . . . . . . . . . . . . . . . 2](http://vs1.manualzilla.com/store/data/006061507_1-ca9b9960dfff7bd40da5691c4a3c1ec7-150x150.png)