Transcript
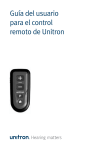
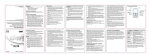
SHARK
User Manual | Manual de Usuario
Welcome
Thank you for purchasing this innovative iSWAG product. Due to
different software versions and network operators, refer to your
phone for the correct details. The specifications in this manual are
subject to change without notice. iSWAG reserves the final right
to interpret the performance of this mobile phone. While the
utmost care was taken in the production of this manual, neither
iSWAG nor any other affiliated company, assumes responsibility
for any mistakes or errors that may be contained in this
document. iSWAG and the iSWAG logo are registered
trademarks of iSWAG. Other trademarks are the property of their
respective owners.
Description of Keys
[Left soft key]
Press this key to enter the main menu
Press this key to confirm the function
Press this key to answer a call
[Right soft key]
Press this key to enter phonebook
Press this key to go back to previous menu
Press this key to reject a call
[OK Key] Press OK key to confirm and enter main menu, press
and hold this key to turn on torch light
[Call key] Press this key to make a call
Press to answer an incoming call
Press to enter call history
[End key] Press to end a call, press and hold to turn off phone
Power On: Press and hold to turn on phone
Press this key to go back to standby screen.
[Navigation keys]
Press to scroll through options when browsing a function list. In
edit mode, press direction keys to navigate. In standby mode,
press a direction key to enter the specified function page. You
can also customize direction keys to match the desired functions.
In conversation mode, press up or down to adjust volume
[Number keys]
Dial numbers to make call. Press and hold number keys for
speed dial, if you set speed dial on.
[ * key] , press * key twice. In Player function or FM radio press *
key to decrease volume.
[ # key] Press and hold this key to switch between profiles. Press
with left soft key to lock the keypad. In Player function or FM
radio, press # key to increase volume.
Bienvenido
Gracias por haber adquirido este teléfono móvil innovador iSWAG.
Lo invitamos a leer las instrucciones presentes en este manual para
que pueda configurar y utilizar todas las funciones que ofrece su
teléfono nuevo. Las especificaciones en este manual están sujetas a
cambios sin aviso. iSWAG reserva el derecho de interpretar el
funcionamiento y rendimiento de este teléfono móvil. Aunque este
manual fue elaborado a conciencia y con mucho cuidado, iSWAG ni
ninguna empresa afiliada, asume responsabilidad por cualquier error
o errores contenidos en este documento. iSWAG y el logotipo de
iSWAG son marcas registradas de iSWAG. El resto de las marcas
comerciales son la propiedad de sus respectivos dueños.
Funciones de las Teclas
[Tecla de Función Izquierda]
Oprima esta tecla para ingresar al menú principal
Oprima esta tecla para confirmar una función
Oprima esta tecla para contestar una llamada
[Tecla de Función Derecha]
Oprima esta tecla para abrir los contactos
Oprima esta tecla para regresar a la pantalla
Oprima esta tecla para rechazar una llamada
[Tecla de OK] Oprima esta tecla para confirmar una función y para ingresar
al menú principal. Oprima y aguante esta tecla para utilizar la linterna.
[Tecla de Llamadas] Oprima esta tecla para iniciar una llamada
Oprima esta tecla para contestar una llamada Oprima esta tecla
para revisar el registro de llamadas.
[Tecla de Finalizar] Oprima esta tecla para terminar una llamada.
Oprima y aguante esta tecla para apagar el teléfono.
Para encender el teléfono oprima y aguante esta tecla
Oprima esta tecla para regresar a la pantalla inicial.
[Teclas de Navegación]
Oprima esta tecla para mostrar las opciones y funciones disponibles.
En ciertas pantallas, esta tecla se puede utilizar para navegar. En
modo de espera puede utilizar estas teclas para abrir ciertas pantallas.
Estas teclas se pueden programar. Durante una conversación, puede
oprimir la tecla hacia arriba o hacia abajo para ajustar el volumen.
[Teclas Numéricas]
Oprima las teclas numéricas, del 0 al 9, para ingresar números y
caracteres. Oprima y aguante las teclas numéricas para efectuar
marcación rápida. La tecla # y la tecla * corresponden a diferentes
funciones dependiendo de la pantalla o el menú. En función de
reproductor de audio o radio FM la tecla * baja el volumen y la tecla
# aumenta el volumen. La tecla # también la puede utilizar para
cambiar de perfil.
Para Comenzar
1. Instalar la Tarjeta SIM y la Batería
Inserte con cuidado la tarjeta SIM, con los conectores dorados
hacia abajo, en la ranura.
Alinee la tarjeta con la muesca de la ranura.
Nota: Para no dañar la tarjeta SIM asegúrese de apagar el
teléfono antes de instalar o retirar la tarjeta
2. Retirar la Batería y la Tarjeta SIM
Antes de retirar la batería y la tarjeta SIM asegúrese de que el
teléfono este apagado.
3. Como Cargar la Batería
Toma aproximadamente dos horas y media para cargar la
bacteria. La carga restante de la batería se muestra en pantalla
por medio del icono que aparece a la derecha de la pantalla en
la esquina superior. Cuando se está cargando la batería, una
animación aparece en pantalla. Cuando la batería ha terminado
de cargar, la animación desaparece. Mientras que es carga la
batería es normal que el teléfono, la batería y el cargador se
calienten.
Nota: La batería se tiene que cargar en un lugar con propia
ventilación y con una temperatura entre -10 ~+55 . Si la temperatura
está muy alta o muy baja, el teléfono le mostrara un aviso.
Solo se pueden utilizar baterías, cargadores y accesorios aprobados
por el fabricante. ¡El uso de una batería, cargador o accesorios no
aprobados podría dañar el teléfono móvil y causar daño!
4. Encender y Apagar el Teléfono
Para encender o apagar su teléfono, mantenga oprimida la tecla
de Finalizar hasta que encienda la pantalla y aparecerá la
animación de inicio o se apague la pantalla. Si intenta encender
el teléfono sin una tarjeta SIM instalada, el teléfono mostrara el
mensaje “Instale la tarjeta SIM”. Al encender el teléfono pudiera
ver uno de estos mensajes:
Ingrese su clave – si ha programado una clave la tiene que
ingresar aquí Ingrese el Código – tiene que ingresar el código de
la tarjeta SIM Buscando – el teléfono está buscando
automáticamente la red local
Getting Started
1. Installing the SIM Card and the Battery
Ensure that the gold contact area on the SIM card is facing
downward, and the beveled edge is properly aligned with the
SIM card slot.
Warning: Make sure to switch off the phone before taking out
SIM card, otherwise your SIM card might be damaged.
2. Removing the Battery and the SIM Card. Before removing the
battery and the SIM card, ensure that your phone is powered off.
3. Charging Batter. It takes about 2.5 hours to fully charge the
battery. While charging, the power indicator on the phone’s
display will flash and rotate, if the phone is off a charging screen
will appear indicating the phone is charging. Once the charging
indicator stops flashing, charging has completed, if the phone is
off a charging-finished icon will appear. It is normal for the
battery, phone, and charger to get hot during the charging
process.
Note: Battery must be charged in a well-ventilated area with a
temperature between -10℃~+55℃. Only use a charger
provided by manufacturer. Using an unauthorized charger might
cause damage and voids the warranty. If the charging
temperature is too high or too low, the phone will automatically
give a warning and stop charging to prevent damage.
4. Turn phone on/off To turn phone on/off, press and hold the
End key. If you turned on the phone without a SIM card installed
you will see the prompt "Insert SIM card". Once the phone is
ready you may see the following prompts: Enter phone password
– if you have set up phone lock password. Enter PIN – if you have
set up SIM card password. Search – the phone will search till
finding appropriate network connection.
Basic Functions
1 Making a call
When the logo of the service provider appears on the display
screen, you can dial or receive calls. The info bar at the upper left
corner of the display screen shows network signal strength (when
there are 5 info bars the signal is at its strongest). The call quality
is very likely to be affected by obstructions; therefore movement
in a small area can effectively improve call performance. Enter
phone number, then press Dial Key to make the call.
2 Llamada de Emergencia
Aunque no tenga una tarjeta SIM instalada, puede realizar
llamadas de emergencia con el teléfono.
En la pantalla vera un mensaje “Llamada de emergencia” para
indicar que solo puede realizar ese tipo de llamadas.
3 Como contestar una llamada
Oprima la tecla de marcación para contestar una llamada. Si
tiene un audífono de manos libres puede contestar una llamada
por medio del botón del audífono. También, con el audífono
manos libres conectado, puede activar la función de contestación
automática para contestar la llamada en cuanto entra. Si tiene
activada la función de contestar con cualquier tecla puede
oprimir cualquier tecla, menos [Tecla de Finalizar] y [Teclas de
Navegación] para contestar una llamada.
4 Registro de Llamadas
El teléfono mantiene un registro de llamadas que incluye la
última llamada perdida, llamadas recibidas, llamadas realizadas,
tiempo de la última llamada, tiempo total en uso.
5 Opciones durante una Llamada
Durante una llamada aparecerá el mensaje “Opciones” en
pantalla que le mostrara las opciones disponibles*.
Función de altavoz
Poner llamada actual en espera
Abrir pantalla de contactos
Abrir registro de llamadas
Abrir menú de mensajes
Grabar llamada actual
Silenciar llamada
Llamada multipartita
Llamada en espera
* Algunas funciones dependen de su red o proveedor local.
Menú de Funciones
1 Como Seleccionar Opciones
Desde la pantalla en espera puede oprimir la tecla de función
izquierda para abrir el menú de funciones o si está en una
llamada puede seleccionar “Opciones” para abrir el menú de
opciones durante una llamada. Utilice la tecla de navegación
para seleccionar la opción deseada. Para salir del menú oprima
la tecla de función derecha o la tecla de finalizar para regresar a
la pantalla en espera.
2 Emergency calls
As long as in the network service range (which can be confirmed
by checking the signal strength bars), you can always call
emergency service. If your network supplier does not provide
roaming service in your area, the screen will display"Emergency",
to inform you that only emergency calls are permitted. If you are
within the network service range, you can also make emergency
calls even without the SIM card.
3 Answering a call
Simply press the Call Key to answer an incoming call. If an
earphone has been connected, use the button on the earphone
to answer a call. If it is not convenient for you to press it, turn on
automatic answer, assuring that the earphone is plugged in, so as
to answer calls automatically while the phone rings or vibrates.
If Any Key answer function is chosen, pressing any key, other than
End key and up/down key, can answer an incoming call.
4 Call records
Your phone can also store call records of the latest missed calls,
received calls, dialed calls, time of last call as well as total talk time.
5 Call options
When on a call pressing “Options” will display the options
available during a call*:
Turn on Speaker phone, Put current call on hold, Enter contacts
menu, Enter Call log menu, Enter message menu, Record the
current call, Mute, Multiple party conference call, Call Waiting
* Some of these functions are dependent on the services offered by your operator.
Function menu
1 Scrolling and selecting functions
In standby mode press left soft key "menu" to enter function
menu, or during a call,
press ”Options” to enter call option menu. Press up or down
keys to scroll to the function you need,
then press left soft key, or OK key, to enter that function. You can
exit a menu by pressing the right soft key,
or the End key to return to standby mode.
2 Lista de Funciones
1 Registros de llamadas
2 Contactos
3 STK(Herramientas
para SIM)
4 Multimedia
4-1 Cámara
4-2 DV
4-3 Audio
4-4 Video
4-5 Radio FM
4-6 Grabadora
4-7 Imágenes
4-8 Snake (juego)
5 Mensajes
5-1 Escribir mensaje
5-2 Bandeja de entrada
5-3 Bandeja de salida
5-4 Borrador
5-5 Correos enviados
5-6 Bandeja de entrada
con seguridad
5-7 Plantilla
5-8 Difundir mensaje
5-9 Correo de voz
6 Perfiles
6-1 Normal
6-2 Silencio
6-3 Interior
6-4 Exterior
7 Herramientas
7-1 Whatsapp
7-2 Mis archivos
7-3 Alarma
7-4 Calendario
7-5 Bluetooth
7-6 Calculadora
7-7 Reloj Mundial
7-8 Ebook
7-9 Linterna
8 Internet
9 Ajustes
9-1 Ajustes de
llamadas
9-2 Ajustes del
teléfono
9-3 Pantalla
9-4 Seguridad
9-5 Conexiones
Declaración de la FCC
Requisitos de la Comisión Federal de Comunicaciones (FCC), parte
15 Este equipo ha sido probado y cumple con los límites de un
dispositivo digital clase B, de conformidad con la parte 15 del
reglamento de la FCC. Dichos límites fueron diseñados para brindar
una protección suficiente contra la interferencia nociva en
residencias. Este equipo genera, utiliza y puede emitir energía de
radiofrecuencia y, si no se instala y se utiliza de conformidad con las
instrucciones, puede generar interferencia nociva a las
comunicaciones de radio. Sin embargo, no hay garantía de que no se
presente interferencia en un lugar particular. Si este equipo genera
interferencia nociva con la recepción de radio o televisión, lo que
puede determinarse apagando y encendiendo el equipo, el usuario
puede corregir la interferencia de una de las siguientes maneras:
2 List of functions
1 Call logs
2 Contacts
3 STK(SIM Toolkit)
4 Multimedia
4-1 Camera
4-2 DV
4-3 Audio
4-4 Video
4-5 FM radio
4-6 Recorder
4-7 Image
4-8 Snake
5 Message
5-1 Write message
5-2 Inbox
5-3 Outbox
5-4 Drafts
5-5 Send box
5-6 Security inbox
5-7 Templates
5-8 Broadcast message
5-9 Voice mail server
6 Profiles
6-1 Normal
6-2 Silent
6-3 Indoor
6-4 Outdoor
7 Tools
7-1 Whatsapp
7-2 My files
7-3 Alarm
7-4 Calendar
7-5 Bluetooth
7-6 Calculator
7-7 World clock
7-8 Ebook
7-9 Torch
8 Internet
9 Settings
9-1 Call settings
9-2 Phone settings
9-3 Display
9-4 Security
9-5 Connections
FCC Statement
This equipment has been tested and found to comply with the limits
for a Class B digital device, pursuant to part 15 of FCC Rules. These
limits are designed to provide reasonable protection against
harmful interference in a residential installation. This equipment
generates and can radiate radio frequency energy and, if not
installed and used in accordance with the instructions, may cause
harmful interference to radio communications. However, there is no
guarantee that interference will not occur in a particular installation.
If this equipment does cause harmful interference to radio or
television reception, which can be determined by turning
the equipment off and on, the user is encouraged to try to correct
the interference by one or more of the following measures:
• Reorient or relocate the receiving antenna.
• Increase the separation between the equipment and receiver.
• Connect the equipment into an outlet on a circuit different from
that to which the receiver is connected.
• Consult the dealer or an experienced radio/TV technician for help.
This device complies with Part 15 of FCC Rules. Operation is subject
to the following two conditions: (1) This device may not cause
harmful interference, and (2) This device must accept any
interference received, including interference that may cause
undesired operation. Note: The manufacturer is not responsible for
any radio or TV interference caused by unauthorized modifications
to this equipment. such modifications could void the user’s
authority to operate this equipment. Any Changes or modifications
not expressly approved by the party responsible for compliance
could void the user's authority to operate the equipment.
Declaración de SAR
Este teléfono móvil ha sido diseñado según los requisitos de seguridad
aplicables para la exposición a ondas de radio. Su teléfono inalámbrico
es un transmisor y receptor de radio. Está diseñado para no superar los
límites* de exposición a energía de radiofrecuencia (RF) fijados por las
autoridades gubernamentales. Estos límites establecen los niveles
permitidos de energía de RF para la población general. Las
especificaciones se basan en los estándares desarrollados por
organizaciones científicas internacionales mediante evaluaciones
periódicas y minuciosas de estudios científicos. Los estándares
incluyen un margen de seguridad destinado a garantizar la seguridad
de todas las personas, independientemente de la edad y de la salud.
Según se reportó a las autoridades, el valor más alto de SAR de este
modelo de teléfono cuando se probó es de un promedio de 1.6 W/kg*
por un gramo de tejido. Puede obtener información más detallada en
http://www.fcc.gov/oet/ea/fccid/.
Utilice número de identificación de la FCC del dispositivo para obtener
mayor información. Este dispositivo fue probado para operaciones
típicas cerca del cuerpo manteniendo la parte posterior del teléfono a
una distancia de 0mm del cuerpo. Para cumplir con estos requisitos de
exposición RF de la FCC, los accesorios deben de mantener una
distancia de 1.5cm de los órganos del usuario. El uso de clips de
cinturón, fundas y similares accesorios no deben contener
componentes metálicos en su montaje. El uso de accesorios que no
cumplan con estos requisitos pueden no cumplir con los requisitos de
exposición RF de la FCC, y debe ser evitado.
FCC ID:
Especificaciones
iSWAG Shark
• Reorientar o reubicar la antena receptora.
• Aumentar la separación entre el equipo y el receptor.
• Conectar el equipo en una toma que esté en un circuito distinto del
circuito en el que está conectado el receptor.
• Consultar al distribuidor o a un técnico de radio y televisión con
experiencia. PRECAUCIÓN: Los cambios o modificaciones que no
estén aprobados expresamente por el fabricante de este dispositivo
podrían invalidar la autoridad del usuario para
operar el equipo.
Este dispositivo cumple con la parte 15 del reglamento de la FCC. Su
operación está sujeta a las siguientes dos condiciones: (1) no es
probable que este dispositivo genere interferencia nociva, y (2) este
dispositivo debe aceptar cualquieri nterferencia.
Las especificaciones están sujetas a cambios.
* La capacidad real puede ser menor debido al software del teléfono.
** Ciertos formatos de archivos pueden ser incompatibles.
SAR Statement
This Phone meets the government's requirements for exposure to
radio waves. The guidelines are based on standards that were
developed by independent scientific organizations through
periodic and thorough evaluation of scientific studies. The standards
include a substantial safety margin designed to assure the safety of
all persons regardless of age or health.
FCC RF Exposure Information and Statement The SAR limit of USA
(FCC) is 1.6W/kg averaged over one gram of tissue. This device has
also been tested against this SAR limit.
Detail SAR information of this device can be viewed on-line at
http://www.fcc.gov/oet/ea/fccid/.
Please use the device FCC ID number for search. This device was
tested for typical body-worn operations with the back of the
handset kept 0mm from the body. To maintain compliance with FCC
RF exposure requirements, use accessories that maintain a 1.5cm
separation distance between the user's bodies. The use of belt clips,
holsters and similar accessories should not contain metallic
components in its assembly. The use of accessories that do not
satisfy these requirements may not comply with FCC RF exposure
requirements, and should be avoided.
FCC ID:
Specifications
iSWAG Shark
Specifications are subject to change without prior notice.
* Actual storage may be less due to device software.
** Certain bitrates, resolutions, and/or file variations may not be compatible.