1
SISTEMAS INFORMÁTICOS 2012/2013
FACULTAD DE INFORMÁTICA
UNIVERSIDAD COMPLUTENSE DE MADRID
DES GUI Front-end
Realizado por:
Pablo Gutiérrez García-Pardo
Elena Tejeiro Pérez de Ágreda
Andrés Vicente del Cura
Dirigido por:
Prof. Fernando Sáenz Pérez
Dpto. Ingeniería del Software e Inteligencia Artificial
Sistemas Informáticos 2012-2013
2
ÍNDICE DE CONTENIDOS
Índice de Figuras ............................................................................................................................... 8
1.
Autorización........................................................................................................................... 10
2.
Resumen del proyecto ....................................................................................................... 11
3.
Abstract ................................................................................................................................... 12
4.
Estado del arte ...................................................................................................................... 13
5.
Estándares .............................................................................................................................. 17
5.1.
Control de versiones ................................................................................................................ 17
5.2.
Documentación .......................................................................................................................... 18
5.3.
Código fuente .............................................................................................................................. 20
6.
Gestión de la configuración.............................................................................................. 24
7.
Gestión de requisitos .......................................................................................................... 26
7.1.
Requisitos generales ................................................................................................................ 26
7.2.
Descripción de la aplicación ................................................................................................. 27
7.2.1.
Inicio de la aplicación ......................................................................................................... 27
7.2.2.
Ventana Explorador de bases de datos (Database explorer) ............................... 28
7.2.2.1.
Nodo Bases de datos (Databases) ............................................................................. 31
7.2.2.2.
Nodos de tipo Base de datos ...................................................................................... 31
7.2.2.3.
Nodo Tablas (Tables)..................................................................................................... 31
7.2.2.4.
Nodos de tipo Tabla ....................................................................................................... 32
7.2.2.5.
Nodos columnas (Columnas) ...................................................................................... 34
7.2.2.6.
Nodos de tipo Restricción de integridad ................................................................ 34
7.2.2.7.
Nodos Vistas (Views)...................................................................................................... 35
Sistemas Informáticos 2012-2013
3
7.2.2.8.
Nodos de tipo Vista ........................................................................................................ 36
7.2.2.9.
Nodo Definición SQL (SQL Text) ................................................................................ 37
7.2.2.10.
Nodo Definición Datalog (Datalog Text) ................................................................ 38
7.2.3.
Ventana Diseño (Design).................................................................................................... 38
7.2.4.
Ventana Datos (Data) ......................................................................................................... 40
7.2.4.1.
Acciones permitidas sobre la rejilla ........................................................................ 42
7.2.4.2.
Barra de estado ................................................................................................................ 47
7.2.4.3.
Barra de menú .................................................................................................................. 47
7.2.4.4.
Barra de comandos ........................................................................................................ 50
7.2.4.5.
Resumen de menús contextuales de la rejilla ..................................................... 51
7.2.4.5.1. Menú contextual de una columna ........................................................................... 51
7.2.4.5.2. Menú contextual de una celda .................................................................................. 51
7.2.4.5.3. Menú contextual de una fila....................................................................................... 52
8.
9.
Planificación ...........................................................................................................................53
8.1.
Primera iteración....................................................................................................................... 53
8.2.
Segunda iteración ...................................................................................................................... 54
8.3.
Tercera iteración ....................................................................................................................... 55
8.4.
Cuarta iteración.......................................................................................................................... 56
Tareas realizadas ..................................................................................................................59
9.1.
Gestión de bases de datos ...................................................................................................... 59
9.1.1.
Esquema de las bases de datos ....................................................................................... 61
9.1.2.
Edición y visualización de datos de tablas y vistas ................................................ 64
9.1.3.
Vista de diseño en tablas ................................................................................................... 65
Sistemas Informáticos 2012-2013
4
9.2.
Configuración de barra de menús ...................................................................................... 67
9.2.1.
Archivos de configuración ................................................................................................ 67
9.2.2.
Configuración mediante la aplicación ......................................................................... 71
9.2.3.
Funcionamiento de la nueva configuración .............................................................. 73
9.2.4.
Comandos de los ítems de menú ................................................................................... 74
9.2.5.
Gestión de iconos ................................................................................................................. 74
9.3.
Ventanas de búsqueda y reemplazamiento.................................................................... 76
9.3.1.
Nuevas funcionalidades .................................................................................................... 77
9.3.1.1.
Botón “especial” .............................................................................................................. 77
9.3.1.2.
Búsquedas y reemplazamientos recientes ........................................................... 78
9.3.1.3.
Barra de progreso........................................................................................................... 79
9.3.1.4.
Otras tareas ....................................................................................................................... 80
9.3.2.
Funcionalidades mejoradas o arregladas .................................................................. 80
9.3.2.1.
Búsqueda y reemplazamiento con expresiones regulares ............................ 81
9.3.2.2.
Búsqueda con F3 y Shift+F3 en editores ............................................................... 81
9.3.2.3.
Otras tareas ....................................................................................................................... 82
9.4.
Consola .......................................................................................................................................... 83
9.4.1.
Copiar y pegar en consola................................................................................................. 83
9.4.2.
Historial de comandos persistente ............................................................................... 83
9.4.3.
Otras tareas ............................................................................................................................ 84
9.5.
Editor de archivos ..................................................................................................................... 85
9.6.
Barra de herramientas ............................................................................................................ 86
Sistemas Informáticos 2012-2013
5
9.7.
Ampliación del manual de usuario ..................................................................................... 87
9.8.
Tareas de carácter general .................................................................................................... 89
9.8.1.
Adaptación a LINUX y MacOS .......................................................................................... 89
9.8.2.
Cursor de espera................................................................................................................... 89
9.8.3.
Ventanas modales ................................................................................................................ 90
9.8.4.
Atajos de teclado en ventanas ......................................................................................... 90
9.9.
Objetivos cumplidos ................................................................................................................. 91
9.9.1.
Gestión de bases de datos ................................................................................................. 91
9.9.2.
Configuración de barra de menús ................................................................................. 91
9.9.3.
Ventanas de búsqueda y reemplazamiento............................................................... 92
9.9.4.
Consola ..................................................................................................................................... 92
9.9.5.
Editor de archivos ................................................................................................................ 93
9.9.6.
Barra de herramientas ....................................................................................................... 93
9.9.7.
Ampliación del manual de usuario ............................................................................... 93
9.9.8.
Tareas de carácter general ............................................................................................... 93
9.10.
Objetivos no cumplidos........................................................................................................... 95
9.11.
Conclusiones ................................................................................................................................ 97
10.
Posibles ampliaciones ....................................................................................................98
10.1.
Código fuente .............................................................................................................................. 98
10.2.
Funcionalidades ......................................................................................................................... 99
11.
Lista de palabras claves.............................................................................................. 102
12.
Bibliografía ...................................................................................................................... 103
13.
Referencias ...................................................................................................................... 104
Sistemas Informáticos 2012-2013
6
14.
Información de contacto ............................................................................................106
Apéndice: Manual de Usuario ..................................................................................................107
Sistemas Informáticos 2012-2013
7
ÍNDICE DE FIGURAS
Figura 1: Captura de pantalla de JEdit ............................................................................................13
Figura 2: Captura de pantalla de JBuilder .....................................................................................14
Figura 3: Captura de pantalla de TOra ...........................................................................................15
Figura 4: Captura de pantalla de ASPIDE ......................................................................................16
Figura 5: Menú bases de datos ............................................................................................................28
Figura 6: Ventana explorador de bases de datos de [22] .........................................................28
Figura 7: MySQL Workbench................................................................................................................29
Figura 8: Ejemplo ventana de diseño................................................................................................38
Figura 9: Ventana de datos, Microsoft Access ...............................................................................40
Figura 10: Ventana de datos, MySQL ................................................................................................41
Figura 11: Boceto ventana de datos..................................................................................................41
Figura 12: Rejilla de vista de datos....................................................................................................42
Figura 13: Panel de Bases de Datos ...................................................................................................59
Figura 14: Entrada Database, menú Vista .....................................................................................60
Figura 15: Vista de datos .......................................................................................................................60
Figura 16: Vista de diseño .....................................................................................................................61
Figura 17: Esquema de las bases de datos .....................................................................................61
Figura 18: Interfaz AcideDatabaseManager .................................................................................63
Figura 19: Clase abstracta AcideDatabaseManager .................................................................64
Figura 20: Vista de datos .......................................................................................................................64
Figura 21: Vista de diseño .....................................................................................................................66
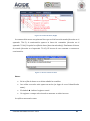
Figura 22: Ejemplo de configuración versión anterior .............................................................68
Figura 23: Configuración del menú Archivo ..................................................................................71
Figura 24: Menú contextual configuración de menús ...............................................................72
Sistemas Informáticos 2012-2013
8
Figura 25: Ventana de búsqueda ........................................................................................................76
Figura 26: Ventana de reemplazamiento .......................................................................................77
Figura 27: Botón “especial”...................................................................................................................78
Figura 28: Insertado ^p ..........................................................................................................................78
Figura 29: Ejemplo de uso de Recientes...........................................................................................79
Figura 30: Barra de progreso parcialmente completa en una búsqueda .........................80
Figura 31: Editores modificados .........................................................................................................82
Figura 32: Confirmación del envío a la consola ...........................................................................85
Figura 33: Botón para enviar el contenido del archivo a la consola ..................................86
Sistemas Informáticos 2012-2013
9
1. AUTORIZACIÓN
Se autoriza a la Universidad Complutense a difundir y utilizar con fines
académicos no comerciales y mencionando expresamente a sus autores, tanto la
propia memoria, como el código, la documentación y/o el prototipo desarrollado.
Pablo Gutiérrez García-Pardo
Elena Tejeiro López de Ágreda
Andrés Vicente del Cura
Sistemas Informáticos 2012-2013
10
2. RESUMEN DEL PROYECTO
Este proyecto de la asignatura de Sistemas Informáticos consiste en el desarrollo de
varias versiones de un proyecto ya existente llamado “ACIDE: A Configurable IDE”
realizado en varias fases como proyecto de la asignatura de Sistemas Informáticos de
varios alumnos. En primer lugar fue realizado por los alumnos Diego Cardiel Freire,
Juan José Ortiz Sánchez y Delfín Rupérez Cañas durante el curso académico 2006-2007.
La siguiente versión del proyecto fue desarrollada en el curso 2007-2008 por Miguel
Martín Lázaro. La versión más reciente hasta hoy fue implementada por el alumno
Javier Salcedo Gómez entre 2010-2011. Este proyecto siempre fue dirigido por Fernando
Sáenz Pérez.
ACIDE es un entorno de desarrollo integrado (IDE) configurable que puede ser
usado para distintos lenguajes de programación. Si quiere obtener más detalles sobre
este proyecto consulte las memorias [1], [2] y [3] de la sección 13 Referencias.
La anterior versión de este proyecto contaba con un código fuente estandarizado y
un comportamiento bastante fiable en líneas generales en cuanto a la gestión de
proyectos y trabajo con distintos lenguajes.
En esta nueva versión hemos profundizado en la conexión de la aplicación con ODBC
y el programa Datalog Educational System (DES)[4] una implementación basada en
Prolog de un Sistema de bases de datos deductivas. Por tanto esta nueva versión consiste
en un DES – GUI Front End.
Además, se ha trabajado en la corrección de errores y ampliación de funcionalidades
de versiones anteriores, como la nueva configuración del menú, la búsqueda de textos y
el envío de contenido desde el editor de archivos a la consola.
Sistemas Informáticos 2012-2013
11
3. ABSTRACT
This project of “Computing Systems” consists of the implementation of some new
versions of a previous project called “ACIDE: A Configurable IDE” made in various
phases as project of “Computing Systems”. At first, it was implemented by Diego Cardiel
Freire, Juan José Ortiz Sánchez and Delfín Rupérez Cañas during the 2006-2007
academic year. The following version was made during the 2007-2008 academic year by
Miguel Martín Lázaro. The most recent version until this was implemented by Javier
Salcedo Gómez during 2010-2011 academic year. This project always was supervised by
Fernando Sáenz Pérez.
ACIDE is an integrated development environment which can be configured and used
for different programming languages. More details about this project can be consulted
in the written papers [1], [2] and [3] of Chapter 13 Referencias.
The previous version of this project presented a standardized source code and a
confinable and useful performance in general about projects management and working
with different programming languages.
In this new version we have worked in the connection of the application with ODBC
and the program Datalog Educational System (DES)[4], a Prolog-based implementation
of deductive database system. Then this version consists on a DES – GUI Front End.
Also, several errors have been repaired and we have added new functionalities to
older versions, like the new menu configuration, text searching and sending contents
from the file editor to the shell.
Sistemas Informáticos 2012-2013
12
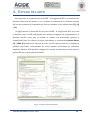
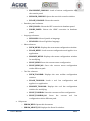
4. ESTADO DEL ARTE
Para presentar el estado del arte de ACIDE – A Configurable IDE en el momento del
presente desarrollo del mismo, se va a realizar un resumen de los distintos estados
del arte presentados en el apartado que lleva ese nombre en las publicaciones [1], [2]
y [3].
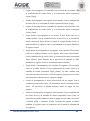
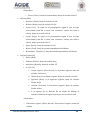
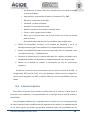
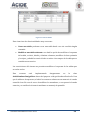
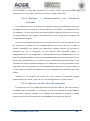
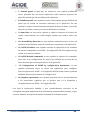
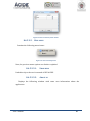
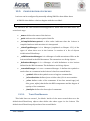
En [1] comenzó el desarrollo del proyecto ACIDE – A Configurable IDE, en el cual
se buscaba crear un IDE configurable para distintos lenguajes de programación y lo
bastante sencillo como para no asustar al usuario con demasiadas opciones y
complejidad. Entre los editores de texto consultados, se encuentran Crimson Editor
[5] y JEdit [6]. Ambos son editores de texto sencillos que permiten el resaltado de
palabras reservadas, seleccionadas de varios listados procedentes de diferentes
lenguajes. Además, JEdit permite configurar los menús, una idea muy atractiva para el
tipo de IDE que se perseguía desarrollar.
Figura 1: Captura de pantalla de JEdit
Sistemas Informáticos 2012-2013
13
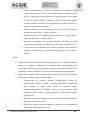
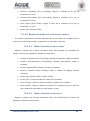
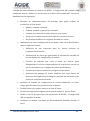
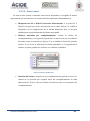
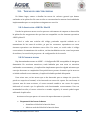
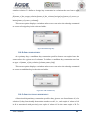
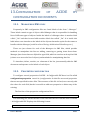
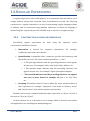
Entre los entornos de desarrollo integrados, se pueden distinguir dos grandes
grupos, los orientados a un lenguaje de programación en concreto y los que tienen
diferentes configuraciones para distintos lenguajes. La principal ventaja del primer
grupo es que permiten mayor especialización y poseen herramientas más específicas.
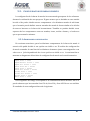
En esta primera opción se destacaron JBuilder [7], JCreator [8] y C++ Builder [9].
Los dos primeros están especializados en programación en Java, siendo JBuilder más
completo que JCreator, ya que ofrece la posibilidad de programar los botones del
interfaz, posee un interfaz gráfico para la creación de elementos Swing y ofrece
depuración. C++ Builder es de la misma casa que este último, ofrece funcionalidades
similares pero para el lenguaje C++.
Figura 2: Captura de pantalla de JBuilder
En el grupo de programas no orientados exclusivamente a un lenguaje, se
encuentra el gran conocido Eclipse [10]. Posee gran cantidad de opciones de
configuración para muchos lenguajes. Su gran inconveniente es que su configuración
requiere una larga descarga de plugins, y sólo para los lenguajes que sus
desarrolladores nos ofrezcan, no se puede configurar a mano. Por otra parte, a veces
se hace demasiado complicado para lo que se buscaba en ACIDE – A Configurable IDE.
Sistemas Informáticos 2012-2013
14
A pesar de las desventajas enumeradas, no deja de ser un programa muy completo y
recomendable a la hora de tomarlo como referencia.
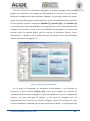
En el documento [2], el único programa que se menciona es Visual Studio Shell
[11]. Se trata del conocido Visual Studio de Microsoft, pero reducido a su estructura
básica, de tal forma que el usuario pueda adaptarlo para programar con un lenguaje
propio y crear herramientas personalizadas.
En cuanto al estado del arte en [3], se menciona que para esa versión de ACIDE – A
Configurable IDE se han seguido tomando como referencia los programas JEdit[6],
[Crimson Editor [7] y Eclipse [10]. Además se han añadido como referencia WinEdt
[12] y NetBeans [13].
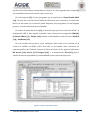
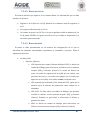
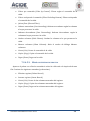
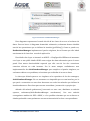
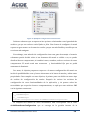
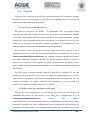
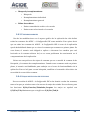
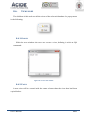
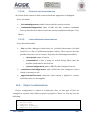
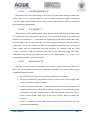
En esta revisión del proyecto se ha trabajado sobre todo en la conexión de la
consola de ACIDE con ODBC y DES. Para ello, se ha tomado como referencia los
entornos gráficos de Sistemas Gestores de Bases de Datos de los propios fabricantes
MS Access [14], Oracle [15], Postgres [16] y la herramienta TOra [17] para la
adición de nuevas propiedades y funcionalidades en la mejora del proyecto.
Figura 3: Captura de pantalla de TOra
Sistemas Informáticos 2012-2013
15
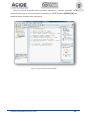
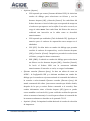
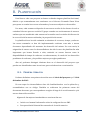
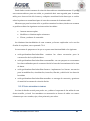
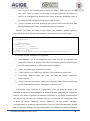
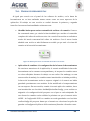
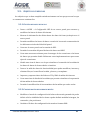
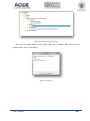
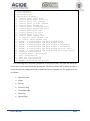
Entre el periodo acaecido entre versiones anteriores y ésta ha aparecido en el
mercado un proyecto con características similares a ACIDE llamado ASPIDE [18] que
también hemos tomado como referencia.
Figura 4: Captura de pantalla de ASPIDE
Sistemas Informáticos 2012-2013
16
5. ESTÁNDARES
La aplicación de estándares en el desarrollo de un proyecto de gran envergadura
como éste es totalmente necesaria y recomendable, sobre todo si hablamos de una
aplicación de código abierto y cuando en el desarrollo de la misma participa un
número considerable de personas.
Se han seguido teniendo en cuenta los estándares aplicados en versiones
anteriores de este proyecto, mencionadas en [1], [2] y [3]. Sin embargo, algunos de
ellos se han modificado para su mejora en la medida de lo posible. A continuación son
detalladamente explicados:
5.1. CONTROL DE VERSIONES
Se ha llevado a cabo el control de versiones utilizando el cliente subversión
Tortoise SVN [21] y el repositorio gratuito Google Code [20].
Cada semana se ha entregado una nueva versión de la aplicación al director
Fernando Sáenz Pérez que consistía en un archivo ZIP y el documento TODO de
tareas. Dentro del archivo ZIP se encontraba el ejecutable del proyecto. Cada archivo
semanal seguía el siguiente convenio de nomenclatura: “ACIDE año_mes_dia.zip”
expresando el año, mes y día en forma numérica. De esta forma podíamos ir
almacenando todo el conjunto de versiones que se han ido entregando, y examinar la
evolución temporal del proyecto sin lugar a la confusión.
El repositorio en Google Code sigue la siguiente estructura:
svn: es el directorio principal del proyecto.
o branches: este directorio contiene las versiones más importantes
que se han comportado de forma estable en el desarrollo del
proyecto. Es decir, lo que se ha considerado una versión entregable.
o tags: aquí se encuentra la documentación del proyecto. Todos los
documentos con listas de tareas que se han elaborado semanalmente
se encontraban en este directorio.
o trunk: aquí se encuentra el código fuente del proyecto.
Sistemas Informáticos 2012-2013
17
o wiki: este directorio no ha sido usado, ya que en teoría estaba
dedicado a la documentación acerca del proyecto. Sin embargo, dada
la comunicación constante entre alumnos y director, no ha sido
finalmente necesario este directorio.
5.2. DOCUMENTACIÓN
En la comunicación entre alumnos y profesor durante la realización del proyecto,
se ha llevado a cabo el seguimiento de una serie de documentos de tareas escritos
periódicamente. Este tipo de documentos de tareas se enviaba semanalmente junto a
cada entregable, para su corrección y actualización, siendo entregada la nueva
versión del documento a los alumnos, con las tareas a corregir y realizar durante la
siguiente semana.
Para llevar correctamente el control de estos documentos y evitar confusiones
entre distintos entregables, se ha establecido una nomenclatura normalizada para
cada documento semanal: “año_mes_día_TODO_ACIDE.docx”, siendo expresados
año, mes y día en forma numérica.
En cuanto al contenido, estos documentos se han dividido en dos secciones
principales: Tareas Realizadas y Tareas Pendientes. Estas categorías se dividen a su
vez en secciones basándose en las diversas funcionalidades de la aplicación. Se
establecen dos niveles de prioridad: tareas urgentes y futuras funcionalidades.
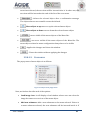
Se ha creado una leyenda para mejorar la comprensión de estos documentos,
explicando el significado de cada color de fuente utilizado en la redacción de las
tareas:
Verde: Implementación completa y funcionamiento correcto.
Azul: Implementación no completa.
Rojo: Sin implementar.
Negro: Comentarios del profesor.
Naranja: Aclaraciones/preguntas de los alumnos.
Los estándares aplicados en estos documentos de tareas han sido los siguientes:
Sistemas Informáticos 2012-2013
18
El estilo de texto Normal en el documento está compuesto por fuente Arial,
con tamaño 12pt, párrafo justificado, sangría de 0,5 cm en la primera línea,
color negro, interlineado de 1,5pt y espaciado anterior y posterior al
párrafo de 6pt.
El estilo de Título 1 está compuesto por fuente Calibri, con tamaño 26pt,
párrafo justificado, color “Azul Oscuro, Texto 2”, estilo Versales, espaciado
anterior 24pt y posterior 15pt al párrafo.
El estilo de Título 2 está compuesto por fuente Calibri, con tamaño 16pt,
párrafo justificado, sangría francesa de 0,63 cm, color “Azul Oscuro, Texto
2”, estilo negrita y Versales, espaciado anterior 24pt y posterior 10pt al
párrafo.
El formato del pie de página está compuesto por fuente Arial, tamaño 12pt,
color negro. El pie de página contiene el texto “Sistemas Informáticos 20122013” y a la derecha el número de página en estilo negrita. Una línea de
color azul separa el pie de página del resto de texto.
Las listas de enumeraciones se han realizado mediante la herramienta para
enumeraciones de Microsoft Word 2007.
El presente documento
y el manual de usuario han seguido los mismos
estándares:
El estilo de texto Normal en el documento está compuesto por fuente
Cambria, con tamaño 12pt, párrafo justificado, sangría de 0,5 cm en la
primera línea, color negro, interlineado de 1,5pt y espaciado anterior y
posterior al párrafo de 6pt.
El estilo de Título 1 está compuesto por fuente Cambria, con tamaño 26pt,
párrafo justificado, color “Azul Oscuro, Texto 2”, estilo Versales, espaciado
anterior 24pt y posterior 15pt al párrafo.
El estilo de Título 2 está compuesto por fuente Cambria, con tamaño 16pt,
párrafo justificado, sangría francesa de 0,63 cm, color “Azul Oscuro, Texto
2”, estilo negrita y Versales, espaciado anterior 24pt y posterior 10pt al
párrafo.
Sistemas Informáticos 2012-2013
19
El estilo de Título 3 está compuesto por fuente Cambria, con tamaño 14pt,
párrafo justificado, sangría francesa de 0,63 cm, color “Azul Oscuro, Texto
2”, estilo negrita y Versales, espaciado anterior 10pt.
El formato para escribir el código fuente en este documento está compuesto
por la fuente Courier New, con tamaño 11pt, alineación a la izquierda y
borde negro.
El formato del pie de página está compuesto por fuente Cambria, tamaño
12pt, color negro. El pie de página contiene el texto “Sistemas Informáticos
2012-2013” y a la derecha el número de página en estilo negrita. Una línea
de color azul separa el pie de página del resto de texto.
El encabezado contiene las imágenes del logo de la aplicación, el símbolo de
la Facultad de Informática y el escudo de la Universidad Complutense de
Madrid.
Las listas de enumeraciones se han realizado mediante la herramienta para
enumeraciones de Microsoft Word 2007.
5.3. CÓDIGO FUENTE
Como se ha comentado anteriormente, se ha hecho un gran esfuerzo por
mantener el código en forma estandarizada. Se han seguido las siguientes normas:
Todo el código está en inglés.
En cada una de las clases del código se encuentra el código de licencia
pública GPLv3, al comienzo de las mismas:
/*
•
ACIDE – A Configurable IDE
* Official web site: http://acide.sourceforge.net
*
•
Copyright © 2007-2013
•
Authors:
*
- Fernando Sáenz Pérez (Team Director).
*
- Version from 0.1 to 0.6:
*
- Diego Cardiel Freire.
*
- Juan José Ortiz Sánchez.
*
- Delfín Rupérez Cañas.
*
- Version 0.7:
*
- Miguel Martín Lázaro.
*
- Version 0.8:
Sistemas Informáticos 2012-2013
20
*
- Javier Salcedo Gómez.
*
- Version from 0.9 to 0.11:
*
- Pablo Gutiérrez García-Pardo.
*
- Elena Tejeiro Pérez de Ágreda.
*
- Andrés Vicente del Cura.
*
•
This program is free software: you can redistribute it and/or
* modify it under the terms of the GNU General Public License as
* published by the Free Software Foundation, either version 3 of
* the License, or (at your option) any later version.
*
*
This program is distributed in the hope that it will be
* useful, but WITHOUT ANY WARRANTY; without even the implied
* warranty of MERCHANBILITY or FITNESS FOR A PARTICULAR PURPOSE.
* See the GNU General Public License for more details.
*
*
You should have received a copy of the GNU General Public
* License along with this program. If not, see
* http://www.gnu.org/licenses/
*>
Comentarios Javadoc, simples y multilínea. Se ha procurado introducir
comentarios en cada una de las líneas de código para hacer más entendible
y amigable en su distribución el código.
// Updates the log
AcideLog.getLog().info(AcideLanguageManager.getInstance().
getLabels().getString(“s555”));
//Loads the ACIDE – A Configurable IDE workbench configuration
AcideWorkbenchConfiguration.getInstance().load();
Por cada clase Java en el código para los comentarios Javadoc se sigue el
siguiente formato:
/**
*
Descripción de la clase.
*
*
@version 0.11
* (@see <NombreDeClase/NombreDeInterfaz>)
*/
Las variables de cada clase van precedidas por ”_”:
private AcideFileMenu _fileMenu;
private boolean _fileInserted;
Sistemas Informáticos 2012-2013
21
En todas las clases el nombre de la clase empieza por “Acide” seguido por
las palabras que definen la clase, empezando cada palabra por mayúscula,
siguiendo el estándar de Java:
public Class AcideMenuBar extends JMenuBar {…}
En los nombres de los métodos, la primera palabra del nombre empieza por
minúscula y las palabras que siguen por mayúscula:
public void setTextOfMenuComponents() {…}
En las constantes de las clases, todo el nombre de la constante va en
mayúsculas, separando cada palabra con”_”.
public static final String DEFAULT_PATH = “./configuration/menu”;
En la configuración de los menús, las constantes que expresan los nombres
y los nombres de los iconos de cada opción del menú terminan con “NAME”
e “IMAGE” respectivamente:
public static final String COMPILER_NAME;
public static final ImageIcon COMPILER_IMAGE;
En clases que se refieren a ventanas de configuración, los nombres de las
variables terminan con el tipo de componente al que hacen referencia:
private JTabbedPane _tabbedPane;
private AcideFileMenuNewPanel _fileMenuPanel;
private JButton _acceptButton;
En todas las clases que corresponden a ventanas de configuración aparecen
los siguientes métodos:
//Builds the ACIDE – A Configurable IDE configuration window
//components
private void initComponents() {…}
//Adds the components to the ACIDE – A Configurable IDE to the
//configuration window
private void addComponents() {…}
//Sets the ACIDE – A Configurable IDE configuration window
//configuration
private void setWindowConfiguration() {…}
//Sets the listeners of the configuration window components.
private void setListeners() {…}
Sistemas Informáticos 2012-2013
22
//Closes the window
private void closeWindow() {…}
En todas las clases que corresponden a la barra de menús y menús
contextuales aparecen obligatoriamente estos métodos:
//Builds the ACIDE – A Configurable IDE configuration window
//components
private void buildComponents() {…}
//Adds the components to the ACIDE – A Configurable IDE to the
//configuration window
private void addComponents() {…}
//Sets the text of the ACIDE – A Configurable IDE class components
//with the labels in the selected language to display
private void setTextOfMenuComponents() {…}
//Updates the ACIDE – A Configurable IDE class components
//visibility with the menu configuration
private void updateComponentsVisibility() {…}
//Sets the listeners of the configuration window components.
private void setListeners() {…}
Sistemas Informáticos 2012-2013
23
6. GESTIÓN DE LA CONFIGURACIÓN
Todos los archivos del proyecto, tanto los archivos de documentación como los
archivos de código son objeto de control de la gestión de la configuración. Se ha
seguido con la configuración de la gestión descrita en las memorias [1], [2] y [3].
Al elegir los nombres de documentos y de clases en el código fuente se utilizarán
siempre nombres que sean descriptivos de la información que contienen. Como se ha
comentado en la sección de estándares, para cada clase en el código fuente se indica
la versión a la que pertenece en el comentario previo al inicio de la clase. El control de
versiones en el código fuente se hace de forma automática gracias al uso del cliente
Tortoise SVN [21].
Debido a que el grupo de trabajo es reducido, y la comunicación ha sido fácil,
fluida y constante, la coordinación en el trabajo con el proyecto ha sido la deseada.
Cada miembro del equipo trabajaba con una copia local de los archivos que estaba
modificando, y no lo subía al repositorio SVN hasta que no había conseguido la
funcionalidad perseguida. De esta forma, en el repositorio únicamente existía código
funcionando correctamente.
Para evitar catástrofes, se hacía una copia de seguridad semanal que guardaba un
miembro del equipo en su memoria local. Así, se pierde el riesgo de pérdida de
información por un fallo en el cliente SVN.
En cuanto al trabajo con la documentación, cada miembro trabajaba con una copia
local de la sección o documento que estuviera modificando. En Google Drive[19] se
mantenían diversos documentos de tareas compartidos en los que el equipo podía
asignar tareas objetivo a cada miembro, a fin de evitar la repetición de las mismas y
mejorar la organización. Cada vez que se consideraba terminada la tarea a realizar, se
enviaba por correo electrónico una copia de la misma al miembro del equipo
encargado de volcar en un documento final el resultado de los distintos trabajos en
paralelo, manteniendo los estándares definidos en la documentación. Al final de cada
día en el que algún documento había sufrido cambios, el encargado del
mantenimiento de los estándares enviaba una copia del documento actualizado a
Sistemas Informáticos 2012-2013
24
cada miembro del equipo, a fin de tener más de una copia de seguridad. Esta forma de
trabajo se ha llevado a cabo sobre todo en la realización de la presente memoria.
Hemos utilizado el siguiente software para la realización del proyecto:
Eclipse SDK versión 4.2 [10] para el desarrollo del código fuente en
lenguaje Java.
Google Drive [19] para la compartición de diversos documentos de interés
entre los miembros del grupo.
Microsoft Office 2007 para la documentación final del proyecto.
Google Code [20] como repositorio de código fuente.
Tortoise SVN [21] para la interacción con el repositorio de datos.
WinRar y 7z para la generación de los archivos comprimidos que contienen
el ejecutable de la aplicación.
Adobe Photoshop CS2 para la edición de los iconos, logotipo e imágenes
del proyecto.
Sistemas Informáticos 2012-2013
25
7. GESTIÓN DE REQUISITOS
Al principio se ha respetado la gestión de requisitos consultada en [3], sin
embargo, ésta se ha ido modificando conforme el proyecto se iba desarrollando y
surgían nuevas posibilidades.
Tras la primera toma de contacto, antes del comienzo del desarrollo del proyecto,
los requisitos fundamentales eran los siguientes:
Eliminación de errores existentes.
Aumento de las funcionalidades requeridas.
Como se menciona en [3], la estandarización y optimización del código fuente se
ha seguido cuidando. Al ser una aplicación de libre distribución, es fundamental que
el código publicado sea legible por terceros de manera que puedan contribuir al
desarrollo del mismo.
A continuación se va a explicar detalladamente el documento “DES-ACIDE:
Aplicación de consulta y gestión de bases de datos DES”. Este documento describe los
requisitos de la aplicación DES-ACIDE integrada en ACIDE - A Configurable IDE que ha
centrado los mayores esfuerzos de desarrollo durante el curso y por la que nuestro
proyecto lleva el nombre DES – GUI Front End.
7.1. REQUISITOS GENERALES
En la aplicación se deben usar los nombres e identificadores exactamente
como se indica en este capítulo de requisitos. En particular se debe prestar
especial atención al uso de mayúsculas y minúsculas.
Todos los cuadros de diálogo con botón Cancelar (Cancel) deben aceptar
para la misma función la pulsación de la tecla Esc.
Al cerrar un cuadro de diálogo con el botón rojo del aspa se debe aplicar la
misma función del botón Cancelar (Cancel) o la función predeterminada
para cerrar el cuadro si no lo hubiere.
Sistemas Informáticos 2012-2013
26
Todos los cuadros de diálogo deben aceptar la pulsación de la tecla ENTER
para realizar la acción predeterminada. Por ejemplo, la pulsación del botón
Aceptar (OK).
Todos los rótulos deben estar gestionados por la localización (dependiendo
del idioma seleccionado en la aplicación se mostrarán los rótulos en ese
idioma). En este documento sólo se muestran los idiomas español e inglés,
pero puede haber más.
Se debe probar la aplicación en distintas plataformas: Windows, Linux, Mac
OS.
Todos los identificadores SQL que se envíen a DES deben aparecer
encerrados entre delimitadores.
El editor de texto que corresponda a la Vista Diseño de una vista debe estar
sincronizado con la selección en el árbol del Explorador de bases de datos. Es
decir, se debe seleccionar el nodo del árbol que corresponda cuando el
editor tenga el foco (y deseleccionar el nodo del Explorador de proyecto , sin
olvidar que se debe volver a seleccionar adecuadamente cuando se lleve el
foco a otro editor de archivo).
El cierre de cualquier ventana se podrá realizar con la combinación de
teclas de acceso directo Alt+F4.
Las ventanas deben ser redimensionables.
Todos los menús y barras de comando deben ser parametrizables por
archivo de configuración
7.2. DESCRIPCIÓN DE LA APLICACIÓN
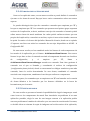
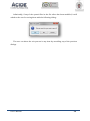
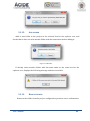
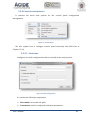
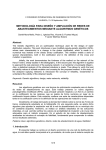
7.2.1.INICIO DE LA APLICACIÓN
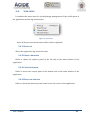
Para acceder a la Aplicación de gestión y consulta de bases de datos DES, se debe
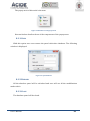
añadir Bases de datos (Databases) como un elemento nuevo en el menú Ver (View).
Sistemas Informáticos 2012-2013
27
Figura 5: Menú bases de datos
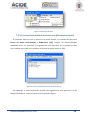
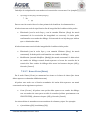
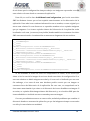
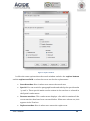
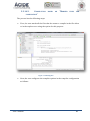
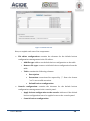
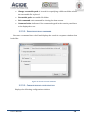
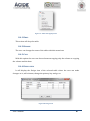
7.2.2.VENTANA EXPLORADOR DE BASES DE DATOS (DATABASE EXPLORER)
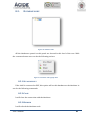
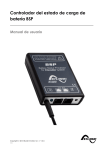
El resultado debe ser que se muestre un panel similar a la ventana del proyecto
Bases de datos relacionales y deductivas [22]. Aunque las funcionalidades
admitidas van a ser parecidas, la organización será diferente. En el ejemplo se abre
una ventana cuyo título es el nombre de la base de datos activa en DES.
Figura 6: Ventana explorador de bases de datos de [22]
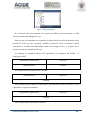
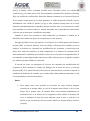
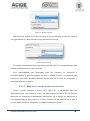
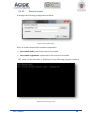
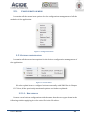
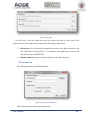
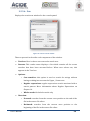
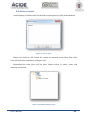
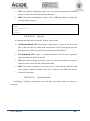
Sin embargo, la nueva aplicación tendrá una organización más parecida a la de
MySQL Workbench, como se muestra en la siguiente figura:
Sistemas Informáticos 2012-2013
28
Figura 7: MySQL Workbench
Si se intenta abrir esta ventana y la consola de DES no está conectada, se debe
emitir un cuadro de diálogo de error.
Una vez que se ha emitido este comando, se debe iniciar la sesión interactiva con la
consola de DES por las corrientes estándar (streams). Estas corrientes estarán
conectadas a la aplicación DES-ACIDE cuanto ésta tenga el foco, y al panel de la
consola cuando se traslade allí el foco.
La ventana se acoplará debajo del Explorador de proyectos de ACIDE – A
Configurable IDE:
Explorador de proyectos
Editores
Bases de datos
Consola
Si el Explorador de proyectos está cerrado:
Bases de datos
Editores
Consola
Si la ventana Bases de datos no está visible, la presentación será como antes., con el
explorador de proyectos abierto:
Explorador de proyectos
Editores
Consola
Con el explorador de proyectos cerrado:
Sistemas Informáticos 2012-2013
29
Editores
Consola
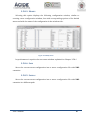
En lugar de la vista plana para la ventana Bases de datos en [22], se debe usar una
vista en árbol con nodos desplegables similar a la del Explorador de proyectos de
ACIDE – A Configurable IDE o el árbol del catálogo de MySQL Workbench (Figura 7).
Cada nivel del árbol se debe poder expandir o colapsar. Su nodo raíz debe ser
Databases, y sus hijos inmediatos los nombres de las bases de datos conectadas con
DES. Cada base de datos tiene como hijos inmediatos: Tablas (Tables), Vistas (Views) y
Restricciones de integridad (Integrity constraints). Por ejemplo:
Databases
Test
Tables
s(b:string(varchar(20),a:number(integer))
o Columns
a:number(integer)
b:string(varchar(20))
o PK:
[b]
o FK:
s[a] -> t.[a]
o FD:
[a] -> [b]
o IC:
:-t(X),(X<0;X>10).
:-t(X),s(X,X).
Views
v(a:number(integer),b:string(varchar(20)))
o Columns
a:number(integer)
b:string(varchar(20))
o SQL Text
SELECT ALL * FROM (t NATURAL INNER JOIN s);
o Datalog Text
v(A,B) :- t(A),s(A,B).
Integrity Constraints
o :-r(X),X<0.
Notas:
Se deben añadir tooltips (textos de ayuda) a los nodos:
o PK: Primary Key (Clave primaria)
o CK: Candidate Key (Clave candidate)
o FK: Foreign Key (Clave externa)
Sistemas Informáticos 2012-2013
30
o FD: Functional Dependency (Dependencia funcional)
o IC: Integrity Constraint (Restricción de integridad)
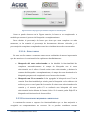
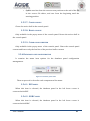
7.2.2.1. NODO BASES DE DATOS (DATABASES)
Es el nodo raíz y debe tener un menú contextual con las opciones:
Establecer como predeterminada (Set as Default).
Nueva (New). Al pulsarlo se debe abrir un cuadro de diálogo con un cuadro
de texto que solicite el nombre de la nueva base de datos a abrir, con
botones Aceptar (OK) y Cancelar (Cancel). Si se abre correctamente se debe
rellenar y desplegar su subárbol hasta el nivel cuarto.
Actualizar (Refresh). El efecto es volver a leer todos los datos y reconstruir
el árbol, manteniendo la vista actual de nodos desplegados.
Cerrar (Close). Al pulsarlo se cerrará la ventana, pero no las conexiones.
7.2.2.2. NODOS DE TIPO BASE DE DATOS
Son los hijos del nodo raíz Bases de datos (Databases) y muestran el nombre de
cada base de datos en conexión. Debe tener un menú contextual con las opciones:
Establecer como predeterminada (Set as Default).
Actualizar (Refresh). El efecto es volver a leer todos los datos y reconstruir
el subárbol de este nodo, manteniendo la vista actual de nodos desplegados.
Ejecutar consulta (Execute Query). Debe abrir una ventana de ejecución de
consulta.
Cerrar (Close). Al pulsarlo se cerrará la conexión de la base de datos y se
quitará el nodo del árbol.
7.2.2.3. NODO TABLAS (TABLES)
Este tipo de nodos son hijos del nodo Base de datos (Database) y muestran el
subárbol con las tablas en la base de datos (las tablas deben aparecer ordenadas
alfabéticamente).
Al pulsar este nodo con el botón secundario del ratón debe aparecer un menú
contextual con las siguientes opciones:
Sistemas Informáticos 2012-2013
31
Crear tabla en vista Diseño (Create Table in Design View). Al pulsar esta
opción se debe abrir la ventana descrita en el apartado 7.2.3, solicitando
previamente el nombre de la tabla en un cuadro de diálogo con botones
Aceptar (OK) y Cancelar (Cancel). Hay que comprobar que la tabla no exista
y emitir un mensaje de error en caso de existir (este cuadro con única
opción Aceptar (OK) que llevará el foco al cuadro anterior para dar la
posibilidad de escribir otro nombre).
Crear tabla con SQL (Create Table with SQL). Al pulsar esta opción debe
aparecer un cuadro de diálogo con un cuadro de texto para escribir la
consulta (relleno previamente con CREATE TABLE) y botones Aceptar (OK)
y Cancelar (Cancel). El texto CREATE TABLE no se debe poder modificar.
Crear tabla con Datalog (Create Table with Datalog). Al pulsar esta opción
debe aparecer un cuadro de diálogo con un cuadro de texto para escribir la
consulta Datalog (relleno previamente con :-type() y botones Aceptar
(OK) y Cancelar (Cancel). El texto :-type( no se debe poder modificar.
Nota: Estas opciones son similares a las de la aplicación BDRD [22] (Figura 6).
7.2.2.4. NODOS DE TIPO TABLA
Los hijos del nodo Tablas (Tables) son las tablas de la base de datos y se
denominan nodos de tipo Tabla. Las tablas que aparecen en el Explorador de bases de
datos deben ir anotadas con sus nombres de columna y tipos. Por ejemplo:
s(b:string(varchar(20)),a:number(integer))
t(a:number(integer))
Al desplegar cada nodo de tipo tabla se deben mostrar sus columnas (nodo
Columnas (Columns)) y restricciones (nodos de tipo Restricción de integridad)
Al seleccionar un nodo de tipo Tabla se debe tener un menú contextual con las
siguientes opciones, que coinciden o mejoran las mismas opciones de la aplicación
BDRD [22]:
Sistemas Informáticos 2012-2013
32
Eliminar (Drop). Para eliminar la tabla (también con la tecla Supr
directamente como atajo de teclado). Se debe pedir confirmación con
cuadro de diálogo.
Cambiar nombre (Rename). Para renombrar la tabla. Debe aparecer un
cuadro de diálogo con un cuadro de texto relleno previamente con el
nombre actual de la tabla y este nombre preseleccionado, y con botones
Aceptar y Cancelar. Si el nombre es el mismo que el original, no hacer nada.
Si ya existe, se informa de que no es posible porque ya existe otra relación
con el mismo nombre, y se vuelve al cuadro anterior para elegir otro.
Copiar (Copy). Para copiar la tabla (también con la combinación de teclas
Ctrl+C). Debe aparecer un cuadro de diálogo con dos botones de radio:
Copiar sólo schema (Copy Only Schema) y Copiar esquema y datos (Copy
Schema and Data). También con los botones Aceptar (OK) y Cancelar
(Cancel).
Pegar (Paste). Para pegar la tabla (también con la combinación de teclas
Ctrl+V). En este caso se debe abrir una ventana con un cuadro de texto con
un nuevo nombre (como hace el Explorador de Windows al copiar un
archivo: tabla_X, donde X es un entero consecutivo al último que hubiese
para la tabla de nombre tabla). El usuario puede cambiar este nombre. La
ventana dispone de los botones Aceptar (OK) y Cancelar (Cancel).
Vista Diseño (Design View). Para abrirla en vista Diseño (Design) y poder
modificar su esquema. Véase el apartado 7.2.3.
Vista Datos (Data View). Para abrirla en vista Datos (Data) y poder
modificar su esquema. Véase el apartado 7.2.4.
Añadir clave primaria (Add Primary Key). Debe aparecer una ventana con
botones Aceptar (OK) y Cancelar (Cancel) y un cuadro de texto relleno
previamente con :-pk(. Este texto no se debe poder modificar.
Añadir clave externa (Add Foreign Key). Debe aparecer una ventana con
botones Aceptar (OK) y Cancelar (Cancel) y un cuadro de texto relleno
previamente con :-fk(. Este texto no se debe poder modificar.
Sistemas Informáticos 2012-2013
33
Añadir clave candidata (Add Candidate Key). Debe aparecer una ventana con
botones Aceptar (OK) y Cancelar (Cancel) y un cuadro de texto relleno
previamente con :-ck(. Este texto no se debe poder modificar.
Añadir dependencia funcional (Add Functional Dependency). Debe aparecer
una ventana con botones Aceptar (OK) y Cancelar (Cancel) y un cuadro de
texto relleno previamente con :-fd(. Este texto no se debe poder
modificar.
Añadir restricción de integridad (Add Integrity Constraint) . Debe aparecer
una ventana con botones Aceptar (OK) y Cancelar (Cancel) y un cuadro de
texto relleno previamente con :-. Este texto no se debe poder modificar.
7.2.2.5. NODOS COLUMNAS (COLUMNAS)
Los nodos Columns (Columnas) son hijos de los nodos Tablas (Tables) y Vistas
(Views). Se debe poder desplegar para mostrar una entrada por cada columna, en
orden alfabético. Por ejemplo:
s(b:string(varchar(20)),a:number(integer))
o Columns
a:number(integer)
b:string(varchar(20))
7.2.2.6. NODOS DE TIPO RESTRICCIÓN DE INTEGRIDAD
Hay varios nodos de este tipo:
PK significa Primary Key (Clave primaria). Este nodo sólo puede tener un
hijo (una tabla sólo tiene una clave primaria).
CK significa Candidate Key (Clave candidata). Este nodo puede varios hijos.
FK significa Foreign Key (Clave externa). Este nodo puede varios hijos.
NL significa Nullable (Admite nulos). Este nodo tiene como hijos las
columnas que admitan nulos.
FD significa Functional Dependency (Dependencia funcional). Este nodo
puede varios hijos.
IC significa Integrity Constraint (Restricción de integridad). Este nodo puede
varios hijos.
Sistemas Informáticos 2012-2013
34
Cada hijo de cualquiera de estos nodos es la restricción en concreto. Por ejemplo:
s(b:string(varchar(20)),a:number(integer))
o ...
o PK:
[b]
En este caso la restricción es la clave primaria de la tabla s: la columna b de s.
Al seleccionar un nodo de tipo Restricción de integridad de la tabla se debe poder:
Eliminarla (con la tecla Supr y con la entrada Eliminar (Drop) de menú
contextual de la restricción de integridad en concreto). Se debe pedir
confirmación con cuadro de diálogo. Si tiene más de un hijo hay que indicar
que se eliminarán todos.
Al seleccionar una restricción de integridad de la tabla se debe poder:
Eliminarla (con la tecla Supr y con entrada Eliminar (Drop) de menú
contextual). Se debe pedir confirmación con cuadro de diálogo.
Modificarla (entrada Modificar (Modify) de menú contextual. Se debe abrir
un cuadro de diálogo textual donde aparezca el texto de creación de la
restricción. Este cuadro de diálogo debe tener los botones Aceptar (OK) y
Cancelar (Cancel).
7.2.2.7. NODOS VISTAS (VIEWS)
En el nodo Vistas (Views) se muestran las vistas en la base de datos (las vistas
deben aparecer ordenadas alfabéticamente).
Al pulsar este nodo con el botón secundario del ratón debe aparecer un menú
contextual con las siguientes opciones:
Crear (Create ). Al pulsar esta opción debe aparecer un cuadro de diálogo
con un cuadro de texto para escribir la consulta (relleno previamente con
CREATE VIEW) y botones Aceptar (OK) y Cancelar (Cancel).
Las vistas deben ir anotadas con sus nombres de columna y tipos. Por ejemplo:
v(a:varbinary(20),b:varbinary(20)).
Sistemas Informáticos 2012-2013
35
Una vista puede tener hasta tres hijos:
Columnas (Columns), que siempre debe aparecer.
Definición SQL (SQL Text), opcional.
Definición Datalog (Datalog Text), opcional.
Notas:
En estos dos últimos hijos, como la definición puede ser extensa, esta
definición se debe poder abrir en una ventana nueva del editor de archivos
con una entrada en el menú contextual Mostrar (Show).
El menú contextual de estos dos hijos también incorpora la entrada Copiar
(Copy) para copiar el contenido al portapapeles.
Al desplegar cada nodo de tipo vista se deben mostrar sus columnas (nodo
Columnas (Columns)) y definiciones SQL y Datalog. Por ejemplo:
Views
o
v(a:number(integer),b:string(varchar(20)))
Columns:
a:number(integer)
b:string(varchar(20))
SQL Text
SELECT ALL * FROM (t NATURAL INNER JOIN s);
Datalog Text
v(A,B) :- t(A),s(A,B).
7.2.2.8. NODOS DE TIPO VISTA
Los hijos del nodo Vistas (Views) son las vistas de la base de datos y se denominan
nodos de tipo Vista. Las vistas que aparecen en el Explorador de bases de datos deben
ir anotadas con sus nombres de columna y tipos. Por ejemplo:
v(a:number(integer),b:string(varchar(20)))
Al seleccionar un nodo de tipo Vista se debe tener un menú contextual con las
siguientes opciones:
Eliminar (Drop). Para eliminar la vista (también con la tecla Supr
directamente como atajo de teclado). Se debe pedir confirmación con
cuadro de diálogo.
Sistemas Informáticos 2012-2013
36
Cambiar nombre (Rename). Para renombrar la vista. Debe aparecer un
cuadro de diálogo con un cuadro de texto relleno previamente con el
nombre actual de la vista, y con botones Aceptar (OK) y Cancelar (Cancel).
Si el nombre es el mismo que el original, no hacer nada. Si ya existe, se
informa de que no es posible porque ya existe otra relación con el mismo
nombre, y se vuelve al cuadro anterior para elegir otro.
Copiar (Copy). Para copiar la vista (también con la combinación de teclas
Ctrl+C).
Pegar (Paste). Para pegar la vista (también con la combinación de teclas
Ctrl+V). En este caso se debe abrir una ventana con un cuadro de texto con
un nuevo nombre (como hace el Explorador de Windows al copiar un
archivo: vista_X, donde X es un entero consecutivo al último que hubiese
para la vista de nombre vista). El usuario puede cambiar este nombre. La
ventana dispone de los botones Aceptar (OK) y Cancelar (Cancel).
Vista Diseño (Design View). Para abrir su definición textual en SQL se abre
un nuevo editor de archivo con léxico SQL. El título de este editor debe ser
Diseño: vista (Design: vista), donde vista es el nombre de la vista. Se debe
asociar a este editor dos botones: Aceptar (OK) y Cancelar (Cancel). Si se
pulsa Aceptar, se debe cambiar el diseño de la vista. Si se pulsa el botón
Cancelar, la tecla Esc o se cierra el editor con el aspa de cierre, se deben
descartar los cambios (simplemente no hacer nada). Con cualquiera de las
dos posibles decisiones (aceptar o descartar los cambios) se debe cerrar el
editor. Hay que tener en cuenta que podrían estar abiertos distintos
editores de diseño (para distintas vistas).
Vista Datos (Data View). Para abrirla en vista Datos (Data) (apartado 7.2.4)
y poder examinar sus contenidos (pero no modificarlos).
7.2.2.9. NODO DEFINICIÓN SQL (SQL TEXT)
Estos nodos son hijos de los nodos de tipo Vista. Tiene un único hijo que
corresponde a la definición SQL de la vista. Si no existe definición SQL no se debe
crear el nodo Definición SQL (SQL Text).
Debe tener un menú contextual con las siguientes entradas:
Sistemas Informáticos 2012-2013
37
Mostrar/Editar (Show/Edit). Para abrir el texto SQL en una ventana nueva
del editor de archivos. Si hay modificaciones cuando se cierre el editor se
debe preguntar si se cambia la definición SQL de la vista.
Copiar (Copy). Para copiar el contenido al portapapeles.
7.2.2.10.
NODO DEFINICIÓN DATALOG (DATALOG TEXT)
Estos nodos son hijos de los nodos de tipo Vista. Tiene un único hijo que
corresponde a la definición Datalog de la vista. Si no existe definición Datalog no se
debe crear el nodo Definición Datalog (Datalog Text).
Debe tener un menú contextual con las siguientes entradas:
Mostrar (Show). Para abrir el texto Datalog en una ventana nueva del editor
de archivos. Sólo se permite mostrar la definición, pero no cambiarla.
Copiar (Copy). Para copiar el contenido al portapapeles.
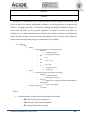
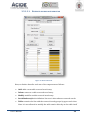
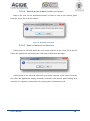
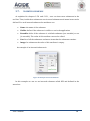
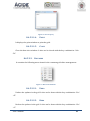
7.2.3.VENTANA DISEÑO (DESIGN)
En la ventana Diseño se pueden examinar y modificar los nombres, tipos de los
campos de una tabla y si admiten nulos, como se muestra (parcialmente) en la
siguiente figura:
Figura 8: Ejemplo ventana de diseño
Cada fila es un campo de la tabla con un nombre (columna Nombre del campo
(Field Name) con cuadros de texto), un tipo (columna Tipo (Type) con cuadros de
Sistemas Informáticos 2012-2013
38
texto), si admite nulos (columna Prohibir nulos (Disallow nulls) con casillas de
verificación), y si forma parte de la clave primaria (columna Clave primaria (Primary
Key) con casillas de verificación). Estas dos últimas columnas no se ven en la Figura 8.
Si un campo forma parte de la clave primaria, se debe desmarcar Prohibir nulos y
deshabilitar esta casilla. El motivo es que si una columna forma parte de la clave
primaria, automáticamente no puede contener un valor nulo. Si se marcase la casilla
para prohibir los valores nulos se estaría haciendo una comprobación innecesaria
cada vez que se insertase o modificase una tupla.
Cuando se inicie esta ventana se debe almacenar en memoria el estado de la
definición de la tabla con objeto de recuperarlo en caso de error.
En lugar del botón Crear que aparece en la Figura 8, se deben poner dos botones:
Aceptar (OK) y Cancelar (Cancel). Con este último se descartan los cambios y con el
primero se emiten los comandos de modificación del esquema y restricciones de
tabla. Pero antes de emitirlos, se debe comprobar si el número de columnas de la
tabla existente ha cambiado (si la tabla es nueva no es necesaria la comprobación). Si
ha cambiado y tiene alguna tupla, entonces se debe advertir que no se pueden realizar
los cambios porque la tabla no está vacía.
Si sucede un error en cualquiera de la serie de comandos de modificación del
esquema se debe mostrar un cuadro de diálogo con el texto del error y el botón
Aceptar (OK). Si se pulsa Cancelar (Cancel) en la ventana Diseño, se debe recuperar el
estado de la definición de la tabla, que se debe haber almacenado previamente en las
correspondientes estructuras de datos.
Notas:
Para poder abrir esta ventana es necesario no tener abierta ninguna
ventana de la misma tabla, ya sea de la misma vista Diseño o de la vista
Datos. En el primer caso, al intentar abrir esta ventana simplemente se
traslada el foco a la abierta. En el segundo se debe emitir un mensaje de
error e informar de que hay otras abiertas, para lo que se solicita si se
deben cerrar. Los botones de este cuadro deben ser Aceptar (OK) y Cancelar
(Cancel).
Sistemas Informáticos 2012-2013
39
Sobre esta ventana se deben poder realizar una serie de acciones definidas
en un menú contextual de la barra de título:
o Configuración de formato (Display Configuration). Reusar la
aplicación de formato de ACIDE – A Configurable IDE. El formato de
esta
ventana
se
aplica
sobre todas
las ventanas
Diseño,
independientemente de la tabla a que se aplique. Esta configuración
de formato se debe guardar en el espacio de trabajo (Workbench).
o Cerrar (Close) para cerrar la ventana y también con la combinación
de teclas de acceso directo Alt+F4.
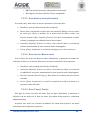
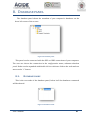
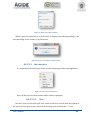
7.2.4.VENTANA DATOS (DATA)
Al hacer doble clic sobre una tabla o una vista (o al seleccionar la entrada Vista
Datos (Data View) en el menú contextual) en el Explorador de bases de datos, se debe
abrir para poder examinar y modificar sus contenidos (datos, no esquema). También
se abre si se ejecuta una consulta desde un editor de archivo de ACIDE – A
Configurable IDE (con la entrada del menú contextual Ejecutar consulta (Execute
Query) o desde la misma entrada en el Explorador de bases de datos). Si es una vista,
no se permite la modificación. Es decir, se abre la vista Datos en una rejilla similar a la
de MS Access:
Figura 9: Ventana de datos, Microsoft Access
O de MySQL Workbench:
Sistemas Informáticos 2012-2013
40
Figura 10: Ventana de datos, MySQL
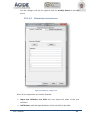
La ventana debe tener una primera línea que será la barra de menús (descrita en el
apartado 7.2.4.3). A continuación aparece la barra de comandos (descrita en el
apartado 7.2.4.4). Después la rejilla de datos (descrita más abajo). Finalmente la barra
de estado (descrita en el apartado 7.2.4.2). El boceto de esta ventana se muestra a
continuación:
Figura 11: Boceto ventana de datos
Notas:
En la rejilla de datos no se deben añadir las comillas.
Las celdas con valor nulo aparecen vacías (en lugar de con el identificador
null).
El símbolo ► indica el registro actual.
Un registro o campo seleccionado se muestra en video inverso.
La rejilla se mostraría como:
Sistemas Informáticos 2012-2013
41
Figura 12: Rejilla de vista de datos
7.2.4.1. ACCIONES PERMITIDAS SOBRE LA REJILLA
Navegación con teclas:
o Flechas arriba y abajo: registro anterior y siguiente.
o RePag y AvPag: página anterior y posterior.
o Ctrl+Inicio y Ctrl+Fin: primer registro y último.
o Inicio y Fin: primer campo (más a la izquierda) y último (más a la
derecha).
o Tab y Mayús+Tab: campo anterior y posterior:
Si se alcanza el último campo y se pulsa Tab se debe trasladar
el foco al primer campo del registro anterior.
Si se alcanza el primer campo y se pulsa Mayús+Tab se debe
trasladar el foco al último campo del registro anterior.
Búsqueda:
o Reusar la búsqueda y reemplazamiento de texto de ACIDE – A
Configurable IDE y aplicarla a la rejilla de datos.
o Se deben admitir los mismos atajos de teclado (son diferentes para
cada idioma).
Ordenación:
o Al pulsar por primera vez sobre el nombre de un campo se debe
ordenar en sentido creciente: el primer registro mostrado con el
menor valor para ese campo. Al pulsar sucesivamente sobre el
mismo campo se debe cambiar el sentido del orden (de creciente a
decreciente y viceversa).
o Nota:
Sistemas Informáticos 2012-2013
42
Al rellenar por primera vez la rejilla con los registros
procedentes de la base de datos no se debe aplicar ningún
tipo de ordenación.
Filtro:
o Filtro por contenido. Al seleccionar el contenido de un campo se
puede filtrar por ese valor con la entrada Filtrar por contenido (FIlter
by content) del menú contextual de la celda.
o Filtro excluyendo el contenido. Al seleccionar el contenido de un
campo se puede filtrar por aquellos registros que no contengan ese
contenido con la entrada Filtrar excluyendo el contenido (Filter
excluding content).
o Quitar filtro. Entrada en el menú contextual en la barra de nombres
de campo Quitar filtro (Discard filter).
o Notas:
Al rellenar por primera vez la rejilla con los registros
procedentes de la base de datos no se debe aplicar ningún
tipo de filtro.
Si hay un filtro aplicado, se debe anotar en la barra de estado
de la ventana Datos con el texto Filtrado (Filtered) y
destacado en color.
Presentación:
o Traslado de columnas. Se debe poder trasladar las columnas
pulsando sobre el nombre de la columna y arrastrándola a su nueva
ubicación.
o Ocultar columnas. Se debe poder ocultar una columna con la entrada
del menú contextual Ocultar columnas (Hide Columns). Si sólo queda
una, no se debe poder ocultar.
o Mostrar columnas. Cuando haya alguna columna oculta se puede
mostrar pulsando la entrada Mostrar columnas (Show Columns) en el
menú contextual del nombre de cualquier columna.
o Notas:
Sistemas Informáticos 2012-2013
43
Si hay alguna columna oculta, se debe anotar en la barra de
estado con el texto Columna(s) ocultas (Hidden Column(s)) y
destacado en color.
El estado de la vista de cualquier tabla o vista de la base de
datos (es decir, criterio de ordenación, columnas mostradas,
orden de las columnas y filtro) se debe mantener mientras no
se desconecte la base de datos a la que pertenezca.
Selección:
o Toda la tabla (todos los registros). Al pulsar la celda superior
izquierda (con fondo gris).
o Toda una fila (un registro). Al pulsar su celda más a la izquierda (con
fondo gris).
o Varias filas (varios registros). Pulsando en la celda más a la izquierda
(con fondo gris) de la primera fila, manteniendo pulsada la tecla
Mayús (Shift) y pulsando en la celda gris de la última fila. También se
admite la combinación de teclas Ctrl+Botón principal de ratón para la
selección de filas que no sean contiguas.
Edición:
o Eliminar registro o registros seleccionados. Con la tecla Supr y
entrada del menú contextual Eliminar registro (Delete Record). Se
debe pedir confirmación con cuadro de diálogo.
o Insertar registro en la posición actual. Con entrada Insertar registro
(Insert Record) del menú contextual de una fila. Después de insertar,
el registro estará en blanco, será el actual y tendrá el foco. Con
Deshacer (Undo) o pulsando la tecla Esc se debe poder deshacer la
inserción antes de realizarla en la base de datos. La inserción en la
base de datos se debe hacer cuando la fila pierda el foco.
o Modificar el registro actual. El contenido de cualquier campo se
puede modificar por teclado o copiando texto desde el portapapeles
(tanto de un campo en concreto como de la fila completa). Cuando se
pierda el foco del registro se actualizarán los cambios en la base de
datos.
Sistemas Informáticos 2012-2013
44
o Copiar al portapapeles el contenido seleccionado de un campo. Con
la combinación de teclas Ctrl+C y la entrada de menú contextual
Copiar (Copy).
o Copiar al portapapeles un registro seleccionado. Con la combinación
de teclas Ctrl+C y la entrada de menú contextual Copiar (Copy).
o Copiar al portapapeles un conjunto de registros seleccionados. Con
la combinación de teclas Ctrl+C y la entrada de menú contextual
Copiar (Copy).
o Pegar desde el portapapeles a un campo. El foco debe estar en el
campo destino. Con la combinación de teclas Ctrl+V y la entrada de
menú contextual Pegar (Paste). Cuando el campo pierda el foco se
debe modificar el registro como se ha indicado en el punto Modificar
el registro actual.
o Pegar desde el portapapeles a un registro seleccionado. El foco debe
estar en el registro destino y este registro debe estar seleccionado.
Con la combinación de teclas Ctrl+V y la entrada de menú contextual
Pegar (Paste). Justo después de la operación de pegado se debe
modificar el registro como se ha indicado anteriormente.
o Pegar desde el portapapeles un conjunto de registros. El foco debe
estar en la tabla destino. Con la combinación de teclas Ctrl+V y la
entrada de menú contextual Pegar (Paste). Se debe realizar una
operación de inserción (como se ha descrito en el punto previo sobre
inserción) por cada uno de los registros a pegar.
o Cortar al portapapeles el texto seleccionado de un campo. Con la
combinación de teclas Ctrl+X y la entrada de menú contextual Cortar
(Cut).
La operación se puede deshacer antes de pegar en otro
registro.
o Cortar al portapapeles el registro seleccionado. Con la combinación
de teclas Ctrl+X y la entrada de menú contextual Cortar (Cut). La
operación se puede deshacer antes de pegar en otra tabla con Ctrl+Z
o Edición (Edit) -> Deshacer (Undo). Después del pegado se deben
eliminar el registro como se ha descrito en el punto de eliminación
de registros.
Sistemas Informáticos 2012-2013
45
o Cortar al portapapeles el conjunto de registros seleccionados. Con la
combinación de teclas Ctrl+X y la entrada de menú contextual Cortar
(Cut). La operación se puede deshacer antes de pegar en otra tabla
con Ctrl+Z o Edición (Edit) -> Deshacer (Undo). Después del pegado
se deben eliminar cada uno de los registros como se ha descrito en el
punto de eliminación de registros.
o Deshacer cambios. Con la combinación de teclas Ctrl+Z y la entrada
de menú Edición (Edit) -> Deshacer (Undo).
o Rehacer cambios. Con la combinación de teclas Ctrl+Y y la entrada de
menú Edición (Edit) -> Rehacer (Redo).
o Actualizar contenidos. Con entrada Actualizar (Update) en menú
contextual de la ventana y también con la tecla de acceso directo F5.
o Cerrar ventana. Con entrada Cerrar (Close) en menú contextual de la
ventana y también con la combinación de teclas de acceso directo
Alt+F4.
Notas:
Puede haber varias ventanas abiertas en vista Datos. Si ya hay una ventana
abierta de una tabla se puede abrir una segunda para la misma tabla, pero
sin permitir ediciones en esta segunda. Cualquier actualización de datos de
la primera se debe actualizar en el resto de ventanas para la misma tabla.
Sobre esta ventana se deben poder realizar una serie de acciones definidas
en un menú contextual de la barra de título:
o Configuración de formato (Display Configuration). Reusar la
aplicación de formato de ACIDE – A Configurable IDE. El formato de
esta
ventana
se
aplica
sobre
todas
las
ventanas
Datos,
independientemente de la tabla o vista a la que se aplique. Esta
configuración de formato se debe guardar en el espacio de trabajo
(Workbench).
o Actualizar (Update) en menú contextual de la ventana y también con
la tecla de acceso directo F5.
o Cerrar (Close) para cerrar la ventana y también con la combinación
de teclas de acceso directo Alt+F4.
Sistemas Informáticos 2012-2013
46
7.2.4.2. BARRA DE ESTADO
Es la barra inferior que aparece en la ventana Datos. La información que se debe
mostrar en la barra:
Registro 1 de N (Record 1 of N), donde N es el número total de registros, si
N>0.
Sin registros (No Records), si N es 0.
Un cuadro de texto Ir a (Go To) en el que se pueda escribir un número de 1 a
N. Al pulsar ENTER, el registro actual será N y la rejilla se desplazará si es
necesario para mostrarlo.
7.2.4.3. BARRA DE MENÚ
El menú se debe parametrizar en un archivo de configuración en el que se
describan las entradas, subentradas, separadores y comandos a ejecutar. Tiene la
siguiente estructura:
Archivo (File)
o Exportar (Export)
CSV separado por comas (Comma-delimited CSV). Se abrirá un
cuadro de diálogo para seleccionar un fichero con los botones
Aceptar (OK) y Cancelar (Cancel). Se creará un fichero de
texto con todos los registros de la rejilla (en ese orden), uno
por línea de texto, y con todos sus campos (en el orden que
aparecen en la rejilla). Si un valor es NULL, se dejará vacío.
CSV separado por tabulador (Tab- delimited CSV). Igual que el
anterior pero el carácter de separación entre campos es el
tabulador.
CSV (CSV). Se debe abrir un cuadro de diálogo que permita
escribir el carácter con los botones Aceptar (OK) y Cancelar
(Cancel). Después se procederá a seleccionar el fichero y
guardar los datos.
XML. Se abrirá un cuadro de diálogo para seleccionar un
fichero con los botones Aceptar (OK) y Cancelar (Cancel).
Sistemas Informáticos 2012-2013
47
o Importar (Import)
CSV separado por comas (Comma-delimited CSV). Se abrirá un
cuadro de diálogo para seleccionar un fichero y con los
botones Aceptar (OK) y Cancelar (Cancel). Por cada línea del
fichero de texto se leerá el valor que corresponde al campo en
el orden en que aparece en la rejilla. Si un valor es vacío, se
carga el valor NULL. Para cada línea del fichero de texto se
realizará una inserción en la tabla como se describió
anteriormente.
CSV separado por tabulador (Tab- delimited CSV). Igual que el
anterior pero el carácter de separación entre campos es el
tabulador.
CSV (CSV). Se debe abrir un cuadro de diálogo que permita
escribir el carácter de separación y con los botones Aceptar
(OK) y Cancelar (Cancel). Después se procederá a seleccionar
el fichero y cargar los datos como antes.
XML (XML). Se abrirá un cuadro de diálogo para seleccionar
un fichero con los botones Aceptar (OK) y Cancelar (Cancel).
Se leerá el fichero XML con la estructura indicada
anteriormente. Si un valor es vacío, se carga el valor NULL
o Ejecutar consulta (Execute Query). Se abre un editor de texto en
ACIDE – A Configurable IDE y se informa mediante un cuadro de
diálogo que la consulta se ejecuta enviando el contenido del editor a
la consola o seleccionando Ejecutar consulta (Execute Query) del
menú contextual del editor (una nueva entrada que debéis añadir,
después de la que ya existe Enviar contenido a la consola). Este
cuadro informativo tiene el botón Aceptar (OK) (pero se puede
cerrar también con la tecla Esc) y una casilla de verificación para no
volver a mostrar el mensaje. La acción para rellenar el contenido de
la ventana resultante se describe en el apartado 7.2.2.2.
o Imprimir (Print). Se imprime la tabla abriendo el cuadro de selección
de impresora.
Sistemas Informáticos 2012-2013
48
<Separador>
o Cerrar (Close). Cierra la ventana Datos. Atajo de teclado: Alt+F4.
Edición (Edit)
o Deshacer (Undo). Atajo de teclado: Ctrl+Z.
o Rehacer (Redo). Atajo de teclado: Ctrl+Y.
o Cortar (Cut) . Se copia en el portapapeles según lo que se haya
seleccionado (una fila o varias, una columna o varias, una celda o
varias). Atajo de teclado: Ctrl+X.
o Copiar (Copy). Se copia en el portapapeles según lo que se haya
seleccionado (una fila o varias, una columna o varias, una celda o
varias). Atajo de teclado: Ctrl+C.
o Pegar (Paste) . Atajo de teclado: Ctrl+V.
o Buscar (Find) . Atajo de teclado dependiente del idioma.
o Reemplazar” (“Replace”). Atajo de teclado dependiente del idioma.
Registros (Records)
o Nuevo (New)
o Eliminar (Delete). Atajo de teclado: Supr.
o Actualizar (Refresh). Atajo de teclado: F5.
o Ir a (Go To)
Primer registro (First Record). Ir al primer registro. Atajo de
teclado: Ctrl+Inicio.
Último (Last). Ir al último registro. Atajo de teclado: Ctrl+Fin.
Siguiente (Next). Ir al siguiente registro. Atajo de teclado:
Flecha abajo.
Anterior (Previous). Ir al anterior registro. Atajo de teclado:
Flecha arriba.
Ir al registro (Go to Record). En un cuadro de diálogo se
solicita el número de registro para que sea el nuevo actual.
<Separador>
o Seleccionar registro (Select Record). Selecciona el registro actual de
la tabla.
Sistemas Informáticos 2012-2013
49
o Seleccionar todos (Select All). Selecciona todos los registros de la
tabla.
Ver (View)
o Ordenar por (Sort by). Se debe abrir una ventana con una rejilla con
una primera columna en la que se pueda seleccionar el campo de la
tabla por el que se debe ordenar, y una segunda columna para
seleccionar el criterio (“Ascendente” o “Descendente”).
o Ordenar por la columna (Sort by Column). Se ordenará según la
columna en la que se encuentre el cursor.
Ascendente (Ascending).
Descendente (Descending).
o Filtrar por contenido (Filter by Content)
o Filtrar excluyendo el contenido (Filter Excluding Content).
o Quitar filtro (Discard Filter)
o Mostrar/Ocultar columnas (Hide/Show Columns). Se debe abrir una
ventana con una rejilla con una primera columna en la que se
muestre cada uno de los campos de la tabla y una casilla de
verificación para cada uno de ellos que indique si se debe mostrar o
no (si la casilla se selecciona, la columna se debe mostrar).
Ayuda (Help)
o Mostrar ayuda (Show Help). Se mostrará el manual de usuario de la
aplicación DES-ACIDE (no de ACIDE – A Configurable IDE).
o Acerca de (About). Mostrará un cuadro de diálogo con los créditos y
el número de la versión.
7.2.4.4. BARRA DE COMANDOS
Se deben mostrar iconos que correspondan a las siguientes acciones, que
especifican el texto de ayuda (Tooltip text). Tiene los siguientes iconos:
Cortar (Cut)
Copiar (Copy)
Pegar(Paste)
Buscar (Find)
Sistemas Informáticos 2012-2013
50
Ordenar ascendente (Sort ascending). Según la columna en la que se
encuentre el cursor.
Ordenar descendente (Sort descending). Según la columna en la que se
encuentre el cursor.
Filtro rápido (Quick Filter). Según el valor de la columna en la que se
encuentre el cursor.
Quitar filtro (Discard Filter).
7.2.4.5. RESUMEN DE MENÚS CONTEXTUALES DE LA REJILLA
Los menús contextuales se deben parametrizar en un archivo de configuración en
el que se describan las entradas, separadores y comandos a ejecutar.
7.2.4.5.1. MENÚ CONTEXTUAL DE UNA COLUMNA
Aparece al pulsar con el botón secundario sobre una columna con el nombre del
campo. Contiene las siguientes entradas (ya descritas):
Ordenar ascendente (Sort Ascending). Ordenar ascendente según la columna.
Ordenar descendente(Sort Descending). Ordenar descendente según la
columna.
Ocultar columna (Hide Column). Ocultar la columna.
Mostrar columnas (Show Columns). Abrir el cuadro de diálogo Mostrar
columnas.
Quitar filtro (Discard Filter). Quitar el filtro.
Cortar (Cut) . Cortar de todas las celdas de la columna.
Copiar (Copy). Copiar los datos de todas las celdas de la columna.
Pegar (Paste) . Pegar en todas las celdas de la columna (lo que se copie de
una columna de una tabla se puede pegar en otra).
7.2.4.5.2. MENÚ CONTEXTUAL DE UNA CELDA
Aparece al pulsar con el botón secundario sobre una celda de datos. Contiene las
siguientes entradas (ya descritas):
Sistemas Informáticos 2012-2013
51
Filtrar por contenido (Filter by Conten”). Filtrar según el contenido de la
celda.
Filtrar excluyendo el contenido (Filter Excluding Content). Filtrar excluyendo
el contenido de la celda.
Quitar filtro (Discard Filter).
Ordenar ascendente (Sort Ascending). Ordenar ascendente según la columna
a la que pertenece la celda.
Ordenar descendente (Sort Descending). Ordenar descendente según la
columna a la que pertenece la celda.
Ocultar columna (Hide Column). Ocultar la columna a la que pertenece la
celda.
Mostrar columnas (Show Columns). Abrir el cuadro de diálogo Mostrar
columnas.
Cortar (Cut). Cortar el contenido de la celda.
Copiar (Copy). Copiar el contenido de la celda.
Pegar (Paste). Pegar en la celda.
7.2.4.5.3. MENÚ CONTEXTUAL DE UNA FILA
Aparece al pulsar con el botón secundario sobre la celda más a la izquierda de una
fila. Contiene las siguientes entradas (ya descritas):
Eliminar registro (Delete Record)
Insertar registro (Insert Record)
Cortar (Cut). Cortar de las columas mostradas del registro.
Copiar (Copy). Copiar las columnas mostradas del registro.
Pegar (Paste). Pegar en las columas mostradas del registro.
Sistemas Informáticos 2012-2013
52
8. PLANIFICACIÓN
Para llevar a cabo este proyecto no hemos realizado ninguna planificación formal,
debido a que semanalmente nos reuníamos con el director Fernando Sáenz Pérez
para poner en común los errores solventados y los nuevos objetivos a desarrollar.
Por tanto, cada semana se disponía de una nueva versión de las fuentes la cual se
enviaba al director para su revisión. El grupo contaba con un documento de tareas a
realizar que era actualizado cada semana en la reunión tras la revisión del director de
la corrección de las tareas realizadas y la proposición de nuevas.
La planificación no ha sido estimada en términos de recursos, tiempo y esfuerzo.
Las tareas semanales se han ido implementando conforme eran más o menos
frecuentes dependiendo del momento de desarrollo del mismo. Por esta razón, la
asignación de tareas entre los desarrolladores ha sido la tarea de planificación más
importante que hemos llevado a cabo; teniendo en cuenta factores como la
disponibilidad de tiempo de cada uno en cada momento, el estado de los desarrollos
pendientes de cada uno, y las posibles mejoras y arreglos pendientes.
Aún así, podemos distinguir distintas fases en el desarrollo del proyecto que
pueden ser identificadas como iteraciones, que serán descritas a continuación:
8.1. PRIMERA ITERACIÓN
Podemos delimitar esta primera iteración entre el inicio del proyecto y el 20 de
diciembre de 2012.
En esta etapa los desarrolladores han ido familiarizándose con la aplicación y
acomodándose con su código. También se realizaron las primeras tareas del
documento de tareas, que corresponden a arreglos de bugs de la versión anterior y de
nuevos desarrollos sencillos.
Algunas de las mejoras introducidas en esta iteración son:
Incluir en el manual información sobre la configuración con XML.
Recuperación del historial de comandos de la sesión anterior.
Sistemas Informáticos 2012-2013
53
Total compatibilidad con Linux y Mac OS.
Escritura de los comandos al enviar contenido del editor a la consola.
Opción de enviar a la consola el contenido de un fichero, o sólo el texto
seleccionado.
Aceptación de las rutas de consola que contengan espacios en blanco.
Solucionar la pérdida de respuesta de la consola ante ENTER sucesivos.
Arreglar la pérdida de los cambios que se realizaran en la barra de
herramientas.
Diseñas las clases necesarias para implementar el panel de las bases de
datos con distintos orígenes de datos.
En la finalización de esta iteración contábamos con una nueva versión de la
aplicación (versión 0.9) más estable y con alguna funcionalidad añadida.
8.2. SEGUNDA ITERACIÓN
La segunda iteración comprende desde el día 20 de diciembre de 2012 hasta el
15 de febrero de 2013.
Durante esta fase se comenzó a implantar el nuevo panel de información de las
bases de datos al proyecto. Inicialmente este panel tendrá como origen de datos DES,
que es el ejecutable conectado a la consola por defecto en los proyectos que
manejamos.
Algunas de las mejoras introducidas en esta iteración fueron:
Solucionar los ciclos en las búsquedas en el panel de la consola.
Añadir una barra de un progreso mientras se ejecutan los procesos de
búsqueda y reemplazamiento.
Guardar las condiciones de búsqueda para continuarla con F3 o Shift-F3 y
no hay texto seleccionado.
Añadir un parámetro de configuración a los editores para habilitar o
deshabilitar la confirmación al enviar el contenido a la consola.
Marcar en rojo los editores afectados por un reemplazamiento.
Sistemas Informáticos 2012-2013
54
Realizar una primera versión de la interfaz del manager de las conexiones a
las bases de datos, que define las operaciones a desarrollar en todas las
implementaciones.
Implementar el panel de bases de datos y su interacción con el resto de
paneles de ACIDE – A Configurable IDE.
Añadir una primera versión del árbol de definición de las bases de datos al
panel pertinente (hasta nivel restricciones de tabla).
Primera versión de la Vista de Datos (Data View) para mostrar el contenido
de las tablas.
Al término de esta iteración obtenemos un primer acercamiento a lo que será
el panel de bases de datos final; con funcionalidad básica e inestable, sólo para
algunos tipos de nodos.
8.3. TERCERA ITERACIÓN
Esta iteración se enmarca entre las fechas 16 de febrero de 2013 y 30 de abril
de 2013. Su principal finalidad fue estabilizar y completar el funcionamiento del
árbol del panel y comenzar a añadir una nueva implementación del manager para
ODBC. En referencia a la vista de datos, implementar la posibilidad de añadir, insertar
y modificar tuplas, filtrados y ordenaciones.
Además se han solucionado problemas en la búsqueda y reemplazamiento en
editores y ampliado la funcionalidad en estos campos.
Solucionar los errores de actualización que surgieron en el árbol del panel.
Incluir los nodos de tipo Vista y de tipo Restricción de Integridad al árbol.
Completar las acciones de los menús contextuales del panel.
Modificar la implementación del manager de las conexiones de las bases de
datos para adecuarlo al patrón singleton, permitiendo que sólo haya una
instancia que lo implemente.
Extender la interfaz del manager para permitir realizar las siguientes
acciones en la vista de datos:
Sistemas Informáticos 2012-2013
55
o Actualización de datos: inserción, modificación y borrado de tuplas
en la vista de datos.
o Importación y exportación de datos en formatos CSV y XML.
o Filtrado y ordenación de la tabla.
o Visualizar y ocultar columnas.
o Imprimir el contenido de la tabla.
o Añadir la ayuda en el menú de la vista de datos.
o Cortar, copiar y pegar sobre la tabla.
o Hacer que la vista de datos sea de sólo lectura en el caso de abrirla
para una vista.
o No permitir abrir más de una vista de datos para modificación.
Añadir las búsquedas recientes en la ventana de Búsqueda y en la de
Reemplazamiento (para ésta también los reemplazamientos recientes).
Incluir la posibilidad de usar caracteres especiales para la búsqueda como
^p (saltos de línea) y ^t (tabulaciones).
Extender la búsqueda de la consola aplicando los cambios realizados en la
búsqueda del editor, excluyendo los reemplazamientos, que no proceden.
Añadir en el manual de usuario la descripción de uso de expresiones
regulares.
Al final de la iteración nos encontramos con una nueva versión de ACIDE – A
Configurable IDE (versión 0.10) en la que podemos utilizar casi por completo el
nuevo panel integrado con DES y realizar todas las acciones permitidas sobre las
tablas.
8.4. CUARTA ITERACIÓN
Esta última iteración abarca desde la publicación de la anterior release hasta el
final del curso académico, correspondiendo con la entrega final de un IDE estable y
distribuible.
Los principales cambios que se aportan ante la versión 0.10 son la integración de
la vista de diseño para la modificación del esquema de las tablas; y la implementación
de un nuevo gestor de menús que permita modificar todas las propiedades de las
Sistemas Informáticos 2012-2013
56
entradas de menú incluidas por defecto en ACIDE – A Configurable IDE y definir otras
totalmente nuevas, similares a los botones de la barra de herramientas. Las tareas
detalladas son las siguientes:
Extender las implementaciones del manager para poder realizar las
acciones de la Vista Diseño:
o Añadir y eliminar columnas.
o Cambiar nombres y tipos de las columnas.
o Cambiar las restricciones (clave primaria y no nulos).
o Recuperar el estado anterior de la tabla si se produce un error.
o No permitir modificar los esquemas de tablas no vacías.
Implementar la nueva configuración de los menús. Para ello se han llevado a
cabo las siguientes tareas:
o Definición de una estructura para los nuevos archivos de
configuración de menús.
o Definición de las clases que gestionarán la información extraíble de
los documentos de configuración de menús.
o Creación de métodos que creen el menú por defecto (para
salvaguardar el correcto comportamiento de la aplicación en caso de
que los documentos de configuración estén mal definidos).
o Creación de la nueva ventana de configuración de menús.
o Definición del manager de iconos añadidos, que copia dentro del
directorio de la aplicación las imágenes que han sido definidas como
iconos de componentes de menú.
Modificar la ventana de configuración de consola añadiendo un nuevo
campo para introducir los parámetros del comando.
Permitir filtrar por campos nulos en la Vista de Datos.
Pequeños arreglos sobre algunas de las acciones sobre la Vista de Datos.
Añadir el cursor de espera para las operaciones de ACIDE – A Configurable
IDE susceptibles de tardar.
Completar el manual con todas las funcionalidades añadidas durante el
curso.
Sistemas Informáticos 2012-2013
57
Extender el manual de usuario con secciones explicando funciones ya
existentes antes de comenzar este curso, pero pobremente explicadas en
versiones anteriores del manual.
Nuevas capturas de pantalla para todo el manual de usuario.
Con la finalización del curso obtenemos la versión 0.11 de ACIDE – A
Configurable IDE, consiguiendo que la aplicación se comporte de forma fiable y
segura.
Sistemas Informáticos 2012-2013
58
9. TAREAS REALIZADAS
En esta sección se detallan las tareas que hemos realizado en el proyecto en
términos de código fuente. Por código fuente se entiende que no se han realizado
modificaciones únicamente sobre las clases en sí, además se han modificado los
diferentes paquetes, recursos (como iconos, manual, ejemplos), librerías¸ y archivos de
configuración (XML, archivos de configuración de ACIDE y ficheros de properties).
9.1. GESTIÓN DE BASES DE DATOS
Sin duda el mayor esfuerzo en las versiones del proyecto que hemos desarrollado
este curso está en el trabajo con Bases de Datos. Desde el principio de nuestra
participación en el proyecto, la conexión de ACIDE – A Configurable IDE con las bases
de datos del sistema, y la creación de una interfaz gráfica para trabajar con ellas han
sido prioritarias.
El esquema de las diferentes bases de datos a las que ACIDE – A Configurable IDE
puede conectarse se ve reflejado en el Panel de Bases de Datos.
Figura 13: Panel de Bases de Datos
Sistemas Informáticos 2012-2013
59
Este panel se muestra mediante la nueva entrada añadida en el menú Vista de la
ventana principal de la aplicación:
Figura 14: Entrada Database, menú Vista
Además se ha creado una vista para la modificación, borrado e inserción de los
datos de dichas bases de datos, que se muestra a través de la entrada Vista de Datos
del menú contextual del panel antes indicado.
Figura 15: Vista de datos
También se ha creado otra vista para la modificación del esquema de aquellas
tablas o vistas que se encuentren vacías. A esta última vista se puede acceder a través
de la entrada del menú contextual Vista de Diseño.
Sistemas Informáticos 2012-2013
60
Figura 16: Vista de diseño
A continuación se comenta de forma detallada la implementación de estas
funcionalidades.
9.1.1.ESQUEMA DE LAS BASES DE DATOS
Las distintas bases de datos se representarán mediante una estructura jerárquica
en la que se mostrarán las diferentes tablas, vistas y restricciones correspondientes a
la base de datos seleccionada.
Figura 17: Esquema de las bases de datos
Sistemas Informáticos 2012-2013
61
La estructura de paquetes en la que se reparte esta funcionalidad se detalla a
continuación:
acide.gui.databasePanel: contiene la clase AcideDataBasePanel, encargada
de la gestión del árbol esquemático de las bases de datos.
o acide.gui.databasePanel.listeners:
contiene
AcideDatabasePanelKeyboardListener
que
la
se
clase
encarga
de
implementar todos los KeyListener de dicho árbol.
o acide.gui.databasePanel.nodes: contiene todas las clases encargadas
de construir y actualizar de manera dinámica los distintos nodos del
panel de bases de datos.
o acide.gui.databasePanel.popup: contiene las clases correspondientes
a cada uno de los menús contextuales asociados a los nodos antes
mencionados.
o acide.gui.databasePanel.popup.listeners:
contiene
las
clases
encargadas de gestionar los distintos listeners para los diferentes
menús contextuales de los nodos.
o acide.gui.databasePanel.utils: contiene las clases de utilidad para el
desarrollo de la implementación de las acciones que pueden
realizarse desde el menú contextual del panel de bases de datos.
Las restricciones del proyecto en cuanto a este panel nos decían que debía ser
programado de tal forma que en un futuro se pudieran integrar distintos orígenes de
datos; como así ocurrió a mediados de curso integrando ODBC al panel.
Esta restricción nos derivaba a tener una interfaz para definir todas las
operaciones posibles a realizar desde los menús contextuales de los elementos de las
bases de datos. También a realizar la primera implementación de dicha interfaz para
el origen de datos DES.
Sistemas Informáticos 2012-2013
62
Figura 18: Interfaz AcideDatabaseManager
Este diagrama representa el estado inicial de las clases de acceso a las bases de
datos. Para no hacer el diagrama demasiado exhaustivo, solamente hemos añadido
una de las operaciones que se definen la interfaz (getTables()). Como se puede ver,
DesDatabaseManager implementa el patrón singleton, de tal forma que sólo habrá
una instancia de ésta clase en toda la aplicación.
Este diseño fue el que se instauró en ACIDE – A Configurable IDE hasta el momento
en el que se nos pidió añadir ODBC como origen de datos alternativo para el nuevo
panel. Esta nueva funcionalidad requería que sólo una de las dos conexiones
estuviera abierta en cada instante. Por lo tanto aunque realizáramos otra
implementación de AcideDatabaseManager que cumpliera el patrón singleton, no
veríamos cubierto ese problema; así tuvimos que rediseñar el acceso a datos.
La clase que debería pasar a ser singleton es la superclase de los dos managers,
AcideDatabaseManager. En ese momento era imposible por ser una interfaz, por lo
que pasó a convertirse en una clase abstracta con todos los métodos que definen la
interfaz abstractos. Esta clase pasa a tener un atributo _instance de su propio tipo.
Además del método getInstance() necesario en este caso, añadimos su método
opuesto,
setInstance(AcideDatabaseManager
newInstance).
Con
este
método
conseguimos cambiar de DES a ODBC, o a los posibles sistemas que en un futuro se
añadan pasándole como parámetro una nueva instancia de la clase correspondiente.
Sistemas Informáticos 2012-2013
63
Figura 19: Clase abstracta AcideDatabaseManager
Al igual que antes el diagrama está resumido, obviando el resto de métodos
implementados.
Para futuros desarrollos en los que se desee añadir una nueva conexión para
bases de datos el procedimiento es sencillo. Bastará con añadir una nueva clase que
extienda a AcideDatabaseManager e implemente todos sus métodos. Además será
necesario añadir una nueva opción de menú en Configuración/Panel de base de datos
y que cambie el tipo de la instancia de la superclase.
9.1.2.EDICIÓN Y VISUALIZACIÓN DE DATOS DE TABLAS Y VISTAS
Para poder manipular y visualizar los datos contenidos en las distintas tablas y
vistas, así como para mostrar los resultados de las consultas ejecutadas sobre ellas
desde el Panel de bases de datos, se ha definido la interfaz Vista de datos.
Figura 20: Vista de datos
Sistemas Informáticos 2012-2013
64
Puede haber varias ventanas de vista de datos abiertas simultáneamente. Si ya hay
una ventana abierta para una tabla, se permitirá abrir una segunda para la misma
tabla, pero ésta será de sólo lectura y cualquier actualización de datos que se realice
sobre la primera se actualizará para el resto de ventanas de la misma tabla.
Mientras que para las vistas sólo se podrán examinar los datos, desde esta ventana
se podrán realizar las siguientes acciones sobre las tablas:
Insertar nuevas tuplas.
Modificar o eliminar tuplas existentes.
Filtrar y ordenar el contenido.
Las distintas funcionalidades de esta ventana ya fueron explicadas en la sección
Gestión de requisitos, en su apartado 7.2.4.
La estructura de paquetes en la que se reparte esta funcionalidad es la siguiente:
acide.gui.databasePanel.dataView: contiene las clases necesarias para la
construcción de la rejilla de datos.
acide.gui.databasePanel.dataView.commandBar: en este paquete se encuentran
las clases utilizadas para la construcción de la barra de herramientas de la vista
de datos.
acide.gui.databasePanel.dataView.listeners: implementa los listener necesarios
para la modificación, visualización, inserción, filtrado y edición de los datos de
las tablas.
acide.gui.databasePanel.dataView.menuBar: se encarga de construir y gestionar
el menú de la ventana de vista de diseño.
9.1.3.VISTA DE DISEÑO EN TABLAS
La vista de diseño servirá para poder ver y editar el esquema de las tablas de una
forma sencilla y visual. Los metadatos se mostrarán en forma de tabla con cuatro
columnas que son: nombre, tipo, clave primaria y no nulos:
Sistemas Informáticos 2012-2013
65
Figura 21: Vista de diseño
Esta vista tiene dos funcionalidades muy concretas:
Crear una tabla: podemos crear una tabla desde cero sin escribir ningún
comando.
Modificar una tabla existente: nos dará la opción de modificar el esquema
de la tabla, es decir, añadir y eliminar columnas, modificar la clave primaria
y los tipos, y añadir la restricción de no nulos a los campos de la tabla que se
consideren necesarios.
Las restricciones del sistema no permiten modificar el esquema de las tablas que
no estén vacías.
Esta
ventana
está
implementada
íntegramente
en
la
clase
AcideDatabaseDesignView dentro del paquete acide.gui.databasePanel.utils. Para
que la tabla no desaparezca, al abrir la ventana se almacena en memoria el estado
actual de ésta. En caso de error al modificar los metadatos, se recuperará el estado
anterior y se notificará al usuario mediante un mensaje de pantalla.
Sistemas Informáticos 2012-2013
66
9.2. CONFIGURACIÓN DE BARRA DE MENÚS
La configuración de la barra de menús ha concentrado gran parte de los esfuerzos
durante la realización de este proyecto. El gran avance que se ha dado en este sentido
ha sido el de poder añadir nuevos componentes a los distintos menús de tal forma
que el usuario pueda definir nuevas entradas de menú de forma similar a la edición
de nuevos botones en la barra de herramientas. También se pueden decidir otros
aspectos de los componentes como su nombre, icono, acción a lanzar y el orden en
que se presentan los mismos.
9.2.1.ARCHIVOS DE CONFIGURACIÓN
En versiones anteriores, para los distintos componentes de la barra de menú el
usuario sólo podía decidir si esa opción era visible o no. El archivo de configuración
de menú constaba de una lista de los distintos elementos junto a una asignación a un
valor true o false dependiendo de si esa opción era visible o no. A continuación se
muestra un fragmento del archivo de configuración de menú en la versión anterior:
New File = true
Open File = true
Open Recent Files = true
Open All Files = true
Save File As = false
Save File = false
Save All Files = false
Close File = true
Close All Files = true
Print File = false
Exit File = true
Este fragmento de código corresponde a la visibilidad del menú Archivo. En él se
puede observar que las entradas Save File As, Save File y Save All Files no son visibles.
El resultado de esta configuración sería el siguiente:
Sistemas Informáticos 2012-2013
67
Figura 22: Ejemplo de configuración versión anterior
Podemos observar que no aparecen las opciones relacionadas con el guardado de
archivos, ya que sus valores están fijados a false. Esta forma de configurar el menú
supuso un gran avance en la anterior versión, ya que era más flexible y sencilla que en
versiones más antiguas.
Sin embargo, este método de configuración tiene una gran desventaja: el usuario
solamente puede decidir sobre si un elemento del menú es visible o no; no puede
añadir ni borrar componentes, ni cambiar iconos, nombres, orden o acciones de estos
componentes. El menú tenía una estructura
y funcionalidad fija que no podía
aumentar ni disminuir.
Por tanto, el objetivo propuesto respecto a la nueva configuración del menú era
incluir la posibilidad de crear y borrar elementos en la barra de menús y editar otras
propiedades. Para cumplir con este objetivo, el primer paso era definir un nuevo tipo
de archivo de configuración de menús. Después de revisar los archivos de
configuración de otras funcionalidades de la aplicación, y de pensar sobre las
necesidades que requería el nuevo comportamiento, se optó por usar archivos XML
con la siguiente estructura:
<acide.configuration.menu.AcideMenuItemsConfiguration>
<__itemsManager>
…
</__itemsManager
</acide.configuration.menu.AcideMenuItemsConfiguration>
La etiqueta raíz dentro de estos documentos XML corresponde con la clase
AcideMenuItemsConfiguration que se encarga de la gestión interna de la
Sistemas Informáticos 2012-2013
68
configuración del menú dentro de Acide – A Configurable IDE. Esta clase contiene un
atributo _itemsManager que contiene las entradas de menú que existen en dicha
configuración. Básicamente lo que hace este objeto es gestionar la lista de
componentes de menú que insertemos en el documento de la siguiente forma:
<__itemsManager>
<__list>
<__list>
…
</__list>
</__list>
</__itemsManager>
Anidados dentro de la última etiqueta <__list> se introduce una lista de elementos
con el orden de aparición deseado dentro de la barra de menú. Estos elementos son o
bien ítems de menú (como por ejemplo Nuevo Archivo) o bien entradas de menú (por
ejemplo la entrada Archivo). La estructura de un ítem de menú es la siguiente:
<acide.configuration.menu.AcideMenuItemConfiguration>
<__command>… </__command>
<__parameter>…</__parameter>
<__name>…</__name>
<__visible>…</__visible>
<__erasable>…</__erasable>
<__image></__image>
</acide.configuration.menu.AcideMenuItemConfiguration>
La función de cada elemento es la siguiente:
_command: almacena el comando que ejecutará el ítem de menú cuando sea
pulsado. Puede ser o bien lanzado en consola o bien realizar una acción de
la aplicación. Más adelante hablaremos sobre este tema.
_parameter: contiene el tipo de parámetro que necesita el comando
expresado en el atributo anterior. El tipo de parámetro puede ser uno de
estos cuatro: NONE (ningún parámetro), TEXT (parámetro de texto), FILE
(parámetro de tipo archivo) o DIRECTORY (de tipo directorio).
_name: contiene, lógicamente, el nombre con el que se mostrará el ítem.
_visible: con valor true o false, indica si el ítem debe ser visible o no. Este
valor es el que realiza la función de todo el archivo de configuración de
versiones anteriores.
_erasable: con valor true o false. Las entradas de menú por defecto de ACIDE
– A Configurable IDE tiene este valor a false, lo que quiere decir que este
Sistemas Informáticos 2012-2013
69
ítem no puede ser borrado (pero sí hecho no visible). Dado que un ítem con
este valor a false no puede ser borrado, la propia aplicación al analizar el
archivo de configuración, añadirá todos estos ítems que deberían existir y
no están por una configuración incorrecta del usuario.
_image: contiene la ruta de la imagen que servirá como icono del ítem. Más
adelante hablaremos sobre el tratamiento a estas imágenes.
Además de ítems de menú, hemos dicho que también podían aparecer
entradas de menú en las listas de elementos. Su estructura sería como sigue:
<acide.configuration.menu.AcideMenuSubmenuConfiguration>
<__itemsManager>
…
</__itemsManager>
<__name>…</__name>
<__visible>…</__visible>
<__erasable>…</__erasable>
<__image></__image>
</acide.configuration.menu.AcideMenuSubmenuConfiguration>
La función de cada elemento es la siguiente:
_itemsManager: ya se ha explicado antes para la lista de entradas que
conforman la barra de menús. Funciona exactamente igual, de tal forma que
en cada menú podemos ir definiendo menús anidados.
_name: el nombre que presentará el menú.
_visible: define si es visible o no, idéntico a los ítems antes explicados.
_erasasable: funciona igual que para los ítems de menús explicados
anteriormente.
_image: para las entradas de menú estas etiquetas deben aparecer vacías ya
que las entradas de menú (o submenús) no tienen icono.
Conociendo cómo funciona la configuración para los ítems de menú y las
entradas de menú, es fácil configurar la barra de menús. Simplemente se trata de
insertar en el orden requerido los distintos elementos en el primer _itemsManager
que aparece en el archivo de configuración, que corresponde a la configuración de
la barra de menús. Anidando nuevos elementos en este primer mánager,
conseguiremos la apariencia deseada para la barra. Como puntualización, añadir
que en el primer mánager, el que corresponde a la configuración de los elementos
Sistemas Informáticos 2012-2013
70
que aparecen en la barra de menús, solo pueden ser añadidos submenús (algo
lógico, en la barra de menús sólo aparecen menús, no ítems).
9.2.2.CONFIGURACIÓN MEDIANTE LA APLICACIÓN
Después de esta profunda reestructuración de la configuración y los archivos que
la definen, es lógico pensar que la ventana de configuración de menú en ACIDE – A
Configurable IDE también ha sufrido una profunda transformación. Ahora no sólo hay
que decidir sobre la visibilidad de los elementos, sino también sobre su nombre, la
acción que realizan, el orden en el que aparecen, etc. En la siguiente imagen se
muestra un ejemplo con la configuración por defecto del menú Archivo:
Figura 23: Configuración del menú Archivo
Vamos a distinguir los distintos apartados de la ventana de configuración:
Se puede observar que en la parte superior aparece el nombre de la ventana
seguido del nombre del archivo de configuración del menú.
Aparecen pestañas con los nombres de los menús que existen en la barra de
menús. Seleccionando cada pestaña podremos acceder a la tabla de
configuración de cada menú.
En la tabla de configuración aparecen los atributos de los distintos
componentes de menú en esta configuración.
o Las columnas Fila, Tipo, Borrable, Ruta y Filas de los hijos no son
editables. Un componente no puede cambiar de tipo una vez creado.
El valor borrable es inamovible, un elemento creado por el usuario
será borrable y uno por defecto será no borrable. La ruta y las filas
Sistemas Informáticos 2012-2013
71
de los hijos vienen determinadas por el orden y los componentes que
contienen los componentes dentro del menú. Estos valores se
pueden modificar cambiando la estructura del menú, pero no
directamente en esta tabla.
o Para los submenús, las columnas Orden y Tiene Parámetro no son
editables ya que carecen de sentido para ellos.
o Para los ítems de menú, la columna Filas de los hijos no es editable ya
que carece de sentido para ellos.
Abajo aparece el panel de botones de la ventana, siguiendo el estilo del
resto de ventanas de configuración. Mediante estos botones el usuario
puede crear un nuevo menú dentro de la barra de menús, borrar un menú,
añadir un nuevo ítem o submenú, borrar componentes que se puedan
borrar, cambiar el orden de los menús y las entradas dentro de uno de ellos,
etc. Están disponibles todas las acciones posibles con los distintos
componentes de menú.
Además de los distintos componentes de la ventana de configuración
explicados, la tabla tiene el siguiente menú contextual:
Figura 24: Menú contextual configuración de menús
Las acciones son las mismas que se podían realizar con los botones anteriormente
explicados, salvo dos que sólo son accesibles desde aquí:
Enviar a menú: sirve para mover a otro menú distinto de la barra de menús
el componente seleccionado. El usuario lo elegirá de una ventana que le
muestra las distintas opciones.
Sistemas Informáticos 2012-2013
72
Insertar en submenú: con esta acción el usuario puede introducir el
componente seleccionado en un submenú distinto dentro del menú en el
que se encuentra. Se elegirá dónde desea insertarlo en una ventana
mostrando las opciones.
Una vez el usuario ha realizado los cambios oportunos, debe pulsar el botón
Aceptar para aplicarlos.
9.2.3.FUNCIONAMIENTO DE LA NUEVA CONFIGURACIÓN
Después de toda esta explicación sobre cómo configurar el menú, vamos a detallar
algo más el funcionamiento de esta configuración.
La clase AcideMenuItemsConfiguration es la que se encarga de gestionar toda la
configuración de la barra de menús. Esta clase usa el patrón singleton, y dentro
contiene un objeto AcideMenuItemsManager que, como hemos explicado antes,
gestiona la configuración indicada por los archivos de configuración. La ventana de
configuración explicada en el apartado anterior edita el fichero de configuración que
utilice el proyecto activo y, al aplicar los cambios, hace que la clase
AcideMenuItemsConfiguration vuelva a leer ese archivo y construya la barra de
menús con las propiedades indicadas. Las clases AcideMenuItemConfiguration y
AcideMenuSubmenuConfiguration son las encargadas de gestionar las propiedades
de cada ítem de menú y submenú respectivamente, y ambas heredan de la clase
AcideMenuObjectConfiguration. Todas estas clases se encuentran en el paquete
acide.configuration.menu.
En
cuanto
a
la
ventana
de
AcideMenuNewConfigurationWindow,
configuración,
en
la
clase
el
encargada
es
paquete
acide.gui.menuBar.configurationMenu.menuMenu.gui. Esta clase cuenta con un panel
para cada menú por defecto de ACIDE – A Configurable IDE, un Hashmap que contiene
los paneles del resto de menús insertados por el usuario, un ArrayList con los
nombres de esos menús y un AcideMenuSubmenuConfiguration con la
configuración de la barra de menús. Para cada panel por defecto existe una clase que
lo gestiona, y para los paneles de los menús introducidos por el usuario otra clase.
Cada una de estas clases se encarga de modelar el comportamiento de la tabla para
cada panel.
Sistemas Informáticos 2012-2013
73
9.2.4.COMANDOS DE LOS ÍTEMS DE MENÚ
Como se ha explicado antes, en esta nueva versión se puede definir el comando a
ejecutar en los ítems de menú. Hay que hacer varios comentarios sobre este nuevo
aspecto.
Se pueden distinguir dos tipos de comandos: comandos que empiezan por “$” y
los que no empiezan por “$”. Los comandos que pertenecen al primer grupo expresan
acciones de la aplicación, es decir, mediante este tipo de comandos el usuario podrá
editar nuevos ítems de menú mediante los cuales podrá realizar acciones que son
propias de la aplicación, como abrir un archivo, copiar el texto seleccionado o mostrar
la ayuda. Se remite a la lectura del Apéndice: Manual de Usuario, donde en su capítulo
12 aparece una lista con todos los comandos de este tipo disponibles en ACIDE – A
Configurable IDE.
En esta nueva versión, se han cambiado todos los listener de cada componente de
los menús de la aplicación por el listener AcideInsertedItemListener. Este nuevo
listener lo que hace es leer el comando asociado al componente de menú en el archivo
de
configuración,
y,
si
empieza
por
“$”,
llama
a
AcideInsertedItemListenersManager usando ese comando. Esta clase gestiona el
comando con el que es llamada, y consultando el archivo de configuración
./configuration/menu/cods.ini, donde se encuentran los códigos numéricos para cada
comando, lanza la acción determinada. De esta forma, cambiando el comando
asociado a un componente, cambiamos la acción que realiza ese componente.
Por otra parte, los comandos que no empiezan con “$” son lanzados en la consola
de forma idéntica a los lanzados por los botones definidos en la barra de
herramientas por el usuario.
9.2.5.GESTIÓN DE ICONOS
En esta versión se presenta al usuario la posibilidad de elegir la imagen que usará
como icono en los componentes de menú. Esto introducía un problema: al ser una
aplicación portable, elegir la ruta de una imagen externa a la aplicación podría
acarrear problemas al cambiar de ubicación y no encontrar la ruta deseada. Por tanto,
se decidió idear un sistema de copia de imágenes en los directorios de la aplicación,
Sistemas Informáticos 2012-2013
74
de tal forma que la configuración siempre trabaje con imágenes expresadas con una
ruta relativa a la ruta donde se encuentra la aplicación.
Para ello, se creó la clase AcideMenuIconsConfiguration, que lee de un archivo
XML los distintos iconos que se han copiado anteriormente en los directorios de la
aplicación. Para cada icono contiene información con su nombre, su ruta original y su
nueva ruta relativa. De esta forma no se repetirán nombres ni se copiarán imágenes
que ya tengamos. Los iconos copiados dentro del directorio de la aplicación serán
localizados en la ruta ./resources/icons/added, donde también se encuentra el archivo
XML antes mencionado. A continuación se muestra un fragmento de este archivo:
<acide.configuration.icons.AcideMenuIconsConfiguration>
<__iconsManager>
<__list>
<__list>
<acide.configuration.icons.AcideAddedIcon>
<__absolute>C:/Usuario/newFile.png</__absolute>
<__relative>./resources/icons/added/newFile.png</__relative>
<__name>newFile.png</__name>
</acide.configuration.icons.AcideAddedIcon>
<acide.configuration.icons.AcideAddedIcon>
<__absolute>C:/Users/menu/newFile.png</__absolute>
<__relative>./resources/icons/added/newFile(1).png</__relative>
<__name>newFile.png</__name>
</acide.configuration.icons.AcideAddedIcon>
</__list>
</__list>
</__iconsManager>
</acide.configuration.icons.AcideMenuIconsConfiguration>
Se ha cambiado la forma de crear los componentes de menú, de tal forma que
ahora se lee la ruta de la imagen de su icono desde su archivo de configuración. Si es
una ruta relativa no habrá ninguna novedad y el icono será el indicado por esa ruta.
Sin embargo, si se trata de una ruta absoluta podría ocurrir que esa imagen se
encuentra fuera del directorio de la aplicación. En este caso, se comprobaría en la
clase antes mencionada si ya existe en el directorio de iconos añadidos esa imagen. Si
no existe, se copiaría dicha imagen dentro del directorio, y en el archivo XML para los
iconos añadidos se incluiría una nueva entrada para esta imagen.
Con este procedimiento nuevo en esta versión, no habrá problemas por cambiar el
directorio donde se encuentra la aplicación, ya que las imágenes siempre se moverán
con ella y la ruta relativa no cambiará.
Sistemas Informáticos 2012-2013
75
9.3. VENTANAS DE BÚSQUEDA Y REEMPLAZAMIENTO
Al comienzo del desarrollo del proyecto en este curso, existían gran cantidad de
tareas por realizar en las ventanas de búsqueda y la de reemplazamiento en los
editores, y la de búsqueda en el panel de la consola. Es por ello que durante dos de las
iteraciones se dedicó un gran esfuerzo a subsanar errores existentes en estas
ventanas y a implementar nuevas funcionalidades necesarias. A continuación vamos a
explicar detalladamente cada una de las tareas que se han llevado a cabo,
dividiéndolas en nuevas funcionalidades y corrección de errores.
Figura 25: Ventana de búsqueda
Sistemas Informáticos 2012-2013
76
Figura 26: Ventana de reemplazamiento
9.3.1.NUEVAS FUNCIONALIDADES
En primer lugar vamos a exponer las nuevas funcionalidades añadidas a estas
ventanas durante este curso. A nuestro juicio eran funcionalidades muy necesarias,
por lo que se les concedió prioridad dentro de la planificación para que su realización
fuera posible.
9.3.1.1. BOTÓN “ESPECIAL”
Como se puede observar en Figura 25 e Figura 26, se ha añadido un nuevo botón
llamado Especial para cada campo de texto, tanto el de búsqueda como el de
reemplazamiento.
La funcionalidad de este nuevo botón es dar a elegir al usuario entre dos
caracteres especiales ^t y ^p para la búsqueda de tabulaciones y saltos de párrafo
respectivamente:
Sistemas Informáticos 2012-2013
77
Figura 27: Botón “especial”
Seleccionando alguna de las dos opciones el usuario añadirá el carácter especial
correspondiente al campo de texto al que pertenezca el botón.
Figura 28: Insertado ^p
El sistema transformará estos caracteres especiales por los correspondientes para
realizar la búsqueda en el editor de texto.
Esta funcionalidad está disponible para las ventanas de búsqueda y
reemplazamiento, y para los campos de texto a buscar y texto a reemplazar. Los
caracteres especiales añadidos también aparecerán en la lista de búsquedas y
reemplazamientos recientes.
9.3.1.2. BÚSQUEDAS Y REEMPLAZAMIENTOS RECIENTES
Como se puede observar en Figura 25 e Figura 26, se ha añadido una lista
desplegable para cada campo de texto, con una etiqueta Recientes. En esta lista se
muestran los elementos recientemente introducidos en el campo de búsqueda (o
reemplazamiento) al que pertenece la lista. Consiste en un historial en el que el
usuario puede recuperar búsquedas o reemplazamientos recientes:
Sistemas Informáticos 2012-2013
78
Figura 29: Ejemplo de uso de Recientes
Seleccionando uno de ellos ese elemento se asignará al campo de texto
correspondiente, haciendo más fácil y rápida la repetición para una búsqueda o
reemplazamiento que ya se ha producido antes.
El usuario puede escribir en el campo de la lista para un acceso más rápido a los
elementos de la misma.
9.3.1.3. BARRA DE PROGRESO
Las búsquedas y reemplazamientos a veces se extienden en el tiempo más de lo
deseado, sobre todo cuando el ámbito es el de todos los documentos abiertos, o usan
expresiones regulares. Este tiempo que la aplicación emplea en la búsqueda podría
ser interpretado por el usuario como un bloqueo de la herramienta, ya que mientras
tanto el resto de la aplicación quedaba deshabilitado. Debido a este hecho, se decidió
que se debía dar al usuario algún tipo de información para indicar que el proceso
estaba en curso y la aplicación seguía su funcionamiento, y así eliminar toda alarma
posible.
Por todo esto, se decidió dotar a las ventanas de búsqueda y reemplazamiento de
sendas barras de progreso que suministraran información sobre el avance del
proceso en curso.
Sistemas Informáticos 2012-2013
79
Figura 30: Barra de progreso parcialmente completa en una búsqueda
Como se puede observar en la Figura anterior, la barra se va completando a
medida que avanza el proceso de búsqueda o reemplazamiento.
Para calcular el porcentaje de barra que tiene que estar completo en cada
momento, se ha tomado el porcentaje de documentos abiertos visitados, y el
porcentaje de reemplazos completados entre las coincidencias totales encontradas.
9.3.1.4. OTRAS TAREAS
En esta sección vamos a comentar otras tareas realizadas de menor importancia
que las anteriores. A continuación las explicamos detalladamente:
Búsqueda del texto seleccionado: se ha añadido la funcionalidad de
completar automáticamente el campo de búsqueda con el texto
seleccionado en el editor. Cuando existe texto seleccionado y abrimos la
ventana de búsqueda o reemplazamiento, el campo de texto destinado a la
búsqueda ya aparecerá completado con el texto seleccionado.
Búsqueda con F3 en consola: Se ha agregado la búsqueda con F3 en la
consola. Esta funcionalidad ya existía para la búsqueda en los editores de
archivos, pero no en el panel de la consola. Si existe texto seleccionado en la
consola y el usuario pulsa F3 se realizará una búsqueda del texto
seleccionado hacia delante de forma cíclica. Si el usuario pulsa Shift+F3 la
búsqueda será hacia atrás de forma cíclica.
9.3.2.FUNCIONALIDADES MEJORADAS O ARREGLADAS
A continuación vamos a exponer las funcionalidades que se han mejorado o
arreglado un comportamiento no correcto. No se pueden considerar nuevas
Sistemas Informáticos 2012-2013
80
funcionalidades ya que han significado un trabajo sobre una funcionalidad ya
existente, pero no por ello era menos necesario el trabajo sobre ellas.
9.3.2.1. BÚSQUEDA
Y
REEMPLAZAMIENTO
CON
EXPRESIONES
REGULARES
La posibilidad del uso de expresiones regulares tanto para búsqueda como para
reemplazamientos ya existía en versiones anteriores de ACIDE – A Configurable IDE.
Sin embargo, a la hora de probar esta funcionalidad, surgieron diferentes errores en
el comportamiento que exigían una dedicación a este campo para conseguir un
comportamiento perfecto.
Uno de los problemas que existían en versiones anteriores era la forma de uso de
las expresiones regulares en los reemplazamientos generales, ya que se usaba el
método replaceAll() que trabaja con expresiones regulares dentro de un texto. El
problema era que al introducir en este método una expresión regular, el
comportamiento no era el esperado. Se ha necesitado un procesamiento previo de la
expresión regular a utilizar, y para los reemplazamientos generales se ha ideado otro
proceso de reemplazamiento: se realizan tantos reemplazamientos individuales como
coincidencias hayan resultado después de la búsqueda. Un nuevo problema que ha
surgido de esto es que después de un reemplazamiento general, si se quiere deshacer
la acción hay que realizar un deshacer por cada reemplazamiento particular que haya
habido.
También se ha añadido un cuadro de error cuando la expresión regular
introducida es incorrecta, ya que en ese caso la búsqueda no se podrá realizar.
9.3.2.2. BÚSQUEDA CON F3 Y SHIFT+F3 EN EDITORES
La búsqueda con F3 ya estaba implementada para los editores. En esta versión se
ha añadido que la búsqueda con F3 busque el texto seleccionado de forma cíclica y
hacia delante. Además, también se ha añadido la posibilidad de realizar la misma
búsqueda del texto seleccionado de forma cíclica y hacia atrás con Shift+F3.
Sistemas Informáticos 2012-2013
81
9.3.2.3. OTRAS TAREAS
En esta sección vamos a comentar otras tareas mejoradas o corregidas de menor
importancia que las anteriores. A continuación las explicamos detalladamente:
Búsqueda con F3 o Shift+F3 sin texto seleccionado: si se pulsa F3 o
Shift+F3 sin que haya texto seleccionado en el editor abierto, se realiza la
búsqueda con la configuración de la última búsqueda. Esto es de gran
utilidad para repetir búsquedas de forma muy rápida.
Editores afectados por reemplazamiento: cuando se realiza un
reemplazamiento, ya sea general o particular, se marcan en rojo los editores
afectados como se muestra en Figura 31 y se habilita el botón de guardar
archivo. Si se cierra la aplicación sin haber guardado, se le preguntará al
usuario si quiere guardar los archivos con cambios realizados.
Figura 31: Editores modificados
Posición del cursor: después de un reemplazamiento general el cursor se
situará en la posición que ocupaba antes del reemplazamiento en cada
editor abierto. El foco volverá al editor de archivo activo en el momento del
reemplazamiento.
Sistemas Informáticos 2012-2013
82
9.4. CONSOLA
El panel de la consola fue la sección que centró gran parte de los esfuerzos durante
la primera iteración del proyecto y principio de la segunda, ya que la mayoría de
errores y arreglos necesarios fueron aquí.
9.4.1.COPIAR Y PEGAR EN CONSOLA
En versiones anteriores de ACIDE – A Configurable IDE, era posible copiar
contenido del editor de archivos dentro de la consola. Este contenido no era editable
y el usuario debía pulsar ENTER después de pegarlo. Este comportamiento era muy
similar al de enviar contenido del archivo a la consola, con la diferencia de que en este
último no se mostraba el contenido enviado, únicamente los resultados (de esta
funcionalidad se hablará más detalladamente en el capítulo 9.5).
Fue necesario rehacer el oyente del evento Pegar del menú contextual y de la
combinación de teclas Ctrl+V de la misma funcionalidad. La modificación de la clase
AcideConsolePanelKeyboardListener del paquete acide.gui.consolePanel.listeners
tuvo lugar añadiendo el método vKeyAction(). En este método, además de enviar al
proceso de la consola el texto pegado, se añade en el JTextPane del panel. De este
modo, cuando la consola devuelva resultados, se colocarán a continuación del texto
del comando.
En caso de que el último comando copiado o enviado (ver capítulo 9.5) no vaya
seguido por un salto de línea, el proceso no devolverá resultado alguno, pero al haber
sido enviado a la consola, en versiones anteriores no podía ser modificado. Con los
cambios efectuados, este último comando será identificado y no se enviará a la
consola. Se permitirá su edición o borrado en el panel.
9.4.2.HISTORIAL DE COMANDOS PERSISTENTE
Otra de las tareas importantes en esta sección fue la de crear un historial de
comandos persistente de una sesión a otra. Para ello se implementó la clase
AcideConsoleCommandsManager
dentro
del
paquete
acide.configuration.console.commands. Al iniciar la aplicación, esta clase lee el archivo
default.xml ubicado en la ruta ./configuration/console y guarda en una lista todos los
comandos allí almacenados. Los comandos introducidos por el usuario en la sesión
Sistemas Informáticos 2012-2013
83
activa se insertan en esa lista cada vez que son enviados a la consola. Al cerrar la
aplicación, el manager de comandos sólo incluirá en el archivo XML los comandos
introducidos en esta sesión, evitando así un historial que guarde comandos de varias
sesiones.
9.4.3.OTRAS TAREAS
Además, mientras se realizaban las tareas antes mencionadas, se detectó que el
panel de la consola perdía la respuesta ante pulsaciones continuadas de ENTER. Este
problema surgió al añadir el historial de comandos, puesto que se procedía a insertar
comandos vacíos y se perdía la sincronización con el proceso. Se solucionó añadiendo
la condición pertinente. A pesar de esta solución tan aparentemente sencilla, fue un
error muy difícil de detectar.
También hemos modificado la ventana de configuración de la consola, añadiendo
un nuevo campo de texto en el que introducir los posibles parámetros de la llamada
de la consola. En caso de guardar el proyecto, se almacenarán en los ficheros de
configuración y serán recuperados al iniciar ACIDE – A Configurable IDE, de tal forma
que tengamos el mismo ejecutable que en la anterior sesión.
Sistemas Informáticos 2012-2013
84
9.5. EDITOR DE ARCHIVOS
En el panel de los editores de archivo no se han realizado tantas tareas como en
otros apartados, básicamente porque este ha sido el punto de mayor esfuerzo de
desarrollo en anteriores versiones de ACIDE – A Configurable IDE y para esta versión
este aspecto ya estaba más desarrollado. De hecho, las únicas tareas llevadas a cabo
tienen que ver con la interacción entre el panel de editores y el panel de consola:
Enviar texto seleccionado en el editor a la consola: En versiones
anteriores existía la opción de enviar el contenido del archivo a la consola
mediante menú contextual. Ahora se ha implementado la posibilidad de
enviar sólo el texto seleccionado.
El funcionamiento es idéntico al
anteriormente comentado, pero únicamente se envía el texto seleccionado.
Esta opción resulta útil a la hora de querer probar fragmentos de código en
la consola. Además ahora también se visualizará en la consola el contenido
enviado. El comportamiento de estas funciones es muy similar al de copiar
y pegar en consola (ver capítulo 9.4.1).
Parámetro para habilitar/deshabilitar la confirmación al enviar
contenido a la consola: Esta funcionalidad se implementó al plantearse la
posibilidad de eliminar la solicitud de confirmación al enviar contenido a la
consola. El usuario podría preferir una manera más rápida de realizar este
proceso, sin que el sistema necesite una y otra vez la confirmación del
usuario. Para ello, se ha añadido en Configuración/Editor de Archivos la
opción Confirmación del envío a la consola para habilitar o deshabilitar la
solicitud de información. Esta nueva información se almacena en el archivo
de configuración del Editor de Archivos explicado en el capítulo 13.3.3 del
Apéndice: Manual de Usuario
Figura 32: Confirmación del envío a la consola
Sistemas Informáticos 2012-2013
85
9.6. BARRA DE HERRAMIENTAS
Al igual que ocurría con el panel de los editores de archivo, en la barra de
herramientas no se han realizado tantas tareas como en otros aspectos de la
aplicación. El trabajo en esta sección se realizó durante la primera y segunda
iteración. Las nuevas funcionalidades a destacar son:
Añadido botón para enviar contenido de archivo a la consola: Como se
ha comentado antes, ya existía la funcionalidad que enviaba el contenido
completo del editor de archivo activo a la consola. Esta acción se realizaba a
través del menú contextual del editor de archivos. Con el nuevo botón
añadido esta acción es más fácilmente accesible ya que está a la vista del
usuario en la barra de herramientas.
Figura 33: Botón para enviar el contenido del archivo a la consola
Aplicación de cambios a la configuración de la barra de herramientas:
En versiones anteriores de la aplicación, el usuario modificaba la barra de
herramientas en la ventana correspondiente y al aceptar los cambios estos
se veían reflejados durante el trabajo en esa sesión. Sin embargo, en una
nueva sesión de trabajo, los cambios antes introducidos se habían perdido y
la barra de herramientas tenía su aspecto original si el usuario no había
guardado previamente esos cambios. Se ha modificado el comportamiento
en este aspecto. En esta versión, cuando el usuario aplica los cambios, éstos
son introducidos en el archivo lastModified.toolbarConfig, y este archivo es
asignado a la configuración del proyecto con el que se esté trabajando. De
esta forma los cambios serán visibles la próxima vez que el usuario inicie
ACIDE – A Configurable IDE. Los cambios no serán guardados en el archivo
.toolbarConfig del proyecto hasta que el usuario no seleccione la opción de
guardar en Configuración/Barra de Herramientas/Guardar o Guardar como.
Sistemas Informáticos 2012-2013
86
9.7. AMPLIACIÓN DEL MANUAL DE USUARIO
La creación de nuevas funcionalidades en esta versión de ACIDE – A Configurable
IDE conllevó lógicamente la expansión del manual de usuario para explicar estas
nuevas posibilidades. Además de crear nuevas secciones para los nuevos elementos
de ACIDE – A Configurable IDE, se evaluó conveniente el añadir nuevas secciones y
expandir otras ya existentes para explicar aspectos de la aplicación que ya existían
pero que estaban pobremente explicados en el manual. Cabe resaltar también que
todas las capturas de pantalla del manual son completamente nuevas. A continuación
se detallan los distintos capítulos del manual de usuario y se explica el trabajo
realizado en cada uno de ellos:
1: System requisites: este capítulo ya existía en la anterior versión del
manual. Se ha añadido una sección explicando cómo ejecutar ACIDE –A
Configurable IDE en los distintos sistemas operativos.
2: Introduction to ACIDE: este capítulo es totalmente nuevo. Pretende
introducir al nuevo usuario en las funcionalidades y aspecto gráfico de la
aplicación.
3: Menu bar: este capítulo ya existía en la versión anterior del manual. Sin
embargo, muchas de las secciones se han modificado para dar una mejor
explicación o, sencillamente, explicar nuevos comportamientos. También se
han añadido secciones nuevas.
4: Project browser panel: en el anterior manual no existía ninguna
explicación sobre el panel de explorador de proyectos. Con este capítulo
hemos querido subsanar el vacío a este respecto.
5: File editor panel: capítulo totalmente nuevo. Con él se pretende explicar
el aspecto del panel del editor de archivos, explicación inexistente en el
anterior manual.
6: Tool bar: en este nuevo capítulo se explica el aspecto y la función de los
distintos componentes de la barra de herramientas. Con este capítulo
explicamos aspectos que antes no estaban cubiertos.
Sistemas Informáticos 2012-2013
87
7: Console panel: al igual que los anteriores, este capítulo totalmente
nuevo pretende dar una breve explicación sobre diversos aspectos del
panel de consola que aún no habían sido explicados.
8: Database panel: este capítulo es nuevo, básicamente porque habla de un
panel que no existía en versiones anteriores de la aplicación. En este
capítulo se explica el funcionamiento del panel de bases de datos, la vista de
datos de las tablas y vistas, y la vista de diseño de las mismas.
9: Status bar: en este nuevo capítulo se explica el aspecto de la barra de
estado. Anteriormente no existía ningún capítulo que tratara sobre este
tema.
10: Accessibility shortcuts: en este capítulo totalmente nuevo se hace un
resumen de los distintos atajos de teclado que se permiten en la aplicación.
11: ACIDE Variables: este capítulo contiene la explicación de las variables
de sistema compatibles con ACIDE – A Configurable IDE. Esta explicación ya
existía en el anterior manual.
12: ACIDE default commands: en este capítulo se exponen los comandos,
para usar en la configuración del menú, que definen las acciones de los
ítems de menú que existen por defecto en la aplicación.
13: Configuration of ACIDE by configuration documents: en este
capítulo totalmente nuevo se ofrece una explicación para configurar
diversos aspectos de ACIDE – A Configurable IDE de forma externa y manual
mediante diversos documentos de configuración.
14: Regular expressions: este capítulo pretende ofrecer una introducción
a las expresiones regulares que se pueden usar en la búsqueda y
reemplazamiento de ACIDE – A Configurable IDE.
Con toda la información añadida, y que considerábamos necesaria, se ha
conseguido una gran ampliación de la información suministrada al usuario, ya que
el nuevo manual casi triplica en tamaño al manual de la última versión.
Sistemas Informáticos 2012-2013
88
9.8. TAREAS DE CARÁCTER GENERAL
En último lugar, vamos a detallar las tareas de carácter general que hemos
realizado en la aplicación. En esta sección se encontrarían las nuevas funcionalidades
implementadas que no encajarían en ninguna otra sección.
9.8.1.ADAPTACIÓN A LINUX Y MACOS
Una de las primeras tareas con las que nos enfrentamos al empezar a desarrollar
la aplicación fue asegurarnos de que ésta era compatible con los sistemas operativos
LINUX y MacOS.
Se llevó a cabo una revisión del código, poniendo especial cuidado en el
tratamiento de las rutas de archivo, ya que los caracteres separadores en estos
sistemas operativos son distintos entre ellos. Por tanto, se revisó todo el código
concerniente al tratamiento de archivos, en funcionalidades varias como la apertura
de archivos, la creación de proyectos o la configuración de la consola.
9.8.2.CURSOR DE ESPERA
Hay determinadas tareas en ACIDE - A Configurable IDE susceptibles de alargarse
demasiado. En versiones anteriores, nada indicaba que esta tarea se estuviera
realizando correctamente, y la aplicación simplemente parecía colgada mientras que
este tipo de tareas se completaba. Esto podría hacer pensar al usuario que la tarea no
se había realizado correctamente y la aplicación había quedado bloqueada.
Para evitar esto, en las tareas que se ha detectado que su tiempo de ejecución
puede ser superior al normal, se ha insertado un cursor de espera. De esta forma, al
ejecutar una de estas acciones, el cursor normal cambia a un cursor de espera,
indicando al usuario que la aplicación está funcionando correctamente. Una vez
terminada la acción, el cursor volverá a su estado original y el usuario podrá seguir
utilizando la aplicación.
Acciones en las que aparece el cursor de espera durante su ejecución:
Esquema de las bases de datos:
o Actualizar el árbol de la base de datos.
o Abrir un nodo del árbol de la base de datos.
Sistemas Informáticos 2012-2013
89
Búsqueda/reemplazamiento:
o Búsqueda.
o Reemplazamiento individual.
o Reemplazamiento general.
Editor de archivos:
o Enviar contenido de archivo a la consola.
o Enviar texto seleccionado a la consola.
9.8.3.VENTANAS MODALES
Una de las modificaciones en el aspecto gráfico de la aplicación ha sido definir
todas las ventanas de ACIDE – A Configurable IDE como modales. Esto quiere decir
que en todas las ventanas de ACIDE – A Configurable IDE el resto de la aplicación
queda deshabilitado hasta que se cierra la ventana que tenemos en primer plano. De
esta forma, el usuario está obligado a aplicar o descartar los cambios que esté
haciendo en la ventana abierta. Así, no se crean problemas de consistencia en el
comportamiento de la aplicación.
Existe una excepción en dos tipos de ventana que no es modal: la ventana de de
búsqueda y la ventana de reemplazamiento. Cuando estas ventanas están en primer
plano, el usuario está habilitado para trabajar con el resto de funcionalidades de la
aplicación. Esto es útil para en una búsqueda, modificar el contenido del archivo sin
necesidad de cerrar dicha ventana.
9.8.4.ATAJOS DE TECLADO EN VENTANAS
En esta versión de ACIDE – A Configurable IDE se ha dotado a todas las ventanas,
tanto a las que ya existían como a las nuevas de atajos de teclado. De esta forma, para
las funciones Sí/No/Cancelar/Tabulador/Aceptar los atajos en español son
S/N/Esc/Tab/A mientras que en inglés son Y/N/Esc/Tab/A.
Sistemas Informáticos 2012-2013
90
9.9. OBJETIVOS CUMPLIDOS
Los objetivos que se han cumplido satisfactoriamente en éste proyecto son los que
se enumeran a continuación:
9.9.1.GESTIÓN DE BASES DE DATOS
Dotar a ACIDE – A Configurable IDE de un nuevo panel para mostrar y
modificar las bases de datos del sistema.
Mostrar la información de dichas bases de datos de forma jerárquica en el
nuevo panel.
Permitir modificar las bases de datos a través de los menús contextuales de
los diferentes niveles del árbol del panel.
Conectar el nuevo panel con la consola de DES.
Permitir la conexión del panel de base de datos con ODBC.
Crear una estructura robusta para el manager de las conexiones a las bases
de datos que permita añadir fácilmente otras implementaciones para otros
tipos de conexiones.
Añadir una vista de datos con la que visualizar el contenido de las tablas de
las bases de datos de forma tabular e intuitiva.
Dotar a la tabla de datos de funcionalidad para poder modificar, insertar y
eliminar filas; así como filtrar la tabla, y buscar y reemplazar.
Importar y exportar datos de ficheros CSV y XML de tablas del sistema.
Crear una vista de diseño de las tablas que permite visualizar el esquema de
dichas tablas de forma tabular.
Permitir la modificación de los metadatos de las tablas que estén vacías.
9.9.2.CONFIGURACIÓN DE BARRA DE MENÚS
Modificar el modo de configuración de la barra de menús, pasando de poder
definir sólo la visibilidad de los ítems a poder definir también la imagen, los
comandos y las posiciones.
Cambiar el fichero de configuración de menús a formato XML.
Sistemas Informáticos 2012-2013
91
Añadir una nueva ventana que permita realizar estas configuraciones de
forma visual.
9.9.3.VENTANAS DE BÚSQUEDA Y REEMPLAZAMIENTO
Incluir una barra de progreso en la ventana de búsqueda y
reemplazamiento.
Añadir a la ventana de búsqueda y reemplazamiento un historial de las
últimas búsquedas de la sesión.
Permitir usar expresiones especiales como ^p y ^t para la búsqueda.
Marcar en rojo los editores que se hayan visto afectados por un
reemplazamiento.
Permitir continuar con la búsqueda anterior si no hay texto seleccionado al
pulsar F3 o Shift+F3.
Extender la búsqueda en el panel de la consola aplicando las modificaciones
realizadas en los editores.
Incluida la búsqueda cíclica hacia atrás con Shift+F3.
Corregido el uso de las expresiones regulares.
9.9.4.CONSOLA
Permitir que se acepten rutas de ejecutables con espacios en blanco.
Crear un historial de comandos persistente, que guarde los comandos
ejecutados en la anterior sesión de ACIDE – A Configurable IDE.
Modificar el pegado en la consola, haciendo que se ejecuten los comandos
de uno en uno, sin pulsar ENTER.
Permitir modificar el último comando pegado si éste no acaba con un salto
de línea.
Solucionar la pérdida de respuesta de la consola ante ENTER sucesivos.
Modificar la ventana de configuración de la consola y los correspondientes
ficheros de configuración para que se acepten los parámetros del
ejecutable.
Sistemas Informáticos 2012-2013
92
9.9.5.EDITOR DE ARCHIVOS
Permitir enviar a la consola sólo el texto seleccionado mediante una opción
en el menú contextual.
Añadir un parámetro de configuración para habilitar o deshabilitar la
pregunta sobre enviar el contenido del editor a la consola.
9.9.6.BARRA DE HERRAMIENTAS
Añadir botón para enviar el contenido del editor a la consola.
Permitir aplicar los cambios realizados en la configuración de la barra de
herramientas de forma persistente.
9.9.7.AMPLIACIÓN DEL MANUAL DE USUARIO
Modificar todas las capturas de pantalla existentes en dicho manual.
Añadir una sección para explicar cómo ejecutar ACIDE – A Configurable IDE
en los diferentes sistemas operativos.
Incluir una introducción a las funcionalidades y la interfaz gráfica de ACIDE
– A Configurable IDE.
Modificar las explicaciones sobre la barra de menús.
Añadir información sobre los paneles que existían anteriormente pero que
no estaban incluidos en dicho manual.
Incluir el funcionamiento del nuevo panel de base de datos.
Añadir información sobre la barra de estado de ACIDE – A Configurable IDE
y los atajos de teclado.
Aportar explicaciones sobre las variables del sistema.
Incluir información sobre los comandos por defecto para la barra de menú.
Informar sobre cómo configurar ACIDE – A Configurable IDE desde los
archivos de configuración.
Citar cómo funciona la búsqueda con expresiones regulares.
9.9.8.TAREAS DE CARÁCTER GENERAL
Completar la compatibilidad con Linux y Mac OS.
Sistemas Informáticos 2012-2013
93
Añadir el cursor de espera en todas las acciones de ACIDE – A Configurable
IDE susceptibles de tardar.
Hacer que todas las ventanas emergentes sean modales.
Añadir atajos de teclado dependientes del idioma en todas las ventanas.
Sistemas Informáticos 2012-2013
94
9.10. OBJETIVOS NO CUMPLIDOS
En el momento que comenzamos el desarrollo del proyecto, el director Fernando
Sáenz Pérez nos propuso una lista de objetivos para trabajar sobre la aplicación
aparte de la conexión con las bases de datos. Debido a la centralización de esfuerzos
en la conexión de ACIDE – A Configurable IDE con las bases de datos del sistema, y
otros aspectos considerados de más prioridad, algunos de objetivos no han podido
ser resueltos finalmente. Se detallan a continuación:
Permitir enviar la señal de interrupción CTRL + C a la consola. Se dedicó
esfuerzo este curso en la realización de esta tarea, sobre todo en
investigación. Surgieron complicaciones para controlar esta interrupción de
Windows, y lo que conseguíamos era cerrar la consola, algo que no nos
interesaba en absoluto. Sin embargo, evaluamos que nos estaba llevando
demasiado tiempo y quitándoselo a otras tareas más prioritarias, por lo que
se decidió dejar sin completar.
Definir e implementar el análisis sintáctico para así poder aplicarlo en
ACIDE – A Configurable IDE.
Definir y aplicar hilos en:
o Apertura de archivos en el editor. De esta forma el usuario tendría el
control de la aplicación mientras que se abren archivos.
o Apertura de proyectos en ACIDE. De forma similar al apartado
anterior, el usuario tendría el control de la aplicación mientras
termina la carga de un proyecto.
o Aplicación del formato léxico en el editor de archivos, como ocurre
en Microsoft Word cuando estamos aplicando la autocorrección. De
esta forma el usuario volvería a tener el control de la aplicación
mientras que a los documentos se les aplica la configuración léxica
correspondiente.
Opción de respetar mayúsculas/minúsculas en los reemplazamientos. Esta
era una tarea que exigía una gran cantidad de esfuerzo para conseguir un
objetivo menos prioritario, por lo que se decidió dejar en beneficio de otras
consideradas más importantes.
Sistemas Informáticos 2012-2013
95
Añadir autocompletar a partir del diccionario léxico. Ésta fue una tarea que
surgió en las últimas semanas de desarrollo. En estas fechas comenzar esta
tarea significaba iniciar el desarrollo de algo desde cero, y dada la
proximidad de la entrega y la necesidad de subsanar otros errores, se dejó
esta tarea para futuras versiones.
Sistemas Informáticos 2012-2013
96
9.11. CONCLUSIONES
Al comenzar el desarrollo de este proyecto, nos dimos cuenta de la complejidad de
trabajar en un proyecto ya iniciado y de tales dimensiones (el proyecto contaba ya
con unas 190000 líneas de código). Durante los primeros meses el avance en la
implementación de nuevas funcionalidades fue muy lento, ya que empleábamos la
mayor parte del tiempo en familiarizarnos con el código que se nos había
suministrado.
Sin embargo, una vez comprendido el código y explorado todas las posibilidades
(y necesidades) del proyecto, el ritmo de trabajo aumentó hasta terminar nuestra
labor con un trabajo que cuenta con casi 300000 líneas de código. Después de todas
las nuevas funcionalidades y los cambios implementados en la aplicación, podemos
concluir que el usuario podrá disfrutar de un software mucho más fiable y seguro.
Todo este trabajo se ha basado en la adición de nuevas funcionalidades (como
máximo exponente la conexión con las bases de datos), aumento de algunas ya
existentes (por ejemplo en las ventanas de búsqueda y reemplazamiento), o cambio
del comportamiento de la aplicación en algún sentido (gestión de la configuración de
la barra de menús). Es por ello que la gran virtud de este proyecto es no tener límites,
siempre va a ser posible añadir mejoras y corregir comportamientos, por lo que aún
queda mucho camino por recorrer.
Es por ello que creemos que hemos alcanzado los objetivos propuestos desde el
primer momento: aprendizaje sobre el desarrollo de un entorno de desarrollo
integrado (IDE), la conexión con las bases de datos del sistema, la implementación de
nuevas funcionalidades necesarias y ampliación y corrección de otras ya existentes.
Todo esto ha llevado a la obtención de una versión distribuible de ACIDE – A
Configurable IDE.
Sistemas Informáticos 2012-2013
97
10.POSIBLES AMPLIACIONES
En esta sección vamos a exponer posibles mejoras para la aplicación, hablando de
ellas tanto a nivel de código fuente como de adición de nuevas funcionalidades o
corrección de funcionalidades ya existentes. Muchas de ellas ya existían en la versión
previa de este proyecto, y al no haberse cumplido en esta versión, siguen vigentes.
10.1. CÓDIGO FUENTE
Hablando de mejoras a nivel de código fuente, se identifican las siguientes:
Definir e implementar el AcideExceptionManager. Ésta clase estaría
encargada de gestionar todas las excepciones que puedan surgir en el
sistema.
A raíz de la implementación de la funcionalidad anterior, definir e
implementar una jerarquía de excepciones. Estas excepciones serán
controladas por AcideExceptionManager.
Redefinir
AcideUndoManager
ya
que
actualmente
existen
comportamientos indeseados en los editores de archivos como los
siguientes:
o Después de un reemplazamiento general, habría que hacer tantos
deshacer como número de reemplazamientos individuales se han
hecho, ya que el reemplazamiento general ahora está implementado
como un conjunto de reemplazamientos individuales.
o Se produce un paso extra al deshace o rehace cuando estamos
editando en el modo OVERWRITE en el editor de texto.
o Cuando se deshace o rehace sobre el editor de texto a veces el cursor
se pierda. Esto es debido a la generación de una excepción en el
método modelToView() dado que el caret de texto se pierde.
Redefinir el AcideTabbedPaneUI de tal forma que vuelva a funcionar
JTabbedPane.SCROLL_TAB_LAYOUT sobre el mismo, evitando de esta forma
que las pestañas se muestren de forma algo desorganizada.
Sistemas Informáticos 2012-2013
98
Adaptar la tabla de configuración del léxico para que se puedan editar las
palabras reservadas sobre la misma tabla. Se desea un comportamiento
similar al de la ventana de configuración de la barra de menús.
Definir el AcideSearchConfiguration y el AcideSearchRecord. Estas dos
clases servirían para guardar configuraciones de búsquedas anteriores, y
poder llevar un registro de las búsquedas que se han ejecutado.
A
raíz
de
la
funcionalidad
anterior,
definir
el
AcideSearchConfigurationWindow para que el usuario pueda acceder a
un historial de búsquedas y seleccionar la búsqueda a ejecutar.
Definir una ventana AcideHelpWindow. El objetivo es mostrar el
contenido de la ayuda en formato HTML en lugar de enlazar con el manual
de usuario en formato PDF. Sería opcional la implementación de un índice
para buscar los contenidos en la ayuda.
Definir y acoplar un JScrollPanel a las listas de archivos recientes y de
proyectos recientes. Actualmente, cuando hay muchos archivos y proyectos
en estas listas, éstas son demasiado grandes y los botones de limpiar lista
quedan ocultos.
10.2. FUNCIONALIDADES
El máximo nivel de prioridad en las nuevas funcionalidades a implementar estaría
ocupado por los objetivos no cumplidos mencionados en el capítulo 9.10. Siguiendo a
los mismos, y ordenadas por orden de prioridad, se encontraría la siguiente lista de
funcionalidades a implementar, extender o corregir:
Añadir menú contextual en los nodos de las columnas (en el panel de bases
de datos) para añadir y eliminar restricciones de integridad.
Añadir parámetro de configuración en el panel de bases de datos para
mostrar en el nodo tabla el esquema completo (con tipos), el nombre y sus
atributos, o sólo el nombre de la tabla.
Hacer parametrizable la barra de menú de la Vista de Datos al estilo de la
barra de menú de ACIDE – A Configurable IDE.
Sistemas Informáticos 2012-2013
99
Ampliar el buffer de deshacer para que se puedan hacer más
reemplazamientos o modificaciones.
Permitir definir el tamaño de la sangría y si es con espacios o tabuladores
en el editor de archivos.
Permitir la definición de diferentes zonas en la barra de herramientas para
agrupar a los comandos por intención, como por ejemplo carga, listado o
flags.
Permitir habilitar o deshabilitar el parseado de las variables de ACIDE – A
Configurable IDE.
Añadir automáticamente la extensión a los archivos que se guarden (por
ejemplo los proyectos). Esto se implementaría definiendo en la
configuración léxica una extensión de archivo. Cuando se aplica una
configuración léxica a un editor de archivo, al guardarlo se le asocia
directamente, y si no la tiene asociada, se le pide al usuario.
Permitir definir un archivo para el log de la consola. Sobre este archivo se
debe volcar la entrada y la salida de la consola.
En la configuración de la consola se debe dejar activado por defecto el eco
de comando
Permitir definir los pares de delimitadores, en lugar de estar predefinidos
(paréntesis, llaves, corchetes). Habría que añadir un frame denominado
“Configuración de delimitadores” en la configuración del léxico.
Añadir comentarios multilínea en la ventana de configuración de léxico.
Mostrar ordenados alfabéticamente primero las carpetas y después los
archivos del proyecto, o poder ordenarlos manualmente, arrastrando los
nombres de un sitio a otro.
Permitir localizar la aplicación a otros idiomas simplemente añadiendo un
nuevo fichero de configuración de idioma. Permitir definir los atajos del
teclado en estos ficheros.
Añadir la opción de agregar y eliminar marcas de comentario en un texto
seleccionado mediante marcas de menús y menú contextual.
Agregar opción para ordenar líneas seleccionadas en los editores de
archivo.
Sistemas Informáticos 2012-2013
100
Añadir botones de navegación para retroceder y avanzar a las posiciones a
las que se haya desplazado el cursor en los editores de archivo.
Añadir una opción incremental para no tener que rellenar desde cero la
consola, ya que es una labor muy tediosa.
Si en la configuración de la consola se elige una consola que no existe, se
debe informar primero de ello sin cerrar la actual.
No borrar la configuración de la consola al cerrarla.
Permitir la multiselección en el árbol del proyecto.
Permitir cambiar el nombre de proyectos y archivos mediante barra de
menús y menú contextual.
Asociar determinado tipo de archivos al sistema operativo. Al abrir estos
archivos desde el sistema operativo se debería abrir ACIDE – A Configurable
IDE.
Permitir ejecutar múltiples instancias de ACIDE – A Configurable IDE a la
vez.
Permitir arrastrar y soltar archivos dentro de ACIDE – A Configurable IDE
para poder abrirlo en un editor o añadirlo a un proyecto.
Permitir la organización de los archivos dentro del editor de archivos
mediante Cascade/Tile Horizontal/Tile Vertical.
Permitir la división de los archivos en el editor. De esta forma se debe
permitir la división hasta en cuatro partes diferentes.
Implementar macros de comandos.
Comprobación de tipos al vuelo.
Sistemas Informáticos 2012-2013
101
11.LISTA DE PALABRAS CLAVES
DES.
Datalog.
Data view.
Design view.
Configurable.
Entorno de desarrollo integrado (IDE).
Base de datos.
Editor multi-archivo.
Búsqueda avanzada.
Consola.
Sistemas Informáticos 2012-2013
102
12.BIBLIOGRAFÍA
Para desarrollar el presente proyecto se han seguido las siguientes fuentes:
Explicación de expresiones regulares en el manual:
o http://es.wikipedia.org/wiki/Expresión_regular
Explicación de la sintaxis de las restricciones pk, fk, ck, etc.
o Datalog Educational System V3.1 User’s Manual. Fernando Sáenz
Pérez. Universidad Complutense de Madrid. 2012.
Introducción a la aplicación en el manual:
o ACIDE: An Integrated Development Environment Configurable for
LATEX. Fernando Sáenz Pérez. The Practex Journal No3. 2007.
http://dw.tug.org/pracjourn/2007-3/saenz_perez-acide/saenz_perezacide.pdf
Tutorial de Java para ODBC y JDBC.
o http://www.java2s.com/Tutorial/Java/0340__Database/0540__JDBCODBC.htm
Sistemas Informáticos 2012-2013
103
13.REFERENCIAS
[1] D. Cardiel Freire, J. J. Ortiz Sánchez y D. Rupérez Cañas. ACIDE: A Configurable IDE.
Universidad Complutense de Madrid. 2007.
[2] M. Martín Lázaro. ACIDE 0.2: a configurable integrated development environment.
Universidad Complutense de Madrid. 2008.
[3] J. Salcedo Gómez. ACIDE: A Configurable IDE. DES GUI Front-end. Universidad
Complutense de Madrid. 2011.
[4] Página oficial de DES: http://www.fdi.ucm.es/profesor/fernan/des/index.html
[5] Página oficial de Crimson Editor: http://www.crimsoneditor.com
[6] Página oficial de JEdit: http://www.jedit.org
[7] Página oficial de JBuilder: http://www.borland.com/jbuilder
[8] Página oficial de JCreator: http://www.jcreator.com
[9] Página oficial de C++ Builder: http://www.borland.com/cppbuilder
[10] Página oficial de Eclipse: http://www.eclipse.org/
[11]
Página
oficial
de
Visual
Studio
Shell:
http://msdn.microsoft.com/en-
us/library/vstudio/bb685691.aspx
[12] Página oficial de WinEdt: http://www.winedt.com/
[13] Página oficial de NetBeans: http//netbeans.org
[14] Página oficial de MS Access: http://office.microsoft.com/es-es/access/
[15] Página oficial de Oracle: http://www.oracle.com
[16] Página oficial de Postgres: www.postgresql.org/
[17] Página oficial de TOra: http://torasql.com/
[18] Página oficial de ASP IDE: http://www.mat.unical.it/ricca/aspide/
[19] Página oficial de Google Drive: https://drive.google.com/
[20] Página oficial de Google Code: http://code.google.com/
[21] Página oficial de Tortoise SVN: http://tortoisesvn.net/
Sistemas Informáticos 2012-2013
104
[22] J. L. Franco Madrigal, A. M. Robla González, A. Sanz Povedano. Proyecto de bases
de datos relacionales y deductivas. Universidad Complutense de Madrid. 2005.
Sistemas Informáticos 2012-2013
105
14.INFORMACIÓN DE CONTACTO
Este proyecto es código libre. Por tanto, todo el código fuente y ejecutables están
disponibles en las siguientes direcciones de internet:
Ejecutable: http://www.fdi.ucm.es/profesor/fernan/ACIDE/
Código fuente: http://code.google.com/p/acide-0-11-release-2012-2013/
Si quisiera ponerse en contacto con alguno de los desarrolladores del proyecto
puede hacerlo a través de las siguientes direcciones de correo electrónico:
Pablo Gutiérrez García-Pardo: [email protected]
Elena Tejeiro Pérez de Ágreda: [email protected]
Andrés Vicente del Cura: [email protected]
Sistemas Informáticos 2012-2013
106
APÉNDICE: MANUAL DE USUARIO
Sistemas Informáticos 2012-2013
107
USER’S MANUAL
VERSION 0.11
INDEX OF CONTENTS
Index of Figures ...............................................................................................................................13
1.
2.
3.
System requisites .................................................................................................................17
1.1.
User ................................................................................................................................................. 17
1.2.
Developer...................................................................................................................................... 18
1.3.
Executing ACIDE ........................................................................................................................ 18
Introducing ACIDE ...............................................................................................................19
2.1.
Technology ................................................................................................................................... 19
2.2.
The Main GUI ............................................................................................................................... 19
2.3.
Projects .......................................................................................................................................... 21
2.4.
Configuration .............................................................................................................................. 21
Menu bar ..................................................................................................................................22
3.1.
File menu ...................................................................................................................................... 22
3.1.1.
New ............................................................................................................................................ 22
3.1.2.
Open........................................................................................................................................... 22
3.1.3.
Open recent files ................................................................................................................... 22
3.1.4.
Open all files ........................................................................................................................... 23
3.1.5.
Close file ................................................................................................................................... 23
3.1.6.
Close all files ........................................................................................................................... 23
3.1.7.
Save file..................................................................................................................................... 23
3.1.8.
Save file as ............................................................................................................................... 23
3.1.9.
Save all files ............................................................................................................................ 23
User’s Manual
2
3.1.10.
Print file .............................................................................................................................. 23
3.1.11.
Exit ........................................................................................................................................ 23
3.2.
Edit menu ..................................................................................................................................... 25
3.2.1.
Undo .......................................................................................................................................... 25
3.2.2.
Redo ........................................................................................................................................... 25
3.2.3.
Copy ........................................................................................................................................... 25
3.2.4.
Paste .......................................................................................................................................... 25
3.2.5.
Cut .............................................................................................................................................. 26
3.2.6.
Select all ................................................................................................................................... 26
3.2.7.
Go to line .................................................................................................................................. 26
3.2.8.
Search ....................................................................................................................................... 26
3.2.9.
Replace ..................................................................................................................................... 28
3.3.
Project menu ............................................................................................................................... 32
3.3.1.
New project ............................................................................................................................ 32
3.3.2.
Open project ........................................................................................................................... 33
3.3.3.
Open recent projects .......................................................................................................... 34
3.3.4.
Close project........................................................................................................................... 34
3.3.5.
Save project ............................................................................................................................ 34
3.3.6.
Save project as....................................................................................................................... 34
3.3.7.
New project file ..................................................................................................................... 34
3.3.8.
Add all opened files ............................................................................................................. 34
3.3.9.
Add file ..................................................................................................................................... 34
User’s Manual
3
3.3.10.
Remove file ........................................................................................................................ 34
3.3.11.
Delete file............................................................................................................................ 34
3.3.12.
Add folder........................................................................................................................... 35
3.3.13.
Remove folder .................................................................................................................. 35
3.3.14.
Compile project................................................................................................................ 36
3.3.14.1.
Compilation based on “Extension” .......................................................................... 36
3.3.14.2.
Compilation based on “Marked files for compilation” ..................................... 37
3.3.15.
Execute project ................................................................................................................ 39
3.3.16.
Set compilable file........................................................................................................... 40
3.3.17.
Unset compilable file ..................................................................................................... 40
3.3.18.
Set main file ....................................................................................................................... 40
3.3.19.
Unset main file ................................................................................................................. 40
3.4.
View menu .................................................................................................................................... 41
3.4.1.
Show log ................................................................................................................................... 41
3.4.2.
Project browser .................................................................................................................... 41
3.4.3.
Console window.................................................................................................................... 41
3.4.4.
Data base window ................................................................................................................ 41
3.5.
Configuration menu .................................................................................................................. 42
3.5.1.
Lexicon configuration ......................................................................................................... 42
3.5.1.1.
New lexicon ....................................................................................................................... 42
3.5.1.2.
Document lexicon ........................................................................................................... 43
3.5.1.3.
Modify lexicon .................................................................................................................. 43
User’s Manual
4
3.5.1.3.1. Reserved words configuration ................................................................................. 44
3.5.1.3.2. Delimiters configuration ............................................................................................. 45
3.5.1.3.3. Remarks configuration ................................................................................................ 46
3.5.1.4.
3.5.2.
Default lexicons ............................................................................................................... 47
Grammar configuration ..................................................................................................... 49
3.5.2.1.
New grammar................................................................................................................... 49
3.5.2.2.
Load grammar .................................................................................................................. 51
3.5.2.3.
Modify grammar.............................................................................................................. 51
3.5.2.4.
Save grammar .................................................................................................................. 52
3.5.2.5.
Save grammar as ............................................................................................................. 52
3.5.2.6.
Configure paths ............................................................................................................... 52
3.5.3.
Compiler .................................................................................................................................. 53
3.5.4.
File editor configuration ................................................................................................... 54
3.5.4.1.
File editor display options configuration ............................................................. 55
3.5.4.2.
Automatic indent ............................................................................................................ 55
3.5.4.3.
Line wrapping .................................................................................................................. 55
3.5.4.4.
Maximum line number to send to console ........................................................... 56
3.5.4.5.
Send to console confirmation .................................................................................... 56
3.5.5.
Console configuration ........................................................................................................ 57
3.5.5.1.
Configure ............................................................................................................................ 57
3.5.5.2.
Execute external command ........................................................................................ 58
3.5.5.3.
Console display configuration ................................................................................... 58
User’s Manual
5
3.5.5.4.
Save content into file ..................................................................................................... 59
3.5.5.5.
Document lexicon ........................................................................................................... 59
3.5.5.6.
Find ....................................................................................................................................... 60
3.5.5.7.
Close console..................................................................................................................... 61
3.5.5.8.
Reset console .................................................................................................................... 61
3.5.5.9.
Clear console buffer ....................................................................................................... 61
3.5.6.
Database panel configuration ......................................................................................... 61
3.5.6.1.
DES panel ........................................................................................................................... 61
3.5.6.2.
ODBC panel ........................................................................................................................ 61
3.5.7.
Language configuration ..................................................................................................... 62
3.5.8.
Menu configuration ............................................................................................................. 62
3.5.8.1.
New ....................................................................................................................................... 62
3.5.8.1.1. Buttons panel ................................................................................................................... 64
3.5.8.1.2. Popup menu ..................................................................................................................... 65
3.5.8.1.3. Key navegation ................................................................................................................ 66
3.5.8.2.
Load ...................................................................................................................................... 66
3.5.8.3.
Modify .................................................................................................................................. 67
3.5.8.4.
Save ....................................................................................................................................... 67
3.5.8.5.
Save as ................................................................................................................................. 67
3.5.9.
Toolbar configuration ........................................................................................................ 68
3.5.9.1.
New ....................................................................................................................................... 68
3.5.9.2.
Load ...................................................................................................................................... 70
User’s Manual
6
3.5.9.3.
Modify .................................................................................................................................. 70
3.5.9.4.
Save....................................................................................................................................... 70
3.5.9.5.
Save as ................................................................................................................................. 71
3.6.
Help menu .................................................................................................................................... 72
3.6.1.
Show help ................................................................................................................................ 72
3.6.2.
About us ................................................................................................................................... 72
3.7.
Inserted submenus ................................................................................................................... 73
3.8.
Inserted menu items ................................................................................................................ 74
4.
Project browser panel ........................................................................................................ 75
5.
File editor panel ................................................................................................................... 76
6.
Tool bar.................................................................................................................................... 78
7.
Console panel ........................................................................................................................ 79
8.
Database panel ...................................................................................................................... 81
8.1.
Databases node .......................................................................................................................... 81
8.1.1.
Open .......................................................................................................................................... 82
8.1.2.
Refresh ..................................................................................................................................... 82
8.1.3.
Close .......................................................................................................................................... 82
8.2.
Database node ............................................................................................................................ 83
8.2.1.
Set as default .......................................................................................................................... 83
8.2.2.
Close .......................................................................................................................................... 83
8.2.3.
Refresh ..................................................................................................................................... 83
8.2.4.
Execute query ........................................................................................................................ 84
8.3.
Tables node.................................................................................................................................. 85
User’s Manual
7
8.3.1.
Create table with Datalog.................................................................................................. 85
8.3.2.
Create table with Design view ........................................................................................ 85
8.3.3.
Create table with SQL ......................................................................................................... 86
8.3.4.
Paste .......................................................................................................................................... 86
8.4.
Table node .................................................................................................................................... 86
8.4.1.
Drop ........................................................................................................................................... 87
8.4.2.
Rename ..................................................................................................................................... 87
8.4.3.
Copy ........................................................................................................................................... 87
8.4.4.
Design view............................................................................................................................. 87
8.4.5.
Data view ................................................................................................................................. 88
8.4.5.1.
Actions permitted on the grid.................................................................................... 88
8.4.5.2.
Menu bar............................................................................................................................. 89
8.4.5.2.1. File menu ........................................................................................................................... 89
8.4.5.2.1.1. Export .............................................................................................................................. 89
8.4.5.2.1.2. Import ............................................................................................................................. 90
8.4.5.2.1.3. Execute query .............................................................................................................. 90
8.4.5.2.1.4. Print ................................................................................................................................. 91
8.4.5.2.1.5. Close ................................................................................................................................. 91
8.4.5.2.2. Edit menu .......................................................................................................................... 91
8.4.5.2.2.1. Undo ................................................................................................................................. 91
8.4.5.2.2.2. Redo ................................................................................................................................. 91
8.4.5.2.2.3. Copy ................................................................................................................................. 92
User’s Manual
8
8.4.5.2.2.4. Paste ................................................................................................................................ 92
8.4.5.2.2.5. Cut..................................................................................................................................... 92
8.4.5.2.2.6. Find .................................................................................................................................. 92
8.4.5.2.2.7. Replace ........................................................................................................................... 92
8.4.5.2.3. Records menu.................................................................................................................. 93
8.4.5.2.3.1. New .................................................................................................................................. 93
8.4.5.2.3.2. Delete .............................................................................................................................. 94
8.4.5.2.3.3. Refresh............................................................................................................................ 94
8.4.5.2.3.4. Go to ................................................................................................................................. 94
8.4.5.2.3.5. Select record................................................................................................................. 95
8.4.5.2.3.6. Select all ......................................................................................................................... 95
8.4.5.2.4. View menu ........................................................................................................................ 95
8.4.5.2.4.1. Sort by ............................................................................................................................. 95
8.4.5.2.4.2. Sort by column ............................................................................................................ 95
8.4.5.2.4.3. Filter by content ......................................................................................................... 96
8.4.5.2.4.4. Filter excluding content........................................................................................... 96
8.4.5.2.4.5. Discard filter................................................................................................................. 96
8.4.5.2.4.6. Hide/show columns .................................................................................................. 96
8.4.5.2.5. Help menu ......................................................................................................................... 97
8.4.5.2.5.1. Show help ...................................................................................................................... 97
8.4.5.2.5.2. About us ......................................................................................................................... 97
8.4.6.
User’s Manual
Add primary key ................................................................................................................... 98
9
8.4.7.
Add Foreign key .................................................................................................................... 98
8.4.8.
Add candidate key................................................................................................................ 99
8.4.9.
Add functional dependency ............................................................................................. 99
8.4.10.
8.5.
Add integrity constraint ............................................................................................ 100
Children of table nodes ........................................................................................................ 101
8.5.1.
Drop ........................................................................................................................................ 101
8.5.2.
Modify .................................................................................................................................... 101
8.6.
Views node ................................................................................................................................ 102
8.6.1.
Create ..................................................................................................................................... 102
8.6.2.
Paste ....................................................................................................................................... 102
8.7.
View node .................................................................................................................................. 103
8.7.1.
Drop ........................................................................................................................................ 103
8.7.2.
Rename .................................................................................................................................. 103
8.7.3.
Copy ........................................................................................................................................ 104
8.7.4.
Paste ....................................................................................................................................... 104
8.7.5.
Design view.......................................................................................................................... 104
8.7.6.
Data view .............................................................................................................................. 104
8.8.
Columns nodes ........................................................................................................................ 104
8.9.
SQL text and Datalog text nodes....................................................................................... 104
9.
Status bar .............................................................................................................................. 107
10.
Accessibility shortcuts ................................................................................................ 108
10.1.
Accessibility shortcuts in English ................................................................................... 108
10.2.
Accessibility shortcuts in Spanish .................................................................................. 110
User’s Manual
10
11.
ACIDE Variables .............................................................................................................114
12.
ACIDE default Commands ..........................................................................................115
13.
Configuration of ACIDE by configuration documents .....................................120
13.1.
Managers in XML files .......................................................................................................... 120
13.2.
Properties configuration ..................................................................................................... 120
13.3.
Workbench configuration ................................................................................................... 122
13.3.1.
Menu configuration..................................................................................................... 123
13.3.2.
Toolbar configuration ................................................................................................ 124
13.3.3.
File editor configuration ........................................................................................... 126
13.3.4.
Console panel configuration.................................................................................... 127
13.3.5.
lexiconAssigner configuration................................................................................ 127
13.4.
Project configuration ............................................................................................................ 127
13.5.
Configuration of lexicons .................................................................................................... 129
13.5.1.
TokenType Manager................................................................................................... 129
13.5.2.
validExtension Manager ........................................................................................... 130
13.5.3.
delimiters Manager ..................................................................................................... 130
13.6.
14.
Commands history ................................................................................................................. 130
Regular Expressions ....................................................................................................132
14.1.
Construction of regular expressions .............................................................................. 132
14.2.
Description of regular expressions ................................................................................. 133
14.2.1.
The DOT “.” ..................................................................................................................... 133
14.2.2.
The BACKSLASH “” ...................................................................................................... 133
14.2.3.
The BRACKETS “[]” ..................................................................................................... 134
User’s Manual
11
14.2.4.
The BAR “|” ..................................................................................................................... 134
14.2.5.
The DOLLAR SIGN “$” ................................................................................................ 135
14.2.6.
The CARET “^” ............................................................................................................... 135
14.2.7.
Parentheses “()” ............................................................................................................ 135
14.2.8.
The QUESTION mark “?” ........................................................................................... 136
14.2.9.
The BRACES “{}” ........................................................................................................... 136
14.2.10.
The ASTERISK “*”......................................................................................................... 136
14.2.11.
The PLUS sign “+”......................................................................................................... 136
User’s Manual
12
INDEX OF FIGURES
Figure 1: ACIDE Main GUI......................................................................................................................20
Figure 2: File Menu ...................................................................................................................................22
Figure 3: Edit Menu ..................................................................................................................................25
Figure 4: Search window ........................................................................................................................27
Figure 5: Replace window......................................................................................................................29
Figure 6: Number of replacements ....................................................................................................31
Figure 7: Project menu ............................................................................................................................32
Figure 8: Project configuration ...........................................................................................................33
Figure 9: Add folder ..................................................................................................................................35
Figure 10: Compilation by extension.................................................................................................36
Figure 11: Marking files..........................................................................................................................37
Figure 12: Compilation by marked files ...........................................................................................38
Figure 13: Execution menu....................................................................................................................39
Figure 14: Execution process ................................................................................................................39
Figure 15: View menu ..............................................................................................................................41
Figure 16: Configuration menu ...........................................................................................................42
Figure 17: Lexicon menu ........................................................................................................................42
Figure 18: New lexicon ............................................................................................................................43
Figure 19: Reserved words ....................................................................................................................44
Figure 20: Delimiters configuration ..................................................................................................45
Figure 21: Remarks configuration .....................................................................................................46
Figure 22: Default lexicons ....................................................................................................................48
Figure 23: Grammar menu ....................................................................................................................49
Figure 24: New grammar ......................................................................................................................49
User’s Manual
13
Figure 25: Grammar generation process ........................................................................................51
Figure 26: Modify grammar .................................................................................................................52
Figure 27: Set paths..................................................................................................................................53
Figure 28: Compiler configuration ....................................................................................................53
Figure 29: File editor configuration ..................................................................................................54
Figure 30: File editor display options ...............................................................................................55
Figure 31: Maximum line number ......................................................................................................56
Figure 32: Console menu ........................................................................................................................57
Figure 33: Shell configuration .............................................................................................................57
Figure 34: Execute external command ............................................................................................58
Figure 35: Console display configuration .......................................................................................59
Figure 36: Console search window ....................................................................................................60
Figure 37: Database panel menu ........................................................................................................61
Figure 38: Language configuration menu ......................................................................................62
Figure 39: Menu configuration menu ...............................................................................................62
Figure 40: New menu ...............................................................................................................................63
Figure 41: Object menu popup menu ................................................................................................65
Figure 42: Modify menu ..........................................................................................................................67
Figure 43: Tool Bar configuration menu ........................................................................................68
Figure 44: New tool bar ..........................................................................................................................68
Figure 45: Modify tool bar .....................................................................................................................70
Figure 46: Help menu ..............................................................................................................................72
Figure 47: About us window .................................................................................................................72
Figure 48: Example of inserted submenu ........................................................................................73
Figure 49: Project browser panel .......................................................................................................75
Figure 50: Project browser popup menu .........................................................................................75
User’s Manual
14
Figure 51: File editor panel ...................................................................................................................76
Figure 52: File editor popup menu.....................................................................................................77
Figure 53: Tool bar ...................................................................................................................................78
Figure 54: Console panel ........................................................................................................................79
Figure 55: Console panel popup menu .............................................................................................79
Figure 56: Database panel.....................................................................................................................81
Figure 57: Databases node ....................................................................................................................81
Figure 58: Databases node popup menu .........................................................................................82
Figure 59: Open database ......................................................................................................................82
Figure 60: Database node ......................................................................................................................83
Figure 61: Database node popup menu ...........................................................................................83
Figure 62: Execute query........................................................................................................................84
Figure 63: Expanding database node ...............................................................................................84
Figure 64: Tables node popup menu .................................................................................................85
Figure 65: New table ................................................................................................................................85
Figure 66: Table node ..............................................................................................................................86
Figure 67: Table node popup menu ...................................................................................................87
Figure 68: Design view ............................................................................................................................87
Figure 69: Data view ................................................................................................................................88
Figure 70: Data view file menu............................................................................................................89
Figure 71: Execute query........................................................................................................................91
Figure 72: Data view edit menu ..........................................................................................................91
Figure 73: Data view search window................................................................................................92
Figure 74: Data view replace window ..............................................................................................93
Figure 75: Data view number of replacements ............................................................................93
Figure 76: Data view records menu ..................................................................................................93
User’s Manual
15
Figure 77: Data view go to menu .......................................................................................................94
Figure 78: Data view view menu ........................................................................................................95
Figure 79: Data view sort by window ...............................................................................................95
Figure 80: Data view hide/show columns ......................................................................................97
Figure 81: Data view help menu .........................................................................................................97
Figure 82: Data view about us window ...........................................................................................98
Figure 83: Add primary key ..................................................................................................................98
Figure 84: Add foreign key ....................................................................................................................99
Figure 85: Add candidate key...............................................................................................................99
Figure 86: Add functional dependency.......................................................................................... 100
Figure 87: Add integrity constraint ................................................................................................ 100
Figure 88: Children of table nodes .................................................................................................. 101
Figure 89: Create view window ........................................................................................................ 102
Figure 90: View node ............................................................................................................................ 103
Figure 91: View node popup menu ................................................................................................. 103
Figure 92: Columns nodes ................................................................................................................... 104
Figure 93: SQL and Datalog text nodes......................................................................................... 105
Figure 94: SQL text ................................................................................................................................ 105
Figure 95: Datalog text ........................................................................................................................ 106
Figure 96: Status bar ............................................................................................................................ 107
User’s Manual
16
1. SYSTEM REQUISITES
1.1.
USER
ACIDE - a Configurable IDE does require neither special system configurations nor
special system requirements because the executable file is attached in its distribution,
making the execution of ACIDE - A Configurable IDE easy and comfortable to the
users.
ACIDE – A Configurable IDE is cross-platform and has been tested on MS
Windows XP/Vista/7, Ubuntu Linux 10.04.1, Ubuntu Linux 12.04, and MacOSX
Snow Leopard. Executables for all of these operating systems are provided. The only
mandatory requirement is the previous installation of the Java Virtual Machine
(JVM). The user will have to get the JRE installation file with 1.6 and later versions,
which is available in the following link:
http://www.java.com/es/download/manual.jsp.
Only with this easy and fast step the user will be able to run ACIDE - A
Configurable IDE on his computer without problems. However, in order to fully
enjoying all the features of the application such as ACIDE - A Configurable IDE
grammar configurations, two extra tools will have to be also installed: javac.exe and
jar.exe.
Those tools are available in the Java Development Kit (JDK) installation file,
which is available in the following link:
http://www.oracle.com/technetwork/java/javase/downloads/index.html
At last, in order to visualize the present document, it is mandatory for the users to
have previously installed any software for PDF files visualization.
User’s Manual
17
1.2.
DEVELOPER
For developers, it is mandatory to have previously installed the Java
Development Kit (JDK) with 1.6 and later versions and any software for the edition
of the source code.
The source code has been fully edited with the Eclipse IDE tool which is available
in:
http://www.eclipse.org/
Furthermore, with the ACIDE - A Configurable IDE source code distribution, the
Eclipse project file is available. The developer has to import the project file into
Eclipse and start the edition, fast and simple.
1.3.
EXECUTING ACIDE
User has to unpack the distribution archive file into the directory he wants to
instal ACIDE – A Configurable IDE, which will be referred to as the distribution
directory from now. Since it is a portable application, it needs to be started from its
distribution directory, which means that the start-up directory of the shortcut must
be the distribution directory.
To execute ACIDE – A Configurable IDE on the different SOs, user only has to run
the des_acide.jar file to open an instance of the application preconfigured to work
with DES. At Windows, the user only have to do double click in the file. He also can
create a script or an alias for executing the file at the distribution root, typing:
java –jar des_acide.jar
or, to avoid that shell depends on executable:
javaw –jar des_acide.jar
Linux and Linux the user can create a script or an alias for executing the file
des_acide.jar at the distribution root, typing:
java –jar des_acide.jar
User’s Manual
18
2. INTRODUCING ACIDE
ACIDE – A Configurable IDE is a cross-platform, open-source Integrated
Development Environment (IDE). It has been developed by different teams of
students coursing Computing Systems and directed by Fernando Sáenz Pérez. Next,
ACIDE – A Configurable IDE features will be further explained:
2.1.
TECHNOLOGY
The implementation of the application has been completely done using Java under
Eclipse. Version control was kindly provided by Tortoise SVN.
2.2.
THE MAIN GUI
Figure 1 shows the main GUI of ACIDE. It consits of four main panels. The left
panel shows the organistation of the current project, the MDI windows in the right
are the opened files which may belong to the project (files may be opened without
assigning them to the project). Below, the left panel shows the databases system
connected with ACIDE, which allows user interaction. Beside, the shell panel is
shown. The case shown is the DES console. The databases, shell and project panels
can be hidden. Moreover, there is no need to work with projects if this flexibility is
not needed;a regular user may use the system as is. The status of the GUI is
remembered for the next time the tool is executed. If the tool opens a project, its
status when it was last saved is restored.
The menu bar includes some common entries:
File: For file related operations.
Edit: For clipboard related operations, Search, Replace, Undo, Redo, Select
All and Go To Line.
Project: For project related operations.
View: For showing/hiding project, shell and databases panels, and
displaying the log. Window arrangements are not possible up to now, but
User’s Manual
19
usual features are cascading and tiling windows both vertically and
horizontally.
Figure 1: ACIDE Main GUI
Configuration: This entry allows to configure Lexicon (for syntax highlight
ing.), Grammar (for parsing on the fly), Compiler (for compiling the project),
File Editor (for changing the display and behavior of the editors), Shell (the
shell in the right bottom panel), Database Panel( the database panel in the
left bottom panel), Language of the GUI, Menu (for the configuration of the
menu bar) and Toolbar for the commands, which can be displayed either as
icons or textual descriptions. Tooltips for toolbar commands can be
configured.
Help: This entry contains Show Help and About ACIDE.
In addition, there is a fixed toolbar, which includes common buttons for the file
and project related basic operations: New, Open, Save and Save All (this last one
only for files). Next to the fixed toolbar, there is the configurable toolbar.
User’s Manual
20
Finally, the status bar gives information about some items: The complete path
of the selected file the selected grammar and lexicon, the line and column
numbers, Caps Lock, Scroll Lock, Num Lock and current time.
All these components will be further explained throughout this document.
2.3.
PROJECTS
A project contains the whole status of a session, which is defined by all the
possible configurations as well as the current display status. It consists of files
arranged in folders (with any tree depth), all the configurations for the session
(lexicon, grammar, compiler, shell, language, file editor, menu and toolbar), main GUI
arragement (panel sizes, and opened files in the project), and file attributes. File
attributes identify a file in a project as compilable and/or main. If a file is compilable,
then the compiler configuration can be set to compile each of these files. If a file is a
main file (there is only one in the project), then it can be used in the compiler
configuration or in the toolbar commands.
The project structure shown in folders is a logical view which may coincide with
the physical structure of the OS folders, but this is not needed. User can include in a
given project a file belonging to another tree structure, therefore allowing to share
files for different projects.
2.4.
CONFIGURATION
The main objetive of this system is to be as highly configurable as possible,
keeping the configurations easy and portable by means of text files. The user can
configure the Lexicon, Grammar, Compiler, File Editor, Shell, Database Panel, Language,
Menu and Toolbar. These configurations will be further explained throughout this
document.
User’s Manual
21
3. MENU BAR
Next we further detail each one of the submenus that ACIDE – A Configurable IDE
as default. As is explained in Chapter 3.5.8 the user can insert new menu submenus
and items. In Chapter 3.7 and Chapter 0 we explain how to use these objects. We also
explain how to configure this menu externally with XML files in Chapter 13.3.1.
3.1.
FILE MENU
It contains the following menu items for the files management:
Figure 2: File Menu
Next, all the previous menu items will be further explained:
3.1.1.NEW
Creates a new empty file in the file editor.
3.1.2.OPEN
Open a previously saved file into the file editor.
3.1.3.OPEN RECENT FILES
Displays a list which contains all the files that have been opened previously in the
file editor and the option to set the list to empty.
User’s Manual
22
3.1.4.OPEN ALL FILES
Open all the files associated to the current project in the file editor.
3.1.5.CLOSE FILE
Close the active file in the file editor, asking to the user if he wants to save it if the
file was previously modified.
3.1.6.CLOSE ALL FILES
Close all the opened files in the file editor, asking to the user if he wants to save
them if the files were previously modified.
3.1.7.SAVE FILE
Save the active file in the file editor at the same path that it was previously saved.
3.1.8.SAVE FILE AS
Save the active file in the file editor into a different path than it was saved before.
3.1.9.SAVE ALL FILES
Save all files opened in the file editor.
3.1.10.
PRINT FILE
Prints the active file in the file editor.
3.1.11.
EXIT
Closes the application and if any changes have been encountered in the current
project configuration, displays the following dialog to the user:
User’s Manual
23
Adittionally, if any of the opened files in the file editor has been modified, it will
asked to the user for saving them with the following dialog:
The user can abort the exit process in any time by cancelling any of the previous
dialogs.
User’s Manual
24
3.2.
EDIT MENU
It contains the following menu items for the common file editor management:
Figure 3: Edit Menu
Next, all the previous menu items will be further explained:
3.2.1.UNDO
Undo the changes in the file editor setting the focus on the file which is the owner
of the change.
3.2.2.REDO
Redo the changes in the file editor setting the focus on the file that is the owner of
the change.
3.2.3.COPY
Copy the selected text in the active file in the file editor or in the console and put it
into the system clipboard.
3.2.4.PASTE
Paste the text stored in the system clipboard in the current position of the active
file in the file editor or in the console.
User’s Manual
25
3.2.5.CUT
Cut the selected text in the active file in the file editor or in the console and put it
into the system clipboard.
3.2.6.SELECT ALL
Selects all the content of the active file in the file editor.
3.2.7.GO TO LINE
It displays a dialog in which the user will type down the number of the line where
he wants to place the caret cursor in the active file in the file editor:
3.2.8.SEARCH
Shows the search text window of the file editor:
User’s Manual
26
Figure 4: Search window
Then we proceed to describe each component of the window:
Text box: Here is where user enters the search text.
Special: You can search for paragraph breaks and tabs by the special marks
^p and ^t. These special marks can be written in the text box or selected in
the Special combo menu.
Recents: This combo menu displays a list which contains all the recent
searches that have been executed before. When user selects one, this
appears in the Text box.
Options:
o Case sensitive: this option is used to search for strings without
having or taking into account the Upper / Lowercase.
o Regular expressions: regular expressions search associated with a
search pattern. More information about Regular Expressions in
Chapter 14.
User’s Manual
27
o Whole words: find whole words only.
Scope:
o Selected text: search within a selected text.
o Current document: document-search starting in a certain position
of the active file of File Editor.
o All opened documents: searches in all opened files on the file
editor.
Direction:
o Forward: searches from the current caret position to the end of the
file in the source file editor.
o Backward: searches from the current caret position to the
beginning of the file in the source file editor.
o Cyclic: searches from the current caret position to the end of the file
in the source file editor, and star from the beginning until the
starting position.
Progress bar: shows the progress of the active search.
3.2.9.REPLACE
Displays the replace text window on the file editor:
User’s Manual
28
Figure 5: Replace window
It offers the same options than the search window and also the replace buttons
and the replace text field to select the text to use for the replacements:
Search text box: Here is where user enters the search text.
Special: You can search for paragraph breaks and tabs by the special marks
^p and ^t. These special marks can be written in the text box or selected in
the Special combo menu.
Recents searches : This combo menu displays a list which contains all the
recent searches that have been executed before. When user selects one, this
appears in the Text box.
Replace text box: Here is where user enters the replace text.
User’s Manual
29
Special: You can replace with paragraph breaks and tabs by the special
marks ^p and ^t. These special marks can be written in the text box or
selected in the Special combo menu.
Recents replaces : This combo menu displays a list which contains all the
recent replacements that have been executed before. When user selects one,
this appears in the replaces Text box.
Options:
o Case sensitive: this option is used to search for and replace strings
without having or taking into account the Upper / Lowercase.
o Regular expressions: regular expressions search associated with a
search pattern. More information about Regular Expressions in
Chapter 14.
o Whole words: find whole words only.
Scope:
o Selected text: search within a selected text.
o Current document: document-search starting in a certain position
of the active file of File Editor.
o All opened documents: searches in all opened files on the file
editor.
Direction:
o Forward: searches from the current caret position to the end of the
file in the source file editor.
o Backward: searches from the current caret position to the
beginning of the file in the source file editor.
o Cyclic: searches from the current caret position to the end of the file
in the source file editor, and star from the beginning until the
starting position.
Progress bar: shows the progress of the active search or replacement.
When a general replacement is performed, it displays the following dialog to
the user informing of the number of replacements:
User’s Manual
30
Figure 6: Number of replacements
User’s Manual
31
3.3.
PROJECT MENU
It contains the menu items required for the project configurations
management:
Figure 7: Project menu
Next, all the previous menu items will be further explained:
3.3.1.NEW PROJECT
Configures a new project displaying the following configuration window:
User’s Manual
32
Figure 8: Project configuration
Next, the window options are further described:
Name: indicates the project name.
Folder: indicates the folder where the project file will be placed. If the
project file already exists in the folder the application will give the chance to
the user to overwrite it or not:
Compiler/Interpreter options
o Compiler: selects the compiler configuration for the new project.
o Interpreter: selects the console panel configuratoin for the new
project.
3.3.2.OPEN PROJECT
Open an existing project.
User’s Manual
33
3.3.3.OPEN RECENT PROJECTS
Displays a list with the projects that have been already opened in the application
and the option to set the list to empty.
3.3.4.CLOSE PROJECT
Closes the current project and sets the default configuration.
3.3.5.SAVE PROJECT
Saves the current project configuration into its configuration file.
3.3.6.SAVE PROJECT AS
Saves the current project configuration into a different configuration file.
3.3.7.NEW PROJECT FILE
Creates a new empty file in the file editor and adds it to the current project
configuration after asking to the user for its final destination.
3.3.8.ADD ALL OPENED FILES
Adds all the opened files in the file editor to the current project configuration.
Files that already belong to the project will not be included again.
3.3.9.ADD FILE
Adds the active file in the file editor to the project configuration.
3.3.10.
REMOVE FILE
Removes the file from the project configuration but does not deletes it from disk.
3.3.11.
DELETE FILE
Removes the file from both project configuration and disk previous user
confirmation:
User’s Manual
34
3.3.12.
ADD FOLDER
Adds a new folder to the project in the selected level at the explorer tree, and
checks that it does not exist another folder with the same name before adding it:
Figure 9: Add folder
If already exists another folder with the same name at the same level at the
explorer tree, displays the following message and does not add it:
3.3.13.
REMOVE FOLDER
Removes the folder from the project configuration previous user’s confirmation:
User’s Manual
35
3.3.14.
COMPILE PROJECT
The project is compiled with the selected parameters in the compiler
configuration window that will be further detailed in the following chapters of the
present document. Next, we ilustrate its usage with two examples.
3.3.14.1.
COMPILATION BASED ON “EXTENSION”
The process has the following steps:
First, in the compiler configuration window the user selects the extension of
the files that he wants to compile:
Figure 10: Compilation by extension
Finally, the project is compiled using the Menu /Project/Compile menu item
option.
User’s Manual
36
3.3.14.2.
COMPILATION
BASED
ON
“MARKED
FILES
FOR
COMPILATION”
The process has the following steps:
First, the user marks all the files that he wants to compile in the file editor
or in the explorer tree using the option for this purpose:
Figure 11: Marking files
Next, the user configures the compiler options in the compiler configuration
as follows:
User’s Manual
37
Figure 12: Compilation by marked files
Finally, the user selects the Menu/Project/Compile menu item option.
User’s Manual
38
3.3.15.
EXECUTE PROJECT
It displays the following configuration window:
Figure 13: Execution menu
Next, we further detail all the window components:
Executable path: path of the selected executable.
Executable arguments: arguments for the selected executable.
The result of the execution is displayed in the following progress window:
Figure 14: Execution process
User’s Manual
39
3.3.16.
SET COMPILABLE FILE
Set the active file in the file editor as compilable.
3.3.17.
UNSET COMPILABLE FILE
Unset the active file in the file editor as compilable.
3.3.18.
SET MAIN FILE
Set the active file in the file editor as main.
3.3.19.
UNSET MAIN FILE
Unset the active file in the file editor as main.
User’s Manual
40
3.4.
VIEW MENU
It contains the menu items for the displaying management of the visible parts of
the application and the log visualization:
Figure 15: View menu
Next, all the previous menu items will be further explained:
3.4.1.SHOW LOG
Shows the application log in the file editor.
3.4.2.PROJECT BROWSER
Hides or shows the explorer panel at the left side of the main window of the
application.
3.4.3.CONSOLE WINDOW
Hides or shows the console panel at the bottom side of the main window of the
application.
3.4.4.DATA BASE WINDOW
Hides or shows the data base panel at the lower left corner of the application.
User’s Manual
41
3.5.
CONFIGURATION MENU
It contains all the menu item options for the configuration management of all the
modules of the application:
Figure 16: Configuration menu
3.5.1.LEXICON CONFIGURATION
It contains all the menu item options for the lexicon configuration management of
the application:
Figure 17: Lexicon menu
We also explain how to configure lexicons externally with XML files in Chapter
13.5. Next, all the previously mentioned options are further explained:
3.5.1.1. NEW LEXICON
Creates a new lexicon configuration with the name that the user types down in the
following window applying it to the active file in the file editor:
User’s Manual
42
Figure 18: New lexicon
3.5.1.2. DOCUMENT LEXICON
Loads the lexicon configuration file with XML extension in the active file in the file
editor.
3.5.1.3. MODIFY LEXICON
Open the lexicon configuration window that contains the following tabs:
User’s Manual
43
3.5.1.3.1. RESERVED WORDS CONFIGURATION
Figure 19: Reserved words
Next, we further describe each one of its components as follows:
Add: adds a new table reserved word entry.
Delete: removes a table reserved word entry.
Modify: modifies a table reserved word entry.
Set delimiter style: the delimiter list now is also taken as reserved words.
Table: contains the list with the reserved words groups by types and colors.
Note: it is not allowed to modify the table entries directly on the table itself
User’s Manual
44
and the changes will not be applied until the modify button is pressed
down.
3.5.1.3.2. DELIMITERS CONFIGURATION
Figure 20: Delimiters configuration
Next, all its components are further detailed:
Input new delimiter text field: the user inputs the name of the new
delimiter.
Add button: adds the input delimiter in the text field to the table.
User’s Manual
45
Delete button: removes selected delimiter from the table.
Table: contains the delimiter list, and it is possible to modify it directly on
it.
3.5.1.3.3. REMARKS CONFIGURATION
Figure 21: Remarks configuration
Next, we further detail all its components:
Comment symbol text field: for input the remark symbol.
Case sensitive check box: for specify if the remark is case sensitive or not.
Color selection button: for the color selection of the remarks.
User’s Manual
46
Font style combo box: for the font style selection.
Preview text field: shows a preview of the remarks.
The lexicon configuration window has in the bottom side the following buttons:
Save as: saves the current lexicon configuration in other path with XML
extension.
Apply: applies the changes to all the opened files with the current lexicon
configuration in the file editor and saves the changes in the configuration
file with XML extension.
Cancel: closes the lexicon configuration window without applying the
changes.
Finally, if there are any changes in the current configuration in the previously
described panels and the user closes the window with the close button or the ESC key,
the following dialog will be displayed:
3.5.1.4. DEFAULT LEXICONS
Shows the default lexicons configuration window:
User’s Manual
47
Figure 22: Default lexicons
Next, we explain each one of its components:
File editor configuration: contains the elements for the default lexicon
configurations management in the file editor:
o Add file type: adds a new default lexicon configuration to the table.
o Remove file type: removes a default lexicon configuration from the
table.
o Table: contains the following columns:
Description.
Extensions: extensions list separed by “;”. Note: the format
“.txt” is not a valid extension.
Default lexicon configuration.
Console configuration: contains the elements for the default lexicon
configurations management in the console panel:
o Apply lexicon configuration to the console: indicates if the default
lexicon configuration has to be applied or not to the console panel.
o Console lexicon configuration.
User’s Manual
48
3.5.2.GRAMMAR CONFIGURATION
It contains the menu item options for the grammar configuration management:
Figure 23: Grammar menu
Next, we further explain each one of the previous menu item options:
3.5.2.1. NEW GRAMMAR
Creates the new grammar configurations from lexicon categories and grammar
rules with EBNF format in the following configuration window:
Figure 24: New grammar
User’s Manual
49
The window has the following components:
Lexicon categories panel:
o Lexicon categories text area: shows the content of the lexicon
categories plain text file with TXT extension.
o Load button: loads the content of the lexicon categories plain text
file with TXT extension into the lexicon categories text area.
o Save button: saves the content of the lexicon categories text area
into a plain text file with TXT extension.
Grammar rules panel:
o Text box of grammar rules: shows the content of the grammar
rules plain text file with TXT extension.
o Load button: loads the content of the grammar rules plain text file
with TXT extension into the grammar rules text area.
o Save button: saves the content of the grammar rules text area into a
plain text file with TXT extension.
Accept button: initializes the grammar creation process.
Cancel button: closes the window without applying the changes.
In the moment that the new grammar is created, it is not saved until the user
selects the save menu option. In the case that the user closes the application without
saving it, the last grammar configuration will be loaded.
If the user selects to verbose the grammar creation process, the following window
will be displayed:
User’s Manual
50
Figure 25: Grammar generation process
3.5.2.2. LOAD GRAMMAR
Loads a grammar configuration with JAR extension.
3.5.2.3. MODIFY GRAMMAR
Displays the same grammar configuration window than the New Grammar menu
item option but it contains the lexicon categories and grammar rules text areas filled
with their file contents:
User’s Manual
51
Figure 26: Modify grammar
3.5.2.4. SAVE GRAMMAR
Saves the current grammar configuration into a file with JAR extension.
3.5.2.5. SAVE GRAMMAR AS
Saves the current grammar configuration into a file with JAR extension in a
different path.
3.5.2.6. CONFIGURE PATHS
For the creation, modification and grammar configurations to hand it is
mandatory to define the required tools paths as it was mentioned in the first chapter
of the present document.
It displays the following window:
User’s Manual
52
Figure 27: Set paths
In each one of the text fields the user will select the path to each one of the
required tools. The window also contains the following components:
Check box: if it is selected the application will use the path selected in the
text field that corresponds; if it is disabled the application will use its
Operative System CLASSPATH.
Explorer buttons: open a dialog window for the files selection.
3.5.3.COMPILER
The following window will be displayed:
Figure 28: Compiler configuration
The window has the following components:
User’s Manual
53
Compiler configuration panel:
o Executable path: path that contains the compiler executable file.
o Compiler arguments: arguments for the compiler.
Compiler options panel:
o Compile all the checked files: indicates if all the compilable files
have to be compiled or not.
o File separator: file separator to separate each one of the files to
compile.
o Extension: file extension of the files to compile.
Accept button: apply the changes.
Cancel button: close the window and do not apply the changes.
3.5.4.FILE EDITOR CONFIGURATION
It contains the menu item options for the file editor configuration management:
Figure 29: File editor configuration
We also explain how to configure the file editor externally with XML files in
Chapter 13.3.3. Next, we further detail each one of the previous menu item
options:
User’s Manual
54
3.5.4.1. FILE EDITOR DISPLAY OPTIONS CONFIGURATION
Displays the following configuration window:
Figure 30: File editor display options
In the configuration window, the user can configure the following parameters:
Font type.
Font size.
Font style.
Foreground color.
Background color.
Restore default values: applies the default configuration:
“Monospaced” font, plain, size of 12, black with white blackground.
3.5.4.2. AUTOMATIC INDENT
Enables or disables the automatic indent in the file editor.
3.5.4.3. LINE WRAPPING
Enables or disables the line wrapping in the file editor.
User’s Manual
55
3.5.4.4. MAXIMUM LINE NUMBER TO SEND TO CONSOLE
Asks to the user for the maximum number of lines to send to the console panel
from the active file in the file editor:
Figure 31: Maximum line number
3.5.4.5. SEND TO CONSOLE CONFIRMATION
If this option is selected, when the user sends contents of the active file in the file
editor the application will display the following confirmation message:
If this option is not selected, when the user sends contents of the active file in the
file editor the application simply sends the contents to the console panel adding each
sent line as a separate command in the console panel command record.
User’s Manual
56
3.5.5.CONSOLE CONFIGURATION
It contains the menu item options for the console panel configuration
management:
Figure 32: Console menu
We also explain how to configure console panel externally with XML files in
Chapter 13.3.4.
3.5.5.1. CONFIGURE
Configures the shell configurations that are loaded in the console panel:
Figure 33: Shell configuration
It contains the following components:
Executable: executable file path.
Parameters: shell is configured with these parameters.
User’s Manual
57
Change executable path: it is used for especifying a different folder where
the executable file is placed.
Executable path: executable file folder.
Exit command: exit command for closing the data stream.
Command echo: indicates if the commands typed in the console panel have
to be displayed or not.
3.5.5.2. EXECUTE EXTERNAL COMMAND
Executes a command into a shell and displays the result in a separate window that
looks like:
Figure 34: Execute external command
3.5.5.3. CONSOLE DISPLAY CONFIGURATION
Displays the following configuration window:
User’s Manual
58
Figure 35: Console display configuration
The user can selects:
Font type.
Font size.
Font color.
Background color.
Maximum buffer size: specifies the maximum number of lines that are
displayed in the console panel.
Restore default configuration: applies the default configuration for the
console panel:
“Monospaced” font, plain, size of 12, black with white background
3.5.5.4. SAVE CONTENT INTO FILE
Saves the console content into a file.
3.5.5.5. DOCUMENT LEXICON
Loads a lexicon configuration with XML extension into the console panel.
User’s Manual
59
3.5.5.6. FIND
Displays the search text window for the console panel:
Figure 36: Console search window
Then we proceed to describe each component of the window:
Text box: Here is where user enters the search text.
Recents: This combo menu displays a list which contains all the recent
searches that have been executed before. When user selects one, this
appears in the Text box.
Options:
o Case sensitive: this option is used to search for strings without
having or taking into account the Upper / Lowercase.
o Regular expressions: regular expressions search associated with a
search pattern. More information about Regular Expressions on
Chapter 14.
o Whole words: find whole words only.
Direction:
o Forward: searches from the current caret position to the end of the
file in the source file editor.
o Backward: searches from the current caret position to the
beginning of the file in the source file editor.
User’s Manual
60
o Cyclic: searches from the current caret position to the end of the file
in the source file editor, and star from the beginning until the
starting position.
3.5.5.7. CLOSE CONSOLE
Closes the active shell in the console panel.
3.5.5.8. RESET CONSOLE
Only available in the popup menu of the console panel. Resets the active shell in
the console panel.
3.5.5.9. CLEAR CONSOLE BUFFER
Only available in the popup menu of the console panel. Clears the console panel
content and leaves only the last line of the previous buffer content.
3.5.6.DATABASE PANEL CONFIGURATION
It contains the menu item options for the database panel configuration
management:
Figure 37: Database panel menu
Then we proceed to describe each component of the menu:
3.5.6.1. DES PANEL
When this item is selected, the database panel in the left lower corner is
connected with DES.
3.5.6.2. ODBC PANEL
When this item is selected, the database panel in the left lower corner is
connected with ODBC.
User’s Manual
61
3.5.7.LANGUAGE CONFIGURATION
Shows the available language list of the application:
Figure 38: Language configuration menu
In this case, the user can choose only between English or Spanish.
3.5.8.MENU CONFIGURATION
It contains the menu item options for the menu configuration management:
Figure 39: Menu configuration menu
We also explain how to configure menu externally with XML files in Chapter
13.3.1. Next, we further describe each one of the previous menu item options:
3.5.8.1. NEW
Displays the following configuration window:
User’s Manual
62
Figure 40: New menu
It displays a list of tabs with the names of the menus in the Menu bar. For each
tab there is a grid with attributes of its menu objects.
The user can edit directly in the grid the attributes he wants to change, except
some that are not editable. The value it is not assigned until user hits ENTER or
changes to other attribute or object. Next, we further describe each one of the
menu objects options:
Row: the number of the row. It is not editable.
Type: the type of the menu object in this row. It can ben Item or Submenu.
It is not editable, this value is assigned when the object is created.
Name: the name of the menu object. It is editable.
Visible: this value sets if the menu object is visible in the Menu bar or not.
Erasable: this value indicates if this menu object is a default menu object
or not. It is not editable. The menu objects with erasable value to false are
default menu objects. These objects have to be always in the Menu bar
configuration, altough they can be not visible. When the application builds
the menu, it checks if all the default menu objects exit in the configuration.
If any menu object does not exit, the application creates it at the end of its
submenu. It can exits only one of each default menu object. The application
will delete the rest.
Image: the path of the image icon of the menu item. The image icons
belong only to menu items.
User’s Manual
63
Path: indicates the location of the menu object inside the menu which
contains it.
Child rows: it is only for menu submenus. It indicates the number of row
of their childern.
Command: it is only for menu items. It sets the command that the menu
item will run. The commands that start with a “$” sign are intern
commands for ACIDE – A Configurable IDE and they are explained on
Chapter 12. Commands that not start with “$” are sent to console.
With parameters: it is only for menu items. Indicates the type of
parameter which the command needs to run.
3.5.8.1.1. BUTTONS PANEL
Next, we further describe each of the buttons of the configuration window:
Add new menu : It will display a window where user can type down
the name of the new menu he wants to insert. It will be inserted at the end
of the menus list.
Delete menu: It will delete the present menu before a confirmation
message. The default menu can be deleted.
Move menu to the left: moves the present menu to the left in the
menus list.
Move menu to the right: moves the present menu to the left in the
menus list.
: adds a new submenu to the menu selected. If there is a
menu submenu selected, the new submenu will be inserted inside it. If there
is a menu item selected, the new submenu will be inserted after it. In other
case, the new submenu will be inserted at the end of the list of the root
menu.
: adds a new menu item to the menu selected. If there is a
menu submenu selected, the new item will be inserted inside it. If there is a
User’s Manual
64
menu item selected, the new item will be inserted after it. In other case, the
new item will be inserted at the end of the list of the root menu.
: deletes the selected object after a confirmation message.
The objects that are not erasable can not be deleted.
Move object to up:moves to up the selected menu object.
Move object to down: moves down the selected menu object.
: sets as visible all the menu objects of the Menu Bar.
: sets as no visible all the menu objects of the Menu Bar. The
menu objects related to menu configuration always have to be visible.
: Applies the changes and closes the window.
: Closes the window without applying the changes.
3.5.8.1.2. POPUP MENU
The popup menu of menu object is as follows:
Figure 41: Object menu popup menu
Next, we further describe each of the options:
Load image icon: it will display a load window where user can select the
image he wants to set as icon of the menu object.
Add new submenu: adds a new submenu to the menu selected. If there is
a menu submenu selected, the new submenu will be inserted inside it. If
User’s Manual
65
there is a menu item selected, the new submenu will be inserted after it. In
other case, the new submenu will be inserted at the end of the list of the
root menu.
Add new item: adds a new menu item to the menu selected. If there is a
menu submenu selected, the new item will be inserted inside it. If there is a
menu item selected, the new item will be inserted after it. In other case, the
new item will be inserted at the end of the list of the root menu.
Delete object: deletes the selected object after a confirmation message.
The objects that are not erasable can not be deleted.
Move item or submenu to up: moves to up the selected menu object.
Move item or submenu to down: moves down the selected menu object.
Send to menu: it displays a window with a list of menus where user can
send the selected menu object.
Insert in submenu:it displays a window with a list of submenus inside the
present menu where user can insert the selected menu object.
3.5.8.1.3. KEY NAVEGATION
Up arrow: selects previous object.
Down arrow: selects next object.
Ctrl + Home: selects the first object.
Ctrl + End: selects the last object.
Tab: selects next attribute.
Tab + Shift: selects previous attribute.
Esc: deselects the selected object.
3.5.8.2. LOAD
Loads a menu configuration with XML extension.
User’s Manual
66
3.5.8.3. MODIFY
Selecting this option displays the following configuration window, similar to
creating a new configuration window, but with corresponding options of the loaded
menu and with the name of the configuration in the window title:
Figure 42: Modify menu
Its performance is equal to the new menu window explained on Chapter 3.5.8.1.
3.5.8.4. SAVE
Saves the current menu configuration into a menu configuration file with XML
extension.
3.5.8.5. SAVE AS
Saves the current menu configuration into a menu configuration file with XML
extension in a different path.
User’s Manual
67
3.5.9.TOOLBAR CONFIGURATION
It contains the menu item options for the tool bar configuration management:
Figure 43: Tool Bar configuration menu
We also explain how to configure toolbar externally with .toolbarConfig files in
Chapter 13.3.2
3.5.9.1. NEW
It displays the following configuration window:
Figure 44: New tool bar
The window has two different panels:
Console panel: defines the commands related to the console panel tool bar
that are executed in the console panel.
User’s Manual
68
External applications panel: defines the commands related to the external
applications tool bar that are executed out of the aplication.
In each one of the panels, the user can do the following operations:
Add button: adds a new command to the command list in the table.
Remove button: removes the selected command from the command list.
Direct edition on the tables: the user can modify the commands by editing
directly on the table. However, the changes will not be applied until the
focus changes or the user presses down the ENTER key.
In the console panel tab the table contains the following parameters:
Name: text to display in the button. If this field is empty the application will
assign it a number as name by default.
Command: command itself. It admits the insertion of ACIDE – A
Configurable IDE special variables that are further detailed in the Chapter 11
of the present document.
Help text: hint text of the button.
Image: image for the button which can be selected by the option available
in the popupmenu of the column.
Extra parameter: shows a combo box with the following options: NONE,
TEXT, FILE, DIRECTORY. Each one of the previous options will ask the user
for the selected type with different dialog windows.
Is executed in the OS shell: indicates if the command is executed in the
Operative System shell or in the loaded shell in the console panel.
In the external applications panel tab the table contains the following
parameters:
Name: text to display in the button. If this field is empty the application will
assign it a number as name by default.
Executable path: executable path of the command to execute. It admits the
insertion of ACIDE – A Configurable IDE special variables that are further
detailed in Chapter 11 of the present document.
User’s Manual
69
Help text: hint text of the button.
Image: image for the button which can be selected by the option available
in the popup menu of the column.
The tool bar configuration files have toolbarConfig extension.
3.5.9.2. LOAD
Loads a tool bar configuration with toolbarConfig extension.
3.5.9.3. MODIFY
It displays the following configuration window:
Figure 45: Modify tool bar
It contains the same options than the configuration window displayed by the
Configuration/Menu/New.
In this case, the window displays the current tool bar configuration loaded in the
tables and also with a different window title which contains the name of the current
configuration to modify.
3.5.9.4. SAVE
Saves the current tool bar configuration into a tool bar configuration file with
toolbarConfig extension.
User’s Manual
70
3.5.9.5. SAVE AS
Saves the current tool bar configuration into a tool bar configuration file with
toolbarConfig extension and with a different path.
User’s Manual
71
3.6.
HELP MENU
Contains the following menu items:
Figure 46: Help menu
Next, the previous menu options are further explained:
3.6.1.SHOW HELP
Links directly to the present document.
3.6.2.ABOUT US
Displays the following window with some extra information about the
application:
Figure 47: About us window
User’s Manual
72
3.7.
INSERTED SUBMENUS
As explained in chapters 3.5.8 and 13.3.1 , user can insert new submenus in the
tool bar. Then, inside these submenus new inserted submenus and menu items can be
defined. For each inserted submenu the attributes are:
Name: the name of the submenu.
Visible: define if the submenu is visible or not in the application.
Erasable: define if the submenu is a default submenu (not erasable) or not
(is erasable). The value of this attribute can not be edited.
List: list of all the submenus and menu items that the submenu contains.
Image: for submenus the value of this attribute is empty.
An example of an inserted submenu is:
Figure 48: Example of inserted submenu
In this example we can see an inserted submenu called DES and defined in the
menu bar.
User’s Manual
73
3.8.
INSERTED MENU ITEMS
As explained in chapters 3.5.8 and 13.3.1 , user can insert new menu items in the
tool bar. For each inserted menu item the attributes are:
Name: the name of the menu item.
Visible: define if the menu item is visible or not in the application.
Erasable: define if the menu item is a default menu item (not erasable) or
not (is erasable). The value of this attribute can not be edited.
Image: defines the path of the image which is the icon of the menu item.
Command: defines the command that is sent to console when this menu
item is clicked.
Parameter: defines the type of parameter that the command of this menu
item needs: None, Text, File or Directory.
A example of inserted menu items can be seen in Chapter 3.7 of the present
document.
User’s Manual
74
4. PROJECT BROWSER PANEL
In the project browser panel are displayed the folders and files of the active
project. The main files appear with a blue circle beside, the compilable files with a
green circle and the rest with a grey circle:
Figure 49: Project browser panel
The popup menu of each file and folder is as follow:
Figure 50: Project browser popup menu
All these options have been explained before on Chapter 3.3.
User’s Manual
75
5. FILE EDITOR PANEL
In the file editor panel are displayed all the opened files by tabs. Each tab is
named by the name of the file it contains:
Figure 51: File editor panel
When a file is modified and it is not saved yet, its tab is as follows:
with a red cross beside the title of the tab.
When a file is set as compilable file, its tab is as follows:
with a green play sign beside the title of the tab.
And finally, when a file is set as main file, its tab is as follows:
User’s Manual
76
With a blue play sign beside the title of the tab.
The popup menu is as follow:
Figure 52: File editor popup menu
All these options have been explained before on Chapter 3.
The available accessibility shortcuts for File Editor will be further explained in
Chapter 10.
User’s Manual
77
6. TOOL BAR
In the toolbar are displayed some items related with files and projects,
commands defined by user to be run in console and commands defined by user to
run external applications:
Figure 53: Tool bar
Next, we further describe each one of the previous components:
: Creates a new file.
: Opens a file.
: Saves current file.
: Saves all opened files.
: Creates a new project.
:Opens a project.
: Saves current project.
The following items are commands configured by user that run commands
on shell (explained on chapters 3.5.9 and 13.3.2).
: Sends file content to console.
The following items are commands configured by user that run external
applications (explained on chapters 3.5.9 and 13.3.2).
User’s Manual
78
7. CONSOLE PANEL
At console panel the user can work with the shell he connects to ACIDE – A
Configurable IDE (explained on Chapter 3.5.5). An example of console panel
connected with DES:
Figure 54: Console panel
The popup menu is as follows:
Figure 55: Console panel popup menu
User’s Manual
79
All the options have been explained before in Chapter 3.
The user can send commands to the shell in different ways. As explained before,
user can send the selected text or the content of a file to the sell. Also he can configure
the toolbar with buttons which send commands to shell. A new performance of this
version is that user can configure the Menu Bar to build buttons that send commands
to shell in the same way that the toolbar buttons. The default buttons of ACIDE – A
Configurable IDE send special commands that will be further explained in Chapter 12.
User’s Manual
80
8. DATABASE PANEL
The database panel shows the metadata of your computer’s databases on the
lower left corner of the screen.
Figure 56: Database panel
This panel can be connected with the DES or ODBC connections of your computer.
The user can choose the connection in the configuration menu, submenu database
panel. Nodes can be expanded with double click or with one click on the node and one
more on the “+” button.
8.1.
DATABASES NODE
This is the root node of the database panel, below it all the databases connected
will be showed.
Figure 57: Databases node
User’s Manual
81
The popup menu of this node is the next:
Figure 58: Databases node popup menu
Next we further detail each one of the components of the popup menu:
8.1.1.OPEN
With this option user can connect the panel with other database. The following
window is displayed:
Figure 59: Open database
8.1.2.REFRESH
All the database panel will be refreshed and user will see all the modifications
made with it.
8.1.3.CLOSE
The database panel will be closed.
User’s Manual
82
8.2.
DATABASE NODE
Figure 60: Database node
All the databases opened on this panel are showed in this level of the tree. With
the contextual menu user can do the following actions:
Figure 61: Database node popup menu
8.2.1.SET AS DEFAULT
If the shell is connected to DES, this option will set this database as the database in
use for the following commands.
8.2.2.CLOSE
It will close the connection with the database.
8.2.3.REFRESH
It will refresh the database node.
User’s Manual
83
8.2.4.EXECUTE QUERY
It will displays a window with a text field to input queries in SQL in the database.
Figure 62: Execute query
When user clicks on “OK” button the results are showed on the Data View. Data
View will be further explained in Chapter 8.4.5.
Expanding this node there will be three folders below it: tables, views, and
integrity constraints.
Figure 63: Expanding database node
User’s Manual
84
8.3.
TABLES NODE
The childrens of this node will be all the tables of this database. Its popup
menu is:
Figure 64: Tables node popup menu
8.3.1.CREATE TABLE WITH DATALOG
This option is only enabled if the panel is connected with DES. The user can create
a table with a Datalog command in a window similar to the window of Execute query
action (Chapter 8.2.4).
8.3.2.CREATE TABLE WITH DESIGN VIEW
With this option the user can create a new table usign a design table with four
columns to choose: name of the field, type, primary key and not null:
Figure 65: New table
With the “*” new rows can be inserted in the design table. If you want to make a
field part of the primary key you have to mark the checkbox of that column. This
option make impossible to mark the Disallow nulls option.
User’s Manual
85
8.3.3.CREATE TABLE WITH SQL
It displays a window like the “Execute query” (Chapter 8.2.4) window where the
use can create a table with SQL commands.
8.3.4.PASTE
This option will create a new table with the schema or with the schema and data
that the user has copied before from another table of the panel.
8.4.
TABLE NODE
If the panel is connected with DES nodes of this type will show the name of the
table and all the information of the fields. However, if the panel is connected with
ODBC, will only show the name of the table.
Figure 66: Table node
With the contextual menu of this node you can make the following actions:
User’s Manual
86
Figure 67: Table node popup menu
8.4.1.DROP
This action will drop the table.
8.4.2.RENAME
The user can change the name of the table with this menu item.
8.4.3.COPY
With this option the user can choose between copying only the schema or copying
the schema and the data.
8.4.4.DESIGN VIEW
It will display the Design view of the selected table where the user can make
changes on it, add columns, change the primary key and go on.
Figure 68: Design view
User’s Manual
87
Clicking on “OK” button, changes will be applied. If an error occurs, the table will
be restored to its previous schema.
8.4.5.DATA VIEW
Displays the following window which shows the data contained in the selected
table or view, where the simbol “►” indicates the current record.
Figure 69: Data view
If it is opened for a view, the modification is not allowed. Also, if a data view for
the selected table is already opened, only another read-only data view can be opened.
8.4.5.1. ACTIONS PERMITTED ON THE GRID
Key navegation:
o Up arrow: selects previous record.
o Down arrow: selects next record.
o Ctrl + Home: selects the first record.
o Ctrl + End: selects the last record.
o Tab: selects next field.
o Tab + Shift: selects previous field.
Sort:
o Clicking on the column header, rows will be sorted ascending: the
first record displayed will be the record with the lowest value for
User’s Manual
88
this field. Pressing successively on the same field will change the
sorting direction.
Presentation:
o The user is able to move the columns by clicking on the column
name and dragging it to its new location.
8.4.5.2. MENU BAR
8.4.5.2.1. FILE MENU
It contains the following menu items for the files management:
Figure 70: Data view file menu
Next, all the previous menu items will be further explained:
8.4.5.2.1.1.
EXPORT
It contains the following menu items for the files management:
Comma-delimited CSV: It opens a dialog box to select a file. A text file will
be created with all the records of the grid and all their fields in the order
they appear in the grid, separated by commas.
Tab-delimited CSV: Same as comma-delimited CSV, but the separator
character between fields is the tab.
User’s Manual
89
CSV: This opens a dialog box where user can write the separator character
and proceed to select the file and save the data.
XML: This opens a dialog box to select a file. A XML file will be created with
the following structure:
<DATA>
<ROW>
<col>value</col>
</ROW>
</DATA>
8.4.5.2.1.2.
IMPORT
It contains the same menu items as “Export” menu item:
Comma-delimited CSV: This opens a dialog box to select a file. For each
line of the text file the value that corresponds to the field appears in the
grid. Each line will be inserted in the table as described before.
Tab-delimited CSV: same as comma-delimited CSV but the separator
character between fields is the tab.
CSV: this opens a dialog box where user can write the separator character
and proceed to select the file and load the data.
XML: This opens a dialog box to select a file. It will read the XML file with
the structure indicated above. Each row of data of the XML file will be
inserted in the table.
8.4.5.2.1.3.
EXECUTE QUERY
It displays a dialog in which the user will type down the query he wants to
perform:
User’s Manual
90
Figure 71: Execute query
8.4.5.2.1.4.
PRINT
It displays the print window to print the grid.
8.4.5.2.1.5.
CLOSE
Close the data view window. It also can be closed with the key combination “Alt +
F4”.
8.4.5.2.2. EDIT MENU
It contains the following menu items for the common grid editor management:
Figure 72: Data view edit menu
8.4.5.2.2.1.
UNDO
Undoes the updates in the grid. It also can be done with the key combination “Ctrl
+ Z”.
8.4.5.2.2.2.
REDO
Redoes the updates in the grid. It also can be done with the key combination “Ctrl
+ Y”.
User’s Manual
91
8.4.5.2.2.3.
COPY
Copies the selected text active field from the grid and put it into the System
clipboard. It also can be done with the key combination “Ctrl+ C” or with the icon
of the icon bar.
8.4.5.2.2.4.
PASTE
Pastes the text stored in the System clipboard in the current position of the active
field in the grid. It also can be done with the key combination “Ctrl + V” or with the
icon
of the icon bar.
8.4.5.2.2.5.
CUT
Cuts the selected text active field from the grid and put it into the System
clipboard. It also can be done with the key combination “Ctrl + X” or with the icon
of the icon bar.
8.4.5.2.2.6.
FIND
Displays the search text window for the data view.
Figure 73: Data view search window
It also can be done with the key combination “Ctrl + F” or with the icon
of the
icon bar.
8.4.5.2.2.7.
REPLACE
Displays the replace text window of the data view:
User’s Manual
92
Figure 74: Data view replace window
When a general replacement is performed, it displays the following dialog to the
user informing of the number of replacements:
Figure 75: Data view number of replacements
8.4.5.2.3. RECORDS MENU
It contains the following menu items for the common grid editor management:
Figure 76: Data view records menu
Next, all the previous menu items will be further explained:
8.4.5.2.3.1.
NEW
Inserts a new record in the grid. The values of the new record must be written at
the last row of the grid. It also can be done clicking in the cell with the “*” icon.
User’s Manual
93
8.4.5.2.3.2.
DELETE
Deletes the selecetd record from the grid.
8.4.5.2.3.3.
REFRESH
Updates the view of the grid.
8.4.5.2.3.4.
GO TO
It contains the following menu items for the common grid editor management:
Figure 77: Data view go to menu
First record: Goes to the first record. It also can be done with the key
combination “Ctrl+ home”.
Last: Goes to the last record. It also can be done with the key combination
“Ctrl + end”.
Next: Goes to next record. It also can be done with the up arrow key.
Previous: Goes to previous record. It also can be done with the down arrow
key.
Go to record: It displays a dialog window where the user will type down
the row number he wants go to.
User’s Manual
94
8.4.5.2.3.5.
SELECT RECORD
Selects the current record from the grid.
8.4.5.2.3.6.
SELECT ALL
Selects all the records from the grid.
8.4.5.2.4. VIEW MENU
It contains the following menu items for the common grid editor management:
Figure 78: Data view view menu
Next, all the previous menu items will be further explained:
8.4.5.2.4.1.
SORT BY
It displays a window with a grid to select the table field by which sort the table,
and the criteria “Ascending” or “Descending”.
Figure 79: Data view sort by window
8.4.5.2.4.2.
SORT BY COLUMN
It contains the following menu items for the common grid editor management:
User’s Manual
95
Ascending: it will order the grid ascending by the selected column. It also
can be done with the icon
of the icon bar.
Descending: it will order the grid ascending by the selected column. It also
can be done with the icon
8.4.5.2.4.3.
of the icon bar.
FILTER BY CONTENT
Filters the grid by the content of the selected field. It also can be done with the
icon
of the icon bar.
8.4.5.2.4.4.
FILTER EXCLUDING CONTENT
Filters records that do not contain the content of the selected field.
8.4.5.2.4.5.
DISCARD FILTER
Removes the filter. It also can be done with the icon
8.4.5.2.4.6.
of the icon bar.
HIDE/SHOW COLUMNS
It will display a window with a grid to select the columns visibility:
User’s Manual
96
Figure 80: Data view hide/show columns
8.4.5.2.5. HELP MENU
Contains the following menu items:
Figure 81: Data view help menu
Next, the previous menu options are further explained
8.4.5.2.5.1.
SHOW HELP
Links directly to the user’s manual of DES-ACIDE.
8.4.5.2.5.2.
ABOUT US
Displays the following window with some extra information about the
application:
User’s Manual
97
Figure 82: Data view about us window
8.4.6.ADD PRIMARY KEY
A primary key constraint specifies that no two tuples have the same values for a
given set of columns. To define a primary key constraint user has to type :pk(name_of_the_relation, [column_name_list]).
This menu option displays a window where user can write the datalog command
to create a primary key in the selected table:
Figure 83: Add primary key
8.4.7.ADD FOREIGN KEY
A foreign key constraint specifies that the values in a given set of columns of a
relation must exist already in the columns declared in the primary key constraint of
User’s Manual
98
another relation. To define a foreign key constraint in a relation the user has to type
:fk(name_of_the_target_relation,[name_of_the_column_foreign_key],name_of_source_re
lation,[name_of_source_column]).
This menu option displays a window where user can write the datalog command
to create a foreign key in the selected table:
Figure 84: Add foreign key
8.4.8.ADD CANDIDATE KEY
As a primary key, a candidate key constraint specifies that no two tuples have the
same values for a given set of columns. To define a candidate key constraint user has
to type :-ck(name_of_the_relation, [column_name_list]).
This menu option displays a window where user can write the datalog command
to create a candidate key in the selected table:
Figure 85: Add candidate key
8.4.9.ADD FUNCTIONAL DEPENDENCY
A functional dependency constraint specifies that, given a set of attributes A1, of a
relation R, they functionally determine another set A2, i.e., each tuple of values of A1
in R is associated with precisely one tuple of values A2 in the same tuple of R. To
User’s Manual
99
define a functional dependency constraint user has to type :-fd (name_of_the_relation,
[A1], [A2]).
This menu option displays a window where you can write the datalog command
to create a functional dependency in the selected table:
Figure 86: Add functional dependency
8.4.10.
ADD INTEGRITY CONSTRAINT
A integrity constraint is represented with a rule without head. The rule body is an
assertion that specifies incosistent data, i.e., should this body can be proved, an
inconsistency is detected and reported to the user.
Declaring such integrity constraints implies to change your mind w.r.t usual
consistency constraints as domain constraints in SQL. For instance, to specify that a
column c of a table t can take values between two integers one can use the SQL clause
CHECK in the creation of the table as follows:
CREATE TABLE t(c INT CHECK (c BETWEEN 0 AND 10));
In contrast, in Datalog user can submit the following constraints:
Figure 87: Add integrity constraint
Notice that the rule body succeeds for values in t out of the interval [0,10]. So, an
integrity constraint specifies unfeasible values rather than feasible.
User’s Manual
100
8.5.
CHILDREN OF TABLE NODES
Under the table node the user can see the information of the columns and all the
constraints like primary key, foreign key and go on.
Figure 88: Children of table nodes
In the primary key node, and in all the nodes which define a constraint (in the
figure the node [department, name]), the user has these options in the popup menu:
8.5.1.DROP
It will drop the restriction.
8.5.2.MODIFY
The user can modify the restriction with this action.
User’s Manual
101
8.6.
VIEWS NODE
The children of this node are all the views of the selected database. Its popup menu
is the following:
8.6.1.CREATE
With the next window the user can create a view, defining it with an SQL
command:
Figure 89: Create view window
8.6.2.PASTE
A new view will be created with the same schema than the view that had been
copied before.
User’s Manual
102
8.7.
VIEW NODE
This node relates the name and the fields informatino of one view of the selected
database.
Figure 90: View node
Its popup menu is as follows:
Figure 91: View node popup menu
8.7.1.DROP
The view will be deleted from the database.
8.7.2.RENAME
The user can change the name of the view with this action.
User’s Manual
103
8.7.3.COPY
The schema of the selected view will be copied to the clipboard.
8.7.4.PASTE
A new view with the schema of the view copied in the clipboard before will be
created.
8.7.5.DESIGN VIEW
A window with the SQL text of the view will be showed.
8.7.6.DATA VIEW
It is almost identical to Data view for Tables, explained before on Chapter 8.4.5.
8.8.
COLUMNS NODES
The children of this node are all the columns of the selected view.
Figure 92: Columns nodes
8.9.
SQL TEXT AND DATALOG TEXT NODES
These nodes show the SQL and Datalog commands of the view definition.
User’s Manual
104
Figure 93: SQL and Datalog text nodes
The user can make double click in this node and a window with this text will
appear where user can modify it.
Figure 94: SQL text
User’s Manual
105
Figure 95: Datalog text
With the popup menu user can show and edit too, and copy the definition text.
User’s Manual
106
9. STATUS BAR
The Status Bar contains some information about the active file, the current project
and go on. It is as follows:
Figure 96: Status bar
Next, we further describe all the components:
Panel 1: the status message is displayed. It shows the path and name of the
active file in the File Editor.
Panel 2: the syntactic configuration shows the name of the grammar
applied to the current project.
Panel 3: the lexicon configuration shows the name of the lexicon applied to
the current project.
Panel 4: shows the line and column where the caret is.
Panel 5: BLOQ MAYUS status.
Panel 5: BLOQ NUM status.
Panel 6: BLOQ SCROLL status.
Panel 7: writing mode: INSERT or OVERWRITE.
Panel 8: the System clock.
User’s Manual
107
10.ACCESSIBILITY SHORTCUTS
The application offers some accessibility shortcuts to wrapper common user
actions such as:
F3 + Selected text: performs the forward text search with the selected text
in the file editor, in the console panel or in the data view window.
F3 + Shift + Selected text: performs the backward text search with the
selected text in the file editor, in the console panel or in the data view
window.
Mouse wheel: performs the vertical scroll line by line in the file editor and
console panel.
Control + mouse wheel: performs the zoom effect for the font size in the
file editor and console panel.
Others accessibility shortcuts depends on the language of the application.
10.1.
ACCESSIBILITY SHORTCUTS IN ENGLISH
Shortcuts in File menu:
Ctrl + N: Creates new file.
Ctrl + O: Opens a file.
Ctrl + S: Saves active file in the file editor.
Ctrl + Shift + S: Saves all files in the file editor.
Ctrl + P : Prints active file in the file editor.
Alt + X: Closes the application.
Shortcuts in Edit menu:
Ctrl + Z: Undo the last action.
Ctrl + Y: Redo the last change.
Ctrl + C: Copy the selected text to the System clipboard.
Ctrl + X: Cuts the selected text to the System clipboard.
User’s Manual
108
Ctrl + V: Paste the test in the System clipboard.
Ctrl + E: Select all the text in the active file of the file editor.
Ctrl + F: Opens the search window.
Ctrl + R: Opens the replace window.
Shortcuts in Project menu:
Alt + Shift + N: Creates a new project.
Alt + Shift + O: Opens a project.
Alt + Shift + S: Save the opened project.
Alt + Shift + A: Adds a file to the opened project.
Alt + C: Compiles the opened project.
Alt + E: Executes the opened project.
Shortcuts in View menu:
Alt + Shift + L: Shows the log tab.
Shortcuts in Configuration menu:
Ctrl + Shift + L: Documents lexicon.
Ctrl + Shift + X: Modifies the lexicon.
Ctrl + Shift + T: Creates a new grammar.
Ctrl + Shift + A: Actives line wrapping.
Ctrl + Shift + F: Opens the search in console window.
Alt + S: Changes language to Spanish.
Alt + E: Changes language to English.
Shortcuts in Help menu:
Ctrl + H: Shows this document.
Shortcuts in Data view:
Up arrow: goes to previous record.
Down arrow: goes to next record.
User’s Manual
109
Tab: goes to next field.
Shift + Tab: goes to previous field.
Alt + F4: closes the Data view window.
Ctrl + Z: undoes the updates in the grid.
Ctrl + Y: redoes the last undo in the grid.
Ctrl + C: copies the selected text active field from the grid to the System
clipboard.
Ctrl + V: pastes the text stored in the System clipboard in the current
position of the active field in the grid.
Ctrl + X: cuts the selected text active field from the grid to the System
clipboard.
Ctrl + F: shows the search text window for the Data view.
F5: refresh the view of the grid.
Ctrl + home: goes to the first record.
Ctrl + end: goes to the last record.
Ctrl + H: links directly to the present document.
Shortcuts in Menu configuration:
Up arrow: selects previous object.
Down arrow: selects next object.
Ctrl + Home: selects the first object.
Ctrl + End: selects the last object.
Tab: selects next attribute.
Tab + Shift: selects previous attribute.
Esc: deselects the selected object.
10.2.
ACCESSIBILITY SHORTCUTS IN SPANISH
Shortcuts in File menu:
Ctrl + N: Creates new file.
Ctrl + O: Opens a file.
User’s Manual
110
Ctrl + G: Saves active file in the file editor.
Ctrl + Shift + G: Saves all files in the file editor.
Ctrl + P : Prints active file in the file editor.
Alt + X: Closes the application.
Shortcuts in Edit menu:
Ctrl + Z: Undo the last action.
Ctrl + Y: Redo the last change.
Ctrl + C: Copy the selected text to the System clipboard.
Ctrl + X: Cuts the selected text to the System clipboard.
Ctrl + V: Paste the test in the System clipboard.
Ctrl + E: Select all the text in the active file of the file editor.
Ctrl + B: Opens the search window.
Ctrl + L: Opens the replace window.
Shortcuts in Project menu:
Alt + Shift + N: Creates a new project.
Alt + Shift + O: Opens a project.
Alt + Shift + S: Save the opened project.
Alt + Shift + A: Adds a file to the opened project.
Alt + C: Compiles the opened project.
Alt + E: Executes the opened project.
Shortcuts in View menu:
Alt + Shift + L: Shows the log tab.
Shortcuts in Configuration menu:
Ctrl + Shift + L: Documents lexicon.
Ctrl + Shift + X: Modifies the lexicon.
Ctrl + Shift + T: Creates a new grammar.
Ctrl + Shift + A: Actives line wrapping.
User’s Manual
111
Ctrl + Shift + F: Opens the search in console window.
Alt + S: Changes language to Spanish.
Alt + E: Changes language to English.
Shortcuts in Help menu:
Ctrl + H: Shows this document.
Shortcuts in Data view:
Up arrow: goes to previous record.
Down arrow: goes to next record.
Tab: goes to next field.
Shift + Tab: goes to previous field.
Alt + F4: closes the Data view window.
Ctrl + Z: undoes the updates in the grid.
Ctrl + Y: redoes the last undo in the grid.
Ctrl + C: copies the selected text active field from the grid to the System
clipboard.
Ctrl + V: pastes the text stored in the System clipboard in the current
position of the active field in the grid.
Ctrl + X: cuts the selected text active field from the grid to the System
clipboard.
Ctrl + F: shows the search text window for the Data view.
F5: refresh the view of the grid.
Ctrl + home: goes to the first record.
Ctrl + end: goes to the last record.
Ctrl + H: links directly to the present document.
Shortcuts in Menu configuration:
Up arrow: selects previous object.
Down arrow: selects next object.
Ctrl + Home: selects the first object.
Ctrl + End: selects the last object.
User’s Manual
112
Tab: selects next attribute.
Tab + Shift: selects previous attribute.
Esc: deselects the selected object.
User’s Manual
113
11.ACIDE VARIABLES
The application supports some variables in the Console Panel, External
Applications Tool Bar and the shell loaded in the console panel such as:
$activeFile$: references the current active file in the file editor panel.
$activeFileName$: references just the current active name file in the file
editor panel.
$activeFilePath$: references just the current active path file in the file
editor panel without including neither file name nor file extension.
$activeFileExt$: references just the current active extension file in the file
editor panel.
$mainFile$: references the file in the file editor panel that has been marked
as MAIN file.
$mainFilePath$: references the just file path in the file editor panel that
has been marked has MAIN file without including neither file name nor file
extension.
$mainFileExt$: references just the file extension in the file editor panel
that has been marked as MAIN file.
User’s Manual
114
12.ACIDE DEFAULT COMMANDS
As explained in Chapter 3.5.8, with the menu configuration the user can assign to
the application the actions that will be executed when menu items are pressed down.
All these commands start with “$”. The commands assigned by default to ACIDE – A
Configurable IDE menu items are:
File menu:
o $NEW_FILE: Creates a new file in the file editor.
o $OPEN_FILE: Opens a file in the file editor.
o $OPEN_ALL_FILES: Opens all the files of the active project.
o $CLOSE_FILE: Closes the active file in the file editor.
o $CLOSE_ALL_FILES: Closes all files in the file editor.
o $SAVE_FILE: Saves the active file.
o $SAVE_FILE_AS: Saves the active file in a different path.
o $SAVE_ALL_FILES: Saves all the opened files in the file editor.
o $PRINT_FILE: Prints the active file in the file editor.
o $EXIT_FILE: Closes the application.
Edit menu:
o $UNDO: Undoes the last action.
o $REDO: Redoes the last undone action.
o $COPY: Copies the selected text to the System clipboard.
o $PASTE: Pastes the text in the System clipboard.
o $CUT: Cuts the selected text to the System clipboard.
o $SELECT_ALL: Select all the text in the active file of the file editor.
o $GO_TO_LINE: Opens a window where user can type down the
number of line where he wants to go.
o $SEARCH: Opens the search window.
o $REPLACE: Opens the replace window.
Project menu:
o $NEW_PROJECT: Creates a new project.
o $OPEN_PROJECT: Opens a project in the application.
o $CLOSE_PROJECT: Closes the opened project in the application.
User’s Manual
115
o $SAVE_PROJECT: Saves the active project in the application.
o $SAVE_PROJECT_AS: Saves the active project in the application with
a different path.
o $ADD_OPENED_FILES: Adds all opened files in the application to
the active project.
o $NEW_PROJECT_FILE: Creates a new file and adds it to the active
project.
o $ADD_FILE: Adds the active file in the file editor to current project.
o $REMOVE_FILE: Removes the active file in the file editor from the
current project.
o $DELETE_FILE: Deletes the active file from the current project and
from disk.
o $ADD_FOLDER: Adds a folder to the current project.
o $REMOVE_FOLDER: Removes the selected folder from the current
project.
o $COMPILE: Compiles the current project.
o $EXECUTE: Executes the current project.
o $SET_COMPILABLE_FILE: Sets compilable the selected file.
o $UNSET_COMPILABLE_FILE: Unsets compilable the selected file.
o $SET_MAIN_FILE: Sets as main file the selected file.
o $UNSET_MAIN_FILE: Unsets as main file the selected file.
View menu:
o $SHOW_LOG_TAB: Shows the log tab.
o $SHOW_EXPLORER_PANEL: Shows or hides the explorer panel.
o $SHOW_CONSOLE_PANEL: Shows or hides the console panel.
o $SHOW_DATABASE_PANEL: Shows or hides the database panel.
Configuration menu:
o Lexicon submenu:
$NEW_LEXICON: Opens a window where user type down the
name for the new lexicon.
$DOCUMENT_LEXICON: Loads the lexicon configuration file
in the active file of the file editor.
User’s Manual
$MODIFY_LEXICON: Open the lexicon configuration window.
116
$DEFAULT_LEXICON:
Shows
the
default
lexicon
configuration window.
o Grammar submenu:
$NEW_GRAMMAR: Opens the new grammar configuration
window.
$LOAD_GRAMMAR: Loads a grammar configuration.
$MODIFY_GRAMMAR:
Displays
the
modify
grammar
configuration window.
$SAVE_GRAMMAR:
Saves
the
current
grammar
configuration into a file.
$SAVE_GRAMMAR_AS:
Saves
the
current
grammar
configuration into a file with a different path.
$SET_PATHS: Displays the set paths window.
o $COMPILER: Displays the compiler configuration window.
o File editor submenu:
$FILE_EDITOR_DISPLAY_OPTIONS: Displays the file editor
display configuration window.
$AUTOMATIC_INDENT: Enables or disables the automatic
indent in the file editor.
$LINE_WRAPPING: Enables or disables the line wrapping in
the file editor.
$MAXIMUM_LINES: Asks to the user for the maximum
number of lines to send to the console panel.
$SEND_CONSOLE_CONFIRMATION: Enables or disables the
confirmation request when user sends contents to console
panel.
o Console submenu:
$CONFIGURE_CONSOLE: Opens the console configuration
window.
$CONSOLE_DISPLAY_OPTIONS: Displays the console display
configuration window.
$SAVE_CONSOLE_CONTENT: Saves the console content into
a file.
User’s Manual
117
$DOCUMENT_CONSOLE: Loads a lexicon configuration into
the console panel.
$SEARCH_CONSOLE: Opens the search in console window.
$CLOSE_CONSOLE: Closes the console.
o Database panel submenu:
$DES_PANEL: Selects the DES conection in database panel.
$ODBC_PANEL: Selects the ODBC conection in database
panel.
o Language submenu:
$SPANISH: Selects Spanish as language.
$ENGLISH: Selects English as language.
o Menu submenu:
$NEW_MENU: Displays the new menu configuration window.
$LOAD_MENU: Loads a menu configuration and applies it to
application.
$MODIFY_MENU: Displays the menu configuration window
for modifying.
$SAVE_MENU: Saves the current menu configuration.
$SAVE_MENU_AS: Saves the current menu configuration
with a different path.
o Tool bar submenu:
$NEW_TOOLBAR: Displays the new toolbar configuration
window.
$LOAD_TOOLBAR: Loads a tool bar configuration and
applies it to application.
$MODIFY_TOOLBAR: Displays the tool bar configuration
window for modifying.
$SAVE_TOOLBAR: Saves the current tool bar configuration.
$SAVE_TOOLBAR_AS:
Saves
the
current
tool
bar
configuration with a different path.
Help menu:
o $SHOW_HELP: Opens this document.
o $SHOW_ABOUT_US: Displays the About Us window.
User’s Manual
118
These commands can be assigned to other menu items than are not the default
menu items.
User’s Manual
119
13.CONFIGURATION
OF
ACIDE
CONFIGURATION DOCUMENTS
13.1.
BY
MANAGERS IN XML FILES
Frequently in XML configuration files we found labels of the form “…Manager”.
These labels contain a type of object called Manager that is responsible for handling
lists of different types of objects. Inside the labels of a Manager there is another label
called “_list” and that in turn holds another label also called “_list”. It is inside this
label where user introduces the labels of the objects that make up the list he wants to
handle with the Manager (could be a list of String, AcideLexiconTokenGroup, etc.).
There are java classes for each of the Managers in XML files, which provide
methods to manipulate the lists as adding, removing or getting items from them.
Manager Java classes have an ObjectList type field, which in turn has an ArrayList field
(where user stores the list of objects) and methods for manipulating that list.
To introduce, delete, reorder, etc. elements of the list, just manually edit the XML
document and operate on the labels of each object.
13.2.
PROPERTIES CONFIGURATION
To configure several properties of ACIDE – A Configurable IDE there is a file called
configuration.properties stored in ./configuration. In this file are stored properties
that are not specified in other files. The structure of this file is fixed; user can only edit
the values for each field, but he is not able to add new properties or delete any of the
existing.
The first line of the properties configuration file is:
#ACIDE Configuration
The following line shows the date of the last time the user ran this issue of ACIDE
– A Configurable IDE. Displays the following format:
#Mon May 27 18:16:32 CEST 2013
User’s Manual
120
The following lines show the property name followed by a “=” and the value
assigned to that property with the following structure:
consolePanel.fontName=name of the font of console panel.
workbenchConfiguration=path to XML file that configures the workbench
(Chapter 13.3)
lastOpenedFileDirectory=the folder was last opened. Used to locate the
user in the same folder next time.
javacPath=path of javac.exe.
jarPath=path of jar.exe.
consolePanel.exitCommand=exit command for console.
ed=
consolePanel.fontStyle=style of the font of console panel.
consolePanel.bufferSize=size of buffer of console panel.
previousMenuNewConfiguration=path to XML file that previously
configured ACIDE – A Configurable IDE menu with the new configuration of
version 0.11 (Chapter 13.3.1)
consolePanel.backgroundColor=console
panel
background
color
(numeric valor).
currentMenuConfiguration=path
to
.menuConfig
file
that
was
configurating ACIDE – A Configurable IDE menu with the configuration of
older versions.
consolePanel.shellDirectory=path to the folder where the .exe of console
shell is stored.
console Panel.shellPath=path to the .exe file of console shell.
consolePanel.fontSize=size of the font of console.
previousToolbarConfiguration=path to .toolbarConfig file that previously
configured ACIDE – A Configurable IDE toolbar (Chapter 13.3.2).
currentMenuNewConfiguration= path to XML file that configures ACIDE –
A Configurable IDE menu with the new configuration of version 0.11
(Chapter 13.3.1).
consolePanel.isechoCommand=true or false to define the behaviour of
echo command at console panel.
User’s Manual
121
language=can be English or Spanish.
currentToolbarConfiguration=path to .toolbarConfig file that configures
ACIDE – A Configurable IDE toolbar (Chapter 13.3.2)
previousMenConfiguration=path to .menuConfig file that previously
configured ACIDE – A Configurable IDE menu with the configuration of older
versions.
lastOpenedProjectDirectory=the folder of project was last opened. Used
to locate the user in the same folder the next time he displays a load or save
project dialog.
javaPath=path of java.exe.
projectConfiguration=path to the .acideProject file used to configure
opened project (explained in Chapter 13.4).
consolePanel.foregroundColor=foreground color for console panel
(numeric valor).
consolePanel.parameters=parameters that console panel needs.
13.3.
WORKBENCH CONFIGURATION
The workbench is all the space where user works with files. It contains the Menu
Bar, the Tool Bar, the Explorer Panel, the File Editor, the Console Panel and the
Database Panel.
The XML file that configures the workbench must be saved in the path
./configuration/workbench.
The root label of this file is:
<acide.configuration.workbench.AcideWorkbenchConfiguration>
to reference the Java class AcideWorkBenchConfiguration.
Inside this root label there are six basic labels:
<_workbenchLoaded>: with true value identifies if the configuration XML
file has been loaded.
<fileEditorConfiguration>: inside this label there are others nested labels
with the configuration of the file editor (explained in Chapter 13.3.3).
User’s Manual
122
<_consolePanelConfiguration>: inside this label there are others nested
labels with the configuration of the console panel (explained in Chapter
13.3.4.
<_lexiconAssignerConfiguration>: inside this label there are others
nested labels with the configuration of lexicons for different extensions and
lexicon applied to console (lexiconAssignerConfiguration explained in
Chapter 13.3.5).
<_recentFilesConfiguration>: inside this label there is a list (inside a _list
label) of Strings with the paths of files opened recently.
<_recentProjectsConfiguration>: inside this label there is a list (inside a
_list label) of Strings with the paths of projects opened recently.
13.3.1.
MENU CONFIGURATION
The Menu Bar is the element situated at the top of Workbench. It contains as
default the submenus File, Edit, Project, View, Configuration and Help. The Menu
Bar provides user to do the most of actions that are provided in ACIDE – A
Configurable IDE.
The root label of this file is:
<acide.configuration.menu.AcideMenuItemsConfiguration>
to reference the Java class AcideMenuItemsConfiguration.
Inside this label there is only one basic label, _itemsManager. This label has two
nested
_list
labels.
Inside
of
the
most
nested
there
are
the
acide.configuration.menu.AcideMenuSubmenuConfiguration objects that define the
basic menus that exit on Menu Bar. They have the following nested labels:
<_name>: the name of the submenu.
<_visible>: with true or false value. It sets if submenu is visible or not.
<_erasable>: with true or false value. It sets if submenu is erasable or not
erasable (it is a default submenu).
<_image>: for submenus this label is empty.
<_itemsManager>: it is equal to root _itemsManager label. It contains all
the menu objects that are inside the submenu.
User’s Manual
123
For the menu items the label is AcideMenuItemConfiguration. They have the
following nested label:
•
<_visible>: with true or false value. It sets if item is visible or not.
<_erasable>: with true or false value. It sets if item is erasable or not
<_name>: the name of the item.
erasable (it is a default item).
<_image>: the path of its image icon.
<_command>: the command will be run when user click on this menu item.
<_parameter>: the type of parameter that command needs to run. It can be
NONE, TEXT, FILE, or DIRECTORY.
User can insert, delete, reorder, etc. AcideMenuObjectConfiguration labels
(AcideMenuSubmenuConfiguration and AcideMenuItemConfiguration both are
subclasses of AcideMenuObjectConfiguration) inside the root label to manage the
configuration of the Menu Bar.
13.3.2.
TOOLBAR CONFIGURATION
The Tool Bar is situated below the Menu Bar. In the Tool Bar appear several
buttons for typical actions with files and projects. It also contains buttons that user
configures to send commands to shell and to launch external applications.
Toolbar configuration is done in .toolbarConfig files. These files are divided in two
parts, one part that stores settings of buttons for the toolbar that paste code on the
console to be run, and other part for configuration of buttons to launch external
applications.
To configure buttons to send commands to the console, each configuration of a
button should be headed by a comment line (starting with //) and consists of six lines
with the following structure:
name = name displayed.
action = command to run on the console.
hintText = help text displayed when user puts mouse over the button.
icon = path of the image for the button.
User’s Manual
124
parameterType = type of the parameter that the command uses on
console. It can be:
o NONE
o TEXT
o FILE
o DIRECTORY
isExecutedInSystemShell = if is executed in the system or not.
Once the list of command buttons is ended, user has to enter the following line
in the file, in order to indicate that the following settings are for buttons that
launch external applications:
//End of Console Panel Tool Bar Button Configuration
Configurations of buttons that launch applications must be headed by a comment
line (starting with //) followed by four lines of properties:
name = name displayed.
path = path to run.
hintText = help text displayed when user puts the mouse over the button.
icon = path of the image for the button.
Once the list of command buttons is ended, user has to enter the following line
in the file, in order to indicate that configuration of buttons that launch external
applications is ended:
//End of External Applications Tool Bar Button Configuration
User’s Manual
125
13.3.3.
FILE EDITOR CONFIGURATION
The File Editor is where user can edit the content of the files. It contains a tab pane
where the opened files are displayed.
The File Editor is configured by a label in the XML file that configures the
Workbench (explained on Chapter 13.3). Inside this label the user can find the
information needed to configure File Editor. The labels are:
_fileEditorConfigurationList: acts like a Manager (explained on Chapter
13.1)
including
two
nested
_list
labels
with
AcideFileEditorPanelConfiguration objects. These objects store information
about files which must be shown opened at File Editor next time the
application will be opened.
_selectedFileEditorPanelName: the name of the file which is shown at the
File Editor.
_fontName: the font name of the text of File Editor.
_fontStyle: font style of the text of File Editor.
_fontSize: font size of the text of File Editor.
_foregroundColor, backgroundColor: RGB components of font color and
background color.
_editionMode: with false value, edition mode is INSERT, with true value it
is OVERWRITE.
_automaticIndent: with true value, automatic indent, with false value,
manual indent.
_maximumLinesToConsole: the maximum number of lines that can be
sent to the console at the same time.
_lineWrapping: with true value, sets on line wrapping, with false value,
sets off line wrapping.
_sendToConsoleConfirmation:
with
true
value,
system
needs
confirmation to send content of file to console. With false value, file content
is sent without confirmation.
User’s Manual
126
13.3.4.
CONSOLE PANEL CONFIGURATION
At Console Panel content of shell connected with the application is displayed.
It has two labels:
_lexiconConfiguration: path of lexicon which is used at console.
_commandsConfiguration: path of XML file that contains commands
history with which we want to start the console (explained in Chapter 13.6).
Sdvsvs
13.3.5.
LEXICONASSIGNER CONFIGURATION
It has three basic labels:
_list: acts like a Manager, inside there is a _list label with another _list label
nested. It is a list of AcideLexiconAssigner objects. These objects describe
possible lexicons to use at console. They have the following nested labels:
o _description: name of lexicon.
o _extensionList: it has a group of nested String labels with the
possible extensions for the lexicons.
o _lexiconConfiguration: path of XML file that configures lexicon.
_consoleLexiconConfiguration: path of XML file that configures lexicon
which is currently in use.
_applyLexiconToConsole: with true value lexicon is applied to console,
with false value it is not applied.
13.4.
PROJECT CONFIGURATION
Project configuration is edited in .acideProject files. In this type of files are
arranged in separate lines different project properties. These are, line by line, the
following:
1.
2.
3.
4.
5.
Project Name
Project Path
Compiler Path
Compiler Arguments
Compiler All Files
User’s Manual
127
6. File separator
7. File extensión
8. Executable path
9. Executable arguments
10. Console panel Shell path
11. Console panel Shell directory
12. Console panel exit command
13. Console panel is echo command
14. Console panel parameters
15. Console panel foreground color
16. Console panel background color
17. Console panel Font name
18. Console panel Font style
19. Console panel Font size
20. Console panel buffer size
21. Is explorer panel showed flag
22. Is console panel showed flag
23. ACIDE - A Configurable IDE main
24. ACIDE - A Configurable IDE main
25. ACIDE - A Configurable IDE main
26. ACIDE - A Configurable IDE main
27. ACIDE - A Configurable IDE main
28. ACIDE - A Configurable IDE main
29. Language configuration
30. Database panel configuration
31. Menu configuration
32. Menu new configuration
33. Tool bar configuration
34. Number of files of the project
window
window
window
window
window
window
width
height
x coordinate
y coordinate
vertical split
horizontal split
The following lines show the properties of the project files. For each file there are
seven lines of text storing the file properties. Therefore, there will be many groups of
seven lines in the configuration file as indicated at line number 34. The properties are
as follows:
Absolute path.
Name.
Parent.
Directory flag.
Compilable flag.
Main flag.
Opened flag.
User’s Manual
128
13.5.
CONFIGURATION OF LEXICONS
Lexicons can be configured by manually editing XML files that define them.
A XML file that defines a lexicon begins with the root label:
<acide.configuration.lexicon.AcideLexiconConfiguration>
to reference the class AcideLexiconConfiguration. Inside this root label there are
seven basic tags:
_name: defines the name of the lexicon.
_path: indicates the relative path of this file.
_isCompiledOrInterpreted: a false value indicates that the lexicon is
compiled and true indicates that it is interpreted.
_tokenTypeManager: it is a Manager (explained on Chapter 13.1) of the
types of token there are in the lexicon. It consists of a list of objects
AcideLexiconTokenGroup.
_validExtensionsManager: it is a Manager of valid extensions of files at the
lexicon defined in the XML document. The extensions are String objects.
_delimitersManager: it is a Manager of valid delimiters at the lexicon
defined in the XML document. The delimiters are String objects.
_remarksManager: it is not a common Manager. It defines the symbol to
mark a line as a comment in the lexicon. It has four nested labels:
o _symbol: defines the symbol to use to begin a comment line.
o _isCaseSensitive: defines (true or false value) if it is case sensitive.
o _color: defines color of the comments. It has four nested tags (red,
blue, green, alpha) that define the RGB components and the degree of
opacity of the comments.
o _fontStyle: defines the font style of comments.
13.5.1.
TOKENTYPE MANAGER
This label has two nested _list labels. Inside of the most nested there are the
AcideLexiconTokenGroup objects that define the token types in the lexicon. The
AcideLexiconTokenGroup objects have five nested labels:
User’s Manual
129
_name: it is a summary of the properties defined by the remaining labels. It
has the following form:
o Color: [R: _, G: _, B: _], Font Style: __, Case Sensitive: _
o For color will take the values defines in the label _color. In Font Style
appears the name that corresponds to the number defined on the
label _fontStyle. In Case Sensitive value yes appears if the label _IsCaseSensitive is true and value not if the label _IsCaseSensitive has
value false.
_color: same structure as explained for _color label above.
_fontStyle: it defines with a number the font style.
_isCaseSensitive: it defines by true or false value if it is case sensitive.
_tokenList: contains a label called _list where appears the list of String
objects which define the tokens with the properties user has described for
this token group. Adding, removing and editing these strings the user will
get the list of tokens.
13.5.2.
VALIDEXTENSION MANAGER
As a Manager, it has two nested _list labels. Inside the last the user can find String
objects labels where he can define extensions valid for the lexicon.
13.5.3.
DELIMITERS MANAGER
It is a Manager whose list contains String objects. With the strings the user defines
the valid delimiters for the lexicon.
13.6.
COMMANDS HISTORY
In ACIDE – A Configurable IDE is possible to configure a commands history so that
when user starts the application already exits this history, similar to when he gets
commands entered earlier in the same run.
The XML file that contains the commands history must be saved in the path
./configuration/console.
The root label of this file is:
User’s Manual
130
<acide.configuration.console.AcideConsoleCommandsConfiguration>
to reference the AcideConsoleCommandsConfiguration class.
Inside this label user has to define another label of Manager
type called
_commandsManager.
As usual at Managers, there are two nested _list. Inside the last the user defines by
String labels the commands he wants to introduce in the commands history. The first
command at the list acts like the less recently entered at the console.
User’s Manual
131
14.REGULAR EXPRESSIONS
A regular expression, often called pattern, is an expression that describes a set of
strings without listing their elements. Most formalizations provide the following
constructors: a regular expression is a way of representing regular languages (finite
or infinite) and is constructed using alphabet characters on which the language is
defined. Regular expressions provide a flexible way to search or recognize strings.
14.1.
CONSTRUCTION OF REGULAR EXPRESSIONS
Specifically, regular expressions are built using the operators union,
concatenation and Kleene closure.
Alternation: A vertical bar separates alternatives. For example,
“red|brown“joins with red or brown.
Quantification: A quantifier after a character specifies the frequency with
which this can occur. The most common quantifiers +, ? and *:
o +: The plus sign indicates that the preceding character must appear
at least once. For example, hello+ joins hello, helloo, hellooo, etc.
o ?: The question mark indicates that the preceding character can
appear at most once. For example, S?pain joins Spain and pain.
o : The asterisk indicates that the preceding character can appear
zero, one, or more times. For example 10 joins 1, 10, 100, 1000,
etc.
Grouping: Parentheses may be used to define the scope and precedence of
other operators. For example, “(m|h)ouse” is the same as “mouse | house”
and “(in)?sensitive” joins with insensitive and sensitive.
Builders can be freely combined within the same expression, so “H (ae? | ä) del” is
the same as “H (a |ae | ä) del”.
Its most obvious use is to describe a set of strings, which is useful in text editors
and applications for searching and manipulating text.
User’s Manual
132
14.2.
DESCRIPTION OF REGULAR EXPRESSIONS
14.2.1.
THE DOT “.”
The dot is interpreted by the search engine as “any character”, looking for any
character NOT including line breaks.
The dot is used as follows: If we search “g.t” in the string “gat get got goot” the
search engine will find “gat” “get” “got”. Note that the search engine don’t find “goot”,
this is because the dot represents a single character and only one.
14.2.2.
THE BACKSLASH “\”
It is used to “tag” the next character in the search expression so that it acquires a
special meaning or stop having him. The backslash is never used by itself, but in
combination with other characters. Used for example in combination with the point
“\.”, this has not its normal meaning and behaves as a literal character.
In the same way, placing a backslash followed by any of the special characters
discussed below, these do not have special meaning and become literal search
characters.
As mentioned previously, the backslash can also give special meaning to
characters that do not. Below is a list of some of these combinations:
\t: represents a tab.
\r: represents the carriage return or return to top, the place where the line
starts again.
\n: represents the new line character through which a line begins.
Remember that in Windows is needed a combination of \r\n to start a new
line, while Unix uses only \n and classic Mac OS uses only \r.
\a: represents a bell or beep that occurs when you print this character.
\e: represents the Esc or Escape.
\f: represents a page break.
\v: represents a vertical tab.
\x: is used to represent ASCII or ANSII code.
\u: is used to represent UNICODE characters with its code.
User’s Manual
133
\d: represents a digit from 0 to 9.
\w: represents any alphanumeric character.
\s: represents a blank space.
\D: any character other than a digit from 0 to 9.
\W: represents any non-alphanumeric character.
\S: any character other than a blank.
\A: represents the beginning of the string. Not a character but a position.
\Z: represents the end of the string. Not a character but a position.
\b: marks the beginning and end of a word.
\B: marks position between two alphanumeric or non-alphanumeric
characters.
14.2.3.
THE BRACKETS “[]”
The function of the brackets in regular expressions is to represent “character
class”, grouping characters into groups or classes. They are useful when is needed to
find one of a group of characters. Within the brackets you can use the “-“ to specify
ranges of characters. Additionally, the metacharacters lose their meaning and become
literal when they are inside the brackets. For example, as mentioned previously, “\d”
is useful to find any character that represents a digit. However, this name does not
include the “.” dividing the decimal part of a number. To search for any character that
represents a digit or a point we can use the regular expression “[\d.]”. As noted above,
within the brackets, the point represents a literal character, not a metacharacter, so it
is not necessary to precede the backslash. The only character that must be preceded
by the backslash inside the brackets is the backslash.
14.2.4.
THE BAR “|”
Used to indicate one of several options. For example, the regular expression “a|e”
find all “a” or “e” in the text. The regular expression “East|West|North|South” will find
any of the names of the cardinal points. The bar is commonly used in conjunction with
other special characters.
User’s Manual
134
14.2.5.
THE DOLLAR SIGN “$”
Represents the end of the string or the end of the line when using the multi-line
mode. There is not a special character, but a position. Using the regular expression
“\.$” the engine will find all the places where a line ends with a dot, which is useful for
moving between paragraphs.
14.2.6.
THE CARET “^”
This character has a dual function, which differs when used alone and when used
in conjunction with other special characters. Firstly its functionality as an individual
character: the character “^” represents the beginning of the chain (in the same way
that the dollar sign “$” represents the end of the string). Therefore, using the regular
expression “^[a-z]” the engine will find all paragraphs beginning with a lowercase
letter. When used in conjunction with the brackets, for example with the form
“[^\w]”, is useful to find any character that is not in the indicated group. The above
expression can found any character that is not alphanumeric or a space, all
punctuation and other special characters.
14.2.7.
PARENTHESES “()”
Similarly to the brackets, parentheses are used to group characters. However,
there are several differences between groups established by brackets and groups
established by parentheses:
Special characters keep their meaning within the parentheses.
Groups established by parentheses make a label for the search engine that
can be used later as denoted below.
Used in conjunction with bar “|” enables optional searches. For example, the
regular expression “to (East | West | North | South) of” searches texts giving
instructions through cardinal points, while the regular expression “East |
West | North| South” find “east” in the word “beast”, failing to fulfill this
purpose.
Used in conjunction with other special characters listed below provide
additional functionality.
User’s Manual
135
14.2.8.
THE QUESTION MARK “?”
The question mark has several features in regular expressions. The first is to
specify which part of the search is optional. For example, the regular expression
“S?pain” can find both “pain” and “Spain”. In conjunction with parentheses specifies
that a larger set of characters is optional, for example, “Nov(\.|ember|iembre)?” finds
both “Nov.”, “November” and “Noviembre”. Similarly, you can use the question mark
with another meaning. Parentheses define groups “anonymous”, but the question
mark in conjunction with triangular brackets “<>” give name to such groups as
follows:
“^(?<Day>\d\d)/(?<Month>\d\d)/(?<Year>\d\d\d\d)$”
Whereupon
it
specifies to the search engine that the first two digits found will be labeled “Day”, the
second will be labeled “Month” and the last four digits will be labeled “Year”.
14.2.9.
THE BRACES “{}”
Usually the braces are literal characters which are used separately in a regular
expression. To be used as metacharacters they have to enclose one or more numbers
separated by commas and to be placed to the right of another regular expression as
follows: “\d{2}”. This expression will find two adjacent digits. Using this formula, the
example “^\d\d/\d\d/\d\d\d\d$” that served to validate a date format will become
to “^\d{2}/\d{2}/\d{4}$” for clarity in reading the expression.
14.2.10.
THE ASTERISK “*”
The asterisk is used to find something that is repeated 0 or more times. For
example, using the expression “[a-zA-Z]\d*” will be possible to find both “H” and
“H1”, “H01”, “H100” and “H1000”, a letter followed by a indefinite number of digits.
14.2.11.
THE PLUS SIGN “+”
It is used to find a string that is repeated one or more times. The expression “[azA-Z]\d+” will find “H1” but will not find “H”.
User’s Manual
136