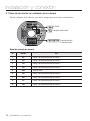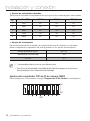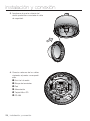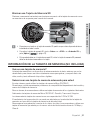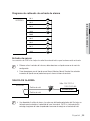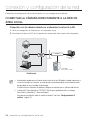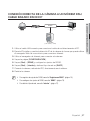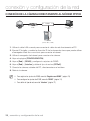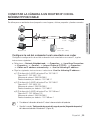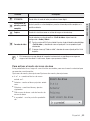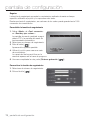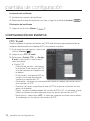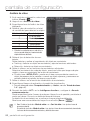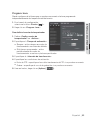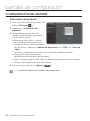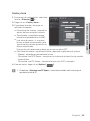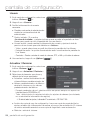
1
CÁMARA DE RED Manual del usuario SNP-3430H Cámara de red Manual del usuario Copyright ©2010 Samsung Techwin Co., Ltd. Reservados todos los derechos. Marca comercial es el logotipo registrado de Samsung Techwin Co., Ltd. El nombre de este producto es la marca comercial registrada de Samsung Techwin Co., Ltd. Otras marcas comerciales mencionadas en este manual son la marca comercial registrada de sus respectiva compañía. Restricción Samsung Techwin Co., Ltd se reserva los derechos de copyright de este documento. Bajo ninguna circunstancia, este documento podría reproducirse, distribuirse o modificarse, en parte o en su totalidad, sin la autorización formal de Samsung Techwin. Renuncia Samsung Techwin hace lo máximo por verificar la integridad y exactitud del contenido de este documento, pero no se proporciona ninguna garantía formal. El uso de este documento y los resultados posteriores será total responsabilidad del propio usuario. Samsung Techwin se reserva el derecho a cambiar el contenido de este documento sin aviso previo. Garantía Si el producto no funciona debidamente en condiciones normales, díganoslo. Samsung Techwin resolverá el problema gratuitamente. El período de garantía es de 3 años. No obstante, se excluye lo siguiente: • Si el sistema se comporta de forma anormal porque ejecuta un programa irrelevante para el sistema operativo. • Pérdida de rendimiento o recursos agotados de forma natural en el procesamiento del tiempo descripción INSTRUCIONES DE SEGURIDAD IMPORTANTES 1. Lea estas instrucciones. 2. Consérvelas. 4. Siga todas las instrucciones. 5. No utilice este aparato cerca del agua. 6. Límpielo únicamente con un paño seco. 7. No obstruya ninguna apertura de ventilación. Instale el aparato siguiendo las instrucciones del fabricante. 8. No lo instale cerca de ninguna fuente de calor como radiadores, focos de calor o cualquier otro aparato (incluidos los amplificadores) que emita calor. 9. No olvide que la finalidad de los enchufes polarizados o de toma a tierra es proporcionarle seguridad. Un enchufe polarizado tiene dos clavijas, una más ancha que la otra. Un enchufe con toma a tierra tiene dos clavijas y una tercera de toma a tierra. Tanto la clavija más ancha, en el caso del enchufe polarizado, como la clavija adicional, en el caso del enchufe con toma a tierra, tienen como objetivo aportarle seguridad. Si el enchufe del aparato no encaja en su toma de corriente, póngase en contacto con un electricista para cambiar la toma de corriente obsoleta. 10. Evite pisar o doblar el cable de alimentación. Ponga especial cuidado para no hacerlo en enchufes, tomas de corriente y en los puntos en los que salen desde el aparato. 11. Utilice únicamente los dispositivos y accesorios especificados por el fabricante. 12. Utilice sólo las mesitas con ruedas, soportes, trípodes o mesas recomendadas por el fabricante o vendidas con el aparato. Cuando se utilice una mesita con ruedas, tenga cuidado al mover la mesita con ruedas junto con el aparato para evitar daños por vuelco. 13. Desenchufe este aparato durante tormentas eléctricas o cuando no se utilice durante largos períodos de tiempo. 14. Remita todas las reparaciones a personal de mantenimiento cualificado. Es necesario enviar el aparato para su reparación cuando ha sufrido cualquier tipo de daño, como, por ejemplo, que el cable o el enchufe de la alimentación está dañado, se han derramado líquidos sobre el aparato o algún objeto ha caído sobre él, el aparato ha sido expuesto a la lluvia o a humedad, no funciona correctamente o se ha caído al suelo. Español _3 ● DESCRIPCIÓN 3. Atente para todas las advertencias. descripción ADVERTENCIA PARA REDUCIR EL RIESGO DE INCENDIO O DESCARGA ELÉCTRICA, MANTENGA ESTE DISPOSITIVO LEJOS DE LLUVIA Y/O LA HUMEDAD. NO INSERTE NINGÚN OBJETO METÁLICO EN LAS REJILLAS DE VENTILACIÓN NI EN NINGUNA ABERTURA DEL EQUIPO. No debe exponer el aparato a gotas ni salpicaduras de agua ni a objetos con líquido, como jarrones, evitando colocarlos sobre el aparato. PRECAUCIÓN PRECAUCIÓN NO ABRIR RIESGO DE SUFRIR UNA DESCARGA ELÉCTRICA PRECAUCIÓN : PARA REDUCIR EL RIESGO DE SUFRIR UNA DESCARGA ELÉCTRICA, NO RETIRE LA CUBIERTA (NI LA PARTE POSTERIOR). DENTRO NO HAY PIEZAS QUE PUEDAN SER REPARADAS POR EL USUARIO. REMITA EL APARATO A PERSONAL DE MANTENIMIENTO CUALIFICADO. EXPLICACIÓN DE LOS SÍMBOLOS GRÁFICOS Un triángulo con un rayo y una punta de flecha es un símbolo de advertencia para avisar al usuario de la presencia de “voltajes peligrosos” dentro de la carcasa del producto que pueden ser lo suficientemente intensas como para constituir un peligro de descarga eléctrica. Un triángulo con un signo de exclamación es un símbolo de advertencia para avisar al usuario de que hay instrucciones importantes de funcionamiento y mantenimiento (reparaciones) en la documentación que acompaña al aparato. 4_ descripción PRECAUCIÓN El puerto de salida BNC se utiliza para controlar el proceso de instalación de la cámara de red. Si mantiene el cable BNC conectado, una tormenta eléctrica puede causar daños o averías en el producto. Precauciones sobre la temperatura de funcionamiento 1. El producto no funciona con una temperatura ambiental que esté por debajo de -50˚C. 2. Es posible que la descongelación no funcione por debajo de -50˚C dependiendo del lugar de instalación. 3. Mantenga el producto encendido en todo momento de forma que la temperatura anterior permanezca por encima de -10˚C. 4. Incluso cuando caliente el producto hasta alcanzar los -20˚C después de tenerlo por debajo de -50˚C, el producto no genera la salida de señal de video y solo muestra la pantalla azul durante 30 minutos antes de reiniciar el módulo de zoom, durante el cual el producto no funciona con normalidad. A continuación, intenta inicializar el modulo del objetivo cada 30 minutos hasta que la temperatura dentro del producto aumenta hasta alcanzar la temperatura de funcionamiento normal. Español _5 ● DESCRIPCIÓN Estas instrucciones de servicio están destinadas únicamente a personal de servicio técnico cualificado. Para reducir el riesgo de descarga eléctrica no realice ninguna operación de servicio que no sean las indicadas en las instrucciones de funcionamiento a menos que esté cualificado para hacerlo. descripción Lea detenidamente las precauciones de seguridad recomendadas que se incluyen a continuación. No coloque este aparato sobre una superficie desigual. No lo instale en una superficie expuesta a la luz directa del sol, cerca de equipos de calefacción ni cerca de áreas frías. No coloque este aparato cerca de material conductivo. No intente reparar este aparato por sí solo. No coloque jarrones sobre el producto. No lo instale cerca de fuentes magnéticas. No bloquee las aberturas de ventilación. No coloque objetos pesados sobre el producto. El Manual del usuario es una guía sobre cómo utilizar los productos El significado de los signos que se utilizan en el manual es el siguiente y Referencia : en caso de que se facilite información de ayuda sobre el uso del producto y Aviso : si existe alguna posibilidad de que se produzcan daños en bienes o lesiones en personas causadas por no seguir las instrucciones Ú Lea este manual por razones de seguridad antes de utilizar los productos y guárdelo en un lugar seguro. 6_ descripción Eliminación correcta de este producto (Residuos de aparatos eléctricos y electrónicos) (Aplicable en la Unión Europea y en países europeos con sistemas de recogida selectiva de residuos) La presencia de este símbolo en el producto, accesorios o material informativo que lo acompañan, indica que al finalizar su vida útil ni el producto ni sus accesorios electrónicos (como el cargador, cascos, cable USB) deberán eliminarse junto con otros residuos domésticos. Para evitar los posibles daños al medio ambiente o a la salud humana que representa la eliminación incontrolada de residuos, separe estos productos de otros tipos de residuos y recíclelos correctamente. De esta forma se promueve la reutilización sostenible de recursos materiales. Los usuarios particulares pueden contactar con el establecimiento donde adquirieron el producto o con las autoridades locales pertinentes para informarse sobre cómo y dónde pueden llevarlo para que sea sometido a un reciclaje ecológico y seguro. Los usuarios comerciales pueden contactar con su proveedor y consultar las condiciones del contrato de compra. Este producto y sus accesorios electrónicos no deben eliminarse junto a otros residuos comerciales. Español _7 ● DESCRIPCIÓN Samsung Techwin respeta el medio ambiente durante todo el proceso de fabricación de sus productos y realiza una serie de procedimientos orientados a ofrecer productos ecológicos. El símbolo Eco representa el compromiso de Samsung Techwin de fabricar productos que respeten el medio ambiente e indica a la vez que este equipo cumple con la Directiva de la Unión Europea EU RoHS. descripción ÍNDICE GENERAL DESCRIPCIÓN 3 3 10 10 11 12 INSTALACIÓN Y CONEXIÓN 16 25 30 16 31 CONEXIÓN Y CONFIGURACIÓN DE LA RED 36 32 36 37 38 39 40 41 44 45 47 47 8_ descripción Instruciones de Seguridad Importantes Características del Producto Características Recomendadas del Ordenador Componentes Vista Ajuste del Interruptor DIP Instalación Nsertar/Eliminar una Tarjeta de Memoria SD Información de la Tarjeta de Memoria (No Incluida) Conexión con otros Dispositivos Conectar la Cámara Directamente a la red de Área Local Conexión Directa de la Cámara a un Módem DSL/Cable Basado en DHCP Conexión de la Cámara Directamente al módem PPPoE Conectar la Cámara a un Router IP con el módem PPPoE/Cable Botones Utilizados en IP Installer Configuración de IP Estática Configuración de IP Dinámica Configuración de Reenvío del Rango de Puertos (Asignación de Puertos) Conexión a la Cámara Desde un PC local Compartido Conexión a la Cámara Desde un PC Remoto a Través de Internet WEB VIEWER 48 48 49 50 52 PANTALLA DE CONFIGURACIÓN 58 APÉNDICE 89 58 58 72 78 84 Configuración Configuración de Audio y Vídeo Configuración red Configuración de Eventos Configuración del Sistema 89 94 95 97 99 Especificaciones Vista del Producto Solución de Problemas Open Source Announcement GPL/LGPL Software License Español _9 ● DESCRIPCIÓN 56 57 Conexión a la Cámara Inicio de Sesión Instalación de Silverlight Runtime Utilización de la Pantalla en Directo Reproducción Reproducción de Grabaciones de Copias de Seguridad descripción CARACTERÍSTICAS DEL PRODUCTO y Flujo de datos múltiple : H.264/MPEG-4/MJPEG Esta cámara de red admite el códec para H.264/MPEG-4/MJPEG y puede mostrar vídeos en diferentes resoluciones y calidades de forma simultánea con diferentes códecs. M No obstante, el vídeo MPEG4 no se puede reproducir en una página Web. Utilice el software CMS para reproducir vídeo en una página Web. y Soporte de varios protocolos de comunicación Admite TCP/IP, UDP, RTP/RTSP para correo electrónico y protocolos FTP así como diversos protocolos de Internet como ARP, HTTP, HTTPS y DHCP. y Supervisión basada en el Explorador Web Utilización de un explorador web de Internet para mostrar la imagen en un entorno de red local. y Función de alarma. Si se produce un evento, el vídeo relacionado con el evento se transferirá al FTP/email especificado por el usuario o se guardará en la memoria SD, o la señal del evento se enviará al puerto de salida de alarma. y Compatibilidad con ONVIF (Spec 1.01) Este producto admite las especificaciones principales de ONVIF. 1. 01. Para más información, consulte www.onvif.org. CARACTERÍSTICAS RECOMENDADAS DEL ORDENADOR y CPU : Intel(R) Core(TM)2 2.00 GHz o superior y Sistema operativo : Windows XP, VISTA, 7 Mac OS y Resolución : 1280X1024 pixeles o superior y RAM : 1GB o superior y Navegador Web : Internet Explorer 6.0 o superior Firefox, Google Chrome, Safari y Memoría de Vídeo : 128MB o superior 10_ descripción COMPONENTES Compruebe si la cámara y los accesorios se incluyen en el paquete del producto. Aspecto Cantidad Descripción Manual del usuario Software del instalador DVD del software de CMS 1 Manual de consulta rápida 1 Bloque de terminales de 9 patillas 2 Se utiliza para la conexión de la alarma Bloque de terminales de 4 patillas 1 Se utiliza para comunicaciones RS-485 Bloque de terminales de 3 patillas 1 Se utiliza para la conexión de alimentación Llave en L 1 Se utiliza para retirar/fijar la cubierta del domo ● DESCRIPCIÓN Nombre de elemento Español _11 descripción VISTA Aspecto b c Elemento Descripción Protector solar y Carcasa que protege el mecanismo interno de PTZ de la luz directa del sol, unidad de alojamiento la lluvia o impactos externos. b Cable de seguridad de Evita que la cubierta de domo se caiga. domo c Cubierta de Domo 12_ descripción Cubierta utilizada para proteger la lente y la unidad principal. Interior c m Mecanismo PTZ Interruptor de config. de comunicaciones Interruptor de configuración de ID Puerto de entrada de audio Puerto de salida de audio Puerto de salida de alarma Puerto de entrada de alarma Ranura para tarjeta Micro SD Puerto de comunicaciones Puerto de alimentación m Descripción Controla las operaciones PTZ de la cámara. Ajusta la velocidad de transferencia y los protocolos. Especifica el ID de la cámara. Se utiliza para conectar el cable de entrada de audio. Se utiliza para conectar el cable de salida de audio. Puerto de bloque de terminales que se utiliza para conectar el cable de salida de alarma. Puerto de bloque de terminales que se utiliza para conectar el cable de entrada de alarma. Ranura para tarjeta Micro SD. Se utiliza para comunicaciones RS-485 Aquí se conecta la fuente de alimentación Calentador Descongela la cubierta del domo con bajas temperaturas aumentando la temperatura interna del alojamiento. Ventilador Descongela la cubierta del domo y elimina la humedad. Conexiones de red Puerto de cable de red. Español _13 ● DESCRIPCIÓN Elemento b b c instalación y conexión ❖ Placa de la interfaz de cableado de la cámara Para el cableado de la cámara, consulte la imagen que se incluye a continuación. RS-485 Puerto de alimentación Puerto de entrada /salida de alarma Señal de entrada de alarma Nº Nombre 1 IN1 Puerto 1 de sensor de entrada de alarma 1 2 IN2 Puerto 1 de sensor de entrada de alarma 2 3 IN3 Puerto 1 de sensor de entrada de alarma 3 4 IN4 Puerto 1 de sensor de entrada de alarma 4 5 GND Toma de Tierra 6 IN5 Puerto 1 de sensor de entrada de alarma 5 7 IN6 Puerto 1 de sensor de entrada de alarma 6 8 IN7 Puerto 1 de sensor de entrada de alarma 7 9 IN8 Puerto 1 de sensor de entrada de alarma 8 14_ instalación y conexión Uso Señal de salida de alarma Nº Nombre Uso OUT1 SALIDA DE ALARMA 1 OUT1 SALIDA DE ALARMA 1 3 OUT2 SALIDA DE ALARMA 2 4 OUT2 SALIDA DE ALARMA 2 5 DUMMY 6 OUT3 SALIDA DE ALARMA 3 7 OUT3 SALIDA DE ALARMA 3 8 OUT4 SALIDA DE ALARMA 4 9 OUT4 SALIDA DE ALARMA 4 ● DESCRIPCIÓN 1 2 No se utiliza Señal de comunicación RS-485 Nº Nombre 1 RS485+ Línea de datos del controlador Uso 2 RS485- Línea de datos del controlador 3 RS485+ Línea de datos del controlador 4 RS485- Línea de datos del controlador Puerto de alimentación Nº. Nombre Uso 1 AC 24V CA 2 F.G Línea de tierra 3 AC 24V CA M El adaptador de suministro eléctrico (CA) no tiene polaridades. J La capacidad máxima del puerto de salida de alarma es de 30V CC/1A, 125V CA/0,5A. Al conectar la cámara a un producto externo con una mayor potencia nominal, utilice un dispositivo de relés independiente para garantizar el funcionamiento adecuado. Para evitar la posible entrada de rayos mientras se realizan las pruebas de vigilancia, realice la prueba con el terminal FG con toma a tierra. Español _15 instalación y conexión AJUSTE DEL INTERRUPTOR DIP Cómo configurar protocolos y conmutadores DIP de ID Puede controlar diversos ajustes del sistema de la cámara utilizando los conmutadores de comunicación y DIP de ID. Antes de instalar el producto, configure los conmutadores DIP de acuerdo con el entorno de instalación. 1. Ajuste los conmutadores según su entorno de instalación. Para obtener información más detallada sobre la configuración, consulte el diagrama que se incluye en la página siguiente. 2. La cámara puede sufrir una avería si los conmutadores no están totalmente encendidos/ apagados; vuelva a comprobar los conmutadores antes de finalizar la configuración. Conmutador DIP de protocolo de comunicaciones (SW1) 16_ instalación y conexión Conmutador DIP de ID de cámara (SW2) Ajustes del Conmutador DIP de Protocolo de Comunicaciones (Sw1) ON ON Finalidad 1~4 Ajustes de protocolo 5~7 Ajustes de vel. baudios 8 Ajustes de terminación SW1 y Ajustes de protocolo Seleccione un protocolo de comunicaciones para la cámara. Nº. Protocolo SW1-#1 SW1-#2 SW1-#3 SW1-#4 1 DET. AUTOM. OFF OFF OFF OFF 2 SAMSUNG-T ON ON ON OFF 3 PELCO-D ON OFF OFF OFF 4 PELCO-P OFF ON OFF OFF 5 SAMSUNG-E ON ON OFF OFF 6 Panasonic OFF OFF ON OFF 7 GE ON OFF ON OFF 8 AD OFF ON ON OFF 9 VICON OFF OFF OFF ON 10 Honeywell (KD6) ON OFF OFF ON 11 BOSCH OFF ON OFF ON 12 Honeywell (VCLTP) ON ON OFF ON Español _17 ● INSTALACIÓN Y CONEXIÓN OFF Nº de pin de SW1 instalación y conexión y Ajustes de velocidad en baudios Seleccione la velocidad de transferencia de un protocolo de comunicaciones seleccionado. Nº. Baud Rate (BPS) SW1-#5 SW1-#6 SW1-#7 1 2400 OFF OFF OFF 2 4800 ON OFF OFF 3 9600 OFF ON OFF 4 19200 ON ON OFF 5 38400 OFF OFF ON y Ajustes de terminación Para evitar la atenuación de señales de comunicación entre la cámara y el controlador, deben configurarse los elementos del final de la línea con los ajustes de terminación. Posición de entrada de cámara M SW1- #8 Terminación de la ruta más larga ON En la ruta OFF El valor predeterminado se resalta en cada tabla de ajustes. Para utilizar con este producto el controlador de otro fabricante, póngase en contacto con el Servicio postventa o con el Departamento de Tecnología. Ajustes del conmutador DIP de ID de cámara (SW2) Para configurar los ID de cámara, consulte “Diagrama de ID de Cámara” a continuación. ON ON OFF SW2 18_ instalación y conexión y Diagrama de ID de Cámara SW2-#1 ON OFF ON OFF ON OFF ON OFF ON OFF ON OFF ON OFF ON OFF ON OFF ON OFF ON OFF ON OFF ON OFF ON OFF ON OFF ON OFF ON OFF ON OFF ON OFF ON OFF ON SW2-#2 OFF ON ON OFF OFF ON ON OFF OFF ON ON OFF OFF ON ON OFF OFF ON ON OFF OFF ON ON OFF OFF ON ON OFF OFF ON ON OFF OFF ON ON OFF OFF ON ON OFF OFF SW2-#3 OFF OFF OFF ON ON ON ON OFF OFF OFF OFF ON ON ON ON OFF OFF OFF OFF ON ON ON ON OFF OFF OFF OFF ON ON ON ON OFF OFF OFF OFF ON ON ON ON OFF OFF SW2-#4 OFF OFF OFF OFF OFF OFF OFF ON ON ON ON ON ON ON ON OFF OFF OFF OFF OFF OFF OFF OFF ON ON ON ON ON ON ON ON OFF OFF OFF OFF OFF OFF OFF OFF ON ON SW2-#5 OFF OFF OFF OFF OFF OFF OFF OFF OFF OFF OFF OFF OFF OFF OFF ON ON ON ON ON ON ON ON ON ON ON ON ON ON ON ON OFF OFF OFF OFF OFF OFF OFF OFF OFF OFF SW2-#6 OFF OFF OFF OFF OFF OFF OFF OFF OFF OFF OFF OFF OFF OFF OFF OFF OFF OFF OFF OFF OFF OFF OFF OFF OFF OFF OFF OFF OFF OFF OFF ON ON ON ON ON ON ON ON ON ON SW2-#7 OFF OFF OFF OFF OFF OFF OFF OFF OFF OFF OFF OFF OFF OFF OFF OFF OFF OFF OFF OFF OFF OFF OFF OFF OFF OFF OFF OFF OFF OFF OFF OFF OFF OFF OFF OFF OFF OFF OFF OFF OFF SW2-#8 OFF OFF OFF OFF OFF OFF OFF OFF OFF OFF OFF OFF OFF OFF OFF OFF OFF OFF OFF OFF OFF OFF OFF OFF OFF OFF OFF OFF OFF OFF OFF OFF OFF OFF OFF OFF OFF OFF OFF OFF OFF Español _19 ● INSTALACIÓN Y CONEXIÓN ID 1 2 3 4 5 6 7 8 9 10 11 12 13 14 15 16 17 18 19 20 21 22 23 24 25 26 27 28 29 30 31 32 33 34 35 36 37 38 39 40 41 instalación y conexión ID 42 43 44 45 46 47 48 49 50 51 52 53 54 55 56 57 58 59 60 61 62 63 64 65 66 67 68 69 70 71 72 73 74 75 76 77 78 79 80 81 82 83 84 SW2-#1 OFF ON OFF ON OFF ON OFF ON OFF ON OFF ON OFF ON OFF ON OFF ON OFF ON OFF ON OFF ON OFF ON OFF ON OFF ON OFF ON OFF ON OFF ON OFF ON OFF ON OFF ON OFF SW2-#2 ON ON OFF OFF ON ON OFF OFF ON ON OFF OFF ON ON OFF OFF ON ON OFF OFF ON ON OFF OFF ON ON OFF OFF ON ON OFF OFF ON ON OFF OFF ON ON OFF OFF ON ON OFF 20_ instalación y conexión SW2-#3 OFF OFF ON ON ON ON OFF OFF OFF OFF ON ON ON ON OFF OFF OFF OFF ON ON ON ON OFF OFF OFF OFF ON ON ON ON OFF OFF OFF OFF ON ON ON ON OFF OFF OFF OFF ON SW2-#4 ON ON ON ON ON ON OFF OFF OFF OFF OFF OFF OFF OFF ON ON ON ON ON ON ON ON OFF OFF OFF OFF OFF OFF OFF OFF ON ON ON ON ON ON ON ON OFF OFF OFF OFF OFF SW2-#5 OFF OFF OFF OFF OFF OFF ON ON ON ON ON ON ON ON ON ON ON ON ON ON ON ON OFF OFF OFF OFF OFF OFF OFF OFF OFF OFF OFF OFF OFF OFF OFF OFF ON ON ON ON ON SW2-#6 ON ON ON ON ON ON ON ON ON ON ON ON ON ON ON ON ON ON ON ON ON ON OFF OFF OFF OFF OFF OFF OFF OFF OFF OFF OFF OFF OFF OFF OFF OFF OFF OFF OFF OFF OFF SW2-#7 OFF OFF OFF OFF OFF OFF OFF OFF OFF OFF OFF OFF OFF OFF OFF OFF OFF OFF OFF OFF OFF OFF ON ON ON ON ON ON ON ON ON ON ON ON ON ON ON ON ON ON ON ON ON SW2-#8 OFF OFF OFF OFF OFF OFF OFF OFF OFF OFF OFF OFF OFF OFF OFF OFF OFF OFF OFF OFF OFF OFF OFF OFF OFF OFF OFF OFF OFF OFF OFF OFF OFF OFF OFF OFF OFF OFF OFF OFF OFF OFF OFF SW2-#1 ON OFF ON OFF ON OFF ON OFF ON OFF ON OFF ON OFF ON OFF ON OFF ON OFF ON OFF ON OFF ON OFF ON OFF ON OFF ON OFF ON OFF ON OFF ON OFF ON OFF ON OFF ON SW2-#2 OFF ON ON OFF OFF ON ON OFF OFF ON ON OFF OFF ON ON OFF OFF ON ON OFF OFF ON ON OFF OFF ON ON OFF OFF ON ON OFF OFF ON ON OFF OFF ON ON OFF OFF ON ON SW2-#3 ON ON ON OFF OFF OFF OFF ON ON ON ON OFF OFF OFF OFF ON ON ON ON OFF OFF OFF OFF ON ON ON ON OFF OFF OFF OFF ON ON ON ON OFF OFF OFF OFF ON ON ON ON SW2-#4 OFF OFF OFF ON ON ON ON ON ON ON ON OFF OFF OFF OFF OFF OFF OFF OFF ON ON ON ON ON ON ON ON OFF OFF OFF OFF OFF OFF OFF OFF ON ON ON ON ON ON ON ON SW2-#5 ON ON ON ON ON ON ON ON ON ON ON OFF OFF OFF OFF OFF OFF OFF OFF OFF OFF OFF OFF OFF OFF OFF OFF ON ON ON ON ON ON ON ON ON ON ON ON ON ON ON ON SW2-#6 OFF OFF OFF OFF OFF OFF OFF OFF OFF OFF OFF ON ON ON ON ON ON ON ON ON ON ON ON ON ON ON ON ON ON ON ON ON ON ON ON ON ON ON ON ON ON ON ON SW2-#7 ON ON ON ON ON ON ON ON ON ON ON ON ON ON ON ON ON ON ON ON ON ON ON ON ON ON ON ON ON ON ON ON ON ON ON ON ON ON ON ON ON ON ON SW2-#8 OFF OFF OFF OFF OFF OFF OFF OFF OFF OFF OFF OFF OFF OFF OFF OFF OFF OFF OFF OFF OFF OFF OFF OFF OFF OFF OFF OFF OFF OFF OFF OFF OFF OFF OFF OFF OFF OFF OFF OFF OFF OFF OFF Español _21 ● INSTALACIÓN Y CONEXIÓN ID 85 86 87 88 89 90 91 92 93 94 95 96 97 98 99 100 101 102 103 104 105 106 107 108 109 110 111 112 113 114 115 116 117 118 119 120 121 122 123 124 125 126 127 instalación y conexión ID 128 129 130 131 132 133 134 135 136 137 138 139 140 141 142 143 144 145 146 147 148 149 150 151 152 153 154 155 156 157 158 159 160 161 162 163 164 165 166 167 168 169 170 SW2-#1 OFF ON OFF ON OFF ON OFF ON OFF ON OFF ON OFF ON OFF ON OFF ON OFF ON OFF ON OFF ON OFF ON OFF ON OFF ON OFF ON OFF ON OFF ON OFF ON OFF ON OFF ON OFF SW2-#2 OFF OFF ON ON OFF OFF ON ON OFF OFF ON ON OFF OFF ON ON OFF OFF ON ON OFF OFF ON ON OFF OFF ON ON OFF OFF ON ON OFF OFF ON ON OFF OFF ON ON OFF OFF ON 22_ instalación y conexión SW2-#3 OFF OFF OFF OFF ON ON ON ON OFF OFF OFF OFF ON ON ON ON OFF OFF OFF OFF ON ON ON ON OFF OFF OFF OFF ON ON ON ON OFF OFF OFF OFF ON ON ON ON OFF OFF OFF SW2-#4 OFF OFF OFF OFF OFF OFF OFF OFF ON ON ON ON ON ON ON ON OFF OFF OFF OFF OFF OFF OFF OFF ON ON ON ON ON ON ON ON OFF OFF OFF OFF OFF OFF OFF OFF ON ON ON SW2-#5 OFF OFF OFF OFF OFF OFF OFF OFF OFF OFF OFF OFF OFF OFF OFF OFF ON ON ON ON ON ON ON ON ON ON ON ON ON ON ON ON OFF OFF OFF OFF OFF OFF OFF OFF OFF OFF OFF SW2-#6 OFF OFF OFF OFF OFF OFF OFF OFF OFF OFF OFF OFF OFF OFF OFF OFF OFF OFF OFF OFF OFF OFF OFF OFF OFF OFF OFF OFF OFF OFF OFF OFF ON ON ON ON ON ON ON ON ON ON ON SW2-#7 OFF OFF OFF OFF OFF OFF OFF OFF OFF OFF OFF OFF OFF OFF OFF OFF OFF OFF OFF OFF OFF OFF OFF OFF OFF OFF OFF OFF OFF OFF OFF OFF OFF OFF OFF OFF OFF OFF OFF OFF OFF OFF OFF SW2-#8 ON ON ON ON ON ON ON ON ON ON ON ON ON ON ON ON ON ON ON ON ON ON ON ON ON ON ON ON ON ON ON ON ON ON ON ON ON ON ON ON ON ON ON SW2-#1 ON OFF ON OFF ON OFF ON OFF ON OFF ON OFF ON OFF ON OFF ON OFF ON OFF ON OFF ON OFF ON OFF ON OFF ON OFF ON OFF ON OFF ON OFF ON OFF ON OFF ON OFF ON SW2-#2 ON OFF OFF ON ON OFF OFF ON ON OFF OFF ON ON OFF OFF ON ON OFF OFF ON ON OFF OFF ON ON OFF OFF ON ON OFF OFF ON ON OFF OFF ON ON OFF OFF ON ON OFF OFF SW2-#3 OFF ON ON ON ON OFF OFF OFF OFF ON ON ON ON OFF OFF OFF OFF ON ON ON ON OFF OFF OFF OFF ON ON ON ON OFF OFF OFF OFF ON ON ON ON OFF OFF OFF OFF ON ON SW2-#4 ON ON ON ON ON OFF OFF OFF OFF OFF OFF OFF OFF ON ON ON ON ON ON ON ON OFF OFF OFF OFF OFF OFF OFF OFF ON ON ON ON ON ON ON ON OFF OFF OFF OFF OFF OFF SW2-#5 OFF OFF OFF OFF OFF ON ON ON ON ON ON ON ON ON ON ON ON ON ON ON ON OFF OFF OFF OFF OFF OFF OFF OFF OFF OFF OFF OFF OFF OFF OFF OFF ON ON ON ON ON ON SW2-#6 ON ON ON ON ON ON ON ON ON ON ON ON ON ON ON ON ON ON ON ON ON OFF OFF OFF OFF OFF OFF OFF OFF OFF OFF OFF OFF OFF OFF OFF OFF OFF OFF OFF OFF OFF OFF SW2-#7 OFF OFF OFF OFF OFF OFF OFF OFF OFF OFF OFF OFF OFF OFF OFF OFF OFF OFF OFF OFF OFF ON ON ON ON ON ON ON ON ON ON ON ON ON ON ON ON ON ON ON ON ON ON SW2-#8 ON ON ON ON ON ON ON ON ON ON ON ON ON ON ON ON ON ON ON ON ON ON ON ON ON ON ON ON ON ON ON ON ON ON ON ON ON ON ON ON ON ON ON Español _23 ● INSTALACIÓN Y CONEXIÓN ID 171 172 173 174 175 176 177 178 179 180 181 182 183 184 185 186 187 188 189 190 191 192 193 194 195 196 197 198 199 200 201 202 203 204 205 206 207 208 209 210 211 212 213 instalación y conexión ID 214 215 216 217 218 219 220 221 222 223 224 225 226 227 228 229 230 231 232 233 234 235 236 237 238 239 240 241 242 243 244 245 246 247 248 249 250 251 252 253 254 255 SW2-#1 OFF ON OFF ON OFF ON OFF ON OFF ON OFF ON OFF ON OFF ON OFF ON OFF ON OFF ON OFF ON OFF ON OFF ON OFF ON OFF ON OFF ON OFF ON OFF ON OFF ON OFF ON SW2-#2 ON ON OFF OFF ON ON OFF OFF ON ON OFF OFF ON ON OFF OFF ON ON OFF OFF ON ON OFF OFF ON ON OFF OFF ON ON OFF OFF ON ON OFF OFF ON ON OFF OFF ON ON 24_ instalación y conexión SW2-#3 ON ON OFF OFF OFF OFF ON ON ON ON OFF OFF OFF OFF ON ON ON ON OFF OFF OFF OFF ON ON ON ON OFF OFF OFF OFF ON ON ON ON OFF OFF OFF OFF ON ON ON ON SW2-#4 OFF OFF ON ON ON ON ON ON ON ON OFF OFF OFF OFF OFF OFF OFF OFF ON ON ON ON ON ON ON ON OFF OFF OFF OFF OFF OFF OFF OFF ON ON ON ON ON ON ON ON SW2-#5 ON ON ON ON ON ON ON ON ON ON OFF OFF OFF OFF OFF OFF OFF OFF OFF OFF OFF OFF OFF OFF OFF OFF ON ON ON ON ON ON ON ON ON ON ON ON ON ON ON ON SW2-#6 OFF OFF OFF OFF OFF OFF OFF OFF OFF OFF ON ON ON ON ON ON ON ON ON ON ON ON ON ON ON ON ON ON ON ON ON ON ON ON ON ON ON ON ON ON ON ON SW2-#7 ON ON ON ON ON ON ON ON ON ON ON ON ON ON ON ON ON ON ON ON ON ON ON ON ON ON ON ON ON ON ON ON ON ON ON ON ON ON ON ON ON ON SW2-#8 ON ON ON ON ON ON ON ON ON ON ON ON ON ON ON ON ON ON ON ON ON ON ON ON ON ON ON ON ON ON ON ON ON ON ON ON ON ON ON ON ON ON INSTALACIÓN 2. Aplique cinta aislante en la rosca del tubo de la parte superior del alojamiento. Déle 7 vueltas antes de colocar el alojamiento superior en el soporte. Para fijar el alojamiento superior, gire la lengüeta de doble tuerca a la derecha hasta el final. B A ● INSTALACIÓN Y CONEXIÓN 1. Antes de poder conectar los cables, apriete las pestañas A y B del mecanismo PTZ para retirarlo. n p o Español _25 instalación y conexión 3. Asegúrese de que la cubierta del domo queda bien conectada al cable de seguridad. 4. Conecte cada uno de los cables siguientes al puerto correspondiente. ➊ Entr./sal. de audio ➋ Bloque de terminales ➌ Red ➍ Alimentación ➎ Tarjeta Micro SD ➏ RS-485 26_ instalación y conexión 1 6 2 3 4 5 5. Compruebe la dirección del conector de presión del alojamiento superior antes de colocar el mecanismo PTZ en los enganches del alojamiento superior y presione hacia abajo. ● INSTALACIÓN Y CONEXIÓN 6. Para fijar el mecanismo PTZ al alojamiento superior, mantenga presionadas las dos lengüetas hasta que oiga un chasquido. Español _27 instalación y conexión 7. Cierre la cubierta de domo. Asegúrese de que cierra la cubierta del domo en la dirección de la flecha 8. Apriete los tornillos (x4) por orden numérico como se muestra en la figura. M Para mantener el mejor rendimiento de sellado, apriete el tornillo en un par entre 0,5 N·m y 1,0 N·m (0,37 ~ 0,73 lbf·pie). 1 4 3 2 28_ instalación y conexión Accesorios opcionales para la instalación Para una instalación más sencilla, puede adquirir los accesorios opcionales apropiados disponibles. ● INSTALACIÓN Y CONEXIÓN 1. ADAPTADOR DE MONTAJE EN PARED (SCX-300WM) Este adaptador se utiliza para instalar la cámara domo en la pared. 2. ADAPTADOR DE MONTAJE EN TECHO (SCX-300CM) Este adaptador se utiliza para instalar la cámara domo en un techo de hormigón. 3. ADAPTADOR DE MONTAJE EN POSTE (SCX-300PM) Se trata de un adaptador para la instalación del ADAPTADOR DE MONTAJE EN PARED (SCX-300WM) en un poste cuyo diámetro sea mayor de 80 mm. 4. ADAPTADOR DE MONTAJE EN ESQUINA (SCX-300KM) Se trata de un adaptador para la instalación del ADAPTADOR DE MONTAJE EN PARED (SCX-300WM) en una esquina de la pared. Español _29 instalación y conexión NSERTAR/ELIMINAR UNA TARJETA DE MEMORIA SD Insertar una Tarjeta de Memoria SD Como se muestra, afloje el tornillo antes de retirar la tarjeta de memoria SD. Inserte la tarjeta SD en la dirección de la flecha. J No inserte al revés la tarjeta de memoria SD a la fuerza. Si lo hace, podría dañar la tarjeta de memoria SD. 30_ instalación y conexión Eliminar una Tarjeta de Memoria SD Presione suavemente hacia abajo en el extremo expuesto de la tarjeta de memoria como se muestra en el esquema para sacarla de la ranura. Si presiona muy fuerte en la tarjeta de memoria SD, podría ser que saliera disparada de forma incontrolada cuando la suelte. Para retirar la tarjeta de memoria SD, ajuste <Grabar> en <APAG.> en <Grabación SD> y pulse [Aplicar ( )]. (página 79) Si ha guardado datos en la tarjeta de memoria SD, retirar la tarjeta de memoria SD provocará daños en los datos almacenados en la tarjeta. INFORMACIÓN DE LA TARJETA DE MEMORIA (NO INCLUIDA) Qué es una tarjeta de memoria? La tarjeta de memoria es un dispositivo de almacenamiento de datos externo que se ha desarrollado para ofrecer una forma totalmente nueva para grabar y compartir datos de vídeo, audio y texto utilizando dispositivos digitales. Seleccionar una tarjeta de memoria adecuada para usted En esta cámara, puede utilizar las tarjetas de memoria Micro SD/SDHC. Sin embargo, podría experimentar problemas de compatibilidad dependiendo del modelo y marca de la tarjeta de memoria. Para su cámara, le recomendamos utilizar una tarjeta de memoria de los siguientes fabricantes: Fabricantes de tarjetas de memoria Micro SD/SDHC : Sandisk, Transcend, Kingston La cámara admite tarjetas de memoria con una capacidad de 2 GB a 32 GB. El rendimiento de la reproducción se puede ver afectada por la velocidad de la tarjeta de memoria, así que utilice la tarjeta de memoria de alta velocidad. Para asegurar una grabación correcta de los datos de vídeo, le recomendamos utilizar una tarjeta de memoria que admita por lo menos velocidad de lectura/escritura de 10 Mbps y Clase 6. Español _31 ● INSTALACIÓN Y CONEXIÓN J instalación y conexión CONEXIÓN CON OTROS DISPOSITIVOS Alimentación Monitor Ethernet Alimentación eléctrica Compruebe la tensión y la corriente nominal antes de realizar las conexiones. M Potencia nominal Tensión de entrada permitida Consumo de corriente 24V CA 19V ~29V CA 2,5 A Si se utiliza hPoE, el calentador no funcionará en absoluto. Utilice un adaptador si el emplazamiento de la instalación necesita la utilización del calentador. El adaptador se vende por separado. 32_ instalación y conexión Comunicaciones RS-485 Para controlar el funcionamiento de PTZ, conecte esta línea al DVR. Para controlar varias cámaras al mismo tiempo, las comunicaciones RS-485 deben configurarse en paralelo como se indica a continuación: ● INSTALACIÓN Y CONEXIÓN Controlador del teclado / DVR RS-485 #1 #2 #n Conexión de vídeo Realice la conexión de vídeo utilizando el cable coaxial BNC. J El puerto de salida BNC sólo se utiliza para controlar el proceso de instalación de la cámara de red. Si mantiene el cable BNC conectado, una tormenta eléctrica puede causar daños o averías en el producto. Español _33 instalación y conexión Conectar la Entrada/Salida de Audio Amp Micrófono Micrófono Amp Altavoces 1. Conecte el puerto AUDIO IN de la cámara con el micrófono directamente o al puerto SALIDA DE LÍNEA del amplificador al que está conectado el micrófono. 2. Conecte el puerto AUDIO OUT de la cámara con el puerto ENTRADA DE LÍNEA del altavoz. 3. Compruebe las especificaciones de entrada de audio. y Códec de Audio G.711 PCM, muestreo μ-law 64kbps 8kHz y Audio Full dúplex y Entrada de Audio Utilizado para entrada de línea de señal única (Máx. 2,4 Vpp) y Salida de audio Utilizado para salida de línea de señal única (Máx. 2,4 Vpp) y Impedancia de salida de línea 600 34_ instalación y conexión Diagrama de cableado de entrada de alarma IN 1 INTERNA IN 2 ● INSTALACIÓN Y CONEXIÓN IN 3 IN 4 GND IN 5 IN 6 IN 7 IN 8 Entrada de sensor La conexión de GND a la clavija de señal de entrada indica que la alarma está activada. M Si desea activar la entrada de la alarma, debe seleccionar un tipo de sensor en el menú de configuración. Tiene dos opciones para el tipo de sensor: Normal Abierto y Normal Cerrado. Una selección incorrecta del tipo de sensor puede hacer que la alarma funcione al contrario. SALIDA DE ALARMA INTERNA Salida de relé Máx. 30V CC/1A 125V CA/0,5A Alimentación Salida de relé M Hay disponibles 4 salidas de alarma, las cuales son del tipo de contacto de relé. Por tanto, no tiene que prestar atención a la polaridad del canal transversal, CA/CC ni al aislamiento. Sin embargo, asegúrese de haber comprobado el consumo de energía en el contacto del relé. Español _35 conexión y configuración de la red Puede fijar la configuración de red de acuerdo con sus configuraciones de red. CONECTAR LA CÁMARA DIRECTAMENTE A LA RED DE ÁREA LOCAL Conectar con la cámara desde un ordenador local en la LAN 1. Abrir un navegador de Internet en su ordenador local. 2. Introduzca la dirección IP de la cámara en la barra de direcciones del navegador. Cámara INTERNET Cámara Ordenador Local Cortafuegos Ordenador Remoto Externo Servidor DDNS (Centro de Datos, COREA) <Red local> M Un ordenador remoto con una Internet externa fuera de la red LAN podría no poder conectarse a la cámara instalada en la intranet, en caso de que el reenvío de puertos no esté correctamente configurado o se haya instalado un cortafuegos. En este caso, para solucionar el problema, póngase en contacto con su administrador de red. La dirección IP viene definida en 192.168.1.100 de forma predeterminada a la entrega. Para cambiar la dirección IP, utilice Instalador IP. Para obtener más detalles sobre el uso de Instalador IP, consulte “Configuración de IP estática”. (página 41) 36_ conexión y configuración de la red CONEXIÓN DIRECTA DE LA CÁMARA A UN MÓDEM DSL/ CABLE BASADO EN DHCP Ordenador Remoto Externo Cámara Servidor DDNS (Centro de Datos, COREA) 1. Utilice el cable LAN cruzado para conectar el cable de red directamente al PC. 2. Ejecute IP Installer y cambie la dirección IP de la cámara de forma que pueda utilizar el navegador Web de su escritorio para conectar a Internet. 3. Utilice el navegador de Internet para conectar a la cámara. 4. Vaya a la página [CONFIGURACIÓN]. 5. Vaya a [Red] – [DDNS] y configure los ajustes de DDNS. 6. Vaya a [Red] – [Interfaz] y defina el tipo de red en [DHCP]. 7. Conecte la cámara, retirada del PC, directamente en el módem. 8. Reinicie la cámara. M Para registrar los ajustes de DDNS, consulte “Registro con DDNS”. (página 75) Para configurar los ajustes de DDNS, consulte “DDNS”. (página 74) Para definir el tipo de red, consulte “Interfaz”. (página 72) Español _37 ● CONEXIÓN Y CONFIGURACIÓN DE LA RED INTERNET Módem DSL/Cable conexión y configuración de la red CONEXIÓN DE LA CÁMARA DIRECTAMENTE AL MÓDEM PPPOE INTERNET Cámara PPPoE o Módem de Cable Ordenador Remoto Externo Servidor DDNS (Centro de Datos, COREA) 1. Utilice el cable LAN cruzado para conectar el cable de red directamente al PC. 2. Ejecute IP Installer y cambie la dirección IP de la cámara de forma que pueda utilizar el navegador Web de su escritorio para conectar a Internet. 3. Utilice el navegador de Internet para conectar a la cámara. 4. Vaya a la página [CONFIGURACIÓN]. 5. Vaya a [Red] – [DDNS] y configure los ajustes de DDNS. 6. Vaya a [Red] – [Interfaz] y defina el tipo de red en [PPPoE]. 7. Conecte la cámara, retirada del PC, directamente en el módem. 8. Reinicie la cámara. M Para registrar los ajustes de DDNS, consulte “Registro con DDNS”. (página 75) Para configurar los ajustes de DDNS, consulte “DDNS”. (página 74) Para definir el tipo de red, consulte “Interfaz”. (página 72) 38_ conexión y configuración de la red CONECTAR LA CÁMARA A UN ROUTER IP CON EL MÓDEM PPPOE/CABLE Se utiliza para un ambiente de red pequeño como hogares, oficinas pequeñas y tiendas normales. INTERNET Router IP Cámara PPPoE o Módem de Cable Ordenador Local PPPoE o Módem Ordenador Remoto de Cable Externo Servidor DDNS (Centro de datos, COREA)) Configurar la red del ordenador local conectado a un router Configure la configuración de red del ordenador local conectado a un router IP, siga las instrucciones siguientes. y Seleccione : <Network Neighborhood> <Properties> <Local Area Connection> <Properties> <General> <Internet Protocol (TCP/IP)> <Properties> <Obtain an IP address automatically> o <Use the following IP address>. y Siga las siguientes instrucciones si selecciona <Use the following IP address>: ej.1) Si la dirección (LAN IP) del router IP es 192.168.1.1 Dirección IP : 192.168.1.100 Máscara de subred : 255.255.255.0 Puerta de enlace por defecto : 192.168.1.1 ej.2) Si la dirección (LAN IP) del router IP es 192.168.0.1 Dirección IP : 192.168.0.100 Máscara de subred : 255.255.255.0 Puerta de enlace por defecto : 192.168.0.1 ej.3) Si la dirección (LAN IP) del router IP es 192.168.xxx.1 Dirección IP : 192.168.xxx.100 Máscara de subred : 255.255.255.0 Puerta de enlace por defecto : 192.168.xxx.1 M Para obtener la dirección del router IP, véase la documentación del producto. Consulte la sección “Configuración de reenvío del rango de puertos (Asignación de puertos)” de la documentación del enrutador de IP. (Página 45) Español _39 ● CONEXIÓN Y CONFIGURACIÓN DE LA RED Cámara conexión y configuración de la red BOTONES UTILIZADOS EN IP INSTALLER Elemento Descripción Device Name Nombre de modelo de la cámara conectada. Haga clic en la columna para clasificar la lista por nombre de modelo. No obstante, la búsqueda se detendrá si hace clic durante la búsqueda. b Mode Muestra <Static> o <Dynamic> para el estado de conexión de red. c MAC(Ethernet) Address Dirección Ethernet de la cámara conectada. Haga clic en la columna para ordenar la lista por dirección Ethernet. No obstante, la búsqueda se detendrá si hace clic durante la búsqueda. IP Address Dirección IP. Haga clic en la columna para ordenar la lista por dirección IP. No obstante, la búsqueda se detendrá si hace clic durante la búsqueda. El valor predeterminado es “192.168.1.100”. Protocol Ajuste de red de la cámara. El ajuste predeterminado de fábrica es “IPv4”. Las cámaras con el ajuste IPv6 mostrarán “IPv6”. UPnP Status Esta función no está actualmente implantada. 40_ conexión y configuración de la red Elemento m M URL La dirección URL de DDNS que permite acceder desde Internet externa. No obstante, se sustituirá por la <IP Address> de la cámara si ha fallado el registro de DDNS. IPv4 Rastrea las cámaras que tengan el ajuste IPv4. IPv6 Rastrea las cámaras que tengan el ajuste IPv6. Search Rastrea las cámaras que estén actualmente conectadas a la red. No obstante, este botón aparecerá atenuado si no se marca ni IPv4 ni IPv6. Auto Set IP Installer configura automáticamente los ajustes de red. Manual Set Debe configurar manualmente los ajustes de red. Exit Sale del programa IP Installer. Para IP installer, utilice sólo la versión que se facilita en el DVD de instalación o utilice la última versión si está disponible. Puede descargar la versión más reciente en el sitio web de los productos. CONFIGURACIÓN DE IP ESTÁTICA Configuración de red manual Ejecute <IP Installer.exe> para ver la lista de búsqueda de cámaras. En el arranque inicial, tanto [Auto Set] como [Manual Set] aparecerán atenuados. M En las cámaras encontradas con el ajuste IPv6, estos botones aparecerán atenuados ya que las cámaras no admiten esta función. 1. Seleccione una cámara en la lista de búsqueda. Busque la dirección MAC (Ethernet) etiquetada en la parte posterior de la cámara. Se activarán los botones [Auto Set] y [Manual Set]. 2. Haga clic en [Manual Set]. Aparece el diálogo Manual Setting. Aparecerán los valores predeterminados de <IP Address>, <Subnet Mask>, <Gateway>, <HTTP Port> y <VNP Port> de la cámara. La <Password> predeterminada es “4321”. Español _41 ● CONEXIÓN Y CONFIGURACIÓN DE LA RED Descripción conexión y configuración de la red 3. En el panel <Address>, facilite la información necesaria. y MAC (Ethernet) Address : la dirección MAC (Ethernet) de la cámara aplicable se definirán automáticamente de forma que no tendrá que introducirla manualmente. M Puede configurar sólo los ajustes de IP estática sólo si se deja sin marcar la casilla de selección de DHCP. Si se utiliza un enrutador de IP y IP Address: introduzca una dirección que se encuentre en el rango de IP facilitado por el enrutador de IP. ej.) 192.168.1.2~254, 192.168.0.2~254, 192.168.XXX.2~254 y Subnet Mask : La <Subnet Mask> del enrutador IP será la <Subnet Mask> de la cámara. y Gateway : La <Local IP Address> del enrutador de IP será la <Gateway> de la cámara. M Es posible que los ajustes difieran dependiendo del modelo de enrutador de IP conectado. Para obtener información adicional, consulte el manual de usuario del enrutador aplicable. Consulte la sección “Configuración de reenvío del rango de puertos (Asignación de puertos)” de la documentación del enrutador de IP. (Página 45) Si no se utiliza un enrutador de IP Para el ajuste de <IP Address>, <Subnet Mask> y <Gateway>, póngase en contacto con el administrador de red. 4. En el panel <Port>, facilite la información necesaria. y HTTP Port : se utiliza para acceder a la cámara utilizando el explorador de Internet, por defecto en 80. Utilice el botón de flechas para cambiar el valor de HTTP Port. y VNP Port : se utiliza para controlar la transferencia de señales de vídeo, por defecto en 4520. 42_ conexión y configuración de la red 5. Introduzca la contraseña. Es la contraseña de inicio de sesión para el usuario “admin” que accede a la cámara. La contraseña predeterminada es “4321”. 6. Haga clic en [OK]. La configuración manual de la red queda completada. Si el enrutador de IP tiene más de una cámara conectada Configure los ajustes relacionados con IP y los ajustes relacionados con Port de forma distinta entre sí. Categoría Cámara 1 Cámara 2 Ajustes relacionados con IP IP Address Subnet Mask Gateway 192.168.1.100 255.255.255.0 192.168.1.1 192.168.1.101 255.255.255.0 192.168.1.1 Ajustes relacionados con el puerto HTTP Port VNP Port 8080 4520 8081 4521 M Si <HTTP Port> se define con un valor distinto a 80, debe facilitar el número de <Port> en la barra de direcciones del explorador de Internet antes de poder acceder a la cámara. ej.) http://Dirección IP : HTTP Port http://192.168.1.100:8080 Configuración automática de red Ejecute <IP Installer.exe> para ver la lista de búsqueda de cámaras. En el arranque inicial, tanto [Auto Set] como [Manual Set] aparecerán atenuados. M En las cámaras encontradas con el ajuste IPv6, estos botones aparecerán atenuados ya que las cámaras no admiten esta función. 1. Seleccione una cámara en la lista de búsqueda. Busque la dirección MAC (Ethernet) etiquetada en la parte posterior de la cámara. Se activarán los botones [Auto Set] y [Manual Set]. 2. Haga clic en [Auto Set]. Aparece el diálogo Auto Setting. Se definirán automáticamente <IP Address>, <Subnet Mask> y <Gateway>. Español _43 ● CONEXIÓN Y CONFIGURACIÓN DE LA RED 7. Una vez completada la configuración manual incluido IP, la cámara se reiniciará. conexión y configuración de la red 3. Introduzca la contraseña. Es la contraseña de inicio de sesión para el usuario “admin” que accede a la cámara. La contraseña predeterminada es “4321”. 4. Haga clic en [OK]. La configuración automática de la red queda completada. CONFIGURACIÓN DE IP DINÁMICA Configuración del entorno de IP dinámica y Ejemplo de entorno de IP dinámica - Si a un enrutador de IP, con cámaras conectadas, se le asigna una dirección IP mediante el servidor DHCP - Si se conecta la cámara directamente al módem utilizando los protocolos DHCP - Si las IP se asignan mediante el servidor DHCP interno a través de la LAN Comprobación de la IP dinámica 1. Ejecute Instalador IP en la máquina local del usuario para mostrar las cámaras que tienen asignadas direcciones con <Dynamic IP> en la lista. 2. Seleccione una cámara en la lista y haga clic en [Manual Set] para comprobar el valor de <Dynamic IP> de la cámara. Si quita la marca de selección de <DHCP>, cambia IP o <Port> a <Static>. 44_ conexión y configuración de la red CONFIGURACIÓN DE REENVÍO DEL RANGO DE PUERTOS (ASIGNACIÓN DE PUERTOS) Reenvío manual del rango de puertos 1. En el menú de configuración del enrutador de IP, seleccione <Applications & Gaming> <Port Range Forward>. Para definir el reenvío del rango de puertos para un enrutador de IP de terceros, consulte el manual del usuario de dicho enrutador de IP. 2. Seleccione <TCP> y <UDP Port> por cada cámara conectada al enrutador de IP. Cada número de puerto del enrutador de IP debe coincidir con el especificado en <Red> - <Puerto> en el menú de configuración de la cámara. 3. Una vez hecho, haga clic en [Save Settings]. Se guardarán los ajustes. M El ejemplo de instrucciones anteriores se basan en el enrutador de IP de CISCO (Modelo: LINKSYS). Es posible que los ajustes difieran dependiendo del modelo de enrutador de IP conectado. Para obtener información adicional, consulte el manual de usuario del enrutador aplicable. Español _45 ● CONEXIÓN Y CONFIGURACIÓN DE LA RED Si ha instalado un enrutador de IP con una cámara conectada, debe definir el reenvío del rango de puertos en el enrutador de IP de forma que un PC remoto pueda acceder a la cámara en él. conexión y configuración de la red Configuración del reenvío del rango de puertos de varias cámaras de red Cuando varias cámaras de red están conectadas a un dispositivo enrutador IP, debe reenviar el puerto TCP 943 del enrutador al puerto TCP 943 de una cámara conectada. J Si no define correctamente el puerto TCP 943 del enrutador, no podrá obtener ninguna secuencia de vídeo en la página Web de la cámara. y El puerto TCP 943 es un puerto para el servidor de política Silverlight de una cámara. Cuando la Cámara 1 y la Cámara 2 estén conectadas a un enrutador: Ù Usuario Internet Ú Inicio 943 3000 3001 4520 4521 8080 8081 Fin 943 3000 3001 4520 4521 8080 8081 Enrutador IP Protocolo TCP TCP/UDP TCP/UDP TCP/UDP TCP/UDP TCP/UDP TCP/UDP Dirección IP 192.168.1.100 192.168.1.100 192.168.1.101 192.168.1.100 192.168.1.101 192.168.1.100 192.168.1.101 Ù Cámara1 (192.168.1.100) Puerto servidor Web 8080 4520 Puerto VNP Puerto RTSP 3000 Puerto de servidor 943 de política Ù Cámara2 (192.168.1.101) Puerto servidor Web 8081 Puerto VNP 4521 Puerto RTSP 3001 Puerto de servidor 943 de política y Puede definir una regla de reenvío de puertos en el dispositivo enrutador IP a través de su página Web de configuración. y No puede cambiar el puerto del servidor de política Silverlight de una cámara. y Puede cambiar los puertos de la cámara a excepción del puerto del servidor de política a través de sus páginas Web de configuración. 46_ conexión y configuración de la red CONEXIÓN A LA CÁMARA DESDE UN PC LOCAL COMPARTIDO 2. Haga doble clic en una cámara para acceder a ella. Se inicia el explorador de Internet y se conecta a la cámara. M También puede acceder a la cámara introduciendo la dirección IP de la cámara encontrada en la barra de direcciones del explorador de Internet. CONEXIÓN A LA CÁMARA DESDE UN PC REMOTO A TRAVÉS DE INTERNET Debido a que no se permite utilizar Instalador IP en un ordenador remoto que no se encuentre en un grupo de red del enrutador IP, los usuarios pueden acceder a las cámaras dentro de una red del enrutador IP utilizando el URL de DDNS de la cámara. 1. Antes de poder acceder a una cámara de una red de enrutador de IP, debe haber definido el reenvío del rango de puertos para el enrutador de IP. 2. Desde el PC remoto, inicie el explorador de Internet e introduzca la dirección URL de DDNS de la cámara, o la dirección IP del enrutador de IP en la barra de direcciones. ej.) http://www.samsungipolis.com/[Dominio DDNS] Español _47 ● CONEXIÓN Y CONFIGURACIÓN DE LA RED 1. Ejecute Instalador IP. Rastreará las cámaras conectadas y mostrará una lista de ellas. web viewer CONEXIÓN A LA CÁMARA Procedimiento normal 1. Inicie el explorador de Internet. 2. Introduzca la dirección IP de la cámara en la barra de direcciones. ej.) • Dirección IP (IPv4) : 192.168.1.100 http://192.168.1.100 - Debe aparecer el diálogo de inicio de sesión. • Dirección IP (IPv6) : 2001:230:abcd: ffff:0000:0000:ffff:1111 http://[2001:230:abcd:ffff:0000:0000: ffff:1111] Si el número de puerto HTTP no es 80 1. Inicie el explorador de Internet. 2. Introduzca la dirección IP y el número de puerto HTTP de la cámara en la barra de direcciones. ej.) Dirección IP : 192.168.1.100:HTTP Port number(8080) http://192.168.1.100:8080 - Debe aparecer el diálogo de inicio de sesión. Utilización del URL 1. Inicie el explorador de Internet. 2. Introduzca el URL de DDNS de la cámara en la barra de direcciones. ej.) Dirección URL : http://www.samsungipolis.com/[Dominio DDNS] - Debe aparecer el diálogo de inicio de sesión. 48_ web viewer Para comprobar la dirección de DDNS Una vez que registre el dispositivo con IP dinámica en el servidor DDNS, puede fácilmente cambiar la IP modificada cuando intente acceder al dispositivo. Para añadir la dirección IP al servidor <DDNS>, visite www.samsungipolis.com y registre su dispositivo y defina la opción DDNS en <DDNS de Samsung> antes de facilitar el nombre de host del servidor de DDNS. INICIO DE SESIÓN El ID predeterminado de usuario es “admin” y la contraseña es “4321”. 1. Introduzca “admin” en el cuadro de entrada <User Name>. 2. Introduzca “4321” en el cuadro de entrada <Password>. Si se cambia la contraseña, introduzca en su lugar la contraseña modificada. 3. Haga clic en [OK]. Si ha iniciado sesión correctamente, verá la pantalla de Live Viewer. M Por razones de seguridad, asegúrese de cambiar la contraseña en <Sistema> - <Usuario>. La ID del administrador, “admin”, es fija y no es posible cambiarla. Si marca la opción “Save this password in your password list” una vez realizada la entrada, la próxima vez se iniciará sesión automáticamente sin que se le pida introducir la información de inicio de sesión. J Si está utilizando Internet Explorer 7.0 o 8.0 como el explorador Web predeterminado, puede ver la mejor calidad de imagen con una relación de pantalla del 100%. Si se reduce la relación existe el riesgo de cortar la imagen en los bordes. Español _49 ● WEB VIEWER Si la cámara está conectada directamente al módem de cable DHCP, al módem DSL o al módem PPPoE, la dirección IP de la red cambiará cada vez que intente conectar al servidor del proveedor de servicios de Internet. Si este es el caso, no se le informará de la dirección IP modificada por el DDNS. web viewer Esta cámara de red utiliza Microsoft Silverlight para mostrar vídeo. INSTALACIÓN DE SILVERLIGHT RUNTIME Si su PC no ha instalado Silverlight Runtime o ha instalado una versión antigua, se le redirigirá automáticamente a la página de instalación de Silverlight Runtime al acceder a Web Viewer. 1. Haga clic en <Click Here>. 2. Cuando aparezca el diálogo de descarga del archivo, haga clic en <Run>. 3. Una vez completada la descarga, haga clic en <Run>. 4. Aparecerá la página de instalación de Silverlight Runtime. <Install now> para continuar con la instalación. 50_ web viewer 5. Una vez hecho, haga clic en <Close>. ● WEB VIEWER 6. Cierre y reinicie el navegador Web e intente acceder a Web Viewer. Una vez instalado correctamente Silverlight Runtime, verá la pantalla en directo. J Para una instalación normal, defina el ajuste de Block Popup de la siguiente forma: Internet Explorer l Herramientas l Bloqueador de elementos emergentes l Desactivar el bloqueador de elementos emergentes (A) Sn embargo, los usuarios de MAC OS X que no están conectados a Internet pueden utilizar el DVD de instalación facilitado para instalar Silverlight Runtime (Ejecute el archivo “Silverlight_xxx.dmg” del DVD. Se le guiará por la instalación del software). Español _51 web viewer UTILIZACIÓN DE LA PANTALLA EN DIRECTO Elemento Descripción Vigilancia Va a la pantalla de supervisión. b REPRODUCCIÓN Cambia a la pantalla de vigilancia que reproduce los datos de grabación en la memoria SD. c CONFIGURACIÓN Va a la pantalla de configuración. Pantalla del visor Muestra en pantalla el vídeo en directo. Salida de alarma Activa el puerto de salida de la alarma. Audio Muestra en pantalla el botón de conmutación de escuchar y hablar del audio. Reinicio de alarma Reinicia los ajustes de salida de la alarma. PTZ 52_ web viewer Le permite controlar el funcionamiento del objetivo del zoom de la cámara. Elemento Descripción PTZ DIGITAL Puede utilizar la rueda del ratón para activar el zoom digital. Optimización de pantalla, pantalla completa Ajuste la pantalla a su tamaño óptimo y muestre el icono de pantalla completa en la pantalla en directo. Captura Guarda la instantánea como un archivo de imagen en formato.bmp. Puede seleccionar un tipo de perfil en <Perfil de vídeo> bajo el menú de configuración <Audio y Vídeo>. Formato de vídeo M Para los usuarios de IE 6.0, pulse el botón Examinar situado al lado del cuadro de diálogo <Perfil de vídeo> y seleccione de nuevo un tipo de perfil si no se reproduce el perfil seleccionado. M Si aparece el mensaje "Códec no válido", seleccione de nuevo un tipo de perfil en la lista de perfiles. M Si la temperatura cae por debajo del rango de funcionamiento, es posible que no se genere ninguna señal de vídeo. En tales casos, espere a que aparezca el vídeo. Para activar el modo de zoom de área En la pantalla del visor, haga clic con el botón secundario para ver el menú contextual que se muestra a continuación: Opciones de menú y descripcionesOpciones de menú y descripciones y Ir a 1 x : cambia el factor de zoom actual a x1. y Anterior : vuelve al área y ajustes anteriores. y Próximo : cambia al área y ajustes siguientes. y Salir zoom de área : sale del modo de zoom de área: y Ir a predef. : va a la posición predefinida. Español _53 ● WEB VIEWER web viewer Para capturar la instantánea 1. Haga clic en [ ] en la escena que va a capturar. Debe aparecer el diálogo de captura. 2. Haga clic en el botón [Save]. La captura se guardará en la ruta especificada. M Si está utilizando IE8 como el navegador Web predeterminado, seleccione “Herramientas-Opciones de InternetSeguridad” y quite la marca de selección de “Usar modo protegido”. Para cambiar el sonido del audio 1. Haga clic en el botón [Audio ( Aparecerá en el Visor el botón correspondiente. )]. 2. Haga clic en el botón para escuchar / silenciar el sonido como desee. Este botón funciona como un conmutador. Para cambiar el sonido del micrófono 1. Haga clic en el botón [Mic ( )]. Aparecerá en el Visor el botón correspondiente. J Aparece el mensaje “No se puede encontrar el dispositivo de grabación de vídeo” si no tiene ningún micrófono. 2. Haga clic en el botón para comenzar / parar de hablar. Este botón funciona como un conmutador. Aparece el diálogo de permisos Silverlight cuando haga clic en el botón del micrófono. 54_ web viewer Para ocupar la pantalla completa ● WEB VIEWER 1. Haga clic en el botón [Pantalla completa ( )]. Aparecerá en el Visor el botón correspondiente. 2. Haga clic en el botón. Con esto el Visor ocupará toda la pantalla. 3. Para salir del modo de pantalla completa, pulse [Esc] en el teclado. Para controlar PTZ 1. Pulse el botón [PTZ ( )] 2. Cuando aparezca en pantalla la barra de botones de PTZ, utilice los botones de dirección para ajustar el ángulo de la cámara, el factor de zoom o el enfoque a su gusto. M Para obtener información adicional sobre el uso de PTZ, consulte “Configuración de PTZ”. (página 66) Español _55 web viewer REPRODUCCIÓN 1. Haga clic en el botón [REPRODUCCIÓN ( )]. 2. Especifique la hora de inicio y la hora de fin de su búsqueda. 3. Seleccione un tipo de búsqueda. 4. Haga clic en el botón [Buscar ( Los resultados de búsqueda aparecerán en la lista. M )]. Si se han grabado más de 500 eventos en e período de búsqueda, la búsqueda se limitará a la fecha en la que se grabó el evento número 500. Por ejemplo, si el período de búsqueda se encuentra entre el día 10 y 15 del mes y se registraron más de 800 eventos entre el 10 y el 11, la búsqueda se limitará hasta el día 11 con un total de 800 eventos, y no se buscarán los eventos posteriores (a partir del día 12). 5. Seleccione un elemento de la lista de búsqueda para reproducirlo. 6. Haga clic en el botón [Reproducir ( )]. 7. Para detener la reproducción del vídeo, )]. haga clic en [Parar ( Para volver a la pantalla de búsqueda, )]. haga clic en [Salir ( Para comprobar la información de tiempo del vídeo en reproducción 1. Haga clic en el botón [Acerca de ( )]. 2. En pantalla aparece la información de la fecha y la hora. 56_ web viewer Para hacer una copia de seguridad del vídeo buscado 1. Haga clic en [ ] en la escena de la va a guardar copia de seguridad. Aparece la ventana Guardar como. M ● WEB VIEWER 2. Haga clic en [Save]. Se hará una copia de seguridad de la captura en la ruta especificada. Si está utilizando IE8 como el navegador Web predeterminado, seleccione “Herramientas-Opciones de InternetSeguridad” y quite la marca de selección de “Usar modo protegido”. REPRODUCCIÓN DE GRABACIONES DE COPIAS DE SEGURIDAD Puede reproducir grabaciones de copias de seguridad utilizando SlimPlayer. Para descargar SlimPlayer 1. Haga clic en [SlimPlayer ( )]. Verá un diálogo de descarga donde puede especificar la ruta de descarga. 2. Especifique la ruta con un nombre de archivo adecuado y haga clic en [Save]. 3. Descomprima el archivo descargado y ejecute el ejecutable. Español _57 pantalla de configuración CONFIGURACIÓN Puede configurar los ajustes de audio y vídeo, red, evento y sistema de la cámara de la red. 1. En la pantalla en directo, haga clic en [CONFIGURACIÓN ( )]. 2. Aparece la pantalla de configuración. CONFIGURACIÓN DE AUDIO Y VÍDEO Perfil de Vídeo 1. En el menú de configuración, seleccione )>. la ficha <Audio y Vídeo ( 2. Haga clic en <Perfil de vídeo>. 3. Seleccione el número de <Perfil de vídeo>. 4. Haga clic en el cuadro de entrada de cada elemento e introduzca / seleccione el valor que desee. Es posible que el menú contextual difiera dependiendo del tipo de códec seleccionado. y Perfil predet. : éste es el perfil de vídeo predeterminado. y Perfil de vel. fotogr. fija : fija la velocidad de fotogramas del perfil seleccionado independientemente de los ajustes de los otros perfiles. y Perfil de E-mail / FTP : el perfil de vídeo que se va a transferir al e-mail o sitio FTP. Sólo el códec de MJPEG se puede definir como Perfil de E-mail / FTP. y Perfil de grabación : éste es el perfil que se aplica a la grabación de vídeo. 5. Una vez hecho, haga clic en [Aplicar ( M )]. Los perfiles que utilizan el códec H.264 se pueden almacenar en la memoria SD con resoluciones de 640x480 o menos. Los vídeos MPEG4 no se pueden almacenar en la memoria SD. 58_ pantalla de configuración Para añadir un perfil de vídeo ¿Qué es el tamaño de GOP? GOP (del inglés Group of Pictures, grupo de imágenes) es un conjunto de fotogramas de vídeo para compresión MPEG4 y H.264, que indican un conjunto de fotogramas existentes entre el I-Frame inicial (fotograma principal) y el siguiente I-Frame. GOP se compone de 2 tipos de fotogramas: I-Frame y P-Frame. I-Frame es el fotograma básico para la compresión, también conocido como fotograma principal, que contiene los datos completos de la imagen. El P-Frame sólo contiene los datos que se han cambiado en relación con el I-Frame precedente. Puede definir entre 1 y 15 para el CÓDEC de MPEG4 y H.264.. Español _59 ● PANTALLA DE CONFIGURACIÓN Puede añadir tantos códec como sea necesario de forma que pueda aplicar una serie de perfiles según las condiciones de grabación. 1. Seleccione un número de perfil. 2. Facilite el nombre y seleccione un códec. 3. Especifique las condiciones en las que se aplicará el códec. 4. Especifique los detalles del códec seleccionado incluida la resolución y la y la velocidad de fotogramas. y Resolución : define el tamaño del vídeo de los archivos MPEG4, H.264 y MJPEG. y Vel. fotograma : especifica la velocidad de fotogramas. y Compresión : especifica la velocidad de compresión del vídeo. y Control de vel. bits : Para la compresión, puede seleccionar entre velocidad de bits constante y velocidad de bits variable. La velocidad de bits constante (CBR) altera la calidad del vídeo y fija la velocidad de bits de transferencia en red, mientras que la velocidad de bits variable da prioridad a la calidad variando la velocidad de bits de la transferencia de red. y Velocidad de bits de destino : especifica la velocidad de bits a la que transferirá el vídeo. y Prioridad de codificación : puede definir el método de transferencia de vídeo en Vel. fotograma o Compresión. y Tamaño de GOP : seleccione un tamaño de GOP entre 1 y 15. y Perfi l: puede seleccionar el método de perfiles H.264. y Codif. Entropia : reduce posibles pérdidas de compresión debido a la codificación. y Multicast(VNP) : especifica el uso del protocolo VNP. - IPv4 : introduzca una dirección IPv4 con la que puede conectar a la red IPv4. - Puerto : especifica el puerto de comunicaciones de vídeo. - TTL : permite definir TTL para el paquete VNP. y Multicast(RTP) : permite especificar el uso del protocolo RTP. - IPv4 : introduzca una dirección IPv4 con la que puede conectar a la red IPv4. - Puerto : especifica el puerto de comunicaciones de vídeo. - TTL : puede definir TTL para el paquete RTP. pantalla de configuración Conf. de vídeo 1. En el menú de configuración, seleccione la ficha <Audio y Vídeo ( )>. 2. Haga clic en <Conf. de vídeo>. 3. Puede configurar los ajustes a su gusto. OSD, General, Balance de blanco, Exposición, Especial y Área. Para ajustar la OSD y Nombre de dispositivo : aparece el <Nombre de dispositivo> en la pantalla en directo, facilitado en <Información del producto> de <Sistema>. y Fecha y hora : muestra la información de fecha y hora en la pantalla en directo. y PTZ : muestra en la pantalla en directo la información de PTZ. Si lo define en <Automático>, la información de PTZ aparecerá sólo si se detecta movimiento PTZ, y desaparecerá si deja de haber movimiento. y Acción : aparece en la pantalla en directo información relacionada con las operaciones como predefinido, oscilación, grupo o seguimiento. Para definir General y Modo enfoque - ONEAF : enfoca automáticamente la cámara después de utilizar la función de panorámica, inclinación o zoom. - Autom. : realiza el enfoque automático continuo. - Manual : cambia el modo de cámara a Enfoque manual. y Zoom digital : permite definir el uso de la función de zoom digital. Si se define en <DES>, el zoom óptico seguirá funcionando pero el zoom digital no se activará en el punto máximo del zoom óptico. y Modo de volteo : si lo activa, la imagen se mostrará invertida. y DIS : corrige la visualización de una imagen que se muestre de forma ligeramente temblorosa. Con DIS, puede obtener una imagen nítida incluso aunque la cámara se vea afectada por vibraciones o sacudidas. Esto resulta de utilidad, especialmente cuando se instala la cámara sobre un pilar alto, en medio de un puente, en el arcén de una autopista o en un lugar ventoso. 60_ pantalla de configuración M A diferencia del zoom óptico, la calidad de los gráficos del zoom digital disminuye conforme aumenta el índice de zoom. Es posible que no funcione con normalidad el enfoque automático en las siguientes situaciones : Enfoque automático enfoca un objeto situado en el centro de la pantalla; es posible que los objetos situados por los bordes de la pantalla no se enfoquen correctamente. Para ajustar el balance de blanco El menú Bal. Blancos ajusta el balance de los colores de la pantalla en condiciones de luz diferentes. Puede definir el balance de blanco por separado para el modo Día y para el modo Noche. 1. Seleccione el modo Día. 2. Seleccione un modo de balance de blanco para el día entre ATW1/ATW2/ AWC/3200K/5600K. y ATW1, ATW2 : la cámara puede ajustar automáticamente la temperatura del color en tiempo real, de acuerdo con las condiciones ambientales. El rango de temperatura permitido se encuentra entre 2500K y 9300K para ATW1 y entre 2000K y 10000K para ATW2. y AWC : Realiza el balance de blanco automático una vez para el vídeo actual. y 3200K : Modo optimizado para 3200K para la temperatura de color. y 5600K : Modo optimizado para 5600K para la temperatura de color. 3. Ajuste la resistencia seleccionando un valor entre -32 Y 32 para cada uno de los ajustes de rojo y azul. 4. Seleccione el modo Noche. Seleccione un modo de balance de blanco para la noche entre ATW1/ATW2/AWC/ 3200K/5600K/DES. Ajuste los valores de Ajuste de rojo y Ajuste de azul para cada modo de balance de blanco. Español _61 ● PANTALLA DE CONFIGURACIÓN - Iluminación brillante, iluminación intermitente como una señal de neón - Cuando la iluminación de fondo sea baja. - Cuando se esté utilizando el obturador lento. - Un objeto oscuro - Cuando la iluminación de fondo sea demasiado alta. - Si en el área de vigilancia aparece un objeto situado a larga distancia y otro a una distancia corta. - Si no hay contraste, por ejemplo, en el techo o en la pared. - Si la cámara apunta a una línea horizontal delgada. pantalla de configuración M Si el modo NOCHE se define en <DES>, <Balance de blanco> funcionará en un modo especificado en el modo DIA en todo momento; de lo contrario, la pantalla cambiará a un modo especificado en <Día/Noche>. Es posible que Bal. Blancos no funcione correctamente en las siguientes situaciones. - Cuando la temperatura de color del entorno que rodea al sujeto se encuentre fuera del rango de color. - Cuando la iluminación de ambiente del sujeto sea atenuada. - Si la cámara se dirige hacia una luz fluorescente o se ha instalado en un lugar en el que la iluminación cambia radicalmente, es posible que con Bal. Blancos no se obtenga resultados uniformes. Para ajustar la Exposición Los ajustes de Exposición se utilizan para controlar el medidor de exposición de la cámara. Ajuste de diafragma 1. Defina el diafragma en ALC o Manual. y ALC : puede definir el nivel de diafragma y la retroiluminación en modo automático. y Manual : puede definir manualmente el nivel de diafragma. 2. Seleccione un nivel de diafragma entre -32 y 32. 3. Si define el modo de diafragma en ALC, seleccione un nivel de diafragma y ajuste el modo de iluminación de fondo. Seleccione uno entre DES/BLC/WDR en luz de fondo. y DES : no utiliza el modo de luz de fondo. y BLC : puede especificar manualmente el área que desea en el vídeo y definir el área para que se vea más claramente. y WDR : muestra una imagen nítida de los objetos en una escena en la que existe tanto un área brillante como un área oscura. 4. Si define el modo de luz de fondo en BLC, puede configurar los ajustes de luz de fondo. 5. Si define el modo de luz de fondo en WDR, configure los ajustes de peso de WDR, nivel de WDR y BB de WDR. y Peso WDR : seleccione entre Bajo/Medio /Alto. y Nivel WDR : seleccione uno entre -9 y 9. y B/B autom. WDR : seleccione Interior o Exterior. M Si define el modo de luz de fondo en BLC, puede especificar un área de luz de fondo. 62_ pantalla de configuración AMP SENS Esto le permite controlar el obturador eléctrico de la cámara. Seleccione entre DES/Autom. x2 ~ x512 / Fija x2 ~ x512. M Si WDR se define en SÍ, no es posible definir Ampl. sensib. en <Fija>. AGC autom. AGC (Automatic Gain Control, Control automático de ganancia) ajusta el control de ganancia de la cámara y el brillo de la pantalla si la cámara ha capturado un objeto en condiciones de luz escasa. M La opción de menú AGC sólo aparecerá si Ampl. sensib. se define en <DES> o <Fija>. Si el modo DÍA/NOCHE se define en Automático, la ganancia se fijará en <Muy alta>. Movimiento Movimiento le permite ajustar el nivel de ganancia en escenas oscuras. También muestra el nivel de parpadeo mientras se encuentra en el modo Ampl. de sensib.. Seleccione entre S.Lento/Lenta/Normal/Rápida/A rápido. M La opción de menú Movimiento sólo aparecerá si Ampl. sensib. se define en <Autom.>. Vel. obutrador Puede controlar la velocidad del obturador de la cámara. y Seleccione entre DES / 1/120 / 1/250 / 1/500 / 1/00 / 1/2000 / 1/4000 / 1/10K. M Si WDR se define en Sí, no es posible ajustar la velocidad del obturador. Puede definir la velocidad del obturador sólo si Ampl. sensib. se define en <DES>. Español _63 ● PANTALLA DE CONFIGURACIÓN y Autom. : con este valor se recupera el brillo acumulando los fotogramas de vídeo si la velocidad del obturador cae drásticamente por la noche o en una escena de bajo contraste. y Fija : con esto se acumulan los fotogramas de vídeo independientemente del brillo del vídeo. pantalla de configuración Día/Noche La función Día y Noche permite que la cámara cambie entre los modos Color y ByN. Puede definir el modo Día /Noche en Autom./Día /Noche. y Mode - Autom. : funciona en modo Color la mayoría de las veces y cambia a modo ByN si se detecta un nivel de luz bajo durante la noche. - Día : funciona en modo Color en todo momento. - Noche : funciona en modo ByN en todo momento. Especial DNR (Reducción de ruido digital) DNR reduce en gran medida la cantidad de ruido de baja luminosidad. y Seleccione entre DES/Bajo/Medio/Alto/ Usuario 1~16. DINAM. (Rango dinámico ampliado) XDR ilumina puntos más oscuros de una imagen al mismo tiempo que retiene el mismo nivel de luz en puntos más brillantes para compensar el brillo general de la imagen con un alto contraste entre los puntos brillantes y oscuros. y Están disponibles los modos DES, Bajo, Medio y Alto. Zoom Velocidad ( 1 ~ 4 ) Puede especificar la velocidad del zoom. Cuanto más alto sea el valor, mayor será la velocidad. Detalle ( 0 ~ 3 ) Puede controlar el contorno general de una imagen. AGC atuom. Color SUPRESIÓN Puede ajustar el rango de reproducción de color de acuerdo con AGC. 64_ pantalla de configuración PIP Puede ver una imagen principal con una subimagen en la misma pantalla. Para definir la zona privada 1. Seleccione <área Privada> En <Área> 2. Seleccione <ACT> en <área privada>. 3. Haga clic en una zona en la imagen y seleccione los 4 puntos de las esquinas para especificar la zona que desea. Aparece un mensaje emergente donde puede introducir un nombre para la zona y hacer clic en [Aceptar ( )]. No arrastre la zona para especificar una zona privada; no funciona. 4. Para borrar el área seleccionada, haga clic en el botón [Borrar ( 5. Una vez hecho, haga clic en [Aplicar ( )]. )]. Puede configurar hasta 12 zonas privadas como máximo. Para definir el área para la compensación de la luz de fondo. 1. En <EXPOSICIÓN>, defina <LUZ FONDO> en <BLC>. 2. Seleccione <BLC> en <Área> y utilice el método de arrastrar y soltar para especificar un área en la pantalla de vista previa. 3. Aparece el diálogo de añadir área donde puede introducir un nombre para la zona y haga clic en )]. [Aceptar ( 4. Para borrar el área seleccionada, haga clic en [Borrar ( )]. Sólo puede especificar un área. 5. Para mostrar el área de luz de fondo especificada, seleccione <ACT> para mostrar el área con luz de fondo. Aunque defina la opción en <DES>, se definirá con normalidad el área real. Español _65 ● PANTALLA DE CONFIGURACIÓN Puede especificar un área concreta del vídeo de la cámara para protegerla por privacidad. pantalla de configuración Configuración de audio Puede configurar los ajustes de E/S de la fuente de audio desde la cámara. 1. En el menú de configuración, seleccione la ficha <Audio y Vídeo ( )>. 2. Haga clic en <Configuración de audio>. 3. Ajuste los niveles de E/S a su gusto. y Entrada de audio : define el valor de entrada de audio. y Salida de audio : define el valor de salida de audio. 4. Una vez hecho, haga clic en [Aplicar ( )]. Conf. PTZ Puede cambiar la dirección del objetivo y activar el zoom. 1. Seleccione la ficha <Audio y vídeo ( en el menú de configuración. )> 2. Haga clic en <Conf. PTZ>. 3. Haga clic en[Ajuste de dirección ( )]. y [Cambiar dirección a ( )/( )/( )/ ( )] : cambia la dirección del objetivo de la cámara. y [Control de velocidad de movimiento ( )] : cuanto más alto sea el número, más rápida será la velocidad de movimiento. 66_ pantalla de configuración ● PANTALLA DE CONFIGURACIÓN 4. Ajuste los botones de control de zoom y enfoque. y [Acercar zoom ( )]: aplica el zoom en pantalla. y [Alejar zoom ( )]: aleja el zoom en pantalla. y [Ajustar enfoque ( / )]: ajusta el enfoque en pantalla. 5. Ajuste la posición predefinida. Para añadir una posición predefinida 1. Seleccione el número de posición predefinida que va a añadir. 2. Defina el nombre de la posición predefinida. 3. Pulse el botón [ ]. Para suprimir una posición prefinida 1. Seleccione el número de posición predefinida que va a añadir. 2. Pulse el botón [ ]. Para mover la posición predefinida 1. Seleccione un número de predet. que desee mover. 2. Pulse el botón [ ]. Español _67 pantalla de configuración Oscilación La oscilación es una función de vigilancia que realiza un movimiento entre dos puntos predefinidos y le permite realizar un seguimiento del movimiento. y Si se activa la oscilación, la cámara se moverá hacia la derecha desde la primera posición predefinida hasta la segunda posición. A continuación, se mueve hacia la izquierda desde la segunda posición predefinida hasta la primera. cha Segunda posición predef. ere d A la Primera posición predef. a erd qui iz A la Si la primera posición predefinida es la misma que la segunda, la cámara girará sobre sí misma 360° a la derecha y luego 360° a la izquierda. Puede especificar la velocidad entre 1°/seg. y 180°/seg. Para configurar los ajustes de oscilación 1. Defina <Modo> de <Conf. secuencia> en <Oscilación>. La pantalla del menú cambiará a la pantalla de ajuste de oscilación. 2. Defina <Primer predef.> y <Segundo predef.> para especificar un rango de oscilación. 3. Especifique la velocidad de movimiento. 4. Pulse el botón [ ]. El primer predef., el segundom predef., la velocidad y el tiempo de espera se guardará en el modo definido. 5. Pulse el botón [ ]. Esto hará que el comando se almacene en el número de oscilación. 6. Pulse el botón [ ]. Con esto se detendrá la oscilación en curso. 68_ pantalla de configuración Groupo La función de grupo permite agrupar varias posiciones predefinidas, oscilaciones y seguimientos antes de ejecutarlas en secuencia. Puede crear hasta 8 grupos, y cada uno puede contener hasta 20 operaciones. ● PANTALLA DE CONFIGURACIÓN Tiempo permanencia PREDEF. OSCILACIÓN SEGUIM. Máx. 20 Para definir un grupo 1. Defina <Modo> de <Conf. secuencia> en <Groupo>. La pantalla del menú cambiará a la pantalla de ajuste de grupo. 2. Seleccione un número de grupo. 3. Seleccione un número e índice entre 1 y 20. 4. Seleccione una operación entre predefinido, oscilación y seguimiento. 5. Especifique el tiempo de permanencia entre 00:04 y 04:00. 6. Si seleccione Predef. para la operación, especifique la velocidad de movimiento; si selecciona Oscilación o Seguimiento, especifique el número de repeticiones. 7. Pulse el botón [Añadir ( )] Los ajustes se introducirán en la lista de la derecha. 8. Repita los pasos del 3 al 7 anteriores para completar la lista de grupos. 9. Una vez especificados todos los grupos, pulse [GRAB ( guardarán en la cámara los grupos recién creados. )]. A continuación, se Español _69 pantalla de configuración Seguim. La función de seguimiento recuerda los movimientos realizados durante un tiempo específico utilizando el joystick y los reproduce más tarde. Puede usar hasta 4 seguimientos, en cada uno de los cuales puede guardar hasta 1000 comandos de comunicación. Para definir la función de seguimiento 1. Defina <Modo> de <Conf. secuencia> en <Barrido y ejec. autom.>. La pantalla de menú cambiará a seguimiento PTZ y la pantalla del menú de funcionamiento automático. 2 Seleccione un número de seguimiento. 3 Pulse el botón [ ]. Aparecerá la siguiente pantalla. 4. Utilice el joystick para crear una serie de movimientos. La capacidad del espacio libre en la memoria aparece en la barra de progreso. 15/JUL/2010 04:27:21 5. Una vez completada la ruta, pulse [Detener grabación ( Para activar la función de seguimiento 1. Seleccione el número de seguimiento. 2. Pulse el botón [ ]. 70_ pantalla de configuración )]. Ejec. Autom. Esto ejecutará la operación secuencial especificada si no se realiza ninguna manipulación durante un tiempo determinado. 1. Defina <Modo> de <Conf. secuencia> en <Barrido y ejec. autom.>. 2. Seleccione un modo de ejecución automática. y Inicio : ejecuta automáticamente la operación a la posición inicial. y Predef. : ejecuta automáticamente la operación al número de predet. y Oscilación :ejecuta automáticamente la operación en modo de Oscilación. y Grupo : ejecuta automáticamente la operación en modo de Grupo. y Trazo : ejecuta automáticamente la operación en modo de Seguimiento. 3. Especifique el tiempo de espera entre 5 segundos y 4 horas. 4. Pulse el botón [ ]. Español _71 ● PANTALLA DE CONFIGURACIÓN Para guardar la ejecución automática pantalla de configuración CONFIGURACIÓN RED Interfaz 1. En el menú de configuración, seleccione )> la ficha <Red ( 2. Haga clic en <Interfaz>. 3. Defina <Interfaz> y <Config. IPv6> según sea necesario. y Tipo IP : selecciona un tipo de conexión IP. - Manual : especifica la dirección IP, la máscara de subred, la puerta de enlace, DNS1 y DNS2. - DHCP : especifica DNS1 y DNS2. - PPPoE : especifica DNS1, DNS2, ID y contraseña. Si lo define en <Manual>, debe especificar manualmente la IP, máscara de subred, puerta de enlace, DNS 1 y 2. y y y y y Dirección MAC : muestra la dirección MAC. Dirección IP : muestra la dirección IP actual. Máscara de subred : muestra la <Máscara de subred> para definir la IP. Puerta de enlace : muestra la <Puerta de enlace> para definir la IP. DNS1/DNS2 : muestra la dirección del servidor DNS (Servicio de nombres de dominios). y Uso de IPv6 : especifica el uso de IPv6. y Dirección de IPv6 : obtiene la dirección IPv6 para acceder a la red IPv6. )]. 4. Una vez hecho, haga clic en [Aplicar ( 72_ pantalla de configuración Puerto y Puerto HTTP : puerto HTTP utilizado para acceder a la cámara a través del explorador Web. El valor predeterminado es 80 (TCP). y Puerto VNP : define un puerto que se utilizará para transferir señales de vídeo con protocolos Samsung. y Puerto RTSP : se utiliza para transferir vídeos en el modo RTSP; el valor predeterminado es 554. y Puerto Visor : se utiliza para transferir vídeos en Web Viewer; el valor predeterminado es 4520. El rango de puertos de Viewer se encuentra entre 4502 y 4534. Si el puerto VNP se encuentra en este rango efectivo, el puerto Viewer debe especificarse de igual forma que el puerto VNP. 4. Una vez hecho, haga clic en [Aplicar ( )]. Español _73 ● PANTALLA DE CONFIGURACIÓN 1. En el menú de configuración, seleccione la ficha <Red ( )>. 2. Haga clic en <Puerto>. 3. Introduzca cada elemento en el menú del puerto según sea necesario. No está disponible ni el rango de puertos entre 0 y 1023 ni el puerto 3702. pantalla de configuración DDNS DDNS es una abreviatura de Servicio de nombres de dominio dinámicos que convierte la dirección IP de una cámara en un nombre de host general de forma que el usuario pueda recordarlo fácilmente. 1. En el menú de configuración, seleccione )>. la ficha <Red ( 2. Haga clic en <DDNS>. 3. Seleccione <DDNS>. 4. Introduzca las opciones de DDNS según el tipo seleccionado. y DDNS de Samsung : se selecciona si utiliza el servidor de DDNS facilitado por Samsung Techwin. y DDNS público : Seleccione uno de los servidores DDNS públicos que se facilitan cuando utilice un servidor DDNS público. - Nombre de host : introduzca el nombre del host (es decir, nombre de host de Dyndns) registrado en el servidor DDNS. - Nombre de usuario : introduzca el nombre de usuario del servicio DDNS. (es decir, ID de usuario registrado con Dyndns) - Contraseña : introduzca la contraseña del servicio DDNS. (es decir, contraseña registrada con Dyndns) 5. Una vez hecho, haga clic en [Aplicar ( 74_ pantalla de configuración )]. Registro con DDNS Para registrar el producto con DDNS de Samsung ● PANTALLA DE CONFIGURACIÓN 1. Visite el sitio Web de iPOLiS (www.samsungipolis.com) y regístrese con una cuenta creada. 2. En la barra de menú superior, seleccione <DDNS SERVICE>-<MY DDNS>. 3. Haga clic en [PRODUCT REGISTRATION]. 4. Introduzca el dominio del producto. Debe realizar una comprobación doble del dominio introducido. 5. Seleccione una <CLASSIFICATION> y especifique el <MODEL NUMBER>. 6. Especifique la ubicación del producto con una descripción en caso necesario. 7. Haga clic en [REGISTRATION]. El producto se añadirá a la lista de productos que puede comprobar. Español _75 pantalla de configuración Para conectar al DDNS de Samsung en la configuración de la cámara 1. En la página de configuración de DDNS, defina <DDNS> en <DDNS de Samsung>. 2. Facilite el <Nombre de host> especificado al registrar el dominio del producto en el sitio DDNS. 3. Haga clic en [Aplicar ( )]. Una vez que se establezca correctamente la conexión, aparecerá en pantalla el mensaje <(Correcto)>. Configuración de DDNS público en los ajustes de cámara 1. Abra la página de ajustes de DDNS y seleccione <DDNS público> para <DDNS>. 2. Introduzca el nombre de host del sitio, nombre de usuario y contraseña. )]. 3. Haga clic en el botón [Aplicar ( Si la conexión se establece correctamente, aparece <(Correcto)>. 4. Una vez hecho, haga clic en [Aplicar ( 76_ pantalla de configuración )]. Filtración del IP Puede crear una lista de IPs a las que desee otorgar o denegar acceso. 1. En el menú de configuración, seleccione )>. la ficha <Red ( ● PANTALLA DE CONFIGURACIÓN 2. Haga clic en <Filtración del IP>. 3. Seleccione un <Tipo de filtro>. y Denegar : si se selecciona, se restringirá el acceso desde las IPs añadidas. y Permitir : si se selecciona, se permitirá el acceso sólo desde las IPs añadidas. 4. Facilite la IP a la que desee otorgar o denegar el acceso. La dirección IP del dispositivo no se puede denegar, el acceso al mismo debe otorgarse sin ningún tipo de condiciones. 5. Una vez hecho, haga clic en [Aplicar ( )]. SSL Puede seleccionar un sistema de conexión seguro o instalar el certificado público para este fin. 1. En el menú de configuración, seleccione la ficha <Red ( )>. 2. Haga clic en <SSL>. 3. Seleccione un sistema de conexión seguro. Para acceder a la cámara utilizando el modo HTTPS, tiene que introducir la dirección IP de la cámara con el formato “https:// <IP_Cámara>”. 4. Busque el certificado público que desee instalar en la cámara. Para instalar el certificado en la cámara, necesita facilitar el nombre del certificado (el usuario lo puede asignar arbitrariamente), archivo de certificado emitido por la entidad de certificación y el archivo de la clave. La opción <HTTPS(Modo de conexión segura con certificado público> sólo se activará si se ha instalado un certificado público. 5. Una vez hecho, haga clic en [Aplicar ( )]. Español _77 pantalla de configuración Instalación del certificado 1. Introduzca el nombre del certificado. 2. Seleccione el archivo del certificado y su clave, y haga clic en el botón [Instalar ( )]. Eliminación del certificado 1. Haga clic en el botón [Borrar ( )]. CONFIGURACIÓN DE EVENTOS FTP / E-mail Puede configurar los ajustes del servidor de FTP/E-mail de forma que pueda transferir las imágenes almacenadas en la cámara al PC si se produce un evento. 1. En el menú de configuración, seleccione )>. la ficha <Evento ( 2. Haga clic en <FTP / E-mail>. 3. Seleccione <Config. FTP> o <Config. E-mail> e introduzca / seleccione el valor que desee. y Config. FTP - Dirección de servidor : introduzca la dirección IP del servidor de FTP a la que transferir las imágenes de la alarma. - ID de usuario : introduzca el ID de usuario con el que desea iniciar sesión en el servidor de FTP. - Contraseña : introduzca la contraseña de cuenta de usuario para iniciar sesión en el servidor de FTP. - Directorio de carga : especifique la ruta de FTP a la que va a transferir las imágenes de la alarma. - Puerto : el puerto predeterminado del servidor de FTP es 21; no obstante, puede utilizar un número de puerto diferente según los ajustes del servidor de FTP. - Modo pasivo : seleccione <ACT> si tiene que conectar en modo pasivo debido al cortafuegos o a los ajustes del servidor de FTP. 78_ pantalla de configuración 4. Una vez hecho, haga clic en [Aplicar ( )]. Grabación SD Puede definir las condiciones de grabación o el uso de la grabación para la memoria SD, compruebe el tamaño de los datos almacenados o formatee la memoria SD. 1. En el menú de configuración, seleccione la ficha <Evento ( )>. 2. Haga clic en <Grabación SD>. Español _79 ● PANTALLA DE CONFIGURACIÓN y Config. E-mail - Dirección de servidor : introduzca la dirección IP del servidor de email que utilizará para transferir el email. ej.) SMTP. hotmail. com - Usar autentificación : permite seleccionar si utilizar autorización. - ID de usuario : introduzca el ID de usuario para iniciar sesión en el servidor de email. - Contraseña : introduzca la contraseña de cuenta de usuario para iniciar sesión en el servidor de email. - Puerto : el puerto predeterminado del servidor de email es 25; no obstante, puede utilizar un número de puerto diferente según los ajustes del servidor de email. - Receptor : introduzca la dirección del receptor de email. - Emisor : introduzca la dirección del emisor del mensaje de correo electrónico. Si la dirección del emisor es incorrecta, es posible que el mensaje de correo del emisor lo clasifique como correo basura el servidor de email y no se envíe. - Asunto : introduzca el asunto del email. - Cuerpo : facilite el texto del mensaje. Adjunte las imágenes de la alarma al email que está preparando. pantalla de configuración Para hacer una grabación en la memoria SD 1. Compruebe el <Tamaño total> y el <Tamaño libre>. 2. Si la memoria SD tiene espacio libre suficiente, defina <Grabar> en <ACT>. De lo contrario, compruebe los datos almacenados y si no los considera importantes, haga clic en <Formatear> para formatear la memoria SD. Si la tarjeta SD graba lentamente, sólo se almacenará un fotograma por segundo. En una tarjeta de memoria SD de gran capacidad, el formateo se ralentizará en consecuencia. Si el tamaño de los datos crece con el tiempo, sólo se puede almacenar 1 fps aunque defina la calidad de grabación en Fotograma completo. 3. Especifique las condiciones de grabación. y Grabar 1 fps por la fuerza : sólo se grabará un fotograma por segundo independientemente del perfil de grabación existente. y Sobrescribir : si se llena la memoria SD, se borrarán datos antiguos y se almacenarán nuevos datos en su lugar. y Duración de prealarma : especifique el punto en el tiempo antes de que se produzca la alarma; las imágenes se transferirán a partir de dicho momento. puede especificar hasta 5 segundos antes de que se produzca la alarma. y Duración de postalarma : especifique el punto en el tiempo después de que se produzca la alarma; las imágenes se transferirán hasta dicho momento. Puede especificar hasta 120 segundos después de que se produzca la alarma. 4. Una vez hecho, haga clic en [Aplicar ( 80_ pantalla de configuración )]. Entrada de alarma 1~8 Puede definir el tipo de entrada de alarma, a hora de activación y el modo de funcionamiento. 2. Haga clic en <Entrada de alarma>. 3. Especifique un dispositivo de entrada. y Tipo - Normal abierto : está normalmente abierta, pero si está cerrada, se activa una alarma. - Normal Cerrado : está normalmente cerrada, pero si está abierta, se activa una alarma. 4. Especifique el <Tiempo de activación>. y Siempre : compruebe siempre se produce una alarma. Se activa en modo de funcionamiento cuando se produce una alarma. y Sólo tiempo programado : comprueba si se produce una alarma en el día de la semana especificado durante un período de tiempo especificado. Se activa en modo de funcionamiento cuando se produce una alarma. 5. Especifique una operación que se realice si se produce una alarma. y Duración de salida 1~4 : Seleccione si definir la salida de alarma si se produce la entrada de una alarma, y especifique el tiempo de salida de alarma. y Envío de E-mail : especifique el uso de la transferencia en email en la configuración de entrada de la alarma. y Grabar : especifique el uso de la grabación en la configuración de entrada de la alarma. y Ir a predef. : va a la posición predefinida especificada al definir la entrada de alarma. 6. Una vez hecho, haga clic en [Aplicar ( )]. Español _81 ● PANTALLA DE CONFIGURACIÓN 1. En el menú de configuración, seleccione la ficha <Evento ( )>. pantalla de configuración Análisis de vídeo 1. En el menú de configuración, seleccione la ficha <Evento ( )>. 2. Haga clic en <Análisis de vídeo>. 3. Especifique el uso de Análisis de vídeo inteligente. 4. Defina el valor de resolución y el nivel de sensibilidad para detectar un objeto. Valor de resolución 1 2 3 4 5 Tamaño de objeto 32 de 8x8 píxeles 24 de 8x8 píxeles 16 de 8x8 píxeles 8 de 8x8 píxeles 1 de 8x8 píxeles Si define la resolución con un valor alto, la cámara puede detectar el movimiento del objeto de forma detallada. 5. Defina el tipo de detección de movimiento. Define detectar y realizar el seguimiento del objeto en movimiento. y Tracking : detecta un objeto en movimiento y ejecuta funciones adicionales. y Detección : detecta un objeto en movimiento. 6. Defina si utilizar o no las funciones de movimientos adicionales. Detecta el movimiento de cualquier objeto, muestra el vídeo que tenga cualquier cambio y hace un seguimiento de la ruta del movimiento. y Si selecciona <MOVIL/FIJO>, puede ver el área correspondiente cuando un objeto desaparece de la pantalla o cuando un objeto aparece y permanece en pantalla durante el período de tiempo especificado. 7. Defina si utilizar o no la función de visualización de movimientos. 8. Especifique el tiempo de activación y la condición de activación. Para más información sobre <Tiempo de activación> y <Acción>, consulte "Entrada de alarma 1~8". (página 81) 9. Después de definir <ACT> en la <Intelligence function>, configure el <Área de enmascaramiento>. Puede especificar hasta 4 zonas de máscara. Haga clic en la pantalla y arrástrela al punto que desee. Con esto se definirá el área de máscara. La detección de movimiento no se activa en la zona privada establecida. Para borrar una zona establecida, haga clic en el botón [Borrar ( )]. M Nom Cambie el ajuste de <Modo de volteo> en <Conf. de vídeo> tras ajustar el area de enmascaramiento. Si cambie el ajuste de <Modo de volteo> tras ajustar el área de enmascaramiento, borre todas las áreas de enmascaramiento existentes y defínalas de nuevo. 82_ pantalla de configuración Program. hora Puede configurar de tal forma que se produzca un evento a la hora programada independientemente de la aparición real del evento. )>. ● PANTALLA DE CONFIGURACIÓN 1. En el menú de configuración, seleccione la ficha <Evento ( 2. Haga clic en <Program. hora>. Para definir el evento de temporizador 1. Defina <Config. evento de temporizador> en <Activar>. 2. Especifique el <Tiempo de activación>. y Siempre : activa siempre en modo de funcionamiento a un intervalo definido. y Sólo tiempo programado : activa periódicamente en modo de funcionamiento a una hora y fecha especificadas. 3. Especifique el <Intervalo de transferencia>. 4. Especifique las condiciones de activación. y Envío de FTP : especifique el uso de la transferencia de FTP si se produce un evento. y Grabar : especifique el uso de la grabación si se produce un evento. 5. Una vez hecho, haga clic en [Aplicar ( )]. Español _83 pantalla de configuración CONFIGURACIÓN DEL SISTEMA Información del producto 1. En el menú de configuración, seleccione la ficha <Sistema ( )>. 2. Haga clic en <Información del producto>. 3. Compruebe la información de la cámara o facilite detallas de acuerdo con el entorno de red. y Nombre de dispositivo : si desea ver el nombre del dispositivo en la pantalla en directo, facilite el nombre del dispositivo y defina ver <Nombre de dispositivo> en <OSD> de <Conf. de vídeo>. y Ubicación : especifique la ubicación en la que está instalada la cámara. y Descripción : facilite información detallada sobre la ubicación de la cámara. y Notas : facilite una explicación sobre la cámara para entender mejor la situación. y Idioma : selecciona el idioma de Web Viewer. 4. Una vez hecho, haga clic en [Aplicar ( J )]. La información relacionada con el producto sólo existe en inglés. 84_ pantalla de configuración Fecha y hora 1. En el menú de configuración, seleccione la ficha <Sistema ( )>. 2. Haga clic en <Fecha y hora>. 4. Una vez hecho, haga clic en [Aplicar ( J )]. Si selecciona <Sincronizar con PC Viewer>, la zona horaria estándar sería la misma que la zona horaria actual del PC. Español _85 ● PANTALLA DE CONFIGURACIÓN 3. Especifique la fecha y hora que se aplicará a la cámara. y Hora actual del sistema : muestra los ajustes de hora actual del sistema. y Zona horaria : especifique la zona horaria local basándose en la GMT. y Usar hora de verano : si se marca, la hora se fijará una hora antes de la zona horaria local para el período de tiempo especificado. Esta opción sólo aparecerá en áreas en las que se aplica DST. y Conf. hora del sistema : especifique la fecha y hora que se aplicará en el sistema. - Manual : especifique manualmente la hora. - Sincronizar con NTP Server : sincronice con la hora de la dirección de servidor especificada. - Sincronizar con PC Viewer : sincronice la hora con el PC conectado. pantalla de configuración Usuario 1. En el menú de configuración, seleccione la ficha <Sistema ( )>. 2. Haga clic en <Usuario>. 3. Facilite la información de usuario necesaria. y Cambiar contraseña de administrador : cambia la contraseña actual del administrador. y Config. invitado : Si se activa <Acceso de invitado>, cualquier invitado puede acceder a la pantalla de Web Viewer pero puede ver sólo la pantalla del visor en directo. y Usuario actual : puede cambiar la información de usuario y ajustar el nivel de permiso de un usuario que esté definido en <Activar>. - Vídeo : puede seleccionar un perfil de vídeo en la pantalla de Live Viewer. - Entrada de audio : la opción de entrada de audio se activará en la pantalla de Live Viewer. - Controles : Puede controlar el menú de cámara, PTZ, el Mic y el botón de alarma. 4. Una vez hecho, haga clic en [Aplicar ( )]. Actualizar / Reiniciar 1. En el menú de configuración, seleccione )>. la ficha <Sistema ( 2. Haga clic en <Actualizar / Reiniciar>. 3. Seleccione el elemento que desee y defínalo de la forma apropiada. y Actualizar : realiza la actualización del sistema.Valores predeterminados de y Valores predeterminados de fábrica : reinicia el sistema con los valores predeterminados de fábrica. - Excepto parámetro de red : reinicia el resto de ajustes excepto los ajustes de interfaz/puerto/DDNS/filtro IP. - Todo : reinicia todos los ajustes incluidos los ajustes de cámara. (no obstante, no se reiniciará la información de registro) Si reinicia todos los ajustes, la dirección IP se reiniciará a 192.168.1.100. y Archivo de copia de seg. de configuración : hace una copia de seguridad de los ajustes actuales del sistema antes de realizar el proceso de restauración. El sistema se reinicia automáticamente tras una copia de seguridad o una restauración. y Reiniciar : reinicia el sistema. 86_ pantalla de configuración Para realizar la actualización 1. Haga clic en [Actualizar]. 2. Haga clic en [Explorar] y especifique un archivo para la actualización. ● APÉNDICE 3. Haga clic en [Enviar]. 4. Aparece el cuadro de diálogo "Actualizar" con la progresión en la parte inferior. M Si termina a la fuerza el proceso de actualización, la actualización no se completará debidamente. Para guardar los ajustes actuales y restaurar los ajustes de copia de seguridad 1. Haga clic en [Copia de segurida]. Debe aparecer el diálogo de Guardar como. 2. Especifique la ruta con un nombre de archivo adecuado y haga clic en [Save]. El archivo de copia de seguridad se guardará en la ruta especificada con el formato ".bin". 3. Para restaurar los ajustes de copia de seguridad, haga clic en [Restaurar]. 4. Seleccione el archivo de copia de seguridad que desee y haga clic en [Open]. Español _87 apéndice Registro Puede comprobar el registro del sistema o el registro de eventos. 1. En el menú de configuración, seleccione la ficha <Sistema ( )>. 2. Haga clic en <Registro>. 3. Seleccione un tipo de registro. y Syslog : puede comprobar los registros del sistema en los casos en los que se graben cambios del sistema incluida la información de hora. y Evtlog : puede comprobar los registros de eventos incluida la información de hora. 4. En la lista de registros de la derecha, seleccione un elemento que buscar. y Si seleccione <All> en la lista desplegable de la parte superior izquierda, aparecerán todos los registros del tipo de registro aplicable. 5. Si en una página no se puede mostrar todos los registros disponibles, utilice los botones inferiores para desplazarse al elemento anterior, siguiente o al último. M Si desea ver los detalles de un registro, haga clic en [Inf. ( )] en la columna derecha del registro; la información de registro se mostrará en el panel inferior. Cada página muestra 15 registros con el más reciente en la parte superior. La lista del registro de eventos/sistema puede contener hasta 1000 registros; pasado este número, los registros más antiguos se borrarán para dar entrada a los nuevos registros creados. 88_ apéndice apéndice ESPECIFICACIONES Opciones CCD Ex-view HAD PS de 1/4 pulg. Píxeles totales NT : 811(H) × 508(V) / PAL: 795 (H) x 596 (V) EPíxeles efectivos NT : 768(H) × 494(V) / PAL: 752 (H) x 582 (V) Sistema de barrido Progresivo (VPS ON) (Si WDR está activado, Barrido interlazado) Sincronización Sólo interna Frecuencia NT: H : 15,734KHz / V : 59,94 Hz, PAL: H : 15,625 KHz / V : 50 Hz Resolución horizontal Color : 600 líneas de TV Iluminación mín. Objetivo Color: 0,7 Lux (F1.6, 50IRE) B/W : 0,07 Lux (F1.6, 50IRE) Índice S/N 52dB Salida de vídeo CVBS : 1,0 Vp-p / 75Ω compuesto Longitud focal (índice de zoom) 3,2~138,5 mm (43X) Coeficiente de apertura máx. F1.6(Angular) / F3.7(Telescópico) Campo de visión angular H : 61,2˚(Angular) ~ 1,47˚(Telescópico) / V : 47,2˚(Angular) ~ 1,1˚ (Telescópico) Distancia mín. del objeto 1m (3,28 pies) Control de enfoque EA / EA de un disparo / Manual Vel. de movimiento de Máx. 3,2 seg. (Angular ➝ Telescópico) zoom Tipo de objetivo Diafragma automático DC Tipo montaje Tipo en placa Español _89 ● APÉNDICE Vídeo Descripción Dispositivo de imágenes apéndice Opciones Panorámica / Inclinación / Giro Funcionamiento Description Alcance de panorámica 360˚ indefinido Velocidad de panorámica Preaj.: 360˚/seg., Manual : 0,05˚/seg ~200˚/seg Rango de inclinación 180˚(0˚ ~ 180˚ ) Velocidad de inclinación Preaj.: 360˚/seg., Manual : 0,05˚/seg ~200˚/seg Pos. predet. 255 ea Presentación en pantalla Inglés, OSD de Web : Inglés, Francés, Alemán, Español, Italiano, Chino, Coreano, Ruso, Japonés, Sueco, Danés, Portugués Título de cámara DES / ACT (Se muestran 32 caracteres) Día y noche Autom. (ICR) / Color / ByN Compensación de luz de fondo DES / BLC Rango dinámico amplio NT : 128X / PAL : 160X Mejora de contraste XDR (eXtended Dynamic Range) (No/Bajo/Medio/Alto) Reducción de ruido digital Filtro de ruido 2D+3D de movimiento adaptativo (No/Bajo/Medio/Alto) Estabilizador digital de DES / ACT imágenes Detección de movimiento Sí Máscara de privacidad DES / ACT (12 zonas programables poligonales) Ampl. sensib. DES / Autom. (2X ~ 512X) (integración de cuadro) 90_ apéndice Opciones Descripción Control de ganancia DES / Bajo / Medio / Alto / Manual Balance de blanco ATW (In) / ATW (Ex) / AWC / Manual Funcionamiento Zoom digital 16X Volteo DES / ACT Perfil Sí VPS DES / ACT Análisis de vídeo inteligente Con movimiento / Fijo PIP DES / ACT ● APÉNDICE Velocidad de obturador NT : DES / A.FLK / Manual (1/120 ~ 1/10Kseg) PAL : DES / A.FLK / Manual (1/100 ~ 1/10Kseg) electrónico Programación Programación de día / hora E/S alarma Entrada 8ea / Salida 4ea (Relé) Interfaz de control remoto RS-485 Protocolo RS-485 Samsung-E, Samsung-T, Pelco-D, Pelco-P, Panasonic, GE(Kalatel), AD, Vicon, Honeywell(DK6), Bosch(Philips), Honeywell(VCLTP) Ethernet RJ-45 (10/100BASE-T) Formato de compresión de vídeo H.264, MPEG4, MJPEG Resolución NT : 704x480, 640x480, 352x240 PAL : 704x576, 640x480, 352x288 Velo. máx. de fotogramas NT : 30fps / PAL : 25fps Red Español _91 apéndice Opciones Ajuste de calidad de vídeo Método de control de vel. de bits H.264/MPEG4 : CBR o VBR MJPEG : VBR Capacidad de flujo de datos Flujo de datos múltiple (hasta 10 perfiles) E/S de audio Entrada de línea / Salida de línea Formato de compresión de audio G.711 μ-law Comunicación de audio Bidireccional IP IPv4, IPv6 Protocolo TCP/IP, UDP/IP, RTP(UDP), RTP(TCP), RTSP, NTP, HTTP, HTTPS, SSL, DHCP, PPPoE, FTP, SMTP, ICMP, IGMP, SNMPv1/v2c/v3(MIB-2), ARP, DNS, DDNS Seguridad Autenticación de inicio de sesión HTTPS(SSL) Autenticación de inicio de sesión Digest Filtro de dirección IP Registro de acceso de usuarios Método de flujo de datos Unicast / Multicast Acceso máx. de usuarios 10 usuarios en modo Unicast Ranura de memoria Ranura de memoria SD/SDHC Compatibilidad ONVIF Sí Visor Web SO admitido : Windows XP / VISTA / 7, MAC OS Navegador admitido :Internet Explorer 6.0 o superior, Firefoxi Google Chrome, Apple Safari Software de gestión central NET-i viewer Red 92_ apéndice Descripción H.264 / MPEG4 : Nivel de compresión, Control de nivel de vel. de bits de destino MJPEG : Control de nivel de calidad Opciones Ambiental Temperatura/humedad de funcionamiento Descripción -50°C ~ +50°C (-58°F ~ +122°F) / 20% ~ 80% HR Protección de ingreso IP66 (Impermeable) Clase 2 24V~50/60 Hz, hPOE 44~57 V Consumo de energía Máx. 20W (Calentador apagado), Máx. 50W (Calentador encendido), hPOE 24 W Color / Material marfil / Antivandalismo / Protección solar de plástico Dimensiones (Ø x Al) Ø 259 x Al 290.5 mm Peso 4,5kg ● APÉNDICE Tensión/corriente de entrada Eléctrico Mecánico Español _93 apéndice VISTA DEL PRODUCTO R8 2,5 101,5 189 22 ROSCA DE TUBO DE 1,5 PULG. Ø259 94_ apéndice SOLUCIÓN DE PROBLEMAS PROBLEMA SOLUCIÓN y Compruebe para asegurarse de que todos los cables de red se han conectado bien. No se puede acceder a la cámara desde un navegador web. y Si está conectado mediante DHCP, compruebe que la cámara puede admitir direcciones IP dinámicas sin problemas. y Si se conecta mediante una URL DDNS, compruebe que la dirección MAC se haya introducido bien. y Si la cámara está conectada al router, compruebe que el reenvío de puertos está configurado adecuadamente. y Los Visualizadores conectados se desconectan debido a cualquier cambio en las configuraciones de cámara o de red. El Visualizador se desconecta durante el control. y Compruebe todas las conexiones de red. No se puede conectar al sistema meditante un navegador de Internet Explorer 7.0. y Cuando intente conectar al sistema mediante un navegador, se comparte la misma información de cookies, resultando en errores cuando se conecta. Por ello, en lugar de usar un navegador, abra una nueva ventana de navegador para conectarse al sistema. La cámara conectada a la red no se detecta en el programa instalador IP. y Apague las configuraciones de cortafuegos en su ordenador, y luego vuelva a buscar la cámara. Se superponen imágenes. y Compruebe si dos o más cámeras están configuradas en una única dirección multicast en lugar de diferentes direcciones. Si se utiliza una única dirección para varias cámaras, las imágenes se pueden superponer. No aparece imagen. y Si el método de transmisión está configurado como multicast, compruebe si hay un router que admita multicast en el LAN al que esté conectado la cámara. y Si la cámara está conectada por una red PPPoE, es posible que el Visualizador se desconecte con condiciones de red pobres. Español _95 ● APÉNDICE y Compruebe para asegurarse de que las configuraciones de Red de la cámara son las apropiadas. apéndice PROBLEMA No se puede grabar en la tarjeta de memoria SD. La tarjeta de memoria SD está insertada pero no funciona correctamente. No se puede formatear la tarjeta de memoria SD. 96_ apéndice SOLUCIÓN y Compruebe si la tarjeta de memoria está defectuosa. y Compruebe si la lengüeta de protección contra escritura de la tarjeta de memoria está definida en "Bloqueo". y Compruebe si la tarjeta de memoria se ha insertado en la dirección correcta. En esta cámara, no se garantiza el funcionamiento de una tarjeta de memoria formateada con otros dispositivos y Formatee de nuevo la tarjeta de memoria en el menú <CONFIGURACIÓN> <Evento> <Grabación SD>. y Compruebe si la lengüeta de protección contra escritura de la tarjeta de memoria está definida en "Bloqueo". OPEN SOURCE ANNOUNCEMENT Some software components of this product incorporate source code covered under the BSD license as follows. Component Name License License URL lighttpd 1.4.25 librtp 1.20 BSD 2.0 BSD 1.0 http://www.opensource.org/licenses/bsd-license.html lighttpd is a secure, fast, compliant, and very flexible web-server that has been optimized for high-performance environments. It has a very low memory footprint compared to other webservers and takes care of cpu-load. Its advanced feature-set (FastCGI, CGI, Auth, Output-Compression, URL-Rewriting and many more) make lighttpd the perfect webserversoftware for every server that suffers load problems. For more additional information, send email to [email protected]. Copyright (C) 2004, Kneschke, incremental All rights reserved. Redistribution and use in source and binary forms, with or without modification, are permitted provided that the following conditions are met : - Redistributions of source code must retain the above copyright notice, this list of conditions and the following disclaimer. - Redistributions in binary form must reproduce the above copyright notice, this list of conditions and the following disclaimer in the documentation and/or other materials provided with the distribution. - Neither the name of the 'incremental' nor the names of its contributors may be used to endorse or promote products derived from this software without specific prior written permission. THIS SOFTWARE IS PROVIDED BY THE COPYRIGHT HOLDERS AND CONTRIBUTORS "AS IS" AND ANY EXPRESS OR IMPLIED WARRANTIES, INCLUDING, BUT NOT LIMITED TO, THE IMPLIED WARRANTIES OF MERCHANTABILITY AND FITNESS FOR A PARTICULAR PURPOSE ARE DISCLAIMED. IN NO EVENT SHALL THE COPYRIGHT OWNER OR CONTRIBUTORS BE LIABLE FOR ANY DIRECT, INDIRECT, INCIDENTAL, SPECIAL, EXEMPLARY, OR CONSEQUENTIAL DAMAGES (INCLUDING, BUT NOT LIMITED TO, PROCUREMENT OF SUBSTITUTE GOODS OR SERVICES; LOSS OF USE, DATA, OR PROFITS; OR BUSINESS INTERRUPTION) HOWEVER CAUSED AND ON ANY THEORY OF LIABILITY, WHETHER IN CONTRACT, STRICT LIABILITY, OR TORT (INCLUDING NEGLIGENCE OR OTHERWISE) ARISING IN ANY WAY OUT OF THE USE OF THIS SOFTWARE, EVEN IF ADVISED OF THE POSSIBILITY OF SUCH DAMAGE. Copyright (c) 1998-2001 University College London All rights reserved. Redistribution and use in source and binary forms, with or without modification, is permitted provided that the following conditions are met : 1. Redistributions of source code must retain the above copyright notice, this list of conditions and the following disclaimer. 2. Redistributions in binary form must reproduce the above copyright notice, this list of conditions and the following disclaimer in the documentation and/or other materials provided with the distribution. 3. All advertising materials mentioning features or use of this software must display the following acknowledgement: This product includes software developed by the Computer Science Department at University College London. 4. Neither the name of the University nor of the Department may be used to endorse or promote products derived from this software without specific prior written permission. THIS SOFTWARE IS PROVIDED BY THE AUTHORS AND CONTRIBUTORS ``AS IS'' AND ANY EXPRESSED OR IMPLIED WARRANTIES, INCLUDING, BUT NOT LIMITED TO, THE IMPLIED WARRANTIES OF MERCHANTABILITY AND FITNESS FOR A PARTICULAR PURPOSEARE DISCLAIMED. IN NO EVENT SHALL THE AUTHORS OR CONTRIBUTORS BE LIABLE FOR ANY DIRECT, INDIRECT, INCIDENTAL, SPECIAL, EXEMPLARY, OR CONSEQUENTIAL DAMAGES (INCLUDING, BUT NOT LIMITED TO, PROCUREMENT OF SUBSTITUTE GOODS OR SERVICES; LOSS OF USE, DATA, OR PROFITS; OR BUSINESS INTERRUPTION) HOWEVER CAUSED AND ON ANY THEORY OF LIABILITY, WHETHER IN CONTRACT, STRICT LIABILITY, OR TORT (INCLUDING NEGLIGENCE OR OTHERWISE) ARISING IN ANY WAY OUT OF THE USE OF THIS SOFTWARE, EVEN IF ADVISED OF THE POSSIBILITY OF SUCH DAMAGE. GPL/LGPL SOFTWARE LICENSE The software included in this product contains copyrighted software that is licensed under the GPL/LGPL. You may obtain the complete Corresponding Source code from us for a period of three years after our last shipment of this product by sending email to [email protected] If you want to obtain the complete Corresponding Source code in the physical medium such as CD-ROM, the cost of physically performing source distribution might be charged. y GPL S/W - Base Kernel, Busybox, Sysvinit, dosfstools y LGPL S/W - gLibc, Inetutils GNU GENERAL PUBLIC LICENSE Version 2, June 1991 Copyright (C)1989, 1991 Free Software Foundation, Inc. 51 Franklin Street,Fifth Floor, Boston, MA 02110-1301, USA Everyone is permitted to copy and distribute verbatim copies of this license document, but changing it is not allowed. Preamble The licenses for most software are designed to take away your freedom to share and change it. By contrast, the GNU General Public License is intended to guarantee your freedom to share and change free software-- to make sure the software is free for all its users. This General Public License applies to most of the Free Software Foundation's software and to any other program whose authors commit to using it. (Some other Free Software Foundation software is covered by the GNU Lesser General Public License instead.) You can apply it to your programs, too. When we speak of free software, we are referring to freedom, not price. Our General Public Licenses are designed to make sure that you have the freedom to distribute copies of free software (and charge for this service if you wish), that you receive source code or can get it if you want it, that you can change the software or use pieces of it in new free programs ; and that you know you can do these things. To protect your rights, we need to make restrictions that forbid anyone to deny you these rights or to ask you to surrender the rights. These restrictions translate to certain responsibilities for you if you distribute copies of the software, or if you modify it. For example, if you distribute copies of such a program, whether gratis or for a fee, you must give the recipients all the rights that you have. You must make sure that they, too, receive or can get the source code. And you must show them these terms so they know their rights. We protect your rights with two steps : (1)copyright the software, and (2)offer you this license which gives you legal permission to copy, distribute and/or modify the software. Also, for each author's protection and ours, we want to make certain that everyone understands that there is no warranty for this free software. If the software is modified by someone else and passed on, we want its recipients to know that what they have is not the original, so that any problems introduced by others will not reflect on the original authors' reputations. Finally, any free program is threatened constantly by software patents. We wish to avoid the danger that redistributors of a free program will individually obtain patent licenses, in effect making the program proprietary. To prevent this, we have made it clear that any patent must be licensed for everyone's free use or not licensed at all. The precise terms and conditions for copying, distribution and modification follow. TERMS AND CONDITIONS FOR COPYING, DISTRIBUTION AND MODIFICATION Version 2, June 1991 Copyright (C) 1989, 1991 Free Software Foundation, Inc. 51 Franklin S 0. This License applies to any program or other work which contains a notice placed by the copyright holder saying it may be distributed under the terms of this General Public License. The "Program", below, refers to any such program or work, and a "work based on the Program" means either the Program or any derivative work under copyright law : that is to say, a work containing the Program or a portion of it, either verbatim or with modifications and/or translated into another language. (Hereinafter, translation is included without limitation in the term "modification".) Each licensee is addressed as "you". Activities other than copying, distribution and modification are not covered by this License ; they are outside its scope. The act of running the Program is not restricted, and the output from the Program is covered only if its contents constitute a work based on the Program (independent of having been made by running the Program). Whether that is true depends on what the Program does. 1. You may copy and distribute verbatim copies of the Program's source code as you receive it, in any medium, provided that you conspicuously and appropriately publish on each copy an appropriate copyright notice and disclaimer of warranty; keep intact all the notices that refer to this License and to the absence of any warranty ; and give any other recipients of the Program a copy of this License along with the Program. You may charge a fee for the physical act of transferring a copy, and you may at your option offer warranty protection in exchange for a fee. 2. You may modify your copy or copies of the Program or any portion of it, thus forming a work based on the Program, and copy and distribute such modifications or work under the terms of Section 1 above, provided that you also meet all of these conditions : a) You must cause the modified files to carry prominent notices stating that you changed the files and the date of any change. b) You must cause any work that you distribute or publish, that in whole or in part contains or is derived from the Program or any part thereof, to be licensed as a whole at no charge to all third parties under the terms of this License. c) If the modified program normally reads commands interactively when run,you must cause it, when started running for such interactive use in the most ordinary way, to print or display an announcement including an appropriate copyright notice and a notice that there is no warranty (or else, saying that you provide a warranty) and that users may redistribute the program under these conditions, and telling the user how to view a copy of this License. (Exception:if the Program itself is interactive but does not normally print such an announcement, your work based on the Program is not required to print an announcement.) These requirements apply to the modified work as a whole. If identifiable sections of that work are not derived from the Program, and can be reasonably considered independent and separate works in themselves, then this License, and its terms, do not apply to those sections when you distribute them as separate works. But when you distribute the same sections as part of a whole which is a work based on the Program, the distribution of the whole must be on the terms of this License, whose permissions for other licensees extend to the entire whole, and thus to each and every part regardless of who wrote it. Thus, it is not the intent of this section to claim rights or contest your rights to work written entirely by you ; rather, the intent is to exercise the right to control the distribution of derivative or collective works based on the Program. In addition, mere aggregation of another work not based on the Program with the Program (or with a work based on the Program)on a volume of a storage or distribution medium does not bring the other work under the scope of this License. 3. You may copy and distribute the Program (or a work based on it, under Section 2)in object code or executable form under the terms of Sections 1 and 2 above provided that you also do one of the following : a) Accompany it with the complete corresponding machine-readable source code, which must be distributed under the terms of Sections 1 and 2 above on a medium customarily used for software interchange ; or, b) Accompany it with a written offer, valid for at least three years, to give any third party, for a charge no more than your cost of physically performing source distribution, a complete machinereadable copy of the corresponding source code, to be distributed under the terms of Sections 1 and 2 above on a medium customarily used for software interchange ; or, c) Accompany it with the information you received as to the offer to distribute corresponding source code. (This alternative is allowed only for noncommercial distribution and only if you received the program in object code or executable form with such an offer, in accord with Subsection b above.) The source code for a work means the preferred form of the work for making modifications to it. For an executable work, complete source code means all the source code for all modules it contains, plus any associated interface definition files, plus the scripts used to control compilation and installation of the executable. However, as a special exception, the source code distributed need not include anything that is normally distributed (in either source or binary form)with the major components (compiler, kernel, and so on)of the operating system on which the executable runs, unless that component itself accompanies the executable. If distribution of executable or object code is made by offering access to copy from a designated place, then offering equivalent access to copy the source code from the same place counts as distribution of the source code, even though third parties are not compelled to copy the source along with the object code. 4. You may not copy, modify, sublicense, or distribute the Program except as expressly provided under this License. Any attempt otherwise to copy, modify, sublicense or distribute the Program is void, and will automatically terminate your rights under this License. However, parties who have received copies, or rights, from you under this License will not have their licenses terminated so long as such parties remain in full compliance. 5. You are not required to accept this License, since you have not signed it. However, nothing else grants you permission to modify or distribute the Program or its derivative works. These actions are prohibited by law if you do not accept this License.Therefore, by modifying or distributing the Program (or any work based on the Program), you indicate your acceptance of this License to do so, and all its terms and conditions for copying, distributing or modifying the Program or works based on it. 6. Each time you redistribute the Program (or any work based on the Program), the recipient automatically receives a license from the original licensor to copy, distribute or modify the Program subject to these terms and conditions. You may not impose any further restrictions on the recipients' exercise of the rights granted herein. You are not responsible for enforcing compliance by third parties to this License. 7. If, as a consequence of a court judgment or allegation of patent infringement or for any other reason (not limited to patent issues), conditions are imposed on you (whether by court order, agreement or otherwise)that contradict the conditions of this License, they do not excuse you from the conditions of this License. If you cannot distribute so as to satisfy simultaneously your obligations under this License and any other pertinent obligations, then as a consequence you may not distribute the Program at all. For example, if a patent license would not permit royalty-free redistribution of the Program by all those who receive copies directly or indirectly through you, then the only way you could satisfy both it and this License would be to refrain entirely from distribution of the Program. If any portion of this section is held invalid or unenforceable under any particular circumstance, the balance of the section is intended to apply and the section as a whole is intended to apply in other circumstances. It is not the purpose of this section to induce you to infringe any patents or other property right claims or to contest validity of any such claims; this section has the sole purpose of protecting the integrity of the free software distribution system, which is implemented by public license practices. Many people have made generous contributions to the wide range of software distributed through that system in reliance on consistent application of that system ; it is up to the author/donor to decide if he or she is willing to distribute software through any other system and a licensee cannot impose that choice. This section is intended to make thoroughly clear what is believed to be a consequence of the rest of this License. 8. If the distribution and/or use of the Program is restricted in certain countries either by patents or by copyrighted interfaces, the original copyright holder who places the Program under this License may add an explicit geographical distribution limitation excluding those countries,so that distribution is permitted only in or among countries not thus excluded. In such case, this License incorporates the limitation as if written in the body of this License. 9. The Free Software Foundation may publish revised and/or new versions of the General Public License from time to time. Such new versions will be similar in spirit to the present version, but may differ in detail to address new problems or concerns. Each version is given a distinguishing version number. If the Program specifies a version number of this License which applies to it and "any later version", you have the option of following the terms and conditions either of that version or of any later version published by the Free Software Foundation. If the Program does not specify a version number of this License, you may choose any version ever published by the Free Software Foundation. 10. If you wish to incorporate parts of the Program into other free programs whose distribution conditions are different, write to the author to ask for permission. For software which is copyrighted by the Free Software Foundation,write to the Free Software Foundation ; we sometimes make exceptions for this. Our decision will be guided by the two goals of preserving the free status of all derivatives of our free software and of promoting the sharing and reuse of software generally. NO WARRANTY 11. BECAUSE THE PROGRAM IS LICENSED FREE OF CHARGE, THERE IS NO WARRANTY FOR THE PROGRAM, TO THE EXTENT PERMITTED BY APPLICABLE LAW. EXCEPT WHEN OTHERWISE STATED IN WRITING THE COPYRIGHT HOLDERS AND/OR OTHER PARTIES PROVIDE THE PROGRAM "ASIS" WITHOUT WARRANTY OF ANY KIND, EITHER EXPRESSED OR IMPLIED, INCLUDING, BUT NOT LIMITED TO, THE IMPLIED WARRANTIES OF MERCHANTABILITY AND FITNESS FOR A PARTICULAR PURPOSE. THE ENTIRE RISK AS TO THE QUALITY AND PERFORMANCE OF THE PROGRAM IS WITH YOU. SHOULD THE PROGRAMPROVE DEFECTIVE, YOU ASSUME THE COST OF ALL NECESSARY SERVICING, REPAIR OR CORRECTION. 12. IN NO EVENT UNLESS REQUIRED BY APPLICABLE LAW OR AGREED TO IN WRITING WILL ANY COPYRIGHT HOLDER, OR ANY OTHER PARTY WHO MAY MODIFY AND/OR REDISTRIBUTE DAMAGES, INCLUDING ANY GENERAL, SPECIAL, INCIDENTAL OR CONSEQUENTIAL DAMAGES ARISING OUT OF THE USE OR INABILITY TO USE THE PROGRAM (INCLUDING BUT NOT LIMITED TO LOSS OF DATA OR DATA BEING RENDERED INACCURATE OR LOSSES SUSTAINED BY YOU OR THIRD PARTIES OR A FAILURE OF THE PROGRAM TO OPERATE WITH ANY OTHER PROGRAMS), EVEN IF SUCH HOLDER OR OTHER PARTY HAS BEEN ADVISED OF THE POSSIBILITY OF SUCH DAMAGES. END OF TERMS AND CONDITIONS How to Apply These Terms to Your New Programs If you develop a new program, and you want it to be of the greatest possible use to the public, the best way to achieve this is to make it free software which everyone can redistribute and change under these terms. To do so, attach the following notices to the program. It is safest to attach them to the start of each source file to most effectively convey the exclusion of warranty ; and each file should have at least the "copyright" line and a pointer to where the full notice is found. one line to give the program's name and an idea of what it does. Copyright (C)yyyy name of author This program is free software ; you can redistribute it and/or modify it under the terms of the GNU General Public License as published by the Free Software Foundation ; either version 2 of the License, or (at your option)any later version. This program is distributed in the hope that it will be useful, but WITHOUT ANY WARRANTY ; without even the implied warranty of MERCHANTABILITY or FITNESS FOR A PARTICULAR PURPOSE. See the GNU General Public License for more details. You should have received a copy of the GNU General Public License along with this program ; if not, write to the Free Software Foundation, Inc.,51 Franklin Street, Fifth Floor, Boston, MA 02110-1301, USA. Also add information on how to contact you by electronic and paper mail. If the program is interactive, make it output a short notice like this when it starts in an interactive mode : program is a subroutine library, you may consider it more useful to permit linking proprietary applications with the library. If this is what you want to do, use the GNU Lesser General Public License instead of this License. GNU GENERAL PUBLIC LICENSE Version 3, 29 June 2007 Copyright © 2007 Free Software Foundation, Inc. <http://fsf.org/> Everyone is permitted to copy and distribute verbatim copies of this license document, but changing it is not allowed. Gnomovision version 69, Preamble Copyright (C) year name of author The GNU General Public License is a free, copyleft Gnomovision comes with ABSOLUTELY NO WARRANTY ; for details type ‘show w’. This is free software, and you are welcome to redistribute it under certain conditions ; type ‘show c’ for details. The hypothetical commands ‘show w’ and ‘show c’ should show the appropriate parts of the General Public License. Of course, the commands you use may be called something other than ‘show w’ and ‘show c’ ; they could even be mouse-clicks or menu items-- whatever suits your program. You should also get your employer (if you work as a programmer)or your school, if any, to sign a "copyright disclaimer" for the program,if necessary. Here is a sample ; alter the names: Yoyodyne, Inc.,hereby disclaims all copyright interest in the program ‘ Gnomovision’ (which makes passes at compilers) written by James Hacker. signature of Ty Coon, 1 April 1989 Ty Coon, President of Vice This General Public License does not permit incorporating your program into proprietary programs. If your license for software and other kinds of works. The licenses for most software and other practical works are designed to take away your freedom to share and change the works. By contrast, the GNU General Public License is intended to guarantee your freedom to share and change all versions of a program--to make sure it remains free software for all its users. We, the Free Software Foundation, use the GNU General Public License for most of our software; it applies also to any other work released this way by its authors. You can apply it to your programs, too. When we speak of free software, we are referring to freedom, not price. Our General Public Licenses are designed to make sure that you have the freedom to distribute copies of free software (and charge for them if you wish), that you receive source code or can get it if you want it, that you can change the software or use pieces of it in new free programs, and that you know you can do these things. To protect your rights, we need to prevent others from denying you these rights or asking you to surrender the rights. Therefore, you have certain responsibilities if you distribute copies of the software, or if you modify it: responsibilities to respect the freedom of others. For example, if you distribute copies of such a program, whether gratis or for a fee, you must pass on to the recipients the same freedoms that you received. You must make sure that they, too, receive or can get the source code. And you must show them these terms so they know their rights. Developers that use the GNU GPL protect your rights with two steps: (1) assert copyright on the software, and (2) offer you this License giving you legal permission to copy, distribute and/or modify it. For the developers' and authors' protection, the GPL clearly explains that there is no warranty for this free software. For both users' and authors' sake, the GPL requires that modified versions be marked as changed, so that their problems will not be attributed erroneously to authors of previous versions. Some devices are designed to deny users access to install or run modified versions of the software inside them, although the manufacturer can do so. This is fundamentally incompatible with the aim of protecting users' freedom to change the software. The systematic pattern of such abuse occurs in the area of products for individuals to use, which is precisely where it is most unacceptable. Therefore, we have designed this version of the GPL to prohibit the practice for those products. If such problems arise substantially in other domains, we stand ready to extend this provision to those domains in future versions of the GPL, as needed to protect the freedom of users. Finally, every program is threatened constantly by software patents. States should not allow patents to restrict development and use of software on general-purpose computers, but in those that do, we wish to avoid the special danger that patents applied to a free program could make it effectively proprietary. To prevent this, the GPL assures that patents cannot be used to render the program nonfree. The precise terms and conditions for copying, distribution and modification follow. TERMS AND CONDITIONS 0. Definitions. “This License” refers to version 3 of the GNU General Public License. “Copyright” also means copyright-like laws that apply to other kinds of works, such as semiconductor masks. “The Program” refers to any copyrightable work licensed under this License. Each licensee is addressed as “you”. “Licensees” and “recipients” may be individuals or organizations. To “modify” a work means to copy from or adapt all or part of the work in a fashion requiring copyright permission, other than the making of an exact copy. The resulting work is called a “modified version” of the earlier work or a work “based on” the earlier work. A “covered work” means either the unmodified Program or a work based on the Program. To “propagate” a work means to do anything with it that, without permission, would make you directly or secondarily liable for infringement under applicable copyright law, except executing it on a computer or modifying a private copy. Propagation includes copying, distribution (with or without modification), making available to the public, and in some countries other activities as well. To “convey” a work means any kind of propagation that enables other parties to make or receive copies. Mere interaction with a user through a computer network, with no transfer of a copy, is not conveying. An interactive user interface displays “Appropriate Legal Notices” to the extent that it includes a convenient and prominently visible feature that (1) displays an appropriate copyright notice, and (2) tells the user that there is no warranty for the work (except to the extent that warranties are provided), that licensees may convey the work under this License, and how to view a copy of this License. If the interface presents a list of user commands or options, such as a menu, a prominent item in the list meets this criterion. 1. Source Code. The “source code” for a work means the preferred form of the work for making modifications to it. “Object code” means any non-source form of a work. A “Standard Interface” means an interface that either is an official standard defined by a recognized standards body, or, in the case of interfaces specified for a particular programming language, one that is widely used among developers working in that language. The “System Libraries” of an executable work include anything, other than the work as a whole, that (a) is included in the normal form of packaging a Major Component, but which is not part of that Major Component, and (b) serves only to enable use of the work with that Major Component, or to implement a Standard Interface for which an implementation is available to the public in source code form. A “Major Component”, in this context, means a major essential component (kernel, window system, and so on) of the specific operating system (if any) on which the executable work runs, or a compiler used to produce the work, or an object code interpreter used to run it. The “Corresponding Source” for a work in object code form means all the source code needed to generate, install, and (for an executable work) run the object code and to modify the work, including scripts to control those activities. However, it does not include the work's System Libraries, or general-purpose tools or generally available free programs which are used unmodified in performing those activities but which are not part of the work. For example, Corresponding Source includes interface definition files associated with source files for the work, and the source code for shared libraries and dynamically linked subprograms that the work is specifically designed to require, such as by intimate data communication or control flow between those subprograms and other parts of the work. The Corresponding Source need not include anything that users can regenerate automatically from other parts of the Corresponding Source. The Corresponding Source for a work in source code form is that same work. 2. Basic Permissions. All rights granted under this License are granted for the term of copyright on the Program, and are irrevocable provided the stated conditions are met. This License explicitly affirms your unlimited permission to run the unmodified Program. The output from running a covered work is covered by this License only if the output, given its content, constitutes a covered work. This License acknowledges your rights of fair use or other equivalent, as provided by copyright law. You may make, run and propagate covered works that you do not convey, without conditions so long as your license otherwise remains in force. You may convey covered works to others for the sole purpose of having them make modifications exclusively for you, or provide you with facilities for running those works, provided that you comply with the terms of this License in conveying all material for which you do not control copyright. Those thus making or running the covered works for you must do so exclusively on your behalf, under your direction and control, on terms that prohibit them from making any copies of your copyrighted material outside their relationship with you. Conveying under any other circumstances is permitted solely under the conditions stated below. Sublicensing is not allowed; section 10 makes it unnecessary. 3. Protecting Users' Legal Rights From Anti-Circumvention Law. No covered work shall be deemed part of an effective technological measure under any applicable law fulfilling obligations under article 11 of the WIPO copyright treaty adopted on 20 December 1996, or similar laws prohibiting or restricting circumvention of such measures. When you convey a covered work, you waive any legal power to forbid circumvention of technological measures to the extent such circumvention is effected by exercising rights under this License with respect to the covered work, and you disclaim any intention to limit operation or modification of the work as a means of enforcing, against the work's users, your or third parties' legal rights to forbid circumvention of technological measures. 4. Conveying Verbatim Copies. You may convey verbatim copies of the Program's source code as you receive it, in any medium, provided that you conspicuously and appropriately publish on each copy an appropriate copyright notice; keep intact all notices stating that this License and any non-permissive terms added in accord with section 7 apply to the code; keep intact all notices of the absence of any warranty; and give all recipients a copy of this License along with the Program. You may charge any price or no price for each copy that you convey, and you may offer support or warranty protection for a fee. 5. Conveying Modified Source Versions. You may convey a work based on the Program, or the modifications to produce it from the Program, in the form of source code under the terms of section 4, provided that you also meet all of these conditions: a) The work must carry prominent notices stating that you modified it, and giving a relevant date. b) The work must carry prominent notices stating that it is released under this License and any conditions added under section 7. This requirement modifies the requirement in section 4 to “keep intact all notices”. c) You must license the entire work, as a whole, under this License to anyone who comes into possession of a copy. This License will therefore apply, along with any applicable section 7 additional terms, to the whole of the work, and all its parts, regardless of how they are packaged. This License gives no permission to license the work in any other way, but it does not invalidate such permission if you have separately received it. d) If the work has interactive user interfaces, each must display Appropriate Legal Notices; however, if the Program has interactive interfaces that do not display Appropriate Legal Notices, your work need not make them do so. A compilation of a covered work with other separate and independent works, which are not by their nature extensions of the covered work, and which are not combined with it such as to form a larger program, in or on a volume of a storage or distribution medium, is called an “aggregate” if the compilation and its resulting copyright are not used to limit the access or legal rights of the compilation's users beyond what the individual works permit. Inclusion of a covered work in an aggregate does not cause this License to apply to the other parts of the aggregate. 6. Conveying Non-Source Forms. You may convey a covered work in object code form under the terms of sections 4 and 5, provided that you also convey the machinereadable Corresponding Source under the terms of this License, in one of these ways: a) Convey the object code in, or embodied in, a physical product (including a physical distribution medium), accompanied by the Corresponding Source fixed on a durable physical medium customarily used for software interchange. b) Convey the object code in, or embodied in, a physical product (including a physical distribution medium), accompanied by a written offer, valid for at least three years and valid for as long as you offer spare parts or customer support for that product model, to give anyone who possesses the object code either (1) a copy of the Corresponding Source for all the software in the product that is covered by this License, on a durable physical medium customarily used for software interchange, for a price no more than your reasonable cost of physically performing this conveying of source, or (2) access to copy the Corresponding Source from a network server at no charge. c) Convey individual copies of the object code with a copy of the written offer to provide the corresponding Source. This alternative is allowed only occasionally and noncommercially, and only if you received the object code with such an offer, in accord with subsection 6b. d) Convey the object code by offering access from a designated place (gratis or for a charge), and offer equivalent access to the Corresponding Source in the same way through the same place at no further charge. You need not require recipients to copy the Corresponding Source along with the object code. If the place to copy the object code is a network server, the Corresponding Source may be on a different server (operated by you or a third party) that supports equivalent copying facilities, provided you maintain clear directions next to the object code saying where to find the Corresponding Source. Regardless of what server hosts the Corresponding Source, you remain obligated to ensure that it is available for as long as needed to satisfy these requirements. e) Convey the object code using peer-topeer transmission, provided you inform other peers where the object code and Corresponding Source of the work are being offered to the general public at no charge under subsection 6d. A separable portion of the object code, whose source code is excluded from the Corresponding Source as a System Library, need not be included in conveying the object code work. A “User Product” is either (1) a “consumer product”, which means any tangible personal property which is normally used for personal, family, or household purposes, or (2) anything designed or sold for incorporation into a dwelling. In determining whether a product is a consumer product, doubtful cases shall be resolved in favor of coverage. For a particular product received by a particular user, “normally used” refers to a typical or common use of that class of product, regardless of the status of the particular user or of the way in which the particular user actually uses, or expects or is expected to use, the product. A product is a consumer product regardless of whether the product has substantial commercial, industrial or non-consumer uses, unless such uses represent the only significant mode of use of the product. “Installation Information” for a User Product means any methods, procedures, authorization keys, or other information required to install and execute modified versions of a covered work in that User Product from a modified version of its Corresponding Source. The information must suffice to ensure that the continued functioning of the modified object code is in no case prevented or interfered with solely because modification has been made. If you convey an object code work under this section in, or with, or specifically for use in, a User Product, and the conveying occurs as part of a transaction in which the right of possession and use of the User Product is transferred to the recipient in perpetuity or for a fixed term (regardless of how the transaction is characterized), the Corresponding Source conveyed under this section must be accompanied by the Installation Information. But this requirement does not apply if neither you nor any third party retains the ability to install modified object code on the User Product (for example, the work has been installed in ROM). The requirement to provide Installation Information does not include a requirement to continue to provide support service, warranty, or updates for a work that has been modified or installed by the recipient, or for the User Product in which it has been modified or installed. Access to a network may be denied when the modification itself materially and adversely affects the operation of the network or violates the rules and protocols for communication across the network. Corresponding Source conveyed, and Installation Information provided, in accord with this section must be in a format that is publicly documented (and with an implementation available to the public in source code form), and must require no special password or key for unpacking, reading or copying. 7. Additional Terms. “Additional permissions” are terms that supplement the terms of this License by making exceptions from one or more of its conditions. Additional permissions that are applicable to the entire Program shall be treated as though they were included in this License, to the extent that they are valid under applicable law. If additional permissions apply only to part of the Program, that part may be used separately under those permissions, but the entire Program remains governed by this License without regard to the additional permissions. When you convey a copy of a covered work, you may at your option remove any additional permissions from that copy, or from any part of it. (Additional permissions may be written to require their own removal in certain cases when you modify the work.) You may place additional permissions on material, added by you to a covered work, for which you have or can give appropriate copyright permission. Notwithstanding any other provision of this License, for material you add to a covered work, you may (if authorized by the copyright holders of that material) supplement the terms of this License with terms: a) Disclaiming warranty or limiting liability differently from the terms of sections 15 and 16 of this License; or b) Requiring preservation of specified reasonable legal notices or author attributions in that material or in the Appropriate Legal Notices displayed by works containing it; or c) Prohibiting misrepresentation of the origin of that material, or requiring that modified versions of such material be marked in reasonable ways as different from the original version; or d) Limiting the use for publicity purposes of names of licensors or authors of the material; or e) Declining to grant rights under trademark law for use of some trade names, trademarks, or service marks; or f) Requiring indemnification of licensors and authors of that material by anyone who conveys the material (or modified versions of it) with contractual assumptions of liability to the recipient, for any liability that these contractual assumptions directly impose on those licensors and authors. All other non-permissive additional terms are considered “further restrictions” within the meaning of section 10. If the Program as you received it, or any part of it, contains a notice stating that it is governed by this License along with a term that is a further restriction, you may remove that term. If a license document contains a further restriction but permits relicensing or conveying under this License, you may add to a covered work material governed by the terms of that license document, provided that the further restriction does not survive such relicensing or conveying. If you add terms to a covered work in accord with this section, you must place, in the relevant source files, a statement of the additional terms that apply to those files, or a notice indicating where to find the applicable terms. Additional terms, permissive or nonpermissive, may be stated in the form of a separately written license, or stated as exceptions; the above requirements apply either way. 8. Termination. You may not propagate or modify a covered work except as expressly provided under this License. Any attempt otherwise to propagate or modify it is void, and will automatically terminate your rights under this License (including any patent licenses granted under the third paragraph of section 11). from the original licensors, to run, modify and propagate that work, subject to this License. You are not responsible for enforcing compliance by third parties with this License. However, if you cease all violation of this License, then your license from a particular copyright holder is reinstated (a) provisionally, unless and until the copyright holder explicitly and finally terminates your license, and (b) permanently, if the copyright holder fails to notify you of the violation by some reasonable means prior to 60 days after the cessation. An “entity transaction” is a transaction transferring control of an organization, or substantially all assets of one, or subdividing an organization, or merging organizations. If propagation of a covered work results from an entity transaction, each party to that transaction who receives a copy of the work also receives whatever licenses to the work the party's predecessor in interest had or could give under the previous paragraph, plus a right to possession of the Corresponding Source of the work from the predecessor in interest, if the predecessor has it or can get it with reasonable efforts. Moreover, your license from a particular copyright holder is reinstated permanently if the copyright holder notifies you of the violation by some reasonable means, this is the first time you have received notice of violation of this License (for any work) from that copyright holder, and you cure the violation prior to 30 days after your receipt of the notice. Termination of your rights under this section does not terminate the licenses of parties who have received copies or rights from you under this License. If your rights have been terminated and not permanently reinstated, you do not qualify to receive new licenses for the same material under section 10. 9. Acceptance Not Required for Having Copies. You are not required to accept this License in order to receive or run a copy of the Program. Ancillary propagation of a covered work occurring solely as a consequence of using peer-to-peer transmission to receive a copy likewise does not require acceptance. However, nothing other than this License grants you permission to propagate or modify any covered work. These actions infringe copyright if you do not accept this License. Therefore, by modifying or propagating a covered work, you indicate your acceptance of this License to do so. 10. Automatic Licensing of Downstream Recipients. Each time you convey a covered work, the recipient automatically receives a license You may not impose any further restrictions on the exercise of the rights granted or affirmed under this License. For example, you may not impose a license fee, royalty, or other charge for exercise of rights granted under this License, and you may not initiate litigation (including a cross-claim or counterclaim in a lawsuit) alleging that any patent claim is infringed by making, using, selling, offering for sale, or importing the Program or any portion of it. 11. Patents. A “contributor” is a copyright holder who authorizes use under this License of the Program or a work on which the Program is based. The work thus licensed is called the contributor's “contributor version”. A contributor's “essential patent claims” are all patent claims owned or controlled by the contributor, whether already acquired or hereafter acquired, that would be infringed by some manner, permitted by this License, of making, using, or selling its contributor version, but do not include claims that would be infringed only as a consequence of further modification of the contributor version. For purposes of this definition, “control” includes the right to grant patent sublicenses in a manner consistent with the requirements of this License. Each contributor grants you a non-exclusive, worldwide, royalty-free patent license under the contributor's essential patent claims, to make, use, sell, offer for sale, import and otherwise run, modify and propagate the contents of its contributor version. In the following three paragraphs, a “patent license” is any express agreement or commitment, however denominated, not to enforce a patent (such as an express permission to practice a patent or covenant not to sue for patent infringement). To “grant” such a patent license to a party means to make such an agreement or commitment not to enforce a patent against the party. If you convey a covered work, knowingly relying on a patent license, and the Corresponding Source of the work is not available for anyone to copy, free of charge and under the terms of this License, through a publicly available network server or other readily accessible means, then you must either (1) cause the Corresponding Source to be so available, or (2) arrange to deprive yourself of the benefit of the patent license for this particular work, or (3) arrange, in a manner consistent with the requirements of this License, to extend the patent license to downstream recipients. “Knowingly relying” means you have actual knowledge that, but for the patent license, your conveying the covered work in a country, or your recipient's use of the covered work in a country, would infringe one or more identifiable patents in that country that you have reason to believe are valid. If, pursuant to or in connection with a single transaction or arrangement, you convey, or propagate by procuring conveyance of, a covered work, and grant a patent license to some of the parties receiving the covered work authorizing them to use, propagate, modify or convey a specific copy of the covered work, then the patent license you grant is automatically extended to all recipients of the covered work and works based on it. A patent license is “discriminatory” if it does not include within the scope of its coverage, prohibits the exercise of, or is conditioned on the non-exercise of one or more of the rights that are specifically granted under this License. You may not convey a covered work if you are a party to an arrangement with a third party that is in the business of distributing software, under which you make payment to the third party based on the extent of your activity of conveying the work, and under which the third party grants, to any of the parties who would receive the covered work from you, a discriminatory patent license (a) in connection with copies of the covered work conveyed by you (or copies made from those copies), or (b) primarily for and in connection with specific products or compilations that contain the covered work, unless you entered into that arrangement, or that patent license was granted, prior to 28 March 2007. Nothing in this License shall be construed as excluding or limiting any implied license or other defenses to infringement that may otherwise be available to you under applicable patent law. 12. No Surrender of Others' Freedom. If conditions are imposed on you (whether by court order, agreement or otherwise) that contradict the conditions of this License, they do not excuse you from the conditions of this License. If you cannot convey a covered work so as to satisfy simultaneously your obligations under this License and any other pertinent obligations, then as a consequence you may not convey it at all. For example, if you agree to terms that obligate you to collect a royalty for further conveying from those to whom you convey the Program, the only way you could satisfy both those terms and this License would be to refrain entirely from conveying the Program. 13. Use with the GNU Affero General Public License. Notwithstanding any other provision of this License, you have permission to link or combine any covered work with a work licensed under version 3 of the GNU Affero General Public License into a single combined work, and to convey the resulting work. The terms of this License will continue to apply to the part which is the covered work, but the special requirements of the GNU Affero General Public License, section 13, concerning interaction through a network will apply to the combination as such. 14. Revised Versions of this License. The Free Software Foundation may publish revised and/ or new versions of the GNU General Public License from time to time. Such new versions will be similar in spirit to the present version, but may differ in detail to address new problems or concerns. Each version is given a distinguishing version number. If the Program specifies that a certain numbered version of the GNU General Public License “or any later version” applies to it, you have the option of following the terms and conditions either of that numbered version or of any later version published by the Free Software Foundation. If the Program does not specify a version number of the GNU General Public License, you may choose any version ever published by the Free Software Foundation. If the Program specifies that a proxy can decide which future versions of the GNU General Public License can be used, that proxy's public statement of acceptance of a version permanently authorizes you to choose that version for the Program. Later license versions may give you additional or different permissions. However, no additional obligations are imposed on any author or copyright holder as a result of your choosing to follow a later version. 15. Disclaimer of Warranty. THERE IS NO WARRANTY FOR THE PROGRAM, TO THE EXTENT PERMITTED BY APPLICABLE LAW. EXCEPT WHEN OTHERWISE STATED IN WRITING THE COPYRIGHT HOLDERS AND/OR OTHER PARTIES PROVIDE THE PROGRAM “AS IS” WITHOUT WARRANTY OF ANY KIND, EITHER EXPRESSED OR IMPLIED, INCLUDING, BUT NOT LIMITED TO, THE IMPLIED WARRANTIES OF MERCHANTABILITY AND FITNESS FOR A PARTICULAR PURPOSE. THE ENTIRE RISK AS TO THE QUALITY AND PERFORMANCE OF THE PROGRAM IS WITH YOU. SHOULD THE PROGRAM PROVE DEFECTIVE, YOU ASSUME THE COST OF ALL NECESSARY SERVICING, REPAIR OR CORRECTION. 16. Limitation of Liability. IN NO EVENT UNLESS REQUIRED BY APPLICABLE LAW OR AGREED TO IN WRITING WILL ANY COPYRIGHT HOLDER, OR ANY OTHER PARTY WHO MODIFIES AND/OR CONVEYS THE PROGRAM AS PERMITTED ABOVE, BE LIABLE TO YOU FOR DAMAGES, INCLUDING ANY GENERAL, SPECIAL, INCIDENTAL OR CONSEQUENTIAL DAMAGES ARISING OUT OF THE USE OR INABILITY TO USE THE PROGRAM (INCLUDING BUT NOT LIMITED TO LOSS OF DATA OR DATA BEING RENDERED INACCURATE OR LOSSES SUSTAINED BY YOU OR THIRD PARTIES OR A FAILURE OF THE PROGRAM TO OPERATE WITH ANY OTHER PROGRAMS), EVEN IF SUCH HOLDER OR OTHER PARTY HAS BEEN ADVISED OF THE POSSIBILITY OF SUCH DAMAGES. 17. Interpretation of Sections 15 and 16. If the disclaimer of warranty and limitation of liability provided above cannot be given local legal effect according to their terms, reviewing courts shall apply local law that most closely approximates an absolute waiver of all civil liability in connection with the Program, unless a warranty or assumption of liability accompanies a copy of the Program in return for a fee. END OF TERMS AND CONDITIONS GNU LESSER GENERAL PUBLIC LICENSE Version 2.1, February 1999 Copyright (C) 1991, 1999 Free Software Foundation, Inc. 51 Franklin Street, Fifth Floor, Boston, MA 02110-1301 USA Everyone is permitted to copy and distribute verbatim copies of this license document, but changing it is not allowed. [This is the first released version of the Lesser GPL. It also counts as the successor of the GNU Library Public License, version 2, hence the version number 2.1.] Preamble The licenses for most software are designed to take away your freedom to share and change it. By contrast, the GNU General Public Licenses are intended to guarantee your freedom to share and change free software to make sure the software is free for all its users. This license, the Lesser General Public License, applies to some specially designated software packages-typically libraries-of the Free Software Foundation and other authors who decide to use it. You can use it too, but we suggest you first think carefully about whether this license or the ordinary General Public License is the better strategy to use in any particular case, based on the explanations below. When we speak of free software, we are referring to freedom of use, not price. Our General Public Licenses are designed to make sure that you have the freedom to distribute copies of free software (and charge for this service if you wish); that you receive source code or can get it if you want it; that you can change the software and use pieces of it in new free programs; and that you are informed that you can do these things. To protect your rights, we need to make restrictions that forbid distributors to deny you these rights or to ask you to surrender these rights. These restrictions translate to certain responsibilities for you if you distribute copies of the library or if you modify it. For example, if you distribute copies of the library, whether gratis or for a fee, you must give the recipients all the rights that we gave you. You must make sure that they, too, receive or can get the source code. If you link other code with the library, you must provide complete object files to the recipients, so that they can relink them with the library after making changes to the library and recompiling it. And you must show them these terms so they know their rights. We protect your rights with a two-step method: (1) we copyright the library, and (2) we offer you this license, which gives you legal permission to copy, distribute and/or modify the library. To protect each distributor, we want to make it very clear that there is no warranty for the free library. Also, if the library is modified by someone else and passed on, the recipients should know that what they have is not the original version, so that the original author’s reputation will not be affected by problems that might be introduced by others. Finally, software patents pose a constant threat to the existence of any free program. We wish to make sure that a company cannot effectively restrict the users of a free program by obtaining a restrictive license from a patent holder. Therefore, we insist that any patent license obtained for a version of the library must be consistent with the full freedom of use specified in this license. Most GNU software, including some libraries, is covered by the ordinary GNU General Public License. This license, the GNU Lesser General Public License, applies to certain designated libraries, and is quite different from the ordinary General Public License. We use this license for certain libraries in order to permit linking those libraries into non-free programs. When a program is linked with a library, whether statically or using a shared library, the combination of the two is legally speaking a combined work, a derivative of the original library. The ordinary General Public License therefore permits such linking only if the entire combination fits its criteria of freedom. The Lesser General Public License permits more lax criteria for linking other code with the library. We call this license the “Lesser” General Public License because it does Less to protect the user’s freedom than the ordinary General Public License. It also provides other free software developers Less of an advantage over competing nonfree programs. These disadvantages are the reason we use the ordinary General Public License for many libraries. However, the Lesser license provides advantages in certain special circumstances. For example, on rare occasions, there may be a special need to encourage the widest possible use of a certain library, so that it becomes a de-facto standard. To achieve this, non-free programs must be allowed to use the library. A more frequent case is that a free library does the same job as widely used non-free libraries. In this case, there is little to gain by limiting the free library to free software only, so we use the Lesser General Public License. In other cases, permission to use a particular library in non-free programs enables a greater number of people to use a large body of free software. For example, permission to use the GNU C Library in non-free programs enables many more people to use the whole GNU operating system, as well as its variant, the GNU/ Linux operating system. Although the Lesser General Public License is Less protective of the users’ freedom, it does ensure that the user of a program that is linked with the Library has the freedom and the wherewithal to run that program using a modified version of the Library. The precise terms and conditions for copying, distribution and modification follow. Pay close attention to the difference between a “work based on the library” and a “work that uses the library”. The former contains code derived from the library, whereas the latter must be combined with the library in order to run. TERMS AND CONDITIONS FOR COPYING, DISTRIBUTION AND MODIFICATION 0. This License Agreement applies to any software library or other program which contains a notice placed by the copyright holder or other authorized party saying it may be distributed under the terms of this Lesser General Public License (also called “this License”). Each licensee is addressed as “you”. A “library” means a collection of software functions and/ or data prepared so as to be conveniently linked with application programs (which use some of those functions and data) to form executables. The “Library”, below, refers to any such software library or work which has been distributed under these terms. A “work based on the Library” means either the Library or any derivative work under copyright law: that is to say, a work containing the Library or a portion of it, either verbatim or with modifications and/or translated straightforwardly into another language. (Hereinafter, translation is included without limitation in the term “modification”.) “Source code” for a work means the preferred form of the work for making modifications to it. For a library, complete source code means all the source code for all modules it contains, plus any associated interface definition files, plus the scripts used to control compilation and installation of the library. Activities other than copying, distribution and modification are not covered by this License; they are outside its scope. The act of running a program using the Library is not restricted, and output from such a program is covered only if its contents constitute a work based on the Library (independent of the use of the Library in a tool for writing it). Whether that is true depends on what the Library does and what the program that uses the Library does. 1. You may copy and distribute verbatim copies of the Library’s complete source code as you receive it, in any medium, provided that you conspicuously and appropriately publish on each copy an appropriate copyright notice and disclaimer of warranty; keep intact all the notices that refer to this License and to the absence of any warranty; and distribute a copy of this License along with the Library. You may charge a fee for the physical act of transferring a copy, and you may at your option offer warranty protection in exchange for a fee. 2. You may modify your copy or copies of the Library or any portion of it, thus forming a work based on the Library, and copy and distribute such modifications or work under the terms of Section 1 above, provided that you also meet all of these conditions: a) The modified work must itself be a software library. b) You must cause the files modified to carry prominent notices stating that you changed the files and the date of any change. c) You must cause the whole of the work to be licensed at no charge to all third parties under the terms of this License. d) If a facility in the modified Library refers to a function or a table of data to be supplied by an application program that uses the facility, other than as an argument passed when the facility is invoked, then you must make a good faith effort to ensure that, in the event an application does not supply such function or table, the facility still operates, and performs whatever part of its purpose remains meaningful. (For example, a function in a library to compute square roots has a purpose that is entirely well-defined independent of the application. Therefore, Subsection 2d requires that any application-supplied function or table used by this function must be optional: if the application does not supply it, the square root function must still compute square roots.) These requirements apply to the modified work as a whole. If identifiable sections of that work are not derived from the Library, and can be reasonably considered independent and separate works in themselves, then this License, and its terms, do not apply to those sections when you distribute them as separate works. But when you distribute the same sections as part of a whole which is a work based on the Library, the distribution of the whole must be on the terms of this License, whose permissions for other licensees extend to the entire whole, and thus to each and every part regardless of who wrote it. Thus, it is not the intent of this section to claim rights or contest your rights to work written entirely by you; rather, the intent is to exercise the right to control the distribution of derivative or collective works based on the Library. In addition, mere aggregation of another work not based on the Library with the Library (or with a work based on the Library) on a volume of a storage or distribution medium does not bring the other work under the scope of this License. 3. You may opt to apply the terms of the ordinary GNU General Public License instead of this License to a given copy of the Library. To do this, you must alter all the notices that refer to this License, so that they refer to the ordinary GNU General Public License, version 2, instead of to this License. (If a newer version than version 2 of the ordinary GNU General Public License has appeared, then you can specify that version instead if you wish.) Do not make any other change in these notices. Once this change is made in a given copy, it is irreversible for that copy, so the ordinary GNU General Public License applies to all subsequent copies and derivative works made from that copy. This option is useful when you wish to copy part of the code of the Library into a program that is not a library. 4. You may copy and distribute the Library (or a portion or derivative of it, under Section 2) in object code or executable form under the terms of Sections 1 and 2 above provided t hat you accompany it with the complete corresponding machine-readable source code, which must be distributed under the terms of Sections 1 and 2 above on a medium customarily used for software interchange. If distribution of object code is made by offering access to copy from a designated place, then offering equivalent access to copy the source code from the same place satisfies the requirement to distribute the source code, even though third parties are not compelled to copy the source along with the object code. 5. A program that contains no derivative of any portion of the Library, but is designed to work with the Library by being compiled or linked with it, is called a “work that uses the Library”. Such a work, in isolation, is not a derivative work of the Library, and therefore falls outside the scope of this License. However, linking a “work that uses the Library” with the Library creates an executable that is a derivative of the Library (because it contains portions of the Library), rather than a “work that uses the library”. The executable is therefore covered by this License. Section 6 states terms for distribution of such executables. When a “work that uses the Library” uses material from a header file that is part of the Library, the object code for the work may be a derivative work of the Library even though the source code is not. Whether this is true is especially significant if the work can be linked without the Library, or if the work is itself a library. The threshold for this to be true is not precisely defined by law. If such an object file uses only numerical parameters, data structure layouts and accessors, and small macros and small inline functions (ten lines or less in length), then the use of the object file is unrestricted, regardless of whether it is legally a derivative work. (Executables containing this object code plus portions of the Library will still fall under Section 6.) Otherwise, if the work is a derivative of the Library, you may distribute the object code for the work under the terms of Section 6. Any executables containing that work also fall under Section 6, whether or not they are linked directly with the Library itself. 6. As an exception to the Sections above, you may also combine or link a “work that uses the Library” with the Library to produce a work containing portions of the Library, and distribute that work under terms of your choice, provided that the terms permit modification of the work for the customer’s own use and reverse engineering for debugging such modifications. You must give prominent notice with each copy of the work that the Library is used in it and that the Library and its use are covered by this License. You must supply a copy of this License. If the work during execution displays copyright notices, you must include the copyright notice for the Library among them, as well as a reference directing the user to the copy of this License. Also, you must do one of these things: a) Accompany the work with the complete corresponding machine-readable source code for the Library including whatever changes were used in the work (which must be distributed under Sections 1 and 2 above); and, if the work is an executable linked with the Library, with the complete machine readable “ work that uses the Library”, as object code and/or source code, so that the user can modify the Library and then relink to produce a modified executable containing the modified Library. (It is understood that the user who changes the contents of definitions files in the Library will not necessarily be able to recompile the application to use the modified definitions.) b) Use a suitable shared library mechanism for linking with the Library. A suitable mechanism is one that (1) uses at run time a copy of the library already present on the user’s computer system, rather than copying library functions into the executable, and (2) will operate properly with a modified version of the library, if the user installs one, as long as the modified version is interfacecompatible with the version that the work was made with. c) Accompany the work with a written offer, valid for at least three years, to give the same user the materials specified in Subsection 6a, above, for a charge no more than the cost of performing this distribution. d) If distribution of the work is made by offering access to copy from a designated place, offer equivalent access to copy the above specified materials from the same place. e) Verify that the user has already received a copy of these materials or that you have already sent this user a copy. For an executable, the required form of the “work that uses the Library” must include any data and utility programs needed for reproducing the executable from it. However, as a special exception, the materials to be distributed need not include anything that is normally distributed (in either source or binary form) with the major components (compiler, kernel, and so on) of the operating system on which the executable runs, unless that component itself accompanies the executable. It may happen that this requirement contradicts the license restrictions of other proprietary libraries that do not normally accompany the operating system. Such a contradiction means you cannot use both them and the Library together in an executable that you distribute. 7. You may place library facilities that are a work based on the Library side-byside in a single library together with other library facilities not covered by this License, and distribute such a combined library, provided that the separate distribution of the work based on the Library and of the other library facilities is otherwise permitted, and provided that you do these two things: a) Accompany the combined library with a copy of the same work based on the Library, uncombined with any other library facilities. This must be distributed under the terms of the Sections above. b) Give prominent notice with the combined library of the fact that part of it is a work based on the Library, and explaining where to find the accompanying uncombined form of the same work. 8. You may not copy, modify, sublicense, link with, or distribute the Library except as expressly provided under this License. Any attempt otherwise to copy, modify, sublicense, link with, or distribute the Library is void, and will automatically terminate your rights under this License. However, parties who have received copies, or rights, from you under this License will not have their licenses terminated so long as such parties remain in full compliance. 9. You are not required to accept this License, since you have not signed it. However, nothing else grants you permission to modify or distribute the Library or its derivative works. These actions are prohibited by law if you do not accept this License. Therefore, by modifying or distributing the Library (or any work based on the Library), you indicate your acceptance of this License to do so, and all its terms and conditions for copying, distributing or modifying the Library or works based on it. 10. Each time you redistribute the Library (or any work based on the Library), the recipient automatically receives a license from the original licensor to copy, distribute, link with or modify the Library subject to these terms and conditions. You may not impose any further restrictions on the recipients’ exercise of the rights granted herein. You are not responsible for enforcing compliance by third parties with this License. 11. If, as a consequence of a court judgment or allegation of patent infringement or for any other reason (not limited to patent issues), conditions are imposed on you (whether by court order, agreement or otherwise) that contradict the conditions of this License, they do not excuse you from the conditions of this License. If you cannot distribute so as to satisfy simultaneously your obligations under this License and any other pertinent obligations, then as a consequence you may not distribute the Library at all. For example, if a patent license would not permit royalty free redistribution of the Library by all those who receive copies directly or indirectly through you, then the only way you could satisfy both it and this License would be to refrain entirely from distribution of the Library. If any portion of this section is held invalid or unenforceable under any particular circumstance, the balance of the section is intended to apply, and the section as a whole is intended to apply in other circumstances. It is not the purpose of this section to induce you to infringe any patents or other property right claims or to contest validity of any such claims; this section has the sole purpose of protecting the integrity of the free software distribution system which is implemented by public license practices. Many people have made generous contributions to the wide range of software distributed through that system in reliance on consistent application of that system; it is up to the author/donor to decide if he or she is willing to distribute software through any other system and a licensee cannot impose that choice. This section is intended to make thoroughly clear what is believed to be a consequence of the rest of this License. 12. If the distribution and/or use of the Library is restricted in certain countries either by patents or by copyrighted interfaces, the original copyright holder who places the Library under this License may add an explicit geographical distribution limitation excluding those countries, so that distribution is permitted only in or among countries not thus excluded. In such case, this License incorporates the limitation as if written in the body of this License. 13. The Free Software Foundation may publish revised and/or new versions of the Lesser General Public License from time to time. Such new versions will be similar in spirit to the present version, but may differ in detail to address new problems or concerns. Each version is given a distinguishing version number. If the Library specifies a version number of this License which applies to it and “any later version”, you have the option of following the terms and conditions either of that version or of any later version published by the Free Software Foundation. If the Library does not specify a license version number, you may choose any version ever published by the Free Software Foundation. 14. If you wish to incorporate parts of the Library into other free programs whose distribution conditions are incompatible with these, write to the author to ask for permission. For software which is copyrighted by the Free Software Foundation, write to the Free Software Foundation; we sometimes make exceptions for this. Our decision will be guided by the two goals of preserving the free status of all derivatives of our free software and of promoting the sharing and reuse of software generally. NO WARRANTY 15. BECAUSE THE LIBRARY IS LICENSED FREE OF CHARGE, THERE IS NO WARRANTY FOR THE LIBRARY, TO THE EXTENT PERMITTED BY APPLICABLE LAW. EXCEPT WHEN OTHERWISE STATED IN WRITING THE COPYRIGHT HOLDERS AND/ OR OTHER PARTIES PROVIDE THE LIBRARY “AS IS” WITHOUT WARRANTY OF ANY KIND, EITHER EXPRESSED OR IMPLIED, INCLUDING, BUT NOT LIMITED TO, THE IMPLIED WARRANTIES OF MERCHANTABILITY AND FITNESS FOR A PARTICULAR PURPOSE. THE ENTIRE RISK AS TO THE QUALITY AND PERFORMANCE OF THE LIBRARY IS WITH YOU. SHOULD THE LIBRARY PROVE DEFECTIVE, YOU ASSUME THE COST OF ALL NECESSARY SERVICING, REPAIR OR CORRECTION. 16. IN NO EVENT UNLESS REQUIRED BY APPLICABLE LAW OR AGREED TO IN WRITING WILL ANY COPYRIGHT HOLDER, OR ANY OTHER PARTY WHO MAY MODIFY AND/OR REDISTRIBUTE THE LIBRARY AS PERMITTED ABOVE, BE LIABLE TO YOU FOR DAMAGES, INCLUDING ANY GENERAL, SPECIAL, INCIDENTAL OR CONSEQUENTIAL DAMAGES ARISING OUT OF THE USE OR INABILITY TO USE THE LIBRARY (INCLUDING BUT NOT LIMITED TO LOSS OF DATA OR DATA BEING RENDERED INACCURATE OR LOSSES SUSTAINED BY YOU OR THIRD PARTIES OR A FAILURE OF THE LIBRARY TO OPERATE WITH ANY OTHER SOFTWARE), EVEN IF SUCH HOLDER OR OTHER PARTY HAS BEEN ADVISED OF THE POSSIBILITY OF SUCH DAMAGES. END OF TERMS AND CONDITIONS How to Apply These Terms to Your New Libraries If you develop a new library, and you want it to be of the greatest possible use to the public, we recommend making it free software that everyone can redistribute and change. You can do so by permitting redistribution under these terms (or, alternatively, under the terms of the ordinary General Public License). To apply these terms, attach the following notices to the library. It is safest to attach them to the start of each source file to most effectively convey the exclusion of warranty; and each file should have at least the “copyright” line and a pointer to where the full notice is found. one line to give the library’s name and an idea of what it does. Copyright (C) year name of author This library is free software; you can redistribute it and/ or modify it under the terms of the GNU Lesser General Public License as published by the Free Software Foundation; either version 2.1 of the License, or (at your option) any later version. This library is distributed in the hope that it will be useful, but WITHOUT ANY WARRANTY; without even the implied warranty of MERCHANTABILITY or FITNESS FOR A PARTICULAR PURPOSE. See the GNU Lesser General Public License for more details. You should have received a copy of the GNU Lesser General Public License along with this library; if not, write to the Free Software Foundation, Inc., 51 Franklin Street, Fifth Floor, Boston, MA 02110-1301 USA Also add information on how to contact you by electronic and paper mail. You should also get your employer (if you work as a programmer) or your school, if any, to sign a “copyright disclaimer” for the library, if necessary. Here is a sample; alter the names: Yoyodyne, Inc., hereby disclaims all copyright interest in the library ‘Frob’ (a library for tweaking knobs) written by James Random Hacker. signature of Ty Coon, 1 April 1990 Ty Coon, President of Vice. RED DE VENTAS SAMSUNG TECHWIN CO., LTD. Samsungtechwin R&D Center, 701, Sampyeong-dong, Bundang-gu, Seongnam-si, Gyeonggi-do, Korea, 463-400 TEL : +82-70-7147-8740~60 FAX : +82-31-8018-3745 SAMSUNG TECHWIN AMERICA Inc. 1480 Charles Willard St, Carson, CA 90746, UNITED STATES Tol Free : +1-877-213-1222 FAX : +1-310-632-2195 www.samsungcctvusa.com www.samsungtechwin.com www.samsungsecurity.com www.samsungipolis.com SAMSUNG TECHWIN EUROPE LTD. Samsung House, 1000 Hillswood Drive, Hillswood Business Park Chertsey, Surrey, UNITED KINGDOM KT16 OPS TEL : +44-1932-45-5300 FAX : +44-1932-45-5325