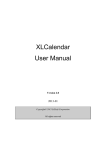
1
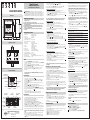
Manual del usuario
INTERRUPTOR HORARIO DIGITAL
Lea atentamente todas las instrucciones
DATA MULTI ANUAL
•
•
•
PROGRAMACION DIARIA/SEMANAL
Los eventos se repiten en todos los días seleccionados para todas las semanas.
– Se pasa automáticamente a la selección de los días de la semana.
” se confirma el día intermitente (a partir del lunes) mientras que con la
Con la tecla “
tecla “ ” se pasa directamente al día siguiente.
– Pulsar la tecla “OK” para pasar a la programación de otro evento, mientras que con “ ”
el usuario vuelve al funcionamiento normal.
El DATA MULTI ANUAL es un interruptor horario digital con 4 circuitos conmutados
independientes y libres de potencial diseñado para el control de cualquier instalación eléctrica.
Permite programación diaria, semanal, mensual, anual y en una fecha prefijada (día, mes y
año). Posibilidad de maniobras cortas (impulsos) entre 1 y 59 segundos, programa aleatorio,
cambio automático de horario verano/invierno , programa de vacaciones y contador de horas
690-010
Dimensiones
ADVERTENCIAS DE SEGURIDAD
1)
2)
3)
4)
5)
Nota: cuando la intermitencia es lenta, quiere decir que el día ha sido seleccionado, en
cambio cuando la intermitencia es veloz significa que el día ha sido desechado.
Para garantizar el nivel de seguridad previsto por el dispositivo es necesario atenerse a
las siguientes reglas:
El aparato debe ser instalado por personal competente.
El aparato debe ser instalado en un tablero que garantice, después de la instalación, la
inaccesibilidad a los bornes.
Instalar el instrumento respetando escrupulosamente los esquemas de conexión.
Antes de acceder a los bornes, asegurarse de que los conductores para conectar al
dispositivo no estén bajo tensión.
No suministrar corriente ni conectar el aparato si alguna parte del mismo está
estropeada.
PROGRAMACION MENSUAL
Los eventos se repiten a lo largo de todos los meses en el mismo día.
– Pulsar “OK” tras haber ajustado la hora, para pasar directamente a la selección de la fecha,
sin confirmar los días de la semana.
Pulsar dos veces “OK” para colocarse en el día sin cambiar año y mes.
” y “ ” para ajustar el día deseado y aprobar con “OK”.
– Usar las teclas “
– Pulsar la tecla “OK” para pasar a la programación de otro evento, mientras que con “ ”
el usuario vuelve al funcionamiento normal.
PROGRAMACION ANUAL
Los eventos se repiten todos los años en el mismo día del mismo mes.
– Pulsar “OK” tras haber ajustado la hora, para pasar directamente a la selección de la fecha
sin confirmar los días de la semana.
Pulsar “OK” para colocarse en el mes sin cambiar el año.
– Usar las teclas “
” y “ ” para ajustar el mes deseado y validar con “OK”.
” y “ ” para ajustar el día deseado y validar con “OK”.
– Usar las teclas “
– Pulsar la tecla “OK” para pasar a la programación de otro evento, mientras que con “ ”
el usuario vuelve al funcionamiento normal.
CARACTERÍSTICAS TÉCNICAS
•
Alimentación:
•
•
•
Frecuencia:
Poder de ruptura:
Cargas máximas recomendadas:
Lámparas incandescentes
1500 W x circuito
Fluorescentes sin compensar
600 W x circuito
Tipo de acción:
1B, 1S, 1T y 1U
Consumo propio:
máximo 22VA a 230V 50Hz
(3 W aprox.)
Salidas:
4 relés monoestables
Reloj anual
Calendario de 01.01.1999
hasta 31.12.2172
Precisión reloj
±1s por día (10ppm)
Reserva de marcha
5 años a 20 ºC (Batería Litio)
Número de programas:
máximo 100 (ON+OFF+impulso)
Resolución programación:
1 minuto
Temperatura de funcionamiento: 0 °C a +50 °C
Tipo de protección:
IP20 según EN60529
Clase de Protección:
II según EN 60335 en condiciones de montaje correctas
Situación de contaminación:
normal
•
•
Esquemas de conexión
•
•
1
2
3
4
5
6
7
•
•
•
•
•
•
•
•
8
230 VAC (-15%/+10%)
24 VAC/DC (-15%/+10%)
50/60 Hz
16(10)A 250V~
PROGRAMACION EN UNA FECHA PREFIJADA
Los eventos se ejecutan en una específica fecha (día, mes, año).
– Pulsar “OK” tras haber ajustado la hora para pasar directamente a la selección de la fecha
sin confirmar los días de la semana.
” y “ ” confirmando cada vez con “OK”.
– Ajustar año, mes y día usando las teclas “
– Pulsar la tecla “OK” para pasar a la programación de otro evento mientras que con “ ”
el usuario vuelve al funcionamiento normal.
PROGRAMACION DE IMPULSOS
El dispositivo se enciende por un tiempo ajustado entre 1 y 59 segundos.
– Si ha sido seleccionado como evento el impulso “ ”, tras haber pulsado “OK” aparece la
cifra “--” intermitente.
– Ajustar por medio de las teclas “
” y “ ” el valor deseado con respecto a la duración
del impulso (de 1 a 59 s) y aprobar con “OK”.
– Sucesivamente ajustar la hora y la fecha siguiendo el mismo procedimiento de la
programación anterior.
– Pulsar la tecla “OK” para pasar a la programación de otro evento, mientras que con “ ”
el usuario vuelve al funcionamiento normal.
RESET
9
10
11
12
13
14
15
16
•
•
Descripción instrumento
Nota: tras la instalación, ejecutar el RESET TOTAL del instrumento antes de efectuar
cualquiera operación.
CONFIRMACIÓN DATO Y
AVANCE PROGRAMACIÓN
PUESTA EN HORA
AJUSTE RELOJ Y SALIDA
RAPIDA DE LA PROGRAMACIÓN
•
PROGRAMACIÓN
MANDO MANUAL RELÉ
“CH1...CH4”
RESET
DECREMENTO / CAMBIO / ANULACIÓN
DE UN PARAMETRO
ESTADO DE
PROGRAMACIÓN
SÍMBOLO PROGRAMA
VACACIONES
INDICACIÓN
AÑO.MES.DÍA
SÍMBOLO
PROGRAMA
IMPULSO
SÍMBOLO HORA
ESTIVAL
SÍMBOLO HORA
INVERNAL
SÍMBOLO PROGRAMA
ALEATORIO
•
•
INCREMENTO / CAMBIO / SELECCIÓN
DE UN PARAMETRO
INDICACIÓN DEL
DÍA DE LA SEMANA
Para ejecutar un RESET PARCIAL del aparato pulsar la tecla “R”.
De esta manera la fecha adquiere el valor por defecto 2001.01.01 y el programa ALEATORIO,
si está activo, se pone en OFF.
El reloj se pone a cero y el display visualiza la hora 00:00 intermitente.
Para ejecutar el RESET TOTAL del instrumento, pulsar la tecla “R” y, después rápidamente
(menos de tres segundos), la tecla “PRG”.
De esta manera se borran todos los programas y el contador de horas se ajusta a cero.
En el centro del display aparece la palabra CLEAR y, seguidamente, la hora 00:00
intermitente.
INDICACIÓN
HORAS:MINUTOS
ORBIS TECNOLOGÍA ELÉCTRICA, S.A.
Lérida, 61
E–28020 MADRID
Teléfono:+ 34 91 5672277; Fax:+34 91 5714006
E-mail: info@ orbis.es
http://www.orbis.es
•
Para ajustar la hora y la fecha pulsar la tecla “ ”.
Se visualizan la hora y los minutos, mientras que los segundos se ponen intermitentes.
” para sincronizarlo al minuto siguiente o bien la tecla “ ” para
Pulsar la tecla “
sincronizarlo al minuto anterior.
Pulsar la tecla “OK” para pasar al ajuste de los minutos (los segundos desaparecen y se
visualiza la fecha).
Pulsar las teclas “
” o “ ” para aumentar/disminuir los minutos.
Pulsar la tecla “OK” para pasar sucesivamente al ajuste de las horas, del año, del mes y del
día (el usuario puede ajustarlos mediante las teclas “
” y “ ”).
Si, tras el ajuste del día, se pulsa la tecla “OK” el usuario vuelve al ajuste de los segundos.
En cualquier momento, pulsando la tecla “ ” el usuario regresa a la visualización normal,
salvando los cambios efectuados.
Si no se pulsa ninguna tecla durante al menos 30 segundos, el aparato vuelve
automáticamente a la visualización normal (salvando los cambios efectuados).
PROGRAMACION
•
•
•
•
•
Pasando a la programación de la hora y la fecha.
Para ajustar los minutos usar las teclas “
” y “ ” hasta alcanzar
la cifra escogida. Aprobar con “OK” para pasar al campo siguiente.
Siempre mediante las teclas “
” y “ ” ajustar la hora, confirmando con “OK”.
En este momento el usuario cuenta con diversos tipos de programación:
Nota: la programación de impulsos puede ser semanal, mensual o anual, pero no “en una
fecha prefijada”.
VISUALIZACION Y CAMBIO DE LOS PROGRAMAS
•
•
•
•
•
Para entrar en visualización/cambio pulsar la tecla “PRG”.
Aparece la palabra PROG y la indicación del canal “CH1” intermitente.
Seleccionar mediante las teclas “CH1”...“CH4” el canal deseado y pulsar “OK”.
Aparecerá el primer programa memorizado con respecto al canal elegido (en caso de que no
estén presentes programas memorizados, aparecerá la pantalla correspondiente a una nueva
programación).
Pulsar “OK” para recorrer todos los programas memorizados.
Después del último programa aparece la pantalla correspondiente a una nueva
programación, si fuesen posible, o la palabra “FULL” si se ha alcanzado el número máximo
de programaciones.
Para cambiar un programa existente, pulsar la tecla “PRG”.
Las modalidades de ajuste de los parámetros son las mismas de la programación. Cuando
todos los campos del programa han sido analizados, pulsado de nuevo “OK” el usuario pasa
al programa siguiente (si existe) o a una nueva programación.
Para volver al funcionamiento normal, pulsar “ ” (los datos ajustados hasta este momento
se salvaguardarán).
Nota: es posible cambiar el tipo de programación de un programa (por ejemplo: de diario
a anual), no es posible cambiar la tipología del evento asociado (por ejemplo, no es
posible transformar un evento de encendido en uno de apagado).
CANCELACION DE LOS PROGRAMAS
•
La programación del dispositivo permite ajustar los horarios de los eventos de encendido
(ON), apagado (OFF) y la programación de pulsos “ ”.
Es posible programar hasta 100 maniobras entre los 4 canales.
Para entrar en programación pulsar la tecla “PRG”.
Aparece la palabra “PRG” y la indicación del canal “CH1” intermitente.
Seleccionar, mediante las teclas “CH1”...“CH4” el canal deseado y pulsar “OK”.
El dispositivo visualizará la palabra PROG, los campos fecha y hora (vacíos), los símbolos
“ON”, “OFF” (del canal seleccionado) el símbolo “ ” intermitentes.
Si existen eventos programados con respecto al canal seleccionado, aparece el primero de
ellos. Pulsando la tecla “OK” se visualizan en sucesión todos los programas ya memorizados
relativos al canal y, finalmente, la pantalla correspondiente a una nueva programación.
•
•
Nota: Si se ha alcanzado el número máximo de programas ajustables, aparece la palabra
“FULL”.
Pulsando de nuevo la tecla “OK” se sale de la programación y se visualiza el número de
programas todavía disponibles con respecto a ese canal.
Para seleccionar el tipo de evento para programar (ON, OFF o IMPULSO) usar las teclas
“
” y “ ” hasta que se vuelva intermitente el evento deseado, y validar con “OK”.
•
•
Colocarse en el programa deseado siguiendo los mismos procedimientos explicados para la
visualización/cambio.
Para borrar el programa pulsar la tecla “PRG” durante 3 segundos aproximadamente.
La palabra CLEAR confirma que la cancelación ha sido posible; seguidamente el dispositivo
se colocará en el programa sucesivo o en la pantalla correspondiente a una nueva
programación.
Para volver al funcionamiento normal pulsar “ ”.
CONMUTACIÓN MANUAL
•
•
Es posible cambiar manualmente el estado de un circuito (con tal que no esté activo el
programa vacaciones).
Pulsar el botón “CH...” correspondiente al circuito del cual el usuario necesita cambiar el
estado hasta alcanzar el deseado.
Los estados posibles son, en el orden en que se enumeran, los siguientes:
- ON: encendido hasta la sucesiva intervención programada
- ON LOCK: encendido hasta la sucesiva intervención manual
- OFF LOCK: apagado hasta la sucesiva intervención manual
- OFF: apagado hasta la sucesiva intervención programada
PROGRAMACION AVANZADA
•
Pulsando la tecla “PRG” durante 5 segundos aproximadamente se activa la programación
avanzada. En esta modalidad el usuario puede acceder a las siguientes funciones:
CAMBIO DE HORARIO (ESTACIÓN) ADELANTO O RETRASO DE LA HORA: Esta función
permite ajustar las fechas para el cambio automático de la hora de verano (hora legal) a la
invierno (hora solar) y viceversa.
– Tras haber entrado en la modalidad de programación avanzada, el display visualiza la
palabra HOUR, los símbolos “ ” y “ ” y la palabra ON (OFF) intermitente que indica si
el cambio automático de la hora ha sido habilitado (deshabilitado).
” y “ ” se conmuta alternativamente entre el estado ON y OFF.
– Con las teclas “
Nota: por defecto, las fechas de cambio de la hora se ajustan automáticamente en el
último domingo de Marzo (cambio a la hora legal de verano) y en el último domingo de
Octubre (cambio a la hora solar).
– Si el cambio de la hora ha sido activado, pulsando la tecla “OK” se visualizan primero los
ajustes del cambio de la hora de solar a legal “ ” y luego los ajustes del cambio de la hora
legal a solar “ ”.
– Para cambiar uno de los ajustes pulsar “PRG” en la pantalla apropiada. Seguidamente,
seleccionar la modalidad de cambio de la hora por medio de las teclas “
” y “ ”.
Las modalidades posibles son las siguientes:
LAST: Si el cambio hora se verifica en un determinado día de la última
semana de un mes escogido.
1st: Si el cambio hora se realiza en un determinado día de la primera
semana de un mes escogido.
2nd: Si el cambio hora se realiza en un determinado día de la segunda
semana de un mes escogido.
3rd: Si el cambio hora se realiza en un determinado día de la tercera
semana de un mes escogido.
4th: Si el cambio hora se realiza en un determinado día de la cuarta
semana de un mes escogido.
DATE Si el cambio se verifica en una fecha precisa (mes, día).
– Tras haber seleccionado la modalidad deseada, pulsar la tecla “OK” para aprobar y pasar al
ajuste de la fecha.
En cuanto a las modalidades Last, 1st, 2nd, 3rd e 4th es necesario ajustar el mes, el día
” y “ ” para la selección y
(MO, ..., SU), la hora y minutos (usar siempre las teclas “
“OK” para la confirmación).
– En cuanto a la modalidad DATE es necesario ajustar el mes, el número del día, la hora y los
minutos.
– Tras haber ajustado los cambios de la hora, pulsar “OK” para pasar al ajuste del programa
ALEATORIO, o “ ” para volver al funcionamiento normal.
Si el cambio de la hora no ha sido activado, pulsando “OK” el usuario pasa
automáticamente al ajuste del programa aleatorio.
PROGRAMA ALEATORIO
Permite accionar el dispositivo con periodos casuales y variables de tiempo de ON/OFF entre
5 y 68 minutos. El programa actúa con conmutaciones independientes en todos los canales
en funcionamiento “OK”, excepto aquellos que están en bloqueo manual (LOCK).
Si el programa ha sido activado el display visualiza el símbolo “ ”.
– Tras haber alcanzado la modalidad de programación avanzada pulsar “OK” hasta que el
display visualiza la palabra “rnd= ON/OFF”.
Para activar (ON) o desactivar (OFF) el programa aleatorio usar las teclas “
”y“ ”y
“OK” para aprobar.
– Pulsar de nuevo “OK” para pasar al programa vacaciones o “ ” para volver al
funcionamiento normal.
PROGRAMA VACACIONES
Permite suspender el funcionamiento del dispositivo en dos periodos de tiempo en el curso
del año.
En estos periodos, los circuitos que no están en el estado de LOCK se colocan en OFF. Al final
del período los circuitos vuelven al estado previsto por la programación normal.
– Tras haber entrado en la modalidad de programación avanzada, pulsar “OK” hasta que el
display visualiza la palabra “Holiday1 Str”.
– Pulsando repetidamente “OK” aparecen los parámetros relativos al inicio y al final del
primer lapso de tiempo y al inicio y al final del segundo.
– Para cambiar uno de los parámetros pulsar la tecla “PRG” en la pantalla apropiada. Usar las
teclas “
” y “ ” para seleccionar el valor del parámetro deseado y “OK” para aprobar.
– Después del ajuste del final del segundo período, pulsar “OK” para pasar a la función
contador de horas o “ ” para volver al funcionamiento normal.
Nota: Cuando el programa vacaciones está activado aparece en el display el símbolo (-----),
si el programa vacaciones no ha sido todavía ajustado, en los campos del año, mes, día,
hora y minutos aparecerán algunas rayas “--”.
FUNCION CONTADOR DE HORAS
Visualiza el número de horas (máximo 99999) de permanencia de los circuitos en estado ON.
– Tras haber entrado en la modalidad de programación avanzada pulsar “OK” hasta que el
display visualiza el número de horas (“-----H”) y la palabra “CH1”.
– Usar la tecla “OK” para visualizar sucesivamente las horas de funcionamiento de los
circuitos en estado ON.
Nota: para poner a cero el contador de horas es necesario efectuar un reset total del
instrumento.
– Pulsar “OK” o “
” para volver al funcionamiento normal.
NORMAS DE REFERENCIA
La conformidad con las Directrices Comunitarias:
73/23/CEE mod. por 93/68/CEE (Baja Tensión)
89/336/CEE mod. por 92/31/CEE y por 93/68/CEE (EMC)
se declara con referencia a las siguientes Normas:
en cuanto a la Seguridad: EN 60730-2-7
en cuanto a la Compatibilidad Electromagnética: EN 55014-1 / EN 55014-2
Manuale d’uso
INTERRUTTORE ORARIO DIGITALE
Leggere attentamente tutte le istruzioni
DATA MULTI ANUAL
Il DATA MULTI ANUAL è un interruttore orario digitale a 4 circuiti di comando indipendenti
e non in tensione, progettato per il controllo di qualsiasi installazione elettrica. Permette una
programmazione giornaliera, settimanale, mensile, annuale e in una data prefissata nel corso
dell’anno.
Programma impulso tra 1 e 59 secondi, programma random, cambio automatico orario estate/
inverno, programma ferie e contatore orario.
690-010
Dimensioni
•
•
•
•
•
PROGRAMMAZIONE GIORNALIERA/SETTIMANALE
Gli eventi vengono ripetuti in tutti i giorni selezionati per tutte le settimane.
– Si passa automaticamente alla selezione dei giorni della settimana.
” si conferma il giorno lampeggiante (partendo dal lunedì) mentre con il
Con il tasto “
tasto “ ” si passa direttamente al giorno successivo.
– Premere il tasto “OK” per passare alla programmazione di un altro evento mentre
con “ ” si torna al funzionamento normale.
AVVERTENZE DI SICUREZZA
1)
2)
3)
4)
5)
Per garantire il grado di sicurezza previsto dal dispositivo occorre attenersi alle
seguenti prescrizioni:
L’apparecchio deve essere installato da persona competente.
L’apparecchio deve essere installato in un quadro tale da garantire, dopo ’installazione,
l’inaccessibilità ai morsetti.
Installare lo strumento seguendo scrupolosamente gli schemi di collegamento.
Prima di accedere ai morsetti, assicurarsi che i conduttori da collegare allo strumento
non siano in tensione.
Non alimentare e collegare lo strumento se qualche parte di esso risulta danneggiata.
Nota: il lampeggio lento indica che il giorno è selezionato, il lampeggio veloce indica che
il giorno è scartato.
PROGRAMMAZIONE MENSILE
Gli eventi vengono ripetuti tutti i mesi allo stesso giorno.
– Premere “OK” dopo aver impostato l’ora per passare direttamente alla selezione della data
senza confermare i giorni della settimana.
Premere due volte “OK” per posizionarsi sul giorno senza modificare anno e mese.
– Utilizzare i tasti “
” e “ ” per impostare il giorno desiderato e confermare con “OK”.
– Premere il tasto “OK” per passare alla programmazione di un altro evento mentre
con “ ” si torna al funzionamento normale.
CARATTERISTICHE TECNICHE
•
Alimentazione:
•
•
•
Frequenza:
Potere di interruzione:
Portata dei contatti:
Lampade ad incandescenza max 1500 W x circuito
Lampade fluorescenti max
600 W x circuito
Tipo di azione:
1B, 1S, 1T e 1U
Assorbimento:
max 22VA a 230V 50Hz
max 3W a 230V 50Hz
Uscite:
4 relè monostabile (canali) in scambio
Orologio
annuale formato AAAA.MM.GG (calendario dal 01.01.1999
al 31.12.2172)
Precisione orologio
±1s al giorno (10ppm)
Batteria al Litio
con riserva di carica 5 anni a 20 °C
Numero di programmi:
max 100 (ON+OFF+impulso)
Risoluzione programmazione: 1 minuto
Temperatura di funzionamento: 0 °C ÷ +50 °C
Grado di protezione
IP20 (IP41 dopo l’installazione)
Classe di isolamento:
II secondo EN 60335 in condizioni di montaggio corrette
Caratteristiche di utilizzo:
inquinamento normale
•
•
Schemi di collegamento
•
•
1
2
3
4
5
6
7
•
•
•
•
•
•
•
•
8
230 VAC (-15%/+10%)
24 VAC/DC (-15%/+10%)
50/60 Hz
16(10)A 250V~
PROGRAMMAZIONE ANNUALE
Gli eventi vengono ripetuti tutti gli anni allo stesso giorno dello stesso mese.
– Premere “OK” dopo aver impostato l’ora per passare direttamente alla selezione della data
senza confermare i giorni della settimana.
Premere “OK” per posizionarsi sul mese senza modificare l’anno.
” e “ ” per impostare il mese desiderato e confermare con “OK”.
– Utilizzare i tasti “
– Utilizzare i tasti “
” e “ ” per impostare il giorno desiderato e confermare con “OK”.
– Premere il tasto “OK” per passare alla programmazione di un altro evento mentre
con “ ” si torna al funzionamento normale.
PROGRAMMAZIONE AD UNA DATA PREFISSATA
Gli eventi vengono eseguiti ad una data precisa (giorno, mese, anno).
– Premere “OK” dopo aver impostato l’ora per passare direttamente alla selezione della data
senza confermare i giorni della settimana.
– Impostare anno, mese e giorno utilizzando i tasti “
” e “ ” confermando ogni volta
con “OK”.
– Premere il tasto “OK” per passare alla programmazione di un altro evento mentre
con “ ” si torna al funzionamento normale.
PROGRAMMAZIONE IMPULSIVA
Il dispositivo si accende per un tempo impostato tra 1 e 59 secondi.
– Se si è selezionato come evento l’impulso “ ”, dopo aver premuto “OK” compare la cifra
“--” lampeggiante.
– Impostare tramite i tasti “
” e “ ” il valore desiderato della durata dell’impulso
(da 1 e 59 s) e confermare con “OK”.
– Impostare quindi l’ora e la data con lo stesso procedimento della programmazione
precedente.
– Premere il tasto “OK” per passare alla programmazione di un altro evento mentre
con “ ” si torna al funzionamento normale.
RESET STRUMENTO
9
10
11
12
13
14
15
16
•
•
Descrizione strumento
Premendo ancora il tasto “OK” si esce dalla programmazione e viene visualizzato il numero
di programmi ancora disponibili per quel canale.
”e
Per selezionare il tipo di evento da impostare (ON, OFF o IMPULSO) utilizzare i tasti “
“ ” fino a che lampeggia l’evento desiderato e confermare con “OK”.
Si passa ora alla programmazione dell’orario e della data.
Per impostare i minuti agire con i tasti “
” e “ ” fino al raggiungimento della cifra
prescelta. Confermare con “OK” per passare al campo successivo.
” e “ ” impostare l’ora confermandola con “OK”.
Sempre tramite i tasti “
Sono ora possibili diversi tipi di programmazione:
Per eseguire il RESET PARZIALE dello strumento premere il tasto “R”.
In questo modo la data viene riportata al valore di default 2001.01.01 e il programma
RANDOM, se attivo, viene posto in OFF.
L’orologio viene azzerato e il display visualizza l’ora 00:00 lampeggiante.
Per eseguire il RESET TOTALE dello strumento, premere il tasto “R” e, entro tre secondi, il
tasto “PRG” .
In questo modo, oltre alle operazioni svolte dal reset parziale, vengono cancellati tutti i
programmi e il contaore viene azzerato.
Al centro del display appare la scritta CLEAR e successivamente viene visualizzata l’ora 00:00
lampeggiante.
Nota: la programmazione impulsiva può essere settimanale, mensile o annuale, ma non
“ad una data fissata”.
VISUALIZZAZIONE E MODIFICA DEI PROGRAMMI
Nota: dopo l’installazione, procedere al RESET TOTALE dello strumento prima di
effettuare qualsiasi operazione.
CONFERMA E AVANZAMENTO
PROGRAMMAZIONE
IMPOSTAZIONE ORA E DATA
IMPOSTAZIONE OROLOGIO
E USCITA RAPIDA DALLA
PROGRAMMAZIONE
•
PROGRAMMAZIONE
COMANDO MANUALE RELÈ
“CH1...CH4”
•
RESET
INCREMENTO/MODIFICA/SELEZIONE
DI UN PARAMETRO
DECREMENTO/MODIFICA/DESELEZIONE
DI UN PARAMETRO
•
•
INDICAZIONE DEL GIORNO
DELLA SETTIMANA
STATO DELLA
PROGRAMMMAZIONE
SIMBOLO PROGRAMMA
FERIE
INDICAZIONE
ANNO/MESE/
GIORNO
SIMBOLO
PROGRAMMA
IMPULSO
SIMBOLO ORA
ESTIVA
SIMBOLO ORA
INVERNALE
PROGRAMMAZIONE
•
•
SIMBOLO PROGRAMMA
RANDOM
INDICACIÓN
HORAS:MINUTOS
ORBIS ITALIA S.p.A.
Via L. Da Vinci, 9/B 20060 Cassina De’ Pecchi - MI
Tel. 02/95343454
Fax 02/9520046
e-mail: [email protected]
http://www.orbisitalia.it
Per impostare l’ora e la data premere il tasto “ ”.
Vengono visualizzati l’ora e i minuti mentre i secondi inizieranno a lampeggiare. Premere
il tasto “
” per sincronizzarli al minuto successivo o il tasto “ ” per sincronizzarli al
minuto precedente.
Premere il tasto “OK” per passare alla regolazione dei minuti (i secondi scompaiono e viene
visualizzata la data).
” o “ ” per incrementare/decrementare i minuti.
Premere i tasti “
Premere il tasto “OK” per passare successivamente alla regolazione delle ore, dell’anno, del
mese e del giorno (impostabili con i tasti “
” e “ ”).
Se dopo aver impostato il giorno si preme il tasto “OK” si ritorna all’impostazione dei
secondi.
In qualsiasi momento, premendo il tasto “ ” si ritorna alla visualizzazione normale,
salvando le modifiche fatte.
Se non viene premuto nessun tasto per almeno 30s, si ritorna automaticamente alla
visualizzazione normale (salvando le modifiche apportate).
•
Con la programmazione del dispositivo è possibile impostare gli orari degli eventi di
accensione (ON), spegnimento (OFF) e funzionamento impulsivo “ ”.
Sono possibili fino a 100 eventi programmabili tra i 4 canali.
Per entrare in programmazione premere il tasto “PRG”.
Compare la scritta “PRG” e l’indicazione del canale “CH1” lampeggiante.
Selezionare tramite i tasti “CH1”...“CH4” il canale desiderato e premere “OK”.
Il dispositivo a questo punto visualizzerà la scritta PROG, i campi data e ora (vuoti) e i
simboli “ON”, “OFF” (del relativo canale) e “ ” lampeggianti.
Se vi sono già eventi programmati per il canale selezionato, compare il primo di essi.
Premendo il tasto “OK” vengono visualizzati in successione tutti i programmi già
memorizzati per il canale ed infine la schermata relativa ad una nuova programmazione.
Nota: Se è stato raggiunto il numero massimo di programmi impostabili, compare la
scritta “FULL”.
•
•
•
•
•
Per entrare in visualizzazione/modifica premere il tasto “PRG”.
Compare la scritta PROG e l’indicazione del canale “CH1” lampeggiante. Selezionare tramite
i tasti “CH1” ... “CH4” il canale desiderato e premere “OK”.
Comparirà il primo programma memorizzato per il canale scelto (nel caso non vi
siano programmi memorizzati, viene visualizzata la schermata relativa ad una nuova
programmazione).
Premere “OK” per scorrere tutti i programmi memorizzati.
Dopo l’ultimo programma compare la schermata relativa ad una nuova programmazione, se
possibile, o la scritta “FULL” se è stato raggiunto il numero max. di programmazioni.
Per modificare un programma esistente, premere il tasto “PRG”.
Le modalità di impostazione dei parametri sono le stesse della programmazione. Quando
tutti i campi del programma sono stati considerati, premendo ancora “OK” si passa al
programma successivo (se presente) o ad una nuova programmazione.
Per tornare al funzionamento normale premere “ ” (i dati impostati fino a questo
momento verranno salvati).
Nota: mentre è possibile cambiare il tipo di programmazione di un programma (ad es. da
giornaliero a annuale), non è possibile cambiare la tipologia dell’evento associato (ad es.
non è possibile trasformare un evento di accensione in uno di spegnimento).
CANCELLAZIONE DEI PROGRAMMI
•
•
•
•
Posizionarsi sul programma desiderato seguendo le stesse procedure viste per la
visualizzazione/modifica.
Per cancellare il programma tenere premuto il tasto “PRG” per circa 3 secondi.
A conferma dell’avvenuta cancellazione comparirà la scritta CLEAR, dopodiché lo
strumento si posizionerà sul programma successivo o sulla schermata relativa ad una nuova
programmazione.
Per tornare al funzionamento normale premere “ ”.
FORZATURA RELE’
•
•
La forzatura del relè consente di modificare manualmente lo stato di un relè (purché non sia
attivo il programma ferie).
Premere il pulsante “CH ..” relativo al relè di cui si vuole modificare lo stato fino al
raggiungimento dello stato desiderato.
•
Nell’ordine gli stati possibili sono:
- ON: relè acceso fino al successivo intervento programmato
- ON LOCK: relè acceso fino al successivo intervento manuale
- OFF LOCK: relè spento fino al successivo intervento manuale
- OFF: relè spento fino al successivo intervento programmato
PROGRAMMAZIONE AVANZATA
•
Tenendo premuto il tasto “PRG” per circa 5 secondi si attiva la programmazione avanzata. In
questa modalità è possibile accedere alle seguenti funzioni:
ORA ESTIVA “ ” / ORA INVERNALE “ ”: questa funzione permette di impostare le
date per il passaggio automatico dall’ora estiva (ora legale) a quella invernale (ora solare) e
viceversa.
– Dopo essere entrati nella modalità programmazione avanzata il display visualizza la scritta
HOUR, i simboli “ ” e “ ” e la scritta ON (OFF) lampeggiante che indica se il cambio
automatico dell’ora è abilitato (disabilitato).
– Con i tasti “
” e “ ” si commuta alternativamente tra lo stato ON e OFF.
Nota: per default le date di cambio dell’ora vengono impostate utomaticamente all’ultima
domenica di Marzo (passaggio all’ora legale) e all’ultima domenica di ottobre (passaggio
all’ora solare).
– Se il cambio dell’ora è attivo, premendo il tasto “OK” vengono prima visualizzate le
impostazioni del cambio dell’ora da solare a legale “ ” e quindi le impostazioni del
cambio dell’ora da legale a solare “ ”.
– Per modificare una delle due impostazioni premere “PRG” nella elativa schermata.
” e “ ”.
Selezionare quindi la modalità di cambio dell’ora tramite i tasti “
Le modalità possibili sono:
LAST Se il cambio ora avviene un determinato giorno dell’ultima
settimana di un mese prescelto
1st Se il cambio ora avviene un determinato giorno della prima
settimana di un mese prescelto
2nd Se il cambio ora avviene un determinato giorno della seconda
settimana di un mese prescelto
3rd Se il cambio ora avviene un determinato giorno della terza
settimana di un mese prescelto
4th Se il cambio ora avviene un determinato giorno della quarta
settimana di un mese prescelto
DATE Se il cambio ora avviene ad una data precisa (mese, giorno).
– Dopo aver selezionato la modalità premere il tasto “OK” per confermare e passare
all’impostazione della data.
Per le modalità Last, 1st, 2nd, 3rd e 4th bisogna impostare il mese, il giorno (MO, ..., SU),
” e “ ” per la selezione e “OK” per la
l’ora ed i minuti (utilizzare sempre i tasti “
conferma.
– Per la modalità DATE bisogna impostare il mese, il numero del giorno, l’ora e i minuti.
– Dopo aver impostato i cambi dell’ora, premere “OK” per passare all’impostazione del
programma RANDOM, o “ ” per tornare al funzionamento normale.
Se il cambio dell’ora non è attivo, premendo “OK” si passa automaticamente
all’impostazione del programma random.
PROGRAMMA RANDOM
Consente di azionare il dispositivo con tempi di ON/OFF casuali variabili tra 5 e 68 minuti.
Il programma agisce con commutazioni indipendenti su tutti i canali in funzionamento ON,
tranne quelli che sono in blocco manuale (LOCK).
Se il programma è attivo il display visualizza il simbolo “ ”.
– Dopo essere entrati nella modalità programmazione avanzata premere “OK” fino a che il
display visualizza la scritta “rnd= ON/OFF”.
”e
Per attivare (ON) o disattivare (OFF) il programma random utilizzare i tasti “
“ ” e “OK” per confermare.
– Premere ancora “OK” per passare al programma ferie, o “ ” per tornare al
funzionamento normale.
PROGRAMMA FERIE
Consente di sospendere il funzionamento del dispositivo per due periodi nell’arco dell’anno.
In questo periodo, i relè che non sono nello stato di LOCK vengono posti in OFF.
Alla fine del periodo i relè tornano nello stato previsto dalla normale programmazione.
– Dopo essere entrati nella modalità programmazione avanzata premere “OK” fino a che il
display visualizza la scritta“Holiday1 Str”.
– Premendo ripetutamente “OK” si visualizzano di seguito i parametri relativi all’inizio e alla
fine del primo periodo e all’inizio e alla fine del secondo.
– Per modificare uno dei parametri premere il tasto “PRG” nella relativa schermata.
Utilizzare i tasti “
” e “ ” per selezionare il valore del parametro desiderato e “OK”
per confermare.
– Dopo l’impostazione della fine del secondo periodo, premere “OK” per passare alla
funzione contaore o “ ” per tornare al funzionamento normale.
Nota: se il programma ferie non è ancora stato impostato, nei campi anno, mese, giorno,
ora e minuti compariranno dei trattini “--”.
FUNZIONE CONTAORE
Visualizza il numero di ore (max. 99999) di permanenza dei relè nello stato ON.
– Dopo essere entrati nella modalità programmazione avanzata premere “OK” fino a che il
display visualizza il numero di ore (“-----H”) e la scritta “CH1”.
– Utilizzare il tasto “OK” per visualizzare successivamente le ore di funzionamento in stato
ON dei relè.
Nota: per azzerare il contaore è necessario procedere ad un reset totale dello strumento.
– Premere “OK” o “
” per tornare al funzionamento normale.
NORME DI RIFERIMENTO
La conformità alle direttive comunitarie:
73/23/CEE mod. da 93/68/CEE (Bassa Tensione)
89/336/CEE mod. da 92/31/CEE e 93/68/CEE (E.M.C.)
è dichiarata in riferimento alle Norme seguenti:
Sicurezza: CEI-EN 60730-2-7
Compatibilità elettromagnetica: CEI-EN 55014-1 / CEI-EN 55014-2
A016.17.54046
Manual User
DIGITAL TIME SWITCH
Read all the instructions carefully
DATA MULTI ANUAL
•
•
•
DAILY/WEEKLY PROGRAMMING
The events are repeated on every day selected every week.
– The system automatically goes to the selection of the days of the week.
” key to confirm the day that is flashing (starting from Monday), and use
Use the “
the “ ” key to go directly to the next day.
– Press “OK” to go to the programming of another event or return to normal operating mode
with “ ”.
DATA MULTI ANUAL is a digital time switch with 4 independent and not live command
circuits, designed for the control of every kind of electrical installation. It allows a daily, weekly,
monthly and yearly planning or in a prefi xed time (day, month, year).
Pulse Program: from 1 to 59 seconds, Random Program, Automatic switch to summer/winter
time, holiday program and hour counter
691-010
Dimensions
SAFETY WARNINGS
Note: slow flashing means that the day is selected, and fast flashing means that the day
has been rejected.
To guarantee the safety levels built into the device, proceed as follows:
1) The appliance has to be installed by a specialist operator
2) The appliance has to be installed in such a way that the terminals are inaccessible after
installation
3) When installing the appliance, follow the wiring diagrams carefully
4) Before touching the terminals, make sure the connectors to be attached to the appliance
are not live
5) Do not power or connect the instrument if any part of it is damaged.
MONTHLY PROGRAMMING
The events are repeated every month on the same day.
– Press “OK” after setting the time to go directly to the selection of the date without
confirming the days of the week.
Press “OK” twice to go to the day without modifying the year or month.
” and “ ” keys to set the day required and confirm with “OK”.
– Use the “
– Press “OK” to go to the programming of another event and press “ ” to return to
normal operating mode.
TECHNICAL SPECIFICATIONS
Wiring diagrams
1
2
3
4
5
6
7
8
•
Power supply:
•
•
•
•
•
Frequency:
Switching power:
Contact capacity:
incandescent lights max
Fluorescent lights max
Type action:
Absorption:
•
•
Outputs:
Annual clock
•
•
•
•
•
•
•
•
Clock precision
Lithium battery
Number of programmes:
Programming resolution:
Operating temperature:
Protection level
Insulation class:
User conditions:
ANNUAL PROGRAMMING
The events are repeated every year on the same day of the same month.
– Press “OK” after setting the time to go directly to the selection of the date without
confirming the days of the week.
Press “OK” to go to the month without modifying the year.
– Use the “
” and “ ” keys to set the month required and confirm with “OK”.
” and “ ” keys to set the day required and confirm with “OK”.
– Use the “
– Press “OK” to go to the programming of another event and press “ ” to return to
normal operating mode.
230 VAC (-15%/+10%)
24 VAC/DC (-15%/+10%)
50/60 Hz
16(10)A 250V~
1500 W per channel
600 W per channel
1B, 1S, 1T and 1U
max 22VA at 230V 50Hz
max 3W at 230V 50Hz
4 mono-stable relays (channels) in exchange
in format YYYY.MM.DD
(calendar from 01.01.1999 to 31.12.2172)
±1s per day (10ppm)
with 5 year charge reserve 20 °C
max 100 (ON + OFF + impulse)
1 minute
0 °C ÷ +50 °C
IP20 (IP41 after installation)
II according to EN 60335 in conditions of correct assembly
normal pollution
PROGRAMMING TO A PRESET DATE
The events take place on a precise date (day, month, year).
– Press “OK” after setting the time to go directly to the selection of the date without
confirming the days of the week.
” and “ ” keys and confirm each time
– Set the year, month and day using the “
with “OK”.
– Press “OK” to go to the programming of another event and press “ ” to return to
normal operating mode.
IMPULSE PROGRAMMING
The instrument comes on for a time set between 1 and 59 seconds.
– If the impulse “ ” is selected as the event, the flashing figure “--” will appear after
pressing “OK”.
– Set the required duration of the impulse (1 to 59 seconds) with the “
” and “ ” keys
and confirm with “OK”.
– Set the time and date in the same way as in the previous programming operation.
– Press “OK” to go to the programming of another event and press “ ” to return to
normal operating mode.
INSTRUMENT RESET
•
9
10
11
12
13
14
15
16
•
For the PARTIAL RESET of the instrument, press the “R” key.
In this way, the date is set to the default value 2001.01.01 and the RANDOM is set to OFF if
active.
The clock is zeroed and the display will show a flashing 00:00.
For the TOTAL RESET of the instrument, press key “R” followed by “PRG” three seconds
later. In this way, in addition to the partial reset operations, all the programmes are cancelled
and the timer is zeroed.
In the centre of the display, the CLEAR message will appear followed by a flashing 00:00.
Note: impulse programming may be weekly, monthly or annual, but not to a set date.
DISPLAY AND MODIFICATION OF THE PROGRAMMES
•
Note: after installation, carry out the total reset of the instrument before any other
operation.
Device description
•
SETTING THE TIME AND DATE
DATA CONFIRM AND
PROGRAMMING FORWARD
•
CLOCK SETTING AND RAPID EXIT
FROM PROGRAMMING
•
PROGRAMMING
MANUAL RELAY COMMAND
“CH1...CH4”
RESET
•
•
INCREASE/MODIFY/SELECTION
OF A PARAMETER
DECREASE/MODIFY/DESELECTION
OF A PARAMETER
To set the time and date, press the “ ” key.
”
The hour and minutes will be displayed, and the seconds will start to flash. Press the “
key to synchronise these to the next minute or the “ ” key to synchronise them to the
previous minute.
Press “OK” to go to the regulation of the minutes (the seconds will disappear and the date
will be displayed).
Press the “
” or “ ” keys to increase/decrease the minutes..
Press “OK” to go to the regulation of the hours, year, month and day (set with the keys
“
” and “ ”).
If “OK” is pressed after the day is set, the system returns to the setting of the seconds.
If the “ ” key is pressed at any time, the system returns to the normal display mode, with
the exception of the modifications made.
If no key is pressed for at least 30 seconds, the system automatically returns to normal
display mode, with the exception of the modifications made.
PROGRAMMING
DAYS
OF THE WEEK
PROGRAMMING
STATUS SYMBOLS
HOLIDAY
PROGRAMME SYMBOL
YEAR/MONTH/DAY”
INDICATION
IMPULSE
PROGRAMME
SYMBOL
SUMMERTIME
SYMBOL
WINTER TIME
SYMBOL
•
•
•
RANDOM
PROGRAMME SYMBOL
•
Lérida, 61
E–28020 MADRID
Teléfono:+ 34 91 5672277; Fax:+34 91 5714006
E-mail: info@ orbis.es
http://www.orbis.es
•
•
•
•
Note: if the maximum number of programmes that can be set has been reached, the
“FULL” message will appear.
Press “OK” again to leave programming mode and see the number of programmes still
available for the channel in question.
To select the type of event to be set (ON, OFF or IMPULSE) use keys “
” and “ ” until
the event required begins to flash, and confirm with “OK”
To enter display/modify, press the “PRG” key.
The PROG message appears and the channel indication “CH1” flashes.
Select the channel required with the “CH1” ... “CH4” keys and press “OK”.
The first programme memorised for the channel selected will appear (if no programmes are
memorised, the screen display for a new programming operation will be displayed).
Press “OK” to scroll through all the programmes memorised.
After the last programme, the screen display for a new programming operation will appear if
possible, or the message “FULL” if the maximum number of programming operations has
been reached.
Press “PRG” to modify an existing programme.
The parameter setting modes are the same as those for the programming. When all the
programme fields have been taken into consideration, press “OK” again to go to the next
programme (if present) or to a new programming operation.
To return to normal operation, press “ ” (the data set up to this time will be saved).
Note: it is possible to change the type of programming for a programme (from daily to
annual, for example), but it is not possible to change the type of associated event (for
example, it is not possible to transform an ON event to an OFF event).
CANCELLING THE PROGRAMMES
•
•
•
•
Go to the programme required using the same procedures as those for display and
modification.
To cancel the programme, hold down the “PRG” key for approximately 3 seconds.
The CLEAR message will appear to confirm the cancellation, and the instrument will then go
to the next programme or the screen display for a new programming operation.
Press “ ” to return to normal operating mode.
FORCING THE RELAYS
•
•
•
HOURS/MINUTES
INDICATION
ORBIS TECNOLOGÍA ELÉCTRICA, S.A.
The programming function can be used to set the times for the ON, OFF and impulse
operation “ ” events.
Up to 100 events can be programmed in the 4 channels.
To enter programming mode, press “PRG”.
The “PRG” message appears and the channel indication “CH1” will flash. Select the channel
required with the “CH1” ... “CH4” keys and press “OK”.
The instrument will now display the message “PROG”, the date and time fields (empty) and
the ON and OFF symbols for the channel and “ ” will flash.
If events are already programmed for the channel selected, the first of these will appear.
Press “OK” to display all the programmes already memorised for the channel in sequence,
followed by the screen display for a new programming operation.
Go to the time and date programming.
Use the “
” and “ ” keys to set the minutes until the figure required is reached.
Confirm with “OK” to move on to the next field.
Use the “
” and “ ” keys to set the time, and confirm with “OK”.
Various types of programming are now possible:
The forcing of the relay makes it possible to modify the status of a relay manually (provided
the holiday programme is not active).
Press the “CH ..” key for the relay whose status is to be modified until the status required is
obtained.
The possible states are as follows, in order:
- ON: relay on until the next programmed operation
- ON LOCK: relay on until the next manual operation
- OFF LOCK: relay off until the next manual operation
- OFF: relay off until the next programmed operation
ADVANCED PROGRAMMING
•
Hold the “PRG” key down for 5 seconds approximately to activate advanced programming.
In this mode, it is possible to gain access to the following functions:
SUMMERTIME “ ” / WINTER TIME “ ”: this function is used to set the dates for the
automatic changeover from summertime to winter time and vice versa.
– After entering advanced programming mode, the display shows the message HOUR, the
symbols “ ” and “ ” and the flashing ON (OFF) message to indicate whether the
automatic time change is enabled or (disabled).
” and “ ” keys to switch from the ON to the OFF status.
– Use the “
Note: the time change dates are automatically set by default to the last Sunday in March
(start of summertime) and the last Sunday in October (start of winter time).
– If the time change is active, press “OK” to display first the settings for the changeover from
winter time to summertime “ ”, then the time change from summertime to winter time
“ ”.
– To modify one of the two settings press “PRG” from the relevant screen display, then select
” and “ ” keys.
the time change mode with the “
The possible modes are:
LAST if the time change takes place on a determined day in the
last week of a previously selected month
1st if the time change takes place on a determined day in the
first week of a previously selected month
2nd if the time change takes place on a determined day in the
second week of a previously selected month
3rd if the time change takes place on a determined day in the
third week of a previously selected month
4th if the time change takes place on a determined day in the
fourth week of a previously selected month
DATE if the time change takes place on a determined date (month, day).
– After selecting the mode, press “OK” to confirm and go to the setting of the date.
For Last, 1st, 2nd, 3rd and 4th modes, set the month, day (MO, ..., SU), time and minutes
” and “ ” to select and “OK” to confirm).
(using the “
– For DATE mode, set the month, number of the day, time and minutes.
– After setting the time changes, press “OK” to go to the setting of the RANDOM programme
or “ ” to return to normal operating mode.
If the time change is not active, when “OK” is pressed the system goes automatically to the
setting of the random programme.
RANDOM PROGRAMME
This is used to activate the instrument with casual ON/OFF times varying from 5 to 68
minutes. The programme operates with independent switching operations in all the channels
in ON operation, with the exception of the channels which are manually locked (LOCK).
If the programme is active, the display shows the symbol “ ”.
– After entering advanced programming mode, press “OK” until the display shows the
message “rnd= ON/OFF”.
To activate (ON) or deactivate (OFF) the random programme, use the “
” and
“ ” keys and “OK” to confirm.
– Press “OK” again to go to the holiday programme, or “ ” to return to normal operating
mode.
HOLIDAY PROGRAMME
This is used to stop the instrument for two periods in the course of the year. In these periods,
the relays that are not in LOCK status are set to OFF.
At the end of the period, the relays will return to the status laid down by the normal
programming.
– After entering advanced programming mode, press “OK” until the display shows the
message “Holiday1 Str”.
– Press “OK” repeatedly to display the parameters for the start and end of the first period and
the start and end of the second.
– To modify one of the parameters, press the “PRG” key in the relevant screen display.
Use the “
” and “ ” keys to select the value of the parameter required and “OK” to
confirm.
– After setting the end of the second period, press “OK” to go to the timer function or “ ”
to return to normal operating mode.
Note: if the holiday programme has not yet been set, dashes “--” will appear in the year,
month, day, hour and minute fields.
TIMER FUNCTION
this displays the number of hours (max. 99999) for which the relay will remain in ON status.
– After entering advanced programming mode, press “OK” until the display shows the
number of hours (“-----H”) and the message “CH1”.
– Use the “OK” key to display the relay operating hours in ON status.
Note: to zero the timer, the instrument has to be totally reset.
– Press “OK” or “
” to return to normal operating mode.
REFERENCE STANDARDS
Conformity with EU directives:
73/23/ECC, modified by 93/68/ECC (low voltage)
89/336/ECC, modified by 92/31/ECC and 93/68/ECC (E.M.C.)
is declared with reference to the following standards:
Safety: EN 60730-2-7
Electromagnetic compatibility: EN 55014-1 / EN 55014-2
Manual do utilizador
INTERRUPTOR HORÁRIO DIGITAL
Ler atentamente todas as instruções
DATA MULTI ANUAL
•
•
•
•
O DATA MULTI ANUAL é um interruptor horário digital com 4 circuitos comutados
independentes e livres de potencial, projectado para o controlo de qualquer instalação eléctrica.
Permite uma programação diária, semanal, mensal, anual e numa data predefinida (dia, mês e
ano). Possibilidade de operações rápidas (impulsos) entre 1 e 59 segundos, programa aleatório,
mudança automática do horário de Verão/Inverno, programa de férias e contador de horas
691-010
Dimensões
PROGRAMAÇÃO DIÁRIA/SEMANAL
Os eventos repetem-se todos os dias seleccionados para todas as semanas.
– Avança-se automaticamente para a selecção dos dias da semana.
” confirma-se o dia intermitente (a partir de segunda-feira) enquanto
Com o botão “
com o botão “ ” se avança directamente para o dia seguinte.
– Prima o botão “OK” para avançar para a programação de outro evento ou o botão “ ”
para voltar ao funcionamento normal.
ADVERTÊNCIAS DE SEGURANÇA
1)
2)
3)
4)
5)
Para garantir o nível de segurança previsto pelo aparelho, é necessário respeitar as
seguintes regras:
O aparelho deve ser instalado por pessoal qualificado.
O aparelho deve ser instalado num painel que garanta, depois da instalação, a
inacessibilidade aos terminais.
Instalar o instrumento respeitando escrupulosamente os esquemas de ligação.
Antes de aceder aos terminais, assegure-se de que os condutores para ligar ao aparelho
não estão sob tensão.
Não fornecer corrente nem ligar o aparelho se alguma parte do mesmo estiver
danificada.
Nota: quando a intermitência for lenta, significa que o dia foi seleccionado. Pelo
contrário, quando a intermitência for rápida, significa que o dia foi rejeitado.
PROGRAMAÇÃO MENSAL
Os eventos repetem-se todos os meses no mesmo dia.
– Prima “OK”, depois de ter configurado a hora, para avançar directamente para a selecção
da data, sem confirmar os dias da semana.
Prima duas vezes “OK” para se colocar no dia sem modificar o ano e o mês.
” e “ ” para seleccionar o dia desejado e confirme com “OK”.
– Use os botões “
– Prima o botão “OK” para avançar para a programação de outro evento ou o botão “ ”
para voltar ao funcionamento normal.
CARACTERÍSTICAS TÉCNICAS
•
Alimentação:
•
•
•
Frequência:
Potência de ruptura:
Cargas máximas recomendadas:
Lâmpadas incandescentes
1500 W x circuito
Fluorescentes não compensadas 600 W x circuito
Tipo de acção:
1B, 1S, 1T e 1U
Consumo próprio:
máximo 22VA a 230V 50Hz
(3 W aprox.)
Saídas:
4 relés monoestáveis
Relógio anual
Calendário de 01.01.1999
até 31.12.2172
Precisão do relógio
±1s por dia (10ppm)
Reserva de funcionamento
5 anos a 20 ºC (Pilha de Litio)
Número de programas:
máximo 100 (ON+OFF+impulso)
Resolução programação:
1 minuto
Temperatura de funcionamento: 0 °C a +50 °C
Tipo de protecção:
IP20 segundo EN60529
Classe de Protecção:
II segundo EN 60335 em condições de montagem correctas
Contaminação:
normal
•
•
Esquemas de ligação
•
•
1
2
3
4
5
6
7
•
•
•
•
•
•
•
•
8
PROGRAMAÇÃO ANUAL
Os eventos repetem-se todos os anos no mesmo dia do mesmo mês.
– Prima “OK”, depois de ter configurado a hora, para avançar directamente para a selecção
da data sem confirmar os dias da semana.
Prima “OK” para se colocar no mês sem modificar o ano.
” e “ ” para seleccionar o mês e o dia desejado e confirme com “OK”.
– Use os botões “
– Prima o botão “OK” para avançar para a programação de outro evento ou o botão “ ”
para voltar ao funcionamento normal.
230 VAC (-15%/+10%)
24 VAC/DC (-15%/+10%)
50/60 Hz
16(10)A 250V~
PROGRAMAÇÃO NUMA DATA PREDEFINIDA
Os eventos são executados numa data específica (dia, mês, ano).
– Prima “OK” depois de ter configurado a hora, para avançar directamente para a selecção da
data sem confirmar os dias da semana.
– Seleccionar o ano, o mês e o dia usando as teclas “
” e “ ” confirmando de cada vez
com “OK”.
– Prima o botão “OK” para avançar para a programação de outro evento ou o botão “ ”
para voltar ao funcionamento normal.
PROGRAMAÇÃO DE IMPULSOS
O aparelho liga-se por um período de tempo configurado entre 1 e 59 segundos.
– Se foi seleccionado como evento o impulso “ ”, depois de ter premido “OK” aparece o
dígito “--” intermitente.
” e “ ” o valor desejado para a duração do impulso (de 1 a
– Seleccione com os botões “
59 s) e confirme com “OK”.
– Configure a hora e a data sucessivamente seguindo o mesmo procedimento da
programação anterior.
– Prima o botão “OK” ” para avançar para a programação de outro evento, ou o botão “ ”
para voltar ao funcionamento normal.
REINICIALIZAÇÃO
9
10
11
12
13
14
15
16
•
•
Descrição do aparelho
Nota: depois da instalação, faça uma REINICIALIZAÇÃO TOTAL do aparelho antes de
efectuar qualquer operação.
CONFIRMAÇÃO DOS DADOS E
AVANÇO DA PROGRAMAÇÃO
CONFIGURAÇÃO DA HORA
•
CONFIGURAÇÃO DO RELÒGIO E
SAÏDA RÁPIDA DA PROGRAMAÇÃO
PROGRAMAÇÃO
CONTROLO MANUAL RELÉ
“CH1...CH4”
INCREMENTO / ALTERAÇÃO /
SELECÇÃO DE UM PARÂMETRO
DECREMENTO / ALTERAÇÃO /
ANULAÇÃO DE UM PARÂMETRO
ESTADO DA
PROGRAMAÇÃO
•
SÍMBOLO PROGRAMA
FÉRIAS
INDICAÇÃO
ANO.MÊS.DÍA
SÍMBOLO
PROGRAMA
IMPULSO
SÍMBOLO DA HORA
DE VERÃO
SÍMBOLO DA HORA
DE INVERNO
SÍMBOLO PROGRAMA
ALEATÓRIO
•
•
REINICIALIZAÇÃO
INDICAÇÃO DO DÍA
DA SEMANA
Para efectuar uma REINICIALIZAÇÃO PARCIAL do aparelho, prima o botão “R”.
Desta forma, a data assume por defeito o valor 2001.01.01 e o programa ALEATÓRIO, se
estiver activo, passa a OFF.
O relógio fica a zero e o ecrã mostra a hora 00:00 intermitente.
Para efectuar a REINICIALIZAÇÃO TOTAL do aparelho, prima o botão “R” e, depois,
rapidamente (menos de três segundos), o botão “PRG”. Desta forma, eliminam-se todos os
programas e o contador de horas fica a zero. No centro do ecrã aparece a palavra CLEAR e, a
seguir, a hora 00:00 intermitente.
INDICAÇÃO
HORAS:MINUTOS
Prima o botão “ ” para configurar a hora e a data.
Visualizam-se a hora e os minutos, enquanto os segundos ficam intermitentes. Prima o
botão“
” para os sincronizar com o minuto seguinte ou então o botão “ ” para os
sincronizar com o minuto anterior.
Prima o botão “OK” para avançar para a configuração dos minutos (os segundos
desaparecem e visualiza-se a data).
Prima as teclas “
” ou “ ” para incrementar/decrementar os minutos.
Prima a botão “OK” para mudar sucessivamente para a configuração das horas, do ano, do
” e “ ”).
mês e do dia (o utilizador pode configurá-los com as teclas “
Se, depois de configurar o dia, o botão “OK” ” for premido, o utilizador regressa à
configuração dos segundos.
Em qualquer altura, premindo o botão “ ” o utilizador regressa à visualização normal,
guardando as alterações efectuadas.
Se não se premir nenhum botão durante pelo menos 30 segundos, o aparelho regressa
automaticamente à visualização normal (guardando as alterações efectuadas).
PROGRAMAÇÃO
•
•
•
A programação do aparelho permite configurar os horários dos eventos de Ligado (ON),
Desligado (OFF) e a programação de impulsos “ ”.
É possível programar até 100 operações no total dos 4 canais.
Para aceder à programação, prima o botão “PRG”.
Aparece a palavra “PRG” e a indicação do canal “CH1” intermitente.
Seleccione, com os botões “CH1”...“CH4” o canal desejado e prima “OK”.
O aparelho mostrará a palavra PROG, l, os campos data e hora (vazios), os símbolos “ON”,
“OFF” (do canal seleccionado) e o símbolo “ ” intermitentes.
Se houver eventos programados associados ao canal seleccionado, aparece o primeiro deles.
Premindo o botão “OK” visualizam-se sucessivamente todos os programas já memorizados
associados ao canal e, finalmente, o ecrã correspondente a uma nova programação.
Nota: a programação de impulsos pode ser semanal, mensal ou anual, mas não “numa
data predefinida”.
VISUALIZAÇÃO E ALTERAÇÃO DOS PROGRAMAS
•
•
•
•
ORBIS TECNOLOGÍA ELÉCTRICA, S.A.
Lérida, 61
E–28020 MADRID
Teléfono:+ 34 91 5672277; Fax:+34 91 5714006
E-mail: info@ orbis.es
http://www.orbis.es
•
Para aceder à visualização/alteração, prima o botão “PRG”.
Aparece a palavra PROG e a indicação do canal “CH1” intermitente.
Seleccione com os botões “CH1”...“CH4” ” o canal desejado e prima “OK”.
Aparecerá o primeiro programa memorizado associado ao canal seleccionado (no caso de não
haver programas memorizados, aparecerá o ecrã correspondente a uma nova programação).
Prima “OK” para percorrer todos os programas memorizados.
Depois do último programa, aparece o ecrã correspondente a uma nova programação, se for
possível, ou a palavra “FULL” se já tiver sido atingido o número máximo de programações.
Para alterar um programa existente, prima o botão “PRG”.
As modalidades de alteração dos parâmetros são as mesmas da programação. Quando todos
os campos do programa tiverem sido analisados, prima novamente o botão “OK” para
avançar para o programa seguinte (se existir) ou para uma nova programação.
Para voltar ao funcionamento normal, prima “ ” (os dados alterados até este momento
serão guardados).
Nota: é possível alterar o tipo de programação de um programa (por exemplo: de diário
para anual), não é possível alterar a tipologia do evento associado (por exemplo, não é
possível transformar um evento Ligado em Desligado).
CANCELAMENTO DOS PROGRAMAS
•
•
•
•
Aceda ao programa desejado seguindo os mesmos procedimentos indicados para a
visualização/alteração.
Para eliminar o programa, prima o botão “PRG” durante 3 segundos aproximadamente.
A palavra CLEAR confirma que o cancelamento foi correcto; depois o aparelho avançará para
o programa seguinte ou para o ecrã correspondente a uma nova programação.
Para voltar ao funcionamento normal, prima “ ”.
COMUTAÇÃO MANUAL
•
•
•
Nota: se o número máximo de programas configuráveis tiver sido atingido, aparece a
palavra “FULL”.
Premindo novamente o botão “OK” sai-se da programação e visualiza-se o número de
programas ainda disponíveis para esse canal.
Para seleccionar o tipo de evento a programar (ON, OFF ou IMPULSO) use as teclas “
”e
“ ” até o evento desejado ficar intermitente, e confirme com “OK”.
Avançando para a programação da hora e da data, use as teclas “
” y “ ” para
seleccionar os minutos até atingir o valor escolhido. Confirme com “OK” para avançar para o
campo seguinte.
Usando sempre os botões “
” e “ ”, configure a hora, e confirme com “OK”.
Agora, o utilizador dispõe de diversos tipos de programação:
É possível alterar manualmente o estado de um circuito (desde que o programa de Férias não
esteja activo).
Prima o botão “CH...”, correspondente ao circuito para o qual necessita alterar o estado, até
seleccionar o desejado.
Os estados possíveis são os seguintes, por esta ordem:
- ON: ligado até à seguinte intervenção programada
- ON LOCK: ligado até à seguinte intervenção manual
- OFF LOCK: desligado até à seguinte intervenção manual
- OFF: desligado até à seguinte intervenção programada.
PROGRAMAÇÃO AVANÇADA
•
Premindo o botão “PRG” durante aproximadamente 5 segundos, activa-se a programação
avançada. Nesta modalidade o utilizador pode aceder às seguintes funções:
MUDANÇA DE HORÁRIO (ESTAÇÃO), AVANÇO OU ATRASO DA HORA: Esta função permite
seleccionar as datas de mudança automática da hora de Verão (hora legal) para a de Inverno
(hora solar) e vice-versa.
– Depois de aceder à modalidade de programação avançada, o ecrã mostra a palavra HOUR,
os símbolos “ ” e “ ” e a palavra ON (OFF) intermitente que indica se a mudança
automática da hora foi activada (desactivada).
” e “ ” comuta-se alternadamente entre o estado ON e OFF.
– Com os botões “
Nota: por defeito, as datas de mudança da hora são configuradas automaticamente para o
último domingo de Março (mudança para a hora legal de Verão) e para o último domingo
de Outubro (mudança para a hora solar).
– Se a mudança da hora tiver sido activada, premindo a botão “OK” svisualizam-se primeiro
a configuração da mudança da hora solar para legal “ ” e depois a configuração da
mudança da hora legal para solar “ ”.
– Para alterar uma das configurações, prima “PRG” no ecrã apropriado. A seguir, seleccione
a modalidade de mudança da hora com os botões “
” e “ ”.
As modalidades possíveis são as seguintes:
LAST: Se a mudança da hora ocorrer num determinado dia da última
semana de um mês seleccionado.
1st: Se a mudança da hora ocorrer num determinado dia da primeira
semana de um mês seleccionado.
2nd: Se a mudança da hora ocorrer num determinado dia da segunda
semana de um mês seleccionado.
3rd: Se a mudança da hora ocorrer num determinado dia da terceira
semana de um mês seleccionado.
4th: Se a mudança da hora ocorrer num determinado dia da quarta
semana de um mês seleccionado.
DATE Se a mudança ocorrer numa data específica (mês, dia).
– Depois de ter seleccionado a modalidade desejada, prima o botão “OK” para confirmar e
avançar para a configuração da data.
Nas modalidades Last, 1st, 2nd, 3rd e 4th é necessário configurar o mês, o dia (MO, ..., SU),
” e “ ” para seleccionar e “OK” para
a hora e os minutos (use sempre os botões “
confirmar).
– Na modalidade DATE , é necessário configurar o mês, o número do dia, a hora e os
minutos. Depois de ter definido as mudanças de hora, prima “OK” para avançar para a
configuração do programa aleatório, ou “ ” para voltar ao funcionamento normal.
Se a mudança da hora não tiver sido activada, premindo “OK” o utilizador avança
automaticamente para a configuração do programa aleatório.
PROGRAMA ALEATÓRIO
Permite accionar o aparelho em períodos aleatórios e variáveis de tempo de ON/OFF entre
5 e 68 minutos. O programa actua com comutações independentes em todos os canais em
funcionamento “OK”, excepto aqueles que estão em bloqueio manual (LOCK).
Se o programa tiver sido activado, o ecrã mostra o símbolo “ ”.
– Depois de aceder à modalidade de programação avançada, prima “OK” até o ecrã mostrar a
palavra “rnd= ON/OFF”.
Para activar (ON) ou desactivar (OFF) o programa aleatório use os botões “
”e“ ”e
“OK” para confirmar.
– Prima novamente “OK” para avançar para o programa Férias ou “ ” para voltar ao
funcionamento normal.
PROGRAMA FÉRIAS
Permite suspender o funcionamento do aparelho em dois períodos de tempo durante o ano.
Nestes períodos, os circuitos que não estiverem no estado de LOCK serão colocados em OFF.
No fim do período, os circuitos voltam ao estado configurado pela programação normal.
– Depois de ter acedido à modalidade de programação avançada, prima “OK” até o ecrã
mostrar a palavra “Holiday1 Str”.
– Premindo repetidamente “OK” aparecem os parâmetros relativos ao início e fim do
primeiro período de tempo e ao início e ao fim do segundo.
– Para modificar um dos parâmetros, prima o botão “PRG” no ecrã apropriado. Use as teclas
“
” e “ ” para seleccionar o valor do parâmetro desejado e “OK” para confirmar.
– Depois de configurar o fim do segundo período, prima “OK” para avançar para a função
contador de horas ou “ ” para voltar ao funcionamento normal.
Nota: : se o programa de Férias ainda não tiver sido configurado, nos campos do ano, mês,
dia, hora e minutos aparecerão alguns traços “--”.
FUNÇÃO CONTADOR DE HORAS
Mostra o número de horas (máximo 99999) de permanência dos circuitos em estado ON.
– Depois de ter acedido à modalidade de programação avançada, prima “OK” até o ecrã
mostrar o número de horas (“-----H”) e a palavra “CH1”.
– Use o botão “OK” ” para visualizar sucessivamente as horas de funcionamento dos circuitos
em estado ON.
Nota: para colocar a zero o contador de horas é necessário efectuar uma reinicialização
total do instrumento.
– Prima “OK” ou “
” para voltar ao funcionamento normal.
NORMAS DE REFERÊNCIA
A conformidade com as Directrizes Comunitárias:
73/23/CEE modificada pela 93/68/CEE (Baixa Tensão)
89/336/CEE modificada pela 92/31/CEE e pela 93/68/CEE (EMC)
é declarada em relação às seguintes Normas:
Segurança: EN 60730-2-7
Compatibilidade Electromagnética: EN 55014-1 / EN 55014-2
A016.17.54046
10
9
DATA CONFIRM AND
PROGRAMMING FORWARD
2
1
WINTER TIME
SYMBOL
SUMMERTIME
SYMBOL
YEAR/MONTH/DAY”
INDICATION
13
5
14
6
MANUAL RELAY COMMAND
“CH1...CH4”
16
8
PROGRAMMING
STATUS SYMBOLS
HOURS/MINUTES
INDICATION
IMPULSE
PROGRAMME
SYMBOL
HOLIDAY
PROGRAMME SYMBOL
DECREASE/MODIFY/DESELECTION
OF A PARAMETER
15
7
Lérida, 61
E–28020 MADRID
Teléfono:+ 34 91 5672277; Fax:+34 91 5714006
E-mail: info@ orbis.es
http://www.orbis.es
ORBIS TECNOLOGÍA ELÉCTRICA, S.A.
RANDOM
PROGRAMME SYMBOL
DAYS
OF THE WEEK
12
4
Device description
11
3
Wiring diagrams
Dimensions
DATA MULTI ANUAL
INCREASE/MODIFY/SELECTION
OF A PARAMETER
RESET
PROGRAMMING
CLOCK SETTING AND RAPID EXIT
FROM PROGRAMMING
691-010
Frequency:
Switching power:
Contact capacity:
incandescent lights max
Fluorescent lights max
Type action:
Absorption:
•
•
•
Clock precision
Lithium battery
Number of programmes:
Programming resolution:
Operating temperature:
Protection level
Insulation class:
User conditions:
•
•
•
•
•
•
•
•
Note: after installation, carry out the total reset of the instrument before any other
operation.
For the PARTIAL RESET of the instrument, press the “R” key.
In this way, the date is set to the default value 2001.01.01 and the RANDOM is set to OFF if
active.
The clock is zeroed and the display will show a flashing 00:00.
For the TOTAL RESET of the instrument, press key “R” followed by “PRG” three seconds
later. In this way, in addition to the partial reset operations, all the programmes are cancelled
and the timer is zeroed.
In the centre of the display, the CLEAR message will appear followed by a flashing 00:00.
1500 W per channel
600 W per channel
1B, 1S, 1T and 1U
max 22VA at 230V 50Hz
max 3W at 230V 50Hz
4 mono-stable relays (channels) in exchange
in format YYYY.MM.DD
(calendar from 01.01.1999 to 31.12.2172)
±1s per day (10ppm)
with 5 year charge reserve 20 °C
max 100 (ON + OFF + impulse)
1 minute
0 °C ÷ +50 °C
IP20 (IP41 after installation)
II according to EN 60335 in conditions of correct assembly
normal pollution
230 VAC (-15%/+10%)
24 VAC/DC (-15%/+10%)
50/60 Hz
16(10)A 250V~
To set the time and date, press the “ ” key.
The hour and minutes will be displayed, and the seconds will start to flash. Press the “
”
key to synchronise these to the next minute or the “ ” key to synchronise them to the
previous minute.
Press “OK” to go to the regulation of the minutes (the seconds will disappear and the date
will be displayed).
Press the “
” or “ ” keys to increase/decrease the minutes..
Press “OK” to go to the regulation of the hours, year, month and day (set with the keys
“
” and “ ”).
If “OK” is pressed after the day is set, the system returns to the setting of the seconds.
If the “ ” key is pressed at any time, the system returns to the normal display mode, with
the exception of the modifications made.
If no key is pressed for at least 30 seconds, the system automatically returns to normal
display mode, with the exception of the modifications made.
•
•
•
•
•
Note: if the maximum number of programmes that can be set has been reached, the
“FULL” message will appear.
Press “OK” again to leave programming mode and see the number of programmes still
available for the channel in question.
To select the type of event to be set (ON, OFF or IMPULSE) use keys “
” and “ ” until
the event required begins to flash, and confirm with “OK”
The programming function can be used to set the times for the ON, OFF and impulse
operation “ ” events.
Up to 100 events can be programmed in the 4 channels.
To enter programming mode, press “PRG”.
The “PRG” message appears and the channel indication “CH1” will flash. Select the channel
required with the “CH1” ... “CH4” keys and press “OK”.
The instrument will now display the message “PROG”, the date and time fields (empty) and
the ON and OFF symbols for the channel and “ ” will flash.
If events are already programmed for the channel selected, the first of these will appear.
Press “OK” to display all the programmes already memorised for the channel in sequence,
followed by the screen display for a new programming operation.
PROGRAMMING
•
•
•
•
SETTING THE TIME AND DATE
•
•
INSTRUMENT RESET
Outputs:
Annual clock
•
•
•
•
Power supply:
•
TECHNICAL SPECIFICATIONS
To guarantee the safety levels built into the device, proceed as follows:
1) The appliance has to be installed by a specialist operator
2) The appliance has to be installed in such a way that the terminals are inaccessible after
installation
3) When installing the appliance, follow the wiring diagrams carefully
4) Before touching the terminals, make sure the connectors to be attached to the appliance
are not live
5) Do not power or connect the instrument if any part of it is damaged.
SAFETY WARNINGS
DATA MULTI ANUAL is a digital time switch with 4 independent and not live command
circuits, designed for the control of every kind of electrical installation. It allows a daily, weekly,
monthly and yearly planning or in a prefi xed time (day, month, year).
Pulse Program: from 1 to 59 seconds, Random Program, Automatic switch to summer/winter
time, holiday program and hour counter
DIGITAL TIME SWITCH
Read all the instructions carefully
Manual User
Note: impulse programming may be weekly, monthly or annual, but not to a set date.
IMPULSE PROGRAMMING
The instrument comes on for a time set between 1 and 59 seconds.
– If the impulse “ ” is selected as the event, the flashing figure “--” will appear after
pressing “OK”.
– Set the required duration of the impulse (1 to 59 seconds) with the “
” and “ ” keys
and confirm with “OK”.
– Set the time and date in the same way as in the previous programming operation.
– Press “OK” to go to the programming of another event and press “ ” to return to
normal operating mode.
PROGRAMMING TO A PRESET DATE
The events take place on a precise date (day, month, year).
– Press “OK” after setting the time to go directly to the selection of the date without
confirming the days of the week.
– Set the year, month and day using the “
” and “ ” keys and confirm each time
with “OK”.
– Press “OK” to go to the programming of another event and press “ ” to return to
normal operating mode.
ANNUAL PROGRAMMING
The events are repeated every year on the same day of the same month.
– Press “OK” after setting the time to go directly to the selection of the date without
confirming the days of the week.
Press “OK” to go to the month without modifying the year.
– Use the “
” and “ ” keys to set the month required and confirm with “OK”.
– Use the “
” and “ ” keys to set the day required and confirm with “OK”.
– Press “OK” to go to the programming of another event and press “ ” to return to
normal operating mode.
MONTHLY PROGRAMMING
The events are repeated every month on the same day.
– Press “OK” after setting the time to go directly to the selection of the date without
confirming the days of the week.
Press “OK” twice to go to the day without modifying the year or month.
– Use the “
” and “ ” keys to set the day required and confirm with “OK”.
– Press “OK” to go to the programming of another event and press “ ” to return to
normal operating mode.
Note: slow flashing means that the day is selected, and fast flashing means that the day
has been rejected.
DAILY/WEEKLY PROGRAMMING
The events are repeated on every day selected every week.
– The system automatically goes to the selection of the days of the week.
Use the “
” key to confirm the day that is flashing (starting from Monday), and use
the “ ” key to go directly to the next day.
– Press “OK” to go to the programming of another event or return to normal operating mode
with “ ”.
Go to the time and date programming.
” and “ ” keys to set the minutes until the figure required is reached.
Use the “
Confirm with “OK” to move on to the next field.
Use the “
” and “ ” keys to set the time, and confirm with “OK”.
Various types of programming are now possible:
Note: it is possible to change the type of programming for a programme (from daily to
annual, for example), but it is not possible to change the type of associated event (for
example, it is not possible to transform an ON event to an OFF event).
To enter display/modify, press the “PRG” key.
The PROG message appears and the channel indication “CH1” flashes.
Select the channel required with the “CH1” ... “CH4” keys and press “OK”.
The first programme memorised for the channel selected will appear (if no programmes are
memorised, the screen display for a new programming operation will be displayed).
Press “OK” to scroll through all the programmes memorised.
After the last programme, the screen display for a new programming operation will appear if
possible, or the message “FULL” if the maximum number of programming operations has
been reached.
Press “PRG” to modify an existing programme.
The parameter setting modes are the same as those for the programming. When all the
programme fields have been taken into consideration, press “OK” again to go to the next
programme (if present) or to a new programming operation.
To return to normal operation, press “ ” (the data set up to this time will be saved).
Go to the programme required using the same procedures as those for display and
modification.
To cancel the programme, hold down the “PRG” key for approximately 3 seconds.
The CLEAR message will appear to confirm the cancellation, and the instrument will then go
to the next programme or the screen display for a new programming operation.
Press “ ” to return to normal operating mode.
•
•
•
The forcing of the relay makes it possible to modify the status of a relay manually (provided
the holiday programme is not active).
Press the “CH ..” key for the relay whose status is to be modified until the status required is
obtained.
The possible states are as follows, in order:
- ON: relay on until the next programmed operation
- ON LOCK: relay on until the next manual operation
- OFF LOCK: relay off until the next manual operation
- OFF: relay off until the next programmed operation
FORCING THE RELAYS
•
•
•
•
CANCELLING THE PROGRAMMES
•
•
•
•
•
DISPLAY AND MODIFICATION OF THE PROGRAMMES
•
•
•
” to return to normal operating mode.
Conformity with EU directives:
73/23/ECC, modified by 93/68/ECC (low voltage)
89/336/ECC, modified by 92/31/ECC and 93/68/ECC (E.M.C.)
is declared with reference to the following standards:
Safety: EN 60730-2-7
Electromagnetic compatibility: EN 55014-1 / EN 55014-2
REFERENCE STANDARDS
– Press “OK” or “
Note: to zero the timer, the instrument has to be totally reset.
TIMER FUNCTION
this displays the number of hours (max. 99999) for which the relay will remain in ON status.
– After entering advanced programming mode, press “OK” until the display shows the
number of hours (“-----H”) and the message “CH1”.
– Use the “OK” key to display the relay operating hours in ON status.
Note: if the holiday programme has not yet been set, dashes “--” will appear in the year,
month, day, hour and minute fields.
HOLIDAY PROGRAMME
This is used to stop the instrument for two periods in the course of the year. In these periods,
the relays that are not in LOCK status are set to OFF.
At the end of the period, the relays will return to the status laid down by the normal
programming.
– After entering advanced programming mode, press “OK” until the display shows the
message “Holiday1 Str”.
– Press “OK” repeatedly to display the parameters for the start and end of the first period and
the start and end of the second.
– To modify one of the parameters, press the “PRG” key in the relevant screen display.
Use the “
” and “ ” keys to select the value of the parameter required and “OK” to
confirm.
– After setting the end of the second period, press “OK” to go to the timer function or “ ”
to return to normal operating mode.
RANDOM PROGRAMME
This is used to activate the instrument with casual ON/OFF times varying from 5 to 68
minutes. The programme operates with independent switching operations in all the channels
in ON operation, with the exception of the channels which are manually locked (LOCK).
If the programme is active, the display shows the symbol “ ”.
– After entering advanced programming mode, press “OK” until the display shows the
message “rnd= ON/OFF”.
To activate (ON) or deactivate (OFF) the random programme, use the “
” and
“ ” keys and “OK” to confirm.
– Press “OK” again to go to the holiday programme, or “ ” to return to normal operating
mode.
– After selecting the mode, press “OK” to confirm and go to the setting of the date.
For Last, 1st, 2nd, 3rd and 4th modes, set the month, day (MO, ..., SU), time and minutes
(using the “
” and “ ” to select and “OK” to confirm).
– For DATE mode, set the month, number of the day, time and minutes.
– After setting the time changes, press “OK” to go to the setting of the RANDOM programme
or “ ” to return to normal operating mode.
If the time change is not active, when “OK” is pressed the system goes automatically to the
setting of the random programme.
LAST if the time change takes place on a determined day in the
last week of a previously selected month
1st if the time change takes place on a determined day in the
first week of a previously selected month
2nd if the time change takes place on a determined day in the
second week of a previously selected month
3rd if the time change takes place on a determined day in the
third week of a previously selected month
4th if the time change takes place on a determined day in the
fourth week of a previously selected month
DATE if the time change takes place on a determined date (month, day).
The possible modes are:
– If the time change is active, press “OK” to display first the settings for the changeover from
winter time to summertime “ ”, then the time change from summertime to winter time
“ ”.
– To modify one of the two settings press “PRG” from the relevant screen display, then select
the time change mode with the “
” and “ ” keys.
Note: the time change dates are automatically set by default to the last Sunday in March
(start of summertime) and the last Sunday in October (start of winter time).
SUMMERTIME “ ” / WINTER TIME “ ”: this function is used to set the dates for the
automatic changeover from summertime to winter time and vice versa.
– After entering advanced programming mode, the display shows the message HOUR, the
symbols “ ” and “ ” and the flashing ON (OFF) message to indicate whether the
automatic time change is enabled or (disabled).
– Use the “
” and “ ” keys to switch from the ON to the OFF status.
Hold the “PRG” key down for 5 seconds approximately to activate advanced programming.
In this mode, it is possible to gain access to the following functions:
ADVANCED PROGRAMMING
•