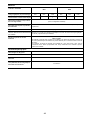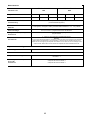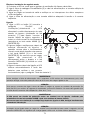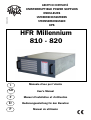
1
V80325A
GRUPPI DI CONTINUITÀ
UNINTERRUPTIBLE POWER SUPPLIES
ONDULEURS
UNTERBRECHUNGSFREIEN
STROMVERSORGUNGEN
UPS
HFR Millennium
810 - 820
I
Manuale d’uso per l’utente
GB
User’s Manual
F
Manuel d’installation et d’utilisation
D
Bedienungsanleitung für den Benutzer
P
Manual do utilizador
INDICE
Dichiarazione di conformità CE . . . . . . . . . . . . . . . . . . . . . . . . . . . . . . . . . .pag.2
Condizioni d’uso . . . . . . . . . . . . . . . . . . . . . . . . . . . . . . . . . . . . . . . . . . . .pag. 3
Introduzione . . . . . . . . . . . . . . . . . . . . . . . . . . . . . . . . . . . . . . . . . . . . . . .pag. 3
Schema a blocchi . . . . . . . . . . . . . . . . . . . . . . . . . . . . . . . . . . . . . . . . . . .pag. 4
Principio di funzionamento . . . . . . . . . . . . . . . . . . . . . . . . . . . . . . . . . . . . .pag. 5
Installazione . . . . . . . . . . . . . . . . . . . . . . . . . . . . . . . . . . . . . . . . . . . . . .pag. 6
Funzioni e segnalazioni . . . . . . . . . . . . . . . . . . . . . . . . . . . . . . . . . . . . . . .pag. 8
Software autodiagnostico UPS LINK . . . . . . . . . . . . . . . . . . . . . . . . . . . . .pag. 10
Impostazione Funzioni speciali . . . . . . . . . . . . . . . . . . . . . . . . . . . . . . . . .pag. 10
Interfacciamento a segnali logici e comando a distanza . . . . . . . . . . . . . . . .pag. 12
Test batterie . . . . . . . . . . . . . . . . . . . . . . . . . . . . . . . . . . . . . . . . . . . . . .pag. 12
Possibili problemi e loro risoluzione . . . . . . . . . . . . . . . . . . . . . . . . . . . . .pag. 14
Caratteristiche tecniche . . . . . . . . . . . . . . . . . . . . . . . . . . . . . . . . . . . . . .pag. 15
Dichiarazione CE di conformità
Direttive del consiglio applicate:
Standard al quale si dichiara la conformità:
Costruttore:
Indirizzo:
Tipo di apparecchiatura:
Modelli:
Anno di apposizione del marchio:
73/23/CEE; 89/336/CEE modificata con le direttive 92/31/CEE, 93/68/CEE
EN 50091-1-1, EN 50091-2
Meta System S.p.A.
via Majakovskij, 10/b Reggio Emilia, Italia
Gruppo di Continuità
HFR MILLENNIUM 810
HFR MILLENNIUM 820
1999
L’apparecchiatura è stata provata nella configurazione tipica di installazione e con periferiche conformi alle Direttive sopra elencate.
Io sottoscritto dichiaro che l’apparato sopra definito soddisfa i requisiti delle Direttive sopra specificate.
Reggio Emilia, 15/10/99
Ing. Cesare Lasagni
Direttore Tecnico
DATI E CARATTERISTICHE TECNICHE POSSONO ESSERE VARIATI SENZA PREAVVISO
2
Congratulazioni per la Vostra scelta!
Questo manuale contiene le informazioni di sicurezza, installazione e funzionamento relative ai
gruppi di continuità serie HFR MILLENNIUM prodotti da Meta System.
Si consiglia di leggere attentamente questo manuale prima di procedere all’installazione del
gruppo di continuità, attenendosi scrupolosamente a quanto di seguito riportato.
Gli UPS della serie HFR MILLENNIUM sono realizzati prevalentemente per uso civile, industriale ed
elettromedicale; tuttavia, in quest’ultimo caso, occorre accertarsi se, nel paese di utilizzo, esistano
particolari normative in merito.
In caso di problemi con l’UPS, si consiglia di leggere questo manuale prima di contattare il servizio
di assistenza tecnica; la sezione “Possibili problemi e loro risoluzione”, infatti, può aiutare a
risolvere la maggior parte degli inconvenienti incontrati durante l’utilizzo del gruppo di continuità.
Importante
Si consiglia di conservare i materiali per l’imballaggio dell’apparecchiatura, in quanto potrebbero
risultare molto utili per un eventuale invio in riparazione.
I danni arrecati dal trasporto a causa di un cattivo imballaggio dell’UPS non sono coperti da
garanzia.
CONDIZIONI D’USO
• L’UPS è stato progettato per alimentare apparecchiature per elaborazione dati, il carico applicato
non deve superare quello indicato sull’etichetta posteriore dell’UPS.
• Il pulsante ON/OFF dell’UPS non isola elettricamente le parti interne. Per isolare l’UPS, scollegarlo
dalla presa di alimentazione di rete.
• Non aprire il contenitore dell’UPS, in quanto, all’interno, vi possono essere parti a tensione
pericolosa anche con spina di rete scollegata; comunque all’interno non sono presenti parti
riparabili dall’utente.
• Il pannello frontale di controllo è previsto per operazioni manuali; non premere sul pannello con
oggetti affilati o appuntiti.
• L’UPS è stato progettato per funzionare in ambienti chiusi, puliti, privi di liquidi infiammabili e di
sostanze corrosive e non eccessivamente umidi.
INTRODUZIONE
I gruppi di continuità della serie HFR MILLENNIUM sono stati studiati per garantire la massima
sicurezza ed affidabilità nell’alimentazione dei sistemi informatici indipendentemente dalle
condizioni della linea elettrica. Il risultato è stato ottenuto combinando una logica di comando
“intelligente”, controllata da un potente microprocessore, con stadi di potenza “on-line” che
utilizzano la tecnologia PWM ad alta frequenza per ottenere ottime prestazioni in termini di
precisione e pulizia della tensione di uscita, rendimento, affidabilità e silenziosità.
La struttura ridondante (HFR MILLENNIUM 820) permette inoltre di avere continuità nell’erogazione
di energia, seppur con potenza ridotta, anche nel caso di guasto di un modulo di potenza,
raggiungendo così un elevatissimo livello in termini di sicurezza di funzionamento. Particolare
attenzione è stata posta nella progettazione dello stadio d'ingresso che, oltre alle funzioni classiche
di filtro e controllo di linea, assolve anche il compito di gestire l’assorbimento di corrente dalla rete,
rendendolo in ogni caso prossimo a quello sinusoidale ideale. Vengono così eliminati i picchi
ripetitivi di assorbimento propri degli alimentatori impiegati in campo informatico e portato il fattore
di potenza di ingresso a valori prossimi a 1 (in osservanza alle normative europee).
3
Le principali prerogative di questa innovativa linea di UPS (Uninterruptible Power Supply) si possono
così riassumere:
• Ridondanza (modello 820).
• Funzionamento di tipo on-line a doppia conversione (massima reiezione ai disturbi e alle
interruzioni di linea; assenza di commutazioni rete-batteria).
• Fattore di potenza di ingresso praticamente unitario qualunque sia il tipo di carico applicato.
• Assoluta stabilità della tensione d'uscita indipendentemente dal carico e dalla tensione di linea.
• Gestione “intelligente” del punto di intervento degli accumulatori interni in funzione della tensione
di linea e del carico applicato.
• Elevata capacità di spunto grazie al sovradimensionamento dei circuiti.
• Sensore per il corretto collegamento del conduttore di neutro in ingresso per la massima sicurezza
dei carichi collegati (inseribile via software).
• Elevatissimo rendimento energetico.
• Silenziosità di funzionamento.
• Assenza di disturbi sui monitor.
• Assoluta assenza di manutenzione.
• Uscita per interfacciamento computer su linea seriale RS 232 con possibilità di interrogazione sui
parametri di funzionamento e sulla storia dell’UPS.
• Uscite a segnali logici e per comando a distanza. (optional)
SCHEMA A BLOCCHI
USCITA
BY PASS
INGRESSO
~
=
~
=
FILTRO
D'INGRESSO
REGOLATORE
DEL FATTORE
DI POTENZA
INVERTER
MODULO
DI POTENZA
=
=
BATTERIE
SURVOLTORE
CARICA
BATTERIE
MODULO
DI POTENZA
BATTERIE
LOGICA A
MICROPROCESSORE
INTERFACCIA
RS 232
COMANDO
A
DISTANZA
4
PRINCIPIO DI FUNZIONAMENTO
In presenza di rete la tensione di ingresso viene filtrata e raddrizzata da uno speciale stadio di
ingresso (regolatore del fattore di potenza) in grado di ottimizzare l’assorbimento di corrente dalla
rete rendendo il fattore di potenza pressochè unitario e di compensare eventuali variazioni di
tensione; tale stadio è in grado di alimentare l’inverter di uscita anche con tensioni di rete molto a
di sotto del valore nominale.
Questa caratteristica si accentua con carichi molto bassi al punto che, con un carico attorno al 50%
del nominale, è possibile il funzionamento a rete fino a circa 100 V di linea senza assorbire energia
dalle batterie.
Ciò consente una gestione “intelligente” del passaggio a batteria che punta a minimizzare l’utilizzo
degli accumulatori.
La tensione, raddrizzata dal primo stadio, viene poi utilizzata da un inverter ad alta frequenza per
generare la tensione di uscita sinusoidale “pulita” e a bassissima distorsione; un veloce circuito di
by-pass sincronizzato interviene durante i picchi di assorbimento che vanno oltre la capacità
dell’inverter, quali l’accensione di particolari periferiche, la smagnetizzazione di monitor a colori di
grandi dimensioni, ecc.
L’assenza della tensione di linea o il suo eccessivo abbassamento attivano automaticamente uno
stadio survoltore in grado, tramite le batterie, di assicurare l’alimentazione senza interruzioni
all’inverter di uscita e, di conseguenza, al carico.
La tipologia circuitale è del tipo a neutro passante, tale cioè da non alterare il regime di neutro delle
apparecchiature ad esso connesse.
Durante il normale funzionamento (se precedentemente abilitato via software), un sensore verifica
la differenza di potenziale fra il conduttore di neutro e quello di terra e, nel caso risulti eccessiva,
attiva la segnalazione acustica.
Tutte le funzioni del gruppo di continuità sono supervisionate da un microprocessore che è anche in
grado di tenere sotto controllo e di memorizzare particolari condizioni di funzionamento, nonchè di
gestire l’interfacciamento dell’UPS con un computer tramite linea seriale RS 232.
È così possibile controllare in tempo reale i parametri di funzionamento e le eventuali anomalie.
5
3
LEGENDA
1
2
3
4
5
6
7
8
9
10
11
12
13
14
8
PULSANTE DI ACCENSIONE E SPEGNIMENTO
PULSANTE DI TACITAZIONE BUZZER E ATTIVAZIONE TEST
7
BATTERIA
LED VERDE MAINS (presenza rete)
4
LED GIALLO BATTERY (funzionamento a batteria)
LED ROSSO ALARM (anomalia di funzionamento)
6
LED ROSSO OVERLOAD (preavviso di sovraccarico o
sovraccarico)
LED GIALLO BY-PASS
5
LED VERDE INVERTER
PRESA-SPINA D’INGRESSO/USCITA
PRESA INTERFACCIA COMPUTER RS232
PRESE INTERFACCIA A LIVELLI LOGICI
1
PULSANTE “SERVICE” PER SETTAGGIO FUNZIONI SPECIALI
CONNETTORE PER COLLEGAMENTO UNITA’ BATTERIE
SUPPLEMENTARE.
2
MORSETTO DI TERRA
INSTALLAZIONE
Nel retro del gruppo di continuità sono predisposti i seguenti collegamenti:
• Presa-spina di Ingresso-Uscita [9]: collegare a questo connettore il cavo di alimentazione e la
presiera di uscita come indicato in figura.
• Presa per collegamento interfaccia seriale computer tipo RS232 (9 poli femmina) [10]: da
utilizzarsi nel caso si voglia sfruttare il software autodiagnostico UPS LINK.
• 2 prese per collegamento comando a distanza e interfaccia computer a segnali logici (9 poli
maschio) [11]: da utilizzarsi con i relativi dispositivi (opzionali).
• Predisposizione per collegamento batterie aggiuntive (13).
AVVERTENZA
Per motivi di sicurezza si consiglia di non modificare i cavi forniti, inoltre è necessario assicurarsi
che la presa di rete a cui si collega il gruppo di continuità abbia una sicura connessione al circuito
di terra.
AVVERTENZA
La presa di alimentazione di rete, o il dispositivo di sezionamento, devono essere installati in
prossimità dell’apparecchiatura e devono essere facilmente accessibili.
6
Procedere all’installazione nel modo seguente:
1) Posizionare il gruppo di continuità in modo che le feritoie di ventilazione non risultino ostruite.
2) Collegare al connettore di Ingresso-Uscita [9] il cavo di alimentazione e la presiera multipla di
uscita (vedi fig. 1).
3) Collegare i carichi alla presiera di uscita, verificando che gli interruttori dei vari utilizzatori siano
spenti.
4) Collegare la spina di alimentazione ad una presa di corrente adeguata alla tensione e alla
corrente richieste.
Accensione
1) Accendere il gruppo di continuità con 10 11
l’apposito pulsante [1] (si veda il paragrafo
“Funzioni e segnalazioni” alla voce “comandi”);
inizialmente l’UPS alimenterà l’uscita
direttamente dalla rete tramite il by-pass
(segnalazione del led giallo) [7] per poi
commutare a inverter dopo alcuni secondi ed
entrare nel modo normale di funzionamento
(sono accesi i led verdi MAINS [3] e
9
INVERTER [8]).
2) Accendere i carichi e verificare che, dopo
l’eventuale intervento del by-pass, si abbia il
ritorno al funzionamento normale; a questo
punto sono accesi il led verde MAINS [3] e il ALLAALLARETE
RETE
led verde INVERTER [8]. Nel caso i carichi
collegati risultino eccessivi, rimarrà inserito il
by-pass e lampeggerà il led rosso OVERLOAD
[6].
3) Qualche istante dopo l’accensione, il gruppo
di continuità esegue automaticamente il test
delle batterie, per verificarne il corretto
funzionamento (vedi paragrafo “Test Batterie”).
12
14
13
Fig. 1
AL CARICO
AL CARICO
AVVERTENZA
Non disinserire mai la spina di alimentazione 230V mentre l’UPS è in funzione, in quanto questa operazione scollega
la terra di protezione sia dall’UPS che dai carichi ad esso connessi.
ATTENZIONE
Poichè le correnti di dispersione verso terra di tutti i carichi si sommano nel conduttore di protezione (filo di terra)
dell’UPS, per motivi di sicurezza, come da norma EN 50091-1-1, occorre assicurarsi che la somma di queste correnti
non superi il valore di 2.7 mA.
AVVERTENZA!
L’UPS é dotato di un circuito di protezione contro un eventuale errore di collegamento, segnalato all’accensione dal
led rosso ALARM acceso fisso e dal suono continuo del buzzer interno.
Nel caso si verificasse questa segnalazione subito dopo l’accensione dell’UPS, sconnettere immediatamente la
spina di alimentazione.
ATTENZIONE
Se dopo l’accensione di tutti i carichi collegati, si nota un lampeggio breve ogni 3 secondi del led rosso OVERLOAD,
significa che il carico connesso all’UPS é al limite massimo consentito.
7
FUNZIONI E SEGNALAZIONI
Segnalazioni luminose:
Con riferimento alla figura a pagina 7, gli indicatori luminosi hanno le seguenti funzioni:
3 Led verde MAINS
- acceso rete regolare, inverter sincrono.
- lampeggiante: rete fuori tolleranza, ma presente e sufficiente per il corretto funzionamento,
oppure inverter non sincrono.
- spento: rete assente o troppo bassa in relazione al carico.
8 Led verde INVERTER
- acceso: inverter in funzione.
- spento: inverter disattivato o guasto.
4 Led giallo BATTERY
- acceso: funzionamento a batteria.
- lampeggiante: riserva batterie o fine autonomia o test batterie negativo.
- spento: funzionamento a rete.
5 Led rosso ALARM
- acceso: blocco del funzionamento dell’UPS.
- lampeggiante: guasto di uno o più moduli di potenza.
- lampeggio alternato breve-lungo: collegamento errato del conduttore di neutro in ingresso (con
sensore di neutro abilitato).
- spento: funzionamento normale.
6 Led rosso OVERLOAD
- acceso: anomalie nella tensione di uscita.
- lampeggiante: sovraccarico.
- spento: funzionamento normale.
- lampeggio breve ogni 3 sec.: preavviso di sovraccarico.
7 Led giallo BY-PASS
- acceso: by-pass attivo (uscita alimentata direttamente dalla rete).
- spento: uscita alimentata dall’inverter.
Segnalazioni acustiche:
• Suono continuo: UPS in blocco.
• Suono intermittente lento (un bip ogni 12 secondi): funzionamento a batteria.
• Suono intermittente veloce: sovraccarico o guasto.
• Suono intermittente alternato breve-lungo: riserva autonomia o test batterie negativo o errata
connessione del conduttore di neutro (con sensore di neutro abilitato).
• Bip singolo: segnalazione accensione dell’UPS o riconoscimento richiesta test batterie o fine test
batterie con esito positivo.
Comandi:
Il gruppo di continuità viene gestito tramite i due pulsanti sul frontale, visibili in figura a pagina 7.
1 Pulsante di accensione/spegnimento:
- Premendo brevemente si ha l’accensione dell’UPS evidenziata dall’accensione momentanea di
tutti i led e da una breve segnalazione acustica (bip).
- Tenendo premuto lo stesso pulsante per circa due secondi si ha lo spegnimento dell’UPS,
evidenziato dal suono intermittente del buzzer.
2 Pulsante tacitazione cicalino/test batterie:
- Mediante una breve pressione di questo pulsante è possibile silenziare il cicalino. In questo
modo la segnalazione acustica in corso viene annullata e il cicalino tace fino a quando non si
renda necessario segnalare un nuovo evento.
- Tenendo premuto per circa due secondi viene richiesto il test delle batterie; per i particolari al
riguardo si veda il paragrafo apposito.
8
Avvertenze:
• In condizioni di funzionamento normale sono accesi i led verdi MAINS [3] e INVERTER [8].
• Durante il funzionamento a batteria sono accesi il led verde INVERTER [8] e il led giallo BATTERY
[4].
• Il funzionamento a batteria è segnalato da un avviso acustico a cadenza lenta (un bip ogni 12
secondi). La riserva autonomia, cioè il momento opportuno per chiudere le procedure avviate
dall’utente su di un computer collegato al gruppo di continuità, è indicata da una segnalazione
acustica intermittente alternata breve-lunga, accompagnata da un uguale lampeggio del led
BATTERY [4]. Il fine autonomia é segnalato dal lampeggio del led giallo “BATTERY” e dal suono
continuo del cicalino, per durata di 15”; in questa condizione il carico non è più alimentato.
• Il lampeggio del led rosso OVERLOAD [6] indica la presenza di un carico eccessivo in uscita. In
tal caso, se la rete è presente, il carico viene alimentato da quest'ultima tramite il by-pass,
diversamente l’UPS va in blocco dopo 15 secondi di sovraccarico continuativo.
• Il lampeggio del led rosso ALARM [5] indica il guasto di uno o più moduli di potenza se
l’intermittenza è rapida; una anomalia nel collegamento del gruppo di continuità (collegamento del
conduttore di neutro errato) se l’intermittenza è di tipo alternato breve-lungo. Nel caso di neutro
errato invertire il verso di inserimento della spina del cavo di alimentazione dell’UPS.
• In caso di blocco dell’UPS per una qualsiasi anomalia si ha lo spegnimento automatico e completo
dopo circa 15 secondi.
9
SOFTWARE AUTODIAGNOSTICO UPS LINK
GUIDA ALL’USO
Connessione
L’UPS é dotato di interfaccia standard RS232, grazie alla quale é possibile accedere, tramite un
elaboratore, ad una serie di dati relativi al funzionamento e alla storia dell’UPS. La funzione é
utilizzabile tramite il programma di interfacciamento UPS LINK per ambiente WINDOWS (*),
connettendo una porta seriale del PC alla presa di interfacciamento [10] presente sul retro
dell’UPS, tramite un cavo RS 232.
Installazione software UPS LINK per WINDOWS(*)
Per installare il software UPS LINK, eseguire in sequenza i passi sotto elencati:
1. Avviare WINDOWS(*).
2. Inserire il disco di installazione in dotazione all’UPS nel drive A.
3. Selezionare File | Esegui dal menù Avvio.
4. Nel riquadro Apri digitare A:\SETUP, quindi selezionare OK.
5. Appare la finestra di dialogo Select Directories dove viene proposta la directory di default nella
quale verranno installati i files del programma. Selezionare OK.
6. Appare una finestra di informazione che chiede conferma per l’inizio dell’installazione.
Selezionare OK per iniziare oppure CANCEL per abbandonare l’installazione.
7. Al termine dell’installazione viene creato un gruppo denominato Meta System UPS Link
contenente due icone:
-Meta System UPS LINK
: Programma di interrogazione.
-Meta System UPS LINK Uninstaller
: Programma per rimuovere l’installazione effettuata.
Dopo essersi assicurati che l’UPS sia collegato ad una porta seriale libera del PC, fare un doppio
clic con il mouse sull’icona Meta System UPS LINK.
* Windows é un marchio registrato Microsoft Corporation.
IMPOSTAZIONE FUNZIONI SPECIALI
Premere il pulsante SERVICE [12] posto sul pannello posteriore dell’UPS (ad UPS spento); il
gruppo di continuità emette un segnale acustico e visualizza sui led del pannello frontale lo stato
delle seguenti opzioni:
- led MAINS [3] acceso
®
Se sensore di neutro abilitato
- led BATTERY [4] acceso
®
Se autorestart abilitato
- led BY PASS [7] acceso
®
Se dip speed inserito
- led INVERTER-ON [8] acceso
®
Se extended PLL lock range inserito
- led OVERLOAD [6] acceso
®
Se load waiting mode abilitato
- led ALARM [5] acceso
®
Se selezionato funzionam. a 60 Hz
Premendo il pulsante Tacitazione Buzzer [2] si seleziona la funzione desiderata (il led relativo
lampeggia).
Premendo il pulsante di Accensione/Spegnimento [1] si inverte lo stato della funzione
selezionata; il led relativo smette di lampeggiare visualizzando il nuovo stato.
Per uscire dal modo service, premere nuovamente il pulsante SERVICE [11] oppure attendere 30
secondi dall’ultima pressione di un pulsante.
10
1 - Neutral sense
Il sensore di neutro è in grado di inibire il funzionamento dell'UPS nel caso in cui il potenziale di neutro
si discosti eccessivamente da quello di terra; all'atto dell'installazione consente di verificare che il verso
di collegamento del cavo di alimentazione sia corretto, bloccando il funzionamento in caso di errore; per
consentire l'avviamento è sufficiente invertire tra loro i cavi di Neutro e Fase di ingresso e riaccendere
il gruppo di continuità (l'anomalia di neutro è segnalata dal lampeggio modulato del led rosso ALARM
accompagnato dal suono del buzzer interno). Funzione normalmente abilitata.
2 - Autorestart
Questa funzione, permette di ottenere la riaccensione automatica dell'UPS al ritorno della rete dopo ogni
blocco per fine autonomia. La riaccensione avviene in funzionamento normale oppure nella modalità
preselezionata tramite il pulsante SERVICE . Funzione normalmente abilitata
3 - Dip speed
Questa funzione è stata inserita per l'utilizzo con carichi che presentano spunti brevi e ripetuti (ad
esempio le stampanti laser). Con il suo inserimento, l'intervento del by-pass viene ritardato di 10 ms
consentendo all'UPS di superare gli spunti più brevi senza il suo intervento. In questo caso si accetta
che la tensione di uscita del gruppo si abbassi leggermente durante il breve periodo di spunto (senza
che sia tuttavia compromesso il funzionamento dei computers eventualmente collegati). Funzione
normalmente abilitata.
4 -Extended pll lock range
Permette di ampliare la gamma di aggancio della frequenza di rete da ±2% a ±20% (è indicato nel
funzionamento con alimentazione prelevata da gruppi elettrogeni). Funzione normalmente non abilitata.
5 - Load waiting mode enable
Il gruppo di continuità può essere configurato per funzionare in "load waiting mode" (LWM). Questo
particolare tipo di funzionamento consente di ottenere l'attivazione e lo spegnimento automatici
dell'UPS in base all'accensione del carico collegato. In questo modo si riduce il periodo di
funzionamento del gruppo di continuità al tempo strettamente necessario per il lavoro degli utilizzatori
(anche quando questi sono regolati da procedure automatiche di accensione e spegnimento). In
particolare, una volta premuto il pulsante di accensione, il gruppo si disporrà in una situazione di attesa
alimentando l'uscita direttamente dalla rete tramite by-pass; in questa condizione (segnalata dal
lampeggio del led giallo BY-PASS) provvede anche all'eventuale ricarica delle batterie. Se, a questo
punto, si ha assorbimento dall'uscita (inserimento di un carico) il relativo aumento di corrente viene
rilevato dal microprocessore che avvia le procedure di accensione, attiva l'inverter e commuta il by-pass
in posizione normale una volta superato lo spunto iniziale del carico. Lo spegnimento del carico riporta
il gruppo in stand-by predisponendolo ad una nuova accensione (in caso di mancanza di corrente durante
la fase di attesa carico il microprocessore interno spegne automaticamente l'UPS per poi riaccenderlo
al ritorno della rete allo scopo di preservare le batterie da inutili scariche). È possibile programmare la
soglia di riconoscimento assenza carico, utilizzando il software autodiagnostico UPS LINK in dotazione
se si dispone di un computer con sistema operativo WINDOWS (vedi paragrafo relativo). Funzione
normalmente non abilitata.
6 - Funzionamento a 60Hz
Il gruppo di continuità può essere configurato per funzionare con tensione di linea a 60Hz. Funzione
normalmente non abilitata.
Per maggiori dettagli su queste funzioni e altre di importanza mionore, fare riferimento all’Help in linea
del software di diagnostica UPS Link.
11
INTERFACCIAMENTO A SEGNALI LOGICI E COMANDO A DISTANZA
Sul retro del gruppo di continuità sono presenti due prese a 9 poli [11], perfettamente identiche ed
intercambiabili, che consentono il collegamento del comando a distanza opzionale e/o di inviare
segnali logici a computer dotati di opportuno hardware e software. I segnali logici sono
elettricamente isolati dal resto dell’UPS e indicano se quest’ultimo sta lavorando a rete o a batteria
e se le batterie sono in riserva autonomia. Tipicamente vengono utilizzati per informare l’operatore
sullo stato dell’UPS, in modo che questi possa chiudere le procedure in corso prima che sia esaurita
l’autonomia del gruppo di continuità evitando così la perdita di dati. In particolar modo con alcuni
sistemi operativi é necessario dare appositi comandi al computer prima di poterlo spegnere in
sicurezza; il segnale di riserva autonomia può essere utilizzato per gestire in modo automatico
queste procedure.
Funzione dei pin dei connettori per interfacciamento a segnali logici e comando a distanza:
Pin 1: Ingresso tensione di telecomando (Tensione massima +15V, stesso effetto della pressione
del pulsante di accensione/spegnimento del pannello frontale)
Pin 2: +15V (Impedenza 100 ½ )
Pin 3: Uscita logica Reserve 0/15V (Impedenza 2,2 K½)
Pin 4: Uscita logica Battery 0/15V (Impedenza 2,2 K½)
Pin 5: GND (Comune)
Pin 6: Uscita Buzzer a 7,5 kHz (Open collector)
1 2 3 4 5
Pin 7: Uscita Reserve (Open collector attivo basso)
Pin 8: GND (Comune)
Pin 9: Uscita Battery (Open collector attivo basso)
6 7 8 9
Tutti i pin sono galvanicamente isolati dai circuiti dell’UPS.
TEST BATTERIE
Il test delle batterie può essere eseguito durante il funzionamento a rete nei seguenti modi:
1. Automaticamente, dopo opportuna programmazione tramite software opzionale di shutdown.
2. Tenendo premuto per un paio di secondi il pulsante di tacitazione cicalino [2].
3. Ad ogni accensione dell’UPS tramite software in dotazione UPS LINK.
Quando viene riconosciuta la richiesta, l’UPS emette una breve segnalazione acustica (bip) dopo
di che, se la rete è presente e non ci sono condizioni anomale quali sovraccarico, neutro errato o
altro, viene effettuato il test, diversamente il comando viene ignorato.
Al termine del test, si possono avere le seguenti indicazioni sui led del pannello frontale:
5 led lampeggianti = batteria carica al 100%
4 led lampeggianti = batteria carica al 80%
3 led lampeggianti = batteria carica al 60%
2 led lampeggianti = batteria carica al 40%
1 led lampeggiante = batteria carica al 20%
1 led lampeggiante + segnalazione acustica = batteria con carica inferiore al 20%.
Il test è eseguito in modo di funzionamento a rete (cioè senza commutazione forzata a batteria),
grazie ad un particolare circuito brevettato da META SYSTEM; pertanto anche in caso di test con
esito negativo non si hanno interruzioni della tensione di uscita.
12
SOSTITUZIONE FUSIBILE DI LINEA
ATTENZIONE
L’apertura, la riparazione o la sostituzione di parti all’interno dell’UPS richiede sempre l’intervento di personale tecnico
specializzato.
Prima di ogni intervento, spegnere l'UPS agendo sul pulsante ON/OFF posto sul frontale, quindi disconnettere il cavo
di alimentazione dalla presa 230V.
1) Spegnere il gruppo di continuità.
2) Scollegare il cavo di alimentazione dalla presa di rete.
3) Rimuovere il coperchio sfilandolo come indicato in figura togliendo le viti situate lungo il bordo
dello stesso.
4) Estrarre il fusibile dalla propria sede facendo leva con un cacciavite, verificarne lo stato e, se
necessario, sostituirlo con uno di uguali caratteristiche.
5) Rimontare il coperchio prima di rimettere in funzione l’apparecchiatura.
13
POSSIBILI PROBLEMI E LORO RISOLUZIONE
Problemi
Soluzioni
• All’accensione l’UPS fa suonare il cicalino e
lampeggiare il led rosso ALARM con intermittenza di tipo
alternato breve-lungo, quindi si spegne dopo 15
secondi.
- È errato il collegamento del conduttore di neutro: girare
la spina di alimentazione, oppure escludere sensore di
neutro (tramite software UPS Link in dotazione).
• L’UPS funziona ma ogni 12 secondi emette un breve
segnale acustico ed é sempre acceso il led giallo
BATTERY.
- Assicurarsi della presenza di tensione nella presa di
rete.
- Controllare il perfetto inserimento del cavo di
alimentazione del gruppo di continuità sia nella presa
di rete che nel connettore del gruppo stesso.
- Verificare lo stato del fusibile d’ingresso (vedi capitolo
“Sostituzione fusibile di linea”).
• L’UPS funziona ma emette un segnale acustico
intermittente e lampeggia il led rosso OVERLOAD +led
giallo BY PASS.
- È presente un sovraccarico dell’uscita dell’UPS.
Ridurre il numero di apparecchiature collegate in modo
che il carico non superi la massima potenza erogabile
dal gruppo di continuità.
• L’UPS emette un segnale acustico costante ed é acceso
il led giallo BATTERY lampeggiante per circa 15 secondi,
dopo di che il gruppo si spegne.
- Il gruppo ha scaricato completamente le batterie, può
ripartire solo se la linea d’ingresso é presente.
Controllare gli interruttori magneto-termici o
differenziali a monte del gruppo e il fusibile d’ingresso
(vedi capitolo “Sostituzione fusibile di linea”).
• L’UPS funziona ma il led verde MAINS lampeggia in
modo rapido.
• L’UPS emette un segnale acustico intermittente e il led
rosso ALARM lampeggia in modo rapido.
- La rete è fuori dai limiti consentiti come tensione e/o
come frequenza, ma pur sempre utilizzabile dall’UPS.
Non è però disponibile la funzione di by-pass.
- È intervenuta la protezione termica. Spegnere il gruppo
di continuità e attendere qualche minuto in modo che
la temperatura interna dell’UPS si normalizzi.
Verificare il corretto funzionamento della ventola e che
il relativo flusso d’aria non sia ostacolato (ad es.
gruppo troppo vicino ad una parete).
- È avvenuto un guasto in qualche circuito interno.
Contattare il più vicino centro di assistenza.
Se durante la condizione di guasto non si accendono i led overload e/o by pass, l’UPS é in grado
di funzionare regolarmente seppur con potenza ridotta.
14
CARATTERISTICHE TECNICHE
Specifiche costruttive
HFR MILLENNIUM
HFR MILLENNIUM
810
820
25 Kg.
35 Kg.
480,5 x 180 x 670 (con maniglie)
Pesi
Dimensioni Lx H x P in mm
Tecnologia
Interfaccia computer
Protezioni
By-pass sincronizzato interno
PWM ad alta frequenza sia per lo stadio di ingresso che per
quello di uscita.
Logica di controllo a microprocessore.
Seriale RS232 standard per interfacciamento con personal computer
tramite software autodiagnostico in dotazione, uscita su connettore a
vaschetta a 9 poli femmina isolato SELV.
Elettroniche contro sovraccarichi, cortocircuito ed eccessiva scarica
delle batterie.
Blocco del funzionamento per fine autonomia.
Limitatore di spunto all’accensione.
Sensore di corretto collegamento del neutro.
Back-feed protection (isolamento elettrico di sicurezza della spina
d’ingresso durante il funzionamento a batteria).
Sia manuale che automatico.
Intervento per sovraccarico e anomalia di funzionamento
Specifiche ambientali
Altitudine massima di immagazzinamento
Gamma di temperatura di immagazzinamento
Gamma di temperatura per il funzionamento
Gamma umidità relativa per il funzionamento
Grado di protezione come da IEC529
Rumore acustico a 1 metro
Caratteristiche elettriche di ingresso
10000 metri
da -20°C a +50° C
da 0°C a 40° C
da 20% a 80% non condensante
IP21
42 dBA
Tensione nominale di ingresso
Gamma della tensione di ingresso
230V
da 184V a 264V con carico nominale
da 110V a 264V al 50% del carico nominale
Frequenza nominale di ingresso
Corrente nominale di ingresso
Corrente massima di ingresso
Distorsione della corrente di ingresso con
carico nominale
Fattore di potenza di ingresso
Corrente di spunto
Numero delle fasi di ingresso
Fusibile di linea
50Hz/60Hz +/-2% selezionabile dall’utente
3.7 A rms
7.1 A rms
4.5 A rms
8.9 A rms
<20%
>0.95
100% della corrente nominale
Monofase
12 A FF
15
Forma d’onda di uscita
In funzionamento a rete
In funzionamento a batteria
Tipologia di funzionamento
HFR MILLENNIUM
HFR MILLENNIUM
810
820
Sinusoidale
Sinusoidale
Gruppo di continuità di tipo no-break, on-line, con neutro passante a
doppia conversione.
Caratteristiche elettriche di uscita in funzionamento a rete
Tensione nominale di uscita
230V +/-1%
Frequenza nominale di uscita
50Hz/60Hz sincronizzata
Corrente di uscita su carico lineare P.F. = 0.7
4.35 A rms
8.7 A rms
Fattore di cresta ammesso sulla corrente di
uscita
Potenza nominale di uscita
Potenza attiva di uscita su carico lineare o
non lineare P.F. = 0.7
Potenza operativa su carico switching
Distorsione armonica totale della tensione di
uscita su carico lineare
Distorsione armonica totale della tensione di
uscita su carico non lineare P.F. 0,7
Capacità di sovraccarico
3,5
1000 VA
2000 VA
700 W
1400 W
1400 VA
2800 VA
< 0.5 %
<1%
300% per 1 secondo senza intervento del by-pass
200% per 5 secondi senza intervento del by-pass
Gamma del Fattore di Potenza del carico
applicato
Numero delle fasi di uscita
Rendimento di conversione AC-AC con carico
lineare P.F.=1 e batterie cariche
del 50% del carico
del 75% del carico
del 100% del carico
da 0.7 a 1
Monofase
80%
84%
90%
Caratteristiche elettriche di uscita in funzionamento a batteria
230V +/-1%
50 Hz/60Hz +/- 1%
1000 VA
2000 VA
Tensione nominale di uscita
Frequenza di uscita
Potenza nominale di uscita
Potenza attiva di uscita su carico lineare o
non lineare P.F. = 0.7
Potenza operativa su carico switching
Distorsione armonica totale della tensione di
uscita
Capacità di sovraccarico
Gamma permessa del Fattore di potenza del
carico applicato
Rendimento di conversione DC-AC con carico
lineare P.F. = 1
al 50% del carico
al 75% del carico
al 100% del carico
700 W
1400 W
1400 VA
2800 VA
<1%
160% per 15 secondi
da 0.7 a 1
80%
80%
80%
16
Funzionamento a batteria
Carico applicato in percentuale
Autonomia indicativa in minuti con batterie
cariche
Tempo di ricarica fino al 90% della carica
totale
Dati tecnici e quantità delle batterie
HFR MILLENNIUM
810
HFR MILLENNIUM
820
50
%
80
%
100
%
50
%
80
%
100
%
22
10
7
22
10
7
5-6 ore a seconda del livello di scarica raggiunto
n. 3 batterie piombo-acido sigillate senza manutenzione 12V
7Ah connesse in serie per ogni modulo
Segnalazione di riserva
Tensione minima di funzionamento a batteria
da 32,2V a 36V, programmabile dall’utente
da 27V a 31,5V con selezione automatica in
funzione del carico applicato, oppure programmabile
dall’utente.
Tempo medio di vita delle batterie
3-6 anni a seconda dell’utilizzo e della temperatura di esercizio
Attenzione!
Le batterie contenute nell’UPS, sono soggette ad una
diminuzione di capacità in funzione del tempo di vita
(caratteristica propria delle batterie al piombo dichiarata dal
costruttore nel manuale tecnico).
Ad esempio, la diminuzione di capacità di una batteria con 4
anni di vita può arrivare fino al 40% con conseguente calo
proporzionale dei tempi di autonomia dell’UPS in
funzionamento a batteria.
Caratteristiche del by-pass
Tipo di by-pass
Normative
Sicurezza:
progettato per soddisfare la norma
Compatibilità elettromagnetica:
immunità
emissioni
elettromeccanico
EN 50091-1-1
Rispondente alla normativa EN 50091-2
Rispondente alla normativa EN 50091-2
17
CONTENTS
Declaration of CE conformity . . . . . . . . . . . . . . . . . . . . . . . . . . . . . . . . . .page 18
Conditions of use . . . . . . . . . . . . . . . . . . . . . . . . . . . . . . . . . . . . . . . . .page 19
Introduction . . . . . . . . . . . . . . . . . . . . . . . . . . . . . . . . . . . . . . . . . . . . . .page 19
Block diagram . . . . . . . . . . . . . . . . . . . . . . . . . . . . . . . . . . . . . . . . . . . .page 20
Operating principles . . . . . . . . . . . . . . . . . . . . . . . . . . . . . . . . . . . . . . . .page 21
Installation . . . . . . . . . . . . . . . . . . . . . . . . . . . . . . . . . . . . . . . . . . . . . .page 22
Functions and signals . . . . . . . . . . . . . . . . . . . . . . . . . . . . . . . . . . . . . .page 24
UPS LINK diagnostic software . . . . . . . . . . . . . . . . . . . . . . . . . . . . . . . . .page 25
Special functions . . . . . . . . . . . . . . . . . . . . . . . . . . . . . . . . . . . . . . . . . .page 26
Logic signal and remote control interface . . . . . . . . . . . . . . . . . . . . . . . . .page 27
Battery test . . . . . . . . . . . . . . . . . . . . . . . . . . . . . . . . . . . . . . . . . . . . . .page 27
Trouble-shooting guide . . . . . . . . . . . . . . . . . . . . . . . . . . . . . . . . . . . . . .page 29
Technical features . . . . . . . . . . . . . . . . . . . . . . . . . . . . . . . . . . . . . . . . .page 30
CE Statement of Conformity
Council directives applied:
Standard to which conformity is declared:
Manufacturer:
Address:
Type of equipment:
Models:
Year mark applied:
73/23/CEE; 89/336/CEE modified with directives 92/31/CEE, 93/68/CEE
EN 50091-1-1, EN 50091-2
Meta System S.p.A.
via Majakovskij, 10/b Reggio Emilia, Italia
Uninterruptible power supply
HFR MILLENNIUM 810,
HFR MILLENNIUM 820
1999
The product has been tested in the typical installation configuration and with peripherals complying with the above-listed Directives. I, the
undersigned, hereby declare that the above-mentioned equipment conforms to the requirements of the Directives specified above.
Reggio Emilia, 15/10/99
Mr. Cesare Lasagni
Technical Director
TECHNICAL DATA AND SPECIFICATIONS ARE SUBJECT TO CHANGE WITHOUT PRIOR NOTICE.
18
Congratulations on your purchase of a Meta System product !
This manual contains information on safety, installation, and operation of the HFR MILLENNIUM
Uninterruptible Power Supply (UPS) produced by Meta System
Please read this manual carefully before proceeding to install the UPS and follow the
instructions scrupulously.
The HFR MILLENNIUM UPS are designed primarily for civil, industrial, and electro-medical use,
however in the latter case you should ascertain whether there are any particular national
regulations in this regard in your country.
In the event of problems with the UPS, we recommend that you read the manual again before
contacting the service centre. The “Trouble-shooting Guide” can help you resolve most of the
problems that may occur in using the UPS.
Important note
We recommend that you keep the original packing materials, as they may be useful should you
need to transport the UPS for repairs.
Any damage during transport of the UPS caused by poor packing is not covered by the
warranty.
CONDITIONS OF USE
• The UPS has been designed to supply power to data processing equipment. The load applied
must not exceed that indicated on the rear plate of the UPS
• The ON/OFF button of the UPS does not electrically insulate the internal parts. To insulate the
UPS, disconnect it from the mains outlet.
• Never open the UPS cabinet, as there may be parts on the inside with dangerous voltage even
when the mains plug is disconnected. In any case there are no parts inside the UPS that can
be repaired by the user.
• The front control panel is used for manual operations. Do not press on this panel with sharp or
pointed objects.
• The UPS has been designed to operate in rooms or spaces that are closed, clean, free of
inflammable liquids and corrosive substances, and not excessively humid.
INTRODUCTION
The HFR MILLENNIUM UPS have been designed to guarantee maximum safety and reliability in
supplying power to I.T. systems independently of the condition of the mains electrical supply. The
UPS is based on the combination of “intelligent” control logic governed by a powerful
microprocessor, and modular “on-line” power modules that use high frequency PWM technology
which ensures excellent performance featuring clean, precise output voltage, efficiency, reliability,
and quiet operation.
In addition, the redundant structure (HFR MILLENNIUM 820) makes it possible to have a
continuous energy supply, though at reduced power, even in the event of a power module failure,
thus offering a very high level of operating security. Particular attention has been paid to the
design of the input stage which, in addition to the classic filter and line control functions, also
handles current absorption from the mains, keeping it close to that of the ideal sinusoidal wave
form. This eliminates repeated absorption peaks typical of power supplies used in I.T. systems,
and takes the input power factor to values near 1 (in compliance with European regulations).
19
The main features of this innovative range of UPS units can be summarized as followed:
• Redundancy (model 820).
• On-line dual conversion operation (maximum rejection of disturbance and line interruptions;
absence of mains-battery switching).
• Input power factor that is almost = 1 whatever type of load applied.
• Absolute stability of the output voltage independent of load and line voltage.
• “Intelligent” management of the intervention point of the internal storage batteries in relation
to the line voltage and the applied load.
• High inrush capacity thanks to the oversized circuits.
• Incorporated sensor for the correct connection of the neutral conductor in input, for the
maximum safety of the operator and the loads connected (selected by software).
• Very high energy efficiency.
• Quiet operation.
• No monitor disturbance
• Absolutely maintenance-free.
• RS232 serial output for computer interface for interrogating the UPS operating parameters and
historical data.
• logic level signals interface and remote control (optional)
BLOCK DIAGRAM
OUTPUT
BY PASS
INPUT
~
=
~
=
INPUT
FILTER
POWER
FACTOR
REGULATOR
INVERTER
POWER
MODULE
=
=
BATTERIES
POSITIVE VOLTAGE
BOOSTER
BATTERY
CHARGER
POWER
MODULE
BATTERIES
MICROPROCESSOR
LOGIC
RS232
INTERFACE
REMOTE
CONTROL
20
OPERATING PRINCIPLES
In the presence of mains supply, the input voltage is filtered and rectified by a special input circuit
(power factor correction) that optimizes current absorption from the mains, making the power
factor near to 1 and compensating for any voltage variations. This circuit can also supply the
output inverter when input voltage is considerably lower than nominal value.
This feature is highlighted with very low loads, so with a load of about 50% of nominal, mains
operation is possible up to 100V line voltage approximately without absorbing energy from the
batteries.
This “intelligent” management of the switchover to battery power is designed to minimize battery
use.
The voltage corrected by the first circuit is then used by a high frequency inverter to generate
“clean” sinusoidal output voltage at very low distortion; a fast synchronized by-pass circuit
intervenes during absorption peaks that exceed the inverter capacity, eg. when switching on
certain peripherals, demagnetization of large colour monitors, and so on.
The absence or excessive drop of the mains voltage automatically activates the booster circuit
which thanks to the batteries ensures interruption free power supply to the output inverter and,
consequently, to the load.
The type of circuit is with direct neutral; i.e. avoiding alteration of the neutral regime of the
apparatus connected to the UPS.
During normal operation if this has been previously selected by software, a sensor checks the
difference in potential between the neutral conductor and that of Earth and, if excessive, activates
an acoustic signal.
All the UPS functions are managed by a microprocessor which also controls and stores particular
operating conditions as well as managing the UPS computer interface via RS232 output. This
makes it possible to check in real time the operating parameters and any anomalies.
21
3
KEY
1
2
3
4
5
6
7
8
9
10
ON/OFF SWITCH
BUZZER STOP AND BATTERY TEST ACTIVATION
SWITCH
GREEN MAINS LED (mains present)
YELLOW BATTERY LED (battery operation)
RED ALARM LED (operating anomaly)
RED OVERLOAD LED (overload warning or overload)
YELLOW BY-PASS LED
GREEN INVERTER LED
INPUT/OUTPUT PLUG/SOCKET
RS232 COMPUTER INTERFACE SOCKET
8
7
4
6
5
1
2
INSTALLATION
The following are located on the back of the UPS unit:
• Input/output plug/socket [9]: connect the power card to
the plug and the multiple out put socket to the socket.
• Socket for RS232 serial computer interface connection
(9-pin female) [10]: required for use of the UPS LINK monitoring software.
• Two sockets to connect the remote control and computer interface to logiic signals (contacts)
(9-pin-male) [11]: to use with the respective accessories (optional);
•output for connection to additional batteries
CAUTION
For safety reasons, it is not advisable to modify the cables supplied. Check the mains outlet to
which the UPS is connected has a secure connection to earth .
CAUTION
The mains power socket, or the mains supply switch, must be installed in the vicinity of the UPS
and must be easily accessible.
22
Installation procedure:
1)
Put the UPS in its final position checking that the ventilation slits are not obstructed.
2)
Connect the power cord to the plug and the multiple output socket to the socket [9]
see Fig. 1).
3)
Connect the loads to the UPS output making sure that the relative appliances are switched
off.
4)
Connect the power supply plug to a current outlet adequate for the voltage and current
required.
Switch-on
1) Switch on the UPS using the power
button [1] (see “controls” in the section
on functions and signals). At this point,
if the neutral sensor does not detect any
anomalies, the UPS will supply the
output directly from the mains by way of
the by-pass (yellow LED) [7], then it will
switch to inverter mode after a few
seconds and enter normal operating
mode (green MAINS LED [3] and
INVERTER LED [8]).
2) Switch on the loads and make sure that
normal operation is restored following a
by-pass intervention. Green MAINS LED
[3] and green INVERTER LED [8] are lit.
If the connected loads are excessive, the
by-pass remains active and the red
OVERLOAD LED will flash [6].
3) A few seconds after switch-on, the UPS
automatically does a battery test to
check correct operation (refer to the
“Battery Test” section)
10
11
12
14
9
13
Fig. 1
ALLA RETE
MAINS
AL CARICO
LOAD
CAUTION
Never disconnect the 230V power supply plug while the UPS is in operation, as this eliminates
earth protection of both the UPS and the connected loads.
ATTENTION
As the leakage currents toward earth of all the loads are summed by the protection conductor
(earth wire) of the UPS, for safety reasons according to the EN 50091-1-1 regulation,check that
the sum of these current values does not exceed 2.7 mA
CAUTION
The UPS is equipped with a circuit to protect against any connection error, which is signalled
by the red ALARM LED and the continuous beep of the incorporated buzzer.
Should this occur when the UPS is switched on, disconnect the power plug immediately.
ATTENTION
If you notice a brief flash of the red OVERLOAD LED every 3 seconds after all the connected loads
have been switched on, the load connected to the UPS is at the maximum limit allowed.
23
FUNCTION AND SIGNAL
Visual signals:
the leds illustrated on page 6, have the following functions:
3 Green MAINS LED
- on: mains normal, inverter synchronized.
- flashing: mains out of tolerance level but present and sufficient for correct operation, or inverter
not syncronized.
- off: mains absent or too low in relation to the load.
8 Green INVERTER LED
- on: inverter operation.
- off: inverter disactivated or defective.
4 Yellow BATTERY LED
- on: battery operation.
- flashing: battery reserve or end of battery autonomy or negative battery test.
- off: mains operation.
5 Red ALARM LED
- on: UPS operation blocked.
- flashing: failure of one or more power modules.
- alternating short-long flashing: incorrect connection of the input neutral conductor (with
neutral sensor enabled).
- off: normal operation.
6 Red OVERLOAD LED
- on: output voltage anomalies.
- flashing: overload.
- off: normal operation.
- brief flashes every 3 seconds: overload warning.
7 Yellow BY-PASS LED
- on: by-pass active (output supplied directly from mains).
- off: output supplied by the inverter.
Acoustic signals:
• Continuous beep: UPS shutdown.
• Slow intermittent beep (one beep every 12 seconds): battery operation.
• Fast intermittent beep: overload or fault.
• Alternating short-long beep: autonomy reserve or negative battery test or incorrect connection
of neutral conductor (with neutral sensor enabled).
• Single beep: indication of UPS switch-on or acknowledgement of battery test request or end
of battery test with positive outcome.
Controls:
The UPS is controlled using the two buttons on the front panel, as seen in the figure on page
6.
1 On/Off button:
- Press to switch on the UPS. This is confirmed by a short illumination of all the LEDs and a brief
acoustic signal (beep).
- Keep the button pressed for about two seconds to switch off the UPS, indicated by the
intermittent beep of the buzzer.
2 Buzzer stop/battery test button:
- Press this button briefly to silence the buzzer. This annuls the acoustic warning in progress and
the buzzer remains silent until it is necessary to signal another event.
- Keep this button pressed for about two seconds make a battery test request; for further details
refer to the relative section of the manual.
24
Please Note:
• Under normal operating conditions, the green MAINS LED [3] and INVERTER LED [8] are on.
• During battery operation, the green INVERTER LED [8] and yellow BATTERY LED [4] are on.
• Battery operation is indicated by a slow beep (one beep every 12 seconds). Autonomy reserve,
i.e. when shutdown of procedures on the computer connected to the UPS must start , is
indicated by an intermittent alternating short-long beep accompanied by similar flashing of the
BATTERY LED [4]. If batteries run down completely, the buzzer will sound continuously and the
yellow “battery” LED will flash to signal this condition, for about 15 seconds. In this case the
output load is no longer receives power.
• Flashing of the red OVERLOAD LED [6] indicates an excessive output load. In this event, if
mains is present, the load is supplied by mains through the by-pass; otherwise, the UPS shuts
down after 15 seconds of continuous overload.
• Flashing of the red ALARM LED [5] if the intermittence is quick, this indicates the failure of one
or more power modules, or if the intermittence is alternating short-long, an anomaly in the UPS
connection (incorrect neutral conductor connection). In the case of incorrect neutral, reverse the
UPS power cable plug.
• When the UPS shuts down due to any anomaly, it is automatically and completely switched off
after about 15 seconds.
UPS LINK DIAGNOSTIC SOFTWARE
Connection
The UPS is equipped with the standard RS232 interface, which makes it possible to access a
series of data by computer related to the operation and history of the UPS. This function can be
used with the UPS LINK interface program for WINDOWS(*), connecting a serial port of the PC to
the interface socket [10] on the back of the UPS using an RS232 serial cable.
Installing UPS LINK software for WINDOWS(*)
To install the UPS LINK software, follow the steps below in sequence:
1. Start WINDOWS(*).
2. Insert the installation disk supplied with the UPS in drive A.
3. Select File / Run from the main menu of Program Manager.
4. Type A:\SETUP on the command line and then select OK.
5. The Select Directories window appears, which proposes the default directories in
which the program files will be installed. Select OK.
6. An information window asks for confirmation to start installation. Select OK to start or
CANCEL to abandon the installation.
7. At the end of installation, a group called Meta System UPS LINK is created which contains
two icons:
-Meta System UPS LINK
: Enquiry program
-Meta System UPS LINK Uninstaller
: Program to remove the installation
Make sure that the UPS is connected to a free serial port of the PC and double click the Meta
System UPS LINK icon.
* Windows is a registered trademark of Microsoft Corporation.
25
SPECIAL FUNCTION
To set special functions, when the UPS is switched-off, press the SERVICE button [11] on the
rear panel of the UPS. The UPS will beep and the LEDs on the front panel will show the status of
the following options:
- MAINS LED [3] on
® neutral sensor is enabled
- BATTERIES LED [4] on
® autorestart is enabled
- BYPASS LED [7] on
® dip speed is on
- INVERTER-ON LED [8] on
® extended PLL lock range is activated
- OVERLOAD LED [6] on
® load waiting mode is enabled
- ALARM LED [5] on
® operation at 60 Hz
To select the desired function press the Buzzer Off button [2] (the corresponding LED will flash).
Pressing the On/Off button [1] inverts the operating status; the corresponding LED stops flashing
and the new status is displayed.
To exit service mode, press the SERVICE button [11] again. Otherwise this takes place
automatically 30 seconds after the last pressing of a button.
1 - Neutral sensor
The neutral sensor can inhibit UPS operation in the event that the neutral potential shifts
excessively from that of earth; during installation, it is used to verify the correct direction of the
power cable connection and to block operation in the event of error. To enable startup in this
case, invert the neutral and phase input cables and restart the UPS. The neutral anomaly is
signalled by modulated flashing of the red ALARM LED accompanied by the buzzer. This function
is normally enabled.
2 - Autorestart
This function enables the automatic restart of the UPS when the mains supply is restored after
UPS shutdown due to end of battery autonomy. Restart takes place in normal operation or in
the mode selected using the SERVICE button. This function is normally enabled.
3 - Dip speed
This function has been included for use with loads that create brief and repeated sags (e.g. laser
printers). When this function is activated, by-pass intervention is delayed by 10 ms, permitting the
UPS to overcome brief sags without tripping the by-pass. The output voltage of the UPS will be
slightly lower during the brief period of the sag (without jeopardizing the operation of any
equipment connected). This function is normally enabled.
4 - Extended PLL lock range
This function makes it possible to extend the lock range of the mains frequency from ±2% to
±20% (advisable when operating with power supply from generating sets). This function is
normally not enabled.
26
LOGIC SIGNAL AND REMOTE CONTROL INTERFACE
On the back of the UPS unit there are two, identical and interchangeable 9-pin sockets [13], which
enable the operational remote control and/or transmission of logic signals to computers
equipped with special hardware and software. The logic signals are electrically insulated from the
rest of the UPS and indicate whether the unit is operating on mains or battery and whether the
batteries are in reserve. Normally, these signals are used for informing the operator of the status
of the UPS so that he can close any procedure in progress before the autonomy of the UPS runs
out, thus preventing data loss. In fact, with certain operating systems it is necessary to give
special commands to the computer before being able to switch it off safely; the autonomy reserve
signal can be used to manage these procedures automatically.
Function of the connector pins for logic signal interface and remote control interface:
Pin 1: Voltage input from remote control (max. voltage +15V, same effect as pressing the
on/off switch on the front panel)
Pin 2: +15V (Impedance 100W)
Pin 3: Reserve logic output 0/15V (Impedance 2.2 kW)
1 2 3 4 5
Pin 4: Battery logic output 0/15V (Impedance 2.2 kW)
Pin 5: GND (Common)
Pin 6: Buzzer output at 7.5 kHz (Open collector)
Pin 7: Reserve output (Open collector active low)
6 7 8 9
Pin 8: GND (Common)
Pin 9: Battery output (Open collector active low)
All the pins are galvanically insulated from the circuits of the UPS.
BATTERY TEST
The battery test can be carried out during mains operation as follows:
1. automatically, when set up accordingly using the optional UPS Management Software.
2. by pressing the buzzer silencing button [2] for a few seconds.
3. at each switch-on of the UPS by means of the UPS LINK monitoring software.
To acknowledge the request, the UPS emits a brief acoustic signal (beep), after which, the test is
carried out if the mains is present and there are no anomalous conditions such as overload,
incorrect neutral, etc.; otherwise, the command is ignored.
On completion of the test, the appropriate following indication is given by the LEDs on the front
panel:
5
4
3
2
1
1
LEDs flashing = 100% battery charge
LEDs flashing = 80% battery charge
LEDs flashing = 60% battery charge
LEDs flashing = 40% battery charge
LED flashing = 20% battery charge
LED flashing + acoustic signal = battery charge less than 20%.
The test is carried out in mains operation mode (i.e. without forcing the switch to battery mode),
thanks to a special circuit patented by META SYSTEM; therefore even if the test result is negative,
there is no interruption of the output voltage.
27
MAINS FUSE REPLACEMENT
NOTICE
Opening, repairing or replacing parts inside the UPS always requires specialised technical personnel. Switch the
UPS off with the ON/OFF button located on the front panel, then unplug the power cord from the mains socket.
1) Switch off the UPS.
2) Unplug the power cord from the mains socket.
3) Remove the cover by pulling towards the top and unscrewing the 5 screws located along the edge of the cover itself.
4) Remove the fuse from its location by levering with a screwdriver, check its condition and if necessary substitute it with an equal
one.
5) Close the cover before restarting the equipment.
28
TROUBLE-SHOOTING GUIDE
Problem
Solution
· When the UPS is switched on, the buzzer beeps - Incorrect connection of the neutral conductor.
Rotate the power plug, or exclude the neutral
and the red ALARM LED flashes alternately shortsensor by the UPS Link Software).
long and then goes off after 15 seconds.
· The UPS operates but beeps briefly every 12 - Make sure that there is voltage at the mains
supply output.
seconds and the yellow BATTERY LED remains
Check that the power cable of the UPS is
on.
connected securely to the mains supply socket
and to the UPS itself.
- Check the input fuse (refer to section “Mains
Fuse Replacement”).
· The UPS operates but beeps intermittently and the - There is an overload on the UPS output. Reduce
the number of appliances connected so that the
red OVERLOAD LED + yellow BYPASS LED flash.
load does not exceed the maximum power that
the UPS can deliver.
· The UPS beeps continuously, and the yellow
BATTERY LED flashes for about 15 seconds, after - The batteries are completely discharged and the
UPS can only start up again if the mains is
which the UPS switches off.
present. Check the cutoff or differential switches
upstream from the unit or the input fuse (refer to
section “Mains Fuse Replacement”).
· The UPS operates but the green MAINS LED is - The mains is outside the admissible limits of
voltage and/or frequency, but still tollerated by
flashing quickly.
the UPS. However, the by-pass is not
operational.
· The UPS emits an intermittent beep and the red
ALARM LED flashes quickly.
- The thermal protection has been tripped. Switch
off the UPS and wait for few minutes for the
internal temperature to normalize. Check to
make sure that the fan is functioning correctly
and that the air flow is not obstructed (e.g. UPS
too close to a wall).
- Failure of an internal circuit. Contact your
service centre.
If the OVERLOAD and/or BY-PASS LEDs do not light up, the UPS can continue to
operate normally, even if with reduced power.
29
TECHNICAL FEATURES
Construction Specifications
Weight (Kg.)
HFR MILLENNIUM
810
HFR MILLENNIUM
820
23 Kg.
33 Kg.
145 x 410 x 595 mm
Dimensions (L x H x D) mm
Technology
High frequency PWM for both the input and output stages. Microprocessor control logic.
Computer interface
Contact for interface with optional kits. 9-pin male connector output, SELV insulation. Standard
RS232 serial connection for PC interface with the monitoring software provided. 9-pin female
connector output with SELV insulation.
Protection
Electronic protection against overload, short circuit, and excessive battery discharge.
Operation shutdown at end of autonomy. Switch-on spike limiter. Correct neutral connection
sensor. Back-feed protection (electrical safety insulation of the input plug during battery
operation).
Both manual and automatic.
Tripped for overload or operating anomaly.
Synchronized by pass
Environmental Specifications
10,000 metres
Maximum storage altitude
from -20°C to +50°C
Storage temperature range
from 0°C to +40°C
Operating temperature range
20-80% non condensing
Relative humidity operating range
IP21
Protection (IEC529)
42 dBA
Acoustic noise at 1m.:
Input features
230 V
Nominal input voltage
Input voltage range
from 184V to 264V with nominal load - from 110 to 264 V at 50% of nominal load
Nominal input frequency
50Hz or 60Hz ±2%, programmable by user
Nominal input current
3,7A rms
7,1A rms
Maximum input current
4,5A rms
8,9A rms
Input current distortion with
nominal load
<10%
>0,99 (with 80% load)
Input power factor
100% of nominal current
Spike current
single-phase
No. input phases
12A FF
Line fuse
30
Output wave form
HFR MILLENNIUM
810
HFR MILLENNIUM
820
Mains operation
sinusoidal
Battery operation
sinusoidal
Operating type
No-break, on-line UPS with direct neutral and dual conversion.
Output features: mains operation
230 V ±1%
Nominal output voltage
50Hz / 60Hz synchronized
Nominal output frequency
Output current with linear load, power
factor 0.7
4,35A rms
Crest factor
Nominal output power
8,7A rms
3,5
1000 VA
2000 VA
Active output power with linear or nonlinear load P.F. 0.7
700 W
1400 W
Operating power with switching load
1400 VA
2800 VA
Total harmonic distortion of
output voltage with linear load
<0.5%
Total harmonic distortion of
output voltage with non-linear
load P.F. 0.7
< 1%
Overload capacity
300% for 1 second without by-pass intervention
200% for 5 seconds without by-pass intervention
Power factor range of the load applied
from 0.7 to 1
No. of output phases
single-phase
AC-AC conversion efficiency with
linear load P.F. 1 and charged
batteries
50% load
75% load
100% load
80%
84%
90%
Output features: battery operation
230V ±1%
Nominal output voltage
50Hz / 60Hz ±1%
Output frequency
Nominal output power
1000 VA
2000 VA
Active output power with linear or
non-linear load, P.F. 0,7
700 W
1400 W
Operating power with switching
load
1400VA
2800VA
Total harmonic distortion of
output voltage
< 1%
160% for 15 seconds
Overload capacity
Admissible power factor range of
the load applied
from 0.7 to 1
DC-AC conversion efficiency with
linear load P.F. 1
at 50% of load
at 75% of load
at 100% of load
80%
80%
80%
31
HFR MILLENNIUM
810
Battery operation
HFR MILLENNIUM
820
Standard UPS
Applied load in percentage
Approximate autonomy in minutes with charged batteries
50
%
80
%
100
%
50
%
80
%
100
%
22
10
7
22
10
7
5-6 hours depending on discharge.
Recharge time to 90%
Technical data and quantity of batteries
3 maintenance-free, sealed lead-acid batteries, 12V 7Ah, connected in series for
each module
from 32,2V to 36V, programmable by user.
Reserve
Minimum battery operation voltage
during discharge
Average battery lifetime
from 27V to 31,5V with automatic selection according to the applied load, or
programmable by user.
3-6 years depending on use and operating temperature.
Attention!
The batteries contained in the UPS are subject to diminishing capacity over time (a
typical feature of lead batteries declared by the manufacturer in the technical
manual).
For example, the decrease in capacity of a battery with 4 years life can be up to 40%,
with consequent proportional drop in UPS battery autonomy time.
By-pass features
Electromechanical
Type of by-pass
Standards
Safety:
designed to comply with standard
EN 50091-1-1
Electromagnetic compatibility:
immunity
emission
Complies with EN 50091-2 standard
Complies with EN 50091-2 standard
32
TABLE DES MATIERES
Déclaration de conformité CE . . . . . . . . . . . . . . . . . . . . . . . . . . . . . . . . .page. 33
Conditions d’utilisation . . . . . . . . . . . . . . . . . . . . . . . . . . . . . . . . . . . . .page. 34
Introduction . . . . . . . . . . . . . . . . . . . . . . . . . . . . . . . . . . . . . . . . . . . . .page. 34
Schéma fonctionnel . . . . . . . . . . . . . . . . . . . . . . . . . . . . . . . . . . . . . . .page. 35
Principe de fonctionnement . . . . . . . . . . . . . . . . . . . . . . . . . . . . . . . . . .page. 36
Installation . . . . . . . . . . . . . . . . . . . . . . . . . . . . . . . . . . . . . . . . . . . . . .page. 37
Signalisation du panneau de contrôles/commandes . . . . . . . . . . . . . . . . .page. 39
Logiciel autodiagnostique UPS LINK . . . . . . . . . . . . . . . . . . . . . . . . . . . .page. 41
Configuration personalisée . . . . . . . . . . . . . . . . . . . . . . . . . . . . . . . . . . .page. 42
Interface à signaux logiques et commande à distance . . . . . . . . . . . . . . . .page. 43
Test batteries . . . . . . . . . . . . . . . . . . . . . . . . . . . . . . . . . . . . . . . . . . . .page. 44
Problèmes techniques . . . . . . . . . . . . . . . . . . . . . . . . . . . . . . . . . . . . . .page. 46
Caractéristiques techniques . . . . . . . . . . . . . . . . . . . . . . . . . . . . . . . . . .page. 47
Déclaration de conformite CE
Directives:
Conforme aux Normes:
Constructeur:
Adresse:
Matériel:
Modèles:
73/23/CEE; 89/336/CEE modifiées par les directives 92/31/CEE, 93/68/CEE
EN 50091-1-1, EN 50091-2
Meta System S.p.A.
via Majakovskij, 10/b Reggio Emilia, Italia
Alimentation sans Interruption
HFR MILLENNIUM 810,
HFR MILLENNIUM 820
Année de déposition de la marque:
1999
L’appareil a été essayé dans la configuration d’installation standard avec des périphériques conformes aux Directives citées
ci-dessus.
Je, soussigné, déclare que l’appareil susmentionné est conforme aux Directives spécifiées ci-dessus.
Reggio Emilia, 15/10/99
Mr. Cesare Lasagni
Directeur technique
LES DONNEES ET CARACTERISTIQUES TECHNIQUES PEUVENT ETRE MODIFIEES SANS PREAVIS.
33
Nous vous remercions et nous vous félicitons d’avoir choisi un produit de la gamme META
SYSTEM !
Ce manuel contient les informations relatives à la sécurité, l’installation et l’utilisation des
onduleurs de la série HFR MILLENNIUM, aussi bien en conteneur simple qu’en conteneur double
Nous vous conseillons de lire attentivement ce manuel avant d’installer votre onduleur
et de respecter scrupuleusement les instructions de mise en service et d’utilisation.
Les onduleurs de la série HFR MILLENNIUM sont principalement destinés à l’usage civil,
industriel et médical. Dans ce dernier cas, vérifiez cependant s’il existe, suivant le pays et le
domaine d’application concerné, des réglementations particulières en la matière.
Si vous avez des questions concernant l’installation ou le fonctionnement de votre onduleur HFR
MILLENNIUM, nous vous conseillons de lire ce manuel avant de contacter le service après-vente.
Le chapitre ‘Problèmes techniques et Solutions’ pourra sans aucun doute vous aider à résoudre
la plupart des difficultés qui se présenteront.
Important
Nous vous conseillons de conserver l’emballage, il vous sera utile si vous devez déplacer ou
échanger l’onduleur.
La garantie ne couvre pas les dégâts subis pendant le transport si l’onduleur n’est pas
emballé correctement.
CONDITIONS D’UTILISATION
• La série HFR MILLENNIUM a été conçu pour protéger les matériels électriques sensibles aux
variations de tensions. La puissance de la charge appliquée ne doit pas dépasser celle indiquée
sur la plaque signalétique au dos de l’onduleur.
• La touche ‘ON/OFF’ (Marche/Arrêt) ne permet pas d’isoler électriquement l’onduleur. Pour
assurer l’isolement électrique complet du HFR MILLENNIUM, débranchez la prise d’alimentation
secteur.
• A l’arrêt, l’onduleur peut présenter des tensions internes pouvant entraînées la mort. N’ouvrez
pas l’onduleur même si celui-ci est débranché, car il peut renfermer des parties sous tension.
L’utilisateur ne pourra en tout cas réparer aucune des pièces qui se trouvent à l’interieur.
• Le panneau de contrôles est prévu pour des opérations manuelles. N’utilisez pas d’objet
pointus ou coupants.
• L’onduleur HFR MILLENNIUM doit être installé dans un lieux clos et propre, à l’abri de
l’humidité. Evitez tout contact avec les liquides inflammables ou substances corrosives.
INTRODUCTION
Les onduleurs de la série HFR MILLENNIUM ont été étudiés pour assurer la protection et le parfait
fonctionnement de tous systèmes informatiques quelque soit les variations du réseaux
électriques en entrée.
Pour obtenir ce résultat, nous avons associé une logique de commande ‘intelligente’ contrôlée
par un microprocesseur puissant avec la technologie On Line, Double Conversions basées sur
une MLI haute fréquence.
Cette technologie garantie en sortie une tension parfaitement sinusoïdale. Doté des dernières
innovations en matière de conversion d’énergie, le rendement du HFR MILLENNIUM est très haut
et se place parmi les onduleurs les plus silencieux du marché.
La structure redondante (HFR MILLENIUM 820) permet également une continuité d'alimentation,
à puissance réduite, même dans le cas de problèmes à un module de puissance. Ce qui permet
d'arriver à un niveau très élevé de sécurité du fonctionnement.
34
L’étage d’entrée a fait l’objet d’une attention toute particulière. En plus de ses rôles de filtre et
de contrôle de ligne, il régule l’absorption des pointes de courant générées par les alimentations
à découpages, les rapprochant en tout cas du sinusoïdal idéal. Le facteur de puissance
rapproché de la valeur 1, répond parfaitement à la directive européenne contre la pollution des
réseaux électriques.
Les avantages présentés par la série d’onduleurs HFR MILLENNIUM sont :
• Redondance (modéle 820).
• On Line, Double conversion basées sur une MLI haute fréquence (réjection maximum aux
dérangements et aux coupures de ligne; absence de commutations secteur - batterie).
• Facteur de puissance pratiquement égal à 1, quelque soit le type de charge appliquée.
• Parfaite stabilité de la tension de sortie quelque soit les variations du secteur et le type de
charge appliquée.
• Optimisation de la durée de vie des batteries. En fonction de la tension d’entrée et du niveau
de charge appliquée, un algorithme de calcul minimise l’intervention des batteries.
• Très haute capacité d’amorçage grâce à des circuits surdimensionnés.
• Détecteur pour la connexion correcte du conducteur de neutre à l'entrée, pour une sécurité
maximale des charges reliées (activé via logiciel).
• Très haut rendement.
• Très faible émission sonore.
• Aucun parasite sur les écrans témoins.
• Aucun besoin d’entretien.
• Liaison série de type RS232 permettant la surveillance des paramètres électriques et
thermiques de l’onduleur ainsi que l’accès à la mémoire d’événements horodatés.
• Deux ports de communication niveaux logiques, poour commande à distance( en option)
SCHEMA FONCTIONNEL
SORTIE
BY PASS
ENTREE
~
=
~
=
FILTRE
D'ENTREE
REGULATEUR DU
FACTEUR DE
PUISSANCE
ONDULEUR
MODULE
DE PUISSANCE
=
=
BATTERIES
SURVOLTEUR
CHARGEUR DE
BATTERIE
MODULE DE PUISSANCE
BATTERIES
LOGIQUE A
MICROPROCESSEUR
INTERFACE
RS232
COMMANDE à
DISTANCE
35
PRINCIPE DE FONCTIONNEMENT
En fonctionnement normal (secteur présent), la tension d’entrée est filtrée et transformée en un
signal continu. La prise de courant en entrée est quasi sinusoïdal (facteur de puissance
pratiquement égal à 1). Ce premier étage permet d'alimenter l'inverseur de sortie même avec
des tensions de secteur beaucoup plus basses de la valeur nominale.
Les gestion ‘intelligente de l’onduleur HFR MILLENNIUM permet, en fonction du niveau de charge
appliquée, d’élargir la plage de tension acceptable par l’étage ‘Régulateur du facteur de
puissance’.
Exemple: A 50% de charge, l’onduleur HFR MILLENNIUM peut accepter une baisse de tension en
entrée de plus de 100 volts sans pour cela faire appel à ses batteries. L’autonomie est préservée
et la durée de vie des batteries optimisée.
Le deuxième étage de conversion ‘Onduleur’ basé sur une MLI haute fréquence assure en sortie
un signal sinusoïdal parfait. La distorsion possible générée par une charge déformante, type
micro-ordinateur, reste très faible.
L’onduleur HFR MILLENNIUM est équipé d’un by-pass synchronisé, circuit ultra rapide intervenant
lorsque la charge appliquée est supérieure à la puissance maximum délivrée par l’étage
‘Onduleur’, comme l’allumage de certain périphériques, la démagnétisation d’écrans en couleurs
de grandes dimensions, etc..
L’absence de tension de secteur ou une chute excessive activent automatiquement l’étage
‘Survolteur’ qui, en fonctionnement sur batteries, fourni l’énergie nécessaire à l’étage ‘Onduleur’
afin d’assurer la continuité de l’alimentation.
Le schéma électrique auquel répond le HFR MILLENNIUM est de type ‘Neutre Passant’. Le régime
de neutre en aval est identique à celui du réseau électrique amont.
Pendant le fonctionnement normal (si activé préalablement via logiciel), un détecteur vérifie la
différence de potentiel entre le conducteur de neutre et celui de terre ; si elle est excessive, il
déclenche un signal sonore.
Toutes les fonctions de l’onduleur sont supervisées par un microprocesseur puissant. Du
contrôle des valeurs électriques à la mémorisation horodatée des événements, le
microprocesseur veille à l’application des paramètres de configuration personnalisée et gère trois
ports de communication comprenant l’interface de dialogue, la liaison série RS232.
Il est done possible d’effectuer en temps réel la surveillance de l’ensemble des paramètres
électriques et des anomalies rencontrées.
36
3
LÉGENDE
8
TOUCHE ‘MARCHE / ARRET’
TOUCHE ‘ARRET DE L’ALARME SONORE’ ou
7
commande du ‘TEST BATTERIES’
3
LED VERTE - MAINS (secteur présent)
4
LED JAUNE - BATTERY (fonctionnement sur batteries) 4
5
LED ROUGE - ALARM (anomalie de fonctionnement 6
alarm activée)
6
LED ROUGE - OVERLOAD (onduleur en surcharge ou
préavis de surcharge)
5
7
LED JAUNE - BY-PASS (fonctionnement sur By-pass)
8
LED VERTE - ONDULEUR (sortie onduleur correcte)
9
PRISE-FICHE D‘ENTREE / SORTIE’
10
INTERFACE RS232
1
1
2
2
INSTALLATION
L’onduleur présente à l’arrière les raccordements suivants•
• Prise-fiche d'entrée-sortie (9) : raccordez à ce connecteur le câble d'alimentation et la prise de
sortie de la manière indiquée sur la figure.
• Interface ‘RS232’ [12] type DB9 (9 broches femelles). Utiliser avec le logiciel de surveillance
et d’exploitation ‘UPS LINK’.
• Interfaces “commande à distance/niveaux logiques” [11]: 2 ports de communication de type
D9 (9 bbroches mâ les) à utiliser avec leur périphériques associés (en option).
• Connecteur pour branchement à des batteries additionelles [13]
MISE EN GARDE
Nous vous conseillons, par mesure de sécurité, de ne pas modifier les câbles fournis.
Le câble de TERRE doit impérativement être raccordé à l’onduleur. Vérifier que ce conducteur
soit bien présent au niveau de votre prise d’alimentation secteur.
MISE EN GARDE
La prise secteur et le disjoncteur amont doivent être facilement accessibles et si possible situés
à proximité de l’onduleur.
37
Procédure d’installation:
1) Positionnez l’onduleur de manière à ne pas obstruer la grille de ventilation à l’arrière de la
machine.
2) Raccordez au connecteur d'entrée-sortie (9) le câble d'alimentation et la prise multiple de
sortie (fig. 1).
3) Après vous êtes assuré que tous les matériels soient en position ‘ARRET’, raccordez-les à
l’onduleur.
4) Branchez la fiche d’alimentation sur une prise ‘2 pôles + TERRE’ adéquate à la tension et au
courant requis.
MISE EN SERVICE
10 11
1) Appuyez sur la touche [1] pour mettre en service
12
l’onduleur (c.f. paragrafe “Signalisation du
Panneau de Controles/Commandes”). Au début
l'onduleur alimentera la sortie directement par le
secteur, à travers le by-pass (signalisation du
voyant jaune) (7) ; quelques secondes après il
sera commuté à inverseur et entrera en mode
normal de fonctionnement : les indicateurs verts
MAINS (3) et ONDULEUR (8) sont allumés.
9
2) Mettez progressivement les matériels connectés
à l’ onduleur sous tension. Le by-pass peut être
sollicité suivant les pointes de courant absorbeés
aux démarrages par certains appareil.Suitte à
cette montée en puissance, le mode de ALLAAURETE
ALLA RETE
fonctionnement de l’ onduleur doit être normal et SECTEUR
les LEDs vertes ‘MAINS’ [3] et ‘ONDULEUR’ [8]
allumés. Si la charge appliqueée est excessive, le
À LAAL
CHARGE
CARICO
AL CARICO
by-pass restera activé et le témoin de surcharge
(LED rouge ‘OVERLOAD’ [6]) clignotera.
3) Quelques minutes après la mise en service,
l’onduleur
HFR
MILLENIUM
exécutera
automatiquement le test des batteries pour voir
si le fonctionnement est correct (c.f. paragrafe “Test Batteries”)
14
13
Fig. 1
MISE EN GARDE
NE JAMAIS DEBRANCHER la prise d’alimentation secteur à 230 V lorsque l’onduleur est en
fonctionnement. Le HFR MILLENNIUM ainsi que les matériels connectés doivent impérativement être
raccordés à la TERRE.
MISE EN GARDE
Par mesure de sécurité, assurez vous que la somme des courants de fuite à la terre de l’onduleur et des
différents matériels qui lui sont connectés n’excède pas les 2,7 mA conformément à la norme
EN 50091-1-1.
MISE EN GARDE
L’onduleur HFR MILLENNIUM est équipé d’un circuit de protection contres les éventuelles erreurs de
branchement. Une erreur de branchement est signalée dès la mise en service de l’onduleur par le
voyant rouge ‘ALARM’ allumé fixe et l’émission d’un signal sonore continu.
Le cas échéant, DEBRANCHEZ immédiatement la prise d’alimentation secteur.
MISE EN GARDE
Avec toutes les charges connectées et allumées, le clignotement bref de la led rouge ‘OVERLOAD’,
toutes les trois secondes, indique que la charge connectée est à la limite maximum admissible.
38
SIGNALISATION DU PANNEAU DE CONTROLES / COMMANDES
En référence à la présentation du panneau de contrôles, Page 24, l’interprétation de la
signalisation est la suivante:
Informations transmises par les voyants
3 LED verte MAINS
- Allumée: Secteur présent, Onduleur synchronisé.
- Clignotante: Secteur hors tolérances mais suffisant pour assurer un bon fonctionnement
et/ou Pas de synchronisation onduleur.
- Eteinte:Secteur absent ou trop faible par rapport à la charge.
8 LED verte ONDULEUR
- Allumée: Onduleur en fonctionnement.
- Eteinte: Onduleur en veille ou en panne.
4 LED jaune BATTERY
- Allumée: Fonctionnement sur batteries.
- Clignotante:Test batteries négatif ou Fonctionnement sur réserve batteries ou fin
d’autonomie.
- Eteinte: Fonctionnement sur secteur.
5 LED rouge ALARM
- Allumée: Blocage du fonctionnement de l’onduleur.
- Clignotante: Panne sur un ou plusieurs tiroirs de puissance.
- Clignotante alterné ‘Bref / Long’: Conducteur Neutre mal branché en entrée (avec
détecteur de neutre validé).
- Eteinte: Fonctionnement normal.
6 LED rouge OVERLOAD
- Allumée: Anomalie sur la tension de sortie.
- Clignotante: Surcharge.
- Eteinte: Fonctionnement normal.
- Clignotante ‘Bref / 3 secondes’: Préavis de surcharge.
7 LED jaune BY-PASS
- Allumée: Fonctionnement sur by-pass, Charge directement connectée sur le secteur.
- Eteinte: Fonctionnement normal.
Informations transmises par le ‘Buzzer’
• Son continu: Blocage du fonctionnement de l’onduleur.
• Son intermittent lent (un bip toutes les 12 secondes): Fonctionnement sur batteries.
• Son intermittent rapide: surcharge ou panne.
• Son intermittent alterné ‘Bref/Long’ : Test batteries négatif et/ou Fonctionnement sur réserve
batteries et/ou Conducteur Neutre mal branché en entrée (avec détecteur de neutre validé).
• Bip simple: Mise en service de l’onduleur, ou Démarrage d’un test batteries ou Fin d’un test
batteries avec un résultat positif
Commandes :
L’onduleur HFR MILLENNIUM est équipé de deux touches de commandes en façade, Page 24.
1 Touche ‘MARCHE / ARRET’
- Une légère pression sur cette touche commande la mise en service de l’onduleur.
Toutes les LEDs s’allument un bref instant, et un bref signal sonore (Bip) est émis.
- Pour arrêter l’onduleur, maintenez pendant quelques secondes la pression sur cette même
touche. Un son intermittent est émis, l’onduleur s’arrête.
2 Touche ‘ARRET DE L’ALARME SONORE’ / ‘TEST BATTERIES’:
- Une légère pression sur cette touche de commande permet d’acquitter le son émis du buzzer
39
- Pour exécuter un test batteries, maintenez pendant deux secondes environ, la pression sur cette
même touche. Pour les détails, consultez le paragraphe spécifique.
Note de synthèse:
• En fonctionnement normal, les LEDs vertes ‘MAINS’ [3] et ‘ONDULEUR’ [8] sont allumées.
• En fonctionnement sur batteries, les LEDs verte ‘ONDULEUR’ [8] et jaune ‘BATTERY’ [4] sont
allumées..
• Le fonctionnement sur batteries est signalé par l’émissions d’un signal sonore à cadence lente
(un Bip toutes les 12 secondes). Le fonctionnement sur réserve batteries, temps pendant
lequel les utilisateurs de micro-ordinateurs doivent sauvegarder puis quitter leur application, est
signalé par l’émission d’un son intermittent ‘Bref/Long’ accompagné d’un clignotement de la
LED ‘BATTERY’ [4]. La fin de l'autonomie est signalée par le voyant jaune "BATTERY" qui
clignote et par un son continu qui dure 15 secondes ; dans cette condition la charge n'est plus
alimentée.
• Le clignotement de la LED rouge ‘OVERLOAD’ [6] indique la présence d’une charge excessive
en sortie.
Si le secteur est correcte, la charge sera directement alimentée par le secteur via le by-pass,
autrement l’onduleur s’arrêtera automatiquement après 15 secondes de surcharge
permanente.
• Le clignotement rapide de la LED rouge ‘ALARM’ [5] indique la panne d’un ou plusieurs cartes
de puissance. Un clignotement alterné ‘Bref/Long’ indique une anomalie dans le branchement
de l’onduleur (anomalie de raccordement du conducteur neutre). Si le Neutre est mal raccordé,
tourner la fiche-secteur dans l’autre sens.
• Si l’onduleur se bloque suite à une anomalie de fonctionnement, le HFR MILLENNIUM s’arrêtera
automatiquement après 15 secondes environ.
40
LOGICIEL DE SURVEILLANCE ET D’EXPLOITATION ‘UPS LINK’ - MODE D’EMPLOI
Branchement
L’onduleur est équipé d’une prise RS232 de type DB9 femelle (12) dédiée à la surveillance et à
l’exploitation des informations électriques et événementielles liées au fonctionnement du HFR LINE.
Le cordon RS232 devra être raccordé entre la DB9 de l’onduleur [12] située au dos de l’onduleur et
le port série de votre micro-ordinateur avec un cordon RS232. Le logiciel ‘UPS LINK’ pour WINDOWS(*)
présente un ensemble de menus et de fonctions assurant la mise en forme des données.
Installation du logiciel ‘UPS LINK’ pour WINDOWS(*)
Pour installer le logiciel ‘UPS LINK’ exécutez la procédure ci-dessous en respectant les séquences:
1. Démarrez votre micro-ordinateur et lancer Windows(*).
2. Introduisez la disquette d’installation, fournie en dotation avec l’onduleur, dans le lecteur A.
3. Sélectionner Fichier / Exécuter à partir du menu principal.
4. Dans la ligne de commande, Tapez A:\SETUP puis sélectionnez OK.
5. La fenêtre de dialogue ‘Select Directories’ (Sélection Répertoires) apparaît et propose par défaut le
répertoire dans lequel seront installés les fichiers du programme. Sélectionnez OK.
6. Une fenêtre d’information apparaît et vous demande de confirmer le commencement de
l’installation. Sélectionnez OK pour commencer ou ‘CANCEL’ pour abandonner l’installation.
7. 7. Quand l’installation est terminée, un groupe nommé ‘Meta System UPS LINK’ est créé. Ce
groupe contient deux icônes:
- Meta System UPS LINK
: Programme de Surveillance et d’Installation.
- Meta System UPS LINK Uninstaller
: Programme pour éliminer l’installation effectuée.
Vérifiez que le cordon RS232 soit bien raccordé entre l’onduleur et un port série de votre microordinateur puis lancer le programme ‘UPS LINK’ (double-clique à l’aide de la souris sur l’icône Meta
system UPS LINK).
(*) WINDOWS est une marque déposée par Microsoft Corporation.
41
CONFIGURATION PERSONNALISEE
L’accès au menu ‘SERVICE’ impose l’arrêt complet de l’onduleur HFR MILLENNIUM et des différentes
charges qui lui sont raccordées. Certains réglages peuvent entraînés des changements importants sur
les niveaux de tension et de fréquence en sortie. Appuyez sur la touche ‘SERVICE’ [11] à l’arrière de
l’onduleur. Suite à l’émission d’un signal sonore, les LEDs du panneau de contrôle / commandes
indiqueront la configuration par défaut :
LED ‘MAINS’ (SECTEUR PRESENT) [3] Allumée
Détecteur de Neutre activé.
LED ‘BATTERY’ (FONCTIONNEMENT SUR BATTERIES) [4] Allumée Redémarrage automatique activé.
LED ‘BY-PASS’ (FONCTIONNEMENT SUR BY-PASS) [7] Allumée
‘DIP Speed’ activé.
LED ‘ONDULEUR’ (SORTIE ONDULEUR CORRECTE) [8] Allumée Extension ‘PLL Lock range’ activée.
LED ‘OVERLOAD’ (ONDULEUR EN SURCHARGE) [6] Allumée Mode veille ‘Attente de Charge’ activé.
LED ‘PROTECTION’ [5] Allumée
Fonctionnement en 60 Hz activé.
Appuyez sur la touche ‘ARRET DE L’ALARME SONORE’[2] pour sélectionner la fonction souhaitée. La
LED correspondante clignote.
Appuyez sur la touche ‘MARCHE / ARRET’[1] pour modifier l’état de la fonction sélectionnée. La LED
correspondante s’arrête de clignoter puis affiche le nouvel état.
Pour quitter le mode ‘SERVICE’, appuyez de nouveau sur la touche ‘SERVICE’[11] ou attendez 30
secondes à compter de la dernière pression d’une touche.
1 - Mesure de la différence de potentiel Neutre/Terre
Ce détecteur de neutre est en mesure de bloquer le fonctionnement de l’onduleur HFR MILLENNIUM
lorsque la différence de potentiel entre le Neutre et la Terre est trop élevée. A la mise en service, le
détecteur permet de vérifier le sens de raccordement ‘PHASE / NEUTRE / TERRE’ et d’en bloquer le
fonctionnement en cas d’erreur. Si celui-ci n’est pas correcte, nous vous conseillons d’arrêter
l’onduleur puis, d’inverser les deux conducteurs ‘PHASE’ et ‘NEUTRE’ et de le remettre en service
(l’anomalie est signalée par le clignotement modulé de la LED rouge ‘ALARM’ et le son du Buzzer).
Fonction normalement activée.
2 - Redémarrage automatique
Cette fonction assure le redémarrage automatique de l’onduleur lorsque celui-ci s’est arrêté après à
une coupure d’électricité de durée supérieure à l’autonomie des batteries. Le redémarrage advient en
fonctionnement normal ou dans la configuration présélectionnée par la touche ‘SERVICE’. Fonction
normalement activée.
3 - Dip Speed
L’électronique de l’onduleur HFR MILLENNIUM peut accepter de très brèves pointes de courant comme
celles d’une imprimante LASER par exemple. Lorsque la fonction ‘DIP Speed’ est activée, l’intervention
du by-pass est retardée d’environ 10 ms., ce qui permet à l’onduleur de dépasser des pointes de
courant les plus brefs sans intervenir. Le niveau de la tension de sortie baisse légèrement à chaque
pointes de courant (variations cependant acceptables par tous matériels informatiques). Fonction
normalement activée.
de courant (variations cependant acceptables par tous matériels informatiques). Fonction
normalement activée.
4 - Extension ‘PLL Lock range’
Cette fonction permet d’augmenter la tolérance en fréquence d’entrée de ±2% à ±20% (Elle est
conseillée pour fonctionner avec des Groupes Electrogènes). Fonction normalement activée.
5 - Mode veille ‘Attente de Charge’
Le HFR LINE peut être programmé en mode veille ‘Attente de Charge’ (Load Waiting Mode - LWM). Ce
mode de fonctionnement met en œuvre un détecteur de seuil capable de commander la mise en
42
5 - Mode veille ‘Attente de Charge’
Le HFR MILLENNIUM peut être programmé en mode veille ‘Attente de Charge’ (Load Waiting Mode LWM). Ce mode de fonctionnement met en œuvre un détecteur de seuil capable de commander la
mise en service ou l’arrêt de l’onduleur en fonction du niveau de courant consommé par la charge. Le
temps de fonctionnement des composants de l’étage de conversion Continu/Alternatif est ainsi réduit
à la durée réelle d’exploitation de l’onduleur (même lorsque ceux-ci sont réglés par des procédures
automatiques de marche/arrêt).
Après avoir programmé l’onduleur en mode veille, appuyez sur la touche ‘MARCHE / ARRET’. La charge
est alors alimentée par le secteur via le by-pass du HFR MILLENNIUM (Clignotement de la LED jaune
‘BY-PASS’). Les batteries sont toujours maintenues en charge et le fonctionnement est considéré
comme normal. L’augmentation du courant en sortie (mise en service de l’utilisation) détectée par le
microprocesseur, entraîne instantanément le démarrage de l’étage de conversion Continu/Alternatif,
la charge est reprise par l’onduleur (LED jaune ‘BY-PASS’ éteinte).
Suite à l’arrêt des matériels raccordés en aval (baisse de courant en sortie), le HFR MILLENNIUM
revient en mode veille ‘Attente de Charge’. Lors d’une coupure secteur pendant la phase ‘Attente de
Charge’, l’onduleur programmé pour préserver ses batteries de toute décharge inutile s’arrête pour se
redémarrer quand la secteur revient. Le seuil de détection ‘Attente de Charge’ peut être modifié à
l’aide du logiciel de surveillance et d’exploitation ‘UPS LINK’ fourni en dotation, par votre microordinateur avec système WINDOWS (Cf. chapitre spécifique). Fonction normalement non activée.
6 - Fonctionnement à 60 Hz
L’onduleur HFR MILLENNIUM peut être programmé pour délivrer une fréquence en sortie de 60 Hz.
Fonction normalement non activée.
INTERFACE A SIGNAUX LOGIQUES ET COMMANDE A DISTANCE
L’onduleur est équipé de deux prises à signaux logiques de type DB9 mâle [13] parfaitement
identiques et interchangeables dédiées au raccordement de la commande à distance en option et
d’envoyer des signaux logiques à des ordinateurs équipés du materiel et du logiciel appropriés.
Electriquement isolés, ces prises à signaux logiques transmettent l’état de fonctionnement du HFR
LINE (Fonctionnement sur secteur, sur batteries, sur réserve batteries) permettant à l’utilisateur, en
mode manuel, ou aux différents micro-ordinateurs, en mode automatique, de sortir des procédures, de
sauvegarder le travail en cours avant l’arrêt ‘Fin d’autonomie’ de l’onduleur et d’eviter ainsi la perte
des sonnées.
Fonction des broches des prises prises DB9 pour l’interface à signaux logiques et la commande à
distance:
Broche 1: Entrée tension Télécommande (Tension maximum +15V, même effet que la pression
de la touche ‘Marche/Arret’ du panneau de contrôles)
Broche 2 : + 15 volts (impédance de 100 Í)
1 2 3 4 5
Broche 3 : Sortie logique fonctionnement sur réserve batteries Tension 0 / 15 volts (impédance de 2,2 kÍ)
Broche 4 : Sortie logique fonctionnement sur batteries6 7 8 9
Tension 0 / 15 volts (impédance de 2,2 kÍ)
Broche 5 : GND (masse commune)
Broche 6 : Sortie Buzzer à 7,5 kHz (Collecteur ouvert)
Broche 7 : Sortie fonctionnement sur réserve batteries(Collecteur ouvert, actif à l’état bas)
Broche 8 : GND (masse commune)
Broche 9 : Sortie fonctionnement sur batteries (Collecteur ouvert, actif à l’état bas)
Toutes les broches sont isolées galvaniquement des circuits de l’onduleur.
43
TEST BATTERIES
Lorsque l’onduleur HFR LINE est en fonctionnement normal sur secteur, le test batteries peut être
exécuté de trois manières différentes :
1. Automatiquement, après une programmation avec le logiciel ‘UPS MANAGEMENT SOFTWARE’
2. En maintenant la touche ‘ARRET DE L’ALARME SONORE / TEST BATTERIES’ [2] appuyée pendant
deux secondes, sans la relâcher
3. A chaque mise en service de l’onduleur. Fonction programmée à l’aide du logiciel ‘UPS LINK’.
La demande d’un ‘TEST BATTERIES’ est validée par un bref signal sonore (Bip). Si les conditions de
fonctionnement de l’onduleur HF LINE sont normales (secteur branché, niveau de charge correcte, pas
de potentiel entre le neutre et la terre, ...), le test est exécuté sinon l’ordre est ignoré.
Suite au test batteries, les LEDs du panneau de contrôles / commandes indiquent le niveau de
charges des batteries :
5 LED qui clignotent = batterie chargée à 100%
4 LED qui clignotent = batterie chargée à 80%
3 LED qui clignotent = batterie chargée à 60%
2 LED qui clignotent = batterie chargée à 40%
1 LED qui clignote = batterie chargée à 20%
1 LED qui clignote accompagnée d’un signal sonore = Batteries chargées à moins de 20%
Le test batterie s’effectue en fonctionnement sur secteur (i.e. sans commutation forcée sur batterie).
Le brevet déposé ‘META SYSTEM’, assure la continuité de l’alimentation sans risque de coupure pour
la charge, même si le résultat du test est négatif.
44
REMPLACEMENT DU FUSIBLE DE SECTEUR
ATTENTION
L'ouverture, la réparation ou le remplacement de parties à l'intérieur de l'onduleur exigent
toujours l'intervention de personnel technique qualifié.
Avant toute intervention, éteignez l'onduleur en appuyant sur le bouton ON/OFF qui se trouve sur
la façade. Débranchez aussi le cordon d'alimentation de la prise 230V.
1. Eteignez l'onduleur.
2. Débranchez le câble d'alimentation de la prise du secteur.
3. Otez le couvercle en le défilant après avoir enlevé les 5 vis qui se trouvent sur le bord du
couvercle. (fig.1)
4. Retirez le fusible à l'aide d'un tournevis, vérifiez son état et, en cas de besoin, remplacez-le
par un fusible ayant les mêmes caractéristiques.
5. Mettez le couvercle à sa place avant de remettre l'appareil en marche.
45
PROBLEMES TECHNIQUES ET SOLUTIONS
PROBLEMES TECHNIQUES
SOLUTIONS
• A la mise en service, la LED rouge ‘ALARM - Le conducteur de neutre est mal raccordé:
clignote avec intermittence alternée ‘Bref/Long’
tourner la fiche- secteur, (au moyen du logiciel
accompagnée d’un signal sonore. Après 15
UPS LINK fourni).
secondes, l’onduleur s’arrête.
• L’onduleur fonctionne mais émet toutes les 12 - Vérifiez que la tension arrive dans la prise de
secteur.
secondes un bref signal sonore (Bip), la LED
Contrôler si le cordon d'alimentation de
jaune ‘BATTERY’ reste allumée.
l'onduleur est branché parfaitement dans la
prise de secteur et dans le connecteur de
l'onduleur.
- Vérifiez l'état du fusible d'entrée (voir le
paragraphe “Remplacement du fusible du
secteur”).
• L’onduleur fonctionne mais émet un signal sonore
intermittent, les LEDs rouge ‘OVERLOAD’ et
jaune ‘BY-PASS’ clignotent
- La sortie est surchargée. Réduisez le nombre
d'appareillages connectés de manière à ce que
la charge ne dépasse pas le puissance
maximum que peut fournir l'onduleur.
• L’onduleur émet un signal sonore continu, et la - L'onduleur a travaillé sur les batteries qui sont
LED jaune ‘BATTERY’ clignote. Après 15
pratiquement à plat. Il ne peut marcher que sur
secondes, l’onduleur s’arrête
secteur.
Vérifiez
les
disjoncteurs
magnétothermiques ou différentiels en amont
de l'onduleur et le fusible d'entrée (cf. le
chapitre "Remplacement du fusible du
secteur").
• L’onduleur fonctionne mais la LED verte ‘MAINS’ - Le secteur est hors des limites admises comme
tension et/ou comme fréquence, mais il est
clignote.
utilisable par l'onduleur. La fonction de by-pass
n'est pas disponible.
• L’onduleur émet un signal sonore intermittent, la
LED rouge ‘ALARM’ clignote rapidement.
- La protection thermique est intervenue. Arrêtez
l'onduleur et attendez quelques minutes de
manière à ce que la température interne de
l'onduleur se stabilise. Vérifiez le bon
fonctionnement du ventilateur et que le flux
d'air ne soit pas gêné (par ex. l'onduleur est
trop près d'une paroi).
- Il y a un problème dans un circuit intérieur.
Si les LEDs ‘OVERLOAD’ et/ou ‘BY-PASS’ ne s’allument pas lors d’un défaut, l’onduleur
HFR MILLENNIUM peut continuer à fonctionner régulièrement, mais à puissance
réduite.
46
CARACTERISTIQUES TECHNIQUES
Spécifications de construction
Poids (Kg.)
HFR MILLENNIUM
810
HFR MILLENNIUM
820
23
33
145 x 410 x 595 mm
Dimensions (L x H x P) mm
MLI haute fréquence tant pour l’étage d’entrée que pour celui de sortie.
Logique de contrôle à microprocesseur.
Technologie
Interface ordinateur
A niveaux logiques pour interfaçage avec kits options. Sortie sur connecteur de type DB9 mâle,
isolé SELV. Série RS232 standard pour interfaçage avec micro-ordinateur par le logiciel
autodiagnostic fourni en dotation. Sortie sur connecteur de type DB9 femelle, isolé SELV.
Protections
Electroniques contre surcharges, courts-circuits et décharge excessive des batteries. Blocage
du fonctionnement cause autonomie épuisée. Limiteur d’amorçage à l’allumage. Détecteur du
bon raccordement du neutre. Protection Back-feed (isolation électrique de l’amont en
fonctionnement sur batterie).
Manuel et Automatique.
Intervention pour surcharge ou mauvais fonctionnement.
By pass synchronisé
Environnements
Altitude max. de magasinage
10,000 mètres
Température de magasinage
de -20°C à +50°C
Température de fonctionnement
de 0°C à +40°C
Humidité relative en
fonctionnement
20-80% sans condensation
IP21
Indice de protection (IEC529)
Emission sonore à 1m.:
Caractéristiques électriques en entrée
42 dB (A)
Tension nominale en entrée
230 Vac
Tolérance en tension
de 184 à 264Vac avec charge nom. - de 110 à 264Vac à 50% de la charge nominale
50Hz / 60Hz ±2% sélectable par l’utilisateur
Fréquence nominale en entrée
Courant nominal en entrée
3,7A rms
7,1A rms
Courant maximum en entrée
4,5A rms
8,9A rms
Distorsion de courant en entrée
avec chaige nominale
< 10%
Facteur de puissance en entrée
>0,99 (à 80% de la charge)
100% du courant nominal
Courant de démarrage
Monophasé
Nombre de phases en entrée
Protection par Fusible
12 A FF
47
Spécifications de construction
HFR MILLENNIUM
810
HFR MILLENNIUM
820
Forme d’onde en sortie
Fonctionnement sur secteur
Sinusoidale
Fonctionnement sur batterie
Sinusoidale
Type de fonctionnement
No-break, on line, à double conversion avec neutre passant
Caractéristiques électriques en sortie, secteur présent
230Vac ±1%
Tension nominale en sortie
50Hz / 60Hz synchronisée
Fréquence nominale en sortie
Courant en sortie sur charge linéaire
avec un facteur de puissance de 0,7
4,35A rms
Facteur de crête sur le courant en sortie
Puissance nominale en sortie
Puissance active en sortie sur charge
linéaire ou non linéaire FP 0,7
Puissance opérante sur charge switching
8,7A rms
3,5
1000 VA
2000 VA
700 W
1400 W
1400 VA
2800 VA
Distorsion harmonique totale de la
tension en sortie sur charge linéaire
<0.5%
Distorsion harmonique totale de
la tension en sortie sur charge
non linéaire FP 0,7
< 1%
Capacité de surcharge
300% pendant 1 seconde sans l’intervention du By-pass
200% pendant 5 secondes sans l’intervention du By-pass
Gamme du facteur de puissance de la
charge appliquée
De 0,7 à 1
Monophasé
Nombre de phases en sortie
Rendement de AC sortie/AC
entrér avec charge linéaire FP 1
et batteries chargées
à 50% de la charge
à 75% de la charge
à 100% de la charge
80%
84%
90%
Caractéristiques électriques en sortie, fonctionnement sur batterie
230Vac ±1%
Tension nominale en sortie
50Hz / 60Hz ±1%
Fréquence en sortie
Puissance nominale en sortie
1000 VA
2000 VA
Puissance active en sortie sur charge
linéaire ou non linéaire FP 0,7
700W
1400 W
Puissance opérante sur charge
switching
1400 VA
2800 VA
Distorsion harmonique totale de
la tension en sortie
< 1%
160% pendant 15 secondes
Capacité de surcharge
Gamme du facteur de puissance de
la charge appliquée
De 0,7 à 1
Rendement DC batterie/AC
batterie avec charge linéaire FP1
à 50% de la charge
à 75% de la charge
à 100% de la charge
80%
80%
80%
48
Batteries
HFR MILLENNIUM
810
Onduleur Standard
HFR MILLENNIUM
820
Charge appliquée (en pourcentage)
50%
80%
100%
50%
80%
100%
Autonomie indicative en minutes, batteries chargées
22
10
7
22
10
7
Temps de recharge jusqu’à 90%
de la charge totale
5-6 heures selon le niveau des batteries.
(avec la configuration standard)
Données techniques et quantité
des batteries
n. 3 batteries Plomb-acide étanche sans entretien, 12V-7Ah reliées en série pour chaque tiroir
de puissance.
Signal de réserve
de 32,2V à 36V, programmable par l’utilisateur
Tension minimum de fonctionnement de27Volts à 31,5Volts avec sélection automatique en fonction du niveau de charge appliquée,
ou manuel, programmable par l’utilisateur.
por batterie
Durée moyenne de vie de
batteries
de 3 à 6 ans selon l’utilisation et la température ambiante.
Mise en garde!
Les batteries contenues dans l’onduleur sont sujettes à une baisse de capacité en fonction de
leur durée (caractéristique des batteries au plomb déclarée par le constructeur dans le manuel
technique).
Pour exemple, la baisse de capacité d’une batterie de 4 ans peut arriver à 40% avec la
conséquence d’une baisse proportionelle des temps d’autonomie de l’onduleur quand il
fonctionne sur batterie.
Caractéristiques By-pass
Electromécanique
Technologie du By-pass
Conformité aux normes
EN 50091-1-1
Sécurité
Compatibilité électromagnétique
Immunité et Emissions
EN 50091-2
49
INHALT
CE-Konformitätserklärung . . . . . . . . . . . . . . . . . . . . . . . . . . . . . . . . . . . .Seite 50
Gebrauchsanweisung . . . . . . . . . . . . . . . . . . . . . . . . . . . . . . . . . . . . . . .Seite 51
Einleitun . . . . . . . . . . . . . . . . . . . . . . . . . . . . . . . . . . . . . . . . . . . . . . . .Seite 51
Blockschema . . . . . . . . . . . . . . . . . . . . . . . . . . . . . . . . . . . . . . . . . . . .Seite 52
Funktionsprinzipien . . . . . . . . . . . . . . . . . . . . . . . . . . . . . . . . . . . . . . . .Seite 53
Installation . . . . . . . . . . . . . . . . . . . . . . . . . . . . . . . . . . . . . . . . . . . . . .Seite 54
Funktionen und Anzeigen . . . . . . . . . . . . . . . . . . . . . . . . . . . . . . . . . . . .Seite 55
Autodiagnosesoftware UPS LINK . . . . . . . . . . . . . . . . . . . . . . . . . . . . . . .Seite 58
Einstellung der Spezialfunktionen . . . . . . . . . . . . . . . . . . . . . . . . . . . . . .Seite 58
Schnittstelle für logische signale und fernsteuerung . . . . . . . . . . . . . . . . .Seite 60
Batterietest . . . . . . . . . . . . . . . . . . . . . . . . . . . . . . . . . . . . . . . . . . . . .Seite 60
Mögliche Funktionsstörungen und ihre Behebung . . . . . . . . . . . . . . . . . . .Seite 62
Technische Daten . . . . . . . . . . . . . . . . . . . . . . . . . . . . . . . . . . . . . . . . .Seite 63
CE-Konformitätserklärung
Angewendete Richtlinien:
Standard, auf den die Erklärung Bezug nimmt:
Hersteller::
Anschrift:
Gerätetyp
Modelle:
Jahr der Verleihung der Marke:
73/23/CEE; 89/336/CEE abgeändert durch die EG-Richtlinien
92/31/CEE, 93/68/CEE
EN 50091-1-1, EN 50091-2
Meta System S.p.A.
via Majakovskij, 10/b Reggio Emilia, Italia
Unterbrechungsfreie Stromversorgung
HFR MILLENNIUM 810,
HFR MILLENNIUM 820
1999
Das Gerät ist in der typischen Installationskonfiguration und mit Peripheriegeräten nach den oben genannten Richtlinien
getestet worden.
Der Unterzeichnende erklärt hiermit, dass das Gerät den Anforderungen der oben genannten Richtlinien entspricht
Reggio Emilia den 15/10/99
Mr. Cesare Lasagni
Technical Director
TECHNISCHE ÄNDERUNGEN JEDERZEIT OHNE VORHERIGE ANKÜNDIGUNG MÖGLICH.
50
Wir gratulieren Ihnen zu ihrer Wahl!
Dieses Handbuch enthält die Informationen zur Sicherheit, zur Installation sowie zum Betrieb der
von Meta System produzierten unterbrechungsfreien Stromversorgungen der Serie HFR
MILLENNIUM.
Es wird empfohlen, das vorliegende Handbuch vor der Installation der unterbrechungsfreien
Stromversorgung aufmerksam zu lesen und die folgenden Anweisungen genau zu beachten.
Die USVs der Serie HFR MILLENNIUM wurden vor allem für den Einsatz in zivilen, industriellen und
medizinischen Anwendungen entwickelt; im letzteren Fall muß jedoch geprüft werden, ob im
Anwendungsland diesbezügliche spezielle Bestimmungen existieren.
Im Falle von Problemen mit der USV wird empfohlen, das vorliegende Handbuch zu lesen, bevor
der Kundendienst benachrichtigt wird; der Abschnitt “Mögliche Funktionsstörungen und ihre
Behebung” kann bei der Behebung der meisten Funktionsstörungen behilflich sein, die bei der
Benutzung der unterbrechungsfreien Stromversorgung auftreten können.
Wichtig
Es wird empfohlen, das Verpackungsmaterial des Geräts aufzubewahren, da es sehr nützlich ist,
falls das Gerät zur Reparatur eingeschickt wird.
Transportschäden aufgrund einer schlechten Verpackung der USV werden von der Garantie
nicht abgedeckt.
GEBRAUCHSANWEISUNG
• Die USV ist für die Speisung von Datenverarbeitungsgeräten konzipiert worden; die angelegte
Last darf die auf dem Etikett auf der Rückseite der USV angegebenen Werte nicht übersteigen.
• Die Taste ON/OFF bewirkt keine elektrische Isolierung der inneren Bauteile. Zur Isolierung der
USV muß der Netzstecker gezogen werden.
• Öffnen Sie das Gehäuse der USV nie, da die Bauteile auch dann eine gefährliche Spannung
aufweisen können, wenn der Netzstecker gezogen ist; im Innern des Gerätes befinden sich
keine Bauteile, die vom Benutzer repariert werden können.
• Das Bedienfeld auf der Vorderseite wird mit der Hand bedient; keine scharfkantigen oder
spitzen Gegenstände benutzen.
• Die USV wurde für den Betrieb in geschlossenen, sauberen Räumen konzipiert, in denen sich
keine entflammbaren Flüssigkeiten oder korrosiven Substanzen befinden und die keine hohe
Feuchtigkeit aufweisen.
EINLEITUNG
Die unterbrechungsfreien Stromversorgungen der Serie HFR MILLENNIUM sind entwickelt
worden, um unabhängig von den Bedingungen der elektrischen Leitung ein Maximum an
Sicherheit und Zuverlässigkeit bei der Speisung von Datenverarbeitungsgeräten zu gewährleisten.
Dieses Ergebnis wurde durch die Kombination einer “intelligenten”, mikroprozessorgesteuerten
Steuerlogik mit modularen Online-Leistungsstufen erzielt, die die PWM-Hochfrequenztechnologie
verwendet, um hinsichtlich der Präzision und Reinheit von Ausgangsspannung, Leistung,
Zuverlässigkeit und Betriebsruhe die bestmöglichen Leistungen zu gewährleisten.
Die Redundanzstruktur (HFR MILLENIUM 820) gestattet es außerdem, auch dann eine
ununterbrochene Stromabgabe, wenn auch mit verringerter Leistung, zu erhalten, wenn eine
Störung des Leistungsmoduls vorliegt, so daß man ein sehr hohes Niveau der Betriebssicherheit
erhält. Bei der Entwicklung wurde besonderes Augenmerk auf die Konzeption der Eingangsstufe
gelegt, die neben den klassischen Funktionen der Filterung und Überwachung der Leitung auch
51
die Leistungsaufnahme aus dem Netz überwacht und sie auf diese Weise in jedem Fall in der
Nähe der idealen Sinuswelle hält. Somit werden die wiederholten Leistungsaufnahmespitzen der
im Bereich der Datenverarbeitung verwendeten Netzteile vermieden und der
Eingangsleistungsfaktor wird (unter Beachtung der europäischen Bestimmungen) auf Werte in der
Nähe von 1 gebracht.
Die wesentlichen Leistungen dieser innovativen Produktlinie von USVs (Unterbrechungsfreie
Stromversorgung) können wie folgt zusammengefaßt werden:
• Redundanz (durch die Benutzung von mehr als einer Leistungsplatine MODELL 820);
• Online-Betrieb mit doppelter Konversion (max. Unterdrückung von Leistungsunterbrechungen;
keine Umschaltung Netz/Batterie);
• Eingangsleistungsfaktor praktisch = 1, unabhängig von der angelegten Last;
• Absolute Stabilität der Ausgangsspannung unabhängig von der angelegten Last und der
Leitungsspannung;
• “Intelligente” Steuerung des Eingriffspunktes der internen Akkumulatoren in Abhängigkeit von
der Leitungsspannung und der angelegten Last;
• Ausgesprochen hohes Anlaufvermögen dank der Überdimensionierung der Schaltungen;
• Sensor für den korrekten Anschluß des Nulleiters im Eingang für ein Höchstmaß der Sicherheit
der angeschlossenen Lasten (über Software einschaltbar);
• Ausgesprochen hohe Energieleistung;
• Geräuschloser Betrieb;
• Keinerlei Störung des Bildschirms;
• Absolut wartungsfrei;
• Computerschnittstelle an RS232 (CCITT V28) mit Möglichkeit der Abfrage der
Betriebsparameter und des Reports der USV.
• 2 Anschlüsse für die Computersschnittestelle und die fernsteuerung.
BLOCKSCHEMA
AUSGANG
BY PASS
EINGANG
~
=
~
=
EINGANGSFILTER
REGLER DES
LEISTUNGSFAKTORS
INVERTER
LEISTUNGSMODUL
=
=
BATTERIEN
SURVOLTORE
BATTERIELADEGER€T
LEISTUNGSMODUL
BATTERIEN
SCHNITTSTELLE
RS232
MIKROPROZESSORLOGIK
FERNSTE
UERUNG
52
FUNKTIONSPRINZIPIEN
Wenn die Spannung am Eingang vorhanden ist, wird sie von einer speziellen Eingangsstufe
(Regler des Leistungsfaktors) gefiltert und gleichgerichtet; dadurch wird die Leistungsaufnahme
aus dem Netz optimiert, da der Leistungsfaktor nahezu eins ist; diese Stufe ist in der Lage, den
Ausgangsfrequenzumrichter auch mit Netzspannungen zu speisen, die stark unter den
Nennwert liegen.
Diese Eigenschaft zeigt sich besonders bei sehr geringen Lasten, die um die 50% der
Nominallast liegen; dabei ist ein Netzbetrieb mit bis zu ca. 100 V möglich, ohne daß Energie aus
der Batterie aufgenommen werden muß.
Dieses “intelligente” Handling der Batterie-Zuschaltung wurde entwickelt, um die Batterie
möglichst wenig zu gebrauchen.
Die von der ersten Stufe gleichgerichtete Spannung wird dann von einem Hochfrequenzinverter
verwendet, um eine “saubere” sinuswellenförmige Ausgangsspannung mit einer ausgesprochen
geringen Verzerrung zu erzeugen; eine schnelle synchronisierte By-pass-Schaltung greift bei
Ausgangsspitzen ein, die die Kapazität des Inverters übersteigen, wie zum Beispiel beim
Einschalten von besonderen Peripheriegeräten, der Entmagnetisierung von großen
Bildschirmen usw.
Wenn keine oder eine nicht ausreichende Leitungsspannung vorhanden ist, wird automatisch
eine Spannungsverstärkerstufe hinzugeschaltet, die mit den Batterien eine unterbrechungsfreie
Speisung des Ausgangsinverters und somit der Last gewährleistet.
Die Art der Schaltung ist eine direkte, neutrale; um zum Beispiel Veränderungen des neutralen
Betriebs der an der USV-Anlage angeschlossenen Geräte zu vermeiden.
Während des normalen Betriebs prüft ein Sensor (wenn vorher über Software freigegeben) das
Potentialgefälle zwischen dem Nulleiter und dem Erdungsleiter und aktiviert, falls dieses zu groß
ist, eine akustische Meldung.
Sämtliche Funktionen der unterbrechungsfreien Stromversorgung werden von einem
Mikroprozessor überwacht, der auch in der Lage ist, besondere Betriebsbedingungen unter
Kontrolle zu halten und abzuspeichern, und der außerdem den Anschluss der USV an einen
Computer steuert, der über eine serielle Schnittstelle (RS232) erfolgt.
Auf diese Weise ist es möglich, die Betriebsparameter und eventuelle Funktionsstörungen in
Echtzeit zu kontrollieren.
53
LEGENDE
1
2
3
4
5
6
7
8
9
10
3
EIN- UND AUSSCHALTTASTE
TASTE STUMMSCHALTUNG BUZZER UND
BETÄTIGUNG BATTERIETEST
GRÜNE LED MAINS (Speisung vorhanden)
GELBE LED BATTERY (Batteriebetrieb)
ROTE LED ALARM (Funktionsstörung)
ROTE LED OVERLOAD (Vorankündigung Überlastung o
der Überlastung)
GELBE LED BY-PASS
GRÜNE LED INVERTER
STECKER EINGANG/AUSGANG
SCHNITTSTELLE COMPUTER RS232
8
7
4
6
5
1
2
INSTALLATION
Auf der Rückseite der unterbrechungsfreien Stromversorgung sind die folgenden Anschlüsse
vorhanden:
• Stecker/Stift für Ein-/Ausgang [9]: An diese Steckverbindung das Speisekabel und die
Ausgangssteckdose anschließen, so wie es in der Abbildung gezeigt ist.
• Serielle Computer-Schnittstelle RS232 (CCITT V28) (9-polige Steckkupplung) [10]: Benutzen Sie
diesen Anschluß, wenn die Autodiagnosesoftware UPS LINK verwendet werden soll.. Le signal
sonore en cours est ainsi annulé et la sonnerie s’éteint jusqu’au prochain événement à
signaler.
• 2 Anschlüsse für die fernsteuerung und die Computerschnittstelle für Logiksignale (9 poliger
stecker) [11]: für die entsprechende vorrichtung benutzen (Sonderausstattungen).
• Ausgang kabel anshluß Batterieeinheit [13]
HINWEIS
Aus Sicherheitsgründen wird empfohlen, die mitgelieferten Kabel nicht zu verändern. Außerdem
muß sichergestellt werden, daß die Netzsteckdose, an die die unterbrechungsfreie
Stromversorgung angeschlossen wird, in ausreichender Weise geerdet ist.
HINWEIS
Die Netzsteckdose oder der Trennschalter müssen sich in der Nähe der Geräte befinden und
leicht zugänglich sein.
54
Gehen Sie bei der Installation wie folgt vor:
1) Stellen Sie die unterbrechungsfreie Stromversorgung so auf, daß die Lüftungsschlitze nicht
verdeckt werden.
2) An die Steckverbindung für Ein-/Ausgang [9] das Speisekabel und die MehrfachAusgangssteckdose anschließen (siehe Abb. 1).
3) Die Lasten an die Ausgangssteckdose anschließen und sicherstellen, daß die Schalter der
verschiedenen Verbraucher offen sind.
4) Den Zufuhrstecker an eine Steckdose mit geeigneter Spannung und Stromstärke anschließen.
Einschalten
1) Die unterbrechungsfreie Stromversorgung 10 11
12
mit der entsprechenden Taste [1]
einschalten (siehe Abschnitt Funktion und
Anzeigen
unter
der
Position
“Bedienelemente”); nun speist die USV
den Ausgang über den Bypass (angezeigt
durch die gelbe Led) [7] direkt vom Netz,
falls der Nulleitersensor keine Anomalie
14
feststellt, und schaltet dann nach einigen
9
13
Sekunden auf Inverter um und nimmt den
normalen Betrieb auf (die grünen Leds
MAINS [3] und INVERTER [8] leuchten auf).
2) Die Lasten einschalten und überprüfen,
Abbildung 1
ALLANETZ
RETE
ob der normale Betrieb nach einem ZUM
ALLA RETE
eventuellen Eingriff des Bypasses wieder
aufgenommen wird; nun ist die grüne Led
AL CARICO
MAINS [3] sowie die grüne Led INVERTER
ZUM VERBRAUCHER
AL CARICO
[8] an. Falls die angeschlossenen Lasten
zu groß sind, bleibt der Bypass
eingeschaltet und die rote Led OVERLOAD
[6] blinkt auf.
3) Kurz nach dem Einschalten der unterbrechungsfreien Stromversorgung führt sie automatisch
den Test der Batterien durch, um deren korrekten Betrieb zu überprüfen (siehe Abschnitt
“Batterietest”)
HINWEIS
Ziehen Sie nie den 230 V Netzstecker, während die USV in Betrieb ist, denn dadurch wird die Erdung
der USV und der daran angeschlossenen Lasten unterbrochen.
Achtung
Da die Dispersionsströme aller angeschlossenen Lasten gegen die Erde sich im Schutzleiter der USV
(Erdungskabel) sammeln, darf diese Stromstärke aus Sicherheitsgründen gemäß Norm EN 500091-1 den
Wert von 2,7 mA nicht übersteigen.
HINWEIS
Die USV ist mit einer Schaltung zum Schutz gegen Anschlußfehler ausgestattet, die durch das
Aufleuchten der roten Led ALARM und den ununterbrochenen Ton des internen Summer angezeigt
werden.
Bei dieser Anzeige die USV direkt abschalten und sofort den Netzstecker ziehen.
ACHTUNG
Falls nach dem Einschalten aller Lasten die rote Led OVERLOAD alle drei Sekunden aufblinkt, so
überschreitet die an die USV angeschlossene Belastung den zulässigen Höchstwert.
55
FUNKTIONEN UND ANZEIGEN
Leuchtanzeigen:
Mit Bezug auf die Abbildung auf Seite 42 haben die Leuchtanzeigen die folgenden Funktionen:
3 Grüne Led MAINS
- an: Netz regelmäßig - Inverter synchron.
- blinkend: Netz außerhalb des Toleranzbereiches, aber vorhanden und ausreichend für einen
korrekten Betrieb, oder Inverter nicht synchron.
- aus: Netz nicht vorhanden oder zu niedrig für die Last.
8 Grüne Led INVERTER
- an: Inverter in Betrieb.
- aus: Inverter abgeschaltet oder defekt.
4 Gelbe Led BATTERY
- an: Batteriebetrieb.
- blinkend: Batteriereserve oder Ende der Autonomie oder Batterietest negativ.
- aus: Netzbetrieb.
5 Rote Led ALARM
- an: Betrieb der USV blockiert.
- blinkend: Defekt eines oder mehrerer Leistungsmodule.
- blinkend abwechselnd kurz/lang: (mit freigegebenem Nulleiter-Sensor) falscher - Anschluß des
Nulleiters am Eingang.
- aus: normaler Betrieb.
6 Rote Led OVERLOAD
- an: Anomalie der Ausgangsspannung.
- blinkend: Überlastung.
- aus: normaler Betrieb.
- kurzes Blinken alle drei Sekunden: Vorankündigung Überlastung.
7 Gelbe Led BY-PASS
- an: By-pass aktiv (Ausgang direkt vom Netz gespeist).
- aus: Ausgang vom Inverter gespeist.
Akustische Anzeigen
• Ununterbrochener Ton: USV blockiert.
• Intermittierender Ton langsam (1 Beep alle 12 Sekunden): Batteriebetrieb.
• Intermittierender Ton schnell: Überlastung oder Defekt.
• Intermittierender Ton abwechselnd kurz/lang: Kapazitätsreserve oder Batterietest negativ,
oder falscher Anschluß des Nulleiters (mit freigegebenem Nulleiter-Sensor).
• Einzelner Beep: Anzeige Einschaltung der USV, oder Erkennung der Aufforderung zum
Batterietest, oder Ende Batterietest mit positivem Resultat.
Bedienelemente:
Die unterbrechungsfreie Stromversorgung wird mit den beiden auf der Abbildung auf Seite 42
gezeigten Tasten auf der Front bedient.
1 Taste Ein- und Ausschalten:
- Durch kurzes Drücken wird die USV eingeschaltet; dabei blinken alle Leds kurz auf und es
ertönt ein akustisches Signal (1 Beep).
- Wenn die gleiche Taste für ca. zwei Sekunden gedrückt gehalten wird, wird die USV
abgeschaltet, was durch einen intermittierenden Ton des Summers angezeigt wird.
2 Taste Stummschaltung Summer/Batterietest :
- Durch ein kurzes Drücken dieser Taste ist es möglich, den Summer stummzuschalten. Auf
diese Weise wird die laufende akustische Anzeige stummgeschaltet und der Summer ist
ruhig, bis ein neuer Vorfall angezeigt werden muß.
56
- Wenn die Taste für ca. zwei Sekunden gedrückt gehalten wird, wird der Batterietest
angefordert; für detaillierte Informationen wird auf den entsprechenden Abschnitt verwiesen.
Hinweise:
• Bei normalen Betriebsbedingungen leuchten die grünen Leds MAINS [3] und INVERTER [8] auf.
• Während des Batteriebetriebs leuchten die grüne Led INVERTER [8] und die gelbe Led BATTERY
[4] auf.
• Der Batteriebetrieb wird durch ein akustisches Signal mit langen Pausen angezeigt (ein Beep
alle 12 Sekunden). Die Kapazitätsreserve, das heißt der Zeitpunkt, an dem der Benutzer die
Anwendungen auf dem an die Unterbrechungsfreie Stromversorgung angeschlossenen
Computer schließen sollte, wird durch ein intermittierendes akustisches Signal kurz/lang
angezeigt, das von dem Blinken der Led BATTERY [4] begleitet wird. Das Ende der Autonomie
wird durch das Aufblinken der gelben LED-Anzeige “BATTERY” und den Dauerton des Summers
auf die Dauer von 15” angezeigt. Unter diesen Bedingungen wird die Last nicht mehr gespeist.
• Das Aufblinken der roten Led OVERLOAD [6] zeigt an, daß die Belastung des Ausgangs zu groß
ist. In diesem Fall wird die Last über den Bypass vom Netz gespeist, falls es vorhanden ist,
anderenfalls blockiert die USV nach 15 Sekunden ununterbrochener Überlastung.
• Das Aufblinken der roten Led ALARM [5] zeigt einen Defekt eines Leistungsmodule an, falls das
Blinken schnell erfolgt; eine Anomalie des Anschlusses der unterbrechungsfreien
Stromversorgung (oder falscher Anschluß des Nulleiters) wird durch ein Aufblinken abwechselnd
kurz/lang angezeigt. Bei einem falschen Nullpunkt die Richtung des Steckers des Speisekabels
der USV umkehren.
• Falls die USV aufgrund einer Anomalie blockiert, so schaltet sie sich nach 15 Sekunden
automatisch ab.
57
AUTODIAGNOSESOFTWARE UPS LINK
Anschluß
Die USV ist mit einer Standardschnittstelle RS232 ausgestattet, mit der eine Reihe von Betriebsund Reportdaten der USV auf einem Computer angezeigt werden können. Die Funktion kann mit
dem Schnittstellenprogramm UPS LINK für WINDOWS (*) benutzt werden, wenn eine serielle
Schnittstelle des PCs mit einem Kabel RS232 mit der Schnittstelle [10] auf der Rückseite der
USV verbunden wird.
Installation der Software UPS LINK für WINDOWS (*)
Bei der Installation der Software UPS LINK wie folgt vorgehen:
1. WINDOWS (*) starten.
2. Die mit der USV gelieferte Installationsdiskette in Laufwerk A einlegen.
3. Im Hauptmenü des Programm-Managers den Befehl Datei - Ausführen wählen.
4. In dem entsprechenden Feld A:\SETUP eintippen und dann OK wählen.
5. Es erscheint das Dialogfenster Select Directories, in dem das Defaultverzeichnis
vorgeschlagen wird, in das die Programmdateien installiert werden. OK wählen.
6. Es erscheint ein Informationsfenster, das zur Bestätigung des Beginns der Installation
auffordert. OK wählen, um anzufangen, oder aber CANCEL zum Verlassen der Installation.
7. Nach Abschluß der Installation wird eine Programmgruppe mit dem Titel Meta System UPS
LINK eingerichtet, die die folgenden beiden Symbole enthält:
- Meta System UPS LINK
: Abfrageprogramm.
- Meta System UPS LINK Uninstaller : Programm zur Deinstallation
Sicherstellen, daß die USV an einen freien seriellen Port des PCs angeschlossen ist und dann
mit der Maus auf das Symbol Meta System UPS LINK klicken.
* Windows ist ein Warenzeichen der Microsoft Corporation.
EINSTELLUNG DER SPEZIALFUNKTIONEN
Die Taste SERVICE [11] auf der Rückseite der USV (bei abgeschalteter USV) drücken; die
unterbrechungsfreie Stromversorgung gibt ein akustisches Signal ab und die Leds auf dem
Frontpaneel zeigen die folgenden Optionen an:
- Led MAINS [3] an
® Falls Nullleitersensor eingeschaltet
- Led BATTERIES [4] an
® Falls Autorestart eingeschaltet
- Led BY-PASS [7] an
® Falls Dip Speed eingeschaltet
- Led INVERTER-ON [8] an
® Falls Extented PLL Lock range eingeschaltet
- Led OVERLOAD [6] an
® Falls load waiting mode eingeschaltet
- Led PROTECTION [5] an
® Falls Betrieb mit 60 Hz gewählt.
Durch Drücken der Taste Stummschaltung Buzzer [2] wird die gewünschte Funktion gewählt (die
entsprechende Led blinkt auf).
Durch Drücken der Taste Einschalten/Ausschalten [1] wird der gewählte Funktionsstatus
geändert; die entsprechende Led blinkt nicht mehr und zeigt den neuen Status an.
Zum Verlassen des Servicemodus erneut die Taste SERVICE [11] drücken oder nach dem letzten
Drücken einer Taste 30 Sekunden warten.
1 - Neutral sense
Der Nullleitersensor ist in der Lage, den Betrieb der USV zu blockieren, falls das Nullleiterpotential
zu stark von dem des Erdleiters abweicht; bei der Installation gestattet er die Überprüfung der
Richtigkeit des Anschlusses des Netzkabels und blockiert den Betrieb, falls der Anschluß nicht
korrekt ist; zur Inbetriebnahme müssen einfach die Kabel von Phase und Nullleiter am Eingang
miteinander vertauscht werden; dann die unterbrechungsfreie Stromversorgung wieder
einschalten (die Anomalie des Nullleiters wird durch das modulierte Blinken der roten Led
PROTECTION, begleitet von einem akustischen Signal des internen Buzzers angezeigt). Die
Funktion ist normalerweise eingeschaltet.
58
2 - Autorestart
Diese Funktion gestattet das automatische Wiedereinschalten der USV bei der Rückkehr der
Spannung nach jedem Blockieren aufgrund des Endes der Kapazität. Das Wiedereinschalten
erfolgt mit der normalen Betriebsweise oder aber mit der Modalität, die mit der Taste SERVICE
gewählt wurde. Die Funktion ist normalerweise eingeschaltet.
3 - Dip Speed
Diese Funktion gestattet die Benutzung mit Lasten, die kurze, wiederholte Leistungsspitzen
aufweisen (zum Beispiel Laserdrucker). Durch das Einsetzen wird der Eingriff des Bypass um 10
ms verzögert und die USV kann die kurzen Leistungsspitzen so ohne Eingriff des Bypasses
überbrücken. In diesem Fall wird in Kauf genommen, daß die Ausgangsspannung der USV
während dieses kurzen Zeitraums leicht abfällt (ohne das dadurch jedoch der Betrieb der
gegebenenfalls angeschlossenen Computer beeinträchtigt wird). Die Funktion ist normalerweise
eingeschaltet.
4 - Extended PLL Lock range
Gestattet die Ausdehnung des Frequenzbereiches des Netzes von ±2% auf ±20% (für den Betrieb
mit einer Speisung von Stromaggregaten). Die Funktion ist normalerweise nicht eingeschaltet.
5 - Load Waiting Mode
Die unterbrechungsfreie Stromversorgung kann für den Betrieb im “Load Waiting Mode” (LWM)
konfiguriert werden. Diese besondere Betriebsweise gestattet ein automatisches Ein- und
Ausschalten der USV bei Einschalten der angeschlossenen Last. Auf diese Weise wird der Betrieb
der unterbrechungsfreien Stromversorgung auf die für die Arbeit der Verbraucher erforderliche Zeit
reduziert (auch wenn diese von automatischen Ein- und Ausschaltzyklen gesteuert werden). Nach
dem Drücken der Einschalttaste stellt die USV sich in eine Wartestellung und speist den Ausgang
über den Bypass direkt vom Netz; dabei (angezeigt durch das Blinken der gelben Led BY-PASS)
wird gegebenenfalls auch die Batterie nachgeladen. Falls dabei eine Leistungsaufnahme am
Ausgang vorhanden ist (Einschalten der Last), so wird der Anstieg der Stromstärke von einem
Mikroprozessor festgestellt, der die USV einschaltet, den Inverter betätigt und den Bypass in die
normale Stellung umschaltet, nachdem die Spitze beim Einschalten der Last überwunden ist. Das
Abschalten der Last stellt die USV in die Wartestellung zurück und bereitet sie für das
Wiedereinschalten vor (Beim Ausfall der Spannung, während die USV sich in Wartestellung
befindet, schaltet der interne Mikroprozessor die USV automatisch ab, um sie dann bei der
Rückkehr der Spannung wieder einzuschalten, um die Batterie vor unnötigen Entladungen zu
schützen.) Es ist möglich, die Lastschwelle mit der mitgelieferten Autodiagnosesoftware UPS LINK
zu programmieren, falls ein Computer mit Betriebssystem WINDOWS vorhanden ist (siehe
entsprechender Abschnitt). Die Funktion ist normalerweise nicht einschaltet.
6 - Betrieb mit 60 Hz
Die unterbrechungsfreie Stromversorgung kann für einen Betrieb mit einer Leitungsspannung
mit 60 Hz konfiguriert werden. Die Funktion ist normalerweise nicht eingeschaltet.
59
SCHNITTSTELLE FÜR LOGISCHE SIGNALE UND FERNSTEUERUNG
Auf der Rückseite der unterbrechungsfreien Stromversorgung sind zwei 9-polige Anschlüsse [13]
vorhanden, die vollkommen identisch und austauschbar sind. Diese ermöglichen den Anschluß
der Fernsteuerung (Sonderzubehör) und/oder das Senden von Logiksignalen an einen mit
entsprechender Hard- und Software ausgestatteten Computer. Die Logiksignale sind elektrisch
gegen den Rest der USV isoliert und zeigen an, ob die USV im Netz- oder im Batteriebetrieb
arbeitet und, ob die Batterie sich im Bereich der Kapazitätsreserve befindet. Normalerweise
werden sie verwendet, um den Benutzer über den Status der USV zu informieren, so daß dieser
die laufenden Arbeiten ohne Datenverlust schließen kann, bevor die Kapazität der
unterbrechungsfreien Stromversorgung erschöpft ist. Bei einigen Betriebssystemen müssen
einige bestimmte Befehle eingegeben werden, bevor ein sicheres Abschalten des Computers
möglich ist; das Signal Ende der Kapazitätsreserve kann verwendet werden, um diese Prozeduren
automatisch auszuführen.
Funktion der Kontaktstifte der Steckverbindungen für den Anschluß der Logiksignale und der
Fernsteuerung:
Pin 1: Eingang Spannung der Fernsteuerung (max. Spannung +15 V, gleiche Wirkung wie das
Drücken der Ein- und Ausschalttaste auf der Vorderseite).
Pin 2: +15 V (Impedanz 100 ½)
Pin 3: Ausgang Logik Reserve 0/15 V (Impedanz 2,2 K½)
Pin 4: Ausgang Logik Battery 0/15 V (Impedanz 2,2 K½)
1 2 3 4 5
Pin 5: GND (gemein)
Pin 6: Ausgang Buzzer mit 7,5 kHz (open collector)
Pin 7: Ausgang Reserve (open collector aktiv niedrig)
6 7 8 9
Pin 8: GND (gemein)
Pin 9: Ausgang Battery (open collector aktiv niedrig)
Alle Kontaktstifte sind elektrisch gegen den Rest der USV isoliert.
BATTERIETEST
Der Batterietest kann während des Netzbetriebs auf die folgenden Weisen durchgeführt werden.
1. Automatisch nach einer entsprechenden Programmierung der UPS Management Software.
2. Durch Drücken der Taste für die Stummschaltung des Summers [2] für ein paar Sekunden.
3. Bei jedem Einschalten der USV mit der mitgelieferten Software UPS LINK.
Wenn die Aufforderung erkannt wird, gibt die USV ein kurzes akustisches Signal (Beep) ab, worauf
Test durchgeführt wird, wenn die unterbrechungsfreie Stromversorgung nicht unter anomalen
Bedingungen wie Überlastungen, falsch angeschlossener Nulleiter usw. arbeitet; anderenfalls
wird der Befehl ignoriert.
Am Ende des Tests können auf dem Frontpanel die folgenden Ergebnisse angezeigt werden:
5 blinkende Leds = Batterieladung auf 100%
4 blinkende Leds = Batterieladung auf 80%
3 blinkende Leds = Batterieladung auf 60%
2 blinkende Leds = Batterieladung auf 40%
1 blinkende Led = Batterieladung auf 20%
1 blinkende Led + akustisches Signal = Batterieladung unter 20%.
Der Test wird dank einer speziellen, von META SYSTEM patentierten Schaltung bei Netzbetrieb
durchgeführt (das heißt ohne Umschaltung auf den Batteriebetrieb); daher ergeben sich auch bei
negativem Testergebnis keine Unterbrechungen der Ausgangsspannung.
60
ERSETZEN DER NETZSICHERUNG
ACHTUNG
Das Öffnen, das Reparieren oder das Ersetzen von Teilen im Inneren der USV verlangt immer
den Eingriff von spezialisiertem Personal.
Vor jedem Eingriff ist die USV durch das Betätigen der Taste ON/OFF auf der Frontseite
auszuschalten, um dann das Speisekabel aus der 230 V-Steckdose zu ziehen.
1) Die Einheit für unterbrechungsfreie Stromversorgung ausschalten.
2) Das Speisekabel aus der Netzsteckdose ziehen.
3) Den Deckel auf der linken Seite entfernen, indem man die 5 Schrauben herausdreht, die sich
längs der Kante desselben befinden.
4) Die Sicherung mit einem Schraubenzieher aus ihrer Aufnahme heraushebeln und ihren
Zustand prüfen. Ggf. ist sie durch eine mit den gleichen Eigenschaften zu ersetzen.
5) Bevor man das Gerät wieder in Betrieb nimmt, den Deckel wieder montieren.
61
MÖGLICHE FUNKTIONSSTÖRUNGEN UND IHRE BEHEBUNG
PROBLEME
ABHILFE
· Beim Einschalten der USV ertönt der Summer und die
rote LED-Anzeige ALARM blinkt abwechselnd
lang/kurz auf, um nach 15 Sekunden auszugehen.
- Der Anschluß des Nulleiters ist falsch. Den
Gerätestecker umdrehen oder den Nulleitersensor
ausschalten (über die Software UPS Link, die zum
Lieferumfang gehört).
· Die USV funktioniert, aber sie gibt alle 12 Sekunden
ein akustisches Signal ab und die gelbe LED-Anzeige
BATTERY leuchtet immer auf.
- Sicherstellen, daß in der Netzsteckdose Spannung
anliegt.
- Sicherstellen, daß das Speisekabel der USV korrekt
in der Netzsteckdose und in die Steckverbindung
der Gruppe selbst steckt.
- Den Zustand der Eingangssicherung prüfen (siehe
Kapitel “Ersetzen der Netzsicherung”).
· Die USV funktioniert, gibt aber ein aussetzendes
akustisches Signal ab und die rote LED-Anzeige
OVERLOAD + die gelbe LED-Anzeige BY PASS
blinken.
- Am Ausgang der USV liegt eine Überlastung vor.
Die Zahl der angeschlossenen Geräte verringern,
damit die Belastung nicht zu höchstzulässige
Leistung überschreitet die von der USV-Gruppe
angegeben werden kann.
· Die USV gibt ein konstantes akustisches Signal an
und die gelbe LED-Anzeige BATTERY blinkt auf die
Dauer von circa 15 Sekunden, danach geht die
Gruppe aus.
- Die Batterien der Gruppe sind ganz entladen, sie
kann nur dann wieder starten, wenn die
Eingangsleitung
vorliegt.
Die
thermischmagnetischen
Schutzschalter
oder
die
Fehlerstrom-Schutzschalter stromauf von der
Gruppe und die Eingangssicherung prüfen (siehe
Kapitel “Ersetzen der Netzsicherung”).
· Die USV funktioniert, aber die grüne LED-Anzeige
MAINS blinkt auf schnelle Weise auf.
-
· Die USV gibt ein aussetzendes akustisches Signal ab
und die rote LED-Anzeige ALARM blinkt auf die
schnelle Weise.
Das Netz ist außerhalb der zulässigen
Spannungswerte und/oder Frequenz, aber immer
noch von der USV benutzbar. Die Funktion Bypass
steht jedoch nicht zur Verfügung.
- Der Thermoschutz hat angesprochen. Die USVGruppe ausschalten und ein paar Minuten
abwarten, bis de Innentemperatur der USV wieder
normalisiert worden ist. Den korrekten Betrieb des
Lüfters prüfen und daß sein Luftstrom nicht
behindert wird (Bsp. wenn die Gruppe zu nahe an
einer Wand steht).
- Es liegt eine Störung auf irgendeinem internen
Stromkreis vor.
Falls die Leds OVERLOAD und/oder BY-PASS während des Defekts nicht aufleuchten, so kann
die USV weiterarbeiten, wenn auch mit reduzierter Leistung.
62
TECHNISCHE DATEN
Konstruktive Angaben
Gewichte (Kg.)
HFR MILLENNIUM
810
HFR MILLENNIUM
820
23
33
Abmessungen (L x H x T)
145 x 410 x 595 mm
Technologie
Hochfrequenz PWM sowohl für die Eingangsstufe, als auch für die Ausgangsstufe. Logiksteuerung mit
Mikroprozessor.
Computerschnittstelle
Standard-Serienanschluß RS232 zum Anschließen an den Personal Computer über die zum
Lieferumfang gehörigen Diagnoseprogramm, Ausgang auf 9-fachem Steckbuchse mit SELV-Isolation.
Schutz
Elektronisch gegen Überlastungen, Kurzschluß und zu starke Entladung der Batterie. Sperrung des
Betrieb bei Ende der Autonomie. Begrenzung des Anlaufs. Sensor für korrekten Anschluß des
Nulleiters. Back-feed protection (elektrische Sicherheitsisolierung des Eingangssteckers während des
Batteriebetriebs).
Synchronisierter Bypass
Sowohl manuell als auch automatisch.
Eingestellt auf Uberlastung und Funktionsabweichung.
Angaben zur Umgebung
Max. Höhe Lagerung
10.000 m
Temperaturbereich Lagerung
von -20°C bis +50°C
Temperaturbereich für den Betrieb
von 0°C bis +40°C
Feuchtigkeitsbereich für den Betrieb
von 20% bis 80% ohne Kondenswasserbildung
IP21
Schutzgrad gemäß (IEC529)
42 dB (A)
Akustischer Lärm bei 1 m
Elektrische Eigenschaften des Eingangs
230 V
Nominaleingangsspannung
Bereich der Eingangsspannung
Nominaleingangsfrequenz
von184 bis 264 bei Nominallast - von 110V bis 264 V bei 50% der Nominallast
50Hz / 60Hz ±2% vom Benutzer Wählbar
Nominaleingangsstromstärke
3.7A rms
Max. Eingangsstromstärke
4,5A rms
7.1A rms
8.9A rms
< 10%
Verzerrung des Eingangsstroms
> 0,99 (mit 80% - last)
Faktor der Eingangsleistung
100% bei Nominalleistung
Spitzenstromstärke
Einphasen
Anzahl der Eingangsphasen
12A FF
Leitungssicherung
63
Konstruktive Angaben
HFR MILLENNIUM
810
HFR MILLENNIUM
820
Betriebsweise
Netzbetrieb
Sinuswelle
Batteriebetrieb
Sinuswelle
Operating type
Unterbrechungsfreie Stromversorgung no break, online, mit durchgehendem Nulleiter bei doppelter Konversion
Elektrische Eigenschaften des Ausgangs bei Netzbetrieb
230 V ±1%
Nominalausgangsleistung
Nominalausgangsfrequenz
Ausgangsstromstärke an linearer
Last LF 0,7
50Hz / 60Hz synchronisiert
4.35A rms
7.7A rms
Crest-Faktor Ausgangsstrom
Nominalausgangsleistung
Wirkausgangsleistung an linearer Last
LF 0,7
Switching-Leistung
3,5
1000 VA
2000 VA
700 W
1400 W
1400 VA
2800 VA
Harmonische Gesamtverzerrung der
Ausgangsspannung bei linearer Last
< 0.5%
Harmonische Gesamtverzerrung der
Ausgangsspannung bei nicht linearer
Last LF 0,7
Überlastkapazität
< 1%
300% für 1 Sekunde ohne Eingriff des Bypasses
200% für 5 Sekunden ohne Eingriff des Bypasses
von 0,7 bis 1
LF-Bereich der angelegten Leistung
Anzahl der Ausgangsphasen
Einphasen
Konversionsleistung AC/AC mit
linearer Last LF 1 und vollen
Batterien
bei 50% der Last
bei 75% der Last
bei 100% der Last
80%
84%
90%
Elektrische Eigenschaften des Ausgangs bei Batteriebetrieb
230V ±1%
Nominalausgangsspannung
50Hz / 60Hz ±1%
Ausgangsfrequenz
Nominale Ausgangsleistung
Scheinbare Ausgangsleistung an linearer
oder nicht linearer Last LF 0,7
Wirkleistung mit Computerlast
1000 VA
2000 VA
700W
1400 W
1400VA
2800VA
Harmonische Gesamtverzerrung
der Ausgangsspannung
< 1%
160% für 15 Sekunden
Überlastkapazität
LF-Bereich der angelegten
Leistung
von 0,7 bis 1
Konversionsleistung DC/AC mit
linearer Last LF 1
bei 50% der Last
bei 75% der Last
bei 100% der Last
80%
80%
80%
64
Batteriebetrieb
HFR MILLENNIUM
810
Standard-USV
Angeschlossene Last in Prozent
Indikative Autonomie mit vollen Batterien in Minuten
Aufladezeit bis auf 90% der
Gesamtladung
Technische Daten und Anzahl der
Batterien
Reserveanzeige
Geringste Betriebsspannung bei
Batteriebetrie
Durchschnittliche Lebensdauer
der Batterien
HFR MILLENNIUM
820
50%
80%
100%
50%
80%
100%
22
10
7
22
10
7
5-6 Stunden je nach Entladungszustand
(in der Standardkonfiguration)
3 wartungsfreie, versiegelte in Reihe geschaltete Bleisäurebatterien 12 V - 7 Ah je Modul.
von 32,2 V bis 36 V, programmierbar durch den Benutzer.
vvon 27 V bis 31,5 V mit automatischer Wahl je nach angelegter Last oder vom Anwender
programmierbar.
3 - 6 Jahre je nach Verwendung und Betriebstemperatur
Achtung !
Die in der USV enthaltenen Batterien unterliegen im Laufe der Zeit einer Verringerung der Kapazität
(Eigenschaften der Bleibatterien, die der Hersteller in dem technischen Handbuch angibt). Zum
Beispiel kann die Verringerung der Kapazität einer Batterie in vier Jahren bis zu 40% betragen und in
entsprechender Weise fallen auch die Zeiten der Kapazität der USV bei Batteriebetrieb ab.
Eigenschaften des Bypasses
Art des Bypasses
elektromechanisch
Normen
Geplante Sicherheit gemäß Norm
EN 50091-1-1
Elektromagnetische Kompatibilität:
entspricht der Norm EN 50091-2
entspricht der Norm EN 50091-2
Immunität
Emissionen
65
ÍNDICE
Declaração CE de conformidade . . . . . . . . . . . . . . . . . . . . . . . . . . . . . . . .pág. 66
Condições de uso . . . . . . . . . . . . . . . . . . . . . . . . . . . . . . . . . . . . . . . . . .pág. 67
Introdução
. . . . . . . . . . . . . . . . . . . . . . . . . . . . . . . . . . . . . . . . . . . . . .pág. 67
Diagrama de blocos . . . . . . . . . . . . . . . . . . . . . . . . . . . . . . . . . . . . . . . .pág. 68
Princípio de funcionamento . . . . . . . . . . . . . . . . . . . . . . . . . . . . . . . . . . .pág. 69
Instalaçã . . . . . . . . . . . . . . . . . . . . . . . . . . . . . . . . . . . . . . . . . . . . . . . .pág. 70
Funções e sinalizações
. . . . . . . . . . . . . . . . . . . . . . . . . . . . . . . . . . . . .pág. 72
Software de auto-diagnóstico UPS LINK . . . . . . . . . . . . . . . . . . . . . . . . . . .pág. 74
Programação das funções especiais . . . . . . . . . . . . . . . . . . . . . . . . . . . . .pág. 74
Interface com sinais logicós e comando a distancia . . . . . . . . . . . . . . . . . .pág. 76
Teste das baterias . . . . . . . . . . . . . . . . . . . . . . . . . . . . . . . . . . . . . . . . .pág. 76
Eventuais problemas e solução . . . . . . . . . . . . . . . . . . . . . . . . . . . . . . . .pág. 78
Características técnicas . . . . . . . . . . . . . . . . . . . . . . . . . . . . . . . . . . . . .pág. 79
Declaraçao CE de conformidade
Declaração CE de conformidade :
Norma para a qual se declara a conformidade:
Fabricante:
Direcção:
Tipo de aparelhagem:
Modelos:
Ano de aplicação da marca
73/23/CEE, 89/336/CEE modificada com
as Normas 92/31/CEE, 93/68/CEE.
EN 50091-1, EN 50091-2
Meta System S.p.A.
via Majakovskij, 10/b Reggio Emilia, Italia
UPS
HFR MILLENNIUM 810,
HFR MILLENNIUM 820
1999
A aparelhagem foi testada na configuração típica de instalação e com periféricos em conformidade com as Normas acima
citadas.
O subscritor declara que o aparelho acima definido satisfaz os requisitos das Normas acima especificadas.
Reggio Emilia, 15/10/99
Eng. Cesare Lasagni
Director Técnico
AS CARACTERÍSTICAS TÉCNICAS PODEM SER ALTERADAS SEM AVISO PRÉVIO.
66
Cumprimentos pela sua escolha!
Este manual contém as informações de segurança, instalação e funcionamento relativas às UPS
da série HFR MILLENNIUM produzidos pela Meta System.
Leia com atenção este manual antes de proceder à instalação da UPS, respeitando
escrupulosamente tudo o que for referido a seguir.
As UPS da série HFR MILLENNIUM foram realizadas principalmente para a utilização civil,
industrial e de electro-medicina; todavia, neste último caso, é necessário garantir que no país de
utilização, existem normas particulares sobre esta questão.
Em caso de problemas com a UPS, leia este manual antes de contactar o serviço de assistência
técnica; a secção "Possíveis problemas e soluções" de facto, pode ajudar a resolver a maior
parte dos inconvenientes que forem encontrados durante a utilização da UPS.
Importante
Aconselha-se a conservação dos materiais da embalagem, pois, poderão ser úteis no caso de
um eventual envio para reparação.
Os danos sofridos pelo transporte devidos a uma má embalagem da UPS não estão cobertos
pela garantia.
CONDIÇÕES DE USO
• A UPS foi projectada para alimentar equipamentos informáticos, a carga aplicada não deve
superar aquela indicada na etiqueta colocada na parte traseira da UPS.
• O botão ON/OFF da UPS não isola electricamente as partes interiores. Para isolar a UPS,
desligue-a da tomada de corrente eléctrica.
• Não abra o armário da UPS, pois, no seu interior, pode haver componentes com tensão eléctrica
perigosa mesmo com a ficha desligada da rede; em todo o caso, no seu interior não existem
componentes que possam ser reparados pelo utilizador.
• O painel frontal de controlo é destinado a operações manuais; não pressione sobre o painel
com objectos afiados ou pontiagudos.
• A UPS foi projectada para funcionar em ambientes fechados, limpos, sem líquidos inflamáveis
e substâncias corrosivas e não excessivamente húmidos.
INTRODUÇÃO
As UPS da série HFR MILLENNIUM foram estudadas para garantir a máxima segurança e
fiabilidade na alimentação de sistemas informáticos independentemente das condições da rede
eléctrica.
O resultado foi obtido combinando uma lógica de comando "inteligente", controlada por um
potente microprocessador, com módulos de potência "on-line" modulares, que utilizam a
tecnologia PWM a alta frequência, para obter óptimos resultados em termos de precisão e com
baixo conteúdo harmónico na tensão de saída, rendimento, fiabilidade e funcionamento
silencioso.
A estrutura (HFR MILLENNIUM 820) também consente dispor da continuidade no fornecimento
da energia, embora com potência reduzida, também no caso de avaria do módulo de potência,
atingindo deste modo um nível muito elevado em termos de segurança de funcionamento.
Prestouse uma particular atenção na elaboração do projecto do andar de entrada que, além das
clássicas funções de filtro e controlo de linha, cumpre também a função de controlar a absorção
de corrente da rede tornando-a, em todo o caso, próxima a sinusoide ideal. Desse modo, são
67
eliminados os picos repetitivos de absorção próprios das fontes de alimentação utilizadas em
equipamentos informáticos, aumentando o factor de potência de entrada para valores próximos
do unitário (em conformidade com as normas europeias).
As principais prerrogativas desta inovadora linha de UPS (Uninterruptible Power Supply) podem
ser resumidas da seguinte maneira:
• Redundância (modelo 820).
• Funcionamento do tipo on-line com dupla conversão ( elevada rejeição às perturbações e às
interrupções da rede; ausência de comutações rede-bateria).
• Factor de potência de entrada praticamente unitário seja qual for o tipo de carga aplicada.
• Absoluta estabilidade da tensão de saída independentemente da carga e da tensão da rede.
• Gestão "inteligente" da carga / descarga das baterias em função da tensão da rede e da carga
aplicada.
• Elevada capacidade de arranque graças ao sobredimensionamento dos circuitos.
• Rendimento energético muito elevado.
• Funcionamento silencioso.
• Ausência de perturbações nos monitores.
• Absoluta ausência de manutenção.
• Saída para interface com o computador numa ligação série RS232 (CCITT V28) com
possibilidade de aceder aos parâmetros de funcionamento e ao histórico da UPS.
• Tomadas para a conexão do comando à distância e interface do computador com dois sinais
logicos.
DIAGRAMA DE BLOCOS
SAIDA
BY PASS
ENTRADA
~
=
~
=
FILTRO
DE ENTRADA
REGULADOR
DO FACTOR
DE POTENCIA
INVERTER
MïDULO
DE POTENCIA
=
=
BATTERIAS
SURVOLTORE
CORREGADOR DE
BATTERIAS
MODULO
DE POTENCIA
BATTERIAS
LOGICA
MICROPROCESSADOR
INTERFACE
RS232
COMANDO
à
DISTÂNCIA
68
PRINCÍPIO DE FUNCIONAMENTO
Em presença da rede eléctrica, a tensão de entrada ‚ é filtrada e rectificada por um andar de
entrada especial (regulador do factor de potência) capaz de absorver melhor a corrente que vem
da rede, tornando o factor de potência quase unitário e de compensar eventuais variações de
tensão; este estádio está apto a alimentar o inverter de saída também no caso de tensões de
rede muito inferiores ao valor nominal.
Esta característica aumenta com cargas muito baixas ao ponto de, com uma carga à volta de
50% da carga nominal, o aparelho poder funcionar pela rede até‚ cerca de 100V na rede sem
absorver energia das baterias.
Isto permite uma gestão "inteligente" da passagem à bateria que tem a finalidade de minimizar
a utilização dos acumuladores.
A tensão, rectificada pelo primeiro conversor, é utilizada depois por um Inversor de alta frequência
para gerar a tensão de saída sinusoidal "limpa" e com baixíssima distorção; um rápido circuito
de by-pass sincronizado intervém durante os picos de absorção, que superam a capacidade do
Inversor, tais como a ligação de periféricos próprios, a desmagnetização de monitores a cores de
grandes dimensões, etc.
A ausência da tensão de rede ou o seu excessivo abaixamento activam automaticamente uma
fase reguladora de tensão capaz, por meio das baterias, de assegurar a alimentação sem
interrupções no Inversor de saída e por consequência, na carga da saída.
O circuito ‚ de tipo neutro passante, de tal modo que não altera o regime de neutro das
aparelhagens conectadas ao mesmo.
Durante o funcionamento normal (se precedentemente habilitado via software), um sensor
verifica a diferença de potencial entre o condutor de neutro e aquele de terra e, no caso em que
resulte excessiva, activa a sinalização acústica..
Todas as funções da UPS, são supervisionadas por um microprocessador que também é capaz
de manter sob controlo e de memorizar particulares condições de funcionamento, além de gerir
o interface da UPS com um computador mediante a ligação série RS232.
Deste modo, é possível controlar em tempo real os parâmetros de funcionamento e as eventuais
anomalias.
69
LÉGENDA
1
2
3
4
5
6
7
8
9
10
3
BOTÃO DE ON/OFF
BOTÃO SILENCIADOR DO BEZOURO E ACTIVAÇÃO DO 8
TESTE À BATERIA
7
LED VERDE MAINS (presença de rede)
LED AMARELO BATTERY (funcionamento pela bateria)
LED VERMELHO ALARM (anomalia de funcionamento) 4
LED VERMELHO OVERLOAD (pré-aviso de sobrecarga,
6
ou sobrecarga)
LED AMARELO BY-PASS
LED VERDE INVERSOR
5
TOMADA-FICHA DE ENTRADA-SAÍDA
FICHA DE INTERFACE COM O COMPUTADOR RS232
1
2
INSTALAÇÃO
Atrás da UPS estão predispostas as seguintes ligações:
• Tomada-ficha de Entrada-Saída [9]: ligar a esta ficha de cablagem o cabo de alimentação e a
tomada de saída, tal como indicado na figura..
• Ficha para a conexão da interface serial do computador tipo RS232 (9 pólos fêmea) [10]: a ser
utilizada para aproveitar o software de autodiagnóstico UPS LINK.
• Duas tomadas para a conexão do comando à distância e interface do computador com dois
sinais lógicos (9 póles macho) [11]: a ser utilizado com as dispositivos respectivos (opcionais)
• Conector de ligaçao de baterias suplementares [13]
ADVERTÊNCIA
Por motivos de segurança‚ é aconselhável não alterar os cabos fornecidos, além disto, é
necessário garantir que na tomada da rede, na qual se efectua a ligação da UPS têm uma
perfeita ligação ao circuito de terra.
ADVERTÊNCIA
A tomada de alimentação da rede ou o dispositivo de seccionamento, devem ser instalados nas
proximidades do equipamento e devem ser facilmente acessíveis.
70
Efectue a instalação do seguinte modo:
1) Posicione a UPS de modo que as grelhas de ventilação não fiquem obstruídas.
2) Ligar à ficha de cablagem Entrada-Saída [9] o cabo de alimentação e a tomada múltipla de
saída (ver fig. 1).
3) Ligue as cargas na tomada de saída e verifique se os interruptores dos vários receptores
estão desligados.
4) Ligue a ficha de alimentação a uma tomada eléctrica adequada à tensão e à corrente
requerida.
Ligação
1) Ligue a UPS no botão [1] (consulte o
parágrafo
"Funções
e
sinalizações");Inicialmente
o
UPS 10 11
12
alimentará a saída directamente da rede
através do by-pass (sinalização do led
amarelo) [7] para depois comutar a
inverter depois de alguns segundos e
entrar no modo normal de funcionamento
(acendem-se os leds verdes MAINS [3] e
INVERTER [8]).
2) Ligue as cargas e verifique que, depois da
9
eventual intervenção do by-pass, o
aparelho retorna para o funcionamento
normal; nesta altura deverão estar acesos
o led verde MAINS [3] e o led verde
NA REDE
RETE
INVERTER [8]. No caso em que as cargas ALLA
ALLA RETE
ligadas são excessivas, a UPS
permanecerá activo o by-pass e o led
NA
AL CARGA
CARICO
vermelho OVERLOAD [6] emitirá um sinal
AL CARICO
intermitente.
3) Alguns instantes depois da ligação, a UPS
efectua automaticamente o teste das
baterias, para verificar o seu correcto
funcionamento (veja o parágrafo “Teste das baterias”).
14
13
Fig. 1
ADVERTENCIA
Nunca desligue a ficha de alimentação 230 V enquanto a UPS estiver em funcionamento, pois, esta
operação desliga a terra de protecção tanto da UPS como das cargas ligadas a ela.
ATENÇÃO
Visto que as correntes de fugas à terra, de todas as cargas se somam no condutor de protecção (fio
terra) da UPS, por motivos de segurança, respeitando a norma EN 50091-1-1 é necessário garantir que
a soma dessas correntes não ultrapassa o valor de 2,7 mA.
ADVERTÊNCIA!
A UPS possui um circuito de protecção contra um eventual erro de ligação, sinalizado pelo
acendimento fixo do led vermelho ALARM e pelo som contínuo do bezouro interno.
No caso em que esta sinalização se verifique logo depois da ligação da UPS, desligue imediatamente
a tomada de alimentação.
ATENÇÃO
Se depois de ter ligado todas as cargas for notada uma intermitência breve, cada 3 segundos, do led
vermelho OVERLOAD, isto significa que a carga ligada à UPS está no limite máximo permitido.
71
FUNÇÕES E SINALIZAÇÕES
Sinalizações luminosas:
Relativamente à figura da pág. 60, os indicadores luminosos possuem as seguintes funções:
3 Led verde MAINS
- aceso: rede regular, inversor sincronizado.
- intermitente: rede fora de tolerância, mas presente e suficiente para o correcto
funcionamento, ou inversor não sincronizado.
- apagado: rede ausente ou muito baixa em relação à carga.
8 Led verde INVERTER
- aceso: Inversor a funcionar.
- apagado: inversor desactivado ou avariado.
4 Led amarelo BATTERY
- aceso: funcionamento pela bateria.
- intermitente: reserva de baterias ou teste das baterias negativoou fim da autonomia.
- apagado: funcionamento pela rede.
5 Led vermelho ALARM
- aceso: bloqueio do funcionamento da UPS.
- intermitente: avaria de um ou mais módulos de potência.
- intermitência alternada breve-longa: ligação incorrecta do condutor de neutro da entrada
(com sensor de neutro habilitado).
- apagado: funcionamento normal.
6 Led vermelho OVERLOAD
- aceso: anomalias na tensão de saída.
- intermitente: sobrecarga na saída.
- apagado: funcionamento normal.
- intermitente breve cada 3 seg.: pré-aviso de sobrecarga.
7 Led amarelo BY-PASS
- aceso: by-pass activo (saída alimentada directamente pela rede).
- apagado: saída alimentada pelo Inversor.
Sinalizações acústicas:
• Som contínuo: UPS em bloqueio.
• Som intermitente lento (um bip cada 12 segundos): funcionamento com bateria.
• Som intermitente rápido: sobrecarga ou avaria.
• Som intermitente alternado breve-longo: reserva de autonomia ou teste das baterias negativo
ou ainda conexão errada do condutor de neutro (com sensor de neutro habilitado).
• Bip único: sinalização de ligação da UPS ou reconhecimento de pedido de teste das baterias
ou fim de teste das baterias com resultado positivo.
Comandos:
A UPS é controlada mediante dois botões na parte frontal; visíveis na figura da pág. 60.
1 Botão de ON/OFF:
- Premindo-o brevemente liga-se a UPS o que é evidenciado pela iluminação de todos os leds e
um breve sinal acústico (bip).
- Mantendo-o premido durante cerca de dois segundos desliga-se a UPS, o que é sinalizado pelo
som intermitente do bezouro.
2 Botão silenciador do bezouro/teste às baterias:
- Mediante breve pressão neste botão, é possível desactivar o bezouro. Desse modo, a
sinalização acústica em curso é anulada e o bezouro permanece em silêncio até‚ ser
necessário sinalizar um novo acontecimento.
- Mantendo-o premido durante cerca de dois segundos, ser requerido o teste às baterias; para
maiores detalhes consulte o respectivo parágrafo.
72
Advertências:
• Em condições normais de funcionamento permanecem acesos os leds verdes MAINS [3] e
INVERTER [8].
• Durante o funcionamento pela bateria permanecem acesos o led verde INVERTER [8] e o led
amarelo BATTERY [4].
• O funcionamento pela bateria ‚ sinalizado por um aviso acústico de ritmo lento (um bip cada
12 segundos). A reserva de autonomia, isto é o momento adequado para fechar todas as
aplicações de um computador que esteja a ser alimentado pela UPS‚ é indicado por um sinal
acústico intermitente alternado breve-longo, acompanhado por uma igual intermitência do led
BATTERY [4]. O fim da autonomia é assinalado pela intermitência do led amarelo "BATTERY"
e pelo som contínuo do buzzer, durante 15 segundos; nesta condução a carga já não é
alimentada.
• A intermitência do led vermelho OVERLOAD [6] indica a presença de carga excessiva na saída.
Neste caso, se houver presença de rede eléctrica, a carga é alimentada por esta última através
do by-pass, em caso contrário a UPS bloqueia-se após 15 segundos de sobrecarga contínua.
• A intermitência do led vermelho ALARM [5] indica a avaria de um ou mais módulos de potência
se a intermitência for rápida; uma anomalia na ligação da UPS (ou ligação do condutor de
neutro errada) se a intermitência for do tipo alternada breve-longa. No caso de neutro errado
inverter a direcção de introdução da ficha do cabo de alimentação do UPS.
• Em caso de bloqueio da UPS por qualquer anomalia, esta desliga-se automática e totalmente
depois de aproximadamente 15 segundos.
73
SOFTWARE AUTO-DIAGNÒSTICO UPS LINK
Conexão
A UPS possui um interface série standard RS232, graças à qual é possível ter acesso, através
de um computador, a uma série de dados relativos ao funcionamento e ao histórico da UPS. A
função é utilizável mediante o programa de interface UPS LINK para ambiente WINDOWS (*),
conectando uma porta série do PC na ficha de interface [10] situada no painel traseiro da UPS,
mediante um cabo RS232.
Instalação do software UPS LINK para WINDOWS (*)
Para instalar o software UPS LINK, efectue as seguinte operações:
1. Abra o WINDOWS (*).
2. Introduza a diskette de instalação que é fornecido com a UPS no drive A.
3. Seleccione File / Seleccione do menu principal Program Manager.
4. Na linha de comando digite: A:\SETUP e OK.
5. Aparece a janela de diálogo Select Directories onde se propõe o directório de instalação no
qual serão instalados os ficheiros do programa. Seleccione OK.
6. Aparece uma janela de informação que pede a confirmação do início da instalação. Seleccione
OK para iniciar ou CANCEL para abandonar a instalação.
7. No término da instalação cria-se um grupo denominado Meta System UPS LINK que contém‚
dois ícones:
- Meta System UPS LINK
: Programa de diagnóstico.
- Meta System UPS LINK Uninstaller : Programa para remover a instalação efectuada.
Depois de ter verificado que a UPS está ligada a uma porta serie livre do PC, faça duplo click
com o rato no ícone Meta System UPS LINK.
Para a instalação do software de interface (UPS Management Software), veja o manual
anexo ao CD-ROM
(*) Windows ‚ uma marca registada Microsoft Corporation.
PROGRAMAÇÃO DAS FUNÇÕES ESPECIAIS
Prima o botão SERVICE [11] situado no painel traseiro da UPS (com a UPS desligada); a UPS
emite um sinal acústico e mostra, nos leds do painel frontal, o estado das seguintes opções:
-
led
led
led
led
led
led
MAINS [3] aceso
BATTERY [4] aceso
BYPASS [7] aceso
INVERTER [8] aceso
OVERLOAD [6] aceso
PROTECTION [5] aceso
® Se o sensor de neutro estiver activado
® Se o reset automático estiver activado
® Se o Dip Speed estiver activado
® Se o modo Extended PLL Lock estiver activado
®Se o modo de espera de carga estiver activado
® Se estiver seleccionado o funcionamento a 60 Hz.
Ao premir o botão Silenciador do Bezouro [2] selecciona-se a função desejada (o led respectivo
emite um sinal intermitente).
Ao premir o botão ON/OFF [1] inverte-se o estado da função seleccionada; o led respectivo anula
o sinal intermitente, visualizando o novo estado.
Para sair do modo service, prima novamente o botão SERVICE [11] ou aguarde 30 segundos
depois da última pressão no botão.
74
1 - Sensor de Neutro
O sensor de neutro‚ permite inibir o funcionamento da UPS no caso em que o potencial do neutro
se afastar excessivamente do da terra; no momento da instalação permite saber se a posição
dos cabos de alimentação é o correcto, bloqueando o funcionamento em caso de erro; para
permitir a entrada em funcionamento basta inverter entre eles os cabos de Neutro e Fase da
entrada e ligar a UPS (a anomalia de neutro é sinalizada pela intermitência do led vermelho
PROTECTION acompanhada pelo som do bezouro). Função normalmente activada.
2 - Restart automático
Esta função permite obter novamente a ligação automática da UPS aquando do retorno da rede
depois de cada bloqueio por fim de autonomia. A ligação realiza-se em funcionamento normal
ou na modalidade pré-seleccionada, através do botão SERVICE. Função normalmente activada.
3 - Dip Speed
Esta função foi introduzida para a utilização com cargas que apresentem picos de arranque
breves e repetidos (por exemplo as impressoras laser). Com a sua actuação, a intervenção do
by-pass será retardada em 10 ms, permitindo à UPS superar os picos de arranque sem a
intervenção daquele. Nesse caso, aceita-se que o valor da tensão de saída da UPS se reduza
levemente durante um breve período inicial (todavia, sem comprometer o funcionamento dos
computadores eventualmente conectados). Função normalmente activada.
4 - Extended PLL Lock range
Permite ampliar a gama aceite da frequência da rede de ± 2% para ± 20% (é indicado para o
funcionamento com grupos electrogéneos). Função normalmente não activada.
5 - Modo de Espera de Carga (Load Waiting Mode)
A UPS pode ser configurada para funcionar em "Modo de espera de carga" (LWM). Este tipo
especifico de funcionamento permite obter a activação e a desactivação automática da UPS com
base na ligação da carga nela pendurada. Deste modo, o período de funcionamento da UPS fica
limitado ao tempo estritamente necessário para o trabalho dos utilizadores (inclusive quando
estas forem reguladas por procedimentos automáticos de ligar e desligar). Em particular, depois
de ter premido o botão ON/OFF, a UPS colocar-se-á numa posição de espera, alimentando a saída
directamente pela rede através do by-pass; nesta situação (sinalizada pela intermitência do led
amarelo BY-PASS) efectua também o eventual recarregamento das baterias. Se, nesta altura,
houver pedido de corrente à saída (introdução de uma carga) o relativo aumento de corrente será
detectado pelo microprocessador, que inicia os procedimentos de ligação, activa o inversor e
comuta do by-pass para o funcionamento normal, uma vez superado o período transitório da
carga. O desligar da carga posiciona a UPS em stand-by, predispondo uma nova ligação (no caso
de corte de rede de alimentação durante a fase de espera da carga, o microprocessador interno
desliga automaticamente a UPS para depois ligá-la novamente com o retorno da rede eléctrica,
a fim de proteger as baterias de descarregamentos desnecessários ). É possível programar o
limite de reconhecimento de ausência de carga, utilizando o software UPS LINK que é fornecido,
se houver um computador com sistema operativo WINDOWS (veja o parágrafo respectivo).
Função normalmente não activada.
6 - Funcionamento a 60 Hz
A UPS pode ser configurada para funcionar com frequência de rede a 60 Hz. Função normalmente
não activada.
75
INTERFACE COM SINAIS LÓGICOS E COMANDO À DISTÂNCIA
Atrás da UPS existem
duas tomadas com 9 pólos [13], perfeitamente idênticas e
intercambiáveis, que permitem a conexão do comando à distância (opcional) e/ou o envio de
sinais lógicos a computadores equipados com hardware e software adequados. Os sinais lógicos
estão electricamente isolados do resto da UPS e indicam se esta está a trabalhar pela rede ou
pela bateria e se as baterias estão em reserva de autonomia. São tipicamente utilizados para
informar o operador sobre o estado da UPS, de modo que os mesmos possam concluir os
procedimentos em curso antes que se esgote a autonomia da UPS evitando assim a perda de
dados. De um modo geral, com alguns sistemas operativos‚ é necessário dar comandos
apropriados ao computador antes de poder desligá-lo com segurança; o sinal de reserva de
autonomia pode ser utilizado para garantir, de modo automático, estes procedimentos.
Função dos pinos dos conectores para interface com sinais lógicos e comando à distância:
Pino 1: Entrada de tensão do controlo remoto (tensão máxima + 15V, mesmo efeito da
pressão do botão de ON/OFF do painel frontal)
Pino 2: + 15 V (Impedância 100 ½
Pino 3: Saída lógica Reserve 0/15 V (Impedância 2,2 K½)
1 2 3 4 5
Pino 4: Saída lógica Battery 0/15 V (Impedância 2,2 K½)
Pino 5: GND (Comum)
Pino 6: Saída para Bezouro com 7,5 kHz (Colector Aberto)
Pino 7: Saída Reserve (Colector Aberto activo à descida)
6 7 8 9
Pino 8: GND (Comum)
Pino 9: Saída Battery (Colector Aberto activo à descida)
Todos os pinos estão galvanicamente isolados dos circuitos do UPS.
TESTE ÀS BATERIAS
O teste às baterias pode ser efectuado durante o funcionamento pela rede das seguintes
maneiras:
1. Automaticamente, depois de uma adequada programação mediante o software ”UPS
Management Software“ que é fornecido com a UPS.
2. Mantendo pressionado, por cerca de dois segundos, o botão silenciador do bezouro [2].
3. Em cada ligação da UPS através do software que é fornecido “UPS LINK”
Quando for reconhecido o pedido, a UPS emite um breve sinal acústico (bip), depois disto, se
houver presença de rede e não existirem condições anómalas tais como sobrecarga, neutro
errado ou outros motivos, o teste é efectuado, caso contrário o comando é ignorado.
No fim do teste, podem ter-se as seguintes indicações nos leds do painel frontal:
5 leds intermitentes = bateria 100% carregada
4 leds intermitentes = bateria 80% carregada
3 leds intermitentes = bateria 60% carregada
2 leds intermitentes = bateria 40% carregada
1 led intermitente = bateria 20% carregada
1 led intermitente + sinalização acústica = bateria com carga inferior a 20%.
O teste‚ é efectuado no modo de funcionamento pela rede (isto é, sem comutação forçada com
bateria), graças a um particular circuito patenteado pela META SYSTEM; portanto, mesmo no
caso de teste com resultado negativo não se verificam interrupções na corrente de saída.
76
1) Desligar o grupo de continuidade
2) Desligar o cabo de alimentação da tomada de corrente
A abertura , a reparação ou a substituição das partes internas do UPS requer sempre a
intervenção de pessoal técnico especializado.
Antes de se efectuar qualquer operação desligar o UPS agindo através do botão ON/OFF
situado na parte dianteira do UPS e desligando o cabo de ligação à tomada de corrente 230V.
3) Retirar a tampa lateral esquerda desaparafusando os 5 parafusos que se encontram no
bordo do mesma.
4) Extrair o fusível do seu alojamento usando uma chave de parafusos como alavanca, verificar
o seu estado e, se necessário, substituir por outro dotado das mesmas características.
5) Montar novamente a tampa antes de por a aparelhagem a funcionar novamente.
77
EVENTUAIS PROBLEMAS E SOLUÇÃO
PROBLEMAS
SOLUÇÕES
• Quando se liga o UPS o buzzer toca uma vez e
acende-se com intermitência o led vermelho ALARM
com intermitência de tipo alternado breve-longo e
depois 15 segundos apaga-se.
- A ligação do condutor de neutro està errada: girar a
ficha de alimentação, ou excluir o sensor de neutro
(através do software UPS Ling em dotação).
• O UPS funciona mas cada 12 segundos emite um
sinal acústico breve e o led amarelo BATTERY está
sempre aceso.
- Verificar que exista corrente na tomada de tensão de
rede.
- Controlar que o cabo de alimentação do grupo de
continuidade esteja perfeitamente inserido na
tomada de rede e na ficha de ligação ao próprio
grupo.
- Verificar o estado do fusível de entrada (ver capítulo
"substituição fusível de linha").
• O UPS funciona e emite um sinal acústico
intermitente, acende-se com intermitência o sinal
vermelho OVERLOAD + led amarelo BY-PASS
- Encontra-se presente uma sobrecarga na saída do
UPS. Reduzir o número de aparelhagens ligadas de
modo que a carga não supere a potência máxima
fornecida pelo grupo de continuidade.
• O UPS emite um sinal acústico constante, acende-se
com intermitência o sinal luminoso amarelo
BATTERY durante cerca 15 segundos e a seguir o
grupo apaga-se.
- O grupo descarregou completamente as baterias,
pode partir novamente somente se se encontra
presente a linha de entrada.
Controlar os interruptores magneto-térmicos ou
diferenciais a montante do grupo e o fusível de
entrada (ver capítulo "substituição fusível de linha").
• O UPS funciona mas o led verde MAINS acende-se
com intermitência rápida.
-
• O UPS emite um sinal acústico intermitente e o led
vermelho ALARM acende-se com intermitência
rápida.
A rede encontra-se fora dos limites consentidos
como tensão e/ou como frequência mas ainda pode
ser utilizada pelo UPS. No entanto não é disponível
a função de by-pass.
- Interveio a protecção térmica. Desligar o grupo de
continuidade e aguardar alguns minutos de modo
que a temperatura interna do UPS se normalize.
Verificar o funcionamento correcto da ventoinha e
que o respectivo fluxo de ar não seja impedido (ex.
grupo demasiado perto de uma parede).
- Verificou-se uma avaria em qualquer circuito interno.
Se durante uma situação de avaria os leds OVERLOAD e/ou BY-PASS não se acenderem, a UPS
é capaz de funcionar regularmente, mesmo com a potência reduzida.
78
CARACTERISTICAS TÉCNICAS
Especificações
de fabricação
Pesos (Kg)
HFR MILLENNIUM
810
HFR MILLENNIUM
820
23
33
145 x 410 x 595 mm
Dimensões (L x A x P)
Tecnologia
PWM de alta frequência quer para o bloco de entrada quer para o de saída.
Lógica de controlo por microprocessador.
Interface computador
Serial RS232 standard para a ligação com PC através do software autodiagnóstico em dotação,
saída sobre ficha de 9 pinos fêmea isolada SELV.
Comando à distância
Saída em conector embutido com 9 pólos macho isolado SELV, por ligação com comando à distância
opcional. Possibilidade de ligar e desligar por programação e visualizações das principais sinalizações da
UPS.
Protecções
Electrónicas contra sobrecargas, curto-circuito e descarga excessiva das baterias. Bloqueio do
funcionamento por fim de autonomia. Limitador de picos de arranque na ligação. Sensor de ligação
correcta do neutro. Back-feed protection (isolamento eléctrico de segurança da ficha de entrada
durante o funcionamento pela bateria).
By-pass sincronizado
Quer manual quer automático. Intervenção por causa de sobrecarga ou anomalia de
funcionamento.
Especificações ambientais
Altitude máx. de armazenagem
10.000 metros
Gama temperatura de armazenagem
de -20°C à +50°C
Gama temperatura de funcionamento
de 0°C à +40°C
Gama humidade relativa de
funcionamento
de 20% a 80% não condensadora
IP21
Grau de protecção (IEC529)
Ruído acústico a 1 metro
42 dB (A)
Características eléctricas de entrada
Tensão nominal de entrada
230 V
Gama da tensão de entrada
de 184 V a 264 V com carga nominal - de 110 V a 264 V com 50% da carga nominal.
Frequência nominal de entrada
50Hz / 60Hz ±2% selecionável pelo utilizador
Corrente nominal de entrada
3,7A rms
7,1A rms
Corrente máxima de entrada
4,5A rms
8,9A rms
<10%
Distorção da corrente de entrada
com carga nominal
Factor de potência de entrada
>0,99 (com 80% de carga)
Corrente de arranque
100% da corrente nominal
Monofásica
Número das fases de entrada
Fusível de rede
12A FF
79
Especificações
de fabrico
HFR MILLENNIUM
810
HFR MILLENNIUM
810
Forma de onda de saída
Em funcionamento com rede
Sinusoidal
Em funcionamento com bateria
Tipo de funcionamento
Sinusoidal
UPS tipo no-break, on-line, com neutro passante de dupla conversão.
Características eléctricas de saída em funcionamento pela rede
Tensão nominal de saída
230 V ±1%
Frequência nominal de saída
Corrente de saída com carga
linear com factor de potência 0.7
50Hz / 60Hz sincronizada
4 ,35A rms
8,7A rms
Factor de pico na corrente de saída
3,5
Potência nominal de saída
Potência activa de saída com
carga linear ou não linear P.F. 0,7
1000 VA
2000 VA
700 W
1400 W
Potência de funcionamento com cargas comutadas
1400 VA
2800 VA
Distorção harmónica total
da tensão de saída com carga linear
<0.5%
Distorção harmónica total
da tensão de saída com
carga não linear P.F. 0,7
Capacidade de sobrecarga
< 1%
300% por 1 segundo sem intervenção do do by-pass2
200% por 5 segundos sem intervenção do do by-pass
Gama do factor de potência
da carga aplicada
de 0,7 a 1
Número das fases de saída
Monofásica
Rendimento de conversao AC-AC
com carga linear P.F. 1 e baterias
carregadas
com 50% da carga
com 75% da carga
com 100% da carga
80%
84%
90%
Características eléctricas de saída em funcionamento pela bateria
Tensão nominal de saída
230V ±1%
Frequência de saída
Potência nominal de saída
50Hz / 60Hz ±1%
1000 VA
2000 VA
Potência activa de saída com
carga linear ou não linear P.F. 0,7
700W
1400 W
Potência de funcionamento com
cargas comutadas
1400VA
2800VA
Distorção harmónica total
da tensão de saída
< 1%
Capacidade de sobrecarga
160% por 15 segundos
Gama permitida do factor de
potência da carga aplicada
de 0,7 a 1
Rendimento de conversão DCAC com carga linear P.F. 1
com 50% da carga
com 75% da carga
com 100% da carga
80%
80%
80%
80
Funcionamento pela bateria
UPS standard
Carga aplicada em percentagem
Autonomia prevista em minutos com baterias carregadas
Tempo de recarga até 90%
da carga total
Dados técnicos e quantidade das
baterias
Aviso de reserva
HFR MILLENNIUM
810
HFR MILLENNIUM
810
50%
80%
100%
50%
80%
100%
22
10
7
22
10
7
5 - 6 horas segundo o nível de descarga alcançado
(na configuração standard)
3 baterias de chumbo-ácido seladas
sem manutenção, 12 V 7Ah ligadas em série para cada módulo.
de 33.2V a 36V, programável pelo utilizador.
Tensão mínima de funcionamento
com baterias durante a descarga
de 27V a 31,5 V com selecção automática em função da carga aplicada, ou programável pelo
utilizador.
Tempo médio de vida das
baterias
3 - 6 anos segundo a utilização e a temperatura de funcionamento das baterias.
Atenção !
As baterias contidas na UPS, estão sujeitas a uma diminuição de capacidade em função do
tempo de vida (característica própria das baterias de chumbo declarada pelo fabricante no
manual técnico). Por exemplo: a diminuição de capacidade de uma bateria com 4 anos de
vida pode chegar até 40% com a consequente redução proporcional do tempo de autonomia
da UPS em funcionamento pela bateria.
Características do by-pass
Tipo de by-pass
Electromecânico
Normas
Segurança:
projectada para satisfazer a norma
EN 50091-1-1
Compatibilidade electromagnética:
Imunidade
Emissoes
Cumpre a norma EN 50091-2
Cumpre a norma EN 50091-2
81
82
service ou l’arrêt de l’onduleur en fonction du niveau de courant consommé par la charge. Le temps
de fonctionnement des composants de l’étage de conversion Continu/Alternatif est ainsi réduit à la
durée réelle d’exploitation de l’onduleur (même lorsque ceux-ci sont réglés par des procédures
automatiques de marche/arrêt).
Après avoir programmé l’onduleur en mode veille, appuyez sur la touche ‘MARCHE / ARRET’. La charge
est alors alimentée par le secteur via le by-pass du HFR LINE (Clignotement de la LED jaune ‘BYPASS’). Les batteries sont toujours maintenues en charge et le fonctionnement est considéré comme
normal. L’augmentation du courant en sortie (mise en service de l’utilisation) détectée par le
microprocesseur, entraîne instantanément le démarrage de l’étage de conversion Continu/Alternatif,
la charge est reprise par l’onduleur (LED jaune ‘BY-PASS’ éteinte).
Suite à l’arrêt des matériels raccordés en aval (baisse de courant en sortie), le HFR LINE revient en
mode veille ‘Attente de Charge’. Lors d’une coupure secteur pendant la phase ‘Attente de Charge’,
l’onduleur programmé pour préserver ses batteries de toute décharge inutile s’arrête pour se
redémarrer quand la secteur revient. Le seuil de détection ‘Attente de Charge’ peut être modifié à
l’aide du logiciel de surveillance et d’exploitation ‘UPS LINK’ fourni en dotation, par votre microordinateur avec système WINDOWS (Cf. chapitre spécifique). Fonction normalement non activée.
6 - Fonctionnement à 60 Hz
L’onduleur HFR LINE peut être programmé pour délivrer une fréquence en sortie de 60 Hz. Fonction
normalement non activée.
83
2 - Autorestart
Diese Funktion gestattet das automatische Wiedereinschalten der USV bei der Rückkehr der
Spannung nach jedem Blockieren aufgrund des Endes der Kapazität. Das Wiedereinschalten
erfolgt mit der normalen Betriebsweise oder aber mit der Modalität, die mit der Taste SERVICE
gewählt wurde. Die Funktion ist normalerweise eingeschaltet.
3 - Dip Speed
Diese Funktion gestattet die Benutzung mit Lasten, die kurze, wiederholte Leistungsspitzen
aufweisen (zum Beispiel Laserdrucker). Durch das Einsetzen wird der Eingriff des Bypass um 10
ms verzögert und die USV kann die kurzen Leistungsspitzen so ohne Eingriff des Bypasses
überbrücken. In diesem Fall wird in Kauf genommen, daß die Ausgangsspannung der USV
während dieses kurzen Zeitraums leicht abfällt (ohne das dadurch jedoch der Betrieb der
gegebenenfalls angeschlossenen Computer beeinträchtigt wird). Die Funktion ist normalerweise
eingeschaltet.
4 - Extended PLL Lock range
Gestattet die Ausdehnung des Frequenzbereiches des Netzes von ±2% auf ±20% (für den Betrieb
mit einer Speisung von Stromaggregaten). Die Funktion ist normalerweise nicht eingeschaltet.
5 - Load Waiting Mode
Die unterbrechungsfreie Stromversorgung kann für den Betrieb im “Load Waiting Mode” (LWM)
konfiguriert werden. Diese besondere Betriebsweise gestattet ein automatisches Ein- und
Ausschalten der USV bei Einschalten der angeschlossenen Last. Auf diese Weise wird der Betrieb
der unterbrechungsfreien Stromversorgung auf die für die Arbeit der Verbraucher erforderliche Zeit
reduziert (auch wenn diese von automatischen Ein- und Ausschaltzyklen gesteuert werden). Nach
dem Drücken der Einschalttaste stellt die USV sich in eine Wartestellung und speist den Ausgang
über den Bypass direkt vom Netz; dabei (angezeigt durch das Blinken der gelben Led BY-PASS)
wird gegebenenfalls auch die Batterie nachgeladen. Falls dabei eine Leistungsaufnahme am
Ausgang vorhanden ist (Einschalten der Last), so wird der Anstieg der Stromstärke von einem
Mikroprozessor festgestellt, der die USV einschaltet, den Inverter betätigt und den Bypass in die
normale Stellung umschaltet, nachdem die Spitze beim Einschalten der Last überwunden ist. Das
Abschalten der Last stellt die USV in die Wartestellung zurück und bereitet sie für das
Wiedereinschalten vor (Beim Ausfall der Spannung, während die USV sich in Wartestellung
befindet, schaltet der interne Mikroprozessor die USV automatisch ab, um sie dann bei der
Rückkehr der Spannung wieder einzuschalten, um die Batterie vor unnötigen Entladungen zu
schützen.) Es ist möglich, die Lastschwelle mit der mitgelieferten Autodiagnosesoftware UPS LINK
zu programmieren, falls ein Computer mit Betriebssystem WINDOWS vorhanden ist (siehe
entsprechender Abschnitt). Die Funktion ist normalerweise nicht einschaltet.
6 - Betrieb mit 60 Hz
Die unterbrechungsfreie Stromversorgung kann für einen Betrieb mit einer Leitungsspannung
mit 60 Hz konfiguriert werden. Die Funktion ist normalerweise nicht eingeschaltet.
84
1 - Sensor de Neutro
O sensor de neutro‚ permite inibir o funcionamento da UPS no caso em que o potencial do neutro
se afastar excessivamente do da terra; no momento da instalação permite saber se a posição
dos cabos de alimentação é o correcto, bloqueando o funcionamento em caso de erro; para
permitir a entrada em funcionamento basta inverter entre eles os cabos de Neutro e Fase da
entrada e ligar a UPS (a anomalia de neutro é sinalizada pela intermitência do led vermelho
PROTECTION acompanhada pelo som do bezouro). Função normalmente activada.
2 - Restart automático
Esta função permite obter novamente a ligação automática da UPS aquando do retorno da rede
depois de cada bloqueio por fim de autonomia. A ligação realiza-se em funcionamento normal
ou na modalidade pré-seleccionada, através do botão SERVICE. Função normalmente activada.
3 - Dip Speed
Esta função foi introduzida para a utilização com cargas que apresentem picos de arranque
breves e repetidos (por exemplo as impressoras laser). Com a sua actuação, a intervenção do
by-pass será retardada em 10 ms, permitindo à UPS superar os picos de arranque sem a
intervenção daquele. Nesse caso, aceita-se que o valor da tensão de saída da UPS se reduza
levemente durante um breve período inicial (todavia, sem comprometer o funcionamento dos
computadores eventualmente conectados). Função normalmente activada.
4 - Extended PLL Lock range
Permite ampliar a gama aceite da frequência da rede de ± 2% para ± 20% (é indicado para o
funcionamento com grupos electrogéneos). Função normalmente não activada.
5 - Modo de Espera de Carga (Load Waiting Mode)
A UPS pode ser configurada para funcionar em "Modo de espera de carga" (LWM). Este tipo
especifico de funcionamento permite obter a activação e a desactivação automática da UPS com
base na ligação da carga nela pendurada. Deste modo, o período de funcionamento da UPS fica
limitado ao tempo estritamente necessário para o trabalho dos utilizadores (inclusive quando
estas forem reguladas por procedimentos automáticos de ligar e desligar). Em particular, depois
de ter premido o botão ON/OFF, a UPS colocar-se-á numa posição de espera, alimentando a saída
directamente pela rede através do by-pass; nesta situação (sinalizada pela intermitência do led
amarelo BY-PASS) efectua também o eventual recarregamento das baterias. Se, nesta altura,
houver pedido de corrente à saída (introdução de uma carga) o relativo aumento de corrente será
detectado pelo microprocessador, que inicia os procedimentos de ligação, activa o inversor e
comuta do by-pass para o funcionamento normal, uma vez superado o período transitório da
carga. O desligar da carga posiciona a UPS em stand-by, predispondo uma nova ligação (no caso
de corte de rede de alimentação durante a fase de espera da carga, o microprocessador interno
desliga automaticamente a UPS para depois ligá-la novamente com o retorno da rede eléctrica,
a fim de proteger as baterias de descarregamentos desnecessários ). É possível programar o
limite de reconhecimento de ausência de carga, utilizando o software UPS LINK que é fornecido,
se houver um computador com sistema operativo WINDOWS (veja o parágrafo respectivo).
Função normalmente não activada.
6 - Funcionamento a 60 Hz
A UPS pode ser configurada para funcionar com frequência de rede a 60 Hz. Função normalmente
não activada.
85