1
Troubleshooting
•If there are no items on the platform, but the LCD does not show zero, press
the “On/Tare” key to reset the scale to zero.
•Overload Warning: Should “Err” appear on the display during a weighing,
this indicates that the maximum weighing capacity of the scale has been
exceeded. Remove the weight immediately; otherwise, permanent damage
could occur.
Precautions
This scale is engineered to give you years of satisfactory service if you handle it
carefully. Here are a few precautions:
1. Always read instructions thoroughly to ensure that you have the full benefit
of all the unit's features.
2. DO NOT immerse unit in water, as doing so will cause damage to internal
components and void the warranty. If you spill liquid on it, dry it
immediately with a soft, lint-free cloth.
Capacity: 22 lbs or 10 kgs
Graduation: 0.1 oz (0-11lbs) or 2 g (0-5 kgs) ;
0.2 oz (11-22 lbs) or 5 g (5-10 kgs)
Dimensions: 7 5/8" x 7 3/4" x 1 3/4"
Platform size: 7 1/4" x 4 5/8"
LCD digits: 0.75 inch
LCD Type: 7 segment
Operates on: AC adapter (included) or one 9-volt battery (not included)
7. This scale is an extremely sensitive weighing device. To avoid damage to
the unit or the battery, do not store anything on the scale.
8. This scale operates on one 9-volt battery (not included). Do not dispose of
this scale or batteries in fire, as the batteries may explode or leak. Remove
the battery if the scale will not be used for a long period of time.
Dépannage
• S'il n'y a pas d'items sur le plateau, mais que l'afficheur ACL n'indique pas
zéro, appuyez sur la touche "ON/TARE" pour remettre la balance à zéro.
• Avertisseur de surcharge: Si "Err" apparaît sur l'afficheur ACL durant une
opération de pesage, ceci signifie que la capacité maximale de la balance a
été dépassée. Enlevez immédiatement l'item se trouvant alors sur le plateau
de la balance, à défaut de quoi des dommages permanents à la balance
pourraient s'ensuivre.
Précautions
Cette balance a été conçue et fabriquée afin de vous procurer des années de
satisfaction si vous en prenez soin adéquatement. Voici quelques mesures
préventives qui vous permettront d'en profiter longtemps:
1. Toujours lire le guide d'utilisation afin de permettre de soutirer le maximum
des possibilités de l'appareil.
2. NE PAS immerger l'appareil dans l'eau, puisque ceci entraînera des
dommages aux composantes internes et annulera la garantie. Si vous
répandez du liquide sur la balance, essuyez-la immédiatement avec un
linge doux et non-pelucheux.
3. NE PAS nettoyer l'appareil avec des matériaux abrasifs ou corrosifs. Ceci
peut rayer les composantes en plastique de l'appareil, et corroder les
circuits électroniques.
4. NE PAS soumettre l'appareil à une force abusive, à des chocs, à la
poussière, et à des extrêmes de température et d'humidité. Ceci pourrait
causer un mauvais fonctionnement de l'appareil, une déformation des
pièces, une diminution de la durée de vie des composantes électroniques,
ou des dommages à la pile.
5. NE PAS utiliser ou entreposer l'appareil dans des conditions de
température ou d'humidité élevées. La chaleur et l'humidité peuvent
affecter les composantes internes de la balance.
6. NE PAS tenter de modifier ou réparer vous-mêmes les composantes
internes de l'appareil. Ceci annulera la garantie et pourrait causer des
dommages. Cet appareil ne contient aucune pièce pouvant être réparée
par l'utilisateur.
7. Cette balance un appareil de mesure d'une très grande sensibilité. Afin
d'éviter tout dommage à l'appareil ou à la pile, ne rien entreposer sur le
plateau de la balance.
8. Cette balance fonctionne grâce à une pile de 9 volts (non incluse). Ne pas
jeter cet appareil ou les piles au feu, puisque les piles peuvent exploser ou
engendrer des fuites de produits corrosifs. Enlever la pile si l'appareil n'est
pas utilisé durant une période de temps prolongée.
Leading the Way in Accuracy ®
This product is warranted against defects in materials or workmanship for
one (1) year for the original purchaser from date of original purchase. It
does not cover damages or wear resulting from accident, misuse, abuse, or
unauthorized adjustment and/or repair. Should this product require service
(or replacement at our option) while under warranty, please pack the item
carefully and return it prepaid, along with receipt showing date of purchase
and a note explaining reason for return to:
Taylor Precision Products
2220 Entrada Del Sol, Suite A
Las Cruces, New Mexico 88001 USA
Customer Service Phone: 1-800-225-4834
Customer Service Fax: 1-505-526-4347
www.taylorusa.com
4. DO NOT subject the units to excessive force, shock, dust, temperature or
humidity. This may result in malfunction, shorter electronic life span,
damaged battery and distorted parts.
6. DO NOT tamper with the unit's internal components. Doing so will
invalidate the warranty on the units and may cause damage. The unit
contains no user-serviceable parts.
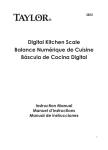
Digital Scale
One Year Limited Warranty
3. DO NOT clean the unit with an abrasive or corrosive material. This may
scratch the plastic parts and corrode the electronic circuits.
5. DO NOT operate or store the scale in high temperature or humidity
conditions. The heat or moisture may interfere with the scale's internal
components.
TE22
Specifications
There are no expressed warranties except as listed above. This warranty
gives you specific legal rights, and you may also have other rights which
vary from state to state.
For additional product information, or warranty information in Canada or
elsewhere outside the USA, please contact us through www.taylorusa.com
©2008 Taylor Precision Products and its affiliated companies, all rights reserved.
Taylor® and Leading the Way in Accuracy® are registered trademarks of Taylor
Precision Products and its affiliated companies. All rights reserved.
Made to our exact specifications in China.
NOT LEGAL FOR TRADE
TE22 - 2.08
Spécifications
Capacité:
Échelle:
22 lb ou 10 kg
0.1 oz (0-11 lb) ou 2 g (0-5 kg);
0.2 oz (11-22 lb) ou 5 g (5-10 kg)
Dimensions:
7 5/8" x 7 ¾" x 1 ¾"
Dimensions du plateau:
7 ¼" x 4 5/8"
Chiffres ACL:
0,75"
Type ACL:
à 7 segments
Alimentation électrique: Adaptateur CA (inclus) ou une pile de 9 volts
(non incluse)
Instruction Manual
Thank you for purchasing a Taylor ® Digital Scale. Your Taylor® Scale is an
example of superior design and craftsmanship. In order to optimize its
function, be sure to read this instruction manual carefully before use. Keep
these instructions handy for future reference.
TE22
Balance Numérique
Leading the Way in Accuracy ®
Garantie limitée d'un an
Taylor® garantit que ce produit est libre de tout défaut de matériaux ou de
main d'oeuvre pour une période d'un (1) an pour l'acheteur original à partir
de la date d'achat original. Elle ne couvre pas les dommages ou l'usure
suite à un accident, une mauvaise utilisation, tout abus, utilisation
commerciale ou réglage interdit et/ou réparation interdite. Si ce produit
doit être réparé (ou remplacement à notre discrétion) alors que la garantie
est encore en vigueur, veuillez l'emballer avec soin et le retourner à frais
prépayés avec la facture indiquant la date d'achat et une note expliquant la
raison du retour à l'adresse suivante:
Taylor Precision Products
2220 Entrada Del Sol, Suite A
Las Cruces, New Mexico 88001 USA
Numéro de téléphone du service à la clientèle: 1-800-225-4834
Numéro de fac-similé: 1-505-526-4347
www.taylorusa.com
Il n'y a aucune garantie expresse sauf celle indiquée précédemment. Cette
garantie vous donne des droits précis, mais vous pouvez aussi avoir d'autres
droits qui varient d'une juridiction à l'autre.
Pour de l'information supplémentaire sur le produit ou sur la garantie au
Canada ou ailleurs à l'extérieur des É.-U. veuillez nous contacter par
www.taylorusa.com
©2008 Taylor Precision Products et ses sociétés affiliées, tous droits réservés. Taylor®
et Leading the Way in Accuracy® sont des marques de commerce déposées de Taylor
Precision Products et ses sociétés affiliées. Tous droits réservés.
Fabriqué en Chine selon nos spécifications exactes.
Ne peut être négocie.
Manuel d'instructions
Merci de votre achat d'une balance numérique Taylor®. Votre balance
Taylor® est un exemple de design et de travail supérieurs. Afin d'en soutirer
le maximum, veuillez lire attentivement votre manuel d'instructions avant
d'utiliser l'appareil. Conservez ces instructions à portée de la main à titre de
référence.
To Ready Scale for Use
1. Remove the scale from its box along with its platform assembly.
2. Place the scale on a hard, flat surface. Uneven surfaces will affect
accuracy.
3. Install the platform assembly onto the scale by matching the platform
posts with the mating holes on top of the scale. Remove any protective
film from the platform.
Power Sources
This scale operates on an AC adapter (included) or one 9-Volt alkaline battery
(not included).
Electrical Power
To power the scale using the AC adapter, insert the connector plug into the
jack at the back of the scale, then plug the other end into the proper
electrical outlet.
Battery Power
1. To power the scale with a 9-Volt alkaline battery, remove the battery
compartment cover from the bottom of the scale.
2. Attach the battery to the 9-Volt battery snap, then place the battery into
the compartment.
3. Replace the battery compartment cover.
4. Replace the battery when “Lo” appears on the LCD.
5. Remove the battery if the scale will not be used for a long period of time.
General Weighing Operation
1. Place the scale on a hard, level surface.
2. Press the “ON/TARE” button to turn the scale on. The display first shows
“88888”, followed by “0.0” (oz) or “0” (g). If the display does not show
zero, press the “ON/TARE” button to reset (tare) the scale to zero.
3. The scale is set at the factory to weigh in pounds/ounces. While the scale
is on, press the UNIT button to switch to kilogram/gram units of
measurement. (Note: The scale will reset to pounds/ounces when it turns
off.)
4. Place the item to be weighed onto the platform. The display will count up
to the weight of the item. As you add weight, the weight displayed
increases. When all the weight is removed, the display will return to zero.
5. The scale will automatically turn off after approximately 2 minutes of
nonuse (if the auto off function is engaged). Press the “OFF” button to
turn the scale off manually.
Préparation de la balance
1. Retirez la balance, ainsi que les pièces composant son plateau, de la boîte.
2. Placez la balance sur une surface rigide et horizontale. L'utilisation de la
balance sur une surface inégale affectera la précision de l'appareil.
3. Installez le plateau sur la balance, en alignant les tenons sous le plateau et les
trous correspondants sur le dessus de la balance. Enlevez toute pellicule
protectrice du plateau.
Sources d'alimentation électrique
Cette balance fonctionne lorsque branchée à une prise de courant régulière à
l'aide d'un adaptateur courant alternatif (ou CA, inclus) ou à l'aide d'une pile
alcaline de 9 volts (non incluse).
Alimentation par branchement à une prise de courant
Pour utiliser votre balance en utilisant l'adaptateur CA, insérez le connecteur de
l'adaptateur dans le connecteur situé à l'arrière de la balance, puis branchez
l'adaptateur dans une prise de courant.
Alimentation par pile
1. Pour utiliser votre balance en utilisant une pile de 9 volts comme source
d'alimentation, enlevez le couvercle du compartiment de la pile situé sous la
balance.
2. Reliez les bornes de la pile à celles du connecteur situé dans le compartiment, et
placez ensuite la pile dans le compartiment.
3. Replacez le couvercle du compartiment de la pile.
4. Remplacez la pile lorsque "Lo" apparaît sur l'afficheur à cristaux liquides (ACL)
5. Enlevez la pile si la balance n'est pas utilisée pour une période de temps
prolongée.
Fonctionnement Général de Pesée
Placez la balance sur une surface rigide et horizontale.
1. Appuyez sur la touche "ON/TARE" pour mettre la balance sous tension.
L'affichage indiquera d'abord "88888", suivi de "0.0" (oz) ou "0" g. Si
l'affichage n'indique pas zéro, appuyer à nouveau sur la touche
"ON/TARE" pour réinitialiser la balance à zéro.
2. La balance est réglée en usine indiquer les poids en livres/onces. Pour
modifier l'affichage au système métrique (i.e. kilogrammes/grammes),
appuyez sur la touche UNIT lorsque la balance est sous tension (Note: la
balance sera réinitialisée au système livres/onces lorsqu'elle sera mise
hors tension).
3. Placer l'item à peser sur le plateau. Les chiffres de l'afficheur ACL
changeront jusqu'à ce que l'affichage indique le poids de l'item. Au fur et
à mesure que vous ajouterez des items sur le plateau, le poids indiqué
augmentera. Lorsque tous les items auront été enlevés du plateau,
l'affichage indiquera à nouveau zéro.
4. La balance se mettra automatiquement hors tension après 2 minutes
d'inactivité (si la fonction "auto off" est activée). Appuyez sur la touche
"OFF" pour mettre la balance hors tension manuellement.
Tare Operation
You may wish to weigh ingredients in a bowl or other container (not
included). In this case, you will need to tare, or offset, the weight of the bowl
so that only the weight of the ingredients is displayed.
1. Choose a container that will safely balance on the platform without
tipping or falling. Do not use a heavy container, as this might reduce the
maximum capacity of the scale.
2. While the scale is off, place the empty container on the scale platform.
Turn the scale on. The display will show “88888” then “0.0”. The weight
of the container has been zeroed out.
3. Add the ingredient to be weighed. The weight of the ingredient alone will
display.
4. The weight of additional ingredients may be tared out as well. For
example, to measure ½ lb rice and ½ lb beans together, place the rice
into the bowl. Once the correct amount of rice is weighed, press the
“ON/TARE” button until the display resets to zero. Add ½ lb of beans.
Both ingredients have been accurately weighed in the same bowl.
5. When weights have been tared out, the display will show “----“ when the
items are removed from the scale. To reset the scale back to zero for a
new measurement, simply press the “ON/TARE” button again. The scale
will reset to zero.
Hold Function
When the “HOLD” function is turned on, the LCD screen will continue to
display the weight for thirty (30) seconds after the weight is removed from
the platform.
To turn on the Hold function:
1. While the scale is on, press the “HOLD” button. A small blinking triangle
icon appears in the upper right corner of the LCD.
2. Place the item to be weighed on the platform. When the weight is locked
in, the triangle will stop blinking, indicating the weight will be “held” on
the LCD when the item is removed. The weight will display for
approximately 30 seconds before the scale turns off automatically.
3. To release the hold function before the scale shuts off, press the “HOLD”
button. The LCD will return to zero. The scale may be turned off
manually by pressing the “OFF” button. The Hold function is
automatically disabled when the scale turns off.
Note: The “HOLD” function can only operate if the weight is stable on the
platform. If the triangle icon continues to blink, this indicates the item is not
stable and the scale cannot lock in the weight. First, check to see that the
scale platform rests properly on the scale. If the triangle icon continues to
blink, move the item slightly on the platform until the icon locks in, indicating
the Hold function is operating.
Opération de Tarage
Vous pouvez vouloir peser des ingrédients dans un bol ou un autre
contenant (non inclus). Dans ce cas, vous devez déduire le poids du bol ou
du contenant de sorte que seul le poids des ingrédients sera affiché (le terme
français pour ce type d'opération est "tarage").
1. Choisissez un contenant dont la forme et la grandeur lui permettent d'être
en équilibre stable sur le plateau de la balance. N'utilisez pas un
contenant trop lourd qui réduirait la capacité maximum de la balance.
2. Alors que la balance est hors tension, placez le contenant vide sur le
plateau de la balance. Mettre la balance sous tension. L'affichage
indiquera "88888", et ensuite "0.0". Cette opération permet à la balance
"d'annuler" le poids du contenant.
3. Ajoutez les ingrédients à peser. Seul le poids des ingrédients sera affiché.
4. Le tarage peut également être utilisé pour mesurer le poids d'ingrédients
additionnels. Par exemple, supposons que vous vouliez peser ensemble ½
lb de riz et ½ lb de fèves. Placez d'abord le riz dans le contenant. Lorsque
la quantité correcte de riz a été atteinte, appuyez sur la touche "ON/TARE"
jusqu'à ce que l'affichage indique zéro. Ajoutez ½ lb de fèves. Les deux
ingrédients auront alors été précisément pesés dans le même contenant.
5. Lorsque le tarage a été utilisé, l'affichage indiquera "----" dès que les
items sont retirés du plateau. Pour réinitialiser la balance pour une
nouvelle série de mesures, simplement appuyez à nouveau sur la touche
"ON/TARE". La balance sera ainsi remise à zéro.
Fonction de garde ("Hold")
Lorsque la fonction de garde (Hold) est activée, l'afficheur ACL continuera
d'afficher le poids pour une durée de trente (30) secondes après que les
ingrédients auront été enlevés du plateau.
Pour activer cette fonction:
1. Alors que la balance est sous tension, appuyez sur la touche "Hold". Une icône
ayant la forme d'un petit triangle clignotant apparaîtra dans le coin supérieur
droit de l'afficheur ACL
2. Placez l'item à peser sur le plateau. Lorsque la mesure du poids est complétée,
le triangle cesse de clignoter, indiquant ainsi que le poids sera "gardé" sur
l'afficheur ACL lorsque l'item sera enlevé du plateau. Le poids sera affiché
durant environ 30 secondes, après quoi la balance se mettra automatiquement
hors tension.
3. Pour désactiver la fonction de garde avant la mise hors tension de la balance,
appuyez sur la touche "Hold". L'afficheur ACL sera remis à zéro. On peut mettre
la balance hors tension manuellement en appuyant sur la touche "OFF". La
fonction de garde est automatiquement désactivée lors de la mise hors tension
de la balance.
Note: La fonction de garde "HOLD" peut être utilisée seulement si le poids sur le plateau est
stable. Si l'icône triangulaire continue de clignoter, ceci signifie que l'item n'est pas stable et que
la balance est incapable de compléter une lecture précise du poids de l'item. Vérifiez d'abord que
le plateau repose correctement sur la balance. Si l'icône triangulaire continue de clignoter,
déplacez l'item légèrement sur le plateau jusqu'à ce que l'icône cesse de clignoter, indiquant alors
que la fonction garde est activée.
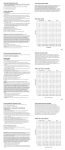
Auto Shut-off Feature
The scale will automatically shut off after 2 minutes of nonuse to conserve the
battery. The auto-shut off feature can be disabled to allow the scale to
operate continuously.
To disable the auto-shut off feature:
1. While the scale is off, press and hold the “ON/TARE”
and “UNIT” buttons at the same time. The scale will
turn on and the full LCD digits will appear (see diagram at right).
2. Release the “ON/TARE” and “UNIT” buttons. The LCD will show either
“SLP1” or “SLP0”.
SLP1 = auto-off is enabled
SLP0 = auto-off is disabled.
3. Press the “UNIT” button to switch between SLP1 and SLP0.
4. Press the “HOLD” button to enter the selection. The display will show
“0.0”. Set up is complete, and the scale is ready for use.
Calibration Function
Occasionally the scale's accuracy should be verified by measuring a known
weight of the scale's approximate capacity. Tare the scale by pressing ZERO,
place the weight on the platform and note the reading. Calibrate the scale if
necessary.
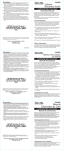
Calibration Procedure
You must use a 5kg calibrated weight ONLY to properly recalibrate the scale.
1. While the scale is off, press and hold down the ON/TARE button. While
holding down ON/TARE, also press and hold the UNIT button.
2. Release both buttons. The LCD digits will first appear
(see diagram at right), then either “SLP0” or “SLP1”.
3. Press the ON/TARE button to enter Zero mode. The LCD will display a
number between 3000 and 10000.
4. Press ON/TARE again. The LCD will show “0”.
5. Place a calibrated 5kg weight on the scale platform. The LCD will display a
number between 10,000 and 20,000
6. Press ON/TARE again. The LCD will show “CAL”, then 5.000KG.
7. The calibration is complete.
Fonction de mise hors tension automatique
Afin d'économiser la pile, la balance se mettra automatiquement hors tension
après 2 minutes si elle n'est pas utilisée. On peut désactiver la fonction de mise
hors tension automatique pour permettre une utilisation continue de la balance.
1. Quand la balance est hors tension, appuyez et maintenez enfoncées
simultanément les touches "ON/TARE" et "UNIT". La balance
sera mise sous tension, et tous les chiffres de l'afficheur ACL
apparaîtront (voir l'illustration à droite).
2. Relâchez les touches "ON/TARE" et "UNIT". L'afficheur ACL montrera alors
"SLP1" ou "SLP0".
SLP1 = mise hors tension automatique est en fonction.
SLP0 = mise hors tension automatique est hors fonction.
3. Appuyez sur la touche "UNIT" pour alterner entre SLP1 et SLP0.
4. Appuyez sur la touche "HOLD" pour formaliser votre choix. L'afficheur ACL
indiquera "0.0". La configuration est maintenant complétée, et la balance est
prête pour l'utilisation.
Fonction d'étalonnage
On devrait à l'occasion vérifier la précision de la balance en pesant un objet dont le
poids connu se rapproche de la capacité maximale de la balance. Effectuez une
opération de tarage en activant le mode ZÉRO, placez le poids sur le plateau et
effectuez une lecture. Si nécessaire, procéder à l'étalonnage de la balance.
Procédure d'étalonnage
Vous devez utiliser UNIQUEMENT un poids étalonné de 5 kg afin de procéder au
ré-étalonnage de la balance.
1. Alors que la balance est hors tension, appuyez et maintenez enfoncée la touche
ON/TARE. Tout en maintenant enfoncée la touche ON/TARE, appuyez et
maintenez enfoncée également la touche UNIT.
2. Relâchez les deux touches. Les chiffres de l'afficheur
ACL apparaîtront tout d'abord (voir l'illustration à droite),
suivis de "SLP0" ou "SLP1".
3. Appuyez sur la touche ON/TARE pour initier le mode ZÉRO. Un nombre compris
entre 3000 et 10000 sera indiqué sur l'afficheur ACL.
4. Appuyez sur la touche "ON/TARE" encore une fois. L'afficheur ACL indiquera "0".
5. Placez un poids étalonné de 5 kg sur le plateau de la balance. L'afficheur ACL
indiquera un nombre compris entre 10,000 et 20,000
6. Appuyez sur la touche "ON/TARE" encore une fois. L'afficheur ACL indiquera
"CAL", suivi de 5.000KG
7. La procédure d'étalonnage est terminée.