1
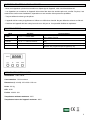
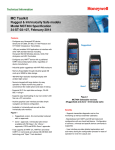
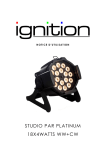
ST 50 W LED Manuel d'utilisation Nous vous recommandons de lire attentivement le manuel avant toute utilisation. TABLE DES MATIERES 1. INSTALLATION DE L'APPAREIL ……………………………………………………………………..Page 3 2. BRANCHEMENT DE L'APPAREIL ……………………………………………………………………Page 3 3. ENTRETIEN ET NETTOYAGE DE L'APPAREIL ……………………………………………………Page 4 4. FONCTIONNEMENT ……………………………………………………………………………………Page 4 5. SPECIFICATIONS TECHNIQUES …………………………………………………………………….Page 4 2 INSTALLATION DE L'APPAREIL - L'appareil doit être installé sur un support pouvant supporter jusqu'à 10 fois le poids de l'appareil pendant une heure sans aucune déformation. - Il est important de toujours assurer la sécurité de votre installation à l'aide d'attaches de sécurité, il est possible de rajouter des attaches de sécurité secondaires pour augmenter la résistance de l'installation. Ainsi, ces attaches supplémentaires permettent de garantir le maintien et la fixation de l'appareil au cas où les attaches principales se détérioraient. - Il est important de ne jamais laisser l'appareil dans les lieux de passages où tous autres endroits pouvant mettre en danger la sécurité d'autrui. - La fixation de l'appareil en hauteur doit être faite par des personnes expérimentées ayant pris en compte la charge totale et le support sur lequel l'appareil va être installé. Il est important de faire une vérification et un entretien de votre installation et de votre appareil régulièrement. - L'appareil doit être placé de telle sorte qu'il soit hors de portée. Si celui-ci doit être abaissé ou relevé, nous vous recommandons d'utiliser de la structure de professionnels. L'appareil ne doit jamais se balancer librement dans la pièce. Attention : L'appareil en tombant peut causer d'importants dommages matériels et corporels, ainsi il est important d'avoir la garantie que votre installation est faite dans des conditions optimales afin d'assurer la sécurité de chacun. - Ne pas placer l'appareil à moins de 50 cm d'une source inflammable. - L'appareil doit être installé avec sa lyre de fixation lors de la fixation à la structure. Le diamètre des trous de la lyre de fixation est de 13 mm. - Pour des installations en hauteur, nous vous recommandons de toujours utiliser une élingue de sécurité pouvant soutenir jusqu'à 10 fois le poids de l'appareil. Passez l'élingue à travers le trou de la lyre de fixation puis passez-là au dessus de la structure. Insérez le bout de l'élingue dans le mousqueton puis visser à fond. Ajustez l'appareil et réglez l'inclinaison à l'aide de la lyre de fixation puis serrez la vis de fixation de la lyre. BRANCHEMENT DE L'APPAREIL Avant la 1ère utilisation, assurez-vous que l'installation ainsi que tous les branchements soient conformes aux normes de sécurité en vigueur. Nous vous rappelons qu'il est important de faire appel à des professionnels pour l'installation, l'entretien et le dépannage de l'appareil. Il est important de relier l'appareil à la terre à l'aide du cordon d'alimentation. Rappel Couleur du Fil Marron Bleu Vert/Jaune Æ Connecteur Æ Phase Æ Neutre Æ Terre L'appareil ne doit pas être relié à un dimmer pack. Après avoir branché l'appareil, il est nécessaire d'attendre 3 ou 4 minutes pour que la lampe chauffe. L'appareil fonctionne maintenant normalement. Remarques Toutes les vis utilisées pour la mise en place de l'appareil doivent être correctement serrées et ne doivent pas être rouillées. Vous ne devez pas laisser le boitier, les fixations ou toutes parties de l'installation se déformer. Les fils électriques et autres câblages ne doivent avoir aucune altération. 3 ENTRETIEN ET NETTOYAGE DE L'APPAREIL - Nous vous rappelons qu'avant tout entretien ou dépannage de l'appareil, celui-ci doit être débranché. - Les réparations ou entretiens de l'appareil doivent être faits dans des endroits prévus à cet effet. De plus, il est essentiel de confier toutes installations, réparations ou tout entretien à des personnes qualifiées. - Toujours utilisez le même type de pièces. - L'appareil doit être nettoyé régulièrement. Utilisez un chiffon doux humide. Ne pas utiliser de solvants ou d'alcool. - L'intérieur de l'appareil doit être nettoyé au moins une fois par an. Il est possible d'utiliser un aspirateur. FONCTIONNEMENT Mode Affichage 1. DMX 1 ***1 où *** = Adresse DMX 2. Esclave (Slave) ***2 3. Dimmer ***3, où *** = Valeur du Dimmer 4. Strobe 5. Fade Fonctionnement CH1=Dimmer (0-512) CH2 = Strobe principal Sélection de la valeur avec les boutons "UP" et "DOWN" (0255) ***4, où *** = Valeur du Strobe Sélection de la valeur avec les boutons "UP" et "DOWN" (1-16) Sélection de la vitesse et du temps du fondu enchainé ***5 où *** = Vitesse du fondu enchainé Sélection des programmes pré-enregistrés (1-16) SPECIFICATIONS TECHNIQUES Alimentation : 240V / 63HZ Consommation : 75 W maximum Dimensions (L x l x H) : 370 x 250 x 370 mm Poids : 5.3 Kg LED : 50 W Fusible : 250V 3.15A Température ambiante maximum : 25°C Température interne de l'appareil maximum : 80°C 4 ST 50W LED OPERATING INSTRUCTIONS Installing T he ins tallation of the device has to be built and constructed in a way that it can hold 10 times the weight for 1 hour without any harming deformation. T he ins tallation mus t always be s ecured with a s econdary s afety attachment, e.g. an appropriate catch net. T his s econdary s afety attachment must be constructed in a way that no part of the ins tallation can fall down if the main attachment fails. W hen rigging, derigging or s ervicing the fixture s taying in the area below the ins tallation place, on bridges , under high working places and other endangered areas is forbidden. T he device s hould be installed outs ide areas where pers ons may walk by or be s eated. IMPORTANT! OV E R HE AD R IG G ING R E QUIR E S E XT E NS IV E E XP E R IE NC E , including (but not limited to) calculation working load limits , installation material being us ed, and periodic s afety ins pection of all ins tallation material and the device. T he device has to be ins talled out of the reach of people. If the device s hall be lowered from the ceiling or high jois ts , profes sional trus sing s ys tems have to be us ed. T he device mus t never be fixed s winging freely in the room. Caution: Devices may caus e s evere injuries when cras hing down! If you have doubts concerning the safety of a pos sible ins tallation, do NOT ins tall the device! ı DANGER OF FIRE! W hen installing the device, make s ure there is no highly-inflammable material (decoration articles, etc.) within a dis tance of min. 0.5 M. Mount the device with the mounting-bracket to your truss ing s ystem us ing an appropriate clamp. T he hole in the mounting bracket has a diameter of 13 mm. F or overhead us e, always install a s afety-rope that can hold at leas t 10 times the weight of the fixture. You mus t only us e s afety-ropes with s crew-on carabines . P ull the s afety-rope through the hole in 1.T R US S ING 2.S AF E T Y -R OP E the mounting-bracket and over the truss ing s ystem etc. Ins ert the 3.S C R E W -ON end in the carabine and tighten the s afety s crew. C AR AB INE Adjust the des ired inclination-angle via the mounting-bracket and fix 4.S AF E T Y -S C R E W the fixation s crews . 5.HOOK 5 DANGER TO LIFE! B efore taking into operation for the first time, the ins tallation has to be approved by an expert or by qualified E NG INE E R S /T E C HNIC IANS only! Connection with the mains ı DANGER TO LIFE! T he electric connection must only be carried out by a qualified electrician! In order to connect the device to the mains, you have to ins tall a power-plug. T he occupation of the connection-cables is as follows : C able B rown B lue P in International Live L Neutral N Yellow/G reen E arth T he earth has to be connected! C onnect the device to the mains with the power-plug. If the device will be directly connected with the local power s upply network, a dis connection s witch with a minimum opening of 3 mm at every pole has to be included in the permanent electrical ins tallation. In general, lighting effects s hould not be connected to dimming-packs . DANG E R TO L IF E ! B efore taking into operation for the first time, the installation has to be approved by an expert! OP E R ATION: After you connected the fixture to the mains , the lamp needs 3-4 minutes warm-up time until it reaches full lighting output. C L E ANING AND MAINT E NANC E T he following points have to be cons idered during the ins pection: 1)All s crews us ed for installing the devices or parts of the device have to be tightly connected and must not be corroded. 2)T here must not be any deformations on hous ings, fixations and installation s pots (ceiling, s us pens ion. trus s ing). 3)T he electric power s upply cables mus t not s how any damages, material fatigue (e.g. porous cables ) or s ediments. F urther instructions depending on the installation s pot and us age have to be adhered by a skilled installer and any s afety problems have to be removed. DANG E R TO L IF E ! Dis connect from mains before starting maintenance operation! W e recommend a frequent cleaning of the device. P leas e us e a mois t, lint-free cloth. Never us e alcohol or s olvents! T he interior of the device s hould be cleaned at leas t annually using a vacuum-cleaner or an air-jet. T here are no s erviceable parts ins ide the device except for the lamp. Maintenance and s ervice operations are only to be carried out by authorized dealers. P leas e refer to the ins tructions under “R eplacing the lamp”. S hould you need any s pare parts , pleas e us e genuine parts. If the power s upply cable of this device becomes damaged, it has to be replaced by authorized dealers Display only in order to avoid hazards . S hould you have further questions , pleas e contact your dealer. Save Up Down Mode Display and Operation Instructions: (as follows figure 1) 6 Figure 1: Mode 1,DMX 1 Display Operation Instructions CH1= dimmer(0~512),CH2= (0~512) ***1, ***=DMX Address strobe master, 2. Slave MODE ***2, 3.dimmer ***3, ***=Dimmer value dimmer value via “Up” and “Down” key. (0~255) 4. strobe ***4, ***= strobe value strobe value via “Up” and “Down” key. (1~16) ***5,***=Fade speed Select speed and fade-time of pregrogrammed programs(1~16) 5, Fade TECHNICAL SPECIFICATIONS P ower s upply: P ower cons umption, Dimens ions (L x W x H); W eight; F itting LE D F us e Maximum ambient temperature ta: Maximum hous ing temperature tS : 240V AC , 63HZ Max. 75W 370x250x370mm 5.3K G 50W 250 V 3.15A 25°C 80°C MADE IN C HINA 7