1
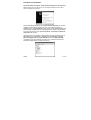
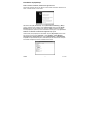
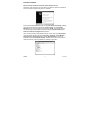
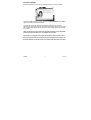
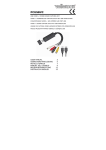
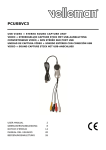
PCUSBVC
USB VIDEO + STEREO SOUND CAPTURE UNIT
VIDEO + STEREOGELUID CAPTURE STICK MET USB-AANSLUITING
UNITÉ DE CAPTURE VIDÉO + SON STÉRÉO À CONNEXION USB
UNIDAD DE CAPTURA VÍDEO + SONIDO ESTÉREO CON CONEXIÓN USB
VIDEO + STEREOKLANG CAPTURE STICK MIT USB-ANSCHLUSS
USER MANUAL
GEBRUIKERSHANDLEIDING
NOTICE D’EMPLOI
MANUAL DEL USUARIO
BEDIENUNGSHANDLEITUNG
PCUSBVC
USB VIDEO + STEREO SOUND CAPTURE UNIT
1.Introduction
To all residents of the European Union
Important environmental information about this product
This symbol on the device or the package indicates that disposal of the device after its
lifecycle could harm the environment.
Do not dispose of the unit (or batteries) as unsorted municipal waste; it should be taken
to a specialized company for recycling.
This device should be returned to your distributor or to a local recycling service.
Respect the local environmental rules.
If in doubt, contact your local waste disposal authorities.
Thank you for choosing Velleman! Please read the manual thoroughly before bringing this device
into service. If the device was damaged in transit, do not install or use it and contact your dealer. The
PCUSBVC comes with 1 x USB 2.0 capture unit, 1 x CD-ROM with Ulead VideoStudio 10.0 software
and this quick installation guide.
The PCUSBVC is a video capture unit with audio allowing you to create, to edit and to save your
own videos and slide shows in only three easy steps. Share your finished projects on DVD,
YouTube™, your iPod® or home cinema system. The PCUSBVC supports AVCHD, Blu-ray
Disk™ and all DVDs.
2.Technical Specifications
Video Input
Audio Input
1 x RCA composite, 1 x S-Video
stereo RCA
3.System Requirements
•
•
•
•
•
•
•
•
USB 2.0 compliant port
Microsoft® Windows® 2000/XP/Vista
Pentium® III 800MHz or higher
256MB RAM
600MB of free hard disk space for software plus 4GB free hard disk space for recording
standard DVD player or recorder
1024 x 768MHz display resolution or higher
Windows® compatible sound card (used for playback)
PCUSBVC
2
VELLEMAN
4.Hardware Installation
Before continuing with the hardware installation, please disable any antivirus software.
Connect the capture unit with a USB 2.0 port on your computer and insert the CD-ROM into your
CD-ROM drive. Following wizard will pop up:
Select [No, not this time] first and select [Install software automatically] next. Click [Next] and
follow the instructions in the wizard to finish the installation. (A [Syntek STK1150] window may
appear during installation process, please click [Continue anyway].) Complete the installation by
clicking [Finish]. If any further components are found, please repeat the above process until the
[Found new hardware: Your hardware is installed and configured for use] window appears.
Next, check that the drivers have been installed correctly. Right click on [My Computer] and click
[Properties] > [Hardware] tab > [Device Manager] > [Imaging Devices]. [Imaging Devices]
should contain [Syntek STK1150]. (If [Syntek STK1150] is preceded by a yellow exclamation
mark, please remove the driver, disconnect the capture unit from your computer and repeat the
installation process described above.
PCUSBVC
3
VELLEMAN
5.Software Installation
Insert the CD-ROM into your CD-ROM drive. Following window will appear:
Click [Next] and select your language. Click [Install VideoStudio 10.0] > [Next] and follow the
instructions in the window until the installation is complete.
Restart your computer. To start the application, click on the Ulead VideoStudio icon on your
computer’s desktop. Explanation on how to use your Ulead VideoStudio software can be found
on the included CD-ROM. Extensive information is also commercially available.
Use this device with original accessories only. Velleman nv cannot be held responsible in
the event of damage or injury resulted from (incorrect) use of this device.
Velleman nv is not a distributor of any of the brands or trademarks in this user manual.
For more info concerning this product, please visit our website www.velleman.eu.
The information in this manual is subject to change without prior notice.
PCUSBVC
4
VELLEMAN
PCUSBVC
VIDEO + STEREOGELUID CAPTURE STICK MET USB-AANSLUITING
1.Inleiding
Aan alle ingezetenen van de Europese Unie
Belangrijke milieu-informatie betreffende dit product
Dit symbool op het toestel of de verpakking geeft aan dat, als het na zijn levenscyclus
wordt weggeworpen, dit toestel schade kan toebrengen aan het milieu. Gooi dit toestel
(en eventuele batterijen) niet bij het gewone huishoudelijke afval; het moet bij een
gespecialiseerd bedrijf terechtkomen voor recyclage. U moet dit toestel naar uw
verdeler of naar een lokaal recyclagepunt brengen. Respecteer de plaatselijke milieuwetgeving.
Hebt u vragen, contacteer dan de plaatselijke autoriteiten inzake verwijdering.
Dank u voor uw aankoop! Lees deze handleiding grondig voor u het toestel in gebruik neemt.
Werd het toestel beschadigd tijdens het transport, installeer het dan niet en raadpleeg uw dealer.
De PCUSBVC wordt geleverd met 1 x USB 2.0 capture stick, 1 x cd-rom met Ulead VideoStudio
10.0-software en deze installatiehandleiding.
De PCUSBVC is een video capture stick met audio waarmee u video’s en diavoorstellingen in
drie eenvoudige stappen kunt opmaken, bewerken en opslaan. Deel uw eindproject met uw
vrienden mee en vertoon ze op dvd, YouTube™, iPod® of homecinema. De PCUSBVC
ondersteunt AVCHD, Blu-ray Disk™ en alle dvd-formaten.
2.Technische specificaties
Video-ingang
Audio-ingang
1 x RCA composiet, 1 x S-Video
stereo RCA
3.Systeemvereisten
•
•
•
•
•
•
•
•
USB 2.0-compatibele poort
Microsoft® Windows® 2000/XP/Vista
Pentium® III 800 MHz of hoger
256 MB RAM
600 MB vrije hardeschijfruimte voor de software plus 4 GB vrije hardeschijfruimte voor opname
standaard dvd-speler of -recorder
Displayresolutie van 1024 x 768 MHz of hoger
Windows®-compatibele geluidkaart (vereist voor het afspelen van videobestanden)
PCUSBVC
5
VELLEMAN
4.Installeren van de hardware
Alvorens de hardware te installeren, schakel elk antivirusprogramma op uw computer uit.
Steek de capture stick in een USB 2.0-poort van uw computer en plaats de cd-rom in de cdromdrive. Volgende wizard verschijnt:
Selecteer eerst [No, not this time] en daarna [Install software automatically]. Klik vervolgens
op [Next] en volg de installatie-instructies in de wizard. Het is mogelijk dat er tijdens de
installatieprocedure een [Syntek STK1150]-venster verschijnt. Klik op [Continue anyway] indien
nodig. Beëindig de installatieprocedure door op [Finish] te klikken. Herhaal de procedure indien
de computer meer hardware vindt tot [Found new hardware: Your hardware is installed and
configured for use] verschijnt.
Controleer vervolgens of de hardware correct is geïnstalleerd. Klik met de rechtermuisknop op
[My Computer] en klik op [Properties] > [Hardware]-tab > [Device Manager] > [Imaging
Devices]. [Imaging Devices] moet [Syntek STK1150] bevatten. Wordt [Syntek STK1150]
voorafgegaan door een geel uitroepteken, verwijder de driver, ontkoppel de capture stick en
herhaal de installatieprocedure zoals hierboven beschreven.
PCUSBVC
6
VELLEMAN
5.Installeren van de software
Plaats de cd-rom in de cd-romdrive. Volgende wizard verschijnt:
Klik op [Next] en kies uw voorkeurtaal. Klik op [Install VideoStudio 10.0] > [Next] en volg de
installatieprocedure in de wizard tot de software is geïnstalleerd.
Herstart uw computer. Om Ulead VideoStudio te gebruiken, klikt u gewoonweg op het icoontje op
het bureaublad van de computer. De cd-rom bevat gebruiksinformatie in verband met de Ulead
VideoStudio-software. Uitgebreide informatie over de software is eveneens in de handel
verkrijgbaar.
Gebruik dit toestel enkel met originele accessoires. Velleman nv is niet aansprakelijk voor
schade of kwetsuren bij (verkeerd) gebruik van dit toestel.
Velleman nv is geen groothandelaar van de merken en handelsmerken in deze
handleiding.
Voor meer informatie omtrent dit product, zie www.velleman.eu.
De informatie in deze handleiding kan te allen tijde worden gewijzigd zonder voorafgaande
kennisgeving.
PCUSBVC
7
VELLEMAN
PCUSBVC
UNITÉ DE CAPTURE VIDÉO + SON STÉRÉO À CONNEXION USB
1.Introduction
Aux résidents de l'Union européenne
Des informations environnementales importantes concernant ce produit
Ce symbole sur l'appareil ou l'emballage indique que l’élimination d’un appareil en fin
de vie peut polluer l'environnement. Ne pas jeter un appareil électrique ou électronique
(et des piles éventuelles) parmi les déchets municipaux non sujets au tri sélectif ; une
déchèterie traitera l’appareil en question. Renvoyer les équipements usagés à votre
fournisseur ou à un service de recyclage local. Il convient de respecter la réglementation locale
relative à la protection de l’environnement.
En cas de questions, contacter les autorités locales pour élimination.
Nous vous remercions de votre achat ! Lire la présente notice attentivement avant la mise en
service de l’appareil. Si l’appareil a été endommagé pendant le transport, ne pas l’installer et
consulter votre revendeur. La PCUSBVC est livrée avec 1 unité de capture USB 2.0, 1 cédérom
avec logiciel Ulead VideoStudio 10.0 et ce guide d’installation rapide.
La PCUSBVC est une unité de capture vidéo avec audio et permet de réaliser, d’éditer et de
sauvegarder vos propres productions vidéo et diaporamas en seulement trois simples étapes.
Partagez vos projets sur DVD, YouTube™, iPod® ou votre système home-cinéma. La PCUSBVC
prend en charge le format AVCHD, Blu-ray Disk™ et tout format de DVD.
2.Spécifications techniques
Entrée vidéo
Entrée audio
1 fiche RCA composite, 1 x S-Vidéo
fiche RCA stéréo
3.Système requis
•
•
•
•
•
•
•
•
port USB 2.0
Microsoft® Windows® 2000/XP/Vista
Pentium® III 800 MHz ou plus
256 Mo de RAM
600 Mo d’espace disque libre pour le logiciel plus 4 Go d’espace disque libre pour les fichiers
lecteur ou enregistreur DVD standard
résolution d’écran de 1024 x 768 MHz ou plus
carte son compatible Windows® pour la lecture de fichiers vidéo
PCUSBVC
8
VELLEMAN
4.Installation du périphérique
Avant de continuer l’installation, désactiver tout logiciel anti-virus.
Insérer l’unité de capture dans un port USB 2.0 de votre ordinateur et insérer le cédérom dans le
lecteur. L’assistant suivant s’ouvre à l’écran :
Sélectionner d’abord [No, not this time]. Cliquer [Install software automatically] > [Next] et
suivre les instructions dans l’assistant. Cliquer [Continue anyway] lorsque la fenêtre [Syntek
STK1150] apparaît. Terminer l’installation en cliquant sur [Finish]. Si l’ordinateur reconnaît
d’autres périphériques, répéter le processus d’installation ci-dessus jusqu’à ce que [Found new
hardware: Your hardware is installed and configured for use] apparaît.
Vérifier ensuite que le périphérique soit bien installé. Cliquer sur [My Computer] avec le bouton
droit de la souris, ensuite cliquer [Properties] > l’onglet [Hardware] > [Device Manager] >
[Imaging Devices]. [Imaging Devices] doit contenir [Syntek STK1150]. Si [Syntek STK1150]
est précédé d’un point d’exclamation jaune, désinstaller le pilote, déconnecter l’unité de capture
de l’ordinateur et répéter le processus d’installation décrit ci-dessus.
PCUSBVC
9
VELLEMAN
5.Installation du logiciel
Insérer le cédérom dans le lecteur. L’assistant suivant s’ouvre à l’écran :
Cliquer [Next] et sélectionner votre langue. Cliquer [Install VideoStudio 10.0] > [Next] et suivre
les instructions d’installation dans l’assistant.
Redémarrer votre ordinateur. Pour lancer l’application, cliquer sur l’icône Ulead VideoStudio sur
le bureau de l’ordinateur. Le cédérom contient des fichiers d’instructions d’utilisation pour le
logiciel Ulead VideoStudio. De nombreux ouvrages concernant le logiciel sont également
disponibles dans le commerce.
N’employer cet appareil qu’avec des accessoires d’origine. SA Velleman ne sera
aucunement responsable de dommages ou lésions survenus à un usage (incorrect) de cet
appareil.
SA Velleman n’est pas affilié aux marques mentionnées dans cette notice.
Pour plus d’information concernant cet article, visitez notre site web www.velleman.eu.
Toutes les informations présentées dans cette notice peuvent être modifiées sans
notification préalable.
PCUSBVC
10
VELLEMAN
PCUSBVC
UNIDAD DE CAPTURA VÍDEO + SONIDO ESTÉREO CON CONEXIÓN USB
1.Introducción
A los ciudadanos de la Unión Europea
Importantes informaciones sobre el medio ambiente concerniente este producto
Este símbolo en este aparato o el embalaje indica que, si tira las muestras inservibles,
podrían dañar el medio ambiente.
No tire este aparato (ni las pilas eventuales) en la basura doméstica; debe ir a una
empresa especializada en reciclaje. Devuelva este aparato a su distribuidor o a la
unidad de reciclaje local.
Respete las leyes locales en relación con el medio ambiente.
Si tiene dudas, contacte con las autoridades locales para eliminación.
¡Gracias por haber comprado la PCUSBVC! Lea atentamente las instrucciones del manual antes
de usarla. Si el aparato ha sufrido algún daño en el transporte no lo instale y póngase en
contacto con su distribuidor. La PCUSBVC se entrega con 1 unidad de captura USB 2.0, 1 CDROM con software Ulead VideoStudio 10.0 y este manual del usuario rápido.
La PCUSBVC es una unidad de captura vídeo con audio y permite realizar, editar y guardar sus
propias producciones de vídeo y diapositivas al hacer sólo tres pasos sencillos. Divida sus
proyectos en DVD, YouTube™, iPod® o su sistema home cinema. La PCUSBVC soporta el
formato AVCHD, Blu-ray Disk™ y cualquier formato de DVD.
2.Especificaciones
Entrada de vídeo
Entrada de audio
1 conector RCA compuesto, 1 x S-Vídeo
conector RCA estéreo
3.Exigencias del sistema
•
•
•
•
•
•
•
•
Puerto USB 2.0
Microsoft® Windows® 2000/XP/Vista
Pentium® III 800 MHz o más reciente
256 MB de RAM
espacio libre en el disco duro : 600MB para el software, mín. 4GB para la grabación
lector o grabadora DVD estándar
resolución de la imagen de 1024 x 768 MHz o más reciente
tarjeta de sonido compatible Windows® para la lectura de ficheros de vídeo
PCUSBVC
11
VELLEMAN
4.Instalar el hardware
Antes de continuar la instalación, desactive cualquier software anti-virus.
Introduzca la unidad de captura en un puerto USB 2.0 del ordenador e introduzca el CD-ROM en
el lector. El siguiente asistente (wizard) se abra en la pantalla:
Primero seleccione [No, not this time]. Haga click en [Install software automatically] > [Next] y
siga las instrucciones del wizard. Haga click en [Continue anyway] si la pantalla [Syntek
STK1150] aparece. Termine la instalación al hacer click en [Finish]. Si el ordenador reconece
otro hardware, repita el procedimiento de instalación hasta que [Found new hardware: Your
hardware is installed and configured for use] aparezca.
Luego, controle si el hardware está instalado de manera correcta. Haga click en [My Computer]
con el botón derecho del ratón, haga click en [Properties] > [Hardware] > [Device Manager] >
[Imaging Devices]. [Imaging Devices] debe contener [Syntek STK1150]. Si un signo de
exclamación amarillo precede [Syntek STK1150], desinstale el driver, desconecte la unidad de
captura del ordenador y repita el procedimiento de instalación (véase arriba).
PCUSBVC
12
VELLEMAN
5.Instalar el software
Introduzca el CD-ROM en el lector. El siguiente asistente (wizard) se abra en la pantalla:
Haga click en [Next] y seleccione el idioma. Haga click en [Install VideoStudio 10.0] > [Next] y
siga las instrucciones de instalación del wizard.
Vuelva a activar el ordenador. Para ejecutar la aplicación, haga click en el icono Ulead
VideoStudio del escritorio del ordenador. El CD-ROM contiene ficheros de instrucción del usuario
para el software Ulead VideoStudio. Más información sobre el software también está disponible
en el comercio.
Utilice este aparato sólo con los accesorios originales. Velleman SL no será responsable
de daños ni lesiones causados por un uso (indebido) de este aparato.
Velleman SL no es mayorista de las marques mencionadas en este manual del usuario.
Para más información sobre este producto, visite nuestra página web www.velleman.eu.
Se pueden modificar las especificaciones y el contenido de este manual sin previo aviso.
PCUSBVC
13
VELLEMAN
PCUSBVC
VIDEO + STEREOKLANG CAPTURE STICK MIT USB-ANSCHLUSS
1.Einführung
An alle Einwohner der Europäischen Union
Wichtige Umweltinformationen über dieses Produkt
Dieses Symbol auf dem Produkt oder der Verpackung zeigt an, dass die Entsorgung
dieses Produktes nach seinem Lebenszyklus der Umwelt Schaden zufügen kann.
Entsorgen Sie die Einheit (oder verwendeten Batterien) nicht als unsortiertes Hausmüll;
die Einheit oder verwendeten Batterien müssen von einer spezialisierten Firma zwecks
Recycling entsorgt werden. Diese Einheit muss an den Händler oder ein örtliches RecyclingUnternehmen retourniert werden. Respektieren Sie die örtlichen Umweltvorschriften.
Falls Zweifel bestehen, wenden Sie sich für Entsorgungsrichtlinien an Ihre örtliche
Behörde.
Wir bedanken uns für den Kauf des PCUSBVC! Lesen Sie diese Bedienungsanleitung vor
Inbetriebnahme sorgfältig durch. Überprüfen Sie, ob Transportschäden vorliegen. Sollte dies der
Fall sein, verwenden Sie das Gerät nicht und wenden Sie sich an Ihren Händler. Lieferumfang: 1
x USB 2.0 Capture Stick, 1 x CD-ROM mit Ulead VideoStudio 10.0-Software und diese
Bedienungsanleitung.
Das Gerät ist ein Video Capture Stick mit Audio mit dem Sie Video- und Diavorführungen in drei
einfachen Schritten machen, bearbeiten und speichern können. Teilen Sie ein vollendetes Projekt
mit Ihren Freunden und zeigen Sie es auf DVD, YouTube™, iPod® oder Home Cinema an. Der
PCUSBVC unterstützt AVCHD, Blu-ray Disk™ und alle DVD-Formate.
2.Technische Daten
Video-Eingang
Audio-Eingang
1 x RCA komposit, 1 x S-Video
Stereo RCA
3.Systemanforderungen
•
•
•
•
•
•
•
•
USB 2.0-kompatibeler Anschluss
Microsoft® Windows® 2000/XP/Vista
Pentium® III 800 MHz oder höher
256 MB RAM
freier Speicherplatz: 600 MB 600MB für Software, min. 4GB für Aufnahme
Standard DVD-Spieler oder -Rekorder
Bildschirmauflösung 1024 x 768 MHz oder höher
Windows®-kompatible Soundkarte (nur für Wiedergabe)
PCUSBVC
14
VELLEMAN
4.Die Hardware installieren
Ehe Sie die Hardware installieren, schalten Sie jedes Antivirusprogramm des Computers aus.
Stecken Sie den Capture Stick in einen USB 2.0-Anschluss des Computers und legen Sie den
CD-ROM in das CD-ROM-Laufwerk ein. Folgender Wizard erscheint:
Wählen Sie zuerst [No, not this time] und danach [Install software automatically] aus. Klicken
Sie danach [Next] und folgen Sie die Installationshinweise des Wizards. Es ist möglich, dass
während des Installationsverfahrens ein [Syntek STK1150]-Fenster erscheint. Klicken Sie
[Continue anyway] wenn nötig. Beenden Sie das Installationsverfahren indem Sie [Finish]
klicken. Wiederholen Sie wenn das Verfahren wenn der Computer mehr Hardware findet bis
[Found new hardware: Your hardware is installed and configured for use] erscheint.
Überprüfen Sie danach, ob die Hardware korrekt installiert ist. Klicken Sie mit der rechten
Maustaste auf [My Computer] und klicken Sie [Properties] > [Hardware]-Tabulator > [Device
Manager] > [Imaging Devices]. [Imaging Devices] muss [Syntek STK1150] enthalten. Geht ein
gelbes Ausrufezeichen [Syntek STK1150] voran, so entfernen Sie den Treiber, trennen Sie den
Capture Stick und wiederholen Sie das Installationsverfahren (siehe oben).
PCUSBVC
15
VELLEMAN
5.Die Software installieren
Legen Sie die CD-ROM in das CD-ROM-Laufwerk. Folgender Wizard erscheint:
Klicken Sie [Next] und wählen Sie die Sprache aus. Klicken Sie [Install VideoStudio 10.0] >
[Next] und folgen Sie das Installationsverfahren im Wizard bis die Software installiert ist.
Starten Sie den Computer wieder. Um Ulead VideoStudio zu verwenden, klicken Sie einfach die
Ikone der Benutzeroberfläche. Die CD-ROM enthält Benutzerinformation in Bezug auf die Ulead
VideoStudio-Software. Ausführliche Information über die Software finden Sie ebenfalls im Handel.
Verwenden Sie dieses Gerät nur mit originellen Zubehörteilen. Velleman NV übernimmt
keine Haftung für Schaden oder Verletzungen bei (falscher) Anwendung dieses Gerätes.
Velleman NV ist kein Großhändler der Marken und Schutzmarken in dieser
Bedienungsanleitung.
Für mehr Informationen zu diesem Produkt, siehe www.velleman.eu.
Alle Änderungen ohne vorherige Ankündigung vorbehalten.
PCUSBVC
16
VELLEMAN