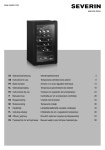
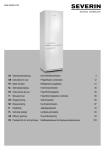
Download Kühlschrank Refrigerator Réfrigérateur-congélateur
Transcript
Gebrauchsanweisung Kühlschrank 쮕 Instructions for use Refrigerator Mode d'emploi Gebruiksaanwijzing Réfrigérateur-congélateur Koelkast Refrigerator Dear Customer, Before using the appliance, please read the following instructions carefully and keep this manual for future reference. The appliance must only be used by persons familiar with these instructions. Connection to the mains supply The appliance should only be connected to an earthed socket installed in accordance with the regulations. Make sure that the supply voltage corresponds with the voltage marked on the rating label. This product complies with all binding CE labelling directives. Do not operate this unit by means of a transformer. To prevent noise vibration, ensure that the power cord does not touch any part of the rear of the unit General information This appliance is a compressor refrigerator, designed for the short-term storage of food in the main cabinet and long-term storage of food in the freezer compartment. Refrigeration appliances are classified into certain climate classes. Please refer to the product data sheet for information on the classification for this unit; the data sheet can be found at the end of this manual. This appliance is intended for domestic or similar applications, such as - in shops, offices and other similar working environments, - in agricultural areas, - by customers in hotels, motels etc. and similar establishments, - in bed-and breakfast type environments. This appliance is not intended for commercial use, nor for use in the catering business or similar wholesale environments. No responsibility is accepted if damage results from improper use, or if these instructions are not complied with. Important safety instructions To prevent the risk of personal injury or damage to the unit, it must only be transported while in its original packaging. This appliance is not intended for use by any persons (including children) with reduced physical, sensory or mental capabilities, or lacking experience and knowledge, unless they have been given supervision or instruction concerning the use of the appliance by a person responsible for their safety. Children should be supervised to ensure that they do not play with the appliance. Caution: Keep any packaging materials well away from children: there is a risk of suffocation. The cooling circuit in this appliance contains the refrigerant isobutane (R600a), a natural gas with a high level of environmental compatibility, which is nevertheless flammable. Ensure, therefore, that none of the components of the refrigerant circuit become damaged during transportation and installation of the appliance. If damage to the cooling circuit does occur, do not switch on or connect the appliance to the mains 15 power. In the case that there is an open fire or any other sources of ignition in the vicinity of the refrigerant gas, make sure it is removed immediately from this area and that the room is then thoroughly ventilated. Warning: Do not damage the cooling circuit. Any escaping refrigerant causes damage to the eyes; there is also a danger of the gas igniting. Warning: Keep ventilation openings, in the appliance enclosure or in the built-in structure, clear of obstruction. Sufficient ventilation must be ensured at all times. Warning: Do not use any external device (e.g.; heaters or heating fans) to accelerate de-frosting; follow only the methods recommended in this manual. The ice removed from the unit during de-frosting is not suitable for human consumption. Warning: Do not operate any electrical appliances (e.g. ice makers) inside the storage compartment that are not specifically permitted in these instructions. Before it is connected to the mains power, the unit must be thoroughly checked for transport damage, including its power cord. In the event of any such damage being found, the appliance must not be connected to the mains. The power cord should be regularly examined for any signs of damage. In the event of such damage being found, the appliance must no longer be used. To avoid the risk of fire, do not place any thermo-electric appliances on top of the unit. Do not place liquid containers on top of the unit, to prevent any leaking or escaping liquid damaging the electrical insulation. This unit is designed for storing food only. Alcoholic substances may be stored only in properly sealed containers and in upright positions. This appliance is not designed for the storage of explosive substances such as aerosol cans with a flammable propellant. To avoid the risk of food poisoning, do not consume food after its storage time has expired. Thawed foods must not be frozen a second time. Do not lean or put undue weight on the shelves, compartments, door etc. Protect the inside of the refrigerator at all times from open flames and any other sources of ignition. Remove the plug from the wall socket - in case of any malfunction, - before de-frosting, - during cleaning, - before maintenance or repair work is carried out. When removing the plug from the wall socket, never pull on the power cord; always grip the plug itself. In order to comply with safety regulations and to avoid hazards, any repairs or modifications to this unit must be carried out by our authorised service personnel, including the replacement of the power cord. If the unit is not used for an extended period of time, we recommend keeping the door open. If the unit is sold, handed over to a third party or disposed of at a suitable recycling facility, attention must be drawn to the presence of the insulation agent ‘cyclopenthane’ as well as to the refrigerant R600a. We reserve the right to introduce technical modifications. Familiarisation The components of your refrigerator-freezer unit may differ in quantity and design from those described here. This description refers to a unit of the group of two-compartment refrigeratorfreezer combinations. 16 The unit consists of two parts: refrigerator cabinet (B) and freezer cabinet (A). 1. 2. 3 4 5 6 7 8 9 10 11 12 13 14 Temperature control and interior light Storage shelves Drain channel cleaning tool Storage shelf Vegetable/fruit fresh storage compartment Bottle storage Multi-purpose storage Egg storage Instructions for using freezer Ice-cube tray Storage shelf Compressor Melt-water evaporation tray Condenser Before using for the first time – Remove any exterior and interior packaging materials completely, including the adhesive strips. – The packaging materials must be properly disposed of. – Fit the two enclosed spacer elements (1) into the corresponding guide slots (2) on the rear. – Before it is connected to the mains, the unit must be thoroughly checked for transport damage, including its power cord. – Clean the unit as described in the section De-frosting and cleaning. – The unit should only be transported in its vertical position; do not tilt any more than 30°. – Once the unit has been positioned, wait for about 30 minutes before it is connected to the mains. – If the unit has been tilted more than 30° during transport, allow it to stand upright for at least 4 hours before it is connected to the mains. – When the unit is first switched on, a slight 'new' smell may be noticed. However, this will disappear once the cooling process has begun. 17 Installation The appliance should be set up in a well-ventilated, dry room. It should be operated in conditions where the relative humidity is no more than 70 %. The product data sheet at the end of this manual contains details of the ambient temperature range suitable for this appliance. Do not use the appliance outdoors. Ensure that the plug is accessible and can be removed from the wall socket at any time. Do not expose the appliance to direct sunlight, and do not position it next to any heat sources (radiators, cookers etc). If this cannot be avoided, however, suitable insulation must be in installed between the heat source and the unit. The unit must not be installed inside a cabinet, nor directly below a hanging cupboard, shelf or similar object. In the case of uneven floors, the adjustable feet on the unit can be used to compensate and ensure optimum stability. Set-up dimensions Ventilation The heated air around the rear of the unit must be able to circulate freely. Therefore, ensure that the air circulation behind the unit is not obstructed. Caution: Ensure at all times that the rear ventilation openings around the top cover are not obstructed. Reversible door If required, the door may be reversed, i.e. from right-hinged (default installation) to left-hinged. To avoid the risk of personal injury or damage to the unit, two people are needed to reverse the door. Warning: Always disconnect the unit from the mains before any maintenance or repair work is carried out. Before you get started, please note the following: Always ensure that the correct number of washers is used on all hinge bolts and screws. 18 So that the doors can close tightly against the frame, take the utmost care that they are properly aligned during re-assembly. – – Open the freezer door (18). Remove the fixing screws (1 and 3) from the top cover (two screws at the front and two at the rear), and take off the cover (4). – Unscrew the upper hinge bracket (5) and remove it. Caution: the door must be supported while this is done. – Take off the freezer door (18). – Unscrew the hinge pin (7) together with the nut (6) and washers (8), and fit the entire assembly to the opposite side of the hinge bracket. – Undo the fixing screws (11) on the centre hinge bracket (10). Caution: Support the door. – Take off the centre hinge bracket (10) together with the hinge pin washers and the plastic plate (9). – Take off the refrigerator door (13). – Tilt the whole unit towards the rear. – Unscrew the lower hinge bracket (14) and take it off. – Unscrew the hinge pin (15) from the bracket, and re-insert it from the other side. – Remove both screws on the left of the underside and replace them on the right. – Fit the lower hinge bracket (14) on the left of the underside. – Put the washers on the hinge pin. – Remove the cap (19) from the freezer door and the cap (16) from the refrigerator door and replace them on the opposite side of the doors. – Take off the caps (17) from the partition between the refrigerator and freezer compartments and remove the screws. – Replace both screws on the opposite side and then the caps. – Fit the refrigerator door (13) onto the pin (15) of the lower hinge bracket. – Fit the pin of the centre hinge bracket (10), together with the washers, to the refrigerator door (13). – Fit the centre hinge bracket (10) together with the plastic plate (9). – Remove both screws from the upper left and replace them on the right. – Place the freezer door (18) onto the pin of the centre hinge bracket. – Fit the pin of the upper hinge bracket (5) to the freezer door (18), and then fit and secure the upper hinge bracket (5). Note: If necessary, the alignment of the doors can be adjusted by slightly loosening the hinge bracket 19 screws, but remember to tighten them afterwards. – Replace the top cover (4) and use the screws (1 and 3) to secure it (two screws at the front and two at the rear). If the unit has been tilted to more than 30°, wait for about 4 hours before re-connecting it to the mains. Temperature control The unit is re-activated by connecting it to the mains. It is only switched off completely when the plug is removed from the wall socket. The temperature in the refrigerator cabinet can be adjusted by setting the temperature control. Turning the control clockwise will decrease the temperature, while turning it anti-clockwise will increase it. The medium settings are usually most suitable for home use. We recommend using a thermometer to check the actual temperature inside the cabinet and make adjustments as necessary. Following a power interruption, or if the unit has been switched off on purpose, it may take 3 to 5 minutes before it switches on again. In position ‘0’, the cooling function is switched off, though the appliance is still connected to the mains. 1. 2. 3. 4. 5. Temperature control Control panel cover Bulb Lamp cover Locking mechanism Interior lighting Changing the light bulb: – Remove the plug from the wall socket. – Use a suitable tool to release the locking tab (5) and remove the lamp cover (4). – Take out the defective bulb and fit a new one (max. 15 W, socket type E14). – Replace the lamp cover. – Connect the unit to the mains power. It may take 3 to 5 minutes before it switches on again. Freezer compartment door To ensure that frozen food will not de-frost prematurely, the door to the freezer compartment should be kept closed at all times. This will also prevent an undue build-up of ice and frost. Ensure, therefore, that the door is only opened briefly to place food in the freezer compartment or to remove it. Freezing and storing food – The temperatures inside the refrigerator cabinet and freezer compartment depend mainly on the ambient temperature, the temperature control setting and the amount of food stored. 20 Freezer compartment: – The freezer compartment is designed for deep-freezing and long-term storage of frozen food, and for making ice cubes. – To ensure that nutritious elements such as vitamins are not lost, fresh food should be deepfrozen right through as quickly as possible. To that effect, the prepared food should be placed into the freezer compartments, properly spaced in one or two rows. – Avoid contact with food that has already been frozen. – Caution: Do not exceed the maximum freezing capacity per day. The product data sheet at the end of this manual contains details of the maximum daily freezing capacity. – Set the temperature control to Max to accelerate the freezing process. After 24 hours, once the food is well frozen, the temperature control can be set back to its original position. – The time required to freeze food may be shortened by dividing it into smaller portions. – Suitable packaging materials for frozen food are transparent (i.e. non-coloured) plastic wrap or bags, or aluminium foil. The packaging materials should be well aired before use; check that the package is air-tight before freezing the food. We strongly recommend that you label every item stored in the freezer with all relevant information such as type of food, freezing date and use-by date. – Do not attempt to deep-freeze carbonated beverages, warm food or any kind of bottled liquids. – Frozen food can be defrosted in the refrigerator. This way, the food is defrosted at a slower rate, retaining its taste. Furthermore, the frozen food helps to keep the temperature inside the refrigerator at its intended level. Use-by dates for frozen food are specified (in months) in the table below. Do not exceed these storage times. However, always observe the manufacturer’s use-by dates for the frozen food. – If the unit remains switched off for an extended period (eg during a power failure), the door should be kept closed; this will help to maintain the lowest possible temperature in the cabinet. The product data sheet at the end of this manual contains detailed information of the maximum safe storage time in case of malfunction. Even a slight rise in the inside temperature will shorten the storage life of the food. Main cabinet – Different areas of the refrigerator cabinet are affected differently by the cooling effect. The warmest area is around the door in the higher part of the cabinet, the coldest around the rear wall and in the lower part of the cabinet. – The food should therefore be stored as follows: – On main cabinet shelves (from top to bottom): bakery items, ready meals, dairy products, meat, fish and cold meats/sausages. 21 – – – – – – In the vegetable compartment: vegetables, salad and fruit. In the door (from top to bottom): butter, cheese, eggs, tubes (eg mustard), small bottles, large bottles, milk and fruit-juice tetra-packs. Initially, the temperature control should be set to position 4. If the cooling effect is too strong, lower it to position 1-3; if it is insufficient, raise it to 5-7. If you notice frost on the rear wall, the most likely cause is that the door has been left open for too long, or that warm food has been placed inside the refrigerator or that the temperature control has been set too high. Liquid or strong-smelling food, or food which is likely to absorb strong odours (e.g. cheese, fish, butter), should be stored separately or in hermetically sealed containers. Warm food should be left to cool down to room temperature before being placed in the refrigerator. Always ensure that the door is properly closed and that the seal is not obstructed by food stored inside the cabinet or door. Making ice cubes A special ice-cube tray is provided for making ice cubes. Fill the tray ¾ full with drinking water and place it in the freezer compartment. The ice cubes are easier to remove from the tray if the tray is left standing at room temperature for 5 minutes. De-frosting and cleaning – Always remove the plug from the wall socket before cleaning. – Do not pour water over or inside the unit. – For frequent cleaning we recommend the use of warm water with some mild detergent. To prevent any unpleasant odour within the refrigerator, it should be cleaned about once a month. – Any accessories should be cleaned separately with soapy water. Do not put them in a dishwasher. – Do not use abrasives or harsh cleaning solutions or any cleaning agents that contain alcohol. – After cleaning, thoroughly clean all surfaces with fresh water before wiping them completely dry. When re-inserting the plug into the wall socket ensure that you have dry hands. – To save energy and to ensure optimum performance, the condenser (at the rear) as well as the compressor should be cleaned at least twice a year with a broom or a vacuum cleaner. – Take care not to remove or damage the rating plate inside the cabinet during cleaning. When de-frosting the freezer compartment Once the build-up of ice inside the freezer compartment has reached a thickness of 2-4 mm, it needs to be de-frosted. This should be done at least twice a year. – Ensure that the plug has been removed from the wall socket. – Remove all food from the compartment, wrap it in newspaper and store it in a cool place to keep the temperature down. Note that, even with a slight increase in temperature, the storage life will be shortened and the food should be used as soon as possible. – Keep the door open. To accelerate defrosting, one or several containers with hot (but not boiling) water may be placed inside the freezer compartment. Warning: do not use any external device or other means (e.g. heaters or heating fans) to accelerate de-frosting. – After cleaning, ensure that the freezer compartment is thoroughly dried and set the temperature control to its maximum position. After 24 hours. it may turned back to its normal setting. Defrosting the refrigerator cabinet : The integral vapouriser is sealed in foam in the rear wall; you may therefore notice a build-up of frost 22 around the rear area. This layer of frost will start melting when the compressor is not working. Through a system of hoses, the melt-water drains into the collection tray below the compressor, where it will be absorbed into the surrounding air. The unit does not therefore require de-frosting, but only proper cleaning instead. To enable the melt-water to drain freely, always ensure that the channel and discharge opening in the cabinet are free of any blockage. Trouble-shooting Certain typical sounds can be heard when the appliance is switched on. These sounds are: – – caused by the electrical motor within the compressor assembly; during compressor start-up the sound level will be slightly higher for a limited period of time. caused by the cooling agent flowing through the circuit. The following table lists possible malfunctions and their probable causes and solutions. In the event of operational problems, check first whether a solution can be found using this table. If the problem persists, disconnect the appliance from the mains power and contact our Customer Service Department. Problem Possible cause and solution – – The appliance is not working – – at all. There is a power failure The main fuse has blown. The temperature control is set to ‘0‘. The fuse in the wall socket (if applicable) has blown. This can be checked by connecting another electrical device to the socket and checking for function. – – The temperature inside the – freezer compartment is not – low enough. Too much food has been stored in the appliance. The doors are not properly closed. There is too much dust on the condenser. Insufficient ventilation: the unit is too close to a wall or other structure or object. The temperature control is set too low. – The normal operating sound changes or becomes louder. – – – Check for proper positioning (uneven floor?). Are any adjacent objects affected by the running of the cooling unit (i.e. causing them to vibrate?) Are there any objects on top of the unit which might be vibrating? 23 Water is collecting on the The melt-water drain system is blocked. Remove the blockage and bottom of the unit. clean the system. Transporting the appliance To prevent damage to the unit during transport, ensure that all accessories and components inside and around the appliance are securely fastened. The unit must only be transported in its vertical position; do not tilt any more than 30°. Once the unit has been positioned, wait for about 30 minutes before it is connected to the mains. If the unit has been tilted more than 30° during transport, allow it to stand in an upright position for at least 4 hours before it is connected to the mains. Disposal This appliance has been manufactured from recyclable materials. After removing the plug from the wall socket, the unit should be rendered unusable by cutting off the power cord before disposing of it through special waste collection points in accordance with local regulations. The refrigerant and the chemical agent in the insulation foam must be disposed of through a competent agency. Take special care not to damage the cooling circuit before the unit is handed over for such disposal. Guarantee This product is guaranteed against defects in materials and workmanship for a period of two years from the date of purchase. Under this guarantee the manufacturer undertakes to repair or replace any parts found to be defective, providing the product is returned to one of our authorised service centres. This guarantee is only valid if the appliance has been used in accordance with the instructions, and provided that it has not been modified, repaired or interfered with by any unauthorised person, or damaged through misuse. This guarantee naturally does not cover wear and tear, nor breakables such as glass and ceramic items, bulbs etc. This guarantee does not affect your statutory rights, nor any legal rights you may have as a consumer under applicable national legislation governing the purchase of goods. If the product fails to operate and needs to be returned, pack it carefully, enclosing your name and address and the reason for return. If within the guarantee period, please also provide the guarantee card and proof of purchase. Information needed by the Customer Service Department Should repairs to the appliance become necessary, please contact our Customer Service Department, providing a detailed fault description and quoting the model number KS ... on the rating plate of the appliance (see picture). This information will help us to handle your request efficiently. 24 In case of any malfunction or other problem, please contact our Customer Services Department. The address can be found in the appendix to this manual. Product data sheet Art. no. KS 9760 / 9761 / 9763 / 9764 Product category KS 9766 / 9767 Refrigerator-freezer Energy efficiency classification A+ A++ Energy consumption in kWh/year 222 197 The actual consumption depends on the pattern of use and the location of the appliance Usable refrigerator capacity (litres) Usable capacity unit (litres) - Freezer 166 201 46 57 Frost-free : freezer unit no Frost-free : refrigeration unit yes Safe storage time in cas e of malfunction, hrs 17 Freezing capacity, kg/24h 2 3 Climate classification N N-T Ambient temperature range, °C 16-32°C Noise emission 16-43°C 39 dB(a) Dimensions (H x W x D) in mm Weight (kg) Electrical specifications 1440 x 560 x 600 1690 x 560 x 630 51 53 See rating plate 25 Réfrigérateur-congélateur Chère cliente, Cher client, Avant d’utiliser cet appareil, veuillez lire soigneusement les instructions suivantes et conserver ce manuel pour future référence. L’appareil doit être utilisé exclusivement par des personnes familiarisées avec les présentes instructions. Branchement au secteur Cet appareil doit être branché sur une prise de terre installée selon les normes en vigueur. Assurezvous que la tension d’alimentation correspond à la tension indiquée sur la plaque signalétique de l’appareil. Ce produit est conforme à toutes les directives relatives au marquage “CE”. Ne pas brancher cet appareil sur un transformateur. Pour éviter tout bruit de vibration, vérifiez que le cordon ne touche aucune partie à l’arrière du réfrigérateur. Informations générales Cet appareil est un réfrigérateur à compresseur destiné à la conservation à court terme des aliments dans l’armoire principale et à la conservation à long terme dans le compartiment de congélation. Les appareils de réfrigération sont classés par classes climatiques. Veuillez vous référer à la fiche technique pour connaître la classe climatique de cet appareil ; celle-ci se trouve à la fin de ce manuel. Cet appareil est destiné à une utilisation domestique ou similaire, telle que - dans des bureaux et autres locaux commerciaux, - dans des zones agricoles, - par la clientèle dans les hôtels, motels et établissements similaires, - et dans des maisons d’hôtes. Cet appareil n’est conçu ni pour un usage commercial ni pour un usage dans la restauration ou environnements similaires. Nous déclinons toute responsabilité en cas de dommages éventuels subis par cet appareil, résultant d’une utilisation incorrecte ou du non-respect de ce mode d’emploi. Importantes consignes de sécurité Pour prévenir tout risque de blessure corporelle ou de dommage au réfrigérateur, l’appareil doit être transporté uniquement dans son emballage d’origine. Cet appareil ne doit pas être utilisé par une personne (y compris un enfant) souffrant d’une déficience physique, sensorielle ou mentale, ou manquant d’expérience ou de connaissances, sauf si cette personne a été formée à l’utilisation de l’appareil par une personne responsable de sa sécurité, ou est surveillée par celle-ci. Les enfants doivent être surveillés afin qu’ils ne jouent pas avec l’appareil. Attention : Tenez les enfants à l’écart des emballages, qui représentent un risque potentiel, par exemple, de suffocation. Le réfrigérant contenu dans le circuit de refroidissement de cet appareil est l’isobutane (R600a), un gaz naturel non polluant, mais qui est, cependant, inflammable. Par conséquent, évitez d’endommager les composants du 26 système de refroidissement pendant le transport et l’installation de l’appareil. Si, toutefois, le circuit de refroidissement s’avère endommagé, ne pas mettre en marche l’appareil et ne pas le connecter au secteur. Si une flamme ou autre source d’allumage se trouve à proximité du gaz réfrigérant, retirez immédiatement l’appareil de la zone, puis aérez amplement la pièce. Avertissement : Ne pas endommager le circuit de refroidissement. Le gaz qui s’en échappe peut causer des lésions oculaires; il existe également un risque d’incendie. Avertissement : Ne pas obstruer les grilles de ventilation situées dans le caisson ou la structure. Une ventilation suffisante doit être maintenue en continu. Avertissement : Ne pas accélérer le dégivrage à l’aide d’un appareil externe (ex. chauffage rayonnant ou soufflant); conformez-vous uniquement aux procédures recommandées dans ce manuel. Le givre issu du dégivrage est impropre à la consommation. Avertissement : Ne faire fonctionner aucun appareil électrique (par ex. sorbetières) à l’intérieur du compartiment de conservation à moins que celui-ci ne soit spécifiquement permis dans ces instructions. Avant de le brancher sur le secteur, vérifiez minutieusement l’appareil, y compris le cordon d’alimentation, pour tout signe de dommages survenus pendant le transport. Au cas où un dommage aurait été détecté, ne pas brancher l’appareil sur le secteur. Examinez régulièrement le cordon pour vous assurer de son parfait état. Ne pas utiliser l’appareil si le cordon est endommagé. Pour éviter tout risque d’incendie, ne placez aucun appareil thermoélectrique sur le réfrigérateur. Ne placez aucun récipient contenant des liquides sur l’appareil : ceci afin d’éviter tout risque de fuite ou de renversement de liquide qui pourrait endommager l’isolation électrique. Cet appareil est conçu uniquement pour la conservation des aliments. Les substances alcooliques doivent être conservées dans des récipients correctement fermés et à la verticale. Cet appareil n’est pas conçu pour la conservation des liquides explosifs tels que les aérosols à gaz propulseur. Pour éviter tout risque d’empoisonnement alimentaire, ne pas consommer les aliments au-delà de leur date limite de conservation. Les aliments décongelés ne doivent jamais être recongelés. Ne pas s’appuyer sur les clayettes, compartiments, porte etc., ni les surcharger. Protégez l’intérieur du réfrigérateur contre les flammes ou tout autre source susceptible de provoquer des flammes. Débranchez toujours la fiche de la prise murale - en cas de fonctionnement défectueux, - avant de dégivrer l’appareil, - avant de nettoyer l’appareil, - avant des travaux de maintenance ou de réparation, Ne débranchez pas l’appareil en tirant sur le cordon ; tirez toujours sur la fiche. Afin de se conformer aux normes de sécurité en vigueur et d’éviter tout risque, la réparation ou la modification de cet appareil, y compris le remplacement du cordon d’alimentation, doit être effectuée par un de nos agents agréés. Si l’appareil reste longtemps sans être utilisé, nous vous recommandons de laisser la porte ouverte. En cas de vente ou cession de l’appareil à un tiers, ou sa remise à un centre de recyclage agréé, il est important de signaler la présence de la matière isolante ‘cyclopentane’ et également du réfrigérant R600a. Nous nous réservons le droit d'apporter à cet appareil toute modification technique quelconque. 27 Familiarisez-vous avec votre appareil Les éléments de votre réfrigérateur-congélateur peuvent différer en quantité et conception de ceux décrit ici. Cette description fait référence à un des appareils du groupe des réfrigérateurscongélateurs combinés à deux compartiments. L’appareil est constitué de deux parties : l’armoire réfrigérante (B) et le compartiment congélation (A). 1. 2. 3. 4. 5. 6. 7 8. 9 Thermostat et éclairage intérieur Clayettes Outil de nettoyage du tuyau d’évacuation Clayette Bac à légumes & fruits frais Balconnet bouteilles Rangement multi-fonctions Casier à œufs 10. 11. 12. 13. 14. Instructions concernant l’utilisation du congélateur Bac à glaçons Clayette Compresseur Bac d’évaporation de l’eau de dégivrage Condensateur Première utilisation – Retirez tous les emballages extérieurs et intérieurs, y compris les bandes adhésives. – Mettez l’emballage au rebut en respectant les consignes de protection de l’environnement. – Insérez les deux entretoises (1, fournies) dans les rails de guidage correspondants (2) à l’arrière de l’appareil. – Avant de le brancher sur le secteur, vérifiez minutieusement l’appareil, y compris le cordon d’alimentation, pour tout signe de dommages survenus pendant le transport. – Nettoyez l’appareil en suivant les instructions figurant à la rubrique Dégivrage et nettoyage ci-après. 28 – – – – L’appareil doit être déplacé uniquement en position verticale ; ne pas l’incliner à plus de 30°. Une fois que l’appareil est installé, attendez environ 30 minutes avant de le brancher sur le secteur. Si l’appareil a été incliné à plus de 30° pendant le transport, laissez-le en position verticale pendant 4 heures minimum avant de le brancher sur le secteur. Ne vous inquiétez pas si lorsque l’appareil est branché sur le réseau électrique pour la première fois, il dégage une légère odeur de neuf. Celle-ci disparaîtra dès que le processus de réfrigération aura commencé. Installation L’appareil doit être installé dans une pièce sèche et bien aérée. Il doit fonctionner dans des environnements où l’humidité relative est inférieure à 70 %. La fiche technique à la fin de ce manuel contient des informations sur la moyenne des températures convenant à l’utilisation de cet appareil. Ne pas utiliser l’appareil à l’extérieur. Assurez-vous que la fiche reste accessible et peut être retirée de la prise à tout moment. Ne pas exposer le réfrigérateur au soleil et ne pas le placer à proximité d’une source de chaleur quelconque (radiateur, cuisinière etc.). Si cela n’est pas possible, mettez en place un dispositif isolant entre la source de chaleur et l’appareil. L’appareil ne doit pas être installé à l’intérieur d’un meuble, ni directement sous un placard mural, une étagère ou objet similaire. Les dénivelés du sol peuvent être rattrapés à l’aide des pieds réglables, assurant ainsi une stabilité parfaite. Dimensions à respecter lors de l’installation Ventilation L’air chauffé, à l’arrière du réfrigérateur, doit pouvoir circuler librement. Vérifiez qu’aucun objet derrière l’appareil n’entrave cette circulation. Attention: Assurez-vous qu’à tout moment, les orifices de ventilation, à l’arrière, autour de la partie supérieure de l’appareil, soient dégagés. 29 Porte réversible La porte peut être montée pour une ouverture à droite ou à gauche. Pour éviter le risque de blessure corporelle ou de dommage à l’appareil, deux personnes sont nécessaires pour changer le sens d’ouverture de la porte. Avertissement: Débranchez toujours l’appareil de la prise murale avant de procéder à des travaux de maintenance ou de réparation. Avant de commencer, veuillez prendre note des consignes suivantes : Veillez toujours à utiliser le nombre correct de rondelles pour tous les boulons de charnière et vis. Pour que les portes puissent fermer hermétiquement, veillez à ce qu’elles soient correctement alignées pendant le montage. – – – – – – – – – – – – – – – – – Ouvrez la porte du congélateur (18). Retirez les vis de fixation (1 et 3) du panneau supérieur (deux vis à l’avant et deux à l’arrière) puis retirez le panneau (4). Dévissez la charnière du haut (5) et retirez-la. Attention : la porte doit être soutenue pendant l’opération. Retirez la porte du congélateur (18). Dévissez l’axe de la charnière (7) ainsi que l’écrou (6) et les rondelles (8), et replacez l’ensemble de l’autre côté de la charnière. Dévissez les vis de fixation (11) de la charnière du milieu (10). Attention : Soutenez la porte. Retirez la charnière du milieu (10) ainsi que les rondelles de l’axe de la charnière et la plaquette en plastique (9). Retirez la porte du réfrigérateur (13). Inclinez l’appareil vers l’arrière. Dévissez la charnière du bas (14) et retirez-la. Dévissez l’axe de la charnière (15) de son support et réinsérez-la de l’autre côté. Retirez les deux vis à gauche, sous l’appareil, et replacez-les à droite. Fixez la charnière du bas (14) à gauche, sous l’appareil. Posez les rondelles sur l’axe de la charnière. Retirez le capuchon (19) de la porte du congélateur et le capuchon (16) de la porte du réfrigérateur et replacez-les sur le côté opposé des portes. Retirez les capuchons (17) du panneau entre les compartiments congélation et réfrigération et retirez les vis. 30 – – – – – – – Replacez les deux vis de l’autre côté puis les capuchons. Montez la porte du réfrigérateur (13) sur l’axe (15) de la charnière du bas. Montez l’axe de la charnière du milieu (10), avec les rondelles, sur la porte du réfrigérateur (13). Fixez la charnière du milieu (10) avec la plaquette en plastique (9). Retirez les deux vis de la partie supérieure gauche et replacez-les à droite. Montez la porte du congélateur (18) sur l’axe de la charnière du milieu. Fixez l’axe sur la charnière du haut (5) de la porte du congélateur (18), puis montez et maintenez en place la charnière du haut (5). Remarque : Si nécessaire, l’alignement des portes peut être corrigé en dévissant légèrement les vis de la charnière, mais n’oubliez pas de les revisser ensuite. – Replacez le panneau supérieur (4) et avec les vis (1 et 3) maintenez-les en place (deux vis à l’avant et deux à l’arrière). Si l’appareil a été penché à plus de 30°, attendez environ 4 heures avant de le rebrancher au secteur. Thermostat Cet appareil est mis en marche automatiquement par son branchement au secteur. Il n’est éteint que lorsque la fiche est retirée de la prise murale. La température à l’intérieur de l’armoire est réglable à l’aide du bouton du thermostat. Vous réduisez la température en tournant le bouton du thermostat dans le sens des aiguilles d’une montre, et vous augmentez la température en le tournant dans le sens inverse des aiguilles d’une montre. Un réglage moyen est en général tout à fait adapté à une utilisation domestique. Nous vous conseillons d’utiliser un thermomètre pour vérifier la température actuelle à l’intérieur de l’armoire et pour effectuer les réglages si nécessaire. A la suite d’une interruption de courant, ou si l’appareil a été éteint volontairement, il peut prendre entre 3 à 5 minutes avant de se remettre en marche. Sur la position ‘0’, la fonction de refroidissement est arrêtée, mais l’appareil reste branché au secteur. 1. 2. 3. 4. 5. Thermostat Panneau de protection de la commande Ampoule Capot de protection de l’ampoule Mécanisme de verrouillage Eclairage intérieur Pour changer l’ampoule: – Retirez la fiche de la prise murale. – Utilisez un outil adapté pour libérer l’ergot de verrouillage (5) et retirez le capot de protection de l’ampoule (4). – Retirez l’ampoule défectueuse, puis remplacez-la par une ampoule neuve (15 W max., douille type E14). – Replacez le capot de protection. – Branchez l’appareil sur le secteur. Il peut prendre entre 3 à 5 minutes avant de se remettre en marche. 31 Porte du compartiment de congélation Pour prévenir la décongélation prématurée des aliments congelés, gardez toujours la porte du compartiment de congélation fermée. Ceci évitera également l’accumulation excessive de givre. N’ouvrez la porte que momentanément, pour placer les aliments dans le compartiment de congélation ou pour les retirer. Congélation et conservation des aliments – Les températures à l’intérieur de l’armoire et du compartiment de congélation dépendent principalement de la température ambiante, la position de la commande et de la quantité d’aliments conservés. Compartiment de congélation: – Le compartiment de congélation est réservé à la congélation des aliments frais et à la conservation à long terme des aliments surgelés, ainsi qu’à la fabrication de glaçons. – Afin de préserver la richesse de vos aliments en éléments nutritifs (comme les vitamines), les aliments frais doivent être congelés dès que possible. Pour ce faire, les aliments préparés doivent être placés dans les compartiments du congélateur, convenablement espacés sur une ou deux rangées. – Évitez le contact avec des aliments déjà congelés. – Attention: Ne pas excéder la capacité maximale de congélation journalière. La fiche technique figurant à la fin de ce manuel d’utilisation contient des informations sur la capacité de congélation maximale journalière. – Placez le thermostat sur la position Max. Au bout de 24 heures, une fois les aliments bien congelés, le thermostat peut être replacé sur sa position d’origine. – Vous pouvez réduire le temps de congélation en réduisant la taille des portions à congeler. – Les emballages convenant aux aliments congelés sont le film plastique alimentaire transparent (c.à.d. sans coloration), les sacs de congélation ou le papier aluminium. Les emballages doivent être bien aérés avant utilisation; leur étanchéité doit être vérifiée avant de congeler les aliments. Nous vous conseillons vivement d’étiqueter chaque article congelé, en notant toutes les informations utiles, telles que la nature de l’aliment, la date de congélation et la date limite de conservation. – N’essayez pas de congeler des boissons gazeuses, des aliments chauds ou des liquides en bouteilles quels qu’ils soient. – Les aliments congelés peuvent être décongelés dans le compartiment réfrigérateur. De cette façon, les aliments sont décongelés plus lentement et conservent leur goût. De plus, les aliments congelés permettent de maintenir la température dans le réfrigérateur à son niveau voulu. Les durées limites de conservation des aliments congelés (en mois) sont détaillées dans le tableau suivant. 32 Ne pas dépasser ces durées limites de conservation. Cependant, respectez toujours les dates d’expiration du fabricant pour les aliments congelés. – En cas d’interruption prolongée du fonctionnement de l’appareil (par ex. en cas d’interruption de courant), la porte doit restée fermée; ceci afin de conserver une température aussi basse que possible dans le compartiment. La fiche technique figurant à la fin de ce manuel d’utilisation contient des informations détaillées concernant la durée de conservation maximale en case de défaillance. Même une légère hausse de température à l’intérieur réduira la durée de conservation des aliments. Cuve du réfrigérateur – Un réfrigérateur comporte plusieurs zones dont la température est différente. La zone la plus chaude se trouve autour de la porte en haut et la zone la plus froide se situe vers le fond et en bas de la cuve. – De ce fait, les aliments doivent être conservés de la façon suivante : – Sur les étagères principales (de haut en bas): les pâtisseries, repas pré cuisinés, produits laitiers, viande, poisson, charcuterie et saucisses. – Dans le bac à légumes: légumes, salade et fruits. – Dans la porte (de haut en bas): beurre, fromage, oeufs, tubes (par ex. la moutarde), petites bouteilles, grandes bouteilles, lait et cartons de jus de fruit. – Pour commencer, mettez le thermostat sur la position 4. Si la température devient trop froide, mettez le thermostat sur 1 à 3; si la température n’est pas assez froide, mettez le thermostat sur 5 à 7. Si vous constatez la formation de givre sur la paroi arrière de la cuve, ceci est probablement dû à une ouverture prolongée de la porte, la mise au réfrigérateur d’aliments encore tièdes ou à un réglage trop élevé de la température. – Les liquides ou aliments à forte odeur, ou les aliments susceptibles d’absorber les odeurs fortes (ex. fromages, poissons ou beurre), doivent être conservés dans des récipients fermant hermétiquement. – Laissez refroidir à température ambiante les aliments tièdes avant de les placer au réfrigérateur. – Vérifiez toujours que la porte est bien fermée et que le joint n’est pas gêné par les aliments stockés dans la cuve ou la porte. Fabrication de glaçons Un bac est prévu pour la fabrication de glaçons. Remplissez le bac aux ¾ d’eau potable, puis placez-le dans le compartiment de congélation. Pour faciliter le démoulage des glaçons, laissez le bac 5 minutes à température ambiante. Dégivrage et nettoyage – Débranchez toujours la fiche de la prise murale avant le nettoyage. – Ne pas asperger d’eau l’extérieur de l’appareil et ne pas en répandre à l’intérieur. – Pour un nettoyage fréquent, nous vous conseillons d’utiliser de l’eau tiède additionnée d’un détergent doux. Nettoyez l’intérieur du réfrigérateur environ une fois par mois afin d’éviter toute mauvaise odeur. – Nettoyez les accessoires séparément à l’eau savonneuse. Ne pas les mettre au lave-vaisselle. – N’utiliser aucun produit d’entretien abrasif ou surpuissant ni ceux contenant de l’alcool. – Après le nettoyage, essuyez toutes les surfaces à l’eau claire avant de bien les sécher. Lorsque vous rebranchez la fiche à la prise murale, assurez-vous d’avoir les mains sèches. – Pour économiser de l’énergie et pour assurer que votre appareil fonctionne de façon optimale, 33 – veuillez nettoyer le condensateur (à l’arrière) ainsi que le compresseur au moins deux fois par an avec une brosse ou un aspirateur. Pendant le nettoyage, prenez soin de ne pas déplacer ou endommager la plaque signalétique à l’intérieur de la cuve. Dégivrage du compartiment de congélation Dès que l’accumulation de glace dans le compartiment congélation atteint une épaisseur de 2-4 mm, l’appareil a besoin d’être dégivré. Cette opération doit être effectuée environ deux fois par an. – Vérifiez que la fiche a été retirée de la prise murale. – Retirez tous les aliments du compartiment, enveloppez-les dans du papier journal, puis placezles dans un endroit frais pour les maintenir à basse température. Notez que même une légère hausse de température écourtera la durée de conservation et l‘aliment devra être consommé aussitôt. – Laissez la porte ouverte. Pour accélérer le dégivrage, placez un ou plusieurs récipients d‘eau chaude (pas bouillante) à l‘intérieur du compartiment de congélation. Avertissement N’utilisez aucun dispositif externe ou autre moyen (ex. chauffages ou convecteurs) pour accélérer le dégivrage. – Après le nettoyage, séchez soigneusement le compartiment congélation et réglez le thermostat sur sa position maximale. Au bout de 24 heures, vous pouvez à nouveau le régler sur une position normale. Dégivrage du réfrigérateur: Le vaporisateur intégré est hermétiquement encastré dans de la mousse dans la partie arrière de l’appareil et vous noterez peut-être une accumulation de glace à l’arrière de l’appareil. Cette couche de glace se dégivre lorsque le compresseur est à l’arrêt. L’eau de dégivrage est alors évacuée par un système de tuyaux et se vide dans un bac situé sous le compresseur et prévu à cet effet, dans lequel elle s’évaporera. Vous n’avez donc pas besoin de dégivrer votre appareil, mais simplement de le nettoyer. Pour permettre à l’eau de dégivrage de s’évacuer correctement, assurez toujours que le tuyau d’évacuation et son embouchure dans l’armoire ne sont pas bouchés. Dépistage des pannes Lors de la mise en marche, certains sons sont audibles. Ces sons sont dus : – – au moteur électrique du bloc compresseur; lors de la mise en route du compresseur, le niveau du son reste élevé pendant un certain temps. au flux de réfrigérant dans le circuit de refroidissement. Le tableau suivant présente les pannes possibles, leurs causes et solutions. En cas de problème de 34 fonctionnement, vérifiez d’abord si la solution figure dans ce tableau. Si le problème persiste, débranchez l’appareil du secteur, puis appelez notre Service Clientèle. Problème Cause possible et solution – – – – Le courant est coupé Un fusible a sauté. Le bouton du thermostat est sur ‘0'. Le fusible de la prise murale (selon le cas) a sauté. Branchez un appareil différent sur la prise pour vérifier son bon fonctionnement. – – La température à l’intérieur du – compartiment de congélation – n’est pas assez basse. – Trop d’aliments stockés dans l’appareil. Les portes ne sont pas bien fermées. Trop de poussière sur le condensateur. Ventilation insuffisante: l'appareil est trop près du mur ou d'un autre objet. La température a été réglée trop basse. – Le bruit lors du fonctionnement – n’e s t plu s l e m ê m e ou a augmenté d’intensité – Vérifiez le bon positionnement de l’appareil (sol irrégulier?). Le système de refroidissement influe t-il sur un objet adjacent (ex. provoque des vibrations) ? Y a-t-il des objets sur l’appareil qui vibrent ? L’appareil ne fonctionne pas. De l’eau s’accumule dans le fond Le tube d’évacuation d’eau est bouché. Retirez l’obstruction et de l’appareil. nettoyez le système. Transport Pour éviter que l’appareil soit endommagé pendant le transport, assurez-vous que tous les accessoires et élements à l’intérieur et autour de l’appareil soient fixés correctement. L’appareil doit etre transporté uniquement dans sa position verticale ; ne pas l’incliner à plus de 30°. Une fois que l’appareil a été installé dans sa position définitive, attendez environ 30 minutes avant de le brancher sur le secteur. Si l’appareil a été incliné à plus de 30° pendant le transport, laissez-le dans une position verticale pendant au moins 4 heures avant de le brancher sur le secteur. Mise au rebut Cet appareil est fabriqué à partir de matières recyclées. Après avoir retiré la fiche de la prise murale, rendez l’appareil inutilisable en coupant le cordon d’alimentation. Apportez-le ensuite à un centre de collecte, conformément à la réglementation locale en vigueur. Le réfrigérant et le produit chimique contenu dans la mousse isolante doivent être traités par un service compétent agréé. Prenez soin de ne pas endommager le circuit de refroidissement avant de remettre l’appareil aux services compétents. Garantie Cet appareil est garanti par le fabricant pendant une durée de deux ans à partir de la date d’achat, contre tous défauts de matière et vices de fabrication. Au cours de cette période, toute pièce défectueuse sera remplacée gratuitement. Cette garantie ne couvre pas l’usure normale de l’appareil, les pièces cassables telles que du verre, des ampoules, etc., ni les détériorations provoquées par une mauvaise utilisation et le non-respect du mode d’emploi. Aucune garantie ne sera due si l’appareil a fait l’objet d’une intervention à titre de réparation ou d’entretien par des personnes non-agréées par 35 nous-mêmes. Cette garantie n’affecte pas les droits légaux des consommateurs sous les lois nationales applicables en vigueur, ni les droits du consommateur face au revendeur résultant du contrat de vente/d’achat. Si votre appareil ne fonctionne plus normalement, veuillez l’adresser, sous emballage solide, à une de nos stations de service après-vente agréées, muni de votre nom et adresse. Si vous retournez votre appareil pendant la période de garantie, n’oubliez pas de joindre à votre envoi la preuve de garantie (ticket de caisse, facture etc.) certifiée par le vendeur. Informations à fournir au Service Clientèle Si une réparation de l’appareil s’avère nécessaire, veuillez contacter notre Service Clientèle, en leur fournissant un résumé détaillé du défaut et le numéro d’article KS ... figurant sur la plaque signalétique de l’appareil (voir schéma). Ces informations nous permettront de traiter votre demande de manière efficace. Veuillez contacter notre Service Clientèle en cas de problème ou de mal fonctionnement de l’appareil. Vous trouverez l’adresse de ce service dans l’appendice de ce manuel. Fiche technique du produit Art. no. KS 9760 / 9761 / 9763 / 9764 Catégorie du produit KS 9766 / 9767 Réfrigérateur/congélateur Classe d'efficacité énergétique A+ A++ Consommation d'énergie kWh/an 222 197 La consommation réelle dépend de l’usage quotidien et l’emplacement de l’appareil Capacité du réfrigérateur (litres) Capacité (litres) - partie congélateur 166 201 46 57 Dégivrage automatique : partie congélateur non Dégivrage automatique : partie réfrigérateur oui 36 Temps de conservation des aliments en cas de panne, H 17 Capacité de congélation, kg/24 H 2 3 Classe climatique N N-T Plage de température ambiante, °C 16-32°C Emission de bruit 16-43°C 39 dB(a) Dimensions (H x L x P) en mm 1440 x 560 x 600 1690 x 560 x 630 Poids, kg 51 53 Alimentation Voir plaque signalétique 37 Koelkast Beste klant Voordat men dit apparaat gebruikt, moet men de volgende instructies goed doorlezen en bewaar dit manuaal voor latere referentie. Dit apparaat moet alleen gebruikt worden door personen bekent met de gebruiksaanwijzing. Aansluiting Dit apparaat mag alleen worden aangesloten op een volgens de wet geinstalleerd geaard stopcontact. Zorg ervoor dat de op het typeplaatje aangegeven spanning overeenkomt met de netspanning. Dit product komt overeen met de richtlijnen aangegeven op het CE-label. Gebruik dit apparaat nooit met een transformer. Om vibratie geluiden te voorkomen, zorg dat het snoer geen andere delen van de achterkant van de koelkast aanraakt. Algemene informatie Dit apparaat is een compressor koelkast, ontworpen voor het opslaan van voedsel voor korte periodes in de koelkast en voor lange periodes in het vriezer compartiment. Koelingsapparaten zijn geclassifiseerd in verschillende klimaat klassen. Gebruik het product informatieblad voor de classificatie van deze unit; het informatieblad kan gevonden worden achterin dit manuaal. Dit apparaat is bestemt voor huishoudelijk of gelijkwaardig gebruik, zoals - in kantoren of andere bedrijfsruimtes, - in agrarische instellingen, - door klanten in hotels, motels enz. en gelijkwaardige establissementen, - in bed-en-ontbijt gasthuizen. Dit apparaat is niet geschikt voor commercieel gebruik, evenmin voor gebruik in een catering bedrijf en gelijkwaardige groothandels. Wordt dit apparaat op een verkeerde manier gebruikt of worden de veiligheidsregels niet gevolgt, dan kan de fabrikant niet aansprakelijk worden gesteld voor eventuele schades. Belangrijke veiligheidsaanwijzingen Om gevaar van persoonlijke ongelukken te voorkomen of schade aan het apparaat, mag dit apparaat alleen vervoert worden in de orginele verpakking. Dit apparaat is niet bestemd voor gebruik door personen (Kinderen inbegrepen) met verminderde fysische, zintuiglijke of mentale bekwaamheid, of gebrek aan ervaring en wetenschap, behalve wanneer men begeleiding of instructies van het apparaat gehad heeft van een persoon verantwoordelijk voor hun veiligheid. Kinderen moeten onder begeleiding zijn om ervoor te zorgen dat ze niet met het apparaat spelen. Waarschuwing: houdt kinderen weg van inpakmateriaal, daar deze een bron van gevaar zijn b.v. door verstikking. Het koelingscircuit in dit apparaat bevat het koelvriesmiddel isobutane (R600a), een natuurlijk gas met een hoge level van milieu compatibility, welke brandbaar is. Zorg er daarom voor, dat geen van de componenten van het koelingscircuit beschadigt worden tijdens het transporteren of 38 installeren van het apparaat. Wanneer er toch schade aan het koelingscircuit ontstaat, moet men het apparaat niet aanzetten of aansluiten op het stroomnet, maar verwijder open vuur en andere bronnen van ontvlamming weg van het koelvries gas; laat de kamer waar het apparaat geplaatst is goed ventileren. Waarschuwing: Beschadig nooit het koelingscircuit. Ontsnappend koelvries gas kan beschadigingen aan de ogen veroorzaken; er is ook gevaar voor ontbranding van het gas. Waarschuwing: Houd ventilatieopeningen, in het apparaat of in de ingebouwde structuur, vrij van versperring. Voldoende ventilatie moet altijd aanwezig zijn. Waarschuwing: Gebruik geen externe middelen (b.v.; verwarming of verwarmingsfan) om het ontdooien te versnellen; volg alleen de methode aangegeven in deze gebruiksaanwijzing. Het ijs wat men verwijdert tijdens het ontdooien is niet geschikt voor menselijke consumptie. Waarschuwing: Gebruik geen elektrische apparaten (b.v. ijsmakers) in de voedsel opbergruimte. Voordat men het apparaat aansluit op het stroomnet, moet de unit eerst goed gecontroleerd worden op beschadigingen, snoer inbegrepen. In het geval dat men zulke schade vind, moet men het apparaat niet op het stroomnet aansluiten. Het snoer moet regelmatig op eventuele beschadiging worden gecontroleerd. Wanneer een beschadiging wordt geconstateerd mag het apparaat niet meer worden gebruikt. Om gevaar van brand te voorkomen, plaats geen thermo-elektrische apparaten boven op de apparaat. Plaats nooit containers met vloeistoffen op de unit: dit om voorkomen dat lekken of ontsnappen van vloeistoffen de elektrische isolatie beschadigd. Deze unit is alleen ontworpen voor het opbergen van voedsel. Alcoholische dranken mogen alleen opgeborgen worden in gesloten containers en in rechtopstaande positie. Dit apparaat is niet ontworpen voor het opbergen van explosieve materialen zoals spuitbussen met een brandbaar drijfgas. Om gevaar van voedselvergiftiging te voorkomen, eet geen voedsel waarvan de opbergtijd overschreden is. Ontdooit voedsel mag nooit opnieuw ingevroren worden. Leun nooit en plaats geen onnodig gewicht op de rekken, vakken, deur enz. Bescherm de binnenkant van de apparaat altijd tegen open vuur en andere vormen van verbranding. Verwijder de stekker uit het stopcontact wanneer - het apparaat niet juist werkt, - voor het ontdooien, - tijdens het schoonmaken, - voordat onderhoud of reparatiewerkzaamheden uitgevoert worden. Trek de stekker niet aan het snoer uit het stopcontact, trek aan de stekker zelf. Om te voldoen aan alle veiligheidsvoorschriften en om gevaar te voorkomen, reparaties en modificaties aan dit apparaat mogen alleen uitgevoert worden door gemachtigd service personeel, vervangen van snoer inbegrepen. Wanneer men de unit voor langere periodes niet gebruikt, bevelen wij aan dat men de deur open houd. Wanneer het apparaat verkocht word, en overgegeven wordt aan een derde of wanneer men het apparaat weggooit in een daarvoor geschikte recycle faciliteit, attentie moet gegeven worden aan de aanwezigheid van de insolatie agent ‘cyclopenthane’ en tevens het koelvriesmiddel R600a. Wij hebben het recht om technische modificaties te introduceren. Beschrijving De componenten van jouw koelkast-vriezer unit kunnen verschillen van deze beschrijving in kwantiteit en ontwerp. Deze beschrijving verwijst naar een unit van de groep van twee39 compartimenten koelkast-vriezer combinaties. De unit bestaat uit twee delen: koelkast (B) en vrieskast (A). 1. 2. 3. 4. 5. 6. 7 8. 9 10. 11. 12. 13. 14. Temperatuurcontrole en binnenverlichting Opbergplaten (hoogte-verstelbaar) Afvoerkanaal schoonmaakhulpstuk Opbergplaten Groenten/fruit vers opbergruimte Flessenrek Algemene opbergruimte Eier opbergruimte Instructies voor vriezergebruik Ijsblokbakje Opbergplaten Compressor Smeltwater verdampingsplaat Condensor Voor het eerste gebruik – Verwijder eerst al het inwendige en uitwendige verpakkingsmateriaal, plakband inbegrepen. – De verpakkingsmaterialen moeten juist weggegooit worden. – Pas de twee ruimtemaker elementen (1, bijgelevert) in de corresponderende geleide gaten aan de achterkant (2). – Voordat men het apparaat aansluit op het stroomnet, moet de unit eerst goed gecontroleerd worden op beschadigingen, snoer inbegrepen. – Maak het apparaat goed schoon zoals aangegeven in de sectie Ontdooien en schoonmaken hieronder. – De unit moet alleen getransporteerd worden in verticale positie; kantel niet meer dan 30°. – Wanneer de unit geplaatst is, wacht dan voor ongeveer 30 minuten voordat men het aansluit op het stroomnet. – Wanneer men de unit meer dan 30° gekantelt heeft tijdens het trasnporteren, laat het dan voor minstens 4 uren rechtop staan voordat men het op het stroomnet aansluit. 40 – Wanneer de unit voor de eerste keer is aangezet, zal een lichte ‘nieuw’ geur aanwezing zijn. Hoe dan ook, dit zal verdwijnen nadat het afkoel proces is begonnen. Installatie Het apparaat moet geplaatst worden in een goed geventileerde, droge ruimte. Het moet gebruikt worden in condities waar de maximale vochtigheid niet hoger is dan 70 %. Het product informatieblad achterin dit manuaal bevat details voor de omgevingstemperatuur range geschikt voor dit apparaat. Gebruik het apparaat niet buitenshuis. Zorg dat de stekker altijd gemakkelijk uit het stopcontact verwijdert kan worden. Zorg dat de vrieskast niet in direct zonlicht geplaatst is, en plaats het nooit naast willekeurig welke andere hittebronnen (verwarming, fornuis enz). Wanneer men dit niet kan voorkomen, moet men een geschikte insolatie plaatsen tussen de hittebron en de unit. Deze unit moet niet in een kabinet geinstalleerd worden, eveneens niet direct onder een hangende kast, boekenplank of gelijkwaardig object. In geval van ongelijke vloeren, kunnen de verstelbare voeren gebruikt worden voor compensatie en optimale stabiliteit. Afmetingen voor opzetten Ventilatie D e v e r w ar m d e lu c ht a an d e achterkant van de koelkast moet vrij kunnen circuleren. Daarom, moet men ervoor zorgen dat de circulatie achter de unit niet geblokkeerd is. Waarschuwing: Zorg er altijd voor dat de ventilatieopeningen aan de achterkant en rond de topafdeking niet geblokkeerd zijn. Omkeerbare deur Wanneer nodig, mag de deur omgedraait worden, d.w.z. van de rechter scharnier (standaard installatie) naar de linker scharnier. Om gevaar van persoonlijk letsel of schade aan de unit te voorkomen, heeft men twee personen nodig om de deur om te keren. 41 Waarschuwing: Verwijder altijd de unit van het stroomnet voordat men onderhoud of reparatiewerkzaamheden uitvoert. Voordat men begint, let op het volgende: Zorg er altijd voor dat men de juiste hoeveelheid tussenplaatjes gebruikt op alle scharnierbouten en schroeven. Zodat de deur stevig tegen het frame sluit, wees zeer voorzichtig en zorg dat deze juist gelijkgericht is tijdens het opbouwen. – – Open de vriezerdeur (18). Verwijder de schroeven (1 en 3) van de bovenste afdeking (twee schroeven aan de voorkant en twee aan de achterkant), en verwijder de afdeking (4). – Schroef de bovenste scharnierbracket (5) los en verwijder het. Waarschuwing: ondersteun de deur terwijl men dit doet. – Neem er de vriezetrdeur (18) af. – Schroef de scharnierpin (7) los samen met de moer (6) en de tussenplaatjes (8), en plaats de gehele opbouw aan de tegenovergestelde zijde van de scharnierbracket. – Draai de schroeven (11) los op de middelste scharnierbracket (10). – Waarschuwing: Ondersteun de deur. – Neem er de middelste scharnierbracket (10) af, samen met de scharnierpin, tussenplaatjes en de plastiek plaat (9). – Neem er de koelkastdeur (13) af. – Kantel de hele unit naar achteren. – Schroef de onderste scharnierbracket (14) los en verwijder het. – Schroef de scharnierpin (5) los van de bracket, en plaats het terug aan de andere zijde. – Verwijder beide schroeven aan de linkerkant van de onderzijde en plaats deze terug aan de rechterkant. – Pas de onderste scharnierbracket (14) aan de linkerkant van de onderzijde. – Plaats de tussenplaatjes op de scharnierpin. – Verwijder het kapje (19) van de vriezerdeur en het kapje (16) van de koelkastdeur en plaats deze terug aan de tegenovergestelde zijde van de deuren. – Verwijder de kapjes (17) van de afscheiding tussen de koelkast en vriezercompartimenten en verwijder de schroeven. – Plaats beide schroeven aan de tegenovergestelde zijde en plaats dan de kapjes. – Pas de koelkastdeur (13) op de pin (15) van de onderste scharnierbracket. – Pas de pin op de middelste scharnierbracket (10), samen met de tussenplaatjes, op de koelkastdeur (13). – Pas de middelste scharnierbracket (10) samen met de plastiek plaat (9). – Verwijder beide schroeven van de linker bovenkant en plaats deze aan de rechter bovenkant. – Plaats de vriezerdeur (18) op de pin van de middelste scharnierbracket. – Pas de pin van de bovenste scharnierbracket (5) op de vriezerdeur (18), en pas dan de bovenste scharnierbracket (5). Let op: Wanneer nodig, kan de ophanging van de deuren versteld worden door de schroeven van de scharnierbracket een beetje los te draaien, niet vergeten om ze hierna weer vast te draaien.. – Plaats de topafdeking (4) en gebruik de schroeven (1 en 3) om het vast te zetten (twee schroeven aan de voorkant en twee aan de achterkant). Wanneer men de unit voor meer dan 30° gekantelt heeft, wacht dan voor ongeveer 4 uur voordat men het weer aansluit op het stroomnet. 42 Temperatuur controle Deze unit is geactiveerd door het aan te sluiten op het stroomnet. Het is alleen geheel uitgeschakeld wanneer men de stekker uit het stopcontact verwijdert. De temperatuur in de koelkast kan versteld worden met gebruik van de temperatuurcontrole. Wanneer men de temperatuur controle rechtsom draait zal de temperatuur verlagen, terwijl het zal verhogen wanneer men het linksom draait. De medium stand is normaal voldoende voor huishoudelijk gebruik. Wij bevelen aan dat men een thermometer gebruikt om de werkelijke temperatuur in de kast te meten en verstel wanneer nodig. Na een stroomonderbreking, of wanneer de unit opzettelijk uitgeschakeld is, kan het 3 tot 5 minuten duren voordat men de unit weer kan aanzetten. In positie ‘0’, de koelfunctie is uitgeschakeld, ondanks dat het apparaat nog aangesloten is op het stroomnet. 1. 2. 3. 4. 5. Temperatuurcontrole Controlepaneel afdeking Lampje Lampafdeking Sluitingsmechanisme Binnenverlichting Vervangen van het lampje: – Verwijder de stekker uit het stopcontact. – Gebruik een daarvoor geschikt hulpstuk om de sluitingspin (5) te ontkoppelen en verwijder de lampafdeking (4). – Neem het gebroken lampje en vervang het met een nieuw lampje (max. 15 W., fitting van type E14). – Plaats de lampafdeking terug. – Sluit de unit aan op het stroomnet. Het kan 3 tot 5 minuten duren voordat men de unit weer kan aanzetten. Vriezer compartiment deur Om ervoor te zorgen dat bevroren voedsel niet voortijdig ontdooit, moet men de deur van het vriezer compartiment altijd gesloten houden. Dit zal ook onnodige opbouw van ijs en vorst voorkomen. Zorg er daarom voor, dat men de deur alleen voor korte tijd opent, genoeg om voedsel in het vriezer compartiment te plaatsen of te verwijderen. Vriezen en opbergen van voedsel – De temperatuur in de koelkast en het vriezer compartiment hangen grotendeels af van de omgevende temperatuur, the temperatuurcontrole zetting en de hoeveelheid op te bergen voedsel. Vriezer compartiment: – Het vriezer compartiment is ontworpen voor het diepvriezen, het opslaan van bevroren voedsel voor lange periodes, en voor het maken van ijsblokjes. – Om te zorgen dat de voedzame elementen zoals vitaminen niet verloren gaan, moet men vers 43 – – – – – – – voedsel zo snel als mogelijk geheel invriezen. En daarom moet men het bereide voedsel in de vriezerruimtes plaatsten, netjes uitgespreid in èèn of twee rijen. Voorkom contact met voedsel wat al bevroren is. Waarschuwing: Overschrijd nooit de dagelijkse maximale vriescapaciteit. Het product informatieblad achterin dit manuaal beval details voor de maximale dagelijkse vriescapaciteit. Zet de temperatuurcontrole naar Max. Na 24 uren, wanneer het voedsel goed bevroren is, kan men de temperatuurcontrole teruggezet worden naar de originele positie. De vriestijd kan verkort worden door het voedsel in kleine porties te verdelen. Geschikte verpakkingsmaterialen voor gevroren voedsel zijn doorzichtig (d.w.z. niet gekleurt) plastiek folie of zakken of aluminium folie. Het verpakkingsmateriaal moet goed gelucht en gecontroleert worden voor luchtdichtheid voor het vriezen van het voedsel. Wij bevelen aan dat men een label plaatst op ieder item in de vriezer met alle belangrijke informatie zoals soort van voedsel, datum van invriezen en houdbaarheidsdatum. Probeer nooit carbonaat houdende dranken, warm voedsel of welke vloeistof dan ook in flessen in te vriezen. Bevroren voedsel kan ontdooit worden in de koelkast. Op deze manier, is het voedsel langzaam ontdooit en zal de smaak bewaart blijven. Bovendien, zal het bevroren voedsel helpen met het behouden van de voorgenomen temperatuurlevel in de koelkast. Houdbaarheidsdatum voor gevroren voedsel is aangegeven (in maanden) in de tabel hieronder. Overschrijd deze opbergtijden niet. Echter, observeer altijd de fabrikants ,gebruik bij datum, voor het gevroren voedsel. – In het gaval dat men de unit uitschakeld voor een langere periode (b.v. tijdens een stroomstoring), moet men de deur niet openen; dit zal helpen met het handhaven van de laagst mogelijke temperatuur in de vrieskast. Het product informatieblad achterin dit manuaal bevat uitvoerige informatie voor de maximale veilige opbergtijd in het geval van een defect. Zelfs een kleine verhoging in binnentemperatuur zal de opbergtijd van het voedsel verkorten. Koelkast – Verschillende gedeeltes van de koelkast worden op een verschillende manier beinvloed door een koelingseffect. Het warmste gedeelte is rond de deur in het bovenste gedeelte van de koelkast, het koudste gedeelte is rond de achtermuur en in het onderste gedeelte van de koelkast. – Het voedsel moet daarom als volgt opgeborgen worden: – Op de hoofdplanken van de koelkast (van boven naar beneden): bakkerij items, kant en klare maaltijden, melk producten, vlees, vis en cold-cuts/worstjes. – In het groenten compartiment: groenten, sla en fruit. – In de deur (van boven naar beneden): boter, kaas, eieren, tubes (b.v. mosterd), kleine flessen, grote flessen, melk en vruchtensap tetra-pakken. 44 – – – – Om te beginnen, zet de temperatuurcontrole naar positie 4. Wanneer de koeling te hoog is, verlaag het naar positie 1-3; wanneer dat onvoldoende is, verhoog het naar 5-7. Wanneer men vorst waarneemt op de achtermuur, is het zeer goed mogelijk dat de deur te lang open geweest is, dat warm voedsel in de koelkast geplaatst is, of dat de temperatuurcontrole een te hoge stand heeft. Vloeibaar of sterk ruikend voedsel, of voedsel wat gemakkelijk sterke geur absorbeert (b.v. kaas, vis, boter), moeten apart, of in luchtdichte containers opgeborgen worden. Warm voedsel moet men eerst laten afkoelen tot kamertemperatuur voordat men dit in de koelkast plaatst. Zorg er altijd voor dat de deur goed gesloten is en dat de afdichting niet geblokkeert word door voedsel wat opgeborgen is in de kast of de deur. Maken van ijsblokjes Een speciaal ijsblokjes bakje is bijgelevert voor het maken van ijsblokjes. Vul het bakje ¾ vol met drinkwater en plaats het in het vriezer compartiment. De ijsblokjes zijn gemakkelijk te verwijderen van het bakje wanneer men het voor 5 minuten op kamertemperatuur laat staan. Ontdooien en schoonmaken – Verwijder altijd de stekker uit het stopcontact voor het schoonmaken. – Giet geen water over of in de unit. – Voor regelmatig schoonmaken bevelen wij aan dat men warm water met wat zachte zeep gebruikt. Om een onaangename geur in de koelkast te voorkomen, moet men deze minstens eens per maand schoonmaken. – Alle hulpstukken moeten apart schoongemaakt worden met zeepwater. Plaats nooit in de vaatwasmachine. – Gebruik geen schurende of harde schoonmaakmiddelen of schoonmaakmiddelen die alcohol bevatten. – Na het schoonmaken, spoel alle oppervlakken goed af met schoon water voordat men deze geheel afdroogt. Wanneer men de stekker weer in het stopcontact stopt moet men ervoor zorgen dat men droge handen heeft. – Om energie te besparen en voor optimale werking, moet de condensator (aan de achterkant) zowel als de compressor minstens twee maal per jaar met een borstel of stofzuiger schoongemaakt worden. – Pas op dat men niet het waarderingsplaatje in de kast beschadigd of verwijderd tijdens het schoonmaken. Wanneer men het vriezer compartiment ontdooit Wanneer de opbouw van ijs in het vriezer compartiment een dikte van 2-4 mm bereikt heeft moet het ontdooit worden. Dit moet tenminste twee keer per jaar gedaan worden. – Zorg dat men de stekker uit het stopcontact verwijderd. – Verwijder al het voedsel uit het compartiment, wikkel het in een krant, en plaats het in een koele plaats om de temperatuur laag te houden. Let op dat, zelfs de kleinste verhoging in temperatuur, de opbergtijd van het voedsel zal verkort worden en moet zo snel mogelijk gebruikt worden. – Houd de deur open. Om het ontdooien te versnellen, kan men èèn of verschillende containers met heet (maar niet kokend) water in het vriezer compartiment plaatsen. Waarschuwing: gebruik geen externe apparaten of andere manieren (b.v. radiatoren of verwarmingen met fan) om het ontdooien te versnellen. – Na het schoonmaken moet men ervoor zorgen dat het vriezer compartiment geheel droog is en de temperatuurcontrol in de maximum positie is gezet. Na 24 uren mag men het naar de 45 normale stand zetten. Ontdooien van de ijskast: De integrerende verdamper is geplaatst in het schuim van de wanden; men kan hierdoor vorst opbouw waarnemen rond de achterkant. Deze laag met vorst zal beginnen te smelten wanneer de compressor niet werkt. Door een systeem met slangen, zal het smeltwater afgevoert worden naar de opvangplaat, onder de compressor, waar het door de omgevende lucht geabsorbeert zal worden. Deze unit hoeft daarom niet ontdooit, maar alleen schoongemaakt te worden. Om te zorgen dat het smeltwater goed wegloopt, moet men er altijd voor zorgen dat de afvoer in het kabinet niet geblokkeert is. Probleemoplosser Bepaalde typische geluiden kunnen gehoort worden wanneer het apparaat aangezet is. Deze geluiden zijn: – – veroorzaakt door de elektrische motor in de compressor opbouw; tijdens het opstarten van de compressor, zal de geluidslevel voor korte tijd vermeerderen. veroorzaakt door de koelvloeistof welke door het circuit stroomt. De volgende tabel geeft een lijst van mogelijke defecten aan, met mogelijke oorzaken en oplossingen. In geval van een gebruiksprobleem, controleer eerst of men een oplossing kan vinden met gebruik van de tabel. Wanneer het probleem aanhoud, verwijder het apparaat van het stroomnet en contact onze Klantenservice Afdeling. Probleem Mogelijke oorzaak en oplossing Het apparaat werkt niet. – – – – Er is een stroomstoring De hoofdzekering is doorgeslagen. De temperatuurcontrole is gezet op ‘0'. De zekering in het stopcontact (wanneer aanwezig) is doorgeslagen. Dit kan gecontroleerd worden door een ander elektrisch apparaat op het stopcontact aan te sluiten om te zien of het werkt. – – De temperatuur in het vriezer – compartiment en is niet laag – genoeg. Teveel voedsel is opgeborgen in het apparaat. De deuren zijn niet goed gesloten. Er is teveel stof op de condensator. Onvoldoende ventilatie: de unit is te dicht bij de muur of een ander voorwerp of bouwsel. De temperatuurcontrole is te laag gezet. – 46 Het normale gebruiksgeluid verandert of word luider. – – – Controleer voor juiste plaatsing (ongelijke vloer?). Worden voorwerpen naast de werkende koelingsunit beinvloed (b.v. veroorzaakt door vibratie?) Zijn er andere voorwerpen boven op de unit welke kunnen vibreren? Water verzameld zich op de Het smeltwater afvoer systeem is geblokkeerd. Verwijder de bodem van de unit. blokkering and maak het systeem schoon. Transporteren van het apparaat Om schade tijdens transporteren te voorkomen, zorg dat alle accessories en componenten in en rond het apparaat goed vastgemaakt zijn. De unit moet alleen rechtop getransporteerd worden; Kantel niet meer dan 30°. Wanneer men de unit geplaatst heeft, moet men ongeveer 30 minuten wachten voordat men het aansluit op het stroomnet. Wanneer de unit meer dan 30° gekanteld is tijdens het transporteren, laat de unit rechtop staan voor minstens 4 uren voordat het op het stroomnet is aangesloten. Weggooien de stekker uit het stopcontact verwijderd, moet men de unit voor het weggooien onbruikbaar maken door het snoer geheel te verwijderen voordat men het apparaat weggooit in de daarvoor speciaal bestemde collectiepunten in overeenkomst met de plaatstelijke wet. Het koelvries gas en de chemische agent in het isolatie schuim moeten weggegooit worden door een bevoegd agentschap. Pas heel goed op dat men het koelingscircuit niet beschadigd voordat de unit is overgegeven voor het weggooien. Garantieverklaring Voor dit apparaat geldt een garantie van twee jaar na de aankoopdatum voor materiaal- en fabrieksfouten. Uitgesloten van garantie is schade die ontstaan is door het niet in acht nemen van de gebruiksaanwijzing, normale slijtage en zeer breekbare onderdelen als glaskannen etc. Deze garantieverklaring heeft geen invloed op uw wettelijke rechten, en ook niet op uw legale rechten welke men heeft als een consument onder de toepasselijke nationale wetgeving welke de aankoop van goederen beheerst. De garantie vervalt bij reparatie door niet door ons bevoegde instellingen. Informatie nodig bij Klantenservice Wanneer reparaties aan het apparaat nodig worden, neem dan contact op met onze Klantenservice, verschaf een goede omschrijving over het defect en het artikelnummer KS ... op de waarderingsplaat van het apparaat (zie plaatje). Deze informatie zal ons helpen met het efficiënt behandelen van het verzoek. 47 In geval van een defect of ander probleem, neem contact op met de Klantenservice Afdeling. Het adres kan gevonden worden in het aanhangsel van dit manuaal. Product informatie blad Art. no. KS 9760 / 9761 / 9763 / 9764 Product categorie KS 9766 / 9767 Koelkast/vriezer Energie efficiency classificatie A+ A++ Energie gebruik in kWh/jaar 222 197 eigenlijke consumptie hangt af van het gebruikspatroon en de locatie van het apparaat Bruikbare koelkast capaciteit (liters) Bruikbare capaciteit unit (liters) - Vriezer 166 201 46 57 Vrostvrije : vriezer unit nee Vrostvrije : koelkast unit ja Veilige opbergtijd in geval van een defect, uren 17 Vries capaciteit, kg/24h 2 Klimaat classificatie Omgevende temperatuur bereik, °C 3 N N-T 16-32°C 16-43°C Geluids emissie 39 dB(a) Afmeting (H x W x D) in mm Gewicht, kg Elektriche specificaties 1440 x 560 x 600 1690 x 560 x 630 51 53 Zie waarderingsplaat 48 49 50 Kundendienstzentralen Service Centres Centrales service-après-vente Oficinas centrales del servicio Centros de serviço Centrale del servizio clienti Service-centrales Centrale serviceafdelinger Centrala kundtjänstplatser Keskushuollot Servisné stredisko Centrala obsługi klientów Szerviz Κεντρικό σέρβις SEVERIN Service Am Brühl 27 59846 Sundern Telefon (02933) 982-460 Telefax (02933) 982-480 [email protected] Kundendienst Ausland Belgique Dancal N.V. Bavikhoofsestraat 72 8520 Kuurne Tel.: 056/71 54 51 Fax: 056/70 04 49 France SEVERIN France Sarl 4, rue de Thal B.P. 38 67211 OBERNAI CEDEX Tel.: 03 88 47 62 08 Fax: 03 88 47 62 09 Bulgaria Noviz AG Khan Kubrat 1 Str. BG-4000 Plovdiv Tel.: + 359 32 275 617, 275 614 e-mail: [email protected] Greece BERSON C. Sarafidis Bros. S.A. Agamemnonos 47 176 75 Kallithea, Athens Tel.: 0030-210 9478700 Czech Republic ARGO spol. s r.o. Žihobce 137 CZ 342 01 Sušice Tel.: + 376 597 197 Fax: + 376 597 197 http://argo.zihobce.cz [email protected] Philippos Business Center Agias Anastasias & Laertou, Pilea Service Post of Thermi 570 01 Thessaloniki, Greece Tel.: 0030-2310954020 Cyprus G.L.G. Trading 4-6, Oidipodos Street Larnaca, Cyprus Tel.: 024/633133 Fax: 024/635992 Danmark Scandia Serviceteknik A/S Hedeager 5 2605 Brondby Tel.: 45-43202700 Fax: 45-43202709 Korea Jung Shin Electronics co., ltd. 501, Megaventuretower 77-9, Moonrae-Dong 3ga, Yongdeungpo-Gu Seoul, Korea Tel: +82-22-637 3245~7 Fax: +82-22-637 3244 Service Hotline: 080-001-0190 Latvia SERVO Ltd. Mr. Janis Pivovarenoks Tel: + 371 7279892 [email protected] Espana Severin Electrodom. España S.L. Plaza de la Almazara Portal 4, 1º E. 45200 ILLESCAS(Toledo) Tel: 925 51 34 05 Fax: 925 54 19 40 eMail: [email protected] http://www.severin.es Bosnia i Herzegovina Malisic MP d.o.o Tromeda Medugorje bb 88260 Citluk Tel: + 387 36 650 446 Fax: + 387 36 651 062 Croatia TD Medimurka d.d. Trg. Republike 6 HR-40000 Cakovec Croatia Tel: +385-40 328 650 Fax: + 385 40 328 134 e-mail: [email protected] Jordan F.A. Kettaneh P.O. Box 485 Amman, 11118, Jordan Tel: 00962-6-439 8642 e-mail: [email protected] Estonia: Tallinn: CENTRALSERVICE, Tammsaare tee 134B, tel: 654 3000 Tartu: CENTRALSERVICE, Aleksandri 6, tel: 7 344 299, 7 344 337, 56 697 843 Pärnu: CENTRALSERVICE, Riia mnt. 64, tel: 44 25 175 Narva: CENTRALSERVICE, Tallinna 6A, tel: 35 60 708 Haapsalu: Teco KM OÜ, Jalaka 1A, tel: 47 56 900 Rakvere: Nirgi Tõnu FIE, tel: 32 40 515 Viljandi: Aaber OÜ, Vabaduse pl. 4, tel: 43 33 802 Kuressaare: Toomas Teder FIE, Pikk 1B, tel: 45 55 978 Käina: Ilmar Pauk Elektroonika FIE, Mäe2S, tel: 46 36 379, 51 87 444 Lebanon Khoury Home 7th Floor, Cité Dora 3 Building, Dora P.O.Box 70611 Antelias, Lebanon Telephone 01 244200, Fax 01 253535 eMail: [email protected] Internet: www.khouryhome.com Luxembourg Ser-Tec Rue du Chateau d´Eua 3364 Leudelange Tel.: 00352 -37 94 94 402 Fax 00352 -37 94 94 400 Macedonia Agrotehna St.Prvomajska bb 1000-Skopje MACEDONIA e-mail: [email protected] Tel : +389 2 / 24 45 009 or - 019 Fax : +389 2 24 63 270 Magyarország TFK Elektronik Kft. Gyar u.2 H-2040 Budaörs Tel.: (+36) 23 444 266 Fax: (+36) 23 444 267 Iran IRAN-SEVERIN KISH CO. LTD. No. 668, 7th. Floor Bahar Tower Ave. South Bahar TEHRAN - IRAN Tel. : 009821 - 77616767 Fax : 009821 - 77616534 [email protected] www.iranseverin.com Nederland HAS b.v. Stedenbaan 8 NL-5121 DP Rijen Tel: 0161-22 00 00 Fax: 0161-29 00 50 Norway Løkken Trading AS Trollåsveien 34 1414 Trollåsen Tel: 40 00 67 34 Fax: 66 80 45 60 Israel Eatay Agencies 109 Herzel St. Haifa Phone: 050-5358648 Email: [email protected] Österreich Degupa Vertriebsgesellschaft m.b.H. Gewerbeparkstr. 7 5081 Anif / Salzburg Tel.: 0 62 46 / 73 58 10 Fax:. 0 62 46 / 72 70 2 Italia Videoellettronica di Sgambati & Gabrini C.S.N.C. via Dino Col 52r-54r-56r, I - 16149 Genova Green Number: 800240279 Tel.: 010/6 45 11 02 - 01041 86 09 Fax: 010/6 42 50 09 e-mail: [email protected] Polska SERV- SERWIS SP. Z O.O. UL. CYGANA 4 45-131 OPOLE Tel/Fax 0048 77 453 86 42 e-mail: [email protected] 51 Portugal Novalva Zona Industrial Maia I Sector X - Lote 293, N. 90 4470 Maia Tel.: 02/9 44 03 84 Fax: 02/9 44 02 68 Russian Federation Orbita Service 123362 Moskau ul. Svobody 18, Tel.: (495) 585 05 73 Орбита Сервис 123362 г. Москва, ул. Свободы, д. 18. Тел.: (495)585-05-73 Romania For Brands srl Str. Capitan Aviator Alexandru Serbanescu Nr. 33-35, Bl. 20E Sc. 2 Et.1, Ap. 27, Sector 1 Bucuresti Tel: + 40 21 233 41 12 + 40 21 233 41 13 + 40 21 688 66 13 Fax: + 40 21 233 41 03 + 40 21 688 66 13 E-mail: [email protected] Web site: www.forbrands.ro Schweiz VB Handels Sàrl GmbH Postfach 306 1040 Echallens Tel: 021 881 60 45 Fax: 021 881 60 46 mail: [email protected] Serbia SMIL doo Pasiceva 28, Novi Sad Serbia and Montenegro tel: + 381-21-524-638 tel: +381-21-553-594 fax: +381-21-522-096 Slowak Republic PREMT,s.r.o. Skladová 1 917 01 Trnava Tel: 033/544 7177 Finland Oy Harry Marcell Ab Rälssitie 6, PL 63 01511 Vantaa Tel.: 00358 / 2 07 599 860 Fax: 00358 / 2 07 599 803 Svenska Rakspecialisten HS Möllevångsgatan 34 214 20 Malmö Tel.: 040/12 07 70 Fax: 040/6 11 03 35 Slovenia SEVTIS d.o.o. Smartinska 130 1000 Ljubljana Tel: 00386 1 542 1927 Fax: 00386 1 542 1926 Stand: 03.2010 I/M No.: 8668.0000


