1
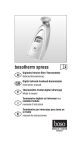
ATTENTION : LA LOI FEDERALE AMERICAINE N’AUTORISE LA VENTE DE CE DISPOSITIF QUE PAR UN PRATICIEN
HABILITE OU SUR ORDONNANCE DE CE DERNIER.
AVERTISSEMENT : CE DISPOSITIF NE DOIT PAS ETRE UTILISE POUR TRAITER DES ENFANTS DE MOINS DE 12 ANS, DES DIABETIQUES, DES INVALIDES ET DES PATIENTS PRESENTANT UNE SENSIBILITE CUTANEE REDUITE OU UNE MAUVAISE CIRCULATION.
AVERTISSEMENT : VEUILLEZ LIRE ATTENTIVEMENT LE MODE D’EMPLOI ET LES MISES EN GARDE QUI ACCOMPAGNENT LE POLAR CARE CUB ET LE COUSSINET DE REFROIDISSEMENT AVANT USAGE.
AVERTISSEMENT : EN CAS DE CHANGEMENT VISIBLE DE L’ASPECT DE LA PEAU DANS LA ZONE D’APPLICATION DU COUSSINET FROID, TEL QUE L’APPARITION DE CLOQUES, DECOLORATION OU GONFLEMENT PENDANT PLUS D’UNE HEURE APRES USAGE, INTERROMPEZ L’EMPLOI DE CE PRODUIT ET CONSULTEZ VOTRE MEDECIN.
POLAR CARE CUB (Pompe manuelle Polar Care)
CONTENU :
1 POLAR CARE CUB, une pompe manuelle pour enveloppements thérapeutiques froids
localisés et un récipient pour eau glacée à utiliser avec les coussinets de refroidissement BREG
(vendus séparément).
MODE D’EMPLOI
Ce dispositif doit être utilisé avec un modèle CUB de Polar Pad BREG.
1 Appliquez le Polar Pad conformément aux directives d’application qui l’accompagnent.
2 Remplissez complètement le refroidisseur avec de la glace. Versez de l’eau sur la glace
jusqu’à ce que le contenu se situe à un peu plus d’un centimètre de la surface du refroidisseur,
puis vissez le couvercle à fond. Enfoncez la tubulure dans l’orifice du couvercle du refroidisseur.
3 Branchez le coussinet en unissant les deux manchons de raccordement jusqu’à ce qu’un
déclic se fasse entendre.
4 Placez le refroidisseur sur une table ou un support situé à la même hauteur ou à un niveau
supérieur à celui de la poire à utiliser. Pressez lentement la poire en caoutchouc jusqu’à ce
que la boule rouge de l’indicateur de débit soit clairement visible au centre de la fenêtre. Ne
pressez pas la poire plus fort que nécessaire pour maintenir la boule au centre.
5 Il faut environ 10 pressions de poire pour remplir complètement le coussinet. Une fois qu’il
est plein, arrêtez le pompage et laissez l’eau du coussinet refroidir la zone atteinte pendant
5 à 10 minutes. Puis pressez la poire 3 ou 4 fois toutes les quelques minutes ou autant que
nécessaire pour maintenir l’effet de froid. Si la température de la peau se refroidit au-delà du
niveau de confort du patient, appuyez moins fréquemment sur la poire. Si la température de la
peau est supérieure à la température désirée, appuyez plus fréquemment sur la poire.
6 Réapprovisionnez le refroidisseur en glace et en eau avant que la glace n’ait complètement
fondu.
7 Pour interrompre la session, arrêtez la pompe et enlevez le coussinet. Videz autant d’eau
que possible du dispositif en élevant le coussinet au-dessus du refroidisseur et en le roulant
lentement à partir de son extrémité pour éliminer toute l’eau qui reste. Videz la glace et l’eau
et séchez tous les composants.
CONSEILS
Il est normal d’observer une certaine condensation sur les tubes et le coussinet, particulièrement
en milieu humide. Lorsqu’une fuite est soupçonnée, la condensation en est généralement la
cause. Pour réduire la condensation sur le coussinet, appliquez des couches de tissu isolant sur
le coussinet avant d’attacher la sangle.
Installez le refroidisseur à la même hauteur ou à un niveau supérieur à celui de la poire à
utiliser. Si possible, il est également préférable de maintenir la poire et le refroidisseur à un
niveau supérieur à celui du coussinet.
S’il s’avère difficile de presser la poire et de faire bouger la boule rouge, vérifiez l’absence de
pli ou de coudure dans le coussinet lors de son application.
N’appliquez qu’une fine couche de pansement entre le coussinet et la peau. Si vous posez
le coussinet sur de multiples couches de pansement, la zone atteinte ne se refroidira pas
correctement.
ATENCIÓN: LA LEY FEDERAL RESTRINGE LA VENTA DE ESTE APARATO A LOS CASOS DE VENTA POR O BAJO LA
ORDEN DE UN PROFESIONAL MÉDICO LICENCIADO.
ADVERTENCIA: ESTE APARATO NO HA SIDO DISEÑADO PARA USO POR NIÑOS MENORES DE 12 AÑOS, DIABÉTICOS, INDIVIDUOS INHABILITADOS Y AQUELLOS CON REDUCIDA SENSIBILIDAD CUTÁNEA O MALA CIRCULACIÓN.
ADVERTENCIA: LEA DETENIDAMENTE LAS INSTRUCCIONES DE USO Y ADVERTENCIAS ANTES DE USAR EL POLAR CARE CUB Y LA ALMOHADILLA ENFRIADORA.
ADVERTENCIA: SI SE PRODUCE UN CAMBIO OBVIO EN EL ASPECTO DE LA PIEL EN EL ÁREA DE LA APLICACIÓN FRÍA, TAL Y COMO AMPOLLAS, DECOLORACIÓN O HINCHAZÓN, DURANTE MÁS DE UNA HORA DESPUÉS DE USARLO, DEJE DE USAR ESTE PRODUCTO Y CONSULTE A SU MÉDICO.
POLAR CARE CUB (bomba manual Polar)
CONTENIDO:
1 POLAR CARE CUB, una bomba manual de terapia fría localizada y contenedor de agua
helada para utilización con las almohadillas refrescantes de BREG, (vendidas aparte).
INSTRUCCIONES DE USO
El Polar Care CUB debe ser usado con una Almohadilla polar BREG modelo CUB.
1 Coloque la Almohadilla polar según las instrucciones incluidas con la misma.
2 Llene la nevera con hielo hasta arriba. Agregue agua hasta 1 centímetro desde el borde de
la nevera y apriete la tapa. Inserte firmemente el tubo en el agujero de la tapa de la nevera.
3 Conecte la almohadilla apretando los acopladores uno contra el otro hasta que escuche un
chasquido.
4 Coloque la nevera en una mesa o soporte a o por encima del nivel al que la perilla de
mano será usada. Apriete la perilla lentamente, hasta que la bola roja indicadora del flujo
sea visible claramente en el centro de la ventana. No apriete la perilla más fuertemente de lo
necesario para mantener la bola centrada.
5 Se necesita apretar aproximadamente 10 veces para llenar la almohadilla completamente.
Una vez que esté llena, pare de bombear y permita que el agua de la almohadilla enfríe el
área afectada durante 5-10 minutos. A continuación, apriete la perilla 3 o 4 veces cada pocos
minutos o según sea necesario para mantener el efecto de frío. Si la temperatura de la piel es
más fría de lo deseado, apriete la perilla con menos frecuencia.
6 Rellene el agua e hielo antes de que el hielo se haya derretido completamente.
Polar Care Cub
POLAR CARE CUB (bomba manual Polar)
POLAR CARE CUB (DISPOSITIVO PER LA TERAPIA DEL FREDDO POLAR CARE CUB)
POLAR CARE CUB (Pompe manuelle Polar Care)
7 Para terminar la sesión, pare de bombear y quite la almohadilla. Drene tanta agua del
sistema como sea posible elevando la almohadilla por encima de la nevera y enrollándola
lentamente empezando en un borde para sacar toda el agua restante. Vacíe el agua e hielo y
seque todos los componentes.
POLAR CARE CUB (handpumpe Polar)
CONSEJOS
Si cree que puede haber goteo de la almohadilla, la causa más probable es la condensación.
Alguna condensación en las líneas, el controlador y la almohadilla es normal, especialmente
en ambientes húmedos. Para reducir este efecto, proporcione capas aislantes de rollo de tela
o de otros materiales similares sobre la almohadilla antes de aplicar la envoltura fijadora.
Mantenga la altura de la nevera a o por encima de la altura de la perilla en uso. Es preferible
también mantener la perilla y la nevera por encima del nivel de la almohadilla, de ser posible.
Si resulta difícil apretar la perilla y mover la bola roja, compruebe que no se formaron arrugas
o dobleces en la almohadilla al colocarla.
Se debería aplicar una venda fina entre la almohadilla y la piel. No coloque la almohadilla
sobre capas múltiples de venda, pues el área afectada no enfriará correctamente.
BREG Inc.
Vista, CA 92081 U.S.A.
WWW.BREG.COM
MDSS GmbH
Schiffgraben 41
D-30175 Hannover
Germany
Telephone Telefax (800) 321-0607
(760) 599-3000
(760) 598-6193
AW 1.14610 REV C
CAUTION: WARNING: WARNING: WARNING: VORSICHT: WARNUNG: WARNUNG: WARNUNG: FEDERAL LAW RESTRICTS THIS DEVICE TO SALE BY OR ON THE ORDER OF A LICENSED HEALTH CARE
PRACTITIONER.
THIS DEVICE IS NOT INTENDED FOR USE BY CHILDREN UNDER 12, DIABETICS, INCAPACITATED INDIVIDUALS, AND THOSE WITH DECREASED SKIN SENSITIVITY OR POOR
CIRCULATION.
CAREFULLY READ POLAR CARE CUB AND COOLING PAD USE INSTRUCTIONS AND WARNINGS PRIOR
TO OPERATION.
IF A NOTICEABLE CHANGE IN SKIN APPEARANCE IN THE AREA OF THE COLD APPLICATION IS OBSERVED, SUCH AS BLISTERING, DISCOLORATION, OR INCREASED SWELLING FOR MORE THAN AN HOUR AFTER USE, DISCONTINUE USE OF THIS PRODUCT AND CONSULT YOUR PHYSICIAN.
POLAR CARE CUB
LAUT GESETZ DARF DIESES GERÄT NUR VON EINEM LIZENSIERTEN KLINIKER ODER AUF DESSEN
ANWEISUNG VERKAUFT WERDEN.
DIESES GERÄT DARF NICHT VON KINDERN UNTER 12 JAHREN, DIABETIKERN, BEHINDERTEN PERSONEN UND PERSONEN MIT VERRINGERTER HAUTEMPFINDLICHKEIT ODER SCHLECHTER DURCHBLUTUNG VERWENDET WERDEN.
VOR INBETRIEBNAHME SORGFÄLTIG ALLE ANLEITUNGEN UND WARNUNGEN ZUM GEBRAUCH DES
POLAR CARE CUB UND DES KÜHLPOLSTERS LESEN.
FALLS SICH DAS AUSSEHEN DER HAUT IM BEREICH DES KÜHLPOLSTERS MERKLICH VERÄNDERT,
Z.B. BLASENBILDUNG, VERFÄRBUNG ODER VERSTÄRKTE ANSCHWELLUNG, DAS PRODUKT NICHT
WEITER VERWENDEN UND EINEN ARZT KONSULTIEREN.
POLAR CARE CUB (handpumpe Polar)
ATTENZIONE: ATTENZIONE: ATTENZIONE: ATTENZIONE: VENDITA CONSENTITA SOLO SU AUTORIZZAZIONE MEDICA.
QUESTO DISPOSITIVO NON DEVE ESSERE USATO DA BAMBINI DI ETÀ INFERIORE AI 12 ANNI, DIABETICI, PERSONE DISABILI E COLORO CHE SOFFRONO DI UNA DIMINUZIONE DELLA SENSIBILITÀ CUTANEA O DI CATTIVA CIRCOLAZIONE.
LEGGERE ATTENTAMENTE LE ISTRUZIONI E GLI AVVERTIMENTI FORNITI CON IL POLAR CARE CUB E IL CUSCINETTO DI RAFFREDDAMENTO PRIMA DI FARLO FUNZIONARE.
SE SI OSSERVA UN CAMBIAMENTO VISIBILE NELL’ASPETTO DELLA PELLE IN CORRISPONDENZA
DELL’AREA DEGLI IMPACCHI FREDDI, COME FORMAZIONE DI VESCICHE, ALTERAZIONE DEL COLORE
O AUMENTO DEL GONFIORE PER OLTRE UN’ORA DOPO L’APPLICAZIONE, INTERROMPERE L’USO DI QUESTO PRODOTTO E CONSULTARE IL MEDICO.
POLAR CARE CUB (DISPOSITIVO PER LA TERAPIA DEL FREDDO POLAR CARE CUB)
CONTENTS:
INHALT:
CONTENIDO:
USE INSTRUCTIONS
GEBRAUCHSANLEITUNG
INSTRUCCIONES DE USO
1 POLAR CARE CUB, a localized cold therapy hand pump and ice water container for use with
BREG cooling pads (sold separately).
The Polar Care CUB must be used with a BREG Polar Pad, CUB model.
1 Apply Polar Pad according to application instructions included with it.
2 Fill cooler with ice to top. Add water to within 1/2 inch of top of cooler and screw on lid
tightly. Firmly insert tubing stem into hole in cooler lid.
3 Connect pad by pushing couplings together firmly until you hear a ”click.“
4 Place cooler on a table or stand at or above the height at which hand bulb will be used.
Squeeze hand bulb slowly until red flow indicator ball is clearly visible in center of window. Do
not squeeze hand bulb harder than necessary to keep ball centered.
5 It takes approximately 10 squeezes of hand bulb to completely fill pad. Once pad is full,
stop pumping and allow water in pad to cool affected area for 5-10 minutes. Then squeeze
hand bulb 3 to 4 times every few minutes or as necessary to maintain the cold effect. If
skin temperature is cooler than comfortably tolerated, squeeze bulb less frequently. If skin
temperature is warmer than desired, squeeze bulb more frequently.
6 Replenish ice and water before ice has melted completely.
7 To end session, stop pumping and remove pad. Drain as much water from system as possible
by elevating pad above cooler and rolling it up slowly from end to squeeze out all remaining
water. Empty ice and water and dry all components.
TIPS
1 POLAR CARE CUB, eine Handpumpe und ein Eiswasserbehälter für die lokale Kältetherapie,
zur Verwendung mit Kühlpolstern von BREG (separat erhältlich).
Das Polar Care CUB muß zusammen mit einem Polar-Polster von BREG, Modell CUB, verwendet
werden.
1 Das Polar-Polster gemäß der ihm beiliegenden Anleitung anlegen.
2 Die Kühlbox ganz mit Eis füllen. Bis ca. 1 cm vom oberen Rand mit Wasser füllen und den
Deckel festschrauben. Die Röhre fest in das Loch im Deckel der Kühlbox stecken.
3 Das Polster durch festes Zusammendrücken der Steckverbindungen anschließen, bis sie mit
einem Klick einrasten.
4 Die Kühlbox auf einen Tisch oder ein Gestell auf gleiche Höhe oder höher als die
Handpumpe stellen. Die Handpumpe langsam drücken, bis die rote Kugel, die den Fluß
anzeigt, deutlich in der Mitte des Fensters zu sehen ist. Die Handpumpe nur so fest drücken,
daß die Kugel in der Mitte bleibt.
5 Das Polster wird durch ungefähr 10-maliges Betätigen der Pumpe vollständig gefüllt.
Wenn das Polster gefüllt ist, die Handpumpe nicht mehr betätigen und das Wasser im Polster
den Körperbereich 5 bis 10 Minuten lang kühlen lassen. Dann die Handpumpe alle paar
Minuten 3 bis 4 Mal (oder so oft wie nötig) drücken, damit das Polster kalt bleibt. Wenn die
Hauttemperatur zu kalt ist, die Handpumpe weniger oft betätigen; wenn die Hauttemperatur zu
warm ist, die Handpumpe öfter betätigen.
6 Eis bzw. Wasser nachfüllen, bevor das Eis ganz geschmolzen ist.
7 Zum Beenden der Therapiesitzung die Handpumpe nicht weiter betätigen und das Polster
Some condensation on tubes and pad is normal, particularly in humid environments. Most times
that leaking is suspected, condensation is the actual cause. To reduce condensation at pad,
provide insulating layers of material over pad before the securing wrap is applied.
entfernen. So viel Wasser wie möglich aus dem System ablaufen lassen; dazu das Polster höher
als die Kühlbox halten und es langsam von einem Ende zum anderen aufrollen, um so das
Restwasser herauszudrücken. Das Eiswasser ausleeren und alle Komponenten abtrocknen.
Keep the height of cooler at or above the height of hand bulb in use. It is also preferable to
keep hand bulb and cooler above pad height if possible.
TIPS
If it is difficult to squeeze hand bulb and move the red ball, then check to be sure that there are
no folds or kinks in pad when it was applied.
A thin dressing layer only should be applied between pad and skin. Do not apply pad over
multiple layers of dressing or affected area will not cool properly.
Eine gewisse Kondensation auf den Schläuchen und am Polster ist besonders in feuchten
Umgebungen normal. Wenn vermutet wird, daß das Polster ausläuft, handelt es sich in den
meisten Fällen in Wirklichkeit um Kondensation. Um den Kondensationseffekt am Polster zu
reduzieren, sollte vor der Befestigung der Polstergurte eine isolierende Materialschicht über
dem Polster angebracht werden.
Die Kühlbox sollte gleich hoch oder höher als die Handpumpe sein. Außerdem ist zu
empfehlen, die Handpumpe und die Kühlbox höher als das Polster zu stellen.
Wenn das Drücken der Handpumpe und damit das Bewegen der roten Kugel schwierig ist,
sollte geprüft werden, ob das Polster richtig angebracht ist (d.h. ohne Falten oder Knicke).
Zwischen Kühlpolster und Haut sollte nur eine dünne Verbandsschicht angelegt werden. Das
Polster nicht über mehreren Verbandsschichten anbringen, da sonst der betroffene Bereich nicht
richtig gekühlt wird.
1 POLAR CARE CUB, una bomba manual de terapia fría localizada y contenedor de agua
helada para utilización con las almohadillas refrescantes de BREG, (vendidas aparte).
El Polar Care CUB debe ser usado con una Almohadilla polar BREG modelo CUB.
1 Applicare il Polar Pad secondo le istruzioni allegate.
2 Riempire completamente di ghiaccio l’apposito contenitore. Aggiungere acqua fino a 1 cm
dall’orlo e avvitare bene il coperchio. Inserire saldamente lo stelo del tubo nel foro posto sul
coperchio del contenitore.
3 Collegare il cuscinetto premendo con forza gli attacchi finché non si sente uno scatto.
4 Collocare il contenitore del ghiaccio su un tavolo o un supporto all’altezza in cui sarà usata
la pompetta a mano o più in alto. Premere lentamente la pompetta a mano finché al centro
della finestra non sia visibile chiaramente la sfera indicatrice di flusso rossa. Non premere la
pompetta più del necessario per mantenere centrata la sfera.
5 Ci vogliono circa 10 pompate per riempire completamente il cuscinetto. Una volta che il
cuscinetto è pieno, smettere di pompare e lasciare che l’acqua nel cuscinetto raffreddi la zona
ammalata per 5-10 minuti. Poi premere la pompetta a mano 3 o 4 volte ogni pochi minuti o
quando necessario per mantenere freddo l’impacco. Se la temperatura della pelle è più fredda
di quanto si vuole, premere la pompetta con minore frequenza. Se la temperatura della pelle è
più calda di quanto si vuole, premere la pompetta con maggiore frequenza.
6 Sostituire l’acqua e il ghiaccio prima che il ghiaccio si sia sciolto completamente.
7 Per terminare la sessione, smettere di pompare e rimuovere il cuscinetto. Scaricare dal
sistema quanta più acqua possibile sollevando il cuscinetto al di sopra del contenitore del
ghiaccio e avvolgendolo lentamente partendo da un’estremità in modo da far fuoriuscire tutta
l’acqua rimasta. Vuotare il ghiaccio e l’acqua e asciugare tutti i componenti.
SUGGERIMENTI
È normale il formarsi di un po’ di condensazione sui tubi e sul cuscinetto, specialmente
in ambienti umidi. Il più delle volte, quando si sospetta una perdita, la causa reale è la
condensazione. Per ridurre la condensazione sul cuscinetto, interporre strati isolanti di stoffa
sopra il cuscinetto prima di applicarvi la fascia di fissazione.
Mantenere il contenitore del ghiaccio all’altezza della pompetta a mano (o più in alto) usata. È
inoltre consigliabile tenere la pompetta e il contenitore più in alto del cuscinetto, se possibile.
Se risultasse difficile premere la pompetta a mano e spostare la sfera rossa, controllare di non
aver piegato o arricciato il cuscinetto al momento dell’applicazione.
Tra la pelle e il cuscinetto si dovrebbe applicare uno strato sottile di medicazione. Non
applicare il cuscinetto sopra molti strati di medicazione, altrimenti l’area malata non si
raffredderà a sufficienza.