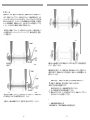
1
Owner’s Instruction Manual
Bicycle Owner’s Manual
日本語版
2007年第9版
9th Edition, 2007
このマニュアルはEN
Standards 14764, 14766, 14781に準拠しています。
This manual meets EN Standards 14764, 14766 and 14781.
Contents
IMPORTANT:
重要
GENERAL WARNING
警告に関する説明
A special note
保護者の
へ to parents
1
2
1.
まずはじめに
1. First
A
A. Bike
転Fit
が体に合うこと
B
B. Safety
安全第First
機能 での安全チェック
C
C. Mechanical
Safety Check
転 に乗る際に
D
D. 最初に
First Ride
3
3
4
5
This
manual contains important safety, performance and service information. Read転
it
このマニュアルでは、安全、性能、サービスに関する説明がなされています。
before
you take the first ride on your new bicycle, and keep it for reference.
に乗る前に必ずこのマニュアルを読みになり、参照できるよう
事に保管してく
ださい。
Additional safety, performance and service information for specific components such
as
suspension or pedals on your bicycle, or for accessories such as helmets or lights
サスペンション、ペダル、ヘルメットや電灯等、各部品に関する事項に関しても、
that
you purchase, may also be available. Make sure that your dealer has given you all
それぞれの説明書が付属している事があります。お買上げ頂いた販売店が、製品に
the
manufacturers’
literature that was included with your bicycle or accessories. In
付随する全ての書類をお客様に提供している事をお確かめください。また当該マニ
case
of a conflict between the instructions in this manual and information provided by a
ュアルと、各部品に関する説明書の内容に齟齬がある場合は、各部品に関する説明
component
manufacturer, always follow the component manufacturer’s instructions.
書を正としてご理解頂くようお願いします。
Ifご質問、不明な点がありましたら、お買上げの販売店もしくは、メーカーまでお問
you have any questions or do not understand something, take responsibility for your
safety
and consult with your dealer or the bicycle’s manufacturer.
合せください。
NOTE:
注意
This manual is not intended as a comprehensive use, service, repair or maintenance manual.
このマニュアルでは包括的な使
Please
see your dealer for all service,、サービス、修理、保守を網羅したものではあり
repairs or maintenance. Your dealer may also be able to
ません。実施的なサービス、修理、保守に関しては、お買上げ頂いた販売店にお問
refer
you to classes, clinics or books on bicycle use, service, repair or maintenance.
合せください。販売店では。サービス、修理、保守等の講習会を実施していること
があります。
2. Safety
2.安全について
A
A. The
Basics
基本的な事項
B
B. Riding
安全 Safety
に関する事項
C
C. Off
Road Safety
オフロードでの安全に関する事項
天での
D
D. Wet
Weather Riding
E.
Riding
E Night
夜間の
F Extreme,
極限
、スタント、競技等
F.
Stunt
or Competition Riding
G Changing
構成部品の取替え、アクセサリーの追加
G.
Components or Adding Accessories
3.
3. 調整
Fit
A.
height
A Standover
スタンドオーバー
さ
B.
B Saddle
サドルposition
さ調整
C.
heightさ調整
and angle
C Handlebar
ハンドルバー
D Control
コントロール位置の調整
D.
position adjustments
E Brake
ブレーキの握りしろ
E.
reach
4. Tech
4.
機能
A.
A Wheels
ホイル
1.1 Secondary
devices
次的 retention
軸締結器具
2.2 Wheels
with cam action systems
クイックリリース・カム
3.3 Removing
and installing wheels
ホイルの取り付け、取り外し
B シートポスト固定レバーの調整
B.
Seat post cam action clamp
C.
C Brakes
ブレーキ
D Shifting
ギアシフト
D.
gears
E Pedals
ペダル
E.
F Bicycle
サスペンション
F.
Suspension
G
タイヤとチューブ
G. Tires and Tubes
6
7
8
8
9
10
11
11
12
14
15
15
16
18
18
18
21
22
24
27
28
29
5. Service
5.
サービス
A.
Intervals
A Service
保守の頻度
B If衝突したとき
B.
your bicycle sustains an impact
31
33
Appendix A:
Appendix B:
Appendix C:
Appendix D:
34
40
46
47
Intended
使
途Use
Lifespan
of your bike and its components
転 とその構成部品の寿命
Coaster
Brakes
コースターブレーキ
締め付けトルクに関して
Fastener
Torque Specifications
警告に関する説明:
サイクリングは、どのスポーツと同じようにケガや破損のリスクやが伴います。そう
GENERAL WARNING:
したリスクは、お客様が責任を負うものとなりますので、安全で責任を
覚したサイ
Like any sport, bicycling involves risk of injury and damage. By choosing to
ride
クリング、適切な使
とメンテナンスに関するルールをよく理解し実践する必要があ
a bicycle, you assume the
responsibility for that risk, so you need to know — and to
ります。
practice — the rules of safe and responsible riding and of proper use and maintenance.
Proper use and maintenance of your bicycle reduces risk of injury.
このマニュアルにはWARNING(警告)、CAUTION(注意)が数多く表記されています。
メンテナンスや点検を怠ったとき、或いは安全なサイクリングを
This Manual contains many “Warnings” and “Cautions” concerningわなかったときの
the consequences
結果について書かれています。
of failure to maintain or inspect your bicycle and of failure to follow safe cycling practices.
安全警告マーク、あるいはWARNING(警告)だけの表
:
•・WARNING(警告)と
The combination of the
safety
alert symbol and the word WARNING indicates a
potentially
hazardous
situation
which,
if
not
avoided,
could
result
in
serious
injury
or
death.
潜在的危険状態を し、もし避けられなかった場合、重症もしくは死亡する事象。
安全警告マーク、あるいはCAUTION(注意)だけの表
•・CAUTION(注意)と
The combination of the
safety
alert symbol and the word CAUTION indicates a
potentially
hazardous situation
which, if not avoided, may result in minor
or moderate
潜在的な危険状態を
し、もし避けられなかった場合、軽傷
もしくは中程度の
injury,
or is an alert against unsafe practices.
ケガをする事象。
:
・安全警告マークなしで、CAUTION(注意)のみの表記では、
転 に重
な if
• The
word CAUTION used without the safety alert symbol indicates a situation
which,
故障、もしくは保証対象とならない事象を表します。
not avoided, could result in serious damage to the bicycle or the voiding of your warranty.
Many of the Warnings and Cautions say “you may lose control and fall”. Because any
当マニュアルの、WARNING(警告)、CAUTION(注意)では、「操作できなくなり転倒
fall can result in serious injury or even death, we do not always repeat the warning of
する」との表現が多くなされています。転倒するとケガをして、最悪死亡することが有
possible injury or 分注意してください。
death.
り得ますので、
転
Because
it is impossible to anticipate every situation or condition
which can occur
操作で起こり得るあらゆる事象に対してマニュアルで
及することは不可能です
while riding, this Manual makes no representation about転
the safe
use of the bicycle
ので、当マニュアルでは全ては網羅されていません。
操作に伴う、予想困難なリ
under all conditions. There are risks associated
with the use
of any bicycle
which cannot
スク、不可避なリスクに対しては、輸
元ではなく、使
者の
責任で対応する事に
be predicted or avoided, and which are the sole responsibility of the rider.
なります。
1
保護者の方へ
A special note for parents:
保護者の方は、未成年者のお子様の行動と安全の確保に責任があり、自転車操作にかん
As a parent or guardian, you are responsible for the activities and safety of your minor
しては、自転車がお子様の体格に合っている事、保守がなされており良好な状態である
child, and that includes making sure that the bicycle is properly fitted to the child; that it
こと、お子様が自転車操作を学び安全な走行をきちんと理解していること、道路交通法
is in good repair and safe operating condition; that you and your child have learned and
だけでなく、常識として安全走行と、自転車操作で発生する責任を理解している事、を
understand the safe operation of the bicycle; and that you and your child have learned,
実践する必要があります。
understand and obey not only the applicable local motor vehicle, bicycle and traffic laws,
保持語者の方は、必ずこのマニュアルをお読みになり、WARNNING(警告)の内容を理解
but also the common sense rules of safe and responsible bicycling. As a parent, you
し、自転車の機能と操作を確認してから、自転車を使用するようにしてください。
should read this manual, as well as review its warnings and the bicycle’s functions and
operating procedures with your child, before letting your child ride the bicycle.
WARNING:
Make sure that your child always wears an approved bicycle helmet
WARNING(警告)
when
riding; but also make sure that your child understands that a bicycle
自転車を使う際、お子様には、認可されたヘルメットを必ず着用させてくださ
helmet
is for bicycling only, and must be removed when not riding. A helmet must not
い。またお子様には、ヘルメット着用は自転車に乗るときだけにするよう、周
be worn
while playing, in play areas, on playground equipment, while climbing trees,
知してください。他のお子様と遊ぶとき、遊具で遊ぶとき、木登りするとき、
or at any
time while not riding a bicycle. Failure to follow this warning could result in
など自転車に乗らないときは、ヘルメットを取るようにしてください。この警
serious
injury
or death.
告を無視した場合、重篤なケガ、死に至ることがあります。
1,まずはじめに
1. First
注意) 自転車を使用する前に必ずこのマニュアルをお読みください。お読みになり、
NOTE: We strongly urge you to read this Manual in its entirety before your first ride. At
各セクションの要点を完全に理解して、分からないなところがないように、参照となる
the very least, read and make sure that you understand each point in this section, and
部分もよくお読みください。もし少しでも分からないところがあったら、自転車に乗ら
refer to the cited sections on any issue which you don’t completely understand. Please
ないようにしてください。詳しくは、お買上げの販売店にお問合せください。
note that not all bicycles have all of the features described in this Manual. Ask your
dealer to point out the features of your bicycle.
A,自転車が体に合うこと
1.自転車が体に合っていますか?詳しくは、Section3.A.をご参照ください。
A. Bike Fit
もし自転車が極端に大きかったり、小さい場合は、操作が困難になり、
1.Is
your bike the right size? To check, see Section 3.A. If your bicycle is too large or
too転倒します。もし体に合わないときは、販売店に問い合わせて違うサイズの
small for you, you may lose control and fall. If your new bike is not the right size, ask
自転車と取替えてください。
your
dealer to exchange it before you ride it.
2.サドルの高さは適切ですか?詳しくは、Section3.B.をご参照ください。サドル高さ
2.Is the saddle at the right height? To check, see Section 3.B. If you adjust your
を調整するときは、「最小挿入しろ」を順守してください。
saddle
height, follow the Minimum Insertion instructions in Section 3.B.
3.サドルとシートポストは適切に固定されていますか?適切に固定されたサドルはグ
3.Are saddle and seat post securely clamped? A correctly tightened saddle will allow
ラグラ動きません。詳しくは、Section3.B.をご参照ください。
no saddle
movement in any direction. See Section 3.B.
4.ハンドルとハンドル軸の高さは適切ですか?詳しくは、Section3.C.、3.D.をご参照
4.Are the stem and handlebars at the right height for you? If not, see Section 3.C.
ください。
5.Can you comfortably operate the brakes? If not, you may be able to adjust their
5.自転車操作に無理はないですか?詳しくは、Section3.D.をご参照ください。
angle and reach. See Section 3.D and 3.E.
6.自転車操作を理解できましたか?もし少しでも分からないところがあったら、お買
6.Do you fully understand how to operate your new bicycle? If not, before your first
上げの販売店にお問合せください。
ride,
have your dealer explain any functions or features which you do not understand.
B,安全第一
B.Safety First
1.Always wear an approved helmet when riding your bike, and follow the helmet
1.自転車に乗る時はヘルメットを着用し、ヘルメットメーカーの取扱説明書に沿った着
manufacturer’s instructions for fit, use and care.
用を心掛けてください。
2.Do you have all the other required and recommended safety equipment? See
2.その他法令に基づいた安全器具を使用していますか?詳しくはSection.2をご参照く
Section 2. It’s your responsibility to familiarize yourself with the laws of the areas where
ださい。適用される法令に準拠することは、使用者の義務になります。
you ride, and to comply with all applicable laws.
3.前後ホイールを適切に固定する方法を知っていますか?詳しくはSection.4.A.1をご
3.Do you know how to correctly secure your front and rear wheels? Check Section
参照ください。ホイルが適切に締結されないまま自転車を操作するのは大変危険で
4.A.1
to make sure. Riding with an improperly secured wheel can cause the wheel to
す。最悪の場合、重篤なケガ或いは死に至ることがあります。
wobble or disengage from the bicycle, and cause serious injury or death.
4.自転車につま先固定クリップあるいは、つま先固定式のペダルがついていますか?詳
4.If your bike has toeclips and straps or clipless (“step-in”) pedals, make sure you
しくはSection.4.E.をご参照ください。これらのペダル操作には特別なスキルが必要
know how they work (see Section 4.E). These pedals require special techniques and
です。メーカーの取扱説明書を順守して正しくお使いください。
skills. Follow the pedal manufacturer’s instructions for use, adjustment and care.
5.Do you have “toe overlap”? On smaller framed bicycles your toe or toeclip may
5.自転車につま先固定用のオーバーラップがついていますか?小さい自転車では、この
be able to contact the front wheel when a pedal is all the way forward and the wheel is
オーバラップが前輪に干渉することがあります。詳しくはSection.4.E.をご参照くだ
turned. Read Section 4.E. to check whether you have toeclip overlap.
さい。自転車操作に無理はないですか?詳しくは、Section3.D.をご参照ください。
6.Does your bike have suspension? If so, check Section 4.F. Suspension can change
6.自転車にサスペンションがついていますか?詳しくはSection.4.F.をご参照ください
the way a bicycle performs. Follow the suspension manufacturer’s instructions for use,
。サスペンションメーカーの取扱説明書に沿って正しい調整をしてご使用ください。
adjustment and care.
2
3
C. Mechanical Safety Check
C,機構面での安全チェック
Routinely check the condition of your bicycle before every ride.
自転車の状態を定期的にチェックしてください。
• Nuts, bolts screws & other fasteners: Because manufacturers use a wide variety
・ナット、ボルト、ねじ、その他締結部品:メーカーは多様なサイズ、種類の締結部品
of fastener sizes and shapes made in a variety of materials, often differing by model and
を使用する為、一般的に締め付けトルクはいくらといった表記はできません。自転車に
component, the correct tightening force or torque cannot be generalized. To make sure
採用されているそれぞれの締結器の締め付けトルクを確認するためには、Appendix.Dを
that the many fasteners on your bicycle are correctly tightened, refer to the Fastener
参照するか、メーカー発行の取扱説明書を参照してください。正しいボルトの締め付け
Torque Specifications in Appendix D of this manual or to the torque specifications in
トルクを得るためには、調整されたトルクレンチが必要です。トルクレンチを使いご自
the instructions provided by the manufacturer of the component in question. Correctly
分で自転車の締結部品を締める場合は、自転車及び、メーカー発行の取扱説明書のトル
tightening a fastener requires a calibrated torque wrench. A professional bicycle
ク仕様欄を参照してください。ご自分で締結部品の調整を行うときは、十分注意を払う
mechanic with a torque wrench should torque the fasteners on you bicycle. If you
と共に、できるだけ早く取扱店のチェックを受ける事を推奨いたします。
choose to work on your own bicycle, you must use a torque wrench and the correct
tightening torque specifications from the bicycle or component manufacturer or from
your dealer. If you need to make an adjustment at home or in the field, we urge you to
exercise care, and to have the fasteners you worked on checked by your dealer as soon
as possible.
WARNING: Correct tightening force on fasteners –nuts, bolts, screws– on your
WARNING:(警告)正しいトルク値で、ボルト、ナット、ねじ等を締結すること
bicycle is important. Too little force, and the fastener may not hold securely. Too
は重要です。ゆるすぎるとボルト類が緩み安全ではありません。きつ過ぎるとネ
muchジ山が擦れたり、ネジが疲労して折れたりします。どちらにしても不適切なトル
force, and the fastener can strip threads, stretch, deform or break. Either way,
incorrect
tightening force can result in component failure, which can cause you to
クで締結部品を締めると、その部位が機能しなくなり、ひいては自転車を操作で
looseきなくなり、転倒する事につながります。
control and fall.
・自転車のどの部品も緩んでいない事を確認してください。前輪を10センチほど持ち上
• Make sure nothing is loose. Lift the front wheel off the ground by two or three
げ車体を地面に落としてみてください。何か緩んでいるような音はしますか?視覚的、
inches, then let it bounce on the ground. Anything sound, feel or look loose? Do a visual
感覚的におかしいとおもうところがないかチェックしてください。どこか緩んでいると
and tactile inspection of the whole bike. Any loose parts or accessories? If so, secure
感じたら、締め直してください。もしよく分からなければ、だれか経験のある人に尋ね
them. If you’re not sure, ask someone with experience to check.
てみてください。
• Tires & Wheels: Make sure tires are correctly inflated (see Section 4.G.1). Check
・タイヤとホイール:タイヤの封入圧が正しい事を確認してください(Section
by putting one hand on the saddle, one on the intersection of the handlebars and stem,
4.G.1参照)サドルとハンドルを握って、体重をかけて車体を地面に押し付け、タイヤ
then bouncing your weight on the bike while looking at tire deflection. Compare what
のへこみ具合を観察してください。適正圧で自転車と使っているときの状態と比べてみ
you see with how it looks when you know the tires are correctly inflated; and adjust if
てください。必要に応じて封入、減圧の調整をしてください。
necessary.
・タイヤが良好な状態ですか?ホイルをゆっくり回してみて、溝の減り具合、側面の亀
• Tires in good shape? Spin each wheel slowly and look for cuts in the tread and
裂などを観察してください。損耗していると思われたら、タイヤを交換してください。
sidewall. Replace damaged tires before riding the bike.
・ホイルに異常はないですか?ホイルをゆっくり回して、ブレーキパッドとのクリアラ
• Wheels true? Spin each wheel and check for brake clearance and side-to-side
ンスを観察してください。ホイルが左右に振れている、或いはブレーキパッドに干渉し
wobble. If a wheel wobbles side to side even slightly, or rubs against or hits the brake
ている場合は、認証された自転車取扱店に持っていき、ホイル調整を依頼してくださ
pads, take the bike to a qualified bike shop to have the wheel trued.
い。
CAUTION:
Wheels must be true for rim brakes to work effectively. Wheel
CAUTION(注意):ホイルのリム調整では、スポーク長さを調整して、リムの振
trueing
is a skill which requires special tools and experience. Do not attempt to
れをとる技術が必要になります。スポーク長さ調整の経験と知識、及び正しい工
true a具を持たない方は、ホイル調整を行わないでください。
wheel unless you have the knowledge, experience and tools needed to do the
job correctly.
・ホイルのリムは汚れていたり、傷んでいませんか?リムの汚れ、とくにブレーキのリ
• Wheel rims clean and undamaged? Make sure the rims are clean and undamaged
ムパッドによるブレーキ痕がないことを確認してください。リムパッドが摩耗してない
at the tire bead and, if you have rim brakes, along the braking surface. Check to make
事、摩耗を示すインディケーターがまだ見えていない事を確認してください。
sure that any rim wear indicator marking is not visible at any point on the wheel rim.
4
WARNING:
Bicycle wheel rims are subject to wear. Ask your dealer about wheel
WARNING(警告):自転車のリムは摩耗するものです。リムが摩耗した事を
rim
wear. Some wheel rims have a rim wear indicator which becomes visible as
示す、インディケーターが付いている自転車もあります。ブレーキパッドの接触
the rim’s
braking surface wears. A visible rim wear indicator on the side of the wheel
面のインディケーターが見えるようになったときは、リムの寿命が来た事を意味
rim isしています。インディケーターが見えるようになった自転車に乗ることは危険で
an indication that the wheel rim has reached its maximum usable life. Riding a
wheelす。自転車を操作できなくなり、転倒する事につながります。
that is at the end of its usable life can result in wheel failure, which can cause
you to loose control and fall.
ブレーキ:ブレーキの機能を確認してください(Sections
4.C参照)。
• Brakes: Check the brakes for proper operation (see Sections
4.C). Squeeze the
ブレーキレバーを握ってください。ブレーキのクイックリリースは閉じていますか?ブ
brake levers. Are the brake quick-releases closed? All control cables seated and
レーキワイヤーケーブルはきちんと締結されていますか?リムパット式のブレーキの場
securely engaged? If you have rim brakes, do the brake pads contact the wheel rim
合、ブレーキパットが、リムに十分に接触しますか?ブレーキレバーの動作範囲25mm以
squarely and make full contact with the rim? Do the brakes begin to engage within an
内で、ブレーキパッドが、リムに十分接触しますか?ブレーキレバーがハンドルの取っ
inch of brake lever movement? Can you apply full braking force at the levers without
手部分に当たる前に、ブレーキが完全に効く状態になっていますか?上記に一つでも該
having them touch the handlebar? If not, your brakes need adjustment. Do not ride the
当する場合は、自転車の使用をやめ、専門の整備士に調整を依頼してください。
bike until the brakes are properly adjusted by a professional bicycle mechanic.
・ホイルの締結に関して:前後ホイルが正しく締結されている事を確認してください。
• Wheel retention system: Make sure the front and rear wheels are correctly
Section
secured. 4.Aを参照。
See Section 4.A
・シートポスト:シートポストがワンタッチ調整レバー式になっている自転車は、レバ
• Seat post: If your seat post has an over-center cam action fastener for easy height
ーの調整と固定位置が適切である事を確認してください。(Section4.B.)
adjustment, check that it is properly adjusted and in the locked position. See Section
・ハンドルバーとサドルの調整:ハンドルとサドルの軸は、受け軸になっているパイプ
4.B.
と、通りがまっすぐになっている事、及びしっかり固定されている事を確認してくださ
• Handlebar and saddle alignment: Make sure the saddle and handlebar stem are
い。
parallel to the bike’s center line and clamped tight enough so that you can’t twist them
・ハンドルの末端:ハンドルについているグリップが良好な状態であること、しっかり
out of alignment. See Sections 3.B and 3.C.
固定されている事を確認してください。もしそうでなければ、取扱店でグリップを交換
• Handlebar ends: Make sure the handlebar grips are secure and in good condition.
してください。ハンドル両端にエクステンションが付いている車種では、それらがしっ
If not, have your dealer replace them. Make sure the handlebar ends and extensions are
かりハンドルに固定されており、手で押してもずれない事を確認してください。
plugged. If not, have your dealer plug them before you ride. If the handlebars have bar
end extensions, make sure they are clamped tight enough so you can’t twist them.
WARNING(警告):ハンドルのグリップが損耗していたり、ゆるかったりすると
WARNING:
Loose or damaged handlebar grips or extensions can cause you to
大変危険です。またハンドルのエクステンションがしっかり固定されていない
lose
control and fall. Unplugged handlebars or extensions can cut you and cause
と、指を切ったり、事故に繋がるおそれがあります。
serious
injury in an otherwise minor accident.
安全に関する最重要事項
VERY IMPORTANT SAFETY NOTE:
自転車とその構成部品の寿命に関する情報は重要ですので、しっかりお読みになり理
Please also read and become thoroughly familiar with the important information
解してください。43ページのAppedix
on the lifespan of your bicycle and itsBを参照のこと。
components in Appendix B on Page 43.
D.
First Ride
D,最初に自転車に乗る際に
最初に自転車に乗るときは、まずヘルメットをかぶり、車や他のサイクリストが
When you buckle on your helmet and go for your first familiarization ride on your
new
bicycle, be sure to pick a controlled environment, away from cars, other cyclists,
いない、安全で広い場所にてまず試運転をするようにしてください。まずは慎重に乗っ
obstacles
or other hazards. Ride to become familiar with the controls, features and
てみて、自転車の形態、性能、操作に慣れてください。
performance
of your new bike.
ブレーキ操作に慣れてください(Section
4.C参照)。
まずは低速で、重心を後ろに移しながら、ゆっくりブレーキをかけてください。後輪ブ
Familiarize yourself with the braking action of the bike (see Section 4.C). Test the
brakes
at slow speed, putting your weight toward the rear and gently applying the
レーキを最初に効かせます。急激に前ブレーキをかけると、前のめりになって、ハンド
brakes,
rear brake first. Sudden or excessive application of the front brake could pitch
ルに体がぶつかることがあります。また急ブレーキをかけると、タイヤがロックされ、
you
over the handlebars. Applying brakes too hard can lock up a wheel, which could
自転車を操作できなくなり、転倒する事につながります。横滑り状態となり、大変危険
cause
です。you to lose control and fall. Skidding is an example of what can happen when a
wheel locks up.
5
つま先を固定する、トー・クリップ、クリップレスペダルを装着した自転車をお使い
If your bicycle has toeclips or clipless pedals, practice getting in and out of the pedals.
の場合、練習を十分に行ってください。Section
4.E.4. のパラグラフB.4参照。
See paragraph B.4 above and Section 4.E.4.
サスペンションがついている自転車の場合、ブレーキをかけた時の、重心の移し方に慣
If your bike has suspension, familiarize yourself with how the suspension responds to
れてください。
brake application and rider weight shifts. See paragraph B.6 above and Section 4.F.
ギヤのシフトの練習をしてください(Section
4.D参照)。
Practice shifting the gears (see Section 4.D). Remember
to never move the shifter
ペダルを後ろ向きに回しながら、ギヤシフトを行うこと、またはギヤを変えたすぐ後
while pedaling backward, nor pedal backwards immediately after having moved the
に、ペダル後ろ向きに回すことは避けてください。チェーンが引っかかり動かなくなる
shifter. This could jam the chain and cause serious damage to the bicycle.
ことがあります。
Check out the handling and response of the bike; and check the comfort.
ハンドル操作、自転車の応答に慣れ、快適に自転車に乗れる事を確かめて下さい。
If you have any questions, or if you feel anything about the bike is not as it should be,
自転車が何かおかしかったり、質問等ありましたら、まずは乗る事を辞めて、販売店ま
consult your dealer before you ride again.
でお問合せください。
2. Safety
A. The
Basics
A.
基本的な事項
WARNING: The area in which you ride may require specific safety devices. It is your
responsibility to familiarize yourself with the laws of the area where you ride and to
WARNING(警告):お住まいの地域によっては、何かしらの安全器具を着用することが
comply with all applicable laws, including properly equipping yourself and your bike as
法律で義務付けられている事があります。法律を守って正しい安全器具を着用し、自転車
the law requires.
を使用することはお客様の義務になります。
Observe all local bicycle laws and regulations. Observe regulations about bicycle
自転車に関する法令をまずお調べ下さい。ライト、自転車の免許、歩道での使用、自転車
lighting, licensing of bicycles, riding on sidewalks, laws regulating bike path and trail
専用路、ヘルメット、幼児を乗せた運転、自転車交通法上の特例、等に関する法令等を閲
use, helmet laws, child carrier laws, special bicycle traffic laws. It’s your responsibility
覧する必要があります。法令に順守して自転車を使用する事はお客様の義務になります。
to know and obey the laws.
1.
Always wear a cycling helmet which meets the latest certification
1.自転車操作中は、認定された規格に準拠したヘルメットを常に着
standards
and is appropriate for the type of riding you do. Always
用してください。ヘルメット製造元の取扱説明書を参照して、サイ
follow
the helmet manufacturer’s instructions for fit, use and care of
ズの合ったものを着用するようにしてください。自転車事故で、重
your
helmet. Most serious bicycle injuries involve head injuries which
篤なケースとなるもののほとんどは頭部の挫傷です。それらはヘル
might
have been avoided if the rider had worn an appropriate helmet.
メットを着用していれば防げたものです。
WARNING:
Failure to wear a helmet when riding may result in
WARNING(警告):ヘルメットを着用せず自転車に乗ると、重篤
serious
injury or death.
なケガ、もしくは死に至る事故につながる事があります。
2.自転車に乗る前に安全チェックを常に行って下さい(Section
2. Always do the Mechanical Safety Check (Section 1.C) before you1.C)
get on a bike.
3.3.自転車操作には十分慣れてください(Section
Be thoroughly familiar with the controls of your4.C.)
bicycle: brakes (Section 4.C.);
pedals
(Section 4.E.); shifting (Section 4.D.)
4. 手、指、もしくは本体部品等を、回転中のチェーン、スプロケット、ペダル、
クランク、等の回転体から遠ざけてください。
4. Be careful to keep body parts and other objects away from the sharp teeth of
chainrings,
the moving chain, the turning pedals and cranks, and the spinning wheels of
5. 以下を守ってください:
your
bicycle.
・すべらずにペダルをこげるシューズを着用してください。靴ヒモが、チェーンホイル
等に巻き込まれないように端末処理をしてください。裸足やサンダルでは自転車に乗
5.
Always wear:
らないでください。
•
Shoes that will stay on your feet and will grip the pedals. Make sure that shoe laces
・明るい色で、だぶつきない服装をしてください。あまりにだぶついていると、自転車
cannot
get into moving parts, and never ride barefoot or in sandals.
に巻き込まれたり、回りの障害物に引っ掛たりすることがあります。
• Bright, visible clothing that is not so loose that it can be tangled in the bicycle or
6
・空中のチリ、ごみ、虫等から目を保護するため、アイ・グラスを着用してください。
snagged by objects at the side of the road or trail.
光度に応じて遮光度が変わるものが望まれます。
• Protective eyewear, to protect against airborne dirt, dust and bugs — tinted when
6. BMX,マウンテンバイク等の自転車をご使用でも、走行中のジャンプで遊ばないで
the sun is bright, clear when it’s not.
ください。ジャンプすると楽しいかもしれませんが、フレームや部品に予想できない負
6. Don’t jump with your bike. Jumping a bike, particularly a BMX or mountain
荷が掛かることがあり、使用者や自転車本体に重大なダメージを与える事があります。
bike, can be fun; but it can put huge and unpredictable stress on the bicycle and its
ジャンプや、スタント走行、自転車レースをする場合は、Section 2.F. をお読みに
components. Riders who insist on jumping their bikes risk serious damage, to their
なり理解してください。
bicycles as well as to themselves. Before you attempt to jump, do stunt riding or race
7. 適度なスピードで自転車走行をお楽しみください。スピードを出すと、その分リス
with your bike, read and understand Section 2.F.
クも高くなります。
7. Ride at a speed appropriate for conditions. Higher speed means higher risk.
B,安全走行に関する事項
B. Riding Safety
1.道交法、地域条例などの関連法規を順守してください。
1. Obey all Rules of the Road and all local traffic laws.
2.バイク、歩行者、他の自転車等が同じ道路で走行していますので、彼らの権利を尊重
2. You are sharing the road or the path with others — motorists, pedestrians and
して、安全走行を心掛けてください。
other cyclists. Respect their rights.
3.回りはあなたに気を配っていないと仮定して、常に慎重に走行してください。
3. Ride defensively. Always assume that others do not see you.
4.前方注意、回避準備の心がけを常にもってください。
4. Look ahead, and be ready to avoid:
・自動車が曲がろうと、歩道にゆっくりと乗り出してきます。
• Vehicles slowing or turning, entering the road or your lane ahead of you, or coming
・停車中の車が突然ドアを開けます
up behind you.
・歩行者が突然飛び出してきます
• Parked car doors opening.
・子供やペットが路上で遊んでいます
• Pedestrians stepping out.
・道路の穴、下水道溝、踏切溝、歩道の段差、橋の継ぎ目、
• Children or pets playing near the road.
濡れたマンホール蓋、工事中の歩道、破片、ゴミ等で走行が困難になり、
• Pot holes, sewer grating, railroad tracks, expansion joints, road or sidewalk
事故につながることがあります。
construction, debris and other obstructions that could cause you to swerve into traffic,
・その他、多くの危険物、障害物が存在し、事故を引き起こすことがあります。
catch your wheel or cause you to have an accident.
5、自転車に乗るときは、自転車専用道路の指示された経路を走行するか、一般道の場合
• The many other hazards and distractions which can occur on a bicycle ride.
できるだけ道の端を交通の流れる方向に向かって走行してください。
5. Ride in designated bike lanes, on designated bike paths or as close to the edge
6、信号では停車、交差点では減速して左右から車が来ない事を確認して、通過してくだ
of the road as possible, in the direction of traffic flow or as directed by local governing
さい。信号が青でも十分に注意をして、交差点を通過し、接触事故に遭わないようにし
laws.
てください。
6. Stop at stop signs and traffic lights; slow down and look both ways at street
7、腕を使ったサインを適切に行使して安全に通過してください。
intersections. Remember that a bicycle always loses in a collision with a motor vehicle,
8、 ヘッドホンをして走行する事はできません。自動車の音、救急車のサイレン等が
so be prepared to yield even if you have the right of way.
聞こえなくなり、接触事故の原因になります。またヘッドホンのケーブルが、絡まり、
7. Use approved hand signals for turning and stopping.
自転車操作の妨げになります。
8. Never ride with headphones. They mask traffic sounds and emergency vehicle
9、二人乗りは禁止です。ただし、国によっては、ヘルメットを装着し、承認された安全
sirens, distract you from concentrating on what’s going on around you, and their wires
器具(チャイルドシート、チャイルドトレーラー)を正しく使用する場合はその限りで
can tangle in the moving parts of the bicycle, causing you to lose control.
はありません。
9. Never carry a passenger, unless it is a small child wearing an approved helmet and
10、走行の傷害になるもの、ホイルの回転に巻きついて危ないもの等を運ばないで
secured in a correctly mounted child carrier or a child-carrying trailer.
ください。
10. Never carry anything which obstructs your vision or your complete control of the
11、原付や自動車に引っ張ってもらい自転車に乗ることは厳禁です。
bicycle, or which could become entangled in the moving parts of the bicycle.
12、 スタント行為、ウイリー、ジャンプ、自転車レース等の危険行為は避けて
11. Never hitch a ride by holding on to another vehicle.
ください。弊社商品に関しては、これらは禁止となっています。それでももしこのよう
12. Don’t do stunts, wheelies or jumps. If you intend to do stunts, wheelies, jumps or
な行為を行うのであれば、Section 2.Fを参照すると共に、起こり得るリスク、
go racing with your bike despite our advice not to, read Section 2.F, Downhill, Stunt or
ご自分の自転車スキルをよく勘案し、自己責任で行うようお願いします。
Competition Biking, now. Think carefully about your skills before deciding to take the
large risks that go with this kind of riding.
7
雨天走行に関しては、Section4.Cをご参照ください。
13.道路で歩行者を驚かすようなを揺動運転をしないでください。
13. Don’t weave through traffic or make any moves that may surprise people with
14, 回りに注意を払い、積極的に道を譲ってください。
whom you are sharing the road.
15, 飲酒運転、薬物服用時の運転は禁止です。
14. Observe and yield the right of way.
16, 悪天候、朝夕で暗く視界の悪い状態、身体疲労時には走行を控えてください。
15. Never ride your bicycle while under the influence of alcohol or drugs.
これらの状態では事故に遭遇するリスクが高くなります。
16. If possible, avoid riding in bad weather, when visibility is obscured, at dawn, dusk or in
the dark, or when extremely tired. Each of these conditions increases the risk of accident.
C. Off Road Safety
C,オフロードでの安全に関する事項
We recommend that children not ride on rough terrain unless they are accompanied
お子様が路面の悪い道で自転車に乗る事は推奨できません。そうされる場合は必ず保護
by
an adult.
者の方と一緒で行ってください。
1.
The variable conditions and hazards of off-road riding require close attention and
1, オフロードは状態が変わりやすく危険ですので、走行するのに高度な技術と注意が
specific skills. Start slowly on easier terrain and build up your skills. If your bike has
求められます。まずは安全な場所で、試運転をしてスキルを磨いてください。サスペン
suspension, the increased speed you may develop also increases your risk of losing
ション搭載車にお乗りの方は、スピードが出るほど操作が困難になり、転倒リスクが高
control and falling. Get to know how to handle your bike safely before trying increased
くなりますのでご注意ください。まずは操作感覚を掴んで、徐々に慣らしてください。
speed or more difficult terrain.
2,お客様の自転車走行に適した安全器具を装着してください。
2. Wear safety gear appropriate to the kind of riding you plan to do.
3,誰もいない場所で、一人で自転車に乗るのはやめてください。誰かと一緒の場合
3. Don’t ride alone in remote areas. Even when riding with others, make sure that
でも、必ず他の誰かが、行き先、戻る場所を把握しておくようにしてください。
someone knows where you’re going and when you expect to be back.
4,万が一の事故に備えて、必ずなんらかの身分証明を携行してください。
4. Always take along some kind of identification, so that people know who you are in
非常事態に備えて、食・飲料、電話のための小銭を携行して走行してください。
case of an accident; and take along some cash for food, a cool drink or an emergency
5,歩行者、ペットには積極的に道を譲り、彼らを驚かせるような走行は謹んで
phone call.
ください。歩行者、ペット等の突然の動きに備え、十分な距離を置くようにしてくだ
5. Yield right of way to pedestrians and animals. Ride in a way that does not frighten
さい。
or endanger
them, and give them enough room so that their unexpected moves don’t
6,
オフロードで何かが起こると、助けを呼ぶことが困難です。行き先の周知、携帯
endanger
you.
電話の携行など十分な準備をしてください。
6.
Be prepared. If something goes wrong while you’re riding off-road, help may not
be
7,
ジャンプやスタント走行、レース参加等の危険な行為する場合、まずSection
2.F.を
close.
お読みになり理解するようにしてください。
7. Before you attempt to jump, do stunt riding or race with your bike, read and
understand Section 2.F.
オフロードでのマナー
Off Road respect
オフロード走行に関する法令を順守して正しい走行をしてください。私有地では使用の
Obey the local laws regulating where and how you can ride off-road, and respect
ルールを守ってください。ハイキング、乗馬、自転車等を楽しむ他の方々と道を共有す
private property. You may be sharing the trail with others — hikers, equestrians, other
ることになりますので、彼ら立場を尊重してください。決められた方向にそって走行
cyclists. Respect their rights. Stay on the designated trail. Don’t contribute to erosion by
し、泥道走行やスライディング走行を避けて下さい。環境系に影響が出るので、植林地
riding in mud or with unnecessary sliding. Don’t disturb the ecosystem by cutting your
や沢を横切って近道をする事はやめてください。環境負荷を最小に抑えるのはサイクリ
own trail or shortcut through vegetation or streams. It is your responsibility to minimize
ストの責任です。持ち込んだものは全て持ち帰ってください。
your impact on the environment. Leave things as you found them; and always take out
everything you brought in.
D,雨天での走行
D.
Wet Weather Riding
WARNING(警告):雨天では、自転車にかぎらず、まわりの自動車も走行性、制
WARNING:
Wet weather impairs traction, braking and visibility, both for the
動性、視認性が低下します。事故が起こる可能性が高くなりますので、十分注
bicyclist
and for other vehicles sharing the road. The risk of an accident is
意してください。
dramatically
increased in wet conditions.
Under wet conditions, the stopping power of your brakes (as well as the brakes of
雨の日では、ブレーキの制動性が極端に落ちますので、自転車のスピードをコントロ
other vehicles sharing the road) is dramatically reduced and your tires don’t grip nearly
ールするのが難しくなります。そうした状態に陥らないためにも、安全運転をこころ
as well. This makes it harder to control speed and easier to lose control. To make sure
がけ、ふだんよりも余裕をもったブレーキングを行ってください。
that you can slow down and stop safely in wet conditions, ride more slowly and apply
8
your brakes earlier and more gradually than you would under normal, dry conditions.
See also Section 4.C.
E,夜間の走行
E. Night Riding
夜間の自転車走行は、大変危険です。他の自転車や歩行者の認識が困難になるため、お
Riding a bicycle at night is much more dangerous than riding during the day. A
子様に関しては、夜間、夜明け、夕暮れにのいずれの時間において決して自転車走行さ
bicyclist is very difficult for motorists and pedestrians to see. Therefore, children
せないでください。リスクを理解し、あえて夜間走行を行う大人のサイクリストにおい
should never ride at dawn, at dusk or at night. Adults who chose to accept the greatly
ても、夜間走行用の器具を装着する等して、十分な注意を払い、リスク低減に努めてく
increased risk of riding at dawn, at dusk or at night need to take extra care both riding
ださい。
and choosing specialized equipment which helps reduce that risk. Consult your dealer
about night riding safety equipment.
WARNING(警告):反射鏡はライトの代わりにはなりません。夜間、夜明け、夕
暮れ、または視界の悪い時に無灯でしかも反射鏡のつかない自転車に乗る事は
WARNING: Reflectors are not a substitute for required lights. Riding at dawn, at
大変危険です。重篤なケガ或いは死に至る場合がありますので決して行わない
dusk, at night or at other times of poor visibility without an adequate bicycle lighting
でください。
system
and without reflectors is dangerous and may result in serious injury or death.
自転車の反射鏡は、自動車のライトや電灯の光を反射して、自転車が走行している
Bicycle reflectors are designed to pick up and reflect car lights and street lights in a
way
that may help you to be seen and recognized as a moving bicyclist.
のを、周囲がやっと視認する程度の発光しかしません。
CAUTION(注意):反射鏡と取付けブラケット自転車が、自転車に装着されている事を確認
CAUTION:
Check reflectors and their mounting brackets regularly to make sure
してください。また汚れがなく、壊れていなく、ガタがない事を確認してください。破損
that
they are clean, straight, unbroken and securely mounted. Have your dealer
した反射鏡は販売店で交換してもらい、曲がったり緩んだりしたものは、まっすぐに調整
replace
damaged reflectors and straighten or tighten any that are bent or loose.
してください。
前後の反射鏡用取付ブラケットは、ブレーキケーブルをとめるようにデザインされてい
The mounting brackets of front and rear reflectors are often designed as brake
straddle
cable safety catches which prevent the straddle cable from catching on the tire
る事があります。ブレーキが切断された時、ワイヤがタイヤに巻き付く事を防止する役
tread
if the cable jumps out of its yoke or breaks.
目を果たしますので、ケーブルはブラケットにしっかり留めてください。
WARNING:
Do not remove the front or rear reflectors or reflector brackets from
WARNING(警告):前後反射鏡及びその取付ブラケットを自転車から取り外さない
your
bicycle. They are an integral part of the bicycle’s safety system.
でください。反射鏡は自転車の重要な安全部品の一つです。反射鏡を外すと、周
Removing
the reflectors reduces your visibility to others using the roadway. Being
囲からの視認性が悪くなり衝突事故の原因となります。
struck反射鏡用取付ブラケットは、ブレーキケーブルを留める機能を備えたものがあり
by other vehicles may result in serious injury or death.
Theます。万が一ブレーキワイヤが切れたときに、ブレーキワイヤがタイヤに絡みつ
reflector brackets may protect you from a brake straddle cable catching on the
tire inかないようにする為です。ブレーキワイヤがタイヤに絡みつくと、走行不能の状
the event of brake cable failure. If a brake straddle cable catches on the tire, it
can cause
the wheel to stop suddenly, causing you to loose control and fall.
態に陥り、転倒の原因となります。
If you choose to ride under conditions of poor visibility, check and be sure you comply
視界の悪い状態で自転車走行をしようとお考えの方は、まず夜間走行に関する法令を確
with all local laws about night riding, and take the following strongly recommended
認し、それを順守してください。また以下の事項を守る事を強くお勧めします。
additional precautions:
• Purchase and install battery or generator powered head and tail lights which meet
・前後のライト用のバッテリー、発電機が機能する事、法規に定められた光量を備え、
all regulatory requirements and provide adequate visibility.
周囲の視認を十分に促している事を確認する。
• Wear light colored, reflective clothing and accessories, such as a reflective vest,
・明るい色の服装をして、反射素材用いたバッグやアクセサリを使う:反射ベスト、反
reflective arm and leg bands, reflective stripes on your helmet, flashing lights attached
射性のアームバンド、レッグバンド等、反射テープのついたヘルメット、ライトを体か
to your body and/or your bicycle ... any reflective device or light source that moves will
自転車に装着する等により、自転車、バイク、歩行者等から良く見えるようにしてくだ
help you get the attention of approaching motorists, pedestrians and other traffic.
さい。
• Make sure your clothing or anything you may be carrying on the bicycle does not
・バックや衣類で、反射鏡が隠れないようにしてください。
obstruct a reflector or light.
・反射鏡がしっかり固定され、曲がっていない事を確認してください。
• Make sure that your bicycle is equipped with correctly positioned and securely
mounted reflectors.
9
夕暮れ、夜明け、夜間での走行時:
While riding at dawn, at dusk or at night:
・スピードを落とす
• Ride slowly.
・暗い場所、高速で移動する車の多い場所では走行しない
• Avoid dark areas and areas of heavy or fast-moving traffic.
・慣れた道をなるべく走行する
• Avoid road hazards.
• If possible, ride on familiar routes.
交通のある場所での走行:
If riding in traffic:
・常に先を予測して走行する。自動車が貴方の動きを認識できるよう走行する。
• Be predictable. Ride so that drivers can see you and predict your movements.
・常に注意する。想定外を予測し、保守的な走行を。
• Be alert. Ride defensively and expect the unexpected.
・交通のある場所での走行が多い方は、取扱店にガイドブックや講習会がないか尋ねて
• If you plan to ride in traffic often, ask your dealer about traffic safety classes or a
ください。
good book on bicycle traffic safety.
F,極限走行、スタント、競技等
F. Extreme, Stunt or Competition Riding
アグロ、ハッキング、フリーライド、ノース・ショア、ダウンヒル、ジャンプ、スタ
Whether you call it Aggro, Hucking, Freeride, North Shore, Downhill, Jumping, Stunt
ントライディング、レース等のいわゆる、極限走行を行うとケガをします。こうした行
Riding, Racing or something else: if you engage in this sort of extreme, aggressive
為は、ケガや死に至るリスクを積極的に受け入れている事になります。
riding you will get hurt, and you voluntarily assume a greatly increased risk of injury or
全ての自転車がこうした走行用に作られているわけではありませんし、こうした行為
death.
を持続的に行えるモデルは多くありません。こうした挑戦的走行が持続的に可能かまず
Not all bicycles are designed for these types of riding, and those that are may not
は自転車メーカーに確認してください。
be suitable for all types of aggressive riding. Check with your dealer or the bicycle’s
ダウンヒル走行では、バイク並のスピードに達しますので、バイクと同じ危険状態、リ
manufacturer about the suitability of your bicycle before engaging in extreme riding.
スクに備える必要があります。公認の整備士に自転車を点検してもらい、完全な状態で
When riding fast down hill, you can reach speeds achieved by motorcycles, and
あることを確認してください。レースに参加するときは、プロ自転車選手、エリア
therefore face similar hazards and risks. Have your bicycle and equipment carefully
担当、レース実行担当者に相談し、現地の状態、必要なものに関して助言を受けてくだ
inspected by a qualified mechanic and be sure it is in perfect condition. Consult with
さい。
expert riders, area site personnel and race officials on conditions and equipment
認可された安全器具を装着してください:フルフェイス・ヘルメット、全覆グローブ、
advisable at the site where you plan to ride. Wear appropriate safety gear, including
身体プロテクター等。コース状態に合わせて、適切な安全器具を装着するのはお客様の
an approved full face helmet, full finger gloves, and body armor. Ultimately, it is your
責任になります。
responsibility to have proper equipment and to be familiar with course conditions.
WARNING:
Although many catalogs, advertisements and articles about
WARNING(警告):カタログ、宣伝、雑誌記事などで、レース等の極限走行を掲載
bicycling
depict riders engaged in extreme riding, this activity is extremely
しているものが多く見られますが、こうした行為は基本的に大変危険なもので、
dangerous,
increases your risk of injury or death, and increases the severity of any
ケガや死に至るリスクが高くなります。こうした催しに参加するのは経験のある
injury.自転車プロ選手です。参加されるのであれば、ご自身の際限をわきまえ、常にヘ
Remember that the action depicted is being performed by professionals with
manyルメットその他の安全器具を装着してください。競技にて、高速走行のジャンプ
years of training and experience. Know your limits and always wear a helmet
and other
appropriate safety gear. Even with state-of-the-art protective safety gear,
、スタント、ダウンヒルを行うと、最新の安全保護器具を装着していても守りき
you could
be seriously injured or killed when jumping, stunt riding, riding downhill at
れるものではなく、ケガもしくは最悪の場合死に至ります。
speed or in competition.
WARNING: Bicycles and bicycle parts have limitations with regard to strength
WARNING(警告):自転車とその部品は、強度と応答性に限界があります。こうし
and integrity, and this type of riding can exceed those limitations.
た競技では、その限界を超える走行となることがあります。
このような走行は危険リスクを増大させるため、お勧めしていませんが、もしおやり
We recommend against this type of riding because of the increased risks; but if you
になるのであれば最低でも以下を守ってください:
choose
to take the risk, at least:
•
Take lessons from a competent instructor first
・有資格者のインストラクターからレッスンを受ける
•
Start with easy learning exercises and slowly develop your skills before trying
・簡単な練習から始め、徐々にスキルを上げて本番に参加する
10
more
difficult or dangerous riding
・スタント、ジャンプ、レース、ダウンヒルを指定された場所でのみ行う
・フル・フェイスヘルメット、その他安全器具を装着する
• Use only designated areas for stunts, jumping, racing or fast downhill riding
・自転車の過剰なストレスがかかること、故障する可能性がある事、保証が無効とな
• Wear a full face helmet, safety pads and other safety gear
る事を理解する
• Understand and recognize that the stresses imposed on your bike by this kind of
activity
may break or damage parts of the bicycle and void the warranty
・自転車を取扱店で点検してもらい、少しでも異常があれば乗らないこと
・有資格者のインストラクターからレッスンを受ける
• Take your bicycle to your dealer if anything breaks or bends. Do not ride your
bicycle
when any part is damaged.
・スタント、ジャンプ、レース、ダウンヒルを行うときは、ご自身のスキル経験を踏
まえ、際限を理解すること。ケガを防ぐのは自己責任の範疇です。
If you ride downhill at speed, do stunt riding or ride in competition, know the limits of
your skill and experience. Ultimately, avoiding injury is your responsibility.
G. `Changing Components or Adding Accessories
G,構成部品の取替え、アクセサリーの追加
There are many components and accessories available to enhance the comfort,
performance and appearance of your bicycle. However, if you change components or add
自転車性能、快適性、外観を良くするための、部品やアクセサリー類がたくさん販売さ
accessories, you do so at your own risk. The bicycle’s manufacturer may not have tested
れていますが、それらに変更或いは装着する際は、自己責任でそのようにしていただき
that component or accessory for compatibility, reliability or safety on your bicycle. Before
ます。自転車メーカーは、そうした別メーカーの部品の信頼性、互換性までテストを行
installing any component or accessory, including a different size tire, make sure that it is
っていない事があります。部品、アクセサリー、サイズの異なるタイヤ等を取り付ける
compatible with your bicycle by checking with your dealer. Be sure to read, understand
場合は、取扱店を交えて互換性を確認してください。それらの製品の取扱説明書を熟読
and follow the instructions that accompany
the products you purchase
for your bicycle.
し、それに従ってください。Appendix
A(35ページ)、Appendix
B(41ページ)を
See also Appendix A, p. 35 and B, p. 41.
参照してください。
WARNING:
Failure to confirm compatibility, properly install, operate and
WARNING(警告):自転車部品、アクセサリーの互換性を確かめず誤って取付てし
maintain
any component or accessory can result in serious injury or death.
まった場合、重篤なケガ或いは死に至る事故の原因となります。
WARNING:
Changing the components on your bike with other than genuine
WARNING(警告):純正でない自転車部品を取り付けた場合、安全性を低下させる
replacement
parts may compromise the safety of your bicycle and may void the
ことにつながり、場合によっては製品保証が無効となることがあります。お取付
warranty.
Check with your dealer before changing the components on your bike.
になる前に取扱店に確認してください。
3. Fit
NOTE: Correct fit is an essential element of bicycling safety, performance and comfort.
NOTE(注記):正しい調整は、自転車の安全性、性能、快適性を確保する重要な要素です。操者
の体格と走行状態に合わせた調整には経験、スキル、工具が必要ですので、調整に関しては、取
Making the adjustments to your bicycle which result in correct fit for your body and
扱店に依頼してください。もしそうしたご経験、スキルやツールをお持ちの方であっても、走行
riding conditions requires experience, skill and special tools. Always have your dealer
前に取扱店に調整具合をチェックしてもらってください。
make the adjustments on your bicycle; or, if you have the experience, skill and tools,
have your dealer check your work before riding.
WARNING(警告):調整して身体に適合した状態でないと、自転車操作が困難になり、転倒
WARNING: If your bicycle does not fit properly, you may lose control and fall. If
の原因になります。新しく買った自転車がどうも合わないという場合、取扱店に調整、も
your new bike doesn’t fit, ask your dealer to exchange it before you ride it.
しくは別商品との交換を依頼してください。
A,スタンドオーバー高さ
A. Standover height
1、ダイヤモンドフレーム採用の自転車
1. Diamond frame bicycles
スタンドオーバー高さは基本的な仕様の一つです。次ページfig2を参照してください。
Standover height is the basic element of bike fit (see ). It is the distance from
自転車をまたいで、自転車のフレームが股に当たる高さを意味します。自転車に乗ると
the ground to the top of the bicycle’s frame at that point where your crotch is when
きのシューズを履いて、自転車をまたいでみて、かかとで地面につけた状態で、フレー
straddling the bike. To check for correct standover height, straddle the bike while
ムを上下に振れるほどの高さが正確なスタンドオーバー高さになります。
wearing the kind of shoes in which you’ll be riding, and bounce vigorously on your heels.
11
股下が、自転車フレームに当たるのであれば、自転
If your crotch touches the frame, the bike is too big
車サイズが大きいことになりますので、そのような
for you. Don’t even ride the bike around the block. A
自転車には乗らないでください。舗装路のみの条件
bike which you ride only on paved surfaces and never
で使用する自転車では、股下とフレームの距離(ク
take off-road should give you a minimum standover
リアランス)が、5cm必要です。砂利道、でこぼこ
height clearance of two inches (5 cm). A bike that
道では、7.5cm、オフロードでは10cm以上のクリア
you’ll ride on unpaved surfaces should give you a
ランスのある自転車を選ぶ必要があります。
minimum of three inches (7.5 cm) of standover height
clearance. And a bike that you’ll use off road should
give you four inches (10 cm) or more of clearance.
2、ステップ・スルーフレーム採用の自転車
2. Step-through frame bicycles
ステップ・スルーフレームは、スタンドオーバー高
Standover height does not apply to bicycles with
さでなく、サドル高さで判断します。サドル高さを
step-through frames. Instead, the limiting dimension
調整するには、下記Bをご参照ください。
is determined by saddle height range. You must be
シートポストのパイプに書かれた、「Minimum
able to adjust your saddle position as describedInsertion」(最小挿入目盛)
in B without exceeding the limits set
「Maximum
Extension」(最大展張目盛)を超えることのないようにしてください。
by the height
of the top of the seat tube and the ”Minimum Insertion” or “Maximum
Extension” mark on the seat post.
B,サドル高さ調整
B. Saddle position
サドルの調整は、自転車の性能と快適性を確保する上で重要です。サドル高さが合わない
Correct saddle adjustment is an important factor in getting the most performance and
という場合は、販売店までお問合せください。
comfort from your bicycle. If the saddle position is not comfortable for you, see your dealer.
サドルは、以下の1から3の事項にそって調整できます;
The
saddle can be adjusted in three directions:
1,
サドル高さの調整:fig.3を参照ください。
1.
Up
and down adjustment. To check for correct saddle height (fig. 3):
・サドルに座ってください
• sit on the saddle;
・ペダルに片方の足を乗せてください
• place one heel on a pedal;
・ペダルを蹴って、ペダルのクランクがシートポストのパイプと並行する点(ペダル底位
• rotate the crank until the pedal with your heel on it is in the down position and the
置)まで蹴ってください。
crank arm is parallel to the seat tube.
上記の状態で、脚がまっすぐでなく、ひざが曲がっている場合、サドル高さを調整
If your leg is not completely straight, your saddle height needs to be adjusted. If your
する必要があります。かかとがペダルに届かず、股がサドルに接触する状態では、サドル
hips must rock for the heel to reach the pedal, the saddle is too high. If your leg is bent at
が高すぎます。かかとが下死点にあってもヒザが曲がっている状態では、サドル高さは低
the knee with your heel on the pedal, the saddle is too low.
すぎです。
Ask your dealer to set the saddle for your optimal
取扱店に最適なサドル高さ調整を依頼してください
riding position and to show you how to make this
。ご自分で調整をされる場合は、以下の方法でお願
adjustment. If you choose to make your own saddle
いします:
height adjustment:
・シートポストのレバーを開く
• loosen the seat post clamp
・シートポストを上下あせてください
• raise or lower the seat post in the seat tube
・サドルがまっすぐになっている事を確認してく
• make sure the saddle is straight fore and aft
ださい。
• re-tighten the seat post clamp to the
・シートポストのレバーをとじてください(締付
recommended torque (Appendix D or the
推奨トルクに関してはAppendix D、もしくは
manufacturer’s instructions).
メーカーの取扱説明書を参照)サドルが適切な位置
Once the saddle is at the correct height, make
で固定されたら、シートポストが、「Minimum
sure that the seat post does not project from the
Insertion」(最小挿入目盛)「Maximum
frame beyond its “Minimum Insertion” or “Maximum
Extension」(最大展張目盛)を超える長さ
Extension” mark (fig. 4).
で固定されていない事を確認してください(fig.4)
。
NOTE:挿入目盛がよく見えるよう、フレームパイプ部分にのぞき穴がついている自転車が
Some bicycles have a sight hole in the seat tube, the purpose of which is to
NOTE:
make it easy to see whether the seat post is inserted in the seat tube far enough to be
あります。
12
safe. If your bicycle has such a sight hole, use it instead of
のぞき穴がついてついている車種であれば、最小挿入目目
the “Minimum Insertion” or “Maximum Extension” mark
盛が穴を通してみえますので、十分な挿入長さでサドル高
to make sure the seat post is inserted in the seat tube far
さ調整をするのが楽になります。
enough to be visible through the sight hole.
fig 5のように、シートポスト下に、サスペンションが
If your bike has an interrupted seat tube, as is the case on
配置された車種があります。この場合は、シートポストの
some suspension bikes, you must also make sure that the
パイプが、サスペンションに干渉しないよう十分な距離を
seat post is far enough into the frame so that you can touch
とってサドル高さを調整する必要があります。fig5のよう
it through the bottom of the interrupted seat tube with the
にパイプに指を入れて第一関節くらいの位置が、シートポ
tip of your finger without inserting your finger beyond its first
ストの下限になります。(上記NOTEも参照のこと)
knuckle. Also see NOTE above and fig. 5).
WARNING: If your seat post is not inserted in the seat
WARNING(警告):B.1で示したように、シートポストがフ
tube as described in B.1 above, the seat post may
レームのパイプ部分に十分挿入されていない場合、シート
ポストが破損し、操作不能、転倒の原因となります。
break,
which could cause you to lose control and fall.
2.サドルの前後位置調整。サドル位置は前後に
Front and back adjustment. The saddle can be
2.
adjusted forward or back to help you get the optimal
振って調整可能です。取扱店に最適な前後サドル位置の調
position on the bike. Ask your dealer to set the saddle for
整を依頼してください。またその方法を教えてもらってく
your optimal riding position and to show you how to make
ださい。もしご自分で調整をされる場合は、クランプがサ
this adjustment. If you choose to make your own front and
ドルのレール部分をしっかり固定してサドルが動かない事
back adjustment, make sure that the clamp mechanism is
、レールの弓曲部分にクランプが掛かっていない事を確認
clamping on the straight part of the saddle rails and is not
してください。また推奨トルクにてクランプを固定してい
touching the curved part of the rails, and that you are using
る事を確認してください。(AppendixD、もしくはメーカ
the recommended torque on the clamping fastener(s)
ーの取扱説明書参照)。
(Appendix D or the manufacturer’s instructions).
3. 3.サドルの角度調整。大体は水平のサドル角度が好まれますが、サドル先端が、
Saddle angle adjustment. Most people prefer a horizontal saddle; but some riders
若干上か下を向いているサドルを好むサイクリストもいます。サドル角度を取扱店に
like
the saddle nose angled up or down just a little. Your dealer can adjust saddle angle
依頼するか、やり方を教わってください。ご自身でサドル角度を調整するときは、サ
or
teach you how to do it. If you choose to make your own saddle angle adjustment and
ドルの角度調整用の鋸歯状のクランプを固定しているボルトを十分に緩めて、鋸歯ど
you
have a single bolt saddle clamp on your seat post, it is critical that you loosen the
うしが干渉しない距離をとってから、サドルの角度を振ってください。サドルを適切
clamp
bolt sufficiently to allow any serrations on the mechanism to disengage before
な角度にしたら、ボルトをしめて鋸歯状のクランプを締結してください。ボルトは適
changing
the saddle’s angle, and then that the serrations fully re-engage before you
正トルクで締めてください(Appendix
Dもしくは、メーカーの取扱説明書を
tighten
the clamp bolt to the recommended
torque (Appendix D or the manufacturer’s
参照してください)。
instructions).
WARNING: When making saddle angle adjustments with a single bolt saddle
WARNING(警告):サドルの角度調整をする場合、角度調整用鋸歯クランプの鋸
clamp, always check to make sure that the serrations on the mating surfaces of
歯部分が磨り減っていないことを確認してください。磨り減った鋸歯だと、サド
the clamp
are not worn. Worn serrations on the clamp can allow the saddle to move,
ルが動いて、走行を困難にし、転倒につながる可能性があります。
causing you to lose control and fall.
常に締め付けボルトを適切トルクで締めるようにしてください。締め付けすぎても金
Always tighten fasteners to the correct torque. Bolts that are too tight can stretch
and
deform. Bolts that are too loose can move and fatigue. Either mistake can lead to a
属疲労で変形する原因になりますし、ゆるすぎてもズレの原因になります。どちらに
sudden
failure of the bolt, causing you to lose control and fall.
しても危険で、操作を困難にし、転倒に繋がるおそれがあります。
Note: Ifサスペンション付きのシートの場合、定期的な点検が必要なことがあります。
your bicycle is equipped with a suspension seat post, the suspension
NOTE:
mechanism may require periodic service or maintenance. Ask your dealer for
取扱店に、推奨される点検周期を確認してください。
recommended service intervals for your suspension seat post.
13
サドル位置を変えると、自転車性能と快適性が本当に変わってきます。最適な位
Small changes in saddle position can have a substantial effect on performance and
置を決めるためには、一回調整したら、乗って確かめる事が大事です。
comfort.
To find your best saddle position, make only one adjustment at a time.
WARNING: After any saddle adjustment, be sure that the saddle adjusting
WARNING(警告):サドルを調整用のボルト、レバー等がしっかりと固定されてい
mechanism is properly seated and tightened before riding. A loose saddle clamp
る事を確認してください。緩んだままで走行しますと、サドルが故障し、操作不
or seat
post clamp can cause damage to the seat post, or can cause you to lose control
能、転倒の原因となります。しっかりと固定されていればサドルは動きません。
and fall. A correctly tightened saddle adjusting mechanism will allow no saddle
movement in any direction. Periodically check to make sure that the saddle adjusting
mechanism is properly tightened.
サドル位置をいろいろ調整してみたけど「やっぱりしっくり来ない」、「なんだか合
わない」という場合は、違うデザインのサドルと取替えてみるといいかもしれませ
If, in spite of carefully adjusting the saddle height, tilt and fore-and-aft position, your
saddle
is still uncomfortable, you may need a different saddle design. Saddles, like people,
ん。取扱店にご相談ください。色々なモデルから、お客様の体格に合ったサドルを選
come
in many different shapes, sizes and resilience. Your dealer can help you select a
定する事ができます。
saddle which, when correctly adjusted for your body and riding style, will be comfortable.
WARNING(警告):お客様の中には希に、正しくサドルの位置調整をしていない自
WARNING:
Some people have claimed that extended riding with a saddle which
転車に乗っているうちに、神経、血管の傷害または、インポテンツを患ったと訴
is
incorrectly adjusted or which does not support your pelvic area correctly can
causeえる方がいらっしゃいます。サドルにまたがって、痛み、しびれ、その他不快に
short-term or long-term injury to nerves and blood vessels, or even impotence.
If your感ずるような事があれば、ご使用をおやめになり、サドル調整を販売店まで依頼
saddle causes you pain, numbness or other discomfort, listen to your body and
してください。
stop riding
until you see your dealer about saddle adjustment or a different saddle.
C. Handlebar height and angle
C,ハンドルバー高さ調整
Your bike is equipped either with a “threadless” stem, which clamps on to the outside
ハンドルの幹軸は外部固定式の「スレッドレス」タイプと、内部固定式の、「くさび合わ
of the steerer tube, or with a “quill” stem, which clamps inside the steerer tube by way
せ式」があり、ハンドル高さの調整方法はそれぞれ異なります。どちらかよく分からない
of an expanding binder bolt. If you aren’t absolutely sure which type of stem your bike
場合は、調整前に取扱店までお問合せください。
has, ask your dealer.
「スレッドレス」(fig.6)の場合は、高さ調整用スペーサーをハンドル軸の上下に振るこ
If your bike has a “threadless” stem (fig. 6) your dealer may be able to change
とで、高さを調整しますが、整備士が必ずこれを行うこととし、経験のない方は調整を控
handlebar height by moving height adjustment spacers from below the stem to above
えるようにしてください。
the stem, or vice versa. Otherwise, you’ll have to get a stem of different length or rise.
「くさび合わせ式」の場合は、ハンドル高さの調整を取扱店に依頼して調整するようにし
Consult your dealer. Do not attempt to do this yourself, as it requires special knowledge.
てください。
If your bike has a “quill” stem (fig. 7) you can ask your dealer to adjust the handlebar
「くさび合わせ式」の場合は、調整用のシャフト軸に、「Mi
height a bit by adjusting stem height.
nimum Insertion」(最小挿入目盛)か「Maximum
A quill stem has an etched or stamped mark on its shaft
Extension」(最大展張目盛)が刻印されています。このこれ
which designates the stem’s “Minimum Insertion” or
らの目盛が露出する高さまでハンドルバー位置を上げないで
“Maximum Extension”. This mark must not be visible above
ください。
the headset.
WARNING: A quill stem’s Minimum Insertion Mark
WARNING(警告):「くさび合わせ式」「Minimum
must not be visible above the top of the headset. If the
Insertion」(最小挿入目盛)が見える状態で、ネジを
stem 締め込みますと、フォークのパイプが損傷することが
is extended beyond the Minimum Insertion Mark the
stem あります。これは操作困難、転倒の原因となりますの
may break or damage the fork’s steerer tube, which
couldでご注意ください。
cause you to lose control and fall.
WARNING: On some bicycles, changing the stem or
WARNING(警告):車種によっては、ハンドル軸の高さ
stem height can affect the tension of the front brake
を変えることで、ブレーキワイヤの張りが変わり、前
cable,ブレーキの効きに影響が出る場合があります。
locking the front brake or creating excess cable slack
14
また、ハンドル軸の高さを変えて、ブレーキパッドの位置が、変わってしまう場合
which can make the front brake inoperable. If the front brake pads move in towards
があり、そのときは、ブレーキパッドの位置を再調整する必要があります。いずれ
the wheel rim or out away from the wheel rim when the stem or stem height is
にしてもブレーキに変化が見られたらすぐに調整してください。
changed, the brakes must be correctly adjusted before you ride the bicycle.
車種によっては、ハンドル軸の角度を調整できるものがあります。もしお持ちの自転
Some bicycles are equipped with an adjustable angle stem. If your bicycle has an
車がそのタイプの場合、ハンドル軸の角度調整は、取扱店に依頼してください。ハン
adjustable angle stem, ask your dealer to show you how to adjust if. Do not attempt to
ドル軸角度を調整すると、他部分の調整が必要となり、経験のない方がこれを行うの
make the adjustment yourself, as changing stem angle may also require adjustments to
は危険です。ハンドル軸角度の調整、ハンドル端の調整は、取扱店が行います。
the bicycle’s controls. Your dealer can also change the angle of the handlebar or bar end
extensions.
WARNING:(警告)正しいトルク値で、ボルト、ナット、ねじ等を締結してください。
WARNING:
Always tighten fasteners to the correct torque. Bolts that are too
ゆるすぎるとボルト類が緩み安全ではありません。きつ過ぎるとネジ山が擦れたり、
tight
can stretch and deform. Bolts that are too loose can move and fatigue.
Eitherネジが疲労して折れたりします。どちらにしても不適切なトルクで締結部品を締める
mistake can lead to a sudden failure of the bolt, causing you to lose control
と、その部位が機能しなくなり、自転車を操作困難、転倒する事につながります。
and fall.
WARNING:
An insufficiently tightened stem clamp bolt, handlebar clamp bolt or
WARNING:(警告)ハンドル軸を高さを固定するボルト、クランプ、ハンドル固定
bar
end extension clamping bolt may compromise steering action, which could
クランプ、ハンドル端面エクステンション用のボルト等が、緩んだまま自転車を操作する
causeと大変危険です。操作を困難にし転倒の原因となります。前輪を膝で抑えて、ハンドルの
you to lose control and fall. Place the front wheel of the bicycle between your
握り、ハンドルを左右に振ってみてください。ハンドル軸がまわる、ハンドルの固定部分
legs and
attempt to twist the handlebar/stem assembly. If you can twist the stem in
がゆるい、ハンドルのエクステンションが動く、等見られましたら、それらの締結は不完
relation
to the front wheel, turn the handlebars in relation to the stem, or turn the bar
全です。 in relation to the handlebar, the bolts are insufficiently tightened.
end extensions
D,コントロール位置の調整
D. Control position adjustments
ブレーキとギアチェンジレバーの取付角度は調整可能です。取扱店までお尋ねください。
The angle of the brake and shift control levers and their position on the handlebars
もしご自分で角度を調整される場合は、固定用クランプが推奨トルクでしっかり固定され
can be changed. Ask your dealer to make the adjustments for you. If you choose
ている事を確認してください。(Appendix.
Dもしくはメーカーの取扱説明書を参照して
to make your own control lever angle adjustment,
be sure to re-tighten the clamp
ください。)
fasteners to the recommended torque (Appendix D or the manufacturer’s instructions).
E,ブレーキの握りしろ
E. Brake reach
ブレーキ握りしろは、ほとんどの場合調整可能です。ブレーキレバーに指が届かない、ブ
Many bikes have brake levers which can be adjusted for reach. If you have small
レーキレバーを握れないという場合は取扱店に調整を依頼してください。
hands or find it difficult to squeeze the brake levers, your dealer can either adjust the
reach or fit shorter reach brake levers.
WARNING(警告):ブレーキの握りしろが短い自転車ほど、ブレーキ調整が重
WARNING: The shorter the brake lever reach, the more critical it is to have
要になってきます。握りしろが短いので、ブレーキレバーを最後まで握り込ん
correctly adjusted brakes, so that full braking power can be applied within
でも、ブレーキが十分に効かない状態になる事があるからです。ブレーキが効
available
brake lever travel. Brake lever travel insufficient to apply full braking
powerかないと、操作困難、転倒の原因となりますのでご注意ください。
can result in loss of control, which may result in serious injury or death.
4. Tech
お客様に安心して楽しく自転車をお使い頂くために、自転車がどう機能するのか理
It’s important to your safety, performance and enjoyment to understand how things
解することが重要です。この章に書かれている事をご自分で実践する前に、まずは
work on your bicycle. We urge you to ask your dealer how to do the things described
取扱店に依頼する事を強くお勧めします。またご自分でやった場合は、自転車に乗
in this section before you attempt them yourself, and that you have your dealer check
る前に、取扱店にチェックしてもらう事をお勧めします。この章に書かれた事で、
your work before you ride the bike. If you have even the slightest doubt as to whether
少しでも分からないことがあったら、取扱店にお尋ねください。
you understand something in this section of the Manual, talk to your dealer. See also
またAppendixA、B、C、及びDを参照してください。
Appendix A, B, C and D.
15
A,ホイール
A. Wheels
Bicycle wheels are designed to be removable for easier transportation and for
自転車のホイールは、搬送やパンク修理に備え、通常簡単に外れるような構造になって
repair of a tire puncture. In most cases, the wheel axles are inserted into slots, called
います。通常は「ドロップアウト」と呼ばれるスロットに、車軸が固定されます。サス
“dropouts” in the fork and frame, but some suspension mountain bikes use what is
ペンションタイプのマウンテンバイクの一部には、「スルーアクセル」という方式で固
called a “through axle” wheel mounting system.
定されるものがあります。もしスルーアクセル搭載車をお使いのお客様は、その部品の
If you have a mountain bike equipped with through axle front or rear wheels, make
メーカー取扱説明書を、取扱店から入手し、それに従ってホイルの脱着を行ってくださ
sure that your dealer has given you the manufacturer’s instructions, and follow those
い。もし、よく分からない場合は、取扱店にお問合せください。
when installing or removing a through axle wheel. If you don’t know what a through
axle is, ask your dealer.
・軸穴のあいた車軸に「スキューア」と呼ばれるシャフトが通って、締め込み用のレバ
Wheels are secured in one of three ways:
ーから構成されるクイックレリースシャフト(fig.8)です。締め込み具合を、調整ナ
• A hollow axle with a shaft (“skewer”) running through it which has an adjustable
ットで調整します。
tension nut on one end and an over-center cam on the other (cam action system, fig.8 a & b)
調整ナット
・軸穴のあいた車軸に「スキューア」と呼ばれるシャフトが通っていて、両端が六角レ
• A hollow axle with a shaft (“skewer”) running through it which has a nut on one end
ンチで締め込むことのできる金具で構成されます。(Fig.9)
and a fitting for a hex key, lock lever or other tightening device on the other (through bolt,
fig. 9)
・両端がナット締めの締結モデルです。市場で多く見られる方式です。(Fig.10)
• Hex nuts or hex key bolts which are threaded on to or into the hub axle (bolt-on
wheel, fig. 10)
Your bicycle may be equipped with a different securing method for the front wheel
前後のホイル軸が異なった方式で締結されているモデルもあります。取扱店に固定方式
than for the rear wheel. Discuss the wheel securing method for your bicycle with your
について、相談してください。
dealer.
It is very important that you understand the type of wheel securing method on your
車軸の固定方法に関して、正しく理解する事、適切な締め付け力で正しく固定すること
bicycle, that you know how to secure the wheels correctly, and that you know how to
は非常に大事です。取扱店から正しい方法を教わり、部品メーカー取扱説明書をよくお
apply the correct clamping force that safely secures the wheel. Ask your dealer to
読みになってください。
instruct you in correct wheel removal and installation, and ask him to give you any
available manufacturer’s instructions.
WARNING(警告):車軸をしっかり固定しないまま自転車に乗るのはとても
WARNING: Riding with an improperly secured wheel can allow the wheel to
危険です。最悪の場合、死に至る事故につながることがあります。
wobble or fall off the bicycle, which can cause serious injury or death.
以下を守る事が大変重要になります。
Therefore, it is essential that you:
1、取扱店の指示を受け、正しい車軸の脱着方法も学んでください。
1. Ask your dealer to help you make sure you know how to install and remove your
2、正しく車軸を固定する方法を理解を理解してください。
wheels safely.
3、車軸をとめるクランプが、しっかり固定されていること、車軸がドロップアウトに
2. Understand and apply the correct technique for clamping your wheel in place.
きちんと嵌っていることを確認してください。
3. Each time, before you ride the bike, check that the wheel is securely clamped.
The clamping action of a correctly secured wheel must emboss the surfaces of the
dropouts.
1、前輪の脱落防止用締め付け具
1.大体の自転車には、二次的な車軸締め付け具が適用されます。
Front Wheel Secondary Retention Devices
Most bicycles have front forks which utilize a secondary wheel retention device to
16
17
reduce
the risk of the wheel disengaging from the fork if the wheel is incorrectly secured.
2次的車軸締結器具は、車軸がまちがって取り付いていて、緩んだときに機能しますが、
Secondary
retention devices are not a substitute for correctly securing your front wheel.
車軸の固定を代替えするものではありません。
2次的車軸締結器具は、2つのカテゴリーに分類できます。
Secondary retention devices fall into two basic categories:
a.クリップタイプ:メーカーがフロントフォーク、ハブに取り付けたもの
The clip-on type is a part which the manufacturer adds to the front wheel hub or front
a,
fork.
b, 統合タイプ:ドロップアウトに備え付けられたもの
詳しくは取扱店にお問合せください。
b. The integral type is molded, cast or machined into the outer faces of the front fork dropouts.
Ask your dealer to explain the particular secondary retention device on your bike.
WARNING(警告):2次的車軸締結器具を外さないようにしてください。車軸の固
WARNING: Do not remove or disable the secondary retention device. As its name
定が正しく行われていない時の、バックアップ機能として大変重要です。車輪が
implies, it serves as a back-up for a critical adjustment. If the wheel is not secured
外れるリスクを低減します。2次的車軸締結器具を外す事は、をしっかり固定し
correctly,
the secondary retention device can reduce the risk of the wheel disengaging
from ないまま自転車に乗るのはとても危険です。重篤なケガ或いは死に至る事故の原
the fork. Removing or disabling the secondary retention device may also void the
因となります。
warranty.
2次的車軸締結器具は、車軸の固定を代替えするものではありません。
Secondary
retention devices are not a substitute for correctly securing your wheel.
車軸の固定が正しくできてない場合は、やはり重篤なケガ或いは死に至る事故の
Failure
to properly secure the wheel can cause the wheel to wobble or disengage, which
could原因となります。
cause you to loose control and fall, resulting in serious injury or death.
2、クイックリリース・カム
2. Wheels with cam action systems
クイックリリースには2つのタイプがあります。Fig.8a
のレバー根元になにも
There are currently two types of over-center cam wheel retention mechanisms: the
ついてないタイプ(トラディショナルタイプ)と、Fig.8bの、レバーの根元にカップが
traditional over-center cam (fig. 8a) and the cam-and-cup system (fig. 8b). Both use an
ついているタイプ(カップタイプ)です。どちらもレバーを締めることで車軸を固定し
over-center cam action to clamp the bike’s wheel in place. Your bicycle may have a camます。カップ付きのものが前輪に、カップなしのレバーのものが後輪に配置されている
and-cup front wheel retention system and a traditional rear wheel cam action system.
事があります。
a. Adjusting the traditional cam action mechanism (fig. 8a)
a, トラディショナルタイプの調整
Fig.8a
The wheel hub is clamped in place
by the force of the over-center cam pushing against
ホイルのハブは、中心にスキューアが通っていて、クイックリリースのレバーと反対側
one dropout and pulling the tension adjusting nut, by way of the skewer, against the other
のナットに挟まれています。レバーを締め付けることで、スキューアが引っ張られ、両
dropout. The amount of clamping force is controlled by the tension adjusting nut. Turning
側のドロップアウトに、挟まれる形で、ハブは固定されます。レバーを時計方向に回す
the tension adjusting nut clockwise while keeping the cam lever from rotating increases
と、締め付け力が強くなります。半回転も回さないうちに、締め付けが安全か安全でな
clamping force; turning it counterclockwise while keeping the cam lever from rotating
いかの堺を超える調整しろがありますので、少しづつ調整を進めてください。
reduces clamping force. Less than half a turn of the tension adjusting nut can make the
difference between safe clamping force and unsafe clamping force.
WARNING(警告):クイックレバーを閉じるときは、最大の力が必要です。反対の
WARNING: The full force of the cam action is needed to clamp the wheel securely.
ナットを手で締めて、レバーをくるくる回した程度では締まりは不十分です。18ペ
Holding the nut with one hand and turning the lever like a wing nut with the other
handージの最初の「WARNING(警告)」をご参照ください。
until everything is as tight as you can get it will not clamp a cam action wheel safely
in the dropouts. See also the first WARNING in this Section, p. 18.
b.
Adjusting the cam-and-cup mechanism (fig. 8b)
b,
カップタイプの調整(Fig.8b)
The cam-and-cup system on your front wheel will have been correctly adjusted for your
前輪のカップタイプは、取扱店によって、適切に調整がなされています。取扱店に、
bicycle by your dealer. Ask your dealer to check the adjustment every six months. Do not
6ヶ月ごとの点検を依頼してください。またその前輪を他の自転車に流用しないようにし
use a cam-and-cup front wheel on any bicycle other than the one for which your dealer
てください。
adjusted it.
3, Removing
ホイルの取り付け取り外し
3.
and Installing wheels
WARNING(警告):リアコースターブレーキ、ドラムブレーキ、ローラーブレーキ
WARNING: If your bike is equipped with a hub brake such as a rear coaster brake,
等のハブブレーキ式の場合、またリアの内部ブレーキの場合は、
front or rear drum, band or roller brake; or if it has an internal gear rear hub, do
18
not attempt to remove the wheel. The removal and re-installation of most hub brakes
ホイルを外さないでください。ハブブレーキの取付取り外しには、専門的な知識が必
and internal gear hubs requires special knowledge. Incorrect removal or assembly
要です。不適切に取り付けてしまうと、操作困難、転倒の原因となります。
can result in brake or gear failure, which can cause you to lose control and fall.
CAUTION:
If your bike has a disc brake, exercise care in touching the rotor or caliper.
CAUTION:
ディスクブレーキ車をお使いの場合、ローターとキャリパーの扱いには十分
Disc rotors have sharp edges, and both rotor and caliper can get very hot during use.
注意してください。ディスクは鋭利で、使用中は大変高温になっています。
a.a.ディスクブレーキ、リムブレーキ採用の前輪の外し方
Removing a disk brake or rim brake Front Wheel
(1)リムブレーキの場合は、ブレーキのクイックリリースシステムを開放して、タイ
(1) If your bike has rim brakes, disengage the brake’s quick-release mechanism to
ヤが外れるようにしてください。(Section4.C
fig.(See
11から15を参照)
increase
the clearance between the tire and the brake pads
Section 4.C fig. 11
through 15).
8a,8b)。
(2)ホイルのクイックレバーを開放してください(fig
(2) If your bike has cam action front wheel retention, move
the cam lever from the
lockedボルト固定式の場合は、スパナでボルトを緩めてください。
or CLOSED position to the OPEN position (figs. 8a & b). If your bike has through
bolt or bolt-on front wheel retention, loosen the fastener(s) a few turns counter(3)ホイルのフロントフォークにクリップ・タイプの二次的な車軸締め付け器具がつ
clockwise
using an appropriate wrench, lock key or the integral lever.
いている場合はそれを外してください。
(3) If your front fork has a clip-on type secondary retention device, disengage it and go
to(4)
stepフロントフォークに統合タイプの二次的な車軸締具とトラディショナル・タイプ
(4). If your front fork has an integral secondary retention device, and a traditional
のクイックリリース(fig.8a)で構成される自転車の場合、調整ナットを緩めて
cam
action system (fig. 8a) loosen the tension adjusting nut enough to allow removing
ホイルを外してください。カップ付きのレバー(fig.8b)を装備した自転車の場合
the
wheel from the dropouts. If your front wheel uses a cam-and-cup system, (fig. 8b)
レバーといっしょにカップ部分も緩め、ホイルを外してください。この際、レバ
squeeze
the cup and cam lever together while removing the wheel. No rotation of any
ーを回転させないでください(締め付け調整が変わってしまいます)
part
is necessary with the cam-and-cup system.
You may need to tap the top of the wheel with the palm of your hand to release the
wheel from the front fork.
b.b.リムブレーキ、ディスクブレーキ仕様の前輪の取り付け方
Installing a disk brake or rim brake Front Wheel
CAUTION: 前輪にディスクブレーキを搭載した自転車で、ディスクを
CAUTION:
If your bike is equipped with a front disk brake, be careful not to
キャリパーに挿入する場合は、ローターとキャリパー、ブレーキパッドの扱いに
damage
the disk, caliper or brake pads when re-inserting the disk into the
は十分注意してください。ディスクが挿入されていない状態で、ブレーキをかけ
caliper.
Never activate a disk brake’s control lever unless the disk is correctly inserted
in theる事をしないでください(Section4.C.参照)
caliper. See also Section 4.C.
(1)クイックレバー式の場合、fig.8.bの「OPEN」の状態にレバーを緩めてホイルを
外してください。ボルト固定式の自転車の場合は次を参照してください。
(1) If your bike has cam action front wheel retention, move the cam lever so that it
(2)フォークの先端の間に、ホイルをもってきて、ドロップアウトにスリットに、
curves away from the wheel (fig. 8b). This is the OPEN position. If your bike has through
ホイル軸をしっかり挿入してください。クイックレバーを閉じてホイルを固定して
bolt or bolt-on front wheel retention, go to the next step.
ください(fig.8a、8b)。レバーは左側に位置します。クリップタイプの2次的な車
(2) With the steering fork facing forward, insert the wheel between the fork blades so
軸締め具がついている場合は、それも固定してください。
that the axle seats firmly at the top of the fork dropouts. The cam lever, if there is one,
(3)トラディショナル・タイプのクイック・カムが装着されている場合、fig.8a
should be on rider’s left side of the bicycle (fig. 8a & b). If your bike has a clip-on type
の「ADJUST]の位置でレバーを右手で押さえ、左手で調整ナットを回し、ナットがド
secondary retention device, engage it.
ロップアウトにしっかりつく状態まで指で締め込んでください。カップ付きのレバ
(3) If you have a traditional cam action mechanism: holding the cam lever in the
ーの場合は、カップとナットをドロップアウトのざぐり部分にしっかり嵌るように
ADJUST position with your right hand, tighten the tension adjusting nut with your left
ホイルを取り付けてください(fig.8.b)。カップ付きの場合、締め付けの調整が不
hand until it is finger tight against the fork dropout (fig. 8a). If you have a cam-and-cup
要です。
system: the nut and cup (fig. 8b) will have snapped into the recessed area of the fork
(4)フォークのスリットに、ホイル軸を差し込んで固定する際、以下のようにして、
dropouts and no adjustment should be required.
リムのセンター出しが必要になります:
(4) While pushing the wheel firmly to the top of the slots in the fork dropouts, and at the
(a)クイックレバーを緩め、CLOSEの位置まで締め込んでください。
same time centering the wheel rim in the fork:
(fig.8.a,
(a) With a cam8b参照)レバーはフォークとへ並行になるまで締め込みます。
action system, move the cam lever upwards and swing it into the
CLOSED position (fig. 8a & b). The lever should now be parallel to the fork blade and
19
クイックレバーをしめ込むときは、フォークのパイプ部分を片手で握り、もう一方
curved toward the wheel. To apply enough clamping force, you should have to wrap your
の手でクイックレバーをぐっとしめ込み、手のひらにくっきりとレバーの痕が付く
fingers around the fork blade for leverage, and the lever should leave a clear imprint in
くらいの力が必要です(この締め具合になるよう、調整ナットの調整が必要)。
the palm of your hand.
(b)スルーボルトもしくは、ボルトじめの車軸固定方式の場合、Appendix.Dを参照に、
(b) With a through-bolt or bolt-on system, tighten the fasteners to the torque
適正トルクで、ボルトをしめてください。
specifications in Appendix D or the hub manufacturer’s instructions.
NOTE:
NOTE:
If, on a traditional cam action system, the lever cannot be pushed all the way to a
クイックリリースが、トラディショナル・タイプで、レバーがフォークと水平になる
position
parallel to the fork blade, return the lever to the OPEN position. Then turn the
まで押し込めない場合は、調整がきつすぎる状態なので、調整ボルトを反時計回りに
tension
adjusting nut counterclockwise one-quarter turn and try tightening the lever again.
90度ずつ回して緩め、適切な固定位置を見つけてください。スルーボルトもしくは、
ボルトじめの車軸固定方式の場合、Appendix.Dもしくは、メーカーの取扱説明書を参
(6) With a through-bolt or bolt-on system, tighten the fasteners to the torque
specifications
in Appendix D or the hub manufacturer’s instructions.
照して、適正トルクでボルトをしめてください。
WARNING(警告):クイックレバーを閉じるときは、適切な締め付け力でしめる
WARNING: Securely clamping the wheel with a cam action retention device
必要があります。 クイックレバーを閉じるときに、手のひらにくっきりとレバ
takes considerable force. If you can fully close the cam lever without wrapping
ーの痕が付かない、あるいはレバー根元の鋸状のキャップがドロップアウドの凹
your fingers
around the fork blade for leverage, the lever does not leave a clear
部分に十分に嵌らないという場合は、クイックの締め付け調整がまだゆるい状態
imprint
in the palm of your hand, and the serrations on the wheel fastener do not
です。この場合、クイックを開いて、調整ボルトを時計回りに90度ずつ回して、
emboss
the surfaces of the dropouts, the tension is insufficient. Open the lever; turn
適切な固定位置を見つけてください。詳しくは18ページの最初の「WARNING(警
the tension
adjusting nut clockwise a quarter turn; then try again. See also the first
告)」をご参照ください。
WARNING
in this Section, p. 18.
(6),上記3.a.(1)のようなブレーキのクイックリリース機構を外し、また取り付けると
(6) If you disengaged the brake quick-release mechanism in 3. a. (1) above, re-engage
きは、ブレーキパッドとリムのクリアランスを確認してください。
it to restore correct brake pad-to-rim clearance.
(7),上記ブレーキを取り付けたら、ホイルを回してパットが、リムに当たらない事を
(7) Spin the wheel to make sure that it is centered in the frame and clears the brake
確認してください。ブレーキを握って、ブレーキが正常に作動する事を確認してくだ
pads; then squeeze the brake lever and make sure that the brakes are operating correctly.
さい。
c. Removing a disk brake or rim brake Rear Wheel
C,デスクブレーキ、リムブレーキの取り外し(リア)
(1) If you have a multi-speed bike with a derailleur gear system: shift the rear
(1)デュライラーギア付きの自転車の場合、ギアチェンジをして、後輪のデュライラー
derailleur to high gear (the smallest, outermost rear sprocket).
ギアを、「高速」(外側の一番小さいスプロケット)に合わせてください。
If you have an internal gear rear hub, consult your dealer or the hub manufacturer’s
内蔵型のギア搭載の自転車に関しては、取り外しを行う前に、取扱店にお問合せくだ
instructions before attempting to remove the rear wheel.
さい。リム式かディスク式ブレーキ付きのギアなしの自転車に関しては、(4)を参照し
If you have a single-speed bike with rim or disk brake, go to step (4) below.
てください。
(2) If your bike has rim brakes, disengage the brake’s quick-release mechanism to
(2)リム式ブレーキでは、ブレーキのクイックリリース機構を開放し、リムとブレーキ
increase the clearance between the wheel rim and the brake pads
(see Section 4.C,
パッドのクリアランスを広げてください(Section4.C,fig11
から15を参照)。
figs. 11 through 15).
(3)デュライラーギア付きの自転車を逆さにしてください。
(3) On a derailleur gear system, pull the derailleur body back with your right hand.
(4)ホイル脱着がクイックレバー式の場合、レバーを「OPEN」(fig.8b)にしてくだ
(4) With a cam action mechanism, move the quick-release lever to the OPEN position
さい。ボルト式、もしくはスルーボルト式の場合、スパナでボルトを緩めるか、ロッ
(fig. 8b). With a through bolt or bolt on mechanism, loosen the fastener(s) with an
クレバーを緩めるかしてください。次にホイルを押してドロップアウトのスリットか
appropriate wrench, lock lever or integral lever; then push the wheel forward far
ら外してください。チェーンがスプロケットから離れます。
enough to be able to remove the chain from the rear sprocket.
(5)ホイルを数センチ上げて、チェーンの干渉を除いてください。
(5) Lift the rear wheel off the ground a few inches and remove it from the rear
dropouts.
D,デスクブレーキ、リムブレーキの取り付け(リア)
d. Installing a disk brake or rim brake Rear Wheel
CAUTION:
If your bike is equipped with a rear disk brake, be careful not to
CAUTION: 後輪にディスクブレーキを搭載した自転車で、ディスクを
damage
the disk, caliper or brake pads when re-inserting the disk into the
キャリパーに挿入する場合は、ローターとキャリパー、ブレーキパッドの扱いに
caliper.
Never activate a disk brake’s control lever unless the disk is correctly
は十分注意してください。ディスクが挿入されていない状態で、ブレーキをかけ
inserted
in the caliper.
る事をしないでください(Section4.C.参照)
20
(1)クイックレバー式の場合、fig.8.bの「OPEN」の状態にレバーを緩めてホイルを
外してください。レバーはスプロケット側の反対に位置します。
(1) With a cam action system, move the cam lever to the OPEN position (see fig. 8 a &
(2)デュライラーギア付きの自転車の場合、ギアチェンジをして、後輪のデュライラー
b). The lever should be on the side of the wheel opposite the derailleur and freewheel
ギアを、「高速」(外側の一番小さいスプロケット)に合わせてください。
sprockets.
次に自転車を逆さにしてください。ギアは「高速」に入っている事を確認して
(2) On a derailleur bike, make sure that the rear derailleur is still in its outermost, high
ください。
gear,
position; then pull the derailleur body back with your right hand. Put the chain on
(3)ギアなしの自転車の場合は、チェーンの緩みを確保する為、前輪のスプロケットか
top of the smallest freewheel sprocket.
ら、チェーンを外して、後輪のスプロケットにはチェーンをつけたままにして
(3) On single-speed, remove the chain from the front sprocket, so that you have plenty
ofください。
slack in the chain. Put the chain on the rear wheel sprocket.
(4)ホイルの軸をドロップアウトのスリットに挿入してください。
(4) Then, insert the wheel into the frame dropouts and pull it all the way in to the
(5)ギアなし自転車、もしくはギヤ内蔵ハブ搭載車の場合は、スリットの車軸の位置を変
dropouts.
えて、チェーンの張りを調整してください。チェーンがまっすぐで、6mm程度の
(5) On a single speed or an internal gear hub, replace the chain on the chainring; pull
上下振れがある張り具合が良いとされています。
the wheel back in the dropouts so that it is straight in the frame and the chain has about
(6)クイックレバー式カムが装着されている場合、fig.8a、8bの「CLOSED]の位置で
1/4 inches of up-and-down play.
レバーを固定してください。レバーを固定するには、片手でフォークを握り、
(6) With a cam action system, move the cam lever upwards and swing it into the
もう一方の手のひらで、レバーをギュッとしめ込み、手のひらにレバーの痕が
CLOSED position (fig. 8 a & b). The lever should now be parallel to the seat stay or chain
くっきりと付く程度の力をかける必要があります。
stay and curved toward the wheel. To apply enough clamping force, you should have to
(7)スルーボルトもしくは、ボルトじめの車軸固定方式の場合、Appendix.Dを参照に、
wrap your fingers around the fork blade for leverage, and the lever should leave a clear
適正トルクで、ボルトをしめてください。
imprint in the palm of your hand.
(7) With a through-bolt or bolt-on system, tighten the fasteners to the torque
specifications in Appendix D or the hub manufacturer’s instructions.
NOTE:
クイックリリースが、トラディショナル・タイプで、レバーがフォークと水平になる
NOTE:
If, on a traditional cam action system, the lever cannot be pushed all the way to
aまで押し込めない場合は、調整がきつすぎる状態なので、調整ボルトを反時計回りに
position parallel to the seat stay or chain stay, return the lever to the OPEN position.
90度ずつ回して緩め、適切な固定位置を見つけて締め直してください。
Then
turn the tension adjusting nut counterclockwise one-quarter turn and try tightening
the lever again.
WARNING(警告):クイックレバーを閉じるときは、適切な締め付け力でしめる
WARNING:
Securely clamping the wheel with a cam action retention device takes
必要があります。 クイックレバーを閉じるときに、手のひらにくっきりとレバ
considerable
force. If you can fully close the cam lever without wrapping your
ーの痕が付かない、あるいはレバー根元の鋸状のキャップがドロップアウドの凹
fingers
around the seat stay or chain stay for leverage, the lever does not leave a clear
部分に十分に嵌らないという場合は、クイックの締め付け調整がまだゆるい状態
imprint
in the palm of your hand, and the serrations on the wheel fastener do not
です。この場合、クイックを開いて、調整ボルトを時計回りに90度ずつ回して、
emboss
the surfaces of the dropouts, the tension is insufficient. Open the lever; turn
適切な固定位置を見つけてください。詳しくは18ページの最初の「WARNING(警
the tension
adjusting nut clockwise a quarter turn; then try again. See also the first
告)」をご参照ください。
WARNING
in this Section, p. 18.
(8),上記3.c.(2)のようなブレーキのクイックリリース機構を外し、また取り付けると
(8) If you disengaged the brake quick-release mechanism in 3. c. (2) above, re-engage
きは、ブレーキパッドとリムのクリアランスを確認してください。
it to restore correct brake pad-to-rim clearance.
(9),上記ブレーキを取り付けたら、ホイルを回してパットが、リムに当たらない事を
(9) Spin the wheel to make sure that it is centered in the frame and clears the
確認してください。ブレーキを握って、ブレーキが正常に作動する事を確認してくだ
brake pads; then squeeze the brake lever and make sure that the brakes are operating
さい。
correctly.
B,シートポストの固定レバー
B.
Seat post cam action clamp
シートポストを固定するレバーが付いている自転車があります。シートポストのレバ
Some bikes are equipped with a cam action seat post binder. The seat post cam action
binder
works exactly
like the traditional wheel cam action fastener (Section 4.A.2) While
ーは、Section
4A.2のトラディショナルタイプのレバーと同じように作動します。
aシートポストのレバーに関しては、fig.8a参照のこと。
cam action binder looks like a long bolt with a lever on one end and a nut on the other,
the binder uses an over-center cam action to firmly clamp the seat post (see fig. 8a).
21
WARNING(警告):シートポストをしっかり固定しないまま自転車に乗るのは、サ
WARNING:
Riding with an improperly tightened seat post can allow the saddle to
ドルが左右にぶれてとても危険です。最悪の場合、死に至る事故に至ることがあ
turn
or move and cause you to lose control and fall. Therefore:
るので、以下を守る事が大変重要になります。
1. Ask your dealer to help you make sure you know how to correctly clamp your seat
1,取扱店に、シートポストのレバーの調整具合がいいか確認をしてもらう
post.
2,シートポスト固定について正しい方法を理解する
2. Understand and apply the correct technique for clamping your seat post.
3,自転車に乗る前に、シートポストの固定具合を確認する。
3. Before you ride the bike, first check that the seat post is securely clamped.
シートポスト固定レバーの調整
Adjusting
the seat post cam action mechanism
シートポストを固定するレバーの締め付け力は、テンション調整ナットで調整でき
The action of the cam squeezes the seat collar around the seat post to hold the
seat
post securely in place. The amount of clamping force is controlled by the tension
ます。テンション調整ナットを時計回りに回す(レバーは握ったまま)と締め付け
adjusting
nut. Turning the tension adjusting nut clockwise while keeping the cam lever
が強くなります。180度も回さない程度で、締め付け力がchがってきますので、調
from
rotating increases clamping force; turning it counterclockwise while keeping the
整は慎重に行ってください。
cam lever from rotating reduces clamping force. Less than half a turn of the tension
adjusting nut can make the difference between safe and unsafe clamping force.
WARNING: The full force of the cam action is needed to clamp the seat post
WARNING(警告):シートポストを固定するのには、強い力は必要です。ナットを
securely. Holding the nut with one hand and turning the lever like a wing nut with
指で押さえ、レバーをくるくると回した程度では、シートポストは固定されませ
the other
ん。 hand until everything is as tight as you can get it will not clamp the seat post
safely.
WARNING(警告):レバーを閉じるときに、片手で、フレームを握っててこを効
WARNING:
If you can fully close the cam lever without wrapping your fingers
かせなくても、レバーが閉じれた、或いは手のひらにくっきりとレバーの痕が付
around
the seat post or a frame tube for leverage, and the lever does not leave a
かない、あるいはレバー根元の鋸状のキャップがドロップアウドの凹部分に十分
clear imprint
in the palm of your hand, the tension is insufficient. Open the lever; turn
に嵌らないという場合は、レバーの調整がまだゆるい状態です。この場合、レバ
the tension
adjusting nut clockwise a quarter turn; then try again.
ーを開いて、テンション調整ナットを時計回りに回して、適切な固定位置を見つ
けてください。
C. Brakes
C,ブレーキ
ブレーキには、一般に3種類があります。リムをパッドで押さえるリムブレーキ、ディ
There are three general types of bicycle brakes: rim brakes, which operate by
squeezing
the wheel rim between two brake pads; disc brakes, which operate by
スクを抑えるディスクブレーキ、それからハブ内蔵ブレーキです。ハブ内蔵式のものに
squeezing
a hub-mounted disc between two brake pads; and internal hub brakes. All
は、ペダルを後ろに回すことで、ブレーキを動作させるものがあります。これはコース
three
can be operated by way of a handlebar mounted lever. On some models of bicycle,
ターブレーキと呼ばれAppendix.Cに記載されています。
the internal hub brake is operated by pedaling backwards. This is called a Coaster Brake
and is described in Appendix C.
WARNING:
1.
Riding with improperly adjusted brakes, worn brake pads, or wheels on
1,不適切な調整がされたブレーキ、摩耗したブレーキパッド、リムに摩耗マー
which the
rim wear mark is visible is dangerous and can result in serious injury or
クが見える、等の問題がある自転車に乗るのは大変危険です。重篤なけが或い
death. は死に至る事故の原因となります。
2.Applying
brakes too hard or too suddenly can lock up a wheel, which could cause
2,急ブレーキはタイヤロック状態になり、操作不能となるので大変危険です。
you to 前ブレーキばかり多用すると、前傾になってハンドルに頭をぶつけたりして大
lose control and fall. Sudden or excessive application of the front brake may
pitch the
rider over the handlebars, which may result in serious injury or death.
変危険です。重篤なけが或いは死に至る事故の原因となります。
3. Some
bicycle brakes, such as disc brakes (fig. 11) and linear-pull brakes (fig.
3,ディスクブレーキ(fig11)、リニアプルブレーキ(fig12)はとても効きがつよ
12), are
extremely powerful. Take extra care in becoming familiar with these brakes
いブレーキですのでよく練習して、自転車の挙動に慣れるようにして
and exercise
particular care when using them.
ください。
22
4, ブレーキのワイヤに、モジュレーターと呼ばれるブレーキ
4. Some bicycle brakes are equipped with a brake force
の効き具合を最適配分するシリンタ形状の部品がついている自転
modulator, a small, cylindrical device through which the
車があります。モジュレーターは最初の効きが優しく、ブレーキ
brake control cable runs and which is designed to provide a
を握るにつれて効きを高める効果があります。モジュレーター搭
more progressive application of braking force. A modulator
載車の場合は、その動作特性に慣れていただくため、特に注意を
makes the initial brake lever force more gentle, progressively
払う必要があります。
increasing force until full force is achieved. If your bike is
5.equipped
ディスクは使用後温になっています。十分に時間が経って、
with a brake force modulator, take extra care in
冷え切るまで、ディスクには絶対触らないようにしてください。
becoming familiar with its performance characteristics.
6.ブレーキパッドは時期が来たら交換する必要があります。メー
5.Disc brakes can get extremely hot with extended use. Be
カーの取扱説明書を参照して、交換時期を把握してください。
careful not to touch a disc brake until it has had plenty of time to
cool.
7.摩耗した部品、損壊した部品に関して、取替えを行うときは、
6. See the brake manufacturer’s instructions for operation
メーカーの純正部品を使用してください。
and care of your brakes, and for when brake pads must be
replaced. If you do not have the manufacturer’s instructions,
see your dealer or contact the brake manufacturer.
7. If replacing worn or damaged parts, use only
manufacturer-approved genuine replacement parts.
1、ブレーキコントロールについて
1. Brake controls and features
It’s very important to your safety that you learn and
どちらのブレーキが前輪か後輪用か理解して使うことは非常に重
remember which brake lever controls which brake on your bike.
要です。通常、右ハンドルのレバーが後輪用、左ハンドルのレバ
Traditionally, the right brake lever controls the rear brake and the
ーが前輪用になっています。ブレーキを作動させて、前輪、後輪
left brake lever controls the front brake; but, to make sure your
どちらのパッドが動くか確認することをお勧めします。
bike’s brakes are set up this way, squeeze one brake lever and
look to see which brake, front or rear, engages. Now do the same
手でブレーキレバーがしっかり握れる事を確認してください。
with the other brake lever.
特に握力の弱いお子様には、ブレーキがしっかり握れる事を確認
Make sure that your hands can reach and squeeze the brake
してください。ブレーキレバーに指が届かない場合はブレーキの
levers comfortably. If your hands are too small to operate the
スパンを調整するか、別のものに交換する事をお勧めします。詳
levers comfortably, consult your dealer before riding the bike. The
しくは取扱店にお問合せください。
lever reach may be adjustable; or you may need a different brake
lever design.
リムブレーキ式の自転車、ほとんどがクイックリリース式の取り
Most rim brakes have some form of quick-release mechanism
外し可能なブレーキを搭載しています。ブレーキのリリースレバ
to allow the brake pads to clear the tire when a wheel is removed
ーが、取り外し位置の「OPEN」のときは、ブレーキが効かない状
or reinstalled. When the brake quick release is in the open
態です。ブレーキがどのように動作するか、取扱店に確認して理
position, the brakes are inoperative. Ask13,
your
dealer
to make sure
解するようにしてください。(Fig.12,
14,
15を参照)
that you understand the way the brake quick release works on
また、お乗りになる前に、ブレーキが正常に作動する事を確認し
your bike (see figs. 12, 13. 14 & 15) and check each time to make
てください。
sure both brakes work correctly before you get on the bike.
2、ブレーキ動作
2. How brakes work
The
braking action of a bicycle is a function of the friction
ブレーキの動作は、ブレーキキングの摩擦抵抗のよって起こりま
between
the braking surfaces. To make sure that you have
す。ブレーキが、最大限の摩擦抵抗を得られる事を確認して
maximum
friction available, keep your wheel rims and brake pads
ください。リム、ブレーキパッド、ディスク、キャリパー等のブレーキ部
or
the
disk
rotor and caliper clean and free of dirt, lubricants,
品を常にきれいな状態にしてください。ブレーキは停止だけに使うの
waxes
or polishes.
ではなくスピードを調節するためにも使われます。
Brakes are designed to control your speed, not just to stop
23
ブレーキ力は、タイヤがロックする直前と、ブレーキがスリップする直前で最大になり
the bike. Maximum braking force for each wheel occurs at the point just before the
ます。スリップしだすと、ブレーキは効かず操作困難に陥ります。タイヤロックを起こ
wheel “locks up” (stops rotating) and starts to skid. Once the tire skids, you actually
さないように、ブレーキ特性に慣れる必要があります。
lose most of your stopping force and all directional control. You need to practice slowing
and stopping smoothly without locking up a wheel. The technique is called progressive
テクニックとして、「進歩的ブレーキ力配分」という方法があります。ブレーキをいっ
brake modulation. Instead of jerking the brake lever to the position where you think
きにかけるのではなく、自転車の動きをみて、徐々にブレーキをかけるやり方です。タ
you’ll generate appropriate braking force, squeeze the lever, progressively increasing the
イヤがロックしそうになったら、ブレーキを緩め、タイヤロックを防ぎます。走行状態
braking force. If you feel the wheel begin to lock up, release pressure just a little to keep
によってブレーキのかけ方が違ってくるので、慣れて感覚を会得する必要があります。
the wheel rotating just short of lockup. It’s important to develop a feel for the amount
簡単になれる方法として、自転車を抱えて歩き、ブレーキを握る力をいろいろ変えて、
of brake lever pressure required for each wheel at different speeds and on different
タイヤがロックするのはどこかを確かめる方法があります。
surfaces. To better understand this, experiment a little by walking your bike and applying
different amounts of pressure to each brake lever, until the wheel locks.
両方のブレーキを効かせたとき、体が前傾姿勢になり、体がハンドルより飛び出すよう
When you apply one or both brakes, the bike begins to slow, but your body wants to
な状態になると、ブレーキをかけ過ぎの状態であると言えます。
continue at the speed at which it was going. This causes a transfer of weight to the front
より負荷がかかった状態で、ブレーキを掛けると、タイヤロックのタイミングは遅くな
wheel (or, under heavy braking, around the front wheel hub, which could send you flying
ります。負荷が軽い状態でブレーキをかけるとタイヤロックのタイミングは早くなりま
over the handlebars).
す。ブレーキをかけて前傾姿勢になるようであれば、体重を後ろにシフトする必要があ
A wheel with more weight on it will accept greater brake pressure before lockup; a
ります。後ろに体重をシフトするために、ブレーキ操作のコツとして、前ブレーキを強
wheel with less weight will lock up with less brake pressure. So, as you apply brakes and
く効かせ、後ろを弱くするのが、効果的です。
your weight is transferred forward, you need to shift your body toward the rear of the
bike, to transfer weight back on to the rear wheel; and at the same time, you need to both
スピードと制動をコントロールするためには、タイヤロックをさせないような体重移動
decrease rear braking and increase front braking force. This is even more important on
を行う事が重要とされています。フロントにサスペンションを搭載した自転車だと、ブ
descents, because descents shift weight forward.
レーキをかけた時に、フロントが沈むので、体重移動がもっと重要になります。(Sect
Two keys to effective speed control and safe stopping are controlling wheel lockup and
ion.4.Fを参照)安全な場所で、まずは、ブレーキングに慣れていただくことをお勧め
weight transfer. This weight transfer is even more pronounced if your bike has a front
します。
suspension fork. Front suspension “dips” under braking, increasing the weight transfer
(see also Section 4.F). Practice braking and weight transfer techniques where there is no
路面状態がわるく雨で濡れたところでは、タイヤの接地力が弱くなり、タイヤロックが
traffic or other hazards and distractions.
起こりやすくなります。ブレーキパッドに水や汚れが付着すると、ブレーキの効きが弱
Everything changes when you ride on loose surfaces or in wet weather. It will take
くなります。こうした場合自転車をゆっくり扱う事が何よりも重要となります。
longer to stop on loose surfaces or in wet weather. Tire adhesion is reduced, so the
wheels have less cornering and braking traction and can lock up with less brake force.
Moisture or dirt on the brake pads reduces their ability to grip. The way to maintain
control on loose or wet surfaces is to go more slowly.
D. Shifting gears
D,ギアシフト
多段ギア式自転車はデュレイラーギア式(下の1参照)ハブ内蔵式(下の2参照)、
Your multi-speed bicycle will have a derailleur drivetrain (see 1. below), an internal
gear
hub drivetrain (see 2. below) or, in some special cases, a combination of the two.
特別な場合として、2つのとも搭載したもの、の3つがあります。
1.1,デュレイラーギア式は次のように動作します。
How a derailleur drivetrain works
デュレイラーギア式の構成
If your bicycle has a derailleur drivetrain, the gear-changing mechanism will have:
・リア側のスプロケット、もしくはカセット
• a rear cassette or freewheel sprocket cluster
・リア側のデュレイラーギア
• a rear derailleur
・フロント側のデュレイラーギア
• usually a front derailleur
・ギアチェンジ用シフター1個か2個付き
• one or two shifters
・チェーン
• one, two or three front sprockets called chainrings
• a drive chain
24
a,ギアのシフト
a. Shifting Gears
ギアシフト様式には、レバー式、ツイストグリップ式トリガー式、コンビネーション
There are several different types and styles of shifting controls: levers, twist grips,
シフト/ブレーキ式、プッシュボタン式があります。取扱店にギアの概要に関して説
triggers, combination shift/brake controls and push-buttons. Ask your dealer to explain
明を受けるようにしてください。用語として、「ダウンシフト」は「ギアを下げる、
the type of shifting controls that are on your bike, and to show you how they work.
低速のギアに入れる、軽いペダリングになる」の意味合いになります。「アップシフ
The vocabulary of shifting can be pretty confusing. A downshift is a shift to a “lower”
ト」は「ギアを上げる、高速のギアに入れる、重いべダリングになる」の意味になり
or “slower” gear, one which is easier to pedal. An upshift is a shift to a “higher” or
ます。フロントのデュレイラーギアはリア側のデュレイラーギアと反対の動きになる
“faster”, harder to pedal gear. What’s confusing is that what’s happening at the front
ため、しばしば用語を混同する原因となっています。例えば坂道を登るとき、ギアを
derailleur is the opposite of what’s happening at the rear derailleur (for details, read
軽くすると楽にこげるため、「ダウンシフト」をするわけですが、ギアのうごきとし
the instructions on Shifting the Rear Derailleur and Shifting the Front Derailleur below).
ては、フロントのギアは、大きいスプロケットから、小さいスプロケットに「ダウン
For example, you can select a gear which will make pedaling easier on a hill (make a
」させるシフトになり、リアのギアでは、小さいスプロケットから、大きいものへと
downshift) in one of two ways: shift the chain down the gear “steps” to a smaller gear
「アップ」する事になります。リア側では、すなわち「ダウンシフト」が、スプロケ
at the front, or up the gear “steps” to a larger gear at the rear. So, at the rear gear
ットの動きで見たときに「アップシフト」になるのです。
cluster, what is called a downshift looks like an upshift. The way to keep things straight
しばし混同するため、覚え方としては、前後のギア共、「自転車のフレーム側より、
is to remember that shifting the chain in towards the centerline of the bike is for
外側のスプロケットにギアチェンジするほど、重いペダリング」となり、これはアッ
accelerating and climbing and is called a downshift. Moving the chain out or away from
プシフト、「自転車のフレーム側にギアチェンジするほど軽いペダリング」になり、
the centerline of the bike is for speed and is called an upshift.
これがダウンシフト、となります。
Whether upshifting or downshifting, the bicycle derailleur system design requires
いずれの場合も、ギアチェンジにおいてはチェーンにある程度のテンションがかかっ
that the drive chain be moving forward and be under at least some tension. A derailleur
ており、ペダルでこいでいる状態でないとギアが変わらないという特性があります。
will shift only if you are pedaling forward.
CAUTION:
Never move the shifter while pedaling backward, nor pedal
CAUTION:ペダルを後ろむきのこいで、ギアのシフターを作動させないで
backwards
immediately after having moved the shifter. This could jam the chain
ください。チェーンがひっかかり動かなくなるばかりか、故障の原因となるこ
and cause
serious damage to the bicycle.
とがあります。
b. Shifting the Rear Derailleur
b,リア側のデュレイラーギアのシフトチェンジ
The rear derailleur is controlled by the right shifter.
通常、ハンドルの右のギアシフターがリア用です。
The function of the rear derailleur is to move the drive chain from one gear sprocket
デュレイラーは、カセットのそれぞれスプロケットにチェーンを移動させるよう機能
to another. The smaller sprockets on the gear cluster produce higher gear ratios.
します。小さいスプロケットにチェーンが入ると、重いペダリングになります。大き
Pedaling in the higher gears requires greater pedaling effort, but takes you a greater
いスプロケットでは軽くなります。軽いペダリングだとこぐのは楽になりますが、ス
distance with each revolution of the pedal cranks. The larger sprockets produce lower
ピードがでなくなります。ちいさいスプロケットにチェーンが入るほど、アップシフ
gear ratios. Using them requires less pedaling effort, but takes you a shorter distance
ト、大きいスプロケットにチェーンが入るほどダウンシフトになります。
with each pedal crank revolution. Moving the chain from a smaller sprocket of the
ペダルでこいでいる状態でないとギアは変わりません。
gear cluster to a larger sprocket results in a downshift. Moving the chain from a larger
sprocket to a smaller sprocket results in an upshift. In order for the derailleur to move
chain from one sprocket to another, the rider must be pedaling forward.
c.theフロント側のデュレイラーギアのシフトチェンジ
ちいさいスプロケットにチェーンが入るほど、ダウンシフトで軽く、大きいスプロケ
ットにチェーンが入るほどアップシフト、で重いペダリングになります。
c. Shifting the Front Derailleur:
The front derailleur, which is controlled by the left shifter, shifts the chain between the
larger and smaller chainrings. Shifting the chain onto a smaller chainring makes pedaling
d.どのギアを使うべきか
easier (a downshift). Shifting to a larger chainring makes pedaling harder (an upshift).
fig.16にあるようにフロント側に一番大きなスプロケット、リアに小さなスプロケッ
トのコンビネーションが一番スピードの出る、重いペダリングになります。ギアは、
d. Which gear should I be in?
一段ごと順々に使う必要はありません。まず「スタート用」として、最適なギアの組
The combination of largest rear and smallest front gears (fig. 16) is for the steepest
み合わせを見つけてください。
hills. The smallest rear and largest front combination is for the greatest speed. It
is not necessary to shift gears in sequence. Instead, find the “starting gear” which
is right for your level of ability — a gear which is hard enough for quick acceleration
25
車体をグラつかせないで楽に漕ぎ始める事ができるのが、最適なギアの組み合わせで
but
easy enough to let you start from a stop without wobbling — and experiment with
す。ギア操作になれる為、ギアチェンジの練習を十分に行ってください。まずは誰も
upshifting
and downshifting to get a feel for the different gear combinations. At first,
いない障害物のない場所で練習して十分に感覚を会得してください。路面状況を予測
practice
shifting where there are no obstacles, hazards or other traffic, until you’ve built
してギアチェンジをしてください。例えば上り坂に差し掛かったらギアを落とすとい
up
your confidence. Learn to anticipate the need to shift, and shift to a lower gear before
った操作です。ギアチェンジが困難な場合は、機構的な問題が生じている事が推測さ
the
hill gets too steep. If you have difficulties with shifting, the problem could be mechanical
れますので、その場合は取扱店にご相談ください。
adjustment.
See your dealer for help.
WARNING(警告):ギアシフトがスムーズに行かないときは、デュレイラーの調整がうまくい
WARNING: Never shift a derailleur onto the largest or the smallest sprocket if
っていない事が考えられますので、デュレイラーを外側の小さいスプロケット、大きいスプ
the derailleur is not shifting smoothly. The derailleur may be out of adjustment
ロケットに入れないようにしてください。チェーンが外れてチェーンが引っかかり操作困難
and the chain could jam, causing you to lose control and fall.
に陥ります。
e.e.ギアチェンジしないとき
What if it won’t shift gears?
ギアレバーを1段変えても、ギアがスムーズ1段変わらないときは、調整がうまくい
If moving the shift control one click repeatedly fails to result in a smooth shift to the
next
gear chances are that the mechanism is out of adjustment. Take the bike to your
っていません。取扱店にて調整を依頼してください。
dealer to have it adjusted.
2. How
an internal gear hub drivetrain works
2.
ハブ内蔵式ギアの動作
If your bicycle has an internal gear hub drivetrain, the gear changing mechanism will
ハブ内蔵式ギアは以下の部品から構成されます。
consist of:
・3,5,7,8,12スピードもしくは、無段変速の内部ギア
• a 3, 5, 7, 8, 12 speed or possibly an infinitely variable internal gear hub
・1つかあるいは2つのギアシフトレバー
• one, or sometimes two shifters
・1つかあるいは2つのワイヤーケーブル
• one or two control cables
・フロント側スプロケット(チェーンリング)
• one front sprocket called a chainring
・チェーン
• a drive chain
a. ハブ内蔵式ギアのシフト
チェンジしたい方向にギアレバーを動かすだけで簡単に、ギアがシフトします。ギア
a.Shifting internal gear hub gears
チェンジをした後に、ペダルの負荷を少し緩めるとギアはまり、ギアチェンジがスム
Shifting with an internal gear hub drivetrain is simply a matter of moving the shifter to
ーズになります。
the indicated position for the desired gear ratio. After you have moved the shifter to the
gear position of your choice, ease the pressure on the pedals for an instant to allow the
hub to complete the shift.
b.b.
Which gear should I be in?
どのギアに入っているか
低速ギア(1)は急な上り坂、高速ギアーは、
The numerically lowest gear (1) is for the
steepest
hills. The numerically largest gear is for
スピード走行用です。
the
greatest speed.
軽いギヤから、重いギアにシフトすることを、
アップシフト、重いギアから、軽いギアにシフ
Shifting from an easier, “slower” gear (like 1)
to
a harder, “faster” gear (like 2 or 3) is called an
トする事をダウンシフトと呼びます。ギアは、
upshift.
Shifting from a harder, “faster” gear to an
一段ごと順々にシフトする必要はありません。
easier,
“slower” gear is called a downshift. It is
まず「スタート用」として、最適なギアの組み
not
necessary to shift gears in sequence. Instead,
合わせを見つけてください。車体をグラつかせ
find
the “starting gear” for the conditions — a gear
ないで楽に漕ぎ始める事ができるのが、最適な
which
is hard enough for quick acceleration but
ギアの組み合わせです。ギアの挙動になれる為
easy
enough to let you start from a stop without
練習が必要です。
wobbling — and experiment with upshifting
and downshifting to get a feel for the different
gears. At first, practice shifting where there are
26
路面状況を予測してギアチェンジをしてください。例えば上り坂に差し掛かったらギ
no obstacles, hazards or other traffic, until you’ve built up your confidence. Learn to
アを落とすといった操作です。ギアチェンジが困難な場合は、機構的な問題が生じて
anticipate the need to shift, and shift to a lower gear before the hill gets too steep. If you
いる事が推測されますので、その場合は取扱店にご相談ください。
have difficulties with shifting, the problem could be mechanical adjustment. See your
dealer for help.
c.
ギアチェンジしないとき
c.
What if it won’t shift gears?
ギアレバーを1段変えても、ギアがスムーズ1段変わらないときは、調整がうまくい
If moving the shift control one click repeatedly fails to result in a smooth shift to the
っていません。取扱店にて調整を依頼してください。
next gear chances are that the mechanism is out of adjustment. Take the bike to your
dealer to have it adjusted.
E、ペダル
E.Pedals
トゥーオーバラップとは、ハンドルを切った時にペダルが前方位置にあると、足がタ
1. Toe Overlap is when your toe can touch the front wheel when you turn the
handlebars
to steer while a pedal is in the forwardmost position. This is common on
イヤに当たってしまうことです。小さいフレームの自転車に起こりやすい現象です。
small-framed
bicycles, and is avoided by keeping the inside pedal up and the outside
これを防ぐには、旋回する方向をみて内側のペダルを上位置に保持し、外側のペダル
pedal
down when making sharp turns. On any bicycle, this technique will also prevent the
を底位置に保持するとよいとされています。このテクニックを使うと、旋回時内側の
inside
pedal from striking the ground in a turn.
ペダルが地面に擦れるのを防ぐこともできます。
WARNING: Toe Overlap could cause you to lose control and fall. Ask your dealer to
WARNING(警告):トゥーオーバラップは操作を困難にし転倒する原因となります。フレー
help you determine if the combination of frame size, crank arm length, pedal design
ムサイズ、クランクアーム長さ、ペダル、シューズなどの組み合わせにかんして取扱店に
助言を受けるようにしてください。オーバラップがない状態でも、旋回内側のペダルは上
and shoes
you will use results in pedal overlap. Whether you have overlap or not, you
must 死点に、外側は下死点においてください。
keep the inside pedal up and the outside pedal down when making sharp turns.
2.2.ペダルには、グリップ力を増すために、表面がギザギザになっているものが
Some bicycles come equipped with pedals that have sharp and potentially dangerous
あります。ハイパフォーマンスペダルと呼ばれるこれらのペダルは、潜在的に危険です
surfaces.
These surfaces are designed to add safety by increasing grip between the
。扱いには十分注意する必要があります。ご自分の技量に応じて、より安全なデザイン
rider’s
shoe and the pedal. If your bicycle has this type of high-performance pedal, you
のペダルを選ぶようにしてください。またスキンパッドをつけて足を保護する事をお勧
must
take extra care to avoid serious injury from the pedals’ sharp surfaces. Based on
めします。
your
riding style or skill level, you may prefer a less aggressive pedal design, or chose
to ride with shin pads. Your dealer can show you a number of options and make suitable
recommendations.
3. 3.トゥクリップとストラップは、つま先をペダルに固定する器具です。
Toeclips and straps are a means to keep feet correctly positioned and engaged
トゥクリップはペダル軸上に足指の拇指球がくるようにデザインされ漕ぎ力を最大に引
with
the pedals. The toeclip positions the ball of the foot over the pedal spindle, which
き出します。ストラップは、締めると、ペダルが回転中常につま先がペダルに固定され
gives
maximum pedaling power. The toe strap, when tightened, keeps the foot engaged
ます。普通のシューズにも適合しますが、一番効果が期待できるのが専用シューズとの
throughout
the rotation cycle of the pedal. While toeclips and straps give some benefit
組み合わせです。詳しい使用法に関しては取扱店ご相談ください。
with
any kind of shoe, they work most effectively with cycling shoes designed for use with
toeclips. Your dealer can explain how toeclips and straps work. Shoes with deep treaded
soles or welts which might make it more difficult for you to insert or remove your foot
should not be used with toeclips and straps.
WARNING(警告):トゥークリップ、ストラップを使用される際は、練習をして十
WARNING: Getting into and out of pedals with toeclips and straps requires skill
分に慣れる事が必要です。練習には集中力を要します。まずは誰もいない障害物
which can only be acquired with practice. Until it becomes a reflex action, the
のない場所でトゥークリップを装着した操作の練習し、感覚を会得してください
technique
requires concentration which can distract your attention and cause you to
。感覚がつかめるまで、トゥーストラップを緩めてつかってください。交通の多
lose control
and fall. Practice the use of toeclips and straps where there are no
い場所では、トゥーストラップを使わないでください。
obstacles,
hazards or traffic. Keep the straps loose, and don’t tighten them until your
technique and confidence in getting in and out of the pedals warrants it. Never ride in
traffic with your toe straps tight.
27
3.
クリップレスペダル(ステップインペダル)はつま先をペダルに固定し、
4.
Clipless pedals (sometimes called “step-in pedals”) are another means to keep
最大の漕ぎ力を得るための器具です。シューズ側のソールに、「クリート」と呼ばれ
feet securely in the correct position for maximum pedaling efficiency. They have a
る板がついており、ペダルのスプリング内蔵受け具と連結するようになっています。
plate, called a “cleat,” on the sole of the shoe, which clicks into a mating spring-loaded
ペダルとの連結、取り外しには特殊な足の動きが必要で、慣れるのに練習が
fixture on the pedal. They only engage or disengage with a very specific motion which
必要です。シューズと「クリート」も、モデルやメーカーにより互換性が異なる為、
must be practiced until it becomes instinctive. Clipless pedals require shoes and cleats
選定に注意が必要です。クリップレスペダルには、つま先を着脱する力を調整できる
which are compatible with the make and model pedal being used.
ものがあります。詳しくはメーカーの取扱説明書を参照するか、取扱店にお問合せく
Many clipless pedals are designed to allow the rider to adjust the amount of force
ださい。完全に慣れるまで、一番ゆるい力で着脱できるよう調整してください。また
needed to engage or disengage the foot. Follow the pedal manufacturer’s instructions,
同時に、不意にペダルからつま先が離れる事のないように、十分な締結力を確保する
or ask your dealer to show you how to make this adjustment. Use the easiest setting
よう調整してください。
until engaging and disengaging becomes a reflex action, but always make sure that
there is sufficient tension to prevent unintended release of your foot from the pedal.
WARNING(警告):クリップレスペダルは、専用のシューズに限りしっかりと連
WARNING: Clipless pedals are intended for use with shoes specifically made
結できるようになっています。互換性のないシューズを使わないようにしてく
to
fit them and are designed to firmly keep the foot engaged with the pedal. Do
ださい。
not use
shoes which do not engage the pedals correctly.
つま先を安全にペダルに着脱できるようになるには練習が必要です。特殊な足の動き
Practice is required to learn to engage and disengage the foot safely. Until engaging
が反射的に出来るようになるまで、練習をして十分に慣れてください。練習には集中
and disengaging the foot becomes a reflex action, the technique requires concentration
力を要します。まずは誰もいない障害物のない場所でトゥークリップを装着した操作
which can distract your attention and cause you to lose control and fall. Practice
の練習し、感覚を会得してください。感覚がつかめるまで、トゥーストラップを緩め
engaging and disengaging clipless pedals in a place where there are no obstacles,
てつかってください。交通の多い場所では、トゥーストラップを使わないで
hazards or traffic; and be sure to follow the pedal manufacturer’s setup and service
ください。メーカー出荷時の調整及び取扱説明書にそって正しく使用してください。
instructions. If you do not have the manufacturer’s instructions, see your dealer or
取扱説明書がない場合は、取扱店もしくは直接メーカーにお問合せください。
contact the manufacturer.
F、サスペンション
F.
Bicycle Suspension
Many bicycles are equipped with suspension systems. There are many different
サスペンションを搭載した自転車が多くありますが、その種類は千差万別です。サス
types of suspension systems — too many to deal with individually in this Manual. If your
ペンションに関してはメーカー出荷時の調整及び取扱説明書にそって正しく理解して
bicycle has a suspension system of any kind, be sure to read and follow the suspension
ください。取扱説明書がない場合は、取扱店もしくは直接メーカーにお問合せくださ
manufacturer’s setup and service instructions. If you do not have the manufacturer’s
い。
instructions, see your dealer or contact the manufacturer.
WARNING(警告):サスペンションの調整、保守を適切に行わず、故障に至った
WARNING: Failure to maintain, check and properly adjust the suspension
場合、操作困難に陥り転倒の原因となります。
system may result in suspension malfunction, which may cause you to lose
control and fall.
サスペンションを搭載した自転車でスピードを出すと、ケガをするリスクも高くなりま
If your bike has suspension, the increased speed you may develop also increases your
す。例えばフロントブレーキだけをかけると、前輪のサスペンションだけが効き過ぎて
risk of injury. For example, when braking, the front of a suspended bike dips. You could
前傾姿勢になり、最悪転倒の原因になります。経験のない方は、Section4.c
lose control and fall if you do not have experience with this system. Learn to handle your
を参照し、サスペンション付き自転車の操作を理解してください。
suspension system safely. See also Section 4.C.
WARNING(警告):サスペンションの調整を行うと、車両及びブレーキ特性が変
WARNING: Changing suspension adjustment can change the handling and
わり、場合によっては危険な状態になります。メーカーの取扱説明書を熟知し
braking characteristics of your bicycle. Never change suspension adjustment
ていない限り、サスペンションの調整を行うことは、やめてください。もし変
unless
you are thoroughly familiar with the suspension system manufacturer’s
えた場合は、常に車両特性、ブレーキ特性に注意を払い、操作に問題がない事
instructions
and recommendations, and always check for changes in the handling and
を確認してください。
braking
characteristics of the bicycle after a suspension adjustment by taking a
careful test ride in a hazard-free area.
28
サスペンションは、振動を吸収し操作性と快適性を向上させます。これは反面、使用
Suspension can increase control and comfort by allowing the wheels to better
者に自転車操作が上手くなったと感じさせることにもなります。しかし、それはあく
follow the terrain. This enhanced capability may allow you to ride faster; but you must
までサスペンションの効果であり、ご自分の操作が上手くなったわけではないことを
not confuse the enhanced capabilities of the bicycle with your own capabilities as a
理解すべきです。自転車操作の熟練には、時間と経験が必要です。本当に上手くなる
rider. Increasing your skill will take time and practice. Proceed carefully until you have
までは、常に安全運転を常に心掛けてください。
learned to handle the full capabilities of your bike.
WARNING:
Not all bicycles can be safely retrofitted with some types of
WARNING(警告):自転車によって、サスペンションの改造取り付けが出来ない
suspension
systems. Before retrofitting a bicycle with any suspension, check
ものがあります。改造を行う場合は、メーカーの取扱説明書を参照し、取付け
with the
bicycle’s manufacturer to make sure that what you want to do is compatible
ようとするサスペンションと互換性がある事を確認してください。間違えて取
with the
bicycle’s design. Failing to do so can result in catastrophic frame failure.
り付けると、重大なフレーム事故につながることがあります。
G、タイヤとチューブ
G. Tires and Tubes
1. Tires
1、タイヤ
Bicycle tires are available in many
タイヤには色々な仕様、特性を備えたもの
designs and specifications, ranging from
があります。一般的なモデルから、特殊な
general-purpose designs to tires designed
地形、天候に対応する希なモデルまで様々
to perform best under very specific weather
です。自転車に乗っていると、違うタイヤ
or terrain conditions. If, once you’ve gained
の方が合っているのではないかと思うとき
experience with your new bike, you feel that
があるでしょう。そんなときは取扱店最適
a different tire might better suit your riding
なタイヤを選んでもらうよう相談してくだ
needs, your dealer can help you select the
さい。サイズ、封入圧、特殊仕様のタイヤ
most appropriate design.
の場合その詳細、等はタイヤの側面に明記
The size, pressure rating, and on some
されています。(fig.17を参照)特にタイ
high-performance tires the specific
ヤの封入圧は重要な情報となります。
recommended use, are marked on the
sidewall of the tire (see fig. 17). The part of
this information which is most important to
you is Tire Pressure.
WARNING(警告):タイヤの最大封入圧力を厳守してください。それ以上の圧が
WARNING:
Never inflate a tire beyond the maximum pressure marked on the
かかるとタイヤがバーストする原因となり、最悪、使用者や周りの人を巻き込
tire’s
sidewall. Exceeding the recommended maximum pressure may blow the
tire offんだ事故につながることになります。
the rim, which could cause damage to the bike and injury to the rider and
bystanders.
圧力ゲージ付きのポンプを使う事をお勧めします。封入圧を適正に保つ最適な方法に
なります。
The best and safest way to inflate a bicycle tire to the correct pressure is with a
bicycle pump which has a built-in pressure gauge.
WARNING(警告):ガソリンスタンドの空気入れコンプレッサーを自転車に使う
WARNING: There is a safety risk in using gas station air hoses or other air
ことは大変危険です。急速に高圧を封入する事になり、タイヤをバーストさせ
compressors. They are not made for bicycle tires. They move a large volume of
ることになります。ガソリンスタンドのコンプレッサーは自転車には使わない
air very
rapidly, and will raise the pressure in your tire very rapidly, which could
causeでください。
the tube to explode.
タイヤの封入圧は、最大圧か、それ以下のレンジで使うかの二つにわけられます。
Tire pressure is given either as maximum pressure or as a pressure range. How
a封入圧により操作の特性が変わるので、地形や天候により圧力調整をするのが理想
tire performs under different terrain or weather conditions depends largely on tire
pressure.
Inflating the tire to near its maximum recommended pressure gives the
です。最大圧で使うと、接地抵抗が減り、スムーズな走行が可能ですが、硬めの乗
lowest
rolling resistance; but also produces the harshest ride. High pressures work
り心地になります。最高圧は、濡れいない舗装された道路に適した選択です。
best on smooth, dry pavement.
29
Very low pressures, at the bottom of the recommended pressure range, give the best
タイヤの封入圧を推奨範囲内の最低圧に設定すると、つるつるの粘土状路面や、タ
performance on smooth, slick terrain such as hard-packed clay, and on deep, loose
イヤが持って行かれそうな滑りやすい砂地で威力を発揮することが出来ます。ただ
surfaces such as deep, dry sand.
し封入圧が低すぎると、チューブを押しつぶしてリムに当てることになり、パンク
Tire pressure that is too low for your weight and the riding conditions can cause a
の原因となります。またタイヤの寿命も縮めることになります。
puncture of the tube by allowing the tire to deform sufficiently to pinch the inner tube
between the rim and the riding surface.
CAUTION(忠告):ペンシルタイプのタイヤゲージは正確でない場合があります
CAUTION:
Pencil type automotive tire gauges can be inaccurate and should not
ので、タイヤ封入圧を測定する際は、高品質ダイヤルゲージを使う事をお勧め
be
relied upon for consistent, accurate pressure readings. Instead, use a high
します。
quality
dial gauge.
Ask your dealer to recommend the best tire pressure for the kind of riding you
自転車をお使いになる用途に最適なタイヤ封入圧があります。取扱店に相談して、最適
will most often do, and have the dealer inflate your tires to that pressure. Then,
なタイヤ圧を設定するようにしてください。Section1.Cを参照し、最適な封入圧がどの
check inflation as described in Section 1.C so you’ll know how correctly inflated tires
ような状態か確認してください。タイヤによっては、毎週か二週間に一度空気を入れる
should look and feel when you don’t have access to a gauge. Some tires may need
必要があります。自転車に乗る前に、空気圧をチェックするようにしてください。
to be brought up to pressure every week or two, so it is important to check your tire
高性能タイヤの場合、タイヤ溝の方向で性能が発揮できるため回転方向が決まっている
pressures before every ride.
ものがあります。タイヤの脇に回転方向が示されていますので、高性能タイヤをお使い
Some special high-performance tires have unidirectional treads: their tread pattern
の方はタイヤの取りつけ方向に間違いがない事を確認してください。
is designed to work better in one direction than in the other. The sidewall marking of a
unidirectional tire will have an arrow showing the correct rotation direction. If your bike
has unidirectional tires, be sure that they are mounted to rotate in the correct direction.
2,タイヤバルブ
2. Tire Valves
バルブ(タイヤの空気入れ口)は大きく2つに分けられます。米式バルブと
There are primarily two kinds of bicycle tube valves: The Schraeder
Valve
and the Presta Valve. The bicycle pump you use must have the fitting
英式バルブです(注意:日本ではもう一つのタイプである英式バルブが一
appropriate
to the valve stems on your bicycle.
般的です)バルブに合わせた適切な空気入れを選択してください。
The Schraeder valve (fig. 18a) is like the valve on a car tire. To inflate a
Schraeder
valve tube, remove the valve cap and clamp the pump fitting onto the
米式バルブは構造的にクルマのバルブと同じです。空気を入れるには、
end
of the valve stem. To let air out of a Schraeder valve, depress the pin in the
(fig18.a)バルブのキャップを外して、ポンプのゴム付きの金具口を、
end
of the valve stem with the end of a key or other appropriate object.
バルブくちに噛み合せます。先端のピンを押し下げることで、空気の入る
状態になります。
The Presta valve (fig. 18b) has a narrower diameter and is only found on
bicycle tires. To inflate a Presta valve tube using a Presta headed bicycle
pump,
remove the valve cap; unscrew (counterclockwise) the valve stem lock
仏式バルブの場合は、バルブのキャップを外して、先端の先端のナットを
nut;
and push down on the valve stem to free it up. Then push the pump head
反時計方向に回します。そして先端のポッチを押して空気が入る状態にし
on
to the valve head, and inflate. To inflate a Presta valve with a Schraeder
ます。空気入れのバルブが仏式でないときは、仏式バルブのアダプターを
pump
fitting, you’ll need a Presta adapter (available at your bike shop) which
先端にセットして空を入れます。空気が入ったら留め用のナットを時計回
screws
on to the valve stem once you’ve freed up the valve. The adapter fits
りに回してバルブをとじます。空気が入りすぎたときは、ナットを再び緩
into
the
Schraeder pump fitting. Close the valve after inflation. To let air out of a Presta
め、先端のポッチを少し押してください。放圧されます。空気を入れ終え
valve,
open up the valve stem lock nut and depress the valve stem.
たらキャップを先端にかぶせます。
WARNING: We highly recommend that you carry a spare inner tube when you
WARNING(警告):走行するときは、スペアチューブを携行する事をお勧めしま
ride your bike. Patching a tube is an emergency repair. If you do not apply the
す。パンクをしても、比較的手間がかからず修理ができるからです。パンク修
patch理用のパッチは、最後の手段としてとらえたほうが現実的です。パッチで修理
correctly or apply several patches, the tube can fail, resulting in possible tube
failure,
which could cause you to loose control and fall. Replace a patched tube as
してもきちんと補修できていないときは、またタイヤがへこみ操作不能に陥り
soon as
possible.
ます。
30
5. Service
WARNING(警告):技術の進歩により、自転車の扱いがより複雑化していますの
WARNING: Technological advances have made bicycles and bicycle components
で、当該マニュアルが、全ての自転車に関する修理、保守に言及することは到底
more complex, and the pace of innovation is increasing. It is impossible for this
不可能です。従って、事故の発生を最小限におさえるためには、このマニュアル
manual
to provide all the information required to properly repair and/or maintain your
に書かれていない、修理、保守に関するサービスを、取扱店から受けている事が
bicycle.
In order to help minimize the chances of an accident and possible injury, it is
重要になります。
critical
that you have any repair or maintenance which is not specifically described in
this manual performed by your dealer. Equally important is that your individual
操作の仕方や使用する地形によって、個人で行う保守の方法も違ってくるため、
maintenance
requirements will be determined by everything from your riding style to
それらを適切に行う事も大変重要です。取扱店に相談し、お客様の保守がどうあ
geographic
location. Consult your dealer for help in determining your maintenance
るべきか理解してください。
requirements.
WARNING: Many bicycle service and repair tasks require special knowledge and
WARNING(警告):保守、修理に関しては、特別な知識や工具が必要になります。
tools. Do not begin any adjustments or service on your bicycle until you have
取扱店から正しい方法を学ぶまでは、保守、修理を個人で行わないでください。
learned
from your dealer how to properly complete them. Improper adjustment or
不適切な調整をすると事故の下になり、重篤なケガや死に至る場合があります。
service may result in damage to the bicycle or in an accident which can cause serious
injury or death.
自転車の保守について学びたい場合;
If you want to learn to do major service and repair work on your bike:
1,自転車部品の据付に関する、メーカー発行のマニュアルのコピーを取扱店から入手して
1. Ask your dealer for copies of the manufacturer’s installation and service instructions
ください。
for the components on your bike, or contact the component manufacturer.
2,取扱店から、修理に関する本を紹介してもらってください
2. Ask your dealer to recommend a book on bicycle repair.
3,取扱店に尋ね、地域の自転車修理コースを受講してください。
3. Ask your dealer about the availability of bicycle repair courses in your area.
最初ご自分で修理されたときは、まず取扱店にその出来具合をチェックしてもらう事をお
We recommend that you ask your dealer to check the quality of your work the first
すすめします。全て正常な状態になっているか確認してもらったほうが良いからです。そ
time you work on something and before you ride the bike, just to make sure that you
れなりに時間がかかる作業になるので、手数料が発生する事があります。
did everything correctly. Since that will require the time of a mechanic, there may be a
modest charge for this service.
また、修理部品として、どんなものがあるか取扱店に確認をすることをおすすめします。
例えばチューブや電球、ブレーキパッド等、交換するものが把握できると、今後ご自分で
We also recommend that you ask your dealer for guidance on what spare parts, such
やりやすくなります。
as inner tubes, light bulbs, etc. it would be appropriate for you to have once you have
learned how to replace such parts when they require replacement.
A,保守の頻度
A. Service Intervals
Some service and maintenance can and should be performed by the owner, and require
ご自分で行う保守作業は、特殊な知識、工具を必要とせず、このマニュアルに書かれた範
no special tools or knowledge beyond what is presented in this manual.
囲で実行できるものになります。下記はご自身ので行う保守作業の例です。これ以外は、
The following are examples of the type of service you should perform yourself. All
特別な工具、設備等が必要なため、公認の整備士が行う作業となります。
other service, maintenance and repair should be performed in a properly equipped facility
by a qualified bicycle mechanic using the correct tools and procedures specified by the
1、最初の再調整:本格的に使用する前に、ケーブルワイヤ、スポークなど、再調整をし
manufacturer.
たほうがよい部品に再調整を施すと、自転車が長持ちします。メカニカル安全チェック
(Section 1.C)をご参照ください。
1. Break-in Period: Your bike will last longer and work better if you break it in before
riding it hard. Control cables and wheel spokes may stretch or “seat” when a new bike
is first used and may require readjustment by your dealer. Your Mechanical Safety Check
(Section 1.C) will help you identify some things that need readjustment. But even if
31
everything seems fine to you, it’s best to take your bike back to the dealer for a checkup.
取扱店に点検を依頼するのが最良の方法です。取扱店は、よくお買い上げ後の30日点
Dealers typically suggest you bring the bike in for a 30 day checkup. Another way to
検を推奨しています。そのほかには3~5時間試し乗りした後に異常のない事を確かめ
judge when it’s time for the first checkup is to bring the bike in after three to five hours
る方法、10~15時間、通常もしくはオフロード使用した後に異常のない事を確かめ
of hard off-road use, or about 10 to 15 hours of on-road or more casual off-road use.
る方法があります。何か異常がありましたら、すぐに使用をやめ、取扱店に持ち込んで
But if you think something is wrong with the bike, take it to your dealer before riding it
指示をうけてください。
again.
2. Before every ride: Mechanical Safety Check (Section 1.C)
2、お乗りになる前に常にメカニカル安全チェック(Section1.C)を実施してください
3. After every long or hard ride; if the bike has been exposed to water or grit; or
3、日常の使用をしていると自転車が濡れたり汚れたりします。少なくとも150Km使用
at least every 100 miles: Clean the bike and lightly lubricate the chain’s rollers with
するごとに、自転車の清掃とチェーンの注油を実施してください。注油で、余計なオイ
a good quality bicycle chain lubricant. Wipe off excess lubricant with a lint-free cloth.
ルがチェーンついた時は、拭き取ってください。注油は大事ですので、取扱店が推奨す
Lubrication is a function of climate. Talk to your dealer about the best lubricants and the
る注油方法があればそれに従ってください。
recommended lubrication frequency for your area.
4. After every long or hard ride or after every 10 to 20 hours of riding:
4、10~20時間ほど過酷に自転車を使用したとき
• Squeeze the front brake and rock the bike forward and back. Everything feel solid?
・フロントブレーキが効くことを確認してください。ブレーキをかけた状態で前後に自
If you feel a clunk with each forward or backward movement of the bike, you probably
転車を動かし、ガタつきが感じられるようであれば、ブレーキ系のボルト、ナットが
have a loose headset. Have your dealer check it.
緩んでいます。取扱店に相談してください。
• Lift the front wheel off the ground and swing it from side to side. Feel smooth? If
・自転車を持ち上げ、前輪を左右に振ってみてください。硬さが感じられるようであれ
you feel any binding or roughness in the steering, you may have a tight headset. Have
ば、ハンドルの締め付けに問題があります。取扱店に相談してください。
your dealer check it.
・ペダルを手で持って本体側に対して振ってみてください。ガタつきが感じられるよう
• Grab one pedal and rock it toward and away from the centerline of the bike; then do
であれば締め付けに問題があります。取扱店に相談してください。
the same with the other pedal. Anything feel loose? If so, have your dealer check it.
・ブレーキパッドが摩耗していませんか。リムに当たらない、ブレーキの効きがわるい
• Take a look at the brake pads. Starting to look worn or not hitting the wheel rim
という状態であれば交換時期にはいっています。
squarely? Time to have the dealer adjust or replace them.
・ギア、ブレーキケーブルのチェックをしてください。錆、摩耗があれば交換時期に入
• Carefully check the control cables and cable housings. Any rust? Kinks? Fraying? If
っています。
so, have your dealer replace them.
・スポークを一本一本触ってみて、張りに異常がないか確認してください。ガタつき、
• Squeeze each adjoining pair of spokes on either side of each wheel between your
緩みがあったらスポークの再調整あるいは交換が必要です。取扱店に相談してくださ
thumb and index finger. Do they all feel about the same? If any feel loose, have your
い。
dealer check the wheel for tension and trueness.
・タイヤを目視して、損耗や異常がないか確認してください。必要に応じて交換をして
• Check the tires for excess wear, cuts or bruises. Have your dealer replace them if
ください。
necessary.
・リムに異常がないか確認してください。摩耗サインが出ている、傷やゆがみがある場
• check the wheel rims for excess wear, dings, dents and scratches. Consult your
合は取扱店に相談してください。
dealer if you see any rim damage.
・構成部品全てが、しっかり取り付いていて緩みがない事を確認してください。
• Check to make sure that all parts and accessories are still secure, and tighten any
・フレーム、とくに溶接部分、ハンドルの取り付け部、シートポストの締結部分に異常
which are not.
がない事を確認してください。傷やクラックができていたら、疲労損壊のサイン
です。この場合部品の交換になります。(Appendix
• Check the frame, particularly in the area around allBを参照)
tube joints; the handlebars; the
stem; and the seatpost for any deep scratches, cracks or discoloration. These are signs
of stress-caused fatigue and indicate that a part is at the end of its useful life and needs
to be replaced. See also Appendix B.
components may be covered by a warranty for a specified period of time by the
自転車本体としての保証制度で保証されるとは限りません。自転車の製品寿命は、ユーザ
manufacturer, this is no guarantee that the product will last the term of the warranty.
ーの使用状況と保守の仕方で変わってきますので、自転車の保証制度は、必ずしも保証期
Product life is often related to the kind of riding you do and to the treatment to which you
間内の自転車の寿命を担保するものではありません。保証制度に謳われている条項を守り
submit the bicycle. The bicycle’s warranty is not meant to suggest that the bicycle cannot
正しい使用をした場合にのみ、その保証は適用されることになります。
be broken or will last forever. It only means that the bicycle is covered subject to the
terms of the warranty. Please be sure to read Appendix A, Intended Use of your bicycle
and Appendix B, The lifespan of your bike and its components, starting on page 43.
5、ブレーキがメカニカル安全チェック(Section1.C)に適合しない場合は、自転車の
5. As required: If either brake lever fails the Mechanical Safety Check (Section 1.C),
使用をやめ、取扱店に持ち込んでください。ギアがスムースに作動しない場合は、デュ
don’t ride the bike. Have your dealer check the brakes.
ライラーの調整が狂っています。取扱店にご相談ください。
If the chain won’t shift smoothly and quietly from gear to gear, the derailleur is out of
6、オフロードで25時間、通常の路面で50時間ほど自転車を使用するごとに、取扱
adjustment. See your dealer.
店で全点検をうけてください。
6. Every 25 (hard off-road) to 50 (on-road) hours of riding: Take your bike to your dealer
for a complete checkup.
B,衝突した時
B. If your bicycle sustains an impact:
First, check yourself for injuries, and take care of them as best you can. Seek medical
まずケガがないか確認してください。必要に応じて医療的援助をうけてください。
help if necessary.
つぎに、自転車に異常がないか確認してください。
Next, check your bike for damage.
なにかに衝突したような場合は、全点検を実施してください。カーボン部品、ホイル、
After any crash, take your bike to your dealer for a thorough check. Carbon composite
ハンドル、パイプ、ペダルクランク等、衝突の影響が出ていそうなときは自転車には乗
components, including fames, wheels, handlebars, stems, cranksets, brakes, etc. which
らず、公認の整備士に分解・点検を実施してもらってください。
have sustained an
must not be ridden until they have been disassembled and
また、Appendix
B impact
を参照してください。
thoroughly inspected by a qualified mechanic.
See also Appendix B, Lifespan of your bike and its components.
WARNING: A crash or other impact can put extraordinary stress on bicycle
WARNING(警告):衝突があった自転車には、内部応力(残留ストレス)が
components, causing them to fatigue prematurely. Components suffering from
残り、金属疲労により突然損壊する事があります。この場合操作困難に陥り、
stress重篤なケガまたは最悪死亡に至る原因となります。
fatigue can fail suddenly and catastrophically, causing loss of control, serious
injury or death.
WARNING:
Like any mechanical device, a bicycle and its components are subject
WARNING(警告):自転車の機構部品は、ストレスにより金属疲労を起こしま
to
wear and stress. Different materials and mechanisms wear or fatigue from
す。材質や機構によってその様態は異なります。金属疲労が臨界になると、突
stress然材質が折れたり壊れたりして、事故、重篤なケガ、或いは最悪の場合死に至
at different rates and have different life cycles. If a component’s life cycle is
exceeded,
the component can suddenly and catastrophically fail, causing serious
る原因となります。キズ、クラック、色あせなどは、部材の疲労のサインで、
injury 寿命が来た事を示していますので、交換が必要です。
or death to the rider. Scratches, cracks, fraying and discoloration are signs of
stress-caused
fatigue and indicate that a part is at the end of its useful life and needs
そうした構成部品は、その部品を製造したメーカーが謳う有限期間の保証対象
to be replaced.
While the materials and workmanship of your bicycle or of individual
となる場合がありますが
32
33
Appendix A
一般用途自転車(状況2)
General Purpose Riding CONDITION 2
Intended use of your bicycle
使用用途
WARNING(警告):自転車の用途を理解し、目的にあった自転車を選択してくだ
WARNING: Understand your bike and its intended use. Choosing the wrong
さい。間違った自転車に乗ることは体に悪く、また間違った使い方をするのは
bicycle
for your purpose can be hazardous. Using your bike the wrong way is
危険です。
dangerous.
全ての用途に適合するような自転車はありません。取扱店では、お客様の最適な一台
No one type of bicycle is suited for all purposes. Your retailer can help you pick the
“right
tool for the job” and help you understand its limitations. There are many types of
をお選び頂けるよう努めると同時に、自転車の限界についても説明しています。自転
bicycles
and many variations within each type. There are many types of mountain, road,
車にはそれぞれ用途があります。山、道、レース、ツーリング等に適合したタイプが
racing,
hybrid, touring, cyclocross and tandem bicycles.
あります。また二つの特性を組み合わせた自転車もあります。ロード/レーシングを組
み合わせた、トリプルクランクを装備する自転車があります。
There are also bicycles that mix features. For example, there are road/racing bikes
with triple cranks. These bikes have the low gearing of a touring bike, the quick handling
of
a racing bike, but are not well suited for carrying heavy loads on a tour. For that
これらはツーリングの低速ギアを備え、レース車のハンドリングを併せ持ちますが、
purpose
you want a touring bike.
重いものを運べるツーリング車のようには使えません。
いろいろな特性をもつ自転車の中から最適な一台をお選びください。取扱店に行く、
Within each of type of bicycle, one can optimize for certain purposes. Visit your
bicycle
shop and find someone with expertise in the area that interests you. Do your
あるいは経験者の話を聞くのがいいと存じます。これ以降のページより、いろいろな
own
homework.
Seemingly small changes such as the choice of tires can improve or
自転車の用途を紹介します。
diminish the performance of a bicycle for a certain purpose.
業界の使用慣例は一般化された進歩的なものを集めています。詳しい自転車の用途に
On the following pages, we generally outline the intended uses of various types of
bikes.
関しては取扱店に問い合わせてください。
Industry usage conditions are generalized and evolving. Consult your dealer about
how you intend to use your bike.
高性能自転車(状況1)
High-Performance Road CONDITION 1
Bikes designed for riding on a paved surface where the tires do not
舗装された路面でパフォーマンスを発揮する自転車に関して
lose ground contact.
適合用途:舗装された路面のみ
INTENDED To be ridden on paved roads only.
使用不可の用途:オフロード、サイクロクロス、ラックやカゴの装着
NOT INTENDED For off-road, cyclocross, or touring with racks or
での走行は不可です。
panniers.
TRADE OFF Material use is optimized to deliver both light weight and
トレードオフ:軽量素材で、パフォーマンス重視の限界設計が採用されています。(1)
specific performance. You must understand that (1) these types of bikes are intended to
自転車競技、レースに参加する方向けの性能重視モデルで製品寿命も短いです。(2)レ
give an aggressive racer or competitive cyclist a performance advantage over a relatively
ース等に参加されない方は、比較的長期のフレーム寿命でお使い頂けます。(3)製品重
short product life, (2) a less aggressive rider will enjoy longer frame life, (3) you are
量の軽いものほど寿命が短いです。重いものほど長持ちします。(4)軽量フレームで
choosing light weight (shorter frame life) over more frame weight and a longer frame
すので、悪路、でこぼこ道対応になっていません。またフレームは、ダメージを受けや
life, (4) you are choosing light weight over more dent resistant or rugged frames that
すいので頻繁に点検する必要があります。手荒な扱い、悪路での作業車両のような使用
weigh more. All frames that are
very light need frequent inspection. These frames are
には対応しません。Appendix
Bをご参照ください。
likely to be damaged or broken in a crash. They are not designed to take abuse or be a
rugged workhorse. See also Appendix B.
MAXIMUM WEIGHT LIMIT
使用者
荷物
Rider (lb/kg)
Luggage*
(lb/kg)
275 / 125
10 / 4.5
* Seat Bag /Handlebar Bag Only
Total (lb/kg)
285 / 129
34
Bikes designed for riding Condition 1, plus smooth gravel roads and
状況1に加え、楽に走行出来る程度の砂利道及び小道、ある程度傾斜が
improved trails with moderate grades where the tires do not lose ground
ある状態も含む状態です。
contact.
適合用途:舗装道路、砂利道、小道
INTENDED For paved roads, gravel or dirt roads that are in good
使用不可の用途:オフロード用、マウンテンバイク用やジャンプ競技用
condition, and bike paths.
は不可です。
NOT INTENDED For off-road or mountain bike use, or for any kind
自転車の中にはサスペンション搭載モデルがありますが、それは快適性を向上させる
of jumping. Some of these bikes have suspension features, but these features are
ためのもので、オフロード向けではありません。タイヤが太く、砂利道や小道によく
designed to add comfort, not off-road capability. Some come with relatively wide tires that
対応するもの、またタイヤが比較的細く、舗装道路での高速移動によく対応するもの
are well suited to gravel or dirt paths. Some come with relatively narrow tires that are best
があります。重い荷物も運びたい、あるいは長持ちするタイヤが欲しいという場合は
suited to faster riding on pavement. If you ride on gravel or dirt paths, carry heavier loads
、取扱店に相談してください。
or want more tire durability talk to your dealer about wider tires.
MAXIMUM WEIGHT LIMIT
使用者
Rider (lb/kg)
300 / 136
Luggage* (lb/kg)
荷物
Total (lb/kg)
30 / 14
285 / 129
For Touring or Trekking
300 / 136
55 / 25
355 / 161
クロスカントリー、マラソン、ハードテイル(状況3)
Cross-Country, Marathon, Hardtails CONDITION 3
Bikes designed for riding Conditions 1 and 2, plus rough trails,
状況1、2に加え、でこぼこ道、小さな障害がある道、自転車操作にす
small obstacles, and smooth technical areas, including areas where
こし技術の要るような道で、ジャンプまでは行かないものの、タイヤが
momentary loss of tire contact with the ground may occur. NOT jumping.
地面から少し離れるような走行が必要な状態。リア・サスペンションが
All mountain bikes without rear suspension are Condition 3, and so are
装備されていない、或いは簡易的リア・サスペンションがついた自転車
some lightweight rear suspension models.
は、状況3に該当します。
INTENDED For cross-country riding and racing which ranges from
適合用途:中級から上級者向けのクロスカントリーやレース(傾斜、岩や切り株などの
mild to aggressive over intermediate terrain (e.g., hilly with small obstacles like roots,
小さな障害物、滑りやすい路面、固まった状態の泥、凹みのある路面等)に適合します
rocks, loose surfaces and hard pack and depressions). Cross-country and marathon
。クロスカントリー、マラソン用
equipment (tires, shocks, frames, drive trains) are light-weight, favoring nimble speed
使用不可の用途:オフロード用、マウンテンバイク用やジャンプ競技用部品(タイヤ吸
over brute force. Suspension travel is relatively short since the bike is intended to move
振材、フレーム、駆動部)は軽量で、激しい負荷がかかる状態でも俊敏に作動します。
quickly on the ground.
俊敏さが求められる為サスペンションの振れ幅は短く設定さています。
NOT INTENDED For Hardcore Freeriding, Extreme Downhill, Dirt Jumping, Slopestyle,
or very aggressive or extreme riding. No spending time in the air landing hard and
使用不可の用途:ハードコア、フリーライディング、極限のダウンヒル、ダーツロード
hammering through obstacles.
、ジャンプ、スロープスタイル、その他極端な乗り方、には適合しません。
TRADE OFF Cross-Country bikes are lighter, faster to ride uphill, and more nimble
トレードオフ クロスカントリー車は、マウンテンバイクよりも軽量でスピードが出ま
than All-Mountain bikes. Cross-Country and Marathon bikes trade off some ruggedness
す。しかしクロスカントリー車は、ギアのレンジが狭い為、ペダリング効率と、上り坂
for pedaling efficiency and uphill speed.
の使用で、マウンテンバイクよりも不利になることがあります。
MAXIMUM WEIGHT LIMIT
使用者
Rider (lb/kg)
300 / 136
* Seat Bag Only
荷物
Luggage*
(lb/kg)
Total (lb/kg)
5 /2.3
305 / 138
35
マウンテンバイク(状況4)
All Mountain CONDITION 4
状況1、2、3に加え、中程度の障害がある道、自転車操作にある程度
Bikes designed for riding Conditions 1, 2, and 3, plus rough technical
areas,
moderately sized obstacles, and small jumps.
の技術の要るような道で、小さなジャンプが必要な状態。
適合用途:トレイルとアップ・ヒル用の「マウンテンバイク」車は、以
INTENDED For trail and uphill riding. All-Mountain bicycles are:
(1)
more heavy duty than cross country bikes, but less heavy duty than
下に適合します。
Freeride
bikes, (2) lighter and more nimble than Freeride bikes,
(1)クロスバイクより過酷で、フリーバイクよりも過酷でない状況で使用
(3) heavier and have more suspension travel than a cross country
する(2)フリーバイクよりも軽量で、俊敏な動きに対応する(3)クロスカントリー車より
bike, allowing them to be ridden in more difficult terrain, over larger obstacles and
も重く、サスペンションが装備され、大きな障害物、適度のジャンプが必要な悪路にも
moderate jumps, (4) intermediate in suspension travel and use components that fit
対応する(4)サスペンションは路面の難易度で言うと中程度に対応するものが装備され
the intermediate intended use, (5) cover a fairly wide range of intended use, and within
ている。(5)さほど過酷でない状態で使用する車種で、適合用途は比較的広い。
this range are models that are more or less heavy duty. Talk to your retailer about your
needs and these models.
使用不可の用途:ハードコアマウンテン、フリーライディング、極限のダウンヒル、ノ
NOT INTENDED For use in extreme forms of jumping/riding such as hardcore
ースショア、ダーツジャンプ、ハッキング、ジャンプやラウンチ(木製のものに乗っ
mountain, Freeriding, Downhill, North Shore, Dirt Jumping, Hucking etc. No large
て、堤防や盛土で行うダーツ競技)で、長ストロークのサスペンションや高耐久部品が
drop offs, jumps or launches (wooden structures, dirt embankments) requiring long
必要な場合、着地を競う競技(エアーランデング)衝突を競う競技には適合しません。
suspension travel or heavy duty components; and no spending time in the air landing
hard and hammering through obstacles.
トレードオフ:マウンテンバイクは、より困難な地形に対応するため、クロスカントリ
TRADE OFF All-Mountain bikes are more rugged than cross country bikes, for riding
ー車よりも頑丈に作られています。上り坂をでは、マウンテンバイクは、クロスカント
more difficult terrain. All-Mountain bikes are heavier and harder to ride uphill than
リー車よりもこぐのが重くなりますが、フリーバイクよりも軽いです。マウンテンバイ
cross country bikes. All-Mountain bikes are lighter, more nimble and easier to ride
クは、フリーバイクよりも堅牢には作られていませんので、極端な路面状態では使用で
uphill than Freeride bikes. All-Mountain bikes are not as rugged as Freeride bikes and
きません。
must not be used for more extreme riding and terrain.
MAXIMUM WEIGHT LIMIT
使用者
Rider (lb/kg)
Luggage* (lb/kg)
300 / 136
5 / 2.3
Total (lb/kg)
305/138
* Seat Bag Only
グラビィテー、フリーライド、ダウンヒル(状況5)
Gravity, Freeride, and Downhill CONDITION 5
Bikes designed for jumping, hucking, high speeds, or aggressive riding
悪路でのジャンプ、ハッキング、高速移動や極端な操作、平地でのランデ
on rougher surfaces, or landing on flat surfaces. However, this type of
ィング、等に使用する自転車です。こうした状況は危険を伴うと同時に、
riding is extremely hazardous and puts unpredictable forces on a bicycle
自転車にも予測出来ない負荷がかかる時があります。状態5で示すような
which may overload the frame, fork, or parts. If you choose to ride in
自転車操作をする場合は、フレーム、フォーク、部品等の安全点検を頻繁
Condition 5 terrain, you should take appropriate safety precautions such
に行う必要があります。フルフェースヘルメット、パッドなどの安全プロ
as more frequent bike inspections and replacement of equipment. You
テクターも装着する必要があります。
should also wear comprehensive safety equipment such as a full-face helmet, pads,
適合用途:経験の豊富なライダーしかこなせないような悪路面を走行することになりま
and body armor.
す。グラビティー、フリーライド、ダウンヒル、はハードコアマウンテン、ノースショ
INTENDED For riding that includes the most difficult terrain that only very skilled
ア、スロープスタイルといった、一番困難な走行を伴う競技に適用される用語です。
riders should attempt.
Gravity, Freeride, and Downhill are terms which describe hardcore mountain, north
shore, slopestyle. This is “extreme” riding and the terms describing it are constantly
グラビティー、フリーライド、ダウンヒル、は(1)マウンテンバイクよりも重荷重用
evolving.
の、ストロークの長いサスペンションがついていて、更に困難な地形に適合します(2)
Gravity, Freeride, and Downhill bikes are: (1) heavier and have more suspension
長ストロークのサスペンション搭載で,過酷な使用に適応します。
travel than All-Mountain bikes, allowing them to be ridden in more difficult terrain,
over larger obstacles and larger jumps, (2) the longest in suspension travel and use
36
components that fit heavy duty intended use. While all that is true, there is no guarantee
そうした極限の操作では、フリーライドバイクのフレームが破損するおそれがあります。
that extreme riding will not break a Freeride bike.
フリーライドを使用するような地形はそもそもが危険な状態です。間違った判断、不運、
The terrain and type of riding that Freeride bikes are designed for is inherently
能力を超えた操作は直ちに事故につながり、重篤なケガ或いは死に至る原因となります。
dangerous. Appropriate equipment, such as a Freeride bike, does not change this
reality. In this kind of riding, bad judgment, bad luck, or riding beyond your capabilities
can easily result in an accident,
where you could be seriously injured, paralyzed or
使用不可の用途:Section
2.F,10ページを参照し、無理は避けるよう心掛けてください。
killed.
NOT INTENDED To be an excuse to try anything. Read Section 2. F, p. 10.
トレードオフ:より困難な地形に適応する為、フリーライド車はマウンテンバイクよりも
TRADE OFF Freeride bikes are more rugged than All-Mountain bikes, for riding more
堅牢につくられています。上り坂をでは、フリーライド車はマウンテンバイク車よりもこ
difficult terrain. Freeride bikes are heavier and harder to ride uphill than All-Mountain
ぐのが重くなります。
bikes.
MAXIMUM WEIGHT LIMIT
荷物
使用者
Rider (lb/kg)
Luggage*
(lb/kg)
5 / 2.3
300 / 136
Total (lb/kg)
305/138
* Seat Bag Only
ダートジャンプ(状況5)
Dirt Jump CONDITION 5
Bikes designed for jumping, hucking, high speeds, or aggressive riding
悪路でのジャンプ、ハッキング、高速移動や極端な操作、平地でのランデ
on rougher surfaces, or landing on flat surfaces. However, this type of
ィング、等に使用する自転車です。こうした状況は危険を伴うと同時に、
riding is extremely hazardous and puts unpredictable forces on a bicycle
自転車にも予測出来ない負荷がかかる時があります。状態5で示すような
which may overload the frame, fork, or parts. If you choose to ride in
自転車操作をする場合は、フレーム、フォーク、部品等の安全点検を頻繁
Condition 5 terrain, you should take appropriate safety precautions such
に行う必要があります。フルフェースヘルメット、パッドなどの安全プロ
as more frequent bike inspections and replacement of equipment. You
テクターも装着する必要があります。
should also wear comprehensive safety equipment such as a full-face helmet, pads, and
適合用途:人口のダートジャンプ場、ランプ、スケート場、予測された障害物で構成さ
body armor.
れる、技能が必要な競技場、ダートジャンプ用の自転車は、BMX車よりも重量があり
INTENDED For man-made dirt jumps, ramps,2.F,10ページに書かれているような
skate parks other predictable obstacles
ます。ダートジャンプ用の自転車は、Section
and terrain where riders need and use skill and bike control, rather than suspension.
「操作が上手くなった」感覚を与えません。
Dirt Jumping bikes are used much like heavy duty BMX bikes.
A Dirt Jumping bike does not give you skills to jump. Read Section 2. F, p. 10.
使用不可の用途:サスペンションが必要な困難な路面においては、使用を避けジャンプ
NOT INTENDED For terrain, drop offs or landings where large amounts of suspension
はしないでください。
travel are needed to help absorb the shock of landing and help maintain control.
トレードオフ:ダートジャンプ用自転車は、フリーバイクよりも軽く俊敏な操作が出来
TRADE OFF Dirt Jumping bikes are lighter and more nimble than Freeride bikes, but
ます。しかしリアサスペンションがなく、フロントサスペンションのストロークも短い
they have no rear suspension and the suspension travel in the front is much shorter.
です。
MAXIMUM WEIGHT LIMIT
使用者
Rider (lb/kg)
Luggage (lb/kg)
荷物
300 / 136
0
Total (lb/kg)
300/136
37
サイクロクロス(状況2)
Cyclo-cross CONDITION 2
マウンテンタンデム(状況2)
Mountain Tandems CONDITION 2
Bikes designed for riding Condition 1, plus smooth gravel roads
状況1に加え、楽に走行出来る程度の砂利道及び小道、ある程度傾斜が
and improved trails with moderate grades where the tires do not
ある状態も含みます。
lose ground contact.
適合用途:サイクロクロス、トレーニング、レースに適応します。
INTENDED For cyclo-cross riding, training and racing. Cycloオフロード、泥路面を含む全部の路面条件、全天候向けで、通勤にも対
cross involves riding on a variety of terrain and surfaces including
応します。
dirt or mud surfaces. Cyclo-cross bikes also work well for all
使用不可の用途:オフロード、マウンテンバイク、ジャンプでは使用できません。サ
weather
rough road riding and commuting.
イクロクロス、レースでの使用では、障害物が近づいたら一度自転車を降りて、自転
NOT INTENDED For off road or mountain bike use, or jumping. Cyclo-cross
車を担いで、その障害物を乗り越えてください。サイクロクロス車は、マウンテンバ
riders
and racers dismount before reaching an obstacle, carry their bike over
イクの用途では使えません。ホイルのサイズは大きいほうがスピードが出ます。しか
the
obstacle and then remount. Cyclo-cross bikes are not intended for mountain
し、マウンテンバイクの小径タイヤよりも丈夫ではありません。
bike
use. The relatively large road bike size wheels are faster than the smaller
mountain bike wheels, but not as strong.
Bikes designed for riding Condition 1, plus smooth gravel roads
状況1に加え、楽に走行出来る程度の砂利道及び小道、ある程度傾斜が
and improved trails with moderate grades where the tires do not
ある状態も含みます。
lose ground contact.
適合用途:マウンテンバイクをタンデム使用にすると、本来のマウンテ
INTENDED The challenges of mountain biking are obvious. The
ンバイクの用途というよりは、中程度の難易度の路面での適用になりま
added challenges of tandem riding mean that you should limit offす。
road tandem riding to easy-moderate terrain.
使用不可の用途:ダウンヒル、フリーライディング、ノースショアには適用できませ
NOT INTENDED For very aggressive mountain bike riding. Mountain tandems
ん。極端な走行はできません。タンデムが安全にできる場所を選んでください。
are most definitely NOT for Downhill, Freeriding, North Shore. Choose terrain
with the abilities of both the Tandem’s captain and stoker in mind.
MAXIMUM WEIGHT LIMIT
荷物
使用者
Rider (lb/kg)
Luggage
(lb/kg)
300 / 136
30 / 13.6
MAXIMUM WEIGHT LIMIT
荷物
使用者
Rider (lb/kg)
Luggage
(lb/kg)
500 / 227
75 / 34
Total (lb/kg)
575 / 261
Total (lb/kg)
330 / 150
ロードタンデム(状況1)
Road Tandems CONDITION 1
Bikes designed for riding on a paved surface where the tires do
舗装された路面で、タイヤが滑ることなく常に路面に接する状態
not lose ground contact.
適合用途:舗装された路面のみ。マウンテンバイクの用途、オフロー
INTENDED Are designed to be ridden on paved roads only. They
ドには適合しません。
are not designed for mountain biking or off-road use.
使用不可の用途:オフロード、マウンテンバイクの用途では使用でき
NOT INTENDED Road tandem should not be taken off-road or
ません。
used as a mountain tandem.
MAXIMUM WEIGHT LIMIT
使用者
荷物
Rider (lb/kg)
Luggage
(lb/kg)
500 / 227
75 / 34
Total (lb/kg)
575 / 261
38
39
「WARNING(警告)」を無視すると、フレームやフォークの損傷につながり、ケガや
Ignoring this WARNING can lead to frame, fork or other component failure, which
最悪の場合死に至る原因となります。
can result in serious injury or death.
Appendix B
自転車とその構成部品の寿命
The lifespan of your bike and its components
1、永年的に使える製品はありません
1. Nothing Lasts Forever, Including Your Bike.
自転車部品の製品寿命が尽きるた後も継続してその部品を使うのは危険です。部品に
When the useful life of your bike or its components is over, continued use is hazardous.
は寿命があります。寿命はその構造と素材で変わってきます。またメンテナンスの具
Every bicycle and its component parts have a finite, limited useful life. The length
of
that life will vary with the construction and materials used in the frame and
合により寿命は変わってきます。形式や使用頻度によってももちろん変わってきま
components;
the maintenance and care the frame and components receive over their
す。
life;
and
the
type
and amount of use to which the frame and components are subjected.
トリックライディング、ランプライディング、ジャンプ、激しい走行、悪条件の
Use
in
competitive
events, trick riding, ramp riding, jumping, aggressive riding, riding
路面、悪天候、過積載、商用での使用、等の通常でない使用をすると製品寿命が極端
on
severe terrain, riding in severe climates, riding with heavy loads, commercial
に短くなります。こうした使用が重なると更に寿命に影響し、予測できない故障を招
activities
and other types of non-standard use can dramatically shorten the life of the
くことになります。
frame and components. Any one or a combination of these conditions may result in an
unpredictable
failure.
軽量の自転車は、重いものに比べ、短寿命であると言われています。軽量な部品を選
ぶことは、軽くてパフォーマンスがでる分、製品寿命が短くなっているというトレー
All aspects of use being identical, lightweight bicycles and their components will
usually
have a shorter life than heavier bicycles and their components. In selecting
ドオフがあります。もし軽量で高パフォーマンスを出せるモデルをお使いであれば、
a頻繁に部品の点検をする事をお勧めします。自転車とその部品を定期的に取扱店で点
lightweight bicycle or components you are making a tradeoff, favoring the higher
performance
that comes with lighter weight over longevity. So, If you choose
検してもらう事をお勧めします。クラック、変形、腐食、表面の剥がれ、くぼみ、等
lightweight,
high
performance equipment, be sure to have it inspected frequently.
は故障のサインです。こうした点検は、事故、ケガを防ぎます。
You should have your bicycle and its components checked periodically by your
dealer for indicators of stress and/or potential failure, including cracks, deformation,
corrosion, paint peeling, dents, and any other indicators of potential problems,
inappropriate use or abuse. These are important safety checks and very important to
help prevent accidents, bodily injury to the rider and shortened product life.
2,自転車に関する専門的な事項
2. Perspective
高いパフォーマンスを出せる自転車には、頻繁に点検を実施する必要があります。こ
Today’s high-performance bicycles require frequent and careful inspection and
service.
In this Appendix we try to explain some underlying material science basics and
のAppendixでは、材料科学の観点から自転車に関連する事項を述べています。ここで
how
they relate to your bicycle. We discuss some of the trade-offs made in designing
は自転車に関するトレードオフを説明し、お客様が自転車をどうお使いになるのが良
your
bicycle and what you can expect from your bicycle; and we provide important, basic
いのか説明をします。また基本的なガイドラインとなる、メンテナンスと点検に関し
guidelines
on how to maintain and inspect it. We cannot teach you everything you need
て説明をします。自転車のメンテナンスと点検に関して、全てここで述べることは不
to
know to properly inspect and service your bicycle; and that is why we repeatedly urge
可能ですので、不明な点があれば、取扱店に相談するようにしてください。
you to take your bicycle to your dealer for professional care and attention.
WARNING: Frequent inspection of your bike is important to your safety. Follow
WARNING(警告):自転車の点検を頻繁に実施することは重要です。Section1.Cの
the Mechanical Safety Check in Section 1.C of this Manual before every ride.
「メカニカルチェック」を参照して、自転車に乗る前には必ず実施してくださ
Periodic,
more detailed inspection of your bicycle is important. How often this more
い。定期的な詳細点検も重要になりますが、頻度はご自身の判断になります。
detailed inspection is needed depends upon you.
You,
the rider/owner, have control and knowledge of how often you use your bike,
取扱店では、お客様のご使用状況に関しては掌握できないので、定期的な点検の
how hard
you use it and where you use it. Because your dealer cannot track your use,
ために自転車を取扱店に持ち込むのはお客様の責任で行われることになります。
you must
take responsibility for periodically bringing your bike to your dealer for
お客様の自転車の点検頻度がどれくらいであれば適当か、どこでどのように自転
inspection
and service. Your dealer will help you decide what frequency of inspection
車を使うのが適当か取扱店に相談してください。
and service
is appropriate
for how and where you use your bike.
このAppendix
を理解し取扱店とコミュニケーションを図ることは重要です。
For点検の頻度やり方、頻度などを決めるのに、このAppendixをしっかりお読みにな
your safety, understanding and communication with your dealer, we urge you
to read
this Appendix in its entirety. The materials used to make your bike determine
ってください。 how and how frequently to inspect.
40
A. Understanding
metals
A.
材料の理解
Steel is the traditional material for building bicycle frames. It has good
スチールは伝統的に自転車に使われてきた素材です。良い特性を備えていますが、高
characteristics, but in high performance bicycles, steel has been largely replaced by
性能自転車には、アルミやチタンが用いられるようになってきました。軽量で扱い安
aluminum and some titanium. The main factor driving this change is interest by cycling
いことがその背景にあります。
enthusiasts in lighter bicycles.
材料の性質
Properties of Metals
自転車には多様な材料が使われていますので、単純に材料の特性で自転車を語れるよ
Please understand that there is no simple statement that can be made that
うな言葉はありません。自転車がどう設計され、テストされ、製造され、サポートさ
characterizes the use of different metals for bicycles. What is true is how the metal
れているかを確認してその上で材料特性と合わせて考えることが重要です。
chosen is applied is much more important than the material alone. One must look at the
way the bike is designed, tested, manufactured, supported along with the characteristics
材料の耐腐食性を理解すると自転車を選ぶ判断材料になります。スチールは錆びるの
of the metal rather than seeking a simplistic answer.
で表面処理が必要です。アルミとチタンは、成形後表面に酸化皮膜を形成するので、
Metals vary widely in their resistance to corrosion. Steel must be protected or rust will
腐食が進行しません。それゆえこの2素材は耐腐食性がありますがアルミはチタンほ
attack it. Aluminum and Titanium quickly develop an oxide film that protects the metal
どではありません。特に他の金属との接点で発生する電解腐食には注意が必要です。
from further corrosion. Both are therefore quite resistant to corrosion. Aluminum is not
perfectly corrosion resistant, and particular care must be used where it contacts other
材料は可塑性があります。可塑性とは曲げたり延ばしたりして、その形に留まる特性
metals and galvanic corrosion can occur.
のことです。可塑性で言うと、スチールが一番可塑的です。
Metals are comparatively ductile. Ductile means bending, buckling and stretching
before breaking. Generally speaking, of the common bicycle frame building materials
次にアルミ、そして一番可塑特性がないものがチタンです。材料の比重は、スチール
steel is the most ductile, titanium less ductile, followed by aluminum.
が7.8g/cm3、チタンが4.5g/cm3、アルミが2.75g/cm3です。カーボンファイバー成形材
Metals vary in density. Density is weight per unit of material. Steel weighs 7.8 grams/
料では、1.45g/cm3となります。材料は疲労します。長期に渡り自転車を使っていると
cm3 (grams per cubic centimeter), titanium 4.5 grams/cm3, aluminum 2.75 grams/cm3.
、金属疲労によりクラックが生じる事があります。金属疲労に関して以下をお読みに
Contrast these numbers with carbon fiber composite at 1.45 grams/cm3.
ください。
Metals are subject to fatigue. With enough cycles of use, at high enough loads, metals
will eventually develop cracks that lead to failure. It is very important that you read The
ガードレールや溝、岩、クルマ等に衝突すると、慣性で体が前に飛ばされます。と同
basics of metal fatigue below.
時にフォークや他の構成部品もダメージを受けます。
Let’s say you hit a curb, ditch, rock, car, another cyclist or other object. At any speed
above a fast walk, your body will continue to move forward, momentum carrying you over
衝突の程度と複雑度でダメージが異なる為、一概に、どれほどの衝突で自転車が破損
the front of the bike. You cannot and will not stay on the bike, and what happens to the
するという耐衝突性は標準化できないのです。しかし、衝突が激しいほど、フォーク
frame, fork and other components is irrelevant to what happens to your body.
は曲がることは言えます。スチール製フォークは極端に曲がります。その特性が衝撃
What should you expect from your metal frame? It depends on many complex factors,
を吸収し、他のフレームが無傷という場合があります。
which is why we tell you that crashworthiness cannot be a design criteria. With that
important note, we can tell you that if the impact is hard enough the fork or frame may
アルミ製フォークはスチールよりも曲がりませんので、フォークが痛むと同時に、フ
be bent or buckled. On a steel bike, the steel fork may be severely bent and the frame
レームにも影響が出る場合があります。激しくぶつかった場合、パイプの先端が破損
undamaged. Aluminum is less ductile than steel, but you can expect the fork and frame
し、本体に近いパイプは曲がる事になるでしょう。
to be bent or buckled. Hit harder and the top tube may be broken in tension and the
down tube buckled. Hit harder and the top tube may be broken, the down tube buckled
金属製自転車が衝突すると、上記のようにフレームが曲がる現象が見られます。今日
and broken, leaving the head tube and fork separated from the main triangle.
では、フレーム側が金属で、フォークにカーボンファイバーを使う自転車が増えてい
When a metal bike crashes, you will usually see some evidence of this ductility in
ます。この組み合わせでは、金属フレーム側が曲がり、カーボンファイバーでは、曲
bent, buckled or folded metal.
がりが見られないという現象が起きます。
It is now common for the main frame to be made of metal and the fork of carbon fiber.
See Section B, Understanding composites below. The relative ductility of metals and
the lack of ductility of carbon fiber means that in a crash scenario you can expect some
bending or bucking in the metal but none in the carbon. Below some load the carbon
41
しかし、衝撃が大きい場合、カーボン製フォークは完全に破壊されます。
fork
may be intact even though the frame is damaged. Above some load the carbon fork
will be completely broken.
金属疲労のに関して
永久的に機能するものは何もありません。使い込めば込むほど、製品の寿命は縮んでい
The
basics of metal fatigue
きます。金属疲労とは、繰り返しの使用により局所的にダメージが積み重なった状態の事
Common sense tells us that nothing that is used lasts forever. The more you use
を表します。金属疲労の原因は、繰り返しの負荷が想定以上にかかるところにあります。
something,
and the harder you use it, and the worse the conditions you use it in, the
よく用いられる例として、ペーパークリップの連続曲げがあります。ペーパークリップを
shorter
its life.
指で持って繰り返し曲げると、ついには折れてしまいます。この例は、自転車に起こる疲
Fatigue is the term used to describe accumulated damage to a part caused by repeated
労が、時間や使用年数に関係のない事を物語っています。倉庫にずっと置いている自転車
loading.
To cause fatigue damage, the load the part receives must be great enough. A
には疲労は生じません。疲労は使用から来る負荷が積み重なって起こるのです。
crude,
often-used example is bending a paper clip back and forth (repeated loading) until
it breaks. This simple definition will help you understand that fatigue has nothing to do
顕微鏡でみると、特に応力のかかる部分にクラックが発生するのがわかります。負荷が連
with
time or age. A bicycle in a garage does not fatigue. Fatigue happens only through use.
続してかかると、クラックも成長します。ある時点をこえると、クラックは目で見てもわ
So what kind of “damage” are we talking about? On a microscopic level, a crack forms
かる状態に成長します。その後クラックは急速の成長し、負荷に耐えられなくなり、最後
in
a highly stressed area. As the load is repeatedly applied, the crack grows. At some point
には破断してしまいます。
the
crack becomes visible to the naked eye. Eventually it becomes so large that the part is
too weak to carry the load that it could carry without the crack. At that point there can be a
疲労を防ぐ方法としては、設計時に応力集中部分の肉厚を十分なほど厚くすることが挙げ
complete
and immediate failure of the part.
られます。しかしこれは、フレームを重厚にし、材料もより多く使うことになります
One can design a part that is so strong that fatigue life is nearly infinite. This requires a
ので、現実的ではありません。軽量かつ強度を維持しなければならない構造物は寿命には
lot
of material and a lot of weight. Any structure that must be light and strong will have a
限りがあります。飛行機、レースカー、バイク等は構成部品にそのような疲労特性があり
finite
fatigue life. Aircraft, race cars, motorcycles all have parts with finite fatigue lives. If
寿命が有限です。もし自転車に恒久的な寿命を持たせようとしたら、大変重厚な構造とな
you
wanted a bicycle with an infinite fatigue life, it would weigh far more than any bicycle
り扱えないでしょう。軽量・高性能の自転車は、短寿命という二律背反要素を抱えていま
sold
today. So we all make a tradeoff: the wonderful, lightweight performance we want
す。ですので日頃からの点検が必要になります。
requires
that we inspect the structure.
点検項目
What
to look for
•・クラックが発生し、急速に成長するような場合
ONCE A CRACKS STARTS IT CAN GROW AND GROW FAST.
SIMPLE RULE 1 : If you find crack,
・対応1
Think
about the crack as forming a pathway to failure. This
replace the part.
クラックが結合し、大きな割れになったときはもう破断の手前で
クラックを見つけたらすぐその部品
means
that any crack is potentially dangerous and will only
す。つまりクラックは潜在的に破断を引き起こす危険状態を意味し
を交換する。
become
ます。 more dangerous.
• CORROSSION SPEEDS DAMAGE. Cracks grow more quickly
・腐食環境の影響
when they are in a corrosive environment. Think about the
腐食環境にあると、クラックは成長しやすくなります。雨、多湿、海
corrosive solution as further weakening and extending the
岸での使用は腐食環境と言えます。
crack.
SIMPLE
・対応2 RULE 2 : Clean your bike,
lubricate
your bike, protect your
自転車を清掃し、潤滑をする。塩分
bike
from salt, remove any salt as
が付着したらすぐに拭き取る。
soon as you can.
• STAINS AND DISCOLORATION CAN OCCUR NEAR A CRACK.
・シミ、色あせが起こった場合
Such staining may be a warning sign that a crack exists.
潜在的なクラックが発生しているサインになります。
SIMPLE
・対応3 RULE 3 : Inspect and
investigate
any staining to see if it
クラックが発生してないか点検して
is
associated with a crack.
ください
• SIGNIFICANT SCRATCHES, GOUGES, DENTS OR SCORING
・キズ、削れ、曲がり、くぼみ等が顕著な場合
CREATE STARTING POINTS FOR CRACKS. Think about the cut
クラックが発生している場合があります。こうした異常点にはストレ
surface as a focal point for stress (in fact engineers call such
スが集中し、クラックに成長します。グラズカッターで切れ目を入
areas “stress risers,” areas where the stress is increased).
れたガラスを想像してくたさい。切れ目が入るとそこから簡単に破
Perhaps you have seen glass cut? Recall how the glass was
断するようになります。
scored and then broke on the scored line.
SIMPLE
・対応4 RULE 4 : Do not scratch,
gouge
or score any surface. If you
キズ、削れ、曲がり、くぼみ等を見
do,
pay frequent attention to this
つけたら、いつも注意を払い、場合
area
or replace the part.
によっては取替えてください。
• SOME CRACKS (particularly larger ones) MAY MAKE
・クラックが成長している場合
CREAKING NOISE AS YOU RIDE. Think about such a noise as
クラックが成長すると、走行中に異音が出てくる事があります。こ
a serious warning signal. Note that a well-maintained bicycle
れは破断の前兆になります。よく整備された自転車は走行中スム
will be very quiet and free of creaks and squeaks.
ーズで音も静かです。
SIMPLE
・対応5 RULE 5 : Investigate
and
find the source of any noise.
音の原因を特定してください。クラッ
It
may not a be a crack, but
クではないかもしれませんが、原因
whatever
is causing the noise
が掴めたら、修理をしてください。
should be fixed promptly.
42
大抵の場合、疲労クラックは製品欠陥ではありません。疲労クラックはその箇所が損耗
In most cases a fatigue crack is not a defect. It is a sign that the part has been worn out,
しているか、寿命に近づいたサインになっています。タイヤの摩耗サインが見えてきた
a sign the part has reached the end of its useful life. When your car tires wear down to
ら、タイヤ交換時期を知らせているだけで、タイヤが不良品であったことを意味するわ
the point that the tread bars are contacting the road, those tires are not defective. Those
けではありません。疲労クラックは、その部品が寿命を迎えたサインで、交換する事を
tires are worn out and the tread bar says “time for replacement.” When a metal part
示すサインです。
shows a fatigue crack, it is worn out. The crack says “time for replacement.”
疲労は科学的に予測できるものではありません。
Fatigue Is Not A Perfectly Predictable Science
疲労は科学的に予測できるものではありません。しかし目安としてどれくらい点検を受
Fatigue is not a perfectly predictable science, but here are some general factors to
けたかというものがあります。軽量高性能な自転車ほど点検が必要です。そうでない自
help you and your dealer determine how often your bicycle should be inspected. The
転車は点検の頻度が低くなります。以下は、疲労に関する要素です。
more you fit the “shorten product life” profile, the more frequent your need to inspect.
The more you fit the “lengthen product life” profile, the less frequent your need to
inspect.
製品寿命を縮める要素
・乱暴で手荒な運転
Factors that shorten product life:
・衝突、ジャンプ、等の衝撃履歴
• Hard, harsh riding style
・使用距離が長い
• “Hits”, crashes, jumps, other “shots” to the bike
・ライダーの体重が重い
• High mileage
・ライダーが体力に自信があり、激しい使用をする
• Higher body weight
・腐食環境(湿気、海水、融雪剤の塩分、汗)
• Stronger, more fit, more aggressive rider
・泥、ほこり、砂、土などでの表面摩耗
• Corrosive environment (wet, salt air, winter road salt, accumulated sweat)
• Presence of abrasive mud, dirt, sand, soil in riding environment
製品寿命を延ばす要素
・自転車を優しく扱う
Factors that lengthen product life:
・衝突、ジャンプ、等の衝撃履歴がない
• Smooth, fluid riding style
・使用距離が短い
• No “hits”, crashes, jumps, other “shots” to the bike
・ライダーの体重が軽い
• Low mileage
・ライダーが常に優しい操作を心がける
• Lower body weight
・腐食環境(湿気、海水、融雪剤の塩分、汗)を避ける、対処する
• Less aggressive rider
・常に清掃が行き届いた状態
• Non-corrosive environment (dry, salt-free air)
• Clean riding environment
WARNING(警告):クラック、出っ張り、へこみが生じている自転車には、そ
WARNING: Do not ride a bicycle or component with any crack, bulge or dent,
れらがどんなに小さくても乗らないでください。破断が起こった場合、重篤
even a small one. Riding a cracked frame, fork or component could lead to
なケガあるいは死に至る原因となります。
complete failure, with risk of serious injury or death.
B, 複合材料について
B. Understanding composites
カーボン複合材料は強く、軽量です。しかし衝突や荷負荷がかかると、まがらずに破断します。
All riders must understand a fundamental reality of composites. Composite materials
constructed of carbon fibers are strong and light, but when crashed or overloaded,
複合材料とは
carbon fibers do not bend, they break.
複数の材料の組合せで出来たものです。カーボンファイバー、繊維プラスチックの複合材を成形
したフレームで出来たのがカーボン車です。高強度で軽量なのが特徴です。
What Are Composites?
The term “composites” refers to the fact that a part or parts are made up of different
components or materials. You’ve heard the term “carbon fiber bike.” This really means
“composite bike.”
Carbon fiber composites are typically a strong, light fiber in a matrix of plastic,
molded to form a shape. Carbon composites are light relative to metals. Steel weighs
7.8 grams/cm3 (grams per cubic centimeter), titanium 4.5 grams/cm3, aluminum 2.75
43
grams/cm3. Contrast these numbers with carbon fiber composite at 1.45 grams/cm3.
自重に対する強度が一番強くなる素材構成が、カーボンファイバーに、エポキシ樹脂を染み
The composites with the best strength-to-weight ratios are made of carbon fiber in
込ませて成形させた複合材になります。エポキシ樹脂が、カーボン繊維をしっかりと結合
a matrix of epoxy plastic. The epoxy matrix bonds the carbon fibers together, transfers
させ、表面のなめらかに仕上げる役目を果たします。カーボンファイバーは素材の骨組みのよ
load to other fibers, and provides a smooth outer surface. The carbon fibers are the
うになりそれにエポキシ樹脂が成形されています。
“skeleton” that carries the load.
なぜ複合材料か?
Why Are Composites Used?
金属の分子構造が等方性を持つのに対して、カーボンファイバーは、特定の負荷方向に対
Unlike metals, which have uniform properties in all directions (engineers call this
して最適の組成配分をすることができます。欲しい方向に最適の組成を配分することで、軽く
isotropic), carbon fibers can be placed in specific orientations to optimize the structure
て強靭な自転車を作る事ができます。
for particular loads. The choice of where to place the carbon fibers gives engineers a
また快適性、吸振性にも優れた車体を作ることができます。金属と違い、カーボンは腐食しな
powerful tool to create strong, light bicycles. Engineers may also orient fibers to suit
いのも大きな利点です。カーボン車は、重量対強度比が最も優れています。
other goals such as comfort and vibration damping.
Carbon fiber composites are very corrosion resistant, much more so than most
複合材料の限界
metals.
よく設計された複合材、またはカーボンフレームは、疲労がほとんどなく、金属の同等物より
Think about carbon fiber or fiberglass boats.
も、耐性が優れています。疲労寿命が長い事はカーボン車の大きな利点ではありますが、や
Carbon fiber materials have a very high strength-to-weight ratio.
はり通常的に点検をする必要があります。カーボンフレームは塑性特性がなく曲がりません
。曲がらない変わりに、限界点を超えると、破断します。破損すると、表面の剥がれ落ち、中
What Are The Limits Of Composites?
の鋭い繊維が露出されます。
Well designed “composite” or carbon fiber bicycles and components have long
fatigue lives, usually better than their metal equivalents.
どこかに衝突させた場合、カーボンフレームはどうなるか?
While fatigue life is an advantage of carbon fiber, you must still regularly inspect your
carbon fiber frame, fork, or components.
ガードレールや溝、岩、クルマ等に衝突すると、慣性で体が前に飛ばされます。と同時にフォ
Carbon fiber composites are not ductile. Once a carbon structure is overloaded, it
ークや他の構成部品もダメージを受けます。
will not bend; it will break. At and near the break, there will be rough, sharp edges
and maybe delamination of carbon fiber or carbon fiber fabric layers. There will be no
衝突の程度と複雑度でダメージが異なる為、一概に、どれほどの衝突で自転車が破損する
bending, buckling, or stretching.
という耐衝突性は標準化できないのです。しかし、衝突が激しいければ、カーボン製フォーク
は完全に破壊されることは有り得ます。
If You Hit Something Or Have A Crash, What Can You Expect From Your Carbon Fiber Bike?
カーボンと、金属の特性の違いに関しては、当該Appendixの、Section2.Aを参照してください
Let’s say you hit a curb, ditch, rock, car, other cyclist or other object. At any speed
。カーボンフレームが金属の2倍の強度があったとして、臨界荷重を超えた場合は、カーボン
above a fast walk, your body will continue to move forward, the momentum carrying you
は曲がらず、破断します。
over the front of the bike. You cannot and will not stay on the bike and what happens to
the frame, fork and other components is irrelevant to what happens to your body.
複合材料フレーム、フォークの点検
What should you expect from your carbon frame? It depends on many complex
クラック:
factors. But we can tell you that if the impact is hard enough, the fork or frame may
クラック、壊れ、トゲ状の繊維が露出している箇所がないか点検してください。
be completely broken. Note the significant difference in behavior between carbon and
クラックが発見されたら自転車には絶対乗らないでください。
metal. See Section 2. A, Understanding metals in this Appendix. Even if the carbon
frame was twice as strong as a metal frame, once the carbon frame is overloaded it
表面の剥がれ(デ・ラミネーション):
will not bend, it will break completely.
表面の剥がれは危険状態です。複合素材は、繊維の層で出来ています。表面の剥がれは、
その箇所の強度が落ちている事をあわらします。表面の剥がれを見つけたら自転車に乗ら
Inspection of Composite Frame, Fork, and Components
ないでください。
Cracks:
Inspect for cracks, broken, or splintered areas. Any crack is serious. Do not ride
any bicycle or component that has a crack of any size. Delamination:
Delamination is serious damage. Composites are made from layers of fabric.
Delamination means that the layers of fabric are no longer bonded together. Do not
ride any bicycle or component that has any delamination.
44
These
are some delamination clues:
表面の剥がれ(デ・ラミネーション)の前兆
1.•
A cloudy or white area. This kind of area looks different from the ordinary
・表面が白く濁った部分は、デラミネーションの前兆です。通常のフレームの表面とは色合
undamaged
areas. Undamaged areas will look glassy, shiny, or “deep,” as if one was
いが違います。通常の部分は深い輝きとツヤがあります。
looking into a clear liquid. Delaminated areas will look opaque and cloudy.
2.•
Bulging or deformed shape. If delamination occurs, the surface shape may
・でっぱりや、変形。デラミネーションが起こると表面が変形します。でっぱり、柔らかいへこ
change.
The surface may have a bump, a bulge, soft spot, or not be smooth and fair.
み、なめらかでない、規則的でない、等の変化が起きます。
3.• A difference in sound when tapping the surface. If you gently tap the surface of an
undamaged
composite you will hear a consistent sound, usually a hard, sharp sound.
・叩いた時の音が違う。デラミネーション部分を叩くと、鈍くてハリのない音がします。通常の
Ifフレームは、硬い、ハリのある音が出ます。
you then tap a delaminated area, you will hear a different sound, usually duller, less
sharp.
Unusual
異音: Noises:
Either a crack or delamination can cause creaking noises while riding. Think about
クラック、デラミネーションがあると、走行中異音が聞こえます。異音は警告のサインです。
such
a noise as a serious warning signal. A well maintained bicycle will be very quiet
メンテナンスの行き届いた自転車はスムーズで静かです。異音が聞こえたら原因を特定し
and
free of creaks and squeaks. Investigate and find the source of any noise. It may
てください。クラックやデラミネーションでないにしても、修理する必要があります。
not be a crack or delamination, but whatever is causing the noise must be fixed before
riding.
WARNING(警告):クラック、デラミネーションが生じている自転車には、そ
WARNING:
Do not ride a bicycle or component with any delamination or crack.
れらがどんなに小さくても乗らないでください。破断が起こった場合、重篤
Riding
a delaminated or cracked frame, fork or other component could lead
なケガあるいは死に至る原因となります。
to complete
failure, with risk of serious injury or death.
C、構成部品にかんして
C. Understanding components
構成部品の点検のためには、それらを正しく取り付け、取り外すことが必要になります。最新
It is often necessary to remove and disassemble components in order to properly
の高性能自転車では、それらには、特殊工具が必要となります。専門の整備士に依頼する
and carefully inspect them. This is a job for a professional bicycle mechanic with the
事をお勧めします。
special tools, skills and experience to inspect and service today’s high-tech highperformance bicycles and their components.
超軽量部品に関して
軽量の構成部品は、重いものに比べ、短寿命であると言われています。軽量な部品を選ぶ
Aftermarket “Super Light” components
ことは、軽くてパフォーマンスがでる分、製品寿命が短くなっているというトレードオフがありま
Think carefully about your rider profile as outlined above. The more you fit the
す。たいがいは、軽量で高パフォーマンスを出せる構成部品のほうが、使いやすくなっていま
“shorten product life” profile, the more you must question the use of super light
す。選択に関しては取扱店に相談をしてください。
components. The more you fit the “lengthen product life” profile, the more likely it is
that lighter components may be suitable for you. Discuss your needs and your profile
標準付属の部品に関して
very honestly with your dealer.
標準付属部品に関しては、自転車メーカーかその部品メーカーが、疲労テストを実施してい
Take these choices seriously and understand that you are responsible for the changes.
ます。しかし、疲労は使用度合いによるもので、標準化されるものではありません。標準付属
A useful slogan to discuss with your dealer if you contemplate changing
品だからといっても、恒久的な耐久性は備えていません。
components is “Strong, Light, Cheap –pick two.”
Original Equipment components
Bicycle and component manufacturers tests the fatigue life of the components that
are original equipment on your bike. This means that they have met test criteria and
have reasonable fatigue life. It does not mean that the original components will last
forever. They won’t.
45
Appendix C
Appendix D
Coaster Brake
コースターブレーキ
Fastener Torque Specifications
締め付けトルクに関して
1. How the coaster brake works
1、コースターブレーキの作用
The coaster brake is a sealed mechanism which is a part of the bicycle’s rear wheel
コースターブレーキは、後輪ハブに内蔵されたブレーキです。ペダルを後ろ向きに回転させる事
hub. The brake is activated by reversing the rotation of the pedal cranks (see fig. 5).
で、制動する仕組みになっています(fig.5参照)。ペダルを水平位置のところから、逆向きにこぎは
Start with the pedal cranks in a nearly horizontal position, with the front pedal in about
じめ、前に来たペダルが4時方向くらいで、後ろ向きにこぐ力を入れていきます。ペダルを8分の1
the 4 o’clock position, and apply downward foot pressure on the pedal that is to the rear.
ほど回すと、ブレーキが効いてきます。さらに後ろ向きに回す力を加えることで、ブレーキがより効
About 1/8 turn rotation will activate the brake. The more downward pressure you apply,
くようになり、後輪が完全にロックするまでブレーキされます。
the more braking force, up to the point where the rear wheel stops rotating and begins
to skid.
Correct tightening torque of threaded fasteners is very important to your safety. Always
適正トルクでナット、ボルト、ねじ、その他締結部品を締結することは非情に重要
tighten fasteners to the correct torque. In case of a conflict between the instructions in
です。
this manual and information provided by a component manufacturer, consult with your
当該取扱説明書と、各構成部品のメーカーが発行するマニュアルとに齟齬がある場合
dealer or the manufacturer’s customer service representative for clarification. Bolts
は、取扱店に確認するか、各構成部品のメーカーに問い合わせてください。
that are too tight can stretch and deform. Bolts that are too loose can move and fatigue.
WARNING(警告):自転車を使用する前に、ブレーキが効くことを確認してください。ブレ
WARNING: Before riding, make sure that the brake is working properly. If it is
ーキが効かない時は、自転車に乗るのを辞め、取扱店に修理を依頼してください。
not working properly, have the bicycle checked by your dealer before you ride it.
WARNING(警告):コースターブレーキだ
WARNING: If your bike has only a
け搭載された自転車では、スピードを控
coaster brake, ride conservatively. A
え安全に走行するように心掛けてくださ
single
rear brake does not have the
い。前後ブレーキ式の自転車にくらべ、
stopping
power of front-and-rear brake
コースターブレーキのみだと、制動力が
systems.
弱くなります。
Either mistake can lead to a sudden failure of the bolt.
ボルトの締め付けが強すぎると、破断の原因になります。ボルドの締め付けがゆるい
と、ガタつきの原因になります。どちらも突然の故障の原因となります。
Always use a correctly calibrated torque wrench to tighten critical fasteners on your
bike. Carefully follow the torque wrench manufacturer’s instructions on the correct way
正しいボルトの締め付けトルクを得るためには、調整されたトルクレンチが必要です。
to set and use the torque wrench for accurate results.
トルクレンチの取扱説明書を参照し、正しい設定でレンチが所望のトルク出せる状態に
してください。
For recommended torque values please consult the accompanying product manual.
ご自分で自転車の締結部品を締める場合は、自転車及び、メーカー発行の取扱説明書の
トルク仕様欄を参照してください。ご自分で締結部品の調整を行うときは、十分注意を
払うと共に、できるだけ早く取扱店のチェックを受ける事を推奨いたします。
2、コースターブレーキの調整
2. Adjusting your coaster brake
コースターブレーキの調整には特殊な工具
Coaster brake service and adjustment
と知識が必要です。
requires special tools and special
ご自身ではコースターブレーキを開けて調
knowledge. Do not attempt to disassemble
整しないようにしてください。調整は取扱
or service your coaster brake. Take the
店に依頼してください。
bicycle to your dealer for coaster brake
service.
46
47
Burley の有限保証
Burley Limited Warranty
Your original dated sales or delivery receipt showing the date of purchase is your proof of purchase.
お買上げ納品書(領収書)、または類似の証憑が、お買上げの証拠となります。万が一
If a defect in materials or workmanship is discovered during the Limited Warranty period, we will,
不良が見つかった場合、無料にて修理もしくは商品交換の対応をいたします。この保証
at our sole option, repair or replace your product at no cost to you. This warranty is only valid in the
制度は、お買上げ頂いた直接のオーナー様にのみ適用になり他人への権限譲渡は出来ま
country in which the product was purchased.
せん。お客様における不適切な組立、部品の改造や取扱説明書の改ざん、マニュアルに
従わない使用、不正な使用、事故への遭遇、及び/又は通常の磨耗等により生じた不良に
The Limited Warranty extends only to the original retail purchaser of this product and is not
transferable to anyone who obtains ownership of the product from the original purchaser.
対しては保証の対象になりません。またレンタル事業で使用した自転車、競技や商用目
的での使用した自転車に対しても保証対象から除外されますので、ご理解をお願いしま
The Limited Warranty does not cover claims resulting from misuse, failure to follow the instructions,
す。
installation, improper maintenance and use, abuse alteration, involvement in an accident, and normal
wear and tear. The Limited Warranty does not cover products which are used in rental operations and
当該製品に係る有限保証は、如何なる法的な解釈によっても、他人への譲渡や委任を認
Burley will not be liable for any incidental or commercial damages relating to such use.
めるものでなく、また他の保証を代替えするものではありません。口頭による合意での
TO THE GREATEST EXTENT PERMITTED BY LAW, THIS LIMITED WARRANTY IS EXCLUSIVE
保証やお客様独自での担保権の設定等に、Burley
Design社が関与することはあ
AND IN LIEU OF ANY OTHER WARRANTY, WRITTEN OR ORAL,
INCLUDING BUT NOT LIMITED
りません。
TO ANY EXPRESS OR IMPLIED WARRANTY OF MERCHANTABILITY OR FITNESS FOR A
PARTICULAR PURPOSE. The duration of any implied warranties, including any implied warranty
商品性の黙示保証、もしくは明示の保証期間に有効とされる、商品の目的適合性を含め
of merchantability or fitness for a particular purpose that may exist during the express warranty
た、あらゆる黙示の保証に関する保証期間は、明示の保証で明記した保証期間内におい
period are expressly limited to the limited warranty period.
て有効となります。
Some states and countries do not allow limitations on how long an implied limited warranty lasts;
therefore, the above limitation and exclusions may not apply to you.
黙示の保証期限を認めない州や国での場合、弊社は、弊社専属の裁量によって、その法
THE CUSTOMER’S EXCLUSIVE REMEDY FOR BREACH OF THIS LIMITED WARRANTY OR OF
令により生じた義務、もしくは明示、黙示の保証を超えたクレームに対して対応する事
ANY IMPLIED WARRANTY OR OF ANY OTHER OBLIGATION ARISING BY OPERATION OF LAW
と致しますが、いかなる場合においても、特殊で、事故的、間接的原因による商品の損
OR OTHERWISE SHALL BE LIMITED AS SPECIFIED HEREIN TO REPAIR OR REPLACEMENT,
壊に対しては、Burley Design社、及びその販売店は保証の責を負わない事を此処に明
AT OUR SOLE OPTION. IN ANY EVENT, RESPONSIBILITY FOR SPECIAL, INCIDENTAL AND
言致します。
CONSEQUENTIAL DAMAGES IS EXPRESSLY EXCLUDED.
Some states do not allow the exclusion of limitation of incidental or consequential damages, so the
係る有限保証に関してお客様が不服を申し立てる場合、お客様は各国の法規定の下、法
above limitation of exclusion may not apply to you.
的な手段を採択することが出来ます。日本においては、東京地方裁判所を第一審の専属
This Limited Warranty gives you specific legal rights, and you may have other rights that vary from
的合意管轄裁判所とする事に致します。
state to state or country.
製品保証や交換のサービスに関しては、お買上げ頂いたBurley代理店、あるいは日本支
For warranty service or replacement part information for the USA or Canada, please contact
部総代理店までお問合せください。
Burley directly by calling 800-311-5294 or emailing [email protected]. For warranty service or
replacement part information outside of the USA and Canada please contact the place of purchase
for warranty service. Please be prepared to provide the product model, serial number and a
description of the warranty issue.
Some replacement parts may be available for purchase after this limited warranty expires. Please
visit us at www.burley.com or call us at 541-687-1644 for more information.
Burley Design
1500 Westec Drive
Eugene, OR 97402 USA
P. 541.687.1644 800.423.8445 F. 541.687.0436
burley@ burley.com Burley.com
Copyright ©2012 by Burley Design LLC
“Burley” is a registered trademark of
Burley Design LLC
New 03/12 Bicycle Manual 2012 Rev 0