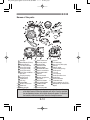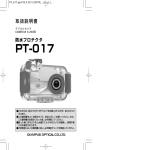
1
PT_027J最終.qxd 05.2.14 10:53 AM ページ 1 (1,1)
取 扱 説明書
デジタルカメラ
CAMEDIA C-7070 Wide Zoom/C-5060 Wide Zoom用
防水プロテクタ
PT-027
■このたびは、防水プロテクタPT-027をお買上げいただき、ありがとうご
ざいます。
■この説明書をよくお読みのうえ、安全に正しくお使いください。また、
この説明書はお読みになった後、必ず保管してください。
■誤った使い方をされると水漏れにより中のカメラが破損し、修理不能
になる場合があります。
■ご使用前には、
この説明書に従い、必ず事前チェックを実施してください。
PT_027J最終.qxd 05.2.14 10:53 AM ページ 1 (1,1)
はじめに
●本書の内容の一部又は全部を無断で複写することは、個人としてご利用にな
る場合を除き禁止されています。また無断転載は固くお断りいたします。
●本製品の不適切な使用により、万一、損害が発生した場合、逸失利益に関し、
または、第三者からのいかなる請求に対し、当社では一切その責任を負いか
ねますのでご了承ください。
●本製品の故障、当社指定の第三者による分解、修理、改造その他の理由により
生じた画像データの消失による損害及び逸失利益などに関し、当社では一切
その責任を負いかねますのでご了承ください。
ご使用前に必ずお読みください
●このプロテクタは、水深40m以内の水中で使用するよう設計された精密機械
です。取扱いには十分ご注意ください。
●プロテクタのご使用前の取扱い方法と事前チェック、メンテナンス、ご使
用後の保管方法はこの取扱説明書の内容をよくご理解のうえ、正しくご利
用ください。
●デジタルカメラの水没事故は、当社では一切その責任を負いかねます。
●使用時の事故(人身・物損)の補償はいたしかねます。
●箱に記載されている注意書きをご使用前に必ずお読みください。
安全にお使いいただくために
この取扱説明書では、製品を正しくお使いいただき、お客様や他の人々への危害
と財産の損害を未然に防止するために、いろいろな絵表示をしています。その表
示と意味は次のようになっています。
警告 この表示を無視して誤った取扱いをすると、人が死亡または重傷を
負う可能性が想定される内容を示しています。
注意 この表示を無視して誤った取扱いをすると、人が傷害を負う可能性が
想定される内容および物的損害のみの発生が想定される内容を示し
ています。
1
PT_027J最終.qxd 05.2.14 10:53 AM ページ 2 (1,1)
警告
1.本製品を乳児、幼児、子供の手の届く範囲に放置しないでください。以下の
ような事故発生の可能性があります。
・高いところから身体の上に落下し、けがをする。
・開閉部に身体の一部をはさみけがをする。
・小さな部品を飲み込む。万一飲み込んだ場合は直ちに医師にご相談ください。
・目の前でフラッシュが発光し、視力に回復不可能なほどの障害を起こす。
2.本製品に装填されるデジタルカメラに電池を入れたまま保管しないでください。
電池を入れたまま保管すると、液漏れや火災の原因となることがあります。
3.万一、本製品にカメラを装填した状態で水漏れがあった場合は、カメラに装
填された電池を速やかに抜いてください。水素ガスの発生による燃焼・爆発の
可能性があります。
4.本製品は樹脂製です。岩などの固いものに強くぶつけると破損し、けがをす
る可能性があります。取扱いには十分ご注意ください。
5.本製品用のシリカゲル及びシリコンOリング用グリスは食べられません。
注意
1.本製品の分解、改造はしないでください。水漏れや不具合発生の原因となるこ
とがあります。当社指定者以外の者による分解、改造をした場合は保証の対象
外となります。
2.異常に温度が高くなるところ、異常に温度が低くなるところ、極端な温度変化
のあるところに本品を置かないでください。部品が劣化することが有ります。
3.砂、ほこり、塵の多いところで開閉すると防水性能が損なわれ水漏れの原因
となることがあります。絶対に避けてください。
4.本製品は水深40m以内の水深で使用するように設計・製造されています。40m
より深い潜水をされた場合本プロテクタや中のカメラに復帰しない変形や破
損が生じたり、水漏れを起こすことがあります。ご注意ください。
5.プロテクタをポケットに入れたままあるいは持ったまま水中に勢いよく飛
び込んだ場合や船上から海へ放り投げる等、乱暴に扱うと水漏れする場合が
有ります。手渡しをする等、取扱いには十分ご注意ください。
6.万一、水漏れ等で内部のカメラが濡れた場合は直ちにカメラの水分を拭取
り、動作確認をしてください。
7.飛行機で移動する場合は、Oリングを取外してください。気圧の関係でプロ
テクタが開かなくなることがあります。
8.本製品に装填されるデジタルカメラを安全にお使いいただくために、デジタ
ルカメラの「取扱説明書」をよくお読みください。
9.本製品を密閉する際はOリング及びその接触面に異物を挟み込まないよう
に十分ご注意ください。
2
PT_027J最終.qxd 05.2.14 10:53 AM ページ 3 (1,1)
電池について
●カメラ専用の当社リチウムイオン充電池(BLM-1)1個をご使用ください。
●電池の電極を濡らさないようご注意ください。故障や、事故の原因となる
可能性があります。
●電池に関するその他の注意はカメラの取扱説明書をよくお読みください。
●別売の C-7070 Wide Zoom/C-5060 Wide Zoom用パワーバッテリーホルダー
(B-HLD20)はご使用出来ません。
カメラのモード設定について
①C-7070 Wide Zoomご使用の場合
●C-7070 Wide Zoomは水中でのワイド撮影やマクロ撮影に適した撮影シーン
モードを搭載しています。水中撮影シーンに合わせてモードを選ぶだけで、
簡単に撮影を楽しむことができます。
詳しくは、本取扱説明書の「水中撮影シーンに合わせた撮影」(P.26)をご
参照ください。
●設定方法については、カメラの取扱説明書も合わせてご確認ください。
②C-5060 Wide Zoomご使用の場合
●本製品をご使用の際は、カメラのモードダイヤルを「P」にし、メニューボ
タンから、「モードメニュー」−「撮影」−「アクセサリー」−「
」
(防水
プロテクタ)に設定してください。
●詳しい設定方法は、カメラの取扱説明書をご確認ください。
3
PT_027J最終.qxd 05.2.14 10:53 AM ページ 4 (1,1)
水漏れ事故を防ぐために
本製品を使用中に水漏れ事故が発生すると装填されたデジタルカメラが修理不能
になります。以下の注意を守った上でご使用ください。
1.本製品を密閉する際にはOリングだけではなくその接触面にも髪の毛、繊
維くず、砂粒等の異物がついていない事を確認してください。たとえ髪の
毛一本、砂粒一粒が挟まっても水漏れの原因となります。特に念入りに確
認してください。
〈Oリングへの異物付着の一例〉
髪の毛
繊維屑
砂粒
2.Oリングは消耗品です。少なくとも1年に1回は新品と交換してください。
また、ご使用の都度メンテナンスをしてください。
3.Oリングは使用状態、保管状態によっては劣化が促進されます。Oリングに傷、ヒ
ビが入っていたり、弾力がなくなっていたらすぐに新しいOリングに交換してください。
4.Oリングメンテナンス時にはOリング溝内をクリーニングし、ゴミ・ほこり・砂
粒等の異物が無いことを確認してください。
5.Oリングには指定のシリコンOリング用グリスをご使用ください。
6.Oリングが正しく入っていないと防水機能が働きません。Oリングを装着す
る際にはOリングが溝からはみ出したり、ねじれたりしないよう注意して取
付けてください。また、プロテクタを密閉する時はOリングが溝から外れな
いよう確認しながら蓋を閉めてください。
7.本製品はプラスティック(ポリカーボネート)製の気密構造です。車、船、海辺など
高温になるところに長時間放置したり、長時間不均一な外力がかかると変形し、
防水機能が失われることが有ります。温度管理には十分ご注意ください。また、
保管時や移動時に上に重いものを載せたり、無理な収納は避けてください。
8.プロテクタの外側からOリングの接触面を強く押したり、プロテクタをねじったり
すると防水機能が損なわれることが有ります。無理な力をかけないようご注意ください。
9.事前テストと最終チェックを実施した上でご使用ください。
10.撮影中に水滴など水漏れの兆候を見付けた場合は、直ちに潜水を中止して、
カメラ及び本製品の水気を取り、
「最終チェックをします」の項目を参考にし
てテストを行い水漏れの有無を確認してください。
4
PT_027J最終.qxd 05.2.14 10:53 AM ページ 5 (1,1)
お取扱について
●以下のような場所で本製品を使用または保管した場合、動作不良や故障、破損、
火災、内部の曇り、水漏れの原因となります。絶対に避けてください。
・直射日光下や自動車の中など高温になるような場所
・火気のある場所
・水深40mより深い水中
・振動のある場所
・高温多湿や温度変化の激しい場所
・揮発性物質のある場所
●本製品は耐衝撃性に優れたポリカーボネート樹脂製ですが、岩などで擦ると
傷が付くことが有ります。また、固い物にぶつけたり、落としたりすると破
損することがあります。
●本製品は装填されたカメラへの衝撃をやわらげるケースではありません。本製品
にデジタルカメラを装填した状態で衝撃を与えたり、重いものを乗せたりすると
デジタルカメラが故障する場合があります。取扱いには十分ご注意ください。
●長期間使用しないとOリングの劣化等により防水性能が低下している場合
が有ります。使用前には事前テストと最終チェックを必ず行ってください。
●ポート取付け部、TTLケーブルコネクタ部、三脚座等には過大な力をかけな
いでください。
●プロテクタを使用した撮影ではフラッシュ光がけられ、画面隅に影が出る
ことが有ります。特にカメラのワイド側でのマクロモード撮影時には目立
つ場合が有ります。画像を確認のうえ、ご使用ください。
●洗浄・防錆・防曇・補修等の目的で、下記の薬品類を使わないでください。プロ
テクタに直接、あるいは、間接的(薬剤が気化した状態)に使用した場合、
高圧下でのひび割れなどの原因となります。
使用できない薬品類
揮発性の有機溶剤、
化学洗剤
説明
プロテクタをアルコール・ガソリン・シンナーなどの揮発性
有機溶剤、または化学洗剤等で洗浄しないでください。
洗浄は真水、または、ぬるま湯で十分です。
防錆剤
防錆剤を使用しないでください。金属部分はステンレス
及び真鍮を使用しており、真水による洗浄で十分です。
市販防曇剤
市販の防曇剤を使用しないでください。必ず指定の防
曇剤シリカゲルを使用してください。
シリコンOリングに指定品以外のシリコングリスを使用
指定外のシリコングリス しないでください。Oリングの表面が変質して、水漏
れの原因となります。
補修などの目的で接着剤を使用しないでください。補修
接着剤
が必要な場合は販売店または弊社サービスステーショ
ンにご相談ください。
5
PT_027J最終.qxd 05.2.14 10:53 AM ページ 6 (1,1)
● この取扱説明書で指示している以外の操作を行い、また、指示している以
外の場所を取外したり、改造を加えたり、指定以外の部品を使用する事は
しないでください。
上記の行為の結果、撮影に不都合が生じたり機材に不具合が発生した場合
は保証の対象外となります。
● デジタルカメラの水没事故は、当社では一切その責任を負いかねます。
● 使用時の事故(人身・物損)の補償はいたしかねます。
● バランスウェイトの被覆が破れると中の金属が腐食することがあります。
被覆を傷つけないようご注意ください。
● バランスウェイトは使用後真水で洗い、水分を十分に拭き取ってください。
6
PT_027J最終.qxd 05.2.14 10:53 AM ページ 7 (1,1)
目次
はじめに ・・・・・・・・・・・・・・・・・・・・・・・・・・・・・・・・・・・・・・・・・・・・・・・・・・・・・・・・・・・・・・・・・・・・・・・・・・・・・・・・・・・・・・・・・ 1
ご使用前に必ずお読みください ・・・・・・・・・・・・・・・・・・・・・・・・・・・・・・・・・・・・・・・・・・・・・・・・・・・・・ 1
安全にお使いいただくために ・・・・・・・・・・・・・・・・・・・・・・・・・・・・・・・・・・・・・・・・・・・・・・・・・・・・・・・・・ 1
電池について ・・・・・・・・・・・・・・・・・・・・・・・・・・・・・・・・・・・・・・・・・・・・・・・・・・・・・・・・・・・・・・・・・・・・・・・・・・・・・・・・・・ 3
カメラのモード設定について ・・・・・・・・・・・・・・・・・・・・・・・・・・・・・・・・・・・・・・・・・・・・・・・・・・・・・・・・・ 3
水漏れ事故を防ぐために ・・・・・・・・・・・・・・・・・・・・・・・・・・・・・・・・・・・・・・・・・・・・・・・・・・・・・・・・・・・・・・・・ 4
お取扱について ・・・・・・・・・・・・・・・・・・・・・・・・・・・・・・・・・・・・・・・・・・・・・・・・・・・・・・・・・・・・・・・・・・・・・・・・・・・・・・ 5
目次・・・・・・・・・・・・・・・・・・・・・・・・・・・・・・・・・・・・・・・・・・・・・・・・・・・・・・・・・・・・・・・・・・・・・・・・・・・・・・・・・・・・・・・・・・・・・・・・・ 7-8
1. 準備をしましょう ・・・・・・・・・・・・・・・・・・・・・・・・・・・・・・・・・・・・・・・・・・・・・・・・・・・・・・・・・・・・・・・・・・・・・・・・・・・・ 9
箱の中を確認します ・・・・・・・・・・・・・・・・・・・・・・・・・・・・・・・・・・・・・・・・・・・・・・・・・・・・・・・・・・・・・・・・・・・・・・・ 9
各部名称 ・・・・・・・・・・・・・・・・・・・・・・・・・・・・・・・・・・・・・・・・・・・・・・・・・・・・・・・・・・・・・・・・・・・・・・・・・・・・・・・・・・・・・・・・・10
ストラップを取付けます ・・・・・・・・・・・・・・・・・・・・・・・・・・・・・・・・・・・・・・・・・・・・・・・・・・・・・・・・・・・・・・・・11
基本操作をマスターします ・・・・・・・・・・・・・・・・・・・・・・・・・・・・・・・・・・・・・・・・・・・・・・・・・・・・・・・・・・・・11
プロテクタの構え方・・・・・・・・・・・・・・・・・・・・・・・・・・・・・・・・・・・・・・・・・・・・・・・・・・・・・・・・・・・・・・・・・・・・・・11
シャッターレバーの押し方 ・・・・・・・・・・・・・・・・・・・・・・・・・・・・・・・・・・・・・・・・・・・・・・・・・・・・・・・・・・・・12
モードダイヤルの使い方・・・・・・・・・・・・・・・・・・・・・・・・・・・・・・・・・・・・・・・・・・・・・・・・・・・・・・・・・・・・・・・・・12
ズームレバーの使い方・・・・・・・・・・・・・・・・・・・・・・・・・・・・・・・・・・・・・・・・・・・・・・・・・・・・・・・・・・・・・・・・・12
ズームレバーのセット・・・・・・・・・・・・・・・・・・・・・・・・・・・・・・・・・・・・・・・・・・・・・・・・・・・・・・・・・・・・・・・・・13
パワースイッチレバーの操作方法・・・・・・・・・・・・・・・・・・・・・・・・・・・・・・・・・・・・・・・・・・・・・・・13
標準ポートの着脱方法・・・・・・・・・・・・・・・・・・・・・・・・・・・・・・・・・・・・・・・・・・・・・・・・・・・・・・・・・・・・・・・・・14
TTLケーブルコネクタキャップの取外し方 ・・・・・・・・・・・・・・・・・・・・・・・・・・・・・・・・・15
ホットシューケーブルキャップの取外し方 ・・・・・・・・・・・・・・・・・・・・・・・・・・・・・・・・・16
TTLコネクタ部の清掃について ・・・・・・・・・・・・・・・・・・・・・・・・・・・・・・・・・・・・・・・・・・・・・・・・・・・16
2.プロテクタの事前チェックをしましょう ・・・・・・・・・・・・・・・・・・・・・・・・・・・・・・・・・・・・・・・・・・・・17
使用前の事前テスト・・・・・・・・・・・・・・・・・・・・・・・・・・・・・・・・・・・・・・・・・・・・・・・・・・・・・・・・・・・・・・・・・・・・・・・ 17
プロテクタの防水部チェック ・・・・・・・・・・・・・・・・・・・・・・・・・・・・・・・・・・・・・・・・・・・・・・・・・・・・・ 17
事前テスト ・・・・・・・・・・・・・・・・・・・・・・・・・・・・・・・・・・・・・・・・・・・・・・・・・・・・・・・・・・・・・・・・・・・・・・・・・・・・・・・・・・ 17
3.デジタルカメラを装填しましょう ・・・・・・・・・・・・・・・・・・・・・・・・・・・・・・・・・・・・・・・・・・・・・・・・・・18
デジタルカメラをチェックします・・・・・・・・・・・・・・・・・・・・・・・・・・・・・・・・・・・・・・・・・・・・・・・・・・・・・・・ 18
電池の確認 ・・・・・・・・・・・・・・・・・・・・・・・・・・・・・・・・・・・・・・・・・・・・・・・・・・・・・・・・・・・・・・・・・・・・・・・・・・・・・・・・・・ 18
撮影可能枚数の確認 ・・・・・・・・・・・・・・・・・・・・・・・・・・・・・・・・・・・・・・・・・・・・・・・・・・・・・・・・・・・・・・・・・・・ 18
デジタルカメラのストラップやレンズキャップを外しましょう・・・・・・・・・・ 18
デジタルカメラのフィルタを取外します・・・・・・・・・・・・・・・・・・・・・・・・・・・・・・・・・・・・・・・・ 18
カメラを準備します・・・・・・・・・・・・・・・・・・・・・・・・・・・・・・・・・・・・・・・・・・・・・・・・・・・・・・・・・・・・・・・・・・・・・・・ 19
装填できるデジタルカメラは? ・・・・・・・・・・・・・・・・・・・・・・・・・・・・・・・・・・・・・・・・・・・・・・・・・・・・ 19
カメラの動作チェックをします ・・・・・・・・・・・・・・・・・・・・・・・・・・・・・・・・・・・・・・・・・・・・・・・・・・・・ 19
プロテクタを開けます ・・・・・・・・・・・・・・・・・・・・・・・・・・・・・・・・・・・・・・・・・・・・・・・・・・・・・・・・・・・・・・・・・・・ 19
デジタルカメラを装填します・・・・・・・・・・・・・・・・・・・・・・・・・・・・・・・・・・・・・・・・・・・・・・・・・・・・・・・・・・・ 19
シリカゲルを装填します ・・・・・・・・・・・・・・・・・・・・・・・・・・・・・・・・・・・・・・・・・・・・・・・・・・・・・・・・・・・・・・ 20
プロテクタのモードダイヤルを引き上げます ・・・・・・・・・・・・・・・・・・・・・・・・・・・・・・・・20
モードダイヤルをセットします・・・・・・・・・・・・・・・・・・・・・・・・・・・・・・・・・・・・・・・・・・・・・・・・・・・・・20
7
PT_027J最終.qxd 05.2.14 10:53 AM ページ 8 (1,1)
装填状態のチェックをします ・・・・・・・・・・・・・・・・・・・・・・・・・・・・・・・・・・・・・・・・・・・・・・・・・・・・・・・・・・・・21
プロテクタを密閉します・・・・・・・・・・・・・・・・・・・・・・・・・・・・・・・・・・・・・・・・・・・・・・・・・・・・・・・・・・・・・・・・・21
専用のバランスウェイトを取付けます ・・・・・・・・・・・・・・・・・・・・・・・・・・・・・・・・・・・・・・・・・・・21
装填後の動作チェック ・・・・・・・・・・・・・・・・・・・・・・・・・・・・・・・・・・・・・・・・・・・・・・・・・・・・・・・・・・・・・・・・・・・・22
液晶フードの取付け方、取外し方 ・・・・・・・・・・・・・・・・・・・・・・・・・・・・・・・・・・・・・・・・・・・・・・・・・・23
取付け方・・・・・・・・・・・・・・・・・・・・・・・・・・・・・・・・・・・・・・・・・・・・・・・・・・・・・・・・・・・・・・・・・・・・・・・・・・・・・・・・・・・・・・・23
取外し方・・・・・・・・・・・・・・・・・・・・・・・・・・・・・・・・・・・・・・・・・・・・・・・・・・・・・・・・・・・・・・・・・・・・・・・・・・・・・・・・・・・・・・・23
レンズキャップの取付け方、取外し方 ・・・・・・・・・・・・・・・・・・・・・・・・・・・・・・・・・・・・・・・・・・・23
最終チェックをします・・・・・・・・・・・・・・・・・・・・・・・・・・・・・・・・・・・・・・・・・・・・・・・・・・・・・・・・・・・・・・・・・・・・・・23
目視検査 ・・・・・・・・・・・・・・・・・・・・・・・・・・・・・・・・・・・・・・・・・・・・・・・・・・・・・・・・・・・・・・・・・・・・・・・・・・・・・・・・・・・・・・23
最終テスト・・・・・・・・・・・・・・・・・・・・・・・・・・・・・・・・・・・・・・・・・・・・・・・・・・・・・・・・・・・・・・・・・・・・・・・・・・・・・・・・・・・・・・・24
4.水中での撮影方法 ・・・・・・・・・・・・・・・・・・・・・・・・・・・・・・・・・・・・・・・・・・・・・・・・・・・・・・・・・・・・・・・・・・・・・・・・・・・25
ストラップの使い方・・・・・・・・・・・・・・・・・・・・・・・・・・・・・・・・・・・・・・・・・・・・・・・・・・・・・・・・・・・・・・・・・・・・・・・・・・25
注意して撮影しましょう ・・・・・・・・・・・・・・・・・・・・・・・・・・・・・・・・・・・・・・・・・・・・・・・・・・・・・・・・・・・・・・・・・・・25
液晶モニタで撮影画面を確認します ・・・・・・・・・・・・・・・・・・・・・・・・・・・・・・・・・・・・・・・・・・・・・・25
シャッターレバーを静かに押します・・・・・・・・・・・・・・・・・・・・・・・・・・・・・・・・・・・・・・・・・・・・・・・・・25
フラッシュ撮影時のご注意 ・・・・・・・・・・・・・・・・・・・・・・・・・・・・・・・・・・・・・・・・・・・・・・・・・・・・・・・・・・・25
5. 水中撮影シーンに合わせた撮影・・・・・・・・・・・・・・・・・・・・・・・・・・・・・・・・・・・・・・・・・・・・・・・・・・・・・・26
水中撮影シーンの種類 ・・・・・・・・・・・・・・・・・・・・・・・・・・・・・・・・・・・・・・・・・・・・・・・・・・・・・・・・・・・・・・・・・・・ 26
水中ワイド ・・・・・・・・・・・・・・・・・・・・・・・・・・・・・・・・・・・・・・・・・・・・・・・・・・・・・・・・・・・・・・・・・・・・・・・・・・・・・・・・・・・・26
水中マクロ ・・・・・・・・・・・・・・・・・・・・・・・・・・・・・・・・・・・・・・・・・・・・・・・・・・・・・・・・・・・・・・・・・・・・・・・・・・・・・・・・・・・・26
撮影シーンの選択方法 ・・・・・・・・・・・・・・・・・・・・・・・・・・・・・・・・・・・・・・・・・・・・・・・・・・・・・・・・・・・・・・・・・・・・・・・26
6. 撮影終了後の取扱い方法 ・・・・・・・・・・・・・・・・・・・・・・・・・・・・・・・・・・・・・・・・・・・・・・・・・・・・・・・・・・・・・・・・27
水滴を拭取りましょう ・・・・・・・・・・・・・・・・・・・・・・・・・・・・・・・・・・・・・・・・・・・・・・・・・・・・・・・・・・・・・・・・・・・・・・・ 27
デジタルカメラを取り出します・・・・・・・・・・・・・・・・・・・・・・・・・・・・・・・・・・・・・・・・・・・・・・・・・・・・・・・・・・・28
プロテクタを真水で洗います ・・・・・・・・・・・・・・・・・・・・・・・・・・・・・・・・・・・・・・・・・・・・・・・・・・・・・・・・・・・・29
プロテクタを乾燥させましょう ・・・・・・・・・・・・・・・・・・・・・・・・・・・・・・・・・・・・・・・・・・・・・・・・・・・・・・・・・・29
7. 防水機能のメンテナンスをしましょう ・・・・・・・・・・・・・・・・・・・・・・・・・・・・・・・・・・・・・・・・・・・・・30
Oリングを取外します ・・・・・・・・・・・・・・・・・・・・・・・・・・・・・・・・・・・・・・・・・・・・・・・・・・・・・・・・・・・・・・・・・・・・30
砂・ゴミなどを取除きましょう ・・・・・・・・・・・・・・・・・・・・・・・・・・・・・・・・・・・・・・・・・・・・・・・・・・・・・・・30
Oリングを取付けます・・・・・・・・・・・・・・・・・・・・・・・・・・・・・・・・・・・・・・・・・・・・・・・・・・・・・・・・・・・・・・・・・・・・31
Oリングへのグリス塗布方法 ・・・・・・・・・・・・・・・・・・・・・・・・・・・・・・・・・・・・・・・・・・・・・・・・・・・・・・・・・・31
消耗品は取替えましょう ・・・・・・・・・・・・・・・・・・・・・・・・・・・・・・・・・・・・・・・・・・・・・・・・・・・・・・・・・・・・・・・・・・31
TTLコネクタとTTLケーブルの固定ネジ部メンテナンス ・・・・・・・・・・・・・・・・32
TTLコネクタキャップのメンテナンス・・・・・・・・・・・・・・・・・・・・・・・・・・・・・・・・・・・・・・・・・・・・32
8. 付録 ・・・・・・・・・・・・・・・・・・・・・・・・・・・・・・・・・・・・・・・・・・・・・・・・・・・・・・・・・・・・・・・・・・・・・・・・・・・・・・・・・・・・・・・・・・・・・・・・33
PT-027ご使用上のQ&A・・・・・・・・・・・・・・・・・・・・・・・・・・・・・・・・・・・・・・・・・・・・・・・・・・・・・・・・・・・・・・・・・33
アフターサービスについて・・・・・・・・・・・・・・・・・・・・・・・・・・・・・・・・・・・・・・・・・・・・・・・・・・・・・・・・・・・・・・・38
仕様 ・・・・・・・・・・・・・・・・・・・・・・・・・・・・・・・・・・・・・・・・・・・・・・・・・・・・・・・・・・・・・・・・・・・・・・・・・・・・・・・・・・・・・・・・・・・・・・・・39
ダイバーズ保険のご案内・・・・・・・・・・・・・・・・・・・・・・・・・・・・・・・・・・・・・・・・・・・・・・・・・・・・・・・・・・・・・・・・・・39
8
PT_027J最終.qxd 05.2.14 10:53 AM ページ 9 (1,1)
1. 準備をしましょう
箱の中を確認します
箱の中の付属品はすべてそろっていますか。
万一、付属品が不足していたり、破損している場合はお買上げ販売店までご連絡
ください。
液晶フード
シリコングリス
(本体についています)
シリカゲル
TTLケーブルコネクト部
防水キャップ
液晶フード
ストラップ
レンズキャップ
防水キャップ
メンテナンス用アダプタ
ハンドストラップ
バックル
オープナー
標準ポート
(本体に装着されています)
バランスウェイト
プロテクタ本体
(Oリングが正常である事を確認してください。)
取扱説明書(本書)
取扱説明書
デジタルカメラ
CAMEDIA C-5060 Wide Zoom/C-7070 Wide Zoom用
防水プロテクタ
PT-027
Oリング取外しピック
保証書
ダイバーズ保険のご案内
保証書
WARRANTY
(販売店控え)
本保証書は、本記載内容で無料修理を行うことをお約束するものです。
お買い上げの日から下記期間中、万一故障が発生した場合は、本契約書を添付ご持参の上
お買い上げ販売店、または当社サービスステーションにご依頼ください。
期 間
お買上げ
本体1年間
年 月 日
本保証書は日本において有効です。
This is a limited warranty for
1 year from your date of
purchase. Useful only in
Japan.
住所 Address
お客様
氏名 Name 性別(男・女)、年齢( 才)
Customer
様
TEL ( )
〔必ず店名印を押してください。〕
販売店
Dealer's
name and
address
JAPAN
品名
型名
防水・防塵
プロテクタ Model
Serial NO.
■このたびは、防水プロテクタPT-027をお買上げいただき、ありがとうご
ざいます。
■この説明書をよくお読みのうえ、安全に正しくお使いください。また、
この説明書はお読みになった後、必ず保管してください。
■誤った使い方をされると水漏れにより中のカメラが破損し、修理不能
になる場合があります。
■ご使用前には、
この説明書に従い、必ず事前チェックを実施してください。
保証責任者
保証履行者
〒192-0032 東京都八王子市石川町2951
お問い合せ先/サービスステーション
03(3292)1931 インフォメーションディスク
CD-ROM
9
PT_027J最終.qxd 05.2.14 10:53 AM ページ 10 (1,1)
各部名称
パームグリップ
標準ポート(PPO-01)
ポート固定用バックル
TTLケーブルコネクト部
Oリング(POL-020A)
Oリング(POL-020B)
Oリング(POL-020C)
拡散版及び拡散版カバー
ハンドストラップつり輪
ハンドストラップ
三脚座
レンズリング
レンズ窓
※ シャッターレバー
※ ズームレバー
※ モードダイヤルノブ
※ パワースイッチレバー ※ カード切換ボタン
後蓋
アクセサリ取付け部
液晶フードストラップ
※ カスタムボタン
※ セルフタイマーボタン
シリコンOリング用グリス(白キャップ)
※ 測光ボタン
シリカゲル
※ AF/マクロ/MFボタン
バランスウェイト
※ 露出補正ボタン
Oリング取外し用ピック
※ フラッシュモードボタン
バックルオープナー
レンズキャップ
前蓋
液晶インナーフード
レンズキャップストラップ
装填ガイドレール
バックル開閉レバー
液晶フード
バックルフック
※ AEL/消去ボタン
※ クイックビューボタン
※ 液晶モニタボタン
※ コントロールダイヤルノブ
※ OK/メニューボタン
標準ポートOリング(POL-101)
※ 十字ボタン
防水キャップメンテナンス用アダプタ
Note:※印のプロテクタ操作部はデジタルカメラの各操作部に対応しています。
プロテクタ操作部を操作することによってデジタルカメラの対応する機
能が動作します。詳しい機能の内容についてはデジタルカメラの取扱説
明書をご覧ください。
10
PT_027J最終.qxd 05.2.14 10:53 AM ページ 11 (1,1)
ストラップを取付けます
プロテクタ本体にストラップを取付けましょう。
取付け説明図
取付け完了図
ハンドストラップ
ハンドストラップつり輪
注意:上図にしたがってストラップを正しく取り付けてください。万一、誤
った取付けによりストラップが外れて本体を落とすなどした場合、損
害など一切の責任は負いかねますのでご了承ください。
基本操作をマスターします
撮影する前に、プロテクタの基本操作をマスターしましょう。
プロテクタの構え方
両手でしっかり持ち、脇をしめプロテクタの液晶モニタ窓を通してデジタルカメ
ラの液晶モニタで撮影画面を確認できるように構えます。
良い例
悪い例
注意:・レンズ窓やレンズリングに無理な力を加えないでください。
・レンズ窓、フラッシュ拡散板に指などがかからないようにご注意ください。
Note: ・撮影画面の確認は液晶モニタで行います。ファインダを通しての画
面確認はできません。
11
PT_027J最終.qxd 05.2.14 10:53 AM ページ 12 (1,1)
シャッターレバーの押し方
シャッターレバーを押すときはカメラブ
レが起きないように注意しながら静か
にレバーを操作します。
Note: ・シャッターの詳しい操作法はデジタルカメラの取扱説明書をご覧ください。
モードダイヤルの使い方
モード
ダイヤルノブ
本プロテクタには、装填されるデジタ
ルカメラのモードダイヤルに対応し
て、同感覚で操作できるモードダ
イヤルを装備しています。プロ
テクタにデジタルカメラを装填
後、撮影する前に必ずモードダ
イヤルが操作できることを確認
してください。
一口
・モードダイヤルノブはデジタルカメラのモードダイヤルに確実にセットさ
アドバイス れたことを確認してください。プロテクタのモードダイヤルノブを操
作しても、デジタルカメラのモードが変更されない場合はダイヤル
を軽く押しつける様にして回してください。
ズームレバーの使い方
装填されるデジタルカメラのズームレバ
ーに対応して、本プロテクタのズームレ
バーを操作する事によりズーム操作が
可能です。
12
PT_027J最終.qxd 05.2.14 10:53 AM ページ 13 (1,1)
ズームレバーのセット
デジタルカメラを装填する際、デジタルカメラのズームレバー突出
部を、プロテクタ内部のズームレバー切り欠き部に入り込むように
装填します。
一口
・デジタルカメラのズームレバー突出部をプロテクタ内面のズームレバー
アドバイス 切り欠き部に確実にセットされたことを確認してください。セットが不
充分な場合、デジタルカメラの装填が不完全となり、プロテクタ後蓋を
閉める事が出来なかったり、ズームレバーを操作しても、ズームが機能
しないことがありますので、充分ご注意ください。
パワースイッチレバーの操作方法
パワースイッチレバーを操作して、カメラの
電源をON/OFFします。
パワースイッチ
レバー
注意:撮影モードでデジタルカメラを装填後、何も操作しないまま約3分
経過すると、カメラはスリープモード(待機状態)になり、動作が停止
します。
スリープモードを解除する(動作状態にする)には、シャッターボタン
等のいずれかのボタンを押します。
詳しくは、デジタルカメラの取扱説明書を参照してください。
13
PT_027J最終.qxd 05.2.14 10:53 AM ページ 14 (1,1)
標準ポートの着脱方法
本プロテクタは、別売のPT-020/PT-027用ワイドポートPPO-02をご使用の際、
PT-020またはPT-027本体に装着されている標準ポートを取外します。
ここでは標準ポートの着脱方法についてご説明します。
取 外 し
1 プロテクタについた水滴を十分拭き取ってか
ら標準ポート左右にある2ヶ所のバックルを
開方向(右図の矢印方向に下から上)にゆっ
くり回転させます。
バックル
2
バックルを下から上に約110度回転させると、
PT-027本体から標準ポートが離れ始めます。
3
そのまま静かにバックルを回転させ、標準ポー
トを完全に本体から分離させます。
取 付 け
1
標準ポートの左右のバックルのカム溝とPT027本体側のボスの位置を合わせます。
2
3
バックルのカム溝
ボス
左右のバックルに本体側のボスをはめ、静か
にバックルを上から下へ回転させながら、標
準ポートを本体に装着します。
左右のバックルが回転しなくなるまで、上から
下に回転させてバックルを固定し、確実に標準
ポートを装着します。
注意:プロテクタにポートが正しく装着されていないと、水漏れの原因となる場合がありま
す。ポート左右のバックルが確実に固定されていることを確認してください。バック
ルに表記されている「OPEN」・「LOCK」の表示も確認しながら着脱してください。
※ 別売のPT-020/PT-027用ワイドポートPPO-02の詳しい取扱方法は、PPO-02付属
の取扱説明書をご参照ください。
14
PT_027J最終.qxd 05.2.14 10:53 AM ページ 15 (1,1)
TTLケーブルコネクタキャップの取外し方
TTLケーブル
コネクタキャップ
・本プロテクタ「PT-027」と、別売のFL-20
フラッシュ用プロテクタ「PFL-01」を組み
合わせてTTLフラッシュ撮影を行う場合、
下記手順に従ってTTLケーブルのコネクタ
キャップを取り外します。
② 取外します。
1プロテクタ本体のTTLケーブルコネクタ
キャップを取外します。
1
① 反時計回りに回転させます。
2 PFL-01付属の水中TTLケーブルのコネ
クタをプロテクタ本体に接続します。
2
水中TTLケーブル
③ コネクタを
差し込みます。
④ コネクタのネジを時計回りに軽く止まる
まで回します。
∼ TTLケーブルコネクタキャップをプロテクタ本体に取付ける場合 ∼
キャップ内側及びTTLケーブルコネクタ部のOリングに異物が付着していない事を確認
し、キャップを時計回りに軽く止まるまで回転して、装着します。
② キャップを時計回りに
止まるまで軽く回します。
キャップ
Oリングの確認
①
コネクタ部
キャップを
装着します。
注意:TTLケーブルコネクタキャップが緩んでいると、水漏れの原因となる場
合があります。キャップは時計回りに止まるまで軽く回し締めてください。
TTLケーブル固定用のネジは、軽く止まるまで時計回りに回してくだ
さい。無理に締めると外れなくなる場合があります。
※ TTLケーブル及びホットシューケーブルの詳しい取扱方法は、別売のPFL-01付属
の取扱説明書をご参照ください。
15
PT_027J最終.qxd 05.2.14 10:53 AM ページ 16 (1,1)
ホットシューケーブルキャップの取外し方
本プロテクタでTTLフラッシュ撮影を行う場合、別売のPFL-01付属のホット
シューケーブルを、プロテクタ本体コネクタとカメラのホットシュー部に接続し
ます。
1
2
プロテクタ内側のホットシューケーブルコ
ネクタ部のキャップを反時計回りに回転し
取外します。
ホットシューケーブルのコネクタ側をプロテ
クタのコネクタに差込み、コネクタネジを時
計回りに止まるまで回し、固定します。
3
ホットシューケーブルのホットシューをカメラ
のホットシューへ差し込みます。
4 ホットシューケーブルを使用しない場合は、
ホットシューケーブルキャップをプロテクタ
内側のコネクタ部に取付け、時計回りに止ま
るまで回転させて固定します。
注意:ホットシューケーブルのコネクタ側をプロテクタのコネクタに差し込む
場合は、必ずプロテクタからカメラを取り出してから行ってください。
TTLコネクタ部の清掃について
TTLコネクタとTTLケーブルの固定ネジ部の固着を防止するため本製品では当
該ネジ部に本製品付属のシリコンOリンググリスを塗布します。
詳しくは本書32頁のメンテナンス方法をご参照ください。
注意:万が一、TTLケーブルの固定ネジ部が外れない場合は、無理に外そう
とせず当社サービスセンターへご相談ください。
16
PT_027J最終.qxd 05.2.14 10:53 AM ページ 17 (1,1)
2. プロテクタの事前チェックをしましょう
使用前の事前テスト
本プロテクタは、製造工程での部品の品質管理及び組立工程での各機能検査などを
厳重に実施しています。さらに全ての製品は高水圧試験機により水圧試験を実施し、
仕様通りの性能が守られているか検査を行い合格したものです。
しかしながら、持ち運びや、保管の状態、メンテナンスの状況等何らかの原因で防水機
能にダメージを受ける場合が有ります。
潜水前には必ず次の事前テストと、カメラ装填後に行う水漏れテストを実施してください。
プロテクタの防水部チェック
本プロテクタの防水部をそれぞれ確認します。
1.プロテクタの前蓋部と後蓋部間のOリングが確実に装着され、バックル
によって閉じられていること。
2.プロテクタ本体と標準ポート部間のOリングが確実に装着され、バック
ルによって確実に標準ポートが装着されていること。
3.TTLケーブルコネクタキャップのOリングが確実に装着され、キャッ
プが緩みなくコネクタへねじ込まれていること。
事前テスト
1.デジタルカメラをプロテクタに装填する前に空のプロテクタを、ご使用
になる水深に沈めて水漏れの有無を確認してください。
2.水漏れ事故は、主に以下の事が原因で起こります。
・Oリングの取付け忘れ
・Oリングの一部または全部が所定の溝から外れていた
・Oリングの傷やヒビ、または変質・変形
・OリングやOリング溝、各Oリング接触面への砂・繊維くず、髪の毛な
ど異物の付着
・各Oリング接触面やOリング溝内の傷
・プロテクタを閉じる際の付属ストラップやシリカゲルの挟み込みテストは
上記の原因を取除いて行うようにしてください。
注意:・水漏れの確認はご使用になる水深に沈めて確認する事がいちばん適切で
す。これが難しい場合は水圧のかからないごく浅いところでも水漏れが確
認できる場合があります。面倒がらずに必ず実施してください。
・万一、事前テスト中に正常な取扱いで水漏れが確認された場合はご使用を
中止し、商品お買上げの販売店またはオリンパスサービスステーション(本取
扱説明書裏面に記載)にご相談ください。
17
PT_027J最終.qxd 05.2.14 10:53 AM ページ 18 (1,1)
3. デジタルカメラを装填しましょう
デジタルカメラをチェックします
プロテクタに装填する前にデジタルカメラをチェックします。
電池の確認
水中撮影は液晶モニタを通して撮影画面の確認をしますので電池の寿命が短
くなります。
電池残量が十分有ることを確認してください。
Note: ・電池消耗による撮影不能を避けるため電池はできるだけダイビング
毎にフル充電状態の電池に交換してください。
撮影可能枚数の確認
記録メディアの撮影可能枚数が十分にあることを確認してください。
デジタルカメラのストラップやレンズキャップを外しましょう
デジタルカメラにストラップやレンズキャップが取付けられている場合は、
必ず取外してください。
注意:・ストラップやレンズキャップを外さずにデジタルカメラを装填した
場合プロテクタが正しく閉まらずに、水漏れの原因となる場合が
あります。
・ストラップやレンズキャップを取外すときはデジタルカメラの取扱
いには十分ご注意ください。万一、カメラを落とす等で破損した
場合、当社では損害など一切の責任は負いかねます。
デジタルカメラのフィルタを取外します
デジタルカメラのレンズにフィルタが付いている場合は、フィルタを取外し
てから、プロテクタにカメラを装填します。
注意:・デジタルカメラのレンズにフィルタを取付けたまま、プロテクタに装
填することは出来ません。必ずフィルタを取外してください。
18
PT_027J最終.qxd 05.2.14 10:53 AM ページ 19 (1,1)
カメラを準備します
装填できるデジタルカメラは?
本製品(PT-027)はCAMEDIA C-7070 Wide Zoom/C-5060 Wide Zoom専用です。
カメラの動作チェックをします
デジタルカメラの取扱説明書にしたがって、動作の確認をしてください。
プロテクタを開けます
付属のバックルオープナーを左図のようにバックル開閉レバーの下に差込みます。
(①
の方向)。そのままゆっくりとバックルオープナーをひいてください
(②の方向)。
バックルオープナーを使わない時は右図のように親指と人差し指でバックル開
閉レバーを横から押え、ゆっくり引き上げてください。
デジタルカメラを装填します
デジタルカメラの電源がOFFである
ことを確認し、プロテクタのズー
ムレバー切り欠き部に、デジタル
カメラのズームレバー突出部が正
しくはまるように注意しながら、
デジタルカメラをプロテクタに静
かに充填します。
注意:・デジタルカメラのズームレバー突出部が、プロテクタ内部のズー
ムレバー切り欠き部に確実にセットされている事を確認してくだ
さい。セットが不十分な場合、デジタルカメラの装填が不完全と
なり、プロテクタ後部蓋を閉める事ができなかったり、ズームレ
バーを操作しても、ズームが機能しない事がありますので十分ご
注意ください。密閉が不十分だと水漏れの原因となります。
19
PT_027J最終.qxd 05.2.14 10:53 AM ページ 20 (1,1)
シリカゲルを装填します
プロテクタを密閉する前に必ず
付属の防曇剤シリカゲル一袋
を、カメラ底面とプロテクタの
間に入れてください。袋は長辺
の接着している側が奥に入る
ように装填してください。
向きに注意
注意:・シリカゲルは指定の場所に指定された向きで必ず奥まで挿入してく
ださい。向きを間違えると、プロテクタ密閉時にシリカゲルの袋
を挟み込み水漏れの原因となります。
・途中まで入れたままでプロテクタを閉めるとシリカゲルの袋をO
リングが挟み込み水漏れの原因となります。
・一度使用したシリカゲルは吸湿性能が衰えています。シリカゲル
はプロテクタ開閉時に毎回交換することをおすすめします。
プロテクタのモードダイヤルを引き上げます
プロテクタの後蓋側にあるモードダイヤルを、プロテ
クタ上面より止まるところまで引き上げながら、静か
に後蓋を閉じます。この際、デジタルカメラのモード
ダイヤルとプロテクタ後蓋側にあるモードダイヤル下
端部が干渉しないように注意して後蓋を閉じます。
モードダイヤルをセットします
プロテクタの後蓋を閉じた後、デジタルカメラのモー
ドダイヤル上部にプロテクタ後蓋側にあるプロテクタ
のモードダイヤル下部が正しくかぶさるように注意し
ながら、プロテクタのモードダイヤルをプロテクタ上
面から押し下げ、セットします。
この時、プロテクタのパワースイッチレバーを操作し
て、カメラのパワースイッチレバーを正しく操作出来
ることを同時に確認してください。
一口
・ プロテクタのモードダイヤルセット後、プロテクタの密閉前にモードダ
アドバイス イヤルを操作し、デジタルカメラのモードダイヤルが切り替わる事をご
確認ください。
20
PT_027J最終.qxd 05.2.14 10:53 AM ページ 21 (1,1)
装填状態のチェックをします
プロテクタを密閉する前に、以下の通り各部の最終チェックをします。
・ズームレバーが正しく機能するようにデジタルカメラが装填されているか。
・シリカゲルは指定された位置に奥まで挿入されているか。
・各Oリングと接触面にゴミなどの異物が付着していないか。
・前蓋側と後蓋側のOリングは正常に装着されてるか。
・レンズポートが正しく装着され、バックルは正しくロックされているか。
・TTLコネクタキャップに緩みがなく、正しく装着されているか。
プロテクタを密閉します
後部蓋を閉じ(Oリングが溝から
はずれないように静かに閉めてく
ださい。)、バックルを後部蓋の端
に引っかけてバックル開閉レバーを
矢印方向に倒すとプロテクタは密閉
状態になります。
注意:・バックル開閉レバーは必ず2ケ所とも矢印の方向に倒し、プロテク
タを密閉状態にしてください。
どちらか片側のバックルが開いている場合、プロテクタは密閉状態
とならず、水漏れの原因となります。
専用バランスウェイトを取付けます
プロテクタ底部の三脚座に、
専用のバランスウェイトを
取り付けます。専用バラン
スウェイトに付属のネジで
しっかりと付けてください。
21
PT_027J最終.qxd 05.2.14 10:53 AM ページ 22 (1,1)
装填後の動作チェック
プロテクタ密閉後、カメラが正しく機能するか最終チェックをします。
・プロテクタのパワースイッチレバーを操作し、カメラの電源がON/OFFで
きるか。
・プロテクタのモードダイヤルノブを操作し、カメラのモードが正しく切り変
わるか。
・プロテクタのシャッターレバーを操作し、カメラのシャッターを操作できるか。
・その他、プロテクタの各種操作ボタンを操作して、カメラが機能するか。
注意: ・カメラが正しく機能しない場合は、本取扱説明書P.18「デジタ
ルカメラをチェックします」からカメラの装填をやり直してく
ださい。
・カメラをプロテクタに装填後、モードダイヤルが動くことを確
認してください。動かない時はモードダイヤルに油脂等が付着
している可能性があります。きれいに拭き取ってください。
・電源を入れたまま約3分間何も操作しないと、電池の消耗を防ぐ
ためにスリープモード(待機状態)になり、カメラは動作を停
止します。ズームレバーやシャッターボタンなどを操作すると
カメラはすぐに動作を再開します。詳しくはデジタルカメラの
取扱説明書をご確認ください。
22
PT_027J最終.qxd 05.2.14 10:53 AM ページ 23 (1,1)
液晶フードの取付け方、取外し方
取付け方 図のように液晶フードの取付け用の凸部を液晶モニタ窓上下のガイドに
強く押込みます。
取外し方 液晶フードを外に拡げるようにして、液晶モニタ窓上下のガイド
から取付用の凸部をはずします。
ガイド
取り付け
取り外し
レンズキャップの取付け方、取外し方
図のようにレンズリングにレンズキ
ャップをはめ込んで取付けます。撮
影前にレンズキャップを取外してく
ださい。
最終チェックをします
目視検査
プロテクタを密閉後、プロテクタの前蓋、後蓋の密閉部分及びプロテクタ本体と
ポートの装着部分の周囲を外側から見て、Oリングのよじれやはずれ、異物の挟
み込みが無いことを確認してください。
注意:・髪の毛や繊維くず等細かいものは目立ちませんが水没事故の原因
になります。特にご注意ください。
23
PT_027J最終.qxd 05.2.14 10:53 AM ページ 24 (1,1)
最終テスト
ここではカメラ装填後の最終水漏れ検査をご紹介します。もし、水没したら…
その不安から開放される唯一の手段です。必ず行うようにしましょう。水槽ま
たはバスタブなどで簡単に行えます。 所用時間 約5分
簡単水没テスト
説明画像
ちょっとヒントです
1
ゆっくりと水の中に
入れていきます。
プロテクターは透明なので、水滴が
入っても簡単に確認できます。
2
最初は3秒だけ水に
つけてみます。
Oリングにトラブルがあれば3秒だ
けでも浸水してきます。蓋の間から
気泡が出てきませんか?
よくチェックしてください。
3
内部に水が入っていない
かチェックします。
4
次は30秒水につけて
チェックします。
5
内部に水が入っていない
かチェックします。
水から引き上げてみてプロテクターの
下に水が溜まっていないか確認します。
内部に水が垂れていませんか?
気泡が出てこないか良く確認してく
ださい。
水中の操作はまだしません。
水から引き上げて下に水がたまって
いないか確認します。
念には念を入れてよく確認してください。
6
次は3分水につけて
チェックします。
気泡が出てこないか良く確認してください。
よく使うボタン類を操作して気泡が出てこな
いか確認してください。
ここで水が入らなければ大丈夫。
7
これが最後のチェックです。
シリカゲルが濡れてませ
んか?
これが大切です。
シリカゲルは濡れてませんか?
よく確認してください。
中が見えるので水没検査も確実ですね。
8
これで安心。
バランスウェイトを
忘れずに…。
これで安心です。
HAVE A NICE DIVE!
24
PT_027J最終.qxd 05.2.14 10:53 AM ページ 25 (1,1)
4. 水中での撮影方法
ストラップの使い方
付属のハンドストラップに
手首を通しストップボタン
で長さを調整します。
注意して撮影しましょう
液晶モニタで撮影画面を確認します
本プロテクタでは撮影画面は液晶モニタを使用して確認します。ファインダは
使用できません。
シャッターレバーを静かに押します
シャッターレバーを押す際は、両手でプロテクタをしっかり支え、カメラブ
レが起きないように注意しながら静かにレバーを操作します。
フラッシュ撮影時のご注意
マクロ撮影時はワイド側でフラッシュ光がけられたり光量むらが発生するこ
とが有ります。
フラッシュ撮影可能範囲
W:約0.8m∼3.7m
T:約0.8m∼2.2m
撮影時の条件(水中での透明度や浮遊物の有無など)でフラッシュ光到達距
離が短くなる場合が有ります。
撮影後は液晶モニタで再生して確認してください。
注意:・別売のPT-020/PT-027用ワイドポートPPO-02を装着してご使用
になる場合、カメラの内蔵フラッシュの光はけられます。フラッシ
ュを使用する場合は、別売のTTLフラッシュプロテクタPFL-01と
エレクトロニクスフラッシュFL-20を組み合わせて使用する等、外
部フラッシュをご使用ください。
25
PT_027J最終.qxd 05.2.14 10:53 AM ページ 26 (1,1)
5. 水中撮影シーンに合わせた撮影
C-7070 Wide Zoom では、カメラに設けられた水中撮影シーンに合わせた設
定を利用することで、簡単に 水中撮影をお楽しみ頂けます。
水中撮影シーンの種類
水中ワイド
魚群など広範囲の水中の景色を撮るのに最適です。
水中で背景の青がより鮮やかに見えるように撮
影します。
QM
水中マクロ
水中で近接撮影をするときに設定します。魚な
ど水中の生物に近接して撮るのに最適です。水
中の自然な色を再現して撮影します。また、フ
ラッシュを使用すると赤色を強調した撮影が可
能です。
撮影シーンの選択方法
①水中シーンに合わせた設定を利用
する場合は、プロテクタのモード
ダイヤルノブを操作し、カメラの
モードを[SCENE]に設定します。
②プロテクタの十字ボタン上下を操
作して液晶モニタで確認しながら
目的の水中撮影シーンモードに設
定します。
26
①
②
QM
PT_027J最終.qxd 05.2.14 10:53 AM ページ 27 (1,1)
6. 撮影終了後の取扱い方法
水滴を拭取りましょう
水中撮影終了後、陸に上がったらプ
ロテクタに付いている水滴を拭取
ります。プロテクタの前蓋・後蓋の
隙間、シャッターレバー、パームグリッ
プ、バックルに付いている水滴など
を繊維くずの出ない柔らかい布や
エアーを使って丹念に除去します。
注意:・特にプロテクタの前蓋と後蓋の間、及びプロテクタ本体とポート
部の間に水滴が残っていると、プロテクタを開けたり、ポートを
着脱する際にその水滴がプロテクタ内にこぼれるおそれがありま
す。特に念入りに水滴を除去してください。
・プロテクタを開けたり、ポートを着脱する際、髪の毛や身体から
落ちる水滴をプロテクタ内部やカメラに落とさぬよう十分ご注意
ください。
・プロテクタを開けたり、ポートを着脱する際、手や手袋に砂・繊
維くず等の異物がついていないことを確かめてください。
・水しぶきや砂のかかる恐れのある場所ではプロテクタを開閉した
り、ポートを着脱したりしないでください。電池や記録メディア
の交換をするためにやむを得ず開閉する場合は、物陰でシートを
敷く等、水しぶきや砂のかからないようにしてください。
・海水のついた手でデジタルカメラや電池に触れないよう注意してくだ
さい。
Note: あらかじめ真水で濡らしたタオルなどをポリ袋に入れて用意しておき、
手や指の塩分を拭取ってから作業するとよいでしょう。
27
PT_027J最終.qxd 05.2.14 10:53 AM ページ 28 (1,1)
デジタルカメラを取り出します
プロテクタのバックルを開き、後蓋側にあるプロテクタモードダイヤルを、止まるま
で引き上げながらプロテクタを注意して開きます。この際、カメラのモードダイヤル
にプロテクタモードダイヤル下端部が引っ掛からないように注意して後蓋を開きま
す。完全に後蓋が開いたのを確認し、装填されているデジタルカメラを取り出します。
Oリング面を必ず上に向けて置いてください。
注意:・開いたプロテクタは、
Oリング面を下に向けて置くと、ゴミなどの異物がOリングやOリ
ング密着面に付着して次回水中撮影時の水漏れの原因になります。
・撮影した画像の保存方法などはデジタルカメラの取扱説明書をお
読みください。
・プロテクタの後蓋を開く際、必ずプロテクタモードダイヤル下端
部とカメラのモードダイヤルがひっかかっていないことを確認し
てください。無理にプロテクタの後蓋を開けようとすると、ひっ
かかったままデジタルカメラ、またはプロテクタを破損する可能
性があります。
28
PT_027J最終.qxd 05.2.14 10:53 AM ページ 29 (1,1)
プロテクタを真水で洗います
ご使用後のプロテクタは空のまま再度密閉してできるだけ早く真水で十分に洗い
ます。海水で使用した場合は、塩分を落とすために真水に一定時間浸けておくと
効果的です。
注意:・部分的に高い水圧がかかると水漏れするおそれがあります。プロ
テクタを水洗いするときは装填したデジタルカメラを取り出して
から行ってください。
・本製品のシャッターレバーや各種ボタンを真水中で操作してシャフ
トに着いた塩分を洗い落としてください。分解しての清掃は決してし
ないでください。
・塩分が付着したまま乾燥させた場合、機能に支障を来たすおそれが
あります。使用後は必ず塩分を洗い落としてください。
プロテクタを乾燥させましょう
真水洗い後塩分のついていない、繊維くずの出ない乾いた柔らかい布で水滴を
拭取り、風通しの良い日陰で完全に乾燥させてください。
注意:・乾燥させるためにヘアードライヤーなど温熱風を使用したり、直
射日光に当てることはしないでください。プロテクタの劣化・変形
やOリングの劣化を速め水漏れの原因になります。
プロテクタをふく際は拭き傷を付けないようご注意ください。
29
PT_027J最終.qxd 05.2.14 10:53 AM ページ 30 (1,1)
7. 防水機能のメンテナンスをしましょう
Oリングを取外します
プロテクタを開けて、プロテクタに装着されているOリングを取外します。
Oリングの取外しかた
①OリングとOリング溝の壁の間にOリング取外しピックを差込みます。
②差込んだピックの先端をOリングの下にくぐらせるようにします。
(ピックの先端で溝を傷付けないよう注意してください)
③浮き上がったOリングを指先でつまんでプロテクタから外してください。
砂・ゴミなどを取除きましょう
目視でOリングについたゴミを取り除いた後、Oリングを指でつまんで全周を
軽くしごくと、砂などの異物の付着や傷・ヒビ割れの有無が確認できます。
各Oリング溝は繊維の出にくい清潔な布、またはかすの出にくい綿棒や歯ブラ
シなどで付着した異物を取り除きます。プロテクタのOリング各密着面も同様
に付着した砂・ゴミを取り除きます。
注意:・Oリングを取り外す時や溝内部をクリーニングする時に、シャー
プペンシル等先端の鋭利なものを使用するとOリングやプロテク
タに傷を付けて水漏れの原因になることがあります。
・指先でOリングをしごいて検査する際に、Oリングを引き伸ばさ
ないように注意してください。
・Oリングを洗浄する際には、アルコール・シンナー・ベンジン等の溶剤、
または化学洗剤の使用は絶対に避けてください。これらの薬品を使用
すると、Oリングに損傷を与えたり、劣化を速めるおそれがあります。
30
PT_027J最終.qxd 05.2.14 10:53 AM ページ 31 (1,1)
Oリングを取付けます
異物の無いことを確認後、Oリングに薄く付属のグリスを塗り、溝にOリングを
はめ込みます。この時、溝からOリングのはみ出しが無いことを確認します。
Oリングへのグリス塗布方法
1
専用グリスをつけ
ます。
指やOリングにゴミの付着がないことを確
認し、専用のグリスを指に5ミリ程度取り出
します。
(グリスの量は5ミリ程度が適切)
2
グリスを全体に伸
ばします。
指にとったグリスを3本の指で挟むように全体
に伸ばしていきます。あまり力を入れてOリン
グを引っ張らないように注意してください。
3
傷や凹凸がないか
チェックします。
全体になじんだグリスを確認して、手の感触と目
で傷や凹凸がないかチェックしてください。傷が
あったら新品のOリングに迷わず交換します。
4
圧着面にグリスを
塗ります。
指に残ったグリスはプロテクタの圧着面
の清掃とグリスアップに使用します。
注意:・撮影途中でも電池や記録メディアの交換などでプロテクタを開けた
場合は防水機能のメンテナンスを必ず実施してください。防水機能
のメンテナンスを怠ると水漏れの原因となります。
・長期間使用しない場合は、Oリングの変形を避けるためにOリン
グを溝から外してシリコングリスを薄く塗り、清潔なポリ袋など
に入れて保管してください。
・塩分が付着したまま乾燥させた場合、機能に支障を来たすおそれが
あります。使用後は必ず塩分を洗い落としてください。
消耗品は取替えましょう
・Oリングは消耗品です。プロテクタの使用回数にかかわらず、少なくとも1年以内
に新品と交換されることをおすすめします。
・使用状況、保管状況によってはOリングの劣化が速まります。傷・ヒビ割れが
入っていたり弾力が低下していたら1年未満でも交換してください。
Note: 消耗品のシリコンOリング用グリス、シリカゲル、本体用Oリングはオリンパス純
正品をお使いください。オリンパスサービスステーションでも購入いただけます。
31
PT_027J最終.qxd 05.2.14 10:53 AM ページ 32 (1,1)
TTLコネクタとTTLケーブルの固定ネジ部メンテナンス
TTLコネクタへTTLケーブルを接続する際の固定用ネジ部分は、メンテナン
スを怠ると海水中での使用による海水成分の析出等により、ネジが外れにく
くなる場合があります。
海水中での使用後は、出来るだけ早く塩抜きを実施し、十分乾燥させた後にネジ
部を綿棒等で清掃し、製品付属のシリコンOリンググリスをたっぷり塗布してくだ
さい。
この部分を清掃し、シリコン
Oリンググリスを塗布します。
TTLコネクタキャップのメンテナンス
TTLコネクタキャップを本体から取外した場合は、必ずキャップ側のOリング
をメンテナンスします。
防水キャップメンテナンス用アダプタを使用してOリングユニットをキャップ
本体から取外します。
防水キャップ
防水キャップメンテナンス用
アダプタ
1
アダプタのピンをキャップ側の穴に合わせ
て差込みます。
2
反時計回りにアダプタを回し、Oリングユニッ
トを取外します。
3
OリングユニットについているOリングを外し
てOリング溝を清掃し、Oリングにシリコング
リスを塗布し再び、ユニットへ装着します。
Oリング
※Oリングユニットを取外した時と逆の手順でキャップ本体へ取付けます。
32
PT_027J最終.qxd 05.2.14 10:53 AM ページ 33 (1,1)
8. 付録
PT-027ご使用上のQ&A
Q1:使用可能なデジタルカメラを教えてください。
A1:本製品(PT-027)は C-7070 Wide Zoom/C-5060 Wide Zoom専用です。
Q2:デジタルカメラをプロテクタにセットする際の注意事項を教えてください。
A2:下記の点に特に注意してセットしてください。
(1)デジタルカメラの電池残量が十分にあることをご確認ください。
水中では液晶モニタを使用するので電池の消耗が速くなります。
(2)記録メディアの記録残枚数をご確認ください。
プロテクタの開閉をなるべく少なくするためにも残数に余裕を持ってご使用ください。
(3)デジタルカメラのストラップやレンズキャップ、フィルターを外してください。
ストラップやレンズキャップ、フィルターを外さずに装填すると、プロテクタ密閉が正
しく行えず、水漏れの原因となる場合があります。
(4)プロテクタを密閉する前に各Oリングが正常に装着されていることを確認して
ください。
(5)プロテクタ本体とポート接続部のバックル、TTLコネクタキャップが確実に
閉まっているか確認します。
(6)各Oリング接触面にゴミ、髪の毛等の異物が付着していないことを確認してく
ださい。
(7)防曇剤シリカゲルを入れましょう。オリンパスプロテクタ用シリカゲルをご使用ください。
(8)プロテクタの後蓋を閉める際は、プロテクタのモードダイヤルを引き上げな
がら静かに閉めます。閉めた後にプロテクタのモードダイヤルを押し下げ、
カメラのモードダイヤルへ確実にセットします。
(9)最後に専用のバランスウェイトを三脚座に取り付けます。
Q3:プロテクタ使用時、保管時の注意事項を教えてください。
A3:下記の点にご注意ください。
(1)プロテクタの外側からOリングの接触面を強く押したり、プロテクタをね
じったりすると防水機能が損なわれて水漏れすることが有ります。
(2)下記のような場所でプロテクタを使用、放置または、保管した場合動作不
良や故障の原因となります。絶対に避けてください。
(イ)直射日光下や自動車の中等、プロテクタが高温になる場所、異常に温度が
低いところ、極端に温度変化が激しいところ
(ロ)火気のある場所
(ハ)揮発性物質のある場所
(ニ)振動のある場所
33
PT_027J最終.qxd 05.2.14 10:53 AM ページ 34 (1,1)
(3)プロテクタにカメラを装填した状態で、以下のような取扱いをした場合、本製品
及び装填されたカメラが故障・破損するおそれがあります。絶対に避けてください。
(イ)物にぶつける
(ロ)落下させる
(ハ)重たいものをのせる
(4)長時間使用しないとカビが生えたり故障の原因になることがあります。使用前
に各操作部の動作確認、事前テスト、最終テストを実施してください。
Q4:プロテクタ開閉時の注意事項を教えてください。
A4:下記の点にご注意ください。
(1)水しぶきや砂のかかるおそれのない場所で、開閉してください。
(2)前蓋と後蓋のすき間、バックル等凹凸の有る個所に付着した水滴を拭取って
ください。開けた時にプロテクタ内に水滴が流れ込むおそれがあります。
(3)プロテクタを開ける際に、髪の毛や身体から、プロテクタ内やカメラの上に
水滴が落ちないようご注意ください。
(4)開いたプロテクタのOリングと前蓋部のOリング接触面に、砂、繊維くず等
異物の付着がないことを確認してください。取外したプロテクタ本体とポー
ト部のOリング面も同様に確認してください。
(5)海水のついた手でカメラや記録メディアに触らないようにしてください。
(6)撮影中に水滴等、水漏れの兆候を発見した場合は、直ちに潜水を中止し、再
度、水漏れのテストを行い水漏れの有無を確認してください。カメラが濡れて
いたら水分を拭取り動作を確認してください。
Q5:使用後のプロテクタの取扱いを教えてください。
A5:使用後のプロテクタはなるべく早くカメラを取り出し、真水で洗ってください。海で
使用した場合は塩分を落とすために一定時間漬けておくと効果的です。真水の中
でボタン・レバーを操作し軸回りの塩分を洗い流してください。水洗い終了後塩分の付
いていない乾いた布で水分を拭取り、陰干しで乾燥させてください。乾燥させるために
ヘアドライヤー等の温熱風を使用したり、直射日光にさらすことは避けてください。高温
や直射日光にさらすとプロテクタの変形・変色・破損やOリングの劣化の原因となりま
す。プロテクタ内部は乾いた繊維くずの出ない柔らかい布で拭いてください。Oリング
を外して塩分・砂・埃等の付着物を拭取り、さらにOリングがはめ込まれていた溝と、
Oリングが接触していた面も同様に付着した汚れを拭取って乾燥させてください。Oリ
ングを溝から外す時に先端の鋭利なものを使用するとOリングに傷を付けて水漏れ
の原因となることがあります。必ず付属のOリング取り外し用ピックをご使用ください。
Q6:水中での撮影方法を教えてください。
A6:下記の点に注意して撮影してください。
(1)プロテクタに付属しているハンドストラップの輪を手首に固定します。
(2)レンズ窓に指がかかっていると指が写ります。プロテクタを保持する時に指の位
置にご注意ください。
34
PT_027J最終.qxd 05.2.14 10:53 AM ページ 35 (1,1)
(3)シャッターレバーを押す際は、両手でプロテクタを支え、カメラブレが起きないよ
う静かに操作してください。
(4)プロテクタ背面の液晶モニタ窓を通してデジタルカメラの液晶モニタで画面
を確認し、撮影してください。ビューファインダを使っての画面確認はできま
せんのでご注意ください。液晶モニタ使用時は電池の消耗が早くなります。電
池消耗による撮影不能を避けるため電池はできるだけダイビング毎にフル
充電状態の電池に交換してください。
Q7:水漏れ有無の確認方法を教えてください。
A7:事前テストとカメラ装填後の最終テストで確認してください。事前テストはカメラを
プロテクタに入れずにご使用深度に沈めて水漏れの有無を確認するのがいちば
ん確かですが、実施が難しい場合は水深1メートル程度のところやバスタブでのテ
ストでも実施した方が安全です。最終テストはバスタブやバケツでも実施可能です。
Q8:水没事故の原因を教えてください。
A8:水没事故は主に下記のことが原因で起こります。
特に念入りに確認してください。
(1)Oリングの取付け忘れ
(2)Oリングの一部または全部が溝から外れていた
(3)Oリングの傷、変質、または変形
(4)Oリングへの砂・繊維くず・髪の毛等異物の付着
(5)Oリング溝、Oリング接触面への砂・繊維くず・髪の毛等異物の付着
(6)プロテクタを密閉する際の、ストラップ、シリカゲル包装袋等の挟み込み
(7)船上から海へ放り投げたり、プロテクタを持ったまま水中に飛び込む等プ
ロテクタに瞬間的に強い力がかかった時。水中に入る際は手渡しを行うな
ど衝撃を与えないようご注意ください。
Q9:Oリングメンテナンスの注意点を教えてください。
A9:下記の点にご注意ください。
(1)Oリングはクリーニングの際にアルコール・シンナー・ベンジン等の有機
溶剤や化学洗剤の使用は避けてください。これらの薬品を使用するとOリ
ングが変質し劣化を速めます。
(2)グリスはオリンパス純正のシリコンOリング用(白キャップ)グリスをお使
いください。PT-008までのプロテクタに付属のグリス(赤キャップ)や他社
製のグリスは本シリコンOリングに適しておりませんので、使用すると表面
が変質して防水機能を損なうことが有ります。
(3)長期間使用しない時はOリングの変形を避けるためにOリングをプロテク
タから外して専用グリスを薄く塗り、清潔なポリ袋等に入れて保管してく
ださい。再度使用する場合はOリングに傷・ひび割れがないこと、弾力が
十分にあること、表面がべとつく等の異常が無いことを確認した上で専用
35
PT_027J最終.qxd 05.2.14 10:53 AM ページ 36 (1,1)
グリスを薄く塗り直してご使用ください。グリスは塗りすぎても防水機能
や許容耐圧は上がりません。かえって砂やゴミなどが付き易い結果になりま
す。薄く均一に塗ることで最大の効果を発揮します。
(4)Oリングは消耗品です。少なくとも1年に1回は交換するようにしてください。
(5)Oリングは使用状態、保管環境などによっては劣化が促進されます。Oリン
グメンテナンス時に傷、ひび割れが入っていたり、弾力が無くなっていたらすぐ
に新しいものと交換してください。
Q10:プロテクタメンテナンス上の注意を教えてください。
A10:下記の点にご注意ください。
(1)洗浄・防錆・防曇・修理等の目的で下記の薬品類を使用しないでください。
・プロテクタをアルコール・シンナー・ベンジン等の揮発性の有機溶剤や化学洗
剤で洗浄しないでください。洗浄は真水またはぬるま湯で十分です。
・防錆剤等を金属部分に使用しないでください。金属部分はアルミ及び真ちゅ
うとステンレスです。真水による洗浄で十分です。
・市販の防曇剤を使わないでください。必ずオリンパス純正の防曇剤シリカゲ
ルをご使用ください。
・修理等の目的で接着剤を使用しないでください。修理が必要な場合は弊社サ
ービスステーションまたはお買上げの販売店にご相談ください。
Q11
:修理について教えてください。
A11
:修理が必要な場合は弊社サービスステーションまたはお買上げの販売店にご相談
ください。ご自分で修理・分解・改造を行わないでください。ご自分またはオリンパ
ス指定者以外の第三者によって修理・分解・改造を行うと保証の対象外となります。
Q12:PT-027付属品の型式と価格を教えてください。
A12:下記の付属品を販売しています。
(1)PT-020/PT-027本体用Oリング
(POL-020A/税込価格¥1,050、POL-020B/
税込価格¥1,050、POL-020C/税込価格¥1,050)
:PT-027の本体に設置されて
いる浸水防止用O型のシリコンゴム製のパッキンです。Oリングは3種類ありま
す。他のプロテクタ用のOリングは使用できません。PT-020用のOリングと共通
で使用できます。
(2)PT-027に装着されている標準ポートPPO-01用Oリング(POL-101/税込価格
¥1,050)
:標準ポートのプロテクタ本体装填部にあるO型のシリコンゴム製の
パッキンです。
(3)シリコンOリング用グリス
(PSOLG-1/税込価格¥840)
:シリコンOリングメンテナン
ス用の専用グリスです。
(4)シリカゲル
(SILCA-5/税込価格¥525)
:プロテクタのガラス部の結露による曇りを
押える乾燥剤です。5袋入り。
36
PT_027J最終.qxd 05.2.14 10:53 AM ページ 37 (1,1)
(5)液晶フード(PFUD-04/税込価格¥1,050):プロテクタの液晶モニタ窓に取
付けて、カメラの液晶モニタを見やすくするフードです。
(6)PT-020/PT-027用バランスウェイト
(PWT-020/税込価格¥2,625):海中でプ
ロテクタを中性浮力に近づけるための錘です。鉛を使わず環境にも配慮し
ています。PT-020用のバランスウェイトと共通で使用できます。
※ お買い求めは大手パソコンショップ、カメラ量販店でご注文ください。
※ 操作ボタン部のOリングはお客様による交換はできません。交換が必要な場合はお
買上げの販売店または当社サービスステーションにご相談ください。有償で交換いた
します。
Q13:水中写真を撮るコツを教えてください。
A13:Webサイト ZUIKO CLUB内のオンライン講座のページに水中写真テクニック
のコーナーが有ります。一度ご覧ください。
URL:http://www.olympus-zuiko.com/school/index.html
37
PT_027J最終.qxd 05.2.14 10:53 AM ページ 38 (1,1)
アフターサービスについて
●保証書はお買上げの販売店からお渡しいたします。「販売店名」・「お買上げ
日」等の記入されたものをお受取りください。もし記入もれがあった場合は、
ただちにお買上げの販売店にお申しでください。また保証内容をよくお読み
のうえ大切に保管してください。
●本製品のアフターサービスに関するお問い合わせや、万一、故障した場合のお
問い合わせはお買上げの販売店、または本取扱説明書裏面に記載の弊社サー
ビスステーションにご相談ください。取扱説明書にしたがったお取扱いによ
り本製品が故障した場合は、お買上げ日より1年間、保証書記載内容に基づい
て無料修理いたします。
保証期間終了後の修理及び保証期間内であってもお客様のお取扱い上の問題
による不具合の修理は有料となります。
●本製品の補修用部品は、本製品製造打ち切り後5年間を目安に当社で保有し
ております。従って本期間中は原則として修理をお受けいたします。なお、期
間後であっても修理可能な場合も有りますのでお買上げの販売店または、お近
くのサービスステーションにお問い合わせください。
●本製品の保証・修理・サービスは日本国内でのみ有効です。海外では修理で
きません。
●本製品の故障に起因する付随的損害(ダイビングに要した諸費用や撮影に要
した諸費用、及び撮影により得られる利益の喪失など)については保証しかねま
す。また、保証期間の内外によらず修理時の運賃諸掛かりはお客様において
ご負担願います。
38
PT_027J最終.qxd 05.2.14 10:53 AM ページ 39 (1,1)
仕様
対象カメラ
オリンパスデジタルカメラ
CAMEDIA C-7070 Wide Zoom/C-5060 Wide Zoom
許容水深
水深40m以内
主要材質
本体:透明ポリカーボネート
バックル:ステンレススチール
グリップ/シャッターレバー/ズームレバー/モードダイヤル:赤色
ポリカーボネート樹脂
レンズ窓:FL強化ガラス
レンズリング/TTLケーブルコネクタキャップ:アルミニウム
各部操作ボタン/防水キャップメンテナンス用アダプタ
:真ちゅうニッケル鍍金
Oリング/レンズキャップ:シリコンゴム
液晶フード:NBRゴム
サイズ
幅161mm×高さ143mm×厚さ127mm(液晶フード含まず)
質量
約776g(カメラ、付属品含まず)
※外観・仕様は改善のため予告無く変更することがあります。あらかじめご了承く
ださい。
ダイバーズ保険のご案内
万一の水漏れ事故に備えて、ダイバーズ保険への加入をおすすめしま
す。詳細は同梱の「ダイバーズ保険のご案内」をご覧ください。
39
PT_027E_最終.qxd 05.2.14 10:50 AM ページ 1 (1,1)
Instruction Manual
Underwater Case
PT-027
For Digital Cameras
CAMEDIA C-7070 Wide Zoom/C-5060 Wide Zoom
■ Thank you for buying the Underwater Case PT-027.
■ Please read this instruction manual carefully and use the product safely
and correctly.
■ Please keep this instruction manual for reference after reading it.
■ Wrong use may cause damage to the camera on the inside from water
leakage, and repair may not be possible.
■ Before use, perform an advance check as described in this manual.
PT_027E_最終.qxd 05.2.14 10:50 AM ページ E-1 (1,1)
Disclaimer
● Unauthorised copying of this manual in part or in full, except for
private use, is prohibited. Unauthorised reproduction is strictly
prohibited.
● OLYMPUS IMAGING CORP. shall not be responsible in any way
for lost profits or any claims by third parties in case of any damage
occurring from incorrect use of this product.
● OLYMPUS IMAGING CORP. shall not be responsible in any way
for damage, lost profits, etc. caused by the loss of image data due
to defects, disassembly, repair or modification of this product by
people, other than third parties specifically authorised by
OLYMPUS IMAGING CORP. or for other reasons.
Please read the following before using the product
● This product has been precision-crafted from high quality
polycarbonate. When used correctly, it lets you take photographs
safely up to a water pressure equivalent to a depth of 40 metres.
● To ensure correct and safe use of the case, please read all
instructions on handling and carrying out the system check as well
as care, maintenance and storage of the case.
● OLYMPUS IMAGING CORP. shall in no way be responsible for
damage caused by water to the camera contained in the case.
● OLYMPUS IMAGING CORP. shall not pay any compensation for
accidents (injuries or material damage) that happen during the use
of this product.
● Before use, be sure to read the precautions printed on the package.
For safe use
This instruction manual uses various pictographs for correct use of
the product and to prevent danger to the user and other persons as
well as property damage. These pictographs and their meanings are
shown below.
WARNING This indicates contents for which the possibility of
human death or severe injury in case of handling under
disregard of this indication can be assumed.
CAUTION This indicates contents for which the possibility of
human injury or the possibility of material damage in
case of handling under disregard of this indication can
be assumed.
E-1
PT_027E_最終.qxd 05.2.14 10:50 AM ページ E-2 (1,1)
WARNING
1. Keep this product out of the reach of babies, infants, and children.
There is the possibility of occurrence of the following types of
accidents.
Injury by dropping onto the body from a height.
Injury from parts of the body getting caught in parts which open
and close.
Swallowing of small parts. Please consult a physician immediately
if any parts have been swallowed.
Triggering of the flash in front of the eyes may cause permanent
vision impairment etc.
2. Do not store with a battery in the digital camera housed in this
product. Storage with a battery inserted may lead to leakage of the
battery liquid and fire.
3. If leakage of water should occur with a camera installed in this
product, quickly remove the battery from the camera. There is the
possibility of ignition and explosion from generation of hydrogen gas.
4. This product is made of resin. There is the possibility that injuries
may be caused when it becomes broken because of strong impact
with a rock or other hard objects. Please handle with sufficient care.
5. The silica gel and the grease for silicone O-rings for this product
are not edible.
CAUTION
1. Do not disassemble or modify this product. This may cause water
leakage or trouble. In case of disassembly or modification by
persons other than those appointed by OLYMPUS IMAGING CORP.,
the guarantee shall not apply.
2. Do not place this product at locations with abnormally high or
abnormally low temperatures or at locations with extreme
temperature changes. The product may deteriorate.
3. Opening and closing at locations with much sand, dust, or dirt may
impair the waterproof characteristic and cause water leakage. This
should be avoided.
4. This product has been designed and manufactured for use at a
water depth within 40 m. Please note that diving to a depth in
excess of 40 m may cause permanent deformation or damage to
the Case and the camera inside the Case or may lead to water
leakage.
E-2
PT_027E_最終.qxd 05.2.14 10:50 AM ページ E-3 (1,1)
5. Rough handling, such as jumping into the water with the case in
your hand or in an outside pocket or throwing the case into the
water, etc. could lead to water leakage. Please always take care
when using the case.
6. If the camera contained in the case becomes wet because of water
leakage, etc., immediately wipe off all moisture and check the
camera is working correctly.
7. Before travelling by air, please make sure you remove the O-ring,
otherwise the difference in air pressure may make it impossible to
open the case.
8. To ensure safe and trouble-free handling and operation of the
digital camera in this product, please read the camera’s instruction
manual carefully.
9. When sealing this product, please take care to ensure no foreign
matter such as sand, dirt or hair are on the O-ring or contact
surfaces.
Batteries
● Use an exclusive lithium-ion battery (Olympus BLM-1) designed for
digital cameras.
● Keep the battery's contacts away from damp or humidity; otherwise
this could impair performance and/or cause accidents.
● For additional battery cautions, refer to your digital camera's
instruction manual.
● The separately available Power Battery Holder for the C-7070 Wide
Zoom/C-5060 Wide Zoom (B-HLD20) cannot be used with this
product.
Setting the camera’s mode
When using the C-7070 Wide Zoom
● The C-7070 Wide Zoom camera includes scene modes expressly
configured to optimize wide-angle and macro shooting under
water. Select the mode according to the scene you want to shoot
under water.
For details, see ”Underwater Shooting According to the Scene
Type” in this manual (page E-28).
● For details on mode setting, refer to the digital camera’s operation
manual.
When using the C-5060 Wide Zoom
● When using this product, set the camera’s mode dial to “P” and
use the menu button to select [Mode Menu] ➔ [Shooting] ➔
[Accessory] ➔ [
].
● For more information, see the camera’s instruction manual.
E-3
PT_027E_最終.qxd 05.2.14 10:50 AM ページ E-4 (1,1)
For Prevention of Water Leakage Accidents
When water leakage occurs while this product is being used, repair of
the camera housed in this product may become impossible. Please
observe the following cautions for use.
1. When sealing this product, make sure that no hairs, fibers, sand
particles or other foreign matter stick not only to the O-ring, but
also to the contact surface. Even a single hair or a single grain of
sand may cause water leakage. Please check with special care.
Examples for foreign matter sticking to the O-ring
Hair
Fibers
Grains of sand
2. The O-ring is a consumption product. Please replace it at least
once a year by new one. Also perform maintenance for every use.
3. Deterioration of the O-ring will progress according to the use
conditions and the storage conditions. Immediately replace the O-ring
by a new one if it is damaged, shows cracks, or has lost its elasticity.
4. At the time of O-ring maintenance, clean the inside of the O-ring
groove and confirm the absence of dirt, dust, sand, and other
foreign matter.
5. Apply the specified silicone O-ring grease to the O-ring.
6. The waterproof function is not effective when the O-ring is not
installed correctly. When installing the O-ring, take care that it does
not project from the groove and that it is not twisted. Also, when
sealing the Case, close the lid after confirming that the O-ring has
not come out of the groove.
7. This product is an airtight construction made of plastic (polycarbonate).
When it is left for a long time in a car, on a boat, at the beach, or at
other places reaching a high temperature, or when it is subjected for a
long time to uneven external force, it may be deformed and the
waterproof function may be lost. Pay sufficient attention to temperature
control. Also do not place heavy objects onto the product during
storage or transport, and avoid unreasonable storage.
8. When the O-ring contact surface is pressed strongly from the
E-4
PT_027E_最終.qxd 05.2.14 10:50 AM ページ E-5 (1,1)
outside of the Case, or when the Case is twisted, the waterproof
function may be lost. Take care not to exert excessive force.
9. Please be sure to perform the advance test and the final test each
time before using the case.
10. If you should notice drops of water or other signs of water leakage
while taking pictures, immediately stop the dive, remove any water
from the camera and the product, test according to the item "Final
check", and confirm whether leakage has occurred or not.
Handling the Product
● Use or storage of the product at the following locations may cause
defective operation, defects, trouble, damage, fire, internal
clouding, or water leakage. Always avoid these locations.
Places where high temperatures exist, such as in direct sunlight, in
a closed vehicle, etc., and/or where extreme differences in
temperatures exist.
Places where there is a lot of dust.
Places where there are open fires.
Places subject to vibrations.
Places where volatile chemicals are stored or used.
Water deeper than 40 meters.
● This product is made of polycarbonate resin with excellent impact
resistance, but it may be damaged by scraping against rocks etc. It
also may break when it hits hard objects or is dropped.
● This product is not a case to soften impacts to the camera inside the
product. When this product with a digital camera inside it is subjected
to impacts or heavy objects are placed onto it, the digital camera may
become damaged. Please handle the product with sufficient care.
● When the product is not used for a long time, the waterproof
performance may drop because of deterioration of the O-ring etc.
Before use, always perform the advance test and the final check.
● Do not apply excessive force to the port mount, TTL cable
connector, tripod socket, etc.
● When a flash is used while the Case is being used, shadows may
appear at the edges of the picture. This is especially notable when
taking pictures in macro mode on the wide-angle side. Please use
a flash after image confirmation.
● Do not use the following chemicals for cleaning, corrosion prevention,
prevention of fogging, repair or other purposes. When these are used
for the Case directly or indirectly (with the chemicals in vaporized state),
they may cause cracking under high pressure or other problems.
E-5
PT_027E_最終.qxd 05.2.14 10:50 AM ページ E-6 (1,1)
Chemicals which cannot be used Explanation
Do not clean the Case with alcohol, gasoline, thinner
Volatile organic solvents, or other volatile organic solvents or with chemical
detergents etc. Pure water or lukewarm water is
chemical detergents
sufficient.
Anticorrosion agent
Do not use anticorrosion agents. The metal parts use
stainless steel or brass, and washing with pure water
is sufficient.
Commercial defogging
agents
Do not use commercial defogging agents. Always
use the specified desiccant silica gel.
Grease other than specified Use only the specified silicone grease for the silicone
O-ring, as otherwise the O-ring surface may
silicone grease
deteriorate and water leakage may be caused.
Do not use adhesive for repairs or other purposes.
Adhesive
When repair is required, please contact a dealer or a
service station of our company.
● Do not perform operations other than specified in this instruction
manual, do not remove or modify parts other than specified, and do
not use parts other than specified.
Any troubles in taking pictures or with the equipment resulting from
the above actions shall be outside the guarantee.
● OLYMPUS IMAGING CORP. shall be in no way responsible for
accidents involving immersion of a digital camera in water.
● OLYMPUS IMAGING CORP. shall not pay any compensation for
accidents (injury or material damage) at the time of use.
● When the enclosure of the balance weight breaks, the metal on the
inside may corrode. Take care not to damage the enclosure.
● After use, wash the balance weight with pure water and wipe off all
moisture sufficiently.
E-6
PT_027E_最終.qxd 05.2.14 10:50 AM ページ E-7 (1,1)
Contents
Disclaimer……………………………………………………………E-1
Please read the following before using the product ……………E-1
For safe use …………………………………………………………E-1
Batteries ……………………………………………………………E-3
Setting the camera’s mode ………………………………………E-3
For Prevention of Water Leakage Accidents ……………………E-4
Handling the Product ………………………………………………E-5
Contents …………………………………………………………E-7-8
1. Preparations …………………………………………………E-9
Check the contents of the package.………………………………E-9
Names of the parts ………………………………………………E-10
Install the strap. ………………………………………………… E-11
Master the basic operation. …………………………………… E-11
Holding the Case ………………………………………………E-11
How to Press the Shutter ………………………………………E-12
How to Use the Mode Dial ……………………………………E-12
How to Use the Zoom Lever …………………………………E-12
Setting the Zoom Lever ………………………………………E-13
Power Switch Lever Operation Method ………………………E-13
Removing/attaching the standard port ………………………E-14
Removing the TTL cable connector cap ……………………E-15
Removing the hot shoe cable cap ……………………………E-16
Cleaning the TTL connector …………………………………E-16
2. Advance Check of the Case …………………………E-17
Advance test before use …………………………………………E-17
Making sure the case is waterproof …………………………E-17
Advance Test ……………………………………………………E-18
3. Install the digital camera. ………………………………E-19
Check the digital camera. ……………………………………… E-19
Battery Confirmation ……………………………………………E-19
Confirmation of the Remaining Number of Pictures to be Taken ……E-19
Removing the carrying strap and lens cap from the digital camera …E-19
Removing the filter from the digital camera …………………………E-19
Prepare the camera ………………………………………………E-20
Which digital cameras can be loaded? ……………………… E-20
Check the operation of the camera. ………………………… E-20
Open the Case. ………………………………………………… E-20
Load the digital camera. ………………………………………… E-20
Insertion of silica gel ……………………………………………E-21
Lifting the mode dial knob ……………………………………E-21
Fitting the mode dial knob ……………………………………E-21
E-7
PT_027E_最終.qxd 05.2.14 10:50 AM ページ E-8 (1,1)
Check the loading status. ……………………………………… E-22
Seal the Case. ……………………………………………………E-22
Install the special balance weight. ………………………………E-22
Perform the final checks after loading. …………………………E-23
Installation and Removal of the LCD Hood ……………………E-24
Installation ………………………………………………………E-24
Removal …………………………………………………………E-24
Mounting and Removing the Lens Cap …………………………E-25
Perform the final checks. ……………………………………… E-25
Visual Inspection ………………………………………………E-25
Final Test …………………………………………………………E-26
4. Taking Pictures Under Water …………………………E-27
How to Use the Hand Strap ……………………………………E-27
Take pictures carefully. ………………………………………… E-27
Confirm the picture on the LCD monitor. ……………………E-27
Quietly press the shutter lever. ……………………………… E-27
Cautions when using the flash ………………………………E-27
5. Underwater Shooting According to the Scene Type ………E-28
Shooting scene modes …………………………………………E-28
Selecting the scene mode. ……………………………………… E-28
6. Handling After Shooting ………………………………E-29
Wipe off any waterdrop. …………………………………………E-29
Take out the digital camera. …………………………………… E-30
Wash the Case with pure water. ……………………………… E-31
Dry the Case. …………………………………………………… E-31
7. Maintaining the Waterproof Function ……………E-32
Remove the O-ring. ………………………………………………E-32
Remove any sand, dirt, etc. …………………………………… E-32
Install the O-ring. ………………………………………………… E-33
How to Apply Grease to the O-ring ……………………………E-33
Replace consumable products. ………………………………… E-34
Maintenance of the threaded sections on the
TTL cable and TTL cable connector ……………………………E-35
Maintenance of the TTL Connector Cap ……………………… E-35
8. Appendix ………………………………………………………E-36
Q & A on the use of the PT-027 …………………………………E-36
After-sale Service …………………………………………………E-41
Specifications ……………………………………………………E-42
Diver's Insurance Guide …………………………………………E-42
E-8
PT_027E_最終.qxd 05.2.14 10:50 AM ページ E-9 (1,1)
1. Preparations
Check the contents of the package.
Check that all accessories are in the box.
Contact your dealer if accessories should be missing or damaged.
LCD hood
(on the body)
Silicone grease
Silica gel
Waterproof cap for
the TTL cable
connector
LCD hood
strap
Lenscap
Waterproof cap
maintenance adapter
Hand strap
Standard port
(Attached to the main body)
Buckle opener
(Check that the O-ring is normal.)
Instruction manual
(this manual)
Pick for O-ring removal
Warranty card
保証書
取扱説明書
デジタルカメラ
CAMEDIA C-5060 Wide Zoom/C-7070 Wide Zoom用
防水プロテクタ
PT-027
WARRANTY
(販売店控え)
本保証書は、本記載内容で無料修理を行うことをお約束するものです。
お買い上げの日から下記期間中、万一故障が発生した場合は、本契約書を添付ご持参の上
お買い上げ販売店、または当社サービスステーションにご依頼ください。
期 間
お買上げ
本体1年間
年 月 日
本保証書は日本において有効です。
This is a limited warranty for
1 year from your date of
purchase. Useful only in
Japan.
住所 Address
お客様
氏名 Name 性別(男・女)、年齢( 才)
Customer
様
TEL ( )
〔必ず店名印を押してください。〕
販売店
Dealer's
name and
address
JAPAN
品名
型名
防水・防塵
プロテクタ Model
Serial NO.
■このたびは、防水プロテクタPT-027をお買上げいただき、ありがとうご
ざいます。
■この説明書をよくお読みのうえ、安全に正しくお使いください。また、
この説明書はお読みになった後、必ず保管してください。
■誤った使い方をされると水漏れにより中のカメラが破損し、修理不能
になる場合があります。
■ご使用前には、
この説明書に従い、必ず事前チェックを実施してください。
保証責任者
保証履行者
〒192-0032 東京都八王子市石川町2951
Balance weight
お問い合せ先/サービスステーション
03(3292)1931 Information disc
E-9
Diver's insurance guide
PT_027E_最終.qxd 05.2.14 10:50 AM ページ E-10 (1,1)
Names of the parts
❈
❈
❈
Palm grip
Standard port (PPO-01)
Port lock buckles
TTL cable connector
O-ring (POL-020A)
O-ring (POL-020B)
O-ring (POL-020C)
Diffuser plate and diffuser
plate cover
Carrying strap ring
Carrying strap
Tripod socket
Lens ring
Lend window
Shutter release lever
Zoom lever
Mode dial knob
❈
❈
❈
❈
❈
❈
❈
❈
❈
❈
❈
❈
Power switch lever
Accessory mount
Custom button
Self-timer button
Metering button
AF/Macro/MF button
Exposure correction button
Flash mode button
Front lid
LCD inner hood
Mounting strap guide rails
❈
LCD hood
❈
AEL/Erase button
LCD monitor button
OK/Menu button
Cross button
Card select button
Rear lid
LCD hood strap
Grease for O-rings (White-cap tube)
Silica gel
Balance weight
Pick for removing O-rings
Buckle opener
Lens cap
Lens cap strap
Buckle open/close lever
Buckle hook
Quick View button
Control dial knob
O-ring for the standard port section (POL-101)
Waterproof cap maintenance
adapter
Note :The Case operation parts marked by ❈ corresponds to the operation parts
of the digital camera. When the operation parts of the Case are operated,
the corresponding functions of the digital camera will operate. For details of
the functions, refer to the instruction manual for the digital camera.
E-10
PT_027E_最終.qxd 05.2.14 10:50 AM ページ E-11 (1,1)
Install the strap.
Install the strap on the Case body.
Installation explanation
Finished installation
Hand strap
Hand strap ring
CAUTION : Please install the strap correctly as shown above. OLYMPUS
IMAGING CORP. shall bear no responsibility for damage etc. caused
by dropping the Case because of incorrect installation of the strap.
Master the basic operation.
Please master the basic operation of the Case before taking pictures.
Holding the Case
Hold the Case securely with both hands, keep your elbows close to
your body, and hold the Case so that you can confirm the picture on the
LCD monitor of the digital camera through the LCD monitor window of
the Case.
良い例
Good example
悪い例
Bad example
CAUTION : • Do not exert excessive force onto the lens window or the lens ring.
• Take care not to put your fingers etc. over the lens window
and the flash diffuser.
Note: • Check your image on the LCD monitor. The viewfinder cannot be used
to check the image.
E-11
PT_027E_最終.qxd 05.2.14 10:50 AM ページ E-12 (1,1)
How to Press the Shutter
When pressing the shutter lever,
press it gently, so that there will
be no movement of the camera.
Advice • For more detailed information on operating the shutter release,
please consult the digital camera’s instruction manual.
How to Use the Mode Dial
The case is equipped with a mode
dial knob that fits on the camera's
mode dial and functions the same
way. After inserting the digital
camera into the case, make sure
that the mode dial knob is operable
before taking any image.
Mode dial
knob
Advice • Please confirm that the mode dial knob has been set securely to
the mode dial of the digital camera. If the mode of the digital
camera does not change when the mode dial knob is operated,
turn the dial while pushing it lightly.
How to Use the Zoom Lever
Zoom operation is possible by
operating the zoom lever of this
Case corresponding to the zoom
lever of the digital camera in the
Case.
E-12
PT_027E_最終.qxd 05.2.14 10:50 AM ページ E-13 (1,1)
Setting the Zoom Lever
When loading the digital camera
in the Case, fit the projecting
part of the zoom lever of the
digital camera into the recessed
part of the zoom lever on the
inside of the Case.
CAUTION : • When loading the camera, confirm that the projecting
part of the zoom lever of the camera is properly set to
the recessed part of the zoom lever of the Case.
• When the setting is insufficient, the loading of the
camera becomes imperfect and it may not be
possible to seal the Case or zooming may not
function. Insufficient sealing will cause water leakage.
Power Switch Lever Operation Method
Power switch
lever
Use the power switch lever
to turn the camera on and
off.
CAUTION : • When the digital camera is not used for about 3
minutes while in the shooting mode, it enters the
sleep mode (standby status) and no operations are
possible.
To cancel sleep mode (and return to operation
status), press the shutter button or any other button.
For details, refer to your digital camera's instruction
manual.
E-13
PT_027E_最終.qxd 05.2.14 10:50 AM ページ E-14 (1,1)
Removing/attaching the standard port
When using the case with the separately available Wide Port for the PT-020/027
(PPO-02), the standard port attached to the PT-020 or PT-027 should be removed.
To remove or reattach, use the following procedures.
Removing
1 Wipe off any water drops, making sure the case is
completely dry. Slowly rotate each of the two buckles on the
left and right of the standard port (from the bottom toward
the top as indicated by the arrow in the figure on the right).
2
3
Buckle
When the two buckles have been turned by about
110 degrees, the standard port begins to
separate from the case.
Continue turning the buckles slowly until the
standard port separates completely from the
case.
Attaching
1
Align the cam grooves of the buckles on the left
and right of the standard port with the bosses on
the case.
2
Buckle cam
groove
Boss
Fit the bosses into the left and right buckles and
fit the standard port into the case while slowly
turning the buckles clockwise.
3
Turn the two buckles clockwise until they stop to
secure the standard port.
CAUTION : • If the standard port is attached improperly to the case, water penetration
may result. Also make sure that the buckles on the left and right of the
standard port are clamped firmly. Confirm indications “OPEN” and
“LOCK” on the buckle when removing and reattaching the port.
❈ For detailed handling of the separately available Wide Port for the PT020/PT-027 (PPO-02), refer to the Wide Port’s instruction manual.
E-14
PT_027E_最終.qxd 05.2.14 10:50 AM ページ E-15 (1,1)
Removing the TTL cable connector cap
TTL flash shooting is possible by uncapping the TTL cable connector
on this case (PT-027) and connecting the FL-20 flash case (optional
PFL-01) as described in the following procedure.
TTL cable
connector cap
1 Remove the TTL cable connector
Remove.
cap from this case.
2 Connect
the underwater TTL
cable connector, provided with
the PFL-01, to the TTL cable
connector on this case.
1
2
Turn counter clockwise.
Underwater
TTL cable
Insert into the
connector.
Turn the threaded section of the connector
clockwise lightly until it is stopped.
---- How to attach the TTL cable connector cap to the case ---Make sure there is no foreign matter attached to the O-rings inside the cap and on
the TTL cable connector. To secure the cap, gently turn it clockwise until it stops.
Gently turn the cap
clockwise until it stops.
Cap
Check O-rings
Connector
Put the cap on the case.
CAUTION : • If the TTL cable connector cap is loose, water
penetration may result. Be sure to gently turn the cap
until it stops to make sure it is firmly secured.
Do not turn or tighten the TTL cable too hard. If it is
too tight, it may be difficult to loosen and remove it.
❈ Refer to the optional PFL-01's instruction manual for detailed
instructions on using the TTL cable and hot shoe cable.
E-15
PT_027E_最終.qxd 05.2.14 10:50 AM ページ E-16 (1,1)
Removing the hot shoe cable cap
When using this case in TTL flash shooting, the hot shoe cable
provided with the separately available PFL-01 should be connected
between the connector on the case and the camera’s hot shoe.
1
Turn the hot shoe cable connector cap inside
the case counterclockwise to remove it.
2 Insert the connector of the hot shoe cable into
the case's connector and turn the connector
screws all the way clockwise to connect them
firmly.
3
Insert the hot shoe on the hot shoe cable into
the hot shoe on the camera.
4 When not using the hot shoe cable, attach the
hot shoe cable cap to the hot shoe cable
connector inside the case and turn the cap all
the way clockwise to attach it firmly.
CAUTION : • Be sure to remove the camera from the case when
inserting the connector of the hot shoe cable into the
case’s connector.
Cleaning the TTL connector
If the threaded sections of the TTL cable and TTL cable connector
stick to each other, the cable may disconnect from the connector. To
prevent this, apply O-ring silicon grease (provided with this case) to
the threaded sections.
For details, see the maintenance description on page E-35 of this
manual.
CAUTION : • If you cannot disconnect the TTL cable, do not use
force to disconnect it. Contact Olympus for support.
E-16
PT_027E_最終.qxd 05.2.14 10:50 AM ページ E-17 (1,1)
2. Advance Check of the Case
Advance test before use
This Case has been the subject of thorough quality control for the parts
during the manufacturing process and thorough function inspections
during the assembly. In addition, a water pressure test is performed
with a water pressure tester for all products to confirm that the
performance conforms to the specifications. However, depending on
the carrying and storage conditions, the maintenance status, etc., the
waterproof function may be damaged.
Before diving, always perform the following advance test and the water
leakage test after installation of the camera.
Making sure the case is waterproof
Check the parts that ensure the case is waterproof.
1. Make sure that the O-ring between the front and rear lids of the
case is attached firmly and the buckle is tightly secured.
2. Make sure that the O-rings between the case and standard port are
attached firmly and that the buckles are tightly secured.
3. Make sure that the O-ring on the TTL cable connector cap is
attached firmly and that the cap is fitted tightly to the connector.
E-17
PT_027E_最終.qxd 05.2.14 10:50 AM ページ E-18 (1,1)
Advance Test
1. Before installing the digital camera in the Case, immerse the empty
Case to the intended water depth to confirm that there is no water
leakage.
2. Main causes of water leakage are as follows.
The O-ring has not been installed.
A part of the O-ring or the entire O-ring is outside the specified
groove.
O-ring damage, cracks, deterioration or deformation.
Sand, fibers, hair or other foreign matter sticking to the O-ring, the
O-ring groove or the O-ring contact surface.
Damage to the O-ring groove or the O-ring contact surface.
When closing the Case, check for catching of the hand strap and
silica gel after the above causes have been eliminated.
CAUTION : • The most suitable method for checking water leakage
is to immerse the Case to the intended water depth.
When this is difficult, water leakage also can be
checked at a shallow depth with no water pressure. Do
not feel that this is troublesome, but perform this test.
• If the advance test should show water leakage with
normal handling, stop using the Case and contact
your dealer or an Olympus service station (listed on
the rear page of this instruction manual).
E-18
PT_027E_最終.qxd 05.2.14 10:50 AM ページ E-19 (1,1)
3. Install the digital camera.
Check the digital camera.
Check the digital camera before loading it in the Case.
Battery Confirmation
Since the LCD monitor is used for picture confirmation while taking
pictures under water, the battery life becomes short.
Confirm that the remaining battery capacity is sufficient.
Note: • To make sure you aren't prevented from shooting because the
battery runs out, it is recommended that you load a fullycharged battery before every diving session.
Confirmation of the Remaining Number of Pictures to be Taken
Confirm that the image storage has a sufficient remaining number
of pictures to be taken.
Removing the carrying strap and lens cap from the digital camera
If the digital camera has a carrying strap and lens cap attached, be
sure to remove them before inserting the digital camera into the
case.
CAUTION : • If the digital camera is inserted into the case without
removing the carrying strap and lens cap, the case
cannot be closed properly and water penetration may
result.
• Be careful when removing the carrying strap and lens
cap from the digital camera. Olympus will not assume
any liability for any damage that may result from
dropping the camera.
Removing the filter from the digital camera
If the digital camera has a lens filter attached, be sure to remove it
before inserting the camera into the case.
CAUTION : • The digital camera cannot be inserted in the case if a
filter is attached to the camera lens. Always be sure
to remove the lens filter.
E-19
PT_027E_最終.qxd 05.2.14 10:50 AM ページ E-20 (1,1)
Prepare the camera
Applicable digital cameras:
This case (PT-027) is designed for use exclusively with CAMEDIA
C-7070 Wide Zoom/C-5060 Wide Zoom digital cameras.
Check the operation of the camera.
Confirm the operation according to the instruction manual for the
digital camera.
Open the Case.
Insert the buckle opener of the accessory into the buckle opening
lever as shown in the figure (in direction ) Pull the buckle opener
slowly (in direction ②). When not using the buckle opener, hold the
buckle opening lever with your thumb and index finger from the side
and pull it up slowly.
Load the digital camera.
Make sure that the digital camera
is turned OFF. Align the projecting
part of the camera's zoom lever
with the notch on the case's zoom,
then insert the camera gently into
the case.
CAUTION : • Confirm that the projecting part of the zoom lever of
the digital camera is set securely to the zoom lever
notch on the inside of the Case. When the setting is
not secure, the loading of the digital camera is not
complete and closing of the rear lid of the Case may
not be possible or zoom may not function even when
the zoom lever is operated.
• Insufficient sealing will cause water leakage.
E-20
PT_027E_最終.qxd 05.2.14 10:50 AM ページ E-21 (1,1)
Insertion of silica gel
Before sealing the Case,
insert the accessory silica
gel bag (for prevention of
fogging) between the
bottom of the camera and
the Case. Insert the bag
with the glued longer side
to the inside.
Pay attention to the orientation.
CAUTION : • Insert the silica gel all the way at the specified location and
with the specified orientation. When the orientation is not
correct, the silica gel bag will be caught when the Case is
sealed and water leakage will be caused.
• Attempting to seal the Case with the bag inserted only part of
the way will cause the silica gel bag to get caught by the O-ring
and water leakage will occur.
• Once silica gel has been used, the moisture absorption
performance will be impaired. Always exchange the silica
gel when the Case is opened and closed.
Lifting the mode dial knob
While lifting the mode dial knob (on the rear lid of
the case) as far as it can go, close the rear lid
gently. When closing the rear lid, make sure that
the camera's mode dial does not touch the bottom
end of the case's mode dial knob.
Fitting the mode dial knob
After closing the rear lid of the case, press the
case's mode dial knob back down. Make sure that
the base of the case's mode dial knob sits properly
on the camera's mode dial.
At this time, operate the case’s power switch lever
to make sure that the camera’s switch lever can be
operated correctly.
Advice • After properly fitting the case's mode dial knob, turn the knob to
make sure that the camera's mode dial switches before closing the
case tightly.
E-21
PT_027E_最終.qxd 05.2.14 10:50 AM ページ E-22 (1,1)
Check the loading status.
Always perform the following final checks before sealing the Case.
Has the camera been inserted properly so that the zoom lever works?
Has the silica gel bag been placed in the correct position and in the proper
way?
Are both the O-rings and the contact surfaces of the front lid free of dirt and
other foreign matter?
Are the O-rings correctly positioned in the groove of the front and rear lids?
Is the lens port attached properly and are the buckles locked correctly?
the TTL cable connector cap attached tightly?
Seal the Case.
When the rear lid is closed
(quietly, so that the O-ring
will not come out of the
groove), the buckles are
engaged with the edge of
the rear lid, and the buckle
lock levers are pushed down
in arrow direction, the Case
will be sealed airtight.
CAUTION : • Seal the Case by turning both buckle lock levers down in
arrow direction. When one of the buckles is left open, the
Case will not be sealed and water leakage will be caused.
Install the special balance weight.
Install the special balance weight
to the tripod mounting thread at
the bottom of the Case. Install the
balance weight securely by
tightening the accessory screw of
the balance weight.
E-22
PT_027E_最終.qxd 05.2.14 10:50 AM ページ E-23 (1,1)
Perform the final checks after loading.
After sealing the case, perform the following final checks to confirm
proper operation of the camera.
Confirm that the camera can be turned ON/OFF from the case’s
power switch lever.
Confirm that the camera mode can be switched with the case’s
mode dial knob.
Press the Case’s shutter level and see if the camera shutter can be
released accordingly.
Press other buttons on the Case to see if the camera functions
accordingly.
CAUTION : • If the camera does not function properly, restart the digital
camera installation procedure from “Check the digital
camera.” on page E-19 of this manual.
• Make sure that the mode dial can be moved after the
camera has been loaded in the Case. If the mode dial
does not move, there may be oil or grease on it; wipe it
clean.
• When the digital camera is not used for about 3 minutes
while in the shooting mode, it enters the sleep mode
(standby status) and no operations are possible. To cancel
sleep mode and return to operation status, press the zoom
lever, shutter button or any other button. For details, refer to
the digital camera's instruction manual.
E-23
PT_027E_最終.qxd 05.2.14 10:50 AM ページ E-24 (1,1)
Installation and Removal of the LCD Hood
Installation
Strongly push the mounting projections of the LCD hood as shown
in the figure into the guides above and below the LCD monitor
window.
Removal
Remove the mounting projections of the LCD hood from the guides
above and below the LCD monitor window by widening the LCD
hood.
Guides
Installation
Removal
E-24
PT_027E_最終.qxd 05.2.14 10:50 AM ページ E-25 (1,1)
Mounting and Removing the Lens Cap
Fit the lens cap onto the lens
ring as shown in the figure. Be
sure to remove the lens cap
before shooting.
Perform the final checks.
Visual Inspection
After closing the case tightly, check the seal between the front and
rear lids and the connection between the port and case to make sure
the O-rings are not twisted, that they sit properly in the grooves, and
that no foreign matter has been caught between the two parts.
CAUTION : • Hairs, fibers, and other narrow items are not very apparent,
but they may cause entry of water, so that special attention
is required.
E-25
PT_027E_最終.qxd 05.2.14 10:50 AM ページ E-26 (1,1)
Final Test
The final test after loading the camera is explained below. This is the only way to
eliminate worry about possible entry of water! Always perform this test. It can be
performed easily in a water tank or a bathtub. The required time is about five minutes.
Simple water
immersion test
1
Place the Case
slowly into the water.
2
At first, immerse the
Case for only three
seconds.
3
Check that no water
has entered into the
Case.
4
Next, immerse the
Case for 30
seconds.
5
Check that no water
has entered.
6
Next, check by
immersing for three
minutes.
7
This is the final check.
Has the silica gel
become moist?
8
Now everything is
all right.
Do not forget the
balance weight.
Explanatory
image
Hints
As the Case is transparent,
waterdrops entering into it can be
confirmed easily.
In case of trouble with the O-ring,
three seconds are enough for water
to enter. Are there air bubbles
coming out between the lids?
Please check carefully.
Remove the Case from the water and
check that no water has accumulated at
the bottom of the Case.
Is there any water trickling down?
Check carefully for air bubbles!
Do not perform any operation yet,
but just observe.
Remove the Case from the water and
check that no water has accumulated
at the bottom of the Case.
Perform very careful confirmation.
Check carefully for air bubbles!
Try operation of the buttons used frequently.
Check carefully for air bubbles!
If there is still no entry of water,
everything is OK!
This is very important!
Has the silica gel become moist?
Please check carefully!
As the inside can be seen, the inspection for
entry of water also can be made securely!
Now everything is all right!
Have a nice dive!
Did you remember to attach the
balance weight?
E-26
PT_027E_最終.qxd 05.2.14 10:51 AM ページ E-27 (1,1)
4. Taking Pictures Under Water
How to Use the Hand Strap
Pass your hand through the
accessory hand strap and
adjust the length with the
stop button.
Take pictures carefully.
Confirm the picture on the LCD monitor.
This Case uses the LCD monitor to confirm the picture. The
viewfinder cannot be used.
Quietly press the shutter lever.
When pressing the shutter lever, hold the Case securely with both
hands and operate the lever quietly to prevent camera shake.
Caution when using the flash
When taking macro shots with a wide-angle setting, the flash may
provide uneven and/or insufficient illumination.
Flash working range
Wide angle :
Approx. 0.8 m to 3.7 m
Tele :
Approx. 0.8 m to 2.2 m
Conditions at the time of shooting (clarity of the water, suspended
matter, etc.), can affect the flash's working range.
For this reason, the image should always be checked on the LCD
monitor after capture.
CAUTION : • When the case is used with the separately available Wide
Port for the PT-020/027 (PPO-02), the light from the builtin flash of the camera will be obstructed. If flash shooting
is required, use an external flash; for example, the
separately available TLL Flash Protector (PFL-01) and
Electronic Flash (FL-20) can be used in combination.
E-27
PT_027E_最終.qxd 05.2.14 10:51 AM ページ E-28 (1,1)
5. Underwater Shooting According to the Scene Type
When this case is used with the C-7070 Wide Zoom, you can easily
shoot underwater using the underwater scene modes built into the
camera.
Shooting scene modes
UNDER WATER WIDE
Suitable for taking pictures of underwater
scenery that spans a wide area. This
mode vibrantly reproduces the blue
background.
UNDER WATER MACRO
Set this mode to take close-ups
underwater. It is suitable for taking pictures
of fish and marine life at close range. The
natural colors found underwater are
accurately reproduced. Additionally, reds
can be accentuated by using the flash.
Selecting the scene mode
To find a camera setup that
best suits the underwater
shooting conditions, turn the
case’s mode dial knob to set
the camera mode to [SCENE].
While confirming the view
displayed on the LCD monitor,
press the up or down cursor
button of the case to select
the desired underwater scene
mode.
E-28
PT_027E_最終.qxd 05.2.14 10:51 AM ページ E-29 (1,1)
6. Handling After Shooting
Wipe off any waterdrop.
After underwater shooting,
remove any drops of water from
the case. Use pressurized air or
a soft, lint-free cloth to carefully
wipe away any moisture from the
hinge between the front and rear
lids, the shutter release lever, the
handgrip and the buckles.
CAUTION : • Water left between the front and rear lids or between
the case and port can get inside the case once it is
opened or the port is detached. Please dry these
areas carefully.
• When opening the case or removing the port, make
sure no water from outside (e.g. drops from your hair
or the diving suit) gets inside of the case and/or on
the camera!
• Before opening the case or removing the port, ensure
that your hands or gloves are completely clean (free
of sand, loose fibers, etc.).
• Never open the case or remove the port in areas
where water could splash or spray or where sand or
dust could be blown in the air. When this cannot be
avoided, for example if the battery or memory card
needs to be changed, the case and camera should be
protected from the wind or spray with a plastic sheet
or similar object.)
• Never touch the digital camera and/or battery you're
your hands are wet with sea water.
Note:
• Moisten a cloth or towel with tap water and keep it in
a plastic bag. Use this to wipe the salt water or
crystals from your hands before you touch the
camera.
E-29
PT_027E_最終.qxd 05.2.14 10:51 AM ページ E-30 (1,1)
Take out the digital camera.
Carefully open the buckles on the case. While pulling up the mode dial
knob on the case's rear lid so that the knob is no longer touching the
digital camera's mode dial, open the case's rear lid. After opening the
rear lid completely, remove the digital camera.
CAUTION : • After opening the case, always put it down it with the
O-ring side face-up. Otherwise, dirt or other foreign
matter could attach itself to the O-rings and/or the
contact surfaces, allowing water to penetrate the case
during the next dive.
• For information on storing images, refer to the digital
camera's instruction manual.
• Before opening the case's rear lid, it is very important
that you make sure the case's mode dial knob is not
still fitted to the camera's mode dial. Never use force
to open the case's rear lid. This could damage the
camera or the case.
E-30
PT_027E_最終.qxd 05.2.14 10:51 AM ページ E-31 (1,1)
Wash the Case with pure water.
After use, seal the Case again after taking out the camera and wash it
sufficiently in pure water as soon as possible. After use in sea water,
it is effective to immerse it for a fixed time in pure water to remove
any salt.
CAUTION : • Water leakage may be caused when a high water
pressure is applied locally. Before washing the Case
with water, remove the digital camera from it.
• Operate the shutter lever and various buttons of this
product in pure water to remove salt adhering to the
shaft. Do not disassemble for cleaning.
• Drying the Case with adhering salt may impair the
function. Always wash off any salt after use.
Dry the Case.
After washing with pure water, use a soft cloth without any salt on it
and not causing any fibers to wipe off any waterdrop and dry the
Case completely at a well ventilated location in the shade.
CAUTION : • Do not use hot air from a hair drier or the like for
drying and do not expose the Case to direct sunlight,
as this may accelerate deterioration and deformation
of the Case and deterioration of the O-ring, leading to
leakage of water.
When wiping the Case, take care not to cause
scratches.
E-31
PT_027E_最終.qxd 05.2.14 10:51 AM ページ E-32 (1,1)
7. Maintaining the Waterproof Function
Remove the O-ring.
Open the Case and remove the O-ring from the Case.
Removal of the O-ring
Insert the O-ring removal pick between the O-ring and the wall of
the O-ring groove.
Move the tip of the inserted pick under the O-ring. (Take care not
to damage the O-ring groove with the tip of the pick.)
Hold the O-ring with your fingertips after it has come out of the
groove and remove it from the Case.
Remove any sand, dirt, etc.
After visually checking that dirt has been removed from the O-ring,
checking for attached sand and other foreign matter, as well as for
damage and cracks can be done by squeezing the entire circumference
of the O-ring lightly with your fingertips.
Use a clean cloth not easily shedding fibers, or cotton swab, tissue
paper or the like, to remove any foreign matter from the O-ring groove.
Clean the O-ring contact surface on the front lid in the same way to
remove any sand and dirt.
E-32
PT_027E_最終.qxd 05.2.14 10:51 AM ページ E-33 (1,1)
CAUTION : • When a mechanical pencil or a similar other sharp
object is used to remove the O-ring or to clean the
inside of the O-ring groove, the Case and the O-ring
may be damaged and water leakage may be caused.
• When the O-ring is checked with the fingertips, take
care not to stretch the O-ring.
• Never use alcohol, thinner, benzene or similar solvents
or chemicals detergents to clean the O-ring. When such
chemicals are used, it is likely that the O-ring will be
damaged or that its deterioration will be accelerated.
Install the O-ring.
Confirm that no foreign matter is attached, apply a thin coat of the
accessory grease to the O-ring, and fit the O-ring into the groove. At
this time, confirm that the O-ring does not stick out from the groove.
How to Apply Grease to the O-ring
1
Apply the
exclusive
lubricant to each
O-ring.
Make sure that your fingers and the Oring are free of dirt, and squeeze about
5 mm of lubricant onto a finger. (5 mm
is the most appropriate amount.)
2
Spread the
lubricant all over
the O-ring.
Surround the lubricant with three
fingers and spread it over the ring. Be
careful not to use excessive force as
this may stretch the O-ring.
3
Check that the
O-ring is free of
scratch or
unevenness.
After spreading the lubricant, check
visually and by touch that the O-ring is not
scratched and that its surface is flat. If it is
damaged in any way, replace it with a
brand-new O-ring.
4
Apply lubricant on
the O-ring contact
surface.
Use the lubricant remaining on the
fingers to clean and lubricate the
case's contact surface.
E-33
PT_027E_最終.qxd 05.2.14 10:51 AM ページ E-34 (1,1)
CAUTION : • Always perform maintenance of the waterproof
function even when the Case has been opened to
exchange the battery or the image storage during
shooting. Neglecting this maintenance may become
the cause of water leakage.
• When the Case is not to be used for a long time,
remove the O-ring from the groove to prevent
deformation of the O-ring, apply a thin coat of silicone
grease, and store it in a clean plastic bag or the like.
• When drying is done with salt attached, it is likely that
a function impairment will be caused. After use,
always wash off any salt.
Replace consumable products.
The O-ring is a consumable product. Independent of the number of
times the Case is used, it is recommended that the O-ring should
be replaced by a new one at least once a year.
Deterioration of the O-ring is accelerated by the use conditions and
the storage conditions. Replace the O-ring even before a year has
passed if it shows signs of damage, cracking or loss of elasticity.
Note: • Please use original Olympus products for the silicone O-ring
grease, the silica gel, and the O-ring. These consumable
products also can be purchased at an Olympus service
station.
E-34
PT_027E_最終.qxd 05.2.14 10:51 AM ページ E-35 (1,1)
Maintenance of the threaded sections on the
TTL cable and TTL cable connector
If the threaded sections used to connect the TTL cable to the TTL cable
connector are not maintained properly, salt and other seawater residue
may adhere the TTL cable and prevent it from being disconnected.
After use in seawater, clean off any salt, sand, or other residue as soon
as possible, then dry the equipment thoroughly. Clean the threaded
sections with a cotton swab and apply a thin, uniform layer of O-ring
silicon grease (provided with this case).
Clean and apply O-ring
silicon grease to these
sections.
Maintenance of the TTL Connector Cap
After removing the TTL connector cap from the waterproof cap, be sure
to clean and grease the O-ring.
Use the waterproof cap maintenance adapter to remove the O-ring unit
from the waterproof cap.
Waterproof cap
maintenance adapter
Waterproof cap
1
Insert the adapter by aligning its pin with the
hole on the cap.
2
Turn the adapter counterclockwise to remove
the O-ring unit.
3 After removing the O-ring attached to the Oring unit, clean the O-ring groove and apply
silicon grease to the O-ring. Then, re-attach
the O-ring to the O-ring unit.
O-ring
❈ Reverse the removal procedure to re-attach the O-ring unit to the
waterproof cap.
E-35
PT_027E_最終.qxd 05.2.14 10:51 AM ページ E-36 (1,1)
8. Appendix
Q & A on the use of the PT-027
Q1 : Which digital camera models can the case be used with?
A1 : The case (PT-027) is designed for use exclusively with C-7070 Wide
Zoom or C-5060 Wide Zoom.
Q2 : What points should be observed when inserting the digital camera into
the case?
A2 : When inserting the digital camera you should pay special attention to the
following points:
(1) Check that the digital camera's battery is fully charged.
This is important because in underwater shooting you can only use the
LCD monitor for framing shots. This uses much more battery power than
the optical viewfinder.
(2) Check the number of remaining images that can fit on the memory card.
Please use a card with as much free storage space as possible so you
won't have open and close the case to replace the card.
(3) Remove the carrying strap and lens cap from the digital camera.
If the carrying strap and lens cap are not removed from the digital
camera, they could catch between the two lids of the case and prevent it
from closing properly. This could lead to water penetration.
(4) Before closing the case, check that the O-rings sit correctly in the
groove.
(5) Make sure that the buckles used for connection of the case and port and
TTL connector cap are closed firmly.
(6) Make sure that the O-rings and the case's contact surfaces are free of
foreign matter and dirt.
(7) Place the silica gel bag in the case to avoid fogging. Only use Olympus
silica gel.
(8) When closing the case's rear lid, pull up the case's mode dial knob and
close the lid gently. After closing the lid, push the mode dial knob down
so that it fits properly onto the camera's mode dial.
(9) Install the special balance weight on the tripod mount thread.
Q3 : What cautions must be observed when using and storing the Case?
A3 : Pay special attention to the following items.
(1) When the O-ring contact surface is pressed strongly from the outside of
the Case, or when the Case is twisted, the waterproof function may be
impaired and water leakage may be caused.
(2) When the Case is used, left or stored at the following locations, defective
operation or trouble may be caused. Always avoid such locations.
(a) Places where the Case can reach high temperatures under direct
E-36
PT_027E_最終.qxd 05.2.14 10:51 AM ページ E-37 (1,1)
sunlight or in a car, places with extremely low temperatures, and
places with extreme temperature variations
(b) Places with open fire
(c) Places with volatile substances
(d) Places with vibrations
(3) In case of the following handling with a camera loaded into the Case,
trouble or breakage may be caused for the Case and/or the loaded
camera. Always avoid such handling.
(a) Hitting other objects
(b) Dropping
(c) Placing heavy objects on top of the Case
(4) When the Case is not used for a long time, trouble from formation of
mold etc. may be caused. Before use, confirm the operation of all
operation parts and perform the advance test and the final test.
Q4 : What cautions must be observed when opening and closing the Case?
A4 : Pay special attention to the following items.
(1) Do not open and close the Case at locations with water spray or sand
spray.
(2) Wipe off all waterdrops from the gap between the front lid and the rear lid
and around projections and recesses such as the buckles. When this is
not done, entry of waterdrops into the Case is to be feared at the time of
opening and closing.
(3) When opening the Case, take care that no water will drip from your hair
or body into the Case or onto the camera.
(4) When the case is open, examine the O-rings and the O-ring contact
surfaces on the front lid for foreign matter such as hair, fiber, and grains
of sand. Remove these if present. Also examine the O-rings used for
connection of the case and port.
(5) Do not touch the camera or the image storage with your hands to which
sea water is sticking.
(6) If you should detect waterdrops or other signs of water leakage while
shooting, immediately end the dive, perform the water leakage test
again, and confirm that there is no leakage. If the camera is wet, wipe off
any moisture and check the operation.
Q5 : How should the Case be handled after use?
A5 : After use, take out the camera as soon as possible and wash the Case
with pure water. In case of use in the ocean, it is effective to immerse the
Case for a certain time in pure water to remove any salt. Operate the
buttons and levers under water to turn the shafts and wash off any salt.
After washing, use a dry cloth without any salt on it to wipe off any
moisture and dry the Case in the shade. Do not use hot air from a hair
E-37
PT_027E_最終.qxd 05.2.14 10:51 AM ページ E-38 (1,1)
drier or the like and do not dry the Case under direct sunlight. Exposure
to high temperatures or direct sunlight may cause deformation,
discoloration or breakage of the Case and deterioration of the O-ring.
Wipe the inside of the Case with a soft cloth not causing any fibers.
Remove the O-ring, wipe off any salt, sand, dust, etc., and also clean the
O-ring groove and the O-ring contact surface in the same way and then
dry them. When an object with a sharp tip is used to remove the O-ring
from the groove, the O-ring may be damaged and water leakage may be
caused. Always use the accessory pick for O-ring removal.
Q6 : How should I take pictures under water?
A6 : Please observe the following items for shooting under water.
(1) Fix the Case with the accessory hand strap to your wrist.
(2) When you place a finger onto the lens window, the finger will appear in
the photo. Pay attention to the position of your fingers when holding the
Case.
(3) When pressing the shutter lever, hold the Case securely with both hands
and operate the lever quietly to prevent camera shake.
(4) Look through the LCD monitor window on the rear of the Case to confirm
the picture and then press the shutter lever. Please note that the
viewfinder cannot be used, When the LCD monitor is used, the battery is
exhausted earlier. In order to avoid losing shutter chances due to an
exhausted battery, please always replace a battery with a fully charged
battery before each dive.
Q7 : How can I check for water leakage?
A7 : For confirmation, perform the advance test and the final test after loading
the camera. The advance test with immersing the Case without the
camera to the intended use depth to check for water leakage is the most
accurate test, but when this is difficult, it is safer to perform this test even
at a depth of 1 m or in a bathtub. The final test also can be performed in
a bathtub or a bucket.
Q8 : What are the causes for entry of water?
A8 : The main causes for the entry of water are shown below. Please check
them most carefully.
(1) Forgetting to install the O-ring
(2) The O-ring is partly or completely outside the groove.
(3) Damage, deterioration, or deformation of the O-ring
(4) Sand, fibers, hair or other foreign matter on the O-ring
(5) When foreign matter (sand, fiber, hair, etc.) is stuck to the O-ring
grooves or O-ring contact surfaces.
(6) Catching of the strap, the bag of silica gel, etc. at the time of sealing the Case.
E-38
PT_027E_最終.qxd 05.2.14 10:51 AM ページ E-39 (1,1)
(7) Throwing the Case from a boat into the water, jumping with the Case into
the water, or other sudden application of strong forces onto the Case.
When entering the water, hand the Case over quietly or avoid impacts in
other ways.
Q9 : What are the important points for O-ring maintenance?
A9 : Please observe the following items.
(1) Never use alcohol, thinner, benzene or similar organic solvents or
chemical detergents to clean the O-ring. When such chemicals are used,
it is to be feared that the O-ring will be damaged or that its deterioration
will be accelerated.
(2) Use the original Olympus silicone O-ring grease (white cap). The grease
attached to Cases up to PT-008 (red cap) and the grease of other
companies are not suitable for this silicone O-ring, and use of such
grease may cause deterioration of the surface and impairment of the
waterproof function.
(3) In order to avoid deformation of the O-ring when the Case is not used for
a long time, remove the O-ring from the Case, apply a thin coat of the
special grease, and store the O-ring in a clean plastic bag. For reuse,
confirm that the O-ring is free of damage and cracks, that it has sufficient
elasticity, that the surface is free of stickiness and other abnormalities,
and use it after applying a thin coat of the special grease. Excessive
application of grease does not improve the waterproof function or the
permissible withstand pressure. However, it may facilitate attachment of
sand, dirt, etc.
A thin, uniform coat produces the best result.
(4) The O-ring is a consumable product. Replace it at least once a year.
(5) Deterioration of the O-ring is accelerated by the use conditions and the
storage conditions. Replace the O-ring immediately by a new one if it
shows signs of damage, cracking or loss of elasticity.
Q10: What are the important points for Case maintenance?
A10: Please observe the following items.
(1) Never use the following chemicals for cleaning, corrosion protection,
defogging, repair or other purposes.
• Never use alcohol, thinner, benzene or similar volatile organic solvents
or chemical detergents to clean the Case. Pure water or lukewarm water
is sufficient for cleaning.
• Do not use anticorrosion agents on the metal parts. The metal parts are
made of aluminum, brass or stainless steel. Cleaning with pure water is
sufficient.
• Do not use commercial defogging agents. Always use the original
Olympus defogging silica gel.
E-39
PT_027E_最終.qxd 05.2.14 10:51 AM ページ E-40 (1,1)
• Do not use adhesive for repairs or other purposes. When repair is
required, please contact a service station of our company or your dealer.
Q11: Please tell me about repairs.
A11: Please contact a service station of our company or your dealer, if repair
should be necessary. Do not try to repair, disassemble or modify the
Case yourself. Repair, disassembly or modification by you or third
parties not authorized by Olympus invalidates the guarantee.
Q12: What are the model names and prices of the accessories available for
use with the PT-027?
A12: The following accessories are available as options.
(1) O-ring for the PT-020/PT-027 (POL-020A/price including tax 1,050 yen,
POL-020B/price including tax 1,050 yen, POL-020C/price including tax
1,050 yen): Packing that must be attached to the O-shaped silicon
rubber section installed on the PT-027 to prevent water penetration.
Three kinds of O-rings are available but the O-rings designed for other
cases cannot be used except for those designed for the PT-020.
(2) O-ring for the PPO-02 standard port on the PT-027 (POL-101/price
including tax 1,050 yen): Packing that must be attached to the O-shaped
silicon rubber section installed on the case mount section of the standard
port.
(3) Grease for silicon O-ring (PSOLG-1): Exclusive grease for maintenance
of the silicon O-ring.
(4) Silica gel (SILCA-5/price including tax 525 yen): Desiccant agent to
reduce fogging of the glass parts of the case due to condensation.
(5)LCD hood (PFUD-04/price including tax 1,050 yen): Hood that attaches
to the LCD monitor window of the protector to improve the view of the
camera’s LCD monitor.
(6) Balance weight for the PT-020/PT-027 (PWT-020/price including tax
2,625 yen): Weight to give the case to the neutral buoyancy in seawater.
An environment-friendly accessory that does not contain lead. It can also
be used as the balance weight for the PT-020.
❈ You can order in large computer shops and camera mass sale stores.
❈ Please contact your dealer or a service station of our company when
replacement is required. Replacement will be made against payment.
Q13: How can I take good underwater photos?
A13: Olympus's ZUIKO CLUB online school website has a page describing
underwater shooting techniques. You can access this page at the
following link:
URL: http://www.olympus-zuiko.com/school/index.html
E-40
PT_027E_最終.qxd 05.2.14 10:51 AM ページ E-41 (1,1)
After-sale Service
● You will receive the Warranty card from your dealer. Please make
sure that the dealer's name, the date of purchase, etc. have been
entered. If they have not been entered, immediately ask your
dealer to have them entered. Read the guarantee conditions
carefully and keep the guarantee card at a safe location.
● Please contact your dealer or one of the service stations of
OLYMPUS IMAGING CORP. listed in this instruction manual for
questions on aftersale service for this product or in case of defects.
In case of a defect of this product, occurring within one year after
the date of purchase and with handling according to this instruction
manual, repair based on the conditions specified in the guarantee
card is performed free of charge.
Payment is required for repairs after expiration of the guarantee
period and for trouble caused by problematic handling by the
customer even during the guarantee period.
● OLYMPUS IMAGING CORP. keeps repair parts for this product for
approximately five years after the end of production of the product.
Accordingly, in principle repairs are accepted during this period. As
repair may be possible even after this period, please contact your
dealer or a service station in your neighborhood.
● Warranty is limited to and valid only in the region of intended
distribution.
● Incidental damages from defects of this product (expenses
required for diving, shooting expenses, loss of profit from photos,
etc.) shall be excluded from the guarantee. In addition, transport
expenses etc. related to repair shall be paid by the customer,
independent of whether they are incurred during or after the
guarantee period.
E-41
PT_027E_最終.qxd 05.2.14 10:51 AM ページ E-42 (1,1)
Specifications
Available models Olympus Digital Cameras
CAMEDIA C-7070 Wide Zoom/C-5060 Wide Zoom
Pressure
resistance
Main materials
Dimensions
Weight
Depth of up to 40 m
Main body: Transparent polycarbonate
Buckles: Stainless steel
Grip/shutter release lever/zoom lever/mode dial knob
: Red polycarbonate
Lens window: FL reinforced glass
Lens ring/TTL cable connector cap: Aluminum
Operation buttons/Waterproof cap maintenance
adapter: Nickel-plated brass
O-rings/lens cap: Silicone rubber
LCD hood: NBR rubber
Width 161 mm x height 143 mm x thickness 127 mm
(projections not included)
776 g (LCD hood not included)
❈ We reserve the right to change the external appearance and the
specifications without notice.
Diver's Insurance Guide
We recommend to subscribe to diver's insurance for water leakage.
For details, refer to the enclosed Diver's Insurance Guide.
E-42
PT_027E_最終.qxd 05.2.14 10:51 AM ページ E-43 (1,1)
〒163-0914 東京都新宿区西新宿2の3の1 新宿モノリス
●ホームページによる情報提供について
製品仕様、パソコンとの接続、OS対応の状況、Q&Aなどの各種情報を、ご提供しております。
オリンパスホームページ (http://www.olympus.co.jp/)
から「お客様サポート」→「映像・情報分野」→「デジタルカメラ/プリンタ」へ進み、
ご利用ください。
●商品に関するお問い合わせ窓口
(オリンパスカスタマーサポートセンター)
フリーダイヤル
0120-084215
携帯電話・PHSからは
FAX
0426-42-7486
0426-42-7499
調査等の都合上、回答までにお時間をいただく場合がありますので、ご了承ください。
営業時間 平日 9:30∼21:00
土、日、祝日 10:00∼18:00
(年末年始、システムメンテナンス日を除く)
●修理に関するお問い合わせ、修理品ご送付先
TEL: 0266-26-0330 FAX: 0266-26-2011
〒394-0083 長野県岡谷市長地柴宮 3の15の1
オリンパス岡谷修理センター
営業時間9:00∼17:00(日曜、夏期・年末年始休業、システムメンテナンス日を除く)
国内サービスステーション(修理受付窓口)
東 京
札 幌
仙 台
名古屋
大 阪
広 島
福 岡
〒101-0052
〒060-0034
〒981-3133
〒460-0003
〒542-0081
〒730-0013
〒810-0004
千代田区神田小川町1の3の1 小川町三井ビル(オリンパスプラザ内) Tel.03(3292)3403
札幌市中央区北4条東1の2の3 札幌フコク生命ビル
Tel.011(231)2320
仙台市泉区泉中央1の13の4 泉エクセルビル
Tel.022(218)8421
名古屋市中区錦2の19の25 日本生命広小路ビル
Tel.052(201)9571
大阪市中央区南船場2の12の26 オリンパス大阪センター
Tel.06(6252)6995
広島市中区八丁堀16の11 日本生命広島第2ビル
Tel.082(228)3821
福岡市中央区渡辺通3の6の11 福岡フコク生命ビル
Tel.092(761)4466
※土・日曜、祝日および年末年始・夏期休暇は原則として休業させていただきます。
オリンパスプラザ内の東京サービスステーションは土曜も営業しております。
© 2005 OLYMPUS IMAGING CORP.
Printed in Japan