1
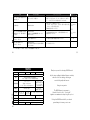
BGSDD-1001 5R系(5R77) 7R系(7R87、7R88、7R89、7R99) 取扱説明書 このたびはクレドールをお買い上げいただき、 ありがとうございました。 日本人独自の感性と精緻をきわめた技術で、 世界に誇れる上質な腕時計をつくろう。 私たちはそうした想いを胸に、 高級腕時計の創造に情熱を傾けてきました。 クレドールとは、フランス語で 「黄金の頂き= CRÊTE D'OR」を意味する名前です。 そこには、常に頂点であろうとする 確固たる決意が込められています。 末長くご愛用くださるようお願い申し上げます。 目次 1 ぜんまいの巻き上げについて(5R 系 ) 18 1. この製品について 4. ご注意いただきたいこと 5. 困ったときは 製品取扱上のご注意 ………………… 4 巻き上げのめやす………………… 18 お手入れについて 特長 ………………………………… 8 手巻でのぜんまいの巻き上げかた 19 性能と型式について 9 パワーリザーブ表示について……… 20 防水性能について…………………… 38 各部の名称と主なはたらき ……… 7R 87: 手巻・日付つき ……… 10 パワーリザーブ表示の見かた … 21 ………………… 36 ……………… 37 バンドについて 7R 89: 手巻・月齢表示つき … 12 三つ折れ式中留(なかどめ)の使いかた 44 18K について 5R 77: 自動巻 ( 手巻つき )・月齢表示つき 14 月末の日付修正について………… 26 時計本体・金属バンドについて…… 47 時刻の合わせかた(7R 99) …… 28 2. ご使用の前に 時刻 ・ 月齢の合わせかた(7R 89・ 5R 77) 30 ぜんまいの巻き上げについて(7R 系 ) 16 製品仕様 …………………………… 56 3 4 …………………… 46 ルミブライトについて …………… 48 アフターサービスについて 5 ……… 50 時刻の合わせかた………………… 30 巻き上げのめやす………………… 16 手巻でのぜんまいの巻き上げかた 17 2 …………………… 42 7R 99: 手巻 …………………… 13 日付と時刻の合わせかた………… 22 りゅうずについて…………………… 15 ……………………… 52 耐磁性能について(磁気の影響)… 40 7R 88: 手巻 ・ 日付つき ……… 11 3. 日付・時刻・月齢の合わせかた 日付・時刻の合わせかた(7R 87・ 7R 88) 22 こんなときは 6. 製品仕様 月齢の合わせかた………………… 32 より正確に時刻を合わせるために 6 35 2 3 製品取扱上のご注意 1 1 注意 取り扱いを誤った場合に、軽症を負う危険性や物質的損害をこうむることが想定されることを示します。 ・次のような場合、ご使用を中止してください ○時計本体やバンドが腐食などにより鋭利になった場合 ○バンドのピンが飛び出してきた場合 ※ すぐに、お買い上げ店・弊社お客様相談窓口にご連絡ください。 ・乳幼児の手の届くところに、時計本体や部品を置かないでください 電池や部品を乳幼児が飲み込んでしまうおそれがあります。 万一飲み込んだ場合は、身体に害があるため、ただちに医師にご相談ください。 この製品について この製品について 警告 取り扱いを誤った場合に、重症を負うなどの重大な結果になる危険性が想定されることを示します。 ・以下の場所での携帯・保管は避けてください ○揮発性の薬品が発散しているところ(除光液などの化粧品、防虫剤、シンナーなど) ○5℃∼35℃から外れる温度に長期間なるところ ○高湿度なところ ○磁気や静電気の影響があるところ ○ホコリの多いところ ○強い振動のあるところ ※ 電池式の場合は、電池が切れた状態で長時間放置しないでください。電池が漏液するおそれがあります。 ・アレルギーやかぶれを起こした場合 ただちに時計の使用をやめ、皮膚科など専門医にご相談ください。 ・その他のご注意 ○商品の分解・改造はしないでください。 ○乳幼児に時計が触れないようにご注意ください。 ケガやアレルギーをひき起こすおそれがあります。 4 5 1 1 注意 この時計はスキューバダイビングや飽和潜水には 絶対に使用しないでください 水や汗、汚れが付着したままにしておくのは避けてください 防水時計でもガラスの接着面・パッキンの劣化や ステンレスがさびることにより、防水不良になる恐れがあります。 BAR(気圧)表示防水時計はスキューバダイビングや飽和潜水用 の時計に必要とされる苛酷な環境を想定した様々な厳しい検査を 行っていません。専用のダイバーズウオッチをご使用ください。 入浴やサウナの際はご使用を避けてください 注意 蒸気や石けん、温泉の成分などが防水性能の劣化を 早めてしまうからです。 水分のついたまま、りゅうずやボタンを 操作しないでください 直接蛇口から水をかけることは避けてください 時計内部に水分が入ることがあります。 水道水は非常に水圧が高く、日常生活用強化防水の時計でも 防水不良になる恐れがあります。 ※ 万一、ガラス内面にくもりや水滴が発生し、長時間消えない場合は防水不良です。 お早めに、お買い上げ店・弊社お客様相談窓口にご相談ください。 6 7 特長 1 この製品について この製品について 警告 1 この製品について この製品について ・この時計は、セイコー独自の機構「スプリングドライブ」を搭載しています。 ・ぜんまいのほどける力を唯一の動力源としながら、クオーツ時計と同等の 高精度を実現しました。 各部の名称と主なはたらき 時計の型式に合ったページをご覧ください。 型式番号は時計の裏側で確認することができます。→ 性能と型式について P. 37 ※ 型式番号は時計の種類を示す番号です。 ・秒針は、完全になめらかな動きをするスイープ運針です。 注意 ・スプリングドライブはぜんまいの力で動きます。パワーリザーブ表示を確認しながら、 充分に巻き上げてご使用ください。 → パワーリザーブ表示について P. 20 型式番号 7R87 7R88 7R89 7R99 5R77 参照ページ ( 各部名称と 主なはたらき) P.10 P.11 P.12 P.13 P.14 ・低温下(0℃以下)では、パワーリザーブ表示が1/ 4(7R 系) 、1/ 6(5R 系 ) 以下になると時計が止まることがあります。 りゅうずを回し、ぜんまいを巻き上げてください。 8 9 1 ■ 7R87:手巻・日付つき ■ 7R88:手巻・日付つき りゅうず 持続時間の表示 → P. 20 0段目:ぜんまいの巻き上げ (手巻) → P. 16 1段目:日付合わせ → P. 26 2段目:時刻合わせ → P. 22 時針 0 1 26 秒針 分針 パワーリザーブ 表示針 りゅうず 持続時間の表示 → P. 20 0段目:ぜんまいの巻き上げ (手巻) → P. 16 1段目:日付合わせ → P. 26 2段目:時刻合わせ → P. 22 時針 2 ※ ねじロック式りゅうずの場合は、 ロックをはずした状態が 0 段目です。 → りゅうずについて P. 15 秒針 日付 0 1 6 2 ※ ねじロック式りゅうずの場合は、 ロックをはずした状態が0段目です。 → りゅうずについて P. 15 日付 ※ 表示の位置やデザインは、モデルによって異なる場合があります。 ※ 表示の位置やデザインは、モデルによって異なる場合があります。 11 10 1 この製品について この製品について 分針 パワーリザーブ 表示針 1 ■ 7R89:手巻・月齢表示つき ■ 7R99:手巻 分針 分針 時針 りゅうず 0段目:ぜんまいの巻き上げ (手巻) → P. 16 1段目:月齢合わせ → P. 32 2段目:時刻合わせ → P. 30 パワーリザーブ 表示針 持続時間の表示 → P. 20 秒針 0 1 0段目:ぜんまいの巻き上げ (手巻) → P. 16 1段目:時刻合わせ → P. 28 持続時間の表示 → P. 20 2 ※ ねじロック式りゅうずの場合は、 ロックをはずした状態が 0 段目です。 → りゅうずについて P. 15 りゅうず パワーリザーブ 表示針 0 1 秒針 ※ ねじロック式りゅうずの場合は、 ロックをはずした状態が 0 段目です。 → りゅうずについて P. 15 月齢表示板 ※ 表示の位置やデザインは、モデルによって異なる場合があります。 12 ※ 表示の位置やデザインは、モデルによって異なる場合があります。 13 この製品について この製品について 時針 1 1 りゅうずについて ■ 5R77:自動巻(手巻つき)・月齢表示つき 分針 りゅうず 0段目:ぜんまいの巻き上げ (手巻) → P. 18 1段目:月齢合わせ → P. 32 2段目:時刻合わせ → P. 30 秒針 0 パワーリザーブ 表示針 1 2 りゅうずを 矢印方向に 回します 月齢表示板 ※ 表示の位置やデザインは、モデルによって異なる場合があります。 通常のりゅうず そのまま引き出して 操作することができます 回せる ねじロック式りゅうず 回せない 操作するときはロックをはずします ゆるめる ※ ねじロック式りゅうずの場合は、 ロックをはずした状態が 0 段目です。 → りゅうずについて P. 15 持続時間の表示 → P. 20 操作が終わったら ロックします 押しつけて しめる ※ ねじロック式りゅうずは、ロックすることで、誤動作の防止と防水性の向上をはかることが できます。 ※ ねじロック式りゅうずは、ねじを無理にしめるとねじ部をこわすおそれがありますので、 ご注意ください。 15 14 ぜんまいの巻き上げについて(7R 系) 2 この製品について この製品について 時針 1 りゅうずには、通常のものとロックできる構造のものの、2 つのタイプがあります。 お使いの時計のりゅうずをご確認ください。 この時計は、ぜんまいの巻き上げを手巻で行います。 りゅうずを回し、ぜんまいを巻き上げることで時計を駆動させることができます。 手巻 :りゅうずを7回転させると、約10時間ぶん巻き上げることができます。 ぜんまいの巻き上げ状態については、パワーリザーブ表示を確認してください。 → パワーリザーブ表示について P . 20 ※ 低温下(0℃以下)では、パワーリザーブ表示が1/ 4以上の状態でご使用ください。 時計が止まる可能性があります。 1.りゅうずを矢印の方向にゆっくり回します。 ※ ねじロック式りゅうずの場合は、ロックを外してください。 → りゅうずについて P. 15 2 ご使用の前に ご使用の前に ■ 巻き上げのめやす ■ 手巻でのぜんまいの巻き上げかた 2.パワーリザーブ表示がフル巻き上げの状態になるまで、ぜんまいを 巻き上げます。 → パワーリザーブ表示の見かた P. 21 秒針が動いていることを確認してください。 パワーリザーブ表示 例1 例2 フル巻き上げの状態 ※ フル巻き上げの状態になると、ぜんまいの巻き過ぎを防止するために、りゅうずを 回すことができなくなります。それ以上無理に回すと故障の原因となりますので ご注意ください。 ※ ねじロック式りゅうずの場合は、ロックしてください。→ りゅうずについて P. 15 16 17 ぜんまいの巻き上げについて(5R 系) 2 ■ 巻き上げのめやす 自動巻:1日あたり12時間の携帯で、連続して3∼5日間使用すると、 フル巻き上げの状態になります。 1.りゅうずを矢印の方向にゆっくり回します。 ※ ねじロック式りゅうずの場合は、ロックを外してください。 → りゅうずについて P. 15 2.パワーリザーブ表示がフル巻き上げの状態になるまで、 ぜんまいを巻き上げます。 → パワーリザーブ表示の見かた P. 21 秒針が動いていることを確認してください。 パワーリザーブ表示 手巻 :りゅうずを5回転させると、約10時間ぶん巻き上げることができます。 ぜんまいの巻き上げ状態については、パワーリザーブ表示を確認してください。 ※ 持続時間はお客様の使用状況(時計を携帯する時間や運動量など)によって異なります。 ※ 1 日の携帯時間が短いときは、パワーリザーブ表示を確認の上、必要に応じてぜんまいを 巻き上げてください。 例1 例2 フル巻き上げの状態 → パワーリザーブ表示について P . 20 ※ 低温下(0℃以下)では、パワーリザーブ表示が1/ 6以上の状態でご使用ください。 時計が止まる可能性があります。 ※ フル巻き上げの状態になってからも、りゅうずは回すことができます。 フル巻き上げの状態からさらにりゅうずを回しても時計が壊れることはありませんが、 ぜんまいはそれ以上巻き上がりませんので過剰な操作はお控えください。 ※ ねじロック式りゅうずの場合は、ロックしてください。→ りゅうずについて P. 15 18 19 パワーリザーブ表示について 2 2 ご使用の前に ご使用の前に この時計は自動巻(手巻つき)です。 腕に着けてご使用いただくと、自然な腕の動きでぜんまいが自動的に巻き上がり、 時計を駆動させることができます。 ぜんまいの巻き上げは手巻で行うこともできます。 ■ 手巻でのぜんまいの巻き上げかた ■ パワーリザーブ表示の見かた パワーリザーブ表示で、ぜんまいの巻き上げ状態(持続時間)のめやすが確認 できます。 パワーリザーブ表示 26 例1 2 パワー リザーブ 表示 ご使用の前に ご使用の前に 時計を腕からはずして置いておくときは、次に使用(携帯)するときまで動き 続けるかどうかをパワーリザーブ表示で確認し、必要に応じてぜんまいを巻き上げ てください。 (時計を止めないようにして使い続けるためには、余裕を持った時間 ぶんを巻き上げるようにしてください。) 例2 ぜんまい の状態 持続 時間 フル巻き上げ 半分程度 7R 系 約48時間 (約2日間) 約24時間 (約1日) 5R 系 約72時間 (約3日間) 約36時間 (約1日半) 巻き上げなし 時計が止まっている または 止まる直前の状態 ※ 表示の位置やデザインは、モデルによって異なる場合があります。 20 21 日付・時刻の合わせかた(7R87・7R88) ■ 日付と時刻の合わせかた ※ 日付のみ修正をするときは、「月末の日付修正について P. 26」を参照してください。 1.時計が動いていることを確認します。 3 3.りゅうずを1段目まで引き出します。 ※ 時計は動き続けています。 ※ ねじロック式りゅうずの場合は、 ロックを外してください。 → りゅうずについて P. 15 0 1 3 りゅうずを 1 段目まで 引き出す 27 日付・時刻 月 ・ 齢の合わせかた 日付・時刻 月 ・ 齢の合わせかた ※ 操作は、必ず時計が動いている状態で行ってください。動いていないときはぜんまいを 巻き上げてください。 → 手巻でのぜんまいの巻き上げかた P. 17 2. 時計の針が午後9時∼午前1時の間でないことを確認します。 午後9時∼午前 1 時のときは、りゅうずを2段目まで引き出し、りゅうずを回し、 一旦時刻を午前 1 時よりも進めておきます。 ※ 日付を回す歯車を、きちんとかみ合わせるための動作です。 ※ 時針を2周させるごとに、日付が「1日ぶん」修正されます。りゅうずを回したとき に日付が変わるところが午前0時です。午前・午後を確認して合わせてください。 4.りゅうずを矢印の方向に回し、日付を前日に合わせます。 ※ りゅうずを右(上方向)に回しても日付は動きません。 例:合わせたい日付が「26日」のときは、 「25日」に合わせます。 25 ※ ねじロック式りゅうずの場合は、ロックを外してください。 → りゅうずについて P. 15 次のページに続く 22 23 5.秒針が 0 秒位置にあるときにりゅうずを2段目まで引き出し、 秒針を止めます。 秒針が0秒位置のとき、 りゅうずを2段目まで引き出す 7.次に時刻を合わせます。 時計回りに針が進むように、りゅうずを矢印の方向に回し、時刻を 合わせます。 合わせたい時刻の10分ほど手前から、分針をゆっくり進めて合わせてください。 0 1 2 3 6.時計回りに針が進むように、矢印の方向にりゅうずを回し、 合わせたい日付になるまで、時刻を進めます。 26 3 26 8.時報などに合わせて、りゅうずを0段目に戻します。 ※ ねじロック式りゅうずの場合は、 ロックしてください。 → りゅうずについて P. 15 26 0 1 2 りゅうずを0段目に戻す 日付・時刻 月 ・ 齢の合わせかた 日付・時刻 月 ・ 齢の合わせかた 24 25 ※ 時針を2周させるごとに、日付が 「1日ぶん」修正されます。 りゅうずを回したときに日付が 変わるところが午前0時です。 午前・午後を確認して合わせて ください。 25 ■ 月末の日付修正について 3.りゅうずを1段目まで引き出します。 この時計の日付表示は、1日∼31日となっています。小の月(2、4、6、9、 11月)が終わった翌日などに、日付修正を行ってください。 ※ 日付のみ修正をするときも、この操作を行ってください。 1.時計が動いていることを確認します。 3 ※ 時計は動き続けています。 ※ ねじロック式りゅうずの場合は、 ロックを外してください。 → りゅうずについて P. 15 例:「31日」から「1日」に変更するとき ※ 時計が止まっているときは、ぜんまいを巻き上げてから、日付と時刻を合わせて ください。 → 日付と時刻の合わせかた P. 22 午後9時∼午前 1 時の間のときは、「日付と時刻の合わせかた P. 22」で合わせて 1 りゅうずを 1 段目まで引き出す 4.りゅうずを矢印の方向に回し、日付を合わせます。 3 ※ りゅうずを右(上方向)に回しても 日付は動きません。 01 2. 時計の針が午後9時∼午前 1 時の間でないことを確認します。 ください。 0 日付・時刻 月 ・ 齢の合わせかた 日付・時刻 月 ・ 齢の合わせかた ※ 操作は、必ず時計が動いている状態で行ってください。動いていないときは ぜんまいを巻き上げてください。 → 手巻でのぜんまいの巻き上げかた P. 17 31 5.りゅうずを0段目に戻します。 ※ ねじロック式りゅうずの場合は、 ロックしてください。 → りゅうずについて P. 15 01 0 1 りゅうずを0段目に戻す 26 27 時刻の合わせかた(7R99) 1.時計が動いていることを確認します。 3.りゅうずを矢印の方向に回し、時刻を合わせます。 合わせたい時刻の10分ほど手前から、分針をゆっくり進めて合わせてください。 ※ 操作は、必ず時計が動いている状態で行ってください。動いていないときは ぜんまいを巻き上げてください。 → 手巻でのぜんまいの巻き上げかた P. 17 3 ※ ねじロック式りゅうずの場合は、 ロックを外してください。 → りゅうずについて P. 15 秒針が 0 秒位置のとき、 りゅうずを引き出す 4.時報などに合わせて、りゅうずを0段目に戻します。 ※ ねじロック式りゅうずの場合は、 ロックしてください。 → りゅうずについて P. 15 0 1 0 1 りゅうずを0段目に戻す 日付・時刻 月 ・ 齢の合わせかた 日付・時刻 月 ・ 齢の合わせかた 28 3 2. 秒針が0秒位置にあるときにりゅうずを引き出し、秒針を止めます。 29 時刻 ・月齢の合わせかた(7R89・5R77) ■ 時刻の合わせかた 時刻と月齢を合わせるときは、最初に時刻を合わせ、次に月齢を合わせます。 3.りゅうずを矢印の方向に回し、時刻を合わせます。 合わせたい時刻の10分ほど手前から、分針をゆっくり進めて合わせてください。 ※ 月齢は24時間に 1 回変わるように設定されていますが、時刻は12時間制です。 1.時計が動いていることを確認します。 3 操作は、必ず時計が動いている状態で行ってください。動いていないときは ぜんまいを巻き上げてください。 7R89 → 手巻でのぜんまいの巻き上げかた P. 17 5R77 → 手巻でのぜんまいの巻き上げかた P. 19 3 2. 秒針が0秒位置にあるときにりゅうずを2段目まで引き出し、 秒針を止めます。 秒針が 0 秒位置のとき、 りゅうずを2段目まで 引き出す ※ ねじロック式りゅうずの場合は、 ロックを外してください。 → りゅうずについて P. 15 4.時報などに合わせて、りゅうずを0段目に戻します。 ※ ねじロック式りゅうずの場合は、 ロックしてください。 → りゅうずについて P. 15 0 1 2 0 1 2 りゅうずを0段目に戻す 30 31 ■ 月齢の合わせかた 1. 現在の月齢を確認します。 ※ 月齢は、新聞(天気予報欄)などに掲載されています。 月齢表示の月の形からおおよその月齢を読むことができます。 時刻合わせをした後に月齢を合わせてください。 2. 時計の針が9時∼2時の間でないことを確認します。 ※ 時刻を合わせるときは、 「時刻の合わせかた P. 30」を参照してください。 月齢 3 0 7 15 22 例1 例2 ※ ねじロック式りゅうずの場合は、ロックを外してください。 → りゅうずについて P. 15 3.りゅうずを1段目まで引き出します。 新月 時計の 表示 9時∼2時のときはりゅうずを2段目まで引き出し、りゅうずを回し、一旦 時刻を2時よりも進めておきます。 → 時刻の合わせかた P. 30 時刻を変えたときは、月齢を合わせた後、元の時刻に合わせてください。 上弦の月 満月 下弦の月 月 月 ※ 月齢は、月の満ち欠けのめやすを示したものです。新月(月齢0. 0) からある日の正午までの 経過時間を日数で表したものです。新月から次の新月までは約29.5日で循環します。 ※ ねじロック式りゅうずの場合は、 ロックを外してください。 → りゅうずについて P. 15 0 1 りゅうずを 1 段目まで 引き出す 4. りゅうずを矢印の方向に回し、月齢表示の「月」がすべて隠れるように 合わせます。 月がすべて隠れた状態 (「月齢0(新月)」の状態) 次のページに続く 3 日付・時刻 月 ・ 齢の合わせかた 日付・時刻 月 ・ 齢の合わせかた 月の満ち欠けと 呼び方 ※ 月齢表示は月齢を示したもので、月そのものの形を表したものではありません。 32 日付・時刻 月 ・ 齢の合わせかた 日付・時刻 月 ・ 齢の合わせかた ※ 33 5. りゅうずを矢印の方向にゆっくり回し、月齢の動きを 1 日分ずつ 数えながら進め、月齢を合わせます。 月齢の端数は四捨五入して合わせてください。 ( 例 ) 月齢「14.8」 であれば、四捨五入して「15」に合わせます。 より正確に時刻を合わせるために スプリングドライブの構造上、下記の点に注意しながら操作していただくと より正確に時刻が合わせられます。 ・時刻を合わせる前に、ぜんまいを充分に巻き上げてください。 (パワーリザーブ表示を見て、フル巻き上げの状態にしてください。) → パワーリザーブ表示の見かた P. 21 3 ・止まっている時計を駆動させ時刻を合わせるときは、ぜんまいを充分に巻き上げ、 30秒以上秒針が動いてから、りゅうずを引き出してください。 ・りゅうずを引き出して秒針を止めている時間は30分以内にしてください。 それ以上の時間りゅうずを引き出していたときは、一旦りゅうずを0段目に戻し、 30秒以上秒針が動いてから時刻合わせを行ってください。 6. りゅうずを0段目に戻します。 ※ ねじロック式りゅうずの場合は、ロックしてください。 → りゅうずについて P. 15 0 1 りゅうずを0段目に戻す 34 35 お手入れについて ●日ごろからこまめにお手入れしてください 性能と型式について 時計の裏側でも性能と型式の確認ができます。 ・時計本体、バンドは肌着類と同様に直接肌に接しています。 汚れたままにしておくと衣類の袖口を汚したり、かぶれの原因になることがあります。 時計を外したときは、早めに柔らかい布などで汗や水分をふき取って、常に清潔に してご使用ください。 ・その際はクリーナー等薬品は使用しないでください。 防水性能 P. 38∼ P. 39 を参照ください RESISTANT 1 0B A R 18 ER AT W ●りゅうずは時々回してください(ゆっくりと数回で結構です) 00000 4 お客様の時計を 特定できる番号 PA N 製造番号 JA お客様の時計の 種類を示す番号 7R88-0AA0 型式番号 KT ・りゅうずのさびつきを防止し、使用しているパッキンの寿命も延びます。 ・ねじロック式りゅうずの場合も同様です。(りゅうずを引き出す必要はありません) → りゅうずについて P. 15 ・ステンレスはさびにくい金属ですが、汚れをそのままにしておくとさびやすく なります。 ご注意いただきたいこと ご注意いただきたいこと 4 日付・時刻 月 ・ 齢の合わせかた 日付・時刻 月 ・ 齢の合わせかた 月齢15 月齢0 3 I N A M DE ※ 上の図は例であり、お買い上げいただいた時計とは異なる場合があります。 36 37 ご注意いただきたいこと ご注意いただきたいこと 防水性能について お買い上げいただいた時計の防水性能を 下記の表でご確認の上ご使用ください。 (「P.37」をご覧ください) 裏ぶた表示 表示なし 4 WATER RESISTANT WATER RESISTANT 5 BAR WATER RESISTANT 10(20)BAR 防水性能 非防水です。 お取扱方法 水滴がかかったり、汗を多くかく場合には、使用しないで下さい。 日常生活用防水です。 日常生活での「水がかかる」程度 の環境であれば使用できます。 日常生活用強化防水で5気圧防水です。 日常生活用強化防水で10(20)気圧防水です。 警告 水泳には使用しないで下さい。 4 水泳などのスポーツに使用できます。 空気ボンベを使用しないスキンダイビングに使用できます。 38 39 時計に影響を及ぼす身の周りの磁気製品例 ご注意いただきたいこと ご注意いただきたいこと 耐磁性能について ( 磁気の影響 ) この時計は、身近にある磁気の影響を受け、時刻が狂ったり止まったりします。 この時計については、JIS 1種相当の耐磁性能があります。 4 お取扱方法 磁気製品より 5 cm以上遠ざける必要があります。 (JIS 水準1種) 交流電気かみそり バッグ (磁石の止め金) 4 磁気を帯びたことが原因で、携帯使用時の精度めやす範囲を超えている場合、磁気の除去 および精度の再調整作業は、保証期間にかかわらず有料とさせていただきます。 ●この時計が磁気の影響を受ける理由 スプリングドライブに内蔵されている調速機構に磁石を使用しており、外からの強い磁力 の影響を受けます。 40 携帯電話 (スピーカー部) 電磁調理器 携帯ラジオ (スピーカー部) 磁気ネックレス 磁気健康枕 41 バンドは直接肌に触れ、汗やほこりで汚れます。そのため、お手入れが悪いと バンドが早く傷んだり、肌のかぶれ・そで口の汚れなどの原因になります。 長くお使いになるためには、こまめなお手入れが必要です。 ●金属バンド ・ ステンレスバンドも水や汗・汚れをそのままにしておくと、さびやすくなります。 ・ 手入れが悪いと、かぶれやワイシャツのそで口が黄色や金色に汚れる原因になります。 ・ 水や汗・汚れは、早めに柔らかな布でふき取ってください。 ・ バンドのすき間の汚れは、水で洗い、柔らかな歯ブラシなどで取り除いてください。 (時計本体は水にぬれないように、台所用ラップなどで保護しておきましょう。) ・ チタンバンドでも、ピン類に強度に優れたステンレスが使用されているものがあり、 ステンレスからさびが発生することがあります。 ・ さびが進行すると、ピンの飛び出しや抜けが発生し、時計を脱落させてしまうことが あります。また、逆に中留が外れなくなることがあります。 ・ 万一ピンが飛び出している場合は、怪我をするおそれがありますので、ただちに 使用をやめて修理をご依頼ください。 ・ 水や汗、直射日光には弱く、色落ちや劣化の原因になります。 ・ 水がかかったときや汗をかいた後は、すぐに乾いた布などで、吸い取るように軽く ふいてください。 ・ 直接日光にあたる場所には放置しないでください。 ・ 色の薄いバンドは、汚れが目立ちやすいので、ご使用の際はご注意ください。 ・ 時計本体が日常生活用強化防水で 10(20)気圧防水になっているものでも、アクアフリー バンド以外の皮革バンドは、入浴中や水泳・水仕事などでのご使用はお控えください。 ●ポリウレタンバンド ・ 光で色があせたり、溶剤や空気中の湿気などにより劣化する性質があります。 ・ 特に半透明や白色・淡い色のバンドは、他の色を吸着しやすく、また変色をおこします。 ・ 汚れたら水で洗い、乾いた布でよくふき取ってください。 (時計本体は水にぬれないように、台所用ラップなどで保護しておきましょう。) ・ 弾力性がなくなり、ひび割れが生じたら取り替え時期です。 4 バンドによるかぶれは、金属や皮革が原因となるアレルギー反応や、汚れ、 かぶれやアレルギー もしくはバンドとのすれなどの不快感が原因となる場合など、いろいろな について 発生原因があります。 バンドサイズの めやすについて バンドは多少余裕をもたせ、通気性をよくしてご使用ください。 時計をつけた状態で、指一本入る程度が適当です。 42 43 三つ折れ式中留(なかどめ)の使いかた ・ 三つ折れ式中留 ・ 着けかた バンドの剣先を定革・遊革に入れてから、 上箱を上からしっかり押さえ、留めます。 定革 (ていかく) 上箱 ご注意いただきたいこと ご注意いただきたいこと 4 ご注意いただきたいこと ご注意いただきたいこと 4 ●皮革バンド バンドについて 遊革 (ゆうかく) 剣先 ・ 外しかた ・ バンドの長さを調節するには 1 バンドの剣先を図のように上箱に 通してください。 上箱 バンドと中留の間に指を入れ、手前に引いて開きます。 2 バンドを左右にスライドさせ、適切な 長さのところで、ピンをアジャスト穴に 入れます。 上箱 ※ バンドを持って開くことは避けてください。 バンドが傷む原因となります。 4 剣先 ピン アジャスト穴 ※ 上記の方法で開きにくいときは、上箱の側面を持ち、中留を開いてください。 44 45 18K(18KT)は金75%とその他の金属との合金です。 他の金属の混ぜ具合によってイエローゴールド(YG)、ホワイトゴールド(WG)、 ピンクゴールド(PG)の色分けをします。 ●18K の変色 ・合金であることから金自体は変色しませんが、その他の金属がさまざまな原因 で変色(赤味、黒ずみ)を起こすことがあります。 ・日頃のお手入れも重要ですが、拭いても取れないときは仕上げ直しを お買い上げ店にご依頼ください。(有料となります。) 4 時計本体・金属バンドについて ご注意いただきたいこと ご注意いただきたいこと 18K について ● バンドの長さ調整(カット ・ 寸延ばし)について ・18Kおよびプラチナのバンドの長さ調整は、お買い上げ店にご依頼ください。 クレドールサービスステーションでお預かりして加工いたします。 モデルによって2∼3週間程度の納期をいただきます。 ・18K およびプラチナのバンドの長さ調整は初回のみ無料です。ただし、寸延ばし に必要な材料 ・ 部品代および別途発生する修理代はご請求させていただきます。 ・ステンレススチールのバンドの長さ調整は、お買い上げ店・弊社お客様相談窓口に ご依頼ください。 その他のお店では有料もしくはお取り扱いいただけない場合があります。 ● 定期的な汚れ落としのおすすめ 4 ・長くご使用いただくために、定期的な汚れ落としをおすすめします。 その際は、お買い上げ店もしくはお店経由クレドールサービスステーションに ご依頼ください。(有料となる場合があります。) 46 47 MEMO ご注意いただきたいこと ご注意いただきたいこと ルミブライトについて お買い上げの時計がルミブライト付きの場合 ルミブライトは、太陽光や照明のあかりを短時間(約10分間:500ルクス以上)で 吸収して蓄え、暗い中で長時間(約3時間∼5時間)発光します。 光が当たらなくなってから輝度(明るさ)は、時間の経過とともに弱まります。 なお、光を蓄える際の光の強さや光の吸収度合いによって、発光する時間に差が生じます。 ※ ルミブライトは、放射能などの有害物質をまったく含んでいない環境・人に安全な蓄光(蓄えた光を放出する)物質です。 <照度のめやすについて> 4 48 環 境 明るさ(照度)のめやす 晴れ 太陽光 くもり 晴れ 屋内(昼間窓際) くもり 雨 1m 照明 3m (白色蛍光灯40W の下で) 4m 100,000ルクス 10,000ルクス 3,000ルクス以上 1,000∼3,000ルクス 1,000ルクス以下 1,000ルクス 500ルクス(通常室内レベル) 250ルクス 4 49 ・保証と修理について ・お買い求めいただきましたクレドールは、厳重な検査・調整を行った後、お手もとに お届けしております。しかし、取扱説明書に沿った正常なご使用状態で、万一、保証 期間内に不具合が生じた場合には、保証書を添えてお買い上げ店へお持ちください。 メーカーにて無料で修理・調整させていただきます。 ・保証期間、保証内容の詳細については、保証書に記載してあります。 ・保証期間経過後の修理、およびクレドールについてのご相談は、お買い上げ店で承っ ております。その他わからない点がございましたら、弊社お客様相談窓口(巻末に記 載)までお問い合わせください。 ・修理用部品について 50 ・クレドールの修理用部品の保有期間は、通常10年を基準としています。正常なご使 用であれば、この期間中は原則として修理が可能です。 ・修理可能な期間は、ご使用条件により著しく異なります。精度が元通りにならない場 合もありますので、修理ご依頼の際にお買い上げ店とよくご相談ください。 ・修理のとき、ケース・文字板・針・ガラス・バンドなどは一部代替部品を使用させて いただくことがありますのでご了承ください。 ・その他わからない点がございましたら、弊社お客様相談窓口(巻末に記載)までお問 い合わせください。 ・分解掃除による点検調整(オーバーホール)について ・ 長くご愛用いただくために、3年∼4年に 1 度程度の分解掃除による点検調整 (オーバーホール)をおすすめします。 ・ この時計のムーブメントは、機構の性質上動力を伝達する歯車部分に常に力が加わ っています。これらが常に機能するためには、定期的な部品の洗浄、油の交換、 精度調整、機能チェック、消耗品の交換などが大切です。 特にお買い上げ後3年目∼4年目の分解掃除による点検調整(オーバーホール)を 行うことが、長く使用するためには重要です。ご使用状況によっては、機械の保油 状態が損なわれたり、油の汚れなどによって部品が磨耗し、止まりにいたることが あります。またパッキンなどの部品の劣化が進み、汗や水分の浸入などで防水性能 が損なわれる場合があります。分解掃除による点検調整(オーバーホール)を、 お買い上げ店にご依頼ください。 ・ 部品交換の際は、「純正部品」とご指定ください。 ・ 分解掃除による点検調整(オーバーホール)の際には、パッキンやバネ棒の交換も あわせてご依頼ください。 ご注意いただきたいこと ご注意いただきたいこと 4 アフターサービスについて 4 51 こんなときは 現象 このようにしてください ぜんまいが「巻き上げなし」の状態になってい る(→ パワーリザーブの表示の見かた P. 21) ぜんまいを巻き上げてください。 携帯中や時計を外す際はパワーリザーブ表示の針を確認し、 必要に応じてぜんまいを巻き上げてください。 毎日使用しているが、パワーリザーブ 表示が上がらない(5R系) 携帯時間が少ない、あるいは腕の動きが少ない りゅうずを回し、ぜんまいを巻き上げてください。 暑いところ、または寒いところへ放置した 時計が一時的に進む/遅れる ガラスのくもりが消えない 常温に戻れば元の精度に戻ります。時刻を合わせ直してください。 ※ この時計は気温5℃∼35℃で腕に着けたときに安定した時間精度が 得られるように調整してあります。 磁気を発生するもののそばに置いた(P. 41) 磁気から遠ざけると、元の精度に戻ります。時刻を合わせ直して ください。 落とした、強くぶつけた、または激しいスポー ツをしたなど、強い衝撃や振動が加えられた 時刻を合わせ直してください。 パッキンの劣化などにより時計内部に水分が 入った お買い上げ店にご相談ください。 参照ページ 7R 系 → P. 17 5R 系 → P. 19 困ったときは 困ったときは 時計が止まった 5 52 考えられる原因 7R 87・ 7R 88 → P. 22 7R 99 → P. 28 7R 89・ 5R 77 → P. 30 5 − 53 現象 考えられる原因 パワーリザーブ表示の残量があるのに 時計が止まった 針の動きが速い 故障ではありません ①以下のりゅうずの操作をしてください。 7R 87・ 7R 88 (7R 87・7R 88・7R 89・5R 77)0段目→2段目→0段目 → P. 22 (7R 99)0段目→1段目→0段目 7R 99 ②時刻を合わせなおしてください。 故障ではありません (日付の切り替えが午後9時∼午前1時の間に働 いているためです。) 日付の変更に時間がかかる (7R88、7R87) → P. 28 より正確に時刻を合わせるには、30秒以上秒針が動いてから、 時刻合わせをしてください。 12時間、針を進めて時刻を合わせ直してください。 時刻が12時間ずれている 7R 系 → P. 16 5R 系 → P. 18 困ったときは 困ったときは 5 参照ページ 低温下(0℃以下)に放置した 止まっている時計を駆動させた直後、 故障ではありません 時刻合わせをしたら、秒針の運針が (動き始めのときは調速機構が働くまで、やや 早く見えた 時間がかかります。) 日付が日中に変わる (7R88、7R87) このようにしてください りゅうずを回し、ぜんまいを巻き上げてください。 低温下(0℃以下)では、パワーリザーブ表示が1/ 4(7R 系)、 1/ 6(5R 系 ) 以下になると時計が止まることがあります。 7R 89・ 5R 77 → P. 30 P. 22 5 そのままお待ちください。 − ※ このほかの現象についてはお買い上げ店、またはお客様相談窓口にご相談ください。 54 55 製品仕様 7R87、7R88 製品仕様 6 56 7R99 7R89 5R77 水晶振動数 32,768Hz(Hz=1秒間の振動数) 精度 平均月差±15秒以内(日差±1秒相当) (ただし、気温5℃∼35℃において腕に着けた場合) 作動温度範囲 - 10℃∼ + 60℃ (低温下(0℃以下)では、 パワーリザーブ表示1/4以上で使用のこと) - 10℃∼ + 60℃ ( 低温下(0℃以下)では パワーリザーブ表示 1/ 6以上で使用のこと) 駆動方式 ぜんまい巻<手巻> ぜんまい巻 <自動巻(手巻つき)> 表示機能 時・分・秒、日付、 パワーリザーブ 持続時間 時 ・ 分 ・ 秒、 パワーリザーブ 時 ・ 分 ・ 秒、パワーリザーブ、月齢 約48時間 約72時間 電子回路 発振・分周・スプリングドライブ制御回路(C-MOS-IC):1個 運針方式 スイープ運針 使用石数 30石 32石 30石 ※仕様は改良のため予告なく変更することがあります。 Thank you very much for choosing a CREDOR watch. Only the unique melding of traditional Japanese sensitivity and state-of-the -art technology can bring you a watch of this quality and character. Doing so is our passion. The CREDOR name is your guarantee. From the French crête d or crest of gold it signifies our commitment to always being the very best. We hope this CREDOR watch will be your favorite personal timepiece for many years to come. CONTENTS 1. ABOUT THIS PRODUCT HANDING CAUTIONS …………………… 60 CHARACTERISTICS …………………… 64 NAMES OF THE PARTS AND THEIR FUNCTION … 65 7R87: Manual winding type with date setting function ……………………………… 66 7R88: Manual winding type with date setting function ……………………………… 67 7R89: Manual winding type with moon phase display function …………………… 68 7R99: Manual winding type ……………… 69 5R77: Automatic type (with manual winding function) featuring moon phasedisplay function …………………………… 70 CROWN ……………………………………… 71 2. BEFORE USING THE WATCH HOW TO WIND THE MAINSPRING (7R series) …………………………………… 72 Guide for winding state of the mainspring … How to manually wind the mainspring … HOW TO WIND THE MAINSPRING (5R series) …… Guide for winding state of the mainspring … How to manually wind the mainspring … POWER RESERVE INDICATOR ……… How to read the Power reserve indicator … 1 72 73 74 74 75 76 77 3. HOW TO SET THE DATE, TIME, AND MOON PHASE HOW TO SET THE DATE AND TIME (7R87, 7R88) … How to set the date and time …………… Date adjustment on the first day after a month that has less than 31 days ……… HOW TO SET THE TIME (7R99) ……… HOW TO SET THE TIME AND MOON PHASE (7R89, 5R77) ……………………… How to set the time and moon phase …… How to set the moon phase ……………… TIPS FOR MORE ACCURATE TIME SETTING … 78 78 4. TO PRESERVE THE QUALITY OF YOUR WATCH DAILY CARE ……………………………… 92 PERFORMANCE AND TYPE …………… 93 WATER RESISTANCE …………………… 94 MAGNETIC RESISTANCE ……………… 96 WATCH BAND …………………………… 98 HOW TO USE THE THREE-PIECE FOLDOVER CLASP … 100 REMARKS ON 18-KARAT GOLD …… 102 WATCH BODY/METAL BRACELET 103 LumiBrite ………………………………… 104 AFTER-SALE SERVICE ……………… 106 5. TROUBLESHOOTING TROUBLESHOOTING ……………… 108 6. SPECIFICATIONS 82 84 3 4 5 86 86 88 91 6 58 1 2 SPECIFICATIONS …………………… 112 59 HANDLING CAUTIONS 1 CAUTIONS To indicate the risks of light injuries or material damages unless the following safety regulations are strictly observed. ・Immediately stop wearing the watch in following cases. ・Avoid the following places for wearing or keeping the watch. ○ If the watch body or band becomes edged by corrosion etc. ○ If the pins protrude from the band. ※ Immediately consult the retailer from whom the watch was purchased or SEIKO CUSTOMER SERVICE CENTER. ・Keep the watch and accessories out of the reach of babies and children. Care should be taken to prevent a baby or a child accidentally swallowing the accessories. If a baby or child swallows the battery or accessories, immediately consult a doctor, as it will be harmful to the health of the baby or child ○ Places where volatile agents(cosmetics such as polish remover, bug repellent, thinners etc.)are vaporizing ○ Places where the temperature drops below 5℃ or rises above 35 ℃ for a long time ○ Places of high humidity ○ Dusty places ○ Places affected by strong magnetism or static electricity ○ Places affected by strong vibrations ABOUT THIS PRODUCT ABOUT THIS PRODUCT WARNING To indicate the risks of serious consequences such as severe injuries unless the following safety regulations are strictly observed. ・If you observe any allergic symptoms or skin irritation Stop wearing the watch immediately and consult a specialist such as a dermatologist or an allergist ・Other cautions ○ Do not disassemble or tamper with the watch. ○ Keep the watch out of the reach of babies and children. Extra care should be taken to avoid risks of any injury or allergic rash or itching that may be caused when they touch the watch. 60 61 WARNING 1 The various tightened inspections under simulated harsh environment, which are usually required for watches designed for scuba diving or saturation diving, have not been conducted on the water-resistant watch with the BAR (barometric pressure) display. For diving, use special watches for diving. CAUTION Do not leave moisture, sweat and dirt on the watch for a long time. Be aware of a risk that a water resistant watch may lessen its water resistant performance because of deterioration of the adhesive on the glass or gasket, or the development of rust on stainless steel. Do not wear the watch while taking a bath or a sauna. Steam, soap or some components of a hot spring may accelerate the deterioration of water resistant performance of the watch. ABOUT THIS PRODUCT ABOUT THIS PRODUCT Do not use the watch in scuba diving or saturation diving. 1 CAUTION Do not turn or pull out the crown when the watch is wet. Water may get inside of the watch. Do not pour running water directly from faucet. ※ If the inner surface of the glass is clouded with condensation or water droplets appear inside of the watch for a long time, the water resistant performance of the watch is deteriorated. Immediately consult the retailer from whom the watch was purchased or SEIKO CUSTMER SERVICE CENTER (listed on the end of a book). The water pressure of tap water from a faucet is high enough to degrade the water resistant performance of a water resistant watch for everyday life. 62 63 NAMES OF THE PARTS AND THEIR FUNCTION ・This watch features“Spring drive, ”the unique mechanism made available only by SEIKO technology. ・The Spring Drive watch ensures quartz accuracy while using the mainspring as its sole power source. Refer to the instructions pertaining to the caliber number of your watch on the following pages. The caliber number can be checked on the case back of your watch. →“PERFORMANCE AND TYPE”on page 93 ABOUT THIS PRODUCT ・The glide-motion second hand moves in a perfectly smooth movement. CAUTION ・Spring Drive works by the power provided by the mainspring. Remember to check the power reserve indicator and keep the mainspring of the watch sufficiently wound while using the watch. →“POWER RESERVE INDICATOR”on page 76. ※ The caliber number identifies your watch type. Caliber number 7R87 7R88 7R89 7R99 5R77 Reference pages (NAMES OF THE PARTS AND THEIR FUNCTION) P.66 P.67 P.68 P.69 P.70 1 ABOUT THIS PRODUCT CHARACTERISTICS 1 ・Under a low-temperature condition (below 0ºC), the watch may stop when the power reserve indicator shows less than one-fourth (7R series) or one-sixth (5R series) of the power reserve. In such a case, turn the crown to wind the mainspring. 64 65 ■ 7R87: Manual winding type with date setting function 1 Power reserve indicator Normal position : Winding up the mainspring (manual operation) → P 72 First click position : Date setting → P 82 Second click position : Time setting → P 78 →“POWER RESERVE INDICATOR”on page 76 Hour Hand 0 1 26 Second Hand Power reserve indicator Normal position : Winding up the mainspring (manual operation) → P 72 First click position : Date setting → P 82 Second click position : Time setting → P 78 →“POWER RESERVE INDICATOR”on page 76 Hour Hand 2 ※ If the crown of your watch is a screw lock type, unscrew the crown to set it to the normal position. →“CROWN”on P 71 0 1 6 Second Hand Date 2 ※ If the crown of your watch is a screw lock type, unscrew the crown to set it to the normal position. →“CROWN”on P 71 Date ※ The position and design of the displays may vary depending on the model. ※ The position and design of the displays may vary depending on the model. 67 66 1 ■ 7R89: Manual winding type with moon phase display function Crown Normal position : Winding up the mainspring (manual operation) → P 72 First click position : Moon phase setting → P 88 Second click position : Time setting → P 86 Power reserve indicator →“POWER RESERVE INDICATOR”on page 76 ■ 7R99: Manual winding type 1 Minute hand Hour Hand Crown Power reserve indicator Normal position : Winding up the mainspring (manual operation) → P 72 First click position : Time setting → P 84 →“POWER RESERVE INDICATOR”on page 76 0 1 2 ※ If the crown of your watch is a screw lock type, unscrew the crown to set it to the normal position. →“CROWN”on P 71 Moon phase display ※ The position and design of the displays may vary depending on the model. 0 1 Second Hand ABOUT THIS PRODUCT ABOUT THIS PRODUCT Minute hand Hour Hand Second Hand 68 1 Crown Minute hand ABOUT THIS PRODUCT ABOUT THIS PRODUCT Crown Minute hand ■ 7R88: Manual winding type with date setting function ※ If the crown of your watch is a screw lock type, unscrew the crown to set it to the normal position. →“CROWN”on P 71 ※ The position and design of the displays may vary depending on the model. 69 1 CROWN ■ 5R77: Automatic type (with manual winding function) featuring moon phase display function Hour Hand Crown Normal position : Winding up the mainspring (manual operation) → P 72 First click position : Moon phase setting → P 88 Second click position : Time setting → P 86 Second Hand 0 Power reserve indicator →“POWER RESERVE INDICATOR”on page 76 1 2 ※ If the crown of your watch is a screw lock type, unscrew the crown to set it to the normal position. →“CROWN”on P 71 Moon phase display ※ The position and design of the displays may vary depending on the model. 1 There are two types of crowns, a normal crown and a screw-lock crown. Check the crown on your watch. Turn the crown clockwise. Normal crown The crown turns. The crown does not turn. Pull out the crown and operate it. Screw-lock type crown Unlock the crown before operating it. Unscrew ※ If your watch has a screw-lock crown, the crown screws into the watch to prevent malfunction and increase water resistance. ※ Be careful not to screw the crown in by force as it may damage the slots of the crown. 71 HOW TO WIND THE MAINSPRING (7R series) This watch is a manual winding type. The mainspring can be manually wound to operate the watch by turning the crown. ■ Guide for winding state of the mainspring Manual winding :Seven full rotations of the crown will provide the power to run the watch for approximately ten hours. Observe the power reserve indicator to check the level of the remaining power. →“POWER RESERVE INDICATOR”on page 76. ※ Under a low-temperature condition (below 0ºC), always keep at least one-fourth of the watch's power reserve shown by the power reserve indicator so that the watch will not stop. ■ How to manually wind the mainspring 1.Slowly turn the crown in the direction of the arrow mark. ※ If the crown of your watch is a screw lock type, unlock the crown. → CROWN on page 71 2 2.Wind the mainspring until the power reserve indicator shows a fullywound state. →“How to read the Power reserve indicator”on page 77 Check that the second hand is moving. Power reserve indicator Ex.1 Ex.2 Fully-wound state ※ The crown cannot be turned further when the mainspring is fully wound to prevent overwinding of the mainspring. Do not try to forcefully turn the crown as this may damage the watch. ※ If the crown of your watch is a screw lock type, lock the crown after the mainspring is fully wound. →“CROWN”on page 71 BEFORE USING THE WATCH BEFORE USING THE WATCH 72 After operating the crown, lock it. While pressing the crown Screw 70 2 ABOUT THIS PRODUCT ABOUT THIS PRODUCT Minute hand 73 HOW TO WIND THE MAINSPRING (5R series) 2 BEFORE USING THE WATCH ■ Guide for winding state of the mainspring Automatic winding:The mainspring of the watch is fully wound when it is worn for twelve hours per day for three to five consecutive days. Manual winding :Five full rotations of the crown will provide the power to run the watch for approximately ten hours. Observe the power reserve indicator to check the level of the remaining power. 1.Slowly turn the crown in the direction of the arrow mark. ※ If the crown of your watch is a screw lock type, unlock the crown. → CROWN on page 71 2 2.Wind the mainspring until the power reserve indicator shows a fullywound state. →“How to read the power reserve indicator”on page 77 Check that the second hand is moving. Power reserve indicator Ex.1 Ex.2 Fully-wound state Refer to“POWER RESERVE INDICATOR”on page 76. ※ Under a low-temperature condition (below 0ºC), always keep at least one-sixth of the watch's power reserve shown by the power reserve indicator so that the watch will not stop. ※ The continuous operable time of the watch may vary depending on actual use conditions, such as the number of hours you wear the watch or the extent of your movement while wearing it. ※ In a case where you wear the watch for a short period of time each day, observe the power reserve indicator to check the level of the remaining power. If necessary, manually wind the mainspring. ※ The crown can be turned further when the mainspring is fully wound. Turning the crown after the mainspring is fully wound will not damage the watch, however, please refrain from excessive operation because the mainspring cannot be wound any further. ※ If the crown of your watch is a screw lock type, lock the crown after the mainspring is fully wound. → CROWN on page 71 74 75 POWER RESERVE INDICATOR 2 BEFORE USING THE WATCH This watch is an automatic watch equipped with a manual winding mechanism. When the watch is worn on the wrist, the motion of the wearer's arm winds the mainspring to operate the watch. You can also manually wind the mainspring by turning the crown. ■ How to manually wind the mainspring Power reserve indicator 26 The Power Reserve Indicator Ex.1 2 Ex.2 The winding state of the mainspring The 7R number of series hours 5R the watch can run series Fully wound Half wound Approximately 48 hours (2 days) Approximately 24 hours (1 day) Approximately 72 hours (3 days) Approximately 36 hours (1 day and a half) Unwound The watch either stops or is running down. BEFORE USING THE WATCH BEFORE USING THE WATCH ・The power reserve indicator lets you know the winding state of the mainspring. ・Before removing the watch from your wrist, observe the power reserve indicator to check if the watch has stored enough power to keep running until the next time you wear it. If necessary, wind the mainspring. (To prevent the watch from stopping, wind the mainspring to store the excess power that will allow the watch to run for extra time.) ■ How to read the Power reserve indicator ※ The position or design of the power reserve indicator may differ depending on the model. 76 77 HOW TO SET THE DATE AND TIME (7R87, 7R88) ■ How to set the date and time ※ For adjusting the date only, refer to“■ Date adjustment on the first day after a month that has less than 31 days”on page 82 3.Pull out the crown to the first click. ※ The watch keeps on operating. ※ If the crown of your watch is a screw lock type, unlock the crown. → CROWN on page 71 1.Make sure that the watch is operating. 3 0 1 2. Make sure that the watch hands do not show any time between the 9:00 p.m. and 1:00 a.m. If the hands show any time between the 9:00 p.m. and 1:00 a.m., pull out the crown to the second click and turn it to temporarily advance the time past 1:00 a.m. 4.Turn the crown in the direction of the arrow mark to set the date to the previous day. ※ Turning the crown clockwise (upward) will not change the date. ※ This procedure is required to ensure the proper engagement of the date driving wheel. ※ Two full rotations of the crown will change the date for one day. While turning the crown, the moment the date changes is midnight. When setting the hour hand, be sure that AM/PM is set correctly. ※ If the crown of your watch is a screw lock type, unlock the crown. → CROWN on page 71 Ex. If you want to set the date to the“26th,” temporarily set the date to the“25th.” 25 Continued on the next page 78 79 5.Pull out the crown to the second click to stop the watch when the second hand is at the 0 second position. Pull out the crown to the second click when the second hand is at the 0 second position. 0 1 2 3 25 6.Turn the crown in the direction of the arrow mark so that the hour and minute hands move clockwise. Advance the time until the date is set to the desired date. 7.Set the time. Turn the crown in the direction of the arrow mark so that the hour and minute hands move clockwise. Set the minute hand about ten minutes behind and then slowly advance the minute hand to the desired time. ※ Two full rotations of the crown will change the date for one day. While turning the crown, the moment the date changes is midnight. When setting the hour hand, be sure that AM/PM is set correctly. 26 8.Push the crown back in to the normal position simultaneously with a time signal. ※ If the crown of your watch is a screw lock type, lock the crown. → CROWN on page 71 26 3 26 0 1 2 Push the crown back in to the normal position. HOW TO SET THE DATE, TIME, AND MOON PHASE HOW TO SET THE DATE, TIME, AND MOON PHASE 80 3 Pull out the crown to the first click. 27 HOW TO SET THE DATE, TIME, AND MOON PHASE HOW TO SET THE DATE, TIME, AND MOON PHASE ※ Always set the date and time when the watch is operating. If the watch is not operating, wind the mainspring. →“How to manually wind the mainspring”on page 73 81 ■ Date adjustment on the first day after a month that has less than 31 days The watch displays the date from the 1st to the 31st. Adjust the date on the first day of the month that has less than 31 days (February, April, June, September, and November). ※ Also conduct the following procedure when adjusting the date only. 3 3.Pull out the crown to the first click. ※ The watch keeps on operating. ※ If the crown of your watch is a screw lock type, unlock the crown. → CROWN on page 71 Ex.: When changing the date from the“31st”to the“1st.” 1.Make sure that the watch is operating. If the hands show any time between 9:00 p.m. and 1:00 a.m., refer to“HOW TO SET THE DATE AND TIME”on page 78 to temporarily advance the hands past 1:00 a.m. 1 Pull out the crown to the first click. 4.Turn the crown in the direction of the arrow mark to set the date. 01 5.Push the crown back in to the normal position. ※ If the crown of your watch is a screw lock type, lock the crown. → CROWN on page 71 01 0 1 Push the crown back in to the normal position. 82 83 HOW TO SET THE TIME (7R99) 1.Make sure that the watch is operating. ※ Always set the date and time when the watch is operating. If the watch is not operating, wind the mainspring. →“How to manually wind the mainspring”on page P. 73 3 3.Turn the crown in the direction of the arrow mark to set the time. Set the minute hand about ten minutes behind and then slowly advance the minute hand to the desired time. 2. Pull out the crown to the first click to stop the watch when the second hand is at the 0 second position. ※ If the crown of your watch is a screw lock type, unlock the crown. → CROWN on page 71 Pull out the crown to the first click when the second hand is at the 0 second position. 3 4.Push the crown back in to the normal position simultaneously with a time signal. ※ If the crown of your watch is a screw lock type, lock the crown. → CROWN on page 71 0 1 0 1 Push the crown back in to the normal position. HOW TO SET THE DATE, TIME, AND MOON PHASE HOW TO SET THE DATE, TIME, AND MOON PHASE 84 3 ※ Turning the crown clockwise (upward) will not change the date. ※ If the watch is not operating, wind the mainspring before setting the date and time. →“HOW TO SET THE DATE AND TIME”on page 78 2. Make sure that the watch hands do not show any time between 9:00 p.m. and 1:00 a.m. 0 HOW TO SET THE DATE, TIME, AND MOON PHASE HOW TO SET THE DATE, TIME, AND MOON PHASE ※ Always set the date and time when the watch is operating. If the watch is not operating, wind the mainspring. →“How to manually wind the mainspring”on page 73 31 85 HOW TO SET THE TIME AND MOON PHASE (7R89, 5R77) ■ How to set the time When setting the time and moon phase, set the time first and then set the moon phase. 3.Turn the crown in the direction of the arrow mark to set the time. Set the minute hand about ten minutes behind and then slowly advance the minute hand to the desired time. ※ It is designed so that the moon phase changes once every 24 hours while the time is shown by a 12-hour display. 1.Make sure that the watch is operating. 3 3 2. Pull out the crown to the second click to stop the watch when the second hand is at the 0 second position. Pull out the crown to the second click when the second hand is at the 0 second position. ※ If the crown of your watch is a screw lock type, unlock the crown. → CROWN on page 71 4.Push the crown back in to the normal position simultaneously with a time signal. ※ If the crown of your watch is a screw lock type, lock the crown. → CROWN on page 71 0 1 2 0 1 2 Push the crown back in to the normal position. 86 87 ■ How to set the moon phase 1. Check the current moon phase. The shape of the moon on the moon phase display indicates the approximate moon phase. After setting the time, set the moon phase. ※ When setting the time, refer to“■ How to set the time”on page 86. Moon phase 3 0 7 15 22 3.Pull out the crown to the first click. New moon Ex.1 Ex.2 If the watch hands show any time between the 9 o'clock and 2 o'clock, pull out the crown to the second click, then turn the crown to temporarily advance the time past 2 o'clock. →“■ How to set the time”on page 86 Adjust the time to the correct time after setting the moon phase. 3 The name of moon phase Moon phase display ※ Check the current moon phase from the weather and moon phase data page in your local newspaper. 2. Make sure that the watch hands do not show any time between the 9 o'clock and 2 o'clock. Quarter moon Full moon Waning moon moon moon ※ The moon phase display shows the phases (waxing and waning) of the moon. The moon phase represents the period from the time when the last new moon (moon phase: 0.0) occurred to noon of the current day in day increments. The average length of the period between new moons is approximately 29.5 days. ※ The shape of the moon on the moon phase display shows the moon phase, and does not show the shape of the moon itself. ※ If the crown of your watch is a screw lock type, unlock the crown. → CROWN on page 71 0 1 Pull out the crown to the first click. 4. Turn the crown in the direction of the arrow mark to hide the moon on the moon phase display. Whole moon is hidden (the state of“Moon phase 0 (new moon)”) Continued on the next page HOW TO SET THE DATE, TIME, AND MOON PHASE HOW TO SET THE DATE, TIME, AND MOON PHASE 88 HOW TO SET THE DATE, TIME, AND MOON PHASE HOW TO SET THE DATE, TIME, AND MOON PHASE ※ Always set the time and moon phase when the watch is operating. If the watch is not operating, wind the mainspring. 7R89 →“How to manually wind the mainspring”on page 73 5R77 →“How to manually wind the mainspring”on page 75 89 5. Slowly turn the crown in the direction of the arrow mark to advance the moon phase by one until the correct moon phase is displayed. Round off the number of the moon phase to the fi rst decimal place. (Ex.) If the current moon phase is 14.8, set the moon phase to“moon phase 15.” TIPS FOR MORE ACCURATE TIME SETTING Keep in mind the following points in order to set the time more accurately. ・Before setting the time, wind the mainspring sufficiently. (Ensure that the power reserve indicator is showing a full-wound state.) →“How to read the Power reserve indicator”on page 77 3 Moon phase 15 6. Push the crown back in to the normal position. ※ If the crown of your watch is a screw lock type, lock the crown. → CROWN on page 71 0 1 ・Do not stop the second hand movement for longer than 30 minutes. If the stoppage of the second hand movement exceeds 30 minutes, push the crown back into the normal position, and wait for at least 30 seconds after the second hand restarts moving, and then continue the time setting. Push the crown back in to the normal position. 90 91 DAILY CARE The case back shows the caliber and performance of your watch Water resistant performance ・The watch body and band touch the skin directly just as underwear. Keep the watch body and band clean in order to avoid stain on the sleeve edge or rash or itch. After removing the watch from your wrist, wipe perspiration or moisture with a soft cloth as soon as possible. ・Do not use any chemical agent such as cleaner to clean the watch. RESISTANT 1 0B A R 00000 N Serial Number 4 The number to identify your watch JA The number to identify the type of your watch 7R88-0AA0 Caliber number KT I N ・This prevents corrosion of the crown and helps to extend the life of the gasket in use. ・The same practice should be applied to the screw-lock type crown. (No need to pull out the screw-lock type crown.) → CROWN on page 71 ・Stainless steel is a highly rust-resistant metal. However, rust will form if contaminants are left on it for a long time. ER AT W 18 ● Turn the crown from time to time. (Only several turns in slow movement will be enough.) Refer to pages 94 - 95. PA ● It is highly recommended for you to take good care of the watch in order to enjoy the superb quality of the watch for a long time. PERFORMANCE AND TYPE To Preserve the Quality of Your Watch To Preserve the Quality of Your Watch 4 3 HOW TO SET THE DATE, TIME, AND MOON PHASE HOW TO SET THE DATE, TIME, AND MOON PHASE Moon phase 0 ・When starting to use a watch after it stops, wind the mainspring sufficiently. To set the time after that, wait for approximately 30 seconds after the small second hand starts to move, then pull the crown out. A M DE ※ The figure above is one example. Performance of your watch is different from above sample. 92 93 WATER 防水性能について RESISTANCE To Preserve the Quality of Your Watch To Preserve the Quality of Your Watch 4 Refer the table below for the description of each degree of water resistant performance of your watch before using. (Refer to “page 93”) Indication on the case back No indication Water resistant performance Condition of use Non-water resistance Avoid drops of water or sweat The watch withstands accidental contact with water in everyday life. WARNING Not suitable for swimming WATER RESISTANT Water resistance for everyday life WATER RESISTANT Water resistance for everyday life at 5 barometric pressures The watch is suitable for sports such as swimming. Water resistance for everyday life at 10(20) barometric pressures. The watch is suitable for diving not using an air cylinder. 5 BAR WATER RESISTANT 10(20)BAR 94 95 MAGNETIC RESISTANCE This watch is a magnetic resistant watch that is fully compliant with JIS level-1 standard. How to handle the watch Keep the watch 5 cm or more away from magnetic products. (JIS level-1 standard) Cellular phone (speaker) AC-powered shaver Bag (with magnet buckle) 4 If the accuracy exceeds the accuracy target range during normal usage due to magnetization, removal of magnetism and accuracy readjustment works are charged regardless of the guarantee period. ● Why is this watch affected by magnetism? Because the adjustment mechanism equipped in the Spring Drive uses a magnet, which is affected by strong magnetism from outside. 96 Examples of common magnetic products that may affect watches Affected by nearby magnetism, this watch may temporarily stop operating, or gain or lose time. To Preserve the Quality of Your Watch To Preserve the Quality of Your Watch 4 4 Magnetic cooking device Portable radio (speaker) Magnetic necklace Magnetic health pillow 97 ● Leather band WATCH BAND ● Metallic band ・Moisture, sweat or soil will cause rust even on a stainless steel band if they are left for a long time. ・Lack of care may cause a yellowish or gold stain on the lower sleeve edge of shirts. ・Wipe off moisture, sweat or soil with a soft cloth as soon as possible ・To clean the soil around the joint gaps of the band, wipe it out in water and then brush it off with a soft toothbrush. (Protect the watch body from water splashes by wrapping it up in plastic wrap etc.) ・Because some titan bracelets use pins made of stainless steel, which has outstanding strength, rust may form in the stainless steel parts. ・If rust advances, pins may poke out or drop out, and the watch case may fall off the bracelet, or the clasp may not open. ・If a pin is poking out, personal injury may result. In such a case, refrain from using the watch and request repair. 4 ・A leather band is susceptible to discoloration and deterioration from moisture, sweat and direct sunlight. ・Wipe off moisture and sweat as soon as possible by gently blotting them up with a dry cloth. ・Do not expose the watch to direct sunlight for a long time. ・Please take care when wearing a watch with light-colored band, as dirt is likely to show up. ・Refrain from wearing a leather band watch other than Aqua Free bands while bathing, swimming, and when working with water even if the watch itself is water-resistant enforced for daily use(10-BAR water resistant). ● Polyurethane band ・A polyurethane band is susceptible to discoloration from light, and may be deteriorated by solvent or atmospheric humidity. ・Especially a translucent, white, or pale colored band easily adsorbs other colors, resulting in color smears or discoloration. ・Wash out dirt in water and clean it off with a dry cloth. (Protect the watch body from water splashes by wrapping it up in plastic wrap etc.) ・When the band becomes less flexible or cracked, replace the band with a new one. To Preserve the Quality of Your Watch To Preserve the Quality of Your Watch The band touches the skin directly and becomes dirty with sweat or dust. Therefore, lack of care may accelerate deterioration of the band or cause skin irritation or stain on the sleeve edge. The watch requires a lot of attention for long usage. 4 Skin irritation caused by a band has various reasons such as Notes on skin allergy to metals or leathers, or skin reactions against friction on irritation and allergy dust or the band itself. Notes on the length of the band Adjust the band to allow a little clearance with your wrist to ensure proper airflow. When wearing the watch, leave enough room to insert a finger between the band and your wrist. 98 99 HOW TO USE THE THREE-PIECE FOLDOVER CLASP Insert the tip of the band into the fixed loop and movable loop, and push the buckle down to fasten the clasp. Fixed loop Buckle Movable loop Tip ・How to take off the watch ・How to adjust the length of the band 4 1 Thread the tip of the band to the buckle. Buckle 2 Slide the band to adjust its length and find the appropriate adjusting hole. Place the pin into the hole. Place your finger between the band and clasp. Pinch the band with your fingers and pull it forward to open the clasp. Buckle ※ Do not pull the tip of the band to open the clasp, as this may damage the band. To Preserve the Quality of Your Watch To Preserve the Quality of Your Watch ・Three-piece foldover clasp ・How to wear the watch 4 Tip Pin 100 Adjusting hole ※ If it is difficult to open the band following the above procedure, hold both sides of the buckle to open the clasp. 101 REMARKS ON 18-KARAT GOLD ● Decoloration of 18-karat gold ・While gold can maintain its glittering quality, other metal components in the alloy may discolor to look like reddish or blackish due to various reasons. ・Daily care helps to prevent discoloration of the alloy, however, if the discoloration or stain of the alloy persists even after wiping the watch off, take your watch to the retailer from whom the watch was purchased for refinishing. (Refinishing will be made at cost.) 4 ● Length adjustment service ・For the length adjustment service of the 18-karat gold or platinum bracelet, ask the retailer from whom the watch was purchased. The watch will be submitted to CREDOR SERVICE STATION for the length adjustment. It may take two to three we eks depending on the model to adjust the length of the bracelet. ・The length adjustment service of the 18-karat gold or platinum bracelet will not be charged only for the first time. However, the cost for materials or parts necessary for the length adjustment and repair cost other than the length adjustment will be charged. ・Only the first length adjustment of the 18-karat gold or platinum bracelet is free of charge. However, the cost for materials or parts necessary for length adjustment and repair cost other than length adjustment will be charged. ・The length adjustment service of stainless-steel band is available from the retailer from whom the watch was purchased or SEIKO CUSTOMER SERVICE CENTER. Some other retailers may charge you for the length adjustment or may not undertake such treatments. To Preserve the Quality of Your Watch To Preserve the Quality of Your Watch 18-karat gold (18KT) is an alloy comprised of 75% of gold and 25% of other metals. Depending on the proportion of the other metals mixed with the gold, the 18-karat gold is classified into three colors such as yellow gold (YG), white gold (WG) and pink gold (PG). WATCH BODY/METAL BRACELET 4 ● Periodic cleaning ・Periodic cleaning is highly recommended to enjoy the best quality of the watch for a long time. Ask the retailer from whom the watch was purchased or the CREDOR SERVICE STATION through your nearby SEIKO retailers. (Cleaning may be made at cost.) 102 103 LumiBrite LumiBrite absorbs the energy of sunlight or artificial light in a short time (light of more than 500 lux for approximately 10 minutes) and stores it to emit light in darkness for a long time (approximately 3 to 5 hours). Please note, however, that, as LumiBrite emits the light it stores, the luminance level of the light decreases gradually over time. The duration of the emitted light may also differ depending on such factors as the brightness of the place where the watch is exposed to light and the amount of light the watch stores. ※ LumiBrite is a luminous paint that is completely harmless to human beings and the natural environment. 4 104 <Reference data on luminance> Environment Reference data on luminance Fine weather Sunlight Cloudy weather Fine weather Indoors Cloudy weather (Window side during daytime) Rainy weather 1m Lighting apparatus 3m (40-watt daylight fluorescent light) 4m 100,000 lux 10,000 lux more than 3,000 lux 1,000 to 3,000 lux less than 1,000 lux 1,000 lux 500 lux (average room luminance) 250 lux To Preserve the Quality of Your Watch To Preserve the Quality of Your Watch If your watch uses LumiBrite MEMO 4 105 AFTER-SALE SERVICE 4 ・Notes on repair parts ・Your CREDOR watch was strictly checked and completely adjusted at the factory to ensure its high accuracy. However, if your watch gets out of order with the correct way of use as described in this instruction booklet within the guarantee period, take your watch to the retailer from whom your watch was purchased together with the certificate of guarantee. Repair and adjustment will be made without charge. ・The guarantee period and detailed guarantee coverage is provided in the certificate of guarantee. ・For repair services after the guarantee period has expired or for any other information regarding the CREDOR watch, please contact the retailer from whom your watch was purchased or SEIKO CUSTOMER SERVICE CENTER (listed at the back of the booklet). 106 ・The CREDOR repair parts will be retained usually for 10 years. In principle, your watch can be reconditioned within this period if used normally. ・The number of years that a watch is considered repairable may vary greatly depending on the conditions under which it was used, and normal accuracy may not be achieved in some cases. We recommend, therefore, that you consult the retailer from whom the watch was purchased when having them repair your watch. ・The case, dial, hands, glass and bracelet, or parts may be replaced with substitutes if the originals are not available. ・For any other information regarding the CREDOR watch, please contact SEIKO CUSTOMER SERVICE CENTER (listed at the back of the booklet). ・Periodic inspection and adjustment by disassembly and cleaning (overhaul) is recommended approximately once every 3 to 4 years in order to maintain optimal performance of the watch for a long time. The power transmission gear of the movement of this watch constantly receives force. To ensure that this mechanism works properly all the time, washing parts, changing oil, adjusting accuracy, checking functions and replacing consumable parts on a regular basis are important. The first overhaul after the purchase of your watch is particularly important for preserving long-time use of your watch. According to use conditions, the oil retaining condition of your watch mechanical parts may deteriorate, abrasion of the parts may occur due to contamination of oil, which may ultimately lead the watch itself to stop. As the parts such as gasket may deteriorate, water-resistant performance may be impaired due to intrusion of perspiration and moisture. Please contact the retailer from whom the watch was purchased for inspection and adjustment by disassembly and cleaning (overhaul). ・For replacement of parts, please specify "SEIKO GENUINE PARTS." ・When asking for inspection and adjustment by disassembly and cleaning (overhaul), make sure that the gasket and push pin are also replaced with new ones. To Preserve the Quality of Your Watch To Preserve the Quality of Your Watch ・Notes on after-sale service and guarantee ・Notes on overhaul 4 107 TROUBLESHOOTING Trouble Possible cause Solution Reference pages The mainspring is in an“unwound”state (Refer to “How to read the power reserve indicator ”on page 77.) Turn the crown to wind the mainspring. While you are wearing the watch or when you take it off, check the remaining power shown by the power reserve indicator and wind the mainspring if necessary. 7R series → P. 73 Even though you wear the watch every day, the power reserve indicator does not come up (5R series). The watch is worn on your wrist only for a short period of time, or your arm movement is small. Turn the crown to wind the mainspring. The watch has been left in extremely high or low temperatures. Return the watch to normal temperature so that it works accurately as usual, and then 7R 87・ 7R 88 reset the time. The watch is adjusted so that it works accurately when it is worn on → P. 78 your wrist under the normal temperature range between 5 °C and 35 °C. The watch is left close to an object with a strong magnetic field (page 97). Keep away the watch from close contact with magnetic objects so → P. 84 that the watch works accurately as usual, and then reset the time. You drop the watch, hit it against a hard surface, or wear it while playing active sports. The watch is exposed to strong vibrations. Reset the time. Moisture gets inside the watch because the gasket is deteriorated. Contact the retailer from whom the watch was purchased. The watch temporarily gains or loses time 5 The inner surface of the glass is clouded. 108 5R series → P. 75 7R 99 7R 89・ 5R 77 → P. 86 Troubleshooting Troubleshooting The watch stops operating. 5 − 109 Trouble Solution Reference pages The watch stops even though the power The watch has been left under the temperature reserve indicator is not showing to“o”. below 0ºC. Turn the crown to wind the mainspring. Under a low-temperature condition 7R series → P. 72 (below 0ºC), the watch may stop when the power reserve indicator shows less 5R series → P. 74 than one-fourth (7R series) or one-sixth (5R series) of the power reserve. The watch hands move quicker than usual. ① Conduct the following crown operation. 7R 87・ 7R 88 (7R87, 7R88, 7R89, 5R77) Normal position → second click → normal position → P. 78 (7R99) Normal position → first click → normal position 7R 99 ② Reset the time. This is not a malfunction. → P. 84 Right after starting the watch, it seems This is not a malfunction (when starting that the second hand moves quicker than the watch, it takes a little time before the usual when setting the time. adjustment function starts working). Set the time after the second hand moves for approximately 30 7R 89・ 5R 77 → P. 86 seconds or more to set the time correctly. The date changes during daytime (7R87, 7R88). AM/PM is not correctly set. Advance the hour hands for 12 hours to correctly set the time. It takes the time to change the date (7R87, 7R88). This is not a malfunction. (It is designed that the date change mechanism works between 9:00 p.m. and 1:00 a.m.) No operation is needed. P. 78 Troubleshooting Troubleshooting 5 Possible cause 5 − ※ Contact the retailer from whom the watch was purchased for any other troubles. 110 111 SPECIFICATIONS 7R87,7R88 Specifications 6 112 7R99 7R89 5R77 Frequency of crystal oscillator 32,768 Hz (Hz = Hertz … Cycles per second) Loss/gain Within 15 seconds per month (equivalent to 1 second per day) (If the watch is worn on your wrist within normal temperature range between 5 ºC and 35 ºC.) Operational temperature range Between ‒10 ºC and +60 ºC Under a low-temperature condition (below 0 ºC), always keep at least one-fourth of the watch power shown by the power reserve indicator. Between ‒10 ºC and +60 ºC Under a low-temperature condition (below 0 ºC), always keep at least one-sixth of the watch power shown by the power reserve indicator. Driving system Spring Drive (manual winding type) Spring Drive (automatic type with manual winding function) Features Hour hand, Minute hand, Second hand, Date, Power Reserve Indicator Continuous operating time IC (Integrated Circuit) Hour hand, Minute hand, Second hand, Power Reserve Indicator, Moon phase display, Approx. 48 hours Approx. 72 hours Oscillator, frequency divider, and spring drive control circuit (CMOS-IC): 1 piece Hand movement Jewels Hour hand, Minute hand, Second hand, Power Reserve Indicator Glide-motion second hand 30 jewels 32 jewels 30 jewels ※ The specifications are subject to change without prior notice for product improvements. http://www.seiko-watch.co.jp/ クレドール専用フリーダイヤル 0120-302-617 受付時間 (月曜日∼金曜日) 9:30∼21:00 (土曜・日曜・祝日) 9:30∼17:30 お客様相談室 〒100-0005 東京都千代田区丸の内 3-1-1 国際ビル 〒550-0013 大阪市西区新町1-4-24 大阪四ツ橋新町ビルデイング 本 社 〒105-8467 東京都港区虎ノ門2-8-10