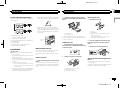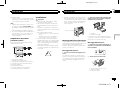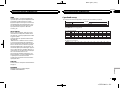
1
Black plate (1,1) Français Español Deutsch Owner’s Manual Mode d’emploi Manuale d’istruzioni Manual de instrucciones Bedienungsanleitung Handleiding Руководство пользователя Italiano DEH-X3600UI DEH-2600UI English CD RDS RECEIVER AUTORADIO CD RDS SINTOLETTORE CD RDS REPRODUCTOR DE CD CON RECEPTOR RDS CD RDS-EMPFÄNGER CD RDS-ONTVANGER CD RDS ПРИЕМНИК Nederlands Русский <QRD3200-A>1 Black plate (2,1) Section Before you start 01 Thank you for purchasing this PIONEER product To ensure proper use, please read through this manual before using this product. It is especially important that you read and observe WARNINGs and CAUTIONs in this manual. Please keep the manual in a safe and accessible place for future reference. Before you start About this unit The tuner frequencies on this unit are allocated for use in Western Europe, Asia, the Middle East, Africa and Oceania. Use in other areas may result in poor reception. The RDS (radio data system) function only works in areas that broadcast RDS signals for FM stations. WARNING If you want to dispose this product, do not mix it with general household waste. There is a separate collection system for used electronic products in accordance with legislation that requires proper treatment, recovery and recycling. Private households in the member states of the EU, in Switzerland and Norway may return their used electronic products free of charge to designated collection facilities or to a retailer (if you purchase a similar new one). For countries not mentioned above, please contact your local authorities for the correct method of disposal. By doing so you will ensure that your disposed product undergoes the necessary treatment, recovery and recycling and thus prevent potential negative effects on the environment and human health. 2 ! Do not attempt to install or service this product by yourself. Installation or servicing of this product by persons without training and experience in electronic equipment and automotive accessories may be dangerous and could expose you to the risk of electric shock, injury or other hazards. ! Do not attempt to operate the unit while driving. Make sure to pull off the road and park your vehicle in a safe location before attempting to use the controls on the device. CAUTION This product is a class 1 laser product classified under the Safety of laser products, IEC 60825-1:2007. If you experience problems Should this unit fail to work properly, please contact your dealer or nearest authorized PIONEER Service Station. CAUTION ! Do not allow this unit to come into contact with liquids. Electrical shock could result. Also, damage to this unit, smoke, and overheating could result from contact with liquids. ! The Pioneer CarStereo-Pass is for use only in Germany. ! Always keep the volume low enough to hear outside sounds. ! Avoid exposure to moisture. En <QRD3200-A>2 Black plate (3,1) Section Using this unit Using this unit Head unit 123 4 5 6 c 1/ d AUX input jack (3.5 mm stereo jack) e Detach button to 6/ 1 CAUTION 78 9 ab c de Use an optional Pioneer USB cable (CD-U50E) to connect the USB storage device as any device connected directly to the unit will protrude out from the unit, which could be dangerous. DEH-2600UI 21 3 4 b 5 6 Display indication DEH-X3600UI 2 1 2 3 9 a 1 SRC/OFF 2 h (eject) 3 MULTI-CONTROL (M.C.) 4 c 6 USB port 5 7 9 b 6 8 a b 3 4 7 6 iPod DEH-2600UI BAND/ (iPod control) (back)/DIMMER (dimmer) a c/d b DISP (list) Sub information section 5 LOC (local seek tuning) 6 TP (traffic program identification) 7 TA (traffic announcements) 9 a b 5 9 8 a 2 (random/shuffle) (repeat) (iPod control) This unit’s iPod function is operated from your iPod. 1 After installation of this unit, turn the ignition switch to ON. SET UP appears. 2 Turn M.C. to switch to YES. # If you do not use the unit for 30 seconds, the set up menu will not be displayed. # If you prefer not to set up at this time, turn M.C. to switch to NO. 3 4 Follow these steps to set the menu. To proceed to the next menu option, you need to confirm your selection. LANGUAGE (multi-language) This unit can display the text information from a compressed audio file even for information embedded in English, Russian or Turkish. ! If the embedded language and the selected language setting are not the same, text information may not display properly. ! Some characters may not be displayed properly. 1 Turn M.C. to select the desired setting. ENG (English)—РУС (Russian)—TUR (Turkish) 2 Press M.C. to confirm the selection. CLOCK SET (setting the clock) (sound retriever) Set up menu 1 MIX (MIXTRAX) DEH-X3600UI 9 4 (list) Disc loading slot 8 3 DEH-2600UI 5 7 de Appears when a lower tier of folder or menu exists. 4 8 78 Main information section ! Tuner: band and frequency ! RDS: program service name, PTY information and other literal information ! CD player, USB storage device and iPod: elapsed playback time and text information English DEH-X3600UI 02 1 2 3 4 Turn M.C. to adjust hour. Press M.C. to select minute. Turn M.C. to adjust minute. Press M.C. to confirm the selection. FM STEP (FM tuning step) Use FM STEP to set FM tuning step options (seek step settings). 1 Turn M.C. to select the FM tuning step. 100 (100 kHz)—50 (50 kHz) 2 Press M.C. to confirm the selection. QUIT appears. ! The manual tuning step is fixed at 50 kHz. ! When AF and TA are turned off, the seek step is fixed at 50 kHz even if set to 100. 5 To finish your settings, turn M.C. to select YES. # If you prefer to change your setting again, turn M.C. to switch to NO. Press M.C. to select. 6 Press M.C. to select. En <QRD3200-A>3 3 Black plate (4,1) Section Using this unit 02 Notes ! You can set up the menu options from the system menu and initial menu. For details about the settings, refer to System menu on page 9 and Initial menu on page 11. ! You can cancel set up menu by pressing SRC/OFF. Using this unit Removing the front panel 1 Press the detach button to release the front panel. 2 Push the front panel upward (M) and then pull it toward (N) you. Basic operations Important ! Handle the front panel with care when removing or attaching it. ! Avoid subjecting the front panel to excessive shock. ! Keep the front panel out of direct sunlight and high temperatures. ! To avoid damaging the device or vehicle interior, remove any cables and devices attached to the front panel before detaching it. 3 Always store the detached front panel in a protective case or bag. Re-attaching the front panel 1 Slide the front panel to the left. 2 Press the right side of the front panel until it is firmly seated. Forcing the front panel into place may result in damage to the front panel or head unit. Selecting a source 1 Press SRC/OFF to cycle between: RADIO—CD—USB/iPod—APP (application)— AUX ! USB MTP displays while the MTP connection is in use. ! Only for DEH-2600UI When there is an iPod connected and a source other than iPod is selected, you can switch to iPod by pressing iPod. Adjusting the volume 1 Turn M.C. to adjust the volume. Note When this unit’s blue/white lead is connected to the vehicle’s auto-antenna relay control terminal, the vehicle’s antenna extends when this unit’s source is turned on. To retract the antenna, turn the source off. Frequently used menu operations Turning the unit on 1 Press SRC/OFF to turn the unit on. Returning to the previous display Returning to the previous list (the folder one level higher) 1 Press /DIMMER. Turning the unit off 1 Press and hold SRC/OFF until the unit turns off. Returning to the ordinary display Canceling the main menu 1 Press BAND/ . Returning to the ordinary display from the list 1 Press BAND/ . Radio Basic operations Selecting a band 1 Press BAND/ until the desired band (FM1, FM2,FM3 for FM or MW/LW) is displayed. Switching preset stations 1 Press c or d. ! Select PCH (preset channel) under SEEK to use this function. Manual tuning (step by step) 1 Press c or d. ! Select MAN (manual tuning) under SEEK to use this function. Seeking 1 Press and hold c or d, and then release. You can cancel seek tuning by briefly pressing c or d. While pressing and holding c or d, you can skip stations. Seek tuning starts as soon as you release c or d. Notes ! For details about SEEK, refer to SEEK (left/ right key setting) on page 5. ! This unit’s AF (alternative frequencies search) function can be turned on and off. AF should be off for normal tuning operation (refer to AF (alternative frequencies search) on page 5). Storing and recalling stations for each band Using preset tuning buttons 1 To store: Press and hold down one of the preset tuning buttons (1/ to 6/ ) until the number stops flashing. 2 To recall: Press one of the preset tuning buttons (1/ to 6/ ). 4 En <QRD3200-A>4 Black plate (5,1) Section Using this unit Switching the display Notes ! If the program service name cannot be acquired in FREQUENCY, the broadcast frequency is displayed instead. If the program service name is detected, the program service name will be displayed. ! Depending on the band, text information can be changed. ! Text information items that can be changed depend on the area. Using PTY functions You can tune in to a station using PTY (program type) information. Searching for an RDS station by PTY information 1 Press (list). 2 Turn M.C. to select a program type. NEWS/INFO—POPULAR—CLASSICS— OTHERS 3 Press M.C. to begin the search. The unit searches for a station broadcasting that type of program. When a station is found, its program service name is displayed. ! To cancel the search, press M.C. again. ! The program of some stations may differ from that indicated by the transmitted PTY. ! If no station is broadcasting the type of program you searched for, NOT FOUND is displayed for about two seconds and then the tuner returns to the original station. PTY list For more details about PTY list, visit the following site: http://www.pioneer.eu/eur/products/25/121/tech/ CarAudio/PTY.html When AF is used, the regional function limits the selection of stations to those broadcasting regional programs. 1 Press M.C. to turn the regional function on or off. Function settings LOCAL (local seek tuning) 1 Local seek tuning allows you to tune in to only those radio stations with sufficiently strong signals for good reception. 1 Press M.C. to select the desired setting. FM: OFF—LV1—LV2—LV3—LV4 MW/LW: OFF—LV1—LV2 The highest level setting allows reception of only the strongest stations, while lower levels allow the reception of weaker stations. Press M.C. to display the main menu. 2 Turn M.C. to change the menu option and press to select FUNCTION. 3 Turn M.C. to select the function. Once selected, the following functions can be adjusted. # If MW/LW band is selected, only BSM, LOCAL and SEEK are available. FM SETTING (FM sound quality settings) The sound quality level can be set to match the broadcast signal conditions of the FM band signal. 1 Press M.C. to display the setting mode. 2 Turn M.C. to select the desired setting. ! STANDARD – This is the standard setting. ! HI-FI – This is the setting to use to prioritize the high quality of stereo sound. ! STABLE – This is the setting to use to prioritize the low noise of monaural sound. BSM (best stations memory) BSM (best stations memory) automatically stores the six strongest stations in the order of their signal strength. 1 Press M.C. to turn BSM on. To cancel, press M.C. again. REGIONAL (regional) TA (traffic announcement standby) 1 Press M.C. to turn traffic announcement standby on or off. AF (alternative frequencies search) 1 Press M.C. to turn AF on or off. NEWS (news program interruption) 1 Press M.C. to turn the NEWS function on or off. SEEK (left/right key setting) You can assign a function to the left and right keys of the unit. Select MAN (manual tuning) to tune up or down manually or select PCH (preset channel) to switch between preset channels. 1 Press M.C. to select MAN or PCH. 02 CD/CD-R/CD-RW and USB storage devices English Selecting the desired text information 1 Press DISP to cycle between the following: ! FREQUENCY (program service name or frequency) ! BRDCST INFO (program service name/PTY information) ! CLOCK (source name and clock) Using this unit MTP connection MTP-compatible Android devices (running Android OS 4.0 or higher) can be connected by MTP connection using the USB source. To connect an Android device, use the cable that came with the device. Notes ! This function is not compatible with MIXTRAX. ! This function is not compatible with WAV. Basic operations Playing a CD/CD-R/CD-RW 1 Insert the disc into the disc loading slot with the label side up. Ejecting a CD/CD-R/CD-RW 1 Press h. Playing songs on a USB storage device 1 Open the USB port cover. 2 Plug in the USB storage device using a USB cable. Stopping playback of files on a USB storage device 1 You may disconnect the USB storage device at any time. Selecting a folder 1 Press 1/ or 2/ . Selecting a track 1 Press c or d. Fast forwarding or reversing 1 Press and hold c or d. ! When playing compressed audio, there is no sound during fast forward or reverse. Returning to root folder 1 Press and hold BAND/ . En <QRD3200-A>5 5 Black plate (6,1) Section Using this unit 02 Switching between compressed audio and CD-DA 1 Press BAND/ . Switching between playback memory devices You can switch between playback memory devices on USB storage devices with more than one Mass Storage Device-compatible memory device. 1 Press BAND/ . ! You can switch between up to 32 different memory devices. Note Disconnect USB storage devices from the unit when not in use. Operations using the MIXTRAX button Turning MIXTRAX on or off Only for DEH-X3600UI You can use this function when USB is selected as the source. You cannot use this function with USB MTP. 1 Press MIX to turn MIXTRAX on or off. ! For more details about MIXTRAX, refer to About MIXTRAX on page 10. ! When MIXTRAX is in use, the sound retriever function is disabled. Using this unit Switching the display Selecting the desired text information 1 Press DISP to cycle between the following: CD-DA ! ELAPSED TIME (track number and playback time) ! CLOCK (source name and clock) ! SPEANA (spectrum analyzer) CD-TEXT ! TRACK INFO (track title/track artist/disc title) ! ELAPSED TIME (track number and playback time) ! CLOCK (source name and clock) ! SPEANA (spectrum analyzer) MP3/WMA/WAV ! TRACK INFO (track title/artist name/album title) ! FILE INFO (file name/folder name) ! ELAPSED TIME (track number and playback time) ! CLOCK (source name and clock) ! SPEANA (spectrum analyzer) Viewing a list of the files (or folders) in the selected folder 1 When a folder is selected, press M.C. Playing a song in the selected folder 1 When a folder is selected, press and hold M.C. Operations using special buttons Selecting a repeat play range to cycle between the following: 1 Press 6/ CD/CD-R/CD-RW ! ALL – Repeat all tracks ! ONE – Repeat the current track ! FLD – Repeat the current folder USB storage device ! ALL – Repeat all files ! ONE – Repeat the current file ! FLD – Repeat the current folder Selecting and playing files/ tracks from the name list Playing tracks in random order to turn random play on or off. 1 Press 5/ Tracks in a selected repeat range are played in random order. ! To change songs during random play, press d to switch to the next track. Pressing c restarts playback of the current track from the beginning of the song. 1 Press list mode. Pausing playback 1 Press 4/PAUSE to pause or resume. to switch to the file/track name 2 Use M.C. to select the desired file name (or folder name). Selecting a file or folder 1 Turn M.C. Playing 1 When a file or track is selected, press M.C. Enhancing compressed audio and restoring rich sound (sound retriever) 1 Press 3/S.Rtrv to cycle between: 1—2—OFF (off) 1 is effective for low compression rates, and 2 is effective for high compression rates. ! Key operation is disabled when MIXTRAX is on. Function settings 1 6 2 Turn M.C. to change the menu option and press to select FUNCTION. Once selected, the function below can be adjusted. ! S.RTRV is not available when MIXTRAX is turned on. S.RTRV (sound retriever) Automatically enhances compressed audio and restores rich sound. 1 Press M.C. to select the desired setting. For details, refer to Enhancing compressed audio and restoring rich sound (sound retriever) on page 6. iPod Basic operations Playing songs on an iPod 1 Open the USB port cover. 2 Connect an iPod to USB input. Playback is performed automatically. Selecting a song (chapter) 1 Press c or d. Selecting an album 1 Press 1/ or 2/ . Fast forwarding or reversing 1 Press and hold c or d. Notes ! The iPod cannot be turned on or off when the control mode is set to CONTROL AUDIO/CTRL AUDIO. ! Disconnect headphones from the iPod before connecting it to this unit. ! The iPod will turn off about two minutes after the ignition is switched off. Press M.C. to display the main menu. En <QRD3200-A>6 Black plate (7,1) Section Using this unit Turning MIXTRAX on or off Only for DEH-X3600UI 1 Press MIX to turn MIXTRAX on or off. ! For more details about MIXTRAX, refer to About MIXTRAX on page 10. Switching the display Selecting the desired text information 1 Press DISP to cycle between the following: ! TRACK INFO (track title/artist name/album title) ! ELAPSED TIME (track number and playback time) ! CLOCK (source name and clock) ! SPEANA (spectrum analyzer) Browsing for a song 1 Press search. 2 Playing a song in the selected category 1 When a category is selected, press and hold M.C. Searching the list by alphabet 1 When a list for the selected category is disto switch to alphabet search played, press mode. ! You also can switch to alphabet search mode by turning M.C. twice. 2 Turn M.C. to select a letter. 3 Press M.C. to display the alphabetical list. ! To cancel searching, press /DIMMER. Notes ! You can play playlists created with the computer application (MusicSphere). The application will be available on our website. ! Playlists that you created with the computer application (MusicSphere) are displayed in abbreviated form. Operations using special buttons to switch to the top menu of list Use M.C. to select a category/song. Changing the name of the song or category 1 Turn M.C. Playlists—artists—albums—songs—podcasts —genres—composers—audiobooks Playing 1 When a song is selected, press M.C. Viewing a list of songs in the selected category 1 When a category is selected, press M.C. Selecting a repeat play range to cycle between the following: 1 Press 6/ ! ONE – Repeat the current song ! ALL – Repeat all songs in the selected list ! When the control mode is set to CONTROL iPod/CTRL iPod, the repeat play range will be same as what is set for the connected iPod. Selecting a random play range (shuffle) to cycle between the following: 1 Press 5/ ! SNG – Play back songs in the selected list in random order. ! ALB – Play back songs from a randomly selected album in order. ! OFF – Not play back in random order. Playing all songs in random order (shuffle all) to turn shuffle all on. 1 Press and hold 5/ ! To turn off shuffle all, select OFF in shuffle. For details, refer to Selecting a random play range (shuffle) on page 7. Pausing playback 1 Press 4/PAUSE to pause or resume. Enhancing compressed audio and restoring rich sound (sound retriever) 1 Press 3/S.Rtrv to cycle between: 1—2—OFF (off) 1 is effective for low compression rates, and 2 is effective for high compression rates. Playing songs related to the currently playing song 02 ! Depending on the song selected to play, the end of the currently playing song and the beginning of the selected song/album may be cut off. Using this unit’s iPod function from your iPod This unit’s iPod function can be controlled by using the connected iPod. CONTROL iPod/CTRL iPod is not compatible with the following iPod models. ! iPod nano 1st generation ! iPod with video % Press BAND/ mode. to switch to link play 2 Turn M.C. to change the mode; press to select. ! ARTIST – Plays an album by the artist currently playing. ! ALBUM – Plays a song from the album currently being played. ! GENRE – Plays an album from the genre currently being played. The selected song/album will be played after the currently playing song. Notes ! The selected song/album may be canceled if you use functions other than link search (e.g. fast forward and reverse). to switch the control ! CONTROL iPod/CTRL iPod – This unit’s iPod function can be operated from the connected iPod. ! CONTROL AUDIO/CTRL AUDIO – This unit’s iPod function can be controlled by using this unit. You can play songs from the following lists. • Album list of the currently playing artist • Song list of the currently playing album • Album list of the currently playing genre 1 Press and hold mode. English Operations using the MIXTRAX button Using this unit Only for DEH-2600UI You can also switch the control mode by pressing iPod. Notes ! Switching the control mode to CONTROL iPod/CTRL iPod pauses song playback. Use the iPod to resume playback. ! The following operations are still accessible from the unit even if the control mode is set to CONTROL iPod/CTRL iPod. — Pausing — Fast forward/reverse — Selecting a song (chapter) ! The volume can only be adjusted from this unit. Function settings 1 Press M.C. to display the main menu. En <QRD3200-A>7 7 Black plate (8,1) Section Using this unit 02 2 Turn M.C. to change the menu option and press to select FUNCTION. 3 Turn M.C. to select the function. Once selected, the following functions can be adjusted. ! AUDIO BOOK is not available when CONTROL iPod/CTRL iPod is selected in the control mode. For details, refer to Using this unit’s iPod function from your iPod on page 7. AUDIO BOOK (audiobook speed) 1 Press M.C. to display the setting mode. 2 Turn M.C. to select your favorite setting. ! FASTER – Playback at a speed faster than normal ! NORMAL – Playback at normal speed ! SLOWER – Playback at a speed slower than normal S.RTRV (sound retriever) 1 Press M.C. to select the desired setting. For details, refer to Enhancing compressed audio and restoring rich sound (sound retriever) on page 7. Using this unit Important Use of third party apps may involve or require the provision of personally identifiable information, whether through the creation of a user account or otherwise, and for certain applications, the provision of geolocation data. ALL THIRD PARTY APPS ARE THE SOLE RESPONSIBILITY OF THE PROVIDERS, INCLUDING WITHOUT LIMITATION COLLECTION AND SECURITY OF USER DATA AND PRIVACY PRACTICES. BY ACCESSING THIRD PARTY APPS, YOU AGREE TO REVIEW THE TERMS OF SERVICE AND PRIVACY POLICIES OF THE PROVIDERS. IF YOU DO NOT AGREE WITH THE TERMS OR POLICIES OF ANY PROVIDER OR DO NOT CONSENT TO THE USE OF GEOLOCATION DATA WHERE APPLICABLE, DO NOT USE THAT THIRD PARTY APP. Starting procedure for iPhone users 1 Connect an iPhone to USB input. 2 Switch the source to APP. 3 Start up the application on the iPhone and initiate playback. Basic operations Selecting a track 1 Press c or d. The following is the detailed information regarding the terminals required to use the application for iPhone on this unit. For iPhone users Using connected device applications ! This function is compatible with iPhone and iPod touch. ! The device has iOS 5.0 or higher. You can use this unit to perform streaming playback of and control tracks in iPhone applications or just for streaming playback. Notes ! Please check our website for a list of supported iPhone applications for this unit. ! Pioneer is not liable for any issues that may arise from incorrect or flawed app-based content. ! The content and functionality of the supported applications are the responsibility of the App providers. 1 Press M.C. to pause or resume. S.RTRV (sound retriever) 1 Press M.C. to select the desired setting. 1—2—OFF (off) 1 is effective for low compression rates, and 2 is effective for high compression rates. Audio adjustments Fast forwarding or reversing 1 Press and hold c or d. 1 Pausing playback 1 Press BAND/ to pause or resume. 2 Turn M.C. to change the menu option and press to select AUDIO. Switching the display Information for compatibility of connected devices PAUSE (pause) Selecting the desired text information 1 Press DISP to cycle between the following: ! TRACK INFO (track title/artist name/album title) ! APP NAME (application name) ! ELAPSED TIME (playback time) ! CLOCK (source name and clock) ! SPEANA (spectrum analyzer) Function settings 1 Press M.C. to display the main menu. 2 Turn M.C. to change the menu option and press to select FUNCTION. Press M.C. to display the main menu. 3 Turn M.C. to select the audio function. Once selected, the following audio functions can be adjusted. ! FADER is not available when SUB.W/SUB.W is selected in SP-P/O MODE. For details, refer to SP-P/O MODE (rear output and preout setting) on page 11. ! SUB.W and SUB.W CTRL are not available when REAR/REAR is selected in SP-P/O MODE. For details, refer to SP-P/O MODE (rear output and preout setting) on page 11. ! SUB.W CTRL is not available when SUB.W is selected in OFF. For details, refer to SUB.W (subwoofer on/off setting) on page 9. ! SLA is not available when FM is selected as the source. FADER (fader adjustment) 3 Turn M.C. to select the function. Once selected, the following functions can be adjusted. 1 Press M.C. to display the setting mode. 2 Turn M.C. to adjust the front/rear speaker balance. BALANCE (balance adjustment) 8 En <QRD3200-A>8 Black plate (9,1) Section Using this unit EQ SETTING (equalizer recall) 1 Press M.C. to display the setting mode. 2 Turn M.C. to select the equalizer. POWERFUL—NATURAL—VOCAL—CUSTOM1—CUSTOM2—FLAT—SUPER BASS The equalizer band and equalizer level can be customized when CUSTOM1 or CUSTOM2 is selected. If selecting CUSTOM1 or CUSTOM2, complete the procedures outlined below. If selecting other options, press M.C. to return to the previous display. ! CUSTOM1 can be set separately for each source. However, USB, iPod and APP are all set to the same setting automatically. ! CUSTOM2 is a shared setting used in common for all sources. 3 Press M.C. to display the setting mode. 4 Press M.C. to cycle between the following: Equalizer band—Equalizer level 5 Turn M.C. to select the desired setting. Equalizer band: 80HZ—250HZ—800HZ— 2.5KHZ—8KHZ Equalizer level: +6 to –6 LOUDNESS (loudness) Loudness compensates for deficiencies in the lowfrequency and high-frequency ranges at low volume. 1 Press M.C. to select the desired setting. OFF (off)—LOW (low)—MID (mid)—HI (high) SUB.W (subwoofer on/off setting) This unit is equipped with a subwoofer output which can be turned on or off. 1 Press M.C. to select the desired setting. NOR (normal phase)—REV (reverse phase)— OFF (subwoofer off) 02 SUB.W CTRL (subwoofer adjustment) SLA (source level adjustment) LANGUAGE (multi-language) Only frequencies lower than those in the selected range are outputted from the subwoofer. 1 Press M.C. to display the setting mode. 2 Press M.C. to cycle between the following: Cut-off frequency—Output level—Slope level Rates that can be adjusted will flash. 3 Turn M.C. to select the desired setting. Cut-off frequency: 50HZ—63HZ—80HZ— 100HZ—125HZ—160HZ—200HZ Output level: –24 to +6 Slope level: –12— –24 This function prevents the volume from changing too dramatically when the source switches. ! Settings are based on the FM volume level, which remains unchanged. ! The MW/LW volume level can also be adjusted with this function. ! USB, iPod and APP are all set to the same setting automatically. 1 Press M.C. to display the setting mode. 2 Turn M.C. to adjust the source volume. Adjustment range: +4 to –4 This unit can display the text information from a compressed audio file even for information embedded in English, Russian or Turkish. ! If the embedded language and the selected language setting are not the same, text information may not display properly. ! Some characters may not be displayed properly. 1 Press M.C. to select the desired setting. ENG (English)—РУС (Russian)—TUR (Turkish) CLOCK SET (setting the clock) BASS BOOST (bass boost) 1 Press M.C. to display the setting mode. 2 Turn M.C. to select a desired level. 0 to +6 is displayed as the level is increased or decreased. HPF SETTING (high pass filter adjustment) Use this function when wanting to listen only to high-frequency sounds. Only frequencies higher than the high-pass filter (HPF) cutoff are output from the speakers. 1 Press M.C. to display the setting mode. 2 Press M.C. to cycle between the following: Cut-off frequency—Slope level 3 Turn M.C. to select the desired setting. Cut-off frequency: OFF—50HZ—63HZ—80HZ —100HZ—125HZ—160HZ—200HZ Slope level: –12— –24 English 1 Press M.C. to display the setting mode. 2 Turn M.C. to adjust the left/right speaker balance. Using this unit System menu Important PW SAVE (power saving) is canceled if the vehicle battery is disconnected and will need to be turned back on once the battery is reconnected. When PW SAVE (power saving) is off, depending on connection methods, the unit may continue to draw power from the battery if your vehicle’s ignition doesn’t have an ACC (accessory) position. 1 Press M.C. to display the main menu. 2 Turn M.C. to change the menu option and press to select SYSTEM. 3 Turn M.C. to select the system menu function. Once selected, the following system menu functions can be adjusted. ! INFO DISPLAY and BRIGHTNESS are not available for DEH-2600UI. ! MUTE MODE is not available for DEHX3600UI. 1 Press M.C. to display the setting mode. 2 Press M.C. to select the segment of the clock display you wish to set. Hour—Minute 3 Turn M.C. to adjust the clock. 12H/24H (time notation) 1 Press M.C. to select the desired setting. 12H (12-hour clock)—24H (24-hour clock) INFO DISPLAY (sub information) The type of text information displayed in the sub information section can be toggled. 1 Press M.C. to display the setting mode. 2 Turn M.C. to select the desired setting. SPEANA—LEVEL METER—SOURCE—CLOCK —OFF ! The signal bar indicator displays for SPEANA or LEVEL METER when the source is set to RADIO. AUTO PI (auto PI seek) The unit can automatically search for a different station with the same programming, even during preset recall. 1 Press M.C. to turn Auto PI seek on or off. AUX (auxiliary input) En <QRD3200-A>9 9 Black plate (10,1) Section Using this unit 02 Activate this setting when using an auxiliary device connected to this unit. 1 Press M.C. to turn AUX on or off. DIMMER (dimmer) 1 Press M.C. to turn the dimmer on or off. ! You can also change the dimmer setting by pressing and holding /DIMMER. BRIGHTNESS (brightness adjustment) You can use this setting to adjust the display brightness. The range of settings available for BRIGHTNESS will vary depending on whether DIMMER is on or off. For details, refer to DIMMER (dimmer) on page 10. 1 Press M.C. to display the setting mode. 2 Turn M.C. to select the desired setting. DIMMER on: 1 to 4 DIMMER off: 1 to 5 MUTE MODE (mute mode) Sound from this system is automatically muted or attenuated when a signal from equipment with a mute function is received. 1 Press M.C. to display the setting mode. 2 Turn M.C. to select the desired setting. ! MUTE – Muting ! 20dB ATT – Attenuation (20dB ATT has a stronger effect than 10dB ATT) ! 10dB ATT – Attenuation PW SAVE (power saving) Switching this function on enables you to reduce the consumption of battery power. ! Turning on the source is the only operation allowed when this function is on. 1 Press M.C. to turn the power save on or off. Selecting the illumination color Only for DEH-X3600UI 10 Using this unit Illumination function menu 1 Press M.C. to display the main menu. 2 Turn M.C. to display ILLUMI and press to select. 3 Turn M.C. to select the illumination function. Once selected, the following audio functions can be adjusted. KEY COLOUR (key section color setting) You can select desired colors for the keys of this unit. 1 Press M.C. to display the setting mode. 2 Turn M.C. to select the illumination color. ! Preset colors (ranging from WHITE to BLUE) ! SCAN (cycle through a variety of colors automatically) ! CUSTOM (customized illumination color) DISP COLOUR (display section color setting) You can select the desired colors for the display of this unit. 1 Press M.C. to display the setting mode. 2 Turn M.C. to select the illumination color. ! Preset colors (ranging from WHITE to BLUE) ! SCAN (cycle through a variety of colors automatically) ! CUSTOM (customized illumination color) ILLUMI FX (illumination effect mode) In this mode, an illumination effect can be seen on the display at certain times such as when the ACC power is turned on/off or a CD is inserted/ ejected. 1 Press M.C. to turn ILLUMI FX on or off. ! The illumination effect will activate when the ACC power is turned on/off regardless of whether the ILLUMI FX setting is on or off. Note When CUSTOM is selected, the customized color saved is selected. Customizing the illumination color You can create custom illumination colors for both KEY COLOUR and DISP COLOUR. 1 Press M.C. to display the main menu. 2 Turn M.C. to display ILLUMI and press to select. 3 Turn M.C. to display KEY COLOUR or DISP COLOUR. Press to select. 4 Press M.C. and hold until the customizing illumination color setting appears in the display. 5 Press M.C. to select the primary color. R (red)—G (green)—B (blue) BOTH COLOUR (key and display color setting) You can select the desired colors for the keys and display of this unit. 1 Press M.C. to display the setting mode. 2 Turn M.C. to select the illumination color. ! Preset colors (ranging from WHITE to BLUE) ! SCAN (cycle through a variety of colors automatically) 6 Turn M.C. to adjust the brightness level. Adjustment range: 0 to 60 # You cannot select a level below 20 for all three of R (red), G (green), and B (blue) at the same time. # You can also perform the same operation on other colors. Note You cannot create a custom illumination color while SCAN is selected. About MIXTRAX Only for DEH-X3600UI MIXTRAX technology is used to insert a variety of sound effects in between songs, allowing you to experience your music as a nonstop mix complete with visual effects. Notes ! Depending on the file/song, sound effects may not be available. ! Turn MIXTRAX off if the visual effects it produces have adverse effects on driving. Refer to Operations using the MIXTRAX button on page 6. MIXTRAX menu 1 Press M.C. to display the main menu. 2 Turn M.C. to change the menu option and press to select MIXTRAX. 3 Turn M.C. to select the MIXTRAX function. Once selected, the following MIXTRAX functions can be adjusted. The function is enabled when MIXTRAX is on. SHORT PLAYBCK (short playback mode) You can select the length of the playback time. 1 Press M.C. to display the setting mode. 2 Turn M.C. to select the desired setting. 1.0 MIN (1.0 minute)—1.5 MIN (1.5 minutes)— 2.0 MIN (2.0 minutes)—2.5 MIN (2.5 minutes) —3.0 MIN (3.0 minutes)—OFF (off) FLASH AREA (flash area) En <QRD3200-A>10 Black plate (11,1) Section Using this unit FLASH PATTERN (flash pattern) The flashing color and MIXTRAX special effects display change with changes in the sound and bass levels. 1 Press M.C. to display the setting mode. 2 Turn M.C. to select the desired setting. ! SOUND LEVEL 1 to SOUND LEVEL 6 – The flash pattern changes according to the sound level. Select a desired mode. ! LOW PASS 1 to LOW PASS 6 – The flash pattern changes according to the bass level. Select a desired mode. ! RANDOM 1 – The flash pattern changes randomly according to the sound level mode and low pass mode. ! RANDOM 2 – The flash pattern changes randomly according to the sound level mode. ! RANDOM 3 – The flash pattern changes randomly according to the low pass mode. DISPLAY FX (display effect) The MIXTRAX special effects display can be turned on or off. 1 Press M.C. to select the desired setting. ON (MIXTRAX special effects display)—OFF (normal display) CUT IN FX (manual cut-in effect) You can turn on or off the MIXTRAX sound effects while manually changing tracks. 1 Press M.C. to select the desired setting. ON (on)—OFF (off) Initial menu System menu 1 Press and hold SRC/OFF until the unit turns off. 1 Press and hold SRC/OFF until the unit turns off. 2 Press and hold SRC/OFF until the main menu appears in the display. 2 Press and hold SRC/OFF until the main menu appears in the display. 3 Turn M.C. to change the menu option and press to select INITIAL. 4 Turn M.C. to select the initial menu function. Once selected, the following initial menu functions can be adjusted. FM STEP (FM tuning step) 1 Press M.C. to select the FM tuning step. 100 (100 kHz)—50 (50 kHz) SP-P/O MODE (rear output and preout setting) The rear speaker leads output and the RCA output of this unit can be used to connect a full-range speaker or subwoofer. Select a suitable option for your connection. 1 Press M.C. to display the setting mode. 2 Turn M.C. to select the desired setting. ! REAR/SUB.W – Select when there is a fullrange speaker connected to the rear speaker leads output and there is a subwoofer connected to the RCA output. ! SUB.W/SUB.W – Select when there is a subwoofer connected directly to the rear speaker leads output without any auxiliary amp and there is a subwoofer connected to the RCA output. ! REAR/REAR – Select when there is a fullrange speaker connected to the rear speaker leads output and the RCA output. If there is a full-range speaker connected to the rear speaker leads output and the RCA output is not used, you may select either REAR/SUB.W or REAR/REAR. 02 2 Turn M.C. to change the menu option and press to select SYSTEM. 3 Turn M.C. to display DEMO OFF and press to select. 4 Turn M.C. to switch to YES. 3 Turn M.C. to change the menu option and press to select SYSTEM. 5 Press M.C. to select. 4 Turn M.C. to select the system menu function. For details, refer to System menu on page 9. Mute function 1 Insert the stereo mini plug into the AUX input jack. Only for DEH-X3600UI This function is enabled when there is a device equipped with a mute function connected to this unit. Sound is muted automatically if you make or receive a phone call with a device equipped with a mute function. 2 Press SRC/OFF to select AUX as the source. Note Phone source displays when you receive a call. Using an AUX source English You can select areas for flashing colors. 1 Press M.C. to display the setting mode. 2 Turn M.C. to select the desired setting. KEY/DISPLAY (key and display)—KEY (key)— OFF (off) ! When OFF is selected, the color set under ILLUMI is used as the display color. Using this unit Note AUX cannot be selected unless the auxiliary setting is turned on. For more details, refer to AUX (auxiliary input) on page 9. Switching the display Selecting the desired text information 1 Press DISP to cycle between the following: ! Source name ! Source name and clock If an unwanted display appears Turn off the unwanted display using the procedures listed below. 1 Press M.C. to display the main menu. En <QRD3200-A>11 11 Black plate (12,1) Section Installation 03 Installation Connections F O N OF Important ! When installing this unit in a vehicle without an ACC (accessory) position on the ignition switch, failure to connect the red cable to the terminal that detects operation of the ignition key may result in battery drain. STAR T ACC position No ACC position ! Use of this unit in conditions other than the following could result in fire or malfunction. — Vehicles with a 12-volt battery and negative grounding. — Speakers with 50 W (output value) and 4 W to 8 W (impedance value). ! To prevent a short-circuit, overheating or malfunction, be sure to follow the directions below. — Disconnect the negative terminal of the battery before installation. — Secure the wiring with cable clamps or adhesive tape. Wrap adhesive tape around wiring that comes into contact with metal parts to protect the wiring. — Place all cables away from moving parts, such as the shift lever and seat rails. — Place all cables away from hot places, such as near the heater outlet. — Do not connect the yellow cable to the battery by passing it through the hole to the engine compartment. — Cover any disconnected cable connectors with insulating tape. — Do not shorten any cables. — Never cut the insulation of the power cable of this unit in order to share the power with other devices. The current capacity of the cable is limited. — Use a fuse of the rating prescribed. 12 — Never wire the negative speaker cable directly to ground. — Never band together negative cables of multiple speakers. ! When this unit is on, control signals are sent through the blue/white cable. Connect this cable to the system remote control of an external power amp or the vehicle’s auto-antenna relay control terminal (max. 300 mA 12 V DC). If the vehicle is equipped with a glass antenna, connect it to the antenna booster power supply terminal. ! Never connect the blue/white cable to the power terminal of an external power amp. Also, never connect it to the power terminal of the auto antenna. Doing so may result in battery drain or a malfunction. ! The black cable is ground. Ground cables for this unit and other equipment (especially, high-current products such as power amps) must be wired separately. If they are not, an accidental detachment may result in a fire or malfunction. This unit 1 5 6 2 34 7 1 Power cord input 2 AUX2 input jack (3.5 mm stereo jack) (DEHX3600UI only) A dedicated input jack designed exclusively for use with devices equipped with a mute function. 3 Rear output or subwoofer output 4 Front output 5 Antenna input 6 Fuse (10 A) 7 Wired remote input Hard-wired remote control adapter can be connected (sold separately). Power cord 2 7 3 4 5 6 3 4 5 6 1 8 a 9 e b c d 1 To power cord input 2 Depending on the kind of vehicle, the function of 3 and 5 may be different. In this case, be sure to connect 4 to 5 and 6 to 3. 3 Yellow Back-up (or accessory) 4 Yellow Connect to the constant 12 V supply terminal. 5 Red Accessory (or back-up) 6 Red Connect to terminal controlled by ignition switch (12 V DC). 7 Connect leads of the same color to each other. 8 Black (chassis ground) 9 Blue/white The pin position of the ISO connector will differ depending on the type of vehicle. Connect 9 and b when Pin 5 is an antenna control type. In another type of vehicle, never connect 9 and b. a Blue/white Connect to system control terminal of the power amp (max. 300 mA 12 V DC). b Blue/white Connect to auto-antenna relay control terminal (max. 300 mA 12 V DC). c Yellow/black If you use an equipment with Mute function, wire this lead to the Audio Mute lead on that equipment. If not, keep the Audio Mute lead free of any connections. d Speaker leads White: Front left + White/black: Front left * Gray: Front right + Gray/black: Front right * Green: Rear left + or subwoofer + Green/black: Rear left * or subwoofer * Violet: Rear right + or subwoofer + Violet/black: Rear right * or subwoofer * e ISO connector In some vehicles, the ISO connector may be divided into two. In this case, be sure to connect to both connectors. Notes ! Change the initial menu of this unit. Refer to SP-P/O MODE (rear output and preout setting) on page 11. The subwoofer output of this unit is monaural. ! When using a subwoofer of 70 W (2 W), be sure to connect the subwoofer to the violet and violet/black leads of this unit. Do not connect anything to the green and green/ black leads. En <QRD3200-A>12 Black plate (13,1) Section Installation Installation Power amp (sold separately) 2 7 3 6 7 1 System remote control Connect to Blue/white cable. 2 Power amp (sold separately) 3 Connect with RCA cables (sold separately) 4 To Front output 5 Front speaker 6 To Rear output or subwoofer output 7 Rear speaker or subwoofer Installation ! ! ! ! Removing the unit 1 Remove the trim ring. 1 4 5 2 1 2 Secure the mounting sleeve by using a screwdriver to bend the metal tabs (90°) into place. 60° 3 1 5 ! Optimum performance is obtained when the unit is installed at an angle of less than 60°. English Perform these connections when using the optional amplifier. 03 Important Check all connections and systems before final installation. Do not use unauthorized parts as this may cause malfunctions. Consult your dealer if installation requires drilling of holes or other modifications to the vehicle. Do not install this unit where: — it may interfere with operation of the vehicle. — it may cause injury to a passenger as a result of a sudden stop. ! The semiconductor laser will be damaged if it overheats. Install this unit away from hot places such as near the heater outlet. ! When installing, to ensure proper heat dispersal when using this unit, make sure you leave ample space behind the rear panel and wrap any loose cables so they are not blocking the vents. Leave ample 5 cm space 5 cm 5cm cm 2 1 Trim ring 2 Notched tab ! Releasing the front panel allows easier access to the trim ring. ! When reattaching the trim ring, point the side with the notched tab down. 1 Dashboard 2 Mounting sleeve # Make sure that the unit is installed securely in place. An unstable installation may cause skipping or other malfunctions. DIN Rear-mount 1 Determine the appropriate position where the holes on the bracket and the side of the unit match. 2 Insert the supplied extraction keys into both sides of the unit until they click into place. 3 Pull the unit out of the dashboard. DIN front/rear mount This unit can be properly installed using either front-mount or rear-mount installation. Use commercially available parts when installing. 2 Tighten two screws on each side. DIN Front-mount 1 Insert the mounting sleeve into the dashboard. For installation in shallow spaces, use the supplied mounting sleeve. If there is enough space, use the mounting sleeve that came with the vehicle. 3 1 2 Removing and re-attaching the front panel You can remove the front panel to protect your unit from theft. For details, refer to Removing the front panel and Re-attaching the front panel on page 4. 1 Tapping screw (5 mm × 8 mm) 2 Mounting bracket 3 Dashboard or console En <QRD3200-A>13 13 Black plate (14,1) Appendix Additional information Troubleshooting Symptoms are written in bold and causes in regular, non-indented text. Regular, indented text is used to indicate actions to be taken. Additional information Symptoms are written in bold and causes in regular, non-indented text. Regular, indented text is used to indicate actions to be taken. Common FORMAT READ PROTECT Sometimes there is a delay between the start of playback and when you start to hear any sound. Wait until the message disappears and you hear sound. All the files on the connected USB storage device are embedded with DRM. Replace the USB storage device. N/A USB The display automatically returns to the ordinary display. You did not perform any operation within about 30 seconds. Perform operation again. The repeat play range changes unexpectedly. Depending on the repeat play range, the selected range may change when another folder or track is being selected or during fast forwarding/reversing. Select the repeat play range again. AMP ERROR NO AUDIO This unit fails to operate or the speaker connection is incorrect; the protective circuit is activated. Check the speaker connection. If the message fails to disappear even after the engine is switched off/on, contact your dealer or an authorized Pioneer Service Station for assistance. The inserted disc does not contain any playable files. Replace the disc. Subfolders cannot be played when FLD (folder repeat) is selected. Select another repeat play range. NO XXXX appears when a display is changed (NO TITLE, for example). There is no embedded text information. Switch the display or play another track/file. The unit is malfunctioning. There is interference. You are using a device, such as a cellular phone, that may cause audible interference. Move electrical devices that may be causing the interference away from the unit. Error messages When you contact your dealer or your nearest Pioneer Service Center, be sure to note the error message. 14 The inserted disc contains DRM protected files. The protected files are skipped. CHECK USB PROTECT CD player ERROR-07, 11, 12, 17, 30 A subfolder is not played back. SKIPPED All the files on the inserted disc are embedded with DRM. Replace the disc. The disc is dirty. Clean the disc. The disc is scratched. Replace the disc. ERROR-07, 10, 11, 12, 15, 17, 30, A0 There is an electrical or mechanical error. Turn the ignition switch OFF and back ON, or switch to a different source, then back to the CD player. ERROR-15 The inserted disc is blank. Replace the disc. ERROR-23 Unsupported CD format. Replace the disc. The connected USB device is not supported by this unit. ! Connect a USB Mass Storage Class compliant device. ! Disconnect your device and replace it with a compatible USB storage device. The USB connector or USB cable has shortcircuited. Check that the USB connector or USB cable is not caught in something or damaged. CHECK USB USB storage device/iPod FORMAT READ Sometimes there is a delay between the start of playback and when you start to hear any sound. Wait until the message disappears and you hear sound. The connected USB storage device consumes more than maximum allowable current. Disconnect the USB storage device and do not use it. Turn the ignition switch to OFF, then to ACC or ON and then connect only compliant USB storage devices. CHECK USB NO AUDIO There are no songs. Transfer the audio files to the USB storage device and connect. The connected USB storage device has security enabled. Follow the USB storage device instructions to disable the security. SKIPPED The connected USB storage device contains DRM protected files. The protected files are skipped. The iPod operates correctly but does not charge. Make sure the connection cable for the iPod has not shorted out (e.g., not caught in metal objects). After checking, turn the ignition switch OFF and back ON, or disconnect the iPod and reconnect. ERROR-19 Communication failed. Perform one of the following operations. –Turn the ignition switch OFF and back ON. –Disconnect the USB storage device. –Change to a different source. Then, return to the USB source. En <QRD3200-A>14 Black plate (15,1) Appendix Additional information ERROR-23 Handling guidelines Discs and player Use only discs that feature either of the following two logos. USB storage device was not formatted with FAT12, FAT16 or FAT32. USB storage device should be formatted with FAT12, FAT16 or FAT32. iPod failure. Disconnect the cable from the iPod. Once the iPod’s main menu is displayed, reconnect the iPod and reset it. STOP There are no songs in the current list. Select a list that contains songs. Use 12-cm discs. Use only conventional, fully circular discs. The following types of discs cannot be used with this unit: ! DualDiscs ! 8-cm discs: Attempts to use such discs with an adaptor may cause the unit to malfunction. ! Oddly shaped discs Apps Do not attach commercially available labels or other materials to the discs. ! The discs may warp making the disc unplayable. ! The labels may come off during playback and prevent ejection of the discs, which may result in damage to the equipment. ! Discs other than CDs ! Damaged discs, including discs that are cracked, chipped or warped ! CD-R/RW discs that have not been finalized Do not touch the recorded surface of the discs. START UP APP Store discs in their cases when not in use. The application has not started running yet. Follow the instructions that appear on the screen. Do not attach labels, write on or apply chemicals to the surface of the discs. To clean a CD, wipe the disc with a soft cloth outward from the center. Condensation may temporarily impair the player’s performance. Let it rest for about one hour to adjust to a warmer temperature. Also, wipe any damp discs off with a soft cloth. iPod Do not leave the iPod in places with high temperatures. Firmly secure the iPod when driving. Do not let the iPod fall onto the floor, where it may become jammed under the brake or accelerator pedal. About iPod settings ! When an iPod is connected, this unit changes the EQ (equalizer) setting of the iPod to off in order to optimize the acoustics. When you disconnect the iPod, the EQ returns to the original setting. ! You cannot set Repeat to off on the iPod when using this unit. Repeat is automatically changed to All when the iPod is connected to this unit. Incompatible text saved on the iPod will not be displayed by the unit. USB storage device Connections via USB hub are not supported. NOT FOUND No related songs. Transfer songs to the iPod. Road shocks may interrupt disc playback. When using discs that can be printed on label surfaces, check the instructions and the warnings of the discs. Depending on the discs, inserting and ejecting may not be possible. Using such discs may result in damage to this equipment. ERROR-16 The iPod firmware version is old. Update the iPod version. Playback of discs may not be possible because of disc characteristics, disc format, recorded application, playback environment, storage conditions, and so on. English iPod failure. Disconnect the cable from the iPod. Once the iPod’s main menu is displayed, reconnect the iPod and reset it. Additional information Do not connect anything other than a USB storage device. Firmly secure the USB storage device when driving. Do not let the USB storage device fall onto the floor, where it may become jammed under the brake or accelerator pedal. Depending on the USB storage device, the following problems may occur. ! Operations may vary. ! The storage device may not be recognized. ! Files may not be played back properly. ! The device may cause audible interference when you are listening to the radio. Compressed audio compatibility (disc, USB) WMA File extension: .wma Bit rate: 48 kbps to 320 kbps (CBR), 48 kbps to 384 kbps (VBR) Sampling frequency: 32 kHz, 44.1 kHz, 48 kHz Windows Mediaä Audio Professional, Lossless, Voice/DRM Stream/Stream with video: Not compatible MP3 File extension: .mp3 Bit rate: 8 kbps to 320 kbps (CBR), VBR En <QRD3200-A>15 15 Black plate (16,1) Appendix Additional information Sampling frequency: 8 kHz to 48 kHz (32 kHz, 44.1 kHz, 48 kHz for emphasis) Compatible ID3 tag version: 1.0, 1.1, 2.2, 2.3, 2.4 (ID3 tag Version 2.x is given priority over Version 1.x.) Additional information Disc Playable folder hierarchy: up to eight tiers (A practical hierarchy is less than two tiers.) Playable folders: up to 99 iPod compatibility Playable files: up to 999 MP3i (MP3 interactive), mp3 PRO: Not compatible File system: ISO 9660 Level 1 and 2, Romeo, Joliet This unit supports only the following iPod models. Supported iPod software versions are shown below. Older versions may not be supported. Made for ! iPod touch (5th generation) ! iPod touch (4th generation) ! iPod touch (3rd generation) ! iPod touch (2nd generation) ! iPod touch (1st generation) ! iPod classic ! iPod with video ! iPod nano (7th generation) ! iPod nano (6th generation) ! iPod nano (5th generation) ! iPod nano (4th generation) ! iPod nano (3rd generation) ! iPod nano (2nd generation) ! iPod nano (1st generation) ! iPhone 5 ! iPhone 4S ! iPhone 4 ! iPhone 3GS ! iPhone 3G ! iPhone Multi-session playback: Compatible File extension: .wav Quantization bits: 8 and 16 (LPCM), 4 (MS ADPCM) Sampling frequency: 16 kHz to 48 kHz (LPCM), 22.05 kHz and 44.1 kHz (MS ADPCM) ! You cannot use this function with USB MTP. Supplemental information Only the first 32 characters can be displayed as a file name (including the file extension) or a folder name. Russian text to be displayed on this unit should be encoded in one of the following character sets: ! Unicode (UTF-8, UTF-16) ! A character set other than Unicode that is used in a Windows environment and is set to Russian in the multi-language setting This unit may not work properly depending on the application used to encode WMA files. There may be a slight delay at the start of playback of audio files embedded with image data or audio files stored on a USB storage device that has numerous folder hierarchies. Packet write data transfer: Not compatible Regardless of the length of blank sections between the songs from the original recording, compressed audio discs play with a short pause between songs. USB storage device Playable folder hierarchy: up to eight tiers (A practical hierarchy is less than two tiers.) Playable folders: up to 500 Playable files: up to 15 000 Playback of copyright-protected files: Not compatible Partitioned USB storage device: Only the first partition can be played. There may be a slight delay when starting playback of audio files on a USB storage device with numerous folder hierarchies. Depending on the generation or version of the iPod, some functions may not be available. Operations may vary depending on the software version of iPod. CAUTION ! Pioneer cannot guarantee compatibility with all USB mass storage devices and assumes no responsibility for any loss of data on media players, smart phones, or other devices while using this product. About the file/format compatibility, refer to the iPod manuals. Audiobook, Podcast: Compatible M3u playlist: Not compatible WAV 16 ! Do not leave discs or a USB storage device in any place that is subject to high temperatures. Users of iPod with the Lightning Connector should use the Lightning to USB Cable (supplied with iPod). Users of iPod with the Dock Connector should use CD-IU51. For details, consult your dealer. CAUTION Pioneer accepts no responsibility for data lost on the iPod, even if that data is lost while this unit is used. Sequence of audio files The user cannot assign folder numbers and specify playback sequences with this unit. Example of a hierarchy 01 02 03 04 05 Level 1 Level 2 Level 3 Level 4 : Folder : Compressed audio file 01 to 05: Folder number 1 to 6: Playback sequence Disc Folder selection sequence or other operation may differ depending on the encoding or writing software. USB storage device Playback sequence is the same as recorded sequence in the USB storage device. To specify the playback sequence, the following method is recommended. 1 Create a file name that includes numbers that specify the playback sequence (e.g., 001xxx.mp3 and 099yyy.mp3). 2 Put those files into a folder. En <QRD3200-A>16 Black plate (17,1) Appendix Additional information streaming via internet, intranets and/or other networks or in other electronic content distribution systems, such as pay-audio or audio-on-demand applications. An independent license for such use is required. For details, please visit http://www.mp3licensing.com. English 3 Save the folder containing files on the USB storage device. However, depending on the system environment, you may not be able to specify the playback sequence. For USB portable audio players, the sequence is different and depends on the player. Additional information WMA Russian character chart D: C D: C D: C D: C D: C :А :Б :В :Г :Д : Е, Ё :Ж :З : И, Й :К :Л :М :Н :О :П :Р :С :Т :У :Ф :Х :Ц :Ч : Ш, Щ :Ъ :Ы :Ь :Э :Ю :Я D: Display C: Character Copyright and trademark iTunes Apple and iTunes are trademarks of Apple Inc., registered in the U.S. and other countries. MP3 Supply of this product only conveys a license for private, non-commercial use and does not convey a license nor imply any right to use this product in any commercial (i.e. revenue-generating) real time broadcasting (terrestrial, satellite, cable and/or any other media), broadcasting/ Windows Media is either a registered trademark or trademark of Microsoft Corporation in the United States and/or other countries. This product includes technology owned by Microsoft Corporation and cannot be used or distributed without a license from Microsoft Licensing, Inc. iPod & iPhone iPhone, iPod, iPod classic, iPod nano, and iPod touch are trademarks of Apple Inc., registered in the U.S. and other countries. Lightning is a trademark of Apple Inc. “Made for iPod” and “Made for iPhone” mean that an electronic accessory has been designed to connect specifically to iPod or iPhone, respectively, and has been certified by the developer to meet Apple performance standards. Apple is not responsible for the operation of this device or its compliance with safety and regulatory standards. Please note that the use of this accessory with iPod or iPhone may affect wireless performance. Androidä Android is a trademark of Google Inc. MIXTRAX MIXTRAX is a trademark of the PIONEER CORPORATION. En <QRD3200-A>17 17 Black plate (18,1) Appendix Additional information Specifications General Power source ................... 14.4 V DC (10.8 V to 15.1 V allowable) Grounding system ............ Negative type Maximum current consumption ................................... 10.0 A Dimensions (W × H × D): DIN Chassis ............................ 178 mm × 50 mm × 165 mm Nose ................................ 188 mm × 58 mm × 15 mm D Chassis ............................ 178 mm × 50 mm × 165 mm Nose ................................ 170 mm × 46 mm × 15 mm (DEH-X3600UI) Nose ................................ 170 mm × 46 mm × 16 mm (DEH-2600UI) Weight ............................. 1 kg MP3 decoding format ...... MPEG-1 & 2 Audio Layer 3 WMA decoding format ..... Ver. 7, 7.1, 8, 9, 10, 11, 12 (2 ch audio) (Windows Media Player) WAV signal format ........... Linear PCM & MS ADPCM (Non-compressed) USB USB standard specification ................................... USB 2.0 full speed Maximum current supply ................................... 1 A USB Class ....................... MSC (Mass Storage Class) File system ....................... FAT12, FAT16, FAT32 MP3 decoding format ...... MPEG-1 & 2 Audio Layer 3 WMA decoding format ..... Ver. 7, 7.1, 8, 9, 10, 11, 12 (2 ch audio) (Windows Media Player) WAV signal format ........... Linear PCM & MS ADPCM (Non-compressed) Audio Maximum power output ... 50 W × 4 70 W × 1/2 W (for subwoofer) Continuous power output ................................... 22 W × 4 (50 Hz to 15 000 Hz, 5 % THD, 4 W load, both channels driven) Load impedance .............. 4 W (4 W to 8 W allowable) Preout maximum output level ................................... 2.0 V Loudness contour ............ +10 dB (100 Hz), +6.5 dB (10 kHz) (volume: –30 dB) Equalizer (5-Band Graphic Equalizer): Frequency ........................ 80 Hz/250 Hz/800 Hz/2.5 kHz/ 8 kHz Equalization range ........... ±12 dB (2 dB step) Subwoofer (mono): Frequency ........................ 50 Hz/63 Hz/80 Hz/100 Hz/ 125 Hz/160 Hz/200 Hz Slope ............................... –12 dB/oct, –24 dB/oct Gain ................................ +6 dB to –24 dB Phase .............................. Normal/Reverse FM tuner Frequency range .............. 87.5 MHz to 108.0 MHz Usable sensitivity ............. 9 dBf (0.8 µV/75 W, mono, S/N: 30 dB) Signal-to-noise ratio ......... 72 dB (IEC-A network) MW tuner Frequency range .............. 531 kHz to 1 602 kHz Usable sensitivity ............. 25 µV (S/N: 20 dB) Signal-to-noise ratio ......... 62 dB (IEC-A network) LW tuner Frequency range .............. 153 kHz to 281 kHz Usable sensitivity ............. 28 µV (S/N: 20 dB) Signal-to-noise ratio ......... 62 dB (IEC-A network) Note Specifications and the design are subject to modifications without notice. CD player System ............................ Usable discs .................... Signal-to-noise ratio ......... Number of channels ........ 18 Compact disc audio system Compact disc 94 dB (1 kHz) (IEC-A network) 2 (stereo) En <QRD3200-A>18 Black plate (19,1) English En <QRD3200-A>19 19 Black plate (20,1) Section Avant de commencer 01 Nous vous remercions d’avoir acheté cet appareil PIONEER Pour garantir une utilisation correcte, lisez bien ce mode d’emploi avant d’utiliser cet appareil. Il est particulièrement important que vous lisiez et respectiez les indications ATTENTION et PRÉCAUTION de ce mode d’emploi. Conservez-le dans un endroit sûr et facilement accessible pour toute consultation ultérieure. Avant de commencer Quelques mots sur cet appareil Les fréquences du syntoniseur de cet appareil sont attribuées pour une utilisation en Europe de l’Ouest, Asie, Moyen-Orient, Afrique et Océanie. Son utilisation dans d’autres régions peut se traduire par une réception de mauvaise qualité. La fonction RDS (radio data system) n’est opérationnelle que dans les régions où des signaux RDS sont diffusés pour les stations FM. ATTENTION Si vous souhaitez vous débarrasser de cet appareil, ne le mettez pas à la poubelle avec vos ordures ménagères. Il existe un système de collecte séparé pour les appareils électroniques usagés, qui doivent être récupérés, traités et recyclés conformément à la législation. Dans les états membres de l’UE, en Suisse et en Norvège, les foyers domestiques peuvent rapporter leurs produits électroniques usagés gratuitement à des points de collecte spécifiés ou à un revendeur (sous réserve d’achat d’un produit similaire). Dans les pays qui ne sont pas mentionnés cidessus, veuillez contacter les autorités locales pour vous informer de la méthode correcte de mise au rebut. En agissant ainsi vous assurerez que le produit que vous mettez au rebut est soumis au processus de traitement, de récupération et de recyclage nécessaire et éviterez ainsi les effets négatifs potentiels sur l’environnement et la santé publique. 20 ! N’essayez pas d’installer cet appareil ou d’en faire l’entretien vous-même. L’installation ou l’entretien de cet appareil par des personnes sans formation et sans expérience en équipement électronique et en accessoires automobiles peut être dangereux et vous exposer à des risques d’électrocution ou à d’autres dangers. ! N’essayez pas de démonter ou de modifier cet appareil. Veillez à quitter la route et garer votre véhicule en lieu sûr avant d’essayer d’utiliser les commandes de l’appareil. PRÉCAUTION Cet appareil est un produit laser de Classe 1, classé selon l’article IEC 60825-1:2007 relatif à la Sécurité des produits laser. APPAREIL À LASER DE CLASSE 1 Si vous rencontrez des problèmes En cas d’anomalie, veuillez contacter votre revendeur ou le centre d’entretien agréé par PIONEER le plus proche. PRÉCAUTION ! Ne laissez pas cet appareil entrer en contact avec des liquides. Cela pourrait provoquer une électrocution. Tout contact avec des liquides pourrait également provoquer des dommages, de la fumée et une surchauffe de l’appareil. ! Le Pioneer CarStereo-Pass est utilisable seulement en Allemagne. ! Maintenez le niveau d’écoute à une valeur telle que vous puissiez entendre les sons provenant de l’extérieur. ! Évitez tout contact avec l’humidité. Fr <QRD3200-A>20 Black plate (21,1) Section Utilisation de cet appareil Appareil central DEH-X3600UI 123 4 5 6 Utilisation de cet appareil c 1/ d Jack d’entrée AUX (jack stéréo 3,5 mm) e Touche de retrait de la face avant à 6/ 1 78 9 ab c de DEH-2600UI 21 3 4 b 5 6 Indications affichées 2 3 2 78 9 a de Section d’informations secondaires 5 LOC (accord automatique sur une station locale) 6 TP (identification des programmes d’informations routières) 7 TA (bulletins d’informations routières) SRC/OFF 2 h (éjection) 3 MULTI-CONTROL (M.C.) (liste) 5 Fente de chargement des disques 6 Port USB MIX (MIXTRAX) DEH-X3600UI 7 8 3 1 4 c iPod DEH-2600UI 8 BAND/ 9 (retour)/DIMMER (atténuateur de luminosité) a c/d b DISP (contrôle de l’iPod) 4 5 7 9 b 6 8 a 9 a DEH-2600UI b 3 4 7 6 8 5 9 a (liste) 4 DEH-X3600UI 1 Apparaît lorsqu’un niveau inférieur de dossier ou de menu existe. b 2 (lecture aléatoire) (répétition de la lecture) (contrôle de l’iPod) La fonction iPod de cet appareil est utilisée à partir de votre iPod. 1 Après avoir installé l’appareil, mettez le contact d’allumage sur ON. SET UP s’affiche. 2 Appuyez sur M.C. pour sélectionner. 4 Procédez comme suit pour définir le menu. Pour passer à la prochaine option de menu, vous devez confirmer votre sélection. LANGUAGE (multilingue) Cet appareil peut afficher les informations textuelles d’un fichier audio compressé même si elles sont incorporées en anglais, en russe ou en turc. ! Si la langue incorporée et la langue sélectionnée sont différentes, les informations textuelles peuvent ne pas s’afficher correctement. ! Certains caractères peuvent ne pas s’afficher correctement. 1 Tournez M.C. pour sélectionner le réglage souhaité. ENG (Anglais)—РУС (Russe)—TUR (Turc) 2 Appuyez sur M.C. pour confirmer la sélection. CLOCK SET (réglage de l’horloge) (sound retriever) Menu de configuration 1 3 Français PRÉCAUTION Utilisez un câble USB Pioneer optionnel (CDU50E) pour connecter le périphérique de stockage USB, faute de quoi ce dernier, comme n’importe quel périphérique relié directement à l’appareil, dépasserait de l’appareil et pourrait s’avérer dangereux. Section d’informations principales ! Syntoniseur : gamme et fréquence ! RDS : nom du service de programme, informations PTY et autres informations textuelles ! Lecteur de CD, périphérique de stockage USB et iPod : temps de lecture écoulé et informations textuelles 02 Tournez M.C. pour passer à YES. # Si vous n’utilisez pas l’appareil dans les 30 secondes environ, le menu de configuration ne s’affichera pas. # Si vous préférez ne pas effectuer la configuration pour l’instant, tournez M.C. pour passer à NO. 1 Tournez M.C. pour régler l’heure. 2 Appuyez sur M.C. pour sélectionner les minutes. 3 Tournez M.C. pour régler les minutes. 4 Appuyez sur M.C. pour confirmer la sélection. FM STEP (incrément d’accord FM) Utilisez FM STEP pour régler les options d’incrément d’accord FM (recherchez les réglages de l’incrément). 1 Tournez M.C. pour choisir l’incrément d’accord FM. 100 (100 kHz) — 50 (50 kHz) 2 Appuyez sur M.C. pour confirmer la sélection. QUIT s’affiche. ! L’incrément d’accord manuel est défini sur 50 kHz. ! Quand les fonctions AF et TA sont toutes deux désactivées, l’incrément d’accord est défini sur 50 kHz même s’il est réglé sur 100. Fr <QRD3200-A>21 21 Black plate (22,1) Section Utilisation de cet appareil 02 5 Pour terminer la configuration, tournez M.C. pour sélectionner YES. # Si vous souhaitez modifier à nouveau le réglage, tournez M.C. pour passer à NO. 6 Appuyez sur M.C. pour sélectionner. Remarques ! Vous pouvez configurer les options de menu à partir du menu système et du menu initial. Pour des détails sur les réglages, reportezvous à la page 28, Menu système et la page 30, Menu initial. ! Vous pouvez annuler le menu de configuration en appuyant sur SRC/OFF. Utilisation de cet appareil Retrait de la face avant 1 Appuyez sur la touche de retrait pour libérer la face avant. 2 Poussez la face avant vers le haut (M), puis tirez-la vers vous (N). 3 Conservez toujours la face avant retirée dans un boîtier ou un sac de protection. Remontage de la face avant 1 Faites glisser la face avant vers la gauche. Opérations de base Important ! Manipulez la face avant avec précaution lorsque vous l’enlevez ou la remontez. ! Évitez de heurter la face avant. ! Conservez la face avant à l’abri des températures élevées et de la lumière directe du soleil. ! Pour éviter d’endommager le périphérique ou l’intérieur du véhicule, retirez tous les câbles et périphériques connectés à la face avant, avant d’enlever cette dernière. 2 Appuyez sur le côté droit de la face avant jusqu’à ce qu’elle soit bien en place. Forcer la face avant en position risque de l’endommager ou d’endommager l’appareil central. Mise en service de l’appareil 1 Appuyez sur SRC/OFF pour mettre en service l’appareil. Mise hors service de l’appareil 1 Maintenez la pression sur SRC/OFF jusqu’à ce que l’appareil soit mis hors tension. 22 Choix d’une source 1 Appuyez sur SRC/OFF pour parcourir les options disponibles : RADIO—CD—USB/iPod—APP (application)— AUX ! USB MTP apparaît lorsque la connexion MTP est en cours d’utilisation. ! Seulement pour DEH-2600UI Lorsqu’un iPod est connecté et qu’une source autre que iPod est sélectionnée, vous pouvez basculer sur iPod en appuyant sur iPod. Réglage du volume 1 Tournez M.C. pour régler le volume. Remarque Si le fil bleu/blanc de l’appareil est relié à la prise de commande du relais de l’antenne motorisée du véhicule, celle-ci se déploie lorsque la source est mise en service. Pour rétracter l’antenne, mettez la source hors service. Opérations de menu fréquemment utilisées Retour à l’affichage précédent Retour à la liste précédente (le dossier de niveau immédiatement supérieur) 1 Appuyez sur /DIMMER. Retour à l’affichage ordinaire Annulation du menu principal 1 Appuyez sur BAND/ . Retour à l’affichage ordinaire à partir de la liste 1 Appuyez sur BAND/ . Radio Opérations de base Sélection d’une gamme 1 Appuyez sur BAND/ jusqu’à ce que la gamme désirée (FM1, FM2, FM3 en FM ou MW/LW (PO/GO)) s’affiche. Changement de fréquence en mémoire 1 Appuyez sur c ou d. ! Sélectionnez PCH (canal présélectionné) sous SEEK pour utiliser cette fonction. Accord manuel (pas à pas) 1 Appuyez sur c ou d. ! Sélectionnez MAN (accord manuel) sous SEEK pour utiliser cette fonction. Recherche 1 Appuyez de manière prolongée sur c ou d, puis relâchez. Vous pouvez annuler l’accord automatique en appuyant brièvement sur c ou d. Lorsque vous appuyez de manière prolongée sur c ou d, vous pouvez sauter des stations. L’accord automatique démarre dès que vous relâchez c ou d. Remarques ! Pour des détails sur SEEK, reportez-vous à la page 23, SEEK (réglage de la touche droite/ gauche). ! La fonction AF (recherche des autres fréquences possibles) de cet appareil peut être mise en service ou hors service. La fonction AF doit être hors service pendant une opération d’accord normal (reportez-vous à la page 23, AF (recherche des autres fréquences possibles)). Fr <QRD3200-A>22 Black plate (23,1) Section Utilisation de cet appareil Enregistrement et rappel des stations pour chaque gamme Utilisation des touches de présélection 2 Pour le rappel : Appuyez sur une des touches de présélection (1/ à 6/ ). Changement de l’affichage Sélection des informations textuelles souhaitées 1 Appuyez sur DISP pour parcourir les options disponibles : ! FREQUENCY (nom du service de programme ou fréquence) ! BRDCST INFO (nom du service de programme/informations PTY) ! CLOCK (nom de la source et horloge) Remarques ! Si le nom du service de programme ne peut pas être acquis dans FREQUENCY, la fréquence d’émission s’affiche alors. Si le nom du service de programme est détecté, celuici s’affiche. ! En fonction de la gamme sélectionnée, les informations textuelles peuvent être différentes. ! Les informations textuelles pouvant être modifiées dépendent de la région. Utilisation des fonctions PTY Vous pouvez rechercher une station à l’aide de son code PTY (type de programme). Recherche d’une station RDS en utilisant le code PTY (liste). 1 Appuyez sur 2 Tournez M.C. pour sélectionner le type de programme. NEWS/INFO—POPULAR—CLASSICS— OTHERS 3 Appuyez sur M.C. pour lancer la recherche. Cet appareil recherche une station qui diffuse ce type de programme. Quand une station est trouvée, son nom de service de programme est affiché. ! Appuyez à nouveau sur M.C. pour abandonner la recherche. ! Le type de l’émission captée peut différer de celui indiqué par le code PTY transmis. ! Si aucune station ne diffuse d’émission du type choisi, l’indication NOT FOUND s’affiche pendant environ deux secondes puis le syntoniseur s’accorde sur la fréquence d’origine. Liste des codes PTY Pour plus de détails sur la liste PTY, visitez le site suivant : http://www.pioneer.eu/eur/products/25/121/tech/ CarAudio/PTY.html Réglages des fonctions 1 Appuyez sur M.C. pour afficher le menu principal. 2 Tournez M.C. pour changer l’option de menu et appuyez pour sélectionner FUNCTION. 3 Tournez M.C. pour sélectionner la fonction. Une fois sélectionnées, les fonctions suivantes peuvent être ajustées. # Si la gamme MW/LW (PO/GO) est sélectionnée, seuls BSM, LOCAL et SEEK sont disponibles. FM SETTING (réglages de qualité sonore FM) Le niveau de qualité sonore peut être réglé afin de correspondre aux conditions du signal d’émission de la gamme FM. 1 Appuyez sur M.C. pour afficher le mode de réglage. 2 Tournez M.C. pour sélectionner le réglage souhaité. ! STANDARD – Il s’agit du réglage standard. ! HI-FI – Il s’agit du réglage à utiliser pour donner la priorité à la qualité supérieure du son stéréo. ! STABLE – Il s’agit du réglage à utiliser pour donner la priorité au faible bruit du son monaural. BSM (mémoire des meilleures stations) La fonction BSM (mémoire des meilleures stations) mémorise automatiquement les six stations les plus fortes dans l’ordre de la force du signal. 1 Appuyez sur M.C. pour mettre la fonction BSM en service. Pour annuler, appuyez à nouveau sur M.C. REGIONAL (stations régionales) Quand la fonction AF est utilisée, la fonction de recherche des stations régionales limite la sélection aux stations qui diffusent des programmes régionaux. 1 Appuyez sur M.C. pour mettre la fonction de recherche des stations régionales en service ou hors service. LOCAL (accord automatique sur une station locale) 02 L’accord automatique sur une station locale ne s’intéresse qu’aux stations de radio dont le signal reçu est suffisamment puissant pour garantir une réception de bonne qualité. 1 Appuyez sur M.C. pour sélectionner le réglage souhaité. FM : OFF—LV1—LV2—LV3—LV4 MW/LW (PO/GO) : OFF—LV1—LV2 La valeur la plus élevée permet la réception des seules stations très puissantes ; les autres valeurs autorisent la réception de stations moins puissantes. Français 1 Pour la mise en mémoire : Appuyez de façon prolongée sur l’une des touches de présélection (1/ à 6/ ) jusqu’à ce que le numéro cesse de clignoter. Utilisation de cet appareil TA (attente de bulletins d’informations routières) 1 Appuyez sur M.C. pour mettre en service ou hors service l’attente d’un bulletin d’informations routières. AF (recherche des autres fréquences possibles) 1 Appuyez sur M.C. pour mettre la fonction AF en service ou hors service. NEWS (interruption pour réception d’un bulletin d’informations) 1 Appuyez sur M.C. pour mettre la fonction NEWS (bulletin d’informations) en service ou hors service. SEEK (réglage de la touche droite/gauche) Vous pouvez assigner une fonction aux touches droite et gauche de l’appareil. Sélectionnez MAN (accord manuel) pour effectuer un accord de fréquence manuellement ou sélectionnez PCH (canaux présélectionnés) pour changer de canal présélectionné. 1 Appuyez sur M.C. pour sélectionner MAN ou PCH. Fr <QRD3200-A>23 23 Black plate (24,1) Section Utilisation de cet appareil 02 CD/CD-R/CD-RW et périphériques de stockage USB Connexion MTP Il est possible de connecter des périphériques Android compatibles MTP (utilisant le système d’exploitation Android 4.0 ou version supérieure) via une connexion MTP à l’aide de la source USB. Pour connecter un périphérique Android, utilisez le câble fourni avec l’appareil. Remarques ! Cette fonction n’est pas compatible avec MIXTRAX. ! Cette fonction n’est pas compatible avec WAV. Opérations de base Lecture d’un CD/CD-R/CD-RW 1 Introduisez un disque, l’étiquette vers le haut, dans le logement de chargement des disques. Avance ou retour rapide 1 Appuyez de manière prolongée sur c ou d. ! Lors de la lecture d’un disque d’audio compressé, aucun son n’est émis pendant l’avance ou le retour rapide. Retour au dossier racine 1 Appuyez sur BAND/ de façon prolongée. Commutation entre les modes audio compressé et CD-DA 1 Appuyez sur BAND/ . Changement de périphérique de mémoire de lecture Vous pouvez basculer entre les périphériques de mémoire sur les périphériques de stockage USB ayant plus d’un périphérique de mémoire compatible avec la norme Mass Storage Class pour effectuer la lecture. 1 Appuyez sur BAND/ . ! Vous pouvez basculer entre 32 différents périphériques de mémoire maximum. Éjection d’un CD/CD-R/CD-RW 1 Appuyez sur h. Remarque Débranchez les périphériques de stockage USB de l’appareil lorsque vous ne l’utilisez pas. Lecture de plages musicales sur un périphérique de stockage USB 1 Ouvrez le capot du port USB. 2 Branchez le périphérique de stockage USB en utilisant un câble USB. Opérations à l’aide de la touche MIXTRAX Arrêt de la lecture de fichiers sur un périphérique de stockage USB 1 Vous pouvez débrancher le périphérique de stockage USB à tout moment. Sélection d’un dossier 1 Appuyez sur 1/ ou 2/ . Sélection d’une plage 1 Appuyez sur c ou d. 24 Utilisation de cet appareil Mise en service ou hors service de MITRAX Seulement pour DEH-X3600UI Vous pouvez utiliser cette fonction lorsque USB est sélectionné comme source. Vous ne pouvez pas utiliser cette fonction avec USB MTP. 1 Appuyez sur MIX pour mettre MIXTRAX en service ou hors service. ! Pour plus de détails sur MIXTRAX, reportezvous à la page 30, À propos de MIXTRAX. ! Lors de l’utilisation de MIXTRAX, la fonction de correction du son est désactivée. Changement de l’affichage Sélection des informations textuelles souhaitées 1 Appuyez sur DISP pour parcourir les options disponibles : CD-DA ! ELAPSED TIME (numéro de plage et temps de lecture) ! CLOCK (nom de la source et horloge) ! SPEANA (analyseur de spectre) CD-TEXT ! TRACK INFO (titre de la plage/interprète de la plage/titre du disque) ! ELAPSED TIME (numéro de plage et temps de lecture) ! CLOCK (nom de la source et horloge) ! SPEANA (analyseur de spectre) MP3/WMA/WAV ! TRACK INFO (titre de la plage/nom de l’interprète/nom de l’album) ! FILE INFO (nom du fichier/nom du dossier) ! ELAPSED TIME (numéro de plage et temps de lecture) ! CLOCK (nom de la source et horloge) ! SPEANA (analyseur de spectre) Sélection et lecture des fichiers/ plages à partir de la liste des noms 1 Appuyez sur pour passer en mode liste des noms de fichiers/plages. 2 Utilisez M.C. pour sélectionner le nom de fichier (ou nom de dossier) souhaité. Sélection d’un fichier ou d’un dossier 1 Tournez M.C. Lecture 1 Lorsqu’un fichier ou une plage est sélectionné(e), appuyez sur M.C. Affichage d’une liste des fichiers (ou des dossiers) dans le dossier sélectionné 1 Quand un dossier est sélectionné, appuyez sur M.C. Lecture d’une plage musicale dans le dossier sélectionné 1 Quand un dossier est sélectionné, appuyez de manière prolongée sur M.C. Opérations à l’aide de touches spéciales Sélection d’une étendue de répétition de lecture pour parcourir les options 1 Appuyez sur 6/ disponibles : CD/CD-R/CD-RW ! ALL – Répétition de toutes les plages ! ONE – Répétition de la plage en cours de lecture ! FLD – Répétition du dossier en cours de lecture Périphérique de stockage USB ! ALL – Répétition de tous les fichiers ! ONE – Répétition du fichier en cours de lecture ! FLD – Répétition du dossier en cours de lecture Lecture des plages dans un ordre aléatoire pour activer ou désactiver 1 Appuyez sur 5/ la lecture aléatoire. Les plages d’une étendue de répétition sélectionnée sont lues dans un ordre aléatoire. ! Pour changer de plage musicale pendant une lecture aléatoire, appuyez sur d pour passer à la plage suivante. Appuyez sur c pour redémarrer la lecture de la plage en cours au début de la plage musicale. Fr <QRD3200-A>24 Black plate (25,1) Section Utilisation de cet appareil Pause de la lecture 1 Appuyez sur 4/PAUSE pour mettre en pause ou reprendre la lecture. Réglages des fonctions 1 Appuyez sur M.C. pour afficher le menu principal. 2 Tournez M.C. pour changer l’option de menu et appuyez pour sélectionner FUNCTION. Une fois sélectionnée, la fonction ci-dessous peut être ajustée. ! S.RTRV n’est pas disponible lorsque la fonction MIXTRAX est en service. S.RTRV (sound retriever) Améliore automatiquement l’audio compressé et restaure un son riche. 1 Appuyez sur M.C. pour sélectionner le réglage souhaité. Pour les détails, reportez-vous à la page 25, Amélioration de l’audio compressé et restauration d’un son riche (sound retriever (correcteur de son compressé)). iPod Opérations de base Lecture de plages musicales sur un iPod 1 Ouvrez le capot du port USB. 2 Connectez un iPod à l’entrée USB. La lecture s’effectue automatiquement. Sélection d’une plage musicale (d’un chapitre) 1 Appuyez sur c ou d. Sélection d’un album 1 Appuyez sur 1/ ou 2/ . Avance ou retour rapide 1 Appuyez de manière prolongée sur c ou d. Remarques ! L’iPod ne peut pas être mis en service ou hors service lorsque le mode de commande est réglé sur CONTROL AUDIO/CTRL AUDIO. ! Débranchez les écouteurs de l’iPod avant de le connecter à cet appareil. ! L’iPod sera mis hors service environ deux minutes après que le contact d’allumage est coupé. Changement de l’affichage Sélection des informations textuelles souhaitées 1 Appuyez sur DISP pour parcourir les options disponibles : ! TRACK INFO (titre de la plage/nom de l’interprète/nom de l’album) ! ELAPSED TIME (numéro de plage et temps de lecture) ! CLOCK (nom de la source et horloge) ! SPEANA (analyseur de spectre) Recherche d’une plage musicale 1 Appuyez sur pour passer au menu principal de la recherche par liste. 2 Utilisez M.C. pour sélectionner une catégorie/plage musicale. Modification du nom d’une plage musicale/catégorie 1 Tournez M.C. Listes de lecture—interprètes—albums—plages musicales—podcasts—genres—compositeurs—livres audio Opérations à l’aide de la touche MIXTRAX Lecture 1 Quand une plage musicale est sélectionnée, appuyez sur M.C. Mise en service ou hors service de MITRAX Seulement pour DEH-X3600UI 1 Appuyez sur MIX pour mettre MIXTRAX en service ou hors service. ! Pour plus de détails sur MIXTRAX, reportezvous à la page 30, À propos de MIXTRAX. Affichage d’une liste des plages musicales dans la catégorie sélectionnée 1 Quand une catégorie est sélectionnée, appuyez sur M.C. 02 Lecture d’une plage musicale dans la catégorie sélectionnée 1 Quand une catégorie est sélectionnée, appuyez sur M.C. de façon prolongée. Recherche par ordre alphabétique dans la liste 1 Lorsque la liste de la catégorie sélectionnée pour activer le mode s’affiche, appuyez sur de recherche par ordre alphabétique. ! Vous pouvez également passer en mode de recherche par ordre alphabétique en tournant M.C. deux fois. 2 Tournez M.C. pour sélectionner une lettre. 3 Appuyez sur M.C. pour afficher la liste alphabétique. ! Pour annuler la recherche, appuyez sur /DIMMER. Français Amélioration de l’audio compressé et restauration d’un son riche (sound retriever (correcteur de son compressé)) 1 Appuyez sur 3/S.Rtrv pour parcourir les options disponibles : 1—2—OFF (hors service) 1 est efficace pour les faibles taux de compression et 2 est efficace pour les taux de compression élevés. ! L’utilisation des touches est désactivée lorsque la fonction MIXTRAX est en service. Utilisation de cet appareil Remarques ! Vous pouvez lire les listes de lecture créées à l’aide de l’application de l’ordinateur (MusicSphere). L’application sera disponible sur notre site web. ! Les listes de lecture créées à l’aide de l’application de l’ordinateur (MusicSphere) sont affichées sous forme abrégée. Fr <QRD3200-A>25 25 Black plate (26,1) Section Utilisation de cet appareil 02 Opérations à l’aide de touches spéciales Sélection d’une étendue de répétition de lecture 1 Appuyez sur 6/ pour parcourir les options disponibles : ! ONE – Répétition de la plage musicale en cours de lecture ! ALL – Répétition de toutes les plages musicales de la liste sélectionnée ! Lorsque le mode de commande est défini sur CONTROL iPod/CTRL iPod, l’étendue de répétition de lecture reste identique à celle définie pour l’iPod connecté. Sélection d’une plage de lecture aléatoire (shuffle) pour parcourir les options 1 Appuyez sur 5/ disponibles : ! SNG – Lecture des plages musicales dans un ordre aléatoire à l’intérieur de la liste sélectionnée. ! ALB – Lecture dans l’ordre de plages musicales à partir d’un album sélectionné au hasard. ! OFF – Pas de lecture dans un ordre aléatoire. Lecture de toutes les plages musicales dans un ordre aléatoire (lecture aléatoire de toutes les plages) pour 1 Appuyez de façon prolongée sur 5/ mettre en service la fonction de lecture aléatoire de toutes les plages. ! Pour mettre hors service la lecture aléatoire de toutes les plages, sélectionnez OFF pour la lecture aléatoire. Pour les détails, reportez-vous à la page 26, Sélection d’une plage de lecture aléatoire (shuffle). Utilisation de cet appareil Pause de la lecture 1 Appuyez sur 4/PAUSE pour mettre en pause ou reprendre la lecture. Amélioration de l’audio compressé et restauration d’un son riche (sound retriever (correcteur de son compressé)) 1 Appuyez sur 3/S.Rtrv pour parcourir les options disponibles : 1—2—OFF (hors service) 1 est efficace pour les faibles taux de compression et 2 est efficace pour les taux de compression élevés. Lecture de plages musicales liées à la plage musicale en cours de lecture Vous pouvez lire des plages musicales dans les listes suivantes. • Liste d’albums de l’interprète en cours de lecture • Liste de plages musicales de l’album en cours de lecture • Liste d’albums du genre en cours de lecture 1 Appuyez de façon prolongée sur activer le mode de lecture en liaison. pour 2 Tournez M.C. pour changer le mode, appuyez pour sélectionner. ! ARTIST – Lit un album de l’interprète en cours de lecture. ! ALBUM – Lit une plage musicale de l’album en cours de lecture. ! GENRE – Lit un album du genre en cours de lecture. La plage musicale/l’album sélectionné sera lu après la lecture de la plage musicale en cours. Remarques ! La plage musicale/l’album sélectionné peut être annulé si vous utilisez d’autres fonctions que la fonction de recherche de liaison (retour rapide et avance rapide, par exemple). ! En fonction de la plage musicale sélectionnée pour la lecture, la fin de la plage en cours de lecture et le début de la plage musicale/de l’album sélectionné peuvent être tronqués. Utilisation de la fonction iPod de cet appareil sur votre iPod La fonction iPod de cet appareil peut être contrôlée à l’aide de l’iPod connecté. CONTROL iPod/CTRL iPod n’est pas compatible avec les modèles d’iPod suivants. ! iPod nano 1ère génération ! iPod avec vidéo % Appuyez sur BAND/ mode de commande. Seulement pour DEH-2600UI Vous pouvez également changer le mode de commande en appuyant sur iPod. Remarques ! Régler le mode de commande sur CONTROL iPod/CTRL iPod met en pause la lecture d’une plage musicale. Utilisez l’iPod pour reprendre la lecture. ! Les opérations suivantes sont toujours accessibles à partir de l’appareil même si le mode de commande est réglé sur CONTROL iPod/CTRL iPod. — Pause — Avance/retour rapide 26 pour changer le ! CONTROL iPod/CTRL iPod – La fonction iPod de cet appareil peut être utilisée à partir de l’iPod connecté. ! CONTROL AUDIO/CTRL AUDIO – La fonction iPod de cet appareil peut être contrôlée à l’aide de cet appareil. — Sélection d’une plage musicale (d’un chapitre) ! Le volume ne peut être réglé qu’à partir de cet appareil. Réglages des fonctions 1 Appuyez sur M.C. pour afficher le menu principal. 2 Tournez M.C. pour changer l’option de menu et appuyez pour sélectionner FUNCTION. 3 Tournez M.C. pour sélectionner la fonction. Une fois sélectionnées, les fonctions suivantes peuvent être ajustées. ! AUDIO BOOK n’est pas disponible lorsque CONTROL iPod/CTRL iPod est sélectionné en mode de commande. Pour les détails, reportez-vous à la page 26, Utilisation de la fonction iPod de cet appareil sur votre iPod. AUDIO BOOK (vitesse du livre audio) 1 Appuyez sur M.C. pour afficher le mode de réglage. 2 Tournez M.C. pour choisir le réglage désiré. ! FASTER – Lecture plus rapide que la vitesse normale ! NORMAL – Lecture à la vitesse normale ! SLOWER – Lecture plus lente que la vitesse normale S.RTRV (sound retriever) 1 Appuyez sur M.C. pour sélectionner le réglage souhaité. Pour les détails, reportez-vous à la page 26, Amélioration de l’audio compressé et restauration d’un son riche (sound retriever (correcteur de son compressé)). Fr <QRD3200-A>26 Black plate (27,1) Section Utilisation de cet appareil Utilisation des applications de l’appareil connecté Vous pouvez utiliser cet appareil pour la lecture en continu et le contrôle de plages d’applications iPhone ou simplement pour la lecture en continu. Informations relatives à la compatibilité des appareils connectés Vous trouverez ci-dessous les informations détaillées relatives aux bornes nécessaires pour utiliser l’application pour iPhone sur cet appareil. Pour les utilisateurs d’iPhone ! Cette fonction est compatible avec iPhone et iPod touch. ! iOS 5.0 ou supérieure est installé sur l’appareil. Remarques ! Veuillez consulter notre site Web pour obtenir la liste des applications iPhone prises en charge pour cet appareil. ! Pioneer ne pourra être tenu responsable des problèmes résultant d’un contenu incorrect ou reposant sur une mauvaise application. ! Le contenu et les fonctionnalités des applications prises en charge sont de la responsabilité des fournisseurs de l’application. Procédure de démarrage des utilisateurs d’un iPhone 1 Connectez un iPhone à l’entrée USB. 2 Basculez la source sur APP. 3 Démarrez l’application sur l’iPhone et lancez la lecture. Opérations de base Sélection d’une plage 1 Appuyez sur c ou d. Avance ou retour rapide 1 Appuyez de manière prolongée sur c ou d. Pause de la lecture 1 Appuyez sur BAND/ pour mettre en pause ou reprendre la lecture. Changement de l’affichage Sélection des informations textuelles souhaitées 1 Appuyez sur DISP pour parcourir les options disponibles : ! TRACK INFO (titre de la plage/nom de l’interprète/nom de l’album) ! APP NAME (nom de l’application) ! ELAPSED TIME (temps de lecture) ! CLOCK (nom de la source et horloge) ! SPEANA (analyseur de spectre) Réglages des fonctions 1 Appuyez sur M.C. pour afficher le menu principal. 2 Tournez M.C. pour changer l’option de menu et appuyez pour sélectionner FUNCTION. 3 Tournez M.C. pour sélectionner la fonction. Une fois sélectionnées, les fonctions suivantes peuvent être ajustées. PAUSE (pause) 1 Appuyez sur M.C. pour mettre en pause ou reprendre la lecture. S.RTRV (sound retriever) 1 Appuyez sur M.C. pour sélectionner le réglage souhaité. 1—2—OFF (hors service) 1 est efficace pour les faibles taux de compression et 2 est efficace pour les taux de compression élevés. 02 Réglages sonores 1 Appuyez sur M.C. pour afficher le menu principal. 2 Tournez M.C. pour changer l’option de menu et appuyez pour sélectionner AUDIO. 3 Tournez M.C. pour sélectionner la fonction audio. Une fois sélectionnées, les fonctions audio suivantes peuvent être ajustées. Français Important L’utilisation d’applications tierces peut impliquer ou nécessiter la fourniture d’informations personnelles, que ce soit en créant un compte d’utilisateur ou une autre méthode ainsi que, pour certaines applications, la fourniture de données de géolocalisation. TOUTES LES APPLICATIONS TIERCES RELÈVENT DE L’ENTIÈRE RESPONSABILITÉ DES FOURNISSEURS, NOTAMMENT MAIS SANS S’Y LIMITER, LA COLLECTE ET LA PROTECTION DES DONNÉES UTILISATEUR ET LES BONNES PRATIQUES DE CONFIDENTIALITÉ. EN ACCÉDANT À UNE APPLICATION TIERCE, VOUS ACCEPTEZ DE PRENDRE CONNAISSANCE DES CONDITIONS DE SERVICE ET DES RÈGLES DE CONFIDENTIALITÉ DES FOURNISSEURS. SI VOUS N’ACCEPTEZ PAS LES CONDITIONS OU RÈGLES D’UN FOURNISSEUR OU SI VOUS N’ACCEPTEZ PAS L’UTILISATION DES DONNÉES DE GÉOLOCALISATION, LE CAS ÉCHÉANT, N’UTILISEZ PAS CETTE APPLICATION TIERCE. Utilisation de cet appareil ! FADER n’est pas disponible lorsque SUB.W/SUB.W est sélectionné dans SP-P/O MODE. Pour les détails, reportez-vous à la page 31, SP-P/O MODE (réglage de la sortie arrière et du préamp). ! SUB.W et SUB.W CTRL ne sont pas disponibles lorsque REAR/REAR est sélectionné dans SP-P/O MODE. Pour les détails, reportez-vous à la page 31, SP-P/O MODE (réglage de la sortie arrière et du préamp). ! SUB.W CTRL n’est pas disponible lorsque SUB.W est sélectionné dans OFF. Pour les détails, reportez-vous à la page 28, SUB.W (réglage en service/hors service du haut-parleur d’extrêmes graves). ! SLA n’est pas disponible lorsque FM est sélectionné comme source. FADER (réglage de l’équilibre avant-arrière) 1 Appuyez sur M.C. pour afficher le mode de réglage. 2 Tournez M.C. pour régler l’équilibre sonore entre les haut-parleurs avant et arrière. BALANCE (réglage d’équilibre sonore) 1 Appuyez sur M.C. pour afficher le mode de réglage. 2 Tournez M.C. pour régler l’équilibre sonore entre les haut-parleurs gauche/droite. EQ SETTING (rappel de l’égaliseur) Fr <QRD3200-A>27 27 Black plate (28,1) Section Utilisation de cet appareil 02 Utilisation de cet appareil 1 Appuyez sur M.C. pour afficher le mode de réglage. 2 Tournez M.C. pour sélectionner l’égaliseur. POWERFUL—NATURAL—VOCAL—CUSTOM1—CUSTOM2—FLAT—SUPER BASS La bande et le niveau de l’égalisateur peuvent être personnalisés lorsque CUSTOM1 ou CUSTOM2 est sélectionné. Si CUSTOM1 ou CUSTOM2 est sélectionné, suivez les procédures décrites ci-dessous. Si d’autres options sont sélectionnées, appuyez sur M.C. pour revenir à l’affichage précédent. ! CUSTOM1 peut être défini séparément pour chaque source. Cependant, USB, iPod et APP sont définis automatiquement sur le même réglage. ! CUSTOM2 est un réglage partagé et commun à toutes les sources. 3 Appuyez sur M.C. pour afficher le mode de réglage. 4 Appuyez sur M.C. pour parcourir les options disponibles : Bande de l’égaliseur—Niveau de l’égaliseur 5 Tournez M.C. pour sélectionner le réglage souhaité. Bande de l’égaliseur : 80HZ—250HZ—800HZ —2.5KHZ—8KHZ Niveau de l’égaliseur : +6 à –6 Cet appareil est équipé d’une sortie haut-parleur d’extrêmes graves qui peut être mise en service ou hors service. 1 Appuyez sur M.C. pour sélectionner le réglage souhaité. NOR (phase normale) — REV (phase inversée) — OFF (haut-parleur d’extrêmes graves désactivé) LOUDNESS (correction physiologique) 1 Appuyez sur M.C. pour afficher le mode de réglage. 2 Tournez M.C. pour sélectionner le niveau désiré. 0 à +6 sont les valeurs affichées tandis que le niveau augmente ou diminue. La correction physiologique a pour objet d’accentuer les hautes et les basses fréquences à bas niveaux d’écoute. 1 Appuyez sur M.C. pour sélectionner le réglage souhaité. OFF (hors service)—LOW (faible)—MID (moyen)—HI (élevé) SUB.W (réglage en service/hors service du hautparleur d’extrêmes graves) SUB.W CTRL (réglage du haut-parleur d’extrêmes graves) Seules les fréquences inférieures à celles de la plage sélectionnée sont produites par le haut-parleur d’extrêmes graves. 1 Appuyez sur M.C. pour afficher le mode de réglage. 2 Appuyez sur M.C. pour parcourir les options disponibles : Fréquence de coupure—Niveau de sortie—Niveau de pente Les débits pouvant être réglés clignotent. 3 Tournez M.C. pour sélectionner le réglage souhaité. Fréquence de coupure : 50HZ—63HZ—80HZ —100HZ—125HZ—160HZ—200HZ Niveau de sortie : –24 à +6 Niveau de pente : –12— –24 BASS BOOST (accentuation des graves) HPF SETTING (réglage du filtre passe-haut) Utilisez cette fonction lorsque vous souhaitez uniquement écouter des sons aigus. Seules les fréquences supérieures à la coupure du filtre passehaut (HPF) sont émises en sortie via les haut-parleurs. 1 Appuyez sur M.C. pour afficher le mode de réglage. 2 Appuyez sur M.C. pour parcourir les options disponibles : Fréquence de coupure—Niveau de pente 3 Tournez M.C. pour sélectionner le réglage souhaité. Fréquence de coupure : OFF—50HZ—63HZ— 80HZ—100HZ—125HZ—160HZ—200HZ Niveau de pente : –12— –24 SLA (réglage du niveau de la source) Cette fonction empêche une modification trop importante du volume lors du basculement de source. ! Les réglages sont basés sur le niveau du volume FM qui lui, demeure inchangé. ! Le niveau du volume MW/LW (PO/GO) peut également être réglé avec cette fonction. ! USB, iPod et APP sont définis automatiquement sur le même réglage. 1 Appuyez sur M.C. pour afficher le mode de réglage. 2 Tournez M.C. pour régler le volume de la source. Plage de réglage : +4 à –4 Menu système Important La fonction PW SAVE (économie d’énergie) est annulée si la batterie du véhicule est déconnectée et devra être réactivée une fois la batterie reconnectée. Quand PW SAVE est hors service, il est possible que selon la méthode de connexion utilisée l’appareil continue à consommer du courant de la batterie si le commutateur de contact de votre véhicule ne possède pas de position ACC (accessoire). 1 Appuyez sur M.C. pour afficher le menu principal. 2 Tournez M.C. pour changer l’option de menu et appuyez pour sélectionner SYSTEM. 3 Tournez M.C. pour sélectionner la fonction du menu système. Une fois sélectionnées, les fonctions du menu système suivantes peuvent être ajustées. ! INFO DISPLAY et BRIGHTNESS ne sont pas disponibles pour DEH-2600UI. ! MUTE MODE n’est pas disponible pour DEHX3600UI. LANGUAGE (multilingue) Cet appareil peut afficher les informations textuelles d’un fichier audio compressé même si elles sont incorporées en anglais, en russe ou en turc. ! Si la langue incorporée et la langue sélectionnée sont différentes, les informations textuelles peuvent ne pas s’afficher correctement. ! Certains caractères peuvent ne pas s’afficher correctement. 1 Appuyez sur M.C. pour sélectionner le réglage souhaité. ENG (Anglais)—РУС (Russe)—TUR (Turc) CLOCK SET (réglage de l’horloge) 28 Fr <QRD3200-A>28 Black plate (29,1) Section Utilisation de cet appareil 12H/24H (notation temporelle) 1 Appuyez sur M.C. pour sélectionner le réglage souhaité. 12H (horloge 12 heures)—24H (horloge 24 heures) INFO DISPLAY (informations secondaires) Le type d’informations textuelles affichées dans la section des informations secondaires peut être changé. 1 Appuyez sur M.C. pour afficher le mode de réglage. 2 Tournez M.C. pour sélectionner le réglage souhaité. SPEANA—LEVEL METER—SOURCE—CLOCK —OFF ! L’indicateur de signal s’affiche pour SPEANA ou LEVEL METER lorsque la source est réglée sur RADIO. AUTO PI (recherche automatique PI) L’appareil peut rechercher automatiquement une autre station avec le même type de programme, y compris si l’accord a été obtenu par le rappel d’une fréquence en mémoire. 1 Appuyez sur M.C. pour mettre en service ou hors service la recherche automatique PI. AUX (entrée auxiliaire) Activez ce réglage lorsque vous utilisez un appareil auxiliaire connecté à cet appareil. 1 Appuyez sur M.C. pour mettre AUX en service ou hors service. 1 Appuyez sur M.C. pour mettre l’atténuateur de luminosité en service ou hors service. ! Vous pouvez également changer le réglage de l’atténuateur de luminosité en appuyant de façon prolongée sur /DIMMER. BRIGHTNESS (réglage de la luminosité) Vous pouvez utiliser ce réglage pour ajuster la luminosité de l’écran. La plage des réglages possibles pour BRIGHTNESS varie selon que DIMMER est en service ou hors service. Pour les détails, reportez-vous à la page 29, DIMMER (atténuateur de luminosité). 1 Appuyez sur M.C. pour afficher le mode de réglage. 2 Tournez M.C. pour sélectionner le réglage souhaité. DIMMER en service : 1 à 4 DIMMER hors service : 1 à 5 MUTE MODE (mode sourdine) Le son émis par l’appareil est automatiquement coupé ou atténué quand un signal en provenance d’un équipement possédant la fonction silencieux est reçu. 1 Appuyez sur M.C. pour afficher le mode de réglage. 2 Tournez M.C. pour sélectionner le réglage souhaité. ! MUTE – Silencieux ! 20dB ATT – Atténuation (20dB ATT a un effet plus fort que 10dB ATT) ! 10dB ATT – Atténuation PW SAVE (économie d’énergie) Activer cette fonction vous permet de réduire la consommation de la batterie. ! La mise en service de la source est la seule opération permise quand cette fonction est en service. 1 Appuyez sur M.C. pour mettre l’économie d’énergie en service ou hors service. Choix de la couleur de l’éclairage Seulement pour DEH-X3600UI Menu des fonctions d’éclairage 1 Appuyez sur M.C. pour afficher le menu principal. 2 Tournez M.C. pour afficher ILLUMI, puis appuyez pour sélectionner. 3 Tournez M.C. pour sélectionner la fonction d’éclairage. Une fois sélectionnées, les fonctions audio suivantes peuvent être ajustées. KEY COLOUR (réglage de couleur de section des touches) Vous pouvez sélectionner les couleurs souhaitées pour les touches de cet appareil. 1 Appuyez sur M.C. pour afficher le mode de réglage. 2 Tournez M.C. pour choisir la couleur d’éclairage. ! Couleurs présélectionnées (de WHITE à BLUE) ! SCAN (parcourir de nombreuses couleurs automatiquement) ! CUSTOM (couleur d’éclairage personnalisée) DISP COLOUR (réglage de couleur de section d’affichage) 02 Vous pouvez sélectionner les couleurs souhaitées pour l’afficheur de cet appareil. 1 Appuyez sur M.C. pour afficher le mode de réglage. 2 Tournez M.C. pour choisir la couleur d’éclairage. ! Couleurs présélectionnées (de WHITE à BLUE) ! SCAN (parcourir de nombreuses couleurs automatiquement) ! CUSTOM (couleur d’éclairage personnalisée) Français 1 Appuyez sur M.C. pour afficher le mode de réglage. 2 Appuyez sur M.C. pour sélectionner le segment de l’affichage de l’horloge que vous souhaitez régler. Heure—Minute 3 Tournez M.C. pour régler l’horloge. Utilisation de cet appareil BOTH COLOUR (réglage de couleur des touches et de l’affichage) Vous pouvez sélectionner les couleurs souhaitées pour les touches et l’afficheur de cet appareil. 1 Appuyez sur M.C. pour afficher le mode de réglage. 2 Tournez M.C. pour choisir la couleur d’éclairage. ! Couleurs présélectionnées (de WHITE à BLUE) ! SCAN (parcourir de nombreuses couleurs automatiquement) ILLUMI FX (mode d’effet d’éclairage) Dans ce mode, il est possible d’afficher un effet d’éclairage sur l’écran à certains moments comme lorsque l’alimentation ACC est en/hors service ou qu’un CD est inséré/éjecté. 1 Appuyez sur M.C. pour mettre ILLUMI FX en service ou hors service. ! L’effet d’éclairage sera activé lorsque l’alimentation ACC est mise en/hors service, que le réglage ILLUMI FX soit activé ou désactivé. Remarque Quand CUSTOM est sélectionné, la couleur personnalisée enregistrée est sélectionnée. DIMMER (atténuateur de luminosité) Fr <QRD3200-A>29 29 Black plate (30,1) Section Utilisation de cet appareil 02 Personnalisation de la couleur d’éclairage Vous pouvez personnaliser les couleurs d’éclairage pour KEY COLOUR et DISP COLOUR. 1 Appuyez sur M.C. pour afficher le menu principal. 2 Tournez M.C. pour afficher ILLUMI, puis appuyez pour sélectionner. 3 Tournez M.C. pour afficher KEY COLOUR ou DISP COLOUR. Appuyez pour sélectionner. 4 Appuyez sur M.C. jusqu’à ce que le réglage de la couleur d’éclairage personnalisée apparaisse sur l’afficheur. 5 Appuyez sur M.C. pour sélectionner la couleur primaire. R (rouge)—G (vert)—B (bleu) 6 Tournez M.C. pour régler le niveau de la luminosité. Plage de réglage : 0 à 60 # Vous ne pouvez pas sélectionner un niveau endessous de 20 pour les trois couleurs R (rouge), G (vert) et B (bleu) en même temps. # Vous pouvez aussi effectuer la même opération sur d’autres couleurs. Remarque Vous ne pouvez pas créer de couleur d’éclairage personnalisée lorsque SCAN est sélectionné. À propos de MIXTRAX Seulement pour DEH-X3600UI Utilisation de cet appareil La technologie MIXTRAX permet d’insérer divers effets sonores entre les plages musicales, vous permettant ainsi de profiter d’un mixage en boucle complet de votre musique avec des effets visuels. Remarques ! Selon le fichier/la plage musicale, des effets sonores peuvent ne pas être disponibles. ! Désactivez MIXTRAX si les effets visuels produits ont une influence néfaste sur la conduite. Reportez-vous à la page 24, Opérations à l’aide de la touche MIXTRAX. Menu MIXTRAX 1 Appuyez sur M.C. pour afficher le menu principal. 2 Tournez M.C. pour changer l’option de menu et appuyez pour sélectionner MIXTRAX. 3 Tournez M.C. pour sélectionner la fonction MIXTRAX. Une fois sélectionnées, les fonctions MIXTRAX suivantes peuvent être ajustées. La fonction est activée lorsque la technologie MIXTRAX est en service. SHORT PLAYBCK (mode de lecture courte) Vous pouvez sélectionner la longueur de la durée de lecture. 1 Appuyez sur M.C. pour afficher le mode de réglage. 2 Tournez M.C. pour sélectionner le réglage souhaité. 1.0 MIN (1,0 minute)—1.5 MIN (1,5 minutes)— 2.0 MIN (2,0 minutes)—2.5 MIN (2,5 minutes) —3.0 MIN (3,0 minutes)—OFF (hors service) Vous pouvez sélectionner des zones pour les couleurs clignotantes. 1 Appuyez sur M.C. pour afficher le mode de réglage. 2 Tournez M.C. pour sélectionner le réglage souhaité. KEY/DISPLAY (touches et écran)—KEY (touches)—OFF (hors service) ! Lorsque OFF est sélectionné, la couleur définie sous ILLUMI est utilisée pour l’écran. FLASH PATTERN (modèle de clignotement) L’affichage de la couleur clignotante et des effets spéciaux MIXTRAX changent suivant l’évolution du niveau sonore et des graves. 1 Appuyez sur M.C. pour afficher le mode de réglage. 2 Tournez M.C. pour sélectionner le réglage souhaité. ! SOUND LEVEL 1 à SOUND LEVEL 6 – le modèle de clignotement change en fonction du niveau sonore. Sélectionnez un mode désiré. ! LOW PASS 1 à LOW PASS 6 – le modèle de clignotement change en fonction du niveau des graves. Sélectionnez un mode désiré. ! RANDOM 1 – Le modèle de clignotement change de manière aléatoire en fonction du mode niveau sonore et mode passebas. ! RANDOM 2 – le modèle de clignotement change de manière aléatoire en fonction du mode niveau sonore. ! RANDOM 3 – le modèle de clignotement change de manière aléatoire en fonction du mode passe-bas. DISPLAY FX (effet d’écran) L’écran d’effets spéciaux MIXTRAX peut être mis en ou hors service. 1 Appuyez sur M.C. pour sélectionner le réglage souhaité. ON (écran d’effets spéciaux MIXTRAX)—OFF (affichage normal) CUT IN FX (effet de coupure manuelle) Vous pouvez activer ou désactiver les effets sonores MIXTRAX pendant le changement manuel de plage. 1 Appuyez sur M.C. pour sélectionner le réglage souhaité. ON (en service)—OFF (hors service) Menu initial 1 Maintenez la pression sur SRC/OFF jusqu’à ce que l’appareil soit mis hors tension. 2 Appuyez de façon prolongée sur SRC/ OFF jusqu’à ce que le menu principal apparaisse sur l’afficheur. 3 Tournez M.C. pour changer l’option de menu et appuyez pour sélectionner INITIAL. 4 Tournez M.C. pour sélectionner la fonction du menu initial. Une fois sélectionnées, les fonctions du menu initial suivantes peuvent être ajustées. FM STEP (incrément d’accord FM) 1 Appuyez sur M.C. pour choisir l’incrément d’accord FM. 100 (100 kHz) — 50 (50 kHz) FLASH AREA (zone de clignotement) 30 Fr <QRD3200-A>30 Black plate (31,1) Section Utilisation de cet appareil SP-P/O MODE (réglage de la sortie arrière et du préamp) Menu système 1 Maintenez la pression sur SRC/OFF jusqu’à ce que l’appareil soit mis hors tension. 2 Appuyez de façon prolongée sur SRC/ OFF jusqu’à ce que le menu principal apparaisse sur l’afficheur. 3 Tournez M.C. pour changer l’option de menu et appuyez pour sélectionner SYSTEM. 3 Tournez M.C. pour afficher DEMO OFF, puis appuyez pour sélectionner. 4 Tournez M.C. pour sélectionner la fonction du menu système. Pour les détails, reportez-vous à la page 28, Menu système. 4 Tournez M.C. pour passer à YES. 5 Appuyez sur M.C. pour sélectionner. Utilisation d’une source AUX 1 Insérez la mini prise stéréo dans le jack d’entrée AUX. 2 Appuyez sur SRC/OFF pour choisir AUX comme source. Remarque Vous ne pouvez pas sélectionner AUX à moins que le réglage auxiliaire soit activé. Pour plus de détails, reportez-vous à la page 29, AUX (entrée auxiliaire). 02 Français La sortie des bornes du haut-parleur arrière et la sortie RCA de cet appareil peuvent être utilisées pour connecter un haut-parleur pleine gamme ou un haut-parleur d’extrêmes graves. Sélectionnez l’option appropriée à votre connexion. 1 Appuyez sur M.C. pour afficher le mode de réglage. 2 Tournez M.C. pour sélectionner le réglage souhaité. ! REAR/SUB.W – Sélectionnez cette option lorsqu’un haut-parleur pleine gamme est connecté aux bornes du haut-parleur arrière et qu’un haut-parleur d’extrêmes graves est connecté à la sortie RCA. ! SUB.W/SUB.W – Sélectionnez cette option lorsqu’un haut-parleur d’extrêmes graves est connecté directement aux bornes du haut-parleur arrière sans amplificateur auxiliaire et qu’un haut-parleur d’extrêmes graves est connecté à la sortie RCA. ! REAR/REAR – Sélectionnez cette option lorsqu’un haut-parleur pleine gamme est connecté aux bornes du haut-parleur arrière et à la sortie RCA. Si un haut-parleur pleine gamme est connecté à la sortie des bornes du hautparleur arrière et que la sortie RCA n’est pas utilisée, vous pouvez sélectionner REAR/SUB.W ou REAR/REAR. Utilisation de cet appareil Fonction silencieux Seulement pour DEH-X3600UI Cette fonction est activée lorsqu’un appareil est équipé d’une fonction silencieux reliée à cet appareil. Le son est coupé automatiquement si vous passez ou recevez un appel téléphonique avec un appareil équipé de la fonction silencieux. Remarque La source téléphone s’affiche lorsque vous recevez un appel. Changement de l’affichage Sélection des informations textuelles souhaitées 1 Appuyez sur DISP pour parcourir les options disponibles : ! Nom de la source ! Nom de la source et horloge Si un écran non souhaité s’affiche Mettez l’écran non souhaité hors service à l’aide des procédures répertoriées ci-dessous. 1 Appuyez sur M.C. pour afficher le menu principal. 2 Tournez M.C. pour changer l’option de menu et appuyez pour sélectionner SYSTEM. Fr <QRD3200-A>31 31 Black plate (32,1) Section Installation 03 Installation Connexions F O N OF Important ! Lors de l’installation de cet appareil dans un véhicule sans position ACC (accessoire) sur le contact d’allumage, ne pas connecter le câble rouge à la borne qui détecte l’utilisation de la clé de contact peut entraîner le déchargement de la batterie. STAR T Avec position ACC Sans position ACC ! L’utilisation de cet appareil dans des conditions autres que les conditions suivantes pourrait provoquer un incendie ou un mauvais fonctionnement. — Véhicules avec une batterie 12 volts et mise à la masse du négatif. — Haut-parleurs avec une puissance de sortie de 50 W et une impédance de 4 W à 8 W. ! Pour éviter un court-circuit, une surchauffe ou un dysfonctionnement, assurez-vous de respecter les instructions suivantes. — Déconnectez la borne négative de la batterie avant l’installation. — Fixez le câblage avec des serre-fils ou de la bande adhésive. Pour protéger le câblage, enroulez dans du ruban adhésif les parties du câblage en contact avec des pièces en métal. — Placez les câbles à l’écart de toutes les parties mobiles, telles que le levier de vitesse et les rails des sièges. — Placez les câbles à l’écart de tous les endroits chauds, par exemple les sorties de chauffage. — Ne reliez pas le câble jaune à la batterie à travers le trou dans le compartiment moteur. — Recouvrez tous les connecteurs de câbles qui ne sont pas connectés avec du ruban adhésif isolant. — Ne raccourcissez pas les câbles. 32 — Ne coupez jamais l’isolation du câble d’alimentation de cet appareil pour partager l’alimentation avec d’autres appareils. La capacité en courant du câble est limitée. — Utilisez un fusible correspondant aux caractéristiques spécifiées. — Ne câblez jamais le câble négatif du haut-parleur directement à la masse. — Ne réunissez jamais ensemble les câbles négatifs de plusieurs haut-parleurs. ! Lorsque cet appareil est sous tension, les signaux de commande sont transmis via le câble bleu/blanc. Connectez ce câble à la télécommande du système d’un amplificateur de puissance externe ou à la borne de commande du relais de l’antenne motorisée du véhicule (max. 300 mA 12 V CC). Si le véhicule est équipé d’une antenne intégrée à la lunette arrière, connectez-le à la borne d’alimentation de l’amplificateur d’antenne. ! Ne reliez jamais le câble bleu/blanc à la borne d’alimentation d’un amplificateur de puissance externe. De même, ne le reliez pas à la borne d’alimentation de l’antenne motorisée. Dans le cas contraire, il peut en résulter un déchargement de la batterie ou un dysfonctionnement. ! Le câble noir est la masse. Les câbles de terre de cet appareil et d’autres produits (particulièrement les produits avec des courants élevés tels que l’amplificateur de puissance) doivent être câblés séparément. Dans le cas contraire, ils peuvent se détacher accidentellement et provoquer un incendie ou un dysfonctionnement. Cet appareil 1 5 6 2 34 7 1 Entrée cordon d’alimentation 2 Jack d’entrée AUX2 (jack stéréo 3,5 mm) (DEH-X3600UI uniquement) Jack d’entrée dédié conçu spécialement pour être utilisé avec les appareils équipés d’une fonction silencieux. 3 Sortie arrière ou haut-parleur d’extrêmes graves 4 Sortie avant 5 Entrée antenne 6 Fusible (10 A) 7 Entrée télécommande câblée Un adaptateur de télécommande câblée (vendu séparément) peut être connecté. Cordon d’alimentation 2 7 3 4 5 6 3 4 5 6 1 8 a 9 e b c d 1 Vers l’entrée cordon d’alimentation 2 Selon le type de véhicule, 3 et 5 peuvent avoir une fonction différente. Dans ce cas, assurez-vous de connecter 4 à 5 et 6 à 3. 3 Jaune Alimentation de secours (ou accessoire) 4 Jaune Connectez à la borne d’alimentation 12 V permanente. 5 Rouge Accessoire (ou alimentation de secours) 6 Rouge Connectez à la borne contrôlée par le contact d’allumage (12 V CC). 7 Connectez les fils de même couleur ensemble. 8 Noir (masse du châssis) 9 Bleu/blanc La position des broches du connecteur ISO est différente selon le type de véhicule. Connectez 9 et b lorsque la broche 5 est de type commande de l’antenne. Dans un type différent de véhicule, ne connectez jamais 9 et b. a Bleu/blanc Connectez à la borne de commande du système de l’amplificateur de puissance (max. 300 mA 12 V CC). b Bleu/blanc Connectez à la borne de commande du relais de l’antenne motorisée (max. 300 mA 12 V CC). c Jaune/noir Si vous utilisez un équipement avec la fonction Coupure du son, câblez ce fil au fil Coupure Audio de cet équipement. Sinon, ne connectez rien au fil Coupure Audio. d Fils des haut-parleurs Blanc : Avant gauche + Blanc/noir : Avant gauche * Gris : Avant droite + Gris/noir : Avant droite * Vert : Arrière gauche + ou haut-parleur d’extrêmes graves + Vert/noir : Arrière gauche * ou haut-parleur d’extrêmes graves * Violet : Arrière droite + ou haut-parleur d’extrêmes graves + Violet/noir : Arrière droite * ou haut-parleur d’extrêmes graves * Fr <QRD3200-A>32 Black plate (33,1) Section Installation Installation e Connecteur ISO Dans certains véhicules, il est possible que le connecteur ISO soit divisé en deux. Dans ce cas, assurez-vous de connecter les deux connecteurs. Amplificateur de puissance (vendu séparément) Réalisez ces connexions lors de l’utilisation d’un amplificateur optionnel. 3 1 5 2 3 2 1 7 4 5 6 7 1 Télécommande du système Connectez au câble bleu/blanc. 2 Amplificateur de puissance (vendu séparément) 3 Connectez avec des câbles RCA (vendus séparément) 4 Vers la sortie avant 5 Haut-parleur avant 6 Vers la sortie arrière ou la sortie du haut-parleur d’extrêmes graves Installation Important ! Vérifiez toutes les connexions et tous les systèmes avant l’installation finale. ! N’utilisez pas de pièces non autorisées car il peut en résulter des dysfonctionnements. ! Consultez votre revendeur si l’installation nécessite le perçage de trous ou d’autres modifications du véhicule. ! N’installez pas cet appareil là où : — il peut interférer avec l’utilisation du véhicule. — il peut blesser un passager en cas d’arrêt soudain du véhicule. ! Le laser à semi-conducteur sera endommagé s’il devient trop chaud. Installez cet appareil à l’écart de tous les endroits chauds, par exemple les sorties de chauffage. ! Des performances optimales sont obtenues quand l’appareil est installé à un angle inférieur à 60°. 60° ! Lors de l’installation, pour assurer une dispersion correcte de la chaleur quand cet appareil est utilisé, assurez-vous de laisser un espace important derrière la face arrière et enroulez les câbles volants de façon qu’ils ne bloquent pas les orifices d’aération. 1 Tableau de bord 2 Manchon de montage # Assurez-vous que l’appareil est correctement mis en place. Toute installation instable peut entraîner des sauts ou autres dysfonctionnements. Montage arrière DIN 1 Déterminez la position appropriée où les trous sur le support et sur le côté de l’appareil se correspondent. Laissez suffisamment 5 cm d’espace 5 cm Français Remarques ! Changez le menu initial de cet appareil. Reportez-vous à la page 31, SP-P/O MODE (réglage de la sortie arrière et du préamp). La sortie haut-parleur d’extrêmes graves de cet appareil est monaurale. ! Lors de l’utilisation d’un haut-parleur d’extrêmes graves de 70 W (2 W), assurez-vous de connecter le haut-parleur d’extrêmes graves aux fils violet et violet/noir de cet appareil. Ne connectez aucun périphérique aux fils vert et vert/noir. 7 Haut-parleur arrière ou haut-parleur d’extrêmes graves 03 5cm cm Montage avant/arrière DIN 2 Cet appareil peut être installé correctement soit en montage frontal ou en montage arrière. Utilisez des pièces disponibles dans le commerce lors de l’installation. 3 1 2 Montage frontal DIN 1 Insérez le manchon de montage dans le tableau de bord. Lors de l’installation de cet appareil dans un espace peu profond, utilisez le manchon de montage fourni. Si l’espace est suffisant, utilisez le manchon de montage fourni avec le véhicule. Serrez deux vis de chaque côté. 1 Vis taraudeuse (5 mm × 8 mm) 2 Support de montage 3 Tableau de bord ou console Retrait de l’appareil 1 Retirez l’anneau de garniture. 2 Fixez le manchon de montage en utilisant un tournevis pour courber les pattes métalliques (90°) en place. 1 2 1 Anneau de garniture 2 Encoche ! Retirer la face avant permet d’accéder plus facilement à l’anneau de garniture. Fr <QRD3200-A>33 33 Black plate (34,1) Section Installation 03 ! Quand vous remontez l’anneau de garniture, pointez le côté avec l’encoche vers le bas. 2 Insérez les clés d’extraction fournies dans les deux côtés de l’appareil jusqu’à ce qu’elles s’enclenchent en place. 3 Tirez l’appareil hors du tableau de bord. Informations complémentaires Dépannage Messages d’erreur Les symptômes apparaissent en gras et les causes sous la forme de texte régulier non indenté. Le texte régulier indenté est utilisé pour indiquer les actions à mettre en œuvre. Quand vous contactez votre distributeur ou le Service d’entretien agréé par Pioneer le plus proche, n’oubliez pas de noter le message d’erreur. Les symptômes apparaissent en gras et les causes sous la forme de texte régulier non indenté. Le texte régulier indenté est utilisé pour indiquer les actions à mettre en œuvre. L’écran revient automatiquement à l’affichage ordinaire. Vous n’avez exécuté aucune opération pendant 30 secondes. Réexécutez l’opération. Commun AMP ERROR L’étendue de répétition de lecture change de manière inattendue. Retrait et remontage de la face avant Vous pouvez retirer la face avant pour protéger l’appareil contre le vol. Pour les détails, reportez-vous à Retrait de la face avant et à la page 22, Remontage de la face avant. En fonction de l’étendue de répétition de lecture, l’étendue sélectionnée peut changer lors de la sélection d’un autre dossier ou d’une autre plage ou pendant l’avance ou le retour rapide. Resélectionnez l’étendue de répétition de lecture. Une anomalie de fonctionnement de l’appareil s’est produite ou la connexion des haut-parleurs est incorrecte. Le circuit de protection est activé. Vérifiez la connexion des haut-parleurs. Si le message ne disparaît pas même après avoir éteint puis démarré le moteur, consultez votre distributeur ou un centre d’entretien agréé par Pioneer. Un sous-dossier n’est pas lu. Il est impossible de lire les sous-dossiers lorsque FLD (répétition du dossier) est sélectionné. Sélectionnez une autre étendue de répétition de lecture. NO XXXX s’affiche lors de la modification de l’affichage (par exemple NO TITLE). Aucune information textuelle n’est intégrée. Basculez l’affichage ou la lecture sur une autre plage/un autre fichier. L’appareil ne fonctionne pas correctement. Il y a des interférences. Vous utilisez un périphérique, un téléphone portable par exemple, qui peut générer des interférences sonores. Éloignez tous les appareils électriques qui pourrait provoquer des interférences. 34 Lecteur de CD ERROR-07, 11, 12, 17, 30 Le disque est sale. Nettoyez le disque. Le disque est rayé. Utilisez un autre disque. ERROR-07, 10, 11, 12, 15, 17, 30, A0 Une erreur mécanique ou électrique est survenue. Coupez et remettez le contact d’allumage ou choisissez une autre source, puis revenez au lecteur de CD. ERROR-15 Le disque inséré est vierge. Utilisez un autre disque. Fr <QRD3200-A>34 Black plate (35,1) Annexe Informations complémentaires ERROR-23 Informations complémentaires CHECK USB NOT FOUND Aucune plage musicale connexe. Transférez les plages musicales sur l’iPod. Le périphérique de stockage USB connecté contient des fichiers protégés par DRM. Les fichiers protégés sont sautés. L’iPod fonctionne correctement mais n’est pas chargé. Assurez-vous que le câble de connexion de l’iPod n’est pas en court-circuit (par exemple, qu’il n’est pas coincé dans des objets métalliques). Après avoir vérifié, mettez le contact d’allumage sur OFF puis sur ON, ou déconnectez l’iPod et reconnectez-le. NO AUDIO PROTECT ERROR-19 Le disque inséré ne contient pas de fichiers pouvant être lus. Utilisez un autre disque. Tous les fichiers sur le périphérique de stockage USB connecté intègrent la protection par DRM. Remplacez le périphérique de stockage USB. SKIPPED N/A USB Le disque inséré contient des fichiers protégés par DRM. Les fichiers protégés sont sautés. Le périphérique USB connecté n’est pas pris en charge par cet appareil. ! Connectez un périphérique de stockage de masse USB compatible. ! Déconnectez votre périphérique et remplacezle par un périphérique de stockage USB compatible. Panne de communication. Effectuez une des opérations suivantes. –Coupez et remettez le contact d’allumage. –Déconnectez le périphérique de stockage USB. –Choisissez une autre source. Revenez ensuite à la source USB. Format CD non pris en charge. Utilisez un autre disque. La sécurité est activée sur le périphérique de stockage USB. Suivez les instructions du périphérique de stockage USB pour désactiver la sécurité. FORMAT READ PROTECT Tous les fichiers sur le disque inséré intègrent la protection par DRM. Utilisez un autre disque. Périphérique de stockage USB/iPod FORMAT READ Le début de la lecture et le début de l’émission des sons sont parfois décalés. Attendez que le message disparaisse pour entendre les sons. NO AUDIO Absence de plages musicales. Transférez les fichiers audio vers le périphérique de stockage USB et procédez à la connexion. SKIPPED CHECK USB Le connecteur USB ou le câble USB est en court-circuit. Vérifiez que le connecteur USB ou le câble USB n’est pas coincé ou endommagé. CHECK USB Le périphérique de stockage USB connecté consomme plus que le courant maximal autorisé. Déconnectez le périphérique de stockage USB et ne l’utilisez pas. Mettez le contact sur OFF, puis sur ACC ou ON, et ne connectez que des périphériques de stockage USB compatibles. Panne iPod. Déconnectez le câble de l’iPod. Quand le menu principal de l’iPod est affiché, reconnectez et réinitialisez l’iPod. Applications START UP APP Français Le début de la lecture et le début de l’émission des sons sont parfois décalés. Attendez que le message disparaisse pour entendre les sons. L’application n’a pas encore démarré. Suivez les instructions qui s’affichent à l’écran. Conseils sur la manipulation Disques et lecteur Utilisez uniquement des disques affichant l’un ou l’autre des logos suivants. ERROR-23 Le périphérique de stockage USB n’a pas été formaté avec FAT12, FAT16 ou FAT32. Le périphérique de stockage USB doit être formaté avec FAT12, FAT16 ou FAT32. ERROR-16 La version du firmware de l’iPod est ancienne. Mettez à jour la version de l’iPod. Panne iPod. Déconnectez le câble de l’iPod. Quand le menu principal de l’iPod est affiché, reconnectez et réinitialisez l’iPod. Utilisez des disques 12 cm. Utilisez seulement des disques conventionnels de forme circulaire. Les types de disques suivants ne peuvent pas être utilisés avec cet appareil. ! DualDiscs ! Disques 8 cm : les tentatives d’utilisation de tels disques avec un adaptateur peuvent entraîner un dysfonctionnement de l’appareil. ! Disques de forme bizarre STOP Aucune plage musicale dans la liste en cours. Sélectionnez une liste qui contient les plages musicales. ! Disques autres que les CD ! Disques endommagés, y compris les disques fendillés, ébréchés ou voilés ! Disques CD-R/RW non finalisés Fr <QRD3200-A>35 35 Black plate (36,1) Annexe Informations complémentaires Ne touchez pas la surface enregistrée des disques. Rangez les disques dans leur coffret dès que vous ne les écoutez plus. Ne posez aucune étiquette sur la surface des disques, n’écrivez pas sur un disque, n’appliquez aucun agent chimique sur un disque. Pour nettoyer un CD, essuyez le disque avec un chiffon doux en partant du centre vers l’extérieur. La condensation peut perturber temporairement le fonctionnement du lecteur. Laissez celui-ci s’adapter à la température plus élevée pendant une heure environ. Essuyez également les disques humides avec un chiffon doux. La lecture de certains disques peut être impossible en raison des caractéristiques du disque, de son format, de l’application qui l’a enregistré, de l’environnement de lecture, des conditions de stockage ou d’autres conditions. Les cahots de la route peuvent interrompre la lecture d’un disque. Lors de l’utilisation de disques dont la surface de l’étiquette est imprimable, vérifiez les instructions et les avertissements des disques. L’insertion et l’éjection peuvent ne pas être possibles selon les disques. L’utilisation d’un tel disque risque d’endommager cet appareil. Ne posez aucune étiquette disponible dans le commerce ou tout autre matériau sur la surface des disques. ! Les disques pourraient se déformer et devenir injouables. ! Les étiquettes pourraient se décoller pendant la lecture et empêcher l’éjection des disques, ce qui pourrait endommager l’appareil. Périphérique de stockage USB Les connexions via un concentrateur USB ne sont pas prises en charge. Ne connectez aucun périphérique autre qu’un périphérique de stockage USB. Fixez fermement le périphérique de stockage USB lors de la conduite. Ne laissez pas le périphérique de stockage USB tomber sur le plancher, où il pourrait gêner le bon fonctionnement de la pédale de frein ou d’accélérateur. En fonction du périphérique de stockage USB, les problèmes suivants peuvent survenir. ! Le fonctionnement peut varier. ! Le périphérique de stockage peut ne pas être reconnu. ! Les fichiers peuvent ne pas être lus correctement. ! Le périphérique peut générer des interférences sonores lorsque vous écoutez la radio. Informations complémentaires Quelques mots sur les réglages de l’iPod ! Lorsqu’un iPod est connecté, cet appareil désactive le réglage EQ (égaliseur) de l’iPod afin d’optimiser l’acoustique. Le réglage EQ original est rétabli lorsque l’iPod est déconnecté. ! Vous ne pouvez pas mettre la fonction de répétition hors service sur l’iPod quand vous utilisez cet appareil. La fonction de répétition est positionnée automatiquement sur répétition de toutes les plages quand vous connectez l’iPod à cet appareil. Tout texte incompatible enregistré sur l’iPod ne sera pas affiché par cet appareil. MP3i (MP3 interactif), mp3 PRO : incompatible WAV Extension de fichier : .wav Bits de quantification : 8 et 16 (LPCM), 4 (MS ADPCM) Fréquence d’échantillonnage : 16 kHz à 48 kHz (LPCM), 22,05 kHz et 44,1 kHz (MS ADPCM) ! Vous ne pouvez pas utiliser cette fonction avec USB MTP. Formats audio compressés compatibles (disque, USB) WMA Extension de fichier : .wma iPod Liste de lecture m3u : incompatible Débit binaire : 48 kbit/s à 320 kbit/s (CBR), 48 kbit/s à 384 kbit/s (VBR) Ne laissez pas l’iPod dans un endroit soumis à une température élevée. Fréquence d’échantillonnage : 32 kHz, 44,1 kHz, 48 kHz Attachez fermement l’iPod pendant que vous conduisez. Ne laissez pas l’iPod tomber sur le plancher, où il pourrait gêner le bon fonctionnement de la pédale de frein ou d’accélérateur. Windows Mediaä Audio Professional, Lossless, Voice/DRM Stream/Stream avec vidéo : incompatible MP3 Extension de fichier : .mp3 Débit binaire : 8 kbit/s à 320 kbit/s (CBR), VBR Fréquence d’échantillonnage : 8 kHz à 48 kHz (32 kHz, 44,1 kHz, 48 kHz pour accentuation) Informations supplémentaires Seuls les 32 premiers caractères d’un nom de fichier (incluant l’extension de fichier) ou d’un nom de dossier peuvent être affichés. Les textes russes à afficher sur cet appareil doivent être codés avec un des jeux de caractères suivants : ! Unicode (UTF-8, UTF-16) ! Un jeu de caractères autre que Unicode qui est utilisé dans un environnement Windows et qui est paramétré sur Russe dans le réglage multilingue Cet appareil peut ne pas fonctionner correctement selon l’application utilisée pour encoder les fichiers WMA. Il peut se produire un léger retard au début de la lecture de fichiers audio intégrés avec des données image ou de fichiers audio stockés sur un périphérique de stockage USB avec de nombreuses hiérarchies de dossiers. Version étiquette ID3 compatible : 1.0, 1.1, 2.2, 2.3, 2.4 (la Version 2.x de l’étiquette ID3 a priorité sur la Version 1.x.) 36 Fr <QRD3200-A>36 Black plate (37,1) Annexe Informations complémentaires Disque Hiérarchie des dossiers pouvant être lus : jusqu’à 8 niveaux (dans la pratique, la hiérarchie compte moins de 2 niveaux). Dossiers pouvant être lus : jusqu’à 99 Système de fichiers : ISO 9660 Niveau 1 et 2, Romeo, Joliet PRÉCAUTION ! Pioneer ne garantit pas la compatibilité avec tous les périphériques de stockage de masse USB et décline toute responsabilité en cas de perte de données sur des lecteurs multimédia, smartphones ou autres périphériques lors de l’utilisation de ce produit. ! Ne laissez pas de disques ou un périphérique de stockage USB dans un lieu où les températures sont élevées. Lecture multi-session : compatible Transfert des données en écriture par paquet : incompatible Quelle que soit la durée du silence entre les plages musicales de l’enregistrement original, la lecture des disques d’audio compressé s’effectue avec une courte pause entre les plages musicales. Périphérique de stockage USB Hiérarchie des dossiers pouvant être lus : jusqu’à 8 niveaux (dans la pratique, la hiérarchie compte moins de 2 niveaux). Dossiers pouvant être lus : jusqu’à 500 Fichiers pouvant être lus : jusqu’à 15 000 Lecture des fichiers protégés par des droits d’auteur : incompatible Périphérique de stockage USB partitionné : Seule la première partition peut être lue. Il peut se produire un léger retard au début de la lecture de fichiers audio sur un périphérique de stockage USB avec de nombreuses hiérarchies de dossiers. Compatibilité iPod Cet appareil prend en charge uniquement les modèles d’iPod suivants. Les versions du logiciel iPod prises en charge sont indiquées ci-dessous. Les versions antérieures ne sont pas prises en charge. Conçu pour ! iPod touch (5ème génération) ! iPod touch (4ème génération) ! iPod touch (3ème génération) ! iPod touch (2ème génération) ! iPod touch (1ère génération) ! iPod classic ! iPod avec vidéo ! iPod nano (7ème génération) ! iPod nano (6ème génération) ! iPod nano (5ème génération) ! iPod nano (4ème génération) ! iPod nano (3ème génération) ! iPod nano (2ème génération) ! iPod nano (1ère génération) ! iPhone 5 ! iPhone 4S ! iPhone 4 ! iPhone 3GS ! iPhone 3G ! iPhone Selon la génération ou la version de l’iPod, certaines fonctions peuvent ne pas être disponibles. Les opérations peuvent différer selon la version du logiciel iPod. Les utilisateurs d’un iPod avec connecteur Lightning doivent utiliser le câble Lightning vers USB (fourni avec l’iPod). Les utilisateurs d’un iPod avec Dock Connector doivent utiliser le CD-IU51. Pour plus de détails, consultez votre revendeur. Pour des détails sur la compatibilité fichier/format, reportez-vous aux manuels de l’iPod. Livre audio, podcast : compatible PRÉCAUTION Pioneer n’accepte aucune responsabilité en cas de perte de données sur l’iPod, même si la perte de données se produit pendant l’utilisation de cet appareil. Séquence des fichiers audio Sur cet appareil, l’utilisateur ne peut pas affecter de numéros de dossier ni spécifier les séquences de lecture. Exemple de hiérarchie 01 02 1 2 03 3 4 04 5 6 05 Niveau 1 Niveau 2 Niveau 3 Niveau 4 : Dossier : Fichier d’audio compressé 01 à 05 : Numéro de dossier 1 à 6 : Séquence de lecture Disque La séquence de sélection des dossiers ou d’autres opérations peut différer en fonction du logiciel de codage ou d’écriture. Périphérique de stockage USB La séquence de lecture est identique à la séquence enregistrée dans le périphérique de stockage USB. Pour spécifier la séquence de lecture, la méthode suivante est recommandée. 1 Créez un nom de fichier en incluant des nombres qui spécifient la séquence de lecture (par exemple, 001xxx.mp3 et 099yyy.mp3). 2 Placez ces fichiers dans un dossier. 3 Enregistrez le dossier contenant les fichiers sur le périphérique de stockage USB. Toutefois, avec certains environnements système, vous ne pouvez pas spécifier la séquence de lecture. Pour les lecteurs audio portables USB, la séquence est différente et dépend du lecteur. Français Fichiers pouvant être lus : jusqu’à 999 Informations complémentaires Tableau des caractères cyrilliques D: C D: C D: C D: C D: C :А :Б :В :Г :Д : Е, Ё :Ж :З : И, Й :К :Л :М :Н :О :П :Р :С :Т :У :Ф :Ъ :Я :Х :Ц :Ч : Ш, Щ :Ы :Ь :Э :Ю D : Affichage C : Caractère Fr <QRD3200-A>37 37 Black plate (38,1) Annexe Informations complémentaires Droits d’auteur et marques commerciales iTunes Apple et iTunes sont des marques commerciales d’Apple Inc., enregistrées aux États-Unis et dans d’autres pays. MP3 La vente de ce produit comporte seulement une licence d’utilisation privée, non commerciale, et ne comporte pas de licence ni n’implique aucun droit d’utilisation de ce produit pour une diffusion commerciale (c’est-à-dire générant des revenus) en temps réel (terrestre, par satellite, câble et/ou tout autre média), diffusion/streaming via internet, des intranets et/ou d’autres systèmes électroniques de distribution de contenu, telles que les applications audio payante ou audio à la demande. Une licence indépendante est requise pour de telles utilisations. Pour les détails, veuillez visiter le site http://www.mp3licensing.com. Informations complémentaires Les accessoires électroniques portant la mention « Made for iPod » et « Made for iPhone » ont été conçus pour fonctionner respectivement avec un iPod ou un iPhone et sont certifiés conformes aux exigences d’Apple par le fabricant. Apple n’est pas responsable pour le fonctionnement de cet appareil ou de sa compatibilité avec les normes réglementaires et de sécurité. Veuillez noter que l’emploi de cet accessoire avec un iPod ou un iPhone peut affecter les performances sans fil. Androidä Android est une marque commerciale de Google Inc. MIXTRAX MIXTRAX est une marque commerciale de PIONEER CORPORATION. WMA Windows Media est une marque déposée ou une marque commerciale de Microsoft Corporation aux États-Unis et/ou dans d’autres pays. Ce produit intègre une technologie détenue par Microsoft Corporation, qui ne peut être utilisée et distribuée que sous licence de Microsoft Licensing, Inc. iPod et iPhone iPhone, iPod, iPod classic, iPod nano et iPod touch sont des marques commerciales d’Apple Inc., déposées aux États-Unis et dans d’autres pays. Lightning est une marque commerciale d’Apple Inc. 38 Fr <QRD3200-A>38 Black plate (39,1) Annexe Informations complémentaires Caractéristiques techniques Généralités Tension d’alimentation ..... 14,4 V CC (10,8 V à 15,1 V acceptable) Pôle négatif 10,0 A 178 mm × 50 mm × 165 mm 188 mm × 58 mm × 15 mm 178 mm × 50 mm × 165 mm 170 mm × 46 mm × 15 mm 170 mm × 46 mm × 16 mm 1 kg Audio Puissance de sortie maximale ................................... 50 W × 4 70 W × 1/2 W (pour le hautparleur d’extrêmes graves) Puissance de sortie continue ................................... 22 W × 4 (50 Hz à 15 000 Hz, THD 5 %, impédance de charge 4 W, avec les deux canaux entraînés) Impédance de charge ...... 4 W (4 W à 8 W acceptable) Niveau de sortie maximum de la sortie préamp ................................... 2,0 V Correction physiologique ................................... +10 dB (100 Hz), +6,5 dB (10 kHz) (volume : –30 dB) Égaliseur (Égaliseur graphique à 5 bandes) : Fréquence ........................ 80 Hz/250 Hz/800 Hz/2,5 kHz/ 8 kHz Plage d’égalisation .......... ±12 dB (par pas de 2 dB) Haut-parleur d’extrêmes graves (mono) : Fréquence ........................ 50 Hz/63 Hz/80 Hz/100 Hz/ 125 Hz/160 Hz/200 Hz Pente ............................... –12 dB/oct, –24 dB/oct Gain ................................ +6 dB à –24 dB Phase .............................. Normale/Inverse 94 dB (1 kHz) (réseau IEC-A) 2 (stéréo) MPEG-1 & 2 Couche Audio 3 Ver. 7, 7.1, 8, 9, 10, 11, 12 (2 canaux audio) (Windows Media Player) Format du signal WAV ...... PCM Linéaire & MS ADPCM (Non compressé) Français Mise à la masse ............... Consommation maximale ................................... Dimensions (L × H × P) : DIN Châssis ............................ Panneau avant ................. D Châssis ............................ Panneau avant ................. (DEH-X3600UI) Panneau avant ................. (DEH-2600UI) Poids ............................... Rapport signal/bruit ......... Nombre de canaux ........... Format de décodage MP3 ................................... Format de décodage WMA ................................... USB Spécification standard USB ................................... USB 2.0 vitesse pleine Alimentation maximale .... 1 A Classe USB ...................... MSC (Mass Storage Class) Système de fichiers .......... FAT12, FAT16, FAT32 Format de décodage MP3 ................................... MPEG-1 & 2 Couche Audio 3 Format de décodage WMA ................................... Ver. 7, 7.1, 8, 9, 10, 11, 12 (2 canaux audio) (Windows Media Player) Format du signal WAV ...... PCM Linéaire & MS ADPCM (Non compressé) Syntoniseur FM Gamme de fréquence ....... 87,5 MHz à 108,0 MHz Sensibilité utile ................ 9 dBf (0,8 µV/75 W, mono, S/B : 30 dB) Rapport signal/bruit ......... 72 dB (réseau IEC-A) Syntoniseur MW (PO) Gamme de fréquence ....... 531 kHz à 1 602 kHz Sensibilité utile ................ 25 µV (S/B : 20 dB) Rapport signal/bruit ......... 62 dB (réseau IEC-A) Syntoniseur LW (GO) Gamme de fréquence ....... 153 kHz à 281 kHz Sensibilité utile ................ 28 µV (S/B : 20 dB) Rapport signal/bruit ......... 62 dB (réseau IEC-A) Remarque Les caractéristiques et la présentation peuvent être modifiées sans avis préalable. Lecteur de CD Système ........................... Compact Disc Digital Audio Disques utilisables ........... Disques compacts Fr <QRD3200-A>39 39 Black plate (40,1) Sezione Prima di iniziare 01 Grazie per aver acquistato questo prodotto PIONEER Leggere attentamente questo manuale prima di utilizzare il prodotto, per assicurarne il corretto utilizzo. È particolarmente importante leggere e osservare le precauzioni contrassegnate da AVVERTENZA e ATTENZIONE contenute in questo manuale. Conservare il manuale in un luogo sicuro e accessibile, per consultazione futura. Prima di iniziare Informazioni sull’unità Le frequenze del sintonizzatore di questa unità sono destinate all’uso in Europa occidentale, in Asia, nel Medio Oriente, in Africa e in Oceania. L’uso in altre aree può dare come risultato una ricezione non adeguata. La funzione RDS (Radio Data System) è utilizzabile solo nelle aree in cui vengono trasmessi segnali RDS per stazioni FM. AVVERTENZA Se si vuole eliminare questo prodotto, non gettarlo insieme ai rifiuti domestici. Esiste un sistema di raccolta differenziata in conformità alle leggi che richiedono appositi trattamenti, recupero e riciclo. Gli utenti privati dei Paesi membri dell’Unione Europea, della Svizzera e della Norvegia possono portare i propri prodotti elettronici gratuitamente presso i centri di raccolta specificati o presso il rivenditore al dettaglio (se l’acquisto è stato eseguito presso un rivenditore di questo tipo). Per i Paesi non specificati in precedenza, contattare le autorità locali per informazioni sul corretto metodo di smaltimento. In questo modo si garantirà che il prodotto smaltito subisca i processi di trattamento, recupero e riciclaggio necessari per prevenire i potenziali effetti negativi per l’ambiente e la salute umana. 40 ! Non cercare di installare o effettuare interventi di manutenzione sul prodotto. L’installazione o l’esecuzione di interventi di manutenzione sul prodotto da parte di persone sprovviste delle qualifiche o dell’esperienza richiesta per apparecchi elettronici e accessori automobilistici potrebbe risultare pericolosa ed esporre a rischi di scosse elettriche e di altre situazioni pericolose. ! Non cercare di utilizzare i comandi dell’unità durante la guida. Prima di utilizzare i comandi dell’unità, parcheggiare il veicolo in un luogo sicuro. ATTENZIONE Questo apparecchio è un prodotto al laser di Classe 1 secondo le norme di sicurezza dei prodotti al laser IEC 60825-1:2007. PRODOTTO LASER DI CLASSE 1 In caso di problemi Nel caso che questa unità non funzioni correttamente, contattare il rivenditore o il Centro di assistenza autorizzato PIONEER più vicino. ATTENZIONE ! Non lasciare che questa unità entri in contatto con liquidi, in caso contrario possono verificarsi scosse elettriche. Inoltre, se questa unità entra in contatto con liquidi, può subire danni oppure emettere fumo o surriscaldarsi. ! Il CarStereo-Pass Pioneer può essere usato solo in Germania. ! Mantenere sempre il volume basso abbastanza da poter udire i suoni provenienti dall’esterno. ! Evitare l’esposizione all’umidità. It <QRD3200-A>40 Black plate (41,1) Sezione Uso dell’unità Uso dell’unità Unità principale c Da 1/ d Connettore di ingresso ausiliario (AUX) (connettore stereo da 3,5 mm) DEH-X3600UI 123 4 5 6 e a 6/ 1 Tasto Rimozione ATTENZIONE 78 9 ab c de DEH-2600UI 6 Indicazioni sul display DEH-X3600UI 2 1 78 9 a 1 SRC/OFF 2 h (espulsione) 3 MULTI-CONTROL (M.C.) 4 c de 3 4 5 7 9 b 6 8 a Vano d’inserimento dei dischi 6 Porta USB b 3 4 7 6 8 5 9 a 9 iPod DEH-2600UI BAND/ (controllo iPod) (indietro)/DIMMER (varialuce) a c/d b DISP 1 2 Viene visualizzato quando esiste una cartella o un menu di livello inferiore. (lista) 4 Sezione delle informazioni secondarie 5 LOC (ricerca di sintonia in modo locale) 6 TP (identificazione dei programmi sul traffico) 7 TA (notiziari sul traffico) 8 (Sound Retriever) 9 (riproduzione casuale/shuffle) a b MIX (MIXTRAX) DEH-X3600UI 8 3 DEH-2600UI (lista) 5 7 2 (ripetizione) (controllo iPod) La funzione iPod di questa unità è controllata dall’iPod stesso. 3 Premere M.C. per selezionare. 4 Per configurare il menu, eseguire questa procedura. Per passare all’opzione di menu successiva, occorre confermare la selezione. LANGUAGE (multilingue) Questa unità è in grado di visualizzare le informazioni di testo dei file audio compressi se sono state incorporate in inglese, russo o turco. ! Se la lingua incorporata e l’impostazione della lingua selezionata non corrispondono, le informazioni di testo potrebbero non essere visualizzate correttamente. ! Alcuni caratteri potrebbero non essere visualizzati correttamente. 1 Ruotare M.C. per selezionare l’impostazione desiderata. ENG (Inglese)—РУС (Russo)—TUR (Turco) 2 Premere M.C. per confermare la selezione. Italiano 21 3 4 b 5 Utilizzare un cavo USB Pioneer opzionale (CDU50E) per collegare un lettore audio USB o un dispositivo di memoria USB, in quanto se i dispositivi vengono collegati direttamente all’unità, sporgeranno dalla stessa e potrebbero risultare pericolosi. Sezione delle informazioni principali ! Sintonizzatore: banda e frequenza ! RDS: nome di servizio del programma, informazioni PTY e altre informazioni letterali ! Sintolettore, dispositivo di memoria USB e iPod: tempo di riproduzione trascorso e informazioni di testo 02 CLOCK SET (impostazione dell’orologio) 1 2 3 4 Ruotare M.C. per regolare le ore. Premere M.C. per selezionare i minuti. Ruotare M.C. per regolare i minuti. Premere M.C. per confermare la selezione. FM STEP (passo di sintonizzazione FM) Menu di configurazione 1 Dopo aver installato l’unità, portare l’interruttore della chiave di avviamento su ON. Viene visualizzata l’indicazione SET UP. 2 Ruotare M.C. per selezionare YES. # Se non si effettuano operazioni con l’unità per 30 secondi, il menu di configurazione non sarà visualizzato. # Se non si desidera eseguire la configurazione in questo momento, ruotare M.C. per selezionare NO. Utilizzare FM STEP per impostare le opzioni relative al passo di sintonizzazione FM (impostazioni per il passo di ricerca). 1 Ruotare M.C. per selezionare il passo di sintonizzazione FM. 100 (100 kHz)—50 (50 kHz) 2 Premere M.C. per confermare la selezione. Viene visualizzata l’indicazione QUIT. ! Il passo di sintonizzazione manuale è fissato a 50 kHz. ! Se le opzioni AF e TA sono disattivate, il passo di ricerca è fissato a 50 kHz, anche se è stato impostato su 100. It <QRD3200-A>41 41 Black plate (42,1) Sezione Uso dell’unità 02 5 Per completare le impostazioni, ruotare M.C. per selezionare YES. # Se si desidera modificare ancora l’impostazione, ruotare M.C. per selezionare NO. 6 Premere M.C. per selezionare. Uso dell’unità Rimozione del frontalino 1 Premere il tasto di rimozione per sganciare il frontalino. 2 Spingere il frontalino verso l’alto (M) e quindi tirarlo verso l’esterno (N). Note ! È possibile configurare le opzioni di menu dal menu di sistema e dal menu iniziale. Per informazioni dettagliate sulle impostazioni, vedere Menu di sistema a pagina 48 e Menu iniziale a pagina 50. ! È possibile annullare il menu di configurazione premendo SRC/OFF. 3 Conservare sempre il frontalino in una custodia o una borsa protettiva, dopo averlo rimosso. Funzionamento di base Reinserimento del frontalino 1 Fare scorrere il frontalino verso sinistra. Importante ! Quando si rimuove o si inserisce il frontalino, maneggiarlo con cura. ! Evitare di sottoporre il frontalino a urti eccessivi. ! Mantenere il frontalino lontano dalla luce solare diretta e dalle alte temperature. ! Per evitare danni ai dispositivi o agli interni del veicolo, accertarsi di scollegare gli eventuali cavi e i dispositivi collegati al frontalino, prima di rimuoverlo. 2 Premere il lato destro del frontalino fino a quando è saldamente installato. Se il frontalino viene inserito con forza eccessiva, l’unità o il frontalino potrebbero subire danni. Accensione dell’unità 1 Premere SRC/OFF per accendere l’unità. Spegnimento dell’unità 1 Premere e tenere premuto SRC/OFF fino a quando l’unità non si spegne. 42 Selezione di una sorgente 1 Premere SRC/OFF per passare in rassegna: RADIO—CD—USB/iPod—APP (applicazione) —AUX ! Quando è in uso la connessione MTP, viene visualizzata l’indicazione USB MTP. ! Solo per il modello DEH-2600UI Se è collegato un iPod ed è stata selezionata una sorgente diversa da iPod, è possibile passare a iPod premendo iPod. Regolazione del volume 1 Ruotare M.C. per regolare il volume. Nota Quando il conduttore isolato blu/bianco di questa unità viene collegato al terminale di controllo del relè dell’antenna automatica, l’antenna dell’automobile si estende quando si accende l’unità. Per ritirare l’antenna, spegnere la sorgente. Operazioni col menu più frequentemente utilizzate Ritorno al display precedente Ritorno all’elenco precedente (la cartella superiore di un livello) 1 Premere /DIMMER. Ritorno al display normale Annullamento del menu principale 1 Premere BAND/ . Ritorno al display normale dall’elenco 1 Premere BAND/ . Radio Funzionamento di base Selezione di una banda 1 Premere BAND/ fino a quando viene visualizzata la banda desiderata (FM1, FM2, FM3 per FM o MW/LW). Selezione delle stazioni preselezionate 1 Premere c o d. ! Selezionare PCH (canale preselezionato) in SEEK per utilizzare questa funzione. Sintonizzazione manuale (passo per passo) 1 Premere c o d. ! Selezionare MAN (sintonizzazione manuale) in SEEK per utilizzare questa funzione. Ricerca 1 Premere e tenere premuto c o d e poi rilasciare. È possibile annullare la ricerca di sintonia premendo brevemente c o d. Se si spinge e si tiene premuto c o d, è possibile saltare le stazioni. La ricerca di sintonia viene avviata non appena si rilascia c o d. Note ! Per ulteriori dettagli sulla funzione SEEK, vedere SEEK (impostazione tasto sinistro/destro) a pagina 43. ! È possibile attivare e disattivare (on/off) la funzione AF (ricerca delle frequenze alternative) di questa unità. Per le operazioni normali di sintonizzazione, la funzione AF deve essere disattivata (vedere AF (ricerca delle frequenze alternative) a pagina 43). It <QRD3200-A>42 Black plate (43,1) Sezione Uso dell’unità Memorizzazione e richiamo delle stazioni per ciascuna banda Uso dei tasti di preselezione sintonia 1 Per memorizzare: Premere e tenere premuto uno dei tasti di preselezione sintonia (da 1/ a 6/ ) fino a quando il numero smette di lampeggiare. 2 Per richiamare: Premere uno dei tasti di preselezione sintonia (da 1/ a 6/ ). Commutazione del display Note ! Se non è possibile ottenere il nome di servizio del programma in FREQUENCY, al suo posto viene visualizzata la frequenza di trasmissione. Se invece il nome di servizio del programma viene rilevato, verrà visualizzato. ! È possibile modificare le informazioni a seconda della banda. ! Le informazioni di testo che possono essere modificate dipendono dall’area. Uso delle funzioni PTY È possibile sintonizzarsi su una stazione usando le informazioni PTY (tipo di programma). Ricerca di una stazione RDS tramite le informazioni PTY (elenco). 1 Premere 2 Ruotare M.C. per selezionare un tipo di programma. NEWS/INFO—POPULAR—CLASSICS— OTHERS 3 Premere M.C. per avviare la ricerca. L’unità ricerca una stazione che trasmette il tipo di programma selezionato. Quando viene trovata una stazione, viene visualizzato il nome di servizio del programma. ! Per annullare la ricerca premere nuovamente M.C. ! Il programma di alcune stazioni può essere diverso da quello indicato dal PTY (tipo di programma) trasmesso. ! Se nessuna stazione trasmette il tipo di programma ricercato, per circa due secondi viene visualizzata l’indicazione NOT FOUND e poi il sintonizzatore torna alla stazione originale. Elenco PTY Per ulteriori dettagli sull’elenco PTY, visitare il sito: http://www.pioneer.eu/eur/products/25/121/tech/ CarAudio/PTY.html Impostazioni delle funzioni 1 Premere M.C. per visualizzare il menu principale. FM SETTING (impostazioni della qualità dell’audio FM) È possibile impostare il livello della qualità dell’audio in modo che corrisponda alle condizioni del segnale trasmesso della banda FM. 1 Premere M.C. per visualizzare la modalità di impostazione. 2 Ruotare M.C. per selezionare l’impostazione desiderata. ! STANDARD – Corrisponde all’impostazione standard. ! HI-FI – Utilizzare questa impostazione per dare la priorità all’alta qualità dell’audio stereo. ! STABLE – Utilizzare questa impostazione per dare la priorità alla riduzione dei disturbi dell’audio mono. BSM (memorizzazione delle stazioni migliori) La funzione BSM (memorizzazione delle stazioni migliori) memorizza automaticamente le sei stazioni più forti in ordine di forza del segnale. 1 Premere M.C. per attivare la funzione BSM. Per annullare, premere nuovamente M.C. REGIONAL (regionale) Quando si utilizza la funzione AF, la funzione regionale limita la selezione alle stazioni che trasmettono programmi regionali. 1 Premere M.C. per attivare o disattivare la funzione regionale. LOCAL (ricerca di sintonia in modo locale) 02 La ricerca di sintonia in modo locale consente di sintonizzare solo le stazioni radio con segnali radio sufficientemente potenti per una buona ricezione. 1 Premere M.C. per selezionare l’impostazione desiderata. FM: OFF—LV1—LV2—LV3—LV4 MW/LW: OFF—LV1—LV2 L’impostazione di livello massimo consente la ricezione solo delle stazioni più forti, mentre i livelli più bassi consentono di ricevere stazioni più deboli. TA (attesa di notiziari sul traffico) Italiano Selezione delle informazioni di testo desiderate 1 Premere DISP per alternare le seguenti impostazioni: ! FREQUENCY (nome di servizio del programma o frequenza) ! BRDCST INFO (nome di servizio del programma/Informazioni PTY) ! CLOCK (nome della sorgente e orologio) Uso dell’unità 1 Premere M.C. per attivare o disattivare l’attesa di notiziari sul traffico. AF (ricerca delle frequenze alternative) 1 Premere M.C. per attivare e disattivare la funzione AF. NEWS (interruzione dei programmi per i notiziari) 1 Premere M.C. per attivare o disattivare la funzione NOTIZIE. SEEK (impostazione tasto sinistro/destro) È possibile assegnare una funzione ai tasti sinistro e destro dell’unità. Selezionare MAN (sintonizzazione manuale) per eseguire la sintonizzazione manuale o PCH (canali preselezionati) per scegliere i canali preselezionati. 1 Premere M.C. per selezionare MAN o PCH. 2 Ruotare M.C. per modificare l’opzione di menu; premere per selezionare FUNCTION. 3 Ruotare M.C. per selezionare la funzione. Dopo aver effettuato la selezione, è possibile regolare le funzioni descritte di seguito. # Se è selezionata la banda MW/LW, è possibile selezionare solo BSM, LOCAL o SEEK. It <QRD3200-A>43 43 Black plate (44,1) Sezione Uso dell’unità 02 CD/CD-R/CD-RW e dispositivi di memoria USB Collegamento MTP È possibile connettere i dispositivi Android compatibili MTP (che eseguono Android OS 4.0 o versione successiva) tramite collegamento MTP, utilizzando la sorgente USB. Per collegare il dispositivo Android, utilizzare il cavo fornito col dispositivo. Note ! Questa funzione non è compatibile con le funzionalità MIXTRAX. ! Questa funzione non è compatibile con i file WAV. Funzionamento di base Riproduzione di CD/CD-R/CD-RW 1 Inserire un disco nel vano d’inserimento dei dischi, con il lato dell’etichetta rivolto verso l’alto. Espulsione dei CD/CD-R/CD-RW 1 Premere h. Riproduzione dei brani registrati su un dispositivo di memoria USB 1 Sollevare la copertura della porta USB. 2 Collegare il dispositivo di memoria USB utilizzando un cavo USB. Arresto della riproduzione dei file sul dispositivo di memoria USB 1 È possibile scollegare il dispositivo di memoria USB in qualsiasi momento. Selezione di una cartella 1 Premere 1/ o 2/ . Selezione di una traccia 1 Premere c o d. 44 Uso dell’unità Esegue l’avanzamento rapido/la modalità inversa rapida 1 Premere e tenere premuto c o d. ! Quando si riproducono file audio compressi, durante l’avanzamento rapido e la modalità inversa non viene emesso audio. Ritorno alla cartella principale 1 Premere e tenere premuto BAND/ . Passaggio da audio compresso a CD-DA 1 Premere BAND/ . Passaggio da un dispositivo di memoria per la riproduzione ad un altro Se sono disponibili più dispositivi di memorizzazione di massa conformi con lo standard Mass Storage Class USB, è possibile alternare i dispositivi di memoria per la riproduzione. 1 Premere BAND/ . ! È possibile alternare fino a 32 differenti dispositivi di memoria. Nota Quando non utilizzati, scollegare i dispositivi di memoria USB dall’unità. Operazioni col pulsante MIXTRAX Attivazione e disattivazione della funzione MIXTRAX Solo per il modello DEH-X3600UI È possibile utilizzare questa funzione se come sorgente è selezionata USB. Non è possibile utilizzare questa funzione con l’opzione USB MTP. 1 Premere MIX per attivare e disattivare la funzione MIXTRAX. ! Per ulteriori informazioni sulla funzione MIXTRAX, vedere Informazioni sulle funzioni MIXTRAX a pagina 50. ! Quando la funzione MIXTRAX è attiva, la funzione sound retriever è disabilitata. Commutazione del display Selezione delle informazioni di testo desiderate 1 Premere DISP per alternare le seguenti impostazioni: CD-DA ! ELAPSED TIME (numero di brano e tempo di riproduzione) ! CLOCK (nome della sorgente e orologio) ! SPEANA (analizzatore di spettro) CD-TEXT ! TRACK INFO (titolo del brano/artista del brano/titolo del disco) ! ELAPSED TIME (numero di brano e tempo di riproduzione) ! CLOCK (nome della sorgente e orologio) ! SPEANA (analizzatore di spettro) MP3/WMA/WAV ! TRACK INFO (titolo del brano/nome dell’artista/titolo dell’album) ! FILE INFO (nome del file/nome della cartella) ! ELAPSED TIME (numero di brano e tempo di riproduzione) ! CLOCK (nome della sorgente e orologio) ! SPEANA (analizzatore di spettro) Selezione e riproduzione di file/ brani dall’elenco dei nomi 1 Premere per passare alla modalità dell’elenco dei nomi file/brani. Visualizzazione di un elenco dei file (o delle cartelle) nella cartella selezionata 1 Quando è selezionata una cartella, premere M.C. Riproduzione di un brano nella cartella selezionata 1 Quando è selezionata una cartella, premere e tenere premuto M.C. Operazioni con i pulsanti speciali Selezione di un intervallo di ripetizione per alternare: 1 Premere 6/ CD/CD-R/CD-RW ! ALL – Ripete tutti i brani ! ONE – Ripete il brano corrente ! FLD – Ripete la cartella corrente Dispositivo di memoria USB ! ALL – Ripete tutti i file ! ONE – Ripete il file corrente ! FLD – Ripete la cartella corrente Riproduzione di brani in ordine casuale per attivare o disattivare la ri1 Premere 5/ produzione casuale. I brani contenuti nell’intervallo di ripetizione selezionato vengono riprodotti in ordine casuale. ! Per cambiare brano durante la riproduzione casuale, premere d per passare al brano successivo. Se si preme c, viene riavviata la riproduzione del brano corrente dall’inizio. 2 Utilizzare M.C. per selezionare il nome del file (o il nome della cartella) desiderato. Selezione di un file o di una cartella 1 Ruotare M.C. Riproduzione 1 Quando è selezionato un file o un brano, premere M.C. It <QRD3200-A>44 Black plate (45,1) Sezione Uso dell’unità Messa in pausa della riproduzione 1 Premere 4/PAUSE per attivare o disattivare la pausa. Miglioramento dell’audio compresso e ripristino del suono completo (funzione Sound Retriever) 1 Premere 3/S.Rtrv per passare in rassegna: 1—2—OFF (disattivata) 1 è efficace per le velocità di compressione basse, mentre 2 è efficace per le velocità di compressione alte. ! I tasti sono disattivati quando la funzione MIXTRAX è attiva. 1 Premere M.C. per visualizzare il menu principale. 2 Ruotare M.C. per modificare l’opzione di menu; premere per selezionare FUNCTION. Dopo aver effettuato la selezione, è possibile regolare la funzione descritta di seguito. ! La funzione S.RTRV non è disponibile quando la funzione MIXTRAX è attiva. S.RTRV (Sound Retriever) Questa funzione migliora automaticamente l’audio compresso e ripristina il suono completo. 1 Premere M.C. per selezionare l’impostazione desiderata. Per ulteriori dettagli, vedere Miglioramento dell’audio compresso e ripristino del suono completo (funzione Sound Retriever) a pagina 45. iPod Funzionamento di base Riproduzione di brani da un iPod 1 Sollevare la copertura della porta USB. 2 Collegare un iPod all’ingresso USB. La riproduzione viene eseguita automaticamente. Selezione di un brano (capitolo) 1 Premere c o d. Selezione di un album 1 Premere 1/ o 2/ . Esegue l’avanzamento rapido/la modalità inversa rapida 1 Premere e tenere premuto c o d. Note ! Non è possibile accendere o spegnere l’iPod se la modalità di controllo è impostata su CONTROL AUDIO/CTRL AUDIO. ! Scollegare gli auricolari dall’iPod prima di collegarlo a questa unità. ! L’iPod si spegne circa due minuti dopo che l’interruttore della chiave di avviamento è stato portato in posizione OFF. Operazioni col pulsante MIXTRAX Attivazione e disattivazione della funzione MIXTRAX Solo per il modello DEH-X3600UI 1 Premere MIX per attivare e disattivare la funzione MIXTRAX. ! Per ulteriori informazioni sulla funzione MIXTRAX, vedere Informazioni sulle funzioni MIXTRAX a pagina 50. Commutazione del display Selezione delle informazioni di testo desiderate 1 Premere DISP per alternare le seguenti impostazioni: ! TRACK INFO (titolo del brano/nome dell’artista/titolo dell’album) ! ELAPSED TIME (numero di brano e tempo di riproduzione) ! CLOCK (nome della sorgente e orologio) ! SPEANA (analizzatore di spettro) Scorrimento dei brani 1 Per passare al menu superiore della ricerca delle liste, premere . 2 Utilizzare M.C. per selezionare una categoria/brano. Modifica del nome del brano o della categoria 1 Ruotare M.C. Liste di riproduzione—artisti—album— brani —podcast—generi—compositori—audiolibri 02 Riproduzione di un brano nella categoria selezionata 1 Mentre è selezionata una categoria, premere e tenere premuto M.C. Ricerca alfabetica nella lista 1 Quando viene visualizzata una lista per la cateper passare alla goria selezionata, premere modalità di ricerca alfabetica. ! È possibile anche passare alla modalità di ricerca alfabetica ruotando M.C. due volte. 2 Ruotare M.C. per selezionare una lettera. 3 Premere M.C. per visualizzare l’elenco in ordine alfabetico. ! Per annullare la ricerca, premere /DIMMER. Note ! È possibile riprodurre le liste di riproduzione create con l’applicazione per computer (MusicSphere). L’applicazione sarà disponibile sul nostro sito web. ! Le liste di riproduzione create con l’applicazione per computer (MusicSphere) vengono visualizzate in forma abbreviata. Italiano Impostazioni delle funzioni Uso dell’unità Riproduzione 1 Mentre è selezionato un brano, premere M.C. Visualizzazione di un elenco dei brani nella categoria selezionata 1 Mentre è selezionata una categoria, premere M.C. It <QRD3200-A>45 45 Black plate (46,1) Sezione Uso dell’unità 02 Operazioni con i pulsanti speciali Selezione di un intervallo di ripetizione 1 Premere 6/ per alternare: ! ONE – Ripete il brano corrente ! ALL – Ripete tutti i brani dell’elenco selezionato ! Se la modalità di controllo è impostata su CONTROL iPod/CTRL iPod, l’intervallo di riproduzione ripetuta sarà uguale a quello impostato per l’iPod collegato. Selezione di un intervallo di riproduzione casuale (modalità shuffle) per alternare: 1 Premere 5/ ! SNG – Riproduce in ordine casuale i brani contenuti nella lista selezionata. ! ALB – Riproduce i brani contenuti in un album selezionato in ordine casuale. ! OFF – Non viene eseguita la riproduzione casuale. Riproduzione casuale di tutti i brani (shuffle all) per attivare la 1 Premere e tenere premuto 5/ riproduzione casuale di tutti i brani. ! Per disattivare la riproduzione casuale di tutti i brani, selezionare OFF nella riproduzione casuale. Per ulteriori dettagli, vedere Selezione di un intervallo di riproduzione casuale (modalità shuffle) a pagina 46. Messa in pausa della riproduzione 1 Premere 4/PAUSE per attivare o disattivare la pausa. Miglioramento dell’audio compresso e ripristino del suono completo (funzione Sound Retriever) 1 Premere 3/S.Rtrv per passare in rassegna: 1—2—OFF (disattivata) 1 è efficace per le velocità di compressione basse, mentre 2 è efficace per le velocità di compressione alte. 46 Uso dell’unità Riproduzione di brani correlati al brano attualmente in riproduzione È possibile riprodurre i brani dalle liste seguenti. • Lista degli album dell’artista correntemente in riproduzione • Lista dei brani dell’album correntemente riprodotto • Lista degli album del genere correntemente in riproduzione 1 Premere e tenere premuto per passare alla modalità di riproduzione collegamento. 2 Ruotare M.C. per modificare la modalità; premere per selezionare. ! ARTIST – Riproduce un album dell’artista attualmente in riproduzione. ! ALBUM – Riproduce un brano dell’album attualmente in riproduzione. ! GENRE – Riproduce un album del genere attualmente in riproduzione. Dopo il brano attualmente in riproduzione, verrà riprodotto il brano/album selezionato. Note ! È possibile annullare il brano/album selezionato, se si utilizzano funzioni diverse dalla ricerca collegamento (ad esempio l’avanzamento o la modalità inversa rapidi). ! A seconda del brano selezionato per la riproduzione, la fine del brano attualmente in riproduzione e l’inizio del brano/album selezionato potrebbero essere tagliati. Utilizzo della funzione iPod dell’unità dall’iPod È possibile controllare la funzione iPod di questa unità tramite l’apparecchio iPod collegato. CONTROL iPod/CTRL iPod non è compatibile con i seguenti modelli di iPod. ! iPod nano di prima generazione ! iPod con video % Premere BAND/ tà di controllo. per alternare la modali- ! CONTROL iPod/CTRL iPod – È possibile utilizzare la funzione iPod di questa unità tramite l’apparecchio iPod collegato. ! CONTROL AUDIO/CTRL AUDIO – È possibile controllare la funzione iPod direttamente da questa unità. Solo per il modello DEH-2600UI È inoltre possibile alternare la modalità di controllo premendo iPod. Note ! Se si passa alla modalità di controllo CONTROL iPod/CTRL iPod, il brano attualmente in riproduzione viene messo in pausa. Utilizzare i comandi dell’iPod per riprendere la riproduzione. ! Anche se la modalità di controllo è impostata su CONTROL iPod/CTRL iPod, è possibile controllare le seguenti funzioni da questa unità. — Pausa — Avanzamento rapido/modalità inversa rapida — Selezione di un brano (capitolo) ! È possibile controllare il volume solo da questa unità. Impostazioni delle funzioni AUDIO BOOK (velocità audiolibri) 1 Premere M.C. per visualizzare la modalità di impostazione. 2 Ruotare M.C. per selezionare l’impostazione preferita. ! FASTER – Riproduzione più veloce del normale ! NORMAL – Riproduzione normale ! SLOWER – Riproduzione più lenta del normale S.RTRV (Sound Retriever) 1 Premere M.C. per selezionare l’impostazione desiderata. Per ulteriori dettagli, vedere Miglioramento dell’audio compresso e ripristino del suono completo (funzione Sound Retriever) a pagina 46. Uso delle applicazioni del dispositivo collegato È possibile utilizzare questa unità per eseguire riproduzioni in streaming e controllare i brani nelle applicazioni per iPhone o solo per riproduzioni in streaming. 1 Premere M.C. per visualizzare il menu principale. 2 Ruotare M.C. per modificare l’opzione di menu; premere per selezionare FUNCTION. 3 Ruotare M.C. per selezionare la funzione. Dopo aver effettuato la selezione, è possibile regolare le funzioni descritte di seguito. ! AUDIO BOOK non è disponibile se come modalità di controllo è selezionata l’impostazione CONTROL iPod/CTRL iPod. Per ulteriori dettagli, vedere Utilizzo della funzione iPod dell’unità dall’iPod a pagina 46. It <QRD3200-A>46 Black plate (47,1) Sezione Uso dell’unità Informazioni sulla compatibilità dei dispositivi collegati Di seguito sono riportate informazioni dettagliate relative ai terminali richiesti per utilizzare le applicazioni per iPhone su questa unità. Per gli utenti iPhone ! Questa funzione è compatibile con dispositivi iPhone e iPod touch. ! Il dispositivo deve eseguire iOS 5.0 o versione successiva. Note ! Per l’elenco delle applicazioni per iPhone supportate da questa unità, consultare il nostro sito web. ! Pioneer non è responsabile di eventuali problemi che possono derivare da errori o difetti del contenuto delle applicazioni. ! Il contenuto e la funzione delle applicazioni supportate sono di responsabilità dei fornitori delle applicazioni. Procedura di inizio per utenti iPhone 2 Ruotare M.C. per modificare l’opzione di menu; premere per selezionare FUNCTION. 3 Ruotare M.C. per selezionare la funzione. Dopo aver effettuato la selezione, è possibile regolare le funzioni descritte di seguito. 02 ! SUB.W CTRL non è disponibile se l’impostazione SUB.W è selezionata in OFF. Per ulteriori dettagli, vedere SUB.W (impostazione on/off del subwoofer) a pagina 48. ! SLA non è disponibile se come sorgente è selezionata FM. 1 Collegare un iPhone all’ingresso USB. PAUSE (pausa) FADER (regolazione dissolvenza) 2 Selezionare APP come sorgente. 1 Premere M.C. per attivare o disattivare la pausa. 1 Premere M.C. per visualizzare la modalità di impostazione. 2 Ruotare M.C. per regolare il bilanciamento degli altoparlanti anteriori/posteriori. 3 Avviare l’applicazione sull’iPhone e avviare la riproduzione. Funzionamento di base Selezione di una traccia 1 Premere c o d. Esegue l’avanzamento rapido/la modalità inversa rapida 1 Premere e tenere premuto c o d. Messa in pausa della riproduzione 1 Premere BAND/ per attivare la pausa o riprendere la riproduzione. Commutazione del display Selezione delle informazioni di testo desiderate 1 Premere DISP per alternare le seguenti impostazioni: ! TRACK INFO (titolo del brano/nome dell’artista/titolo dell’album) ! APP NAME (nome dell’applicazione) ! ELAPSED TIME (tempo di riproduzione) ! CLOCK (nome della sorgente e orologio) ! SPEANA (analizzatore di spettro) Impostazioni delle funzioni 1 Premere M.C. per visualizzare il menu principale. S.RTRV (Sound Retriever) 1 Premere M.C. per selezionare l’impostazione desiderata. 1—2—OFF (disattivata) 1 è efficace per le velocità di compressione basse, mentre 2 è efficace per le velocità di compressione alte. BALANCE (regolazione del bilanciamento) 1 Premere M.C. per visualizzare la modalità di impostazione. 2 Ruotare M.C. per regolare il bilanciamento dell’altoparlante sinistro/destro. Italiano Importante L’utilizzo di applicazioni di terze parti potrebbe comportare o richiedere di fornire informazioni personali di identificazione attraverso la creazione di un account utente o in altro modo e, per alcune applicazioni, attraverso l’invio di dati di geolocalizzazione. TUTTE LE APPLICAZIONI DI TERZE PARTI SONO DI RESPONSABILITÀ ESCLUSIVA DEI RISPETTIVI FORNITORI, INCLUSI MA NON LIMITATAMENTE ALLA GESTIONE E SICUREZZA DEI DATI UTENTE E ALLE PROCEDURE DI TUTELA DELLA PRIVACY. ACCEDENDO AD APPLICAZIONI DI TERZE PARTI, SI ACCETTA DI ESAMINARE I TERMINI DEL SERVIZIO E I CRITERI SULLA PRIVACY DEI FORNITORI. SE NON SI ACCETTANO I TERMINI O I CRITERI DI QUALSIASI FORNITORE O NON SI ACCONSENTE, DOVE SIA APPLICABILE, ALL’USO DEI DATI DI GEOLOCALIZZAZIONE, NON UTILIZZARE TALI APPLICAZIONI DI TERZE PARTI. Uso dell’unità EQ SETTING (richiamo dell’equalizzatore) Regolazione dell’audio 1 Premere M.C. per visualizzare il menu principale. 2 Ruotare M.C. per modificare l’opzione di menu; premere per selezionare AUDIO. 3 Ruotare M.C. per selezionare la funzione audio. Dopo aver effettuato la selezione, è possibile regolare le funzioni audio descritte di seguito. ! FADER non è disponibile se l’impostazione SUB.W/SUB.W è selezionata in SP-P/O MODE. Per ulteriori dettagli, vedere SP-P/O MODE (uscita posteriore e impostazione pre-out) a pagina 51. ! SUB.W e SUB.W CTRL non sono disponibili se l’impostazione REAR/REAR è selezionata in SP-P/O MODE. Per ulteriori dettagli, vedere SP-P/O MODE (uscita posteriore e impostazione pre-out) a pagina 51. It <QRD3200-A>47 47 Black plate (48,1) Sezione Uso dell’unità 02 1 Premere M.C. per visualizzare la modalità di impostazione. 2 Ruotare M.C. per selezionare l’equalizzatore. POWERFUL—NATURAL—VOCAL—CUSTOM1—CUSTOM2—FLAT—SUPER BASS La banda di equalizzazione e il livello dell’equalizzatore possono essere personalizzati se è selezionata l’impostazione CUSTOM1 o CUSTOM2. Se si seleziona CUSTOM1 o CUSTOM2, completare la procedure descritta di seguito. Se si selezionano altre opzioni, premere M.C. per tornare al display precedente. ! L’impostazione CUSTOM1 può essere impostata separatamente per ciascuna sorgente. Tuttavia, USB, iPod e APP vengono automaticamente configurate sulla stessa impostazione. ! CUSTOM2 è un’impostazione condivisa utilizzata per tutte le sorgenti. 3 Premere M.C. per visualizzare la modalità di impostazione. 4 Premere M.C. per alternare le seguenti impostazioni: Banda d’equalizzazione—Livello equalizzatore 5 Ruotare M.C. per selezionare l’impostazione desiderata. Banda d’equalizzazione: 80HZ—250HZ— 800HZ—2.5KHZ—8KHZ Livello equalizzatore: +6 a –6 LOUDNESS (sonorità) La sonorità compensa le deficienze nelle gamme delle frequenze basse e alte a basso volume. 1 Premere M.C. per selezionare l’impostazione desiderata. OFF (non attiva)—LOW (bassa)—MID (media) —HI (alta) SUB.W (impostazione on/off del subwoofer) 48 Uso dell’unità Questa unità è dotata di un’uscita subwoofer che può essere attivata o disattivata. 1 Premere M.C. per selezionare l’impostazione desiderata. NOR (fase normale)—REV (fase invertita)— OFF (subwoofer disattivato) SUB.W CTRL (regolazione del subwoofer) Solo frequenze più basse di quelle presenti nell’intervallo selezionato vengono emesse dal subwoofer. 1 Premere M.C. per visualizzare la modalità di impostazione. 2 Premere M.C. per alternare le seguenti impostazioni: Frequenza di taglio—Livello di uscita—Livello pendenza I valori regolabili lampeggiano. 3 Ruotare M.C. per selezionare l’impostazione desiderata. Frequenza di taglio: 50HZ—63HZ—80HZ— 100HZ—125HZ—160HZ—200HZ Livello di uscita: da –24 a +6 Livello pendenza: –12— –24 BASS BOOST (incremento dei bassi) 1 Premere M.C. per visualizzare la modalità di impostazione. 2 Ruotare M.C. per selezionare il livello desiderato. A seconda se il livello aumenta o diminuisce, viene visualizzata l’indicazione da 0 a +6. HPF SETTING (regolazione del filtro passa alto) Utilizzare questa funzione se si desidera ascoltare solo il segnale audio ad alta frequenza. Dagli altoparlanti verranno emesse solo le frequenze superiori al limite del filtro passa alto (HPF). 1 Premere M.C. per visualizzare la modalità di impostazione. 2 Premere M.C. per alternare le seguenti impostazioni: Frequenza di taglio—Livello pendenza 3 Ruotare M.C. per selezionare l’impostazione desiderata. Frequenza di taglio: OFF—50HZ—63HZ— 80HZ—100HZ—125HZ—160HZ—200HZ Livello pendenza: –12— –24 SLA (regolazione del livello della sorgente) Questa funzione impedisce che il volume cambi in modo eccessivo quando viene selezionata una sorgente diversa. ! Le impostazioni sono basate sul livello di volume FM, che rimane immutato. ! Con questa funzione è anche possibile regolare il livello di volume MW/LW. ! USB, iPod e APP vengono automaticamente configurate sulla stessa impostazione. 1 Premere M.C. per visualizzare la modalità di impostazione. 2 Ruotare M.C. per regolare il volume della sorgente. Intervallo di regolazione: da +4 a –4 Menu di sistema Importante La modalità PW SAVE (risparmio energetico) viene annullata se la batteria del veicolo viene scollegata e sarà necessario riattivarla dopo aver ricollegato la batteria. Se la funzione PW SAVE (risparmio energetico) è disattivata, a seconda del metodo di collegamento, l’unità potrebbe continuare a consumare energia dalla batteria se l’interruttore della chiave di avviamento del veicolo non è dotato di posizione ACC (accessori). 1 Premere M.C. per visualizzare il menu principale. 2 Ruotare M.C. per modificare l’opzione di menu; premere per selezionare SYSTEM. 3 Ruotare M.C. per selezionare la funzione del menu di sistema. Dopo aver effettuato la selezione, è possibile regolare le funzioni del menu di sistema descritte di seguito. ! INFO DISPLAY e BRIGHTNESS non sono disponibili per il modello DEH-2600UI. ! MUTE MODE non è disponibile per il modello DEH-X3600UI. LANGUAGE (multilingue) Questa unità è in grado di visualizzare le informazioni di testo dei file audio compressi se sono state incorporate in inglese, russo o turco. ! Se la lingua incorporata e l’impostazione della lingua selezionata non corrispondono, le informazioni di testo potrebbero non essere visualizzate correttamente. ! Alcuni caratteri potrebbero non essere visualizzati correttamente. 1 Premere M.C. per selezionare l’impostazione desiderata. ENG (Inglese)—РУС (Russo)—TUR (Turco) It <QRD3200-A>48 Black plate (49,1) Sezione Uso dell’unità CLOCK SET (impostazione dell’orologio) 1 Premere M.C. per visualizzare la modalità di impostazione. 2 Premere M.C. per selezionare il segmento del display dell’orologio che si desidera impostare. Ora—Minuto 3 Ruotare M.C. per regolare l’orologio. 12H/24H (nota temporale) INFO DISPLAY (informazioni secondarie) È possibile alternare il tipo di informazioni di testo visualizzate nella sezione delle informazioni secondarie. 1 Premere M.C. per visualizzare la modalità di impostazione. 2 Ruotare M.C. per selezionare l’impostazione desiderata. SPEANA—LEVEL METER—SOURCE—CLOCK —OFF ! L’indicatore della barra del segnale viene visualizzato per le impostazioni SPEANA o LEVEL METER quando la sorgente è impostata su RADIO. AUTO PI (ricerca automatica PI) L’unità può ricercare automaticamente una stazione diversa con la stessa programmazione, anche durante il richiamo delle preselezioni. 1 Premere M.C. per attivare o disattivare la ricerca automatica PI. AUX (ingresso ausiliario) Attivare questa impostazione se a questa unità viene collegato un dispositivo ausiliario. 1 Premere M.C. per attivare o disattivare AUX. 1 Premere M.C. per attivare e disattivare il varialuce. ! È inoltre possibile modificare l’impostazione del varialuce premendo e tenendo premuto /DIMMER. BRIGHTNESS (regolazione della luminosità) È possibile utilizzare questa impostazione per regolare la luminosità del display. La gamma delle impostazioni disponibili per BRIGHTNESS varia a seconda di se l’opzione DIMMER è attivata o disattivata. Per ulteriori dettagli, vedere DIMMER (varialuce) a pagina 49. 1 Premere M.C. per visualizzare la modalità di impostazione. 2 Ruotare M.C. per selezionare l’impostazione desiderata. DIMMER attivata: 1 - 4 DIMMER disattivata: 1 - 5 MUTE MODE (modalità di silenziamento) Il suono del sistema viene silenziato o attenuato automaticamente quando viene ricevuto un segnale da un apparecchio dotato di funzione di silenziamento. 1 Premere M.C. per visualizzare la modalità di impostazione. 2 Ruotare M.C. per selezionare l’impostazione desiderata. ! MUTE – Silenziamento ! 20dB ATT – Attenuazione (20dB ATT ha un effetto più accentuato rispetto a 10dB ATT) ! 10dB ATT – Attenuazione PW SAVE (risparmio energetico) Attivando questa funzione, è possibile ridurre il consumo di energia della batteria. ! L’attivazione della sorgente è l’unica operazione consentita quando questa funzione è attiva. 1 Premere M.C. per attivare o disattivare la modalità di risparmio energetico. Selezione del colore dell’illuminazione Solo per il modello DEH-X3600UI Menu delle funzioni di illuminazione 1 Premere M.C. per visualizzare il menu principale. 2 Ruotare M.C. per visualizzare ILLUMI, quindi premere per selezionare. 3 Ruotare M.C. per selezionare la funzione di illuminazione. Dopo aver effettuato la selezione, è possibile regolare le funzioni audio descritte di seguito. KEY COLOUR (impostazione colore sezione tasti) È possibile scegliere il colore desiderato per i tasti di questa unità. 1 Premere M.C. per visualizzare la modalità di impostazione. 2 Ruotare M.C. per selezionare il colore dell’illuminazione. ! Colori preselezionati (da WHITE a BLUE) ! SCAN (alterna automaticamente una varietà di diversi colori) ! CUSTOM (colore dell’illuminazione personalizzato) DISP COLOUR (impostazione colore sezione display) 02 È possibile scegliere il colore desiderato per il display di questa unità. 1 Premere M.C. per visualizzare la modalità di impostazione. 2 Ruotare M.C. per selezionare il colore dell’illuminazione. ! Colori preselezionati (da WHITE a BLUE) ! SCAN (alterna automaticamente una varietà di diversi colori) ! CUSTOM (colore dell’illuminazione personalizzato) BOTH COLOUR (impostazione del colore dei tasti e del display) Italiano 1 Premere M.C. per selezionare l’impostazione desiderata. 12H (formato orologio a 12 ore)—24H (formato orologio a 24 ore) Uso dell’unità È possibile scegliere il colore desiderato per i tasti e per il display di questa unità. 1 Premere M.C. per visualizzare la modalità di impostazione. 2 Ruotare M.C. per selezionare il colore dell’illuminazione. ! Colori preselezionati (da WHITE a BLUE) ! SCAN (alterna automaticamente una varietà di diversi colori) ILLUMI FX (modalità effetto di illuminazione) In questa modalità, un effetto di illuminazione verrà visualizzato sul display in diverse circostanze, ad esempio quando l’interruttore della chiave di avviamento attiva o disattiva l’alimentazione ACC o viene inserito o espulso un CD. 1 Premere M.C. per attivare o disattivare ILLUMI FX. ! L’effetto di illuminazione verrà visualizzato quando l’interruttore della chiave di avviamento attiva o disattiva l’alimentazione ACC, indipendentemente da se l’impostazione ILLUMI FX è attivata o disattivata. Nota Scegliendo CUSTOM, il colore personalizzato salvato viene selezionato. DIMMER (varialuce) It <QRD3200-A>49 49 Black plate (50,1) Sezione Uso dell’unità 02 Personalizzazione del colore dell’illuminazione È possibile creare un colore dell’illuminazione personalizzato per KEY COLOUR e DISP COLOUR. 1 Premere M.C. per visualizzare il menu principale. 2 Ruotare M.C. per visualizzare ILLUMI, quindi premere per selezionare. 3 Ruotare M.C. per visualizzare KEY COLOUR o DISP COLOUR. Premere per selezionare. 4 Premere M.C. e mantenerlo premuto sino a quando sul display appare l’impostazione del colore dell’illuminazione personalizzato. 5 Premere M.C. per selezionare il colore primario. R (rosso)—G (verde)—B (blu) 6 Ruotare M.C. per regolare il livello della luminosità. Intervallo di regolazione: da 0 a 60 # Non è possibile selezionare un livello inferiore a 20 per tutti e tre i colori R (rosso), G (verde) e B (blu) allo stesso tempo. # È inoltre possibile eseguire la stessa operazione da sui colori. Nota Non è possibile creare un colore dell’illuminazione personalizzato se è selezionata l’opzione SCAN. Informazioni sulle funzioni MIXTRAX Uso dell’unità La tecnologia MIXTRAX viene utilizzata per inserire diversi effetti sonori tra i brani e consente di sperimentare la musica come un mix nonstop, completo di effetti visivi. Note ! A seconda del file/brano, gli effetti sonori potrebbero non essere disponibili. ! Se gli effetti visivi prodotti distraggono dalla guida, disattivare la funzione MIXTRAX. Vedere Operazioni col pulsante MIXTRAX a pagina 44. Menu MIXTRAX 1 Premere M.C. per visualizzare il menu principale. 2 Ruotare M.C. per modificare l’opzione di menu; premere per selezionare MIXTRAX. 3 Ruotare M.C. per selezionare la funzione MIXTRAX. Dopo aver effettuato la selezione, è possibile regolare le funzioni MIXTRAX descritte di seguito. La funzione è attivata se l’impostazione MIXTRAX è abilitata. SHORT PLAYBCK (modalità riproduzione breve) È possibile selezionare la durata del tempo di riproduzione. 1 Premere M.C. per visualizzare la modalità di impostazione. 2 Ruotare M.C. per selezionare l’impostazione desiderata. 1.0 MIN (1 minuto)—1.5 MIN (1,5 minuti)— 2.0 MIN (2 minuti)—2.5 MIN (2,5 minuti)— 3.0 MIN (3 minuti)—OFF (disattivata) È possibile selezionare le aree per i colori lampeggianti. 1 Premere M.C. per visualizzare la modalità di impostazione. 2 Ruotare M.C. per selezionare l’impostazione desiderata. KEY/DISPLAY (tasto e display)—KEY (tasto)— OFF (disattivata) ! Se è impostata l’opzione OFF, il colore impostato in ILLUMI verrà usato come colore del display. FLASH PATTERN (schema flash) I colori lampeggianti e gli effetti speciali MIXTRAX possono variare in base ai livelli del suono e dei bassi. 1 Premere M.C. per visualizzare la modalità di impostazione. 2 Ruotare M.C. per selezionare l’impostazione desiderata. ! Da SOUND LEVEL 1 a SOUND LEVEL 6 – Lo schema lampeggiante varia in base al livello del suono. Selezionare la modalità desiderata. ! Da LOW PASS 1 a LOW PASS 6 – Lo schema lampeggiante varia in base al livello dei bassi. Selezionare la modalità desiderata. ! RANDOM 1 – Lo schema lampeggiante varia casualmente in base al livello del suono e alla modalità del livello dei bassi. ! RANDOM 2 – Lo schema lampeggiante varia casualmente in base al livello del suono. ! RANDOM 3 – Lo schema lampeggiante varia casualmente in base al livello dei bassi. DISPLAY FX (effetto display) È possibile attivare o disattivare gli effetti speciali MIXTRAX per il display. 1 Premere M.C. per selezionare l’impostazione desiderata. ON (display degli effetti speciali MIXTRAX)— OFF (display normale) CUT IN FX (effetto taglio manuale) È possibile attivare o disattivare gli effetti sonori MIXTRAX quando si cambiano manualmente i brani. 1 Premere M.C. per selezionare l’impostazione desiderata. ON (attivato)—OFF (disattivato) Menu iniziale 1 Premere e tenere premuto SRC/OFF fino a quando l’unità non si spegne. 2 Premere e tenere premuto SRC/OFF fino a visualizzare sul display il menu principale. 3 Ruotare M.C. per modificare l’opzione di menu; premere per selezionare INITIAL. 4 Ruotare M.C. per selezionare la funzione del menu iniziale. Dopo aver effettuato la selezione, è possibile regolare le funzioni del menu iniziale descritte di seguito. FM STEP (passo di sintonizzazione FM) 1 Premere M.C. per selezionare il passo di sintonizzazione FM. 100 (100 kHz)—50 (50 kHz) FLASH AREA (area flash) Solo per il modello DEH-X3600UI 50 It <QRD3200-A>50 Black plate (51,1) Sezione Uso dell’unità SP-P/O MODE (uscita posteriore e impostazione pre-out) Menu di sistema 1 Premere e tenere premuto SRC/OFF fino a quando l’unità non si spegne. 2 Premere e tenere premuto SRC/OFF fino a visualizzare sul display il menu principale. 3 Ruotare M.C. per modificare l’opzione di menu; premere per selezionare SYSTEM. 4 Ruotare M.C. per selezionare la funzione del menu di sistema. Per ulteriori dettagli, vedere Menu di sistema a pagina 48. Uso della sorgente AUX 1 Collegare il cavo mini plug stereo al connettore di ingresso ausiliario (AUX). 2 Premere SRC/OFF per selezionare AUX come sorgente. Nota Non è possibile selezionare la sorgente AUX se non viene attivata l’impostazione dell’apparecchio ausiliario. Per ulteriori dettagli, vedere AUX (ingresso ausiliario) a pagina 49. 4 Ruotare M.C. per selezionare YES. 5 Premere M.C. per selezionare. 02 Funzione di silenziamento Solo per il modello DEH-X3600UI Questa funzione è attivata quando a questa unità è collegato un dispositivo dotato di funzione di silenziamento. Se si effettua o si riceve una chiamata con un dispositivo dotato di funzione di silenziamento, il suono viene automaticamente silenziato. Italiano Le uscite degli altoparlanti posteriori e l’uscita RCA di questa unità possono essere utilizzate per collegare altoparlanti a gamma completa o un subwoofer. Selezionare l’opzione più adatta alla configurazione. 1 Premere M.C. per visualizzare la modalità di impostazione. 2 Ruotare M.C. per selezionare l’impostazione desiderata. ! REAR/SUB.W – Selezionare quando alle uscite degli altoparlanti posteriori sono collegati altoparlanti a gamma completa e all’uscita RCA è collegato un subwoofer. ! SUB.W/SUB.W – Selezionare quando alle uscite degli altoparlanti posteriori è collegato direttamente un subwoofer senza un amplificatore ausiliario e all’uscita RCA è collegato un subwoofer. ! REAR/REAR – Selezionare quando alle uscite degli altoparlanti posteriori e all’uscita RCA sono collegati altoparlanti a gamma completa. Se alle uscite degli altoparlanti posteriori è collegato un altoparlante a gamma completa e l’uscita RCA non viene utilizzata, è possibile selezionare REAR/SUB.W o REAR/REAR. Uso dell’unità Nota Quando viene ricevuta una chiamata, viene visualizzato il telefono come sorgente. Commutazione del display Selezione delle informazioni di testo desiderate 1 Premere DISP per alternare le seguenti impostazioni: ! Nome sorgente ! Nome della sorgente e orologio Se viene visualizzato un display indesiderato Per disattivare il display indesiderato, utilizzare la procedura descritta di seguito. 1 Premere M.C. per visualizzare il menu principale. 2 Ruotare M.C. per modificare l’opzione di menu; premere per selezionare SYSTEM. 3 Ruotare M.C. per visualizzare DEMO OFF, quindi premere per selezionare. It <QRD3200-A>51 51 Black plate (52,1) Sezione Installazione 03 Installazione Collegamenti F O N OF Importante ! Quando si installa questa unità in un veicolo che non dispone della posizione ACC (accessoria) per l’interruttore della chiave di avviamento, se non si collega il cavo rosso a un terminale accoppiato al funzionamento dell’interruttore della chiave di avviamento, la batteria potrebbe scaricarsi. STAR T Con posizione ACC Senza posizione ACC ! Se questa unità viene utilizzata in condizione diverse dalle seguenti, potrebbero verificarsi incendi o malfunzionamenti. — Veicoli dotati di batteria da 12 volt e messa a terra negativa. — Altoparlanti con uscita nominale da 50 W e impedenza nominale compresa tra 4 W e 8 W. ! Per evitare rischi di cortocircuito, surriscaldamento o malfunzionamento, accertarsi di seguire le indicazioni riportate di seguito. — Prima dell’installazione, scollegare il morsetto negativo della batteria. — Assicurare i cavi con morsetti per cavi o nastro adesivo. Per proteggere i cavi, avvolgere nastro adesivo attorno agli stessi nei punti in cui entrano in contatto con parti metalliche. — Posizionare tutti i cavi in modo che non possano entrare in contatto con componenti mobili, come la leva del cambio e i binari dei sedili. — Non posizionare i cavi in luoghi soggetti a surriscaldamento, come le bocchette dell’impianto di riscaldamento. — Non collegare il cavo giallo alla batteria facendolo passare attraverso fori nel vano motore. — Rivestire tutti i connettori scollegati con nastro isolante. 52 — Non accorciare i cavi. — Non condividere mai l’alimentazione con altri dispositivi tagliando l’isolante del cavo di alimentazione dell’unità. La capacità di carico di corrente del cavo è limitata. — Utilizzare esclusivamente un fusibile con la portata prescritta. — Non collegare mai direttamente a terra il cavo negativo dell’altoparlante. — Non legare mai assieme cavi negativi di più altoparlanti. ! Quando questa unità è accesa, i segnali di controllo vengono trasmessi dal cavo blu/ bianco. Collegarlo al telecomando del sistema di amplificazione di potenza o al terminale di controllo del relè dell’antenna automatica del veicolo (max. 300 mA 12 V CC). Se il veicolo è dotato di un’antenna a vetro, collegarla al terminale di alimentazione di potenza dell’antenna. ! Non collegare mai il cavo blu/bianco al terminale di alimentazione dell’amplificatore di potenza esterno. Inoltre, non collegarlo mai al terminale di alimentazione dell’antenna automatica. In caso contrario, la batteria potrebbe scaricarsi o potrebbero verificarsi malfunzionamenti. ! Il cavo nero è la messa a terra. I cavi di messa a terra di questa unità e di altre apparecchiature (soprattutto per i prodotti ad alta tensione, quali amplificatori di potenza) devono essere collegati separatamente. In caso contrario, se scollegati accidentalmente, potrebbero provocare incendi o malfunzionamenti. Questa unità 1 5 6 2 34 1 Ingresso cavo di alimentazione 2 Connettore di ingresso ausiliario AUX2 (connettore stereo da 3,5 mm) (solo DEHX3600UI) Connettore di ingresso dedicato progettato esclusivamente per l’uso con dispositivi dotati di funzione di silenziamento. 3 Uscita posteriore o del subwoofer 4 Uscita anteriore 5 Ingresso antenna 6 Fusibile (10 A) 7 Ingresso telecomando cablato È possibile collegare un adattatore per telecomando cablato (venduto a parte). Cavo di alimentazione 2 7 3 4 5 6 3 4 5 6 1 8 a 9 e b c d 1 All’ingresso del cavo di alimentazione 2 A seconda del tipo di veicolo, la funzione di 3 e 5 potrebbe essere diversa. In questo caso, accertarsi di collegare 4 a 5 e 6 a 3. 3 Giallo Riserva (o accessorio) 4 Giallo Collegare al terminale di alimentazione costante 12 V. 5 Rosso Accessorio (o riserva) 6 Rosso Collegare al terminale controllato dall’interruttore di accensione (12 V CC). 7 Collegare insieme i cavi dello stesso colore. 8 Nero (messa a terra telaio) 9 Blu/bianco La posizione dei pin del connettore ISO sarà diversa a seconda del tipo di veicolo. Collegare 9 e b quando il Pin 5 è del tipo controllo antenna. In un altro tipo di veicolo, non collegare mai 9 e b. a Blu/bianco Collegare al terminale di controllo del sistema dell’amplificatore di potenza (max. 300 mA 12 V CC). b Blu/bianco Collegare al terminale di controllo del relè dell’antenna automatica (max. 300 mA 12 V CC). c Giallo/nero Se si utilizza un apparecchio dotato di funzione di silenziamento, collegare questo cavo al cavo di silenziamento audio di tale apparecchio. In caso contrario, non collegare il cavo di silenziamento audio. d Cavi altoparlanti Bianco: Anteriore sinistro + Bianco/nero: Anteriore sinistro * Grigio: Anteriore destro + Grigio/nero: Anteriore destro * Verde: Posteriore sinistro + o subwoofer + Verde/nero: Posteriore sinistro * o subwoofer * Viola: Posteriore destro + o subwoofer + Viola/nero: Posteriore destro * o subwoofer * 7 It <QRD3200-A>52 Black plate (53,1) Sezione Installazione Installazione e Connettore ISO In alcuni veicoli, il connettore ISO potrebbe essere diviso in due. In questo caso, accertarsi di collegare entrambi i connettori. Installazione ! Importante Controllare tutti i collegamenti e i sistemi prima dell’installazione finale. Non utilizzare componenti non approvati, poiché potrebbero provocare malfunzionamenti. Consultare il rivenditore se l’installazione richiede la trapanatura di fori o altre modifiche del veicolo. Non installare questa unità se: ! Amplificatore di potenza (venduto a parte) ! Se si surriscalda il laser a semiconduttore potrebbe subire danni. Non installare questa unità in luoghi soggetti a surriscaldamento, come in prossimità delle bocchette dell’impianto di riscaldamento. ! Le prestazioni ottimali si ottengono quando l’unità viene installata con un’angolazione inferiore a 60°. Eseguire questi collegamenti quando si usa l’amplificatore opzionale. 3 1 5 2 ! — potrebbe interferire con il funzionamento del veicolo. — potrebbe procurare lesioni al passeggero in caso di arresto improvviso del veicolo. 5 Lasciare ampio spazio 2 Assicurare la fascetta di montaggio utilizzando un cacciavite per piegare le linguette metalliche (90°) in posizione. 1 2 5 cm 5 cm 5cm cm Montaggio DIN anteriore/posteriore Questa unità può essere installata correttamente sia dalla posizione di montaggio anteriore, sia dalla posizione di montaggio posteriore. Durante l’installazione utilizzare componenti disponibili in commercio. 1 Cruscotto 2 Fascetta di montaggio # Accertarsi che l’unità sia saldamente installata in posizione. Un’installazione instabile potrebbe causare salti audio o altri malfunzionamenti. Montaggio DIN posteriore 1 Determinare la posizione appropriata, in modo che i fori sulla staffa e sul lato dell’unità corrispondano. Montaggio DIN anteriore 60° 3 2 1 7 4 ! ! Durante l’installazione, per assicurare la corretta dissipazione del calore quando si utilizza l’unità, accertarsi di lasciare ampio spazio dietro il pannello posteriore e avvolgere eventuali cavi allentati in modo che non ostruiscano le aperture. Italiano Note ! Modifica delle impostazioni di menu iniziali di questa unità. Vedere SP-P/O MODE (uscita posteriore e impostazione pre-out) a pagina 51. L’uscita subwoofer di questa unità è mono. ! Se si usa un subwoofer da 70 W (2 W), assicurarsi di collegarlo ai fili viola e viola/nero di questa unità. Non collegare niente ai fili verde e verde/nero. 03 6 7 1 Telecomando sistema Collegare al cavo Blu/bianco. 2 Amplificatore di potenza (venduto a parte) 3 Collegare con cavi RCA (venduti a parte) 4 All’uscita anteriore 5 Altoparlante anteriore 6 All’uscita posteriore o del subwoofer 7 Altoparlanti posteriori o subwoofer 1 Inserire la fascetta di montaggio nel cruscotto. Se l’unità viene installata in uno spazio poco profondo, utilizzare la fascetta di montaggio fornita. Se dietro l’unità vi è spazio sufficiente, utilizzare la fascetta di montaggio fornita con il veicolo. 2 Serrare due viti su ciascun lato. 3 1 2 1 Vite autofilettante (5 mm × 8 mm) 2 Staffa di montaggio 3 Cruscotto o console It <QRD3200-A>53 53 Black plate (54,1) Sezione Installazione 03 Informazioni supplementari Rimozione dell’unità Risoluzione dei problemi 1 Malfunzionamento dell’unità. Ci sono interferenze. In questo manuale i sintomi dei problemi sono riportati in testo grassetto, mentre le cause sono riportate in testo normale, non rientrato. Il testo normale, ma rientrato indica le azioni da intraprendere. Si utilizza un dispositivo, come un telefono cellulare, che potrebbe provocare interferenze audio. Spostare il dispositivo elettrico che causa interferenze lontano dall’unità. Rimuovere la guarnizione. 1 Guarnizione 2 Linguetta intaccata ! La rimozione del frontalino permette di accedere facilmente alla guarnizione. ! Quando si riapplica la guarnizione, spingere il lato con la linguetta intaccata verso il basso. 2 Inserire le chiavi di estrazione fornite su entrambi i lati dell’unità fino a che non scattano in posizione. 3 Estrarre l’unità dal cruscotto. Il display torna automaticamente alla visualizzazione normale. Non è stata eseguita alcuna operazione per 30 secondi. Eseguire nuovamente l’operazione. L’intervallo di riproduzione ripetuta cambia imprevedibilmente. A seconda dell’intervallo di riproduzione ripetuta, l’intervallo selezionato potrebbe cambiare quando si seleziona una cartella o un brano diverso, o quando si procede all’avanzamento rapido/modalità inversa. Selezionare nuovamente l’intervallo di riproduzione ripetuta. I brani di una sottocartella non vengono riprodotti. Rimozione e reinserimento del frontalino È possibile rimuovere il frontalino per proteggere l’unità dai furti. Per ulteriori dettagli, vedere Rimozione del frontalino e Reinserimento del frontalino a pagina 42. 54 Non è possibile riprodurre i brani delle sottocartelle se è selezionata l’opzione FLD (ripetizione della cartella). Selezionare un altro intervallo di riproduzione ripetuta. Quando cambia il display, viene visualizzata un’indicazione NO XXXX (ad esempio, NO TITLE). Nel brano non è incorporata alcuna informazione di testo. Modificare la visualizzazione o riprodurre un altro brano/file. Messaggi di errore Se si contatta il rivenditore o il Centro assistenza Pioneer più vicino, accertarsi di annotare il messaggio di errore. In questo manuale i sintomi dei problemi sono riportati in testo grassetto, mentre le cause sono riportate in testo normale, non rientrato. Il testo normale, ma rientrato indica le azioni da intraprendere. Problemi comuni AMP ERROR L’unità non funziona o l’altoparlante non è collegato correttamente; è stato attivato il circuito di protezione. Controllare il collegamento degli altoparlanti. Se il messaggio non scompare anche dopo aver disattivato e riattivato l’alimentazione, contattare il rivenditore o la stazione assistenza PIONEER più vicino. Lettore CD ERROR-07, 11, 12, 17, 30 Il disco è sporco. Pulire il disco. Il disco è graffiato. Sostituire il disco. It <QRD3200-A>54 Black plate (55,1) Appendice Informazioni supplementari Informazioni supplementari ERROR-07, 10, 11, 12, 15, 17, 30, A0 NO AUDIO CHECK USB NOT FOUND Si è verificato un errore elettrico o meccanico. Spegnere e accendere il motore oppure passare a una sorgente diversa e poi di nuovo al lettore CD. Assenza di brani. Trasferire i file audio nel dispositivo di memoria USB e stabilire il collegamento. Non esistono brani correlati. Scaricare i brani sull’iPod. Il dispositivo di memoria USB collegato ha la protezione attivata. Seguire le istruzioni del dispositivo di memoria USB per disattivare la protezione. L’iPod funziona correttamente ma non si ricarica. Accertarsi che il cavo di collegamento dell’iPod non sia in cortocircuito (ad esempio, bloccato da oggetti di metallo). Dopo aver verificato, portare l’interruttore della chiave di avviamento su OFF e quindi su ON, oppure scollegare l’iPod e collegarlo nuovamente. SKIPPED ERROR-19 Il formato del CD non è supportato. Sostituire il disco. Il dispositivo di memoria USB collegato contiene file protetti da tecnologia DRM. I file protetti vengono saltati. FORMAT READ PROTECT A volte si verifica ritardo tra quando la riproduzione viene avviata e quando si inizia a percepire il suono. Attendere che il messaggio scompaia. Tutti i file sul dispositivo di memoria USB collegato sono protetti da tecnologia DRM. Sostituire il dispositivo di memoria USB. Errore di comunicazione. Eseguire una delle operazioni riportate di seguito. –Portare l’interruttore della chiave di avviamento in posizione OFF e quindi di nuovo su ON. –Scollegare il dispositivo di memoria USB. –Passare a una sorgente diversa. Quindi, tornare alla sorgente USB. NO AUDIO N/A USB Il disco inserito non contiene file riproducibili. Sostituire il disco. Il dispositivo USB collegato non è supportato da questa unità. ! Collegare un dispositivo USB compatibile con lo standard MSC (Mass Storage Class). ! Scollegare il dispositivo e sostituirlo con un dispositivo di memoria USB compatibile. ERROR-15 Il disco inserito è vuoto. Sostituire il disco. ERROR-23 Il disco inserito contiene file protetti con tecnologia DRM. I file protetti vengono saltati. PROTECT Tutti i file nel disco inserito sono protetti da tecnologia DRM. Sostituire il disco. Dispositivo di memoria USB/iPod FORMAT READ A volte si verifica ritardo tra quando la riproduzione viene avviata e quando si inizia a percepire il suono. Attendere che il messaggio scompaia. CHECK USB Il connettore USB o il cavo USB è in cortocircuito. Verificare che il connettore USB o il cavo USB non sia incastrato o danneggiato. CHECK USB Il dispositivo di memoria USB collegato consuma più della potenza massima consentita. Scollegare il dispositivo di memoria USB e non utilizzarlo. Portare l’interruttore della chiave di avviamento in posizione OFF, quindi su ACC o ON e infine collegare solo dispositivi di memoria USB compatibili. L’applicazione non è stata ancora avviata. Seguire le istruzioni visualizzate sullo schermo. Linee guida per l’uso corretto Italiano SKIPPED Applicazioni START UP APP Dischi e lettori Utilizzare esclusivamente dischi che riportino uno dei due seguenti loghi. Errore dell’iPod. Scollegare il cavo dall’iPod. Quando viene visualizzato il menu principale dell’iPod, collegare l’iPod e reimpostarlo. ERROR-23 Il dispositivo di memoria USB non è formattato in FAT12, FAT16 o FAT32. Il dispositivo di memoria USB deve essere formattato in FAT12, FAT16 o FAT32. ERROR-16 La versione del firmware dell’iPod è obsoleta. Aggiornare la versione dell’iPod. Errore dell’iPod. Scollegare il cavo dall’iPod. Quando viene visualizzato il menu principale dell’iPod, collegare l’iPod e reimpostarlo. Utilizzare dischi da 12 cm. Utilizzare esclusivamente dischi convenzionali, completamente circolari. Questa unità non può riprodurre i seguenti tipi di dischi: ! DualDisc ! Dischi da 8 cm: Se si cerca di utilizzare tali dischi con un adattatore, potrebbero verificarsi malfunzionamenti dell’unità. ! Dischi di forma irregolare STOP Nessun brano presente nella lista corrente. Selezionare una lista che contenga brani. ! Dischi diversi da CD ! Dischi danneggiati, inclusi dischi crepati, scheggiati o piegati ! Dischi CD-R/RW non finalizzati It <QRD3200-A>55 55 Black plate (56,1) Appendice Informazioni supplementari Non toccare la superficie registrata dei dischi. Informazioni supplementari Dispositivo di memoria USB Quando non si utilizzano, conservare i dischi nelle rispettive custodie. I collegamenti tramite hub USB non sono supportati. Non attaccare etichette, non scrivere e non applicare prodotti chimici sulla superficie dei dischi. Non collegare dispositivi diversi dai dispositivi di memoria USB. Per pulire un CD, passare delicatamente un panno morbido sul disco procedendo dal centro verso l’esterno. Durante la guida fissare saldamente il dispositivo di memoria USB. Non lasciar cadere il dispositivo di memoria USB sul fondo della vettura, dove potrebbe incastrarsi sotto il pedale del freno o dell’acceleratore. La formazione di condensa potrebbe temporaneamente limitare le prestazioni del lettore. In tal caso, lasciarlo raggiungere una temperatura più alta per circa un’ora. Inoltre, pulire i dischi che dovessero presentare condensa con un panno morbido. La riproduzione dei dischi potrebbe non essere possibile a causa delle caratteristiche del disco, del formato del disco, dell’applicazione di registrazione, dell’ambiente di riproduzione, delle condizioni di conservazione e così via. Le asperità della strada possono far interrompere la riproduzione di un disco. Se si utilizzano dischi sui quali è possibile applicare etichette, controllare le istruzioni e le avvertenze dei dischi. L’inserimento e l’espulsione potrebbe non riuscire, a seconda dei dischi. L’uso di dischi di questo tipo potrebbe danneggiare questa unità. Non affiggere sui dischi etichette o altri materiali disponibili in commercio. ! I dischi potrebbero deformarsi e non sarà più possibile riprodurli. ! Le etichette potrebbero staccarsi durante la riproduzione, impedendo l’espulsione dei dischi. Ciò potrebbe danneggiare questa unità. A seconda del dispositivo di memoria USB, potrebbero verificarsi i problemi seguenti. ! Le operazioni potrebbero risultare diverse. ! Il dispositivo di memoria potrebbe non essere riconosciuto. ! I file potrebbero non essere riprodotti correttamente. ! Il dispositivo potrebbe provocare interferenze audio mentre si ascolta la radio. Informazioni sulle impostazioni dell’iPod ! Quando un iPod è collegato, questa unità disattiva la funzione EQ (equalizzatore) dell’iPod per ottimizzare l’acustica. Quando si scollega l’iPod, l’impostazione EQ ritorna al valore originale. ! Non è possibile disattivare l’opzione di ripetizione dell’iPod se il dispositivo viene utilizzato con questa unità. L’opzione di ripetizione viene automaticamente modificata su Tutti quando si collega l’iPod a questa unità. Se il testo salvato sull’iPod non è compatibile, non verrà visualizzato da questa unità. Compatibilità MP3i (MP3 interattivo), mp3 PRO: non compatibile WAV Estensione file: .wav Bit di quantizzazione lineare: 8 e 16 (LPCM), 4 (MS ADPCM) Frequenza di campionamento: da 16 kHz a 48 kHz (LPCM), 22,05 kHz e 44,1 kHz (MS ADPCM) Compatibilità audio compresso (dischi, USB) ! Non è possibile utilizzare questa funzione con l’opzione USB MTP. WMA Informazioni supplementari Estensione file: .wma iPod Compatibilità lista di riproduzione m3u: non compatibile Velocità in bit: da 48 kbps a 320 kbps (CBR), da 48 kbps a 384 kbps (VBR) Non lasciare l’iPod in luoghi soggetti a temperature elevate. Frequenza di campionamento: 32 kHz, 44,1 kHz, 48 kHz Durante la guida fissare saldamente l’iPod. Non lasciar cadere l’iPod sul fondo della vettura, dove potrebbe incastrarsi sotto il pedale del freno o dell’acceleratore. Windows Mediaä Audio Professional, Lossless, Voice/DRM Stream/Stream con video: Non compatibile MP3 Estensione file: .mp3 Velocità in bit: da 8 kbps a 320 kbps (CBR), VBR Frequenza di campionamento: da 8 kHz a 48 kHz (32 kHz, 44,1 kHz, 48 kHz per l’enfatizzazione) Per i nomi dei file (incluse le estensioni) o i nomi delle cartelle, è possibile visualizzare esclusivamente i primi 32 caratteri. Il testo cirillico da visualizzare su questa unità deve essere codificato con uno dei seguenti set di caratteri: ! Unicode (UTF-8, UTF-16) ! Un set di caratteri diverso da Unicode utilizzato in ambiente Windows e impostato come cirillico nell’impostazione multilingue A seconda dell’applicazione utilizzata per codificare i file WMA, questa unità potrebbe non funzionare correttamente. In alcuni casi possono intercorrere alcuni istanti prima dell’avvio della riproduzione di file incorporati con dati immagine o file audio su dispositivi di memoria USB con numerose gerarchie di cartelle. Versioni tag ID3 compatibili: 1.0, 1.1, 2.2, 2.3, 2.4 (alla tag ID3 Versione 2.x viene data la priorità rispetto alla Versione 1.x.) 56 It <QRD3200-A>56 Black plate (57,1) Appendice Informazioni supplementari Disco Informazioni supplementari ATTENZIONE Riproduzione multi-sessione: compatibile ! Pioneer non garantisce la compatibilità con tutti i dispositivi di memoria USB e non si assume alcuna responsabilità per l’eventuale perdita di dati da lettori di file multimediali, smart phone o altri dispositivi anche se i dati vengono persi durante l’uso con questa unità. ! Non lasciare dischi o dispositivi di memoria USB in luoghi esposti ad alte temperature. Trasferimento dati con scrittura a pacchetti: non compatibile Compatibilità iPod Gerarchia delle cartelle riproducibili: fino a otto livelli (una gerarchia pratica non dovrebbe prevedere più di due livelli.) Cartelle riproducibili: fino a 99 File riproducibili: fino a 999 File system: ISO 9660 di livello 1 e 2, Romeo, Joliet Dispositivo di memoria USB Gerarchia delle cartelle riproducibili: fino a otto livelli (una gerarchia pratica non dovrebbe prevedere più di due livelli.) Cartelle riproducibili: fino a 500 File riproducibili: fino a 15 000 Riproduzione dei file con protezione del copyright: non compatibile Dispositivo di memoria USB partizionato: verrà riprodotta solo la prima partizione riproducibile. In alcuni casi possono intercorrere alcuni istanti prima dell’avvio della riproduzione di file audio su un dispositivo di memoria USB con numerose gerarchie di cartelle. L’unità è compatibile esclusivamente con i seguenti modelli di iPod. Le versioni compatibili del software iPod sono riportate di seguito. È possibile che le versioni anteriori non siano compatibili. Compatibile con ! iPod touch (di quinta generazione) ! iPod touch (di quarta generazione) ! iPod touch (di terza generazione) ! iPod touch (di seconda generazione) ! iPod touch (di prima generazione) ! iPod classic ! iPod con video ! iPod nano (di settima generazione) ! iPod nano (di sesta generazione) ! iPod nano (di quinta generazione) ! iPod nano (di quarta generazione) ! iPod nano (di terza generazione) ! iPod nano (di seconda generazione) ! iPod nano (di prima generazione) ! iPhone 5 ! iPhone 4S ! iPhone 4 ! iPhone 3GS ! iPhone 3G ! iPhone Il funzionamento può variare a seconda della versione del software di iPod. Gli utenti di iPod dotato di connettore Lightning devono utilizzare il cavo adattatore da Lightning a USB (fornito con l’iPod). Gli utenti di iPod dotato di connettore Dock devono utilizzare il cavo CD-IU51. Consultare il rivenditore per ulteriori dettagli. Per informazioni dettagliate sulla compatibilità di file/formati, vedere i manuali dell’iPod. Audiolibro, Podcast: compatibile ATTENZIONE Pioneer non si assume alcuna responsabilità per l’eventuale perdita di dati dall’iPod, anche se i dati vengono persi durante l’uso di questa unità. Riproduzione in sequenza dei file audio Con questa unità, l’utente non può assegnare i numeri alle cartelle e specificare sequenze di riproduzione. Esempio di gerarchia 01 02 1 2 03 3 4 04 5 6 05 Livello 1 Livello 2 Livello 3 Livello 4 : cartella : file audio compresso da 01 a 05: numero della cartella da 1 a 6: sequenza di riproduzione Disco La sequenza di selezione delle cartelle o altre operazioni potrebbero risultare differenti, a seconda del software utilizzato per la codifica o la scrittura. Dispositivo di memoria USB La sequenza di riproduzione è la stessa della sequenza di registrazione sul dispositivo di memoria USB. Per specificare la sequenza di riproduzione, si consiglia di utilizzare il seguente metodo. 1 Creare un nome file includendo i numeri che specificano la sequenza di riproduzione (ad esempio, 001xxx.mp3 e 099yyy.mp3). 2 Inserire tali file in una cartella. 3 Salvare la cartella contenente i file nel dispositivo di memoria USB. Tuttavia, a seconda dell’ambiente di sistema, potrebbe non essere possibile specificare la sequenza di riproduzione. Per i lettori audio portatili USB, la sequenza è diversa e dipende dal tipo di lettore. Italiano Indipendentemente dalla durata degli intervalli vuoti tra i brani della registrazione originale, i dischi contenenti file audio compresso verranno riprodotti con una breve pausa tra i brani. A seconda della generazione o della versione dell’iPod, alcune funzioni potrebbero non essere disponibili. Tabella dei caratteri cirillici D: C D: C D: C D: C D: C :А :Б :В :Г :Д : Е, Ё :Ж :З : И, Й :К :Л :М :Н :О :П :Р :С :Т :У :Ф :Ъ :Я :Х :Ц :Ч : Ш, Щ :Ы :Ь :Э :Ю D: Display C: Carattere It <QRD3200-A>57 57 Black plate (58,1) Appendice Informazioni supplementari Copyright e marchi registrati Informazioni supplementari Apple ed iTunes sono marchi di fabbrica di Apple Inc., registrati negli Stati Uniti ed in altri Paesi. non può essere considerata responsabile di questo dispositivo o della sua osservanza delle norme di sicurezza e dei vari regolamenti. Tenere presente che l'uso di questo accessorio con l'iPod o l'iPhone può peggiorare le prestazioni wireless. MP3 Androidä La fornitura di questo prodotto prevede il trasferimento di una licenza esclusivamente per uso privato, non-commerciale e non prevede la concessione di una licenza, né implica qualsiasi diritto a utilizzare questo prodotto in qualsiasi trasmissione in diretta commerciale (ovvero, che generi profitti) terrestre, via satellite, cavo e/ o tramite altro mezzo, trasmissioni/diffusioni tramite Internet, Intranet e/o altre reti o in altri sistemi elettronici di distribuzione di contenuti, come applicazioni di trasmissione audio a pagamento o audio-on-demand. Per tali usi è necessaria una licenza specifica. Per dettagli, visitare http://www.mp3licensing.com. Android è un marchio di fabbrica di Google Inc. iTunes MIXTRAX MIXTRAX è un marchio registrato di PIONEER CORPORATION. WMA Windows Media è un marchio di fabbrica o marchio di fabbrica depositato della Microsoft Corporation negli Stati Uniti ed in altri paesi. Questo prodotto include tecnologie di proprietà della Microsoft Corporation e non è utilizzbile senza licenza della Microsoft Licensing, Inc. iPod e iPhone iPhone, iPod, iPod classic, iPod nano, e iPod touch sono marchi di Apple Inc., registrati negli Stati Uniti e in altri Paesi. Lightning è un marchio di fabbrica di Apple Inc. “Fatto per l'iPod” e “Fatto per l'iPhone” significano che un accessorio elettronico è stato progettato specificamente rispettivamente per il collegamento con l'iPod o l'iPhone ed è stato certificato dal suo sviluppatore corrispondere agli standard operativi stabiliti da Apple. Apple 58 It <QRD3200-A>58 Black plate (59,1) Appendice Informazioni supplementari Dati tecnici Generali Alimentazione .................. 14,4 V di c.c. (variazioni consentite da 10,8 V a 15,1 V) Negativa 10,0 A 178 mm × 50 mm × 165 mm 188 mm × 58 mm × 15 mm 178 mm × 50 mm × 165 mm 170 mm × 46 mm × 15 mm 170 mm × 46 mm × 16 mm 1 kg Audio Potenza d’uscita massima ................................... 50 W × 4 70 W × 1/2 W (per il subwoofer) Potenza d’uscita continua ................................... 22 W × 4 (da 50 Hz a 15 000 Hz, 5% THD, carico 4 W, entrambi i canali) Impedenza di carico ......... 4 W (variazioni consentite da 4 W a 8 W) Livello massimo di uscita ................................... 2,0 V Contorno della sonorità .... +10 dB (a 100 Hz), +6,5 dB (a 10 kHz) (volume: –30 dB) Equalizzatore (equalizzatore grafico a 5 bande): Frequenza ........................ 80 Hz/250 Hz/800 Hz/2,5 kHz/ 8 kHz Gamma di equalizzazione ................................... ±12 dB (a passi di 2 dB) Subwoofer (mono): Frequenze ........................ 50 Hz/63 Hz/80 Hz/100 Hz/ 125 Hz/160 Hz/200 Hz Pendenza ......................... –12 dB per ottava, –24 dB per ottava Guadagno ........................ da +6 dB a –24 dB Fase ................................. Normale e invertita Lettore CD Sistema ........................... Sistema audio per compact disc Dischi utilizzabili .............. Compact disc USB Specifiche standard USB ................................... USB 2.0 massima velocità Alimentazione massima ... 1 A Classe USB ...................... MSC (Mass Storage Class) File system ....................... FAT12, FAT16, FAT32 Formato di decodifica MP3 ................................... MPEG-1 & 2 Audio Layer 3 Formato di decodifica WMA ................................... Ver. 7, 7.1, 8, 9, 10, 11, 12 (2 canali audio) (Windows Media Player) Formato segnale WAV ...... PCM lineare & MS ADPCM (Non compresso) Italiano Messa a terra ................... Consumo massimo .......... Dimensioni (L × A × P): DIN Unità principale ............... Pannello anteriore ............ D Unità principale ............... Pannello anteriore ............ (DEH-X3600UI) Pannello anteriore ............ (DEH-2600UI) Peso ................................ Rapporto segnale/rumore ................................... 94 dB (a 1 kHz) (rete IEC-A) Numero di canali ............. 2 (stereo) Formato di decodifica MP3 ................................... MPEG-1 & 2 Audio Layer 3 Formato di decodifica WMA ................................... Ver. 7, 7.1, 8, 9, 10, 11, 12 (2 canali audio) (Windows Media Player) Formato segnale WAV ...... PCM lineare & MS ADPCM (Non compresso) Sintonizzatore FM Gamma di frequenze ........ da 87,5 MHz a 108,0 MHz Sensibilità ........................ 9 dBf (0,8 µV/75 W, mono, rapporto S/R: 30 dB) Rapporto segnale/rumore ................................... 72 dB (rete IEC-A) Sintonizzatore MW Gamma di frequenze ........ da 531 kHz a 1 602 kHz Sensibilità ........................ 25 µV (rapporto S/R: 20 dB) Rapporto segnale/rumore ................................... 62 dB (rete IEC-A) Sintonizzatore LW Gamma di frequenze ........ da 153 kHz a 281 kHz Sensibilità ........................ 28 µV (rapporto S/R: 20 dB) Rapporto segnale/rumore ................................... 62 dB (rete IEC-A) Nota Caratteristiche tecniche e design sono soggetti a eventuali modifiche senza preavviso. It <QRD3200-A>59 59 Black plate (60,1) Sección Antes de comenzar 01 Gracias por haber adquirido este producto PIONEER Lea con detenimiento este manual antes de utilizar el producto por primera vez para que pueda darle el mejor uso posible. Es muy importante que lea y cumpla con la información que aparece bajo los mensajes de ADVERTENCIA y PRECAUCIÓN de este manual. Una vez leído, guarde el manual en un lugar seguro y a mano para poder consultarlo en el futuro. Antes de comenzar Acerca de esta unidad Las frecuencias del sintonizador de esta unidad están asignadas para su uso en Europa Occidental, Asia, Oriente Próximo, África y Oceanía. El uso en otras áreas puede causar una recepción deficiente. La función RDS (sistema de datos de radio) opera sólo en áreas con emisoras de FM que trasmitan señales de RDS. ADVERTENCIA Si desea deshacerse de este producto, no lo mezcle con los residuos generales de su hogar. De conformidad con la legislación vigente, existe un sistema de recogida distinto para los productos electrónicos que requieren un procedimiento adecuado de tratamiento, recuperación y reciclado. Las viviendas privadas en los estados miembros de la UE, en Suiza y Noruega pueden devolver gratuitamente sus productos electrónicos usados en los centros de recolección previstos o bien en una tienda minorista (si adquieren un producto similar nuevo). En el caso de los países que no se han mencionado en el párrafo anterior, póngase en contacto con las autoridades locales a fin de conocer el método de eliminación correcto. Al actuar siguiendo estas instrucciones, se asegurará de que el producto eliminado se someta a los procesos de tratamiento, recuperación y reciclaje necesarios, evitando de este modo efectos potencialmente negativos en el entorno y la salud humana. 60 ! No trate de instalar o reparar este producto usted mismo. La instalación o la reparación de este producto por parte de personas sin cualificación ni experiencia en equipos electrónicos y accesorios para automóviles puede ser peligrosa y puede exponerle al riesgo de sufrir una descarga eléctrica u otros peligros. ! No intente utilizar la unidad mientras esté conduciendo. Asegúrese de salir de la carretera y aparcar su vehículo en un lugar seguro antes de intentar utilizar los controles del dispositivo. PRECAUCIÓN Este aparato es un producto de láser de clase 1 clasificado como tal en Seguridad de productos de láser, IEC 60825-1:2007. PRODUCTO LASER CLASE 1 En caso de problemas con el dispositivo Si esta unidad no funcionase correctamente, póngase en contacto con su concesionario o con el centro de servicio PIONEER autorizado más cercano. PRECAUCIÓN ! Evite que esta unidad entre en contacto con líquidos, ya que puede producir una descarga eléctrica. Además, el contacto con líquidos puede causar daños en la unidad, humo y recalentamiento. ! El CarStereo-Pass de Pioneer solo debe usarse en Alemania. ! Mantenga siempre el volumen lo suficientemente bajo como para poder escuchar los sonidos que provienen del exterior. ! Evite la exposición a la humedad. Es <QRD3200-A>60 Black plate (61,1) Sección Durante el uso de la unidad Unidad principal Durante el uso de la unidad c 1/ d Conector de entrada AUX (conector estéreo de 3,5 mm) e Botón de soltar DEH-X3600UI 123 4 5 6 a 6/ 1 9 ab c de DEH-2600UI 21 3 4 b 5 6 Utilice un cable USB Pioneer opcional (CDU50E) para conectar el dispositivo de almacenamiento USB, ya que cualquier dispositivo conectado directamente a la unidad sobresaldrá de ésta y podría resultar peligroso. Indicaciones de la pantalla DEH-X3600UI 78 9 a de 4 Sección de información secundaria 5 LOC (sintonización por búsqueda local) 6 TP (identificación de programa de tráfico) 7 TA (anuncios de tráfico) CLOCK SET (ajuste del reloj) SRC/OFF 2 h (expulsar) 3 MULTI-CONTROL (M.C.) (lista) 5 Ranura de carga de discos 6 Puerto USB MIX (MIXTRAX) DEH-X3600UI 7 iPod DEH-2600UI 8 BAND/ 9 (parte posterior)/DIMMER (reductor de luz) a c/d b DISP (control de iPod) 2 3 8 3 1 4 c 4 5 7 9 b 6 8 a b 3 9 a b DEH-2600UI 4 7 6 5 9 8 a Aparece cuando existe un nivel, carpeta o menú inferior. (lista) (recuperador de sonido) (aleatorio/reproducción aleatoria) (repetición) (control de iPod) La función iPod de la unidad se controlará desde el iPod. Menú de configuración 1 2 LANGUAGE (idiomas múltiples) 1 Una vez instalada la unidad, gire la llave de encendido hasta la posición ON. Aparecerá SET UP. 2 Pulse M.C. para cambiar a YES. # El menú de configuración desaparece si no utiliza la unidad durante 30 segundos. # Si prefiere dejar la configuración para más tarde, gire M.C. para cambiar a NO. 3 1 2 3 4 Español 2 1 4 Para configurar el menú, siga estos pasos. Para avanzar a la siguiente opción del menú debe confirmar primero su selección. Esta unidad puede mostrar la información de texto de un archivo de audio comprimido incluso para aquella información integrada en inglés, ruso o turco. ! Si el idioma integrado y el idioma seleccionado no coinciden, puede que la información de texto no se muestre correctamente. ! Es posible que algunos caracteres no se visualicen correctamente. 1 Gire M.C. para seleccionar el ajuste deseado. ENG (Inglés)—РУС (Ruso)—TUR (Turco) 2 Pulse M.C. para confirmar la selección. PRECAUCIÓN 78 Sección de información principal ! Sintonizador: banda y frecuencia ! RDS: nombre del servicio del programa, información PTY y otro tipo de información de texto ! Reproductor de CD, dispositivo de almacenamiento USB y iPod: tiempo de reproducción transcurrido e información de texto 02 Gire M.C. para ajustar la hora. Presione M.C. para seleccionar el minuto. Gire M.C. para ajustar el minuto. Pulse M.C. para confirmar la selección. FM STEP (paso de sintonía de FM) Utilice FM STEP para ajustar las opciones de paso de sintonía FM (ajustes del paso de búsqueda). 1 Gire M.C. para seleccionar el paso de sintonía de FM. 100 (100 kHz)—50 (50 kHz) 2 Pulse M.C. para confirmar la selección. Aparecerá QUIT. ! El paso de sintonía manual está fijado en 50 kHz. ! Cuando se desactivan AF y TA, el paso de búsqueda se fija en 50 kHz incluso si está ajustado en 100. Pulse M.C. para seleccionarlo. Es <QRD3200-A>61 61 Black plate (62,1) Sección Durante el uso de la unidad 02 5 Para cerrar la configuración, gire M.C. y seleccione YES. # Si prefiere volver a cambiar la configuración, gire M.C. para cambiar a NO. 6 Pulse M.C. para seleccionarlo. Notas ! Se pueden configurar las opciones del menú desde el menú del sistema y desde el menú de inicio. Si desea más información sobre los ajustes, consulte Menú del sistema en la página 68 y Menú inicial en la página 70. ! Si desea cancelar el menú de configuración, pulse SRC/OFF. Durante el uso de la unidad Extracción del panel frontal 1 Pulse el botón de soltar para liberar el panel delantero. 2 Empuje el panel delantero hacia arriba (M) y tire de él hacia usted (N). 3 Coloque siempre el panel frontal en la funda o bolsa protectora. Colocación del panel delantero 1 Deslice el panel hacia la izquierda. Funcionamiento básico Importante ! Maneje con cuidado el panel frontal cuando lo quite o ponga. ! Evite someter el panel delantero a impactos excesivos. ! Mantenga el panel delantero alejado de la luz solar directa y no lo exponga a altas temperaturas. ! Para evitar que el dispositivo o el interior del vehículo sufran daños, retire todos los cables o dispositivos conectados al panel delantero antes de extraerlo. 2 Pulse el lado derecho del panel delantero hasta que se asiente firmemente. Si aplica una fuerza excesiva para fijar el panel delantero, puede que resulte dañado el panel delantero o la unidad principal. Encendido de la unidad 1 Pulse SRC/OFF para encender la unidad. Apagado de la unidad 1 Mantenga pulsado SRC/OFF hasta que se apague la unidad. 62 Selección de una fuente 1 Pulse SRC/OFF para desplazarse entre: RADIO—CD—USB/iPod—APP (aplicación)— AUX ! Se muestra USB MTP mientras está en uso la conexión MTP. ! Solo para DEH-2600UI Si hay un iPod conectado y se selecciona una fuente diferente a iPod, se podrá cambiar a iPod pulsando iPod. Ajuste del volumen 1 Gire M.C. para ajustar el volumen. Nota Si el cable azul/blanco de esta unidad está conectado al terminal de control del relé de la antena automática del vehículo, la antena se extenderá cuando se encienda el equipo. Para retraer la antena, apague la fuente. Operaciones del menú utilizadas frecuentemente Retorno a la visualización anterior Para volver a la lista anterior (la carpeta de un nivel superior) 1 Pulse /DIMMER. Retorno a la visualización normal Acceso al menú principal 1 Pulse BAND/ . Retorno a la visualización normal desde la lista 1 Pulse BAND/ . Radio Funcionamiento básico Selección de una banda 1 Pulse BAND/ hasta que se visualice la banda deseada (FM1, FM2, FM3 para FM o MW/LW). Cambio de emisoras presintonizadas 1 Pulse c o d. ! Para utilizar esta función, seleccione PCH (canal presintonizado) en SEEK. Sintonización manual (paso a paso) 1 Pulse c o d. ! Para utilizar esta función, seleccione MAN (sintonización manual) en SEEK. Búsqueda 1 Mantenga pulsado c o d y luego suéltelo. Se puede cancelar la sintonización por búsqueda pulsando brevemente c o d. Mientras mantiene pulsado c o d se pueden saltar las emisoras. La sintonización por búsqueda comienza inmediatamente después de que suelte c o d. Notas ! Para obtener detalles sobre SEEK, consulte SEEK (ajuste tecla izquierda/derecha) en la página 63. ! Se puede activar y desactivar la función AF (búsqueda de frecuencias alternativas) de esta unidad; se debe desactivar la función AF para la sintonización normal (consulte AF (búsqueda de frecuencias alternativas) en la página 63). Es <QRD3200-A>62 Black plate (63,1) Sección Durante el uso de la unidad Almacenamiento y recuperación de emisoras para cada banda Uso de los botones de ajuste de presintonías 1 Para guardar: mantenga pulsado uno de los botones de ajuste de presintonías (1/ a 6/ ) hasta que el número deje de parpadear. 2 Para recuperar emisoras: pulse uno de los botones de ajuste de presintonías (1/ a 6/ ). Cambio de la visualización Notas ! Si no se puede adquirir el nombre del servicio de programa en FREQUENCY, se visualizará la frecuencia en su lugar. Si se detecta el nombre del servicio de programa, se visualizará el nombre del servicio de programa. ! Dependiendo de la banda, puede cambiarse la información de texto. ! Los elementos de información de texto pueden cambiar según la zona. Uso de las funciones PTY Se puede sintonizar una emisora utilizando la información PTY (tipo de programa). Búsqueda de una emisora RDS por información PTY (lista). 1 Pulse 2 Gire M.C. para seleccionar el tipo de programa. NEWS/INFO—POPULAR—CLASSICS—OTHERS 3 Pulse M.C. para comenzar la búsqueda. La unidad busca una emisora que transmita ese tipo de programa, cuando la encuentra, se visualiza el nombre del servicio de programa. ! Para cancelar la búsqueda, vuelva a pulsar M.C. ! El programa de algunas emisoras puede ser distinto al programa indicado por el PTY transmitido. ! Si ninguna emisora está transmitiendo el tipo de programa que busca, se visualizará NOT FOUND durante unos dos segundos y el sintonizador volverá a la emisora original. FM SETTING (ajustes de calidad de sonido FM) Puede ajustar el nivel de calidad del sonido para que coincida con las condiciones de las señales de emisión de la señal de banda FM. 1 Pulse M.C. para mostrar el modo de ajuste. 2 Gire M.C. para seleccionar el ajuste deseado. ! STANDARD – Es el ajuste estándar. ! HI-FI – Es el ajuste que debe utilizar para dar prioridad a la alta calidad del sonido estéreo. ! STABLE – Es el ajuste que debe utilizar para dar prioridad al ruido bajo del sonido monoaural. BSM (memoria de las mejores emisoras) BSM (memoria de las mejores emisoras) guarda automáticamente las seis emisoras más fuertes ordenadas por la intensidad de la señal. 1 Pulse M.C. para activar la función BSM. Para cancelar, vuelva a pulsar M.C. 02 1 Pulse M.C. para activar o desactivar la espera por anuncio de tráfico. AF (búsqueda de frecuencias alternativas) 1 Pulse M.C. para activar o desactivar la función AF. NEWS (interrupción por programa de noticias) 1 Pulse M.C. para activar o desactivar la función NEWS. SEEK (ajuste tecla izquierda/derecha) Es posible asignar funciones a las teclas derecha e izquierda de la unidad. Seleccione MAN (sintonización manual) para subir o bajar la frecuencia de forma manual o seleccione PCH (canales presintonizados) para cambiar entre los canales presintonizados. 1 Presione M.C. para seleccionar MAN o PCH. REGIONAL (regional) Lista PTY Para obtener más detalles sobre la lista PTY, visite la siguiente página web: http://www.pioneer.eu/eur/products/25/121/tech/ CarAudio/PTY.html Cuando se usa la función AF, la función regional limita la selección de las emisoras a aquellas que transmiten programas regionales. 1 Pulse M.C. para activar o desactivar la función regional. LOCAL (sintonización por búsqueda local) Ajustes de funciones 1 Pulse M.C. para acceder al menú principal. 2 Gire M.C. para cambiar la opción de menú y pulse para seleccionar FUNCTION. 3 Gire M.C. para seleccionar la función. Una vez seleccionado, se pueden ajustar las siguientes funciones. # Si se selecciona la banda MW/LW, solo estarán disponibles BSM, LOCAL y SEEK. La sintonización por búsqueda local le permite sintonizar sólo las emisoras de radio con señales lo suficientemente intensas como para asegurar una correcta recepción. 1 Pulse M.C. para seleccionar el ajuste deseado. FM: OFF—LV1—LV2—LV3—LV4 MW/LW: OFF—LV1—LV2 El ajuste de nivel superior solo permite recibir las emisoras con las señales más intensas, mientras que los ajustes más bajos permiten recibir las emisoras con señales más débiles. Español Selección de la información de texto deseada 1 Pulse DISP para desplazarse entre las siguientes opciones: ! FREQUENCY (nombre del servicio de programa o frecuencia) ! BRDCST INFO (nombre del servicio de programa/información PTY) ! CLOCK (nombre de la fuente y reloj) Durante el uso de la unidad CD/CD-R/CD-RW y dispositivos de almacenamiento USB Conexión MTP Los dispositivos Android compatibles con MTP (al ejecutar el sistema operativo Android 4.0 o superior) se pueden conectar a través de la conexión MTP utilizando la fuente USB. Para conectar un dispositivo Android, utilice el cable suministrado con el dispositivo. Notas ! Esta función no es compatible con MIXTRAX. ! Esta función no es compatible con WAV. TA (espera por anuncio de tráfico) Es <QRD3200-A>63 63 Black plate (64,1) Sección Durante el uso de la unidad 02 Funcionamiento básico Reproducción de un CD/CD-R/CD-RW 1 Inserte el disco en la ranura de carga de discos con el lado de la etiqueta hacia arriba. Expulsión de un CD/CD-R/CD-RW 1 Pulse h. Reproducción de canciones de un dispositivo de almacenamiento USB 1 Abra la tapa del puerto USB. 2 Conecte el dispositivo de almacenamiento USB mediante un cable USB. Detención de la reproducción de archivos en un dispositivo de almacenamiento USB 1 Puede desconectar el dispositivo de almacenamiento USB en cualquier momento. Selección de una carpeta 1 Pulse 1/ o 2/ . Selección de una pista 1 Pulse c o d. Avance rápido o retroceso 1 Mantenga pulsado c o d. ! Al reproducir audio comprimido, no hay sonido durante el avance rápido o el retroceso. Regreso a la carpeta raíz 1 Mantenga pulsado BAND/ . Cambio entre audio comprimido y CD-DA 1 Pulse BAND/ . Cambio entre dispositivos de memoria de reproducción Se puede cambiar entre dispositivos de memoria de reproducción en dispositivos de almacenamiento USB con más de un dispositivo de memoria compatible con uno de almacenamiento masivo. 1 Pulse BAND/ . ! Se puede cambiar hasta 32 dispositivos de memoria diferentes. 64 Durante el uso de la unidad Nota Desconecte los dispositivos de almacenamiento USB de la unidad cuando no los utilice. Operaciones con el botón MIXTRAX Activación o desactivación de MIXTRAX Solo para DEH-X3600UI Se puede utilizar esta función cuando se selecciona USB como fuente. No puede usar esta función con USB MTP. 1 Presione MIX para activar o desactivar MIXTRAX. ! Para obtener más información sobre MIXTRAX, consulte Sobre MIXTRAX en la página 69. ! Cuando se usa MIXTRAX, la función sound retriever se desactiva. Cambio de la visualización Selección de la información de texto deseada 1 Pulse DISP para desplazarse entre las siguientes opciones: CD-DA ! ELAPSED TIME (número de pista y tiempo de reproducción) ! CLOCK (nombre de la fuente y reloj) ! SPEANA (analizador de espectro) CD-TEXT ! TRACK INFO (título de la pista/artista de la pista/título del disco) ! ELAPSED TIME (número de pista y tiempo de reproducción) ! CLOCK (nombre de la fuente y reloj) ! SPEANA (analizador de espectro) MP3/WMA/WAV ! TRACK INFO (título de la pista/nombre del artista/título del álbum) ! FILE INFO (nombre del fichero/nombre de la carpeta) ! ELAPSED TIME (número de pista y tiempo de reproducción) ! CLOCK (nombre de la fuente y reloj) ! SPEANA (analizador de espectro) Selección y reproducción de archivos/pistas de la lista de nombres 1 Pulse para cambiar al modo de lista por nombre de archivo/pista. Visualización de una lista de los archivos (o las carpetas) de la carpeta seleccionada 1 Tras seleccionar una carpeta, pulse M.C. Reproducción de una canción de la carpeta seleccionada 1 Tras seleccionar una carpeta, mantenga pulsado M.C. Operaciones con botones especiales Selección de un intervalo de repetición de reproducción para desplazarse entre las siguien1 Pulse 6/ tes opciones: CD/CD-R/CD-RW ! ALL – Repite todas las pistas ! ONE – Repite la pista actual ! FLD – Repite la carpeta actual Dispositivo de almacenamiento USB ! ALL – Repite todos los archivos ! ONE – Repite el archivo actual ! FLD – Repite la carpeta actual Reproducción de las pistas en orden aleatorio para activar o desactivar la repro1 Pulse 5/ ducción aleatoria. Las pistas de una gama de repetición seleccionada se reproducen en orden aleatorio. ! Para cambiar de canciones durante la reproducción aleatoria, pulse d para cambiar a la pista siguiente; si se pulsa c se reiniciará la reproducción de la pista actual desde el principio de la canción. 2 Utilice M.C. para seleccionar el nombre del archivo deseado (o de la carpeta). Selección de un archivo o una carpeta 1 Gire M.C. Reproducción 1 Tras seleccionar un archivo o una pista, pulse M.C. Es <QRD3200-A>64 Black plate (65,1) Sección Durante el uso de la unidad Pausa de la reproducción 1 Pulse 4/PAUSE para pausar o reanudar. Mejora del audio comprimido y restauración del sonido óptimo (Sound Retriever) 1 Pulse 3/S.Rtrv para desplazarse entre: 1—2—OFF (desactivado) 1 es efectivo para tasas de compresión baja, y 2 para tasas de compresión alta. ! El teclado no responde cuando se activa MIXTRAX. Ajustes de funciones 1 Pulse M.C. para acceder al menú principal. ! S.RTRV no está disponible cuando se activa MIXTRAX. S.RTRV (recuperador de sonido) Mejora automáticamente el audio comprimido y restaura el sonido óptimo. 1 Pulse M.C. para seleccionar el ajuste deseado. Para obtener más información, consulte Mejora del audio comprimido y restauración del sonido óptimo (Sound Retriever) en la página 65. iPod Funcionamiento básico Reproducción de canciones en un iPod 1 Abra la tapa del puerto USB. 2 Conecte un iPod a la entrada USB. La reproducción se inicia automáticamente. Selección de una canción (capítulo) 1 Pulse c o d. Selección de un álbum 1 Pulse 1/ o 2/ . Avance rápido o retroceso 1 Mantenga pulsado c o d. Notas ! El iPod no puede encenderse o apagarse cuando el modo de control está ajustado en CONTROL AUDIO/CTRL AUDIO. ! Desconecte los auriculares del iPod antes de conectarlo a esta unidad. ! El iPod se apagará aproximadamente dos minutos después de que la llave de encendido del automóvil se ponga en OFF. Operaciones con el botón MIXTRAX Activación o desactivación de MIXTRAX Solo para DEH-X3600UI 1 Presione MIX para activar o desactivar MIXTRAX. ! Para obtener más información sobre MIXTRAX, consulte Sobre MIXTRAX en la página 69. Cambio de la visualización Selección de la información de texto deseada 1 Pulse DISP para desplazarse entre las siguientes opciones: ! TRACK INFO (título de la pista/nombre del artista/título del álbum) ! ELAPSED TIME (número de pista y tiempo de reproducción) ! CLOCK (nombre de la fuente y reloj) ! SPEANA (analizador de espectro) Para buscar una canción 1 Para ir al menú superior de la búsqueda de listas, pulse . 2 Utilice M.C. para seleccionar una categoría/canción. Cambio del nombre de la canción o la categoría 1 Gire M.C. Listas de reproducción—artistas—álbumes— canciones—podcasts—géneros—compositores—audiolibros 02 Reproducción de una canción de la categoría seleccionada 1 Tras seleccionar una categoría, mantenga pulsado M.C. Búsqueda alfabética en las listas 1 Cuando se visualice una lista de la categoría para cambiar al modo seleccionada, pulse de búsqueda alfabética. ! Es posible cambiar al modo de búsqueda por orden alfabético girando M.C. dos veces. 2 Haga girar M.C. para seleccionar una letra. 3 Pulse M.C. para visualizar la lista alfabética. ! Para cancelar la búsqueda, pulse /DIMMER. Notas ! Es posible reproducir listas de reproducción creadas con el programa de ordenador (MusicSphere). Dicho programa estará disponible en nuestro sitio web. ! Las listas de reproducción creadas con el programa de ordenador (MusicSphere) se muestran de forma abreviada. Español 2 Gire M.C. para cambiar la opción de menú y pulse para seleccionar FUNCTION. Una vez seleccionado, se puede ajustar la función de abajo. Durante el uso de la unidad Reproducción 1 Tras seleccionar una canción, pulse M.C. Visualización de una lista de canciones de la categoría seleccionada 1 Tras seleccionar una categoría, pulse M.C. Es <QRD3200-A>65 65 Black plate (66,1) Sección Durante el uso de la unidad 02 Operaciones con botones especiales Selección de un intervalo de repetición de reproducción 1 Pulse 6/ para desplazarse entre las siguientes opciones: ! ONE – Repite la canción actual ! ALL – Repite todas las canciones de la lista seleccionada ! Cuando el modo de control se ha ajustado en CONTROL iPod/CTRL iPod, el intervalo de repetición de reproducción será el mismo que el que se ajustó para el iPod conectado. Selección de un intervalo de reproducción aleatorio (shuffle) para desplazarse entre las si1 Pulse 5/ guientes opciones: ! SNG – Reproduce canciones siguiendo un orden aleatorio dentro de la lista. ! ALB – Reproduce canciones siguiendo un orden aleatorio dentro del álbum. ! OFF – No se reproduce en orden aleatorio. Reproducción de todas las canciones en orden aleatorio (shuffle all) para activar la 1 Mantenga presionado 5/ función de reproducción de todas las canciones en orden aleatorio (shuffle all). ! Para desactivar la reproducción de todas las canciones en orden aleatorio, seleccione OFF en reproducción aleatoria. Para más información, consulte Selección de un intervalo de reproducción aleatorio (shuffle) en la página 66. Pausa de la reproducción 1 Pulse 4/PAUSE para pausar o reanudar. Mejora del audio comprimido y restauración del sonido óptimo (Sound Retriever) 1 Pulse 3/S.Rtrv para desplazarse entre: 1—2—OFF (desactivado) 1 es efectivo para tasas de compresión baja, y 2 para tasas de compresión alta. 66 Durante el uso de la unidad Reproducción de canciones relacionadas con la canción que se está reproduciendo Se pueden reproducir canciones de las siguientes listas: • Lista de álbumes del artista que se está reproduciendo • Lista de canciones del álbum que se está reproduciendo • Lista de álbumes del género que se está reproduciendo 1 Mantenga pulsado para cambiar al modo de reproducción de enlace. 2 Haga girar M.C. para cambiar el modo y pulse para seleccionarlo. ! ARTIST – Reproduce un álbum del artista que se está reproduciendo. ! ALBUM – Reproduce una canción del álbum que se está reproduciendo. ! GENRE – Reproduce un álbum del género que se está reproduciendo. La canción o el álbum seleccionado se reproducirá después de la canción que se esté reproduciendo en ese momento. Notas ! Se puede cancelar la canción o el álbum seleccionado mediante funciones diferentes a la búsqueda de enlace (p. ej., avance rápido y retroceso). ! Según la canción seleccionada, pueden cortarse el final de la canción que se esté reproduciendo o el principio de la canción o del álbum seleccionados. Uso de la función iPod de la unidad desde el iPod La función iPod de esta unidad se puede controlar desde el iPod conectado. CONTROL iPod/CTRL iPod no es compatible con los siguientes modelos de iPod: ! iPod nano 1ª generación ! iPod con vídeo % Pulse BAND/ control. ! AUDIO BOOK no está disponible cuando se selecciona CONTROL iPod/CTRL iPod en modo de control. Para más información, consulte Uso de la función iPod de la unidad desde el iPod en la página 66. para cambiar el modo de ! CONTROL iPod/CTRL iPod – La función iPod de esta unidad se puede utilizar desde el iPod conectado. ! CONTROL AUDIO/CTRL AUDIO – La función iPod de esta unidad se puede controlar desde esta unidad. Solo para DEH-2600UI También puede cambiar el ajuste de salida presionando iPod. Notas ! Al cambiar el modo de control a CONTROL iPod/CTRL iPod, se pausa la reproducción de la canción. Utilice el iPod para reanudar la reproducción. ! Las siguientes operaciones estarán disponibles en esta unidad aunque se ajuste el modo de control en CONTROL iPod/CTRL iPod. — Pausa — Avance rápido/retroceso — Selección de una canción (capítulo) ! El volumen solo se puede controlar desde esta unidad. AUDIO BOOK (velocidad del audiolibro) 1 Pulse M.C. para mostrar el modo de ajuste. 2 Gire M.C. para seleccionar su ajuste favorito. ! FASTER – Reproducción con velocidad superior a la normal ! NORMAL – Reproducción con velocidad normal ! SLOWER – Reproducción con velocidad inferior a la normal S.RTRV (recuperador de sonido) 1 Pulse M.C. para seleccionar el ajuste deseado. Para obtener más información, consulte Mejora del audio comprimido y restauración del sonido óptimo (Sound Retriever) en la página 66. Uso de las aplicaciones del dispositivo conectado Puede utilizar la unidad para reproducir y controlar las pistas en aplicaciones de iPhone o simplemente para reproducir música. Ajustes de funciones 1 Pulse M.C. para acceder al menú principal. 2 Gire M.C. para cambiar la opción de menú y pulse para seleccionar FUNCTION. 3 Gire M.C. para seleccionar la función. Una vez seleccionado, se pueden ajustar las siguientes funciones. Es <QRD3200-A>66 Black plate (67,1) Sección Durante el uso de la unidad Información acerca de la compatibilidad de dispositivos conectados A continuación se muestra información detallada acerca de las terminales necesarias para utilizar la aplicación para iPhone en esta unidad. Para usuarios de iPhone ! Esta función es compatible tanto con iPhone como con iPod touch. ! El dispositivo tiene un iOS 5.0 o superior. Notas ! Compruebe en nuestra página web la lista de las aplicaciones de iPhone compatibles con esta unidad. ! Pioneer no se responsabiliza de cualquier problema que pueda surgir a causa de un contenido incorrecto o defectuoso de la aplicación. ! El contenido y funcionamiento de las aplicaciones compatibles son responsabilidad de los proveedores de las mismas. Ajustes de funciones Procedimiento de inicio para usuarios de iPhone 3 Gire M.C. para seleccionar la función. Una vez seleccionado, se pueden ajustar las siguientes funciones. 1 Conecte un iPhone a una salida USB. 2 Cambie la fuente a APP. 3 Inicie la aplicación en el iPhone e inicie la reproducción. Funcionamiento básico Selección de una pista 1 Pulse c o d. 1 Pulse M.C. para acceder al menú principal. 2 Gire M.C. para cambiar la opción de menú y pulse para seleccionar FUNCTION. FADER (ajuste de ecualizador) 1 Pulse M.C. para pausar o reanudar. 1 Pulse M.C. para mostrar el modo de ajuste. 2 Gire M.C. para ajustar el balance entre los altavoces delanteros/traseros. S.RTRV (recuperador de sonido) 1 Pulse M.C. para seleccionar el ajuste deseado. 1—2—OFF (desactivado) 1 es efectivo para tasas de compresión baja, y 2 para tasas de compresión alta. Ajustes de audio Pausa de la reproducción 1 Pulse BAND/ para pausar o reanudar. 1 Pulse M.C. para acceder al menú principal. Selección de la información de texto deseada 1 Pulse DISP para desplazarse entre las siguientes opciones: ! TRACK INFO (título de la pista/nombre del artista/título del álbum) ! APP NAME (nombre de la aplicación) ! ELAPSED TIME (tiempo de reproducción) ! CLOCK (nombre de la fuente y reloj) ! SPEANA (analizador de espectro) ! SUB.W y SUB.W CTRL no están disponibles cuando se selecciona REAR/REAR en SP-P/O MODE. Para más información, consulte SP-P/O MODE (ajuste de la salida posterior y del preamplificador) en la página 70. ! SUB.W CTRL no está disponible cuando se selecciona SUB.W en OFF. Para más información, consulte SUB.W (ajuste de subgraves activado/desactivado) en la página 68. ! SLA no está disponible si se ha seleccionado FM como fuente. PAUSE (pausar) Avance rápido o retroceso 1 Mantenga pulsado c o d. Cambio de la visualización 02 BALANCE (ajuste del balance) 1 Pulse M.C. para mostrar el modo de ajuste. 2 Gire M.C. para ajustar el balance de los altavoces izquierdo o derecho. Español Importante El uso de aplicaciones de terceros puede implicar o necesitar la puesta a disposición de información de identificación personal, bien mediante la creación de una cuenta de usuario o de algún otro modo, y, para ciertas aplicaciones, la puesta a disposición de datos de geoubicación. TODAS LAS APLICACIONES DE TERCEROS SON RESPONSABILIDAD EXCLUSIVA DE LOS PROVEEDORES, INCLUIDAS SIN LIMITACIÓN LA RECOPILACIÓN Y LA SEGURIDAD DE LOS DATOS DE USUARIO Y LAS PRÁCTICAS DE PRIVACIDAD. AL ACCEDER A APLICACIONES DE TERCEROS, USTED SE MANIFIESTA DE ACUERDO EN REVISAR LOS TÉRMINOS DE SERVICIO Y LAS POLÍTICAS DE PRIVACIDAD DE LOS PROVEEDORES. SI NO ESTÁ DE ACUERDO CON LOS TÉRMINOS O LAS POLÍTICAS DE ALGÚN PROVEEDOR O NO CONSIENTE EL USO DE DATOS DE GEOUBICACIÓN DONDE SEA APLICABLE, NO UTILICE ESTAS APLICACIONES DE TERCEROS. Durante el uso de la unidad EQ SETTING (recuperación de ecualizador) 2 Gire M.C. para cambiar la opción de menú y pulse para seleccionar AUDIO. 3 Gire M.C. para seleccionar la función de audio. Una vez seleccionado, se pueden ajustar las siguientes funciones de audio. ! FADER no está disponible cuando se selecciona SUB.W/SUB.W en SP-P/O MODE. Para más información, consulte SP-P/O MODE (ajuste de la salida posterior y del preamplificador) en la página 70. Es <QRD3200-A>67 67 Black plate (68,1) Sección Durante el uso de la unidad 02 1 Pulse M.C. para mostrar el modo de ajuste. 2 Gire M.C. para seleccionar el ecualizador. POWERFUL—NATURAL—VOCAL—CUSTOM1—CUSTOM2—FLAT—SUPER BASS La banda y el nivel de ecualización se pueden personalizar si se selecciona CUSTOM1 o CUSTOM2. Si selecciona CUSTOM1 o CUSTOM2, complete los pasos que se describen más abajo. Si selecciona otras opciones, pulse M.C. para volver a la pantalla anterior. ! CUSTOM1 se puede ajustar por separado para cada fuente; no obstante, USB, iPod y APP se ajustan igual automáticamente. ! CUSTOM2 es una configuración compartida que se utiliza para todas las fuentes. 3 Pulse M.C. para mostrar el modo de ajuste. 4 Pulse M.C. para desplazarse entre las siguientes opciones: Banda de ecualización—Nivel de ecualización 5 Gire M.C. para seleccionar el ajuste deseado. Banda de ecualización: 80HZ—250HZ— 800HZ—2.5KHZ—8KHZ Nivel de ecualización: +6 a –6 LOUDNESS (sonoridad) La sonoridad compensa las deficiencias en los intervalos de frecuencias bajas y altas cuando se escucha a un volumen bajo. 1 Pulse M.C. para seleccionar el ajuste deseado. OFF (desactivado)—LOW (bajo)—MID (medio)—HI (alto) SUB.W (ajuste de subgraves activado/desactivado) Esta unidad está equipada con una salida de subgraves que se puede activar o desactivar. 1 Pulse M.C. para seleccionar el ajuste deseado. NOR (fase normal)—REV (fase inversa)—OFF (subgraves desactivados) Durante el uso de la unidad Solo las frecuencias más bajas que aquellas en el intervalo seleccionado se generan por el altavoz de subgraves. 1 Pulse M.C. para mostrar el modo de ajuste. 2 Pulse M.C. para desplazarse entre las siguientes opciones: Frecuencia de corte—Nivel de salida—Nivel de pendiente Las tasas que se puedan ajustar parpadearán. 3 Gire M.C. para seleccionar el ajuste deseado. Frecuencia de corte: 50HZ—63HZ—80HZ— 100HZ—125HZ—160HZ—200HZ Nivel de salida: de –24 a +6 Nivel de pendiente: –12— –24 SLA (ajuste del nivel de fuente) LANGUAGE (idiomas múltiples) Esta función evita que el volumen cambie demasiado drásticamente cuando se cambia de fuente. ! Los ajustes se basan en el nivel de volumen de FM, que se mantiene inalterado. ! El nivel del volumen de MW/LW también se puede ajustar con esta función. ! USB, iPod y APP reciben el mismo ajuste automáticamente. 1 Pulse M.C. para mostrar el modo de ajuste. 2 Gire M.C. para ajustar el volumen de la fuente. Gama de ajuste: de +4 a –4 Esta unidad puede mostrar la información de texto de un archivo de audio comprimido incluso para aquella información integrada en inglés, ruso o turco. ! Si el idioma integrado y el idioma seleccionado no coinciden, puede que la información de texto no se muestre correctamente. ! Es posible que algunos caracteres no se visualicen correctamente. 1 Pulse M.C. para seleccionar el ajuste deseado. ENG (Inglés)—РУС (Ruso)—TUR (Turco) CLOCK SET (ajuste del reloj) BASS BOOST (intensificación de graves) Menú del sistema 1 Pulse M.C. para mostrar el modo de ajuste. 2 Gire M.C. para seleccionar el nivel que desee. Se visualiza 0 a +6 mientras se aumenta o disminuye el nivel. Importante PW SAVE (ahorro de energía) se cancela si la batería del vehículo se desconecta, y se debe activar de nuevo cuando se vuelva a conectar la batería. Dependiendo de los métodos de conexión, cuando PW SAVE (ahorro de energía) está desactivado, la unidad puede seguir obteniendo energía de la batería si la llave de encendido de su vehículo no tiene posición ACC (accesorio). HPF SETTING (ajuste del filtro de paso alto) Utilice esta función si desea escuchar solo sonidos de alta frecuencia. Solamente se emiten por los altavoces frecuencias más altas que el corte del filtro de paso alto (HPF). 1 Pulse M.C. para mostrar el modo de ajuste. 2 Pulse M.C. para desplazarse entre las siguientes opciones: Frecuencia de corte—Nivel de pendiente 3 Gire M.C. para seleccionar el ajuste deseado. Frecuencia de corte: OFF—50HZ—63HZ— 80HZ—100HZ—125HZ—160HZ—200HZ Nivel de pendiente: –12— –24 1 Pulse M.C. para acceder al menú principal. 2 Gire M.C. para cambiar la opción de menú y pulse para seleccionar SYSTEM. 3 Gire M.C. para seleccionar la función del menú del sistema. Una vez seleccionado, se pueden ajustar las siguientes funciones del menú de sistema. ! INFO DISPLAY y BRIGHTNESS no están disponibles para DEH-2600UI. ! MUTE MODE no está disponible para DEHX3600UI. 1 Pulse M.C. para mostrar el modo de ajuste. 2 Pulse M.C. para seleccionar el segmento de la pantalla del reloj que desea ajustar. Hora—Minuto 3 Gire M.C. para ajustar el reloj. 12H/24H (anotación de la hora) 1 Pulse M.C. para seleccionar el ajuste deseado. 12H (reloj de 12 horas)—24H (reloj de 24 horas) INFO DISPLAY (información secundaria) El tipo de información de texto que se visualiza en la sección de información secundaria se puede cambiar. 1 Pulse M.C. para mostrar el modo de ajuste. 2 Gire M.C. para seleccionar el ajuste deseado. SPEANA—LEVEL METER—SOURCE—CLOCK —OFF ! La barra de señales muestra SPEANA o LEVEL METER cuando la fuente está seleccionada en RADIO. AUTO PI (búsqueda PI automática) SUB.W CTRL (ajuste de subgraves) 68 Es <QRD3200-A>68 Black plate (69,1) Sección Durante el uso de la unidad La unidad puede buscar automáticamente una emisora diferente con el mismo programa, incluso durante la recuperación de emisoras presintonizadas. 1 Pulse M.C. para activar o desactivar la función de búsqueda PI automática. AUX (entrada auxiliar) Active este ajuste si utiliza un dispositivo auxiliar conectado a esta unidad. 1 Pulse M.C. para activar o desactivar AUX. DIMMER (atenuador de luz) 1 Pulse M.C. para activar o desactivar el atenuador de luz. ! También se puede cambiar la configuración de atenuador de luz manteniendo pulsado /DIMMER. Puede utilizar este ajuste para modificar el brillo de la pantalla. La variedad de ajustes disponibles para BRIGHTNESS variarán dependiendo si DIMMER está activado o no. Para más información, consulte DIMMER (atenuador de luz) en la página 69. 1 Pulse M.C. para mostrar el modo de ajuste. 2 Gire M.C. para seleccionar el ajuste deseado. DIMMER activado: de 1 a 4 DIMMER desactivado: de 1 a 5 MUTE MODE (modo de silencio) El sonido proveniente de este sistema se silencia o atenúa automáticamente cuando se recibe una señal desde un equipo con función de silenciamiento. 1 Pulse M.C. para mostrar el modo de ajuste. 2 Gire M.C. para seleccionar el ajuste deseado. ! MUTE – Silenciamiento ! 20dB ATT – Atenuación (20dB ATT tiene un efecto más potente que 10dB ATT) ! 10dB ATT – Atenuación PW SAVE (ahorro de energía) La activación de esta función le permite reducir el consumo de la batería. ! Cuando esta función está activada, la única operación que se permite es el encendido de la fuente. 1 Pulse M.C. para activar o desactivar el ahorro de energía. Selección de la iluminación en color Solo para DEH-X3600UI Menú de funciones de iluminación 1 Pulse M.C. para acceder al menú principal. 2 Gire M.C. para visualizar ILLUMI y púlselo para realizar la selección. 3 Gire M.C. para seleccionar la función de iluminación. Una vez seleccionado, se pueden ajustar las siguientes funciones de audio. KEY COLOUR (configuración del color de la sección de teclas) Es posible elegir los colores de las teclas de esta unidad. 1 Pulse M.C. para mostrar el modo de ajuste. 2 Gire M.C. para seleccionar el color de la iluminación. ! Colores predefinidos (de WHITE a BLUE) ! SCAN (ver una variedad de colores automáticamente) ! CUSTOM (color de iluminación personalizado) DISP COLOUR (configuración del color de la sección de pantalla) Es posible elegir los colores de la pantalla de esta unidad. 1 Pulse M.C. para mostrar el modo de ajuste. 2 Gire M.C. para seleccionar el color de la iluminación. ! Colores predefinidos (de WHITE a BLUE) ! SCAN (ver una variedad de colores automáticamente) ! CUSTOM (color de iluminación personalizado) BOTH COLOUR (configuración del color de pantalla y teclado) Es posible elegir los colores de las teclas y de la pantalla de esta unidad. 1 Pulse M.C. para mostrar el modo de ajuste. 2 Gire M.C. para seleccionar el color de la iluminación. ! Colores predefinidos (de WHITE a BLUE) ! SCAN (ver una variedad de colores automáticamente) ILLUMI FX (modo de efecto de iluminación) En este modo, se puede ver un efecto de iluminación en la pantalla en diferentes momentos, como cuando se enciende/apaga la alimentación ACC o cuando se introduce o se expulsa un CD. 1 Pulse M.C. para activar o desactivar ILLUMI FX. ! El efecto de iluminación se activa cuando se enciende/apaga la alimentación ACC independientemente de si el ajuste ILLUMI FX está activado o desactivado. Nota Para seleccionar el color personalizado que ha guardado, seleccione CUSTOM. 02 Personalización de la iluminación en color Es posible crear iluminación en colores personalizados tanto para KEY COLOUR como para DISP COLOUR. 1 Pulse M.C. para acceder al menú principal. 2 Gire M.C. para visualizar ILLUMI y púlselo para realizar la selección. 3 Gire M.C. para visualizar KEY COLOUR o DISP COLOUR. Púlselo para realizar la selección. 4 Mantenga pulsado M.C. hasta que el ajuste de la iluminación personalizada aparezca en la pantalla. Español BRIGHTNESS (ajuste de brillo) Durante el uso de la unidad 5 Pulse M.C. para seleccionar el color primario. R (rojo)—G (verde)—B (azul) 6 Gire M.C. para ajustar el nivel de brillo. Gama de ajuste: de 0 a 60 # No puede seleccionar un nivel por debajo de 20 en R (rojo), G (verde) y B (azul) a la vez. # Puede realizar la misma operación en otros colores. Nota No es posible crear un color de iluminación personalizado mientras está seleccionado SCAN. Sobre MIXTRAX Solo para DEH-X3600UI La tecnología MIXTRAX se utiliza para introducir diversos efectos de sonido entre las canciones, lo que permite experimentar la música como una mezcla ininterrumpida que se complementa con una sucesión de efectos visuales. Es <QRD3200-A>69 69 Black plate (70,1) Sección Durante el uso de la unidad 02 Notas ! Según el archivo/canción, es posible que los efectos de sonido no estén disponibles. ! Apague MIXTRAX si los efectos visuales que produce tienen efectos adversos en la conducción. Consulte Operaciones con el botón MIXTRAX en la página 64. Menú MIXTRAX 1 Pulse M.C. para acceder al menú principal. 2 Gire M.C. para cambiar la opción de menú y pulse para seleccionar MIXTRAX. 3 Gire M.C. para seleccionar la función MIXTRAX. Una vez seleccionado, pueden ajustarse las siguientes funciones de MIXTRAX. La función está activada cuando MIXTRAX está activado. SHORT PLAYBCK (modo de reproducción corto) Se puede seleccionar la duración del tiempo de reproducción. 1 Pulse M.C. para mostrar el modo de ajuste. 2 Gire M.C. para seleccionar el ajuste deseado. 1.0 MIN (1,0 minutos)—1.5 MIN (1,5 minutos) —2.0 MIN (2,0 minutos)—2.5 MIN (2,5 minutos)—3.0 MIN (3,0 minutos)—OFF (desactivado) FLASH AREA (área de parpadeo) Puede seleccionar áreas para el parpadeo de colores. 1 Pulse M.C. para mostrar el modo de ajuste. 2 Gire M.C. para seleccionar el ajuste deseado. KEY/DISPLAY (tecla y pantalla)—KEY (tecla) —OFF (desactivado) ! Si se selecciona OFF, el color ajustado en ILLUMI se utiliza como color de pantalla. FLASH PATTERN (patrón de parpadeo) 70 Durante el uso de la unidad El color parpadeante y la visualización de los efectos especiales de MIXTRAX cambian si se efectúan cambios en los niveles de graves y de sonido. 1 Pulse M.C. para mostrar el modo de ajuste. 2 Gire M.C. para seleccionar el ajuste deseado. ! SOUND LEVEL 1 a SOUND LEVEL 6 – El patrón de parpadeo cambia de acuerdo con el nivel de sonido. Seleccione el modo deseado. ! LOW PASS 1 a LOW PASS 6 – El patrón de parpadeo cambia de acuerdo con el nivel de graves. Seleccione el modo deseado. ! RANDOM 1 – El patrón de parpadeo cambia aleatoriamente de acuerdo con el modo de nivel de sonido y el modo de paso bajo. ! RANDOM 2 – El patrón de parpadeo cambia aleatoriamente de acuerdo con el modo de nivel de sonido. ! RANDOM 3 – El patrón de parpadeo cambia aleatoriamente de acuerdo con el modo de paso bajo. DISPLAY FX (efecto de pantalla) La visualización de los efectos especiales MIXTRAX se puede activar o desactivar. 1 Pulse M.C. para seleccionar el ajuste deseado. ON (visualización de los efectos especiales MIXTRAX)—OFF (visualización normal) CUT IN FX (efecto de interrupción manual) Puede activar o desactivar los efectos de MIXTRAX mientras cambia de pista manualmente. 1 Pulse M.C. para seleccionar el ajuste deseado. ON (activado)—OFF (desactivado) Menú inicial 1 Mantenga pulsado SRC/OFF hasta que se apague la unidad. 2 Mantenga pulsado SRC/OFF hasta que aparezca el menú principal en la pantalla. 3 Gire M.C. para cambiar la opción de menú y pulse para seleccionar INITIAL. 4 Gire M.C. para seleccionar la función del menú de inicio. Una vez seleccionado, se pueden ajustar las siguientes funciones del menú inicial. FM STEP (paso de sintonía de FM) 1 Pulse M.C. para seleccionar el paso de sintonía de FM. 100 (100 kHz)—50 (50 kHz) SP-P/O MODE (ajuste de la salida posterior y del preamplificador) La salida de cables de altavoces traseros y la salida RCA de esta unidad se puede usar para conectar altavoces de gama completa o de subgraves. Seleccione la opción adecuada para su conexión. 1 Pulse M.C. para mostrar el modo de ajuste. 2 Gire M.C. para seleccionar el ajuste deseado. ! REAR/SUB.W – Seleccione cuando haya conectado un altavoz de gama completa a la salida de cables de altavoces traseros y un subgrave a la salida RCA. ! SUB.W/SUB.W – Seleccione cuando haya conectado un subgrave directamente a la salida de cables de altavoces traseros, sin ningún amplificador auxiliar, y un subgrave a la salida RCA. ! REAR/REAR – Seleccione cuando exista un altavoz de gama completa conectado a la salida de cables de los altavoces traseros y a la salida RCA. Si hay un altavoz de gama completa conectado a la salida de cables de los altavoces traseros y la salida RCA no se utiliza, podrá seleccionar REAR/SUB.W o REAR/REAR. Menú del sistema 1 Mantenga pulsado SRC/OFF hasta que se apague la unidad. 2 Mantenga pulsado SRC/OFF hasta que aparezca el menú principal en la pantalla. 3 Gire M.C. para cambiar la opción de menú y pulse para seleccionar SYSTEM. 4 Gire M.C. para seleccionar la función del menú del sistema. Para obtener más información, consulte Menú del sistema en la página 68. Uso de una fuente AUX 1 Inserte el miniconector estéreo en el conector de entrada AUX. 2 Pulse SRC/OFF para seleccionar AUX como fuente. Nota No se puede seleccionar AUX si no se activa el ajuste auxiliar. Para obtener más información, consulte AUX (entrada auxiliar) en la página 69. Cambio de la visualización Selección de la información de texto deseada 1 Pulse DISP para desplazarse entre las siguientes opciones: ! Nombre de la fuente ! Nombre de la fuente y reloj Si aparece un display no deseado Desactive el display no deseado mediante los pasos que se indican a continuación. Es <QRD3200-A>70 Black plate (71,1) Sección Durante el uso de la unidad Instalación 02 03 2 Gire M.C. para cambiar la opción de menú y pulse para seleccionar SYSTEM. 3 Gire M.C. para visualizar DEMO OFF y púlselo para realizar la selección. 5 Pulse M.C. para seleccionarlo. F O T Función de silenciamiento Nota La fuente de teléfono se visualiza cuando recibe una llamada. Posición ACC Sin posición ACC ! El uso de esta unidad en unas condiciones distintas de las indicadas a continuación podría causar incendios o fallos de funcionamiento. — Vehículos con una batería de 12 voltios y conexión a tierra negativa. — Altavoces con 50 W (valor de salida) y 4 W a 8 W (valor de impedancia). ! Para evitar cortocircuitos, sobrecalentamiento o fallos de funcionamiento, asegúrese de seguir las siguientes instrucciones. — Desconecte el terminal negativo de la batería antes de la instalación. — Asegure el cableado con pinzas para cables o cinta adhesiva. Envuelva con cinta adhesiva las partes en contacto con piezas metálicas para proteger el cableado. — Mantenga los cables alejados de las partes móviles, como la palanca de cambios y los raíles de los asientos. — Coloque todos los cables alejados de lugares calientes, como cerca de la salida del calefactor. — No conecte el cable amarillo a la batería pasándolo a través del orificio hasta el compartimiento del motor. — Cubra con cinta aislante los conectores de cables que queden desconectados. — No acorte ningún cable. — Nunca corte el aislamiento del cable de alimentación de esta unidad para compartir la corriente con otros equipos. La capacidad de corriente del cable es limitada. — Utilice un fusible con la intensidad nominal indicada. — Nunca conecte el cable negativo de los altavoces directamente a tierra. — Nunca empalme los cables negativos de varios altavoces. ! Cuando se enciende esta unidad, se emite una señal de control a través del cable azul/ blanco. Conecte este cable al mando a distancia del sistema de un amplificador de potencia externo o al terminal de control del relé de la antena automática del vehículo (máx. 300 mA 12 V cc). Si el vehículo posee una antena integrada en el cristal del parabrisas, conéctela al terminal de la fuente de alimentación del amplificador de la antena. ! Nunca conecte el cable azul/blanco al terminal de potencia de un amplificador de potencia externo, ni al terminal de potencia de la antena automática, de lo contrario, puede descargarse la batería o producirse un fallo de funcionamiento. ! El cable negro es el cable a tierra. Los cables a tierra de esta unidad y de otros productos (especialmente productos de alta tensión, como amplificadores de potencia) se deben conectar por separado, de lo contrario, puede producirse un incendio o un fallo de funcionamiento si se desconectan por accidente. Español Solo para DEH-X3600UI Esta función está habilitada si hay un dispositivo equipado con una función de silenciamiento conectada a esta unidad. El sonido se silencia automáticamente si realiza o recibe llamadas telefónicas con un dispositivo equipado con una función de silenciamiento. STAR Pulse M.C. para cambiar a YES. Importante ! Cuando esta unidad se instale en un vehículo sin posición ACC (accesorio) en la llave de encendido, el cable rojo se debe conectar al terminal que pueda detectar la operación de la llave de encendido. De lo contrario, puede descargarse la batería. N 4 Conexiones OF 1 Pulse M.C. para acceder al menú principal. Esta unidad 1 5 6 2 34 7 1 Entrada del cable de alimentación Es <QRD3200-A>71 71 Black plate (72,1) Sección Instalación 03 Instalación 2 Conector de entrada AUX2 (conector estéreo de 3,5 mm) (solo DEH-X3600UI) Un conector de entrada dedicado diseñado exclusivamente para utilizarse con dispositivos equipados con una función de silenciamiento. 3 Salida trasera o salida de subgraves 4 Salida delantera 5 Entrada de la antena 6 Fusible (10 A) 7 Entrada remota conectada Es posible conectar un adaptador de mando a distancia físicamente conectado (se vende por separado). Cable de alimentación 3 4 5 2 6 3 5 7 1 4 6 8 a 9 e b c d 1 A la toma del cable de alimentación 2 Según el tipo de vehículo, las funciones de 3 y 5 pueden ser diferentes. En este caso, conecte 4 a 5 y 6 a 3. 3 Amarillo Reserva (o accesorio) 72 4 Amarillo Conectar al terminal de alimentación constante de 12 V. 5 Rojo Accesorio (o reserva) 6 Rojo Conectar al terminal controlado por la llave de encendido (12 V CC). 7 Conecte entre sí los cables del mismo color. 8 Negro (Toma de tierra del chasis) 9 Azul/blanco La posición de las patillas del conector ISO será diferente según el tipo de vehículo. Conecte 9 y b cuando la patilla 5 sea del tipo control de antena. En otro tipo de vehículo, no se deben conectar nunca 9 y b. a Azul/blanco Conectar al terminal de control del sistema del amplificador de potencia (máx. 300 mA 12 V CC). b Azul/blanco Conectar al terminal de control del relé de la antena automática (máx. 300 mA 12 V CC). c Amarillo/negro Si utiliza un equipo con función de silenciamiento, conecte este cable con el cable de silenciamiento de audio de ese equipo. En caso contrario, mantenga el cable de silenciamiento de audio sin ninguna conexión. d Cables de altavoces Blanco: delantero izquierdo + Blanco/negro: delantero izquierdo * Gris: delantero derecho + Gris/negro: delantero derecho * Verde: trasero izquierdo + o altavoz de subgraves + Verde/negro: trasero izquierdo * o altavoz de subgraves * Violeta: trasero derecho + o altavoz de subgraves + Violeta/negro: trasero derecho * o altavoz de subgraves * e Conector ISO En algunos vehículos, el conector ISO puede estar dividido en dos. En este caso, asegúrese de conectar los dos conectores. Notas ! Cambie el menú inicial de esta unidad. Consulte SP-P/O MODE (ajuste de la salida posterior y del preamplificador) en la página 70. La salida de graves de esta unidad es monoaural. ! Al usar un altavoz de subgraves de 70 W (2 W), conecte el mismo a los cables violeta y violeta/negro de esta unidad. No conecte nada al cable verde ni al verde/negro. Amplificador de potencia (se vende por separado) Realice estas conexiones cuando utilice el amplificador opcional. 2 — Pueda interferir con el manejo del vehículo. — Pueda lesionar a un pasajero como consecuencia de un frenazo brusco. ! El láser semiconductor se dañará si se sobrecalienta. Instale esta unidad alejada de zonas que alcancen altas temperaturas, como cerca de la salida del calefactor. ! Se logra un rendimiento óptimo si la unidad se instala en un ángulo inferior a 60°. 60° 4 5 3 2 1 7 Importante ! Compruebe todas las conexiones y sistemas antes de la instalación final. ! No utilice piezas no autorizadas, ya que pueden causar fallos de funcionamiento. ! Consulte a su distribuidor si para la instalación es necesario taladrar orificios o hacer otras modificaciones al vehículo. ! No instale esta unidad en un lugar donde: 3 1 5 Instalación 6 7 1 Control remoto del sistema Conexión a cable azul/blanco. 2 Amplificador de potencia (se vende por separado) 3 Conectar con cables RCA (se venden por separado) 4 Salida delantera 5 Altavoz delantero 6 A la salida trasera o salida de subgraves 7 Altavoz trasero o altavoz de subgraves ! Cuando instale, para asegurar la dispersión apropiada del calor durante el uso de esta unidad, asegúrese de dejar un amplio espacio por detrás del panel trasero y enrolle los cables sueltos de modo que no bloqueen las aberturas de ventilación. Deje un amplio espacio 5 cm 5 cm Es <QRD3200-A>72 Black plate (73,1) Sección Instalación Instalación 3 Montaje delantero/posterior de DIN Montaje trasero DIN Esta unidad puede instalarse correctamente tanto si se realiza una instalación frontal o trasera. En la instalación, emplee piezas disponibles en el mercado. 1 Determine la posición correcta, de modo que los orificios del soporte y del lateral de la unidad coincidan. 03 Extraiga la unidad del salpicadero. Montaje delantero DIN 1 Inserte el manguito de montaje en el salpicadero. Si realiza la instalación en un espacio poco profundo, utilice el manguito de montaje suministrado. Si hay suficiente espacio, utilice el manguito de montaje que venía con el vehículo. Retirada y colocación del panel delantero 2 Apriete los dos tornillos en cada lado. 3 1 2 Fije el manguito de montaje utilizando un destornillador para doblar las pestañas metálicas (90°) y colocarlas en su lugar. Puede extraer el panel delantero para proteger la unidad contra robo. Para obtener más información, consulte Extracción del panel frontal y Colocación del panel delantero en la página 62. 2 Español 1 Tornillo con rosca cortante (5 mm × 8 mm) 2 Carcasa 3 Salpicadero o consola 1 Extracción de la unidad 1 Retire el anillo de guarnición. 2 1 Salpicadero 2 Manguito de montaje # Asegúrese de que la unidad esté firmemente instalada en su lugar. Una instalación inestable puede causar saltos en el audio o un mal funcionamiento de la unidad. 1 Anillo de guarnición 2 Pestaña con muesca ! Libere el panel delantero para acceder más fácilmente al anillo de guarnición. ! Al volver a colocar el anillo de guarnición, oriente hacia abajo la pestaña con muesca. 2 Inserte en ambos lados de la unidad las llaves de extracción provistas hasta que se escuche un ligero chasquido. Es <QRD3200-A>73 73 Black plate (74,1) Apéndice Información adicional Información adicional Solución de problemas Mensajes de error Los síntomas se escriben en negrita y las causas en escritura normal sin sangría. El texto normal con sangría se utiliza para indicar las acciones que se han de tomar. Anote el mensaje de error antes de contactar con su concesionario o con el servicio técnico oficial de Pioneer más cercano. Los síntomas se escriben en negrita y las causas en escritura normal sin sangría. El texto normal con sangría se utiliza para indicar las acciones que se han de tomar. La pantalla vuelve automáticamente a la visualización normal. No ha realizado ninguna operación en aproximadamente 30 segundos. Realice la operación de nuevo. El intervalo de repetición de reproducción cambia de manera inesperada. Dependiendo del intervalo de repetición de reproducción, el intervalo seleccionado puede cambiar cuando se selecciona otra carpeta o pista o cuando se utilice el avance rápido/retroceso. Seleccione de nuevo el intervalo de repetición de reproducción. Comunes AMP ERROR La unidad no funciona o la conexión de los altavoces es incorrecta; se activa el circuito de protección. Compruebe la conexión de los altavoces. Si el mensaje no desaparece aun después de apagar y volver a encender el motor, contacte con su distribuidor o con el Servicio técnico oficial Pioneer. NO XXXX aparece cuando se cambia una pantalla (NO TITLE, por ejemplo). No hay información de texto incorporada. Cambie la pantalla o reproduzca otra pista/ archivo. La unidad no funciona correctamente. Hay una interferencia. Está utilizando un dispositivo, como un teléfono móvil, que puede causar interferencias. Aleje de la unidad los dispositivos eléctricos que puedan estar causando interferencias. 74 Formato de CD no compatible. Sustituya el disco. FORMAT READ A veces se produce un retraso entre el comienzo de la reproducción y la emisión del sonido. Espere hasta que el mensaje desaparezca y oiga sonido. ERROR-07, 11, 12, 17, 30 El disco insertado no contiene archivos reproducibles. Sustituya el disco. El disco insertado contiene archivos protegidos con DRM. Los archivos protegidos se saltan. Todos los archivos del disco insertado tienen DRM integrado. Sustituya el disco. Dispositivo de almacenamiento USB o iPod ERROR-07, 10, 11, 12, 15, 17, 30, A0 FORMAT READ Se ha producido un error eléctrico o mecánico. Coloque la llave de encendido del automóvil en la posición de desactivación y luego pase de nuevo a activación, o cambie a una fuente diferente y, a continuación, vuelva a activar el reproductor de CD. A veces se produce un retraso entre el comienzo de la reproducción y la emisión del sonido. Espere hasta que el mensaje desaparezca y oiga sonido. ERROR-15 El disco insertado aparece en blanco. Sustituya el disco. SKIPPED El dispositivo de almacenamiento USB conectado tiene archivos protegidos con DRM. Los archivos protegidos se saltan. PROTECT Todos los archivos en el dispositivo de almacenamiento USB conectado tienen DRM integrado. Cambie el dispositivo de almacenamiento USB. SKIPPED El disco está sucio. Limpie el disco. El disco está rayado. Sustituya el disco. El dispositivo de almacenamiento USB conectado tiene la seguridad activada. Para desactivar la seguridad, siga las instrucciones del dispositivo de almacenamiento USB. NO AUDIO PROTECT Reproductor de CD No se reproduce una subcarpeta. No se pueden reproducir las subcarpetas cuando se selecciona FLD (repetición de carpeta). Seleccione otro intervalo de repetición de reproducción. ERROR-23 NO AUDIO No hay canciones. Transfiera los archivos de audio al dispositivo de almacenamiento USB y conéctelo. N/A USB El dispositivo USB conectado no es compatible con esta unidad. ! Conecte un dispositivo que cumpla con la clase de almacenamiento masivo USB. ! Desconecte su dispositivo y sustitúyalo por un dispositivo de almacenamiento USB compatible. CHECK USB El conector USB o el cable USB está cortocircuitado. Compruebe que el conector USB o el cable USB no esté enganchado en algo ni dañado. CHECK USB El dispositivo de almacenamiento USB consume más de la corriente máxima admisible. Desconecte el dispositivo de almacenamiento USB y no lo utilice. Coloque la llave de encendido del automóvil en posición OFF, luego en ACC u ON y, a continuación, conecte únicamente dispositivos de almacenamiento USB compatibles. Es <QRD3200-A>74 Black plate (75,1) Apéndice Información adicional Información adicional CHECK USB NOT FOUND El iPod funciona correctamente pero no se carga. Compruebe que el cable de conexión del iPod no esté cortocircuitado (p. ej., atrapado entre objetos metálicos). Una vez confirmado, cambie la llave de encendido del automóvil a la posición de desactivación y luego pase de nuevo a activación; o bien desconecte una vez el iPod y conéctelo de nuevo. No hay canciones relacionadas. Transfiera canciones al iPod. ERROR-19 La aplicación no se ha iniciado aún. Siga las instrucciones que aparecen en la pantalla. Pautas para el manejo Discos y reproductor Utilice únicamente discos que tengan uno de estos dos logotipos: Fallo del iPod. Desconecte el cable del iPod. Una vez que aparezca el menú principal del iPod, vuelva a conectar el iPod y reinícielo. ERROR-23 El dispositivo de almacenamiento USB no está formateado con FAT12, FAT16 ni FAT32. El dispositivo de almacenamiento USB debe formatearse con FAT12, FAT16 o FAT32. ERROR-16 La versión de firmware del iPod es antigua. Actualice la versión del iPod. Fallo del iPod. Desconecte el cable del iPod. Una vez que aparezca el menú principal del iPod, vuelva a conectar el iPod y reinícielo. Utilice discos de 12 cm. Utilice sólo discos convencionales y completamente circulares. ! Discos que no sean CD ! Discos dañados, incluido discos que estén partidos, desconchados o deformados ! Discos CD-R/RW que no se han finalizado Al usar discos de superficie imprimible para etiquetas, lea primero las instrucciones y las advertencias de los discos. Es posible que algunos discos no puedan insertarse ni expulsarse. La utilización de este tipo de discos puede dañar el equipo. No pegue etiquetas compradas por separado ni otro tipo de material a los discos. ! Los discos podrían combarse y no podrán reproducirse. ! Las etiquetas pueden despegarse durante la reproducción, evitando la expulsión del disco y causando de este modo daños en el equipo. No toque la superficie grabada de los discos. Cuando no utilice los discos, guárdelos en sus cajas. Dispositivo de almacenamiento USB No fije etiquetas, no escriba ni aplique sustancias químicas en la superficie de los discos. No se admiten las conexiones a través de un concentrador USB. Para limpiar un CD, pásele un paño suave desde el centro hacia afuera. No conecte ningún otro objeto que no sea un dispositivo de almacenamiento USB. La condensación puede afectar temporalmente al rendimiento del reproductor. Deje de usarlo durante una hora aproximadamente para que se adapte a la temperatura más cálida. Además, si los discos tienen humedad, séquelos con un paño suave. Cuando conduzca, fije el dispositivo de almacenamiento USB firmemente. No deje caer el dispositivo de almacenamiento USB al suelo, ya que puede quedar atascado debajo del freno o del acelerador. Quizá no pueda reproducir algunos discos debido a sus características, formato, programas grabados, entorno de reproducción, condiciones de almacenamiento u otras causas. Las vibraciones en las carreteras pueden interrumpir la reproducción de un disco. Español Error de comunicación. Realice una de las siguientes operaciones: –Cambie la llave de encendido del automóvil a la posición de desactivación y luego pase de nuevo a activación. –Desconecte el dispositivo de almacenamiento USB. –Cambie a una fuente diferente. Después vuelva a la fuente USB. Aplicaciones START UP APP Los siguientes tipos de discos no se pueden utilizar con esta unidad: ! DualDisc ! Discos de 8 cm: Si se intenta reproducir este tipo de discos con una adaptador, la unidad puede no funcionar correctamente. ! Discos con formas extrañas Se pueden producir los siguientes problemas según el dispositivo de almacenamiento USB que se utilice. ! Las operaciones pueden variar. ! Es posible que no se reconozca el dispositivo de almacenamiento. ! Puede que los archivos no se reproduzcan correctamente. ! El dispositivo puede causar interferencias al escuchar la radio. STOP No hay canciones en la lista actual. Seleccione una lista que contenga canciones. Es <QRD3200-A>75 75 Black plate (76,1) Apéndice Información adicional iPod No deje el iPod en lugares expuestos a una temperatura elevada. Cuando conduzca, fije el iPod firmemente. No deje caer el iPod al suelo, ya que puede quedar atascado debajo del freno o del acelerador. Acerca de los ajustes del iPod ! Cuando el iPod está conectado, esta unidad desactiva el ajuste EQ (ecualizador) del iPod para mejorar la acústica; al desconectar el iPod, el EQ retoma su valor original. ! No puede desactivar la Repetición del iPod cuando utiliza esta unidad. La Repetición se cambiará automáticamente a Todo cuando el iPod esté conectado a esta unidad. La unidad no mostrará el texto incompatible guardado en el iPod. Compatibilidad con audio comprimido (disco, USB) WMA Extensión de archivo: .wma Velocidad de grabación: de 48 kbps a 320 kbps (CBR) y de 48 kbps a 384 kbps (VBR) Frecuencia de muestreo: 32 kHz, 44,1 kHz, 48 kHz Windows Mediaä Audio Professional, Lossless, Voice/DRM Stream/Stream con vídeo: no compatible MP3 76 Información adicional Frecuencia de muestreo: de 8 kHz a 48 kHz (32 kHz, 44,1 kHz, 48 kHz para énfasis) Versiones de etiqueta ID3 compatibles: 1.0, 1.1, 2.2, 2.3, 2.4 (la etiqueta ID3 versión 2.x tiene prioridad sobre la versión 1.x) Lista de reproducción M3u: no compatible MP3i (MP3 interactivo), mp3 PRO: no compatible WAV Esta unidad puede no funcionar correctamente, según la aplicación utilizada para codificar archivos WMA. Puede producirse una pequeña demora cuando se inicie la reproducción de archivos de audio que contienen datos de imágenes o archivos de audio almacenados en un dispositivo USB con numerosas jerarquías de carpetas. Reproducción de archivos protegidos por derechos de autor: no compatible Dispositivo de almacenamiento USB particionado: solo se puede reproducir la primera partición. Puede producirse cierto retraso cuando se inicie la reproducción de archivos de audio en un dispositivo de almacenamiento USB con numerosas jerarquías de carpetas. Disco PRECAUCIÓN Extensión de archivo: .wav Bits de cuantificación: 8 y 16 (LPCM), 4 (MS ADPCM) Frecuencia de muestreo: 16 kHz a 48 kHz (LPCM), 22,05 kHz y 44,1 kHz (MS ADPCM) Jerarquía de carpetas reproducibles: hasta ocho niveles (una jerarquía práctica de carpetas tiene menos de dos niveles). Carpetas reproducibles: hasta 99 Archivos reproducibles: hasta 999 ! No puede usar esta función con USB MTP. Sistema de archivos: ISO 9660 Nivel 1 y 2, Romeo, Joliet Información complementaria Reproducción multisesión: compatible Solo se pueden visualizar los primeros 32 caracteres como nombre de archivo (incluida la extensión) o nombre de carpeta. Los textos en ruso que se visualizarán en esta unidad se deben codificar con los siguientes conjuntos de caracteres: ! Unicode (UTF-8, UTF-16) ! Los conjuntos de caracteres distintos de Unicode que se usan en el entorno Windows y que están ajustados en ruso en la configuración de idiomas múltiples. Transferencia de datos en formato Packet Write: no compatible Independientemente de la longitud de la secciones en blanco que haya entre las canciones de la grabación original, los discos de audio comprimidos se reproducirán con una breve pausa entre cada canción. Dispositivo de almacenamiento USB Jerarquía de carpetas reproducibles: hasta ocho niveles (una jerarquía práctica de carpetas tiene menos de dos niveles). Extensión de archivo: .mp3 Carpetas reproducibles: hasta 500 Velocidad de grabación: de 8 kbps a 320 kbps (CBR), VBR Archivos reproducibles: hasta 15 000 ! Pioneer no garantiza la compatibilidad con todos los dispositivos de almacenamiento masivo USB y no se hace responsable de la pérdida de los datos en los reproductores multimedia, smartphones u otros dispositivos, mientras se utilicen con este producto. ! No deje discos ni dispositivos de almacenamiento USB en lugares expuestos a altas temperaturas. Compatibilidad con iPod Esta unidad solo es compatible con los siguientes modelos de iPod. Las versiones compatibles del software iPod se muestran abajo; es posible que las versiones más antiguas no sean compatibles. Fabricado para ! iPod touch (5.ª generación) ! iPod touch (4.ª generación) ! iPod touch (3.ª generación) ! iPod touch (2.ª generación) ! iPod touch (1.ª generación) ! iPod classic ! iPod con vídeo ! iPod nano (7.ª generación) ! iPod nano (6.ª generación) ! iPod nano (5.ª generación) ! iPod nano (4.ª generación) ! iPod nano (3.ª generación) ! iPod nano (2.ª generación) Es <QRD3200-A>76 Black plate (77,1) Apéndice Información adicional ! ! ! ! ! ! ! iPod nano (1.ª generación) iPhone 5 iPhone 4S iPhone 4 iPhone 3GS iPhone 3G iPhone Información adicional 01 02 1 2 03 Los usuarios de iPod con conector Lightning deberían usar el cable Lightning a USB (suministrado con el iPod). Los usuarios de iPod con el conector del Dock deberían utilizar CD-IU51. Para más información, consulte a su proveedor. 5 6 Audiolibro, podcast: compatible PRECAUCIÓN Pioneer no asume ninguna responsabilidad por la pérdida de datos en el iPod, incluso si la pérdida ocurre durante el uso de esta unidad. Secuencia de archivos de audio El usuario no puede asignar números de carpeta ni especificar secuencias de reproducción con esta unidad. 05 Nivel 1 Nivel 2 Nivel 3 Nivel 4 : carpeta : archivo de audio comprimido 01 a 05: número de carpeta 1 a 6: secuencia de reproducción Disco La secuencia de selección de carpetas u otras operaciones pueden diferir, dependiendo del software de codificación o escritura. Dispositivo de almacenamiento USB La secuencia de reproducción es la misma que la secuencia grabada en el dispositivo de almacenamiento USB. Para especificar la secuencia de reproducción, se recomienda el siguiente método. 1 Cree un nombre del archivo que incluya números que especifiquen la secuencia de reproducción (p. ej., 001xxx.mp3 y 099yyy.mp3). 2 Coloque esos archivos en una carpeta. 3 Guarde la carpeta que contiene los archivos en el dispositivo de almacenamiento USB. Sin embargo, dependiendo del entorno del sistema, tal vez no pueda especificar la secuencia de reproducción. Para reproductores de audio portátiles USB, la secuencia es diferente y depende del reproductor. D: C D: C D: C D: C D: C :А :Б :В :Г :Д : Е, Ё :Ж :З : И, Й :К :Л :М :Н :О :П :Р :С :Т :У :Ф :Х :Ц :Ч : Ш, Щ :Ъ :Ы :Ь :Э :Ю :Я D: Visualización C: Carácter Copyright y marcas registradas iTunes Apple e iTunes son marcas comerciales de Apple Inc., registradas en los EE.UU. y en otros países. MP3 La venta de este producto solo otorga una licencia para su uso privado, no comercial. No otorga ninguna licencia ni concede ningún derecho a utilizar este producto en transmisiones comerciales (es decir, lucrativas) en tiempo real (terrestres, vía satélite, por cable y/o por cualquier otro medio), transmisiones/streaming por Internet, intranets u otras redes o en otros sistemas de distribución de contenido electrónico, como por ejemplo, aplicaciones de pago por escucha (pay-audio) o audio bajo demanda (audio-on-demand). Se necesita una licencia independiente para su uso comercial. Para obtener más información, visite http://www.mp3licensing.com. WMA Windows Media es una marca registrada o una marca de fábrica de Microsoft Corporation en los Estados Unidos y/u otros países. Este producto incluye tecnología propiedad de Microsoft Corporation, y no se puede usar ni distribuir sin una licencia de Microsoft Licensing, Inc. iPod y iPhone iPhone, iPod, iPod classic, iPod nano y iPod touch son marcas comerciales de Apple Inc., registradas en los EE. UU. y en otros países. Lightning es una marca comercial de Apple Inc. “Made for iPod” y “Made for iPhone” significan que un accesorio electrónico ha sido diseñado para ser conectado específicamente a un iPod o a un iPhone, respectivamente, y ha sido homologado por quien lo desarrolló para cumplir con las normas de funcionamiento de Apple. Apple no es responsable del funcionamiento de este aparato ni de que cumpla con las normas de seguridad y reguladoras. Tenga presente que el empleo de este accesorio con un iPod o iPhone puede afectar la operación inalámbrica. Español Si desea más información sobre la compatibilidad de archivos y formatos, consulte los manuales del iPod. 3 4 04 Según la generación o versión del iPod, es posible que algunas funciones no estén disponibles. Las funciones pueden variar según la versión de software del iPod. Tabla de caracteres rusos Ejemplo de una jerarquía Androidä Android es una marca comercial de Google Inc. MIXTRAX MIXTRAX es una marca comercial de PIONEER CORPORATION. Es <QRD3200-A>77 77 Black plate (78,1) Apéndice Información adicional Especificaciones Generales Fuente de alimentación .... 14,4 V cc (10,8 V a 15,1 V permisible) Sistema de derivación a tierra ................................... Tipo negativo Consumo máximo de corriente ................................... 10,0 A Dimensiones (An × Al × Pr): DIN Bastidor ........................... 178 mm × 50 mm × 165 mm Cara anterior .................... 188 mm × 58 mm × 15 mm D Bastidor ........................... 178 mm × 50 mm × 165 mm Cara anterior .................... 170 mm × 46 mm × 15 mm (DEH-X3600UI) Cara anterior .................... 170 mm × 46 mm × 16 mm (DEH-2600UI) Peso ................................ 1 kg Audio Potencia de salida máxima ................................... 50 W × 4 70 W × 1/2 W (para altavoz de subgraves) Potencia de salida continua ................................... 22 W × 4 (50 Hz a 15 000 Hz, 5 % THD, 4 W de carga, ambos canales activados) Impedancia de carga ....... 4 W (4 W a 8 W permisibles) Nivel de salida máxima del preamplificador ................................... 2,0 V Contorno de sonoridad ..... +10 dB (100 Hz), +6,5 dB (10 kHz) (volumen: –30 dB) Ecualizador (ecualizador gráfico de 5 bandas): Frecuencia ....................... 80 Hz/250 Hz/800 Hz/2,5 kHz/ 8 kHz Gama de ecualización ...... ±12 dB (paso de 2 dB ) Altavoz de subgraves (mono): Frecuencia ....................... 50 Hz/63 Hz/80 Hz/100 Hz/ 125 Hz/160 Hz/200 Hz Pendiente ........................ –12 dB/oct, –24 dB/oct Ganancia ......................... +6 dB a –24 dB Fase ................................. Normal/Inversa Reproductor de CD Sistema ........................... Sistema de audio de discos compactos Discos utilizables ............. Disco compacto Relación de señal a ruido ................................... 94 dB (1 kHz) (red IEC-A) Número de canales .......... 2 (estéreo) 78 Formato de decodificación MP3 ................................... MPEG-1 & 2 Audio Layer 3 Formato de decodificación WMA ................................... Ver. 7, 7.1, 8, 9, 10, 11, 12 (audio 2 canales) (Windows Media Player) Formato de señal WAV ..... PCM lineal & MS ADPCM (No comprimido) USB Especificación de la norma USB ................................... USB 2.0 velocidad máxima Consumo máximo de corriente ................................... 1 A Clase USB ....................... MCS (Clase de almacenamiento masivo) Sistema de archivos ......... FAT12, FAT16, FAT32 Formato de decodificación MP3 ................................... MPEG-1 & 2 Audio Layer 3 Formato de decodificación WMA ................................... Ver. 7, 7.1, 8, 9, 10, 11, 12 (audio 2 canales) (Windows Media Player) Formato de señal WAV ..... PCM lineal & MS ADPCM (No comprimido) Sintonizador de FM Intervalo de frecuencias ... de 87,5 MHz a 108,0 MHz Sensibilidad utilizable ...... 9 dBf (0,8 µV/75 W, mono, señal/ruido: 30 dB) Relación de señal a ruido ................................... 72 dB (red IEC-A) Sintonizador de MW Intervalo de frecuencias ... de 531 kHz a 1 602 kHz Sensibilidad utilizable ...... 25 µV (señal/ruido: 20 dB) Relación de señal a ruido ................................... 62 dB (red IEC-A) Sintonizador de LW Intervalo de frecuencias ... de 153 kHz a 281 kHz Sensibilidad utilizable ...... 28 µV (señal/ruido: 20 dB) Relación de señal a ruido ................................... 62 dB (red IEC-A) Nota Las especificaciones y el diseño están sujetos a modificaciones sin previo aviso. Es <QRD3200-A>78 Black plate (79,1) Español Es <QRD3200-A>79 79 Black plate (80,1) Abschnitt Bevor Sie beginnen 01 Vielen Dank, dass Sie sich für dieses PIONEER-Produkt entschieden haben Bitte lesen Sie diese Anleitung vor der Verwendung dieses Produkts zur Gewährleistung seiner ordnungsgemäßen Verwendung durch. Lesen und befolgen Sie dabei insbesondere die Hinweise WARNUNG und VORSICHT. Bewahren Sie die Anleitung zur zukünftigen Bezugnahme sicher und griffbereit auf. Bevor Sie beginnen Zu diesem Gerät Die Tuner-Frequenzen dieses Geräts sind für Westeuropa, Asien, den Mittleren Osten, Afrika und Ozeanien bestimmt. Der Gebrauch in anderen Gebieten kann zu mangelhaftem Empfang führen. Die RDS-Funktion (Radio-Datensystem) funktioniert nur in Gebieten mit UKW-Sendern, die RDS-Signale ausstrahlen. Wichtig Bitte tragen Sie die folgenden Informationen in das dafür vorgesehene Formular auf der Rückseite der Anleitung ein: Mischen Sie dieses Produkt, wenn Sie es entsorgen wollen, nicht mit gewöhnlichen Haushaltsabfällen. Es gibt ein getrenntes Sammelsystem für gebrauchte elektronische Produkte, über das die richtige Behandlung, Rückgewinnung und Wiederverwertung gemäß der bestehenden Gesetzgebung gewährleistet wird. Privathaushalte in den Mitgliedstaaten der EU, in der Schweiz und in Norwegen können ihre gebrauchten elektronischen Produkte kostenfrei bei speziell dafür eingerichteten Sammelstellen abgeben oder zu einem Fachhändler zurückbringen (sofern sie ein vergleichbares neues Produkt kaufen). In den Ländern, die hier nicht aufgeführt sind, wenden Sie sich hinsichtlich der zu beachtenden Entsorgungsweise bitte an die zuständige Gemeindeverwaltung. Auf diese Weise stellen Sie sicher, dass das zu entsorgende Produkt der erforderlichen Verarbeitung, Rückgewinnung und Wiederverwertung zugeführt wird, und verhindern damit potenziell negative Auswirkungen auf die Umwelt sowie Gesundheitsschäden. 80 — 14-stellige Seriennummer (an der Unterseite des Geräts angegeben) — Kaufdatum (Datum der Quittung) — Stempel des Händlers Diese Informationen dienen als Eigentumsnachweis. Im Fall eines Diebstahls teilen Sie der Polizei die 14-stellige Seriennummer und das Kaufdatum des Geräts mit. Bewahren Sie die Bedienungsanleitung an einem sicheren Ort auf. VORSICHT ! Dieses Gerät darf nicht mit Flüssigkeiten in Kontakt kommen. Dies könnte einen Stromschlag verursachen. Darüber hinaus kann der Kontakt mit Flüssigkeit eine Beschädigung des Geräts, Rauchentwicklung und Überhitzung nach sich ziehen. ! Wählen Sie stets eine Lautstärke, bei der Sie Umgebungsgeräusche noch deutlich wahrnehmen können. ! Setzen Sie dieses Gerät keiner Feuchtigkeit aus. VORSICHT Bei diesem Gerät handelt es sich zwar um ein Laserprodukt der Klasse 1, das entsprechend dem Standard Sicherheit für Laserprodukte IEC 60825-1:2007 klassifiziert ist. LASER KLASSE 1 Im Problemfall WARNUNG ! Versuchen Sie nicht, dieses Produkt selbst zu montieren oder zu warten. Werden Montage- oder Wartungsarbeiten des Produkts von Personen ohne Ausbildung und Erfahrung hinsichtlich elektronischer Geräte und Fahrzeugzubehör vorgenommen, kann dies gefährlich sein und möglicherweise zu elektrischen Schlägen, Verletzungen oder anderen Gefahren führen. ! Bedienen Sie das Gerät niemals während der Fahrt. Fahren Sie an den Straßenrand und parken Sie Ihr Fahrzeug zuerst an einem sicheren Ort, bevor Sie die Bedienelemente des Geräts bedienen. Sollte dieses Gerät nicht ordnungsgemäß funktionieren, dann wenden Sie sich an Ihren Händler oder an die nächstgelegene PIONEERKundendienststelle. De <QRD3200-A>80 Black plate (81,1) Abschnitt Gebrauch dieses Geräts Hauptgerät DEH-X3600UI 123 4 5 6 Gebrauch dieses Geräts c 1/ d AUX-Eingang (3,5-mm-Stereoanschluss) e Taste zum Entriegeln der Frontplatte bis 6/ 1 VORSICHT 78 9 ab c de DEH-2600UI 21 3 4 b 5 6 Verwenden Sie für den Anschluss eines USBSpeichergeräts ein optionales USB-Kabel von Pioneer (CD-U50E), da direkt an diese Einheit angeschlossene Zusatzgeräte hervorstehen und eine Gefahr darstellen könnten. 2 3 c Display-Anzeige 5 LOC (Lokal-Suchlaufabstimmung) DEH-X3600UI 6 TP (Verkehrsprogramm-Identifizierung) 7 TA (Verkehrsdurchsagen) 2 9 de 3 SRC/OFF 2 h (Auswurf) 3 MULTI-CONTROL (M.C.) 4 (Liste) 5 Disc-Ladeschacht 6 USB-Anschluss MIX (MIXTRAX) DEH-X3600UI 7 8 9 iPod DEH-2600UI BAND/ (iPod-Steuerung) (Zurück)/DIMMER (Dimmer) a c/d b DISP 4 5 7 9 b 6 8 a a b DEH-2600UI b 3 4 7 1 6 8 5 9 a 2 (Sound Retriever) (Zufall/Shuffle) (Wiederholwiedergabe) (iPod-Steuerung) Die iPod-Funktionen dieses Geräts werden über Ihren iPod bedient. Setup-Menü 1 Drehen Sie nach der Installation des Geräts den Zündschalter auf EIN. Die Angabe SET UP erscheint. 3 Drücken Sie zur Auswahl M.C. 4 Befolgen Sie diese Schritte, um das Menü einzurichten. Sie müssen Ihre Auswahl bestätigen, um die nächste Menüoption aufrufen zu können. LANGUAGE (Spracheinstellung) Das Gerät kann Textinformationen komprimierter Audiodateien auch dann anzeigen, wenn sie auf Englisch, Russisch oder Türkisch aufgezeichnet wurden. ! Falls die für die Aufzeichnung verwendete Sprache und die gewählte Spracheinstellung nicht übereinstimmen, werden die Textinformationen ggf. nicht richtig angezeigt. ! Bestimmte Zeichen werden ggf. nicht ordnungsgemäß angezeigt. 1 Drehen Sie M.C., um die gewünschte Einstellung zu wählen. ENG (Englisch)—РУС (Russisch)—TUR (Türkisch) 2 Drücken Sie M.C., um die Auswahl zu bestätigen. CLOCK SET (Einstellen der Uhrzeit) 1 Drehen Sie M.C., um die Stunde einzustellen. 2 Drücken Sie auf M.C., um die Minuten auszuwählen. 3 Drehen Sie M.C., um die Minuten einzustellen. 4 Drücken Sie M.C., um die Auswahl zu bestätigen. Deutsch 1 (Liste) Unterinformationsbereich 8 9 a Erscheint, wenn eine untergeordnete Ordner- oder Menüebene vorhanden ist. 4 1 78 Hauptinformationsbereich ! Tuner: Frequenzband und Frequenz ! RDS: Programm-Service-Name, PTY-Information und andere Textinformationen ! CD-Player, USB-Speichermedium und iPod: verstrichene Wiedergabezeit und Textinformationen 02 2 Drehen Sie M.C., um zu YES umzuschalten. # Wenn Sie das Gerät nicht innerhalb von 30 Sekunden bedienen, wird das Setup-Menü nicht angezeigt. # Wenn Sie es vorziehen, die Einstellungen nicht jetzt vorzunehmen, drehen die den M.C.-Regler auf NO. De <QRD3200-A>81 81 Black plate (82,1) Abschnitt Gebrauch dieses Geräts 02 FM STEP (UKW-Kanalraster) Verwenden Sie FM STEP, um die UKW-Kanalrasteroptionen (Suchschritteinstellungen) einzustellen. 1 Drehen Sie M.C., um die UKW-KanalrasterFunktion zu wählen. 100 (100 kHz)—50 (50 kHz) 2 Drücken Sie M.C., um die Auswahl zu bestätigen. Die Angabe QUIT erscheint. ! Bei der manuellen Abstimmung ist das Kanalraster auf 50 kHz fest eingestellt. ! Wenn AF und TA deaktiviert sind, ist für das Suchlauf-Kanalraster 50 kHz fest eingestellt, selbst wenn 100 ausgewählt ist. 5 Um die Einstellungen abzuschließen, drehen Sie M.C., um zu YES zu wechseln. # Möchten Sie Ihre Einstellungen wieder ändern, drehen Sie M.C., um NO auszuwählen. 6 Drücken Sie zur Auswahl M.C. Hinweise ! Sie können die Menüoptionen über das Systemmenü und Grundmenü einstellen. Für Details zu den Einstellungen siehe Systemmenü auf Seite 89 und Grundmenü auf Seite 91. ! Das Einstellmenü kann durch Drücken von SRC/OFF abgebrochen werden. Grundlegende Bedienvorgänge Wichtig ! Handhaben Sie die Frontplatte beim Entfernen oder Anbringen vorsichtig. ! Setzen Sie die Frontplatte keinen übermäßigen Stößen aus. ! Setzen Sie die Frontplatte weder direkter Sonnenbestrahlung noch hohen Temperaturen aus. 82 Gebrauch dieses Geräts ! Entfernen Sie alle etwaigen angeschlossenen Kabel und Geräte, bevor Sie die Frontplatte abnehmen, um eine Beschädigung des Geräts oder des Fahrzeuginneren zu vermeiden. Abnehmen der Frontplatte 1 Drücken Sie die Taste zum Entriegeln der Frontplatte. 2 Drücken Sie die Frontplatte nach oben (M) und ziehen Sie sie in Ihre Richtung (N). Wählen einer Programmquelle 1 Drücken Sie SRC/OFF, um zwischen den folgenden Optionen umzuschalten: RADIO—CD—USB/iPod—APP (Anwendung) —AUX ! USB MTP wird angezeigt, während die MTPVerbindung hergestellt ist. ! Nur für DEH-2600UI Wenn ein iPod angeschlossen und eine andere Quelle als iPod gewählt ist, können Sie durch Drücken von iPod zu iPod wechseln. Regeln der Lautstärke 1 Drehen Sie M.C., um die Lautstärke anzupassen. 3 Bewahren Sie die entfernte Frontplatte immer in einem Schutzgehäuse oder einem Beutel auf. Wiederanbringen der Frontplatte 1 Schieben Sie die Frontplatte nach links. Hinweis Wenn das blau/weiße Kabel dieses Geräts an die Steuerklemme des Automatikantennenrelais des Kraftfahrzeugs angeschlossen wird, wird die Antenne ausgefahren, sobald das Gerät eingeschaltet wird. Zum Einfahren der Antenne schalten Sie die Programmquelle aus. Häufig verwendete Menüschritte 2 Drücken Sie dann gegen die rechte Seite der Frontplatte, bis sie sicher einrastet. Wenden Sie keine Gewalt beim Anbringen der Frontplatte an, da diese oder das Hauptgerät sonst beschädigt werden könnten. Einschalten des Geräts 1 Drücken Sie die Taste SRC/OFF, um das Gerät einzuschalten. Ausschalten des Geräts 1 Drücken und halten Sie SRC/OFF gedrückt, bis sich das Gerät ausschaltet. Zurückschalten zur vorherigen Anzeige Zum Zurückschalten zur vorherigen Liste (bzw. zum übergeordneten Ordner) 1 Drücken Sie /DIMMER. Zurückschalten zur normalen Anzeige Beenden des Hauptmenüs 1 Drücken Sie BAND/ . Zurückschalten zur normalen Anzeige von der Liste 1 Drücken Sie BAND/ . Radio Grundlegende Bedienvorgänge Wahl eines Bands (Wellenbereich) 1 Drücken Sie BAND/ , bis der gewünschte Wellenbereich angezeigt wird (FM1, FM2, FM3 für UKW bzw. MW/LW). Wechseln der voreingestellten Sender 1 Drücken Sie c oder d. ! Wählen Sie PCH (voreingesteller Kanal) unter SEEK, um diese Funktion verwenden zu können. Manuelle (schrittweise) Abstimmung 1 Drücken Sie c oder d. ! Wählen Sie MAN (manuelle Abstimmung) unter SEEK, um diese Funktion verwenden zu können. Suchlauf 1 Drücken und halten Sie c oder d gedrückt und lassen Sie die Taste dann wieder los. Durch kurzes Drücken von c oder d kann die Suchlaufabstimmung aufgehoben werden. Durch Drücken und Gedrückthalten von c oder d können Sender übersprungen werden. Die Suchlaufabstimmung beginnt, sobald c bzw. d losgelassen wird. Hinweise ! Details zu SEEK finden Sie unter SEEK (Einstellen der linken/rechten Tasten) auf Seite 83. ! Der Alternativfrequenz-Suchlauf (AF) dieses Geräts kann ein- und ausgeschaltet werden. Für den normalen Abstimmbetrieb sollte AF ausgeschaltet sein (siehe AF (Alternativfrequenz-Suchlauf) auf Seite 83). De <QRD3200-A>82 Black plate (83,1) Abschnitt Gebrauch dieses Geräts Speichern und Abrufen von Radiostationen für jedes Band Verwendung der Stationstasten 1 Zum Speichern: Drücken Sie eine der Stationstasten (1/ bis 6/ ) und halten diese gedrückt, bis die Stationsnummer nicht mehr blinkt. 2 Zum Abrufen: Drücken Sie eine der Stationstasten (1/ bis 6/ ). Umschalten der Anzeige Wählen der gewünschten Textinformationen 1 Drücken Sie auf DISP, um zwischen den folgenden Optionen umzuschalten: ! FREQUENCY (Programm-Service-Name oder Frequenz) ! BRDCST INFO (Programm-Service-Name/ PTY-Information) ! CLOCK (Programmquellname und Uhr) Gebrauch der ProgrammtypFunktionen (PTY) Sie können einen Sender anhand eines Programmtyps (PTY) abstimmen. Suchen nach RDS-Stationen anhand eines Programmtyps (Liste). 1 Drücken Sie auf 2 Drehen Sie M.C., um einen Programmtyp zu wählen. NEWS/INFO—POPULAR—CLASSICS— OTHERS 3 Drücken Sie M.C., um die Suche zu starten. Das Gerät sucht nach einer Station, die ein Programm des gewählten Typs ausstrahlt. Wenn eine solche Station gefunden wird, wird deren Stationsname angezeigt. ! Zum Aufheben des Suchlaufs drücken Sie M.C. erneut. ! Das Programm mancher Sender kann von dem tatsächlich übertragenen Programmtyp (PTY) abweichen. ! Wird kein Sender gefunden, der ein Programm des gewählten Typs ausstrahlt, dann erscheint zwei Sekunden lang NOT FOUND und der Tuner schaltet auf die ursprüngliche Station zurück. PTY-Liste Detaillierte Informationen zur PTY-Liste finden Sie auf folgender Website: http://www.pioneer.eu/eur/products/25/121/tech/ CarAudio/PTY.html Funktionseinstellungen 1 Drücken Sie auf M.C., um das Hauptmenü anzuzeigen. 2 Drehen Sie M.C., um die Menüoption zu wechseln, und drücken Sie auf FUNCTION, um die angezeigte Option zu wählen. # Wenn das MW/LW-Band gewählt ist, stehen nur BSM, LOCAL und SEEK zur Verfügung. FM SETTING (Einstellungen für die UKW-Klangqualität) Die Klangqualität kann so eingestellt werden, dass sie den Sendesignalbedingungen des UKWFrequenzbereichsignals entspricht. 1 Drücken Sie auf M.C., um den Einstellmodus aufzurufen. 2 Drehen Sie M.C., um die gewünschte Einstellung zu wählen. ! STANDARD – Dies ist die Standardeinstellung. ! HI-FI – Diese Einstellung sollte verwendet werden, um vorzugsweise eine hohe Stereo-Klangqualität zu verwenden. ! STABLE – Diese Einstellung sollte verwendet werden, um vorzugsweise einen MonoKlang mit geringem Rauschen zu verwenden. BSM (Best-Sender-Memory) BSM (Best-Sender-Memory) speichert die sechs stärksten Sender automatisch in der Reihenfolge ihrer Signalstärke. 1 Drücken Sie M.C., um BSM einzuschalten. Zum Abbrechen des Speichervorgangs drücken Sie M.C. erneut. REGIONAL (Regional) Bei Verwendung des Alternativfrequenz-Suchlaufs beschränkt die Regionalfunktion die Auswahl auf Sender, die regionale Programme ausstrahlen. 1 Drücken Sie M.C., um die Regionalfunktion ein- oder auszuschalten. 02 Mit der Lokal-Suchlaufabstimmung wird nur nach Stationen mit ausreichender Signalstärke für einen guten Empfang gesucht. 1 Drücken Sie auf M.C., um die gewünschte Einstellung zu wählen. UKW: OFF—LV1—LV2—LV3—LV4 MW/LW: OFF—LV1—LV2 Bei Auswahl der höchsten Stufe werden nur die stärksten Sender empfangen, während bei Auswahl der niedrigeren Stufen schwächere Sender zugelassen werden. TA (Verkehrsdurchsagebereitschaft) 1 Drücken Sie M.C., um die Verkehrsdurchsagebereitschaft ein- oder auszuschalten. AF (Alternativfrequenz-Suchlauf) 1 Drücken Sie M.C., um den AlternativfrequenzSuchlauf ein- oder auszuschalten. NEWS (Nachrichtenunterbrechung) 1 Drücken Sie M.C., um die Nachrichtenfunktion ein- oder auszuschalten. SEEK (Einstellen der linken/rechten Tasten) Sie können den linken und rechten Tasten des Gerät eine Funktion zuweisen. Wählen Sie MAN (manuelle Abstimmung) zur manuellen Abstimmung oder PCH (vorprogrammierter Kanal) zum Umschalten zwischen den vorprogrammierten Kanälen. 1 Drücken Sie M.C., um MAN oder PCH zu wählen. Deutsch Hinweise ! Wenn der Programm-Service-Name nicht unter FREQUENCY abgerufen werden kann, wird stattdessen die Sendefrequenz angezeigt. Der Programm-Service-Name wird bei einer Erkennung angezeigt. ! Je nach dem Band kann die Textinformation geändert werden. ! Welche Textinformationen geändert werden können, hängt vom Bereich ab. Gebrauch dieses Geräts LOCAL (Lokal-Suchlaufabstimmung) 3 Drehen Sie M.C., um die gewünschte Funktion zu wählen. Nach der Auswahl können die folgenden Funktionen angepasst werden. De <QRD3200-A>83 83 Black plate (84,1) Abschnitt Gebrauch dieses Geräts 02 CD/CD-R/CD-RW-Discs und USB-Speichermedien MTP-Verbindung MTP-kompatible Android-Geräte (mit AndroidBetriebssystem 4.0 oder höher) können über eine MTP-Verbindung unter Verwendung einer USB-Quelle verbunden werden. Um ein Android-Gerät anzuschließen, verwenden Sie das dem Gerät beiliegende Kabel. Hinweise ! Diese Funktion ist nicht mit MIXTRAX kompatibel. ! Diese Funktion ist nicht mit WAV kompatibel. Grundlegende Bedienvorgänge Wiedergabe einer CD/CD-R/CD-RW-Disc 1 Legen Sie die Disc mit der Etikettenseite nach oben in den Ladeschacht. Auswerfen einer CD/CD-R/CD-RW-Disc 1 Drücken Sie auf h. Wiedergabe von Musiktiteln eines USB-Speichermediums 1 Öffnen Sie die Abdeckung des USB-Anschlusses. 2 Schließen Sie das USB-Speichermedium über ein USB-Kabel an. Wiedergabe der Musiktitel auf einem USB-Speichermedium abbrechen 1 Das USB-Speichermedium kann jederzeit vom Gerät getrennt werden. Wählen eines Ordners 1 Drücken Sie 1/ oder 2/ . Wahl eines Titels 1 Drücken Sie c oder d. 84 Gebrauch dieses Geräts Schnellvorlauf bzw. -rücklauf 1 Drücken und halten Sie c oder d gedrückt. ! Bei der Wiedergabe von Dateien im komprimierten Audio-Format wird beim schnellen Vor- und Rücklauf kein Ton ausgegeben. Rückkehr zum Stammordner 1 Drücken und halten Sie BAND/ gedrückt. Umschalten zwischen dem komprimierten Audioformat und CD-DA 1 Drücken Sie BAND/ . Umschalten zwischen Wiedergabespeichergeräten Sie können zwischen Wiedergabespeichereinheiten eines USB-Speichermediums wechseln, welches über mehrere Massenspeicherklasse kompatible Einheiten verfügt. 1 Drücken Sie BAND/ . ! Sie können zwischen bis zu 32 verschiedenen Speichergeräten wechseln. Hinweis Trennen Sie USB-Speichermedien bei Nichtverwendung von diesem Gerät ab. Bedienung mithilfe der MIXTRAX-Taste MIXTRAX ein- oder ausschalten Nur für DEH-X3600UI Sie können diese Funktion verwenden, wenn USB als Programmquelle gewählt ist. Diese Funktion kann nicht mit USB MTP verwendet werden. 1 Drücken Sie auf MIX, um MIXTRAX ein- oder auszuschalten. ! Für weitere Einzelheiten zu MIXTRAX siehe Über MIXTRAX auf Seite 90. ! Wenn MIXTRAX verwendet wird, ist die „Sound Retriever“-Funktion deaktiviert. Umschalten der Anzeige Wählen der gewünschten Textinformationen 1 Drücken Sie auf DISP, um zwischen den folgenden Optionen umzuschalten: CD-DA ! ELAPSED TIME (Titelnummer und Wiedergabezeit) ! CLOCK (Programmquellname und Uhr) ! SPEANA (Spektralanalysator) CD-TEXT ! TRACK INFO (Titelname/Titel-Künstler/ Disc-Titel) ! ELAPSED TIME (Titelnummer und Wiedergabezeit) ! CLOCK (Programmquellname und Uhr) ! SPEANA (Spektralanalysator) MP3/WMA/WAV ! TRACK INFO (Titelname/Künstlername/Albumtitel) ! FILE INFO (Dateiname/Ordnername) ! ELAPSED TIME (Titelnummer und Wiedergabezeit) ! CLOCK (Programmquellname und Uhr) ! SPEANA (Spektralanalysator) Auswählen und Wiedergeben von Dateien/Titeln der Namensliste 1 Drücken Sie , um in den Datei-/Titellistenmodus umzuschalten. 2 Verwenden Sie M.C., um den Namen der gewünschten Datei (bzw. des gewünschten Ordners) zu wählen. Auswählen einer Datei oder eines Ordners 1 Drehen Sie M.C. Wiedergabe 1 Drücken Sie nach Auswahl einer Datei oder eines Titels auf M.C. Anzeige einer Liste der Dateien (oder Ordner) im gewählten Ordner 1 Drücken Sie nach Auswahl eines Ordners auf M.C. Wiedergabe eines Musiktitels im gewählten Ordner 1 Drücken und halten Sie M.C. nach Auswahl des Ordners gedrückt. Bedienvorgänge mit speziellen Tasten Wählen eines Wiederholbereichs 1 Drücken Sie 6/ , um zwischen den folgenden Optionen umzuschalten: CD/CD-R/CD-RW-Discs ! ALL – Wiederholung aller Titel ! ONE – Wiederholung des momentanen Titels ! FLD – Wiederholung des momentanen Ordners USB-Speichermedium ! ALL – Wiederholung aller Dateien ! ONE – Wiederholung der momentanen Datei ! FLD – Wiederholung des momentanen Ordners Abspielen von Titeln in zufälliger Reihenfolge , um die zufallsgesteuerte 1 Drücken Sie 5/ Wiedergabe ein- oder auszuschalten. Die Titel innerhalb des gewählten Wiederholbereichs werden in einer zufälligen Reihenfolge gespielt. ! Um Titel während der zufälligen Wiedergabe zu ändern, drücken Sie auf d, um zum nächsten Titel zu wechseln. Durch Drücken von c wird die Wiedergabe des aktuellen Titels von seinem Anfang neu gestartet. De <QRD3200-A>84 Black plate (85,1) Abschnitt Gebrauch dieses Geräts Pausieren der Wiedergabe 1 Drücken Sie 4/PAUSE, um die Wiedergabe anzuhalten oder fortzusetzen. Verbessern der komprimierten Audiodaten und Wiederherstellen eines reichen Klangbild (Sound Retriever) 1 Drücken Sie 3/S.Rtrv, um zwischen den folgenden Optionen umzuschalten: 1—2—OFF (Aus) 1 wirkt bei einem niedrigen und 2 bei einem hohen Kompressionsfaktor. ! Die Tastenbedienung ist deaktiviert, wenn MIXTRAX eingeschaltet ist. Funktionseinstellungen 1 Drücken Sie auf M.C., um das Hauptmenü anzuzeigen. 2 Drehen Sie M.C., um die Menüoption zu wechseln, und drücken Sie auf FUNCTION, um die angezeigte Option zu wählen. Nach der Auswahl kann die unten stehende Funktion angepasst werden. iPod Grundlegende Bedienvorgänge Wiedergabe von Musiktiteln eines iPods 1 Öffnen Sie die Abdeckung des USB-Anschlusses. 2 Schließen Sie einen iPod an den USB-Eingang an. Die Wiedergabe erfolgt automatisch. Wahl eines Musiktitels (Kapitels) 1 Drücken Sie c oder d. Auswählen eines Albums 1 Drücken Sie 1/ oder 2/ . Schnellvorlauf bzw. -rücklauf 1 Drücken und halten Sie c oder d gedrückt. Hinweise ! Der iPod kann nicht ein- bzw. ausgeschaltet werden, wenn der Steuermodus CONTROL AUDIO/CTRL AUDIO gewählt wurde. ! Trennen Sie die Kopfhörer vom iPod, bevor Sie ihn mit diesem Gerät verbinden. ! Wenn die Zündung des Wagens ausgeschaltet wird, schaltet sich der iPod nach etwa zwei Minuten aus. S.RTRV (Sound Retriever) Verbessert komprimierte Audiodaten und stellt ein reiches Klangbild wieder her. 1 Drücken Sie auf M.C., um die gewünschte Einstellung zu wählen. Für detaillierte Informationen hierzu siehe Verbessern der komprimierten Audiodaten und Wiederherstellen eines reichen Klangbild (Sound Retriever) auf Seite 85. Bedienung mithilfe der MIXTRAX-Taste MIXTRAX ein- oder ausschalten Nur für DEH-X3600UI 1 Drücken Sie auf MIX, um MIXTRAX ein- oder auszuschalten. ! Für weitere Einzelheiten zu MIXTRAX siehe Über MIXTRAX auf Seite 90. Umschalten der Anzeige Wählen der gewünschten Textinformationen 1 Drücken Sie auf DISP, um zwischen den folgenden Optionen umzuschalten: ! TRACK INFO (Titelname/Künstlername/Albumtitel) ! ELAPSED TIME (Titelnummer und Wiedergabezeit) ! CLOCK (Programmquellname und Uhr) ! SPEANA (Spektralanalysator) Suchen nach Musiktiteln 1 Drücken Sie , um zum Hauptmenü der Listensuche zu wechseln. 2 Verwenden Sie M.C., um eine Kategorie bzw. einen Musiktitel auszuwählen. Musiktitel- oder Kategorienname ändern 1 Drehen Sie M.C. Spiellisten—Künstler—Alben—Musiktitel— Podcasts—Musik-Genres—Komponisten— Hörbücher Wiedergabe 1 Drücken Sie nach Auswahl eines Musiktitels auf M.C. 02 Wiedergabe eines Musiktitels der gewählten Kategorie 1 Drücken und halten Sie M.C. nach Auswahl der Kategorie gedrückt. Alphabetische Listensuche 1 Sobald die Liste der gewählten Kategorie angezeigt wird, drücken Sie die Taste , um in den alphabetischen Suchmodus umzuschalten. ! Durch zweimaliges Drehen von M.C. kann in den alphabetischen Suchmodus gewechselt werden. 2 Drehen Sie M.C., um einen Buchstaben zu wählen. 3 Drücken Sie M.C., um eine alphabetisch sortierte Liste anzuzeigen. ! Zum Abbrechen des Suchvorgangs drücken Sie auf /DIMMER. Hinweise ! Sie können Spiellisten mithilfe einer auf unserer Website erhältlichen Computer-Anwendung (MusicSphere) erstellen. ! Die mithilfe dieser Computer-Anwendung (MusicSphere) erstellten Spiellisten werden abgekürzt angezeigt. Deutsch ! S.RTRV steht nicht zur Verfügung, wenn MIXTRAX eingeschaltet ist. Gebrauch dieses Geräts Wiedergabe einer Musiktitelliste der ausgewählten Kategorie 1 Drücken Sie nach Auswahl einer Kategorie auf M.C. De <QRD3200-A>85 85 Black plate (86,1) Abschnitt Gebrauch dieses Geräts 02 Bedienvorgänge mit speziellen Tasten Wählen eines Wiederholbereichs 1 Drücken Sie 6/ , um zwischen den folgenden Optionen umzuschalten: ! ONE – Wiederholung des momentanen Musiktitels ! ALL – Wiederholung aller Musiktitel in der gewählten Liste ! Wenn als Steuermodus CONTROL iPod/CTRL iPod gewählt wurde, ist der Wiederholbereich der gleiche wie im angeschlossenen iPod. Auswählen des zufälligen Wiederholbereichs (Shuffle) , um zwischen den folgen1 Drücken Sie 5/ den Optionen umzuschalten: ! SNG – Zufallsgesteuerte Wiedergabe der Musiktitel der gewählten Liste ! ALB – Wiedergabe in der richtigen Reihenfolge der Musiktitel in einem nach dem Zufallsprinzip gewählten Album ! OFF – Kein Abspielen in zufälliger Reihenfolge Abspielen aller Musiktitel in zufälliger Reihenfolge (Shuffle All) gedrückt, um 1 Drücken und halten Sie 5/ die Funktion „Shuffle All“ (zufällige Wiedergabe aller Titel) einzuschalten. ! Zum Ausschalten der Funktion „Shuffle All“ wählen Sie OFF im Shuffle-Modus. Für detaillierte Informationen hierzu siehe Auswählen des zufälligen Wiederholbereichs (Shuffle) auf Seite 86. Gebrauch dieses Geräts Pausieren der Wiedergabe 1 Drücken Sie 4/PAUSE, um die Wiedergabe anzuhalten oder fortzusetzen. Verbessern der komprimierten Audiodaten und Wiederherstellen eines reichen Klangbild (Sound Retriever) 1 Drücken Sie 3/S.Rtrv, um zwischen den folgenden Optionen umzuschalten: 1—2—OFF (Aus) 1 wirkt bei einem niedrigen und 2 bei einem hohen Kompressionsfaktor. Wiedergabe von Musiktiteln mit Bezug zum momentan spielenden Titel Es können Musiktitel der folgenden Listen abgespielt werden: • Albumliste des momentan spielenden Künstlers • Musiktitelliste des momentan spielenden Albums • Albumliste des momentan spielenden MusikGenres 1 Drücken und halten Sie gedrückt, um in den Modus der verknüpften Wiedergabe umzuschalten. 2 Drehen Sie M.C., um den Modus zu wechseln, und drücken Sie ihn, um den angezeigten Modus zu wählen. ! ARTIST – Wiedergabe eines Albums des momentan spielenden Künstlers ! ALBUM – Wiedergabe eines Musiktitels eines Albums des momentan spielenden Künstlers ! GENRE – Wiedergabe eines Albums aus dem Genre des momentan spielenden Künstlers Der ausgewählte Musiktitel bzw. das ausgewählte Album wird nach dem gerade spielenden Musiktitel wiedergegeben. 86 Hinweise ! Die Wiedergabe des ausgewählten Musiktitels/Albums wird ggf. abgebrochen, wenn Sie eine andere Funktion als die Verbindungssuche (wie z. B. Schnellvorlauf oder -rücklauf) wählen. ! Je nach dem für die Wiedergabe gewählten Musiktitel können das Ende des momentan spielenden Musiktitels und der Anfang des ausgewählten Musiktitels/Albums abgeschnitten werden. Verwenden der iPod-Funktionen dieses Geräts über den iPod Die iPod-Funktionen dieses Geräts können über den angeschlossenen iPod gesteuert werden. CONTROL iPod/CTRL iPod ist nicht mit den folgenden iPod-Modellen kompatibel: ! iPod nano der 1. Generation ! iPod mit Videos % Drücken Sie auf BAND/ , um in den Funktionssteuermodus zu wechseln. ! CONTROL iPod/CTRL iPod – Die iPod-Funktionen dieses Geräts können über den angeschlossenen iPod bedient werden. ! CONTROL AUDIO/CTRL AUDIO – Die iPodFunktionen dieses Geräts können über das Gerät gesteuert werden. Nur für DEH-2600UI Der Steuermodus kann auch durch Drücken auf iPod geändert werden. Hinweise ! Wenn Sie den Steuermodus auf CONTROL iPod/CTRL iPod umschalten, wird die Musiktitelwiedergabe unterbrochen. Verwenden Sie den iPod, um mit der Wiedergabe fortzufahren. ! Selbst wenn CONTROL iPod/CTRL iPod als Steuermodus gewählt wurde, können die folgenden Vorgänge direkt über dieses Gerät vorgenommen werden: — Pause — Schnellvorlauf/-rücklauf — Wahl eines Musiktitels (Kapitels) ! Die Lautstärke kann nur über das Hauptgerät angepasst werden. Funktionseinstellungen 1 Drücken Sie auf M.C., um das Hauptmenü anzuzeigen. 2 Drehen Sie M.C., um die Menüoption zu wechseln, und drücken Sie auf FUNCTION, um die angezeigte Option zu wählen. 3 Drehen Sie M.C., um die gewünschte Funktion zu wählen. Nach der Auswahl können die folgenden Funktionen angepasst werden. ! AUDIO BOOK steht nicht zur Verfügung, wenn im Steuermodus CONTROL iPod/CTRL iPod gewählt wurde. Für detaillierte Informationen hierzu siehe Verwenden der iPod-Funktionen dieses Geräts über den iPod auf Seite 86. AUDIO BOOK (Hörbuch-Abspielgeschwindigkeit) 1 Drücken Sie auf M.C., um den Einstellmodus aufzurufen. 2 Drehen Sie M.C., um die von Ihnen bevorzugte Einstellung zu wählen. ! FASTER – Schnellere Wiedergabe als normale Wiedergabegeschwindigkeit ! NORMAL – Normale Wiedergabegeschwindigkeit ! SLOWER – Langsamere Wiedergabe als normale Wiedergabegeschwindigkeit De <QRD3200-A>86 Black plate (87,1) Abschnitt Gebrauch dieses Geräts S.RTRV (Sound Retriever) 1 Drücken Sie auf M.C., um die gewünschte Einstellung zu wählen. Für detaillierte Informationen hierzu siehe Verbessern der komprimierten Audiodaten und Wiederherstellen eines reichen Klangbild (Sound Retriever) auf Seite 86. Arbeiten mit Anwendungen angeschlossener Geräte Dieses Gerät können Sie zur Streaming-Wiedergabe und zum Steuern von Titeln in iPhone-Anwendungen oder nur für die StreamingWiedergabe verwenden. Gebrauch dieses Geräts Wichtig Die Verwendung von Apps von Dritten kann eventuell die Angabe personenbezogener Daten nach sich ziehen oder notwendig machen entweder durch das Eröffnen eines Benutzerkontos o. Ä. und für bestimmte Anwendungen die Angabe von Geolokationsdaten. ALLE APPS VON DRITTEN UNTERLIEGEN DER ALLEINIGEN VERANTWORTUNG DER ANBIETER EINSCHLIESSLICH UND OHNE EINSCHRÄNKUNG DEM SAMMELN UND SICHERN DER ANWENDERDATEN UND DATENSCHUTZMASSNAHMEN. DURCH ZUGRIFF AUF APPS VON DRITTEN ERKLÄREN SIE SICH MIT DEN NUTZUNGSBEDINGUNGEN UND DATENSCHUTZRICHTLINIEN DER JEWEILIGEN ANBIETER EINVERSTANDEN. WENN SIE DEN NUTZUNGSBEDINGUNGEN UND RICHTLINIEN EINES ANBIETERS ODER DER VERWENDUNG VON GEOLOKATIONSDATEN, WO ZUTREFFEND, NICHT ZUSTIMMEN, DANN SEHEN SIE VON DER VERWENDUNG VON APPS VON DRITTEN AB. Hinweise ! Besuchen Sie unsere Website, um eine Liste der unterstützten iPhone-Anwendungen für dieses Gerät zu erhalten. ! Pioneer übernimmt keine Haftung für jegliche von inkorrekten oder fehlerhaften appbasierten Inhalten verursachte Probleme. ! Inhalt und Funktionalität der unterstützten Anwendungen liegen in der Verantwortlichkeit der App-Anbieter. Einrichtverfahren für iPhoneAnwender 1 Schließen Sie ein iPhone an den USB-Eingang an. 2 Ändern Sie die Quelle zu APP. 3 Starten Sie die Anwendung auf dem iPhone, und beginnen Sie mit der Wiedergabe. Grundlegende Bedienvorgänge Informationen zur Kompatibilität von angeschlossenen Geräten Schnellvorlauf bzw. -rücklauf 1 Drücken und halten Sie c oder d gedrückt. Im Folgenden finden Sie detaillierte Informationen über die erforderlichen Anschlüsse, um die Anwendung für das iPhone auf diesem Gerät verwenden zu können. Pausieren der Wiedergabe 1 Drücken Sie BAND/ , um die Wiedergabe anzuhalten oder fortzusetzen. Für iPhone-Anwender ! Diese Funktion ist mit dem iPhone und dem iPod touch kompatibel. ! Das Gerät läuft unter dem iOS-Betriebssystem 5.0 oder höher. Umschalten der Anzeige Wählen der gewünschten Textinformationen 1 Drücken Sie auf DISP, um zwischen den folgenden Optionen umzuschalten: ! TRACK INFO (Titelname/Künstlername/Albumtitel) ! APP NAME (Anwendungsname) ! ELAPSED TIME (Wiedergabezeit) ! CLOCK (Programmquellname und Uhr) ! SPEANA (Spektralanalysator) Funktionseinstellungen 1 Drücken Sie auf M.C., um das Hauptmenü anzuzeigen. 2 Drehen Sie M.C., um die Menüoption zu wechseln, und drücken Sie auf FUNCTION, um die angezeigte Option zu wählen. 3 Drehen Sie M.C., um die gewünschte Funktion zu wählen. Nach der Auswahl können die folgenden Funktionen angepasst werden. Deutsch Wahl eines Titels 1 Drücken Sie c oder d. 02 PAUSE (Pause) 1 Drücken Sie M.C., um die Wiedergabe anzuhalten oder fortzusetzen. S.RTRV (Sound Retriever) 1 Drücken Sie auf M.C., um die gewünschte Einstellung zu wählen. 1—2—OFF (Aus) 1 wirkt bei einem niedrigen und 2 bei einem hohen Kompressionsfaktor. Audio-Einstellungen 1 Drücken Sie auf M.C., um das Hauptmenü anzuzeigen. De <QRD3200-A>87 87 Black plate (88,1) Abschnitt Gebrauch dieses Geräts 02 2 Drehen Sie M.C., um die Menüoption zu wechseln, und drücken Sie auf AUDIO, um die angezeigte Option zu wählen. 3 Drehen Sie M.C., um die gewünschte Audio-Funktion zu wählen. Nach der Auswahl können die folgenden Audiofunktionen angepasst werden. ! FADER steht nicht zur Verfügung, wenn in SP-P/O MODE die Option SUB.W/SUB.W gewählt wurde. Für detaillierte Informationen hierzu siehe SP-P/O MODE (Heckausgangund Preout-Einstellungen) auf Seite 91. ! SUB.W und SUB.W CTRL stehen nicht zur Verfügung, wenn in SP-P/O MODE die Option REAR/REAR gewählt wurde. Für Details siehe SP-P/O MODE (Heckausgang- und Preout-Einstellungen) auf Seite 91. ! SUB.W CTRL steht nicht zur Verfügung, wenn in OFF die Option SUB.W gewählt wurde. Für Details siehe SUB.W (Subwoofer Ein/Aus) auf Seite 88. ! SLA steht nicht zur Verfügung, wenn als Quelle FM gewählt wurde. FADER (Überblendeinstellung) 1 Drücken Sie auf M.C., um den Einstellmodus aufzurufen. 2 Drehen Sie M.C., um die Front-/Heck-Lautsprecherbalance einzustellen. BALANCE (Balance-Einstellung) Gebrauch dieses Geräts 1 Drücken Sie auf M.C., um den Einstellmodus aufzurufen. 2 Drehen Sie M.C., um einen Equalizer zu wählen. POWERFUL—NATURAL—VOCAL—CUSTOM1—CUSTOM2—FLAT—SUPER BASS Das Equalizer-Band und der Equalizer-Pegel können individuell angepasst werden, wenn CUSTOM1 oder CUSTOM2 gewählt ist. Schließen Sie bei Wahl von CUSTOM1 oder CUSTOM2 den unten genannten Vorgang ab. Kehren Sie bei Wahl einer anderen Option durch Drücken auf M.C. zur vorherigen Anzeige zurück. ! CUSTOM1 kann für jede Quelle separat eingestellt werden. USB, iPod und APP sind hingegen automatisch auf die gleiche Einstellung gesetzt. ! Bei CUSTOM2 handelt es sich um eine gemeinsam verwendete Einstellung für alle Quellen. 3 Drücken Sie auf M.C., um den Einstellmodus aufzurufen. 4 Drücken Sie M.C., um zwischen den folgenden Optionen umzuschalten: Equalizerband—Equalizer-Pegel 5 Drehen Sie M.C., um die gewünschte Einstellung zu wählen. Equalizer-Band: 80HZ—250HZ—800HZ— 2.5KHZ—8KHZ Equalizer-Pegel: +6 bis –6 LOUDNESS (Loudness) 1 Drücken Sie auf M.C., um den Einstellmodus aufzurufen. 2 Drehen Sie M.C., um die Links-/Rechts-Lautsprecherbalance einzustellen. EQ SETTING (Equalizer-Abruf) Die Loudness-Funktion kompensiert die verminderte Wahrnehmung von niedrigen und hohen Frequenzen bei geringer Lautstärke. 1 Drücken Sie auf M.C., um die gewünschte Einstellung zu wählen. OFF (Aus)—LOW (Niedrig)—MID (Mittel)—HI (Hoch) Dieses Gerät ist mit einem Subwoofer-Ausgang ausgestattet, der ein- und ausgeschaltet werden kann. 1 Drücken Sie auf M.C., um die gewünschte Einstellung zu wählen. NOR (Normalphase)—REV (Gegenphase)— OFF (Subwoofer Aus) SUB.W CTRL (Subwoofer-Einstellungen) Vom Subwoofer werden nur solche Frequenzen ausgegeben, die unter dem gewählten Bereich liegen. 1 Drücken Sie auf M.C., um den Einstellmodus aufzurufen. 2 Drücken Sie M.C., um zwischen den folgenden Optionen umzuschalten: Trennfrequenz—Ausgabepegel—Pegel der Steilheit Einstellbare Werte blinken. 3 Drehen Sie M.C., um die gewünschte Einstellung zu wählen. Trennfrequenz: 50HZ—63HZ—80HZ—100HZ —125HZ—160HZ—200HZ Ausgangspegel: –24 bis +6 Pegel der Steilheit: –12— –24 BASS BOOST (Bassverstärkung) 1 Drücken Sie auf M.C., um den Einstellmodus aufzurufen. 2 Drehen Sie M.C., um den gewünschten Pegel zu wählen. Während der Erhöhung bzw. Verminderung des Pegels wird 0 bis +6 angezeigt. Verwenden Sie diese Funktion, um nur Hochfrequenztöne anzuhören. Nur Frequenzen, die höher als die Trennfrequenz des Hochpassfilters (HPF) sind, werden über die Lautsprecher ausgegeben. 1 Drücken Sie auf M.C., um den Einstellmodus aufzurufen. 2 Drücken Sie M.C., um zwischen den folgenden Optionen umzuschalten: Trennfrequenz—Pegel der Steilheit 3 Drehen Sie M.C., um die gewünschte Einstellung zu wählen. Trennfrequenz: OFF—50HZ—63HZ—80HZ— 100HZ—125HZ—160HZ—200HZ Pegel der Steilheit: –12— –24 SLA (Programmquellen-Pegeleinstellung) Diese Funktion verhindert, dass sich die Lautstärke beim Wechseln der Programmquelle dramatisch ändert. ! Die Einstellungen basieren auf der UKW-Lautstärke, die unverändert bleibt. ! Der MW/LW-Lautstärkepegel kann ebenfalls mit dieser Funktion eingestellt werden. ! USB, iPod und APP sind automatisch auf die gleiche Einstellung gesetzt. 1 Drücken Sie auf M.C., um den Einstellmodus aufzurufen. 2 Drehen Sie M.C., um die Lautstärke für die Programmquelle einzustellen. Einstellbereich: +4 bis –4 HPF SETTING (Hochpassfilter-Anpassung) SUB.W (Subwoofer Ein/Aus) 88 De <QRD3200-A>88 Black plate (89,1) Abschnitt Gebrauch dieses Geräts Systemmenü Wichtig Die Funktion PW SAVE (Energiesparmodus) wird deaktiviert, wenn die Fahrzeugbatterie abgeklemmt wird und muss neu aktiviert werden, sobald die Batterie wieder angeschlossen wird. Wenn PW SAVE (Energiesparmodus) deaktiviert ist, kann das Gerät je nach Anschlussart Batterieleistung in Anspruch nehmen, sollte die Zündung des Fahrzeugs über keine ACC-Position (Zubehörposition) verfügen. 1 Drücken Sie auf M.C., um das Hauptmenü anzuzeigen. 2 Drehen Sie M.C., um die Menüoption zu wechseln, und drücken Sie auf SYSTEM, um die angezeigte Option zu wählen. 3 Drehen Sie M.C., um die SystemmenüFunktion zu wählen. Nach der Auswahl können die folgenden Systemmenüfunktionen angepasst werden. LANGUAGE (Spracheinstellung) AUTO PI (Automatische PI-Suche) Das Gerät kann Textinformationen komprimierter Audiodateien auch dann anzeigen, wenn sie auf Englisch, Russisch oder Türkisch aufgezeichnet wurden. ! Falls die für die Aufzeichnung verwendete Sprache und die gewählte Spracheinstellung nicht übereinstimmen, werden die Textinformationen ggf. nicht richtig angezeigt. ! Bestimmte Zeichen werden ggf. nicht ordnungsgemäß angezeigt. 1 Drücken Sie auf M.C., um die gewünschte Einstellung zu wählen. ENG (Englisch)—РУС (Russisch)—TUR (Türkisch) Das Gerät kann selbst bei einem Stationsabruf automatisch nach einer anderen Station mit derselben Programmierung suchen. 1 Drücken Sie M.C., um den Auto-PI-Suchlauf ein- oder auszuschalten. CLOCK SET (Einstellen der Uhrzeit) 1 Drücken Sie M.C., um den Dimmer ein- bzw. auszuschalten. ! Sie können die Dimmer-Einstellung auch durch Drücken und Halten von /DIMMER ändern. 1 Drücken Sie auf M.C., um den Einstellmodus aufzurufen. 2 Drücken Sie M.C., um den Teil der Zeitanzeige zu wählen, der eingestellt werden soll. Stunden—Minuten 3 Drehen Sie M.C., um die Uhrzeit einzustellen. 12H/24H (Uhrzeitformat) 1 Drücken Sie auf M.C., um die gewünschte Einstellung zu wählen. 12H (12-Stunden-Uhr)—24H (24-Stunden-Uhr) INFO DISPLAY (Unterinformationsbereich) Zwischen der Art der Textinformation, die im Unterinformationsbereich angezeigt wird, kann gewechselt werden. 1 Drücken Sie auf M.C., um den Einstellmodus aufzurufen. 2 Drehen Sie M.C., um die gewünschte Einstellung zu wählen. SPEANA—LEVEL METER—SOURCE—CLOCK —OFF ! Wenn als Quelle RADIO ausgewählt ist, wird bei den Optionen SPEANA und LEVEL METER ein Signalbalken eingeblendet. AUX (Zusatzeingang) Aktivieren Sie diese Einstellung, wenn ein zusätzliches, mit diesem Gerät verbundenes Gerät verwendet wird. 1 Drücken Sie M.C., um AUX ein- oder auszuschalten. DIMMER (Dimmer) BRIGHTNESS (Regeln der Helligkeit) Mithilfe dieser Einstellung können Sie die Helligkeit des Displays anpassen. Die für BRIGHTNESS verfügbaren Einstellungsbereiche hängen davon ab, ob DIMMER aktiviert oder deaktiviert ist. Für detaillierte Informationen hierzu siehe DIMMER (Dimmer) auf Seite 89. 1 Drücken Sie auf M.C., um den Einstellmodus aufzurufen. 2 Drehen Sie M.C., um die gewünschte Einstellung zu wählen. DIMMER ein: 1 bis 4 DIMMER aus: 1 bis 5 MUTE MODE (Stummschaltung) 02 Die Klangwiedergabe dieses Geräts wird automatisch stummgeschaltet oder gedämpft, wenn das Signal eines Geräts mit Stummschaltung empfangen wird. 1 Drücken Sie auf M.C., um den Einstellmodus aufzurufen. 2 Drehen Sie M.C., um die gewünschte Einstellung zu wählen. ! MUTE – Stummschaltung ! 20dB ATT – Dämpfung (20dB ATT hat eine stärkere Wirkung als 10dB ATT) ! 10dB ATT – Dämpfung PW SAVE (Energiesparmodus) Wenn Sie diese Funktion einschalten, reduzieren Sie den Verbrauch von Batterieleistung. ! Bei aktiviertem Energiesparmodus kann nur die Programmquelle eingeschaltet werden. 1 Drücken Sie M.C., um den Energiesparmodus ein- oder auszuschalten. Wählen der Beleuchtungsfarbe Nur für DEH-X3600UI Beleuchtungsfunktionsmenü 1 Drücken Sie auf M.C., um das Hauptmenü anzuzeigen. Deutsch ! INFO DISPLAY und BRIGHTNESS stehen unter DEH-2600UI nicht zur Verfügung. ! MUTE MODE steht unter DEH-X3600UI nicht zur Verfügung. Gebrauch dieses Geräts 2 Drehen Sie M.C., um die Option ILLUMI zur Anzeige zu bringen, und drücken Sie dann darauf, um Ihre Auswahl zu bestätigen. 3 Drehen Sie M.C., um die Beleuchtungsfunktion zu wählen. Nach der Auswahl können die folgenden Audiofunktionen angepasst werden. De <QRD3200-A>89 89 Black plate (90,1) Abschnitt Gebrauch dieses Geräts 02 KEY COLOUR (Tastenbereich-Farbeinstellung) ILLUMI FX (Beleuchtungseffektmodus) Sie können gewünschte Farben für die Tasten dieses Geräts auswählen. 1 Drücken Sie auf M.C., um den Einstellmodus aufzurufen. 2 Drehen Sie M.C., um die Beleuchtungsfarbe zu wählen. ! Voreingestellte Farben (von WHITE bis BLUE) ! SCAN (Automatisches Durchlaufen einer Vielzahl an Farben) ! CUSTOM (benutzerdefinierte Beleuchtungsfarbe) In diesem Modus wird zu unterschiedlichen Zeiten ein Beleuchtungseffekt auf dem Display angezeigt, z. B. wenn der Zubehörstrom (ACC) ein-/ausgeschaltet oder eine CD eingelegt/ ausgeworfen wird. 1 Drücken Sie M.C., um ILLUMI FX ein- bzw. auszuschalten. ! Der Beleuchtungseffekt wird aktiviert, wenn der Zubehörstrom (ACC) ein-/ausgeschaltet wird, unabhängig davon, ob die ILLUMI FXEinstellung ein- oder ausgeschaltet ist. DISP COLOUR (Displaybereich-Farbeinstellung) Hinweis Bei Auswahl von CUSTOM wird die gespeicherte benutzerdefinierte Farbe verwendet. Sie können für das Display dieses Geräts eine gewünschte Farbe auswählen. 1 Drücken Sie auf M.C., um den Einstellmodus aufzurufen. 2 Drehen Sie M.C., um die Beleuchtungsfarbe zu wählen. ! Voreingestellte Farben (von WHITE bis BLUE) ! SCAN (Automatisches Durchlaufen einer Vielzahl an Farben) ! CUSTOM (benutzerdefinierte Beleuchtungsfarbe) Sie können Beleuchtungsfarben für sowohl KEY COLOUR als auch DISP COLOUR individuell anpassen. BOTH COLOUR (Tasten- und Displayfarbeinstellung) 2 Drehen Sie M.C., um die Option ILLUMI zur Anzeige zu bringen, und drücken Sie dann darauf, um Ihre Auswahl zu bestätigen. Sie können für die Tasten und das Display dieses Geräts gewünschte Farben auswählen. 1 Drücken Sie auf M.C., um den Einstellmodus aufzurufen. 2 Drehen Sie M.C., um die Beleuchtungsfarbe zu wählen. ! Voreingestellte Farben (von WHITE bis BLUE) ! SCAN (Automatisches Durchlaufen einer Vielzahl an Farben) 90 Gebrauch dieses Geräts Individuelle Einstellung der Beleuchtungsfarbe 1 Drücken Sie auf M.C., um das Hauptmenü anzuzeigen. 3 Drehen Sie M.C., um KEY COLOUR oder DISP COLOUR zur Anzeige zu bringen. Drücken Sie den Regler, um die Auswahl zu bestätigen. 4 Drücken und halten Sie M.C. gedrückt, bis die benutzerdefinierte Beleuchtungsfarbeinstellung im Display angezeigt wird. 5 Berühren Sie M.C., um die Grundfarbe zu wählen. R (Rot)—G (Grün)—B (Blau) 6 Drehen Sie M.C., um das Helligkeitsniveau einzustellen. Einstellbereich: 0 bis 60 # Es kann nicht gleichzeitig für alle drei Grundfarben R (Rot), G (Grün) und B (Blau) ein Wert unter 20 gewählt werden. # Sie können denselben Bedienvorgang auch für andere Farben ausführen. Hinweis Wenn SCAN ausgewählt wurde, kann die Beleuchtungsfarbe nicht vom Anwender angepasst werden. 3 Drehen Sie M.C., um die MIXTRAX-Funktion zu wählen. Nach der Auswahl können die folgenden MIXTRAX-Funktionen angepasst werden. Diese Funktion ist aktiviert, wenn MIXTRAX eingeschaltet ist. SHORT PLAYBCK (Kurzwiedergabemodus) Sie können die Länge der Wiedergabedauer wählen. 1 Drücken Sie auf M.C., um den Einstellmodus aufzurufen. 2 Drehen Sie M.C., um die gewünschte Einstellung zu wählen. 1.0 MIN (1,0 Minuten)—1.5 MIN (1,5 Minuten) —2.0 MIN (2,0 Minuten)—2.5 MIN (2,5 Minuten)—3.0 MIN (3,0 Minuten)—OFF (Aus) Über MIXTRAX FLASH AREA (Blinkbereich) Nur für DEH-X3600UI Mit der MIXTRAX-Technologie können Sie verschiedene Soundeffekte in den Pausen zwischen den Titeln einblenden, und dadurch einen Nonstopp-Musikmix mit visuellen Effekten kreieren. Es kann festgelegt werden, für welche Optionen die blinkenden Farben angezeigt werden. 1 Drücken Sie auf M.C., um den Einstellmodus aufzurufen. 2 Drehen Sie M.C., um die gewünschte Einstellung zu wählen. KEY/DISPLAY (Taste und Anzeige)—KEY (Taste)—OFF (Aus) ! Bei der Wahl von OFF wird die für ILLUMI ausgewählte Farbe als Anzeigefarbe verwendet. Hinweise ! Je nach Datei/Musiktitel stehen die Soundeffekte möglicherweise nicht zur Verfügung. ! Deaktivieren Sie MIXTRAX, wenn die dabei kreierten visuellen Effekte den Fahrer beeinträchtigen. Siehe Bedienung mithilfe der MIXTRAX-Taste auf Seite 84. FLASH PATTERN (Blinkmuster) MIXTRAX-Menü 1 Drücken Sie auf M.C., um das Hauptmenü anzuzeigen. 2 Drehen Sie M.C., um die Menüoption zu wechseln, und drücken Sie auf MIXTRAX, um die angezeigte Option zu wählen. De <QRD3200-A>90 Black plate (91,1) Abschnitt Gebrauch dieses Geräts Die blinkende Farbe und MIXTRAX-Sondereffektanzeige ändern sich aufgrund von Änderungen der Lautstärke und des Bass-Pegels. 1 Drücken Sie auf M.C., um den Einstellmodus aufzurufen. 2 Drehen Sie M.C., um die gewünschte Einstellung zu wählen. ! SOUND LEVEL 1 bis SOUND LEVEL 6 – Das Blinkmuster ändert sich entsprechend der Lautstärke. Wählen Sie den gewünschten Modus. ! LOW PASS 1 bis LOW PASS 6 – Das Blinkmuster ändert sich entsprechend dem Bass-Pegel. Wählen Sie den gewünschten Modus. ! RANDOM 1 – Das Blinkmuster ändert sich zufällig je nach Lautstärkemodus und Tiefpassmodus. ! RANDOM 2 – Das Blinkmuster ändert sich zufällig je nach Lautstärkemodus. ! RANDOM 3 – Das Blinkmuster ändert sich zufällig je nach Tiefpassmodus. DISPLAY FX (Anzeigeeffekte) CUT IN FX (manuelle Einblendeffekte) Die MIXTRAX-Soundeffekte können beim manuellen Wechseln der Titel aus- oder eingeschaltet werden. 1 Drücken Sie auf M.C., um die gewünschte Einstellung zu wählen. ON (Ein)—OFF (Aus) Grundmenü 1 Drücken und halten Sie SRC/OFF gedrückt, bis sich das Gerät ausschaltet. 2 Drücken und halten Sie SRC/OFF gedrückt, bis das Hauptmenü im Display erscheint. 3 Drehen Sie M.C., um die Menüoption zu wechseln, und drücken Sie auf INITIAL, um die angezeigte Option zu wählen. 4 Drehen Sie M.C., um die GrundmenüFunktion zu wählen. Nach der Auswahl können die folgenden Grundmenüfunktionen angepasst werden. FM STEP (UKW-Kanalraster) 1 Drücken Sie M.C., um die UKW-KanalrasterFunktion zu wählen. 100 (100 kHz)—50 (50 kHz) SP-P/O MODE (Heckausgang- und Preout-Einstellungen) Der Hecklautsprecher-Leitungsausgang und Cinch-Ausgang dieses Geräts können zum Anschluss eines Vollbereichslautsprechers oder Subwoofers verwendet werden. Wählen Sie für Ihren Anschluss eine geeignete Option. 1 Drücken Sie auf M.C., um den Einstellmodus aufzurufen. 2 Drehen Sie M.C., um die gewünschte Einstellung zu wählen. ! REAR/SUB.W – Wählen Sie diese Option, wenn ein Vollbereichslautsprecher an den Hecklautsprecher-Leitungsausgang und ein Subwoofer an den Cinch-Ausgang angeschlossen ist. ! SUB.W/SUB.W – Wählen Sie diese Option, wenn ein Subwoofer an den Hecklautsprecher-Leitungsausgang ohne Verwendung eines zusätzlichen Verstärkers und ein Subwoofer an den Cinch-Ausgang angeschlossen ist. ! REAR/REAR – Wählen Sie diese Option, wenn ein Vollbereichslautsprecher an den Hecklautsprecher-Leitungsausgang und den Cinch-Ausgang angeschlossen ist. Wenn ein Vollbereichslautsprecher an den Hecklautsprecher-Leitungsausgang angeschlossen ist und der Cinch-Ausgang nicht verwendet wird, können Sie entweder REAR/SUB.W oder REAR/REAR auswählen. 02 3 Drehen Sie M.C., um die Menüoption zu wechseln, und drücken Sie auf SYSTEM, um die angezeigte Option zu wählen. 4 Drehen Sie M.C., um die SystemmenüFunktion zu wählen. Für detaillierte Informationen hierzu siehe Systemmenü auf Seite 89. Verwendung der AUXProgrammquelle 1 Verbinden Sie den Stereo-Mini-Klinkenstecker mit dem AUX-Eingang. 2 Drücken Sie die Taste SRC/OFF, um AUX als Programmquelle zu wählen. Hinweis AUX kann nur gewählt werden, wenn die AUXEinstellung eingeschaltet wurde. Für weitere Einzelheiten siehe AUX (Zusatzeingang) auf Seite 89. Umschalten der Anzeige Deutsch Die MIXTRAX-Sondereffekte können ein- und ausgeschaltet werden. 1 Drücken Sie auf M.C., um die gewünschte Einstellung zu wählen. ON (MIXTRAX-Sondereffektanzeige)—OFF (normale Anzeige) Gebrauch dieses Geräts Wählen der gewünschten Textinformationen 1 Drücken Sie auf DISP, um zwischen den folgenden Optionen umzuschalten: ! Programmquellenname ! Programmquellname und Uhr Systemmenü Bei Anzeige einer unerwünschten Anzeige 1 Drücken und halten Sie SRC/OFF gedrückt, bis sich das Gerät ausschaltet. Schalten Sie die unerwünschte Anzeige anhand des unten beschriebenen Vorgangs aus. 2 Drücken und halten Sie SRC/OFF gedrückt, bis das Hauptmenü im Display erscheint. 1 Drücken Sie auf M.C., um das Hauptmenü anzuzeigen. De <QRD3200-A>91 91 Black plate (92,1) Abschnitt Gebrauch dieses Geräts 02 Installation 03 2 Drehen Sie M.C., um die Menüoption zu wechseln, und drücken Sie auf SYSTEM, um die angezeigte Option zu wählen. 3 Drehen Sie M.C., um die Option DEMO OFF zur Anzeige zu bringen, und drücken Sie dann darauf, um Ihre Auswahl zu bestätigen. 4 Drehen Sie M.C., um zu YES umzuschalten. Wichtig ! Bei der Installation des Geräts in einem Kraftfahrzeug, das am Zündschalter keine Position ACC aufweist, kann es je nach Anschlusstyp zu einer Entleerung der Fahrzeugbatterie kommen, wenn das rote Kabel nicht mit dem Anschluss verbunden wurde, der für die Erkennung des Zündschlüsselbetriebs verantwortlich ist. OF Drücken Sie zur Auswahl M.C. F O N 5 Anschlüsse T Nur für DEH-X3600UI Diese Funktion ist aktiviert, wenn an dieses Gerät ein mit einer Stummschaltung ausgestattetes Gerät angeschlossen ist. Der Ton wird automatisch stummgeschaltet, wenn Sie über ein mit einer Stummschaltung ausgestattetes Gerät einen Anruf tätigen oder empfangen. Hinweis Wenn ein Anruf eingeht, wird die Telefon-Programmquelle angezeigt. Zündung mit Position ACC STAR Stummschaltung Zündung ohne Position ACC ! Der Einsatz dieses Geräts in einer anderen als der nachstehend angegebenen Betriebsumgebung kann einen Brand auslösen oder eine Funktionsstörung zur Folge haben: — Kraftfahrzeuge mit 12-Volt-Batterie und negativer Erdung. — Lautsprecher mit 50 W (Ausgabe) und 4 W bis 8 W (Impedanz). ! Um Kurzschluss, Überhitzung oder Funktionsstörungen zu vermeiden, halten Sie sich stets an die nachstehend aufgeführten Anweisungen: — Trennen Sie die Verbindung zur negativen Anschlussklemme der Fahrzeugbatterie, bevor Sie das Gerät installieren. — Sichern Sie die Kabel mit Kabelklemmen oder Klebeband. Zum Schutz der Verkabelung sollten die Kabel an allen Stellen, an denen sie mit Metallteilen in Berührung kommen, mit Isolierband umwickelt werden. — Bringen Sie die Kabel in sicherer Entfernung von beweglichen Fahrzeugkomponenten, wie z. B. Schalthebel und Sitzschienen, an. — Bringen Sie die Kabel in größtmöglicher Entfernung von Stellen an, die sich erhitzen, wie z. B. die Heizungsöffnung. 92 — Führen Sie das gelbe Batteriekabel nicht durch ein Loch in den Motorraum, um die Verbindung mit der Fahrzeugbatterie herzustellen. — Kleben Sie freie Kabelanschlüsse mit Isolierband ab. — Kürzen Sie die Kabel nicht. — Entfernen Sie niemals die Isolierung des Stromkabels dieses Geräts, um die Stromzufuhr mit einem anderen Gerät zu teilen. Dadurch wird die Stromversorgungsleistung des Kabels beeinträchtigt. — Verwenden Sie eine Sicherung, die den vorgegebenen Leistungsmerkmalen entspricht. — Verdrahten Sie das negative Lautsprecherkabel niemals direkt mit der Erde. — Gruppieren Sie niemals die negativen Kabel mehrerer Lautsprecher. ! Wenn dieses Gerät eingeschaltet wird, liegen Steuersignale am blau/weißen Kabel an. Verbinden Sie dieses Kabel mit der Systemfernbedienung eines externen Leistungsverstärkers oder der Steuerklemme des Automatikantennenrelais des Kraftfahrzeugs (max. 300 mA, 12 V Gleichspannung). Wenn das Fahrzeug mit einer in die Heckscheibe integrierten Radioantenne ausgestattet ist, verbinden Sie das Kabel mit der Versorgungsklemme des Antennenboosters. ! Verbinden Sie das blau/weiße Kabel niemals mit der Leistungsklemme des externen Leistungsverstärkers. Darüber hinaus darf das Kabel keinesfalls mit der Leistungsklemme der Fahrzeugantenne verbunden werden. Andernfalls kann es zu einer Entleerung oder Funktionsstörung der Fahrzeugbatterie kommen. De <QRD3200-A>92 Black plate (93,1) Abschnitt Installation Installation ! Das schwarze Kabel gewährleistet die Erdung. Dieses Kabel wie auch die Erdungskabel anderer Produkte (insbesondere von Hochstromprodukten wie Leistungsverstärker) müssen separat verdrahtet werden. Anderenfalls kann es zu einem Brand oder einer Funktionsstörung kommen, wenn sich die Kabel versehentlich lösen. Netzkabel 2 Dieses Gerät 1 2 34 7 3 4 5 6 3 4 5 6 1 8 a 5 6 7 e b c d 1 Zum Netzzugang 2 Je nach Fahrzeugtyp können die Funktionen 3 und 5 variieren. Stellen Sie in diesem Fall sicher, dass der Anschluss von 4 nach 5 und 6 nach 3 erfolgt. 3 Gelb Reserveversorgung (oder Zubehör) 4 Gelb Verbindung mit der Klemme der konstanten 12-V-Spannungsversorgung. 5 Rot Zubehör (oder Reserveversorgung) 6 Rot Verbindung mit der Klemme der zündungsgesteuerten Spannungsversorgung (12 V Gleichspannung). 7 Verbinden Sie jeweils Anschlüsse derselben Farbe miteinander. 8 Schwarz (Fahrgestell-Erdung) Hinweise ! Ändern Sie das Grundeinstellmenü dieses Geräts. Siehe SP-P/O MODE (Heckausgangund Preout-Einstellungen) auf Seite 91. Die Subwoofer-Ausgabe dieses Geräts erfolgt in Mono. ! Bei Verwendung eines 70-W-Subwoofers (2 W) muss sichergestellt werden, dass der Subwoofer am violetten und violett/schwarzen-Anschluss dieses Geräts angeschlossen wird. Schließen Sie nichts an den grünen und grün/schwarzen-Anschluss an. Leistungsverstärker (separat erhältlich) Führen Sie diese Verkabelungen beim Gebrauch eines optionalen Verstärkers durch. 3 1 5 2 3 2 1 7 4 5 6 7 1 Systemfernbedienung Verbindung mit blau/weißem Kabel. 2 Leistungsverstärker (separat erhältlich) 3 Verbindung mit Cinch-Kabeln (separat erhältlich) 4 Zum Frontausgang 5 Vorderer Lautsprecher 6 Zum Heck- oder Subwooferausgang 7 Hecklautsprecher oder Subwoofer Deutsch 1 Netzkabelzugang 2 AUX2-Eingang (3,5-mm-Stereoanschluss) (nur DEH-X3600UI) Eine spezielle Eingangsbuchse zur ausschließlichen Verwendung mit Geräten, die mit einer Stummschaltung ausgestattet sind. 3 Heck- oder Subwooferausgang 4 Frontausgang 5 Antenneneingang 6 Sicherung (10 A) 7 Eingang der festverdrahteten Fernbedienung Es besteht die Möglichkeit, einen (separat erhältlichen) festverdrahteten Fernbedienungsadapter anzuschließen. 9 9 Blau/Weiß Die Pin-Position des ISO-Anschlusses variiert je nach Fahrzeugtyp. Wird Pin 5 zur Steuerung der Antenne verwendet, verbinden Sie 9 und b. Verbinden Sie in jedem anderen Fahrzeugtyp niemals 9 und b. a Blau/Weiß Verbindung mit der Systemsteuerungsklemme des Leistungsverstärkers (max. 300 mA, 12 V Gleichspannung). b Blau/Weiß Verbindung mit der Steuerungsklemme des Automatikantennenrelais (max. 300 mA 12 V Gleichspannung). c Gelb/Schwarz Wenn Sie ein Gerät mit Stummschaltfunktion verwenden, verbinden Sie diesen Draht mit dem Draht der Audio-Stummschaltung dieses Geräts. Andernfalls sollte der Draht der Audio-Stummschaltung (Mute) frei bleiben. d Lautsprecherkabel Weiß: Vorn links + Weiß/Schwarz: Vorn links * Grau: Vorn rechts + Grau/Schwarz: Vorn rechts * Grün: Hinten links + oder Subwoofer + Grün/Schwarz: Hinten links * oder Subwoofer * Violett: Hinten rechts + oder Subwoofer + Violett/Schwarz: Hinten rechts * oder Subwoofer * e ISO-Anschluss Bei manchen Fahrzeugtypen kann der ISOAnschluss zweigeteilt sein. Stellen Sie in diesem Fall sicher, dass zu beiden Anschlüssen Verbindungen hergestellt werden. 03 Installation Wichtig ! Überprüfen Sie vor der endgültigen Installation alle Anschlüsse und Systeme. ! Die Verwendung nicht zugelassener Teile kann eine Funktionsstörung zur Folge haben. ! Wenden Sie sich an Ihren Fachhändler, wenn für die Installation Löcher gebohrt oder andere Änderungen am Fahrzeug vorgenommen werden müssen. De <QRD3200-A>93 93 Black plate (94,1) Abschnitt Installation 03 Installation ! Installieren Sie dieses Gerät keinesfalls an folgenden Orten: — Orte, an denen das Gerät die Steuerung des Fahrzeugs behindern könnte. — Orte, an denen das Gerät die Insassen des Fahrzeugs im Anschluss an eine Schnellbremsung verletzen könnte. ! Der Halbleiterlaser kann durch Überhitzung beschädigt werden. Installieren Sie dieses Gerät deshalb in sicherer Entfernung von Hitzequellen, wie z. B. Heizöffnungen. ! Optimale Leistung kann durch eine Installation des Geräts in einem Winkel unter 60° erzielt werden. DIN-Frontmontage 1 Führen Sie den Montagerahmen in das Armaturenbrett ein. Verwenden Sie den mitgelieferten Montagerahmen, wenn bei der Installation wenig Platz zur Verfügung steht. Bei ausreichendem Platz kann der mit dem Fahrzeug mitgelieferte Montagerahmen verwendet werden. Reichlich Platz lassen 5 cm 5 cm 1 Blechschraube (5 × 8 mm) 2 Montageklammer 3 Armaturenbrett oder Konsole 1 Entfernen Sie den Einpassungsring. Abnehmen und Wiederanbringen der Frontplatte Sie können die Frontplatte zum Schutz vor Diebstahl abnehmen. Detaillierte Informationen hierzu finden Sie unter Abnehmen der Frontplatte und Wiederanbringen der Frontplatte auf Seite 82. 2 1 Armaturenbrett 2 Montagerahmen # Stellen Sie sicher, dass das Gerät fest angebracht ist. Ein instabiler Einbau kann zum Aussetzen von Tönen führen oder andere Fehlfunktionen verursachen. DIN-Rückmontage 5cm cm 2 Entfernen des Geräts 1 3 Ziehen Sie das Gerät aus dem Armaturenbrett. 3 1 2 Befestigen Sie den Montagerahmen mithilfe eines Schraubendrehers: Die Metallklammern sind in eine sichere Position (90°) zu biegen. 60° ! Um beim Gebrauch des Geräts eine ordnungsgemäße Wärmezerstreuung zu gewährleisten, ist bei der Installation genügend Freiraum hinter der Rückseite vorzusehen. Lose Kabel sind aufzuwickeln, damit sie die Lüftung nicht behindern. 2 Ziehen Sie auf jeder Seite zwei Schrauben fest. 1 Bestimmen Sie die geeignete Position, damit die Löcher an der Klammer und den Geräteseiten ordnungsgemäß ausgerichtet sind. 1 Einpassungsring 2 Aussparung ! Bei entriegelter Bedienfläche lässt sich der Einpassungsring einfacher erreichen. ! Halten Sie beim Wiederanbringen des Einpassungsrings die Seite mit der Aussparung nach unten. 2 Führen Sie die mitgelieferten Extraktionsschlüssel an beiden Geräteseiten ein, bis sie in der richtigen Position einrasten. Front-/Rückmontage nach DIN Dieses Gerät kann sowohl über die Front- als auch über die Rückmontage installiert werden. Verwenden Sie für die Montage im Handel erhältliches Zubehör. 94 De <QRD3200-A>94 Black plate (95,1) Anhang Zusätzliche Informationen Zusätzliche Informationen Fehlerbehebung Fehlermeldungen Symptome sind in Fett, Ursachen in normalem, nicht eingerückten Text und Abhilfemaßnahmen in normalem, eingerückten Text geschrieben. Vor der Kontaktaufnahme mit Ihrem Händler oder der nächstgelegenen Pioneer-Kundendienststelle sollten Sie sich die angezeigte Fehlermeldung notieren. Symptome sind in Fett, Ursachen in normalem, nicht eingerückten Text und Abhilfemaßnahmen in normalem, eingerückten Text geschrieben. Das Display schaltet automatisch in die normale Anzeige um. Sie haben keinen Bedienvorgang innerhalb von 30 Sekunden durchgeführt. Wiederholen Sie den Vorgang. Allgemeines AMP ERROR Der Wiederholbereich ändert sich unerwartet. Ja nach Wiederholbereich kann sich der ausgewählte Bereich ändern, sobald ein anderer Ordner oder Musiktitel ausgewählt wird oder während des schnellen Vor- und Rücklaufs. Wählen Sie den Wiederholbereich erneut aus. Betriebsstörung des Geräts oder falsche Lautsprecherverbindung; Schutzschaltung ist aktiviert. Überprüfen Sie die Lautsprecherverbindung. Wenn die Meldung selbst nach dem Aus-/ Einschalten des Motors weiterhin angezeigt wird, wenden Sie sich zur Unterstützung an Ihren Händler oder eine Pioneer-Kundendienststelle. ERROR-23 Nicht unterstütztes CD-Format. Wechseln Sie die Disc aus. FORMAT READ Nach dem Wiedergabestart ist der Ton in manchen Fällen erst nach einer Verzögerung zu hören. Warten Sie bis die Anzeige erlischt und Sie einen Ton hören. NO AUDIO Die eingelegte Disc enthält keine abspielbaren Dateien. Wechseln Sie die Disc aus. SKIPPED Die eingelegte Disc enthält Dateien mit DRM-Schutz (digitale Rechteverwaltung). Die geschützten Dateien werden übersprungen. Ein Unterordner wird nicht wiedergegeben. Unterordner können nicht wiedergegeben werden, wenn FLD (Ordner-Wiederholung) ausgewählt ist. Wählen Sie einen anderen Wiederholbereich. PROTECT CD-Player ERROR-07, 11, 12, 17, 30 Die Disc ist verschmutzt. Reinigen Sie die Disc. Es sind keine Textinformationen eingebettet. Schalten Sie die Anzeige um oder spielen Sie einen anderen Titel bzw. eine andere Datei ab. Die Disc ist verkratzt. Wechseln Sie die Disc aus. Sie verwenden ein Gerät, wie z. B. ein Mobiltelefon, welches Störgeräusche verursachen könnte. Lassen Sie einen ausreichenden Abstand zwischen dieser Einheit und den Geräten, die die Funkstörung verursachen. Es liegt ein elektrischer oder mechanischer Fehler vor. Schalten Sie die Zündung aus (OFF) und wieder ein (ON) oder schalten Sie auf eine andere Programmquelle um und dann wieder zum CDPlayer zurück. ERROR-15 Die eingelegte Disc ist leer. Wechseln Sie die Disc aus. Das verbundene USB-Speichermedium enthält Dateien mit DRM-Schutz. Die geschützten Dateien werden übersprungen. PROTECT Alle Dateien auf dem verbundenen USB-Speichermedium sind mit DRM geschützt. Tauschen Sie das USB-Speichermedium aus. N/A USB Das angeschlossene USB-Gerät wird von diesem Gerät nicht unterstützt. ! Schließen Sie ein dem Standard USBMassenspeicher-Klasse entsprechendes Gerät an. ! Trennen Sie das Gerät ab und schließen Sie ein kompatibles USB-Speichermedium an. CHECK USB USB-Speichermedium/iPod FORMAT READ ERROR-07, 10, 11, 12, 15, 17, 30, A0 Im Gerät ist eine Fehlfunktion aufgetreten. Es liegen Funkstörungen vor. SKIPPED Nach dem Wiedergabestart ist der Ton in manchen Fällen erst nach einer Verzögerung zu hören. Warten Sie bis die Anzeige erlischt und Sie einen Ton hören. Der USB-Anschluss oder das USB-Kabel wurde kurzgeschlossen. Stellen Sie sicher, dass die USB-Klemme oder das USB-Kabel nicht eingeklemmt oder beschädigt ist. Deutsch NO XXXX erscheint, wenn sich die Anzeige ändert (z. B. NO TITLE). Alle Dateien auf der eingelegten Disc weisen einen DRM-Schutz (digitale Rechteverwaltung) auf. Wechseln Sie die Disc aus. Es wurde ein USB-Speichermedium mit aktivierter Sicherheitsfunktion angeschlossen. Halten Sie sich an die Anweisungen in der Bedienungsanleitung des USBSpeichermediums, um die Sicherheitsfunktion zu deaktivieren. NO AUDIO Es sind keine Musiktitel vorhanden. Übertragen Sie die Audio-Dateien auf das USBSpeichermedium und schließen Sie das Gerät dann an. De <QRD3200-A>95 95 Black plate (96,1) Anhang Zusätzliche Informationen Zusätzliche Informationen CHECK USB ERROR-23 Das angeschlossene USB-Speichermedium verbraucht mehr als den maximal zulässigen Stromverbrauch. Trennen Sie das USB-Speichermedium von diesem Gerät und verwenden Sie es nicht mehr in Verbindung mit dem Gerät. Drehen Sie den Zündschlüssel in die Position OFF (Aus) und anschließend in die Position ACC oder ON (Ein). Schließen Sie dann nur ein kompatibles USBSpeichermedium an. Das USB-Speichermedium wurde nicht mit FAT12, FAT16 oder FAT32 formatiert. Das USB-Speichermedium sollte mit FAT12, FAT16 oder FAT32 formatiert sein. CHECK USB Der iPod funktioniert ordnungsgemäß, wird jedoch nicht geladen. Kontrollieren Sie, dass das iPod-Kabel nicht kurzgeschlossen (d. h. zwischen Gegenständen aus Metall eingeklemmt) wurde. Schalten Sie anschließend die Zündung aus (OFF) und wieder ein (ON) oder trennen Sie die Verbindung zum iPod und schließen Sie den iPod dann wieder an. iPod gestört. Trennen Sie das Kabel vom iPod. Sobald das Hauptmenü auf dem iPod erscheint, schließen Sie ihn erneut an und setzen Sie ihn zurück. Discs und Player Verwenden Sie ausschließlich Discs, die eines der folgenden zwei Logos aufweisen: ERROR-16 iPod gestört. Trennen Sie das Kabel vom iPod. Sobald das Hauptmenü auf dem iPod erscheint, schließen Sie ihn erneut an und setzen Sie ihn zurück. Verwenden Sie 12-cm-Discs. STOP Die aktuelle Liste enthält keine Musiktitel. Wählen Sie eine Liste, die Musiktitel enthält. NOT FOUND Keine entsprechenden Musiktitel gefunden. Übertragen Sie Musiktitel auf den iPod. Verwenden Sie ausschließlich herkömmliche, runde Discs. Die folgenden Disc-Typen können nicht mit diesem Gerät verwendet werden: ! DualDiscs ! 8-cm-Discs: Der Versuch, solche Discs mit einem Adapter zu verwenden, kann eventuell zu Fehlfunktionen des Geräts führen. ! Discs in ungewöhnlichen Formen Apps START UP APP Die Anwendung ist noch nicht betriebsbereit. Folgen Sie den auf dem Bildschirm angezeigten Anweisungen. Kondensation kann eine vorübergehende Störung der Player-Leistung zur Folge haben. Warten Sie in diesem Fall etwa eine Stunde ab, bis sich der Player an die höheren Temperaturen angepasst hat. Zudem sollten feuchte Discs mit einem weichen Tuch trockengerieben werden. Unter Umständen ist eine Disc-Wiedergabe nicht möglich. Das kann auf die spezifischen Eigenschaften der Disc, das Disc-Format, die für die Aufzeichnung verwendete Software, die Wiedergabeumgebung, die Lagerbedingungen usw. zurückzuführen sein. Die iPod-Firmwareversion ist veraltet. Aktualisieren Sie die iPod-Version. ERROR-19 Kommunikation gestört. Führen Sie einen der folgenden Bedienvorgänge durch: – Schalten Sie die Zündung aus (OFF) und wieder ein (ON). – Trennen Sie das USB-Speichermedium vom Gerät. – Schalten Sie auf eine andere Programmquelle um. Kehren Sie anschließend wieder zur Programmquelle USB zurück. Handhabungsrichtlinien ! Andere Discs als CDs ! Beschädigte Discs einschließlich Discs mit Rissen, Verwellungen und abgeplatzten Teilen ! CD-R/RW-Discs mit nicht abgeschlossener Aufzeichnung Berühren Sie unter keinen Umständen die DiscOberfläche mit den aufgezeichneten Daten. Bewahren Sie die Discs bei Nichtgebrauch in deren Hülle auf. Kleben Sie keine Etiketten auf Discs, beschriften Sie sie nicht und wenden Sie keine Chemikalien auf die Disc-Oberfläche an. Erschütterungen aufgrund von Unebenheiten der Fahrbahn können die Disc-Wiedergabe unterbrechen. Bei Verwendung von bedruckbaren Discs, beachten Sie die Anleitung und die Warnhinweise der Disc. Je nach Beschaffenheit der Discs, können Sie eventuell nicht eingelegt oder ausgeworfen werden. Die Verwendung solcher Discs kann zu einer Beschädigung dieses Gerätes führen. Bringen Sie keine handelsüblichen Etiketten oder andere Materialien auf den Discs an. ! Die Discs können sich verformen und werden nicht wiedergegeben. ! Die Etiketten können sich während der Wiedergabe lösen und den Auswurf behindern, wodurch das Gerät beschädigt werden könnte. USB-Speichermedium Verbindungen über einen USB-Hub werden nicht unterstützt. Schließen Sie ausschließlich USB-Speichermedien an. Wischen Sie die Discs zum Reinigen mit einem weichen Tuch von der Mitte zum Rand hin ab. 96 De <QRD3200-A>96 Black plate (97,1) Anhang Zusätzliche Informationen Sorgen Sie für eine sichere Befestigung des USBSpeichermediums während der Fahrt. Lassen Sie das USB-Speichermedium nicht auf den Boden fallen, wo es unter der Bremse oder dem Gaspedal eingeklemmt werden könnte. Je nach USB-Speichermedium können folgende Probleme auftreten: ! Die Bedienung kann unterschiedlich sein. ! Das Speichergerät wird unter Umständen nicht erkannt. ! Dateien werden eventuell nicht richtig wiedergegeben. ! Das Gerät kann Störgeräusche verursachen, während Sie Radio hören. Zusätzliche Informationen Kompatible komprimierte Audio-Formate (Discs, USBSpeichermedien) WMA Dateierweiterung: .wma Bitrate: 48 Kbit/s bis 320 Kbit/s (CBR - Konstante Bitrate), 48 Kbit/s bis 384 Kbit/s (VBR - Variable Bitrate) Abtastfrequenz: 32 kHz; 44,1 kHz; 48 kHz Windows Mediaä Audio Professional, Lossless, Voice/DRM Stream/Stream mit Video: Nicht kompatibel iPod Bewahren Sie den iPod nicht an Orten auf, an denen hohe Temperaturen herrschen. MP3 Dateierweiterung: .mp3 Bitrate: 8 Kbit/s bis 320 Kbit/s (CBR), VBR Zu den iPod-Einstellungen ! Wenn ein iPod an dieses Gerät angeschlossen wird, wird die Equalizer-Einstellung des iPods automatisch deaktiviert, um die Akustik zu optimieren. Beim Trennen der Verbindung wird der Equalizer auf die ursprüngliche Einstellung zurückgesetzt. ! Bei der Verwendung dieses Geräts lässt sich die Wiederholfunktion auf dem iPod nicht ausschalten. Wenn ein iPod mit diesem Gerät verbunden ist, wird die Funktion zur Wiederholung aller Titel automatisch aktiviert. Kompatible ID3-Tag-Version: 1.0, 1.1, 2.2, 2.3, 2.4 (ID3-Tag-Version 2.x erhält Vorrang vor Version 1.x) Auf dem iPod gespeicherter Text, der nicht mit diesem Gerät kompatibel ist, wird nicht angezeigt. Abtastfrequenz: 8 kHz bis 48 kHz (32 kHz; 44,1 kHz; 48 kHz für Emphase) M3u-Spielliste: Nicht kompatibel MP3i (MP3 interaktiv), mp3 PRO: Nicht kompatibel WAV Zusätzliche Informationen Von Dateinamen (einschließlich der Dateierweiterung) bzw. von Ordnernamen können jeweils nur die ersten 32 Zeichen angezeigt werden. Damit kyrillische Buchstaben auf diesem Gerät angezeigt werden können, müssen diese mit einem der folgenden Zeichensätze codiert worden sein: ! Unicode (UTF-8, UTF-16) ! Andere Zeichensätze als Unicode, die in einer Windows-Umgebung verwendet und in den Sprachoptionen auf Russisch eingestellt wurden. Je nach der Anwendung, die für die Codierung der WMA-Dateien verwendet wurde, funktioniert dieses Gerät ggf. nicht ordnungsgemäß. Nach dem Wiedergabestart kann es bei Audio-Dateien, in die Bilddaten eingebettet wurden bzw. bei Audio-Dateien auf einem USB-Speichermedium mit einer komplexen Ordnerhierachie zu einer kurzen Verzögerung kommen. Datenübertragungen im Paketverfahren: Nicht kompatibel Ungeachtet der Länge der Leerstellen, die die Originalaufnahme zwischen den einzelnen Musiktiteln aufweist, wird bei der Wiedergabe von komprimierten Audio-Discs stets eine kurze Pause zwischen den Titeln eingefügt. USB-Speichermedium Abspielbare Ordnerstruktur: bis zu acht Ebenen (der Einfachheit halber sollte die Ordnerstruktur jedoch aus weniger als zwei Ebenen bestehen). Abspielbare Ordner: bis zu 500 Abspielbare Dateien: bis zu 15 000 Wiedergabe von urheberrechtlich geschützten Dateien: Nicht kompatibel Partitioniertes USB-Speichermedium: Es kann nur die erste Partition wiedergegeben werden. Beim Start der Wiedergabe von Audio-Dateien auf einem USB-Speichermedium, das eine komplexe Ordnerhierarchie aufweist, ist der Ton u. U. erst mit einiger Verzögerung zu hören. Disc Deutsch Sorgen Sie für eine sichere Befestigung des iPods während der Fahrt. Lassen Sie den iPod nicht auf den Boden fallen, wo er unter der Bremse oder dem Gaspedal eingeklemmt werden könnte. ! Diese Funktion kann nicht mit USB MTP verwendet werden. VORSICHT Abspielbare Ordnerstruktur: bis zu acht Ebenen (der Einfachheit halber sollte die Ordnerstruktur jedoch aus weniger als zwei Ebenen bestehen). Abspielbare Ordner: bis zu 99 Dateierweiterung: .wav Abspielbare Dateien: bis zu 999 Quantisierungsbits: 8 und 16 (LPCM), 4 (MS ADPCM) Dateisystem: Konformität mit ISO 9660 Stufe 1 und 2, Romeo, Joliet Abtastfrequenz: 16 kHz bis 48 kHz (LPCM); 22,05 kHz und 44,1 kHz (MS ADPCM) Multi-Session-Wiedergabe: Kompatibel ! Pioneer kann nicht die Kompatibilität mit allen USB-Speichermedien gewährleisten und übernimmt keine Verantwortung für eventuelle Datenverluste auf Media-Playern, Smartphones oder anderen Geräten, die mit diesem Gerät verwendet werden. ! Bewahren Sie keine Discs oder USB-Speichermedien an Orten auf, an dem erhöhte Temperaturen herrschen. De <QRD3200-A>97 97 Black plate (98,1) Anhang Zusätzliche Informationen iPod-Kompatibilität Dieses Gerät unterstützt nur die folgenden iPodModelle. Die unterstützten iPod-Softwareversionen sind unten stehend aufgelistet. Ältere Versionen werden ggf. nicht unterstützt. Hergestellt für ! iPod touch (5. Generation) ! iPod touch (4. Generation) ! iPod touch (3. Generation) ! iPod touch (2. Generation) ! iPod touch (1. Generation) ! iPod classic ! iPod mit Video ! iPod nano (7. Generation) ! iPod nano (6. Generation) ! iPod nano (5. Generation) ! iPod nano (4. Generation) ! iPod nano (3. Generation) ! iPod nano (2. Generation) ! iPod nano (1. Generation) ! iPhone 5 ! iPhone 4S ! iPhone 4 ! iPhone 3GS ! iPhone 3G ! iPhone Je nach iPod-Generation bzw. -Version können einige Funktionen nicht verfügbar sein. Je nach der iPod-Softwareversion gestaltet sich die Bedienung ggf. etwas unterschiedlich. Benutzer eines iPod mit Lightning-Anschluss sollten das (im iPod-Lieferumfang enthaltene) Lightning-auf-USB-Kabel verwenden. Benutzer eines iPod mit Dock-Anschluss sollten ein CD-IU51 verwenden. Weitere Einzelheiten erfahren Sie bei Ihrem Fachhändler. Informationen bezüglich der Datei-/Formatkompatibilität finden Sie im Handbuch Ihres iPods. Hörbücher, Podcasts: Kompatibel 98 Zusätzliche Informationen VORSICHT Pioneer haftet in keinem Fall für den Verlust von Daten auf einem iPod, selbst dann nicht, wenn der Datenverlust während der Verwendung dieses Geräts aufgetreten ist. Reihenfolge der Audio-Dateien Der Benutzer kann keine Ordnernummern zuweisen und auch die Wiedergabereihenfolge mit diesem Gerät nicht bestimmen. Beispiel einer Datenträger-Struktur 01 02 1 2 03 3 4 04 5 6 05 Stufe 1 Stufe 2 Stufe 3 Stufe 4 : Ordner : Komprimierte Audio-Datei 01 bis 05: Ordnernummer 1 bis 6: Wiedergabereihenfolge 3 Speichern Sie den Ordner mit den Dateien auf dem USB-Speichermedium. Je nach Systemumgebung ist eine Festlegung der Dateiwiedergabereihenfolge jedoch u. U. nicht möglich. Die Dateireihenfolge bei tragbaren USB-AudioPlayern unterscheidet sich jeweils vom verwendeten Player. WMA Russischer Zeichensatz D: C D: C D: C D: C D: C :А :Б :В :Г :Д : Е, Ё :Ж :З : И, Й :К :Л :М :Н :О :П :Р :С :Т :У :Ф :Х :Ц :Ч : Ш, Щ :Ъ :Ы :Ь :Э :Ю :Я D: Anzeige C: Zeichen Disc Die bei der Ordnerauswahl oder einem anderen Bedienvorgang angewendete Reihenfolge kann sich je nach der verwendeten Codierungs- bzw. Schreibsoftware ändern. USB-Speichermedium Die Wiedergabereihenfolge entspricht der Aufzeichnungsreihenfolge auf dem USB-Speichermedium. Für die Bestimmung der Wiedergabereihenfolge wird folgende Vorgehensweise empfohlen: 1 Erstellen Sie Dateinamen basierend auf Zahlen, um dadurch die gewünschte Wiedergabereihenfolge festzulegen (z. B. 001xxx.mp3 oder 099yyy.mp3). 2 Speichern Sie diese Dateien in einem Ordner. über Intranets und/oder andere Netzwerke oder in anderen elektronischen Inhalt-Vertriebssystemen, z. B. „Pay-Audio”- oder „Audio-on-demand”-Anwendungen. Für eine derartige Nutzung ist eine separate Lizenz erforderlich. Detaillierte Informationen hierzu finden Sie unter http://www.mp3licensing.com. Copyrights und Marken iTunes Apple und iTunes sind Warenzeichen von Apple Inc., eingetragen in den USA und anderen Ländern. MP3 Die Bereitstellung dieses Produkts erfolgt in Verbindung mit einer Lizenz zur privaten, nichtkommerziellen Nutzung und impliziert weder die Übertragung einer Lizenz noch die Einräumung eines Rechts zur Verwendung dieses Produkts in kommerziellen (d. h. ertragsorientierten) LiveProgrammen (leitungsbasiert, per Satellit, Kabel und/oder über jedes beliebige andere Medium), zum Broadcasting/Streaming über das Internet, Windows Media ist eine eingetragene Marke oder eine Marke der Microsoft Corporation in den USA und/oder anderen Ländern. Dieses Produkt enthält Technologie, die Eigentum der Microsoft Corporation ist und nicht ohne Lizenz von Microsoft Licensing, Inc. vertrieben werden darf. iPod und iPhone iPhone, iPod, iPod classic, iPod nano und iPod touch sind in den USA sowie in anderen Ländern eingetragene Marken von Apple Inc. Lightning ist ein Warenzeichen der Apple Inc. Die Kennzeichnungen „Made for iPod” und „Made for iPhone” bedeuten, dass ein elektronisches Zubehörteil spezifisch zum Anschluss an iPod oder iPhone konstruiert wurde und entsprechend vom Entwickler als die Leistungsstandards von Apple erfüllend zertifiziert wurde. Apple übernimmt keine Verantwortung für die richtige Funktion dieses Geräts oder seine Erfüllung von Sicherheits- oder anderen Vorschriften. Bitte beachten Sie, dass der Gebrauch dieses Zubehörteils in Verbindung mit einem iPod oder iPhone die drahtlose Leistung beeinträchtigen kann. Androidä Android ist eine Marke von Google Inc. MIXTRAX MIXTRAX ist ein Warenzeichen der PIONEER CORPORATION. De <QRD3200-A>98 Black plate (99,1) Anhang Zusätzliche Informationen Technische Daten Allgemein Stromversorgung ............. 14,4 V Gleichspannung (Toleranz 10,8 V bis 15,1 V) Erdungssystem ................ Negativ Maximale Leistungsaufnahme ................................... 10,0 A Abmessungen (B × H × T): DIN Einbaugröße .................... 178 mm × 50 mm × 165 mm Frontfläche ...................... 188 mm × 58 mm × 15 mm D Einbaugröße .................... 178 mm × 50 mm × 165 mm Frontfläche ...................... 170 mm × 46 mm × 15 mm (DEH-X3600UI) Frontfläche ...................... 170 mm × 46 mm × 16 mm (DEH-2600UI) Gewicht ........................... 1 kg Audio CD-Player Typ ................................... Compact-Disc-Digital-Audiosystem Kompatible Discs ............. Compact Disc Signal-Rauschabstand ..... 94 dB (1 kHz) (IEC-A-Netz) USB USB-Standard-Spezifikation ................................... USB 2.0 Full Speed Maximale Stromversorgung ................................... 1 A USB-Klasse ..................... MSC (Massenspeicher-Klasse) Dateisystem ..................... FAT12, FAT16, FAT32 MP3-Decodiermodus ....... MPEG-1 und 2 Audio Layer 3 WMA-Decodiermodus ...... Vers. 7, 7.1, 8, 9, 10, 11, 12 (2Kanal-Audio) (Windows Media Player) WAV-Signalformat ............ Lineare PCM und MS ADPCM (nicht komprimiert) UKW-Tuner Frequenzbereich .............. 87,5 MHz bis 108,0 MHz Nutzempfindlichkeit ......... 9 dBf (0,8 µV/75 W, Mono, Signal-Rauschabstand: 30 dB) Signal-Rauschabstand ..... 72 dB (IEC-A-Netz) Deutsch Max. Ausgangsleistung .... 50 W × 4 70 W × 1/2 W (für Subwoofer) Dauer-Ausgangsleistung ................................... 22 W × 4 (50 Hz bis 15 000 Hz, 5 % THD, bei 4-W-Last, beide Kanäle betrieben) Lastimpedanz .................. 4 W (4 W bis 8 W zulässig) Maximaler Preout-Ausgangspegel ................................... 2,0 V Loudness-Kontur ............. +10 dB (100 Hz), +6,5 dB (10 kHz) (Lautstärke: –30 dB) Equalizer (5-Band Graphic Equalizer): Frequenz .......................... 80 Hz/250 Hz/800 Hz/2,5 kHz/ 8 kHz Entzerrungsbereich .......... ±12 dB (Inkrement 2 dB) Subwoofer (Mono): Frequenz .......................... 50 Hz/63 Hz/80 Hz/100 Hz/ 125 Hz/160 Hz/200 Hz Steilheit ........................... –12 dB/Okt., –24 dB/Okt. Verstärkung ..................... +6 dB bis –24 dB Phase .............................. Normal/Gegen Anzahl der Kanäle ............ 2 (Stereo) MP3-Decodiermodus ....... MPEG-1 und 2 Audio Layer 3 WMA-Decodiermodus ...... Vers. 7, 7.1, 8, 9, 10, 11, 12 (2Kanal-Audio) (Windows Media Player) WAV-Signalformat ............ Lineare PCM und MS ADPCM (nicht komprimiert) MW-Tuner Frequenzbereich .............. 531 kHz bis 1 602 kHz Nutzempfindlichkeit ......... 25 µV (Signal-Rauschabstand: 20 dB) Signal-Rauschabstand ..... 62 dB (IEC-A-Netz) LW-Tuner Frequenzbereich .............. 153 kHz bis 281 kHz Nutzempfindlichkeit ......... 28 µV (Signal-Rauschabstand: 20 dB) Signal-Rauschabstand ..... 62 dB (IEC-A-Netz) Hinweis Änderungen der technischen Daten und des Designs vorbehalten. De <QRD3200-A>99 99 Black plate (100,1) Hoofdstuk Vóór u begint 01 Hartelijk dank voor uw keuze voor dit Pioneer-product Lees deze handleiding voordat u het product in gebruik neemt zodat u het goed leert gebruiken. Lees vooral de gedeelten die met WAARSCHUWING en LET OP gemarkeerd zijn aandachtig. Bewaar deze handleiding na het lezen op een veilige, voor de hand liggende plaats zodat u hem indien nodig altijd kunt raadplegen. Vóór u begint Informatie over dit toestel De tuner van dit toestel kan worden afgestemd op frequenties die gebruikt worden in West-Europa, Azië, het Midden-Oosten, Afrika en Oceanië. In andere gebieden is de ontvangst wellicht slecht. De RDS-functie (Radio Data System) werkt alleen in gebieden waar FM-zenders RDSinformatie uitzenden. WAARSCHUWING Deponeer dit product niet bij het gewone huishoudelijk afval wanneer u het wilt verwijderen. Er bestaat een speciaal wettelijk voorgeschreven verzamelsysteem voor de juiste behandeling, het opnieuw bruikbaar maken en de recycling van gebruikte elektronische producten. In de lidstaten van de EU en in Zwitserland en Noorwegen kunnen particulieren afgedankte elektronische producten gratis bij de daarvoor bestemde verzamelplaatsen inleveren. Als u een soortgelijk nieuw product koopt, kunt u het afgedankte product ook bij uw verkooppunt inleveren. Als u in een ander land woont, neem dan contact op met de plaatselijke overheid voor informatie over het weggooien van afgedankte producten. Op die manier zorgt u ervoor dat uw afgedankte product op de juiste wijze wordt verwerkt, hergebruikt en gerecycled, zonder schadelijke gevolgen voor het milieu en de volksgezondheid. 100 ! Probeer het product niet zelf te monteren en voer er geen onderhoud aan uit. Montage of onderhoud van het product door personen zonder technische opleiding en ervaring met elektronische apparatuur en auto-accessoires kan gevaarlijk zijn, en kan een elektrische schok, verwonding of andere gevaren veroorzaken. ! Bedien het toestel niet tijdens het rijden. Als u knoppen op het toestel wilt bedienen, moet u het voertuig eerst van de weg halen en op een veilige plaats parkeren. LET OP Dit apparaat is geclassificeerd als een klasse 1 laserproduct onder de veiligheidsnormen voor laserproducten, IEC 60825-1:2007. KLASSE 1 LASERPRODUCT Bij problemen Neem contact op met uw leverancier of het dichtstbijzijnde erkende Pioneer-servicecentrum als het toestel niet naar behoren functioneert. LET OP ! Zorg ervoor dat het toestel niet met vloeistof in aanraking komt. Een elektrische schok kan daarvan het gevolg zijn. Bovendien kan contact met vloeistoffen rookvorming, oververhitting en andere schade aan het toestel veroorzaken. ! De Pioneer CarStereo-Pass wordt alleen in Duitsland gebruikt. ! Zet het volume nooit zo hoog dat u geluiden buiten het voertuig niet meer kunt horen. ! Zorg dat het toestel niet wordt blootgesteld aan vocht. Nl <QRD3200-A>100 Black plate (101,1) Hoofdstuk Gebruik van het toestel Hoofdtoestel DEH-X3600UI 123 4 5 6 Gebruik van het toestel c 1/ d AUX-ingang (3,5 mm-stereoplug) e Verwijderen tot 6/ 1 LET OP 78 9 ab c de DEH-2600UI 21 3 4 b 5 6 Sluit een USB-opslagapparaat via een Pioneer USB-kabel (CD-U50E, optioneel) op dit toestel aan. Sluit het niet rechtstreeks op dit toestel aan omdat het dan uitsteekt en verwondingen of beschadigingen kan veroorzaken. Display-indicaties 2 3 9 a c de 3 1 SRC/OFF 2 h (uitwerpen) 3 MULTI-CONTROL (M.C.) 4 (lijst) Laadsleuf voor disc 6 USB-poort MIX (MIXTRAX) DEH-X3600UI 7 8 9 iPod DEH-2600UI BAND/ (iPod-bediening) (terug)/DIMMER (dimmer) a c/d b DISP 5 7 9 b 6 8 a b 3 4 7 6 8 (lijst) Bijkomende informatie 5 LOC (automatisch afstemmen op lokale zenders) 6 TP (verkeersprogramma-identificatie) 7 TA (verkeersberichten) (sound retriever) 9 (willekeurige weergave/shuffle) a (herhalen) b DEH-2600UI 5 9 a (iPod-bediening) De iPod-functie van dit toestel wordt via de iPod bediend. 2 Dit toestel kan Engelse, Russische of Turkse tekstinformatie bij een gecomprimeerd audiobestand weergeven. ! Als de gebruikte taal niet overeenkomt met de taalinstelling van dit toestel, wordt tekst wellicht niet correct weergegeven. ! Het is mogelijk dat sommige tekens niet juist worden weergegeven. 1 Draai aan M.C. en selecteer de gewenste instelling. ENG (Engels)—РУС (Russisch)—TUR (Turks) 2 Druk op M.C. om de selectie te bevestigen. CLOCK SET (klok) 1 2 3 4 Draai aan M.C. om het uur in te stellen. Druk op M.C. om de minuut te selecteren. Draai aan M.C. om de minuut in te stellen. Druk op M.C. om de selectie te bevestigen. FM STEP (FM-afstemstap) Instellingenmenu 1 4 Volg deze stappen om het menu in te stellen. Om verder te gaan naar de volgende menuoptie, moet u uw selectie bevestigen. 1 Zet het contact aan na de installatie van dit toestel. SET UP verschijnt. 2 Draai aan M.C. en selecteer YES. # Als u het toestel niet binnen 30 seconden gebruikt, wordt het instellingenmenu niet weergegeven. # Als u de instelling later wilt maken, selecteert u met M.C. nu NO. Gebruik FM STEP om de FM-afstemstap in te stellen (afstemstap bij het zoeken). 1 Draai aan M.C. en selecteer de FM-afstemstap. 100 (100 kHz)—50 (50 kHz) 2 Druk op M.C. om de selectie te bevestigen. QUIT verschijnt. ! Bij handmatig afstemmen is de afstemstap vast ingesteld op 50 kHz. ! Als de functies AF en TA zijn uitgeschakeld, is de afstemstap vast ingesteld op 50 kHz, ook als 100 is geselecteerd. Nl <QRD3200-A>101 Nederlands 5 4 Licht op wanneer er een menu of mappen op een lager niveau bestaan. 4 8 78 3 Druk op M.C. om uw keuze te bevestigen. LANGUAGE (taalinstelling) 2 DEH-X3600UI 1 Basisinformatie ! Tuner: frequentieband en frequentie ! RDS: programmaservicenaam, PTY-informatie en andere tekstinformatie ! Cd-speler, USB-opslagapparaat en iPod: verstreken weergavetijd en tekstinformatie 02 101 Black plate (102,1) Hoofdstuk Gebruik van het toestel 02 5 Draai aan M.C. en selecteer YES om de instelling te voltooien. # Als u nog iets wilt wijzigen, draait u M.C. naar NO. 6 Druk op M.C. om uw keuze te bevestigen. Opmerkingen ! U kunt de menu-opties instellen in het systeemmenu en het begininstellingenmenu. Raadpleeg Systeemmenu op bladzijde 108 en Beginmenu op bladzijde 110 voor meer informatie over de instellingen. ! U kunt het instellingenmenu annuleren door op SRC/OFF te drukken. Gebruik van het toestel Het voorpaneel verwijderen 1 Druk op de toets Verwijderen om het voorpaneel los te maken. 2 Duw het voorpaneel naar boven (M) en trek het naar u toe (N). 3 Bewaar het losgemaakte voorpaneel altijd in een beschermende tas of een doosje. Het voorpaneel terugzetten 1 Schuif het voorpaneel naar links. Basisbediening Belangrijk ! Wees voorzichtig bij het verwijderen en terugplaatsen van het voorpaneel. ! Stel het voorpaneel niet bloot aan schokken. ! Stel het voorpaneel niet bloot aan direct zonlicht en hoge temperaturen. ! Maak eerst alle kabels en apparaten (indien aanwezig) van het voorpaneel los voordat u het verwijdert om beschadiging aan het toestel en het voertuiginterieur te voorkomen. 2 Druk de rechterzijde van het voorpaneel aan tot het goed geplaatst is. Als u kracht gebruikt om het voorpaneel terug te plaatsen, kunt u het paneel of het toestel beschadigen. Een signaalbron selecteren 1 Druk op SRC/OFF om over te schakelen tussen: RADIO—CD—USB/iPod—APP (toepassing)— AUX ! Wanneer de MTP-verbinding actief is, wordt USB MTP weergegeven. ! Alleen voor DEH-2600UI Als een iPod aangesloten is en een andere bron dan iPod geselecteerd is, kunt u naar iPod overschakelen door op iPod te drukken. Het volume afstellen 1 Draai aan M.C. om het volume te regelen. Opmerking Als de blauw-witte draad van dit toestel is aangesloten op de bedieningsaansluiting van de automatische antenne van het voertuig, schuift de antenne uit wanneer er een signaalbron van dit toestel wordt ingeschakeld. Als de signaalbron wordt uitgeschakeld, wordt de antenne weer ingeschoven. Veelgebruikte menufuncties Het toestel inschakelen 1 Druk op SRC/OFF om het toestel in te schakelen. Terugkeren naar het vorige display Terugkeren naar de vorige lijst (de map die een niveau hoger ligt) 1 Druk op /DIMMER. Het toestel uitschakelen 1 Houd SRC/OFF ingedrukt tot het toestel uit gaat. Terugkeren naar het gewone display Het hoofdmenu annuleren 1 Druk op BAND/ . Radio Basisbediening Een frequentieband selecteren 1 Druk op BAND/ totdat de gewenste frequentieband (FM1, FM2, FM3 voor FM of MW/LW) op het display verschijnt. Overschakelen tussen voorkeuzestations 1 Druk op c of d. ! Om deze functie te gebruiken, moet u PCH (voorkeuzezender) selecteren onder SEEK. Handmatig afstemmen (stap voor stap) 1 Druk op c of d. ! Om deze functie te gebruiken, moet u MAN (handmatig afstemmen) selecteren onder SEEK. Automatisch afstemmen 1 Houd c of d ingedrukt en laat deze weer los. U kunt het automatisch afstemmen afbreken door even op c of d te drukken. Als u c of d ingedrukt houdt, worden zenders overgeslagen. Het automatisch afstemmen begint zodra u c of d loslaat. Opmerkingen ! Raadpleeg SEEK (instelling linker/rechter toets) op bladzijde 103 voor meer informatie over SEEK. ! U kunt de AF-functie (zoeken naar alternatieve frequenties) in- en uitschakelen. Voor normaal afstemmen moet de AF-functie uit staan (raadpleeg AF (alternatieve frequenties zoeken) op bladzijde 103). Terugkeren naar het gewone display van de lijst 1 Druk op BAND/ . 102 Nl <QRD3200-A>102 Black plate (103,1) Hoofdstuk Gebruik van het toestel Zenders voor de verschillende frequentiebanden opslaan en oproepen De voorkeuzetoetsen gebruiken 1 Opslaan: Houd de gewenste voorkeuzetoets (1/ t/m 6/ ) ingedrukt tot het nummer stopt met knipperen. 2 Oproepen: Druk op de gewenste voorkeuzetoets (1/ t/m 6/ ). Een ander display kiezen De gewenste informatie selecteren 1 Druk op DISP om over te schakelen tussen: ! FREQUENCY (programmaservicenaam of frequentie) ! BRDCST INFO (programmaservicenaam/ PTY-informatie) ! CLOCK (naam signaalbron en klok) Opmerkingen ! Als de programmaservicenaam niet gedetecteerd kan worden in FREQUENCY, wordt de frequentie weergegeven. Anders wordt de programmaservicenaam weergegeven. ! Afhankelijk van de frequentieband kan de tekstinformatie verschillen. ! Welke tekstinformatie gewijzigd kan worden, hangt af van het gebied. Gebruik van het toestel RDS-zenders zoeken via PTY-informatie (lijst). 1 Druk op 2 Draai aan M.C. om een programmatype te kiezen. NEWS/INFO—POPULAR—CLASSICS— OTHERS 3 Druk op M.C. om het zoeken te beginnen. Het toestel zoekt naar een zender die het geselecteerde programmatype uitzendt. Als er een zender is gevonden, wordt de programmaservicenaam weergegeven. ! Druk opnieuw op M.C. om het zoeken te annuleren. ! Het programma van een zender kan afwijken van de informatie die door de PTY-code wordt aangegeven. ! Als er geen zender gevonden wordt die het gewenste soort programma uitzendt, wordt op het display ongeveer twee seconden lang NOT FOUND getoond en keert de tuner terug naar de oorspronkelijke zender. PTY-lijst Bezoek de volgende website voor meer informatie over de PTY-lijst: http://www.pioneer.eu/eur/products/25/121/tech/ CarAudio/PTY.html Functie-instellingen PTY-functies Met behulp van PTY-informatie (programmatypeinformatie) kunt u op een bepaald soort zender afstemmen. 2 Draai aan M.C., selecteer de menuoptie FUNCTION en druk erop. 3 Draai aan M.C. om de gewenste functie te selecteren. U kunt de volgende functies aanpassen. # Als de MW/LW-band is geselecteerd, zijn alleen BSM, LOCAL en SEEK beschikbaar. De geluidskwaliteit kan worden aangepast aan het signaal van de FM-band. 1 Druk op M.C. om de instellingenmodus weer te geven. 2 Draai aan M.C. en selecteer de gewenste instelling. ! STANDARD – Dit is de standaardinstelling. ! HI-FI – In deze instelling wordt de hoge kwaliteit van stereogeluid benadrukt. ! STABLE – In deze instelling wordt de lage ruis van monogeluid benadrukt. BSM (geheugen voor de sterkste zenders) Met de functie BSM (Best Stations Memory) kunt u automatisch de zes sterkste zenders in het geheugen opslaan. Deze worden opgeslagen in volgorde van signaalsterkte. 1 Druk op M.C. om de functie BSM in te schakelen. Druk nogmaals op M.C. om deze te annuleren. REGIONAL (regionaal) Als de functie AF is ingeschakeld, kan de regionale functie gebruikt worden om het zoeken tot regionale programma’s te beperken. 1 Druk op M.C. om de regionale functie in of uit te schakelen. LOCAL (automatisch afstemmen op lokale zenders) Als deze functie is ingeschakeld, stemt het toestel alleen af op zenders waarvan het signaal voldoende sterk is voor een goede ontvangst. 1 Druk op M.C. en selecteer de gewenste instelling. FM: OFF—LV1—LV2—LV3—LV4 MW/LW: OFF—LV1—LV2 Als u het hoogste niveau selecteert, wordt alleen afgestemd op de sterkste zenders. Bij lagere niveaus wordt ook afgestemd op zwakkere zenders. TA (stand-by voor verkeersberichten) 1 Druk op M.C. om de functie Stand-by voor verkeersberichten in en uit te schakelen. AF (alternatieve frequenties zoeken) 1 Druk op M.C. om AF aan of uit te zetten. NEWS (onderbreking door nieuwsberichten) 1 Druk op M.C. om de nieuwsfunctie in of uit te schakelen. SEEK (instelling linker/rechter toets) U kunt een functie toewijzen aan de linker en rechter toets van het toestel. Selecteer MAN (handmatig afstemmen) om handmatig af te stemmen of PCH (voorkeuzezenders) om op voorkeuzezenders af te stemmen. 1 Druk op M.C. om MAN of PCH te selecteren. Cd/cd-r/cd-rw-discs en USBopslagapparaten MTP-verbinding Android-apparaten die compatibel zijn met MTP (apparaten met Android OS 4.0 of hoger) kunnen via de USB-bron met een MTP-verbinding worden aangesloten. Sluit Android-apparaten aan met de eigen kabel van het apparaat. Nederlands 1 Druk op M.C. om het hoofdmenu weer te geven. FM SETTING (instellingen voor FM-geluidskwaliteit) 02 Opmerkingen ! Deze functie is niet compatibel met MIXTRAX. ! Deze functie is niet compatibel met WAV. Nl <QRD3200-A>103 103 Black plate (104,1) Hoofdstuk Gebruik van het toestel 02 Basisbediening Een cd/cd-r/cd-rw afspelen 1 Plaats een disc met het etiket omhoog in de laadsleuf. Een cd/cd-r/cd-rw uitwerpen 1 Druk op h. Songs op een USB-opslagapparaat afspelen 1 Open het deksel van de USB-poort. 2 Sluit het USB-opslagapparaat aan via een USB-kabel. Stoppen met afspelen van songs op een USB-opslagapparaat 1 U kunt een USB-opslagapparaat op elk gewenst moment verwijderen. Een map selecteren 1 Druk op 1/ of 2/ . Een fragment selecteren 1 Druk op c of d. Vooruit of achteruit spoelen 1 Houd c of d ingedrukt. ! Als u gecomprimeerde audio afspeelt, is er geen geluid bij vooruit- en achteruitspoelen. Terugkeren naar de hoofdmap 1 Houd BAND/ ingedrukt. Overschakelen tussen gecomprimeerde audio en cd-da 1 Druk op BAND/ . Overschakelen tussen afspeelbare geheugenapparaten Als een USB-opslagapparaat meerdere USB Mass Storage-compatibele afspeelbare geheugenapparaten bevat, kunt u tussen deze apparaten overschakelen. 1 Druk op BAND/ . ! U kunt overschakelen tussen maximaal 32 verschillende geheugenapparaten. 104 Gebruik van het toestel Opmerking Ontkoppel USB-opslagapparaten van dit toestel wanneer u ze niet gebruikt. Bediening met de MIXTRAX-toets MIXTRAX in- of uitschakelen Alleen voor DEH-X3600UI U kunt deze functie gebruiken wanneer USB als signaalbron is geselecteerd. U kunt deze functie niet gebruiken met USB MTP. 1 Druk op MIX om MIXTRAX in of uit te schakelen. ! Raadpleeg Informatie over MIXTRAX op bladzijde 109 voor meer informatie over MIXTRAX. ! Wanneer MIXTRAX gebruikt wordt, is de sound retriever uitgeschakeld. Een ander display kiezen De gewenste informatie selecteren 1 Druk op DISP om over te schakelen tussen: CD-DA ! ELAPSED TIME (fragmentnummer en weergavetijd) ! CLOCK (naam signaalbron en klok) ! SPEANA (spectrumanalyzer) CD-TEXT ! TRACK INFO (fragmenttitel/naam artiest fragment/disctitel) ! ELAPSED TIME (fragmentnummer en weergavetijd) ! CLOCK (naam signaalbron en klok) ! SPEANA (spectrumanalyzer) MP3/WMA/WAV ! TRACK INFO (fragmenttitel/naam artiest/ albumtitel) ! FILE INFO (bestandsnaam/mapnaam) ! ELAPSED TIME (fragmentnummer en weergavetijd) ! CLOCK (naam signaalbron en klok) ! SPEANA (spectrumanalyzer) Bestanden en fragmenten in de lijst selecteren en afspelen 1 Druk op om over te schakelen naar de lijst met bestands- of fragmentnamen. 2 Gebruik M.C. om de gewenste bestandsnaam (of mapnaam) te selecteren. Een bestand of map selecteren 1 Draai aan M.C. Afspelen 1 Selecteer een bestand of fragment en druk op M.C. Het afspelen onderbreken 1 Druk op 4/PAUSE om het afspelen te onderbreken (pauze) of te hervatten. De geluidskwaliteit van gecomprimeerde audio verbeteren (sound retriever) 1 Druk op 3/S.Rtrv om over te schakelen tussen: 1—2—OFF (uit) 1 heeft effect bij lage compressie en 2 heeft effect bij hoge compressie. ! De toetsbediening wordt uitgeschakeld als MIXTRAX aan staat. Functie-instellingen Een lijst van de bestanden (mappen) in de geselecteerde map weergeven 1 Selecteer een map en druk op M.C. 1 Druk op M.C. om het hoofdmenu weer te geven. Een song in de geselecteerde map afspelen 1 Selecteer een map en houd M.C. ingedrukt. 2 Draai aan M.C., selecteer de menuoptie FUNCTION en druk erop. U kunt de volgende functie aanpassen. Bediening met speciale toetsen Een herhaalbereik selecteren om over te schakelen tussen: 1 Druk op 6/ Cd/cd-r/cd-rw-discs ! ALL – Alle fragmenten herhalen ! ONE – Het huidige fragment herhalen ! FLD – De huidige map herhalen USB-opslagapparaat ! ALL – Alle bestanden herhalen ! ONE – Het huidige bestand herhalen ! FLD – De huidige map herhalen ! S.RTRV is niet beschikbaar als MIXTRAX aan staat. S.RTRV (sound retriever) Deze verbetert automatisch de weergave van gecomprimeerde audio en zorgt voor een vol geluid. 1 Druk op M.C. en selecteer de gewenste instelling. Raadpleeg De geluidskwaliteit van gecomprimeerde audio verbeteren (sound retriever) op bladzijde 104 voor meer informatie. Fragmenten in willekeurige volgorde afspelen om willekeurige weergave in of 1 Druk op 5/ uit te schakelen. Fragmenten in een geselecteerd herhaalbereik worden in willekeurige volgorde afgespeeld. ! Druk tijdens weergave in willekeurige volgorde op d om naar het volgende fragment te gaan. Als u op c drukt, wordt het huidige fragment opnieuw vanaf het begin afgespeeld. Nl <QRD3200-A>104 Black plate (105,1) Hoofdstuk Gebruik van het toestel iPod Basisbediening Muziek op een iPod afspelen 1 Open het deksel van de USB-poort. 2 Sluit een iPod aan op de USB-ingang. Het afspelen begint automatisch. Een song selecteren (hoofdstuk) 1 Druk op c of d. Gebruik van het toestel Een ander display kiezen De gewenste informatie selecteren 1 Druk op DISP om over te schakelen tussen: ! TRACK INFO (fragmenttitel/naam artiest/ albumtitel) ! ELAPSED TIME (fragmentnummer en weergavetijd) ! CLOCK (naam signaalbron en klok) ! SPEANA (spectrumanalyzer) Een album selecteren 1 Druk op 1/ of 2/ . Naar een song bladeren Vooruit of achteruit spoelen 1 Houd c of d ingedrukt. 1 Druk op om naar het hoofdmenu met zoeklijsten te gaan. Opmerkingen ! De iPod kan niet worden in- en uitgeschakeld als de bedieningsmodus is ingesteld op CONTROL AUDIO/CTRL AUDIO. ! Verwijder de koptelefoon van de iPod voordat u hem op dit toestel aansluit. ! De iPod wordt uitgeschakeld ongeveer twee minuten nadat de contactschakelaar is uitgezet. Bediening met de MIXTRAX-toets Selecteer een categorie of song met M.C. De naam van een song of categorie wijzigen 1 Draai aan M.C. Speellijsten—artiesten—albums—songs— podcasts—genres—componisten—audioboeken Afspelen 1 Selecteer een song en druk op M.C. Een lijst van songs in de geselecteerde categorie weergeven 1 Selecteer een categorie en druk op M.C. Een song in de geselecteerde categorie afspelen 1 Selecteer een categorie en houd M.C. ingedrukt. Alfabetisch in een lijst zoeken 1 Geef de lijst voor de geselecteerde categorie om alfabetisch te zoeken. weer en druk op ! U kunt ook overschakelen naar alfabetisch zoeken door twee keer aan M.C. te draaien. 2 Draai aan M.C. om een letter te selecteren. 3 Druk op M.C. om de alfabetische lijst weer te geven. ! Druk op /DIMMER om het zoeken te annuleren. Bediening met speciale toetsen Een herhaalbereik selecteren om over te schakelen tussen: 1 Druk op 6/ ! ONE – De huidige song herhalen ! ALL – Alle songs in de geselecteerde lijst herhalen ! In de bedieningsmodus CONTROL iPod/CTRL iPod wordt hetzelfde herhaalbereik gebruikt dat is ingesteld voor de aangesloten iPod. Een herhaalbereik voor afspelen in willekeurige volgorde (shuffle) selecteren om over te schakelen tussen: 1 Druk op 5/ ! SNG – De songs in de geselecteerde lijst in willekeurige volgorde afspelen. ! ALB – De songs van een willekeurig album op volgorde afspelen. ! OFF – Niet afspelen in willekeurige volgorde. Alle songs in willekeurige volgorde afspelen (shuffle all) ingedrukt om de functie Shuffle 1 Houd 5/ all in te schakelen. ! Selecteer OFF in Shuffle om Shuffle all uit te schakelen. Raadpleeg voor meer informatie Een herhaalbereik voor afspelen in willekeurige volgorde (shuffle) selecteren op bladzijde 105. Het afspelen onderbreken 1 Druk op 4/PAUSE om het afspelen te onderbreken (pauze) of te hervatten. De geluidskwaliteit van gecomprimeerde audio verbeteren (sound retriever) 1 Druk op 3/S.Rtrv om over te schakelen tussen: 1—2—OFF (uit) 1 heeft effect bij lage compressie en 2 heeft effect bij hoge compressie. Songs afspelen die verwant zijn met de huidige song De volgende lijsten voor songs zijn beschikbaar. • Lijst van albums van de huidige artiest • Lijst van songs op het huidige album • Lijst van albums van het huidige genre 1 Houd ingedrukt om naar de gekoppelde weergavemodus over te schakelen. 2 Draai aan M.C. om een andere modus te kiezen; druk erop om een modus te selecteren. ! ARTIST – Een album van de huidige artiest afspelen. ! ALBUM – Een song van het huidige album afspelen. ! GENRE – Een album van het huidige genre afspelen. De geselecteerde song of het geselecteerde album wordt na de huidige song afgespeeld. Opmerkingen ! De geselecteerde song of het geselecteerde album kan worden geannuleerd als u een andere functie dan gekoppeld zoeken gebruikt (bijvoorbeeld snel vooruit of achteruit spoelen). ! Afhankelijk van de geselecteerde song is het mogelijk dat het einde van de huidige song en het begin van de geselecteerde song (album) worden afgesneden. Nl <QRD3200-A>105 Nederlands MIXTRAX in- of uitschakelen Alleen voor DEH-X3600UI 1 Druk op MIX om MIXTRAX in of uit te schakelen. ! Raadpleeg Informatie over MIXTRAX op bladzijde 109 voor meer informatie over MIXTRAX. 2 Opmerkingen ! U kunt speellijsten afspelen die zijn gemaakt met de computertoepassing MusicSphere. Deze toepassing is beschikbaar op onze website. ! Speellijsten die zijn gemaakt met de computertoepassing MusicSphere worden verkort weergegeven. 02 105 Black plate (106,1) Hoofdstuk Gebruik van het toestel 02 De iPod-functie van dit toestel via de iPod gebruiken De iPod-functie van dit toestel kan via een aangesloten iPod bediend worden. CONTROL iPod/CTRL iPod kan niet worden gebruikt met de volgende iPod-modellen. ! iPod nano 1e generatie ! iPod met video % Druk op BAND/ dus te wijzigen. om de bedieningsmo- ! CONTROL iPod/CTRL iPod – De iPod-functie van dit toestel kan via de aangesloten iPod bediend worden. ! CONTROL AUDIO/CTRL AUDIO – De iPodfunctie van dit toestel kan via dit toestel bediend worden. Alleen voor DEH-2600UI U kunt ook op iPod drukken om de bedieningsmodus te wijzigen. Opmerkingen ! Als u de bedieningsmodus overschakelt op CONTROL iPod/CTRL iPod, wordt het afspelen van songs onderbroken. Gebruik de iPod om de weergave te hervatten. ! Ook als de bedieningsmodus is ingesteld op CONTROL iPod/CTRL iPod, kunnen de volgende functies vanaf dit toestel bediend worden. — Pauze — Vooruit en achteruit spoelen — Een song selecteren (hoofdstuk) ! Het volume kan alleen vanaf dit toestel worden bijgesteld. Functie-instellingen 1 Druk op M.C. om het hoofdmenu weer te geven. 2 Draai aan M.C., selecteer de menuoptie FUNCTION en druk erop. 106 Gebruik van het toestel 3 Draai aan M.C. om de gewenste functie te selecteren. U kunt de volgende functies aanpassen. ! AUDIO BOOK kan niet worden gebruikt als CONTROL iPod/CTRL iPod is geselecteerd in de bedieningsmodus. Raadpleeg De iPodfunctie van dit toestel via de iPod gebruiken op bladzijde 106 voor meer informatie. AUDIO BOOK (audioboeksnelheid) 1 Druk op M.C. om de instellingenmodus weer te geven. 2 Draai aan M.C. en selecteer de gewenste instelling. ! FASTER – Weergave is sneller dan normaal ! NORMAL – Weergave met normale snelheid ! SLOWER – Weergave is langzamer dan normaal S.RTRV (sound retriever) 1 Druk op M.C. en selecteer de gewenste instelling. Raadpleeg De geluidskwaliteit van gecomprimeerde audio verbeteren (sound retriever) op bladzijde 105 voor meer informatie. Applicaties van aangesloten apparaten gebruiken Via dit toestel kunt u songs van iPhone-applicaties via streaming afspelen en bedienen of alleen via streaming afspelen. Belangrijk Voor gebruik van applicaties van derden worden mogelijk persoonsgegevens gebruikt of moet u zulke gegevens verstrekken, bijvoorbeeld door het opzetten van een gebruikersaccount of op andere wijze, en voor sommige applicaties worden mogelijk geolocatiegegevens gebruikt. ALLE APPLICATIES VAN DERDEN VALLEN UITSLUITEND ONDER VERANTWOORDELIJKHEID VAN HUN UITGEVER, INCLUSIEF MAAR NIET BEPERKT TOT HET VERZAMELEN EN BEVEILIGEN VAN GEBRUIKERSGEGEVENS EN HET PRIVACYBELEID. DOOR EEN APPLICATIE VAN DERDEN TE GEBRUIKEN, GAAT U ERMEE AKKOORD OM U TE INFORMEREN OVER DE GEBRUIKSVOORWAARDEN EN HET PRIVACYBELEID VAN DE UITGEVER ERVAN. ALS U NIET AKKOORD GAAT MET DE GEBRUIKSVOORWAARDEN OF HET BELEID VAN EEN UITGEVER OF GEEN TOESTEMMING GEEFT VOOR HET GEBRUIK VAN GEOLOCATIEGEGEVENS (INDIEN VAN TOEPASSING), MOET U DE APPLICATIE NIET GEBRUIKEN. Informatie over de compatibiliteit van aangesloten apparaten Hieronder vindt u gedetailleerde informatie over de benodigde aansluitingen om de applicatie voor iPhone op dit toestel te gebruiken. Voor iPhone ! Deze functie is compatibel met de iPhone en iPod touch. ! Het apparaat moet iOS 5.0 of later hebben. Opmerkingen ! Raadpleeg onze website voor een overzicht van ondersteunde iPhone-applicaties voor dit toestel. ! Pioneer is niet aansprakelijk voor problemen die kunnen ontstaan door fouten of gebreken in de gebruikte toepassing. ! De provider van de App is verantwoordelijk voor de inhoud en de functionaliteit van de aangeboden toepassing. Startprocedure voor iPhone 1 Sluit een iPhone aan op de USB-ingang. 2 Schakel de signaalbron over naar APP. 3 Start de applicatie op de iPhone en begin met afspelen. Basisbediening Een fragment selecteren 1 Druk op c of d. Vooruit of achteruit spoelen 1 Houd c of d ingedrukt. Het afspelen onderbreken 1 Druk op BAND/ om het afspelen te onderbreken (pauze) of te hervatten. Een ander display kiezen De gewenste informatie selecteren 1 Druk op DISP om over te schakelen tussen: ! TRACK INFO (fragmenttitel/naam artiest/ albumtitel) ! APP NAME (naam van applicatie) ! ELAPSED TIME (weergavetijd) ! CLOCK (naam signaalbron en klok) ! SPEANA (spectrumanalyzer) Functie-instellingen 1 Druk op M.C. om het hoofdmenu weer te geven. Nl <QRD3200-A>106 Black plate (107,1) Hoofdstuk Gebruik van het toestel 2 Draai aan M.C., selecteer de menuoptie FUNCTION en druk erop. 3 Draai aan M.C. om de gewenste functie te selecteren. U kunt de volgende functies aanpassen. Gebruik van het toestel ! SUB.W CTRL kan niet worden gebruikt als SUB.W is geselecteerd in OFF. Raadpleeg voor meer informatie SUB.W (subwoofer aan/ uit) op bladzijde 107. ! SLA is niet beschikbaar als de signaalbron is ingesteld op FM. PAUSE (pauze) FADER (fader aanpassen) 1 Druk op M.C. om het afspelen te onderbreken (pauze) of te hervatten. 1 Druk op M.C. om de instellingenmodus weer te geven. 2 Draai aan M.C. om de balans tussen de luidsprekers voorin en achterin in te stellen. S.RTRV (sound retriever) 1 Druk op M.C. en selecteer de gewenste instelling. 1—2—OFF (uit) 1 heeft effect bij lage compressie en 2 heeft effect bij hoge compressie. Audio-instellingen 1 Druk op M.C. om het hoofdmenu weer te geven. 2 Draai aan M.C., selecteer de menuoptie AUDIO en druk erop. 3 Draai aan M.C. en selecteer de audiofunctie. U kunt de volgende audiofuncties aanpassen. 1 Druk op M.C. om de instellingenmodus weer te geven. 2 Draai aan M.C. om de balans tussen de linker/ rechterluidsprekers in te stellen. EQ SETTING (equalizercurven) LOUDNESS (loudness) De loudness-functie compenseert een tekort aan lage tonen en hoge tonen bij een laag volume. 1 Druk op M.C. en selecteer de gewenste instelling. OFF (uit)—LOW (laag)—MID (midden)—HI (hoog) SUB.W (subwoofer aan/uit) Dit toestel is voorzien van een in- en uitschakelbare subwooferuitgang. 1 Druk op M.C. en selecteer de gewenste instelling. NOR (normale fase)—REV (tegengestelde fase)—OFF (subwoofer uit) SUB.W CTRL (subwoofer aanpassen) De subwoofer geeft alleen frequenties beneden de geselecteerde waarde weer. 1 Druk op M.C. om de instellingenmodus weer te geven. 2 Druk op M.C. om over te schakelen tussen: Drempelfrequentie—Uitgangsniveau—Vervalniveau Instelbare waarden knipperen. 3 Draai aan M.C. en selecteer de gewenste instelling. Drempelfrequentie: 50HZ—63HZ—80HZ— 100HZ—125HZ—160HZ—200HZ Uitgangsniveau: –24 tot +6 Hellingsniveau: –12 — –24 BASS BOOST (bass boost) 1 Druk op M.C. om de instellingenmodus weer te geven. 2 Draai aan M.C. en selecteer het gewenste niveau. U kunt het niveau verhogen of verlagen tussen de waarden 0 en +6. De waarde wordt op het display getoond. HPF SETTING (high pass filter aanpassen) Gebruik deze functie als u alleen naar geluid met hogere frequenties wilt luisteren. Alleen frequenties boven de drempelfrequentie van het high pass filter worden weergegeven. 1 Druk op M.C. om de instellingenmodus weer te geven. 2 Druk op M.C. om over te schakelen tussen: Drempelfrequentie—Vervalniveau 3 Draai aan M.C. en selecteer de gewenste instelling. Drempelfrequentie: OFF—50HZ—63HZ— 80HZ—100HZ—125HZ—160HZ—200HZ Hellingsniveau: –12 — –24 Nl <QRD3200-A>107 Nederlands ! FADER kan niet worden gebruikt als SUB.W/SUB.W is geselecteerd in SP-P/O MODE. Raadpleeg voor meer informatie SP-P/O MODE (achteruitgang en preout-instelling) op bladzijde 110. ! SUB.W en SUB.W CTRL kunnen niet worden gebruikt als REAR/REAR is geselecteerd in SP-P/O MODE. Raadpleeg voor meer informatie SP-P/O MODE (achteruitgang en preout-instelling) op bladzijde 110. BALANCE (balansinstelling) 1 Druk op M.C. om de instellingenmodus weer te geven. 2 Draai aan M.C. om de equalizer te selecteren. POWERFUL—NATURAL—VOCAL—CUSTOM1—CUSTOM2—FLAT—SUPER BASS De equalizerband en het equalizerniveau kunnen worden aangepast van CUSTOM1 en CUSTOM2. Volg de onderstaande procedure als u CUSTOM1 of CUSTOM2 selecteert. Voor een andere optie drukt u op M.C. om terug te keren naar het vorige display. ! CUSTOM1 kan voor elke signaalbron afzonderlijk worden ingesteld. USB, iPod en APP worden echter automatisch op dezelfde stand ingesteld. ! CUSTOM2 is een gemeenschappelijk instelling voor alle signaalbronnen. 3 Druk op M.C. om de instellingenmodus weer te geven. 4 Druk op M.C. om over te schakelen tussen: Equalizerband—Equalizerniveau 5 Draai aan M.C. en selecteer de gewenste instelling. Equalizerband: 80HZ—250HZ—800HZ— 2.5KHZ—8KHZ Equalizerniveau: +6 tot –6 02 107 Black plate (108,1) Hoofdstuk Gebruik van het toestel 02 SLA (bronniveauregeling) LANGUAGE (taalinstelling) De functie voorkomt sterke volumewisselingen wanneer de bron wordt overgeschakeld. ! De instellingen zijn gebaseerd op het FM-volumeniveau, dat zelf niet gewijzigd kan worden. ! Het MW/LW-volumeniveau kan ook met deze functie worden aangepast. ! USB, iPod en APP worden automatisch hetzelfde ingesteld. 1 Druk op M.C. om de instellingenmodus weer te geven. 2 Draai aan M.C. om het bronvolume te regelen. Instelbereik: +4 tot –4 Dit toestel kan Engelse, Russische of Turkse tekstinformatie bij een gecomprimeerd audiobestand weergeven. ! Als de gebruikte taal niet overeenkomt met de taalinstelling van dit toestel, wordt tekst wellicht niet correct weergegeven. ! Het is mogelijk dat sommige tekens niet juist worden weergegeven. 1 Druk op M.C. en selecteer de gewenste instelling. ENG (Engels)—РУС (Russisch)—TUR (Turks) Systeemmenu Belangrijk Als het toestel van de accu wordt losgekoppeld, wordt PW SAVE (energiezuinige modus) uitgeschakeld. Deze functie moet u weer inschakelen als het toestel terug met de accu wordt verbonden. Als het voertuig niet van een contactschakelaar met accessoirestand (ACC) is voorzien, is het (afhankelijk van de aansluiting) mogelijk dat het toestel de accu blijft belasten als PW SAVE (energiezuinige modus) is uitgeschakeld. 1 Druk op M.C. om het hoofdmenu weer te geven. 2 Draai aan M.C., selecteer de menuoptie SYSTEM en druk erop. 3 Draai aan M.C. en selecteer de systeemmenufunctie. U kunt de volgende functies in het systeemmenu aanpassen. ! INFO DISPLAY en BRIGHTNESS zijn niet beschikbaar voor DEH-2600UI. ! MUTE MODE is niet beschikbaar voor DEHX3600UI. 108 Gebruik van het toestel CLOCK SET (klok) 1 Druk op M.C. om de instellingenmodus weer te geven. 2 Druk op M.C. om het onderdeel van de klok te selecteren dat u wilt instellen. Uur—Minuut 3 Draai aan M.C. om de klok in te stellen. 12H/24H (tijdweergave) 1 Druk op M.C. en selecteer de gewenste instelling. 12H (12-uurs klok)—24H (24-uurs klok) INFO DISPLAY (bijkomende informatie) U kunt instellen wat voor soort bijkomende informatie wordt weergegeven. 1 Druk op M.C. om de instellingenmodus weer te geven. 2 Draai aan M.C. en selecteer de gewenste instelling. SPEANA—LEVEL METER—SOURCE—CLOCK —OFF ! Voor SPEANA en LEVEL METER wordt een signaalniveau-indicator weergegeven als de bron is ingesteld op RADIO. Als deze functie is ingeschakeld, probeert het toestel bij slechte ontvangst automatisch een andere zender met gelijkaardige programma’s te vinden, ook als u een voorkeuzezender selecteerde. 1 Druk op M.C. om de automatische PI-zoekfunctie in of uit te schakelen. AUX (externe aansluiting) Schakel deze instelling in als een extern apparaat op dit toestel is aangesloten. 1 Druk op M.C. om AUX in of uit te schakelen. DIMMER (dimmer) Het geluid van dit toestel kan automatisch worden uitgeschakeld of gedempt wanneer een ander apparaat met uitschakelingsfunctie daarom vraagt met een speciaal signaal. 1 Druk op M.C. om de instellingenmodus weer te geven. 2 Draai aan M.C. en selecteer de gewenste instelling. ! MUTE – Tijdelijk uitschakelen ! 20dB ATT – Dempen (20dB ATT heeft meer effect dan 10dB ATT) ! 10dB ATT – Dempen PW SAVE (energiezuinige stand) 1 Druk op M.C. om de dimmer in of uit te schakelen. ! U kunt de dimmer ook instellen door /DIMMER even ingedrukt te houden. BRIGHTNESS (helderheid aanpassen) Met deze instelling kunt u de helderheid van het display aanpassen. Het instelbereik voor BRIGHTNESS is verschillend naargelang DIMMER is in- of uitgeschakeld. Raadpleeg DIMMER (dimmer) op bladzijde 108 voor meer informatie. 1 Druk op M.C. om de instellingenmodus weer te geven. 2 Draai aan M.C. en selecteer de gewenste instelling. DIMMER aan: 1 tot 4 DIMMER uit: 1 tot 5 MUTE MODE (dempen) Met deze functie wordt het energieverbruik van de accu verminderd. ! Als deze functie is ingeschakeld, kan alleen het bronsignaal worden ingeschakeld. 1 Druk op M.C. om de energiezuinige modus in of uit te schakelen. De verlichtingskleur selecteren Alleen voor DEH-X3600UI Verlichtingsfuncties 1 Druk op M.C. om het hoofdmenu weer te geven. 2 Draai aan M.C., geef ILLUMI weer en druk erop. 3 Draai aan M.C. om de gewenste verlichting te selecteren. U kunt de volgende audiofuncties aanpassen. AUTO PI (automatisch PI-zoeken) Nl <QRD3200-A>108 Black plate (109,1) Hoofdstuk Gebruik van het toestel Gebruik van het toestel KEY COLOUR (kleurinstelling voor toetsen) ILLUMI FX (verlichtingseffect) U kunt de kleur van de toetsen van het toestel naar wens instellen. 1 Druk op M.C. om de instellingenmodus weer te geven. 2 Draai aan M.C. en selecteer de verlichtingskleur. ! Vooringestelde kleuren (WHITE tot BLUE) ! SCAN (automatisch verschillende kleuren afwisselen) ! CUSTOM (aangepaste verlichtingskleur) In deze stand wordt op bepaalde momenten een verlichtingseffect weergegeven op het display, bijvoorbeeld wanneer u het ACC-contact aan- of uitzet en een cd plaatst of verwijdert. 1 Druk op M.C. om ILLUMI FX in of uit te schakelen. ! Het verlichtingseffect wordt geactiveerd wanneer het ACC-contact wordt aan- of uitgezet, ongeacht of de instelling ILLUMI FX wel of niet is ingeschakeld. DISP COLOUR (kleurinstelling voor display) U kunt de kleuren van het display van het toestel naar wens instellen. 1 Druk op M.C. om de instellingenmodus weer te geven. 2 Draai aan M.C. en selecteer de verlichtingskleur. ! Vooringestelde kleuren (WHITE tot BLUE) ! SCAN (automatisch verschillende kleuren afwisselen) ! CUSTOM (aangepaste verlichtingskleur) BOTH COLOUR (toets- en displaykleur) De verlichtingskleur zelf aanpassen U kunt aangepaste kleuren maken voor KEY COLOUR en DISP COLOUR. 1 Druk op M.C. om het hoofdmenu weer te geven. Opmerking U kunt geen aangepaste kleur maken terwijl SCAN is geselecteerd. Informatie over MIXTRAX Alleen voor DEH-X3600UI MIXTRAX is een technologie waarmee tussen songs overgangseffecten worden ingelast zodat u non-stop kunt genieten van de muziek en de visuele effecten erbij. Opmerkingen ! Afhankelijk van het bestand of de song zijn er mogelijk geen geluidseffecten beschikbaar. ! Schakel MIXTRAX uit als u de visuele effecten hinderlijk vindt tijdens het rijden. Raadpleeg Bediening met de MIXTRAX-toets op bladzijde 104. SHORT PLAYBCK (kort afspelen) U kunt de weergaveduur instellen. 1 Druk op M.C. om de instellingenmodus weer te geven. 2 Draai aan M.C. en selecteer de gewenste instelling. 1.0 MIN (1,0 minuut)—1.5 MIN (1,5 minuten) —2.0 MIN (2,0 minuten)—2.5 MIN (2,5 minuten)—3.0 MIN (3,0 minuten)—OFF (uit) FLASH AREA (knipperweergave) Hier kunt u de gewenste onderdelen voor de kleureffecten selecteren. 1 Druk op M.C. om de instellingenmodus weer te geven. 2 Draai aan M.C. en selecteer de gewenste instelling. KEY/DISPLAY (toetsen en display)—KEY (toetsen)—OFF (uit) ! Als OFF is geselecteerd, wordt voor het display de onder ILLUMI opgeslagen kleur gebruikt. FLASH PATTERN (knipperpatroon) MIXTRAX-menu 2 Draai aan M.C., geef ILLUMI weer en druk erop. 3 Draai aan M.C., selecteer KEY COLOUR of DISP COLOUR en druk erop. 4 Houd M.C. ingedrukt tot het scherm voor kleuraanpassing verschijnt. 5 Druk op M.C. om de primaire kleur te selecteren. R (rood)—G (groen)—B (blauw) 1 Druk op M.C. om het hoofdmenu weer te geven. 2 Draai aan M.C., selecteer de menuoptie MIXTRAX en druk erop. 3 Draai aan M.C. en selecteer de gewenste MIXTRAX-functie. U kunt de volgende MIXTRAX-functies instellen wanneer MIXTRAX ingeschakeld is. Nederlands U kunt de kleuren van de toetsen en het display van het toestel naar wens instellen. 1 Druk op M.C. om de instellingenmodus weer te geven. 2 Draai aan M.C. en selecteer de verlichtingskleur. ! Vooringestelde kleuren (WHITE tot BLUE) ! SCAN (automatisch verschillende kleuren afwisselen) Opmerking Als CUSTOM is geselecteerd, wordt de opgeslagen aangepaste kleur gebruikt. # U kunt deze handeling ook voor andere kleuren uitvoeren. 02 6 Draai aan M.C. om de helderheid te regelen. Instelbereik: 0 tot 60 # U kunt niet voor alle drie de kleuren R (rood), G (groen) en B (blauw) tegelijk een waarde onder 20 instellen. Nl <QRD3200-A>109 109 Black plate (110,1) Hoofdstuk Gebruik van het toestel 02 De knipperende kleur en speciale effecten van MIXTRAX veranderen mee met het geluid en de basniveaus. 1 Druk op M.C. om de instellingenmodus weer te geven. 2 Draai aan M.C. en selecteer de gewenste instelling. ! SOUND LEVEL 1 t/m SOUND LEVEL 6 – Het knipperpatroon verandert naargelang het geluidsniveau. Selecteer de gewenste stand. ! LOW PASS 1 t/m LOW PASS 6 – Het knipperpatroon verandert naargelang het basniveau. Selecteer de gewenste stand. ! RANDOM 1 – Het knipperpatroon verandert willekeurig naargelang de geluidsniveaustand en de low pass-stand. ! RANDOM 2 – Het knipperpatroon verandert willekeurig naargelang de geluidsniveaustand. ! RANDOM 3 – Het knipperpatroon verandert willekeurig naargelang de low passstand. DISPLAY FX (display-effect) Hier kunt u de speciale MIXTRAX display-effecten in- of uitschakelen. 1 Druk op M.C. en selecteer de gewenste instelling. ON (MIXTRAX-effecten weergeven)—OFF (gewone weergave) CUT IN FX (manueel invoegeffect) Hiermee zet u MIXTRAX-geluidseffecten aan of uit wanneer u handmatig naar een ander nummer bladert. 1 Druk op M.C. en selecteer de gewenste instelling. ON (aan)—OFF (uit) Gebruik van het toestel Beginmenu 1 Houd SRC/OFF ingedrukt tot het toestel uit gaat. 2 Houd SRC/OFF ingedrukt tot het hoofdmenu wordt weergegeven. 3 Draai aan M.C., selecteer de menuoptie INITIAL en druk erop. 4 Draai aan M.C. en selecteer de gewenste functie. U kunt de volgende functies in het beginmenu aanpassen. FM STEP (FM-afstemstap) 1 Druk op M.C. om de FM-afstemstap te selecteren. 100 (100 kHz)—50 (50 kHz) SP-P/O MODE (achteruitgang en preout-instelling) Op de uitgang voor de achterluidspreker en de RCA-uitgang van dit toestel kan een luidspreker met volledig bereik of een subwoofer aangesloten worden. Selecteer de gewenste instelling. 1 Druk op M.C. om de instellingenmodus weer te geven. 2 Draai aan M.C. en selecteer de gewenste instelling. ! REAR/SUB.W – Selecteer deze stand als op de uitgang voor de achterluidspreker een luidspreker met volledig bereik aangesloten is, en op de RCA-uitgang een subwoofer aangesloten is. ! SUB.W/SUB.W – Selecteer deze stand als op de uitgang voor de achterluidspreker een subwoofer rechtstreeks aangesloten is zonder versterker, en op de RCA-uitgang een subwoofer is aangesloten. ! REAR/REAR – Selecteer deze stand als op de uitgang voor de achterluidspreker en op de RCA-uitgang een luidspreker met volledig bereik is aangesloten. Als op de uitgang voor de achterluidspreker een luidspreker met volledig bereik is aangesloten en de RCA-uitgang niet gebruikt wordt, kunt u zowel REAR/SUB.W als REAR/REAR selecteren. De AUX-signaalbron 1 Steek de stereo-miniplugkabel in de AUX-ingang van dit toestel. 2 Druk op SRC/OFF en kies AUX als signaalbron. Opmerking De signaalbron AUX kan alleen worden geselecteerd als de externe aansluiting is ingeschakeld. Raadpleeg voor meer informatie AUX (externe aansluiting) op bladzijde 108. Een ander display kiezen De gewenste informatie selecteren 1 Druk op DISP om over te schakelen tussen: ! Naam signaalbron ! Naam signaalbron en klok Als een scherm verkeerd wordt weergegeven Zet het ongewenste scherm als volgt uit. Systeemmenu 1 Houd SRC/OFF ingedrukt tot het toestel uit gaat. 2 Houd SRC/OFF ingedrukt tot het hoofdmenu wordt weergegeven. 3 Draai aan M.C., selecteer de menuoptie SYSTEM en druk erop. 110 4 Draai aan M.C. en selecteer de systeemmenufunctie. Raadpleeg Systeemmenu op bladzijde 108 voor meer informatie. 1 Druk op M.C. om het hoofdmenu weer te geven. 2 Draai aan M.C., selecteer de menuoptie SYSTEM en druk erop. 3 Draai aan M.C., geef DEMO OFF weer en druk erop. 4 Draai aan M.C. en selecteer YES. Nl <QRD3200-A>110 Black plate (111,1) Hoofdstuk Gebruik van het toestel Installatie 02 03 O ACC-stand STAR Opmerking De telefoonbron geeft aan wanneer u een gesprek ontvangt. F N Alleen voor DEH-X3600UI Deze functie wordt ingeschakeld als een apparaat met een dempingsfunctie op dit toestel wordt aangesloten. Als u een telefoongesprek maakt of ontvangt met een apparaat met dempingsfunctie, wordt het geluid automatisch gedempt. Belangrijk ! Als dit toestel wordt geïnstalleerd in een voertuig met een contactschakelaar zonder ACCstand (accessoirestand), kan de accu leeglopen als de rode kabel niet wordt aangesloten op de aansluiting die de bediening van de contactschakelaar herkent. OF Dempingsfunctie Verbindingen T 5 Druk op M.C. om uw keuze te bevestigen. Geen ACC-stand ! Gebruik van dit toestel onder andere omstandigheden dan de volgende kan leiden tot brand of storingen. — Voertuigen met een accu van 12 volt en negatieve aarding. — Luidsprekers van 50 W (uitgangswaarde) en 4 W tot 8 W (impedantiewaarde). ! Om kortsluiting, oververhitting en storingen te voorkomen, moet u onderstaande aanwijzingen opvolgen. ! Als dit apparaat aan staat, wordt het bedieningssignaal doorgegeven via de blauw/witte kabel. Verbind deze kabel met de afstandsbediening van een externe versterker of met de bedieningsaansluiting van de automatische antenne van het voertuig (maximaal 300 mA, 12 V gelijkstroom). Als het voertuig is uitgerust met een glasantenne, verbindt u deze met de voedingsaansluiting van de antennebooster. ! Verbind de blauw/witte kabel nooit met de voedingsaansluiting van een externe versterker of automatische antenne. Anders kan de accu leeglopen of kan er storing optreden. ! De zwarte kabel is de aarding. Dit toestel moet gescheiden worden geaard van andere apparaten (met name apparaten die veel stroom verbruiken zoals een versterker). Anders kan er brand of storing ontstaan wanneer de aarding per ongeluk losraakt. Dit toestel 1 5 6 Nederlands — Koppel de negatieve aansluiting van de accu los voordat u het toestel installeert. — Gebruik kabelklemmen of plakband om de bekabeling veilig aan te brengen. Bescherm de kabels met plakband op plaatsen waar deze tegen metalen onderdelen liggen. — Plaats geen kabels in de buurt van beweegbare onderdelen zoals de versnellingspook of de stoelrails. — Leg kabels niet op plaatsen die heet kunnen worden, zoals dicht bij de kachel. — Sluit de gele kabel niet op de accu aan via een gat in het motorcompartiment. — Dek alle ongebruikte kabelaansluitingen af met isolatietape. — Maak de kabels niet korter. — Verwijder nooit de isolatie van de voedingskabel van dit toestel om andere apparaten van stroom te voorzien. De stroomcapaciteit van de voedingskabel is beperkt. — Gebruik een zekering met het voorgeschreven vermogen. — Verbind de negatieve luidsprekerkabel nooit rechtstreeks met de aarding. — Voeg de negatieve kabels van verschillende luidsprekers nooit samen. 2 34 7 1 Ingang stroomkabel 2 AUX2-ingang (3,5 mm-stereoplug) (alleen DEH-X3600UI) Een speciale ingang voor apparaten met een dempingsfunctie. Nl <QRD3200-A>111 111 Black plate (112,1) Hoofdstuk Installatie 03 3 4 5 6 7 Installatie Achteruitgang of subwooferuitgang Uitgang voor Antenne-ingang Zekering (10 A) Ingang voor draadafstandsbediening Een bedrade afstandsbedieningsadapter kan aangesloten worden (los verkrijgbaar). Stroomkabel 3 4 5 2 6 3 5 7 1 4 6 8 a 9 e b c d 1 Naar ingang stroomkabel 2 De functie van 3 en 5 kan verschillen afhankelijk van het type voertuig. Verbind in dat geval 4 met 5 en 6 met 3. 3 Geel Back-up (of accessoire) 4 Geel Aansluiten op de constante 12 V-voedingsaansluiting. 5 Rood Accessoire (of back-up) 6 Rood Aansluiten op een aansluiting die door de contactschakelaar wordt aangestuurd (12 V gelijkstroom). 112 7 Verbind kabels van dezelfde kleur met elkaar. 8 Zwart (chassisaarding) 9 Blauw-wit De pinpositie van de ISO-connector verschilt naargelang het type voertuig. Als pin 5 de antenne aanstuurt, verbindt u 9 en b. In andere typen voertuigen verbindt u 9 en b nooit. a Blauw-wit Aansluiten op systeembedieningsaansluiting van de versterker (maximaal 300 mA, 12 V gelijkstroom). b Blauw-wit Aansluiten op bedieningsaansluiting van de gemotoriseerde antenne (maximaal 300 mA, 12 V gelijkstroom). c Geel/zwart Als u apparatuur met dempingsfunctie gebruikt, verbindt u deze draad met de draad voor audiodemping op die apparatuur. Als u zulke apparatuur niet gebruikt, verbindt u de draad voor audiodemping niet. d Luidsprekerkabels Wit: Linksvoor + Wit-zwart: Linksvoor * Grijs: Rechtsvoor + Grijs-zwart: Rechtsvoor * Groen: Linksachter + of subwoofer + Groen-zwart: Linksachter * of subwoofer * Violet: Rechtsachter + of subwoofer + Violet-zwart: Rechtsachter * of subwoofer * e ISO-connector Bij sommige voertuigen is de ISO-connector in twee verdeeld. Verbind in dat geval beide connectoren. Opmerkingen ! Wijzig het beginmenu van het toestel. Raadpleeg gedeelte SP-P/O MODE (achteruitgang en preout-instelling) op bladzijde 110. De subwooferuitgang van dit toestel is mono. ! Als u een subwoofer van 70 W (2 W) gebruikt, moet u de subwoofer aansluiten op de violette en zwart-violette draden van dit toestel. Sluit niets aan op de groene en groen-zwarte draden. Versterker (apart verkrijgbaar) Maak deze verbindingen als de optionele versterker wordt gebruikt. 2 3 6 7 1 Systeemafstandsbediening Verbinden met blauw-witte kabel. 2 Versterker (apart verkrijgbaar) 3 Aansluiten op RCA-kabels (apart verkrijgbaar) 4 Naar vooruitgang 5 Luidsprekers voorin 6 Naar achteruitgang of subwooferuitgang 7 Luidspreker achterin of subwoofer Installatie ! ! ! ! 60° 4 5 2 1 7 ! De halfgeleiderlaser raakt bij oververhitting beschadigd. Plaats dit apparaat niet op plaatsen waar het warm wordt, zoals nabij de uitlaat van een kachel. ! Dit toestel werkt het beste als het wordt geplaatst onder een hoek van minder dan 60°. 3 1 5 — het de besturing van het voertuig kan belemmeren. — het de inzittenden kan verwonden bij een noodstop. Belangrijk Controleer alle aansluitingen en systemen voordat u de installatie voltooit. Gebruik geen onderdelen van andere fabrikanten; deze kunnen storingen veroorzaken. Neem contact op met uw dealer als er voor de installatie gaten moeten worden geboord of als er andere aanpassingen aan het voertuig nodig zijn. Installeer dit toestel niet op een plaats waar: ! Laat bij het plaatsen voldoende ruimte vrij achter het achterpaneel en wikkel losse kabels zo dat ze de ventilatiegaten niet blokkeren; zorg altijd dat warmte goed wordt afgevoerd tijdens gebruik van het toestel. Laat voldoende 5 cm ruimte vrij 5 cm 5cm cm DIN-bevestiging voor/achter Dit toestel kan geïnstalleerd worden via een voor- of achtermontage. Gebruik voor installatie in de handel verkrijgbare onderdelen. Nl <QRD3200-A>112 Black plate (113,1) Hoofdstuk Installatie DIN-voormontage Installatie 2 1 Schuif de montagebehuizing in het dashboard. Gebruik voor installatie in een ondiepe ruimte de meegeleverde montagebehuizing. Als er voldoende ruimte is, gebruikt u de montagebehuizing die met het voertuig geleverd werd. 3 1 2 Het voorpaneel verwijderen en terug bevestigen U kunt het voorpaneel verwijderen om het toestel tegen diefstal te beveiligen. Raadpleeg Het voorpaneel verwijderen en Het voorpaneel terugzetten op bladzijde 102 voor meer informatie. 1 Zelftappende schroef (5 mm × 8 mm) 2 Bevestigingsklem 3 Dashboard of console 2 Zet de montagebehuizing vast door met een schroevendraaier de metalen lipjes op hun plaats te buigen (90°). 1 Draai aan elke kant twee schroeven vast. 03 Het toestel verwijderen 1 Verwijder de sierlijst. 2 1 Dashboard 2 Montagebehuizing # Controleer of het toestel stevig op zijn plaats is gemonteerd. Het toestel functioneert wellicht niet naar behoren als het niet goed is bevestigd. 1 Sierlijst 2 Lipje met inkeping ! De sierlijst is gemakkelijker bereikbaar als u het voorpaneel verwijdert. ! Plaats de sierlijst terug met de kant met het lipje met de inkeping onderaan. DIN-achtermontage 1 Bepaal de juiste positie waar de gaten in de klem en in de zijde van het toestel op een lijn liggen. 3 Nederlands 2 Steek de meegeleverde uittreksleutels in de beide kanten van het toestel totdat ze op hun plaats klikken. Trek het toestel uit het dashboard. Nl <QRD3200-A>113 113 Black plate (114,1) Aanhangsel Aanvullende informatie Aanvullende informatie Problemen verhelpen Foutmeldingen Symptomen worden vet gedrukt. Oorzaken worden in gewoon lettertype zonder inspringen gedrukt. Gewone en ingesprongen tekst geeft aan wat u moet doen. Schrijf een foutmelding altijd nauwkeurig op en houd die bij de hand als u contact opneemt met uw leverancier of Pioneer-servicecentrum. Symptomen worden vet gedrukt. Oorzaken worden in gewoon lettertype zonder inspringen gedrukt. Gewone en ingesprongen tekst geeft aan wat u moet doen. Het display keert automatisch terug naar het gewone display. U hebt gedurende ongeveer 30 seconden geen handeling uitgevoerd. Voer de handeling opnieuw uit. Het bereik voor herhaald afspelen wordt onverwachts gewijzigd. Afhankelijk van het herhaalbereik kan het geselecteerde bereik gewijzigd worden wanneer u een andere map of een ander fragment selecteert of vooruit of achteruit spoelt. Selecteer het gewenste herhaalbereik opnieuw. Algemeen AMP ERROR Dit toestel werkt niet of er is een probleem met de luidsprekeraansluiting; het beveiligingscircuit is geactiveerd. Controleer de luidsprekeraansluiting. Neem contact op met uw leverancier of een erkend Pioneer Servicecentrum als het bericht nog wordt weergegeven nadat u de motor hebt uit- en aangezet. ERROR-23 Het cd-formaat wordt niet ondersteund. Plaats een andere disc. FORMAT READ Na het begin van het afspelen duurt het soms even totdat er geluid klinkt. Wacht tot het bericht verdwijnt en er geluid klinkt. Onderliggende mappen worden niet afgespeeld wanneer FLD (map herhalen) is geselecteerd. Selecteer een ander herhaalbereik. Als het display wordt gewijzigd, verschijnt NO XXXX (bijvoorbeeld NO TITLE). Er is geen tekstinformatie beschikbaar. Wijzig de displaystand of speel een ander fragment of bestand af. Het toestel functioneert niet correct. Er is interferentie. U gebruikt mogelijk een apparaat (bijvoorbeeld een mobiele telefoon) dat hoorbare interferentie veroorzaakt. Gebruik nabij dit toestel geen elektrische apparaten die interferentie kunnen veroorzaken. 114 Cd-speler ERROR-07, 11, 12, 17, 30 De disc is vuil. Reinig de disc. De disc is bekrast. Plaats een andere disc. ERROR-07, 10, 11, 12, 15, 17, 30, A0 Elektrisch of mechanisch probleem. Zet het contact uit en weer aan, of schakel over naar een andere signaalbron en dan terug naar de cd-speler. ERROR-15 De geplaatste disc bevat geen gegevens. Plaats een andere disc. SKIPPED Het aangesloten USB-opslagapparaat bevat bestanden die met DRM zijn beveiligd. Beveiligde bestanden worden overgeslagen. NO AUDIO PROTECT De geplaatste disc bevat geen afspeelbare bestanden. Plaats een andere disc. Alle bestanden op het aangesloten USB-opslagapparaat zijn beveiligd met DRM. Gebruik een ander USB-opslagapparaat. SKIPPED N/A USB De geplaatste disc bevat bestanden die door digitaal rechtenbeheer (DRM) beveiligd zijn. Beveiligde bestanden worden overgeslagen. Het aangesloten USB-apparaat wordt niet ondersteund door dit toestel. ! Gebruik een opslagapparaat dat compatibel is met USB Mass Storage Class. ! Ontkoppel het apparaat en sluit een compatibel USB-opslagapparaat aan. PROTECT Een onderliggende map wordt niet afgespeeld. De inhoud van het USB-opslagapparaat is beveiligd. Raadpleeg de instructies bij het USBopslagapparaat om de beveiliging uit te schakelen. Alle bestanden op de disc zijn door digitaal rechtenbeheer (DRM) beveiligd. Plaats een andere disc. USB-opslagapparaat en iPod CHECK USB Er is kortsluiting opgetreden in de USB-aansluiting of de USB-kabel. Controleer of de USB-stekker en de USB-kabel niet ergens ingeklemd of beschadigd zijn. FORMAT READ Na het begin van het afspelen duurt het soms even totdat er geluid klinkt. Wacht tot het bericht verdwijnt en er geluid klinkt. NO AUDIO Er zijn geen songs. Zet de audiobestanden over naar het USBopslagapparaat en sluit het aan. CHECK USB Het aangesloten USB-opslagapparaat verbruikt meer stroom dan de maximaal toelaatbare waarde. Ontkoppel het USB-opslagapparaat en gebruik het niet meer. Zet de contactschakelaar van het voertuig uit, dan in de accessoirestand (ACC) of aan, en sluit een compatibel USBopslagapparaat aan. Nl <QRD3200-A>114 Black plate (115,1) Aanhangsel Aanvullende informatie Aanvullende informatie CHECK USB NOT FOUND De iPod functioneert correct maar wordt niet opgeladen. Controleer of de kabel van de iPod niet is kortgesloten, bijvoorbeeld contact maakt met metalen voorwerpen. Zet daarna het contact uit en weer aan, of ontkoppel de iPod en sluit deze weer aan. Geen verwante songs. Zet songs over naar de iPod. ERROR-19 Communicatiefout. Probeer de volgende mogelijkheden. – Zet het contact uit en dan weer aan. – Ontkoppel het USB-opslagapparaat. – Schakel over naar een andere signaalbron. Schakel vervolgens terug naar de USBsignaalbron. iPod-fout. Verwijder de kabel uit de iPod. Sluit de kabel weer aan als het hoofdmenu van de iPod wordt weergegeven en stel de iPod opnieuw in. Applicaties START UP APP De applicatie is nog niet gestart. Volg de instructies op het scherm. Aanwijzingen voor het gebruik Discs en de player Gebruik uitsluitend discs die voorzien zijn van een van onderstaande twee logo’s. ERROR-16 iPod-fout. Verwijder de kabel uit de iPod. Sluit de kabel weer aan als het hoofdmenu van de iPod wordt weergegeven en stel de iPod opnieuw in. STOP De huidige lijst bevat geen songs. Selecteer een lijst die wel songs bevat. Het maken van verbindingen via een USB-hub wordt niet ondersteund. Plak geen labels op discs, schrijf er niet op en breng het oppervlak niet in aanraking met chemische middelen. Sluit alleen een USB-opslagapparaat aan en geen andere apparaten. Als u een cd reinigt, veegt u de disc van het midden naar de buitenkant met een zachte doek schoon. Maak het USB-opslagapparaat stevig vast voordat u gaat rijden. Zorg dat het niet op de grond valt omdat het dan onder het rem- of gaspedaal terecht kan komen. Condens en vocht kunnen de werking van de speler tijdelijk negatief beïnvloeden. Laat de speler in een warmere omgeving ongeveer een uur op temperatuur komen. Veeg vochtige schijven met een zachte doek schoon. Sommige discs kunnen niet worden afgespeeld afhankelijk van het type disc, de indeling ervan, de toepassing waarmee deze is opgenomen, de omgeving waarin deze wordt afgespeeld, de manier waarop deze wordt bewaard, enzovoort. Gebruik uitsluitend normale, ronde discs. De volgende typen discs kunnen niet op dit toestel worden afgespeeld: ! DualDiscs ! Discs van 8 cm. Als u deze discs met een adapter probeert af te spelen, kan het toestel defect raken. ! Discs in een ongewone vorm ! Andere discs dan cd’s ! Beschadigde discs, inclusief schijven die zijn gebarsten, gebogen of waarvan stukjes zijn afgebroken ! Cd-r/rw-discs die niet zijn gefinaliseerd Bij gebruik van discs met een bedrukbaar labeloppervlak moet u de instructies en waarschuwingen van de discs controleren. Afhankelijk van de disc kan laden of uitwerpen niet mogelijk zijn. Het gebruik van zulke discs kan dit toestel beschadigen. Plak geen in de handel verkrijgbare labels of andere materialen op de discs. ! De discs kunnen vervormen waardoor ze onafspeelbaar kunnen worden. ! De labels kunnen loslaten tijdens het afspelen en de disc blokkeren bij het uitwerpen en het toestel beschadigen. Afhankelijk van het USB-opslagapparaat kunnen de volgende problemen voorkomen. ! De bediening kan verschillend zijn. ! Het opslagapparaat wordt niet herkend. ! Bestanden worden niet correct afgespeeld. ! Het toestel kan hoorbare interferentie veroorzaken wanneer u naar de radio luistert. iPod Stel de iPod niet bloot aan hoge temperaturen. Maak de iPod stevig vast voordat u gaat rijden. Zorg dat de iPod niet op de grond kan vallen omdat hij dan onder het rem- of gaspedaal terecht kan komen. Informatie over iPod-instellingen ! Wanneer een iPod is aangesloten, wordt de equalizer van de iPod door dit toestel uitgeschakeld voor een optimale klankweergave. Als u de iPod loskoppelt, wordt de equalizer naar de oorspronkelijke instelling teruggezet. ! Tijdens gebruik van dit toestel kunt u de herhaalfunctie op de iPod niet uitschakelen. De herhaalfunctie wordt automatisch ingesteld op Alle als u de iPod op dit toestel aansluit. Nederlands De versie van de iPod-firmware is verouderd. Werk de versie van de iPod bij. Gebruik discs van 12 cm. USB-opslagapparaat Bewaar discs in het bijbehorende doosje wanneer u ze niet gebruikt. Schokken tijdens het rijden van het voertuig kunnen de disc laten overslaan. ERROR-23 Het USB-opslagapparaat was niet geformatteerd met de indeling FAT12, FAT16 of FAT32. Gebruik een USB-opslagapparaat dat geformatteerd is met de indeling FAT12, FAT16 of FAT32. Raak de gegevenszijde van de disc niet aan. Tekst op de iPod die niet compatibel is met de specificaties van dit toestel kan niet worden weergegeven. Nl <QRD3200-A>115 115 Black plate (116,1) Aanhangsel Aanvullende informatie Compatibiliteit met gecomprimeerde audio (disc, USB) WMA Bestandsextensie: .wma Bitsnelheid: 48 kbps tot 320 kbps (CBR), 48 kbps tot 384 kbps (VBR) Bemonsteringsfrequentie: 32 kHz, 44,1 kHz, 48 kHz Windows Mediaä Audio Professional, Lossless, Voice/DRM Stream/Stream met video: Niet compatibel MP3 Bestandsextensie: .mp3 Aanvullende informatie Bijkomende informatie Alleen de eerste 32 tekens van de bestandsnaam (inclusief de extensie) of mapnaam worden weergegeven. Mappenhiërarchie: maximaal acht niveaus diep (Voor praktisch gebruik kunt u beter niet meer dan twee niveaus gebruiken.) Russische tekst kan alleen op dit toestel worden weergegeven als die met een van de volgende tekensets is gecodeerd: ! Unicode (UTF-8, UTF-16) ! Andere tekensets dan Unicode die in een Windows-omgeving worden gebruikt en op Russisch zijn ingesteld bij de taalinstellingen Afspeelbare mappen: maximaal 500 Een juiste werking van dit toestel is afhankelijk van de toepassing waarmee de WMA-bestanden zijn gecodeerd. Er kan een beetje vertraging optreden bij het beginnen met afspelen van audiobestanden met beeldgegevens of bestanden op een USB-opslagapparaat met een uitgebreide mappenstructuur. Bitsnelheid: 8 kbps tot 320 kbps (CBR), VBR Bemonsteringsfrequentie: 8 kHz tot 48 kHz (32 kHz, 44,1 kHz, 48 kHz voor de beste kwaliteit) Compatibele ID3-tag-versie: 1.0, 1.1, 2.2, 2.3, 2.4 (ID3-tag versie 2.x krijgt prioriteit boven versie 1.x.) M3u speellijst: Niet compatibel MP3i (MP3 interactive), mp3 PRO: Niet compatibel WAV Disc Mappenhiërarchie: maximaal acht niveaus diep (Voor praktisch gebruik kunt u beter niet meer dan twee niveaus gebruiken.) Afspeelbare mappen: maximaal 99 Quantisatiebits: 8 en 16 (LPCM), 4 (MS ADPCM) Bemonsteringsfrequentie: 16 kHz tot 48 kHz (LPCM), 22,05 kHz en 44,1 kHz (MS ADPCM) ! U kunt deze functie niet gebruiken met USB MTP. 116 Afspeelbare bestanden: maximaal 15 000 Afspelen van auteursrechtelijk beschermde bestanden: Niet compatibel Gepartitioneerd USB-opslagapparaat: Alleen de eerste partitie kan worden afgespeeld. Bij het starten van audiobestanden op een USBopslagapparaat met een uitgebreide mappenstructuur kan enige vertraging optreden. LET OP ! Pioneer garandeert geen compatibiliteit met alle USB-opslagapparaten en kan niet verantwoordelijk worden gesteld voor eventueel gegevensverlies op mediaspelers, smartphones of andere apparaten tijdens gebruik van dit product. ! Laat discs en USB-opslagapparaten niet achter op plaatsen waar de temperatuur hoog kan oplopen. Afspeelbare bestanden: maximaal 999 Bestandssysteem: ISO 9660 Level 1 en 2, Romeo, Joliet Afspelen van multisessie-discs: Compatibel Bestandsextensie: .wav USB-opslagapparaat Packet write data transfer: Niet compatibel Bij het afspelen van gecomprimeerde audiodiscs wordt altijd een korte pauze ingelast tussen de fragmenten. Dit gebeurt ongeacht de duur tussen de fragmenten op de originele opname. Compatibiliteit met iPod Alleen de volgende iPod-modellen kunnen met dit toestel gebruikt worden. Ondersteunde versies van de iPod-software worden hieronder genoemd. Oudere versies worden wellicht niet ondersteund. Gemaakt voor ! iPod touch (5e generatie) ! iPod touch (4e generatie) ! iPod touch (3e generatie) ! iPod touch (2e generatie) ! iPod touch (1e generatie) ! ! ! ! ! ! ! ! ! ! ! ! ! ! ! iPod classic iPod met video iPod nano (7e generatie) iPod nano (6e generatie) iPod nano (5e generatie) iPod nano (4e generatie) iPod nano (3e generatie) iPod nano (2e generatie) iPod nano (1e generatie) iPhone 5 iPhone 4S iPhone 4 iPhone 3GS iPhone 3G iPhone Afhankelijk van de generatie en de versie van de iPod zijn sommige functies mogelijk niet beschikbaar. De bediening kan variëren, afhankelijk van de softwareversie van de iPod. Gebruikers van een iPod met Lightning-aansluiting moeten de Lightning-naar-USB-kabel gebruiken (bij de iPod geleverd). Gebruikers van een iPod met dock-connector moeten CD-IU51 gebruiken. Raadpleeg uw leverancier voor meer informatie. Raadpleeg de handleiding van de iPod voor meer informatie over ondersteunde bestandsindelingen. Audioboek, podcast: Compatibel LET OP Pioneer is niet verantwoordelijk voor verlies van gegevens op de iPod, ook niet tijdens gebruik van dit toestel. Nl <QRD3200-A>116 Black plate (117,1) Aanhangsel Aanvullende informatie Volgorde van audiobestanden De gebruiker kan met dit toestel geen mapnummers toewijzen of de afspeelvolgorde wijzigen. Voorbeeld van een boomstructuur 01 02 1 2 03 3 4 04 5 6 05 Niveau 1 Niveau 2 Niveau 3 Niveau 4 : Map : Gecomprimeerd audiobestand 01 tot 05: Mapnummer 1 tot 6: Afspeelvolgorde Disc De mapvolgorde en andere instellingen zijn afhankelijk van de software die voor het coderen en schrijven is gebruikt. USB-opslagapparaat Lijst van Russische tekens S: T S: T S: T S: T S: T :А :Б :В :Г :Д : Е, Ё :Ж :З : И, Й :К :Л :М :Н :О :П :Р :С :Т :У :Ф :Х :Ц :Ч : Ш, Щ :Ъ :Ы :Ь :Э :Ю :Я S: Scherm T: Teken Copyright en handelsmerken iTunes Apple en iTunes zijn handelsmerken van Apple Inc., geregistreerd in de V.S. en andere landen. Dit product bevat technologie die het eigendom is van Microsoft Corporation en die niet gebruikt of gedistribueerd mag worden zonder toestemming van Microsoft Licensing, Inc. iPod & iPhone iPhone, iPod, iPod classic, iPod nano en iPod touch zijn handelsmerken van Apple Inc., gedeponeerd in de VS en andere landen. Lightning is een handelsmerk van Apple Inc. “Gemaakt voor iPod” en “Gemaakt voor iPhone” wil zeggen dat een elektronische accessoire speciaal ontwikkeld is voor verbinding met respectievelijk een iPod of iPhone en door de maker gewaarborgd is als conform de Apple werkingsnormen. Apple is niet verantwoordelijk voor de werking van dit apparaat en voor het voldoen aan de veiligheidsnormen en wettelijke normen. Houd er rekening mee dat het gebruik van dit accessoire met iPod of iPhone invloed kan hebben op de draadloze prestatie. Androidä Android is een handelsmerk van Google Inc. MP3 Dit product is uitsluitend bedoeld voor niet-commercieel privégebruik. Het mag niet in een commerciële omgeving worden gebruikt voor realtime-uitzendingen (over land, via satelliet, kabel en/of andere media), voor uitzendingen/ streaming via internet, intranet en/of andere netwerken, of in andere elektronische distributiesystemen zoals betaalradio of audio-opaanvraagtoepassingen. Hiervoor is een aparte licentie nodig. Kijk voor meer informatie op http://www.mp3licensing.com. MIXTRAX MIXTRAX is een handelsmerk van de PIONEER CORPORATION. Nederlands De afspeelvolgorde is gelijk aan de volgorde waarin de bestanden zijn opgenomen op het USB-opslagapparaat. Ga als volgt te werk als u wilt dat bestanden in een bepaalde volgorde worden afgespeeld. 1 Geef de bestanden namen met nummers die de afspeelvolgorde aangeven, bijvoorbeeld 001xxx.mp3 en 099yyy.mp3. 2 Plaats de bestanden in een map. 3 Sla de map met bestanden op het USB-opslagapparaat op. Merk echter op dat de afspeelvolgorde niet altijd kan worden bepaald. Dit is afhankelijk van het gebruikte systeem. De afspeelvolgorde op draagbare USB-audiospelers is verschillend en hangt af van de gebruikte audiospeler. Aanvullende informatie WMA Windows Media is een gedeponeerd handelsmerk of een handelsmerk van Microsoft Corporation in de Verenigde Staten en/of in andere landen. Nl <QRD3200-A>117 117 Black plate (118,1) Aanhangsel Aanvullende informatie Technische gegevens Algemeen Spanningsbron ................ 14,4 V gelijkstroom (10,8 tot 15,1 V toelaatbaar) Negatief Aarding ........................... Maximaal stroomverbruik ................................... Afmetingen (B × H × D): DIN Chassis ............................ Voorkant .......................... D Chassis ............................ Voorkant .......................... (DEH-X3600UI) Voorkant .......................... (DEH-2600UI) Gewicht ........................... 10,0 A 178 mm × 50 mm × 165 mm 188 mm × 58 mm × 15 mm 178 mm × 50 mm × 165 mm 170 mm × 46 mm × 15 mm 170 mm × 46 mm × 16 mm 1 kg Audio Maximaal uitgangsvermogen ................................... 50 W × 4 70 W × 1/2 W (voor de subwoofer) Doorlopend uitgangsvermogen ................................... 22 W × 4 (50 Hz tot 15 000 Hz, 5% THD, 4 W belasting, beide kanalen) Belastingsimpedantie ...... 4 W (4 W tot 8 W toegestaan) Preout maximaal uitgangsniveau ................................... 2,0 V Contouren loudness ......... +10 dB (100 Hz), +6,5 dB (10 kHz) (volume: –30 dB) Equalizer (grafische equalizer met vijf banden): Frequentie ....................... 80 Hz/250 Hz/800 Hz/2,5 kHz/ 8 kHz Bereik equalizer ............... ±12 dB (in stappen van 2 dB) Subwoofer (mono): Frequentie ....................... 50 Hz/63 Hz/80 Hz/100 Hz/ 125 Hz/160 Hz/200 Hz Helling ............................. –12 dB/oct, –24 dB/oct Gain ................................ +6 dB tot –24 dB Fase ................................. Normaal/tegengesteld Cd-speler Systeem ........................... Compact Disc Audio Bruikbare discs ................ Compact Discs Signaal-tot-ruisverhouding ................................... 94 dB (1 kHz) (IEC-A-netwerk) 118 Aantal kanalen ................. 2 (stereo) MP3-decoderingsformaat ................................... MPEG-1 & 2 Audio Layer 3 WMA-decoderingsformaat ................................... Versie 7, 7.1, 8, 9, 10, 11, 12 (2 kan. audio) (Windows Media Player) WAV-signaalformaat ........ Lineaire PCM & MS ADPCM (niet gecomprimeerd) USB USB-specificatie .............. USB 2.0 volledige snelheid Maximaal stroomverbruik ................................... 1 A USB-klasse ...................... MSC-apparatuur (Mass Storage Class) Bestandssysteem ............. FAT12, FAT16, FAT32 MP3-decoderingsformaat ................................... MPEG-1 & 2 Audio Layer 3 WMA-decoderingsformaat ................................... Versie 7, 7.1, 8, 9, 10, 11, 12 (2 kan. audio) (Windows Media Player) WAV-signaalformaat ........ Lineaire PCM & MS ADPCM (niet gecomprimeerd) FM-tuner Frequentiebereik .............. 87,5 MHz tot 108,0 MHz Bruikbare gevoeligheid .... 9 dBf (0,8 µV/75 W, mono, S/R: 30 dB) Signaal-tot-ruisverhouding ................................... 72 dB (IEC-A-netwerk) MW-tuner Frequentiebereik .............. 531 kHz tot 1 602 kHz Bruikbare gevoeligheid .... 25 µV (S/R: 20 dB) Signaal-tot-ruisverhouding ................................... 62 dB (IEC-A-netwerk) LW-tuner Frequentiebereik .............. 153 kHz tot 281 kHz Bruikbare gevoeligheid .... 28 µV (S/R: 20 dB) Signaal-tot-ruisverhouding ................................... 62 dB (IEC-A-netwerk) Opmerking Technische gegevens en ontwerp kunnen zonder voorafgaande kennisgeving worden gewijzigd. Nl <QRD3200-A>118 Black plate (119,1) Nederlands Nl <QRD3200-A>119 119 Black plate (120,1) Раздел Перед началом эксплуатации 01 Благодарим Вас за покупку этого изделия компании PIONEER Для обеспечения правильности эксплуатации внимательно прочитайте данное руководство перед началом использования изделия. Особенно важно, чтобы Вы прочли и соблюдали инструкции, помеченные в данном руководстве заголовками ПРЕДУПРЕЖДЕНИЕ и ВНИМАНИЕ. Держите данное руководство под рукой для обращения к нему в будущем. шего изделия с соблюдением обязательных процедур по обработке, утилизации и вторичной переработке и, таким образом, предотвратите потенциальное негативное воздействие на окружающую среду и здоровье людей. Дату изготовления оборудования можно определить по серийному номеру, который содержит информацию о месяце и годе производства. Если вы желаете утилизировать данное изделие, не выбрасывайте его вместе с обычным бытовым мусором. Существует отдельная система сбора использованных электронных изделий в соответствии с законодательством, которая предполагает соответствующее обращение, возврат и переработку. Частные лица в странах Евросоюза, Швейцарии и Норвегии могут бесплатно возвращать использованные электронные изделия в специализированные пункты приема или в магазин (при покупке аналогичного нового устройства). Если Ваша страна не указана в приведенном выше перечне, обращайтесь в органы местного управления за инструкциями по правильной утилизации продукта. Тем самым Вы обеспечите утилизацию Ва- Сведения об этом устройстве Частоты тюнера в этом устройстве распределены для использования в Западной Европе, Азии, на Ближнем Востоке, в Африке и Океании. При использовании в других регионах качество приема может быть плохим. Функция RDS (радиовещательная система передачи информации) работает только в регионах, где транслируются сигналы RDS для FM-станций. Перед началом эксплуатации ПРЕДУПРЕЖДЕНИЕ ! Не пытайтесь самостоятельно производить установку или ремонт изделия. Установка или ремонт изделия лицами, не обладающими специальными навыками и опытом работы с электронным оборудованием и автомобильными аксессуарами, могут создать опасность поражения электрическим током или иных инцидентов. ! Ни в коем случае не пытайтесь управлять устройством во время движения. Прежде чем использовать органы управления устройством, необходимо съехать с дороги и припарковать автомобиль в безопасном месте. При возникновении проблем При неполадках в работе этого изделия свяжитесь с торговым представителем компании-производителя или с ближайшим сервисным пунктом PIONEER. ВНИМАНИЕ ! Не допускайте попадания жидкости на устройство. Это может повлечь поражение электрическим током. Кроме того, попадание жидкости в устройство может стать причиной его выхода из строя, перегрева и появления дыма. ! Pioneer CarStereo-Pass предназначен для использования только в Германии. ! Всегда сохраняйте уровень громкости достаточно низким, чтобы были слышны звуки извне. ! Не допускайте воздействия влажности на изделие. ВНИМАНИЕ Данное изделие является лазерным изделием класса 1 согласно классификации по Безопасности лазерных изделий, IEC 60825-1:2007. ЛАЗЕРНЫЙ ПРОДУКТ КЛАСС 1 120 Ru <QRD3200-A>120 Black plate (121,1) Раздел Использование данного устройства Основное устройство DEH-X3600UI 123 4 5 6 Использование данного устройства c С 1/ d Вход AUX (стереоразъем 3,5 мм) e Кнопка снятия панели по 6/ 1 ВНИМАНИЕ 78 9 ab c de DEH-2600UI 21 3 4 b 5 6 Для подключения запоминающих устройств USB используйте USB-кабель Pioneer (CDU50E, приобретается отдельно), поскольку любое устройство при подключении напрямую выступает из устройства, что создает потенциальную опасность. DEH-X3600UI 2 1 78 9 a de 3 1 SRC/OFF 2 h (извлечение) 3 MULTI-CONTROL (M.C.) 4 c (список) 5 Щель для загрузки диска 6 USB порт MIX (MIXTRAX) DEH-X3600UI 7 iPod DEH-2600UI 8 BAND/ 9 (назад)/DIMMER (регулятор освещенности) a c/d b DISP 4 5 7 9 b 6 8 a DEH-2600UI b 3 4 7 1 6 8 5 9 a 2 # Если вы хотите выполнить настройку позже, поверните M.C., чтобы выбрать NO. 3 Нажмите M.C. для выбора. 4 Настройте меню с помощью описанных ниже действий. Для перехода к следующему пункту меню необходимо подтвердить выбор. LANGUAGE (выбор языка) 9 (случайный порядок/перемешать) Данное устройство может отображать текстовую информацию из сжатых аудиофайлов, в том числе информацию на английском, русском и турецком языках. ! При несовместимости настроек встроенного и выбранного языка возможны искажения при выводе текстовых сообщений. ! Некоторые символы могут отображаться неправильно. 1 Поворачивайте M.C. для выбора настройки. ENG (английский)—РУС (русский)—TUR (турецкий) 2 Нажмите M.C., чтобы подтвердить выбор. a (повтор) CLOCK SET (установка часов) 2 3 Индикация на дисплее Сектор основной информации ! Тюнер: диапазон и частота ! RDS: название программы, PTY-информация и прочая текстовая информация ! Проигрыватель компакт-дисков, запоминающее устройство USB и iPod: время, прошедшее с начала воспроизведения, и текстовая информация 02 Отображается при наличии нижнего уровня папки или меню. (список) 4 Сектор дополнительной информации 5 LOC (настройка с местным поиском) 6 TP (идентификатор дорожных программ) 7 TA (дорожные сводки) 8 (sound retriever, технология преобразования звука) b (управление iPod) Управление функциями iPod производится с устройства iPod. Установочное меню 1 После установки устройства поверните ключ зажигания в положение ON. Появится надпись SET UP. 1 Поворачивайте M.C., чтобы установить часы. 2 Нажимайте M.C., чтобы выбрать установку минут. 3 Поворачивайте M.C., чтобы установить минуты. 4 Нажмите M.C., чтобы подтвердить выбор. 2 Русский (управление iPod) Поверните M.C. для выбора YES. # Если в течение 30 секунд устройство не используется, установочное меню не будет выводиться. Ru <QRD3200-A>121 121 Black plate (122,1) Раздел Использование данного устройства 02 FM STEP (шаг настройки в FM-диапазоне) Для установки шага настройки в FM-диапазоне (настройки поиска) используйте меню FM STEP. 1 Поверните M.C., чтобы выбрать шаг настройки в FM-диапазоне. 100 (100 кГц)—50 (50 кГц) 2 Нажмите M.C., чтобы подтвердить выбор. Появится надпись QUIT. ! Шаг ручной настройки фиксированный и составляет 50 кГц. ! При выключении функций AF и TA шаг настройки автоматически меняется на 50 кГц, даже если установлено 100. Снятие передней панели 1 Чтобы отсоединить переднюю панель, нажмите на кнопку отсоединения панели. 2 Нажмите на панель по направлению вверх (M) и потяните на себя (N). 3 Всегда храните отсоединенную панель в защитном футляре или чехле. # Если понадобится вновь изменить настройку, поверните M.C. и выберите NO. Установка передней панели 1 Зафиксируйте левый край панели на устройстве. Нажмите M.C. для выбора. Примечания ! Настроить параметры меню можно в меню системы и в начальном меню. Более подробную информацию см. в разделах Меню системы на стр. 129 и Стартовое меню на стр. 131. ! Вы можете отменить настройку параметра, нажав кнопку SRC/OFF. Основные операции Важно ! При отсоединении и установке передней панели обращайтесь с ней осторожно. ! Оберегайте переднюю панель от сильных ударов. ! Предохраняйте переднюю панель от воздействия прямого солнечного света и высоких температур. Выбор источника сигнала 1 Нажимайте кнопку SRC/OFF для выбора из следующих функций: RADIO—CD—USB/iPod—APP (приложение) —AUX ! При подключении по протоколу MTP на дисплее отображается USB MTP. ! Только для DEH-2600UI Если подключен iPod и выбран любой источник сигнала, кроме iPod, можно переключиться на iPod с помощью кнопки iPod. Регулировка громкости 1 Для регулировки громкости поворачивайте M.C. 5 Чтобы закончить настройку, поверните M.C. и выберите YES. 6 122 ! Прежде чем снять переднюю панель, обязательно отключите от нее все кабели и устройства, чтобы не повредить устройство и внутреннюю отделку салона. Использование данного устройства Примечание Когда голубой/белый провод этого устройства подключен к реле панели управления автомобильной антенной, антенна на автомобиле выдвигается при включении источника сигнала этого устройства. Чтобы втянуть антенну, выключите источник сигнала. Часто используемые элементы меню 2 Нажмите на правый край передней панели и зафиксируйте ее. В случае приложения излишнего усилия передняя панель или основное устройство могут быть повреждены. Включение устройства 1 Нажмите кнопку SRC/OFF, чтобы включить устройство. Выключение устройства 1 Нажмите и удерживайте кнопку SRC/OFF, пока устройство не выключится. Возврат к предыдущему дисплею Возврат к предыдущему списку (к папке на один уровень выше) /DIMMER. 1 Нажмите кнопку Возврат в исходный режим Выход из главного меню 1 Нажмите кнопку BAND/ . Возврат в исходный режим из списка 1 Нажмите кнопку BAND/ . Радиоприемник Основные операции Выбор диапазона 1 Нажимайте кнопку BAND/ , пока на дисплее не отобразится нужный диапазон (FM1, FM2, FM3 для FM или MW/LW). Переключение станций предварительной настройки 1 Нажмите кнопку c или d. ! Чтобы использовать эту функцию, в меню SEEK выберите PCH (запрограммированная станция). Ручная настройка (пошаговая) 1 Нажмите кнопку c или d. ! Чтобы использовать эту функцию, в меню SEEK выберите MAN (ручная настройка). Поиск 1 Нажмите и удерживайте кнопку c или d, а затем отпустите. Вы можете отменить настройку с поиском кратким нажатием c или d. При нажатии и удерживании кнопки c или d можно пропускать радиостанции. Настройка с поиском начнется сразу после отпускания кнопки c или d. Примечания ! Подробную информацию о меню SEEK см. в разделе SEEK (настройка левой и правой кнопок) на стр. 123. ! Можно включить или выключить функцию AF (поиск альтернативных частот) данного устройства. Для обычной настройки функция AF должна быть выключена (смотрите в AF (поиск альтернативных частот) на стр. 123). Ru <QRD3200-A>122 Black plate (123,1) Раздел Использование данного устройства Сохранение и вызов из памяти радиостанций для каждого диапазона Использование кнопок предварительной настройки 1 Сохранение: нажмите и удерживайте одну из кнопок предварительной настройки (с 1/ по 6/ ), пока номер не прекратит мигать. 2 Вызов: нажмите одну из кнопок предварительной настройки (с 1/ по 6/ ). Переключение дисплея Выбор текстовой информации 1 Нажимайте DISP для выбора из следующих функций: ! FREQUENCY (служебное название программы или частота) ! BRDCST INFO (служебное название программы/информация PTY) ! CLOCK (название источника сигнала и часы) Примечания ! Если служебное название программы в поле FREQUENCY отсутствует, вместо него отображается канал. Если служебное название программы обнаружено, оно будет отображаться. ! Текстовая информация может меняться в зависимости от диапазона. ! Возможность внесения изменений в текстовую информацию зависит от региона. Можно настроиться на радиостанцию с помощью информации PTY (типа программы). Список PTY Более подробную информацию о списке PTY можно получить на веб-сайте: http://www.pioneer.eu/eur/products/25/121/tech/ CarAudio/PTY.html Настройка функций 1 Нажмите M.C., чтобы открыть главное меню. 2 Поворачивайте M.C. для прокрутки пунктов меню; нажмите, чтобы выбрать FUNCTION. 3 Для выбора функции поворачивайте M.C. Следующие выбранные функции можно настраивать. # В диапазонах MW/LW можно выбрать только BSM, LOCAL и SEEK. FM SETTING (настройки качества звука FM) Уровень качества звука можно установить в соответствии с условиями приема сигнала в FM-диапазоне. 1 Для отображения установочного меню нажмите M.C. 2 Поворачивайте M.C. для выбора настройки. ! STANDARD – стандартная настройка. ! HI-FI – настройка с приоритетом высокого качества стереозвучания. ! STABLE – настройка с приоритетом низкого уровня помех монофонического звучания. BSM (запоминание лучших станций) Функция BSM (запоминание лучших станций) позволяет автоматически сохранять в памяти устройства шесть станций с самым мощным сигналом в порядке убывания его мощности. 1 Нажмите M.C., чтобы включить функцию BSM. Для отмены режима нажмите M.C. еще раз. REGIONAL (региональный) При использовании функции AF функция региональных программ ограничивает выбор станциями, транслирующими региональные программы. 1 Нажмите M.C., чтобы включить или выключить функцию региональных программ. 02 Настройка с местным поиском позволяет Вам настраиваться только на радиостанции с достаточно мощными сигналами для качественного приема. 1 Нажмите M.C. для выбора нужной настройки. FM: OFF—LV1—LV2—LV3—LV4 MW/LW: OFF—LV1—LV2 Настройка самого высокого уровня позволяет осуществлять прием только станций с самым сильным сигналом, а уменьшение уровня настройки позволяет принимать станции с более слабым сигналом. TA (режим ожидания дорожных сводок) 1 Нажмите M.C., чтобы включить или выключить режим ожидания дорожных сводок. AF (поиск альтернативных частот) 1 Нажмите M.C., чтобы включить или выключить функцию AF. NEWS (прерывание для передачи новостей) 1 Нажмите M.C., чтобы включить или выключить функцию НОВОСТИ. SEEK (настройка левой и правой кнопок) Правой и левой кнопкам на устройстве можно назначить определенную функцию. Выберите MAN (ручная настройка) для ручной настройки или PCH (предустановленный канал) для переключения между заранее настроенными каналами. 1 Нажмите кнопку M.C., чтобы выбрать MAN или PCH. Русский Использование функций PTY Поиск станции RDS с помощью информации PTY (список). 1 Нажмите 2 Кнопкой M.C. выберите тип программы. NEWS/INFO—POPULAR—CLASSICS—OTHERS 3 Нажмите M.C., чтобы начать поиск. Устройство начинает поиск радиостанций, передающих данный тип программ. При обнаружении радиостанции на дисплее будет показано название данной программы. ! Для отмены поиска нажмите M.C. еще раз. ! Программы некоторых радиостанций могут отличаться от программ, указанных в передаваемом коде PTY. ! Если ни одна из станций не передает программы нужного типа, то на дисплее в течение примерно двух секунд будет показано NOT FOUND, и затем тюнер перейдет в режим приема станции, с которой был начат поиск. Использование данного устройства LOCAL (настройка с местным поиском) Ru <QRD3200-A>123 123 Black plate (124,1) Раздел Использование данного устройства 02 CD/CD-R/CD-RW и запоминающие устройства USB Подключение по протоколу MTP Устройства Android, поддерживающие протокол MTP (с операционной системой Android OS 4.0 или выше), можно подключить по протоколу MTP как USB-устройство. Для подключения используйте кабель, входящий в комплект поставки устройства Android. Примечания ! Эта функция не поддерживает MIXTRAX. ! Эта функция не поддерживает WAV. Основные операции Воспроизведение CD/CD-R/CD-RW 1 Вставьте диск в щель для загрузки маркированной стороной вверх. Извлечение диска CD/CD-R/CD-RW 1 Нажмите h. Воспроизведение композиций на запоминающем устройстве USB 1 Откройте крышку порта USB. 2 Подключите запоминающее устройство USB с помощью кабеля USB. Остановка воспроизведения файлов на запоминающем устройстве USB 1 Запоминающее устройство USB можно отключить в любой момент. Выбор папки 1 Нажмите кнопку 1/ или 2/ . Выбор дорожки 1 Нажмите кнопку c или d. 124 Ускоренная перемотка вперед или назад 1 Нажмите и удерживайте кнопку c или d. ! При воспроизведении сжатых аудиофайлов звук не воспроизводится, если включена ускоренная перемотка вперед или назад. Возврат к корневой папке 1 Нажмите и удерживайте кнопку BAND/ . Переключение между сжатыми аудиофайлами и диском CD-DA 1 Нажмите кнопку BAND/ . Переключение между запоминающими устройствами При наличии нескольких запоминающих устройств USB Mass Storage воспроизведение можно переключать между ними. 1 Нажмите кнопку BAND/ . ! Возможно переключение между 32 различными запоминающими устройствами. Примечание Если запоминающее устройство USB не используется, отключите его. Функции кнопки MIXTRAX Выключение и включение функции MIXTRAX Только для DEH-X3600UI Эту функцию можно использовать, если в качестве источника сигнала выбрано USB. Эта функция не работает, если выбрано USB MTP. 1 Нажмите MIX, чтобы включить или выключить функцию MIXTRAX. ! Подробнее о MIXTRAX см. в разделе Информация о MIXTRAX на стр. 130. ! Когда используется MIXTRAX, функция sound retriever отключена. Использование данного устройства Переключение дисплея Выбор текстовой информации 1 Нажимайте DISP для выбора из следующих функций: CD-DA ! ELAPSED TIME (номер дорожки и время воспроизведения) ! CLOCK (название источника сигнала и часы) ! SPEANA (анализатор спектра) CD-TEXT ! TRACK INFO (название дорожки/исполнитель/название диска) ! ELAPSED TIME (номер дорожки и время воспроизведения) ! CLOCK (название источника сигнала и часы) ! SPEANA (анализатор спектра) MP3/WMA/WAV ! TRACK INFO (название дорожки/имя исполнителя/название альбома) ! FILE INFO (название папки/название файла) ! ELAPSED TIME (номер дорожки и время воспроизведения) ! CLOCK (название источника сигнала и часы) ! SPEANA (анализатор спектра) 2 С помощью M.C. выберите нужное имя файла (или папки). Выбор файла или папки 1 Поворачивайте M.C. Воспроизведение 1 Выберите файл или дорожку и нажмите M. C. Просмотр списка названий файлов (папок) в выбранной папке 1 Выберите папку и нажмите M.C. Воспроизведение композиции из выбранной папки 1 Выберите папку, затем нажмите и удерживайте M.C. Выбор и воспроизведение фалов/дорожек из списка 1 Нажмите кнопку , чтобы отобразить список названий файлов/дорожек. Ru <QRD3200-A>124 Black plate (125,1) Раздел Использование данного устройства Функции с использованием специальных кнопок Выбор диапазона повторного воспроизведения 1 Нажимайте кнопку 6/ для выбора из следующих функций: CD/CD-R/CD-RW ! ALL – Повторное воспроизведение всех дорожек ! ONE – Повтор текущей дорожки ! FLD – Повтор текущей папки Запоминающее устройство USB ! ALL – Повтор всех файлов ! ONE – Повтор текущего файла ! FLD – Повтор текущей папки Воспроизведение дорожек в произвольной последовательности , чтобы включить или 1 Нажмите кнопку 5/ выключить функцию воспроизведения в произвольной последовательности. Данная функция позволяет воспроизводить дорожки в произвольной последовательности в пределах выбранного диапазона повторного воспроизведения. ! Для переключения на следующую дорожку во время воспроизведения в произвольной последовательности нажмите кнопку d. При нажатии на кнопку c воспроизведение текущей дорожки начинается с начала. Приостановка воспроизведения 1 Нажмите кнопку 4/PAUSE, чтобы включить паузу или возобновить воспроизведение. Улучшение качества звука сжатых аудиофайлов и восстановление полноты звучания (технология преобразования звука) 1 Нажимайте кнопку 3/S.Rtrv для выбора из следующих функций: 1—2—OFF (выкл) Настройка 1 эффективна для файлов с низкой степенью сжатия, а настройка 2 – для файлов с высокой степенью сжатия. ! Эта клавиша неактивна, если включена функция MIXTRAX. Настройка функций 1 Нажмите M.C., чтобы открыть главное меню. 2 Поворачивайте M.C. для прокрутки пунктов меню; нажмите, чтобы выбрать FUNCTION. Выбранные функции, которые можно настраивать, перечислены ниже. ! Функция S.RTRV недоступна, если включена функция MIXTRAX. S.RTRV (sound retriever, технология преобразования звука) Переключение дисплея iPod Основные операции Воспроизведение музыки на iPod 1 Откройте крышку порта USB. 2 Подключите iPod к разъему USB. Воспроизведение начинается автоматически. Выбор композиции (раздела) 1 Нажмите кнопку c или d. Выбор альбома 1 Нажмите кнопку 1/ 02 или 2/ . Ускоренная перемотка вперед или назад 1 Нажмите и удерживайте кнопку c или d. Примечания ! iPod можно включить или выключить, если выбран режим управления CONTROL AUDIO/CTRL AUDIO. ! Перед подключением iPod к данному устройству отсоедините от него наушники. ! Выключение iPod происходит примерно через две минуты после выключения зажигания. Функции кнопки MIXTRAX Выключение и включение функции MIXTRAX Только для DEH-X3600UI 1 Нажмите MIX, чтобы включить или выключить функцию MIXTRAX. ! Подробнее о MIXTRAX см. в разделе Информация о MIXTRAX на стр. 130. Выбор текстовой информации 1 Нажимайте DISP для выбора из следующих функций: ! TRACK INFO (название дорожки/имя исполнителя/название альбома) ! ELAPSED TIME (номер дорожки и время воспроизведения) ! CLOCK (название источника сигнала и часы) ! SPEANA (анализатор спектра) Поиск композиции 1 Для перехода к главному меню поиска по списку нажмите . 2 С помощью M.C. выберите категорию/ композицию. Выбор названия композиции или категории 1 Поворачивайте M.C. Плейлисты—исполнители—альбомы—композиции—подкасты—жанры—композиторы—аудиокниги Воспроизведение 1 Выберите композицию и нажмите M.C. Просмотр списка композиций в выбранной категории 1 Выберите категорию и нажмите M.C. Русский Автоматически улучшает качество звука сжатых аудиофайлов и восстанавливает полноту звучания. 1 Нажмите M.C. для выбора нужной настройки. Подробную информацию см. в Улучшение качества звука сжатых аудиофайлов и восстановление полноты звучания (технология преобразования звука) на стр. 125. Использование данного устройства Ru <QRD3200-A>125 125 Black plate (126,1) Раздел Использование данного устройства 02 Воспроизведение композиции в выбранной категории 1 Выберите категорию, затем нажмите и удерживайте M.C. Поиск в списке по алфавиту 1 Когда список выбранной категории отобразится на дисплее, нажмите , чтобы включить режим поиска по алфавиту. ! Дважды повернув M.C., можно перейти в режим поиска по алфавиту. 2 Для выбора буквы поворачивайте M.C. 3 Нажмите M.C. для отображения списка по алфавиту. ! Для отмены поиска нажмите /DIMMER. Примечания ! Можно воспроизводить списки воспроизведения, созданные с помощью приложения для компьютера (MusicSphere). Приложение можно скачать на нашем сайте. ! Списки воспроизведения, созданные с помощью приложения (MusicSphere), будут отображаться в сокращенном виде. Функции с использованием специальных кнопок Выбор диапазона повторного воспроизведения 1 Нажимайте кнопку 6/ для выбора из следующих функций: ! ONE – повтор текущей композиции ! ALL – повтор всех композиций в выбранном списке ! Если выбран режим управления CONTROL iPod/CTRL iPod, диапазон повторного воспроизведения будет аналогичным установленному для подключенного iPod. Выбор диапазона воспроизведения в произвольной последовательности (“перемешать”) для выбора из 1 Нажимайте кнопку 5/ следующих функций: ! SNG – воспроизведение композиций из выбранного списка в произвольной последовательности. ! ALB – воспроизведение по порядку композиций из альбома, выбранного случайным образом. ! OFF – отмена воспроизведения в произвольной последовательности. Воспроизведение всех композиций в произвольной последовательности (“перемешать все”) /5, 1 Нажмите и удерживайте кнопку чтобы включить функцию “перемешать все”. ! Чтобы отключить функцию “перемешать все”, выберите OFF в меню перемешивания. Подробнее см. в разделе Выбор диапазона воспроизведения в произвольной последовательности (“перемешать”) на стр. 126. 126 Использование данного устройства Приостановка воспроизведения 1 Нажмите кнопку 4/PAUSE, чтобы включить паузу или возобновить воспроизведение. Улучшение качества звука сжатых аудиофайлов и восстановление полноты звучания (технология преобразования звука) 1 Нажимайте кнопку 3/S.Rtrv для выбора из следующих функций: 1—2—OFF (выкл) Настройка 1 эффективна для файлов с низкой степенью сжатия, а настройка 2 – для файлов с высокой степенью сжатия. Воспроизведение композиций в жанре воспроизводимой в данный момент композиции Можно воспроизводить композиции из следующих списков. • Список альбомов артиста, композиция которого воспроизводится в данный момент • Список композиций, относящихся к воспроизводимому в данный момент альбому • Список альбомов, относящихся к воспроизводимому в данный момент музыкальному жанру 1 Нажмите и удерживайте кнопку для переключения в режим воспроизведения по категории. 2 Для изменения режима вращайте M.C., для выбора – нажмите. ! ARTIST – Воспроизведение альбома артиста, композиция которого воспроизводится в данный момент. ! ALBUM – Воспроизведение композиции из альбома, который воспроизводится в данный момент. ! GENRE – Воспроизведение альбома в жанре, который воспроизводится в данный момент. Выбранная композиция или альбом будет воспроизводиться после окончания воспроизведения текущей композиции. Примечания ! Возможна отмена воспроизведения выбранной композиции/альбома, если вы используете любые другие функции, кроме поиска по категории (например, перемотка вперед или назад). ! В зависимости от того, какая композиция выбрана, конец текущей композиции и начало выбранной композиции/альбома могут быть обрезаны. Использование функций iPod данного устройства на вашем iPod Управление функциями iPod данного устройства может производиться с подключенного iPod. Режим CONTROL iPod/CTRL iPod несовместим со следующими моделями iPod: ! iPod nano 1-го поколения ! iPod с поддержкой видео % Переключение между режимами управления производится нажатием BAND/ . ! CONTROL iPod/CTRL iPod – управление функциями iPod данного устройства может производиться с подключенного iPod. ! CONTROL AUDIO/CTRL AUDIO – управление функциями iPod данного устройства может производиться с помощью органов управления данного устройства. Только для DEH-2600UI Переключение режима управления также производится нажатием кнопки iPod. Ru <QRD3200-A>126 Black plate (127,1) Раздел Использование данного устройства Примечания ! При переключении на режим управления CONTROL iPod/CTRL iPod воспроизведение композиции приостанавливается. Чтобы возобновить воспроизведение, используйте iPod. ! Следующими функциями можно управлять с данного устройства, даже если выбран режим управления CONTROL iPod/CTRL iPod. — Пауза — Ускоренная перемотка вперед/назад — Выбор композиции (раздела) AUDIO BOOK (скорость воспроизведения аудиокниги) 1 Для отображения установочного меню нажмите M.C. 2 Поворачивайте M.C., чтобы выбрать нужную настройку. ! FASTER – Ускоренное воспроизведение ! NORMAL – Воспроизведение с обычной скоростью ! SLOWER – Замедленное воспроизведение ! Громкость можно регулировать только с основного устройства. S.RTRV (sound retriever, технология преобразования звука) Настройка функций 1 Нажмите M.C. для выбора нужной настройки. Подробную информацию см. в Улучшение качества звука сжатых аудиофайлов и восстановление полноты звучания (технология преобразования звука) на стр. 126. 1 Нажмите M.C., чтобы открыть главное меню. 2 Поворачивайте M.C. для прокрутки пунктов меню; нажмите, чтобы выбрать FUNCTION. 3 Для выбора функции поворачивайте M.C. Следующие выбранные функции можно настраивать. ! Функция AUDIO BOOK недоступна, если в качестве режима воспроизведения выбрано CONTROL iPod/CTRL iPod. Подробнее см. в разделе Использование функций iPod данного устройства на вашем iPod на стр. 126. Использование приложений на подсоединенном устройстве Это устройство можно использовать для потокового воспроизведения и управления композициями на iPhone с помощью приложений или только для потокового воспроизведения. Использование данного устройства Важно Использование приложений сторонних разработчиков может включать в себя или требовать предоставления личных данных (создание профиля пользователя или другие способы), а для некоторых приложений - предоставления данных о местонахождении. ВСЕ ПРИЛОЖЕНИЯ СТОРОННИХ РАЗРАБОТЧИКОВ НАХОДЯТСЯ В СФЕРЕ ОТВЕТСТВЕННОСТИ ЭТИХ РАЗРАБОТЧИКОВ, ЧТО БЕЗ ОГРАНИЧЕНИЙ ВКЛЮЧАЕТ В СЕБЯ СБОР И БЕЗОПАСНОСТЬ ПОЛЬЗОВАТЕЛЬСКИХ ДАННЫХ И ОБРАЩЕНИЕ С ЧАСТНОЙ ИНФОРМАЦИЕЙ. ПРИ ИСПОЛЬЗОВАНИИ ПРИЛОЖЕНИЙ СТОРОННИХ РАЗРАБОТЧИКОВ ВЫ СОГЛАШАЕТЕСЬ С УСЛОВИЯМИ ПРЕДОСТАВЛЕНИЯ СЕРВИСА И ПОЛИТИКОЙ КОНФИДЕНЦИАЛЬНОСТИ РАЗРАБОТЧИКОВ. ЕСЛИ ВЫ НЕ СОГЛАСНЫ С УСЛОВИЯМИ ИЛИ ПОЛИТИКОЙ РАЗРАБОТЧИКА ИЛИ НЕ ЖЕЛАЕТЕ ПРЕДОСТАВЛЯТЬ ДАННЫЕ О СВОЕМ МЕСТОНАХОЖДЕНИИ, КОГДА ЭТО ТРЕБУЕТСЯ, НЕ ИСПОЛЬЗУЙТЕ ТАКОЕ ПРИЛОЖЕНИЕ. Сведения о совместимости подключаемых устройств Ниже приводится подробная информация о разъемах, необходимых для использования приложений с iPhone на этом устройстве. 02 Примечания ! Список совместимых приложений для iPhone см. на нашем сайте. ! Компания Pioneer не несет ответственности за любые проблемы, связанные с некорректными или поврежденными данными приложений. ! За содержимое и функциональность поддерживаемых приложений несут ответственность разработчики приложений. Порядок запуска для пользователей iPhone 1 Подключите iPhone к разъему USB. 2 Переключите источник сигнала на APP. 3 Запустите приложение на iPhone и включите воспроизведение. Основные операции Выбор дорожки 1 Нажмите кнопку c или d. Ускоренная перемотка вперед или назад 1 Нажмите и удерживайте кнопку c или d. Приостановка воспроизведения 1 Нажмите кнопку BAND/ , чтобы включить паузу или возобновить воспроизведение. Для пользователей iPhone Русский ! Данная функция поддерживается iPhone и iPod touch. ! На устройстве установлена iOS 5.0 или более поздней версии. Ru <QRD3200-A>127 127 Black plate (128,1) Раздел Использование данного устройства 02 Переключение дисплея Выбор текстовой информации 1 Нажимайте DISP для выбора из следующих функций: ! TRACK INFO (название дорожки/имя исполнителя/название альбома) ! APP NAME (название приложения) ! ELAPSED TIME (время воспроизведения) ! CLOCK (название источника сигнала и часы) ! SPEANA (анализатор спектра) Настройка функций 1 Нажмите M.C., чтобы открыть главное меню. 2 Поворачивайте M.C. для прокрутки пунктов меню; нажмите, чтобы выбрать FUNCTION. 3 Для выбора функции поворачивайте M.C. Следующие выбранные функции можно настраивать. PAUSE (пауза) 1 Нажмите M.C., чтобы включить паузу или возобновить воспроизведение. S.RTRV (sound retriever, технология преобразования звука) 1 Нажмите M.C. для выбора нужной настройки. 1—2—OFF (выкл.) Настройка 1 эффективна для файлов с низкой степенью сжатия, а настройка 2 – для файлов с высокой степенью сжатия. 128 Регулировки параметров звука 1 Нажмите M.C., чтобы открыть главное меню. 2 Поворачивайте M.C. для прокрутки пунктов меню; нажмите, чтобы выбрать AUDIO. 3 Для выбора аудиофункции поворачивайте M.C. Следующие выбранные аудиофункции можно настраивать. ! Функция FADER недоступна, если в режиме SP-P/O MODE выбрано SUB.W/SUB.W. Подробнее см. в разделе SP-P/O MODE (настройка выхода заднего канала и предварительного усилителя) на стр. 131. ! Функции SUB.W и SUB.W CTRL недоступны, если в режиме SP-P/O MODE выбрано REAR/REAR. Подробнее см. в разделе SP-P/O MODE (настройка выхода заднего канала и предварительного усилителя) на стр. 131. ! Функция SUB.W CTRL недоступна, если в режиме OFF выбрано SUB.W. Подробнее см. в разделе SUB.W (включение/выключение сабвуфера) на стр. 128. ! Функция SLA недоступна, если в качестве источника сигнала выбрано FM. FADER (регулировка баланса) 1 Для отображения установочного меню нажмите M.C. 2 Нажмите M.C., чтобы отрегулировать баланс передних и задних громкоговорителей. BALANCE (регулировка баланса) Использование данного устройства 1 Для отображения установочного меню нажмите M.C. 2 Поворачивайте M.C., чтобы отрегулировать баланс левого/правого громкоговорителей. EQ SETTING (вызов настроек эквалайзера) 1 Для отображения установочного меню нажмите M.C. 2 Нажмите кнопку M.C., чтобы выбрать эквалайзер. POWERFUL—NATURAL—VOCAL—CUSTOM1—CUSTOM2—FLAT—SUPER BASS Полосу и уровень эквалайзера можно отрегулировать, если выбрано CUSTOM1 или CUSTOM2. При выборе CUSTOM1 или CUSTOM2 выполните действия, описанные ниже. При выборе других настроек нажмите M.C., чтобы вернуться к предыдущему дисплею. ! CUSTOM1 можно выбрать отдельно для каждого источника сигнала. Однако для USB, iPod и APP автоматически устанавливаются одинаковые настройки. ! CUSTOM2 - это общая настройка, используемая для всех источников сигнала. 3 Для отображения установочного меню нажмите M.C. 4 Нажимайте M.C. для выбора из следующих функций: Полоса эквалайзера—Уровень эквалайзера 5 Поворачивайте M.C. для выбора настройки. Полоса эквалайзера: 80HZ—250HZ— 800HZ—2.5KHZ—8KHZ Уровень эквалайзера: от +6 до –6 LOUDNESS (тонкомпенсация) Тонкомпенсация компенсирует недостаточное звуковое давление в нижнем и верхнем диапазонах частот на низкой громкости. 1 Нажмите M.C. для выбора нужной настройки. OFF (выкл)—LOW (низкий)—MID (средний) —HI (высокий) SUB.W (включение/выключение сабвуфера) Это устройство имеет выход канала сабвуфера, который можно включать и выключать. 1 Нажмите M.C. для выбора нужной настройки. NOR (нормальная фаза)—REV (обратная фаза)—OFF (сабвуфер выключен) SUB.W CTRL (настройка сабвуфер) На выходе сабвуфера будут воспроизводиться только те частоты, которые ниже указанных частот среза. 1 Для отображения установочного меню нажмите M.C. 2 Нажимайте M.C. для выбора из следующих функций: Частота среза—Уровень выходного сигнала—Крутизна характеристики Изменяемые значения будут мигать. 3 Поворачивайте M.C. для выбора настройки. Частота среза: 50HZ—63HZ—80HZ—100HZ —125HZ—160HZ—200HZ Уровень выходного сигнала: от –24 до +6 Крутизна характеристики: –12— –24 BASS BOOST (усиление нижних звуковых частот) 1 Для отображения установочного меню нажмите M.C. 2 Поворачивайте M.C. для выбора нужного уровня. При увеличении или уменьшении уровня отображаются надписи с 0 до +6. Ru <QRD3200-A>128 Black plate (129,1) Раздел Использование данного устройства HPF SETTING (настройка фильтра верхних частот) Используйте эту функцию, если вы хотите, чтобы воспроизводились только высокие частоты. На громкоговорители будут выводиться только частоты выше, чем установленные фильтром высоких частот (HPF). 1 Для отображения установочного меню нажмите M.C. 2 Нажимайте M.C. для выбора из следующих функций: Частота среза—Крутизна характеристики 3 Поворачивайте M.C. для выбора настройки. Частота среза: OFF—50HZ—63HZ—80HZ— 100HZ—125HZ—160HZ—200HZ Крутизна характеристики: –12— –24 SLA (регулировка уровня входного сигнала) Эта функция предупреждает скачки громкости при смене источника сигнала. ! Настройки основываются на уровне громкости FM-тюнера, который остается неизменным. ! Регулировку уровня громкости в диапазоне MW/LW также можно производить с помощью данной функции. ! Для USB, iPod и APP автоматически устанавливается одинаковая настройка. 1 Для отображения установочного меню нажмите M.C. 2 Поворачивая M.C., отрегулируйте уровень громкости источника сигнала. Диапазон настройки: от +4 до –4 Меню системы Важно PW SAVE (режим энергосбережения) отключается при отсоединении аккумуляторной батареи автомобиля; при подсоединении батареи его потребуется включить снова. При выключенном режиме PW SAVE (режим энергосбережения) возможно, что, в зависимости от метода подключения, устройство будет потреблять энергию аккумулятора, если зажигание автомобиля не имеет положения АСС. 1 Нажмите M.C., чтобы открыть главное меню. 2 Поворачивайте M.C. для прокрутки пунктов меню; нажмите, чтобы выбрать SYSTEM. 3 Для выбора функции меню системы поворачивайте M.C. Следующие выбранные функции меню системы можно настраивать. ! INFO DISPLAY и BRIGHTNESS недоступны для DEH-2600UI. ! MUTE MODE недоступно для DEHX3600UI. Использование данного устройства LANGUAGE (выбор языка) Данное устройство может отображать текстовую информацию из сжатых аудиофайлов, в том числе информацию на английском, русском и турецком языках. ! При несовместимости настроек встроенного и выбранного языка возможны искажения при выводе текстовых сообщений. ! Некоторые символы могут отображаться неправильно. 1 Нажмите M.C. для выбора нужной настройки. ENG (английский)—РУС (русский)—TUR (турецкий) CLOCK SET (установка часов) 1 Для отображения установочного меню нажмите M.C. 2 Нажимайте M.C., чтобы выбрать сегмент дисплея часов, который нужно установить. Часы—Минуты 3 Поворачивайте M.C., чтобы отрегулировать время. 12H/24H (формат отображения времени) 1 Нажмите M.C. для выбора нужной настройки. 12H (12-часовой)—24H (24-часовой) INFO DISPLAY (дополнительная информация) AUTO PI (автоматический поиск по идентификатору программы) Устройство может автоматически искать другую станцию с такой же программой даже во время вызова предварительной настройки. 1 Нажмите M.C., чтобы включить или выключить автоматический поиск по идентификатору программы. AUX (вспомогательный вход) Активируйте эту настройку при подключении к данному устройству вспомогательного устройства. 1 Нажмите M.C., чтобы включить или выключить функцию AUX. DIMMER (регулятор освещенности) 1 Нажмите M.C., чтобы включить или выключить регулятор освещенности. ! Вы также можете выбрать другую настройку регулятора освещенности, удерживая нажатой кнопку /DIMMER. BRIGHTNESS (настройка яркости) Используется для настройки яркости дисплея. Набор настроек для BRIGHTNESS зависит от того, включена ли функция DIMMER. Подробнее см. в разделе DIMMER (регулятор освещенности) на стр. 129. 1 Для отображения установочного меню нажмите M.C. 2 Поворачивайте M.C. для выбора настройки. DIMMER вкл.: от 1 до 4 DIMMER выкл.: от 1 до 5 MUTE MODE (режим приглушения звука) Русский Можно выбирать тип информации, отображаемой в секторе дисплея для дополнительной информации. 1 Для отображения установочного меню нажмите M.C. 2 Поворачивайте M.C. для выбора настройки. SPEANA—LEVEL METER—SOURCE—CLOCK —OFF ! Шкала-индикатор сигнала отображается для SPEANA или LEVEL METER, если в качестве источника сигнала выбрано RADIO. 02 Ru <QRD3200-A>129 129 Black plate (130,1) Раздел Использование данного устройства 02 Звук/уровень звукового сигнала данной системы автоматически понижается при получении сигнала от оборудования с функцией приглушения звука. 1 Для отображения установочного меню нажмите M.C. 2 Поворачивайте M.C. для выбора настройки. ! MUTE – приглушение звука ! 20dB ATT – ослабление уровня сигнала (20dB ATT имеет более сильный эффект, чем 10dB ATT) ! 10dB ATT – ослабление уровня сигнала PW SAVE (энергосбережение) Включение этой функции позволяет снизить потребляемую мощность аккумуляторной батареи. ! При включении этой функции единственной возможной операцией является включение источника сигнала. 1 Нажмите M.C., чтобы включить или выключить функцию энергосбережения. Выбор цвета подсветки Только для DEH-X3600UI Меню функции подсветки 1 Нажмите M.C., чтобы открыть главное меню. 2 Поверните M.C., чтобы отобразить ILLUMI, затем нажмите. 3 Для выбора функции подсветки поворачивайте M.C. Следующие выбранные аудиофункции можно настраивать. 130 KEY COLOUR (настройка цвета подсветки клавиатуры) На этом устройстве можно выбрать цвет подсветки кнопок. 1 Для отображения установочного меню нажмите M.C. 2 Поворачивайте M.C., чтобы выбрать цвет подсветки. ! предустановленные цвета (в диапазоне от WHITE до BLUE) ! SCAN (автоматическая смена всех цветов по очереди) ! CUSTOM (пользовательский цвет подсветки) DISP COLOUR (настройка цвета подсветки сектора дисплея) На этом устройстве можно выбрать цвет подсветки дисплея. 1 Для отображения установочного меню нажмите M.C. 2 Поворачивайте M.C., чтобы выбрать цвет подсветки. ! предустановленные цвета (в диапазоне от WHITE до BLUE) ! SCAN (автоматическая смена всех цветов по очереди) ! CUSTOM (пользовательский цвет подсветки) BOTH COLOUR (настройка цвета подсветки кнопок и дисплея) На этом устройстве можно выбрать цвет подсветки кнопок и дисплея. 1 Для отображения установочного меню нажмите M.C. 2 Поворачивайте M.C., чтобы выбрать цвет подсветки. ! предустановленные цвета (в диапазоне от WHITE до BLUE) ! SCAN (автоматическая смена всех цветов по очереди) Использование данного устройства ILLUMI FX (режим световых эффектов) В этом режиме на дисплее появляются световые эффекты в определенных условиях, например, когда ключ зажигания находится в положении ACC или зажигание выключено, или при установке/извлечении компакт-диска. 1 Нажмите M.C., чтобы включить или выключить функцию ILLUMI FX. ! Поворот ключа зажигания в положении ACC и выключение зажигания сопровождаются световыми эффектами независимо от того, включена ли настройка ILLUMI FX. Примечание Если выбрано CUSTOM, используется сохраненный ранее пользовательский цвет. Настройка цвета подсветки Можно создавать пользовательские цвета подсветки как для KEY COLOUR, так и для DISP COLOUR. 1 Нажмите M.C., чтобы открыть главное меню. 2 Поверните M.C., чтобы отобразить ILLUMI, затем нажмите. 3 Поверните M.C., чтобы отобразить KEY COLOUR или DISP COLOUR. Затем нажмите, чтобы выбрать. 6 Поворачивайте M.C., чтобы отрегулировать уровень яркости. Диапазон настройки: от 0 до 60 # Нельзя выбрать уровень ниже 20 для всех трех цветов - R (красный), G (зеленый) и B (голубой) - одновременно. # Для других цветов можно выполнить те же операции. Примечание Когда выбрано SCAN, создать пользовательский цвет невозможно. Информация о MIXTRAX Только для DEH-X3600UI Технология MIXTRAX используется для вставления стереоэффектов между композициями, позволяя слушать музыку нон-стоп в сочетании с визуальными эффектами. Примечания ! Для некоторых файлов/композиций возможность добавления звуковых эффектов отсутствует. ! Выключите функцию MIXTRAX, если визуальные эффекты отвлекают вас от вождения. См. Функции кнопки MIXTRAX на стр. 124. Меню MIXTRAX 1 Нажмите M.C., чтобы открыть главное меню. 4 Нажмите M.C. и удерживайте до тех пор, пока не откроется экран настройки пользовательского цвета. 2 Поворачивайте M.C. для прокрутки пунктов меню; нажмите, чтобы выбрать MIXTRAX. 5 Нажимайте M.C., чтобы выбрать основной цвет. R (красный)—G (зеленый)—B (голубой) 3 Для выбора функции MIXTRAX поворачивайте M.C. Следующие выбранные функции MIXTRAX можно настраивать. Функции доступны при включенном режиме MIXTRAX. Ru <QRD3200-A>130 Black plate (131,1) Раздел Использование данного устройства SHORT PLAYBCK (режим краткого воспроизведения) Можно выбрать длительность времени воспроизведения. 1 Для отображения установочного меню нажмите M.C. 2 Поворачивайте M.C. для выбора настройки. 1.0 MIN (1,0 мин)—1.5 MIN (1,5 мин)— 2.0 MIN (2,0 мин)—2.5 MIN (2,5 мин)— 3.0 MIN (3,0 мин)—OFF (выкл) FLASH AREA (область пульсирующего цвета) Можно выбрать области пульсирующего цвета. 1 Для отображения установочного меню нажмите M.C. 2 Поворачивайте M.C. для выбора настройки. KEY/DISPLAY (кнопки и дисплей)—KEY (кнопки)—OFF (выкл) ! Если выбрано OFF, цвет, выбранный в меню ILLUMI, будет использоваться в качестве цвета подсветки дисплея. FLASH PATTERN (цветовая заставка) Пульсирующие цвета и спецэффекты MIXTRAX меняются в зависимости от уровня громкости и низких частот. 1 Для отображения установочного меню нажмите M.C. 2 Поворачивайте M.C. для выбора настройки. ! С SOUND LEVEL 1 по SOUND LEVEL 6 – цветовая заставка меняется в зависимости от уровня громкости. Выберите нужный режим. ! С LOW PASS 1 по LOW PASS 6 – цветовая заставка меняется в зависимости от уровня низких частот. Выберите нужный режим. ! RANDOM 1 – цветовая заставка изменяется произвольно в зависимости от уровня громкости и уровня низких частот. ! RANDOM 2 – цветовая заставка изменяется произвольно в зависимости от уровня громкости. ! RANDOM 3 – цветовая заставка изменяется произвольно в зависимости от уровня низких частот. DISPLAY FX (экранные эффекты) Можно включить или выключить экранные эффекты MIXTRAX. 1 Нажмите M.C. для выбора нужной настройки. ON (экранные эффекты MIXTRAX)—OFF (обычный дисплей) CUT IN FX (эффект сведения вручную) Стартовое меню 1 Нажмите и удерживайте кнопку SRC/ OFF, пока устройство не выключится. 2 Нажмите кнопку SRC/OFF и удерживайте ее, пока не откроется стартовое меню. 3 Поворачивайте M.C. для прокрутки пунктов меню; нажмите, чтобы выбрать INITIAL. 4 Для выбора функции меню системы поворачивайте M.C. Следующие выбранные функции стартового меню можно настраивать. FM STEP (шаг настройки в FM-диапазоне) 1 Нажмите M.C., чтобы выбрать шаг настройки в FM-диапазоне. 100 (100 кГц)—50 (50 кГц) 02 SP-P/O MODE (настройка выхода заднего канала и предварительного усилителя) Выход на провода заднего громкоговорителя и выход заднего канала RCA можно использовать для подключения широкополосного громкоговорителя или сабвуфера. Выберите настройку, подходящую для Вашего соединения. 1 Для отображения установочного меню нажмите M.C. 2 Поворачивайте M.C. для выбора настройки. ! REAR/SUB.W – Выберите, если к выходу заднего канала подсоединен широкополосный громкоговоритель, и также имеется сабвуфер, подсоединенный к выходу RCA. ! SUB.W/SUB.W – Выберите, если сабвуфер подключен напрямую к выходу заднего канала без дополнительного усилителя, и также имеется сабвуфер, подсоединенный к выходу RCA. ! REAR/REAR – Выберите, если широкополосный громкоговоритель подсоединен к выходу заднего канала и к выходу RCA. Если к выходу заднего канала подсоединен широкополосный громкоговоритель, а выход RCA не используется, можно выбрать REAR/SUB.W или REAR/ REAR. Меню системы 1 Нажмите и удерживайте кнопку SRC/ OFF, пока устройство не выключится. 2 Нажмите кнопку SRC/OFF и удерживайте ее, пока не откроется стартовое меню. Ru <QRD3200-A>131 Русский Можно включить или звуковые эффекты MIXTRAX, переключая композиции вручную. 1 Нажмите M.C. для выбора нужной настройки. ON (вкл)—OFF (выкл) Использование данного устройства 131 Black plate (132,1) Раздел Использование данного устройства 02 Установка 03 4 Для выбора функции меню системы поворачивайте M.C. Подробную информацию см. в Меню системы на стр. 129. 3 Поверните M.C., чтобы отобразить DEMO OFF, затем нажмите. 4 Поверните M.C. для выбора YES. Использование дополнительного источника сигнала (AUX) 5 Нажмите M.C. для выбора. 2 Нажмите кнопку SRC/OFF, чтобы выбрать AUX в качестве источника сигнала. Примечание Невозможно выбрать AUX, если не включена вспомогательная настройка. Подробную информацию см. в разделе AUX (вспомогательный вход) на стр. 129. Переключение дисплея Выбор текстовой информации 1 Нажимайте DISP для выбора из следующих функций: ! Название источника ! Название источника сигнала и часы Если открылся неверный экран Отключите неверный экран, как описано ниже. 1 Нажмите M.C., чтобы открыть главное меню. 132 Важно ! При установке данного устройства в автомобиле, в котором отсутствует положение ключа зажигания АСС, красный кабель должен быть подключен к клемме, которая определяет рабочее положение ключа зажигания; в противном случае может возникнуть утечка тока аккумуляторной батареи. Только для DEH-X3600UI Эта функция включается, если к этому устройству подключено устройство, оснащенное функцией приглушения звука. Звук на устройстве, оснащенном такой функцией, автоматически приглушается при получении входящего звонка или при наборе номера. Примечание При получении входящего звонка появляется индикация телефона. OF Функция приглушения звука F O T 1 Вставьте мини-штекер стереокабеля в гнездо AUX. Соединения Положение ACC STAR 2 Поворачивайте M.C. для прокрутки пунктов меню; нажмите, чтобы выбрать SYSTEM. N 3 Поворачивайте M.C. для прокрутки пунктов меню; нажмите, чтобы выбрать SYSTEM. Положение ACC отсутствует ! Эксплуатация данного устройства в условиях, отличных от описанных ниже, может привести к пожару или сбою в работе устройства. — Транспортные средства с 12-вольтовым аккумулятором и заземлением отрицательного полюса. — Громкоговорители с 50 Вт (выходная мощность) и от 4 W до 8 W (сопротивление). ! Во избежание короткого замыкания, перегрева или неисправностей обязательно соблюдайте следующие указания. — Перед установкой отсоедините отрицательную клемму аккумулятора. — Закрепите провода при помощи зажимов или изоляционной ленты. Для защиты проводки заизолируйте провода в местах их соприкосновения с металлическими деталями. — Разместите все кабели в удалении от подвижных деталей, таких как рычаг переключения передач и направляющие сидений. — Разместите все кабели в удалении от нагревающихся деталей, таких как решетка обогревателя. — Запрещается подключать желтый провод дисплея к аккумуляторной батарее автомобиля через сверленое отверстие в отсеке двигателя. — Изолируйте концы всех не подсоединенных кабелей изоляционной лентой. — Не укорачивайте кабели. — Никогда не срезайте изоляцию со шнура питания данного устройства с целью подачи питания на другое устройство. Допустимая нагрузка кабеля по току ограничена. — Используйте предохранитель с указанными параметрами. — Запрещается напрямую заземлять отрицательный вывод громкоговорителя. — Запрещается связывать вместе отрицательные кабели нескольких громкоговорителей. ! При включении питания устройства управляющий сигнал подается через синебелый провод. Подключите этот провод к клемме пульта управления внешнего усилителя мощности или клемме реле управления антенны с электроприводом (макс. 300 мА 12 В постоянного тока). Если автомобиль оборудован встроенной в оконное стекло антенной, подсоедините провод к клемме питания усилителя антенны. ! Запрещается подсоединять сине-белый кабель к клемме питания внешнего усилителя мощности. Также запрещается подсоединять данный провод к клемме питания антенны с электроприводом. В противном случае может возникнуть утечка тока аккумуляторной батареи или иная неисправность. Ru <QRD3200-A>132 Black plate (133,1) Раздел Установка Установка ! Черный кабель является заземляющим. Заземляющие кабели данного устройства и других устройств (особенно устройств, предназначенных для эксплуатации при больших токах, таких как усилитель мощности) должны монтироваться отдельно. В противном случае их случайное отсоединение может привести к пожару или неисправности. Шнур питания 2 Данное устройство 1 2 34 7 3 4 5 6 3 4 5 6 1 8 a 5 6 9 7 1 Гнездо шнура питания 2 Вход AUX2 (стереоразъем 3,5 мм) (только DEH-X3600UI) Специальный разъем, разработанный только для использования с устройствами, оснащенными функцией приглушения звука. 3 Выход заднего канала или выход сабвуфера 4 Передний выход 5 Гнездо антенны 6 Плавкий предохранитель (10 A) 7 Вход проводного пульта дистанционного управления Служит для подключения проводного адаптера пульта дистанционного управления (приобретается отдельно). e b c d Примечания ! Требуется изменение стартового меню данного устройства. См. SP-P/O MODE (настройка выхода заднего канала и предварительного усилителя) на стр. 131. Выход сабвуфера данного устройства монофонический. ! При использовании сабвуфера мощностью 70 Вт (2 W) обязательно подсоедините к сабвуферу фиолетовый и фиолетовый/черный провод данного устройства. Не подсоединяйте зеленый и зеленый/черный провода. Усилитель мощности (приобретается отдельно) Используйте данную схему подсоединения при использовании дополнительного усилителя мощности. 3 1 5 2 3 2 1 7 4 5 6 7 1 Пульт дистанционного управления системой Подсоедините синий/белый кабель. 2 Усилитель мощности (приобретается отдельно) 3 Подключите с помощью кабелей RCA (приобретаются отдельно) 4 К переднему выходу 5 Передний громкоговоритель 6 К выходу заднего канала или выходу сабвуфера 7 Задний громкоговоритель или сабвуфер Ru <QRD3200-A>133 Русский 1 К гнезду шнура питания 2 В зависимости от типа автомобиля функции 3 и 5 могут отличаться. В этом случае следует подключить 4 к 5 и 6 к 3. 3 Желтый Резервный разъем (или разъем дополнительного оборудования) 4 Желтый Подключите к клемме источника постоянного тока 12 В. 5 Красный Разъем дополнительного оборудования (или резервный разъем) 6 Красный Подключите к клемме, на которую подается напряжение (12 В постоянного тока) при включении зажигания. 7 Подсоедините провода одинакового цвета друг к другу. 8 Черный (заземление на массу) 9 Синий/белый Расположение штекера разъема ISO на различных автомобилях может отличаться. Если штекер 5 предназначен для управления антенной, подсоедините 9 к b. На других автомобилях подключать 9 к b запрещается. a Синий/белый Подключите к клемме панели управления усилителя мощности (макс. 300 мА 12 В постоянного тока). b Синий/белый Подключите к клемме реле управления антенны с электроприводом (макс. 300 мА 12 В постоянного тока). c Желтый/черный Если используется оборудование, имеющее функцию приглушения звука, данный провод необходимо подсоединить к клемме Audio Mute данного устройства. В противном случае необходимо проследить за тем, чтобы данный провод не контактировал с любыми другими разъемами. d Выводы громкоговорителей Белый: Передний левый + Белый/черный: Передний левый * Серый: Передний правый + Серый/черный: Передний правый * Зеленый: Задний левый + или сабвуфер + Зеленый/черный: Задний левый * или сабвуфер * Фиолетовый: Задний правый + или сабвуфер + Фиолетовый/черный: Задний правый * или сабвуфер * e Разъем ISO В некоторых автомобилях разъем ISO может иметь два вывода. В этом случае необходимо подсоединить оба разъема. 03 133 Black plate (134,1) Раздел Установка 03 Установка Установка ! ! ! ! Важно Перед окончательной установкой проверьте все соединения и системы. Не используйте детали, не разрешенные производителем к использованию, поскольку это может стать причиной неисправностей. Уточните у дилера компании, требует ли установка сверления отверстий или внесения иных изменений в конструкцию автомобиля. Не устанавливайте данное устройство в местах, где оно может: — помешать управлению автомобилем. — травмировать пассажира при внезапной остановке автомобиля. ! Перегрев полупроводникового лазера приведет к его выходу из строя. Разместите все кабели в удалении от нагревающихся деталей, таких как решетка обогревателя. ! Оптимальной является установка устройства под углом менее 60°. 60° ! При установке необходимо обеспечить эффективный отвод тепла, оставив достаточное пространство за задней панелью и закрепив свободные кабели так, чтобы они не закрывали вентиляционные отверстия. Оставить просторное место 2 Закрепите обойму, подогнув с помощью отвертки металлические язычки (90°). 2 5cm cm Переднее/заднее крепление стандарта DIN Для данного изделия предусмотрена возможность установки с помощью переднего или заднего крепления. При установке используйте детали, имеющиеся в продаже. 1 Снимите рамку. 1 5 см 5 см Демонтаж устройства 1 Приборная панель 2 Монтажная обойма # Убедитесь, что устройство надежно закреплено в гнезде. Неустойчивость устройства может привести к его выпадению и неполадкам в работе. 1 Декоративная рамка 2 Язычок ! Снятие передней панели облегчает доступ к декоративной рамке. ! При установке декоративной рамки сторона рамки с язычком должна быть направлена вниз. Заднее крепление стандарта DIN 2 Вставьте прилагаемые экстракторы с обеих сторон устройства до щелчка. 1 Совместите отверстия на кронштейне и боковых панелях устройства. 3 Вытяните устройство из приборной панели автомобиля. Переднее крепление стандарта DIN 1 Вставьте монтажную обойму в переднюю панель. При установке в недостаточно глубоком гнезде используйте монтажную обойму, входящую в комплект поставки устройства. При наличии достаточного пространства за устройством применяется монтажная обойма, поставляемая вместе с автомобилем. 2 Затяните по два винта с каждой стороны. Снятие и установка передней панели 3 1 2 В целях защиты от кражи переднюю панель можно снять. Чтобы получить дополнительную информацию, см. Снятие передней панели и Установка передней панели на стр. 122. 1 Самонарезающий винт (5 мм × 8 мм) 2 Монтажная рамка 3 Приборная панель или консоль 134 Ru <QRD3200-A>134 Black plate (135,1) Приложение Дополнительная информация Устранение неисправностей Симптомы выделены жирным шрифтом; причины показаны обычным шрифтом без отступа. Способы устранения показаны обычным шрифтом с отступом. Дисплей автоматически возвращается в исходный режим. В течение 30 секунд не было выполнено никаких операций. Повторите операцию. Диапазон повторного воспроизведения самопроизвольно изменяется. В зависимости от выбранного диапазона воспроизведения он может изменяться при выборе другой папки или дорожки, а также при перемотке вперед/назад. Выберите диапазон повторного воспроизведения еще раз. Устройство функционирует с ошибками. Имеются помехи. Вложенные папки не воспроизводятся, если выбран диапазон FLD (повторное воспроизведение папки). Выберите другой диапазон повторного воспроизведения. При изменении дисплея отображается NO XXXX (например, NO TITLE). Текстовая информация отсутствует. Переключите дисплей или включите воспроизведение другой дорожки/файла. ERROR-07, 10, 11, 12, 15, 17, 30, A0 Используется устройство, например, сотовый телефон, которое может вызывать шумовые помехи. Уберите прибор, вызывающий помехи, от этого устройства. Электрическая или механическая неисправность. Установите ключ зажигания в положение OFF, а затем – в положение ON или переключитесь на другой источник сигнала, а затем обратно на проигрыватель компактдисков. Сообщения об ошибках ERROR-15 Прежде чем обратиться к торговому представителю или в ближайший сервисный центр Pioneer, обязательно запомните сообщение об ошибке. Симптомы выделены жирным шрифтом; причины показаны обычным шрифтом без отступа. Способы устранения показаны обычным шрифтом с отступом. Общие AMP ERROR Вложенная папка не воспроизводится. Дополнительная информация Устройство не работает или неправильно подсоединен громкоговоритель; сработала цепь защиты. Проверьте, подключен ли громкоговоритель. Если сообщение не исчезает даже после выключения/выключения зажигания, свяжитесь с дилерским центром или авторизованным сервисным центром Pioneer. Проигрыватель компакт-дисков Вставлен пустой диск. Замените диск. ERROR-23 Формат диска не поддерживается. Замените диск. FORMAT READ Иногда происходит задержка между началом воспроизведения и появлением звука. Звук появится после того как с дисплея исчезнет сообщение. NO AUDIO На диске отсутствуют файлы, которые можно воспроизвести. Замените диск. SKIPPED Диск содержит файлы, защищенные технологией DRM. Защищенные файлы пропускаются. PROTECT Диск загрязнен. Очистите диск. Все файлы на диске защищены технологией DRM. Замените диск. Диск поцарапан. Замените диск. Иногда происходит задержка между началом воспроизведения и появлением звука. Звук появится после того как с дисплея исчезнет сообщение. NO AUDIO Композиции отсутствуют. Перенесите аудиофайлы на запоминающее устройство USB и подключите его. На подключенном запоминающем устройстве USB включена функция защиты от перезаписи. Отключите функцию защиты от перезаписи в соответствии с инструкцией по эксплуатации запоминающего устройства USB. SKIPPED На подключенном запоминающем устройстве USB содержатся файлы, защищенные технологией DRM. Защищенные файлы пропускаются. PROTECT Все файлы на подключенном запоминающем устройстве USB защищены технологией DRM. Замените запоминающее устройство USB. N/A USB Подключенное устройство USB не поддерживается данным устройством. ! Подключите запоминающее устройство USB класса Mass Storage. ! Отсоедините устройство и замените его на совместимое запоминающее устройство USB. Ru <QRD3200-A>135 Русский ERROR-07, 11, 12, 17, 30 Запоминающее устройство USB/iPod FORMAT READ 135 Black plate (136,1) Приложение Дополнительная информация CHECK USB ERROR-23 Короткое замыкание на разъеме USB или в кабеле USB. Убедитесь, что разъем USB или кабель USB не защемлен и не поврежден. Запоминающее устройство USB не отформатировано в системе FAT12, FAT16 или FAT32. Запоминающее устройство USB должно быть форматировано в FAT12, FAT16 или FAT32. CHECK USB ERROR-16 Подключенное запоминающее устройство USB потребляет больше максимально допустимой силы тока. Отсоедините запоминающее устройство USB и не используйте его. Установите ключ зажигания в положение OFF, затем – в положение ACC или ON, и затем подключайте только совместимые запоминающие устройства USB. Устаревшая версия прошивки iPod. Обновите версию прошивки iPod. CHECK USB iPod работает, но не подзаряжается. Убедитесь в отсутствии короткого замыкания в кабеле iPod (например, что кабель не зажат между металлическими предметами). После проверки кабеля установите ключ зажигания в положение OFF, а затем – в положение ON, либо отключите и заново подключите iPod. ERROR-19 Сбой связи. Выполните следующие действия. – Установите ключ зажигания в положение OFF, а затем – в положение ON. – Отключите запоминающее устройство USB. – Выберите другой источник сигнала. Затем вновь выберите USB в качестве источника сигнала. Сбой iPod. Отключите кабель от iPod. После появления на дисплее главного меню iPod заново подключите iPod и перезагрузите его. Дополнительная информация Рекомендации по обращению с изделием Диски и проигрыватель Используйте только диски, имеющие один из следующих логотипов. Сбой iPod. Отключите кабель от iPod. После появления на дисплее главного меню iPod заново подключите iPod и перезагрузите его. STOP В текущем списке отсутствуют композиции. Выберите список, содержащий музыкальные композиции. NOT FOUND Композиций не найдено. Загрузите композиции на iPod. Приложение еще не запущено. Следуйте экранным подсказкам. Воспроизведение дисков может быть невозможно из-за характеристик диска, формата диска, приложения, при помощи которого выполнялась запись, условий воспроизведения, условий хранения и других факторов. Толчки от неровностей дороги могут вызвать прерывание воспроизведения диска. Используйте 12-см диски. Используйте только обычные круглые диски. Следующие типы дисков нельзя использовать на данном устройстве: ! Диски формата DualDisc ! 8-см диски: попытки использовать такие диски с помощью адаптера могут привести к неисправности устройства. ! Диски необычных форм Приложения START UP APP Конденсация может временно ухудшить работу проигрывателя. Оставьте его для адаптации к более высокой температуре примерно на час. Также удалите влагу с дисков с помощью мягкой ткани. ! Диски других форматов, кроме CD ! Поврежденные диски, в т.ч. с трещинами, с отколотыми краями или деформированные ! Диски CD-R/RW, запись на которых не была завершена При использовании дисков, на поверхность которых могут наноситься этикетки, изучите инструкции и предупреждения для этих дисков. Установка и извлечение некоторых дисков могут быть невозможны. Использование таких дисков может привести к повреждению оборудования. Не приклеивайте на диски этикетки и другие материалы. ! Это может деформировать диски, в результате чего их воспроизведение будет невозможным. ! Этикетки могут отклеиться во время воспроизведения и затруднить извлечение дисков, а также повредить оборудование. Запоминающее устройство USB Не прикасайтесь к записанной поверхности дисков. Подключение через USB-концентратор не поддерживается. Когда диски не используются, храните их в футлярах. Не подключайте другие устройства, кроме запоминающих устройств USB. Не приклеивайте этикеток, не пишите и не наносите химических веществ на поверхность дисков. Для очистки компакт-диска протрите диск мягкой тканью от центра к краю. 136 Ru <QRD3200-A>136 Black plate (137,1) Приложение Дополнительная информация При движении автомобиля надежно закрепите запоминающее устройство USB. Не роняйте запоминающее устройство USB на пол, где оно может застрять под педалью тормоза или акселератора. В зависимости от типа запоминающего устройства USB могут возникнуть следующие проблемы. ! Управление функциями может отличаться. ! Запоминающее устройство может не распознаваться. ! Файлы не могут воспроизводиться корректно. ! Устройство может создавать шумовые помехи во время прослушивания радио. iPod Не оставляйте iPod в местах с высокой температурой воздуха. При движении автомобиля надежно закрепите iPod. Не роняйте iPod на пол, где он может застрять под педалью тормоза или акселератора. WMA Расширение: .wma Скорость передачи данных: от 48 кбит/с до 320 кбит/с (постоянная), от 48 кбит/с до 384 кбит/с (переменная) Частота дискретизации: 32 кГц, 44,1 кГц, 48 кГц Windows MediaäAudio Professional, Lossless, Voice/DRM Stream/Stream с поддержкой видео: не поддерживается MP3 WAV Расширение: .wav Разрядность квантования: 8 и 16 (LPCM), 4 (MS ADPCM) Частота дискретизации: от 16 кГц до 48 кГц (LPCM), 22,05 кГц и 44,1 кГц (MS ADPCM) ! Эта функция не работает, если выбрано USB MTP. Дополнительная информация В качестве названия файла или папки могут отображаться только первые 32 символа (включая расширение). Частота дискретизации: от 8 кГц до 48 кГц (32 кГц, 44,1 кГц, 48 кГц пиковая) Для отображения в данном устройстве кодировка русского текста должна соответствовать одному из следующих наборов символов: ! Юникод (UTF-8, UTF-16) ! Отличный от Юникода набор символов, использующийся в среде Windows, для которого в языковой настройке задан русский язык Совместимая версия тегов ID3: 1.0, 1.1, 2.2, 2.3, 2.4 (теги ID3 версии 2.x имеют приоритет перед версией 1.x.) Это устройство может работать некорректно в зависимости от приложений, использованных для кодирования файлов WMA. Списки воспроизведения M3u: не поддерживаются При начале воспроизведения аудиофайлов, содержащих изображения, и файлов с запоминающего устройства USB, содержащего разветвленные иерархии папок, может происходить небольшая задержка. Расширение: .mp3 Скорость передачи данных: от 8 кбит/с до 320 кбит/с (постоянная), переменная MP3i (интерактивный MP3), mp3 PRO: не поддерживаются Диск Допустимая иерархия папок: до восьми уровней (реальная иерархия папок составляет менее двух уровней) Количество воспроизводимых папок: не более 99 Количество воспроизводимых файлов: не более 999 Файловая система: ISO 9660 уровень 1 и 2, Romeo, Joliet Воспроизведение нескольких сессий: поддерживается Пакетный формат записи: не поддерживается Независимо от продолжительности паузы между композициями в изначальной записи, при воспроизведении дисков со сжатыми аудиофайлами между композициями будут короткие паузы. Запоминающее устройство USB Допустимая иерархия папок: до восьми уровней (реальная иерархия папок составляет менее двух уровней) Количество воспроизводимых папок: не более 500 Количество воспроизводимых файлов: не более 15 000 Воспроизведение защищенных от копирования файлов: не поддерживается Русский Настройки iPod ! При подключении iPod к данному устройству эквалайзер iPod автоматически отключается, что обеспечивает оптимальное звучание. При отсоединении iPod для эквалайзера автоматически выбирается предыдущая настройка. ! При использовании данного устройства отключение функции повторного воспроизведения на iPod невозможно. Если iPod подключен к данному устройству, будет автоматически выбран режим повтора всех композиций. Поддержка сжатых аудиофайлов (компактдиск, USB) Дополнительная информация Текстовая информация несовместимого формата, сохраненная на iPod, не будет отображаться на дисплее данного устройства. Ru <QRD3200-A>137 137 Black plate (138,1) Приложение Дополнительная информация Запоминающее устройство USB, содержащее разделы: воспроизводится только первый раздел. При начале воспроизведения аудиофайлов на запоминающем устройстве USB, содержащем разветвленные иерархии папок, может возникать небольшая задержка. ВНИМАНИЕ ! Pioneer не гарантирует совместимость со всеми устройствами USB mass storage и не несет ответственности за любую потерю данных на медиапроигрывателях, смартфонах и других устройствах при использовании этого изделия. ! Не оставляйте диски или запоминающее устройство USB в местах с высокой температурой воздуха. Поддержка iPod Данное устройство поддерживает только перечисленные ниже модели iPod. Совместимые версии ПО для iPod также указаны ниже. Более старые версии могут не поддерживаться. Сделано для ! iPod touch (5-го поколения) ! iPod touch (4-го поколения) ! iPod touch (3-го поколения) ! iPod touch (2-го поколения) ! iPod touch (1-го поколения) ! iPod classic ! iPod с поддержкой видео ! iPod nano (7-го поколения) ! iPod nano (6-го поколения) ! iPod nano (5-го поколения) ! iPod nano (4-го поколения) ! iPod nano (3-го поколения) ! iPod nano (2-го поколения) ! iPod nano (1-го поколения) 138 ! ! ! ! ! ! Дополнительная информация iPhone 5 iPhone 4S iPhone 4 iPhone 3GS iPhone 3G iPhone 01 02 1 2 03 Пользователям iPod с интерфейсом Lightning потребуется кабель Lightning - USB (входит в комплект поставки iPod). Пользователям iPod с интерфейсом Dock Connector потребуется кабель CD-IU51. Подробную информацию можно получить по месту покупки. О совместимости файлов/форматов см. в руководствах к iPod. Аудиокниги, подкасты: поддерживаются ВНИМАНИЕ Компания Pioneer не несет ответственности за потерю данных на iPod, даже если эти данные будут потеряны во время использования данного устройства. Последовательность воспроизведения аудиофайлов Пользователь не может назначать номера папок и устанавливать последовательность воспроизведения с помощью данного устройства. 3 4 04 В зависимости от версии программного обеспечения или поколения iPod некоторые функции могут быть недоступны. Функции iPod могут различаться в зависимости от версии программного обеспечения. Таблица символов для русского языка Пример иерархии 5 6 05 : Папка : Сжатый аудиофайл от 01 до 05: Номер папки от 1 до 6: Последовательность воспроизведения Диск Последовательность выбора папок и других действий может отличаться в зависимости от кодировки или программного обеспечения, использованного для записи. Запоминающее устройство USB Файлы воспроизводятся в той последовательности, в которой они записаны на запоминающем устройстве USB. Для выбора алгоритма воспроизведения рекомендуется выполнить следующие действия. 1 Присвойте файлам имена с цифрами, определяющими последовательность воспроизведения (например, 001xxx.mp3 и 099yyy.mp3). 2 Поместите эти файлы в папку. 3 Сохраните папку, содержащую файлы, на запоминающем устройстве USB. Учитывайте, что в некоторых системных средах невозможно установить порядок воспроизведения. Последовательность воспроизведения файлов на портативном аудиоплеере USB может изменяться и зависит от типа плеера. Д: Б Д: Б Д: Б Д: Б Д: Б :А :Б :В :Г :Д : Е, Ё :Ж :З : И, Й :К :Л :М :Н :О :П :Р :С :Т :У :Ф :Ъ :Я :Х :Ц :Ч : Ш, Щ :Ы :Ь :Э :Ю Д: Дисплей Б: Буква Авторское право и товарные знаки iTunes Apple и iTunes являются торговыми знаками компании Apple Inc., зарегистрированными в США и других странах. MP3 Поставка этого изделия дает право только на его частное и некоммерческое использование и не предоставляет лицензии и не подразумевает право использования этого изделия в любых коммерческих (т.е. приносящих прибыль) прямых трансляциях (телевизионных, спутниковых, кабельных и/или любых других), вещании/потоковой передаче через Интернет, локальных сетях и/или других сетях или в других электронных системах распространения, таких как системы платного аудио и аудио по запросу. Для такого использования необходима специальная лицензия. Дополнительную информацию см. на сайте http://www.mp3licensing.com. Ru <QRD3200-A>138 Black plate (139,1) Приложение Дополнительная информация WMA Windows Media – это зарегистрированная торговая марка или торговая марка Microsoft Corporation в США и/или других странах. В данном изделии используются технологии, принадлежащие корпорации Microsoft, которые не разрешается использовать или распространять без лицензии от Microsoft Licensing, Inc. iPod и iPhone iPhone, iPod, iPod classic, iPod nano и iPod touch являются товарными знаками компании Apple Inc., зарегистрированными в США и других странах. Lightning является торговым знаком компании Apple Inc. “Made for iPod” и “Made for iPhone” означает, что электронный прибор был разработан с целью подключения определенно к iPod или iPhone соответственно, и имеется сертифицикация разработчика о соответствии с техническими характеристиками Apple. Apple не несет ответственности за работу данного устройства или его соответствие со стандартами по технике безопасности или регулятивными нормами. Пожалуйста, обратите внимание, что использование данного прибора с iPod или iPhone может отрицательно сказываться на качестве беспроводной связи. Дополнительная информация Серийный номер На этом рисунке показана информация о месяце и годе изготовления устройства. 12 цифр 10 цифр 2 цифры P1 P2 Дата изготовления оборудования P1 - Год изготовления 2001 2002 Год Символ A B Год Символ 2011 K 2012 L P2 - Месяц изготовления Месяц 1 2 3 Символ A B C 2003 C 2004 D 2005 E 2006 F 2007 G 2008 H 2009 I 2010 J 2013 M 2014 N 2015 O 2016 P 2017 Q 2018 R 2019 S 2020 T 4 D 5 E 6 F 7 G 8 H 9 I 10 J 11 K 12 L Androidä Android является товарным знаком компании Google Inc. MIXTRAX Русский MIXTRAX является торговой маркой PIONEER CORPORATION. Ru <QRD3200-A>139 139 Black plate (140,1) Приложение Дополнительная информация Технические характеристики Общие Источник питания ........... 14,4 В постоянного тока (допустимый диапазон от 10,8 В до 15,1 В) Система заземления ..... Заземление отрицательного полюса Максимальный потребляемый ток ................................... 10,0 А Размеры (Ш × В × Г): DIN Шасси ............................. 178 мм × 50 мм × 165 мм Передняя панель ........... 188 мм × 58 мм × 15 мм D Шасси ............................. 178 мм × 50 мм × 165 мм Передняя панель ........... 170 мм × 46 мм × 15 мм (DEH-X3600UI) Передняя панель ........... 170 мм × 46 мм × 16 мм (DEH-2600UI) Масса ............................. 1 кг Аудио Максимальная выходная мощность ................................... 50 Вт × 4 70 Вт × 1/2 W (для сабвуфера) Номинальная выходная мощность ................................... 22 Вт × 4 (от 50 Гц до 15 000 Гц, суммарное значение коэффициента нелинейных искажений 5 %, нагрузка 4 W для обоих каналов) Сопротивление нагрузки ................................... 4 W (допустимо – от 4 W до 8 W) Максимальная выходная мощность ................................... 2,0 В Контур громкости ........... +10 дБ (100 Гц), +6,5 дБ (10 кГц) (громкость: –30 дБ) Эквалайзер (5-полосный графический эквалайзер): Частота ........................... 80 Гц/250 Гц/800 Гц/2,5 кГц/ 8 кГц Диапазон амплитудно-частотных характеристик ................................... ±12 дБ (с шагом 2 дБ) 140 Дополнительная информация Сабвуфер (моно): Частота ........................... 50 Гц/63 Гц/80 Гц/100 Гц/ 125 Гц/160 Гц/200 Гц Крутизна характеристики ................................... –12 дБ/окт, –24 дБ/окт Усиление ........................ +6 дБ до –24 дБ Фаза ............................... Нормальная/Обратная Диапазон частот ............. от 531 кГц до 1 602 кГц Полезная чувствительность ................................... 25 мкВ (отношение сигнал/ шум: 20 дБ) Отношение сигнал/шум ................................... 62 дБ (сеть IEC-A) Проигрыватель компакт-дисков LW-тюнер Система ......................... Аудиосистема с компакт-диском Используемые диски ..... Компакт-диск Отношение сигнал/шум ................................... 94 дБ (1 кГц) (сеть IEC-A) Число каналов ............... 2 (стерео) Формат декодирования файлов MP3 ................................... MPEG-1 и 2 Audio Layer 3 Формат декодирования файлов WMA ................................... Версии 7, 7.1, 8, 9, 10, 11, 12 (двухканальный звук) (Windows Media Player) Формат сигнала WAV ..... Linear PCM и MS ADPCM (без компрессии) USB Стандартная спецификация USB ................................... USB 2.0 полноскоростной Максимальный ток питания ................................... 1 А Класс USB ...................... MSC (Mass Storage Class) Файловая система ......... FAT12, FAT16, FAT32 Формат декодирования файлов MP3 ................................... MPEG-1 и 2 Audio Layer 3 Формат декодирования файлов WMA ................................... Версии 7, 7.1, 8, 9, 10, 11, 12 (двухканальный звук) (Windows Media Player) Формат сигнала WAV ..... Linear PCM и MS ADPCM (без компрессии) MW-тюнер Диапазон частот ............. от 153 кГц до 281 кГц Полезная чувствительность ................................... 28 мкВ (отношение сигнал/ шум: 20 дБ) Отношение сигнал/шум ................................... 62 дБ (сеть IEC-A) Примечание: В соответствии со статьей 5 закона Российской Федерации «О защите прав потребителей» и постановлением правительства Российской Федерации № 720 от 16.06.97 компания Pioneer Europe NV оговаривает следующий срок службы изделий, официально поставляемых на российский рынок. Автомобильная электроника: 6 лет Прочие изделия (наушники, микрофоны и т.п.): 5 лет Примечания ! Характеристики и конструкция могут быть изменены без предварительного уведомления. ! Данное устройство произведено в Таиланде. FM-тюнер Диапазон частот ............. от 87,5 МГц до 108,0 МГц Полезная чувствительность ................................... 9 дБф (0,8 мкВ/75 W, моно, отношение сигнал/шум: 30 дБ) Отношение сигнал/шум ................................... 72 дБ (сеть IEC-A) Ru <QRD3200-A>140 Black plate (141,1) Русский Ru <QRD3200-A>141 141 Black plate (142,1) 142 Ru <QRD3200-A>142 Black plate (143,1) Русский Ru <QRD3200-A>143 143 <QRD3200-A> 144 <QRD3200-A> 145 <QRD3200-A> 146 <QRD3200-A> 147 PIONEER CORPORATION 1-1, Shin-ogura, Saiwai-ku, Kawasaki-shi, Kanagawa 212-0031, JAPAN Корпорация Пайонир 1-1, Син-Огура, Сайвай-ку, г. Кавасаки, префектура Канагава, 212-0031, Япония Импортер ООО “ПИОНЕР РУС” 125040, Россия, г. Москва, ул. Правды, д.26 Тел.: +7(495) 956-89-01 PIONEER EUROPE NV Haven 1087, Keetberglaan 1, B-9120 Melsele, Belgium/Belgique TEL: (0) 3/570.05.11 PIONEER ELECTRONICS (USA) INC. P.O. Box 1540, Long Beach, California 90801-1540, U.S.A. TEL: (800) 421-1404 PIONEER ELECTRONICS OF CANADA, INC. 340 Ferrier Street, Unit 2, Markham, Ontario L3R 2Z5, Canada TEL: 1-877-283-5901 TEL: 905-479-4411 PIONEER ELECTRONICS ASIACENTRE PTE. LTD. 253 Alexandra Road, #04-01, Singapore 159936 TEL: 65-6472-7555 PIONEER ELECTRONICS AUSTRALIA PTY. LTD. 5 Arco Lane, Heatherton, Victoria, 3202 Australia TEL: (03) 9586-6300 PIONEER ELECTRONICS DE MEXICO, S.A. de C.V. Blvd.Manuel Avila Camacho 138 10 piso Col.Lomas de Chapultepec, Mexico, D.F. 11000 TEL: 55-9178-4270 先鋒股份有限公司 台北市內湖區瑞光路407號8樓 電話: 886-(0)2-2657-3588 先鋒電子(香港)有限公司 香港九龍長沙灣道909號5樓 電話: 852-2848-6488 ã 2013 PIONEER CORPORATION. All rights reserved. ã 2013 PIONEER CORPORATION. Tous droits de reproduction et de traduction réservés. ã PIONEER CORPORATION, 2013. Все права защищены. <KOKZ13E> <QRD3200-A> EW <QRD3200-A>148