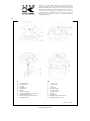
1
Fax +32 2 359 95 50 Copies of the I/B. Please reproduce them without any changes except under special instruction from Team International BELGIUM. The pages must be reproduced and folded in order to obtain a booklet A5 (+/- 148.5 mm width x 210 mm height). When folding, make sure you keep the good numbering when you turn the pages of the I/B. Don’t change the page numbering. Keep the language integrity. Eismaschine Ice Cream Maker Sorbetière IJsmachine Máquina para hacer helados Geladeira Gelatiera Urządzenie do robienia lodów Aparat de preparat inghetata Výrobník zmrzliny TKG ICE 1 I/B Version 120829 230V~ 50Hz 12W Front cover page (first page) Assembly page 1/64 Fax +32 2 359 95 50 Copies of the I/B. Please reproduce them without any changes except under special instruction from Team International BELGIUM. The pages must be reproduced and folded in order to obtain a booklet A5 (+/- 148.5 mm width x 210 mm height). When folding, make sure you keep the good numbering when you turn the pages of the I/B. Don’t change the page numbering. Keep the language integrity. D 1. 2. 3. 4. 5. 6. 7. 8. 9. 10. 11. GB 1. 2. 3. 4. 5. 6. 7. 8. 9. 10. 11. Motorgehäuse Deckelhaken Deckel Deckelloch Drehachse Rührer Ein/Aus-Schalter Loch zum Einfüllen von Zutaten Befestigungshaken Schlitz für den Gefrierbehälter Gefrierbehälter Motor body Cover hook Cover Cover slot Rotation shaft Mixing spatula On/Off switch Funnel Fixing hook Refrigerating container slot Refrigerating container 2 Assembly page 2/64 TKG ICE 1 - 120829 Fax +32 2 359 95 50 Copies of the I/B. Please reproduce them without any changes except under special instruction from Team International BELGIUM. The pages must be reproduced and folded in order to obtain a booklet A5 (+/- 148.5 mm width x 210 mm height). When folding, make sure you keep the good numbering when you turn the pages of the I/B. Don’t change the page numbering. Keep the language integrity. FR 1. 2. 3. 4. 5. 6. 7. 8. 9. 10. 11. I 1. 2. 3. 4. 5. 6. 7. 8. 9. 10. 11. Bloc moteur Ergots du couvercle Couvercle Fentes du couvercle Axe de rotation Spatule pour mélanger Interrupteur marche/arrêt Orifice pour les ingrédients Crochets de fixation Fentes du bol réfrigérant Bol réfrigérant NL 1. 2. 3. 4. 5. 6. 7. 8. Corpo motore Ganci coperchio Coperchio Asole del coperchio Perno di rotazione Spatola miscelatrice Interruttore On/Off Vano per ingredienti Ganci fissaggio Asole contenitore refrigerante Contenitore refrigerante PL 1. 2. 3. 4. 5. 6. 7. 8. 9. 10. Motorblok Dekselhaak Deksel Dekselgat Draaias Mengspatel Aan/uit-schakelaar Opening voor het toevoegen van ingrediënten 9. Bevestigingshaakje 10. Koelbakgaatje 11. Koelbak Obudowa silnika Haczyk Pokrywa Szczeliny mocujące pokrywę Łacznik obrotowy Szpatuła mieszająca Włacznik/Wyłacznik On/Off Lejek Haczyk mocujący Szczeliny mocująca pojemnika 11. Pojemnik do mrożenia SP 1. 2. 3. 4. 5. 6. 7. 8. 9. 10. 11. Bloque motor Ganchos de la tapa Tapa Ranuras de la tapa Eje de rotación Espátula para mezclar Interruptor encendido/apagado Orificio para los ingredientes Ganchos de fijación Ranuras del recipiente refrigerante Recipiente refrigerante RO 1. 2. 3. 4. 5. 6. 7. 8. 9. 10. 11. Carcasa motorului Carlig capac Capac Slot capac Arbore rotatie Spatula mixare Întrerupător Pornit/Oprit Orificiu pentru ingrediente Carlig de fizare Slot container refrigerator Container refrigerator P 1. 2. 3. 4. 5. 6. 7. 8. 9. 10. 11. Bloco do motor Ganchos da tampa Tampa Encaixes da tampa Eixo de rotação Espátula para misturar Interruptor ligar/desligar Orifício para os ingredientes Ganchos da fixação Encaixes do recipiente refrigerante Recipiente refrigerante SK 1. 2. 3. 4. 5. 6. 7. 8. 9. 10. 11. Teleso motora Háčik krytu Kryt Štrbina pre kryt Otočný hriadeľ Miešacia lopatka Hlavný vypínač Lievik Upevňovací háčik Štrbina chladiacej nádoby Chladiaca nádoba 3 Assembly page 3/64 TKG ICE 1 - 120829 Copies of the I/B. Please reproduce them without any changes except under special instruction from Team International BELGIUM. The pages must be reproduced and folded in order to obtain a booklet A5 (+/- 148.5 mm width x 210 mm height). When folding, make sure you keep the good numbering when you turn the pages of the I/B. Don’t change the page numbering. Keep the language integrity. Fax +32 2 359 95 50 WICHTIGE SICHERHEITSVORSCHRIFTEN Lesen Sie aufmerksam die Gebrauchsanleitung, bevor Sie Ihr Gerät benutzen, und befolgen Sie immer die Sicherheitsvorschriften und die Gebrauchsanweisung. Wichtig: Personen (einschließlich Kinder), die aufgrund ihrer physischen, sensorischen oder geistigen Fähigkeiten oder ihrer Unerfahrenheit oder Unkenntnis nicht in der Lage sind, das Gerät sicher zu benutzen, sollten dieses Gerät nicht ohne Aufsicht oder Anweisung durch eine verantwortliche Person benutzen. Kinder sollten beaufsichtigt werden, um sicherzustellen, dass sie nicht mit dem Gerät spielen. Kontrollieren Sie, ob die Netzspannung mit der auf dem Gerät vermerkten Spannung übereinstimmt, bevor Sie das Gerät benutzen. Lassen Sie Ihr Gerät niemals beim Gebrauch unbeaufsichtigt. Überprüfen Sie regelmäßig, dass das Gerät nicht beschädigt ist. Bei Beschädigung der Anschlussleitung oder des Gerätes, letzteres nicht benutzen, sondern von einem Fachmann(*) überprüfen bzw. reparieren lassen. Eine beschädigte Anschlussleitung muss von einem Fachmann(*) ausgewechselt werden, damit jede Gefahr gemieden wird. Benutzen Sie das Gerät nur zu Haushaltszwecken, wie in der Bedienungsanleitung angegeben. Tauchen Sie das Gerät niemals in Wasser oder andere Flüssigkeiten, weder zum Reinigen, noch zu einem anderen Zweck. Geben Sie das Gerät niemals in die Spülmaschine. Benutzen Sie das Gerät nicht in der Nähe einer Wärmequelle. Ziehen Sie den Stecker aus der Steckdose bevor Sie das Gerät reinigen oder wegräumen. Während des Gerätebetriebs können alle sich bewegenden Teile eine Gefahrenquelle darstellen. Halten Sie sich zur Vermeidung von Hautabschürfungen oder anderen Unfällen immer an die folgenden Sicherheitsmaßnahmen: Handhaben Sie zur Vermeidung von Kälteverbrennungen den Kältebehälter nur mit Handschuhen oder anderen Schutzmitteln, wenn er eingefroren ist. Benutzen Sie nur die gelieferten Gerätekomponenten. Berühren Sie während des Gerätelaufs nie die montierten Zubehörteile. Halten Sie nie die Klingen oder andere sich drehende Bauteile an; lassen Sie die Teile im Behälter und warten Sie ab, bis dieselben aufgrund ihrer eigenen Trägheit zum Stillstand kommen. Achten Sie darauf, dass weder Wasser noch andere Flüssigkeiten in den Gerätekörper eindringen und waschen Sie das Gerät nicht im Geschirrspüler. Sollte das Gerät nass werden oder in Flüssigkeiten fallen, ziehen Sie sofort den Netzstecker aus, trocknen Sie es sorgfältig ab und vergewissern Sie sich, dass keine Flüssigkeit ins Motorgehäuse eingedrungen ist. Lassen Sie ggf. das Gerät von einem Fachmann überprüfen. Benutzen Sie das Gerät nicht im Freien und bewahren Sie es an einem trockenen Platz auf. Benutzen Sie nur Zubehör, welches vom Lieferanten empfohlen wurde. Anderes Zubehör stellt eine Gefahr für den Benutzer dar und das Gerät könnte dadurch beschädigt werden. Ziehen Sie niemals an der Anschlussleitung um das Gerät zu bewegen. Stellen Sie das Gerät bzw. den Gefrierbehälter auf eine stabile, ebene Fläche. Achten Sie darauf, dass die Anschlussleitung nicht irgendwo hängen bleibt und dies zum Fall des Gerätes führen könnte. Wickeln Sie die Anschlussleitung nicht um das Gerät oder knicken Sie diese nicht. Halten Sie während des Betriebs die Hände, Haare und Kleidungsstücke von dem Behälter fern, die mit den Drehteilen in Berührung kommen und sich daran verfangen können. Stellen Sie die Eiscrememaschine nicht in den Kühl- oder Gefrierschrank: Nur der Kältebehälter ist dafür geeignet. 4 Assembly page 4/64 TKG ICE 1 - 120829 Fax +32 2 359 95 50 Copies of the I/B. Please reproduce them without any changes except under special instruction from Team International BELGIUM. The pages must be reproduced and folded in order to obtain a booklet A5 (+/- 148.5 mm width x 210 mm height). When folding, make sure you keep the good numbering when you turn the pages of the I/B. Don’t change the page numbering. Keep the language integrity. Fassen Sie den Kältebehälter nicht mit bloßen Händen an; benutzen Sie einen Kunststoffbeutel oder Handschuhe: Der Hautkontakt kann teilweise Kälteverbrennungen verursachen. Versuchen Sie nicht, den Kältebehälter zu öffnen: Sollte Flüssigkeit aus demselben austreten, wenden Sie sich an eine Fachkraft. Falls das Gerät Flüssigkeit verliert, benutzen Sie es nicht und essen Sie das möglicherweise verunreinigte Eis nicht. Das Gerät nicht mit nassen Händen oder Füssen berühren. Während des Betriebs darf das Gerät nicht umpositioniert werden. Benutzen Sie das Gerät nicht zum Mischen heißer Flüssigkeiten. Falls das Gerät nicht richtig funktioniert, ziehen Sie sofort den Stecker aus der Steckdose, und wenden Sie sich an einen Fachmann(*). (*) Fachmann: anerkannter Kundendienst des Lieferanten oder des Importeurs, der für derartige Reparaturen zuständig ist. Für eventuelle Reparaturen wenden Sie sich bitte an diesen Kundendienst. GERÄTEBETRIEB Vor dem ersten Gebrauch den Kältebehälter, den Deckel, die Rührspatel und die Achse mit Seifenwasser waschen und sorgfältig spülen (die Wassertemperatur darf nicht höher als 40°C sein); vor der Verwendung gut abtrocknen. Eis kann die Bakterienentwicklung fördern: waschen Sie die Eismaschine daher sorgfältig nach jedem Gebrauch und trocknen Sie sie gut ab. Das Motorgehäuse darf nicht in Wasser oder anderen Flüssigkeiten getaucht werden; benutzen Sie zum Reinigen einen leicht angefeuchteten Lappen. Das Motorgehäuse verfügt zum Einund Ausschalten des Motors über einen Druckschalter 0-I (aus/ein). Alle Zubehörteile (Deckel, Achse, Spachtel) werden am Motorgehäuse angebracht: kontrollieren Sie vor der Benutzung ihren festen Sitz. Befestigen Sie zuerst das Motorgehäuse am Deckel (siehe Seite 2); vergewissern Sie sich insbesondere, dass die Deckelhaken in die Deckellöcher einrasten. Führen Sie dann die Drehachse in den Rührer ein und das Ganze ins Loch am Motorgehäuse. Demontieren Sie nach dem Gebrauch alle Zubehörteile. Entfernen Sie die Drehachse und die Rührspachtel, und drücken Sie dann leicht auf die Deckelhaken um das Motorgehäuse und den Deckel zu trennen. Setzen Sie zum Verschließen des Behälters den Deckel so auf den Rand, dass die beiden Haken über den entsprechenden Stiften zu liegen kommen und drehen Sie den Deckel im Uhrzeigersinn. Kontrollieren Sie, ob das Ende des Rührspachtels sich in das Loch am Boden einlegt. Um den Deckel zu entfernen, gehen Sie in umgekehrter Reihenfolge vor. Einfrieren des Kältebehälters Vergewissern Sie sich, dass Ihr Gefrierfach –18°C (***) erreicht und stellen Sie den Temperaturregler auf diesen Wert ein. Anderenfalls, bei Nichterreichen von –18°C, ist die Speiseeisherstellung nicht möglich. Schützen Sie den Behälter zur Vermeidung von Kälteverbrennungen mit einem Kunststoffbeutel; dadurch verhindern Sie auch die Eisbildung auf den Hakenverschlüssen. Stellen Sie den Behälter in das kälteste Fach des Gefrierschranks und kontrollieren Sie, dass: - er senkrecht und auf keinen Fall auf dem Kopf steht; - ausreichend Freiraum um den Behälter ist; - er vollständig leer ist. Je nach der Speiseeismenge, die zubereitet werden soll (500 g oder 1000 g), und je nach Temperatur des Gefrierfachs (-18°C oder tiefer) lassen Sie den Behälter für 10 oder 12 Stunden im Gefrierschrank. 5 Assembly page 5/64 TKG ICE 1 - 120829 Fax +32 2 359 95 50 Copies of the I/B. Please reproduce them without any changes except under special instruction from Team International BELGIUM. The pages must be reproduced and folded in order to obtain a booklet A5 (+/- 148.5 mm width x 210 mm height). When folding, make sure you keep the good numbering when you turn the pages of the I/B. Don’t change the page numbering. Keep the language integrity. Vergewissern Sie sich, dass die Flüssigkeit im Inneren des Kältebehälters gefroren ist: sie muss vollständig fest sein. Bei ständiger Aufbewahrung des Kältebehälters im Gefrierschrank kann er bei Bedarf schnell verwendet werden, ohne auf die Erstarrung des Kältemittels warten zu müssen. Eiszubereitung Halten Sie für die Zubereitung des Eisgemisches an die aufgeführten Rezeptvorschläge. Sie können jedes beliebige Rezept benutzen, vorausgesetzt die Zutatenmenge übersteigt nicht 0,6 Liter. Während der Zubereitung muss die Raumtemperatur unter 25°C liegen: anderenfalls kann kein optimales Ergebnis gewährleistet werden. 1. Bevor Sie den Behälter aus dem Gefrierschrank nehmen, die Eismischung in einer Schüssel vorbereiten. Stellen Sie die Mischung zum Abkühlen in den Gefrierschrank. 2. Nehmen Sie den Kältebehälter aus dem Gefrierfach (zur Vermeidung von Kälteverbrennungen Handschuhe oder ein Tuch verwenden) und setzen Sie ihn auf eine ebene Fläche. Der Behälter muss sofort nach der Entnahme aus dem Gefrierschrank benutzt werden. 3. Den Deckel (siehe Abschnitt „GERÄTEBETRIEB“) mit Motor, Drehachse und Rührer aufsetzen und verriegeln; kontrollieren, dass die Teile gut befestigt sind. 4. Den Netzstecker in die Steckdose stecken und den 0/I-Schalter in Position „I“ drücken, um das Rührwerk einzuschalten. Gießen Sie jetzt langsam das Speiseeisgemisch durch die Öffnung im Deckel in den Behälter; achten Sie darauf, dass das Gemisch nicht überläuft und so der Motor nass wird. Die Mischung darf den Behälter nur halb füllen. Rühren Sie die Mischung (d. h. lassen Sie Eismaschine laufen) für ca. 40-60 Minuten: Die Zeit hängt von der gewünschten Konsistenz ab (je länger die Zeitdauer, umso fester und gefrorener wird das Eis). Denken Sie daran, dass hausgemachtes Eis nie die Festigkeit von Eis haben kann, das Sie im Geschäft kaufen; es wird immer weicher sein. 5. Während der Zubereitung können Sie feine Schokoladensplitter oder Rosinen und andere Zutaten hinzufügen; alkoholische Zugaben sollten nur zum Schluss hinzugefügt werden (sie verlangsamen den Gefriervorgang). 6. Nach Fertigstellung den Aus-Schalter drücken, den Netzstecker ziehen, den Deckel gegen den Uhrzeigersinn ausklinken und abnehmen. Benutzen Sie zur Entnahme und zum Servieren von halbgefrorenem Eis eine Gummispachtel oder einen Holzlöffel (keine Metallgegenstände verwenden). Servieren Sie das Eis sofort. 7. Sie können das Eis zum Versteifen für kurze Zeit im Gefrierfach lassen (nicht länger als 30 Minuten); für längere Aufbewahrung sollten Sie eine Schale mit Deckel zum Einfrieren verwenden (es dauert einige Stunden, bis das Eis im Gefrierschrank hart wird). Die Konservierungsdauer kann 1 oder 2 Wochen betragen: je nachdem, ob es sich bei den benutzten Grundzutaten um „natürliche“ oder um „halbgekochte“ Zutaten handelt. PFLEGE UND REINIGUNG Ziehen Sie den Stecker aus der Steckdose, bevor Sie das Gerät reinigen. Es ist wichtig, dass der Behälter und alle Komponenten nach dem Gebrauch sorgfältig gewaschen und getrocknet werden, um Bakterienbildung und dem Entstehen unangenehmer Gerüche vorzubeugen. Zur Reinigung des Behälters, des Deckels und des Zapfens Wasser und ein handelsübliches Reinigungsmittel für Geschirrspülmaschinen verwenden; reiben Sie die Teile mit einem weichen Schwamm ab (benutzen Sie keine Metallschwämmchen oder Scheuermittel). Spülen Sie gut nach und trocknen Sie sorgfältig ab. Die Wassertemperatur darf maximal 40°C betragen. Verwenden Sie zum Reinigen ein weiches, leicht feuchtes Tuch. Verwenden Sie keine scheuernden oder aggressiven Reinigungsmittel. 6 Assembly page 6/64 TKG ICE 1 - 120829 Fax +32 2 359 95 50 Copies of the I/B. Please reproduce them without any changes except under special instruction from Team International BELGIUM. The pages must be reproduced and folded in order to obtain a booklet A5 (+/- 148.5 mm width x 210 mm height). When folding, make sure you keep the good numbering when you turn the pages of the I/B. Don’t change the page numbering. Keep the language integrity. Kontrollieren Sie regelmäßig den Zustand des Netzkabels auf Schäden; für das Auswechseln ist ein Spezialwerkzeug erforderlich: wenden Sie sich daher an den Kundendienst für eventuelle Reparaturen. Zur Entsorgung des Gerätes wenden Sie sich an kommunale Sammelstellen. Wir empfehlen Ihnen, die Anschlussleitung abzuschneiden (ziehen Sie vorher den Stecker aus der Steckdose!) und den Gefrierbehälter nicht gewaltsam zu öffnen. Speiseeis Vanilleeis 100 g Zucker - 250 ml Milch - 250 ml Sahne - 2 Eier - 1 Päckchen Vanillezucker Die Eier mit dem Zucker schlagen, bis die Mischung schaumig ist. Milch und Sahne hinzufügen, gut mischen und die Mischung in den Kältebehälter gießen. Malagaeis 200 g Zucker - 350 ml Milch - 200 ml Sahne - Eiweiß von 2 Eiern - 100 g Rosinen - etwas Rum Die Rosinen waschen und in Rum einweichen (sie müssen ganz bedeckt sein). Das Ei mit dem Zucker schaumig schlagen, Milch und Sahne hinzufügen, gut mischen und das Präparat in den Kältebehälter gießen. Kurz bevor das Eis fertig ist, die trockenen Rosinen und einen Teil des verwendeten Rums beigeben. Haselnusseis 250 g Zucker - 400 ml Milch - 2 Eier - 100 g Schmelzschokolade - 50 g gehackte und geschälte Nüsse - eine Prise Vanille Die Schokolade in kleine Splitter zerhacken und mit etwas Milch und Vanille in einem Behälter in ein Wasserbad geben. Das Ei mit dem Zucker schaumig schlagen, die verbliebene Milch und die geschmolzene Schokolade (sie muss sich abgekühlt haben) hinzufügen. Die klein gehackten Nüsse beimengen, gut mischen und die Mischung in den Kältebehälter gießen. Zitroneneis 250 g Zucker - 300 ml Milch - 300 ml Sahne - 4 Zitronen - 1,5 Löffel Zitronensirup Die Zitronen auspressen, den Saft auf den Zucker und den Zitronensirup gießen, gut mischen und die übrigen Zutaten hinzufügen. Schlagen, bis die Mischung gleichmäßig eingedickt ist. Die Mischung in den Kältebehälter gießen. Bananeneis 150 g Zucker - 150 ml Milch - 300 g (Netto) Bananenfruchtfleisch - etwas Zitronensaft Die Bananen schälen und in kleine Stücke schneiden, den Zitronensaft und Zucker hinzugeben. Mischen und Milch hinzufügen; gut rühren und die Mischung in den Kältebehälter gießen. Schokoladeneis 200 g Zucker - 400 ml Milch - 200 ml Sahne - 2 Eier - 100 g Schmelzschokolade Die Schokolade in kleine Splitter zerhacken und mit etwas Milch und Vanille in einem Behälter in ein Wasserbad geben. Die Eier mit dem Zucker schaumig schlagen, die verbliebene Milch und die geschmolzene Schokolade (sie muss sich abgekühlt haben) hinzufügen, gut vermischen und die Mischung in den Kältebehälter gießen. Blaubeereis 200 g Zucker - 250 ml Sahne - 400 g eingefrorene Blaubeeren - ½ Zitrone Die Blaubeeren bei Zimmertemperatur auftauen und in dem sich bildenden Saft lassen; Zitronensaft, Sahne und Zucker zugeben. Die Zutaten gut vermischen, bis sie fest werden, und die Mischung in den Kältebehälter gießen. Erdbeereis 150 g Zucker - 250 ml Milch - 200 ml Sahne - 1 Ei - 300 g reife Erdbeeren 7 Assembly page 7/64 TKG ICE 1 - 120829 Fax +32 2 359 95 50 Copies of the I/B. Please reproduce them without any changes except under special instruction from Team International BELGIUM. The pages must be reproduced and folded in order to obtain a booklet A5 (+/- 148.5 mm width x 210 mm height). When folding, make sure you keep the good numbering when you turn the pages of the I/B. Don’t change the page numbering. Keep the language integrity. Die Eier mit Zucker schaumig schlagen, die klein geschnittenen Erdbeeren und die anderen Zutaten hinzufügen. Gut vermischen und die Mischung in den Kältebehälter gießen. Walnusseis 200 g Zucker - 300 ml Milch - 200 ml Sahne - 2 Eier - 100 g Walnüsse (Nusskern) - 2 Löffel Nusslikör Die Nüsse zerhacken, Zucker, die Eier hinzufügen und die Mischung schaumig schlagen. Die restlichen Zutaten beimengen, die Mischung gut verrühren und in den Kältebehälter gießen. Liköreis und Soft Drinks Die Rezepte mit Alkohol erfordern eine 10 - 15 Minuten längere Eiszubereitung. Champagnergeschmack 125 g Zucker - 300 ml Sahne - 300 ml Champagner oder Sekt Den Zucker im Champagner auflösen, die Sahne hinzufügen und in den Behälter gießen. Pfefferminzgeschmack 100 g Zucker - 250 ml Milch - 250 ml Sahne - 250 ml Pfefferminzlikör - 1 + ½ Zitronen Den Zucker gut mit dem Zitronensaft vermischen. Die weiteren Zutaten hinzugeben, gut vermischen und die Mischung in den Behälter gießen. Whiskygeschmack 100 g Zucker - 250 ml Milch - 300 ml Sahne - 1 Ei - 85 ml Whisky - 1 Prise zerriebener Zitronenschalen Das Ei mit dem Zucker schaumig schlagen, die zerriebenen Zitronenschalen hinzugeben (nur um den Geschmack anzureichern), Milch, Sahne und den Likör hinzufügen, gut vermischen und die Mischung in den Behälter gießen. Zitronatgeschmack 100 g Zucker - 450 ml Milch - 300 ml Zitronatsirup Den Zucker mit Milch vermischen, den Zitronatsirup beimengen, gut vermischen und die Mischung in den Behälter gießen. Sorbets Die Rezepte mit Alkohol erfordern eine 10 - 15 Minuten längere Eiszubereitung. Es empfiehlt sich, die Sorbets erst beim Servieren dem Kältebehälter zu entnehmen, da sie schnell schmelzen. Champagnergeschmack 100 g Zucker - eine Flasche Champagner oder Brut Den Zucker im Champagner auflösen und die Mischung in den Behälter gießen. Brandygeschmack 100 g Zucker - 400 ml Wasser - 3 Zitronen - 180 ml Brandy Den Saft von drei Zitronen gut mit den anderen Zutaten vermischen und die Mischung in den Kältebehälter schütten. Erdbeergeschmack 150 g Zucker - 400 g Erdbeeren - 1 Zitrone - 2 Löffel Granatapfelsirup Die Erdbeeren zerkleinern, den Zitronensaft und die anderen Zutaten hinzugeben. Die Mischung gut verrühren und in den Kältebehälter schütten. 8 Assembly page 8/64 TKG ICE 1 - 120829 Fax +32 2 359 95 50 Copies of the I/B. Please reproduce them without any changes except under special instruction from Team International BELGIUM. The pages must be reproduced and folded in order to obtain a booklet A5 (+/- 148.5 mm width x 210 mm height). When folding, make sure you keep the good numbering when you turn the pages of the I/B. Don’t change the page numbering. Keep the language integrity. Pfirsichgeschmack 150 g Zucker - 400 g Pfirsichfruchtfleisch - 1 Zitrone Das Pfirsichfruchtfleisch zerkleinern, den Zitronensaft darüber gießen und den Zucker hinzufügen. Gut vermischen und die Mischung in den Kältebehälter gießen. Aprikosengeschmack 150 g Zucker - 400 g Aprikosenfruchtfleisch - 1 Zitrone - 2 Löffel Aprikosenbrandy Das Aprikosenfruchtfleisch zerkleinern, den Zitronensaft darüber gießen und den Zucker hinzufügen. Gut vermischen und die Mischung in den Kältebehälter gießen. Bananengeschmack 150 g Zucker - 450 g Bananenfruchtfleisch - 350ml Wodka - 1 Zitrone - eine Prise Vanille Die Bananen zerkleinern, den Zitronensaft darüber gießen und den Zucker hinzufügen. Gut vermischen und die Mischung in den Kältebehälter gießen. Melonengeschmack 150 g Zucker - 400 g Melone - 1 Zitrone - ein Glas Brandy Die Melone zerkleinern, den Zitronensaft darüber gießen und den Zucker hinzufügen. Gut vermischen und die Mischung in den Kältebehälter gießen. UMWELTSCHUTZ – RICHTLINIE 2002/96/EG Zum Schutz unserer Umwelt und unserer Gesundheit sind Elektro- und Elektronik-Altgeräte nach bestimmten Regeln zu entsorgen. Dies fordert den Einsatz sowohl des Herstellers bzw. Lieferanten als auch des Verbrauchers. Aus diesem Grund darf dieses Gerät, wie das Symbol auf dem Typenschild bzw. auf der Verpackung zeigt, nicht in den unsortierten Restmüll gegeben werden. Der Verbraucher hat das Recht, dieses Gerät über kommunale Sammelstellen zu entsorgen; von dort aus wird die spezifische Behandlung, Verwertung bzw. das Recycling gem. den Erfordernissen der Richtlinie sichergestellt. 9 Assembly page 9/64 TKG ICE 1 - 120829 Fax +32 2 359 95 50 Copies of the I/B. Please reproduce them without any changes except under special instruction from Team International BELGIUM. The pages must be reproduced and folded in order to obtain a booklet A5 (+/- 148.5 mm width x 210 mm height). When folding, make sure you keep the good numbering when you turn the pages of the I/B. Don’t change the page numbering. Keep the language integrity. IMPORTANT SAFEGUARDS Please read these instructions carefully before using the appliance, and always follow the safety and operating instructions. Important: People (including children) who are not able to use the appliance in a safe way, due to their physical, sensorial or mental capacity or their lack of experience or knowledge, must never use the appliance except if they are supervised by a person responsible for their safety or if they previously received instructions concerning the safe use of the appliance. Close supervision is necessary to prevent children from using the appliance as a toy. Check that your mains voltage corresponds to that stated on the appliance. Never leave the appliance unsupervised when in use. From time to time check the appliance for damages. Never use the appliance if cord or appliance shows any signs of damage. In that case, repairs should be made by a competent qualified electrician(*). Should the cord be damaged, it must be replaced by a competent qualified electrician(*) in order to avoid all danger. Only use the appliance for domestic purposes and in the way indicated in these instructions. Never immerse the appliance in water or any other liquid for any reason whatsoever. Never place it into the dishwasher. Never use the appliance near hot surfaces. Before cleaning or storing the appliance, always unplug the appliance from the power supply. When the appliance is operating, the moving parts are dangerous. To avoid abrasion or other injuries, respect these warnings: Handle the refrigeration bowl only with gloves or other protection to avoid cold “burns” when frozen. Only use the components supplied. Do not touch the accessory fitted to the appliance when this is operating. Do not stop the blades or moving parts from rotating; leave them submerged in the container until they stop naturally from inertia. Check that the motor body does not come into contact with water or other liquids; should it get wet or happen to fall into a liquid, immediately take the plug out of the power supply socket, dry it carefully and check that liquid has not entered the motor body; if in doubt, contact professionally qualified personnel. Never use the appliance outside and always place it in a dry environment. Never use accessories that are not recommended by the producer. They could constitute a danger to the user and risk to damage the appliance. Never move the appliance by pulling the cord. Stand the appliance on a table or flat surface. Make sure the cord cannot get caught in any way. Do not wind the cord around the appliance and do not bend it. Keep your hands, hair and any accessories away from the bowl when the appliance is operating, to prevent them from contacting and getting caught up with rotating parts. Do not place the ice cream maker in the refrigerator or freezer: only the refrigerant container is suitable for this purpose. Do not grip the refrigerant container with bare hands. Protect your hands by using a plastic bag or gloves: contact with the skin can cause partial “burns”. Never try to open the refrigerant container: if any liquid leaks out, contact professionally qualified personnel. In case of machine’s liquid loss: do not use the device and do not eat the ice-cream if contaminated. 10 Assembly page 10/64 TKG ICE 1 - 120829 Fax +32 2 359 95 50 Copies of the I/B. Please reproduce them without any changes except under special instruction from Team International BELGIUM. The pages must be reproduced and folded in order to obtain a booklet A5 (+/- 148.5 mm width x 210 mm height). When folding, make sure you keep the good numbering when you turn the pages of the I/B. Don’t change the page numbering. Keep the language integrity. Do not touch the appliance with wet hands or feet. Do not move the appliance when it is operating. Do not use the appliance to mix boiling liquids. In the event of a fault or poor operation, switch the appliance off and have it checked by a competent qualified electrician(*). (*) Competent qualified electrician: after-sales department of the producer or importer or any person who is qualified, approved and competent to perform this kind of repairs in order to avoid all danger. In case of need you should return the appliance to this electrician. OPERATION Before first time use, wash the refrigerating container, lid, spatula and shaft with soapy water and rinse them carefully (the water temperature must not exceed 40°C): before use dry them carefully. Ice cream is sensitive to bacteria: every time you use the ice cream maker, check that the utensils are very clean and dry. Do not submerge the motor body in water or other liquids; clean it with a slightly damp cloth. The motor body has a push switch: press it to switch the motor 0-I (on/off). All the accessories (lid, shaft, spatula) fit to the motor body: before using them, check that they are well attached. First of all fit the motor unit together with the lid (see page 2) and make sure the pins on the motor unit insert into the slots of the lid. Then insert the shaft into the spatula and the whole into the hole on the motor unit. After use, disassemble all the accessories. First, remove the shaft and spatula, then press slightly the pins of the motor unit to separate it from the lid. To fit the lid to the container, place it on the freezing bowl so that the lugs insert into the slot on the bowl and turn the lid clockwise. Check that the end of the spatula ends up into the hole on the bottom of the bowl. To remove the lid, proceed inversely. Freezing the refrigerating container Check that the freezer can reach –18°C and set the thermostat so that this temperature is guaranteed. Ice cream cannot be made if this temperature is not reached. Place the container in a plastic bag to protect yourself against cold “burns” and to stop ice forming next to the fixing hooks. Place the container into the coldest compartment of the freezer, and ensure that: - It is in a vertical position, and especially not upside down - There is sufficient space all around - Nothing is inside it. Depending on the quantity of ice cream and the freezer temperature, leave the container in the freezer for 10 or 12 hours, in other words according to the amount of ice cream to prepare (500g or 1000g) and the temperature (-18°C or even less). Check that the cooling liquid inside the container is frozen: it must be completely solid. If you always keep the container in the freezer, it can be used when needed, without waiting for the solidification time of the refrigerating liquid. Ice cream preparation To prepare ice cream mixtures, follow the recipes below. All the recipes can be used, on condition that no more than 0.6 litres of ingredients are involved. The room temperature must be lower than 25°C during preparation: if this is not the case, an optimal result cannot be guaranteed. 1. Before removing the container from the freezer, prepare the ice cream mixture in a bowl. Put the mixture into the refrigerator to cool it. 11 Assembly page 11/64 TKG ICE 1 - 120829 Fax +32 2 359 95 50 Copies of the I/B. Please reproduce them without any changes except under special instruction from Team International BELGIUM. The pages must be reproduced and folded in order to obtain a booklet A5 (+/- 148.5 mm width x 210 mm height). When folding, make sure you keep the good numbering when you turn the pages of the I/B. Don’t change the page numbering. Keep the language integrity. 2. 3. 4. 5. 6. 7. Remove the refrigerating container from the freezer (wear gloves or use a cloth to avoid cold “burns”) and place it on a stable support base. The container should be used immediately after removal from the freezer. Fit the lid, motor unit, shaft and spatula together (see paragraph “OPERATION”). Fix the lid to the freezing bowl. Put the plug into the current socket and press the 0/I button to “I” to make the spatula rotate. Now, immediately but gradually pour the ice cream mixture into the container through the hole in the lid, without dripping and wetting the motor: the mixture must not pass over half the volume of the container. Mix for around 40-60 minutes: the time depends on the desired consistency (the longer the time, the more frozen the product will be). Remember that homemade ice cream does not have the same consistency as that bought in a shop; in fact, it is softer. During preparation, you can add fine chocolate chips, raisins or other ingredients: alcoholic liquids are added almost at the end (they slow down cooling). At the end, turn off using the switch, remove the plug from the socket, turn the lid anticlockwise and lift it to remove it from the bowl. To serve the cold dessert, remove it using a rubber spatula or wooden spoon (do not use metal objects). Now serve immediately. The ice cream can be left in the container to become hard in the freezer for a brief period (no longer than 30 minutes). For long term freezing, we recommend using a container with a lid (several hours in the freezer are necessary for the ice cream to become hard). The conservation period can be 1 or 2 weeks. This time depends on whether the ingredients used are “natural” or “semi-cooked”. CLEANING AND MAINTENANCE Before cleaning the appliance, switch it off and remove the plug from the current socket. It is important for the container and all the components to be well washed immediately after use, to prevent the formation of bacteria or unpleasant smells. When cleaning the container, spatula, lid and pin, use water with a normal detergent for dishes, and rub with a soft sponge (do not use metal scouring pads or abrasive products). Rinse carefully and dry completely. The temperature of the water must not exceed 40°C. Clean the body with a soft, slightly damp cloth; do not use abrasive or corrosive products. Periodically check that the electrical cord is not damaged. A special tool is needed to replace it: contact an authorised assistance centre also for any necessary repairs. When you decide to dispose of the appliance, please go to a municipal collecting point. We recommend that you make the appliance inoperative by cutting the power cord (but first make sure you have removed the plug from the electrical outlet), and that you do not break open the refrigerating container. Ice cream recipes Vanilla flavour 100g of sugar - 250ml of milk - 250ml of cream - 2 eggs - 1 packet of vanilla sugar Beat the eggs together with the sugar until the mixture becomes frothy. Add the milk and cream, mix well and pour the preparation into the refrigerating container. Malaga flavour 200g of sugar - 350ml of milk - 200ml of cream - 2 eggs - 100g of raisins - a little rum Wash the raisins and macerate them in the rum (to cover). Beat the eggs with the sugar, add milk and cream, mix well and pour the preparation into the refrigerating container. When the ice cream is almost ready, add the dry raisins and part of the rum used. 12 Assembly page 12/64 TKG ICE 1 - 120829 Fax +32 2 359 95 50 Copies of the I/B. Please reproduce them without any changes except under special instruction from Team International BELGIUM. The pages must be reproduced and folded in order to obtain a booklet A5 (+/- 148.5 mm width x 210 mm height). When folding, make sure you keep the good numbering when you turn the pages of the I/B. Don’t change the page numbering. Keep the language integrity. Hazelnut flavour 250g of sugar - 400g of milk - 2 eggs - 100g of plain chocolate - 50g of shelled and peeled hazelnuts - a pinch of vanillin Crumble the chocolate into small flakes and mix it with a little milk and the vanillin in a container; melt in a bain-marie. Beat the eggs with the sugar, add the remaining milk and melted chocolate (it must be cooled). Add the finely diced hazelnuts, mix well and pour the preparation into the refrigerating container. Lemon flavour 250g of sugar - 300g of milk - 300g of cream - 4 lemons - 1.5 tablespoon of lemon syrup Squeeze the lemons and pour the juice onto the sugar and the lemon syrup, mix and then add the other ingredients. Beat well so that the preparation becomes dense and uniform and place everything into the refrigerating container. Banana flavour 150g of sugar - 150ml of milk - 300g (net) of banana pulp - a little lemon juice Peel the bananas and half them into pieces; add the lemon juice and sugar. Amalgamate, add the milk, mix well and pour everything into the refrigerating container. Chocolate flavour 200g of sugar - 400ml of milk - 200ml of cream - 2 eggs - 100g of plain chocolate Crumble the chocolate into small flakes and mix it with a little milk and the vanillin in a container; melt in a bain-marie. Beat the eggs with the sugar, add the remaining and melted chocolate (it must be cooled), mix well and pour the preparation into the refrigerating container. Blueberry flavour 200g of sugar - 250g of cream - 400g frozen blueberries - ½ lemon Defrost the blueberries at room temperature and leave them in the resulting syrup, add the lemon juice, cream and sugar. Mix the ingredients well until they take on consistency, and pour the preparation into the refrigerating container. Strawberry flavour 150g of sugar - 250ml of milk - 200g of cream - 1 egg - 300g ripe strawberries Beat the eggs with the sugar, add the strawberries cut into small pieces and the other ingredients. Mix well and pour the preparation into the refrigerating container. Walnut flavour 200g of sugar - 300ml of milk - 200ml of cream - 2 eggs - 100g of walnuts (kernel) - 2 tablespoons of walnut liqueur Chop the walnuts, add the sugar and eggs and beat so that they become firm. Add the other ingredients, mix the preparation well and pour into the refrigerating container. Liqueur ice creams and soft drinks Recipes with alcohol need 10 – 15 minutes longer to prepare than ice cream. Champagne flavour 125g of sugar - 300ml of cream - 400ml of champagne or brut Dissolve the sugar in the champagne, add the cream and pour into the container. Mint flavour 100g of sugar - 250ml of milk - 250ml of cream - 250ml mint liqueur - 1 + ½ lemon juice 13 Assembly page 13/64 TKG ICE 1 - 120829 Fax +32 2 359 95 50 Copies of the I/B. Please reproduce them without any changes except under special instruction from Team International BELGIUM. The pages must be reproduced and folded in order to obtain a booklet A5 (+/- 148.5 mm width x 210 mm height). When folding, make sure you keep the good numbering when you turn the pages of the I/B. Don’t change the page numbering. Keep the language integrity. Add the lemon juice to the sugar, mixing together as far as possible. Add the other ingredients, mix the preparation well and pour into the container. Whisky flavour 100g of sugar - 250ml of milk - 300ml of cream - 1 egg – 85ml of whisky - 1 pinch of grated lemon rind Beat the egg together with the sugar, add the lemon rind (for flavour), the milk, cream and liqueur, mix the preparation well and pour into the container. Lemon flavour 100g of sugar - 450ml of milk - 300ml of citron syrup Mix the sugar with the milk, add the citron syrup, mix the preparation well and pour into the container. Sorbet recipes Recipes with alcohol need 10 – 15 minutes longer to prepare than ice cream. We recommend removing them from the refrigerating container at the moment of serving as they melt rapidly. Champagne flavour 100g of sugar - bottle of champagne or brut Dissolve the sugar in the champagne, and pour into the refrigerating container. Brandy flavour 100g of sugar - 400ml of water - 3 lemons - 180ml of brandy Add the juice of 3 lemons to the ingredients, mix well the preparation and pour into the refrigerating container. Strawberry flavour 150g of sugar - 400g of strawberries - 1 lemon - 2 tablespoons of pomegranate syrup Dice the strawberries; pour on the lemon juice and the other ingredients. Mix the preparation well and pour into the refrigerating container. Peach flavour 150g of sugar - 400g peach pulp - 1 lemon Dice the peach pulp; pour on the lemon juice and the sugar. Mix the preparation well and pour into the refrigerating container. Apricot flavour 150g of sugar - 400g apricot pulp - 1 lemon - 2 tablespoons of apricot brandy Dice the apricot pulp; pour on the lemon juice and the sugar. Mix the preparation well and pour into the refrigerating container. Banana flavour 150g of sugar - 450g banana pulp - 350ml vodka - 1 lemon - one pinch of vanillin Dice the bananas; pour on the lemon juice and the other ingredients. Mix the preparation well and pour into the refrigerating container. Melon flavour 150g of sugar - 400g melon pulp - 1 lemon - one beaker of brandy Dice the melon pulp; pour on the lemon juice and the other ingredients. Mix well the preparation and pour into the refrigerating container. 14 Assembly page 14/64 TKG ICE 1 - 120829 Fax +32 2 359 95 50 Copies of the I/B. Please reproduce them without any changes except under special instruction from Team International BELGIUM. The pages must be reproduced and folded in order to obtain a booklet A5 (+/- 148.5 mm width x 210 mm height). When folding, make sure you keep the good numbering when you turn the pages of the I/B. Don’t change the page numbering. Keep the language integrity. PROTECTION OF THE ENVIRONMENT – DIRECTIVE 2002/96/EC In order to preserve our environment and protect human health, the waste electrical and electronic equipment should be disposed of in accordance with specific rules with the implication of both suppliers and users. For this reason, as indicated by the symbol on the rating label or on the packaging, your appliance should not be disposed of as unsorted municipal waste. The user has the right to bring it to a municipal collection point performing waste recovery by means of reuse, recycling or use for other applications in accordance with the directive. 15 Assembly page 15/64 TKG ICE 1 - 120829 Fax +32 2 359 95 50 Copies of the I/B. Please reproduce them without any changes except under special instruction from Team International BELGIUM. The pages must be reproduced and folded in order to obtain a booklet A5 (+/- 148.5 mm width x 210 mm height). When folding, make sure you keep the good numbering when you turn the pages of the I/B. Don’t change the page numbering. Keep the language integrity. POUR VOTRE SECURITE Lisez attentivement cette notice avant toute utilisation, et respectez bien à la fois les consignes de sécurité et d'usage. Important: Votre appareil n’est pas prévu pour être utilisé par des personnes (y compris les enfants) dont les capacités physiques, sensorielles ou mentales sont réduites, ou des personnes dénuées d’expérience ou de connaissance, sauf si elles ont pu bénéficier, par l’intermédiaire d’une personne responsable de leur sécurité, d’une surveillance ou d’instructions préalables concernant son utilisation en toute sécurité. Il convient de surveiller les enfants pour s’assurer qu’ils ne jouent pas avec l’appareil. Avant d'utiliser l'appareil, vérifiez que la tension du réseau correspond bien à celle de l'appareil. Ne laissez jamais votre appareil sans surveillance lorsque celui-ci est en fonctionnement ou sous tension. Vérifiez régulièrement l’état de votre appareil et s’il est endommagé de quelque façon que ce soit, ne l'utilisez pas mais faites-le vérifier et réparer par un service qualifié compétent(*). Si le câble est endommagé, il doit être obligatoirement remplacé par un service qualifié compétent(*) afin d’éviter tout danger. Utilisez l'appareil uniquement pour des usages domestiques et de la manière indiquée dans la notice. Ne plongez jamais l'appareil dans l'eau ou dans tout autre liquide ni pour son nettoyage ni pour toute autre raison. Ne le mettez jamais dans le lave-vaisselle. N'utilisez pas l'appareil près de sources de chaleur. L’appareil doit obligatoirement être débranché avant de le nettoyer ou de le ranger. Quand l'appareil est en marche, les parties en mouvement sont dangereuses. Pour éviter tout risque d’accident, respectez impérativement les avertissements ci-dessous: Manipulez toujours le bol réfrigérant avec des gants ou autres équipements de protection afin d'éviter les brûlures par le froid quand il est congelé. Utilisez uniquement les accessoires fournis avec l'appareil. Ne touchez pas l'accessoire monté sur l'appareil lorsqu’il est en fonctionnement. N’arrêtez pas la rotation des lames ou de toute autre partie en mouvement, mais laissez-les à l'intérieur du bol jusqu'à ce qu'elles s'arrêtent d'elles-mêmes. Veillez à ne pas utiliser l'appareil à l'extérieur et entreposez-le dans un endroit sec. N’utilisez pas d’accessoires non recommandés par le fabricant, cela peut présenter un danger pour l’utilisateur et risque d’endommager l’appareil. Ne déplacez jamais l’appareil en tirant sur le câble. Posez cet appareil sur une table ou un support suffisamment stable pour éviter sa chute. Veillez à ce que le cordon d’alimentation ne puisse être accidentellement accroché et ce, afin d’éviter toute chute de l’appareil. Evitez d’enrouler le cordon autour de l’appareil et ne le tordez pas. Veillez à ce que le bloc moteur n'entre pas en contact avec de l'eau ou autres liquides, ne le mettez pas au lave-vaisselle. S'il devait être mouillé ou tomber dans un liquide, débranchez immédiatement l'appareil de la prise de courant, séchez-le avec soin et assurez-vous que le liquide n'a pas pénétré à l'intérieur du bloc moteur. En cas de doute, contactez un service qualifié compétent(*). Maintenez les mains, les cheveux et tout autre accessoire éloigné du bol pendant l’utilisation pour éviter qu'ils n'entrent en contact avec les parties en mouvement et ne s'enroulent autour de celles-ci. Ne mettez pas la sorbetière dans le réfrigérateur ou le congélateur: seul le bol réfrigérant est prévu à cet effet. Ne prenez pas le bol réfrigérant à main nue; utilisez un sachet en plastique ou des gants pour éviter tout risque de brûlure partielle. 16 Assembly page 16/64 TKG ICE 1 - 120829 Fax +32 2 359 95 50 Copies of the I/B. Please reproduce them without any changes except under special instruction from Team International BELGIUM. The pages must be reproduced and folded in order to obtain a booklet A5 (+/- 148.5 mm width x 210 mm height). When folding, make sure you keep the good numbering when you turn the pages of the I/B. Don’t change the page numbering. Keep the language integrity. N’essayez jamais d'ouvrir le bol réfrigérant; en cas de fuite de liquide, contactez un service qualifié compétent(*). Ne touchez pas l'appareil si vous avez les mains ou les pieds mouillés. Ne déplacez pas l'appareil pendant son fonctionnement. N’utilisez pas l'appareil pour mélanger des liquides bouillants. En cas de mauvais fonctionnement de l'appareil, débranchez-le et adressez-vous à un service qualifié compétent(*). (*) Service qualifié compétent: service après-vente du fabricant ou de l'importateur ou une personne qualifiée, reconnue et habilitée à faire ce genre de réparation afin d'éviter tout danger. Dans tous les cas, veuillez retourner l'appareil auprès de ce service. FONCTIONNEMENT Lors de la première utilisation, lavez le bol réfrigérant, le couvercle, la spatule et l’axe avec de l'eau savonneuse (à une température ne dépassant pas les 40°C) et rincez-les soigneusement; laissez-les sécher complètement avant l’utilisation. La glace est sensible aux bactéries; avant chaque utilisation de l'appareil, assurez-vous que la sorbetière et les ustensiles sont bien propres et secs. Ne plongez jamais le bloc moteur dans l'eau ou autres liquides, nettoyez-le avec un chiffon légèrement humide. Le bloc moteur est muni d'un interrupteur à pression: actionnez-le pour allumer ou éteindre le moteur 0-I (marche/arrêt). Tous les accessoires (couvercle, axe, spatule) se fixent sur le bloc moteur: avant toute utilisation, vérifiez qu'ils sont bien solidaires de ce dernier. Montez tout d’abord le bloc moteur sur le couvercle (voir page 2) et assurez-vous les pointes s'emboîtent dans les fentes prévues à cet effet sur le couvercle. Puis insérez l’axe dans la spatule et l’ensemble dans l’orifice prévu à cet effet sur le bloc moteur. Après utilisation, démontez tous les accessoires, retirez tout d’abord l’axe et la spatule, puis serrez légèrement les pattes du bloc moteur pour le séparer du couvercle. Pour fixer le couvercle sur le bol, placez-le sur le bol réfrigérant de façon à ce que les ergots s’insèrent dans les fentes du bol, puis faites tourner le couvercle dans le sens des aiguilles d’une montre jusqu’à venir en butée. Assurez-vous que la pointe de la spatule se trouve dans le creux au fond du bol. Pour retirer le couvercle, procédez de façon inverse. Congélation du bol réfrigérant Assurez-vous que le congélateur peut atteindre les –18°C (***) et réglez le thermostat de façon à ce que cette température soit garantie. Si la température est supérieure à –18°C, la glace ne se formera pas. Mettez le bol dans un sachet en plastique afin de vous protéger des brûlures par le froid et d’éviter la formation de givre à proximité des crochets de fixation. Placez le bol dans la partie la plus froide du congélateur et veillez à ce que: - il ne soit pas incliné, mais en position verticale. - il y ait suffisamment d'espace autour. - rien ne tombe à l'intérieur. Selon la quantité de glace (500 g ou 1 kg) et la température du congélateur (-18°C ou plus froid), laissez le bol dans le congélateur 10 à 12 heures. Vérifiez que le liquide réfrigérant à l'intérieur du bol est congelé: il doit être complètement solide. Pour pouvoir utiliser le bol à tout moment sans devoir attendre que le liquide réfrigérant se solidifie, nous vous conseillons de le laisser en permanence dans le congélateur. 17 Assembly page 17/64 TKG ICE 1 - 120829 Fax +32 2 359 95 50 Copies of the I/B. Please reproduce them without any changes except under special instruction from Team International BELGIUM. The pages must be reproduced and folded in order to obtain a booklet A5 (+/- 148.5 mm width x 210 mm height). When folding, make sure you keep the good numbering when you turn the pages of the I/B. Don’t change the page numbering. Keep the language integrity. Préparation de la glace Pour la préparation de crèmes glacées, utilisez les recettes indiquées ci-dessous. La quantité d'ingrédients ne doit jamais dépasser 0,6 litre. La température ambiante doit être inférieure à 25°C pendant la préparation, sinon le résultat pourrait ne pas être satisfaisant. 1. Avant de sortir le bol du congélateur, préparez le mélange à glace dans un récipient. Placez le mélange dans le réfrigérateur pour qu’il refroidisse. 2. Sortez le bol réfrigérant du congélateur (utilisez des gants ou un chiffon pour éviter les brûlures par le froid) et posez-le sur une surface stable. Utilisez le bol immédiatement après l'avoir sorti du congélateur. 3. Assemblez le bloc moteur, le couvercle, l’axe de rotation et la spatule (voir paragraphe « FONCTIONNEMENT »). Fixez le couvercle sur le bol réfrigérant. 4. Branchez la fiche dans la prise de courant et mettez le bouton 0/I sur la position "I" pour mettre en marche la rotation de la spatule. Versez immédiatement mais progressivement le mélange à glace dans le bol à travers l'ouverture prévue à cet effet dans le couvercle; veillez à ce qu'il ne déborde pas, car le moteur ne doit jamais être mouillé. Le mélange ne doit pas dépasser la moitié du bol. Faites fonctionner la sorbetière pendant 40 à 60 minutes, le temps dépend de la consistance que l'on souhaite obtenir (plus le temps est long, plus la crème sera congelée). N’oubliez pas qu'une glace préparée à la maison est plus molle qu'une glace achetée en magasin. 5. Pendant la préparation, vous pouvez ajouter des éclats de chocolat ou des raisins secs et bien d'autres ingrédients, les boissons alcoolisées doivent être ajoutées en dernier car elles ralentissent le processus de refroidissement. 6. Une fois la préparation terminée, mettez l'interrupteur sur la position 0, débranchez la fiche de la prise de courant, faites tourner le couvercle dans le sens inverse des aiguilles d’une montre et soulevez-le pour le retirer. Pour servir la crème glacée, utilisez une spatule en caoutchouc ou une cuiller en bois (jamais d'ustensiles métalliques). 7. Il est possible de laisser la glace dans le bol pour la faire durcir au congélateur pendant un temps réduit (ne pas dépasser les 30 minutes); pour une congélation de plus longue durée, transvaser la crème dans un récipient avec couvercle (pour obtenir une glace dure, la laisser quelques heures au congélateur). La période de conservation est d'une à deux semaines. Cela dépend si les ingrédients de base sont "naturels" ou "mi-cuits". NETTOYAGE ET ENTRETIEN Avant de nettoyer l'appareil, arrêtez-le et débranchez-le. Il est important de bien laver le bol et tous les accessoires tout de suite après l'utilisation afin d'éviter la formation de bactéries et de mauvaises odeurs. Pour nettoyer le bol, la spatule, le couvercle et l'axe, utilisez de l'eau avec du liquide vaisselle et frotter à l'aide d'une éponge souple (n’utilisez jamais de pailles de fer ou autres produits abrasifs). Rincez et séchez soigneusement. La température de l'eau ne doit pas dépasser les 40°C. Pour nettoyer le bloc moteur, utilisez un chiffon doux, légèrement humide, évitez les produits abrasifs ou corrosifs. Vérifiez régulièrement que le cordon électrique n'est pas endommagé. Son remplacement requiert l'utilisation d'un outil spécial: s'adresser à un centre d'assistance agréé pour d’éventuelles réparations. Si vous décidez de mettre votre appareil au rebut, adressez-vous à un lieu public de collecte procédant à un tri sélectif des déchets. Il est conseillé de rendre l’appareil inutilisable en coupant son cordon d'alimentation (assurez-vous que l'appareil soit débranché au préalable) et de ne pas ouvrir le bol réfrigérant en forçant. 18 Assembly page 18/64 TKG ICE 1 - 120829 Fax +32 2 359 95 50 Copies of the I/B. Please reproduce them without any changes except under special instruction from Team International BELGIUM. The pages must be reproduced and folded in order to obtain a booklet A5 (+/- 148.5 mm width x 210 mm height). When folding, make sure you keep the good numbering when you turn the pages of the I/B. Don’t change the page numbering. Keep the language integrity. Glaces Parfum vanille 100 g de sucre – 250 ml de lait – 250 ml de crème – 2 œufs – 1 sachet de sucre vanillé Fouettez les œufs avec le sucre jusqu'à ce que le mélange devienne mousseux. Ajoutez le lait et la crème, mélangez bien et versez la préparation dans le bol réfrigérant. Parfum malaga 200 g de sucre – 350 ml de lait – 200 ml de crème – 2 blancs d’œufs – 100 g de raisins secs – un peu de rhum Lavez les raisins secs et laissez- les macérer dans le rhum (ils doivent être couverts). Fouettez l'œuf avec le sucre, ajoutez le lait et la crème, mélangez bien et versez la préparation dans le bol réfrigérant. Quand la glace est presque prête, ajoutez les raisins secs et le rhum. Parfum noisette 250 g de sucre – 400 ml de lait – 2 œufs – 100 g de chocolat fondant – 50 g de noisettes mondées – une pincée de vanilline Concassez le chocolat en petits éclats et mélangez-les avec un peu de lait et la vanilline dans un récipient, mettez le tout au bain-marie. Fouettez les œufs avec le sucre, ajoutez le lait restant et le chocolat fondu (il doit avoir refroidi). Ajoutez les noisettes concassées, mélangez bien et versez la préparation dans le bol réfrigérant. Parfum citron 250 g de sucre – 300 ml de lait – 300 ml de crème – 4 citrons – 1,5 cuillerée de sirop de citron Pressez les citrons et versez le jus dans le sucre et le sirop de citron, mélangez et ajoutez ensuite les autres ingrédients. Fouettez énergiquement jusqu'à ce que la préparation soit dense et uniforme et versez le tout dans le bol réfrigérant. Parfum banane 150 g de sucre – 150 ml de lait – 300 g (nets) de pulpe de banane – un peu de jus de citron Épluchez les bananes et découpez-les en petits morceaux, ajoutez le jus de citron et le sucre. Mélangez et ajoutez le lait, mélangez bien et versez le tout dans le bol réfrigérant. Parfum chocolat 200 g de sucre – 400 ml de lait – 200 ml de crème – 2 œufs – 100 g de chocolat fondant Concassez le chocolat en petits éclats et les mélanger à un peu de lait et la vanilline dans un récipient au bain-marie. Fouettez les œufs avec le sucre, ajoutez le lait restant et le chocolat fondu (il doit avoir refroidi), mélangez bien et versez la préparation dans le bol réfrigérant. Parfum myrtille 200 g de sucre – 250 ml de crème – 400 g de myrtilles surgelées – ½ citron Décongelez les myrtilles à température ambiante; laissez-les dans leur sirop, ajoutez le jus de citron, la crème et le sucre. Bien mélanger les ingrédients jusqu'à ce qu'ils prennent consistance et versez la préparation dans le bol réfrigérant. Parfum fraise 150 g de sucre – 250 ml de lait – 200 ml de crème – 2 œufs – 300 g de fraises mûres Fouettez les œufs avec le sucre, ajoutez les fraises en petits morceaux et les autres ingrédients. Mélangez bien et versez la préparation dans le bol réfrigérant. Parfum noix 200 g de sucre – 300 ml de lait – 200 ml de crème – 2 œufs – 100 g de noix (cerneaux) – 2 cuillerées de brou de noix Pilez les noix, ajoutez le sucre et l'œuf et battez le tout jusqu’à ce que le mélange blanchisse. Ajoutez les autres ingrédients, mélangez bien la préparation et versez-la dans le bol réfrigérant. 19 Assembly page 19/64 TKG ICE 1 - 120829 Fax +32 2 359 95 50 Copies of the I/B. Please reproduce them without any changes except under special instruction from Team International BELGIUM. The pages must be reproduced and folded in order to obtain a booklet A5 (+/- 148.5 mm width x 210 mm height). When folding, make sure you keep the good numbering when you turn the pages of the I/B. Don’t change the page numbering. Keep the language integrity. Glaces alcoolisées Les recettes de glaces aux boissons alcoolisées demandent 10-15 minutes supplémentaires pour la préparation de la glace. Parfum champagne 125 g de sucre – 300 ml de crème – 400 ml de champagne ou de mousseux brut Dissolvez le sucre dans le champagne, ajoutez la crème et versez dans le bol. Parfum menthe 100 g de sucre – 250 ml de lait – 250 ml de crème – 250 ml de liqueur à la menthe – jus de 1+½ citron Ajoutez le jus de citron au sucre et mélangez-les jusqu’à ce que le mélange soit homogène. Ajoutez les autres ingrédients, mélangez bien la préparation et versez-la dans le bol réfrigérant. Parfum whisky 100 g de sucre – 250 ml de lait – 300 ml de crème – 1 œuf – 85 ml de whisky – 1 pincée de zeste de citron râpé Battez l'œuf et le sucre, ajoutez le zeste de citron (juste assez pour donner du goût), le lait, la crème et la liqueur, mélangez bien la préparation et versez-la dans le bol réfrigérant. Parfum cédrat 100 g de sucre – 450 ml de lait – 300 ml de sirop de cédrat Mélangez le sucre au lait, ajoutez le sirop de cédrat, mélangez bien la préparation et versez-la dans le bol réfrigérant. Sorbets Les recettes de sorbets aux boissons alcoolisées demandent 10-15 minutes supplémentaires de préparation. Il est conseillé de sortir ces sorbets du bol réfrigérant juste avant de les servir car ils fondent rapidement. Parfum champagne 100 g de sucre – bouteille de champagne ou de mousseux brut Dissolvez le sucre dans le champagne et verser dans le bol réfrigérant. Parfum brandy 100 g de sucre – 400 ml d'eau – 3 citrons – 180 ml de brandy Ajoutez le jus des 3 citrons aux ingrédients, mélangez bien la préparation et versez-la dans le bol réfrigérant. Parfum fraise 150 g de sucre – 400 g de fraises – 1 citron – 2 cuillerées de sirop de grenadine Ecrasez les fraises, versez le jus de citron et les autres ingrédients. Mélangez bien la préparation et versez-la dans le bol réfrigérant. Parfum pêche 150 g de sucre – 400 g de pulpe de pêche – 1 citron Ecrasez la pulpe de pêche, versez le jus de citron et le sucre. Mélangez bien la préparation et versez-la dans le bol réfrigérant. Parfum abricot 150 g de sucre – 400 g de pulpe d'abricot – 1 citron – 2 cuillerées d'eau-de-vie à l'abricot Ecrasez la pulpe d'abricot, versez le jus de citron et les autres ingrédients. Mélangez bien la préparation et versez-la dans le bol réfrigérant. 20 Assembly page 20/64 TKG ICE 1 - 120829 Fax +32 2 359 95 50 Copies of the I/B. Please reproduce them without any changes except under special instruction from Team International BELGIUM. The pages must be reproduced and folded in order to obtain a booklet A5 (+/- 148.5 mm width x 210 mm height). When folding, make sure you keep the good numbering when you turn the pages of the I/B. Don’t change the page numbering. Keep the language integrity. Parfum banane 150 g de sucre – 450 g de pulpe de banane – 350 ml vodka – 1 citron – 1 pincée de vanilline Ecrasez les bananes, versez le jus de citron et les autres ingrédients. Mélangez bien la préparation et versez-la dans le bol réfrigérant. Parfum melon 150 g de sucre – 400 g de pulpe de melon – 1 citron – un verre de brandy Ecrasez la pulpe de melon, versez le jus de citron et les autres ingrédients. Mélangez bien la préparation et versez-la dans le bol réfrigérant. PROTECTION DE L’ENVIRONNEMENT – DIRECTIVE 2002/96/CE Afin de préserver notre environnement et notre santé, l’élimination en fin de vie des appareils électriques et électroniques doit se faire selon des règles bien précises et nécessite l’implication de chacun, qu’il soit fournisseur ou utilisateur. C’est pour cette raison que votre appareil, tel que le signale le symbole apposé sur sa plaque signalétique ou sur l'emballage, ne doit en aucun cas être jeté dans une poubelle publique ou privée destinée aux ordures ménagères. L'utilisateur a le droit de déposer l'appareil dans des lieux publics de collecte procédant à un tri sélectif des déchets pour être soit recyclé, soit réutilisé pour d’autres applications conformément à la directive. 21 Assembly page 21/64 TKG ICE 1 - 120829 Fax +32 2 359 95 50 Copies of the I/B. Please reproduce them without any changes except under special instruction from Team International BELGIUM. The pages must be reproduced and folded in order to obtain a booklet A5 (+/- 148.5 mm width x 210 mm height). When folding, make sure you keep the good numbering when you turn the pages of the I/B. Don’t change the page numbering. Keep the language integrity. BELANGRIJKE VEILIGHEIDSVOORSCHRIFTEN Lees de gebruiksaanwijzing aandachtig alvorens u uw toestel gebruikt, en respecteer altijd de veiligheids- en de gebruiksvoorschriften. Belangrijk: Personen (kinderen inbegrepen) die wegens hun fysieke, sensoriële of mentale capaciteiten, of wegens hun gebrek aan ervaring of kennis, het toestel niet veilig kunnen gebruiken, mogen dit toestel niet zonder toezicht of instructies van een verantwoordelijke persoon gebruiken. Houd kinderen goed in het oog om te vermijden dat ze met het toestel spelen. Controleer of de netspanning overeenkomt met deze van het toestel vooraleer u het gebruikt. Laat uw toestel tijdens het gebruik nooit zonder toezicht. Controleer regelmatig of het toestel of het snoer niet beschadigd is. Gebruik het toestel niet indien het snoer of het toestel zelf enige beschadiging zouden vertonen maar laat het in dit geval nakijken en herstellen door een bekwame gekwalificeerde dienst(*) om ieder gevaar te vermijden. Gebruik het toestel enkel voor huishoudelijk gebruik en op de wijze zoals vermeld in de gebruiksaanwijzing. Dompel het toestel nooit onder in water of in enige andere vloeistof, noch om het te reinigen, noch om welke andere reden ook. Steek het nooit in een afwasmachine. Gebruik het toestel niet in de nabijheid van warmtebronnen. Haal de stekker uit het stopcontact en laat het toestel afkoelen vooraleer u het reinigt of opbergt. Wanneer het apparaat in gebruik is, zijn de bewegende onderdelen gevaarlijk. Houd om schaafwonden en andere verwondingen te voorkomen volgende maatregelen in acht: Behandel de koelbak enkel met handschoenen of andere bescherming om koude “brandwonden” te voorkomen. Gebruik enkel de geleverde onderdelen. Raak de accessoires bevestigd aan het apparaat niet aan terwijl het in gebruik is. Stop de messen of bewegende onderdelen niet; laat ze ondergedompeld in de koelbak tot ze stoppen door de natuurlijke inertie. Zorg ervoor dat het motorblok niet in contact komt met water of andere vloeistoffen. Als het toch nat wordt of in een vloeistof valt, trek dan onmiddellijk de stekker uit het stopcontact, droog het toestel voorzichtig af en controleer dat er geen vloeistof in het motorblok is gedrongen. Contacteer in geval van twijfel een bekwame gekwalificeerde dienst. Gebruik het apparaat nooit buiten, en plaats het in een droge omgeving. Gebruik nooit accessoires die niet zijn aangeraden door de producent. Deze kunnen een gevaar vormen voor de gebruiker en het toestel beschadigen. Trek nooit aan de kabel om het toestel te verplaatsen. Plaats het apparaat op een tafel of een vlakke ondergrond. Zorg dat het elektriciteitssnoer nergens kan achterhaken. Wind het snoer niet rond het apparaat, en plooi het niet. Houd uw handen, haar en accessoires uit de buurt van de kom wanneer het apparaat in gebruik is, om te voorkomen dat ze bewegende onderdelen aanraken, en hierin verstrengeld raken. Plaats de roomijsmaker niet in de koelkast of diepvriezer: enkel de koelbak is hiervoor geschikt. Grijp de koelbak niet met blote handen vast. Bescherm uw handen met een plastic zak of handschoenen. Contact met de huid kan gedeeltelijke “brandwonden” veroorzaken. Probeer nooit de koelbak te openen: neem contact op met een bekwame gekwalificeerde dienst(*) als er enige vloeistoffen uit lekken. 22 Assembly page 22/64 TKG ICE 1 - 120829 Fax +32 2 359 95 50 Copies of the I/B. Please reproduce them without any changes except under special instruction from Team International BELGIUM. The pages must be reproduced and folded in order to obtain a booklet A5 (+/- 148.5 mm width x 210 mm height). When folding, make sure you keep the good numbering when you turn the pages of the I/B. Don’t change the page numbering. Keep the language integrity. In het geval van vloeistofverlies: gebruik het toestel niet, en consumeer het mogelijk besmette ijs niet. Raak het toestel niet aan met natte handen of voeten. Verplaats het apparaat niet wanneer het in gebruik is. (*) Bekwame gekwalificeerde dienst: klantendienst van de fabrikant of de invoerder, die erkend en bevoegd is om dergelijke herstellingen te doen zodat elk gevaar vermeden wordt. Gelieve het toestel bij problemen naar deze dienst terug te brengen. INSTALLATIE Zet het apparaat uit de buurt van warmtebronnen of materialen of wat dan ook dat in contact kan komen met de bewegende onderdelen. Zorg er ook voor dat het apparaat op een stabiele en vlakke ondergrond staat, want anders kan het omkantelen. Zorg er voor dat de accessoires op een correcte manier op het apparaat gemonteerd zijn alvorens er mee te werken. Gebruik het apparaat niet om kokende vloeistoffen te mengen. Zet in het geval van een gebrekkige werking het apparaat uit en laat het controleren door een bekwame gekwalificeerde dienst. GEBRUIK Reinig voor het eerste gebruik de koelbak, het deksel, de spatel en de as met zeepwater en spoel deze voorzichtig af (de watertemperatuur mag niet meer zijn dan 40°C): droog deze onderdelen af voor gebruik. Roomijs is gevoelig voor bacteriën: controleer of de werktuigen proper en droog zijn telkens u de roomijsmaker gebruikt. Dompel het motorblok niet onder in water of andere vloeistoffen, maar reinig het met een vochtige doek. Het motorblok heeft een drukknop: druk hierop om de motor in 0/1 (aan/uit) te schakelen. Alle accessoires (deksel, as, spatel) passen op het motorblok: controleer dat deze goed bevestigd zijn alvorens ze te gebruiken. Plaats eerst het motorblok op het deksel (zie blz. 2) en zorg ervoor dat de haken op het motorblok in de dekselgaten passen. Schuif dan de as in de mengspatel en het geheel in het gat van het motorblok. Haal na gebruik alle accessoires uit elkaar. Verwijder eerst de as en de mengspatel, en druk dan lichtjes op de haken om het motorblok en het deksel te scheiden. Plaats het deksel op de rand van de koelbak, zodanig dat de haken in hun pinnen grijpen. Draai het deksel in wijzerzin. Controleer of het uiteinde van de mengspatel in het gat op de bodem van de bak terechtkomt. Om het deksel te verwijderen draait u het in tegenwijzerzin. De koelbak invriezen Controleer of uw diepvriezer –18°C kan bereiken, en stel de thermostaat in zodat deze temperatuur gegarandeerd is. Roomijs kan niet bereid worden als deze temperatuur niet bereikt wordt. Plaats de koelbak in een plastic zak om uzelf te beschermen tegen “koude brandwonden”, en om te voorkomen dat ijs gevormd wordt aan de bevestigingshaken. Plaats de koelbak in het koudste compartiment van de diepvriezer en zorg er voor dat: - De koelbak zich in een verticale positie bevindt, maar zeker niet ondersteboven. - Er voldoende ruimte rondom de koelbak is. - De koelbak leeg is. Laat de koelbak 10 tot 12 uur in de diepvriezer, afhankelijk van de hoeveelheid roomijs en de temperatuur van de diepvries, met andere woorden naargelang de hoeveelheid te bereiden roomijs (500g of 1000g) en de temperatuur (-18°C of minder). 23 Assembly page 23/64 TKG ICE 1 - 120829 Fax +32 2 359 95 50 Copies of the I/B. Please reproduce them without any changes except under special instruction from Team International BELGIUM. The pages must be reproduced and folded in order to obtain a booklet A5 (+/- 148.5 mm width x 210 mm height). When folding, make sure you keep the good numbering when you turn the pages of the I/B. Don’t change the page numbering. Keep the language integrity. Controleer dat de vloeistof in de koelbak bevroren is: deze moet volledig vast zijn. Als u de koelbak altijd in de diepvriezer bewaart, kan deze gebruikt worden wanneer nodig, u hoeft dan niet te wachten gedurende de stoltijd van de te bevriezen vloeistof. Roomijsbereiding Volg onderstaande recepten om roomijsmengsels te bereiden. Alle recepten kunnen gebruikt worden, op voorwaarde dat er niet meer dan 0,6 liter aan ingrediënten gebruikt wordt. De kamertemperatuur moet minder dan 25°C bedragen tijdens de bereiding: is dit niet het geval, dan is een optimaal resultaat niet gegarandeerd. 1. Bereid het roomijsmengsel in een kom voor u de koelbak uit de diepvriezer neemt. Zet het mengsel in de diepvriezer om het af te koelen. 2. Neem de koelbak uit de diepvriezer (gebruik handschoenen om koude “brandwonden” te voorkomen), en zet hem op een stabiele ondergrond. De koelbak moet onmiddellijk na gebruik uit de diepvriezer gebruikt worden. 3. Neem het deksel (zie paragraaf “GEBRUIK”), reeds compleet met motor, as en spatel, en zorg ervoor dat deze goed gemonteerd en vergrendeld zijn. Bevestig het deksel op de koelbak. 4. Steek de stekker in het stopcontact en zet de 0/1 knop op “1” om de spatel te doen draaien. Giet onmiddellijk maar geleidelijk het roomijsmengsel in de koelbak door het gat in het deksel, zonder te morsen en de motor nat te maken: het mengsel mag niet meer dan de helft van de koelbak vullen. Meng (met de roomijsmaker) gedurende 40-60 minuten: de duur hangt af van de gewenste dikte (hoe langer, des te meer zal het product bevroren zijn). Onthoud dat zelfgemaakt roomijs niet dezelfde dikte heeft als roomijs gekocht in een winkel, het is in feite zachter. 5. Tijdens de bereiding kan u fijne chocoladeschilfers, rozijnen of andere ingrediënten toevoegen. Alcoholische dranken worden aan het einde toegevoegd (deze vertragen het koelen). 6. Zet het toestel na afloop uit met de schakelaar, verwijder de stekker uit het stopcontact, en maak het deksel los door het in tegenwijzerzin te draaien en verwijder het. Gebruik een plastic spatel of een houten lepel om het koude dessert op te dienen (gebruik geen metalen voorwerpen). Dien onmiddellijk op. 7. Het roomijs kan een korte periode in de koelbak gelaten worden om in de diepvriezer te stollen (niet meer dan 30 minuten). Wij raden aan een bak met deksel te gebruiken om het roomijs langere tijd in te vriezen (roomijs heeft een aantal uren nodig om te stollen). De bewaarperiode kan variëren van 1 tot 2 weken. Deze periode hangt af van de vraag of de gebruikte ingrediënten “natuurlijk” of “half gekookt” zijn. REINIGING EN ONDERHOUD Schakel het toestel uit en trek de stekker uit het stopcontact alvorens het te reinigen. Het is belangrijk dat de koelbak en alle onderdelen onmiddellijk na gebruik grondig gereinigd worden, om vorming van bacteriën of geuren te voorkomen. Gebruik water met een normaal wasmiddel voor de vaatwas wanneer u de koelbak reinigt, en wrijf hem schoon met een zachte spons (gebruik geen staalwol of schuurmiddelen). Spoel voorzichtig af en droog goed af. De temperatuur van het water mag niet meer dan 40°C bedragen. Reinig de behuizing met een zachte, vochtige doek: gebruik geen schurende of aantastende producten. Controleer regelmatig of de elektrische kabel niet beschadigd is. Een speciaal werktuig is nodig om het te vervangen: contacteer een geautoriseerde klantendienst voor alle eventueel benodigde herstellingen. Als u beslist het apparaat niet meer te gebruiken, lever het dan in bij een gemeentelijk containerpark. Wij raden u aan dat u het onklaar maakt door het elektrisch snoer door te 24 Assembly page 24/64 TKG ICE 1 - 120829 Fax +32 2 359 95 50 Copies of the I/B. Please reproduce them without any changes except under special instruction from Team International BELGIUM. The pages must be reproduced and folded in order to obtain a booklet A5 (+/- 148.5 mm width x 210 mm height). When folding, make sure you keep the good numbering when you turn the pages of the I/B. Don’t change the page numbering. Keep the language integrity. snijden (verzeker u er eerst van dat de stekker uit het stopcontact getrokken is), en maak de koelbak niet open door te forceren. Recepten voor roomijs Vanille 100g suiker – 250ml melk – 250ml room – 2 eieren – 1 pakje vanillesuiker Klop de eieren op met de suiker tot het mengsel schuimend is. Voeg de melk en de room toe, meng goed en giet het geheel in de koelbak. Malaga 200g suiker – 400g melk – 2 eieren – 100g rozijnen – een teugje rum Was de rozijnen en week ze in de rum (de rum moet de rozijnen bedekken). Klop de eieren op met de suiker, voeg de melk en room toe, meng goed en giet het geheel in de koelbak. Wanneer het roomijs bijna klaar is, kan u de rozijnen en een deel van de gebruikte rum toevoegen. Hazelnoot 250g suiker – 400g melk – 2 eieren – 100g melkchocolade – 50g gepelde hazelnoten – een snuifje vanilline Kruimel de chocolade tot kleine kruimels en meng ze met een beetje melk en de vanilline in een bak; smelt in een bain-marie. Klop de eieren op met de suiker, voeg de resterende melk en de gesmolten chocolade (moet afgekoeld zijn) toe. Voeg de fijn gesneden hazelnoten toe, meng goed en giet het geheel in de koelbak. Citroen 250g suiker – 300g melk – 300g room – 4 citroenen – 1,5 eetlepel citroenstroop Pers de citroenen en giet het sap op de suiker en de citroenstroop, meng en voeg de andere ingrediënten toe. Klop goed op zodat de bereiding stevig en uniform wordt, en doe het geheel in de koelbak. Banaan 150g suiker – 150ml melk – 300g (netto) bananenpulp – een teugje citroensap Pel de bananen en snijd ze in stukken; voeg het citroensap en de suiker toe. Meng ze samen, voeg de melk toe, meng goed en giet het geheel in de koelbak. Chocolade 200g suiker – 250g melk – 200ml room – 2 eieren – 100g melkchocolade Kruimel de chocolade tot kleine schilfers en meng ze met een beetje melk in een bak; smelt in een bain-marie. Klop de eieren op met de suiker, voeg de resterende en gesmolten chocolade toe (moet afgekoeld zijn), meng goed en giet het geheel in de koelbak. Bosbes 200g suiker – 250g room – 400g bevroren bosbessen – ½ citroen Ontdooi de bosbessen op kamertemperatuur en laat ze in de resulterende stroop. Voeg het citroensap, de room en de suiker toe. Meng de ingrediënten tot ze dik worden, en giet het geheel in de koelbak. Aardbei 150g suiker – 250ml melk – 200g room – 1 ei – 300g rijpe aardbeien Klop de eieren op met de suiker, voeg de in kleine stukken gesneden aardbeien en de andere ingrediënten toe. Meng goed en giet het geheel in de koelbak. 25 Assembly page 25/64 TKG ICE 1 - 120829 Fax +32 2 359 95 50 Copies of the I/B. Please reproduce them without any changes except under special instruction from Team International BELGIUM. The pages must be reproduced and folded in order to obtain a booklet A5 (+/- 148.5 mm width x 210 mm height). When folding, make sure you keep the good numbering when you turn the pages of the I/B. Don’t change the page numbering. Keep the language integrity. Walnoot 200g suiker – 300ml melk – 200ml room – 2 eieren – 100g walnoten (pit) – 2 eetlepels walnootlikeur Hak de walnoten, voeg de suiker en eieren toe, en klop op tot ze stevig worden. Voeg de andere ingrediënten toe, meng het geheel goed en giet het geheel in de koelbak. Likeurroomijs en soft drinks Recepten met alcohol hebben 10 tot 15 minuten extra bereidingstijd nodig. Champagne 125g suiker – 300ml room – 400ml champagne of brut Los de suiker op in de champagne, voeg de room toe en giet het geheel in de koelbak. Munt 100g suiker – 250ml melk – 250ml room – 250ml muntlikeur – sap van 1 + ½ citroen Voeg het citroensap bij de suiker, meng het samen voor zover mogelijk. Voeg de andere ingrediënten toe, meng het geheel grondig en giet het in de koelbak. Whisky 100g suiker – 250ml melk – 300ml room – 1 ei – 85ml whisky – 1 snuifje geraspte citroenschil Klop het ei op met de suiker, voeg de citroenschil (voor de smaak), de melk, de room, en de whisky toe. Meng het geheel en giet het in de koelbak. Citroen 100g suiker – 450ml melk – 300ml citroenstroop Meng de suiker met de melk, voeg de citroenstroop toe, meng het geheel grondig en giet het in de koelbak. Sorbet-recepten Recepten met alcohol hebben 10 tot 15 minuten extra bereidingstijd nodig. Wij raden aan ze pas uit de koelbak te verwijderen wanneer ze opgediend worden, aangezien ze snel smelten. Champagne 100g suiker – fles champagne of brut Los de suiker op in de champagne en giet het geheel in de koelbak. Cognac 100g suiker – 400ml water – 3 citroenen – 180ml brandy Voeg het sap van 3 citroenen bij de ingrediënten, meng het geheel grondig, en giet het in de koelbak. Aardbei 150g suiker – 400g aardbeien – 1 citroen – 2 eetlepels granaatappelstroop Snijd de aardbeien in schijven; giet er het citroensap en de andere ingrediënten over. Meng het geheel grondig en giet het in de koelbak. Perzik 150g suiker – 400g perzikpulp – 1 citroen Snijd de perzikpulp in schijven; giet er het citroensap en de suiker over. Meng het geheel grondig, en giet het in de koelbak. 26 Assembly page 26/64 TKG ICE 1 - 120829 Fax +32 2 359 95 50 Copies of the I/B. Please reproduce them without any changes except under special instruction from Team International BELGIUM. The pages must be reproduced and folded in order to obtain a booklet A5 (+/- 148.5 mm width x 210 mm height). When folding, make sure you keep the good numbering when you turn the pages of the I/B. Don’t change the page numbering. Keep the language integrity. Abrikoos 150g suiker – 400 abrikozenpulp – 1 citroen – 2 eetlepels abrikozencognac Snijd de abrikozenpulp in stukken; giet er het citroensap en de suiker over. Meng het geheel grondig en giet het in de koelbak. Banaan 150g suiker – 450g bananenpulp – 350ml wodka – 1 citroen – een snuifje vanilline Snijd de bananen in schijven; giet er het citroensap en de andere ingrediënten over. Meng het geheel grondig en giet het in de koelbak. Meloen 150g suiker – 400g meloenpulp – 1 citroen – 1 beker cognac Snijd de meloenpulp; giet er het citroensap en de andere ingrediënten over. Meng het geheel grondig en giet het in de koelbak. MILIEUBESCHERMING – RICHTLIJN 2002/96/EG Om ons milieu en onze gezondheid te beschermen, moet afgedankte elektrische en elektronische apparatuur in overeenstemming met welbepaalde regels weggegooid worden. Dit vergt zowel de inzet van de leveranciers als van de gebruikers. Daarom mag uw apparaat, zoals op het typeplaatje of op de verpakking aangegeven door het symbool , niet met het gewone huisvuil weggegooid worden. De gebruiker heeft het recht het toestel naar een gemeentelijk centrum van gescheiden inzameling te brengen waar het overeenkomstig de richtlijn hergebruikt, gerecycleerd of voor andere doeleinden gebruikt zal worden. 27 Assembly page 27/64 TKG ICE 1 - 120829 Fax +32 2 359 95 50 Copies of the I/B. Please reproduce them without any changes except under special instruction from Team International BELGIUM. The pages must be reproduced and folded in order to obtain a booklet A5 (+/- 148.5 mm width x 210 mm height). When folding, make sure you keep the good numbering when you turn the pages of the I/B. Don’t change the page numbering. Keep the language integrity. CONSEJOS DE SEGURIDAD Lea detenidamente el modo de empleo antes de utilizar el aparato, y siempre siga las medidas de seguridad y el modo de funcionamiento. Importante: Las personas (incluidos niños) con incapacidades físicas, sensoriales o mentales, o sin experiencia o conocimiento nunca deben utilizar el aparato, salvo si están bajo la vigilancia de una persona responsable de su seguridad o si recibieron previamente instrucciones con respecto al uso seguro del aparato. Es necesario vigilar a los niños para que no jueguen con el aparato. Antes de utilizar el aparato, compruebe que el voltaje de la red eléctrica coincide con el aparato. No deje nunca su aparato sin vigilancia cuando esté en marcha. Compruebe de vez en cuando que el aparato no esté dañado y no utilice su aparato si el cable o el aparato están dañados por el motivo que sea. Cualquier reparación debe ser realizada por un servicio cualificado competente(*). Si el cable está dañado, debe ser reemplazado por un servicio cualificado competente(*) para evitar cualquier tipo de daño. Utilice el aparato sólo para usos domésticos y de la manera indicada en el modo de empleo. No sumerja nunca el aparato en el agua o en cualquier otro líquido ni para su limpieza ni por cualquier otra razón. No lo introduzca nunca en el lavavajillas. No utilice el aparato cerca de fuentes de calor. Desenchufe el aparato antes de limpiarlo o recogerlo. Cuando el aparato esté funcionando, las partes en movimiento están peligrosas. Para evitar riesgos de accidente, respete imperativamente las instrucciones siguientes: Manipule siempre el recipiente refrigerante con guantes u otras protecciones para evitar quemaduras con el frío cuando esté congelado. Utilice sólo accesorios fornecidos con el aparato. No toque los accesorios cuando el aparato esté funcionando y no intente parar su movimiento. No pare el movimiento de las cuchillas o de cualquier otra parte en movimiento, déjelas dentro del recipiente hasta que se paren. Procure no utilizar el aparato en el exterior y colóquelo en un sitio seco. No utilice accesorios no recomendados por el fabricante, ello puede conllevar un riesgo para el usuario y dañar el aparato. No mueva nunca el aparato estirando del cable. Coloque el aparato sobre una mesa o un soporte estable para evitar su caída. Coloque el aparato sobre una mesa o un soporte lo suficiente estable y procure que el cable no se enganche en alguna parte, a fin de evitar posibles caídas del mismo. Evite enrollar el cable alrededor del aparato y no lo tuerza. Procure que el bloque motor no entre en contacto con agua u otros líquidos, no lo ponga en el lavavajillas. Si fuera mojado o cayera en un líquido, desenchufe inmediatamente el aparato, seque el bloque motor y asegúrese de que el líquido no entró en el interior del bloque motor. En caso de dudas, llame a un servicio técnico cualificado(*). Mantenga manos, cabellos y cualquier otro accesorio lejos del recipiente durante el uso. Evite que entren en contacto con las partes en movimiento y que se enrollen alrededor de ellas. No ponga la sorbetera dentro del frigorífico o del congelador: sólo el recipiente refrigerante está concebido para este fin. No toque el recipiente refrigerante sin guantes, utilice una bolsa plástica o guantes para evitar quemaduras parciales. 28 Assembly page 28/64 TKG ICE 1 - 120829 Fax +32 2 359 95 50 Copies of the I/B. Please reproduce them without any changes except under special instruction from Team International BELGIUM. The pages must be reproduced and folded in order to obtain a booklet A5 (+/- 148.5 mm width x 210 mm height). When folding, make sure you keep the good numbering when you turn the pages of the I/B. Don’t change the page numbering. Keep the language integrity. No intente nunca abrir el recipiente refrigerante, en caso de escape del líquido, llame a un servicio técnico cualificado(*). No toque el aparato con las manos o los pies mojados. No desplace nunca el aparato cuando esté funcionando. Nunca utilice el aparato para mezclar líquidos hirviendo. Si el aparato no funciona correctamente, desenchúfelo y diríjase al servicio técnico cualificado(*). (*) Servicio técnico cualificado: servicio técnico del fabricante o del importador o una persona cualificada, reconocida y habilitada a fin de evitar cualquier peligro. En cualquier caso devuelva el aparato al servicio técnico. FUNCIONAMIENTO Antes de la primera utilización, limpie el recipiente refrigerante, la tapa, la espátula y el eje con agua y detergente (la temperatura del agua no debe ser superior a 40°C) y páselos por agua; déjelos secar del todo. El helado está sensible a las bacterias; antes de cada utilización del aparato, asegúrese de que la sorbetera y los accesorios están limpios y secos. No sumerja nunca el bloque motor en agua u otros líquidos, límpielo con un paño ligeramente húmedo. El bloque motor cuenta con un interruptor: acciónelo para encender o apagar el motor 0-I (encendido/apagado). Todos los accesorios (tapa, eje, espátula) se acoplan en el bloque motor: antes de cada utilización, compruebe que están correctamente fijados. Primero, encaje el bloque motor en la tapa (véase página 2) y asegúrese de que los ganchos se encajen en las ranuras de la tapa. Introduzca el eje en la espátula y el conjunto en el orificio previsto para este fin en el bloque motor. Después del uso, desmonte todos los accesorios, primero, quite el eje y la espátula, y apriete ligeramente en los ganchos del bloque motor para separar la tapa. Para acoplar la tapa en el recipiente, póngala en el recipiente de forma que los ganchos se introduzcan en las ranuras del recipiente y gire la tapa en el sentido de las agujas del reloj hasta que quede bloqueada. Asegúrese de que la extremidad de la espátula se encuentra en el hueco del fondo del recipiente. Para quitar la tapa, proceda de modo inverso. Congelación del recipiente refrigerante Asegúrese de que el congelador puede alcanzar –18°C (***) y ajuste el termostato para que esta temperatura esté garantizada. Si la temperatura es superior a – 18°C, será imposible hacer helado. Ponga el recipiente en una bolsa plástica para evitar quemaduras por el frío y la formación de hielo cerca de los ganchos de fijación. Coloque el recipiente en la parte más fría del congelador y asegúrese de que: - no está inclinado, pero en posición vertical. - queda espacio alrededor del recipiente. - no cae nada dentro del recipiente. Dependiendo de la cantidad de helado (500 g o 1 kg) y de la temperatura del congelador (-18°C o más frío), deje el recipiente en el congelador 10 a 12 horas. Compruebe que el líquido refrigerante en el interior del recipiente está congelado: debe estar del todo sólido. Para poder utilizar el recipiente en cualquier momento sin deber esperar que el líquido refrigerante se solidifique, aconsejamos que lo deje siempre en el congelador. 29 Assembly page 29/64 TKG ICE 1 - 120829 Fax +32 2 359 95 50 Copies of the I/B. Please reproduce them without any changes except under special instruction from Team International BELGIUM. The pages must be reproduced and folded in order to obtain a booklet A5 (+/- 148.5 mm width x 210 mm height). When folding, make sure you keep the good numbering when you turn the pages of the I/B. Don’t change the page numbering. Keep the language integrity. Preparación del helado Para preparar helado, puede utilizar las recetas más abajo. La cantidad de ingredientes no debe nunca superar 0,6 litro. La temperatura ambiente debe ser inferior a 25°C durante la preparación, en caso contrario el resultado podría no ser satisfactorio. 1. Antes de sacar el recipiente del congelador, prepare la mezcla para helado en un recipiente. Coloque la mezcla en el frigorífico para que enfríe. 2. Saque el recipiente refrigerante en el congelador (utilice los guantes o un trapo para evitar quemaduras por el frío) y póngalo en una superficie estable. Utilice el recipiente inmediatamente después de sacarlo del congelador. 3. Acople el bloque motor, la tapa, el eje de rotación y la espátula (véase párrafo “FUNCIONAMIENTO”). Acople la tapa en el recipiente. 4. Enchufe el aparato y póngalo en marcha colocando el botón 0/I en la posición “I”. La espátula empieza a girar. Vierta inmediatamente pero progresivamente la mezcla para helado en el recipiente a través de la abertura de la tapa; procure que no se desborde para no mojar el bloque motor. No llene más que la mitad del recipiente con la mezcla. Deje funcionar la sorbetera durante 40 a 60 minutos, el tiempo depende de la consistencia que se quiere obtener (cuanto más tiempo se mezclará, más congelado será el helado). No olvide que un helado preparado en casa está más blando que uno comprado en una tienda. 5. Durante la preparación, puede añadir pedazos de chocolate, pasas o muchos otros ingredientes, las bebidas alcohólicas deben ser añadidas al final porque vuelven el proceso de enfriamiento más lento. 6. Una vez terminada la preparación, ponga el interruptor en la posición 0, desenchufe el aparato y gire la tapa en el sentido contrario de las agujas del reloj y levántela para quitarla. Para servir el helado, utilice una espátula de goma o una cuchara de madera (nunca utensilios metálicos). 7. Se puede dejar el helado en el recipiente para que se vuelva duro en el congelador durante poco tiempo (nunca más que 30 minutos); para congelar el helado durante más tiempo, transváselo en un recipiente tapado (para obtener helado duro, déjelo unas horas en el congelador). El periodo de conservación es de una o dos semanas. Depende si los ingredientes de base son “naturales” o “medio cocidos”. LIMPIEZA Desenchufe la clavija eléctrica y apague el aparato antes de limpiarlo. Es importante limpiar con cuidado el recipiente y todos los accesorios inmediatamente después del uso para evitar la formación de bacterias y de malos olores. Para limpiar el recipiente, la espátula, la tapa y el eje, utilice agua y detergente y restriegue con una esponja suave (no utilice nunca estropajos metálicos u otros productos abrasivos). Páselos por agua y séquelos con cuidado. La temperatura del agua no debe superar 40°C. Para limpiar el bloque motor, utilice un paño suave, ligeramente húmedo. No utilice productos abrasivos o corrosivos. Compruebe regularmente que el cable eléctrico no está dañado. Para substituirlo, es necesario utilizar una herramienta especial: llame a un servicio cualificado competente. Si decide desprenderse de este aparato, por favor déjelo en un servicio municipal de recogida de aparatos. Le recomendamos que previamente se asegure que el aparato queda completamente inoperativo, cortando el cable de conexión (asegurándose primero que éste está desconectado de cualquier enchufe eléctrico) y de no romper la ranura del recipiente de refrigeración. 30 Assembly page 30/64 TKG ICE 1 - 120829 Fax +32 2 359 95 50 Copies of the I/B. Please reproduce them without any changes except under special instruction from Team International BELGIUM. The pages must be reproduced and folded in order to obtain a booklet A5 (+/- 148.5 mm width x 210 mm height). When folding, make sure you keep the good numbering when you turn the pages of the I/B. Don’t change the page numbering. Keep the language integrity. Helados Vainilla 100 g de azúcar – 250 ml de leche – 250 ml de nata – 2 huevos – 1 saquito de azúcar-vainilla Bate los huevos con el azúcar hasta que se obtenga una mezcla espumosa. Añada la leche y la nata, mezcle bien y vierta la preparación en el recipiente refrigerante. Málaga 250 g de azúcar – 350 ml de leche – 200 ml de nata – 2 claras de huevo – 100 g de pasas – un poco de ron Lave las pasas y macérelas en el ron (deben encontrarse dentro del ron). Bate las claras con el azúcar y añada la leche y la nata, mezcle bien y vierta la preparación en el recipiente refrigerante. Cuando el helado esté casi terminado, añada las pasas y el ron. Avellana 250 g azúcar – 400 ml de leche – 2 huevos – 100 g de chocolate puro – 50 g de avellanas sin cáscara – un pellizco de vainilla Machaque el chocolate y mezcle los pedazos con un poco de leche y la vainilla en un recipiente, cueza el conjunto al baño-maría. Bate los huevos con el azúcar, añada la leche sobrante y el chocolate fundido (debe ser frío). Añada las avellanas, mezcle bien y vierta la preparación en el recipiente refrigerante. Limón 250 g de azúcar – 300 ml de leche – 300 ml de nata – 4 limones – 1,5 cucharada de jarabe de limón Exprime los limones y vierta el zumo en el azúcar y el jarabe de limón, mezcle y añada los otros ingredientes. Bate enérgicamente hasta que la preparación se vuelva densa y uniforme y vierta el conjunto el recipiente refrigerante. Banana 150 g de azúcar – 150 ml de leche – 300 g de pulpa de banana – un poco de zumo de limón Pele las bananas y córtelas en pequeños pedazos, añada el zumo de limón y el azúcar. Mezcle y añada la leche, mezcle bien y vierta la preparación en el recipiente refrigerante. Chocolate 250 g de azúcar – 400 ml de leche – 200 ml de nata – 2 huevos – 100 g de chocolate puro Machaque el chocolate y mezcle los pedazos con un poco de leche y la vainilla en un recipiente, cueza el conjunto al baño-maría. Bate los huevos con el azúcar, añada la leche sobrante y el chocolate fundido (debe ser frío), mezcle bien y vierta la preparación en el recipiente refrigerante. Arándano 200 g de azúcar – 200 ml de leche – 400 g de arándanos congelados – ½ limón Descongele los arándanos a temperatura ambiente, déjelos en su zumo, añada el zumo del limón, la nata y el azúcar. Mezcle los ingredientes hasta que la preparación se vuelva consistente y viértala en el recipiente refrigerante. Fresa 150 g de azúcar – 250 ml de leche – 200 ml de nata – 2 huevos – 300 g de fresas maduras Bate los huevos con el azúcar, añada las fresas cortadas en pedazos y los otros ingredientes. Mezcle bien y vierta la preparación en el recipiente refrigerante. 31 Assembly page 31/64 TKG ICE 1 - 120829 Fax +32 2 359 95 50 Copies of the I/B. Please reproduce them without any changes except under special instruction from Team International BELGIUM. The pages must be reproduced and folded in order to obtain a booklet A5 (+/- 148.5 mm width x 210 mm height). When folding, make sure you keep the good numbering when you turn the pages of the I/B. Don’t change the page numbering. Keep the language integrity. Nuez 200 g de azúcar – 300 ml de leche – 200 ml de nata – 2 huevos – 100 g de nueces – 2 cucharadas de licor de cáscara de nuez Machaque las nueces, añada el azúcar y los huevos. Bate el conjunto hasta que la mezcla se vuelva clara. Añada los otros ingredientes, mezcle bien y vierta la preparación en el recipiente refrigerante. Helados alcohólicos Las recetas de helados alcohólicos requieren 10-15 minutos más que los helados simples. Champán 125 g de azúcar – 300 ml de nata – 400 ml de champán o de cava Mezcle el azúcar con el champán, añada la nata y vierta la preparación en el recipiente refrigerante. Menta 100 g de azúcar – 250 ml de leche – 250 ml de nata – 250 ml de licor de menta – zumo de 1½ limón Mezcle el zumo del limón con el azúcar hasta que la mezcla esté homogénea. Añada los otros ingredientes, mezcle bien y vierta la preparación en el recipiente refrigerante. Whisky 100 g de azúcar – 250 ml de leche – 300 ml de nata – 1 huevo – 85 ml de whisky – 1 pellizco de corteza de limón Bate el huevo y el azúcar, añada la corteza de limón (sólo para dar gusto), la leche, la nata y el licor, mezcle bien y vierta la preparación en el recipiente refrigerante. Cidro 100 g de azúcar – 450 ml de leche – 300 ml de jarabe de cidro Mezcle el azúcar y la leche, añada el jarabe de cidro, mezcle bien y vierta la preparación en el recipiente refrigerante. Sorbetes Las recetas de sorbetes a base de alcohol requieren 10-15 minutos más que los helados simples. Aconsejamos que sirva los sorbetes inmediatamente después de sacarlos del congelador porque se derriten rápidamente. Champán 100 g de azúcar – botella de champán o de cava Mezcle el azúcar con el champán y vierta la preparación en el recipiente refrigerante. Brandy 100 g de azúcar – 400 ml de agua – 3 limones – 180 ml de brandy Mezcle los ingredientes con el zumo de los 3 limones, mezcle bien y vierta la preparación en el recipiente refrigerante. Fresa 150 g de azúcar – 400 g de fresas – 1 limón – 2 cucharadas de granadina Machaque las fresas, vierta el zumo de limón y los otros ingredientes. Mezcle bien y vierta la preparación en el recipiente refrigerante. 32 Assembly page 32/64 TKG ICE 1 - 120829 Fax +32 2 359 95 50 Copies of the I/B. Please reproduce them without any changes except under special instruction from Team International BELGIUM. The pages must be reproduced and folded in order to obtain a booklet A5 (+/- 148.5 mm width x 210 mm height). When folding, make sure you keep the good numbering when you turn the pages of the I/B. Don’t change the page numbering. Keep the language integrity. Melocotón 150 g de azúcar – 400 g de pulpa de melocotón – 1 limón Machaque la pulpa de melocotón, vierta el zumo de limón y el azúcar. Mezcle bien y vierta la preparación en el recipiente refrigerante. Albaricoque 150 g de azúcar – 400 g de pulpa de albaricoque – 1 limón – 2 cucharadas de aguardiente de albaricoque Machaque la pulpa de albaricoque, vierta el zumo de limón y los otros ingredientes. Mezcle bien y vierta la preparación en el recipiente refrigerante. Banana 150 g azúcar – 450 g de pulpa de banana – 350 ml de vodka – 1 limón – un pellizco de vainilla Machaque las bananas, vierta el zumo de limón y los otros ingredientes. Mezcle bien y vierta la preparación en el recipiente refrigerante. Melón 150 g de azúcar – 400 g de pulpa de melón – 1 limón – un vaso de brandy Machaque la pulpa de melón, vierta el zumo de limón y los otros ingredientes. Mezcle bien y vierta la preparación en el recipiente refrigerante. PROTECCIÓN DEL MEDIO AMBIENTE – DIRECTIVA 2002/96/CE Para poder preservar nuestro medio ambiente y proteger la salud humana, los residuos eléctricos y equipos electrónicos deberían ser destruidos de acuerdo con unas normas especificas con la implicación de ambos proveedores y consumidores. Por esta razón, como indica el símbolo en la placa de datos técnicos, su aparato no debería ser tirado en un contenedor municipal sino que debería ser devuelto a la tienda, o dejado en un punto de recolección para ser reciclado o usado para otras aplicaciones conforme a la directiva. 33 Assembly page 33/64 TKG ICE 1 - 120829 Fax +32 2 359 95 50 Copies of the I/B. Please reproduce them without any changes except under special instruction from Team International BELGIUM. The pages must be reproduced and folded in order to obtain a booklet A5 (+/- 148.5 mm width x 210 mm height). When folding, make sure you keep the good numbering when you turn the pages of the I/B. Don’t change the page numbering. Keep the language integrity. PARA A SUA SEGURANÇA Antes de utilizar o aparelho leia com sentido de responsabilidade as instruções de funcionamento e respeite sempre as orientações de segurança e de utilização dadas no manual das instruções. Importante: As pessoas (incluídas as crianças) com incapacidades físicas, sensoriais ou mentais, ou sem experiência ou conhecimento não devem utilizar o aparelho excepto se estiverem a ser vigiadas por uma pessoa responsável pela sua segurança ou se receberam previamente instruções relativas ao uso seguro do aparelho. Convém vigiar as crianças para certificar-se que não joguem com o aparelho. Antes de ligar a ficha do cabo da alimentação à tomada eléctrica certifique-se que a corrente eléctrica tem a potência igual à indicada na placa sinalética do aparelho. Mantenha o aparelho sob vigilância quando em funcionamento. Verifique com regularidade o estado do aparelho e em caso de danos leve-o a um serviço técnico competente para o analisar e reparar(*). Se o cabo da alimentação estiver danificado este tem de ser obrigatoriamente substituído pelo que deve levar o aparelho a um serviço técnico competente(*) a fim de evitar qualquer perigo. O aparelho destina-se ao uso doméstico e tem de respeitar as instruções de utilização. O aparelho nunca deve ser mergulhado na água ou em qualquer outro líquido seja para a limpeza ou por qualquer outra razão. Nunca meta o aparelho na máquina de lavar louça. Não ponha o aparelho próximo de fontes de calor. O aparelho ao ser limpo ou guardado tem de ter a ficha do cabo da alimentação retirada da tomada eléctrica. Quando o aparelho estiver a funcionar, as partes em movimento estão perigosas. Evite acidentes. Respeite imperativamente as instruções seguintes: Manipule sempre o recipiente refrigerante com luvas ou outras protecções. Evite queimaduras pelo frio quando o recipiente estiver congelado. Utilize apenas os acessórios fornecidos com o aparelho. Não toque nos acessórios quando o aparelho está a funcionar. Não tente parar o movimento das lâminas ou de qualquer outra parte em movimento. Deixe-as no recipiente até ficar completamente paradas. O aparelho não deve ser utilizado ao ar livre e deve ser guardado em locais secos. Utilize sempre acessórios recomendados por técnicos competentes. Não corra riscos. Nunca retire a ficha do cabo da alimentação da tomada eléctrica puxando pelo cabo da alimentação. Coloque o aparelho numa mesa ou superfície plana e segura de forma a não permitir a queda do aparelho. Verifique se o cabo da alimentação se encontra preso em alguma coisa. Evite as quedas do aparelho. Não enrole o cabo da alimentação à volta do aparelho e não o torça. Tenha cuidado que o bloco do motor não entre em contacto com água ou outros líquidos. Não o ponha na máquina de lavar a louça. Se fosse molhado ou se caísse num líquido, retire imediatamente a ficha do cabo da alimentação da tomada eléctrica, seque o bloco do motor e certifique-se que o líquido não entrou no interior do bloco do motor. Em caso de dúvidas, contacte um serviço técnico habilitado(*). Mantenha as mãos, os cabelos e qualquer acessório afastado do recipiente durante a utilização. Evite que entrem em contacto com as partes em movimento e que se enrolem à volta de estas. Não ponha a geladeira no frigorífico ou no congelador: apenas o recipiente refrigerante está concebido para este fim. Não toque no recipiente refrigerante sem protecção; utilize um saco plástico ou luvas. Evite queimaduras. 34 Assembly page 34/64 TKG ICE 1 - 120829 Fax +32 2 359 95 50 Copies of the I/B. Please reproduce them without any changes except under special instruction from Team International BELGIUM. The pages must be reproduced and folded in order to obtain a booklet A5 (+/- 148.5 mm width x 210 mm height). When folding, make sure you keep the good numbering when you turn the pages of the I/B. Don’t change the page numbering. Keep the language integrity. Nunca tente abrir o recipiente refrigerante; em caso de fuga do líquido, contacte um serviço técnico competente(*). Não toque no aparelho se tiver as mãos ou os pés molhados. Não desloque o aparelho durante o funcionamento. Não utilize o aparelho para misturar líquidos a ferver. Em caso de mau funcionamento do aparelho, retire a ficha do cabo da alimentação da tomada eléctrica e contacte um serviço técnico competente(*). (*) Serviço técnico habilitado: serviço técnico do fabricante ou do importador ou uma pessoa qualificada, reconhecida e habilitada para evitar qualquer perigo. Em qualquer caso devolva o aparelho ao serviço técnico. FUNCIONAMENTO Antes da primeira utilização, limpe o recipiente refrigerante, a tampa, a espátula e o eixo com água em sabonária (a temperatura da água não deve ser superior a 40°C), passe-os por água e deixe-os secar completamente. O gelado está muito sensível às bactérias; depois de cada utilização do aparelho, verifique se a geladeira e os acessórios estão limpos e secos. Nunca mergulhe o bloco do motor na água ou em outros líquidos, limpe-o com um pano ligeiramente húmido. O bloco do motor tem um interruptor: accione-o para ligar ou desligar o motor 0/I (ligado/desligado). Todos os acessórios (tampa, eixo, espátula) são para ser montados no bloco do motor: antes de cada utilização, certifique-se que estão bem fixados. Primeiro monte o bloco do motor na tampa (veja página 2) e verifique se os ganchos se encaixam nas ranhuras da tampa. Logo introduza o eixo na espátula e o conjunto no orifício previsto para este fim no bloco do motor. Depois da utilização, desmonte todos os acessórios, retire o eixo e a espátula, logo aperte ligeiramente os ganchos do bloco do motor para o separar da tampa. Para juntar a tampa ao recipiente, coloque a tampa no recipiente de forma que os ganchos se encaixem nas ranhuras do recipiente e gire a tampa no sentido dos ponteiros do relógio até a tampa ficar bloqueada. Certifique-se que a extremidade da espátula se encontra na cavidade no fundo do recipiente. Para retirar a tampa, proceda de forma contrária. Congelação do recipiente refrigerante Verifique se o congelador pode alcançar –18°C (***) e regule o termóstato para que esta temperatura esteja garantida. Se a temperatura for superior a –18°C, será impossível fazer o gelado. Coloque o recipiente num saco plástico para evitar queimaduras pelo frio e a formação de gelo perto dos ganchos de fixação. Coloque o recipiente na parte mais fria do congelador e certifique-se que: - não está inclinado mas em posição vertical. - há espaço à volta do recipiente. - nada cai no interior do recipiente. Dependendo da quantidade de gelado (500 g ou 1 kg) e da temperatura do congelador (-18°C ou mais frio), deixe o recipiente no congelador 10 a 12 horas. Verifique se o líquido refrigerante no interior do recipiente está congelado: deve estar completamente solido. Para poder utilizar o recipiente sem tiver que esperar que o líquido refrigerante se torne solido, aconselhamos a que o deixe sempre no congelador. 35 Assembly page 35/64 TKG ICE 1 - 120829 Fax +32 2 359 95 50 Copies of the I/B. Please reproduce them without any changes except under special instruction from Team International BELGIUM. The pages must be reproduced and folded in order to obtain a booklet A5 (+/- 148.5 mm width x 210 mm height). When folding, make sure you keep the good numbering when you turn the pages of the I/B. Don’t change the page numbering. Keep the language integrity. Preparação do gelado Para preparar gelado, utilize as receitas abaixo indicadas. A quantidade dos ingredientes não deve nunca exceder 0,6 litro. A temperatura ambiente deve ser inferior a 25°C durante a preparação. Antes pelo contrário, o resultado poderia não ser satisfatório. 1. Antes de tirar o recipiente do congelador, prepare a mistura para gelado num recipiente. Coloque a mistura no frigorífico para que arrefeça. 2. Tire o recipiente refrigerante do congelador (utilize luvas ou um pano para evitar queimaduras pelo frio) e coloque-o numa superfície estável. Utilize o recipiente imediatamente depois de o tirar do congelador. 3. Junte o bloco do motor, a tampa, o eixo de rotação e a espátula (veja parágrafo “FUNCIONAMENTO”). Monte a tampa no recipiente refrigerante. 4. Ligue a ficha do cabo da alimentação a tomada eléctrica e coloque o interruptor 0/I na posição “I” para ligar o aparelho. A espátula começa a girar. Verta imediatamente mais progressivamente a mistura no recipiente pelo orifício da tampa; certifique-se que não transborde já que o motor nunca deve ser molhado. Não encha mais que a metade do recipiente com a mistura. Deixe funcionar a geladeira durante 40 a 60 minutos, o tempo depende da consistência que se deseja obter (quanto mais tempo se misturará o gelado, tanto mais consistente ficará). Não esqueça que um gelado preparado em casa está menos duro do que um gelado comprado numa loja. 5. Durante a preparação, pode juntar chocolate, passas de uva ou outros ingredientes, as bebidas alcoólicas devem ser juntadas por último porque tornam o processo de arrefecimento mais lento. 6. Uma vez terminada a preparação, coloque o interruptor na posição 0, retire a ficha do cabo da alimentação da tomada eléctrica, gire a tampa no sentido contrário ao dos ponteiros do relógio e levante-a para a retirar. Para servir o gelado, utilize uma espátula de goma ou uma colher de madeira (nunca utensílios metálicos). 7. Se pode deixar o gelado no recipiente para o tornar mais duro no congelador durante pouco tempo (nunca mais que 30 minutos); para o congelar durante mais tempo, transvase-o num recipiente com tampa (para obter um gelado mais duro, deixe-o umas horas no congelador). O gelado pode ser conservado durante uma ou duas semanas. Depende se os ingredientes de base são “naturais” ou “meio cozidos”. LIMPEZA Desligue o aparelho, retire a ficha do cabo da alimentação da tomada eléctrica antes de proceder à limpeza. É importante limpar muito bem o recipiente e todos os acessórios imediatamente depois da utilização para evitar a formação de bactérias e de maus cheiros. Para limpar o recipiente, a espátula, a tampa e o eixo, utilize água em sabonária e esfregue com uma esponja suave (nunca utilize palhas-d’aço ou outros produtos abrasivos). Passe-os por agua e seque-os com cuidado. A temperatura da água não deve ser superior a 40°C. Para limpar o bloco do motor, utilize um pano suave ligeiramente húmido. Não utilize produtos abrasivos ou corrosivos. Verifique que o cabo da alimentação não está danificado. Para o substituir è preciso utilizar uma ferramenta especial: chame um serviço técnico competente para o reparar. Quando decidir descartar o aparelho, por favor, coloque-o no caixote do lixo camarário. Recomendamos que faça o aparelho inoperante, cortando-lhe o cabo de alimentação (verifique primeiro que a ficha está retirada da tomada eléctrica) e que não quebre o recipiente de refrigeração. 36 Assembly page 36/64 TKG ICE 1 - 120829 Fax +32 2 359 95 50 Copies of the I/B. Please reproduce them without any changes except under special instruction from Team International BELGIUM. The pages must be reproduced and folded in order to obtain a booklet A5 (+/- 148.5 mm width x 210 mm height). When folding, make sure you keep the good numbering when you turn the pages of the I/B. Don’t change the page numbering. Keep the language integrity. Gelados Baunilha 100 g de açúcar – 250 ml de leite – 250 ml de nata – 2 ovos – 1 saqueta de baunilha açucarada Bate os ovos com o açúcar até que a mistura fique espumosa. Junte o leite e a nata, misture bem e encha o recipiente refrigerante com a preparação. Málaga 200 g de açúcar – 350 ml de leite – 200 ml de nata – 2 claras de ovo – 100 g de passas de uva – um pouco de rum Lave as passas de uva e macere-as no rum (devem ficar dentro do rum). Bate o ovo com o açúcar, junte o leite e a nata, misture bem e encha o recipiente refrigerante com a preparação. No final da preparação, junte as passas de uva e o rum. Avelã 250 g de açúcar – 400 ml de leite – 2 ovos – 100 g de chocolate preto – 50 g de avelãs sem casca – uma pitada de baunilha Triture o chocolate e misture os pedaços com um pouco de leite e a baunilha num recipiente. Coze o conjunto num banho-maria. Bate os ovos com o açúcar, junte o resto do leite e o chocolate fundido (deve ser arrefecido). Junte as avelãs, misture bem e encha o recipiente refrigerante com a preparação. Limão 250 g de açúcar – 300 ml de leite – 300 ml de nata – 4 limões – 1,5 colheradas de xarope de limão Esprema os limões e misture o sumo com o açúcar e o xarope de limão, junte os outros ingredientes. Bate energicamente até a preparação ficar densa e uniforme e encha o recipiente refrigerante com o conjunto. Banana 150 g de açúcar – 150 ml de leite – 300 g de polpa de banana – um pouco de sumo de limão Descasque as bananas e corte-as em pequenos pedaços, junte o sumo de limão e o açúcar. Misture e junte o leite, misture bem e encha o recipiente refrigerante com a preparação. Chocolate 200 g de açúcar – 400 ml de leite – 200 ml de nata – 2 ovos – 100 g de chocolate preto Triture o chocolate e misture os pedaços com um pouco de leite e a baunilha num recipiente. Coze o conjunto num banho-maria. Bate os ovos com o açúcar, junte o resto do leite e o chocolate fundido (deve ser arrefecido), misture bem e encha o recipiente refrigerante com a preparação. Mirtilo 200 g de açúcar – 250 ml de nata – 400 g de mirtilos congelados – ½ limão Descongele os mirtilos a temperatura ambiente, deixe-os no próprio sumo, junte o sumo de limão, a nata e o açúcar. Misture bem os ingredientes até a preparação ficar consistente e encha o recipiente refrigerante. Morango 150 g de açúcar – 250 ml de leite – 200 ml de nata – 2 ovos – 300 g de morangos maduros Bate os ovos e o açúcar, junte os morangos cortados em pedaços e os outros ingredientes. Misture bem e encha o recipiente refrigerante com a preparação. 37 Assembly page 37/64 TKG ICE 1 - 120829 Fax +32 2 359 95 50 Copies of the I/B. Please reproduce them without any changes except under special instruction from Team International BELGIUM. The pages must be reproduced and folded in order to obtain a booklet A5 (+/- 148.5 mm width x 210 mm height). When folding, make sure you keep the good numbering when you turn the pages of the I/B. Don’t change the page numbering. Keep the language integrity. Noz 200 g de açúcar – 300 ml de leite – 200 ml de nata – 2 ovos – 100 g de nozes – 2 colheradas de licor de casca de noz Moa as nozes, junte o açúcar e o ovo e bate o conjunto até a mistura tornar-se clara. Junte os outros ingredientes, misture bem e encha o recipiente refrigerante com a preparação. Gelados com álcool Para preparar gelados a base de bebidas alcoólicas, são precisos mais 10-15 minutos. Champanhe 125 g de açúcar – 300 ml de nata – 400 ml de Champanhe ou vinho espumante Dissolva o açúcar no Champanhe, junte a nata e encha o recipiente refrigerante com a preparação. Menta 100 g de açúcar – 250 ml de leite – 250 ml de nata – 250 ml de licor de menta – sumo de 1½ limão Misture o sumo de limão com o açúcar até a mistura ficar homogénea. Junte os outros ingredientes, misture bem e encha o recipiente refrigerante com a preparação. Uísque 100 g de açúcar – 250 ml de leite – 300 ml de nata – 1 ovo – 85 ml de uísque – 1 casquinha de limão Bate o ovo e o açúcar, junte a casquinha de limão (para dar gosto), o leite, a nata, o licor, misture bem e encha o recipiente refrigerante com a mistura. Cidra 100 g de açúcar – 450 ml de leite – 300 ml de xarope de cidra Misture o açúcar e o leite, junte o xarope de cidra, misture bem e encha o recipiente refrigerante com a preparação. Sorvetes Para preparar sorvetes a base de bebidas alcoólicas, são precisos mais 10-15 minutos. Aconselhamos a que tire os sorvetes do recipiente refrigerante no momento de os servir porque derretem rapidamente. Champanhe 100 g de açúcar – uma garrafa de Champanhe ou vinho espumante Dissolva o açúcar no Champanhe e encha o recipiente refrigerante com a preparação. Brande 100 g de açúcar – 400 ml de água – 3 limões – 180 ml de brande Junte o sumo dos 3 limões aos ingredientes, misture bem e encha o recipiente refrigerante com a preparação. Morango 150 g de açúcar – 400 g de morangos – 1 limão – 2 colheradas de xarope de romã Triture os morangos, junte o sumo dos limões e os outros ingredientes. Misture bem e encha o recipiente refrigerante com a preparação. Pêssego 150 g de açúcar – 400 g de polpa de pêssego – 1 limão Triture a polpa dos pêssegos, junte o sumo de limão e o açúcar. Misture bem e encha o recipiente refrigerante com a preparação. 38 Assembly page 38/64 TKG ICE 1 - 120829 Fax +32 2 359 95 50 Copies of the I/B. Please reproduce them without any changes except under special instruction from Team International BELGIUM. The pages must be reproduced and folded in order to obtain a booklet A5 (+/- 148.5 mm width x 210 mm height). When folding, make sure you keep the good numbering when you turn the pages of the I/B. Don’t change the page numbering. Keep the language integrity. Damasco 150 g de açúcar – 400 g de polpa de damasco – 1 limão – 2 colheradas de aguardente de damasco Triture a polpa dos damascos, junte o sumo de limão e os outros ingredientes. Misture bem e encha o recipiente refrigerante com a preparação. Banana 150 g de açúcar – 450 g de polpa de banana – 350 ml de vodka – 1 limão – 1 pitada de vanilina Triture as bananas, junte o sumo de limão e os outros ingredientes. Misture bem e encha o recipiente refrigerante com a preparação. Melão 150 g de açúcar – 400 g de polpa de melão – 1 limão – um copo de brande Triture a polpa de melão, junte o sumo de limão e os outros ingredientes. Misture bem e encha o recipiente refrigerante com a preparação. PROTECÇÃO DO MEIO AMBIENTE – DIRECTIVA 2002/96/CE Para a preservação do ambiente e da nossa saúde, a eliminação no fim da vida útil dos aparelhos elétricos e eletrônicos, deve-se efetuar no cumprimento das legislações em vigor e pela participação de todos quer sejam produtores ou utilizadores. É por esta razão que o vosso aparelho tem na placa sinalética o símbolo , informando que em caso algum o aparelho deve ser colocado no caixote do lixo camarário ou privado para que não vá para as lixeiras comuns mas sim devolvido ao revendedor ou depositado nos locais apropriados e identificados para a recolha destes aparelhos para que uma vez recolhidos sejam reciclados, reutilizados ou lhe sejam dados outras aplicações. 39 Assembly page 39/64 TKG ICE 1 - 120829 Fax +32 2 359 95 50 Copies of the I/B. Please reproduce them without any changes except under special instruction from Team International BELGIUM. The pages must be reproduced and folded in order to obtain a booklet A5 (+/- 148.5 mm width x 210 mm height). When folding, make sure you keep the good numbering when you turn the pages of the I/B. Don’t change the page numbering. Keep the language integrity. AVVERTENZE Vi invitiamo a leggere attentamente le istruzioni prima di utilizzare l’apparecchio, e vi preghiamo di seguire sempre attentamente le istruzioni di sicurezza e di utilizzo. Importante: Le persone (inclusi i bambini) che non sono capaci di utilizzare l’apparecchio, sia per incapacità fisiche, sensoriali o mentali, sia per mancanza di esperienza o di conoscenze, non devono per niente utilizzare l’apparecchio tranne se sono sorvegliati da una persona responsabile per la loro sicurezza o se hanno previamente ricevuto istruzioni relative all’uso sicuro dell’apparecchio. Sorvegliare i bambini perché non utilizzino l’apparecchio come un giocattolo. Prima di mettere in funzione l’apparecchio, controllare che la tensione sia conforme a quella dell’apparecchio. Non lasciare l’apparecchio incustodito durante il funzionamento. Verificare regolarmente che l'apparecchio non sia danneggiato. Non accendere l’apparecchio qualora il cavo o l’apparecchio stesso dovessero presentare un qualsiasi danneggiamento. Tutte le riparazioni devono essere eseguite da un servizio qualificato(*). Un cavo danneggiato deve essere sostituito da un servizio qualificato(*) per evitare qualsiasi pericolo. Questo apparecchio dovrà essere destinato solo all’uso domestico e secondo le indicazioni riportate nel presente libretto d'istruzioni. Non immergere l'apparecchio in acqua o in altro liquido, né per pulirlo né per qualsiasi altra ragione. Non mettere l’apparecchio in lavastoviglie. Non usare l’apparecchio in prossimità di sorgenti di calore. Staccare la spina dalla presa elettrica prima di pulire o riporre l’apparecchio. Non usare l’apparecchio all’aperto e riporlo sempre in un luogo asciutto. Non utilizzare accessori se non quelli consigliati dal fabbricante; l’utilizzo di accessori diversi potrebbe essere pericoloso per l’utente ed inoltre potrebbe danneggiare l’apparecchio. Non tirare il cavo per spostare l’apparecchio. Posizionare l’apparecchio su un tavolo o un supporto abbastanza stabile, e assicurarsi che il cavo elettrico non possa impigliarsi per evitare una caduta dell’apparecchio. Non avvolgere il cavo intorno all’apparecchio, non metterlo in contatto con le parti calde e non storcerlo. Quando l’apparecchio è in funzione le parti in movimento sono pericolose. Per evitare abrasioni o altri infortuni, bisogna rispettare le seguenti avvertenze: Maneggiare la ciotola refrigerante solo con guanti o altre protezioni per evitare, quando è congelata, scottature da freddo. Impiegare solo i componenti in dotazione. Non toccare l’accessorio montato sull’apparecchio quando questo è in funzione. Non fermare la rotazione delle lame o comunque delle parti in movimento, ma lasciarle immerse nel contenitore fino a quando si sono arrestate naturalmente per loro inerzia. Controllate che il corpo motore non venga a contatto con acqua o altri liquidi e non metterlo in lavastoviglie. Nel caso dovesse bagnarsi o immergersi in liquidi, staccare immediatamente la spina dalla presa di corrente, asciugarlo con cura e verificare che il liquido non sia entrato all’interno del corpo motore; in caso di dubbio rivolgersi a personale professionalmente qualificato. Tenere le mani, capelli o qualsiasi altro accessorio lontano dalla ciotola quando l’apparecchio è in funzione, per evitare che possano venire a contatto e attorcigliarsi con le parti rotanti. Non mettere la gelatiera nel frigorifero o in freezer: solo il contenitore refrigerante è idoneo a tal scopo. 40 Assembly page 40/64 TKG ICE 1 - 120829 Fax +32 2 359 95 50 Copies of the I/B. Please reproduce them without any changes except under special instruction from Team International BELGIUM. The pages must be reproduced and folded in order to obtain a booklet A5 (+/- 148.5 mm width x 210 mm height). When folding, make sure you keep the good numbering when you turn the pages of the I/B. Don’t change the page numbering. Keep the language integrity. Non afferrare il contenitore refrigerante a mani nude, ma proteggerle utilizzando una busta di plastica o guanti: il contatto con la pelle può causare ustioni parziali. Non tentare mai di aprire il contenitore refrigerante: se ci fosse fuoriuscita di liquido rivolgersi a personale professionalmente qualificato. In caso di perdita del liquido non utilizzare apparecchio e non ingerire il gelato eventualmente inquinato. Non toccare l’apparecchio con mani e piedi bagnati. Non spostare l’apparecchio durante il funzionamento. Non usare l’apparecchio per mescolare liquidi bollenti. In caso di guasto o cattivo funzionamento spegnere l’apparecchio e farlo controllare da personale professionalmente qualificato(*). (*) Servizio qualificato: servizio assistenza tecnica del fabbricante o dell’importatore o una persona qualificata, riconosciuta ed autorizzata ad effettuare riparazioni, cui inviare l’apparecchio per la riparazione o il controllo. Rivolgere in ogni caso l’apparecchio a questo servizio. FUNZIONAMENTO Al primo impiego lavare con acqua saponata e sciacquare accuratamente contenitore refrigerante, coperchio, spatola e perno (la temperatura dell’acqua non deve superare i 40°C); prima del loro utilizzo asciugarli accuratamente. Il gelato è sensibile ai batteri: verificare ad ogni impiego che gelatiera ed utensili siano ben puliti ed asciutti. Il corpo motore non deve essere immerso in acqua o altri liquidi, ma pulito con un panno leggermente umido. Il corpo motore è dotato di interruttore 0-I (spento-acceso). Tutti gli accessori (coperchio, perno, spatola) si innestano al corpo motore: prima del loro impiego verificare che a questo siano ben solidali. In anzi tutto fissare il corpo motore sul coperchio (vedi pagina 2) verificando che i ganci del corpo motore si infilano nelle rispettive asole ricavate nel coperchio. Poi inserire il perno nella spatola e l’insieme nell’orifizio previsto a tal fine sul corpo motore. Dopo l’uso, smontare gli accessori, staccare il perno e la spatola, poi stringere leggermente i ganci per separare il corpo motore. Per inserire il coperchio al contenitore verificare che i tre ganci di fissaggio si inseriscano all’interno delle rispettive asole del contenitore, girare in senso orario per assicurare il bloccaggio. Controllare che l’estremità della spatola si trovi nel cavo del fondo del contenitore. Per rimuovere il coperchio, procedere al contrario. Congelamento del contenitore refrigerante Verificare che il freezer possa raggiungere –18°C e regolare il termostato in modo che sia garantita questa temperatura. Il non raggiungimento di –18°C non permette la formazione del gelato. Mettere il contenitore in una busta di plastica al fine di proteggersi da scottature da freddo ed evitare che possa formarsi del ghiaccio in prossimità dei ganci di fissaggio. Collocare nel freezer il contenitore nel comparto più freddo, ed accertarsi che: - sia in posizione verticale e soprattutto non sia capovolto - ci sia spazio sufficiente intorno - nulla sia inserito nel suo interno A seconda della quantità di gelato e della temperatura del freezer, lasciare il contenitore nel freezer per circa 10-12 ore, cioè in base al gelato da preparare (500g o 1000g) e della temperatura (-18°C o ancor meno). Verificare che il liquido all’interno del contenitore refrigerante sia congelato: deve essere completamente solido. Conservando sempre il contenitore nel freezer, lo si può impiegare all’occorrenza senza attendere il tempo di solidificazione del liquido refrigerante. 41 Assembly page 41/64 TKG ICE 1 - 120829 Fax +32 2 359 95 50 Copies of the I/B. Please reproduce them without any changes except under special instruction from Team International BELGIUM. The pages must be reproduced and folded in order to obtain a booklet A5 (+/- 148.5 mm width x 210 mm height). When folding, make sure you keep the good numbering when you turn the pages of the I/B. Don’t change the page numbering. Keep the language integrity. Preparazione del gelato Per la preparazione delle miscele del gelato seguire le ricette riportate. Qualsiasi ricetta può essere utilizzata a patto che non comporti più di 1 litro di ingredienti. La temperatura ambiente deve essere inferiore a 25°C durante la preparazione: diversamente non si garantisce un risultato ottimale. 1. Prima di togliere il contenitore dal freezer, preparare la miscela di gelato in una ciotola. Tenere la miscela in frigorifero per raffreddarla. 2. Estrarre il contenitore refrigerante dal freezer (usare dei guanti o un panno per evitare scottature da freddo) e posizionarlo su un piano d’appoggio stabile. Il contenitore va utilizzato subito dopo averlo rimosso dal freezer. 3. Agganciare il coperchio già completo di motore, perno e spatola (vedi pagina 2), ed assicurasi che questi siano ben assemblati e fissati. 4. Inserire la spina nella presa di corrente e premere il pulsante 0/I in posizione “I” azionando la rotazione della spatola. Quindi versare subito, ma gradualmente, la miscela da gelato nel contenitore attraverso il foro del coperchio senza farla tracimare e bagnare così il motore; la miscela non dovrà oltrepassare la metà del contenitore. Mescolare (quindi far funzionare la gelatiera) per 40-60 minuti circa: il tempo dipende dalla consistenza che si desidera ottenere (più lungo è il tempo, più congelato sarà il preparato). Ricordarsi che un gelato fresco fatto in casa non avrà la medesima consistenza del gelato acquistato in negozio, ma è più morbido. 5. Alla fine della preparazione si possono aggiungere cioccolato a scaglie fini o uvetta ed altri ingredienti; gli alcolici vanno aggiunti pressoché alla fine (rallentano il raffreddamento). 6. Una volta terminato, spegnere l’interruttore (pos. 0), estrarre la spina dalla presa, sganciare e togliere il coperchio girandolo in senso antiorario e sollevandolo. Per servire il semifreddo, estrarlo con una spatola di gomma o un cucchiaio di legno (non utilizzare oggetti metallici). E servirlo immediatamente. 7. È possibile lasciare il gelato nel contenitore ad indurirsi nel freezer per un breve periodo (non più di 30 minuti), mentre si consiglia un congelamento a lungo termine in una vaschetta con coperchio (servono alcune ore nel freezer per ottenere un gelato duro). Il periodo di conservazione potrà essere di 1 o 2 settimane: dipende se gli ingredienti di base sono “naturali” o “semi-cotti”. PULIZIA E MANUTENZIONE Prima di pulire l’apparecchio spegnerlo e disinserire la spina dalla presa di corrente. E’ importante che contenitore e tutti i componenti siano lavati bene e subito dopo l’impiego, per evitare formazione di batteri o cattivi odori. Per la pulizia del contenitore, spatola, coperchio e perno, utilizzare acqua con un normale detergente per stoviglie, e strofinare con una spugnetta morbida (non utilizzare pagliette metalliche o prodotti abrasivi). Sciacquare con cura e asciugare completamente. La temperatura dell’acqua non deve superare i 40°C. Per la pulizia del corpo motore, utilizzare un panno morbido leggermente inumidito con acqua: asciugare con cura (non utilizzare pagliette metalliche o prodotti abrasivi). Controllare periodicamente che il cordone elettrico non sia danneggiato, per la sua sostituzione necessita un utensile speciale: rivolgersi ad un centro assistenza autorizzato anche per eventuali riparazioni. Se si decide di non utilizzare più l’apparecchio, si raccomanda di renderlo inoperante tagliando il cavo di alimentazione (prima assicurarsi d’aver tolto la spina dalla presa di corrente), e di rendere innocue quelle parti che sono pericolose qualora utilizzate per gioco dai bambini (ad esempio il contenitore). 42 Assembly page 42/64 TKG ICE 1 - 120829 Fax +32 2 359 95 50 Copies of the I/B. Please reproduce them without any changes except under special instruction from Team International BELGIUM. The pages must be reproduced and folded in order to obtain a booklet A5 (+/- 148.5 mm width x 210 mm height). When folding, make sure you keep the good numbering when you turn the pages of the I/B. Don’t change the page numbering. Keep the language integrity. Gelati Gusto alla vaniglia 100gr. di zucchero - 250ml. di latte - 250ml. di panna - 2 uova - 1 bustina di zucchero vanigliato Sbattere gli albumi con lo zucchero finché non diventano chiari e schiumosi. Aggiungere latte e panna, mescolare bene e versare il preparato nel contenitore refrigerante. Gusto al malaga 200gr. di zucchero - 350ml. di latte - 200ml. di panna - 2 albumi - 100gr. di uvetta - un po’ di rum Lavare l’uvetta e farla macerare nel rum (deve coprirla). Sbattere le uova con lo zucchero, aggiungere latte e panna, mescolare bene e versare il preparato nel contenitore refrigerante. Quando il gelato è pressoché pronto, aggiungere l’uvetta asciutta e parte del rum utilizzato. Gusto alla nocciola 250gr. di zucchero - 400ml. di latte - 2 uova - 100gr. di cioccolato fondente - 50gr. di nocciole sgusciate e pelate - un pizzico di vanillina Sminuzzare a piccole scaglie il cioccolato e mescolarlo con un po’ di latte e la vanillina in un recipiente metterlo a bagnomaria. Sbattere le uova con lo zucchero, aggiungere il latte rimasto e il cioccolato fuso (deve essersi raffreddato). Aggiungere le nocciole sminuzzate in pezzettini, mescolare bene e versare il preparato nel contenitore refrigerante. Gusto limone 250gr. di zucchero - 30ml. di latte - 300gr. di panna - 4 limoni - 1,5 cucchiaio di sciroppo di limone Spremere i limoni e versare il succo allo zucchero e allo sciroppo di limone, mescolare e aggiungere poi gli altri ingredienti. Sbattere bene finché il preparato è denso e uniforme, e inserire tutto nel contenitore refrigerante. Gusto banana 70gr. di zucchero - 400ml. di latte - 350gr. (netto) di polpa di banana - un po’ di succo di limone Pelare le banane e sminuzzarle sino a formare una polpa, aggiungere il succo di limone e lo zucchero. Amalgamare e aggiungere latte, mescolare bene e versare il tutto nel contenitore refrigerante. Gusto al cioccolato 200gr. di zucchero - 400ml. di latte - 200ml. di panna - 2 uova - 100gr. di cioccolato fondente Sminuzzare a piccole scaglie il cioccolato e mescolarlo con un po’ di latte e la vanillina in un recipiente a bagnomaria. Sbattere le uova con lo zucchero, aggiungere il latte rimasto e il cioccolato fuso (deve essersi raffreddato), mescolare bene e versare il preparato nel contenitore refrigerante. Gusto ai mirtilli 150gr. di zucchero - 250ml. di panna - 400gr. di mirtilli surgelati - ½ limone Scongelare i mirtilli a temperatura ambiente e lasciandoli nel loro sciroppo formatosi, aggiungere il succo del limone, panna e zucchero. Mescolare bene gli ingredienti finché prendono consistenza, e versare il preparato nel contenitore refrigerante. Gusto alla fragola 200gr. di zucchero - 300ml. di latte - 200ml. di panna - 2 uova - 100gr. di fragole mature Sbattere le uova con lo zucchero, aggiungere le fragole in piccoli pezzi e gli altri ingredienti. Mescolare bene e versare il preparato nel contenitore refrigerante. 43 Assembly page 43/64 TKG ICE 1 - 120829 Fax +32 2 359 95 50 Copies of the I/B. Please reproduce them without any changes except under special instruction from Team International BELGIUM. The pages must be reproduced and folded in order to obtain a booklet A5 (+/- 148.5 mm width x 210 mm height). When folding, make sure you keep the good numbering when you turn the pages of the I/B. Don’t change the page numbering. Keep the language integrity. Gusto alle noci 200gr. di zucchero - 300ml. di latte - 200ml. di panna - 2 uova - 100gr. di noci (gheriglio) - 3 cucchiai di liquore nocino Tritare le noci ed aggiungere lo zucchero, le uova e sbattere in modo che tutto sia ben montato. Aggiungere gli altri ingredienti e mescolare bene il preparato e versare nel contenitore refrigerante. Gelati al liquore e soft drinks Le ricette con alcolici richiedono 10-15 minuti in più di preparazione del gelato. Gusto allo champagne 125gr. di zucchero - 300ml. di panna - 400ml. di champagne o brut Sciogliere lo zucchero nello champagne, aggiungere la panna e versare nel contenitore. Gusto alla menta 100gr. di zucchero - 250ml. di latte - 250ml. di panna - 250ml. liquore alla menta - 1 + ½ succo di limone Aggiungere allo zucchero il succo di limone, amalgamandoli il più possibile. Aggiungere gli altri ingredienti, e mescolare bene il composto e versare nel contenitore. Gusto al whisky 100gr. di zucchero - 250ml. di latte - 300ml. di panna - 1 uovo - 85ml. di whisky - 1 pizzico di buccia di limone grattugiata Sbattere l’uovo con lo zucchero, aggiungere la buccia di limone (tanto da insaporire), il latte, panna e liquore, mescolare bene il composto e versare nel contenitore. Gusto al cedro 100gr. di zucchero - 450ml. di latte - 300ml. di sciroppo di cedro Mescolare lo zucchero con latte, aggiungere lo sciroppo di cedro, mescolare bene il preparato e versare nel contenitore. Sorbetti Le ricette con alcolici richiedono 10-15 minuti in più di preparazione del gelato. E’ consigliato estrarli dal contenitore refrigerante al momento di servirli, in quanto si sciolgono rapidamente. Gusto allo champagne 100gr. di zucchero - bottiglia di champagne o brut Sciogliere lo zucchero nello champagne, e versare nel contenitore refrigerante. Gusto al brandy 100gr. di zucchero - 400ml. di acqua - 3 limoni - 180ml. di brandy Aggiungere il succo dei 3 limoni agli ingredienti, mescolare bene il preparato e versare nel contenitore refrigerante. Gusto alla fragola 150gr. di zucchero - 400gr. di fragole - 1 limone - 2 cucchiai di sciroppo di melagrana Sminuzzare le fragole, versarvi il succo di limone e gli altri ingredienti. Mescolare bene il preparato e versare nel contenitore refrigerante. Gusto alla pesca 150gr. di zucchero - 400gr. di polpa di pesca - 1 limone Sminuzzare la polpa di pesca, versarvi il succo di limone e lo zucchero. Mescolare bene il preparato e versare nel contenitore refrigerante. 44 Assembly page 44/64 TKG ICE 1 - 120829 Fax +32 2 359 95 50 Copies of the I/B. Please reproduce them without any changes except under special instruction from Team International BELGIUM. The pages must be reproduced and folded in order to obtain a booklet A5 (+/- 148.5 mm width x 210 mm height). When folding, make sure you keep the good numbering when you turn the pages of the I/B. Don’t change the page numbering. Keep the language integrity. Gusto all’albicocca 150gr. di zucchero - 400gr. di polpa d’albicocche - 1 limone - 2 cucchiai di brandy all’albicocca Sminuzzare la polpa di albicocca, versarvi il succo di limone e gli altri ingredienti. Mescolare bene il preparato e versare nel contenitore refrigerante. Gusto alla banana 150gr. di zucchero - 450gr. di polpa di banana - 350ml. di vodka - 1 limone - un pizzico di vanillina Sminuzzare le banane, versarvi il succo di limone e gli altri ingredienti. Mescolare bene il preparato e versare nel contenitore refrigerante. Gusto al melone 150gr. di zucchero - 400gr. di polpa di melone - 1 limone - un bicchiere di brandy Sminuzzare la polpa di melone, versarvi il succo di limone e gli altri ingredienti. Mescolare bene il preparato e versare nel contenitore refrigerante. DIRETTIVA 2002/96/CE SULLO SMALTIMENTO DI APPARECCHI ELETTRICI ED ELETTRONICI Per preservare l'ambiente e la nostra salute, l'eliminazione dei vecchi apparecchi elettrici e elettronici non più utilizzati, va fatta secondo la direttiva sopra citata che impone l'obbligo al costruttore, al commerciante e all'utilizzatore di consegnare gli apparecchi ai centri di raccolta specializzati, i quali saranno in grado di smaltire e riciclare i vecchi prodotti come la legge prescrive. Per questa ragione troverete apposto sull’etichetta segnaletica il simbolo che indica di non gettare il vecchio apparecchio non più utilizzato, in pattumiera o nel cassonetto delle immondizie. Per eliminare il vecchio apparecchio non più utilizzato, potete consegnarlo al rivenditore il cambio di quello nuovo acquistato, o direttamente nei centri di raccolta specializzati messi a disposizione dal vostro comune di residenza. 45 Assembly page 45/64 TKG ICE 1 - 120829 Fax +32 2 359 95 50 Copies of the I/B. Please reproduce them without any changes except under special instruction from Team International BELGIUM. The pages must be reproduced and folded in order to obtain a booklet A5 (+/- 148.5 mm width x 210 mm height). When folding, make sure you keep the good numbering when you turn the pages of the I/B. Don’t change the page numbering. Keep the language integrity. ZASADY BEZPIECZNEGO UŻYTKOWANIA Zanim zaczniesz używać urządzenie przeczytaj uważnie instrukcję i postępuj wyłącznie z jej wskazaniami. Ważne: Osoby (w tym dzieci), które ze względów zdrowotnych lub innych mających wpływ na bezpieczne użytkowanie urządzenia, nie mogą należycie obsługiwać urządzenia nie powinny go użytkować. Użytkowanie urządzenia może stanowić dla nich niebezpieczeństwo skaleczenia. Szczególnie dotyczy to dzieci, które mogą uznać urządzenie za zabawkę. Zanim włączysz urządzenie sprawdź czy napięcie sieciowe zgadza się z parametrami podanymi na tabliczce znamionowej urządzenia. Podczas użycia nie zostawiaj urządzenia bez nadzoru. Regularnie sprawdzaj czy kabel zasilający nie jest uszkodzony. Nie używaj urządzenia z uszkodzonym kablem zasilającym. Wszelkie naprawy powinny być dokonane przez wykwalifikowanego elektryka(*). Jeżeli przewód jest uszkodzony, musi zostać zastąpiony przez wykwalifikowanego elektryka(*) w celu uniknięcia niebezpieczeństwa. Urządzenie służy tylko do użytku domowego i powinno być używane zgodnie ze wskazaniami niniejszej instrukcji. Nie zanurzaj w wodzie ani żadnym innym płynie. Nie czyść w zmywarce do naczyń. Nie używaj w pobliżu źródeł ciepła. Przed czyszczeniem wyłącz przewód zasilający z gniazda. Pod czas gdy urządzenie pracuje, jego ruchome części mogą stanowić zagrożenie. Aby uniknąć zadrapań i skaleczeń zachowaj szczególna ostrożność: Aby uniknąć szoku termicznego używaj rękawic w czasie podnoszenia. Używaj wyłącznie części rekomendowanych przez producenta. Nie dotykaj akcesoriów podłączonych do urządzenia pod czas jego pracy. Nie próbuj zatrzymać ostrzy I innych ruchomych części, kiedy te obracają się. Po wyłączeniu pozostaw aż same zatrzymają się. Nie używaj na zewnątrz, zadbaj aby urządzenie pracowało w suchym otoczeniu. Nigdy nie używaj urządzeń ani części nie posiadających rekomendacji producenta ponieważ może to być niebezpieczne dla użytkownika. Mogą one również wpłynąć na wadliwe działanie urządzenia lub jego uszkodzenie. Nigdy nie ciągnij, nie podnoś itp. urządzenia za kabel ani nie wyłączaj wtyczki z sieci w ten sposób. Nie owijaj kabla wokół urządzenia, nie zginaj go, nie skręcaj. Zachowaj szczególną ostrożność aby ręce, włosy, ubrania nie stykały się z misą pod czas działania urządzenia. Nie umieszczaj urządzenia w lodówce lub zamrażarce. Nadje się do tego jedynie pojemnik do mrożenia. Nie chwytaj pojemnika do mrożenia bez rękawic (możesz użyć rękawic foliowych). Nie staraj się otwierać pojemnika do mrożenia. W przypadku wycieku skontaktuj sie z serwisem. W przypadku wycieku płynu chłodniczego: nie używaj urządzenia, nie jedz przygotowanych już w urządzeniu lodów. Nie dotykaj urządzenia mokrymi rękami. Nie przenoś urządzenia podczas jego działania. (*) Uprawniony elektryk: Osoba wskazana przez dział sprzedaży producenta lub importera lub każda osoba posiadająca niezbędne kwalifikacje umożliwiające dokonywanie tego typu napraw bez stwarzania zagrożenia. W każdym przypadku urządzenie należy przekazywać tym osobom. 46 Assembly page 46/64 TKG ICE 1 - 120829 Fax +32 2 359 95 50 Copies of the I/B. Please reproduce them without any changes except under special instruction from Team International BELGIUM. The pages must be reproduced and folded in order to obtain a booklet A5 (+/- 148.5 mm width x 210 mm height). When folding, make sure you keep the good numbering when you turn the pages of the I/B. Don’t change the page numbering. Keep the language integrity. INSTALACJA Ustaw urządzenie z dala od źródeł ciepła i wszelkich przedmiotów, które mogą dostać się do środka podczas działania. Upewnij się, że powierzchnia, na której stoi urządzenie, jest płaska i stabilna. Przed użyciem upewnij się, że akcesoria zostały prawidłowo zmontowane. Nie używaj urządzenia do mieszania gotujących się płynów. W przypadku złego działania, wyłącz urządzenie z sieci i skontaktuj się z serwisem. DZIAŁANIE URZĄDZENIA Przed pierwszym użyciem wyczyść pojemnik, szpatułkę i łącznik pod ciepłą bieżącą wodą z detergentem. Wypłucz i dokładnie osusz. Lody są podatne na działanie bakterii. Przed każdym użyciem dokładnie sprawdzaj czy urządzenie jest czyste i suche. Nie zanurzaj obudowy silnika w wodzie ani żadnym innym płynie. Czyść ją wyłącznie przy użyciu miękkiej wilgotnej ściereczki. W obudowie znajduje się włącznik, którym uruchomisz urządzenie 0-I (on/off). Sprawdź czy wszystkie akcesoria zostały prawidłowo zamontowane. Ważne, aby pokrywa była zamontowana dokładnie w szczelinach montażowych. Używaj haczyków do montażu pokrywy pojemnika. Mrożenie Sprawdź czy może schłodzić pojemnik do –18°C, ustaw termostat zamrażarki na tej temperaturze. Lody nie zostaną odpowiedni zmrożone jeśli urządzenie nie może osiągnąć tej temperatury. 1) Umieść pojemnik w worku foliowym aby chronić się przed szokiem termicznym przy dotykaniu. 2) Umieść pojemnik w zamrażarce na najchłodniejszym poziomie i upewnij się, że: - pojemnik nie stoi dołem do góry - jest wystarczająca przestrzeń wokół pojemnika - nic nie znajduje się na pojemniku. 3) W zależności od ilości lodów i temperatury w zamrażarce, pojemnik powinien zostać w środku przez 10 do 12 godzin. 4) Sprawdź czy płyn wewnątrz pojemnika jest zmrożony. 5) Jeśli w pojemniku znajdują się zmrożone lody przechowuj w zamrażarce. Przygotowanie lodów Aby przygotować lody postępuj zgodnie z poniższymi instrukcjami. Wszystkie przepisy zostały przygotowane dla ilości nie większej niż 0.6 l składników. Podczas przygotowywania temperatura pokojowa pomieszczenia powinna być niższa niż 25°C. 1. Zanim wyjmiesz pojemnik z zamrażarki przygotuj mieszankę. Następnie odstaw do zamrażarki. 2. Wyjmij pojemnik z zamrażarki (chwytaj przez materiał ochronny aby uniknąć szoku termicznego) I ustaw na stabilnej I płaskiej powierzchni. Pojemnik powinien znależć zastosowanie natychmiast po wyjeciu z zamrażarki. 3. Dołacz pokrywę, obudowe silnika, łacznik i szpatułkę. 4. Włącz urządzenie do sieci I naciśnij przycisk 0/I w pozycję “I”, szpatułka zacznie się obracać. Następnie przez lejek w pokrywie wlej mieszankę do pojemnika. Nie przekraczaj połowy pojemności pojemnika. Wymieszaj przez ok. 40-60 minut w zależności od żądanej konsystencji. Pamiętaj, ze lody produkcji domowej różnią się w konsystencji od tych kupowanych w sklepie. 47 Assembly page 47/64 TKG ICE 1 - 120829 Fax +32 2 359 95 50 Copies of the I/B. Please reproduce them without any changes except under special instruction from Team International BELGIUM. The pages must be reproduced and folded in order to obtain a booklet A5 (+/- 148.5 mm width x 210 mm height). When folding, make sure you keep the good numbering when you turn the pages of the I/B. Don’t change the page numbering. Keep the language integrity. 5. 6. 7. W czasie mieszania możesz dodać czekoladę, kawałki owoców lub alkohol (tylko na końcu mieszania bo spowalnia mrożenie). Po zakończeniu mieszania, wyłącz z sieci, zdejmij pokrywę I wyjmij mieszankę przy pomocy drewnianego lub plastikowego narzędzia do naczyń. Podaj natychmiast po przyrządzeniu. Aby lody były twardsze pozostaw w pojemniku i wstaw do zamrażarki na nie dłużej niż 30 minut. Do dłuższego przechowywania zalecamy przykryć pojemnik pokrywką. W zależności od składników, z których zrobione są lody, można przechowywać w zamrażarce od 1 do 2 tygodni. CZYSZCZENIE I KONSERWACJA Przed czyszczeniem wyłacz z sieci. Aby chronić przed przykrym zapachem i bakteriami ważne by dokładnie umyć pojemnik i pozostałe części zaraz po użyciu. 1. Do czyszczenia szpatuły i pokrywy używaj bieżącej wody (nie cieplejszej niż 40°C) z płynem do mycia naczyń. Dokładnie wysusz. Nie używaj do czyszczenia materiałów ściernych. 2. Obudowę wytrzyj wilgotna sciereczką. 3. Regularnie sprawdzaj czy kabel zasilający nie jest uszkodzony. Nie używaj urządzenia z uszkodzonym kablem zasilającym. 4. Gdy zdecydujesz się na zutylizowanie urządzenia udaj się do okręgowego punktu zbiórki. Zaleca się uniemożliwienie pracy urządzenia poprzez odcięcie kabla zasilającego (uprzednio należy upewnić się że kabel wyjęty został z gniazdka) oraz upewnienie się, że pojemnik mrożący nie został uszkodzony. PRZEPISY Lody waniliowe 100g cukru – 250ml mleka – 250ml śmietanki – 2 jajek – 1 opakowanie cukru waniliowego Ubij jajka z cukrem. Dodaj mleko I śmietankę, dobrze wymieszaj- do uzyskania jednolitej masy i wlej do pojemnika. Malaga 200g cukru – 350ml mleka – 200ml śmietanki – 2 jaja – 100g rodzynek – odrobina rumu Wypłucz rodzynki i zamocz je w rumie (zalej taka ilością rumu aby zakryć). Ubij jaja z cukrem, dodaj mleko I śmietankę, dobrze wymieszaj i wlej do pojemnika. Kiedy lody są prawie gotowe dodaj rodzynki i część rumu. Orzechowe 250g cukru – 400g mleka – 2 jaja – 100g naturalnej czekolady – 50g obranych orzechów laskowych – wanilia Pokrusz czekoladę I wymieszaj z odrobina mleka i wanilią. Ubij jaja z cukrem I wymieszaj z reszta mleka, dodaj czekoladę (całość musi być zimna). Dodaj orzechy dobrze wymieszaj wlej do pojemnika. Cytrynowe 250g cukru – 300g mleka – 300g śmietanki – 4 cytryny – 1,5 łyżki stołowej syropu cytrynowego Wyciśnij cytryny I dodaj sok do cukru I syropu. Mieszając dodaj pozostałe składniki. Dobrze ubij I przełóż do pojemnika. Bananowe 150g cukru – 150ml mleka – 300g pulpy bananowej – odrobina soku z cytryny Obierz banany I pokrój w niewielkie kawałki. Dodaj sok z cytryny i cukier. Mieszając dodaj mleko i dokładnie wymieszaj. Przelej do pojemnika. 48 Assembly page 48/64 TKG ICE 1 - 120829 Fax +32 2 359 95 50 Copies of the I/B. Please reproduce them without any changes except under special instruction from Team International BELGIUM. The pages must be reproduced and folded in order to obtain a booklet A5 (+/- 148.5 mm width x 210 mm height). When folding, make sure you keep the good numbering when you turn the pages of the I/B. Don’t change the page numbering. Keep the language integrity. Czekoladowe 200g cukru – 400ml mleka – 200ml śmietanki – 2 jaja – 100g czekolady Pokrusz czekoladę I wymieszaj z odrobina mleka i wanilią. Ubij jaja z cukrem I wymieszaj z reszta mleka, dodaj czekoladę (całość musi być zimna). Wymieszaj i wlej do pojemnika. Jagodowe 200g cukru – 250g of śmietanki – 400g mrożonych jagód – ½ cytryny Rozmroź jagody I pozostaw aż uzyskasz syrop. Dodaj sok z cytryny, śmietankę i cukier. Wymieszaj dokładnie i wlej do pojemnika. Truskawkowe 150g cukru – 250ml mleka – 200g śmietanki – 1 jajo – 300g truskawek Ubij jajko z cukrem, dodaj truskawki pokrojone w małe kawałki I reszte składników. Dokładnie wymieszaj i przelej do pojemnika. OCHRONA ŚRODOWISKA NATURALNEGO Symbol na tabliczce znamionowej urządzenia oznacza, że produktu nie wolno wyrzucać razem z innymi odpadami z gospodarstw domowych. Polskie prawo zabrania pod karą grzywny łączenia zużytego sprzętu elektrycznego i elektronicznego wraz z innymi odpadami. Dbając o pozbycie się produktu w należyty sposób, można zapobiec potencjalnym negatywnym skutkom dla środowiska naturalnego i zdrowia ludzkiego, jakie mogłyby wyniknąć z niewłaściwego postępowania z odpadami powstałymi ze zużytego sprzętu elektronicznego. System zbierania zużytego sprzętu jest zgodny z obowiązującymi na terenie Rzeczpospolitej Polskiej normami prawnymi, (Ustawa z dnia 29 lipca 2005, Dziennik Ustaw Nr 180 poz.1494 i 1495) obowiązki wynikające z ustawy przejęła w imieniu przedsiębiorcy Organizacja Odzysku. Gospodarstwo domowe pełni istotną rolę w przyczynianiu się do ponownego użycia i odzysku, w tym recyklingu, zużytego sprzętu elektrycznego. Przestrzeganie zasad selektywnej zbiórki sprzętu ma zapewnić właściwy poziom ochrony zdrowia ludzkiego i środowiska naturalnego. Waga netto urządzenia - 2,3 kg 49 Assembly page 49/64 TKG ICE 1 - 120829 Fax +32 2 359 95 50 Copies of the I/B. Please reproduce them without any changes except under special instruction from Team International BELGIUM. The pages must be reproduced and folded in order to obtain a booklet A5 (+/- 148.5 mm width x 210 mm height). When folding, make sure you keep the good numbering when you turn the pages of the I/B. Don’t change the page numbering. Keep the language integrity. MĂSURI DE SIGURANŢĂ Va rugam citiţi cu atenţie aceste instrucţiuni înainte de a folosi aparatul si intotdeauna urmati instructiunile de siguranta si operare. Important: persoanele (inclusiv copii) care nu sunt capabile sa folosească produsul în şi guranţa, datorita capacităţii lor fizice, senzoriale sau mentale, sau datorita lipsei de experienţa sau cunoaştere, nu trebuie niciodată sa folosească produsul decât dacă sunt supravegheaţi de o persoana responsabila cu siguranţa lor sau dacă ei anterior au primit instrucţiuni privind folosirea aparatului. Supravegherea îndeaproape este necesara pentru a împiedica copiii sa folosească aparatul ca pe o jucărie. Verificaţi daca tensiunea la care conectaţi aparatul corespunde cu tensiunea recomandata. Nu lăsaţi aparatul nesupravegheat in timpul folosirii. Verificaţi din când în când starea cablului de alimentare. Nu porniţi aparatul atunci când cablul de alimentare sau aparatul este avariat. În cazul în care cablul de alimentare se deteriorează trebuie să fie înlocuit la o unitate de service specializată(*). Reparaţiile de orice tip vor fi efectuate numai într-o unitate de service competentă(*) in scopul de a evita orice pericol. Folosiţi aparatul numai in scop domestic si in modul specificat in aceste instrucţiuni. Nu scufundaţi niciodată aparatul in nici un fel de lichid pentru nici un motiv. Nu îl puneţi in maşina de spălat vase. Nu utilizaţi aparatul langă suprafeţe încinse. Înainte de a-l curăţa, deconectaţi aparatul de la sursa de curent. Cand aparatul este in functionare, partile care se misca sunt periculoase. Pentru a evita zgariere sau alte raniri, repectati aceste avertizari: Manevrati bolul de refrigerare numai cu manusi sau alte protectii pentru a evita “arsurile” reci atunci cand este congelat. Folositi numai componentele furnizate. Nu atingeti accesoriul folosit la aparat cand acesta este in functiune. Nu opriti lamele sau partile mobile cand se invart; lasati-le scufundate in container pana cand se opresc in mod natural din inertie. Verificati ca si corpul motorului sa nu vina in contact cu apa sau alte lichide; daca se uda sau se intampla sa cada in lichid, scoateti imediat din priza, uscati-l cu atentie si verificati ca lichid sa nu fi patruns in corpul motorului; daca aveti indoieli, contactati personalul calificat. Nu folosiţi aparatul in exterior si plasaţi-l întotdeauna intr-un loc uscat. Nu folosiţi niciodată accesorii care nu sunt recomandate de producător. Pot constitui un pericol in uz si exista riscul deteriorării aparatului. Nu uitaţi niciodată aparatul trăgând de cablu. Plasaţi aparatul pe o masa sau pe o suprafaţa plana. Nu răsuciţi cablul in jurul aparatului si nu îl îndoiţi. Pastrati mainile, parul sau orice alte accesorii departe de bol cand aparatul este in functiune, pentru a preveni contactul si prinderea intre partile ce se rotesc. Nu puneti masina de facut inghetata in frigider sau congelator: numai containerul de refrigerare este potrivit in acest scop. Nu apucati containerul refrigerator cu mainile goale. Protejati-va mainile folosind o punga de plastic sau manusi: contactul cu pielea poate cauza “arsuri” partiale. Nu incercati niciodata sa deschideti containerul refrigerator: daca vreun lichid curge, contactati personalul calificat. 50 Assembly page 50/64 TKG ICE 1 - 120829 Fax +32 2 359 95 50 Copies of the I/B. Please reproduce them without any changes except under special instruction from Team International BELGIUM. The pages must be reproduced and folded in order to obtain a booklet A5 (+/- 148.5 mm width x 210 mm height). When folding, make sure you keep the good numbering when you turn the pages of the I/B. Don’t change the page numbering. Keep the language integrity. In cazul in care aparatul pierde lichid: nu folositi aparatul si nu mancati inghetata daca este contaminate. Nu atingeti aparatul cu mainile sau picioarele ude. Nu mutate aparatul cand este in functionare. Nu folositi aparatul pentru a amesteca lichide fierbinti. In cazul unei defectiuni sau functionare defectuoasa, opriti aparatul si verificati-l la un electrician calificat(*). (*) Electrician calificat: departamentul de vânzări al producătorului sau importatorului sau orice persoana care este calificata, competenta si aprobata de aceştia sa execute astfel de reparaţii in scopul de a evita orice fel de pericol. In orice caz trebuie sa returnaţi aparatul acestui electrician. OPERARE Inainte de prima utilizare, spalati containerul refrigerator, capacul, spatula si arboreal cu apa si sapun si clatiti cu atentie (temperatura apei nu trebuie sa depaseasca 40°C): inainte de utilizare, uscati-le bine. Inghetata este sensibila la bacteria: de fiecare data cand folositi masina de inghetata, verificati ca ustensilele sa fie foarte curate si uscate. Nu scufundati carpul motor in apa sau alte lichide: curatati-l cu o carpa usor umeda. Corpul motor are un buton de apasare: apasati pentru a muta de la 0-I (pornit/oprit). Toate accesoriile (capac, arbore, spatula) se potrivesc la unitatea motor: inainte de utilizare, verificati sa fie bine atasate. In primul rand, fixate unitatea motor impreuna cu capacul (vezi pagina 2) si asigurati-va ca piciorusele de pe unitatea motor se introduce in lacasele de pe capac. Apoi introduceti arboreal in spatula si intregul in gaura din unitatea motor. Dupa utilizare, dezasamblati toate accesoriile. Intai scoateti arboreal si spatula, apoi apasati usor piciorusele de pe unitatea motor pentru a o separa de capac. Pentru a fixa capacaul la container, asezati-l pe bolul de congelare in asa fel incat urechile sa se introduca in sloturile bolului de congelare si rasuciti capacul in sensul acelor de ceasornic. Verificati ca si capatul spatulei sa intre in gaura de pe fundul bolului. Pentru a scoate capacul, procedati invers. Congelarea containerului de refrigerare Verificati ca si congelatorul sa poata ajunge la –18°C si setati termostatul ca aceasta temperature sa fie garantata. Inghetata nu poate fi facuta daca aceasta temperature nu este atinsa. Puneti containerul intr-o punga de plastic pentru a va proteja impotriva “arsurilor reci” si a impiedica gheata sa se formeze pe carligele de fixare. Puneti containerul in compartimentul cel mai rece al congelatorului si asigurati-va ca: - Este in pozitie vertical si in special nu cu susul in jos - Este spatiu sufficient in jurul acestuia - Nimic nu este in interior. In functie de cantitatea de inghetata si temperature congelatorului, lasati containerul in congelator timp de 10-12 ore, cu alte cuvinte, in functie de cantitatea de inghetata de preparat (500g sau 1000g) si temperatura (-18°C sau chiar mai putin). Verificati ca lichidul de racire din interiorul containerului este inghetat: trebuie sa fie complet solid. Daca tineti mereu containerul in congelator, poate fi folosit cand aveti nevoie, fara a mai fi nevoie sa asteptati timpul de solidificare a lichidului de refrigerare. 51 Assembly page 51/64 TKG ICE 1 - 120829 Fax +32 2 359 95 50 Copies of the I/B. Please reproduce them without any changes except under special instruction from Team International BELGIUM. The pages must be reproduced and folded in order to obtain a booklet A5 (+/- 148.5 mm width x 210 mm height). When folding, make sure you keep the good numbering when you turn the pages of the I/B. Don’t change the page numbering. Keep the language integrity. Prepararea inghetatei Pentru a prepara amestecuri de inghetata, urmati retetele de mai jos. Toate retetele pot fi folosite, cu conditia ca nu mai mult de 0,6 litri de ingrediente sa fie folosite. Temperatura camarei trebuie sa fie mai mica de 25°C in timpul prepararii: daca nu este asa, un rezultat optim nu este garantat. 1. Inainte de scoaterea containerului din congelator, preparati amestecul de inghetata intrun bol. Puneti amestecul in frigider pentru a-l raci. 2. Scoateti containerul refrigerator din congelator (purtati manusi sau folositi o carpa pentru a evita “arsurile reci”) si asezati-l pe o suprafata dreapta stabila. Containerul trebuie folosit imediat dupa scoaterea din congelator. 3. Fixati capacul, unitatea motor, arboreal si spatula impreuna (vezi paragraph “Operare”). Fixati capacul pe bolul de congelare. 4. Introduceti stecherul in priza si apasati butonul 0/I la “I” pentru a face spatula sa se roteasca. Acum, imediat dar gradual, turnati amestecul de inghetata in container prin gaura din capac, fara a picura sau a uda motorul: amestecul nu trebuie sa treaca peste jumatatea volumului containerului. Amestecati circa 40-60 minute: timpul depinde de consistent dorita (cu cat timpul este mai lung, cu atat mai inghetat va fi produsul). Retineti ca inghetata facuta acasa nu are aceeasi consistenta ca cea cumparata din magazine: in fond, este mai moale. 5. In timpul prepararii, puteti adauga mici fulgi de ciocolata, stafide sau alte ingrediente: ingredinetele alcoolice sunt adaugate aproape la final (acestea incetinesc racirea). 6. La final, opriti folosind butonul de intrerupere, scoateti stecherul din priza, rotiti capacul in sensul invers acelor de ceasornic si ridicati-l pentru a il indeparta de pe bol. Pentru a service desertul rece, scoateti-l folosind o spatula de cauciuc sau o lingura de lemn (nu folositi obiecte de metal). Acum serviti-l imediat. 7. Inghetata poate fi lasata in container pentru a se intari in congelator pentru o perioada scurta de timp (nu mai mult de 30 minute). Pentru congelare indelungata, recomandam folosirea unui container cu capac (sunt necesare cateva ore in congelator pentru ca inghetata sa devina tare). Perioada de conservare poate fi intre 1 si 2 saptamani. Aceasta perioada depinde daca ingredientele folosite sunt “naturale” sau “semipreparate”. CURĂŢARE Inainte de curatarea aparatului, opriti-l si scoateti stecherul din priza. Este important ca si containerul si toate componentele sa fie bines palate imediat dupa utilizare, pentru a preveni formarea de bacteria sau mirosuri neplacute. Atunci cand curatati containerul, spatula, capacul si pinii, folositi apa cu detergent normal pentru vase, si frecati cu un burete moale (nu folositi tampoane metalice de curatare sau produse abrazive). Clatiti cu atentie si uscati complet. Temperatura apei nu trebuie sa depaseasca 40°C. Curatati corpul cu o carpa moale, usor umeda; nu folositi produse abrazive sau corozive. Verificati periodic ca si cablul electric sa nu fie deteriorate. Daca o unealta speciala este necesar a fi inlocuita: contactati un reprezentant autorizat, de asemenea si pentru eventuale reparatii necesare. Atunci cand va hotarati sa aruncati aparatul, va rugam sa mergeti la punctual de colectare municipal. Va recomandam sa faceti aparatul neoperational prin taierea cablului de alimentare (dar inainte aveti grija sa fie scos din priza) si ca nu spargeti containerul de refrigerare. 52 Assembly page 52/64 TKG ICE 1 - 120829 Fax +32 2 359 95 50 Copies of the I/B. Please reproduce them without any changes except under special instruction from Team International BELGIUM. The pages must be reproduced and folded in order to obtain a booklet A5 (+/- 148.5 mm width x 210 mm height). When folding, make sure you keep the good numbering when you turn the pages of the I/B. Don’t change the page numbering. Keep the language integrity. Retete de inghetata Aroma de vanilie 100g zahar - 250ml lapte - 250ml frisca - 2 oua - 1 pachet de zahar vanilat Bateti ouale impreuna cu zaharul pana cand amestecul devine spumos. Adaugati laptele si frisca, amestecati bine si turnati amestecul in containerul refrigerator. Aroma Malaga 200g zahar - 350ml lapte - 200ml frisca - 2 oua - 100g stafide - putin rom Spalati stafidele si lasati-le la macerat in rom (sufficient pentru a le acoperi). Bateti ouale impreuna cu zaharul, adaugati lapte si frisca, amestecati bine si turnati amestecul in containerul refrigerator. Cand inghetata este aproape gata, adaugati stafidele si o parte din romul utilizat. Aroma Alune 250g zahar - 400g lapte - 2 oua - 100g tableta de ciocolata - 50g de alone decojite - un strop de vanilie Rupeti ciocolata in fulgi mici si amestecati-le cu putin lapte si vanilie intr-un container; topiti-le intr-un bain-marie. Bateti ouale cu zaharul, adaugati laptele ramas si ciocolata topita (trebuie sa fie racita). Adaugati alunele fin maruntite, amestecati bine si turnati amestecul in containerul refrigerator. Aroma Lamaie 250g zahar - 300g lapte - 300g frisca - 4 lamai - 1.5 lingura de sirop de lamaie Stoarceti lamaile si turnati sucul in zaharul si siropul de lamiae, amestecati si apoi adaugati restul ingredientelor. Bateti bine in asa fel incat amestecul devine dens si uniform si turnati amestecul in containerul refrigerator. Aroma Banane 150g zahar - 150ml lapte - 300g (net) de pulpa de banana – putin suc de lamaie Cojiti bananele si feliati-le; adaugati sucul de lamiae si zaharul. Omogenizati, adaugati laptele, amestecati bine si turnati totul in containerul de refrigerare. Aroma de ciocolata 200g zahar - 400ml lapte - 200ml frisca - 2 oua - 100g tableta ciocolata Rupeti ciocolata in fulgi mici si amestecati-le cu putin lapte si vanilie intr-un container; topiti-le intr-un bain-marie. Bateti ouale cu zaharul, adaugati laptele ramas si ciocolata topita (trebuie sa fie racita),amestecati bine si turnati amestecul in containerul refrigerator. Aroma de coacaze 200g zahar - 250g frisca - 400g coacaze congelate - ½ lamaie Dezghetati coacazele la temperature camerei si lasati-le in siropul rezultat, adaugati sucul de lamiae, frisca si zaharul. Amestecati ingredientele bine pana cand capata consistent si turnati amestecul in containerul refrigerator. Aroma Capsuni 150g zahar - 250ml lapte - 200g frisca - 1 ou - 300g capsuni coapte Bateti ouale cu zaharul, adaugati capsunile taiate in bucati mici si celelalte ingredient. Amestecati bine si turnati amestecul in containerul refrigerator. Aroma Nuci 200g zahar - 300ml lapte - 200ml frisca - 2 oua - 100g nuci (miez) - 2 linguri de licior de nuci 53 Assembly page 53/64 TKG ICE 1 - 120829 Fax +32 2 359 95 50 Copies of the I/B. Please reproduce them without any changes except under special instruction from Team International BELGIUM. The pages must be reproduced and folded in order to obtain a booklet A5 (+/- 148.5 mm width x 210 mm height). When folding, make sure you keep the good numbering when you turn the pages of the I/B. Don’t change the page numbering. Keep the language integrity. Maruntiti nucile, adaugati zaharul si ouale si bateti-le pana cand amestecul devine ferm. Adaugati celelalte ingredient, amestecati bine si turnati amestecul in containerul refrigerator. Inghetate cu lichior si bauturi racoritoare Retetele cu alcool au nevoie de 10 – 15 minute mai mult pentru a se prepara decat inghetata. Aroma Sampanie 125g zahar - 300ml frisca - 400ml sampanie sau vin spumos Dizolvati zaharul in sampanie, adaugati frisca si turnati in container. Aroma Menta 100g zahar - 250ml lapte - 250ml frisca - 250ml lichior de menta - 1 + ½ suc lamaie Adaugati sucul de lamaie cu zahar, amestecati-le cat de bine puteti. Adaugati celelalte ingrediente, amestecati bine si turnati in container. Aroma Whisky 100g zahar - 250ml lapte - 300ml frisca - 1 ou – 85ml whisky - 1 varf de cutit de coaja de lamaie rasa Bateti ouale impreuna cu zaharul, adaugati lamaia rasa (pentru aroma), laptele, frisca si lichiorul, amestecati bine si turnati continutul in container. Aroma Lamaie 100g zahar - 450ml lapte - 300ml sirop de citrice Amestecati zaharul cu laptele, adaugati siropul de citric, amestecati bine si turnati in container. Retete Serbet Retetele cu alcool au nevoie de 10 – 15 minute mai mult pentru preparare decat inghetata. Recomandam scoaterea din containerul refrigerator in momentul servirii pentru ca se topesc rapid. Aroma Sampanie 100g zahar – o sticla de sampanie sau vin spumos Dizolvati zaharul in sampanie si apoi turnati continutul in containerul refrigerator. Aroma Coniac 100g zahar - 400ml apa - 3 lamai - 180ml coniac Adaugati sucul a 3 lamai impreuna cu ingredientele, amestecati bine si turnati in containerul refrigerator. Aroma Capsuni 150g zahar - 400g capsuni - 1 lamaie - 2 linguri sirop de rodie Taiati capsunile; turnati sucul de lamaie si celelalte ingrediente. Amestecati continutul bine si turnati-l in containerul refrigerator. Aroma Piersici 150g zahar - 400g pula piersica - 1 lamaie Taiati pula de piersica; turnati cusul de lamiae si zaharul. Amestecati continutul bine si turnati-l in containerul refrigerator. Aroma Caise 150g zahar - 400g pulpa caisa - 1 lamaie - 2 linguri de coniac de caise 54 Assembly page 54/64 TKG ICE 1 - 120829 Fax +32 2 359 95 50 Copies of the I/B. Please reproduce them without any changes except under special instruction from Team International BELGIUM. The pages must be reproduced and folded in order to obtain a booklet A5 (+/- 148.5 mm width x 210 mm height). When folding, make sure you keep the good numbering when you turn the pages of the I/B. Don’t change the page numbering. Keep the language integrity. Taiati pulpa de caisal turnati sucul de lamiae si zaharul. Amestecati continutul bine si turnati-l in containerul refrigerator. Aroma Banane 150g zahar - 450g pulpa banana - 350ml vodca - 1 lamaie - un varf de cutit de vanilie Taiati bnanele; turnati sucul de lamaie si celelalte ingrediente. Amestecati continutul bine si turnati-l in containerul refrigerator. Aroma Pepene galben 150g zahar - 400g pulpa pepene galben - 1 lamaie - un pahar de coniac Taiati pulpa de pepene; turnati sucul de lamiae si celelalte ingredient. Amestecati continutul bine si turnati-l in containerul refrigerator. PROTECTIA MEDIULUI – DIRECTIVA 2002/96/EC Simbolul de pe tăbliţa cu datele tehnice înseamnă că produsul nu se poate arunca împreună cu alte reziduuri menajere. Legea pedepseşte cu amendă persoanele care aruncă aparatele electrice şi electronice împreună cu alte reziduuri. Debarasarea corespunzătoare a produselor uzate previne formarea unor efecte negative pentru mediul natural şi sănătatea umană, care pot fi produse de manipularea nepotrivită a reziduurilor rămase din uzarea aparatelor electronice. 55 Assembly page 55/64 TKG ICE 1 - 120829 Fax +32 2 359 95 50 Copies of the I/B. Please reproduce them without any changes except under special instruction from Team International BELGIUM. The pages must be reproduced and folded in order to obtain a booklet A5 (+/- 148.5 mm width x 210 mm height). When folding, make sure you keep the good numbering when you turn the pages of the I/B. Don’t change the page numbering. Keep the language integrity. POKYNY NA OBSLUHU DÔLEŽITÉ BEZPEČNOSTNÉ UPOZORNENIA Pred používaním zariadenia si pozorne prečítajte tieto pokyny, a vždy dodržujte bezpečnostné a prevádzkové pokyny v návode. Dôležité: Osoby (vrátane detí), ktoré nie sú schopné používať zariadenie bezpečným spôsobom kvôli fyzickým, zmyslovým alebo duševným schopnostiam alebo kvôli nedostatku skúseností alebo vedomostí, nesmú nikdy používať toto zariadenie, ak nie sú pod dohľadom osoby zodpovednej za ich bezpečnosť alebo ak predtým nedostali pokyny týkajúce sa bezpečného používania zariadenia. Na deti je potrebné dôsledne dohliadať, aby nepoužívali toto zariadenie ako hračku. Skontrolujte, či sa napätie v elektrickej sieti zhoduje s napätím uvedeným na zariadení. Zariadenie nikdy nenechávajte bez dozoru, keď sa používa. Z času na čas skontrolujte, či kábel nie je poškodený. Zariadenie nikdy nepoužívajte, ak kábel alebo samotné zariadenie vykazujú akékoľvek príznaky poškodenia. Všetky opravy by mal vykonávať kompetentný, kvalifikovaný elektrikár(*) aby sa predišlo nebezpečenstvu. Zariadenie používajte iba na domáce účely a spôsobom, aký je uvedený v týchto pokynoch. Zariadenie nikdy a zo žiadneho dôvodu neponárajte do vody alebo do akejkoľvek kvapaliny. Zariadenie nikdy nevkladajte do umývačky riadu. Zariadenie nikdy nepoužívajte v blízkosti horúcich plôch. Zariadenie vždy pred čistením alebo uskladnením odpojte od elektrického napájania. Keď je zariadenie v prevádzke, pohyblivé časti sú nebezpečné. Aby ste sa vyhli poškriabaniu alebo iným poraneniam, rešpektujte tieto upozornenia: S chladiacou nádobou manipulujte iba v rukaviciach alebo pri použití inej ochrany, aby ste sa vyhli studeným „popáleninám“ pri zamrznutí. Používajte iba dodané komponenty. Keď je zariadenie v prevádzke, nedotýkajte sa k nemu pripojeného príslušenstva. Nezastavujte otáčanie lopatiek alebo pohyblivých častí; nechajte ich ponorené v nádobe, kým sa zotrvačnosťou samy neprestanú otáčať. Dávajte pozor, aby teleso motora neprišlo do styku s vodou alebo inými kvapalinami; ihneď vytiahnite zástrčku z elektrickej zásuvky, dôkladne ju vysušte a skontrolujte, či kvapalina nevnikla do telesa motora: ak máte pochybnosti, kontaktujte profesionálnych kvalifikovaných opravárov. Zariadenie nikdy nepoužívajte vonku a vždy ho umiestňujte do suchého prostredia. Nikdy nepoužívajte príslušenstvo, ktoré neodporúča výrobca. Môže predstavovať nebezpečenstvo pre používateľa a riziko poškodenia spotrebiča. Zariadenie nikdy nepremiestňujte ťahaním za kábel. Postavte zariadenie na stôl alebo na rovný povrch. Ubezpečte sa, že kábel sa žiadnym spôsobom nemôže niekde zachytiť. Neomotávajte kábel okolo zariadenia ani ho nezohýbajte. Keď je zariadenie v prevádzke, udržiavajte svoje ruky, vlasy a akékoľvek príslušenstvo mimo dosahu nádoby, aby ste zabránili kontaktu a zachyteniu v otáčajúcich sa častiach. Neumiestňujte výrobník zmrzliny do chladničky alebo do mrazničky: na tento účel je vhodná iba chladiaca nádoba. Nechytajte chladiacu nádobu holými rukami. Chráňte si ruky pomocou plastového vrecka alebo rukavíc: kontakt s pokožkou môže spôsobiť čiastočné "popáleniny". Nikdy sa nepokúšajte otvoriť chladiacu nádobu: ak z nej vytečie akákoľvek kvapalina, kontaktujte profesionálnych kvalifikovaných opravárov. V prípade straty kvapaliny zariadenia: zariadenie nepoužívajte a nejedzte zmrzlinu, ak je kontaminovaná. 56 Assembly page 56/64 TKG ICE 1 - 120829 Fax +32 2 359 95 50 Copies of the I/B. Please reproduce them without any changes except under special instruction from Team International BELGIUM. The pages must be reproduced and folded in order to obtain a booklet A5 (+/- 148.5 mm width x 210 mm height). When folding, make sure you keep the good numbering when you turn the pages of the I/B. Don’t change the page numbering. Keep the language integrity. Nedotýkajte sa zariadenia mokrými rukami alebo nohami. Nehýbte so zariadením, keď je v prevádzke. Nepoužívajte zariadenie na miešanie vrelých tekutín. V prípade poruchy alebo chybnej prevádzky zariadenie vypnite a dajte ho skontrolovať kompetentnému kvalifikovanému elektrikárovi (*). (*) Kompetentný kvalifikovaný elektrikár: popredajné oddelenie výrobcu alebo dovozca alebo akákoľvek osoba, ktorá je kvalifikovaná, schválená a kompetentná na vykonávanie takýchto opráv s cieľom predchádzania akýmkoľvek nebezpečenstvám. V každom prípade by ste mali vrátiť zariadenie takémuto elektrikárovi. PREVÁDZKA Pred prvým použitím umyte chladiacu nádobu, veko, lopatku a hriadeľ mydlovou vodou a dôkladne ich opláchnite (teplota vody nesmie prekročiť 40°C): pred použitím ich dôkladne osušte. Zmrzlina je citlivá na baktérie: vždy, keď budete používať výrobník zmrzliny, skontrolujte, či sú diely veľmi čisté a suché. Neponárajte teleso motora do vody ani do iných kvapalín; očistite ho mierne navlhčenou handričkou. Teleso motora obsahuje spínač: jeho prepínaním medzi polohami 0-I (Zap./Vyp.) môžete motor zapnúť alebo vypnúť. Všetky diely príslušenstva (veko, hriadeľ, lopatka) zapadajú zapadajú do telesa motora: pred použitím sa ubezpečte, že sú dobre pripevnené. Najskôr spojte jednotku motora s vekom (pozri stranu 2) a ubezpečte sa, že kolíky na jednotke motora zapadajú do štrbín vo veku. Potom vložte hriadeľ do lopatky a tento celok do otvoru na jednotke motora. Po použití rozoberte všetko príslušenstvo. Najskôr demontujte hriadeľ a lopatku, potom jemným zatlačením na kolíky jednotky motora oddeľte jednotku od veka. Ak chcete nasadiť veko na nádobu, položte ho na mraziacu misku tak, aby jazýčky zapadali do štrbiny na miske a otočte veko v smere hodinových ručičiek. Skontrolujte, či koniec lopatky končí v otvore v spodnej časti misky. Ak chcete veko odmontovať, postupujte opačne. Zmrazenie chladiacej nádoby Skontrolujte, či mraznička dosiahne teplotu -18°C a nastavte termostat tak, aby bola táto teplota zaručená. Zmrzlina sa nedá vyrobiť, ak sa nedosiahne táto teplota. Vložte nádobu do plastového vrecka, aby ste sa chránili pred studenými "popáleninami" a aby ste zabránili tvorbe ľadu vedľa upevňovacích háčikov. Položte nádobu do najstudenšieho priestoru mrazničky a ubezpečte sa, že: - Je vo vertikálnej polohe, najmä však že nie je prevrátená zhora nadol - Po všetkých stranách je dostatok voľného miesta - V nádobe nič nie je. V závislosti od množstva zmrzliny a teploty mrazničky nechajte nádobu v mrazničke na 10 alebo 12 hodín, inými slovami podľa množstva zmrzliny na prípravu (500 g alebo 1000 g) a podľa teploty (-18°C alebo ešte menej). Skontrolujte, či je chladiaca kvapalina v nádobe zamrznutá: musí byť úplne pevná. Ak budete vždy uchovávať nádobu v mrazničke, dá sa použiť vždy v prípade potreby bez čakania na zamrznutie chladiacej kvapaliny. 57 Assembly page 57/64 TKG ICE 1 - 120829 Fax +32 2 359 95 50 Copies of the I/B. Please reproduce them without any changes except under special instruction from Team International BELGIUM. The pages must be reproduced and folded in order to obtain a booklet A5 (+/- 148.5 mm width x 210 mm height). When folding, make sure you keep the good numbering when you turn the pages of the I/B. Don’t change the page numbering. Keep the language integrity. Príprava zmrzliny Pri príprave zmrzlinových zmesí postupujte podľa nasledovných receptov. Dajú sa použiť všetky recepty za podmienky, že neobsahujú viac ako 0,6 litra prísad. Počas prípravy musí byť teplota v miestnosti nižšia ako 25°C: v opačnom prípade sa nedá zaručiť optimálny výsledok. 1. Pred vybratím nádoby z mrazničky pripravte zmrzlinovú zmes v miske s jazýčkom, aby sa všetka zmes vyliala do chladiacej nádoby. Dajte zmes ochladnúť do chladničky. 2. Vyberte chladiacu nádobu z mrazničky (použite rukavice alebo utierku, aby ste sa vyhli studeným "popáleninám") a položte ju na stabilnú plochu. Nádoba by sa mala použiť ihneď po vybratí z mrazničky. 3. Zmontujte veko, jednotku motora, hriadeľ a lopatku (pozrite si odsek "PREVÁDZKA"). Upevnite veko na mraziacej miske. 4. Zasuňte zásuvku do zástrčky a tlačidlo 0/I prepnite do polohy "I", aby sa lopatka začala otáčať. Ihneď potom pomaly nalejte zmrzlinovú zmes do nádoby cez otvor vo veku tak, aby ste neobliali a neomočili motor: zmes nesmie prevyšovať polovicu objemu nádoby. Miešajte približne 40 – 60 minút: čas závisí od požadovanej konzistencie (čím dlhší čas, tým viac zamrznutý bude výrobok). Pamätajte si, že domáca zmrzlina nemá rovnakú konzistenciu ako zmrzlina z obchodu, v skutočnosti je mäkšia. 5. Počas prípravy môžete pridať malé úlomky čokolády, hrozienka alebo iné prísady. Alkoholické nápoje sa pridávajú takmer na konci (spomaľujú chladenie). 6. Na konci zariadenie vypnite pomocou vypínača, vytiahnite zástrčku zo zásuvky, otočte veko proti smeru hodinových ručičiek a zdvihnite ho z misky. Ak chcete podávať chladný dezert, vyberte ho pomocou gumenej lopatky alebo drevenej lyžice (nepoužívajte kovové predmety). Ihneď podávajte. 7. Zmrzlinu môžete nakrátko nechať v nádobe, aby stvrdla v mrazničke (nie dlhšie ako 30 minút). Na dlhodobé mrazenie odporúčame použiť nádobu s vekom (na stvrdnutie zmrzliny je potrebných niekoľko hodín v mrazničke). Doba skladovateľnosti je 1 alebo 2 týždne. Táto doba závisí od toho, či použité prísady sú "prírodné" alebo "napoly pripravené". ČISTENIE A ÚDRŽBA Zariadenie pred čistením vypnite; vytiahnite zástrčku z elektrickej zásuvky. Je dôležité, aby sa nádoba a všetky komponenty dôkladne umyli ihneď po použití, aby sa predišlo vzniku baktérií alebo nepríjemných pachov. Pri čistení nádoby, lopatky, veka a kolíka používajte vodu s normálnym čistiacim prostriedkom na riad a umývajte pomocou mäkkej špongie (nepoužívajte kovové drôtenky alebo abrazívne výrobky). Dôkladne opláchnite a úplne vysušte. Teplota vody nesmie prekročiť 40°C. Očistite teleso mäkkou, mierne navlhčenou handričkou; nepoužívajte abrazívne alebo korozívne produkty. Pravidelne kontrolujte, či elektrický kábel nie je poškodený. Na jeho výmenu je potrebný špeciálny nástroj: ohľadom akýchkoľvek potrebných opráv kontaktujte autorizované asistenčné centrum. Ak sa rozhodnete nepoužívať zariadenie, odporúčame, aby ste ho znefunkčnili odrezaním napájacieho kábla (najskôr sa však ubezpečte, že zástrčka je vytiahnutá z elektrickej zásuvky). Taktiež zabezpečte, aby diely, ktoré sú nebezpečné, keď sa s nimi hrajú deti (napríklad chladiaca nádoba), nepredstavovali nebezpečenstvo. 58 Assembly page 58/64 TKG ICE 1 - 120829 Fax +32 2 359 95 50 Copies of the I/B. Please reproduce them without any changes except under special instruction from Team International BELGIUM. The pages must be reproduced and folded in order to obtain a booklet A5 (+/- 148.5 mm width x 210 mm height). When folding, make sure you keep the good numbering when you turn the pages of the I/B. Don’t change the page numbering. Keep the language integrity. Recepty na prípravu zmrzliny Vanilková príchuť 250 g cukru – 350 ml mlieka – 200 ml smotany – 5 žĺtkov Vyšľahajte žĺtky spolu s cukrom, až kým nebudú ľahké a penové. Pridajte mlieko a smotanu, dobre zamiešajte a nalejte zmes do chladiacej nádoby. Príchuť malaga 200 g cukru – 350 ml mlieka – 200 ml smotany – 2 vajcia – 100 g hrozienok – trochu rumu Premyte hrozienka a namočte ich do rumu (tak, aby boli zaliate). Vyšľahajte vajcia s cukrom, pridajte mlieko a smotanu, dobre zamiešajte a nalejte zmes do chladiacej nádoby. Keď je zmrzlina takmer pripravená, pridajte suché hrozienka a časť použitého rumu. Lieskovcová príchuť 250 g cukru – 400 g mlieka – 2 vajcia – 100 g horkej čokolády – 50 g olúpaných a očistených lieskových orechov – štipka vanilínu Rozdrvte čokoládu na malé vločky a zmiešajte ju s trochou mlieka a vanilínu v nádobe; rozpustite v horúcom kúpeli na ohrievanie jedál. Vyšľahajte vajcia s cukrom, pridajte zvyšné mlieko a roztopenú čokoládu (musí byť ochladená). Pridajte lieskové orechy pokrájané na drobné kúsky, dobre zamiešajte a nalejte zmes do chladiacej nádoby. Citrónová príchuť 250 g cukru – 300 g mlieka – 300 g smotany – 4 citróny – 1,5 PL citrónového sirupu Vytlačte citróny a šťavu nalejte na cukor a citrónový sirup, zamiešajte a potom pridajte ostatné prísady. Dobre vyšľahajte, aby bola zmes hustá a rovnomerná a všetko vylejte do chladiacej nádoby. Banánová príchuť 150 g cukru – 150 ml mlieka – 300 g (čistej) banánovej dužiny – trochu citrónovej šťavy Olúpte banány prepoľte ich na kusy; pridajte citrónovú šťavu a cukor. Zmiešajte dokopy, pridajte mlieko, dobre zamiešajte a všetko nalejte do chladiacej nádoby. Čokoládová príchuť 200 g cukru – 400 ml mlieka – 200 ml smotany – 2 vajcia – 100 g horkej čokolády Rozdrvte čokoládu na malé vločky a zmiešajte ju s trochou mlieka a vanilínu v nádobe; rozpustite v horúcom kúpeli na ohrievanie jedál. Vyšľahajte vajcia s cukrom, pridajte zvyšnú roztopenú čokoládu (musí byť ochladnutá), dobre zamiešajte a nalejte zmes do chladiacej nádoby. Borievková príchuť 200 g cukru – 250 g smotany – 400 g mrazených borievok – ½ citrónu Rozmrazte borievky pri izbovej teplote a nechajte ich vo vzniknutej šťave, pridajte citrónovú šťavu, smotanu a cukor. Prísady dobre zmiešajte, kým nenadobudnú konzistenciu a nalejte zmes do chladiacej nádoby. Jahodová príchuť 150 g cukru – 250 ml mlieka – 200 g smotany – 1 vajce – 300 g zrelých jahôd Vyšľahajte vajcia s cukrom, pridajte jahody pokrájané na malé kúsky a ostatné prísady. Dobre zamiešajte a nalejte zmes do chladiacej nádoby. 59 Assembly page 59/64 TKG ICE 1 - 120829 Fax +32 2 359 95 50 Copies of the I/B. Please reproduce them without any changes except under special instruction from Team International BELGIUM. The pages must be reproduced and folded in order to obtain a booklet A5 (+/- 148.5 mm width x 210 mm height). When folding, make sure you keep the good numbering when you turn the pages of the I/B. Don’t change the page numbering. Keep the language integrity. Orechová príchuť 200 g cukru – 300 ml mlieka – 200 ml smotany – 2 vajcia – 100 g vlašských orechov (jadier) – 2 PL orechového likéru Nasekajte orechy, pridajte cukor a vajcia a vyšľahajte, kým zmes nebude pevná. Pridajte ostatné prísady, zmes dobre zamiešajte a nalejte do chladiacej nádoby. Zmrzliny s alkoholom a nealkoholické nápoje Príprava receptov s alkoholom trvá o 10 – 15 minút dlhšie ako príprava zmrzliny. Príchuť šampanského 125 g cukru – 300 ml smotany – 400 ml šampanského alebo suchého vína Rozpustite cukor v šampanskom, pridajte smotanu a nalejte zmes do nádoby. Mätová príchuť 100 g cukru – 250 ml mlieka – 250 ml smotany – 250 ml mätového likéru – 1 + ½ citrónovej šťavy Do cukru pridajte citrónovú šťavu a čo najlepšie zmiešajte. Pridajte ostatné prísady, zmes dobre zamiešajte a nalejte do nádoby. Príchuť whisky 100 g cukru – 250 ml mlieka – 300 ml smotany – 1 vajce – 85 ml whisky – 1 štipka nastrúhanej citrónovej kôry Vyšľahajte vajce s cukrom, pridajte citrónovú kôru (pre chuť), mlieko, smotanu a likér, zmes dobre zamiešajte a nalejte do nádoby. Citrónová príchuť 100 g cukru – 450 ml mlieka – 300 ml citrónového sirupu Zmiešajte cukor s mliekom, pridajte citrónový sirup, zmes dobre zamiešajte a nalejte do nádoby. Chop orechy, cukor, pridáme vajcia a zmes poraziť do hladka. Zvyšok prísad v úzkych, zmes sa mieša dobre a naliať do nádrže studenej. Recepty na sorbet Príprava receptov s alkoholom trvá o 10 – 15 minút dlhšie ako príprava zmrzliny. Odporúčame vytiahnuť ich z chladiacej nádoby tesne pred podávaním, pretože sa rýchlo roztápajú. Príchuť šampanského 100 g cukru – fľaša šampanského alebo suchého vína Rozpustite cukor v šampanskom a nalejte do chladiacej nádoby. Príchuť brandy 100 g cukru – 400 ml vody – 3 citróny – 180 ml brandy K prísadám pridajte šťavu z 3 citrónov, zmes dobre zamiešajte a nalejte do chladiacej nádoby. Jahodová príchuť 150 g cukru – 400 g jahôd – 1 citrón – 2 PL sirupu z granátového jablka Nakrájajte jahody na kocky; pridajte citrónovú šťavu a ostatné prísady. Zmes dobre zamiešajte a nalejte do chladiacej nádoby. Broskyňová príchuť 150 g cukru – 400 g broskyňovej dužiny – 1 citrón Nakrájajte broskyňovú dužinu na kocky; pridajte citrónovú šťavu a cukor. Zmes dobre zamiešajte a nalejte do chladiacej nádoby. 60 Assembly page 60/64 TKG ICE 1 - 120829 Fax +32 2 359 95 50 Copies of the I/B. Please reproduce them without any changes except under special instruction from Team International BELGIUM. The pages must be reproduced and folded in order to obtain a booklet A5 (+/- 148.5 mm width x 210 mm height). When folding, make sure you keep the good numbering when you turn the pages of the I/B. Don’t change the page numbering. Keep the language integrity. Marhuľová príchuť 150 g cukru – 400 g marhuľovej dužiny – 1 citrón – 2 PL marhuľového brandy Nakrájajte marhuľovú dužinu na kocky; pridajte citrónovú šťavu a cukor. Zmes dobre zamiešajte a nalejte do chladiacej nádoby. Banánová príchuť 150 g cukru – 450 g banánovej dužiny – 350 ml vodky – 1 citrón – jedna štipka vanilínu Nakrájajte banány na kocky; pridajte citrónovú šťavu a ostatné prísady. Zmes dobre zamiešajte a nalejte do chladiacej nádoby. Melónová príchuť 150 g cukru – 400 g melónovej dužiny – 1 citrón – jeden pohárik brandy Nakrájajte melónovú dužinu na kocky; pridajte citrónovú šťavu a ostatné prísady. Zmes dobre zamiešajte a nalejte do chladiacej nádoby. OCHRANA ŽIVOTNÉHO PROSTREDIA – SMERNICA 2002/96/ES Kvôli ochrane nášho životného prostredia a ľudského zdravia by sa mal odpad z elektrických a elektronických zariadení likvidovať v súlade so špecifickými pravidlami so zapojením sa dodávateľov aj používateľov. Z tohto dôvodu, ako signalizuje symbol na štítku s menovitými údajmi alebo na obale, by ste toto zariadenie nemali vyhadzovať spolu s netriedeným komunálnym odpadom. Používateľ má právo priniesť výrobok na zberné miesto komunálneho odpadu, ktoré vykonáva recykláciu odpadu prostredníctvom opätovného použitia, recyklácie alebo použitia na iné účely v súlade so smernicou. 61 Assembly page 61/64 TKG ICE 1 - 120829 Fax +32 2 359 95 50 Copies of the I/B. Please reproduce them without any changes except under special instruction from Team International BELGIUM. The pages must be reproduced and folded in order to obtain a booklet A5 (+/- 148.5 mm width x 210 mm height). When folding, make sure you keep the good numbering when you turn the pages of the I/B. Don’t change the page numbering. Keep the language integrity. Návod na použitie, záručné vyhlásenie a servis Vážený zákazník, aby Vám Váš elektrospotrebič slúžil čo najlepšie, pozorne si pred jeho prvým uvedením do prevádzky prečítajte celý návod na použitie.Tento elektrospotrebič bol riadne preskúšaný. Predávajúci Vám poskytuje záručnú dobu v trvaní 2 rokov od dátumu jeho zakúpenia. V tejto dobe odstránime bezplatne všetky závady a nedostatky, ktoré podstatne obmedzujú jeho funkciu a ktoré prekázateľne vznikli vadou materiálu alebo nedostatkami pri výrobe. Závady odstránime podľa nášho uváženia opravou alebo výmenou vadnej časti prístroja. Záruka sa nevzťahuje na závady spôsobené nedodržaním návodu na použitie,nesprávnym zapojením, neprimeraným zaobchádzaním, normálnym opotrebovaním a na nedostatky, ktoré sú pre vlastnú funkciu prístroja nepodstatné a vznikli napríklad na krehkých dieloch elektrospotrebiča, napr.ľahko rozbitné diely zo skla, umelých hmôt a žiarovky. Záruka stráca platnosť zásahom do prístroja inou osobou, ako osobou nami poverenou servisom. Ak sa vyskytne na Vašom prístroji závada, zašlite alebo odovzdajte elektrospotrebič s kompletným príslušenstvom s uvedením Vašej adresy a tel. čísla a popisom závady na adresu servisu. Oprava v záručnej dobe Vám bude vykonaná bezplatne iba vtedy, ak priložíte k spotrebiču doklad o zakúpení prístroja (pokladničný blok, faktúra) a toto záručné vyhlásenie, kde sú servisné záznamy. Nárok na záruku zaniká, ak je porucha spôsobená: - mechanickým poškodením (vrátane poškodenia v priebehu prepravy), - nešetrným a nesprávnym používaním v nesúlade s návodom, nepozornosťou, znečistením a zanedbanou údržbou, - vonkajšou udalosťou (prepätie v sieti, živelná pohroma a pod.), - pripojením výrobku na iné sieťové napätie, aké je preň určené, - pri nepredložení originálneho dokladu o zakúpení. Nárok zaniká takisto v prípade, keď ktokoľvek vykonal modifikácie alebo adaptácie na rozšírenie funkcií výrobku oproti zakúpenému vyhotoveniu alebo kvôli možnosti jeho prevádzkovania v inej krajine, ako pre ktorú bol navrhnutý. Nárok nebude uznaný na časti, podliehajúce bežnému opotrebeniu, ktoré je v priebehu prevádzky nutné meniť kvôli správnej funkcii výrobku (napr. filtre, sáčky, gumové tesnenia, odvápňovacie tyčinky, batérie, žiarovky, obaly a pod.) Servisné záznamy: Dodávateľ výrobku pre Slovensko spol. s r.o. Centrum 1746 / 265, 017 01 Považská Bystrica, tel.: 042/4330791, fax: 042/4260610, www.brel.sk, [email protected] Organizácia poverená servisom výrobkov: Brel, spol. s r.o., Centrum 1746/265, 017 01 Považská Bystrica Tel.: 042/4340193, fax: 042/4260610, mobil: 0910/357277, [email protected], www.brel.sk 62 Assembly page 62/64 TKG ICE 1 - 120829 Fax +32 2 359 95 50 Copies of the I/B. Please reproduce them without any changes except under special instruction from Team International BELGIUM. The pages must be reproduced and folded in order to obtain a booklet A5 (+/- 148.5 mm width x 210 mm height). When folding, make sure you keep the good numbering when you turn the pages of the I/B. Don’t change the page numbering. Keep the language integrity. 63 Assembly page 63/64 TKG ICE 1 - 120829 Copies of the I/B. Please reproduce them without any changes except under special instruction from Team International BELGIUM. The pages must be reproduced and folded in order to obtain a booklet A5 (+/- 148.5 mm width x 210 mm height). When folding, make sure you keep the good numbering when you turn the pages of the I/B. Don’t change the page numbering. Keep the language integrity. Fax +32 2 359 95 50 TKG ICE 1 Deutsch 4 English 10 Français 16 Nederlands 22 Español 28 Português 34 Italiano 40 Polski 46 Română 50 Slovenský 56 Back cover page (last page) Assembly page 64/64