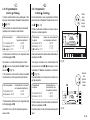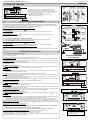
1
WIRELESS CHRONOTHERMOSTAT EQUIPPED WITH RADIO TRANSMITTER
CHRONOTHERMOSTAT SANS FILS AVEC TRANSMETTEUR RADIO
DRAHTLOSER ZEITTHERMOSTAT MIT FUNKÜBERTRAGUNG
CRONOTERMOSTATO SENZA FILI DOTATO DI TRASMETTITORE RADIO
CRONOTERMOSTATO SIN CABLES CON RADIOTRANSMISOR
EASY PROGRAM
Wall-mounting, Daily - Weekly
Winter / Summer , 2 temperature levels + antifreeze
Telephone programmer input
Montage en saillie, Journalier - Hebdomadaire
Hiver
/ Eté , 2 niveaux de température + antigel
Entrée pour télécommande téléphonique
Wandmontage, Täglich - Wöchentlich
Winter / Sommer , 2 Temperaturstufen + Frostschutz
mit Eingang für Telefonschaltung
Da parete, Giornaliero - Settimanale
Inverno
/ Estate , 2 livelli di temperatura + antigelo
Ingresso per programmatore telefonico
De pared, Día - Semanal
Invierno / Verano , 2 niveles de temperatura + antihielo
Entrada para mando telefónico
lm - DETXPE003
09/03
P-1
Index
ENGLISH
Index
FRANCAIS
Inhalt
DEUTSCH
Technical specifications and performances
Chap. 1 Note for contractor
Données techniques et performances
Chap. 1 - Instructions pour l'installateur
Technische Daten und Leistungsangaben
Kap. 1 - Anleitungen für den Installateur
1.1
1.2
1.3
1.4
1.5
1.1
1.2
1.3
1.4
1.5
1.1
1.2
1.3
1.4
1.5
-
Installation guidelines
Examples of installation
Installing the chronothermostat
Inserting or replacing batteries
Coupling the chronothermostat to the receiver
-
Indications et prescriptions pour l’installation
Exemples d’installation
Installation du chronothermostat
Insertion/remplacement des piles d’alimentation
Accouplement du chronothermostat au récepteur
-
Anleitungen und Vorschriften für die Installation
Installationsbeispiele
Installation des Zeitthermostats
Einsetzen und Auswechseln der Batterien
Angleichung des Zeitthermostats an den
Empfänger
Chap. 2 - User instructions
Chap. 2 - Mode d'emploi pour l'utilisateur
Kap. 2 - Bedienungsanleitung für Anwender
2.1
2.2
2.3
2.4
2.5
2.6
2.7
2.8
2.1
2.2
2.3
2.4
2.5
2.6
2.7
2.8
Légende des indications de l’afficheur
Légende des fonctions des touches
Programmation du chronothermostat
Programme libre P 5
Programmation de la demi-heure
Lecture des programmes insérés
Reset
Modification des températures Confort, Activité et
Economy
2.9 - Limitation des valeurs de température
programmables
2.10 - Programmation Eté - Hiver
2.11 - Changement de l’heure, des minutes, du jour de
la semaine - changement de l’heure d’été
2.12 - Fonctionnement en MANUEL
2.13 - Suspension du programme pour nettoyage
2.14 - Programme COUNT-DOWN - P 6
2.15 - Exclusion du chronothermostat
2.16 - Fonctionnement par télécommande téléphonique
2.17 - Différentiel de température
2.18 - Exclusion totale de la température antigel
2.19 - Trasmission de test pour vérifier la intensité
du signal
2.1
2.2
2.3
2.4
2.5
2.6
2.7
2.8
Chap. 3 - Prog. de fonctionnement fixes insérés
Kap. 3 - Programme universtellbarer funktionen
-
Key to display information
Key to button functions
Programming the chronothermostat
Free program P 5
Programming half-hours
Read programs
Reset
Changing Comfort, Working and Economy
temperatures
2.9 - Limiting settable temperature values
2.10 - Programming Summer - Winter
2.11 - Changing hour, minutes, day of the week Daylight saving/standard time
2.12 - Operation in MANUAL mode
2.13 - Suspension of program for room cleaning
2.14 - COUNT-DOWN program - P 6
2.15 - Exclusion of the chronothermostat
2.16 - Telephone programmer operating mode
2.17 - Temperature differential
2.18 - Total deselection of antifreeze temperature
2.19 - Test transmission to verify radio signal capacity
Chap. 3 - Fixed set programs
P-2
-
-
2.9 2.102.112.122.132.142.152.162.17 2.18 2.19 -
Auflistung der Anzeigen
Beschreibung der Tastenfunktionen
Programmierung des Zeitthermostats
Freies Programm P 5
Programmierung einer halben Stunde
Anzeige der eingegebenen Programme
Reset
Änderung der Temperaturen
Comfort, Betätigung und Economy
Begrenzungen für die einzugebenden
Temperaturwerte
Programmierung Sommer - Winter
Verstellen der Stunde, der Minuten, des Wochentags - Umstellung auf die Sommer-/Sonnenzeit
MANUELLER Betriebsmodus
Unterbrechung des Programms zur Reinigung
COUNT-DOWN-Programm - P 6
Ausschließung des Zeitthermostats
Betriebsmodus über Telefonschaltung
Temperaturdifferential
Totale Ausschließung der Frostschutztemperatur
Testübertragung zur Überprüfung der Funksignalreichweite
Indice
ITALIANO
Indice
ESPANOL
Chap. - Kap. - Cap.
Page - Seite - Pagina
Dati tecnici e prestazioni
Cap. 1 - Istruzioni per l’installatore
Datos técnicos y especificaciones
Cap. 1 - Instrucciones para el instalador
1
P-5÷P-9
P - 10
1.1
1.2
1.3
1.4
1.5
1.1
1.2
1.3
1.4
1.5
1.1
1.2
1.3
1.4
1.5
P - 10
P - 10
P - 12
P - 14
P - 16
- Indicazioni e prescrizioni per l’installazione
- Esempi d’installazione
- Installazione del cronotermostato
- Inserimento/sostituzione pile di alimentazione
- Abbinamento del cronotermostato al ricevitore
-
Normas para la instalación
Ejemplo de instalación
Instalación del cronotermostato
Introducción y sustitución de las pilas
Combinación del cronotermostato con el receptor
Cap. 2 - Istruzioni d'uso per l'utilizzatore
Cap. 2 - Instrucciones para el usuario
2
P - 18
2.1
2.2
2.3
2.4
2.5
2.6
2.7
2.8
- Legenda indicazioni display
- Legenda funzioni tasti
- Programmazione del cronotermostato
- Programma libero P 5
- Programmazione della mezz'ora
- Lettura dei programmi inseriti
- Reset
- Modifica delle temperature di Comfort, Attività e
di Economy
2.9 - Limitazione dei valori di temperatura impostabili
2.1
2.2
2.3
2.4
2.5
2.6
2.7
2.8
2.1
2.2
2.3
2.4
2.5
2.6
2.7
2.8
P - 18
P - 20
P - 22
P - 24
P - 28
P - 28
P - 30
P - 32
2.9
P - 34
2.10 - Programmazione: Estate - Inverno
2.11 - Cambio ora, minuti, giorno della
settimana - cambio ora legale/solare
2.12 - Funzionamento in MANUALE
2.13 - Sospensione del programma per pulizie
2.14 - Programma COUNT-DOWN - P 6
2.15 - Esclusione del cronotermostato
2.16 - Funzionamento con programmatore telefonico
2.17 - Differenziale di temperatura
2.18 - Esclusione totale della temperatura antigelo
2.19 - Trasmissione di test per verifica dell'intensità del
segnale radio
2.10 2.11 -
2.10
2.11
P - 38
P - 40
2.12
2.13
2.14
2.15
2.16
2.17
P - 42
P - 44
P - 44
P - 48
P - 48
P - 52
2.18
2.19
P - 54
P - 56
Cap. 3 - Programmi di funzionamento fissi inseriti
Cap. 3 - Programas de funcionamiento fijos
3
P - 58
-
2.9 -
2.12
2.13
2.14
2.15
2.16
2.17
2.18
2.19
-
Indicaciones del display
Funciones de las teclas
Programación del cronotermostato
Programa libre P 5
Programación cada media hora
Lectura de los programas introducidos
Reinicialización (Reset)
Modificación de las temperaturas confort,
actividad y ahorro
Limitación de los valores de temperatura
programables
Programación: Verano - Invierno
Cambio de hora, minutos, día de la semana cambio de hora legal/solar
Funcionamiento MANUAL
Suspensión del programa durante la limpieza
Programa COUNT-DOWN - P 6
Exclusión del cronotermostato
Funcionamiento con programador telefónico
Diferencial de temperatura
Exclusión total de la temperatura antihielo
Transmisión de test para verificar la intensidad
de la señal de radio
P-3
Note - Notes - Anmerkungen - Note - Notas
GB
Important: for system modes and the operation of the wireless heat regulation system and for a correct installation, also
consult the specific receiver manual.
N.B.: the radio frequency waves emitted by the wireless timer-thermostat involve no health risks.
The manufacturer reserves the right to introduce any modification without prior notice.
F
Important: pour les modalités d’installation et de fonctionnement du système de réglage thermique sans fil et pour une
installation correcte, consulter également le manuel spécifique du récepteur.
N.B.: les ondes à fréquence radio émises par le chronothermostat sans fil ne nuisent pas à la santé.
Le constructeur se réserve le droit d’apporter sans preavis toutes modifications nécessaires.
D
Wichtig: Für die Modalitäten der Anlage und die Funktion des drahtlosen Temperaturregelungssystems sowie die korrekte
Installation beachten Sie bitte auch das spezifische Handbuch für den Empfänger.
HINWEIS: die vom drahtlosen Zeitthermostat ausgesandten Funkwellen sind für Menschen nicht gesundheitsgefährdend.
Der Hersteller behält sich Voranzeige verpflichtung die Genehmigung alle technische und kontstruktive Umängerungen, die er nötig hält einzufüheren.
I
Importante: per le modalità di impianto e di funzionamento del sistema di termoregolazione senza fili e per una corretta
installazione, consultare anche il manuale specifico del ricevitore.
N.B.: le onde a radiofrequenza emesse dal cronotermostato senza fili non comportano rischi per la salute delle persone.
Il costruttore si riserva di introdurre tutte le modifiche tecniche e costruttive che riterrà necessarie, senza obblighi di preavviso.
E
Importante: consultar el manual del receptor para instalar, utilizar y saber cómo funciona el sistema de termorregulación sin cables.
NOTA: las ondas de radiofrecuencia que emite el cronotermostato no implican riesgos para la salud de las personas.
El fabricante se reserva la facultad de aportar todos las modificaciones constructivas que considere necesarias sin previo aviso.
P-4
ENGLISH
Technical specifications
Supply voltage :
Command output:
Antenna:
Signal frequency (carrier):
Maximum signal capacity in free air:
Maximum signal capacity in the presence of walls:
Type of input from telephone programmer:
Wires section at terminals:
Insulation type:
Protection degree:
Pollution:
Operating temperature limits:
Storage temperature limits:
Battery life:
Time remaining from lighting off “Battery Low” symbol:
Addjustment temperature range:
Comfort-Economy
Anti-freeze
Setting temperature resolution:
Display temperature resolution:
Thermal gradient:
Differential operation:
Temperature refresh:
Reference standards:
(Direttives R&TTE 1999/5/CE)
Performance
2 x 1.5V alkaline battery - type AAA (LR03)
1.5 V 1050 mA/h
by radio (to a receiver actuator of the “Wireless heat
regulation” family)
integrated into the device
868,35 MHz
120 m
30 m (according to the chap. 1.1)
for contact normally open, voltage-free.
min. 0,75 mm2 ÷ max. 1.5 mm2
Class III
IP 30 / surface-mounted model
normal
-5 °C ÷ + 55 °C
-10 °C ÷ +65 °C
12 months approx.
15 days approx.
+5 °C to +39 °C (limitable)
+5 °C to +15 °C
0.5 °C
0.1 °C
max 1 °K/15 min.
T variable from 0.2 °C to 0,7 °C
once every 60 seconds
LVD
EN 60 950-1
EMC
EN 301 489-3
RADIO
EN 300 220-3
• Operation by program and manual (temporary or
permanent manual forcing).
• Suspension of heat regulation program for
environmental cleaning (max 3 hours).
• Total thermic regulation switch off.
• Day, hour and minutes change (e.g. daylight
saving time).
• Time or room temperature display.
• 4 fixed programs.
• One completely free program (P 5).
(minimum programmable time: 1/2 hour).
• A "count-down" program (P 6) that can be used
to suspend the program currently selected for a
set interval (max. = 999 h.).
• Error indication: temperature out of range,
probe failure.
• Possibility of total exclusion of the frost prevention
temperature (systems with anti-freeze liquid).
• Possibility of assignment to one or more receivers.
• Indication of the transmission of the radio signal
on the display.
• Easy coupling of the transmitter to the zone, with
self-learning.
• Transmission of “test” signal to verify the presence
and capacity of the signal.
• Transmission to the receiver of the status of an
almost dead battery.
• Operating safety is provided by the double
transmission of the information to the receiver.
P-5
FRANCAIS
Données techniques
Alimentation:
Sortie des commandes:
Antenne:
Fréquence du signal (porteuse):
Portée maximale du signal(à l’air libre:
Portée maximale du signal en présence d’obstacles:
Type d’entrée de programmateur téléphonique:
Section des fils aux bornes:
Type d’isolation:
Degré de protection:
Pollution:
Limites de la température de fonctionnement:
Limites de la température de stockage:
Autonomie de fonctionnement:
Autonomie de l’allumage sur l’afficheur
du symbole “Batterie déchargée”:
Champ réglage température:
Confort - Economie
Antigel
Résolution de l'établissement de la température:
Résolution de l'affichage de la température:
Gradient thermique:
Fonctionnement différentiel:
Actualisation de la température:
Normatives de référence:
(Direttives R&TTE 1999/5/CE)
P-6
Performances
2 x 1,5 V piles alcalines type AAA (LR03)
1,5 V 1050 mA/h
via radio (à récepteur/actionneur de la famille “Ré glage thermique sans fil”)
intégrée dans le dispositif
868,35 MHz
120 m
30 m (en accord avec le chap. 1.1)
pour contact normalement ouvert sans potentiel
min. 0,75 mm2 ÷ max. 1,5 mm2
Classe III
IP 30 / montage mural
normale
-5 °C ÷ + 55 °C
-10 °C ÷ + 65 °C
environ 12 mois
environ 15 jours
de +5 °C à +39 °C (limitable)
de +5 °C à +15 °C
0,5 °C
0,1 °C
max. 1 °K/15 min.
T modifiable de 0,2 °C à 0,7 °C
1 fois toutes les 60 secondes
LVD
EN 60 950-1
EMC
EN 301 489-3
RADIO
EN 300 220-3
• Fonctionnement programmé et manuel (forçage
manuel temporaire ou permanent).
• Suspension du programme de réglage thermique
pour le nettoyage environnemental (3 heures maxi)
• Arrêt total de la thermorégulation.
• Modification du jour, de l'heure et des minutes
(ex. changement de l’heure d’été).
• Visualisation heure ou température ambiante.
• 4 programmes fixes.
• Un programme (P 5) librement programmable
(temps minimum programmable: 1/2 heure).
• Programme (P 6), "count-down" de suspension
du programme en cours pendant une période de
temps programmée (max. = 999 heures).
• Signalisations d’erreur: hors plage de température, sonde en panne.
• Possibilité d’exclure complètement la température
antigel (systèmes avec fluide antigel).
• Possibilité d’affectation à un ou à plusieurs récepteurs.
• Indicateur sur l’afficheur de la transmission du signal radio.
• Accouplement facile du transmetteur à la zone par
autoapprentissage.
• Transmission du signal de “test” pour la vérification de la présence et de la portée du signal.
• Trasmission au récepteur de l’état de batterie sur
le point de s’épuiser.
• La sécurité de service du còntrole est garantie
par une double transmission des informations
au récepteur.
DEUTSCH
Technische Daten
Versorgung:
Befehlsausgang:
Antenne:
Trägerfrequenz:
Max. Reichweite des Signals im freien Raum:
Max. Reichweite des Signals bei vorhandenen Wänden:
Eingang vom Typ telefonische Programmierung:
Kabelquerschnitt für Klemmen:
Isolationsklasse:
Schutzart:
Verschmutzungsgrad:
Betriebstemperatur:
Lagherungstemperatur:
Betriebsdauer:
Betriebsdauer nach Einschalten auf Display
“Batterie entladen”:
Temperaturregelbereich:
Komfort - Economy
Frostschutz
Auflösung Temperaturskala:
Auflösung Temperaturnzeige:
Thermischer Gradient:
Differentialbetrieb:
Temperatur-Aktualisierung:
Bezugsnormen:
(Richtlinien R&TTE 1999/5/CE)
Leistungsangaben
2 Batterien Alkali-Stabbatterien 1,5 V:
Mod. AAA (LR03) 1,5 V 1050 mA/h
via Funk (mit Triebempfänger vom Typ “drahtlose
Temperaturregelung”)
im Gerät integriert
868,35 MHz
120 m
30 m (Gemäß der Kap. 1.1)
für normalerweise offenen Kontakt, potentialfrei.
min. 0,75 mm2 ÷ max. 1,5 mm2
Klasse III
IP 30 / Wandmontage
normal
-5 °C ÷ + 55 °C
-10 °C ÷ +65 °C
ca. 12 Monate
ca. 15 Täge
von +5 °C bis +39 °C (senkbar)
von +5 °C bis +15 °C
0,5 °C
0,1 °C
max. 1°K/15 Min.
T einstellbar von 0,2 °C auf 0,7 °C
alle 60 Sekunden
LVD
EN 60 950-1
EMC
EN 301 489-3
RADIO
EN 300 220-3
• Betriebsmodus Programmbetrieb oder manuell
(zeitlich begrenzte oder permanente manuelle Auslösung).
• Unterbrechung des Temperaturregelungsprogramms für Reinigungszwecke (max 3 Std.).
• vollkommene Ausschließung der Thermostateinstellung.
• Neueinstellung von Wochentag, Stunde und Minuten (z.B. bei Sommerzeit).
• Visualisierung der Uhrzeit / Raumtemperatur.
• 4 voreingestellte Programme.
• frei programmierbares Programm (P 5) (mindeste
programmierbare Zeitspanne: 1/2 Stunde).
• "Count-down"- Programm (P 6), welches das aktuelle Programm für eine eingegebene Zeit unterbricht (max. Vorgabezeit = 999 Stunden).
• Fehleranzeige: Uberschreitung der Temperaturgrenze, Beschädigung der Sonde.
• Möglichkeit der vollkommenen Ausschließung der
Frostschutztemperatur (Anlagen mit Frostschutzflüssigkeit).
• Möglichkeit der Zuweisung an einen oder mehrere
Empfänger.
• Anzeige der Funkübertragung auf dem Display.
• Einfache Angleichung des Senders an die Umgebung, mit Autoset.
• Übertragung des “test”-Signals zur Überprüfung
des Vorhandenseins und der Reichweite des Signals.
• Übertragung des Batteriestatus fast leer an den
Empfänger.
• Die Sicherheit bei der Ausführung wird durch die
zveifache übertragung der informationen an den
Empfänger gewänhrleistet.
P-7
ITALIANO
Dati tecnici
Alimentazione:
Uscita dei comandi:
Antenna:
Frequenza di trasmissione (portante):
Portata massima del segnale in aria libera:
Portata massima del segnale in presenza di pareti:
Tipo di ingresso da programmatore telefonico:
Sezione dei fili ai morsetti:
Tipo di isolamento:
Grado di protezione:
Polluzione:
Limiti della temperatura di funzionamento:
Limiti della temperatura di stoccaggio:
Autonomia di funzionamento:
Autonomia dall’accensione sul display
del simbolo di “Batteria scarica”:
Campo di regolazione temperature:
Comfort e Economy
Antigelo
Risoluzione dell’impostazione di temperatura:
Risoluzione della visualizzazione di temperatura:
Gradiente termico:
Funzionamento differenziale:
Aggiornamento visualizzazione temperatura:
Normative di riferimento:
(Direttiva R&TTE 1999/5/CE)
P-8
n. 2 batterie alcaline ministilo da 1,5 V
tipo AAA (LR03) 1,5 V 1050 mA/h
via radio (a ricevitore attuatore della
famiglia “Termoregolazione senza fili”)
integrata nel dispositivo
868,35 MHz
120 m
30 m (conformemente al capitolo 1.1)
per contatto normalmente aperto,
libero da potenziale
min. 0,75 mm2 ÷ max. 1,5 mm2
Classe III
IP 30 / montaggio a parete
normale
- 5 °C ÷ + 55 °C
- 10 °C ÷ + 65 °C
12 mesi circa
15 giorni circa
da + 5 °C a + 39 °C (limitabile)
da + 5 °C a + 15 °C
0,5 °C
0,1 °C
max 1 °K/15 min.
T modificabile da 0,2 °C a 0,7 °C
1 volta ogni 60 secondi
LVD
EN 60 950-1
EMC
EN 301 489-3
RADIO
EN 300 220-3
Dati prestazionali
• Funzionamento da programma e manuale
(forzatura manuale temporanea o permanente).
• Sospensione del programma di termoregolazione per pulizie ambientali (max 3 ore).
• Spegnimento totale della termoregolazione.
• Modifica del giorno, ora, minuti (es. ora legale).
• Visualizzazione delI’ora o temperatura ambiente.
• 4 programmi fissi.
• Un programma (P 5) liberamente programmabile,
(tempo minimo programmabile 1/2 ora).
• Programma (P 6) "count-down" per la sospensione del programma in corso per un periodo di
tempo impostato (max. 999 ore).
• Segnalazioni di errore: fuori campo di temperatura, sonda in avaria.
• Possibilità di esclusione totale della temperatura
antigelo (impianti con fluido antigelo).
• Possibilità di assegnazione a uno o più ricevitori.
• Indicazione sul display della trasmissione del
segnale radio.
• Facile abbinamento del trasmettitore alla zona,
con autoapprendimento.
• Trasmissione segnale di "test" per verifica della
presenza e portata del segnale.
• Trasmissione al ricevitore dello stato di batterie
quasi scariche.
• La sicurezza di esercizio è garantita da una doppia trasmissione delle informazioni al ricevitore.
ESPANOL
Datos técnicos
Alimentación:
Salida de los mandos:
Antena:
Frecuencia de transmission (portante):
Alcance máximo de la señal en espacios abiertos:
Alcance máximo de la señal con paredes:
Tipo de entrada desde programador telefónico:
Sección de los cables a los bornes:
Tipo de aislamiento:
Grado de protección:
Polución:
Límites de temperatura de funcionamiento:
Límites de temperatura de almacenaje:
Autonomía de funcionamiento:
Autonomía de funcionamiento desde la
aparición del icono “Batería descargada”:
Campo de regulación de la temperatura:
Comfort - Ahorro
Antihielo
Resolución de la fijación de temperatura:
Resolución de la temperatura visualizada:
Gradiente térmico:
Funcionamiento diferencial:
Actualización de la temperatura:
Normas de referencia:
(Direttiva R&TTE 1999/5/CE)
Especificaciones
2 pilas alcalinas de 1,5 V - mod. AAA (LR03)
1,5 V 1050 mA/h
por radio (con receptor/actuador de la familia “Termorregulación sin cables”)
integrada en el dispositivo
868,35 MHz
120 m
30 m (conformemente al capitolo 1.1)
contacto normalmente abierto, libre de potencial.
min. 0,75 mm2 ÷ máx.1,5 mm2
Clase III
IP 30 / montaje en pared
normal
-5 °C ÷ + 55 °C
-10 °C ÷ +65 °C
12 meses aproximadamente
15 diás aproximadamente
de +5 °C a +39 °C (limitable)
de +5 °C a +15 °C
0,5 °C
0,1 °C
máx. 1 °K/15 min.
T modificable de 0,2 °C a 0,7 °C
cada 60 segundos
LVD
EN 60 950-1
EMC
EN 301 489-3
RADIO
EN 300 220-3
• Funcionamiento programado o manual (forzamiento manual temporal o permanente).
• Suspensión del programa de termorregulación
durante la limpieza (máx. 3 horas).
• Desactivación de la termoregulación.
• Modificación del día, la hora y los minutos (por
ejemplo: hora legal).
• Visualización de la hora o la temperatura ambiente
• 4 programas fijos.
• Un programa (P 5) totalmente libre (tiempo
minimo programable 1/2 hora).
• Programa (P 6) con cuenta regresiva para suspender el programa que se está utilizando durante un tiempo programable (máx. 999 horas).
• Señalizaciónes des errores: fuera del campo de
temperatura, sonda averiada.
• Posibilidad de inhabilitar la temperatura antihielo
(instalaciones con líquido antihielo).
• Posibilidad de asignación a uno o varios receptores.
• Indicación en el display de la transmisión de la
señal de radio.
• Fácil combinación del transmisor con la zona.
Con autoaprendizaje.
• Transmisión de la señal “test” para verificar la
presencia y el alcance de la señal.
• Transmisión al receptor de la señal de batería
descargada.
• La seguridad del funcionamiento está garantizada por la doble transmisión de información al receptor.
P-9
GB
F
D
1 - NOTE FOR
CONTRACTOR
1 - INSTRUCTIONS POUR
L’INSTALLATEUR
1 - ANLEITUNGEN FÜR DEN
INSTALLATEUR
1.1 - Installation guidelines
1.1 - Indications et prescriptions pour
l’installation
1.1 - Anleitungen und Vorschriften für
die Installation
Important: installation and electrical connection of
devices and appliances must be carried out by skilled
people and in compliance with statutory regulations.
The manufacturer declines any liability regarding the
use of products subject to special environmental and/
or installation standards. Examples given in the manual are purely indicative.
Important: l’installation et le branchement électrique
des dispositifs et appareils doivent être effectués par
du personnel compétent et conformément aux normes et aux réglementations en vigueur. Le constructeur décline toute responsabilité en ce qui concerne l’utilisation de produits devant respecter des
normes particulières quant au milieu ambiant et/ou à
l’installation. Les exemples présentés dans cette documentation sont indicatifs.
Hinweis: Die Installation und der elektrische
Anschluss der Geräte müssen von qualifizierten Fachkräften im Einklang mit den geltenden Normen und
gesetzlichen Vorschriften ausgeführt werden. Der
Hersteller übernimmt keine Haftung für die Verwendung von Produkten, für die spezielle Einsatzbedingungen oder Installationsnormen gelten.
Die diesbezüglich angegebenen Beispiele entsprechen den gültigen Normen.
Install the chronothermostat 1.50 to 1.70 m from the
floor, well away from heat sources, air vents, doors or
windows and anything else that could affect its operation (fig. 1.i - fig. 2.i).
Si possible, installer le chronothermostat à 1,50 ÷ 1,70
m du sol et à bonne distance des sources de chaleur, des prises d’air, des portes ou des fenêtres et
de tout ce qui peut agir sur le fonctionnement (fig. 1.i
- fig 2.i).
Bringen Sie den Zeitthermostat möglichst in einer
Höhe von 1,50 ÷ 1,70 m, entfernt von Wärmequellen,
Luftzufuhrgittern, Fenstern und Türen und weiteren
den Betrieb des Gerätes beeinträchtigenden Gegenständen bzw. Umständen an (Abb. 1.i - Abb. 2.i).
Cabinets, walls and slabs containing metal can
limit the operation of the product.
With the support of the “test” (see heading 2.19)
function, it is possible to verify in advance the optimum position (of best signal reception) for installing
the timer-thermostat and receiver.
Armoires, murs et sols en matière métallique peuvent limiter le fonctionnement du produit.
Le support de la fonction “test” (voir paragraphe
2.19) permet de vérifier préalablement la position optimale (de meilleure réception du signal) d’installation du chronothermostat et du récepteur.
Wandschränke oder Metallplatten können die
Funktion des Gerätes einschränken.
Mit Hilfe der Funktion “test” (siehe Abschnitt 2.19)
kann präventiv die optimale Position (bester Empfang
des Signals) für die Installation des Zeitthermostats
und des Empfängers ermittelt werden.
1.2 - Example of installation
1.2 - Exemple d’installation
1.2 - Installationsbeispiele
Example of installation in a heating system with
wireless chronothermostat that controls a surfacemounted boiler (fig. 3.i).
Exemple d’installation dans un système de chauffage
avec chronothermostat sans fil qui commande la
chaudière murale (fig. 3.i).
Installationsbeispiel für eine Heizungsanlage mit
Drahtloser Zeitthermostat zur Steuerung des wandmontierten Durchlauferhitzers (Abb. 3.i).
P - 10
I
E
1 - ISTRUZIONI PER
L’INSTALLATORE
1 - INSTRUCCIONES PARA
EL INSTALADOR
1.1 - Indicazioni e prescrizioni per
l’installazione
1.1 - Normas para la instalación
Importante: l'installazione ed il collegamento elettrico dei dispositivi ed apparecchiature devono essere
eseguiti da personale qualificato ed in conformità alle
norme e leggi vigenti. Il costruttore non si assume
alcuna responsabilità per quanto concerne l'impiego
di prodotti che debbano seguire particolari norme di
ambiente e/o installazione. Gli esempi riportati nella
presente documentazione sono di principio.
Importante: La instalación y la conexión eléctrica de
los dispositivos y equipos deben ser realizadas por
personal calificado y conforme a las normas y leyes
en vigor. El fabricante no se asume ninguna responsabilidad en lo concerniente al uso de productos que
deban seguir especiales normativas ambientales y/o
de instalación. Los ejemplos que se dan en esta documentación son generales.
Installare preferibilmente il cronotermostato a quota
1,50 ÷ 1,70 m dal pavimento; lontano da sorgenti di
calore, prese d'aria, porte o finestre e da quanto possa influenzarne il funzionamento (fig. 1.i - fig. 2.i).
Instalar, en preferencia, el cronotermostato a 1,50 ÷
1,70 m del suelo, lejos de fuentes de calor,
respiraderos, puertas, ventanas u otros elementos que
puedan influir en el funcionamiento (fig. 1.i - fig. 2.i).
Armadi pareti o solette in materiale metallico possono limitare il funzionamento del prodotto.
Con il supporto della funzione “test” (vedi paragrafo 2.19) è possibile verificare preventivamente la posizione ottimale (di miglior ricezione del segnale) di
installazione del cronotermostato e del ricevitore.
Las paredes, las plataformas y los armarios metálicos pueden afectar el funcionamiento del dispositivo.
Con la función “test” (ver apartado 2.19) es posible
identificar la mejor posición de instalación del cronotermostato y del receptor para optimizar la recepción
de la señal.
1.2 - Esempio d’installazione
1.2 - Ejemplo de instalación
Esempio d’installazione, in impianto di riscaldamento, con cronotermostato senza fili che comanda la
caldaia murale (fig. 3i).
Ejemplo de instalación de un cronotermostato sin
cables para controlar una caldera de pared (fig. 3i).
Fig. 1.i
Fig. 2.i
Boiler
Chaudière
Kessel
Caldaia
Caldera
Receiver
Récepteur
Empfänger
Ricevitore
Receptor
Chronothermostat
Chronothermostat
Zeitthermostat
Cronotermostato
Cronotermostato
Fig. 3.i
D
Hinweis:
Fig.1 (Figura 1) = Abb. 1 (Abbildung 1)
P - 11
GB
F
D
1.3 - Installing the chronothermostat
1.3 - Installation du chronothermostat
1.3 - Installation des Zeitthermostats
•
•
•
•
Fix the base to the back box (or to the wall),
using the pairs of holes provided: A-A, B-B or
C-C (fig. 4.i).
Make the electrical connections to the contacts
on the telephone programmer (if provided) as
shown in figure 5.i, paying particular attention
that the cabling does not interfere with the correct closing of the body.
•
N.B.: fig. 4.i, D = knockouts allowing entry of wires
(flexible only)
Fixer la base du chronothermostat à la boîte à
encastrer (ou au mur) en utilisant les paires de
trous prévues: A-A, B-B or C-C (fig. 4.i).
Exécuter les branchements électriques sur le
contact du programmateur téléphonique (si
prévu) comme indiqué dans la figure 5.i, en
veillant à ce que le câble n’entrave pas la fermeture du corps.
•
N.B: fig. 4.i, "D" = zones amovibles pour l’entrée
des fils (uniquement flexibles).
Befestigen Sie die Grundplatte des Zeitthermostats am Gehäuse (oder an der Wand)
mittels der entsprechenden vorgegebenen
Bohrungslöcher: A-A, B-B or C-C (Abb. 4.i).
Führen Sie die elektrischen Anschlüsse am
Kontakt des telefonischen Programmierers
(wenn vorgesehen) wie in Abbildung 5.i beschrieben aus, und achten Sie besonders auf
den Verlauf der Kabel, damit diese die Schließung des Gerätekörpers nicht beeinträchtigen.
Hinweis: Abb. 4.i, "D" = Herausnehmbare Teile, die das Anklemmen der (ausschließlich biegsamen) Kabel ermöglichen.
Contact of telephone
programmer
Chronothermostat
2
Conctat du télécommande
téléphonique
1
Kontakt der
Telefonschaltung
Chronothermostat
2
1
2
Fig. 5.i
Fig. 5.i
Abb. 5.i
•
•
•
•
Fit the body to the base as shown in fig. 6.i.
Perform the operation of coupling the receiver
as shown in paragraph 1.5 and the receiver instruction manual.
P - 12
•
Appliquer le corps du chronothermostat à la
base (voir fig. 6.i).
Exécuter l’opération d’accouplement au récepteur comme indiqué au paragraphe 1.5 et dans
le manuel d’instructions du récepteur.
Zeitthermostat
•
1
Befestigen Sie das Zeitthermostat an der
Grundplatte, siehe hierzu Abb. 6.i.
Führen Sie die Angleichung an den Empfänger wie in Abschnitt 1.5 und im Handbuch des
Empfängers beschrieben aus.
I
E
1.3 - Installazione del cronotermostato
1.3 - Instalación del cronotermostato
•
Fissare la base del cronotermostato alla scatola incasso (o alla parete), utilizzando le opportune coppie di fori A-A, B-B o C-C (fig. 4-i).
•
Eseguire i collegamenti elettrici al contatto del
programmatore telefonico (se previsto) come
indicato in figura 5.i, prestando particolare attenzione affinchè il cablaggio non interferisca
con la corretta chiusura del corpo.
•
N.B.: fig. 4.i, "D" = aree asportabili per l’ingresso dei fili (solo flessibili).
Nota: fig. 4.i, "D" = areas extraíbles para la entrada
de los conductores (sólo flexibles).
•
Contatto del programmatore telefonico
Contacto del
programador telefónico
1
Fig. 5.i
•
•
Applicare il corpo del cronotermostato alla base
come in fig. 6-i.
Eseguire l’operazione di abbinamento al ricevitore come indicato nel paragrafo 1.5 e sul manuale istruzioni del ricevitore.
Cronotermostato
2
Fig. 5.i
•
80
B A
Efectuar las conexiones eléctricas al contacto
del programador telefónico como se indica en
la figura 5.i, prestando atención para que los
cables no obstaculicen el cierre del cuerpo.
•
D
D
C
D
A B C
B
Fig. 4.i
Cronotermostato
2
B
D
Fijar la base del cronotermostato en la pared o
en la caja empotrada utilizando los pares de
orificios A-A, B-B, C-C (fig. 4.i).
Fixing clips
Dents de fixation
Befestigungs Klammem
Dentini di fissaggio
Dientes de fijación
120
18
1
Aplicar el cuerpo del cronotermostato a la base
como indica la fig. 6.i.
Realizar la combinación con el receptor como
se indica en el apartado 1.5 y en el manual de
instrucciones del receptor.
Fig. 6.i
P - 13
GB
F
D
1.4 - Inserting or replacing batteries
1.4 - Insertion et remplacement des piles
d’alimentation
1.4 - Einsetzen und Auswechseln der
Batterien
•
•
•
•
•
•
•
•
Open the button cover (fig. 7.i)
Remove the cover of the battery compartment
Insert two 1.5 V batteries, type LR03, taking
care to position the poles correctly.
Important: when replacing batteries, the time available to make the changeover without losing data is
about 1 minute; any longer, and the chronothermostat will need reprogramming.
Öffnen Sie die Tastatur-Schutzklappe (Abb. 7.i)
Entfernen Sie die Abdeckung des Batteriegehäuses
•
Fügen Sie zwei Batterien 1,5 V des Typs LR03
ein; bitte beachten Sie hierbei deren Polarität.
Hinweis: Wenn Sie die Batterien auswechseln, haben Sie ohne Datenverlust für den gesamten Vorgang ca. 1 Minute Zeit. Sofern Sie länger benötigen sollten, muss der Zeitthermostat neu programmiert werden.
Warnings:
Avertissements:
Hinweise:
•
•
•
•
•
•
•
do not short-circuit the batteries
always remove the batteries before disposing of the chronothermostat
do not throw dead batteries away in the
trash but always deposit them in the
containers provided
N.B.: values with a very low differential (such as
0.2 °C) can lead to a greater frequency of command
transmissions to the receiver with a consequent
shortening of battery life.
P - 14
Ouvrir le volet de la loge des touches (fig. 7.i)
Retirer le couvercle du logement des piles
Insérer deux piles 1,5 V type LR03 en prêtant
attention aux polarités.
Attention: en cas de remplacement des piles, le
temps dont on dispose pour effectuer l’opération
sans perdre les données est d’environ 1 minute. Ce
laps de temps écoulé, il est nécessaire de reprogrammer le chronothermostat.
•
ne pas court-circuiter les batteries
si l’on jette le thermostat, ne jamais
oublier d’en extraire les batteries
ne pas jeter les batteries épuisées avec
les autres déchetes mais les jeter dans
les conteneurs appropriés
N.B.: les valeurs du différentiel très basses (ex.
0,2°C) peuvent comporter plus de fréquence de
transmission des commandes au récepteur, ce qui
épuise plus rapidement les batteries.
•
Batterien nicht kurzschließen
Beim Entsorgen des Zeitthermostats die
Batterien immer entnehmen
Leere Batterien nicht in den Hausmüll,
sondern ausschließlich in die dafür vorgesehenen Sammelbehälter geben
Hinweis: Sehr niedrige Differentialwerte (z.B.
0,2°C) können zu einer häufigeren Steuerungsübertragung an den Empfänger führen. Dadurch
leeren sich die Batterien schneller.
I
E
1.4 -Inserimento e sostituzione pile di
alimentazione
1.4 - Introducción y sustitución de las
pilas
•
•
•
•
•
Aprire lo sportello copritasti (fig. 7.i)
Asportare il coperchio dell’alloggiamento pile
Inserire due pile 1,5 V tipo LR03 prestando
attenzione alle polarità.
Attenzione: nel caso di sostituzione delle pile, il
tempo a disposizione per l’operazione senza perdere i dati è di circa 1 minuto, superato il quale è
necessario riprogrammare il cronotermostato.
Abrir la puerta que cubre las teclas (fig. 7.i)
Extraer la tapa del compartimiento de las
pilas
•
Introducir dos pilas de 1,5 V tipo LR03
prestando atención a los polos.
Atención: para sustituir las pilas sin perder los datos se dispone de aproximadamente un minuto. Finalizado este plazo será necesario volver a programar el cronotermostato.
Avvertenze:
Advertencias:
•
•
•
•
•
non cortocircuitare le batterie
nel caso di smaltimento del cronotermostato estrarre sempre le batterie.
non gettare le batterie esauste con gli
altri rifiuti ma riporle esclusivamente
negli appositi contenitori
N.B.: valori del differenziale molto bassi (es. 0,2°C)
possono comportare una maggior frequenza delle
trasmissioni dei comandi al ricevitore con conseguente più rapido esaurimento delle batterie.
•
Fig. 7.i
no poner las baterías en cortocircuito
antes de desechar el cronotermostato hay que extraer las baterías
no eliminar las baterías junto con los
residuos comunes; depositarlas en
contenedores específicos.
Nota: si el diferencial es muy bajo (por ejemplo
0,2°C) la transmisión de mandos al receptor se vuelve más frecuente y en consecuencia las baterías
se descargan más rápido.
P - 15
F
D
1.5 - Coupling the chronothermostat to
the receiver (self-learning)
GB
1.5 - Accouplement du chronothermostat
au récepteur (autoapprentissage)
1.5 - Angleichung des Zeitthermostats an
einen Empfänger (Autoset)
Attention: for these operations, carefully fol-
Attention: pour ces opérations, consulter at-
Achtung: Lesen Sie die Bedienungsanleitung
low the instruction sheet included with the receiver.
tentivement la feuille des instructions du récepteur.
für den Empfänger aufmerksam durch, bevor
Sie diesen Vorgang ausführen.
1) PRELIMINARY OPERATIONS
•
Install and power the receiver.
•
Program the chronothermostat as indicated
in heading 2.3 of the user’s instructions.
1) OPÉRATIONS PRÉLIMINAIRES
1) VORBEREITUNG
•
Empfänger installieren und an die Stromversorgung anschließen.
•
Den Zeitthermostat wie in Abschnitt 2.3 der
Bedienungsanleitung angegeben programmieren.
2) ON THE CHRONOTHERMOSTAT
2) SUR LE CHRONOTHERMOSTAT
•
•
Installer et alimenter le récepteur.
Programmer le chronothermostat comme indiqué au paragraphe 2.3 des instructions pour
l’utilisateur.
2) AM ZEITTHERMOSTAT
Press the “test” key until the word tESt appears
on the display, then release the key: the antenna
symbol will flash every 3 seconds (fig. 8.i).
Attention: the transmission of the test signal remains active for a maximum of 3 minutes.
Appuye sur la touche “test” jusqu’à l’apparition
sur l’affichage du message tESt, et relâcher la
touche : le symbole d’antenne clignotera toutes
les trois secondes (fig. 8.i).
Attention: la transmission du signal de test reste
active pendant 3 minutes au maximum.
Die Taste “test” gedrückt halten, bis auf dem Display die Anzeige tESt erscheint, dann die Taste
loslassen: das Antennensymbol blinkt alle 3 Sekunden auf (Abb. 8.i).
Achtung: Die Übertragung des Testsignals bleibt
max. 3 Minuten lang aktiv.
3) ON THE RECEIVER
Perform the coupling operations shown in the receiver instruction manual in the chapter “Coupling
to a transmitter”.
3) SUR LE RÉCEPTEUR
Executer les opérations d’accouplement indiquées
dans le manuel d’instructions du récepteur, au chapitre “Accouplement à un transmetteur”.
3) AM EMPFÄNGER
Die in der Bedienungsanleitung des Empfängers
im Kapitel “Angleichen an einen Sender” angegebenen Vorgänge ausführen.
4) ON THE CHRONOTHERMOSTAT
(exit from the coupling operations)
4) SUR LE CHRONOTHERMOSTAT
(sortie des opérations d’accouplement)
4) AM ZEITTHERMOSTAT
(Angleichen verlassen)
Die Taste “test” mindestens 1 Sekunde lang gedrückt halten und dann loslassen. Auf dem Display erscheint das vorher benutzte Programm.
Der Zeitthermostat ist an den Empfänger angeglichen.
Press the “test” key for at least 1 second, then
release it . The previously running program will
appear on the display.
The chronothermostat has been coupled to the receiver.
P - 16
Appuyer sur la touche “test” pendant au moins
1 seconde et la relâcher. Sur l’afficheur apparaît le programme qui était en cours.
Le chronothermostat est accouplé au récepteur.
I
E
1.5 - Abbinamento del cronotermostato
al ricevitore (autoapprendimento)
1.5 - Combinación del cronotermostato
con el receptor (autoaprendizaje)
Attenzione: per queste operazioni consultare
Atención: para estas operaciones se deben leer
attentamente il foglio istruzioni del ricevitore.
atentamente las instrucciones del receptor.
1) OPERAZIONI PRELIMINARI
1) OPERACIONES PRELIMINARES
•
•
Installare ed alimentare il ricevitore.
Programmare il cronotermostato come indicato nel paragrafo 2.3 delle istruzioni per
l’utilizzatore.
2) SUL CRONOTERMOSTATO
•
•
Instalar y alimentar el receptor.
Programar el cronotermostato como se indica en el apartado 2.3 de las instrucciones de
uso.
2) EN EL CRONOTERMOSTATO
Premere il tasto “test” fino alla comparsa sul
display della scritta tESt, quindi rilasciare il tasto:
il simbolo di antenna presenterà un lampeggio ogni
3 secondi (fig. 8.i).
Presionar la tecla “test” hasta que aparezca en
el display la palabra tESt y soltarla: el símbolo
de la antena parpadea cada 3 segundos (fig.
8.i).
Attenzione: la trasmisione del segnale di test
Atención: la transmisión de la señal de test per-
resta attiva per massimo 3 minuti.
manece activa 3 minutos como máximo.
3) SUL RICEVITORE
Eseguire le operazioni di abbinamento indicate nel
manuale istruzioni del ricevitore, al capitolo “Abbinamento ad un trasmettitore”.
3) EN EL RECEPTOR
4) SUL CRONOTERMOSTATO
(uscita dalle operazioni di abbinamento)
4) EN EL CRONOTERMOSTATO
(después de terminar con la combinación)
Premere il tasto “test” per almeno 1 secondo
quindi rilasciarlo. Sul display appare il programma
precedentemente in corso.
Il cronotermostato è abbinato al ricevitore.
Fig. 8.i
Realizar la combinación como se indica en el capítulo “Combinación con un transmisor” del
manual de instrucciones del receptor
Presionar la tecla “test” por lo menos 1 segundo
y soltarla. En el display aparece el último programa que se utilizó.
El cronotermostato está combinado con el receptor.
P - 17
GB
F
D
2 - USER INSTRUCTIONS
2 - MODE D’EMPLOI
POUR L’UTILISATEUR
2 - BEDIENUNGSANLEITUNG
FÜR ANWENDER
2.1 - Key to display information
2.1 - Légende des indications de l’afficheur
2.1 - Auflistung der Anzeigen
1)
2)
3)
4)
5)
6)
7)
Comfort temperature t1
Reference temperature
0.5 °C visualization
Appliance in operation
Days of the week
Current time or temperature
Operation using telephone programmer
8)
9)
10)
11)
12)
1)
2)
3)
4)
5)
6)
7)
8)
9)
10)
11)
12)
Blinking temperature value indicates out of range
(-5 °C ÷ +39 °C).
Err indicates probe fault.
La valeur de la température clignotante indique que
le champ de lecture (-5 °C ÷ +39 °C) a été dépassé.
L’ indication Err indique que la sonde est en panne.
Manual operation
Signal radio transmission in progress
Winter operation
Summer operation
Temperature scale over 24 hours
upper digit = Comfort temperature
lower digit = Economy temperature
no digit = antifreeze temperature
The presence of 2 digits one above the other is
equivalent to a HALF HOUR of operation for
each temperature.
13) Battery low
14) Antifreeze temperature t
15) Economy temperature t2
P - 18
Température Confort t1
Indication température de référence
Affichage 0,5 °C
Signal utilisateur en fonction
Jours de la semaine
Heure actuelle ou température
Fonctionnement de télécommande téléphonique
Fonctionnement manuel
Transmission du signal radio en cours
Fonctionnement en hiver
Fonctionnement en été
Echelle thermique sur 24 heures
chiffre supérieur = température Confort
chiffre inférieur = température Economie
sans chiffre = température Antigel
La présence de 2 chiffres l’un sur l’autre équi
vaut à une DEMI-HEURE de fonctionnement de
chaque température.
13) Signal batterie déchargée
14) Température Antigel t
15) Température Economie t2
1)
2)
3)
4)
5)
6)
7)
Komfort-Temperatur t1
Anzeige Bezugstemperatur
Visualisierung 0,5 °C
Anzeige Gerät in Funktion
Wochentage
Aktuelle Uhrzeit oder Temperatur
Betriebsmodus über Telefonschaltung
8)
9)
10)
11)
12)
Manueller Betrieb
Betrieberradio im kurs
Betriebsmodus Winter
Betriebsmodus Sommer
24 Stunden-Temperaturskala
Zahleneingabe Maximalwert = Komfort-Temperatur
Zahleneingabe Minimalwert = Economy-Temperatur
Abwesenheit von Eingabewerten = Frostschutztemperatur
Die Anzeige von 2 übereinander angeordneten
Ziffern entspricht einer HALBEN STUNDE
Betriebszeit für jede Temperatur.
13) Anzeige Batterie leer
14) Frostschutz-temperatur t
15) Economy-Temperatur t2
Eine blinkende Temperaturanzeige gibt an, dass die Temperatur den lesbaren Bereich überschritten hat (-5 °C ÷
+39 °C). Die Anzeige Err gibt an: Sonde defekt.
I
E
2 - ISTRUZIONI D’USO
PER L’UTILIZZATORE
2 - INSTRUCCIONES
PARA EL USUARIO
2.1 - Legenda indicazioni display
2.1 - Indicaciones del display
1) Temperatura di Comfort t1
2)
3)
4)
5)
6)
7)
8)
9)
10)
11)
12)
Segnalazione temperatura di riferimento
Visualizzazione 0,5 °C
Segnalazione utenza in funzione
Giorni della settimana
Ora attuale o temperatura
Funzionamento da programmatore telefonico
Funzionamento manuale
Trasmisione del segnale radio in corso
Funzionamento in inverno
Funzionamento in estate
Scala termica sulle 24 ore
digit superiore = temperatura Comfort
digit inferiore = temperatura Economy
mancanza digit = temperatura Antigelo
La presenza di 2 digit uno sopra I’altro equivale a MEZZ'ORA di funzionamento per ciascuna
temperatura.
13) Segnalazione batteria scarica
14) Temperatura di Antigelo t
15) Temperatura di Economy t2
1)
2)
3)
4)
5)
6)
7)
Temperatura Confort t1
Señalización de la temperatura de referencia
Visualización 0,5 °C
Señalización de equipo en funcionamiento
Días de la semana
Hora corriente o temperatura
Funcionamiento por mando telefónico
Funcionamiento manual
Transmismisión de la señal de radio en curso
Funcionamiento de invierno
Funcionamiento de verano
Escala térmica de las 24 horas
segmento superior = temperatura Confort
segmento inferior = temperatura Ahorro
ningún segmento = temperatura Antihielo
2 segmentos superpuestos equivale a MEDIA
HORA de funcionamiento con cada temperatura.
13) Señalización de batería descargada
14) Temperatura Antihielo t
15) Temperatura ahorro t2
1 2
5
6 7
8
9 10
8)
9)
10)
11)
12)
15
El valor parpadeante indica que la temperatura ha
superado el campo de lectura (-5 °C a +39 °C)
Err indica un fallo en la sonda.
14
13
12
11
Fig. 1
D
Il valore della temperatura lampeggiante indica il
superamento del campo di lettura (-5 °C ÷ +39 °C).
L’ indicazione Err indica lo stato di sonda in avaria.
3 4
Hinweis:
Fig.1 (Figura 1) = Abb. 1 (Abbildung 1)
P - 19
F
D
2.2 - Key to button functions
GB
2.2 - Légende des fonctions des touches
2.2 - Beschreibung der Tastenfunktionen
1)
1)
1)
2)
3)
4)
5)
6)
7)
8)
9)
10)
11)
12)
13)
14)
15)
Confirm (OK) (hours, minutes, day, program
and all operations requiring confirmation)
Select - display programs P 1 ÷ P 6
Program hour - min - day - count-down hours in
P 6.
Display time - temperature
Suspend program during room cleaning
Winter (heating) or summer (airconditioning) operation
Set temperature t1 Comfort
Set temperature t2 Economy
Set temperature t Antifreeze
Key not present on this model
Key for transmitting the "test" signal
Key for manually activating and deactivating
system operation
Decrease temperature
Increase temperature
Select temperature Comfort t1, Economy t2,
Antifreeze t ; adjustable
Combination giving Reset
2)
3)
4)
5)
6)
7)
8)
9)
10)
11)
12)
13)
14)
15)
N.B.: Other special button functions are described
under the relative headings.
P - 20
Touche confirmation (OK) (heures, minutes,
jour, programme et pour toutes les opérations
réclamant une confirmation)
Touche sélection - affichage programmes
P1÷P6
Touche programmation heure - min - jour - n°
heures count-down dans P 6
Touche affichage heure - température
Touche suspension du programme pour nettoyage
Touche fonctionnement hiver (chauffage) ou
été
(climatisation)
Touche programmation température t1 Confort
Touche programmation température t2 Economie
Touche programmation température t Antigel
Touche non présente sur ce modèle
Touche pour transmission signal de "test"
Touche d’activation fonctionnement manuel et
désactivation de l’installation
Touche pour abaisser la température sélectionnée
Touche pour augmenter la température sélectionnée
Touche pour sélectionner les températures
Confort t1, Economie t2, Antigel t ; réglables.
Combinaison de touches pour Reset
N.B.: D’autres fonctions particulières des touches sont
décrites dans les paragraphes consacrés à l’utilisation.
2)
3)
4)
5)
6)
7)
8)
9)
10)
11)
12)
13)
14)
15)
Bestätigungstaste (OK) (Stunde, Minuten,
Wochentag, Programm sowie sämtliche
Vorgänge, die eine Bestätigung benötigen)
Wähltaste - Visualisierung Programme
P1÷P6
Taste Programmierung - Min. - Wochentag Stundenanzahl Count-down in P 6.
Taste Visualisierung Uhrzeit - Temperatur
Taste Programmunterbrechung für Reinigungszwecke
Taste Betriebsmodus Winter (Heizung) oder
Sommer (Klimaanlage)
Taste für Temperaturprogrammierung t1
Komfort-Temperatur
Taste für Temperaturprogrammierung t2
Economy-Temperatur
Taste für Temperaturprogrammierung t
Frostschutz
Auf diesem Modell nicht vorhandene Taste
Taste zur Übertragung des Testsignals
Taste zum Einschalten des manuellen Betriebs
und Ausschalten der Anlage
Taste Temperatur niedriger
Taste Temperatur höher
Temperatur-Wähltaste Komfort-Temperatur t1,
Economy-Temperatur t2, Frostschutz t ; einstellbar
Tastenkombination für Reset
Hinweis: Weitere spezielle Tastenfunktionen werden in den jeweiligen Abschnitten beschrieben.
I
E
2.2 - Legenda funzioni tasti
2.2 - Funciones de las teclas
1)
1)
2)
3)
4)
5)
6)
7)
8)
9)
10)
11)
12)
13)
14)
15)
Tasto per conferma (OK) (ore, minuti, giorno,
programma e per tutte le operazioni dove è richiesta la conferma)
Tasto selezione - visualizzazione programmi
P1÷P6
Tasto programmazione ora - min - giorno - n°
ore count-down in P 6.
Tasto visualizzazione ora o temperatura
Tasto sospensione programma per pulizie
Tasto funzionamento inverno
(riscaldamen(condizionamento)
to) o estate
Tasto programmazione temperatura t1 Comfort
Tasto programmazione temperatura t2 Economy
Tasto programmazione temperatura t Antigelo
Tasto non presente in questo modello
Tasto per trasmissione segnale di "test"
Tasto per attivazione funzionamento manuale
e disattivazione impianto
Tasto per abbassare la temperatura selezionata
Tasto per alzare la temperatura selezionata
Tasto per selezionare le temperature:
Comfort t1, Economy t2, Antigelo t ;
regolabili
Combinazione tasti per Reset
2)
3)
4)
5)
6)
7)
8)
9)
10)
11)
12)
13)
14)
15)
Confirmación (OK) (de hora, minutos, día, programa y todas las operaciones que requieren
confirmación)
Selección - visualización de los programas
P1aP6
Programación de hora - min - día - n° horas de
cuenta regresiva en P 6.
Visualización de hora - temperatura
Suspensión durante la limpieza del programa
que se está utilizando
Funcionamiento de invierno
(calefacción) o
(acondicionamiento)
verano
Programación de la temperatura t1 Confort
Programación de la temperatura t3 Ahorro
Programación de la temperatura t Antihielo
Tecla no existente en este modelo
Tecla para transmitir la señal de "test"
Tecla para activar el funcionamiento manual y
desactivar la instalación
Reducción de la temperatura
Aumento de la temperatura
Selección de las temperaturas:
Confort t1, Ahorro t2, Antihielo t ; regulables
Combinación de teclas para reinicializar
(Reset)
11
12
13
15
1
2
3
14
4
5
6
7
8
9
10
Fig. 2
N.B.: Ulteriori particolari funzioni dei tasti sono
descritte negli specifici paragrafi di utilizzo.
Nota: Otras funciones particulares de las teclas se
describen en los apartados que explican el manejo.
P - 21
GB
F
D
2.3 - Programming the chronothermostat
2.3 - Programmation du chronothermostat
2.3 - Programmierung des Zeitthermostats
When the batteries are inserted, the device runs a
self-test routine, after which the display will appear
as in the figure 3 and the chronothermostat is ready
for programming.
A l’insertion des piles, un cycle d’autotest est lancé.
A la fin, l’afficheur se présente comme sur la figure
3 et le chronothermostat est prêt pour la programmation.
Durch das Einfügen der Batterien wird ein Auto-TestZyklus aktiviert, nach dessen Vollendung die Anzeige wie auf der Abbildung 3 anzeigt, daraufhin ist der
Zeitthermostat für die Programmierung bereit.
a) Setting current HOUR - MINUTES - DAY
a) Programmation HEURE - MINUTES - JOUR (actuels)
HEURE Appuyer sur la touche /Day.
L’heure étant réglée, appuyer sur la touche OK pour confirmer (les chiffres des
minutes clignotent - fig.4).
a) Programmierung STUNDEN- MINUTEN
WOCHENTAG (aktuell)
HOUR
Press the /Day button. Having set the
hour, press OK to confirm (minute digits
blinking - fig. 4).
MINUTES Press the /Day button. Having set the
minutes, press OK to confirm (day digits
blinking - fig. 5).
DAY
Press /Day momentarily to select the
current day (indicator blinking on day of
the week). To confirm press OK (P01 will
blink in the display - fig. 6).
N.B.: Press /Day momentarily for single increment,
press and hold for fast scroll.
b) Selecting the program
The chronothermostat has 4 fixed programs (see chapter 3).
If one of these programs is suitable, press PROG repeatedly until the display shows the particular
program, then press OK.
After a few seconds the display will show the room
temperature and the programmed heating periods
(fig 6a).
If none of these programs happens to be suitable,
press PROG repeatedly until program P 5 appears,
then proceed as indicated in heading 2.4.
P - 22
MINUTES Appuyer sur la touche /Day. Les minutes étant réglées, appuyer sur la touche
OK pour confirmer (les indices des jours
clignotent - fig. 5).
JOUR
Appuyer par à-coups sur la touche /Day
pour sélectionner le jour actuel (indice clignotant au niveau du jour de la semaine).
Confirmer en appuyant sur la touche OK
(sur l’afficheur P01 clignote - fig. 6).
N.B.: Appuyer sur la touche /Day par impulsions
par incrément simple, la maintenir appuyée pour avoir
un incrément rapide.
b) Sélection du programme de fonctionnement
Le chronothermostat contient 4 programmes fixes
(voir le chapitre 3).
Si l’un de ces programmes répond à vos besoins,
appuyer sur la touche PROG jusqu’à ce que l’afficheur ne présente le programme désiré, puis appuyer
sur OK.
Quelques secondes plus tard, l’afficheur fait apparaître la température ambiante et les périodes de
chauffage programmées (fig. 6a).
STUNDE: Betätigen Sie die Taste /Day.
Nach der Stundeneingabe drücken Sie zur
Bestätigung auf OK (die Zahlen der
Minutenangabe blinken - Abb. 4).
MINUTEN: Betätigen Sie die Taste /Day. Nach der
Minuteneingabe drücken Sie zur Bestätigung auf OK die Angabe der Wochentage blinkt - Abb. 5).
WOCHENTAG: Drücken Sie mehrfach auf die Taste
/Day um den aktuellen Wochentag auszuwählen (die blinkende Anzeige gibt den
ausgewählten Wochentag an). Bestätigen
Sie durch die Betätigung der Taste OK.
Auf der Anzeige wird der Schriftzug P01,
blinken (Abb. 6).
Hinweis: Drücken Sie die Taste /Day mehrfach,
um schrittweise vorwärts zu gehen, halten Sie gedrückt, um schnell vorwärts zu gehen.
b) Wahl des Betriebsmodus-Programms
Im Zeitthermostat sind 4 Programme gespeichert (siehe hierzu das letzte Kapitel). Wenn eines dieser Programme Ihren Bedürfnissen entspricht, betätigen Sie
die Taste PROG , bis das gewünschte Programm auf
der Anzeige angegeben wird, nun drücken Sie auf
OK.
I
E
2.3 - Programmazione del cronotermostato
2.3 - Programación del cronotermostato
All'inserimento delle pile si attiva un ciclo di autotest,
al termine del quale il display si presenta come in
figura 3 ed il cronotermostato è pronto per la programmazione.
Al introducir las pilas se activa un ciclo de autotest.
Una vez finalizado, el display se presenta como en la
figura 3 y el cronotermostato está en condiciones de
ser programado.
a) Programmazione: ORA - MINUTI - GIORNO (attuali)
a) Programación HORA - MINUTOS - DÍA (actuales)
ORA
HORA
MINUTI
Premere il tasto /Day. Impostata l'ora
premere il tasto OK per confermare (i digit
dei minuti lampeggeranno - fig. 4).
Premere il tasto /Day. Impostati i minuti
premere il tasto OK per confermare (gli indici dei giorni lampeggeranno - fig. 5).
GIORNO Premere ad impulsi il tasto /Day per selezionare il giorno corrente (indice lampeggiante in corrispondenza del giorno della
settimana). Premere il tasto OK per confermare. Sul display apparirà P01, lampeggiante (fig. 6).
N.B.: Premere il tasto /Day ad impulsi per incremento singolo, mantenere premuto per incremento
veloce.
b) Scelta del programma di funzionamento
Nel cronotermostato sono stati inseriti 4 programmi
fissi (vedi capitolo 3).
Se uno di questi programmi soddisfa le vostre esigenze, premere il tasto PROG sino alla
visualizzazione sul display del programma desiderato, quindi premere OK.
Dopo alcuni secondi apparirà sul display la temperatura ambiente ed i periodi di riscaldamento programmati (fig. 6a).
Blinking - Clignotant - Blinkend
Lampeggianti - Parpadeante
Fig. 3
Presionar la tecla
/Day. Digitar la hora
y presionar OK para confirmar (dígitos de
los minutos, parpadeantes - fig. 4).
MINUTOS Presionar la tecla /Day. Digitar los minutos y presionar OK para confirmar (indices
de los días, parpadeantes - fig. 5).
DÍA
Presionar repetidamente la tecla /Day
para seleccionar el día (parpadea el índice
del día de la semana) y confirmar presionando OK. Una vez confirmada, en el display empezará a parpadear P01 (fig. 6).
Fig. 4
Nota: Presionar la tecla /Day repetidamente para
el incremento simple y mantenerla presionada para
el incremento rápido.
b) Selección del programa de funcionamiento
El cronotermostato viene con 4 programas fijos (ver
capítulo 3).
Presionar PROG para visualizarlos sucesivamente
en el display y OK para seleccionar el programa deseado.
Unos segundos después se visualizan la temperatura
ambiente y los períodos de calefacción programados
(fig. 6a).
Fig. 5
Blinking - Clignotant - Blinkend
Lampeggiante - Parpadeante
Fig. 6
P - 23
GB
F
Si aucun des programmes prévus ne correspond à
vos besoins, appuyer sur la touche PROG de façon
à faire apparaître le programme P 5, puis suivre la
démarche indiquée dans le paragraphe 2.4.
D
Nach wenigen Sekunden wird die Raumtemperatur
angezeigt, einschließlich der vorgegebenen Betriebsphasen (Abb. 6a).
Sollte keines der Programme Ihren Bedürfnissen entsprechen, betätigen Sie die Taste PROG, bis das
Programm P 5 angezeigt wird. Gehen Sie nun vor,
wie im Abschnitt 2.4 beschrieben wird.
2.4 - Free program P 5
2.4 - Programme libre P 5
2.4 - Freies Programm P 5
Program P 5 can be programmed freely for every hour
of the day on three different temperatures (t1, t2, t )
and differently for every day of the week.
•
Press PROG until P 05 appears in the display
(fig. 7).
•
Confirm the selection of program P 5 by pressing OK.
The display will show the two digits relative to the
time 00:00, with the day indicator positioned on Monday, all blinking (fig. 8).
To select the temperature for the time currently blinking, press the relative button.
Le programme P 5 se programme librement pour
chaque heure du jour sur trois indices de température (t1, t2, t ) et de façon différente pour chaque
jour de la semaine.
•
Appuyer sur la touche PROG jusqu’à ce que l’afficheur ne fasse apparaître le sigle P 05 (fig. 7).
•
Confirmer la sélection du programme P 5 en
appuyant sur la touche OK.
L’afficheur fait clignoter les deux chiffres se référant
à l’heure 00:00 et l’indice du jour au niveau du lundi
(fig. 8).
La sélection de la température pour I’heure clignotante se fait en appuyant sur la touche correspondante.
Das Programm P 5 kann für jede Stunde des Tages
auf drei verschiedene Temperaturangaben (t1, t2,
t ) und für jeden Tag unterschiedlich frei eingestellt
werden.
•
Betätigen Sie die Taste PROG bis auf der Anzeige der Schriftzug P 05 wiedergegeben wird
(Abb. 7).
•
Bestätigen Sie die Auswahl dieses Programms
P 5 durch das Betätigen der Taste OK.
Auf der Anzeige blinken zwei Zahlen 00:00 , die sich
auf die Uhrzeit und die Angabe des Wochentags in
Bezug auf Montag beziehen (Abb. 8).
Durch das Betätigen der entsprechenden Taste kann
für die blinkende Uhrzeit unter den verschiedenen
Temperaturen ausgewählt werden.
Setting the temperatures for Monday.
For each hour of the day, confirm the desired temperature by pressing t1, t2, t until the 24-hour curve
for Monday is complete.
It is also possible to program half-hours, as indicated
in heading 2.5.
Having set the temperatures for Monday (fig. 9), press
OK to confirm the program (if an error has been committed, program again).
P - 24
Programmation des températures pour le lundi.
Pour chaque heure du jour, confirmer le type de température désirée en appuyant sur les touches t1, t2,
t et achever le diagramme quotidien de 24 heures
pour le lundi.
Il est possible de programmer la demi-heure comme
il est indiqué dans le paragraphe 2.5.
Temperatureinstellung für Montag.
Bestätigen Sie die gewünschte Temperaturangabe
für jede Stunde, indem Sie die Tasten t1, t2, t drükken, bis Sie das Tagesdiagramm für die 24 Stunden
des Montags vervollständigt haben.
Eine halbe Stunde kann eingegeben werden, wie im
Abschnitt 2.5 beschrieben wird.
I
Nel caso nessuno dei programmi predisposti corrisponda alle Vostre esigenze, premere il tasto PROG
fino all'apparizione del programma P 5, quindi procedere come descritto nel paragrafo 2.4.
E
Para crear un programa propio hay que presionar
PROG hasta que aparezca el programa P 5 y luego
seguir las instrucciones del apartado 2.4.
2.4 - Programma libero P 5
2.4 - Programa libre P 5
Il programma P 5 è liberamente programmabile per
ogni ora del giorno su tre differenti indici di temperatura (t1, t2, t ) e in modo diverso per ogni giorno
della settimana.
•
Premere il tasto PROG sino a quando sul display
apparirà la scritta P 05 (fig. 7).
•
Confermare la scelta del programma P 5 premendo il tasto OK.
Sul display appariranno lampeggianti i 2 digit riferiti
all’ora 00:00 e l’indice del giorno in corrispondenza
del lunedì (fig. 8).
La scelta della temperatura per I’ora lampeggiante avverrà premendo il corrispondente tasto.
El programa P 5 se puede configurar libremente con
tres índices de temperatura (t1, t2, t ) de acuerdo
con la hora del día y el día de la semana.
•
Presionar PROG hasta que el display visualice
P 05 (fig. 7).
•
Confirmar la selección del programa P 5 presionando OK.
En el display parpadearán los 2 segmentos de la hora
00:00 y el índice del día lunes (fig. 8).
La selección de la temperatura para cada hora parpadeante se efectúa presionando la tecla correspondiente.
Programmazione temperature per il giorno di
lunedì.
Confermare per ogni ora del giorno il tipo di temperatura desiderata premendo i tasti t1, t2, t sino a completare il diagramma giornaliero di 24 ore relativo al
giorno di lunedì.
E' possibile programmare la mezz'ora come indicato
nel paragrafo 2.5.
Programación de la temperatura para el día lunes.
Elegir la temperatura para cada hora del día presionando las teclas t1, t2, t hasta completar el
diagrama de las 24 horas del lunes.
Es posible programar la temperatura también cada
media hora como se indica en el apartado 2.5.
Una vez programadas las temperaturas del lunes (fig.
9) hay que presionar OK para confirmar el programa (en caso de error hay que volver a programar).
Fig. 6a
Fig. 7
Digit
Chiffre
Zahl
Indice
Segmento
Comfort
Confort
Komfort
Comfort
Confort
Economy
Economie
Economy
Economy
Ahorro
Fig. 8
Antifreeze: not denoted on temperature scale
Antigel: non visualisée sur l’échelle thermique
Frostschutz: keine Visualisierung auf der Temperaturskala
Antigelo: non visualizzato sulla scala di temperatura
Antihielo: no visualizado en la escala térmica
P - 25
GB
When OK is pressed to confirm, the program set for
Monday is saved in the memory, the dash will blink
under Tuesday (2) and the two digits relative to the
time 00:00 will blink over the temperature scale for
the previous day (fig. 10).
N.B.: the buttons t1, t2, t can be pressed momentarily (1h forward at each touch) or pressed and held
until the desired hour is reached (moving forward
automatically 1h with each blink).
Setting the temperatures for Tuesday.
To use the same temperature scale as for Monday,
press OK: the same scale will be entered for Tuesday; at this point the dash will blink under Wednesday and the two digits will reappear blinking on the
time 00:00.
If the same temperature scale is NOT required, proceed by pressing t1, t2, t as described for Monday.
Having set the temperatures for Tuesday, press OK
to confirm.
Repeat the same procedure until the programs for
all days of the week are completed.
After confirming (OK) the program for Sunday, the
display will show the current day and time or the room
temperature and the temperature scale with the digit
of the current hour (blinking): the chronothermostat
is now in operation.
P - 26
F
N.B.: Il est possible d’appuyer par à-coups sur les
touches t1, t2, t (avance de 1 h à chaque impulsion) ou de les maintenir appuyées jusqu’à ce que
l’on obtienne l’heure désirée (avance automatique de
1h à chaque clignotement des chiffres).
D
Wenn die Temperaturprogrammierung für Montag
beendet ist (Abb. 9), drücken Sie auf die Taste OK
um das eingegebene Programm zu bestätigen (bei
einem Fehler muss neu programmiert werden).
Durch die Bestätigung (OK) wird das eingegebene
Programm (Montag) gespeichert und auf der Anzeige blinken der Strich unter Dienstag (2) und die zwei
Zahlen 00:00 , die sich auf die Uhrzeit beziehen. Darüber wird die Temperaturskala des vorhergehenden
Tages wiedergegeben (fig. 10).
Hinweis: die Tasten t1, t2, t können durch wiederholtes Drücken bedient werden (jedes Drücken 1 Std.
vorwärts), oder man kann sie bis zum Erreichen der
gewünschten Stunde gedrückt halten (bei jedem Aufleuchten der Zahlen automatisch 1 Std. vorwärts)
Programmation températures pour le mardi.
Temperatureinstellung für Dienstag.
Si l’on désire la même échelle thermique que pour le
lundi, appuyer sur la touche OK: la même échelle
est introduite pour le mardì et le tiret pour le mercredi et les 2 chiffres situés au niveau de l’heure 00:00
se mettent à clignoter.
Si l’on NE désire PAS la même programmation de
l’échelle thermique, appuyer sur les touches t1, t2,
t , comme il est indiqué pour le lundi. A la fin du
réglage des températures du mardi, appuyer sur la
touche OK pour confirmer.
Suivre la même démarche pour achever la programmation de tous les jours de la semaine.
Après avoir confirmé (OK) le programme du dimanche, l’afficheur fait apparaître l’indice du jour actuel,
l’heure actuelle ou la température ambiante et
l’échelle thermique, avec le chiffre de l’heure actuelle
qui clignote: le chronothermostat est alors en fonction.
Wenn Sie dieselbe Temperaturskala von Montag
wünschen, betätigen Sie die Taste OK: für Dienstag
wird dieselbe Temperaturskala eingespeichert und
der Strich für Mittwoch blinkt auf, so wie die zwei
Zahlen bezüglich der Uhrzeit.
Wenn NICHT dieselbe Temperaturskala eingegeben
werden soll, betätigen Sie die Tasten t1, t2, t , wie
für Montag beschrieben wurde. Wenn die
Temperaturprogrammierung für Dienstag beendet
ist, betätigen Sie zur Bestätigung die Taste OK .
La programmation des températures du lundi terminée (fig. 9), appuyer sur la touche OK pour confirmer
le programme introduit (en cas d’erreur, reprogrammer).
La confirmation (OK) fixe en mémoire le programme
introduit (pour lundì) et l’afficheur fait clignoter un tiret sous le mardi (2) et les 2 chiffres au niveau de
l’heure 00:00, superposés à l’échelle thermique programmée pour la veille (fig. 10).
Wiederholen Sie dasselbe Vorgehen für alle restlichen Wochentage.
Nach der Bestätigung (OK) des Programms für Sonntag werden auf der Anzeige der aktuelle Wochentag
und die aktuelle Uhrzeit oder die Raumtemperatur und
die Temperaturskala einschließlich blinkender Uhrzeit angegeben: der Zeitthermostat ist nun in Betrieb.
I
Terminata la programmazione delle temperature per
il giorno di lunedì (fig. 9) premere il tasto OK per confermare il programma impostato (in caso di errore
riprogrammare).
La conferma (OK) fisserà in memoria il programma
impostato (per lunedì) e sul display apparirà lampeggiante il trattino sotto il giorno di martedì (2) e lampeggianti i 2 digit in corrispondenza dell'ora 00:00,
sovrapposti alla scala termica programmata per il giorno precedente (fig. 10).
N.B.: i tasti t1, t2, t possono essere premuti con
singoli impulsi, con avanzamento di 1 h ad ogni pressione, o mantenuti premuti sino all’ora desiderata con
avanzamento automatico di 1h ad ogni lampeggio dei
digit.
Programmazione temperature per il giorno di
martedì.
Se si desidera la stessa scala termica di lunedì, premere il tasto OK: verrà inserita la stessa scala anche
per martedì e lampeggerà il trattino per il giorno di
mercoledì e i 2 digit in corrispondenza dell’ora 00:00.
Se NON si desidera la stessa programmazione della
scala termica, procedere premendo i tasti t1, t2, t
come descritto per lunedì.
Al termine della impostazione delle temperature per
martedì premere il tasto OK per conferma.
Ripetere lo stesso procedimento sino a completare i
programmi per tutti i giorni della settimana.
Dopo la conferma (OK) del programma della domenica, sul display appariranno l’indice del giorno attuale, la temperatura ambiente o l’ora attuale e la scala
termica con il digit dell’ora attuale lampeggiante: il
cronotermostato è in funzione.
E
La confirmación (OK) guarda en la memoria el programa del lunes y en el display empiezan a parpadear el guión debajo del día martes (2) y los segmentos de la hora 00:00 ubicados por encima de la
escala térmica programada para el día anterior (fig. 10).
Nota: las teclas t1, t2, t se pueden presionar repetidamente para avanzar de hora en hora, o bien se
pueden mantener oprimidas para avanzar rápidamente 1 hora por cada parpadeo de los segmentos.
Monday lundi Montag lunedí lunes
Fig. 9
Programación de la temperatura para el día
martes.
Si para el martes se desea programar la misma escala térmica del lunes hay que presionar OK. Aparece la escala y empiezan a parpadear el guión correspondiente al día miércoles y los 2 segmentos
de la hora 00:00.
Si NO se desea programar la misma escala térmica
hay que presionar las teclas t1, t2, t como se describió anteriormente para el lunes.
Una vez elegidas las temperaturas para el martes
hay que confirmarlas presionando OK.
Repetir el mismo procedimiento hasta completar la
semana.
Una vez confirmado (OK) el programa del domingo,
el display visualiza el índice del día y la hora corrientes, la temperatura ambiente y la escala térmica, que
parpadea en el segmento de la hora corriente. Esto
significa que el cronotermostato está funcionando.
Tuesday mardi Dienstag martedí martes
Fig. 10
P - 27
GB
F
D
2.5 - Programming half-hours
2.5 - Programmation de la demi-heure
2.5 - Programmierung einer halben Stunde
Example - Program:
from 08:00 to 08:30 temperature t1 (comfort)
from 08:30 to 09:00 temperature t2 (economy)
Exemple - Programmer:
de 08:00 à 08:30 température t1 (confort)
de 08:30 à 09:00 température t2 (economie)
•
Fixer la température t1 à 08h00. Le chiffre au
niveau de t2 disparaît alors que les chiffres pour
la programmation de l’heure suivante clignotent
(09:00 - fig. 11a).
•
Appuyer sur la touche /Day pour revenir à la
programmation de l’heure précédente (08:00). Le
chiffre au niveau de t2 clignote (fig. 11b).
Attention:pour la deuxième demi-heure, l’on
peut sélectionner les températures: t2, t .
•
Fixer la température t2 pour la deuxième demiheure. Au niveau de 08:00, les chiffres relatifs à
t1 et à t2 sont fixes, tandis que les chiffres utilisés pour la programmation de l’heure suivante
(09:00) se mettent à clignoter (fig. 11c).
Beispiel- Programmieren:
von 08:00 Uhr bis 08:30 Uhr Temperatur t1 (Komfort)
von 08:30 Uhr bis 09:00 Uhr Temperatur t2 (Economy)
•
•
•
Set temperature t1 to 08:00 o’clock. The digit corresponding to t2 disappears and the digits for
programming the next hour will flash (09:00
o’clock - fig. 11a).
Press /Day key to return to programming the
previous hour (08:00 o’clock). The digit corresponding to t2 will flash (fig. 11b).
Warning: for the second half-hour it will be possible only to select temperatures: t2, t
Set temperature t2 for the second half-hour. For
08:00 the two t1 and t2 digits remain permanently
alight, whilst the digits for the next hour (09:00)
will blink (fig. 11c).
•
•
•
Stellen Sie die Temperatur t1 für 08:00 Uhr ein.
Die Ziffer für t2 erlöscht, die Ziffern für die Programmierung der nächsten Stunde (09:00 Uhr Abb. 11a) blinken.
Betätigen Sie die Taste /Day , um zur Programmierung der vorherigen Stunde zurückzukehren
(08:00 Uhr). Die beiden Zahlen bezüglich der t2
blinken auf (Abb. 11b).
Achtung: für die zweite Stundenhälfte können
die Temperaturen: t2, t angewählt werden.
Stellen Sie die Temperatur t2 für die zweite Hälfte
der Stunde ein. Für 08:00 Uhr werden t1 und t2
kontinuierlich angezeigt, während die Zahlen für
die Programmierung der darauffolgenden Stunde (09:00 Uhr) blinken (Abb. 11c).
2.6 - Read programs
2.6 - Lecture des programmes insérés
2.6 - Anzeige der eingegebenen Programme
Press PROG: the display will show the program in
use. If the program is one of the four fixed programs
(P1 ÷ P4), the display will automatically show the settings by groups of days.
Having read the program, press OK to return to it; if
no confirmation is given, after 2 minutes the chronothermostat will revert to the program set initially.
Appuyer sur la touche PROG: le programme utilisé
apparaît sur l’afficheur. Si le programme est l’un des
quatre programmes fixes (P1 ÷ P4), les réglages sont
présentés automatiquement et en succession par
groupes de jours.
A la fin de la lecture du programme, appuyer sur la
touche OK pour le réinsérer; en l’absence de cette
opération, dans les 2 minutes qui suivent, le chronothermostat réinsère le programme introduit au départ.
Si le programme utilisé est le P 5, le défilement du
réglage de chaque jour se fait automatiquement; 2
minutes après, le programme P 5 est réinséré automatiquement.
Betätigen Sie die Taste PROG: die Anzeige gibt das
aktuelle Programm wieder. Stimmt dieses mit einem
der gespeicherten Programme überein (P1 ÷ P4), so
werden in automatischer Reihenfolge die Eingaben
bezüglich gruppierter Wochentage angegeben.
Nach der Anzeige des Programms drücken Sie auf
OK um es wieder einzugeben (andernfalls nimmt der
Zeitthermostat nach 2 Minuten das ursprünglich eingegebene Programm wieder auf)
Falls das aktuelle Programm mit P 5 übereinstimmt,
werden die Eingaben automatisch nacheinander
angezeigt; nach einer Minute wird automatisch das
If the program in use is P 5, the settings for each day
will scroll automatically; after 2 minutes, program P 5
will be re-set automatically.
P - 28
I
E
2.5 - Programmazione della mezz'ora
2.5 - Programación cada media hora
Esempio - Programmare:
dalle ore 08:00 alle ore 08:30 temp. t1 (comfort)
dalle ore 08:30 alle ore 09:00 temp. t2 (economy)
Ejemplo - Programar:
de las 08:00 a las 08:30 la temperatura t1 (confort)
y de las 08:30 a las 09:00 la temperatura t2 (ahorro)
•
•
•
•
Fissare la temperatura t1 alle ore 08:00. Scompare il digit in corrispondenza di t2 e lampeggiano
i digit per la programmazione dell’ora successiva (ore 09:00 - fig. 11a).
Premere il tasto /Day per tornare nella programmazione dell’ora precedente (ore 08:00).
Lampeggia il digit in corrispondenza di t2 (fig.
11b).
Attenzione: per la seconda mezz'ora si possono selezionare le temperature: t2, t .
Fissare la temperatura t2 per la seconda mezz'ora. In corrispondenza delle ore 08:00 i digit
relativi a t1 e t2 sono fissi, mentre lampeggiano i
digit per la programmazione dell’ora successiva
(ore 09:00 - fig. 11c).
•
•
•
Programar la temperatura t1 para las 08:00 horas. Desapare el segmento correspondiente a
t2 y empiezan a parpadear los segmentos de la
hora siguiente (09:00 horas - fig. 11a).
Presionar la tecla //Day para volver a la programación de la hora anterior (08:00). Parpadea
el segmento correspondiente a t2 (fig. 11b).
Atención: para la segunda media hora se pueden seleccionar las temperaturas: t2, t
Programar la temperatura t2 para la segunda
media hora. Los segmentos correspondientes a
t1 e t2 para las 08:00 están fijos, mientras que
los de la hora siguiente parpadean (09:00 horas
- fig. 11c).
2.6 - Lettura dei programmi inseriti
2.6 - Lectura de los programas introducidos
Premere il tasto PROG: apparirà sul display il programma utilizzato. Nel caso il programma sia uno
dei quattro programmi fissi inseriti (P1 ÷ P4), verranno presentate in successione automatica le
impostazioni per gruppi di giorni.
Al termine della lettura del programma premere il
tasto OK per reinserirlo (in assenza di questa operazione, dopo 2 minuti il cronotermostato reinserisce
il programma inizialmente impostato).
Se il programma utilizzato è il P 5, lo scorrimento
dell'impostazione di ciascun giorno avverrà automaticamente; trascorsi 2 minuti, il programma P 5
Presionar la tecla PROG: el display visualizará el programa utilizado. Si es uno de los cuatro programas
fijos (P1 ÷ P4), en sucesión automática se visualizan
las configuraciones por grupos de días.
Fig. 11
hour heure Uhr ora hora: 08:00
t1
Fig. 11a
hour heure Uhr ora hora: 09:00
/DAY
Fig. 11b
hour heure Uhr ora hora: 08:30
t2
Al terminar la lectura del programa hay que presionar OK para volver a confirmarlo. (Si no se presiona
OK, al cabo de dos minutos el cronotermostato vuelve a introducir el programa inicial).
Si el programa utilizado es P 5 se sucede la configuración de cada día, y al cabo de dos minutos P 5 se
vuelve a introducir automáticamente.
Fig. 11c
hour heure Uhr ora hora: 09:00
P - 29
GB
N.B.: In read mode, programs are selected
sequentially by pressing PROG.
F
N.B.: Au cours de la lecture, on passe d’un programme au suivant en appuyant sur la touche PROG.
With Read Programs activated, it is possible to
replace the current program and/or change program P 5.
Pendant la lecture des programmes, il est possible de remplacer le programme en cours et/ou
de modifier le programme P 5.
Remplacement du programme en cours d’utilisation.
Pour remplacer le programme actuellement en fonction, sélectionner avec la touche PROG le nouveau
programme et confirmer la nouvelle sélection en appuyant sur la touche OK.
Modification du programme P 5
Au cours de la lecture du programme P 5, appuyer
sur la touche OK: le programme du lundi apparaît et
les chiffres de la première heure clignotent. Effectuer
la programmation en suivant la démarche indiquée
dans le paragraphe 2.4.
D
Programm P 5 wieder aufgenommen.
Hinweis: Während der Programmanzeige geht man
durch das Betätigen der Taste PROG in das darauffolgende Programm.
Während der Anzeige der Programme kann das
aktuelle Programm ersetzt bzw. das Programm
P 5 verändert werden.
Änderung des aktuellen Programms.
Um das aktuelle Programm zu ändern, wählen Sie
mit der Taste PROG das neue Programm aus und
bestätigen dieses durch die Betätigung der Taste OK.
Änderung des Programms P 5
Drücken Sie während der Programmanzeige des Programms P5 auf die Taste OK: das Programm für
Montag wird angezeigt, indem die Zahlen der ersten
Stunde blinken. Nehmen Sie die Programmierung vor
wie in Abschnitt 2.4 beschrieben.
2.7 - Reset
2.7 - Reset
2.7 - Reset
To clear unwanted data that may have been entered (e.g. after a programming test), press PROG
and /Day simultaneously.
All segments of the display light up (general self-test
- fig. 12).
Afterwards, the display will appear as in fig.13 and
the chronothermostat is ready to be programmed
again (heading 2.3-a).
Si l’on désire annuler les données insérées (par exemple, après un essai de programmation), appuyer en
même temps sur les deux touches: PROG et /Day.
L’afficheur fait apparaître tous les segments allumés
(autotest général - fig. 12).
Ensuite, l’afficheur se présente comme à la fig. 13 et
le chronothermostat est prêt pour une nouvelle programmation (paragraphe 2.3-a).
Attention: la commande de reset n’agit pas sur les
fonctions suivantes: valeurs des plages de température bloquées - exclusion de la température antigel accouplement au récepteur.
Le reset suspend temporairement la transmission via
radio qui reprendra automatiquement à la fin de la
nouvelle programmation.
Wenn Sie die eingegebenen Daten annullieren möchten (z.B. nach einer Probe-Programmierung), drükken Sie gleichzeitig auf die beiden Tasten: PROG und
/Day. Auf der Anzeige leuchten sämtliche Segmente
(allgemeiner Auto-Test - fig. 12).
Nach dem Rückstellen werden dieselben Angaben
wie in Abb.13. Der Zeitthermostat ist für eine neue
Programmierung bereit (Abschnitt 2.3-a).
Achtung: die Reset-Taste beein nicht flußt folgende
Funktionen: gesperrte Temperaturwerte - Ausschließung der Frostschutztemperatur - Angleichen an den
Empfänger. Die Funktion Reset setzt die Funkübertragung für eine begrenzte Zeit aus; diese wird
am Ende der neuen Programmierung automatisch
wieder aufgenommen.
Replacing the program in use.
To replace the current program, select another one
using the PROG button, then press OK to confirm.
Changing program P 5
While reading program P 5, press OK: the display
will show the Monday program with the digits of the
first hour blinking. Proceed with programming as described in heading 2.4.
Important: the reset does not affect the following functions, which remain in the memory:fixed temperature
set points - antifreeze temperature deselected - coupling to the receiver.
Reset temporarily suspends radio transmission; this
will automatically resume when the new programming
is completed.
P - 30
I
verrà reinserito automaticamente.
N.B.: in lettura dei programmi, si passa da un programma al successivo premendo il tasto PROG.
Nello stato di lettura programmi è possibile sostituire il programma in uso e/o modificare il programma P 5.
Sostituzione del programma in uso.
Per sostituire il programma attualmente in funzione,
selezionare con tasto PROG il nuovo programma e
confermare la nuova scelta premendo il tasto OK.
Modifica del programma P 5
In lettura del programma P 5, premere il tasto OK:
verrà visualizzato il programma del lunedì con lampeggianti i digit della prima ora. Procedere alla programmazione come indicato nel paragrafo 2.4.
E
NOTA: Para pasar de un programa al siguiente hay
que presionar PROG.
2.7 - Reset
2.7 - Reinicialización (Reset)
Se si desidera annullare i dati inseriti (ad esempio
dopo una prova di programmazione) premere contemporaneamente i due tasti: PROG e /Day.
Sul display appariranno tutti i segmenti accesi
(autotest generale - fig. 12). Successivamente il
display si presenterà come in fig.13 ed il cronotermostato sarà pronto per una nuova programmazione (paragrafo 2.3-a).
Attenzione: il comando di reset non agisce
sull’impostazione delle seguenti funzioni: valori dei
set di temperatura bloccati - esclusione della temperatura di antigelo - abbinamento al ricevitore.
Il reset sospende temporaneamente la trasmissione
via radio; questa riprenderà automaticamente al termine della nuova programmazione.
Si se desea anular los datos introducidos (por ejemplo, después de hacer una prueba) hay que presionar simultáneamente las teclas: PROG y /Day.
Todos los segmentos se encienden (autotest general - fig. 12).
Tras la reinicialización el display se presenta como
en la fig. 13; sucesivamente el cronotermostato esta
listo para una nueva programación (apartado 2.3-a).
Atención: no obstante la reinicialización, la memoria conserva las siguientes funciones: temperaturas
bloqueadas - aexclusión de la temperatura antihielo
- combinación con el receptor.
El restablecimiento suspende temporalmente la transmisión por radio; ésta se reanuda automáticamente
al término de la programación.
Durante la lectura es posible tanto sustituir el programa que se está utilizando como modificar el
programa P 5.
Sustitución del programa que se está utilizando.
Para sustituir el programa que se está utilizando hay
que seleccionar con la tecla PROG el nuevo programa y confirmar la selección presionando OK.
Modificación del programa P 5
Si durante la lectura del programa P 5 se presiona
OK, se visualiza el programa del lunes y parpadean
los segmentos de la primera hora. Para modificar el
programa hay que consultar el apartado 2.4.
Fig. 12
Reset
Reinicialización
Blinking - Clignotant - Blinkend
Lampeggianti - Parpadeante
Fig. 13
P - 31
GB
F
D
2.8 - Changing Comfort, Economy and
Antifreeze temperatures
2.8 - Modification des températures
Confort, Economy et Antigel
2.8 - Änderung der Temperaturen
Comfort, Economy und Frostschutz
If the factory set temperatures:
t1 = 20 °C, t2 = 17 °C, t = 5 °C (winter)
t1 = 26 °C, t2 = 29 °C, t = - - (summer)
(anti-freeze not anticipated for the “summer”)
do not satisfy your needs, they can be changed at
will, as indicated below:
Si les températures préétablies:
t1 = 20 °C, t2 = 17 °C, t = 5 °C (hiver)
t1 = 26 °C, t2 = 29 °C, t = - - (eté)
(antigel non prévue pour l“Eté”)
ne répondent pas à vos besoins, il est possible de
les modifier à votre guise, comme indiqué ci-dessous:
t1 and t2 can be set between +5 °C and +39 °C
t1 et t2 modifiables de +5 °C à +39 °C
t anti-freeze can be set between +5 °C and +15 °C
t antigel modifiable de +5 °C à +15 °C
•
Use t1/t2/t to select the temperature set point
that needs changing, indicated by the blinking
arrow (fig. 14).
•
Avec la touche t1/t2/t , sélectionner le réglage
de température que l’on souhaite modifier et indiqué par la flèche clignotante (fig. 14).
•
Change the current set point by pressing but(reduce) or
(increase) momentarily.
tons:
At each touch the value changes by 0.5 °C.
•
Modifier la température sélectionnée en ap(abaispuyant par à-coups sur les boutons:
ser) (augmenter). Chaque impulsion entraîne
une variation de 0,5 °C.
Sofern die vorgegebenen Temperaturen:
t1 = 20 °C, t2 = 17 °C, t = 5 °C (Winter)
t1 = 26 °C, t2 = 29 °C, t = - - (Sommer)
(Frostschutz für “Sommer” nicht vorgesehen)
Ihren persönlichen Bedürfnissen nicht entsprechen,
so können diese beliebig geändert werden, wie im
Folgenden beschrieben ist:
t1 e t2 veränderbar zwischen +5 °C und +39 °C
t Frostschutz veränderbar zwischen +5 °C und
+15 °C
•
Wählen Sie mit den Tasten t1/t2/t eine
Temperaturgruppe aus, die verändert werden
soll; diese wird durch den blinkenden Pfeil angezeigt (Abb. 14).
The new temperatures selected in this way will be
the new set points (for all programs).
With programming completed, the arrow automatically
returns to the set point for the current hour approximately 5 seconds after the last touch of the button.
N.B.: the device will accept temperature values that
satisfy the following conditions:
Winter:
t1 greater than or equal to t2 greater than or equal to t
Summer:
t2 greater than or equal to t1
Les températures ainsi fixées constituent une nouvelle référence pour le réglage de température relatif
(pour tous les programmes).
La programmation étant achevée, la flèche revient
automatiquement au réglage concerné par l’heure
actuelle, environ 5 secondes après le dernier
actionnement de la touche.
N.B.: le dispositif permet d’introduire des valeurs de
température répondant aux conditions suivantes:
Hiver:
t1 égale ou supérieure à t2 égale ou supérieure à t
Eté:
t2 égale ou supérieure à t1
P - 32
•
Ändern Sie die Temperatureinstellung durch wiederholtes Drücken auf die Tasten:
(niedriger)
(höher). Jeder Tastendruck entspricht einer
Änderung von 0,5 °C.
Auf die neu festgelegte Temperaturgruppe beziehen
sich nun alle Eingaben (für alle Programme).
Wenn die Programmierung abgeschlossen ist, geht
ca. 5 Sek.. nach der letzten Tastenbedienung der Pfeil
automatisch auf die vorangehende aktuelle Anzeige
zurück.
Hinweis: die Temperatureinstellung der Vorrichtung
muss den folgenden Bedingungen entsprechen:
Winter:
t1 größer oder gleich t2 größer oder gleich t
Sommer:
t2 größer oder gleich t1
I
E
2.8 - Modifica delle temperature di
Comfort, Economy e di Antigelo
2.8 - Modificación de las temperaturas
Confort, Ahorro y Antihielo
Nel caso le temperature prefissate in fabbrica:
t1 = 20 °C, t2 = 17 °C, t = 5 °C (per inverno)
t1 = 26 °C, t2 = 29 °C, t = - - (per estate)
(antigelo non previsto per "estate")
non soddisfino le Vostre necessità, si potranno modificare a piacimento come sotto indicato:
Si las temperaturas programadas de fábrica::
t1 = 20 °C, t2 = 17 °C, t = 5 °C (invierno)
t1 = 26 °C, t2 = 29 °C, t = - - (verano)
(antihielo no previsto para “Verano”)
no satisfacen las exigencias del usuario, es posible
modificarlas:
t1 e t2 modificabili da +5 °C a +39 °C
t1 y t2 se pueden modificar entre +5 °C y +39 °C
t antigelo modificabile da +5 °C a +15 °C
t antihielo se puede modificar entre +5 °C y +15 °C
•
Selezionare con il tasto t1/t2/t il set di temperatura che si desidera modificare, indicato dalla
freccia lampeggiante (fig. 14).
•
Seleccionar con la tecla t1/t2/t la temperatura que se desea modificar. La flecha parpadea
(fig. 14).
•
Modificare la temperatura selezionata agendo
ad impulsi sui pulsanti:
(abbassare)
(alzare). Ad ogni impulso corrisponde una variazione di 0,5 °C.
•
Modificar la temperatura seleccionada presionando repetidamente las teclas:
(para reducirla)
o
(para aumentarla). A cada impulso corresponde una variación de 0,5 °C.
Le temperature così fissate saranno il nuovo riferimento del relativo set di temperatura (per tutti i programmi).
Terminata la programmazione, dopo circa 5 sec. dall’ultimo azionamento del tasto, la freccia ritorna automaticamente al set interessato dall’ora attuale.
Las temperaturas elegidas serán la nueva referencia de temperatura (para todos los programas).
Terminada la programación, 5 segundos después de
presionar la tecla por última vez, la flecha vuelve
automáticamente a la temperatura de la hora corriente.
N.B.: il dispositivo consente valori di temperatura
che soddisfino le seguenti condizioni:
Nota: el dispositivo admite sólo determinados valores de temperatura de acuerdo con las siguientes
condiciones:
Inverno:
t1 maggiore o uguale a t2 maggiore o uguale a t
Estate:
t2 maggiore o uguale a t1
Invierno:
t1 mayor o igual que t2 mayor o igual que t
Verano:
t2 mayor o igual que t1
Fig. 14
Selected temperature set point indicator
Indice de la plage de température sélectionnée
Zeigt die gewählte Temperaturgruppe an
Indice del set di temperatura selezionato
Índice de la temperatura seleccionada
Increase temperature
Augmenter la température
Temperatur höher
Alzare la temperatura
Aumentar la temperatura
Select temperature set point
Sélection réglage température
Auswahl der Temperaturgruppe
Selezione set temperatura
Selección de la temperatura
t1 = Comfort, confort,
Komfort
t2 = Economy, Economie,
Economia, Ahorro
t = Antifreeze, Antigel,
Frostschutz, Antigelo,
Antihielo
Decrease temperature
Abaisser la température
Temperatur niedriger
Abbassare la temperatura
Reducir la temperatura
P - 33
GB
F
D
2.9 - Limiting settable temperature values
2.9 - Limitation des valeurs de température programmables
2.9 - Begrenzungen für die einzugebenden
Temperaturwerte
The maximum and/or minimum temperature settable
with the chronothermostat, or both, can be limited.
This limitation can be applied to both winter and summer operations; the relative settings are stored and
will not be deleted by a reset.
The operation can be executed only with the program
activated (P1.... P5).
Example: winter operation; maximum settable temperature (t1) = 19 °C, minimum settable temperature
(t2) = 15 °C.
Set the maximum t1 and/or minimum t2 temperature
using buttons
and (see heading 2.8), then store
the values.
Press and hold buttons t1 and t2 simultaneously until
the two temperature values t1 and t2 start blinking;
then release. (fig. 15)
Il est possible de limiter les valeurs: maximum, minimum ou les deux, de la température programmable
sur le chronothermostat. La limitation peut être appliquée aussi bien au fonctionnement hiver qu’au fonctionnement eté; les valeurs respectivement introduites sont mémorisées et elles ne sont pas effacées
par la commande reset.
L’opération ne peut être exécutée que lorsque le programme (P1.... P5) est en fonction.
Exemple: fonctionnement hiver; température maximale programmable (t1) = 19 °C, température minimale programmable (t2) = 15 °C.
et
la vaAprès avoir introduit avec les touches
leur de la température maximale t1 et/ou minimale t2
(voir paragraphe 2.8), les fixer. Maintenir appuyées
en même temps les touches t1 et t2 jusqu’à ce que
se mettent à clignoter les deux valeurs de température t1 et t2; ensuite, les relâcher (fig.15).
Folgende Werte können begrenzt werden: max. und/
oder min. der in den Zeitthermostat einzugebenden
Temperaturwerte. Diese Begrenzung kann sowohl für
den Winter- als auch für den Sommer-Betriebsmodus
eingerichtet werden; die diesbezüglich eingegebenen
Werte werden gespeichert und können durch die Taste Reset nicht gelöscht werden.
Dieser Vorgang kann ausschließlich bei Aktivierung eines der Programme ( P1.... P5) vorgenommen werden.
Beispiel: Winter-Betriebsmodus; einstellbare Temperatur max. (t1) = 19 °C, einstellbare Temperatur
min.(t2) = 15 °C.
Mit Hilfe der Tasten
und
werden die max. t1
bzw. min.-Werte t2 eingestellt (siehe Abschnitt 2.8)
woraufhin diese gespeichert werden müssen.
Halten Sie gleichzeitig die Tasten t1 und t2 gedrückt,
bis die zwei Temperaturwerte t1 sowie t2 blinken;
lassen Sie nun die Taste los (Abb. 15).
a)
Pour fixer les deux limites de température:
appuyer sur la touche t1, puis sur la touche t2;
l’afficheur bloque les valeurs respectives accompagnées des indices
qui clignotent (fig. 16).
Appuyer sur la touche OK pour confirmer: le chronothermostat revient au programme de fonctionnement en cours.
a)
Um beide Temperaturgrenzen festzulegen: betätigen Sie die Taste t1, und anschließend t2; auf
der Anzeige stehen nun neben den blinkenden
Pfeilen die jeweiligen Werte (Abb. 16). Zur Bestätigung drücken Sie die Taste OK: der Zeitthermostat stellt auf den aktuellen Betrieb zurück.
b)
Pour fixer uniquement la valeur de température
maximale : appuyer sur la touche t1; l’afficheur
bloque la valeur de t1, accompagnée par l’indice
qui clignote (fig. 17). Appuyer sur la touche OK
pour confirmer: le chronothermostat revient au
programme de fonctionnement en cours.
b)
Um nur den max. Temperaturwert zu begrenzen: betätigen Sie die Taste t1; der Wert t1 wird
neben dem blinkenden Pfeil angezeigt (Abb.
17). Zur Bestätigung drücken Sie die Taste OK:
der Zeitthermostat stellt auf den aktuellen Betrieb zurück.
a)
b)
To store both temperature limits: press t1, then
press t2; the relative values will be fixed on the
display with the indicators blinking alongside
(fig. 16). Press OK to confirm: the chronothermostat will revert to the currently activated program.
To fix the maximum temperature limit only:
press t1; the t1 value will be fixed on the display,
with the indicator blinking alongside (fig. 17).
Press OK to confirm: the chronothermostat will
revert to the currently activated program.
P - 34
I
E
2.9 -Limitazione dei valori di temperatura
impostabili
2.9 - Limitación de los valores de
temperatura programables
È possibile limitare i valori: massimo, minimo, o entrambi, della temperatura impostabile sul cronotermostato. La limitazione può essere applicata sia al
funzionamento inverno sia al funzionamento estate; i
rispettivi valori impostati sono memorizzati e non vengono cancellati dal comando reset.
L’operazione è eseguibile solo con il programma
(P1....P5) in funzione.
Esempio: funzionamento inverno; temperatura massima impostabile (t1) = 19 °C, temperatura minima
impostabile (t2) =15 °C.
Dopo aver impostato con i tasti
e
il valore
della temperatura massima t1 e/o minima t2 (vedi
paragrafo 2.8) procedere al loro fissaggio.
Mantenere premuti contemporaneamente i tasti t1 e
t2 fino al lampeggio dei due valori di temperatura t1
e t2; quindi rilasciarli (fig.15).
Es posible determinar la máxima de temperatura
programable, la mínima o ambas. La limitación puede aplicarse tanto al funcionamiento de invierno como
al de verano. Los valores quedan memorizados y no
se borran con la reinicialización (reset).
La limitación puede efectuarse sólo cuando el programa está en funcionamiento (P1.... P5).
Ejemplo: funcionamiento de invierno; temperatura
máxima programable (t1) = 19 °C, temperatura mínima programable (t2) = 15 °C.
Después de determinar con las teclas
y
los
valores de temperatura máxima t1 y/o mínima t2 (ver
apartado 2.8) para fijarlos hay que:
presionar simultáneamente las teclas t1 y t2 hasta
que parpadeen los dos valores de temperatura t1, y
t2; luego soltarlas. (fig.15)
a)
Per fissare entrambi i limiti di temperatura:
premere il tasto t1, quindi premere il tasto t2; sul
display si bloccano i rispettivi valori con a fianco
gli indici lampeggianti (fig.16). Premere il tasto
OK per confermare: il cronotermostato torna al
programma di funzionamento in corso.
b)
Per fissare il solo valore massimo di temperatura: premere il tasto t1; sul display si blocca
il valore di t1, affiancato dall’indice lampeggiante (fig.17). Premere il tasto OK per confermare:
il cronotermostato torna al programma di funzionamento in corso.
a)
Para fijar ambos límites de temperatura:
presionar la tecla t1, y luego la tecla t2; en el
display los valores se bloquean y los índices
que están al lado parpadean (fig.16). Presionar
OK para confirmar: el cronotermostato vuelve al
programa que se está utilizando.
b)
Para fijar sólo el valor máximo de
temperatura: presionar la tecla t1; en el display
el valor de t1 se bloquea y el índice que está
al lado parpadea (fig.17). Presionar OK para
confirmar: el cronotermostato vuelve al programa
que se está utilizando.
Blinking - Clignotant - Blinkend
Lampeggianti - Parpadeante
fig.15
Blinking - Clignotant - Blinkend
Lampeggianti - Parpadeante
fig. 16
P - 35
c)
GB
To fix the minimum temperature limit only:
press t2; the t2 value will be fixed on the display,
with the indicator blinking alongside. Press OK
to confirm: the chronothermostat will revert to the
program currently activated.
c)
Cancellation of the set temperature limits (individually or both)
•
•
•
Press and hold buttons t1 and t2 simultaneously
until the indicators appear blinking alongside
the fixed temperature values t1 and/or t2, then
release.
Press t1 and/or t2 to clear one limit, or both. The
temperature values released will blink, without the
indicators.
Press OK to confirm: the chronothermostat will
revert to the currently activated program.
Annullation des limites de température définies
(ensemble ou séparément)
c)
•
Appuyer en même temps sur les touches t1 et
t2 et attendre que les indices se mettent à clignoter à côté des valeurs de température t1 et/
ou t2 bloquées, puis relâcher.
Appuyer sur la touche t1 et/ou la touche t2 pour
annuler le bloc désiré ou tous les deux. Les valeurs de température débloquées clignotent, sans
indices.
Appuyer sur la touche OK pour confirmer: le chronothermostat revient au programme de fonctionnement en cours.
D
Um nur den max. Temperaturwert zu
begrenzen:
betätigen Sie die Taste t2; der Wert t2 wird neben dem blinkenden Pfeil angezeigt. Zur Bestätigung drücken Sie die Taste OK: der Zeitthermostat stellt auf den aktuellen Betrieb zurück.
Annullieren der eingegebenen Temperaturrenzen (einzeln oder zusammen)
•
•
•
P - 36
F
Pour fixer uniquement la valeur de température minimale:
appuyer sur la touche t2; l’afficheur bloque la
valeur de t2, accompagnée de l’indice qui clignote. Appuyer sur la touche OK pour confirmer:
le chronothermostat revient au programme de
fonctionnement en cours.
•
•
Drücken Sie gleichzeitig auf die Tasten t1 und
t2, bis die blinkenden Pfeile
neben den gespeicherten Werten t1 bzw. t2 stehen.
Drücken Sie die Tasten t1 bzw. t2 um die Sperrung eines Wertes oder beider Werte zu annullieren. Die freigegebenen Temperaturwerte blinken ohne Anzeige der Pfeile.
Zur Bestätigung drücken Sie die Taste OK: der
Zeitthermostat stellt auf den aktuellen Betrieb zurück.
I
c)
Per fissare il solo valore minimo di
temperatura:
premere il tasto t2; sul display si blocca il valore di
t2, affiancato dall’indice lampeggiante. Premere
il tasto OK per confermare: il cronotermostato torna al programma di funzionamento in corso.
E
c)
Para fijar sólo el valor mínimo de
temperatura:
presionar la tecla t2; en el display el valor de t2
se bloquea y el índice parpadea. Presionar OK
para confirmar: el cronotermostato vuelve al programa que se está utilizando.
Annullamento dei limiti di temperatura impostati
(singolarmente o entrambi)
Anulación de los límites de temperatura programados (en forma individual o conjunta)
•
•
•
•
Premere contemporaneamente i tasti t1 e t2 fino
alla comparsa degli indici lampeggianti a fianco dei valori di temperatura t1 e/o t2 bloccati,
quindi rilasciare.
Premere il tasto t1 e/o il tasto t2 per annullare il
blocco desiderato, o entrambi. I valori di temperatura sbloccati lampeggeranno, privi degli indici.
Premere il tasto OK per confermare: il cronotermostato torna al programma di funzionamento
in corso.
•
•
Presionar simultáneamente las teclas t1 y t2
hasta que los índices que parpadean al lado
de los valores de temperatura t1 o t2 se bloqueen; luego soltarlas.
Presionar la tecla t1 o la tecla t2 o ambas para
anular el bloqueo. Los valores de temperatura
desbloqueados empiezan a parpadear sin índices.
Presionar OK para confirmar: el cronotermostato vuelve al programa que se está utilizando.
Blinking - Clignotant - Blinkend
Lampeggianti - Parpadeante
fig. 17
P - 37
GB
F
D
2.10 - Programming
Winter
- Summer
2.10 - Programmation
Hiver - Eté
2.10 - Programmierung
Winter
- Sommer
The chronothermostat is factory-set for "winter" op-
En usine, votre chronothermostat est prévu pour
Ihr Zeitthermostat wird werkseits für den Betriebs-
eration, displayed as:
fonctionner en mode "hiver" visualisé par:
(fig. 18).
modus “Winter“ eingestellt Visualisierung:
(Abb. 18).
Unter diesen Bedingungen wird die gesteuerte Anlage (Kessel) gemäß des nachfolgenden Beispiels
eingegeben:
(fig. 18).
Under these conditions the appliance (burner) will be
activated as described in the example below:
Temperature set points:
t1 - Comfort = 20 °C
t2 - Economy = 17 °C
t - Antifreeze = 5 °C
Burner operation with
room temperature:
< 20 °C
< 17 °C
< 5 °C
Dans ces conditions, l’utilisateur commandé (chaudière) est inséré comme dans l’exemple ci-dessous:
Réglage de
Chaudière en fonction avec
température:
température ambiante:
t1 - Confort = 20 °C
< 20 °C
t2 - Economie = 17 °C
< 17 °C
< 5 °C
t - Antigel = 5 °C
Burner operation will be indicated by ON blinking.
If the controlled appliance is an air conditioner: press
the
as:
/
button for "summer" operation, displayed
Le fonctionnement de l’utilisateur est indiqué par le
mot ON qui clignote.
Si l’utilisateur est un climatiseur: appuyer sur la tou-
(fig. 19).
In these conditions the appliance (air conditioner) will
be activated as described in the example below:
che
/
lisé par:
pour avoir le fonctionnement "été" visua(fig. 19).
Dans ces conditions, l’utilisateur commandé (climatiseur) est inséré comme dans l’exemple ci-dessous:
Temperature set points:
t1 - Comfort = 26 °C
t2 - Economy = 29 °C
Air conditioner operation
with room temperature:
> 26 °C
> 29 °C
Air conditioner operation will be indicated by ON
blinking.
In both cases the temperature values can be changed.
Réglage de
Climatiseur en fonction avec
température:
température ambiante:
t1 - Confort = 26 °C
> 26 °C
t2 - Economie = 29 °C
> 29 °C
Le fonctionnement de l’utilisateur est indiqué par le
mot ON qui clignote.
Dans les deux cas, les valeurs de température peuvent être modifiées.
P - 38
Temperaturregler:
t1 - Komfort = 20 °C
t2 - Economy = 17 °C
t - Frostschutz = 5 °C
Kessel in Betrieb
bei Raumtemperatur:
< 20 °C
< 17 °C
< 5 °C
Der Betrieb der Anlage wird durch den blinkenden
Schriftzug ON gekennzeichnet.
Wenn es sich bei der Anlage um eine Klimaanlage
handelt: drücken Sie die Taste
/
um auf den
Betriebsmodus "Sommer" umzustellen. Visualisierung:
(Abb. 19).
Unter diesen Bedingungen wird die gesteuerte Anlage (Klimaanlage) gemäß des nachfolgenden Beispiels eingegeben:
Temperaturregler:
t1 - Komfort = 26 °C
t2 - Economy = 29 °C
Klimaanlage in Betrieb
bei Raumtemperatur:
> 26 °C
> 29 °C
Der Betrieb der Anlage wird durch den blinkenden
Schriftzug ON gekennzeichnet.
In beiden Fällen können die Temperaturwerte geändert werden.
I
E
2.10 - Programmazione
Inverno - Estate
2.10 - Programación
Invierno - Verano
II Vostro cronotermostato viene predisposto in fabbrica per il funzionamento “inverno” visualizzato da:
El cronotermostato viene programado de fábrica
para funcionar en "Invierno" visualizado con la fle-
(fig. 18).
In tali condizioni verrà inserita I’utenza comandata
(caldaia) come da esempio sotto indicato:
cha:
Set di temperatura:
t1 - Comfort = 20 °C
t2 - Economy = 17 °C
t - Antigelo = 5 °C
Caldaia in funzione con
temperatura ambiente:
< 20 °C
< 17 °C
< 5 °C
(fig. 18).
En tales condiciones la caldera se conecta como se
indica en el ejemplo siguiente:
Temperaturas
Caldera en funcionamiento
de ajuste:
con temperatura ambiente:
t1 - Confort = 20 °C
< 20 °C
t2 - Ahorro = 17 °C
< 17 °C
< 5 °C
t - Antihielo = 5 °C
Il funzionamento dell'utenza verrà segnalato dalla
scritta lampeggiante ON.
El funcionamiento de la caldera estará señalizado por
el parpadeo de ON.
Se l'utenza è un condizionatore: premere il tasto
Si el equipo conectado es un acondicionador hay
per avere il funzionamento “estate” visualizzato da:
(fig. 19).
/ para poner el cronoque presionar la tecla
termostato en "Verano" visualizado con la flecha:
In tali condizioni verrà inserita I’utenza comandata
(condizionatore) come da esempio sotto indicato:
(fig. 19).
El acondicionador se conecta como se indica en el
ejemplo siguiente:
/
Set di temperatura:
Condizionatore in funzione
con temperatura ambiente:
t1 - Comfort = 26 °C
> 26 °C
t2 - Economy = 29 °C
> 29 °C
Winter
Hiver
Winter
Inverno
Invierno
Temperaturas
de ajuste:
t1 - Confort = 26 °C
t2 - Ahorro = 29 °C
Fig. 18
Acondicionador en
funcionamiento con
temperatura ambiente:
> 26 °C
> 29 °C
Il funzionamento dell'utenza verrà segnalato dalla
scritta lampeggiante ON.
El funcionamiento de l'acondicionador estará señalizado por el parpadeo de ON.
In entrambi i casi i valori di temperatura possono
essere variati.
En ambos casos los valores de temperatura pueden
variar.
ON
Summer
Eté
Sommer
Estate
Verano
Fig. 19
P - 39
GB
F
D
2.11 - Changing hour, minutes, day of the
week - Daylight saving/standard time
2.11 - Changement de l’heure, des minutes, du jour de la semaine - change
ment de l’heure d’été
2.11 - Verstellen der Stunde, der Minuten,
des Wochentags - Umstellung auf
die Sommer-/Sonnenzeit
Press and hold the /Day button until the hour digits start blinking (fig. 20).
Continuer d’appuyer sur la touche /Day jusqu’à ce
que n’apparaissent que les chiffres de l’heure en clignotant (fig. 20).
Halten Sie die Taste /Day gedrückt, bis ausschließlich die Zahlen der Stunde blinken (Abb. 20).
•
•
•
Change the hour (if necessary) by pressing the
/Day button. Press OK to confirm, even if no
change is made: hour digits fixed, minute digits
blinking (fig. 21).
Change the minutes (if necessary) by pressing
the /Day button. Press OK to confirm, even if
no change is made: minute digits fixed, day indicator blinking.
Select the day of the week (if necessary) by
pressing the /Day button. Press OK to confirm, even if no change is made.
The chronothermostat returns to the program currently active.
P - 40
•
Verstellen Sie die Stunde (sofern erforderlich),
indem Sie die Taste
/Day drücken. Bestätigen Sie auf jeden Fall durch die Betätigung der
Taste OK: die Zahlen der Stunde leuchten durchgehend, jene der Minuten blinken (Abb. 21).
•
Verstellen Sie die Minuten (sofern erforderlich),
indem Sie die Taste /Day drücken. Bestätigen
Sie auf jeden Fall durch Drücken der Taste OK:
die Zahlen der Minuten leuchten durchgehend,
die Anzeige des Wochentags blinkt.
•
Sélectionner le jour de la semaine (si besoin est)
en appuyant sur la touche /Day. Dans tous les
cas, confirmer en appuyant sur la touche OK.
Wählen Sie den Wochentag aus (sofern erforderlich), indem Sie die Taste /Day drücken. Bestätigen Sie auf jeden Fall durch Drücken der Taste OK.
Le chronothermostat revient au fonctionnement en
cours.
Der Zeitthermostat stellt auf den aktuellen Betrieb
zurück.
•
Modifier I’heure (si besoin est) en appuyant sur
la touche /Day. Dans tous les cas, confirmer
en appuyant sur la touche OK: les chiffres de
l’heure sont fixes et ceux des minutes clignotent
(fig. 21).
•
Modifier les minutes (si besoin est) en appuyant
sur la touche /Day. Dans tous les cas, confirmer en appuyant sur la touche OK: les chiffres
des minutes sont fixes, l’indice du jour de la semaine clignote.
•
I
E
2.11 - Cambio ora, minuti, giorno della
settimana - cambio ora legale/solare
2.11 - Cambio de hora, minutos, día de la
semana - cambio de hora legal/solar
Mantenere premuto il tasto /Day sino alla comparsa dei soli digit dell’ora, lampeggianti (fig. 20).
Mantener presionada la tecla /Day hasta que los
dígitos de la hora aparezcan y empiecen a parpadear (fig. 20).
•
•
•
Modificare I’ora (se occorre) premendo il tasto
/Day. In ogni caso confermare premendo il tasto OK: digit dell’ora fissi, lampeggeranno i digit
dei minuti (fig. 21).
Modificare i minuti (se occorre) premendo il tasto /Day. In ogni caso confermare premendo il
tasto OK: digit dei minuti fissi, lampeggerà l’indice del giorno della settimana.
•
Para modificar la hora (si se requiere) hay que
presionar la tecla /Day. En todo caso confirmar presionando la tecla OK. Los dígitos de la
hora quedan fijos y empiezan a parpadear los
de los minutos (fig. 21).
•
Para modificar los minutos (si se requiere) hay
que presionar la tecla /Day. En todo caso confirmar presionando la tecla OK: los dígitos de los
minutos quedan fijos y empieza a parpadear el
índice del día de la semana.
Selezionare il giorno della settimana (se occorre) premendo il tasto /Day. In ogni caso confermare premendo il tasto OK.
Il cronotermostato torna al funzionamento in corso.
•
Blinking - Clignotant - Blinkend
Lampeggianti - Parpadeante
Fig. 20
Blinking - Clignotant - Blinkend
Lampeggianti - Parpadeante
Seleccionar el día de la semana (si se requiere)
presionando la tecla /Day). En todo caso confirmar presionando la tecla OK.
El cronotermostato vuelve al funcionamiento que se
está utilizando.
Fig. 21
P - 41
GB
F
D
2.12 - Operation in MANUAL mode -
2.12 - Fonctionnement en MANUEL -
2.12 - MANUELLER Betriebsmodus -
There are 2 manual modes, both of which have the
effect of suspending the current program:
Il existe deux modes de fonctionnement manuel, avec
suspension du programme en cours:
Es stehen 2 manuelle Betriebsmodi zur Verfügung,
durch die das aktuelle Programm unterbrochen wird:
a) Temporary manual operation.
•
Press the
button momentarily: the indicator appears, blinking, below the symbol and
the current temperature level will be applied to
all hours of the day (fig. 22).
•
Select the temperature level in the Comfort,
Economy or Antifreeze modes range by pressing t1, t2, t .
a) Fonctionnement manuel temporaire.
•
Appuyer rapidement sur la touche
: l’indice
apparaît en clignotant, sous le symbole
et le niveau de température en cours est appliqué à toutes les heures de la journée (fig.
22).
•
Sélectionner le niveau de température Confort,
Economie ou Antigel désiré en appuyant sur
les touches respectives t1, t2, t .
Le fonctionnement manuel temporaire S’INTERROMPT AUTOMATIQUEMENT À MINUIT DU
JOUR ACTUEL.
Pour anticiper le retour au fonctionnement automatique (programme), appuyer de nouveau sur la touche
.
a) Zeitlich begrenzter manueller Betriebsmodus.
•
Drücken Sie kurz auf die Taste
: der Pfeil
blinkt , unter dem Symbol , und der
Temperaturbereich wird für jede Uhrzeit des Tages vorgegeben (Abb. 22).
•
Wählen Sie den gewünschten Temperaturbereich Komfort, Economy oder Frostschutz
aus, indem Sie die entsprechenden Tasten t1,
t2, t betätigen.
Der zeitlich begrenzte manuelle Betriebsmodus
ENDET AUTOMATISCH UM 24.00 UHR DES AKTUELLEN DATUMS.
Um den automatischen Betriebsmodus vorzuverlegen (Programm), drücken Sie erneut die Taste
.
Temporary manual operation CEASES AUTOMATICALLY AT MIDNIGHT ON THE CURRENT
DAY.
To return to automatic operation (program), press the
button again.
b) Permanent manual operation.
•
Press and hold the
button until the indicator , below the symbol, remains permanently
alight (3 seconds approx); the current temperature level will beapplied to all hours of the day.
•
Select the temperature level desired by pressing t1, t2 or t .
Permanent manual operation REMAINS ACTIVE
INDEFINITELY; to deselect manual mode and return
to automatic operation (program) press
.
b) Fonctionnement manuel permanent.
•
Maintenir la touche
appuyée jusqu’à ce
que l’indice , situé sous le symbole , ne devienne fixe (environ 3 secondes); le niveau de
température en cours est appliqué à toutes les
heures.
•
Sélectionner le niveau de température désiré en
appuyant sur les touches t1, t2 ou t .
Le fonctionnement manuel permanent RESTE
ACTIF POUR UNE DURÉE INDÉTERMINÉE; pour
le désactiver et revenir au fonctionnement automatique (programme), appuyer sur la touche
.
P - 42
b) Permanenter manueller Betriebsmodus.
•
Halten Sie die Taste
gedrückt, bis der Pfeil
, unter dem Symbol , durchgehend erscheint
(ca. 3 Sek.); der aktuelle Temperaturbereich wird
aufsämtliche Uhrzeiten angewendet.
•
Wählen Sie den gewünschten Temperaturbereich aus, indem Sie die Taste t1, t2 bzw. t
betätigen.
Der permanente manuelle Betriebsmodus IST
ZEITLICH UNBEGRENZT. Um diesen zu
deaktivieren und auf den automatischen Betriebsmodus zurückzugehen (Programm) drücken Sie auf
die Taste
.
I
E
2.12 - Funzionamento in MANUALE -
2.12 - Funcionamiento MANUAL -
Sono possibili 2 modi di funzionamento manuale,
con sospensione del programma in corso:
Son posibles 2 modos de funcionamiento manual con
los programas suspendidos:
a) Funzionamento manuale temporaneo.
•
Premere brevemente il tasto
: appare l'indice
, lampeggiante, sotto il simbolo e il
livello di temperatura in corso è applicato a tutte le ore del giorno (fig. 22).
•
Selezionare il livello di temperatura Comfort,
Economy o Antigelo desiderato premendo i rispettivi tasti t1,t2, t .
a) Funcionamiento manual temporal.
•
Presionar brevemente la tecla
: parpadea
el índice
debajo del símbolo y la temperatura programada se aplica a todas las horas del
día. (fig. 22)
•
Seleccionar el nivel de temperatura Confort, Actividad, o Antihielo presionando las teclas t1,t2,
t .
Il funzionamento manuale temporaneo CESSA
AUTOMATICAMENTE ALLA MEZZANOTTE DEL
GIORNO CORRENTE.
Per anticipare il ritorno al funzionamento automatico
(programma) premere nuovamente il tasto
.
El funcionamiento manual temporal CESA AUTOMÁTICAMENTE A LAS 24:00 DEL DÍA ACTUAL.
Para anticipar el retorno al funcionamiento automático (programado) hay que presionar nuevamente
la tecla
.
b) Funzionamento manuale permanente.
•
Mantenere premuto il tasto
fin quando
l'indice
, sotto il simbolo , diventa fisso (circa 3 sec.); il livello di temperatura in corso è
applicato a tutte le ore.
•
Selezionare il livello di temperatura desiderato
premendo i tasti t1, t2 o t .
b) Funcionamiento manual permanente.
•
Mantener presionada la tecla
hasta que
el índice
debajo del símbolo quede fijo (3
segundos aproximadamente); la temperatura
programada se aplica a todas las horas.
•
Seleccionar el nivel de temperatura presionando las teclas t1,t2, t .
Il funzionamento manuale permanente RESTA ATTIVO A TEMPO INDETERMINATO; per disattivarlo
e ritornare al funzionamento automatico (da programma) premere il tasto
.
El funcionamiento manual permanente QUEDA
ACTIVO POR TIEMPO INDETERMINADO; para
desactivarlo y volver al funcionamiento automático
(programado) hay que presionar la tecla
.
Temporary manual
Manuel temporaire
Manuell zeitlich begrenzt
Manuale temporaneo
Manual temporal
Blinking
Clignotant
Blinkend
Lampeggiante
Parpadeante
Permanent manual
Manuel permanent
Manuell permanent
Manuale permanente
Manual permanente
Alight
Allumé
Lichtsignal
Acceso
Encendido
Fig. 22
P - 43
GB
2.13 - Suspension of program for room
F
2.13 - Suspension du programme pour
nettoyage -
cleaning When operating with programs (P1 ÷ P5), the controlled appliance can be deactivated for 3 hours, by
pressing button , during which time the chronothermostat will switch to antifreeze mode (fig. 23).
The activation of this function is shown by the absence of the digits denoting the 3 hours, starting from
the current hour. Once the 3 hours have elapsed, the
chronothermostat will revert to the program interrupted.
Uniquement en fonctionnement avec programme (P1
÷ P5), en appuyant sur la touche , on provoque l’arrêt de l’utilisateur raccordé pendant une période de 3
heures au cours desquelles le chronothermostat se
met en antigel (fig. 23).
L’insertion de cette fonction est visualisée par l’absence de chiffres au niveau des 3 heures, à partir de
l’heure en cours. Ces 3 heures étant passées, le chronothermostat reprend le programme interrompu.
D
2.13 - Unterbrechung des Programms zu
Reinigungszwecken Diese kann lediglich während des Betriebs eines der
Programme (P1 ÷ P5) erfolgen. Wenn Sie die Taste
drücken, schaltet sich die angeschlossene Anlage
für 3 Stunden aus, woraufhin der Zeitthermostat auf
den Frostschutz-Betriebsmodus übergeht (Abb. 23).
Die Eingabe dieser Funktion wird durch ein Fehlen
der Zahlen angezeigt, die den betreffenden 3 Stunden mit Beginn der aktuellen Stunde entsprechen.
Nach Ablauf der 3 Stunden nimmt der Zeitthermostat
das unterbrochene Programm wieder auf.
To reactivate the program interrupted before the end
of the 3 hours, press button : the missing digits will
reappear.
Warning: if the antifreeze temperature is deselected
permanently (see heading 2.18), or in "summer" operation, the controlled appliancewill keep disabled for
trhee hours.
Pour réactiver le programme interrompu, avant la fin
des 3 heures, appuyer sur la touche : les chiffres
suspendus se réinsèrent.
2.14 - COUNT-DOWN program - P 6
2.14 - Programme COUNT-DOWN - P 6
2.14 - COUNT-DOWN-Programm - P 6
In the event that the dwelling is to be left empty for
a number of days, select the program P 6 (CountDown).
Si l’on doit s’absenter de chez soi pendant plusieurs
jours, sélectionner le programme P 6 (Count-Down).
Vor einer mehrtägigen Abwesenheit wählen Sie das
Programm P 6 (Count-Down).
•
•
•
Attention: si l’on a exclu de façon permanente la température antigel (voir paragraphe 2.18) ou en fonctionnement "été", le dispositif commandé est désactivé pendant 3 heures.
Press and hold the PROG button until the display shows P 06 , then confirm by pressing OK.
Appuyer sur la touche PROG jusqu’à ce que
l’afficheur ne fasse apparaître le sigle P 06 , puis
confirmer en appuyant sur la touche OK.
The display will show the day of the week and
the caption c000 (fig. 24).
L’afficheur fait apparaître l’indice du jour de
la semaine et le signe c000 (fig. 24).
P - 44
Wenn das unterbrochene Programm vor Ablauf der
3 Stunden wieder aufgenommen werden soll, muss
die Taste gedrückt werden. Hierdurch werden die
fehlenden Zahlen erneut angezeigt.
Achtung: Falls das Frostschutztemperatur-Programm
permanent ausgeschlossen wurde (siehe Abschnitt
2.18), oder bei "Sommerbetrieb" wird die gesteuerte
Vorrichtung 3 Stunden lang entahtiviert bleiben.
Drücken Sie die Taste PROG, bis auf der Anzeige der Schriftzug P 06 erscheint, anschließend
bestätigen Sie durch das Drücken der Taste OK.
Der Wochentag wird angezeigt und es erscheint
der Schriftzug c000 (Abb. 24).
I
2.13 - Sospensione del programma per
E
2.13 - Suspensión del programa durante
pulizie -
la limpieza -
Solo in funzionamento da programma (P1 ÷ P5), premendo il tasto si avrà lo spegnimento dell’utenza
allacciata per un periodo di 3 ore durante le quali il
crononotermostato si metterà in antigelo (fig. 23).
Sólo durante el funcionamiento automático (P1 ÷ P5)
es posible apagar la caldera durante tres horas presionando la tecla . El cronotermostato se pone en
antihielo (fig. 23).
L’inserimento di tale funzione è visualizzato dalla
mancanza dei digit in corrispondenza delle 3 ore, a
partire dall’ora in corso. Trascorse le 3 ore il cronotermostato riprende il programma interrotto.
La activación de la función está indicada por la desaparición de los segmentos correspondientes a las 3
horas, a partir de la hora en curso. Transcurridas las
3 horas, el cronotermostato vuelve al programa interrumpido.
Per riattivare il programma interrotto, prima del termine delle 3 ore, premere il tasto : si reinseriranno
i digit sospesi.
Attenzione: nel caso sia stata esclusa in modo permanente la temperatura antigelo (vedi paragrafo
2.18) o in funzionamento “estate”, il dispositivo comandato resterá disattivato per 3 ore.
Atención: si la temperatura antihielo se ha excluido
en forma permanente (ver apartado 2.18) y en funcionamiento "verano", el programa mantendrá la caldera (acondicionador) desactivada durante tres horas.
2.14 - Programa COUNT-DOWN - P 6
Nel caso in cui ci si debba assentare per più giorni
dalla propria abitazione selezionare il programma
P 6 (Count-Down).
Si la casa va a estar deshabitada por varios días
es conveniente seleccionar el programa P 6 (CountDown).
•
•
Sul display apparirà l’indice del giorno della settimana e la scritta c000 (fig. 24).
3 horas - 3 Stunden
3 heures - 3 ore - 3 hours
Si se desea reactivar el programa antes de que trans. Los
curran 3 horas hay que presionar la tecla
segmentos correspondientes a las 3 horas de suspensión vuelven a aparecer.
2.14 - Programma COUNT-DOWN - P 6
Premere il tasto PROG sino a quando sul
display apparirà la scritta P 06 quindi confermare premendo il tasto OK.
Fig. 23
Blinking - Clignotant - Blinkend
Lampeggianti - Parpadeante
Presionar PROG hasta que el display visualice
P 06 y presionar OK para confirmar.
El display visualiza el índice del día de la semana y c000 (fig. 24).
Fig. 24
P - 45
GB
•
•
•
F
Establish how long the absence will be, in hours
(e.g.: 7 days = 168 hours). Maximum CountDown period = 999 hours.
Enter the hours by pressing the /Day button
(momentarily for single increments, or pressing and holding for fast scroll).
•
Press OK to confirm (fig. 25).
•
From this moment the chronothermostat will begin
the reverse count and the Count-Down program will
maintain the antifreeze temperature (5 °C) until the
hours programmed have elapsed.
At the end of the count-down, the program will reactivate the usual program to ensure a warm and
welcoming return.
It is possible to quit this program at any moment by
pressing the PROG button.
In this instance it will be necessary to reinstate the
current program or store a new one, using the select
and confirm procedure as described in heading 2.3-b
"Selecting the program".
Warning: if the antifreeze temperature is deselected
permanently (see heading 2.18) or in "summer" operation, the COUNT-DOWN program will keep the
controlled appliance desabled for the full programmed
duration.
P - 46
•
Etablir en heures la durée de l’absence (exemple : 168 heures = 7 jours). Programmation maximale des heures en Count-Down = 999 heures.
Insérer les heures en appuyant sur la touche
/Day (par à-coups ou de façon continue pour
avoir un défilement rapide).
Appuyer sur la touche OK pour confirmer.
(fig. 25).
A partir de ce moment donné, votre chronothermostat commence le compte à rebours et le programme
Count-Down conserve la température Antigel (5 °C)
jusqu’à la fin des heures programmées.
Le compte à rebours étant achevé, le programme
Count-Down réinsère votre programme habituel, de
façon à ce que vous trouviez une maison chaude et
accueillante à votre retour.
A tout moment, il est possible de quitter ce programme en appuyant sur la touche PROG.
Il est alors nécessaire de réinsérer dans la mémoire
le programme en cours d’utilisation ou un nouveau
programme en suivant la procédure de sélection et
de confirmation du programme indiquée dans le paragraphe 2.3-b "Sélection du programme de fonctionnement".
Attention: si l’on a exclu de façon permanente la température antigel (voir paragraphe 2.18) ou en fonctionnement "été", le programme COUNT-DOWN
maintient le dispositif commandé désactivé pendant
toute la durée programmée.
D
•
•
•
Berechnen Sie die Länge Ihrer Abwesenheit in
Stunden (z.B.: 168 Std. = 7 Tage). Max. CountDown-Stundenanzahl = 999 Std.
Geben Sie diese Stundenzahl ein, indem Sie
die Taste /Day drücken (entweder durch
Mehrfachdrücken oder, für ein schnelles Vorwärtsgehen, durch kontinuierliches Drücken).
Zur Bestätigung drücken Sie die Taste OK
(Abb. 25).
Von diesem Augenblick an zählt der Zeitthermostat
rückwärts, und das Count-Down-Programm wird die
Frostschutztemperatur (5 °C) bis zur Vollendung der
Stundenanzahl einhalten.
Anschließend wird das Count-Down-Programm Ihr
gewohntes Programm wieder aufnehmen, so dass
Sie bei Ihrer Rückkehr gemütlich geheizte Räume
vorfinden.
Dieses Programm kann durch Drücken der Taste
PROG vorzeitig verlassen werden.
In diesem Fall muss das aktuelle oder ein neues
Programm erneut gespeichert werden, indem man
dieses auswählt und bestätigt, siehe Kapitel 2.3-b
"Wahl des Betriebsmodus-Programm".
Achtung: Falls das Frostschutztemperatur-Programm permanent ausgeschlossen wurde (siehe
Abschnitt 2.18) oder bei "Sommer" Betrieb, wird das
COUNT-DOWN-Programm die gesteuerte Vorrichtung (Durchlauferhitzer) für den gesamten Zeitraum
ausgestellt lassen.
I
•
Stabilire in termini di ore il periodo di assenza
(esempio: 168 ore = 7 gg.). Massimo numero
di ore programmabili in Count-Down = 999 ore.
•
Inserire le ore premendo il tasto /Day (ad impulsi o con pressione continua per scorrimento
veloce).
•
E
•
•
Premere il tasto OK per confermare (fig. 25).
Da questo momento il Vostro cronotermostato inizierà il conto alla rovescia ed il programma CountDown manterrà la temperatura antigelo (5 °C) sino
all’esaurimento delle ore programmate.
Finito il conto alla rovescia il programma CountDown reinserirà il Vostro abituale programma, affinché al Vostro ritorno possiate ritrovare l'abitazione alla temperatura desiderata.
•
Establecer, en términos de horas, el periodo de
ausencia (por ejemplo: 168 horas = 7 dias). Número máximo de horas para la cuenta regresiva
= 999 horas.
Introducir las horas presionando la tecla /Day
(presionarla repetidamente para incrementar el
número de horas de a uno, o bien en forma continua para incrementarlo rápidamente).
Presionar OK para confirmar (fig. 25).
Fig. 25
El cronotermostato empieza la cuenta regresiva. El
programa mantendrá la temperatura antihielo (5 °C)
hasta que transcurra el número de horas programado.
Una vez terminada la cuenta regresiva, el programa habitual volverá a ponerse en funcionamiento.
A su regreso, los habitantes de la casa encontrarán una temperatura agradable.
In qualsiasi momento si potrà uscire da questo programma premendo il tasto PROG.
Sarà quindi necessario reinserire in memoria il programma in uso o uno nuovo, seguendo il procedimento di selezione e conferma programma, come
descritto nel paragrafo 2.3-b "Scelta del programma
di funzionamento".
El programa P 6 se puede interrumpir presionando
la tecla PROG.
Será necesario volver a introducir en la memoria el
programa que se estaba utilizando o uno nuevo,
siguiendo el procedimiento de selección y confirmación descrito en el apartado 2.3-b "Selección del
programa de funcionamiento".
Attenzione: nel caso sia stata esclusa in modo permanente la temperatura antigelo (vedi paragrafo
2.18) o in funzionamento “estate”, il programma
COUNT-DOWN manterrà disattivato il dispositivo
comandato per tutto il tempo programmato.
Atención: si la temperatura antihielo se ha excluido
en forma permanente (ver apartado 2.19) y en funcionamiento "verano", el programa CUENTA REGRESIVA mantendrá el aparato mandado, desactivado.
P - 47
GB
F
D
2.15 - Exclusion of the chronothermostat
2.15 - Exclusion du chronothermostat
2.15 - Ausschließung des Zeitthermostats
Press and hold button
until OFF appears in
the display, to indicate that the chronothermostat is
deactivated (fig. 26).
In this mode, all the heat regulation functions handled by the timer-thermostat (and relative receiver)
are inactive; only the display of the current time and
the dead battery signal remain operating.
Pressing button
again, the program set previously will resume.
N.B.: for the purpose of extending the life of the battery, we recommend activating the system exclusion
function when it is not being used.
Maintenir la touche
appuyée jusqu’à ce que
l’afficheur ne fasse apparaître le mot OFF, pour indiquer que le chronothermostat est désactivé (fig. 26).
Dans cet état, toutes les fonctions de réglage thermique gérées par le chronothermostat (et récepteur
correspondant) sont inactives ; seule la visualisation
de l’heure actuelle et la signalisation de batterie épuisée restent en service.
En appuyant de nouveau sur la touche
, on revient au programme précédemment introduit.
Halten Sie die Taste
solange gedrückt, bis OFF
angezeigt wird, dieses Symbol zeigt die Deaktivierung des Zeitthermostats an (Abb. 26).
In diesem Modus sind sämtliche vom Zeitthermostat
(und dem entsprechenden Empfänger) geregelten
Temperaturregelungsfunktionen deaktiviert; Nur die
Stundenanzeige und die Meldung Batterie leer bleiben in Betrieb.
Durch Drücken der Taste
gehen Sie zu dem
vorher eingegebenen Programm zurück.
N.B.: afin de prolonger la durée des batteries, il est
conseillé d’activer la fonction d’exclusion de l’installation lorsqu’elle n’est pas utilisée.
Hinweis: Um die Batterien zu schonen, wird empfohlen, die Funktion Anlage ausschließen zu aktivieren, wenn diese nicht benutzt wird.
2.16 - Telephone programmer operating
mode
2.16 - Fonctionnement par télécommande
téléphonique
2.16 - Betriebsmodus über
Telefonschaltung
The telephone programmer controls the chronothermostat by closing the contact connected to terminals
1 and 2 of the device (heading 1.3 - Installing the
chronothermostat).
Contact closed = control activated
Contact open = control not activated
The control is operational only if the chronothermostat
is found in one of the following operating modes:
•
temporary manual
•
permanent manual
•
P 6 program (count-down)
When the timer-thermostat receives the activation
command (contact closed), it is set to "permanent
manual operation" with temperature "comfort" (*).
Le télécommande téléphonique commande le chronothermostat en fermant le contact raccordé aux bornes 1 et 2 de celui-ci (paragraphe 1.3 - Installation du
chronothermostat) .
Contact fermé = commande activée
Contact ouvert = commande non activée
La commande n’est opérationnelle que si le chronothermostat se trouver dans l’un des modes de fonctionnement suivants :
•
manuel temporaire
•
manuel permanent
•
programme P 6 (count-down)
Quand le chronothermostat reçoit la commande d’activation (contact fermé), se met en mode de "fonctionnement manuel permanent" avec température
"confort" (*) .
Die Telefonschaltung steuert den Zeitthermostat, indem sie dessen Kontakt zu den Klemmen 1 und 2
schließt (Kapitel 1.3 - Installation des Zeitthermostat).
Kontakt geschlossen= Telefonschaltung aktiviert
Kontakt offen = Telefonschaltung deaktiviert
Die Steuerung ist nur dann in Betrieb, wenn der Zeitthermostat sich in einer der folgenden Betriebsarten
befindet:
•
Manuell zeitlich begrenzt
•
Manuell permanent
•
Programm P 6 (Count-down)
Wenn der Zeitthermostat den Befehl Einschalten erhält (Kontakt geschlossen), so geht er in "Permanente manuelle Funktion" bei Temperatur "Comfort"
(*) über.
P - 48
I
E
2.15 - Esclusione del cronotermostato
2.15 - Exclusión del cronotermostato
Mantenere premuto il tasto
sino alla comparsa
sul display della scritta OFF, ad indicare che il cronotermostato è disattivato (fig. 26).
In questo stato, tutte le funzioni di termoregolazione
gestite dal cronotermostato (e relativo ricevitore) sono
inattive; solo la visualizzazione dell’ora attuale e la
segnalazione di batteria scarica rimangono in funzione.
Premendo nuovamente il tasto
si tornerà al programma precedentemente impostato.
Mantener presionada la tecla
hasta que el OFF
desaparezca en el display y el cronotermostato quede desactivado (fig. 26).
Todas las funciones del cronotermostato (y del receptor) quedan desactivadas; se visualiza sólo la
hora corriente y la señal de batería descargada.
Presionando nuevamente la tecla
se vuelve al
programa anterior.
Nota: para prolongar la duración de las baterías se
aconseja activar la función de inhabilitación de la
instalación cuando no se utiliza.
N.B.: al fine di aumentare la durata delle batterie si
consiglia di attivare la funzione di esclusione dell’impianto quando questo non viene usato.
2.16 - Funzionamento con programmatore
telefonico
2.16 - Funcionamiento con programador
telefónico
Il programmatore telefonico comanda il cronotermostato chiudendo il contatto collegato ai morsetti 1 e 2
di quest’ultimo (paragrafo 1.3 - Installazione del cronotermostato).
Contatto chiuso = comando attivato
Contatto aperto = comando disattivato
Il comando è operativo solo se il cronotermostato si
trova in uno dei seguenti modi di funzionamento:
•
manuale temporaneo
•
manuale permanente
•
programma P 6 (count-down)
Quando il cronotermostato riceve il comando di attivazione (contatto chiuso), si pone in "funzionamento manuale permanente" con temperatura
"comfort" (*) .
El mando telefónico gobierna el cronotermostato cerrando el contacto conectado a los bornes 1 y 2 (apartado 1.3 - Instalación del cronotermostato).
Contacto cerrado = mando activado
Contacto abierto = mando desactivado
Esta función está habilitada sólo si el cronotermostato se encuentra en uno de los siguientes modos
de funcionamiento:
•
manual temporal
•
manual permanente
•
programa P 6 (cuenta regresiva)
Cuando el cronotermostato recibe el mando de activación (contacto cerrado) se pone en “funcionamiento manual permanente” con temperatura “confort” (*).
Fig. 26
Fig. 27
P - 49
GB
F
D
The display will show the indicators for permanent
manual operation and forcing by telephone programmer (fig. 27).
(*) note: if the chronothermostat is activated from
the telephone programmer in temporary manual
mode, it retains this status, utilizing the "comfort"
temperature until midnight, then switches to permanent manual.
L’afficheur fait apparaître les indices inhérents au
fonctionnement manuel permanent et au forçage par
télécommande téléphonique (fig. 27).
(*) remarque: si l’activation se fait en fonctionnement
manuel temporaire, le chronothermostat conserve cet état, avec température "confort", jusqu’à
minuit; puis il se commute sur manuel permanent.
Deactivation of telephone programmer forcing:
Désactivation du forçage par télécommande téléphonique:
Auf dem Display erscheinen die Anzeigen für den permanenten manuellen Betrieb und die Umstellung auf
Telefonschaltung (Abb. 27).
(*) Hinweis: Erfolgt die o. a. Aktivierung während des
zeitlich begrenzten manuellen Betriebsmodus, so
wird dieser einschließlich der "Komfort-Temperatur" beibehalten bis 24.00 Uhr; zu dieser Zeit
stellt der Zeitthermostat auf den permanenten manuellen Betriebsmodus um.
Deaktivierung des Betriebsmodus über Telefonschaltung:
a)
a)
a)
b)
from telephone programmer, by opening of the
contact, which returns the chronothermostat to
the operating mode selected when telephone
programmer control was activated.
from chronothermostat, by pressing button
for 7 seconds; in this case the chronothermostat
will be switched to the state in which there is no
control whatever, OFF.
N.B.: Activating and deactivating controls are operational within one minute.
P - 50
par télécommande téléphonique, avec l’ouverture du contact, qui remet le chronothermostat
au mode de fonctionnement présent à ce moment donné de l’activation.
b) par chronothermostat en appuyant pendant 7 secondes sur la touche
; dans ce cas, le
chronothermostat est mis en condition d’arrêt
complet du réglage, OFF.
N.B.: les commandes d’activation et de désactivation sont opérationnelles dans la minute qui suit.
über Telefonschaltung, die den Zeitthermostat
bei offenem Kontakt auf den vorherigen
Betriebsmodus umstellt.
b) Durch 7 Sekunden langes Drücken der Taste
des Zeitthermostats; in diesem Fall wird
der Zeitthermostat ausgeschlossen, OFF.
Hinweis: Die Aktivierungs- und Deaktivierungstasten können während der Zeitdauer von einer Minute gedrückt werden.
I
E
Sul display appaiono gli indici relativi al funzionamento
manuale permanente ed alla forzatura da programmatore telefonico (fig. 27).
En el display aparecen los índices de funcionamiento manual permanente y gobierno por mando telefónico (fig. 27).
(*) nota: se l’attivazione avviene in funzionamento
manuale temporaneo, il cronotermostato mantiene
tale stato, con temperatura "comfort", sino alla mezzanotte; poi commuta su manuale permanente
(*) Nota: si la activación se produce durante el funcionamiento manual temporal, el cronotermostato
mantiene el mismo estado con temperatura "confort" hasta las 24:00; luego pasa a manual permanente.
Disattivazione della forzatura da programmatore telefonico:
Desactivación del mando telefónico:
a)
a)
abriendo el contacto desde el mando telefónico; el cronotermostato vuelve al modo de funcionamiento anterior.
b)
presionando 7 segundos la tecla
del cronotermostato; éste se pone en OFF y la termorregulación se apaga.
da programmatore telefonico, con l’apertura del
contatto, che riporta il cronotermostato al modo
di funzionamento presente al momento dell’attivazione.
b) da cronotermostato premendo per 7 secondi il
tasto
; in questo caso il cronotermostato
viene posto nello stato di spegnimento totale
della regolazione, OFF.
N.B.: i comandi di attivazione e disattivazione sono
operativi entro 1 minuto.
Nota: los mandos de activación y desactivación vuelven a operar al minuto.
P - 51
GB
F
D
2.17 - Temperature differential
2.17 - Différentiel de température
2.17- Temperaturdifferential
The chronothermostat operates in differential mode
(ON-OFF) with a differential value factory-set to 0.3
°C. The differential value can be displayed and
changed.
Changing the differential (fig. 28):
•
Press and hold t1: until the existing differential
value appears in the display, e.g. b0.3c
•
Change the value (from 0.2 °C to 0.7 °C) using
the buttons
and/or
, which give increments
of 0.1 °C; having selected the value, wait 5 seconds and the display will revert to the program
currently activated.
In the event of a Reset, the differential value will return to 0.3 °C.
Le chronothermostat fonctionne en mode différentiel
(ON-OFF) avec une valeur du différentiel fixée en
usine à 0,3 °C. La valeur du différentiel peut être affichée et modifiée.
Modification du différentiel (fig. 28):
•
Appuyer sur la touche t1: jusqu’à ce que l’afficheur ne fasse apparaître la valeur du différentiel existant ex. b0.3c
•
Modifier la valeur (de 0,2 °C à 0,7 °C) à l’aide
des touches
et/ou
avec des variations de
0,1 °C; la valeur désirée étant obtenue attendre
5 secondes. L’afficheur présente lors de nouveau
le programme en cours.
La commande de Reset remet le différentiel à 0,3 °C.
Der Zeitthermostat funktioniert in Differentialbetrieb
(ON-OFF) mit dem vorgegebenen Differentialwert
0,3 °C. Der Differentialwert kann angezeigt und verändert werden.
Änderung des Differentialwerts (Abb. 28):
•
Betätigen Sie die Taste t1: bis auf der Anzeige
der aktuelle Differentialwert erscheint, z.B. b0.3c.
•
Den Wert (zwischen 0,2 °C und 0,7 °C) durch
Betätigender Tasten
und/oder
ändern.
Jeder Tastenrück entspricht 0,1 °C. Sobald der
gewünschte Wert erreicht ist, 5 Sekunden abwarten, dann zeigt das Display wieder das laufende Program an.
Die Reset bringt das Differential auf 0,3 °C zurück.
P - 52
I
E
2.17 - Differenziale di temperatura
2.17 - Diferencial de temperatura
Il cronotermostato funziona in modo differenziale (ONOFF) con valore del differenziale prefissato in fabbrica a 0,3 °C. Il valore del differenziale può essere visualizzato e modificato.
Modifica del differenziale (fig. 28):
•
Premere il tasto t1: sino alla comparsa sul display
del valore di differenziale esistente, es. b0.3c
•
Modificare il valore (da 0,2 °C a 0,7 °C) agendo
sui tasti
e/o
con variazioni di 0,1 °C; ottenuto il valore desiderato attendere 5 sec. ed il
display ritornerà a visualizzare il programma in
corso.
Il comando di Reset riporta il differenziale al valore di
0,3 °C.
El cronotermostato funciona de modo diferencial (ONOFF). El valor del diferencial viene de fábrica
preestablecido en 0,3 °C. El valor puede visualizarse
y modificarse.
Modificación del diferencial (fig. 28):
•
Presionar la tecla t1 hasta que el display visualice
el diferencial existente; por ej. b0.3c
•
Modificar el valor (de 0,2 °C a 0,7 °C) presionando las teclas
y/o
con variaciones de
0,1 °C; una vez elegido el valor esperar 5 segundos; el display volverá a visualizar el programa que se está utilizando.
Al reinicializarse el cronotermostato, el diferencial
vuelve al valor de 0,3 °C.
Differential adjustable from 0.2 °C to 0.7 °C
Différentiel réglable de 0,2 °C à 0,7 °C
Einstellbares Differential zwischen 0,2 °C und 0,7 °C
Differenziale regolabile da 0,2 °C a 0,7 °C
Diferencial regulable de 0,2 °C a 0,7 °C
°C
On
Off
Load - Charge
Last - Carico
Carga
On
Time
Temps
Zeit
Tempo
Tiempo
Fig. 28
P - 53
GB
F
D
2.18 - Total deselection of antifreeze
temperature
2.18 - Exclusion totale de la température
antigel
2.18 - Totale Ausschließung der
Frostschutztemperatur
This function allows the thermoregulation to be deactivated when operating with the antifreeze temperature t selected.
Cette fonction permet de désactiver la régulation thermique pendant les périodes de fonctionnement où la
température antigel t est programmée
Fonction active : pendant les périodes de fonctionnement avec température antigel t , le réglage
thermique est actif avec valeur de température défini (en usine = + 5 °C).
Fonction désactivée: pendant les périodes de fonctionnement avec température antigel t , la thermorégulation est désactivée (n’utiliser que dans les installations à circulation de liquide antigel).
N.B.: Cette fonction est établie en usine dans la condition “active” et elle ne peut être désactivée qu’en
chauffage (hiver).
Pour programmer cette fonction, appuyer sur la touche t jusqu’à ce que l’afficheur ne fasse apparaître
ON
05.0c (fonction active) (fig. 29) ou OFF 05.0c (fonction désactivée) (fig. 30).
(05.0 °C en usine ou autre valeur définie)
Diese Funktion ermöglicht das Deaktivieren der
Wärmeregulierung in der Betriebsphase mit eingestellter Frostschutztemperatur t .
Funktion aktiviert: In der Betriebsphase mit eingestellter Frostschutztemperatur t bleibt die
Temperaturregelung beim eingestellten Temperaturwert (werkseitig = + 5 °C) aktiviert.
Funktion deaktiviert: in der Betriebsphase mit eingestellter Frostschutztemperaturt t , ist die Wärmeregulierung deaktiviert (nur bei Anlagen zu verwenden, in denen Frostschutzflüssigkeit zirkuliert).
Hinweis: Diese Funktion wird werkseits in den Modus “aktiviert” gespeichert, und sie kann nur in der
Heizperiode deaktiviert werden.
Um diese Funktion zu programmieren, betätigen Sie
die Taste t , bis auf der Anzeige ON 05.0c (Funktion
aktiviert) (Abb. 29) oder OFF 05.0c (Funktion deaktiviert) erscheint (Abb. 30).
(05.0 °C werkseitig oder anderer eingestellter Wert)
Pour désactiver la fonction, appuyer sur la touche
Um diese Funktion zu deaktivieren, drücken Sie auf
Active function: during period of operation with antifreeze temperature t , heat regulation is active with
the temperature value set (factory setting = + 5 °C).
Function off: when utilizing the antifreeze temperature t , thermoregulation is deactivated (use only for
systems filled with antifreeze fluid in circuit).
N.B.: This function is factory set to “active” status and
can be deactivated only in heating mode (winter).
To program the function, press and hold t until the
display shows the caption ON 05.0c (function on) (fig.
29) or OFF 05.0c (function off) (fig. 30).
(05.0 °C from the factory or other set value)
To deactivate the function, press the
ON
05.0c
05.0c
To activate the function, press the
OFF
05.0c
button:
OFF
ON
button:
05.0c
Press OK to confirm.
This programmed status will not be cleared by a reset.
P - 54
ON
05.0c
05.0c
Pour activer la fonction, appuyer sur la touche
OFF
05.0c
:
OFF
ON
ON
:
05.0c
Appuyer sur la touche OK pour confirmer.
L’état programmé n’est pas modifié par la commande
de reset.
05.0c
05.0c
Um diese Funktion zu aktivieren, drücken Sie auf
OFF
05.0c
:
OFF
ON
:
05.0c
Zur Bestätigung drücken Sie auf OK.
Dieser eingegebene Modus wird durch die ResetTaste nicht zurückgestellt.
I
E
2.18 - Esclusione totale della temperatura
antigelo
2.18 - Exclusión total de la temperatura
antihielo
Questa funzione consente di disattivare la termoregolazione nei periodi di funzionamento con impostata la temperatura antigelo t .
Funzione attiva: nei periodi di funzionamento con
temperatura antigelo t , la termoregolazione è attiva
con set di temperatura impostato (di fabbrica: + 5 °C).
Funzione disattivata: nei periodi di funzionamento
con temperatura antigelo t , la termoregolazione è
disattivata (usare solo negli impianti con circolazione
di liquido antigelo).
N.B.: Questa funzione viene prefissata in fabbrica
nello stato “attiva” e può essere disattivata solo in
riscaldamento (inverno).
Per programmare questa funzione, premere il tasto
t sino alla comparsa sul display della scritta ON 05.0c
(funzione attiva) (fig. 29) oppure OFF 05.0c (funzione
disattivata) (fig. 30).
Esta función permite desactivar la termoregulación
durante los períodos de funcionamiento con temperatura antihielo t .
ON
05.0c
OFF
05.0c
:
OFF
ON
Función desactivada: durante los períodos de funcionamiento con temperatura antihielo t , la termorregulación se desactiva (usar sólo en instalaciones
con circulación de líquido anticongelante).
Nota: Esta función viene "activa" de fábrica y puede desactivarse sólo en invierno (calefacción).
Fig. 29
Para programarla hay que presionar la tecla t hasta
que el display visualice ON 05.0c (función activada)
(fig. 29) o bien OFF 05.0c (función desactivada) (fig.
30).
Para desactivarla
ON
05.0c
Per attivare la funzione premere il tasto
Función activada: durante los períodos de funcionamiento con temperatura antihielo t , la termorregulación se activa con la temperatura programada
(de fábrica: + 5 °C).
OFF
(05.0 °C de fábrica u otro valor)
(05.0 °C di fabbrica o altro valore impostato)
Per disattivare la funzione premere il tasto
ON
:
05.0c
Premere il tasto OK per confermare.
Lo stato programmato non viene modificato dal comando di reset.
05.0c
:
OFF
05.0c
Para activarla hay que presionar
OFF
05.0c
ON
:
05.0c
Fig. 30
Presionar OK para confirmar.
El estado programado no se modifica cuando el cronotermostato se reinicializa (reset).
P - 55
F
D
2.19 - Test transmission to verify radio
signal capacity
GB
2.19 - Trasmission de test pour vérifier la
intensité du signal radio
2.19 - Testübertragung zur Überprüfung
der Funksignalreichweite
Attention: for these operations, carefully follow
the instructions included with the receiver.
Attention : pour ces opérations consulter attentivement la feuille d’instructions du récepteur.
ON THE CHRONOTHERMOSTAT
SUR LE CHRONOTHERMOSTAT
Achtung: Lesen Sie die Bedienungsanleitung
für den Empfänger aufmerksam durch, bevor
Sie diesen Vorgang ausführen.
Press the “test” key and hold it down until the word
bEEP appears on the display, then release the key:
the antenna symbol will flash once every 3 seconds
(fig 31).
Appuyer sur la touche “test” et maintenir la pression
jusqu’à ce que le message bEEP s’affiche, et relâcher la touche : le symbole d’antenne présentera 1
clignotement toutes les 3 secondes (fig 31).
ON THE RECEIVER
SUR LE RÉCEPTEUR
•
•
Every time a signal is received there will be 1, 2
or 3 brief beeps, as a function of the intensity (1=
LOW, 2 = MEDIUM, 3 = HIGH) of the signal received.
•
The corrisponding "
•
The 3 LEDs on the VMETER (signal intensity
indicator) will briefly light up whenever a signal is
received, as a function of the intensity of the signal.
" LED will flash
A chaque réception du signal, 1, 2 ou 3 brefs
signaux sonores seront émis, en fonction de
l’intensité (1= BASSE, 2 = MOYENNE, 3 =
HAUTE) du signal reçu.
AUF DEM ZEITTHERMOSTAT
Halten Sie die Taste “test” gedrückt, bis auf dem Display die Anzeige bEEP erscheint, lassen Sie jetzt
die Taste los: Das Antennensymbol blinkt alle 3 Sekunden auf (Abb. 31).
AM EMPFÄNGER
•
Bei jedem Empfangen eines Signals ertönen 1,
2 oder 3 kurze akustische Signaltöne, je nach
Intensität (1= SCHWACH, 2 = MITTEL, 3 =
STARK) des empfangenen Signals.
•
Die entsprechende LED "
•
Die 3 LED des VMETER (Indikator für die Intensität eines Signals) leuchten bei jedem Empfangen eines Signals kurz auf, je nach Intensität des
empfangenen Signals.
" correspondante clignote.
•
La LED "
•
Les 3 LED du VMETER (indicateur d’intensité
du signal) s’allumeront brièvement à chaque
réception de signal, en fonction de l’intensité
du signal reçu
" blinkt.
Attention: the transmission of the test signal
remains active for a maximum of 3 minutes.
Attention: la transmission du signal de test
reste active pendant 3 minutes au maximum.
Deactivating the "verify" function
Désactivation du fonctionnement "vérification"
Deaktivierung des Testmodus
ON THE CHRONOTHERMOSTAT
SUR LE CHRONOTHERMOSTAT
AUF DEM ZEITTHERMOSTAT
Press the “test” key for more than 1 second and then
let it go. The previously running program will appear
on the display.
Appuyer sur la touche “test” pendant plus de 1 seconde et la relâcher. Sur l’afficheur apparaît le programme qui était en cours.
Halten Sie die Taste “test” mindestens 1 Sekunde
lang gedrückt, und lassen Sie sie dann los. Auf dem
Display erscheint das vorher benutzte Programm.
P - 56
Achtung: die Übertragung des Testsignals
bleibt max. 3 Minuten lang aktiv.
I
E
2.19 - Trasmissione di test per verifica
dell'intensità del segnale radio
2.19 - Transmisión de test para verificar
la intensidad de la señal de radio
Attenzione: per queste operazioni consultare
attentamente il foglio istruzioni del ricevitore.
Atención: para estas operaciones se deben leer
atentamente las instrucciones del receptor.
SUL CRONOTERMOSTATO
Premere il tasto “test” e mantenerlo premuto fino alla
comparsa sul display della scritta bEEP, quindi rilasciare il tasto: il simbolo di antenna presenterà 1
lampeggio ogni 3 secondi (fig 31).
EN EL CRONOTERMOSTATO
SUL RICEVITORE
EN EL RECEPTOR
•
Ad ogni ricezione di segnale, 1, 2 o 3 brevi segnali acustici verranno emessi, in funzione dell’intensità (1= BASSA, 2 = MEDIA, 3 = ALTA)
del segnale ricevuto.
•
Según la intensidad de cada señal recibida se
oirán 1, 2 o 3 breves señales acústicas (1= BAJA,
2 = MEDIA, 3 = ALTA).
•
El LED "
•
Il LED "
•
I 3 LED del VMETER (indicatore di intensità del
segnale) si accenderanno brevemente ad ogni
ricezione di segnale, in funzione dell’ intensità
del segnale ricevuto
•
Los 3 LED del VMETER (indicador de intensidad de la señal) se encienden brevemente con
cada señal recibida, según la intensidad del señal.
" corrispondente lampeggia .
Attenzione: la trasmissione del segnale di Test
resta attiva per massimo 3 minuti.
Presionar la tecla “test” hasta que aparezca en el
display la palabra bEEP y soltarla: el símbolo de la
antena parpadea cada 3 segundos (fig 31).
Fig. 31
" correspondiente parpadea.
Atención: la transmisión de la señal de Test permanece activa 3 minutos como máximo.
Disattivazione del funzionamento "verifica"
Desactivación del funcionamiento "verificacion"
SUL CRONOTERMOSTATO
EN EL CRONOTERMOSTATO
Premere il tasto “test” per oltre 1 secondo quindi
rilasciarlo. Sul display appare il programma precedentemente in corso.
Presionar la tecla “test” más de un segundo y soltarla. En el display aparece el último programa que
se utilizó.
P - 57
GB
F
3 - FIXED SET OFF
THE PROGRAMS
D
3 - PROGRAMMES DE
FONCTIONNEMENT
FIXES INSERES
3 - PROGRAMME
UNIVERSTELLBARER
FUNKTIONEN
Program - Programme - Programm - Programma - Programa:
Comfort - Confort - Komfort - Comfort - Confort
t2
Economy - Economie - Economy - Economy - Ahorro
t
Antifreeze - Antigel - Frostschutz - Antigelo - Antihielo
Program - Programme - Programm - Programma - Programa:
From Monday to Friday - De lundi à vendredi - Montag bis Freitag
Da lunedì a venerdì - De lunes a viernes
t1
t2
P - 58
P1
All the days of the week - Tous les jours de la semaine - Alle Täge der Woche
Tutti i giorni della settimana - Todos los diás de la semana
t1
t1
06,00 ÷ 22,00
t2
00,00 ÷ 06,00
22,00 ÷ 24,00
P2
From Saturday to Sunday - De samedì à dimanche - Samstag und Sonntag
Da sabato a domenica - De sábado a domingo
06,00 ÷ 09,00
17,00 ÷ 22,00
t1
06,00 ÷ 22,00
00,00 ÷ 06,00
09,00 ÷ 17,00
22,00 ÷ 24,00
t2
00,00 ÷ 06,00
22,00 ÷ 24,00
I
E
3 - PROGRAMAS DE
FUNCIONAMIENTO
FIJOS
3 - PROGRAMMI DI
FUNZIONAMENTO
FISSI INSERITI
Program - Programme - Programm - Programma - Programa:
P3
From Monday to Friday - De lundi à vendredi - Montag bis Freitag
Da lunedì a venerdì - De lunes a viernes
t1
t2
From Saturday to Sunday - De samedi à dimanche - Samstag und Sonntag
Da sabato a domenica - De sábado a domingo
06,00 ÷ 09,00
11,00 ÷ 14,00
17,00 ÷ 22,00
00,00
09,00
14,00
22,00
÷
÷
÷
÷
06,00
11,00
17,00
24,00
Program - Programme - Programm - Programma - Programa:
From Monday to Friday - De lundi à vendredi - Montag bis Freitag
Da lunedì a venerdì - De lunes a viernes
t
00,00 ÷ 24,00
t1
06,00 ÷ 22,00
t2
00,00 ÷ 06,00
22,00 ÷ 24,00
P4
From Saturday to Sunday - De samedi à dimanche - Samstag und Sonntag
Da sabato a domenica - De sábado a domingo
t1
06,00 ÷ 23,00
t2
00,00 ÷ 06,00
23,00 ÷ 24,00
P - 59
GB
F
Declaration of conformity: We declare that the product indicated below satisfies the applicable Essential Requirements of the R&TTE1999/5/CE directive.
The product’s conformity to the directive is confirmed by the CE mark on the product and in this document.
A complete copy of the “Declaration of Conformity” to directive R&TTE1999/5/CE, is available upon request from the Declarer’s address shown below.
Déclaration de conformité: Nous déclarons que le produit ci-dessous répond aux conditions requises essentielles applicables conformément à la directive
R&TTE1999/5/CE. La conformité du produit à la directive est confirmée par la marque CE figurant sur le produit et sur le présent document.
Copie intégrale de la “Déclaration de conformité” à la Directive R&TTE1999/5/CE, est disponible, sur demande, auprès de l’adresse du déclarant, ci-dessou.
D
Konformitätserklärung: Das nebenstehend bezeichnete Gerät entspricht den Unabdingbaren Anforderungen der Richtlinie R&TTE1999/5/CE.
Die Konformität des Gerätes mit der Richtlinie wird durch das CE-Zeichen auf dem Gerät sowie auf dem vorliegenden Dokument bestätigt. Eine vollständige Ausfertigung der “Konformitätserklärung” mit der Richtlinie R&TTE1999/5/CE ist auf Anfrage unter der nebenstehenden Adresse des Deklaranten erhältlich.
I
Dichiarazione di conformità: Si dichiara che il prodotto sotto indicato soddisfa i Requisiti Essenziali applicabili richiesti dalla Direttiva R&TTE1999/5/CE. La
conformità del prodotto alla direttiva è confermata dal marchio CE riportato sul prodotto e sul presente documento.
Copia integrale della “Dichiarazione di Conformità” alla Direttiva R&TTE1999/5/CEE, è disponibile, a richiesta, presso l’indirizzo del Dichiarante, sotto riportata.
E
Declaración de conformidad: Este dispositivo cumple con los Requisitos Esenciales aplicables de la Directiva R&TTE1999/5/CE. La conformidad del
producto a la directiva está confirmada por la marca CE que se encuentra en el producto y en el presente documento.
Una copia integral de la “Declaración de conformidad” a la Directiva R&TTE1999/5/CE está disponible bajo pedido en la dirección del Declarante, que figura a
continuación.
Product: Wireless Chronothermostat
Produit: Chronothermostat sans fils
Gerät:
Drahtloser Zeitthermostat
Prodotto: Cronotermostato senza fili
Producto: Cronotermostato sin cable
Model, modèle, Modell, modello, modelo:
Marking, marquage, Markierung, marcatura, marca:
P - 60
Declarer, déclarant, Deklarant, dichiarante, declarante:
Foglio integrativo libretto istruzioni allegato
PE - DERXNN005
10/04
ITALIANO
4 - FUNZIONE “MASTER”
Indice “Master”
Esempio
La funzione “Master” consente di realizzare impianti multizona nei quali,
oltre alla termoregolazione di ciascuna zona tramite termostato o
cronotermostato (via radio) ad essa abbinato, il cronotermostato con
“Master” può subentrare nella termoregolazione di tutte le zone ad esso
assegnate (secondo i modi di funzionamento più avanti riportati).
La funzione “Master” è disponibile solo nel modello di cronotermostato
con “Master” ( fig. 1)
ON OFF
H O
2
/
Fig. 1
Cronotermostato
zona 2 (o termostato)
Cronotermostato
zona 1 - “Master”
Ricevitore
2 zone
Zona 1
1 2 3 4 5 6
Tasto “Master”
ISTRUZIONI PER L’INSTALLATORE
Elettrovalvole
di zona
Fig. 2
4.1 - Assegnazione delle zone ai “Master”
(da effettuare dopo aver eseguito le operazioni di abbinamento dei trasmettitori vedi cap. 1.5 del libretto istruzioni allegato)
Per le operazioni di assegnazione dei cronotermostati “Master” alle zone (canali) attenersi scrupolosamente a quanto riportato nel capitolo “Predisposizione del ricevitore per il funzionamento con Master” del manuale d’istruzioni dei ricevitori.
SUL CRONOTERMOSTATO “MASTER” attivare lo stato di “Master Test”:
•
premere il tasto Master fino alla comparsa sul display della scritta “
Esempio
Fig. 3
CRONOTERMOSTATO
CRONOTERMOSTATO
“MASTER”
”, quindi rilasciarlo, FIG 4.
SUL RICEVITORE:
•
verificare lo stato della zona ed eseguire tutte le operazioni di assegnazione indicate sul manuale d’istruzioni del ricevitore.
Al termine delle operazioni:
ZONA 1
SUL CRONOTERMOSTATO “Master” disattivare lo stato di “Master - Test” premere il tasto Master per 2 secondi, quindi rilasciarlo. Sul
display appare il programma precedentemente in corso.
CRONOTERMOSTATO
TERMOSTATO
1 0
30
5
15
25
20
ON
4.2 - Annullamento dell’assegnazione di una zona a un “Master”
Anche per le operazioni di annullamento attenersi scrupolosamente a quanto riportato nel manuale d’istruzioni dei ricevitori.
SUL CRONOTERMOSTATO “MASTER” attivare lo stato di “Master Test”:
•
premere il tasto Master fino alla comparsa sul display della scritta “
ZONE E TRASMETTITORI
”, quindi rilasciarlo.
SUL RICEVITORE:
•
verificare lo stato della zona ed eseguire tutte le operazioni di annullamento indicate sul manuale d’istruzioni del ricevitore.
SUL CRONOTERMOSTATO “MASTER” disattivare lo stato di “Master - Test”:
•
premere il tasto master per 2 secondi, quindi rilasciarlo.
N.B.: lo stato di “Master - Test” cessa automaticamente dopo 3 minuti dalla sua attivazione; quindi il cronotermostato ritornerà al normale
funzionamento.
ON
1
2
3
4
5
6
7
8
ISTRUZIONI D’USO PER L’ UTILIZZATORE
4.3 - Modalità di funzionamento “Master”
Negli impianti con presenza di zone assegnate ad un cronotermostato “Master”, la funzione “Master” può esere attivata o disattivata dall’utente
premendo brevemente sul tasto Master.
Lo stato di “Master” attivato viene indicato sul display dall’indice “ | Master” acceso (Fig. 5).
Funzione “Master” disattivata: il cronotermostato “Master” si comporta come un normale cronotermostato ed agisce solo sulla zona cui è
abbinato.
Funzione “Master” attivata: il cronotermostato “Master” sostituisce, sino alla disattivazione della funzione, i cronotermostati e/o termostati abbinati
alle zone a lui assegnate, nelle modalità sotto indicate.
In funzionamento “master” è possibile modificare livelli e valori di temperatura e passare da manuale temporaneo a manuale permanente o
programma (profilo).
RICEVITORE CON BARRA ED ATTUATORI
1 2 3 4 5 6
ON OFF
H O
2
/
A) Master manuale temporaneo (fig.6)
Attivazione: con cronotermostato master in funzionamento manuale temporaneo (vedi cap.2.12 a - libretto istruzioni allegato), premere
brevemente il tasto “Master”. Sul display si accende fisso l’indice “ | Master” ed è presente l’indice di funzionamento manuale, lampeggiante.
Funzionamento:
•
la termoregolazione di tutte le zone assegnate al “Master” è gestita dal “Master”; livello di temperatura (comfort, economy, antigelo) e valori di
temperatura sono quelli impostati nel “Master”.
Fig. 4
Importante in funzionamento “Master manuale temporaneo” allo scadere della mezzanotte si possono verificare i seguenti casi:
•
Se la funzione “Master” è stata attivata con cronotermostato in funzionamento “manuale temporaneo”, cessa la funzione “manuale temporaneo”
e cessa la funzione “Master”; il cronotermostato si pone in funzionamento da programma.
•
Se la funzione “Master” è stata attivata prima di porre il cronotermostato in funzionamento “manuale temporaneo”; cessa la funzione “manuale
temporaneo” ed il cronotermostato si pone in funzionamento “Master da programma”.
Disattivazione della funzione “Master”: premere brevemente il tasto “Master”; sul display scompare l’indice “ | Master”: il cronotermostato
rimane in funzionamento “manuale temporaneo” e le zone assegnate al master tornano sotto il controllo dei rispettivi trasmettitori.
Indice “Master”
1 2 3 4 5 6
ON OFF
H O
2
/
B) Master manuale permanente (fig. 6)
Attivazione: con cronotermostato master in funzionamento manuale permanente (vedi cap.2.12 b - libretto istruzioni allegato), premere
brevemente il tasto “Master”. Sul display si accende fisso l’indice “ | Master” ed è presente l’indice di funzionamento manuale, fisso.
Funzionamento:
•
la termoregolazione di tutte le zone assegnate al “Master” è gestita dal “Master”; livello di temperatura (comfort, economy, antigelo) e valori di
temperatura sono quelli impostati nel “Master”.
Disattivazione della funzione “Master”: premere brevemente il tasto “Master”; sul display scompare l’indice “ | Master”: il cronotermostato
rimane in funzionamento “manuale permanente” e le zone assegnate al master tornano sotto il controllo dei rispettivi trasmettitori.
Fig. 5
Tasto “Master”
Con “Master manuale
temporaneo” attivato
C) Master da programma in funzione (da profilo)
1 2 3 4 5 6
Attivazione: con cronotermostato master in funzionamento da programma, premere brevemente il tasto “Master”. Sul display si accende
fisso l’indice “ | Master”.
Funzionamento:
•
nei periodi dove il programma (profilo) presenta i livelli di temperatura economy e antigelo la termoregolazione di tutte le zone assegnate al “Master” è gestita dal “Master”; livello di temperatura e valori di temperatura sono quelli impostati nel “Master”.
•
nei periodi dove il programma (profilo) presenta il livello di temperatura confort la termoregolazione non viene più gestita dal master
(che continua a gestire la sua zona di abbinamento) ma dai trasmettitori abbinati alle singole zone. Sul display resta comunque
presente l’indice “ | Master” (fig.7).
Con “Master manuale
permanente” attivato
ON OFF
H O
2
/
Fig. 6
Disattivazione della funzione “Master”:premere brevemente il tasto “Master”; sul display scompare l’indice “ | Master”: il cronotermostato
rimane in funzionamento da programma e le zone assegnate al master tornano sotto il controllo dei rispettivi trasmettitori: il cronotermostato
rimane in funzionamento “manuale permanente” e le zone assegnate al master tornano sotto il controllo dei rispettivi trasmettitori.
IMPORTANTE sul “Master” attivato è possibile:
1 2 3 4 5 6
ON
H
2
- utilizzare le funzioni Count-down, l’interruzione per pulizie o l’esclusione impianto (OFF) senza che il funzionamento “master”
/
venga disattivato. Queste funzioni vengono applicate in tutte le zone assegnate al “Master”.
- Passare da una modalità all’altra (programma in funzione, manuale temporaneo o permanente) premendo il tasto manuale.
Funzionamento con programmatore telefonico (vedi capitolo 2.16 del libretto istruzioni allegato)
Attivando il programmatore telefonico collegato ad un cronotermostato “Master” in funzionamento:
•“Master manuale temporaneo”
•“Master manuale permanente”
•Programma “count-down”
tutte le zone ad esso assegnate verranno termoregolate sul livello “Comfort” del “Master”. Disattivando il programmatore telefonico il cronotermostato
torna al modo di funzionamento presente al momento dell’attivazione.
Fig. 7
Periodo con temperatura Comfort:
il “Master” anche se attivato, non controlla le
zone assegnate, che tornano sotto il controllo
dei rispettivi trasmettitori.
Appendix to accompanying instruction manual
PE - DERXNN005
ENGLISH
4 - “MASTER” MODE
“Master” arrow
Example
Zone 2
receiver
1 2 3 4 5 6
ON OFF
H O
2
/
Zone 2
chronothermostat
(or thermostat)
Zone 1 “Master”
chronothermostat
Zona 1
“Master” mode lets you set up multi-zone systems in which, in addition to the
standard temperature control based on single zone thermostats or (radio)
chronothermostats, a “Master” chronothermostat can control all the zones in the
system as described below.
“Master” mode is only available on chronothermostat models with a “Master”
key (fig. 1).
Fig. 1
10/04
“Master” key
INSTRUCTIONS FOR THE INSTALLER
Zone solenoid
valve
Fig. 2
4.1 - Assigning zones to “Master” chronothermostats
(This can only be done after the various zone transmitters have been coupled as instructed in section 1.5 of the accompanying
instruction manual.)
First follow the instructions given in the “Programming the receiver for Master mode” section of the receiver instruction manual to assign the
various zones (channels) to the “Master” chronothermostat.
Select “Master Test” Mode ON THE “MASTER” CHRONOTHERMOSTAT.
•
Press and hold the “Master” key until “
Example
Fig. 3
“MASTER”
CHRONOTHERMOSTAT
” disappears from the display (fig.4).
ON THE RECEIVER:
•
Check the status of the zone and complete all the assignment steps listed in the receiver instruction manual.
When you finish, proceed as follows.
CHRONOTHERMOSTAT
ZONE 1
CHRONOTHERMOSTAT
THERMOSTAT
Quit “Master Test” mode ON THE “Master” CHRNOTHERMOSTAT by pressing and holding the Master key for 2 seconds.
1 0
15
ZONES AND TRANSMITTERS
First follow the instructions given in the receiver instruction manual to cancel zone assignments.
Select “Master Test” Mode ON THE “MASTER” CHRONOTHERMOSTAT.
Press and hold the “Master” key until “
25
20
ON
4.2 - Cancelling the assignment of a zone to a “Master” chronothermostat
•
30
5
The previous program returns to the display.
” disappears from the display.
ON THE RECEIVER:
•
Check the status of the zone and complete all the cancellation steps listed in the receiver instruction manual.
Quit “Master Test” mode ON THE “MASTER” CHRONOTHERMOSTAT by pressing and holding the Master key for 2 seconds.
•
N.B.: The “Master” timer-thermostat quits “Master Test” mode automatically after 3 minutes and returns to normal functioning mode.
ON
1
2
3
4
5
6
7
8
USER INSTRUCTIONS
4.3 - “Master” mode
In systems with a number of zones assigned to a “Master” chronothermostat, you can select and quit “Master” mode simply by briefly pressing the
“Master” key.
RECEIVER WITH CONTROL BOX
AND ACTUATORS
When “Master” mode is selected, an arrow appears against “Master” on the display “ | Master” (Fig. 5).
When not in “Master” mode, the “Master” chronothermostat behaves like a normal chronothermostat and only controls its own zone.
When “Master” mode is selected, the “Master” chronothermostat assumes control over the zones of all other chronothermostats and/or thermostats
in the system as described below, until you quit “Master” mode again.
You can still modify temperature ranges and settings and switch from temporary manual to permanent manual or program mode while in “Master” mode.
1 2 3 4 5 6
ON OFF
H O
2
A) Temporary manual master mode (fig.6)
/
Selecting temporary manual master mode: Set the “Master” chronothermostat to temporary manual mode (see section 2.12 a in the accompanying
instruction manual), then briefly press the “Master” key. A steady arrow appears against “Master” on the display “ | Master” and a flashing arrow
appears against manual mode.
Functioning:
•
The “Master” chronothermostat assumes control of all the zones assigned to it. The temperature range (comfort, economy, anti-frost) and the
settings used are those set on the “Master” chronothermostat.
Fig. 4
“Master” arrow
Important! In “Temporary manual master” mode, the following events can occur at midnight:
•
If the “Master” chronothermostat was in “temporary manual” mode when “Master” mode was selected, it quits both “temporary manual” mode
and “Master” mode and resumes functioning in program mode.
•
If the “Master” chronothermostat was set first to “Master” mode and then to “temporary manual” mode, it quits “temporary manual” mode and
resumes functioning as “Master” in program mode.
Quitting “Master” mode: Briefly press the “Master” key. The arrow against “Master” “ | Master” disappears from the display. The “Master”
chronothermostat remains in “temporary manual” mode and the various transmitters resume control of their respective zones.
B) Permanent manual master mode
1 2 3 4 5 6
ON OFF
H O
2
/
(fig. 6)
Selecting permanent manual master mode: Set the “Master” chronothermostat to permanent manual mode (see section 2.12 b in the accompanying
instruction manual), then briefly press the “Master” key. A steady arrow appears against “Master” on the display “ | Master” and a steady arrow appears
against manual mode.
Functioning:
•
The “Master” chronothermostat assumes control of all the zones assigned to it. The temperature range (comfort, economy, anti-frost) and the
settings used are those set on the “Master” chronothermostat.
Quitting “Master” mode:Briefly press the “Master” key. The arrow against “Master”” | Master” disappears from the display. The “Master”
chronothermostat remains in “permanent manual” mode and the various transmitters resume control of their respective zones.
Fig. 5
“Master” key
With “Temporary
manual Master”
selected
C) Program (profile) master mode
1 2 3 4 5 6
Selecting program master mode: Set the “Master” chronothermostat to program mode, then briefly press the “Master” key. A steady arrow appears
against “Master” on the display “ | Master”.
Functioning:
•
During program periods using the economy and anti-frost temperature ranges, the “Master” chronothermostat assumes control of all the zones
assigned to it. The temperature range (comfort, economy, anti-frost) and the settings used are those set on the “Master” chronothermostat.
•
During program periods using the comfort temperature range, the “Master” chronothermostat controls only its own zone, leaving control of the
other zones to their respective transmitters. A steady arrow nevertheless remains on the display against “Master” “ | Master” (fig.7).
With “Permanent
manual Master”
selected
ON OFF
H O
2
/
Fig. 6
Quitting “Master” mode: briefly press the “Master” key. The arrow against “Master” “ | Master” disappears from the display. The “Master”
chronothermostat remains in program mode and the various transmitters resume control of their respective zones.
IMPORTANT! Even in “Master” mode you can still:
1 2 3 4 5 6
ON
H
- use the functions for Count-down, interruption for cleaning and system off (OFF) without quitting “master” mode.
2
These functions apply to all the zones assigned to the “Master” chronothermostat.
/
- Switch from one mode to another (program to temporary manual or permanent manual) simply by pressing the Manual key.
Functioning with the telephone programmer (see section 2.16 of the accompanying instruction manual)
If you activate a telephone programmer connected to an active “Master” chronothermostat:
•”Temporary manual Master”
•”Permanent manual Master”
•Count-down” program”
All the zones assigned to that “Master” chronothermostat will be controlled in the “Comfort” temperature range. When you deactivate the telephone
programmer, the “Master” chronothermostat resumes functioning in the mode it was in before the telephone programmer was activated.
Fig. 7
Program period using Comfort temperature range: Even if
“Master” mode is selected, the “Master” chronothermostat
does not assume control of the zones assigned to it but
leaves them under the control of their respective
transmitters.
Feuille complémentaire du livret d’instructions joint
PE - DERXNN005
10/04
FRANCAIS
4 - FONCTION “MASTER”
Index “Master”
Exemple
La fonction “Master” permet de réaliser des installations multizones sur
lesquelles, outre la thermorégulation de chaque zone par thermostat et
chronothermostat reliés via radio, le chronothermostat avec “Master” peut
controler la thermorégulation de toutes les zones affectées (selon les
modes de fonctionnement ci-après).
La fonction “Master” est disponible seulement pour le modèle de
chronothermostat avec “Master” ( fig. 1)
ON OFF
H O
2
/
Fig. 1
Chronothermostat de
Chronothermostat
de zone 1 - “Master” zone 2 (ou thermostat)
Récepteur
2 zones
Zona 1
1 2 3 4 5 6
Touche “Master”
INSTRUCTIONS POUR L’INSTALLATEUR
Electrovannes
de zone
Fig. 2
4.1 - Affectation des zones aux “Master”
(à effectuer après avoir effectué les opérations d’accouplement des transmetteurs voir chap. 1.5 du livret d’instructions ci-joint)
Pour les opérations d’affectation des chronothermostats “Master” aux zones (canaux) respecter scrupuleusement les instructions du chapitre
“Prédisposition du récepteur au fonctionnement avec Master” du manuel d’instructions des récepteurs.
SUR LE CHRONOTHERMOSTAT “MASTER” activer le statut “Master Test” :
•
appuyer la touche Master jusqu’à affichage de “
Exemple
Fig. 3
CHRONOTHERMOSTAT
“MASTER”
”, et relâcher, FIG 4.
SUR LE RÉCEPTEUR :
•
vérifier le statut de la zone et effectuer toutes les opérations d’attribution indiquées sur le manuel d’instructions du récepteur.
A la fin des opérations :
CHRONOTHERMOSTAT
ZONE 1
CHRONOTHERMOSTAT
SUR LE CHRONOTHERMOSTAT “Master” désactiver le statut “Master - Test” appuyer Master pendant 2 secondes, relâcher. Sur
l’afficheur sera visualisé le programme précédent.
THERMOSTAT
1 0
30
5
15
25
20
ON
4.2 - Annulation de l’affectation d’une zone à un “Master”
Pour les opérations d’annulation également respecter scrupuleusement les indications du manuel d’instructions des récepteurs.
SUR LE CHRONOTHERMOSTAT “MASTER” activer le statut “Master Test” :
•
appuyer la touche Master jusqu’à effacement de “
ZONES ET TRANSMETTEURS
”, et relâcher.
SUR LE RÉCEPTEUR :
•
vérifier le statut de la zone et effectuer toutes les opérations d’annulation indiquées sur le manuel d’instructions du récepteur.
SUR LE CHRONOTHERMOSTAT “MASTER” désactiver le statut “Master - Test” :
•
appuyer la touche master pendant 2 secondes, et relâcher.
N.B. : le statut de “Master - Test” cesse automatiquement après 3 minutes de son activation; le chronothermostat reviendra à son fonctionnement
normal.
ON
1
2
3
4
5
6
7
8
INSTRUCTIONS D’UTILISATION
4.3 - Modalités de fonctionnement “Master”
Sur les installations avec présence de zones affectées à un chronothermostat “Master”, la fonction “Master” peut être activée ou désactivée par l’usager
en appuyant brièvement sur Master.
RÉCEPTEUR AVEC BARRE
ET ACTIONNEURS
Le statut “Master” activé est indiqué sur l’afficheur par l’index “ | Master” allumé (Fig. 5).
Fonction “Master” désactivée : le chronothermostat “Master” se comporte comme un chronothermostat normal et agit uniquement sur la zone pour
laquelle il est validé.
Fonction “Master” activée : le chronothermostat “Master” remplace, jusqu’à la désactivation de la fonction, les chronothermostats et/ou thermostats
accouplés aux zones d’affectation, dans les modalités indiquées.
En fonctionnement “master” il est possible de modifier les niveaux et valeurs de température et de passer de manuel temporaire à manuel permanent
ou programme (profil)
1 2 3 4 5 6
ON OFF
H O
2
/
A) Master manuel temporaire (fig.6)
Activation : avec chronothermostat master en mode manuel temporaire (voir chap.2.12 a - livret d’instructions joint), appuyer brièvement “Master”.
Sur l’afficheur s’allume fixe l’index “ | Master”. L’index de fonctionnement manuel fonctionne clignotant.
Fonctionnement :
•
la thermorégulation de toutes les zones affectées au “Master” est gérée par le “Master”; niveau de température (confort, economy, antigel) et
valeurs de température sont sélectionnées sur le “Master”.
Fig. 4
Important en fonctionnement “Master manuel temporaire” à minuit il est possible de constater les cas suivants:
•
Si la fonction “Master est activée avec chronothermostat en mode “manuel temporaire”, la fonction “manuel temporaire” et “Master” cessent; le
chronothermostat se place en mode programme.
•
Si la fonction “Master a été activée avant de placer le chronothermostat en mode “manuel temporaire”, la fonction “manuel temporaire” cesse et
le chronothermostat se place en mode “Master de programme”.
Désactivation de la fonction “Master” : appuyer brièvement “Master”; l’index “ | Master” s’efface: le chronothermostat reste en mode “manuel
temporaire” et les zones affectées au master reviennent sous le contrôle des transmetteurs respectifs.
Index “Master”
1 2 3 4 5 6
ON OFF
H O
2
/
B) Master manuel permanent (fig. 6)
Activation : avec le chronothermostat master en mode manuel permanent (voir chap.2.12 b - livret d’instructions joint), appuyer brièvement la touche
“Master”. Les index “ | Master” et mode manuel s’affichent fixement.
Fonctionnement :
•
la thermorégulation de toutes les zones affectées au “Master” est gérée par le “Master”; niveau de température (confort, economy, antigel) et
valeurs de température sont sélectionnées sur le “Master”.
Désactivation de la fonction “Master” :appuyer brièvement la touche “Master”; l’afficheur visualise l’index “ | Master”: le chronothermostat reste
en fonctionnement “manuel permanent” et les zones affectées au master reviennent sous le contrôle des transmetteurs.
Fig. 5
Touche
“Master”
Avec “Master manuel
temporaire” activé
Avec “Master manuel
permanent” activé
C) Master de programme en fonction (de profil)
Activation : avec le chronothermostat master en mode programme, appuyer brièvement la touche “Master”. Sur l’afficheur l’index “ | Master” s’allume
fixe.
Fonctionnement :
•
Sur les périodes où le programme (profil) présente les niveaux de température economy et antigel la thermorégulation de toutes les zones affectées
au “Master” est gérée par le “Master”; niveau et valeurs de température sont ceux sélectionnés sur le “Master”.
•
1 2 3 4 5 6
ON OFF
H O
2
/
Sur les périodes où le programme (profil) présente le niveau de température confort la thermorégulation n’est plus gérée par le master (qui
continue à gérer sa zone d’accouplement) mais par les transmetteurs accouplés aux zones. L’index “ | Master” (fig.7) reste affiché.
Désactivation de la fonction “Master” : appuyer brièvement “Master”; l’index “ | Master” s’efface: le chronothermostat reste en mode programme
et les zones affectées au master reviennent sous le contrôle des transmetteurs: le chronothermostat reste en mode ”manuel permanent” et les zones
affectées au master reviennent sous le contrôle des transmetteurs.
IMPORTANT sur le “Master” activé il est possible de :
Fig. 6
1 2 3 4 5 6
ON
H
- utiliser les fonctions Count-down, l’interruption pour nettoyage ou l’exclusion de l’installation (OFF) sans que le mode “master”
2
soit désactivé. Ces fonctions sont appliquées sur toutes les zones affectées au “Master”.
/
- Passer d’un mode à l’autre (programme en fonction, manuel temporaire ou permanent) en appuyant la touche manuelle.
Fonctionnement avec programmateur téléphonique (voir chapitre 2.16 du livret d’instructions joint)
En activant le programmateur téléphonique relié à un chronothermostat “Master” en fonctionnement:
•“Master manuel temporaire”
•“Master manuel permanent”
•Programme “count-down”
toutes les zones affectées sont thermorégulées sur le niveau “Confort” du “Master”. En désactivant le programmateur téléphonique le chronothermostat
revient au mode de fonctionnement actif au moment de l’activation.
Fig. 7
Période avec température Confort:
Le “Master” même activé ne contrôle pas les
zones affectées, qui reviennent sous le contrôle
des transmetteurs respectifs.
PE - DERXNN005
Página complementaria del manual de instrucciones adjunto
10/04
ESPAÑOL
4 - FUNCIÓN “MASTER”
Indicador “Master”
Ejemplo
La función “Master” permite crear sistemas multizona en los cuales la temperatura de las diferentes zonas se regula mediante termostatos o cronotermostatos
(vía radio) y, además, hay un cronotermostato con la función “Master” que, si se
desea, permite regular la temperatura de todas las zonas que se le han
asignado según los modos de funcionamiento descritos a continuación.
La función “Master” sólo está disponible en el modelo de cronotermostato con
“Master” (fig. 1).
ON OFF
H O
2
/
Fig. 1
Cronotermostato zona
2 (o termostato)
Cronotermostato
zona 1 - “Master”
Receptor
de 2 zonas
Zona 1
1 2 3 4 5 6
Tecla “Master”
INSTRUCCIONES PARA EL INSTALADOR
Electroválvulas
de zona
Fig. 2
4.1 - Asignación de las zonas a los “Master”
(efectuar la asignación tras asociar los transmisores de la manera ilustrada en el cap. 1.5 del manual de instrucciones adjunto)
Para asignar los cronotermostatos “Master” a las zonas (canales), seguir escrupulosamente las instrucciones del capítulo “Predisposición del
receptor para el funcionamiento con Master” del manual de instrucciones de los receptores.
EN EL CRONOTERMOSTATO “MASTER” , activar el estado “Master - Test”:
•
pulsar la tecla Master hasta que en el display se visualice el mensaje “
Ejemplo
Fig. 3
CRONOTERMOSTATO
“MASTER”
” y, luego, soltarla (fig. 4).
EN EL RECEPTOR:
•
controlar el estado de la zona y efectuar todas las operaciones de asignación descritas en el manual de instrucciones del receptor.
Al finalizar estas operaciones:
CRONOTERMOSTATO
ZONE 1
TERMOSTATO
CRONOTERMOSTATO
EN EL CRONOTERMOSTATO “Master”, desactivar el estado “Master - Test”, pulsar la tecla Master durante 2 segundos y soltarla. En
el display aparece el último programa utilizado.
1 0
30
5
15
25
20
ON
4.2 - Cancelación de la asignación de una zona a un “Master”
Para la cancelación, efectuar escrupulosamente las operaciones descritas en el manual de instrucciones de los receptores.
EN EL CRONOTERMOSTATO “MASTER” , activar el estado “Master - Test”:
•
pulsar la tecla Master hasta que en el display se visualice el mensaje “
ZONAS Y TRANSMISORES
” y, luego, soltarla.
EN EL RECEPTOR:
•
controlar el estado de la zona y efectuar todas las operaciones de cancelación descritas en el manual de instrucciones del receptor.
EN EL CRONOTERMOSTATO “MASTER” , desactivar el estado “Master - Test”:
•
pulsar la tecla Master durante 2 segundos y soltarla.
N.B.: el estado de “Master - Test” cesa automáticamente tras 3 minutos de activarlo; por lo tanto, el cronotermostato vuelve al funcionamiento
normal.
ON
1
2
3
4
5
6
7
8
INSTRUCCIONES PARA EL USUARIO
4.3 - Modalidad de funcionamiento “Master”
En los sistemas con zonas asignadas a un cronotermostato “Master”, el usuario puede activar o desactivar la función “Master” pulsando brevemente
la correspondiente tecla.
RECEPTOR CON BARRA
Y ACCIONADORES
Si la modalidad de funcionamiento “Master” está activada, en el display se enciende el indicador “ | Master” (fig. 5).
Función “Master” desactivada: el cronotermostato “Master” funciona como un cronotermostato normal y sólo regula la zona asignada.
Función “Master” activada: el cronotermostato “Master” sustituye, hasta que se desactiva la función, a los cronotermostatos y/o termostatos
asociados a las zonas que se le han asignado según las modalidades descritas a continuación.
En la modalidad “Master” es posible modificar niveles y valores de temperatura y pasar de la modalidad manual temporáneo a la manual permanente
o programa (perfil).
1 2 3 4 5 6
ON OFF
H O
2
/
A) Master manual temporáneo (fig. 6)
Activación: con el cronotermostato Master en modalidad “Manual temporáneo (véase cap.2.12 a - manual de instrucciones adjunto), pulsar brevementela
tecla “Master”. En el display, el indicador “ | Master” se enciende de modo fijo y el indicador de funcionamiento manual parpadea.
Funcionamiento:
•
la temperatura de todas las zonas asignadas al “Master” está regulada por éste, que, por lo tanto, determina el nivel de temperatura (confort,
economy o antihielo) y sus valores.
Fig. 4
Indicador “Master”
Importante durante el funcionamiento “Master manual temporáneo”, al llegar la medianoche se pueden presentar los siguientes casos:
•
Si la función “Master” se ha activado con el cronotermostato en modalidad “Manual temporáneo”, dicha modalidad y la función “Master” se
interrumpen y el cronotermostato pasa a funcionar según lo programado.
•
Si la función “Master” se ha activado antes de seleccionar la modalidad “Manual temporáneo” en el cronotermostato, dicha modalidad se
interrumpe y el cronotermostato pasa a funcionar según lo programado.
Desactivación de la función “Master”: pulsar brevemente la tecla “Master; en el display desaparece el indicador “ | Master”: el cronotermostato
funciona en modalidad “Manual temporáneo” y las zonas asignadas al master vuelven a estar controladas por los correspondientes transmisores.
1 2 3 4 5 6
ON OFF
H O
2
/
B) Master manual permanente (fig. 6)
Activación: con el cronotermostato master en modalidad “Manual permanente” (véase cap.2.12 b - manual de instrucciones adjunto), pulsar brevemente la tecla “Master”. En el display, el indicador “ | Master” se enciende de modo fijo y el indicador de funcionamiento manual también se enciende
de forma fija.
Funcionamiento:
•
la temperatura de todas las zonas asignadas al “Master” está regulada por éste, que, por lo tanto, determina el nivel de temperatura (confort,
economy o antihielo) y sus valores.
Desactivación de la función “Master”: pulsar brevemente la tecla “Master”; en el display desaparece el indicador “ | Master”: el cronotermostato
funciona en modalidad “Manual permanente” y las zonas asignadas al master vuelven a estar controladas por los correspondientes transmisores.
Fig. 5
Tecla “Master”
Con “Master manual
temporáneo” activado
Con “Master manual
permanente” activado
C) Master según programa en función (desde perfil)
Activación: con el cronotermostato master en funcionamiento según programa, pulsar brevemente la tecla “Master”. En el display, el indicador “
| Master” se enciende de modo fijo.
Funcionamiento:
•
cuando el programa (perfil) presenta niveles de temperatura economy y antihielo, la temperatura de todas las zonas asignadas al “Master” está
regulada por éste que, por lo tanto, determina el nivel de temperatura y sus valores.
•
cuando el programa (perfil) presenta niveles de temperatura confort, la temperatura deja de estar regulada por el master (que sigue gestionando
la zona asociada) y pasa a estar regulada por los transmisores de cada zona. En el display permanece presente el indicador “ | Master” (fig.
7).
1 2 3 4 5 6
ON OFF
H O
2
/
Fig. 6
Desactivación de la función “Master”: pulsar brevemente la tecla “Master”; en el display desaparece el indicador “ | Master”: el cronotermostato
funciona según lo programado y las zonas asignadas al master vuelven a estar controladas por los correspondientes transmisores: el cronotermostato
funciona en la modalidad “Manual permanente” y las zonas asignadas al master vuelven a estar controladas por los correspondientes transmisores.
1 2 3 4 5 6
ON
H
IMPORTANTE en el “Master” activado es posible:
2
- utilizar las funciones Count-down, la interrupción para limpieza o la exclusión de la instalación (OFF) sin que el funcionamiento
“Master” se desactive. Estas funciones se aplican a todas las zonas asignadas al “Master”.
/
- Pasar de una modalidad a otra (programa usado, manual temporáneo o permanente) pulsando la tecla manual.
Funcionamiento con programador telefónico (véase capítulo 2.16 del manual de instrucciones adjunto)
Si se activa el programador telefónico conectado a un cronotermostato “Master” en funcionamiento:
• “Master manual temporáneo”
• “Master manual permanente”
• Programa “count-down”
la temperatura de todas las zonas asignadas a éste se regulará según el nivel “Confort” del “Master”. Al desactivar el programador telefónico, el
cronotermostato vuelve al modo de funcionamiento existente al momento de la activación.
Fig. 7
Período con temperatura Confort:
aunque el “Master” esté activado, no controla las
zonas asignadas, que vuelven a estar controladas
por los correspondientes transmisores.
Ergänzendes Merkblatt zur beiliegenden Bedienungsanleitung
PE - DERXNN005
10/04
DEUTSCH
4 - “MASTER”-FUNKTION
Anzeige “Master”
Beispiel
Mit der “Master”-Funktion können Multizonenanlagen realisiert werden, bei
denen jede Regelzone durch den jeweiligen, an sie angleichenen Thermostat
oder Zeitthermostat (per Funk) temperaturgeregelt wird, und außerdem der
“Master”-Zeitthermostat (gemäß den unten angegebenen Betriebsweisen) in
die Temperaturregelung aller ihm zugewiesenen Zonen eintreten kann.
Die “Master”-Funktion ist nur bei dem Zeitthermostatmodell mit “Master”
verfügbar (Abb. 1)
ON OFF
H O
2
/
Abb. 1
Zeitthermostat Zone 2
(oder Thermostat)
Zeitthermostat Zone
1 - “Master”
Empfänger
2 Zone
Zona 1
1 2 3 4 5 6
Taste “Master”
ANLEITUNGEN FÜR DEN INSTALLATEUR
ZonenMagnetventile
Abb. 2
4.1 - Zuweisung der Zonen an die “Master”
(diese muss nach der Angleichen der Sender durchgeführt werden - siehe Kap. 1.5 der beiliegenden Bedienungsanleitung)
Beispiel
Abb. 3
Bei der Zuweisung der “Master”-Zeitthermostate an die Zonen (Kanäle) sind die in der Bedienungsanleitung der Empfänger im Kapitel
“Vorbereitung des Empfängers für den Betrieb mit Master” enthaltenen Anweisungen strikt zu befolgen.
AM “MASTER”-ZEITTHERMOSTAT den Status “Master Test” aktivieren:
Die Taste Master drücken, bis am Display die Meldung “
” erscheint, dann loslassen, Abb. 4.
AM “MASTER”-ZEITTHERMOSTAT den Status “Master - Test” deaktivieren, die Taste Master 2 Sekunden lang drücken und dann loslassen.
ZEITTHERMOSTAT
“MASTER”-ZEITTHERMOSTAT
ZONE 1
ZEITTHERMOSTAT
THERMOSTAT
5
Am Display erscheint das vorher benutzte Programm.
10
30
•
AM EMPFÄNGER:
•
Den Status der Zone feststellen und alle in der Bedienungsanleitung des Empfängers beschriebenen Arbeitsschritte zur Zuweisung
ausführen.
Anschließend:
5
1
20
25
ON
4.2 - Rückgängig machen der Zuweisung einer Zone an einen “Master”
ZONEN UND SENDER
Auch beim Rückgängig machen sind die in der Bedienungsanleitung der Empfänger enthaltenen Anweisungen strikt zu befolgen.
AM “MASTER”-ZEITTHERMOSTAT den Status “Master Test” aktivieren:
•
Die Taste Master drücken, bis am Display die Meldung “
”, dann loslassen.
AM EMPFÄNGER:
•
Den Status der Zone feststellen und alle in der Bedienungsanleitung des Empfängers beschriebenen Arbeitsschritte zum Rückgängig
machen ausführen.
AM “MASTER”-ZEITTHERMOSTAT den Status “Master - Test” deaktivieren:
•
Die Taste Master 2 Sekunden lang drücken und dann loslassen.
Hinweis: Der Status “Master - Test” endet 3 Minuten nach Aktivierung automatisch; danach kehrt der Zeitthermostat zum Normalbetrieb zurück.
ON
1
2
3
4
5
6
7
8
GEBRAUCHSANWEISUNGEN FÜR DEN BENUTZER
4.3 - Betriebsmodus “Master”
EMPFÄNGER MIT LEISTE
UND STELLGLIED
In den Anlagen, in denen Zonen vorhanden sind, die einem “Master”-Zeitthermostat zugewiesen wurden, kann die Funktion “Master” vom Benutzer
durch kurzes Drücken auf die Taste Master aktiviert oder deaktiviert werden.
Der aktivierte Status “Master” wird am Display durch die Anzeige “ | Master” signalisiert (Abb. 5).
Funktion “Master” deaktiviert: Der “Master”-Zeitthermostat verhält sich wie ein normaler Zeitthermostat und agiert nur in der an ihn angeglichenen
Zone.
Funktion “Master” aktiv: Bis zur Deaktivierung der Funktion ersetzt der “Master”-Zeitthermostat die Zeitthermostate und/oder Thermostate, die
an die ihm zugewiesenen Zonen angeglichen sind.
Im “Master”-Betrieb können Temperaturebenen und -werte geändert, und vom vorübergehenden auf Dauer-Manualbetrieb oder Programmbetrieb
umgeschaltet werden (Profil)
1 2 3 4 5 6
ON OFF
H O
2
/
A) Vorübergehender manueller Master-Betrieb (Abb. 6)
Aktivierung: Mit Master-Zeitthermostat im vorübergehenden Manualbetrieb (siehe Kap. 2.12 a - beiliegende Bedienungsanleitung) die Taste
“Master” kurz drücken. Am Display erscheint die Daueranzeige “ | Master” und die blinkende Anzeige des Manualbetriebs.
Funktionsweise:
•
Die Temperaturregelung aller dem “Master” zugewiesenen Zonen wird vom “Master” gesteuert; Temperaturebene (Komfort, Economy, Frostschutz)
und Temperaturwerte sind die im “Master” eingegebenen.
Abb. 4
Anzeige “Master”
Wichtig Im “vorübergehenden manuellen Master-Betrieb” können um Mitternacht folgende Fälle eintreten:
•
Wenn die “Master”-Funktion aktiviert wurde, solange der Zeitthermostat im “vorübergehenden Manualbetrieb” war, endet sowohl die Funktion
“vorübergehender Manualbetrieb” als auch die “Master”-Funktion; der Zeitthermostat schaltet auf Programmbetrieb.
•
Wenn die “Master”-Funktion aktiviert wurde, bevor der Zeitthermostat auf “vorübergehenden Manualbetrieb” geschaltet wurde, endet die Funktion
“vorübergehender Manualbetrieb” und der Zeitthermostat schaltet auf die Betriebsart “Master von Programm”.
Deaktivierung der Funktion “Master”: Die Taste “Master” kurz drücken; am Display verschwindet die Anzeige “ | Master”: Der Zeitthermostat
bleibt im “vorübergehenden Manualbetrieb” und die dem Master zugewiesenen Zonen kehren unter die Kontrolle der jeweiligen Sender zurück.
1 2 3 4 5 6
ON OFF
H O
2
/
B) Andauernder manueller Master-Betrieb (Abb. 6)
Aktivierung: Mit Master-Zeitthermostat im Dauer-Manualbetrieb (siehe Kap. 2.12 b - beiliegende Bedienungsanleitung) die Taste “Master” kurz
drücken. Am Display erscheint die Daueranzeige “ | Master” und die Daueranzeige des Manualbetriebs.
Funktionsweise:
•
Die Temperaturregelung aller dem “Master” zugewiesenen Zonen wird vom “Master” gesteuert; Temperaturebene (Komfort, Economy, Frostschutz)
und Temperaturwerte sind die im “Master” eingegebenen.
Deaktivierung der “Master”-Funktion: Die Taste “Master” kurz drücken; am Display verschwindet die Anzeige “ | Master”: Der Zeitthermostat
bleibt im “Dauer-Manualbetrieb” und die dem Master zugewiesenen Zonen kehren unter die Kontrolle der jeweiligen Sender zurück.
C) Master von Programm in Funktion (von Profil)
Abb. 5
Mit aktiviertem
In den Phasen, für die im Programm (Profil) die Temperaturebene Komfort vorgesehen ist, wird die Temperaturregelung nicht mehr vom Master
(der weiterhin die an ihn angeglichene Zone steuert), sondern von den Sendern gesteuert, die an die einzelnen Zonen angeglichen sind. Am
Display bleibt die Anzeige “ | Master” (Abb. 7).
Mit aktiviertem “andauerndem
“vorübergehendem manuellen
manuellem Master-Betrieb”
Master-Betrieb”
Aktivierung: Mit Master-Zeitthermostat in Programmbetrieb die Taste “Master” kurz drücken. Am Display erscheint die Daueranzeige “ |
Master”.
Funktionsweise:
•
In den Phasen, für die im Programm (Profil) die Temperaturebenen Economy und Frostschutz vorgesehen sind, wird die Temperaturregelung aller
dem “Master” zugewiesenen Zonen vom “Master” gesteuert; Temperaturebene und Temperaturwerte sind die im “Master” eingegebenen.
•
Taste “Master”
1 2 3 4 5 6
ON OFF
H O
2
/
Abb. 6
Deaktivierung der “Master”-Funktion: Die Taste “Master” kurz drücken; am Display verschwindet die Anzeige “ | Master”: Der Zeitthermostat
bleibt im Programmbetrieb und die dem Master zugewiesenen Zonen kehren unter die Kontrolle der jeweiligen Sender zurück: Der Zeitthermostat bleibt
in “Dauer-Manualbetrieb” und die dem Master zugewiesenen Zonen kehren unter die Kontrolle der jeweiligen Sender zurück.
WICHTIG Am aktivierten “Master” ist folgendes möglich:
1 2 3 4 5 6
ON
H
2
- Verwendung der Countdown-Funktionen, die Unterbrechung zur Reinigung oder für den Ausschluss der Anlage (OFF) ohne, dass
der “Master”-Betrieb deaktiviert wird. Diese Funktionen werden in allen dem “Master” zugewiesenen Zonen angewandt.
/
- Von einem Betriebsmodus zum anderen (Programm in Funktion, vorübergehender oder Dauer-Manualbetrieb) wird durch Drücken
auf die Manual-Taste gewechselt.
Betrieb mit telefonischem Programmierer (siehe Kapitel 2.16 der beiliegenden Bedienungsanleitung)
Bei Aktivierung des telefonischen Programmierers, der mit dem Zeitthermostat “Master” in Betrieb verbunden ist:
•“Vorübergehender manueller Master-Betrieb”
•“Andauernder manueller Master-Betrieb”
•Programm “Countdown”
werden alle ihm zugewiesenen Zonen auf Ebene “Komfort” des “Master” temperaturgeregelt. Wenn der telefonische Programmierer deaktiviert wird,
kehrt der Zeitthermostat zu dem Betriebsmodus zurück, der vor der Aktivierung benutzt wurde.
Periode mit Komfort-Temperatur:
Auch wenn er aktiviert ist, kontrolliert der “Master” nicht die
zugewiesenen Zonen, die unter die Kontrolle der jeweiligen
Sender zurückkehren.
Abb. 7