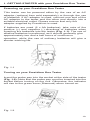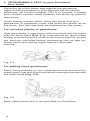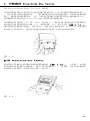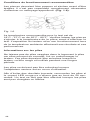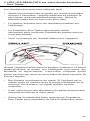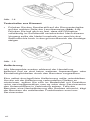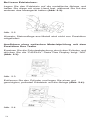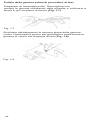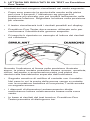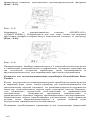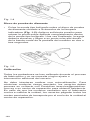
1
Duo Tester | PDT
USER HANDBOOK
Language Contents
1. English Language
pg. 03
2. Chinese Language
pg. 21
3. French Language
pg. 38
4. German Language
pg. 57
5. Italian Language
pg. 77
6. Russian Language
pg. 97
7. SpanishLanguage
pg. 119
2
Contents
(English Version)
I. Disclaimers, Exclusions and Limitations of
Liability
pg. 04
II. About this book
pg. 05
III. About your Presidium Duo Tester
pg. 06
IV. IMPORTANT NOTICE pg. 09
1. GETTING STARTED with your Presidium
Duo Tester
pg. 10
2. PERFORMING A TEST on your Presidium
Duo Tester pg. 15
3. READING TEST RESULTS on your
Presidium Duo Tester
pg. 18
4. TAKING CARE of your Presidium Duo Tester pg. 20
3
I. Disclaimers, Exclusions and Limitations of Liability
PLEASE READ AND NOTE PRESIDIUM WARRANTY
TERMS AND CONDITIONS as stated in the warranty
card. Presidium warranty for its testers are subject to
proper use by its users in accordance with all the terms
and conditions as stated in the relevant user handbook
and shall cover only manufacturing defects.
Due to continuous product improvement, Presidium
reserves the right to revise all documents including the
right to make changes to the handbook without notice and
without obligation to notify any person of such revisions or
changes. Users are advised to check Presidium’s website
http://www.presidium.com.sg/ from time to time.
Presidium shall not be responsible for any damage or
loss resulting from the use of this tester or handbook, and
under no circumstances shall Presidium, its manufacturer
or any of its subsidiaries, licensors, distributors, resellers,
servants and/or agents be liable for any direct or indirect
damages, resulting from the use of this tester.
TO THE MAXIMUM EXTENT PERMITTED BY
APPLICABLE LAW, under no circumstances shall
Presidium, its manufacturer or any of its subsidiaries,
licensors, distributors, resellers, servants and/or agents be
responsible for any special, incidental, consequential or
indirect damages howsoever caused.
The tester or Presidium Duo Tester (PDT) referred to in
this handbook is provided and/or sold on an “as is” basis.
Except as required by applicable law, no warranties of any
kind, either expressed or implied, including, but not limited
to, the implied warranties of merchantability and fitness for
a particular purpose.
4
II. About this book
Thank you for purchasing the Presidium Duo Tester (“PDT”
or “tester”).
This handbook is designed to help you set up your tester
and describes all you need to know about how to use your
tester accurately and take care of it in line with its
requirements. Please read these instructions carefully and
keep them handy for future reference.
This book also contains the terms and conditions in relation
to the use of the tester including the Disclaimer,
EXCLUSION and Limitation of Liability clauses stated
above in Section I.
5
III. About your Presidium Duo Tester (PDT)
The Presidium Duo Tester’s thermal measurement is based
on an invention by Professor Julian Goldsmid, from the
University of New South Wales, Australia. It was developed
to help distinguish between diamonds and its simulants using the principles of thermal conductivity. Diamonds, with
their exceptional heat conductivity properties are unlike any
other simulants and are therefore not easily replicable. The
Presidium Duo Tester with a Color Stone Estimator display
will assist users to distinguish popular colored gemstones
from each other.
The Presidium Duo Tester also comes with a built-in
reflectivity tester, providing an alternative method to identify
the gemstones being tested.
It is to be noted that natural and synthetic gemstones have
similar physical and optical properties. As such, the
Presidium Duo Tester does not distinguish between natural
and synthetic gemstones. As with all thermal testers in the
market, the tester is therefore not able to differentiate
between natural diamonds and moissanite.
The Presidium Duo Tester has been subjected to thorough
factory quality control, and will generally give a clear and
reliable reading of the gemstone being tested under proper
use. However, you are advised to conduct further
supporting tests.
6
The Presidium Duo Tester features the following:
•
Retractable thermoelectric probe tip that
ensures constant pressure between probe tip and
gemstone
Industry’s thinnest probe tip (0.6mm) for testing
gemstones as small as 0.02ct
Metal alert buzzer to ensure that probe tip is in contact
with gemstone during testing
Large easy-to-read analog dial and digital index LED
displays
Built-in diamond and simulant test discs for reference
Built-in simulant reflectivity chart
Built-in simulant set for reference (optional item
provided by Presidium)
Powered by 5 x AA batteries or AC adaptor
•
•
•
•
•
•
•
Included in your package:
•
•
•
•
•
•
•
•
•
Presidium Duo Tester
Probe pen
AC adaptor
Built-in simulant reflectivity chart
Built-in test simulant test discs
User handbook
Warranty card
Protective carrying case
Built-in simulant set for reference (optional Item)
7
1
Reflectivity Calibration Inlet
2
Simulant Test Disc
3
ON/OFF LED Indicator
4
Diamond Test Disc
5
Adaptor
6
Probe Protective Cap
7
Reflectivity Chart
8
Probe Pen
9
Thermal Conductivity Calibration Inlet
10
Probe Pen Holder
11
ON/OFF Display Button
12
Gemstone Test Pad
13
Reflectivity Display Screen
14
Cylinder Cap
15
Simulant Set
8
IV. IMPORTANT NOTICE
•
Keep the tester dry. Precipitation and all types of
liquids or moisture can contain minerals that will
corrode electronic circuits. If your tester gets wet,
remove the battery, and allow the tester to dry
completely before replacing it.
•
Do not use, store or expose the tester in dusty, dirty
areas. Its moving parts and electronic components can
be damaged.
•
Do not use, store or expose the tester in hot areas.
High temperatures can damage or shorten the life of
the tester, damage batteries, and warp or melt certain
plastics.
•
Do not use, store or expose the tester in cold areas.
When the tester returns to its normal temperature,
moisture can form inside the tester and damage
electronic circuit boards.
•
Do not attempt to open the tester other than as
instructed in this handbook.
•
Do not drop, knock, or shake the tester. Rough
handling may break internal circuit boards and fine
mechanics.
•
Do not use harsh chemicals, cleaning solvents, or
strong detergents to clean the tester.
•
Do not paint the tester. Paint can clog the moving parts
and prevent proper operation.
If the tester is not working properly, kindly contact our
Customer Service at [email protected] or
Presidium Instruments Pte Ltd
No. 6 Penjuru Lane
Singapore 609187
Singapore
(65) 6379 5000
Attn: Customer Service Executive
9
1. GETTING STARTED with your Presidium Duo Tester
Powering up your Presidium Duo Tester
This tester can be powered either by the use of an AC
adaptor (optional item sold separately) or through the use
of batteries. If AC adaptor is used, connect one end of the
AC adaptor to the tester and the other end directly into a
suitable electrical outlet. Please ensure that only the
adaptor supplied by Presidium is used.
If batteries are used (5 x AA batteries), take note of the
positive (+) and negative (-) directions of batteries when
inserting the batteries into the tester (Fig. 1.1). The use of
alkaline batteries is preferred, as it should generally give
approximately two and a half hours of continuous
operation, while the use of ordinary batteries will give a
shorter working life.
Fig. 1.1
Turning on your Presidium Duo Tester
Insert the probe pen into the socket at the side of the tester
(Fig. 1.2). Note that the probe pen must be inserted into the
socket before turning on the unit. Otherwise, the indicator
will rise to the green zone (Diamond) when turned on.
Fig. 1.2
10
Slide the [ON/OFF] button at the back of the unit to turn on
the unit (Fig. 1.3) and wait for approximately 20
seconds or until the red LED lights up.
Fig. 1.3
Testing to ensure your Presidium Duo Tester is
functioning properly
Simulant test disc
•
Press the probe tip onto the simulant test disc located
on the left of the indicator lamp (Fig. 1.4). Apply
sufficient pressure to retract the protruding tip
completely into the probe pen. The indicator should
rise to and remain within the white strip (preferably at
the center of white strip) with “CAL” printed on top,
within two to three seconds.
Fig. 1.4
11
Diamond test disc
•
Press the probe tip onto the diamond test disc located
on the right of the indicator lamp (Fig. 1.5). Apply
sufficient pressure to retract the protruding tip
completely into the probe pen. Once this has been
completed, the needle should rise and reach its
highest point well within the green band of the meter
display, within two to three seconds
Fig. 1.5
Calibration
All testers have been calibrated during the
manufacturing process and no further adjustment or user
intervention to the tester is required.
Self-calibration should not be attempted. To minimize any
risks associated, users should contact Presidium at
[email protected] or its service center for
assistance. In the event that users require the manufacturer
to re-calibrate the unit, the users will bear the associated to/
fro freight cost for the shipping of unit to the service center.
12
Recommended testing conditions
The gemstone should be clean and dry before testing.
However, elaborate cleaning procedures are not normally
necessary (Fig. 1.6).
Fig. 1.6
The recommended testing temperature is 18°C – 27°C or
65°F- 80°F. Please allow the gemstone or jewelry piece to
adjust to room temperature prior to testing. Exposure and/
or operation of the tester outside the room temperature
would affect the results and performance of the tester.
Battery information
Do not leave worn out batteries in the battery
compartment as the batteries may corrode, leak, and
damage the tester. Batteries should be removed when the
tester is expected to be stored for any extended period of
time.
Batteries do not have to be removed when the AC adaptor
is in use.
To prevent inaccurate readings, replace with new batteries
if the red LED does not light up after 20 seconds. A test
should not be performed when the battery is low or weak.
13
Cleaning your gemstone prior to testing
Prepare a clean tissue. Carefully retrieve the gemstone
with tweezers and place the gemstone face down on the
table (Fig. 1.7).
Fig. 1.7
Gently rub the table of gemstone against the tissue/
jewellery cloth and place the gemstone on the centre of the
Test Pad (Fig. 1.8)
Fig. 1.8
14
2. PERFORMING A TEST on your Presidium
Duo Tester
Place the tip of the probe pen against the gemstone.
Apply minimal pressure to fully depress the tip into the
probe pen for correct reading. This is to provide a steady
and constant contact made between the probe tip and the
gem stone.
When testing a loose stone, place the stone onto the
depression of protective cover and press the probe tip on
the stone. The test result will be displayed on the meter.
For mounted jewelry or gemstones:
Hold the jewelry or gemstone with one hand and the tester
with the other hand (Fig. 2.1). Care should be taken when
testing mounted jewelry. User must ensure that the stones
are securely mounted before conducting test as gap between stone and setting might lead to inaccurate
reading.
Fig. 2.1
For testing loose gemstones:
Place the gemstone on the metal stone rest and hold the
metal stone rest with one hand while holding the probe with
the other hand (Fig. 2.2).
Fig. 2.2
Note: Metal stone rest is not provided by Presidium.
15
Place the gemstone on the metal stone rest and hold the
metal stone rest with one hand while holding the probe with
the other hand (Fig. 2.2).
Performing an optical test with your Presidium Duo
Tester
Replace the protective cover with the cylinder and press
the “DISPLAY” button. The display will give “000” reading
(Fig. 2.3).
Fig. 2.3
Remove the cylinder and place a well-cleaned, polished
gemstone on the centre of the pad
(Fig. 2.4)
Fig. 2.4
Cover the gemstone with the recessed cylinder (Fig. 2.5).
Fig. 2.5
16
Press and hold the “DISPLAY” button and wait until the
displayed number remains stable (about 2 seconds)
(Fig. 2.6).
Fig. 2.6
Note: The 7-simulant set gemstones are used with the aid
of the reflectivity chart at the back of the unit for calibration
and functional testing of the Reflectivity sensor.
Tips for using your Presidium Duo Tester
If the tester is being used for the first time, or if the tester
has not been used for a week, it is advisable to clean the
probe tip using a piece of paper to attain consistent and accurate reading. Rub the tip gently across the paper surface
before testing.
The probe tip must be placed at a right angle or
perpendicular to the facet of gemstone for an accurate
reading
Tests should be conducted on the table of the gemstone.
In the event of any doubt, kindly test on the girdle of the
gemstones instead.
When mounted stones are not recessed in their setting,
their reflectivity can be measured. Use a black plastic box
(e.g., photographic film container) as an alternative to the
recessed cylinder.
To achieve optimum accuracy for tests involving very small
gemstones (10 points and below), it is important to allow
the gemstone to cool down before subsequent tests.
It is advisable to take multiple readings regarding the test
results indicated.
17
3. READING TEST RESULTS on your Presidium Duo
Tester
The test results are indicated as follows:
•
After pressing the probe tip on the stone for about 2
seconds, the indicator will reach its highest position,
then slowly fall back. Take the reading at the highest
position.
•
The tester will provide all possible results on the
display.
•
The Presidium Duo Tester should be used only to
confirm the identity of suspected gemstone.
•
An example of reading the result on the meter is given
below:
When the indicator stops at the above position, the stone
tested may be Quartz, Amethyst, Citrine, Tanzanite or
Aqua, i.e., any stones that fall within the white strip that
the indicator passes.
•
Metal Alert Buzzer: If the tip of the pen comes in
contact with the metal mounting of a stone, an audible
signal is emitted.
•
Relatively low readings in the green zone must be
expected with very small diamonds.
•
Based on the thermal test results, Presidium Duo
Tester can help distinguish between :
18
Sapphire
vs. Tanzanite
Jadeite
vs.
Sapphire
vs. Iolite
Jadeite
vs.
Sapphire
vs. Spinel
Ruby
vs.
Chrysoprase
Aventurine
Quartz
Spinel
Sapphire
vs. Citrine
Ruby
vs.
Garnet
Sapphire
vs. Topaz
Topaz
vs.
Aquamarine
Sapphire
vs. Tourmaline Topaz
vs.
Amethyst
Emerald
vs. Jadeite
Topaz
vs.
Citrine
Emerald
vs. Garnet
Spinel
vs.
Garnet
Jadeite
vs. Garnet
Gemstones
vs.
Glass
The use of the thermal results is restricted to the
gemstones listed above and will assist the jeweler to
distinguish the many confusing gemstones in the market.
Reading optical test results
•
A Reflectivity Number is displayed. Note the Reflectivity
Number and compare it with the reflectivity chart at
tached in the package.
•
In case of a borderline reading, clean the stone and
pad again before the next test and/or move stone
slightly off center. By repositioning the stone, a dis
torted reflection from a scratched area of the surface
may be avoided. Repeat the test.
•
Synthetic Spinel/Synthetic Sapphire and High Zircon/
GGG have overlapping Reflectivity Numbers. If in
doubt, use thermal conductivity measurement for easy
separation.
•
Synthetic Sapphire: needle goes to a high position in
the red zone.
•
Synthetic Spinel: Needle goes about halfway into the
red zone.
•
High Zircon: Needle goes 2/3 into the red zone.
•
GGG: Needle goes 1/3 into the red zone
19
4. TAKING CARE of your Presidium Duo Tester
•
The probe and wire tip is extremely sensitive and
should be handles with care. Caution should be taken
so as not to damage the probe tip.
•
Do not leave worn out batteries in the battery
compartment as the batteries may corrode,leak or
damage the tester. Batteries should be removed when
the tester is expected to be stored for an extended
period of time.
Your tester is a product of extensive design and
craftsmanship and should be treated with care.
Thank you for taking time to go through the user
handbook which will enable you to understand your recent
purchase better.
Presidium also recommends that you register your warranty by sending the warranty registration card to us or register
online at http://www.presidium.com.sg/
20
Presidium Duo Tester
(PDT) 用户手册
21
目录
(Chinese Version)
I.
免责声明、排除条款和责任限制
pg.23
II.
关于本手册
pg.24
III. 关于 Presidium Duo Tester
IV. 重要说明
pg.25
pg.27
1. 开始使用 Presidium Duo Tester
pg.28
2. 在 Presidium Duo Tester
上执行检测
pg.32
3. 在 Presidium Duo Tester
上读取检测结果
pg.35
4. 维护 Presidium Duo Tester
pg.37
22
I. 免责声明、排除条款和责任限制 请仔细阅读并注意在质保卡中所述的 PRESIDIUM 质保条款
和条件。 Presidium 为其检测仪器所提供的质保的前提条
件是,用户按照相关用户手册所载的全部条款和条件进行
正确的使用,并且仅涵盖生产上的瑕疵。
由于产品的不断更新,Presidium 保留对所有文档进行修
订的权利,包括在未事先通知的情况下修改手册的权利,
亦不承担向任何人通知此类修订或修改的义务。 我们建议
用户定期访问并查阅 Presidium 的网站:
http://www.presidium.com.sg/。
对于因使用本检测仪或手册而造成的任何损害或损
失,Presidium 概不负责,并且无论在任何情况
下,Presidium、其生产商或任何子公司、授权商、经销
商、中间商、公务人员和/或代理人均不对由于使用本检测
仪而造成的任何直接或间接的损害承担法律责任。
在适用法律的最大允许范围内,并且无论在任何情况
下,Presidium、其生产商或任何子公司、授权商、经销
商、中间商、公务人员和/或代理人均不对由于使用本检测
仪而造成的任何特殊、偶发、结果或间接及其它任何方式
所造成的损害负责。
本手册中所引述之检测仪或 Presidium Duo Tester (PDT)
均是“按原样”提供和/或出售的。 除了适用法律的特别
要求外,我们均不提供任何形式的明示或暗示担保,包括
但不限于对适销性或对特定用途的适用性的暗示担保。
23
II. 关于本手册
感谢您购买 Presidium Duo Tester(简称“PDT”或“检
测仪”)。
本手册旨在帮助您设置检测仪,并且将介绍关于如何正确
地使用检测仪及按照要求对其进行护理的所有知识。 请仔
细阅读这些说明,将其放在方便之处以便将来参考。
本手册中还包括了与使用检测仪相关的条款和条件,包括
在上面的第 I 部分中所述的免责声明、排除条款和责任限
制条款。
24
III. 关于 Presidium Duo Tester (PDT)
Presidium Duo Tester 的热敏测量法是以澳大利亚新南威
尔士大学 Julian Goldsmid 教授的发明为基础的。 研制此
方法的目的是利用导热性原理帮助区分钻石及其仿品。 钻
石具有优异的导热性,与其他任何仿品都不同,因此并不
容易复制。 Presidium Duo Tester 配备有色宝石评估显示
屏,将帮助用户分辨常见的有色宝石。
Presidium Duo Tester 还附带内置的反射率检测仪,提供
了又一种鉴别受测宝石的方法。
必须注意的是,天然宝石和人造宝石具有相似的物理和光
学特性。 因此,Presidium Duo Tester 不能分辨天然宝
石和人造宝石。 所以和市面上所有热敏检测仪一样,本检
测仪不能分辨天然钻石和莫桑石。
Presidium Duo Tester 经受了严格的工厂质量控制,在
正确使用的条件下通常可为受测宝石给出明确而可靠的读
数。 但是建议您执行可资旁证的其他检测。
Presidium Duo Tester 的特点如下:
•
•
•
•
•
•
•
•
可伸缩的热电探针头,确保探针头和宝石之
间的压力保持恒定
业内最细的探针头 (0.6mm),可用于检测小
至 0.02ct 的宝石
金属报警蜂鸣器,确保在检测时探针头与宝
石保持接触
易于判读的大型模拟表盘和数字指数 LED
显示屏
内置钻石和仿品检测盘供参考
内置仿品反射率图表
内置仿品套件供参考(Presidium 提供的
可选配件)
5 节 AA 电池或交流适配器供电
包装物品:
•
•
•
•
•
•
•
•
•
25
Presidium Duo Tester
探针笔
交流适配器
内置仿品反射率图表
内置检测仿品检测盘
用户手册
质保卡
保护性便携袋
内置仿品套件供参考(Presidium 提供的
可选配件)
1
反射率校准插口
2
仿品检测盘
3
开/关 LED 指示灯
4
钻石检测盘
5
适配器
6
探针保护帽
7
反射率图表
8
探针笔
9
导热性校准插口
10
探针笔架
11
开/关显示屏按钮
12
宝石检测台
13
放射率显示窗
14
桶形帽
15
仿品套件
26
IV. 重要说明
•
保持检测仪干燥。 雨水以及任何形式的液体或湿气
均可能含有对电子线路具有腐蚀性的矿物质。如果
检测仪被打湿,请取出电池,让检测仪彻底晾干,如
仍然故障则需更换设备。
•
切勿在多灰尘和脏乱的环境中使用、存放或暴露检测
仪。这有可能损坏其活动部件或电子元件。
•
切勿在高温环境中使用、存放或暴露检测仪。高温有
可能损坏或缩短检测仪的寿命、损伤电池以及使某些
塑料部件变形或熔化。
•
切勿在低温环境中使用、存放或暴露检测仪。当检测
仪回到正常温度时可能在仪器内部形成湿气,从而对
电子线路板造成损害。
•
切勿尝试通过未在本手册中说明的方法来打开检测
仪。
•
切勿跌落、撞击或摇晃检测仪。粗暴地使用可能导致
内部电路板和精密器械断裂。
•
切勿使用刺激性化学物质、清洁溶剂或强力洗涤剂来
清洗检测仪。
•
切勿给检测仪上漆。油漆可能会阻塞活动部件,影响
其正常工作。
如果检测仪无法正常工作,请通过以下方式联系我们的客
户服务部门 - 电子邮件:[email protected] 或
者寄信至:
Presidium Instruments Pte Ltd
No. 6 Penjuru Lane
Singapore 609187
Singapore
(65) 6379 5000
Attn: Customer Service Executive
27
1. 开始使用 Presidium Duo Tester
为 Presidium Duo Tester 供电
本检测仪既可使用交流适配器供电(可单独选购的配件)
,也可使用电池供电。 如果使用交流适配器,请将适配器
的一端连接检测仪,另一端直接插入配套的电源插座中。
请确保仅使用由 Presidium 提供的适配器。
如果使用电池(5 节 AAA 电池),则在将电池放入检测仪
时应注意电池的正极 (+) 和负极 (-) 的方向(图 1.1)。
推荐使用碱性电池,因为它一般可以保证约 2.5 个小时的
持续工作时间,使用普通电池的话其工作时间较短。
图 1.1
打开 Presidium Duo Tester
将探针笔插入检测仪侧面的插座(图 1.2)。 注意,必须
先将探针笔插入插座,再打开检测仪。 否则,打开检测仪
时指针将摆升至绿色区域(钻石)。
图 1.2
28
拨动检测仪背面的 [ON/OFF] 按钮打开检测仪(图 1.3),
然后等待约 20 秒,或等待至红色 LED 亮起为止。
图 1.3
执行检测以确认 Presidium Duo Tester 是否工作正常
仿品检测盘
•
将探针头顶在指示灯左边的仿品检测盘上
(图 1.4)。 施加足够压力,使针头完全缩
进探针笔中。 在两到三秒钟内,指针应该
摆至白色条带中并保持不动(最好位于白色
条带中央),上方显示“CAL”。
图 1.4
钻石检测盘
•
将探针头顶在指示灯右边的钻石检测盘上
(图 1.5)。 施加足够压力,使针头完全
缩进探针笔中。 完成此操作后,在两到三
秒钟内,指针应该摆至最高点,深入仪表指
示盘的绿色条带中。
29
图 1.5
校准
所有检测仪在制造过程中都经过校准,不需要对检测仪作
进一步调整或用户干预。
使用者不应该尝试自行校准。为了尽量降低一切有关风
险,用户应该通过 [email protected] 或服务中
心联系 Presidium 以寻求帮助。 如果用户需要制造商重
新校准检测仪,则用户应承担检测仪运至服务中心和返回
的相关运费。
推荐的检测条件
宝石接受检测前应清洁干燥。 但是通常不必执行复杂的清
洁程序(图 1.6)。
图 1.6
30
建议的检测温度为 18°C – 27°C(65°F- 80°F)。在
检测前请让宝石调整至室温。 在室温范围外暴露和/或操作
检测仪都会影响检测结果和检测仪的性能。
电池信息
切勿将用完的电池留在电池匣内,因为电池电解液可能出
现泄露,从而腐蚀和损坏检测仪。 如果预计要将检测仪存
放较长时间,应取出电池。
在使用交流适配器时不必取出电池。
为避免读数不准确,如果红色 LED 在 20 秒后未亮起,请
更换新电池。 当电池的电量低或微弱时,不应执行检测。
在检测前清洁宝石
准备一张干净的绵纸。 用镊子小心地夹起宝石,将它的切
平面朝下放在纸上(图 1.7)。
图 1.7
将宝石切平面抵住绵纸/首饰布轻轻擦拭,然后将宝石放在
检测台中央(图 1.8)。
图 1.8
31
2.
在 Presidium Duo Tester 上执行检测
将探针笔的针头抵住宝石。 略微用力,使针头完全缩进探
针笔中,以获得正确读数。 这样做的目的是使探针头和宝
石之间保持稳定接触。
在检测裸石时,将宝石放在保护盖的凹坑上,然后用探针
头顶在宝石上。 检测结果将显示在仪表上。
对于已镶嵌的珠宝或宝石:
一手拿住首饰或宝石,另一手拿住检测仪(图 2.1)。 检
测镶嵌首饰时应该小心操作。 用户在执行检测前必须确保
宝石镶嵌牢固,因为宝石和镶托之间的空隙可能导致读数
不准。
Fig. 2.1
如果检测的是裸石:
将宝石放在金属宝石托上,一手拿住金属宝石 托,另一手
拿住探针(图 2.2)。
图 2.2
注:Presidium不提供金属宝石底座。
32
用 Presidium Duo Tester 执行光学检测
用小桶换下保护盖,然后按“DISPLAY”按钮。 显示屏将显
示“000”的读数(图 2.3)。
图 2.3
取下小桶,将经过适当清洁、擦亮的宝石放在检测台中央
(图 2.4)。
图 2.4
用埋藏式小桶罩住宝石(图 2.5)。
图 2.5
33
按住“DISPLAY”按钮,直到显示的数字保持稳定为止
(约 2 秒钟)(图 2.6)。
图 2.6
注意: 可将 7 种仿品宝石套件与检测仪背面的 RI 图标配
合使用,对反射率传感器进行校准和功能检测。
关于使用 Presidium Duo Tester 的提示
如果检测仪是首次使用,或者检测仪已有一周未使用,建
议用一张纸擦拭探针头,从而获得一致而准确的读数。
应在检测前将针头在纸面上轻轻揉擦。为了获得准确读
数,必须使探针头垂直于宝石的切割面
执行检测时应该让宝石的切平面朝下。 如有任何疑问,请
在宝石的腰棱上执行检测。
如果镶嵌宝石并非埋藏在其镶托中,则可以测量其反射
率。 可以使用黑色塑料盒(例如摄影胶片盒)代替埋藏式
小桶。
在检测非常小的宝石(不超过 10 分)时,必须等宝石冷
却才能继续检测。建议为显示的检测结果采集多个相关读
数
34
3. 在 Presidium Duo Tester 上读取结果
检测结果显示如下:
•
将探针头顶住宝石约 2 秒后,指针将转到读数最高
的位置,然后缓慢回转。记录最高位置的读数。
•
检测仪将在显示屏上提供所有可能结果。
•
应该仅将 Presidium Duo Tester 用于确认受怀疑的
宝石的品种。
•
下面给出读取仪表结果的示例:
如果指针停留在以上位置,受测宝石可能是水晶、紫水
晶、黄水晶、坦桑黝帘石或海蓝宝石,即任何处于指针经
过的白色条带内的宝石。
•
金属报警蜂鸣器: 如果笔头接触到宝石的
金属底托,将发出声音信号。
•
如果检测非常小的钻石,必须预计到结果可
能是绿色区域中相当低的读数。
•
根据热敏检测结果,Presidium Duo Tester
可帮助区分:
35
蓝宝石
与
坦桑黝帘石
硬玉
与
绿玉髓
蓝宝石
与
堇青石
硬玉
与
星彩石英
蓝宝石
与
尖晶石
红宝石
与
尖晶石
蓝宝石
与
黄水晶
红宝石
与
石榴石
蓝宝石
与
黄玉
黄玉
与
海蓝宝石
蓝宝石
与
电气石
黄玉
与
紫水晶
翡翠
与
硬玉
黄玉
与
黄水晶
翡翠
与
石榴石
尖晶石
与
石榴石
硬玉
与
石榴石
各种宝石
与
玻璃
热敏检测结果仅限用于以上列出的宝石,它们可帮助珠宝
商分辨市场上许多容易混淆的宝石
读取光学检测结果
•
将显示反射率数值。 记录反射率数值,然后与包装
中附带的反射率图表对比。
•
如果读数处于范围边界,请在再次检测前重新清洁宝
石和检测台,和/或将宝石从中央略微挪开。 改变
宝石位置可避免表面刮伤部位导致的折射率失真。
重复检测。
•
人造尖晶石/人造蓝宝石和高型锆石/GGG 的反射率
范围有重叠。 如果有疑问,请使用导热测量结果以
方便区分。
•
人造蓝宝石: 指针停留在红色区域中读数偏高的位
置。
•
人造尖晶石: 指针大约停留在红色区域的一半位
置。
•
高型锆石: 指针停留在红色区域 2/3 的位置。
•
GGG: 指针停留在红色区域 1/3 的位置。
36
4. 维护 Presidium Duo Tester
•
探针和针头极其敏感,应该小心处理。 应该 小心操
作,防止探针头受损。
•
切勿将用完的电池留在电池匣内,因为电池电解液可
能出现泄露,从而腐蚀或损坏检测仪。 如果预计要
将检测仪存放较长时间,应取出电池。
您的检测仪融合了大量的设计与工艺,因此应小 心使用。
感谢您抽出时间阅读本用户手册,它会让您更好地了解您
新购买的产品。
Presidium 还建议您完成质保注册流程,可以通过将质保注
册卡寄送给我们,也可以通过
http://www.presidium.com.sg/ 在线注册。
37
Manuel de l’utilisateur
pour le Presidium Duo
Tester (PDT)
38
Table(French
desVersion)
matières
I. Dénis, exclusions et limitations de
responsabilité
pg. 40
II. A propos de ce manuel
pg. 41
III. A propos de votre Presidium Duo Tester
pg. 42
IV. AVIS IMPORTANT
pg. 45
1. PREMIERE UTILISATION de votre Presidium
Duo Tester
pg. 46
2. EFFECTUER UN TEST sur votre Presidium
Duo Tester
pg. 51
3. LIRE LES RESULTATS sur votre Presidium
Duo Tester
pg. 54
4. PRENDRE SOIN de votre Presidium Duo
Tester
39
pg. 56
I. Dénis, exclusions et limitations de responsabilité
VEUILLEZ LIRE ET PRENDRE NOTE DES CONDITIONS
GENERALES DE GARANTIE telles qu’elles sont
présentées sur la carte de garantie. La garantie Presidium
pour ses testeurs dépend de leur bonne utilisation par ses
utilisateurs, conformément à toutes les conditions
générales indiquées dans le manuel de l’utilisateur
correspondant et elle ne couvre que les défauts de
fabrication.
En raison de l’amélioration continue de ses produits,
Presidium se réserve le droit de mettre à jour tous les
documents y compris le droit d’apporter des modifications
au manuel sans préavis et sans obligation d’avertir qui que
ce soit de ces mises à jour ou modifications. Les
utilisateurs sont invités à consulter le site Web de
Presidium http://www.presidium.com.sg/ de temps à autre.
Presidium ne sera pas tenu responsable pour tout
dommage ou perte résultant de l’utilisation de cet appareil
de contrôle ou d’un manuel, et en aucun cas Presidium,
le fabricant ou l’une de ses filiales, concédants de licence,
distributeurs, revendeurs, personnes à son service et/ou
agents ne seront responsables pour tout dégât direct
ou indirect occasionné par l’usage de cette balance.
DANS LA MESURE MAXIMALE AUTORISEE PAR LA LOI
APPLICABLE, Presidium, son fabricant ou ses filiales,
concédants de licence, distributeurs, revendeurs,
personnes à son service et/ou agents ne seront en aucun
cas responsables de quelque dommage que ce soit :
particulier, accidentel, consécutif ou indirect, quelle qu’en
soit l’origine.
Le testeur ou Presidium Duo Tester (PDT) dont il est question dans ce manuel est fourni et/ou vendu « en l’état ».
Sauf si cela requis par la loi applicable, aucune garantie
d’aucune sorte n’est exprimée, qu’elle soit expresse ou
implicite, comprenant, mais sans s’y limiter, les garanties
implicites de qualité marchande et d’adéquation à un
usage particulier.
40
II. A propos de ce manuel
Nous vous remercions d’avoir acheté le Presidium Duo
Tester (“PDT” or “testeur”).
Ce manuel est conçu pour vous aider à configurer votre
testeur et décrit tout ce que vous devez savoir sur la façon
d’utiliser votre testeur de façon précise et de prendre soin
de lui en conformité avec le maniement requis. Veuillez lire
ces instructions attentivement et les conserver pour toute
référence future.
Ce manuel contient aussi les conditions générales en ce
qui concerne l’utilisation de l’appareil y compris le Déni,
l’EXCLUSION et les autres clauses limitatives de
responsabilité indiquées ci-dessus dans la section I.
41
III. Au sujet de votre Duo Tester (PDT)
La mesure thermique de Presidium Duo Tester s’appuie
sur une invention du Professeur Julian Goldsmid, de
l’Université de New South Wales en Australie. Elle a été
développée pour faciliter la distinction entre les diamants
et les imitations en utilisant les principes de conductivité
thermique. Les diamants, avec leurs propriétés de
conduction exceptionnelles, sont différents de toute autre
pierre similaire, naturelle ou synthétique, et ne peuvent
donc pas être facilement imités. Le Presidium Duo Tester
avec son affichage Color Stone Estimator, aidera les
utilisateurs à distinguer les pierres de couleurs courantes
les unes des autres.
Le Presidium Duo Tester dispose aussi d’un testeur de
réflectivité intégré, autre méthode pour identifier les pierres
que l’on teste.
Il faut noter que les pierres naturelles et synthétiques ont
des propriétés physiques et optiques similaires. Donc, le
Presidium Duo Tester ne fait pas la distinction entre les
pierres naturelles et synthétiques. Comme c’est le cas pour
tous les testeurs thermiques sur le marché, le Presidium
Diamond Mate ne peut pas faire la distinction entre les
diamants naturels et les moissanites.
Le Presidium Duo Tester a été soumis à de nombreux tests
rigoureux de contrôle qualité en usine et donnera
habituellement des résultats clairs et fiables sur la pierre
qui est testée dans des conditions d’utilisation correctes.
Cependant, nous vous conseillons d’effectuer d’autres
tests pour vérification.
42
Les particularités du Presidium Duo Tester sont les
suivantes :
•
•
•
•
•
•
•
•
Embout de sonde thermoélectrique rétractable qui as
sure une pression constante entre l’embout et la pierre
L’embout de sonde le plus fin existant dans l’industrie
(0.6mm)pour tester des pierres aussi petites que 0.02
ct
Un bip d’alerte pour le métal afin de détecter tout
contact avec la pierre pendant le test
Grand cadran analogue facile à lire et af fichage digital
LED d’un index
Disques intégrés de tests de diamants et de pierres
d’imitation pour référence
Tableau intégré de la réflectivité d’autres pierres
d’imitation, pour référence
Ensemble intégré de pierres d’imitation pour référence
(option proposée par Presidium)
Fonctionne avec 5 piles AA ou avec adapta teur
secteur
Inclus dans votre emballage :
•
•
•
•
•
•
•
•
•
Presidium Duo Tester
Jauge stylo
Adaptateur secteur
Tableau intégré de réflectivité de pierres d’imitation
Disques intégrés de tests de pierres d’imitation pour
référence
Manuel de l’utilisateur
Carte de garantie
Étui de transport
Ensemble intégré de pierres d’imitation pour référence
(en option)
43
1
Étalonnage de la réflectivité
2
Disque testeur d'imitations
3
Voyant LED ON/OFF
4
Disque test de diamant
5
Adaptateur
6
Élément de protection de la sonde
7
Charte de réflectivité
8
Sonde stylo
9
Prise d’étalonnage de conductivité thermique
10
Porte sonde
11
Bouton d’affichage ON/OFF
12
Test pad de pierre gemme
13
Affichage de réflectivité
14
Couvercle du cylindre
15
Plaque pour imitations
44
IV. AVIS IMPORTANT
•
S’assurer que le testeur est sec. Les précipitations et
tous les types de liquides ou d’humidité peuvent
contenir des minéraux susceptibles de détériorer
les circuits électroniques. Si votre testeur est humide,
retirez les piles et laissez l’appareil sécher
complètement avant de le remettre en place.
•
Ne pas utiliser, ranger ou laisser le testeur dans des
endroits poussiéreux et sales. Ses pièces et ses
composants électroniques peuvent être endommagés.
•
Ne pas utiliser, ranger ou exposer le testeur dans des
locaux très chauds. Des températures élevées peuvent
endommager ou réduire la vie du testeur, endommager
les piles et déformer ou faire fondre certains plastiques.
•
Ne pas utiliser, ranger ou exposer le testeur dans des
endroits froids. Lorsque le testeur reprend sa
température normale, de l’humidité risque de se former
à l’intérieur du testeur et d’endommager les circuits
électroniques.
•
Ne tentez pas d’ouvrir le testeur autrement que de la
façon indiquée dans ce manuel.
•
Vous ne devez ni laisser tomber, ni cogner, ni secouer
le testeur. Une manipulation brutale pourrait
endommager les circuits internes et les petites pièces
mécaniques.
•
Ne pas utiliser de produits chimiques décapants, de
solvants de nettoyage ou de détergents puissants pour
nettoyer le testeur.
•
Ne peignez pas le testeur. La peinture peut bloquer les
pièces mobiles et empêcher le bon fonctionnement du
testeur.
Si le testeur ne fonctionne pas correctement, veuillez
contacter le service clientèle de Presidium à
[email protected] ou :
Presidium Instruments Pte Ltd
No. 6 Penjuru Lane
Singapore 609187
Singapore
(65) 6379 5000
Attn: Customer Service Executive
45
1. PREMIÈRE UTILISATION de votre Presidium Duo
Tester
Mise sous tension de votre Presidium Duo Tester
Ce testeur peut être alimenté en utilisant un adaptateur
secteur (vendu séparément, en option) ou des piles. Si
l’adaptateur secteur est utilisé, branchez une extrémité
de l’adaptateur au testeur et l’autre extrémité directement
dans une prise électrique appropriée Veuillez faire en sorte
de n’utiliser que l’adaptateur fourni par Presidium.
Si vous utilisez des piles (5 piles AA), veillez à insérer les
piles dans le testeur en respectant les repères positifs (+)
et négatifs (-) des piles (Fig. 1.1). Il est préférable d’utiliser
des piles alcalines, puisque cela assure généralement
deux heures et demie de fonctionnement continu, alors que
l’utilisation de piles ordinaires en raccourcira
la durée
Fig. 1.1
Allumage de votre Presidium Duo Tester
Insérer la Sonde stylo dans la prise sur le côté du testeur
(Fig. 1.2). Notez bien que la Sonde stylo doit être insérée
dans la prise avant l’allumage de l’appareil. Sinon, l’aiguille
passera dans la zone verte (Diamant) lors de l’allumage.
46
Fig. 1.2
Pousser le bouton [ON/OFF] derrière l’appareil afin de
l’allumer (Fig. 1.3) et attendez environ 20 secondes ou
jusqu’à ce que le témoin LED s’allume.
Fig. 1.3
Vérifier pour vous assurer que votre Presidium Duo
Tester fonctionne correctement
Disque testeur d’imitations
•
Appuyez l’embout de la sonde sur le disque
test des pierres d’imitation à gauche du
voyant (Fig. 1.4). Appuyez suffisamment
pour que l’embout rentre complètement dans
la sonde. L’aiguille du cadran devrait se
déplacer et s’arrêter en deux ou trois
secondes dans la zone blanche (de
préférence au centre de cette zone)
où « CAL » est imprimé.
47
Fig. 1.4
Disque test de diamant
•
Appuyez l’embout de la sonde sur le disque test de
diamant se trouvant à droite du voyant (Fig. 1.5).
Appuyez suffisamment pour que l’embout rentre
complètement dans la sonde. Cela fait, l’aiguille devrait
bouger et atteindre son plus haut point en deux ou trois
secondes, clairement dans la zone verte sur le cadran
affiché.
Fig. 1.5
Étalonnage
Tous les testeurs ont été étalonnés pendant le processus
de fabrication et aucun autre ajustage n’est nécessaire pas
plus que l’intervention de l’utilisateur.
Il ne faut pas tenter de procéder à l’étalonnage soi-même.
Pour éviter tout risque à cet égard, les utilisateurs devraient
contacter Presidium à [email protected] ou à son
centre d’entretien pour se faire conseiller. Au cas où les
utilisateurs auraient besoin de faire ré-étalonner l’appareil,
ils partageront les frais de transport nécessités par l’envoi
de l’appareil au centre d’entretien.
48
Conditions de fonctionnement recommandées
Les pierres devraient être propres et sèches avant d’être
testées. Il n’est pas cependant normalement nécessaire
d’effectuer un nettoyage approfondi. (Fig. 1.6).
Fig. 1.6
La température recommandée pour le test est de
18°C - 27°C ou de 65°F - 80°F. Veuillez laisser les pierres
s‘ajuster à la température de la pièce avant d’effectuer le
test. L’exposition du testeur et/ou son fonctionnement hors
de la température ambiante affecterait ses résultats et ses
performances.
Informations sur les piles
Ne laissez pas de piles usagées dans le logement à piles
car elles peuvent se corroder, fuir ou endommager le
testeur. Les piles devraient être enlevées lorsque le
testeur va être rangé et inutilisé pendant une longue
période.
Les piles ne doivent pas être enlevées lorsque
l’adaptateur secteur est en cours d’utilisation.
Afin d’éviter des résultats inexacts, renouvelez les piles si
le voyant LED rouge ne s’allume pas au bout de 20 secondes. Un test ne doit pas être effectué lorsque les piles
sont peu chargées ou faibles
49
Nettoyage de vos pierres avant de les tester
Préparez un mouchoir en papier propre. Prenez
délicatement la pierre avec des pinces et placez-la sur la
table la tête en bas (Fig. 1.7).
Fig. 1.7
Frottez doucement la table de la pierre contre le papier ou
le tissu pour joaillerie et placez la pierre au centre du Test
pad (Fig. 1.8).
Fig. 1.8
50
2. EFFECTUER UN TEST sur votre Presidium Duo
Tester
Placez le bout de la sonde contre la pierre. Appliquez une
pression minimum pour faire entrer totalement l’embout
dans la sonde et obtenir un résultat correct. Ceci est
nécessaire pour assurer un contact constant et correct
entre l’embout et la pierre.
Lorsque vous testez une seule pierre, placez la sur le
creux du capuchon protecteur et appuyez sur l’embout de
la sonde sur la pierre. Le résultat du test s’affichera sur le
testeur.
Pour des bijoux montés ou des pierres serties :
Tenez le bijou ou la pierre d’une main et le testeur de l’autre
main (Fig. 2.1). II faut faire attention lorsque l’on teste des
pierres serties. L’utilisateur doit s’assurer que les pierres
sont serties solidement avant de lancer le test, car un
espace entre la pierre et le bijou sur lequel elle est sertie
pourrait entrainer un résultat inexact.
Fig. 2.1
Pour tester des pierres seules :
Placez la pierre sur le récipient métallique et tenez la pierre
avec une main tout en tenant la sonde avec l’autre (Fig.
2.2).
Fig. 2.2
Remarque : support métallique pour la pierre non fourni par
Presidium.
51
Réaliser un test optique avec votre Presidium Duo Tester
Remettre le couvercle protecteur sur le cylindre et
appuyez sur le bouton « DISPLAY ». L’écran affichera «
000» comme résultat (Fig. 2.3).
Fig. 2.3
Enlever le cylindre et placer une pierre polie et bien
nettoyée au centre du pad. (Fig. 2.4).
Fig. 2.4
Couvrir la pierre avec le cylindre creux (Fig. 2.5).
Fig. 2.5
52
Appuyer sur le bouton “DISPLAY” et attendez jusqu’à ce
que le numéro affiché reste stable (environ 2 secondes)
(Fig. 2.6).
Fig. 2.6
Note : Les 7 pierres d’imitation sont utilisées à l’aide du
tableau IR au dos de l’appareil à des fins d’étalonnage et
de tests de fonctionnement du capteur de réflectivité.
Conseils pour utiliser votre Presidium Duo Tester
Veuillez noter que si le testeur est utilisé pour la première
fois ou si le testeur n’a pas été utilisé depuis une semaine,
il est conseillé de nettoyer l’embout en utilisant un bout de
papier afin de s’assurer d’un résultat normal et exact.
Frottez l’embout doucement sur la surface du papier avant
de procéder au test. L’embout de la sonde doit être placé à
angle droit ou perpendiculaire à la facette de la pierre pour
une lecture exacte
Les tests devraient être effectués sur la table de la pierre.
En cas de doute, veuillez tester aussi sur le pourtour des
pierres.
Quand des pierres serties ne sont pas trop enfoncées dans
leur sertissage, on peut mesurer leur réflectivité. Utiliser
une boîte noire en plastique (par exemple une boîte pour
bobines de pellicule photos) comme alternative au cylindre
creux
Pour parvenir à une exactitude maximum lors de tests avec
de très petites pierres (10 points et moins), il est important
de laisser refroidir la pierre avant d’entreprendre d’autres
tests. Il est conseillé de relever plusieurs lectures s’il y a un
doute sur le résultat des tests qui s’affichent.
53
3. LIRE LES RÉSULTATS sur votre Sonde Presidium
Duo Tester
Les résultats des tests sont indiqués ainsi :
•
Après une pression de la sonde sur la pierre pendant
environ 2 secondes, l’aiguille atteindra sa position la
plus haute, puis retombera doucement. Notez le
résultat lorsqu’elle se trouve au plus haut.
•
Le testeur donnera tous les résultats possibles sur
l’affichage.
•
Le Presidium Duo Tester devrait être utilisé
seulement pour confirmer l’identité de pierres dont on
n’est pas certain.
•
Voici un exemple de résultat obtenu sur l’appareil :
Quand l’aiguille s’arête dans la position ci-dessus, la pierre
testée peut être un quartz, une améthyste, une citrine, une
tanzanite ou aigue-marine, c’est-à-dire n’importe quelle
pierre se trouvant dans la zone blanche dans laquelle se
trouve l’aiguille.
•
Bip d’alerte en présence de métal. Si l’embout de la
sonde entre en contact avec la partie métallique de la
monture d’une pierre, un signal audible se fera
entendre.
•
Il est normal que des diamants très petits donnent des
résultats en bas de la zone verte.
•
Selon les résultats des tests thermiques, Presidium
Duo Tester peut permettre de faire la distinction entre :
54
Saphir
contre Tanzanite Jadeite
Saphir
contre Lolite
Jadeite
Saphir
contre Spinelle
Rubis
contre Chrysoprase
Aventurine
contre
Quartz
contre Spinelle
Saphir
contre Citrine
Rubis
contre Grenat
Saphir
Topaze
contre Aigue-marine
Topaze
contre Améthyste
Émeraude
contre Topaze
Tourmacontre
line
contre Jadéite
Topaze
contre Citrine
Émeraude
contre Grenat
contre Grenat
Jadeite
contre Garnet
Spinelle
Pierres
gemmes
Saphir
contre Verre
L’utilisation de résultats thermiques se limite aux pierres
figurant sur la liste ci-dessus et permettra aux joaillers
de faire la distinction entre les nombreuses pierres sur le
marché.
Lecture des résultats des tests optiques
•
Un chiffre de réflectivité s’affiche. Notez-le et comparez
le avec le tableau de réflectivité inclus dans
l’emballage.
•
Dans le cas d’un résultat peu clair, nettoyez la pierre
et le pad encore une fois avant de re faire le test et/ou
excentrez légèrement la pierre sur le pad. En replaçant
la pierre, on peut éviter une vue déformée due à une
partie rayée de la surface. Refaire le test
•
Le spinelle synthétique/le saphir synthétique et le
zircone supérieur/GGG ont des chiffres de réflectivité
qui se chevauchent. Si vous avez des doutes, utilisez
la conductivité ther mique pour une sélection facile.
•
Saphir synthétique : l’aiguille se trouve en haut de la
zone rouge.
•
Spinelle synthétique : l’aiguille se trouve à peu près au
milieu de la zone rouge.
•
Zircone supérieur : l’aiguille se trouve aux deux tiers de
la zone rouge.
•
GGG : l’aiguille se trouve au tiers de la zone rouge.
55
4. PRENDRE SOIN de votre Presidium Duo Tester
•
La sonde et son embout métallique sont extrêmement
sensibles et devraient être manipulés avec soin. On
doit veiller à ne pas endommager la sonde et l’embout
métallique
•
Ne laissez pas de piles usagées dans le logement à
piles car les piles peuvent se corroder, fuir ou endom
mager le testeur. Les piles devraient être enlevées
lorsque le tes teur va être rangé pendant une longue
période.
Votre testeur est un produit dû à une conception et une
technologie avancées et il doit être manipulé avec
précaution.
Merci d’avoir pris le temps de parcourir le manuel ’
utilisation qui vous permettra de mieux comprendre votre
récent achat.
Presidium recommande également de faire enregistrer
votre garantie en nous envoyant la carte de garantie ou
en l’enregistrant en ligne ici : http://www.presidium.com.sg/
56
Benutzeranleitung für
Presidium Duo Tester
(PDT)
57
Inhalt
(German Version)
I. Disclaimer, Ausschlüsse und
Haftungsbeschränkungen
pg. 59
II. Über diese Anleitung pg. 60
III. Informationen zu Ihrem Presidium Duo
Tester
pg. 61
IV. WICHTIGER HINWEIS
pg. 64
1. ERSTE SCHRITTE mit Ihrem Presidium Duo
Tester
pg. 65
2. DURCHFÜHREN EINER MESSUNG
mit dem Presidium Duo Tester
pg. 70
3. ABLESEN VON MESSERGEBNISSEN Ihres
Presidium Duo Testers
pg. 74
4. WARTUNG UND PFLEGE Ihres Presidium
Duo Testers
pg. 76
58
I. Disclaimer, Ausschlüsse und Haftungsbeschrän
kungen
BITTE LESEN SIE SORGFÄLTIG DIE
GEWÄHRLEISTUNGSBESTIMMUNGEN UND
GESCHÄFTSBEDINGUNGEN auf der Garantiekarte. Die
Gewährleistung von Presidium für Messgeräte gilt nur bei
sachgemäßer Anwendung in Übereinstimmung mit den in
der zugehörigen Anleitung genannten Geschäftsbedingungen und deckt nur Herstellungsfehler ab.
Aufgrund kontinuierlicher Produktverbesserungen behält
sich Presidium vor, an der Bedienungsanleitung und
anderer Produktdokumentation nicht angekündigte und
nicht meldepflichtige Revisionen vorzunehmen. Benutzern
wird empfohlen, von Zeit zu Zeit die Presidium-Website
aufzusuchen http://www.presidium.com.sg/.
Presidium haftet nicht für Schäden oder Verluste, die
aus der Benutzung dieses Testers oder seiner Anleitung
entstehen, und weder Presidium noch seine
Fertigungsbetriebe oder andere Zulieferer, Lizenzgeber,
Distributoren, Wiederverkäufer, Bedienstete und/oder
Agenturen haften für direkte oder indirekte Schäden, die
durch Benutzung des Testers verursacht werden.
NACH MAXIMAL VERFÜGBARER GESETZGEBUNG darf
weder Presidium noch seine Fertigungsbetriebe oder
andere Zulieferer, Lizenzgeber, Distributoren,
Wiederverkäufer, Bedienstete und/oder Agenturen für
direkte oder indirekte Schäden mit beliebiger Ursache
haftbar gemacht werden
Das in dieser Anleitung erwähnte Messgerät Presidium
Duo Tester (PDT) wird “wie besehen” angeboten. Es
besteht über die gesetzlichen Vorschriften hinaus weder
ausdrücklich noch mittelbar irgendeine Gewährleistung,
insbesondere keine Gewährleistung bezüglich der
Marktfähigkeit oder Eignung für einen bestimmten Zweck
59
II. Über diese Anleitung
Vielen Dank für den Kauf des Presidium Duo Testers
(“PDT” oder “Messgerät”).
Diese Anleitung soll Ihnen die Inbetriebnahme Ihres
Messgerätes erleichtern und enthält alle erforderlichen
Informationen zur korrekten Nutzung des Messgerätes und
seiner sachgerechten Pflege. Bitte lesen Sie diese
Anleitung sorgfältig und bewahren Sie sie für einen
späteren Gebrauch an einem sicheren Ort auf.
Diese Anleitung enthält auch die Geschäftsbedingungen
bezüglich der Nutzung des Meßgerätes einschließlich des
Disclaimers und der zuvor in Abschnitt I genannten
AUSSCHLUSS- und Beschränkungsklauseln.
60
III. Informationen zu Ihrem Presidium Duo Tester (PDT)
Die Thermomessung des Presidium Duo Testers beruht
auf einer Erfindung von Professor Julian Goldsmid von der
University of New South Wales in Australien. Das
Verfahren ist zur Unterscheidung von Diamanten und
Nachbildungen anhand der thermischen Leitfähigkeit
entwickelt worden. Diamanten sind aufgrund ihrer
außergewöhnlichen Wärmeleiteigenschaften im Gegensatz zu natürlichen oder synthetischen Imitaten nicht leicht
zu reproduzieren. Der Presidium Duo Tester mit Skala zur
Bestimmung farbiger Edelsteine unterstützt Benutzer bei
der Unterscheidung bekannter Farbedelsteine.
Der Presidium Duo Tester enthält auch ein eingebautes
Messgerät zur Bestimmung des Reflektionsvermögens als
zusätzliche Methode zur Bestimmung der geprüften Steine.
Es muss erwähnt werden, dass natürliche und synthetische
Edelsteine ähnliche physische und optische Eigenschaften
aufweisen. Aus diesem Grund unterscheidet der Presidium
Duo Tester nicht zwischen natürlichen und synthetischen
Edelsteinen. Wie alle anderen marktüblichen
Thermomessgeräte kann das Messgerät nicht zwischen
Naturdiamanten und Moissanit
unterscheiden.
Der Presidium Duo Tester wurde gründlich und intensiv
labortechnisch getestet und gibt im Allgemeinen klare und
zuverlässige Messergebnisse des getesteten Edelsteins
bei sachgemäßer Nutzung. Dennoch empfehlen wir, zur
Sicherheit stets weitere Tests durchzuführen.
61
Der Presidium Duo Tester hat folgende technischen
Merkmale:
•
•
•
•
•
•
•
•
Bewegliche thermoelektrische Prüfspitze, die
konstanten Druck zwischen Prüfspitze und Edelstein
gewährleistet
Dünnste Probenspitze der Branche (0,6 mm) zum
Testen von Edelsteinen ab 0,02 ct
Metallischer Warnsummer, der vor verseh entlichem
Kontakt der Prüfspitze mit Metall warnt
Große, leicht abzulesende Messuhr und digitales
LED-Display
Integrierte Diamant- und Imitatprüflinge für
Referenzwecke
Integrierte Tafel mit Reflektionswerten von Imitaten
Integriertes Imitat-Set für Referenzzwecke (optionales
Zubehör von Presidium)
Stromversorgung: 5x AA-Batterien oder Netzadapter
Inhalt der Verpackung:
•
•
•
•
•
•
•
•
•
Presidium Duo Tester
Sondierstift
Netzteil
Integrierte Tafel mit Reflektionswerten von Imitaten
Eingebaute Testscheibe aus Edelstein-Imitat
Benutzeranleitung
Garantiekarte
Geschütztes Trageetui
Integriertes Imitat-Set für Referenzzwecke (optionales
Zubehör)
62
1
Öffnung zur Reflektionskalibrierung
2
Testscheibe aus Imitat
3
EIN/AUS-LED-Anzeige
4
Testscheibe aus Diamant
5
Adapter
6
Schutzkappe für Prüfspitze
7
Übersicht mit Reflektionswerten
8
Sondierstift
9
Öffnung zur Kalibrierung der thermischen Leitfähigkeit
10
Sondierstifthalter
11
EIN/AUS-Displaytaste
12
Edelstein-Prüfablage
13
Reflektivitätsanzeigefenster
14
Zylinderkappe
15
Imitat-Set
63
IV. WICHTIGER HINWEIS
•
Das Messgerät nicht bei Hitze lagern oder betreiben.
Hohe Temperaturen können die Lebensdauer des
Messgerätes verkürzen oder das Gerät bzw. dessen
Batterien beschädigen – zusätzlich können bestimmte
Plastikteile des Gerätes sich verziehen oder schmelzen
•
Das Messgerät nicht in staubiger oder verschmutzter
Umgebung lagern oder betreiben. Die beweglichen
Teile und elektronische Bauelemente könnten beschä
digt werden.
•
Das Messgerät nicht bei Hitze lagern oder betreiben.
Hohe Temperaturen können die Lebensdauer des
Messgerätes verkürzen oder das Gerät bzw. dessen
Batterien beschädigen – zusätzlich können bestimmte
Plastikteile des Gerätes sich verziehen oder schmel
zen.
•
Das Messgerät nicht bei Hitze lagern oder betreiben.
Bei der anschließenden Erwärmung auf die
Normaltemperatur kann sich im Inneren des
Messgerätes Feuchtigkeit niederschlagen und die
elektronischen Bau teile beschädigen.
•
Nicht versuchen, das Messgerät auf andere Weise als
in der Anleitung beschrieben zu öffnen.
•
Nicht fallen lassen, stoßen oder schütteln. Rauer
Umgang kann zu Brüchen interner Schaltkreise und
der Feinmechanik führen.
•
Keine aggressiven Chemikalien, scharfe
Reinigungsmittel oder Lösungsmittel zum Reinigen des
Messgerätes verwenden.
•
Das Messgerät nicht lackieren oder bemalen. Lack
oder Farbe kann die beweglichen Teile verkleben und
den einwandfreien Betrieb verhindern.
Falls das Messgerät nicht korrekt funktioniert, wenden Sie
sich bitte an den Presidium-Kundendienst unter
[email protected] oder an:
Presidium Instruments Pte Ltd
No. 6 Penjuru Lane
Singapore 609187
Singapore
(65) 6379 5000
Attn: Customer Service Executive
64
1. ERSTE SCHRITTE mit Ihrem Presidium Duo Tester
Einschalten des Presidium Duo Testers
Dieses Messgerät kann mithilfe eines Netzteils (separat erhältlicher Artikel) betrieben werden oder über Batterien. Bei
Verwendung eines Netzteils verbinden Sie das eine Kabel
mit dem Tester und schließen Sie das Netzkabel des
Netzteils an eine Steckdose an. Bitte achten Sie darauf,
dass nur der von Presidium gelieferte Adapter verwendet
wird.
Achten Sie bei Batteriebetrieb (5 x Typ AA) beim
Einsetzen der Batterien in das Messgerät auf die richtige
Polung (+) und (-) (Abb. 1.1). Der Einsatz von
Alkalibatterien wird empfohlen – dadurch ergibt sich im
Gegensatz zu herkömmlichen Batterien mit geringerer
Kapazität eine kontinuierliche Laufzeit von etwa 2,5 Stunden.
Abb. 1.1
Einschalten Ihres Presidium Duo Testers
Setzen Sie den Sondierstift in den dafür
vorgesehenen Sondierstifthalter an der Seite des
Messgerätes ein (Abb. 1.2). Beachten Sie, dass sich der
Sondierstift in der Aussparung befinden muss, bevor Sie
das Gerät einschalten. Andernfalls steigt die Anzeige beim
Einschalten direkt in den grünen Bereich (Diamant).
65
Abb. 1.2
Schieben Sie den [EIN/AUS]-Schalter auf der Rückseite
des Gerätes auf EIN, um das Gerät einzuschalten
(Abb. 1.3) und warten Sie für etwa 20 Sekunden oder bis
die rote LED aufleuchtet.
Abb. 1.3
Überprüfen der ordnungsgemäßen Funktion des Presidium Duo Testers
Testscheibe aus Imitat
•
Drücken Sie den Sondierstift auf die Testscheibe aus
Imitat auf der linken Seite der Leuchtanzeige
(Abb. 1.4). Drücken Sie ledi glich so fest, dass die
Prüfspitze vollständig im Sondierstift verschwindet. Die
Anzeige sollte bis innerhalb des weißen Streifens
(vorzugsweise in der Mitte des weißen Streifens)
aufsteigen und die Schrift “CAL” sollte innerhalb von
etwa zwei bis drei Sekunden oben angezeigt werden.
66
Abb. 1.4
Testscheibe aus Diamant
• Drücken Sie den Sondierstift auf die Dia mantscheibe
auf der rechten Seite der Leuchtanzeige (Abb. 1.5).
Drücken Sie ledi glich so fest, dass die Prüfspitze
vollständig im Sondierstift verschwindet. Nach diesem
Vorgang sollte die Nadel innerhalb von zwei bis drei
Sekunden bis hoch in den grünen Bereich der Ansteige
steigen
Abb. 1.5
Kalibrierung
Alle Messgeräte wurden während der Herstellung
kalibriert und es sind keine weiteren Anpassungen oder
Einstellmöglichkeiten durch den Benutzer vorgesehen.
Eine selbst durchgeführte Kalibrierung sollte unterbleiben.
Um die mit der Kalibrierung verbundenen Risiken zu
minimieren, sollten Sie sich im Bedarfsfall mit Presidium
unter [email protected] oder dem Servicecenter
des Unternehmens in Verbindung setzen. Falls der
Benutzer eine Neukalibrierung des Gerätes wünscht, trägt
der Benutzer die anfallenden Frachtkosten zum/vom
Servicecenter.
67
Empfohlene Testbedingungen
Der Edelstein sollte zur Materialprüfung sauber und trocken sein. Aufwendige Reinigungsmaßnahmen sind jedoch
in der Regel nicht erforderlich.(Abb. 1.6).
Abb. 1.6
Die empfohlene Prüftemperatur ist 18°C – 27°C bzw. 65°F
– 80°F. Achten Sie darauf, dass sich der Edelstein oder
das Schmuckobjekt vor der Messung an die
Raumtemperatur angepasst hat. Wenn das Messgerät bei
Temperaturen außerhalb der Raumtemperatur gelagert
oder betrieben wird, beeinflusst dies die
Messergebnisse und die Wirksamkeit des Messgerätes.
Hinweise zum Batteriebetrieb
Entnehmen Sie verbrauchte Batterien aus dem
Batteriefach, da Batterien korrodieren oder auslaufen und
das Messgerät beschädigen können. Entnehmen Sie die
Batterien auch, wenn das Instrument voraussichtlich für
einen längeren Zeitraum nicht verwendet wird.
Bei Verwendung eines Netzteils müssen die Batterien
nicht entfernt werden.
Um ungenaue Messungen zu vermeiden, tauschen Sie
die Batterien aus, sobald die rote LED nach 20 Sekunden
noch nicht aufleuchtet. Bei niedrigem bzw. schwachem
Batteriestrom sollten keine Tests durchgeführt werden.
68
Reinigen des Edelsteins vor der Messung
Bereiten Sie ein sauberes Tuch vor. Legen Sie den
Edelstein behutsam mit einer Pinzette auf einen Tisch
(Abb. 1.7).
Abb. 1.7
Reiben Sie den Edelstein an dem vorbereiteten Tuch und
platzieren Sie den Edelstein auf die Mitte des
Messbereichs (Abb. 1.8).
Abb. 1.8
69
2. DURCHFÜHREN EINER MESSUNG mit dem
Presidium Duo Tester
Setzen Sie die Prüfspitze des Sondierstifts auf den
Edelstein. Wenden Sie für korrekte Messergebnisse
gerade so viel Druck an, dass die Spitze vollständig in den
Teststift geschoben wird. Damit wird ein stetiger,
konstanter Kontakt zwischen der Prüfspitze und dem
Edelstein hergestellt.
Beim Testen eines losen Steines platzieren Sie diesen auf
die Mulde der Schutzabdeckung und drücken die
Prüfspitze auf den Stein. Das Messergebnis wird sofort
angezeigt.
Für gefasste Schmuckstücke oder Edelsteine:
Halten Sie mit der einen Hand das Schmuckstück bzw. den
Edelstein und mit der anderen Hand das Messgerät (Abb.
2.1). Beim Prüfen gefasster Schmuckstücke ist auf
Folgendes zu achten: Der Nutzer muss vor dem Test
sicherstellen, dass das Prüfobjekt fest in der Fassung sitzt,
da eine Lücke zwischen Stein und Fassung zu einer
ungenauen Messung führen kann.
Abb. 2.1
70
Bei losen Edelsteinen:
Legen Sie den Edelstein auf die metallische Ablage und
halten Sie diese mit einer Hand fest, während Sie mit der
anderen das Messgerät halten (Abb. 2.2).
Abb. 2.2
Hinweis: Steinauflage aus Metall wird nicht von Presidium
mitgeliefert.
Ausführen einer optischen Materialprüfung mit dem
Presidium Duo Tester
Ersetzen Sie die Schutzabdeckung durch den Zylinder und
drücken Sie die “DISPLAY”-Taste Das Display zeigt “000”
(Abb. 2.3).
Abb. 2.3
Entfernen Sie den Zylinder und legen Sie einen gut
gereinigten, polierten Edelstein auf die Ablage (Abb. 2.4).
Abb. 2.4
71
Setzen Sie den eingebuchteten Zylinder auf den Edelstein
(Abb. 2.5).
Abb. 2.5
Halten Sie die “DISPLAY”-Taste gedrückt und warten Sie,
bis die angezeigte Zahl stabil bleibt (etwa 2 Sekunden)
(Abb. 2.6).
Abb. 2.6
Hinweis: Die 7 Imitatsteine wurden anhand der RI-Tafel auf
der Rückseite des Gerätes zur Kalibrierung und für
Funktionstests des Reflektionssensors verwendet
Tipps zum Gebrauch Ihres Presidium Duo Testers
Bitte beachten Sie, dass die Prüfspitze bei der erstmaligen
Benutzung oder nach einwöchiger Nichtbenutzung mit
einem Blatt Papier gereinigt werden sollte, um konsistente
und genaue Messungen zu erzielen. Reinigen Sie die
Spitze vor der Materialprüfung behutsam durch kreisende
Bewegung auf das Papier.
Die Prüfspitze muss für genaue Messungen im rechten
Winkel bzw. senkrecht zur Facette des Edelsteins
aufgesetzt werden.
Die Messungen an Edelsteinen sollten auf dem
Arbeitstisch erfolgen. Bei eventuellen Zweifeln testen Sie
bitte zunächst auf den Gürtelbereichen des Prüfobjekts.
72
Wenn gefasste Steine in der Fassung nicht eingebuchtet
sind, kann das Reflektionsvermögen nicht geprüft werden.
Verwenden Sie eine schwarze Plastikschachtel (z. B.
Schmalfilm-Dose) als Alternative zum eingebuchteten
Zylinder.
Um eine optimale Genauigkeit beim Prüfen sehr kleiner
Edelsteine (10 Punkte oder weniger) zu erzielen, muss das
Prüfobjekt vor weiteren Tests hinreichend abkühlen.
Dabei ist es ratsam, mehrere Messwerte zu ermitteln.
73
3. ABLESEN VON MESSERGEBNISSEN Ihres
Presidium Duo
Die Testergebnisse werden wie folgt angezeigt:
•
Nachdem die Sondenspitze für etwa 2 Sekunden
auf den Stein gedrückt wurde, erreicht die Anzeige den
höchsten Wert und fällt dann langsam wieder ab.
Lesen Sie den Wert an der höchsten Position ab.
•
Das Messgerät zeigt alle möglichen Ergeb nisse auf
dem Display an.
•
Der Presidium Duo Tester sollte stets nur zur Art
bestimmung eines verdächtigen Steins genutzt werden.
•
Ein Beispiel für das Ablesen eines Ergebnisses finden
Sie untenstehend:
Wenn die Anzeige an der oben gezeigten Position stehen
bleibt, kann das Prüfobjekt aus Quartz, Amethyst, Citrin,
Tanzanit oder Aqua usw bestehen, d. h. aus jeder Sorte,
die innerhalb des weißen Streifens liegt, den die Nadel
überquert
•
Metall-Warnsignal: Wenn die Prüfspitze in Kontakt
mit der Metallfassung eines Steins kommt, ertönt ein
Tonsignal
•
Bei sehr kleinen Diamanten kommt es zu relativ
kleinen Ablesewerten.
•
Anhand der Ergebnisse der thermischen Prüfung
kann der Presidium Duo Tester bei der Unterscheidung
folgenden Steine helfen:
74
Saphir
vs.
Tanzanit
Jadeit
vs.
Saphir
vs.
Lolit
Jadeit
vs.
Saphir
vs.
Spinel
Rubin
vs.
Chrysopras
AventurinQuartz
Spinel
Saphir
vs.
Citrin
Rubin
vs.
Garnet
Saphir
vs.
Topas
Topas
vs.
Aquamarine
Saphir
vs.
Turmalin
Topas
vs.
Amethyst
Smaragd
vs.
Jadeit
Topas
vs.
Citrine
Smaragd
vs.
Garnet
Spinel
vs.
Garnet
Jadeit
vs.
Garnet
Edelsteine
vs.
Glas
Die Verwendung der Ergebnisse der thermischen Prüfung
dient nur den oben genannten Edelsteinen und hilft dem
Juwelier bei der Unterscheidung der verwirrenden Vielfalt
gängiger Edelsteine.
Auslesen optischer Testwerte
•
Eine Reflektivitätszahl wird angezeigt. Notieren Sie die
Reflektivitätszahl und vergleichen Sie sie mit der
beigefügten Reflektivitätstafel.
•
Bei einer grenzwertigen Messung reinigen Sie den
Stein und die Ablage vor dem nächsten Test erneut
oder legen den Stein in einer abweichenden
Position hin. Durch die Neupositionierung des Steins
wird möglicherweise eine Verzerrung der Reflektion
durch Oberflächenkratzer vermieden. Wiederholen Sie
den Test.
•
Synthetischer Spinel/Synthetischer Saphir und High
Zircon/GGG haben überlappende Reflektionszahlen.
Führen Sie im Zweifelsfall zur einfachen Bestimmung
eine Messung der thermischen Leitfähigkeit durch.
•
Synthetischer Saphir: die Nadel läuft bis zur höchsten
Position im roten Bereich.
•
Synthetischer Spinel: Die Nadel läuft bis zur Hälfte des
roten Bereichs.
•
High Zircon: Die Nadel läuft bis 2/3 in den roten
Bereich.
•
GGG: Die Nadel läuft 1/3 in den roten Bereich.
75
4. WARTUNG UND PFLEGE des Presidium Duo
Testers
•
Die Sonde mit der Prüfspitze ist äußerst emp findlich
und sollte sorgsam behandelt werden. Achten Sie
darauf, die Sonde und die Prüfspitze nicht zu
beschädigen.
•
Entnehmen Sie verbrauchte Batterien aus dem
Batteriefach, da Batterien korrodieren oder auslaufen
und das Messgerät beschädi gen können. Entnehmen
Sie die Batterien auch, wenn das Instrument
voraussichtlich für einen längeren Zeitraum nicht
verwendet wird.
Das Messgerät ist ein Präzisionsprodukt und sollte
sorgfältig behandelt werden.
Vielen Dank für Ihre Aufmerksamke it für diese
Benutzeranleitung, anhand derer Sie das erworbene
Produkt besser kennengelernt haben.
Presidium empfiehlt Ihnen, Ihre Gewährleistung auf das
Produkt durch Einsenden der Garantiekarte an uns zu r
egistrieren, oder sich online zu unter http://www.presidium.
com.sg/ zu registrieren.
76
Guida per l’utente di
Presidium Duo Tester
(PDT)
77
Indice
( Italian Version)
I. Liberatorie, esclusioni e limitazioni di
responsabilità
pg. 79
II. Informazioni su questa guida
pg. 80
III. Informazioni su Presidium Duo Tester
pg. 81
IV. AVVISO IMPORTANTE
pg. 84
1. OPERAZIONI PRELIMINARI con Presidium
Duo Tester
pg. 85
2. SVOLGIMENTO DI UN TEST con Presidium
Duo Tester
pg. 90
3. LETTURA DEI RISULTATI DI UN TEST su
Presidium Duo Tester
pg. 94
4. MANUTENZIONE di Presidium Duo Tester
pg. 96
78
I. Liberatorie, esclusioni e limitazioni di responsabilità
SI PREGA DI LEGGERE E PRENDERE NOTA DEI
TERMINI E DELLE CONDIZIONI DELLA GARANZIA
PRESIDIUM illustrati nel certificato di garanzia. La
garanzia dei tester Presidium è valida solo a patto che
gli utenti utilizzino i tester in conformità con tutti i termini
e le condizioni illustrati nella guida dell’utente rilevante e
copre esclusivamente i difetti di produzione.
Dati i continui miglioramenti apportati al prodotto,
Presidium si riserva il diritto di modificare tutti i
documenti, compreso il diritto di apportare modifiche
alla guida senza preavviso e senza obbligo di notifica
in merito a tali revisioni e modifiche nei confronti
di alcun individuo. Si consiglia agli utenti di controllare
regolarmente il sito Web Presidium http://www.presidium.
com.sg/.
Presidium non si assume alcuna responsabilità in merito
a danni o perdite derivanti dall’uso di questo tester o di
questo manuale, e in nessuna circostanza Presidium, i
suoi produttori o una delle sue consociate, uno dei suoi
licenziatari, distributori, rivenditori, funzionari e/o agenti
saranno responsabili di eventuali danni diretti o indiretti
risultanti dall’uso di questo tester.
NELLA MASSIMA MISURA CONSENTITA DALLA
LEGGE APPLICABILE, in nessuna circostanza
Presidium, il produttore o una delle sue consociate, dei
suoi licenziatari, distributori, rivenditori, funzionari e/o
agenti saranno responsabili per eventuali danni speciali,
incidentali, consequenziali o indiretti, a prescindere dalla
causa di tali danni.
Il tester o l’unità Presidium Duo Tester (PDT) descritto/a
in questa guida viene fornito/a e/o venduto/a nello stato
in cui si trova. Eccetto ove richiesto dalla legge
applicabile, non viene fornita alcuna garanzia di nessun
tipo, esplicita o implicita, incluse, senza limitazioni, le garanzie implicite di commerciabilità e adeguatezza per un
particolare scopo.
79
II. Informazioni su questa guida
Grazie per aver acquistato Presidium Duo Tester (“PDT”
o “tester”).
Questa guida è stata creata allo scopo di aiutare l’utente a
impostare il tester e contiene tutte le informazioni
necessarie a garantire un utilizzo accurato e una
manutenzione in linea con i requisiti del tester. Leggere
attentamente queste istruzioni e tenerle a portata di mano
per futuro riferimento.
Questo libretto contiene inoltre i termini e le condizioni
d’uso del tester, comprese le clausole liberatorie, di
ESCLUSIONE e limitazione delle responsabilità
illustrate precedentemente nella sezione I.
80
III. Informazioni su Presidium Duo Tester (PDT)
La misurazione termica di Presidium Duo Tester si basa su
un’invenzione del Professor Julian Goldsmid dell’Università
del New South Wales, in Australia. Questa tecnologia è stata sviluppata per consentire la distinzione tra i diamanti e i
loro simulanti utilizzando i principi della conduttività
termica. I diamanti, grazie alle loro eccezionali proprietà di
conduttività termica, sono diversi da qualsiasi altro
simulante, e non sono pertanto facilmente replicabili.
Presidium Duo Tester, dotato di display Color Stone
Estimator, aiuta gli utenti a distinguere le gemme colorate
più comuni.
Presidium Duo Tester è inoltre dotato di tester della
rifrazione integrato, offrendo un metodo alternativo per
identificare le gemme sottoposte al test.
È importante notare che le gemme naturali e sintetiche
hanno proprietà fisiche e ottiche simili. Di conseguenza,
Presidium Duo Tester non è in grado di distinguere le
gemme naturali da quelle sintetiche. Come per tutti gli
altri tester termici a disposizione sul mercato, il tester non
è pertanto in grado di distinguere tra i diamanti naturali e
la moissanite.
Presidium Duo Tester è stato sottoposto a controlli
qualitativi approfonditi in fabbrica, e solitamente restituirà
una lettura chiara ed affidabile delle gemme sottoposte al
test, se utilizzato correttamente. Tuttavia, è consigliabile
condurre dei test aggiuntivi a supporto dei risultati.
81
Presidium Duo Tester comprende le seguenti funzioni:
•
•
•
•
•
•
•
•
Punta con sonda termoelettrica retrattile in grado di
assicurare una pressione costante tra la punta della
sonda e la gemma
Punta con sonda estremamente sottile (0,6 mm) per il
test delle gemme di dimensioni ridotte, fino a 0,02 ct
Segnale acustico di notifica di contatto con il metallo
che consente di verificare che la punta della sonda sia
in contatto con la gemma durante il test
Quadrante analogico e display LED con indice digitale
ampi e di facile lettura
Dischi per il test di diamanti e simulanti inte grati per
riferimento
Diagramma di rifrazione dei simulanti integrato
Set di simulanti integrato per riferimento (articolo
opzionale fornito da Presidium)
Alimentato tramite 5 batterie AA o adattatore CA
Inclusi nella confezione:
•
•
•
•
•
•
•
•
•
Presidium Duo Tester
Sonda a penna
Adattatore CA
Diagramma di rifrazione dei simulanti inte grato
Dischi per il test dei simulanti integrati
Guida dell’utente
Certificato di garanzia
Custodia protettiva per il trasporto
Set di simulanti integrato per riferimento (articolo
opzionale)
82
1
Ingresso di taratura della rifrazione
2
Disco per il test dei simulanti
3
Indicatore LED ON/OFF
4
Disco per il test dei diamanti
5
Adattatore
6
Cappuccio protettivo della sonda
7
Diagramma di rifrazione
8
Sonda a penna
9
Ingresso di taratura della conduttività termica
10
Supporto per sonda a penna
11
Pulsante display ON/OFF
12
Tampone di test delle gemme
13
Finestra di visualizzazione della rifrazione
14
Cappuccio del cilindro
15
Set di simulanti
83
IV. AVVISO IMPORTANTE
•
Tenere all’asciutto il tester. La pioggia e tutti i tipi di
liquidi o condensa possono contenere minerali in
grado di corrodere i circuiti elettrici.In caso di
penetrazione di liquidi all’interno del tester, rimuovere
la batteria e lasciare asciugare completamente il tester
prima di reinserirla.
•
Non utilizzare, conservare o esporre il tester ad/in
aree ricche di polvere e detriti. Le parti e i componenti
elettronici potrebbero restare danneggiati.
•
Non utilizzare, conservare o esporre il tester ad/in aree
con temperature elevate. Le temperature elevate
possono danneggiare il tester o accorciarne la durata,
danneggiare le batterie e deformare o fondere
determinati tipi di plastica.
•
Non utilizzare, conservare o esporre il tester ad/in aree
con temperature ridotte. Quando la temperatura del
tester ritorna alla normalità, è possibile che al suo
interno si verifichi la formazione di condensa,
danneggiando i circuiti elettronici.
•
Non tentare di aprire il tester seguendo una procedura
diversa da quella illustrata all’interno di questa guida.
•
Evitare di far cadere, sottoporre a urti o scuotere il
tester. Il maneggiamento incauto potrebbe provocare la
rottura dei circuiti interni e dei meccanismi di
precisione.
•
Non utilizzare prodotti chimici corrosivi, solventi
detergenti o detergenti aggressivi per pulire il tester.
•
Non verniciare il tester. La vernice potrebbe ostruire le
parti e impedire il corretto funzionamento.
In caso di malfunzionamento del tester, contattare il servizio clienti all’indirizzo di posta elettronica [email protected] o tramite corrispondenza all’indirizzo:
Presidium Instruments Pte Ltd
No. 6 Penjuru Lane
Singapore 609187
Singapore
(65) 6379 5000
Attn: Customer Service Executive
84
1. OPERAZIONI PRELIMINARI con Presidium Duo
Tester
Alimentazione di Presidium Duo Tester
Questo tester può essere alimentato per mezzo di un adattatore CA (articolo opzionale venduto separatamente) o
tramite le batterie. Se si utilizza l’adattatore CA,
collegare un’estremità dell’adattatore CA al tester e l’altra
estremità direttamente ad una presa elettrica idonea.
Utilizzare esclusivamente l’adattatore fornito da Presidium.
Se si utilizzano le batterie (5 batterie AA), fare attenzione
alla posizione del polo positivo (+) e negativo (-) quando
si inseriscono le batterie all’interno del tester (Fig. 1.1). È
consigliabile utilizzare batterie alcaline, dal momento che
le batterie di questo tipo forniscono solitamente due ore e
mezza di autonomia continua, mentre le batterie normali
offrono un’autonomia più ridotta.
.
Fig. 1.1
Accensione di Presidium Duo Tester
Inserire la sonda a penna nella presa l aterale del tester
(Fig. 1.2). Notare che è necessario inserire la sonda a
penna nella presa prima di accendere l’unità. In caso
contrario, l’indicatore si solleverà fino a puntare alla zona
verde (Diamante) all’accensione dell’unità.
85
Fig. 1.2
Portare il pulsante [ON/OFF] sul retro dell’unità in
posizione ON per accendere l’unità (Fig. 1.3) e attendere
circa 20 secondi finché il LED rosso non si accende.
Fig. 1.3
Esecuzione di un test per verificare il corretto
funzionamento di Presidium Duo Tester
Disco per il test dei simulanti
•
Premere la punta della sonda sul disco per il test
dei simulanti collocato a sinistra della lampadina
dell’indicatore (Fig. 1.4). Applicare una pressione
sufficiente a far rientrare completamente la punta
sporgente all’interno della sonda a penna. L’indicatore
dovrebbe posizionarsi, e rimanere posizionato,
all’interno della fascia bianca (preferibilmente al centro
della fascia bianca) sormontata dalla dicitura “CAL”,
entro due o tre secondi.
86
Fig. 1.4
Disco per il test dei diamanti
• Premere la punta della sonda sul disco per il test dei
diamanti collocato a destra della lampadina
dell’indicatore (Fig. 1.5). Applicare una pressione
sufficiente a far rientrare completamente la punta
sporgente all’interno della sonda a penna. Al termine
di questa operazione, l’ago dovrebbe sollevarsi fino a
raggiungere la posizione più elevata all’interno della
fascia verde del display del contatore, entro due o tre
secondi.
Fig. 1.5
Taratura
Tutti i tester sono stati tarati in fase di produzione e non
richiedono ulteriori regolazioni o interventi dell’utente.
L’utente non è autorizzato a svolgere la taratura. Per ridurre
i rischi associati con questa operazione, gli utenti possono
contattare Presidium all’indirizzo [email protected].
sg o il centro assistenza Presidium per ottenere assistenza.
Nel caso in cui richiedano al produttore di ripetere la
taratura dell’unità, gli utenti dovranno assumersi i costi
associati alla spedizione dell’unità al/dal centro assistenza.
87
Condizioni di test consigliate
È consigliabile pulire e asciugare la gemma prima di
procedere al test. Tuttavia, solitamente non è necessario
seguire procedure di pulizia elaborate (Fig. 1.6).
Fig. 1.6
La temperatura di test consigliata è compresa tra 18°C e
27°C o 65°F e 80°F. Attendere che la gemma o il gioiello si
adattino alla temperatura ambiente prima di procedere al
test. L’esposizione e/o l’utilizzo del tester ad una
temperatura diversa dalla temperatura ambiente
influenzerebbe i risultati e la performance del tester.
Informazioni sulla batteria
Non lasciare le batterie esaurite nel vano delle batterie dal
momento che potrebbero corrodersi o danneggiare il tester.
Rimuovere le batterie quando si prevede di riporre il tester
per un periodo di tempo prolungato.
Quando si utilizza l’adattatore CA non è necessario
rimuovere le batterie.
Per impedire l’ottenimento di letture inaccurate, dotare
l’unità di nuove batterie nel caso in cui il LED rosso non
si accenda entro 20 secondi. Evitare di svolgere un test
quando le batterie hanno un livello di carica ridotto o
prossimo all’esaurimento.
88
Pulizia della gemma prima di procedere al test
Preparare un fazzoletto pulito. Raccogliere con
cautela la gemma utilizzando delle pinzette e collocarla a
faccia in giù sul piano di lavoro (Fig. 1.7).
Fig. 1.7
Strofinare delicatamente la sezione piana della gemma
contro il fazzoletto/il panno per gioielleria e posizionare la
gemma al centro del tampone di test (Fig. 1.8).
Fig. 1.8
89
2. SVOLGIMENTO DI UN TEST con Presidium Duo
Tester
Collocare la punta della sonda a penna contro la gemma.
Applicare una pressione minima in modo da far rientrare
completamente la punta della sonda a penna per garantire una lettura corretta. Questa operazione è necessaria al
fine di garantire un contatto regolare e costante tra la punta
della sonda e la gemma.
In occasione del test di una gemma sciolta, collocare la
gemma nell’avvallamento del coperchio protettivo e
premere la punta della sonda sulla pietra. Il risultato del test
verrà visualizzato immediatamente sul contatore.
Per gioielli o gemme incastonati/e:
Afferrare il gioiello o la gemma con una mano e il tester con
l’altra mano (Fig. 2.1). Procedere con cautela in occasione
del test dei gioielli incastonati. L’utente deve assicurarsi che
le pietre siano incastonate saldamente prima di condurre il
test dal momento che la presenza di uno spazio vuoto tra
la pietra e l’incastonatura potrebbe portare all’ottenimento
di una lettura inaccurata.
Fig. 2.1
Per il test delle gemme sciolte:
Collocare la gemma sull’apposito supporto metallic e
tenere fermo il supporto con una mano,afferrando la sonda
con l’altra mano (Fig. 2.2).
90
Fig. 2.2
Nota: piastra in metallo per pietre non fornita da Presidium.
Svolgimento di un test ottico con Presidium Duo Tester
Sostituire il coperchio protettivo con il cilindro e premere
il pulsante “DISPLAY”. Il display restituirà la lettura “000”
(Fig. 2.3).
Fig. 2.3
Rimuovere il cilindro e collocare una gemma
accuratamente pulita e lucidata al centro del tampone (Fig.
2.4).
Fig. 2.4
91
Coprire la gemma con il cilindro incassato (Fig. 2.5).
Fig. 2.5
Tenere premuto il pulsante “DISPLAY” e attendere finché il
numero visualizzato rimane fisso (circa 2 secondi)
(Fig. 2.6).
Fig. 2.6
Nota: le gemme del set di 7 simulanti vengono
utilizzate congiuntamente al diagramma RI collocato sul
retro dell’unità per la taratura e il test funzionale del sensore di rifrazione
Suggerimenti per l’uso di Presidium Duo Tester
Se il tester viene utilizzato per la prima volta, o se non viene
utilizzato per più di una settimana, è consigliabile pulire la
punta della sonda con un fazzoletto di carta per ottenere
letture costanti e accurate. Strofinare delicatamente la
punta dello strumento contro la superficie di carta prima di
procedere al test.
La punta della sonda deve essere posizionata ad angolo
retto o in perpendicolare alla faccetta della gemma al fine
di ottenere una lettura
accurata.
92
È consigliabile condurre i test sulla sezione piana della
gemma. In caso di dubbi, ripetere il test sulla
cintura delle gemme. Le pietre non incassate all’interno
dell’incastonatura consentono la misurazione della
rifrazione. Utilizzare un contenitore di plastica (ad es., un
contenitore per rullini fotografici) in alternativa al cilindro
incassato.
Per garantire la massima accuratezza dei risultati dei test
condotti su gemme di dimensioni estremamente ridotte (10
punti o meno), è importante lasciar raffreddare la gemma
prima di ripetere i test.
È consigliabile ottenere più letture per i risultati dei test indicate
93
3. LETTURA DEI RISULTATI DI UN TEST su Presidium
Duo Tester
I risultati dei test vengono visualizzati nel modo seguente:
•
Dopo aver premuto la punta della sonda sulla pietra
per circa 2 secondi, l’indicatore rag giungerà la
posizione più elevata, per poi tornare lentamente nella
posizione inferiore. Registrare la lettura nella posizione
più elevata.
•
Il tester visualizzerà tutti i risultati possibili sul display.
•
Presidium Duo Tester deve essere utilizzato solo per
confermare l’identità delle gemme sospette.
•
Di seguito è riportato un esempio di lettura dei risultati
sul contatore:
Quando l’indicatore si ferma nella posizione illustrata
sopra, la pietra testata potrebbe essere quarzo, ametista,
citrino, tanzanite o acquamarina,ossia una pietra che
rientra nella fasciabianca superata dall’indicatore.
•
Segnale acustico di notifica di contatto con il metallo:
Nel caso in cui la punta della penna venga a contatto
con la montatura metallica di una pietra, l’unità emette
un segnale sonoro.
•
I diamanti di dimensioni estremamente ridotte
restituiranno letture relativamente basse nella zona
verde.
•
In base ai risultati del test termico, Presidium Duo
Tester permette di distinguere tra:
94
Zaffiro
vs.
Tanzanite
Giadeite
vs.
Zaffiro
vs.
Iolite
Giadeite
vs.
Zaffiro
vs.
Spinello
Rubino
vs.
Crisoprasio
Quarzo
avventurina
Spinello
Zaffiro
vs.
Citrino
Rubino
vs.
Granato
Zaffiro
vs.
Topazio
Topazio
vs.
Acquamarina
Zaffiro
vs.
Tormalina
Topazio
vs.
Ametista
Smeraldo
vs.
Giadeite
Topazio
vs.
Citrino
Smeraldo
vs.
Granato
Spinello
vs.
Granato
Giadeite
vs.
Granato
Gemme
vs.
Vetro
I risultati termici possono essere utilizzati esclusivamente
per le gemme sopraelencate; questi risultati aiuteranno il
gioielliere a distinguere tra le numerose gemme
estremamente simili presenti sul mercato.
Lettura dei risultati del test ottico
•
Viene visualizzato un numero di rifrazione. Annotare
il numero di rifrazione e confrontarlo con il diagramma
di rifrazione fornito insieme all’unità.
•
In caso di ottenimento di letture prossime al limite,
pulire nuovamente la pietra e il tampone prima di
ripetere il test e/o o decentrare leggermente la pietra.
Riposizionando la pietra, è possibile evitare il riflesso
distorto di un’area graffiata della superficie. Ripetere
il test.
•
Lo spinello sintetico/zaffiro sintetico e lo zircone alto/
GGG hanno numeri di rifrazione identici. In caso di
dubbio, utilizzare la misurazione della conduttività per
distinguere facilmente queste pietre.
•
Zaffiro sintetico: l’ago si sposta in una posizione
elevata nella zona rossa.
•
Spinello sintetico: l’ago si sposta in prossimità del
centro nella zona rossa.
•
Zircone alto: l’ago si sposta per 2/3 nella zona rossa.
•
GGG: l’ago si sposta per 1/3 nella zona rossa.
95
4. MANUTENZIONE di Presidium Duo Tester
•
La sonda e la punta metallica sono estremamente
delicati e devono essere maneggiati con cura.
Procedere con cautela per evitare di danneggiare la
punta della sonda.
•
Non lasciare le batterie esaurite nel vano delle batterie
dal momento che potrebbero corrodersi o
danneggiare il tester. Rimuovere le batterie quando
si prevede di riporre il tester per un periodo di tempo
prolungato.
Il tester è frutto di accurata progettazione e scrupolosa
realizzazione e deve essere maneggiato con cautela.
Grazie per aver dedicato il tempo necessario a leggere la
guida dell’utente contenente informazioni utili a
comprendere meglio il prodotto appena acquistato.
Presidium consiglia inoltre di registrare la garanzia
inviandoci la scheda di registrazione della garanzia o registrandosi on-line all’indirizzo http://www.presidium.com.sg/
96
Руководство для
пользователей, прибор
Presidium Duo Tester
(PDT)
97
Содержание
(Russian Version)
I. Отказ от гарантии, исключение и
ограничение ответственности
pg. 99
II. Руководство для пользователей
pg. 100
III. Прибор Presidium Duo Tester
pg. 101
IV. ВАЖНЫЕ ИНСТРУКЦИИ ПО
ТЕХНИКЕ БЕЗОПАСНОСТИ
pg. 104
1. ПОРЯДОК РАБОТЫ, прибор Presidium
Duo Tester
pg. 106
2. ТЕСТИРОВАНИЕ, прибор Presidium Duo
Tester
pg. 111
3. РЕЗУЛЬТАТЫ ТЕСТИРОВАНИЯ, прибор
Presidium Duo Tester
pg. 115
4. ТЕХ. ОБСЛУЖИВАНИЕ, прибор Presidium
Duo Tester
pg. 118
98
I. Отказ от гарантии, исключение и ограничение
ответственности
ПРОЧИТАЙТЕ И ПРИМИТЕ ВО ВНИМАНИЕ ПОЛОЖЕНИЯ И
УСЛОВИЯ ГАРАНТИЙНОГО ОБСЛУЖИВАНИЯ, приведенные
в гарантийном талоне. Гарантийные обязательства компании
Presidium на контрольно-измерительные приборы должны
соблюдаться надлежащим образом пользователями в
соответствии со всеми положениями и условиями, указанными
в соответствующем руководстве, и распространяются
исключительно на производственные дефекты.
Поскольку
компания
Presidium
постоянно
усовершенствует свою продукцию, то она оставляет
за собой право обновлять все документы, включая
право на внесение изменений в руководство без
предварительного уведомления и без обязательства
на извещение какого-либо лица о таком обновлении
или изменении. Пользователям необходимо время от
времени просматривать веб-сайт компании Presidium
http://www.presidium.com.sg/.
Компания Presidium не несет ответственность за
какие-либо повреждения или убытки в результате
пользования данным контрольно-измерительным
прибором или руководством и ни при каких-либо
обстоятельствах
компания
Presidium,
ее
производитель или какие-либо дочерние пре
дприятия,лицензиары,дистрибьюторы,торгов
ые представители, служащие и/или агенты не
несут ответственности за какие-либо прямые или
косвенные повреждения, возникшие в результате
пользования данным контрольно-измерительным
прибором.
В МАКСИМАЛЬНОЙ СТЕПЕНИ, РАЗРЕШЕННОЙ
ЗАКОНОМ, ни при каких обстоятельствах компании
Presidium,
ее
производитель
или
какие-либо
дочерние предприятия, лицензиары, дистрибьюторы,
торговые представители, служащие и/или агенты не
несут ответственности за какие-либо фактические,
случайные,
сопутствующие
или
косвенные
повреждения, возникшие каким-либо образом.
Контрольно-измерительный прибор или Presidium
Duo Tester (PDT), указанный в данном руководстве,
предоставлен и/или продан на основании «как есть».
Если иное не предусмотрено действующим законом, то
отсутствуют гарантии какого-либо рода, определенные
или подразумеваемые, включая, но не ограничиваясь
этим, гарантии коммерческой дееспособности и
пригодности для использования по назначению.
99
II. Руководство для пользователей
Благодарим за покупку Presidium Duo Tester («PDT» или
«контрольно-измерительный прибор»).
Данное руководство предназначено для того,чтобы
помочь Вам настроить свой контрольно- змерительный
прибор, а также предоставить информацию том, что
Вы должны знать для правильного использования
контрольно-измерительного прибора и его служивания
в соответствии с требованиями. Внимательно
прочитайте данные инструкци и исохраняйте их в
легкодоступном месте для использования в будущем.
В данном руководстве находятся положения и условия
касательно использования контрольно-измерительного
прибора, включая пункты об отказе от гарантии,
ИСКЛЮЧЕНИИ и ограничении ответственности,
приведенные выше в разделе I.
100
III. Прибор Presidium Duo Tester (PDT)
Прибор Presidium Duo Tester создан на основе
изобретения профессора Джулиана Голдсмида (Julian Goldsmid) из Университета Нового Южного Уэльса
(the University of New South Wales), расположенного
в Австралии. Он разработан, чтобы отличать
бриллианты и алмазы друг от друга и от имитаций при
помощи использования принципов теплопроводности.
За основу берется тот факт, что алмаз проводит
тепло быстрее, чем любой другой материал,причем
теплопроводность других веществ даже не сопоставима
с теплопроводностью алмаза, что и делает их трудными
для имитации. Прибор Presidium Duo Tester снабжен
дисплеем «Color Stone
Estimator» («Определить цветных камней»), чтобы
помочь пользователям различить распространенные
цветные камни друг от друга.
Прибор Presidium Duo Tester также поставляется
со
встроенным
тестером
для
определения
показателя отражения, что, в свою очередь, является
альтернативным
методом
для
идентификации
тестируемых драгоценных камней.
Необходимо отметить, что природные и синтетические
драгоценные камни имеют одинаковые физические и
оптические свойства. Прибор Presidium Duo Tester
фактически
не
дает
возможности
отличить
натуральные драгоценные камни от синтетических
драгоценных камней. Также как и другие термические
контрольно- измерительные приборы, данный прибор
не в состоянии отличить натуральные бриллианты
от муассанитов.
Прибор Presidium Duo Tester прошел
тщательный контроль качества на заводеизготовителе и, как правило, предоставляет
четкое и надежное показание для
тестируемого драгоценного камня, если
прибор используется по назначению.
Однако рекомендуется провести другие
сопутствующие тестирования для получения
достоверных данных.
101
Прибор Presidium
следующим:
•
•
•
•
•
•
•
•
Duo
Tester
характеризуется
Выдвижной наконечник термоэлектрического щупа,
который обеспечивает постоянное прижатие
наконечника щупа к поверхности драгоценного
камня
Самый тонкий в отрасли наконечник щупа (0,6 мм)
для тестирования бриллиантов, наименьшая масса
которых может быть 0.02 карат.
Металлический зуммер, который звуковым
сигналом оповещает о том, что наконечник щупа не
прижат к поверхности драгоценного камня во время
тестирования
Крупная легко-читаемая аналоговая шкала и
цифровые светодиодные дисплеи для отображения
справочных данных
Встроенные диски-имитаторы алмазов и подделки,
используемые в качестве справочной информации
Встроенная таблица-имитатор параметров
отражения
Встроенный набор-имитатор в качестве справочной
информации (дополнительная опция, предлагаемая
компанией Presidium)
Питание от пяти аккумуляторных батареек типа
«AA» или сетевого адаптера.
Комплектация:
•
•
•
•
•
•
•
•
•
Presidium Duo Tester
Щуп-ручка
Сетевой адаптер
Встроенная таблица-имитатор параметров
отражения
Встроенные диски-имитаторы подделок
Руководство для пользователей
Гарантийный талон
Защитный кожух
Встроенный набор-имитатор в качестве
справочной информации (дополнительная опция,
предлагаемая компанией Presidium)
102
1
Разъем отсека для калибровки параметров
отражения
2
Диск-имитатор подделки
3
Светодиодный индикатор «ON/OFF» (ВКЛ./
ОТКЛ.)
4
Диск-имитатор бриллианта
5
Адаптер
6
Защитный колпачок щупа
7
Таблица показателей отражения
8
Щуп-ручка
9
Разъем отсека для калибровки измерителя
теплопроводности
10
Держатель для щупа-ручки
11
Кнопка [ON/OFF Display]
(«ВКЛ./ОТКЛ. Дисплей»)
12
Тестовая площадка для камня
13
Панель индикации параметров отражения
14
Колпачок цилиндрической формы
15
Набор-имитатор
103
IV. ВАЖНЫЕ ИНСТРУКЦИИ ПО ТЕХНИКЕ
БЕЗОПАСНОСТИ
•
Храните контрольно-измерительный прибор
в сухом месте. Атмосферные осадки и все типы
жидкости или влага могут содержать минералы,
которые способствуют коррозии электронных
схем.Если на прибор попала вода, то выньте
из него аккумулятор. После того, как прибор
тщательно
просушили, заново вставьте
аккумулятор.
•
Запрещается использовать, хранить или
устанавливать прибор в пыльных и грязных местах.
Подвижные детали и электронные компоненты
могут быть повреждены.
•
Запрещается использовать, хранить или
устанавливать контрольно-измерительный
прибор в жарких помещениях. Высокая
температура может повредить или сократить
срок службы контрольноизмерительного прибора,
испортить аккумулятор и деформировать или
расплавить некоторые пластмассовые детали.
•
Запрещается использовать, хранить или
устанавливать контрольно-измерительный прибор
в холодных помещениях. При нагревании
контрольно-измерительного прибора до
нормальной температуры внутри прибора может
конденсироваться влага. Это может повредить
электронные платы.
•
Открывайте крышку контрольно-измерительного
прибора только таким способом, который указан в
руководстве.
•
Запрещается ронять, ударять о поверхность или
трясти контрольно-измерительный прибор. Грубое
обращение с прибором может привести к поломке
внутренних микросхем и точной механики.
•
Запрещается использовать агрессивные
химические вещества, растворители или
сильнодействующие моющие средства для очистки
контрольно-измерительного прибора.
•
Запрещается красить контрольноизмерительный
прибор. Краска может блокировать подвижные
детали и препятствовать правильному
функционированию прибора.
104
В случае возникновения каких-либо сбоев при
эксплуатации весов свяжитесь со службой технической
поддержки компании Presidium по электронной почте
[email protected] или по адресу:
Presidium Instruments Pte Ltd
No. 6 Penjuru Lane
Singapore 609187
Singapore
(65) 6379 5000
Attn: Customer Service Executive
105
1. ПОРЯДОК РАБОТЫ, прибор Presidium Duo Tester
Подключение Presidium Duo Tester к источнику
питания
Данный прибор может работать как от адаптера
переменного тока (дополнительный блок, который
продается отдельно), так и от аккумулятора. В
случае
использования
адаптера
переменного
тока подсоедините штекер адаптера к разъему на
контрольно-измерительном приборе, а вилку шнура
питания вставьте в подходящую розетку электрической
сети. Убедитесь в том, что используется только сетевой
адаптер, который поставлен компанией Presidium.
В случае использования аккумуляторных батареек
(5
аккумуляторные
батарейки
типа
«AA»)
обратите внимание на положительный значок (+) и
отрицательный значок (-) при размещении батареек
в батарейный отсек весов (Рис. 1.1). Рекомендуется
использовать щелочные батарейки, поскольку они
обеспечивают непрерывную эксплуатацию прибора
на протяжении около двух с половиной часов. Если
используются обычные батарейки, то прибор работают
непродолжительное время.
Рис. 1.1
106
Включение прибора Presidium Duo Tester
Вставьте щуп-ручку в гнездо, расположенное на
боковой панели измерительного прибора (Рис. 1.2).
Внимание: щуп-ручку необходимо вставить в гнездо
до включения прибора. В противном случае стрелкаиндикатор отклонится в зеленый сектор (Бриллиант),
если прибор включен.
Рис. 1.2
Чтобы включить прибор, сдвиньте в сторону кнопку
[ON/OFF] («ВКЛ./ОТКЛ.»), расположенную с тыльной
стороны прибора, и подождите приблизительно 20
секунд или до тех пор, пока светодиодные индикаторы
не загорятся.
Рис. 1.3
107
Проведение проверки, чтобы убедиться, что Presidium Duo Tester функционирует надлежащим
образом.
Диск-имитатор подделки
•
Прижмите наконечник щупа к диску-имитатору
подделки, который расположен слева от
индикаторной лампочки (Рис. 1.4). Приложите
достаточных усилий, чтобы выступающий
наконечник полностью вошел внутрь корпуса
щупа-ручки. Стрелка-индикатор отклонится и
остановится на белой полоске (желательно в
центре белой полоски), над которой находиться
надпись «CAL» («КАЛИБРОВКА»), через 2-3
секунды
Рис. 1.4
Диск-имитатор алмаза
• Прижмите наконечник щупа к диску-имитатору
алмаза, который расположен справа от
индикаторной лампочки (Рис. 1.5). Приложите
достаточных усилий, чтобы выступающий
наконечник полностью вошел внутрь корпуса
щупа-ручки. Как только это произойдет, стрелка
начнет двигаться и максимально отклонится в
зеленом секторе приборной панели через 2-3
секунды.
Рис. 1.5
108
Калибровка
Калибровка всех контрольно-измерительных приборов
Производится во время производственного процесса и
какие-либо последующие регулировочные работы или
какое-либо вмешательство пользователя в работу
прибора не требуются
Запрещается самостоятельно проводить калибровку
прибора. Чтобы минимизировать какие-либо связанные
с этим риски, пользователи должны связаться с
компанией Presidium по электронной почте service@
presidium.com.sg или с ее центром технического
обслуживания для получения необходимой помощи.
В случае если пользователь требует, чтобы
производитель провел повторную калибровку прибора,
то пользователь оплачивает расходы, связанные
с транспортировкой прибора в центр технического
обслуживания и обратно.
Рекомендуемые условия для поверки
Поверхность драгоценного камня должна быть чистой
и сухой перед поверкой. Однако обычно не требуется
проведение тщательной процедуры очистки (Рис. 1.6).
Рис. 1.6
Рекомендуемая температура для поверки - 18°C –
27°C или 65°F – 80°F. Перед проведением поверки
необходимо, чтобы драгоценный камень прогрелся/
остыл до комнатной температуры. Перед проведением
поверки необходимо, чтобы драгоценный камень
прогрелся/остыл до комнатной температуры.
109
Информация по эксплуатации аккумулятора
Не
оставляйте
использованные
батарейки
в
батарейном отсеке, поскольку они могут коррозировать,
потечь или нанести ущерб прибору. Аккумулятор
необходимо вынуть, если предполагается, что прибор
будет храниться на протяжении длительного периода
времени.
Если используется адаптер переменного тока,
аккумуляторные батарейки могут оставаться внутри
прибора.
Чтобы избежать неправильных показателей, вставьте
новые аккумуляторные батарейки, если красный
светодиодный индикатор не загорится через 20
секунд. При слабости или недостаточной емкости
аккумуляторных батареек нельзя проводить поверку.
Очистка драгоценного камня перед поверкой
Приготовьте чистую ткань. Аккуратно возьмите камень
при помощи пинцета и положите его лицевой стороной
на стол (Рис. 1.7).
Рис. 1.7
Осторожно протрите площадку камня тканью/
салфеткой для ювелирных изделий и поместите камень
в центр тестовой площадки (Рис. 1.8)
Рис. 1.8
110
2. ТЕСТИРОВАНИЕ, прибор Presidium Duo Tester
Ориентируйте наконечник щупа-ручки перпендикулярно
к поверхности драгоценного камня. Чтобы получить
правильное показание, приложите небольшое усилие,
чтобы полностью задвинуть наконечник внутрь корпуса
щупа-ручки. Это позволит поддерживать непрерывный
и постоянный контакт наконечника щупа с поверхностью
драгоценного камня.
Если тестируется камень без оправы, то поместите
камень в углубление на защитном кожухе. Прижмите
наконечник щупа к поверхности камня. На экране
прибора появиться результат тестирования
Ювелирные изделия или драгоценные камни в
оправе:
Держите в одной руке ювелирное изделие или
драгоценный камень, а в другой руке – контрольноизмерительный прибор (Рис. 2.1). Тестирование
ювелирного изделия в оправе необходимо проводить
с огромной осторожностью. Перед проведением
тестирования пользователь должен убедиться,
что камни надежно закреплены в оправе, поскольку
зазор между камнем и оправой может привести к
получению неправильного показания
Рис. 2.1
Драгоценные камни без оправы:
Поместите драгоценный камень в металлическую
подставку для камней. Одной рукой придерживайте
подставку, а другой рукой держите прибор (Рис. 2.2).
111
Рис. 2.2
Примечание: Металлическая опора
компанией Presidium не поставляется.
для
камня
Проведение оптического тестирования при помощи
прибора Presidium Duo Tester
Снимите защитный кожух, закройте тестовую лощадку
колпачком цилиндрической формы. Нажмите кнопку
«DISPLAY» («ДИСПЛЕЙ»). На дисплее появится
показание «000» (Рис. 2.3).
Fig. 2.3
Уберите колпачок цилиндрической формы и поместите
в центр тестовой площадки хорошо очищенный,
полированный драгоценный камень (Рис. 2,4).
Рис. 2.4
112
Накройте камень колпачком цилиндрической формы
(Рис. 2.5).
Рис. 2.5
Нажмите
и
удерживайте
кнопку
«DISPLAY»
(«ДИСПЛЕЙ»). Подождите до тех пор, пока на экране
дисплея цифры перестанут меняться (около 2 секунд)
(Рис. 2.6).
Рис. 2.6
Примечание: Набор-имитатор из 7 камней используется
с таблицей показателей отражения, которая находится
на тыльной стороне прибора, для калибровки и
функционального тестирования датчика отражения
Советы по использованию прибора Presidium Duo
Tester
Если контрольно-измерительный прибор используется
в первый раз, или, если прибор не использовался на
протяжении одной недели, то рекомендуется провести
очистку наконечника щупа при помощи листа бумаги,
что позволит получить постоянный и правильный
показатель.
Аккуратно протрите наконечник о
поверхность бумаги перед проведением тестирования.
Наконечник щупа необходимо установить под прямым
углом или перпендикулярно к грани камня для
получения правильного показания.
Поверки необходимо проводить на площадке (верхней
113
горизонтальной грани) драгоценного камня. Если у вас
возникли сомнения, то проведите тестирования на
другом месте - на рундисте камней.
Если камни в оправе не «утоплены» в свои гнезда, то
можно измерить их параметры отражения. Вместо
колпачка цилиндрической формы можно использовать
черную пластмассовую коробку (например, коробку
для фотопленки).
Для получения оптимальной точности при тестировании
очень маленьких камней (0,10 карат и меньше)
необходимо охладить камень перед последующими
поверками.
Рекомендуется снять несколько показателей в
зависимости от полученных результатов тестирования.
114
3. РЕЗУЛЬТАТЫ ТЕСТИРОВАНИЯ, прибор Presidium
Duo Tester
Результаты тестирования показывают следующее:
•
Прижмите наконечник щупа к камню на
приблизительно 2 секунды. Стрелка отклониться
максимально вправо, затем медленно вернется на
прежнее положение. Снимите показание измерения
по максимальному отклонению стрелки индикатора.
•
Прибор предоставит все возможные результаты на
дисплее.
•
Прибор Presidium Duo Tester необходимо
использовать только для подтверждения
идентичности сомнительных драгоценных камней.
•
Ниже дан пример того, как трактовать результат,
полученный измерительным прибором:
Если стрелка остановиться в верхнем положении, то
тестируемый камень может быть кварцем, аметистом,
цитрином, танзанитом или аквамарином, т.е. любым
камнем в пределах белой полосы, которую стрелка
пройдет.
•
Зуммер, который звуковым сигналом оповещает
о прикосновении щупа к металлу: Прибор
предупреждает звуковым сигналом, если
наконечник щупа коснулся металлической оправы
камня.
•
Если тестируются очень маленькие бриллианты, то
возможно ожидать, что стрелка лишь
незначительно отклонится в зеленый сектор.
•
В зависимости от результатов температурной
проверки с помощью прибора Presidium Duo Tester
можно различить:
115
Сапфир
от
танзанита
Жадеит
от
хризопраза
Сапфир
от
иолита
Жадеит
от
авантюрина
Сапфир
от
шпинель
Рубин
от
шпинеля
Сапфир
от
цитрина
Рубин
vот
граната
Сапфир
от
топаза
Топаз
от
аквамарина
Сапфир
от
турмалина
Топаз
от
аметиста
Изумруд
от
жадеита
Топаз
от
цитрина
Изумруд
от
граната
от
граната
Жадеит
от
граната
Шпинель
Драгоценные
камни
от
стекла
Использование
температурных
результатов
предназначено исключительно для идентификации
драгоценных камней, список которых приведен выше.
Это поможет ювелиру различить многие вводящие в
заблуждение драгоценные камни, представленные на
рынке
Результаты оптического тестирования
•
На экране дисплея высветиться показатель
отражения. Запишите на листке бумаге показатель
отражения и сравните его с данными таблицы
показателей отражения, которая поставляется в
комплекте.
•
В случае получения результата, близкого к
предельным значениям, то перед последующей
проверкой проведите очистку камня и снова
положите его на тестовую площадку и/или сдвиньте
камень немного от центра площадки. Посредством
изменения положения камня можно избежать
искаженного отражения от поцарапанной площадки
поверхности. Повторите проверку снова.
•
Синтетический шпинель/Синтетический
сапфир и циркон c «высоким показателем
дисперсии»/гадолинии-галлиевый гранат имеют
«перекрывающийся» параметр отражения.
Если возникли сомнения, то проведите измерение
теплопроводности для быстрой идентификации
камней.
•
Синтетический сапфир: стрелка отклониться вверх
в красный сектор.
116
•
Синтетический шпинель: Стрелка отклониться
приблизительно на половину шкалы в красный
сектор.
•
Циркон с высоким показателем дисперсии:
Стрелка отклониться на 2/3 шкалы в красный
сектор.
•
ГГГ (гадолинии-галлиевый гранат): Стрелка
отклониться на 1/3 шкалы в красный сектор.
117
4. ТЕХ. ОБСЛУЖИВАНИЕ, прибор Presidium
Duo Tester
•
Щуп и проволочный наконечник являются
особенно чувствительными. Необходимо
бережно обращаться с ними, особенно при
снятии защитного колпачка с наконечника
щупа. Необходимо предпринимать все
меры предосторожности, чтобы не
повредить наконечник щупа.
•
Не оставляйте использованные батарейки
в батарейном отсеке, поскольку они
могут коррозировать, потечь или нанести
ущерб контрольно-измерительному
прибору. Аккумулятор необходимо
вынуть, если предполагается, что прибор
будет храниться на протяжении
длительного периода времени
Данный прибор являются продуктом
колоссального труда проектировщика и
производителя и должны эксплуатироваться с
величайшим бережным отношением.
Благодарим Вас, что Вы уделили время для
прочтения руководства для пользователей.
Это позволит Вам лучше понять ценность
приобретенного товара.
Компания Presidium также рекомендует Вам,
чтобы Вы зарегистрировали свою гарантию
посредством отсылки регистрационной
гарантийной карточки или зарегистрировались
в онлайн режиме на веб-сайте
http://www.presidium.com.sg/.
118
Manual del usuario para el
probador doble
Presidium (PDT)
119
Contenido
(Spanish Version)
I. Exenciones, exclusiones y
limitaciones de responsabilidad
pág. 121
II. Acerca de este manual
pág. 122
III. Acerca de su probador doble Presidium
IV. AVISO IMPORTANTE
pág. 123
pág. 126
1. PRIMEROS PASOS con su probador doble
Presidium pág. 127
2. REALIZAR UNA PRUEBA con su
probador doble Presidium
pág. 132
3. LECTURA DE LOS RESULTADOS de la
prueba con su probador doble Presidium
pág. 135
4. CUIDADOS de su probador doble
Presidium
pág. 137
120
I. Exenciones, exclusiones y limitaciones de
responsabilidad
LEA Y TENGA EN CUENTA LOS TÉRMINOS Y
CONDICIONES DE GARANTÍA DE PRESIDIUM según se
estipulan en la tarjeta de garantía. La garantía de
Presidium para sus probadores está sujeta al uso
adecuado de los usuarios de conformidad con todos los
términos y condiciones estipulados en el manual del
usuario correspondiente y cubrirá solo defectos de
fabricación.
Debido a la mejora continua del producto, Presidium se
reserva el derecho de revisar todos los documentos,
incluido el derecho a realizar cambios en el manual, sin
previo aviso y sin obligación de notificar a ninguna
persona de dichas revisiones o cambios. Es aconsejable
que los usuarios visiten la página web de Presidium
http://www.presidium.com.sg/ periódicamente.
Presidium no será responsable de ningún daño ni pérdida
que surja del uso de este probador o manual y, en
ninguna circunstancia, Presidium, sus fabricantes ni
ninguna de sus filiales, otorgantes de licencia,
distribuidores, revendedores, empleados o agentes será
responsable de ningún daño directo o indirecto que surja
del uso de este probador.
HASTA EL MÁXIMO PERMITIDO POR LA LEY APLICABLE, en Ninguna circunstancia Presidium, sus fabricantes ni ninguna de sus filiales, otorgantes de licencia,
distribuidores, revendedores, empleados o agentes serán
responsables de ningún daño especial, derivado, consecuente o indirecto, sin importar cómo se haya ocasionado.
El probador o probador doble Presidium (PDT)
mencionado en este manual se proporciona o vende “tal
como está”. Excepto que la ley aplicable lo exija, no posee
garantías de ningún tipo, ya sean expresas o implícitas,
incluyendo, entre otras, las garantías implícitas de
comerciabilidad y adecuación a un fin particular.
121
II. Acerca de este manual
Gracias por comprar el probador doble Presidium (“PDT”
o “probador”).
Este manual está diseñado para ayudarle a instalar su
probador y describe todo lo que necesita saber sobre cómo
utilizar el probador de forma precisa y cuidarla según sus
requisitos. Lea estas instrucciones cuidadosamente y
manténgalas a mano para referencia futura.
Este manual también contiene los términos y las
condiciones con respecto al uso del probador, incluyendo
las cláusulas de Exención, EXCLUSIÓN y limitación de
responsabilidad estipuladas anteriormente en la
Sección I.
122
III. Acerca de su probador doble Presidium
(PDT)
La medición térmica del probador doble Presidium se basa
en una invención del Profesor Julian Goldsmid de la Universidad de New South Wales en Australia. Se desarrolló
para ayudar a distinguir entre diamantes y sus imitaciones
usando los principios de conductividad térmica. Los diamantes, con sus excepcionales propiedades de conductividad del calor, son diferentes a cualquier otra imitación
y, por lo tanto, no son fácilmente replicables. El probador
doble Presidium con una pantalla de estimación del color
de la piedra ayuda a los usuarios a distinguir las piedras
preciosas de color populares entre sí.
El probador doble Presidium también posee un probador
de reflexión incorporado, lo que brinda un método
alternativo de identificar la piedra preciosa que se está
probando.
Se debe tener en cuenta que las piedras preciosas
naturales y sintéticas tienen propiedades físicas y ópticas
similares. Como tal, el probador doble Presidium no distingue entre piedras preciosas naturales y sintéticas. Al
igual que con todos los probadores términos en el
mercado, el probador no puede diferenciar entre
diamantes naturales y moissanita.
El probador doble Presidium se ha sometido un exhaustivo
control de calidad en fábrica, y generalmente
proporcionará una lectura clara y fiable de la piedra
preciosa que se está probando si se utiliza
adecuadamente. Sin embargo, se le aconseja que realice
otras pruebas de apoyo.
123
El probador doble Presidium ofrece lo siguiente:
•
•
•
•
•
•
•
•
Punta de sonda termoeléctrica retráctil que garantiza
una presión constante entre la punta de la sonda y la
piedra preciosa
La punta de sonda más fina de la industria (0,6 mm)
para probar piedras preciosas tan pequeñas como de
0,02 ct
Zumbador de alerta de metales para garan tizar que la
punta de la sonda esté en con tacto con la piedra
preciosa durante la prueba
Cuadrante grande fácil de leer y pantallas LED
digitales
Discos de prueba de diamante e imitaciones
incorporados para referencia
Cuadro de reflexión de imitaciones incorpo rado
Conjunto de imitación incorporado para referencia
(artículo opcional proporcionado por Presidium)
Alimentado con 5 pilas AA o un adaptador de CA
Contenido del envase:
•
•
•
•
•
•
•
•
•
Probador doble Presidium
Sonda tipo bolígrafo
Adaptador de CA
Cuadro de reflexión de imitaciones incorpo rado
Discos de prueba de imitaciones incorpora dos
Manual del usuario
Tarjeta de garantía
Funda protectora
Conjunto de imitación incorporado para refer encia
(artículo opcional)
124
1
Entrada de calibración de reflexión
2
Disco de prueba de imitación
3
Indicador de encendido/apagado
4
Disco de prueba de diamante
5
Adaptador
6
Tapa protectora de la sonda
7
Cuadro de reflexión
8
Sonda tipo bolígrafo
9
Entrada de calibración de conductividad térmica
10
Soporte de la sonda tipo bolígrafo
11
Botón de encendido/apagado de la pantalla
12
Almohadilla de prueba de la piedra preciosa
13
Ventana de visualización de la reflexión
14
Tapa del cilindro
15
Conjunto de imitación
125
IV. AVISO IMPORTANTE
•
Mantenga seco el probador. La precipitación y todos
los tipos de líquidos o humedad pueden contener
minerales que generen corrosión en los circuitos
eléctricos. Si su probador se moja, extraiga la pila y
permita que el probador se seque completamente
antes de volver a colocarla.
•
No utilice, almacene ni exponga el probador a áreas
sucias o con abundante polvo. Sus piezas móviles y
los componentes electrónic os pueden dañarse.
•
No utilice, almacene ni exponga el probador a áreas
calientes. Las altas temperaturas pueden dañar o
acortar la vida útil del probador, dañar las pilas y
deformar o derretir ciertos plásticos.
•
No utilice, almacene ni exponga el probador a áreas
frías. Cuando el probador vuelve a su temperatura
normal, se puede formar humedad dentro del mismo y
dañar las placas de circuito electrónico.
•
No intente abrir el probador de una manera que no sea
la que se indica en este manual.
•
No deje caer, golpee o sacuda el probador. La
manipulación brusca puede romper las placas de
circuito interno y los mecanismos finos.
•
No utilice químicos fuertes, solventes de limpieza ni
detergentes fuertes para limpiar el probador.
•
No pinte el probador. La pintura puede obstruir las
piezas móviles y evitar un funcio namiento correcto.
Si el probador no funciona adecuadamente, póngase en
contacto con el Servicio de atención al cliente al service@
presidium.com.sg. o:
Presidium Instruments Pte Ltd
No. 6 Penjuru Lane
Singapore 609187
Singapore
(65) 6379 5000
Attn: Customer Service Executive
126
1. PRIMEROS PASOS con su probador doble
Presidium
Alimentación de su probador doble Presidium
Este probador puede alimentarse con un adaptador de CA
(artículo opcional que se vende por separado) o con pilas.
Si se utiliza un adaptador de CA, conecte un extremo del
adaptador de CA al probador y el otro extremo
directamente en una toma de corriente eléctrica
adecuada. Asegúrese de utilizar solo el adaptador
proporcionado por Presidium.
Si se utilizan pilas (5 pilas AA), tenga en cuenta las direcciones positivas (+) y negativas (-) de las pilas al insertarlas
en el probador (Fig. 1.1). Se prefiere el uso de pilas alcalinas, ya que generalmente brindan
aproximadamente dos horas y media de uso continuo,
mientras que el uso de pilas normales proporciona una
vida de trabajo más corta
Fig. 1.1
Encendido de su probador doble Presidium
Inserte la sonda tipo bolígrafo en el enchufe en el lateral
del probador (Fig. 1.2). Tenga en cuenta que la sonda tipo
bolígrafo debe insertarse en el enchufe antes de encender
la unidad. De lo contrario, el indicador subirá hasta la zona
verde (diamante) al encenderse.
127
Fig. 1.2
Pulse el botón [encendido/apagado] en la parte trasera
de la unidad para encenderla (Fig. 1.3) y espere
aproximadamente 20 segundos o hasta que las luces LED
se enciendan.
Fig. 1.3
Prueba para garantizar que su probador doble
Presidium esté funcionando correctamente
Disco de prueba de imitación
•
Pulse la sonda tipo bolígrafo sobre el disco de prueba
de imitación ubicado a la izquierda de la lámpara
indicadora (Fig. 1.4). Aplique suficiente presión para
retraer la punta sobresaliente completamente dentro
de la sonda tipo bolígrafo. El indicador debería el
evarse y permanecer dentro de la banda blanca
(preferentemente en el centro de la banda blanca)
con “CAL” impreso en la parte superior en dos a tres
segundos
128
Fig. 1.4
Disco de prueba de diamante
•
Pulse la sonda tipo bolígrafo sobre el disco de prueba
de diamante ubicado a la derecha de la lámpara
indicadora (Fig. 1.5). Aplique suficiente presión para
retraer la punta sobre saliente completamente dentro
de la sonda tipo bolígrafo. Una vez finalizado, la aguja
debería elevarse y llegar a su punto más alto dentro
de la banda verde de la pantalla del medidor en dos o
tres segundos.
Fig. 1.5
Calibración
Todos los probadores se han calibrado durante el proceso
de fabricación y no se necesita ningún ajuste o
intervención adicional del usuario.
No debe intentarse realizar una autocalibración. Para
minimizar cualquier riesgo asociado, los usuarios deben
ponerse en contacto con Presidium aservice@presidium.
com.sg o su centro de reparación para obtener asistencia.
En caso de que los usuarios necesiten que el fabricante
vuelva a calibrar la unidad, los usuarios pagarán todos los
costes asociados de transporte por el envío de la unidad al
centro de reparación.
129
Condiciones recomendadas de prueba
La piedra preciosa debe estar limpia y seca antes de
probarse. Sin embargo, normalmente no es necesario llevar a cabo elaborados procedimientos de limpieza
(Fig. 1.6).
Fig. 1.6
La temperatura de prueba recomendada es de 18 °C – 27
°C 65 °F - 80 °F. Permita que la piedra preciosa o pieza
de joya se ajuste a la temperatura ambiente antes de la
prueba. La exposición u operación del probador fuera del
rango de temperatura ambiente podría afectar los
resultados y el desempeño del probador.
Información de las pilas
No deje pilas gastadas dentro del compartimiento para
pilas, ya que estas pueden corroerse, tener fugas o dañar
el probador. Las pilas deberán retirarse cuando el
probador se vaya a almacenar durante un período extendido.
Las pilas no tienen que extraerse al utilizar el adaptador
de CA.
Para evitar lecturas imprecisas, reemplace con nuevas pilas cuando el indicador LED no se encienda después de 20
segundos. No se deberá llevar a cabo una prueba cuando
la potencia de la pila es baja o débil.
130
Limpieza de su piedra preciosa antes de la prueba
Prepare un papel tisú limpio. Tome la piedra preciosa cuidadosamente con unas pinzas y coloque la piedra preciosa
mirando hacia abajo sobre la cara (Fig. 1.7).
Fig. 1.7
Frote suavemente la cara de la piedra preciosa contra el
papel tisú/paño de joyería y coloque la piedra preciosa en
el centro de la almohadilla de prueba (Fig. 1.8).
Fig. 1.8
131
2. REALIZAR UNA PRUEBA con su probador doble
Presidium
Coloque la punta de la sonda tipo bolígrafo sobre la piedra
preciosa. Aplique la presión mínima para introducir completamente la punta en la sonda tipo bolígrafo para una
correcta lectura. Esto proporcionará un contacto estable y
constante entre la punta de la sonda y la piedra preciosa.
Al realizar la prueba de una piedra suelta, coloque la piedra en la depresión de la cubierta protectora y presione la
punta de la sonda sobre la piedra. El resultado de la prueba
se mostrará en el medidor.
Para joyas o piedras preciosas montadas:
Sostenga la joya o piedra preciosa con una mano y el
probador con la otra (Fig. 2.1). Se debe tener cuidado al
probar joyas montadas. El usuario debe asegurarse que
las piedras se hayan montado de forma segura antes de
realizar la prueba que ya el espacio entre la piedra y el
engaste puede generar una lectura inadecuada.
Fig. 2.1
Coloque la piedra preciosa sobre el soporte metálico para
piedras y sostenga el soporte metálico para piedras con
una mano mientras sostiene la sonda con la otra
(Fig. 2.2).
Fig. 2.2
Nota: Presidium no proporciona los restos de piedra
metálicos.
132
Realizar una prueba óptica con su probador doble Presidium
Vuelva a colocar la cubierta protectora con el cilindro y
pulse el botón “PANTALLA”. La pantalla le dará una lectura
de “000” (Fig. 2.3).
Fig. 2.3
Quite el cilindro y coloque la piedra preciosa limpia y pulida
en el centro de la almohadilla (Fig. 2.4).
Fig. 2.4
Cubra la piedra preciosa con el cilindro empotrado
(Fig. 2.5).
Fig. 2.5
133
Pulse y mantenga pulsado el botón “PANTALLA” y espere
hasta que los números visualizados permanezcan estables
(aproximadamente 2 segundos) (Fig. 2.6).
Fig. 2.6
Nota: las piedras del conjunto de 7 imitaciones se utiliza
con ayuda del cuadro de IR en la parte trasera de la unidad
para fines de calibración y prueba funcional del sensor de
reflexión.
Consejos para utilizar el probador doble Presidium
Si el probador se utilizará por primera vez o si no se ha utilizado durante una semana, es aconsejable limpiar la punta
de la sonda con un trozo de papel para lograr una lectura
consistente y precisa: Frote la punta suavemente en una
superficie de papel antes de llevar a cabo la prueba.
La punta de la sonda deberá colocarse a un ángulo recto o
perpendicular a la faceta de la piedra preciosa para obtener una lectura precisa Las pruebas deben realizarse sobre
la cara de la piedra preciosa. En caso de dudas, pruebe en
la cintura de la piedra preciosa.
Cuando las piedras montadas no están empotradas en
su engaste, es posible medir su reflexión. Utilice una caja
plástica negra (p. ej., un recipiente de película fotográfica)
como alternativa al cilindro empotrado.
Para lograr una precisión óptima de las pruebas que involucran piedras preciosas muy pequeñas (10 puntos e inferior), es importante permitir que la piedra preciosa se enfríe
antes de realizar las pruebas subsiguientes.
Es aconsejable tomar múltiples lecturas con
respecto a los resultados de la prueba indicados.
134
3. LECTURA DE LOS RESULTADOS de la prueba con
su probador doble Presidium
Los resultados de la prueba se indican de la siguiente
manera:
•
Después de presionar la punta de la sonda sobre la
piedra durante aproximadamente 2 segundos, el
indicador llegará a su posición más alta, después
volverá a bajar. Tome la lectura en la posición más alta.
•
El probador proporcionará todos los resulta dos
posibles en la pantalla.
•
El probador doble Presidium deberá utilizarse solo
para confirmar la identidad de piedras preciosas
sospechadas.
•
Un ejemplo de lectura del resultado en el medidor se
proporciona a continuación:
Cuando el indicador se detiene en la posición anterior, la
piedra probada puede ser cuarzo, amatista, citrino,
tanzanita o aguamarina, es decir, cualquier piedra
preciosa que se encuentre dentro de la banda blanca que
el indicador pasa.
•
Zumbador de alerta de metales: si la punta del
bolígrafo entra en contacto con el metal del montaje
de una piedra, se emite una señal audible.
•
Se deben esperar lecturas relativamente bajas en la
zona verde con diamantes muy pequeños.
•
Según los resultados de pruebas térmicas, el probador
doble Presidium puede ayudar a distinguir entre:
135
Zafiro
vs.
Tanzanita
Jadeita
vs.
Zafiro
vs.
Iolita
Jadeita
vs.
Zafiro
vs.
Espinel
Rubí
vs.
Crisoprasa
Cuarzo
aventurina
Espinel
Zafiro
vs.
Citrina
Rubí
vs.
Granate
Zafiro
vs.
Topacio
Topacio
vs.
Aguamarina
Zafiro
vs.
Turmalina
Topacio
vs.
Amatista
Esmeralda
vs.
Jadeita
Topacio
vs.
Citrina
Esmeralda
vs.
Granate
vs.
Granate
Esmeralda
vs.
Granate
Espinel
Piedras
preciosas
vs.
Vidrio
El uso de los resultados térmicos está restringido a las
piedras preciosas enumeradas anteriormente y ayudará
al joyero a distinguir las muchas piedras preciosas poco
claras en el mercado.
Lectura de los resultados de la prueba óptica
•
Se muestra un número de reflexión. anote el número
de reflexión y compárelo con el cuadro de reflexión
incorporado en el envase.
•
En caso de una lectura cerca del límite, limpie la
piedra y la almohadilla nuevamente antes de realizar
la siguiente prueba o desplace la piedra levemente del
centro. Al volver a colocar la piedra, es posible evitar
una reflexión distorsionada de un área rayada de la
superficie. Repita la prueba.
•
El espinel sintético/zafiro sintético y el zircón alto/GGG
poseen números de reflexión superpuestos. En caso
de dudas, utilice la medición de conductividad térmica
para una fácil separación.
•
Zafiro sintético: la aguja va a una posición alta en la
zona roja.
•
Espinel sintético: la aguja va aproximadamente hasta
la mitad de la zona roja.
•
Zircón alto: la aguja va aproximadamente hasta dos
tercios de la zona roja.
•
GGG: la aguja va aproximadamente hasta un tercio de
la zona roja.
136
4. CUIDADO del probador doble Presidium
•
La punta de la sonda y alambre es extrema damente
sensible y debería manipularse con cuidado. Se debe
tener precaución de no dañar la punta de la sonda.
•
No deje pilas gastadas dentro del compartimiento para
pilas, ya que estas pueden corroerse, tener fugas o
dañar el probador. Las pilas deberán retirarse cuando
el probador se vaya a almacenar durante un período
extendido.
El probador es un producto de diseño y fabricación de
envergadura, y debería tratarse con cuidado.
Gracias por tomarse el tiempo de leer el manual del
usuario que le permitirá comprender mejor su reciente
compra.
Presidium también recomienda que registre su garantía al
enviar la tarjeta de registro de la garantía o completar el
registro en línea en http://www.presidium.com.sg/
137
www.presidium.com.sg
Copyright © 2013 Presidium Instruments Pte Ltd.
All rights reserved.