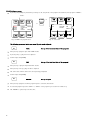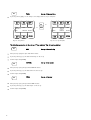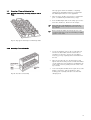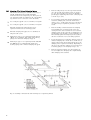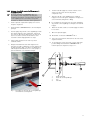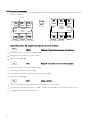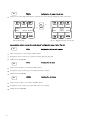
1
CERTOMAT® BS-1 Inkubations-Schüttelschrank Bedienungsanleitung Operating Manual Mode d`emploi 85030-520-51 Allgemeine Sicherheitshinweise Besondere Hinweise Diese Dokumentation zum Inkubationsschüttelschrank CERTOMAT® BS-1 beschreibt das Gerät zu dem bei der Revisions-Nr. angegebenen Zeitpunkt der Druckausgabe. Alle Angaben wurden sorgfältig zusammengestellt, erfolgen jedoch ohne Gewähr. Die Sartorius Stedim Biotech GmbH behält sich Änderungen in Aufbau und Ausstattung seiner Produkte sowie der zugehörigen Dokumentationen vor, ohne gesondert darauf hinzuweisen. • Laborleiter bzw. für den Geräteeinsatz verantwortliche Personen müssen das Personal auf die Gefahren beim Betrieb des CERTOMAT® BS-1 hinweisen und die Einhaltung der relevanten Sicherheitsmaßregeln gewährleisten. Das Personal muss die erforderliche Qualifikation für den Anwendungsbereich und den Umgang mit dem Gerät besitzen. • Die Angaben zur Bedienung sind sorgfältig zu beachten. Damit lässt sich ein unsachgemäßer Umgang vermeiden und der volle Gewährleistungsanspruch bleibt erhalten. Setzen Sie sich bei Fragen dazu mit uns in Verbindung. Aufgrund der ständigen Weiterentwicklung der Geräte besteht die Möglichkeit, dass einzelne Bauteile bzw. ihre Bedienung nicht beschrieben sind. Auch können Angaben enthalten sein, die für Ihr Gerät nicht zutreffen. Sollten für Sie wichtige Informationen fehlen, sollten Sie sachliche Fehler finden oder ausführlichere Informationen zu einzelnen Bauteilen wünschen, weisen Sie uns bitte darauf hin. Der CERTOMAT® BS-1 ist ein Beispiel aus dem Laborgeräteprogramm der Sartorius Stedim Biotech GmbH. Das weitere Geräteprogramm umfasst Schüttler und Schüttelinkubatoren, Homogenisatoren, Zentrifugen, Reinstwasseranlagen, Luftkeimsammler und Fermenter / Bioreaktoren. Weitere Informationen finden Sie auf unserer Internetseite www.sartorius-stedim.com Sind Schritte mit besonderer Sorgfalt auszuführen oder besondere Aspekte zu beachten, stehen Sicherheitshinweise, gekennzeichnet wie dieser Absatz Wichtige Sicherheitshinweise in dieser Anleitung sind durch dieses Symbol gekennzeichnet. Solche Anweisungen gelten ergänzend zu den sonstigen Sicherheitsvorschriften für den Anwendungsbereich und am Arbeitsplatz. • Geräte in falscher Spannungsversion dürfen Sie nicht in Betrieb nehmen. • Nichtbeachten der Sicherheitshinweise kann z.B. Schäden am Gerät oder sonstige Sach- und gegebenenfalls auch Personenschäden nach sich ziehen. Über unser gesamtes Produktprogramm informieren wir Sie gern auf Anfrage. • Teil 1 gibt Ihnen eine Übersicht über Aufbau und Ausstattung des BS-1. EG-Konformitätserklärung • Teil 2 informiert Sie über die Anforderungen, die das Gerät an den Aufstellort stellt. Darüber hinaus werden Aufstellung und Anschluss beschrieben. • In Teil 3 finden Sie die Informationen über die Inbetriebnahme und Bedienung des Gerätes. Falls Sie das Gerät schon kennen und es betriebsbereit installiert ist, können Sie direkt zu diesem Teil der Anleitung gehen. • Teil 4, enthält technischen Daten und Bestellinformationen. Hier finden Sie insbesondere Angaben über optionale Ausstattungen und das Zubehörprogramm zum Schüttler. Mit den beigefügten oder dem Gerät beiliegenden Konformitätserklärungen bestätigt die Sartorius Stedim Biotech GmbH die Übereinstimmung des CERTOMAT® BS-1 mit den benannten Richtlinien. 2 Leitfaden für diese Anleitung Sartorius Stedim Biotech GmbH August-Spindler-Straße 11 37079 Göttingen Telefon +49.551.308.3118 Fax +49.551.308.3918 [email protected] www.sartorius-stedim.com Die Bedienungsanleitung ist nach dem folgenden Schema aufgebaut. Dadurch können Sie die für Sie wichtigen Informationen gezielt aufsuchen, entsprechend Ihrem Informationsbedarf. Inhalt Besondere Hinweise EG-Konformitätserklärung Allgemeine Sicherheitshinweise Leitfaden für diese Anleitung 1 Aufbau und Funktion 4 1.1 1.2 1.2.1 1.2.2 1.2.3 1.2.4 Mechanischer Aufbau Ausstattungsmöglichkeiten Schüttelantriebe Tablare Beleuchtungseinrichtung Einlegerost 4 4 4 4 4 4 2 Aufstellung und Inbetriebnahme 5 Anlieferung, Kontrolle der Vollständigkeit Aufstellung und laborseitige Anschlüsse Einrichten am Arbeitsplatz Elektrischer Anschluss Ausrüstung des BS-1 und Anschluß von Ausstattungsoptionen 2.3.1 Schüttelantrieb 2.3.2 Beleuchtungseinrichtung (Option) 2.3.3 Optionale Kühleinrichtung 2.3.4 Montage des Einlegerostes (optional) 2.3.4.1 Einbau der Montageleisten (4 Stück) 2.3.4.2 Einbau der Haltewinkel 5 6 6 6 7 7 7 7 7 8 8 3 Bedienung des CERTOMAT® BS-1 9 3.1 3.2 3.2.1 3.2.2 Sicherheitshinweise Ausrüstung, Einbau und Beladung eines Tablars Ausrüsten eines Tablars Justieren des Ausgleichsgewichts für die vorgesehene Beladung Aus- und Einbau eines Tablars Inbetriebnahme Aufstellung und Einstellungen Funktions- und Menü-Übersicht Manuell-Menü „MAN“ Programm-Menü „PROG“ Programmdefinition Beispiel für Programmierung Passwortschutz für Programme Löschen eines Programm-Passwortschutzes Starten eines Programmes Setup-Menü „SETUP1“ Setup-Menü „SETUP2“ Betrieb mit dem eingebauten Kühlaggregat Anschluß externer Geräte Analoge Ausgänge (ANALOG OUT) RS 232-Schnittstelle Sammelalarm 2.1 2.2 2.2.1 2.2.2 2.3 3.2.3 3.3 3.3.1 3.3.2 3.3.3 3.3.4 3.3.4.1 3.3.4.2 3.3.4.3 3.3.4.4 3.3.4.5 3.3.5 3.3.6 3.3.7 3.4 3.4.1 3.4.2 3.4.3 37 37 37 38 39 39 39 39 39 39 40 3.7 Montage von Tablaren und Aufbausystemen Montage und Beladung fertig bestückter Tablare Montage von Reagenzglasgestellen Montage des Universal-Aufbausystems Wartungshinweise und Trouble-Shooting Wartung und Reinigung Reinigung Wartung der Beleuchtungseinrichtung Maßnahmen bei Betriebsstörungen Elektrische Störungen Störungen am Schüttelantrieb Betriebsstörungen bei der Ausstattungsoption mit Kühlaggregat Gewährleistung und Kundendienst 4 Technische Daten, Bestellinformationen 41 4.1 4.1.1 4.1.2 4.1.3 4.1.4 4.1.5 4.1.6 4.2 4.2.1 4.2.2 4.2.3 4.3 4.4 4.5 4.6 4.7 4.8 Technische Daten Mechanischer Aufbau Elektrischer Anschluss Betriebsdaten Analogausgang Sammelalarm Option Kühlung Bestelldaten Schüttlerkonfigurationen Ausstattungsoptionen Zubehör Sicherheitshinweise für Laborschüttler EG-Konformitätserklärung Dekontaminationserklärung Entsorgungs- und Reparaturhinweise Maßblatt CERTOMAT® BS-1 Prospekt CERTOMAT® BS-1 41 41 41 41 41 41 41 42 42 42 43 49 49 49 49 49 49 3.5 3.5.1 3.5.2 3.5.3 3.6 3.6.1 3.6.1.1 3.6.1.2 3.6.2 3.6.2.1 3.6.2.2 3.6.2.3 40 40 9 10 10 11 12 13 13 14 14 18 19 23 24 25 26 28 34 35 36 36 36 36 3 1 Aufbau und Funktion 1.1 Mechanischer Aufbau 1.2 Ausstattungsmöglichkeiten 1.2.1 Schüttelantriebe Bedienterminal und Steuerelektronik für den Antrieb sind im Bedienteil rechts im Schrank eingebaut. Der Schüttelantrieb befindet sich unter der Auffangwanne des Inkubationsraums. Der Antrieb entspricht dem des Laborschüttlers CERTOMAT® RM und ist je nach Ausführung ausgelegt für: Der CERTOMAT® BS-1 ist ein einfach zu bedienender, leistungsfähiger und langlebiger InkubationsSchüttelschrank für den universellen Einsatz z.B. in biologischen und chemischen Laboratorien. In der Grundausführung besitzt der BS-1 den Schüttelantrieb und die integrierte Heizung. Der Schüttelantrieb umfasst einen bürstenlosen Außenläufermotor und den geräuscharmen, robusten Poly-V-Riemenantrieb. Es sind Schüttelantriebe mit unterschiedlichem Hub verfügbar, wobei der Hub durch unseren Service vor Ort umstellbar ist. Die verschiedenen Schüttelgeschwindigkeiten sind stufenlos einstellbar. Der Schüttler kann mit Tablaren unterschiedlicher Größe und zahlreichen Klammern, Gestellen sowie Auffangsystemen aus dem CERTOMAT® -Schüttlerprogramm ausgestattet werden. Zwei große Isolierglastüren erleichtern das Befestigen und Entnehmen der Schüttelbehälter oder das Wechseln des Tablars und erlauben die visuelle Kontrolle. Für Inkubationen im Bereich und unterhalb der Raumtemperatur kann ein Kühlaggregat eingebaut sein. Als weitere Option ist eine Beleuchtungseinrichtung verfügbar. Eine Übersicht zu den Ausstattungsmöglichkeiten finden Sie unten, ausführliche Informationen enthält Kapitel 4, „Technische Daten und Bestellinformationen“. Damit können Sie die Ausstattung des Schüttelschranks entsprechend Ihren spezifischen Anforderungen festlegen. Der Inkubationsraum des Schrankes ist in Edelstahl ausgeführt. Am Boden ist eine Auffangwanne installiert, um zu verhindern, dass bei Gefäßbruch verschüttete Medien unkontrolliert austreten können. Die Auffangwanne kann mit wenigen Handgriffen aus dem Inkubationsraum entfernt und gereinigt werden. Diese Bauweise erleichtert auch das Reinigen des Schüttelschrankes. Sie können den Schüttelschrank als Boden- oder Tischgerät einsetzen und es lassen sich 2 - 3 Schüttelschränke stapeln. Für den Stapelbetrieb von 2 Schränken ist ein Untergestell erhältlich, mit dem Sie die Schränke in eine optimale Bedienhöhe bringen können. • Kreisbewegung: Ø 25 mm oder 50 mm (je nach Ausführung im Lieferzustand; durch den Service der Sartorius AG auch vor Ort auf die alternative Amplitude umstellbar). • Drehzahlbereich: 40 ... 400 1/min • Drehzahlabweichung : max. ±1 % vom Endwert • Der Antrieb hat einen patentierten, einstellbaren Massenausgleich 1.2.2 Tablare Tablare können fertig bestückt mit Klammern für Erlenmeyerkolben geliefert werden (Typ E bzw. F) oder sind für die individuelle Bestückung als Universaltablare Typ EU bzw. FU erhältlich. • Dimensionen: Typ E/EU: Tablar Typ F/FU: B x T = 420 x 420 mm1)1) B x T = 800 x 420 mm Universaltablare können mit Klammern für Erlenmeyerkolben verschiedener Größen, schwenkbaren Reagenzglashaltern und Universalaufbausystemen bestückt werden. Die Universal-Aufbausysteme erlauben es, verschiedenste Gefäße aufzustellen, z.B. Flaschen, Bechergläser oder Scheidetrichter. 1.2.3 • 1.2.4 • Beleuchtungseinrichtung Als weitere Option steht eine Beleuchtungseinrichtung mit 5 Leuchtstoffröhren à 18 W zur Verfügung. Jede Leuchtstoffröhre ist einzeln abschaltbar. Die Montage der Beleuchtungseinrichtung (siehe Punkt 2.3.2) sowie die Aktivierung im SETUP2-Menü wird unter Punkt 3.3.6 beschrieben. Einlegerost Zur statischen Inkubation, z.B. in Petrischalen, steht ein Einlegerost als Option zur Verfügung. Die Montage des Einlegerostes wird in Kapitel 2.3.4 beschrieben. 1) In modifizierter Ausführung für neue Arretierung; Umrüstung vorhandener Tablare für diese Arretierung auf Anfrage. Setzen Sie sich dazu mit unserem Service in Verbindung. 4 2 Aufstellung und Inbetriebnahme 2.1 Anlieferung, Kontrolle der Vollständigkeit Ausstattung und Lieferumfang des Inkubationsschüttelschrankes CERTOMAT® BS-1 hängen vom Bestellumfang ab. Der Schüttelantrieb sowie die Option „Kühlaggregat“ werden werkseitig entsprechend den Kundenspezifikationen eingebaut. Der Inkubationsschüttelschrank wird nach einem sorgfältigen Funktionstest geliefert. Für den Transport zum Aufstellort, die Aufstellung und vor der Inbetriebnahme prüfen Sie folgende Voraussetzungen: 1. Für den Transport muss geeignetes Transportgerät (Hubwagen, etc.) verfügbar sein. Türen, Aufzüge und Wege bis zum Aufstellort müssen einen gefahrlosen Transport erlauben. 2. Der Aufstellort muss für den Schüttelschrank geeignet sein. Die Aufstellfläche muss genügend Platz bieten und das Gewicht des komplett ausgestatteten BS-1 aufnehmen können: − Abmessungen des Schrankes: 1150 x 720 x 770 mm (B x H x T) − Gewicht: ca. 230 kg einschl. Beladung • Bei Lieferung als Einzelschrank oder bei 2 gestapelten Schränken kann der (untere) Schrank auf einen Sockel gestellt werden, was die Bedienung erleichtert. • Wenn Sie mehrere CERTOMAT® BS-1 aufeinander stapeln (möglich sind bis zu 3 Geräte), beachten Sie die Dimensionen sowie das Gewicht der Gerätekombination mit den Komponenten und die daraus resultierenden Belastungen. 3. Der Arbeitsplatz muss beim Schüttelbetrieb übertragene Schwingungen aufnehmen können. Im Arbeitsumfeld aufgestellte Geräte dürfen nicht beeinträchtigt werden. Beachten Sie die Hinweise zur Begrenzung der Schüttelgeschwindigkeiten in Kapitel 3. Falls der Arbeitsplatz nicht für den BS-1 geeignet und das Gerät nicht für Ihre Netzspannung ausgelegt ist, dürfen Sie es nicht aufstellen und in Betrieb nehmen. 6. Überprüfen Sie den Zustand des Gerätes und des mitgelieferten Zubehörs. Alle in der Bestellung spezifizierten Komponenten sind vormontiert oder liegen der Lieferung bei. Die Lieferung sollte vollständig und alle Teile unbeschädigt sein. • Sollte Ihr Schüttelschrank nicht in der korrekten Spannungsversion vorliegen, sollte das Gerät nicht funktionieren, Teile fehlen oder beschädigt sein, informieren Sie bitte schnellstmöglich Ihre Vertretung der Sartorius Stedim Biotech GmbH. Die Tablarbewegung versetzt den Schüttler in Schwingungen, die das einstellbare Ausgleichsgewicht nicht für alle Lasten und Schüttelgeschwindigkeiten kompensieren kann. Insbesondere bei schwerer Beladung (> 10 kg) und hoher Schüttelfrequenz können Resonanzeffekte auftreten und Vibrationen sich auf die Aufstellfläche übertragen. 4. Die Spannungsversorgung muss den Gerätespezifikationen entsprechen. Vergleichen Ihre Netzspannung mit den Angaben auf dem Typenschild am Gerät. 5. Der Schüttelschrank ist für übliche Laborbedingungen ausgelegt, vgl. die Angaben zu den Umfeldbedingungen im Anhang. Bei speziellen Umfeldbedingungen oder beim Einsatz aggressiver Medien müssen Sie die Eignung aller Teile testen. Fehlfunktionen und Schäden, wie Korrosion durch aggressive Medien, unterliegen nicht unserer Gewährleistung. 5 2.2 Aufstellung und laborseitige Anschlüsse 2.2.1 Einrichten am Arbeitsplatz Der CERTOMAT® BS-1 ist stapelbar. Sie können bis zu drei Geräte aufeinander stellen. Soweit sich die nachfolgenden Angaben auf einen Schüttelschrank beziehen, gelten sie auch entsprechend für Ihre Gerätekombination. 1. Stellen Sie den BS-1 so auf, dass er gut zugänglich ist und sein Betrieb andere Geräte nicht beeinträchtigt. Der rechte Maschinenteil sollte ca. 50 cm Abstand von Geräten oder der Wand haben. Dann ist die Seitentür zugänglich, ohne dass der BS-1 umgestellt werden muss, wenn Sie z.B. für die Wartung die Seitentür öffnen wollen. Für eine ausreichende Belüftung ist ein Mindestwandabstand von 15 cm erforderlich. Enthält der BS-1 das optionale Kühlregister (Wärmetauscher) empfehlen wir zum Anschluss der externen Peripheriegeräte für die Rückseite einen Abstand von ca. 50 cm. • Bei Lieferung als Einzelschrank oder bei 2 Schränken, die gestapelt werden sollen, kann der (untere) Schrank auf einen Sockel gestellt werden, was die Bedienung erleichtert. Jedes Gerät kann separat bedient werden. 2. Wollen Sie 2-3 Schüttelschränke stapeln − entfernen Sie die Kunststoffkappen auf der Oberseite des vorgesehenen Unterschranks − ersetzen Sie die Füße des Oberschranks gegen die mitgelieferten Zentrierstifte − bei Bedarf können Sie die mitgelieferten Tragösen in die Oberseite des oberen Schrankes drehen, um ihn mit Hebezeugen heben zu können. 3. Stellen Sie die Schränke vorsichtig aufeinander. Beachten Sie das Gewicht der Schränke. Verwenden Sie nur geeignete Hebewerkzeuge oder Hilfsmittel. Die Zentrierstifte müssen ohne Verkanten in die Bohrungen an der Oberseite des jeweils unteren Schrankes passen. 4. Justieren Sie den Schüttelschrank bzw. die gestapelten Schränke sorgfältig waagrecht. Steht der Schüttelschrank schief, kann der Schüttelantrieb schnell verschleißen, insbesondere bei schweren Lasten auf dem Tablar und hohen Schüttelgeschwindigkeiten. Bei gestapelten Schränken, die schief stehen, kann der gesamte Schrankaufbau beim Betrieb der Schüttler instabil werden, insbesondere bei schwerer Beladung bzw. hohen Schüttelgeschwindigkeiten. 6 2.2.2 Elektrischer Anschluss • Sie benötigen eine Schukosteckdose mit 230 V, 50 Hz oder 115 V, 60 Hz, je nach Länderstandard. Sie dürfen das Gerät nicht ans Netz anschließen, wenn die Anschlussbedingungen im Labor nicht mit den Angaben auf dem Typenschild übereinstimmen. • Verfügt das Labor nicht über passende Geräteanschlüsse, kann der für Sie zuständige Service der Sartorius AG einen geeigneten Gerätestecker montieren. 2.3 Ausrüstung des BS-1 und Anschluss von Ausstattungsoptionen 2.3.1 Schüttelantrieb • Der Schüttelantrieb ist gemäß Ihrer Bestellung werkseitig in den Schüttelschrank eingebaut und nach Ausrüsten mit dem Tablar und Beladen mit den Schüttelgefäßen betriebsbereit. Ein Umbau des Schüttelantriebs auf einen anderen Hub darf nur durch qualifizierte und autorisierte Servicetechniker erfolgen. Setzen Sie sich dazu gegebenenfalls mit der zuständigen Service-Vertretung oder direkt mit dem Service-Dienst der Sartorius AG in Verbindung. Abb. 3: Angeschlossene Beleuchtungseinheit 2.3.2 • Beleuchtungseinrichtung (Option) Die Beleuchtungseinrichtung in die dafür vorgesehenen Führungsschienen einschieben. Zuvor sind die 4 Befestigungsschrauben der Einschubschienen etwas zu lösen. Schieben Sie die Beleuchtungseinrichtung soweit hinein, bis die Querbohrung in den Einschubschienen sichtbar wird. Setzen Sie die mitgelieferten Schrauben in die Querbohrungen ein und sichern Sie auf diese Weise die Beleuchtungseinrichtung gegen herausrutschen. Ziehen Sie die 4 Befestigungsschrauben wieder sorgfältig an. Stecken Sie den Stecker für die Stromversorgung in die dafür vorgesehene Steckdose im Inkubationsraum (s. Abb. 1). Sichern Sie den Stecker (s. Abb. 2)durch Verschrauben der Überwurfmutter in der Steckdose (s. Abb. 3). Nach Aktivierung der Option „LICHT“ im SETUP2-Menü (siehe Punkt 3.3.6), ist die Beleuchtungseinrichtung betriebsbereit. Bei Bedarf können Sie einzelne Röhren von Hand abschalten, um die Lichtintensität zu verringern (s. Abb. 4) Abb. 4: Schalter für Leuchtstoffröhren 2.3.3 • 2.3.4 Optionale Kühleinrichtung Ist der CERTOMAT® BS-1 mit dem integrierten Kühlaggregat ausgestattet, sind keine weiteren Anschlüsse erforderlich. Bei Kühlbetrieb entstehendes Kondensat kann im Gerät verdunsten und die feuchte Luft über die geräteseitige Entlüftung abgeführt werden. Montage des Einlegerostes (optional) Lieferumfang: 1 Abb. 1: Anschlussdose für optionale Beleuchtung 2 4 3 Abb. 5: Einlegerost mit Montagematerial Abb. 2: Stecker der optionalen Beleuchtung 1. 2. 3. 4. Befestigungsschrauben Montageleisten Haltewinkel Einlegerost (12 Stück) (4 Stück) (4 Stück) (1 Stück) 7 2.3.4.1 Einbau der Montageleisten (4 Stück) 1. Fixieren Sie die erste Montageleiste mit der oberen Schraube an der vorgesehenen Position der Seitenwand (Schraube locker anziehen). 2. Drücken Sie nun den Haltewinkel zusammen und lassen Sie das untere Ende des Haltewinkels - eine Aussparung tiefer - in die Montageleiste einrasten (s. Abb. 8). Montageleiste Achten Sie auf die korrekte Einpauposition (s. Abb. 6) Haltewinkel Abb. 8: Montierter Haltewinkel 3. Montieren Sie die übrigen 3 Haltewinkel in der gleichen Reihenfolge, in den anderen Montageleisten. Achten Sie auf die gleiche Höhe der Haltewinkel. 4. Legen Sie den Einlegerost in das Gerät ein. Der Luftstrom des Gerätelüfters im Innenraum, darf nicht blockiert werden! Achten Sie auf den sicheren Sitz und die waagerechte Position des Einlegerostes. 5. Falls nötig: − Einlegerost entfernen − falsch positionierte Haltewinkel durch leichtes Zusammendrücken entfernen − Haltewinkel in neuer Position wieder montieren Abb. 6: Einbauposition der Montageleiste 2. Setzen Sie die übrigen 2 Schrauben in die Schraubenlöcher ein und ziehen Sie diese leicht an. 3. Ziehen Sie alle Schrauben fest. 4. Montieren Sie die übrigen 3 Montageleisten in der gleichen Reihenfolge. 2.3.4.2 Einbau der Haltewinkel 1. Befestigen Sie den Haltewinkel mit dem oberen Haken zuerst – in der gewünschten Höhe - in der Aussparung der Montageleiste (s. Abb. 7) Montageleiste Haltewinkel Abb. 7: Montage der Haltewinkel 8 3 Bedienung des CERTOMAT® BS-1 3.1 Sicherheitshinweise Vor jeder Inbetriebnahme des CERTOMAT® BS-1 muss die Funktion des Türkontakt-Schalters überprüft werden! (siehe Abschnitt 3.3.1) Von den im CERTOMAT® BS-1 eingesetzten Medien können Gefahren ausgehen, die spezifisch für die Medien und den Prozess sind. Dies gilt z.B. für Schüttelkulturen mit lebenden Zellen und Viren, aggressiven oder brennbaren Medien. Diese Anleitung kann Gefahren und daraus resultierende Sicherheitsmaßnahmen jedoch nicht näher beschreiben. Der Betreiber muss das Personal über Gefahren beim Umgang mit den Medien bzw. kontaminierten Geräten und die einzuhaltenden Sicherheitsmaßregeln unterrichten. Folgende Sicherheitsmaßnahmen sind zu beachten: Bei Einsatz potentiell gefährlicher Medien sollten Aufenthalt am Arbeitsplatz und Bedienung des Schüttelschrankes nur für autorisierte Personen möglich sein, unbefugte Personen dürfen nicht am Gerät manipulieren können. Reduzieren Sie die Schüttelgeschwindigkeiten, falls der Schüttelschrank stärker vibriert (durch Resonanzeffekte), andere Geräte im Umfeld beeinträchtigt oder beim Betrieb von gestapelten Schränken der Schrankaufbau instabil wird. Auch im Normalbetrieb sind kritische Betriebszustände möglich. Abhängig von der Beladung können bestimmte Schüttelgeschwindigkeiten den Schüttelschrank in Schwingungen versetzen (Resonanzeffekte). Der Antrieb enthält ein Ausgleichsgewicht, das solche Schwingungen nicht immer vollständig kompensieren kann. Dann ist eine Übertragung der Schwingungen auf die Aufstellfläche möglich und andere Geräte im Umfeld können beeinträchtigt werden. Wenn Sie Medien in offenen Gefäßen inkubieren, sollten Sie mit möglichst niedrigen Schüttelgeschwindigkeiten arbeiten. Werden Medien verschüttet, z.B. nach dem Bruch von Glasgefäßen, sollten Sie den Schüttelschrank sofort reinigen und den Glasbruch bzw. alle Fremdkörper beseitigen. Vermeiden Sie, dass Fremdkörper zwischen Schütteltisch und Auffangwanne oder in den Schüttelantrieb gelangen können. Siehe auch Abschnitt 3.6. Bediener sollten geeignete Arbeitskleidung und persönliche Schutzausrüstungen, wie Handschuhe, Schutzbrillen und gegebenenfalls Atemschutz tragen. Sie dürfen nur Ausrüstungen verwenden, die die Sartorius Stedim Biotech GmbH für den Einsatz mit dem CERTOMAT® BS-1 freigegeben hat. Prüfen Sie die einwandfreie Beschaffenheit aller Teile, insbesondere die Glasgefäße. Verwenden Sie keine beschädigten (Glas)Teile. Betreiben Sie den Schüttelantrieb nie ohne Tablar. Schalten Sie den Schüttelantrieb immer ab, bevor Sie Behälter mit Schüttelgut darauf befestigen bzw. entnehmen oder das Tablar aus- bzw. einbauen. Befestigen Sie das Tablar sowie die Aufbauten, Gefäßhaltesysteme und Zubehörteile sorgfältig. Zentrieren Sie das Tablar und verteilen die Beladung gleichmäßig auf dem Schütteltisch. Gefäße dürfen sich nicht lockern, herausschleudern oder gegeneinander schlagen. 9 3.2 Ausrüstung, Einbau und Beladung eines Tablars Die Sartorius Stedim Biotech GmbH bietet fertig bestückte Tablare (mit Haltern für Erlenmeyerkolben bestimmter Größen) oder Tablare ohne Aufbauten. Das Tablar kann bei Auslieferung oder nach Aufstellen des Schüttelschrankes betriebsbereit vorbereitet sein. Wenn damit die von Ihnen benötigten Gefäßhalterungen und Aufbausysteme verfügbar sind, können Sie die Schüttelbehälter einsetzen und den Schüttelschrank starten wie in Abschnitt 3.3 beschrieben. Wollen Sie das Tablar umrüsten oder ein anderes Tablar einsetzen, beachten Sie die nachfolgenden Angaben. 3.2.1 Ausrüsten eines Tablars • Wir empfehlen, die Gefäßhalterungen und Aufbausysteme auf dem Tablar zu montieren, bevor Sie das Tablar in den BS-1 einsetzen. Sie lassen sich dann leichter handhaben. Dagegen sollten Sie insbesondere große und schwere Schüttelbehälter erst auf das Tablar stellen und befestigen, nachdem Sie das Tablar in den BS-1 eingebaut haben. • Beachten Sie die Dimensionen des Inkubationsraumes: ca. 890 x 495 x 650 mm (B x H x T) Beachten Sie das Gewicht des Tablars nach dem Beladen. Die Schüttelbehälter behindern die Handhabung. Sie können mit dem Tablar anstoßen, Schüttelbehälter beschädigen, Medien ungewollt freisetzen und sich gegebenenfalls dabei verletzen. 10 1. Befestigen Sie beim ersten Einsatz eines unbestückten Tablars die benötigten Haltevorrichtungen für die Schüttelbehälter. Um eine vorhandene Tablarbestückung zu ändern, lösen Sie zunächst alle nicht benötigten Teile. • Bei Klammern für Erlenmeyerkolben sind unterschiedliche Größen beliebig kombinierbar. Für Reagenzröhrchen, Bechergläser, Flaschen oder Scheidetrichter sind Aufbausysteme, wie Reagenzglasgestelle oder Universal-Aufbausysteme, erhältlich. Ausführliche Hinweise zu den verfügbaren Gefäßhalterungen und Aufbausystemen finden Sie in Abschnitt 4.3. 2. Achten Sie schon bei der Montage der Halterungen darauf, dass Sie beim späteren Beladen der Tablare die Schüttelbehälter gleichmäßig verteilen und sicher befestigen können. 3.2.2 Justieren des Ausgleichsgewichts für die vorgesehene Beladung Im Lieferzustand ist der CERTOMAT® BS-1 für eine Beladung von 10 kg voreingestellt. Weicht die vorgesehene Beladung davon ab, müssen Sie das Ausgleichsgewicht neu justieren. Dadurch können Sie die im Betrieb entstehenden Vibrationen minimieren. 1. Wiegen Sie das komplett bestückte Tablar mit allen Schüttelgefäßen. 2. Schalten Sie den CERTOMAT® BS-1 am Hauptschalter aus 3. Zum Einstellen des Ausgleichsgewichts mit dem Verstellwerkzeug für die Beladung klappen Sie die Frontklappe unterhalb der beiden Glastüren nach unten. Die Frontklappe ist über Magnete fixiert. Hinter dieser Klappe finden Sie das Verstellwerkzeug. 4. 5. 6. Stecken Sie das Verstellwerkzeug (1) durch die Öffnung unter der Frontklappe im Gehäuse auf die Achse des Ausgleichsgewichts (2); 7. Drehen Sie das Ausgleichsgewicht mit dem Verstellwerkzeug im Uhrzeigersinn hinein (für Beladung <10 kg) bzw. gegen den Uhrzeigersinn heraus (Beladung >10kg). • Die für eine bestimmte Beladung erforderlich Einstellung des Ausgleichsgewichtes ist auf dem Verstellwerkzeug markiert. 8. Entfernen Sie den Innensechskantschlüssel und das Verstellwerkzeug und schließen die Frontklappe. 9. Montieren Sie das bestückte Tablar. 10. Schalten Sie den CERTOMAT® BS-1 wieder ein. Schüttler läuft nur an, wenn beide Türen ordnungsgemäß geschlossen sind! Drehen Sie den Schütteltisch mit der Hand in die äußerste, hintere Position. 11. Testen Sie die Laufruhe bei Ihrer gewünschten Schüttelgeschwindigkeit. Blockieren Sie den Antrieb des Schütteltisches indem Sie den mitgelieferten Innensechskantschlüssel durch die Bohrung des Schütteltisches (Abb. 9 u. 10, Pos. 4) einstecken. Bewegen Sie den Schütteltisch kurz hin und her, bis der Antrieb vollständig blockiert ist. 12. Falls eine Nachjustierung erforderlich ist, stoppen Sie den Schüttler [Taste-STOP], schalten den CERTOMAT® BS-1 aus, entfernen das Tablar und wiederholen die Schritte 3-11. 4 3 1. 2. 3. 4. Verstellwerkzeug Ausgleichsgewicht Achse Innensechskantschlüssel 1 Abb. 9: Einstellen des Ausgleichgewichts entsprechend der Beladung 11 3.2.3 Aus- und Einbau eines Tablars 1. Senken Sie das Tablar auf den Schütteltisch ab und schieben Sie es dabei mit den Aussparungen (1a/1b) gegen die hinteren Rändelschrauben (1c/1d) und die Klemme (2a) des Schütteltisches. Beachten Sie das Gewicht des Tablars wenn Sie es bereits mit Schüttelgefäßen beladen haben. 2. Drücken Sie die Vorderkante des Tablars nach unten (2b), bis es in der vorderen Halteklemme (2c) einrastet. 3. Die Bohrungen (3a/3b) im Tablar passen sich dabei in die Zentrierkonen (3c/3d) im Schütteltisch ein und fixieren das Tablar. Achten Sie auf den gleichmäßigen Sitz der Zentrierkonen (3c/3d) im Tablar. Nur dann liegt das Tablar korrekt auf dem Schütteltisch auf. 1b 1a 3a Falls notwendig, können Sie die Zentrierkonen wie folgt justieren: 1. Die Schrauben der Zentrierkonen (3c/3d) mit dem Innensechskantschlüssel lösen. 2. Das Tablar gegebenenfalls leicht hin und her bewegen. Die Zentrierkonen (3c/3d) zentrieren sich dabei selbsttätig in den Bohrungen (3a/3b) des Tablars. 3. Nach dem Toleranzausgleich die Schrauben der Zentrierkonen (3c/3d) wieder sorgfältig festschrauben. 4. Zur zusätzlichen Sicherung des Tablars - speziell bei hohen Beladungen in Verbindung mit hohen Drehzahlen -, müssen die mitgelieferten Senkschrauben M5 x 8 in die dafür vorgesehenen Bohrungen eingeschraubt werden. 2b 3b 1c 2a 1d 4 3c 2c 3d Abb. 10 Tablarmontage auf dem Schütteltisch (Tablar ohne Aufbausystem und Beladung dargestellt) 12 3.3 Inbetriebnahme Prüfung des Türkontakt-Schalters 3.3.1 Aufstellung und Einstellungen Nur für Geräte mit Seriennummer bis: 00499/05 1. Falls Sie den Aufstellort (z.B. Kühlraum <-> Labor) gewechselt haben, warten Sie, bis sich das Gerät auf Raumtemperatur erwärmt hat, bevor Sie es in Betrieb nehmen. Ansonsten kann Luftfeuchtigkeit im Gerät kondensieren und Funktionsstörungen verursachen. Vor jeder Inbetriebnahme des CERTOMAT® BS-1 muss die Funktion des Türkontakt-Schalters überprüft werden! Um die Funktion des Türkontakt-Schalters zu überprüfen gehen Sie folgendermaßen vor: Wenn Sie einen CERTOMAT® BS-1 mit eingebautem Kühlaggregat transportiert haben, dürfen Sie das Gerät erst nach einer Stunde Wartezeit in Betrieb nehmen. So vermeiden Sie Schäden am Kühlaggregat. 2. Schließen Sie den CERTOMAT® BS-1 mit dem Netzkabel an eine geeignete Steckdose an. 3. Das Drehen des Netzschalters (1) versorgt die Elektronik mit Netzspannung. Der CERTOMAT® BS-1 befindet sich nach Einschalten und Initialisieren im Manuell-Menü „MAN“ • Nach dem Einschalten initialisiert sich das Gerät. Nach ca. 5 sec. leuchtet die Hintergrundbeleuchtung des Displays sowie die grüne Betriebs-LED. Das ManuellMenü „MAN“ ist aktiv. Das Gerät ist nun betriebsbereit. • Geschwindigkeit [ /min.]: 50 F3 Zeit [h:min]: 00:10 Drücken Sie die START-Taste, um den Schüttler zu starten. Nach Ablauf der voreingestellten Zeit (siehe Abschnitt 3.3.5) leuchtet die Alarm-LED auf dem Frontpanel auf. Falls eingestellt, ertönt außerdem ein Alarmsignal. 3 4 5 3 2 6 7 1 9 1 F1 Öffnen Sie die Türen des CERTOMAT® BS-1– der Schüttler muss anhalten! Durch Betätigung der Taste [ESC] gelangt man vom „Manuell-Menü“ in das Hauptmenü. 10 Geben Sie im Manuell-Menü „MAN“ folgende Werte über die Folientastatur des Frontpanel ein. (Siehe Kapitel 3.3.3) 8 • Drücken Sie die ENTER-Taste, um den Alarm zu quittieren • Schließen Sie die rechte Tür – der Schüttler läuft wieder an. Läuft der Schüttler trotz geöffneter rechter Tür weiter, so liegt ein Defekt am Gerät vor. In diesem Fall darf das Gerät nicht weiter in Betrieb genommen werden! Defekte können durch Ihre Service-Vertretung der Sartorius AG repariert werden oder durch autorisiertes Servicepersonal vor Ort. Im Fall eines Defektes informieren Sie bitte Ihre Vertretung der Sartorius AG oder direkt Sartorius AG Servicezentrum Nord Weender Landstraße 94-108 37075 Göttingen Telefon +49.551.308.3729 / 3740 / 3741 Fax +49.551.308.3730 Abb. 11: Frontpanel mit Folientastatur 1. Netzschalter 2. Taste [+/-] zum Einstellen von Prozesswerten (Temperatur, Drehzahl) 3. Funktionsfeld [F1 – F5] 4. Alphanumerisches Display 5. Anzeigefeld MODE 6. [ESC] – Taste für Menürücksprung [ENTER] – Taste für Bestätigung von Eingaben / Änderungen 7. Betriebs-LED (grün) 8. [START] – Taste 9. Alarm-LED (rot) 10. [STOP] - Taste 13 3.3.2 Funktions- und Menü-Übersicht In der Menü-Übersicht ersehen Sie die im Hauptmenü zur Verfügung stehenden Menü-Punkte. In den nachfolgend beschriebenen Kapiteln finden Sie die Einstellungen des jeweils gewählten Menü-Punktes. F3 Funktionstastenbelegung SETUP-Menüs: siehe Kap. 3.3.5 / 3.3.6 F4 SETUP MAN CERTOMAT BS-1 10:13:35 PROG HAUPT MAN Manuell-Menü: siehe Kap. 3.3.3 F5 MODE PROG Programm-Menü: siehe Kap. 3.3.4 Anzeigefeld MODE: über dem Feld MODE wird das jeweils aktuell eingestellte Menü angezeigt. Hier: „HAUPT“ für Haupt-Menü. Abb. 12: Haupt Menü (Menü-Übersicht) 3.3.3 Manuell-Menü „MAN“ • Durch Betätigung der Taste [F4] „MAN“ im Hauptmenü wird das „Manuell-Menü“ aktiviert. • Rücksprung von dem „Manuell-Menü“ in das Hauptmenü mit [ESC] F4 MAN SETUP CERTOMAT BS-1 10:13:25 PROG HAUPT < > ESC Abb. 13: Haupt-Menü GESCHW 0 AUS KÜHLUNG TEMP 10.0°C ZEIT 00:00 <-> MAN Abb. 14: MAN: Manuell-Menü Folgende Einstellungen im „Manuell-Menü“ (Abb. 10) können vorgenommen werden: F1 Einstellung der Geschwindigkeit • Nach Drücken von [F1] blinkt das Eingabefeld „GESCHWINDIGKEIT“ in U/min. • Durch Drücken der Tasten [+/-] wird die Geschwindigkeit eingestellt • Eingabe mit [ENTER] bestätigen F2 14 GESCHW: TEMP: Einstellung der Temperatur • Nach Drücken von [F2] blinkt das Eingabefeld „TEMPERATUR“ in °C • Durch Drücken der Tasten [+/-] wird die Temperatur eingestellt • Eingabe mit [ENTER] bestätigen F3 ZEIT: Einstellung des Timer • Nach Drücken von [F3] kann der „TIMER“ (ZEIT) eingestellt werden • Durch Drücken der Tasten [+/-] wird die gewünschte Laufzeit in [h : min] eingestellt • Eingabe mit [ENTER] bestätigen • Die Laufzeit kann zwischen 00h:01min und 99h:59min sowie „CONT.“ (Dauerbetrieb) eingestellt werden. F4 • KÜHLUNG: Ein- und Ausschalten der Kühlung (nur bei „UHK-Version“) Nach Drücken von [F4] wird die Kühlung ein- / ausgeschaltet Das Einschalten der Kühlung ist nur bei Temperatursollwerten < 38,5°C möglich! Wird ein höherer Wert, trotz eingeschalteter Kühlung, eingegeben und mit [ENTER] bestätigt, ertönt ein kurzes Signal und die Kühlung wird ausgeschaltet. MODE • MODE: Anzeigefeld Das jeweils “aktive” Menü wird angezeigt, hier: „MAN“ für Manuell-Menü 15 • Mit Taste [F5] kann wechselweise auf ein weiteres Anzeigefeld umgeschaltet werden, um alle einzustellenden Werte anzuzeigen (nur bei Option „Beleuchtung“). < GESCHW 0 AUS KÜHLUNG F5 > TEMP 10.0°C ZEIT 00:00 LICHT AN <-> MAN <-> Abb. 15: einstellbare Parameter F2 • LICHT: Abb. 16: weitere Einstellmöglichkeiten Ein- und Ausschalten der Beleuchtung (nur bei Option „Beleuchtung“) Nach Drücken von [F2] wird die Beleuchtung ein- / ausgeschaltet MODE MODE: Anzeigefeld • Das jeweils „aktive“ Menü wird angezeigt, hier „MAN für „Manuell-Menü“ • Durch anschließendes Drücken der Taste [START] erfolgt der Übergang in den Betriebsmodus „RUN“. • Die vorher eingestellten Werte für: Geschwindigkeit: Temperatur: Beleuchtung: Kühlung: Timer: GESCHW TEMP LICHT KÜHL ZEIT werden nun aktiviert. 16 MAN • Mit Taste [F5] kann wechselweise auf ein weiteres Anzeigefeld umgeschaltet werden, um alle Ist-Werte anzuzeigen. < HEIZNG AUS KÜHLG. AUS LICHT AUS <-> RUN F5 Abb. 17: Betriebsmodus RUN • > GESCHW 125 01:23 ZEIT TEMP1 23.4°C <-> RUN Abb. 18: Betriebsmodus RUN Der „TIMER“ läuft. Die jeweilige Restlaufzeit wird angezeigt. Im Betriebsmodus werden die IST-Werte angezeigt. Ein Ändern der Werte ist hier nicht möglich! • Durch längeres Drücken der Funktionstasten [GESCHW], [TEMP], [KÜHL] und [LICHT] blinkt der Parameter und der SOLL-Wert wird angezeigt. Nach dem Loslassen der Funktionstasten erfolgt wieder die Anzeige der IST-Werte. • Die IST-Wertanzeige der Temperatur bezieht sich auf die Lufttemperatur im Inkubationsraum. • Durch Drücken der Taste [STOP] erfolgt der Rücksprung in das Manuell-Menü „MAN“. • Heizung, Kühlung, Licht und Schüttler werden abgeschaltet. • Eine erneute Einstellung kann vorgenommen werden. • Nach Ablauf der eingestellten Laufzeit, erfolgt automatisch der Rücksprung in das Manuell-Menü „MAN“. Die Kühlung läuft nach dem Drücken der Taste [STOP] bis zu 3 Minuten nach. Ein Wiedereinschalten der Kühlung ist erst nach 3 Minuten möglich. 17 3.3.4 Programm-Menü „PROG“ • Durch Betätigung der Taste [F5] „PROG“ wird das „PROGRAMM-Menü“ aktiviert. „PROG1“ blinkt! • Rücksprung in das Hauptmenü mit [ESC] * F5 MAN SETUP CERTOMAT BS-1 08:53:27 PROG HAUPT < blinkt * > ESC PROG1 ENTER START PROG4 PROG2 PROG3 programmiert startet PROG5 PROG1 Abb. 19: Haupt-Menü Abb. 20: PROG1-4: Programm-Menü 18 • Mit [F1] .... [F5] wird das entsprechende Programm ausgewählt. Nach der Auswahl blinkt das ausgewählte Programm im Display. • Im Feld „MODE“ erscheint automatisch das ausgewählte Programm, hier „PROG1“. • Die Programmierung anhand eines Beispiels wird unter Punkt 3.3.4.2. „Beispiel für Programmierung“ erläutert. 3.3.4.1 Programmdefinition • Nach Drücken der Taste [ENTER] (alternativ die blinkende Funktionstaste ca. 2 sec drücken) erfolgt der Wechsel in die Programmdefinitionen „PRSTEP....STEP.... ...STEP4“ • In diesem Menü können innerhalb des Programms „PROG1.....PROG5“ die verschiedenen „STEPS“ angewählt werden • Bei passwortgeschützen Programmen, muss das entsprechende Passwort zur Editierung/Änderung vorhandener Programme eingegeben werden. * blinkt * ENTER PROG1 ENTER START PROG4 PROG2 PROG3 programmiert startet PROG5 PROG1 > alternativ die blinkende Funktionstaste ca. 2 sec. drücken < PRSTEP AN 0:00 STEP3 ESC STEP1 0:00 0:00 STEP4 STEP2 0:00 PROG1 Abb. 22: Programmdefinition Abb. 21: PROG1-4: Programm-Menü • In Abb. 14 (Programmdefinition) wird angezeigt, ob der PRSTEP „AN“ oder „AUS“ ist. Des Weiteren wird die Step-Dauer angezeigt. Anwahl der verschiedenen „STEPS“ (Abb. 18): F1 • STEP2 für: STEP3 für: STEP4 Nach Drücken von [F5] können die Einstellungen für „STEP4“ erfolgen. MODE • für: Nach Drücken von [F4] können die Einstellungen für „STEP3“ erfolgen. F5 • STEP1 Nach Drücken von [F3] können die Einstellungen für „STEP2“ erfolgen. F4 • für: Nach Drücken von [F2] können die Einstellungen für „STEP1“ erfolgen. F3 • PRSTEP Nach Drücken von [F1] können die Einstellungen für „PRSTEP“ erfolgen. F2 • für: MODE: Anzeigefeld Das jeweils „aktive” PROG wird angezeigt, hier: „PROG1. 19 Mit den Tasten [F1 bis F5] können die einstellbaren Parameter der Steps angewählt werden. Funktionstasten PRSTEP AN 0:00 STEP3 STEP1 0:00 0:00 STEP4 F1-F5 STEP2 0:00 < > ESC PROG1 GESCHW 0 AUS KÜHLUNG TEMP 10.0°C ZEIT 00:00 <-> STEP1 Abb. 24: einstellbare Parameter Abb. 23: Programmdefinition Für jeden „STEP“ können folgende Parameter eingestellt werden (Abb. 20): F1 GESCHW: Einstellung der Geschwindigkeit • Nach Drücken von [F1] blinkt das Eingabefeld „GESCHWINDIGKEIT“ in U/min • Durch Drücken der Tasten [+/-] wird die Geschwindigkeit eingestellt • Eingabe mit [ENTER] bestätigen F2 TEMP: Einstellung der Temperatur • Nach Drücken von [F2] blinkt das Eingabefeld „TEMPERATUR“ in °C • Durch Drücken der Tasten [+/-] wird Temperatur eingestellt • Eingabe mit [ENTER] bestätigen F3 ZEIT: Einstellung der STEP-Dauer [h : min] • Nach Drücken von [F3] blinkt das Eingabefeld „ZEIT“ • Durch Drücken der Tasten [+/-] wird das Zeitintervall (Dauer) eingestellt • Eingabe mit [ENTER] bestätigen • Bei der STEP-Dauer können Werte zwischen 00h:01 min (sofortiger Weitersprung zum nächsten Step) und 99h:59 min sowie „CONT.“ (Dauerbetrieb bis zum manuellen Abbruch durch STOP) eingestellt werden. Dem PRSTEP kann keine feste Laufzeit vorgegeben werden. Er kann nur „AN“ oder „AUS“ geschaltet werden! 20 • Bei eingeschaltetem PRSTEP werden die im PRSTEP gewählten Bedingungen vom Drücken der Taste [START] bis zum eigentlichen Programmbeginn [STEP1] aktiviert. • Bei ausgeschaltetem PRSTEP werden Schüttler, Temperierung, Kühlung und Licht bis zum Programmbeginn [STEP1] deaktiviert. F4 • KÜHLUNG: Ein- und Ausschalten der Kühlung (nur bei “UHK-Version”) Nach Drücken von [F4] wird die Kühlung ein- / ausgeschaltet Das Einschalten der Kühlung ist nur bei Temperatursollwerten < 38,5°C möglich! Wird ein höherer Wert, trotz eingeschalteter Kühlung, eingegeben und mit [ENTER] bestätigt, ertönt ein kurzes Signal und die Kühlung wird ausgeschaltet. MODE MODE: Anzeigefeld • Der jeweils “aktive” STEP wird angezeigt • Mit Taste [F5] kann wechselweise auf ein weiteres Anzeigefeld umgeschaltet werden, um weitere Parameter einzustellen (nur bei Option „Beleuchtung“). < GESCHW 0 AUS KÜHL F5 > TEMP 10.0°C ZEIT 00:00 LICHT AN <-> STEP1 <-> Abb. 25: einstellbare Parameter F2 • Abb. 26: weitere Einstellmöglichkeiten Ein- und Ausschalten der Beleuchtung (nur bei Option “Beleuchtung”) Nach Drücken von [F2] wird die Beleuchtung ein- / ausgeschaltet MODE • LICHT: STEP1 MODE: Anzeigefeld Der jeweils „aktive” STEP wird angezeigt, hier „STEP1“ 21 • Durch Drücken der Taste [ESC] erfolgt der Rücksprung in die vorherigen Menüs (bis in das Hauptmenü) ESC GESCHW 0 AUS KÜHLUNG TEMP 10.0°C ZEIT 00:00 <-> STEP1 > ESC PRSTEP AN 0:00 STEP3 Abb. 27: Einstellmöglichkeiten innerhalb eines „STEPS“ PROG2 PROG3 programmiert startet PROG5 PROG1 Abb. 29: Programm-Menü 22 STEP2 00:00 PROG1 Abb. 28: Programmdefinition ESC PROG1 ENTER START PROG4 STEP1 0.0°C 0:00 STEP4 > MAN SETUP CERTOMAT BS-1 08:53:27 PROG HAUPT Abb. 30: Haupt-Menü > 3.3.4.2 Beispiel für Programmierung • • • • • Insgesamt können fünf verschiedene Programme im Gerät abgespeichert werden. Jedes Programm wiederum besteht aus einem „PRSTEP“ und vier weiteren Steps, die nacheinander abgearbeitet werden. Für jeden Step können die Werte für Kühlung, Licht, Drehzahl und Temperatur unabhängig voneinander eingestellt werden. Jeder Step besitzt eine definierte Laufzeit. Der Haupteinsatzbereich für den „PRSTEP“ liegt in der termin / zeitgenauen Bereitstellung von Kulturen, z.B. nach dem Wochenende oder am nächsten Morgen. Vorteile: Man muss ein Programm nur einmal mit Laufzeiten definieren und kann es anschließend zu einem beliebigen Zeitpunkt starten. Der Zeitpunkt des Programmendes bleibt immer gleich. • Werden nur ein oder zwei Steps benötigt, so können die restlichen Steps mit Laufzeit 00:00 definiert werden, so dass das Programm danach direkt angehalten wird. Eine Wiederholfunktion für Endlosschleifen steht zur Verfügung. Der „PRSTEP“ kann nur an- oder ausgeschaltet werden (keine Laufzeit). Er definiert die Bedingungen (Kühlung, Licht, Drehzahl und Temperatur) vom Drücken der Taste [START] bis zum Programmbeginn (STEP1). Bei ausgeschaltetem „PRSTEP“ werden Kühlung, Licht, Drehzahl und Temperatur bis zum Programmbeginn ausgeschaltet. • Komfortables Starten von Nacht- oder Wochenendprogrammen am Tage bzw. vor dem Wochenende. • Bedingungen vor dem Start des Programms sind reproduzierbar, da diese vom Gerät gemäß der Einstellungen im „PRSTEP“ gehalten werden. • Automatischer Programmstart ohne Anwesenheit des Personals. Beispiel: Am Montagmorgen um 9:00 Uhr sollen Kulturen zur Verfügung stehen. Das Programm (STEP1...STEP4) zur Herstellung dieser Kulturen benötigt insgesamt 38 h. Somit müsste das Programm ohne Nutzung des „PRSTEP“ am Samstag um 19:00 Uhr manuell gestartet werden. Der „PRSTEP“ erlaubt es, den Startzeitpunkt beliebig zu halten und den Ansatz bis zum Programmbeginn unter gewünschten Bedingungen zu halten. PROG1: PRSTEP: AN bei 20 °C, Drehzahl 0, Licht aus, Kühlung ein Step 1: 7 h bei 30 °C , Drehzahl 200, Licht an, Kühlung aus Step 2: 10 h bei 40 °C, Drehzahl 100, Licht aus, Kühlung aus Step 3: 20 h bei 10 °C, Drehzahl 60, Licht an, Kühlung ein Step 4: 1 h bei 10 °C, Drehzahl 200, Licht an, Kühlung ein Funktion PRESTEP STEP1 STEP2 STEP3 STEP4 Kühlung ein aus aus ein ein Licht aus an aus an an 200 200 Drehzahl [U/min] 100 60 0 40 30 Temperatur 20 [°C] 10 ZEIT (Laufzeit) AN 7h Samstag Sonntag 19:00 Programm- 02:00 START PRESTEP START Tag Uhrzeit 10 10 h Sonntag 20 h Montag 12:00 08:00 1h Montag 09:00 Programmende Abb. 31: Programmierbeispiel 23 3.3.4.3 Passwortschutz für Programme • Der „Passwortschutz“ (Code) für Programme dient dazu, einmal erstellte Programm-Inhalte vor unbefugtem Zugriff zu schützen. Der Programminhalt kann ohne Kenntnis des Passworts nicht verändert werden. Optional kann auch das „Starten“ und „Stoppen“ des Programms durch dieses Passwort geschützt werden. • Nach Drücken der Taste [ENTER] erfolgt der Wechsel in das Menü zur Eingabe des „Passwort“ (Code) für das jeweils aktive Programm. • Zur Sicherheit muss bei der Vergabe des Passwortes das „Passwort“ zweimal eingegeben werden. ENTER PRSTEP AN 0:00 STEP3 STEP1 0:00 0:00 STEP4 STEP2 0:00 PASSWORT EINGABE: PROG1 Abb. 32: Programmdefinition von PROG1 24 > Abb. 33: Passwortvergabe für PROG1 • Durch Drücken der Funktionstasten [F1] ... [F5], [+], [-], [START] oder [STOP] als zulässige Zeichen, erfolgt die Eingabe des „Passworts“ (Code) (als „º“ im Display sichtbar) • Das „Passwort“ (Code) muss min. 4 Stellen und darf max. 7 Stellen besitzen. • Nach erfolgter Passworteingabe muss das „Passwort“ (Code) mit der Taste [ENTER] bestätigt werden. Dadurch erfolgt der Übergang zum Bestätigen des zuvor eingegebenen Passwortes. • Nach der erneuten Eingabe des Passwortes muss das „Passwort“ (Code) mit der Taste [ENTER] erneut bestätigt werden. Dadurch wird die „Passworteingabe“ gesichert. Gleichzeitig erfolgt der Rücksprung in das „Programmdefinitions-Menü“. • Durch Drücken der Taste [ESC] kann die „Passwort-Vergabe“ abgebrochen werden. Alle bis dahin erfolgten „Passwort-Eingaben“ werden ungültig. 3.3.4.4 Löschen eines Programm-Passwortschutzes • Wählen Sie im Programmdefinitions-Menü das Programm an, in dem Sie das Passwort löschen möchten (Passwortkenntnis erforderlich). • Durch Drücken der Taste [ENTER] gelangen Sie aus dem Programmdefinitions-Meue in das Menü zur Passwortvergabe PRSTEP AN 0:00 STEP3 STEP1 0:00 0:00 STEP4 STEP2 0:00 ENTER > PASSWORT EINGABE: PROG1 Abb. 34: Programmdefinition von PROG1 Abb. 35: Passwortvergabe für PROG1 • Das Löschen / Deaktivieren des „Passworts“ (Code) erfolgt mit der Taste [ENTER] als erstes Passwortzeichen. Es erfolgt dadurch der Übergang zum Bestätigen des Löschen / Deaktivieren. • Durch erneute Eingabe von [ENTER] wird das vorhandene „Passwort“ (Code) gelöscht und es erfolgt ein automatischer Rücksprung in das Programmdefinitions-Menü. • Durch Drücken der Taste [ESC] kann das Löschen / Deaktivieren des „Passwortes“ (Code) abgebrochen werden. 25 3.3.4.5 Starten eines Programmes • Durch anschließendes Drücken der Taste [START] erfolgt der Wechsel in den Einstellmodus des vorgewählten Programms, hier Programm 1 „PROG1“. * blinkt * START < PROG1 ENTER START PROG4 > ESC ZEIT 08:15 PROG2 PROG3 programmiert startet PROG5 PROG1 TAG 30.04.99 START WDHLG AN PROG1 Abb. 36: PROG1-4: Programm-Menü Abb. 37: Startmenü Folgende Parameter im Startmenü (Abb. 33) können eingestellt werden: F1 • Nach Drücken von [F1] blinkt das Eingabefeld „ZEIT“ • Durch Drücken der Taste [+/-] wird die Zeit eingestellt • Eingabe mit [ENTER] bestätigen F2 TAG: Einstellung der Zeit (Startzeitpunkt des Programmes) Einstellung Datum (Startdatum des Programmes) • Nach Drücken von [F2] blinkt das Eingabefeld „TAG“ • Durch Drücken der Tasten [+/-] wird das Datum eingestellt • Voreingestellt ist jeweils das aktuelle Datum und die aktuelle Uhrzeit • Eingabe mit [ENTER] bestätigen F3 26 ZEIT: WDHLG: Einstellung Wiederholung • Nach Drücken von [F3] wird die automatische Programmwiederholung aktiviert / deaktiviert • Bei aktivierter Programmwiederholung wird „STEP 1“ bis „STEP 4“ des Programms in einer Endlosschleife abgearbeitet • Der „PRSTEP“ wird nur beim ersten Mal durchlaufen. F4 F5 nicht aktiv MODE MODE Anzeigefeld • Der jeweils „aktive” Programm wird angezeigt, hier „PROG1“ • Durch anschließendes Drücken der Taste [START] erfolgt der Übergang in den Betriebsmodus „RUN“. Das vorher aktivierte Programm wird abgearbeitet. • Mit Taste [F5] kann wechselweise auf ein weiteres Anzeigefeld zur Darstellung aller Istwerte umgeschaltet werden! HEIZNG AUS KÜHLG. AUS LICHT AUS <-> RUN 1,1 < F5 > Abb. 38: RUN: Betriebsmodus GESCHW 130 10:25 ZEIT TEMP1 13.8°C <-> RUN 1,1 Abb. 39: RUN: Betriebsmodus • Bei der ZEIT-Anzeige erfolgt die Anzeige der Restlaufzeit eines „STEPS“. Während der „PRSTEP“-Abarbeitung erfolgt keine Zeitanzeige (Anzeige „PRSTEP“) • Im Betriebsmodus werden die ISTWERTE angezeigt und das gestartete Programm läuft automatisch. • Durch Drücken der jeweiligen Funktionstasten wird der SOLLWERT angezeigt. • Nach dem Loslassen der Funktionstaste erfolgt wieder die Anzeige der ISTWERTE. • Durch Drücken der Taste [STOP] erfolgt der Rücksprung in das Programm-Menü „PROG“. Heizung, Kühlung, Licht und Schüttelantrieb werden abgeschaltet. Die Programmabarbeitung wird gestoppt. Bei der Programmabarbeitung erfolgt die Anzeige, welches Programm und welcher „STEP“ gerade abgearbeitet wird, z.B.: RUN 2,- RUN 1,1 • RUN 2,P STEP1 PRSTEP AUS PRSTEP AN Programm 1 Programm 2 Programm 2 Für die Programme „PROG2-PROG5“ werden die Einstellungen analog der Beschreibung für Programm 1 „PROG1“ angewendet. 27 3.3.5 Setup-Menü „SETUP1“ • Durch Drücken der Taste [F3] erfolgt der Wechsel in das „SETUP1-Menü“. • Alle im Setup vorgenommenen Einstellungen und Veränderungen werden intern gespeichert und bleiben auch nach Spannungsausfall oder Aus- und wieder Einschalten aktiv! F3 MAN SETUP CERTOMAT BS-1 08:53:27 PROG HAUPT < > ESC Abb. 40: Haupt-Menü SPRACH DIAG. KONTRAST +/- ALARME ZEIT SETUP1 SERVICE Abb. 41: Setup1-Menü Displaykontrast • Kann durch Drücken der Tasten [+] und [-] verändert werden Durch längeres Betätigen der Taste [-] wird der Kontrast so stark reduziert, dass keine Informationen mehr im Display sichtbar sind! Folgende Parameter im „SETUP1-Menü“ (Abb. 37) können eingestellt werden: F1 28 SPRACH: Einstellung der Menüsprache • Nach Drücken der Taste [F1] gelangt man in das Menü zur Einstellung der Menüsprache (Deutsch, Englisch, Französisch). • Ein Pfeil kennzeichnet die jeweils aktive Sprache. • Durch Drücken der Tasten [+] / [-] kann der Pfeil verschoben werden. • Durch Drücken der Taste [ENTER] wird die jeweils eingestellte Sprache bestätigt. • Durch Drücken der Taste [ESC] gelangt man wieder in das „Setup1-Menü“. Die vorher eingestellte Sprache wird nun in den Menüs dargestellt. F2 DIAG: Diagnose der aufgetretenen Alarmmeldungen In einer Liste werden die aufgetretenen Alarme angezeigt. Folgende Informationen werden für jeden Fehlertyp separat zur Verfügung gestellt: Fehlertyp z.B. Drehzahl- oder Temperaturalarm Fehlerzähler Anzahl der aufgetretenen Alarme seit der letzten Quittierung Datum / Uhrzeit / Alarmbeginn Datum / Uhrzeit / Alarmende Datum und Uhrzeit des Alarmbeginn (nur der zuletzt aufgetretenen Alarme) Datum und Uhrzeit des Alarmende (nur der zuletzt aufgetretenen Alarme) • Ein Pfeil kennzeichnet den jeweils aktiven Listeneintrag. • Durch Drücken der Tasten [+/-] kann der Pfeil verschoben werden. • Durch Drücken der Taste [ENTER] wird der jeweils aktive Listeneintrag gelöscht. Danach stehen die Alarminformationen für diesen Fehlertyp nicht mehr zur Verfügung. • Wenn kein Alarm aufgetreten ist, bzw. alle Listeneinträge gelöscht wurden, erscheint „ „ [ -------<ESC>----- ] auf dem Display. Das Diagnose-Menü kann dann mit [ESC] verlassen werden. F3 ALARME: Alarmdefinition In einer Liste können für Temperatur, Drehzahl, Türkontakt und Spannungsausfall die Alarmparameter eingestellt werden. • Ein Pfeil kennzeichnet den jeweils aktivierten Parameter • Durch Drücken der Tasten [+/-] kann der Pfeil verschoben werden • Durch Drücken der Taste [ENTER] werden JA / NEIN-Definitionen direkt geändert, bzw. numerische Werte zum verändern freigegeben (Wert blinkt). • Durch Drücken der Tasten [+/-] kann der jeweils blinkende Wert eingestellt werden. • Durch Drücken der Taste [ENTER] wird der eingestellte Wert bestätigt. • Durch Drücken der Taste [ESC] erfolgt der Rücksprung in das SETUP1-Menü 29 Folgende Alarmparameter können eingestellt werden: Temperatur 1 AN AUS Der Temperaturalarm ist aktiv Der Temperaturalarm ist inaktiv Signal AN AUS Akustisches Signal bei Auftreten des Alarms aktiv Akustisches Signal bei Auftreten des Alarms inaktiv Zeit OK 40 [s] Zeit ERR 40 [s] min. 3,0 [°C] max. 3,0 [°C] Zeitdauer, in der die Solltemperatur nach einem Temperaturfehler mind. wieder erreicht sein muss, bevor der nächste Fehler erfasst werden kann (hier 40 Sekunden) Zeitdauer, in der der Temperaturfehler mind. auftreten muss, bevor der Fehler gemeldet wird (hier 40 Sekunden) Erlaubte Temperaturabweichung nach unten, in der kein Fehler gemeldet wird (hier 3,0°C) Erlaubte Temperaturabweichung nach oben, in der kein Fehler gemeldet wird (hier 3,0°C) AN AUS Der Türkontaktalarm ist aktiv Der Türkontaktalarm ist inaktiv Signal AN AUS Akustisches Signal bei Auftreten des Alarms aktiv Akustisches Signal bei Auftreten des Alarms inaktiv Zeit OK 5 [s] Zeit ERR 2 [s] Zeitdauer, in der die Plexiglashaube mind. wieder geschlossen sein muss, bevor der Fehler erneut erfasst wird (hier 5 Sekunden) Zeitdauer, in der die Plexiglashaube mind. geöffnet sein muss, bevor der Fehler gemeldet wird (hier 2 Sekunden) Türkontakt Drehzahl AN AUS Der Drehzahlalarm ist aktiv Der Drehzahlalarm ist inaktiv Signal AN AUS Akustisches Signal bei Auftreten des Alarms aktiv Akustisches Signal bei Auftreten des Alarms inaktiv Zeit OK 20 [s] Zeit ERR 20 [s] min. 10 [U/min] max. 10 [U/min] Zeitdauer, in der die Solldrehzahl nach einem Drehzahlfehler mind. Wieder erreicht sein muss, bevor der nächste Fehler erfasst werden kann (hier 20 Sekunden) Zeitdauer, in der der Drehzahlfehler mind. auftreten muss, bevor der Fehler gemeldet wird (hier 20 Sekunden) Erlaubte Drehzahlabweichung nach unten, in der kein Fehler gemeldet wird (hier 10 U/min) Erlaubte Drehzahlabweichung nach oben, in der kein Fehler gemeldet wird (hier 10 U/min) Spannungsausfall Signal 30 AN AUS Der Spannungsausfallalarm ist aktiv Der Spannungsausfallalarm ist inaktiv AN AUS Akustisches Signal bei Auftreten des Alarms aktiv Akustisches Signal bei Auftreten des Alarms inaktiv • Bei Auftreten eines Alarms erfolgt eine optische Anzeige über Alarm-LED bzw. eine akustische Meldung über Summer (wenn aktiviert). Gleichzeitig wird der Alarm in die Diagnose übernommen und kann nach Programmende im Punkt SETUP / DIAG. ausgelesen werden. • Über einen potentialfreien Kontakt kann eine Meldung über die SUB-D Buchse nach außen erfolgen (siehe Punkt 3.4.3). • Durch Drücken der Taste [ENTER] erfolgt das Quittieren der optischen und akustischen Meldung sowie das Rücksetzen des potentialfreien Kontaktes. • Bei Öffnen der Türen wird, unabhängig davon, ob der Türkontaktalarm AN oder AUS ist, der Schüttelantrieb gestoppt und die Heizung ausgeschaltet. Werden die Türen wieder geschlossen, so erfolgt ein automatischer Wideranlauf des Schüttelantriebs und der Heizung. Schüttler läuft nur an, wenn beide Türen ordnungsgemäß geschlossen sind! • Bei Spannungsausfall innerhalb der Programmabarbeitung bzw. im Betriebsmodus „RUN“ wird die bereits abgearbeitete Zeit gesichert. Bei Wiederkehr der Spannung erfolgt ein automatischer Anlauf des Gerätes. Die noch verbleibende Zeit des Programms wird abgearbeitet. Dies erfolgt unabhängig davon, ob der Spannungsausfallalarm aktiv ist oder nicht. • Die Alarmdefinition für den Spannungsausfall dient nur dazu, die optische/akustische Alarmmeldung bzw. den Eintrag in die Diagnose nach Wiederkehr der Netzspannung zu aktivieren. 31 F4 • ZEIT: Zeit- und Datumseinstellung Durch Drücken der Taste [F4] kann auf das Anzeigefeld „Zeit- und Datumseinstellung” umgeschaltet werden F4 SPRACH DIAG. KONTRAST +/- ALARME ZEIT SETUP1 SERVICE < ESC > TAG STUNDE MONAT 18.09.99 9:47:34 MINUTE JAHR SETUP1 Abb. 43: Zeit- Datumseinstellung Abb. 42: Setup-Menü Folgende Parameter für die “Zeit- und Datumseinstellung” (Abb. 39) können eingestellt werden: F1 Einstellung des Wochentages • Nach Drücken von [F1] blinkt das Eingabefeld „TAG.“ • Durch Drücken der Tasten [+/-] kann der gewünschte Wochentag eingestellt werden • Eingabe mit [ENTER] bestätigen F2 MONAT: Einstellung des Monats • Nach Drücken von [F2] blinkt das Eingabefeld „MONAT“ • Durch Drücken der Tasten [+/-] kann der gewünschte Monat eingestellt werden • Eingabe mit [ENTER] bestätigen F3 32 TAG: JAHR: Einstellung des Jahres • Nach Drücken von [F3] blinkt das Eingabefeld „JAHR“ • Durch Drücken der Tasten [+/-] kann das gewünschte Jahr eingestellt werden • Eingabe mit [ENTER] bestätigen F4 STUNDE: Einstellung der Stunden • Nach Drücken von [F4] blinkt das Eingabefeld „STUNDE“ • Durch Drücken der Tasten [+/-] kann die gewünschte Stunde eingestellt werden • Eingabe mit [ENTER] bestätigen F5 MINUTE: Einstellung der Minuten • Nach Drücken von [F5] blinkt das Eingabefeld „MINUTE“ • Durch Drücken der Tasten [+/-] kann die gewünschte Minute eingestellt werden • Eingabe mit [ENTER] bestätigen MODE • MODE: Anzeigefeld Das jeweils “aktive” Menü wird angezeigt, hier „SETUP1“ 33 3.3.6 Setup-Menü „SETUP2“ • Durch Drücken der Taste [F5] erfolgt der Übergang in das „SETUP2-Menü“ zur Eingabe von Geräte-Parametern. • Alle im Setup vorgenommenen Einstellungen und Veränderungen werden intern gespeichert und bleiben auch nach Spannungsausfall oder Aus- und wieder Einschalten aktiv! F5 SPRACH DIAG. KONTRAST +/- ALARME ZEIT SETUP1 SERVICE < > ESC GERÄT SETUP PASSW SETUP2 Abb. 44: Setup1-Menü Abb. 45: Setup2-Menü Folgende „Geräte Parameter” (Abb. 41) können eingestellt werden: F1 GERÄT: Aktivierung verschiedener Geräteoptionen In einer Liste können Geräteoptionen aktiviert oder deaktiviert werden sowie Geräteinformationen abgerufen werden. 34 • Ein Pfeil kennzeichnet den jeweils aktivierten Parameter • Durch Drücken der Tasten [+/-] kann der Pfeil verschoben werden • Durch Drücken der Taste [ENTER] werden JA / NEIN-Definitionen direkt geändert, bzw. numerische Werte zum verändern freigegeben (Wert blinkt). • Durch Drücken der Tasten [+/-] kann der jeweils blinkende Wert eingestellt werden. • Durch Drücken der Taste [ENTER] wird der eingestellte Wert bestätigt. • Durch Drücken der Taste [ESC] erfolgt der Rücksprung in das SETUP2-Menü. Temp. Offset 0,0 Licht JA NEIN August /2002 111 Ser No. 39 Istwertkorrektur für den 1.PT100 (für Temperaturregelung). Kalibrierwerte können eingestellt werden. Das Vorzeichen kann durch Drücken der Tasten [F1 ... F5] verändert werden. Beleuchtung aktiv Beleuchtung inaktiv Software-Version (hier Version 1.11) Hardware-Seriennummer (hier Nr. 39) F2 SETUP Einstellung interner Parameter PASSW F3 • Durch Drücken der Taste [F2 und F3] erfolgt der Übergang in Menüs zur Eingabe interner Parameter. GERÄT SETUP F2 > F3 > PASSWORT PASSW EINGABE SETUP2 < ENTER Abb. 46: Setup2-Menü Abb. 47: Passworteingabe-Menü Diese Menüs sind für Servicezwecke reserviert und passwortgeschützt. Veränderungen dieser Parameter sind nur autorisiertem Personal vorbehalten. Unsachgemäße Veränderungen können zur Zerstörung des Gerätes führen. F4 • RESET Durch längeres Drücken der Taste [F4] wird das Gerät zurückgesetzt. Alle Einstellungen, Programme, Passwörter, u.s.w., gehen unwiderruflich verloren! 3.3.7 Betrieb mit dem eingebauten Kühlaggregat • Bei einem Schüttelschrank mit integriertem Kühlaggregat muss keine Vorsorge für Kondensatablauf getroffen werden. Entstehendes Kondensat kann im Gerät verdampfen. • Um Defekte zu vermeiden, schaltet ein Sicherheitskreis das Kühlaggregat oberhalb von +38,5 °C dauerhaft ab. 35 3.4 Anschluß externer Geräte 3.4.2 • Auf der Geräterückseite besitzt der CERTOMAT® BS-1 zwei 9-polige Sub-D Buchsen für analoge Signalausgänge, RS 232-Schnittstelle, sowie einen Sammelalarmkontakt. 3.4.3 3.4.1 • • Analoge Ausgänge (ANALOG OUT) Für die externe Registrierung von Drehzahlen und Temperaturen, z.B. mit einem Schreiber, besitzt der CERTOMAT® BS-1 analoge Signalausgänge (0 ... 10 V) Drehzahl: 0 V entspricht 0 U/min 10 V entspricht 400 U/min • Temperatur: 0 V entspricht 0°C 10 V entspricht 100°C Die 9-polige Sub-D-Buchse „RS 232“ ist zur Zeit eine Sartorius-Service-Schnittstelle. Sammelalarm Über die 9-polige Sub-D-Buchse „ANALOG OUT“ wird auf PIN 4/9 ein potentialfreier Kontakt zur Verfügung gestellt, mit dem Alarmsituationen extern gemeldet werden können. Ab Seriennummer 00500/05 Der Relaiskontakt ist im Normalbetrieb geschlossen. Im Fall eines Alarms öffnet der Relaiskontakt und gibt über den potentialfreien Sammelalarmausgang eine Fehlermeldung aus. Dabei gelten folgende Bedingungen: • RS 232-Schnittstelle Kontaktbelastbarkeit: 230 V AC / 0,5 A (ohmsche Last) Der Abschlusswiderstand an den Spannungsausgängen darf 10 kΩ nicht unterschreiten. • Optional können Stromsignale (0 ... 20 mA) bzw. (4 ... 20 mA) zur Verfügung gestellt werden. Der Abschlusswiderstand an den Stromausgängen darf 500 Ω nicht überschreiten. 1 5 1 2 9 3 Abb. 48: Geräterückseite 1. RS232 Schnittstelle 2. 9-polige Buchse „Analog Out“ für Schreiberanschluss, etc., − Pin 1 = Signal + /Temperatur − Pin 2 = Gnd / Temperatur − Pin 6 = Signal + / Drehzahl − Pin 7 = Gnd / Drehzahl − Pin 4 = Sammelalarm − Pin 9 = Sammelalarm 3. Netzeingangsbuchse mit Netzleitung und Schukostecker 36 6 3.5 Montage von Tablaren und Aufbausystemen 3.5.1 Montage und Beladung fertig bestückter Tablare Als fertig bestückte Tablare sind die Tablare Typ E und F erhältlich. Detaillierte Informationen dazu finden Sie bei den Bestellinformationen im Anhang. 1. Stellen Sie das Tablar in den BS-1 und befestigen Sie es wie unter Punkt 3.2.2 (Aus- und Einbau eines Tablars) beschrieben. 2. Stecken Sie die Erlenmeyerkolben in die Klammern (sie können auch Flaschen, Becher, etc., verwenden, die in die Klammern passen). Beachten Sie die Verteilung der Lasten, verteilen Sie die Gefäße gleichmäßig von der Tablarmitte aus. Vergewissern Sie sich, dass die Gefäße fest sitzen und im Betrieb nicht herausgeschleudert werden können. Abb. 49: Tablar Typ F mit Klammern für Erlenmeyerkolben 3.5.2 Montage von Reagenzglasgestellen 1. Lösen Sie die Klemmschraube und nehmen Sie den Reagenzglashalter aus seinem Gestell bzw. schwenken Sie ihn zur Seite, so dass die Öffnungen für die Halteschrauben zugänglich sind. 2. Stellen Sie die benötigten Gestelle auf das Universaltablar und schrauben Sie sie fest. Beachten Sie bei der Anordnung, dass Sie beim Einsetzen der Reagenzgläser die Last von der Tablarmitte aus gleichmäßig verteilen können. 3. Soweit Sie die Reagenzglashalter ganz ausgebaut haben, können Sie die Halter jetzt wieder einsetzen. Drehen Sie die Halter in ihre richtige Lage und fixieren sie mit der Feststellschraube. Abb. 50: Reagenzglasgestelle 37 3.5.3 Montage des Universal-Aufbausystems 1. Universal-Aufbausysteme sind für die Tablare EU sowie FU erhältlich. Im Anhang finden Sie weitere Angaben zu den Komponenten. Grundelemente sind je zwei für die Tablare passende Seitenteile sowie die Verbindungsstäbe: Stellen Sie die Seitenteile (1) auf das Tablar und schrauben Sie diese fest, vgl. Pos. (1a). Für jedes Seitenteil sind 4 Schrauben vorgesehen. Montieren Sie die Verbindungsstäbe an den Seitenteilen wie in Pos. (1b) dargestellt. 2. Für das Aufbausystem mit Universalspannleisten montieren Sie die Spannleisten, vgl. Pos. (3). Sie benötigen 2 Spannleisten und können weitere ergänzen, soweit erforderlich. 3. Stellen Sie die Schüttelbehälter zwischen die Spannleisten und verteilen sie gleichmäßig von der Tablarmitte aus. Um die Spannleisten zu verstellen, können Sie die Spannschrauben (3a/3b) lösen und die Spannleisten verschieben. Ziehen Sie die Spannschrauben (3a/3b) handfest an, so dass die Behälter sich im Betrieb nicht lockern. 4. Für das Aufbausystem für Scheidetrichter benötigen Sie eine Universalspannleiste (s.o.) als Auflage. Montieren Sie dann den Aufbausatz für die Scheidetrichter (2a) auf die Spannleiste für Scheidetrichter (2). Sie können dort je nach Größe der Scheidetrichter bis zu 5 dieser Halter (Pos. 2a) montieren. 5. Setzen Sie die Scheidetrichter auf. Sie können dann jeweils die Spannleiste und den Aufbausatz so verschieben, dass die Behälter sicher fixiert werden. • Grundelement Typ B-2, Art.-Nr. 8854238, für Tablar EU • Grundelement Typ B-3, Art. Nr. 8854243, für Tablar FU Als Aufbausysteme dienen z.B. Universalspannleisten und Montage-Sets für Scheidetrichter • Universalspannleisten Typ U, Art.-Nr. 8854254, für Grundelement B-2 / B-3 • Aufbausatz Typ S-1 für Scheidetrichter 50 und 100 ml, Art.-Nr. 8854262, mit Klammern und Rückhaltefedern sowie 1 Universalspannleiste Typ U • Aufbausatz Typ S-1 für Scheidetrichter 250, 500 und 1000 ml, Art.-Nr. 8854270, mit Klammern und Rückhaltefedern sowie 1 Universalspannleiste Typ U Abb. 51: Montage der Universalspannleisten und Aufbausysteme für Scheidetrichter 38 3.6 Wartungshinweise und Trouble-Shooting 3.6.1 Wartung und Reinigung Die Wartung für den Inkubationsschüttelschrank vom Typ BS-1 beschränkt sich auf die notwendige Reinigung, den Wechsel defekter Sicherungen sowie die Überprüfung des Antriebsriemens im Schüttelantrieb. Bei Ausrüstung mit der optionalen Beleuchtungseinrichtung können Sie defekte Leuchtstoffröhren auswechseln. Der Schüttelantrieb ist für die Lebensdauer geschmiert. Der Motor ist ein wartungsfreier, bürstenloser Außenläufermotor. Ziehen Sie vor Reinigungsarbeiten bzw. für die Demontage des Schütteltisches unbedingt den Netzstecker. Sollte der Schütteltisch durch unbeabsichtigtes Einschalten des Schüttelantriebs anlaufen, besteht Verletzungsgefahr. • Wartung und Service am Schüttelantrieb (z.B. das Auswechseln des Antriebsriemens), an elektrischen und elektronischen Bauteilen oder am optionalen Kühlaggregat sind dem dazu qualifizierten und autorisierten Service vorbehalten. 3.6.1.2 Wartung der Beleuchtungseinrichtung • Die Wartung beschränkt sich auf die Überprüfung und den Ersatz defekter Leuchtstoffröhren und Gerätesicherungen. Bei anderen Störungen benachrichtigen Sie den für Sie zuständigen Service der Sartorius AG. 1. Schalten Sie die Beleuchtungseinheit aus und ziehen auch das Netzkabel. 2. Ziehen Sie die defekte Leuchtstoffröhre aus der Halterung und bauen Sie die neue Röhre ein. Werkseitig werden handelsübliche Leuchtstoffröhren „L18W/77 (Fluora)“ oder Leuchtstoffröhren nach Kundenspezifikation eingebaut. 3. Ersetzen Sie defekte Sicherungen. Die Sicherungen befinden sich in einem Sicherungseinsatz hinter der rechten Seitentür. Verwenden Sie Sicherungen vom gleichen Typ, wie werkseitig eingebaut. 3.6.2 3.6.2.1 Elektrische Störungen • 3.6.1.1 Reinigung 1. 2. Innenverkleidung und Einbauten bestehen aus Edelstahl. Sie können verschmutzte Geräteoberflächen und Tablare mit üblichen Haushaltsspülmitteln oder Alkohol reinigen. Sie sollten aggressive, z.B. chlorhaltige Reinigungsmittel vermeiden. Reinigung der Auffangwanne: Schüttler ausschalten und Netzstecker ziehen. Nehmen Sie das Tablar heraus. Lösen Sie die 4 Befestigungsschrauben des Schütteltisches. Nehmen Sie den Schütteltisch ab. Die Auffangwanne ist nun frei zugänglich und kann zur gründlichen Reinigung entnommen werden. 3. Setzen Sie die gereinigte Auffangwanne wieder ein. Befestigen Sie den Schütteltisch mit 4 Schrauben. Setzen Sie das Tablar wieder ein. Verbinden Sie den BS-1 wieder mit der Netzleitung. 4. Für die Desinfektion nach Inkubation z.B. von Mikroorganismen und Zellen empfehlen wir alkoholische Desinfektionsmittel, z.B. Meliseptol, B. Braun Melsungen AG. Lassen Sie den Innenraum nach Reinigung und Desinfektion ausreichend lange auslüften. Maßnahmen bei Betriebsstörungen Prüfen Sie den Netzanschluss. Liegt Spannung an der Steckdose an und ist das Netzkabel richtig eingesteckt? Sollten Störungen auch an anderen Geräten auftreten, können Probleme im Stromnetz vermutet werden. Beseitigen Sie zunächst solche Störungsursachen. Prüfen Sie die Sicherungen. Sie finden die Sicherungen in einem Sicherungseinsatz hinter der rechten Seitentür. Ziehen Sie den Netzstecker, bevor Sie die Seitentür öffnen. Defekte Sicherungen sind durch Verfärbung oder am geschmolzenen Faden erkennbar. Verwenden Sie Sicherungen vom gleichen Typ, wie werkseitig eingebaut. • Sollten Sie den Schüttler danach nicht in Betrieb nehmen können, informieren Sie die für Sie zuständige Service-Vertretung der Sartorius AG. Die ServiceRufnummer finden Sie auf der nächsten Seite. Entfernen Sie zerbrochene Glaskolben, verschüttete Flüssigkeiten und Fremdkörper immer schnellstmöglich. Sie sollten Verschmutzungen nicht antrocknen lassen. 5. Achten Sie darauf, dass keine Fremdkörper in die Kanäle des Umluftsystems gelangen. Staubablagerungen sollten Sie regelmäßig von den äußeren Lüftungsgittern entfernen. 39 3.6.2.2 Störungen am Schüttelantrieb • Läuft der Schüttelantrieb unrund oder ruckartig, kann der Antriebsriemen verschmutzt sein. Wenn sich der Schütteltisch nicht dreht, obwohl der Motor hörbar läuft, kann der Antriebsriemen defekt sein. Läuft der Antriebsmotor nicht, wenn die Spannungsversorgung und alle erforderlichen Voreinstellungen korrekt sind, kann der Motor defekt sein. 1. Um den Antriebsriemen zu überprüfen, nehmen Sie das Tablar und den Schütteltisch ab. Lösen Sie dazu die 4 Schrauben in der Mitte des Schütteltisches. Sie können den Riemen durch den oberen Gehäuseausbruch sehen. 2. Zum Montieren des Schütteltisches ziehen Sie die Schrauben über Kreuz sorgfältig fest. • Sollte der Antriebsriemen beschädigt (gerissen) oder ein Defekt des Motors bzw. der Antriebssteuerung zu vermuten sein, informieren Sie die für Sie zuständige Service-Vertretung der Sartorius AG. 3.7 Soweit nicht schriftlich anders vereinbart, haben alle Geräte der Sartorius Stedim Biotech GmbH eine Gewährleistung gemäß den Allgemeinen Geschäftsbedingungen ab Lieferdatum. • Die Gewährleistung gilt für Defekte und fehlerhaften Betrieb bedingt durch Konstruktions-, Herstellungs- und Materialfehler, jedoch nicht für Störungen, die auf Fehlbedienungen und unsachgemäße Behandlung und Verwendung zurückzuführen sind, sowie nicht für Teile, die durch übliche Abnutzung defekt werden und nicht für Verbrauchsmaterialien. • Die Gewährleistung erlischt, wenn der Benutzer oder nicht autorisierte Drittpersonen das Gerät technisch verändern bzw. Ausrüstungen, Komponenten und Zubehör verwenden, welche die Sartorius Stedim Biotech GmbH nicht für den Einsatz in Verbindung mit dem Schüttelschrank CERTOMAT® BS-1 freigegeben hat. Defekte können durch Ihre Service-Vertretung der Sartorius AG repariert werden oder durch autorisiertes Servicepersonal vor Ort. Im Fall eines Defektes informieren Sie bitte Ihre Vertretung der Sartorius AG oder direkt 3.6.2.3 Betriebsstörungen bei der Ausstattungsoption mit Kühlaggregat • • Der Kompressor des Kühlaggregats ist mit einem internen Wicklungsschutz ausgestattet, der bei Übersteigen einer bestimmten Wicklungstemperatur öffnet. Es kann bis zu einer Stunde dauern, bis der Wicklungsschutz wieder schließt und das Gerät weiterläuft. Sollte es zu häufigem Abschalten kommen, informieren Sie die für Sie zuständige Service-Vertretung der Sartorius AG. Gewährleistung und Kundendienst Sartorius AG Servicezentrum Nord Weender Landstraße 94-108 37075 Göttingen Telefon +49.551.308.3729 / 3740 / 3741 Fax +49.551.308.3730 • Bei Reparaturen dürfen nur Ersatzteile verwendet werden, die von der Sartorius Stedim Biotech GmbH für den CERTOMAT® BS-1 freigegeben wurden. • Sie können defekte Geräte an die Sartorius AG zurücksenden. Eingeschickte Geräte müssen sauber, in hygienisch einwandfreiem Zustand und sorgfältig verpackt sein. Teile, die durch Medien und Medienbestandteile verunreinigt wurden, müssen gereinigt, dekontaminiert, desinfiziert oder auch sterilisiert werden, gemäß den für den Anwendungsbereich geltenden Sicherheitsrichtlinien, z.B. zur chemischen oder biologischen Sicherheit. Der Absender muss die Einhaltung der Sicherheitsrichtlinien nachweisen. Dazu ist die beigefügte Dekontaminationserklärung ausgefüllt und unterschrieben dem Gerät beizufügen. Ohne Unbedenklichkeitsnachweis oder Beschreibung durchgeführter Maßnahmen werden Geräte nicht repariert. Transportschäden sowie die nachträgliche Reinigung und Desinfektion, falls notwendig, gehen zu Lasten des Absenders. 40 4 Technische Daten, Bestellinformationen 4.1 Technische Daten 4.1.1 Mechanischer Aufbau Schüttelschrank Gewicht (mit Einbauten) Schütteltisch Material Tablare Beladung 4.1.2 4.1.3 4.1.4 4.1.5 440 x 420 mm (B x T) Schrank aus Stahlblech mit säurefester Lackierung; Innenauskleidung aus Edelstahl 1) Typ E/EU : (420 x 420 mm)1); Typ F/FU : (800 x 420 mm) abhängig von Tablar und montierten Aufbausystemen des Sartorius Stedim Biotech GmbH Zubehörprogramms Elektrischer Anschluss Anschluss Schuko-Steckdose Netzspannung 230 V (±5 %) / 50 Hz oder 115 V (±5 %) / 60 Hz Leistungsaufnahme ca. 1,2 kW inkl. Kühlung Beleuchtung ca. 90 W (5 x 18 W) Absicherung T6,3A bei 230 V, T10A bei 115 V Funkentstör-Prüfung gemäß EN 55011 und EN 55014 Betriebsdaten Kreisbewegung Ø 25 mm oder 50 mm, je nach Schüttelantrieb Drehzahlbereich 40 ... 400 min-1 Drehzahlabweichung max. ±1% (bezogen auf den Endwert) Inkubationstemperatur Umgebungstemperatur Heizversion RT +8 °C ... +70 °C Heiz- und Kühlversion RT -10 °C ... +70 °C +10 ... +60 °C (+10 ... + 30 °C bei UHK-Version) relative Raumfeuchte 10 ... 60 %; Innenraum 10 ... 80 %, nicht kondensierend Analogausgang Buchse, 9-polig Sub-D 0 ... 10 V (min. Abschlusswiderstand = 10 kΩ) (Pinbelegung siehe Punkt 3.4, Abb. 37) 0 ... 20 mA bzw. 4 ... 20 mA (optional) (max. Abschlusswiderstand = 500 Ω) Genauigkeit ± 0,3 V Sammelalarm Sammelalarm 4.1.6 außen 1150 x 720 x 770 mm (B x H x T) Innen 890 x 495 x 650 mm (B x H x T) ca. 230 kg potentialfreier Kontakt (Öffner), max. 230 VAC (0,5 A ohmsche Last) über SUB-D-Buchse „Analog Out“ Pin 4/9 Option Kühlung Kältemittel R 134a Füllmenge 270g RT = Raumtemperatur (Maß- und Konstruktionsänderungen behalten wir uns vor) 1) In modifizierter Ausführung für neue Arretierung; Umrüstung vorhandener Tablare für diese Arretierung auf Anfrage. Setzen Sie sich mit unserem Service in Verbindung. 41 4.2 Bestelldaten 4.2.1 Schüttlerkonfigurationen Art.-Nr. Bestellinformationen, besondere Merkmale Inkubations-Schüttler CERTOMAT® BS-1 / 25 mm Ausführung 230 V / 50 Hz 8865027 Heizversion (UH) 8865221 Heiz- und Kühlversion (UHK) Inkubations-Schüttler CERTOMAT® BS-1 / 50 mm Ausführung 230 V / 50 Hz 4.2.2 8865124 Heizversion (UH) 8865329 Heiz- und Kühlversion (UHK) Ausstattungsoptionen Art.-Nr. 8864489 Untergestell Vierkant-Rahmenkonstruktion mit Blechverkleidung zur Aufnahme von bis zu 2 BS-1 schlagfeste Einbrenn-Lackierung B x H x T : 1150 x 220 x 700 mm 4 höhenverstellbare Füße 8861455 Beleuchtungseinheit für CERTOMAT ® BS-1 bestehend aus fünf Leuchtstoffröhren, à 18 W, einzeln abschaltbar, programmierbar Version 230 V / 50 Hz - in Verbindung mit Kühlung UHK auf Anfrage Version 115 V / 60 Hz - nachträglich einzubauen 8861471 42 Bestellinformationen, besondere Merkmale Einlegerost komplett Edelstahl 640 x 880 mm für Petrischalen, höhenverstellbar, mit Schienen, Befestigungsschrauben und Halter für Einlegerost 4.2.3 Zubehör Art.-Nr. Bestellinformationen, besondere Merkmale Festbestückte Tablare (mit Klammern f. Erlenmeyerkolben) 8853533 Tablar E 420 x 420 mm – Halteklammern aus Edelstahl Tablar mit 39 Klammern für Erlenmeyerkolben 100 ml 8853568 Tablar mit 20 Klammern für Erlenmeyerkolben 250 ml 8853584 Tablar mit 14 Klammern für Erlenmeyerkolben 500 ml 8853606 Tablar mit 9 Klammern für Erlenmeyerkolben 1.000 ml 8853688 Tablar E 420 x 420 mm – Halteklammern aus Kunststoff Tablar mit 39 Kunststoffklammern für Erlenmeyerkolben 100 ml 8853666 Tablar mit 19 Kunststoffklammern für Erlenmeyerkolben 250 ml 8853677 Tablar mit 14 Kunststoffklammern für Erlenmeyerkolben 500 ml 8853738 Tablar F 800 x 420 mm – Halteklammern aus Edelstahl Tablar mit 74 Klammern für Erlenmeyerkolben 100 ml 8853762 Tablar mit 40 Klammern für Erlenmeyerkolben 250 ml 8853789 Tablar mit 26 Klammern für Erlenmeyerkolben 500 ml 8853800 Tablar mit 15 Klammern für Erlenmeyerkolben 1.000 ml 8853002 Universal - Tablare Typ EU (420 x 420 mm) 8853037 Typ FU (800 x 420 mm) 8860416 8864497 8864470 Haftfolie für Universal - Tablare Haftfolie „Premium“ für Universal-Tablare, 30 x 1 mm, Rolle mit 10 m, dauerhafte Qualität Haftfolie für Universaltablare, 30 x 1 mm, Rolle mit 50 m zum Fixieren von Bechergläsern, Erlenmeyerkolben. etc., für langsame Schüttelgeschwindigkeiten Haftmatte für Universal - Tablare Haftmatte für Universaltablare, 380 x 420 mm zum Fixieren von Bechergläsern, Erlenmeyerkolben. etc., für langsame Schüttelgeschwindigkeiten und Temperaturen bis ca. 50 °C 43 Art.-Nr. Bestellinformationen, besondere Merkmale Reagenzglasgestelle Abb. 52: Reagenzglasgestell 8853134 Reagenzglasgestell für 64 Gläser Ø 14 mm 8853142 Reagenzglasgestell für 42 Gläser Ø 16 mm 8853150 Reagenzglasgestell für 36 Gläser Ø 18 mm 8853169 Reagenzglasgestell für 33 Gläser Ø 20 mm 8853185 Reagenzglasgestell für 18 Gläser Ø 25 mm 8853177 Reagenzglasgestell für 12 Gläser Ø 30 mm 8853088 Gestelle für Zentrifugengläser mit Verschraubung Gestell für 42 Zentrifugengläser Ø 16 mm 8853096 Gestell für 36 Zentrifugengläser Ø 18 mm 8853193 Gestell für 33 Zentrifugengläser Ø 20 mm 8853240 Gestell für 12 Zentrifugengläser Ø 30 mm Halteklammern für Erlenmeyer-Kolben: (zur wahlweisen Bestückung der Universal - Tablare) 44 8854505 Halteklammern für Erlenmeyer-Kolben 25 ml Bestückungskapazität des Tablars bei Tablar Typ EU - max. 49 Stück bei Tablar Typ FU - max. 98 Stück 8854513 Halteklammern für Erlenmeyer-Kolben 50 ml Bestückungskapazität des Tablars bei Tablar Typ EU - max. 48 Stück bei Tablar Typ FU - max. 96 Stück 8854521 Halteklammern für Erlenmeyer-Kolben 100 ml Bestückungskapazität des Tablars bei Tablar Typ EU - max. 24 Stück bei Tablar Typ FU - max. 48 Stück 8854556 Halteklammern für Erlenmeyer-Kolben 250 ml Bestückungskapazität des Tablars bei Tablar Typ EU - max. 17 Stück bei Tablar Typ FU - max. 39 Stück Art.-Nr. Bestellinformationen, besondere Merkmale 8854572 Halteklammern für Erlenmeyer-Kolben 500 ml Bestückungskapazität des Tablars bei Tablar Typ EU - max. 12 Stück bei Tablar Typ FU - max. 26 Stück 8854599 Halteklammern für Erlenmeyer-Kolben 1.000 ml Bestückungskapazität des Tablars bei Tablar Typ EU - max. 8 Stück bei Tablar Typ FU - max. 17 Stück 8854610 Halteklammern für Erlenmeyer-Kolben 2.000 ml Bestückungskapazität des Tablars bei Tablar Typ EU - max. 4 Stück bei Tablar Typ FU - max. 9 Stück 8854629 Halteklammern für Erlenmeyer-Kolben 3.000 ml Bestückungskapazität des Tablars bei Tablar Typ EU - max. 4 Stück bei Tablar Typ FU - max. 8 Stück 8854637 Halteklammern für Erlenmeyer-Kolben 5.000 ml Bestückungskapazität der Universal-Tablare bei Tablar Typ EU - max. 2 Stück bei Tablar Typ FU - max. 6 Stück Halteklammern für Fernbachkolben: (zur wahlweisen Bestückung der Universal - Tablare) 8854564 Halteklammern für Fernbachkolben 450 ml Bestückungskapazität der Universal - Tablare bei Tablar Typ EU - max. 6 Stück bei Tablar Typ FU - max. 15 Stück 8854600 Halteklammern für Fernbachkolben 1800 ml Bestückungskapazität der Universal - Tablare bei Tablar Typ EU - max. 1 Stück bei Tablar Typ FU - max. 6 Stück 8854640 Halteklammern für Fernbachkolben 2800 ml Bestückungskapazität der Universal - Tablare bei Tablar Typ EU - max. 1 Stück bei Tablar Typ FU - max. 6 Stück 45 Art.-Nr. Bestellinformationen, besondere Merkmale Halteklammern aus Kunststoff für Erlenmeyer-Kolben (zur wahlweisen Bestückung der Universal - Tablare) 8854700 Halteklammern aus Kunststoff für Erlenmeyerkolben 100 ml Bestückungskapazität der Universal – Tablare bei Tablar Typ EU - max. 20 Stück bei Tablar Typ FU - max. 58 Stück 8854711 Halteklammer aus Kunststoff für Erlenmeyerkolben 250 ml Bestückungskapazität der Universal-Tablare bei Tablar Typ EU max. 20 Stück bei Tablar Typ FU max. 40 Stück 8854722 Halteklammer aus Kunststoff für Erlenmeyerkolben 500 ml Bestückungskapazität der Universal-Tablare bei Tablar Typ EU max. 16 Stück bei Tablar Typ FU max. 26 Stück 8854733 Halteklammer aus Kunststoff für Erlenmeyerkolben 1.000 ml Bestückungskapazität der Universal-Tablare bei Tablar Typ EU max. 8 Stück bei Tablar Typ FU max. 17 Stück Anmerkung: Halteklammern aus Kunststoff sind ideal für den Einsatz von Erlenmeyerkolben mit Schlaucholiven. Siehe unten! Schüttelkolben GL (Kulturkolben Erlenmeyer-Form, mit Schikanen und GL-14-Anschluß) Abb. 53: Schüttelkolben mit Schikanen in der Wandung und GL 14 Anschluß Schüttelkolben aus DURAN-Glas, Erlenmeyer-Form; gerader Hals für Metallkappen, Hals, außen Ø = 38 mm; Kolbenwandung mit 3 Schikanen (Ê 120°) mit GL 14 - Anschluß incl. Kunststoffkappe und Olive für Schlauch Ø 4 x 7 mm 8861064 Ausführung 300 ml, max. Ø = 87 mm, H = 161 mm; Set à 10 Stück 8861072 Ausführung 500 ml, max. Ø = 105 mm, H = 183 mm; Set à 10 Stück 8861080 Ausführung 1.000 ml, max. Ø = 131 mm, H = 232 mm; Set à 10 Stück Zubehör für Schikanekolben 46 8861099 Verschlusskappe aus Aluminium, Packung à 10 Stck. 8861102 Verschlusskappe aus Edelstahl, Packung à 10 Stck. Art.-Nr. Bestellinformationen, besondere Merkmale Schüttelkolben (Kulturkolben Erlenmeyer-Form, mit Schikanen) Abb. 54: Schüttelkolben mit Schikanen in der Wandung Schüttelkolben aus DURAN-Glas, Erlenmeyer-Form; gerader Hals für Metallkappen, Hals, außen Ø = 38 mm; Ausführung für Verschluss-Stopfen Kolbenwandung mit 3 Schikanen (Ê 120°) 8861005 Ausführung 300 ml, Ø = max. 87 mm, H = 161 mm; Set à 10 Stück 8861013 Ausführung 500 ml, Ø = max. 105 mm, H = 183 mm; Set à 10 Stück 8861021 Ausführung 1.000 ml, Ø = max. 131 mm, H = 232 mm; Set à 10 Stück 8861022 Ausführung 2.000 ml, Ø = max. 166 mm, H = 305 mm; Set à 10 Stück 8860998 Ausführung 500 ml, Ausführung für Verschlussstopfen Ø = max. 105 mm, H = 180 mm; Set à 10 Stück andere Größen auf Anfrage Universal-Aufbausystem Basiselement Typ B bestehend aus je 2 Seitenteilen sowie 4 Längsstangen Abb. 55: Basiselement zum Universal-Aufbausystem 8854238 Typ B-2 für Tablar EU 8854246 Typ B-3 für Tablar FU 47 Art.-Nr. Bestellinformationen, besondere Merkmale Universal-Spannleiste Typ U Abb. 56: Universal-Spannleiste 8854254 Typ U für Basiselemente B-2 und B-3 Abb. 57: Aufbausystem mit 3 Universal-Spannleisten Aufbausatz für Scheidetrichter Typ S Abb. 58: Aufbausatz für Scheidetrichter 8854262 8854270 Typ S-1 für 5 Stück Scheidetrichter 50 oder 100 ml; mit Klammern, Rückhaltefedern und 1 Universalspannleiste U-2 Typ S-2 für 3 Stück Scheidetrichter 250, 500 oder 1000 ml; mit Klammern, Rückhaltefedern und 1 Universalspannleiste U-2 Bestückungskapazitäten EU-Tablar mit System B-2: 1 Aufbausatz S 1 oder S 2 FU-Tablar mit System B-3: 2 Aufbausätze S 1 oder S 2 48 4.3 Sicherheitshinweise für Laborschüttler (Sicherheitshinweise für Laborschüttler s. Anlage) 4.4 EG-Konformitätserklärung (EG-Konformitätserklärung s. Anlage) 4.5 Dekontaminationserklärung (Dekontaminationserklärung s. Anlage) 4.6 Entsorgungs- und Reparaturhinweise (Entsorgungs- und Reparaturhinweise s. Anlage 4.7 Maßblatt CERTOMAT ® BS-1 (Maßblatt/Aufstellplan CERTOMAT® BS-1 s. Anlage) 4.8 Prospekt CERTOMAT® BS-1 (Informationen zum Zubehör finden Sie anliegend) 49 Sartorius Stedim Biotech GmbH August-Spindler-Straße 11 37079 Göttingen, Germany Telefon +49.551.308.0 Fax +49.551.308.3289 www.sartorius-stedim.com Copyright by Sartorius Stedim Biotech GmbH, Göttingen, Deutschland. Nachdruck oder Übersetzung, auch auszugsweise, ist ohne schriftliche Genehmigung der Sartorius Stedim Biotech GmbH nicht gestattet. Alle Rechte nach dem Gesetz über das Urheberrecht bleiben der Sartorius Stedim Biotech GmbH vorbehalten. Die in dieser Anleitung enthaltenen Angaben und Abbildungen entsprechen dem unten angegebenen Stand. Änderungen der Technik, Ausstattung und Form der Geräte gegenüber den Angaben und Abbildungen in dieser Anleitung selbst bleiben der Sartorius Stedim Biotech GmbH vorbehalten. Stand: Februar 2008, Sartorius Stedim Biotech GmbH, Göttingen Printed in Germany. Gedruckt auf chlorfrei gebleichtem Papier W4A000 · KT Publication No.: SB6027-t08024 Order No.: 85030-520-51 Sicherheitshinweise Laborschüttler und Inkubations-Schüttelschränke 85030-520-67 Inhalt 1 Einführung 3 2 Transport und Installation 3 2.1 2.2 Transport der Geräte Anforderungen an den Aufstellort 3 3 3 Betriebshinweise 4 3.1 3.2 Umgang mit Medien Inbetriebnahme und Normalbetrieb 4 4 4 Reinigung, Wartung und Service 5 4.1 4.2 4.3 4.4 Reinigung Wartung und Service Rücksenden von defekten Geräten Maßnahmen bei Standortwechsel 5 5 5 5 2 1 Einführung 2 Transport und Installation Die nachfolgenden Sicherheitshinweise informieren Sie über Vorsichtsmaßregeln für CERTOMAT® Laborschüttler und Inkubationsschüttelschränke aus dem Produktprogramm der Sartorius Stedim Biotech GmbH, insbesondere für: 2.1 Transport der Geräte • Transport und Installation • Ausrüstung und Inbetriebnahme • Betrieb • Reinigung, Wartung und Service Diese Sicherheitshinweise sind nicht übertragbar, sie gelten nur für die Ausführung und Ausstattung der Schüttler zum Zeitpunkt der Lieferung. Auf weitere, spezifische Sicherheitsbestimmungen (d.h. gesetzliche oder in anderer Weise verpflichtende Vorschriften) wird an dieser Stelle nicht eingegangen. Bitte wenden Sie sich an Ihre zuständige Behörde. Gefahrenhinweise tragen das vorstehende Symbol und sind hervorgehoben wie dieser Absatz. Ignorieren der Gefahrenhinweise kann Schäden am Gerät oder sonstige Sach- und Personenschäden nach sich ziehen. Die Schüttler und besonders die Inkubationsschüttelschränke sind sehr schwer. Verwenden Sie daher für den Transport zum Aufstellort und bei Standortwechsel nur dazu geeignete Werkzeuge, Transport- und Hebemittel. Stellen Sie sicher, dass die Transportwege ausreichend dimensioniert sind und dass das Gewicht von Geräten und Hebemitteln nicht die zulässige Belastung des Bodens überschreitet. Setzen Sie für den Transport nur qualifiziertes Personal ein. Stellen Sie sicher, dass keine Personen durch die Transportarbeiten verletzt werden können. Bei Geräten mit Transportsicherungen dürfen diese erst am Aufstellort entfernt werden. 2.2 1. Der Boden am Aufstellort bzw. die vorgesehenen Labortische müssen das Gewicht der vollständig ausgerüsteten Geräte aufnehmen können. 2. Die Aufstellfläche muß ausreichend groß und rutschfest sein um die waagrechte Aufstellung der Geräte zu erlauben. 3. Die Geräte müssen für die Bedienung, Wartung und Service leicht zugänglich sein. 4. Die Schüttler bzw. Inkubationsschüttelschränke können insbesondere bei schwerer Beladung Schwingungen auf die Aufstellfläche übertragen. Stellen Sie andere Geräte im Umfeld so auf, dass diese durch den Betrieb der Schüttler nicht beeinträchtigt werden. 5. Der Netzanschluss muss den Gerätespezifikationen auf dem Typenschild entsprechen und mit einem Schutzleiter versehen sein. Sind Schritte mit besonderer Sorgfalt auszuführen oder besondere Aspekte zu beachten, stehen Sicherheitshinweise, gekennzeichnet wie dieser Absatz. [Æ ..] kennzeichnet Verweise auf Inhalte dieser Anleitung oder andere Dokumente. In der Klammer stehen die Bezeichnungen der Abbildungen, Abschnitte oder Dokumente. Anforderungen an den Aufstellort Nach der Aufstellung muß das Gerät mit einer Wasserwaage ausgerichtet werden! Vor dem Stapeln von Geräten (max. 3 Stück), muß das unterste Gerät waagrecht ausrichten sein! 3 3 Betriebshinweise 1. Stellen Sie sicher, daß nur autorisierte Personen Zugang zum Arbeitsplatz haben. 2. Das Personal ist in die gültigen Sicherheitsbestimmungen und in diese Sicherheitshinweise einzuweisen. 3.1 Generell zu empfehlen ist das Tragen geeigneter Arbeitskleidung und persönlicher Schutzausrüstungen, wie Handschuhe, Schutzbrillen und gegebenenfalls Atemschutz. 4 Greifen Sie bei eingeschaltetem Gerät nicht mit den Fingern zwischen Schütteltisch und Gehäuse. Es besteht Verletzungsgefahr durch den konstruktiv bedingten Abstand zwischen diesen Bauelementen. Umgang mit Medien Von den eingesetzten Medien und Stoffen können Gefahren ausgehen, die spezifisch für die Stoffe und den Prozeß sind und daher an dieser Stelle nicht im Detail beschrieben werden können. Ihr Unternehmen sollte hierzu geeignete Sicherheitsbestimmungen herausgeben und die Bediener sorgfältig einweisen. 3.2 Beachten Sie die seitliche Bewegung der Tablare und daraus resultierende Stoß- oder Quetschgefahren, insbesondere bei großen Tablaren, bei geringem Abstand zu anderen Gegenständen oder z.B. bei großem Hub und schwerer Beladung. Inbetriebnahme und Normalbetrieb 1. Verwenden Sie ausschließlich Geräte und Zubehörteile, welche die Sartorius Stedim Biotech GmbH für den Einsatz mit dem Schüttler freigegeben hat. 2. Überprüfen Sie die einwandfreie Beschaffenheit aller Teile, insbesondere bei Glasgefäßen. Beschädigte Teile dürfen nicht verwendet werden. 3. Betreiben Sie den Schüttler nie ohne Tablar. Schalten Sie das Gerät ab, bevor Sie Tablare, Aufbauten der Schütteltische oder Zubehörteile montieren / demontieren. 4. Lassen Sie bei der Montage der Tablare genügend Abstand zur Wand oder anderen Geräten, insbesondere bei Tablaren, die über den Schütteltisch hinausragen. Befestigen Sie die Tablare sorgfältig. 5. Befestigen Sie die Tablaraufbauten und Zubehörteile sorgfältig. Beim Bestücken der Schüttler mit den Schüttelbehältern (Flaschen, Erlenmeyerkolben, etc.) verteilen Sie die Lasten gleichmäßig auf dem Tablar. 6. Bei Inkubationsschüttelschränken prüfen Sie den festen Sitz des Tablars und schließen Sie die Türen, bevor Sie den Schüttelbetrieb starten. 7. Kontrollieren Sie vor dem Start und im laufenden Betrieb den stabilen Sitz der Gefäße in den Halterungen. Die Gefäße dürfen sich nicht lockern, klappern oder anschlagen. Schalten Sie das Gerät sofort ab, wenn sich Gefäße lösen. 8. Betreiben Sie die Geräte nur mit den zulässigen Betriebswerten. Beachten Sie die Hinweise an den Geräten und in den Technischen Daten. 9. Nach dem Abschalten des Schüttlers warten Sie, bis der Schütteltisch in Ruhelage ist, bevor Sie Gefäße entnehmen oder weitere Gefäße einsetzen. 4 Reinigung, Wartung und Service 4.3 Defekte Geräte oder Komponenten können Sie an die zuständige Sartorius AG-Vertretung oder an die Sartorius AG einsenden. Regelmäßige Reinigung und Wartung erhält die Geräte funktionsfähig und betriebssicher. Beachten Sie die für den Anwendungsbereich geltenden Sicherheitsbestimmungen zum Umgang mit biologischem Material und kontaminierten Geräten. Vor Reinigungs- und Wartungsarbeiten müssen Sie biologisch kontaminierte Teile gemäß den Sicherheitsbestimmungen desinfizieren oder sterilisieren. Vor Reinigungs- oder Wartungsarbeiten schalten Sie das Gerät ab und ziehen den Netzstecker heraus. Verhindern Sie ein unbeabsichtigtes Einschalten und Anlaufen des Gerätes. Wartung und Reparaturen an den Antrieben, Austausch von Antriebsriemen oder Arbeiten an elektrischen Einrichtungen sind dem dazu qualifizierten Service vorbehalten. 4.1 1. 1. Die Geräte müssen gereinigt, hygienisch einwandfrei sowie sorgfältig verpackt sein. 2. Sie müssen kontaminierte Teile gemäß den für den Anwendungsbereich gültigen Sicherheitsrichtlinien reinigen, desinfizieren oder sterilisieren. Die Einhaltung der Richtlinien müssen Sie durch eine beizufügende Reinigungs- und Dekontaminierungsbescheinigung nachweisen. 3. Stimmen Sie die Rücksendung mit dem Service ab, bevor Sie das Gerät versenden. 4.4 Maßnahmen bei Standortwechsel 1. Beachten Sie die für Reinigung und Wartung beschriebenen Maßnahmen zur Vermeidung biologischer oder chemischer Gefahren. Reinigung 2. Trennen Sie das Gerät von der Stromversorgung. Entfernen Sie auf bzw. im Gerät aufgestellte Gefäße und Zubehörteile. Die Geräteoberflächen können Sie mit üblichen Laborreinigungsmitteln reinigen. Verwenden Sie keine aggressiven, z.B. chlorhaltigen Mittel. 3. Montieren Sie die gegebenenfalls bei Anlieferung eingebauten Transportsicherungen wieder. Beachten Sie die weiteren Hinweise unter „Transport der Geräte“ (2.1). 2. Glasbruch und verschüttete Medien sollten Sie schnellstmöglich beseitigen. 3. Für Inkubationsschüttler finden Sie spezielle Hinweise in der Bedienungsanleitung. 4.2 Rücksenden von defekten Geräten Wartung und Service Wartung und Störungsbeseitigung durch Benutzer sollten sich beschränken auf: • Prüfen der laborseitigen Spannungsversorgung und der Geräteanschlüsse. • Prüfen der Sicherungen und Ersatz bei Defekt. • Bei Inkubationsschüttelschränken: Austauschen der Leuchtkörper bei Defekt. Sind Betriebsstörungen nicht zu beseitigen verständigen Sie die für Sie zuständige Sartorius AG-Vertretung oder direkt: Sartorius AG Servicezentrum Nord Weender Landstraße 94-108 37075 Göttingen Telefon +49.551.308.3729 / 3740 / 3741 Fax +49.551.308.3730 Wenn Sie für Wartungsarbeiten Servicemitarbeiter der Sartorius AG anfordern, muß eine schriftliche Reinigungs- und Dekontaminierungs-Bescheinigung vorliegen. 5 Sartorius Stedim Biotech GmbH August-Spindler-Straße 11 37079 Göttingen Telefon +49.551.308.3118 Fax +49.551.308.3918 www.sartorius-stedim.com Copyright by Sartorius Stedim Biotech GmbH, Göttingen, Deutschland. Nachdruck oder Übersetzung, auch auszugsweise, ist ohne schriftliche Genehmigung der Sartorius Stedim Biotech GmbH nicht gestattet. Alle Rechte nach dem Gesetz über das Urheberrecht bleiben der Sartorius Stedim Biotech GmbH vorbehalten. Die in dieser Anleitung enthaltenen Angaben und Abbildungen entsprechen dem unten angegebenen Stand. Änderungen der Technik, Ausstattung und Form der Geräte gegenüber den Angaben und Abbildungen in dieser Anleitung selbst bleiben der Sartorius Stedim Biotech GmbH vorbehalten. Stand: Februar 2008, Sartorius Stedim Biotech GmbH, Göttingen Printed in Germany. Gedruckt auf chlorfrei gebleichtem Papier W4A000 · KT Publication No.: SB6043az08022 Order No.: 85030-520-67 F-13-01 Version 01 Seite 1/4 Rückware Gültig ab 01.01.2008 Erklärung über die Dekontaminierung und Reinigung von Geräten und Komponenten Sofern Sie die Geräte oder Komponenten zurücksenden, teilen Sie uns bitte auf Seite 2 dieses Formblattes mit, was Sie zu beanstanden haben und welche Arbeiten ausgeführt werden sollen. Um unser Personal zu schützen, müssen wir sicherstellen, dass die Geräte und Komponenten weder biologisch, noch chemisch, noch radioaktiv kontaminiert sind. Wir können diese Geräte oder Komponenten daher nur annehmen, wenn: • die Geräte und Komponenten adäquat gereinigt und dekontaminiert wurden. • diese Erklärung durch eine autorisierte Person ausgefüllt, unterzeichnet und an uns zurückgesandt wurde. Wir bitte Sie um Verständnis für unsere Maßnahmen, unseren Angestellten eine sichere und ungefährliche Arbeitsumgebung bereitzustellen. A. Beschreibung der Geräte und Komponenten Beschreibung / Artikel-Nr. Serien-Nr. Rechnungs-/Lieferschein-Nr. Lieferdatum B. Kontaminierung / Reinigung Bitte beschreiben Sie präzise die biologische , chemische, oder radioaktive Kontaminierung Bitte beschreiben Sie die Reinigungs- und Dekontaminierungsmethode/-prozedur Das Gerät war kontaminiert mit und wurde gereinigt und dekontaminiert durch 85030-520-68 Seite 2/4 F-13-01 Version 01 Rückware Gültig ab 01.01.2008 C. Rechtsverbindliche Erklärung Hiermit versichere ich/wir, daß die Angaben in diesem Formular korrekt und vollständig sind. Die Geräte und Komponenten wurden entsprechend den gesetzlichen Bestimmungen sachgemäß dekontaminiert und gereinigt. Von den Geräten gehen keinerlei chemische, biologische oder radioaktive Risiken aus, die eine Gefährdung für die Sicherheit oder die Gesundheit betroffener Personen darstellt. Firma / Institut Adresse / Land Tel. / Fax Name der autorisierten Person Position Datum / Unterschrift D. Grund der Rücksendung Falschlieferung Umtausch Reparatur Umbau Entsorgung Sonstiges E. Beschreibung der Fehlfunktion (bei Reparatur) und/oder Beschreibung der auszuführenden Arbeiten F-13-01 Version 01 Seite 3/4 Rückware Gültig ab 01.01.2008 F. Vom Sartorius-Servicezentrum auszufüllen Bemerkungen Bitte verpacken Sie das Gerät sachgemäß und senden Sie es frei Empfänger an Ihren zuständigen lokalen Service oder direkt an Sartorius AG Servicezentrum Nord Sartorius AG Servicezentrum Nord Weender Landstraße 94-108 37075 Göttingen Telefon +49.551.308.3729 / 3740 / 3741 Fax +49.551.308.3730 F-13-01 Version 01 Seite 4/4 Gültig ab 01.01.2008 Sartorius Stedim Biotech GmbH August-Spindler-Straße 11 37079 Göttingen, Germany Telefon +49.551.308.0 Fax +49.551.308.3289 www.sartorius-stedim.com Copyright by Sartorius Stedim Biotech GmbH, Göttingen, Deutschland. Nachdruck oder Übersetzung, auch auszugsweise, ist ohne schriftliche Genehmigung der Sartorius Stedim Biotech GmbH nicht gestattet. Alle Rechte nach dem Gesetz über das Urheberrecht bleiben der Sartorius Stedim Biotech GmbH vorbehalten. Die in dieser Anleitung enthaltenen Angaben und Abbildungen entsprechen dem unten angegebenen Stand. Änderungen der Technik, Ausstattung und Form der Geräte gegenüber den Angaben und Abbildungen in dieser Anleitung selbst bleiben der Sartorius Stedim Biotech GmbH vorbehalten. Stand: Februar 2008, Sartorius Stedim Biotech GmbH, Göttingen Printed in Germany. Gedruckt auf chlorfrei gebleichtem Papier W4A000 · KT Publication No.: SB6044-n08023 Order No.: 85030-520-68 Rückware Entsorgungs- und Reparaturhinweise Wird die Verpackung nicht mehr benötigt, ist diese der örtlichen Müllentsorgung zuzuführen. Die Verpackung besteht aus umweltfreundlichen Materialien, die als Sekundärrohstoffe dienen können. Das Gerät inklusive Zubehör und Batterien gehört nicht in den Hausmüll. Die EU-Gesetzgebung fordert in ihren Mitgliedsstaaten, elektrische und elektronische Geräte vom unsortierten Siedlungsabfall getrennt zu erfassen, um sie anschließend wiederzuverwerten. In Deutschland und einigen anderen Ländern führt die Sartorius AG die Rücknahme und gesetzeskonforme Entsorgung ihrer elektrischen und elektronischer Produkte selbst durch. Diese Produkte dürfen nicht – auch nicht von Kleingewerbetreibenden – in den Hausmüll oder an Sammelstellen der örtlichen öffentlichen Entsorgungsbetriebe abgegeben werden. Hinsichtlich der Entsorgung wenden Sie sich daher in Deutschland wie auch in den Mitgliedsstaaten des Europäischen Wirtschaftsraumes bitte an unsere Service-Mitarbeiter vor Ort oder an unsere Service-Zentrale in Göttingen: Sartorius AG Servicezentrum Weender Landstrasse 94-108 37075 Göttingen In Ländern, die keine Mitglieder des Europäischen Wirtschaftsraumes sind oder in denen es keine Sartorius-Filialen gibt, sprechen Sie bitte die örtlichen Behörden oder Ihr Entsorgungsunternehmen an. Vor der Entsorgung bzw. Verschrottung des Gerätes sollten die Batterien entfernt werden und einer Sammelstelle übergeben werden. Mit gefährlichen Stoffen kontaminierte Geräte (ABC-Kontamination) werden weder zur Reparatur noch zur Entsorgung zurückgenommen. Ausführliche Informationen mit Service-Adressen zur Reparaturannahme bzw. Entsorgung Ihres Gerätes finden Sie in dem Beipackzettel/auf der beiliegenden CD-Rom sowie auf unserer Internetseite (www.sartorius.com). CERTOMAT® BS-1 Programmierbarer Inkubationsschüttelschrank CERTOMAT ® BS-1 Programmierbarer Inkubationsschüttelschrank Der CERTOMAT® BS-1 bietet viel Platz auf wenig Raum für alle mikrobiologischen, biochemischen, pflanzenphysiologischen und anderen Laboratorien. Um die Schüttelkapazität zusätzlich zu erhöhen, können bis zu drei Schüttelschränke gestapelt und unabhängig voneinander betrieben werden. Der patentierte einstellbare Massenausgleich sorgt dafür, daß auch dreifach hoch gestapelte Geräte bei voller Beladung mit maximaler Geschwindigkeit betrieben werden können. Die innovative Programmierung von Temperatur, Schüttelgeschwindigkeit und Beleuchtung erfolgt über eine Folientastatur in Echtzeit. Bis zu 5 Programme mit je 5 Schritten sind passwortgeschützt speicherbar, die aktuellen Werte werden auf dem LCD-Display angezeigt. Der CERTOMAT® BS-1 ist mit Schüttelamplituden von 25 mm oder 50 mm verfügbar. Der Innenraum ist aus poliertem Edelstahl (1.4301) gefertigt und kann problemlos hygienisch rein gehalten werden. Verschüttete Flüssigkeit wird in der serienmäßig gelieferten Edelstahlwanne aufgefangen. Das Tablar lässt sich mit einem einzigen Handgriff leicht fixieren. Die optional eingebaute Kühlung ermöglicht eine Inkubation unterhalb der Umgebungstemperatur, eine zusätzlich lieferbare Beleuchtungseinheit macht in Verbindung mit der integrierten Kühlung auch die Kultivierung phototropher Organismen möglich. Vorteile Bis zu drei Schüttelschränke stapelbar Variabler Massenausgleich für maximale Geschwindigkeit bei hoher Beladung Alle Parameter individuell programmierbar Fünf Programme mit je vier Schritten plus pre-step Umfassendes Alarmsystem Analogausgang für kontinuierliche Datenerfassung Optional eingebautes Kühlaggregat Optionale Beleuchtungseinheit Sicherheit ist auch bei Stromausfall gewährleistet, denn Zeitpunkt und Dauer der Netzunterbrechung werden erfasst und als Fehlermeldung im Display angezeigt. Über die Memory-Funktion werden die zuletzt eingestellten Werte gespeichert und nach Beendigung der Störung reaktiviert. Über den Analogausgang können Temperatur und Geschwindigkeit kontinuierlich dokumentiert werden. Schüttelamplituden von 25 mm und 50 mm Schnelle und einfache Tablarfixierung Auffangwanne aus Edelstahl für mehr Sicherheit Für 5-Liter-Kolben geeignet Zubehör Bestellnummer Beschreibung BBI-8861455 BBI-8854416 Beleuchtungseinheit für CERTOMAT® BS-1, 5 x 18 W, einzeln einschaltbar, programmierbar, nur in Verbindung mit Kühlung, max. 2.500 Lux Untergestell für zwei CERTOMAT® BS-1, geschweißte Profilrahmenkonstruktion, höhenverstellbare Füße Höhenverstellbarer Einlegerost aus Edelstahl für Petrischalen für CERTOMAT® BS-1 Montagesatz für Referenzthermometer (Pt100) für CERTOMAT® BS-1 BBI-8853738 BBI-8853762 BBI-8853789 BBI-8853800 Tablar Typ F (800 + 420 mm), bestückt mit Edelstahl-Halteklammern 74 Klammern, für Erlenmeyer-Kolben 100 ml 40 Klammern, für Erlenmeyer-Kolben 250 ml 26 Klammern, für Erlenmeyer-Kolben 500 ml 15 Klammern, für Erlenmeyer-Kolben 1000 ml BBI-8853037 Universal-Tablar, zu komplettieren mit Klammern, Gestellen oder Aufbausystemen Typ FU (800+ 420 mm) BBI-8854505 BBI-8854513 BBI-8854521 BBI-8854556 BBI-8854572 BBI-8854599 BBI-8854610 BBI-8854629 BBI-8854637 Edelstahl-Halteklammern für Tablar Typ FU für Erlenmeyer-Kolben 25 ml (max. 98) für Erlenmeyer-Kolben 50 ml (max. 96) für Erlenmeyer-Kolben 100 ml (max. 48) für Erlenmeyer-Kolben 250 ml (max. 39) für Erlenmeyer-Kolben 500 ml (max. 26) für Erlenmeyer-Kolben 1000 ml (max. 17) für Erlenmeyer-Kolben 2000 ml (max. 9) für Erlenmeyer-Kolben 3000 ml (max. 8) für Erlenmeyer-Kolben 5000 ml (max. 6) BBI-8854564 BBI-8854600 BBI-8854640 für Fernbach-Kolben 450 ml (max. 15) für Fernbach-Kolben 1800 ml (max. 6) für Fernbach-Kolben 2800 ml (max. 6) BBI-8854700 BBI-8854711 BBI-8854722 BBI-8854733 Kunststoff-Halteklammern, glasfaserverstärkt für Erlenmeyer-Kolben 100 ml (max. 48) für Erlenmeyer-Kolben 250 ml (max. 39) für Erlenmeyer-Kolben 500 ml (max. 26) für Erlenmeyer-Kolben 1000 ml (max. 17) BBI-8853134 BBI-8853142 BBI-8853150 BBI-8853169 BBI-8853185 BBI-8853177 Schwenkbare Gestelle für Reagenzgläser (max. 8 Gestelle) für 64 Reagenzgläser d14 mm für 42 Reagenzgläser d 16 mm für 36 Reagenzgläser d 18 mm für 33 Reagenzgläser d 20 mm für 18 Reagenzgläser d 25 mm für 16 Reagenzgläser d 30 mm BBI-8853088 BBI-8853096 BBI-8853193 BBI-8853240 Schwenkbare Gestelle für Zentrifugenröhrchen (max. 8 Gestelle) für 42 Röhrchen d 16 mm für 36 Röhrchen d 18 mm für 33 Röhrchen d 20 mm für 16 Röhrchen d 30 mm BBI-8864489 BBI-8861471 Bestellnummer BBI-8850321 Beschreibung Halter für Mikrotiterplatten, Edelstahl für 1 Standard-96-Loch-Platte oder 1 Deepwell-Platte Standard-Platten: max. 12 Halter auf Tablar Typ EU, 21 Halter auf Tablar Typ FU Deepwell-Platten: max. 9 Halter auf Tablar Typ EU, 18 Halter auf Tablar Typ FU BBI-8864470 Haftfolie für Universal-Tablare Standard-Haftfolie, Rolle mit 50 m, 30 + 1 mm, Premium-Haftfolie, Rolle mit 10 m, 30 + 1 mm, mehrfach verwendbar Antirutsch-Matte, 380 + 450 mm, individuell zuschneidbar BBI-8854246 BBI-8854254 Universal-Aufbausystem Basiselement B-3 für Tablar Typ FU Spannleiste, Typ U, für Basiselement B-3 BBI-8861005 BBI-8861013 BBI-8861021 BBI-8861022 Schikanekolben, DURAN, Typ Erlenmeyer, 3 Schikanen im Winkel von 120°, gerader Hals Erlenmeyer-Kolben 300 ml, Packung mit 10 Stück Erlenmeyer-Kolben 500 ml, Packung mit 10 Stück Erlenmeyer-Kolben 1000 ml, Packung mit 10 Stück Erlenmeyer-Kolben 2000 ml, Packung mit 10 Stück BBI-8861064 BBI-8861072 BBI-8861080 Schikanekolben, DURAN, Typ Erlenmeyer, 3 Schikanen im Winkel von 120°, gerader Hals, Anschluss GL 14 Erlenmeyer-Kolben 300 ml, Packung mit 10 Stück Erlenmeyer-Kolben 500 ml, Packung mit 10 Stück Erlenmeyer-Kolben 1000 ml, Packung mit 10 Stück BBI-8861099 BBI-8861102 Kappen für Erlenmeyer-Kolben, gerader Hals Aluminiumkappe, Packung mit 10 Stück Edelstahlkappe, Packung mit 10 Stück BBI-8860998 Schikanekolben, DURAN, Typ Erlenmeyer, 3 Schikanen im Winkel von 120°, enghalsig für Stopfen Erlenmeyer-Kolben 500 ml, Packung mit 10 Stück BBI-8864497 BBI-8860416 Bestellinformationen und Technische Spezifikationen Bestellinformationen CERTOMAT® BS-1 Version mit Umluftheizung (UH) 230 V/50 Hz 230 V/50 Hz 115 V/60 Hz 115 V/60 Hz BBI-8865027 BBI-8865124 BBI-8865035 BBI-8865132 CERTOMAT® BS-1/25 mm CERTOMAT® BS-1/50 mm CERTOMAT® BS-1/25 mm CERTOMAT® BS-1/50 mm CERTOMAT® BS-1 Version mit Umluftheizung/Kühlung (UHK) 230 V/50 Hz 230 V/50 Hz 115 V/60 Hz 115 V/60 Hz BBI-8865221 BBI-8865329 BBI-8865230 BBI-8865337 CERTOMAT® BS-1/25 mm CERTOMAT® BS-1/50 mm CERTOMAT® BS-1/25 mm CERTOMAT® BS-1/50 mm Alle Modelle werden ohne Tablar und sonstiges Zubehör geliefert. Für die Inkubation von Zellen oder das Mischen von Flüssigkeiten benötigen Sie ein Tablar mit weiterem Zubehör zur Aufnahme von Schüttelkolben, Scheidetrichtern oder Reagenzgläsern. Technische Spezifikationen Mechanische Daten Abmessungen B + H + T = 1150 + 720 + 770 mm Inkubationsraum B + H + T = 890 + 495 + 650 mm Gewicht (ohne Tablar) 198 kg Gehäuse Stahlblech mit säurefester Pulverbeschichtung, Innenauskleidung aus Edelstahl Antrieb Kollektorloser Motor, dreifache exzentrische Lagerung mit einstellbarem Massenausgleich Tablare, Typen|Größen Typ E/EU (420 + 420 mm), Typ F/FU (800 + 420 mm) Tablarbefestigung Einfacher Klemmmechanismus max. Beladung 20 kg, Massenausgleich beladungsabhängig einstellbar Stapeln bis zu 3 Einheiten, ohne Geschwindigkeitsreduzierung Schutzart Elektrische Daten IP21 Elektrischer Anschluss Kaltgerätesteckdose, separates Kabel ca. 3 m Schutzklasse l Netzspannung 230 V/50 Hz oder 115 V/60 Hz Heizleistung 650 W Kühlleistung 500 W Beleuchtung 90 W (5 + 18 W), max. 2.500 Lux Absicherung 2 + T6.3 A bei 230 V, 2 + T10 A bei 115 V Störprüfungen Betriebsdaten nach DIN EN 55022 und DIN EN 61000 Schüttelbewegung Kreisförmig, d 25 mm oder 50 mm, je nach Version Schüttelgeschwindigkeit 40 bis 400 U/min Drehzahlabweichung max. ± 1 % des Endwerts Inkubationstemperatur RT + 8 °C bis + 70°C (UH) | RT – 10°C bis + 70°C (UHK) Einstellung|Anzeige Alphanumerische Folientastatur, LCD Programmierung Bis zu 5 Programme mit je 4 Schritten und 1 Pre-step, mit Wiederholung Programmierbare Parameter Geschwindigkeit, Zeit, Temperatur, Beleuchtung Timerbetrieb 0:01 bis 98:59 Stunden; Dauerbetrieb bei Einstellung auf 99:00 Stunden Memory-Funktion Wiederanlauf nach Stromausfall Alarme Akustisch und visuell Luftumwälzung Ca. 180 m3/h Umbebungstemperatur + 10 bis + 35 °C (UH) | + 10 bis + 30°C (UHK) Feuchte Datenausgang extreme Feuchte vermeiden Analogausgang Für Geschwindigkeit und Temperatur, SUB-D-Buchse, 9-polig, 0 bis 10 V oder 0 bis 20 mA bzw. 4 bis 20 mA (umsteckbar durch Servicetechniker) Digitalausgang für Geschwindigkeit und Temperatur, Protokollausdruck über RS232 Schnittstelle, ausgelöst durch Tastendruck „START“ auf Bedienfeld während des Betriebes, und für Service-Funktionen Sammelalarm potentialfreier Kontakt (Schließer), max. 230 VAC (0,5 A Ohmsche Last) über SUB-D Buchse „Analog Out“ Pin 4/9 Sartorius AG Weender Landstraße 94–108 37075 Göttingen Telefon 0551.308.0 Fax 0551.308.3289 www.sartorius.com Sartorius BBI Systems GmbH Schwarzenberger Weg 73–79 34212 Melsungen Telefon 05661.71.3400 Fax 05661.71.3702 www.sartorius-bbi-systems.com Technische Änderungen vorbehalten. Printed in Germany. Gedruckt auf chlorfrei gebleichtem Papier W/sart-216 · G Publication No.: SB-1015-d05092 Order No.: 85030-514-35 CERTOMAT® BS-1 Incubation Shaking Cabinet Operating Manual 85030-520-51 General Safety Notes Introductory Notes This Operating Manual for the Incubator Shaking Cabinet CERTOMAT® BS-1 refers to the design and equipment features of this device at the date of print given with the Rev.No.. The information included in this Operating Manual has been carefully estimated and checked. However, no guarantee can be given with respect to completeness and correctness of this information. Sartorius Stedim Biotech GmbH reserves the right to modify the equipment and to change this operating manual without notice. • Laboratory seniors or the persons responsible for the use of the equipment must inform the personnel about potential risks of operating the CERTOMAT® BS-1. Furthermore they have to guarantee that the relevant safety instructions are observed. The personnel must have the necessary qualification for the operation of the equipment and its handling. • Please take special care regarding the operating information. Improper use of the unit can thus be avoided and you retain full claim for guarantee. Please contact us if you have any questions. Due to the continuous development of the units it may be possible that different building components or their use are not described. There may be information which does not apply to your device. If you find missing, misleading or wrong information or if you should wish additional information about different components please send us a note The CERTOMAT® BS-1 is just an example of laboratory equipment products from Sartorius Stedim Biotech GmbH. Our range of equipment includes shakers and incubator shakers, homogenizers, centrifuges, ultrapure water systems, air samplers and fermenters/bioreactors. You will find further information on our homepage www.sartorius-stedim.com. Steps to be carried out with special care or special aspects or special issues to be considered are marked as this paragraph. Important safety notes in this manual are marked with this symbol. Such instructions apply in addition to the other safety instructions for the field of application and for the working place. • Do not use devices with the wrong power rating. • Disregard of the safety instructions may for example result in damage to the equipment or may cause other material and eventually also person damage. Upon request, we will be pleased to inform you about our complete product range. Sartorius Stedim Biotech GmbH Weender Landstraße 94 - 108 37075 Göttingen, Germany Telephone +49.551.308.3118 Telefax +49.551.308.3918 [email protected] www.sartorius-stedim.com Guide through this manual This Operating Manual is organized systematically. Depending on your knowledge of the device you can start from the beginning or go directly to the chapter of your interest. • Section 1 gives an overview of design and functions of the BS-1. • Section 2 describes the requirements for installation at the working place. Furthermore the installation and the connection of the unit are explained. • Section 3 includes the operating information. If the equipment is installed ready for use or if you are used to the CERTOMAT® BS-1, respectively, you can go straight on to this section. • Section 4 is a summary of all important technical data. Here you find ordering information of optional equipment and accessories for the shaker. EG-Statement of Conformity With the Statement of Conformity, which is attached or which accompanies the equipment, Sartorius Stedim Biotech GmbH confirms the conformance of the CERTOMAT® BS-1 with the specified guidelines. 2 Contents Introductionary Note EG Statement of Conformity General Safety Notes Guide through this manual 1 Design and Function 4 1.1 1.2 1.2.1 1.2.2 1.2.3 1.2.4 Design and Construction Features Available Equipment and Accessories Shaking Drives Trays Illumination Unit Grating insert 4 4 4 4 4 4 2 Delivery and Installation 5 2.1 2.2 2.2.1 2.2.2 2.3 Delivery and Checking of Completeness Installation and Laboratory Connection Placement at the Working Place Power Supply Configuration of the CERTOMAT® BS-1 and Optional Equipment 2.3.1 Shaking Drive with Tray Support 2.3.2 Illumination Unit (option) 2.3.3 Connection of the Optional Cooling Devices 2.3.4 Installation of the grating insert (optionally) 2.3.4.1 Installation of the mounting rails (4 pieces) 2.3.4.2 Installation of the angle bracket 3 3.1 3.2 3.2.1 3.2.2 Operating Information Safety Notes Equipment, Mounting and Loading of a Tray Equipping the Tray Adjustment of the Counter Weight to the Intended Load 3.2.3 Mounting and Dismounting a Tray 3.3 Commissioning 3.3.1 Mounting and Set-ups 3.3.2 Menu overview 3.3.3 Manual menu “MAN“ 3.3.4 Program menu „PROG“ 3.3.4.1 Program definition 3.3.4.2 Example for programming 3.3.4.3 Password protection for programs 3.3.4.4 Cancelling of a program password 3.3.4.5 Starting a program 3.3.5 Setup menu „SETUP1“ 3.3.6 Set-up menu „SETUP2“ 3.3.7 Operation of the Optional Internal Refrigerator 3.4 Connection of External Equipment 3.4.1 Analog Exits (ANALOG OUT) 3.4.2 RS 232 Interface 3.4.3 Collective alarm 5 6 6 6 7 7 7 7 7 8 8 9 3.5 Mounting of Trays and Mounting Sets 3.5.1 Assembly and Loading of Finally Equipped Sets of Trays 3.5.2 Mounting of Test Tube Racks 3.5.3 Mounting of the Universal Mounting System 3.6 Maintenance and Trouble-Shooting 3.6.1 Maintenance and Cleaning 3.6.1.1 Cleaning 3.6.1.2 Maintenance of the Illumination Unit 3.6.2 Correction of malfunctions 3.6.2.1 Electrical Malfunctions 3.6.2.2 Malfunctions of the Shaking Drive 3.6.2.3 Malfunctions of the Optional Refrigerator 3.7 Warranty Regulations and Service 37 37 38 39 39 39 39 39 39 40 40 40 4 Technical Data, Ordering Information 41 4.1 4.1.1 4.1.2 4.1.3 4.1.4 4.1.5 4.1.6 4.2 4.2.1 4.2.2 4.2.3 4.3 Technical Data Mechanical Design Mains Supply Operating Data Analog Out Collective alarm Option refrigerator Ordering Information Configuration of the Shaking Cabinets Optional Equipment Accessories Safety Instructions Laboratory Shakers and Incubation Shaking Cabinets EG Declaration of Conformity Declaration of Decontamination Information and Instructions on Disposal and Repairs Dimension sheet CERTOMAT® BS-1 Prospectus CERTOMAT® BS-1 41 41 41 41 41 41 41 42 42 42 43 4.4 4.5 4.6 4.7 4.8 37 49 49 49 49 49 49 9 10 10 11 12 13 13 14 14 18 19 23 24 25 26 28 34 35 36 36 36 36 3 1 Design and Function 1.1 Design and Construction Features The CERTOMAT® BS-1 is an easy to operate, efficient and durable incubator shaking cabinet for universal use in the various tasks of biological and chemical laboratories, for example. The basic equipment of the BS-1 includes one tray support for shaking trays, carrying the drive unit, and the heater. The drive consists of a motor of external rotor type with brushless drive and a noiseless, robust Poly-V belt-drive. Shaking drives with different orbits are available. The orbit can be modified by our service on site. The different shaking speeds can be adjusted continuously. The shaker can be equipped with trays of different size and numerous clamps, holders as well as mounting systems of the CERTOMAT® - shaker program. Two large doors made of Thermo pane glass facilitate the fixing and removing of the shaking containers or the changing of the tray and they allow the visual control. For incubations near and below room temperature a refrigerating set are optionally available. For more information concerning the equipment configurations see below, detailed information you will find in chapter 4 “Technical Data and Ordering Information”. With this information you can define the specifications of the shaking cabinet according to your specific demands. 1.2 Available Equipment and Accessories 1.2.1 Shaking Drives The operating terminal and the control system are included in the panel on the right side of the cabinet. The shaking drive is mounted below the spill tray inside the cabinet. The drive is similar to the drive used for the bench top shaker CERTOMAT® RM. The drive specifications are as follows: • Orbital motion Ø 25 mm and 50 mm (depending on the delivered device version; can be changed to alternate amplitude in-place at customer’s site by authorized service representatives of Sartorius AG). • Shaking speeds: 40 ... 400 1/min. • Rotation speed accuracy: max. ± 1% of final value. • The drive has a patented, variable mass compensation. 1.2.2 Trays can be delivered with sets of fixed clamps for Erlenmeyer flasks of different sizes (type E, F), or they are available for individual mounting as universal trays type EU or FU. • The incubation chamber of the cabinet is made of stainless steel. The internal bottom is designed as a spill tray made of stainless steel. If containers get damaged during shaking operation this prevents spilled media from escaping unchecked. The spill tray can be easily removed from the incubation chamber and then cleaned. This design also facilitates the efficient cleaning of the shaking cabinet. Dimensions: type E/EU: tray type F/FU: W x D about 420 x 420 mm 1)1) W x D about 800 x 420 mm The universal trays can be equipped with clamps for Erlenmeyer flasks of different sizes, hinged test tube racks and universal mounting system. The universal mountings allow to use various vessels, such as beakers, bottles, or separation funnels. 1.2.3 You can use the shaking cabinet on the floor or on the table and you can stack 2 – 3 shaking cabinets. For stacking 2 cabinets a support frame is available. That means optimal arrangement for operation. Trays • 1.2.4 • Illumination Unit The BS-1 can be ordered with an optional illumination unit comprising 5 lamps of 18 W each. Each lamp can be switched off separately. The mounting of the illumination unit (see point 2.3.2) as well as its activation in the SETUP2-menu is described in point 3.3.6. Grating insert To static incubation, e.g. in Petri dishes, a grating insert as an option available. The mounting of the grating insert is described in chapter 2.3.4. 1 Trays of modified design for new locking; rebuilding of existing trays for this locking on request. Please contact the Sartorius customer service. 4 2 Delivery and Installation 2.1 Delivery and Checking of Completeness The configuration and the extent of delivery of the incubation shaking cabinet depend on the individual order. The shaking drive, and if ordered, the option „refrigerator“ will be preinstalled in the factory prior to delivery according to the customer´s demands. Each CERTOMAT® BS-1 is delivered after a thorough functional test. For transport to the working place, and prior to the installation and start-up of the unit you should check the following: 1. A suitable transport route through the building and appropriate transportation means (lifting trucks, etc.) should be available. The floor, the doors and elevators must be large enough for safe transport. 2. The working place must be suited for the shaking cabinet. It must offer sufficient space for convenient placement and it must compensate the weight of the completely mounted shaking cabinet: • Single cabinets or a stack of two cabinets can be placed on a support frame. This will ease operation of the controls. − If the working place is not suitable for the CERTOMAT® BS-1 and the unit does not correspond with your power rating, you must not start and operate it. 6. Please check the condition of your device and the accessories provided. All components specified in the order are premounted or are enclosed in the delivery. The delivery should be complete and all parts undamaged. • If the CERTOMAT® BS-1 has the wrong mains specifications, in case of malfunction of the unit or if any parts are damaged or are missing inform your Sartorius Stedim Biotech GmbH representative as soon as possible. Dimensions of the support frame: 1150 x 200 x 710 mm (W x H x D) • Up to three cabinets can be stacked. In this case the working place must be steady enough to carry the weight of all cabinets including all accessories and the load. Also the dimensions of the devices must be taken into consideration. 3. The working place must be able to compensate vibrations which are caused by the shaking operation. Make sure that surrounding equipment cannot be disturbed by the BS-1. Please observe the notes for the limitation of the shaking speeds in chapter 3. The action of the loaded trays causes vibrations, which will change with load and shaking speed. These vibrations cannot be fully compensated by the adjustable counter-balance weight. Especially at heavy loads (>10 kg) and high shaking speeds resonance effects may occur and vibrations may be transmitted to the working place. 4. The power supply of the laboratory must correspond to the technical specifications of your CERTOMAT® BS-1 see the labels on the unit. 5. The shaking cabinet is designed for normal laboratory conditions, see information about the environmental conditions in the supplement. Under special environmental conditions or when using aggressive media you have to test the suitability of all parts. Malfunction and damage, such as corrosion by aggressive media, are not subject to our guarantee. 5 2.2.2 Power Supply 2.2 Installation and Laboratory Connection 2.2.1 Placement at the Working Place You can stack the CERTOMAT® BS-1. Up to three devices can be placed on top of each other. As far as the information below refers to a shaking cabinet they apply also to your unit. • You will require or need to prepare a laboratory grounded socket offering 230 V, 50 Hz or 115 V, 60 Hz, depending on the country standard. Check on the type plate on the cabinet whether it has the correct power ratings. Never connect the CERTOMAT® BS-1 to power supplies of wrong ratings. 1. Place the CERTOMAT® BS-1 in such a way, that it is easily accessible and does not interfere with other devices. The right part of the machine should be positioned in an approx. distance of 50 cm from other devices or from the wall. So the side door is accessible and you will not have to reposition the BS-1, if you want, for instance, to open the side door. A minimum wall distance of 15 cm is necessary for sufficient ventilation. • If the plug at the power supply cable does not fit to your sockets, the service technician of Sartorius AG can attach a suitable plug. • For placement of one or 2 cabinets in stack arrangement we recommend to place the (lower) cabinet onto the optional support frame. This makes the operation easier. Each unit can be operated separately. 2. To stack to 2 to 3 cabinets, − remove the plastic caps at the upper cover of the cabinet, which is to be placed below. − replace the feet of the intended upper cabinet by the locating pins included in the delivery. − if necessary, the eyelets provided can be screwed into the upper side of the top cabinet so that the cabinet can be easily lifted. 3. Place the cabinets carefully on top of each other. Take care of the weight of the cabinets. Only use suited lifting tools or devices. The locating pins should easily fit into their borings in the upper cover of the lower cabinet. 4. Carefully level the incubation shaker or the stacked units. Unbalanced placement of the cabinet can cause uneven rotation of the tray support. The drive can be subject to quick wear and tear or be damaged, respectively. Especially at heavy loads of the shakers and with high shaking speeds, the stack arrangement of 2 ... 3 cabinets can start to wobble during operation. 6 2.3 Configuration of the CERTOMAT® BS-1 and Optional Equipment 2.3.1 Shaking Drive with Tray Support • 2.3.2 • The shaking drive will be mounted in the factory prior to delivery in the shaking cabinet and will be ready for use after assembly of the tray and loading with shaking containers. Rebuilding to a different orbit must only be done by authorized and qualified service personnel. Please contact your service representative or the service department of Sartorius AG, if necessary. Illumination Unit (option) Abb. 3: Affiliated lighting unit Push the illumination unit in the prepared guiding bars. You have to release the 4 fastening screws of the pull bars first. Push the illumination unit into the device until the cross hole in the pull bars becomes visible. Insert the delivered screws in the cross holes and protect the illumination unit in this way from sliding out. Fasten the 4 fastening screws carefully again. Plug the plug for the mains supply in the prepared socket in the incubation chamber (refer to fig. 1). Secure the plug (refer fig. 2) by fastening the coupling ring in the socket (refer fig. 3). After activation of the option “LIGHT” in the manual menu (see point 3.3.6) the illumination unit is ready for operation. If required, individual lamps can be manually switched off to reduce the light intensity (refer fig. 4). Abb. 4: Switch for fluorescent tubes 2.3.3 • 2.3.4 Connection of the Optional Cooling Devices If your CERTOMAT® BS-1 includes the optional refrigerator, no additional connections are required. Any condensate produced during cooling operation, will be evaporated inside the cabinet and the humid air be exhausted via the ventilation of the cabinet. Installation of the grating insert (optionally) Scope of delivery: Abb. 1: Connecting box for the optional lighting unit 1 2 4 Abb. 2: Plug of the optional lighting unit 3 Figure 5: Grating insert with installation material 1. 2. 3. 4. Fastening screws Mounting rails Angle bracket Grating insert (12 pcs.) (4 pcs.) (4 pcs.) (1 pcs.) 7 2.3.4.1 Installation of the mounting rails (4 pieces) 1. Attach the first mounting rail with the upper screw in the provided position of the side wall (slightly tighten the screw). 2. Now press the angle bracket in such a way that the lower end of it snaps in the mounting rail – one recess notch under it (see figure 8). Mounting rail Care for the correct mounting position (see figure 6) Angle bracket Figure 8: Assembled angle bracket 3. Install the remaining 3 angle brackets in the same order at the other mounting rails. Take care for the equal height of the angle brackets. 4. Insert the grating insert into the device. The air flow of the device ventilator inside must not be blocked! Take care for the safe seat and the horizontal position of the grate. 5. If necessary: − remove the grating insert − remove the incorrectly positioned angle bracket by pressing it slightly − install the angle bracket in a new position again Figure 6: Mounting position of the mounting rail 2. Insert the remaining 2 screws into the screw holes and tighten them slightly. 3. Securely tighten all screws. 4. Install the remaining 3 mounting rails in the same order. 2.3.4.2 Installation of the angle bracket 1. First attach the upper hook of the angle bracket in the recess of the mounting rail at the desired height (see figure 7). Mounting rail Angle bracket Figure 7: Installation of the angle bracket 8 3 Operating Information 3.1 Safety Notes Media used with incubation shakers like the CERTOMAT® BS-1 can be hazardous. This is especially true for caustic, inflammable or infectious media, for instance. Since the risks and the correlated safety requirements depend on the media, they cannot be discussed herein. Your company must issue applicable safety guidelines, distribute them to the laboratory staff and ensure, that they are strictly followed. The following safety instructions must be observed: When hazardous agents are to be used only authorized personnel should have access to the laboratory or to the working area, respectively, and be allowed to operate the CERTOMAT® BS-1. It must be guaranteed that unauthorized persons do not have access to the unit. Critical conditions are possible even during normal operation. At specific shaking speeds and depending on the load the action of the shaking drive can cause vibrations due to „self-resonance“ effects. Such vibrations cannot be fully compensated by the internal balance weights of the tray support and will be transmitted to the BS-1 and the working place. If media are incubated in open containers you should lower the shaking speed as far as possible, to avoid unintended spillage of the media. If the media are released unintentionally, i.e. due to breaking of glass vessels, for instance, you should clean the spill tray and incubation chamber. Remove broken glass and any foreign bodies as soon as possible and prevent those parts from entering the gap between the tray support and the spill tray or from being introduced into the drive unit. Further information is given in chapter 3.6. Operators should wear adequate working clothes and personal protection, such as gloves, protective goggles, or breath protection, for instance. Only equipment and accessories must be used which Sartorius Stedim Biotech GmbH has released for the BS1. Before starting operation all parts should be checked for damages, especially the glass parts. You must not use any damaged or defective equipment. Do not start the shaking drive without a tray installed. Always switch-off the shaking drive before mounting or removing the tray or any of the containers to be incubated. Properly fasten the tray and all mountings and holders to prevent that the containers can loosen during operation. When loading the tray, evenly distribute the containers on the tray (i.e. balanced arrangement) and ensure that they cannot hit against each other. Reduce the shaking speed as far as necessary, if resonance effects occur and vibrations are transmitted to the working place or neighbouring equipment or if the stack arrangement becomes unstable. 9 3.2 Equipment, Mounting and Loading of a Tray Sartorius Stedim Biotech GmbH offers trays for the CERTOMAT® BS-1 fixed with sets of universal clamps for Erlenmeyer flasks of different sizes, or trays without assemblies. On delivery or after the first set-up of the BS-1 the tray can be premounted ready for operation. If this includes all clamps and mountings required for first use, you can insert the containers and start operation, as shown in section 3.3. If you need to change the tray or its equipment for your application or if you want to insert another tray please read the following information. 3.2.1 Equipping the Tray • We recommend to mount all clamps and mounting sets for your containers on the tray before you place the tray in the BS-1. So they can be handled easier. However, the flasks, bottles, etc. with the media (especially heavy containers) should be placed on the tray after it has been attached to the tray support. • Take care of the dimensions of the incubation chamber, about 890 x 495 x 650 mm (W x H x D) Mind the weight of the fully equipped tray. It may be very heavy. The shaking containers may hinder the handling. You can hit with the tray and damage the containers placed on the tray. Media may be released unintentionally and may cause personnel hazards. 10 1. For a universal tray without clamps, etc., place and screw tight the holders and mountings required. In order to change an existing tray setup, first release all parts which are not needed. • Clamps for Erlenmeyer flasks are available in different sizes which can be individually combined. For test tubes, bottles, beakers or separation funnels, mounting systems, such as test tube racks or universal mounting sets, are available. Detailed information about the available container holders and mounting systems you will find in section 3.4. 2. When assembling clamps and other devices on the tray, make sure to distribute them evenly. This will avoid uneven loads and ensure that the containers can be safely fixed on the tray / in the clamps. 3.2.2 Adjustment of the Counter Weight to the Intended Load Upon delivery the CERTOMAT® BS-1 is preadjusted for a load of 10 kg. If the intended load is different from this, the counter weight has to be readjusted correspondingly. Thus the vibrations which may occur during operation, can be minimized. 1. Weigh the completely equipped tray with all shaking containers attached. 2. Switch off the BS-1 at the main switch. 3. To adjust the counter weight with the variable tool for the load open the front flap under the glass doors downwards. The front flap is fixed with magnets. Behind these flap you will find the variable tool. 6. Put the variable tool (1) through the opening under the front flap in the housing and guide it on the axis of the counter weight (2); 7. Please turn the counter weight with the variable tool in the clockwise direction (for load <10 kg) or turn it out anticlockwise (load >10kg). • The adjustment of the counter weight which is necessary for a certain load is marked on the variable tool. 8. Please remove the hexagon socket screw key and the variable tool and close the front flap. 9. Mount the loaded tray. 10. Switch on the BS-1. The CERTOMAT® BS-1 starts only if both doors are closed. 4. Please turn the shaking table by hand to rearmost position. 5. Block the drive of the shaking table by putting the delivered hexagon socket screw key through the boring of the shaking table (Fig. 10, pos. 4). Carefully turn the shaking table until the drive has totally blocked. 11. Test for the silent operation at your intended shaking speed. 12. If a re-adjustment is necessary, stop the shaker (key STOP), switch off the BS-1, remove the tray and repeat steps 3 – 11. 4 3 1. 2. 3. 4. Variable tool Counter weight Axis Hexagon socket screw key 1 Fig. 9: Adjustment of the counter weight corresponding to the load 11 3.2.3 Mounting and Dismounting a Tray 1. Place the tray onto the shaking table. Push it with the indents (1a/1b) against the rear knurled screws (1c/1d) and the clamp (2a) of the shaking table. Please mind the weight of the tray if you have already loaded it with shaking containers. 2. Push down (2b) the front edge of the tray so that it properly fits into the front clamp (2c). 3. The borings (3a/3b) will precisely fit onto the locating pins of the tray support (3c/3d) and locate the tray. Please take care that the locating pins (3c/3d) are placed evenly in the tray. Only then the tray is situated correctly on the shaking table. If necessary, you can adjust the locating pins as follows: 1b 1a 3a 1. Release the screws of the locating pins (3c/3d) with the hexagon socket screw key. 2. If necessary, move the tray slightly. The locating pins (3c/3d) position themselves in the centre of the borings (3a/3b) of the tray 3. Tighten the screws of the locating pins (3c/3d) carefully again after the tolerance balancing. 4. In order to improve the safe position of the tray – especially at high loads in connection with high speed – the provided flat headed screws M5 x 8 must be screwed in the prepared borings. 2b 3b 1c 2a 1d 4 3c 2c 3d Fig. 10 Mounting of the tray on the shaking table (tray shown without mounting systems and containers) 12 3.3 Commissioning Checking the door contact switch 3.3.1 Mounting and Set-ups Only for devices with serial number to: 00499/05 If you have changed the mounting place (e. g. cooling room <-> laboratory) please wait until the device has warmed up to room temperature before you start it. Otherwise the air humidity may condensate in the device leading to functional disturbances. Whenever you start to operate the CERTOMAT® BS-1, you have to check the proper function of the door contact switch! 1. To check the function of the switch, proceed as follows: Following the transport of a CERTOMAT® BS-1 with integrated cooling unit, the device may only be put into operation after a waiting period of an hour. This avoids danger to the cooling unit. 2. 3. After turning on the CERTOMAT® BS-1 and initialisation, the unit is in the Manual-Menu „MAN“. • Connect the CERTOMAT® BS-1 with the mains cable to a suited socket. By turning the mains switch (1) the electronics are supplied with line voltage. • After the switching on the device initializes. After approx. 5 sec. the background illumination of the display as well as the green operating LED light. The manual menu “MAN“ is active. The device is now ready for operation. F1 speed [1/min.]: 50 F3 time [h:min]: 00:10 Press the START-key to start the shaker. Open the right door of the CERTOMAT® BS-1. The BS-1 must stop. By pressing the ESC-key you change from the manual menu to the main menu. Once the preset time has expired (see chapter 3.3.5), the alarm LED on the front panel lights up. If activated, an alarm signal is generated in addition. 3 • Press ENTER to acknowledge the alarm. • Close the door of the CERTOMAT® BS-1. The shaker restarts. If the shaker continues to run in spite of the opened right door, the unit is defective. In this case the BS-1 must not be started! 4 5 3 2 6 7 1 10 Fig. 11: Frontpanel with key pad 1. mains switch 2. [+/-] -key for setting of process values (temperature, speed) 3. function field [F1-F5] 4. alphanumeric display 5. display field MODE 6. [ESC] -key for menu jump back [ENTER] -key for confirmation of inputs / changes 7. Operation-LED (green) 8. [START] -key 9. ALARM-LED (red) 10. [STOP] -key In the manual mode „MAN“ enter these values via the keypad: (see also chapter 3.3.3) 9 Repairs can be carried out by the Sartorius AG service representative or by authorized personnel of a customer-owned workshop. Please inform your local Sartorius AG sales representative or contact: Sartorius AG Servicezentrum Nord Weender Landstraße 94-108 37075 Göttingen, Germany Telephone +49.551.308.3729 / 3740 / 3741 Telefax +49.551.308.3730 8 13 3.3.2 Menu overview In the menu overview you will find the menu points which are available in the main menu. In the chapters described in the following you will find the set-ups of the respectively selected menu item. Operating keys F3 F3: SETUP-Menus: see chap. 3.3.5/3.3.6 F4 MAN SETUP CERTOMAT BS-1 10:13:35 PROG MAIN F4: MAN manual menu: see chap. 3.3.3 F5 MODE F5: PROG program menu: see chap. 3.3.4 Display field: above the MODE-field the respective „active“ menu is indicated. Here: “MAIN“ for main menu. Fig. 12 Main menu (menu overview) 3.3.3 Manual menu “MAN“ • In activating the key [F4] “MAN“ in the main menu the „manual menu“ is activated. • Back jump from the „manual menu“ to the main menu with [ESC] F4 SETUP MAN CERTOMAT BS-1 10:13:25 PROG MAIN < > ESC Fig. 13: main menu SPEED 0 OFF COOLING Set-up of speed After pressing of [F1] the input field “SPEED“ in speed/min. flashes. • In pressing the [+/-] -keys the speed is adjusted • Please confirm input with [ENTER] TEMP: Set-up of the temperature • After pressing of [F2] the input field “TEMPERATURE“ flashes in °C • In pressing the [+/-] -keys the temperature is adjusted. Confirm input with [ENTER]. 14 SPEED • F2 TIME 00:00 <-> MAN Fig. 14: MAN: manual menu The following set-ups in the “main menu“ (fig. 10) can be carried out: F1 TEMP 10.0°C F3 TIME: Set-up of the TIMER • After pressing of [F3] the “TIMER“ [TIME] can be adjusted • In pressing the keys [+/-] the desired operating time in [h : min] is adjusted • Confirm input with [ENTER] • The operating time can be set between 00h:01min and 99h:59min as well as “CONT.“ (Continuous operation). F4 • COOLING: Switching the cooling on and off (only at “UHK version “) After pressing of [F4] the cooling is switched on / off. Switching the cooling on is only possible at temperature set values < 38.5°C! If a higher temperature value is entered and confirmed by pressing [ENTER] while the refrigerator is on, a brief signal sounds and the refrigerator will be switched off. MODE • MODE: Display field The respective „active“ menu is indicated, here: “MAN“ for manual menu 15 • With the [F5] key you can mutually change to another display field in order to indicate all values to be set (only at option “illumination“). < SPEED 0 OFF COOLING F5 > TEMP 10.0°C TIME 00:00 LIGHT ON <-> MAN <-> Fig. 15: adjustable parameters F2 • LIGHT: Switching the illumination on and off (only at option “illumination”) MODE: Display field • The respective “active” menu is indicated, here “MAN“ for manual menu. • In pressing the key [START] you change to the operating mode “RUN“. • The previously adjusted values for: Speed Temperature Lighting Cooling Timer are activated now. 16 Fig. 16: further set-up possibilities After pressing of [F2] the illumination is switched on / off. MODE : : : : : SPEED TEMP LIGHT COOLING TIME MAN • With the key [F5] you can alternately change to another display field in order to indicate all actual values. < HEAT OFF COOL. OFF LIGHT OFF <-> RUN F5 > Fig. 17: Operating mode RUN • SPEED 125 01:23 TIME TEMP1 23.4°C <-> RUN Fig. 18: Operating mode RUN The “TIMER“ runs. The operating time remaining is indicated. In the operating mode the ACTUAL values are indicated. Set values cannot be changed here! • In pressing the function keys [SPEED], [TEMP], [COOLING] and [LIGHT] a little bit longer the parameter flashes and the SET-value is indicated. After the release of the function keys the ACTUAL-values are indicated again. • The ACTUAL value display of the temperature refers to the air temperature in the incubation room. • In pressing the key [STOP] you jump back to the manual menu „MAN“. • Heating, cooling, light and shaker are switched off. • A new set-up can be effected. • After the adjusted operating time is finished, you automatically jump back to the manual menu “MAN“. Once key [STOP] has been pressed, the refrigerator will continue to operate for up to 3 minutes. The refrigerator can only be restarted after 3 minutes. 17 3.3.4 Program menu „PROG“ • In activating the key [F5] “PROG“ the “program menu“ is activated. ”PROG1“ flashes! • Jump back to the main menu with [ESC] * F5 MAN SETUP CERTOMAT BS-1 08:53:27 PROG MAIN < flashes * > ESC PROG1 ENTER START PROG4 PROG2 PROG3 programmed starts PROG5 PROG1 Fig. 19: main menu Fig. 20: PROG1-4: program menu 18 • With [F1] … [F5] the respective program is selected. After the selection the selected program flashes in the display. • In the “MODE“-field the setup program appears automatically, here “PROG1“ • The programming according to an example is explained in point 3.3.4.2 “Example for programming“. 3.3.4.1 Program definition • After pressing of the [ENTER] key (alternately press the flashing function key for approx. 2 sec.) you change to the program definitions „PRSTEP . .STEP1 . .STEP4“. • In this menu the different “STEPS“ can be selected within the program „PROG1 … PROG4“. • For programs protected by passwords the respective password must be entered for the editing/modification of present programs. * flashes * ENTER PROG1 ENTER START PROG4 PROG2 PROG3 programmed starts PROG5 PROG1 > Alternately press the flashing function key for approx 2 sec. < PRSTEP ON 0:00 STEP3 STEP1 0:00 0:00 STEP4 STEP2 0:00 PROG1 ESC Fig. 22: program definition Fig. 21: PROG1-4: program menu • In fig. 18 (program definition) is indicated, whether the PRSTEP is “ON” or “OFF”. Furthermore the step duration is indicated. Selection of the different “STEPS“ (fig. 18): F1 • STEP2 for: STEP3 for: STEP4 After pressing of [F5] the set-ups for “STEP4“ can be effected. MODE • for: After pressing of [F4] the set-ups for “STEP3“ can be effected. F5 • STEP1 After pressing of [F3] the set-ups for “STEP2“ can be effected. F4 • for: After pressing of [F2] the set-ups for “STEP1“ can be effected. F3 • PRSTEP After pressing of [F1] the set-ups for “PRSTEP“ can be effected. F2 • for: MODE: Anzeigefeld The respective “active” PROG is indicated, here „PROG1. 19 With the keys [F1 to F5] the adjustable parameters of the steps can be selected. Function keys PRSTEP ON 0:00 STEP3 STEP1 0:00 0:00 STEP4 F1-F5 STEP2 0:00 PROG1 < > ESC SPEED 0 OFF COOLING TEMP 10.0°C TIME 00:00 <-> STEP1 Fig. 24: adjustable parameters Fig. 23: program definition For each “STEP“ the following parameters can be adjusted (fig. 20): F1 SPEED: Set-up of the speed • After pressing of [F1] the input field “SPEED“ in speed/min. flashes • In pressing the keys [+/-] the speed is adjusted • Confirm input with [ENTER] F2 TEMP: Set-up of the temperature • After pressing of [F2] the input field “TEMPERATURE“ in °C flashes • After pressing of the keys [+/-] the temperature is adjusted • Confirm input with [ENTER] F3 TIME: Set-up of the STEP-duration [h : min] • After pressing of [F3] the input field “TIME“ flashes • In pressing the keys [+/-] the time interval (duration) is adjusted • Confirm input with [ENTER] • At the STEP duration values between 00h:01min (immediate change to the next step) and 99h:59min as well as “CONT.“ (continuous operation until the manual break with STOP) can be adjusted You cannot determine a firm operating time for the PRSTEP. It can only be switched „ON“ or „OFF“! 20 • PRSTEP in operating mode: the conditions selected in the PRSTEP from the pressing of the [START] key up to the actual program start [STEP1] are activated. • PRSTEP not operating: the shaker, tempering, cooling and light are deactivated until the program start [STEP1]. F4 • COOLING: Switching the cooling on and off (only at “UHK version”) After pressing of [F4] the cooling is switched on / off. Switching the cooling on is only possible at temperature set values <38.5 °C! If a higher temperature value is entered and confirmed by pressing [ENTER] while the refrigerator is on, a brief signal sounds and the refrigerator will be switched off. MODE MODE: Display field • The respective “active“ STEP is indicated • With the [F5] key you can alternately change to another display field in order to set up further parameters (only at option “illumination“). < SPEED 0 OFF COOL F5 > TEMP 10.0°C TIME 00:00 LIGHT ON <-> STEP1 <-> Fig. 25: adjustable parameters F2 • Fig. 26: further set-up possibilities Switching the illumination on and off (only at option “illumination”) After pressing of [F2] the illumination is switched on / off. MODE • LIGHT: STEP1 MODE: Display field The respective “active” STEP is indicated, here “STEP1“ 21 • In pressing the key [ESC] you jump back to the previous menus (until the main menu) ESC SPEED 0 OFF COOLING TEMP 10.0°C TIME 00:00 <-> STEP1 > ESC PRSTEP ON 0:00 STEP3 Fig. 27: set-up possibilities with in a „STEP“ PROG2 PROG3 programmed starts PROG5 PROG1 Fig. 29: program menu 22 STEP2 00:00 PROG1 Fig. 28: program definition ESC PROG1 ENTER START PROG4 STEP1 0.0°C 0:00 STEP4 > MAN SETUP CERTOMAT BS-1 08:53:27 PROG MAIN Fig. 30: main menu > • 3.3.4.2 Example for programming • • • • Altogether five different programs can be memorized in the device. Each program consists of one “PRSTEP“ and four further steps which can be processed one after the other. For each step the values for cooling, light, speed and temperature can be set independently from one another. Each step has a defined duration time. The main purpose of use for the “PRSTEP“ is the date/time exactness for the provision of cultures, e. g. after the weekend or the next morning. Advantages: You have to define the program only once with operating times and you can start it afterwards at any time. The time of the program end remains always the same. • If only one or two steps are required the remaining steps can be defined with a duration time 00:00 so that the program is directly stopped afterwards. A repeat function for endless loops is available. The “PRSTEP“ can only be switched on or off (no operating time). It defines the conditions (cooling, light, speed and temperature) from the pressing of the key [START] until the program start (STEP1). At “PRSTEP“ switched off, the cooling, light, speed and temperature are switched off until the program start. • Comfortable start of night or weekend programs during the day or before the weekend • Conditions are reproducible before the start of the program because these are held by the device according to the settings in the "PRSTEP". • Automatic program start without the personnel being present Example: On Monday morning at 9:00 o’clock any cultures have to be ready. The program (STEP1...STEP4) for the production of these cultures needs altogether 36 h. So the program must be started manually without use of the “PRSTEP“ on Saturday evening at 7:00 o’clock. The “PRSTEP“ makes it possible to choose any time for the start and to keep the material cooled under the desired conditions.. PROG1: PRSTEP: ON at 20 °C, speed 0, light off, cooling on Step 1: 7 h at 30 °C, speed 200, light on, cooling off Step 2: 10 h at 40 °C, speed 100, light off, cooling off Step 3: 20 h at 10 °C, speed 60, light on, cooling on Step 4: 1 h at 10 °C, speed 200, light on, cooling on Function PRSTEP STEP1 STEP2 STEP3 STEP4 Cooling on off off on on Light off on off on on 200 200 Speed [rpm] 100 60 0 40 30 Temperature 20 [°C] 10 TIME (operating time) Day Time START PRSTEP ON 7h 10 h Saturday Sunday 19:00 Program START 02:00 10 20 h Sunday 12:00 1h Monday 08:00 Monday 09:00 Program end Fig. 31: Example for programming 23 3.3.4.3 Password protection for programs • The “password protection“ (code) for programs serves to protect programs, which have once been established, when against unauthorized access. The content of the program cannot be modified without knowledge of the password. If required also the “starting“ and “stopping“ of the programs can be protected by this password. • After pressing of the [ENTER] key you change to the menu where you enter the “password“ (code) for the active program. • For safety reasons the “password“ must be entered twice when the password is determined. ENTER PRSTEP ON 0:00 STEP3 STEP1 0:00 0:00 STEP4 > STEP2 0:00 INPUT: PROG1 Fig. 32: program definition of PROG1 24 PASSWORD Fig. 33: determination of password for PROG1 • In pressing the function keys [F1] ... [F5], [+], [-], [START] or [STOP] as admissible signs the “password“ (code) (visible “º“ on the display) is entered. • The “password“ (code) must have at least 4 and at most 7 places. • After the input of the password the “password“ (code) must be confirmed with the [ENTER] key. Then you change automatically to the confirmation of the password which has been entered. • After the repeated input of the password the “password“ (Code) must be confirmed once again with the [ENTER] key in order to secure the “password input”. At the same time the back jump to the “program definition menu” is effected. • In pressing the [ESC] key the “password determination“ can be stopped. All “password inputs“ which have been effected until this time become invalid. 3.3.4.4 Cancelling of a program password • Select in the program definition menu the program in which you want to cancel the password (password knowledge is necessary). • In pressing the [ENTER] key you change from the program definition menu to the menu for password determination. PRSTEP ON 0:00 STEP3 STEP1 0:00 0:00 STEP4 STEP2 0:00 ENTER > PASSWORD INPUT: PROG1 Fig. 34: program definition of PROG1 Fig. 35: determination of password for PROG1 • Deleting / deactivating of the “password” (code) is carried out with the [ENTER] key as first password sign. You change then to the confirmation of the deletion / deactivation. • The repeated input of [ENTER] causes the deletion of the existing “password” (code) and the automatic back jump to the program definition menu is effected. • In pressing the [ESC] key the deletion / deactivation of the “password“ (code) can be stopped. 25 3.3.4.5 Starting a program • In pressing the [START] key afterwards you change to the setup mode of the program selected before, here program 1 “PROG1“. * flashes * START < PROG1 ENTER START PROG4 > ESC TIME 08:15 PROG2 PROG3 programmed starts PROG5 PROG1 DAY 30.04.99 START REPEAT ON PROG1 Fig. 36: PROG1-4: program menu Fig. 37: start menu The following parameters in the start menu (fig. 33) can be adjusted: F1 • After pressing of [F1] the input field “TIME“ flashes • In pressing the [+/-]-key the time is adjusted • Confirm input with [ENTER] F2 DAY: Set-up of the time (start time of the program) Set-up of the date (start date of the program) • After pressing of [F2] the input field “DAY“ flashes • After pressing of the [+/-] keys the date is adjusted • The current date and the current time are respectively preadjusted • Confirm input with [ENTER] F3 26 TIME: REPEAT: Set-up of repeat • After pressing of [F3] the automatic program repeat is activated / deactivated • At activated program repeat the “STEP 1“ to “STEP 5“ of the program is processed in an endless loop • The “PRSTEP“ is cycled only at the first time. F4 F5 MODE MODE inactive Display field • The respective “active” program is indicated, here “PROG1“ • In pressing the [START] key afterwards you change to the operating mode “RUN“. The program activated before is processed. • With the [F5] key you can alternately change to another display field in order to indicate all actual values! HEAT OFF COOL OFF LIGHT OFF <-> RUN 1,1 < F5 > Fig. 38: RUN: operating mode SPEED 130 10:25 TIME TEMP1 13.8°C <-> RUN 1,1 Fig. 39: RUN: operating mode • At the TIME-display the rest operating time of a “STEP“ is indicated. During the “PRSTEP“ processing no time is indicated (display “PRSTEP“) • In the operating mode the ACTUAL VALUES are indicated and the started program runs automatically. • In pressing the respective function keys the SET VALUE is indicated. • After having released the function key the ACTUAL VALUES are indicated again. • In pressing the [STOP] key you jump back to the program menu “PROG“. Heating, cooling, light and shaking drive are switched off. The program processing is stopped. It is indicated during the program processing which program and which “STEP“ are being processed at the moment, e. g.: RUN 2,- RUN 1,1 • RUN 2,P STEP1 PRSTEP OFF PRSTEP ON Programm 1 Programm 2 Programm 2 For the programs “PROG2-PROG5“ the set-ups are used analogously to the description for program 1 “PROG1“. 27 3.3.5 Setup menu „SETUP1“ • In pressing the [F3] key you change to the “setup1 menu“. • All set-ups and modifications are memorized internally and remain active also after voltage loss or switching off and on! F3 MAN SETUP CERTOMAT BS-1 08:53:27 PROG MAIN < Fig. 40: main menu ESC > LANG. CONTRA +/- DIAG. ALERTS TIME SERVICE SETUP1 Fig. 41: setup1 menu Display contrast • Can be modified in pressing the keys [+] and [-]. Attention: In pressing the key [-] the contrast is so much reduced that no information is visible at the display! The following parameters in the “setup-menu1“ (fig. 37) can be adjusted: F1 28 LANG.: Set-up of the menu language • After pressing of the [F1] key you come to the menu in which you adjust the menu language (German, English, French). • An arrow marks the respectively active language. • In pressing the keys [+] / [-] the arrow can be moved. • In pressing the [ENTER] key the respectively adjusted language is confirmed. • In pressing the [ESC] key you change again to the “setup1-menu“. The language set-up before is now shown in the menus. F2 DIAG: Diagnosis of the alarm messages which occured The alarms which occurred are indicated on a list. The following information is separately made for disposal for each error type: Error type e. g. speed or temperature alarm Error counter Number of the alarms which occurred since the last acknowledgment Date / time / alarm start Date / time / alarm end Date and time of the alarm start (only of the alarms which occurred last) Date and time of the alarm end (only of the alarms which occurred last) • An arrow marks the respective active list entry. • In pressing the keys [+/-] the arrow can be moved. • In pressing the [ENTER] key the respectively active list entry is cancelled. Afterwards the alarm information for this kind of error is not available any more. • If no alarm occurred or if all list entries were cancelled [“....<ESC>....“] appears on the display. The diagnosis menu can only be quit with [ESC]. F3 ALERTS: Alarm definition In a list the alarm parameters for temperature, speed, door contact and voltage loss can be adjusted. • An arrow marks the respectively active parameter • In pressing the keys [+/-] the arrow can be displaced • In pressing the [ENTER] key the YES / NO definitions are directly changed or the numeric values can be released for modification (value flashes). • In pressing the keys [+/-] the respectively flashing value can be set. • In pressing the [ENTER] key the adjusted value is confirmed. • In pressing the [ESC]-key you jump back to the SETUP1-menu. 29 These alarm parameters can be adjusted: Temperature 1 ON OFF The temperature alarm is active The temperature alarm is inactive Signal ON OFF Acoustic signal active in case of an alarm Acoustic signal inactive in case of an alarm Time OK 40 [s] Time ERR 40 [s] min. 3,0 [°C] max. 3,0 [°C] Duration of time, during which the set temperature must have been at least reached after a temperature error, before the next error can be registered (here 40 seconds). Duration of time, during which the temperature error must at least occur, before the error is indicated (here 40 seconds). Permitted temperature deviation downwards, where no error is indicated (here 3,0 °C) Permitted temperature deviation upwards, where no error is indicated (here 3,0 °C) Door contact ON OFF The door contact alarm is active The door contact alarm is inactive Signal ON OFF Acoustic signal is active if the alarm occurs Acoustic signal is inactive if the alarm occurs Time OK 5 [s] Time ERR 2 [s] Duration of time, during which the plexiglass cover must be at least closed, before the error is registered again (here 5 seconds) Duration of time, during which the plexiglass cover must be at least opened, before the error is indicated (here 2 seconds) Speed 30 ON OFF The speed alarm is active The speed alarm is inactive Signal ON OFF Acoustic signal active at alarm message Acoustic signal inactive at alarm message Time OK 20 [s] Time ERR 20 [s] min. 10 [U/min] max. 10 [U/min] Duration of time, during which the set speed after a speed error must have been at least reached again, before the next error can be registered (here 20 seconds) Duration of time, during which the speed error must at least occur, before the error is indicated (here 20 seconds) Permitted speed deviation downwards, where no error is indicated (here 10 U/min.) Permitted speed deviation upwards, where no error is indicated (here 10 U/min.) Power failure ON OFF The power failure alarm is active The power failure alarm is inactive Signal ON OFF Acoustic signal is active if the alarm occurs Acoustic signal is inactive if the alarm occurs • In case of an alarm there is an optical display via alarmLED or an acoustic message via buzzer (if active). At the same time the alarm is taken over in the diagnosis and can be read-out after the program end in the menu SETUP / DIAG. • A message to an outside alarm center can be sent over a contact without potential via the SUB-D socket (see point 3.4.3). • In pressing the [ENTER] key the optical and acoustic messages are acknowledged and the contact without potential is set back. • In opening the doors the shaking drive is stopped and the heating is switched off, independent of the fact, if the door contact alarm is ON or OFF. As soon as the doors are closed again, the shaking drive and the heating will automatically operate again. The CERTOMAT® BS-1 starts only if both doors are closed. • In the case of power loss during the program processing or in the operation mode “RUN“ the time which has already been processed is saved. Once the power supply is resumed, the device starts automatically. The remaining time of the program is processed. This happens independent of the fact whether the power loss alarm is active or not. • The alarm definition for the power loss serves only for the activation of the optical/acoustic alarm message or the entry in the diagnosis after the voltage has returned. 31 F4 • TIME: Set-up of time and date In pressing the key [F4] you can change to the display field “set-up of time/date“ F4 LANG. CONTRA +/- DIAG. ALARM TIME SERVICE SETUP1 < > DAY ESC HOUR MONTH 18.09.99 9:47:34 MINUTE Fig. 43: set- up time/date Fig. 42: setup menu The following parameters for the set-up of “time and date” (fig. 39) can be adjusted: F1 DAY: Set-up of the week day • After pressing of [F1] the input field “DAY“ flashes • In pressing the keys [+/-] the desired week day can be set up • Confirm input with [ENTER] MONTH: Set-up of the month F2 • After pressing of [F2] the input field “MONTH“ flashes • In pressing the keys [+/-] the desired month can be set up • Confirm input with [ENTER] YEAR: F3 32 • After pressing of [F3] the input field “YEAR“ flashes“ • In pressing the keys [+/-] the desired year can be set up • Confirm input with [ENTER] Set-up of the year YEAR SETUP1 F4 HOUR: Set-up of hours • After pressing of [F4] the input field “HOUR“ flashes • In pressing the keys [+/-] the desired hour can be set up • Confirm input with [ENTER] F5 MINUTE: Set- up of the minutes • After pressing of [F5] the input field “MINUTE“ flashes • In pressing the keys [+/-] the desired minute can be set up • Confirm input with [ENTER] MODE • MODE: Display field The respective “active“ menu is indicated, here “SETUP1“ 33 3.3.6 Set-up menu „SETUP2“ • In pressing the [F5] key you change to the “SETUP2-menu“ for the input of the device parameters. • All set-ups and modifications are memorized internally and remain active also after voltage loss or switching off and on! F5 LANG. CONTRA +/- DIAG. ALARM TIME SERVICE SETUP1 < > ESC DEVICE SETUP PASSW SETUP2 Fig. 44: setup1-menu Fig. 45: setup2-menu The following “device parameters“ (fig. 41) can be adjusted: F1 DEVICE: Activation of different device options Device options can be activated or deactivated in a list as well as device information can be called. 34 • An arrow marks the respectively activated parameter • In pressing the keys [+/-] the arrow can be moved • In pressing the [ENTER] key the YES / NO-definitions are directly modified or numeric values are released for modification (value flashes). • In pressing the keys [+/-] the respectively flashing value can be adjusted. • In pressing the key [ENTER] the adjusted value is confirmed. • In pressing the [ESC] key you jump back to the SETUP2 menu. Temp.Offset 0,0 Light Yes No Actual value correction for the 1.PT100 (for temperature regulation). Calibrating values can be adjusted. The digit sign can be modified by pressing the [F1 ... F5] keys. Ilumination active Ilumination inactive 2. PT100 ON OFF Referencethermometer activ Referencethermometer inactiv August 2002 Ser No. 111 39 Software version Hardware serial number (here no. 39) F2 SETUP Set-up of internal parameters PASSW F3 • In pressing the [F2 und F3] keys you change to menus where you input internal parameters. DEVICE SETUP RESET F2 > F3 > PASSWORD PASSW INPUT SETUP2 < ENTER Fig. 46: setup2 menu Fig. 47: password entry menu These menus are reserved for service purposes and are protected by passwords. Modifications of these parameters can only be carried out by authorized personnel. Improper modifications may destroy the unit. F4 • RESET In pressing the [F4] key a little bit longer the device is reset. All set-ups, programs, passwords etc. will definitely get lost! 3.3.7 Operation of the Optional Internal Refrigerator • If the CERTOMAT® BS-1 is equipped with the optional refrigerator, you need not care for condensate produced during cooling operation. Existing condensate will be evaporated internally in the cabinet. • To avoid damages of the refrigerator an integrated overheat protection permanently switches off the unit if the temperature in the incubation room exceeds +38.5 C. 35 3.4 Connection of External Equipment 3.4.2 At the rear side of the device the CERTOMAT® BS-1 has two Sub-D sockets with 9 poles for analog signal exits, RS 232 interface, as well as a collective alarm contact. • 3.4.3 3.4.1 • Analog Exits (ANALOG OUT) • For the external registration of speeds and temperatures, e. g. with a recorder, the CERTOMAT® BS-1 has analog signal exits (0 ... 10 V). • The conditions are as follows: Speed: 0 V corresponds to 0 U/min. 10 V corresponds to 400 U/min. • Temperature: RS 232 Interface The Sub-D socket with 9 poles “RS 232“ is currently a Sartorius AG service interface. Collective alarm A contact without potential is made available on PIN 4/9 via a Sub-D-Socket “ANALOG OUT“. Alarm situations can be reported externally by help of this contact. From serial no. 00500/05 The relay contact is closed during normal operations. In case of an alarm, the relay contact opens and generates an error message via the voltage-free collective alarm output. 0 V corresponds to 0 °C 10 V corresponds to 100 °C Contact loading capacity: 230 V AC / 0.5 A (Ohm load) The moving load at the voltage entries must not be lower than 10 kΩ. • Current signals (0 ... 20 mA) or (4 ... 20 mA) can optionally made for disposal. The moving load at the current entries must not be higher than 500 kΩ. 1 5 1 2 9 3 Fig. 48: 1. 2. − − − − − − 3. 36 Device rear side RS232 interface Socket “Analog out” with 9 poles for recorder connection etc., Pin 1 = signal + /temperature Pin 2 = Gnd / temperature Pin 6 = Signal + / speed Pin 7 = Gnd / speed Pin 4 = collective alarm Pin 9 = collective alarm Supply entry socket with supply main and shock-proof plug 6 3.5 Mounting of Trays and Mounting Sets 3.5.1 Assembly and Loading of Finally Equipped Sets of Trays The trays type E and F are available as completely equipped trays. Detailled information you will find in the “Ordering Information“ in the supplement. 1. Place the tray in the BS-1 and fasten it as explained in point 3.2.3 (Mounting and dismounting a tray). 2. Insert the Erlenmeyer flasks in the clamps (you can also use bottles, beakers etc. which fit in the clamps). Please take care of the distribution of the loads and distribute them evenly starting from the centre of the tray outward. Before starting the shaker check the proper seat of all containers. They must not get loose and flung off during operation of the shaker. Fig. 49: Tray type F with clamps for Erlenmeyer flasks 3.5.2 Mounting of Test Tube Racks Fig. 50: Test tube rack assembly 1. Loosen the clamping screw of the test tube rack and turn the test tube holder, until the screw-holes for attachment of the rack to the tray are accessible. If necessary, you may completely remove the holder from the rack. 2. Place the test tube rack onto the universal tray and tighten with the mounting screws. Consider the number of racks required for your application and distribute the racks evenly on the tray starting from the centre of the tray outward. 3. As far as being disassembled, mount again the test tube holders to their racks. Turn the holders into their working position (usually vertical). Locate with their clamping screw. 37 3.5.3 Mounting of the Universal Mounting System 1. The universal mounting set is available for the trays of size EU and FU. Enclosed you will find further information about the component parts. Basic parts are two side frames which are adapted to the corresponding tray and the rods for connection of the side frames: Place the side parts (1) onto the tray and screw them onto the tray with the mounting screws as shown at pos. (1a). For each side part 4 screws are supplied to provide proper tightening. Then mount connecting rods as shown at pos. (1b). 2. For a mounting system with universal clamping rods attach the clamping rods at the side frame rods as shown at pos. 3. You'll need at least two rods and you can add as many as required for placement of your vessels. 3. Place the shaking containers between the clamping rods. Distribute the containers evenly on the tray, starting from the centre outward. You can loosen the clamping screws 3a/3b of the rods to readjust the rod and properly locate the flasks, vessels and beakers, etc. Then carefully tighten the clamping screws (3a/3b) so that the containers do not loosen during operation. 4. For the mounting set for separation funnels attach one universal clamping rod as shown above. It will serve as support. Then mount the retaining springs (2a) to the clamping rod for separation funnels (2). Depending on the size of the separation funnels you can mount up to 5 retaining springs to the clamping rod (pos. 2a). 5. Place the separation funnels onto the mounting set. You can readjust the clamping rods as required using their clamping screws attached. • Set of side parts type B-2, art. no. 8854238, for tray EU • Set of side parts type B-3, art. no. 8854243, for tray FU Universal clamping rods and mounting sets for separation funnels serve as mounting systems • Universal clamping rods type U, art.-no. 8854254, for side part set B-2 / B-3 • Mounting set type S-1 for separating funnels 50 and 100 ml, art. no. 8854262, with clamps and retaining springs and 1 universal clamping rod type U • Mounting set type S-1 for separating funnels 250, 500 and 1000 ml, art. no. 8854270, with clamps and retaining springs and 1 universal clamping rod type U Fig. 51: Assembly of universal rods and mounting sets for separating funnels 38 3.6.1.2 Maintenance of the Illumination Unit 3.6 Maintenance and Trouble-Shooting 3.6.1 Maintenance and Cleaning • Except for necessary cleaning, the replacement of defective fuses and checking of the shaking drive belt the CERTOMAT® BS-1 is maintenance-free. If the optional illumination unit is installed, you can replace defective lamps. All bearings of the shaking drive are lubricated for their lifetime. The drive motor is a servicefree brushless motor of external rotor type. Maintenance is confined to the checking for and replacement of defective fluorescent lamps and device fuses. If other malfunctions occur, please contact your service representative of Sartorius AG. 1. Switch-off the illumination unit and disconnect from its mains supply. 2. Pull the defective fluorescent tube out of its holder. Insert the new tube. On delivery commercially available fluorescent tubes “L18W/77 (Fluora)“, or fluorescent tubes according to the customer’s specifications are installed. 3. Replace defective fuses, if necessary. The fuses are placed in a fuse assembly behind the door at the right hand side panel. Note to use the same type/size for replacement, as delivered from factory side. Disconnect the mains cable from laboratory grounded socket before cleaning and/or maintenance and service. Unintended starting of the shaking drive during cleaning and maintenance can cause personnel hazards. • Maintenance and service of the shaking drive, such as the replacement of the drive belt, service of the electrical and electronic equipment or of the optional cooling devices must only be done by qualified and authorized service personnel. 3.6.2 3.6.1.1 Cleaning 1. The interior incubation chamber consists of stainless steel. For cleaning, we recommend usual household cleaning agents or alcohol. Do not use aggressive cleaning agents. Chlorous (hypochlorite) agents, for instance, can cause corrosion. 2. Cleaning the spill tray: Switch off the BS-1 and pull mains plug. Take out the tray. Loosen the 4 screws of the shaking table. Take off the shaking table. The spill tray is now fully accessibly and can be taken out for thorough cleaning. 3. Put the clean spill tray back in place. Mount the shaking table and fix it with 4 screws. Insert the tray. Reconnect the BS-1 to mains. 4. After incubation of living microorganisms and cells the CERTOMAT® BS-1 may need to be disinfected. For disinfection we recommend disinfectants based on alcohols, such as B. Braun Medical AG’s Meliseptol®. After cleaning and disinfection with such agents you should thoroughly dry and ventilate the incubation room. Correction of malfunctions 3.6.2.1 Electrical Malfunctions • If the BS-1 does not start, check the mains supply. The mains cable should be properly connected and the laboratory mains be operative. If other devices in the laboratory are malfunctioning at this time, a mains failure (such as voltage fluctuations) can be the cause. Check the fuses. They are located in an insert inside the cabinet, behind the right side panel. Disconnect the unit from mains before you open the side doors. A burned-off body or a melted wire will indicate a defective fuse. For replacement note the correct voltage/current of the fuses. • If the BS-1 cannot be started although the mains supply is operative and the fuses are in good condition, contact your service representative of Sartorius AG. You will find the telephone number on the next page. You should remove broken glass, spilled liquids and other impurities immediately after they occur. Please take care that impurities do not dry. 5. Take care that no foreign bodies can enter the aircirculation system. Regularly remove dust from the outer covering grids of the built-in ventilator and of the refrigerator regularly. 39 3.6.2.2 Malfunctions of the Shaking Drive • If the shaking drive runs noisy or irregularly the belt can be dirty. If the tray support does not turn although the shaking drive is working (you can hear the motor run), the drive belt may be damaged. If the motor is inoperative although the power supply and all necessary adjustments are available, the motor may be damaged. 1. For checking the belt drive, the tray and shaking table must be disassembled. Unscrew the 4 mounting screws in the centre of the shaking table and remove it. You can check the belt through the opening in the cover of the drive. 2. For the mounting of the shaking table carefully tighten the screws crosswise. • If the drive belt is damaged (torn) or the motor is suspected to be defective, please contact your service representative of Sartorius AG. 3.7 The Sartorius Stedim Biotech GmbH warrants its products according to the terms specified in the “General Terms and Conditions of Business“ and unless other terms were agreed upon in writing. Date of reference is the date of delivery. • The guarantee includes defects and malfunctioning due to construction, production and material faults, however it does not include defects due to wrong operation and improper treatment and use. Furthermore it does not apply for parts which became damaged due to normal wear and also not for consumer materials. • The guarantee will lapse if the user or unauthorized third persons modify the device technically or if they use equipment, components and accessories, which have not been passed by Sartorius Stedim Biotech GmbH for the application in connection with the shaking cabinet CERTOMAT® BS-1. Repairs can be carried out by the Sartorius AG service representative or by authorized personnel of a customer-owned workshop. Please inform your local Sartorius AG sales representative or contact: 3.6.2.3 Malfunctions of the Optional Refrigerator • • Warranty Regulations and Service The compressor of the refrigerator includes an internal winding protection for overheat detection. This device cuts off the power supply at overheating of the winding. The refrigerator will automatically be enabled for restart after cooling down of the winding. This may last up to 1 hour. Sartorius AG Service-Zentrum Nord Weender Landstraße 94-108 37075 Göttingen, Germany Telephone +49.551.308.3729 / 3740 / 3741 Telefax +49.551.308.3730 If the overheat protection cuts-off the refrigerator often or repeatedly, you should contact your service representative of Sartorius AG. • Only spare parts passed by Sartorius Stedim Biotech GmbH must be used. • Defective units can be returned to Sartorius AG. Any units to be sent to us for repair have to be in perfect hygienic condition, clean and well packed. If parts were polluted by media and media components, they have to be cleaned, decontaminated, disinfected or sterilised, according to the valid safety rules of this particular application, e.g. for chemical or biological safety. The sender has to prove that all safety guidelines have been observed. For this purpose you have to fill in the enclosed decontamination declaration and attach it to the apparatus. No apparatus will be repaired without declaration of decontamination or description of the measures taken. Transport damages or subsequent cleaning or disinfection, if required, will be borne by the sender. 40 4 Technical Data, Ordering Information 4.1 Technical Data 4.1.1 Mechanical Design Shaking cabinet Weight (with equipment) outside housing 1150 x 720 x 770 mm (W x H x D); incubation room 890 x 495 x 650 mm (W x H x D) about 230 kg Tray support 440 x 420 mm (W x D) Materials outside cabinet : sheet steel case with acidproof varnish; incubation room inside: stainless steel case Type E/EU (420 x 420 mm)1); type F/FU : (800 x 420 mm) Trays, type/size Load 4.1.2 4.1.3 4.1.4 4.1.5 Mains Supply Laboratory connector laboratory grounded socket (specific connectors on request) Mains specifications 230 V (±5 %) 50 Hz or 115 V (±5 %) 60 Hz Power consumption about 1.2 kW (including refrigeration) Ilumination about 90 W (5 x 18 W) Fuses T6,3A for 230 V, T10A for 115 V Radio interfer. suppression according to EN 55011 and EN 55014 Operating Data Orbital motion Ø 25 mm or Ø 50 mm, depending shaker drive Shaking speed 40 ... 400 min-1 Rotation speed accuracy max. ±1% (of final value) Incubation temperature Ambient temperature heating version RT +8 °C ... +70 °C heating and cooling version RT –10 °C .. +70 °C +10 ... +60 °C (+10 ... + 30 °C at UHK version) Ambient humidity 10 ... 60 %; Incubation room 10 ... 80 %, not condensing Analog Out Socket, 9-poles Sub-D 0 ... 10 V (min. moving load = 10 kΩ) (Pin configuration see point 3.4, fig. 37) 0 ... 20 mA or 4 ... 20 mA (optionally) (max. moving load = 500 Ω) Exactness ± 0,3 V Collective alarm Collective alarm 4.1.6 depending on tray and mounting system of the Sartorius Stedim Biotech GmbH accessory program Contact without potential (closer), max. 230 VAC (0.5 A Ohm load) via SUB-D-socket „analog out“ Pin 4/9. Option refrigerator Refrigerant R 134a Filling 270g RT = room temperature (We reserve the right to carry out dimensional and construction modifications) 1) Trays of modified design for new locking; rebuilding of existing trays for this locking on request. Please contact the Sartorius AG customer service. 41 4.2 Ordering Information 4.2.1 Configuration of the Shaking Cabinets Cat.-no. Features and Specifications Incubation shaker CERTOMAT ® BS-1 / 25 mm Version 230 V / 50 Hz 8865027 Heating version (UH) 8865221 Heating and cooling version (UHK) Incubation shaker CERTOMAT ® BS-1 / 50 mm Version 230 V / 50 Hz 4.2.2 8865124 Heating version (UH) 8865329 Heating and cooling version (UHK) Optional Equipment Cat.-no. 8864489 42 Features and Specifications Support frame welded metal sectional-frame construction for up to two CERTOMAT® BS-1 shock-resistant stove enamel finish dimensions: 1150 x 220 x 700 mm (W x H x D) 4 height adjustable stands 8861455 Ilumination unit for CERTOMAT ® BS-1 consisting of five fluorescent lamps, à 18 W, can be switched off separately, programmable Version 230 V / 50 Hz – in connection with cooling UHK On request Version 115 V / 60 Hz – can be integrated afterwards 8861471 Grid for petri dishes Stainless steel 640 x 880 mm For Petri dishes, height adjustable 4.2.3 Accessories Cat.-no. Features and Specifications Trays with fixed clamps (with clamps for Erlenmeyer flasks) Tray E 420 x 420 mm – clamps made of stainless steel 8853533 Tray incl. 39 clamps for Erlenmeyer flasks 100 ml 8853568 Tray incl. 20 clamps for Erlenmeyer flasks 250 ml 8853584 Tray incl. 14 clamps for Erlenmeyer flasks 500 ml 8853606 Tray incl. 9 clamps for Erlenmeyer flasks 1.000 ml Tray E 420 x 420 mm – plastic clamps 8853688 Tray incl. 39 plastic clamps for Erlenmeyer flasks 100 ml. 8853666 Tray incl. 19 plastic clamps for Erlenmeyer flasks 250 ml. 8853677 Tray incl. 14 plastic clamps for Erlenmeyer flasks 500 ml. Tray F 800 x 420 mm – clamps made of stainless steel 8853738 Tray incl. 74 clamps for Erlenmeyer flasks 100 ml 8853762 Tray incl. 40 clamps for Erlenmeyer flasks 250 ml 8853789 Tray incl. 26 clamps for Erlenmeyer flasks 500 ml 885 3800 Tray incl. 15 clamps for Erlenmeyer flasks 1.000 ml Universal - Trays 8853002 type EU (420 x 420 mm) 8853037 type FU (800 x 420 mm) 8860416 8864497 8864470 Sticky tape for universal trays Sticky tape “Premium” for universal trays, 30 x 1 mm, roll of 10 m, durable quality Sticky tape for universal trays, size 30 x 1 mm, roll of 50 m for fixing of Erlenmeyer flasks, beakers, etc., only for use at low shaking speeds Anti-skid layer for universal trays Anti-skid layer size 380 x 420 mm for placement of Erlenmeyer flasks, beakers, etc., only for use at low shaking speeds and temperatures up to 50 °C 43 Cat.-no. Features and Specifications Test Tube Racks Fig. 52: Test tube rack 8853134 Test tube rack for 64 test tubes Ø 14 mm 8853142 Test tube rack for 42 test tubes Ø 16 mm 8853150 Test tube rack for 36 test tubes Ø 18 mm 8853169 Test tube rack for 33 test tubes Ø 20 mm 8853185 Test tube rack for 18 test tubes Ø 25 mm 8853177 Test tube rack for 12 test tubes Ø 30 mm 8853088 Racks for centrifuge tubes, with screw cap Rack for 42 centrifuge tubes Ø 16 mm 8853096 Rack for 36 centrifuge tubes Ø 18 mm 8853193 Rack for 33 centrifuge tubes Ø 20 mm 8853240 Rack for 12 centrifuge tubes Ø 30 mm Clamps for Erlenmeyer flasks (for optional mounting onto the universal trays) 44 8854505 Clamps for Erlenmeyer flasks 25 ml required / possible max. number of clamps for tray type EU - max. 49 pcs. for tray type FU - max. 98 pcs. 8854513 Clamps for Erlenmeyer flasks 50 ml required / possible max. number of clamps for tray type EU - max. 48 pcs. for tray type FU - max. 96 pcs. 8854521 Clamps for Erlenmeyer-flasks 100 ml required / possible max. number of clamps for tray type EU - max. 24 pcs. for tray type FU - max. 48 pcs. 8854556 Clamps for Erlenmeyer flasks 250 ml required / possible max. number of clamps for tray type EU - max. 17 pcs. for tray type FU - max. 39 pcs. Cat.-no. Features and Specifications 8854572 Clamps for Erlenmeyer flasks 500 ml required / possible max. number of clamps for tray type EU - max. 12 pcs. for tray type FU - max. 26 pcs. 8854599 Clamps for Erlenmeyer flasks 1.000 ml required / possible max. number of clamps for tray type EU - max. 8 pcs. for tray type FU - max. 17 pcs. 8854610 Clamps for Erlenmeyer flasks 2.000 ml required / possible max. number of clamps for tray type EU - max. 4 pcs. for tray type FU - max. 9 pcs. 8854629 Clamps for Erlenmeyer flasks 3.000 ml, required / possible max. number of clamps for tray type EU - max. 4 pcs. for tray type FU - max. 8 pcs. 8854637 Clamps for Erlenmeyer flasks 5.000 ml required / possible max. number of clamps for tray type EU - max. 2 pcs. for tray type FU - max. 6 pcs. Clamps for Fernbach flasks (optional equipment of the universal trays) 8854564 Clamps for Fernbach flasks 450 ml required / possible max. number of clamps for tray type EU - max. 6 pcs. for tray type FU - max. 15 pcs. 8854600 Clamps for Fernbach flasks 1.800 ml required / possible max. number of clamps for tray type EU - max. 1 pc. for tray type FU – max. 6 pcs. 8854640 Clamps for Fernbach flasks 2.800 ml required / possible max. number of clamps for tray type EU – max. 1 pc. for tray type FU – max. 6 pcs. 45 Cat.-no. Features and Specifications Plastic clamps for Erlenmeyer flasks (optional equipment of the universal trays) 8854700 Plastic clamps for Erlenmeyer flasks 100 ml 8854711 required / possible max. number of clamps for tray type EU - max. 20 pcs. for tray type FU - max. 58 pcs. Plastic clamps for Erlenmeyer flasks 250 ml required / possible max. number of clamps for tray type EU - max. 20 pcs. for tray type FU - max. 40 pcs. 8854722 Plastic clamps for Erlenmeyer flasks 500 ml required / possible max. number of clamps for tray type EU - max. 16 pcs. for tray type FU - max. 26 pcs. 8854733 Plastic clamps for Erlenmeyer flasks 1.000 ml required / possible max. number of clamps for tray type EU - max. 9 pcs. for tray type FU - max. 15 pcs. Note: Plastic clamps are ideal for use with Erlenmeyer flasks with tubing connection. See below! Shaking flask GL Erlenmeyer type, with baffles for increased turbulence Fig. 53: Shaking flask Erlenmeyer type; with baffles in the concave side-wall section and connector GL14 for tubing connection 8861064 shaking flask made of DURAN®-glass, Erlenmeyer-type; straight neckpiece for metal caps; neckpiece of Ø = 38 mm; flask body with three baffles at Δ 120deg with GL 14 - connector incl. plastic cap and hose connectors for tubings of size 4 x 7 mm size 300 ml, max. Ø = 87 mm, H = 161 mm; set of 10 pcs. 8861072 size 500 ml, max. Ø = 105 mm, H = 183 mm; set of 10 pcs. 8861080 size 1.000 ml, max. Ø = 131 mm, H = 232 mm; set of 10 pcs Accessories for baffles shaking flasks 46 8861099 cap made of aluminium, set of 10 pcs. 8861102 stainless steel cap, set of 10 pcs. Cat.-no. Features and Specifications Shaking flask Erlenmeyer type, with baffles for increased turbulence Fig. 54: Shaking flask Erlenmeyer type; with baffles in the concave side-wall section shaking flask made of DURAN®-glass, Erlenmeyer-type; straight neckpiece for metal caps; neckpiece of Ø = 38 mm or version with cellucotton stoppers flask body with three baffles at Δ 120deg 8861005 size 300 ml, max. Ø = 87 mm, H = 161 mm; set of 10 pcs. 8861013 size 500 ml, max. Ø = 105 mm, H = 183 mm; set of 10 pcs. 8861021 size 1.000 ml, max. Ø = 131 mm, H = 232 mm; set of 10 pcs. 8861022 size 2.000 ml, max Ø = 166 mm, H = 305 mm; set of 10 pcs. 8860998 size 500 ml, version for cellucotton stoppers, etc. max Ø = 105 mm, H = 180 mm; set of 10 pcs. Other versions on request Universal Mounting Set Basic element type B, each consisting of 2 side frames and 4 rods Fig. 55: Basic element type B of universal mounting set 8854238 type B-2 for trays EU 8854246 type B-3 for tray FU 47 Cat.-no. Features and Specifications Universal clamping rod type U Fig. 56: Universal clamping rod 8854254 type U for basic elements B-2 and B-3 Fig. 57: Mounting system with universal clamping rods Mounting set for separating funnels type S Fig. 58: Mounting set for separating funnels type S 8854262 8854270 type S-1 for 5 pcs. separating funnels 50 or 100 ml; set includes clamps, retaining springs and a universal clamping rod U-2 type S-2 for 3 pcs. separating funnels 250, 500 or 1.000 ml; set includes clamps, retaining springs and a universal clamping rod U-2 Max. number of mounting sets for tray type is 1 mounting set S 1 or S 2 for tray type EU with set B-2 2 sets of mountings S 1 or S 2 for tray type FU with set B-3 48 4.3 Safety Instructions Laboratory Shakers and Incubation Shaking Cabinets (Safety Instructions Laboratory Shakers and Incubation Shaking Cabinets see appendix) 4.4 EG Declaration of Conformity (EG Declaration of Conformity see appendix) 4.5 Declaration of Decontamination (Declaration of Decontamination see appendix) 4.6 Information and Instructions on Disposal and Repairs (Information and Instructions on Disposal and Repairs see appendix) 4.7 Dimension sheet CERTOMAT® BS-1 (Dimension sheet see appendix) 4.8 Prospectus CERTOMAT® BS-1 (Prospectus CERTOMAT® BS-1 see appendix) 49 Sartorius Stedim Biotech GmbH August-Spindler-Straße 11 37079 Göttingen, Germany Telephone +49.551.308.0 Telefax +49.551.308.3289 www.sartorius.com Copyright by Sartorius Stedim Biotech GmbH, Göttingen, Germany. All rights resserved. No part of this publication may be reprinted or translated in any form or by any means without the prior written permission of Sartorius Stedim Biotech GmbH. The status of the information, specifications and illustrations in this manual is indicated by the date given below. Sartorius Stedim Biotech GmbH reserves the right to make changes to the technology, features, specifications, and design of the equipment without notice. Status: February 2008, Sartorius Stedim Biotech GmbH, Göttingen, Germany Printed in Germany on paper that has been bleached without any use of chlorine W4A000 · KT Publication No.: SB6027-t08024 Order No.: 85030-520-51 Safety Instructions Laboratory Shakers and Incubation Shaking Cabinets 85030-520-67 Content 1 Introduction 3 2 Transport and Installation 3 2.1 2.2 Transporting Equipment Requirements at the site of installation 3 3 3 Operating Instructions 4 3.1 3.2 Working with Media Initial Startup and Normal Operation 4 4 4 Cleaning, Maintenance, and Service 5 4.1 4.2 4.3 4.4 Cleaning Maintenance and Service Returning Defective Units Relocating equipment 5 5 5 5 2 1 Introduction 2 Transport and Installation These Safety Instructions contain our recommendations for precautions in handling CERTOMAT® laboratory shakers and incubation shaking cabinets from the product program of the company Sartorius Stedim Biotech GmbH, especially for 2.1 Transporting Equipment • transport and installation • equipping and initial startup • operation • cleaning, maintenance, and service These safety instructions are non-transferable and meant exclusively for the equipment delivered. They are not valid for other equipment. Additional, specific safety regulations (i.e., legally or otherwise mandatory rules) are not dealt with by these instructions. Please consult your local authorities for further information. Possible risks and dangers are marked with this symbol and highlighted like this paragraph. Ignoring these warnings may cause damage to the instrument or lead to other material or personal damage. Steps to be carried out with special care or special aspects or issues to be considered are marked with safety instructions formatted as this paragraph. [Æ ..] Identifies references to contents of these instructions or other documents. Labels of illustrations, sections, or documents are in parentheses. The shakers and especially the incubation shaking cabinets are heavy. Use only suitable transportation and lifting tools when moving or setting up units. Make sure clearances are sufficient along the transport route and that the combined weight of lifting and transportation tools does not exceed the maximum load permitted for the floor or ground. Use only qualified personnel to transport the equipment. Make sure personnel is protected from injury during transport. Do not remove any transport protection before the equipment has been transported to the site of installation. 2.2 Requirements at the site of installation 1. The floor or the laboratory bench where the equipment is to be installed must be able to support the weight of the fully equipped units and systems. 2. The installation place should be sufficiently dimensioned and feature a non-slip surface. 3. The equipment has to be easily accessible for operation, maintenance, and service tasks. 4. The shakers and the incubation shaking cabinets may transmit vibrations to the installation surface especially when carrying a heavy load. For this reason, install the shakers so that surrounding equipment is not affected. 5. The power supply must match the rating indicated on the type plate and must be grounded correctly. Use a level to align the equipment after setting it up! Before stacking equipment (max. 3 units), make sure that the bottom most device is properly aligned horizontally! 3 3 Operating Instructions 1. Make sure, that only authorized people have access to the working area. 2. Personnel has to be instructed about applicable safety instructions and other legally or otherwise compulsory regulations. 3.1 Working with Media The utilized media and substances can be hazardous and may pose dangers that are specific to the substances and the processes and thus cannot be described here in detail. Your company should issue corresponding safety regulations and carefully instruct the operating personnel. Recommended basic protection equipment includes such items as suitable working clothes, gloves, goggles, and respiratory equipment, if necessary. 3.2 4 Initial Startup and Normal Operation 1. Use only units, equipment, accessories, and spare parts released by the company Sartorius Stedim Biotech GmbH for use with the shaker. 2. Check all components for damage, especially glass components such as jars. Any damaged components must not be used. 3. Never use the shaker without the tray. Switch the unit off before installing/uninstalling trays, mounting sets, or additional accessories. 4. When mounting the trays, leave enough space between the unit and other objects, especially in case of trays extending over or beyond the shaker table or bench. Make sure that trays are properly installed and fastened. 5. Fasten the tray mountings and accessories properly. Distribute loads evenly on the tray when loading the shaker with the shaking vessels (Erlenmeyer flasks, bottles, etc.). 6. In case of incubation shaking cabinets, make sure the tray is firmly positioned; close the doors before starting the shaking process. 7. Before starting the shaker and during normal operation, check that the vessels are firmly positioned in their holders. The vessels must not become loose, rattle, or touch one another or the walls of the shaker. Switch the unit off immediately if vessels become loose in their holders. 8. Operate the equipment only within the permitted range of operating parameters. Comply with the equipment instructions and the technical data. Head the lateral movement of the trays and the resulting impact or crushing hazards, especially with large trays, in case of low clearances to other equipment or objects or large amplitudes and heavy loads. Never put fingers between tray support and frame when the unit is active. The space between these components is narrow due to constructional constraints. Risk of injury! 9. After switching off the shaker, wait until the shaker support has come to a completel standstill before removing or adding vessels. 4 Cleaning, Maintenance, and Service 4.3 Defective units or components can be returned to the responsible Sartorius AG representative or directly to Sartorius AG. Regular cleaning and maintenance ensures the equipment's functionality and safety. Comply with the legal safety regulations applicable to the field of application concerning the handling of microbial material and contaminated equipment. Prior to any cleaning or maintenance work, disinfect or sterilize any biologically contaminated components according to the safety regulations. Prior to any cleaning or maintenance work, switch the unit off and pull the power cable to disconnect the unit from the mains power supply. Make sure that the unit cannot be restarted or activated accidentally. Servicing and repairing drive systems, replacing drive belts, or working on electrical/electronic equipment should only be performed by qualified service personnel. 4.1 1. 1. The equipment has to be clean, hygienically flawless, and carefully packaged. 2. Contaminated parts have to be cleaned, disinfected, or sterilized according to the respective and applicable safety guidelines. Compliance with the guidelines has to be documented with a cleaning and decontamination certificate to be enclosed with the shipment. 3. Negotiate the return shipment with the Service Dept. before shipping any equipment. 4.4 Relocating equipment 1. Comply with the described cleaning and maintenance measures described to avoid biological or chemical hazards. Cleaning 2. Clean the surfaces of the units with standard laboratory cleaners. Do not use corrosive agents (e.g., chlorous agents). Disconnect the equipment from the mains power supply. Remove vessels and additional equipment or components inside of the unit or connected to the unit. 3. If applicable, reinsert the transport protection. Read and comply with the additional notes under "Transporting Equipment" (2.1). 2. Broken glass or spilled liquids should be removed as quickly as possible. 3. For incubator shakers special hints are given in the operating manual. 4.2 Returning Defective Units Maintenance and Service Maintenance and troubleshooting by the user should be restricted to the following tasks: • Checking the voltage supply in the lab and the equipment connections. • Checking and replacing defective fuses. • For incubation shaking cabinets: Replacing defective light fittings. If problems or malfunctions cannot be solved or remedied, please contact your Sartorius AG representative or contact us directly: Sartorius AG Servicezentrum Nord Weender Landstraße 94-108 37075 Göttingen, Germany Telephone +49.551.308.3729 / 3740 / 3741 Fax +49.551.308.3730 A written cleaning and decontamination certificate has to be provided when requesting service technicians of the company Sartorius AG to perform maintenance tasks. 5 Sartorius Stedim Biotech GmbH August-Spindler-Straße 11 37079 Göttingen, Germany Telephone +49.551.308.0 Fax +49.551.308.3289 www.sartorius-stedim.com Copyright by Sartorius Stedim Biotech GmbH, Göttingen, Germany. All rights reserved. No part of this publication may be reprinted or translated in any form or by any means without the prior written permission of Sartorius Stedim Biotech GmbH. The status of the information, specifications and illustrations in this manual is indicated by the date given below. Sartorius Stedim Biotech GmbH reserves the right to make changes to the technology, features, specifications, and design of the equipment without notice. Status: February 2008, Sartorius Stedim Biotech GmbH, Göttingen, Germany Printed in Germany on paper that has been bleached without the use of chlorine W4A000 · KT Publication No.: SB6043az08022 Order No.: 85030-520-67 F-13-01 Version 01 Page 1/4 Return of material Effective Date 01.01.2008 Declaration about decontamination and cleaning of equipment and components When returning equipment or components, please describe on page 2 of this form the problem(s) or fault(s) you have found. Please also indicate the remedial actions you require. To protect our personnel, we require all equipment or components be free of biological, chemical, or radioisotopic contaminants. We will only accept such equipment or components when: • the equipment or components have been adequately cleaned and decontaminated. • this declaring document has been completed, signed and returned by an authorized person. Please help us in assuring a safe, hazard-free work environment. A. Description of the Equipment or Component(s) Description / Cat. No. Serial no. No. of invoice/delivery note Date of delivery B. Contamination / Cleaning Attention: Please specify exactly the biological, chemical, or radioisotopic contaminant Attention: Please describe the cleaning and decontamination procedure/method The equipment was contaminated with and it has been cleaned and decontaminated by 85030-520-68 F-13-01 Version 01 Page 2/4 Return of material Effective Date 01.01.2008 C. Legally binding declaration I (we) certify that all information given in this form is correct and complete. The equipment and components have been adequately decontaminated and cleaned according to the legal requirements. No chemical or biological or radioisotopic risks remain that can endanger exposed persons' safety or health. Company / Institute Address / Country Tel. / Fax (with area code) Name of the authorized person Position Signature / Date D. Reason for return wrong delivery exchange repair modification disposal other E. Please describe the problem(s) or fault(s) you have found (for repair) and/or indicate the remedial actions you require F-13-01 Version 01 Page 3/4 Return of material Effective Date 01.01.2008 F. Reserved for Sartorius-Service Center Notes Please pack the unit properly and send it freight paid to your local service supplier or directly to Sartorius AG Servicezentrum Nord, Germany. Sartorius AG Servicezentrum Nord Weender Landstraße 94-108 37075 Göttingen, Germany Telephone +49.551.308.3729 / 3740 / 3741 Fax +49.551.308.3730 F-13-01 Version 01 Page 4/4 Effective Date 01.01.2008 Sartorius Stedim Biotech GmbH August-Spindler-Straße 11 37079 Göttingen, Germany Telephone +49.551.308.0 Telefax +49.551.308.3289 www.sartorius-stedim.com Copyright by Sartorius Stedim Biotech GmbH, Göttingen, Germany. All rights resserved. No part of this publication may be reprinted or translated in any form or by any means without the prior written permission of Sartorius Stedim Biotech GmbH. The status of the information, specifications and illustrations in this manual is indicated by the date given below. Sartorius Stedim Biotech GmbH reserves the right to make changes to the technology, features, specifications, and design of the equipment without notice. Status: February 2008, Sartorius Stedim Biotech GmbH, Göttingen, Germany Printed in Germany on paper that has been bleached without any use of chlorine W4A000 · KT Publication No.: SB6044-n08023 Order No.: 85030-520-68 Return of material Information and Instructions on Disposal and Repairs Packaging that is no longer required must be disposed of at the local waste disposal facility. The packaging is made of environmentally friendly materials that can be used as secondary raw materials. The equipment, including accessories and batteries, does not belong in your regular household waste. The EU legislation requires its Member States to collect electrical and electronic equipment and disposed of it separately from other unsorted municipal waste with the aim of recycling it. In Germany and many other countries, Sartorius AG takes care of the return and legally compliant disposal of its electrical and electronic equipment on its own. These products may not be placed with the household waste or brought to collection centers run by local public disposal operations – not even by small commercial operators. For disposal in Germany and in the other Member States of the European Economic Area (EEA), please contact our service technicians on location or our Service Center in Goettingen, Germany: Sartorius AG Service Center Weender Landstrasse 94-108 37075 Goettingen, Germany In countries that are not members of the European Economic Area (EEA) or where no Sartorius affiliates, subsidiaries, dealers or distributors are located, please contact your local authorities or a commercial disposal operator. Prior to disposal and/or scrapping of the equipment, any batteries should be removed and disposed of in local collection boxes. Sartorius AG, its affiliates, subsidiaries, dealers and distributors will not take back equipment contaminated with hazardous materials (ABC contamination) – either for repair or disposal. Please refer to the accompanying leaflet/manual or visit our Internet website (www.sartorius.com) for comprehensive information that includes our service addresses to contact if you plan to send your equipment in for repairs or proper disposal. CERTOMAT® BS-1 Programmable incubation shaking cabinet CERTOMAT ® BS-1 Programmable incubation shaking cabinet The CERTOMAT® BS-1 offers large space on a small footprint for all labs in microbiology, molecular biology, biochemistry as well as plant physiology and others. The innovative programming of temperature, shaking speed and light is done via membrane key pad in real time. Up to 5 programms with 5 steps each can be stored password protected. All actual values are shown on a 4 line 20 character alphanumeric LCD display. Safety even in case of power failure: time and length are recorded and shown as alert on the display. The memory function stores the last set points and re-installs them after power failure. Continuous recording for documentation of all parameters by analog output is possible. Two shaking amplitudes of 25 mm and 50 mm are convertible. The patented adjustable mass compensation enables high speed with high load and stands for a quiet run. The interior is made of polished stainless steel (1.4301) and thus can easily be kept in hygienic clean conditions. A standard stainless steel spill tray collects spilled liquid. The clip-in tray fixation is done in one motion and needs no further action. Benefits The built-in optional cooling unit enables incubation temperatures below ambient. An optional illumination unit allows the cultivation of phototrophic organisms. Individual programming of all parameters The innovative programming allows individual run of temperature, shaking speed and light. Start of the incubation program after a period of delay with cooling can be realized. Additional shaking capacity is created by stacking the units. Without any additional equipment, up to three units can be stacked and run individually. Stackable up to three units Reproducible process safety Reliable drive with adjustable mass compensation Power failure is indicated with length and time Continuous recording for documentation is standard Adjustable mass compensation for high speed at maximum load Stainless steel spill tray for more safety Fast and easy tray fixation Built-in cooling unit optional Orbit 25 mm and 50 mm, can be converted later Illumination unit optional Accepts 5 liter flasks Accessories Reference Description 886 1455 Illumination unit for CERTOMAT® BS-1, 5+18 W, individually activated, programmable, only in combination with cooling Support frame (for CERTOMAT® BS-T or two CERTOMAT® BS-1), welded sectional frame construction, height-adjustable feet Grid for Petri dishes, stainless steel, adjustable height, for use in CERTOMAT® BS-1 Installation set for reference thermometer (Pt100), for CERTOMAT® BS-1 and CERTOMAT® BS-T 886 4489 886 1471 885 4416 885 3738 885 3762 885 3789 885 3800 Tray type F (800+420 mm) equipped with stainless steel clamps 74 clamps inox for flasks 100 ml 40 clamps inox for flasks 250 ml 26 clamps inox for flasks 500 ml 15 clamps inox for flasks 1,000 ml 885 3037 Universal tray to be completed with clamps, racks or mounting system Type FU (800+420 mm) 885 4505 885 4513 885 4521 885 4556 885 4572 885 4599 885 4610 885 4629 885 4637 Stainless steel clamps, capacity for tray type FU for Erlenmeyer flasks 25 ml (max. 98) for Erlenmeyer flasks 50 ml (max. 96) for Erlenmeyer flasks 100 ml (max. 48) for Erlenmeyer flasks 250 ml (max. 39) for Erlenmeyer flasks 500 ml (max. 26) for Erlenmeyer flasks 1,000 ml (max. 17) for Erlenmeyer flasks 2,000 ml (max. 9) for Erlenmeyer flasks 3,000 ml (max. 8) for Erlenmeyer flasks 5,000 ml (max. 6) 885 4564 885 4600 885 4640 for Fernbach flasks of 450 ml (max. 15) for Fernbach flasks of 1,800 ml (max. 6) for Fernbach flasks of 2,800 ml (max. 6) 885 4700 885 4711 885 4722 885 4733 Plastic clamps reinforced with glass fibre for Erlenmeyer flasks 100 ml (max. 48) for Erlenmeyer flasks 250 ml (max. 39) for Erlenmeyer flasks 500 ml (max. 26) for Erlenmeyer flasks 1,000 ml (max. 17) 885 3134 885 3142 885 3150 885 3169 885 3185 885 3177 Hinged racks for test tubes (8 racks max.) for 64 tubes d 14 mm for 42 tubes d 16 mm for 36 tubes d 18 mm for 33 tubes d 20 mm for 18 tubes d 25 mm for 16 tubes d 30 mm 885 3088 885 3096 885 3193 885 3240 Hinged racks for centrifugation tubes (8 racks max.) for 42 tubes d 16 mm for 36 tubes d 18 mm for 33 tubes d 20 mm for 16 tubes d 30 mm Reference 885 0321 Description Holders for microtiter plates, stainless steel for 1 standard 96-well plate or deepwell plate standard plates: max. 12 holders on EU tray, 21 holders on FU tray deepwell plates: max. 9 holders on EU tray, 18 holders on FU tray 886 4497 886 0416 886 4470 Sticky tape for universal trays Standard, roll of 50 m, 30+1 mm Premium, roll of 10 m, 30+1 mm, repeated use Anti-skid layer, 380 +450 mm, for individual cut 885 4246 885 4254 Universal mounting system Basic element B-3 for tray FU Clamping rod, type U for mounting systems B-2 and B-3 885 4262 885 4270 Mounting system for separation funnels (for use with type FU, in combination with type B-3 basic element) Type S-1 for 5 separatory funnels 50 and 100 ml Type S-2 for 3 separatory funnels 250, 500 and 1,000 ml 886 1005 886 1013 886 1021 886 1022 Shaking flasks, DURAN, Erlenmeyer type, 3 baffles at 120°, straight rim Erlenmeyer flasks 300 ml, pack of 10 Erlenmeyer flasks 500 ml, pack of 10 Erlenmeyer flasks 1,000 ml, pack of 10 Erlenmeyer flasks 2,000 ml, pack of 10 886 1064 886 1072 886 1080 Shaking flasks, DURAN, Erlenmeyer type, 3 baffles at 120°, straight rim, connector GL 14 Erlenmeyer flasks 300 ml, pack of 10 Erlenmeyer flasks 500 ml, pack of 10 Erlenmeyer flasks 1,000 ml, pack of 10 886 1099 886 1102 Caps for Erlenmeyer flasks, straight rim Cap Aluminium, pack of 10 Cap Stainless steel, pack of 10 886 0998 Shaking flasks, DURAN, Erlenmeyer type, 3 baffles at 120°, narrow neck for plug Erlenmeyer flasks 500 ml, pack of 10 Technical Data Ordering information CERTOMAT® BS-1 version with circulation/heating (UH) 230 V/50 Hz 886 5027 230 V/50 Hz 886 5124 115 V/60 Hz 886 5035 115 V/60 Hz 886 5132 CERTOMAT® BS-1/25 mm CERTOMAT® BS-1/50 mm CERTOMAT® BS-1/25 mm CERTOMAT® BS-1/50 mm CERTOMAT® BS-1 version with circulation/heating/cooling (UHK) 230 V/50 Hz 886 5221 230 V/50 Hz 886 5329 115 V/60 Hz 886 5230 115 V/60 Hz 886 5337 CERTOMAT® BS-1/25 mm CERTOMAT® BS-1/50 mm CERTOMAT® BS-1/25 mm CERTOMAT® BS-1/50 mm Technical data Mechanical Shaking speed: Accuracy: Mode: Amplitude: Motor: Drive: Control: Stackable: 40 to 400 rpm ±1% of max. value orbital 25 mm or 50 mm brushless motor triple eccentric bearing, variable mass compensation via microprocessor up to three units without speed reduction Temperature Temperature range: Version with cooling: Air circulation: ambient +8°C to +70°C ambient –10°C to +70°C ca. 180 m3/h Trays Recommended trays: Maximal load: Tray fixation: Type F/FU (420+800 mm) All trays with accessories out of Sartorius-program Spring-clip snap mechanism Programming Parameters: Timing: Programs: Indication: Speed, temperature, illumination (option) date, hour, minute up to 5 programs, with cycling LCD, alphanumeric, 4 lines, 20 characters Safety Memory: Alarms: Safety class: Restart after power failure acoustic and shown on LCD IP 21 Environmental conditions Admissible temperature: Relative humidity: from +10°C to +45°C up to +32°C with cooling mode from 10% to 90%, not condensing Documentation Analog out: Digital out: for speed and temperature 0–10 V, optional 0/4–20 mA RS232 Electric Power supply: Heating capacity: Cooling capacity: 230 V/50 Hz 650 W 500 W Dimensions External (W + H + D): Internal (W + H + D): Weight (without tray): 1150+720+770 mm 890 +495+650 mm 195 kg All models are delivered without tray and other accessories. For incubating cells or mixing liquids a tray is needed together with additional accessories to hold shaking flasks, separation funnels or tubes. Sartorius AG Weender Landstrasse 94–108 37075 Goettingen, Germany Sartorius S.A. 4, rue Emile Baudot 91127 Palaiseau Cedex, France Phone +49.551.308.0 Fax +49.551.308.3289 Phone +33.1.6919.2100 Fax +33.1.6920.0922 www.sartorius.com Sartorius BBI Systems GmbH Schwarzenberger Weg 73–79 34212 Melsungen, Germany Phone +49.5661.71.3400 Fax +49.5661.71.3702 www.sartorius-bbi-systems.com Sartorius North America Inc. 131 Heartland Blvd. Edgewood, New York 11717, USA Phone +1.631.254.4249 Toll-free +1.800.3687178 Fax +1.631.254.4253 Sartorius BBI Systems, Inc. 2800 Baglyos Circle Bethlehem, PA 18020, USA Phone +1.610.866.4800 Fax +1.610.866.4890 Sartorius Ltd. Longmead Business Park Blenheim Road, Epsom Surrey, KT19 9 QQ, U.K. Phone +44.1372.737159 Fax +44.1372.726171 Specifications subject to change without notice. Printed in Germany on paper that has been bleached without any use of chlorine. W/sart-000 · G Publication No.: SB-1015-e05021 Order No.: 85030-514-36 Sartorius S.p.A. Via dell’Antella, 76/A 50011 Antella (FI), Italy Phone +39.055.63.40.41 Fax +39.055.63.40.526 Sartorius, S.A. C/Isabel Colbrand 10 –12 Planta 4, Oficina 121 Polígono Industrial de Fuencarral 28050 Madrid, Spain Phone +34.91.3586091 Fax +34.91.3588804 Sartorius Technologies N.V. Luchthavenlaan 1 – 3 1800 Vilvoorde, Belgium Phone +32.2.756.0670 Fax +32.2.756.0681 Sartorius K.K. KY Building, 8-17 Kitashinagawa 1-chome Shinagawa-ku Tokyo 140-0001, Japan Phone +81.3.3740.5407 Fax +81.3.3740.5406 CERTOMAT® BS-1 Agitateur/incubateur forme armoire Mode d`emploi 85030-520-51 Remarques concernant la sécurité Remarques préalables Cette documentation décrit le CERTOMAT® BS-1 u moment précis indiqué par le numéro de révision. Toutes les données de ce mode d'emploi ont été soigneusement contrôlées, elles sont toutefois sans garantie. Sartorius Stedim Biotech GmbH se réserve le droit de modifier ses appareils soit au niveau technique, soit au niveau équipement ainsi que les documentations correspondantes sans informations préalables. • Les responsables du laboratoire ou les personnes responsables de l'utilisation des appareils doivent prévenir le personnel des dangers lors de l'exploitation du CERTOMAT® BS-1 et garantir le respect des mesures de sécurité importantes. Le personnel doit posséder la qualification nécessaire en regard du domaine d'application et de l'utilisation de l'appareil. • Veillez à observer scrupuleusement les données relatives à la commande. Ceci permet d'éviter une manutention non conforme et les droits de garantie complets restent préservés. Si vous avez des questions, veuillez nous contacter. En raison du développement constant sur les appareils, il est possible que certains composants ou leur commande ne soient pas décrits. Il est possible aussi que certaines données ne correspondent pas exactement à votre appareil. Si des informations importantes vous font défaut ou si vous trouvez des erreurs ou si vous avez besoin de détails spécifiques sur votre appareil, veuillez nous en informer. L‘agitateur/incubateur forme armoire CERTOMAT® BS-1 st un exemple de programme d'appareillage de laboratoires de Sartorius Stedim Biotech GmbH. Nous vous offrons un programme complet d'appareillages allant d'appareils de laboratoire: fermenteurs de labo et pilote, appareils de périphérie adaptés à vos besoins, jusqu'aux installations complètes de fermenteurs pour la production. Sur demande, nous vous informerons volontiers sur nos systèmes et sur la totalité de notre programme. Lorsque des étapes doivent être effectuées avec le plus grand soin ou d'autres aspects doivent être observés, les remarques de sécurité sont caractérisées par ce pictogramme tel qu’indiqué par ce paragraphe. Les conseils de sécurité importants fournis dans ce mode d'emploi sont caractérisés par ce pictogramme. De tels conseils sont valables en plus des autres règles de sécurité pour le domaine d'application et sur le lieu de travail. • N'exploitez pas les appareils dotés d'une version de tension erronée. • Un non-respect de ces conseils de sécurité peut par ex. entraîner des dégâts sur l'appareil ou tout autres dégât matériel et le cas échéant des dommages corporels. Sartorius Stedim Biotech GmbH August-Spindler-Straße 11 37079 Göttingen, Allemangne Téléphone +49.551.308.3118 Fax +49.551.308.3918 [email protected] www.sartorius-stedim.com Déclaration de conformité EG Avec les déclarations de conformité fournies ou jointes à cet appareil, Sartorius Stedim Biotech GmbH déclare la concordance du CERTOMAT® BS-1 avec les directives en vigueur. 2 Précis du mode d'emploi Ce mode d'emploi est bâti selon le schéma suivant. De cette manière, vous pouvez accéder de manière ciblée aux informations importantes en fonction de vos besoins. • La 1ère partie vous donne une vue d'ensemble sur la structure et l'équipement du BS-1. • La 2ème partie vous informe sur les exigences que l'appareil exige de son lieu d'emplacement. De plus, la mise en place et le raccordement sont décrits. • Dans la 3ème partie, vous trouverez des informations sur la mise en service et la commande de l'appareil. Au cas où vous seriez déjà familiarisé avec l'appareil et qu'il est déjà prêt à l'emploi, vous pourrez passer directement à cette partie du mode d’emploi. • La 4ème partie contient des données techniques et des informations ayant trait à la commande. Vous trouverez en particulier des données sur les équipements optionnels et le programme d'accessoires de l'agitateur. Sommaire Remarques préalables Déclaration de conformité EG Remarques concernant la sécurité Précis de ce mode d’emploi 1 Structure et Fonctionnement 4 1.1 1.2 1.2.1 1.2.2 1.2.3 1.2.4 Construction mécanique Variantes d'équipement Entraînement d'agitation Plateaux Dispositif d'éclairage Grille de pose 4 4 4 4 4 4 2 Pose et mise en Service 2.1 2.2 2.2.1 2.2.2 2.3 5 5 6 6 6 Livraison, contrôle de la totalité Pose et raccordement à effectuer par le laboratoire Aménagement du poste de travail Raccordement électrique Equipement du BS-1 et raccordement des options d’équipement 2.3.1 Entraînement d’agitation 2.3.2 Dispositif d’éclairage (option) 2.3.3 Installation frigorifique optionnelle 2.3.4 Montage de la grille de pose (en option) 2.3.4.1 Montage des barrettes de montage (4) 2.3.4.2 Montage des angles de retenue 7 7 7 7 7 8 8 3 9 3.1 3.2 3.2.1 3.2.2 Commande du CERTOMAT® BS-1 Conseils de sécurité Equipement, montage et chargement d'un plateau Equipement d’un plateau Ajustage du poids de contre équilibrage pour le chargement prévu 3.2.3 Démontage et montage d’un plateau 3.3 Mise en service 3.3.1 Mise en place et configurations 3.3.2 Description des fonctions et des menus 3.3.3 Menu manuel „MAN“ 3.3.4 Menu de programme „PROG“ 3.3.4.1 Définition du programme 3.3.4.2 Exemple de programmation 3.3.4.3 Protection de mot de passe pour des programmes 3.3.4.4 Suppression d'une protection par mot de passe d'un programme 3.3.4.5 Lancement d'un programme 3.3.5 Menu Setup "SETUP1“ 3.3.6 Menu Setup "SETUP2“ 3.3.7 Exploitation avec le groupe de refroidissement monté 3.4 Branchement d’appareils externes 3.4.1 Sorties analogiques (ANALOG OUT) 3.4.2 Interface RS 232 3.4.3 Alarme collective 9 10 10 Montage de plateaux et de systèmes de montages 3.5 3.5.1 Montage et chargement de plateaux entièrement équipés 3.5.2 Montage de supports à tubes à réaction 3.5.3 Montage du système de construction universel 3.6 Conseils de maintenance et dépistage des erreurs 3.6.1 Maintenance et nettoyage 3.6.1.1 Nettoyage 3.6.1.2 Entretien de l’éclairage 3.6.2 Mesures lors d’un dysfonctionnement 3.6.2.1 Dysfonctionnements électriques 3.6.2.2 Dysfonctionnements au niveau de l’entraînement d’agitation 3.6.2.3 Dysfonctionnements pour la version de l’appareil avec groupe frigorifique 3.7 Garantie et service après-vente 4 Caracteristiques techniques, Informations de Commande 4.1 4.1.1 4.1.2 4.1.3 4.1.4 4.1.5 4.1.6 4.2 4.2.1 4.2.2 4.2.3 4.3 Caractéristiques techniques Mécanique Raccordement électrique Données de fonctionnement Sortie analogique Alarme collectrice Option refroidissement Références de commande Configurations d’agitateur Options d’équipement Accessoires Instructions de sécurité pour les Agitateurs de laboratoire et armoires d’agitation et d’incubation Déclaration de conformité EG Déclaration de décontamination (pour renvoi d’appareils) Instructions d’élimination des déchets et de réparation Plan joint CERTOMAT® BS-1 Accessoires 4.4 4.5 4.6 4.7 4.8 37 37 37 38 39 39 39 39 39 39 40 40 40 41 41 41 41 41 41 41 41 42 42 42 43 49 49 49 49 49 49 11 12 13 13 14 14 18 19 23 24 25 26 28 34 35 36 36 36 36 3 1 Structure et Fonctionnement 1.1 Construction mécanique 1.2 Variantes d'équipement 1.2.1 Entraînement d'agitation Le terminal de manutention et l'électrique de commande destinés à l'entraînement sont montés dans la partie de commande à droite de l'armoire. L'entraînement d'agitation se trouve sous la cuvette collectrice de la chambre d'incubation. L'entraînement correspond à l'agitateur de laboratoire CERTOMAT® RM. Le CERTOMAT® BS-1 est un agitateur/incubateur à longue durée de vie et d'emploi universel par exemple dans des laboratoires biologiques et chimiques et dont l'opération est conviviale. La version de base du CERTOMAT® BS-1 est équipée d'un entraînement d'agitation et d'un chauffage intégré. L'entraînement d'agitation inclut un moteur à induit extérieur et la commande à courroie poly V solide à faible émission de bruits. Des entraînements d'agitation aux courses différentes sont disponibles, la course pouvant être réglée par notre service sur place. Différentes vitesses d'agitation sont réglables progressivement. L'agitateur peut être équipé de plateaux de taille différente ainsi qu'avec des systèmes de construction et la panoplie d'accessoires du programme d'agitation du CERTOMAT®. Une double-porte à vitrage isolant facilite l‘installation et le retrait des récipients d‘agitation ou le changement du plateau et permet le contrôle visuel. Pour les incubations l‘exploitation dans la zone de température ambiante ou au-dessous de celle-ci, une tige de refroidissement (échangeur thermique) ou un groupe frigorifique est installé. Si vous le désirez, une installation d‘éclairage est disponible. Vous trouverez des informations détaillées concernant les possibilités d‘équipement au Chapitre 4 „Caractéristiques techniques et de commande“. Ce surplus d‘informations vous permettra d‘optimiser l‘équipement de l‘agitateur en fonction de vos besoins spécifiques. La chambre d'incubation de l'agitateur est en acier fin. Le fond est une cuvette de récupération afin d'éviter que des médiums répandus puissent se déverser de manière incontrôlée en cas de rupture du récipient. Cette forme de construction facilite aussi le nettoyage de l'agitateur. La cuvette collectrice peut être retirée aisément de la chambre d'incubation. Vous pouvez utiliser l‘agitateur comme appareil au sol ou comme appareil de table et 2 à 3 agitateurs peuvent être superposés de manière modulaire. Un socle de rehaussement est disponible pour l‘exploitation modulaire avec deux appareils qui vous permet d‘amener les agitateurs à une hauteur de manutention optimale. • Mouvement orbital: Ø 25 mm ou 50 mm (selon sa version à l'état de livraison; réglable par le service aprèsvente de Sartorius AG sur place sur l'amplitude). • Plage de vitesse: 40 ... 400 tr/min • Divergence de vitesse: max. ± 1 % de la valeur finale • L’entraînement a un équilibrage des masses breveté et réglable 1.2.2 Plateaux Des plateaux peuvent être livrés complètement équipés de tulipes pour Erlenmeyer (type E ou F) ou se prêtent à un équipement personnalisé en tant que plateaux universels type EU ou FU. • Dimensions: Type E/EU : L x P = 420 x 420 mm 1) 1) Type F/FU : L x P = 800 x 420 mm Les plateaux universels peuvent être équipés de tulipes pour Erlenmeyer de différentes tailles, de supports de tubes pivotables et de systèmes de montage universels. Les systèmes de construction universels permettent de poser des récipients divers, par ex. les bouteilles, les béchers ou les entonnoirs de décantation. 1.2.3 • 1.2.4 • Dispositif d'éclairage Comme option supplémentaire, un dispositif d'éclairage avec 5 tubes fluorescents à 18 W est disponible. Chaque tube fluorescent peut être déconnecté séparément. Le montage du dispositif d'éclairage (voir Point 2.3.2) ainsi que son activation dans le menu SETUP2 seront décrits au point 3.3.6. Grille de pose Une grille de pose est disponible en tant qu’option pour une incubation statique, par ex. dans des boîtes de Petri. Le montage de la grille de pose sera décrit au chapitre 2.3.4 ) Dans la version modifiée pour nouveau blocage; changement de plateaux existants pour ce système sur demande. Veuillez contacter notre service. 1 4 2 Pose et mise en Service 2.1 Livraison, contrôle de la totalité 5. L'équipement et l'ampleur de la livraison de l'agitateur/incubateur CERTOMAT® BS-1 sont fonction de la commande. L'entraînement d'agitation ainsi que les options „tige de refroidissement“ et „groupe frigorifique“ sont montés en usine conformément aux spécifications du client. L'agitateur/incubateur forme armoire est livré selon un test de fonctionnement minutieux. Pour le transport au lieu d'emplacement, la pose et avant la mise en service, veillez à assurer les conditions suivantes: 1. 2. Pour le transport, un appareil de transport approprié (chariot élévateur, etc.) doit être disponible. Les portes, les ascenseurs et les voies empruntées jusqu'au lieu d'emplacement doivent permettre un transport sans danger. Le lieu d’emplacement doit être approprié pour l’agitateur/incubateur. La surface de pose doit offrir une place suffisante et doit être à même de supporter le pois du CERTOMAT® BS-1 complètement équipé: − Dimensions de l’armoire: 1150 x 720 x 770 mm (L x H x P) − Poids: env. 195 kg en plus du chargement respectif • Lors d‘une livraison en tant qu‘armoire à un module ou en cas de deux armoires superposées, l‘armoire (inférieure) peut être posée sur un socle ce qui facilite la manutention. • Si vous superposez plusieurs CERTOMAT® BS-1 les uns sur les autres (jusqu‘à 3 appareils), veillez à observer les dimensions ainsi que le poids de la combinaison des appareils entre eux et de leurs composants ainsi que des charges en résultant. 3. Le poste de travail doit pouvoir supporter les oscillations transmises lors de l'exploitation de l'agitation. Les appareils posés dans le champ de travail ne doivent pas être endommagés. Veillez à prendre en ligne de compte les conseils pour la limitation de la vitesse d'agitation au Chapitre3. L'agitateur/incubateur forme armoire est conçu pour des conditions en laboratoire usuelles, cf. données portant sur les conditions d'environnement en annexe. Lors de conditions ambiantes spéciales ou de l'utilisation de médiums agressifs, testez l'aptitude de tous les composants. Des dysfonctionnements et des dégâts tels que la corrosion par des médias agressifs ne sont pas soumis à notre garantie. Si le plan de travail n'est pas approprié pour le CERTOMAT® BS-1 et si l'appareil n'est pas conçu pour votre tension réseau, ne le posez pas et ne le mettez pas en service. 6. Contrôlez l'état de l'appareil et des accessoires livrés. Tous les composants spécifiés dans la commande sont montés ou sont joints à la livraison. La livraison doit être complète et tous les composants doivent s'avérer intacts. • Si votre agitateur/incubateur n'existe pas dans la version de tension correcte ou si l'appareil ne fonctionne pas ou si des composants manquent ou sont endommagés, veuillez contacter rapidement votre succursale de Sartorius Stedim Biotech GmbH. Le mouvement du plateau transmet à l‘agitateur des oscillations qui ne peuvent pas être compensées par le contre poids d‘équilibrage réglable pour toutes les charges et les vitesses d‘agitation. Particulièrement pour des chargements importants (> 10 kg) et une fréquence d‘agitation élevée, des effets de résonance peuvent apparaître et des vibrations peuvent être transmises au plan de travail ou est posé l‘appareil. 4. La tension d'alimentation doit correspondre aux spécifications de l'appareil. Comparez votre tension réseau aux indications apposées sur la plaque signalétique de votre appareil. 5 2.2 Pose et raccordement à effectuer par le laboratoire 2.2.1 Aménagement du poste de travail Le CERTOMAT® BS-1 est superposable. Vous pouvez poser jusqu’à 3 appareils les uns sur les autres. Dans la mesure où les données suivantes se rapportent à un agita-teur/incubateur, elles s'appliquent également à votre combinaison d'appareils. 1. Posez le BS-1 de manière à ce qu’il soit bien accessible et que son exploitation n’endommage pas d’autres appareils. La partie de machine droite devrait avoir une distance d’env. 50 cm des appareils ou du mur. La porte latérale est alors accessible sans pour autant déplacer le BS-1 lorsque vous voulez par ex. ouvrir la porte latérale pour la maintenance. Un écart de paroi minimal de 15 cm s’avère nécessaire pour un aérage suffisant. Si le BS-1 comprend la tige de refroidissement optionnelle (échangeur thermique), nous recommandons pour le raccordement des appareils périphériques externes pour le côté arrière une distance d’env. 50 cm. • Lors de la livraison en tant qu’armoire individuelle ou pour d’autres armoires qui peuvent être superposées, l’armoire (inférieure) peut être posée sur un socle ce qui facilite la manutention. Chaque appareil peut être commandé séparément. 2. Si vous désirez superposer 2-3 agitateurs/incubateurs − Retirez les caches en plastique sur le côté supérieur de l’armoire inférieure prévue. − Remplacez les pieds de l’armoire supérieure contre les goupilles de centrage livrées. − Au besoin, vous pouvez fixer les oeillets de transport livrés sur le côté supérieur de l’armoire supérieure afin de la transporter moyennant un engin de levage. 3. Superposez les armoires avec précaution les unes sur les autres. Veillez à observer le poids des armoires. N’utilisez que des outils de levage ou outils auxiliaires appropriés. Les goupilles de centrage doivent concorder sans coincer dans les alésages situés sur le côté supérieur de l’armoire inférieure respective. 4. Ajustez l’agitateur/incubateur ou les armoires empilées minutieusement à la verticale. Si l’agitateur/incubateur est placé de travers, l’entraînement d’agitation peut s’user rapidement, en particulier lors de charges importantes sur le plateau et les vitesses d’agitation élevées. Lors d’armoires superposées qui sont de travers, la totalité de la structure de l’armoire peut devenir instable lors de l’exploitation des agitateurs/incubateurs en particulier lors d’un chargement important ou de vitesses d’agitation élevées. 6 2.2.2 Raccordement électrique • Utilisez une prise de courant de protection 230 V , 50 Hz ou 115 V, 60 Hz, en fonction du standard en vigueur du pays. Ne raccordez pas l'appareil au réseau si les conditions de raccordement ne concordent pas aux indications inscrites sur la plaque signalétique. • Si le laboratoire ne dispose pas des raccordements d'appareils correspondants, le service habilité de Sartorius AG doit monter une fiche d'appareil appropriée. 2.3 Equipement du BS-1 et raccordement des options d’équipement 2.3.1 Entraînement d’agitation • 2.3.2 • Conformément à votre commande, l'entraînement d'agitation est monté en usine dans l'agitateur/incubateur et est prêt à l'emploi après équipement avec le plateau et chargement des récipients d'agitation. La transformation de l’agitation sur une autre course ne peut être effectuée que par les techniciens de service qualifiés et autorisés. Pour ce faire, contactez la succursale de service après-vente autorisée ou directement le service de maintenance de la société Sartorius AG. Fig. 3: Unité d’éclairage raccordée Dispositif d’éclairage (option) Insérez le dispositif d'éclairage dans les rails de guidage prévus à cet effet. Desserrez préalablement les 4 vis de fixation des rails d'insertion. Glissez le dispositif d'éclairage jusqu'à ce que l'alésage transversal soit visible dans les rails d’insertion. Enfoncez les vis livrées dans les alésages transversaux et bloquez de cette manière le dispositif d'éclairage contre un glissement. Serrez à nouveau les 4 vis de fixation minutieusement. Insérez la fiche pour l'alimentation électrique dans la prise de courant prévue à cet effet dans la chambre d'incubation (voir Fig. 1). Assurez la fiche en vissant l'écrou-raccord dans la prise de courant (voir Fig. 2 et 3). Après activation de l'option „LUMIERE“ dans le menu SETUP2 (voir Point 3.3.6), le dispositif d'éclairage est prêt à l'emploi. Si besoin est, il vous est possible de déconnecter quelques tubes manuellement, afin de diminuer l’intensité de la lumière (voir Fig. 4). Fig. 4: Interrupteur pour les tubes fluorescents 2.3.3 • 2.3.4 Installation frigorifique optionnelle Si le CERTOMAT® BS-1 est équipé d'un groupe frigorifique intégré, un autre raccordement s'avère superflu. Lors d'une exploitation à froid, le condensat généré peut s'évaporer dans l'appareil et l'air humide peut être évacué via la purge côté appareil. Montage de la grille de pose (en option) Ampleur de la livraison : 1 Fig. 1: Prise de raccordement pour éclairage optionnel 2 4 3 Fig. 5 : Grille de pose avec matériel de montage Fig. 2: Connecteur de l’éclairage optionnel 1. 2. 3. 4. Vis de fixation Barrettes de montage Angles de retenue Grille de pose (12) (4) (4) (1) 7 2.3.4.1 Montage des barrettes de montage (4) 1. A l’aide de la vis supérieure, fixer la première barrette de montage sur la position prévue de la paroi latérale (visser la vis légèrement). 2. Enfoncer alors l’angle de retenue et laisser s’encliqueter l’extrémité inférieure de l’angle de retenue dans la barrette de montage– un évidement plus bas (v. fig. 8). Barrette de montage Veiller à la position de montage correcte (voir fig. 6) Angle de retenue Fig. 8 : Angle de retenue monté 3. Monter les 3 autres angles de retenue dans le même ordre, dans les autres barrettes de montage. Veiller à la même hauteur des angles de retenue. 4. Insérer la grille de pose dans l’appareil. Le courant d’air du ventilateur de l’appareil dans l’habitacle ne doit pas être bloqué ! Veiller à l’assise correcte et à la position horizontale de la grille de pose. 5. Si nécessaire : − Retirer la grille de pose − Retirer l’angle de retenue positionné de manière erronée en pinçant légèrement − Remonter l’angle de retenue dans la nouvelle position Fig. 6 : Position de montage de la barrette de montage 2. Enfoncer les 2 autres vis dans les trous de vis et serrer légèrement. 3. Serrer toutes les autres vis. 4. Monter les 3 autres barrettes de montage dans le même ordre. 2.3.4.2 Montage des angles de retenue 1. Dans un premier temps, fixer l’angle de retenue à l’aide du crochet supérieur – à la hauteur désirée – dans l’évidement de la barrette de montage (v. fig. 7) Barrette de montage Angle de retenue Fig. 7: Montage des angles de retenue 8 3 Commande du CERTOMAT® BS-1 3.1 Conseils de sécurité Un danger peut émaner des médiums et des produits intervenants dans le CERTOMAT® BS-1. Ce danger est spécifique aux médiums et au processus. Ceci s'applique entre autres aux cultures d'agitation avec des cellules vivantes ou des médiums agressifs. Toutefois, les dangers et les mesures de sécurité qui en découlent ne peuvent être traités dans le cadre de ce mode d'emploi. Il appartient à votre entreprise d'instruire le personnel sur les dangers pouvant émaner des médiums ou des appareils contaminés et de faire observer les règles de sécurité à respecter. Veillez à respecter les règles de sécurité suivantes: Lors de l'emploi de médiums potentiellement dangereux, l'accès au poste de travail et la manipulation de l'agitateur/incubateur devraient être réservés uniquement à des personnes autorisées, il est interdit à des personnes non autorisées de manipuler l'appareil. Des états d'exploitation critiques sont possibles également en exploitation normale. En fonction du chargement, des vitesses d'agitation définies peuvent provoquer des oscillations de l'agitateur/incubateur (effets de résonance). L'entraînement englobe un contre poids qui ne peut pas toujours compenser complètement de telles oscillations. Une transmission des oscillations sur la surface de pose est alors possible et d'autres appareils à proximité peuvent être affectés eux aussi. Si vous incubez des médiums dans des récipients ouverts, travaillez si possible avec des vitesses d’agitation les plus basses possibles. Si des médiums sont répandus par ex. après la cassure de récipients en verre, nettoyez immédiatement l’agitateur/incubateur et le verre brisé ou tous les corps étrangers. Evitez que des corps étrangers ne pénètrent entre la table d’agitation et la cuvette de réception ou dans l’entraînement d’agitation. Les opérateurs doivent porter des vêtements de travail appropriés et une protection personnelle comme par ex. des gants , des lunettes de protection et éventuellement un masque respiratoire protecteur. N'utilisez que des équipements que la société Sartorius Stedim Biotech GmbH a autorisés pour l'utilisation en conjonction avec le CERTOMAT® BS-1. Contrôlez la consistance parfaite de tous les composants, en particulier des récipients en verre. N'utilisez aucune pièce en verre endommagée. N’exploitez jamais l’entraînement d’agitation sans plateau. Déconnectez toujours l’entraînement d’agitation avant de fixer ou de retirer des plateaux avec de l’agent d’agitation ou avant de démonter/monter le plateau. Fixez soigneusement le plateau ainsi que les appareils rapportés, systèmes de support de récipients et accessoires. Répartissez le chargement uniformément sur la table d’agitation. Les récipients ne doivent pas sortir de leur fixation, être projetés ou se heurter entre eux. Réduisez la fréquence d'agitation au cas où l'agitateur/incubateur vibrerait plus intensément (à travers des effets de résonance) ou nuit à d'autres appareils à proximité ou lorsque la construction de l’armoire devient instable lors de l’exploitation d’armoires empilées. 9 3.2 Equipement, montage et chargement d'un plateau Sartorius Stedim Biotech GmbH offre des plateaux entièrement équipés (avec supports pour Erlenmeyer de différentes tailles) ou plateaux sans accessoires. Lors de la livraison ou après pose de l'agitateur/incubateur, le plateau peut être préparé prêt à l'emploi. Si les fixations de récipients et les systèmes de construction dont vous avez besoin sont disponibles, insérez les récipients d'agitation et démarrez l'agitateur/incubateur comme décrit au Paragraphe 3.3. Si vous voulez modifier l'équipement d'un plateau ou insérer un autre plateau, suivez les indications suivantes. 3.2.1 Equipement d’un plateau • Nous recommandons de monter les fixations de récipients et les systèmes de montage sur le plateau avant d'insérer le plateau dans le CERTOMAT® BS-1. Leur maniement est ensuite plus aisé. Par contre, ne posez et ne fixez de récipients d'agitation grands et lourds sur le plateau qu’après avoir monté préalablement le plateau dans le CERTOMAT® BS-1. • Respectez les dimensions de la chambre d’incubation env. 890 x 495 x 650 mm (L x H x P) Veillez au poids du tableau chargé. Les récipients d'agitation entravent le maniement. Vous pouvez heurter avec le plateau d’autres objets, endommager des récipients d'agitation, libérer involontairement des médiums et le cas échéant vous blesser. 10 1. Lors de la première utilisation d'un plateau vide, fixez les dispositifs de fixation requis pour le récipient d'agitation. Si vous voulez modifier l'équipement d'un plateau, démontez préalablement les parties superflues. • Vous pouvez combiner des tulipes pour Erlenmeyer de différentes tailles. Pour les tubes à essai, les béchers, les bouteilles ou les décanteurs, des systèmes de montage comme des supports pour tubes d'essai ou des systèmes de montage universels sont en vente. Vous trouverez des informations détaillées sur les supports de récipients et les systèmes de montage disponibles au Paragraphe 3.4. 2. Lors du montage des récipients dans les fixations, veillez à répartir uniformément les récipients d'agitation lors du changement des plateaux et à les fixer de manière fiable. 3.2.2 Ajustage du poids de contre équilibrage pour le chargement prévu En état de la livraison, le CERTOMAT® BS-1 est préconfiguré pour un chargement de 10 kg. Si le chargement prévu dévie, vous devez ajuster le poids de contre équilibrage. De cette manière, vous pouvez minimiser les vibrations naissantes dans l’exploitation. 1. Pesez le plateau complètement équipé avec tous les récipients d’agitation. 2. Désenclenchez le CERTOMAT® BS-1 sur l’interrupteur principal. 3. Pour le réglage du poids de contre-équilibrage à l’aide de l’outil de réglage pour le chargement, rabattez la face avant en dessous des deux portes en verre vers le bas. La face avant est fixée via des aimants. Vous trouverez l'outil de réglage derrière ce clapet. 4. 5. 6. Insérez l’outil de réglage (1) à travers l’orifice sous le clapet avant du carter sur l’axe du poids de compensation (2). 7. Virez le poids de contre-équilibrage avec l’outil de réglage en sens horaire (pour chargement <10 kg) ou en sens anti-horaire (chargement >10kg). • La configuration nécessaire pour un certain chargement du poids de contre-équilbrage est marquée sur l’outil de réglage. 8. Retirez la clé mâle coudée et l’outil de réglage et fermez la face avant. 9. Montez le plateau équipé. 10. Enclenchez à nouveau le CERTOMAT® BS-1. 11. Testez le fonctionnement silencieux lors de votre vitesse d’agitation désirée. Virez la table d’agitation à la main en position extérieure arrière. 12. Si un réajustage s’avère nécesssaire, stoppez l’agitateur [touche STOP], désenclenchez le CERTOMAT® BS-1, retirez le plateau et répétez les étapes 3-11. Bloquez l’entraînement de la table d’agitation en insérant la clé mâle coudée livrée à travers l’alésage de la table d’agitation (Fig. 9 et 10, Pos. 4). Déplacez la table d’agitation brièvement en va et vient jusqu’à ce que l’entraînement soit entièrement bloqué. 4 3 1. 2. 3. 4. Outil de réglage Poids de contre-équilibrage Axe Clé mâle 1 Fig. 9: Configuration du poids de contre-équilibrage conformément au chargement 11 3.2.3 Démontage et montage d’un plateau 1. Placez le plateau sur la table d'agitation et positionnez les deux fentes (1a/1b) par rapport aux vis moletées arrière (1c/1d) et glissez le plateau sous la pince (2a) de la table d'agitation. Faites attention au poids du plateau si vous l'avez déjà chargé avec des récipients d'agitation. 2. Pressez l'arête avant du plateau vers le bas (2b), jusqu'à ce qu'elle s'enclique dans la pince avant (2c). 3. Les perçages (3a/3b) du plateau se centrent automatiquement sur les cônes (3c/3d) de la table d'agitation et fixent le plateau. Veillez à ce que les cônes (3c/3d) soient centrés uniformément sur le plateau. Le plateau est alors placé correctement sur la table d'agitation. 1b 1a Si nécessaire, vous pouvez ajuster les cônes comme suit: 3a 1. Desserrez les vis des cônes (3c/3d) avec la clé mâle coudée pour vis à six pans creux. 2. Déplacez le plateau éventuellement légèrement d'un côté à l'autre. Les cônes (3c/3d) se centrent eux-mêmes dans les forages (3a/3b) du plateau. 3. Serrez de nouveau soigneusement les vis des cônes (3c/3d) après l'équilibrage de tolérance. 4. Pour une sécurité supplémentaire du plateau – spécialement lors de chargements élevés en relation avec des vitesses élevées, les vis à tête fendue livrées M5 x 8 doivent être vissées dans les forages prévus à cet effet. 2b 3b 1c 2a 1d 4 3c 2c 3d Abb. 10: Montage du plateau (plateau representé sans accessoires ni chargement) 12 3.3 Mise en service Contrôle de l’interrupteur de contact de porte 3.3.1 Mise en place et configurations Seulement pour des appareils avec un numéro de série à 00499/5 1. Si vous avez changé l'appareil de place (par exemple chambre froide <-> laboratoire), attendez que l'appareil soit à température ambiante avant de l'enclencher. Dans le cas contraire, l'humidité de l'air peut condenser dans l'appareil et provoquer éventuellement un dysfonctionnement. Avant chaque mise en service du CERTOMAT® BS-1, la fonction de l’interrupteur du contact de porte doit être contrôlée ! Afin de contrôler le fonctionnement de l’interrupteur de contact de porte, procédez comme suit. Si vous avez transporté un CERTOMAT® BS-1 et qu'un groupe frigorifique est monté, vous ne devez mettre en marche l'appareil qu'après une heure de temps d'attente. Ceci permet d'éviter des dégâts sur l'appareil. 2. Avec le câble de réseau, branchez le CERTOMAT® BS-1 sur une prise de courant appropriée. 3. En tournant l'interrupteur (1), l'électronique est alimentée en tension de réseau. Après enclenchement et initialisation, le CERTOMAT® BS-1 se trouve dans le menu manuel „MAN“. • Après mise en marche, l'appareil est initialisé. Après env. 5 secondes, l'éclairage de l'arrière-plan du display s'allume ainsi que la DEL de service verte. Le menu manuel „MAN“ est actif. L'appareil est maintenant prêt à l'emploι. • Dans le menu manuel „MAN“, entrez les valeurs suivantes via le clavier à membrane du panneau frontal. (voir Chapitre 3.3.3) F1 Vitesse [1/min.]: 50 F3 Heure [h:min]: 00:10 Appuyez sur la touche START pour démarrer l’agitateur. Ouvrez la porte droite du CERTOMAT® BS-1 – l’agitateur doit s’arrêter. Le fait d'actionner la touche [ESC] permet à l'opérateur de passer du „menu manuel“ au menu principal. Après écoulement du temps préréglé (voir Chapitre 3.3.5), la DEL Alarme s’éclaire sur le panneau avant. Si réglé, un signal d’alarme retentit en plus. 3 • Appuyez sur la touche ENTER pour valider l’alarme. • Fermez la porte – l’agitateur redémarre. Si l’agitateur continue à marcher malgré que la porte droite est ouverte, l’appareil présente un dysfonctionnement. Dans ce cas, l’appareil ne doit pas continuer à être exploité ! 4 5 3 2 6 7 1 10 9 Les avaries peuvent être réparées par le personnel de service autorisé sur site ou par le service après-vente de Sartorius AG. Veuillez vous adresser au concessionnaire de service après-vente habilité ou directement à: Sartorius AG Servicezentrum Nord Weender Landstraße 94-108 37075 Göttingen, Allemangne Téléphone +49.551.308.3729 / 3740 / 3741 Fax +49.551.308.3730 8 Fig. 11: Face avant avec clavier lisse 1. Interrupteur de réseau 2. Touche [+/-] pour l'ajustage des données des opérations (température, nombre de tours 3. Champ de fonctions [F1-F5] 4. Affichage alphanumérique 5. Zone d'affichage MODE 6. Touche [ESC] pour retour au menu Touche [ENTER] pour la confirmation d'entrées / modifications 7. DEL de service (verte) 8. Touche [START] 9. DEL alarme (rouge) 10. Touche [STOP] 13 3.3.2 Description des fonctions et des menus Dans la structure du menu, vous trouverez les points de menu qui sont disponibles dans le menu principal. Dans les chapitres suivants, vous trouverez les configurations du point de menu respectivement choisi. Occupation des touches F3 Menus SETUP: voir Chap. 3.3.5/3.3.6 F4 MAN SETUP CERTOMAT BS-1 10:13:35 PROG PRINC. Menu manuel MAN: voir Chap.3.3.3 F5 MODE Menu de programme PROG: voir Chap. 3.3.4 Zone d'affichage MODE: au-dessus de la zone MODE, le menu actuellement configuré est affiché. Dans le cas présent: "PRINC.“ pour menu principal. Fig. 12 Menu principal (vue d'ensemble du menu) 3.3.3 Menu manuel „MAN“ • En pressant la touche [F4] "MAN“ dans le menu principal, le "menu manuel“ est activé. • Retour du "menu manuel“ au menu principal avec [ESC] F4 SETUP MAN CERTOMAT BS-1 10:13:25 PROG PRINC. < > VITESSE 0 ARRET REFR. ESC Fig. 13: Menu principal TEMP 10.0°C TEMPS 00:00 <-> MAN Fig. 14: MAN: Menu manuel Les configurations suivantes peuvent être effectuées dans le „menu Manuel“ (Fig. 10): F1 Réglage de la vitesse • Après avoir pressé [F1], la zone d'entrée "VITESSE“ (tours/min) clignote. • En pressant les touches [+/-], la vitesse est réglée • Validez l'entrée par [ENTER] F2 14 VITESSE: TEMP: Ajustage de la température • Après avoir pressé [F2], la zone d'entrée "TEMPERATURE“ en °C clignote • En pressant les touches [+/-], la température est réglée • Validez l'entrée par [ENTER] F3 TEMPS: Réglage du timer • Après avoir pressé [F3], réglez le "TIMER“ (TEMPS) • En pressant les touches [+/-], la durée d'exécution est réglée en [h:min] • Validez l'entrée par [ENTER] • La durée d'écoulement peut être réglée entre 00h:01min et 99h:59min ainsi que "CONT.“ (exploitation durable). F4 • REFR: Enclenchez et désenclenchez le refroidissement (uniquement pour „version UHK“) Après avoir pressé [F4], le refroidissement est enclenché / désenclenché La mise en service du refroidissement n'est possible que pour des consignes de température <38,5 °C! Si une valeur supérieure est entrée (malgré le refroidissement enclenchée) et est confirmée par [ENTER], un signal bref retentit et le refroidissement est désenclenché MODE • MODE: Zone d'affichage Le menu respectivement “actif” est affiché, dans le cas présent: "MAN“ pour menu actuel 15 • La touche [F5] permet de passer tour à tour à une autre zone d'affichage afin d'afficher toutes les valeurs à régler (uniquement pour option "éclairage“). < VITESSE 0 ARRET REFR. F5 TEMP 10.0°C TEMPS 00:00 LUMIERE MARCHE <-> MAN <-> Fig. 15: Paramètres configurables F2 • LUMIERE: MODE: Activation et désactivation de l'affichage (uniquement pour option „éclairage“) Zone d'affichage • Le menu respectivement "actif“ est affiché, dans le cas présent "MAN pour „menu manuel“ • En appuyant sur la touche [START], la transition est opérée au mode de service "RUN“. • Les valeurs préalablement réglées pour: Vitesse Température Eclairage Refroidissement Timer : VITESSE : TEMP : LUMIERE : REFR. : TEMPS sont maintenant activées. MAN Fig. 16: Autres possibilités de réglage Après avoir pressé [F2], l'éclairage est activé/désactivé MODE 16 > • La touche [F5] permet de passer tour à tour à une autre zone d'affichage afin d'afficher toutes les valeurs réelles. < CHAUF. ARRET REFR. ARRET LUM ARRET <-> RUN F5 > Fig. 17: Mode d'exploitation RUN • VITESSE 125 01:23 TEMPS TEMP1 23.4°C <-> RUN Fig. 18: Mode d'exploitation RUN Le "TIMER“ marche. La durée d'opération respective est affichée. En mode d'exploitation, les valeurs REELLES sont affichées. Une modification des valeurs n'est pas possible ici! • En exerçant une pression prolongée sur les touches de fonction [VITESSE], [TEMP], [REFR] et [LUMIERE], le paramètre clignote et la valeur de CONSIGNE est affichée. Après relâchement des touches de fonction, l'affichage des valeurs REELLES se fait à nouveau. • L'affichage de la valeur REELLE de la température se réfère à la température de l'air dans la chambre d'incubation. • En appuyant sur la touche [STOP], le retour au menu manuel "MAN“ se fait • Le chauffage, le refroidissement, la lumière et l'agitateur sont déconnectés. • Un nouveau réglage peut être effectué. • Après écoulement du temps réglé, un retour au menu manuel"MAN“ se fait automatiquement. La touche [STOP] enfoncée, le refroidissement continue à fonctionner 3 minutes. Un réenclenchement du refroidissement n'est possible qu'au bout de 3 minutes. 17 3.3.4 Menu de programme „PROG“ • En pressant la touche [F5] "PROG“, le "menu PROGRAMME“ est activé. "PROG1“ clignote! • Retour au menu principal avec [ESC] * F5 SETUP MAN CERTOMAT BS-1 08:53:27 PROG PRINC. Fig. 19: Menu principal 18 < ESC > PROG1 ENTER START PROG4 clignote * PROG2 PROG3 programmé lancé PROG5 PROG1 Abb. 20: PROG1-4: Menu de programme • Avec [F1] .... [F5], le programme correspondant est sélectionné. Après sélection, le programme correspondant choisi clignote sur l'affichage. • Dans la zone "MODE“, le programme choisi apparaît automatiquement, dans le cas présent "PROG1“. • La programmation illustrée à l'aide d'un exemple est expliquée au Point 3.3.4.2. "Exemple de programmation“. 3.3.4.1 Définition du programme • En pressant la touche [ENTER] (appuyez alternativement la touche de fonction clignotante env. 2 sec), le passage aux définitions de programme „PRSTEP....STEP.... ...STEP4“ est initialisé. • Dans ce menu, les différents "STEPS“ peuvent être sélectionnés au sein des programmes "PROG1.....PROG5“. • Lors de programmes protégés par mot de passe, le mot de passe correspondant destiné à l'édition/modification des programmes existants doit être entré. * clignote * ENTER PROG1 ENTER START PROG4 PROG2 PROG3 programmé lancé PROG5 PROG1 > alternativement la touche de fonction clignotante env. 2 sec. < STEP1 0:00 0:00 STEP4 STEP2 0:00 PROG1 ESC Fig. 21: PROG1-4: Menu de programme • PRSTEP ACTIVEE 0:00 STEP3 Fig. 22: Définition du programme La figure 18 (définition du programme) affiche si la PRSTEP est "ACT“ ou "INACT“. Par ailleurs, la durée de la step est affichée. Sélection des différentes "STEPS“ (Fig. 18): F1 • STEP2 pour: STEP3 pour: STEP4 Après avoir pressé [F5], les configurations pour "STEP4“ peuvent être effectuées.. MODE • pour: Après avoir pressé [F4], les configurations pour "STEP3“ peuvent être effectuées. F5 • STEP1 Après avoir pressé [F3], les configurations pour "STEP2“ peuvent être effectuées. F4 • pour: Après avoir pressé [F2], les configurations pour "STEP1“ peuvent être effectuées. F3 • PRSTEP Après avoir pressé [F1], les configurations pour "PSTEP“ peuvent être effectuées. F2 • pour: MODE: Zone d'affichage Le PROG respectif “actif” est affiché, dans le cas présent: "PROG1“. 19 Les touches [F1 à F5] permettent de sélectionner les paramètres réglables des steps. Touches de fonction PRSTEP AKTIVEE 0:00 STEP3 STEP1 0:00 0:00 STEP4 F1-F5 STEP2 0:00 PROG1 < > VITESSE 0 ARRET REFR. ESC TEMP 10.0°C TEMPS 00:00 <-> STEP1 Fig. 24: Paramètres réglables Fig. 23: Définition du programme Pour chaque "STEP“, les paramètres suivants peuvent être réglés (Fig. 20): F1 VITESSE: Réglage de la vitesse • Après avoir pressé F1, la zone d'entrée "VITESSE“ (tours/min) clignote • En pressant les touches [+/-], la vitesse est réglée • Validez l'entrée par [ENTER] F2 TEMP: Ajustage de la température • Après avoir pressé [F2], la zone d'entrée "TEMPERATURE“ en °C clignote • En pressant les touches [+/-], la température est réglée • Validez l'entrée par [ENTER] F3 TEMPS: Réglage de la durée de la STEP [h:min] • Après avoir pressé [F3], la zone d'entrée "TEMPS“ clignote • En pressant les touches [+/-], l'intervalle de temps (durée) est ajusté • Validez l'entrée par [ENTER] • Lors de la durée du STEP, des valeurs situées entre 00h:01min (passage imminent à l'étape suivante) et 99h:59min ainsi que "CONT.“ peuvent être réglées (exploitation continuelle jusqu'à l'arrêt manuel par STOP). Une durée d'exécution fixe ne peut être assignée à une PRSTEP. Elle ne peut être qu' "ACTIVEE“ ou "DESACTIVEE“! 20 • En cas d’une PRSTEP activée, les fonctions qui ont été sélectionnées sont activées dans la PRSTEP de la pression de touche [START] jusqu'au lancement réel du programme [STEP1]. • En cas d’une PRESTEP désactivée, l'agitateur, la mise à température, le refroidissement et la lumière sont désactivés jusqu'au début du programme [STEP1]. F4 • REFR: Activation et désactivation du refroidissement (uniquement pour version UHK) Après avoir pressé [F4], le refroidissement est activé / désactivé La mise en service du refroidissement n'est possible que pour des consignes de température <38.5°C! Si une valeur supérieure est entrée (malgré le refroidissement enclenchée) et est confirmée par [ENTER], un signal bref retentit et le refroidissement est dés enclenché. MODE MODE: Zone d'affichage • La STEP respectivement “active” est indiquée • La touche [F5] permet de passer tour à tour à une autre zone d'affichage afin d'afficher toutes les valeurs à régler (uniquement pour option "éclairage“). < VITESSE 0 ARRET REFR. F5 > TEMP 10.0°C TEMPS 00:00 LUMIERE MARCHE <-> STEP1 <-> Fig. 25: Paramètres réglables F2 • Fig. 26: Autres possibilités de réglage Activation et désactivation de l'affichage (uniquement pour option éclairage Après avoir pressé [F2], l'éclairage est allumé / éteint MODE • LUMIERE: STEP1 MODE: Zone d'affichage Le STEP respectivement “activé” est affiché, dans le cas présent "STEP1“ 21 • En pressant la touche [ESC], l'opérateur retourne aux menus précédents (jusqu'au menu principal) ESC VITESSE 0 ARRET REFR. TEMP 10.0°C TEMPS 00:00 <-> STEP1 > ESC PRSTEP MARCHE 0:00 STEP3 Fig. 27: Possibilités de réglage au sein d'une „STEP“ PROG2 PROG3 programmé lancé PROG5 PROG1 Fig. 29: Menu de programme 22 STEP2 00:00 PROG1 Fig. 28: Définition de programme ESC PROG1 ENTER START PROG4 STEP1 0.0°C 0:00 STEP4 > MAN SETUP CERTOMAT BS-1 08:53:27 PROG PRINC. Fig. 30: Menu principal > 3.3.4.2 Exemple de programmation • • • Au total cinq programmes différents peuvent être mémorisés dans l'appareil. Chaque programme se compose à son tour d'une "PRSTEP“ et de quatre steps supplémentaires qui sont traitées les unes après les autres. Pour chaque step, les valeurs pour le refroidissement, la lumière, le nombre de tours et la température peuvent être réglées indépendamment les unes des autres. Chaque step possède une durée d’exécution bien définie. Si une ou deux steps sont requises, les steps restantes peuvent alors être définies avec la durée d'exécution 00:00 de manière à ce que le programme puisse être arrêté directement. Une fonction Répétition est disponible pour des boucles sans fin. La "PRSTEP“ ne peut être qu'activée ou désactivée (aucune durée d'exploitation). Elle définit les conditions (refroidissement, lumière, nombre de tours et températures) de l'appui de la touche [START] jusqu'au début du programme (STEP1). • Lors d'une "PRSTEP“ désactivée, le refroidissement, la lumière, le nombre de tours et la température jusqu'au début du programme est désactivée. • Le rayon d'action principal pour la "PRSTEP“ est la disponibilité ponctuelle/au moment précis désiré de cultures par ex. après le week-end ou le lendemain. • Avantages: L'opérateur n'a besoin de définir le programme qu'une seule fois avec des durées d'exécution et il peut le lancer ensuite au moment voulu. Le temps de la fin du programme reste toujours identique. • Lancement confortable des programmes de nuit ou de week-end pendant la journée ou avant le week-end. • Les conditions avant le lancement du programme sont reproductibles, étant donné que celles-ci sont maintenues conformément aux configurations dans le „PRSTEP“. • Début de programme automatique sans présence de personnel. Exemple: Le lundi matin, des cultures doivent être disponibles à 9:00 heures. Le programme (STEP1...STEP4) destiné à la fabrication de ces cultures a besoin d'au total 38 h. De cette manière, le programme devrait être lancé manuellement sans utilisation de la "PRSTEP“ le samedi à 19:00 heures. La "PRSTEP“ permet de maintenir le point de début à volonté et de maintenir le matériel sous les conditions désirées jusqu'au début du programme. PROG1: PRSTEP: ACTIVEE à 20 °C, nombre de tours 0, lumière arrêt, refroidissement marche Step 1: 7 h à 30 °C , nombre de tours 200, lumière marche, refroidissement arrêt Step 2: 10 h à 40 °C, nombre de tours 100, lumière arrêt, refroidissement arrêt Step 3: 20 h à 10 °C, nombre de tours 60, lumière marche, refroidissement marche Step 4: 1 h à 10 °C, nombre de tours 200, lumière marche, refroidissement marche Fig. 31: Exemple de programmation 23 3.3.4.3 Protection de mot de passe pour des programmes • La "protection de mot de passe“ (code) pour des programmes sert à protéger des contenus de programme créés contre un accès non autorisé. Le contenu du programme ne peut être modifié sans connaître le mot de passe. Au choix, le "lancement“ et le"stoppage“ du programme peut être protégé par un mot de passe. • Après pression de la touche [ENTER], le passage au menu concerné a lieu pour entrer le „mot de passe“ (code) pour le programme actif respectif. • Pour des raisons de sécurité, entrer le „mot de passe“ deux fois lors de l'attribution du mot de passe. ENTER PRSTEP MARCHE 0:00 STEP3 STEP1 0:00 0:00 STEP4 STEP2 0:00 MOT DE PASSE ENTREE: PROG1 Fig. 32: Définition de programme PROG1 24 > Fig. 33: Assignation de mot de passe pour le PROG1 • En appuyant sur les touches de fonctions [F1] ... [F5], [+], [-], [START] ou [STOP] comme caractères autorisés, l'opérateur entre le "mot de passe“ (code) (visible en tant qu' "º“ sur l'affichage) • Le „mot de passe“ (code) doit comporter au min. 4 positions et ne doit pas dépasser 7 positions. • Après l'entrée du mot de passe, le "mot de passe“ (code) doit être validé à l'aide de la touche [ENTER]. Le passage pour la validation du mot de passe entré préalablement est effectué. • Après la nouvelle entrée du mot de passe, le "mot de passe“ (code) doit être validé à nouveau à l'aide de la touche [ENTER]. L'„entrée du mot de passe“ est ainsi sauvegardée. Simultanément, le retour au „menu de définition de programme“ a lieu. • Le fait d'appuyer sur la touche [ESC] permet d'annuler l'"assignation du mot de passe“. Toutes les "entrées du mot de passe“ deviennent invalides. 3.3.4.4 Suppression d'une protection par mot de passe d'un programme • Dans le menu de définition de programme, choisissez le programme dans lequel vous désirez supprimer le mot de passe (connaissance du mot de passe nécessaire). • En appuyant sur la touche [ENTER], vous parvenez du menu de définition de programme au menu servant à l'attribution du mot de passe PRSTEP MARCHE 0:00 STEP3 STEP1 0:00 0:00 STEP4 Fig. 34: Définition de programme PROG1 STEP2 0:00 ENTER > MOT DE OASSE ENTREE: PROG1 Abb. 35: Assignation de mot de passe pour le PROG1 • La suppression / désactivation du "mot de passe“ (code) se fait avec la touche [ENTER] comme premier caractère de mot de passe. La transition à la validation de la suppression / désactivation a lieu. • En tapant une nouvelle fois [ENTER], le „mot de passe“ (code) est supprimé et un retour automatique au menu de définition de programme a lieu. • En appuyant sur la touche [ESC], la suppression / désactivation du "mot de passe“ (code) est annulée. 25 3.3.4.5 Lancement d'un programme • Le fait d'appuyer ensuite sur la touche [START] permet de passer au mode de réglage du programme sélectionné, dans ce cas le programme 1 "PROG1“. * clignote * START < PROG1 ENTER START PROG4 > ESC HEURE 08:15 PROG2 PROG3 programmé lancé PROG5 PROG1 JOUR 30.04.99 START REPET MARCH PROG1 Fig. 36: PROG1-4: Menu de programme Fig. 37: Menu de lancement Les paramètres suivants (Fig. 33) peuvent être réglés dans le menu de lancement: F1 Réglage de l’heure (point de lancement du programme) • Après avoir pressé F1, la zone d'entrée "HEURE“ clignote • En appuyant sur les touches [+/-], le temps est réglé • Validez l'entrée par [ENTER] F2 JOUR: Réglage de la date (date de lancement du programme) • Après avoir pressé F2, la zone d'entrée "JOUR“ clignote • En pressant les touches [+/-], la date est réglée • La configuration par défaut est respectivement la date et l'heure actuelles • Validez l'entrée par [ENTER] F3 26 HEURE: REPET: Réglage répétition • Après avoir pressé [F3], la répétition du programme automatique est activée / désactivée • Lors d'une répétition du programme activé, les "STEP 1“ à "STEP 4“ du programme sont traités dans une boucle sans fin • La "PRSTEP“ n'est parcourue que la première fois. F4 F5 MODE MODE Inactivé Zone d'affichage • Le programme respectivement “actif” est affiché, dans le cas présent "PROG1“ • En appuyant ensuite sur la touche [START], la transition se fait en mode d'exploitation "RUN“. Le programme préalablement activé est traité. • La touche [F5] permet de passer tour à tour à une autre zone d'affichage destinée à la visualisation de toutes les valeurs réelles! CHAUFF. ARRET REFR. ARRET LUM ARRET <-> RUN 1,1 < F5 > Fig. 38: RUN: Mode d'exploitation VITESSE 130 10:25 TEMPS TEMP1 13.8°C <-> RUN 1,1 Fig. 39: RUN: Mode d'exploitation • Lors d'un affichage TEMPS, l'affichage de la durée d'exécution restante d'une "STEP“ est indiquée. Pendant le traitement de la "PRSTEP“, aucun affichage de temps (affichage "PRSTEP“) n'est indiqué • Dans le mode d'exploitation, les VALEURS REELLES sont affichées et le programme lancé marche automatiquement. • En pressant les touches de fonction respectives, la VALEUR DE CONSIGNE est affichée. • Après avoir relâché la touche de fonction, l'affichage des VALEURS REELLES est visualisé à nouveau. • En pressant la touche [STOP], l'opérateur revient au menu de programme "PROG“. Le chauffage, le refroidissement, la lumière et l'entraînement d'agitation sont déconnectés. Le traitement du programme est stoppé. Lors du traitement du programme, l'affichage signalise le programme et la "STEP“ en cours de traitement par ex: RUN 2,- RUN 1,1 • RUN 2,P STEP1 PRSTEP ARRET PRSTEP MARCHE Programm 1 Programme 2 Programme 2 Pour les programmes "PROG2-PROG5“, les configurations sont appliquées selon le descriptif du programme 1 "PROG1“. 27 3.3.5 Menu Setup "SETUP1“ • En pressant sur la touche [F3], l'opérateur passe au "menu SETUP1“. • Toutes les configurations et les modifications effectuées dans le Setup sont enregistrées en interne et restent actifs après la chute de tension ou après le désenclenchement et le réenclenchement! F3 MAN SETUP CERTOMAT BS-1 08:53:27 PROG PRINC. < > ESC Fig. 40: Menu principal LANGUE DIAGN CONTRAST +/- ALARME TEMPS SETUP1 SERVICE Fig. 41: Menu Setup1 Contraste d'affichage • Peut être modifié à l'aide des touches [+] et [-] Attention: Un appui prolongé sur la touche [-] réduit le contraste : aucune information n'apparaîtra plus sur l'affichage! Les paramètres suivants peuvent être réglés dans le menu "SETUP1“ (Fig. 37): F1 28 LANGUE: Réglage de la langue des menus • Après pression de la touche [F1], l'opérateur parvient au menu destiné au réglage de la langue de menu (allemand, anglais, français). • Une flèche matérialise la langue respectivement active. • En appuyant sur les touches [+] / [-], la flèche peut être déplacée. • En appuyant sur la touche [ENTER], la langue respectivement configurée est validée. • En pressant la touche [ESC], l'opérateur retourne au menu "Setup1“. La langue configurée préalablement est affichée maintenant dans les menus. F2 DIAGN: Diagnostic des messages d'alarme survenus Les alarmes survenues sont listées dans une liste. Les informations suivantes sont disponibles pour chaque type d'erreur séparément: Type d'erreur Par ex. nombre de tours ou alarme de température Compteur d'erreurs Nombre des alarmes survenues depuis le dernier acquittement Date / heure / début de l'alarme Date / heure / fin de l'alarme Date et heure du début de l'alarme (alarme qui s'est passée en dernier lieu) Date et heure de la fin de l'alarme (alarme qui s'est passée en dernier lieu) • Une flèche marque l'entrée de la liste respectivement indiquée. • En appuyant sur les touches [+/ -], la flèche peut être déplacée. • En appuyant sur la touche [ENTER], l'entrée de la liste respectivement activée peut être supprimée. Puis les informations d'alarme pour ce type d'erreur ne sont plus disponibles. • Si aucune alarme n'est survenue ou si toutes les entrées sont effacées de la liste, „ „ [ -------<ESC>----- ] apparaît sur l'affichage. Le menu de diagnostic peut être alors quitté avec [ESC]. F3 ALARME: Définition de l'alarme Dans une liste, les paramètres d'alarmes pour la température, le nombre de tours, le contact de porte et la chute de la tension peuvent être réglés. • Une flèche marque le paramètre respectivement activé • En appuyant sur les touches [+/ -], la flèche peut être dé • En appuyant sur la touche [ENTER], les définitions OUI/ NON sont modifiées directement ou les valeurs numériques autorisées pour la modification (la valeur clignote). • En appuyant sur les touches [+/-], la valeur respectivement clignotante peut être configurée. • En appuyant sur la touche [ENTER], la valeur configurée est validée. • En appuyant sur la touche [ESC], l'opérateur retourne au menu SETUP1 29 Les paramètres d'alarme suivants peuvent être configurés: ACT INACT L'alarme de température est active L'alarme de température n'est pas active Signal ACT INACT Le signal acoustique est actif s'il y a une alarme Le signal acoustique est inactif s'il y a une alarme Temps OK 40 [s] Temps ERR 40 [s] min. 3,0 [°C] max. 3,0 [°C] Durée de temps, dans laquelle la température de consigne doit être au moins à nouveau obtenue après une erreur de température, jusqu'à ce que l’erreur suivante soit recensée (dans le cas présent 40 secondes) Durée de temps, dans laquelle l'erreur de température doit survenir pour que l'erreur soit signalée (dans le cas présent 40 secondes) Déviation de température tolérée vers le bas dans laquelle aucune erreur n'est signalée (dans le cas présent 3,0 °C) Déviation de température tolérée vers le haut dans laquelle aucune erreur n'est signalée (dans le cas présent 3,0 °C) Température 1 Contact de porte ACT INACT L'alarme de contact de porte est active L'alarme de contact de porte est inactive Signal ACT INACT Le signal acoustique est actif s'il y a une alarme Le signal acoustique est inactif s'il y a une alarme Temps OK 5 [s] Temps ERR 2 [s] Laps de temps dans lequel la chape en plexiglas doit être au moins à nouveau refermée avant que l'erreur ne soit recensée (dans le cas présent 5 secondes) Laps de temps dans lequel la chape en plexiglas doit être au moins à nouveau ouverte avant que l'erreur ne soit recensée à nouveau (dans le cas présent 2 secondes) Nombre de tours ACT INACT Le nombre de tours d'alarme est actif Le nombre de tours d'alarme est inactif Signal ACT INACT Le signal acoustique est actif s'il y a une alarme Le signal acoustique est inactif s'il y a une alarme Temps OK 20 [s] Temps ERR 20 [s] min. 10 [trs/min] max. 10 [trs/min] Durée de temps dans laquelle le nombre de tours de consigne doit être au moins à nouveau atteint avant que l'erreur ne soit recensée (dans le cas présent 20 secondes) Durée de temps dans laquelle l'erreur du nombre de tours doit au moins survenir avant que l'erreur ne survienne (dans le cas présent 20 secondes) Déviation de nombre de tours tolérée vers le bas dans laquelle aucune erreur n'est signalée (dans le cas présent, 10 trs/min) Déviation de nombre de tours tolérée vers le haut dans laquelle aucune erreur n'est signalée (dans le cas présent, 10 trs/min) Panne de tension Signal 30 ACT INACT L'alarme de panne de tension est active L'alarme de panne de tension est inactive ACT INACT Le signal acoustique est actif s'il y a une alarme Le signal acoustique est inactif s'il y a une alarme • Lors de la survenue d'une alarme, un affichage automatique a lieu via la DEL alarme ou un message acoustique via un vibreur sonore (si activé). Simultanément, l'alarme est validée dans le diagnostic et peut être lue après fin du programme dans le point SETUP / DIAG. • Via un contact dénué de potentiel, un message peut être émis à l'extérieur moyennant la douille SUB-D (voir Point 3.4.3). • En appuyant sur la touche [ENTER], l'acquittement des messages optiques et acoustiques se fait ainsi que la remise à zéro du contact dénué de potentiel. • Lors de l’ouverture des portes et indépendamment du fait si l’alarme de contact de porte est ACT ou DESAC, l’agitation est stoppée et le chauffage est désenclenché. Si les portes sont fermées à nouveau, l’agitation et le chauffage redémarrent à nouveau. • En cas d'une chute de tension au sein du traitement de programme ou dans le mode d'exploitation „RUN“, le temps déjà traité est sauvegardé. Lors du retour de la tension, un démarrage automatique de l'appareil a lieu. Le temps restant du programme est traité. Ceci se fait indépendamment du fait si l'alarme de chute de tension est activée ou non. • La définition d'alarme de la chute de tension ne sert qu'à activer le message d'alarme optique/acoustique ou l'entrée dans le diagnostic après retour de la tension de réseau. 31 F4 • TEMPS: Configuration du temps et de la date En pressant la touche [F4], l'opérateur peut commuter à la zone d'affichage “Réglage du temps et de la date” F4 LANGUE DIAGN KONTRAST +/TEMPS ALARME < > ESC JOUR HEURE SERVICE SETUP1 DIAGN 18.09.99 9:47:34 MINUTE Les paramètres suivants peuvent être ajustés dans la “configuration temps et date" (fig. 39): JOUR: Configuration du jour de la semaine • Après avoir pressé F1, la zone d'entrée "JOUR“ clignote • En appuyant sur les touches [+/-], le jour de la semaine désiré peut être réglé • Validez l'entrée par [ENTER] MOIS: Configuration du mois F2 • Après avoir pressé [F2], la zone d'entrée "MOIS“ clignote • En appuyant sur les touches [+/-], l'année désirée peut être configurée • Validez l'entrée par [ENTER] ANNEE: Configuration de l'année F3 32 SETUP1 Fig. 43: : Réglages du temps et de la date Fig. 42: Menu Setup F1 ANNEE • Après avoir pressé [F3], la zone d'entrée "ANNEE“ clignote • En appuyant sur les touches [+/-], l'heure désirée peut être configurée • Validez l'entrée par [ENTER] F4 HEURE: Configuration des heures • Après avoir pressé [F4], la zone d'entrée "HEURE“ clignote • En appuyant sur les touches [+/-], l'heure désirée peut être configurée • Validez l'entrée par [ENTER] F5 MINUTE: Configuration des minutes • Après avoir pressé [F5], la zone d'entrée "MINUTE“ clignote • En appuyant sur les touches [+/-], la minute désirée peut être réglée • Validez l'entrée par [ENTER] MODE • MODE: Zone d'affichage Le menu respectivement “actif” est affiché, dans le cas présent "SETUP1“ 33 3.3.6 Menu Setup "SETUP2“ • Le fait d'appuyer sur la touche [F5] permet de passer au "menu SETUP2“ pour l'entrée de paramètres d'appareils. • Toutes les configurations et les modifications effectuées dans le Setup sont enregistrées en interne et restent actives après la chute de tension ou après le désenclenchement et le réenclenchement! F5 LANGUE DIAGN CONTRAST +/- ALARME TEMPS SETUP1 SERVICE < > ESC APPAREIL SETUP MPASSE SETUP2 Fig. 44: Menu Setup1 FIG. 45: Menu Setup2 Les “paramètres suivants de l'appareil ” (fig. 41) peuvent être configurés: F1 APPAREIL: Activation de différentes options d'appareils Les options d'appareils peuvent être activées ou désactivées dans une liste ainsi que les informations d'appareils peuvent être appelées. • Une flèche marque le paramètre respectivement affiché • En appuyant sur les touches [+/-], la flèche peut être déplacée • En appuyant sur la touche [ENTER], les définitions OUI/ NON sont modifiées directement ou les valeurs numériques autorisées pour la modification (la valeur clignote). • En appuyant sur les touches [+/-], la valeur respectivement clignotante peut être configurée. • En appuyant sur la touche [ENTER], la valeur configurée est validée. • En appuyant sur la touche [ESC], l'opérateur retourne au menu SETUP2. Offset temp 0,0 éclairage Août 2002 OUI NON OUI NON 111 N0 de service 39 2. PT100 34 Correction de valeur réelle pour le 1.PT100 (pour réglage de température). Les valeurs de calibrage peuvent être configurées. Le signe moins peut être modifié en appuyant sur les touches [F1 ... F5]. Eclairage actif Eclairage inactif Thermomètre de référence actif Thermomètre de référence inactif No de logiciel (dans le cas présent version 1.11 Numéro de série de matériel (dans le cas présent no 39) F2 SETUP Configuration des paramètres internes MPASSE F3 • En appuyant sur les touches [F2 et F3], l'opérateur accède au menu pour l'entrée de paramètres internes. APPAREIL SETUP F2 > F3 > MOT DE PASSE MPASSE ENTREE SETUP2 < ENTER Fig. 46: Menu Setup2 Fig. 47: Menu entrée de mot de passe Ces menus sont réservés à des fins de service et sont protégés par mot de passe. Les modifications de ces paramètres ne peuvent être effectués que par le personnel autorisé. Des modifications non conformes peuvent entraîner l'endommagement de l'appareil. F4 • RESET En exerçant une pression prolongée sur la touche [F4], l'appareil est réinitialisé. Toutes les configurations, programmes, mots de passe, etc. seront irrémédiablement perdus! 3.3.7 Exploitation avec le groupe de refroidissement monté • Lors d‘un agitateur avec groupe de refroidissement intégré, aucune mesure préventive ne doit être prise pour l‘écoulement de la condensation. Du condensat naissant peut s‘écouler dans l‘appareil. • Pour pallier des défauts, un circuit de sécurité commute le groupe frigorifique au-dessus de +38.5 °C de manière durable. 35 3.4 Branchement d’appareils externes 3.4.2 • Sur la face arrière de l’appareil, le CERTOMAT® BS-1 est doté de deux douilles Sub-D à 9 pôles pour des sorties de signal analogiques, une interface RS 232, ainsi qu’un contact d’alarme collective. 3.4.3 3.4.1 • • Sorties analogiques (ANALOG OUT) Pour l’enregistrement externe de nombres de tours et températures, par exemple avec un enregistreur, le CERTOMAT® BS-1 a des sorties de signal analogiques (0 ... 10 V). • Nombre de tours: Température: La douille sub D à 9 pôles "RS 232“ est actuellement une interface du service Sartorius AG. Alarme collective Un contact sans potentiel est mis à la disposition sur les BROCHES 4/9 sur la douille Sub-D à 9 pôles "ANALOG OUT“, avec lequel des situations d’alarme peuvent être signalisées en externe. A partir du numéro de série 00500/05 En exploitation normale, le contact du relais est fermé. En cas d’alarme, le contact du relais s’ouvre et émet un message d’erreur sans potentiel via la sortie du bras d’alarme collective. Selon la configuration, les sorties ont les signaux suivants: • Interface RS 232 0 V correspond à 0 tr/min 10 V correspond à 400 tr/min Capacité de charge de contact: 230 V AC / 0,5 A (charge ohmique) 0 V correspond à 0°C 10 V correspond à 100°C La résistance terminale au niveau des sorties de tension ne doit pas être en dessous de 10 kΩ. • En option, des signaux de sortie (0 ... 20 mA) ou (4 ... 20 mA) sont disponibles. La résistance terminale au niveau des sorties de courant ne doit pas être en dessous de 500 Ω. 1 5 1 2 9 3 Fig. 48: Face arrière de l’appareil 1. Interface RS232 2. douille à 9 pôles "Analog Out“ pour le raccorde de l’enregistreur, etc., − Broche 1 = Signal + /température − Broche 2 = GROUND / température − Broche 6 = Signal + / nombre de tours − Broche 7 = GROUND / nombre de tours − Broche 4 = Alarme collective − Broche 9 = Alarme collective 3. Douille d’entrée du réseau avec ligne de réseau et fiche à contact de protection 36 6 3.5 Montage de plateaux et de systèmes de montages 3.5.1 Montage et chargement de plateaux entièrement équipés Les plateaux type E et F sont disponibles comme plateaux équipés au complet. Vous trouverez des informations détaillées en annexe dans les informations de commande. 1. Posez le plateau dans le BS-1 et fixez-le comme décrit au Point 3.2.2 (démontage et montage) d’un plateau. 2. Insérez les Erlenmeyer dans les tulipes (vous pouvez utiliser également des bouteilles, des béchers, etc qui sont adaptables dans les tulipes). Observez la répartition des charges, répartissez les récipients uniformément en partant du milieu du plateau. Assurez-vous que les récipients soient bien fixés et qu’ils ne puissent pas être éjectés durant l’exploitation. Fig. 49: Plateau type F avec tulipes pour erlenmeyer 3.5.2 Montage de supports à tubes à réaction 1. Desserrez la vis de serrage et retirez le support des tubes à réaction de son socle et inclinez-le vers le côté de manière à ce que les orifices des vis d’arrêt soient accessibles. 2. Posez les supports requis sur le plateau universel et vissez-le à fond. Veillez à ce que lors de l’agencement vous puissiez répartir la charge uniformément en partant du milieu du plateau lors de l’insertion des tubes à réaction. 3. Dès que vous avez démonté entièrement les supports des tubes à réaction, vous pouvez alors insérer les supports. Tournez les supports dans leur position correcte et fixez-les à l’aide de la vis d’arrêt. Fig. 50: Montage de supports à tubes à réaction 37 3.5.3 Montage du système de construction universel Les systèmes de construction universels sont disponibles pour les plateaux EU ainsi que FU. Vous trouverez en annexe d’autres indications portant sur les composants. Les éléments de base sont au nombre de 2 pour les pièces latérales correspondantes du plateau ainsi que les tiges de raccordement: • • o Elément de base type B-2, n d’article 8854238, pour le plateau EU 1. Posez les pièces latérales (1) sur le plateau et vissez-les à fond cf.pos (1a). 4 vis sont prévues pour chaque pièce latérale. Montez les tiges de raccordement sur les pièce latérales comme illustré en pos. (1b). 2. Pour le système de montage avec des tringles-tendeur universelles, montez les tringles-tendeur, cf. pos. (3). Vous possédez 2 tringles-tendeur et pouvez en remplacer d’autres si nécessaire. 3. Posez les récipients d’agitation entre les tringles-tendeur et répartissez la charge uniformément en partant du milieu du plateau. Pour régler les tringles-tendeur, dévissez les vis tendeuses (3a/3b) et déplacez les tringles-tendeur. Serrez les vis tendeuses (3a/3b) fermement de sorte que les récipients ne sortent pas de leurs gonds pendant l’exploitation. 4. En ce qui concerne le système de montage pour les entonnoirs de décantation, utilisez une tringle-tendeur universelle comme support (voir plus haut). Montez alors le kit de montage pour les entonnoirs de décantation (2a) sur la tringle-tendeur destinée aux entonnoirs de décantation (2). En fonction de la taille des entonnoirs de décantation, vous pouvez monter jusqu’à 5 supports (Pos. 2a). 5. Posez l’entonnoir de décantation. Vous pouvez déplacer respectivement la tringle-tendeur et le kit de montage de manière à ce que les récipients soient fixés de manière fiable. o Elément de base type B-3, n d’article 8854243, pour le plateau FU Des tringles-tendeurs universelles et des sets de montage pour les entonnoirs à décantation servent entre autres de systèmes de construction • o Tringles-tendeurs universelles type U-2, n d’article 8854289, pour élément de base B-2/B-3 • Kit de montage type S-1 pour entonnoirs à décantation 50 et 100 ml, no d’article 8854262, avec pinces et ressorts de retenue ainsi qu’une tringle-tendeur universelle type U-2 • Kit de montage type S-1 pour entonnoirs à décantation o 250, 500 et 1000 ml, n d’article 8854270, avec pinces et ressorts de retenue ainsi qu’une tringle-tendeur universelle type U-2 Fig. 51: Montage des tringles-tendeur universelles et des systèmes de montage pour entonnoirs de décantation 38 3.6 Conseils de maintenance et dépistage des erreurs 3.6.1 Maintenance et nettoyage Le CERTOMAT® type BS-1 est un appareil qui ne sollicite pas de maintenance particulière hormis un nettoyage régulier et éventuellement un changement des fusibles défectueux ainsi que le contrôle de la courroie d’entraînement dans l’entraînement d’agitation. Lors de l’équipement avec un dispositif d’éclairage optionnel, vous pouvez changer les tubes fluorescents défectueux. L’entraînement d’agitation est graissé à vie. Le moteur est à rotor externe sans maintenance et sans charbon. Avant tout nettoyage resp. démontage de la table d’agitation, il est impératif de débrancher l’appareil du secteur. Danger de blessures lors d’une mise en marche involontaire. • La maintenance et le service effectués sur l’entraînement d’agitation (par ex. le chargement de la courroie d’entraînement), les composants électriques ou sur le groupe frigorifique est réservé au service qualifié et autorisé. 3.6.1.2 Entretien de l’éclairage • La maintenance se limite au contôle et au remplacement des tubes fluorescents et des fusibles d'appareils. En cas d’autres dysfonctionnements, veuillez informer le service compétent de Sartorius AG. 1. Eteignez le dispositif d’éclairage et tirez le câble réseau. 2. Retirez les tubes fluorescents défectueux de leur support et insérez les nouveaux tubes. En usine, des tubes fluorescents usuels „L18W/77 (Fluora)“ ou des tubes fluorescents sont montés selon spécification clients 3. Remplacez les fusibles défectueux. Les fusibles se trouvent dans un insert de fusible derrière la porte latérale droite. Utilisez des fusibles du même type comme monté en usine. 3.6.2 3.6.2.1 Dysfonctionnements électriques • 3.6.1.1 Nettoyage 1. 2. Le revêtement intérieur et les objets installés sont en acier fin. Vous pouvez nettoyer des surfaces d’appareil et des plateaux avec des produits de nettoyage usuels ou avec de l’alcool. Evitez d’utiliser des produits de lavage abrasifs, par exemple des nettoyants contenant du chlore. Nettoyage de la cuve de réception: Arrêtez l’agitateur et retirez la prise de secteur. Retirez le plateau. Desserrez les 4 vis de fixation du plateau d’agitation. Retirez le plateau d’agitation. La cuve de réception est à présent accessible et peut être retirée pour un nettoyage minutieux. 3. Insérez à nouveau la cuve de réception nettoyée. Fixez le plateau d’agitation moyennant 4 vis. Insérez à nouveau le plateau. Reconnectez le B1 à la ligne du secteur. 4. Pour la désinfection après l’incubation, p. ex. de microorganismes et cellules, nous vous recommandons des moyens de désinfection avec de l’alcool, p. ex. Meliseptoll®, voir aussi l’information de commande en annexe. Aérez l’intérieur assez longtemps après nettoyage et désinfection. Mesures lors d’un dysfonctionnement Contrôlez le secteur. Y a-t-il du courant et est-ce que le câble de réseau est bien branché ? Y a-t-il un dysfonctionnement sur d’autres appareils laissant supposer qu’il y a un problème dans le circuit électrique. Eliminez d’abord ce risque de panne. Contrôlez les fusibles. Les fusibles sont logés dans un insert derrière la porte latérale droite. Tirez la prise du secteur avant d’ouvrir la porte latérale. Les fusibles défectueux sont reconnaissables à une couleur foncée ou à des fils grillés. Utilisez des fusibles du même type comme monté en usine. • Si vous ne pouvez remettre tout de suite l’agitateur en service, veuillez contacter votre revendeur ou le service habilité de Sartorius AG. Vous trouverez le numéro de téléphone du service habilité à la page suivante. Eliminez les récipient cassés, les liquides versés et les corps étrangers toujours immédiatement. Ne laissez pas sécher des impuretés. 5. Faites attention qu’il n’y ait pas des corps étrangers dans les égouts du système d’air de circulation. Des dépôts de poussière doivent être régulièrement éliminés des grillages d’aération extérieurs. 39 3.6.2.2 Dysfonctionnements au niveau de l’entraînement d’agitation • 1. Si l’entraînement d’agitation ne tourne pas bien rond ou par saccades, la courroie d’entraînement est probablement encrassée. Si la table d’agitation ne tourne pas, bien qu’on entende le moteur, la courroie d’entraînement peut être défectueuse. Si le moteur d’entraînement ne marche pas, si l’alimentation en courant et tous les préréglages nécessaires sont corrects, le moteur peut être défectueux. Afin de vérifier la courroie d’entraînement, retirez le plateau et la table d’agitation. Veuillez desserrer les 4 vis situées au milieu de la table d’agitation. Vous pouvez voir la courroie d’entraînement à travers l’usinage supérieur du carter. 2. Pour le montage de la table d’agitation, serrez soigneusement les vis en croix. • Au cas où la courroie d’entraînement serait défectueuse (déchirée) ou si un défaut du moteur ou de la commande d’entraînement est probable, informez le service compétent de Sartorius AG, voir ci-dessous. 3.7 Garantie et service après-vente Si aucune autre disposition écrite n’a été prise, Sartorius Stedim Biotech GmbH assure une garantie pour tous ses produits suivant ses conditions générales de vente valables au moment de la livraison. • La garantie est valable pour des défauts de construction, de fabrication ou de matériel mais elle ne s’applique ni à des dysfonctionnements qui résulteraient de manipulations erronées ou d’un traitement ou d’une utilisation impropres ni à des pièces qui sont devenues défectueuses en raison de l’usure ou à des matériaux de consommation. • La garantie devient caduque si l’opérateur ou des personnes non autorisées modifient l’appareil d’un point de vue technique ou utilisent des équipements, composants et accessoires autres que Sartorius Stedim Biotech GmbH n’a pas autorisé pour l’exploitation en relation avec l’agitateur CERTOMAT® BS-1. Des pannes peuvent être réparées par votre service habilité de Sartorius AG ou par un personnel de service après-vente autorisé sur place. En cas de panne, veuillez contacter la succursale habilitée de Sartorius AG ou directement 3.6.2.3 Dysfonctionnements pour la version de l’appareil avec groupe frigorifique • Le compresseur du groupe frigorifique est équipé d’une protection de bobinage interne, qui s’ouvre si une certaine température de bobinage est dépassée. Il se peut qu’il dure une heure jusqu’à ce que la protection de bobinage se referme et l’appareil continue d’opérer. • Si l’appareil s’arrête souvent, veuillez informer le service compétent de Sartorius AG. Sartorius AG Servicezentrum Nord Weender Landstraße 94-108 37075 Göttingen, Allemangne Téléphone +49.551.308.3729 / 3740 / 3741 Fax +49.551.308.3730 • En cas de réparations, seules des pièces de rechange doivent être utilisées qui ont été autorisées par Sartorius Stedim Biotech GmbH pour le CERTOMAT® BS-1. • Vous pouvez renvoyer des appareils défectueux à Sartorius AG. Tous les appareils devant nous être retournés doivent être soigneusement nettoyés et désinfectés avant le retour en usine. Ils doivent être aussi soigneusement emballés. Les parties décontaminées doivent être désinfectées ou stérilisées suivant les règles de sécurité applicables aux produits utilisés. L’expéditeur doit respecter les règles de sécurité en vigueur. Les avaries de transport ainsi qu’un éventuel travail de nettoyage ou de désinfection non effectués par vos soins vous sera facturé. La déclaration de décontamination jointe doit être dûment remplie et signée et retournée avec l’appareil. 40 4 Caracteristiques techniques, Informations de Commande 4.1 Caractéristiques techniques 4.1.1 Mécanique Agitateur/incubateur Poids (avec accessoires) Extérieur 1150 x 720 x 770 mm (L x H x P) Intérieur 890 x 495 x 650 mm (L x H x P) Env. 195 kg Table d’agitation 440 x 420 mm (L x P) Matériau Coffre en tôle d’acier, peinture pulvérisée bonne résistance aux acides; revêtement intérieur en acier spécial Type E/EU : (420 x 420 mm)1); Type F/FU : (800 x 420 mm) Plateaux Chargements 4.1.2 4.1.3 Raccordement électrique Branchement Fiche à contact de protection Alimentation 230 V (±5 %) / 50 Hz ou 115 V (±5 %) / 60 Hz Puissance absorbée Env. 1,2 kW refroidissement incl. Eclairage Env. 90 W (5 x 18 W) Fusibles T6.3A pour 230 V, T10A pour 115 V Degré de perturbation Selon EN 55011 et EN 55014 Données de fonctionnement Mouvement orbital Ø 25 mm ou 50 mm, en fonction de l’entraînement d’agitation Plage des nombres de tours Déviation 40 ... 400 tr/min Température d’incubation 4.1.4 4.1.5 max. ±1% (par rapport à la valeur finale) Température ambiante Version chauffante RT +8 °C ... +70 °C Version chauffante et de refroidissement RT -10 °C ... +70 °C +10 ... +60 °C (+10 ... + 30 °C pour version UHK) Humidité relative 10 ... 60 %; chambre intérieure 10 ... 80 %, non condensée Sortie analogique Douille, 9 pôles Sub-D 0 ... 10 V (résistance terminale min. = 10 kΩ) (occupation des broches voir Point 3.4, Fig. 37) 0 ... 20 mA ou 4 ... 20 mA (en option) (résistance terminale maxi = 500 Ω) Précision ± 0,3 V Alarme collectrice Alarme collectrice 4.1.6 En fonction du plateau et des systèmes de montage adaptés du programme d’accessoires Sartorius Stedim Biotech GmbH Contact sans potentiel (fermeture), maxi 230 VAC (0,5 A charge ohmique) via douille SUB-D "Analog Out“ broches 4/9 Option refroidissement Réfrigérant R 134a Quantité 270g TL = Température de local (Nous nous réservons le droit de procéder à des modifications de date et de constructio 1) En version modifiée pour blocage „Quick-Snap“; changement de plateau pour ce système à la demande. Mettez-vous en relation avec notre service. 41 4.2 Références de commande 4.2.1 Configurations d’agitateur Référence no Références de commande, caractéristiques spéciales Agitateur d’incubation CERTOMAT® BS-1 / 25 mm Version 230 V / 50 Hz 8865027 Version chauffante (UH) 8865221 Version chauffante et de refroidissement (UHK) Agitateur d’incubation CERTOMAT® BS-1 / 50 mm Version 230 V / 50 Hz 4.2.2 8865124 Version chauffante (UH) 8865329 Version chauffante et de refroidissement (UHK) Options d’équipement Référence no 8864489 Support Structure à cadres carrés avec revêtement en tôle pour réception de jusqu’à 2 BS-1 vernissage à la laque à cuire anti-chocs Dimensions L x H x P : 1150 x 200 x 710 mm 4 pieds à hauteur réglable 8861455 Unité d’éclairage CERTOMAT® BS-1 se composant de 5 tubes fluorescents, à 18 W, déconnectable séparément, programmable Version 230 V /50 Hz – en combinaison avec refroidissement UHK demande Version 115 V / 60 Hz – à monter postérieurement 8864560 8861471 42 Références de commande, caractéristiques spéciales Tige de refroidissement BS-1 / BS-T Echangeur thermique (UHW) pour l’exploitation avec un refroidissement externe par exemple avec FRIGOMIX® R ou alimentation d’eau de refroidissement externe livrable départ usine Grille d’insertion Acier spécial 640 x 880 mm Pour boîtes de Petri, réglables en hauteur 4.2.3 Accessoires Référence no Références de commande, caractéristiques spéciales Plateaux équipés (avec tulipes pour Erlenmeyer) 8853533 Plateau E 420 x 420 mm - Pinces de retenue en acier spécial Plateau avec 39 tulipes pour Erlenmeyer 100 ml 8853568 Plateau avec 20 tulipes pour Erlenmeyer 250 ml 8853584 Plateau avec 14 tulipes pour Erlenmeyer 500 ml 8853606 Plateau avec 9 tulipes pour Erlenmeyer 1000 ml Plateau E 420 x 420 mm - Pinces de retenue en matière plastique 8853688 Plateau avec 39 pinces de retenue pour Erlenmeyer 100 ml 8853666 Plateau avec 19 pinces de retenue pour Erlenmeyer 250 8853677 Plateau avec 14 pinces de retenue pour Erlenmeyer 500 8853738 Plateau F 800 x 420 mm Plateau avec 74 tulipes pour Erlenmeyer 100 ml 8853762 Plateau avec 40 tulipes pour Erlenmeyer 250 ml 8853789 Plateau avec 26 tulipes pour Erlenmeyer 500 ml 8853800 Plateau avec 15 tulipes pour Erlenmeyer 1000 ml 8853002 Plateaux universels Type EU (420 x 420 mm) 8853037 Type FU (800 x 420 mm) 8860416 8864497 8864470 Pellicule adhésive pour plateaux universels Pellicule adhésive „Premium“ pour plateaux universels, 30 x 1 mm, rouleau de 10 m, uualité durable Pellicule adhésive pour plateaux universels, 30 x 1 mm, rouleau de 60 m pour la fixation de béchers, Erlenmeyer. etc., pour vitesses d’agitation lentes Tapis adhésif pour plateaux universels Tapis adhésif pour plateaux adhésifs, 380 x 420 mm pour fixation de béchers, Erlenmeyer, etc., pour vitesses d’agitation lentes et températures jusqu’à env. 50 °C 43 Référence no Références de commande, caractéristiques spéciales Supports à tube à réaction Fig. 52: Support à tube à réaction 8853134 Support à tube à réaction pour 64 verres Ø 14 mm 8853142 Support à tube à réaction pour 42 verres Ø 16 mm 8853150 Support à tube à réaction pour 36 verres Ø 18 mm 8853169 Support à tube à réaction pour 33 verres Ø 20 mm 8853185 Support à tube à réaction pour 18 verres Ø 25 mm 8853177 Support à tube à réaction pour 12 verres Ø 30 mm 8853088 Supports pour verres centrifuge avec vissage Support pour 42 verres centrifuges Ø 16 mm 8853096 Support pour 36 verres centrifuges Ø 18 mm 8853193 Support pour 33 verres centrifuges Ø 20 mm 8853240 Support pour 12 verres centrifuges Ø 30 mm Pinces de fixation pour Erlenmeyer: (pour équipement au choix des plateaux universels) 44 8854505 Pinces de fixation pour Erlenmeyer 25 ml Capacité du plateau pour plateau type EU - maxi 49 pièces pour plateau type FU - maxi 98 pièces 8854513 Pinces de fixation pour Erlenmeyer 50 ml Capacité du plateau pour plateau type EU – maxi 48 pièces pour plateau type FU - maxi 96 pièces 8854521 Pinces de fixation pour Erlenmeyer 100 ml Capacité du plateau pour plateau type EU - maxi 24 pièces pour plateau type FU - maxi 48 pièces 8854556 Pinces de fixation pour Erlenmeyer 250 ml Capacité du plateau pour plateau type EU - maxi 17 pièces pour plateau type FU - maxi 39 pièces Référence no 8854572 Références de commande, caractéristiques spéciales Pinces de fixation pour Erlenmeyer 500 ml Capacité du plateau pour plateau type EU - maxi 12 pièces pour plateau type FU - maxi 26 pièces 8854599 Pinces de fixation pour Erlenmeyer 1000 ml Capacité du plateau pour plateau type EU - maxi 8 pièces pour plateau type FU - maxi 17 pièces 8854610 Pinces de fixation pour Erlenmeyer 2000 ml Capacité du plateau pour plateau type EU - maxi 4 pièces pour plateau type FU - maxi 9 pièces 8854629 Pinces de fixation pour Erlenmeyer 3000 ml Capacité du plateau pour plateau type EU - maxi 4 pièces pour plateau type FU - maxi 8 pièces 8854637 Pinces de fixation pour Erlenmeyer 5.000 ml Capacité des plateaux universels pour plateau type EU - maxi 2 pièces pour plateau type FU - maxi 6 pièces Pinces de fixation pour ballons Fernbach: (pour équipement au choix des plateaux universels) 8854564 Pince de fixation pour ballon Fernbach 450 ml Capacité des plateaux universels pour plateau type EU - maxi 6 pièces pour plateau type FU - maxi 15 pièces 8854600 Pince de fixation pour ballon Fernbach 1800 ml Capacité des plateaux universels pour plateau type EU - maxi 1 pièce pour plateau type FU - maxi 6 pièces 8854640 Pince de fixation pour ballon Fernbach 2800 ml Capacité des plateaux universels pour plateau type EU - maxi 1 pièce pour plateau type FU - maxi 6 pièces 45 Référence no Références de commande, caractéristiques spéciales Pinces de fixation en matière plastique pour Erlenmeyer (pour équipement au choix des plateaux universels) 8854700 Pinces de fixation en matière plastique pour Erlenmeyer 100 ml Capacité des plateaux universels pour plateau type EU - maxi 20 pièces pour plateau type FU - maxi 58 pièces 8854711 Pinces de fixation en matière plastique pour Erlenmeyer 250 ml Capacité des plateaux universels pour plateau type EU - maxi 20 pièces pour plateau type FU - maxi 40 pièces 8854722 Pinces de fixation en matière plastique pour Erlenmeyer 500 ml Capacité des plateaux universels pour plateau type EU - maxi 16 pièces pour plateau type FU - maxi 26 pièces 8854733 Pinces de fixation en matière plastique pour Erlenmeyer 1000 ml Capacité des plateaux universels pour plateau type EU - maxi 9 pièces pour plateau type FU - maxi 5 pièces Remarque Les pinces de retenue en matière plastique sont idéales pour l’utilisation d’Erlenmeyer avec embout à olive. Voir ci-dessous ! Fiole d’agitation GL (fiole de culture forme Erlenmeyer avec chicanes et raccordement GL-14) Fig. 53: Fioles d’agitation avec chicanes dans la paroi et raccordement GL 14 Fioles d’agitation en verre DURAN®, forme Erlenmeyer ; col droit pour fermetures métalliques, col, extérieur Ø = 38 mm; paroi avec 3 chicanes (Ê 120°) avec raccordement GL 14 – y compris couvercle en matière plastique et olive pour tuyau Ø 4 x 7 mm 8861064 Version 300 ml, max. Ø = 87 mm, H = 161 mm; set à 10 pièces 8861072 Version 500 ml, max. Ø = 105 mm, H = 183 mm; set à 10 pièces 8861080 Version 1.000 ml, max. Ø = 131 mm, H = 232 mm; set à 10 pièces Accessoires chicanes de fiole 46 8861099 Bouchon de fermeture en aluminium, sachet de 10 pièces 8861102 Bouchon de fermeture en acier fin, sachet de 10 pièces Référence no Références de commande, caractéristiques spéciales Fiole d’agitation (fiole de culture forme Erlenmeyer avec chicanes) Fig. 54: Fiole d’agitation avec chicanes sur la paroi Fioles d’agitation en verre DURAN®, forme Erlenmeyer; col droit pour fermetures métalliques, col, extérieur Ø = 38 mm ou; version pour bouchon de fermeture Paroi de fiole avec 3 chicanes (Ê 120°) 8861005 Version 300 ml, Ø = max. 87 mm, H = 161 mm; set à 10 pièces 8861013 Version 500 ml, Ø = max 105 mm, H = 183 mm; set à 10 pièces 8861021 Version 1.000 ml, Ø = max 131 mm, H = 232 mm; set à 10 pièces 8861022 Version 2.000 ml, Ø = max 166 mm, H = 305 mm; set à 10 pièces 8860998 Version 500 ml, version pour bouchons de fermeture Ø = max 105 mm, H = 180 mm; set à 10 pièces Autres tailles sur demande Système de montage universel Basiselement Typ B composé de 2 pièces latérales ainsi que de 4 barres longitudinales Fig. 55: Elément de base pour système de montage universel 8854238 Type B-2 pour plateau EU 8854246 Type B-3 pour plateau FU 47 Référence no Références de commande, caractéristiques spéciales Tringle-tendeur universelle type U Fig. 56: Tringle-tendeur universelle 8854254 Type U pour élément de base B-2 et B-3 Fig. 57: Système de montage avec 3 tringles-tendeur universelles Kit de montage pour entonnoir de décantation type S Fig. 58: Système de montage pour entonnoir de décantation 8854262 8854270 Type S-1 pour 5 entonnoirs de décantation 50 ou 100 ml avec tulipes, ressorts de retenue et 1 tringle-tendeur universelle U-2 Type S-2 pour 3 entonnoirs de décantation 250, 500 ou 1000 ml; avec tulipes, ressorts de retenue et 1 tringle-tendeur universelle U-2 Capacités Plateau EU avec système B-2: 1 kit de montage S 1 ou S 2 Plateau FU avec système B-3: 2 kits de montage S 1 ou S 2 48 4.3 Instructions de sécurité pour les Agitateurs de laboratoire et armoires d’agitation et d’incubation (Instructions de sécurité pour les Agitateurs de laboratoire et armoires d’agitation et d’incubation voir Annexe) 4.4 Déclaration de conformité EG (Déclaration de conformité EG voir Annexe) 4.5 Déclaration de décontamination (pour renvoi d’appareils) (Déclaration de décontamination voir Annexe) 4.6 Instructions d’élimination des déchets et de réparation (Instructions d’élimination des déchets et de réparation voir Annexe) 4.7 Plan joint CERTOMAT® BS-1 (plan coté joint voir Annexe) 4.8 Accessoires (Vous trouverez les informations sur les accessoires ci-après) 49 Sartorius Stedim Biotech GmbH August-Spindler-Straße 11 37079 Göttingen, Allemangne Tél. +49.551.308.0 Fax +49.551.308.3289 www.sartorius-stedim.com Copyright by Sartorius Stedim Biotech GmbH, Göttingen, République Fédérale d’Allmangne. Tous droits réservés. Toute reproduction ou traduction, intégrale ou partielle, faite sans le consentement écrit de la société Sartorius Stedim Biotech GmbH, est illustrations contenues dans ce manuel correspondent à l’état à la date indiquée cidessous. Sartorius Stedim Biotech GmbH se réserve le droit de modifier la technique, les équipements et la forme des appareils par rapport aux informations et illustrations de ce manuel. Etat: Février 2008, Sartorius Stedim Biotech GmbH, Göttingen, Allemangne Imprimé en Allemangne sur papier non blanchi au chlore W4A000 · KT N° de publication: SB6027-t08024 Order No.: 85030-520-51 Remarques concernant la sécurité Agitateurs de laboratoire et armoires d’agitation et d’incubation 85030-520-67 Sommaire 1 Introduction 3 2 Transport et installation 3 2.1 2.2 Transport des appareils Exigences posées au lieu de pose 3 3 3 Conseils de manipulation 4 3.1 3.2 Manipulation avec les médium Mise en service et exploitation normale 4 4 4 Nettoyage, entretien et service 5 4.1 4.2 4.3 4.4 Nettoyage Entretien et service Renvoi d’appareils défectueux Manipulations lors du changement de site 5 5 5 5 2 1 Introduction 2 Transport et installation Les remarques suivantes concernant la sécurité vous informent sur les mesures de précaution à adopter lors de l’utilisation des agitateurs de laboratoire et des armoires d’agitation et d’incubation CERTOMAT® de la palette de produits Sartorius Stedim Biotech GmbH, en particulier pour : 2.1 Transport des appareils • le transport et l’installation • l’équipement et la mise en service • l’exploitation • la maintenance, le nettoyage et le service Ces remarques de sécurité ne peuvent être transférées, elles ne s’appliquent qu’à la version et à l’équipement des agitateurs au moment de la livraison. Les autres prescriptions de sécurité spécifiques (c’est-à-dire légales ou engageantes d'autre part) ne seront pas traitées dans ce passage. Veuillez contacter votre organisation habilitée. Les remarques de sécurité concernant le danger et caractérisées par le présent pictogramme sont mises en surbrillance comme ce paragraphe. Si vous ne prenez pas en compte ces remarques, cette omission peut entraîner des dommages pour l'appareil ou d'autres dommages matériels ou corporels. Lorsque des étapes doivent être effectuées avec le plus grand soin ou d'autres aspects doivent être observés, les remarques de sécurité sont caractérisées par ce pictogramme. [Æ ..] Cette flèche symbolise des renvois à des contenus de cette documentation ou d’autres documents. Les désignations des figures, passages et documents sont entre parenthèses Les agitateurs et tout particulièrement les armoires d’agitation d’incubation sont très lourds. C’est pourquoi n’utilisez que les outils appropriés, les moyens de transport et les dispositifs de levage adéquats pour le transport sur le lieu de montage et lors d'un changement de site. Assurez-vous que les voies de transport soient suffisamment dimensionnées et que le poids des appareils et des engins de levage ne dépasse pas la charge autorisée du sol. Confiez le transport à un personnel qualifié. Assurezvous qu’aucune personne ne puisse être blessée suite aux travaux de transport. En présence d’appareils munis de sécurités de transport, les enlever seulement sur le lieu de pose. 2.2 Exigences posées au lieu de pose 1. Le sol sur le lieu de pose ou les tables de laboratoire prévues doivent être à même de recevoir le poids des appareils entièrement équipés. 2. La surface de pose doit être suffisamment grande et antidérapante afin de permettre la pose horizontale des appareils. 3. Les appareils doivent être facilement accessibles pour la commande, la maintenance et le service. 4. Les agitateurs ou les armoires d'agitation d'incubation peuvent transmettre des oscillations sur la surface de pose en particulier lors d'une charge lourde. Posez les autres appareils dans le périmètre immédiat de manière à ce qu'ils ne soient pas entravés par l'exploitation des agitateurs. 5. Le raccordement au réseau doit correspondre aux spécifications des appareils sur la plaque signalétique et être muni d’un conducteur de protection. Après la pose, l’appareil doit être aligné moyennant un niveau à bulle d’air ! Avant l’empilage d’appareils (maxi 3), l’appareil situé le plus en bas doit être à l’horizontale ! 3 3 Conseils de manipulation 1. Assurez-vous que seules les personnes autorisées aient accès au poste de travail. 2. Le personnel doit être familiarisé avec les prescriptions de sécurité en vigueur ainsi qu’avec les remarques de sécurité. 3.1 En général, il est recommandé de porter les vêtements de travail appropriés et les équipements de protection personnels, tels que des gants, des lunettes de protection et le cas échéant une protection respiratoire. 4 Lorsque l’appareil est en marche, ne mettez pas la main entre le plateau d’agitation et le carter. La distance conditionnée par la construction entre ces composants peut entraîner un danger de blessure. Manipulation avec les médium Des dangers peuvent émaner des médium et des matériaux utilisés, qui sont spécifiques pour les matériaux et le processus mis en oeuvre. Ils ne peuvent être décrits ici en détail. Il appartient à votre entreprise de publier les prescriptions de sécurité appropriées à cet effet et d'instruire minutieusement les opérateurs. 3.2 Tenez compte du mouvement latéral des plateaux et des dangers de coup ou de pincement pouvant en résulter, en particulier pour les grands plateaux ou lors d'une distance minime par rapport aux autres objets ou par exemple lors d'une grande course et d'une forte charge. Mise en service et exploitation normale 1. Utilisez exclusivement des appareils et des accessoires autorisés par Sartorius Stedim Biotech GmbH pour l’utilisation avec l'agitateur. 2. Contrôlez la qualité parfaite de toutes les pièces, en particulier pour les récipients en verre. Les pièces endommagées ne doivent pas être utilisées. 3. N’exploitez jamais l’agitateur sans plateau. Désenclenchez l’agitateur avant de monter ou de démonter les plateaux, les superstructures des tables d'agitation ou les accessoires. 4. Lors du montage des plateaux, laissez suffisamment d’espace par rapport au mur ou à d’autres appareils, en particulier pour les plateaux qui dépassent au-dessus de la table d’agitation. Fixez minutieusement les plateaux. 5. Fixez minutieusement les superstructures du plateau et les accessoires. Lors de l'équipement des agitateurs avec les récipients (bouteilles, tulipes Erlenmeyer, etc.), répartissez les charges uniformément sur le plateau. 6. Lors d’armoires d’agitation d’incubation, contrôlez l’assise solide du plateau et fermez les portes avant de lancer l’agitation. 7. Avant le démarrage et en cours d’exploitation, contrôlez l’assise stable des récipients dans leurs supports. Les récipients ne doivent pas se desserrer, claquer ou s’entrechoquer. Arrêtez immédiatement l’agitateur si des récipients se desserrent 8. Exploitez les appareils avec les valeurs de service autorisées. Veuillez tenir compte des remarques sur les appareils et contenues dans les données techniques. 9. Une fois l’agitateur arrêté, attendez jusqu’à ce le plateau d’agitation soit en position de repos avant de retirer les récipients ou d’utiliser d’autres appareils. 4 Nettoyage, entretien et service 4.3 Vous pouvez envoyer les appareils ou les composants défectueux à la succursale Sartorius AG compétente ou à Sartorius AG. Un nettoyage et un entretien réguliers permettent d’assurer un fonctionnement correct et une exploitation fiable de l'appareil. Veillez à observer les prescriptions de sécurité en vigueur pour le domaine d’application lors de la manipulation du matériel biologique et des appareils contaminés. Avant tout travail de nettoyage ou de maintenance, vous devez désinfecter ou stériliser les parties contaminées d'un point de vue biologique conformément aux prescriptions de sécurité. Avant tout travail de nettoyage ou de maintenance, déconnectez l’appareil et tirez le câble d'alimentation. Empêchez la mise en service et le démarrage intempestifs. La maintenance et les réparations sur les entraînements, le remplacement de courroies d’entraînement ou les travaux sur les dispositifs électriques sont réservés au service qualifié à cet effet. 4.1 1. Les appareils doivent être nettoyés, parfaitement hygiéniques et être emballés minutieusement. 2. Conformément aux prescriptions de sécurité valables pour le domaine d'application, vous devez nettoyer les parties contaminées, les désinfecter ou les stériliser. Vous devez prouver le respect des prescriptions en joignant le certificat de nettoyage et de décontamination. 3. Avant d’’envoyer l’appereil, convenez du renvoi avec le service aprés-vente. 4.4 Manipulations lors du changement de site 1. Lors du nettoyage et de la maintenance, respectez les mesures décrites afin d'éviter les dangers biologiques ou chimiques. 2. Déconnectez l'appareil de l'alimentation en courant. Retirez les récipients et les accessoires posés dans ou sur l'appareil. 3. Le cas échéant, remontez les sécurités de transport montées lors de la livraison. Respectez les autres remarques au Paragraphe „Transport des appareils“ (2.1). Nettoyage 1. Les surfaces des appareils peuvent être nettoyées avec les produits de nettoyage habituels pour laboratoire. N'utilisez aucun produit agressif, par exemple des produits chlorés. 2. Eliminez le plus vite possible les bris de verre et les médiums répandus 4.2 Renvoi d’appareils défectueux Entretien et service L’entretien et l’élimination des pannes par l’utilisateur doivent se limiter au : • Contrôle de l’alimentation en tension côté laboratoire et des raccordements des appareils. • Contrôle des fusibles et remplacement s'ils sont défectueux • Pour les armoires d’agitation d’incubation : remplacement des voyants s'ils sont défectueux Si des dérangements fonctionnels ne peuvent être éliminés, contactez la succursale Sartorius AG ou directement : Sartorius AG Service Weender Landstraße 94-108 37075 Göttingen, Allemangne Téléphone +49.551.308.3729 / 3740 / 3741 Fax +49.551.308.3730 Si vous convoquez des collaborateurs du service aprèsvente Sartorius AG pour les travaux d'entretien, il convient de joindre une déclaration de nettoyage et de décontamination écrite. 5 Sartorius Stedim Biotech GmbH August-Spindler-Straße 11 37075 Göttingen, Allemagne Tél. +49.551.308.0 Fax +49.551.308.3289 www.sartorius-stedim.com Copyright by Sartorius Stedim Biotech GmbH, Göttingen, République Fédérale d’Allemagne. Tous droits réservés. Toute reproduction ou traduction, intégrale ou partielle, faite sans le consentement écrit de la société Sartorius Stedim Biotech GmbH ainsi que les illustrations contenues dans ce manuel correspondent à l’état à la date indiquée ci-dessous. Sartorius Stedim Biotech GmbH se réserve le droit de modifier la technique, les équipements et la forme des appareils par rapport aux informations et illustrations de ce manuel. Etat: Février 2008, Sartorius Stedim Biotech GmbH, Göttingen, Allemagne Imprimé en Allemagne sur papier blanchi sans chlore W4A000 · KT N° de publication: SB6043az08022 o N de commande .: 85030-520-67 Page F-13-01 Version 01 1/4 Marchandise retournée Valable à partir de 01.01.2008 Déclaration de décontamination et de nettoyage des appareils et des composants Lorsque vous nous retournez des appareils ou des composants, veuillez nous décrire à la page 2 de ce formulaire les problèmes rencontrés et quels travaux doivent être effectués. Afin de protéger notre personnel, nous devons nous assurer que les appareils et les composants que vous renvoyez ne sont ni contaminés d’un point de vue biologique, chimique ou radioactif. C‘est la raison pour laquelle nous ne pouvons accepter d‘appareils ou de composants que si: • les appareils et les composants ont été Nettoyes et de Contamines de manière idéale. • cette explication a été remplie par une personne autorisée, dûment signée et nous a été retournée. Nous vous remercions de votre compréhension de notre souci d‘offrir à nos collaborateurs un environnement de travail sûr et non dangereux. A. Description des appareils et composants Description / no d‘article. No de série No de facture/livraison Date de livraison B. Contamination / nettoyage Veuillez décrire précisément la contamination biologique, chimique ou radioactive. Veuillez décrire la méthode/procédure de nettoyage et de décontamination L‘appareil a été contaminé par l‘appareil a été nettoyé et décontaminé par 85030-520-68 Page F-13-01 Version 01 2/4 Marchandise retournée Valable à partir de 01.01.2008 C. Déclaration juridique J‘assure (nous assurons) que les indications fournies dans ce formulaire sont correctes et complètes. Les appareils et les composants ont été décontaminés et nettoyés soigneusement conformément aux directives en vigueur. Aucun risque qu‘il soit chimique, biologique ou radioactif pouvant menacer la sécurité ou la santé des personnes concernées n‘émane de cet appareil. Entreprise / Institut Adresse / Pays Tél. / Fax Nom de la personne autorisée Position Date / Signature D. Motif du renvoi Livraison erronée Echange Réparation Transform évacuation Autres E. Description du dysfonctionnement (pour réparation) et/ou description des travaux à effectuer F-13-01 Version 01 Page 3/4 Marchandise retournée Valable à partir de 01.01.2008 F. A remplir par le service Sartorius-Servicezentrum Remarques Veillez à empaqueter correctement l'appareil et envoyez-le à vos frais à la succursale habilitée locale ou bien directement au centre de service (Sartorius AG Servicezentrum Nord). Sartorius AG Service Weender Landstraße 94-108 37075 Göttingen, Allemangne Téléphone +49.551.308.3729 / 3740 / 3741 Fax +49.551.308.3730 F-13-01 Version 01 Page 4/4 Valable à partir de 01.01.2008 Sartorius Stedim Biotech GmbH August-Spindler-Straße 11 37079 Göttingen, Allemangne Téléphone +49.551.308.0 Fax +49.551.308.3289 www.sartorius-stedim.com Copyright by Sartorius Stedim Biotech GmbH, Göttingen, République Fédérale d’Allmangne. Tous droits réservés. Toute reproduction ou traduction, intégrale ou partielle, faite sans le consentement écrit de la société Sartorius Stedim Biotech GmbH, est illustrations contenues dans ce manuel correspondent à l’état à la date indiquée ci-dessous. Sartorius Stedim Biotech GmbH se réserve le droit de modifier la technique, les équipements et la forme des appareils par rapport aux informations et illustrations de ce manuel. Etat: Février 2008, Sartorius Stedim Biotech GmbH, Göttingen, Allemangne Imprimé en Allemangne sur papier non blanchi au chlore W4A000 · KT N° de publication: SB6044-n08023 Order No.: 85030-520-68 Marchandise retournée Instructions d’élimination des déchets et de réparation Si vous n’avez plus besoin de l’emballage de votre appareil, veuillez l’apporter au service local de retraitement des déchets. Cet emballage se compose entièrement de matériaux écologiques pouvant être recyclés. L’appareil, y compris les accessoires, les piles et les batteries, ne doivent pas être jetés dans les ordures ménagères normales. La législation de l’Union européenne prescrit aux Etats membres de collecter les équipements électriques et électroniques séparément des déchets municipaux non triés afin de permettre ensuite de les récupérer, de les valoriser et de les recycler. En Allemagne et dans quelques autres pays, la société Sartorius AG se charge elle-même de reprendre et d’éliminer ses équipements électriques et électroniques conformément à la loi. Ces appareils ne doivent pas être jetés – même par de petites entreprises – dans les ordures ménagères ni apportés dans les points de collecte des services locaux d’élimination des déchets. Pour obtenir de plus amples renseignements sur l’élimination des déchets, veuillez vous adresser en Allemagne, tout comme dans les Etats membres de l’Espace Economique Européen, à notre responsable local du service après-vente ou à notre centre de service après-vente à Goettingen en Allemagne : Sartorius AG Service Center Weender Landstrasse 94-108 37075 Goettingen Allemagne Dans les pays qui ne font pas partie de l’Espace Economique Européen ou dans lesquels Sartorius n’a ni filiale, ni succursale, ni revendeur, veuillez vous adresser aux autorités locales ou à l’entreprise chargée de l’élimination de vos déchets. Les piles, batteries et accumulateurs rechargeables ou non doivent être enlevés avant de jeter l’appareil ou de le mettre au rebut et ils doivent être jetés dans les boîtes de collecte locales prévues à cet effet. Les appareils contaminés par des substances dangereuses (contaminations NBC) ne sont pas repris par Sartorius AG, ses filiales, ses succursales ni par ses revendeurs pour être réparés ou éliminés. Veuillez consulter la notice explicative ou visiter notre site Internet (www.sartorius.com) pour obtenir davantage de renseignements ainsi que les adresses des centres de service après-vente à contacter si vous envisagez le renvoi en réparation, l’élimination ou le recyclage de votre appareil. Sales and Service Contacts For further contacts, visit www.sartorius-stedim.com Europe America Asia|Pacific India Sartorius Stedim India Pvt. Ltd. 10, 6th Main, 3rd Phase Peenya KIADB Industrial Area Bangalore – 560 058 Germany Sartorius Stedim Biotech GmbH August-Spindler-Strasse 11 37079 Goettingen Austria Sartorius Stedim Austria GmbH Franzosengraben 12 A-1030 Vienna USA Sartorius Stedim North America Inc. 131 Heartland Blvd. Edgewood, New York 11717 Phone +49.551.308.0 Fax +49.551.308.3289 Phone +43.1.7965763.18 Fax +43.1.796576344 Toll-Free +1.800.368.7178 Fax +1.631.254.4253 Belgium Sartorius Stedim Belgium N.V. Leuvensesteenweg, 248/B 1800 Vilvoorde Sartorius Stedim SUS Inc. 1910 Mark Court Concord, CA 94520 www.sartorius-stedim.com Sartorius Stedim Systems GmbH Schwarzenberger Weg 73–79 34212 Melsungen Phone +49.5661.71.3400 Fax +49.5661.71.3702 www.sartorius-stedim.com France Sartorius Stedim Biotech S.A. Z.I. des Paluds Avenue de Jouques – BP 1051 13781 Aubagne Cedex Phone +32.2.756.06.80 Fax +32.2.756.06.81 Phone +1.925.689.6650 Toll Free +1.800.914.6644 Fax +1.925.689.6988 Denmark Sartorius Stedim Nordic A/S Hoerskaetten 6D, 1. DK-2630 Taastrup Sartorius Stedim Systems Inc. 201 South Ingram Mill Road Springfield, MO 65802 Phone +45.7023.4400 Fax +45.4630.4030 Phone +33.442.845600 Fax +33.442.845619 Italy Sartorius Stedim Italy S.p.A. Via dell’Antella, 76/A 50012 Antella-Bagno a Ripoli (FI) Sartorius Stedim France 4, rue Emile Baudot 91127 Palaiseau Cedex Phone +39.055.63.40.41 Fax +39.055.63.40.526 Phone +33.1.6919.2100 Fax +33.1.6920.0922 Netherlands Sartorius Stedim Netherlands B.V. Edisonbaan 24 3439 MN Nieuwegein Phone +31.30.6025080 Fax +31.30.6025099 Spain Sartorius Stedim Spain SA C/Isabel Colbrand 10–12, Planta 4, Oficina 121 Polígono Industrial de Fuencarral 28050 Madrid Phone +34.91.3586102 Fax +34.91.3588804 Switzerland Sartorius Stedim Switzerland GmbH Lerzenstrasse 21 8953 Dietikon Phone +41.44.741.05.00 Fax +41.44.741.05.09 U.K. Sartorius Stedim UK Limited Longmead Business Park Blenheim Road, Epsom Surrey KT19 9 QQ Phone +44.1372.737159 Fax +44.1372.726171 Phone +1.417.893.9636 Fax +1.631.253.5170 Phone +91.80.2839.1963|0461 Fax +91.80.2839.8262 Japan Sartorius Stedim Japan K.K. KY Building, 8–11 Kita Shinagawa 1-chome Shinagawa-ku Tokyo 140-0001 Phone +81.3.3740.5407 Fax +81.3.3740.5406 Malaysia Sartorius Stedim Malaysia Sdn. Bhd. Lot L3-E-3B, Enterprise 4 Technology Park Malaysia Bukit Jalil 57000 Kuala Lumpur Phone +60.3.8996.0622 Fax +60.3.8996.0755 Singapore Sartorius Stedim Singapore Pte. Ltd. 10, Science Park Road, The Alpha #02-25, Singapore Science Park 2 Singapore 117684 Phone +65.6872.3966 Fax +65.6778.2494 Australia Sartorius Stedim Australia Pty. Ltd. Unit 17/104 Ferntree Gully Road Waverley Business Park East Oakleigh, Victoria 3166 Phone +61.3.9590.8800 Fax +61.3.9590.8828