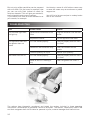
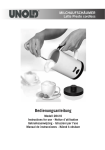
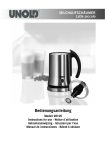
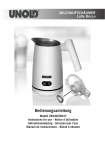
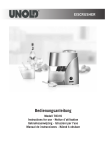
1
Milchaufschäumer Latte Presto Bedienungsanleitung Modell 28400 Instructions for use - Notice d´utilisation Gebruiksaanwijzing - Istruzioni per l’uso Manual de instrucciones - Návod k obsluze Impressum: Bedienungsanleitung Modell 28400 Stand: Mai 2012 /nd Copyright © Mannheimer Straße 4 68766 Hockenheim Telefon +49 (0) 62 05/94 18-0 Telefax +49 (0) 62 05/94 18-12 E-Mail [email protected] Internet www.unold.de SERVICE-HOTLINE Bei Fragen zu den Rezepten und zum Gebrauch des Gerätes können Sie sich direkt an unsere Beraterin Frau Blum wenden: Montag und Dienstag von 8 bis 12 Uhr und 13 bis 17 Uhr Rufnummer: 0 18 05/94 18 99* *derzeit 0,14 EUR/Minute aus dem Festnetz der Deutschen Telekom. Bei Anrufen aus Mobilfunknetzen und aus dem Ausland (+49 18 05/94 18 99) können abweichende Kosten anfallen. Ab 1.3.2010 Mobilfunkpreis maximal 0,42 EUR/Minute. Kunden aus Österreich wählen bitte die Nummer +43 (0) 1/8 10 20 39 Inhaltsverzeichnis Bedienungsanleitung Modell 28400 Technische Daten................................................................................................................ 8 Symbolerklärung.................................................................................................................. 8 Für Ihre Sicherheit............................................................................................................... 8 Tipps für optimalen Milchschaum.......................................................................................... 10 Vor dem ersten Benutzen...................................................................................................... 10 Abnehmen des Aufsatzes für Milchschaum............................................................................ 10 Bedienen – Milch aufschäumen............................................................................................ 10 Bedienen – Milch erhitzen.................................................................................................... 11 Reinigen und Pflegen........................................................................................................... 11 Rezeptideen für Kaffee......................................................................................................... 12 Fehler beheben................................................................................................................... 13 Garantiebestimmungen........................................................................................................ 14 Entsorgung / Umweltschutz.................................................................................................. 14 Service-Adressen................................................................................................................. 15 Instructions for use Model 28400 Technical specifications....................................................................................................... 16 Explanation of the symbols................................................................................................... 16 For your safety..................................................................................................................... 16 Tips on how to obtain perfect milk froth................................................................................. 17 Before using the appliance for the first time . ........................................................................ 18 Removing the accessory for milk froth.................................................................................... 18 Milk frothing function.......................................................................................................... 18 Milk heating function........................................................................................................... 18 Cleaning and care................................................................................................................ 19 Recipes.............................................................................................................................. 19 Troubleshooting................................................................................................................... 20 Guarantee conditions........................................................................................................... 21 Waste Disposal / Environmental Protection............................................................................. 21 Notice d´utilisation Modèle 28400 Spécification technique ...................................................................................................... 22 Explication des symboles...................................................................................................... 22 Consignes de sécurité.......................................................................................................... 22 Avant la première utilisation................................................................................................. 23 L’art et la manière de réaliser une mousse de lait parfaite........................................................ 24 Montage/démontage des embouts pour mousse de lait............................................................ 24 Utilisation de l’appareil – préparation mousse de lait.............................................................. 24 Utilisation de l’appareil – préparation lait chaud..................................................................... 25 Nettoyage et entretien.......................................................................................................... 25 Idées de recettes................................................................................................................. 26 Dépannage.......................................................................................................................... 26 Conditions de garantie......................................................................................................... 28 Traitement des déchets / Protection de l’environnement.......................................................... 28 Gebruiksaanwijzing Model 28400 Technische gegevens . ......................................................................................................... 29 Verklaring van de symbolen................................................................................................... 29 Voor uw veiligheid................................................................................................................ 29 Tips voor optimaal melkschuim............................................................................................. 30 Vóór het eerste gebruik......................................................................................................... 31 Het opzetstuk voor melkschuim afnemen............................................................................... 31 Bedienen - melk opschuimen................................................................................................ 31 Inhaltsverzeichnis Bedienen - melk verhitten.................................................................................................... 32 Reiniging en onderhoud....................................................................................................... 32 Receptideeën...................................................................................................................... 33 Storingen verhelpen............................................................................................................. 33 Garantievoorwaarden............................................................................................................ 34 Verwijderen van afval / Milieubescherming............................................................................. 34 Istruzioni per l’uso Modello 28400 Dati tecnici ........................................................................................................................ 35 Significato dei simboli......................................................................................................... 35 Per la sicurezza................................................................................................................... 35 Consigli per ottenere la migliore schiuma di latte ................................................................... 36 Prima del primo impiego...................................................................................................... 37 Come rimuovere il frullino integrato montalatte....................................................................... 37 Impiego: Come schiumare il latte.......................................................................................... 37 Impiego: Come riscaldare il latte........................................................................................... 38 Pulizia e cura...................................................................................................................... 38 Idee per ricette.................................................................................................................... 39 Diagnostica dei problemi...................................................................................................... 39 Norme die garanzia.............................................................................................................. 40 Smaltimento / Tutela dell’ambiente....................................................................................... 40 Manual de instrucciones Modelo 28400 Datos técnicos . .................................................................................................................. 41 Explicación de símbolos....................................................................................................... 41 Para su seguridad................................................................................................................ 41 Recomendaciones para obtener una espuma de leche óptima.................................................. 42 Antes de la primera utilización.............................................................................................. 43 Quitar la caperuza para la espuma de leche........................................................................... 43 Manejo - Espumar leche....................................................................................................... 43 Manejo - Calentar leche........................................................................................................ 44 Limpieza y conservación....................................................................................................... 44 Recetario............................................................................................................................ 45 Eliminación de fallos........................................................................................................... 45 Condiciones de garantia....................................................................................................... 46 Disposición/Protección del medio ambiente............................................................................ 46 Návod k obsluze Modelu 28400 Technické údaje ................................................................................................................. 47 Vysvětlení symbolů............................................................................................................... 47 Pro Vaši bezpečnost............................................................................................................. 47 Tipy k dosažení optimální mléčné pěny.................................................................................. 48 Před prvním použitím........................................................................................................... 49 Odebrání nástavce pro mléčnou pěnu.................................................................................... 49 Obsluha - napěňování mléka................................................................................................. 49 Obsluha - ohřev mléka.......................................................................................................... 50 Čištění a péče..................................................................................................................... 50 Nápady na recepty............................................................................................................... 51 Odstraňování chyb............................................................................................................... 51 Záruční podmínky................................................................................................................ 52 Likvidace / Ochrana životného prostředí ................................................................................ 52 Einzelteile 1 2 3 4 6 5 Einzelteile 1 2 3 4 D GB F NL I E CZ Deckel Lid Couvercle Deksel Coperchio Tapa Poklop D GB F NL I E CZ Handgriff Handle Poignée Handvat Manico Asa Madlo D GB F NL I E CZ Behälter mit Zuleitung Jug with cable Réservoir Reservoir met snoer Bricco con cavo di collegamento Recipiente con zócalo y conductor de alimentación Nádobka s přívodním kabelem D Einschalttaste mit Kontrollleuchte GB Main switch with indicator light F Touche de mise en marche avec témoin lumineux NL Inschakelknop met controlelampje I Pulsante di accensione con spia di controllo Interruptor principal con piloto de control Spínací tlačítko s kontrolkou E CZ 5 6 D GB Fester Aufsatz für heiße Milch Accessory for hot milk F Embout fixe pour lait chaud NL Vast opzetstuk voor hete melk I Base fissa per latte caldo E Tapa para la preparación de leche caliente CZ Pevný nástavec na horké mléko D GB F NL I E Aufsatz für Milchschaum Accessory for milk froth Batteur pour mousse de lait Opzetstuk voor melkschuim Base per schiuma di latte Accesorio para la preparación de espuma de leche Nástavec pro mléčnou pěnu CZ Bedienungsanleitung Modell 28400 Technische Daten Leistung: 420-500 Watt, 220-240 V~, 50/60 Hz Maße: Ca. 16,1 x 10,3 x 16,3 cm (L/B/H) Zuleitung: Ca. 75 cm Gewicht: Ca. 0,75 kg Farbe: Weiß Fassungsvermögen:Minimum 100 ml, Maximum 150 ml für Milchschaum/250 ml für heiße Milch Behälter: Antihaftbeschichtet, zur leichten Reinigung Deckel: Abnehmbar Ausstattung: Perfekter Milchschaum auf Knopfdruck, für Milchschaum und heiße Milch, Antihaftbeschichtet für einfache Reinigung, automatische Abschaltung Zubehör: Bedienungsanleitung mit Rezepten Technische Änderungen vorbehalten. Symbolerklärung Dieses Symbol kennzeichnet eventuelle Gefahren, die Verletzungen nach sich ziehen können oder zu Schäden am Gerät führen. Dieses Symbol weist Sie auf eine eventuelle Verbrennungsgefahr hin. Gehen Sie hier immer besonders achtsam vor. Für Ihre Sicherheit Allgemeine Sicherheitshinweise 1. Bitte lesen Sie die folgenden Anweisungen und bewahren Sie diese auf. 2. Dieses Gerät ist nicht dafür bestimmt, durch Personen (einschließlich Kinder) mit eingeschränkten physischen, sensorischen oder geistigen Fähigkeiten oder mangels Erfahrung und/oder mangels Wissen benutzt zu werden, es sei denn, sie werden durch eine für ihre Sicherheit zuständige Person beaufsichtigt oder erhielten von ihr Anweisungen, wie das Gerät zu benutzen ist. 3. Kinder sollten beaufsichtigt werden, um sicher zu stellen, dass sie nicht mit dem Gerät spielen. 4. Das Gerät an einem für Kinder unzugänglichen Ort aufbewahren. 5. Gerät nur an Wechselstrom mit Spannung gemäß Typenschild anschließen. 8 6. Dieses Gerät darf nicht mit einer externen Zeitschaltuhr oder einem Fernbedienungssystem betrieben werden. 7. Der Sockel darf nicht mit Wasser oder anderen Flüssigkeiten in Kontakt kommen. Falls dies doch einmal geschehen sollte, muss er vor erneuter Benutzung vollkommen trocken sein. 8. Das Gerät ist ausschließlich für den Haushaltsgebrauch oder ähnliche Verwendungszwecke bestimmt, z. B. Teeküchen in Geschäften, Büros oder sonstigen Arbeitsstätten, landwirtschaftlichen Betrieben, zur Verwendung durch Gäste in Hotels, Motels oder sonstigen Beherbergungsbetrieben, in Privatpensionen oder Ferienhäusern. 9. Öffnen Sie auf keinen Fall das Gehäuse des Milchaufschäumers. Es besteht Gefahr durch Stromschlag. 10.Prüfen Sie regelmäßig das Gerät, den Stecker und die Zuleitung auf Verschleiß oder Beschädigungen. Bei Beschädigung des Anschlusskabels oder anderer Teile senden Sie das Gerät oder den Sockel bitte zur Überprüfung und Reparatur an unseren Kundendienst (Anschrift siehe Garantiebestimmungen). Unsachgemäße Reparaturen können zu erheblichen Gefahren für den Benutzer führen und haben den Ausschluss der Garantie zur Folge. Hinweise zum Aufstellen und Benutzen des Gerätes 11.Achten Sie darauf, dass die verwendete Steckdose leicht zugänglich ist, um das Anschlusskabel im Notfall schnell heraus ziehen zu können. 12.Das Gerät bzw. die Zuleitung niemals mit nassen Händen berühren. 13.Der Milchaufschäumer darf nicht in der Spülmaschine gereinigt werden. 14.Stellen Sie das Gerät aus Sicherheitsgründen niemals auf heiße Oberflächen, ein Metalltablett oder auf einen nassen Untergrund. 15.Tauchen Sie das Gerät oder die Zuleitung keinesfalls in Wasser oder andere Flüssigkeiten ein. 16.Das Gerät oder die Zuleitung dürfen nicht in der Nähe von Flammen betrieben werden. 17.Benutzen Sie den Milchaufschäumer stets auf einer freien, ebenen und hitzebeständigen Oberfläche. 18.Achten Sie darauf, dass die Zuleitung nicht über den Rand der Arbeitsfläche hängt, da dies zu Unfällen führen kann, wenn z. B. Kleinkinder daran ziehen. 19.Die Zuleitung muss so verlegt sein, dass ein Ziehen oder darüber Stolpern verhindert wird. 20.Wickeln Sie die Zuleitung nie um das Gerät. 21.Ziehen Sie die Zuleitung immer nur am Anschlussstecker aus der Steckdose, nie am Anschlusskabel. 22.Tragen Sie das Gerät nicht am Anschlusskabel. 23.Verwenden Sie den Milchaufschäumer nur in Innenräumen. 24.Verwenden Sie das Gerät ausschließlich zum Erhitzen von Milch. Erhitzen Sie keine anderen Flüssigkeiten, da diese das Gerät beschädigen können. 25.Ebenso dürfen keine Gegenstände wie Dosen oder Flaschen im Milchaufschäumer erhitzt werden. 26.Benutzen Sie den Behälter nicht im Backofen oder der Mikrowelle. 27.Stellen Sie sicher, dass der Deckel des Gerätes stets fest geschlossen ist, um Verletzungen durch heiße Milchspritzer zu vermeiden. 28.Schalten Sie das Gerät niemals ein, wenn keine Milch eingefüllt ist. 29.Stellen Sie sicher, dass allen Benutzern, insbesondere Kindern, die Gefahr durch austretenden Dampf oder heiße Milchspritzer bekannt ist – Verbrennungsgefahr! 30.Fassen Sie das Gerät nur am Handgriff an, um Verbrennungen zu vermeiden. 31.Berühren Sie niemals die drehenden Teile am Gerät und stecken Sie weder Gegenstände noch Körperteile in das laufende Gerät, um Verletzungen zu vermeiden. 32.Füllen Sie nie mehr als 250 ml Milch in das Gerät, um ein Überkochen der Milch zu vermeiden. 33.Verschieben Sie das Gerät nicht, solange es in Betrieb ist, um Verbrühungen durch herausspritzende Milch zu vermeiden. 34.Lassen Sie das Gerät zwischen zwei Zubereitungen mehrere Minuten abkühlen. 35.Das Gerät darf nicht mit Zubehör anderer Hersteller oder Marken benutzt werden, um Schäden zu vermeiden. 36.Nach Gebrauch sowie vor dem Reinigen den Netzstecker aus der Steckdose ziehen. Das Gerät niemals unbeaufsichtigt lassen, wenn der Netzstecker eingesteckt ist. 37.Lassen Sie das Gerät vor dem Reinigen abkühlen. 38.Öffnen Sie auf keinen Fall das Gehäuse des Milchaufschäumers. Es besteht Gefahr durch Stromschlag. Vorsicht! Nicht den Deckel öffnen, während die Milch erhitzt wird. Wenn der Behälter überfüllt wird, kann heiße Milch herausspritzen. Achten Sie bitte aus Sicherheitsgründen darauf, dass die Kontaktstelle am Behälterrand, in die der Deckel einrastet, stets trocken bleibt. Der Hersteller übernimmt keine Haftung bei fehlerhafter Montage, bei unsachgemäßer oder fehlerhafter Verwendung oder nach Durchführung von Reparaturen durch nicht autorisierte Dritte. 9 Tipps für optimalen Milchschaum 1. Die besten Ergebnisse erzielen Sie mit kühlschrankkalter Milch. 2. Sie können jede Art von Milch zum Aufschäumen verwenden. Das beste Ergebnis erzielen Sie mit 1,5 %iger Magermilch. Probieren Sie aber auch einmal andere Milchsorten, denn jede ergibt eine andere Konsistenz des Schaumes. 3. Für Allergiker empfehlen wir Sojamilch. 4. Faktoren wie Frische oder Grad der Pasteurisierung können sich auf den Aufschäumprozess auswirken. 5. Das Gerät erhitzt die Milch bis ca. 62 bis 68 °C. So erhalten Sie einen für den Kaffee optimal temperierten Milchschaum. 6. Mit dem Milchaufschäumer lässt sich aber auch eine besonders sämige Salatsauce herstellen. 7. Tipp: um ein eventuelles Ansetzen von heißer Milch im Behälter zu vermeiden, können Sie vor dem Benutzen den Behälter innen dünn mit Butter einstreichen. Vor dem ersten Benutzen 1. Entfernen Sie alle Verpackungsmaterialien und ggf. Transportsicherungen. 2. Reinigen Sie alle Teile mit einem feuchten Tuch, wie im Kapitel „Reinigen und Pflegen“ auf Seite 11 beschrieben. 3. Prüfen Sie, ob das Gerät stabil steht. 4. Schließen Sie den Sockel mittels der Zuleitung an das Stromnetz (220-240 V~, 50/60 Hz) an. Bedienen – Milch aufschäumen 1. Ziehen Sie den Deckel nach oben hin vom Behälter ab. 2. Drehen Sie nun den Aufsatz für Milchschaum auf den Rührstab. 3. Füllen Sie mindestens 100 ml Milch (Markierung Min) und maximal 150 ml Milch (untere Markierung Max.) in den Behälter. Füllen Sie keinesfalls mehr Milch ein, da sich aufgeschäumte Milch ausdehnt und zum Überlaufen des Behälters führen kann. 4. Setzen Sie den Deckel wieder auf den Behälter. 5. Drücken Sie die Einschalttaste. 6. Die Kontrollleuchte zeigt an, dass das Gerät mit der Zubereitung des Milchschaumes beginnt. 7. Möchten Sie die Zubereitung von Milchschaum unterbrechen, drücken Sie erneut die Einschalttaste. 8. In ca. 90 Sekunden ist der Milchschaum fertig und das Gerät stoppt automatisch. 9. Öffnen Sie nun den Deckel und nehmen Sie diesen nach oben vom Gerät weg. 10.Sie können den fertigen Milchschaum in ein Gefäß umgießen oder umschöpfen. 11.Wenn Sie nochmals Milchschaum zubereiten möchten, lassen Sie das Gerät bitte für ca. 2 bis 4 Minuten abkühlen. Reinigen Sie dann den Behälter wie im Kapitel Reinigen und Pflegen, beschrieben. Wichtig: Es dürfen keine Milchreste im Behälter verbleiben, um Keimbildung zu verhindern. Reinigen Sie das Gerät nach jedem Benutzen! 10 Bedienen – Milch erhitzen 1. Bereiten Sie das Gerät wie im Kapitel „Milch aufschäumen“ beschrieben, vor. 2. Drehen Sie nun den Aufsatz für heiße Milch auf den Rührstab. 3. Füllen Sie mindestens 100 ml Milch (Markierung Min) und maximal 250 ml Milch (obere Markierung Max.) in den Behälter. Füllen Sie keinesfalls mehr Milch ein, da dies sonst zum Überlaufen des Behälters führen kann. 4. Setzen Sie den Deckel wieder auf den Behälter. 5. Drücken Sie die Einschalttaste. 6. Die Kontrollleuchte zeigt an, dass das Gerät mit dem Erhitzen der Milch beginnt. 7. Möchten Sie die Zubereitung von heißer Milch unterbrechen, drücken Sie erneut die Einschalttaste. 8. In ca. 90 Sekunden ist die Milch erhitzt und das Gerät stoppt automatisch. 9. Öffnen Sie nun den Deckel und nehmen Sie diesen nach oben vom Gerät weg. 10.Sie können nun die Milch in ein Gefäß umgießen. 11.Wenn Sie nochmals Milch erhitzen möchten, lassen Sie das Gerät bitte für ca. 2 bis 4 Minuten abkühlen. Reinigen Sie dann den Behälter wie im Kapitel Reinigen und Pflegen, beschrieben. 12.Tipp: Wenn Sie mit dem Erhitzen der Milch fertig sind, montieren Sie den Aufsatz für Milchschaum wieder, damit dieser nicht verloren geht. Wichtig: Es dürfen keine Milchreste im Behälter verbleiben, um Keimbildung zu verhindern. Reinigen Sie das Gerät nach jedem Benutzen! Reinigen und Pflegen 1. Lassen Sie das Gerät abkühlen, bevor Sie es reinigen. 2. Vor dem Reinigen stets das Gerät ausschalten und den Stecker aus der Steckdose ziehen. 3. Aus hygienischen Gründen muss das Gerät direkt nach dem Benutzen gereinigt werden. In den Milchresten könnten sich sonst unter Umständen gesundheitsgefährdende Keime bilden. 4. Die Zuleitung und der Behälter dürfen nicht in Wasser oder eine andere Flüssigkeit eingetaucht oder in der Spülmaschine gereinigt werden. 5. Wischen Sie den Behälter, den Deckel und den Rührstab mit Aufsatz mit einem feuchten Tuch und etwas Spülmittel ab. Verwenden Sie keine scharfen Scheuermittel, Stahlwolle, metallischen Gegenstände, heiße Reinigungsmittel oder Desinfektionsmittel, da diese zu Beschädigungen führen können. Dies gilt insbesondere für die Antihaftbeschichtung im Inneren des Behälters. 6. Säubern Sie den Behälter von innen mit einem weichen Tuch und warmem Wasser, dem Sie ein mildes Spülmittel zusetzen können. Kratzen Sie hartnäckige Verschmutzungen bitte nicht mit harten Gegenständen ab, um zu vermeiden, dass die Beschichtung beschädigt wird. Lassen Sie das Wasser bei Bedarf etwas einweichen, um Verschmutzungen zu entfernen. Spülen Sie danach den Behälter gründlich mit warmem Wasser aus. 7. Am Innenrand des Deckels ist ein Dichtungsring befestigt. Dieser muss von Zeit zu Zeit ebenfalls gereinigt werden. Ziehen Sie 11 hierfür den Ring vom Deckel ab und reinigen Sie ihn in warmem Spülwasser. Lassen Sie den Ring gut trocknen und befestigen Sie ihn dann wieder am Deckel. Achten Sie dabei darauf, dass die Rillen des Dichtrings nach außen zeigen müssen. 8. Das Gerät muss außen vollkommen trocken sein, bevor Sie es wieder benutzen dürfen. Rezeptideen für Kaffee Mit der aufgeschäumten Milch können Sie heiße oder kalte Kaffeespezialitäten kreieren. Cappuccino – der italienische Klassiker Er besteht aus 1/3 Espresso, 1/3 heißer Milch und 1/3 Milchschaum. Auf Wunsch können Sie z. B. Kakaopulver darüber streuen. schaum. Vorsichtig mit Espresso auffüllen. Nun noch eine Haube aus Milchschaum oder Schlagsahne und mit Schokoladenraspeln oder Kakaopulver verzieren. Caffè Latte In Frankreich ist dieser Kaffee als Café au lait bekannt, in Deutschland als Milchkaffee. Er besteht ebenfalls aus Espresso. Geben Sie die gewünschte Menge erhitzte Milch hinzu und fügen Sie auf Wunsch als “Krone” eine kleine Portion Milchschaum oben drauf. Eiskaffee Geben Sie starken, kalten Kaffee in ein hohes Glas. Nun geben Sie pro Glas eine bis zwei Kugeln Vanilleeis hinzu und füllen das Glas mit kaltem Milchschaum auf. Auf Wunsch mit Schokoraspeln garnieren. Latte Macchiato Ein gut zubereiteter Latte Macchiato besteht aus mehreren Schichten. Fangen Sie mit Milch an und geben Sie dann abwechselnd Espresso, heiße Milch und Milchschaum in ein hohes Trinkglas. Lassen Sie die Milchschaumschicht immer erst etwas setzen, bevor Sie den Espresso zugeben. So vermischen sich die Schichten nicht. Achten Sie darauf, dass der Espresso heiß ist. Möchten Sie das Getränk z. B. mit Sirup oder Likör aromatisieren, so geben Sie diese Zutaten bitte nur in die heiße Milch, nicht in den Espresso, da dieser sonst zu schnell absinkt. Mochaccino Geben Sie 1 bis 2 Teelöffel Schokoladensirup in ein Glas, darüber den etwas abgekühlten Milch- 12 Aber nicht nur Kaffeespezialitäten lassen sich mit Milchschaum herstellen. Wussten Sie zum Beispiel, dass Sie den Milchschaum anstelle von Schlagsahne auch für köstliche Desserts verwenden können? Sie erhalten damit leicht bekömmliche, wunderbar cremige Kreationen. Geben Sie z. B. einfach mal den heißen Milchschaum über Erdbeeren oder über das morgendliche Müsli. Und probieren Sie ebenfalls eine Milchschaumhaube z. B. auf Cremesuppen oder servieren Sie diese in einer Tasse als Pilz-Cappuccino oder Kartoffel-Cappuccino. Viele weitere Rezeptideen können Sie in Kochbüchern oder auch im Internet nachlesen. Fehler beheben Fehler Mögliche Ursache Lösung Die Kontrolleuchte leuchtet nicht Stecker nicht eingesteckt Stecker in Steckdose stecken Temperaturüberwachung Gerät abkühlen lassen Deckel nicht richtig geschlossen Deckel schließen und bis zum Anschlag zudrehen Kontakte am Griff verschmutzt Kontakte am Griff reinigen Das Gerät heizt, aber der Rührstab dreht sich nicht Milch tritt am Deckel aus Füllmenge zu groß Füllmenge reduzieren Deckel nicht richtig geschlossen Deckel schließen und bis zum Anschlag zudrehen Dichtungsring am Deckel fehlt oder ist verschmutzt Dichtungsring reinigen und einsetzen Die Rezepte in dieser Bedienungsanleitung wurden von den Autoren und von der UNOLD AG sorgfältig erwogen und geprüft, dennoch kann keine Garantie übernommen werden. Eine Haftung der Autoren bzw. der UNOLD AG und ihrer Beauftragten für Personen-, Sach- und Vermögensschäden ist ausgeschlossen. 13 GARANTIEBESTIMMUNGEN Wir gewähren auf unsere Geräte eine Garantie von 24 Monaten, bei gewerblichem Gebrauch 12 Monate, ab dem Kaufdatum für Schäden, die bei bestimmungsgemäßem Gebrauch nachweislich auf Werksfehler zurückzuführen sind. Innerhalb der Garantiezeit beheben wir Material- und Herstellungsfehler nach unserem Ermessen durch Reparatur oder Umtausch. Unsere Garantieleistungen gelten ausschließlich für in Deutschland und Österreich verkaufte Geräte. Bei anderen Ländern wenden Sie sich bitte an den zuständigen Importeur. Geräte, für die eine Mängelbeseitigung beansprucht wird, senden Sie bitte zusammen mit einer Kopie des maschinell erstellten Kaufbelegs, aus dem das Kaufdatum ersichtlich sein muss, sowie einer Fehlerbeschreibung gut verpackt und freigemacht an unseren Kundendienst. Im Garantiefall werden dem Kunden entstandene Versandkosten zurückerstattet. Von der Garantie ausgeschlossen sind Schäden durch Verschleiß, unsachgemäße Handhabung und Nichteinhaltung der Wartungs- und Pflegeanweisungen. Der Garantieanspruch erlischt, wenn Reparaturen oder Eingriffe am Gerät von dritter Stelle vorgenommen werden. Eventuelle Ansprüche des Endverbrauchers gegenüber dem Verkäufer oder Händler werden durch diese Garantie nicht eingeschränkt. Entsorgung / Umweltschutz Unsere Geräte werden auf hohem Qualitätsniveau für eine lange Nutzungsdauer hergestellt. Regelmäßige Wartung und fachgerechte Reparaturen durch unseren Kundendienst können die Nutzungsdauer des Gerätes verlängern. Wenn ein Gerät defekt und nicht mehr zu reparieren ist, beachten Sie bitte: Dieses Produkt darf nicht zusammen mit dem normalen Hausmüll entsorgt werden. Sie müssen dieses Produkt an einer ausgewiesenen Sammelstelle zum Recycling von elektrischen oder elektronischen Geräten abliefern. Durch das separate Sammeln und Recyceln von Abfallprodukten helfen Sie mit, die natürlichen Ressourcen zu schonen und stellen sicher, dass das Produkt in gesundheits- und umweltverträglicher Weise entsorgt wird. 14 Service-Adressen Deutschland Mannheimer Straße 4 68766 Hockenheim Kundendienst Telefon +49 (0) 62 05/94 18-27 Telefax +49 (0) 62 05/94 18-22 E-Mail [email protected] Internet www.unold.de Sie möchten innerhalb der Garantiezeit ein Gerät zur Reparatur einsenden? Auf unserer Internetseite www.unold.de/ruecksendung können Sie sich einen Rücksendeaufkleber ausdrucken, um damit das Paket kostenlos bei der Post abzugeben (nur für Einsendungen aus Deutschland und Österreich). ÖsterreichSchweiz Reparaturabwicklung, Ersatzteile: ESC Electronic Service Center GmbH Molitorgasse 15 A-1110 Wien Telefon +43 (0) 1/9 71 70 59 Telefax +43 (0) 1/9 71 70 59 E-Mail [email protected] MENAGROS SA Route der Servion CH - 1083 Mezières Telefon +41 (0) 21 9 03 01-15 Telefax +41 (0) 21 9 03 01-11 E-Mail [email protected] Internet www.menagros.ch PolenTschechien „Quadra-net“ Sp. z o.o. Skadowa 5 61-888 Poznan Skadowa 5 Internet www.quadra-net.pl befree.cz s.r.o. Škroupova 150 537 01 Chrudim Telefon +42 0 46 46 01 881 E-Mail [email protected] 15 Instructions for use Model 28400 Technical Specifications Power rating: Dimensions: Cable: Weight: Colour: Capacity: Jug: Lid: Features: Accessories: 420-500 watts, 220-240 V~, 50/60 Hz Approx. 16.1 x 10.3 x 16.3 cm (L/W/H) Approx. 75 cm Approx. 0.75 kg White Minimum 100 ml, maximum 150 ml for frothed milk/250 ml for hot milk Non-stick coating for easy cleaning Removable Perfect frothed milk at the press of a button; for frothed and hot milk, non-stick coating for easy cleaning, switches off automatically Instruction manual with recipes We reserve the right to introduce technical modifications. Explanation of the symbols This symbol indicates potential hazards that may result in injury or damage to the appliance. This symbol indicates a potential burning hazard. Please be especially careful at all times here. For your safety General safety information 1. Please read the following information and keep it for future reference. 2. This appliance is not intended for use by persons (including children) with reduced physical, sensory or mental capabilities, or lack of experience and/or knowledge, unless they are supervised or have been given instructions concerning the use of the appliance by a person responsible for their safety. 3. Children should be supervised to ensure that they do not play with the appliance. 4. Keep the appliance out of the reach of children. 5. Connect the appliance only to an AC power supply with the voltage indicated on the rating plate. 6. Do not operate this appliance with an external timer or remote control system. 7. The base must not come into contact with water or other liquids. If this happens, make 16 sure that it is completely dry before using the appliance again. 8. This appliance is intended only for domestic use or similar, such as: staff kitchen areas in shops, offices and other working environments agricultural enterprises by guests in hotels, motels or other accommodation facilities, bed and breakfast accommodation and holiday homes. 9. Never open the casing of the milk frother. There is a risk of electric shock. 10.Check the appliance, the plug and the cable regularly for wear or damage. If the cable or other parts are damaged, send the appliance or the base of the appliance to our customer service for inspection and repair (see warranty conditions for the address). Improper repairs can cause considerable hazards for the users and will void the warranty. Information for positioning and using the appliance 11.Make sure that the electrical socket you are using is easily accessible and that you can pull the plug out quickly in an emergency. 12.Never touch the appliance or cable with wet hands. 13.Do not clean the milk frother in a dishwasher. 14.For safety reasons, never place the appliance on hot surfaces, a metal tray or a wet surface. 15.Never immerse the appliance or the cable in water or other liquids. 16.Do not place the appliance or cable near open flames during operation. 17.Always use the milk frother on a level, uncluttered and heat-resistant surface. 18.Make sure that the cable does not hang over the edge of the worktop or table, since this can cause accidents, for example if small children pull on the cable. 19.The cable must be laid so that it cannot be pulled out and that no one can trip over it. 20.Never wind the cable around the appliance. 21.Always disconnect the cable from the wall socket by pulling on the plug, never on the cable. 22.Do not carry the appliance by the cable. 23.Use the milk frother only indoors. 24.Use the appliance only to heat milk. Do not heat other liquids, as this may damage the appliance. 25.Never heat other objects, such as cans or bottles, in the milk frother. 26.Do not use the jug in the oven or microwave. 27.Make sure that the lid of the appliance is always completely closed, to prevent injuries from hot splashing milk. 28.Never switch the appliance on if there is no milk in the jug. 29.Make sure that all users, especially children, are aware of the risk of injury from escaping steam or hot splashing milk – risk of burning. 30.Hold the appliance only by the handle to avoid burns. 31.To prevent injuries, never touch moving parts of the appliance and do not put objects or parts of your body into the appliance while it is running. 32.Never fill more than 250 ml milk into the appliance to prevent the milk boiling over. 33.Do not move the appliance while it is running to prevent scalding from splashing milk. 34.Allow the appliance to cool for several minutes between two operations. 35.To prevent damage, do not use the appliance with accessories from other manufacturers. 36.Disconnect the appliance from the wall socket after use and before cleaning it. Never leave the appliance unattended when it is plugged into the wall socket. 37.Allow the appliance to cool before cleaning it. 38.Never open the casing of the milk frother. There is danger of electric shock. Caution! Do not open the lid while milk is being heated. If the jug is too full, hot milk may splash out. For safety reasons, make sure that the contact on the edge of the jug in which the lid engages is always dry. The manufacturer will not be liable in the event of incorrect assembly, improper or incorrect use or if repairs are carried out by unauthorized third parties. Tips on how to obtain perfect milk froth 1. You will get the best results with milk from the refrigerator. 2. You can use any type of milk for froth, but you will get the best results with low fat milk (1.5%). But try out other types of milk, as the consistency of the froth varies with each type. 3. We recommend soy milk for people with allergies. 4. Factors such as freshness or level of pasteurisation may have an effect on the frothing process. 5. The appliance heats milk to between 62 and 68 °C, which is the ideal temperature for milk froth for your coffee. 6. The milk froth can also be used to prepare especially creamy salad dressings. 7. Tip: To prevent hot milk sticking to the jug, you can spread a thin layer of butter inside the jug beforehand. 17 Before using the appliance for the first time 1. Remove all packaging materials and transport safety equipment. 2. Clean all parts with a damp cloth, as described in „Cleaning and Care“ on page 19. 3. Check that the appliance stands firmly. 4. Connect the appliance to the power supply (220-240 V~, 50 Hz) with the cable. Milk frothing function 1. Remove the lid from the jug. 2. Click on the milk froth accessory to the agitator. 3. Add at least 100 ml milk (min. mark), but no more than 150 ml (lower max. mark) to the jug. Never add more milk, since frothed milk expands and may overflow from the jug. 4. Replace the lid. 5. Press the on/off button. 6. The indicator light shows that the appliance starts frothing the milk. 7. If you wish to interrupt the frothing process, press the on/off button again. 8. The milk froth is ready in about 90 seconds and the appliance stops automatically. 9. Open the lid and remove it from the jug. 10.You can now pour or spoon the milk froth into a container. 11.If you wish to froth more milk, allow the appliance to cool for 2 to 4 minutes. Then clean the jug as described in Cleaning and Care. Important: Make sure that there is no milk residue in the jug to prevent germs forming. Clean the appliance after every use. Milk heating function 1. Prepare the appliance as described in „Frothing milk“. 2. Click on the milk heating accessory to the agitator. 3. Add at least 100 ml milk (min. mark), but no more than 250 ml (top max. mark) to the jug. Never add more milk, since the milk may overflow from the jug. 4. Replace the lid. 5. Press the on/off button. 6. The indicator light shows that the appliance starts heating the milk. 18 7. If you wish to interrupt the heating process, press the on/off button again. 8. The milk is heated in about 90 seconds and the appliance stops automatically. 9. Open the lid and remove it from the jug. 10.You can now pour the milk into a container. 11.If you wish to heat more milk, allow the appliance to cool for 2 to 4 minutes. Then clean the jug as described in Cleaning and Care. 12.Tip: When you are finished heating milk, replace the milk frother accessory so that it doesn‘t get lost. Important: Make sure that there is no milk residue in the jug to prevent germs forming. Clean the appliance after every use. Cleaning and Care 1. Allow the appliance to cool before cleaning it. 2. Before you clean the appliance, always switch it off and pull the plug out of the wall socket. 3. For hygienic reasons, clean the appliance immediately after every use. Otherwise, harmful germs may form. 4. The cable and jug must not be immersed in water or any other liquid or be cleaned in the dishwasher. 5. Wipe the jug, lid, agitator with accessory with a damp cloth and some washing-up liquid. Do not use any abrasive products, steel wool, metal objects, hot cleaning products or disinfectants, since they may damage the appliance. This applies especially to the non-stick coating inside the jug. 6. Clean the inside of the jug with a soft cloth and warm water with some mild washing-up liquid. Do not scrape stubborn residue with hard objects, otherwise you will damage the coating. If necessary, allow water to soak in to remove residue. Then rinse the jug thoroughly with warm water. 7. The lid has a sealing ring inside. This also has to be cleaned from time to time. To do this, remove the ring from the lid and clean it in warm water with washing-up liquid. Allow the ring to dry completely before attaching it to the lid again. Remember that the grooves on the sealing ring must face outward. 8. The appliance must be completely dry before you use it again. Recipes With milk froth you can prepare hot and cold coffee specialties. Capuccino – the classic Italian It consists of 1/3 espresso, 1/3 hot milk and 1/3 milk froth. If you wish you may decorate it with chocolate powder. to it using for example syrup or liqueur, add these ingredients only to the hot milk and not to the espresso, as it would make the espresso sink too fast. Caffe Latte This coffee is known in France as Café au lait, a milk coffee. It is also made of espresso. Add the desired quantity of heated milk and, if you wish, crown it with a bit of froth milk. Mochaccino Put 1 to 2 tsp. of chocolate syrup in a glass and add a bit of slightly cooled down milk froth. Fill it up carefully with espresso. To finish, put a crown of milk froth or whipped cream on top and decorate with shaved chocolate or chocolate powder. Latte Macchiato A well prepared Latte Macchiato consists of various layers. Start with filling the milk into a high glass and then add alternately espresso, hot milk and milk froth. Allow the milk froth layer to settle before you add the espresso. Thus the layers will not intermingle. Mind that the espresso must be hot. If you wish to give flavour Iced coffee Pour cold, strong coffee into a high glass. Now add 1 to 2 balls of vanilla icecream and fill the glass up with cold milk froth. If you wish, you can decorate it with shaved chocolate. 19 But not only coffee specialties can be prepared with milk froth. Did you know, for example, that you can use milk froth instead of cream for delicious desserts? This will give you wonderful, easily digestible and creamy creations. Try to use hot milk froth on fresh strawberries or your cereals, for example. And also try a crown of milk froth on cream soup or serve the cream soup as mushroom or potato cappuccino. You will find a lot more recipes in cookery books and on the Internet. Troubleshooting Error Possible causes Solution The indicator light does not light up Appliance not connected to the mains Plug the connector into the wall socket Temperature control Let the appliance cool down Lid is not closed properly Close lid properly and turn until it is fixed Contacts on the handle are dirty Clean the contacts on the handle Excessive quantity of liquid Reduce lquid quantity Lid is not closed properly Close lid properly and turn until it is fixed Gasket at the lid is lacking or dirty Clean the gasket and insert it The appliance heats but the agitator does not rotate Milk leaks from the lid The authors have thoroughly considered and tested the recipes included in these operating instructions. Nevertheless, a guarantee cannot be accepted. The authors, respectively UNOLD AG and their assignees shall not be liable for personal injuries, material damages and financial loss. 20 Guarantee Conditions We guarantee our appliances for 24 months, or in case of commercial use for 12 months, from the date of purchase in case of defects that occur during normal use and are demonstrably due to a factory fault. Within the warranty period we will remedy defective materials or workmanship through repair or replacement, at our option. Our warranty terms apply only to appliances sold in Germany and Austria. For other countries, please contact the responsible importer. In the event of a claim for remedy of defects, please send the appliance to our after sales service, properly packaged and postage paid, together with a copy of the automatically generated sales receipt, which must show the date of purchase, and a description of the defect. If the defect is covered by the warranty, the customer will be reimbursed for the shipping costs. The warranty does not cover damage from normal wear, improper handling and failure to comply with the maintenance and care instructions. The warranty is void if repairs or modifications are made to the appliance by third parties. Any claims of the end consumer vis-à-vis the retailer are not limited by this warranty. Waste Disposal / Environmental Protection Our appliances are produced on a high quality level for a long lifetime. Regular maintenance and expert repairs by our after-sales service can extend the useful life of the appliance. If an appliance is defective and repair is not possible we ask you to follow the following instructions for disposal. Do not dispose this appliance together with your standard household waste. Please bring this product to an approved collection point for recycling of electric and electronic products. By separate collection and disposal of waste products you help to protect natural resources and ensure, that the product is disposed in an adequate way to protect health and environment. 21 Notice d´utilisation Modèle 28400 Spécification technique Puissance : Dimensions : Longueur cordon : Poids : Couleur : Capacité : Réservoir : Couvercle : Caractéristiques : Accessoires : 420-500 W, 220-240 V~ ,50/60 Hz Env. 16,1 x 10,3 x 16,3 cm (LO/LA/HA) Env. 75 cm Env. 0,75 kg Blanc 100 ml min., 150 ml max. (préparation mousse de lait) 250 ml max. (préparation lait chaud) Revêtement antiadhésif pour nettoyage facile Démontable Mousse de lait parfaite en pressant un bouton, pour mousse de lait et lait chaud, revêtement antiadhésif pour nettoyage facile, mise hors marche automatique Notice d’utilisation avec recettes Sous réserve de modifications techniques. Explication des symboles Ce symbole vous indique des risques possibles qui puissent entraîner des lésions ou des endommagements de l’appareil. Ce symbole indique le risque d’être brûlé. Soyez prudent en utilisant l’appareil. Consignes de sécurité Consignes générales 1. Lire attentivement le mode d’emploi et le conserver soigneusement pour toute consultation ultérieure. 2. Cet appareil n’est pas prévu pour être utilisé par des personnes (y compris les enfants) dont les capacités physiques, sensorielles ou mentales sont réduites ou par des personnes dénuées d’expérience et/ou de connaissance, sauf si elles ont pu bénéficier, par l’intermédiaire d’une personne responsable de leur sécurité, d’une surveillance ou d’instructions préalables concernant l’utilisation de l’appareil. 3. Il convient de surveiller les enfants pour s’assurer qu’ils ne jouent pas avec l’appareil. 4. Tenir l’appareil hors de portée des enfants. 5. Vérifier que l’installation électrique est compatible avec la puissance et la tension indiquées sur la plaque signalétique. Ne raccorder qu’à un courant alternatif. 22 6. Cet appareil n‘est pas destiné à être mis en marche au moyen d‘un minuteur indépendant ou par un système de commande à distance. 7. Le socle ne doit en aucun cas être mis en contact avec de l’eau ou tout autre liquide. Dans le cas contraire, il est impératif de contrôler avant toute nouvelle utilisation qu’il est parfaitement sec. 8. L’appareil est exclusivement destiné à un usage domestique ou similaire comme par ex. : espaces thé et café (boutiques), coins cuisine (bureaux et autres lieux de travail), exploitations agricoles, mis à la disposition des clients séjournant dans un hôtel, motel ou autre type d’hébergement, dans des chambres d’hôtes ou maisons de vacances. 9. Afin d’éviter tout choc électrique, ne jamais ouvrir le bloc moteur du mousseur à lait. 10.Contrôler régulièrement l’état de l’appareil, de la prise ainsi que du cordon d’alimentation. En cas d’usure ou de détérioration du câble ou d’autres éléments, retourner l’appareil ou son support à notre service après-vente (se reporter aux Conditions de garantie pour les coordonnées) chargé de procéder aux vérifications et réparations nécessaires. Toute intervention inappropriée peut s’avérer dangereuse pour l’utilisateur et entraînera l’annulation de la garantie. 25.Des objets, comme des boîtes ou des bouteilles, ne doivent en aucun cas être réchauffés dans le mousseur à lait. 26.Ne pas utiliser le réservoir au four traditionnel ni au micro-ondes. 27.Afin d’éviter toute blessure corporelle, s’assurer que le couvercle de l’appareil est toujours correctement fermé. 28.Ne jamais allumer l’appareil lorsqu’il ne contient pas de lait. 29.S’assurer que tous les utilisateurs, notamment les enfants, sont conscients des dangers liés à la vapeur formée et aux éclaboussures de lait bouillant. Risque de brûlure ! 30.Pour prévenir tout risque de brûlure, toujours manipuler l’appareil en le portant par sa poignée. 31.Ne jamais toucher les composants en cours de fonctionnement et ne pas introduire d’objets ni de doigts dans l’appareil sous tension. 32.Pour éviter tout risque de débordement, ne jamais mettre plus de 250 ml de lait. 33.Ne pas déplacer l’appareil lorsqu’il fonctionne pour éviter le risque de brûlure. 34.Laisser refroidir l’appareil quelques minutes entre deux utilisations. 35.Pour éviter tout dommage, ne pas utiliser d’accessoires non recommandés par le fabricant, ni des éléments d’une autre marque que celle de l’appareil. 36.Après utilisation et avant toute opération de nettoyage, éteindre et débrancher l’appareil. Ne jamais laisser l’appareil sans surveillance lorsqu’il est encore branché. 37.Laisser refroidir l’appareil dans son intégralité avant de le nettoyer. 38.Afin d’éviter tout choc électrique, ne jamais ouvrir le bloc moteur du mousseur à lait. Consignes spéciales 11.Faites attention, que la prise de courant est facilement accessible. 12.Ne jamais toucher l’appareil aves des mains humides. 13.Ne jamais nettoyer le mousseur à lait dans le lave-vaiselle. 14.Pour des raisons de sécurité, ne jamais placer l’appareil sur ou près de surfaces chaudes, métalliques ou humides. 15.Ne jamais plonger l’appareil dans l’eau ou d’autres liquides. 16.Ne pas utiliser l’appareil ou son câble à proximité d’une flamme nue. 17.Toujours placer le mousseur à lait sur une surface bien dégagée, plane et résistante à la chaleur. 18.Afin d’éviter tout accident en présence d’enfants, ne pas laisser pendre le cordon d’alimentation. 19.Placer le cordon de manière à ce que personne ne puisse tirer dessus ou trébucher. 20.Ne jamais enrouler le cordon d’alimentation autour de l’appareil. 21.Pour débrancher le mousseur à lait, toujours Mise en garde : retirer la fiche de la prise murale et non le ne jamais ouvrir le couvercle lorsque cordon d’alimentation de l’appareil. le lait est en train de chauffer ! 22.Ne pas tirer sur le cordon pour déplacer le Si le réservoir est trop rempli, le lait socle. bouillant peut gicler. 23.Ne pas utiliser le mousseur à lait en plein Faites attention que le point de contact air. dans le bord est toujours sec. 24.Utiliser le mousseur pour faire chauffer uniquement du lait et non d’autres liquides, pouvant endommager l’appareil. Le fabricant n’est nullement responsable en cas de montage non conforme, d‘utilisation irrégulière ou non conforme ou suite à l’exécution de réparations par des tiers non autorisés. Avant la première utilisation 1. Enlevez tous les emballages et, le cas échéant, retirez les protections de transport. 2. Essuyez soigneusement tous les composants de l’appareil avec un chiffon humide (cf. « Nettoyage et entretien », page 25). 23 3. Vérifiez que l’appareil est posé sur une surface stable. 4. Insérez la fiche du cordon d’alimentation dans une prise secteur appropriée (220240 V~, 50/60 Hz). L’art et la manière de réaliser une mousse de lait parfaite 1. Pour obtenir une mousse onctueuse, vous pouvez utiliser du lait très frais (sortant du réfrigérateur) ou encore du lait chaud jusqu’à 60°C maximum. 2. Vous pouvez faire mousser tous les types de lait. Le lait demi-écrémé (1,5%) est idéal, sans pour autant exclure les autres sortes de lait ayant une consistance de mousse différente. 3. Pour les personnes souffrant d’allergies, il est recommandé d’utiliser du lait de soja. 4. Au cours de l’émulsion du lait, divers facteurs tels que la fraîcheur du produit ou la température de pasteurisation peuvent intervenir et modifier le résultat. 5. L’appareil chauffe le lait jusqu’à env. 62 – 68°C, températures idéales pour agrémenter le café d’une fine couche de mousse. 6. Vous pouvez également utiliser le batteur pour préparer une vinaigrette bien liée. 7. Pour éviter que le lait chaud attache vous pouvez beurrer le réservoir légerement. Utilisation de l’appareil – préparation mousse de lait 1. Fixez ensuite le batteur dans le couvercle. 2. Remplissez le réservoir de lait en respectant les niveaux, soit entre 100 ml (repère « Min. ») et 150 ml (repère inférieur « Max. »). Ne jamais dépasser le repère maximum, sachant que le volume de lait va gonfler pendant l’opération de moussage et peut donc déborder. 3. Replacez le couvercle en le tournant jusqu’à ce qu’il s’enclenche. 4. Appuyez sur la touche de mise en marche. 5. Le témoin lumineux correspondant indique que la préparation est en cours. 24 6. Veuillez noter que le processus de moussage ne peut être interrompu manuellement. Si vous souhaitez éteindre l’appareil, retirez la fiche de la prise secteur ou enlevez le réservoir du socle. 7. La mousse de lait est prête en l’espace de 90 secondes, voire une minute et demie maximum. L’appareil s’arrête automatiquement. 8. Ouvrez le couvercle et retirez-le de l’appareil. 9. La mousse de lait est désormais prête. Il ne vous reste plus qu’à la transvaser dans un autre récipient ou la récupérer délicatement à la louche. 10.Laissez refroidir l’appareil env. 2 à 4 minutes chaque fois que vous faites mousser du lait. Une fois que vous avez terminé, nettoyez le réservoir (cf. « Nettoyage et entretien »). Remarque : veillez à ce qu’il ne reste aucun résidu de lait dans le réservoir afin d’éviter la formation de germes. Nettoyez impérativement l’appareil après chaque utilisation ! Utilisation de l’appareil – préparation lait chaud 1. Préparez l’appareil comme décrit ci-avant. 2. Fixez ensuite le batteur pour les lait chaud dans le couvercle. 3. Remplissez le réservoir de lait en respectant les niveaux, soit entre 100 ml (repère « Min. ») et 250 ml (repère supérieur « Max. »). Ne jamais dépasser le repère maximum pour éviter tout débordement. 4. Replacez le couvercle en le tournant jusqu’à ce qu’il s’enclenche. 5. Pour faire chauffer le lait, appuyez sur le bouton de mise en marche. 6. Le témoin lumineux indique que la préparation est en cours. 7. Veuillez noter que le processus de chauffe ne peut être interrompu manuellement. Si vous souhaitez éteindre l’appareil, retirez la fiche de la prise secteur ou enlevez le réservoir du socle. 8. Le lait est chauffé en env. 90 secondes. L’appareil s’arrête automatiquement. 9. Ouvrez le couvercle et retirez-le de l’appareil. 10.Le lait chaud est désormais prêt. Il ne vous reste plus qu’à le transvaser dans un autre récipient. 11.Laissez refroidir l’appareil env. 2 à 4 minutes chaque fois que vous faites chauffer du lait. Une fois que vous avez terminé, nettoyez le réservoir (cf. « Nettoyage et entretien »). 12.Remarque : veillez à ce qu’il ne reste aucun résidu de lait dans le réservoir afin d’éviter la formation de germes. Nettoyez impérativement l’appareil après chaque utilisation ! Astuce : lorsque vous avez terminé de faire chauffer le lait, fixez à nouveau le batteur dans le couvercle afin de ne pas le perdre. Nettoyage et entretien 1. Laissez refroidir l’appareil dans son intégralité avant de le nettoyer. 2. Avant de procéder au nettoyage, éteindre systématiquement l’appareil et le débrancher. 3. Pour des raisons d’hygiène, il est impératif de nettoyer l’appareil directement après chaque utilisation. Les résidus de lait peuvent favoriser le développement de germes dangereux pour la santé. 4. Ne jamais plonger le support, le câble d’alimentation ni le réservoir dans l’eau ou tout autre liquide, et ne pas les mettre au lave-vaisselle. 5. Nettoyez le socle et le réservoir avec un chiffon humide et quelques gouttes de produit vaisselle. Ne jamais utiliser de produits abrasifs, laine d’acier, objets métalliques, détergents chauds ni de désinfectants, pouvant détériorer l’appareil, notamment le revêtement antiadhésif (intérieur du réservoir). 6. À l‘aide d‘un chiffon doux, nettoyez l’intérieur du réservoir à l’eau chaude additionnée d’un peu de produit vaisselle doux si nécessaire. Ne pas gratter avec un objet pointu ou tranchant afin de protéger le revêtement antiadhésif de toute détérioration. En cas de salissures tenaces, laissez tremper le réservoir un certain temps. Puis rincez-le soigneusement à l’eau chaude. 7. Au bord intérieur de réservoir se trouve un anneau de joint qui doit être nettoyé également de temps en temps. Enlevez l’anneau du couvercle et nettoyez-le dans l’eau 25 chaude. Laissez sécher l’anneau et fixez-le de nouveau. Faites attention que les rainures montre vers l’extérieur- 8. Avant toute nouvelle utilisation, l’extérieur de l’appareil doit être complètement sec. Idées de recettes La mousse de lait, incontournable pour agré-menter des spécialités de café, aussi bien chaudes que froides. de lait qui a eu le temps de refroidir. Versez Cappuccino – le grand classique italien délicatement l’Espresso. Recouvrir le tout d’un 1/3 d’Espresso, 1/3 de lait chaud et 1/3 de nuage de mousse de lait ou de chantilly et garnir mousse de lait. Le tout saupoudré par ex. de de copeaux de chocolat ou de poudre de cacao. cacao en poudre. Caffè Latte Variante italienne du « café au lait » français. L’élément de base de ce café est également un Espresso sur lequel on verse du lait chaud. Le tout couronné d’une onctueuse mousse de lait. Café frappé (glacé) Versez du café fort bien froid dans un verre haut. Ajoutez une à deux boules de glace à la vanille. Agrémentez le tout d’une couche de mousse froide et saupoudrez de copeaux de chocolat. Latte Macchiato Un vrai Latte Macchiato se compose de trois « étages » dans un ordre bien défini. Versez tout d’abord du lait chaud dans un verre haut et étroit à parois épaisses. Ajoutez ensuite la mousse de lait. Laissez la mousse reposer un court instant avant de verser délicatement l’Espresso venant se loger entre les deux premières couches. Rien ne bouge, rien ne se mélange, dans la mesure où l’Espresso est bien chaud. Vous pouvez aromatiser cette boisson avec du sirop ou de la liqueur. Pour cela, incorporez l’ingrédient désiré au lait chaud et non à l’Espresso qui risquerait de se mélanger très rapidement. La mousse de lait se marie à merveille non seulement avec des spécialités à base de café mais aussi avec un grand nombre de préparations diverses. Saviez-vous, par exemple, que vous pouvez remplacer la crème chantilly par de la mousse de lait dans des recettes sucrées ? Créations à la fois aériennes et divinement onctueuses garanties ! La mousse de lait est idéale pour accompagner des fraises ou encore des céréales au petit-déjeuner. À goûter absolument : veloutés nappés d’un nuage de mousse ou cappuccinos de champignons ou de pommes de terre servis dans une tasse. Mochaccino Mettez 1 à 2 cuillères à café de sirop de chocolat dans un verre, puis ajoutez la mousse Pour de nouvelles idées recettes, n’hésitez pas à consulter des livres de cuisine tout comme Internet. Dépannage Erreurs de fonctionnement Causes possibles Solutions Le voyant de contrôle ne s’allume pas L’appareil n’est pas branché Insérer la fiche dans une prise secteur Système de contrôle de température activé Laisser refroidir l’appareil 26 Erreurs de fonctionnement Causes possibles Solutions L’appareil chauffe, mais le mélangeur ne tourne pas Le couvercle n’est pas correctement fermé Replacer le couvercle jusqu’à ce qu’il s’enclenche Surface de préhension sale Nettoyer les éléments de contact Repère de remplissage max. dépassé Réduire la quantité Le couvercle n’est pas correctement fermé Replacer le couvercle jusqu’à ce qu’il s’enclenche Joint d’étanchéité manquant, mal positionné ou sale Enlever, nettoyer et replacer le joint Le lait déborde du réservoir 27 Conditions de Garantie Les défauts de l’appareil qui se produisent malgré l’utilisation correcte suite à une faute de l‘usine et dont nous sommes informés immédiatement après qu’ils soient constatés dans les 24 mois après la livraison aux preneur final, seront réparés gratuitement. Notre garantie n’est valide que pour les appareils vendus en Allemagne et en Autriche. Dans tout autre pays veuillez contacter l’importateur. Veuillez envoyer à notre adresse les appareils, pour lesquels vous réclamez une suppression de défauts, avec le bon d’achat montrant la date d’achat, port payé et proprement emballé. Les coûts de transport seront remboursés en cas de garantie en Allemagne et en Autriche. Les défauts causés par usure, utilisation incorrecte ou non-respect des instructions de maintenance sont exclus. Notre obligation de garantie cesse, si de réparations ou des interventions sont accomplies par des tiers. Cette garantie n’affecte pas les droits du consommateur contre le commerçant. Traitement des déchets / Protection de l’environnement Nos appareils sont produits selon un standard élevé de qualité pour une longue durée d’utilisation. Un entretien régulier et des réparations compétentes par notre service après-vente prolongent cette durée d’utilisation. Si néanmoins l’appareil est endommagé et ne peut plus être réparé, veuillez suivre les instructions suivantes. Ne jamais disposer ce produit avec les dégâts de ménage. Apportez ce produit à une station de collection pour récupération de produits électriques et électroniques. Par la collection séparée vous aidez à protéger les ressources naturelles et prenez soin, que le produit est démonté sans risque pour la santé et l’environnement. Les recettes disponibles dans ce mode d’emploi ont été soigneusement examinées et contrôlées par leurs auteurs respectifs et par la société UNOLD AG. Notre responsabilité n’est toutefois en aucun cas engagée. Les auteurs et la société UNOLD AG ainsi que ses représentants déclinent toute responsabilité en cas de dommages corporels, matériels et pécuniaires. 28 Gebruiksaanwijzing Model 28400 Technische gegevens Vermogen: Afmetingen: Snoer: Gewicht: Kleur: Inhoud: Reservoir: Deksel: Uitrusting: Accessoires: 420-500 watt, 220-240 V~, 50/60 Hz Ca. 16,1 x 10,3 x 16,3 cm (L/B/H) Ca. 75 cm Ca. 0,75 kg Wit Minimum 100 ml, maximum 150 ml voor melkschuim/250 ml voor hete melk Voorzien van antikleeflaag, voor eenvoudige reiniging Afneembaar Perfect melkschuim met één druk op de knop, voor melkschuim en hete melk, antikleeflaag voor eenvoudige reiniging, automatische uitschakeling Gebruiksaanwijzing met recepten Technische wijzingen voorbehouden. Verklaring van de symbolen Dit symbool wijst op eventuele gevaren die letsel tot gevolg kunnen hebben of tot schade aan het apparaat leiden. Dit symbool wijst op een eventueel verbrandingsgevaar. Ga hier altijd zeer voorzichtig te werk. Voor uw veiligheid Algemene veiligheidsvoorschriften 1. Lees de volgende instructies en bewaar ze. 2. Dit apparaat is niet bestemd voor gebruik door personen (waaronder kinderen) met beperkte fysieke, zintuiglijke of geestelijke vermogens of met een gebrek aan ervaring en/of kennis, tenzij ze onder toezicht staan van iemand die verantwoordelijk is voor hun veiligheid of van deze persoon instructies over het gebruik van het apparaat hebben gekregen. 3. Kinderen moeten onder toezicht staan om er zeker van te zijn dat ze niet met het apparaat spelen. 4. Het apparaat bewaren op een plaats die niet toegankelijk is voor kinderen. 5. Apparaat uitsluitend op wisselstroom met spanning overeenkomstig het typeplaatje aansluiten. 6. Dit apparaat mag niet met een externe timer of een afstandsbedieningssysteem gebruikt worden. 7. De sokkel mag niet met water of andere vloeistoffen in contact komen. Als dit toch een keer gebeurt, moet hij helemaal droog zijn alvorens hij opnieuw wordt gebruikt. 8. Het apparaat is uitsluitend bestemd voor huishoudelijk gebruik of soortgelijke gebruiksdoeleinden, bijvoorbeeld kitchenettes in winkels, kantoren of op andere plaatsen waar wordt gewerkt, landbouwbedrijven, voor gebruik door gasten in hotels, motels of andere onderkomens, in privépensions of vakantiehuizen. 9. Open nooit de behuizing van de melkopschuimer. Er bestaat gevaar voor een elektrische schok. 10.Controleer het apparaat, de stekker en het snoer regelmatig op slijtage of beschadigingen. Bij schade aan het snoer of andere onderdelen stuurt u het apparaat of de sokkel ter controle en reparatie naar onze technische dienst (adres zie garantiebe29 palingen). Verkeerd uitgevoerde reparaties kunnen aanzienlijke gevaren voor de gebruiker tot gevolg hebben en leiden ertoe dat de garantie vervalt. Instructies voor het plaatsen en gebruik van het apparaat 11.Let erop dat het gebruikte stopcontact goed toegankelijk is om het snoer er in geval van nood snel uit te kunnen trekken. 12.Het apparaat of het snoer nooit met natte handen aanraken. 13.De melkopschuimer mag niet in de vaatwasser gereinigd worden. 14.Plaats het apparaat om veiligheidsredenen nooit op hete oppervlakken, op een metalen plateau of op een natte ondergrond. 15.Dompel het apparaat of het snoer nooit onder in water of andere vloeistoffen. 16.Het apparaat of het snoer mag niet in de buurt van vlammen gebruikt worden. 17.Gebruik de melkopschuimer altijd op een vrij, egaal en hittebestendig oppervlak. 18.Let erop dat het snoer niet over de rand van het werkvlak hangt, omdat dit tot ongevallen kan leiden als bijvoorbeeld kleine kinderen eraan trekken. 19.Het snoer moet zodanig gelegd zijn dat niemand eraan kan trekken of erover kan struikelen. 20.Wikkel het snoer nooit om het apparaat. 21.Trek het snoer altijd alleen aan de stekker uit het stopcontact, nooit aan het snoer zelf. 22.Draag het apparaat niet aan het snoer. 23.Gebruik de melkopschuimer alleen binnen. 24.Gebruik het apparaat uitsluitend om melk te verhitten. Verhit geen andere vloeistoffen, omdat deze het apparaat kunnen beschadigen. 25.Ook mogen er geen voorwerpen zoals blikjes of flesjes in de melkopschuimer verhit worden. 26.Gebruik het reservoir niet in de oven of magnetron. 27.Zorg ervoor dat het deksel van het apparaat altijd goed gesloten is om verwondingen door hete melkspetters te voorkomen. 28.Schakel het apparaat nooit in als er geen melk in is gegoten. 29.Zorg ervoor dat alle gebruikers, in het bijzonder kinderen, bekend zijn met het gevaar door ontsnappende stoom of hete melkspetters – verbrandingsgevaar! 30.Pak het apparaat alleen aan de handgreep vast om brandwonden te voorkomen. 31.Raak de draaiende onderdelen op het apparaat nooit aan en steek geen voorwerpen of lichaamsdelen in het werkende apparaat om letsel te voorkomen. 32.Giet nooit meer dan 250 ml melk in het apparaat om het overkoken van de melk te voorkomen. 33.Verplaats het apparaat niet zolang het in werking is om brandwonden door uitspattende melk te voorkomen. 34.Laat het apparaat tussen twee bereidingen meerdere minuten afkoelen. 35.Om schade te voorkomen, mag het apparaat niet met accessoires van andere fabrikanten of merken gebruikt worden. 36.Na gebruik en vóór het reinigen de stekker uit het stopcontact trekken. Het apparaat nooit onbeheerd laten als de stekker in het stopcontact is gestoken. 37.Laat het apparaat vóór het reinigen afkoelen. 38.Open in geen geval de behuizing van de melkopschuimer. Er bestaat gevaar van letsel door elektrische schokken. Voorzichtig! Open het deksel niet terwijl de melk wordt verhit. Bij overvulling van het reservoir kan hete melk uitspatten. Let er om veiligheidsredenen op dat het contactpunt op de rand van het reservoir waarin het deksel vastklikt altijd droog blijft. De fabrikant is niet aansprakelijk, indien het apparaat verkeerd gemonteerd, ondeskundig of foutief gebruikt of door niet geautoriseerde derden gerepareerd werd. Tips voor optimaal melkschuim 1. U behaalt de beste resultaten met koude melk uit de koelkast. 2. U kunt elke soort melk gebruiken voor het opschuimen. U behaalt het beste resultaat met magere melk met een vetgehalte van 1,5%. Probeer echter ook eens andere soorten melk, want elke soort zorgt voor een andere consistentie van het schuim. 30 3. Voor mensen met een allergie bevelen wij sojamelk aan. 4. Factoren als versheid of pasteurisatiegraad kunnen het opschuimproces beïnvloeden. 5. Het apparaat verhit de melk tot ca. 62 tot 68 °C. Zo krijgt u een op de optimale temperatuur gebrachte melkschuim voor de koffie. 6. Met de melkopschuimer kan echter ook een zeer smeuïge dressing gemaakt worden. 7. Tip: om te voorkomen dat hete melk eventueel in het reservoir vast blijft zitten, kunt u het reservoir vóór gebruik aan de binnenkant dun met boter insmeren. Vóór het eerste gebruik 1. Verwijder alle verpakkingsmaterialen en eventueel transportbeveiligingen. 2. Reinig alle onderdelen met een vochtige doek zoals beschreven in het hoofdstuk “Reiniging en onderhoud“ op pagina 32. 3. Controleer of het apparaat stevig staat. 4. Sluit het apparaat door middel van het snoer op het stroomnet (220-240 V~, 50/60 Hz) aan. Bedienen - melk opschuimen 1. Trek het deksel naar boven van het reservoir af. 2. Schuif nu het opzetstuk voor melkschuim op de roerstaaf. 3. Giet minimaal 100 ml melk (markering Min) en maximaal 150 ml melk (onderste markering Max.) in het reservoir. Giet nooit meer melk in het reservoir, omdat opgeschuimde melk uitzet en het reservoir hierdoor kan overlopen. 4. Plaats het deksel weer op het reservoir. 5. Druk op de inschakeltoets. 6. Het controlelampje geeft aan dat het apparaat begint met het bereiden van het melkschuim. 7. Als u de bereiding van melkschuim wilt onderbreken, drukt u nogmaals op de inschakeltoets. 8. Het melkschuim is in ca. 90 seconden klaar en het apparaat stopt automatisch. 9. Open nu het deksel en neem deze naar boven van het apparaat af. 10.U kunt het melkschuim in een kom overgieten of overscheppen. 11.Als u opnieuw melkschuim wilt bereiden, laat u het apparaat ongeveer twee tot vier minuten afkoelen. Reinig vervolgens het reservoir zoals beschreven in het hoofdstuk “Reiniging en onderhoud“. Belangrijk: er mogen geen melkresten in het reservoir achterblijven om kiemvorming te voorkomen. Reinig het apparaat na elk gebruik! 31 Bedienen - melk verhitten 1. Bereid het apparaat voor zoals beschreven in het hoofdstuk „Melk opschuimen“. 2. Schuif nu het opzetstuk voor melk verhitten op de roerstaaf. 3. Giet minimaal 100 ml melk (markering Min) en maximaal 250 ml melk (bovenste markering Max.) in het reservoir. Giet nooit meer melk in het reservoir, omdat dit ertoe kan leiden dat het reservoir overloopt. 4. Plaats het deksel weer op het reservoir. 5. Druk op de inschakeltoets. 6. Het controlelampje geeft aan dat het apparaat begint met het verhitten van de melk. 7. Als u de bereiding van hete melk wilt onderbreken, drukt u nogmaals op de inschakeltoets. 8. De melk is in ca. 90 seconden verhit en het apparaat stopt automatisch. 9. Open nu het deksel en neem deze naar boven van het apparaat af. 10.U kunt de melk nu in een kom overgieten. 11.Als u opnieuw melk wilt verhitten, laat u het apparaat ongeveer twee tot vier minuten afkoelen. Reinig vervolgens het reservoir zoals beschreven in het hoofdstuk “Reiniging en onderhoud“. 12.Tip: als u klaar bent met het verhitten van de melk, monteert u het opzetstuk voor melkschuim weer, zodat u het niet kwijtraakt. Belangrijk: er mogen geen melkresten in het reservoir achterblijven om kiemvorming te voorkomen. Reinig het apparaat na elk gebruik! Reiniging en onderhoud 1. Laat het apparaat afkoelen, voordat u het reinigt. 2. Vóór het reinigen altijd het apparaat uitschakelen en de stekker uit het stopcontact trekken. 3. Om hygiënische redenen moet het apparaat meteen na gebruik gereinigd worden. Anders zouden in bepaalde omstandigheden gezondheidsbedreigende kiemen in de melkresten kunnen ontstaan. 4. Het snoer en het reservoir mogen niet in water of een andere vloeistof ondergedompeld of in de vaatwasser gereinigd worden. 5. Maak het reservoir, het deksel en de roerstaaf met opzetstuk schoon met een vochtige doek en een beetje afwasmiddel. Gebruik geen bijtende schuurmiddelen, staalwol, metalen voorwerpen, hete schoonmaakmiddelen of ontsmettingsmiddelen, omdat deze tot beschadigingen kunnen leiden. Dit geldt 32 in het bijzonder voor de antikleeflaag aan de binnenkant van het reservoir. 6. Maak het reservoir aan de binnenkant schoon met een zachte doek en warm water, waaraan u een mild afwasmiddel kunt toevoegen. Krab hardnekkig vuil niet weg met harde voorwerpen om te voorkomen dat de laag beschadigd raakt. Laat het water desgewenst een beetje inweken om vuil te verwijderen. Spoel vervolgens het reservoir grondig uit met warm water. 7. Aan de binnenrand van het deksel is een pakkingring bevestigd. Deze ring moet af en toe ook gereinigd worden. Trek de ring hiervoor van het deksel af en reinig hem in warm afwaswater. Laat de ring goed drogen en bevestig hem dan weer op het deksel. Let er daarbij op dat de groeven van de pakkingring naar buiten gericht moeten zijn. Receptideeën Met de opgeschuimde melk kunt u hete of koude koffiespecialiteiten creëren. Cappuccino – de klassieke Italiaan De cappucino bestaat uit 1/3 espresso, 1/3 hete melk en 1/3 melkschuim. Naar wens kunt u bijv. cacaopoeder er overheen strooien. Caffè Latte In Frankrijk is deze koffie bekend als “café au lait”, in Duitsland als “Milchkaffee”. Hij bestaat eveneens uit espresso. Voeg de gewenste hoeveelheid verwarmde melk toe en doe naar wens als “kroon” een kleine portie melkschuim er boven op. Latte Macchiato Een goed bereide Latte Macchiato bestaat uit meerdere lagen. Begin met melk en geef dan afwisselend espresso, hete melk en melkschuim in een hoge drinkglas. Laat de laag melkschuim eerst iets zakken voordat u de espresso toevoegt. Op deze manier vermengen zich de lagen niet. Let er op dat de espresso heet is. Als u de drank bijv. met siroop of likeur wilt aromatiseren, geef deze ingrediënten alleen in de hete melk en niet in de espresso omdat deze anders te snel omlaag zakt. im. Voorzichtig espresso bijvullen. Nu nog melkschuim of slagroom als mutsje erop doen en met geraspte chocola of cacaopoeder versieren. IJskoffie Geef sterke koude koffie in een hoog drinkglas. Voeg nu per glas één à twee bolletjes vanilleijs toe en vul het glas met koud melkschuim. Naar wens met geraspte chocola garneren. U kunt echter niet alleen maar koffiespecialiteiten met melkschuim bereiden. Wist u bijvoorbeeld dat u het melkschuim ook in plaats van slagroom voor overheerlijke desserts kunt gebruiken? U tovert daarmee lichte, heerlijk romige creaties. Geef het hete melkschuim bijvoorbeeld eens over aardbeien of s’morgens over uw muesli. En probeer ook eens een mutsje van melkschuim bijv. op crèmesoepen of serveer dit in een kopje als paddestoel-cappuccino of aardappelcappuccino. U vindt nog veel meer receptideën in kookboeken of ook in het internet. Mochaccino Geef 1 à 2 teelepels chocoladesiroop in een glas, daarover het ietwat afgekoelde melkschu- Storingen verhelpen Fout Mogelijke oorzaak Oplossing Het controlelampje brandt niet. Stekker niet in stopcontact. Stekker in stopcontact steken. Temperatuurbewaking Apparaat laten afkoelen. Het deksel is niet correct gesloten. Het deksel sluiten en tot aan de aanslag vastdraaien. Contacten aan het handvat zijn vuil. Contacten aan het handvat schoonmaken. Vulhoeveelheid te groot. Vulhoeveelheid reduceren. Het deksel is niet correct gesloten. Het deksel sluiten en tot aan de aanslag vastdraaien. Dichtingsring van eht deksel ontbreekt of is vuil. Dichtingsring reinigen en aanbrengen. Het apparaat verwarmt, maar de roerstaaf draait niet. Melk komt aan het deksel naar buiten. 33 Garantievoorwaarden Wij geven op onze apparaten een garantietermijn van 24 maanden, gerekend vanaf de dag van aanschaf. Deze garantie geldt voor schade, die bij correct gebruik aantoonbaar is veroorzaakt door een fout in de productie. Binnen de garantietermijn verhelpen wij materiaal- en productiefouten door herstelling of vervanging naar onze keuze. Onze garantie is slechts geldig voor in Duitsland en Oostenrijk verkopte apparaten. In andere landen a.u.b. de importeur aanspreken. Apparaaten, waarvoor garantie in aanspraak wordt genomen, moeten ons samen met een kopie van de machineel gegenereerde kassabon waaruit de koopdatum duidelijk wordt, alsmede een beschrijving van de fout goed verpakt aan onze klantenservice worden toegezonden, porto betaald. Als er sprake van garantie is, worden de verzendingskosten in Duitsland en Oostenrijk aan de klant vergoed. De garantie dekt geen schade veroorzaakt door slijtage, onbehoorlijk gebruik/foutieve handelingen en niet-naleving van de onderhouds- en reinigingsaanwijzingen. Het recht op garantie vervalt, wanneer reparaties of manipulaties aan het apparaat door derden worden doorgevoerd. Eventuele rechten van de eindgebruiker t.o.v. de verkoper of distributeur worden door deze garantie niet aangetast. Verwijderen van afval / Milieubescherming Onze apparaten zijn geproduceerd met een hoge qualiteit voor een lange gebruik. Regelmatige onderhoud en vakkundig reparaties door onze klantenservice verlengt de gebruiksduur. Wanneer het apparat defekt is en kan niet meer gerepareerd worden, let op de volgende instructies. Dit product mag niet samen met het normale huishoudelijke afval worden afgevoerd. U dient dit product bij een voor het recycleren van elektrische of elektronische apparaten aangewezen verzamelplaats in te leveren. Door het separaat inzamelen en recycleren van afvalproducten helpt u mee bij het zuinig omgaan met de natuurlijke hulpbronnen en zorgt u ervoor dat het product op een gezondheids- en milieuvriendelijke manier afgevoerd wordt. De recepten in deze gebruiksaanwijzing zijn door de auteurs en door UNOLD AG zorgvuldig ontwikkeld en getest. Een garantie kan er echter niet worden aanvaard. De auteurs en/of UNOLD AG en haar gemachtigden kunnen in geen geval aansprakelijk worden gesteld voor letsel, materiële schade en financiële schade. 34 Istruzioni per l’uso Modello 28400 Dati tecnici Potenza: 420-500 Watt, 220-240 V~, 50/60 Hz Dimensioni: Circa 16,1 x 10,3 x 16,3 cm (LxPxH) Cavo di connessione:Circa 75 cm Peso: Circa 0,75 kg Colore: Bianco Capienza: Min. 100 ml, max. 150 ml per la schiuma del latte/250 ml per il latte caldo Bricco: Rivestimento antiaderente, facile da pulire Coperchio: Rimovibile In dotazione: Schiuma del latte perfetta grazie ad un solo pulsante, ideale per preparare la schiuma del latte e per riscaldare il latte, dotato di rivestimento antiaderente per facilitare la pulizia, spegnimento automatico Accessori: Istruzioni d‘uso con ricette Con riserva di modifiche tecniche. Significato dei simboli Questo simbolo segnala possibili pericoli in grado di provocare lesioni a persone o danni all‘apparecchio. Questo simbolo indica un possibile pericolo di ustioni. In presenza di questo simbolo agire sempre con la massima cautela. Per la sicurezza Si prega di leggere le seguenti indicazioni e di conservarle in luogo sicuro. 1. Questo apparecchio non deve essere utilizzato da persone (compresi bambini) con ridotte capacità fisiche, sensoriali o mentali o che non abbiano sufficiente esperienza e conoscenze delle modalità di utilizzo, a meno che non siano sotto sorveglianza di una persona che dia loro indicazioni per un utilizzo corretto e sicuro del presente apparecchio. 2. Tenere sotto controllo i bambini affinché non giochino con questo apparecchio. 3. Depositare l‘apparecchio in un luogo inaccessibile ai bambini. 4. Collegare l‘apparecchio solamente alla corrente alternata con tensione corrispondente all‘indicazione riportata sulla targhetta dati. 5. Questo apparecchio non deve essere utilizzato con un orologio programmabile esterno o un sistema a telecomando. 6. Evitare che la base venga a contatto con acqua o con altre sostanze liquide. Se ciò dovesse tuttavia succedere una volta, occorre far asciugare completamente l‘apparecchio prima di riutilizzarlo. 7. L‘apparecchio si presta esclusivamente ad un impiego domestico o per simili finalità d‘utilizzo quali ad es. in cucine di negozi, uffici o altri luoghi di lavoro, aziende agricole, per un impiego da parte degli ospiti di alberghi, motel o di altre attività ricettive, in pensioni private o in case vacanze. 8. Non aprire in nessun caso l‘alloggiamento del montalatte. Vi è il pericolo di folgorazione. 9. Controllare regolarmente l‘eventuale presenza di usura o danni sull‘apparecchio, sulla presa e sul cavo di collegamento. In caso di danni al cavo di collegamento 35 o ad altri componenti si prega di inviare l‘apparecchio o la base per un‘ispezione e la riparazione al nostro Centro di Assistenza Clienti (per l‘indirizzo consultare le condizioni di garanzia). Eventuali riparazioni non a regola d‘arte possono causare notevoli pericoli per l‘utente e fanno decadere il diritto di garanzia. 24.Non riscaldare oggetti come lattine o bottiglie all‘interno del montalatte. 25.Non impiegare il bricco in forni né in forni a microonde. 26.Assicurarsi che il coperchio dell‘apparecchio sia sempre chiuso, al fine di evitare ustioni causate dagli schizzi di latte bollente. 27.Non accendere mai l‘apparecchio se non contiene latte. 28.Assicurarsi che tutti gli utenti, in particolare i bambini, siano consapevoli del pericolo di ustionarsi con il vapore o con gli schizzi di latte bollente! 29.Per evitare di bruciarsi, prendere l‘apparecchio sempre e solo dal manico. 30.Non toccare mai le componenti girevoli dell‘apparecchio e non inserire oggetti o parti corporee nell‘apparecchio in movimento al fine di evitare infortuni. 31.Non riempire l‘apparecchio con più di 250ml di latte al fine di evitarne l‘ebollizione e che fuoriesca. 32.Non spostare l‘apparecchio mentre è in funzione al fine di evitare di ustionarsi con gli schizzi di latte. 33.Tra una preparazione e l‘altra lasciare raffreddare l‘apparecchio per diversi minuti. 34.Al fine di evitare danneggiamenti non utilizzare l‘apparecchio con accessori di altri produttori o altre marche. 35.Dopo l‘impiego e prima di pulirlo togliere la spina dalla presa. Non lasciare l‘apparecchio incustodito quando la spina è inserita. 36.Prima di lavare l‘apparecchio, lasciarlo raffreddare. 37.Durante il funzionamento, non aprire per nessun motivo il corpo dello schiumatore. Pericolo di scossa elettrica. Indicazioni per la collocazione e l‘utilizzo dell‘apparecchio 10.Si prega di assicurarsi che la presa impiegata sia di facile accesso al fine di sconnettere rapidamente il cavo di collegamento in caso di emergenza. 11.Non toccare mai l‘apparecchio o il cavo di collegamento con le mani bagnate. 12.Non lavare il montalatte in lavastoviglie. 13.Per motivi di sicurezza, non collocare l‘apparecchio su superfici calde, su vassoi in metallo o su superfici bagnate. 14.Non immergere l‘apparecchio o il cavo di collegamento in acqua o in altre sostanze liquide. 15.Non azionare l‘apparecchio o il cavo di alimentazione nelle vicinanze di fiamme accese. 16.Utilizzare il montalatte sempre su una superficie libera, piana e resistente al calore. 17.Non lasciare il cavo di alimentazione sospeso liberamente oltre il bordo della superficie di lavoro al fine di prevenire incidenti, ad esempio nel caso in cui dei bambini piccoli lo dovessero tirare. 18.Assicurarsi che il cavo di collegamento sia posizionato in modo tale da non poter essere tirato o che non ci si possa inciampare. 19.Non attorcigliare mai il cavo intorno all‘apparecchio. Attenzione! 20.Disinserire la spina del cavo sempre dalla Non aprire il coperchio mentre viene presa, non tirando il cavo. riscaldato il latte. 21.Non trasportare l‘apparecchio prendendolo Se il contenitore è troppo pieno può dal cavo di collegamento. fuoriuscire latte bollente. 22.Impiegare il cappuccinatore montalatte Per motivi di sicurezza controllare solamente all‘interno di locali. che il punto di contatto sul bordo del 23.Impiegare l‘apparecchio esclusivamente bricco in cui si incastra il coperchio per riscaldare il latte. Non riscaldare altre sia sempre asciutto. sostanze liquide in quanto esse potrebbero danneggiare l‘apparecchio. Il produttore declina qualunque responsabilità in caso di montaggio errato, utilizzi errati o non idonei o qualora le riparazioni siano eseguite da terzi non autorizzati. Consigli per ottenere la migliore schiuma di latte 1. I migliori risultati si ottengono utilizzando latte freddo da frigorifero. 36 2. Per schiumare si può utilizzare qualsiasi tipo di latte; Il miglior risultato si raggiunge tuttavia con il latte magro parzial- mente scremato (1,5%). Si consiglia però di provare anche altri tipi di latte in quanto ognuno produrrà una diversa consistenza della schiuma. 3. Per i soggetti allergici si consiglia il latte di soia. 4. I fattori relativi a freschezza e grado di pastorizzazione possono influire sul processo di schiumatura. 5. L‘apparecchio riscalda il latte fino a 62-68 °C. In questo modo si ottiene una schiuma di latte ottimale per il caffè. 6. Con il montalatte si può anche preparare una salsa particolarmente densa per condire le insalate. 7. Consiglio pratico: per evitare che il latte caldo si depositi nel bricco, prima di adoperarlo si consiglia di imburrarlo con un sottile strato di burro. Prima del primo impiego 1. Eliminare tutti i materiali di imballaggio e le sicure di trasporto. 2. Pulire tutte le componenti con un panno umido, come descritto nel capitolo: „Pulizia e cura“ a pagina 38. 3. Controllare che l‘apparecchio sia stabile in posizione verticale. 4. Collegare alla rete l‘apparecchio mediante il cavo di alimentazione (220-240 V~, 50 Hz). Impiego: Come schiumare il latte 1. Sollevare il coperchio dal bricco. 2. Inserire il frullino montalatte sulla frusta. Non superare le dosi consigliate di latte in quanto schiumando potrebbe fuoriuscire dal bricco. 4. Riposizionare il coperchio sul bricco. 5. Premere il pulsante di accensione. 6. La spia luminosa si accende indicando che l‘apparecchio inizia la preparazione della schiuma di latte. 7. Se si desidera interrompere tale processo, premere di nuovo il pulsante. 8. Dopo circa 90 secondi sarà pronta la schiuma di latte e l‘apparecchio si spegnerà automaticamente. 9. Aprire il coperchio e toglierlo dall‘apparecchio sollevandolo. 10.E‘ possibile versare in un altro contenitore la schiuma di latte pronta. 11.Se si desidera preparare ancora schiuma di latte, lasciare raffreddare l‘apparecchio per almeno 2-4 minuti. Pulire il bricco come descritto nel capitolo: „Pulizia e cura“. Importante: Assicurarsi che non rimangano resti di latte nel bricco al fine di evitare la formazione di germi. Pulire il bricco dopo ogni impiego! 3. Riempire il bricco con almeno 100 ml di latte (fino alla tacca Min.) e al massimo con 150 ml di latte (tacca inferiore Max.). 37 Impiego: Come riscaldare il latte 1. Preparare l‘apparecchio come descritto nel capitolo „Come schiumare il latte“. 2. Inserire il frullino per latte caldo sulla frusta. 3. Riempire il bricco con almeno 100 ml di latte (fino alla tacca Min.) e al massimo con 250 ml di latte (tacca superiore Max.). Non superare le dosi consigliate di latte in quanto potrebbe fuoriuscire dal bricco. 4. Riposizionare il coperchio sul bricco. 5. Premere il pulsante di accensione. 6. La spia luminosa si accende indicando che l‘apparecchio inizia a riscaldare il latte. 7. Se si desidera interrompere tale processo, premere di nuovo il pulsante. 8. Dopo circa 90 secondi il latte è pronto e l‘apparecchio si spegne automaticamente. 9. Aprire il coperchio e toglierlo dall‘apparecchio sollevandolo. 10.A questo punto è possibile versare il latte in un altro contenitore. 11.Se si desidera riscaldare altro latte, lasciare raffreddare l‘apparecchio per almeno 2-4 minuti. Pulire il bricco come descritto nel capitolo: „Pulizia e cura“. 12.Consiglio pratico: Quando il processo di riscaldamento del latte è terminato, rimontare il frullino montalatte in modo tale che non vada perso. Importante: Assicurarsi che non rimangano resti di latte nel bricco al fine di evitare la formazione di germi. Pulire il bricco dopo ogni impiego! Pulizia e cura 1. Prima di pulire l‘apparecchio attendere che si sia raffreddato. 2. Spegnerlo sempre prima di pulirlo ed estrarre la spina dalla presa elettrica. 3. Per motivi igienici occorre pulire l‘apparecchio direttamente dopo l‘impiego altrimenti nei residui di latte potrebbero formarsi dei germi nocivi alla salute. 4. Non immergere il cavo e il bricco in acqua o in altre sostanze liquide e non lavarlo in lavastoviglie. 5. Pulire con un panno umido e un po’ di detersivo il bricco, il coperchio e la frusta con frullino integrato. Non utilizzare alcuna sostanza abrasiva, pagliette, oggetti metallici, detergenti bollenti o disinfettanti in quanto potrebbero causare danni all‘apparecchio. Ciò riguarda particolarmente il rivestimento antiaderente all‘interno del bricco. 6. Pulire l‘interno del bricco con un panno morbido imbevuto di acqua calda e un detersivo 38 leggero. Non grattare lo sporco più ostinato con oggetti duri al fine di non danneggiare il rivestimento antiaderente. Se necessario lasciare dell‘acqua nel bricco per un po‘ di tempo in modo da rimuovere lo sporco. Alla fine risciacquare accuratamente il bricco con acqua calda. 7. Sul bordo interiore del coperchio è fissata una guarnizione ad anello. Anch‘essa deve essere pulita di tanto in tanto. A tal fine estrarre la guarnizione dal coperchio e pulirla in acqua calda di risciacquo. Lasciare asciugare bene la guarnizione prima di fissarla nuovamente nel coperchio. Prestare attenzione che gli anelli dell‘anello di tenuta siano rivolti verso l‘esterno. 8. L‘apparecchio deve essere completamente asciutto sull‘esterno prima di poterlo riutilizzare. Idee per ricette Con il latte schiumato è possibile creare specialità a base di caffè calde o fredde. Cappuccino – Il classico italiano È costituito da 1/3 di espresso, 1/3 di latte caldo e 1/3 di schiuma di latte. Se lo si desidera, è possibile cospargervi del cacao in polvere. Caffelatte In Francia questo caffè è conosciuto come Cafe au lait, in Germania come Milchkaffee. La base è sempre l’espresso. Aggiungere la quantità desiderata di latte scaldato e aggiungere a piacimento come “corona” una piccola porzione di schiuma di latte. Latte macchiato Un latte macchiato preparato a regola d’arte è costituito da più strati. Iniziare con il latte e aggiungere, alternandoli, espresso, latte caldo e schiuma di latte, utilizzando un bicchiere di vetro alto. Prima di versare l’espresso, lasciare riposare un po’ lo strato di schiuma di latte. In questo modo gli strati non si mescolano. Accertarsi che l’espresso sia caldo. Se per esempio si desidera aromatizzare la bevanda con sciroppo o liquore, aggiungere questi ingredienti solo nel latte caldo, non nell’espresso, che altrimenti sprofonda troppo velocemente. Eiskaffee Versare del caffè freddo e forte in un bicchiere alto. A questo punto aggiungere una - due palline di gelato alla vaniglia e riempire il bicchiere con schiuma di latte fredda. Se lo si desidera, guarnire con delle scaglie di cioccolato. Con la schiuma di latte si possono preparare molte altre specialità, non necessariamente a base di caffè. Lo sapevate per esempio che è possibile utilizzare la schiuma di latte anziché la panna anche per deliziosi dessert? In questo modo è possibile ottenere creazioni splendidamente cremose e digeribili. Versare per esempio la schiuma di latte calda sulle fragole oppure sul muesli della colazione. Oppure si consiglia di ideare una copertura di schiuma di latte per esempio su zuppe cremose o di servirle in una tazza come cappuccino ai funghi o alle patate. Molte altre idee per ricette si trovano sui ricettari o su Internet. Diagnostica dei problemi Difetto Possibile causa Soluzione La spia di controllo non si accende La spina non è inserita Inserire la spina nella presa della corrente Controllo della temperatura Lasciare raffreddare l’apparecchio Il coperchio non è chiuso correttamente Chiudere il coperchio e ruotarlo finché non si blocca I contatti sul manico sono sporchi Pulire i contatti sul manico Recipiente troppo pieno Ridurre la quantità di latte nel recipiente Il coperchio non è chiuso correttamente Chiudere il coperchio e ruotarlo finché non si blocca Anello di guarnizione assente o sporco Pulire l’anello di guarnizione e sostituirlo L’apparecchio riscalda ma il dispositivo di mescolamento non ruota Il latte fuoriesce dal coperchio 39 Norme die garanzia I nostri prodotti sono garantiti per 24 mesi dalla data di acquisto per i guasti manifestatisi durante un utilizzo conforme alle disposizioni e attribuibili in modo dimostrabile a difetti di fabbricazione. Nel periodo di garanzia porremo rimedio ai difetti materiali e di produzione secondo la nostra valutazione, procedendo alla riparazione o alla sostituzione dell’apparecchio. Le nostre prestazioni di garanzia valgono esclusivamente per gli apparecchi venduti in Germania e Austria. In tutti gli altri casi rivolgersi all‘importatore. Gli apparecchi per i quali si richiede la riparazione di guasti ci devono essere inviati con spedizione affrancata e debitamente imballati, unitamente a una copia del documento di acquisto redatto a macchina dal quale risulti la data di vendita, nonché la descrizione del guasto. In caso di garanzia al cliente verranno rimborsati i costi di spedizione sostenuti. Sono esclusi dalla garanzia i guasti dovuti all’usura, all’uso inappropriato o al mancato rispetto delle regole di manutenzione. Il diritto di garanzia decade qualora siano state effettuate riparazioni o interventi da parte di terzi. Eventuali diritti del consumatore finale verso il venditore o negoziante non vengono limitati dalla presente garanzia. Smaltimento / Tutela dell’ambiente I nostri apparecchi vengono prodotti rispettando un elevato standard qualitativo per una lunga durata di utilizzo. Una corretta manutenzione e riparazioni adeguate a cura dal nostro servizio clienti possono prolungare la durata di utilizzo del prodotto. Se un apparecchio è difettoso e non più riparabile, per il suo smaltimento si presti attenzione ai punti che seguono. Questo prodotto non deve essere smaltito unitamente ai comuni rifiuti domestici. Consegnare il prodotto a un centro di raccolta per il riciclaggio dei rifiuti elettrici o elettronici. Con la raccolta differenziata dei rifiuti e dei prodotti riciclabili è possibile contribuire alla tutela delle risorse naturali e far smaltire il prodotto nel rispetto dell’ambiente e della salute. Le ricette di queste istruzioni per l’uso sono state ideate e verificate dagli autori e da UNOLD AG. Tuttavia non può essere emessa alcuna garanzia. È esclusa la responsabilità degli autori, di UNOLD AG e dei rispettivi incaricati per danni provocati a persone, cose o materiali. 40 Manual de instrucciones Modelo 28400 Datos técnicos Potencia: Medidas: Conductor de alimentación: Peso: Color: Capacidad: Recipiente: Tapa: Equipamiento: Accesorios: 420-500 W, 220-240 V~, 50/60 Hz Aprox. 16,1 x 10,3 x 16,3 cm (L/An/Al) Aprox. 75 cm Aprox. 0,75 kg Blanco Mínimo 100 ml, máximo 150 ml para espuma de leche/250 ml para leche caliente Recubierto con material antiadherente para limpieza sencilla Desmontable Espuma de leche perfecta presionando un botón, para espuma de leche y leche caliente, recubierto con material antiadherente para limpieza sencilla; desconexión automática Instrucciones de uso con recetas Nos reservamos el derecho de introducir modificaciones técnicas. Explicación de símbolos Este símbolo se asocia con riesgos eventuales que pueden provocar lesiones o daños en el aparato. Este símbolo hace referencia a un eventual riesgo de quemaduras. Proceda siempre con especial cuidado. Para su seguridad Indicaciones generales de seguridad 1. Lea las siguientes instrucciones y guárdelas. 2. Este aparato no está concebido para ser utilizado por personas (incluidos niños) con capacidades físicas, sensoriales o mentales restringidas, o con falta de experiencia y/o conocimiento, a menos que sean vigiladas por una persona responsable de su seguridad o hayan recibido instrucciones de la misma sobre el uso del aparato. 3. Los niños deberían vigilarse para garantizar que no jueguen con el aparato. 4. El aparato debe guardarse en un lugar inaccesible para niños. 5. El aparato sólo debe conectarse a corriente alterna con tensión conforme a la placa de características. 6. Este aparato no debe funcionar con un reloj programador externo o un sistema de control remoto. 7. La base no debe entrar en contacto con agua o con otros líquidos. Si ocurriera eso, la misma tiene que estar totalmente seca antes de utilizarse de nuevo. 8. El aparato está destinado exclusivamente al uso doméstico o a fines similares, p. ej. cocinas de té en tiendas, oficinas u otros centros de trabajo, empresas agrícolas, para uso por clientes en hoteles, moteles u otras empresas de alojamiento, en pensiones privadas o casas de vacaciones. 9. No abra en ningún caso la carcasa del espumador de leche. Existe riesgo por descarga eléctrica. 10.Compruebe regularmente el aparato, el enchufe y el conductor de alimentación en cuanto a desgaste o daños. En caso de daño en el cable de conexión o en otras piezas, envíe el aparato o el zócalo a nuestro servicio técnico a efectos de verificación y reparación (la dirección puede encontrarla en las disposiciones de garantía). Las 41 reparaciones inadecuadas pueden provocar riesgos considerables para el usuario y tienen como consecuencia la anulación de la garantía. Indicaciones para la colocación y el uso del aparato 11.Procure que la toma de corriente utilizada sea fácilmente accesible para poder sacar el cable de conexión rápidamente en caso de emergencia. 12.El aparato o el conductor de alimentación no deben tocarse nunca con las manos húmedas. 13.El espumador de leche no debe limpiarse en el lavavajillas. 14.Por motivos de seguridad, no coloque nunca el aparato sobre superficies calientes, sobre una placa de metal o una base húmeda. 15.El aparato o el conductor de alimentación no deben sumergirse en ningún caso en agua o en otros líquidos. 16.El aparato o el conductor de alimentación no deben funcionar en las inmediaciones de llamas. 17.El espumador de leche ha de utilizarse siempre sobre una superficie libre, lisa y resistente al calor. 18.Procure que el conductor de alimentación no cuelgue por encima del borde de la encimera, pues ello puede provocar accidentes si p. ej. los niños pequeños tiran del mismo. 19.El conductor de alimentación tiene que colocarse de forma que se eviten tirones o tropiezos. 20.No enrolle nunca el conductor de alimentación en el aparato. 21.El conductor de alimentación debe sacarse siempre de la toma de corriente por el enchufe de conexión, nunca por el cable de conexión. 22.No transporte el aparato por el cable de conexión. 23.El espumador de leche ha de utilizarse sólo en interiores. 24.Use el aparato exclusivamente para calentar leche. No caliente ningún otro líquido, pues el aparato podría resultar dañado. 25.En el espumador de leche tampoco deben calentarse objetos como botes o botellas. 26.No introduzca el recipiente en el horno o el microondas. 27.Para evitar lesiones por salpicaduras de leche caliente, asegúrese de que la tapa del aparato esté bien cerrada. 28.No conecte nunca el aparato si no se ha echado leche. 29.Asegúrese de que todos los usuarios - sobre todo los niños - son conscientes del riesgo derivado de vapor saliente o salpicaduras de leche caliente – ¡riesgo de quemaduras! 30.Para evitar quemaduras, agarre el aparato sólo por el asa. 31.Para evitar lesiones, no toque nunca las piezas giratorias del aparato, ni inserte objetos o miembros corporales con el aparato en marcha. 32.Para evitar un desbordamiento de la leche, no eche nunca más de 250 ml de leche en el aparato. 33.Para evitar escaldaduras por leche salpicada hacia fuera, no desplace el aparato mientras esté funcionando. 34.Deje enfriar el aparato durante varios minutos entre una preparación y otra. 35.Para evitar daños, el aparato no debe utilizarse con accesorios de otros fabricantes o marcas. 36.Después del uso y antes de la limpieza, saque el enchufe de red de la toma de corriente. El aparato tiene que vigilarse en todo momento si el enchufe de red está insertado. 37.Deje enfriar el aparato antes de la limpieza. 38.No abra la carcasa del espumador de leche bajo ningún concepto. Existe peligro por descarga eléctrica. ¡Precaución! No abra la tapa mientras se calienta la leche. Si el recipiente está excesivamente lleno, la leche caliente puede salpicarse hacia fuera. Por motivos de seguridad, procure que permanezca seca la zona de contacto en el borde del recipiente donde encaja la tapa. El fabricante no es responsable en caso de montaje erróneo, uso inapropiado o equivocado o después de haber sido efectuadas reparaciones por terceros no autorizados. Recomendaciones para obtener una espuma de leche óptima 1. Los mejores resultados puede obtenerlos con leche fría del frigorífico. 42 2. Se puede utilizar cualquier tipo de leche para espumar. El mejor resultado puede lograrlo con leche desnatada al 1,5 %. No obstante, pruebe también otros tipos de leche, pues cada tipo tiene una espuma con consistencia distinta. 3. Para personas alérgicas recomendamos leche de soja. 4. En el proceso de espumado pueden influir factores como frescura o grado de pasteurización. 5. El aparato calienta la leche hasta aprox. 62 - 68°C. Así puede obtener una espuma de leche con temperatura óptima para el café. 6. Sin embargo, con el espumador de leche también puede elaborarse una salsa de ensalada especialmente espesa. 7. Recomendación: Para evitar una eventual sedimentación de leche caliente en el recipiente, antes de la utilización puede aplicar una fina capa de mantequilla en el interior del recipiente. Antes de la primera utilización 1. Retire todos los materiales de embalaje y eventuales seguros de transporte. 2. Limpie todas las piezas con un paño húmedo, como se describe en el apartado ”Limpieza y conservación“ en la página 44. 3. Compruebe si el aparato está colocado de forma estable. 4. Conecte el aparato a la red eléctrica (220240 V~, 50/60 Hz) mediante el conductor de alimentación. Manejo - Espumar leche 1. Extraiga la tapa del depósito desplazándola hacia arriba. 2. Empuje luego la caperuza de espuma de leche en la varilla agitadora. 3. Eche un mínimo de 100 ml de leche (marca mín.) y un máximo de 150 ml de leche (marca inferior máx.) en el recipiente. No eche más leche en ningún caso, pues la leche espumada se dilata y puede desbordarse del recipiente. 4. Vuelva a colocar la tapa en el recipiente. 5. Presione la tecla de conexión. 6. El piloto de control indica que el aparato inicia la preparación de la espuma de leche. 7. Si desea interrumpir la preparación de espuma de leche, presione nuevamente la tecla de conexión. 8. La espuma de leche estará lista en aprox. 90 segundos, y el aparato se para automáticamente. 9. Abra luego la tapa y retírela del aparato desplazándola hacia arriba. 10.La espuma de leche terminada puede verterla en un recipiente o trasvasarla al mismo. 11.Si desea volver a preparar espuma de leche, deje enfriar el aparato durante aprox. 2 4 minutos. Limpie después el recipiente como se describe en el apartado “Limpieza y conservación”. Importante: Para evitar la formación de gérmenes, en el recipiente no deben permanecer restos de leche. Limpie el aparato después de cada uso. 43 Manejo - Calentar leche 1. Prepare el aparato como se describe en el apartado „Espumar leche“. 2. Empuje luego la caperuza para calentar leche en la varilla agitadora. 3. Eche un mínimo de 100 ml de leche (marca mín.) y un máximo de 250 ml de leche (marca superior máx.) en el recipiente. No eche más leche en ningún caso, pues podría desbordarse el recipiente. 4. Vuelva a colocar la tapa en el recipiente. 5. Presione la tecla de conexión. 6. El piloto de control indica que el aparato empieza a calentar la leche. 7. Si desea interrumpir la preparación de leche caliente, vuelva a presionar la tecla de conexión. 8. La leche se habrá calentado en aprox. 90 segundos, y el aparato se para automáticamente. 9. Abra luego la tapa y retírela del aparato desplazándola hacia arriba. 10.Ahora puede verter la leche en un recipiente. 11.Si desea calentar leche de nuevo, deje enfriar el aparato durante aprox. 2 - 4 minutos. Limpie después el recipiente como se describe en el apartado “Limpieza y conservación”. 12.Recomendación: Si ha terminado de calentar la leche, monte nuevamente la caperuza de espuma de leche para que no se pierda. Importante: Para evitar la formación de gérmenes, en el recipiente no deben permanecer restos de leche. Limpie el aparato después de cada uso. Limpieza y conservación 1. Antes de limpiar el aparato, deje que se enfríe. 2. Antes de la limpieza, desconecte siempre el aparato y saque el enchufe de la toma de corriente. 3. Por motivos higiénicos, el aparato tiene que limpiarse justo después del uso. En otro caso, en los restos de leche podrían formarse gérmenes nocivos para la salud. 4. El cable y el recipiente no deben sumergirse en agua o en otros líquidos, o limpiarse en el lavavajillas. 5. El recipiente, la tapa y la varilla agitadora con caperuza deben limpiarse con un paño húmedo y un poco de detergente. No use productos abrasivos, lana de acero, objetos metálicos ni productos de limpieza o desinfectantes calientes, pues podrían provocar daños. Esto se aplica sobre todo al recubrimiento antiadherente en el interior del recipiente. 44 6. Limpie el recipiente desde el interior con un paño suave y agua tibia a la que puede añadir un detergente suave. Para evitar que se dañe el recubrimiento, no rasque la suciedad persistente con objetos duros. En caso necesario, deje que el agua se remoje un poco para eliminar la suciedad. A continuación, lave el recipiente minuciosamente con agua tibia. 7. En el borde interior de la tapa se halla sujeto un anillo de obturación. El mismo también tiene que limpiarse de vez en cuando. Para ello, extraiga el anillo de la tapa y límpielo con agua tibia de lavado. Deje que el anillo se seque bien y sujételo de nuevo en la tapa. En este caso, tenga en cuenta que las ranuras del anillo de obturación deben indicar hacia fuera. 8. Antes de que pueda utilizar de nuevo el aparato, el mismo tiene que estar totalmente seco en el exterior. Recetario Con la espuma de leche podrá preparar cafés especiales tanto calientes como fríos. Capuchino – el italiano más clásico Se compone de 1/3 de café, 1/3 de leche caliente y 1/3 de espuma de leche. Si lo desea, puede espolvorearlo p. ej. con chocolate en polvo. ligeramente enfriada. Añada el café con cuidado. Corónelo todo con espuma de leche o nata batida y adórnelo con chocolate raspado o en polvo. Café Latte Este café se conoce en España como café con leche. También en este caso, la base es el buen café. Añada la cantidad deseada de leche caliente y, si lo desea, corónelo con un poco de espuma de leche. Café helado a la vainilla Vierta el café cargado y frío en un vaso alto. Ahora añada 1 a 2 bolas de helado de vainilla a cada vaso y rellene los vasos con espuma de leche fría. Si lo desea, decórelo con virutas de chocolate. Latte Macchiato Un latte macchiato debidamente preparado tiene diferentes capas. Empiece con la leche, vertiéndola en un vaso alto y añadiendo alternadamente café, leche caliente y espuma de leche. Deje reposar cada capa de espuma antes de añadir el café. Así evita que las capas se mezclen. Procure que el café esté caliente. Si desea aromatizar la bebida p. ej. con sirope o licor, añada estos ingredientes sólo a la leche caliente y no al café, para que la capa de café no baje demasiado deprisa. Pero no solo se puede preparar especialidades de café con la espuma de leche. ¿Sabía, por ejemplo, que puede usar leche espumada en vez de nata montada para preparar unos postres deliciosos? Así sus postres serán ligeros y cremosos. Pruebe usando la espuma de leche caliente con fresas frescas o cereales. Pruebe también una capa de espuma de leche en sus cremas de verduras o sirva su crema de champiñones o patatas en una taza como si fuera un capuchino. Mochaccino Ponga 1 a 2 cucharaditas de sirope de chocolate en un vaso y añada la espuma de leche Encontrará muchas ideas y recetas más en los libros de cocina o en Internet. Eliminación de fallos Problema Posible causa Solución El piloto de control no se enciende El equipo no está conectado a la toma de corriente Conecte el equipo a la toma de corriente Control de temperatura Deje que el equipo se enfríe La tapa no está debidamente cerrada Cierre la tapa y gírela hasta el tope Los contactos en el asa se han ensuciado Limpie los contactos en el asa Cantidad de llenado excesiva Reduzca la cantidad de llenado La tapa no está debidamente cerrada Cierre la tapa y gírela hasta el tope El anillo junta falta o se ha ensuciado Limpiar y colocar el anillo junta El equipo calienta la leche pero el batidor no gira La leche rebosa en la tapa 45 Condiciones de Garantia Otorgamos garantía de 24 meses sobre nuestros aparatos a partir de la fecha de compra por daños que durante su uso comprabadamente tengan que ver con errores de fábrica. Dentro del período de garantía, solucionamos errores de material y de fabricación a consideración nuestra mediante reparación o cambio. Nuestros servicios de garantía son válidos únicamente para los aparatos que han sido vendidos en Alemania y Austria. Para todos los demás casos diríjase por favor al importador correspondiente. Aquellos aparatos que se presentan para eliminar errores, por favor enviarlos junto a una copia del comprobante de compra extendido a máquina, del cual debe desprenderse la fecha de compra, así como una breve descripción de las deficiencias, apropiadamente embalado y con los sellos correspondientes a nuestro servicio al cliente. En caso de garantía, los gastos de envío serán restituidos al cliente. Aquellos daños causados por desgaste están excluidos de la garantía, así como manipulación incorrecta, e incumplimiento de las condiciones de mantenimiento y cuidado. El derecho a garantía expira si las reparaciones o mantenimiento son realizadas por terceros. Todo reclamo del consumidor final ante el vendedor, comerciante no se ve afectado por esta garantía. Disposición/Protección del medio ambientE Nuestros aparatos se fabrican con un alto nivel de calidad por un largo período de uso. El mantenimiento regular y las reparaciones de tipo técnico a través de nuestro servicio al cliente pueden prolongar la duración del aparato. Cuando un aparato está defectuoso y ya no puede repararse, por favor considere en la disposición final los siguientes puntos: Este producto no puede ser eliminado junto a la basura domiciliaria. Usted debe entregar este producto a un lugar oficial para el reciclaje de aparatos eléctricos o electrónicos. Mediante la clasificación por separado y el reciclaje de productos residuales, Usted contribuye a proteger los recursos naturales y asegura que el producto sea eliminado de forma salubre y acorde con el medio ambiente. Las recetas del presente manual de instrucciones han sido cuidadosamente seleccionadas y probadas tanto por sus autores como por UNOLD AG quienes, no obstante, no asumen garantía alguna. Queda explícitamente excluida cualquier responsabilidad de los autores y UNOLD AG o sus delegados por daños personales, materiales o financieros. 46 Návod k obsluze Modelu 28400 Technické údaje Výkon: Rozměry: Přívodní kabel: Hmotnost: Barva: Kapacita: Nádobka: Víko: Vybavení: Příslušenství: 420-500 wattů, 220-240 V~, 50/60 Hz Cca 16,1 x 10,3 x 16,3 cm (d/š/v) Cca 75 cm Cca 0,75 kg Bílý Minimum 100 ml, maximum 150 ml pro mléčnou pěnu/250 ml pro horké mléko Neadhezivní potah, pro snadné čištění Snímatelné Perfektní mléčná pěna pouhým stisknutím tlačítka, na mléčnou pěnu a horké mléko, protiadhezivní vrstva pro jednoduché čištění, automatické vypínání Návod k obsluze s recepty Technické změny vyhrazeny. Vysvětlení symbolů Tento symbol označuje eventuální nebezpečí, která mohou mít za následek zranění nebo poškození přístroje. Tento symbol poukazuje na eventuální nebezpečí popálení. Postupujte tu vždy zvláště opatrně. Pro Vaši bezpečnost Všeobecná bezpečnostní upozornění 1. Přečtěte si prosím následující instrukce a uschovejte si je. 2. Tento přístroj není určen k použití osobami (včetně dětí) s omezenými fyzickými, senzorickými nebo duševními schopnostmi, nebo v důsledku nedostatečných zkušeností a/nebo znalostí, pokud nejsou pod dozorem osoby, která je odpovědná za jejich bezpečnost, nebo od ní obdržely instrukce, jak s přístrojem zacházet. 3. Dohlížejte na děti, aby si s přístrojem nehráli. 4. Spotřebič uschovávejte na místě nedostupném pro děti. 5. Spotřebič připojovat jenom na střídavý proud s napětím odpovídajícím typovém štítku. 6. Tento spotřebič nesmí být provozován s externími spínacími hodinami nebo dálkovým ovládacím zařízením. 7. Podstavec se nesmí dostat do styku s vodou nebo jinými kapalinami. Pokud k tomu přesto jednou dojde, musí být před dalším použitím naprosto suchý. 8. Spotřebič je určen výhradně pro domácí upotřebení nebo podobné účely, jako např. v čajovnách v obchodech, kancelářích nebo na jiných pracovištích, zemědělských provozovnách, k použití hosty v hotelech, motelech nebo jiných ubytovacích zařízeních, v soukromých penziónech nebo rekreačních chatách. 9. Těleso napěňovače mléka v žádném případě neotvírejte. Hrozí nebezpečí úrazu elektrickým proudem. 10.Kontrolujte spotřebič, zástrčku a přívodní kabel pravidelně na opotřebení nebo poškození . V případě poškození přívodního kabelu nebo jiných částí zašlete prosím spotřebič nebo jeho podstavec na kontrolu a opravu našemu servisu (adresa viz záruční 47 podmínky). Neodborné opravy mohou mít za následek značná nebezpečí pro uživatele a vedou ke ztrátě záruky. Upozornění k umístění a používání spotřebiče 11.Dbejte na to, aby byla použitá zásuvka snadno dostupná, abyste mohl v případě potřeby přívodní kabel rychle odpojit. 12.Nikdy se nedotýkejte spotřebiče resp. přívodního kabelu mokrýma rukama. 13.Napěňovač mléka se nesmí čistit v myčce na nádobí. 14.Z bezpečnostních důvodů nestavte spotřebič nikdy na horké povrchy, kovový tác nebo mokré podklad. 15.Nikdy neponořujte spotřebič nebo přívodní kabel do vody nebo do jiných kapalin. 16.Spotřebič či přívodní kabel nesmí být provozován v blízkosti ohně. 17.Používejte napěňovač mléka vždy na volném, rovném a žáruvzdorném povrchu. 18.Dbejte na to, aby přívodní kabel nevisel přes hranu pracovní plochy, poněvadž to může mít za následek úrazy, když za něj zatáhnou např. malé děti. 19.Přívodní kabel musí být kladen tak, aby nebylo možné za něj zatáhnout nebo o něj zakopnout. 20.Nikdy neomotávejte přívodní kabel kolem spotřebiče. 21.Vytahujte přívodní kabel ze zásuvky vždy jenom za zástrčku, nikdy za kabel. 22.Nenoste spotřebič za přívodní kabel. 23.Používejte napěňovač mléka jenom ve vnitřních prostorech. 24.Používejte spotřebič výhradně k ohřívání mléka. Neohřívejte žádné jiné kapaliny, protože ty by mohly spotřebič poškodit. 25.Právě tak se v napěňovači mléka nesmí ohřívat žádné předměty jako konzervy nebo láhve. 26.Nepoužívejte nádobku v troubě na pečení nebo v mikrovlnné troubě. 27.Zajistěte, aby víko spotřebiče bylo vždy pevně uzavřené, aby nedošlo ke zranění stříkanci horkého mléka. 28.Není-li spotřebič naplněn mlékem, nikdy jej nezapínejte. 29.Zajistěte, aby si byli všichni uživatelé, zejména děti, vědomi nebezpečí hrozícího od unikající páry nebo horkých stříkanců mléka - nebezpečí popálení! 30.Uchopujte spotřebič jenom za rukojeť, abyste se vyhnul popálení. 31.Nikdy se nedotýkejte otáčejících se částí spotřebiče a nestrkejte do běžícího spotřebiče předměty nebo končetiny , aby nedošlo k úrazu. 32.Nikdy nenaplňujte do spotřebiče více než 250 ml mléka, aby se mléko nepřevařilo. 33.Nepřemisťujte spotřebič pokud je v provozu, abyste se vyvaroval opaření vystřikujícím mlékem. 34.Nechte spotřebič mezi dvěma použitími několik minut vychladnout. 35.Spotřebič se nesmí používat s příslušenstvím jiných výrobců nebo značek, aby se nepoškodil. 36.Po použití a před čištěním vytáhněte zástrčku ze zásuvky. Nikdy nenechávejte spotřebič bez dozoru, pokud je zástrčka zastrčená. 37.Před čištěním nechte spotřebič vychladnout. 38.V žádném případě neotevírejte kryt zpěňovače mléka. Hrozí nebezpečí zasažení proudem. Pozor! Neotvírejte víko, když se ohřívá mléko. V případě, že je nádobka přeplněna, může vystříknout horké mléko. Z bezpečnostních důvodů dbejte na to, aby byl styčný okraj nádobky, do něhož víko zaskakuje, vždy suchý. Výrobce nepřebírá žádné ručení při chybné montáži, neodborném nebo chybném použití nebo po provedení opravy neautorizovanými třetími osobami. Tipy k dosažení optimální mléčné pěny 1. Nejlepších výsledků dosáhnete s mlékem z ledničky. 2. K napěnění můžete použít jakéhokoli druhu mléka. Nejlepšího výsledku dosáhnete s odstředěným mlékem 1,5%. Vyzkoušejte však také jiné druhy mléka, protože pěna z každého druhu má jinou konzistenci. 3. Alergikům doporučujeme sojové mléko. 4. Faktory jako čerstvost nebo stupeň pasterizace mohou ovlivnit proces napěňování. 48 5. Spotřebič ohřeje mléko na 62 až 68°C. Tak obdržíte pro kávu optimálně ohřátou mléčnou pěnu. 6. V napěňovači mléka však můžete připravit i zvláště hustou salátovou zálivku. 7. Tip: Aby se horké mléko v nádobce nepřipálilo, můžete před použitím nádobku uvnitř lehce namastit máslem. Před prvním použitím 1. Odstraňte všechny obaly a v daném případě zajištění pro přepravu. 2. Vyčistěte všechny části vlhkým hadrem, jak je popsáno v kapitole „Čištění a péče“ na stránce 50. 3. Překontrolujte, zda spotřebič stojí stabilně. 4. Připojte spotřebič přívodním kabelem k elektrické síti (220-240 V~ 50/60 Hz). Obsluha - napěňování mléka 1. Odeberte víko z nádobky směrem nahoru. 2. Nyní popřípadě nasaďte na míchací tyčinku nástavec pro mléčnou pěnu. 3. Naplňte do nádobky alespoň 100 ml mléka (značka min) a maximálně 150 ml mléka (dolní značka max.). V žádném případě nenaplňujte více mléka, protože se objem napěněného mléka zvětší a mléko by z nádobky mohlo přetéci. 4. Nasaďte víko zase na nádobku. 5. Stiskněte zapínací tlačítko. 6. Kontrolka signalizuje, že spotřebič začíná s přípravou mléčné pěny. 7. Chcete-li přípravu mléčné pěny přerušit, stiskněte zapínací tlačítko ještě jednou. 8. Za cca 90 vteřin je mléčná pěna hotová a spotřebič se automaticky zastaví. 9. Nyní otevřete víko a odeberte ho ze spotřebiče směrem nahoru. 10.Hotovou mléčnou pěnu můžete ze spotřebiče přelít nebo nabírat. 11.Chcete-li připravit mléčnou pěnu ještě jednou, nechte prosím spotřebič cca 2 až 4 minuty vychladnout. Poté spotřebič vyčistěte podle popisu v kapitole Čištění a péče. Důležité: V nádobce nesmí zůstat žádné zbytky mléka, aby nevznikly žádné choroboplodné zárodky. Čistěte spotřebič po každém použití! 49 Obsluha - ohřev mléka 1. Připravte spotřebič podle popisu v kapitole „Napěňování mléka“. 2. Nyní popřípadě nasaďte na míchací tyčinku nástavec pro horkého mléka. 3. 4. Naplňte do nádobky alespoň 100 ml mléka (značka min) a maximálně 250 ml mléka (horní značka max.). V žádném případě nenaplňujte více mléka, protože by mléko z nádobky mohlo přetéci. 5. Nasaďte víko zase na nádobku. 6. Stiskněte zapínací tlačítko. 7. Kontrolka signalizuje, že spotřebič začíná s ohřevem mléka. 8. Chcete-li přípravu horkého mléka přerušit, stiskněte zapínací tlačítko ještě jednou. 9. Za cca 90 vteřin se mléko ohřeje a spotřebič se automaticky zastaví. 10.Nyní otevřete víko a odeberte ho ze spotřebiče směrem nahoru. 11.Nyní můžete mléko přelít do jiné nádoby. 12.Chcete-li ohřát další mléko, nechte prosím spotřebič cca 2 až 4 minuty vychladnout. Na závěr spotřebič vyčistěte podle popisu v kapitole Čištění a péče. 13.Tip: Jste-li s ohřevem mléka hotovi, připevněte zase nástavec pro mléčnou pěnu, aby se neztratil. Důležité: V nádobce nesmí zůstat žádné zbytky mléka, aby nevznikly žádné choroboplodné zárodky. Čistěte spotřebič po každém použití! Čištění a péče 1. Než budete spotřebič čistit, nechte jej vychladnout. 2. Před čištěním spotřebič vždy vypněte a vytáhněte zástrčku ze zásuvky. 3. Z hygienických důvodů se musí spotřebič čistit hned po použití. Ve zbytcích mléka se jinak mohou vytvořit zdravotně závadné choroboplodné zárodky. 4. Kabel a nádobka se nesmí ponořovat do vody nebo do jiné kapaliny nebo čistit v myčce na nádobí. 5. Otřete nádobku, víko a míchací tyčinku s nástavcem vlhkým hadrem a trochou mycího prostředku. Nepoužívejte žádné agresivní prostředky na drhnutí, ocelovou vatu, kovové předměty, horké čisticí prostředky nebo dezinfekční prostředky, protože by mohly způsobit poškození. To platí zejména pro protiadhezivní vrstva uvnitř nádobky. 50 6. Čistěte vnitřek nádobky měkkým hadrem a teplou vodou, do níž můžete přidat mírný mycí prostředek. Neodstraňujte prosím houževnatou nečistotu tvrdými předměty, abyste nepoškodil protiadhezivní vrstvu. V případě potřeby nechte nečistotu vodou trochu změknout, abyste ji mohl lépe odstranit. Poté vypláchněte nádobku důkladně teplou vodou. 7. Na vnitřním okraji víka se nachází těsnicí kroužek. Ten je nutné čas od času rovněž vyčistit. Za tímto účelem kroužek z víka stáhněte a vyčistěte ho v teplé oplachovací vodě. Nechte kroužek dobře oschnout a pak ho zase nasaďte na víko. Přitom dbejte na to, aby drážky těsnicího kroužku ukazovaly směrem ven. 8. Než budete smět spotřebič opět použít, musí být zvenčí naprosto suchý. Nápady na recepty Pomocí napěněného mléka můžete vytvářet horké nebo studené speciality z kávy. Cappuccino – italská klasika Skládá se z 1/3 espresa, 1/3 horkého mléka a 1/3 mléčné pěny. Na přání můžete posypat např. kakaovým práškem. pěnu. Pozor při naplňování espresa. Ještě čepici mléčné pěny nebo šlehačky a ozdobit čokoládovými hoblinami nebo kakaovým práškem. Caffè Latte Ve Francii je tato káva známá jako Cafe au lait, v Německu jako mléčná káva „ Milchkaffee“. Skládá se také z espresa. Přidejte požadované množství horkého mléka a na přání doplňte nahoru jako „korunu“ malou porci mléčné pěny. Ledová káva Do vysoké sklenice nalijte silnou studenou kávu. Nyní dejte do každé sklenice až dva kopečky vanilkové zmrzliny a sklenici naplňte studenou mléčnou pěnou. Na přání ozdobte čokoládovými hoblinkami. Latte Macchiato Dobře připravené Latte Macchiato se skládá z několika vrstev. Začněte mlékem a dávejte pak střídavě espreso, horké mléko a mléčnou pěnu do vysoké sklenice. Mléčnou pěnu vždy nejprve nechte trochu sednout, než přidáte espreso. Tak se tyto vrstvy nepromíchají. Dbejte na to, aby bylo espreso horké. Chcete nápoj ochutit např. sirupem nebo likérem? Pak tyto přísady prosím dávejte výlučně do horkého mléka, ne do espresa, protože to pak rychle klesá. Ale pomocí mléčné pěny můžete vytvářet nejen speciality z kávy. Věděli jste například, že mléčnou pěnu můžete použít i místo šlehačky na chutné dezerty? Získáte tím lehce stravitelné a úžasné kreace. Dejte si např. někdy horkou mléčnou pěnu na jahody nebo na ranní müsli. A vyzkoušejte také čepici mléčné pěny např. na krémové polévce nebo ji naservírujte v šálku jako houbové nebo bramborové cappuccino. Mnoho dalších nápadů najdete v kuchařských knihách nebo na internetu. Mochaccino Do sklenice přidejte 1 až 2 lžičky čokoládového sirupu, na to poněkud chladnější mléčnou Odstraňování chyb Chyba Možná příčina Řešení Kontrolka nesvítí Není zastrčená zástrčka Zástrčku zasuňte do zásuvky Kontrola teploty Přístroj nechte vychladnout. Víko není správně uzavřeno. Uzavřete víko a otočte až na doraz Znečištěné kontakty na rukojeti Vyčistěte kontakty na rukojeti Příliš velké naplněné množství Omezte množství náplně Víko není správně uzavřeno. Uzavřete víko a otočte až na doraz Chybí těsnění nebo je znečištěné Těsnění vyčistěte a nasaďte Přístroj se zahřívá, ale netočí se míchací tyč. Mléko kolem víka vytéká 51 Záruční podmínky Na naše přístroje poskytujeme záruku v trvání 24 měsíců (u průmyslového využití 12 měsíců) od data koupě výrobku, záruka se vztahuje na poškození, která prokazatelne vznikla při správném použití v důsledku výrobních vad. Po dobu záruky budeme odstraňovat materiální i výrobní vady opravou nebo výměnou podle našeho uvážení. Poskytnutí záruky výhradně platí pro zařízení prodány v Německu i Rakousku. V jiných zemích se obrat’te prosím na kompetentní dovozce. Přístroje, na které bylo uplatňováno odstranění vad, zašlete prosím s mechanicky vyhotovenou kopií nákupního dokladu, ze kterého musí být bezpodmínečně patrný datum nákupu i s popisem vad, přístroj musí být bezpečně zabalen a nafrankován na náš záruční servis. V připadě opravněné záruky jsou kupujícím vraceny poštovní poplatky. Tato záruka se nevztahuje na poškození způsobená opotřebením, nesprávným zacházením a nedodržováním návodů k údržbě a obsluze. Záruční doba zaniká, když opravy nebo manipulace s přístrojem byly provedeny třetí osobou. Eventuální nároky zákazníka vůči prodejci/obchodníku nejsou touhle zárukou omezeny. Likvidace / Ochrana životného prostředí Naše vyrobené přístroje mají vysoce kvalitní standard pro zajišt’ění jejich dlouhé životnosti. Pravidelné údržby i opravy odborně provedeny naším prodejním servisem mohou mít vliv na prodloužení provozní životnosti přístroje. Když je přístroj vadný a už ho nelze opravit, neopomeňte prosím: Toto zařízení nepatří do běžného domovního odpadku, ale musí být předáno do autorizované sběrny pro recyklování elektrických nebo elektronických zařízení. Separátní sběr a recyklování odpadních produktů umožňuje šetření přírodních zdrojů a zajišt’uje, aby byly odpady likvidovány způsobem, který je pro zdraví a kologii přijatelný. Recepty v tomto návodu k použití byly pečlivě zváženy a odzkoušeny autory z firmy UNOLD AG, přesto není možno za tyto převzít záruku. Poskytnutí záruky na poškození zdraví, věcné a majetkové škody prostřednictvím autorů popř. firmou UNOLD AG a jí pověřenými osobami je vyloučeno. 52 53 54 55 Aus dem Hause