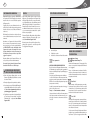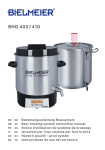
1
BHG 411.0 / 411.1 DE 06 GB 17 FR 28 IT 39 CZ 50 ES 60 Bedienungsanleitung Einkochautomat Preserving cooker instruction manual Stérilisateur pour conserves - Guide d‘utilisation Istruzioni per l‘uso del bollitore per conserve Návod k použití - zavařovacího automatu Esterilizador para envasados - Instrucciones de uso 2 CZ OBSAH ES ÍNDICE Important safety instructions. . . . . . . . . . . . . . 17 Důležité bezpečnostní pokyny . . . . . . . . . . . . 50 Indicaciones importantes de seguridad. . . 60 Allgemeine Informationen. . . . . . . . . . . . . . . . 9 General information. . . . . . . . . . . . . . . . . . . . . . . 20 Všeobecné informace. . . . . . . . . . . . . . . . . . . . . 52 Informaciones generales. . . . . . . . . . . . . . . . . . 62 Wichtige Hinweise . . . . . . . . . . . . . . . . . . . . . . . . 9 Important instructions. . . . . . . . . . . . . . . . . . . . 20 Důležité pokyny. . . . . . . . . . . . . . . . . . . . . . . . . . . 52 Indicaciones importantes . . . . . . . . . . . . . . . . . 62 Reinigung . . . . . . . . . . . . . . . . . . . . . . . . . . . . . . . . 9 Cleaning . . . . . . . . . . . . . . . . . . . . . . . . . . . . . . . . . . 20 Údržba . . . . . . . . . . . . . . . . . . . . . . . . . . . . . . . . . . . 52 Limpieza . . . . . . . . . . . . . . . . . . . . . . . . . . . . . . . . . . 62 Bedienung des Gerätes. . . . . . . . . . . . . . . . . . . . 10 Operating the appliance . . . . . . . . . . . . . . . . . . 21 Obsluha přístroje. . . . . . . . . . . . . . . . . . . . . . . . . . 53 Manejo del aparato. . . . . . . . . . . . . . . . . . . . . . . . 63 Temperatureingabe-Modus. . . . . . . . . . . . . . . 10 Temperature setting mode. . . . . . . . . . . . . . . . 21 Režim nastavení teploty. . . . . . . . . . . . . . . . . . . 53 Modo de introducción de temperatura . . . 63 Zeiteingabe-Modus. . . . . . . . . . . . . . . . . . . . . . . 11 Time setting mode. . . . . . . . . . . . . . . . . . . . . . . . 22 Režim nastavení času. . . . . . . . . . . . . . . . . . . . . . 54 Modo de introducción de tiempo . . . . . . . . . 64 Ausschalten des Gerätes . . . . . . . . . . . . . . . . . . 11 Switching off the appliance . . . . . . . . . . . . . . . 22 Vypnutí přístroje . . . . . . . . . . . . . . . . . . . . . . . . . . 54 Apagado del aparato . . . . . . . . . . . . . . . . . . . . . 64 Geräte mit Auslaufhahn. . . . . . . . . . . . . . . . . . . 11 Appliances with a tap . . . . . . . . . . . . . . . . . . . . . 22 Zařízení s výpustným kohoutem . . . . . . . . . . 54 Aparatos con grifo de descarga . . . . . . . . . . . 64 Einkochen . . . . . . . . . . . . . . . . . . . . . . . . . . . . . . . . 11 Preserving . . . . . . . . . . . . . . . . . . . . . . . . . . . . . . . . 22 Zavařování. . . . . . . . . . . . . . . . . . . . . . . . . . . . . . . . 54 Envasar . . . . . . . . . . . . . . . . . . . . . . . . . . . . . . . . . . . 64 Entsaften. . . . . . . . . . . . . . . . . . . . . . . . . . . . . . . . . . 13 Juice extraction. . . . . . . . . . . . . . . . . . . . . . . . . . . 24 Odšťavnění. . . . . . . . . . . . . . . . . . . . . . . . . . . . . . . . 56 Extracción de zumo. . . . . . . . . . . . . . . . . . . . . . . 66 Technische Angaben. . . . . . . . . . . . . . . . . . . . . . 13 Technical details. . . . . . . . . . . . . . . . . . . . . . . . . . . 24 Technické údaje. . . . . . . . . . . . . . . . . . . . . . . . . . . 56 Datos técnicos. . . . . . . . . . . . . . . . . . . . . . . . . . . . . 66 Rezepte. . . . . . . . . . . . . . . . . . . . . . . . . . . . . . . . . . . 14 Recipes. . . . . . . . . . . . . . . . . . . . . . . . . . . . . . . . . . . . 25 Recepty. . . . . . . . . . . . . . . . . . . . . . . . . . . . . . . . . . . 57 Recetas. . . . . . . . . . . . . . . . . . . . . . . . . . . . . . . . . . . . 67 Garantie. . . . . . . . . . . . . . . . . . . . . . . . . . . . . . . . . . . 16 Warranty. . . . . . . . . . . . . . . . . . . . . . . . . . . . . . . . . . 27 Záruční list. . . . . . . . . . . . . . . . . . . . . . . . . . . . . . . . 59 Garantía. . . . . . . . . . . . . . . . . . . . . . . . . . . . . . . . . . . 69 FR TABLE DES MATIERES IT CONTENUTO DE INHALT GB INDEX Wichtige Sicherheitshinweise. . . . . . . . . . . . . 6 Recommandations de sécurité. . . . . . . . . . . . 28 Importanti indicazioni di sicurezza. . . . . . . . 39 Informations générales . . . . . . . . . . . . . . . . . . . 31 Informazioni generali . . . . . . . . . . . . . . . . . . . . . 42 Informations importantes. . . . . . . . . . . . . . . . . 31 Informazioni importanti. . . . . . . . . . . . . . . . . . . 42 Entretien. . . . . . . . . . . . . . . . . . . . . . . . . . . . . . . . . . 31 Pulizia . . . . . . . . . . . . . . . . . . . . . . . . . . . . . . . . . . . . 42 Utilisation de l'appareil . . . . . . . . . . . . . . . . . . . . 32 Utilizzo dell‘apparecchio. . . . . . . . . . . . . . . . . . 43 Mode saisie de la température . . . . . . . . . . . . 32 Modo di inserimento temperatura . . . . . . . . 43 Mode saisie de la durée . . . . . . . . . . . . . . . . . . . 33 Modo di inserimento del tempo. . . . . . . . . . . 44 Arrêt de l'appareil . . . . . . . . . . . . . . . . . . . . . . . . . 33 Spegnimento dell'apparecchiatura . . . . . . . 44 Appareils avec robinet de vidange . . . . . . . . 33 Apparecchi con rubinetto di erogazione . . 44 Conserves . . . . . . . . . . . . . . . . . . . . . . . . . . . . . . . . 33 Bollire. . . . . . . . . . . . . . . . . . . . . . . . . . . . . . . . . . . . . 44 Extraction de jus . . . . . . . . . . . . . . . . . . . . . . . . . . 35 Centrifuga . . . . . . . . . . . . . . . . . . . . . . . . . . . . . . . . 46 Donnees techniques. . . . . . . . . . . . . . . . . . . . . . 35 Dati tecnici . . . . . . . . . . . . . . . . . . . . . . . . . . . . . . . . 46 Recettes. . . . . . . . . . . . . . . . . . . . . . . . . . . . . . . . . . . 36 Ricette . . . . . . . . . . . . . . . . . . . . . . . . . . . . . . . . . . . . 47 Garantie. . . . . . . . . . . . . . . . . . . . . . . . . . . . . . . . . . . 38 Garanzia . . . . . . . . . . . . . . . . . . . . . . . . . . . . . . . . . . 49 3 DE EINKOCH-VOLLAUTOMAT ELEKTRONISCH GEREGELT 1 Deckel 2 Kessel 3 Unterteil 4 Display (Erklärt auf Seite 10) 5 Kabelaufwicklung und Steckerdepot 6 Auslaufhahn (bei Modellausführung mit Hahn) GB AUTO-PRESERVING COOKER 1 Lid 2 Pot 3 Bottom part 4 Display (Explained on page 21) 5 Cord storage and plug depot 6 Tap (for model version with tap) Product may be subject to change . 1 Änderungen vorbehalten . FR STÉRILISATEUR POUR CONSERVES 1 Couvercle 2 Cuve 3 Base 4 Écran (présenté page 32) 5 Range-cordon et range-prise 6 Robinet de vidange (sur les modèles équipes d'un robinet) Sous réserve de modifications . IT BOLLITORE PER CONSERVE AUTOMATICO 1 Coperchio 2 Bollitore 3 Parte inferiore 4 Display (a pagina 43) 5 Custodia cavo e spina depot 6 Rubinetto erogatore (per modelli con rubinetto) 2 6 Salvo il diritto di cambiamenti . 3 °C 50 40 4 60 70 40 80 50 60 100 80 20 90 100 0 CZ ZAVAŘOVACÍ AUTOMAT 1 Víko 2 Hrnec 3 Spodní část 4 Displej (vysvětlivky na straně 53) 5 Navíjení a uložení kabelu 6 Výpustný ventil (u modelů s kohoutem) Změny vyhrazeny . ES min. 70 30 90 110 120 ENVASADOR AUTOMÁTICO CON REGULACIÓN ELECTRÓNICA 1 Tapa 2 Caldera 3 Base 4 Display (explicado en la página 63) 5 Enrollador de cable y depósito de cable 6 Grifo de purga (en la ejecución de modelo con grifo) 5 Se reserva el derecho a efectuar modificacciones . WEEE-Reg.- Nr.: DE30751975 4 Lizenz Nr.: 5452569 5 DE GEBRAUCHSANWEISUNG für alle BIELMEIER Einkauchautomaten mit elektronischer Regelung, LCD Anzeige WICHTIGE SICHERHEITSHINWEISE Wir freuen uns, dass Sie sich für dieses Produkt entschieden haben und bedanken uns für Ihr Vertrauen. Die Sicherheit von BIELMEIER-Elektrogeräten entspricht den anerkannten Regeln der Technik und den gesetzlichen Bestimmungen. Damit Sie viel Freude an Ihrem neuen BIELMEIER Einkoch- oder Glühweinautomaten haben, bitten wir Sie, die nachfolgenden Hinweise sorgfältig zu beachten. LESEN SIE DIE GEBRAUCHSANWEISUNG VOR DER ERSTEN INBETRIEB NAHME SORGFÄLTIG DURCH UND BEWAHREN SIE DIESE AUF! Das Gerät darf nicht in Betrieb genommen werden, wenn: – die Zuleitung beschädigt ist, – das Gerät sichtbare Schäden aufweist, – das Gerät heruntergefallen sein sollte, – das Gerät außen nass oder feucht ist. Bei offensichtlichen Schäden an Gerät bzw. Zuleitung, lassen Sie das Gerät von einem Fachmann oder dem BIELMEIER Kundendienst prüfen. Das Gerät nur an Wechselstrom gemäß dem Typenschild anschließen (Schuko-Steckdose). Wickeln Sie die Zuleitung vollständig ab. Lassen Sie jedoch die Zuleitung nie herunterhängen. Der Netzstecker (5) ist zu ziehen: – bei Störungen während des Betriebes, – vor jeder Reinigung und Pflege, – nach dem Gebrauch. Das Gerät muss auf eine stabile, ebene und freie Fläche gestellt werden. Stellen Sie Gerät und Zuleitung nie auf heiße Oberflächen oder in die Nähe von offenem F euer, Gaskochern, etc. 6 DE Achtung! Platzieren Sie Ihr Gerät dort, wo Sie es verwenden wollen. Stellen Sie die Einkoch-Gläser hinein und befüllen Sie das Gerät mit Wasser, wie in Abb. 1 (S. 12) angegeben. Stecken Sie erst dann den Stecker (5) in eine geerdete Steckdose. Transportieren Sie das Gerät nur im leerenund kalten Zustand! Befüllt hat der Einkochautomat ein hohes Gewicht, wodurch Ver letzungsgefahr besteht! Das Gerät nur im kalten und vollständig geleerten Zustand an den Griffen anheben! Bei Missachtung droht die Gefahr von Verbrühungen und / oder Verbrennungen. Entleeren Sie das Gerät im heißen Zustand niemals durch Kippen des Gerätes. Im heißen Zustand ist der Inhalt ausschließlich durch den Auslaufhahn, falls vorhanden, zu entnehmen. Sollte dies nicht möglich sein, muss abgewartet werden bis das Gerät und der Inhalt abgekühlt sind. Beim Kippen des Geräts im befüllten und h eißen Zustand besteht die Gefahr von Verbrennungen und / oder Verbrühungen. Befüllen Sie das Gerät bevor Sie es einschalten. Schalten Sie das Gerät nicht ohne Wasser ein, da sonst die Emailierung und der beschichtete Auflagerost (nicht im Lieferumfang enthalten) beschädigt werden könnten. Sollte dies trotz aller Vorsicht doch passieren, muss mit dem Einfüllen von Wasser gewartet werden, bis das Gerät abgekühlt ist, ansonsten könnte die plötzliche Dampfentwicklung zu Verbrühungen führen. Füllen Sie den Kessel (2) bis höchstens 4 cm unterhalb des Randes (ent spricht 23 Liter Kochmodus). Ein Überlaufen ist gefährlich und kann das Gerät beschädigen. Vorsicht! Durch austretenden Dampf besteht Verbrühungsgefahr! Vorsicht, das Gerät wird im Betrieb heiß! Fassen Sie daher das Gerät nur an den isolierten Griffen an, ansonsten nur mit wärmeisolierenden Topflappen. Tauchen Sie das Gerät nie in Wasser! Schützen Sie ebenso die Zuleitung vor Feuchtigkeit. 7 DE Ziehen Sie nach dem Gebrauch immer den Netzstecker und lassen Sie das Gerät abkühlen Dieses Gerät ist nicht dafür bestimmt, durch Personen (einschließlich Kin der) mit eingeschränkten physischen, sensorischen oder geistigen Fähigkeiten oder mangel Erfahrungen und/ oder mangels Wissen benutzt zu werden, es sei denn, Sie werden durch eine für ihre Sicherheit zuständige Person beaufsichtigt oder erhielten von ihr Anweisungen, wie das Gerät zu benutzen ist. Kinder sollten beaufsichtigt werden, um sicherzustellen, dass sie nicht mit dem Gerät spielen. Dieses Gerät ist nur für den hauswirtschaftlichen Gebrauch und nicht für den gewerblichen Einsatz geeignet. Bei Zweckentfremdung oder falscher Handhabung kann keine Haftung für evtl. Schäden übernommen werden. DE ALLGEMEINE INFORMATIONEN Fassungsvermögen: Der BIELMEIER Einkoch automat fasst 27 Liter. Der Flüssigkeitsstand darf bis max. 4 cm unter den oberen Rand reichen. Das Gerät ist vielseitig verwendbar: Einkochen, Wärmen im Wasserbad, Zubereiten von heißen Getränken, Kochen, Aufwärmen, Blanchieren von Gemüse usw. Dicke, zum Anbrennen neigende Speisen müssen langsam und unter ständigem Rühren erwärmt werden. Bitte beachten Sie: Sollte Ihr Gerät einmal leer kochen, so verhindert ein zusätzlicher Trockengehschutz zu starke Überhitzung. WICHTIG: Das Gerät gut abkühlen lassen, bevor wieder Wasser nachgefüllt wird, sonst besteht Verbrühungsgefahr durch Dampfbildung. Außerdem kann der Behälter beschädigt werden. REINIGUNG Ziehen Sie vor dem Reinigen immer den Netzstecker aus der Steckdose. Tauchen Sie das Gerät nie ins Wasser! Wischen Sie es bei gezogenem Stecker (5) außen feucht ab. Verwenden Sie keine scharfen und scheuernden Reinigungsmittel. Waschen Sie es innen aus. Etwa auftretende Kalkrückstände können Sie mit Essigwasser oder handelsüblichem Entkalker von Zeit zu Zeit beseitigen – anschließend mit klarem Wasser auskochen! Schöpfen Sie die Reinigungsflüssigkeit ab oder lassen Sie sie über den Auslaufhahn (6) – falls vorhanden – ab. Kippen Sie das Gerät nicht! Von Zeit zu Zeit muss der Auslaufhahn (6) - falls vorhanden - mit heißem Wasser, dem Spülmittel zugesetzt werden kann, gereinigt werden. Beim ersten Gebrauch kann Geruch entstehen, der sich aber nach kurzer Betriebsdauer verliert. Aus hygienischen Gründen sollten Sie vor dem ersten Gebrauch das Gerät mit ca. 6 Liter Wasser einmal auskochen. WICHTIGE HINWEISE ZUM GEBRAUCH DES GERÄTES Vor dem ersten Gebrauch die Innenseite des Kessels (2) sorgfältig reinigen. Bitte beachten Sie hierzu den Abschnitt „Reinigung“. Befüllen Sie das Gerät bevor Sie es einschalten. Überfüllen Sie den Kessel (2) nicht! Füllen Sie den Topf (2) bis maximal 4 cm unterhalb des Randes. Ein Überlaufen ist gefährlich und kann das Gerät beschädigen. Flüssigkeiten, die nach Gebrauch noch im Kessel (2) vorhanden sind, müssen abgeschöpft oder über den Auslaufhahn (6) – falls vorhanden – abgelassen werden. Kippen Sie das Gerät nicht! 8 9 DE DE BEDIENUNG DES GERÄTES ZEITEINGABE-MODUS "Temp./Zeit" Taste 2x drücken Zeitanzeige 1-120 Minuten und - - = Dauerbetrieb Temperaturanzeige 30°-100°C °C min Wahlschalter Temperatur/Zeit Ein/Aus Minus Netzstecker einstecken Display leuchtet Einschalten bzw . Betriebs-Modus Taste: 1x drücken: EINSCHALTEN DES GERÄTES Nach dem Einschalten des Gerätes durch Betätigung des Ein-Aus-Schalters leuchten alle LCD-Segmente (Liquid Crystal Display) für eine Sekunde auf . Die zuletzt verwendete Temperatur wird angezeigt . Die Ziffern der Temperaturanzeige blinken, wenn die im Einkocher gemessene Temperatur von der eingestellten Temperatur (Soll-Temperatur) abweicht . Ist die eingestellte Temperatur erreicht, leuchten die Ziffern stetig . Zeit: - - = Dauerbetrieb Gerät heizt auf eingestellte Temperatur auf und läuft im Dauerbetrieb bis zum erneuten Betätigen der "Ein/Aus" Taste . Plus "Minus"-Taste TEMPERATUREINGABE-MODUS "Temp./Zeit" Taste 1x drücken Das Temperatur-Symbol (°C) blinkt, Ziffern leuchten stetig, wenn die Soll-Temperatur nicht erreicht ist . Zeit: - - im Dauerbetrieb; Die Heizung ist während des Eingabe-Modus nicht unterbrochen, es wird auf die Soll-Temperatur geheizt bzw . die Soll-Temperatur gehalten . "Minus"-Taste Herunterzählen der Temperatur; bei kurzem Drücken der Taste wird in Einer-Schritten herunter gezählt; bis auf 30°C (niedrigste Temperatureinstellung) . Solange die Taste gehalten wird, wird die Temperatur schnell herunter gezählt . "Plus"-Taste Hochzählen der Temperatur; bei kurzem Drücken der Taste wird in Einerschritten hoch gezählt; bis auf 100°C (höchste Temperatureinstellung) . Die Temperatur wird schnell hoch gezählt, solange die Taste gehalten wird . Wird nach Start des Temperatureingabe-Modus bzw . nach Änderung der Temperatur mit der "Minus"- bzw . "Plus"-Taste 5 sec . keine Änderung vorgenommen, wird der Temperatureingabe-Modus verlassen und das Gerät geht in den Betriebs-Modus . 10 Das Zeitsymbol (min) blinkt und die zuletzt eingestellte Zeit wird angezeigt und kann mit "Minus" oder "Plus" verändert werden . Wird nach Start des Zeiteingabe-Modus bzw . nach Änderung der Zeit, mit "Minus"- bzw . "Plus"-Taste 5 sec . keine Änderung vorgenommen, wird der Zeiteingabe-Modus verlassen und das Gerät geht in den Betriebs-Modus . Die zuletzt eingestellte Zeit wird bei Erreichen der eingestellten Temperatur (Soll-Temperatur) herunter gezählt . Herunterzählen der Zeit; bei kurzem Drücken der Taste wird in Einer-Schritten herunter gezählt; (1 Minute = niedrigste Einstellung) . Solange die Taste gehalten wird, wird die Zeit schnell herunter gezählt . Befand sich das Gerät vor dem Aufrufen des ZeitModus im Dauerbetrieb (Zeit-Anzeige: - - min), springt die angezeigte Zeit von - - Dauerbetrieb zunächst auf 120 min und wird dann bis 0 min herunter gezählt . "Plus"-Taste Hochzählen der Zeit; bei kurzem Drücken der Taste wird in Einerschritten hoch gezählt; (120 Minuten / - - Dauerbetrieb = höchste Einstellung) . Die Zeit wird schnell hoch gezählt, solange die Taste gehalten wird . Um erneut in den Dauerbetrieb zu wechseln, muss im Zeiteingabe-Modus die Zeit auf - - Dauerbetrieb gesetzt werden . Auch während des Herunterzählens der Zeit können Temperatur und Zeit jederzeit verändert werden . Die zuletzt eingestellte Temperatur wird gespeichert und erscheint bei Wiedereinschalten des Einkochers, auch wenn das Gerät in der Zwischenzeit vom Netz getrennt wurde . Ziehen Sie zusätzlich nach dem Gebrauch den Netzstecker . GERÄTE MIT AUSLAUFHAHN (6) Sie können dünne Flüssigkeiten durch den Auslaufhahn (6) entnehmen . Bei der Zubereitung dickflüssiger Speisen empfehlen wir, um eine Verstopfung zu vermeiden, den Hahnanschluss im Innern des Gerätes, z . B . mit einem Stopfen, abzudichten . WISSENSWERTES ZUM EINKOCHEN Vorab sei gesagt: gegenüber Omas Einkochregeln hat sich nichts geändert! Einkochen bedeutet Sterilisieren des Einmachgutes ohne chemische Konservierungsstoffe . Die erzeugte gleichmäßige Hitze tötet die im Einmachgut vorhandenen Keime; gleichzeitig wird durch den entstehenden Unterdruck das Einmachglas keimfrei und luftdicht verschlossen . Nur . . . der Einkoch-Topf ist nicht mehr derselbe wie zu Omas Zeiten! BIELMEIER Einkochautomaten bringen Ihnen viele Erleichterungen, die Oma auch gerne gehabt hätte! EINKOCHEN – SO FUNKTIONIERT’S! Vorbereitung und Sauberkeit sind aus Haltbarkeitsgründen oberstes Gebot. Obst und Gemüse sollten von guter Qualität, frisch und optimal gereift sein . Waschen Sie Obst und Gemüse unzerkleinert AUSSCHALTEN DES GERÄTES Ausschalten durch Drücken der Taste "Ein/Aus". Das Gerät kann in jedem Zustand ausgeschaltet werden . Zeiteingaben im Zeiteingabe-Modus werden nicht gespeichert . und lassen Sie es abtropfen . Grüne Bohnen und Erbsen sind haltbarer, wenn sie vorher blanchiert werden . Reinigen Sie Gläser, Dosen und Flaschen zuerst sorgfältig mit heißem Spülwasser . Spülen Sie sie anschließend klar nach und lassen sie auf einem sauberen Tuch abtropfen . 11 DE DE Prüfen Sie alle Gefäße auf anhaftende Reste und Beschädigungen . Reinigen Sie die Verschlüsse ebenfalls sorg- fältig mit heißem Spülwasser und lassen Sie sie bis zum Gebrauch in klarem Wasser liegen . Verwenden Sie keine porösen, beschädigten und überdehnten Gummiringe oder -kappen . Entnehmen Sie die heißen Gläser . Lassen Sie die Klammern bis zur vollständigen Abkühlung auf den Gläsern . Dosen müssen sofort in kaltes Wasser gelegt werden . – grundsätzlich das Einkochgut nur bis maximal 2 cm unter den Rand füllen, – bei breiartigem Einmachgut (z . B . Apfelmus) 3 – 4 cm bis zum Glasrand frei lassen, – bei Wurst aller Art, das Gefäß nur ¾ füllen, – bei nachquellendem Einkochgut (z . B . Kuchenteig) nur bis zu ½ Glashöhe füllen . – Beachten Sie bitte auch die jeweiligen Hinweise beim Gläserkauf . (Abb. 1) einem trockenen, kühlen und dunklen Ort auf . Zweckmäßig ist die Beschriftung der Gläser, Füllen Sie in den Einkochautomaten minde- Wie und auf welche vielfältigen Arten Sie Obst, Setzen Sie den Entsafteraufsatz, wie in Abb. 2 Eingemachtes bewahren Sie am besten an Gemüse, Fleisch etc . einkochen können, entnehmen Sie bitte Ihren Kochbüchern . Sehen Sie hierzu auch unsere Rezeptbeispiele auf S . 14 . Schraub- oder Spannverschlüssen . rost . Sie können auch unterschiedlich hohe Gläser verwenden . Die Gläser sollen zu ⁄ bis ¾ im Wasser stehen; bei Doppelbelegung also die obere Lage . Die optimale Wasserfüllhöhe: Beim Einsetzen der Gläser soll die Wasser- temperatur etwa gleich der Gläsertemperatur sein . Dies spart Energie und Zeit . Setzen Sie den Deckel (1) auf den Kessel (2) . Stecken Sie das Gerät ein . Entnehmen Sie die Einkochtemperatur und -zeit dem Rezept bzw . Einkochbuch und stellen Sie sie bei Ihrem BIELMEIER Einkochautomaten ein . Die Aufheizzeit zählt nicht zur Einkochzeit . Die Einkochzeit beginnt erst dann, wenn die gewählte Temperatur erreicht ist . stens 6 Liter Wasser. gezeigt, auf den Kochautomaten . Entsafteraufsatz EINKOCHTABELLE Obst Temp. Johannisbeeren 85°C Äpfel, Birnen 90°C Erdbeeren 75°C Heidelbeeren 85°C Himbeeren, Stachelbeeren 80°C Kirschen, Mirabellen 85°C Pfirsiche, Aprikosen, 90°C Zwetschgen Rhabarber kochen Zeit 20 Min . 30 Min . 25 Min . 25 Min . 30 Min . 30 Min . 30 Min . 30 Min . Verschließen Sie die Gefäße fest mit Klammern, Stellen Sie die Gläser immer auf den Einlege- DER UMWELT ZULIEBE Sie benötigen hierfür den BIELMEIER Entsafteraufsatz BHG 430 (nicht im Lieferumfang enthalten) oder einen anderen handelsüblichen Entsafteraufsatz mt einem Durchmesser von 35 cm . Dosen usw . (mit Datum und Inhalt) . Befüllen Sie die Gefäße wie folgt: ENTSAFTEN Gemüse Blumenkohl Bohnen, Erbsen Dicke Bohnen Essig-Gurken Karotten, Möhren, Kohlrabi Kürbis Rosenkohl, Wirsing, Spargel Tomaten Fleisch Bratenstück, vorgebraten Gulasch, angebraten Wild / Geflügel, angebraten Wurstmasse Temp. Zeit kochen 90 Min . kochen 120 Min . kochen 90 Min . 90°C 30 Min . kochen 90 Min . 90°C 30 Min . kochen 120 Min . 90°C 30 Min . Temp. Zeit kochen 75 Min . kochen 75 Min . kochen 75 Min . kochen 120 Min . Einkochautomat . . . bisher . . . heute (Abb. 2) Geben Sie das vorbereitete Obst, Gemüse etc . in den Fruchtkorb - füllen Sie ihn jedoch nicht mehr als bis zu ¾ . Weitere Details zum Vorbereiten des Entsaftungsguts entnehmen Sie bitte der Bedienungsanleitung Ihres Entsafteraufsatzes oder Ihren Kochbüchern . Setzen Sie den Deckel (1) auf den Entsafterauf- satz und vergewissern Sie sich, dass er sauber schließt, damit der Dampf nicht entweichen kann . Stecken Sie den Stecker Ihres Einkochautomaten in eine Schukosteckdose . Wählen Sie 100°C an der Temperaturanzeige um eine durchgehende Beheizung zu gewährleisten . Schalten Sie die Zeitangabe auf Dauerbetrieb und starten Sie das Entsaften durch erneute Betätigung der "Ein/Aus" Taste . Werfen Sie Verpackungsmaterial und ausgediente Geräte nicht einfach weg, sondern führen Sie sie der Wiederverwertung zu . Den zuständigen Recyclinghof bzw . die nächste Sammelstelle erfragen Sie bitte bei Ihrer Kommunalverwaltung . Zur Inanspruchnahme von Garantieleistungen wenden Sie sich bitte an Ihren Händler oder die BIELMEIER Kundendienstzentrale Ihres Landes . Gemäß Europäischer Richtlinie 2002/96/EG über Elektro- und Elektronik-Altgeräte und Umsetzung in nationales Recht müssen verbrauchte Elektrogeräte getrennt gesammelt und einer umweltgerechten Wiederverwertung zugeführt werden . Derzeit gültige Entsorgungsmaßnahmen für ausgediente Elektrogeräte erfragen Sie bitte bei Ihrer Gemeinde- oder Stadtverwaltung . TECHNISCHE ANGABEN Stromquelle: 220 – 230 V ~ / 50 Hz Anschlusswert: 1800 W Schutzklasse: I Kesselvolumen: 27 Liter im Normalmodus 23 Liter im Kochmodus (entspricht einer Befüllung 4 cm unterhalb des Geräterandes) Gewicht: 6,05 kg Das Gerät entspricht den EU-Richtlinien Nr . 73/23 EWG und Nr . 89/336 EWG . Technische Änderungen vorbehalten . Schalten Sie bei Betriebsende die "Ein/Aus" Taste aus und ziehen Sie den Netzstecker Ihres Einkochautomates . Wichtig: Vor jedem neuen Entsaftungsvorgang muss Wasser nachgefüllt werden . Hinweis: Diese Angaben sind Richtwerte . Die Zeiten gelten erst ab dem Erreichen der jeweiligen Temperatur . Großmutters Rezepte behalten auch bei Einkochautomaten bzw . Einkochvollautomaten ihre Gültigkeit . Ziehen Sie nach Ablauf der Einkochzeit den 12 Netzstecker (5) . 13 DE DE REZEPTE ÄPFEL Zuckerzugabe Für süße Äpfel: 300 – 400 g Zucker auf 1 Liter Wasser Für saure Äpfel: 500 – 600 g Zucker auf 1 Liter Wasser KALBSROULADEN Zubereitung Die Äpfel werden geschält, geviertelt und vom Kerngehäuse befreit. Die Apfelstücke danach sofort in kaltes Wasser legen. Damit die Früchte nicht anlaufen und braun werden, werden einige Tropfen Zitronensaft hinzugefügt. Nebenher können Sie die Zuckerlösung laut angegebenem Verhältnis am Herd aufsetzen. Danach die Früchte in die Gläser füllen, mit der aufgekochten Zuckerlösung übergießen und 30 Minuten bei 90°C einkochen. ERDBEER-HIMBEER-KONFITÜRE Zutaten Zubereitung 500 g Zucker 750 g Erdbeeren 500 g Himbeeren Saft einer halben Zitrone Die Himbeeren sorgfältig verlesen und durch ein Sieb streichen. Die Erdbeeren, das Himbeermark und den Zucker vermischen und einige Zeit ziehen lassen. Danach den Zitronensaft hinzufügen. Die Fruchtmischung unter Rühren zum Kochen bringen und bis zur Gelierprobe (1 TL Konfitüre auf einen kalten Porzellanteller geben – geliert es innerhalb kurzer Zeit, so ist es fertig) kochen. Die Konfitüre in die Einkoch- oder Schraubgläser füllen und diese sofort verschließen und 10 Minuten bei 90°C einkochen. KAROTTEN Info: Unbedingt vor dem Einkochen vorkochen! Achtung! Erhitzungsdauer variiert: für Karotten in Scheiben oder Würfel: 90 Minuten bei 100°C für ganze Karotten: 120 Minuten bei 100°C 14 Info: Unbedingt vor dem Einkochen vorbraten! Zutaten für 4 – 6 Portionen 700 g Kalbskeule (ca. 4 – 6 Schnitzel mit je 120 – 150 g) 2 Zwiebeln 50 g Gewürzgurken 50 g magerer Katenschinken 2 – 3 El mittelscharfer Senf Salz und Pfeffer 2 El Öl 400 ml Kalbsfond Zubereitung Nachdem das Kraut von den Karotten abgeschnitten wurde, schabt man die obere Haut mit einem Gemüsemesser ab und legt sie sofort in frisches Wasser, damit die schöne Farbe nicht verblasst. Danach die Karotten in Scheiben oder Würfel schneiden und in einem Topf etwa 5 Minuten vorkochen. Nun schreckt man sie mit kaltem Wasser ab, füllt sie in die Gläser, übergießt sie mit einer leichten, aufgekochten Salzlösung und kocht die Karotten 90 Minuten bei 100°C ein. Das Öl in einem Schmortopf erhitzen und die Rouladen darin rundherum scharf anbraten. Mit Kalbsfond ablöschen und zugedeckt bei mittlerer Hitze garschmoren. Anschließend die Fäden oder Spicknadeln entfernen, die Rouladen in Gläser legen, mit der Bratensoße bis 3 cm unter den Glasrand übergießen und 75 Minuten bei 100°C einkochen. ROSINEN-HEFE-KUCHEN IM GLAS Zutaten Zubereitung 500 g Mehl 1⁄8 – ¼ Ltr. Milch 3 – 4 Eier 80 g Zucker 12 g frische Hefe oder Mit lauwarmer Milch die Hefe anrühren, die geschmolzene, lauwarme Butter, Salz, Zucker und die Eier zugeben und alles miteinander vermischen. Das Mehl übersieben und unterrühren. Den Teig kneten und abschlagen. Über Nacht den Teig zugedeckt stehen lassen. ½ Päckchen Trockenhefe Schneidet man die Karotten in Scheiben oder Würfel, so eignen sich dazu besonders junge, aber nicht zu kleine Karotten, deren Aroma und Zartheit die große Mühe der Vorbereitung rechtfertigen. Zubereitung Die Schnitzel evtl. flach klopfen. Zwiebeln, Gurken und Schinken fein würfeln. Alles mit dem Senf zu einer glatten Masse verrühren. Die Rouladen mit Salz und Pfeffer würzen und die Masse jeweils mittig darauf verteilen. Die Seiten einschlagen, die Rouladen fest aufrollen und mit einem Faden umbinden oder mit Hilfe einer feinen Spicknadel die Rouladen durch länglich geschnittene Speckstreifen zusammenhalten. etwas Salz 150 g Butter 200 g Rosinen Am nächsten Tag wird der Teig nochmals geknetet, bis er sich von der Schlüssel löst, dabei werden die Rosinen schnell eingearbeitet. Anschließend die Sturzgläser gut einfetten und mit Paniermehl oder gemahlenen Nüssen ausstreuen. Die Gläser bis zur Hälfte mit der Teigmasse füllen, dann noch einmal kurz gehen lassen. Verschließen Sie die Gläser mit Deckel und Klammern. Backen und Einkochen geschieht gleichzeitig im Heißwasserbad für 120 Minuten bei 100°C. en Wir wu“ nschen Ihnen viel Vergnu“ g ochautomaten! mit Ihrem Bielmeier Eink 15 DE GARANTIE Für die am Verkaufstag beginnende Garantie gelten innerhalb der EU und der Schweiz folgende Bestimmungen: 1.Garantiedauer: 2 Jahre 2.Garantieleistungen: a) Nach unserer Wahl Reparatur oder Austausch von Teilen, die nach unserer Überprüfung Material- oder Fertigungsfehler aufweisen. b) Die Garantie wird nur bei Vorzeigen dieser Garantiekarte und der Verkaufsrechnung geleistet. Die Karte ist nur gültig, wenn sie am Verkaufstag vollständig ausgefüllt wurde. c) Die Garantieleistung gilt nur gegenüber dem Erstverbraucher. d) Durch die Reparatur oder den Austausch von Teilen innerhalb der Garantiedauer wird die ursprüngliche Garantiezeit weder verlängert noch erneuert. e) Transportkosten gehen zu Lasten des Käufers (gilt nicht für die ersten 6 Monate der Garantiezeit). f) Sofern der Schaden oder Mangel nicht beseitigt werden kann oder die Nachbesserung von uns abgelehnt oder unzumutbar verzögert wird, wird innerhalb von 6 Monaten ab Kauf-/Lieferdatum auf Wunsch des Endabnehmers entweder kostenfrei Ersatz geliefert oder der Minderwert vergütet oder das Gerät gegen Erstattung des Kaufpreises, jedoch nicht über den marktüblichen Preis hinaus, zurückgenommen. INSTRUCTION MANUAL for all BIELMEIER preserving cookers, fully automatic preserving cookers and wine cookers 3. Die Garantie gilt nicht: Für Kratzer und Flecken am Gerät. Für Beleuchtungs- und Kontrolllampen. IMPORTANT SAFETY INSTRUCTIONS Für leicht zerbrechliche Teile aus Bakelit, Glas, Plastik und so weiter, es sei denn, es handelt sich um Materialfehler, die von uns als solche anerkannt werden. We're delighted that you've chosen our product and we thank you for your business! The safety of all electronic appliances from BIELMEIER complies with generally accepted technical standards and with safety legislation. Für Beschädigungen, die durch falsche Installation oder Befestigung verursacht wurden. Before you start enjoying your new BIELMEIER preserving cooker, please read the following information carefully: Wenn das Gerät an ein Stromnetz mit höherer Spannung, als auf dem Gerät angegeben, angeschlossen wird. Bei falscher oder unsachgemäßer Bedienung. Bei mangelnder Sorgfalt. Bei ungenügender oder falscher Wartung. Bei Fallenlassen des Gerätes oder einzelner Teile. Bei unsachgemäßem Transport oder unsachgemäßer Verpackung für den Transport. 4. Die Garantie erlischt: Wenn das Gerät für andere als für Haushaltszwecke eingesetzt wird. Wenn Personen, die nicht von unserer Firma dazu ermächtigt sind, Reparaturen oder Änderungen durchführen. READ THE INSTRUCTIONS CAREFULLY BEFORE USING THE APPLI ANCE FOR THE FIRST TIME AND KEEP THESE INSTRUCTIONS IN A SAFE PLACE. Do not use the appliance if: – the mains cable is damaged, – the appliance is visibly damaged, – the appliance has previously been dropped, – the appliance is wet outside. If the appliance or mains cable are visibly damaged, please have your appliance checked by an expert or by customer service. Only connect this appliance to an AC power outlet as specified on the appliance's rating plate (Schuko (Type F) socket – using an adapter if required). Unwind the mains cable fully before use. Für dieses Gerät leisten wir 2 Jahre Garantie für Mängel, die auf Fertigungs- oder Materialfehler zurückzuführen sind. Die Garantiezeit beginnt mit dem Tag der Übergabe und wird nur bei Vorlage der Garantiekarte und der Verkaufsrechnung gewährt. Weitergehende Ansprüche bestehen nicht. Modell: 16 Stempel und Unterschrift des Verkäufers Wichtig! Bitte notieren Sie hier den auf dem Typenschild am Gerät befindlichen FD-Code: Verkaufsdatum Never leave the mains cable dangling. Unplug the appliance from the mains: – if any fault occurs during operation – before cleaning and servicing – after each use Position the appliance in an unobstructed space on a stable, level sur face. 17 Never place the appliance or mains cable on a hot surface or near an open flame, e. g. gas cooker. Attention! Place the appliance in the position in which it is to be used. Insert the preserving jars and fill the appliance with water, as shown in Fig. 1 (page 23). Only insert the mains plug into an earthed socket after this step. Move the appliance only, when it’s empty and cold! Filled, the pre serving cooker has a high weight, which may cause injuries! Just raise the appliance at the handles, if it’s cold and empty! Dan ger of scalding and / or burns by non-obervance. Always pull out the plug after use and allow the unit to cool down. Children are unaware of the possible dangers associated with electrical ap pliances. For this reason, never leave a child alone and unsupervised with the appliance and be extra vigilant when using the appliance when children are around. This appliance is designed for household use only and is not suitable for commercial use. The manufacturer accepts no liability for possible damages in cases where the appliance is used incorrectly or for purposes other than those for which it is intended. Never empty the preserving cooker, if it’s hot by tilting the device. If the appliance is hot, just emty it through the tap. If this is not possible, you have to wait until the appliance and the contents have cooled off. Danger of scalding and / or burns, when tilting the device in hot and filled state. Fill the appliance before switching it on. Do not switch the unit on when there is no water in it as otherwise the enamel and the coated rack (not included with the product) could be damaged. If this should happen in spite of all precautions, you must wait until the unit has cooled down before filling it with water as otherwise the sudden emission of steam could lead to scalding. Do not fill container to a level higher than 4 cm below the rim. Hot water may spurt out if the pot is overfilled. Caution! Risk of scalding due to escaping steam! Caution! The appliance becomes hot when in use! For this reason, only take hold of – stainless steel appliances by the handles while wearing a heat-insulating oven mitt. enamel appliances by their insulated handles. – – plastic appliances by the handle rims. Never immerse the appliance in water! Similarly, do not expose the mains cable to moisture. 18 19 GENERAL INFORMATION Capacity: The BIELMEIER preserving cooker has a capacity of 27 litres . The level of liquid in the cooker must be no higher than 4 cm below the rim . The appliance can be used in many different ways: preserving, heating in a water bath, preparing hot drinks, cooking*, reheating*, blanching vegetables*, etc . Thick food that tends to burn easily requires slow, constant stirring .* Please note: In the event that the cooker boils dry, a built-in circuit breaker will protect the appliance from overheating . IMPORTANT: Allow the appliance to cool down completely before adding any liquid. If you add liquid to the hot appliance, there is a danger of scalding by steam and a risk of damage (deformation) to the bottom of the cooker. An odor may develop for a short time the first time you use the appliance . For reasons of hygiene, fill the appliance with approx. 6 litres of water – set the temperature control switch (4) to the “Entsaften” (juice making) setting – and bring to the boil before you use the appliance for the first time. IMPORTANT INSTRUCTIONS FOR USING Carefully clean the inside of the pot (2) before using the appliance for the first time . For more information, refer to the “Cleaning” section . Fill the appliance with water before switching it on . Take care not to overfill the pot (2)! Fill the pot (2) to a level no higher than 4 cm below the rim . Hot water may spurt out if the pot is overfilled. If liquids still in the pot (2) after use, you have to skim it or drain it by the tap (10) – if available . Never tilt the device! 20 PLEASE NOTE FOR THE PLASTIC VERSION: The appliance is designed to be used for preserving food, making juice and preparing hot drinks only . OPERATING THE APPLIANCE Do not heat or boil foods with a thick, viscous consistency in the appliance directly. Unlike the enamel and stainless steel versions, the plastic appliance has an open bottom and the heating element is uncovered. Time display 1-120 minutes and – – = continuous operation Temperature display 30°-100°C °C min Caution! Risk of scalding and / or burns, when improper use! Never grasp into the pot (2), if the appliances is plugged or if was running a short time ago . Selector switch Temperature/Time On/Off Minus Plus CLEANING Never immerse the appliance in water! Unplug from the mains, wipe down the exterior and wash out the interior . Limescale deposits can be removed by regular descaling with a mixture of vinegar and water or a commercial descaler, followed by boiling of a pot full of clean water . Skim cleaning emulsion in the pot (2) or drain it by the tap (10) – if available . Never tilt the device! Clean the tap (10) occasionally with hot water, which can be mixed with a cleaning agent . Insert plug Display is lit Switching on or operating mode Button: press once: SWITCHING THE APPLIANCE ON After switching the appliance on by pressing the On-Off-button all LCD-segments (liquid crystal display) are lit for a second . The temperature that was last set is indicated . The ciphers of the temperature display blink when the temperature measured by the boiler differs from the set temperature (nominal temperature) . Once the set temperature is reached, the ciphers are constantly lit . Time: – – = continuous operation mode Appliance heats up until set temperature is reached and runs in continuous mode until ‚On/Off’ button is pressed again . TEMPERATURE SETTING MODE Press ‚Temp/Time’ button once The temperature symbol (°C) blinks, ciphers are permanently lit when the set temperature has not been reached . Time: – – in continuous operation mode; The heating goes on working during setting mode to heat up until set temperature is reached or set temperature is maintained . ‚Minus’ button Count down of temperature count down; when pressing the button shortly, a countdown number by number is effected until 30°C are reached (lowest possible temperature setting) . If you keep the button pressed, countdown is done fast . ‚Plus’ button Count up of temperature; when pressing the button shortly the temperature is count up number by number until 100°C are reached (highest possible temperature setting) . If you keep the button pressed, count up is done fast . If after starting the temperature setting mode and changing the temperature by means of the ‚Minus’ or ‚Plus’ button no entry is made for 5 seconds, the temperature setting mode is left and the appliance returns to the operating mode . 21 TIME SETTING MODE Press ‚Temp./Time’ twice The time symbol (min) blinks and the time that was last set is indicated and can be changed by the ‚Minus’ or ‚Plus’ button, respectively . If after starting the time setting mode or after changing the time by means of the ‚Minus’ or ‚Plus’ button no entry is made for 5 seconds, the time setting mode is left and the appliance returns to the operating mode . Upon reaching the set temperature (nominal temperature), the time that was last set is counted down . ‚Minus’ button Count down of the time; when pressing the button shortly, a countdown number by number is effected; (1 minute = lowest possible setting) . If you keep the button pressed, countdown is done fast . If the appliance was set to continuous operation mode before choosing the time setting mode (time indicated: – – min), the display changes from – – continuous operation mode to 120 min and then countdown to 0 min is started . ‚Plus’ button Count up of time; when pressing the button shortly the time is count up number by number; (120 minutes / – – continuous operation = maximum setting) . If you keep the button pressed, count up is done fast . To change again to the continuous operation mode, the time must be set to – – continuous operation in time setting mode . Even during countdown of the time it is possible to change temperature and time . The last temperature setting is saved and is displayed again after restarting the boiler, even if the appliance had been disconnected from the mains in the meantime . It is necessary to pull the plug from the socket after switching off the appliance . APPLIANCES WITH A TAP (6) Thin liquids can be poured from the pot through the tap (6) . To avoid blockages occurring when preparing foods with a thick, viscous consistency, we recommend that you seal off the tap from inside the appliance, e .g . with a plug . Switch off by pressing the button ‚On/Off ’. The appliance may be switched off any time . Time settings made in the time setting mode will not be saved . 22 Remove the jars . Leave the clamps on the jars – The containers should only ever be filled up to 2 cm at most below the mouth of the jar . until they have cooled down completely . At this point, place the jars immediately in cold water . – For foods with a mushy consistency (e . g . apple sauce), leave 3 – 4 cm headspace between the top of the preserve and the mouth of the jar . Your preserves are best stored in a cool, dry – For sausages of any kind, only fill the container ¾ full . Refer to your cookery books for information – For foods that will swell during the preserving process (e .g . cake mixture), only fill the container up to ½ full . – Please also note the instructions provided by the jar manufacturer . ALL YOU NEED TO KNOW ABOUT PRESERVING First things first: Grandma's rules for canning and preserving still hold true! Preserving simply means sterilizing without chemical preserving agents . The even heat that is generated kills bacteria in the food, while, at the same time, the resulting vacuum enables air-tight, sterile sealing of the preserving jar . But . . . the preserving pot has come quite a way since Grandma's day! BIELMEIER preserving cookers make things so easy that Grandma would have been glad to have one of her own! PRESERVING – HOW IT’S DONE! Preparation and cleanliness are of the utmost importance when preserving food. Choose fresh, ripe, high-quality fruit and vegetables . Wash fruit and vegetables whole and leave to dry . Green beans and peas keep for longer if they are blanched first . Carefully wash jars, cans and bottles in hot SWITCHING OFF THE APPLIANCE To fill the containers: water, rinse them clear and leave them on a clean cloth to dry . Check all containers for any stubborn residues and for damage . Wash the seals in hot soapy water and then leave them in clean water until they are needed . Do not use any porous, damaged or stretched rubber rings or rubber caps . (Fig. 1) Seal the containers tightly with screw-caps, fasteners or clamps . Always place the jars on the grating insert (not included) when putting them into the cooker . Different sized jars can be used . Ensure that the glasses are ⁄ to ¾ sub- merged in the water . If you are using two levels of jars, this applies to the upper level . The optimal water fill levels: The water temperature should be roughly the same as the temperature of the jars when you place them in the cooker . This saves both time and energy . Place the lid (1) on the pot (2) . Connect the appliance to the mains . Check your recipe or the preserving chart for the required preserving temperature and time and make the corresponding settings on your BIELMEIER preserving cooker . The time taken for the cooker to heat up does not count as part of the preserving time . The preserving time does not start until the selected temperature is reached . Unplug the appliance once the preserving pro- and dark place . It is useful to label each container with the date and its contents . and ideas on preserving fruit, vegetables, meat, etc . For some ideas, why not check out our recipe section on page 25 . PRESERVING CHART Fruit Temp. Redcurrants 85°C Apples, pears 90° C Strawberries 75° C Blueberries 85° C Raspberries, gooseberries 80° C Cherries, yellow plums 80° C Peaches, apricots, damsons 90° C Rhubarb Boil Time 20 mins . 30 mins . 25 mins . 25 mins . 30 mins . 30 mins . 30 mins . 30 mins . Vegetables Cauliflower Beans, peas Broad beans Gherkins Carrots, turnip cabbage Pumpkin Brussels sprouts, asparagus, savoy cabbage Tomatoes 30 mins . Temp. Time Boil 90 mins . Boil 120 mins . Boil 90 mins . 90° C 30 mins . Boil 90 mins . 90° C 30 mins . Boil 120 mins . 90° C Meat Temp. Time Large meat cuts, precooked Boil 75 mins . Goulash, precooked Boil 75 mins . Game and poultry, precooked Boil 75 mins . Sausage meat Boil 120 mins . Notes: These temperatures and times are only provided as guidelines . The times specified start when the corresponding temperatures are reached . Grandma's recipes will work just as well with your preserving cooker . cess is complete . 23 JUICE EXTRACTION CARING FOR THE ENVIRONMENT To use the juice extraction function, you will need the BIELMEIER juice extraction top BHG 430 (not included) or another standard juice extraction top with a diameter of 35 cm. Please do not simply throw away packaging and disused appliances. These can be recycled. Contact your local authority for details of the relevant recycling centre or the nearest collection point. Fill the preserving cooker with at least 6 litres To claim warranty, please contact your retailer or your local BIELMEIER customer service center. Place the juice extraction top on the preserv- According to the European Directive 2002/96/ EC on waste electrical and electronic equipment and its transposition into national law any used electrical appliances must be collected separately and recycled in an environmentally correct manner. Ask your local municipal administration for currently valid measures of disposal for waste electrical equipment. of water. ing cooker, as shown in Fig. 2. Juice Extractor AutoPreserving Cooker . . . up to now . . . today (Fig. 2) Place the prepared fruit, vegetables, etc. in the fruit basket, taking care not to fill it more than ¾ full. For more information about preparing the items for juicing, refer to instructions with your juice extraction top or your own cookery books. TECHNICAL DETAILS Power source: 220 – 230 V ~ / 50 Hz Power consumption: 1800 Watt Place the lid (1) on the juice extraction top and Protection class: I Plug your preserving cooker into a Schuko Capacity: 27 litres in normal mode 23 litres in cooking mode (corresponds to filling height of 4 cm below the rim of the pot) Turn the temperature control to 100°C to en- Weight: 6.05 kg Set the timer to the "Dauerbetrieb" (continu- This appliance conforms with EU Directive 73/23 EEC and 89/336/EEC. make sure that it is closes tightly. Otherwise, energy will be wasted due to escaping steam. socket (Type F) (use an adapter if required). sure a continuous heating. ous mode) setting and start juicing by reconfirming the "On / Off" button. When you have finished using the cooker, press the "On / Off" button and unplug your preserving cooker. Important: Your cooker needs to be refilled each time you use the juice extraction function! RECIPES APPLE PRESERVE Sugar To prepare For sweet apples: Peel and quarter the apples, and remove the cores. Immediately cover the apple pieces with cold water. Add a few drops of lemon juice to prevent browning. Add 300 – 400 g of sugar to 1 litre of water For sour apples: Add 500 – 600 g of sugar to 1 litre of water Next, fill your jars with the fruit and pour over the boiled sugar solution. Finally, leave to cook in your preserving cooker for 30 minutes at 90°C. STRAWBERRY AND RASPBERRY PRESERVE Ingredients To prepare 500 g sugar Carefully sort the raspberries and press them through a sieve. Mix the strawberries, raspberry pulp and sugar, and leave the mixture standing for a short time. Next, add the lemon juice. 750 g strawberries 500 g raspberries Juice of half a lemon Bring the fruit mixture to the boil, stirring constantly and then boil until it passes "the set test" (i.e. put 1 tsp of the preserve on a cold china plate – if it sets quickly, it's ready!). Fill your preserving jars or screw-top jars with the jam, seal immediately and leave to cook in your preserving cooker for 10 minutes at 90°C. Technical changes reserved. HOME-CANNED CARROTS Info: Carrots must be preboiled before preserving! To prepare Caution! Cooking times vary: When slicing or dicing carrots, it pays to choose the youngest carrots that are not too small. These are the most flavorsome and tender, which will make the extra effort worthwhile. for sliced or diced carrots: 90 minutes at 100°C for whole carrots: 120 minutes at 100°C 24 At the same time, mix the sugar solution in the specified concentration and bring to the boil on the stove. Remove the foliage from the carrots, peel the outer layer of skin with a vegetable peeler, and immediately place the carrots in fresh water so that they lose none of their colour. Next, slice or dice the carrots and boil them in a saucepan of water for approx. 5 minutes. Then quench with cold water, fill the jars, pour over a mild salt solution (boiled) and leave the carrots to cook for 90 minutes at 100°C in your preserving cooker. 25 WARRANTY VEAL ROULADES Info: Meat must be precooked to rare before preserving! Makes 4 – 6 portions 700 g veal leg (approx. four – six 120 – 150 g cutlets) 2 onions 50 g gherkins 50 g lean smoked ham 2 – 3 tbsp medium-hot mustard Salt and pepper 2 tbsp oil 400 ml veal stock To prepare Flatten the veal cutlets if necessary. Finely dice the onions, gherkins, and ham. Add the mustard and stir together until the mixture reaches a smooth consistency. Season the veal cutlets with salt and pepper and spread an equal portion of your prepared mixture down the center strip of each cutlet. Fold in the sides of each cutlet, and tightly roll up the roulades and tie with string. Alternatively, use a thin larding needle to hold the roulades together with strips of the bacon cut lengthwise. Heat the oil in a stewing pot, add the roulades and sear them on all sides. Pour in veal stock to deglaze the pan, and then cover and stew on medium heat until tender. Remove the string or larding needles, place the roulades in jars, cover with the gravy up to 3 cm below the rim and leave to cook in your preserving cooker for 75 minutes at 100°C. Ingredients To prepare 500 g flour 1⁄8 – ¼ litre of milk 3 – 4 eggs 80 g sugar 12 g fresh yeast Mix the yeast with lukewarm milk. Add the melted, lukewarm butter, the salt, sugar and eggs and mix well. Sieve in the flour and stir it into the mixture. Knead and work into soft dough. Cover and leave to stand overnight. Pinch of salt 150 g butter 200 g raisins The following day, knead the dough again until it comes away from the sides of the bowl. Then quickly work in the raisins. Next, grease your wide-mouthed canning jars well and line with a layer of breadcrumbs or ground nuts. Fill each jar half-full with the dough mixture and leave to prove for a short time. Seal the jars with the lids and clips. You can bake and preserve these cakes at the same time using the hot water bath method by leaving them in your preserving cooker for 120 minutes at 100°C. 26 1. Warranty period: 2 years 2. Conditions of warranty: a) Parts which exhibit defects in material and/or workmanship after our inspection will either be repaired or replaced at our discretion. b) The warranty will only be honoured upon presentation of this warranty card and purchase receipt. This warranty is only valid if it is filled out on the date of sale and in a complete and appropriate manner. c) This warranty is only valid for the first owner of the device. d) No replacement or repair of parts performed within the warranty period shall provide grounds for any extension of the original warranty period. e) Any transportation costs shall be borne by the purchaser (this shall not apply during the first 6 months of the warranty). JAR-BAKED RAISIN WHEAT CAKES or ½ packet of dried yeast In the EU and Switzerland, the following conditions apply for the warranty, which begins on the date of purchase of the product: Enjoy using your Bielmeier preserving cooker! f) Within the first 6 months after the purchase/ delivery of the device, if the damage or defect cannot be eliminated, if we refuse to repair the defect, or in the event of a delay in our repairing of the device, then the end user can choose from one of three options: the device will be replaced free of charge, its value will be reimbursed, or the device will be taken back with a refund of the original purchase price which shall not exceed the usual market price. 3. The warranty does not apply to: spots and scratches on the device control lamps and lights motor brushes easily breakable parts (e. g. bakelite, plastic, glass), even in the case of defects in material as recognized by us damage due to improper installation or improper repair damage caused by an inappropriate voltage supply or an inappropriate electricity network improper or inappropriate use of the equipment unsatisfactory care damage caused by incompetent or insufficient maintenance damage caused by dropping the equipment or part thereof improper transportation or insufficient packaging during transportation 4. The warranty shall be deemed void: in the case of use or application of the device for something other than its intended use for household purposes. in the case of any servicing or repairing of the device performed by third parties that have not been authorized for such purpose by our company. A 2-year warranty is provided for damage caused by defects in material or workmanship. The warranty period shall begin on the day of delivery or on the day the buyer takes possession of the item, and the warranty will only be honoured upon presentation of the warranty card and the purchase receipt. No further claims shall be granted. Model: Stamp and signature of salesperson Important! Please write down the FD-code located on the rating plate here: Date of sale 27 FR MODE D‘EMPLOI pour tous les stérilisateurs pour conserves BIELMEIER à régulation électronique, affichage LCD RECOMMANDATIONS DE SÉCURITÉ Nous sommes heureux de votre achat et vous remercions de votre confiance. La sécurité des appareils électriques BIELMEIER répond aux directives techniques et légales officiellement reconnues. Afin de profiter au mieux de votre nouveau stérilisateur ou de votre machine à boissons chaudes BIELMEIER, nous vous demandons de vous conformer aux recommandations de sécurité suivantes. VEUILLEZ LIRE ATTENTIVEMENT CE MODE D'EMPLOI AVANT D'UTI LISER VOTRE APPAREIL POUR LA PREMIÈRE FOIS ET SUIVRE SES RECOMMANDATIONS ! Ne mettez pas l'appareil en marche dans les situations suivantes : – si l'alimentation est endommagée, – si l'appareil est visiblement abîmé, – après une chute de l'appareil, – si l'extérieur de l'appareil est mouillé ou humide. Si l'appareil ou son alimentation affichent des dégâts visibles, vous devez le confier à un technicien autorisé ou au service clientèle de BIELMEIER pour contrôle. Branchez l'appareil uniquement sur du courant alternatif, conformément aux indications de la plaque signalétique (prise à contact de protection). Déroulez entièrement le cordon d'alimentation. Ne laissez jamais traîner le cordon d'alimentation. Débranchez la prise de courant (5) dans les situations suivantes – en cas de défaut de fonctionnement, – avant tout nettoyage ou opération d'entretien, – après utilisation. L'appareil doit être placé sur une surface libre, plane et stable. Ne posez jamais l'appareil et son cordon d'alimentation sur des surfaces chaudes ou à proximité de gazinières, de feux, etc. 28 FR Attention! Placez votre appareil à l'endroit où vous souhaitez l'uti liser. Insérez les récipients avec le contenu à stériliser dans l'appareil et remplissez celui-ci d'eau, comme illustré dans l'image 1 (S. 34). Branchez ensuite la prise (5) sur une prise de courant avec mise à la terre. Déplacez l'appareil uniquement à froid et vide ! Lorsque l'appareil est rempli, son poids important risque d'occasionner des blessures ! Manipulez l'appareil par ses poignées uniquement lorsqu'il est totalement vide et froid ! En cas de non-suivi de ces instructions, un risque de brûlures est présent. Ne basculez jamais l'appareil chaud pour le vider. Lorsque l'appareil est chaud, videz-le uniquement en utilisant le robinet de vidange (6). Si cela n'est pas possible, attendez jusqu'à ce que l'appareil et son contenu aient refroidi. Tout basculement de l'appareil alors qu'il est plein et encore chaud risque d'occasionner des brûlures . Remplissez l'appareil avant de le brancher. Ne mettez pas l'appareil en marche sans qu'il contienne de l'eau, vous risqueriez d'abîmer l'émail et la grille support qui comporte un revêtement (non comprise dans la livraison). Si cela devait arriver malgré tout, attendez que l'appareil ait refroidi avant de le remplir d'eau, sinon le dégagement soudain de vapeur peut causer des brûlures. Remplissez la cuve (2) en respectant un espace de 4 cm sous le bord. Tout débordement serait dangereux et pourrait endommager l'appareil. Attention ! La vapeur d'eau générée par l'appareil peut occasionner des brûlures ! Attention, l'appareil chauffe en fonctionnement ! Par conséquent, n'utilisez que des poignées isolantes ou à défaut des maniques de cuisine anti-chaleur pour prendre l'appareil. Ne plongez jamais l'appareil dans l'eau ! Maintenez le cordon d'alimentation à l'abri de l'humidité. Après utilisation, débranchez toujours l'appareil et laissez-le refroidir. 29 FR Cet appareil ne doit pas être utilisé par des enfants et des adultes dont les capacités physiques, sensorielles ou mentales sont réduites ou qui manquent d'expérience et/ou de connaissances, à moins qu'ils ne soient surveillés en permanence par une personne chargée de leur sécurité ou qui leur a expliqué comment ils doivent utiliser l'appareil. Les enfants doivent être surveillés afin qu'ils ne jouent pas avec l'appareil. Cet appareil est réservé à un usage domestique et ne convient pas à un usage commercial. Nous déclinons toute responsabilité pour des dommages qui découle raient d'une utilisation détournée ou inappropriée de l'appareil. FR INFORMATIONS GÉNÉRALES Capacité: Le stérilisateur BIELMEIER a une capacité de 27 litres. Il peut être rempli jusqu'à un niveau maximal de 4 cm sous le bord de la cuve. L'appareil peut servir à plusieurs usages: préparation de conserves, cuisson au bain-marie, préparation de boissons chaudes, cuisson, réchauffage, blanchiment de légumes, etc. Les préparations épaisses devront être agitées en continu afin d'éviter qu'elles ne brûlent. Veuillez remarquer: Si le contenu du stérilisateur pour conserves s'évapore entièrement, il existe une protection qui empêche d'endommager l’appareil. IMPORTANT: Laissez l'appareil refroidir avant de le remplir à nouveau. Il existe sinon un risque de brulure par formation de vapeur. De plus, le fond du stérilisateur peut se deformer. ENTRETIEN Avant le nettoyage, toujours débrancher le câble de raccordement au réseau. Ne plongez jamais l'appareil dans l'eau ! Débranchez la prise (5) et lavez l'intérieur en maintenant la prise à l'abri de l'humidité. Vous pouvez éliminer les dépôts de calcaire en utilisant de l'eau vinaigrée ou un produit anticalcaire approprié – veillez à terminer le nettoyage avec de l'eau claire ! Enlevez tout liquide restant dans la cuve ou videzle à l'aide du robinet de vidange (6) – si l'appareil en est équipé. Ne faites pas basculer l'appareil ! De temps à autre, nettoyez le robinet de vidange (6) avec de l'eau chaude et du liquide vaisselle. Lors de la première utilisation, l'appareil peut dégager une odeur particulière: celle-ci disparaîtra après quelques utilisations. Pour des raisons d'hygiène, nous vous recommandons de faire fonctionner l'appareil à vide, en le remplissant de 6 litres d'eau, avant la première utilisation. INFORMATIONS IMPORTANTES CONCERNANT L'UTILISATION DE CET APPAREIL Avant la première utilisation, nettoyez soigneusement l'intérieur de la cuve (2). Pour cela, reportez-vous à la section relative au nettoyage. Remplissez l'appareil avant de le brancher. Ne remplissez pas trop la cuve (2) ! Remplissezla (2) en respectant un espace minimal de 4 cm sous le bord.Tout débordement serait dangereux et pourrait endommager l'appareil. Tout liquide se trouvant dans la cuve (2) après l'utilisation doit être enlevé ou évacué à l'aide du robinet de vidange (6) – si l'appareil en est équipé. Ne faites pas basculer l'appareil ! 30 31 FR FR UTILISATION DE L'APPAREIL MODE SAISIE DE LA DURÉE Affichage de la durée 1-120 minutes et - - = Fonctionnement en continu Affichage de la température 30°-100°C °C min Sélecteur Température/Durée Marche/Arrêt Moins Plus Appuyez deux fois sur la touche "température/durée" Le symbole durée (min) clignote et la durée réglée en dernier s'affiche, elle peut être modifiée à l'aide de la touche "moins" ou "plus" . Après avoir activé le mode saisie de durée ou modifié la durée à l'aide de la touche "moins" ou "plus", si vous n'effectuez aucune modification pendant 5 s, vous quittez le mode saisie de durée et l'appareil passe en mode fonctionnement . La durée réglée en dernier est réduite lorsque la température réglée (température théorique) est atteinte . La température réglée en dernier est sauvegardée et elle s'affiche lors de la remise en marche du stérilisateur, même si l'appareil a été débranché entre temps . Après utilisation, débranchez également la prise . APPAREIL AVEC ROBINET DE VIDANGE (6) Vous pouvez vider le reste de liquide dans la cuve à l'aide du robinet de vidange (6) . Pour la stérilisation de préparations visqueuses et épaisses, nous vous recommandons de colmater la sortie vers le robinet à l'intérieur de la cuve, afin d'éviter de boucher celuici . Touche "moins" Brancher la prise d'alimentation L'écran s'allume Mise en marche et mode de fonctionnement Touche: Appuyer une fois MISE EN MARCHE DE L'APPAREIL Après avoir mis l'appareil en marche à l'aide de l'interrupteur marche-arrêt, tous les segments LCD (Liquid Crystal Display) s'allument pendant une seconde . La dernière température utilisée s'affiche . Les chiffres de l'affichage de la température clignotent si la température mesurée dans le stérilisateur est différente de la température réglée (température théorique) . Si la température réglée est atteinte, les chiffres restent allumés en permanence . Durée: - - = Fonctionnement en continu L'appareil chauffe jusqu'à la température réglée et fonctionne en continu jusqu'à ce que vous appuyiez à nouveau sur la touche ''marche/ arrêt'' . MODE SAISIE DE LA TEMPÉRATURE Appuyer une fois sur la touche ''température/durée'' Le symbole Température (°C) clignote, les chiffres sont allumés en permanence si la température théorique n'est pas atteinte . Durée: -- en fonctionnement en continu; Pendant le mode saisie, le chauffage n'est pas interrompu, le chauffage à la température théorique a lieu ou bien la température théorique est maintenue . Touche ''moins'' Réduction de la température ; une brève pression de touche permet de réduire par incréments de 1 la température jusqu'à 30 °C (réglage à la température la plus faible) . Pour réduire rapidement la température, maintenez la touche enfoncée . Touche ''plus'' Augmentation de la température; une brève pression de touche permet d'augmenter par incréments de 1 la température jusqu'à 100 °C (réglage à la température la plus élevée) . Pour augmenter rapidement la température, maintenez la touche enfoncée . Après avoir activé le mode saisie de température ou modifié la température à l'aide de la touche "moins" ou "plus", si vous n'effectuez aucune modification pendant 5 s, vous quittez le mode saisie de température et l'appareil passe en mode fonctionnement . 32 Réduction de la durée; une brève pression de touche permet une réduction par incréments de 1 (1 minute = réglage de la durée la plus courte) . Pour réduire rapidement la durée, maintenez la touche enfoncée . Si l'appareil était en mode fonctionnement en continu avant d'appeler le mode durée (affichage de la durée: - - min), la durée affichée passe de - fonctionnement en continu à 120 min dans un premier temps avant de revenir à 0 min . Touche "plus" Augmentation de la durée; une brève pression de touche permet une augmentation par incréments de 1; (120 minutes / - - fonctionnement en continu = réglage de la durée la plus longue) . Pour augmenter rapidement la durée, maintenez la touche enfoncée . Pour revenir au fonctionnement continu, en mode saisie de la durée, la durée doit être mise sur - fonctionnement en continu . Vous pouvez modifier la température et la durée à tout moment même pendant la réduction de la durée . ARRÊT DE L'APPAREIL Pour éteindre l'appareil, appuyez sur la touche "marche/arrêt". Quel que soit l'état, il est possible d'éteindre l'appareil . Les saisies de durée en mode saisie de la durée ne sont pas sauvegardées . AU SUJET DES CONSERVES Rien n'a changé par rapport aux recettes de nos grands-mères ! Le but de notre appareil est de stériliser des préparations sans faire appel à des conservateurs chimiques . La chaleur régulière générée par l'appareil permet de tuer les germes ; dans le même temps, les bocaux sont stérilisés par la dépressurisation et fermés hermétiquement . Seul l'outil a changé : les stérilisateurs BIELMEIER vous apportent un confort que votre grand-mère aurait apprécié FAIRE DES CONSERVES – MODE D'EMPLOI La préparation et la propreté sont les premiers impératifs en matière de stérilisation. Les fruits et légumes utilisés doivent être frais et de bonne qualité . Lavez-les entiers et laissez-les sécher . Les haricots verts et petits pois se conserveront plus longtemps s'ils sont blanchis . Nettoyez soigneusement les bocaux, boîtes et bouteilles à l'eau chaude . Rincez-les soigneusement et laissez-les s'égoutter sur un torchon propre . Vérifiez l'absence de résidus et l'état de chaque récipient . 33 FR FR Vous ne devez pas utiliser de caoutchoucs ou de fermoirs poreux ou abîmés . Une fois le temps de cuisson écoulé, débranchez la prise d'alimentation de l'appareil (5) . Remplissez les récipients comme suit : – Remplissez-les avec la préparation en laissant un espace minimal de 2 cm par rapport au bord, – Si la préparation est de la purée ou de la mousse (compote de pomme par exemple), remplissez vos récipients jusqu'à 3 ou 4 cm du bord , – Pour de la charcuterie, remplir les récipients aux ¾, – Si la préparation risque de gonfler (ex . : une pâte à gâteau), remplissez les récipients à mi-hauteur seulement . – Veuillez également vous reporter aux conseils en matière d'achat de récipients . Retirez les récipients de l'appareil . Laissez les pinces de serrage en place jusqu'à ce que les récipients et leur contenu aient complètement refroidi . Les conserves doivent être immédiatement plongées dans de l'eau froide . Il est recommandé de conserver vos préparations dans un endroit sec et frais et à l'abri de la lumière . Veillez à inscrire sur chacun des récipients la date de préparation et son contenu . Pour connaître les modes de préparation applicables aux fruits, légumes et viandes, reportezvous à vos livres de cuisine . Nous vous donnons également quelques exemples de recettes en page 36 . Remarque: ces données ont une valeur indicative . Les temps de cuisson sont valables à partir du moment où la température indiquée est atteinte . Les recettes de nos grands- mères restent valables, même avec les stérilisateurs modernes . EXTRACTION DE JUS Vous devez utiliser la centrifugeuse BIELMEIER BHG 430 (non fournie) ou une autre centrifugeuse du commerce, en respectant un diamètre de 35 cm . Remplissez l'appareil avec au moins 6 litres d'eau. Positionnez la centrifugeuse (voir image 2) sur l'appareil . TABLEAU DE CUISSON (image 1) Fermez les récipients à l'aide de pinces, de bagues de fermeture ou de boutons à vis . Positionnez les récipients sur la grille (non fournie) . Vous pouvez utiliser des récipients de tailles différentes . Les récipients doivent être immergés dans l'eau aux ⁄ ou aux ¾ ; si vous immergez vos récipients sur deux niveaux, cela s'applique au deuxième niveau . Hauteur optimale de l'eau: Au moment de positionner les récipients dans l'appareil, la température de l'eau doit être dans l'idéal semblable à celle des récipients . Cela permet d'économiser de l'énergie et de gagner du temps . Positionnez le couvercle (1) sur la cuve (2) . Allumez l'appareil . Vérifiez la température et le temps de cuisson nécessaires dans votre recette ou livret de recettes et réglez-les sur votre appareil BIELMEIER . Le temps de préchauffage ne compte pas dans le temps de cuisson . Celui-ci commence à s'écouler une fois la température réglée atteinte . 34 Fruits Temp. Groseilles 85°C Pommes, poires 90°C Fraises 75°C Myrtilles 85°C Framboises, 80°C groseilles à maquereau Cerises, mirabelles 85°C Pêches, abricots, quetsches 90°C Rhubarbe cuisson Durée 20 min 30 min 25 min 25 min 30 min 30 min 30 min 30 min Légumes Chou-fleur Haricots, petits pois Fèves Cornichons Carottes, chou-rave Citrouille Choux de Bruxelles, chou de milan, asperges Tomates Temp. cuisson cuisson cuisson 90°C cuisson 90°C cuisson Durée 90 min 120 min 90 min 30 min 90 min 30 min 120 min 90°C 30 min Viande Pièce de rôti, pré-rôtie Goulasch, saisi à la poêle Gibier/volaille, saisi à la poêle Chair à saucisse Temp. cuisson cuisson cuisson cuisson Durée 30 min 30 min 30 min 30 min Centrifugeuse Stérilisateur pour conserves . . . auparavant . . . aujord'hui (image 2) Placez les fruits ou légumes dans le panier – en veillant à ne pas remplir celui-ci à plus des ¾ . Pour plus de détails sur la préparation, reportez-vous au livret d'utilisation de votre centrifugeuse ou à votre livre de cuisine . Posez le couvercle (1) sur la centrifugeuse et veillez à le fermer correctement . Dans le cas contraire vous gaspilleriez de l'énergie, car l'appareil laisserait échapper de la vapeur . Branchez la prise (5) de votre appareil sur une prise à contact de protection . Sélectionnez 100°C sur l'affichage de température afin de garantir un chauffage continu . Mettez l'affichage de la durée en fonctionnement en continu et commencez à extraire le jus en appuyant à nouveau sur la touche "marche/arrêt" . CONSIDÉRATIONS ÉCOLOGIQUES Nous vous demandons de ne pas jeter directement vos matériaux d'emballage et appareils usagés, mais de les confier à des organismes de recyclage . Vous pouvez obtenir les coordonnées des établissements de collecte les plus proches de chez vous en vous adressant à vos services municipaux . En cas de réclamation au titre de la garantie, veuillez vous adresser à votre distributeur ou au service clientèle de BIELMEIER pour votre pays . Conformément à la directive européenne 2002/96/CE relative aux déchets d'équipements électriques et électroniques et à sa transposition dans le droit national, les appareils électriques usagés doivent être collectés séparément et soumis à un recyclage respectueux de l'environnement . Informez-vous auprès des services administratifs de votre commune ou de votre ville sur les mesures d'élimination actuellement applicables aux appareils électriques hors service . DONNÉES TECHNIQUES Alimentation: 220 – 230 V ~ / 50 Hz Puissance électrique: 1800 W Classe de protection: I Volume de la cuve: 27 litres en mode normal 23 litres en mode cuisson (correspond à un remplissage 4 cm sous le bord de l'appareil) Poids: 6,05 kg L'appareil est conforme aux directives européennes n° 73/23 CEE et n° 89/336 CEE . Sous réserve de modifications techniques . A la fin du fonctionnement, mettez la touche "marche/arrêt" sur arrêt et débranchez la prise d'alimentation du stérilisateur . Important: veillez à remplir le récipient d'eau avant chaque utilisation en mode d'extraction de jus ! 35 FR FR RECETTES ROULADES DE VEAU POMMES Sucre Préparation Info : précuisson impérative ! Pommes douces : 300 – 400 g de sucre pour 1 litre d'eau Éplucher les pommes, les couper en quartiers et les débarrasser de leur trognon. Plonger les pommes aussitôt dans de l'eau froide. Ajouter quelques gouttes de citron afin de les empêcher de brunir. Ingrédients : pour 4 à 6 personnes Pommes acides : 500 – 600g de sucre pour 1 litre d'eau Préparer la solution eau et sucre selon les indications données. Remplir les récipients de fruits, les napper d'eau et de sucre et laisser cuire à 90 °C pendant 30 minutes. Préparation 700 g de cuisseau de veau (soit 4 à 6 escalopes de 120 à 150 g chacune) 2 oignons 50 g de cornichons Faire chauffer l'huile dans une sauteuse et faire saisir les roulades. Mouiller avec le fond de veau et laisser mijoter à feu moyen. 50 g de jambon maigre 2 – 3 CS de moutarde Enlever les fils ou piques utilisés, puis remplir les récipients avec les roulades, ajouter le jus de cuisson en remplissant jusqu'à 3 cm du bord des récipients ; laisser chauffer pendant 75 minutes à 100 °C. Sel et poivre 2 CS d'huile 400 ml de fond de veau CONFITURE FRAISE-FRAMBOISE Ingrédients Préparation 500 g de sucre Trier et presser les framboises à travers un tamis. Mélanger les fraises, la pulpe de framboises et le sucre et laisser reposer quelques instants. Ajouter le jus de citron. 750 g de fraises 500 g de framboises Le jus d'un demi-citron Faire cuire le mélange en remuant en continu jusqu'à ce qu'il se gélifie (faire le test en déposant une cuillère à café de confiture sur une assiette en porcelaine froide). Remplir un ou plusieurs récipients de confiture, fermer aussitôt et les laisser dans le stérilisateur 10 minutes à 90 °C. GÂTEAU AUX RAISINS SECS Ingrédients Préparation 500 g de farine Mélanger le lait tiédi et la levure, et ajouter le beurre ramolli, le sel, le sucre et les œufs. Bien mélanger. Ajouter la farine en pluie et bien mélanger. Pétrir la pâte. La recouvrir et la laisser reposer une nuit. 1⁄8 – ¼ de litre de lait 3 – 4 œufs 80 g de sucre 12 g de levure fraîche ou ½ paquet de levure sèche Un peu de sel CAROTTES Info : précuisson impérative ! Préparation Attention! le temps de stérilisation est variable : Couper les carottes en rondelles ou en dés : la tendresse et l'arôme des carottes nouvelles se prêtent bien à ce mode de préparation. Les choisir d'une taille moyenne. carottes en rondelles ou en dés : 90 minutes à 100 °C carottes entières : 120 minutes à 100 °C 36 Une fois la fane enlevée, gratter les carottes à l'aide d'un couteau à légumes et les plonger aussitôt dans de l'eau fraîche, afin qu'elles ne perdent pas leur couleur. Couper les carottes en rondelles ou en dés et les laisser précuire environ 5 minutes dans une casserole. Les plonger aussitôt dans de l'eau froide, puis remplir les récipients ; napper avec une solution d'eau salée amenée à ébullition et laisser 90 minutes à 100 °C dans l'appareil. Aplatir les escalopes si nécessaire. Émincer les oignons, les cornichons et le jambon. Mélanger les trois ingrédients et les mêler avec la moutarde pour obtenir une pâte. Poivrer et saler les escalopes et répartir la pâte à la moutarde dessus. Rouler les escalopes et utiliser du fil, des piques ou des tranches de lard pour les faire tenir. 150 g de beurre 200 g de raisins secs Le jour suivant, pétrir à nouveau la pâte jusqu'à ce qu'elle ne colle plus. Y intégrer rapidement les raisins secs. Beurrer et fariner les pots (ou remplacer la farine avec de la poudre de noisettes). Remplir les pots à mi-hauteur avec la pâte, puis laisser un peu reposer. Fermer les pots avec les couvercles et mettre les pinces en place. La cuisson et la stérilisation s'opèrent simultanément dans l'appareil : l'opération dure 120 minutes à 100 °C. Nous vous souhaitons beaucoup de plaisir avec votre appareil Bielmeier ! 37 FR IT GARANTIE Pour la garantie prenant effet le jour de l'achat, sur les territoires de l’UE et de la Suisse, s'appliquent les conditions suivantes. 1. Durée de la garantie: 2 ans 2. Prestations de garantie: a) A notre discrétion, réparation ou échange de pièces qui présentent un défaut de matériau ou de fabrication après vérification par nos soins. 3. La garantie n’est pas applicable: aux rayures et taches sur l’appareil. aux lampes d’éclairage et de contrôle. aux brosses motorisées. aux parties fragiles en bakélite, verre, plastique, etc. à moins qu’il ne s’agisse d’un défaut dans le matériau et qu’il ait été reconnu en tant que tel par nos soins. ISTRUZIONI PER L’USO per tutti i bollitori automatici BIELMEIER con regolamento elettronico, display LCD IMPORTANTI INDICAZIONI DI SICUREZZA Siamo lieti che abbiate deciso di acquistare questo prodotto e vi ringraziamo per la vostra fiducia. La sicurezza degli apparecchi elettrici BIELMEIER soddisfa i requisiti tecnici e le normative di legge vigenti. Perché possiate godere al meglio dei vantaggi del vostro nuovo bollitore per vin brulè BIELMEIER vi preghiamo di osservare con attenzione le seguenti indicazioni. b) La garantie ne sera effectuée que sur présentation de cette carte de garantie et de la facture de l’achat. La carte n’est valable que si elle a été remplie intégralement au jour de l’achat. aux dommages qui ont été causés par une lorsque l’appareil est raccordé à un réseau c) La prestation de garantie n’est applicable qu’au premier utilisateur. électrique dont la tension est supérieure à celle indiquée sur l’appareil. LEGGERE CON ATTENZIONE LE ISTRUZIONI PER L’USO PRIMA DEL PRI MO UTILIZZO E CONSERVARLE CON CURA! d) La période initiale de garantie n’est ni prolongée ni renouvelée du fait de la réparation ou de l’échange de pièce pendant la durée de la garantie. en cas de mauvaise utilisation ou d’usage in- L’apparecchio non deve essere messo in funzione se: – il cavo di alimentazione è danneggiato, – l’apparecchio presenta dei danni visibili, – l’apparecchio è caduto, – l’apparecchio è bagnato o umido. e) Les frais de transport sont à la charge de l’acheteur (ne s’applique pas pendant les 6 premiers mois de la garantie). f) Dans la mesure où le dommage ou le défaut ne peut pas être supprimé ou si l’amélioration a été refusée par nos soins ou si elle est retardée de manière non raisonnable, il sera procédé dans les 6 mois à partir de la date de l’achat/de livraison à un remplacement gratuit où la valeur minimale sera remboursée ou l’appareil sera repris contre remboursement du prix d’achat, mais toutefois à hauteur du prix courant du marché au maximum. installation ou une fixation inappropriée. approprié. en cas d’absence de soins. en cas d’entretien insuffisant ou inapproprié. en cas de chute de l’appareil ou de pièces individuelles. en cas de transport inapproprié ou d’emballage insuffisant en cas de transport. 4. La garantie est caduque: lorsque l’appareil a été utilisé à d’autres fins qu’un usage domestique. lorsque des personnes qui n’ont pas été agréées par notre entreprise exécutent des réparations ou des modifications sur l’appareil. Nous accordons une garantie de 2 ans sur cet appareil pour les défauts découlant de défauts dans la fabrication ou les matériaux. La durée de la garantie commence au jour de la remise et elle n’est applicable que sur présentation de la carte de garantie et de la facture de l’achat. Toute autre prétention complémentaire est nulle. Modèle: Important! Veuillez noter ici le code FD se trouvant sur le panneau de type de l’appareil: In presenza di danni evidenti all’apparecchio o al cavo di alimentazione, fate controllare l’apparecchio da uno specialista o dal servizio di assistenza alla clientela di BIELMEIER. Collegare l’apparecchio solo alla corrente alternata, come indicata sulla targhetta del prodotto (presa Schuko). Avvolgere completamente il cavo di alimentazione. Non lasciare mai il cavo di alimentazione sospeso. Si deve staccare la spina (5): – in caso di guasti durante il funzionamento, – prima di ogni cura e manutenzione, – dopo l’utilizzo. L’apparecchio deve essere collocato su di una superficie stabile e libera. Non collocare mai l’apparecchio ed il cavo di alimentazione su superfici roventi o nelle vicinanze di fiamme libere, bollitori a gas ecc. 38 Timbre et signature du vendeur Date de la vente 39 IT Attenzione! Collocare l’apparecchio dove lo si vuole utilizzare. Collocare i vasetti da bollire all’interno e riempire l’apparecchio d’acqua come indicato nell’ Imm. 1 (Pag. 45). Solo allora inserire la spina (5) in una presa collegata alla terra. Trasportare l’apparecchio solo quando è vuoto e freddo! Altrimenti si rischia di scottarsi e/o di ustionarsi! Sollevare l’apparecchio tramite le maniglie e solo quando è freddo e completamente vuoto! In caso contrario, si corre il rischio di scottarsi o ustionarsi. Non svuotare mai l’apparecchio caldo ribaltandolo. Quando è caldo si deve eliminare il contenuto esclusivamente tramite il rubinetto di erogazione, se presente. Se ciò non fosse possibile, si deve attendere fino a che l’apparecchio ed il suo contenuto si sono raffreddati. Se si inclina l’apparecchio pieno e caldo sussiste il pericolo di scottature e/o ustioni. IT Questo apparecchio non è destinato ad un utilizzo da parte delle persone (inclusi i bambini) con capacità fisiche, sensoriali o psichiche limitate o con delle carenze nelle esperienze e/o conoscenze necessarie, salvo che siano sorvegliate da una persona responsabile della loro sicurezza o che abbiano da questa ricevuto delle istruzioni su come questa apparecchiatura deve essere utilizzata. Si devono inoltre controllare i bambini per garantire che non giochino con questa apparecchiatura. Questo apparecchio è idoneo ad un uso domestico e non ad un utilizzo commerciale. In caso di utilizzo non conforme o errato non ci si assume alcuna re sponsabilità per eventuali danni. Riempire l’apparecchio prima di accenderlo. Non accendere l’apparecchio senza acqua, altrimenti lo smalto e la gra ticola con il rivestimento (non compresa in dotazione) possono restare danneggiati. Se ciò dovesse accadere nonostante si sia prestato attenzione, attendere prima di versare dell’acqua fino a che l’apparecchio si è raffreddato, altrimenti l’improvviso sviluppo di vapore potrebbe causare delle scottature. Riempire il bollitore (2) al massimo fino a 4 cm sotto il bordo (corrisponde a 23 litri nel modo ebollizione). La tracimazione è pericolosa e può danneggiare l’apparecchio. Cautela! Con l’emissione di vapore si ha il pericolo di scottature! Cautela, l’apparecchio quando è in funzione scotta! Per questo non si deve toccare l’apparecchio solo sui manici isolati, oppure utilizzando delle presine termoisolanti. Non immergere mai l’apparecchio nell’acqua! Proteggere anche il cavo di alimentazione dall’umidità. Dopo l’uso staccare sempre la spina e lasciar raffreddare l’apparecchio. 40 41 IT INFORMAZIONI GENERALI Capacità: il bollitore automatico BIELMEIER ha una portata di 27 litri . Il liquido può arrivare al massimo fino a 4 cm sotto il bordo superiore dell’apparecchio . L’apparecchio può essere utilizzato in modo versatile: bollire, riscaldare a bagnomaria, preparare bevande calde, cuocere, riscaldare, sbollentare le verdure ecc . Gli alimenti densi che tendono a bruciarsi devono essere riscaldati lentamente e mescolando continuamente . Attenzione: se l’apparecchio dovesse bollire fino a svuotarsi, una protezione da evaporazione previene un eccessivo surriscaldamento . IMPORTANTE: lasciare raffreddare bene l’apparecchio prima di riempirlo di nuovo d’acqua, altrimenti si rischia di scottarsi per la formazione di vapore. Inoltre si può danneggiare il recipiente. Al primo utilizzo si può formare dell’odore, che cessa però dopo un breve funzionamento . Per motivi igienici prima del primo utilizzo si dovrebbero far bollire ca. 6 litri d’acqua. INFORMAZIONI IMPORTANTI PER L’UTILIZZO DELL’APPARECCHIO Prima del primo utilizzo pulire con cura l’interno del bollitore (2) . A tal fine osservare la sezione “Pulizia“ . Riempire l’apparecchio prima di accenderlo . Non riempire troppo il bollitore (2)! Riempire il recipiente (2) al massimo fino a 4 cm sotto il bordo . Un eccessivo riempimento è pericoloso e può danneggiare l’apparecchio. I liquidi ancora presenti nel recipiente (2) do- po l’uso devono essere prelevati o erogati con il rubinetto (6) – se presente . Non ribaltare l’apparecchio! 42 IT PULIZIA UTILIZZO DELL’APPARECCHIO Prima della pulizia togliere sempre la spina dalla presa . Non immergere mai l’apparecchio nell’acqua! Pulire l’esterno con un panno umido con la spina (5) staccata . Non utilizzare utensili affilati o detergenti abrasivi . Sciacquare l'interno . Eventuali residui calcarei formatisi possono essere eliminati di tanto in tanto con acqua e aceto o con un comune prodotto anticalcare – quindi bollire con acqua pulita! Indicazione della temperatura 30°-100°C Prelevare il liquido della pulizia o fatelo defluire attraverso il rubinetto di erogazione (6) – se presente . Non ribaltare l’apparecchio! On/Off Indicazione del tempo 1-120 min - - = Funzionamento continuato °C Di tanto in tanto si deve pulire il rubinetto di erogazione (6) – se presente – con dell’acqua calda con l’aggiunta di detergente . min Selettore Temperatura/Tempo Meno Inserire la spina Il display si accende Accendere o selezionare il modo di comando Tasto: premere 1x: ACCENSIONE DELL'APPARECCHIATURA Dopo l'accensione dell'apparecchiatura azionando l'interruttore si accendono tutti i segmenti del display a cristalli liquidi (Liquid Crystal Display) per un secondo . Viene indicata l'ultima temperatura utilizzata . Le cifre dell'indicazione della temperatura lampeggiano quando la temperatura misurata nel bollitore si scosta dalla temperatura impostata (temperatura nominale) . Quando la temperatura impostata viene raggiunta le cifre restano accese . Tempo: - - = Funzionamento continuato L'apparecchiatura riscalda fino alla temperatura impostata e mantiene un funzionamento continuato fino ad un nuovo azionamento del tasto "On/Off " . Più MODO DI INSERIMENTO TEMPERATURA Premere il tasto "Temperatura/Tempo" 1x Il simbolo della temperatura (°C) lampeggia, le cifre restano accese quando la temperatura nominale non è raggiunta . Tempo: - - in funzionamento continuato; il riscaldamento non si interrompe nel modo inserimento, si riscalda alla temperatura nominale o si mantiene la temperatura nominale . Tasto "Meno" Abbassamento della temperatura; premendo brevemente il tasto si abbassa il valore a scatti di un'unità; fino a 30°C (minima impostazione della temperatura) . Se si tiene premuto il tasto la temperatura viene abbassata velocemente . Tasto "Più" Aumento della temperatura; premendo brevemente il tasto si alza il valore a scatti di un'unità; fino a 100°C (massima impostazione della temperatura) . Se si tiene premuto il tasto la temperatura viene alzata velocemente . Se dopo un avvio del modo di inserimento della temperatura o dopo una modifica della temperatura con i tasti "meno" o "più" non si esegue nessuna modifica 43 IT IT per 5 sec ., il modo di inserimento della temperatura viene abbandonato e si passa al modo operativo . momento . Le indicazioni della durata nel modo di inserimento del tempo non sono memorizzate . Controllare che i contenitori non contengano Pulire anche le chiusure con cura con MODO DI INSERIMENTO DEL TEMPO L'ultima temperatura impostata viene memorizzata e sarà visualizzata al riaccendere del bollitore, anche se l'apparecchiatura nel frattempo viene scollegata dalla rete elettrica . Premere il tasto "Temperatura/Tempo" 2x Il simbolo del tempo (min) lampeggia e viene indicato l'ultimo tempo impostato, che può essere modificato con i tasti "Meno" e "Più" . Se dopo un avvio del modo di inserimento del tempo o dopo una modifica del tempo con i tasti "meno" o "più" non si esegue nessuna modifica per 5 sec ., il modo di inserimento della temperatura viene abbandonato e si passa al modo operativo . Al raggiungimento della temperatura impostata (temperatura nominale) parte il conto alla rovescia dell'ultimo tempo impostato . Tasto "Meno" Si abbassa il tempo; premendo brevemente il tasto si abbassa il valore a scatti di un'unità; (1 minuto = impostazione minima) . Se si tiene premuto il tasto il tempo viene abbassato velocemente . Se l'apparecchio prima di aver richiamato il modo "Tempo" si trovava in funzionamento continuato (indicazione del tempo: - - min), il tempo indicato passa dal "- -" del funzionamento continuato a 120 min e poi viene diminuito fino a 0 min . Tasto "Più" Aumento del tempo; premendo brevemente il tasto si alza il valore a scatti di un'unità; (120 minuti / - - funzionamento continuato = massima impostazione) . Se si tiene premuto il tasto il tempo viene alzato velocemente . Per tornare al funzionamento continuato si deve impostare il modo di inserimento del tempo su - - . Anche durante il conto alla rovescia del tempo la temperatura ed il tempo possono essere cambiati in qualsiasi momento . Dopo l'uso staccare la presa dalla spina . APPARECCHI CON RUBINETTO DI EROGAZIONE (6) Si possono prelevare i liquidi dal rubinetto di erogazione (6) . Nella preparazione di cibi densi si consiglia, per prevenire che si intasi, di sigillare l’interno del rubinetto dell’apparecchio ad esempio con una toppa . CONOSCENZE NECESSARIE PER BOLLIRE Bollire significa sterilizzare le conserve senza conservanti chimici . Il calore uniforme generato uccide con l’ebollizione i germi esistenti; allo stesso tempo nel vaso delle conserve si genera un vuoto che chiude ermeticamente il vaso e protegge la conserva dai germi . Solo . . . la pentola per l’ebollizione non è più quella dei tempi della nonna! Il bollitore automatico BIELMEIER vi dà tutte le agevolazione che la nonna avrebbe voluto avere! BOLLIRE – FUNZIONA COSÌ! Preparazione e pulizia sono della massima importanza per motivi di scadenza. La frutta e la verdura devono essere di buona qualità, fresche e mature al punto giusto . gare ancora intera . I fagiolini ed i piselli si conservano più a lungo se prima vengono sbollentati . Spegnimento premendo il tasto "On/Off ". 44 L'apparecchiatura può essere spenta in qualsiasi dell’acqua calda con detergente e fino al loro utilizzo tenerle in dell’acqua pulita . Pulire i vasi, i barattoli e le bottiglie con cu- ra dapprima con acqua calda e detergente . Quindi sciacquarli e lasciarli sgocciolare su di un panno pulito . unta la temperatura desiderata . Trascorso il tempo impostato, estrarre la spina (5) . Togliere i vasi bollenti . Lasciare le clip sui vasi fino al loro completo raffreddamento . I barattoli devono essere messi subito nell’acqua fredda . Non utilizzare guarnizioni o tappi porosi o Le conserve vanno custodite preferibilmente Riempire i contenitori come segue: È opportuno mettere un’etichetta sui vasi, sui danneggiati . in un luogo asciutto, fresco e buio . – sostanzialmente vaso bollito deve essere riempito al massimo fino a 2 cm sotto il bordo, – per le sostanze con la consistenza della purea (ad esempio la mousse di mele) lasciare 3 – 4 cm dal bordo del vaso, – per gli insaccati di tutti i tipi riempire il recipiente solo per ¾, – per le sostanze che aumentano di volume (ad es . gli impasti) riempire solo ½ vaso . – Osservare anche le indicazioni ricevute all’acquisto del vaso . Prima di tutto va detto che rispetto alle regole della nonna nel bollire non è cambiato niente! Lavare la frutta e la verdura e lasciatela asciu- SPEGNIMENTO DELL' APPARECCHIATURA dei residui e che non siano danneggiati . (Imm. 1) Chiudere bene i contenitori con le clip o con le chiusure avvitate o ermetiche . Collocare i vasi sempre sulla graticola . Si possono anche utilizzare vasi di diverse altezze . I vasi devono essere immersi nell’acqua da ²/³ a ¾; se disposti su due piani questo vale per il piano superiore . Il riempimento ottimale dell’acqua: Quando si mettono i vasi nel bollitore la temperatura dei vasi e la temperatura dell’acqua devono essere più o meno uguali . Ciò consente di risparmiare tempo ed energia . Mettere il coperchio (1) sul bollitore (2) . Inserire la presa dell’apparecchio . Vedere la durata e la temperatura della cottura sulla ricetta o sul libro di cucina ed impostarle sul bollitore automatico BIELMEIER . Il tempo di riscaldamento non va compre- so nella durata dell’ebollizione . La durata dell’ebollizione inizia solo quando si è raggi- barattoli ecc . (con data e contenuto) . Come e con quali varietà è possibile conser- vare frutta, verdura, carne ecc . lo si può leggere nei libri di ricette . A questo proposito vedere i nostri esempi di ricette a pag . 47 . TABELLA DI EBOLLIZIONE Frutta Ribes Mele, pere Fragole Mirtilli Lamponi, uva spina Ciliegie, mirabelle Pesche, albicocche, Susine Rabarbaro Temp. 85°C 90°C 75°C 85°C 80°C 85°C 90°C bollire Durata 20 Min . 30 Min . 25 Min . 25 Min . 30 Min . 30 Min . 30 Min . 30 Min . Verdura Cavolfiore Fagioli, piselli Fave Cetrioli sottaceto Carote, carotine, rape Zucca Cavoletti, verza, asparagi Pomodori Temp. Durata bollire 90 Min . bollire 120 Min . bollire 90 Min . 90°C 30 Min . bollire 90 Min . 90°C 30 Min . bollire 120 Min . 90°C 30 Min . Carne Arrosto, precotto Gulasch, rosolato Selvaggina/pollame, rosolata Insaccati Temp. bollire bollire bollire Durata 75 Min . 75 Min . 75 Min . bollire 120 Min . Nota: questi sono valori indicativi . I tempi valgono dal raggiungimento della rispettiva temperatura . Le ricette della nonna restano valide anche con i bollitori automatici e con i bollitori completamente automatici . 45 IT IT PER AMORE DELL’AMBIENTE CENTRIFUGA Per la centrifuga è necessario l’accessorio per la centrifuga BIELMEIER BHG 430 (non compreso in dotazione) o un altro accessorio per centrifuga disponibile in commercio di 35 cm di diametro. Versare nel bollitore almeno 6 litri d’acqua. Montare l’accessorio per centrifuga sul bollitore come illustrato nell’ Imm. 2. Accessorio per centrifuga Bollitore automatico . . . fino a ieri . . . oggi (Imm. 2) Inserire la frutta, verdura ecc. già preparata nel cestello per la frutta – non riempirlo più di ¾. Per maggiori dettagli sulla preparazione delle centrifughe vedere le istruzioni per l’uso dell’accessorio per centrifuga o i vostri libri di ricette. Mettere il coperchio (1) sull’accessorio per centrifuga e controllare che sia chiuso bene, perché potrebbe fuoriuscire del vapore. Inserire la spina del bollitore in una presa Schuko. Selezionare 100°C sull'indicatore della tempera- Non buttare via il materiale di imballaggio e gli apparecchi vecchi con la spazzatura comune, portateli ai punti di riciclaggio. Chiedete all’amministrazione comunale qual è il punto di riciclaggio competente o il punto di raccolta più vicino. Per richieste di assistenza in garanzia rivolgersi al proprio rivenditore o alla centrale di assistenza ai clienti BIELMEIER nel proprio paese. Conformemente alla direttiva europea 2002/96/ CE sulle vecchie apparecchiature elettriche ed elettroniche ed alla sua adozione nel diritto nazionale, le apparecchiature elettriche usate devono essere raccolte separatamente riciclate nel rispetto dell'ambiente. Richiedere alle autorità locali o all'amministrazione municipale le normative vigenti sullo smaltimento per le apparecchiature elettriche non più utilizzabili. DATI TECNICI Alimentazione elettrica: 220 – 230 V ~ / 50 Hz Premere alla fine dell'operazione il tasto "On/ Peso: 6,05 kg Off" e staccare la presa del vostro bollitore automatico. Importante: prima di ogni procedura di centrifuga si deve versare dell’acqua. Zucchero per mele dolci: 300 – 400 g di zucchero per un litro d'acqua per mele meno dolci: 500 – 600 g di zucchero per un litro d'acqua L'apparecchiatura è conforme alle direttive UE n. 73/23 CEE e n. 89/336 CEE. Ci si riserva il diritto di apportare modifiche tecniche. Sbucciare le mele, dividerle in quattro e levare il torsolo. Mettere subito i pezzi di mela in acqua con alcune gocce di limone per evitare che si scurisca. Contemporaneamente mettete sul fornello la soluzione zuccherata. CONFETTURA DI FRAGOLE E LAMPONI Ingredienti Preparazione 500 g di zucchero 750 g di fragole 500 g di lamponi succo di mezzo limone Scegliere i lamponi e spremerli sdrusciandoli su un colino. Mischiare le fragole, il purè di lamponi e lo zucchero e lasciarlo ritirare per un po' di tempo. Aggiungere il succo di limone. Portare il miscuglio ad ebollizione mescolandolo continuamente fino alla prova gelatina (mettere un cucchiaio di confettura su di un piatto di porcellana freddo: se si solidifica in gelatina in breve tempo la confettura è pronta). Mettere la confettura in barattoli di vetro con chiusura a vite e chiuderli immediatamente. Farli cuocere per 10 minuti a 90 gradi. CAROTE Informazione: necessitano di precottura! Attenzione! Il tempo di sterilizzazione è variabile: per carote a rondelle o a cubetti: 90 minuti a 100°C per carote intere: 120 minuti a 100°C 46 Preparazione Successivamente mettere la frutta nei bicchieri e innaffiarli con la soluzione zuccherata. Far cuocere per 30 minuti a 90 gradi. Potenza allacciata: 1800 W Selezionare il funzionamento continuato come indicazione del tempo ed avviare la centrifuga premendo nuovamente il tasto "On/Off". MELE Classe di protezione: I Volume del bollitore: 27 litri nel modo normale 23 litri nel modo ebollizione (corrisponde ad un riempimento fino a 4 cm sotto il bordo dell'apparecchiatura) tura per garantire un riscaldamento continuo. RICETTE Preparazione Se si vogliono tagliare le carote a rondelle o a cubetti, occorre preferire carote giovani ma non troppo piccole il cui aroma e dolcezza giustificano la fatica nel prepararle. Dopo aver levato il verde dalle carote, si gratta la pellicina superiore con un coltello per verdure e se mette subito in acqua fresca, per non rovinarne il bel colore e poi si tagliano a rondelle o a cubetti e si precuociono in una pentola per 5 minuti. Successivamente si mettono in un contenitore colmo di acqua fredda e dopo in un barattolo dove vengono annaffiate con una soluzione salata leggera e brevemente scottata. Cuocere le carote per 90 minuti a 100 gradi. 47 IT IT GARANZIA ROTOLO DI VITELLO Informazione: necessita di precottura! Ingredienti per 4-6 porzioni 700 g di coscia di vitello (circa 4-6 scaloppine da 120 – 150 g ognuna) 2 cipolle 50 g di cetrioli speziati 50 g di prosciutto magro 2 – 3 cucchiai di senape mediamente piccante sale e pepe 2 cucchiai di olio 400 ml di fondo di vitello Preparazione Battere la carne per appiattirla. Tagliare a dadetti sottili le cipolle, i cetrioli e il prosciutto. Sbatterli insieme alla senape fino ad ottenere un composto liscio. Salare e pepare il rotolo e distribuire nel mezzo il composto. Piegare i lati e rotolare la carne su se stessa, legarla con uno spago o con l'aiuto di uno spiedino dopo averla tenuta assieme da strisce longitudinali di speck. Scaldare l'olio in padella e arrostirvi il rotolo all'esterno. Innaffiare con il fondo di vitello e lasciar cuocere coperto a fiamma media. Successivamente levare i fili o gli spiedini, mettere il rotolo in bicchieri e coprirlo con il sugo liquido creatosi fino a 3 cm dal bordo. Cuocere per 75 minuti a 100 g. Le seguenti disposizioni di garanzia decorrono dalla data di acquisto e sono valide all’interno dell’UE e della Svizzera. 1. Periodo di garanzia: 2 anni a) Riparazione o sostituzione, a nostro esclusivo giudizio e dopo accurata verifica, di pezzi che presentano difetti di materiale o di fabbricazione. b) La garanzia è valida solo su presentazione di questo certificato di garanzia, che a sua volta è valido solo se compilato in ogni sua parte nel giorno dell’acquisto. per danni causati da errata installazione o 2. Prestazioni di garanzia: c) La garanzia è valida solo per il primo utente. d) Il periodo di garanzia non sarà rinnovato o prolungato a seguito di successiva riparazione o sostituzione di pezzi. e) I costi di trasporto sono a carico dell’acquirente (non vale per i primi 6 mesi di garanzia). TORTA DI UVETTA Ingredienti Preparazione 500 g farina 1⁄8 – ¼ di litro di latte 3 – 4 uova 80 g zucchero 12 g di lievito fresco o ½ bustina di lievito per Nel latte tiepido sciogliere il lievito, il burro sciolto e tiepido, sale, zucchero. Aggiungere le uova, la farina setacciata e mischiare. Impastare il tutto e lasciarlo riposare una notte coperto. di lievito fresco o ½ bustina di lievito per dolci Successivamente imburrare i lati dei contenitori e cospargerli di farina o noci tritate. 150 g burro 200 g di uvetta Riempire i vasetti con l'impasto fino a metà e lasciare lievitare un altro po'. dolci in polvere in polvere 48 Il giorno successivo impastare nuovamente fino a quando l'impasto si stacca dal recipiente. Aggiungere velocemente l'uvetta. Chiudere i vasetti con il coperchio e i ganci. La cottura e la sterilizzazione avvengono simultaneamente nell'apparecchio a bagno Maria per 120 minuti a 100°C. n i vostri Vi auguriamo buon divertimento co apparecchi BIELMEIER ! 3. La garanzia non è valida: f) In caso di guasto o difetto irreparabile, qualora la riparazione venisse da noi respinta o gli interventi necessari non fossero eseguiti entro un termine adeguato, si provvederà - a scelta dell’utente entro 6 mesi dalla data di acquisto/fornitura - alla sostituzione gratuita dell’apparecchio o al rimborso del valore minimo o alla riconsegna dell’apparecchio dietro rimborso del prezzo d’acquisto, tuttavia non del prezzo corrente sul mercato. per graffi o macchie sull’apparecchio. per graffi o macchie sull’apparecchio. per le spazzole del motore. per parti leggermente fragili in bachelite, vetro, plastica e simili, eccetto che si tratti di difetti di costruzione riconosciuti da noi come tali. fissaggio. se l’apparecchio è collegato ad una rete elet- trica di tensione maggiore rispetto a quella indicata sull’apparecchio. in caso di uso errato o inadeguato. in caso di scarsa cura. in caso di manutenzione errata o insufficiente. in caso di manutenzione errata o insufficiente. in caso di trasporto inadeguato o di imballaggio inadeguato per il trasporto. 4. La garanzia decade: se l’apparecchio è utilizzato per scopi diversi da quelli domestici. se le riparazioni e le modifiche sono esegu- ite da personale non autorizzato dalla nostra azienda. Garantiamo questo apparecchio per un periodo di 2 anni per guasti dovuti a difetti di materiale o di fabbricazione. La garanzia decorre dal giorno della fornitura del prodotto ed è valida solo su presentazione del certificato di garanzia e della ricevuta fiscale di pagamento. Ulteriori pretese di garanzia sono escluse. Modello: Timbro e firma del Rivenditore Importante! Si prega di annotare l’FD- Code apposto sulla targhetta dell’apparecchio: Data dell’acquisto 49 CZ NÁVOD K POUŽITÍ pro všechny elektronicky řízené zavařovací automaty BIELMEIER, LCD displej DŮLEŽITÉ BEZPEČNOSTNÍ POKYNY Velmi nás těší, že jste se rozhodli právě pro tento produkt a děkujeme za vaši důvěru. Bezpečnost elektrospotřebičů BIELMEIER odpovídá obecně platným technickým předpisům a zákonům o bezpečnosti. Přesto bychom vás i ostatní uživatele chtěli upozornit na následující skutečnosti. PŘED UVEDENÍM SPOTŘEBIČE DO PROVOZU SI PEČLIVĚ PŘEČTĚTE NÁVOD K POUŽITÍ A USCHOVEJTE HO! Spotřebič nesmí být uveden do provozu, jestliže: – je poškozen přívodní kabel, – spotřebič vykazuje viditelná poškození, – spotřebič upadl na zem, – spotřebič je vlhký. Při viditelném poškození spotřebiče nebo přívodního kabelu, nechte přístroj přezkoušet u odborníka nebo v servisním středisku BIELMEIER. Spotřebič připojte pouze ke zdroji střídavého napětí, které odpovídá označení na typovém štítku přístroje (chráněná zásuvka). Přívodní kabel úplně odmotejte. Přívodní kabel nikdy nenechávejte volně viset. Zástrčku vytáhněte ze zásuvky (5): – Při poruchách během provozu, – Před každým čištěním a údržbou, – Po použití. Spotřebič umístěte na rovnou, volnou a stabilní podložku. Spotřebič neodkládejte ani nenechávejte v provozu na horké ploše ne bo v blízkosti otevřeného plynového hořáku. 50 CZ Pozor! Umístěte spotřebič tam, kde ho budete používat. Za vařovací sklenice postavte dovnitř a spotřebič naplňte vodou (obr. 1) (strana 55). Teprve potom zapojte přístroj do zásuvky. Spotřebič transportujte jen studený a prázdný! Pokud je plný, má vysokou hmotnost a vzniká nebezpečí zranění! Vychladlý a zcela prázdný přístroj uchopte pouze za k tomu určené úchyty! Předejdete tak nebezpečí popálení. Nikdy nevyprazdňujte horký přístroj za jeho okraje. V horkém sta vu je obsah nutné odebrat výhradně výpustným kohoutem. Pokud je to možné, počkejte, až přístroj i jeho obsah vychladnou, jinak hrozí nebezpečí opaření a/nebo spálenin! Před zapnutím naplňte spotřebič vodou. Přístroj nikdy nezapínejte prázdný (bez vody), protože by se mohla poškodit emailová vrstva a rošt (není součást dodávky). Pokud by k tomu přes veškerou opatrnost došlo, je nutné počkat s plněním vodou, až přístroj vychladne. Jinak hrozíopaření horkou párou. Naplňte hrnec (2) nejvýše 4 cm pod okraj (odpovídá 23 litrům). Přeplnění je nebezpečné a může přístroj poškodit. Pozor! Vzniklou párou může dojít k nebezpečí opaření! Pozor! Spotřebič je za provozu horký! Přístroj přenášejte pouze za rukojeti, jinak pouze pomocí chňapek izolujících teplo. Nikdy neponořujte spotřebič do vody! Před vlhkostí chraňte i přívodní kabel. Po použití vytáhněte přístroj ze zásuvky a nechte ho zchladit. Tento přístroj není určený k tomu, aby ho používaly osoby (včetně dětí) s omezenými fyzickými, psychickými a duševními schopnostmi nebo s nedostatkem zkušeností a znalostí. Je to možné pouze pod dohledem kompetentních osob nebo v tom případě, jestliže je příslušné osoby poučily, jak přístroj používat. Děti by měly být pod dohledem dospělých osob, aby bylo garantováno, že si nesmějí s přístrojem hrát. 51 CZ CZ Tento spotřebič je určen jen pro použití v domácnosti, nikoliv pro ko merční účely . Za eventuální škody vzniklé používáním spotřebiče k jiným než uvede ným účelům, nebo nedodržením pokynů v návodu k použití nepřebíráme žádnou odpovědnost . OBSLUHA PŘÍSTROJE Ukazatel času 1-120 minut a - - = nepřetržitý provoz Ukazatel teploty 30°-100°C °C VŠEOBECNÉ INFORMACE Objem: Zavařovací automat BIELMEIER má objem 27 litrů . Tekutina smí dosahovat max . 4 cm pod horní okraj nádoby . Spotřebič je mnohostranně použitelný: k zavařování, ohřívání ve vodní lázni, přípravě horkých nápojů, vaření, ohřívání, blanšírování zeleniny aj . Hustá jídla, která se mohou připálit, je třeba ohřívat pomalu za stálého míchání . Prosím pozor: Začne-li zařízení vařit prázdné, zamezí příliš silnému přehřátí dodatečná pojistka proti chodu za sucha . DŮLEŽITÉ: Nechte zařízení dobře vychladnout, než je opět naplníte vodou, jinak hrozí nebezpečí opaření vzniklou parou. Kromě toho se tím může nádoba poničit. Při prvním použití může vzniknout mírný zápach, který po chvíli zmizí . Z hygienických důvodů byste měli spotřebič před prvním použitím naplnit asi 6 litry vody. DŮLEŽITÁ UPOZORNĚNÍ K POUŽÍVÁNÍ SPOTŘEBIČE Spínač teplota/čas Ein/Aus mínus Před prvním použitím umyjte důkladně vnitř- plus ní stěny nádoby . Před zapnutím přístroje naplňte nádobu vodou . Nádobu nepřeplňujte, dodržujte doporuče- nou hranici max . 4 cm pod horní okraj, jinak může horká voda vystřikovat ven. Tekutiny, které potom ještě v automatu zů- stanou, musí být odebrány, nebo vypuštěny kohoutem (pokud je k dispozici) . Automat nepřeklápějte! ÚDRŽBA Před čištěním vždy vytáhněte přístroj ze zásuvky . Nikdy neponořujte spotřebič do vody . Vytáhněte síťový kabel ze zásuvky a utřete spotřebič zvenku vlhkým hadrem a zevnitř ho vypláchněte . Nepoužívejte žádné ostré ani drsné čisticí prostředky . Vnitřní část přístroje vymyjte . Vzniklé usazeniny vodního kamene čas od času odstraňte octovou vodou nebo odvápňovačem, který je v obchodech běžně dostupný . Následně vždy nechte převařit čistou vodou . Použitý roztok na čištění odčerpejte nebo vypusťte výpustným kohoutem, pokud je jím váš spotřebič vybaven . Nikdy spotřebič nepřeklápějte! 52 min Zapněte přístroj do zásuvky Displej svítí Zapnutí, popř . provozní modus Tlačítko: stiskněte 1x ZAPNUTÍ PŘÍSTROJE Po zapnutí přístroje tlačítkem Ein/Aus se na jednu sekundu rozsvítí všechny LCD segmenty (Liquid Crystal Display) . Ukáže se naposledy použitá teplota . Číslice ukazatele teploty blikají, když se teplota naměřená v automatu liší od nastavené teploty (požadovaná teplota) . Pokud je dosažena nastavená teplota, svítí číslice nepřetržitě . Čas: - - = trvalý provoz Přístroj se ohřeje na nastavenou teplotu a pracuje nepřetržitě až k další aktivaci tlačítka "Ein/ Aus . REŽIM NASTAVENÍ TEPLOTY Tlačítko "teplota/čas" stisknout 1x Symbol teploty (°C), číslice svítí nepřetržitě, když není dosažena požadovaná teplota . Čas: - - v nepřetržitém provozu, vyhřívání není během zadávání času přerušeno, přístroj se zahřívá na požadovou teplotu, popř .ji udržuje . Tlačítko - "mínus" Snižování teploty, krátkým opakovaným stisknutím tlačítka se teplotní údaj snižuje vždy o jeden stupeň, až na 30 °C (nejnižší nastavení teploty) . Pokud zůstane tlačítko stisknuté, teplota se snižuje rychleji . Tlačítko - "plus" Zvyšování teploty, krátkým opakovaným stisknutím tlačítka se teplotní údaj zvyšuje, až na 100°C (nejvyšší nastavení teploty) . Teplota se zvyšuje rychleji, pokud zůstane tlačítko stisknuté . Pokud po spuštění modu nastavení teploty, popř . po změně teploty pomocí tlačítka "mínus" nebo "plus" nenastane 5 sekund žádná změna, opustí se modus nastavení teploty a přístroj pracuje v provozním modu . 53 CZ CZ REŽIM NASTAVENÍ ČASU Tlačítko "teplota/ čas" stisknout 2x Symbol času (min) bliká a ukáže se poslední nastavený čas, který může být změněn pomocí "plus" nebo "mínus" . Pokud po spuštění modu nastavení času, popř . po změně času pomocí tlačítka "mínus" nebo "plus" nenastane 5 sekund žádná změna, opustí se modus nastavení času a přístroj pracuje v provozním modu . Naposledy nastavený čas se při dosažení požadované teploty snižuje . Tlačítko "mínus" ZAŘÍZENÍ S VÝPUSTNÝM KOHOUTEM (6) Řídké tekutiny můžete vypouštět výpustným kohoutem (6) . Při přípravě hustých jídel doporučujeme utěsnit zevnitř odtok do kohoutu (např . zátkou), abyste zabránili ucpání výpustného kohoutu . CENNÉ ZKUŠENOSTI K ZAVAŘOVÁNÍ Jak se všeobecně říká, oproti časům, kdy zavařovaly naše babičky, se nic nezměnilo! Snižování časového údaje krátkým opakovaným stisknutím tlačítka (1 minuta = nejnižší nastavení) . Pokud zůstane tlačítko stisknuté, snižuje se čas rychle . Zavařování znamená sterilizování zavařované suroviny bez přidávání konzervačních látek . Vytvářená stálá teplota zabíjí zárodky v zavařované surovině . Zároveň se vzniklým tlakem je zavařovací sklenice sterilně a vzduchotěsně uzavřena . Pokud se přístroj nachází v trvalém provozu před zahájením modu času (ukazatel času: - - min), přeskočí zadaný čas z - - trvalého provozu nejprve na 120 min . a pak se bude snižovat až na 0 . Jen zavařovací hrnec už není ten samý jako za dob našich babiček . Zavařovací automaty BIELMEIER přinášejí mnohostranné ulehčení práce, které by tehdy každá babička uvítala . Tlačítko "plus" Zvyšování časového údaje krátkým opakovaným stisknutím tlačítka (120 minut / - - trvalý provoz = nejvyšší nastavení) . Čas se zvyšuje rychle, pokud zůstane tlačítko stisknuté . Aby byl přístroj nastaven do trvalého provozu, musí být nastaven čas na - - trvalý provoz . Také během snižování času mohou být teplota a čas kdykoli změněny . VLASTNÍ ZAVAŘOVÁNÍ Příprava a čistota jsou z důvodu trvanlivosti nejdůležitější. Ovoce a zelenina by měly být jen té nejvyšší kvality, čerstvé a zralé . Ovoce a zeleninu (nerozkrájené) dobře umyjte a nechte okapat . sobem: – Max . 2 cm pod okraj, – U kašovité hmoty (jablečná dřeň) jen 4 cm pod okraj, – Zeniny všeho druhu plňte jen do ¾ sklenice, – Suroviny, které zvětší svůj objem (např . těsto na koláče) jen do ½ sklenice . – U sklenic dodržujte pokyny určené výrobcem . Sklenice pevně uzavřete šroubovacími, pružinovými uzávěry nebo svorkami . Sklenice stavte vždy na rošt . Můžete použít sklenice různé výšky . Sklenice mají stát ve vodě do ⁄ až ¾, při dvojité vrstvě platí pro vrchní řadu . Optimální výška plnění: Teplota sklenic by měla být stejná jako teplota Nasaďte poklici na spotřebič . Zapojte přístroj do zásuvky . Zjistěte si v re- ceptech nebo v kuchařce teplotu i dobu zavařování a nastavte je na vašem automatu BIELMEIER . Sklenice, plechovky a lahve nejprve pečlivě Doba zahřívání se nepočítá do doby zavařo- vání . Začíná teprve tehdy, když je dosažena zvolená teplota . Zkontrolujte, zda v nádobách nejsou připále- Na konci vaření vyjměte síťový kabel ze Přístroj je možné vypnout v každém stavu . Časové údaje v časovém modu nejsou uloženy . Umyjte také pečlivě uzávěry pod horkou vodou Vyjměte zavařovací sklenice . Svorky ponechte Naposledy nastavená teplota je uložena a objeví se při opětovném zapnutí zavařovacího automatu, i když byl mezitím přístroj odpojen od sítě . Nepoužívejte také žádné gumové těsnění, Po používání vypojte přístroj ze zásuvky . né zbytky nebo zda nejsou poškozené . a nechte je až do použití ponořené v čisté vodě . které je poškozené, vytahané nebo má póry . apod . zavařovat si vyberte v kuchařkách . Můžete se také podívat do našich receptů na s . 57 . ORIENTAČNÍ ZAVAŘOVACÍ TABULKA Ovoce Teplota černý rybíz 85°C jablka, hrušky 90°C jahody 75°C borůvky 85°C maliny, angrešt 80°C třešně, mirabelky 85°C broskve, meruňky, švestky 90°C rebarbora vařit Čas 20 min . 30 min . 25 min . 25 min . 30 min . 30 min . 30 min . 30 min . Zelenina květák fazole, hrách fazole kyselé okurky karotka, mrkev, kedluben dýně růžičková kapusta, kapusta, chřest rajčata 30 min . Teplota Čas vařit 90 min . vařit 120 min . vařit 90 min . 90°C 30 min . vařit 90 min . 90°C 30 min . vařit 120 min . 90°C vody, ušetříte tak čas i energii . umyjte horkou vodou, vypláchněte a nechte je uschnout na čisté utěrce . Vypnutí přístroje pomocí tlačítka "Ein/Aus". Jak a jakým způsobem ovoce, zeleninu, maso (obr. 1) Zelené fazole a hrách jsou trvanlivější, když je předem mírně podusíte (blanšírujete) . VYPNUTÍ PŘÍSTROJE Sklenice vždy naplňujte následujícím způ- zásuvky (5) . Maso Teplota Čas pečeně-plátek, vařit 75 min . předpe čené guláš vařit 75 min . zvěřina / drůbež, zapečené vařit 75 min . uzeninová směs vařit 120 min . Upozornění: Tyto údaje jsou jen orientační . Časy platí až po dosažení zvolené teploty . Recepty platí i v době zavařovacích automatů . až do úplného vychladnutí sklenic . Plechovky musíte ihned ponořit do studené vody . Zavařené suroviny je nejlépe uchovávat v suchu, chladu a ve tmě . Je účelné a praktické si sklenice popisovat (datum, obsah) . 54 55 CZ CZ ODŠŤAVNĚNÍ DBEJTE NA ŽIVOTNI PROSTŘEDI K tomuto účelu potřebujete odšťavňovací nástavec BIELMEIER BHG 430 (není součást dodávky) nebo jiný nástavec běžně dostupný v obchodech (průměr 35 cm). Do nádoby nalijte nejméně 6 l vody. Adaptační kroužek a odšťavňovací nástavec nasaďte na zavařovací automat (obr.2) . . . nyní (obr. 2) Obalový materiál a vysloužilé spotřebiče nevyhazujte do komunálního odpadu, ale na příslušná sběrná místa tomu určená. Příslušné recyklační středisko nebo sběrné místo zjistíte u obecní správy vašeho bydliště. V případě potřeby záruční opravy se obraťte na vašeho prodejce nebo na příslušné servisní středisko společnosti BIELMEIER. Podle evropské směrnice 2002/96/EG o použitých elektrických a elektronických přístrojích a její aplikace v národním právu se musí nepoužitelné přístroje třídit odděleně a ekologicky recyklovat. Na aktuální opatření o likvidaci elektroodpadu se informujte na příslušném obecním nebo městském úřadu. Připravené ovoce, zeleninu aj. vložte do koše na ovoce – nenaplňujte ho více než do ¾. Další detaily k přípavě si prosím vyhledejte v návodu k použití vašeho odšťavňovacícho nástavce nebo ve vašich kuchařkách. Nasaďte poklici na nástavec a ujistěte se, jestli správně doléhá. Jinak uniká energie, protože může unikat pára. Zapojte síťový kabel do zásuvky. Na ukazateli teploty zvolte 100°C, aby byl zaručen trvalý ohřev. Přepněte časový údaj na trvalý provoz a zaha- jte odšťavňování opětovným stisknutím tlačítka "Ein / Aus". Při ukončení provozu vypněte tlačítko "Ein / Aus" a vytáhněte přístroj ze zásuvky. Důležité: Při každém novém procesu odšťavňování musí být znovu doplněna voda. TECHNICKÉ ÚDAJE Zdroj proudu: 220 – 230 V ~ / 50 Hz Připojení: 1800 W Třída ochrany: I RECEPTY JABLKA Přídavek cukru Příprava sladká jablka: 300 - 400 g cukru na 1 litr vody kyselá jablka: 500 – 600 g cukru na 1 litr vody Jablka oloupejte, nakrájejte na čtvrtky a odstraňte jádřinec. Nakrájené kousky jablek vložte ihned do studené vody. Přidejte několik kapek citrónové šťávy, aby jablka nezhnědla. Kromě toho si můžete postavit na sporák cukrový roztok dle výše uvedeného poměru. Poté naplňte ovoce do sklenic, přelijte svařeným cukrovým roztokem a nechte zavařit 30 minut při 90ºC. MARMELÁDA – JAHODY-MALINY Přísady Příprava 500 g cukru Maliny je nutné pečlivě přebrat a propasírovat sítem. Jahody, malinovou dřeň a cukr pečlivě promíchejte a nechte chvíli odstát. Potom přidejte citrónovou šťávu. 750 g jahod 500 g malin šťáva z půlky citrónu Objem nádoby: 27 l v normálním modu 23 l v modu vaření (odpovídá naplnění 4 cm pod okrajem přístroje) Naplňte marmeládu do zavařovacích nebo šroubovacích sklenic, ihned je uzavřete a zavařujte 10 minut při 90º. Hmotnost: 6,05 kg Přístroj odpovídá evropským směrnicím č. 73/23 EWG a č. 89/ 336 EWG. Technické změny vyhrazenyn. MRKEV Info: je nutné mrkem předem uvařit! Příprava Pozor! Dobu ohřevu je nutno měnit: Pokud krájíte mrkev na plátky nebo na kousky, hodí se k tomu především mladá, ale ne příliš malá mrkev, jejíž aroma a jemnost pak vyváží námahu při přípravě. mrkev nakrájená na plátky nebo na kostky: 90 minut při 100ºC celá mrkev: 120 minut při 100º 56 Ovocnou směs přiveďte za stálého míchání k varu a vyzkoušejte, jestli dostatečně rosolovatí (1 čajovou lžičku marmelády dejte na studený porcelánový talíř – pokud ztuhne v krátké době, je marmeláda hotová). Z mrkve odřízněte nať, oškrabejte a ihned vložte do vody, aby mrkev neztratila svoji barvu. Potom nakrájejte mrkev na plátky nebo na kostičky a předvařte v hrnci asi pět minut. Poté ji rychle zchlaďte studenou vodou, naplňte do sklenic, zalijte svařeným slaným nálevem a celé vařte 90 minut při 100ºC. 57 CZ CZ ZÁRUČNÍ LIST TELECÍ ROLÁDA Pro záruku začínající dnem prodeje spotřebiče platí pro země EU (i Českou republiku) a Švýcarsko tyto podmínky: Příprava Info: před zavařením je nutné předem upéct! Přísady na 4 – 6 porcí 700 g telecí kýty (asi 4 – 6 řízků po 120 – 150 g) 2 cibule 50 g okurek (nakládaček) 50 g libové šunky 2 -3 polévkové lžíce středně ostré hořčice sůl a pepř 2 polévkové lžíce oleje 400 ml telecího vývaru Řízky naklepejte, cibuli, okurky a šunku nakrájejte na kostičky. Vše vymíchejte s hořčicí na jemnou hmotu. Rolády osolte a opepřete a doprostřed na ně rovnoměrně naneste připravenou hmotu. Přehněte strany, roládu pevně srolujte, omotejte nití nebo pomocí jemné špikovací jehlice a podélně nakrájených proužků slaniny spojte tak, aby roláda držela pohromadě. Rozpalte olej a rolády na něm zprudka ze všech stran orestujte. Zalijte telecím vývarem a přikryté (při středním stupni) duste, až bude maso měkké. Nakonec odstraňte nitě i jehlice, vložte rolády do sklenic, zalijte výpekem 3 cm pod okraj sklenice a zavařujte 75 minut při 100ºC. 1. Trvání záruky: 2 roky 2. Poskytování záruky: Přísady Příprava 500 g mouky 1/8 – ¼ l mléka 3 – 4 vejce 80 g cukru 12 g čerstvého droždí neb ½ balíčku sušené- Droždí zamíchejte do vlažného mléka, přidejte rozpuštěné vlažné máslo, sůl, cukr a vejce, vše smíchejte dohromady a nakonec zamíchejte prosetou mouku. Těsto prodělejte a nechte přikryté stát přes noc. ho špetka soli 150 g másla 200 g rozinek Další den těsto prodělejte znovu tak, aby se nedotýkalo stěn mísy, zároveň rychle zapracujte rozinky. poškrábání nebo fleky na spotřebiči a na světelné kontrolky nebo žárovky a na motorové kartáče. a) záruční opravu provedeme podle našeho zvážení opravou nebo výměnou vadných dílů, jestliže tyto závady vznikly prokazatelně vadou materiálu nebo chybou při výrobě. na lehce rozbitné díly z bakelitu, skla, plastů apod., pokud se nejedná o chybu materiálu. b)záruční oprava bude provedena jen při předložení tohoto záručního listu a dokladu o zaplacení. kdy je spotřebič zapojen do sítě s vyšším napětím než je na spotřebiči uvedeno. c) záruku mohou uplatnit pouze první majitelé spotřebiče. d)jestliže dojde k opravě nebo výměně spotřebiče v záruční době, záruční doba se prodlouží. KYNUTÝ ROZINKOVÝ KOLÁČ VE SKLE 3. Záruka se nevztahuje na případy: e) poplatky za dopravu hradí kupující. f) v případě, že se závada nebo škoda nedá odstranit, nebo se překročí doba servisního zásahu (30 dnů), bude spotřebič vyměněn za nový, nebo vráceny peníze v prodejně, kde byl spotřebič zakoupen. poškození jako následek chybné instalace nebo upevnění. chybného nebo neodpovídajícího použití. nedbalosti při používání. upadnutí spotřebiče nebo jeho jednotlivých částí. nevhodného transportu nebo nedostatečného zabalení. 4. Záruka zaniká: při použití spotřebiče jinak než v domácnosti. při provádění opravy nebo změny na spotřebiči osobou jinou než pověřenou naším servisem. Skleněný poklop vymažte tukem a vysypte strouhankou nebo strouhanými ořechy. Sklenice naplňte těstem zhruba do poloviny a nechte ještě krátce kynout. Pak je uzavřete poklopem a svorkami. Pečení a zavařování probíhá současně v horké vodní lázni 120 minut při 100°C. Na tento spotřebič poskytujeme 2 roky záruku na nedostatky, které jsou označeny jako výrobní chyby nebo chyby materiálu. Záruční doba začíná dnem prodeje a je uznána po předložení záručního listu a dokladu o zaplacení. Jiné nároky neuznáváme. Model: Důležité ! Prosím, napište si FD kód, který je umístěný na štítku: ne Prejeme Vam prijemne chvile strave eier! se zavarovacim automatem Bielm v vl l v 58 l l l l l razítko a podpis prodávajícího datum prodeje 59 ES INSTRUCCIONES DE USO Para todos los envasadores automáticos de BIELMEIER con regulación electrónica, indicador LCD INDICACIONES IMPORTANTES DE SEGURIDAD Nos alegramos de que se haya decidido por este producto y le damos las gracias por la confianza prestada. La seguridad de los aparatos eléctricos de BIELMEIER cumple con las reglas reconocidas de la técnica y con las disposiciones legales. Para que pueda sacar mucho provecho de su nuevo aparato automático envasador o de elaboración de vino caliente de BIELMEIER, le rogamos que tenga en cuenta cuidadosamente las siguientes indicaciones. ¡LEA DETENIDAMENTE LAS INSTRUCCIONES DE SEGURIDAD ANTES DE PONERLO EN FUNCIONAMIENTO POR PRIMERA VEZ Y GUÁRDELAS! El aparato no se puede poner en funcionamiento si: – el cable de enchufe está dañado, – el aparato muestra daños, – el aparato se hubiera caído, – el aparato estuviera húmedo o mojado por fuera. En el caso de daños evidentes en el aparato o en el cable, haga que un técnico o el servicio de atención al cliente de BIELMEIER lo comprueben. Enchufe el aparato solo a corriente alterna conforme a la placa de ca racterísticas (enchufe Schuko). Desarrolle completamente el cable. Pero no deje que el cable quede colgado. Se ha de quitar el enchufe (5): – en caso de perturbaciones durante el servicio, – antes de cada limpieza y cuidado, – después del uso. Hay que colocar el aparato sobre una superficie estable, plana, y libre. No coloque nunca el aparato y el cable sobre superficies calientes o en las proximidades de fuego abierto, hornillos de gas, etcétera. 60 ES ¡Atención! Coloque el aparato allí donde desea usarlo. Coloque dentro los tarros de envasado y llene el aparato con agua, tal como se indica en la Fig. 1 (p. 65). Sólo entonces deberá conectar el enchufe (5) a una toma de corriente puesta tierra. ¡Transporte el aparato siempre vacío y frío! ¡El aparato de envasado lleno es muy pesado, con lo cual se crearía un peligro de lesiones! ¡Levante el aparato por los asideros, solo frío y completamente vacío! En caso de incumplimiento, existe amenaza de peligro de escaldaduras y/o quemaduras. No vacíe nunca el aparato caliente inclinándolo. Con el aparato ca liente solo se puede extraer el contenido exclusivamente a través del grifo de purga, en caso de existir. Si esto no fuera posible, se tiene que esperar hasta que el aparato y el contenido se hayan enfriado. Al inclinar el aparato lleno y caliente existe peligro de quemaduras y/o escaldaduras. Llene en el aparato antes de conectarlo. No encienda el aparato sin agua, ya que entonces se podría dañar el esmalte y la reja de apoyo con recubrimiento (no incluida en el volumen de suministros). Si, a pesar de todas las precauciones, esto sucediera, es preciso esperar para llenar el agua hasta que el aparato se haya enfriado, pues de lo contrario la creación repentina de vapor podría provocar escaldaduras. Llene la caldera (2) hasta 4 cm por debajo del borde (corresponde a 23 l del modo de cocción). El desbordamiento es peligroso y puede dañar el aparato. ¡Cuidado! ¡Debido a la salida de vapor existe peligro de escaldaduras! ¡Cuidado! ¡El aparato se calienta durante el servicio! Sujete por ello el aparato sólo por los asideros aislados o con agarradores aislantes. ¡Nos sumerja nunca el aparato en agua! Proteja asimismo el cable contra la humedad. Retire siempre el enchufe después del uso y deje enfriar el aparato. 61 ES ES Este aparato no estás destinado a ser utilizado por personas (inclusive niños) con discapacidades físicas sensoriales o intelectuales o con falta de experiencia y/o falta de conocimientos, salvo que sean vigiladas por una persona responsable de su seguridad o reciban instrucciones de esta sobre cómo se ha de utilizar el aparato . Hay que vigilar a los niños para asegurarse de que no jueguen con el aparato . Este aparato solo es apropiado para el uso doméstico y no para una aplicación industrial . En caso de uso para fines ajenos o de manejo falso, no es posible asumir garantías por eventuales daños . MANEJO DEL APARATO Indicador de tiempos 1-120 minutos y - - = Servicio permanente Indicador de temperatura 30°-100°C °C Selector Temperatura/tiempo Encendido/apagado Menos INFORMACIONES GENERALES Capacidad: El envasador automático de BIELMEIER tiene una capacidad de 27 l . El nivel del líquido puede llegar hasta, como máximo, 4 cm por debajo del borde superior . El aparato se puede utilizar para varios fines: envasado con esterilización, calentamiento al baño María, preparación de bebidas calientes, guisar, calentar, blanquear verduras, etcétera . Los platos espesos, que tiendan a quemarse, tienen que calentarse removiendo permanentemente . Por favor, tenga en cuenta lo siguiente: si su aparato cociera hasta quedar vacío, entonces una protección adicional contra el secado impide un excesivo recalentamiento . Importante: deje enfriar bien el aparato antes de volver a llenarlo con agua, pues de lo contrario existe peligro de escaldadura debido a la formación de vapor. Además, el recipiente puede dañarse. 62 Llene el aparato antes de usarlo . ¡No sobrellene la caldera (2)! Llene la caldera (2) hasta, como máximo, 4 cm por debajo del borde . El desbordamiento es peligroso y puede dañar el aparato. Los líquidos que permanezcan en la caldera después del uso (2) tienen que ser achicados completamente o vaciados por el grifo de purga (6) -en caso de existir . ¡No incline el aparato! LIMPIEZA Al utilizar el aparato por primera vez, se pueden desprender olores, que se disiparán tras un breve tiempo de servicio . Por razones de higiene, debería Vd. cocer en el aparato aproximadamente 6 l de agua antes de usarlo por primera vez. Retire el líquido de limpieza o evácuelo a través del grifo de purga (6) – caso de existir . ¡No incline el aparato para vaciarlo! Antes de usar el aparato por primera vez, limpie esmeradamente la parte interior de la Más caldera (2) . Por favor, tenga en cuenta aquí la sección ''Limpieza'' . Antes de limpiar el aparato, retire siempre el enchufe de la toma de corriente . ¡No sumerja nunca en agua el aparato! Límpielo por fuera con el enchufe retirado (5) con un paño húmedo . No utilice medios de limpieza cortantes o abrasivos . Límpielo por dentro . Los restos de cal que se pudieran dar, los puede eliminar de cuando en cuando con agua y vinagre o con un descalcificador usual en el mercado . ¡A continuación, cocer agua clara! INFORMACIONES IMPORTANTES SOBRE EL USO DEL APARATO min De vez en cuando hay que limpiar el grifo de purga (6) – en caso de existir – con agua caliente a la que se puede añadir detergente . Inserte el enchufe El display se ilumina Enciéndalo o Modo de servicio MODO DE INTRODUCCIÓN DE TEMPERATURA T/min ''Temp./Tiempo'' pulsar la tecla 1 vez Tecla: pulse 1 vez: CONEXIÓN DEL APARATO Después de encender el aparato accionando el interruptor de ''Encendido/apagado'', se iluminan todos los segmentos de LCD (Liquid Crystal Display) durante un segundo . Se indica la temperatura utilizada por última vez . Las cifras del indicador de temperatura parpadean si la temperatura medida en el envasador se desvía de la temperatura ajustada (temperatura teórica) . Al alcanzarse la temperatura ajustada, se iluminan las cifras de forma continua . Tiempo: - - = servicio permanente El aparato se calienta hasta la temperatura ajustada y marcha el servicio permanente hasta accionar de nuevo la tecla ''Encendido/apagado'' . El símbolo de temperatura (°C) parpadea, las cifras se iluminan de forma permanente si la temperatura teórica no se ha alcanzado . Tiempo: - - en servicio permanente; la calefacción no se interrumpe durante el Modo entrada de valores, se calienta hasta la temperatura teórica o se mantiene la temperatura teórica . Tecla ''Menos'' Cuenta atrás de la temperatura; presionando brevemente la tecla, desciende el indicador en pasos de uno; hasta 30 °C (ajuste de temperatura más bajo) . Manteniendo la tecla apretada, desciende rápidamente el indicador de temperatura . Tecla ''Más'' Se eleva la temperatura; presionando brevemente la tecla, asciende el indicador en pasos de uno; hasta 100°C (máximo ajuste de la temperatura) . Manteniendo la tecla apretada, asciende rápidamente el indicador de temperatura . Si después del arranque del Modo entrada de temperatura o después de cambiar la temperatura con la tecla “Menos” o “Más”, no se efectúa un cambio tras 5 segundos, se abandona el Modo entrada de temperatura y el aparato pasa al Modo de servicio . 63 ES ES MODO DE INTRODUCCIÓN DE TIEMPO °C/min ''Temp./tiempo'' Pulsar la tecla 2 veces El símbolo de tiempos (min) parpadea y es indicado el tiempo ajustado por última vez, que puede ser modificado con ''Menos'' o ''Más'' .Si después del arranque del Modo entrada de tiempos o después de cambiar la temperatura con la tecla ''Menos'' o ''Más'', no se efectúa un cambio tras 5 segundos, se abandona el Modo entrada de tiempos y el aparato pasa al Modo de servicio . El tiempo ajustado por última vez cuenta hacia atrás al alcanzarse la temperatura ajustada (temperatura teórica) . Tecla ''Menos'' Cuenta atrás del tiempo; presionando brevemente la tecla, desciende el indicador en pasos de uno; (1 minuto = ajuste más bajo) . Manteniendo la tecla apretada, desciende rápidamente el contador de tiempo . Si el aparato se encontraba en servicio antes de llamar el modo de tiempo (indicador de tiempo: - - min), entonces el tiempo indicado salta de - servicio permanente, primeramente, a 120 min, contando después hacia atrás hasta cero . Tecla ''Más'' Eleva el tiempo; presionando brevemente la tecla, asciende el indicador en pasos de uno; (120 min/ - - servicio permanente = ajuste más alto posible) . Manteniendo la tecla apretada, asciende rápidamente por el contador de tiempo . Para cambiar de nuevo al servicio permanente, se tiene que poner el tiempo en el Modo de entrada de tiempos en - - servicio permanente . También en la cuenta atrás del tiempo se pueden cambiar en todo momento la temperatura y el tiempo . Es almacenada la temperatura ajustada por último y aparece al volver a conectar el envasador, también si el aparato ha estado desconectado de la red durante este tiempo . Extraiga adicionalmente el enchufe después de usar el aparato . APARATOS CON GRIFO DE DESCARGA (6) Puede extraer líquidos fluidos por el grifo de purga (6) . En la preparación de comidas espesas, recomendamos obturar la toma del grifo en el interior del aparato, p . ej . con un tapón . DIGNO DE SABER SOBRE EL ''ENVASADO'' Dicho sea antes de nada: ¡respecto a las reglas de envasado de la abuela, nada ha cambiado! Envasar significa esterilizar la conserva sin substancias químicas conservantes . El calor uniforme generado mata los gérmenes contenidos en el producto a conservar; al mismo tiempo, por la baja presión que se genera, el recipiente de conserva se cierra libre de gérmenes y hermético al aire . ¡Solo que la caldera de envasado no es la misma que en tiempos de la abuela! Las ollas de envasado automáticas de BIELMEIER le van a suponer mucho alivio, que también la abuela hubiera querido gozar! ENVASAR: ¡ASÍ FUNCIONA! La preparación y la limpieza son, por ra- zones de conservación, el primer mandamiento. La fruta y las verduras deberían ser de buena calidad, frescas y maduradas de forma óptima . Limpie la fruta y la verdura sin cortarla y déjela gotear . APAGADO DEL APARATO Las judías verdes y los guisantes se conservan mejor si se blanquean antes . Desconecte presionando la tecla ''Encendido/apagado''. El aparato se puede desconectar en cualquier estado . Las entradas de tiempos en el Modo de entrada de tiempo no son almacenadas . 64 Limpie antes tarros o vasos, latas y botellas esmeradamente con agua calienta para enjuagar . Enjuague a continuación con agua clara y déjelos gotear sobre un paño seco . Compruebe que en los recipientes no quedan adheridos restos y que no están dañados . Limpie también con esmero las tapas, con agua caliente de aclarar, y déjelas en agua clara hasta usarlas . No haga uso de aros de goma o caperuzas porosas, dañadas o deformadas . Llene los recipientes del siguiente modo: – por principio, llene envasado solo hasta 2 centímetros por debajo del borde, – en el caso de envasado en forma de puré (p . ej . mus de manzana), deje libres de 3 a 4 centímetros, – en el caso de salchicha de todo tipo, llene el recipiente solo hasta ¾, – en el caso de envasados que se esponjan (p . ej . masa de tortas), solo hasta de la altura del vaso . – Tenga también en cuenta las respectivas indicaciones al comprar los vasos . (Fig. 1) Cierre firmemente los recipientes con grapas, cierres a presión o de rosca . Coloque siempre los vasos sobre la reja de envasado (no incluida en el volumen de suministro) . Puede utilizar también tarros de diferentes alturas . Los tarros deben estar de 2⁄3 a ¾ en agua; en el caso de dos capas, la capa de arriba . Altura óptima del agua: Al colocar los tarros, la temperatura del agua debe ser aproximadamente igual que la temperatura de los tarros . Esto ahorra energía y tiempo . Coloque la tapa (1) sobra la cuba (2) . Enchufe el aparato . Consulte la temperatura y el tiempo de envasado en un libro de recetas o en un libro de envasados, y ajústela en su envasador automático BIELMEIER . El tiempo de calentamiento no cuenta como tiempo de envasado . El tiempo de envasado comienza solo en el momento que se haya alcanzado la temperatura seleccionada . Una vez transcurrido el tiempo de envasado, quite el enchufe de red (5) . Retire los recipientes calientes . Deje las grapas en los recipientes hasta su completo enfriamiento . La latas se tienen que poner inmediatamente en agua fría . Los envasados se guardan de forma óp- tima en un lugar seco, fresco y obscuro . Es útil rotular los tarros, vasos, latas, etc . (con la fecha y el contenido) . En sus libros de cocina podrá encontrar cómo y de qué distintas maneras puede envasar Vd . fruta, verdura, carne, etc . Vea al respecto también nuestros ejemplos de recetas en la p . 67 . TABLA DE ENVASADO Fruta Grosellas Manzanas, peras Fresas Arándanos Frambuesas, uvas espina Cerezas, ciruelas amarillas Melocotones, albaricoques, ciruelas japonesas Ruibarbo Temp. 85°C 90°C 75°C 85°C 80°C 85°C 90°C Tiempo 20 min . 30 min . 25 min . 25 min . 30 min . 30 min . 30 min . cocer 30 min . Verdura Coliflor Frijoles, guisantes Judías grandes Peninos en vinagre Zanahorias, colinabo Calabaza Col de Bruselas, col de Milán, espárragos Tomates Carne Asado, prefrito Gulasch, ligeramente cocinado Caza / volatería, ligeramente cocinada Masa de salchicha Temp. Tiempo cocer 90 min . cocer 120 min . cocer 90 min . 90°C 30 min . cocer 90 min . 90°C 30 min . cocer 120 min . 90°C Temp. cocer cocer 30 min . Tiempo 75 Min . 75 Min . cocer 75 Min . cocer 120 Min . 65 ES ES Indicación: Estos datos sirven solo a modo de orientación. Los tiempos son válidos solo a partir del momento en que se alcanza la respectiva temperatura. Las recetas de la abuela siguen siendo válidas, también con el envasador automático o completamente automáticos. EXTRACCIÓN DE ZUMO Para ello se necesita la pieza adicional de extracción de zumos de BIELMEIER BHG 430 (no contenida en el volumen de suministro) u otro extractor de zumos usual en el mercado, con un diámetro de 35 cm. Llene el envasador al menos 6 l de agua. Coloque en el envasador automático la pieza adicional de extracción de zumo, tal como lo muestra Fig. 2. accesorio de exprimidor No tire simplemente a la basura el material de embalaje y el aparato fuera de servicio, sino entréguelo para su reciclaje. Pregunte en su administración local por la estación de reciclaje competente o el punto limpio más próximo. MANZANAS Para tener derecho a los servicios de garantía, por favor, diríjase a su comerciante o a la central de atención de al cliente de BIELMEIER en su país. Conforme a la directriz europea 2002/96/CE sobre dispositivos eléctricos y electrónicos y a la incorporación al Derecho nacional, los aparatos eléctricos usados tienen que ser recogidos por separado y entregados para un reciclaje conforme al medio ambiente. Por favor, infórmese en su Ayuntamiento sobre las medidas de recogida actualmente vigente para aparatos eléctricos usados. Fuente de corriente: 220 – 230 V ~ / 50 Hz . . . hoy (Fig. 2) Valor de conexión: 1800 W Añada fruta, verdura, etc., preparada en la ca- Clase de protección: I Coloque la tapa (2) sobre el aditamento y Volumen de la caldera: 27 litros en modo normal 23 litros en modo de cocido (corresponde al llenado hasta 4 cm por debajo del borde del aparato) nasta – pero no llene más que hasta ¾. Otros detalles sobre la preparación del envasado los puede obtener de las instrucciones de servicio de la pieza adicional o de sus libros de cocina. asegúrese de que cierra limpiamente, puesto que puede escaparse vapor. Aditamento de azúcar para manzanas dulces: 300 - 400 g de azúcar por 1 l de agua para manzanas ácidas: 500 - 600 g de azúcar por 1 l de agua CONFITURA DE FRESAS Y FRAMBUESAS Ingredientes Preparación 500 g de azúcar 750 g de fresas 500 g de frambuesas zumo de medio limón Se escogen y se limpian bien las frambuesas y se pasan por un colador. Mezclar las fresas, la masa de frambuesas y el azúcar y dejarlo que se haga algún tiempo. Después, añadir el zumo de limón. Conecte el enchufe de su envasador automáti- El aparato cumple con la directriz UE n° 73/23 CEE y n° 89/336 CEE. Información: ¡Cocer sin falta antes del envase! Seleccione 100 °C en el indicador de tempera- Nos reservamos el derecho a realizar modificaciones técnicas. Ponga el indicador de tiempo en servicio per- manente y encienda el envasador accionando la tecla ''Encender/apagar''. Desconecte al final del servicio la tecla ''Encender/apagar'' y extraiga el enchufe de red de su envasador. Importante: Antes de proceder nuevamente a extraer zumo, se tiene que volver a llenar agua. Se pelan las manzanas, se cortan en cuatro y se elimina el corazón. Los trozos de manzana se colocan inmediatamente en agua fría. Para que la fruta no se pase o se ponga marrón, se añaden algunas gotas de jugo de limón. Después se coloca la frutas en los tarros y se llena con la solución de azúcar cocida y se cuece envasa 30 minutos a 90°C. ZANAHORIAS tura para asegurar una calefacción ininterrumpida. Preparación Al mismo tiempo, se pone a calentar la solución de azúcar conforme a la relación indicada. Peso: 6,05 kg co en una toma de corriente. 66 RECETAS DATOS TÉCNICOS Olla eléctrica y dispensador de bebidas calientes . . . hasta POR AMOR AL MEDIO AMBIENTE ¡Atención! La duración del calentamiento varía: para zanahorias en rodajas o en cubitos: 90 minutos a 100°C para zanahorias enteras: 120 minutos a 100°C La mezcla de frutas se pone a hervir removiéndola y cocinándola hasta la prueba de gelatinización (poner sobre un plato de porcelana frío – si gelatiniza en un tiempo breve, entonces ya está lista). Llene la confitura en los tarros de envase, ciérrelos inmediatamente y se cuece 10 minutos a 90°C. Preparación Si se cortan las zanahorias en rodajas o en cubitos, son apropiadas especialmente las zanahorias jóvenes, aunque no demasiado pequeñas, cuyo aroma y delicadeza justifican el trabajo de la preparación. Después de haber cortado las ramas de la zanahoria, se raspa la piel externa con un cuchillo de cocina y se colocan inmediatamente en agua fresca, para que no palidezca su buen color. Después se cortan las zanahorias en rodajas o cubitos y se pre-cocinan en una olla unos cinco minutos. Luego se bañan brevemente con agua fría, se llenan con ella los tarros, se riegan con una ligera solución de agua con sal hervida y se cuece 90 minutos a 100°C. 67 ES ES GARANTÍA ROLLOS DE TERNERA Información: ¡cocer sin falta antes del envase! Ingredientes para 4 - 6 porciones 700 g de pierna de ternera (aprox. 4 - 6 escalopes de 120 - 150 g) 2 cebollas 50 g de pepinillos en escabeche 50 g de jamón magro 2 - 3 cucharas soperas de mostaza medio picante sal y pimienta 2 dos cucharas soperas de aceite 400 ml de fondo de ternera Preparación Eventualmente se golpean los escalopes. Cortar en cubitos pequeños las cebollas, los pepinos y el jamón. Mezclar todo con la mostaza para formar una masa suave. Condimentar los escalopes con sal y pimienta y repartir la masa desde el centro. Doblar los lados, enrollar firmemente y atarlos con un hilo o mantener compactos los rollos con cintas de tocino cortadas longitudinalmente, con ayuda de agujas de mechar. Calentar el aceite en un estofador y freír a fuego vivo los rollos por todos lados. Añadir el fondo de ternera y cocerlo a temperatura media, hasta que estén hechos. A continuación, retirar los hilos o las agujas de mechar, colocar los rollos en tarros, llenar con la salsa hasta 3 cm por debajo del borde del tarro y se cuece 75 minutos a 100°C. TORTA DE PASAS CON LEVADURA Ingredientes Preparación 500 g de harina 1⁄8 – ¼ litro de leche 3 – 4 huevos 80 g de azúcar 12 g de levadura fresca o Desleír la levadura con leche tibia, añadir la mantequilla tibia, sal, azúcar y los huevos y mezclarlo todo. Pasar la harina por el colador y añadirla a la mezcla. Amasar la mezcla y dejarla por la noche cubierta. Al siguiente día se amasa de nuevo la masa hasta que se desprenda de la hondilla, entonces se añaden y se mezclan rápidamente las pasas. ½ paquete de levadura seca algo de sal 150 g de mantequilla 200 g de pasas A continuación, engrasar bien los tarros y empolvorearlos con harina o con nuez molida. Llenar los tarros hasta la mitad con la masa, dejarlos fermentar brevemente. Cierre los vasos con la tapas y las grapas. El cocinado y el envasado tiene lugar simultáneamente en un baño María por 120 minutos a 100°C. Para la garantía, que comienza el día de la venta, son válidas dentro de la UE y en Suiza las siguientes disposiciones: 1. Duración de la garantía: 2 años 2. Prestaciones de garantía: a) de nuestra elección: reparación o recambio de piezas, que según nuestra inspección muestran fallos de material o de fabricación. b) La garantía sólo es prestada previa presentación de esta tarjeta de garantía y de la factura de compra. La tarjeta es sólo válida si se ha rellenado completamente el día de venta. ! 68 para arañazos y manchas en el aparato. Para lámparas de iluminación y control. para piezas frágiles, de vidrio, plástico, etcétera, salvo que se trate de defectos de material que sean reconocidos como tales por nosotros. por daños causados por falsa instalación o fijación. c) Las prestaciones de garantía sólo son válidas frente al primer consumidor. si el aparato se conecta a la red con una tensión superior a la indicada para el aparato. d) Por la reparación o el recambio de piezas dentro del período de garantía no se extiende o renueva el período de garantía original. en caso de manejo erróneo o inadecuado. e) Los costos de transporte corren a cargo del comprador (es válido no sólo para los primeros seis meses del período de garantía). por dejar caer el aparato o piezas individuales. f) En la medida en que no se pueda eliminar el daño o defecto, o que la mejora sea rechazada por nosotros o que se demore de forma no exigible, dentro de los seis meses contados a partir de la fecha de compra o suministro, según deseo del receptor final se suministrará sustitución libre de costes o se abonará la depreciación de la mercancía o se admitirá la devolución del aparato contra el abono del precio de compra, aunque no por encima del precio de mercado usual. por falta de cuidado. por mantenimiento insuficiente o erróneo. por transporte o embalaje inadecuado para el transporte. 4. La garantía se extingue: si el aparato es utilizado para otros fines que los domésticos. si personas que no han sido autorizada por nuestra compañía han realizado reparaciones o modificaciones en el aparato. Para este aparato prestamos una garantía de 2 años por defectos que pueden ser originados por fallos de fabricación o de material. El período de garantía comienza el día de la entrega y es concedida solo previa presentación de la tarjeta de garantía y de la factura de compra. No existen otras pretensiones que vayan más allá de estas. Modelo: n Le deseamos que disfrute mucho co lmeier! su envasador automa'tico de Bie 3. La garantía no es válida: Sello y firma del vendedor ¡Importante! Por favor, anote aquí el código FD que se encuentra en la placa de características del aparato: Fecha de venta 69 DE 70 Notizen GB Notes FR Notes IT Note CZ Poznámky ES Notas DE Notizen GB Notes FR Notes IT Note CZ Poznámky ES Notas 71 Bielmeier Hausgeräte GmbH Gnaglbergstraße 6 D-94267 Prackenbach +49 (0) 9942 94 88 93-0 +49 (0) 9942 94 88 93-22 [email protected] www.bielmeier-hausgeraete.com