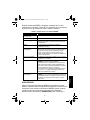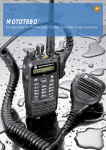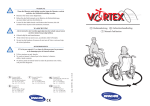
1
cover.fm Page 0 Tuesday, August 21, 2007 4:35 PM
IMPRESTM
Adaptive
Multi-Unit Charger
Accessories
EN
LAS
BP
FRC
IT
简
ID
PR
NL
DE
RU
FR
ES
MUC.book Page 0 Tuesday, September 25, 2007 12:03 PM
This accessory manual is applicable to the following IMPRES Multi-Unit chargers that are
available for the MOTOTRBO Professional Digital Radios:
WPLN4211, WPLN4212, WPLN4213, WPLN4214, WPLN4215, WPLN4216, WPLN4217,
WPLN4218, WPLN4219, WPLN4220, WPLN4221, WPLN4222, WPLN4223, WPLN4224,
WPLN4237, WPLN4238, WPLN4239, PMLN5255, PMLN5256, PMLN5257, PMLN5258,
PMLN5259, PMLN5260
MOTOROLA, the Stylized M Logo, the MOTOTRBO logo and the IMPRES Logo are registered trademarks
of Motorola, Inc.
All other product or service names are the property of their respective owners.
© 2006, 2007 by Motorola, Inc. All Rights Reserved.
MUC.book Page 1 Tuesday, September 25, 2007 12:03 PM
TABLE OF CONTENTS
Operational Safety Guidelines ....................................................3
Charging Procedure ........................................................................ 4
Initialization.................................................................................5
Automatic Reconditioning...........................................................6
Manually Terminating the Reconditioning Process ......................... 6
Manually Initiating the Reconditioning Process ............................... 6
Troubleshooting..........................................................................7
Service........................................................................................8
Motorola Authorized Power Cords..............................................9
Motorola Authorized Batteries ....................................................9
IMPRES Feature / Benefit Description .....................................10
Charger Display Module (CDM) ...............................................11
General Display Information .......................................................... 11
Sequencing Diagrams for IMPRES Batteries ................................ 16
Display Text Orientation ................................................................ 19
1
English
Operating Instructions ................................................................4
MUC.book Page 2 Tuesday, September 25, 2007 12:03 PM
English
IMPORTANT
SAFETY INSTRUCTIONS
SAVE THESE INSTRUCTIONS
This document contains important safety and operating instructions.
Please read these instructions carefully and save them for future
reference.
Before using the battery charger, read all the instructions and
cautionary markings on (1) the charger, (2) the battery, and (3) the
radio using the battery.
1. To reduce risk of injury, charge only the rechargeable
Motorola-authorized batteries listed in Table 4. Other
batteries may explode, causing personal injury and
WARNING
damage.
!
2. Use of accessories not recommended by Motorola may result in
risk of fire, electric shock, or injury.
3. To reduce risk of damage to the electric plug and cord, pull by the
plug rather than the cord when disconnecting the charger.
4. An extension cord should not be used unless absolutely necessary.
Use of an improper extension cord could result in risk of fire and
electric shock. If an extension cord must be used, make sure that
the cord size is 18AWG for lengths of up to 100 feet (30.48m), and
16AWG for lengths up to 150 feet (45.72m).
5. To reduce risk of fire, electric shock, or injury, do not operate the
charger if it has been broken or damaged in any way. Take it to a
qualified Motorola service representative.
2
MUC.book Page 3 Tuesday, September 25, 2007 12:03 PM
WARNINGS (continued)
!
7. To reduce risk of electric shock, unplug the charger from the AC
outlet before attempting any maintenance or cleaning.
8. For fuse replacement, use only fuses of the same type and rating
listed on the charger label. Replace fuses with Cooper-Bussman
GDC-3.15 or approve equivalent only. The following parts can be
ordered from Motorola Radio Products and Services Division (1800-422-4210 [US and Canada] or 1-847-538-8023 [International]):
Fuse
Cover
6571489S01
0987739G01
OPERATIONAL SAFETY GUIDELINES
• Turn the radio off when charging the battery.
• This equipment is not suitable for outdoor use. Use only in dry
locations/conditions.
• Connect equipment only to an appropriately fused and wired supply
of the correct voltage (as specified on the product).
• Disconnect from line voltage by removing the main plug from the outlet.
• The socket outlet to which this equipment is connected should be
close and easily accessible.
• For equipment using fuses, replacements must comply with the type
and rating specified in the equipment instructions.
• Maximum ambient temperature around the charger must not exceed
40°C (104°F).
• Make sure the cord is located where it will not be stepped on, tripped
over, or subjected to water, damage, or stress.
• This unit utilizes the same wall mount unit as the NTN4796 Multi-Unit
Charger. The wall mount part number is NLN7967.
3
English
6. The IMPRES Adaptive Multi-Unit Charger can only be
repaired by a qualified service technician authorized by
Motorola. Any violation of this policy can void unit
WARNING
warranty.
MUC.book Page 4 Tuesday, September 25, 2007 12:03 PM
English
OPERATING INSTRUCTIONS
The IMPRES Adaptive Charger System is a fully automated battery
care system. All a user needs to do is follow these simple steps:
1. Place the radio / IMPRES battery into the charger.
2. Remove the radio / IMPRES battery when it's fully charged (LED
turns steady GREEN).
The charger pockets accommodate either a radio with an IMPRES
battery attached or an IMPRES battery alone. Prior to charging a
radio with an IMPRES battery, turn the radio off. Batteries charge
best at room temperature.
Charging Procedure
1. Plug the charger end of the power supply cord into the power
receptacle located at the back of the charger.
2. Plug the wall receptacle end of the power supply cord into the
appropriate AC outlet. A successful power-up sequence is
indicated by a SINGLE GREEN BLINK on the charger indicator.
3. Insert an IMPRES battery, or a radio with an IMPRES battery (with
the radio turned off), into the charger’s pocket by:
a. Aligning the groove on each side of the battery with the
corresponding raised rail on each side of the charger pocket.
b. Pressing the battery toward the rear of the pocket.
c. Sliding the battery into the charger pocket, ensuring complete
contact between the charger and battery contacts.
4. To remove a radio or IMPRES battery from the charger, use two
hands to remove a radio or battery from the charger pocket - one
hand to hold and support the charger, and the other hand to remove
the radio or battery.
4
MUC.book Page 5 Tuesday, September 25, 2007 12:03 PM
Table 1. IMPRES Battery Charging Indicators
Charge Indicator
Description
Single Green Blink
Charger has successfully powered up.
Steady Red
Battery is in rapid charge mode.
Blinking Green
Battery has completed rapid charge (>90% available
capacity). Battery is in Top-Off charge (Trickle
charge).
Steady Green
Battery has completed charging and is fully charged.
Blinking Orange
Battery is recognized by charger but is waiting to
charge. (Either the battery voltage is too low or the
battery temperature is too low or too high to allow
charging. When this condition is corrected, the battery
will automatically begin charging.)
Blinking Red
Battery is unchargeable or not making proper contact.
Steady Orange
(This feature applies to IMPRES batteries only)
Battery is in recondition or initialization mode. The
length of time the charger remains in this mode
depends upon the state of charge remaining in the
battery when inserted. (Fully charged batteries require
more time to recondition – 8 to 12 hours or more –
than fully discharged batteries.)
Blinking Red/Green
(This feature applies to IMPRES batteries only)
Battery has completed charging and is fully charged.
Battery continues to be usable, but may be nearing
the end of its rated service life.
INITIALIZATION
In order for the features of Motorola IMPRES batteries and the
Adaptive Charging System to be fully available, the data contained in
Motorola IMPRES batteries must be initialized by the charger the first
time it is charged. This process is indicated by a STEADY ORANGE
light on the charger indicator (the same as if the battery were
reconditioning). The process is automatic, includes an initial
reconditioning of the battery, and begins charging upon completion of
this process. This process requires time to initialize the battery, so the
battery should be left in the charger for approximately 12 hours to
5
English
Once the IMPRES battery is properly seated into the pocket, the
charger indicator illuminates, indicating the charger has recognized the
presence of the battery. Refer to the charging indicators in Table 1.
MUC.book Page 6 Tuesday, September 25, 2007 12:03 PM
English
complete the process. Do not remove the battery from the charger until
the STEADY GREEN light is on.
AUTOMATIC RECONDITIONING
The Motorola IMPRES Adaptive Charger, when used in conjunction
with a Motorola IMPRES battery, has the ability to determine when it is
appropriate to recondition the battery (required to remove memory
issues in IMPRES batteries).
When an IMPRES battery is properly inserted into the charger, the
charger determines if it is appropriate to recondition the battery. If the
battery needs reconditioning, the charger automatically indicates a
STEADY ORANGE. This process may take up to 12 hours to
complete, depending upon the state of charge and capacity rating of
the battery when it is inserted.
It is important to note, for this process to be effective, the IMPRES
battery must be allowed to complete the recondition/recharge process.
Leave the battery in the charger until the charger indicates a STEADY
GREEN.
At the completion of the recondition cycle, the charger automatically
recharges the IMPRES battery.
Manually Terminating the Reconditioning Process
At any time during the reconditioning process of a Motorola IMPRES
battery (STEADY ORANGE indication), reconditioning may be
terminated by removing and reinserting the battery back into the
charger within 5 seconds. This causes the charger to terminate the
reconditioning process and begin the charging process. The charger
indicator changes to a STEADY RED. The charger will attempt to
recondition the battery at the next battery insertion.
Manually Initiating the Reconditioning Process
Within 2-1/2 minutes of the initial insertion of an IMPRES battery
(STEADY RED indication), remove and reinsert the battery within 5
6
MUC.book Page 7 Tuesday, September 25, 2007 12:03 PM
TROUBLESHOOTING
When troubleshooting, always observe the color of the LED.
Table 2. Troubleshooting
Problem
No charger
indication
What it means...
What to do...
1a. Charger contact is not
being made.
1a. Check that the radio with
battery, or the battery alone, is
inserted correctly.
1b. • Make sure that the power
cord is securely plugged into
the charger and an
appropriate AC outlet, and
that there is power to the
outlet.
1b. No power to the
charger.
• Replace fuses.
Blinking Red
Indication
2a. Charger contact is not
being made.
2b. Battery is not
chargeable.
7
2a. • Remove the battery from the
charger and replace it back
into the charger.
• Verify that the battery is a
Motorola-authorized battery
listed in Table 4. Other
batteries may not charge.
• Remove power from the
battery charger and, using a
clean dry cloth, clean the
gold metal charging contacts
of both the battery and the
charger.
2b. Replace battery.
English
seconds to manually force reconditioning to occur. The charger
indicator changes from a STEADY RED to a STEADY ORANGE. This
forces the charger to recondition and automatically recharge the
battery. This is a useful feature to have when IMPRES batteries have
been in storage for several months or longer. Two or three manual
recondition cycles may be required to rejuvenate the batteries, due to
long term storage conditions.
MUC.book Page 8 Tuesday, September 25, 2007 12:03 PM
Table 2. Troubleshooting (continued)
English
Problem
Blinking
Orange
Indication
What it means...
3.
What to do...
Battery is waiting to
charge. The battery
temperature may be
below 5°C (41°F) or
above 40°C (104°F) or
the battery voltage may
be lower than the
predetermined
threshold level for rapid
charging.
3.
When this condition is
corrected, the battery will
begin charging automatically.
SERVICE
the IMPRES Adaptive Multi-Unit Charger can only be repaired by a
qualified service technician authorized by Motorola. Any violation of
this policy will void the unit warranty. For more information on
serviceability of the Multi-Unit Charger and Charger Display Module,
refer to the charger service manual, 6871357L01.
For service in US, contact the following depot. Please call and confirm
your return before sending the unit to the depot for service.
Motorola Service Center
2200 Galvin Drive
Elgin, IL 60123
1-800-422-4210 (US & Canada)
1-847-538-8023 (International)
For service (EMEA), contact the following depot. Please call and
confirm your return before sending the unit to the depot for service.
Motorola Service Center
Motorola GmbH
Customer Care
Am Borsigturm 130
13507 Berlin
Germany
Tel: +49 30 6686 1555
8
MUC.book Page 9 Tuesday, September 25, 2007 12:03 PM
MOTOROLA AUTHORIZED POWER CORDS
Table 3: Motorola Power Cords
Plug Type
Charger Kit
Charger Kit
(Display
Model)
Power Cord
No Power cord / plug
WPLN4211
WPLN4218
None
U.S./NA
WPLN4212
WPLN4219
3087791G01
Euro
WPLN4213
WPLN4220
3087791G04
U.K.
WPLN4214
WPLN4221
3087791G07
Australia/New Zealand
WPLN4215
WPLN4222
3087791G10
Argentina
WPLN4216
WPLN4223
3087791G13
Korea
WPLN4217
WPLN4224
3087791G16
EMEA Hybrid
WPLN4237
WPLN4238
3087791G01
US/NA 1-UP
-
WPLN4239
3087791G01
No Power cord / plug - China
PMLN5258
PMLN5260
None
China
PMLN5257
PMLN5259
3087791G21
Japan
PMLN5256
PMLN5255
3087791G20
MOTOROLA AUTHORIZED BATTERIES
The following tables list batteries that can be used with the specific
subscriber radios identified in the table headings.
Table 4: Standard & IMPRES Batteries for MOTOTRBO Professional Digital Radios
Kit (PN)
Chemistry
FM
IMPRES
Capacity
PMNN4065
NiMH
No
No
High
PMNN4066
Li-Ion
No
Yes
Ultra High
PMNN4069
Li-Ion
Yes
Yes
Ultra High
PMNN4077
Li-Ion
No
Yes
Ultra High
9
English
This charger is designed for use in 100 VAC to 240 VAC, 50/60 Hz
applications and uses the following Motorola power cords.
MUC.book Page 10 Tuesday, September 25, 2007 12:03 PM
English
IMPRES FEATURE / BENEFIT DESCRIPTION
The IMPRES energy solution is an advanced Tri-Chemistry energy
system developed by Motorola which encompasses (a) IMPRES
batteries, (b) the IMPRES Adaptive Multi-Unit Charger and, (c) radio
hardware/software which provides the capability for IMPRES
compatible radios to communicate with IMPRES batteries.
The IMPRES Adaptive Multi-Unit Charger, when used in conjunction
with Motorola IMPRES batteries, will:
1. Maximize operation time between charge cycles by automatically
eliminating memory effect.
2. Maximize battery life by significantly reducing heat during the trickle
and post-charge cycles.
3. Eliminate the need to purchase reconditioning equipment and train
personnel to “manage battery maintenance tasks.”
With this unique patented system approach, there is no need to track
and record IMPRES battery use, conduct manual reconditioning
cycles, or remove batteries from chargers following charging.
The IMPRES Adaptive Multi-Unit Charger monitors the usage pattern
of the IMPRES battery, stores that information in the IMPRES battery,
and performs a recondition cycle only when needed.
The IMPRES Adaptive Multi-Unit Charger will not overheat the
IMPRES battery regardless of how long it is left in the pocket. The
charger monitors the battery and automatically “tops off” the battery as
required.
10
MUC.book Page 11 Tuesday, September 25, 2007 12:03 PM
CHARGER DISPLAY MODULE (CDM)
General Display Information
The IMPRES Adaptive Multi-Unit Charger with CDM provides the user
with valuable information while performing battery maintenance and
care. The information that the charger displays and the corresponding
LED indicators are detailed in the following tables.
Start Up
Upon Charger Power-up
LED
SINGLE GREEN BLINK
Line 1
IMPRES
Line 2
If There is No Battery in the Pocket
LED
OFF
Line 1
NO BATTERY
Line 2
Reading Battery Data
LED
Any Defined Indication
Line 1
READING
Line 2
BATTERY DATA
11
English
The IMPRES Adaptive Multi-Unit Charger can be enhanced with the
addition of a charger display module (CDM). Order and install Motorola
part no. RLN5382.
MUC.book Page 12 Tuesday, September 25, 2007 12:03 PM
Non-IMPRES Battery in the Pocket
English
LED
Defined by Charge State
Line 1
NON-IMPRES
Line 2
BATTERY
IMPRES Battery in the Pocket
IMPRES and Software Versions are Displayed
LED
Defined by Charge State
Line 1
IMPRES
Line 2
SW xx.yy; aa.bb
NOTE:
xx.yy denotes charger SW version, and aa.bb denotes CDM
SW version.
IMPRES Battery Kit # and Serial # are Displayed
(Each IMPRES battery shows a unique serial # for Easy ID)
LED
Defined by Charge State
Line 1
KIT# --------
Line 2
SN: --------------
IMPRES Battery Kit # and Chemistry are Displayed
LED
Defined by Charge State
Line 1
KIT# --------
Line 2
-----CHEMISTRY
Forecasted # of Cycles Prior to Automatic Recondition
LED
Defined by Charge State
Line 1
----CYCLES
Line 2
TO RECONDITION
* Displayed only when the number of cycles prior to the next reconditioning
cycle is estimated to be less than six.
12
MUC.book Page 13 Tuesday, September 25, 2007 12:03 PM
Charger Waiting to Charge, Battery is Hot
Blinking ORANGE
Line 1
WAITING TO CHG
Line 2
HOT BATTERY
Charger Waiting to Charge, Battery is Cold
LED
Blinking ORANGE
Line 1
WAITING TO CHG
Line 2
COLD BATTERY
Charger Waiting to Charge, Low Voltage
LED
Blinking ORANGE
Line 1
WAITING TO CHG
Line 2
LOW VOLTAGE
NOTE:
Not all screens shown above will be displayed. For example,
Waiting to Charge displays (battery hot, cold, low voltage) will
only be shown if the situation warrants.
Charger is in Rapid Charge Mode
LED
Steady RED
Line 1
RAPID CHARGE
Line 2
Charger is in Trickle Charge Mode
LED
Blinking GREEN
Line 1
TRICKLE CHARGE
Line 2
Charge is Complete
LED
Steady GREEN or Blinking RED / GREEN
Line 1
CHARGE COMPLETE
Line 2
13
English
LED
MUC.book Page 14 Tuesday, September 25, 2007 12:03 PM
English
Charger is in Discharge/Reconditioning Mode
LED
Steady ORANGE
Line 1
DISCHARGE
Line 2
Charger is Calibrating an IMPRES Battery
LED
Steady ORANGE, Steady RED, & Blinking ORANGE or
GREEN
Line 1
Calibrating
Line 2
Battery
LED
Steady GREEN
Line 1
Battery
Line 2
Calibrated
* All IMPRES batteries should be calibrated before initial use. An IMPRES
charger will automatically initiate calibration for all new batteries
Battery Capacity Data is Displayed as “%” in mAH, and Voltage for
IMPRES Battery Only
LED
Defined by Charge State
Line 1
----% RATED CAP.
Line 2
----mAH --.-V
Estimated Capacity After Charge for IMPRES Battery Only
LED
Defined by Charge State
Line 1
EST CAP AFTER
Line 2
CHARGE xx%
14
MUC.book Page 15 Tuesday, September 25, 2007 12:03 PM
NOTE:
(1) Estimated time to complete rapid charge may include any
remaining time required to complete a discharge cycle plus
the time required to complete a rapid charge cycle.
(2) Battery capacity information may not be displayed for
uncalibrated batteries.
(3) Use of IMPRES batteries with non-IMPRES chargers can
affect capacity and charge time accuracy.
(4) Use of uncalibrated IMPRES battery packs can affect
charge time accuracy.
15
English
NOTE:
Fully charged IMPRES batteries immediately inserted into a
different pocket may show a slightly lower initial capacity due
to stand loss estimations. The charger will correct this
deviation when the battery reaches full charge in the new
pocket, typically in a few minutes.
MUC.book Page 16 Tuesday, September 25, 2007 12:03 PM
Sequencing Diagrams for IMPRES Batteries
English
IMPRES Li-Ion Battery Display Sequence
Start
(4.0 sec)
(2.0 sec)
(2.0 sec)
LED
Defined by Charge State
Line 1
KIT# xxxxxxxx
Line 2
SN: yyyyyyyyyyyy
LED
Defined by Charge State
Line 1
KIT# xxxxxxxx
Line 2
yyyyy CHEMISTRY
LED
Defined by Charge State
Line 1
xxxx CYCLES
Line 2
TO RECONDITION
Every
73.0 sec
Displayed only when the number of
cycles prior to the next reconditioning cycle is estimated to be less than
six
(2.0 sec)
LED
Steady RED
Line 1
RAPID CHARGE
Every
13.0 sec
Line 2
5X
LED
(7.0 sec)
(4.0 sec)
Defined by Charge State
Line 1
xx% RATED CAP.
Line 2
yyyyy mAH zz.z V
LED
Defined by Charge State
Line 1
EST CAP AFTER
Line 2
CHARGE xx%
16
65.0
sec
MUC.book Page 17 Tuesday, September 25, 2007 12:03 PM
Before Calibration:
English
Start
(4.0 sec)
(2.0 sec)
(2.0 sec)
LED
Defined by Charge State
Line 1
KIT# xxxxxxxx
Line 2
SN: yyyyyyyyyyyy
LED
Defined by Charge State
Line 1
KIT# xxxxxxxx
Line 2
yyyyy CHEMISTRY
LED
Steady ORANGE
Line 1
DISCHARGE
Every
51.0 sec
Every
9.0 sec
5X
Line 2
45.0
sec
(7.0 sec)
LED
Defined by Charge State
Line 1
CALIBRATING
Line 2
BATTERY
17
MUC.book Page 18 Tuesday, September 25, 2007 12:03 PM
English
After Calibration:
Start
LED
Line 1
(4.0 sec) Line 2
Defined by Charge State
KIT# xxxxxxxx
SN: yyyyyyyyyyyy
LED
Defined by Charge State
Line 1
KIT# xxxxxxxx
(2.0 sec) Line 2
Every
61.0sec
yyyyy CHEMISTRY
LED
Steady GREEN
Line 1
CHARGE COMPLETE
Every
11 sec
(2.0 sec) Line 2
5X
LED
Defined by Charge State
Line 1
BATTERY
(2.0 sec) Line 2
LED
Line 1
(7.0 sec) Line 2
CALIBRATED
Defined by Charge State
xx% RATED CAP.
yyyy mAH zz.z V
18
55.0
sec
MUC.book Page 0 Wednesday, September 26, 2007 4:32 PM
Dieses Zubehörhandbuch gilt für die folgenden IMPRES-Mehrfachladegeräte, die für die
Serie der MOTOTRBO Professionellen Digitalfunkgeräte erhältlich sind:
WPLN4211, WPLN4212, WPLN4213, WPLN4214, WPLN4215, WPLN4216, WPLN4217,
WPLN4218, WPLN4219, WPLN4220, WPLN4221, WPLN4222, WPLN4223, WPLN4224,
WPLN4237, WPLN4238, WPLN4239, PMLN5255, PMLN5256, PMLN5257, PMLN5258,
PMLN5259, PMLN5260
MOTOROLA, das stilisierte M-Logo, das MOTOTRBO-Logo und das IMPRES-Logo sind eingetragene Warenzeichen von
Motorola, Inc. Alle anderen Produkt- oder Dienstleistungsnamen sind Eigentum ihrer jeweiligen Inhaber.
© 2006, 2007 Motorola, Inc. Alle Rechte vorbehalten.
MUC.book Page 1 Wednesday, September 26, 2007 4:32 PM
INHALTSVERZEICHNIS
Sicherheitsrichtlinien für den Betrieb ..........................................3
Bedienungsanleitung ..................................................................4
Laden eines Akkus .......................................................................... 4
Initialisierung...............................................................................5
Automatische Rekonditionierung................................................6
Fehlersuche................................................................................7
Service........................................................................................8
Von Motorola zugelassene Netzkabel ........................................9
Von Motorola zugelassene Akkus ..............................................9
Beschreibung der Merkmale und Leistungen des IMPRESLadegeräts................................................................................10
Ladegerät mit Displaymodul (CDM) .........................................11
Allgemeine Informationen zum Display ......................................... 11
Sequenzdiagramme für IMPRES Akku ......................................... 16
Ausrichtung des Anzeigetextes ..................................................... 19
1
Deutsch
Manuelles Beenden des Rekonditionierungsprozesses.................. 6
Manuelles Einleiten des Rekonditionierungsprozesses .................. 6
MUC.book Page 2 Wednesday, September 26, 2007 4:32 PM
WICHTIGE SICHERHEITSHINWEISE
BEWAHREN SIE DIESE HINWEISE AUF
Deutsch
Dieses Dokument enthält wichtige Sicherheits- und Bedienungshinweise.
Bitte lesen Sie diese Hinweise sorgfältig durch und heben Sie das
Handbuch auf, damit Sie sie später jederzeit nachschlagen können.
Lesen Sie alle Hinweise und Warnungen (1) am Ladegerät und (2) am
Akku sowie (3) an dem Handsprechfunkgerät, in das der Akku eingesetzt
wird.
1. Um die Verletzungsgefahr zu verringern, dürfen nur die in
Tabelle 4 aufgeführten, von der Firma Motorola
zugelassenen Akkus aufgeladen werden. Andere Akkus
können beim Aufladen explodieren und Verletzungen
ACHTUNG
WARNING
bzw. Sachschäden verursachen.
!
2. Bei Verwendung von Zubehörteilen, die nicht von der Firma Motorola
freigegeben sind, besteht Feuer-, Stromschlag- und Verletzungsgefahr.
3. Ziehen Sie den Stecker niemals am Kabel aus der Steckdose, wenn
Sie die Stromversorgung des Ladegeräts unterbrechen möchten, um
Beschädigungen des Netzkabels und des Steckers zu vermeiden.
4. Verwenden Sie nach Möglichkeit kein Verlängerungskabel. Bei
Verwendung eines ungeeigneten Verlängerungskabels besteht Brandund Stromschlaggefahr. Wenn der Einsatz eines Verlängerungskabels
unbedingt erforderlich ist, muss auf die richtigen Kabeldurchmesser
geachtet werden. Diese lauten wie folgt: Kabelgröße 18 AWG für
Kabellängen bis zu 30,48 Meter und 16 AWG für Kabellängen bis zu
45,72 Meter.
5. Bei Verwendung schadhafter Ladegeräte besteht Feuer-, Stromschlagund Verletzungsgefahr. Lassen Sie daher bitte beschädigte Ladegeräte
vom Motorola-Kundendienst reparieren.
6. Das IMPRES-Mehrfachladegerät darf nur von einem von Motorola
autorisierten qualifizierten Servicetechniker repariert werden. Bei
Nichtbeachten dieses Hinweises kann die Garantie für das Gerät
ungültig werden.
2
MUC.book Page 3 Wednesday, September 26, 2007 4:32 PM
WARNHINWEISE (Fortsetzung)
!
7. Bevor Sie das Ladegerät warten oder reinigen, sollten
Sie den Netzstecker abziehen, um einem Stromschlag
vorzubeugen.
ACHTUNG
WARNING
Sicherung 6571489S01
Abdeckung 0987739G01
SICHERHEITSRICHTLINIEN FÜR DEN BETRIEB
• Schalten Sie das Handsprechfunkgerät zum Laden eines Akkus ab.
• Das Ladegerät ist nicht für den Einsatz im Freien ausgelegt und darf nur
in trockenen Räumen betrieben werden.
• Schließen Sie das Ladegerät nur an eine ordnungsgemäß gesicherte
und verkabelte Steckdose an, die die richtige Spannung aufweist (siehe
Etikett am Ladegerät).
• Ziehen Sie den Netzstecker ab, wenn das Ladegerät von der
Netzspannung isoliert werden soll.
• Die Steckdose für das Ladegerät muss in der Nähe befindlich und leicht
erreichbar sein.
• In Geräten mit Überspannungsschutz dürfen nur solche Sicherungen
verwendet werden, die dem in der Bedienungsanleitung angegebenen
Typ entsprechen.
• Das Ladegerät darf bei Umgebungstemperaturen über 40°C nicht
eingesetzt werden.
• Achten Sie darauf, dass Sie das Kabel so verlegen, dass niemand
darauf treten oder darüber stolpern kann. Außerdem darf es nicht mit
Wasser in Berührung kommen, Zugkräften ausgesetzt werden oder
beschädigt werden.
• Die Wandhalterung für dieses Gerät ist die gleiche wie die des
Mehrfachladegeräts NTN4796 (Teilnummer NLN7967).
3
Deutsch
8. Sicherungen dürfen nur durch Sicherungen desselben
Typs und Bemessungsstroms ersetzt werden. Als Ersatzsicherungen
sind Cooper-Bussman GDC-3.15 oder geprüfte gleichwertige
Sicherungen zu verwenden. Die folgenden Teile können über die
Motorola Radio Products and Services Division (1-800-422-4210 [USA
und Kanada] bzw. 1-847-538-8023 [International]) bestellt werden:
MUC.book Page 4 Wednesday, September 26, 2007 4:32 PM
BEDIENUNGSANLEITUNG
Das IMPRES-Ladegerätsystem ist ein vollautomatisches Akku-EnergieManagement-System. Seine Benutzung ist einfach und erfordert nur die
folgenden einfachen Schritte:
1. Setzen Sie das Funkgerät/den IMPRES-Akku in das Ladegerät ein.
Deutsch
2. Nehmen Sie das Funkgerät/den IMPRES-Akku aus dem Ladegerät,
wenn es/er voll aufgeladen ist (LED leuchtet ununterbrochen GRÜN).
Die Ladeschalen des Ladegeräts nehmen jeweils entweder ein Funkgerät
mit daran angebrachtem IMPRES-Akku oder einen IMPRES-Akku allein
auf. Schalten Sie das Funkgerät aus, bevor Sie es samt seinem
IMPRES-Akku aufladen. Akkus werden am besten bei Raumtemperatur
geladen.
Laden eines Akkus
1. Stecken Sie den Ladegerätstecker des Netzkabels in die Buchse an
der Rückseite des Ladegeräts.
2. Stecken Sie den Netzstecker des Stromkabels in die entsprechende
Netzsteckdose. Ein erfolgreicher Einschaltvorgang wird durch
EINMALIGES GRÜNES AUFBLINKEN der Ladeanzeige angezeigt.
3. Setzen Sie einen IMPRES-Akku bzw. ein Funkgerät samt IMPRESAkku (Funkgerät ist ausgeschaltet) wie folgt in die Ladeschale des
Ladegeräts ein:
a. Richten Sie die Rinne an jeder Seite des Akkus auf die
entsprechende Schiene an jeder Seite der Ladeschale aus.
b. Drücken Sie den Akku zur Rückseite der Ladeschale.
c. Schieben Sie den Akku in die Ladeschale. Achten Sie dabei
darauf, dass die Kontakte des Ladegeräts die Kontakte des
Akkus berühren.
4. Zum Entnehmen eines Funkgeräts bzw. eines IMPRES-Akkus aus
dem Ladegerät halten Sie das Ladegerät mit einer Hand fest. Mit der
anderen Hand nehmen Sie das Funkgerät bzw. den Akku aus der
Ladeschale.
4
MUC.book Page 5 Wednesday, September 26, 2007 4:32 PM
Wenn der IMPRES-Akku richtig in die Ladeschale eingesetzt wird, leuchtet
die Ladeanzeige und zeigt dadurch an, dass das Ladegerät den Akku
erfasst hat; siehe Ladeanzeigen in Tabelle 1.
Tabelle 1: IMPRES-Akkuladeanzeigen
Ladeanzeige
Beschreibung
Ladegerät wurde erfolgreich eingeschaltet
Rot
Akku ist im Schnellladungsbetrieb.
Grün blinkend
Schnellladung des Akkus beendet (>90 % verfügbare
Kapazität). Akku wird mit Erhaltungsstromstärke fertig
geladen.
Grün
Ladevorgang des Akkus ist abgeschlossen. Der Akku
ist vollständig geladen.
Gelb blinkend
Akku wird vom Ladegerät erfasst, wartet aber noch
auf die Ladung (entweder ist die Akkuspannung zu
niedrig oder der Akku ist zu kalt oder zu heiß zum
Laden. Der Ladezyklus beginnt automatisch, wenn
dieser Zustand korrigiert worden ist).
Rot blinkend
Akku kann nicht geladen werden oder Kontakt
zwischen Akku und Ladekontakten ist nicht
einwandfrei.
Gelb
(Nur für IMPRES-Akkus) Akku ist im
Rekonditionierungs- oder Initialisierungsmodus. Wie
lange das Ladegerät in dieser Betriebsart bleibt, hängt
vom Ladezustand des Akkus beim Einsetzen in das
Ladegerät ab (bei vollständig geladenen Akkus dauert
die Rekonditionierung länger – 8 Stunden oder mehr –
als bei vollständig entladenen Akkus).
Rot/grün blinkend
(Nur für IMPRES-Akkus) Ladevorgang des Akkus ist
abgeschlossen. Der Akku ist vollständig aufgeladen.
Akku ist noch verwendbar, nähert sich aber eventuell
dem Ende seiner nutzbaren Lebensdauer.
INITIALISIERUNG
Damit die Leistungsmerkmale der Motorola IMPRES-Akkus und des
adaptiven Ladesystems uneingeschränkt zur Verfügung stehen, müssen
die in Motorola IMPRES-Akkus enthaltenen Daten bei der Erstladung des
Akkus vom Ladegerät initialisiert werden. Dieser Initialisierungsprozess
wird durch GELBES Leuchten der Ladeanzeige angezeigt (wie beim
Rekonditionieren des Akkus). Der Prozess ist automatisch. Er schließt
5
Deutsch
Einmaliges grünes
Aufblinken
MUC.book Page 6 Wednesday, September 26, 2007 4:32 PM
eine anfängliche Rekonditionierung des Akkus ein, an die sich das Laden
des Akkus anschließt. Dieser Prozess benötigt eine gewisse Zeit zum
Initialisieren des Akkus. Der Akku muss deshalb etwa 12 Stunden lang im
Ladegerät bleiben, wenn er das erste Mal in das Ladegerät gesteckt wird.
Der Akku sollte erst dann aus dem Ladegerät genommen werden, wenn
die GRÜNE Leuchte ununterbrochen leuchtet.
Deutsch
AUTOMATISCHE REKONDITIONIERUNG
Beim Einsatz zusammen mit einem Motorola IMPRES-Akku kann das
IMPRES-Ladegerät von Motorola bestimmen, wann eine
Rekonditionierung des Akkus angebracht ist (zum Beseitigen von
Speicherproblemen bei IMPRES-Akkus erforderlich).
Wenn ein IMPRES-Akku ordnungsgemäß in das Ladegerät gesteckt wird,
bestimmt das Ladegerät, ob der Akku rekonditiert werden sollte. Ist eine
Rekonditionierung erforderlich, leuchtet die Ladeanzeige GELB. Dieser
Rekonditionierungsprozess kann bis zu 12 Stunden und länger dauern, je
nach Ladezustand und Nennkapazität des Akkus beim Einsetzen in das
Ladegerät.
Wichtig: Damit dieser Prozess effektiv sein kann, muss der
Rekonditionierungs-/Nachladevorgang des IMPRES-Akkus vollständig
ablaufen können. Lassen Sie den Akku deshalb im Ladegerät, bis die
Ladeanzeige GRÜN leuchtet.
Nach Beendigung des Rekonditionierungszyklus lädt das Ladegerät den
IMPRES-Akku automatisch nach.
Manuelles Beenden des Rekonditionierungsprozesses
Während des Rekonditionierungsprozesses eines Motorola IMPRESAkkus (GELBE Anzeige) kann die Rekonditionierung jederzeit
unterbrochen werden, indem der Akku aus dem Ladegerät genommen und
innerhalb von 5 Sekunden wieder in das Ladegerät eingesetzt wird. Das
bewirkt, dass das Ladegerät den Rekonditionierungsprozess beendet und
den Ladeprozess beginnt. Die Ladeanzeige zeigt dann ROT an. Wenn der
Akku das nächste Mal in das Ladegerät eingesetzt wird, versucht das
Ladegerät erneut, ihn zu rekonditionieren.
Manuelles Einleiten des Rekonditionierungsprozesses
Zum manuellen Einleiten der Rekonditionierung gehen Sie innerhalb von 2
½ Minuten nach dem ersten Einsetzen eines IMPRES-Akkus in das
Ladegerät (ROTE Anzeige) wie folgt vor: Nehmen Sie den Akku aus dem
6
MUC.book Page 7 Wednesday, September 26, 2007 4:32 PM
Ladegerät und setzen Sie ihn innerhalb von 5 Sekunden wieder ein. Die
Ladeanzeige wechselt von ROT auf GELB. Dies bewirkt, dass das
Ladegerät den Akku rekonditioniert und automatisch auflädt. Dieses
Merkmal des Ladegeräts ist besonders nützlich, wenn IMPRES-Akkus
mehrere Monate oder noch länger eingelagert waren. Auf Grund von
Langzeitlagerungsbedingungen werden zum Auffrischen der Akkus
eventuell zwei oder mehr Rekonditionierungs-zyklen benötigt.
FEHLERSUCHE
Tabelle 2: Fehlerbehebung
Problem
Keine
Ladeanzeige
Fehlfunktion
Abhilfemaßnahme
1a. Kontakt mit dem
Ladegerät nicht
hergestellt.
1b. Stromversorgung zum
Ladegerät besteht
nicht.
1a. Prüfen Sie, ob der Akku bzw.
das Handsprechfunkgerät
samt Akku richtig in die
Ladeschale gesteckt wurde.
1b. • Achten Sie darauf, dass das
Netzkabel richtig an das
Ladegerät und eine
geeignete Netzsteckdose
angeschlossen ist und dass
die Netzsteckdose Strom
führt.
• Sicherung(en) austauschen.
Anzeige blinkt
rot
2a. Kontakt mit dem
Ladegerät nicht
hergestellt.
2a. • Nehmen Sie den Akku aus
dem Ladegerät und setzen
Sie ihn wieder ein.
• Prüfen Sie nach, ob der
Akku ein in Tabelle 4
genannter, von Motorola
zugelassener Akku ist.
Andere Akkus werden evtl.
nicht geladen.
• Trennen Sie das Ladegerät
von der Stromversorgung
und reinigen Sie die
goldfarbenen Ladekontakte
am Akku und am Ladegerät
mit einem sauberen
trockenen Tuch.
2b. Ersetzen Sie den Akku.
2b. Batterie ist nicht
aufladbar.
7
Deutsch
Beobachten Sie bei der Fehlersuche immer die Ladeanzeige des
Ladegeräts.
MUC.book Page 8 Wednesday, September 26, 2007 4:32 PM
Tabelle 2: Fehlerbehebung
Problem
Deutsch
Anzeige blinkt
orange
Fehlfunktion
3.
Abhilfemaßnahme
Akku wartet auf
Ladung. Es kann sein,
dass die
Akkutemperatur unter
5°C oder über 40°C
liegt oder die
Akkuspannung
niedriger ist als der
vorbestimmte
Schwellenwert für die
Schnellladung.
3.
Wenn dieser Zustand korrigiert
worden ist, wird der Akku
geladen.
SERVICE
Das IMPRES-Mehrfachladegerät kann nur von einem von Motorola
autorisierten, qualifizierten Servicetechniker repariert werden. Bei
Nichtbeachten dieser Vorschrift wird die Garantie ungültig. Weitere
Angaben über die Wartbarkeit des Mehrfachladegeräts und des
Ladegerät-Displaymoduls sind der Wartungsanleitung für das Ladegerät,
6871357L01, zu entnehmen.
Für Wartung/Service in den USA wenden Sie sich an das folgende Center.
Bestätigen Sie die Rücksendung des Geräts bitte telefonisch, bevor Sie es
zur Wartung an das Center zurücksenden.
Motorola Service Center
2200 Galvin Drive
Elgin, IL 60123
1-800-422-4210 (US & Kanada)
1-847-538-8023 (International)
Für Wartung/Service (EMEA) wenden Sie sich an das folgende Center.
Bestätigen Sie die Rücksendung des Geräts bitte telefonisch, bevor Sie es
zur Wartung an das Center zurücksenden.
Motorola Service Center
Motorola GmbH
Customer Care
Am Borsigturm 130
13507 Berlin
Deutschland
Tel: +49 30 6686 1555
8
MUC.book Page 9 Wednesday, September 26, 2007 4:32 PM
VON MOTOROLA ZUGELASSENE NETZKABEL
Dieses Ladegerät ist für Anwendungen mit 100 V bis 240 V Wechselstrom,
50/60 Hz, ausgelegt und mit den folgenden Motorola Netzkabeln zu
verwenden:
Tabelle 3: Motorola Netzkabel
Steckertyp
Ladegerät-Kit
(Modell mit
Display)
Netzkabel
Kein Kabel/Stecker
WPLN4211
WPLN4218
Kein Netzkabel
US/Nordamerika
WPLN4212
WPLN4219
3087791G01
Europa
WPLN4213
WPLN4220
3087791G04
GB
WPLN4214
WPLN4221
3087791G07
Australien/Neuseeland
WPLN4215
WPLN4222
3087791G10
Argentinien
WPLN4216
WPLN4223
3087791G13
Korea
WPLN4217
WPLN4224
3087791G16
EMEA Hybrid-Stecker
WPLN4237
WPLN4238
3087791G01
-
WPLN4239
3087791G01
PMLN5258
PMLN5260
Kein Netzkabel
US/NA 1-UP
Kein Kabel/Stecker - China
China
PMLN5257
PMLN5259
3087791G21
Japan
PMLN5256
PMLN5255
3087791G20
VON MOTOROLA ZUGELASSENE AKKUS
Die folgende Tabelle enthält die Akkus, die mit den spezifischen, in den
Spaltenüberschriften angegebenen Teilnehmerfunkgeräten verwendet
werden können.
Table 4: Standard- und IMPRES-Akkus für MOTOTRBO™ Professionelle Digitalfunkgeräte
Kit (PN)
Akkutyp
FM
IMPRES
Kapazität
PMNN4065
NiMH
Nein
Nein
Hoch
PMNN4066
Li-Ion
Nein
Ja
Ultrahoch
PMNN4069
Li-Ion
Ja
Ja
Ultrahoch
PMNN4077
Li-Ion
Nein
Ja
Ultrahoch
9
Deutsch
Ladegerät-Kit
MUC.book Page 10 Wednesday, September 26, 2007 4:32 PM
BESCHREIBUNG DER MERKMALE UND LEISTUNGEN DES IMPRESLADEGERÄTS
Deutsch
Die Energie-Management-Lösung IMPRES von Motorola ist ein modernes
Energiesystem für drei verschiedene Akkutypen. Zum System gehören: (a)
IMPRES-Akkus, (b) das IMPRES-Mehrfachladegerät und (c) FunkgerätHardware/Software, über die der Datenaustausch zwischen IMPRESkompatiblen Sprechfunkgeräten und IMPRES-Akkus möglich ist.
Die Verwendung des IMPRES-Mehrfachladegeräts zusammen mit
IMPRES-Akkus bietet die folgenden Vorzüge:
1. Die Betriebszeit zwischen Ladezyklen wird maximiert, da der MemoryEffekt automatisch eliminiert wird.
2. Die Akku-Lebensdauer wird maximiert, da wesentlich weniger Wärme
während der Erhaltungsladezyklen und der an das Laden
anschließenden Zyklen entsteht.
3. Der Kauf von zusätzlichen Rekonditionierungsgeräten wird überflüssig,
ebenso die Schulung von Personal in „Akkuwartungsaufgaben“.
Mit diesem einzigartigen patentierten Systemkonzept gehören das
Kontrollieren und Protokollieren der IMPRES-Akkunutzung, das
Durchführen manueller Rekonditionierungszyklen und die Notwendigkeit,
Akkus nach dem Aufladen aus dem Ladegerät nehmen zu müssen, der
Vergangenheit an.
Das IMPRES-Mehrfachladegerät überwacht das Nutzungsmuster des
IMPRES-Akkus, speichert diese Informationen im IMPRES-Akku und führt
nur dann einen Rekonditionierungszyklus durch, wenn es erforderlich ist.
Im IMPRES-Mehrfachladegerät wird der IMPRES-Akku nie zu heiß, ganz
gleich, wie lange er in der Ladeschale steckt. Das Ladegerät überwacht
den Akku und hält ihn durch Erhaltungsladung im voll geladenen Zustand.
10
MUC.book Page 11 Wednesday, September 26, 2007 4:32 PM
LADEGERÄT MIT DISPLAYMODUL (CDM)
Die Funktionalität des IMPRES Mehrfachladegeräts kann durch
Hinzufügen eines Ladegerät-Displaymoduls (CDM) noch weiter verbessert
werden. Bestellen und installieren Sie Motorola Teil-Nr. RLN5382.
Allgemeine Informationen zum Display
Inbetriebnahme
Bei Inbetriebnahme des Ladegeräts
LED
LEUCHTET EINMAL GRÜN AUF
Zeile 1
IMPRES
Zeile 2
Wenn kein Akku in der Schale steckt
LED
OFF (AUS)
Zeile 1
NO BATTERY (KEIN AKKU)
Zeile 2
Akkudaten werden gelesen
LED
Beliebige vordefinierte Anzeige
Zeile 1
READING (AKKUDATEN)
Zeile 2
BATTERY DATA (WERDEN GELESEN)
Kein IMPRES Akku in der Ladeschale
LED
Je nach Ladezustand
Zeile 1
NON-IMPRES (KEIN IMPRES)
Zeile 2
BATTERY (AKKU)
IMPRES Akku in der Ladeschale
IMPRES und Softwareversionen werden angezeigt
LED
Je nach Ladezustand
Zeile 1
IMPRES
Zeile 2
SW xx.yy; aa.bb
11
Deutsch
Das IMPRES Mehrfachladegerät mit CDM bietet dem Benutzer während
der Wartung und Pflege des Akkus nützliche Informationen. Die vom
Ladegerät angegebenen Informationen und die zugehörigen LEDAnzeigen werden in den folgenden Tabellen detailliert angeführt.
MUC.book Page 12 Wednesday, September 26, 2007 4:32 PM
HINWEIS:
xx.yy bezeichnet Ladegerät-SW-Version, während aa.bb die
CDM-SW-Version angibt.
Deutsch
Kit-Nr. und Seriennummer des IMPRES-Akkus werden angezeigt
(jeder IMPRES-Akku weist eine eindeutige Seriennummer (SN) zur
einfachen Erkennung auf).
LED
Je nach Ladezustand
Zeile 1
KIT# -------- (KIT-NR)
Zeile 2
-----CHEMISTRY (CHEM. EIGENSCH.)
IMPRES Akku-Kit-Nr. und chem. Eigenschaften werden angezeigt
LED
Je nach Ladezustand
Zeile 1
KIT# -------- (KIT-NR)
Zeile 2
-----CHEMISTRY (CHEM. EIGENSCH.)
Voraussichtliche Zahl der Zyklen bis zur automatischen
Rekonditionierung
LED
Je nach Ladezustand
Zeile 1
----CYCLES (ZYKLEN)
Zeile 2
TO RECONDITION (BIS REKONDITIONIERUNG)
* Wird nur angezeigt, wenn die Anzahl der Zyklen bis zum nächsten
Rekonditonierungszyklus schätzungsweise weniger als 6 beträgt.
12
MUC.book Page 13 Wednesday, September 26, 2007 4:32 PM
Ladegerät wartet auf Ladebeginn, Akku ist heiss
LED
ORANGE blinkend
Zeile 1
WAITING TO CHG (WARTEN AUF LADEN)
Zeile 2
HOT BATTERY (AKKU HEISS)
Ladegerät wartet auf Ladebeginn, Akku ist kalt
LED
ORANGE blinkend
Zeile 1
WAITING TO CHG (WARTEN AUF LADEN)
Zeile 2
COLD BATTERY (AKKU KALT)
LED
ORANGE blinkend
Zeile 1
WAITING TO CHG (WARTEN AUF LADEN)
Zeile 2
LOW VOLTAGE (SPANNUNG NIEDRIG)
HINWEIS:
Es werden nicht alle der oben angeführten Hinweise
angezeigt. Die Anzeigen ‘Warten auf Laden‘ (Akku heiss, kalt;
Spannung niedrig) werden nur angezeigt, wenn der
entsprechende Zustand gegeben ist.
Ladegerät ist im Schnellladungsbetrieb
LED
ROT
Zeile 1
RAPID CHARGE (SCHNELLLADUNG)
Zeile 2
Ladegerät arbeitet im Erhaltungsladungsbetrieb
LED
GRÜN blinkend
Zeile 1
TRICKLE CHARGE (ERHALTUNGSLADUNG)
Zeile 2
Laden abgeschlossen
LED
Ununterbrochen GRÜN oder ROT/GRÜN blinkend
Zeile 1
CHARGE COMPLETE (LADEN ABGESCHLOSSEN)
Zeile 2
13
Deutsch
Ladegerät wartet auf Ladebeginn, Spannung niedrig
MUC.book Page 14 Wednesday, September 26, 2007 4:32 PM
Ladegerät arbeitet im Entlade-/Rekonditionierungsbetrieb
LED
Ununterbrochen ORANGE
Zeile 1
DISCHARGE (ENTLADEN)
Zeile 2
Ladegerät kalibriert einen IMPRES Akku
Deutsch
LED
Ununterbrochen ORANGE, ununterbrochen ROT und
ORANGE oder GRÜN blinkend
Zeile 1
Calibrating (wird kalibriert)
Zeile 2
Battery (Akku)
LED
Ununterbrochen GRÜN
Zeile 1
Battery (Akku)
Zeile 2
Calibrated (kalibriert)
* Alle IMPRES Akkus sind vor der Erstverwendung zu kalibrieren. Das
IMPRES Ladegerät kalibriert jeden neuen Akku automatisch.
Akkuleistungsdaten werden als „%“ in mAH und als Spannung nur für
IMPRES-Akku angezeigt.
LED
Je nach Ladezustand
Zeile 1
----% RATED CAP. (Nennleistung)
Zeile 2
----mAH --.-V
Geschätzte Leistung nach Ladung nur für IMPRES-Akku
LED
Je nach Ladezustand
Zeile 1
EST CAP AFTER (Geschätzte Leistung nach)
Zeile 2
CHARGE xx% (Ladung xx%)
14
MUC.book Page 15 Wednesday, September 26, 2007 4:32 PM
HINWEIS:
Wenn voll aufgeladene IMPRES-Akkus sofort in eine andere
Ladeschale im Ladegerät eingesetzt werden, wird auf Grund
von Standverlustschätzungen eventuell eine etwas niedrigere
Anfangsleistung angezeigt. Das Ladegerät korrigiert diese
Abweichung, wenn der Akku in der neuen Ladeschale seine
volle Ladung erreicht, gewöhnlich innerhalb einiger Minuten.
15
Deutsch
HINWEIS:
(1) Die geschätzte Zeit bis zur vollständigen Schnellladung
kann eventuell die zum Beenden eines Entladungszyklus
sowie die zum Durchführen eines Schnellladungszyklus
erforderliche Zeit beinhalten.
(2) Bei
nicht
kalibrierten
Akkus
werden
die
Akkukapazitätsdaten eventuell nicht angezeigt.
(3) Das Laden von IMPRES Akkus in anderen als IMPRES
Ladegeräten kann die Genauigkeit der Angaben bezüglich
Kapazität und Ladezeiten beeinflussen.
(4) Der Einsatz von unkalibrierten IMPRES-Akkus kann die
Genauigkeit
der
Angaben
bezüglich
Ladezeiten
beeinträchtigen.
MUC.book Page 16 Wednesday, September 26, 2007 4:32 PM
Sequenzdiagramme für IMPRES Akku
Anzeigesequenz bei IMPRES LiIon-Akku
Start
LED
Je nach Ladezustand
Zeile 1
KIT# xxxxxxxx
Deutsch
(4,0 Sek.) Zeile 2
(2,0 Sek.)
(2,0 Sek.)
Alle
73,0 Sek.
SN: yyyyyyyyyyyy
LED
Je nach Ladezustand
Zeile 1
KIT# xxxxxxxx
Zeile 2
yyyyy CHEMISTRY
LED
Je nach Ladezustand
Zeile 1
xxxx CYCLES
Zeile 2
TO RECONDITION
Wird nur angezeigt, wenn die Anzahl
der Zyklen bis zum nächsten
Rekonditonierungszyklus
schätzungsweise weniger als 6
beträgt.
(2,0 Sek.)
LED
Steady RED
Zeile 1
RAPID CHARGE
Alle
13,0 Sek.
Zeile 2
LED
Je nach Ladezustand
Zeile 1
xx% RATED CAP.
(7,0 Sek.) Zeile 2
yyyyy mAH zz.z V
LED
Zeile 1
(4,0 Sek.) Zeile 2
Je nach Ladezustand
EST CAP AFTER
CHARGE xx%
16
5X
65,0
Sek.
MUC.book Page 17 Wednesday, September 26, 2007 4:32 PM
Vor der Kalibrierung:
Start
(4,0 Sek.)
(2,0 Sek.)
Je nach Ladezustand
Zeile 1
KIT# xxxxxxxx
Zeile 2
SN: yyyyyyyyyyyy
LED
Je nach Ladezustand
Zeile 1
KIT# xxxxxxxx
Zeile 2
yyyyy CHEMISTRY
LED
Steady ORANGE
Zeile 1
DISCHARGE
Alle
51,0 Sek.
Deutsch
(2,0 Sek.)
LED
Alle
9,0 Sek.
5X
Zeile 2
45,0
Sek.
LED
(7,0 Sek.)
Je nach Ladezustand
Zeile 1
CALIBRATING
Zeile 2
BATTERY
17
MUC.book Page 18 Wednesday, September 26, 2007 4:32 PM
Nach der Kalibrierung:
Start
LED
Zeile 1
Deutsch
(4,0 Sek.) Zeile 2
Je nach Ladezustand
KIT# xxxxxxxx
SN: yyyyyyyyyyyy
LED
Je nach Ladezustand
Zeile 1
KIT# xxxxxxxx
(2,0 Sek.) Zeile 2
yyyyy CHEMISTRY
LED
Steady GREEN
Zeile 1
CHARGE COMPLETE
(2,0 Sek.) Zeile 2
Je nach Ladezustand
Zeile 1
BATTERY
LED
Zeile 1
(7,0 Sek.) Zeile 2
Alle
11 Sek.
5X
LED
(2,0 Sek.) Zeile 2
Alle
61,0 Sek.
CALIBRATED
Je nach Ladezustand
xx% RATED CAP.
yyyy mAH zz.z V
18
55,0
Sek.
MUC.book Page 19 Wednesday, September 26, 2007 4:32 PM
Ausrichtung des Anzeigetextes
Der Text auf dem CDM kann um 180 Grad gedreht werden, sodass das
IMPRES Mehrfachladegerät nach Wunsch auf einem Tisch oder an einer
Wand montiert werden kann.
Zum Drehen der Anzeige eine große Büroklammer in das Loch unterhalb
des Displays senkrecht zum Tisch stecken. Ein Klickgeräusch zeigt an,
dass die Umschaltung aktiviert und der Anzeigetext um 180 Grad gedreht
wurde.
Deutsch
19
MUC.book Page 0 Wednesday, September 26, 2007 11:01 AM
Ce manuel d’utilisation d’accessoire peut être utilisé avec les chargeurs multiples IMPRES
suivants destinés aux radios numériques professionnelles MOTOTRBO.
WPLN4211, WPLN4212, WPLN4213, WPLN4214, WPLN4215, WPLN4216, WPLN4217,
WPLN4218, WPLN4219, WPLN4220, WPLN4221, WPLN4222, WPLN4223, WPLN4224,
WPLN4237, WPLN4238, WPLN4239, PMLN5255, PMLN5256, PMLN5257, PMLN5258,
PMLN5259, PMLN5260
MOTOROLA, le logo stylisé M, le logo MOTOTRBO, le logo IMPRES sont des marques déposées de Motorola, Inc.
Tous les autres noms de produits ou de services sont reconnus comme appartenant à leurs propriétaires légitimes.
© 2006, 2007 Motorola, Inc. Tous droits réservés.
MUC.book Page 1 Wednesday, September 26, 2007 11:01 AM
TABLE DES MATIÈRES
Instructions de sécurité pour l’utilisation .....................................3
Instructions d’utilisation ..............................................................4
Procédure de chargement ............................................................... 4
Initialisation.................................................................................5
Reconditionnement automatique................................................6
Pour terminer manuellement un reconditionnement........................ 6
Pour lancer manuellement un reconditionnement ........................... 6
Dépannage .................................................................................7
Entretien .....................................................................................8
Cordons d’alimentation agréés Motorola ....................................9
Description des caractéristiques / avantages IMPRES ............10
Module d’affichage pour chargeur (CDM) ................................11
Informations générales affichées................................................... 11
Diagrams de Séquences pour les Batteries IMPRES ................... 16
Orientation du texte affiché............................................................ 19
1
Français
Batteries agréées Motorola ........................................................9
MUC.book Page 2 Wednesday, September 26, 2007 11:01 AM
INSTRUCTIONS DE SECURITE
IMPORTANTES
CONSERVEZ CES INSTRUCTIONS
Ce document contient d'importantes instructions de sécurité et d'utilisation.
Veuillez lire attentivement ces instructions et conservez-les pour pouvoir
les consulter à nouveau à titre de référence.
Avant d’utiliser le chargeur, lisez toutes les instructions, les avertissements
et les informations sur (1) le chargeur, (2) la batterie et (3) le poste.
!
Français
AVERTISSEMENT
WARNING
1. Pour réduire les risques de blessure, ne chargez que
des batteries rechargeables agréées Motorola et
répertoriées dans le Tableau 4. D’autres batteries
peuvent exploser, provoquer des blessures ou des
dégâts matériels.
2. L’utilisation d’accessoires non agréés par Motorola
peut présenter un risque d’incendie, d’électrocution ou de
blessure.
3. Pour ne jamais risquer d’endommager la prise et le câble électriques,
tirez toujours sur la prise et jamais sur le câble pour débrancher le
chargeur.
4. Sauf dans les cas où cela est absolument indispensable, il est
préférable de ne jamais utiliser de rallonge électrique pour brancher le
chargeur. Un câble d’extension électrique défectueux peut introduire
un risque d’incendie ou d’électrocution. Si une rallonge est
indispensable, vous devez utiliser un câble 18AWG pour toutes les
longueurs inférieures à 30 m et un câble 16AWG toutes les longueurs
inférieures à 45 m.
5. Pour réduire le risque d’incendie, d’électrocution ou de blessure,
n’utilisez jamais un chargeur endommagé ou présentant un
quelconque défaut. Confiez-le à un agent de maintenance Motorola
agréé.
6. Un chargeur multiple adaptatif IMPRES peut uniquement être réparé
par un technicien spécialisé agréé par Motorola. Toute violation de cet
avertissement peut annuler la garantie.
2
MUC.book Page 3 Wednesday, September 26, 2007 11:01 AM
AVERTISSEMENTS (suite)
!
AVERTISSEMENT
WARNING
7. Pour réduire le risque d’électrocution, débranchez
l’alimentation électrique c.a. du chargeur avant
d’effectuer toute opération d’entretien ou de
nettoyage.
8. Pour remplacer le fusible, utilisez uniquement un fusible ayant les
caractéristiques indiquées sur l’étiquette du chargeur. Utilisez
uniquement des fusibles Cooper-Bussman GDC-3.15 ou un équivalent
agréé. Les composants suivants peuvent être commandés auprès de
la division Motorola Radio Products & Services (1-800-422-4210 [US &
Canada] ou 1-847-538-8023 [International]) :
Fusible
Cache
6571489S01
0987739G01
• Eteignez le poste lorsque vous voulez charger sa batterie.
• Cet équipement n’est pas conçu pour être utilisé à l’extérieur. Utilisez-le
uniquement dans des endroits secs et des conditions sans humidité.
• Connectez uniquement l’équipement avec un câble d’alimentation
protégé par un fusible à une source dont la tension a été vérifiée et
égale à celle indiquée sur le produit.
• Pour débrancher l’appareil de la source d'alimentation, retirez la prise
secteur.
• La prise d’alimentation à laquelle l’équipement est connecté doit être
proche et facilement accessible.
• Si l’appareil est doté d’un fusible, le fusible de remplacement doit être
identique en type et en valeur nominale aux spécifications indiquées
dans les instructions fournies avec cet appareil.
• La température ambiante maximale autour de l’équipement ne doit pas
dépasser 40°C (104°F).
• Vérifiez que le câble est placé de façon à ce que personne ne puisse
marcher dessus ou s’y prendre les pieds, pour qu’il ne reçoive aucune
projection d’eau, ni risque d’être endommagé ou étiré.
• Cette unité utilise le même système de fixation murale que le chargeur
multiple NTN4796. Le numéro de référence de ce système est
NLN7967.
3
Français
INSTRUCTIONS DE SÉCURITÉ POUR L’UTILISATION
MUC.book Page 4 Wednesday, September 26, 2007 11:01 AM
INSTRUCTIONS D’UTILISATION
Un chargeur adaptatif IMPRES est un système de maintenance pour
batteries entièrement automatisé. L’utilisateur doit seulement suivre les
simples instructions suivantes :
1. Placer le poste / la batterie IMPRES dans le chargeur.
2. Sortir le poste / la batterie IMPRES après la fin du chargement signalé
par le témoin vert fixe.
Chaque compartiment du chargeur peut recevoir un poste contenant une
batterie IMPRES ou une batterie IMPRES seule. Pour charger une batterie
installée dans un poste, ce poste doit être éteint. Les batteries se chargent
mieux à la température ambiante intérieure.
Français
Procédure de chargement
1. Branchez la prise du cordon d’alimentation au connecteur situé au dos
du chargeur.
2. Branchez l’autre extrémité du cordon d’alimentation à la prise secteur
CA. La mise sous tension correcte du système est signalée par un
SEUL ÉCLAT VERT du témoin lumineux du chargeur.
3. Insérez une batterie IMPRES ou un poste contenant une batterie
IMPRES (le poste étant éteint), dans le chargeur :
a. Alignez la rainure de chaque côté de la batterie avec le rail
correspondant de chaque côté du compartiment du chargeur.
b. Poussez la batterie vers le fond du compartiment.
c. En faisant glisser la batterie dans son compartiment, vérifiez la
bonne connexion des contacts du chargeur et de la batterie.
4. Pour sortir le poste ou la batterie IMPRES du compartiment du
chargeur, vous devez utiliser les deux mains – une main pour retenir et
soutenir le chargeur, l'autre main pour retirer le poste ou la batterie.
4
MUC.book Page 5 Wednesday, September 26, 2007 11:01 AM
Lorsque la batterie IMPRES est correctement positionnée dans le
compartiment, le témoin du chargeur s’allume pour signaler qu’il a détecté
la présence de la batterie. Voir les indicateurs de charge dans le
Tableau 1.
Tableau 1. Indicateurs de charge
Indicateur de charge
Description
La mise sous tension du chargeur s’est correctement
effectuée.
Rouge fixe
La batterie est en charge rapide.
Vert clignotant
La charge rapide est terminée (>90% de la capacité
totale). La batterie est en charge d’appoint.
Vert fixe
Le processus de charge est terminé. La batterie est
totalement chargée.
Orange clignotant
Le chargeur a détecté la présence de la batterie, mais
la procédure de charge est mise en attente (soit la
tension de la batterie est trop basse, soit sa
température est trop haute ou trop basse). Dès que
cet état sera corrigé, la procédure de charge débutera
automatiquement.
Rouge clignotant
La batterie ne peut pas être chargée ou n’est pas en
contact avec les bornes du chargeur.
Orange fixe
Caractéristique spécifique des batteries IMPRES
uniquement. La batterie est en mode de
reconditionnement ou d’initialisation. La durée de ce
mode dépend de l’état de charge de la batterie. (Une
batterie pleine nécessite un reconditionnement plus
long qu’une batterie vide – 8 à 12 heures ou plus.)
Vert/ rouge clignotant
Caractéristique spécifique aux batteries IMPRES
uniquement. La procédure de charge est terminée et
la batterie est pleine. La batterie est utilisable, mais
approche de sa fin de vie.
INITIALISATION
Pour que les caractéristiques des batteries IMPRES Motorola et du
système de chargement adaptatif soient totalement opérationnelles, les
données des batteries IMPRES doivent être initialisées par le chargeur
lors de leur première charge. Cette procédure automatique est signalée
par un témoin ORANGE FIXE sur le chargeur (comme pendant le
reconditionnement d’une batterie). Elle inclut un reconditionnement initial
de la batterie, dont l'exécution commence dès que ce processus a été
achevé. L’initialisation est une opération longue. La batterie doit rester
5
Français
Un éclat vert
MUC.book Page 6 Wednesday, September 26, 2007 11:01 AM
dans le chargeur pendant environ 12 heures. Ne retirez pas la batterie du
chargeur avant de voir le témoin VERT FIXE allumé.
RECONDITIONNEMENT AUTOMATIQUE
Le chargeur adaptatif IMPRES Motorola (lorsqu’il est utilisé avec une
batterie IMPRES Motorola) peut déterminer si la batterie nécessite ou non
un reconditionnement (cette opération sert à éliminer les effets mémoires
des batteries IMPRES).
Français
Lorsqu’une batterie IMPRES est correctement positionnée dans le
compartiment, le chargeur détermine si un reconditionnement est
nécessaire. Si tel est le cas, le reconditionnement débute et le témoin
ORANGE FIXE du chargeur s’allume. Il peut nécessiter jusqu’à 12 heures,
selon l’état de charge et la capacité de la batterie.
Remarque importante : Le reconditionnement ne peut être efficace que s’il
n’est pas interrompu et s’il se termine correctement. Vous devez donc
laisser la batterie dans le chargeur jusqu’à ce que le témoin du chargeur
soit VERT FIXE.
Après le reconditionnement, le chargeur recharge la batterie IMPRES.
Pour terminer manuellement un reconditionnement
La procédure de reconditionnement peut être annulée à tout instant
(témoin ORANGE FIXE). Pour cela, retirez la batterie de son
compartiment et réintroduisez-la immédiatement ou en moins de 5
secondes. Le chargeur annule alors le reconditionnement et lance le
chargement de la batterie. Le témoin du chargeur passe au ROUGE FIXE.
Le reconditionnement de cette batterie sera effectué lors sa prochaine
insertion dans le chargeur.
Pour lancer manuellement un reconditionnement
Après un délai de deux minutes et demie après l’insertion initiale d’une
batterie IMPRES (témoin ROUGE FIXE), retirez et réinsérez la batterie
dans un intervalle inférieur à 5 secondes pour déclencher la procédure de
reconditionnement. Le témoin du chargeur passe de ROUGE FIXE à
ORANGE FIXE. Cette manipulation simple force le chargeur à
reconditionner puis à charger automatiquement la batterie. Cette fonction
est très utile lorsque des batteries IMPRES ont été stockées pendant
plusieurs mois ou plus. Selon la durée du stockage, deux ou trois cycles
6
MUC.book Page 7 Wednesday, September 26, 2007 11:01 AM
de reconditionnement manuels peuvent être nécessaires pour redonner
aux batteries toute leur capacité.
DÉPANNAGE
Pour le dépannage, observez attentivement la couleur du témoin
lumineux.
Tableau 2. Dépannage
Problème
Signification
Action
1a. Absence de contact.
Rouge
clignotant
2a. Absence de contact.
1b. Aucune alimentation
électrique.
1a. Vérifiez que le poste
contenant la batterie, ou la
batterie seule, est
correctement inséré dans le
chargeur.
1b. • Vérifiez que le câble
d’alimentation est
correctement branché au
chargeur et au secteur, et
qu’il n’y a pas de coupure de
courant.
• Remplacez le(s) fusible(s).
2b. La batterie ne peut pas
être chargée.
7
2a. • Retirez la batterie et
réinsérez-la dans le
chargeur.
• Vérifiez que la batterie est
agréée par Motorola
(Tableau 4). La charge
d’autres batteries peut être
impossible.
• Débranchez le chargeur de
son alimentation électrique.
A l’aide d’un chiffon sec et
propre, nettoyez les broches
de contact de la batterie et
du chargeur.
2b. Réinsérez la batterie dans le
chargeur.
Français
Le témoin
lumineux est
éteint.
MUC.book Page 8 Wednesday, September 26, 2007 11:01 AM
Tableau 2. Dépannage
Problème
Le témoin
Orange
clignote
Signification
3.
Action
En attente du début du
cycle de charge. La
température de la
batterie peut être
inférieure à 5°C (41°F)
ou supérieure à 40°C
(104°F) ou la tension
de la batterie peut être
inférieure à celle du
seuil minimal
nécessaire à la charge
rapide.
3.
Dès que cette condition est
rectifiée, la charge de la
batterie débutera.
Français
ENTRETIEN
Un chargeur multiple adaptatif IMPRES peut uniquement être réparé par
un technicien spécialisé agréé par Motorola. Toute violation de cet
avertissement peut annuler la garantie. Pour obtenir d’autres informations
sur l’entretien et la réparation d’un chargeur multiple et d’un module
d’affichage pour chargeur, consultez le manuel d’entretien pour chargeur
6871357L01.
Pour la maintenance aux États-Unis, contactez le centre indiqué cidessous. Veuillez appeler pour confirmer votre référence de renvoi de
produit avant d’expédier votre produit.
Motorola Service Center
2200 Galvin Drive
Elgin, IL 60123
1-800-422-4210 (US & Canada)
1-847-538-8023 (International)
Pour la maintenance dans la région EMEA, contactez le centre indiqué cidessous. Veuillez appeler pour confirmer votre référence de renvoi de
produit avant d’expédier votre produit.
Motorola Service Center
Motorola GmbH
Customer Care
Am Borsigturm 130
13507 Berlin
Allemagne.
Tél: +49 30 6686 1555
8
MUC.book Page 9 Wednesday, September 26, 2007 11:01 AM
CORDONS D’ALIMENTATION AGRÉÉS MOTOROLA
Ce chargeur est conçu pour fonctionner avec une alimentation de 100 V
CA à 240 V CA, 50/60 Hz. Il utilise les cordons d’alimentation Motorola
suivants :
Tableau 3: Cordons d’alimentation Motorola
Type de prise
Kit de
chargeur
(modèle avec
afficheur)
Aucun câble ou prise
WPLN4211
WPLN4218
Aucun
U.S./NA
WPLN4212
WPLN4219
3087791G01
Euro
WPLN4213
WPLN4220
3087791G04
R.U.
WPLN4214
WPLN4221
3087791G07
Australie/NZ
WPLN4215
WPLN4222
3087791G10
Argentine
WPLN4216
WPLN4223
3087791G13
Corée
WPLN4217
WPLN4224
3087791G16
Hybride EMEA
WPLN4237
WPLN4238
3087791G01
-
WPLN4239
3087791G01
Aucun câble ou prise - Chine
PMLN5258
PMLN5260
Aucun
Chine
PMLN5257
PMLN5259
3087791G21
Japon
PMLN5256
PMLN5255
3087791G20
US/NA 1-UP
Câble
d’alimentation
BATTERIES AGRÉÉES MOTOROLA
Les tableaux suivants répetorient les batteries qui peuvent être utilisées
dans les modèles de radios spécifiquement identifiés.
Tableau 4: Batteries Standard & IMPRES pour radios numériques professionnelles
MOTOTRBO™
Kit (PN)
Chimie
FM
IMPRES
Capacité
PMNN4065
NiMH
Non
Non
Haute
PMNN4066
Li-Ion
Non
Oui
Ultra Haute
PMNN4069
Li-Ion
Oui
Oui
Ultra Haute
PMNN4077
Li-Ion
Non
Oui
Ultra Haute
9
Français
Kit de
chargeur
MUC.book Page 10 Wednesday, September 26, 2007 11:01 AM
DESCRIPTION DES CARACTÉRISTIQUES / AVANTAGES IMPRES
La solution d’alimentation électrique IMPRES utilise une triple technologie
chimique avancée, développée par Motorola. Elle se compose (a) des
batteries IMPRES, (b) du chargeur multiple adaptatif IMPRES, (c) des
composants matériels et logiciels du poste de radio. Elle offre une
fonctionnalité de communication entre les radios IMPRES compatibles et
les batteries IMPRES.
Utilisé avec des batteries Motorola IMPRES, le Chargeur Conditionneur
Multiple IMPRES :
1. Maximise la durée de fonctionnement entre les chargements en
éliminant automatiquement tout effet mémoire.
Français
2. Maximise la durée de vie de la batterie en réduisant considérablement
la chaleur pendant les cycles de charge d’entretien et d’appoint.
3. Elimine toute nécessité d’acheter un appareil de reconditionnement
des batteries et élimine le besoin de former les personnels aux tâches
de maintenance des batteries.
Grâce à ce système breveté unique, vous n’avez pas besoin de suivre et
de noter l’utilisation de chaque batterie IMPRES, ni de lancer
manuellement des cycles de reconditionnement, ou de retirer du chargeur
les batteries pleines.
Le chargeur multiple adaptatif IMPRES analyse l’utilisation des batteries
IMPRES, enregistre ces informations dans chaque batterie IMPRES, et
exécute un cycle de reconditionnement uniquement lorsqu’il est
nécessaire.
Le chargeur multiple adaptatif IMPRES ne peut pas surchauffer une
batterie IMPRES, quelle que soit la durée de son séjour dans le chargeur.
Le chargeur surveille l’état de la batterie et applique automatiquement une
charge d’appoint, si nécessaire.
10
MUC.book Page 11 Wednesday, September 26, 2007 11:01 AM
MODULE D’AFFICHAGE POUR CHARGEUR (CDM)
Le chargeur multiple adaptif IMPRES peut être amélioré par
l’adjonction d’un module d’affichage (CDM – Charger Display Module).
Commandez et installez la pièce Motorola No. RLN5382.
Informations générales affichées
Le chargeur multiple reconditionneur IMPRES avec l’afficheur CDM
donne à l’utilisateur des informations importantes pendant les
opérations de maintenance de ses batteries. Ces informations et les
indications du témoin lumineux sont décrites dans les tableaux
suivants.
Démarrage
À la mise sous tension du chargeur
UN ÉCLAT VERT
Ligne 1
IMPRES
Français
Témoin
Ligne 2
S’il n’y a pas de batterie dans la case
Témoin
OFF (DÉSACTIVÉ)
Ligne 1
NO BATTERY (SANS BATTERIE)
Ligne 2
Lecture des données de la batterie
Témoin
toute indication
Ligne 1
READING (LECTURE EN COURS)
Ligne 2
BATTERY DATA (DONNÉES DE LA BATTERIE)
11
MUC.book Page 12 Wednesday, September 26, 2007 11:01 AM
La batterie dans la case du chargeur n’est pas du type IMPRES
Témoin
Défini par l’état de charge
Ligne 1
NON-IMPRES
Ligne 2
BATTERY (BATTERIE)
La batterie dans la case du chargeur est du type IMPRES
IMPRES and Software Versions are Displayed
Témoin
Défini par l’état de charge
Ligne 1
IMPRES
Ligne 2
SW xx.yy; aa.bb
Français
REMARQUE :
xx.yy indique la version du logiciel et aa.bb indique la version
de l’afficheur CDM.
Le numéro du kit de la batterie IMPRES # et son numéro de série #
sont affichés. (chaque batterie IMPRES a un numéro de série unique #
pour faciliter son identification)
Témoin
Défini par l’état de charge
Ligne 1
KIT# -------- (No. du Kit # --------)
Ligne 2
SN: -------------- (No. de série : --------------)
Le numéro de référence du kit batterie IMPRES et sa catégorie
chimique sont affichés
Témoin
Défini par l’état de charge
Ligne 1
KIT# -------- (KIT No. --------)
Ligne 2
-----CHEMISTRY (-----CHIMIE)
Nombre de cycles prévus avant le reconditionnement automatique
Témoin
Défini par l’état de charge
Ligne 1
----CYCLES (----CYCLES)
Ligne 2
TO RECONDITION (RECONDITIONNER)
* Uniquement affiché lorsque le nombre de cycles antérieurs au prochain
reconditionnement est inférieur à six.
12
MUC.book Page 13 Wednesday, September 26, 2007 11:01 AM
Le chargeur est en attente. La batterie est chaude
Témoin
ORANGE clignotant
Ligne 1
WAITING TO CHG (ATTENTE CHARGE)
Ligne 2
HOT BATTERY (BATTERIE CHAUDE)
Le chargeur est en attente. La batterie est froide
Témoin
ORANGE clignotant
Ligne 1
WAITING TO CHG (ATTENTE CHARGE)
Ligne 2
COLD BATTERY (BATTERIE FROIDE)
Le chargeur est en attente. Tension faible
Témoin
ORANGE clignotant
Ligne 1
WAITING TO CHG (ATTENTE CHARGE)
Ligne 2
LOW VOLTAGE (TENSION FAIBLE)
La batterie est en charge rapide.
Témoin
ROUGE fixe
Ligne 1
RAPID CHARGE (CHARGE RAPIDE)
Ligne 2
Le chargeur est en mode Charge d’appoint
Témoin
VERT clignotant
Ligne 1
TRICKLE CHARGE (CHARGE D’APPOINT)
Ligne 2
Charge terminée
Témoin
VERT fixe ou ROUGE / VERT clignotant
Ligne 1
CHARGE COMPLETE (CHARGE TERMINÉE)
Ligne 2
13
Français
REMARQUE :
Tous les écrans indiqués ci-dessus ne sont pas affichés. Par
exemple, Attente de charge (batterie chaude, froide, tension
faible) n’apparaît que lorsque la situation l’exige.
MUC.book Page 14 Wednesday, September 26, 2007 11:01 AM
Le chargeur est en mode Décharge / reconditionnement
Témoin
ORANGE fixe
Ligne 1
DISCHARGE
Ligne 2
Français
Le chargeur calibre une batterie IMPRES
Témoin
ORANGE fixe, ROUGE fixe, & ORANGE ou VERT clignotant
Ligne 1
Calibrating (Calibrage)
Ligne 2
Battery (Batterie)
Témoin
VERT fixe
Ligne 1
Battery (Batterie)
Ligne 2
Calibrated (Calibrée)
* Toutes les batteries IMPRES doivent être calibrées avant d’être utilisées. Un
chargeur IMPRES lance automatiquement la calibration chaque fois qu’une
batterie neuve est insérée.
Les données de la capacité de la batterie sont affichées sous la forme :
“%” en mAH, et en Volts – uniquement avec une batterie IMPRES
Témoin
Défini par l’état de charge
Ligne 1
----% RATED CAP. (----% CAP. NORM.)
Ligne 2
----mAH --.-V
Capacité estimée après recharge – uniquement avec une batterie
IMPRES
Témoin
Défini par l’état de charge
Ligne 1
EST CAP AFTER (CAP. EST. APRÈS )
Ligne 2
CHARGE xx%
14
MUC.book Page 15 Wednesday, September 26, 2007 11:01 AM
REMARQUE :
Lorsque vous insérez une batterie IMPRES dans un autre
compartiment immédiatement après la fin d’une recharge
complète, la capacité indiquée peut être légèrement inférieure
à la charge pleine. Cela est dû aux estimations des pertes
hors utilisation. Le chargeur corrigera cette déviation lorsque
la batterie retrouvera sa charge maximale dans ce
compartiment, après quelques minutes.
15
Français
REMARQUE :
(1) La durée estimée d’une charge rapide peut inclure un cycle
de décharge plus le cycle de charge rapide complet.
(2) Les informations relatives à la capacité de la batterie
peuvent ne pas être affichées lorsque la batterie n’a pas été
calibrée.
(3) L’utilisation de batteries IMPRES avec des chargeurs nonIMPRES peut affecter la capacité et la précision de la durée
de chargement.
(4) L’utilisation de batteries IMPRES non calibrées peut
affecter la précision de la durée de charge.
MUC.book Page 16 Wednesday, September 26, 2007 11:01 AM
Diagrams de Séquences pour les Batteries IMPRES
Séquence d’affichage pour les batteries IMPRES Li-Ion
Démarrage
(4,0 s)
Français
(2,0 s)
(2,0 s)
Témoin
Défini par l’état de charge
Ligne 1
KIT# xxxxxxxx
Ligne 2
SN: yyyyyyyyyyyy
Témoin
Défini par l’état de charge
Ligne 1
KIT# xxxxxxxx
Ligne 2
yyyyy CHEMISTRY
Témoin
Défini par l’état de charge
Ligne 1
xxxx CYCLES
Ligne 2
TO RECONDITION
Toutes les
73,0 s
Uniquement affiché lorsque le
nombre de cycles antérieurs au
prochain reconditionnement est
inférieur à six.
(2,0 s)
Témoin
Steady RED
Ligne 1
RAPID CHARGE
Toutes les
13,0 s
Ligne 2
5X
Témoin
(7,0 s)
(4,0 s)
Défini par l’état de charge
Ligne 1
xx% RATED CAP.
Ligne 2
yyyyy mAH zz.z V
Témoin
Défini par l’état de charge
Ligne 1
EST CAP AFTER
Ligne 2
CHARGE xx%
16
65,0 s
MUC.book Page 17 Wednesday, September 26, 2007 11:01 AM
Avant calibration :
Démarrage
(4,0 s)
(2,0 s)
Défini par l’état de charge
Ligne 1
KIT# xxxxxxxx
Ligne 2
SN: yyyyyyyyyyyy
Témoin
Défini par l’état de charge
Ligne 1
KIT# xxxxxxxx
Ligne 2
yyyyy CHEMISTRY
Témoin
Steady ORANGE
Ligne 1
DISCHARGE
Toutes les
51,0 s
Toutes les
9,0 s
5X
Ligne 2
45,0 s
(7,0 s)
Témoin
Défini par l’état de charge
Ligne 1
CALIBRATING
Ligne 2
BATTERY
17
Français
(2,0 s)
Témoin
MUC.book Page 18 Wednesday, September 26, 2007 11:01 AM
After Calibration:
Start
(4,0 s)
Français
(2,0 s)
(2,0 s)
Témoin
Défini par l’état de charge
Ligne 1
KIT# xxxxxxxx
Ligne 2
SN: yyyyyyyyyyyy
Témoin
Défini par l’état de charge
Ligne 1
KIT# xxxxxxxx
Ligne 2
yyyyy CHEMISTRY
Témoin
Steady GREEN
Ligne 1
CHARGE COMPLETE
Toutes les
61,0 s
Toutes les
11 s
Ligne 2
5X
(2,0 s)
(7,0 s)
Témoin
Défini par l’état de charge
Ligne 1
BATTERY
Ligne 2
CALIBRATED
Témoin
Défini par l’état de charge
Ligne 1
xx% RATED CAP.
Ligne 2
yyyy mAH zz.z V
18
55,0 s
MUC.book Page 19 Wednesday, September 26, 2007 11:01 AM
Orientation du texte affiché
Pour une installation de bureau ou murale du chargeur multiple
adaptatif IMPRES, l’afficheur CDM est équipé d’une fonction
d’inversion du texte à 180 degrés.
Pour l’activer, insérez l’extrémité d’un trombone à papier dans le petit
orifice sous l’affichage et perpendiculairement à la surface du bureau.
Un son “clic ” confirme le changement (activé / désactivé) et que
l’affichage a été inversé à 180 degrés.
Français
19
MUC.book Page 0 Wednesday, September 26, 2007 3:51 PM
Le informazioni riportate nel presente manuale accessori si riferiscono ai seguenti caricatori
a più unità IMPRES per le radio digitali professionali MOTOTRBO
WPLN4211, WPLN4212, WPLN4213, WPLN4214, WPLN4215, WPLN4216, WPLN4217,
WPLN4218, WPLN4219, WPLN4220, WPLN4221, WPLN4222, WPLN4223, WPLN4224,
WPLN4237, WPLN4238, WPLN4239, PMLN5255, PMLN5256, PMLN5257, PMLN5258,
PMLN5259, PMLN5260
MOTOROLA, il logo stilizzato M, il logo MOTOTRBO e il logo IMPRES sono marchi commerciali depositati di
Motorola, Inc. I nomi di tutti gli altri prodotti o servizi sono di proprietà dei rispettivi titolari.
© 2006, 2007 Motorola, Inc. Tutti i diritti riservati.
MUC.book Page 1 Wednesday, September 26, 2007 3:51 PM
INDICE
Precauzioni per il funzionamento sicuro .....................................3
Istruzioni per l’uso.......................................................................4
Carica della batteria......................................................................... 4
Inizializzazione ...........................................................................5
Ricondizionamento automatico ..................................................6
Interruzione manuale del processo di ricondizionamento ............... 6
Avvio manuale del processo di ricondizionamento.......................... 6
Diagnostica.................................................................................7
Manutenzione .............................................................................8
Cavi di alimentazione approvati da Motorola..............................9
Batterie approvate da Motorola ..................................................9
Descrizione delle caratteristiche e dei benefici di IMPRES ......10
Caricatori dotati di modulo display (CDM) ................................11
Informazioni generali sul display ................................................... 11
Diagrammi di Sequenze delle Batterie IMPRES ........................... 16
Orientazione del testo sul display.................................................. 19
Italiano
1
MUC.book Page 2 Wednesday, September 26, 2007 3:51 PM
INFORMAZIONI IMPORTANTI SULLA
SICUREZZA
CONSERVARE QUESTE ISTRUZIONI
Nel presente documento sono riportate informazioni importanti sulla
sicurezza e l'utilizzo. Leggere con attenzione queste istruzioni e
conservarle per riferimento futuro.
Prima di utilizzare il caricatore, leggere con attenzione tutte le istruzioni
e le avvertenze relative (1) al caricatore, (2) alla batteria e (3) alla radio
in cui è inserita la batteria.
1. Per ridurre il rischio di lesioni, caricare solo le
batterie ricaricabili, approvate da Motorola,
elencate nella Tabella 4. L’uso di altre batterie può
AVVERTENZA
comportare pericolo di esplosioni, che potrebbero
WARNING
causare lesioni personali o danni.
!
2. L’uso di accessori non consigliati da Motorola può comportare
rischio d’incendio, scosse elettriche o lesioni.
3. Per ridurre il rischio di danni alla spina elettrica o al cavo,
scollegare il caricatore staccando la spina e non tirando il cavo.
Italiano
4. Non utilizzare prolunghe salvo che non sia assolutamente
necessario. L’uso di una prolunga non idonea può comportare
rischio di incendio e scosse elettriche. Se è necessario utilizzare
una prolunga, accertarsi che il cavo sia del diametro di 18AWG per
le prolunghe fino a 30,48 m e di 16AWG per quelle fino a 45,72 m.
5. Per ridurre il rischio d’incendio, scosse elettriche o lesioni, non
utilizzare il caricatore se è rotto o danneggiato. Portarlo a un centro
assistenza Motorola qualificato e autorizzato.
6. Il caricatore adattivo a più unità IMPRES può essere riparato solo
da tecnici specializzati, autorizzati da Motorola. La mancata
osservanza di questo requisito renderà nulla la garanzia dell’unità.
2
MUC.book Page 3 Wednesday, September 26, 2007 3:51 PM
AVVERTENZE (continua)
!
7. Per ridurre il rischio di scosse elettriche,
scollegare il caricatore dalla presa di rete prima di
eseguire la manutenzione o di pulirlo.
AVVERTENZA
WARNING
8. Sostituire i fusibili solo con quelli dello stesso tipo
e taratura elencati sull’etichetta del caricatore. Sostituire i fusibili
con quelli Cooper-Bussman GDC-3.15 o di tipo equivalente. Le
seguenti parti possono essere ordinate presso Motorola Radio
Products and Services Division (1-800-422-4210 [USA e Canada] o
1-847-538-8023 [Internazionale]):
Fusibile
6571489S01
Coperchio 0987739G01
PRECAUZIONI PER IL FUNZIONAMENTO SICURO
• Spegnere la radio quando si carica la batteria.
• L’apparecchio non è adatto per essere utilizzato all’aperto. Utilizzare
solo in ambienti asciutti.
• Collegare l’apparecchio a una presa dotata di salvavita e con la
tensione corretta, come specificato sul prodotto.
• Scollegare dalla tensione di rete staccando la spina dalla presa.
• La presa di rete cui l’apparecchio è collegato deve essere vicina e di
facile accesso.
• Negli apparecchi dotati di fusibili, quelli di ricambio devono essere di
tipo e taratura uguali alle specifiche riportate nelle istruzioni che
accompagnano l’apparecchio.
• Verificare che il cavo sia posizionato in modo che non venga
calpestato, che non intralci il passaggio o che non venga bagnato,
danneggiato o sia soggetto a sollecitazioni.
• Questo caricatore utilizza la stessa unità di montaggio a muro del
caricatore a più unità NTN4796; il codice parte dell’unità di
montaggio a muro è NLN7967.
3
Italiano
• La temperatura ambiente massima nell’area circostante
l’alimentatore non deve superare i 40°C.
MUC.book Page 4 Wednesday, September 26, 2007 3:51 PM
ISTRUZIONI PER L’USO
Il sistema di caricatori adattivi IMPRES è un sistema per la
manutenzione delle batterie completamente automatizzato. L’utente
deve solo eseguire queste semplici operazioni:
1. Inserire la radio / la batteria IMPRES nel caricatore
2. Rimuovere la radio / la batteria IMPRES a carica ultimata (il LED
verde RESTA ACCESO)
I vani del caricatore possono alloggiare la radio con la batteria
IMPRES inserita oppure la sola batteria IMPRES. Prima di caricare la
batteria IMPRES inserita nella radio, spegnere la radio. Per una
carica ottimale, utilizzare il caricatore a temperatura ambiente.
Carica della batteria
1. Inserire lo spinotto del cavo di alimentazione nella presa sulla parte
posteriore del caricatore.
2. Inserire la spina del cavo di alimentazione nella presa di rete
appropriata. Se l’accensione avviene correttamente, l’indicatore
VERDE del caricatore lampeggia una sola volta.
3. Inserire la batteria IMPRES o la radio con la batteria IMPRES (con
la radio spenta) nel vano del caricatore:
a. allineando la scanalatura su ciascun lato della batteria alla
rispettiva rotaia in rilievo su ciascun lato del vano del
caricatore
Italiano
b. spingendo la batteria verso la parte posteriore del vano
c. facendo scivolare la batteria nel vano del caricatore,
verificando che i contatti del caricatore e della batteria
vengano a contatto.
4. Rimuovere la radio o la batteria IMPRES dal vano del caricatore
con entrambe le mani: tenere saldo il caricatore con una mano e
rimuovere la radio o la batteria con l’altra.
4
MUC.book Page 5 Wednesday, September 26, 2007 3:51 PM
Quando la batteria IMPRES è alloggiata correttamente nel vano,
l’indicatore del caricatore si illumina, per segnalare che ne ha rilevato
la presenza. Per gli indicatori di carica, vedere la Tabella 1.
Tabella 1: Indicatori di carica per le batterie IMPRES
Indicatore di carica
Descrizione
Accensione corretta del caricatore.
Rosso
La batteria è nella modalità di caricamento rapido.
Verde lampeggiante
Il ciclo di carica rapida è stato completato (>90% della
capacità disponibile). La batteria passa alla carica di
mantenimento.
Verde
Il ciclo di carica è completato e la batteria è
completamente carica.
Arancione
lampeggiante
La batteria è stata rilevata dal caricatore, ma è in
attesa di essere caricata. (La tensione della batteria è
troppo bassa oppure la sua temperatura è troppo
bassa o troppo alta per consentire il processo di
carica. Questo avrà inizio non appena le condizioni si
saranno normalizzate.)
Rosso lampeggiante
La batteria non può essere caricata o non ha un buon
contatto con il caricatore.
Arancione
(Questa funzione è disponibile solo con le batterie
IMPRES) La batteria è nella modalità di
ricondizionamento o inizializzazione. Il periodo per il
quale il caricatore resta in questa modalità dipende
dallo stato di carica restante nella batteria al momento
del suo inserimento nel vano. (Il tempo di
ricondizionamento di batterie completamente cariche
– 8 o più ore – è maggiore del tempo richiesto per
batterie completamente scariche.)
Rosso e verde
lampeggiante
(Questa funzione è disponibile solo con le batterie
IMPRES) Il ciclo di carica è completato e la batteria è
completamente carica. La batteria continua ad essere
utilizzabile, ma è vicina al termine del suo normale
ciclo di vita.
INIZIALIZZAZIONE
Affinché le funzioni delle batterie IMPRES e del sistema di carica
adattivo di Motorola siano completamente disponibili, il caricatore deve
inizializzare i dati contenuti nelle batterie IMPRES quando vengono
caricate per la prima volta. Questo processo viene segnalato
dall’accensione dell’indicatore ARANCIONE (come avviene per il
5
Italiano
Verde lampeggiante
una sola volta
MUC.book Page 6 Wednesday, September 26, 2007 3:51 PM
processo di ricondizionamento). Il processo è automatico e comprende
un primo ricondizionamento della batteria, al termine del quale ha
inizio la carica. Poiché l’inizializzazione della batteria richiede del
tempo, essa va lasciata nel caricatore per circa 12 ore quando la si
carica per la prima volta. Non rimuovere la batteria dal caricatore
finché l’indicatore non passa dall’arancione al VERDE.
RICONDIZIONAMENTO AUTOMATICO
Il caricatore adattivo IMPRES, utilizzato assieme alla batteria IMPRES
Motorola, è in grado di determinare quando la batteria deve essere
ricondizionata (questo processo è necessario per rimuovere i problemi
di memoria in questo tipo di batterie).
Se la batteria IMPRES è alloggiata correttamente, il caricatore
determina se il ricondizionamento è necessario, nel qual caso, il
caricatore inizia automaticamente il processo di ricondizionamento,
segnalato dall’accensione dell’indicatore ARANCIONE. Il processo
può impiegare fino a 12ore, a seconda dello stato di carica e della
capacità della batteria al momento dell’inserimento nel caricatore.
È importante ricordare che, affinché questo processo sia efficace, la
batteria deve poter completare il ciclo di ricondizionamento e di carica.
Lasciare la batteria nel caricatore finché l’indicatore non passa
dall’arancione al VERDE.
Al termine del ciclo di ricondizionamento, il caricatore inizia
automaticamente quello di carica.
Italiano
Interruzione manuale del processo di ricondizionamento
In qualsiasi momento durante il ciclo di ricondizionamento di una
batteria IMPRES Motorola (indicatore ARANCIONE), è possibile
interrompere il ricondizionamento rimuovendo la batteria e
reinserendola entro 5 secondi. Questa operazione fa sì che il
caricatore termini il processo di ricondizionamento ed inizi quello di
carica. L’indicatore passa dall’arancione al ROSSO. Il caricatore
cercherà di ricondizionare la batteria quando questa verrà inserita in un
momento successivo.
Avvio manuale del processo di ricondizionamento
Per ricondizionare manualmente la batteria IMPRES, entro 2 minuti e
½ dall’inserimento iniziale nel caricatore (indicatore ROSSO)
6
MUC.book Page 7 Wednesday, September 26, 2007 3:51 PM
rimuoverla e quindi reinserirla entro 5 secondi. L’indicatore del
caricatore passa dal ROSSO all’ARANCIONE. Questa operazione
forza il ricondizionamento, al termine del quale la batteria verrà
caricata automaticamente. Questa caratteristica è particolarmente utile
quando le batterie IMPRES sono rimaste in magazzino per più mesi o
per periodi più lunghi. È possibile che, per ricondizionare le batterie
rimaste in magazzino per periodi prolungati, siano necessari due o tre
cicli di ricondizionamento manuale.
DIAGNOSTICA
Quando si esegue questo processo di diagnostica, osservare il colore
del LED:
Tabella 2: Diagnostica
Problema
Indicatore
spento
Causa
Azione correttiva
1a. Il caricatore e la
batteria non sono in
contatto.
1b. Non arriva
alimentazione al
caricatore.
1a. Controllare che la radio con la
batteria o la sola batteria sia
alloggiata correttamente.
1b. • Verificare che il cavo di
alimentazione sia inserito
correttamente nel caricatore
e nella presa di rete
appropriata e che la corrente
venga erogata dalla presa di
rete.
• Sostituire il fusibile (o i
fusibili).
Indicatore
rosso
lampeggiante
2a. Il caricatore e la
batteria non sono in
contatto.
7
Italiano
2b. La batteria non può
essere caricata.
2a. • Rimuovere e reinserire la
batteria nel caricatore.
• Verificare che la batteria sia
una batteria approvata da
Motorola, come elencato
nella Tabella 4. È possibile
che altri tipi di batterie non
vengano caricati.
• Staccare il caricatore dalla
presa di rete, quindi pulire i
contatti di carica, di metallo
dorato, della batteria e del
caricatore con un panno
pulito ed asciutto.
2b. Sostituire la batteria.
MUC.book Page 8 Wednesday, September 26, 2007 3:51 PM
Tabella 2: Diagnostica
Problema
Indicatore
arancione
lampeggiante
Causa
3.
Azione correttiva
La batteria è in attesa
di essere caricata. È
possibile che la
temperatura della
batteria sia inferiore a
5°C o superiore a
40°C, oppure che la
tensione della batteria
sia inferiore al livello di
soglia predefinito per la
carica rapida.
3.
La carica della batteria avrà
inizio non appena le condizioni
si sono normalizzate.
MANUTENZIONE
Il caricatore adattivo a più unità IMPRES può essere riparato solo da
tecnici specializzati, autorizzati da Motorola. La mancata osservanza di
questo requisito renderà nulla la garanzia dell’unità. Per ulteriori
informazioni sulla riparazione dei caricatori a più unità e di quelli dotati
di modulo display, consultare il Manuale per la riparazione del
caricatore, 6871357L01.
Per la riparazione dell’unità (negli Stati Uniti), rivolgersi al Centro
riparazioni riportato di seguito. Prima di restituirla, chiamare il Centro
per segnalare la spedizione.
Italiano
Motorola Service Center
2200 Galvin Drive
Elgin, IL 60123
1-800-422-4210 (USA e Canada)
1-847-538-8023 (Internazionale)
Per la riparazione dell’unità (EMEA), rivolgersi al Centro riparazioni
riportato di seguito. Prima di restituirla, chiamare il Centro per segnalare la
spedizione.
Motorola Service Center
Motorola GmbH
Customer Care
Am Borsigturm 130
13507 Berlino
Germania.
Tel: +49 30 6686 1555
8
MUC.book Page 9 Wednesday, September 26, 2007 3:51 PM
CAVI DI ALIMENTAZIONE APPROVATI DA MOTOROLA
Questo caricatore è progettato per l’uso con tensioni di rete comprese
tra 100 V c.a. e 240 V c.a., 50/60 Hz e con i seguenti cavi di
alimentazione Motorola.
Tabella 3: Cavi di alimentazione Motorola
Tipo di spina
Kit del
caricatore
Kit del
caricatore
(Modello con
display)
Cavo di
alimentazione
Nessun cavo / spina
WPLN4211
WPLN4218
Nessuno
U.S./Nordamerica
WPLN4212
WPLN4219
3087791G01
Europa
WPLN4213
WPLN4220
3087791G04
U.K.
WPLN4214
WPLN4221
3087791G07
Australia/Neozelanda
WPLN4215
WPLN4222
3087791G10
Argentina
WPLN4216
WPLN4223
3087791G13
Corea
WPLN4217
WPLN4224
3087791G16
Ibrido EMEA
WPLN4237
WPLN4238
3087791G01
-
WPLN4239
3087791G01
PMLN5258
PMLN5260
Nessuno
USA/America del Nord 1-UP
Nessun cavo / spina -Cina
Cina
PMLN5257
PMLN5259
3087791G21
Giappone
PMLN5256
PMLN5255
3087791G20
BATTERIE APPROVATE DA MOTOROLA
Nelle tabelle che seguono è riportato l’elenco delle batterie che
possono essere utilizzate con specifiche radio abbonate, come
indicato nell’intestazione delle tabelle.
Tabella 4: Batterie standard e IMPRES per le radio digitali professionali MOTOTRBO
Tipo
FM
IMPRES
NiMH
No
No
Alta
PMNN4066
Li-Ion
No
Sì
Altissima
capacità
PMNN4069
Li-Ion
Sì
Sì
Altissima
capacità
PMNN4077
Li-Ion
No
Sì
Altissima
capacità
9
Capacità
Italiano
Kit (PN)
PMNN4065
MUC.book Page 10 Wednesday, September 26, 2007 3:51 PM
DESCRIZIONE DELLE CARATTERISTICHE E DEI BENEFICI DI IMPRES
La soluzione IMPRES è un sistema avanzato con tre chimiche,
concepito da Motorola, che consiste di (a) batterie IMPRES, (b)
caricatore adattivo a più unità IMPRES e (c) hardware e software della
radio che permette alle radio compatibili con IMPRES di comunicare
con le batterie IMPRES.
Se utilizzato con le batterie IMPRES, il caricatore adattivo a più unità
IMPRES consente di:
1. massimizzare il tempo operativo tra i cicli di carica, eliminando
automaticamente l’effetto memoria;
2. massimizzare la durata della batteria, riducendone notevolmente il
riscaldamento durante i cicli di carica di mantenimento e di postcarica;
3. eliminare la necessità di acquistare apparecchi di
ricondizionamento e di formare il personale nella “gestione dei
compiti di manutenzione delle batterie.”
Grazie a questo esclusivo sistema brevettato, non è più necessario
tenere le registrazioni dell’uso della batteria, eseguire manualmente i
cicli di ricondizionamento né rimuovere le batterie dal caricatore dopo
averle caricate.
Italiano
Il caricatore adattivo a più unità IMPRES controlla le modalità di utilizzo
della batteria IMPRES, memorizza in esse i dati ed esegue il ciclo di
ricondizionamento solo quando è necessario.
Il caricatore adattivo a più unità IMPRES non surriscalda la batteria,
indipendentemente dal tempo in cui rimane nel vano del caricatore. Il
caricatore controlla il livello di carica della batteria e, all’occorrenza,
passa automaticamente alla carica di mantenimento.
10
MUC.book Page 11 Wednesday, September 26, 2007 3:51 PM
CARICATORI DOTATI DI MODULO DISPLAY (CDM)
Il caricatore adattivo a più unità IMPRES può essere potenziato
installando un modulo display per caricatori (CDM). Ordinare e
installare il modulo, codice parte Motorola RLN5382.
Informazioni generali sul display
Il caricatore adattivo a più unità IMPRES con CDM consente all’utente
di visualizzare dati importanti durante l’esecuzione delle operazioni di
manutenzione e ricondizionamento della batteria. I dati visualizzati dal
caricatore e i relativi indicatori LED sono riportati nelle tabelle che
seguono.
Avvio
All’accensione del caricatore
LED
VERDE, LAMPEGGIA UNA VOLTA
Riga 1
IMPRES
Riga 2
Nessuna batteria nel vano
LED
OFF
Riga 1
NO BATTERY (NESSUNA BATTERIA)
Riga 2
Lettura dei dati della batteria
LED
Qualsiasi indicazione definita
Riga 1
READING (LETTURA)
Riga 2
BATTERY DATA (DATI BATTERIA)
Italiano
11
MUC.book Page 12 Wednesday, September 26, 2007 3:51 PM
Batteria non IMPRES nel vano
LED
Definito dallo stato di carica
Riga 1
NON-IMPRES (NON IMPRES)
Riga 2
BATTERY (BATTERIA)
Batteria IMPRES nel vano
Vengono visualizzati IMPRES e la versione del software
LED
Definito dallo stato di carica
Riga 1
IMPRES
Riga 2
SW xx.yy; aa.bb
NOTA:
xx.yy indica la versione software del caricatore, mentre aa.bb
la versione software del CDM.
Vengono visualizzati i numeri di kit e di serie della batteria IMPRES
(Ogni batteria IMPRES ha un numero di serie esclusivo per identificarla
con facilità)
LED
Definito dallo stato di carica
Riga 1
KIT# -------- (KIT n.--------)
Riga 2
SN: --------------
Vengono visualizzati il numero del kit e il tipo di batteria IMPRES
LED
Definito dallo stato di carica
Riga 1
KIT# -------- (KIT n.--------)
Riga 2
-----CHEMISTRY (TIPO--------)
Italiano
Numero di cicli previsti prima del ricondizionamento automatico
LED
Definito dallo stato di carica
Riga 1
----CYCLES (----CICLI)
Riga 2
TO RECONDITION (AL RICONDIZIONAMENTO)
* Visualizzato solo se il numero stimato di cicli prima del ciclo di ricondizionamento successivo è inferiore a sei.
12
MUC.book Page 13 Wednesday, September 26, 2007 3:51 PM
Il caricatore è in attesa di iniziare la carica: la batteria è calda
LED
ARANCIONE lampeggiante
Riga 1
WAITING TO CHG (IN ATTESA DI CAR)
Riga 2
HOT BATTERY (BATTERIA CALDA)
Il caricatore è in attesa di iniziare la carica: la batteria è fredda
LED
ARANCIONE lampeggiante
Riga 1
WAITING TO CHG (IN ATTESA DI CAR)
Riga 2
COLD BATTERY (BATTERIA FREDDA)
Il caricatore è in attesa di iniziare la carica: tensione bassa
LED
ARANCIONE lampeggiante
Riga 1
WAITING TO CHG (IN ATTESA DI CAR)
Riga 2
LOW VOLTAGE (BASSA TENSIONE)
NOTA:
Non tutte le informazioni summenzionate verranno
visualizzate sul display. Ad esempio, quelle relative all’attesa
di inizio della carica (batteria calda o fredda, bassa tensione)
verranno visualizzate solo quando richiesto dal caso.
Caricatore nella modalità di carica rapida
LED
Steady RED
Riga 1
RAPID CHARGE
Riga 2
Il caricatore è nella modalità di carica di mantenimento
VERDE lampeggiante
Riga 1
TRICKLE CHARGE (CARICA DI MANTENIMENTO)
Riga 2
Carica ultimata
LED
VERDE; oppure ROSSO/VERDE lampeggiante
Riga 1
CHARGE COMPLETE (CARICA ULTIMATA)
Riga 2
13
Italiano
LED
MUC.book Page 14 Wednesday, September 26, 2007 3:51 PM
Il caricatore è nella modalità di scarica/ricondizionamento
LED
ARANCIONE
Riga 1
DISCHARGE (SCARICA)
Riga 2
Il caricatore sta calibrando una batteria IMPRES
LED
ARANCIONE, ROSSO, e ARANCIONE o VERDE
lampeggiante
Riga 1
Calibrating (Calibrazione)
Riga 2
Battery (Batteria)
LED
VERDE
Riga 1
Battery (Batteria)
Riga 2
Calibrated (Calibrata)
* Calibrare tutte le batterie IMPRES prima di utilizzarle per la prima volta. Il
caricatore IMPRES avvierà automaticamente il processo di calibrazione in
tutte le batterie nuove.
I dati di capacità della batteria sono visualizzati come “%”, mAH e
tensione solo per le batterie IMPRES
LED
Definito dallo stato di carica
Riga 1
----% RATED CAP. (----% CAP NOMINALE)
Riga 2
----mAH --.-V
Capacità stimata dopo la carica solo per le batterie IMPRES
LED
Definito dallo stato di carica
EST CAP AFTER (CAP STIM POST)
Riga 2
CHARGE xx% (CARICA xx%)
Italiano
Riga 1
14
MUC.book Page 15 Wednesday, September 26, 2007 3:51 PM
NOTA:
Se le batterie IMPRES completamente cariche vengono
inserite immediatamente in un vano diverso, è possibile che
venga indicata una capacità iniziale lievemente inferiore, per
via della stima di perdita di capacità della batteria stazionaria.
Il caricatore correggerà questa deviazione quando la batteria
raggiungerà lo stato di carica completa nel nuovo vano, di
regola entro pochi minuti.
NOTA:
(1) La stima del tempo necessario a completare la carica
rapida può comprendere il tempo restante per completare
un ciclo di scarica più il tempo richiesto per ultimare un ciclo
di carica rapida.
(2)È possibile che i dati di capacità della batteria non vengano
visualizzati in caso di batterie non calibrate.
(3) Se le batterie IMPRES vengono caricate con caricatori non
IMPRES, è possibile alterare la precisione della capacità e
del tempo di carica.
(4) L’uso di pacchi batteria IMPRES non calibrati può
influenzare l’accuratezza del tempo di carica.
Italiano
15
MUC.book Page 16 Wednesday, September 26, 2007 3:51 PM
Diagrammi di Sequenze delle Batterie IMPRES
Sequenza di visualizzazione delle batterie IMPRES agli ioni di litio
Avvio
(4,0 sec)
(2,0 sec)
(2,0 sec)
LED
Definito dallo stato di carica
Line 1
KIT# xxxxxxxx
Line 2
SN: yyyyyyyyyyyy
LED
Definito dallo stato di carica
Riga 1
KIT# xxxxxxxx
Riga 2
yyyyy CHEMISTRY
LED
Definito dallo stato di carica
Riga 1
xxxx CYCLES
Riga 2
TO RECONDITION
Ogni
73,0 sec
Visualizzato solo se il numero
stimato di cicli prima del ciclo di
ricondizionamento successivo è
inferiore a sei
(2,0 sec)
LED
Steady RED
Riga 1
RAPID CHARGE
Ogni
13,0 sec
Riga 2
Italiano
5X
LED
(7,0 sec)
(4,0 sec)
Definito dallo stato di carica
Riga 1
xx% RATED CAP.
Riga 2
yyyyy mAH zz.z V
LED
Definito dallo stato di carica
Riga 1
EST CAP AFTER
Riga 2
CHARGE xx%
16
65,0
sec
MUC.book Page 17 Wednesday, September 26, 2007 3:51 PM
Prima della calibrazione:
Avvio
(4,0 sec)
(2,0 sec)
(2,0 sec)
LED
Definito dallo stato di carica
Riga 1
KIT# xxxxxxxx
Riga 2
SN: yyyyyyyyyyyy
LED
Definito dallo stato di carica
Riga 1
KIT# xxxxxxxx
Riga 2
yyyyy CHEMISTRY
LED
Steady ORANGE
Riga 1
DISCHARGE
Ogni
51,0 sec
Ogni
9,0 sec
5X
Riga 2
45,0
sec
(7,0 sec)
LED
Definito dallo stato di carica
Riga 1
CALIBRATING
Riga 2
BATTERY
Italiano
17
MUC.book Page 18 Wednesday, September 26, 2007 3:51 PM
Dopo la calibrazione:
Avvio
LED
Riga 1
(4,0 sec) Riga 2
Definito dallo stato di carica
KIT# xxxxxxxx
SN: yyyyyyyyyyyy
LED
Definito dallo stato di carica
Riga 1
KIT# xxxxxxxx
(2,0 sec) Riga 2
Ogni
61,0 sec
yyyyy CHEMISTRY
LED
Steady GREEN
Riga 1
CHARGE COMPLETE
Ogni
11 sec
(2,0 sec) Riga 2
5X
LED
Definito dallo stato di carica
Riga 1
BATTERY
(2,0 sec) Riga 2
CALIBRATED
LED
Definito dallo stato di carica
Riga 1
xx% RATED CAP.
yyyy mAH zz.z V
Italiano
(7,0 sec) Riga 2
18
55,0
sec
MUC.book Page 19 Wednesday, September 26, 2007 3:51 PM
Orientazione del testo sul display
Per consentire il montaggio del caricatore adattivo a più unità IMPRES
su tavolo o su parete, il CDM è dotato della funzione di “rotazione” del
testo visualizzato a 180 gradi.
Per ruotare il testo, inserire una grossa graffa nel piccolo foro
sottostante il display, in direzione perpendicolare alla superficie del
tavolo. Uno scatto segnala l’attivazione del pulsante di selezione della
rotazione e il testo viene ruotato di 180 gradi.
Italiano
19
back.fm Page 21 Tuesday, September 25, 2007 11:58 AM
m
*6816789H01*
6816789H01-B