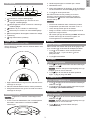
1
AuraBreeze Aroma Diffuser
WA638
User Manual
• This product is not intended to use by children or persons
with diminished physical, sensory or mental capabilities
unless under supervision.
Introduction.................................................................. 1
Important Safety Information....................................... 1
Precautions.................................................................. 1
Packaging Contents.................................................... 2
Overivew...................................................................... 2
Top View............................................................... 2
Bottom View.......................................................... 2
Touch Keys........................................................... 2
LCD Display Screen............................................. 3
Getting Started............................................................ 3
Insert CR2032 Battery.......................................... 3
Add Water............................................................. 3
Clock............................................................................ 3
Set The Clock....................................................... 3
Diffuser........................................................................ 3
Set The Diffuser.................................................... 3
Mood Light................................................................... 3
Set Mood Light...................................................... 3
Soothing Sound........................................................... 3
Set Sound............................................................. 3
Volume......................................................................... 4
Set Volume........................................................... 4
Alarm........................................................................... 4
Set Alarm Time..................................................... 4
Turn On/Off Alarm................................................. 4
Sleep Timer................................................................. 4
Set Sleep Timer.................................................... 4
Specifications.............................................................. 4
About Oregon Scientific............................................... 4
FCC Statement............................................................ 4
EU-Declaration Of Conformity..................................... 5
Disposal Information For Users................................... 5
NOTE The technical specifications for this product and
the contents of the user manual are subject to change
without notice.
Precautions
DOs
• Handle the unit with care
• Use filtered tap water instead of distilled water. Add sufficient
water before adding essential oil.
• Remove dust regularly with a dry cloth. Accumulated dust
poses potential fire hazard.
• Place the unit on a dry, flat, stable and water-resistant
surface.
• Wipe extra essential oil on the lens area immediately
with a dry cloth to avoid damage to the unit.
• For better mist distribution in the room, place the unit on a
raised surface with the mist directed into an open area.
• Children should be supervised to ensure that they do not
play with the product.
• Use only a few drops of essential oil.
• When disposing this product, ensure it is collected
separately for special waste treatment.
• The contents of this manual may not be reproduced without
the permission of the manufacturer.
• Use with essential oil only. Add sufficient amount of water
before adding essential oil.
DON’Ts
• DO NOT turn the unit upside down without removing cover
lid and liquid content from the water tank.
• DO NOT let water, detergent or any other liquid enter the
opening to the fan.
• DO NOT block the ventilation inlet by placing the unit on
soft surface such as cushions, or carpet.
INTRODUCTION
Thank you for purchasing AuraBreeze Aroma Diffuser. This
aroma diffuser is designed for your relaxation at home.
It provides 3 well known holistic relaxation techniques:
Aromatherapy, Mood Light and Soothing Sound.
• DO NOT tamper with the unit’s internal components. This
invalidates the warranty.
• DO NOT subject the unit to excessive force, shock, dust,
temperature or humidity.
NOTE Please keep this manual handy as you use your
new product. It contains practical step-by-step instructions,
as well as technical specifications and warnings you should
know about.
• DO NOT cover the unit with newspaper, curtains etc. when
in operation.
• DO NOT direct the mist towards any electrical appliance,
furniture, plant, paint or heat source.
IMPORTANT SAFETY INFORMATION
• DO NOT inhale mist directly from the mist outlet.
Read this user manual carefully before use.
• DO NOT obstruct the air inlet or air outlet of the unit.
• To avoid electric shock and/or a fire hazard, do not immerse
the unit in liquid.
• DO NOT use water which have been drunk by people.
• DO NOT place the unit directly on the floor. Flooring may be
damaged if it is in direct contact with the mist for a prolonged
period.
• Do not pull the electrical cord to move or unplug the unit.
• Do not disassemble the unit while it is plugged into a power
supply or in operation.
• DO NOT use in humid locations.
• To avoid electric shock and/or a fire hazard, do not clean
the power jack with water detergent or any other liquids.
• DO NOT fill the water tank beyond the MAX marking
indicated.
• Do not touch the power cord with wet hands.
• DO NOT immerse the unit in water. If you spill liquid on the
unit, dry it immediately with a soft, lint-free cloth.
• Do not operate this unit beyond its intended use or the
technical data specified. Improper use could cause damage.
• DO NOT clean the unit with abrasive or corrosive materials.
• DO NOT use water over 40 °C.
1
EN
CONTENTS
EN
PACKAGING CONTENTS
BOTTOM VIEW
1
2
1 x Main unit and 1x adapter
OVERIVEW
1. CR2032 battery compartment
TOP VIEW
2. Power cable linked to the adapter
TOUCH KEYS
1
2
3
4
1
1. Water tank
2. Water tank cover
2
3
4
5
6
7
1.
- Press to display the current volume setting, press
again to toggle the volume level.
2.
- Press to show the remaining time of sleep timer.
Press twice to enter timer setting mode, press
repeatedly to toggle the timer setting.
3.
- Press to display the current sound setting, press
again to toggle 6 soothing sound or off.
4.
- Press to turn the unit on/off or confirm the settings.
5.
- Press to display the current light setting, press
again to toggle the mood light setting.
6.
- Press to display alarm setting, press again to turn
alarm on/off, or adjust settings in clock setting
mode and alarm setting mode.
3. LCD display screen
4. Touch keys
2
- Press and hold to enter alarm setting mode
7.
- Press to display the current setting, press again to
toggle the diffusing level.
1
2
2. Add few drops of essential oils into the water.
3
3. Place the cover back in place.
4
5
6
4. Plug the power adapter to the power outlet. Make sure
the adaptor is not obstructed and is easily accessible
to the unit.
7
8
1.
the unit is in volume setting mode
2.
the soothing sound is on / the unit is in soothing sound setting mode
3.
Mood light is on / the unit is in mood-light setting mode
4.
Diffuser is on / the unit is in diffuser setting mode
5.
Alarm is set to on / the unit is in alarm setting mode
6.
Sleep timer is on / the unit is in sleep timer setting mode
5.Press
NOTE
• Do not use distilled water with this product.
• Temperature of water should be around 15 – 40 °C.
• 100% nature essential oil should be used.
• Switch off the unit and unplug from the mains before
moving or cleaning the unit.
7. Time display
8.
to turn the unit on.
When the water almost runs out (around 50ml remains in
the unit), the diffusing function will stop automatically and
will keep blinking until the unit is turned off.
• When the water fills up to the MAX marking, the unit
diffuses mist up to 8 hours approximately if the sleep
timer is set to OFF.
Diffuser low battery display (CR2032)
GETTING STARTED
INSERT CR2032 BATTERY
CLOCK
This unit is equipped with a CR2032 battery as a backup
power source.
SET THE CLOCK
Set the clock when the unit is turned on for the first time.
to set the 12/24-hour format, hour or minute.
1.Press
Press and hold
to speed up the selection.
2.Press
to confirm.
DIFFUSER
SET THE DIFFUSER
1.Press
once to display the current setting. The screen
displays
.
NOTE The screen returns to idle if no keys are pressed
after 2 seconds.
again to toggle different diffusing modes –
2.Press
1 (Low), 2 (High) or OFF.
MOOD LIGHT
SET MOOD LIGHT
1.Press
once to display the current setting. The screen
.
displays
1. Open the battery compartment cover by turning it in
anticlockwise using a coin.
again to toggle different mood light setting
2.Press
(1/2/3/4/5/6/LOOP/OFF).
2. Insert a CR2032 battery into the compartment,
matching the polarity.
SOOTHING SOUND
3. Close the battery compartment cover by turning it in
clockwise using a coin.
SET SOUND
1.Press
once to display the current setting. The screen
displays
.
ADD WATER
NOTE Do not plug the unit to the power outlet before
adding water.
NOTE The screen returns to idle if no keys are pressed
after 2 seconds.
1. Remove the water tank cover, pour tap water in room
temperature into the water tank. Do not exceed the MAX
mark.
2.Press
3
again to toggle different sound (1/2/3/4/5/6/OFF).
EN
LCD DISPLAY SCREEN
EN
VOLUME
ABOUT OREGON SCIENTIFIC
SET VOLUME
Visit our website www.oregonscientific.com to learn more
about Oregon Scientific products.
1.Press once to display the current setting. The screen
displays
.
For any enquiry, please contact our Customer Services at
[email protected].
NOTE The screen returns to idle if no keys are pressed
after 2 seconds.
Oregon Scientific Global Distribution Limited reserves the right
to interpret and construe any contents, terms and provisions
in this user manual and to amend it, at its sole discretion, at
any time without prior notice. To the extent that there is any
inconsistency between the English version and any other
language versions, the English version shall prevail.
again to toggle different volume setting 2. Press
– 1 (low), 2 (medium), or 3 (high).
ALARM
You may set an alarm to turn on the unit automatically.
FCC STATEMENT
SET ALARM TIME
This device complies with Part 15 & 18 of the FCC Rules.
Operation is subject to the following two conditions: (1) This
device may not cause harmful interference, and (2) This device
must accept any interference received, including interference
that may cause undesired operation.
1. Press and hold for about 2 seconds to enter the alarm
time setting. The screen displays
.
2.Press to set the hour and minute. Press and hold to
speed up the selection. Press to confirm.
WARNING Changes or modifications not expressly
approved by the party responsible for compliance could void
the user's authority to operate the equipment.
to toggle different diffusing modes – 1 (Low),
3.Press
2 (High) or OFF, then press to confirm.
to toggle different mood light setting
4.Press
(1/2/3/4/5/6/LOOP/OFF), then press to confirm.
NOTE This equipment has been tested and found to comply
with the limits for a Class B digital device, pursuant to Part
15 & 18 of the FCC Rules. These limits are designed to
provide reasonable protection against harmful interference
in a residential installation.
to toggle different sound (1/2/3/4/5/6/OFF),
5.Press
then press to confirm.
to toggle different volume setting – 1 (low), 2
6.Press
(medium), or 3 (high), then press to confirm.
This equipment generates, uses and can radiate radio
frequency energy and, if not installed and used in accordance
with the instructions, may cause harmful interference to
radio communications. However, there is no guarantee
that interference will not occur in a particular installation. If
this equipment does cause harmful interference to radio or
television reception, which can be determined by turning the
equipment off and on, the user is encouraged to try to correct
the interference by one or more of the following measures:
7. The alarm is set to on. The unit returns to idle and
.
displays
TURN ON/OFF ALARM
• Press
to display the set alarm time.
• Press
again to toggle the alarm on/off.
• Reorient or relocate the receiving antenna.
SLEEP TIMER
• Increase the separation between the equipment and receiver.
SET SLEEP TIMER
• Connect the equipment into an outlet on a circuit different
from that to which the receiver is connected.
Press
twice enter the timer setting, then press
repeatedly to toggle the sleep timer setting.
• Consult the dealer or an experienced radio/TV technician
for help.
NOTE The screen returns to idle if no keys are pressed
after 2 seconds.
When the sleep timer starts to count down, press
display the remaining time.
This Class B digital apparatus complies with Canadian
ICES-003.
to
DECLARATION OF CONFORMITY
The following information is not to be used as contact for
support or sales. Please call our customer service number
(listed on our website at www.oregonscientific.com), or on
the warranty card for this product) for all inquiries instead.
We
Name:
Oregon Scientific, Inc.
Address: 10778 SW Manhasset Dr.
Tualatin, Or 97062 USA
Telephone No.: 1-800-853-8883
SPECIFICATIONS
LxWxH
200 x 200 x 82 mm
(7.87 x 7.87 x 3.23 in)
Weight
780 g
Water tank volume
450 ml
Operation temperature
Temperature range (operation)
10 °C to 40 °C
Temperature range (storage)
-20 °C to 60°C
declare that the product
Product No.: WA638
Product Name: AuraBreeze Aroma Diffuser
Manufacturer: IDT Technology Limited
Address: Block C, 9/F, Kaiser Estate,
Phase 1, 41 Man Yue St.,
Hung Hom, Kowloon,
Hong Kong
Power
Input
100-240V AC 50-60Hz
Output
12 V 1000mA
4
EN
EU-DECLARATION OF CONFORMITY
Hereby, Oregon Scientific, declares that AuraBreeze Aroma
Diffuser (model: WA638) is in compliance with EMC directive
2004/108/EC and LVD directive 2006/95/EC. A copy of the
signed and dated Declaration of Conformity is available on
request via our Oregon Scientific Customer Service.
DISPOSAL INFORMATION FOR USERS
Pursuant to and in accordance with Article 14 of
the Directive 2012/19/EU of the European
Parliament on waste electrical and electronic
equipment (WEEE), and pursuant to and in
accordance with Article 20 of the Directive
2006/66/EC of the European Parliament on batteries and
accumulators and waste batteries.
The barred symbol of the rubbish bin shown on the
equipment indicates that, at the end of its useful life, the
product must be collected separately from other waste.
Please note that the batteries/rechargeable batteries
must be removed from the equipment before it is given as
waste. To remove the batteries/accumulators refer to the
specifications in the user manual. Therefore, any products
that have reached the end of their useful life must be given
to waste disposal centers specializing in separate collection
of waste electrical and electronic equipment, or given back
to the dealer when purchasing a new WEEE, pursuant to
and in accordance with Article 14 as implemented in the
country.
The adequate separate collection for the subsequent
start-up of the equipment sent to be recycled, treated
and disposal of in an environmentally compatible way
contributes to preventing possible negative effects on the
environment and health and optimizes the recycling and
reuse of components making up the apparatus.
Abusive disposal of the product by the user involves
application of the administrative sanctions according to the
laws in force.
5
• Ziehen Sie nicht am Stromkabel, um das Gerät zu
verschieben oder den Stecker zu ziehen.
• Zerlegen Sie das Gerät nicht, wenn der Netzstecker gesteckt
ist oder das Gerät in Betrieb ist.
• Um einen elektrischen Schlag und/oder Brandgefahr zu
vermeiden, reinigen Sie den Netzstecker nicht mit in Wasser
aufgelöstem Reinigungsmittel oder anderen Flüssigkeiten.
INHALT
• Berühren Sie das Stromkabel nicht mit nassen Händen.
Einführung................................................................... 1
Wichtige Sicherheitshinweise...................................... 1
Vorsichtsmassnahmen................................................ 1
Verpackungsinhalt....................................................... 2
Übersicht..................................................................... 2
Ansicht Von Oben................................................. 2
Ansicht Von Unten................................................ 2
Tasten................................................................... 2
LCD-Display.......................................................... 3
Erste Schritte............................................................... 3
CR2032 Batterie Einlegen.................................... 3
Wasser Einfüllen................................................... 3
Kuhr............................................................................. 3
Uhr Einstellen....................................................... 3
Bedufter....................................................................... 3
Bedufter Einstellen................................................ 3
Stimmungslicht............................................................ 4
Stimmungslicht Einstellen..................................... 4
Entspannungsklänge................................................... 4
Klänge Einstellen.................................................. 4
Lautstärke.................................................................... 4
Lautstärke Einstellen............................................ 4
Einschaltautomatik...................................................... 4
Einschaltautomatik Einstellen............................... 4
Einschaltautomatik Ein-/Ausschalten.................... 4
Abschaltautomatik....................................................... 4
Abschaltautomatik Einstellen................................ 4
Technische Daten........................................................ 4
Über Oregon Scientific................................................ 4
Entsorgung.................................................................. 4
EU-Konformitäts-Erklärung.......................................... 5
• Betreiben Sie das Gerät nur für den beabsichtigten Zweck
und entsprechend der technischen Daten. Unangemessene
Verwendung kann zu Beschädigung führen.
• Dieses Produkt ist nicht zur Verwendung durch Kinder oder
Personen mit eingeschränkten körperlichen, sensorialen
oder geistigen Fähigkeiten geeignet, sofern diese nicht
dabei beaufsichtigt werden.
HINWEIS Die technischen Daten dieses Produkts und der
Inhalt der Bedienungsanleitung können ohne Ankündigung
geändert werden.
VORSICHTSMASSNAHMEN
ZU BEACHTEN:
• Gehen Sie vorsichtig mit dem Gerät um.
• Verwenden Sie statt destilliertem Wasser gefiltertes
Leitungswasser. Füllen Sie ausreichend Wasser ein, bevor
Sie ätherisches Öl hinzufügen.
• Entfernen Sie Staub regelmäßig mit einem trockenen Tuch.
Angesammelter Staub stellt eine potenzielle Brandgefahr dar.
• Stellen Sie das Gerät auf einer trockenen, ebenen, stabilen
und wasserbeständigen Oberfläche ab.
• Entfernen Sie überschüssiges ätherisches Öl vom
Display Bereich umgehend, um Beschädigungen an
der Einheit zu vermeiden.
• Zur besseren Duftverteilung im Raum stellen Sie das Gerät
erhöht und offen ab.
• Kinder sind von dem Produkt fernzuhalten.
• Verwenden Sie nur einige wenige Tropfen ätherischen Öls.
• Entsorgen Sie das Produkt getrennt als Sondermüll.
• Der Inhalt dieser Anleitung darf nur mit Genehmigung des
Herstellers reproduziert werden.
• Verwenden Sie nur ätherische Öle. Füllen Sie ausreichend
Wasser ein, bevor Sie das ätherische Öl hinzufügen.
EINFÜHRUNG
DAS SOLLTEN SIE LASSEN:
Vielen Dank, dass Sie den AuraBreeze Raumbedufter
gekauft haben. Dieser Raumbedufter dient Ihrer Entspannung
zu Hause. Er verbindet drei bewährte ganzheitliche
Entspannungstechniken: Aromatherapie, Stimmungslicht und
Entspannungsklänge.
• Drehen Sie das Gerät NICHT um, ohne zuvor den Deckel
abzunehmen und den flüssigen Inhalt des Wasserbehälters
zu entleeren.
HINWEIS Bitte halten Sie diese Anleitung für die
Verwendung Ihres neuen Produkts bereit. Sie enthält
praktische Schritt-für-Schritt-Anweisungen sowie
technische Daten und Warnungen, die Sie beachten sollten.
• Versperren Sie NICHT den Lüftungseinlass, indem Sie das
Gerät auf einer weichen Oberfläche wie einem Kissen oder
Teppich abstellen.
• Lassen Sie Wasser, Reinigungsmittel oder andere
Flüssigkeiten NICHT in die Öffnung des Lüfters gelangen.
• Manipulieren Sie NICHT die inneren Bauteile des Geräts.
Dadurch verlieren Sie die Garantie.
WICHTIGE SICHERHEITSHINWEISE
• Setzen Sie das Gerät NICHT übermäßigen Kräften,
Stößen, Staubansammlungen, Temperaturen oder hoher
Luftfeuchtigkeit aus.
Lesen Sie diese Bedienungsanleitung vor der Verwendung
des Geräts sorgfältig durch.
• Befolgen Sie die Anweisungen zum Reinigen des Geräts.
• Bedecken Sie das Gerät im Betrieb NICHT mit Zeitungen,
Vorhängen usw.
• Um einen elektrischen Schlag und/oder Brandgefahr zu
vermeiden, tauchen Sie das Gerät nicht in Flüssigkeiten ein.
1
DE
AuraBreeze Raumbedufter
WA638
Bedienungsanleitung
DE
ANSICHT VON UNTEN
• Leiten Sie den Duftnebel NICHT in Richtung elektrischer
Geräte, Möbel, Pflanzen, Anstriche oder Wärmequellen.
• Inhalieren Sie den Duftnebel NICHT direkt am Auslass.
• Versperren Sie den Lufteinlass und den Luftauslass des
Geräts NICHT.
• Verwenden Sie das Wasser NICHT als Trinkwasser.
1
• Stellen Sie das Gerät NICHT direkt auf den Boden. Der
Bodenbelag kann beschädigt werden, wenn er dem
Duftnebel über einen langen Zeitraum direkt ausgesetzt ist.
• Verwenden Sie das Gerät NICHT in feuchten Umgebungen.
• Füllen Sie NICHT mehr Wasser ein als bis zur
Kennzeichnung MAX.
• Tauchen Sie das Gerät NICHT in Wasser ein. Wenn Sie
Flüssigkeit auf dem Gerät verschütten, trocknen Sie es
sofort mit einem weichen, fusselfreien Tuch.
2
• Reinigen Sie das Gerät NICHT mit aggressiven oder
ätzenden Materialien.
• Verwenden Sie KEIN Wasser über 40 °C.
1. Fach für Batterie CR2032
VERPACKUNGSINHALT
2. Stromkabel zum Netzteil
TASTEN
1 x Hauptgerät und 1 x Netzteil
ÜBERSICHT
ANSICHT VON OBEN
1
1
2
3
4
1.Wasserbehälter
2. Deckel des Wasserbehälters
3.LCD-Display
4.Tasten
2
2
3
4
5
6
7
1.
- Drücken, um die eingestellte Lautstärke anzuzeigen,
erneut drücken, um die Lautstärke auszublenden.
2.
- Drücken Sie die Taste, um die verbleibende
Einschlafzeit anzuzeigen. Drücken Sie
zweimal, um den Einstellmodus für den Timer
aufzurufen, und drücken Sie wiederholt, um die
Timereinstellung umzuschalten.
3.
- Drücken, um die Klangeinstellung anzuzeigen, erneut
drücken, um einen von 6 Entspannungsklängen
auszuwählen oder Klänge auszuschalten.
4.
- Drücken, um das Gerät ein-/auszuschalten oder um
die Einstellungen zu bestätigen.
5.
-Drücken, um die Beleuchtungseinstellung anzuzeigen,
erneut drücken, um das Stimmungslicht ein-/
auszuschalten.
6.
- Drücken, um die Einschaltautomatik anzuzeigen,
erneut drücken, um die Einschaltautomatik ein-/
- Gedrückt halten, um die Einschaltautomatik
einzustellen
7.
- Drücken, um die aktuelle Einstellung anzuzeigen,
erneut drücken, um die Bedufterstärke zu wechseln.
WASSER EINFÜLLEN
HINWEIS Schließen Sie das Gerät nicht an der
Netzstromversorgung an, bevor Sie das Wasser aufgefüllt
haben.
1. Nehmen Sie den Deckel des Wasserbehälters ab
und füllen Sie Leitungswasser (Zimmertemperatur)
in den Behälter ein. Überschreiten Sie dabei nicht die
Kennzeichnung MAX.
LCD-DISPLAY
1
2
3
4
5
6
7
8
1.
Die Lautstärke kann eingestellt werden
2. Geben Sie einige Tropfen des ätherischen Öls ins Wasser.
2.
Entspannungsklänge sind eingeschaltet. /
Entspannungsklänge können eingestellt werden
3. Setzen Sie den Deckel wieder auf.
3.
Stimmungslicht ist eingeschaltet. / Stimmungslicht kann
eingestellt werden
4.
Bedufter ist eingeschaltet. / Bedufter kann eingestellt
werden
5.
Einschaltautomatik ist eingeschaltet. /
Einschaltautomatik kann eingestellt werden
6.
Abschaltautomatik ist eingeschaltet. / Abschaltautomatik
kann eingestellt werden
4. Stecken Sie das Netzteil in die Netzsteckdose. Achten
Sie darauf, dass das Netzteil gut zugänglich ist und sich
in Reichweite des Geräts befindet.
5. Drücken Sie
HINWEIS
• Verwenden Sie kein destilliertes Wasser für dieses
Produkt.
7. Uhrzeit-Anzeige
8.
um das Gerät einzuschalten.
Wenn das Wasser beinahe ausgeht (es verbleiben ca.
50ml im Gerät), stoppt die Bedufterfunktion automatisch
blinkt solange, bis das Gerät ausgeschaltet wird.
und
• Die Wassertemperatur sollte ca. 15 - 40 °C betragen.
Batterie des Bedufters fast leer (CR2032)
• Verwenden Sie zu 100 % natürliche ätherische Öle.
ERSTE SCHRITTE
• Bevor Sie das Gerät bewegen oder reinigen, schalten
Sie es aus und trennen Sie es vom Netz.
CR2032 BATTERIE EINLEGEN
• Wenn das Wasser bis zur MAX Kennzeichnung befüllt
ist, reicht die Verdampfer-Funktion für ca. 10 Std
(Schlaftimer ausgeschaltet)
Dieses Gerät ist mit einer Stützbatterie des Typs CR2032
ausgerüstet.
KUHR
UHR EINSTELLEN
Stellen Sie die Uhr beim ersten Einschalten des Geräts
8 Sekunden lang gedrückt, bis die
ein oder halten Sie
Uhrzeitanzeige blinkt.
um das 12/24-Stundenformat, die
1.Drücken Sie
Stunden und Minuten und AM/PM einzustellen. Halten
gedrückt, um schneller durch die Auswahl zu
Sie
blättern.
2. Bestätigen Sie mit
.
BEDUFTER
BEDUFTER EINSTELLEN
1. Drücken Sie
einmal, um die aktuelle Einstellung
anzuzeigen. Auf dem Display wird
angezeigt.
1. Öffnen Sie die Batteriefachabdeckung, indem Sie diese
mittels einer Münze im Gegenuhrzeigersinn drehen.
HINWEIS Das Display kehrt in den Ruhemodus zurück,
wenn 2 Sekunden lang keine Tasten gedrückt werden.
2. Legen Sie eine Batterie CR2032 in das Batteriefach
ein. Beachten Sie dabei die Polarität.
erneut, um die Bedufterstärke zu
2. Drücken Sie
wechseln – 1 (niedrig), 2 (hoch) oder OFF/AUS.
3. Schließen Sie das Batteriefach wieder, indem Sie
die Batteriefachabdeckung mittels einer Münze im
Uhrzeigersinn drehen.
3
DE
auszuschalten oder um die Einstellungen beim
Einstellen der Uhrzeit oder der Einschaltautomatik
zu ändern.
DE
STIMMUNGSLICHT
ABSCHALTAUTOMATIK
STIMMUNGSLICHT EINSTELLEN
ABSCHALTAUTOMATIK EINSTELLEN
1. Drücken Sie
einmal, um die aktuelle Einstellung
anzuzeigen. Auf dem Display wird
angezeigt.
Betätigen Sie
zweimal, um den Einstellmodus für den
Timer zu aktivieren, und betätigen Sie
wiederholt, um
die Einstellungen für den Einschlaftimer umzuschalten.
om erneut, um ein anderes Stimmungslicht
2. Drücken Sie
auszuwählen (1/2/3/4/5/6/LOOP/OFF).
HINWEIS Das Display kehrt in den Ruhemodus zurück,
wenn 2 Sekunden lang keine Tasten gedrückt werden.
ENTSPANNUNGSKLÄNGE
Nach dem Start der Abschaltautomatik können Sie
drücken, um die Restzeit anzuzeigen.
KLÄNGE EINSTELLEN
1. Drücken Sie
einmal, um die aktuelle Einstellung
anzuzeigen. Auf dem Display wird
angezeigt.
TECHNISCHE DATEN
HINWEIS Das Display kehrt in den Ruhemodus zurück,
wenn 2 Sekunden lang keine Tasten gedrückt werden.
erneut, um einen anderen Klang
2. Drücken Sie
auszuwählen (1 / 2 / 3 / 4 / 5 / 6 / OFF ).
LxBxH
200 x 200 x 82 mm
(7.87 x 7.87 x 3.23 Zoll)
Gewicht
780 g
Wasserbehälter
450ml
Betriebstemperatur
LAUTSTÄRKE
Temperaturbereich (Betrieb)
10 °C bis 40 °C
LAUTSTÄRKE EINSTELLEN
Temperaturbereich (Lagerung)
-20 °C bis 60°C
1. Drücken Sie
einmal, um die aktuelle Einstellung
angezeigt.
anzuzeigen. Auf dem Display wird
Leistung
HINWEIS Das Display kehrt in den Ruhemodus zurück,
wenn 2 Sekunden lang keine Tasten gedrückt werden.
Eingang
100-240 V AC, 50-60 Hz
Ausgang
12 V, 1000 mA
erneut, um eine andere Lautstärke
2. Drücken Sie
einzustellen – 1 (leise), 2 (mittel) oder 3 (laut).
ÜBER OREGON SCIENTIFIC
EINSCHALTAUTOMATIK
Besuchen Sie unsere Website www.oregonscientific.com, um
mehr über die Produkte von Oregon Scientific zu erfahren.
Mit der Einschaltautomatik können Sie das Gerät
automatisch einschalten.
Für etwaige Anfragen kontaktieren Sie bitte unseren
Kundendienst unter [email protected].
EINSCHALTAUTOMATIK EINSTELLEN
Oregon Scientific Global Distribution Limited behält sich das
Recht vor, die Inhalte, Bedingungen und Bestimmungen
in dieser Bedienungsanleitung zu interpretieren und
auszulegen, und diese jederzeit nach eigenem Ermessen
ohne vorherige Ankündigung abzuändern. Soweit es
irgendwelche Unterschiede zwischen der englischen
Version und den Versionen in anderen Sprachen gibt, ist
die englische Version maßgebend.
1. Halten Sie ca. 2 Sekunden lang gedrückt, um in den
Einstellmodus zu gelangen. Auf dem Display wird
angezeigt.
um die Stunden und Minuten
2. Drücken Sie
einzustellen. Halten Sie
gedrückt, um die Auswahl
zu beschleunigen. Bestätigen Sie mit .
, um die Bedufterstärke auszuwählen
3. Drücken Sie
– 1 (niedrig), 2 (hoch) oder OFF/AUS. Bestätigen Sie
dann mit .
ENTSORGUNG
Dieses Gerät entspricht den Anforderungen
der Europäischen Richtlinien 2011/65/EU
und 2012/19/EU über die Verwendung
gefährlicher Substanzen in elektrischen und
elektronischen Geräten, sowie deren
Entsorgung.
um das Stimmungslicht auszuwählen
4. Drücken Sie
(1/2/3/4/5/6/LOOP/OFF). Bestätigen Sie dann mit .
, um den Klang auszuwählen
5. Drücken Sie
(1/2/3/4/5/6/OFF). Bestätigen Sie dann mit .
6. Drücken Sie um die Lautstärke auszuwählen – 1 (leise),
2 (mittel) oder 3 (laut). Bestätigen Sie dann mit .
Das durchgestrichene Mülltonnensymbol auf dem Gerät
zeigt an, dass dieses Gerät zur Entsorgung nicht in den
Hausmüll gelangen darf, sondern auf getrenntem Wege
als Sonderabfall dem Recycling zugeführt werden muss.
7. Die Einschaltautomatik ist eingeschaltet. Das Gerät
an.
kehrt in den Ruhemodus zurück und zeigt
EINSCHALTAUTOMATIK EIN-/AUSSCHALTEN
• Drücken Sie
anzuzeigen.
Geben Sie deshalb alle so gekennzeichneten Produkte zum
Ende des Gebrauchs gesondert bei einer Sammelstelle für
elektrische oder elektronische Geräte ab, oder bringen Sie
das Gerät wieder zu dem Fachhändler zurück, bei dem Sie
das Gerät gekauft haben, oder ein neues Gerät kaufen.
, um die eingestellte Einschaltzeit
erneut, um die Einschaltautomatik ein-/
• Drücken Sie
auszuschalten.
4
DE
Die vorschriftsmäßige und getrennte Entsorgung
von elektronischen Geräten durch das Zuführen zum
Recycling-Maerialkreislauf, stellt die umweltverträgliche
Weiterbehandlung und Wiederverwertung des Gerätes
und dessen Komponenten sicher, gewährleistet, dass
keine negativen Folgen für Menschen und die Umwelt
entstehenden, und dass eine rohstoffsparende Aufbereitung
des Gerätes sichergestellt ist.
Die unsachgemäße Entsorgung dieses Gerätes durch
den Benutzer kann dazu führen, dass dieser strafrechtlich
gemäß den geltenden Gesetzen verfolgt wird.
EU – KONFORMITÄTS-ERKLÄRUNG
Oregon Scientific erklärt hiermit, das der AuraBreeze
Raumbedufter (Modell: WA638) den Anforderungen
der EMC Richtlinie 2004/108/EC genügt. Eine Kopie der
unterzeichneten und datierten Konformitätserklärung wird
Ihnen auf Anfrage gerne Oregon Scientific Kundenservice
bereitgestellt.
5
• Ne démontez pas l’appareil lorsque celui-ci est branché sur
une prise de courant ou en cours d’utilisation.
• Pour éviter tout risque de choc électrique et/ou tout risque
d’incendie, ne nettoyez pas l’appareil avec du détergent ou
tout autre liquide.
• Ne touchez pas le cordon d’alimentation avec des mains
mouillées.
CONTENU
• Ne pas faire fonctionner cet appareil au-delà de son
utilisation prévue ou des données techniques spécifiées.
Une mauvaise utilisation peut causer des dommages.
Introduction.................................................................. 1
Consignes Importantes De Securite............................ 1
Precautions.................................................................. 1
Contenu De L’emballage............................................. 2
Vue D’ensemble.......................................................... 2
Vue De Dessus..................................................... 2
Vue De Dessous................................................... 2
Touches Tactiles................................................... 2
Ecran D’affichage LCD......................................... 3
Pour Commencer........................................................ 3
Inserez La Pile CR2032........................................ 3
Ajouter De L’eau................................................... 3
Horloge........................................................................ 3
Reglage De L’horloge........................................... 3
Diffuseur...................................................................... 3
Reglage Du Diffuseur........................................... 3
Lumiere D’ambiance.................................................... 4
Reglage De La Lumiere D’ambiance.................... 4
Son apaisant................................................................ 4
Reglage Du Son................................................... 4
Volume......................................................................... 4
Reglage Du Volume.............................................. 4
Alarme......................................................................... 4
Reglage De L’heure De L’alarme.......................... 4
Activer/Desactiver L’alarme.................................. 4
Minuteur De Sommeil.................................................. 4
Reglage Du Minuteur De Sommeil....................... 4
Specifications.............................................................. 4
À Propos D’oregon Scientific....................................... 4
Mise Au Rebut............................................................. 4
• Ce produit n’est pas destiné à être utilisé par des enfants
ou des personnes possédant des capacités physiques,
sensorielles ou mentales réduites, sauf sous surveillance
REMARQUE Les caractéristiques techniques de ce
produit et le contenu de ce mode d’emploi sont sujets à
modifications sans.
PRECAUTIONS
À FAIRE
• Manipulez l'appareil avec soin.
• Utilisez de l’eau du robinet filtrée plutôt que de l’eau distillée.
Versez suffisamment d’eau dans l’appareil avant d’ajouter
les huiles essentielles.
• Nettoyez régulièrement la poussière sur l’appareil à l’aide
d’un chiffon sec. De la poussière qui s’accumule peut
présenter des risques d’incendie.
• Placez l'appareil sur une surface plane et sèche,
résistante à l'eau, et en dirigeant la brume diffusée vers
une zone ouverte.
• Essuyez immédiatement l’huile extra essentielle dans
la zone de contact avec un chiffon sec pour éviter
d’endommager l’unité.
• Pour une meilleure distribution de la brume dans la pièce,
placez l’appareil sur une surface surélevée en vous assurant
que la brume est diffuse en direction d’une zone ouverte.
• Les enfants doivent être surveillés pour s'assurer qu'ils ne
jouent pas avec l'appareil ou ses composants.
• Utilisez seulement quelques gouttes d’huiles essentielles.
EU – Déclaration De Conformité................................. 5
• Lors de l'élimination de ce produit, assurez-vous qu'il soit
collecté séparément pour un traitement des déchets spéciaux.
INTRODUCTION
• Le contenu de ce mode d’emploi ne peut être reproduit sans
l'autorisation du fabricant.
• À utiliser uniquement avec des huiles essentielles. Ajoutez
suffisamment d’eau avant d’ajouter les huiles essentielles.
Merci d’avoir acheté le Diffuseur d’Arôme AuraBreeze. Ce
diffuseur d’arôme a été conçu pour votre relaxation à la
maison. Il offre trois techniques holistiques de relaxation:
Aromathérapie, Lumière d’ambiance et Son Apaisant.
À NE PAS FAIRE
• NE PAS mettre l'appareil à l'envers sans enlever le couvercle
et le liquide contenu dans le réservoir d’eau.
Veuillez garder ce manuel à portée de main de l’utilisation du
produit. Il contient des instructions pratiques, étape par étape,
ainsi que des spécifications techniques et des avertissements
dont il est recommandé de prendre connaissance.
• NE PAS laisser de l'eau, du détergent, ou tout autre liquide
pénétrer dans l'ouverture de l'appareil
• Ne pas bloquer l'entrée de la ventilation en plaçant l'appareil
sur une surface molle telle qu’un coussin ou un tapis.
CONSIGNES IMPORTANTES DE SECURITE
• NE PAS toucher aux composants internes de l'appareil, cela
invaliderait votre garantie.
À lire attentivement avant utilisation :
Suivez les instructions de Soin et d’Entretien pour nettoyer
l’appareil.
• Pour éviter tout risque de choc électrique et/ou tout risque
d’incendie, ne plongez pas l’appareil dans un liquide.
• Ne pas soumettre le produit à une force excessive, aux
chocs, à la poussière, à des températures extrêmes ou à
de l'humidité.
• Ne tirez pas sur le cordon électrique d’alimentation pour
déplacer ou débrancher l’appareil.
• NE PAS couvrir l'appareil avec du papier journal, des
rideaux, etc. pendant le fonctionnement.
1
FR
Diffuseur d’Arôme AuraBreeze
WA638
Mode d’emploi
FR
• Ne pas diriger la brume diffusée vers tout appareil électrique,
meuble, plante, peinture ou source de chaleur.
3. Écran d’affichage LCD
4. Touches tactiles
• NE PAS inhaler les aérosols directement à la sortie des
buses de diffusion.
VUE DE DESSOUS
• NE PAS obstruer l'entrée d'air ou la sortie d'air de l'appareil.
• NE PAS utiliser d’eau qui a été précédemment bu
par quelqu’un.
• NE PAS placer l'appareil directement sur le sol. Le
revêtement du sol peut être endommagé en cas de contact
direct avec la brume diffusée, lors d’une utilisation prolongée
de l’appareil.
1
• NE PAS utiliser dans des endroits humides.
• NE PAS remplir le réservoir d’eau au-delà de la marque
MAX indiquée sur l’appareil.
• NE PAS immerger l'appareil dans l'eau. Si vous renversez
du liquide sur l'appareil, séchez-le immédiatement avec un
chiffon doux non pelucheux.
2
• NE PAS nettoyer l'appareil avec des matériaux corrosifs ou abrasifs.
• NE PAS utiliser d’eau dont la temperature est supérieure à 40 °C.
CONTENU DE L’EMBALLAGE
1. Compartiment de la pile CR2032
2. Câble d’alimentation relié à l’adaptateur
TOUCHES TACTILES
1 x Unité principale et 1x adaptateur
VUE D’ENSEMBLE
VUE DE DESSUS
1
1
2
3
4
1. Réservoir à eau
2. Couvercle du réservoir à eau
2
2
3
4
5
6
7
1.
- Appuyez pour afficher le réglage actuel du volume,
et appuyez de nouveau pour choisir le niveau du
volume.
2.
- Appuyez ici pour voir le temps restant sur la minuterie
de sommeil. Appuyez deux fois ici pour entrer dans
le mode de réglage de la minuterie de sommeil, et
appuyez ici de manière répétée pour faire défiler
les différents réglages de la minuterie de sommeil.
3.
- Appuyez pour afficher les réglages actuels du son,
et appuyez de nouveau pour choisir un des 6 sons
apaisants ou pour désactiver le son.
4.
- Appuyez pour allumer/éteindre l’appareil ou
confirmer les réglages.
5.
- Appuyez pour afficher les réglages actuels de la
lumière d’ambiance, et appuyez de nouveau pour
faire défiler les réglages de la lumière d’ambiance.
- Appuyez pour afficher les réglages de l’horloge,
et appuyez de nouveau pour activer/désactiver
l’alarme ou ajuster les réglages en mode réglage
de l’heure et en mode réglage de l’alarme.
- Maintenez appuyé pour entrer dans le mode de
réglage de l’alarme.
7.
- Appuyez pour afficher les réglages actuels, et
appuyez de nouveau pour faire défiler les niveaux
de diffusion.
FR
6.
AJOUTER DE L’EAU
REMARQUE Ne branchez pas l'appareil sur une prise de
courant avant d'avoir ajouter l'eau.
1. Retirez le couvercle du réservoir d’eau et versez de l’eau
du robinet à température ambiante dans le réservoir
d’eau. Ne pas versez l’eau au delà de la marque MAX.
ECRAN D’AFFICHAGE LCD
1
2
3
4
5
6
2. Ajoutez quelques gouttes d’huiles essentielles dans
l’eau.
7
8
1.
l’appareil est en mode de réglage du volume
2.
un son apaisant est activé/ l’appareil est en mode
de réglage des sons apaisants
3.
la lumière d’ambiance est activée/ l’appareil est en mode
de réglage de la lumière d’ambiance
4.
le diffuseur d’arôme est activé/ l’appareil est en
mode de réglage du diffuseur
5.
l’alarme est activée/ l’appareil est en mode
de reglage de l’alarme
6.
le minuteur de sommeil est activé/ l’appareil est en mode
de réglage du minuteur de sommeil
3. Replacez le couvercle.
4. Branchez l’adaptateur sur une prise de courant.
Assurez-vous que l’adaptateur n’est pas obstrué et est
facilement libre d’accès pour l’unité principale.
5. Appuyez sur
REMARQUE
• N’utilisez pas d’eau distillée avec ce produit.
• La température de l’eau doit être aux alentours de
15 – 40 °C.
• Vous devez utiliser des huiles essentielles 100%
naturelles.
7. Affichage de l’heure
8.
pour activer l’appareil.
Lorsque l'eau vient à manquer dans l'appareil (environ 50ml
restant), la fonction de diffusion s’arrête automatiquement
clignote jusqu'à ce que l’appareil soit éteint.
et l’icone
Affichage des piles faibles (CR2032)
• Désactivez l’appareil et débranchez le cordon
d’alimentation avant de déplacer l’appareil ou de le
nettoyer.
POUR COMMENCER
• Lorsque l’eau atteint le marquage MAX , l’unité diffuse
la brume pendant environ 10 heures si le minuteur de
sommeil est mis sur OFF.
INSEREZ LA PILE CR2032
Cet appareil est équipé d’une pile CR2032 servant
d’alimentation de réserve.
HORLOGE
REGLAGE DE L’HORLOGE
Réglez l’horloge lorsque l’appareil est activé pour la première
fois, ou maintenez appuyé fpendant 8 secondes jusqu'à ce
que l’affichage de l’heure se mette à clignoter.
pour régler le format de l’heure 12/24,
1. Appuyez sur
les heures, et les minutes. Maintenez appuyé
pour
faire défiler les valeurs de sélection plus rapidement.
2. Appuyez sur
pour confirmer.
DIFFUSEUR
rEGLAGE DU DIFFUSEUR
1. Appuyez une fois sur
L’écran affiche
.
pour afficher le réglage actuel.
REMARQUE Après 2 secondes d’inutilisation des
touches, l’écran se met en mode veille.
1. Ouvrez le compartiment à piles en utilisant une piece
de monnaie et en tournant dans le sens inverse des
aiguilles d'une montre.
pour faire défiler les
2. Appuyez de nouveau sur
différents modes de diffusion – 1 (faible), 2 (fort) ou OFF.
2. Insérez une pile CR2032 dans le compartiment à piles,
en respectant les indications de polarité.
3. Fermez le compartiment à piles en utilisant une pièce
de monnaie et en tournant dans le sens des aiguilles
d'une montre.
3
FR
LUMIERE D’AMBIANCE
MINUTEUR DE SOMMEIL
REGLAGE DE LA LUMIERE D’AMBIANCE
REGLAGE DU MINUTEUR DE SOMMEIL.
1. Appuyez une fois sur
L’écran affiche alors
Appuyez deux fois sur
pour entrer dans les réglages de
la minuterie, puis appuyez sur
de manière répétée pour
faire défiler les différents réglages du minuteur de sommeil.
pour afficher le réglage actuel.
.
pour faire défiler
2. Appuyez de nouveau sur
les différents réglages de la lumière d’ambiance
(1/2/3/4/5/6/LOOP/OFF).
REMARQUE Après 2 secondes d’inutilisation des touches,
l’écran se met en mode veille.
Son apaisant
Lorsque le minuteur de sommeil commence le compte à
pour afficher le temps restant.
rebours, appuyez sur
REGLAGE DU SON
1. Appuyez une fois sur
L’écran affiche alors
SPECIFICATIONS
pour afficher le réglage actuel.
.
REMARQUE Après 2 secondes d’inutilisation des
touches, l’écran se met en mode veille.
pour faire défiler les différents
2. Appuyez de nouveau sur
sons (1/2/3/4/5/6/OFF).
200 x 200 x 82 mm
(7.87 x 7.87 x 3.23 in)
Poids
780 g
Volume du réservoir d’eau
450 ml
Température de fonctionnement
Plage de température
(en utilisation)
Plage de température
(en stockage)
VOLUME
REGLAGE DU VOLUME
1. Appuyez une fois sur
L’écran affiche alors
LxWxH
pour afficher le réglage actuel.
.
10 °C à 40 °C
-20 °C à 60°C
Alimentation
REMARQUE Après 2 secondes d’inutilisation des
touches, l’écran se met en mode veille.
pour faire défiler les
2. Appuyez de nouveau sur
différents réglages du volume – 1 (faible), 2 (moyen),
ou 3 (fort).
Entrée
100-240V AC 50-60Hz
Sortie
12 V 1000mA
À PROPOS D’OREGON SCIENTIFIC
Pour plus d‘informations sur les produits Oregon Scientific
France, rendez-vous sur notre site www.oregonscientific.fr.
ALARME
Vous pouvez régler une alarme pour activer l’appareil
automatiquement.
Besoin de plus d’informations? Contactez notre service
client expert à [email protected].
REGLAGE DE L’HEURE DE L’ALARME
Oregon Scientific Global Distribution Limited se réserve
le droit d’interpréter tout contenu, termes et provisions
d présent manuel de l’utilisateur et de les amender à sa
seule discrétion, n’importe quand et sans avis préalable.
Dans la mesure où des incohérences sont constatées entre
la version anglaise et l es versions traduites en langues
étrangères, la version anglaise prévaudra.
1. Maintenez appuyé pendant 2 secondes pour accéder aux
réglages de l’heure de l’alarme. L’écran affiche alors
.
pour régler les heures et les minutes.
2. Appuyez sur
Maintenez appuyé pour accéder rapidement à l’heure
et aux minutes choisies. Appuyez sur pour confirmer.
pour faire défiler les différents modes
3. Appuyez sur
de diffusion – 1 (faible), 2 (fort) ou OFF, puis appuyez
sur pour confirmer.
MISE AU REBUT
Conformément aux directives européennes
2011/65/UE et 2012/19/UE relatives à la
limitation d'utilisation de substances
dangereuses dans les équipements
électriques et électroniques ainsi qu’à leur
élimination.
pour faire défiler les différents réglages
4. Appuyez sur
de la lumière d’ambiance (1/2/3/4/5/6/LOOP/OFF),puis
appuyez sur pour confirmer.
pour faire défiler les différents sons
5. Appuyez sur
(1/2/3/4/5/6/OFF), puis appuyez sur pour confirmer.
Le symbole barré de la poubelle indiqué sur le produit signifie
qu’à la fin de son cycle de vie, le produit doit être collecté
séparément des autres déchets ménagers.
6. Appuyez sur pour faire défiler les différents réglages
du volume – 1 (faible), 2 (moyen), ou 3 (élevé), puis
appuyez sur pour confirmer.
Par conséquent, tous les produits qui ont atteint la fin de
leur durée de vie doivent être déposés dans des centres
de stockage spécialisés dans la collecte séparée des
déchets d'équipements électriques et électroniques, ou
donnés à un détaillant au moment de l'achat d’un nouvel
équipement similaire.
7. L’alarme est activée. L’appareil retourne en mode de
.
veille et affich
aCTIVER/DESACTIVER L’ALARME
• Appuyez sur
l’alarme.
pour afficher l’heure sélectionnée de
• Appuyez de nouveau sur
l’alarme.
pour activer ou désactiver
4
FR
La collecte séparée de ce produit pour être recyclé, traité
et éliminé de façon écologique, contribue à éviter les
effets négatifs possibles sur l'environnement et la santé,
et optimise le recyclage et la réutilisation des composants
constituant l'appareil.
L’élimination abusive de ce produit par l'utilisateur peut
entrainer l'application de sanctions administratives
conformément à la législation en vigueur.
EU – DÉCLARATION DE CONFORMITÉ
Par la présente, Oregon Scientific déclare que ce Diffuseur
d’Arôme AuraBreeze (Modèle: WA638) est conforme à la
directive CEM 2004/108/CE. Une copie de la Déclaration
de conformité signée et datée est disponible sur demande
auprès de notre Service à la clientèle.
Cet appareil numérique de la classe B est comforme à la
norme NMB-003 du Canada.
5
• Non smontare l'unità mentre è collegata a una fonte di
alimentazione oppure è in funzione.
• Per evitare scosse elettriche e/o rischio di incendi, non pulire
la spina di alimentazione con detergente a base d'acqua o
altri liquidi.
• Non toccare il cavo di alimentazione con le mani umide.
INDICE
• Non utilizzare questa unità oltre il suo uso previsto o i dati tecnici
specificati. L'uso errato potrebbe essere causa di danni.
Introduzione................................................................. 1
Informazioni Importanti Per La Sicurezza.................... 1
Precauzioni.................................................................. 1
Contenuto Della Confezione........................................ 2
Panoramica................................................................. 2
Vista Superiore..................................................... 2
Vista Inferiore........................................................ 2
Pulsanti................................................................. 2
Schermo Display LCD.......................................... 3
Per Iniziare.................................................................. 3
Inserire La Batteria CR2032................................. 3
Aggiungere Acqua................................................ 3
Orologio....................................................................... 3
Impostare L’orologio............................................. 3
Diffusore...................................................................... 3
Impostare Il Diffusore............................................ 3
Luce D’atmosfera........................................................ 3
Impostare La Luce D’atmosfera............................ 3
Suono Calmante.......................................................... 4
Impostare Il Suono................................................ 4
Volume......................................................................... 4
Impostare Il Volume.............................................. 4
Sveglia......................................................................... 4
Impostare L’ora Della Sveglia............................... 4
Accendere/Spegnere La Sveglia.......................... 4
Timer Di Spegnimento................................................. 4
Impostare Il Timer Di Spegnimento...................... 4
Specifiche.................................................................... 4
Informazioni Su Oregon Scientific............................... 4
Informazione Agli Utenti Sullo Smaltimento................. 4
UE-Dichiarazione Di Conformitá.................................. 5
• Questo prodotto non è destinato all'uso da parte di bambini
o persone dalle ridotte capacità fisiche, sensoriali o mentali,
a meno che non siano soggette a supervisione.
NOTA Le specifiche tecniche di questo prodotto e i
contenuti del manuale utente sono soggetti a modifiche
senza preavviso.
PRECAUZIONI
COSA FARE
• Maneggiare l'unità facendo attenzione
• Usare acqua del rubinetto filtrata invece di acqua distillata.
Aggiungere acqua sufficiente prima di aggiungere l'olio
essenziale
• Togliere regolarmente la polvere con un panno asciutto. La
polvere accumulata pone il rischio di incendi.
• Posizionare l'unità su una superficie asciutta, piatta, stabile
e resistente all'acqua.
• Pulire l'eventuale olio essenziale che dovesse cadere
sul prodotto specie sulla parte superiore, display e tasti,
immediatamente con un panno.
• Per una migliore distribuzione del vapore nella stanza,
posizionare l'unità su una superficie rialzata con il vapore
diretto verso una zona aperta.
• I bambini devono essere soggetti a supervisione per
accertarsi che non giochino con il prodotto.
• Usare solo alcune gocce di olio essenziale.
• Quando si smaltisce il prodotto, accertarsi che sia ritirato
separatamente per il trattamento dei rifiuti speciali.
• È vietata la riproduzione dei contenuti di questo manuale
senza il permesso del produttore.
• Usare solo con olio essenziale. Aggiungere una quantità
d'acqua sufficiente prima di aggiungere l'olio essenziale.
INTRODUZIONE
COSA NON FARE
Grazie per aver acquistato il Diffusore d'aroma AuraBreeze.
Questo diffusore d'aroma è progettato per il vostro
rilassamento a casa. Offre 3 note tecniche di rilassamento
olistico: Aromaterapia, Luce d'atmosfera e Suono calmante.
• NON capovolgere l'unità senza rimuovere il tappo del
coperchio e il contenuto liquido dal serbatoio d'acqua.
NOTA Tenere questo manuale a portata di mano quando
si usa il nuovo prodotto. Contiene istruzioni pratiche
passo-passo, oltre che specifiche tecniche e avvisi che
occorre conoscere.
• NON bloccare la presa di ventilazione sistemando l'unità
su una superficie morbida, come cuscini o un tappeto.
INFORMAZIONI IMPORTANTI PER LA SICUREZZA
Leggere attentamente questo manuale prima dell'uso.
• NON sottoporre l'unità a forza eccessiva, urti, polvere,
temperatura o umidità.
• Seguire le istruzioni in Cura e manutenzione per pulire
l'unità.
• NON coprire l'unità con giornali, tende, ecc. mentre è in
funzione.
• Per evitare scosse elettriche e/o rischio di incendi, non
immergere l'unità in un liquido.
• NON dirigere il vapore verso apparecchiature elettriche,
arredi, piante, vernici o fonti di calore.
• Non tirare il cavo di alimentazione elettrico per spostare o
scollegare l'unità.
• NON inalare il vapore direttamente dall'uscita del vapore.
• NON lasciare che acqua, detergente o altro liquido entrino
nell'apertura della ventola.
• NON manomettere i componenti interni dell'unità. Ciò
annullerà la garanzia.
• NON ostruire la presa o l'uscita d'aria dell'unità.
1
IT
Diffusore d'aroma AuraBreeze
WA638
Manuale utente
IT
VISTA INFERIORE
• NON usare acqua bevuta da persone.
• NON posizionare l'unità direttamente sul pavimento. Il
pavimento potrebbe essere danneggiato se entra a diretto
contatto con il vapore per un periodo prolungato.
• NON usare i luoghi umidi.
• NON riempire il serbatoio dell'acqua oltre il contrassegno
MAX indicato.
1
• NON immergere l'unità nell'acqua. Se si versa del liquido
nell'unità, asciugare immediatamente con un panno morbido
privo di filacce.
• NON pulire l'unità con materiali abrasivi o corrosivi.
• NON usare acqua oltre i 40 °C.
CONTENUTO DELLA CONFEZIONE
2
1. Vano batteria CR2032
2. Cavo di alimentazione collegato all'adattatore
PULSANTI
1 x unità principale a 1 x adattatore
PANORAMICA
VISTA SUPERIORE
1
1
2
3
4
1. Serbatoio dell'acqua
2. Coperchio del serbatoio dell'acqua
3. Schermo display LCD
4.Pulsanti
2
2
3
4
5
6
7
1.
- Premere per visualizzare l'impostazione volume
corrente, premere nuovamente per modificare il
livello del volume.
2.
- Premere per visualizzare il tempo rimanente del
timer di spegnimento. Premere due volte per
entrare in modalità impostazione timer, premere
ripetutamente per cambiare le impostazioni del
timer.
3.
- Premere per visualizzare l'impostazione audio
corrente, premere nuovamente per accendere o
spegnere 6 il suono calmante.
4.
- Premere per accendere/spegnere l'unità o
confermare le impostazioni.
5.
- Premere per visualizzare l'impostazione luce
corrente, premere nuovamente per modificare
l'impostazione della luce d'atmosfera.
6.
- Premere per visualizzare l'impostazione sveglia,
premere nuovamente per accendere/spegnere la
sveglia, o regolare le impostazioni nella modalità
IT
di impostazione dell'orologio e la modalità di
impostazione della sveglia.
- Premere e tenere premuto per accedere alla
modalità di impostazione dell'ora.
7.
- Premere per visualizzare l'impostazione corrente,
premere nuovamente per modificare il livello di
diffusione.
AGGIUNGERE ACQUA
NOTA Non inserire la spina dell’unità nella presa di
corrente prima di aggiungere l’acqua.
1. Rimuovere il coperchio del serbatoio dell'acqua, versare
acqua di rubinetto a temperatura ambiente nel serbatoio
dell'acqua. Non superare il contrassegno MAX.
SCHERMO DISPLAY LCD
1
2
3
4
5
6
7
8
2. Aggiungere alcune gocce di olio essenziale all'acqua.
3. Rimettere il coperchio in posizione.
1.
L'unità è in modalità di impostazione volume
2.
Il suono calmante è acceso/l'unità è nella modalità
di impostazione del suono calmante
3.
La luce d'atmosfera è accesa/l'unità è nella modalità
di impostazione della luce d'atmosfera
4.
Il diffusore è acceso/l'unità è nella modalità di
impostazione del diffusore
5.
La sveglia è accesa/l'unità è nella modalità di
impostazione della sveglia
6.
Il timer di spegnimento è acceso/l'unità è nella
modalità di impostazione del timer di spegnimento
4. Inserire l'adattatore di corrente nella presa di
alimentazione. Accertarsi che l'adattatore non sia
ostruito e sia facilmente accessibile per l'unità.
5.Premere
NOTA
• Non usare acqua distillata con questo prodotto.
• La temperatura dell'acqua deve essere intorno a 15 – 40 °C.
7. Display ora
8.
per accendere l'unità.
Quando l’acqua è quasi finita (circa 50ml rimangono
nell’unità), la funzione di diffusione si interromperà
continuerà a lampeggiare fino a
automaticamente e
quando l'unità viene spenta.
• Usare 100% di olio essenziale naturale.
Display batteria diffusore quasi scarica (CR2032)
• Spegnere l'unità e scollegarla dalla presa di
alimentazione prima di spostare o pulire l'unità.
PER INIZIARE
• Quando l'acqua si riempie fino al livello MAX, l'unità
si diffonde nebbia fino a 10 ore circa se il timer di
spegnimento è impostato su OFF.
INSERIRE LA BATTERIA CR2032
Questa unità è dotata di una batteria CR2032 come fonte di
alimentazione di riserva.
OROLOGIO
IMPOSTARE L’OROLOGIO
Impostare l'orologio quando si accende l'unità per la prima
volta, oppure premere e tenere premuto per 8 secondi fino
a quando il display dell'ora lampeggia.
1.Premere per impostare il formato 12/24 ore, l'ora o minuti.
Premere e tenere premuto per accelerare la selezione.
2.Premere
per confermare.
DIFFUSORE
IMPOSTARE IL DIFFUSORE
1.Premere
una volta per visualizzare l'impostazione
.
corrente. Lo schermo visualizza
NOTA Lo schermo torna a essere inattivo se non si
premono pulsanti dopo 2 secondi.
per navigare tra le varie
2. Premere nuovamente
modalità di diffusione – 1 (Bassa), 2 (Alta) o OFF.
1. Usare una moneta per aprire il comparto batterie
ruotandolo in senso anti-orario.
LUCE D’ATMOSFERA
2. Inserire una batteria CR2032 nel vano, rispettando la
polarità.
IMPOSTARE LA LUCE D’ATMOSFERA
1.Premere
una volta per visualizzare l'impostazione
.
corrente. Lo schermo visualizza
3. Chiudere il coperchio del comparto batterie facendolo
ruotare in senso orario usando una moneta.
per navigare tra le varie
2. Premere nuovamente
impostazioni della luce d'atmosfera (1/2/3/4/5/6/LOOP/OFF).
3
IT
SPECIFICHE
SUONO CALMANTE
IMPOSTARE IL SUONO
1.Premere
una volta per visualizzare l'impostazione
corrente. Lo schermo visualizza
.
NOTA Lo schermo torna a essere inattivo se non si
premono pulsanti dopo 2 secondi.
2. Premere nuovamente
(1/2/3/4/5/6/OFF).
LxWxH
200 x 200 x 82 mm
(7.87 x 7.87 x 3.23 in)
Peso
780 g
Serbatoio di acqua
450 ml
Temperatura di esercizio
per navigare tra i differenti suoni
VOLUME
Intervallo di temperatura
(funzionamento)
Intervallo di temperatura
(stoccaggio)
IMPOSTARE IL VOLUME
Alimentazione
1.Premere
una volta per visualizzare l'impostazione
corrente. Lo schermo visualizza
.
Ingresso
100-240V CA 50-60Hz
Uscita
12 V 1000mA
NOTA Lo schermo torna a essere inattivo se non si
premono pulsanti dopo 2 secondi.
Per ulteriori informazioni sui prodotti Oregon Scientific,
visitate il nostro sito web www.oregonscientific.com.
SVEGLIA
Per richiedere informazioni, contattate il nostro Servizio
Clienti all’indirizzo [email protected]
È possibile impostare una sveglia per accendere l'unità
automaticamente.
Oregon Scientific Global Distribution Limited si riserva il
diritto di interpretare e definire eventuali contenuti, termini
e disposizioni contenuti in questo manuale per l’utente
e di modificarli, a sua esclusiva discrezione, in qualsiasi
momento e senza preavviso. Nella misura in cui risultassero
incongruenze tra la versione in inglese e quelle in altre
lingue, farà fede la versione in inglese.
IMPOSTARE L’ORA DELLA SVEGLIA
1. Premere e tenere premuto
per circa 2 secondi per
accedere all'impostazione della sveglia. Lo schermo
visualizza
.
per impostare l'ora e i minuti. Premere e
2.Premere
tenere premuto per accelerare la selezione. Premere
per confermare.
INFORMAZIONE AGLI UTENTI SULLO
SMALTIMENTO
per navigare tra le varie modalità di
3.Premere
diffusione – 1 (Bassa), 2 (Alta) o OFF, quindi premere
per confermare.
Ai sensi dell’art.26 del Decreto Legislativo
14 marzo 2014, n. 49 "Attuazione della
Direttiva 2012/19/UE sui rifiuti di
apparecchiature elettriche ed elettroniche
(RAEE)" ed ai sensi dell'art.22 del Decreto
Legislativo 188 del 20 novembre 2008
"Attuazione della direttiva 2006/66/CE concernente pile,
accumulatori e relativi rifiuti ".
per navigare tra le varie impostazioni
4.Premere
della luce d'atmosfera (1/2/3/4/5/6/LOOP/OFF), quindi
premere per confermare.
5.Premere per navigare tra le varie impostazioni audio
(1/2/3/4/5/6/OFF), quindi premere per confermare.
per navigare tra le varie impostazioni
6.Premere
volume – 1 (Bassa), 2 (Media) o 3 (Alta), quindi premere
per confermare.
Il simbolo del cassonetto barrato riportato sull’apparecchiatura
o sulla sua confezione indica che il prodotto alla fine della
propria vita utile deve essere raccolto separatamente dagli
altri rifiuti per permetterne un adeguato trattamento e riciclo.
7. La sveglia è impostata. L'unità torna a essere inattiva
.
e visualizza
Si ricorda che le pile/accumulatori devono essere rimosse
dall’apparecchiatura prima che questa sia conferita come
rifiuto. Per rimuovere le pile/ accumulatori fare riferimento alle
specifiche indicazioni riportate nel manuale d'uso.
aCCENDERE/SPEGNERE LA SVEGLIA
• Premere
Da -20 °C a 60°C
INFORMAZIONI SU OREGON SCIENTIFIC
per navigare tra le varie
2. Premere nuovamente
impostazioni volume – 1 (Bassa), 2 (media) o 3 (alta)
per visualizzare l'ora della sveglia impostata.
• Premere nuovamente
sveglia.
Da 10 °C a 40 °C
per accendere/spegnere la
L’utente dovrà, pertanto, conferire gratuitamente
l’apparecchiatura e la pila giunta a fine vita agli idonei
centri comunali di raccolta differenziata dei rifiuti elettrici
ed elettronici, oppure riconsegnarle al rivenditore secondo
le seguenti modalità:
TIMER DI SPEGNIMENTO
IMPOSTARE IL TIMER DI SPEGNIMENTO
Premere
due volte per entrare in modalità impostazione
timer, quindi premere
ripetutamente per cambiare le
impostazioni del timer di spegnimento.
- sia pile portatili sia apparecchiature di piccole
dimensioni, ovvero con almeno un lato esterno non
superiore a 25 cm, è prevista la consegna gratuita senza
obbligo di acquisto presso i negozi con una superficie di
vendita delle apparecchiature elettriche ed elettroniche
superiore ai 400 mq. Per negozi con dimensioni inferiori,
tale modalità è facoltativa.
NOTA Lo schermo torna a essere inattivo se non si
premono pulsanti dopo 2 secondi.
Quando il timer di spegnimento inizia il conto alla rovescia,
per visualizzare il tempo residuo.
premere
4
IT
- per apparecchiature con dimensioni superiori a 25 cm, è
prevista la consegna in tutti i punti di vendita in modalità 1
contro 1, ovvero la consegna al rivenditore potrà avvenire
solo all’atto dell’acquisto di un nuovo prodotto equivalente,
in ragione di uno a uno.
L’adeguata raccolta differenziata per l’avvio successivo
dell’apparecchiatura e delle pile/accumulatori dismessi al
riciclaggio, al trattamento e allo smaltimento ambientalmente
compatibile contribuisce ad evitare possibili effetti negativi
sull’ambiente e sulla salute e favorisce il reimpiego e/o riciclo
dei materiali di cui essi sono composti.
Lo smaltimento abusivo di apparecchiature, pile ed
accumulatori da parte dell’utente comporta l’applicazione
delle sanzioni di cui alla corrente normativa di legge.
UE – DICHIARAZIONE DI CONFORMITÁ
Con la presente, Oregon Scientific dichiara che Diffusore
d'aroma AuraBreeze (Modello: WA638) rispetta le direttive
EMC 2004/108/EC. Una copia della Dichiarazione di
Conformità firmata e datata è disponibile a richiesta tramite
il nostro Servizio Clienti Oregon Scientific.
5
• No desarme la unidad mientras esté enchufada al suministro
de corriente o encendida.
• Para evitar descargas eléctricas o incendios, no limpie
la toma de alimentación con detergente líquido o algún
otro líquido.
ÍNDICE DE MATERIAS
• No toque el cable de alimentación con las manos mojadas.
Introducción................................................................. 1
Medidas De Seguridad Importantes............................ 1
Precauciones............................................................... 1
Contenido.................................................................... 2
Descripción General.................................................... 2
Vista Superior....................................................... 2
Vista Inferior.......................................................... 2
Teclas Táctiles...................................................... 2
Pantalla LCD......................................................... 3
Guía De Inicio.............................................................. 3
Insertar La Pila CR2032....................................... 3
Añadir Agua.......................................................... 3
Reloj............................................................................ 3
Ajuste Del Reloj.................................................... 3
Aromatizador............................................................... 3
Ajuste Del Aromatizador....................................... 3
Luz Ambiental.............................................................. 3
Ajuste De La Luz Ambiental.................................. 3
Sonido Relajante......................................................... 4
Ajustar Sonido...................................................... 4
Volumen....................................................................... 4
Ajustar El Volumen............................................... 4
Alarma......................................................................... 4
Ajuste De La Alarma............................................. 4
Activar Y Desactivar La Alarma............................ 4
Temporizador De Apagado Automático....................... 4
Ajuste Del Temporizador De Apagado
Automático............................................................ 4
Especificaciones.......................................................... 4
Sobre Oregon Scientific............................................... 4
Eliminación.................................................................. 4
• No utilice esta unidad para fines más allá del uso pretendido
o de los datos técnicos especificados. El uso incorrecto
puede causar daños.
• Este producto no está diseñado para ser utilizado por niños
o personas con una capacidad física, sensorial o mental
reducida, salvo que estén bajo supervisión adulta.
NOTA Las especificaciones técnicas de este producto y el
contenido del manual de usuario están sujetos a cambios
sin aviso previo.
PRECAUCIONES
QUÉ HACER
• Maneje la unidad con cuidado.
• Utilice agua corriente filtrada en lugar de agua destilada.
Añada suficiente agua antes de añadir aceites esenciales.
• Quite el polvo regularmente con un paño seco. La
acumulación de polvo puede conllevar incendios.
• Coloque la unidad sobre una superficie seca, plana, estable
y resistente al agua.
• Limpiar aceite esencial adicional en el área de la lente
inmediatamente con un paño seco para evitar daños a
la unidad.
• A fin de conseguir una distribución más uniforme de la
neblina, coloque la unidad sobre una superficie elevada y
dirija la neblina hacia un área despejada.
• Los niños deben ser supervisados para asegurarse de que
no juegan con el producto.
• Utilice solo unas pocas gotas de aceite esencial.
• Cuando vaya a deshacerse del producto, asegúrese de
que sea recogido por separado para su tratamiento como
un desecho especial.
UE – Declaración De Conformidad............................. 5
• El contenido de este manual no debe ser reproducido sin
el permiso del fabricante.
INTRODUCCIÓN
• Utilice solamente con aceites esenciales. Añada suficiente
agua antes de añadir aceites esenciales.
Gracias por adquirir el Aromatizador AuraBreeze. Este
aromatizador está diseñado para la relajación en el hogar
e incluye 3 técnicas holísticas de relajación bien conocidas:
aromaterapia, luz ambiental y sonidos relajantes.
QUÉ NO HACER
NOTA Por favor, mantenga este manual a mano al utilizar
su nuevo producto, ya que contiene instrucciones prácticas
paso a paso, así como datos técnicos y advertencias que
debe conocer.
• NO deje que el agua, los detergentes u otros líquidos
penetren las aberturas del ventilador.
• NO ponga la unidad boca abajo sin quitar antes la tapa y
vaciar el depósito de agua.
• NO obstruya las ranuras de ventilación de la unidad
mediante su colocación en superficies blandas tales como
cojines o alfombras.
MEDIDAS DE SEGURIDAD IMPORTANTES
• NO altere los componentes internos de la unidad, dado que
invalidará la garantía.
Lea el manual de usuario detenidamente antes de usar este
producto.
• NO someta la unidad a impactos, polvo, temperatura,
humedad o fuerza excesiva.
• Siga las instrucciones de la sección de Limpieza y
mantenimiento para limpiar la unidad.
• NO cubra la unidad con periódicos, cortinas o objetos
similares cuando está en funcionamiento.
• A fin de evitar descargas eléctricas o incendios, no sumerja
la unidad en un elemento líquido.
1
ES
• No tire del cable eléctrico cuando transporte o desenchufe
la unidad.
Aromatizador AuraBreeze
WA638
Manual de usuario
ES
VISTA INFERIOR
• NO dirija la neblina hacia aparatos eléctricos, muebles,
plantas, pinturas o fuentes de calor.
• NO inhale la neblina directamente del lugar por donde es
expulsada.
• NO obstruya las entradas o salidas de aire de la unidad.
• NO utilice agua de la que hayan bebido otras personas.
1
• NO coloque la unidad en el suelo. El suelo podría dañarse
si está en contacto directo con la neblina por periodos
prolongados.
• NO utilice la unidad en lugares húmedos.
• NO llene el depósito de agua por encima de la marca MAX.
• NO sumerja la unidad en el agua. Si derrama líquido sobre
la unidad, séquela inmediatamente con un paño suave y
sin pelusas.
2
• NO limpie la unidad con materiales abrasivos o corrosivos.
• NO utilice agua a más de 40 °C.
CONTENIDO
1. Compartimento de las pilas CR2032
2. Cable de alimentación vinculado al adaptador
TECLAS TÁCTILES
1 x unidad principal, 1 x adaptador de alimentación
DESCRIPCIÓN GENERAL
VISTA SUPERIOR
1
1
2
3
4
2
4
5
6
7
- Pulse para mostrar el volumen actual y pulse de
nuevo para cambiar el nivel del volumen.
2.
- Pulse este botón para mostrar el tiempo restante del
temporizador; púlselo dos veces para acceder al modo
de ajuste del temporizador; y púlselo reiteradamente
para cambiar de unos ajustes a otros.
3.
- Pulse para mostrar el sonido actual y pulse de
nuevo para seleccionar uno de los 6 sonidos o
desactivarlo.
4.
- Pulse para encender o apagar la unidad o confirmar
los ajustes realizados.
5.
- Pulse para mostrar la luz ambiental actual y pulse
de nuevo para cambiar de luz ambiental.
6.
- Pulse para mostrar la hora de la alarma y pulse de
nuevo para activar, desactivar o realizar ajustes
en el modo de ajuste de la hora o en el modo de
ajuste de la alarma.
- Mantenga pulsado para acceder al modo de ajuste
de la hora.
2. Tapa del depósito de agua
4. Teclas táctiles
3
1.
1. Depósito de agua
3. Pantalla LCD
2
- Pulse para mostrar el ajuste actual y pulse de
nuevo para cambiar el nivel de difusión.
AÑADIR AGUA
NOTA No enchufe la unidad a la toma de corriente antes
de añadir el agua.
PANTALLA LCD
1
2
3
5
6
1. Quite la tapa del depósito de agua y vierta agua del grifo
a temperatura ambiente en el depósito. No exceda la
marca MAX.
4
7
8
1.
La unidad está en el modo de ajuste del volumen.
2.
El sonido relajante está activado / La unidad está
en el modo de ajuste del sonido relajante
3.
La luz ambiental está activada / La unidad está en el
modo de ajuste de la luz ambiental
4.
El aromatizador está activado / La unidad está en
el modo de ajuste del aromatizador
5.
La alarma está activada / La unidad está en el modo
de ajuste de la alarma
6.
2. Añada unas pocas gotas de aceites esenciales en el agua.
3. Vuelva a poner la tapa.
4. Enchufe el adaptador de alimentación en la toma de
corriente. Asegúrese de que el adaptador no esté
obstruido y la unidad pueda acceder fácilmente a él.
5.Pulse
El temporizador está activado / La unidad está en el
modo de ajuste del temporizador.
7. Pantalla de la hora
8.
para encender la unidad.
Cuando ya no queda apenas agua (alrededor de 50 ml
en la unidad), la función aromatizadora se detendrá
parpadeará hasta que
automáticamente y el icono
sea apagada.
NOTA
Las pilas del aromatizador están casi descargardas
(CR2032)
• No utilice agua destilada con este producto.
• La temperatura del agua debe entre 15 y 40 °C.
GUÍA DE INICIO
• Se recomienda utilizar aceites esenciales 100% naturales.
INSERTAR LA PILA CR2032
• Apague la unidad y desenchúfela del suministro de
corriente antes de moverla o limpiarla.
Esta unidad viene equipada con una pila tipo CR2032 a
modo de fuente de energía de reserva.
• Cuando el agua llena hasta la marca MAX, la unidad
se difunde niebla hasta 10 horas aproximadamente si
el temporizador de apagado está ajustado en OFF.
RELOJ
AJUSTE DEL RELOJ
Ajuste el reloj cuando encienda la unidad por primera vez,
mantenga pulsado durante 8 segundos hasta que la hora
parpadee en la pantalla.
para seleccionar el formato de 12 o 24 horas
1. Pulse
y ajustar la hora o los minutos. Mantenga pulsado
para avanzar más deprisa.
2.Pulse
para confirmar.
AROMATIZADOR
AJUSTE DEL AROMATIZADOR
1.Pulse
una vez para mostrar el ajuste actual. La
pantalla mostrará
.
1. Gire la tapa del compartimento de la pila en sentido
horario con una moneda.
NOTA La pantalla volverá al modo inactivo si no se
pulsa ninguna tecla durante 2 segundos.
2. Inserte la pila CR2032 en el compartimento haciendo
coincidir el sentido de los polos.
para seleccionar unos de los niveles
2. Pulse otra vez
de difusión –1 (Bajo), 2 (Alto), o OFF (desactivado).
3. Cierre la tapa del compartimento de las pilas girándola
con una monada hacia la derecha.
LUZ AMBIENTAL
AJUSTE DE LA LUZ AMBIENTAL
1.Pulse
una vez para mostrar el ajuste actual. La pantalla
mostrará
.
otra vez para seleccionar el ajuste de luz
2.Pulse
ambiental (1/2/3/4/5/6/LOOP/OFF).
3
ES
7.
ES
SONIDO RELAJANTE
ESPECIFICACIONES
AJUSTAR SONIDO
1.Pulse una vez para mostrar el ajuste actual. La pantalla
mostrará
.
NOTA La pantalla volverá al modo inactivo si no se
pulsa ninguna tecla durante 2 segundos.
La. x An. x Al.
200 x 200 x 82 mm
(7.87 x 7.87 x 3.23 in)
Peso
780 g
El volumen del depósito de agua 450 ml
Temperatura operacional
otra vez para seleccionar el ajuste de sonido
2.Pulse
(1/2/3/4/5/6/OFF).
VOLUMEN
Rango de temperatura
(en funcionamiento)
Rango de temperatura
(almacenado)
AJUSTAR EL VOLUMEN
Alimentación
1.Pulse
una vez para mostrar el volumen actual. La
pantalla mostrará
.
Entrada
100-240V AC 50-60Hz
Salida
12 V 1000mA
NOTA para seleccionar el nivel del volumen –1 (Bajo),
2 (Medio), o –, o 3 (Alto)–.
De 10 °C a 40 °C
De -20 °C a 60°C
SOBRE OREGON SCIENTIFIC
para seleccionar el nivel del volumen 2. Pulse otra vez
–1 (Bajo), 2 (Medio), o –, o 3 (Alto)–.
Visite nuestro sitio web www.oregonscientific.com para
obtener más información sobre los productos de Oregon
Scientific.
ALARMA
Si tiene alguna duda, póngase en contacto con nuestros
servicios al cliente en [email protected].
Vd. puede ajustar la alarma para encender la unidad
automáticamente.
Oregon Scientific Global Distribution Limited se reserva el
derecho de interpretar e inferir cualquier contenido, términos
y provisiones de este manual de usuario y corregirlo, a su
discreción en cualquier momento y sin aviso previo. Si
hubiese alguna divergencia entre la versión en inglés y las
versiones de otros idiomas, prevalecerá la versión en inglés.
AJUSTE DE LA ALARMA
1. Mantenga pulsado unos 2 segundos para acceder al
modo de ajuste de la alarma. La pantalla mostrará
.
2.Pulse para ajustar las horas y los minutos. Mantenga
pulsado
para avanzar más deprisa. Pulse
para
confirmar.
ELIMINACIÓN
to toggle different diffusing modes – 1 (Low),
3.Pulse
2 (High) or OFF, then press para confirmar.
Conforme a las Directivas Europeas 2011/65/
EU y 2012/19/EU sobre la restricción de uso
de sustancias peligrosas en equipos
eléctricos y electrónicos así como la
eliminación de residuos.
4.Pulse otra vez para seleccionar el ajuste de luz ambiental
(1/2/3/4/5/6/LOOP/OFF), y pulse para confirmar.
otra vez para seleccionar el ajuste del sonido
5.Pulse
(1/2/3/4/5/6/OFF), y pulse para confirmar.
6. Pulse otra vez para seleccionar el nivel del volumen
–1 (Bajo), 2 (Medio), o –, o 3 (Alto)–, y pulse
para
confirmar.
El símbolo tachado de un cubo de basura que se muestra
en el equipo indica que, al final de su vida útil, se debe
recoger el producto de forma separada de otros residuos.
7. La alarma está ahora activada. La unidad volverá al
.
modo inactivo y mostrará
Por lo tanto, cualquier producto que haya alcanzado el final
de su vida útil debe entregarse a centros de eliminación
de residuos especializados en la recogida separad de
residuos de equipos eléctricos y electrónicos, o entregarse
al distribuidor en el momento de la adquisición de una equipo
similar, conforme a una base de uno por otro.
ACTIVAR Y DESACTIVAR LA ALARMA
• Pulse
para mostrar la alarma.
• Pulse
otra vez para activar o desactivar la alarma.
La recogida separada adecuada para el posterior puesta
en marcha del equipo que se va a enviar a reciclar, tratar
y eliminar de una forma compatible con el medioambiente
contribuye a evitar los posibles efectos negativos sobre
el medioambiente y la salud y optimiza el reciclaje y
reutilización de los componentes que conforman el aparato.
TEMPORIZADOR DE APAGADO AUTOMÁTICO
AJUSTE DEL TEMPORIZADOR DE APAGADO
AUTOMÁTICO
Pule
dos veces para acceder a los ajustes del
temporizador. A continuación, pulse
reiteradamente
para cambiar de unos ajustes a otros del temporizador.
Una eliminación abusiva del producto por parte del usuario
implica la adopción de sanciones administrativas conforme
a la legislación vigente.
NOTA La pantalla volverá al modo inactivo si no se pulsa
ninguna tecla durante 2 segundos.
Cuando el temporizador comience la cuenta atrás, pulse
para mostrar el tiempo restante.
4
ES
UE – DECLARACIÓN DE CONFORMIDAD
Por la siguiente, Oregon Scientific, declara que este
Aromatizador AuraBreeze (Modelo: WA638) cumple
con la directiva EMC 2004/108/EC. Disponemos de una
copia de la Declaración de conformidad firmada y fechada
previa solicitud a nuestros servicio de atención al cliente
de Oregon Scientific.
5
• Não puxe o cabo elétrico para deslocar ou desligar o
equipamento.
• Não desmonte o equipamento se este estiver ligado à
corrente ou em funcionamento.
• Para evitar choques elétricos e/ou perigo de incêndio,
não limpe o plugue elétrico com detergente para água ou
qualquer outro líquido.
CONTEÚDO
• Não toque no cabo de alimentação com as mãos molhadas.
Introdução.................................................................... 1
Informações De Segurança Importantes..................... 1
Precauções.................................................................. 1
Conteúdo Da Embalagem........................................... 2
Aspecto Geral.............................................................. 2
Vista De Cima....................................................... 2
Vista De Baixo...................................................... 2
Botões Tácteis...................................................... 2
Tela LCD............................................................... 3
Iniciar........................................................................... 3
Inserir Pilha CR2032............................................. 3
Adicionar Água..................................................... 3
Relógio........................................................................ 3
Configurar O Relógio............................................ 3
Difusor......................................................................... 3
Configurar O Difusor............................................. 3
Luz Ambiente............................................................... 3
Configurar A Luz Ambiente................................... 3
Som Tranquilizante...................................................... 4
Configurar O Som................................................. 4
Volume......................................................................... 4
Configurar O Volume............................................ 4
Alarme......................................................................... 4
Configurar Hora Do Alarme.................................. 4
Ligar/Desligar O Alarme........................................ 4
Temporizador............................................................... 4
Configurar O Temporizador.................................. 4
Specifications.............................................................. 4
Sobre A Oregon Scientific............................................ 4
Descartar..................................................................... 4
• Não use este equipamento para outras funções que não
as indicadas ou especificadas nos dados técnicos. O uso
incorreto do equipamento pode causar danos.
• Este produto não deve ser usado por crianças ou pessoas
com capacidades mentais, sensoriais ou físicas reduzidas,
exceto quando acompanhadas.
NOTA As especificações técnicas para este produto
e o conteúdo do manual de instruções estão sujeitos a
alterações sem aviso prévio.
PRECAUÇÕES
O QUE FAZER
• Manusear o equipamento com cuidado
• Usar água da torneira filtrada em vez de água destilada.
Acrescentar água suficiente antes de juntar óleo essencial
• Remover o pó regularmente com um pano seco. O pó em
acumulação representa potencial perigo de incêndio.
• Coloque o equipamento numa superfície seca, lisa, estável
e resistente à água.
• Limpe o excesso de óleo essencial da área do display
para evitar danos à unidade.
• Para uma melhor distribuição da névoa pelo compartimento,
coloque o equipamento numa superfície elevada, com a
brisa direcionada para o espaço aberto.
• As crianças devem ser vigiadas, para assegurar que não
brincam com o produto.
• Usar apenas algumas gotas de óleo essencial.
• Ao eliminar este produto, assegurar-se que o coloca no
contentor do ecoponto reservado para o efeito.
• O conteúdo deste manual não pode ser reproduzido sem
a autorização do fabricante.
EU – Declaração De Conformidade............................ 5
• Usar apenas com óleo essencial. Acrescentar água
suficiente antes de juntar óleo essencial.
INTRODUÇÃO
O QUE NÃO FAZER
Agradecemos a sua aquisição do Difusor de Aromas
AuraBreeze. Este difusor de aromas está concebido para
proporcionar momentos de descontração em casa. Inclui
3 técnicas holísticas de relaxamento bem conhecidas:
Aromaterapia, Luz Ambiente e Som Tranquilizante.
• NÃO virar o equipamento ao contrário sem remover a tampa
e o líquido do reservatório de água.
• NÃO deixar água, detergente ou qualquer outro líquido
entrar na abertura do ventilador.
NOTA Por favor, tenha o manual à mão quando usar o
novo produto. Contém instruções práticas passo-a-passo,
bem como especificações técnicas e advertências que
deve ter em consideração.
• NÃO bloquear a entrada do ventilador, colocando o
equipamento em superfícies moles, como por exemplo
almofadas ou tapetes.
INFORMAÇÕES DE SEGURANÇA IMPORTANTES
• NÃO modificar os componentes internos do equipamento.
Isso faz com que a garantia fique em efeito.
Leia este manual de instruções cuidadosamente antes da
utilização.
• NÃO sujeitar o equipamento a força excessiva, choque, pó,
temperatura e umidade.
• Siga as instruções na seção Cuidados e Manutenção para
limpar o equipamento.
• NÃO cobrir o equipamento com jornal, cortinas, etc, durante
o funcionamento.
• Para evitar choques elétricos e/ou perigo de incêndio, não
mergulhe o equipamento em líquidos.
• NÃO direcionar a névoa para qualquer aparelho elétrico,
mobília, planta, pintura ou fonte de calor.
1
POR
Difusor de aromas AuraBreeze
WA638
Manual de Instruções
POR
VISTA DE BAIXO
• NÃO inalar a névoa diretamente do orifício de saída.
• NÃO obstruir a entrada ou saída de ar do equipamento.
• NÃO usar água que tenha sido usada por pessoas.
• NÃO colocar o equipamento em contato direto com o chão.
O pavimento pode ficar danificado se em contato direto com
a névoa por longos períodos de tempo.
1
• NÃO usar em espaços úmidos.
• NÃO.encher o reservatório de água acima da indicação MAX .
• NÃO mergulhar o equipamento em água. Se verter líquido
em cima do equipamento, secar imediatamente com um
pano macio e sem pelos.
• NÃO limpar o equipamento com materiais abrasivos ou
corrosivos.
2
• NÃO usar água acima de 40 °C.
CONTEÚDO DA EMBALAGEM
1. Compartimento das pilhas CR2032
2. Cabo de alimentação ligado ao adaptador
BOTÕES TÁCTEIS
1 x unidade principal e 1 x adaptador
ASPECTO GERAL
VISTA DE CIMA
1
1
2
3
4
1. Reservatório de água
4. Botões tácteis
2
3
4
5
6
7
1.
- Pressione para mostrar a configuração atual de
volume, pressione novamente para alternar o nível
de volume.
2.
- Pressione para apresentar o tempo restante
do temporizador de sono. Pressione duas
vezes para entrar no mood de configuração do
temporizador, pressione repetidamente para
alternar a configuração do temporizador.
3.
- Pressione para mostrar a configuração atual de
som, pressione novamente para alternar som
tranquilizante 6 ou desligado.
4.
- Pressione para ligar/desligar o equipamento ou
confirmar as configurações.
5.
- Pressione para mostrar as configurações atuais
de luz, pressione novamente para alternar as
configurações de luz ambiente.
6.
- Pressione para mostrar as configurações de
alarme, pressione novamente para ligar/desligar
o alarme ou ajustar as configurações no modo
2. Tampa do reservatório de água
3. Tela LCD
2
- Pressione continuamente para inserir o modo de
configuração de alarme.
7.
- Pressione para mostrar as configurações atuais,
pressione novamente para alternar o nível de difusão.
ADICIONAR ÁGUA
NOTA Não ligue a unidade à tomada de alimentação antes
de adicionar água.
1. Remova a tampa do reservatório de água e deite água
da torneira à temperatura ambiente no reservatório. Não
exceder a marca MAX.
TELA LCD
1
2
5
6
3
4
7
8
1.
o equipamento está em modo de configuração de
volume
2.
o som tranquilizante está ligado / o equipamento está
em modo de configuração de som tranquilizante
3.
a luz ambiente está ligada / o equipamento está em
modo de configuração de luz ambiente
2. Junte algumas gotas de óleos essenciais à água.
3. Coloque a tampa no lugar.
4. Ligue o adaptador de energia à tomada. Assegure-se
que o adaptador não está obstruído e é facilmente
acessível ao equipamento.
5.Pressione
para ligar o equipamento.
4.
o difusor está ligado / o equipamento está em modo
de configuração do difusor
Quando a água quase se esgota (cerca de 50ml restam
na unidade), o difusor deixa de funcionar automaticamente
pisca continuamente até o equipamento ser desligado.
5.
o alarme está ligado / o equipamento está em modo de
configuração do alarme
• Não usar água destilada com este produto.
6.
NOTA
o temporizador está ligado / o equipamento está em
modo de configuração do temporizador
• A temperatura da água deve rondar os 15 – 40 °C.
• Deve ser usado óleo essencial 100% natural.
7. Tela do relógio
8.
• Desligue o equipamento e retire da tomada antes de
deslocar ou limpar o equipamento.
Tela de pilha com pouca carga do difusor (CR2032)
INSERIR PILHA CR2032
• Quando a água alcança a marca MAX, a unidade
difunde vapor por aproximadamente até 10h caso o
timer esteja desligado (OFF).
A unidade está equipada com uma bateria CR2032 como
fonte de alimentação de reserva.
RELÓGIO
INICIAR
CONFIGURAR O RELÓGIO
Configure o relógio quando ligar o equipamento pela primeira
vez ou pressione continuamente durante 8 segundos até
a tela piscar.
para configurar o formato 12/24, hora ou
1.Pressione
minuto. Pressione continuamente
para acelerar a
seleção.
2.Pressione
para confirmar.
DIFUSOR
CONFIGURAR O DIFUSOR
1.Pressione
uma vez para mostrar as configurações
.
atuais. A tela mostra
NOTA A tela volta ao estado inativo se, após 2 segundos,
não premir nenhum botão.
para alternar entre os
2. Pressione novamente
diferentes modos de difusão – 1 (Baixo), 2 (Alto) ou OFF.
1. Abra a tampa do compartimento de baterias rodando-a
em sentido anti-horário utilizando uma moeda.
LUZ AMBIENTE
2. Insira a pilha CR2032 no compartimento, fazendo
corresponder as polaridades.
CONFIGURAR A LUZ AMBIENTE
1.Pressione
uma vez para mostrar as configurações
.
atuais. A tela mostra
3. Feche a tampa do compartimento da bateria usando
uma moeda para a rodar no sentido horário.
para alternar entre diferentes
2. Pressione novamente
configurações de luz ambiente (1/2/3/4/5/6/LOOP/OFF).
3
POR
de configuração do relógio e no modo de
configuração do alarme.
POR
SPECIFICATIONS
SOM TRANQUILIZANTE
CONFIGURAR O SOM
1.Pressione
uma vez para mostrar as configurações
atuais. A tela mostra
.
NOTA A tela volta ao estado inativo se, após 2 segundos,
não premir nenhum botão.
CxLxA
200 x 200 x 82 mm
(7.87 x 7.87 x 3.23 in)
Peso
780 g
Volume do tanque d’água
450 ml
Temperatura de funcionamento
2. Pressione novamente para alternar entre os diferentes
sons (1/2/3/4/5/6/OFF).
VOLUME
Amplitude térmica
(funcionamento)
Amplitude térmica
(armazenamento)
CONFIGURAR O VOLUME
Energia
1.Pressione
uma vez para mostrar as configurações
atuais. A tela mostra
.
Entrada
100-240V AC 50-60Hz
Saída
12 V 1000mA
NOTA A tela volta ao estado inativo se, após 2 segundos,
não premir nenhum botão.
10 °C até 40 °C
-20 °C até 60°C
SOBRE A OREGON SCIENTIFIC
para alternar entre as
2. Pressione novamente
diferentes configurações de volume – 1 (baixo), 2 (médio), ou 3 (alto).
Visite o nosso website www.oregonscientific.com para saber
mais sobre os produtos da Oregon Scientific.
ALARME
Para mais informações, contate o nosso Serviço de Atendimento
ao Cliente através do email [email protected] ou
pelo telefone (11)3523-1934.
Pode configurar o alarme para ligar o equipamento
automaticamente
A Oregon Scientific Global Distribution Limited reserva o
direito de interpretar e definir quaisquer conteúdos, termos
e disposições neste manual do usuário, e de o modificar
a seu exclusivo critério, em qualquer altura e sem aviso
prévio. No caso de existir alguma inconsistência entre a
versão em inglês e as outras versões noutras línguas, a
versão em inglês prevalecerá.
CONFIGURAR HORA DO ALARME
1. Pressione continuamente
durante cerca de 2 segundos para inserir as configurações da hora do
alarme. A tela mostra
.
para configurar as horas e os minutos.
2.Pressione
Pressione continuamente
para acelerar a seleção.
Pressione para confirmar.
DESCARTAR
De acordo com as Directivas Europeias
2011/65/EU e 2012/19/EU sobre a restrição
do uso de substâncias perigosas em
equipamento eléctrico e electrónico bem
como do seu descarte como resíduos.
3.Pressione para alternar entre os diferentes modos de
difusão – 1 (Baixo), 2 (Alto) ou OFF, depois pressione
para confirmar.
para alternar entre os diferentes modos de luz
4.Press
ambiente (1/2/3/4/5/6/LOOP/OFF), depois pressione
para confirmar.
O símbolo da proibição de caixote do lixo mostrado no
equipamento indica que, no fim da sua vida útil, o produto
deverá ser recolhido separadamente de outros resíduos.
para alternar entre os diferentes sons
5.Pressione
(1/2/3/4/5/6/OFF), depois pressione para confirmar.
para alternar entre as diferentes
6.Pressione
configurações de volume – 1 (baixo), 2 (médio), or 3
(alto), depois pressione para confirmar.
Portanto, quaisquer produtos que tenham chegado ao fim da
sua vida útil devem ser entregues a centros de tratamento
de resíduos especializados na recolha separada de resíduos
de equipamento eléctrico e electrónico, ou devolvidos ao
retalhista no momento da compra de novo equipamento
similar, numa base de um para um.
7. O alarme está ligado. O equipamento volta ao estado
.
inativo e mostra
LIGAR/DESLIGAR O ALARME
• Pressione
A recolha selectiva adequada para o posterior aproveitamento
do equipamento enviado para ser reciclado, tratado e
descartado de um modo ambientalmente compatível
contribui para evitar possíveis efeitos negativos no ambiente
e na saúde e optimiza a reciclagem e a reutilização dos
componentes que formam o aparelho.
para mostrar a configuração da hora de alarme.
• Pressione novamente
para alternar entre ligado/desligado.
TEMPORIZADOR
CONFIGURAR O TEMPORIZADOR
O descarte abusivo do produto por parte do usuárioimplica
a aplicação de sanções administrativas conforme as leis
em vigor.
Pressione
duas vezes para entrara na configuração
do temporizador, depois pressione
repetidamente para
alternar a configuração do temporizador.
NOTA A tela volta ao estado inativo se, após 2 segundos,
não premir nenhum botão.
Quando o temporizador começar a contagem decrescente,
para mostrar o tempo restante.
pressione
4
POR
EU – DECLARAÇÃO DE CONFORMIDADE
Por este modo, Oregon Scientific, declara que este Difusor
de aromas AuraBreeze (Modelo: WA638) está conforme a
directiva EMC 2004/108/EC. Uma cópia da Declaração de
Conformidade assinada e data será disponibilizada a pedido
através do nosso Serviço de Clientes da Oregon Scientific.
5
• Haal het apparaat niet uit elkaar terwijl het is aangesloten
op een voeding of in bedrijf is.
• Om elektrische schokken en/of brandgevaar te voorkomen,
de stekker niet reinigen met een waterig schoonmaakmiddel
of andere vloeistoffen.
• Raak het netsnoer niet met natte handen aan.
INHOUD
• Gebruik dit apparaat niet anders dan voor het beoogde
gebruik en niet buiten de vermelde technische gegevens.
Oneigenlijk gebruik kan schade veroorzaken.
Introductie.................................................................... 1
Belangrijke Veiligheidsinformatie................................. 1
Voorzorgsmaatregelen................................................ 1
Inhoud Van De Verpakking.......................................... 2
Overzicht..................................................................... 2
Bovenaanzicht...................................................... 2
Onderaanzicht...................................................... 2
Aanraaktoetsen..................................................... 2
Scherm LCD-Display............................................ 3
Om Te Beginnen.......................................................... 3
Plaats Een CR2032 Batterij.................................. 3
Toevoegen Van Water........................................... 3
Klok.............................................................................. 3
Instellen Van De Klok............................................ 3
Diffusor........................................................................ 3
Stel De Diffusor In................................................. 3
Stemmingslicht............................................................ 3
Stel Stemmingslicht In.......................................... 3
Kalmerend Geluid........................................................ 4
Stel Geluid............................................................ 4
Volume......................................................................... 4
Stel Volume In....................................................... 4
Alarm........................................................................... 4
Stelalarmtijd.......................................................... 4
Inschakelen/Uitschakelenalarm............................ 4
Sleeptimer................................................................... 4
Stel Sleeptimer In................................................. 4
Specificaties................................................................ 4
Over Oregon Scientific................................................ 4
Verwijdering................................................................. 4
EG-Verklaring Van Conformiteit................................... 5
• Dit product is niet bestemd voor gebruik door kinderen
of personen met verminderde lichamelijke, zintuiglijke of
geestelijke vermogens, tenzij onder toezicht.
NB De technische specificaties van dit product en de
inhoud van de handleiding kunnen zonder voorafgaande
mededeling worden gewijzigd.
VOORZORGSMAATREGELEN
WAT TE DOEN
• Behandel de eenheid met zorg.
• Gebruik gefilterd kraanwater in plaats van gedestilleerd
water. Voeg voldoende water toe alvorens etherische olie
toe te voegen.
• Verwijder stof regelmatig met een droge doek. Opeenhoping
van stof vormt potentieel brandgevaar.
• Plaats de eenheid op een droge, vlakke, stabiele en
waterbestendige ondergrond.
• Veeg extra essentiële olie op de lens onmiddellijk met een
droge doek om schade aan het apparaat te voorkomen.
• Plaats, voor een betere verdeling van de nevel in de kamer,
de eenheid op een hoger gelegen oppervlak met de nevel
gericht naar een open gebied.
• Kinderen moeten onder toezicht staan om ervoor te zorgen
dat ze niet met het product spelen.
• Gebruik slechts een paar druppels essentiële olie.
• Wanneer dit product wordt afgevoerd, zorg er dan voor
dat het afzonderlijk voor speciale afvalbehandeling wordt
verzameld.
• De inhoud van dit handboek mag niet worden
gereproduceerd zonder de toestemming van de fabrikant.
• Gebruik alleen met etherische olie. Voeg voldoende water
toe alvorens etherische olie toe te voegen.
INTRODUCTIE
WAT NIET TE DOEN
Dank u voor de aankoop van de AuraBreeze Aromadiffusor.
Deze Aromadiffusor is ontworpen voor uw ontspanning thuis.
Hij levert 3 goed bekende holistische ontspanningstechnieken:
Aromatherapie, Stemmingslicht en Kalmerend geluid.
• KEER de eenheid NIET ondersteboven zonder eerst het
deksel te hebben geopend en de vloeibare inhoud uit de
watertank te hebben verwijderd.
NB Houd deze handleiding bij de hand terwijl u uw
nieuwe product gebruikt. Hij bevat praktische stap-voorstap aanwijzingen, zowel als technische specificaties en
waarschuwingen waarover u moet weten.
• LAAT GEEN water, reinigingsmiddel of enige andere
vloeistof in de opening naar de ventilator komen.
bELANGRIJKE VEILIGHEIDSINFORMATIE
• KNOEI NIET met de interne onderdelen van de eenheid.
Hierdoor wordt de garantie ongeldig.
• BLOKKEER de ventilatieopening NIET door het plaatsen van
de eenheid op een zacht oppervlak zoals kussens, of tapijt.
Lees dit gebruikershandboek zorgvuldig voordat u het product
gebruikt.
• ONDERWERP de eenheid NIET aan buitensporig geweld,
schok, stof, temperatuur of vochtigheid.
• Volg de aanwijzingen in Verzorging en Onderhoud om de
eenheid te reinigen.
• BEDEK de eenheid NIET met kranten, gordijnen enz.
wanneer hij in werking is.
• Om elektrische schokken en/of brandgevaar te voorkomen,
mag het apparaat niet in vloeistof worden ondergedompeld.
• RICHT de nevel NIET direct naar enig elektrisch apparaat,
meubelen, planten, lak of warmtebronnen.
• Trek niet aan het netsnoer om het toestel te verplaatsen of
om de stekker uit het stopcontact te trekken.
• ADEM de nevel NIET direct in vanuit de nevelspuitmond.
1
NL
AuraBreeze Aromadiffusor
WA638
Gebruikershandboek
NL
ONDERAANZICHT
• VERSTOP de luchtinlaat of de luchtuitlaat van de eenheid NIET.
• GEBRUIK GEEN water dat door mensen is gedronken.
• PLAATS de eenheid NIET direct op de vloer. De
vloerbedekking kan worden beschadigd als deze gedurende
een langere periode in direct contact komt met de mist.
• NIET GEBRUIKEN in natte ruimtes.
1
• VUL het waterreservoir NIET hoger dan de aangegeven
MAX markering.
• DOMPEL de eenheid NIET in water onder. Als u vloeistof
op de eenheid hebt gemorst, droog hem dan onmiddellijk
af met een zachte, pluisvrije doek.
• REINIG de eenheid NIET met abrasieve of corrosieve
materialen.
2
• GEBRUIK GEEN water heter dan 40 °C.
INHOUD VAN DE VERPAKKING
1. CR2032 batterijvak
2. Voedingskabel verbonden met de adapter
AANRAAKTOETSEN
1 x Hoofdapparaat en 1 x adapter
OVERZICHT
BOVENAANZICHT
1
1
2
3
4
2
4
5
6
7
- Druk hierop om de huidige volume-instelling te
tonen, druk opnieuw om het volume te schakelen.
2.
- Indrukken om de resterende slaaptijd op de
slaaptimer te tonen. Twee keer indrukken om de
timerinstelling modus te openen, en herhaaldelijk
indrukken om de de timerinstelling te schakelen.
3.
- Druk hierop om de actuele geluidsinstelling te
tonen, druk opnieuw om 6 rustgevende geluiden
om te schakelen of om uit te schakelen.
4.
- Druk hierop om de eenheid in/uit te schakelen of
de instellingen te bevestigen.
5.
- Druk hierop om de huidige lichtinstelling te tonen,
druk opnieuw om het stemmingslicht in/uit te
schakeleng.
6.
- Druk hierop om de alarminstelling te tonen, druk opnieuw
om het alarm aan/uit te zetten, of om de instellingen te
wijzigen in klokinstelmode en alarminstelmode.
- Houd ingedrukt om naar de tijdinstelmodus te
gaan.
3. Scherm LCD-display
4.Aanraaktoetsen
3
1.
1.Watertank
2. Deksel watertank
2
1. Verwijder het deksel van de watertank, giet
kraanwater van kamertemperatuur in de watertank.
Overschrijd de MAX markering niet.
- Druk hierop om de huidige volume-instelling
te tonen, druk opnieuw om het volume te
schakelen.
SCHERM LCD-DISPLAY
1
2
3
4
5
6
7
8
2. Voeg enkele druppels etherische oliën aan het water
toe.
1.
de eenheid is in de instelmode voor volume
3. Plaats het deksel terug op zijn plaats.
2.
Het Kalmerend geluid is aan / de eenheid is in de
instelmode voor Kalmerend geluid
3.
Het stemmingslicht is aan / de eenheid is in de
instelmode voor stemmingslcht
4. Sluit de voedingsadapter aan op het stopcontact.
Zorg ervoor dat de adapter niet wordt geblokkeerd en
gemakkelijk toegankelijk is vanaf het apparaat.
4.
De diffusor is aan / de eenheid is in de instelmode
voor de diffusor
5.
Het alarm is ingeschakeld / de eenheid is in de
instelmode voor het alarm
6.
De Sleeptimer is aan / de eenheid is in de
instelmode voor de slaapstand
5. Druk op
NB
• Gebruik geen gedistilleerd water in dit product.
• De watertemperatuur moet ongeveer 15 – 40 °C zijn.
7.Tijddisplay
8.
om de eenheid in te schakelen.
Wanneer het water bijna op is (ongeveer 50 ml resterend
in het apparaat), stopt de diffusorfunctie automatisch en
knipperen totdat het apparaat wordt uitgeschakeld.
zal
• 100% zuivere etherische olie moet worden gebruikt.
Diffusor display voor lage batterijspanning (CR2032)
• Schakel de eenheid uit en ontkoppel de netspanning
voordat u de eenheid verplaatst of schoonmaakt.
OM TE BEGINNEN
• Indien het waterreservoir gevuld is tot de MAX
markering zal het toestel ongeveer 10 uur, met de
sleep timer uitgeschakeld, verneveling geven.
PLAATS EEN CR2032 BATTERIJ
Dit apparaat is uitgerust met een CR2032 batterij als backup voedingsbron.
KLOK
INSTELLEN VAN DE KLOK
Stel de klok in wanneer de eenheid voor de eerste keer wordt
ingeschakeld, of druk op en houd gedurende 8 seconden
ingedrukt totdat het tijddisplay knippert.
om het 12/24-uur formaat, uur of minuut
1.Druk op
in te stellen. Druk op
en houd ingedrukt om de
instelsnelheid van de selectie te verhogen.
2. Druk op
om te bevestigen.
DIFFUSOR
STEL DE DIFFUSOR IN
1. Druk eenmaal op
om de actuele instelling te
tonen. Het scherm toont
.
NB Het scherm wordt passief indien na 2 seconden
geen toetsen worden ingedrukt.
1. Open het batterijvak door deze met behulp van een
munt naar links te draaien.
om om te schakelen
2. Druk opnieuw eenmaal op
tussen verschillende verspreidingsmodi – 1 (laag), 2 (hoog) or OFF.
2. Plaats een CR2032 batterij in het vak, en let op de
juiste polariteit.
STEMMINGSLICHT
3. Sluit de batterijhouder door deze met een muntstuk
naar rechts te draaien.
STEL STEMMINGSLICHT IN
1. Druk eenmaal op
Het scherm toont
TOEVOEGEN VAN WATER
NB Het apparaat niet op het stopcontact aansluiten vóór
het toevoegen van water.
om de actuele instelling te tonen.
.
om tussen verschillende
2. Druk opnieuw op
stemmingslichtinstellingen (1/2/3/4/5/6/LOOP/OFF)te
schakelen.
3
NL
7.
NL
KALMEREND GELUID
SPECIFICATIES
STEL GELUID
1. Druk eenmaal op
scherm toont
.
om de actuele instelling te tonen. Het
NB Het scherm wordt passief indien na 2 seconden
geen toetsen worden ingedrukt.
LxBxH
200 x 200 x 82 mm
(7.87 x 7.87 x 3.23 in)
Gewicht
780 g
Inhoud waterreservoir
450ml
Bedrijfstemperatuur
om tussen verschillende geluiden
2. Druk opnieuw op
(1 / 2 / 3 / 4 / 5 / 6 / OFF ) te schakelen.
Temperatuurbereik (bedrijf)
10 °C tot 40 °C
Temperatuurbereik (opslag)
-20 °C tot 60 °C
Voeding
VOLUME
STEL VOLUME IN
1. Druk eenmaal op
Het scherm toont
om de actuele instelling te tonen.
.
NB Het scherm wordt passief indien na 2 seconden
geen toetsen worden ingedrukt.
Ingang
100-240 VAC 50-60 Hz
Uitgang
12 V 1000 mA
OVER OREGON SCIENTIFIC
om tussen verschillende
2. Druk opnieuw op
volume-instellingen – 1 (laag), 2 (middel), of 3 (hoog)
te schakelen.
Bezoek onze website www.oregonscientific.com voor
meer informatie over de producten van Oregon Scientific.
ALARM
Oregon Scientific Global Distribution Limited behoudt zich
het recht voor enige inhoud, bepalingen en voorwaarden
in deze gebruikershandleiding te interpreteren en deze
te allen tijde naar eigen inzicht en zonder voorafgaande
kennisgeving te wijzigen. Met dien verstande dat, indien
er enige inconsistentie bestaat tussen de Engelstalige
versie en een versie in enige andere taal, de Engelse
versie bindend is.
SMocht u vragen hebben, neem dan contact op met onze
klantenservice op [email protected].
U kunt een alarm instellen om het apparaat automatisch
in te schakelen.
STELALARMTIJD
1. Druk en houd
gedurende ongeveer 2 seconden
ingedrukt om naar de instelling van de alarmtijd te
gaan. Het scherm toont
.
VERWIJDERING
om het uur en de minuut in te stellen.
2. Druk op
Druk op
en houd ingedrukt om de instelsnelheid
van de selectie te verhogen. Druk op to confirm.
Overeenkomstig Europese richtlijnen
2011/65/EG en 2012/19/EG inzake de
beperking van het gebruik van gevaarlijke
stoffen in elektrische en elektronische
apparatuur, alsmede de verwijdering van hun
afvalstoffen.
om om te schakelen tussen verschillende
3. Druk op
verspreidingsmodi – 1 (laag), 2 (hoog) of OFF, druk
dan op om te bevestigen.
om tussen verschillende
4. Druk op
stemmingslichtinstellingen (1/2/3/4/5/6/LOOP/OFF) te
om te bevestigen.
schakelen, druk dan op
Het symbool van de vuilnisbak op de verpakking geeft aan
dat het apparaat aan het einde van zijn gebruiksduur als
gescheiden afval moet worden verwerkt.
tom tussen verschillende
5. Druk op
geluiden(1/2/3/4/5/6/OFF) te schakelen, druk dan op
om te bevestigen.
Daarom moeten alle producten die het einde van hun
gebruiksduur hebben bereikt worden afgeleverd aan
afvalverwerkingcentra gespecialiseerd in gescheiden
inzameling van afgedankte elektrische en elektronische
apparatuur, of geretourneerd aan de leverancier op het
moment van de aankoop van nieuw soortgelijke apparaat
op basis van omwisseling.
om tussen verschillende volume6. Druk op
instellingen – 1 (laag), 2 (middel), of 3 (hoog) te
schakelen, druk dan op
om te bevestigen.
7. Het alarm is ingesteld op aan. De eenheid keert terug
.
naar inactief en toont
Adequaat gescheiden inzameling voor de latere start van de
apparatuur verzonden om te worden gerecycled, behandeld
en verwijdering van een milieuvriendelijke wijze bijdraagt
tot het voorkomen van mogelijke negatieve effecten op het
milieu en volksgezondheid en optimaliseert de recycling
en hergebruik van onderdelen die deel uitmaken van het
apparaat.
INSCHAKELEN/UITSCHAKELENALARM
• Druk op
om de alarmtijd te tonen.
• Druk opnieuw op
om het alarm aan/uit te schakelen.
SLEEPTIMER
Verkeerde verwijdering van het product kan leiden tot
administratieve sancties volgens de geldende wetgeving.
STEL SLEEPTIMER IN
Druk twee keer op
om de timerinstelling te opene.
Druk vervolgens herhaaldelijk op
om door de sluimertimerinstellen te schakelen.
NB Het scherm wordt passief indien na 2 seconden
geen toetsen worden ingedrukt.
Wanneer de sleeptimer begint af te tellen, druk op
de resterende tijd te tonen.
om
4
EG-VERKLARING VAN CONFORMITEIT
Oregon Scientific verklaart hierbij dat deze AuraBreeze
Aromadiffusor (Model: WA638) voldoet aan EMC-richtlijn
2004/108/EG. Een kopie van de getekende en gedateerde
verklaring van overeenstemming is op verzoek beschikbaar
via onze Oregon Scientific klantenservice.
5
• Ta inte isär enheten när den är ansluten till en strömkälla
eller är i drift.
• För att undvika elektriska stötar och/eller brand, rengör
inte strömuttaget med vatten, rengöringsmedel eller
andra vätskor.
• Rör inte nätkabeln med våta händer.
INNEHÅLL
• Använd inte denna enhet bortom dess avsedda användning
eller för andra tekniska uppgifter än de som anges. Felaktig
användning kan leda till skador.
Inledning...................................................................... 1
Viktig Säkerhetsinformation......................................... 1
Försiktighetsåtgärder................................................... 1
Förpackningens Innehåll............................................. 2
Översikt....................................................................... 2
Ovanifrån.............................................................. 2
Underifrån............................................................. 2
Tryckkänsliga Knappar......................................... 2
LCD-Skärm........................................................... 3
Komma Igång.............................................................. 3
Sätt I Ett CR2032 Batteri...................................... 3
Tillsätt Vatten........................................................ 3
Klocka.......................................................................... 3
Ställ Klockan......................................................... 3
Diffuser........................................................................ 3
Ställ In Diffusern................................................... 3
Stämningsljus.............................................................. 3
Ställ In Stämningsljus........................................... 3
Rogivande Ljud............................................................ 3
Ställ In Ljud........................................................... 3
Volym........................................................................... 4
Ställ In Volyme...................................................... 4
Alarm........................................................................... 4
Ställ In Alarmtid..................................................... 4
Sätta På/Av Alarmet.............................................. 4
Insomningsfunktion...................................................... 4
Ställ In Insomningsfunktionen............................... 4
Specifikationer............................................................. 4
Om Oregon Scientific.................................................. 4
Kassering..................................................................... 4
• Denna produkt är inte avsedd för av barn eller personer
med nedsatt fysiska, sensoriska eller mentala förmågor
utan övervakning.
NOTERA De tekniska specifikationerna för denna produkt
och innehållet i användarmanualen kan ändras utan
förvarning.
FÖRSIKTIGHETSÅTGÄRDER
ATT GÖRA
• Hantera enheten försiktigt.
• Använda filtrerat kranvatten i stället för destillerat vatten.
Tillsätt tillräckligt med vatten innan du tillsätter eterisk olja.
• Avlägsna dammet regelbundet med en torr trasa.
Ackumulerat damm utgör brandfara.
• Placera enheten på en torrt, plan, stabil och
vattenavvisande yta.
• Torka extra eterisk olja på objektiv området omedelbart
med en torr trasa för att undvika skador på enheten.
• För bättre fördelning av dimman i rummet, placera den på
en upphöjd yta med dimman riktat till ett öppet område.
• Barn bör övervakas så att de inte leker med produkten.
• Använd endast några droppar eterisk olja.
• När du kasserar den här produkten, se till att den sorteras
separat för särskilt omhändertagande.
• Innehållet i denna manual får inte kopieras utan tillstånd
från tillverkaren.
• Använd endast eterisk olja. Tillsätt tillräcklig mängd vatten
innan tillsatsen av eterisk olja.
GÖR INTE
EU - Försäkran Om Överensstämmelse..................... 4
• Vänd INTE upp och ner på enheten utan att ta bort
täcklocket och det flytande innehållet från vattentanken.
INLEDNING
• Låt INTE vatten, rengöringsmedel eller annan vätska in i
öppningen till fläkten.
Tack för att du köpt AuraBreeze Aroma Diffuser. Denna
doft-diffuser är avsedd för avkoppling hemma. Det förser
3 välkända holistiska avslappningstekniker: Aromaterapi,
Stämningsljus och Rogivande Ljud.
• Blockera INTE ventilationsinloppet genom att placera
enheten på ett mjukt underlag såsom kuddar eller en matta.
• Mixtra INTE med enhetens interna komponenter. Detta kan
påverka garantin.
NOTERA Ha denna manual till hands när du använder
din nya produkt. Den innehåller praktiska steg-försteg instruktioner, samt tekniska specifikationer och
varningsmeddelanden som du bör känna till.
• Utsätt INTE apparaten för kraftig våld, stötar, damm,
temperatur eller luftfuktighet.
• Täck INTE enheten med tidningar, gardiner etc. när den är
i drift.
VIKTIG SÄKERHETSINFORMATION
Läs den här användarhandboken noggrant innan användning.
• Rikta INTE dimman mot någon elektrisk apparat, möbel,
växt, färg eller värmekälla.
• Följ instruktionerna i Skötsel och Underhåll för att rengöra
enheten.
• UNDVIK att andas in vattendimma direkt från dimman-uttaget.
• För att undvika elektriska stötar och/eller brand, lägg inte
ner enheten i en vätska.
• Blockera INTE luftintaget eller luftutsläppet på enheten.
• Använd INTE vatten som har druckits av människor.
• Dra inte i elsladden för att flytta eller koppla ur enheten.
• Placera INTE apparaten direkt på golvet. Golv kan skadas om
den är i direkt kontakt med dimman under en längre period.
1
SWE
AuraBreeze Aroma Diffuser
WA638
Instruktionsmanual
SWE
UNDERIFRÅN
• Används INTE på fuktiga platser.
• Fyll INTE vattentanken över den angivna MAX-märkningen.
• Doppa INTE ner produkten i vatten. Om du spiller vätska på
enheten, torka omedelbart den med en mjuk, luddfri trasa.
• Rengör INTE enheten med repande eller frätande material.
1
• Använd INTE vatten över 40 ° C.
FÖRPACKNINGENS INNEHÅLL
2
1. CR2032 batterifack
2. Strömkabel kopplad till adaptern
TRYCKKÄNSLIGA KNAPPAR
1 x Huvudenhet och 1x adapter
ÖVERSIKT
OVANIFRÅN
1
2
3
4
1
2
4
5
6
7
- Tryck för att visa aktuell volyminställning, tryck
igen för att växla volymnivån.
2.
- Tryck för att visa den återstående tiden för
insomningstimern. Tryck två gånger för att
komma till timerinställningsläget, tryck upprepade
gånger för att växla timerinställningen.
3.
- Tryck för att visa aktuella ljudinställningar, tryck
igen för att växla mellan 6 rogivande ljud eller
stäng av.
4.
- Tryck för att slå på/av enheten eller bekräfta
inställningarna.
5.
- Tryck för att visa aktuell ljusinställning, tryck igen
för att växla till stämningsljus.
6.
- Tryck för att visa larminställning, tryck igen för
att slå på/av alarmet, eller justera inställningarna
i klock- och larminställningsläget.
- Tryck och håll in för att öppna larminställningsläget.
7.
- Tryck för att visa den aktuella inställningen, tryck
igen för att växla diffuser-nivån.
3.LCD-skärm
4. Tryckkänsliga knappar
3
1.
1.Vattentank
2.Vattentank-locket
2
1
2. Tillsätt några droppar av eteriska oljor i vattnet.
2
3
3. Sätt tillbaka locket.
4
4. Anslut strömadaptern till eluttaget. Se till att adaptern
inte är blockerad och att det är lätttillgänglig för enheten.
5
6
5.Tryck
7
8
för att slå på enheten.
När vattnet nästan tar slut (omkring 50 ml kvar i
enheten), kommer difusser-funktionen att stanna
kommer att fortsätta blinka tills
automatiskt och
enheten stängs av.
1.
Enheten är i volym-inställningsläge
2.
Det rogivande ljudet är på / enheten är I det
rogivljud- inställningsläget.
3.
Stämningsljuset är tänd / enheten är i stämningsinställningsläget.
4.
Diffusern är på / enheten är I diffuser-läge.
• 100% naturlig eterisk olja bör användas.
5.
Alarmet är på / enheten är i larminställningsläge.
6.
Insomningstimern är inkopplad / enheten är i viloläge.
• Stäng av enheten och dra ut stickproppen innan du
flyttar eller rengör enheten.
NOTERA
• Använd inte destillerat vatten med denna produkt.
• Temperaturen på vattnet bör vara cirka 15-40 ° C.
• När vattnet fylls upp till markeringen MAX, diffunderar
enheten dimma upp till 10 timmar ungefär, om
insomningstimern är inställd på OFF.
7.Tidsvisning
8.
Lågt batteri-skärm (CR2032)
KOMMA IGÅNG
KLOCKA
SÄTT I ETT CR2032 BATTERI
STÄLL KLOCKAN
Denna enhet är utrustad med ett CR2032-batteri som
backup strömkälla.
Ställ in klockan när enheten slås på för första gången, eller
tryck och håll in
i 8 sekunder tills tid-displayen blinkar.
för att ställa in 12/24-timmarsformatet,
1.Tryck
timme och minut. Tryck och håll in
för att
påskynda valet.
2.Tryck
för att bekräfta.
DIFFUSER
STÄLL IN DIFFUSERN
1.Tryck
en gång för att visa den aktuella inställningen.
Skärmen visar
.
NOTERA Skärmen återgår till ursprungsläge om inga
knappar trycks in inom 2 sekunder.
igen för att växla till de olika spridande
2.Tryck
lägen - 1 (låg), 2 (Hög) eller OFF.
STÄMNINGSLJUS
STÄLL IN STÄMNINGSLJUS
1. Öppna batterifackets lock genom att vrida det moturs
med hjälp av ett mynt.
1.Tryck
oen gång för att visa den aktuella inställningen.
Skärmen visar
.
2. Sätt i ett CR2032 batteriet i facket, matcha polariteten.
igen för att växla mellan olika stämningsjus2.Tryck
inställningar (1/2/3/4/5/6/LOOP/OFF).
3. Stäng batterifackets lock genom att vrida det medurs
med hjälp av ett mynt.
ROGIVANDE LJUD
STÄLL IN LJUD
TILLSÄTT VATTEN
1.Tryck
en gång för att visa den aktuella inställningen.
Skärmen visar
.
NOTERA Koppla inte in enheten i strömuttaget innan
vatten fylls på.
NOTERA Skärmen återgår till ursprungsläge om inga
knappar trycks in inom 2 sekunder.
1. Ta bort locket till vattentanken, häll i rumstempererat
kranvatten i vattentanken. Överskrid inte MAXmarkeringen.
igen för att växla mellan olika ljud
2.Tryck
(1/2/3/4/5/6/OFF).
3
SWE
LCD-SKÄRM
SWE
VOLYM
OM OREGON SCIENTIFIC
STÄLL IN VOLYME
Besök vår webbsajt www.oregonscientific.com för att ta reda
på mer om Oregon Scientifics produkter.
1. Tryck
en gång för att visa den aktuella
inställningen. Skärmen visar
.
Om du har några frågor är du välkommen att kontakta vår
Kundtjänst på [email protected].
NOTERA Skärmen återgår till ursprungsläge om inga
knappar trycks in inom 2 sekunder.
Oregon Scientific Global Distribution Limited reserverar
sig rätten att redigera och uttolka innehåll, terminologi och
föreskrifter i denna manual samt att göra tillägg när som helst
igen för att växla mellan olika volym2. Tryck
inställningar – 1 (låg), 2 (medium), or 3 (hög).
utan föregående meddelande. Om skillnader finns mellan
den engelska versionen och andra språkversioner, gäller
den engelska.
ALARM
Du kan ställa in ett larm för att slå på enheten automatiskt.
KASSERING
STÄLL IN ALARMTID
1. Tryck och håll in
i ca 2 sekunder för att gå in
inställningen för alarmtid. Skärmen visar
.
2.Tryck
håll in
I enlighet med EU direktiv 2011/65/EU och
2012/19/EU om begränsning av användningen
av farliga ämnen i elektriska och elektroniska
produkter samt deras kassering.
för att ställa in timme och minut. Tryck och
att påskynda valet. Tryck för att bekräfta.
Det streckade symbolen över soptunnan som visas på
utrustningen visar att, vid slutet av dess livslängd måste
produkten samlas in separat från annat avfall.
för att växla mellan olika diffuser-lägen 3.Tryck
– 1 (Låg), 2 (Hög) eller AV, tyck sedan för att bekräfta.
för att växla mellan olika ljusinställningar
4.Tryck
(1/2/3/4/5/6/LOOP/OFF), tryck sedan för att
bekräfta.
Därför måste alla produkter som har nått slutet av sin
livslängd ges till avfallshanterings centrum som specialiserar
sig på separat insamling av elektriskt och elektroniskt avfall,
eller returneras till återförsäljaren vid inköp av nya liknande
utrustning på en-för-en-basis.
för att växla mellan olika ljudinställningar
5.Tryck
(1/2/3/4/5/6/OFF), tryck sedan för att bekräfta.
för att växla mellan olika volyminställningar 6.Tryck
– 1 (Låg), 2 (Medium), eller 3 (Hög), tryck sedan
för att bekräfta.
7. Alarmen är på. Enheten går till ursprungsläge och visar
Korrekt separat insamling av utrustning som skickas
för att återvinnas, behandlas och omhändertas på ett
miljövänligt sätt bidrar till att förebygga eventuella negativa
effekter på miljö och hälsa och optimerar återvinning och
återanvändning av apparatens komponenter.
.
SÄTTA PÅ/AV ALARMET
Felaktig kassering av produkten innebär tillämpning av
administrativa påföljder enligt gällande lagstiftning.
• Tryck
.
• Tryck
igen för att växla alarmet på/av.
EU - FÖRSÄKRAN OM ÖVERENSSTÄMMELSE
INSOMNINGSFUNKTION
Härmed deklarerar, Oregon Scientific , att denna AuraBreeze
Aroma Diffuser (modell: WA638) uppfyller EMC-direktivet
2004/108/EC. En kopia av den undertecknade och daterade
försäkran om överensstämmelse finns tillgänglig på begäran
via vår kundservice påOregon Scientific.
STÄLL IN INSOMNINGSFUNKTIONEN
Tryck
två gånger för att komma till timerinställningen,
tryck sedan
upprepade gånger för att växla
timerinställningen.
NOTERA Skärmen återgår till ursprungsläge om inga
knappar trycks in efter 2 sekunder.
När insomningstimern startar dess nedräkning , tryck
för att visa den återstående tiden.
SPECIFIKATIONER
LxBxH
200 x 200 x 82 mm
(7.87 x 7.87 x 3.23 in)
VIKT
780 g
Vattentank volym
450 ml
Drifttemperatur
Temperaturintervall (drift)
Temperaturintervall
(förvaring)
10 °C till 40 °C
-20 °C till 60°C
Ström
Ingång
100-240V AC 50-60Hz
Utgång
12 V 1000mA
4
•除非在監管下使用,否則本產品不適合兒童或身體、感官
或精神上能力障礙之人士。
㳄 本產品技術規格和本使用者手冊內容如有更改,恕不
另行通知。
目錄
注意事項
簡介............................................................................. 1
重要安全資訊............................................................... 1
注意事項...................................................................... 1
包裝內容...................................................................... 2
整體外觀...................................................................... 2
俯視圖................................................................... 2
底視圖................................................................... 2
觸摸鍵................................................................... 2
LCD 顯示幕........................................................... 2
入門操作...................................................................... 3
插入CR2032電池.................................................. 3
加水...................................................................... 3
時鐘............................................................................. 3
設定時鐘............................................................... 3
噴霧器.......................................................................... 3
設定噴霧器............................................................ 3
意境燈.......................................................................... 3
設定意境燈............................................................ 3
自然音樂...................................................................... 3
設定音樂............................................................... 3
音量............................................................................. 3
設定音量............................................................... 3
響鬧............................................................................. 3
設定響鬧時間........................................................ 3
開啟/關閉響鬧器................................................... 3
睡眠計時器................................................................... 3
設定睡眠計時器.................................................... 3
產品規格...................................................................... 4
關於歐西亞................................................................... 4
處置方法...................................................................... 4
使用須知
•使用本機時請輕拿輕放。
•請使用已過濾的自來水而不是蒸餾水。加入精油前請加入
足量的水。
•定期用乾布清除灰塵。灰塵累積過多容易造成火災危險。
•請將本機放置在乾燥、平穩和防水的表面上。
•請立即以乾布擦拭顯示屏上多餘之精油以免裝置受損。
•為了令房間內有更好的霧化分佈,請將本機放於較高的位
置,並讓霧氣直接進入空曠地方。
•請照顧好兒童,確保兒童不會把玩本機。
•加入適量精油即可。
•棄置產品時,請確保將其單獨收集以進行特殊廢物處理。
•未經製造商許可,不得複製本手冊上的內容。
•僅允許使用精油。
禁止事項
•取下水箱蓋將液體倒空之前,請勿將本機倒置。
•請勿將水、清潔劑或其他液體通過開口倒入風扇。
•請勿將本機放在柔軟表面上,如坐墊、地毯,以免阻塞進
氣口。
•請勿隨意篡改本機內部零件。否則不予保養維修。
•請勿讓本機放在過度受力、震動、充滿塵埃、溫度或濕度
過高的環境中。
•本機運作時,請勿用報紙、窗簾等覆蓋本機。
•請勿將霧氣直接對準任何電器、傢俱、植物、油漆或熱源
排放。
•請勿直接從排霧口吸入霧氣。
•請勿阻礙本機的進氣口和出氣口。
•請勿使用已被人飲用過的水。
符合聲明...................................................................... 4
•請勿直接將本機放置在地板上。如果地板直接接觸霧氣的
時間過長,可能會造成地板損壞。
簡介
•請勿在潮濕處使用。
感謝您購買瑩韻香薰儀。此款香薰儀專為您居家休閒而設
計。它為您提供了3種放鬆身心的功能:香薰噴霧、意境
燈,以及自然音樂。
•請勿將水箱水位裝滿超過 MAX 標記。
•請勿將本機浸入水中。如果液體潑灑在本機上,請使用柔
軟且不起毛的布立即將水擦乾。
㳄 請妥善保存本手冊,以供您使用本產品時參考。本手冊
包含操作步驟指引,以及您應該瞭解的技術規範和警告。
•請勿使用研磨性或腐蝕性材料擦拭本機。
•請勿使用溫度超過40℃的水。
重要安全資訊
使用前請仔細閱讀本用戶手冊。
•請按照維修和保養說明清潔本機。
•為避免觸電和/或火災,請勿將本機浸入液體中。
•移動本機和拔下插頭時,請勿拉扯電源線。
•插入電源或操作時,請勿拆卸設備。
•為避免觸電和/或火災危險,請勿以水溶性清潔劑或其他任
何液體清理電源插口。
•請勿用濕手接觸電源線。
1
TC
•請勿在超出本機預定用途或指定技術參數外使用本機。使
用不當可能會造成損害。
瑩韻香薰儀
WA638
用戶手冊
TC
包裝內容
觸摸鍵
1台主機和1個插頭
1
整體外觀
俯視圖
1
2
3
4
2
3
4
5
6
7
1.
- 按下可顯示現時音量設定,再次按下可調校音量。
2.
- 按下以顯示睡眠計時器的剩餘時間。按兩次以進入計
時器設定模式,重覆按下則可以切換計時器設定。
3.
- 按下可顯示現時音樂設定,再次按下可調校6種自
然音樂或關閉。
4.
- 按下可開/關本機或確認設定。
5.
- 按下可顯示現時意境燈設定,再次按下可調校意境
燈設定。
6.
- 按下可顯示響鬧設定,再次按下可開啟或關閉響
鬧,或調整時鐘設定模式和響鬧設定模式中的設定。 - 長按可進入響鬧設定模式。
7.
- 按下可顯示現時噴霧等級設定,再次按下可調校噴
霧等級。
LCD 顯示幕
1
1. 水箱
2. 水箱蓋
3. LCD顯示屏
4. 觸控鍵
2
3
4
5
6
底視圖
1
7
8
1.
本機處於音量設定模式
2.
自然音樂開啟/本機處於自然音樂設定模式
3.
意境燈開啟/本機處於意境燈設定模式
4.
噴霧器開啟/本機處於噴霧等級設定模式
5.
響鬧器開啟/本機處於響鬧設定模式
6.
睡眠計時器開啟/本機處於睡眠定時設定模式
7. 時間顯示
8.
2
1. CR2032電池盒
2. 電源線連接至插頭
2
噴霧器低電量顯示 (CR2032)
TC
入門操作
噴霧器
插入CR2032電池
設定噴霧器
此裝置配備了一顆CR2032 電池,以作後備電源之用。
1. 按下
一次,可顯示現時設定。螢幕將顯示
。
㳄 如果沒有按下任何鍵,2 秒後螢幕回到閒置狀態。
2. 再次按下
調校不同噴霧模式 - 1(低),2(高)或關閉。
意境燈
設定意境燈
1. 按下
一次,可顯示現時設定。螢幕將顯示
。
可調校不同的意境燈設定( 1 / 2 / 3 / 4 /
2. 再次按下
5 / 6 / 循環 / 關閉 )。
自然音樂
設定音樂
1. 按下
一次,可顯示現時設定。螢幕將顯示
。
㳄 如果沒有按下任何鍵,2秒後螢幕回到閒置狀態。
2. 再次按下
關閉 )。
1. 使用硬幣順時針方向轉動電池盒蓋,以將盒蓋打開。
2. 將CR2032電池插入電池盒,注意電池極性。
可調校不同的音樂( 1 / 2 / 3 / 4 / 5 / 6 /
音量
3. 使用硬幣以順時針方向轉動電池槽蓋,以將槽蓋關
閉。
設定音量
1. 按下
一次,可顯示現時設定。螢幕將顯示
。
㳄 如果沒有按下任何鍵,2秒後螢幕回到閒置狀態。
加水
2. 再次按下 3(高)。
㳄 加水前,請勿將裝置插入電源插座中。
1. 取下水箱蓋,將室溫自來水倒入水箱。請勿超過MAX標
記。
調校不同音量模式 - 1(低),2(中)或
響鬧
您可以設定響鬧器自動開啟本機。
設定響鬧時間
1. 按住
2. 在水中添加適量精油。
4. 將電源插頭連接到電源插座上。確保插頭沒有受阻,
並可以容易地接入本機。
可調校不同的意境燈設定( 1 / 2 / 3 / 4 / 5 / 6
4. 按下
/ 循環 / 關閉 ),然後再按下 以確認。
啟動本機。
可調校不同的音樂設定( 1 / 2 / 3 / 4 / 5 / 6
5. 按下
/ 關閉 ),然後再按下 以確認。
當水差不多用完時 (裝置內只剩餘約 50 毫升),擴散功能
將繼續閃爍,直至本機關閉。
會自動停止,
調校不同的音量設定 - 1 (低), 2 (中)
6. 再次按下
或 3(高),然後按下 以確認。
㳄
• 請勿使用蒸餾水。
7. 響鬧器設定為開。本機返回閒置狀態並顯示
• 水溫應在15 - 40℃之間。
。
開啟/關閉響鬧器
• 請使用100%天然精油。
• 按下
• 移動或清潔本機之前,請關閉本機並將插頭從電源上
拔下。
可顯示設定的響鬧時間。
• 再次按下
• 如果關閉睡眠計時器,水缸的水可持續噴霧約10小時。
可開啟/關閉響鬧。
睡眠計時器
時鐘
設定睡眠計時器
按下 兩次以進入計時器設定,然後重覆按下
切換睡眠計時器設定。
設定時鐘
當本機第一次開啟時,請設定時鐘,或按住
直到時間顯示開始閃爍。
持續8秒,
以
㳄 如果沒有按下任何鍵,2秒後螢幕回到閒置狀態。
可設定12 小時 / 24 小時格式,以及小時和分
1. 按下
鐘。長按
可加快選擇。
2. 按下
.
可加快選擇。按
調校不同噴霧等級模式 - 1(低),2(
3. 再次按下
高)或關閉,然後按下 以確認。
3. 將蓋子蓋好。
5. 按下
約2秒,進入響鬧時間設定。螢幕將顯示
可設定開啟的時間。長按
2. 按下
下 進行確認。
當睡眠計時器開始倒數,按下
以確認。
3
可顯示剩餘時間。
TC
產品規格
長x寬x高
200 x 200 x 82 mm
(7.87 x 7.87 x 3.23 in)
重量
780 克
水缸容量
450 毫升
工作溫度
溫度範圍(工作)
10℃至40℃
溫度範圍(儲存)
-20℃至60℃
功率
輸入
100-240V AC 50-60Hz
輸出
12 V 1000mA
關於歐西亞
瀏覽我們的網站www.oregonscientific.com瞭解更多關
於歐西亞的產品。
如有任何疑問,請聯絡我們的客戶服務
[email protected].
Oregon Scientific Global Distribution Limited保留權
利,隨時行使獨立裁決權,於未事前通知情況下詮釋和
解釋本用戶手冊之任何內容、條款與條件並修改之。若
英語版本與任何其他語言版本有任何不一致處,將以英
語版本為準。
處置方法
根據歐洲聯盟指令2011/65/EU及2012/19/EU,關
於使用電力或電子儀器危機物品的限制,以及
其廢物的處置方法。
裝置上那個畫上交叉的垃圾箱圖案,表示當裝置的使用壽
命完結時,必須將它和其他廢物分開收集。
因此,任何產品到了其使用壽命完結之時,必須將它們送
往廢物處置中心,並特定要將這些電力及電子儀器與其他
廢物分開收集,或在購買相類似的新產品時,以舊換新的
方式將它們送回給零售商。
適當地分開收集這些儀器,並將其以環境相容的方式來回
收、處理及棄置,可以避免損害環境及健康,以及可以盡
量將裝置的組件回收再用。
根據現行法律,胡亂處置此產品的用戶可能會負上行政
處罰。
符合聲明
Oregon Scientific 特此聲明瑩韻香薰儀(型號:WA638)
符合 EMC 2004/108/EC的指令。已簽署及載有日期的符
合聲明副本,Oregon Scientific 客戶服務人員會經要求
下提供。
4
•除非在监管下使用,否则本产品不适合儿童及身体、感官
或精神上能力障碍之人士。
㽂㯌 本产品技术规格和本用户手册内容如有更改,恕不
另行通知。
目录
注意事项
简介............................................................................. 1
重要安全信息............................................................... 1
注意事项...................................................................... 1
包装内容...................................................................... 2
整体外观...................................................................... 2
俯视图................................................................... 2
底视图................................................................... 2
触摸键................................................................... 2
LCD 显示屏........................................................... 2
入门操作...................................................................... 3
插入CR2032电池.................................................. 3
加水...................................................................... 3
时钟............................................................................. 3
设置时钟............................................................... 3
喷雾器.......................................................................... 3
设置喷雾器............................................................ 3
意境灯.......................................................................... 3
设置意境灯............................................................ 3
自然音乐...................................................................... 3
设置音乐............................................................... 3
音量............................................................................. 3
设定音量............................................................... 3
响闹............................................................................. 3
设定响闹时间........................................................ 3
打开/关闭响闹器................................................... 3
睡眠定时器................................................................... 4
设定睡眠定时器.................................................... 4
产品规格...................................................................... 4
关于欧西亚................................................................... 4
处置方法...................................................................... 4
符合声明...................................................................... 4
使用须知
•使用本机时请轻拿轻放。
•请使用已过滤的自来水而不是蒸馏水。加入精油前请加入
足量的水。
•定期用干布清除灰尘。灰尘累积过多容易造成火灾隐患。
•请将本机放置在干燥、平稳和防水的表面上。
•请立即用干布擦拭显示屏上多余的精油,以免机器受损。
•为了在房间内实现更好的雾化分布,请将本机放于较高的
位置,并让雾气直接进入空旷区。
•请照顾好儿童,确保儿童不会把玩本机。
•加入适量精油即可。
•产品废弃时,请确保将其单独收集以进行特殊废弃物处理。
•未经制造商许可,不得转载本手册上的内容。
•仅允许使用精油。
禁止事项
•取下水箱盖将液体倒空之前,请勿将本机上下倒置。
•请勿将水、清洁剂或其他液体通过开口倒入风扇。
•请勿将本机放在柔软表面上,如靠垫、地毯,以免阻塞通
风入口。
•请勿随意篡改本机内部组件。否则不予保修。
•请勿让本机暴露在过度受力、震动、充满尘埃、温度或湿
度过高的环境中。
•本机运作时,请勿用报纸、窗帘等覆盖本机。
•请勿将雾气直接对准任何家电、家具、植物、油漆或热源
排放。
•请勿直接从排雾口吸入雾气。
•请勿阻碍本机的进气口和出气口。
•请勿使用已被人饮用过的水。
•请勿直接将本机放置在地板上。如果地板直接接触雾气的
时间过长,可能会造成地板损坏。
简介
•请勿在潮湿处使用。
感谢您购买莹韵香熏仪。此款香熏喷雾器专为您居家休闲
而设计。它具备3种可放松身心的功效:香熏治疗、心情转
换灯,以及舒缓音乐。
•请勿将水箱水位装满超过 MAX 标记。
•请勿将本机浸入水中。如果液体泼洒在本机上,请使用柔
软且不起毛的布立即将水擦干。
㽂㯌 请妥善保存本手册,以便您使用本产品时参考。本手
册包含分步操作指导,以及您应该了解的技术规范和警告。
•请勿使用研磨性或腐蚀性材料擦拭本机。
•请勿使用温度超过40℃的水。
重要安全信息
使用前请仔细阅读本用户手册。
•请按照维护和保养说明清洁本机。
•为避免触电和/或火灾,请勿将本机浸入液体中。
•移动本机和拔下适配器时,请勿拉扯电源线。
•插入电源或操作时,请勿拆卸设备。
•为避免触电和/或火灾危险,请勿以水溶性清洁剂或其他任
何液体清理电源插口。
•请勿用湿手接触电源线。
1
SC
•请勿在超出本机预定用途或指定技术参数外使用本机。使
用不当可能会造成损害。
莹韵香熏仪
WA638
用户手册
SC
包装内容
触摸键
1台主机和1个适配器
1
整体外观
俯视图
1
2
3
4
2
3
4
5
6
7
1.
- 按下可显示当前音量设置,再次按下可切换音
量。
2.
- 按下以显示睡眠定时器的剩余时间。按两次以进入定
时器设置模式,重复按下则可以切换定时器设置。
3.
- 按下可显示当前音乐设置,再次按下可切换6种自
然音乐或关闭
4.
- 按下可开/关本机或确认设置。
5.
- 按下可显示当前心情转换灯设置,再次按下可切
换心情转换灯设置。
6.
- 按下可显示响闹设置,再次按下可开启或关闭响
闹,或调整时钟设定模式和响闹设定模式中的设
置。 - 长按可进入响闹设定模式。
7.
1. 水箱
2. 水箱盖
3. LCD显示屏
4. 触摸键
- 按下可显示当前喷雾等级设置,再次按下可切换
喷雾等级。
LCD 显示屏
1
底视图
2
3
4
5
6
1
7
8
1.
本机处于音量设置模式
2.
自然音乐开启/本机处于自然音乐设置模式
3.
心情转换灯开启/本机处于心情转换灯设置模式
4.
喷雾器开启/本机处于喷雾等级设置模式
5.
响闹器开启/本机处于响闹设置模式
6.
睡眠定时器开启/本机处于睡眠定时设置模式
7. 时间显示
8.
2
1. CR2032电池仓
2. 电源线连接至适配器
2
喷雾器低电量显示 (CR2032)
SC
入门操作
喷雾器
插入CR2032电池
设置喷雾器
此装置配备了一颗CR2032 电池,以作后备电源之用。
1. 按下
一次,可显示当前设置。屏幕将显示
。
㽂㯌 如果没有按下任何键,2 秒后屏幕返回至空闲
状态。
2. 再次按下
关闭。
切换不同喷雾模式 - 1(低),2(高)或
意境灯
设置意境灯
1. 按下
一次,可显示当前设置。屏幕将显示
.
可切换不同的意境灯设置( 1 / 2 / 3 / 4 /
2. 再次按下
5 / 6 / 循环 / 关闭 )。
自然音乐
设置音乐
1. 按下
一次,可显示当前设置。屏幕将显示
。
㽂㯌 如果没有按下任何键,2秒后屏幕返回至空闲状
态。
1. 使用硬币顺时针方向转动电池槽盖,以将槽盖打开。
2. 再次按下
关闭 )。
2. 将CR2032电池插入电池盒,注意极性匹配。
3. 使用硬币以顺时针方向转动电池槽盖,以将槽盖关闭。
可切换不同的音乐( 1 / 2 / 3 / 4 / 5 / 6 /
音量
加水
设定音量
㽂㯌 加水前,请勿将装置插入电源插座中。
1. 按下
1. 取下水箱盖,将室温自来水倒入水箱。请勿超过MAX
标记。
一次,可显示当前设置。屏幕将显示
。
㽂㯌 如果没有按下任何键,2秒后屏幕返回至空闲状态。
2. 再次按下 切换不同音量模式 - 1(低),2(中)
或 3(高)。
响闹
您可以设置响闹方式自动开启本机。
2. 在水中添加适量精油。
设定响闹时间
3. 将盖子盖好。
1. 按住
4. 将电源适配器连接到电源插座上。确保适配器未受
阻,并可以方便地接入本机。
可设置开启的时间。长按
2. 按下
下 进行确认。
5. 按下
约2秒,进入响闹时间设置。屏幕将显示
切换不同喷雾等级模式 - 1(低),2(
3. 再次按下
高)或关闭,然后按下 以确认
启动本机。
当水差不多用完时 (装置内只剩余约 50 毫升),扩散功能
将继续闪烁,直至本机关闭。
会自动停止,
可切换不同的心情转换灯设置( 1 / 2 / 3 / 4 /
4. 按下
5 / 6 / 循环 / 关闭 ),然后再按下 以确认。
㽂㯌
可切换不同的音乐设置( 1 / 2 / 3 / 4 / 5 /
5. 按下
6 / 关闭 ),然后再按下 以确认。
• 请勿在本产品使用蒸馏水。
• 水温应在15 - 40℃之间。
切换不同的音量设置 - 1 (低), 2 (中)
6. 再次按下
或 3(高),然后按下 以确认。
• 请使用100%天然精油。
• 移动或清洁本机之前,请关闭本机并将适配器从电源
上拔下。
7. 响闹器设置为开。本机返回空闲状态并显示
• 如果关闭睡眠定时器,水缸的水可持续喷雾约10小时。
打开/关闭响闹器
时钟
• 再次按下
• 按下
设置时钟
当本机第一次开启时,请设置时钟,或按住 持续8秒,直到
时间显示开始闪烁。
可设置12 小时 / 24 小时格式,以及小时和分
1. 按下
钟。长按
可加快选择。
2. 按下
.
可加快选择。按
进行确认。
3
可显示设定的响闹时间。
可打开/关闭响闹。
。
SC
符合声明
睡眠定时器
Oregon Scientific 特此声明莹韵香熏仪(型号:WA638)符
合 EMC 2004/108/EC的指令。已签署及载有日期的符合声
明副本,Oregon Scientific 客户服务人员会经要求下提供。
设定睡眠定时器
按下 两次以进入定时器设置,然后重复按下
换睡眠定时器设置。
以切
㽂㯌 如果没有按下任何键,2秒后屏幕返回至空闲状态。
当睡眠定时器开始倒计,按下 可显示剩余时间。
产品规格
LxWxH
200 x 200 x 82 毫米
(7.87 x 7.87 x 3.23 英寸)
重量
780 克
水缸容量
450 毫升
工作温度
温度范围(工作)
10℃至40℃
温度范围(储存)
-20℃至60℃
功率
输入
100-240V AC 50-60Hz
输出
12 V 1000mA
关于欧西亚
浏览我们的网站www.oregonscientific.com.cn了解更多
关于欧西亚的产品。
如有任何疑问,请联络我们的客户服务
[email protected].
Oregon Scientific Global Distribution Limited保留权
利,随时行使独立裁决权,于未事前通知情况下诠释和解
释本用户手册之任何内容、条款与条件并修改之。若英语
版本与任何其他语言版本有任何不一致处,将以英语版本
为准。
处置方法
根据欧洲联盟指令2011/65/EU及2012/19/
EU,关于使用电力或电子仪器危机物品的限
制,以及其废物的处置方法。
装置上那个画上交叉的垃圾箱图案,表示当装置的使用寿
命完结时,必须将它和其他废物分开收集。
因此,任何产品到了其使用寿命完结之时,必须将它们送
往废物处置中心,并特定要将这些电力及电子仪器与其他
废物分开收集,或在购买相类似的新产品时,以旧换新的
方式将它们送回给零售商。
适当地分开收集这些仪器,并将其以环境相容的方式来回
收、处理及弃置,可以避免损害环境及健康,以及可以尽
量将装置的组件回收再用。
根据现行法律,胡乱处置此产品的用户可能会负上行政
处罚。
4