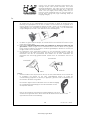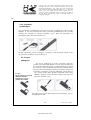
1
Fax +32 2 359 95 50 Copies of the I/B. Please reproduce them without any changes except under special instruction from Team International BELGIUM. The pages must be reproduced and folded in order to obtain a booklet A5 (+/- 148.5 mm width x 210 mm height). When folding, make sure you keep the good numbering when you turn the pages of the I/B. Don’t change the page numbering. Keep the language integrity. Dampfreiniger Steam Cleaner Nettoyeur à vapeur Stoomreiniger Limpiador de vapor Limpar com vapor Oczyszczacz parowy Aparat curatat cu aburi ПАРОЧИСТАЧКА TKG SFC 1001 I/B Version 100525 230V~ 50Hz 1500W Ï Front cover page (first page) Assembly page 1/76 Copies of the I/B. Please reproduce them without any changes except under special instruction from Team International BELGIUM. The pages must be reproduced and folded in order to obtain a booklet A5 (+/- 148.5 mm width x 210 mm height). When folding, make sure you keep the good numbering when you turn the pages of the I/B. Don’t change the page numbering. Keep the language integrity. Fax +32 2 359 95 50 WICHTIGE SICHERHEITSVORSCHRIFTEN Lesen Sie aufmerksam die Gebrauchsanleitung, bevor Sie Ihr Gerät benutzen, und befolgen Sie immer die Sicherheitsvorschriften und die Gebrauchsanweisung. Wichtig: Personen (einschließlich Kinder), die aufgrund ihrer physischen, sensorischen oder geistigen Fähigkeiten oder ihrer Unerfahrenheit oder Unkenntnis nicht in der Lage sind, das Gerät sicher zu benutzen, sollten dieses Gerät nicht ohne Aufsicht oder Anweisung durch eine verantwortliche Person benutzen. Kinder sollten beaufsichtigt werden, um sicherzustellen, dass sie nicht mit dem Gerät spielen. Kontrollieren Sie, ob die Netzspannung mit der auf dem Gerät vermerkten Spannung übereinstimmt, bevor Sie das Gerät benutzen. Lassen Sie Ihr Gerät niemals beim Gebrauch unbeaufsichtigt. Schließen Sie das Gerät immer an eine geerdete Steckdose an. Wenn eine Verlängerungsschnur notwendig ist, muss eine Schnur mit einer Stärke von mindestens 10 Ampere verwendet werden. Eine Schnur mit niedrigerer Ampere- oder Watt-Zahl als die Geräte-Daten könnte sich überhitzen. Achten Sie darauf, dass die Schnur so liegt, dass man nicht darüber stolpern oder fallen kann oder sie herausreißt. Benutzen Sie das Gerät nur zu Haushaltszwecken, wie in der Bedienungsanleitung angegeben. Tauchen Sie das Gerät niemals in Wasser oder andere Flüssigkeiten, weder zum Reinigen, noch zu einem anderen Zweck. Benutzen Sie das Gerät nicht in der Nähe einer Wärmequelle. Überprüfen Sie regelmäßig die Anschlussleitung und das Gerät auf Beschädigungen. Bei Beschädigungen an Anschlussleitung oder Gerät, darf das Gerät aus Sicherheitsgründen nicht mehr benutzt werden. Für Reparaturen wenden Sie sich an einen Fachmann(*). Eine beschädigte Anschlussleitung muss von einem Fachmann(*) ausgewechselt werden. Das Gleiche gilt, wenn der Wassertank nicht mehr funktioniert oder beschädigt ist. Demontieren Sie den Wassertank nicht um elektrische Entladung zu vermeiden: Wenden Sie sich an einen Fachmann. Eine inkorrekte Montage stellt eine Stromschlaggefahr dar, wenn das Gerät benutzt wird. Lassen Sie den flexiblen Schlauch niemals mit einer heißen Oberfläche in Berührung kommen. Benutzen Sie das Gerät nicht im Freien und bewahren Sie es an einem trockenen Platz auf. Benutzen Sie nur Zubehör, welches vom Lieferanten empfohlen wurde. Anderes Zubehör stellt eine Gefahr für den Benutzer dar und das Gerät könnte dadurch beschädigt werden. Ziehen Sie niemals an der Anschlussleitung, um das Gerät zu bewegen. Achten Sie darauf, dass die Anschlussleitung nicht irgendwo hängen bleibt und dies zum Fall des Gerätes führen könnte. Wickeln Sie die Anschlussleitung nicht um das Gerät oder knicken Sie diese nicht. Das Gerät ist kein Spielzeug; unter keiner Bedingung sollte man sich auf das Gerät setzen. Richten Sie den Dampf niemals auf Geräte mit elektronischen Komponenten (z.B. die Innenseite eines Backofens). Rollen Sie die Anschlussleitung und den flexiblen Schlauch völlig aus, bevor Sie das Gerät anschalten. ZIEHEN SIE DEN STECKER AUS DER STECKDOSE UND LASSEN SIE DEN WASSERTANK VOLLSTÄNDIG ABKÜHLEN, BEVOR SIE DEN WASSERTANK ÖFFNEN, FÜLLEN, ENTLEEREN, BEWEGEN ODER REINIGEN. Ziehen Sie immer den Stecker aus der Steckdose nach Gebrauch oder wenn das Gerät nicht benutzt wird. 2 Assembly page 2/76 TKG SFC 1001 - 100525 Fax +32 2 359 95 50 Copies of the I/B. Please reproduce them without any changes except under special instruction from Team International BELGIUM. The pages must be reproduced and folded in order to obtain a booklet A5 (+/- 148.5 mm width x 210 mm height). When folding, make sure you keep the good numbering when you turn the pages of the I/B. Don’t change the page numbering. Keep the language integrity. Das Symbol auf dem Gerät bedeutet, dass Sie vorsichtig sein sollten! Passen Sie auf, denn das Berühren von heißem Wasser, Dampf oder den heißen Teilen des Gerätes könnte zu ernsthaften Verbrennungen führen. Füllen Sie den Wassertank niemals mit Essig, Entkalkungsmittel oder anderen chemischen Produkten. Achten Sie darauf, dass Sie niemals den flexiblen Schlauch falten, biegen oder quetschen. Schalten Sie das Gerät nicht an ohne Wasser eingefüllt zu haben. Stellen Sie sicher, dass Sie das Gerät nicht über 45° kippen während des Gebrauchs. Wenn das Gerät in Betrieb ist, sollten Sie die Düsen nicht auf Personen, Tiere oder Pflanzen richten. ÖFFNEN SIE NIEMALS DEN WASSERTANK, WENN DAS GERÄT IN BETRIEB IST. BENUTZEN SIE DEN DAMPFREINIGER NICHT, WENN: ) DER FLEXIBLE SCHLAUCH DURCHLÖCHERT IST. ) EINES DER ZUBEHÖRTEILE BESCHÄDIGT IST. Das Gerät erzeugt heißen Wasserdampf, wie das Symbol ( ) auf der Dampfpistole angibt. Achten Sie darauf, dass Sie sich bei der Benutzung des Gerätes nicht verbrennen und richten Sie es niemals auf Sie selbst oder irgendeine andere Person. Bevor Sie den Wassertankverschluss losdrehen, schalten Sie das Gerät aus und lassen Sie den Druck ab, indem Sie auf den Dampfknopf drücken bis kein Wasserdampf mehr aus dem flexiblen Schlauch kommt. Ziehen Sie vor jeder Reinigung/jedem Unterhalt den Stecker aus der Steckdose und lassen Sie das Gerät ausreichend abkühlen. Benutzen Sie immer den Handgriff, wenn Sie das Gerät tragen wollen. (*) Fachmann: anerkannter Kundendienst des Lieferanten oder des Importeurs, der für derartige Reparaturen zuständig ist. Für eventuelle Reparaturen wenden Sie sich bitte an diesen Kundendienst. BESCHREIBUNG DES GERÄTES 3 Assembly page 3/76 TKG SFC 1001 - 100525 Fax +32 2 359 95 50 Copies of the I/B. Please reproduce them without any changes except under special instruction from Team International BELGIUM. The pages must be reproduced and folded in order to obtain a booklet A5 (+/- 148.5 mm width x 210 mm height). When folding, make sure you keep the good numbering when you turn the pages of the I/B. Don’t change the page numbering. Keep the language integrity. 1. 2. 3. 4. 5. 6. 7. 8. 9. 10. Fußbodendüse Tuch für Fußbodendüse Fensterwischer Scheuerbürste Basis Trichter Messbecher Tuch für Scheuerbürste Kleine Bürste Große Bürste 11. 12. 13. 14. 15. 16. 17. 18. 19. 20. Gebogene Düse Dampfregler Ein- und Ausschalter Handgriff Sicherheitsdeckel Dampfknopf Gerade Düse Verbindungsstück für Zubehör Verlängerungsrohr (3 Stück) Flexibler Schlauch EIGENSCHAFTEN: Dieses Gerät kann überall benutzt werden und ist sehr einfach zu bedienen. Außerdem brauchen Sie es nur mit Wasser zu füllen. Es reinigt, entfettet und desinfiziert völlig ohne chemische Produkte (über 100°C) und eignet sich für verschiedene Materialien und Oberflächen wie z.B. Fenster, Kleidung, Gartenmöbel, Fahrräder, Wagen, Fliesen usw. Achtung! Richten Sie dieses Gerät niemals auf Personen oder Tiere. Dieses Gerät ist also ideal für die Desinfektion von Kühlschränken und Bädern, für die Entfernung von Gerüchen aus Kleidung und für den Streit gegen Milben und andere Parasiten in Matratzen, Kissen und Teppichen. ZUBEHÖR Fußbodendüse: für waschbare Wandbekleidung und Bodenbelag. Sie kann mit oder ohne Tuch benutzt werden. Für empfindliche Oberflächen wie z.B. Holz oder Linoleum wird es empfohlen, das Tuch zu benutzen. Stellen Sie die Fußbodendüse auf das Tuch und befestigen Sie das überhängende Material unter den Clips an der linken und rechten Seite der Fußbodendüse. Drücken Sie dazu auf das innere Teil der Clips zuoberst auf der Fußbodendüse um die Clips zu öffnen und befestigen Sie das Tuch unterhalb der Clips. Verbindungsstück für Zubehör: um die Zubehörteile auf das Gerät zu montieren. Gerade Düse: für Fugen, Bretter usw. Kleine Bürste: um hartnäckigen Schmutz von Rollläden, Heizkörpern, Ventilen usw. zu entfernen. Große Bürste: um starke Beschmutzung von weniger empfindlichen Materialien wie z.B. Edelstahl oder Stein zu entfernen. Scheuerbürste: für Gardinen und Kleidung usw. Kann zusammen mit Tuch benutzt werden. 4 Assembly page 4/76 TKG SFC 1001 - 100525 Fax +32 2 359 95 50 Copies of the I/B. Please reproduce them without any changes except under special instruction from Team International BELGIUM. The pages must be reproduced and folded in order to obtain a booklet A5 (+/- 148.5 mm width x 210 mm height). When folding, make sure you keep the good numbering when you turn the pages of the I/B. Don’t change the page numbering. Keep the language integrity. Fensterwischer: für Fenster, Spiegel, Glastüren usw. Achtung! Nicht direkt auf kaltes Glas benutzen. Gebogene Düse: für Toiletten und Oberflächen, die schwierig zu erreichen sind. Verlängerungsrohre: ideal für die Verlängerung der Zubehörteile. AUFBEWAHRUNG DES ZUBEHÖRS: In der Basis des Gerätes gibt es ein Fach, in dem Sie das Zubehör aufbewahren können. Trennen Sie den Wassertank von der Basis, indem Sie auf den Knopf an der Hinterseite des Gerätes neben dem rechten Rad drücken und zur gleichen Zeit den Wassertank aufheben anhand des Handgriffes. Wenn Sie das Zubehör eingesetzt haben oder das gewünschte Zubehörteil herausgenommen haben, stellen Sie den Wassertank zurück auf die Basis des Gerätes. Drücken Sie den Wassertank fest nieder, bis er einrastet. GEBRAUCH: ACHTUNG! Dieses Gerät darf nicht direkt auf sanfte Kunststoffe, nicht-vorbehandeltes Holz oder kaltes Glas benutzt werden. Dampf könnte die Oberfläche von Möbeln beschädigen. Für einen sicheren Gebrauch sollten Sie daher im Voraus einen Prüflauf ausführen. Achten Sie auf die Unterhaltsvorschriften des Möbelherstellers. MONTAGE: (STECKEN SIE DEN STECKER NICHT IN DIE STECKDOSE, BEVOR SIE EIN ZUBEHÖRTEIL GEWÄHLT UND MONTIERT HABEN.) Achtung! Ziehen Sie nach dem Gebrauch den Stecker aus der Steckdose und drücken Sie auf den Dampfknopf um den Innendruck ausreichend zu verringern. Dann können Sie den Sicherheitsdeckel entfernen. 1. Nehmen Sie das gewünschte Zubehörteil aus dem Aufbewahrungsfach heraus und stellen Sie den Wassertank zurück auf die Basis des Gerätes (siehe Abschnitt “AUFBEWAHRUNG DES ZUBEHÖRS”). 2. Befestigen Sie den flexiblen Schlauch mit der Dampfpistole am Gerät. Klappen Sie dazu die Kappe auf, die den Schacht bedeckt, und stecken Sie das Schlauchverbindungsstück in den Schacht, bis es einrastet. Stellen Sie sicher, dass das Stäbchen des Schlauchverbindungsstücks in den kleinen Schlitz an der Unterseite des Schachts eintritt. Sie können auf die Entriegelungsknöpfe zu beiden Seiten des Schlauchverbindungsstücks drücken, um den Eintritt des Schlauchverbindungsstücks zu erleichtern. Um den Schlauch nach Gebrauch zu entfernen, drücken Sie auf die Entriegelungsknöpfe zu beiden Seiten des Schlauchverbindungsstücks und ziehen Sie am Schlauchverbindungsstück. 3. Schrauben Sie den Sicherheitsdeckel ab. Drücken Sie dazu auf den Sicherheitsdeckel und drehen Sie ihn gleichzeitig im Gegenuhrzeigersinn (falls es noch Wasser im Tank gibt und falls der Sicherheitsdeckel noch festgeschraubt war nach einem vorherigen Gebrauch, dann tritt ein wenig Entgasung auf. Dies ist normal und nicht gefährlich). 5 Assembly page 5/76 TKG SFC 1001 - 100525 Fax +32 2 359 95 50 Copies of the I/B. Please reproduce them without any changes except under special instruction from Team International BELGIUM. The pages must be reproduced and folded in order to obtain a booklet A5 (+/- 148.5 mm width x 210 mm height). When folding, make sure you keep the good numbering when you turn the pages of the I/B. Don’t change the page numbering. Keep the language integrity. 4. 5. 6. 7. 8. Füllen Sie den Wassertank mit Wasser. Verwenden Sie bitte den mitgelieferten Messbecher und den Trichter. Überschreiten Sie niemals den maximalen Füllstand (1,4 Liter). Falls das Wasser in Ihrer Gegend hart ist, wird es empfohlen destilliertes Wasser zu verwenden oder in diesem Fall können Sie auch Leitungswasser verwenden, das im Voraus gekocht worden ist. Zur Beachtung: Füllen Sie den Wassertank niemals mit Entkalkungsmittel, Parfüm oder Reinigungsmittel um Beschädigung des Gerätes zu vermeiden. Schrauben Sie den Sicherheitsdeckel wieder fest. Drücken Sie dazu auf den Sicherheitsdeckel und drehen Sie ihn gleichzeitig im Uhrzeigersinn. Montieren Sie die Verlängerungsrohre, falls Sie Fußböden oder Oberflächen, die schwierig zu erreichen sind, reinigen wollen. Drücken Sie dazu das offene Teil eines Rohrs auf die Dampfpistole, bis der Entriegelungsknopf der Dampfpistole einrastet. Sie können nur ein, zwei oder die drei Verlängerungsrohre montieren. Um die Verlängerungsrohre nach dem Gebrauch wegzunehmen, drücken Sie auf den Entriegelungsknopf zuoberst auf dem Verlängerungsrohr oder auf der Dampfpistole und ziehen Sie die Rohre auseinander. Machen Sie die Fußbodendüse am Verlängerungsrohr fest, bis der Entriegelungsknopf einrastet, falls Sie Fußböden reinigen wollen. Falls Sie ein anderes Zubehörteil verwenden wollen, brauchen Sie erst das Verbindungsstück für Zubehör zu montieren: schieben Sie das Verbindungsstück für Zubehör auf die Dampfpistole oder auf das Verlängerungsrohr hinauf, bis der Entriegelungsknopf einrastet. Montieren Sie dann die gerade Düse auf das Verbindungsstück für Zubehör und drehen Sie die gerade Düse eine Vierteldrehung entgegen dem Uhrzeigersinn, damit sie einrastet. Um die gerade Düse nach dem Gebrauch wegzunehmen, drehen Sie sie eine Vierteldrehung im Uhrzeigersinn und ziehen Sie sie ab. Um die Fußbodendüse oder das Verbindungsstück für Zubehör nach dem Gebrauch wegzunehmen, drücken Sie auf den entsprechenden Entriegelungsknopf und ziehen Sie sie/es ab. 9. Die kleine und große Rundbürsten, die Scheuerbürste und die gebogene Düse können auf die gerade Düse montiert werden. 10. Fensterwischer: Achtung! Benutzen Sie dieses Gerät nicht direkt auf kaltes Glas. Sonst könnte das Glas zerbrechen. Heizen Sie das Glas vor, indem Sie Dampf sprühen in einem größeren Bogen aus einer Entfernung von 20-25cm. Verringern Sie langsam den Abstand bis 10-15cm um das Glas weiter vorzuheizen. 11. Der Fensterwischer muss auf die Scheuerbürste montiert werden. Montieren Sie erst die Scheuerbürste auf die gerade Düse. Entfernen Sie das Tuch von der Scheuerbürste und verbinden Sie den Fensterwischer mit der Scheuerbürste anhand der zwei Scharniere. Der Fensterwischer kann einfach demontiert werden, indem Sie die Scharniere loshaken. Scheuerbürste Fensterwischer Scharnier Haken 6 Assembly page 6/76 TKG SFC 1001 - 100525 Fax +32 2 359 95 50 Copies of the I/B. Please reproduce them without any changes except under special instruction from Team International BELGIUM. The pages must be reproduced and folded in order to obtain a booklet A5 (+/- 148.5 mm width x 210 mm height). When folding, make sure you keep the good numbering when you turn the pages of the I/B. Don’t change the page numbering. Keep the language integrity. GEBRAUCH: 1. Stecken Sie den Stecker in die Steckdose und drücken Sie auf den Ein- und Ausschalter um das Gerät anzuschalten. Die grüne und rote Kontrollleuchten leuchten auf. Sobald die Vorwärmung beendet ist (nach ungefähr 10 Minuten), erlischt die rote Heizkontrollleuchte. Das Gerät ist jetzt betriebsbereit. Das Gerät ist ausgestattet mit einer Kindersicherung. Um die Sicherheitsverriegelung auszuschalten, schieben Sie den dreieckigen Steckstift auf der rechten Seite der Dampfpistole nach links. Drücken Sie auf den Dampfknopf und bewegen Sie das Gerät langsam über die Oberfläche, die gereinigt werden sollte. Es wird vorgeschlagen, dass der Abstand zwischen der Düse und der Oberfläche mindestens 2-3cm ist. Es ist normal, dass die rote Kontrollleuchte an- und ausgeht während des Betriebes, weil der Thermostat das Heizelement automatisch regelt. ACHTUNG! DAS GERÄT DARF NICHT MEHR ALS 45° GEKIPPT WERDEN WÄHREND DES BETRIEBES. RICHTEN SIE DAS GERÄT NIEMALS AUF PERSONEN, TIERE ODER PFLANZEN. 2. 3. 4. Das Gerät ist ausgestattet mit einem Überhitzungsschutz. Wenn eine Temperatur von 180°C erreicht wird, schaltet sich das Gerät automatisch ab. Ziehen Sie in diesem Fall den Stecker aus der Steckdose und warten Sie 30 Minuten, damit das Gerät abkühlt. Den Dampfausstoß regeln: drehen Sie den Dampfregler im Uhrzeigersinn für minder Dampf oder entgegen dem Uhrzeigersinn für mehr Dampf. Den Wassertank nachfüllen: Schalten Sie das Gerät aus und ziehen Sie den Stecker aus der Steckdose. Drücken Sie auf den Dampfknopf und lassen Sie den Innendruck ganz entweichen. Warten Sie ungefähr 3 Minuten und schrauben Sie den Sicherheitsdeckel langsam ab. ACHTUNG! Heißer Dampf kann entweichen. Verbrennungsgefahr! Nachdem das Gerät ungefähr bis zur Umgebungstemperatur abgekühlt ist, füllen Sie den Wassertank. Verwenden Sie bitte den mitgelieferten Trichter und den Messbecher. Überschreiten Sie niemals den maximalen Füllstand von 1,4 Liter! Schließen Sie den Sicherheitsdeckel und stecken Sie den Stecker wieder in die Steckdose. Ein voller Tank stimmt ungefähr überein mit einem Gebrauch von 40 Minuten. Achtung! Bevor Sie den Sicherheitsdeckel abschrauben, versichern Sie sich dass der Innendruck ausreichend verringert ist. Schalten Sie nach dem Gebrauch das Gerät aus und ziehen Sie den Stecker aus der Steckdose, verringern Sie den restlichen Innendruck und entleeren Sie den Wassertank. Warten Sie, bis das Gehäuse und die Zubehörteile abgekühlt sind, bevor Sie das Gerät berühren. Schließen Sie den Wassertank nicht, bevor dieser völlig ausgetrocknet ist. 7 Assembly page 7/76 TKG SFC 1001 - 100525 Fax +32 2 359 95 50 Copies of the I/B. Please reproduce them without any changes except under special instruction from Team International BELGIUM. The pages must be reproduced and folded in order to obtain a booklet A5 (+/- 148.5 mm width x 210 mm height). When folding, make sure you keep the good numbering when you turn the pages of the I/B. Don’t change the page numbering. Keep the language integrity. 5. Entkalkung: Um die ausgezeichnete Qualität und Leistungsfähigkeit Ihres Dampfreinigers zu behalten, empfehlen wir Ihnen das Gerät regelmäßig zu entkalken (alle sechs Monate). Fügen Sie ein oder zwei Stäbchen für Kalksteinbeseitigung in 1 Liter heißes Wasser (50°C) ein und füllen Sie den Wassertank mit dieser Lösung auf. Lassen Sie die Lösung etwa 30 Minuten einwirken, und gießen Sie dann die Lösung weg. Spülen Sie den Tank mit klarem Wasser aus. Spülung: Wir empfehlen Ihnen, den Tank jede 5 Benutzungen auszuspülen, um den Kalkstein zu beseitigen, der sich am Boden des Tankes abgesetzt hat. Füllen Sie den Wassertank nur mit Wasser. Schließen Sie den Sicherheitsdeckel und schütteln Sie den Tank mit der Hand. Öffnen Sie dann den Sicherheitsdeckel und entleeren Sie den Tank. Lassen Sie den Tank völlig austrocknen, bevor Sie ihn schließen. Achtung! Tauchen Sie das Gerät niemals in Wasser. Wischen Sie das Gehäuse nur mit einem leicht befeuchteten Tuch. Versuchen Sie nicht, das Gerät zu reparieren. Wenn nötig müssen Reparaturen von elektrischen Geräten von einem Fachmann gemacht werden. FEHLERERKENNUNG: Problem • Mögliche Ursache Stecker nicht korrekt in der Steckdose • Gerät ist nicht eingeschaltet • Steckdose beschädigt • Anschlussleitung beschädigt • Kindersicherung angeschaltet • Kein Wasser im Tank • Der Wassertank ist verkalkt • Zu viel Wasser im Tank Wasser läuft aus der • Düse heraus Gerät zu stark gekippt Grüne Betriebsleuchte leuchtet nicht auf • • • • • Kein Dampf Das Gerät braucht viel Zeit um aufzuheizen Wasser kocht während des Füllens Zubehörteil lockert sich Andere Probleme • • Gerät nicht genügend heiß • Wassertank noch sehr heiß • Zubehörteil nicht korrekt montiert • Gerät ist beschädigt Hinweis Stecken Sie den Stecker wieder in die Steckdose Schalten Sie das Gerät ein Kontrollieren Sie die Steckdose Wenden Sie sich an den Kundendienst Schieben Sie den Steckstift an der rechten Seite der Dampfpistole nach links Füllen Sie den Tank mit Wasser • Entkalken Sie den Wassertank • Verringern Sie die Wassermenge Halten Sie das Gerät auf korrekte Weise fest Lassen Sie das Gerät aufheizen • • • Lassen Sie das Gerät abkühlen • Montieren Sie das Zubehörteil wieder Wenden Sie sich an den Kundendienst • UMWELTSCHUTZ – RICHTLINIE 2002/96/EG Zum Schutz unserer Umwelt und unserer Gesundheit sind Elektro- und Elektronik-Altgeräte nach bestimmten Regeln zu entsorgen. Dies fordert den Einsatz sowohl des Herstellers bzw. Lieferanten als auch des Verbrauchers. 8 Assembly page 8/76 TKG SFC 1001 - 100525 Fax +32 2 359 95 50 Copies of the I/B. Please reproduce them without any changes except under special instruction from Team International BELGIUM. The pages must be reproduced and folded in order to obtain a booklet A5 (+/- 148.5 mm width x 210 mm height). When folding, make sure you keep the good numbering when you turn the pages of the I/B. Don’t change the page numbering. Keep the language integrity. Aus diesem Grund darf dieses Gerät, wie das Symbol auf dem Typenschild bzw. auf der Verpackung zeigt, nicht in den unsortierten Restmüll gegeben werden. Der Verbraucher hat das Recht, dieses Gerät über kommunale Sammelstellen zu entsorgen; von dort aus wird die spezifische Behandlung, Verwertung bzw. das Recycling gem. den Erfordernissen der Richtlinie sichergestellt. 9 Assembly page 9/76 TKG SFC 1001 - 100525 Fax +32 2 359 95 50 Copies of the I/B. Please reproduce them without any changes except under special instruction from Team International BELGIUM. The pages must be reproduced and folded in order to obtain a booklet A5 (+/- 148.5 mm width x 210 mm height). When folding, make sure you keep the good numbering when you turn the pages of the I/B. Don’t change the page numbering. Keep the language integrity. IMPORTANT SAFEGUARDS Please read these instructions carefully before using the appliance, and always follow the safety and operating instructions. Important: People (including children) who are not able to use the appliance in a safe way, due to their physical, sensorial or mental capacity or their lack of experience or knowledge, must never use the appliance except if they are supervised by a person responsible for their safety or if they previously received instructions concerning the safe use of the appliance. Close supervision is necessary to prevent children from using the appliance as a toy. Before using the appliance, check that your mains voltage corresponds to that stated on the appliance. Never leave the appliance unsupervised when in use. Connect the plug only to an earthed wall socket. If an extension cord is absolutely necessary, a 10-ampere or higher cord should be used. Never use cords rated for less than 10-ampere. Care should be taken to arrange the cord so that it cannot be pulled or tripped over. Use the appliance for domestic purposes only and in the way indicated in these instructions. Never immerse the appliance in water or any other liquid for any reason whatsoever. Never use the appliance near hot surfaces. Check the cord for damages from time to time. Never use the appliance if the cord or appliance shows any signs of damage. Should the cord be damaged, it must be replaced by a competent qualified electrician (*). All repairs should be made by a competent qualified electrician (*). The same goes if the water tank is not functioning anymore or if it is damaged. To avoid any electrical discharge, do not disassemble the water tank: take your appliance to a qualified technician for examination. An incorrect assembly may cause a risk of electric shocks when the appliance is used. Do not allow the flexible hose to touch hot surfaces. Never use the appliance outside and always place it in a dry environment. Never use accessories which are not recommended by the producer. They could constitute a danger to the user and risk to damage the appliance. Never move the appliance by pulling the cord. Make sure the cord cannot get caught in any way. Do not wind the cord around the appliance and do not bend it. This appliance is not a toy, it is not supposed to be sat on. The steam should not be directed towards equipments containing electrical components such as the interior of ovens. Unroll the power cord and the flexible hose completely before switching on the appliance. UNPLUG THE APPLIANCE AND LET THE WATER TANK COOL DOWN COMPLETELY BEFORE OPENING, FILLING, EMPTYING, MOVING OR CLEANING THE WATER TANK. Always unplug the appliance after use and when it is not being used. on the appliance means that you need to pay attention! Be careful The symbol because touching the hot water, steam or the hot parts of the appliance might result in serious burns. Never fill the water tank with vinegar, descaling agent or any other chemical product. Do not fold, bend or squash the flexible hose in any way. Do not operate the appliance without water in the tank. Make sure that the appliance is not tilted over 45° during the operation. When the appliance is in operation, the nozzles should not be directed towards humans, animals or plants. 10 Assembly page 10/76 TKG SFC 1001 - 100525 Fax +32 2 359 95 50 Copies of the I/B. Please reproduce them without any changes except under special instruction from Team International BELGIUM. The pages must be reproduced and folded in order to obtain a booklet A5 (+/- 148.5 mm width x 210 mm height). When folding, make sure you keep the good numbering when you turn the pages of the I/B. Don’t change the page numbering. Keep the language integrity. NEVER OPEN THE WATER TANK DURING USE. DO NOT USE THE STEAM CLEANER IF: ) THE FLEXIBLE HOSE IS PUNCHED. ) ONE OF THE ACCESSORIES IS DAMAGED. Your appliance produces hot steam as the symbol ( ) located on top of the steam gun indicates. Do not get burnt during use and never point the steam at yourself or anyone else. Before opening the safety cap, switch off the appliance and always bleed the tank by pressing the steam button until no more steam comes out. Before each cleaning/maintenance unplug the appliance from the mains supply socket and let it cool down sufficiently. Carry the appliance only by its handle. (*) Competent qualified service: after-sales department of the producer or importer or any person who is qualified, approved and competent to perform this kind of repairs in order to avoid all danger. In case of need you should return the appliance to this service. DESCRIPTION OF THE APPLIANCE 1. 2. 3. 4. 5. 6. 7. 8. 9. 10. Floor brush Cloth for floor brush Window wiper Scrubbing brush Base Funnel Measuring cup Cloth for scrubbing brush Small brush Large brush 11. 12. 13. 14. 15. 16. 17. 18. 19. 20. Curved nozzle Steam regulator On-off switch Handle Safety cap Steam button Straight nozzle Accessory connecting piece Extension tube (3 pieces) Flexible hose 11 Assembly page 11/76 TKG SFC 1001 - 100525 Fax +32 2 359 95 50 Copies of the I/B. Please reproduce them without any changes except under special instruction from Team International BELGIUM. The pages must be reproduced and folded in order to obtain a booklet A5 (+/- 148.5 mm width x 210 mm height). When folding, make sure you keep the good numbering when you turn the pages of the I/B. Don’t change the page numbering. Keep the language integrity. CHARACTERISTICS: This appliance can be used anywhere and is very easy to handle; moreover, you only have to fill it with water. It cleans, degreases and disinfects completely without chemical products (over 100°C) and is suitable for different materials and areas, e.g. windows, clothing, garden furniture, bicycles, cars, tiles etc. Warning! Never direct this appliance at humans or animals. This appliance is also ideal for the disinfection of refrigerators and baths, for the removal of odours from clothing and to fight against mites and other parasites in mattresses, pillows and carpets. ACCESSORIES Floor brush: for washable wall and floor covering. It may be used with or without its cloth. For sensitive surfaces such as wood or linoleum it is recommended to use the cloth. Place the floor brush on the cleaning cloth and secure the overhanging material under the clips on the left and right side of the floor brush. To do so, press on the inner end of the clips on top of the floor brush to open the clips and secure the cleaning cloth under the clips. Accessory connecting piece: to assemble the accessories onto the appliance. Straight nozzle: for joints, shelves etc. Small brush: to remove stubborn dirt from blinds, radiators, valves etc. Large brush: to remove heavy staining from less sensitive materials such as stainless steel or stone. Scrubbing brush: for curtains and clothing etc. To be used together with cloth. Window wiper: for windows, mirrors, glass doors etc. Caution! Do not use on cold glass directly. Curved nozzle: for toilets and areas which are difficult to reach. Extension tubes: ideal for the extension of the accessories. 12 Assembly page 12/76 TKG SFC 1001 - 100525 Fax +32 2 359 95 50 Copies of the I/B. Please reproduce them without any changes except under special instruction from Team International BELGIUM. The pages must be reproduced and folded in order to obtain a booklet A5 (+/- 148.5 mm width x 210 mm height). When folding, make sure you keep the good numbering when you turn the pages of the I/B. Don’t change the page numbering. Keep the language integrity. STORAGE OF ACCESSORIES: In the base of the appliance there is a compartment in which you can store the accessories. Separate the water tank from the base by pressing the button at the back of the appliance near the right wheel and lifting the water tank upwards by the handle at the same time. When you have stored the accessories or taken out the desired accessory, put the water tank back on the base of the appliance. Press down firmly until it clicks into place. OPERATION: CAUTION! This appliance should not be used directly on soft plastics, non-pretreated wood or cold glass. Steam could damage the furniture surface. For a safe work please execute a test run beforehand. Pay attention to the instructions for maintenance of the manufacturer. ASSEMBLY: (DO NOT ATTACH THE APPLIANCE TO THE POWER SUPPLY UNTIL YOU HAVE CHOSEN AND ATTACHED AN ACCESSORY.) Warning! After use, unplug the appliance from the mains supply socket and press the steam button to reduce the internal pressure sufficiently. Then you can release the safety cap. 1. Take the desired accessory from the storage compartment and put the water tank back on the base of the appliance (see section “STORAGE OF ACCESSORIES”). 2. Attach the flexible hose with the steam gun to the appliance. To do so, flip down the flap that covers the hose connection inlet and insert the hose connector into the hose connection inlet until it locks, making sure that the small lug of the hose connector enters into the small slot at the bottom of the hose connection inlet. You may press the release buttons on the sides of the hose connector to facilitate the entering of the hose connector into the hose connection inlet. To remove the hose after use, press the release buttons on the sides of the hose connector and pull at the hose connector. 3. Unscrew the safety cap. To do so, press the safety cap and at the same time turn it anticlockwise (if there is still water in the tank and if the safety cap was still screwed in tight for a previous use, some degassing will occur. This is normal and not dangerous). 4. Fill the water tank with water. Please use the provided measuring cup and the funnel. Do not exceed the maximum filling level (1.4 litres). If the water in your region is hard, it is advisable to use distilled water or in that case you can also use tap water that has been boiled beforehand. 5. Note: never fill descaling agent, perfume or detergent into the water tank, in order to avoid damages to the appliance. 6. Screw back the safety cap. To do so, press the safety cap and at the same time turn it clockwise. 7. If you want to clean floors or areas which are difficult to reach, assemble the extension tubes. To do so, push the open end of a tube onto the steam gun until the release button of the steam gun clicks into place. You can assemble just one, two or all three extension tubes. To take the extension tubes off after use, press the release button on top of the extension tube or steam gun and pull the tubes apart. 8. Put the floor brush on the extension tube until the release button clicks into place if you want to clean floors. If you want to use another accessory, you first have to assemble the accessory connecting piece: slide the accessory connecting piece onto the steam gun or onto the extension tube until the release button clicks into place. Then assemble the straight nozzle onto the accessory connecting piece and give the straight nozzle a quarter turn in an anti-clockwise direction to lock it into place. To take the straight nozzle off after use, give it a quarter turn in a clockwise direction and pull it off. To take the floor brush or the accessory connecting piece off after use, press the appropriate release button and pull it off. 13 Assembly page 13/76 TKG SFC 1001 - 100525 Fax +32 2 359 95 50 Copies of the I/B. Please reproduce them without any changes except under special instruction from Team International BELGIUM. The pages must be reproduced and folded in order to obtain a booklet A5 (+/- 148.5 mm width x 210 mm height). When folding, make sure you keep the good numbering when you turn the pages of the I/B. Don’t change the page numbering. Keep the language integrity. 9. The small and large brushes, the scrubbing brush and the curved nozzle can be assembled onto the straight nozzle. 10. Window wiper: Caution! Do not operate this appliance directly on cold glass. Otherwise the glass may crack. Preheat the glass by spraying steam in a wider arc from a distance of 20-25cm. Slowly reduce the distance to 10-15cm to preheat the glass further. 11. The window wiper must be attached to the scrubbing brush. First assemble the scrubbing brush onto the straight nozzle. Take off the cloth from the scrubbing brush and connect the window wiper to the brush by the two hinges. The window wiper can be dismantled easily by unhooking the hinges again. Scrubbing brush Window wiper Hinges Hooks OPERATION: 1. Attach the appliance to the mains supply and press the on-off switch to switch the appliance on. The green and red control lamps light up. As soon as the preheating (about 10 minutes) is terminated, the red heating control lamp goes out. The appliance is now ready for use. The appliance is equipped with a child safety device. To release the locking device, push the triangular pin on the right-hand side of the steam gun towards the left. Press the steam button and move the appliance slowly over the surface which is to be cleaned. It is recommended that the distance between the nozzle and the surface amounts to at least 2-3cm. 14 Assembly page 14/76 TKG SFC 1001 - 100525 Fax +32 2 359 95 50 Copies of the I/B. Please reproduce them without any changes except under special instruction from Team International BELGIUM. The pages must be reproduced and folded in order to obtain a booklet A5 (+/- 148.5 mm width x 210 mm height). When folding, make sure you keep the good numbering when you turn the pages of the I/B. Don’t change the page numbering. Keep the language integrity. It is normal that the red control lamp switches on and off during the process, since the thermostat controls the heating element automatically. CAUTION! THE APPLIANCE CANNOT BE TILTED OVER 45° DURING THE OPERATION. NEVER DIRECT THE APPLIANCE TOWARDS HUMANS, ANIMALS OR PLANTS. 2. 3. 4. 5. The appliance is equipped with an overheating protection. When a temperature of 180°C is reached, the appliance switches off automatically. In that case, unplug the appliance and wait 30 minutes for the appliance to cool down. Adjusting the steam rate: turn the steam regulator clockwise for less steam or anticlockwise for a greater amount of steam. Refilling the water tank: Switch off and unplug the appliance from the mains supply socket. Press the steam button and release the internal pressure completely. Wait approx. 3 minutes and release the safety cap slowly. ATTENTION! Hot steam may escape. Risk of burning! After the appliance has cooled down to approximately the ambient temperature, fill the water tank. Please use the provided funnel and the measuring cup. Do not exceed the maximum quantity of 1.4 litres! Close the safety cap and attach the appliance to the mains supply again. One full tank corresponds to approximately 40 minutes of use. Warning! Before you release the safety cap, make sure that the internal pressure is sufficiently reduced. Switch off and unplug the appliance, release the remaining internal pressure and empty the water tank after use. Wait until the housing and the accessories have cooled down before touching the appliance. Do not close the water tank until it has dried out completely. Descaling: in order to maintain the excellent quality and efficiency of your cleaner, we recommend you to descale the appliance at regular intervals (once every 6 months). Place one or two limescale removal sticks in 1 litre of warm water (50°C) and fill the water tank with the solution. Allow the solution to work for about 30 minutes, then pour it away. Rinse out the tank with clear water. Rinsing: we recommend rinsing the tank every 5 uses in order to remove limescale that has been deposited on the bottom of the tank. Fill the water tank only with water. Close the safety cap and shake the tank by hand. Then open the safety cap and empty the tank. Allow the tank to dry out completely before closing it. Warning! Never immerse the appliance in water. Wipe the housing only with a lightly moistened cloth. Do not try to repair the appliance. In case of need, repairs of electrical appliances must be carried out by qualified personnel. ERROR DETECTION: Problem Green operating pilot lamp does not light up • Possible cause Appliance not plugged correctly • • • • Appliance is not switched on Mains supply socket damaged Power cord is damaged • • • • The child safety device is on • No water in tank • No steam • 15 Assembly page 15/76 Advice Attach the appliance to mains supply socket again Switch on the appliance Check the socket Contact the customer service Push the pin on the righthand side of the steam gun to the left Fill water in tank TKG SFC 1001 - 100525 Fax +32 2 359 95 50 Copies of the I/B. Please reproduce them without any changes except under special instruction from Team International BELGIUM. The pages must be reproduced and folded in order to obtain a booklet A5 (+/- 148.5 mm width x 210 mm height). When folding, make sure you keep the good numbering when you turn the pages of the I/B. Don’t change the page numbering. Keep the language integrity. The appliance takes a long time to • heat up Water runs out from nozzle Water cooks while filling in Accessory comes loose Other problems The water tank is furred up • • • Too much water in the tank Appliance too strongly tilted Appliance not hot enough • Water tank still very hot • Accessory not correctly attached • Appliance is damaged • Descale the water tank • • Reduce water Hold the appliance correctly Let the appliance heat up Let the appliance cool down • • • Attach the accessory again • Contact the customer service PROTECTION OF THE ENVIRONMENT – DIRECTIVE 2002/96/EC In order to preserve our environment and protect human health, the waste electrical and electronic equipment should be disposed of in accordance with specific rules with the on the implication of both suppliers and users. For this reason, as indicated by the symbol rating label or on the packaging, your appliance should not be disposed of as unsorted municipal waste. The user has the right to bring it to a municipal collection point performing waste recovery by means of reuse, recycling or use for other applications in accordance with the directive. 16 Assembly page 16/76 TKG SFC 1001 - 100525 Fax +32 2 359 95 50 Copies of the I/B. Please reproduce them without any changes except under special instruction from Team International BELGIUM. The pages must be reproduced and folded in order to obtain a booklet A5 (+/- 148.5 mm width x 210 mm height). When folding, make sure you keep the good numbering when you turn the pages of the I/B. Don’t change the page numbering. Keep the language integrity. POUR VOTRE SECURITE Lisez attentivement cette notice avant toute utilisation, et respectez bien à la fois les consignes de sécurité et d'usage. Important: Votre appareil n’est pas prévu pour être utilisé par des personnes (y compris les enfants) dont les capacités physiques, sensorielles ou mentales sont réduites, ou des personnes dénuées d’expérience ou de connaissance, sauf si elles ont pu bénéficier, par l’intermédiaire d’une personne responsable de leur sécurité, d’une surveillance ou d’instructions préalables concernant son utilisation en toute sécurité. Il convient de surveiller les enfants pour s’assurer qu’ils ne jouent pas avec l’appareil. Avant d'utiliser l'appareil, vérifiez que la tension du réseau correspond bien à celle de l'appareil. Ne laissez jamais votre appareil sans surveillance lorsque celui-ci est en fonctionnement ou sous tension. Branchez la fiche dans une prise de courant reliée à la terre. Si une rallonge est absolument nécessaire, utilisez une rallonge d’au moins 10 ampères. N’utilisez jamais de rallonges de moins de 10 ampères. Assurez-vous que la rallonge ne puisse être accidentellement accrochée. Utilisez l'appareil uniquement pour des usages domestiques et de la manière indiquée dans la notice. Ne plongez jamais l'appareil dans l'eau ou dans tout autre liquide ni pour son nettoyage ni pour toute autre raison. N'utilisez pas l'appareil près de sources de chaleur. Vérifiez régulièrement l’état de votre appareil et s’il est endommagé de quelque façon que ce soit, ne l'utilisez pas mais faites-le vérifier et réparer par un service qualifié compétent(*). Si le cordon d’alimentation est endommagé, il doit être obligatoirement remplacé par un service qualifié compétent(*). De même si le réservoir d’eau s’est arrêté de fonctionner ou s’il est endommagé. Pour éviter toute décharge électrique, ne démontez pas le réservoir d’eau: présentez votre appareil chez un technicien qualifié afin qu’il examine votre appareil. Un montage incorrect peut causer un risque de décharges électriques lorsque l'appareil est utilisé. Assurez-vous que le flexible ne touche pas les surfaces chaudes de l’appareil. Veillez à ne pas utiliser l'appareil à l'extérieur et entreposez-le dans un endroit sec. Ne pas utiliser des accessoires non recommandés par le fabricant, cela peut présenter un danger pour l’utilisateur et risque d’endommager l’appareil. Ne déplacez jamais l’appareil en tirant sur le câble. Veillez à ce que le cordon d’alimentation ne puisse être accidentellement accroché et ce, afin d’éviter toute chute de l’appareil. Évitez d’enrouler le cordon autour de l’appareil et ne le tordez pas. Cet appareil n’est pas un jouet, veillez à ce que personne ne monte dessus. La vapeur ne doit pas être dirigée vers des équipements comportant des composants électriques, tels que l’intérieur des fours. Déroulez entièrement le cordon électrique et le flexible avant de mettre l’appareil en marche. DEBRANCHEZ L’APPAREIL ET LAISSEZ REFROIDIR COMPLETEMENT LE RESERVOIR D’EAU AVANT DE L’OUVRIR, LE REMPLIR, LE VIDER, LE DEPLACER OU DE NETTOYER CE DERNIER. Débranchez toujours votre appareil après usage et lorsque vous ne l'utilisez pas. présent sur l’appareil! Faites attention car Attention comme l’indique le symbole vous pourriez vous brûler en touchant l’eau chaude, la vapeur ou les parties chaudes du produit. 17 Assembly page 17/76 TKG SFC 1001 - 100525 Fax +32 2 359 95 50 Copies of the I/B. Please reproduce them without any changes except under special instruction from Team International BELGIUM. The pages must be reproduced and folded in order to obtain a booklet A5 (+/- 148.5 mm width x 210 mm height). When folding, make sure you keep the good numbering when you turn the pages of the I/B. Don’t change the page numbering. Keep the language integrity. Ne remplissez jamais le réservoir d’eau avec du vinaigre, détartrant ou autre produit chimique. Ne pas plier, courber ou écraser le flexible. N’utilisez jamais l’appareil sans eau dans le réservoir. N'inclinez jamais l'appareil à plus de 45° pendant l'utilisation. Lorsque l'appareil est en fonctionnement, la vapeur ne doit pas être dirigée vers des personnes, des animaux ou des plantes. LE RESERVOIR D'EAU NE DOIT JAMAIS ETRE OUVERT PENDANT L'UTILISATION. N’UTILISEZ PAS LE NETTOYEUR A VAPEUR SI: ) LE FLEXIBLE EST PERFORÉ. ) UN DES ACCESSOIRES EST ENDOMMAGE. Votre appareil produit de la vapeur chaude comme indiqué par le symbole ( ) situé sur le pistolet avec interrupteur vapeur. Evitez de vous brûler pendant l’utilisation et ne dirigez jamais la vapeur vers vous-même ou vers une autre personne. Avant d’ouvrir le bouchon de sécurité, éteignez l’appareil et libérez toujours la pression interne du réservoir en appuyant sur le bouton vapeur jusqu’à ce qu’il n’y aie plus de vapeur qui s’échappe. Débranchez toujours l'appareil et laissez-le refroidir complètement avant de procéder à toute opération de nettoyage ou d'entretien. Portez l’appareil uniquement par sa poignée. (*) Service qualifié compétent: service après-vente du fabricant ou de l'importateur ou une personne qualifiée, reconnue et habilitée à faire ce genre de réparation afin d'éviter tout danger. Dans tous les cas, veuillez retourner l'appareil auprès de ce service. DESCRIPTION DE L'APPAREIL 18 Assembly page 18/76 TKG SFC 1001 - 100525 Copies of the I/B. Please reproduce them without any changes except under special instruction from Team International BELGIUM. The pages must be reproduced and folded in order to obtain a booklet A5 (+/- 148.5 mm width x 210 mm height). When folding, make sure you keep the good numbering when you turn the pages of the I/B. Don’t change the page numbering. Keep the language integrity. Fax +32 2 359 95 50 1. 2. 3. 4. 5. 6. 7. 8. 9. 10. Brosse pour sols Chiffon pour la brosse pour sols Laveur de carreaux Brosse dure Base Entonnoir Gobelet doseur Chiffon pour brosse dure Petite brosse Grande brosse 11. Lance courbée 12. Bouton de réglage du débit de vapeur 13. Interrupteur marche/arrêt 14. Poignée 15. Bouchon de sécurité 16. Bouton vapeur 17. Lance droite 18. Accessoire de connexion 19. Tube d’extension (3 pièces) 20. Flexible CARACTERISTIQUES: Cet appareil peut s’utiliser partout et est très maniable; de plus vous n’avez besoin que de le remplir d’eau. Cet appareil nettoie, dégraisse et désinfecte complètement sans produit chimique (plus de 100°C). Il convient également à différents matériaux et différentes applications tels que le nettoyage des fenêtres, des vêtements, des accessoires de jardin, des vélos, de la voiture, des carreaux, etc. Attention! Ne jamais diriger le jet sur des personnes ou des animaux. Cet appareil est aussi idéal pour désinfecter les réfrigérateurs, les baignoires, enlever les odeurs des vêtements ainsi que combattre les mites et autres parasites des matelas, oreillers et tapis. ACCESSOIRES Brosse pour sols: pour les tapisseries murales et les revêtements de sol lavables. La brosse peut être utilisée avec ou sans chiffon. Pour les surfaces sensibles comme le bois ou le linoléum il est recommandé d’utiliser le chiffon. Placez la brosse sur le chiffon et fixez le tissu en surplomb sous les attaches du côté gauche et droit de la brosse. Pour cela, appuyez sur le côté intérieur des attaches sur le dessus de la brosse afin de les ouvrir et fixez le chiffon sous les attaches. Accessoire de connexion: pour monter les accessoires sur l’appareil. Lance droite: pour les joints, les planches. Petite brosse: pour faire disparaître la saleté persistante de stores, radiateurs, valves etc. Grande brosse: pour faire disparaître les taches persistantes de matériels moins sensibles comme l’acier inoxydable ou la pierre. Brosse dure: pour rideaux, vêtements, etc. A utiliser avec un tissu. 19 Assembly page 19/76 TKG SFC 1001 - 100525 Fax +32 2 359 95 50 Copies of the I/B. Please reproduce them without any changes except under special instruction from Team International BELGIUM. The pages must be reproduced and folded in order to obtain a booklet A5 (+/- 148.5 mm width x 210 mm height). When folding, make sure you keep the good numbering when you turn the pages of the I/B. Don’t change the page numbering. Keep the language integrity. Laveur de carreaux: pour fenêtres, miroir, baie vitrée, etc. Attention, ne pas utiliser directement sur du verre froid. Lance courbée: pour les toilettes et les zones difficiles d’accès. Tubes d’extension: idéal pour l’extension des accessoires. RANGEMENT DES ACCESSOIRES: Dans la base de l’appareil se trouve un compartiment dans lequel vous pouvez ranger les accessoires. Séparez le réservoir d’eau de la base en appuyant sur le bouton à l’arrière de l’appareil près de la roue droite et en soulevant le réservoir d’eau par la poignée. Quand vous avez rangé les accessoires ou enlevé l’accessoire désiré, remettez le réservoir d’eau sur la base de l’appareil. Appuyez fermement sur le réservoir jusqu’à ce qu’il se soit enclenché avec un déclic. OPERATION: ATTENTION! Cet appareil ne doit pas être utilisé vers du plastique, du bois non traité ou du verre froid. La vapeur peut endommager la surface des meubles. Pour un emploi plus sûr, faites d’abord un test et faites attention à respecter les consignes d’entretien du fabricant. ASSEMBLAGE: (NE PAS METTRE SOUS TENSION AVANT D’AVOIR CHOISI ET FIXE UN ACCESSOIRE) Attention! Après usage, débranchez l’appareil et appuyez sur le bouton de vapeur pour réduire suffisamment la pression interne. 1. Enlevez l’accessoire désiré du compartiment de rangement et remettez le réservoir d’eau sur la base de l’appareil (voir paragraphe “RANGEMENT DES ACCESSOIRES”). 2. Fixez le flexible avec le pistolet sur l’appareil. Pour cela, ouvrez le rabat qui couvre l’orifice de connexion, insérez l’embout du flexible dans l’orifice en vous assurant que le petit ergot de l’embout s’insère dans la fente en bas de l’orifice et enfoncer l’embout du flexible jusqu'au déclic vous indiquant le blocage. Afin de faciliter la connexion, vous pouvez appuyer sur les boutons de déverrouillage situés sur les deux côtés de l’embout du flexible. Pour enlever le flexible après l’usage, appuyez sur les 2 boutons de déverrouillage de l’embout du flexible puis tirez. 3. Dévissez le bouchon en appuyant dessus et en tournant simultanément dans le sens inverse des aiguilles d'une montre (si vous aviez laissé de l’eau dans le réservoir et le bouchon vissé lors d’un usage ultérieur, un léger dégazage se produira. Ceci est normal et ne présente aucun danger). 4. En utilisant le doseur et l’entonnoir, remplir le réservoir d’eau. Ne dépassez jamais le niveau maximum de remplissage (1,4 litre). Si l’eau dans votre région est « dure » (fort calcaire), nous vous recommandons d’utiliser de l’eau déminéralisée ou alors vous pouvez aussi utiliser de l’eau du robinet qui a bouilli au préalable. 5. Note: pour éviter de causer des dégâts sur l’appareil, ne jamais remplir le réservoir avec du détartrant, du parfum ou du détergent. 20 Assembly page 20/76 TKG SFC 1001 - 100525 Fax +32 2 359 95 50 Copies of the I/B. Please reproduce them without any changes except under special instruction from Team International BELGIUM. The pages must be reproduced and folded in order to obtain a booklet A5 (+/- 148.5 mm width x 210 mm height). When folding, make sure you keep the good numbering when you turn the pages of the I/B. Don’t change the page numbering. Keep the language integrity. 6. 7. 8. Bien revissez le bouchon en appuyant dessus et en tournant simultanément dans le sens des aiguilles d'une montre. Si vous voulez nettoyer des sols ou des zones difficiles d’accès, vous pouvez monter les tubes d’extension. Pour cela, poussez la partie ouverte d’un tube sur le pistolet jusqu’à ce que le bouton de déverrouillage du pistolet se soit enclenché avec un déclic. Vous pouvez monter un, deux ou les trois tubes. Pour enlever les tubes après l’usage, appuyez sur le bouton de déverrouillage au-dessus du tube ou du pistolet et tirez pour séparer les tubes. Si vous voulez nettoyer des sols, montez la brosse pour sols sur le tube d’extension jusqu’à ce que le bouton de déverrouillage se soit enclenché avec un déclic. Si vous voulez utiliser un autre accessoire, vous devez d’abord monter l’accessoire de connexion: glissez l’accessoire de connexion sur le pistolet ou sur le tube d’extension jusqu’à ce que le bouton de déverrouillage se soit enclenché avec un déclic. Puis montez la lance droite sur l’accessoire de connexion et tournez la lance droite d’un quart de tour dans le sens inverse des aiguilles d’une montre. Pour enlever la lance droite après l’usage, tournez-la d’un quart de tour dans le sens des aiguilles d’une montre puis tirez. Pour enlever la brosse pour sols ou l’accessoire de connexion après l’usage, appuyez sur le bouton de déverrouillage correspondant puis tirez. 9. Les petites et grandes brosses, la brosse dure et la lance courbée doivent être montées sur la lance droite. 10. Laveur de carreaux: Attention! Ne pas utiliser cet appareil directement sur du verre froid. Sinon le verre pourrait se fêler. Préchauffez le verre en vaporisant dans un arc plus grand d’une distance de 20-25cm. Réduisez lentement la distance vers 10-15cm afin de continuer à préchauffer le verre. 11. Le laveur de carreaux doit être attaché à la brosse dure. Assembler la brosse dure sur la lance droite. Retirer le tissu de la brosse dure et connecter le laveur de carreaux à la brosse par les deux attaches. Le laveur de carreaux peut être démonté facilement en décrochant les deux crochets des attaches. Brosse dure Laveur de carreaux Attache Crochets OPERATION: 1. Branchez l’appareil et appuyez sur l’interrupteur marche/arrêt pour l’allumer. Les témoins de contrôle vert et rouge s’allument. Dès que le préchauffage est terminé (10 minutes), le témoin de chauffe rouge s’éteint. L’appareil est alors prêt à être utilisé. 21 Assembly page 21/76 TKG SFC 1001 - 100525 Fax +32 2 359 95 50 Copies of the I/B. Please reproduce them without any changes except under special instruction from Team International BELGIUM. The pages must be reproduced and folded in order to obtain a booklet A5 (+/- 148.5 mm width x 210 mm height). When folding, make sure you keep the good numbering when you turn the pages of the I/B. Don’t change the page numbering. Keep the language integrity. L’appareil est équipé d’une sécurité enfants. Pour débloquer la sécurité, poussez la goupille triangulaire du pistolet vers le gauche. Appuyez sur le bouton vapeur et passez lentement sur la surface à nettoyer. Il est recommandé de laisser une distance d’au moins 2 à 3 cm entre le jet et la surface à nettoyer. 2. 3. 4. 5. Pendant l’utilisation de l’appareil, le témoin lumineux rouge s’allume et s’éteint régulièrement. Lorsqu’il s’allume, cela signifie que l’appareil chauffe. Vous pouvez continuer à utiliser l’appareil. ATTENTION! L’APPAREIL NE PEUT ETRE INCLINE A PLUS DE 45° PENDANT LE FONCTIONNEMENT. NE JAMAIS DIRIGER LE JET SUR DES PERSONNES, DES ANIMAUX OU DES PLANTES. L’appareil est équipé d’une protection contre la surchauffe. Quand une température de 180°C est atteint, l’appareil s’éteint automatiquement. Dans ce cas, débranchez l’appareil et attendez 30 minutes afin de laisser refroidir l’appareil. Adapter le débit de vapeur: tournez le bouton de réglage du débit de vapeur dans le sens des aiguilles d’une montre pour moins de vapeur ou dans le sens inverse des aiguilles d’une montre pour plus de vapeur. Ré-remplir le réservoir: Eteignez et débranchez l’appareil. Appuyez sur le bouton de vapeur pour libérer la pression interne complètement. Attendez approximativement 3 minutes et ouvrez lentement le bouchon de sécurité. ATTENTION! De la vapeur chaude peut s’échapper. Risque de brûlures! Après que l’appareil aie refroidi approximativement à température ambiante, remplissez le réservoir. Pour ce faire, utilisez le doseur ainsi que l’entonnoir. Ne dépassez jamais la quantité maximale de 1,4 litre! Refermez le couvercle de sécurité et rebranchez l’appareil au courant. Un réservoir plein correspond à environ 40 minutes d’usage. Attention! Avant d’ouvrir le bouchon de sécurité, assurez-vous que la pression interne aie été suffisamment libérée. Eteignez et débranchez l’appareil, libérez la pression interne et videz le réservoir d’eau après l’usage. Attendez jusqu’à ce que le corps et les accessoires aient refroidi avant de toucher l’appareil. Ne fermez pas le réservoir d’eau avant qu’il ait séché complètement. Détartrage: pour maintenir la qualité et l’efficacité de votre nettoyeur, il vous est recommandé de détartrer votre appareil à intervalles réguliers (une fois par 6 mois). Mettez une ou deux tablettes anticalcaires dans un litre d’eau chaude (50°C) et remplissez le réservoir de cette solution. Laissez la solution dans le réservoir pour 30 minutes, puis videz-la. Rincez le réservoir à l’eau claire. Rinçage: nous vous recommandons de rincer le réservoir tous les 5 usages afin d’enlever le calcaire qui s’est déposé dans le fond du réservoir. Remplissez le réservoir uniquement avec de l’eau. Refermez le couvercle de sécurité et secouez le réservoir avec votre main. 22 Assembly page 22/76 TKG SFC 1001 - 100525 Fax +32 2 359 95 50 Copies of the I/B. Please reproduce them without any changes except under special instruction from Team International BELGIUM. The pages must be reproduced and folded in order to obtain a booklet A5 (+/- 148.5 mm width x 210 mm height). When folding, make sure you keep the good numbering when you turn the pages of the I/B. Don’t change the page numbering. Keep the language integrity. Ensuite ouvrez le couvercle et videz l’eau du réservoir. Laissez sécher le réservoir complètement avant de le fermer. Attention! Ne jamais immerger l’appareil dans l’eau. Nettoyez le corps uniquement avec un chiffon légèrement humide. N’essayez pas de réparer l’appareil; en cas de problème, des réparations devront être opérées par un service qualifié compétent. DETECTION D’ERREUR: Problème Le témoin lumineux de fonctionnement vert ne s’allume pas Cause possible • • • • L’appareil est mal branché L’appareil n’est pas allumé La prise de courant est endommagée Le cordon d’alimentation est endommagé Conseil • • • • • • La serrure de sécurité enfants est active • Pas d’eau dans le réservoir • Le réservoir d’eau s’est entartré • • • Trop d’eau dans le réservoir L’appareil est trop penché • • Pas de vapeur L’appareil prend beaucoup de temps pour chauffer • Rebrancher l’appareil à la prise de courant Allumer l’appareil Vérifier le courant Contacter le service clientèle Pousser la goupille du côté droit du pistolet vers le gauche Remplir le réservoir d’eau Détartrer le réservoir • L’appareil n’est pas assez chaud Retirer de l’eau Tenir l’appareil moins penché • Laisser chauffer L’eau boue au remplissage • Le réservoir d’eau est trop chaud • L’accessoire se détache • L’accessoire est mal attaché Autres problèmes • L’appareil est endommagé De l’eau sort du jet Laisser refroidir • Rattacher l’accessoire correctement • Contacter le service clientèle PROTECTION DE L’ENVIRONNEMENT – DIRECTIVE 2002/96/CE Afin de préserver notre environnement et notre santé, l’élimination en fin de vie des appareils électriques et électroniques doit se faire selon des règles bien précises et nécessite l’implication de chacun, qu’il soit fournisseur ou utilisateur. C’est pour cette raison que votre apposé sur sa plaque signalétique ou sur appareil, tel que le signale le symbole l'emballage, ne doit en aucun cas être jeté dans une poubelle publique ou privée destinée aux ordures ménagères. L'utilisateur a le droit de déposer l'appareil dans des lieux publics de collecte procédant à un tri sélectif des déchets pour être soit recyclé, soit réutilisé pour d’autres applications conformément à la directive. 23 Assembly page 23/76 TKG SFC 1001 - 100525 Fax +32 2 359 95 50 Copies of the I/B. Please reproduce them without any changes except under special instruction from Team International BELGIUM. The pages must be reproduced and folded in order to obtain a booklet A5 (+/- 148.5 mm width x 210 mm height). When folding, make sure you keep the good numbering when you turn the pages of the I/B. Don’t change the page numbering. Keep the language integrity. BELANGRIJKE VEILIGHEIDSVOORSCHRIFTEN Lees de gebruiksaanwijzing aandachtig alvorens u uw toestel gebruikt, en respecteer altijd de veiligheids- en de gebruiksvoorschriften. Belangrijk: Personen (kinderen inbegrepen) die wegens hun fysieke, sensoriële of mentale capaciteiten, of wegens hun gebrek aan ervaring of kennis, het toestel niet veilig kunnen gebruiken, mogen dit toestel niet zonder toezicht of instructies van een verantwoordelijke persoon gebruiken. Hou kinderen goed in het oog om te vermijden dat ze met het toestel spelen. Controleer of de netspanning overeenkomt met deze van het toestel vooraleer u het gebruikt. Laat uw toestel tijdens het gebruik nooit zonder toezicht. Steek de stekker altijd in een geaard stopcontact. Als het gebruik van een verlengsnoer absoluut noodzakelijk is, gebruik er dan een van minstens 10 ampère. Gebruik nooit snoeren van minder dan 10 ampère. Zorg ervoor dat niemand over het verlengsnoer kan struikelen. Gebruik het toestel enkel voor huishoudelijk gebruik en op de wijze zoals vermeld in de gebruiksaanwijzing. Dompel het toestel nooit onder in water of in enige andere vloeistof, noch om het te reinigen, noch om welke andere reden ook. Gebruik het toestel niet in de nabijheid van warmtebronnen. Controleer regelmatig de staat van uw toestel. Gebruik het toestel niet indien het snoer of het toestel zelf enige beschadiging zouden vertonen maar laat het nakijken en herstellen door een bekwame gekwalificeerde dienst(*). Een beschadigd snoer dient te worden vervangen door een bekwame gekwalificeerde dienst(*). Hetzelfde geldt als het waterreservoir niet meer functioneert of beschadigd is. Demonteer het waterreservoir niet om elektrische schokken te vermijden: breng uw toestel naar een bekwaam technicus voor onderzoek. Een niet-correcte montage kan een risico op elektrische schokken met zich meebrengen wanneer het toestel wordt gebruikt. Zorg ervoor dat de flexibele buis niet in contact komt met hete oppervlakken. Gebruik het toestel niet buiten en berg het op in een droge plaats. Gebruik geen accessoires die niet door de fabrikant aanbevolen werden. Dit kan het toestel beschadigen en gevaarlijk zijn voor de gebruiker. Trek nooit aan het snoer om het toestel te verplaatsen. Zorg dat het elektriciteitssnoer nergens kan achterhaken en daardoor de val van het toestel veroorzaken. Draai het snoer niet rond het toestel en plooi het niet. Dit toestel is geen speelgoed. Zorg ervoor dat niemand erop gaat zitten. De stoom mag niet gericht worden naar installaties die elektrische onderdelen bevatten zoals bijvoorbeeld de binnenkant van ovens. Rol het snoer en de flexibele buis volledig af alvorens het toestel aan te schakelen. TREK DE STEKKER UIT HET STOPCONTACT EN LAAT HET WATERRESERVOIR VOLLEDIG AFKOELEN ALVORENS HET TE OPENEN, VULLEN, LEDIGEN, VERPLAATSEN OF SCHOON TE MAKEN. Trek altijd de stekker uit het stopcontact na gebruik en wanneer het toestel niet in gebruik is. op het toestel betekent dat u voorzichtig moet zijn! Wees op uw hoede Het symbool want het aanraken van het hete water, de stoom of de hete onderdelen van het toestel zou tot ernstige brandwonden kunnen leiden. Vul het waterreservoir nooit met azijn, ontkalkingsmiddel of een ander chemisch product. Plooi, buig of plet de flexibele buis niet. Stel het toestel niet in werking zonder water in het reservoir. 24 Assembly page 24/76 TKG SFC 1001 - 100525 Fax +32 2 359 95 50 Copies of the I/B. Please reproduce them without any changes except under special instruction from Team International BELGIUM. The pages must be reproduced and folded in order to obtain a booklet A5 (+/- 148.5 mm width x 210 mm height). When folding, make sure you keep the good numbering when you turn the pages of the I/B. Don’t change the page numbering. Keep the language integrity. Zorg ervoor dat het toestel niet meer dan 45° wordt gekanteld tijdens het gebruik. Wanneer het toestel in gebruik is, mag de lans niet worden gericht naar mensen, dieren of planten. OPEN HET WATERRESERVOIR NOOIT TIJDENS HET GEBRUIK. GEBRUIK DE STOOMREINIGER NIET ALS: ) DE FLEXIBELE BUIS DOORBOORD IS. ) EEN VAN DE ACCESSOIRES BESCHADIGD IS. Uw toestel produceert hete stoom zoals het symbool ( ) bovenaan het stoompistool aanduidt. Verbrand u niet tijdens het gebruik en richt de stoom nooit op uzelf of iemand anders. Alvorens u de veiligheidsdop opent, dient u het toestel uit te schakelen en de interne druk te laten ontsnappen uit het reservoir door op de stoomknop te drukken tot er geen stoom meer uit het toestel komt. Trek voor elk onderhoud/elke reiniging de stekker uit het stopcontact en laat het toestel voldoende afkoelen. Draag het toestel enkel met de handgreep. (*) Bekwame gekwalificeerde dienst: klantendienst van de fabrikant of de invoerder, die erkend en bevoegd is om dergelijke herstellingen te doen zodat elk gevaar vermeden wordt. Gelieve het toestel bij problemen naar deze dienst terug te brengen. BESCHRIJVING VAN HET TOESTEL 1. 2. 3. 4. 5. 6. 7. 8. 9. 10. Vloerborstel Doek voor vloerborstel Ruitenwisser Schuurborstel Basis Trechter Maatbeker Doek voor schuurborstel Klein borsteltje Groot borsteltje 11. 12. 13. 14. 15. 16. 17. 18. 19. 20. Kromme lans Stoomregelaar Aan-/uitschakelaar Handgreep Veiligheidsdop Stoomknop Rechte lans Verbindingsstuk voor accessoires Verlengbuis (3 stuks) Flexibele buis 25 Assembly page 25/76 TKG SFC 1001 - 100525 Fax +32 2 359 95 50 Copies of the I/B. Please reproduce them without any changes except under special instruction from Team International BELGIUM. The pages must be reproduced and folded in order to obtain a booklet A5 (+/- 148.5 mm width x 210 mm height). When folding, make sure you keep the good numbering when you turn the pages of the I/B. Don’t change the page numbering. Keep the language integrity. EIGENSCHAPPEN: Dit toestel kan overal gebruikt worden en is erg eenvoudig te bedienen; daarenboven hoeft u het enkel met water te vullen. Het maakt schoon, ontvet en desinfecteert volledig zonder chemische producten (bij meer dan 100°C) en is geschikt voor verscheidene materialen en oppervlakken, bv. ramen, kleding, tuinmeubelen, fietsen, wagens, tegels enz. Opgelet! Richt dit toestel nooit naar mensen of dieren. Dit apparaat is ook ideaal voor het desinfecteren van koelkasten en baden, voor het verwijderen van geuren uit kleding en voor het bestrijden van mijten en andere parasieten in matrassen, kussens en tapijten. ACCESSOIRES Vloerborstel: voor afwasbare muur- en vloerbekleding. Mag gebruikt worden met of zonder zijn doek. Voor gevoelige oppervlakken zoals hout of linoleum is het aangeraden om het doek te gebruiken. Zet de vloerborstel op het doek en maak het overhangende materiaal vast onder de klemmen aan de linker- en rechterkant. Druk daarvoor op het binnenste stuk van de klemmen op de vloerborstel om de klemmen te openen en maak het doek vast onder de klemmen. Verbindingsstuk voor accessoires: om de accessoires op het toestel te monteren. Rechte lans: voor voegen, planken enz. Klein borsteltje: om hardnekkig vuil te verwijderen van rolluiken, radiatoren, ventielen enz. Groot borsteltje: om hardnekkige vlekken te verwijderen van minder gevoelige materialen zoals roestvrij staal of steen. Schuurborstel: voor gordijnen, kleding enz. Samen te gebruiken met doek. Ruitenwisser: voor ramen, spiegels, glazen deuren enz. Opgelet! Niet rechtstreeks op koud glas gebruiken. Kromme lans: voor toiletten en moeilijk te bereiken plaatsen. Verlengbuizen: ideaal voor het verlengen van de accessoires. 26 Assembly page 26/76 TKG SFC 1001 - 100525 Fax +32 2 359 95 50 Copies of the I/B. Please reproduce them without any changes except under special instruction from Team International BELGIUM. The pages must be reproduced and folded in order to obtain a booklet A5 (+/- 148.5 mm width x 210 mm height). When folding, make sure you keep the good numbering when you turn the pages of the I/B. Don’t change the page numbering. Keep the language integrity. OPBERGING VAN DE ACCESSOIRES: In de basis van het toestel bevindt zich een opbergvak waarin u de accessoires kan opbergen. Verwijder het waterreservoir van de basis door op de knop achteraan het toestel vlakbij het rechterwiel te drukken en het waterreservoir tegelijkertijd op te heffen met de handgreep. Wanneer u de accessoires heeft opgeborgen of het gewenste accessoire uit het toestel heeft genomen, zet dan het waterreservoir terug op de basis van het toestel. Druk het reservoir stevig neer tot het vastklikt. GEBRUIK: OPGELET! Dit toestel mag niet rechtstreeks op zacht plastic, niet-voorbehandeld hout of koud glas gebruikt worden. Stoom zou het oppervlak van meubels kunnen beschadigen. Voer daarom voor een veilig gebruik op voorhand een test uit. Respecteer de onderhoudsvoorschriften van de meubelfabrikant. MONTAGE: (STEEK DE STEKKER NIET IN HET STOPCONTACT VOORDAT U EEN ACCESSOIRE HEEFT GEKOZEN EN GEMONTEERD.) Waarschuwing! Trek na het gebruik de stekker uit het stopcontact en druk op de stoomknop om de interne druk voldoende te verminderen. Daarna kunt u de veiligheidsdop afnemen. 1. Neem het gewenste accessoire uit het opbergvak en zet het waterreservoir terug op de basis van het toestel (zie paragraaf “OPBERGING VAN DE ACCESSOIRES”). 2. Maak de flexibele buis met stoompistool vast aan het toestel. Duw daarvoor de klep die het aansluitingspunt van het apparaat bedekt naar beneden en steek het verbindingsstuk van de flexibele buis in het aansluitingspunt van het apparaat zodat het vastklikt, en zorg ervoor dat het blokje van het verbindingsstuk van de flexibele buis in het gleufje onderaan het aansluitingspunt geschoven wordt. U kunt op de ontgrendelingsknoppen aan de zijkanten van het verbindingsstuk van de flexibele buis drukken om het inschuiven te vergemakkelijken. Om de flexibele buis na gebruik te verwijderen drukt u op de ontgrendelingsknoppen aan de zijkanten van het verbindingsstuk en trekt u aan het verbindingsstuk van de flexibele buis. 3. Schroef de veiligheidsdop los. Druk hiervoor op de veiligheidsdop en draai hem tegelijkertijd in tegenwijzerzin (als er nog water in het reservoir is en als de veiligheidsdop nog stevig vastgeschroefd was na een vorig gebruik, dan zal een beetje ontgassing plaatsvinden. Dit is normaal en niet gevaarlijk). 4. Vul het waterreservoir met water. Gelieve de voorziene maatbeker en de trechter te gebruiken. Overschrijd nooit het maximale vulniveau (1,4 liter). Als het water in uw streek hard is, is het aangeraden om gedistilleerd water te gebruiken of in dit geval kunt u ook leidingwater gebruiken dat op voorhand gekookt geworden is. 5. Opmerking: doe nooit ontkalkingsmiddel, parfum of detergent in het waterreservoir om schade aan het apparaat te voorkomen. 6. Schroef de veiligheidsdop terug vast. Druk hiervoor op de veiligheidsdop en draai hem tegelijkertijd in wijzerzin. 7. Als u vloeren wilt schoonmaken of oppervlakken die moeilijk te bereiken zijn, monteer dan de verlengbuizen. Duw daarvoor het open deel van een buis op het stoompistool tot de ontgrendelingsknop van het stoompistool vastklikt. U kunt één, twee of de drie verlengbuizen monteren. Om de verlengbuizen na gebruik te verwijderen drukt u op de ontgrendelingsknop bovenaan de verlengbuis of het stoompistool en trekt u de buizen uit elkaar. 8. Bevestig de vloerborstel op de verlengbuis tot de ontgrendelingsknop vastklikt als u vloeren wilt schoonmaken. Als u een ander accessoire wilt gebruiken, moet u eerst het verbindingsstuk voor accessoires monteren: schuif het verbindingsstuk voor accessoires op het stoompistool of op de verlengbuis tot de ontgrendelingsknop vastklikt. Monteer dan 27 Assembly page 27/76 TKG SFC 1001 - 100525 Fax +32 2 359 95 50 Copies of the I/B. Please reproduce them without any changes except under special instruction from Team International BELGIUM. The pages must be reproduced and folded in order to obtain a booklet A5 (+/- 148.5 mm width x 210 mm height). When folding, make sure you keep the good numbering when you turn the pages of the I/B. Don’t change the page numbering. Keep the language integrity. de rechte lans op het verbindingsstuk voor accessoires en draai de rechte lans een kwartslag in tegenwijzerzin om ze vast te maken. Om de rechte lans na gebruik af te nemen draait u ze een kwartslag in wijzerzin en trekt u eraan. Om de vloerborstel of het verbindingsstuk voor accessoires na gebruik af te nemen drukt u op de betreffende ontgrendelingsknop en trekt u aan de borstel of het verbindingsstuk. 9. De kleine en grote ronde borsteltjes, de schuurborstel en de kromme lans kunnen op de rechte lans worden gezet. 10. Ruitenwisser: Opgelet! Gebruik dit toestel niet rechtstreeks op koud glas. Anders kan het glas breken. U dient het glas voor te verwarmen door stoom te stuiven in een grotere boog vanaf een afstand van 20-25cm. Verminder geleidelijk de afstand tot 10-15cm om het glas verder voor te verwarmen. 11. De ruitenwisser moet gemonteerd worden op de schuurborstel. Monteer eerst de schuurborstel op de rechte lans. Neem het doek van de schuurborstel en maak de ruitenwisser vast aan de schuurborstel door middel van de twee scharnieren. De ruitenwisser kan eenvoudig gedemonteerd worden door de scharnieren weer los te haken. Schuurborstel Ruitenwisser Scharnier Haken GEBRUIK: 1. Steek de stekker in het stopcontact en druk op de aan-/uitschakelaar om het toestel aan te schakelen; het groene en het rode controlelampje lichten op. Zodra de voorverwarming (ongeveer 10 minuten) is afgelopen, gaat het rode controlelampje uit. Het toestel is dan klaar voor gebruik. Het toestel is uitgerust met een kinderslot. Duw om deze beveiliging uit te schakelen de driehoekige pin aan de rechterkant van het stoompistool naar links. Druk op de stoomknop en beweeg het toestel langzaam over het oppervlak dat moet worden schoongemaakt. Het is aan te raden dat de afstand tussen de lans en het oppervlak ten minste 2-3cm bedraagt. 28 Assembly page 28/76 TKG SFC 1001 - 100525 Fax +32 2 359 95 50 Copies of the I/B. Please reproduce them without any changes except under special instruction from Team International BELGIUM. The pages must be reproduced and folded in order to obtain a booklet A5 (+/- 148.5 mm width x 210 mm height). When folding, make sure you keep the good numbering when you turn the pages of the I/B. Don’t change the page numbering. Keep the language integrity. Het is normaal dat het rode controlelampje tijdens het gebruik aan en uit gaat, omdat de thermostaat het verwarmingselement automatisch regelt. OPGELET! HET TOESTEL MAG NIET MEER DAN 45° WORDEN GEKANTELD TIJDENS HET GEBRUIK. RICHT HET TOESTEL NOOIT NAAR MENSEN, DIEREN OF PLANTEN. 2. 3. 4. 5. Het toestel is uitgerust met een beveiliging tegen oververhitting. Wanneer een temperatuur van 180°C wordt bereikt, schakelt het toestel zich automatisch uit. Trek in dit geval de stekker uit het stopcontact en wacht 30 minuten zodat het toestel kan afkoelen. Het stoomdebiet regelen: draai de stoomregelaar in wijzerzin voor minder stoom of in tegenwijzerzin voor meer stoom. Het waterreservoir bijvullen: Schakel het toestel uit en trek de stekker uit het stopcontact. Druk op de stoomknop en laat de interne druk volledig verdwijnen. Wacht ongeveer 3 minuten en neem de veiligheidsdop langzaam af. OPGELET! Hete stoom kan ontsnappen. Risico op brandwonden! Nadat het toestel is afgekoeld tot ongeveer de kamertemperatuur, vul dan het waterreservoir. Gebruik alstublieft de voorziene trechter en maatbeker. Overschrijd nooit de maximale hoeveelheid van 1,4 liter! Sluit de veiligheidsdop en steek de stekker weer in het stopcontact. Een volle tank komt ongeveer overeen met 40 minuten gebruik. Waarschuwing! Zorg ervoor dat de interne druk voldoende is afgenomen vooraleer u de veiligheidsdop verwijdert. Schakel het toestel uit na gebruik en trek de stekker uit het stopcontact, laat de resterende interne druk ontsnappen en ledig het waterreservoir. Wacht tot de behuizing en de accessoires afgekoeld zijn vooraleer het toestel aan te raken. Sluit het waterreservoir niet vooraleer het volledig is uitgedroogd. Ontkalking: om de uitstekende kwaliteit en efficiëntie van uw stoomreiniger te behouden raden wij u aan om het toestel regelmatig te ontkalken (1 keer om de 6 maanden). Doe een of twee ontkalkingsstokjes in 1 liter warm water (50°C) en vul het waterreservoir met dit mengsel. Laat het ongeveer 30 minuten inwerken en giet dan het mengsel weg. Spoel het reservoir uit met zuiver water. Uitspoelen: wij raden u aan om het reservoir om de 5 gebruiksbeurten uit te spoelen om kalksteen te verwijderen die zich op de bodem van het reservoir heeft neergezet. Vul het waterreservoir enkel met water. Sluit de veiligheidsdop en schud het reservoir met de hand. Open dan de veiligheidsdop en ledig het reservoir. Laat het reservoir volledig uitdrogen vooraleer het te sluiten. Waarschuwing! Dompel het toestel nooit onder in water. Veeg de behuizing enkel schoon met een licht vochtige doek. Probeer het toestel niet te herstellen. Indien nodig moeten herstellingen van elektrische apparaten worden uitgevoerd door gekwalificeerde vaklui. 29 Assembly page 29/76 TKG SFC 1001 - 100525 Fax +32 2 359 95 50 Copies of the I/B. Please reproduce them without any changes except under special instruction from Team International BELGIUM. The pages must be reproduced and folded in order to obtain a booklet A5 (+/- 148.5 mm width x 210 mm height). When folding, make sure you keep the good numbering when you turn the pages of the I/B. Don’t change the page numbering. Keep the language integrity. FOUTOPSPORING: Probleem Mogelijke oorzaak • Advies Steek de stekker weer in het stopcontact Schakel het toestel aan Controleer het stopcontact Contacteer de klantendienst Duw de pin aan de rechterkant van het stoompistool naar links Vul het reservoir met water Het waterreservoir is verkalkt • Ontkalk het waterreservoir • Te veel water in het reservoir • • Toestel te veel gekanteld • • Groen controlelampje licht • niet op • • Stekker niet correct in stopcontact Toestel niet aangeschakeld Stopcontact beschadigd Snoer beschadigd • • • • • • Kinderslot is aan • Geen water in reservoir • Geen stoom Het toestel heeft veel tijd nodig om op te warmen • Toestel niet heet genoeg • Verminder de hoeveelheid water Houd het toestel op correcte wijze vast Laat het toestel opwarmen Water kookt tijdens het vullen • Waterreservoir nog zeer heet • Laat het toestel afkoelen Accessoire komt los • Accessoire niet correct bevestigd • Andere problemen • Toestel is beschadigd Bevestig het accessoire opnieuw Contacteer de klantendienst Water lekt uit de lans • MILIEUBESCHERMING – RICHTLIJN 2002/96/EG Om ons milieu en onze gezondheid te beschermen, moet afgedankte elektrische en elektronische apparatuur in overeenstemming met welbepaalde regels weggegooid worden. Dit vergt zowel de inzet van de leveranciers als van de gebruikers. Daarom mag uw apparaat, , niet met zoals op het typeplaatje of op de verpakking aangegeven door het symbool het gewone huisvuil weggegooid worden. De gebruiker heeft het recht het toestel naar een gemeentelijk centrum van gescheiden inzameling te brengen waar het overeenkomstig de richtlijn hergebruikt, gerecycleerd of voor andere doeleinden gebruikt zal worden. 30 Assembly page 30/76 TKG SFC 1001 - 100525 Fax +32 2 359 95 50 Copies of the I/B. Please reproduce them without any changes except under special instruction from Team International BELGIUM. The pages must be reproduced and folded in order to obtain a booklet A5 (+/- 148.5 mm width x 210 mm height). When folding, make sure you keep the good numbering when you turn the pages of the I/B. Don’t change the page numbering. Keep the language integrity. CONSEJOS DE SEGURIDAD Lea detenidamente el modo de empleo antes de utilizar el aparato, y siempre siga las medidas de seguridad y el modo de funcionamiento. Importante: Las personas (incluidos niños) con incapacidades físicas, sensoriales o mentales, o sin experiencia o conocimiento nunca deben utilizar el aparato, salvo si están bajo la vigilancia de una persona responsable de su seguridad o si recibieron previamente instrucciones con respecto al uso seguro del aparato. Es necesario vigilar a los niños para que no jueguen con el aparato. Antes de utilizar el aparato, compruebe que el voltaje de la red eléctrica coincide con el aparato. No deje nunca su aparato sin vigilancia cuando esté en marcha. Conecte el enchufe solo a una toma de tierra. Si fuese precisa la utilización de una extensión eléctrica, se debería usar un mínimo de 10 amperios. No utilice nunca una extensión eléctrica con una intensidad inferior a 10 amperios. Tome las precauciones necesarias para que no se enganche o tropiece con el cordón eléctrico. Utilice el aparato sólo para usos domésticos y de la manera indicada en el modo de empleo. No sumerja nunca el aparato en el agua o en cualquier otro líquido ni para su limpieza ni por cualquier otra razón. No utilice el aparato cerca de fuentes de calor. Compruebe de vez en cuando que el aparato no esté dañado y no utilice su aparato si el cable o el aparato están dañados por el motivo que sea. Cualquier reparación debe ser realizada por un servicio cualificado competente(*). Si el cable está dañado, debe ser reemplazado por un servicio cualificado competente(*). Lo mismo si el deposito de agua no funciona o si está dañado. Para evitar ninguna descarga eléctrica, no desmonte el deposito de agua: coja su aparato y llevelo a un servicio técnico cualificado para una revisión. Un desmontaje incorrecto puede causar un riesgo de shock eléctrico cuando su aparato está en uso. Procure que el tubo flexible no esté en contacto con superficies calientes. Procure no utilizar el aparato en el exterior y colóquelo en un sitio seco. No utilice accesorios no recomendados por el fabricante, ello puede conllevar un riesgo para el usuario y dañar el aparato. No mueva nunca el aparato estirando del cable. Procure que el cable no se enganche en alguna parte, a fin de evitar posibles caídas del mismo. Evite enrollar el cable alrededor del aparato y no lo tuerza. Este aparato no es un juguete, procure que nadie se suba encima. El vapor no debería estar dirigido directamente hacia equipos que contengan componentes eléctricos como el interior de los hornos. Desenrolle totalmente el cordón eléctrico así como el tubo flexible antes de poner el aparato en marcha. DESENCHUFE EL APARATO Y DEJE ENFRIAR EL DEPOSITO DE AGUA COMPLETAMENTE ANTES DE ABRIR, LLENANDO, VACIANDO, MOVIENDO O LIMPIANDO EL DEPOSITO DE AGUA. Siempre desenchufe el aparato después de su uso y cuando no está siendo usado. en el aparato significa que usted necesita poner atención! Cuidado El símbolo porque tocando el agua caliente, vapor o las partes calientes puede cuasar serias quemaduras. Nunca llene el deposito de agua con vinagre, u otros productos químicos. No plegue, tuerza o pise el flexible de cualquier manera que sea. 31 Assembly page 31/76 TKG SFC 1001 - 100525 Fax +32 2 359 95 50 Copies of the I/B. Please reproduce them without any changes except under special instruction from Team International BELGIUM. The pages must be reproduced and folded in order to obtain a booklet A5 (+/- 148.5 mm width x 210 mm height). When folding, make sure you keep the good numbering when you turn the pages of the I/B. Don’t change the page numbering. Keep the language integrity. No utilizar sin agua en el deposito. Asegúrese que el aparato no está inclinado 45º durante su funcionamiento. Cuando el aparato está en funcionamiento, la boquilla no debe ser dirigida directamente a los humanos, animales o plantas. NUNCA ABRA EL DEPOSITO DE AGUA DURANTE SU USO. NO UTILICE EL VAPOR SI: ) EL TUBO FLEXIBLE ESTÁ PERFORADO. ) UNO DE LOS ACCESORIOS ESTÁ DAÑADO. Su aparato produce vapor caliente como lo indica el símbolo ( ) que se encuentra en la manguera, tenga cuidado de no quemarse durante el uso y no dirija nunca el flujo de vapor hacia usted o hacia otra persona. Antes de abrir la tapa de seguridad, apagar el aparato y vaciar el tanque apretando el botón de vapor hasta que deje de salir agua completamente. Antes de cada limpieza/mantenimiento desenchufe el aparato y déjelo enfriar lo suficiente. Sujetar el aparato únicamente de este modo. (*) Servicio técnico cualificado: servicio técnico del fabricante o del importador o una persona cualificada, reconocida y habilitada a fin de evitar cualquier peligro. En cualquier caso devuelva el aparato al servicio técnico. DESCRIPCION DEL APARATO 1. 2. 3. 4. 5. 6. 7. 8. 9. 10. Cepillo de suelo Trapo para cepillo Ventana de limpieza Cepillo de limpieza Base Embudo Vaso medidor Trapo para cepillo de limpieza Cepillo metálico Cepillo nylon 11. 12. 13. 14. 15. 16. 17. 18. 19. 20. Boquilla curva Regulador de vapor Botón encendido/apagado Asa Tapa de seguridad Botón vapor Boquilla recta Pieza para conectar accesorios Tubo de extensión (3 piezas) Manguera flexible 32 Assembly page 32/76 TKG SFC 1001 - 100525 Fax +32 2 359 95 50 Copies of the I/B. Please reproduce them without any changes except under special instruction from Team International BELGIUM. The pages must be reproduced and folded in order to obtain a booklet A5 (+/- 148.5 mm width x 210 mm height). When folding, make sure you keep the good numbering when you turn the pages of the I/B. Don’t change the page numbering. Keep the language integrity. CARACTERISTICAS: Este aparato puede ser usado en cualquier lugar y es muy fácil de transporter; asímismo, usted solo tiene que llenar con agua. Limpia, desengrasa y desinfecta completamente sin ningún producto químico (sobre 100ºC) y es valido para diferentes materiales y zonas, e.j. ventanas, ropa, muebles de jardin, bicicletas, coches, azulejos etc. Precaución! Nunca dirija el aparato a humanos o animales. Este aparato es ideal para la desinfección de frigoríficos y baños, para quitar olores de la ropa y para luchar contra los acaros y otros parasitos, en colchones, almohadas y moquetas. ACCESORIOS Cepillo de suelo: para paredes lavables y revestimiento de suelos. Se puede utilizar con o sin su paño. Para las superficies sensibles, tales como la madera o linóleo se recomienda el uso con el paño. Coloque el cepillo de suelo en el paño de limpieza y sujetando las partes sobrantes del mimo con los broches o clips situados a derecha e izquierda del cepillo. Para hacerlo, pulse en el extremo interior de los clips en la parte superior del cepillo para abrir los clips y sujetar el paño. Pieza de conexión de accesorios: para montar los accesorios en el aparato. Boquilla recta: para juntas, estanterias etc. Cepillo nylon: para quitar la suciedad difícil de las persianas, radiadores, válvulas, etc. Cepillo metálico: para quitar manchas pesadas de materiales menos sensibles, tales como el acero inoxidable o la piedra. Cepillo de limpieza: para cortinas y ropas etc. Para usar junto con el trapo. Limpiador de ventanas: para ventanas, cristales, puertas de cristal etc. Precaución! No lo utilice directamente en cristales fríos. Boquilla curva: para water o zonas difíciles de alcanzar. Tubo de extensión: ideal para la extensión de los accesorios. 33 Assembly page 33/76 TKG SFC 1001 - 100525 Fax +32 2 359 95 50 Copies of the I/B. Please reproduce them without any changes except under special instruction from Team International BELGIUM. The pages must be reproduced and folded in order to obtain a booklet A5 (+/- 148.5 mm width x 210 mm height). When folding, make sure you keep the good numbering when you turn the pages of the I/B. Don’t change the page numbering. Keep the language integrity. GUARDAR ACCESORIOS EN LA BASE DEL APARATO HAY UN COMPARTIMENTO EN EL CUAL USTED PUEDE ALMACENAR ACCESORIOS. Separe el depósito de agua de la base presionando el botón en la parte trasera cerca de la rueda derecha y tire del depósito cogiendo del asa al mismo tiempo. Cuando usted haya almacenado los accesorios o cogido el accesorio deseado, ponga el deposito de agua otra vez en la base. Presione hacia abajo firmemente hasta click en su sitio. FUNCIONAMIENTO: PRECAUCIÓN! Este aparato no debería ser usado directamente en plásticos blandos, madera no pretratada o cristal frío. El vapor puede dañar la superficie de los muebles. Para un trabajo seguro ejecute una prueba de antemano. Ponga atención a las instrucciones para el mantenimiento del fabricante. MONTAJEY: (NO ENCHUFE EL APARATO A LA TOMA DE CORRIENTE HASTA QUE HAYA DECIDICO Y ADJUNTADO EL ACCESORIO APROPIADO.) Precaución! Después de su uso, desenchufe el aparato desde la toma de corriente y presione el botón de vapor para reducer la presión interna suficientemente. Después puede soltar la tapa de seguridad. 1. Coja el accesorio deseado del compartimento de almacenamiento y ponga otra vez el deposito en su sitio (ver sección “GUARDAR ACCESORIOS”). 2. Adjunte el tubo flexible con la pistola de vapor al aparato. Para ello levantar la solapa que tapa el orificio de conexión e introducir el tubo flexible en el orificio hasta oir el click que indique el bloqueo. Asegúrese que la pestaña del tubo se inserta en la endidura abajo del orificio: puede presionar las pestañas laterales del tubo flexible con el fin de facilitar la conexión. Para retirar el tubo, presionar las pestañas y estirar. 3. Desenrosque la tapa de seguridad. Para hacer esto, presione la tapa de seguridad y al mismo tiempo gire en el sentido contrario de las agujas del reloj (si dejó agua en el depósito y el tapón cerrado en su anterior uso, al abrirlo se producira una leve desgasificación que es normal y no presenta ningún peligro). 4. Llene el deposito con agua. Por favor, use el vaso medidor y el embudo. No exceda nunca el nivel máximo de llenado (1.4 litros). Si el agua de vuestra región es dura, le recomendamos utilizar agua desmineralizada o proceder a utilizar también agua del grifo hervida. 5. Nota: nunca llene con perfumes, detergentes para prevenir daños. 6. Vuelva a enroscar la tapa de seguridad. Para hacer esto, presione la tapa de seguridad y al mismo tiempo gire en el sentido de las agujas del reloj. 7. Si quier limpiar suelos o zonas difíciles (o de difícil acceso) tiene que montar los tubos prolongados. Para hacer esto, poner la parte abierta del tubo, encima de la pistola, hasta que el botón de desbloqueo de la pistola de vapor en su sitio. Usted puede montar uno, dos o 3 tubos de extensión. Usted los puede quitar después de su uso, presione el botón de desbloqueo en la parte superior del tubo o de la pistola de vapor y tirar de las partes del tubo. 8. Si quiere limpiar el suelo, ponga el cepillo del suelo en el tubo de extensión hasta que el botón de desbloqueo haga click. Si usted quiere usar otro accesorio conecte piezas en la pistola de vapor o en el tubo de extensión. Monte la boquilla recta directamente sobre la pieza de conexión de accesorios y gire la boquilla recta un cuarto de vuelta en sentido contrario a las agujas del reloj hasta que encaje en su lugar. Para quitar la boquilla después de su uso, gire un cuarto de vuelta en el sentido de las agujas del reloj y tire de él. Para quitar el cepillo de suelo o la pieza de conexión de accesorios después de su utilización, pulse el botón de liberación adecuado y tire de él. 34 Assembly page 34/76 TKG SFC 1001 - 100525 Fax +32 2 359 95 50 Copies of the I/B. Please reproduce them without any changes except under special instruction from Team International BELGIUM. The pages must be reproduced and folded in order to obtain a booklet A5 (+/- 148.5 mm width x 210 mm height). When folding, make sure you keep the good numbering when you turn the pages of the I/B. Don’t change the page numbering. Keep the language integrity. 9. El cepillo metálico y nylon así como la boquilla curva pueden ser puestos en la boquilla recta. 10. El limpiador de cristales: precaución! No haga funcionar este aparato directamente en cristales fríos. Ya que el cristal podría romperse. Precaliente el cristal tirando spray a una distancia de 20-25 cm. Vaya reduciendo la distancia despacio a 10-15 cm para precalentar el cristal. 11. El limpiador de cristales debe ser adjuntado al cepillo de limpieza. Primero ponga el cepillo de limpieza en la boquilla recta. Quite el trapo del cepillo de limpieza y conecte el limpiador de cristales al cepillo por las dos bisagras. El limpiador de cristales puede ser quitado fácilmente desenganchando las bisagras otra vez. CEPILLO DE LIMPIEZA LIMPIADOR DE CRISTALES GANCHOS BISAGRAS FUNCIONAMIENTO: 1. Ponga el aparato en una toma de corriente y presione el botón on-off para encender el aparato. La luz verde y roja se encendrá. Tan pronto como el precalentamiento (sobre 10 minutos) esté terminado, la luz roja de control desaparecerá. El aparato está listo para usar. El aparato está equipado con un dispositivo de seguridad para niños. Para quitar el desbloqueo, presione el botón triangular en la parte derecha del asa de la pistola de vapor hacia la izquierda. Presione el botón de vapor y quite el aparato despacio sobre la superficie que ha sido limpiada. Se recomienda que la distancia entre la boquilla y la superficie sea al menos 2-3 cm. 35 Assembly page 35/76 TKG SFC 1001 - 100525 Fax +32 2 359 95 50 Copies of the I/B. Please reproduce them without any changes except under special instruction from Team International BELGIUM. The pages must be reproduced and folded in order to obtain a booklet A5 (+/- 148.5 mm width x 210 mm height). When folding, make sure you keep the good numbering when you turn the pages of the I/B. Don’t change the page numbering. Keep the language integrity. Es normal que la luz roja de control se encienda y apague durante el proceso, desde que el termostato controla los elementos de calor automáticamente. PRECAUCIÓN! EL APARATON NO PUEDE SER INCLINADO POR ENCIMA DE LOS 45º DURANTE SU FUNCIONAMIENTO. NUNCA DIRIGA EL APARATO HACIA HUMANOS, ANIMALES O PLANTAS. EL APARATO ESTÁ EQUIPADO CON PROTECCIÓN CONTRA SOBRECALENTAMIENTO. CUANDO SE ALCANZA UNA TEMPERATURA DE 180ºC, EL APARATO SE APAGARÁ AUTOMATICAMENTE. EN ESE CASO, DESENCHUFE Y ESPERE UNOS 30 MINUTOS PARA DEJAR ENFRIAR EL APARATO. 2. 3. 4. 5. Ajustar el vapor: gire el regulador de vapor en el sentido de las agujas del reloj para menos vapor o en el sentido contrario de las agujas del reloj para más cantidad de vapor. Rellenar el deposito de agua: Apague y desenchufe el aparato desde la toma de corriente. Presione el botón de vapor y libere la presión interna completamente. Espere aprox. 3 minutos y libere la tapa de seguridad con cuidado. Vapor caliente se puede escapar. Riesgo de quemaduras. Después de que el aparato se haya enfriado a la temperatura medioambiental aproximadamente, rellene el deposito de agua. Por favor, use el embudo y el vaso medidor. No se exceda del máximo 1.4 litros. Atención! Antes de que usted libere la tapa de seguridad, asegúrese de que la presión interna se ha reducido suficientemente. Apague y desenchufe el aparato, haga que salga la presión interna y vacíe el deposito de agua después de su uso. Espere hasta que el aparato y los accesorios se hayan enfriado antes de tocarlos. No cierre el deposito de agua hasta que se haya secado completamente. Quitar la cal: para mantener en una excelente calidad y eficiencia de su limpiador, le recomendamos que haga este proceso en intervalos regulares (cada 6 meses). Coloque un o dos tiras de limon en 1 litro de agua caliente (50°C) y llene el depósito de agua con la solución. Permita que la solución haga el trabajo aproximadamente 30 minutos entonces lo tira lejos. Aclare el tanque con agua clara. Enjuagar: le recomendamos que lo haga cada 5 usos para prevenir riesgos de cal depositados en el fondo del deposito de agua. Llene el deposito solo con agua. Cierre la tapa de seguridad y mueva el deposito con la mano. Después abra la tapa y vacíe el deposito. Deje que el tanque se seque completamente antes de cerrar. Precaución! Nunca sumerja el aparato en agua. Seque el cuerpo con un trapo con suavidad. No intente reparar el aparato, en caso de necesidad, lleve el aparato a un servicio técnico cualificado. 36 Assembly page 36/76 TKG SFC 1001 - 100525 Fax +32 2 359 95 50 Copies of the I/B. Please reproduce them without any changes except under special instruction from Team International BELGIUM. The pages must be reproduced and folded in order to obtain a booklet A5 (+/- 148.5 mm width x 210 mm height). When folding, make sure you keep the good numbering when you turn the pages of the I/B. Don’t change the page numbering. Keep the language integrity. ERRORES DETECTADOS: Problema Posible causa • • La luz de puesta en marcha verde no se enciende • • • El aparato no está enchufado correctamente El aparato no está encendido La toma de corriente está dañada El cable está dañado • • • Consejo Ponga otra vez el aparato en la toma de corriente otra vez Encienda el aparato Compruebe el enchufe Contacte con el servicio de atención al cliente No vapor • • No hay agua en el deposito El dispositivo de bloqueo para niños está encendido • • Llene con agua el deposito Quite el desbloqueo El aparato tarde mucho tiempo en calentarse • El deposito de agua está embozado • Limpie el deposito • • • Demasiad agua en el deposito Demasada inclinación en el aparato El aparato no ha calentado lo suficiente • • Quite agua Ponga el aparato en posición correcta Deje que el aparato se caliente • El deposito de agua esta todavia muy caliente • Accesorios no colocados correctamente • El aparato está dañado El agua se sale de la boquilla El agua hierve mientras estoy rellenando Accesorios se pierden Otros problemas • • Deje enfriar el aparato • Ponga los accesorios otra vez Contacte con el servicio de atención al cliente • PROTECCIÓN DEL MEDIO AMBIENTE – DIRECTIVA 2002/96/CE Para poder preservar nuestro medio ambiente y proteger la salud humana, los residuos eléctricos y equipos electrónicos deberían ser destruidos de acuerdo con unas normas especificas con la implicación de ambos proveedores y consumidores. Por esta razón, como en la placa de datos técnicos, su aparato no debería ser tirado en un indica el símbolo contenedor municipal sino que debería ser devuelto a la tienda, o dejado en un punto de recolección para ser reciclado o usado para otras aplicaciones conforme a la directiva. 37 Assembly page 37/76 TKG SFC 1001 - 100525 Fax +32 2 359 95 50 Copies of the I/B. Please reproduce them without any changes except under special instruction from Team International BELGIUM. The pages must be reproduced and folded in order to obtain a booklet A5 (+/- 148.5 mm width x 210 mm height). When folding, make sure you keep the good numbering when you turn the pages of the I/B. Don’t change the page numbering. Keep the language integrity. PARA A SUA SEGURANÇA Antes de utilizar o aparelho leia com sentido de responsabilidade as instruções de funcionamento e respeite sempre as orientações de segurança e de utilização dadas no manual das instruções. Importante: As pessoas (incluídas as crianças) com incapacidades físicas, sensoriais ou mentais, ou sem experiência ou conhecimento não devem utilizar o aparelho excepto se estiverem vigiadas por uma pessoa responsável pela sua segurança ou se receberam previamente instruções relativas ao uso seguro do aparelho. Convém vigiar as crianças para que elas não brinquem com o aparelho. Antes de ligar a ficha do cabo da alimentação à tomada eléctrica certifique-se que a corrente eléctrica tem a potência igual à indicada na placa sinalética do aparelho. Mantenha o aparelho sob vigilância quando em funcionamento. Ligue a ficha apenas a uma tomada de terra. Se uma extensão eléctrica for necessária, tem de ter no mínimo 10 amperes, caso contrário poderá ocorrer um sobreaquecimento. Tenha cuidado para que o cabo da alimentação não fique enrolado em alguma coisa e que não se tropece nele. O aparelho destina-se ao uso doméstico e tem de respeitar as instruções de utilização. O aparelho nunca deve ser mergulhado na água ou em qualquer outro líquido seja para a limpeza ou por qualquer outra razão. Não ponha o aparelho próximo de fontes de calor. Verifique com regularidade o estado do aparelho e em caso de danos leve-o a um serviço técnico competente para o analisar e reparar(*). Se o cabo da alimentação estiver danificado este tem de ser obrigatoriamente substituído pelo que deve levar o aparelho a um serviço técnico competente(*). O mesmo acontece se o depósito de água não funcionar ou se estiver danificado. Para evitar qualquer descarga eléctrica, não desmonte o depósito de água: leve o seu aparelho a um técnico competente para o analisar. Uma montagem incorrecta pode provocar choques electricos quando voltar a utilizar o aparelho. Não deixe a mangueira flexível do vapor tocar nas superfícies quentes. O aparelho não deve ser utilizado ao ar livre e deve ser guardado em locais secos. Use sempre os acessórios recomendados pelo fabricante ou pelos serviços técnicos competentes(*). Nunca retire a ficha do cabo da alimentação da tomada eléctrica puxando pelo cabo da alimentação. Verifique se o cabo da alimentação se encontra enrolado ou preso em alguma coisa. Não enrole o cabo da alimentação à volta do aparelho e não o torça. O aparelho não é um brinquedo pelo que não deve permitir que o montem. Não deve apontar o vapor do aparelho para equipamentos com componentes eléctricos, tais como o interior dos fornos. Desenrole completamente o cabo da alimentação bem como a mangueira flexível do vapor antes de colocar o aparelho em funcionamento. DESLIGUE O APARELHO E DEIXE ARREFECER POR COMPLETO O DEPÓSITO DE ÁGUA ANTES DE O ABRIR, ENCHER, ESVAZIAR, MOVER OU LIMPAR. Desligue o aparelho sempre, depois de usá-lo e quando não o utilizar. no aparelho significa que necessita ter atenção! Tenha cuidado porque O símbolo a água, o vapor e as peças quentes, e podem provocar queimaduras graves. Nunca encha o depósito de água com vinagre, descalcificador ou outro produto químico. Não dobre, torça ou pise a mangueira flexível do vapor seja por que motivo for. Não utilize o aparelho sem que este tenha água no depósito. 38 Assembly page 38/76 TKG SFC 1001 - 100525 Fax +32 2 359 95 50 Copies of the I/B. Please reproduce them without any changes except under special instruction from Team International BELGIUM. The pages must be reproduced and folded in order to obtain a booklet A5 (+/- 148.5 mm width x 210 mm height). When folding, make sure you keep the good numbering when you turn the pages of the I/B. Don’t change the page numbering. Keep the language integrity. Verifique que não inclina o aparelho mais que 45º enquanto o utiliza. Quando o aparelho funciona, o bocal não deve ser apontado para as pessoas, animais ou plantas. NUNCA ABRA O DEPÓSITO DE ÁGUA ENQUANTO UTILIZA O APARELHO. NÃO UTILIZE O APARELHO PARA LIMPAR A VAPOR SE: ) A MANGUEIRA FLEXÍVEL DO VAPOR ESTIVER PERFURADA. ) QUALQUER UM DOS ACESSÓRIOS ESTIVER DANIFICADO. O aparelho produz vapor quente como indica o símbolo ( ) que se encontra na pega. Evite queimaduras. Nunca dirija o fluxo do vapor para si ou para uma outra pessoa. Antes de abrir a tampa de segurança, desligue o aparelho e esvazie sempre o depósito pressionando o botão do vapor, não o solte, até que expulse todo o vapor. Depois de cada utilização desligue o aparelho da tomada eléctrica e deixe-o arrefecer durante um tempo suficiente. Transporte o aparelho apenas pela sua asa. (*) Serviço técnico habilitado: serviço técnico do fabricante ou do importador ou uma pessoa qualificada, reconhecida e habilitada para evitar qualquer perigo. Em qualquer caso devolva o aparelho ao serviço técnico. DESCRIPÇÃO DO APARELHO 1. 2. 3. 4. 5. 6. 7. 8. 9. 10. Escova para chão Pano para escova do chão Acessório para limpar janelas Escova Base Funil Copo de medida Pano para escova Escova de metal Escova de nylon 11. 12. 13. 14. 15. 16. 17. 18. 19. 20. Ponta curva Regulador de vapor Botão on/off Asa Tampa de segurança Botão do vapor Ponta recta Acessório de conexão Tubo de extensão (3 peças) Tubo flexível 39 Assembly page 39/76 TKG SFC 1001 - 100525 Fax +32 2 359 95 50 Copies of the I/B. Please reproduce them without any changes except under special instruction from Team International BELGIUM. The pages must be reproduced and folded in order to obtain a booklet A5 (+/- 148.5 mm width x 210 mm height). When folding, make sure you keep the good numbering when you turn the pages of the I/B. Don’t change the page numbering. Keep the language integrity. CARACTERÍSTICAS: Este aparelho pode ser utilizado em qualquer lugar e é muito fácil de manusear; além disso, só tem que o encher com água. Limpa, desinfecta e tira a gordura na totalidade, sem adicionar produtos químicos (mais de 100ºC); é apropriado para diferentes áreas e materiais, por exemplo, para janelas, roupa, móveis de jardim, bicicletas, carros, telhas, etc. Cuidado! Nunca aponte o aparelho para seres humanos nem animais. Este aparelho é ideal para desinfectar frigoríficos e casas de banho, elimina os olores das roupas, e luta contra os ácaros e outros parasitas em colchões, almofadas e tapetes. ACESSÓRIOS Escova para o chão: para limpar paredes e pavimentos. Pode ser usada com ou sem o pano. Para superfícies delicadas, como madeira ou linóleo, recomenda-se usar o pano. Coloque a escova sobre o pano e prenda o material com as patilhas de segurança, do lado esquerdo e direito da escova. Para fazer isso, pressione a extremidade interna dos grampos colocada na parte superior da escova, permitindo que estes se abram e segure o pano com as patilhas. Acessório de conexão: para unir os acessórios com o aparelho. Ponta reta: para juntas, prateleiras, etc. Escova de metal: para retirar sujidade de zonas difíceis como prateleiras, radiadores, válvulas, etc. Escova de nylon: para retirar sujidade de materiais menos delicados, tais como aço inoxidável ou pedra. Escova esfregão: para cortinas, vestuário, tecidos, etc. Para ser utilizado em com um pano. Acessório para limpar janelas: para janelas, espelhos, portas de vidro, etc. Atenção! Não use diretamente sobre o vidro frio. Ponta curva: para casas de banho e áreas de difícil acesso. Tubos de extensão: ideal para a extensão dos acessórios. 40 Assembly page 40/76 TKG SFC 1001 - 100525 Fax +32 2 359 95 50 Copies of the I/B. Please reproduce them without any changes except under special instruction from Team International BELGIUM. The pages must be reproduced and folded in order to obtain a booklet A5 (+/- 148.5 mm width x 210 mm height). When folding, make sure you keep the good numbering when you turn the pages of the I/B. Don’t change the page numbering. Keep the language integrity. ARMAZENAMENTO DOS ACESSÓRIOS: Na base do aparelho há um compartimento onde pode guardar os acessórios. Separe o depósito da água pressionando o botão de detrás do aparelho perto da roda direita e, ao mesmo tempo, puxe o depósito da água pela da asa. Quando guardar os acessórios ou retirar o acessório que deseja utilizar, volte a colocar o depósito da água detrás da base do aparelho. Pressione firmemente até que se encaixe no lugar. OPERAÇÕES: ATENÇÃO! Este aparelho não deve ser usado directamente sobre plásticos macios, madeira sem tratamento ou vidro frio. O vapor pode danificar a superfície dos móveis. Para assegurar-se, por favor, faça um teste de antemão. Tome atenção ás instruções de manutenção do fabricante. MONTAGEM: (NÃO LIGUE O APARELHO Á TOMADA ELÉCTRICA ANTES DE TER ESCOLHIDO E ENCAIXADO O ACESSÓRIO QUE VAI UTILIZAR.) Cuidado! Após o uso, desligue o aparelho da corrente eléctrica e pressione o botão do vapor para reduzir suficientemente a pressão interna. Depois pode abrir a tampa de segurança. 1. 2. 3. 4. 5. 6. 7. 8. Retire o acessório que deseja utilizar, do compartimento de armazenagem e coloque o depósito de água na parte detrás do aparelho (veja o parágrafo “ARMAZENAMENTO DE ACESSÓRIOS”). Una o tubo flexível com o injetor de vapor do aparelho. Para fazer isso, coloque para baixo as patilhas que cobrem a entrada do tubo e insira o conector na entrada de ligação até não poder mais, verifique que a pequena saliência que tem o conector encaixa perfeitamente na fenda que tem o tubo de conexão, á entrada na parte inferior. Pode pressionar os botões de abertura nas laterais do conector do tubo para facilitar a entrada do conector. Para retirar o tubo após o uso, pressione os botões de abertura nas laterais do conector do tubo e puxe-o. Desaperte a tampa de segurança. Para fazer isso, pressione a tampa e ao mesmo tempo gire-a no sentido contrário aos ponteiros do relógio (se houver ainda água no depósito e se a tampa de segurança ainda está enroscada, de uma anterior utilização, pode ocorrer alguma desgasificação. Isso é normal e não representa perigo). Encha o depósito de água com água. Por favor, utilize o copo de medição e o funil fornecidos. Não exceda o nível máximo de enchimento (1,4 litros). Se a água, na sua zona é dura, aconselhamos que utilize água destilada ou, nesse caso, também pode utilizar água da torneira se for previamente fervida. Nota: nunca coloque desincrustante, perfume ou detergente no depósito de água, pode danificar o aparelho. Enrosque de novo a tampa de segurança. Para fazer isso, pressione a tampa e ao mesmo tempo gire-a no sentido dos ponteiros do relógio. Se desejar limpar o chão em áreas de difícil acesso, monte os tubos de extensão. Para fazer isso, empurre a extremidade aberta do tubo sobre o injetor de vapor até os cliques do botão de liberação do injetor de vapor estejam no lugar. Você pode montar um, dois ou três os tubos de extensão. Para tirar os tubos de extensão após sua utilização, pressione o botão na parte superior do tubo de extensão ou do injetor de vapor e retire os tubos de forma individual. Se desejar limpar pavimentos, coloque a escova para o chão no tubo de extensão até encaixar os botões de liberação no lugar. Se quiser usar um outro acessório, primeiro tem que montar a peça de acessório de conexão: colocando o acessório de conexão no injetor de vapor ou no tubo de extensão até que se encaixe no botão de liberação. Em seguida, coloque a ponta reta no acessório de conexão e dê a esse bocal um quarto de 41 Assembly page 41/76 TKG SFC 1001 - 100525 Fax +32 2 359 95 50 Copies of the I/B. Please reproduce them without any changes except under special instruction from Team International BELGIUM. The pages must be reproduced and folded in order to obtain a booklet A5 (+/- 148.5 mm width x 210 mm height). When folding, make sure you keep the good numbering when you turn the pages of the I/B. Don’t change the page numbering. Keep the language integrity. volta no sentido contrário ao dos ponteiros do relógio para a encaixar no lugar. Para tirar o bocal reto após o uso, gire-o no sentido dos ponteiros do relógio e retire-o. Para retirar a escova para o chão ou o acessório de conexão após o uso, pressione o botão de liberação adequado e retire-o. 9. As escovas de metal e de nylon, a escova esfregão e o bocal curvo podem ser encaixados no bocal reto. 10. Limpa janelas: Cuidado! Não utilize este acessório diretamente sobre vidro frio. Caso contrário o vidro pode quebrar. Pré-aqueça o vidro dispersando vapor, em forma de circulo, a uma distância de 20-25 cm. Lentamente reduza a distância para 10-15 cm para pré-aquecer o vidro posterior. 11. O limpa janelas deve ser encaixado diretamente á escova esfregão. Primeiro monte a escova esfregão na ponta reta. Retire o pano da escova esfregão e encaixe o limpa janelas entre as duas dobradiças. O limpa janelas pode desmontar-se facilmente desencaixando-o das dobradiças novamente. Escova esfregão Limpa janelas FUNCIONAMENTO: 1. Dobradiç Hooks Conecte o aparelho á corrente eléctrica e pressione o botão on-off para ligar o aparelho. As luzes de controle, verde e vermelha acender-se-ão. Deixe aquecer (aproximadamente 10 minutos) quando termine, a luz de controle vermelha apaga-se. O aparelho fica agora pronto para ser utilizado. O aparelho está equipado com um dispositivo de segurança para crianças. Para libertar o dispositivo de bloqueio, empurre a saliência triangular colocada no lado direito do injetor de vapor para o lado esquerdo. Pressione o botão de vapor e movimente o aparelho devagar sobre a superfície que está limpando. Recomendamos que deixe uma distância entre o bocal e a superfície de, pelo menos, 2-3cm. 42 Assembly page 42/76 TKG SFC 1001 - 100525 Fax +32 2 359 95 50 Copies of the I/B. Please reproduce them without any changes except under special instruction from Team International BELGIUM. The pages must be reproduced and folded in order to obtain a booklet A5 (+/- 148.5 mm width x 210 mm height). When folding, make sure you keep the good numbering when you turn the pages of the I/B. Don’t change the page numbering. Keep the language integrity. É normal que a luz de controle vermelha se acenda e apague durante o processo, o termostato controla o aquecimento automaticamente. ATENÇÃO! O APARELHO NÃO SE PODE INCLINAR MAIS DE 45º DURANTE O PROCESSO. NUNCA APONTE O APARELHO A PESSOAS, ANIMAIS OU PLANTAS. 2. 3. 4. 5. O aparelho está equipado com uma proteção de sobreaquecimento. Quando a temperatura de 180°C for alcançada, o aparelho apaga-se automaticamente. Neste caso, desligue o aparelho durante 30 minutos para que se possa arrefecer. Ajuste a quantidade de vapor: gire o regulador de vapor, na direcção dos ponteiros do relógio para uma quantidade reduzida de vapor, e, na direcção contrária aos ponteiros dos relógios para uma quantidade maior de vapor. Encher o depósito de água: Apague e desligue o aparelho da corrente eléctrica. Pressione o botão de vapor e esvazie completamente a pressão interna. Espera aproximadamente 3 minutos e desaperte devagar a tampa de segurança. Pode escapar-se vapor quente. Risco de queimar-se! Depois de ter arrefecido o aparelho até á temperatura ambiente, encha o depósito de água. Por favor, utilize o copo de medição e o funil que lhe fornecemos. Não exceda o nível máximo de enchimento (1,4 litros). Coloque a tampa de segurança e ligue o aparelho de novo á corrente elétrico. Um depósito de água cheio corresponde, aproximadamente a 40 minutos de uso. Cuidado! Antes de colocar a tampa de segurança, comprove que a pressão interna foi suficientemente reduzida. Apague e desligue o aparelho, liberte a pressão interna e esvazie a água que sobra no depósito após sua utilização. Aguarde que até que o depósito e os acessórios estejam frios, antes de trocar no aparelho. Não feche o depósito de água até que não esteja completamente seco. Descalcificar: de forma a preservar a excelente qualidade e eficiência do seu aparelho, recomendamos-lhe que o descalcifique com alguma regularidade (cada 6 messes). Coloque uma ou duas pastilhas de remoção de cálcario num litro de água morna (50°C) e encha o depósito de água com esta mistura. Permita que a solução actue durante 30 minutos, depois retire-a. Lave o depósito com água limpa. Enxuague: recomendamos que lave o depósito a cada 5 usos a fim de retirar o calcário que fica depositado no fundo do mesmo. Encha o depósito de água apenas com água. Feche com a tampa de segurança e agite o depósito com as mãos. Depois abra a tampa de segurança e esvazie o depósito. Espere-se a que o depósito se seque completamente antes de fechá-lo. Atenção! Nunca mergulhe o aparelho na água! Não tente reparar o aparelho. Caso necessite, reparar o aparelho eléctrico deve levá-lo a um profissional qualificado. 43 Assembly page 43/76 TKG SFC 1001 - 100525 Fax +32 2 359 95 50 Copies of the I/B. Please reproduce them without any changes except under special instruction from Team International BELGIUM. The pages must be reproduced and folded in order to obtain a booklet A5 (+/- 148.5 mm width x 210 mm height). When folding, make sure you keep the good numbering when you turn the pages of the I/B. Don’t change the page numbering. Keep the language integrity. DETECÇÃO DE FALHOS: Problema A luz verde do aparelho não se acende Não liberta vapor • • • • • • O aparelho leva muito tempo em aquecer A água escorre para fora do bocal Causa Possível O aparelho não está ligado correctamente á corrente electrica O aparelho não está aceso A tomada electrica está danificada O cabo eléctrico está danificado O dispositivo de segurança está bloqueado Não tem água no depósito • • • • • • • Conselho Ligue o aparelho novamente á corrente eléctrica Acenda o aparelho Verifique o cabo Contate com o serviço de atenção ao cliente Empurre o botão do lado direitro do injetor de vapor para o lado esquerdo Encha o depósito de água Descalcifique o depósito de água • O depósito de água tem resíduos de calcário • • Demasiada água no depósito O aparelho está demasiado inclinado O aparelho não está suficientemente quente A água do depósito está ainda muito quente • • Retirar água Mantenha o aparelho recto • Deixe o aparelho aquecer • Deixe o aparelho arrefecer O acessório não está correctamente encaixado O aparelho está danificado • Volte a encaixar o acessório • Contacte com a atenção ao cliente • A água ferve enquanto enche o depósito Acessorio está solto • Outros problemas • • PROTECÇÃO DO MEIO AMBIENTE – DIRECTIVA 2002/96/CE Para a preservação do ambiente e da nossa saúde, a eliminação no fim da vida útil dos aparelhos eléctricos e electrónicos, deve-se efectuar no cumprimento das legislações em vigor e pela participação de todos quer sejam produtores ou utilizadores. É por esta razão , informando que em caso que o vosso aparelho tem na placa sinalética o símbolo algum o aparelho deve ser colocado no caixote do lixo camarário ou privado para que não vá para as lixeiras comuns mas sim devolvido ao revendedor ou depositado nos locais apropriados e identificados para a recolha destes aparelhos para que uma vez recolhidos sejam reciclados, reutilizados ou lhe sejam dados outras aplicações. 44 Assembly page 44/76 TKG SFC 1001 - 100525 Copies of the I/B. Please reproduce them without any changes except under special instruction from Team International BELGIUM. The pages must be reproduced and folded in order to obtain a booklet A5 (+/- 148.5 mm width x 210 mm height). When folding, make sure you keep the good numbering when you turn the pages of the I/B. Don’t change the page numbering. Keep the language integrity. Fax +32 2 359 95 50 1. Zasady bezpiecznego użytkowania 1.1. • • • • • • • • • Zasilanie Upewnij się, że napięcie wskazane na tabliczce znamionowej urządzenia jest zgodne z napięciem w gniazdku. Podłączaj urządzenie tylko do gniazdka z uziemieniem Wtyczka urządzenia musi pasować do gniazdka. Nie należy w żaden sposób zmieniać wtyczki. Nie używaj adapterów. Tylko odpowiednie gniazdko i niemodyfikowana wtyczka zmniejsza ryzyko porażenia prądem. Zaleca się aby urządzenie podłączone było tylko do gniazdek z uziemieniem(z odcięciem prądu). W razie potrzeby skonsultuj się ze specjalistą elektrykiem. Nigdy nie dotykaj wtyczki mokrymi rękoma. Zawsze wyłączaj urządzenie wyjmując wtyczkę z gniazdka. Nie ciągnij nigdy za kabel! Uszkodzony kabel powinien być wymieniony na taki sam - o tych samych parametrach technicznych. W celu naprawy oddaj urządzenie do punktu serwisowego. Używając przedłużacza upewnij się że posiada on parametry odpowiednie dla urządzenia. W razie wątpliwości zapytaj specjalistę elektryka. Upewniaj się że kabel nie jest niebezpiecznie zniszczony. Nie może być zagięty, przytrzaśnięty czy rozerwany. 1.2. Dzieci, a urządzenie • Uważaj szczególnie na dzieci i osoby upośledzone. • Nie pozostawiaj nigdy urządzenia niezabezpieczonego, zwłaszcza w pobliżu dzieci oraz osób upośledzonych. • Urządzenie należy przechowywać z dala od dzieci • Nie pozwalaj dzieciom na zabawę żadnymi elementami opakowania, zwłaszcza workiem foliowym. 1.3. Działanie urządzenia • Sprawdzaj regularnie czy urządzenie, kabel oraz akcesoria nie są uszkodzone. • Nie używaj urządzenia jeśli są na nim oznaki uszkodzenia • Nigdy nie kieruj urządzenia w kierunku ludzi, zwierząt czy roślin (ryzyko oparzenia) oraz systemów i przewodów elektrycznych . • Używaj urządzenia pod nadzorem. Włączaj urządzenie po skończeniu pracy i wyciągaj wtyczkę z gniazdka. 45 Assembly page 45/76 TKG SFC 1001 - 100525 Fax +32 2 359 95 50 Copies of the I/B. Please reproduce them without any changes except under special instruction from Team International BELGIUM. The pages must be reproduced and folded in order to obtain a booklet A5 (+/- 148.5 mm width x 210 mm height). When folding, make sure you keep the good numbering when you turn the pages of the I/B. Don’t change the page numbering. Keep the language integrity. • Urządzenie jest wyposażone w termostat oraz system wyłączania automatycznego – w celu uniknięcia przegrzania się. • Akcesoria nagrzewają się podczas pracy. Pamiętaj o tym przy ich wymianie. • Nigdy nie odkręcaj zbiornika podczas działania urządzenia. Zbiornik jest pod ciśnieniem. • Urządzenie nie może być pochylane podczas pracy powyżej 45o . • Nigdy nie zanurzaj urządzenia w wodzie ani w innych płynach • Trzymaj urządzenie z dala od deszczu i wilgoci. Urządzenie nie jest przeznaczone do użytku zewnętrznego. • Używaj urządzenia do pojemników, które nie są wypełnione wodą czy innymi płynami. • Nie używaj urządzenia jeśli w zbiorniku nie ma wody. • Wypełniaj zbiornik w odpowiednim czasie. • Opróżniaj zbiornik jeśli nie korzystasz z urządzenia • Nigdy nie wypełniaj zbiornika innymi płynami niż woda(nie używaj perfum, odkamieniaczy oraz płynów zawierających alkohol) ponieważ mogą uszkodzić urządzenie i uczynić je niebezpiecznym. • Wyciągaj wtyczkę z gniazdka oraz pozwól urządzeniu wychłodzić się zanim napełnisz je wodą. • Nie nalewaj do zbiornika więcej wody niż wskaźnik maksimum. W tym celu używaj dołączonych do urządzenia miarki oraz lejka. • Upewnij się że pokrywa zbiornika została dobrze zamknięta zanim zaczniesz korzystać z urządzenia • Noś urządzenie tylko przy użyciu rączki. • Nie dotykaj żadnych nagrzanych elementów urządzenia. Normalnym jest że urządzenie nagrzewa się podczas pracy. • Kilka kropel wody może od czasu do czasu wypaść z dyszy. Jest to normalnym wynikiem skroplenia. • Siła i temperatura pary mogą mieć niekorzystny wpływ na niektóre materiały. Przed użyciem zawsze sprawdź na kawałku materiału czy myjka ciśnieniowa go nie zniszczy. • Pożyczając urządzenie osobom trzecim upewnij się że jest tam też instrukcja obsługi. • Używaj tylko oryginalnych akcesoriów załączonych do urządzenia. 1.4. Utrzymanie i pielęgnacja • Aby uniknąć ryzyka nigdy nie naprawiaj urządzenia sam. Konsultuj się w tej sprawie z Punktem Obsługi Klienta bądź z wykwalifikowanym specjalistą elektrykiem. • Wyłączaj urządzenie, wyjmuj wtyczkę z gniazdka i pozwól by się wychłodziło Dopiero po tym schowaj je w bezpieczne miejsce. 46 Assembly page 46/76 TKG SFC 1001 - 100525 Fax +32 2 359 95 50 Copies of the I/B. Please reproduce them without any changes except under special instruction from Team International BELGIUM. The pages must be reproduced and folded in order to obtain a booklet A5 (+/- 148.5 mm width x 210 mm height). When folding, make sure you keep the good numbering when you turn the pages of the I/B. Don’t change the page numbering. Keep the language integrity. 2. Wstęp 2.1.Podziękowania Jesteśmy niezmiernie zadowoleni, że zdecydowali się państwo na zakup niniejszego urządzenia. Czyścik parowy jest uniwersalnym urządzeniem służącym do wielu celów. Tylko pod wpływem pary o wysokiej temperaturze możliwe jest usunięcie uporczliwych zabrudzeń oraz brudu i bakterii z gładkich powierzchni, płyt kuchennych, okien i luster bez ich rysowania. To dopuszczalny, ekologiczny sposób na usunięcie przypaleń, pleśni, tłuszczu, mydła i innych zabrudzeń bez użytku rozpuszczających je środków chemicznych. 2.2. Rozpakowywanie Wyjmij urządzenie i pozostałe akcesoria. Sprawdź czy zawartość pudełka się zgadza. W miarę możliwości zachowaj pudełko i wewnętrzne opakowania, aby w razie transportu chroniły urządzenie. Skontaktuj się ze sprzedawcą jeśli zauważysz oznaki uszkodzenia urządzenia. Nie używaj urządzenia pod żadnym pozorem jeśli dostrzeżesz uszkodzenia. Ostrzeżenie: Upewnij się że żadne z elementów opakowania (zwłaszcza worek foliowy) nie dostanie się w ręce dziecka – niebezpieczeństwo uduszenia się. 2.3. Elementy wchodzące w skład zestawu W skład zestawu wchodzą następujące elementy: 1. Lejek 2. Miarka 3. Rączka z przewodem parowym oraz łącznik 4. Adaptor do akcesoriów 5. Dysza 6. Zagięta końcówka 7. Szczotka metalowa 8. Szczotka nylonowa 9. 2 w 1 element (do mycia okien) 10. Bawełniana nakładka 11. 2 w 1 element (do mycia okien) 12. Duża szmatka do mycia 13. Dysza podłogowa 14. 3 rury przedłużające 15. Czyścik parowy z kablem zasilającym i wtyczką. 47 Assembly page 47/76 TKG SFC 1001 - 100525 Fax +32 2 359 95 50 Copies of the I/B. Please reproduce them without any changes except under special instruction from Team International BELGIUM. The pages must be reproduced and folded in order to obtain a booklet A5 (+/- 148.5 mm width x 210 mm height). When folding, make sure you keep the good numbering when you turn the pages of the I/B. Don’t change the page numbering. Keep the language integrity. 2.4. Zdjęcie urządzenia i akcesoriów 48 Assembly page 48/76 TKG SFC 1001 - 100525 Fax +32 2 359 95 50 Copies of the I/B. Please reproduce them without any changes except under special instruction from Team International BELGIUM. The pages must be reproduced and folded in order to obtain a booklet A5 (+/- 148.5 mm width x 210 mm height). When folding, make sure you keep the good numbering when you turn the pages of the I/B. Don’t change the page numbering. Keep the language integrity. 3. Informacje wstępne 3.1. Montaż akcesoriów Rączka z przewodem parowym wraz z wybranym akcesorium (końcówką) muszą być podłączone do urządzenia zanim zostanie ono uruchomione. Urządzenie posiada schowek wewnątrz obudowy, w którym jest miejsce na akcesoria. Aby otworzyć schowek wciśnij żółty przycisk znajdujący się w tylnej części pomiędzy kołami podciągając jednocześnie uchwyt na urządzeniu. Oddzielona zostanie wówczas obudowa górna od dolnej (rysunek 2 i 3) Wyjmij wybraną końcówkę. Zamknij urządzenie nakładając górą część, lekko ją dociskając dopóki nie usłyszysz kliknięcia. 3.1.1. Przewód parowy Podłącz przewód parowy do gniazdka w przedniej części urządzenia. W tym celu odchyl czarną klapkę i wciśnij przewód do momentu kliknięcia, który oznacza prawidłowy montaż (rys.4). Aby wyjąć przewód przyciśnij przyciski zwalniające po obu stronach łącznika i wyciągnij go z gniazdka (rys.5). 49 Assembly page 49/76 TKG SFC 1001 - 100525 Fax +32 2 359 95 50 Copies of the I/B. Please reproduce them without any changes except under special instruction from Team International BELGIUM. The pages must be reproduced and folded in order to obtain a booklet A5 (+/- 148.5 mm width x 210 mm height). When folding, make sure you keep the good numbering when you turn the pages of the I/B. Don’t change the page numbering. Keep the language integrity. 3.1.2. Przewody przedłużające Użyj przewodów przedłużających jeśli chcesz wyczyścić podłogę lub miejsca trudno dostępne. W tym celu włóż otwarty koniec przewodu przedłużającego do przewodu parowego do momentu aż usłyszysz kliknięcie (rys.6). Włóż tyle przewodów ile potrzebujesz (jeden, dwa lub wszystkie trzy). Wciśnij odpowiedni przycisk zwalniający i pociągnij z boku przewody ruchem w dół, aby ponownie przedłużyć cały przewód (rys.7). 3.1.3. Dysza podłogowa Podłącz dyszę podłogową do końca przewodu parowego. Upewnij się że usłyszałeś kliknięcie.(rys.8). Dysza ta nadaje się do czyszczenia zmywalnych ścian i pokryć podłogowych. Może być używana z lub bez nakładki materiałowej (szmatki).Zaleca się jej używanie dla podłóg drewnianych i linoleum. Połóż dyszę na szmatce i zabezpiecz ją poprzez podłożenie pod zatrzaski po lewej i prawej stronie dyszy. Wciśnij wewnętrzne strony żółtej Uwaga: podkładki , następnie otwórz zatrzaski i szmatka może być teraz Dysza podłogowa posiada bezpiecznie założona.(rys.9) oddzielny łącznik. Zamontuj go jak na poniższym rysunku Aby zdjąć dyszę wciśnij odpowiedni przycisk zwalniający (rys.7) i pociągnij dyszę w dół. 50 Assembly page 50/76 TKG SFC 1001 - 100525 Fax +32 2 359 95 50 Copies of the I/B. Please reproduce them without any changes except under special instruction from Team International BELGIUM. The pages must be reproduced and folded in order to obtain a booklet A5 (+/- 148.5 mm width x 210 mm height). When folding, make sure you keep the good numbering when you turn the pages of the I/B. Don’t change the page numbering. Keep the language integrity. 3.1.4. Adaptor do akcesoriów Czyścik parowy posiada wiele końcówek w celu umożliwienia czyszczenia trudno dostępnych powierzchni. Najpierw zamontuj adapter bądź do dyszy parowej bądź do przewodów przedłużających. Upewnij się że adapter jest poprawnie zainstalowany (rys.10) Przyciśnij odpowiedni przycisk zwalniający i pociągnij w dół aby wyjąć adapter. 3.1.5. Dysza do podłączania końcówek Końcówki mogą być używane same lub też z jedną ze szczotek, zagiętą końcówką lub dyszą do okien. Dysza jest podłączana do bagnetu. Wciśnij dyszę na adapter i przekręć o ¼ w kierunku strzałek wskazanych na dyszy (rys. 11). Aby zdjąć dyszę działaj w sposób odwrotny – przekręć dyszę o ¼ w kierunku przeciwnym do strzałek i pociągnij w dół. 3.1.6. Zagięta końcówka Wciśnij końcówkę na dyszę do podłączania końcówek.(rys.12).Ta końcówka pozwala wyczyścić ciężko dostępne miejsca jak rogi, załamania czy toalety. Aby zdjąć końcówkę należy pociągnąć ją w dół. 51 Assembly page 51/76 TKG SFC 1001 - 100525 Fax +32 2 359 95 50 Copies of the I/B. Please reproduce them without any changes except under special instruction from Team International BELGIUM. The pages must be reproduced and folded in order to obtain a booklet A5 (+/- 148.5 mm width x 210 mm height). When folding, make sure you keep the good numbering when you turn the pages of the I/B. Don’t change the page numbering. Keep the language integrity. 3.1.7. Szczotka Montaż szczotek jest identyczny jak w przypadku zagiętej końcówki. Przy użyciu metalowej szczotki nawet najcięższy brud z żaluzji, kaloryferów, zaworów może być usunięty (rys 13).Większa szczotka nylonowa (rys. 14) jest odpowiednia do czyszczenia powierzchni takich jak stal nierdzewna czy kamień. Aby zdjąć szczotkę należy pociągnąć ją w dół. 3.1.8. Szczotka 2w1 Składa się z nakładki, na która nakładany jest element czyszczący okna. Nałóż nakładkę na dyszę do podłączania końcówek. Załóż bawełnianą nakładkę aby zabezpieczyć czyszczoną powierzchnie.(rys.15). W celu umycia okien, luster czy kafelek połącz ostrze gumowe z nakładką (rys.16). UWAGA: Szkło może ulec stłuczeniu w wyniku szoku termicznego! Ogrzej powierzchnię poprzez stopniowe zbliżanie dyszy do niej – najpierw 20-25 cm a następnie zmniejszaj odległość do 10-15cm ogrzewając tym samych mytą powierzchnię. 3.2. Napełnianie wodą Urządzenie posiada wbudowany zbiornik o pojemności 1,4 litra. Podczas napełniania zbiornika urządzenie musi być odłączone od zasilania. 52 Assembly page 52/76 TKG SFC 1001 - 100525 Fax +32 2 359 95 50 Copies of the I/B. Please reproduce them without any changes except under special instruction from Team International BELGIUM. The pages must be reproduced and folded in order to obtain a booklet A5 (+/- 148.5 mm width x 210 mm height). When folding, make sure you keep the good numbering when you turn the pages of the I/B. Don’t change the page numbering. Keep the language integrity. Odkręć pokrywę zbiornika (rys.17) poprzez przyciśnięcie jej w dół i równoczesne przekręcenie przeciwnie do wskazówek zegara. W celu napełnienia użyj lejka i miarki (rys.18). UWAGA: Przed użyciem urządzenia zawsze sprawdzaj na niewidocznym dla oka kawałku tolerancję materiału na gorącą wodę pod ciśnieniem. ⎯ Para może spowodować wyblaknięcie powierzchni drewnianej, ⎯ Może odbarwić lśniący plastik, ⎯ Akryl, aksamit, len reagują na temperaturę pary ⎯ Nie używaj w styku z włóknami dralonowymi bez wcześniejszego testu na niewidocznym dla oka kawałku. W sposób zrozumiały sprzedawca nie jest odpowiedzialny za zniszczenia przedmiotów, materiałów, roślin i ludzi w związku z nieodpowiednim użyciem urządzenia. Wypełniaj tylko czystą wodą bez dodatku perfum, środków czyszczących zawierających alkohol gdyż mogą uszkodzić urządzenie. Zaleca się używanie wody destylowanej aby zapobiec kamieniowi jeśli woda jest bardzo twarda (2,5mmol/1 lub 21dH). W takim wypadku przegotuj wcześniej wodę aby przedłużyć działanie urządzenia. UWAGA: Nie przekraczaj 1,4 litra wody w zbiorniku Zakręć zbiornik przyciskając pokrywę i przekręcając ją zgodnie ze wskazówkami zegara. WSKAZÓWKA: Wlewając ciepłą wodę skrócisz czas nagrzewania się urządzenia. 53 Assembly page 53/76 TKG SFC 1001 - 100525 Copies of the I/B. Please reproduce them without any changes except under special instruction from Team International BELGIUM. The pages must be reproduced and folded in order to obtain a booklet A5 (+/- 148.5 mm width x 210 mm height). When folding, make sure you keep the good numbering when you turn the pages of the I/B. Don’t change the page numbering. Keep the language integrity. Fax +32 2 359 95 50 4. Działanie urządzenia 4.1. Podłączanie do sieci Włóż wtyczkę do poprawnie zainstalowanego gniazdka (rys.19). Włącz urządzenie wciskając przycisk ON/OFF (rys.20). Zielona lampka kontrolna i czerwona lampka grzania (rys.20)zaświecą się. Lampka kontrolna będzie palić się od momentu podłączenia urządzenia do prądu aż do jego wyłączenia. Lampka nagrzewania wskazuje że urządzenie się nagrzewa. Odpowiednia temperatura zostanie osiągnięta po około 11 minutach, czerwona lampka wówczas zgaśnie. Urządzenie jest gotowe do użytku. 4.2. Użytkowanie urządzenia Uwaga: Po osiągnięciu temperatury 180 stopni urządzenie samoczynnie się wyłączy (system odcinania nagrzewania). Odłącz je wówczas od prądu i odczekaj 30 minut aż się wychłodzi Ostrzeżenie: Nigdy nie kieruj wylotu urządzenia w kierunku ludzi, zwierząt roślin czy urządzeń elektrycznych (kuchenek) Zwolnij blokadę (blokada przed dziećmi) poprzez przesunięcie żółtej trójkątnej zatyczki znajdującej się z prawej strony uchwytu dyszy parowej w lewą stronę.(rys.21) W tym momencie z dyszy wydobędzie się para jeśli przycisk będzie przyciśnięty. Przytrzymaj dyszę nad kawałkiem starego materiału aby ten przejął pierwsze uderzenie wody. Można rozpocząć sprzątanie. UWAGA: Po wyłączeniu funkcji pary może się ona jeszcze wydobywać przez kilka sekund. 54 Assembly page 54/76 TKG SFC 1001 - 100525 Fax +32 2 359 95 50 Copies of the I/B. Please reproduce them without any changes except under special instruction from Team International BELGIUM. The pages must be reproduced and folded in order to obtain a booklet A5 (+/- 148.5 mm width x 210 mm height). When folding, make sure you keep the good numbering when you turn the pages of the I/B. Don’t change the page numbering. Keep the language integrity. Nie celuj dyszy za długo w jedno miejsce. Poruszaj nią do przodu i do tyłu. Siła pary może być kontrolowana i dostosowywana do poziomu zabrudzenia. Przekręć pokrętło pary w kierunku zgodnym ze wskazówkami zegara aby zmniejszyć siłę pary, i w kierunku przeciwnym by ją zwiększyć (rys.22). Nie przekręcaj nigdy urządzenia o więcej niż 45 stopni i upewniaj się że stoi na podstawie. Jedno napełnienie zbiornika wystarcza na 50 minut działania. Nie zostawiaj włączonego urządzenia bez nadzoru, zwłaszcza jeśli w pobliżu znajdują się dzieci pamiętaj o przesunięciu blokady pary. W tym celu przesuń żółty trójkątny przycisk z lewej strony na prawą. Ostrzeżenie: Urządzenie i akcesoria nagrzewają się podczas pracy. Zanim zmienisz końcówkę pozwól urządzeniu wychłodzić się . NIGDY NIE OTWIERAJ POKRYWY ZBIORNIKA PODCZAS PRACY BOWIEM JEST ON POD CIŚNIENIEM. 4.3. Uzupełnianie zbiornika Zbiornik powinien być uzupełniony w momencie gdy zmniejsza się przepływ pary. Wyłącz urządzenie wciskając przycisk ON/OFF. Zielona lampka zgaśnie. Wciśnij przycisk pary aby uwolnić pozostałą w nim parę i zablokuj dyszę. Wyjmij wtyczkę z gniazdka i pozwól urządzeniu się wychłodzić. Przyciśnij zbiornik z wodą w dół i przekręć przeciwnie do wskazówek zegara. Ostrzeżenie: Gorąca para może wydostać się podczas otwierania. Istnieje ryzyko oparzenia się zbiornikiem czy pokrywą. 55 Assembly page 55/76 TKG SFC 1001 - 100525 Fax +32 2 359 95 50 Copies of the I/B. Please reproduce them without any changes except under special instruction from Team International BELGIUM. The pages must be reproduced and folded in order to obtain a booklet A5 (+/- 148.5 mm width x 210 mm height). When folding, make sure you keep the good numbering when you turn the pages of the I/B. Don’t change the page numbering. Keep the language integrity. Napełnij wodą przy użyciu lejka i miarki. Zamknij pokrywę. Teraz urządzenie można ponownie podłączyć. Będzie ono gotowe do użytku w momencie zgaśnięcia czerwonej lampki. 4.4. Kończenie pracy z urządzeniem i przechowywanie Wyłącz urządzenie. Zielona lampka zgaśnie. Wciśnij przycisk pary aby uwolnić pozostałą w dyszy parę (rys 23). Zabezpiecz dyszę poprzez przesunięcie zabezpieczenia rączki z lewej strony na prawą. Wyjmij kabel z gniazdka zasilającego i pozwól urządzeniu wystygnąć. Opróżnij zbiornik z pozostałej w nim wody (rys.24). Nie zamykaj zbiornika dopóki całkowicie nie wyschnie. Czyścik musi całkowicie ostygnąć zanim zostanie schowany. Przechowuj go z dala od dzieci. Elementy przedłużajże wraz z dyszą do podłogi mogą być przechowywane w opakowaniu z tyłu urządzenia. 5. Informacje ogólne 5.1. Czyszczenie i utrzymanie urządzenia Ostrzeżenie: Przed czyszczeniem i magazynowaniem urządzenia upewnij się że jest ono wyłączone z zasilania. Czyść urządzenie tylko poprzez wycieranie go z zewnątrz wilgotną ściereczką. Nie używaj żadnych detergentów, alkoholu ponieważ mogą zniszczyć obudowę. Zaleca się by zbiornik był płukany najpóźniej po 5 napełnieniach jeśli twardość wody sięga 1.8mmol/1 (10dH).Wstrząśnij zbiornikiem i wylej pozostałość wraz z osadem który pojawił się na dnie. Pozwól zbiornikowi wyschnąć. Aby przedłużyć działanie urządzenia zaleca się płukać go co 6 miesięcy odkamieniaczem. Umieść jedną a co najwyżej dwie 56 Assembly page 56/76 TKG SFC 1001 - 100525 Fax +32 2 359 95 50 Copies of the I/B. Please reproduce them without any changes except under special instruction from Team International BELGIUM. The pages must be reproduced and folded in order to obtain a booklet A5 (+/- 148.5 mm width x 210 mm height). When folding, make sure you keep the good numbering when you turn the pages of the I/B. Don’t change the page numbering. Keep the language integrity. dawki w 1 litrze gorącej wody (50 stopni)- wlej następnie ten roztwór do zbiornika. Odczekaj około 30 minut i wylej wodę z resztką kamienia. Powtórz ten zabieg jeśli jest to konieczne. Na koniec przepłukuj zbiornik wodą. Dysponowanie po zakończeniu okresu żywotności urządzenia. Po upłynięciu okresu działania urządzenia lub też w przypadku awarii należy wyjąć wtyczkę z gniazdka i przeciąć kabel zasilający. Dysponuj urządzeniem zgodnie z założeniami określonymi na danym terenie Skontaktuj się z instytucją zajmującą się dalszym dysponowaniem zużytym sprzętem elektrycznym. 5.2. Problemy Zanim zwrócisz się o pomoc do punktu serwisowego sprawdź czy sam nie rozwiążesz problemu. PROBLEM Lampka kontrolna nie zapala się POWÓD NAPRAWA Urządzenie nie jest podłączone do prądu lub też nie jest włączone. Gniazdko jest uszkodzone. Włóż kabel do gniazdka i włącz urządzenie. Sprawdź gniazdko poprzez podłączenie do niego innego urządzenia. Wymień w punkcie serwisowym kabel. Kabel zasilający jest uszkodzony. Nie wydobywa się para, a przycisk pary jest wciśnięty. Blokada przed dziećmi wydzielanie się pary. Zbiornik z wodą jest pusty. chroni Przesuń żółtą zasuwę na dyszy z lewej strony w prawą. Wypełnij wodą zbiornik.(rozdział 4.4) Niewielka ilość pary się wydobywa Przycisk ustawienia poziomu pary jest na pozycji minimum. Przekręć przycisk w stronę przeciwną do wskazówek zegara dopóki nie osiągniesz wymaganego efektu. Urządzenie wymaga długiego czasu nagrzewania Zbiornik z wodą jest zaśmiecony Wyczyść zbiornik przy odkamieniacza (rozdział 5.1.) 57 Assembly page 57/76 użyciu TKG SFC 1001 - 100525 Fax +32 2 359 95 50 Copies of the I/B. Please reproduce them without any changes except under special instruction from Team International BELGIUM. The pages must be reproduced and folded in order to obtain a booklet A5 (+/- 148.5 mm width x 210 mm height). When folding, make sure you keep the good numbering when you turn the pages of the I/B. Don’t change the page numbering. Keep the language integrity. OCHRONA ŚRODOWISKA NATURALNEGO na tabliczce znamionowej urządzenia oznacza, że produktu nie wolno wyrzucać Symbol razem z innymi odpadami z gospodarstw domowych. Polskie prawo zabrania pod karą grzywny łączenia zużytego sprzętu elektrycznego i elektronicznego wraz z innymi odpadami. Dbając o pozbycie się produktu w należyty sposób, można zapobiec potencjalnym negatywnym skutkom dla środowiska naturalnego i zdrowia ludzkiego, jakie mogłyby wyniknąć z niewłaściwego postępowania z odpadami powstałymi ze zużytego sprzętu elektronicznego. System zbierania zużytego sprzętu jest zgodny z obowiązującymi na terenie Rzeczpospolitej Polskiej normami prawnymi, (Ustawa z dnia 29 lipca 2005, Dziennik Ustaw Nr 180 poz.1494 i 1495) obowiązki wynikające z ustawy przejęła w imieniu przedsiębiorcy Organizacja Odzysku. Gospodarstwo domowe pełni istotną rolę w przyczynianiu się do ponownego użycia i odzysku, w tym recyklingu, zużytego sprzętu elektrycznego. Przestrzeganie zasad selektywnej zbiórki sprzętu ma zapewnić właściwy poziom ochrony zdrowia ludzkiego i środowiska naturalnego. Waga netto urządzenia- . 5.30 kg 58 Assembly page 58/76 TKG SFC 1001 - 100525 Fax +32 2 359 95 50 Copies of the I/B. Please reproduce them without any changes except under special instruction from Team International BELGIUM. The pages must be reproduced and folded in order to obtain a booklet A5 (+/- 148.5 mm width x 210 mm height). When folding, make sure you keep the good numbering when you turn the pages of the I/B. Don’t change the page numbering. Keep the language integrity. MĂSURI DE SIGURANŢĂ Va rugam cititi cu atentie aceste instructiuni inainte de a folosi aparatul si intotdeauna urmati instructiunile de siguranta si operare. Important: persoanele ( inclusiv copii) care nu sunt capabile sa folosească produsul in siguranţa, datorita capacităţii lor fizice, senzoriale sau mentale, sau datorita lipsei de experienţa sau cunoaştere, nu trebuie niciodată sa folosească produsul decât daca sunt supravegheaţi de o persoana responsabila cu siguranţa lor sau daca ei anterior au primit instrucţiuni privind folosirea aparatului. Supravegherea îndeaproape este necesara pentru a împiedica copiii sa folosească aparatul ca pe o jucărie. Verificaţi daca tensiunea la care conectaţi aparatul corespunde cu tensiunea recomandata. Nu lăsaţi aparatul nesupravegheat in timpul folosirii. Conectati aparatul numai la o priza cu impamantare. Daca aveti nevoie de un prelungitor, este necesar sa utilizati unul de 10 amperi sau mai mult. Nu utilizati niciodata unul sub 10 amperi. Aveti grija sa conectati prelungitorul astfel acesta sa nu treaca peste aparat sau sa fie smuls din priza. Folosiţi aparatul numai in scop domestic si in modul specificat in aceste instrucţiuni. Nu scufundaţi niciodată aparatul in nici un fel de lichid pentru nici un motiv. Nu folosiţi aparatul langa surse de caldura. Verificaţi periodic starea aparatului si in cazul in care se observa semne de deteriorare a acestuia nu-l mai utilizaţi; repararea aparatului poate fi făcuta doar de o persoana calificata si competenta(*). In cazul in care cablul de alimentare este deteriorat, trebuie sa fie înlocuit obligatoriu de către o persoana calificata(*). Acelasi lucru se intampla daca rezervorul de apa nu functioneaza sau este defect. Pentru a evita orice accident electric, nu demontati dvs rezervorul de apa: luati aparatul si duceti-l la un tehnician autorizat pentru examinare. O asamblare incorecta poate duce la socuri electrice cand aparatul este in functiune. Nu lasati furtunul flexibil sa atinga suprafete fierbinti. Nu folosiţi aparatul in exterior si plasaţi-l întotdeauna intr-un loc uscat. Nu folosiţi niciodată accesorii care nu sunt recomandate de producător. Pot constitui un pericol in uz si exista riscul deteriorării aparatului. Nu uitaţi niciodată aparatul trăgând de cablu. Asigurativa ca cordonul nu poate fi prins in nici un fel. Nu răsuciţi cablul in jurul aparatului si nu îl îndoiţi. Acest aparat nu este o jucarie si nu trebuie folosit ca atare. Aburul nu va fi directionat spre produse care contin componente electrice ca de ex interiorul cuptoarelor electrice. Desfaceti complet cablul de alimentare si furtunul flexibil inainte de a porni aparatul. SCOATETI DIN PRIZA APARATUL SI LASATI REZERVORUL SA SE RACEASCA COMPLET INAINTE DE A-L DESCHIDE PENTRU UMPLERE, GOLIRE, SAU CURATAREA REZERVORULUI. Intotdeauna scoateti din priza aparatul dupa folosire sau cand nu este in uz. de pe aparat inseamna ca trebuie sa fiti atenti! Fiti grijulii deoarece intrand Simbolul in contact cu apa fierbinte, aburul sau partile fierbinti ale a aparatului poate duce la arsuri serioase. Nu umpleti niciodata rezervorul de apa cu otet, substante decalcifiante sau orice alt produs chimic. Nu indoiti, pliati sau striviti furtunul flexibil in nici un fel. Nu operati cu aparatul fara apa in rezervor. 59 Assembly page 59/76 TKG SFC 1001 - 100525 Fax +32 2 359 95 50 Copies of the I/B. Please reproduce them without any changes except under special instruction from Team International BELGIUM. The pages must be reproduced and folded in order to obtain a booklet A5 (+/- 148.5 mm width x 210 mm height). When folding, make sure you keep the good numbering when you turn the pages of the I/B. Don’t change the page numbering. Keep the language integrity. Asigurati-va ca aparatul nu este inclinat peste 45° in timpul utilizarii. In timpul utilizarii, duza nu va fi indreptata spre oameni, animale sau plante. NU DESCHIDETI NICIODATA REZERVORUL DE APA IN TIMPUL UTILIZARII. NU FOLOSITI APARATUL DE CURATAT DACA: ) DACA FURTUNUL FLEXIBIL ESTE PERFORAT. ) UNUL DINTRE ACCESORII ESTE DEFECT. Aparatul dumneavoastra produce abur fierbinte cand indica simbolul ( ) localizat in partea de sus a pistolului. Aveti grija sa nu va opariti in timpul functionarii si de asemeni nu indreptati aburul spre dumneavoastra sau alta persoana. Inainte de deschiderea capacului de siguranta, opriti aparatul si goliti-l apasand butonul de aburi pana cand numai iese abur. Inainte de curatare/intretinere scoateti din priza aparatul si lasati-l sa se raceasca sufficient. Transportati aparatul numai de manerul acestuia. (*) Electrician calificat: departamentul de vânzări al producătorului sau importatorului sau orice persoana care este calificata, competenta si aprobata de aceştia sa execute astfel de reparaţii in scopul de a evita orice fel de pericol. In orice caz trebuie sa returnaţi aparatul acestui electrician. DESCRIEREA APARATULUI 1. 2. 3. 4. 5. 6. 7. 8. 9. 10. Perie podea Carpa pentru perie podea Accesoriu curatat ferestre Perie curatare Baza Palnie Cana masurare Carpa pentru peria spalare Perie metalica Perie nylon 11. 12. 13. 14. 15. 16. 17. 18. 19. 20. Duza curbata Regulator abur Intrerupator pornit-oprit Maner Capac siguranta Buton abur Duza dreapta Accesoriu pentru conectare piese Tub prelungitor (3 piese) Furtun flexibil 60 Assembly page 60/76 TKG SFC 1001 - 100525 Fax +32 2 359 95 50 Copies of the I/B. Please reproduce them without any changes except under special instruction from Team International BELGIUM. The pages must be reproduced and folded in order to obtain a booklet A5 (+/- 148.5 mm width x 210 mm height). When folding, make sure you keep the good numbering when you turn the pages of the I/B. Don’t change the page numbering. Keep the language integrity. CARACTERISTICI Acest aparat poate fi folosit oriunde si este foarte usor de manevrat; mai mult decat atat, trebuie numai sa-l umpleti cu apa. Aparatul curata, degreseaza si dezinfecteaza complet fara produse chimice (peste 100°C) si este bun pentru diferite materiale si arii, ex. ferestre, haine, mobile de gradina, biciclete, masini, tigle etc. Atentionare! Nu directionati aparatul catre animale sau oameni. Acest aparat este de asemeni ideal pentru dezinfectarea frigidereleor si bailor, pentru indepartarea mirosurilor neplacute de pe haine si distrugerea moliilor si a altor paraziti din cuverturi, plapumi si covoare. ACCESORII Perie podea: pentru pereti sau podele lavabile. Poate fi folosita cu sauf ara carpa sa. Pentru suprafete sensibile ca lemnul sau linoleumul este recomandabil sa folositi carpa. Puneti peria de podele pe carpa si asigurati materialul care ramane pe dinafara cu clipsurile periei situate in partea dreapta si stanga a periei. Pentru a proceda astfel, apasati capatul interior al clipsurilor, de pe partea superioara a periei si asigurati capetele carpei sub clipsuri. Accesoriu pentru conectare piese: pentru asamblarea accesoriilor la aparat. Duza dreapta: pentru imbinari, articulatii, rafturi etc. Perie metalica: pentru a indeparta murdaria dura de pe jaluzele, calorifere, robineti etc. Perie nylon: pentru a indeparta murdaria de pe materiale mai putin sensibile ca inoxul sau piatra. Perie curatare: pentru perdele, draperii si haine etc. A fi folosita cu carpa destinata ei. Accesoriu ferestre: pentru ferestre, oglinzi, usi de sticla etc. Avertisment! Nu folositi direct pe sticla rece. Duza curbata: pentru toalete si suprafete greu de accesat. Tuburi prelungitoare: ideale pentru extinderea accesoriilor. 61 Assembly page 61/76 TKG SFC 1001 - 100525 Fax +32 2 359 95 50 Copies of the I/B. Please reproduce them without any changes except under special instruction from Team International BELGIUM. The pages must be reproduced and folded in order to obtain a booklet A5 (+/- 148.5 mm width x 210 mm height). When folding, make sure you keep the good numbering when you turn the pages of the I/B. Don’t change the page numbering. Keep the language integrity. DEPOZITAREA ACCESORIILOR: La baza aparatului exista prevazut un compartiment in care puteti ndepozita accesoriile. Separati rezervorul pentru apa de pe baza. Apasand butonul care se afla pe spatele aparatului langa roata dreapta si ridicati, in acelasi timp, rezervorul de apa cu ajutorul manerului. Dup ace ati depozitat accesoriile sau ati luat unul dintre ele, puneti rezervorul de apa la locul lui. Apasati in jos ferm pana cand face click la locul lui. OPERARE: ATENTIE! Acest aparat nu va fi folosit direct pe plastic sensibil, lemn netratat sau sticla rece. Aburul poate strica suprafata mobilei. Pentru o folosire sigura faceti un test inainte de folosire. Fiti atenti la instructiunile de intretinere prezentate de producator. ASAMBLARE: (NU CONECTATI APARATUL LA PRIZA PANA CAND NU ATI ALES SI CONECTAT ACCESORIUL POTRIVIT.) Atentionare! Dupa folosire si deconectarea de la priza, apasati butonul de aburi ca sa reduceti presiunea interna suficient. Apoi puteti desface capacul de protectie. 1. Luati accesoriul dorit din din compartimentul de stocare si puneti rezervorul de apa la loc pe baza (vezi sectiunea “DEPOZITAREA ACCESORIILOR”). 2. Atasati furtunul flexibil cu pistolul pentru aburi la aparat. Pentru a proceda astfel, deschideti clapeta care acopera intrarea pentru conectare a furtunului si introduceti-o pana cand se blocheaza, asigurandu-va ca mica canelura a conectorului furtunului intra in mica deschizatura a intrarii conectarii furtunului. Pentru a scoate furtunul dupa utilizare, apasati butoanele de deschidere de pe partile conectorului si trageti de capatul furtunului. 3. Desurubati capacul de siguranta. Pentru a proceda astfel, apasati capacul si in acelasi timp rotiti-l in sens invers acelor de ceasornic (daca mai este apa in rezervor si capacul de siguranta mai este strans usor de la o folosire anterioara, vor fi eliminate ceva gaze. Aceasta este normal si nu porezinta pericole). 4. Umpeti rezervorul cu apa. Va rugam folositi cana de masura si palnia livrate cu aparatul. Nu depasiti nivelul maxim de umplere (1,4 litri) daca apa din yona dumneavoastra este dura, este recomandat sa folositi apa distilata sau sa folositi apa de la robinet care a fost fiarta in prealabil. 5. Nota: niciodata nu umpleti cu agenti de decalcifiere, parfum sau detergent, pentru a evita defectarea aparatului. 6. Insurubati inapoi capacul de siguranta. Pentru a proceda astfel, apasati apasati capacul si in acelasi timp rotiti-l in sensul acelor de ceasornic. 7. Daca doriti sa curatati podele sau suprafete la care este greu de ajuns, va fugam montati tuburile prelungitoare. Pentru a proceda astfel, impingeti capatul deschis al unui tub in pistolul de abur pana cand auziti un click al butonului de eliberare. Puteti conecta numai unul, doua sau trei tuburi prelungitoare. Pentru a demonta tuburile dupa utilizare, apasati butonul de eliberare de pe partea superioara a tubului sau de pe pistolul de abur si trageti de tuburi. 8. Conectati peria de podea pe tubul extensibil pana cand butonul face clic, daca doriti sa curatati podele. Daca doriti sa folositi un alt accesoriu, intai trebuie sa conectati accesoriul: faceti sa alunece accesoriul pe un tub de prelungire sau generatorul de aburi pana cand butonul de eliberare face clic. Apoi asamblati duza dreapta in accesoriu si invartiti un sfert de tura in sensul invers al sagetii pentru a bloca accesoriul. Pentru a desface accesoriul dupa folosire, rotiti in sensul sagetii si trageti de acesta. Pentru a scoate peria de podea apasati pec el mai apropiat buton de eliberare si trageti. 62 Assembly page 62/76 TKG SFC 1001 - 100525 Fax +32 2 359 95 50 Copies of the I/B. Please reproduce them without any changes except under special instruction from Team International BELGIUM. The pages must be reproduced and folded in order to obtain a booklet A5 (+/- 148.5 mm width x 210 mm height). When folding, make sure you keep the good numbering when you turn the pages of the I/B. Don’t change the page numbering. Keep the language integrity. 9. Periile de metal sau nzlon, peria de curatare si duza curbata pot fi asamblate pe duza dreapta. 10. Stergator ferestre: Avertisment! Nu folositi acest aparat direct pe sticla rece. Altfel sticla se poate sparge. Preincalziti sticla prin stropire cu aburi in forma de arc, de la o distanta de 20-25cm. Reduceti incet distanta la 10-15 cm pentru a preincalzi sticla. 11. Stergatorul de ferestre trebuie sa fie atasat la peria de spalare. Intai asamblati peria de spalare la aparat. Scateti carpa de pe peria de spalare si conectat stergatorul de ferestre la perie de cele doua agatatori. Stergatorul poate fi dezasamblat usor scotandu-l din din agatatori. Perie spalare Stergator ferestre Agatatori Carlige OPERARE: 1. Conectati aparatul la sursa de tensiune si apasati butonul de pornire. Se aprind lampile de control verde si rosu. Imediat ce preincalzirea este terminata (in jur de 10 minute) lampa rosie de control se stinge. Acum aparatul este gata de folosire. Aparatul este echipat cu un dispozitiv contra pornirii de catre copii. Pentru a-l debloca, apasati pinul triunghiular dinspre partea dreapta a manerului catre stanga. Apasati butonul pentru aburi si deplasati aparatul incet peste suprafata pe car doriti s-o curatati. Este recomandabil ca distanta intre duza sau suprafata sa fie de cel putin 2-3cm. Este normal ca in timpul functionarii lampa rosie de control sa se aprinda sau sa se stinga, in timp ce termostatul lucraza. 63 Assembly page 63/76 TKG SFC 1001 - 100525 Fax +32 2 359 95 50 Copies of the I/B. Please reproduce them without any changes except under special instruction from Team International BELGIUM. The pages must be reproduced and folded in order to obtain a booklet A5 (+/- 148.5 mm width x 210 mm height). When folding, make sure you keep the good numbering when you turn the pages of the I/B. Don’t change the page numbering. Keep the language integrity. AVERTISMENT! APARATUL NU POATE FI INCLINAT PESTE 45° IN TIMPUL OPERARII. NICIODATA NU DIRECTIONATI APARATUL CATRE OAMENI, ANIMALE SAU PLANTE. Aparatul cu o protectie impotriva supraincalzirii. Cand este atinsa temperatura de 180°C, aparatul se opreste automat. In acest caz scoateti aparatul din priza si lasati-l timp de 30 minute pentru ca acesta sa se raceasca. 2. 3. 4. 5. Ajustarea nivelului de abur: rotiti regulatorul de aburi in sensul acelor de ceasornic pentru abur mai putin sau in sensul invers acelor de ceasornic pentru un nivel mai mare de aburi. Reumplerea rezervorului de apa: Opriti si scoateti aparatul din priza. Apasati butonul de aburi ca sa depresuruzati aparatul complet. Apasati aproximativ 3 minute si desfaceti capacul rezervorului incet. Poate scapa aburi. Risc de oparire! Dupa ce aparatul s-a racit la aproximativ temperatura mediului ambient, umpleti rezervorul de apa. Va rugam folositi palnia si cana de masura livrate odata cu aparatul. Nu depasiti cantitatea de 1,4 l de apa! Inchideti capacul de siguranta si conectati aparatul la priza din nou. Un reyervor plin ajunge pentru aproximativ 40 minute. Avertizare! Inainte de a elibera capacul de siguranta, asigurati-va ca presiunea interna este sufficient de redusa. Opriti si scoateti aparatul din priza, eliberati presiunea ramasa usor si goliti rezervorul de apa, dupa folosire. Asteptati pana cand carcasa si accesoriile s-au racit inainte de a atinge aparatul. Nu inchideti rezervorul de apa pana cand acesta nu s-a uscat complet. Decalcifiere: pentru a mentine aparatul dvs. in conditii excelente si efficient va recomandam sa decalcifiati aparatul la intervale regulate (odata la sase luni). Puneti unul sau doua stickuri de produs de decalcifiere intr-un litru de apa incalzita la (50°C) si umpleti reyervorul de apa cu aceasta solutie. Lasati solutia sa lucreze aproximatic 30 minute si apoi goliti rezervorul. Clatiti aparatul cu apa rece proaspata. Clatire va recomandam sa clatiti aparatul dupa fiecare cinci folosiri ca sa e liminati depunerile de pe fundul rezervorului. Umpleti rezervorul cu apa. Inchideti capacul si agitati. Apoi desfaceti capacul si goliti rezervorul. Lasati ca rezervorul sa se usuce complet inainte de a-l inchide. Avertisment! Niciodata nu scufundati aparatul in apa. Stergeti numai carcasa cu o carpa moale umezita. Nu incercati sa reparati dumneavoastra aparatul. In cazul unei reparatii aceasta va fi facuta de persoane autorizate. EVENTUALE PROBLEME: Problema Cauze posibile • Lampa verde nu se aprinde Nu scoate aburi Aparatului ii ia mult timp pentru a produce aburi • • • Aparatul nu este conectat correct la priza Aparatul nu este pornit Prza este defecta Cablul de alimentare este defect • • • • Recomandari Reconectati aparatul din nou Porniti aparatul Verificati priza Contactati un service autorizat • • Nu este apa in rezervor Nu este dezactivat dispoyitivul impotriva folosirii de copii • • Umpleti rezervorul Dezactivati dispozitivul • Rezervorul este murdar • Decalcifiati rezervorul 64 Assembly page 64/76 TKG SFC 1001 - 100525 Fax +32 2 359 95 50 Copies of the I/B. Please reproduce them without any changes except under special instruction from Team International BELGIUM. The pages must be reproduced and folded in order to obtain a booklet A5 (+/- 148.5 mm width x 210 mm height). When folding, make sure you keep the good numbering when you turn the pages of the I/B. Don’t change the page numbering. Keep the language integrity. Curge apa din duza Apa clocoteste in timpul umperii rezervorului Accesoriile cad de pe conector Alte probleme • Prea multa apa in rezervor • • Aparatul este inclinat prea tare Aparatul nu este incalzit suficient • Rezervorul de apa este inca fierbinte • Accesoriile nu sunt conectate corect • Aparatul este defect • • • Reduceti cantitatea de apa Tineti aparatul corect Lasati aparatul sa se incalzeasca • Lasati aparatul sa se raceasca • Conectati accesoriile corect Contactati serviceul • PROTECTIA MEDIULUI – DIRECTIVA 2002/96/EC Simbolul de pe tăbliţa cu datele tehnice înseamnă că produsul nu se poate arunca împreună cu alte reziduuri menajere. Legea pedepseşte cu amendă persoanele care aruncă aparatele electrice şi electronice împreună cu alte reziduuri. Debarasarea corespunzătoare a produselor uzate previne formarea unor efecte negative pentru mediul natural şi sănătatea umană, care pot fi produse de manipularea nepotrivită a reziduurilor rămase din uzarea aparatelor electronice. 65 Assembly page 65/76 TKG SFC 1001 - 100525 Fax +32 2 359 95 50 Copies of the I/B. Please reproduce them without any changes except under special instruction from Team International BELGIUM. The pages must be reproduced and folded in order to obtain a booklet A5 (+/- 148.5 mm width x 210 mm height). When folding, make sure you keep the good numbering when you turn the pages of the I/B. Don’t change the page numbering. Keep the language integrity. CERTIFICAT DE GARANTIE TEAM/ROMIX/KALORIK/MAYBAUM/MAGIC/PMD/ECOLINE/ROYAL Declaratia de Conformitate (se va completa conform tabelelor de catre magazin) Produsul : ……………………………………………….……………………………………………... ………….. Magazin : ……………………………………………….…………………………………………………………… Marca/Model : ……………………………………………….……………………………………………………… Adresa, Tel : ……………………………………………….…………………………………………..…………… Nr. Serie : ……………………………………………….…………………………………… ………..…………… Data Vanzarii : ……………………………………………….………………………………………...…………… Termen de garantie : ……………………………………………….……………………………………………… Factura/Chitanta :……………………………………………….…………………………………….. …………… Client:………………………………………………….……………………………………………….. …………… S-a efectuat proba de functionare, s-au predat instructiunile de utilizare in limba romana, toate accesorile, s-a prezentat modul de folosire si s-a predat aparatul in perfecta stare de functionare, s-a completat corect prezentul Certificat de Garantie Semnatura si stampila vanzatorului Semnatura cumparator Semnatura si stampila producatorului CONDITII DE GARANTIE Asiguram conform OG 21/92 republicata si Legea 449/2003 o perioada de 24 de luni de garantie in urmatoarele conditii : 1. Instructiunile de utilizare si instalare trebuie citite si respectate obligatoriu inainte de instalarea si folosirea rodusului 2. Pentru a beneficia de reparatii in garantie, cumparatorul are obligatia sa prezinte Certificatul de garantie impreuna cu factura/chitanta originala de cumparare a produsului si ambalajul original si nederiorat 3. Durata termenului de garantie se prelungeste cu termenul scurs de la data reclamatiei pana la data punerii in functiune 4. Vanzatorul este obligat sa livreze consumatorului produse care sunt conforme cu contractul de vanzare cumparare 5. Se considera ca produsele sunt conforme daca : a) Corespund descrierii facute de vanzator si au aceleasi calitati ca si produsele pe care vanzatorul le-a prezentat cumparatorului ca mostra sau model ; b) Corespund oricarui scop specific solicitat de catre consumator, scop facut cunoscut vanzatorului si acceptat de acesta la incheierea contractului de vanzare cumparare ; c) Corespund scopurilor pentru care sunt utilizate in mod normal produsele de acelasi tip ; 6. Pana la proba contrarie lipsa de conformitate aparuta in termen de 6 luni de la livrarea produsului se prezuma ca a existat la momentul livrarii acestuia cu exceptia cazurilor in care prezumtia este incompatibila cu natura produsului sau lipsei de conformitate ; 7. Nu se considera a fi lipsa de conformitate daca in momentul incheierii contractului de vanzare cumparare consumatorul a cunoscut sau nu putea, in mod rezonabil, sa nu cunoasca aceasta lipsa de conformitate ori daca lipsa de conformitate isi are originea in materialele furnizate de consumator; 8. Orice reparatie sau inlocuire a produselor va fi facuta intr-o perioada rezonabila de timp, stabilita de comun acord intre vanzator si consumator. In cazul in care vanzatorul dupa toate eforturile si 66 Assembly page 66/76 TKG SFC 1001 - 100525 Fax +32 2 359 95 50 Copies of the I/B. Please reproduce them without any changes except under special instruction from Team International BELGIUM. The pages must be reproduced and folded in order to obtain a booklet A5 (+/- 148.5 mm width x 210 mm height). When folding, make sure you keep the good numbering when you turn the pages of the I/B. Don’t change the page numbering. Keep the language integrity. incercarile constata ca produsul respectiv nu se poate repara si nici inlocui, atunci se obliga sa restituie cumparatorului contravaloarea produsului in RON (aceeasi de pe factura sau chitanta);Pentru a beneficia de reparatie gratuita in garantie sau service autorizat, clientul se va adresa magazinului de unde a achizitionat produsul respectiv ; NU SE ACORDA service gratuit si nu se inlocuiesc produsele defectate in perioada de garantie, in urmatoarele conditii : a) Deteriorari si defectiuni datorate transportului necorespunzator efectuat de cumparator ; b) Nerespectarea de catre cumparator a conditiilor de manipulare, instalare, utilizare si intretinere precizate in instructiunile de folosire ; c) Interventii efectuate in perioada de garantie de catre persoane neautorizate ; d) Utilizarea produsului pentru alte activitati si in alte conditii decat cele pentru care sunt utilizate in mod normal produsele de acest fel; Utilizarea in scop industrial a produselor achizitionate care nu fac parte din gama produselor industriale, determina pierderea garantiei. Perioada de garantie a produselor din gama produselor industriale este de 12 luni. In sensul prevederilor legale, respectarea drepturilor fundamentale ale consumatorilor devine obligatory. a) protectia impotriva riscului de a achizitiona un produs sau de a li se presta un serviciu care ar putea sa le prejudicieze viata, sanatatea sau securitatea ori sa le afecteze drepturile si interesele legitime ; b) informarea completa, corecta si precisa asupra caracteristicilor esentiale ale produselor si serviciilor, astfel incat decizia pe care o adopta in legatura cu acestea sa corespunda cat mai bine nevoilor lui, precum si de a fi educati in calitatea lor de consumatori ; c) accesul la piete care le asigura o gama variata de produse si servicii de calitate ; d) despagubirea pentru prejudiciile generate de calitatea necorespunzatoare a produselor si serviciilor, folosind in acest scop mijloacele prevazute de lege ; e) exonerarea de plata produselor si serviciilor care nu au fost solicitate si acceptate ; f) despagubirea pentru daunele provocate de produsele si serviciile care nu corespund clauzelor contractuale ; g) asigurarea service-ului necesar si pieselor de schimb pe durata medie de utilizare a produsului, stabilita in documentele tehnice normative sau declarata de catre producator ori convenita de parti ; h) plata, pentru produsele sau serviciile de care beneficiaza, a unor sume stabilite cu exactitate, in prealabil; majorarea pretului stabilit initial este posibila numai cu acordul consumatorului. 9. Durata medie de utilizare: 2 ani.Perioada maxima de reparare/inlocuire este de 15 zile calendaristice.Drepturile consumatorului sunt in conformitate cu Legea 449/2003, Legea 269/2004 si HG 448/2005. Data sesizarii Data reparatiei Data prelungirii Magazin Semnatura Pentru lista actualizata de Service-uri autorizate va rugam sunati la tel:+40 (21) 319 83 26 sau verificati pe site la adresa: www.team-int.ro Team International Romania Srl; Str. Industriilor 56A, sector 3, Bucuresti CUI 16991287; R.C. J40/19685/29.11.2004 67 Assembly page 67/76 TKG SFC 1001 - 100525 Fax +32 2 359 95 50 Copies of the I/B. Please reproduce them without any changes except under special instruction from Team International BELGIUM. The pages must be reproduced and folded in order to obtain a booklet A5 (+/- 148.5 mm width x 210 mm height). When folding, make sure you keep the good numbering when you turn the pages of the I/B. Don’t change the page numbering. Keep the language integrity. УПЪТВАНЕ ВАЖНИ МЕРКИ ЗА БЕЗОПАСНОСТ Моля прочетете внимателно тези инструкции преди да използвате уреда. Важно: Хора (вкл. деца) които не са способни да използват уреда по безопасен начин, поради физично, психично или умствено заболяване или поради неопитност, не трябва да използват уреда, освен ако те не са контролирани от лице, което отговаря за тяхната безопасност, или ако преди това са получили инструкции по отношение на безопасната употреба на уреда. Необходим е строг надзор за предотвратяване използването на уреда като играчка от деца. Правила за безопасно използване Преди употреба, проверете дали волтажа и захранването да отговарят на това на уреда. Уреда да не се оставя без наблюдение, когато е включен в ел. мрежа. Свържете уреда към заземен контакт. Ако е необходим удължител, използвайте 10-амперов или с по-вече Ампери, но никога под 10 ампера. Внимавайте кабела да не се огъва или превива. Уреда е предназначен само за домашна употреба, по начин описан в упътването. Уреда не трябва да се потапя във вода или друга течност, без значение на причината. Не използвайте уреда в близост до горещи повърхности. Редовно проверявайте уреда за повреди. Уреда не трябва да се използва ако кабела е повреден. Уреда трябва да се поправи от квалифициран ел. техник (*). Ако кабела е повреден, смяната му става само в упълномощения сервиз. Това се отнася ако резервоара не работи или е повреден. За да се предпазите от ел. разряд, не разглобявайте резервоара: занесете уреда на квалифициран ел. техник за преглед. Неправилен монтаж може да причини ел. удар, при използване на уреда. Внимавайте гъвкавия кабел да не се допира до горещи повърхности. Уреда не трябва да се използва навън, и трябва да се съхранява в сухи помещения. Не използвайте приставки, които не са одобрени от производителя. Те може да се опасни за потребителя и да повредят уреда. Никога не местете уреда дърпайки го за кабела. Внимавайте кабела да не се прегъне. Не намотавайте кабела около уреда, както и не го прегъвайте. Уреда не е играчка, същия не е предназначен за сядане върху него. Парата не трябва да се насочва към ел. оборудване, например вътрешност на електрически печки. Развийте напълно кабела, преди да включите уреда. ИЗКЛЮЧЕТЕ УРЕДА И ИЗЧАКАЙТЕ РЕЗЕРВОАРА НАПЪЛНО ДА ИЗСТИНЕ ПРЕДИ ДА ГО ОТВОРИТЕ, НАПЪЛНИТЕ, ИЗПРАЗНИТЕ ПРЕМЕСТИТЕ ИЛИ ПОЧИСТИТЕ. Винаги изключвайте уреда след употреба и когато не се използва. на уреда означава, че трябва да внимавате! Внимавайте, защото при Символа докосване на гореща вода, пара или металните части на предната част на уреда, може да доведе до сериозни изгаряния. Никога не пълнете резервоара с оцет, течност за отстраняване на варовика или друг химичен продукт. Внимавайте уреда да не е наклонен на 45° при работа. Когато уреда работи, дюзите не трябва да се насочват към хора, животни или растения. НЕ ОТВАРЯЙТЕ РЕЗЕРВОАРА ПО ВРЕМЕ НА РАБОТА НА УРЕДА! НЕ ИЗПОЛЗВАЙТЕ УРЕДА АКО: 68 Assembly page 68/76 TKG SFC 1001 - 100525 Copies of the I/B. Please reproduce them without any changes except under special instruction from Team International BELGIUM. The pages must be reproduced and folded in order to obtain a booklet A5 (+/- 148.5 mm width x 210 mm height). When folding, make sure you keep the good numbering when you turn the pages of the I/B. Don’t change the page numbering. Keep the language integrity. Fax +32 2 359 95 50 ) ) ГЪВКАВИЯ МАРКУЧ Е ПРОБИТ. ЕДИН ОТ АКСЕСОАРИТЕ Е ПОВРЕДЕН. Уреда произвежда гореща пара както показва символа ( ). Внимавайте да не се изгорите при употреба. Никога не насочвайте парата към Вас или някой друг. Преди да отворите предпазното капаче, изключете уреда и натиснете копчето за пара, докато парата спре да излиза. Преди всеко почистване, изключете уреда от захранването и изчакайте да изстине достатъчно. Носете уреда само за дръжката му. (*) Квалифициран ел. техник: Сервизния отдел на производителя или вносителя упълномощава лице, което е квалифицирано и компетентно да извърши поправки, зада предотврати опасност. Повредения уред трябва да се върне в сервиза. ОПИСАНИЕ НА ПАРО- ЧИСТАЧКАТА 1. 2. 3. 4. 5. 6. 7. 8. 9. 10. Четка за под Кърпа за четката за под Чистачка за прозореца Твърда четка Корпус Фуния Мерителна чашка Кърпа за твърдата четка Малка четка Голяма четка 11. 12. 13. 14. 15. 16. 17. 18. 19. 20. Обла дюза Паро регулатор Копче за вкл./изключване Дръжка Защитно капаче Копче за парата Права дюза Конектор за допълнителни части Удължители тръби (3 броя) Гъвкав маркуч ХАРАКТЕРИСТИКИ: Уреда може да се използва навсякъде и е много лесен за употреба – единствено трябва да го напълните с вода. Паро-чистачката почиства, премахва мазнина и дезинфекцира 69 Assembly page 69/76 TKG SFC 1001 - 100525 Fax +32 2 359 95 50 Copies of the I/B. Please reproduce them without any changes except under special instruction from Team International BELGIUM. The pages must be reproduced and folded in order to obtain a booklet A5 (+/- 148.5 mm width x 210 mm height). When folding, make sure you keep the good numbering when you turn the pages of the I/B. Don’t change the page numbering. Keep the language integrity. напълно без химически продукти (над 100°C); уреда е подходящ за почистване на различни материали и райони, например стъкла, дрехи, градинска мебел, велосипеди, коли, плочки и т.н. Внимание! Никога не насочвайте уреда към хора или животни. АКСЕСОАРИ Четка за под: за миещи се стени и подова. Може да се използва с или без кърпа. За чувствителни повръхности, като дърво или линолеум, препоръчително е да се използва кърпата. Поставете кърпа на четката, като пъхнете крайщата под клипса, от лявата и от дясната страна. За целта, натиснете външните краища на клипса на четката за да отворите клипса и поставете чиста кърпа отдолу. Конектор на части: за добавяне на допълнителни части към уреда. Права дюза: за ъгли, рафтове и т.н. Малка четка: за отстраняване на упорита мърсотия от радиатори, вентили, щори и т.н. Голяма четка: за отстраняване на големи петна от не толкова чувствителни материали (неръждаема стомана или камък). Твърда четка: за завеси, дрехи и т.н. Да се използва заедно с кърпа. Чистачка за прозорци: за прозорци, огледала, стъкла на врати и т.н. Внимание! Да не се използва директно върху студено стъкло. Обла дюза: за тоалетни и райони, трудни на достъп. Тръби за удължение: идеални за удължаване на частите. 70 Assembly page 70/76 TKG SFC 1001 - 100525 Fax +32 2 359 95 50 Copies of the I/B. Please reproduce them without any changes except under special instruction from Team International BELGIUM. The pages must be reproduced and folded in order to obtain a booklet A5 (+/- 148.5 mm width x 210 mm height). When folding, make sure you keep the good numbering when you turn the pages of the I/B. Don’t change the page numbering. Keep the language integrity. СЪХРАНЕНИЕ НА ЧАСТИТЕ: В корпуса на уреда има отделение, в което може да съхранявате частите. Свалете резервоара от корпуса, натискайки копчето, разположено отзад на уреда, близко до дясното колело, и повдигнете едно временно нагоре резервоара за дръжката. Когато приберете или извадите необходимата Ви част, поставете обратно резервоара. Натиснете го надолу докато отиде на мястото си. УПОТРЕБА: ВНИМАНИЕ! Уреда не трябва да се използва директно на мека пластмаса, необработено дърво или студено стъкло. Парата може да повреди повърхността на мебелите. За безопасна работа, опитайте предварително. Спазвайте упътванията на производителя. МОНТАЖ: НЕ ВКЛЮЧВАЙТЕ УРЕДА, ПРЕДИ СЪОТВЕТНАТА ЧАСТ ДА Е ПОСТАВЕНА.) Внимание! След употреба, изключете уреда от захранването и натиснете копчето за парата, за да спадне вътрешното налягане. След това освободете предпазното капаче. 1. Извадете желаната част от отделението за съхранение и поставете резервоара обратно на корпуса на уреда (вижте отдела “СЪХРАНЕНИЕ НА ЧАСТИ”). 2. Поставете маркуча с пистолета за пара на уреда. За целта, натиснете надолу клапата, закриваща изхода на маркуча и поставете конектора в отвора, докато се затвори, като внимавате малкото ухо на конектора да влезе в отвора на маркуча. Може да натиснете бутона за освобождаване, намиращ се отстрани на конектора, за да подпомогнете влизането на конектора в маркуча. За да извадите конектора, натиснете освобождаващия бутон на конектора на маркуча и изтеглете конектора. 3. Развийте предпазното капаче. За целта, натиснете капачето, завъртайки го едновременно обратно на часовниковата стрелка (ако има все още вода в резервоара и капачето е здраво затворено при предишна употреба, може да излезе малко пара. Това е нормално и не е опасно). 4. Напълнете резервоара. Използвайте мерителната чаша и фунията. Не превишавайте максималното ниво на пълнете (1.4 литра). При твърда вода, трябва да се използва дестилирана или чешмена, предварително преварена вода. 5. Забележка: не наливайте препарат за почистване на варовик, парфюм или миещ препарат в резервоара, за да не повредите уреда. 6. Завъртете капачето, като го натиснете надолу и по посока на часовниковата стрелка. 7. Ако искате да почистите подове или трудно достъпни зони, поставете удължителните тръби. За целта, поставете отворения край на тръбата в парния пистолет, докато бутона на парния пистолет застане на мястото си. Може да монтирате една, две или три удължителни тръби. За да свалите тръбите след употреба, натиснете бутона за освобождаване на върха на удължителната тръба или на парния пистолет и изтеглете тръбите. 8. Поставете четката за под на разклонителната тръба, като бутона за освобождаване застане на мястото си, ако искате да почиствате подове. Ако искате да използвате друга част, в началото поставете частта на конектора: пъхнете часта в парния пистолет или в удължителната тръба, докато бутона за освобождаване застане на мястото си. След това монтирайте правата дюза на конектора, като завъртите леко дюзата на ¼ оборот обратно на часовниковата стрелка, докато спре. За да свалите правата дюза след употреба, завъртете я на ¼ оборот по посока на часовниковатат стрелка и я изтеглете. За да свалите четката за под или конектора, натиснете съответния освобождаващ бутон и я изтеглете. 9. Малката, голямата и твърдата четка и облата дюза може да се монтират директно на правата дюза . 71 Assembly page 71/76 TKG SFC 1001 - 100525 Fax +32 2 359 95 50 Copies of the I/B. Please reproduce them without any changes except under special instruction from Team International BELGIUM. The pages must be reproduced and folded in order to obtain a booklet A5 (+/- 148.5 mm width x 210 mm height). When folding, make sure you keep the good numbering when you turn the pages of the I/B. Don’t change the page numbering. Keep the language integrity. 10. Чистачка за прозорци: Внимание! Не работете с уреда директно върху студено стъкло. Това може да доведе до пукване на стъклото. Затоплете стъклото, като го напръскате с пара от разстояние 20-25 cм. Бавно намалете разстоянието до 10-15см за да затоплите още стъклото. 11. Чистачката за прозорци трябва да се монтира на твърдата четка. Най-напред монтирайте твърдата четка на правата дюза. Свалете кърпата от твърдата четка, свържете чистачката за прозорци към двете панти. Чистачката за прозорци може да се свали с отварянето на двете панти. Твърда четка Чистачка за прозорци Кукички Панти УПОТРЕБА: 1. Свържете уреда към ел. захранване и натиснете копчето за включване. Светват зелената и червената контролни лампи. След приключване на загряването (около 10 минути) червената контролна лампа се изключва. Уреда е готов за употреба. Уреда има устройство за защита от деца. За да освободите заключващото копче, натиснете наляво спусъка на парния пистолет. Натиснете бутона за пара, като движите бавно уреда над повърхността, която ще почиствате. Разстоянието между дюзата и повърхността трябва да е поне 2-3 см. Включването и изключването на червената контролна лампа е нормално, което показва, че термостата контролира автоматично нагревателния елемент. ВНИМАНИЕ ! УРЕДА НЕ МОЖЕ ДА СЕ НАКЛАНЯ НАД 45° ПО ВРЕМЕ НА РАБОТА. НИКОГА НЕ НАСОЧВАЙТЕ УРЕДА КЪМ ХОРА, ЖИВОТНИ ИЛИ РАЗСТЕНИЯ. 2. 3. Уреда е оборудван със защита от прегряване. При достигане на температура от 180°C, уреда се изключва автоматично. В този случай, изключете уреда и изчакайте 30 минути паро чистачката да изстине. Настройте паро подаването: завъртете регулатора на парата по посока на часовника за по-малко пара или в посока обратна на часовника за повече пара. Напълване на резервоара: Изключете уреда и извадете кабела от контакта. Натиснете бутона за пара и изпуснете вътрешното налягане. Изчакайте около 3 минути и отворете защитното капаче бавно. ВНИМАНИЕ! Може да има изпускане на пара. Внимавайте да не се изгорите! След като уреда изстине до стайна температура, напълнете резервоара. Използвайте фунията и мерителната чашка. Не превишавайте максималното 72 Assembly page 72/76 TKG SFC 1001 - 100525 Fax +32 2 359 95 50 Copies of the I/B. Please reproduce them without any changes except under special instruction from Team International BELGIUM. The pages must be reproduced and folded in order to obtain a booklet A5 (+/- 148.5 mm width x 210 mm height). When folding, make sure you keep the good numbering when you turn the pages of the I/B. Don’t change the page numbering. Keep the language integrity. количество от 1.4 литра! Затворете защитното капаче и включете отново уреда към ел. захранване. Пълен резервоар позволява около 40 минути работа. Внимание! Преди да отворите защитното капаче, вътрешното налягане трябва да е ниско. 4. Изключете уреда и извадете кабела от контакта, изпуснете останалото вътешно налягане и изпразнете резервоара след употреба. Изчакайте корпуса и частите да изстинат преди да работите с уреда. Не затваряйте резервоара, преди да е изсъхнал напълно. 5. Отстраняване на варовика: за поддържане на паро чистачката ефективна и в отлично състояние, препоръчително отстраняването на варовика редовно – един път на всеки 6 месеца. Поставете 1 или 2 пръчици за отстраняване на варовика в 1 литър топла вода (50°C), след което изсипете течността в резервоара. Изчакайте течноста да работи около 30 минути, след което я изсипете. Измийте основно резервоара с чиста вода. Миене: препоръчително е измиването на резервоара след всяка 5 употреба, за да остраните остатъците от варовика на дъното на резервоара. Напълнете резервоара само с вода. Затворете защитното капаче и разтърсете резервоара с ръка. След това отворете капачето и изпразнете резервоара. Изчакайте резервоара да изсъхне, преди да го затворите. Внимание! Никога не потапяйте уреда във вода. Изтрийте корпуса с влажна кърпа. Не се опитвайте да поправите уреда! Ремонта на уреда трябва да бъде направен само от квалифициран ел. техник. УСТАНОВЯВАНЕ НА ГРЕШКИ: Проблем Възможна причина • Уреда не е добре включен Зелената лампа не свети • • • Уреда не е включен Контакта е повреден Кабела е повреден • Уреда за защита от деца е включен • Няма вода в резервоара Много време е необходимо за загряване • Резервоара е запълнен с варовик Вода тече от дюзата • • • Резервоара е препълнен Уреда е много наклонен Уреда не е достатъчно горещ • Съвет • • • • • • Натиснете щифта от дясната страна на парния пистолет Напълнете резервоара • Отстранете варовика • • • Изсипете водата Дръжте уреда правилно Изчакайте уреда да се загрее Резервоара е много горещ • Изчакайте уреда да изстине • Частите не са поставени правилно • Поставете частите отново • Уреда е повреден • Свържете се със сервиза Няма пара Водата ври при сипване Частите са разхлабени Други проблеми Включете уреда отново към захранването Включете уреда Проверете контакта Свържете се със сервиза ЗАЩИТА НА ОКОЛНАТА СРЕДА – ДИРЕКТИВА 2002/96/EC За защита на околната среда и човешкото здраве, отпадъчното електрическо и електронно оборудване трябва да се съхранява в съответствие със специални правила, които засягат доставчика и потребителя. Поради тази причина, ако Вашия уред има 73 Assembly page 73/76 TKG SFC 1001 - 100525 Fax +32 2 359 95 50 Copies of the I/B. Please reproduce them without any changes except under special instruction from Team International BELGIUM. The pages must be reproduced and folded in order to obtain a booklet A5 (+/- 148.5 mm width x 210 mm height). When folding, make sure you keep the good numbering when you turn the pages of the I/B. Don’t change the page numbering. Keep the language integrity. символ на табелката или опаковката, то същия не трябва да се изхвърля заедно с общия боклук. Потребителя има право да занесе уреда до мястото, където се събиране такъв отпадък, който се рециклира, преработва или се използва за други цели съгласно директивата. 74 Assembly page 74/76 TKG SFC 1001 - 100525 Fax +32 2 359 95 50 Copies of the I/B. Please reproduce them without any changes except under special instruction from Team International BELGIUM. The pages must be reproduced and folded in order to obtain a booklet A5 (+/- 148.5 mm width x 210 mm height). When folding, make sure you keep the good numbering when you turn the pages of the I/B. Don’t change the page numbering. Keep the language integrity. ГАРАНЦИОННА КАРТА КУПУВАЧ.......................................................................................................................................... АДРЕС................................................................................................................................................ СТОКАТА Е ЗАКУПЕНА ОТ.......................................................................................................... ............................................................................................................................................................. НА ДАТА............................................................................................................................................ ВИД НА СТОКАТА...................................................../МОДЕЛ...................................................... ГАРАНЦИОНЕН СРОК.................................................................................................................... Гаранционното поддържане на закупената стока се осъществява от „Тирол Сервиз”ООД и е в сила само на територията на Република България. КУПУВАЧ......................................................... ПРОДАВАЧ.............................................................. /подпис/ /подпис/ печат/ ГАРАНЦИОННИ УСЛОВИЯ: 1. Гаранцията е валидна само при попълнена ясно и правилно гаранционна карта в момента на продажба на стоката от продавача. 2. Закупената стока се рекламира за ремонт безплатно в сервиза, в съответствие с изискванията на БДСпри всички фабрични дефекти възникнали в процеса на експлоатация в рамките на гаранционния срок. 3. Под гаранционен ремонт се разбира безплатен ремонт или подмяна на възли и части от изделието поради доказан фабричен дефект. 4. Гаранцията не покрива дефекти, причинени от небрежност и невнимание при употреба на уреда, от неспазване на инструкциите за работа и съхранение, неправилен пуск и поддръжка, поради ремонт и поддръжка извършван от неупълномощени лица, повреди възникнали при превоза или други обстоятелства, които не могат да бъдат определени като конструктивни или фабрични дефекти. 5. При всеки случай купувачът е длъжен да докаже дефекта, възникналата щета и причинната връзка помежду им. 6. Гаранцията не покрива дефекти , възникнали от неизправности по ел.инсталация и свързването на уреда с ел.мрежа, механични повреди по корпуса, както и износените механични части в процеса на нормалната и правилна експлоатация. 7. Гаранцията не важи за случаите, когато уреда не е използван съгласно предназначението му и съобразно инструкциите за експлоатация и съхранение. 8. Разходите и рисковете по транспортирането на уредите до сервиз и / или посещението на техник до клиента са за сметка на клиента. СЕРВИЗНА МРЕЖА: София: 02-8690227/0888-492241 Варна : 0885-827112 Русе : 0888-528947 Стара Загора: 0898518686 Плевен: 064 680233 /0897 951 806 Пловдив: 0894-381 907 Бургас: 0888-242 304 Троян: 0888-154 139 В.Търново: 0888- 708 728 75 Assembly page 75/76 TKG SFC 1001 - 100525 Copies of the I/B. Please reproduce them without any changes except under special instruction from Team International BELGIUM. The pages must be reproduced and folded in order to obtain a booklet A5 (+/- 148.5 mm width x 210 mm height). When folding, make sure you keep the good numbering when you turn the pages of the I/B. Don’t change the page numbering. Keep the language integrity. Fax +32 2 359 95 50 TKG SFC 1001 Deutsch 2 English 10 Français 17 Nederlands 24 Español 31 Português 38 Polska 45 Română 59 Български 68 Ï Back cover page (last page) Assembly page 76/76