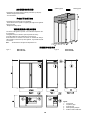
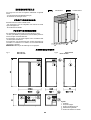
1
ARMADI FRIGORIFERI PER CARRELLI REFRIGERATORS ROLL-IN AND PASS-THROUGH EINFAHR-U. DURCHFAHRKÜHLSCHRÄNKE ARMOIRES A CHARIOTS ISTRUZIONI PER L’INSTALLAZIONE, L’USO E LA MANUTENZIONE INDICE AVVERTENZE GENERALI E DATI TECNICI RICEVIMENTO ISTRUZIONI PER IL MONTAGGIO PANNELLO DI COMANDO MESSA IN FUNZIONE PULIZIA E MANUTENZIONE RICERCA GUASTI I 3 5 6 8 9 10 11 +2 / +10 °C ROLL-IN ROLL-IN ROLL-IN ROLL-IN 1P TN 1PP TN 2P TN 2PP TN -15 / -20 °C ROLL-IN 1P BT ROLL-IN 1PP BT INSTALLATION, USE AND MAINTENANCE INSTRUCTIONS INDEX GENERAL NOTICES RECEPTION ASSEMBLY INSTRUCTIONS CONTROL PANEL START-UP CLEANING AND MAINTENANCE FAULT FINDING GB 13 15 16 18 19 20 21 AUFSTELLUNGS-, BEDIENUNGS- UND WARTUNGSANWEISUNGEN INHALT D ALLGEMEINE HINWEISE UND TECHNISCHE DATEN ERHALT DER WARE MONTAGEANLEITUNG SCHALTTAFEL INBETRIEBNAHME REINIGUNG UND WARTUNG STÖRUNGSSUCHE 23 25 26 28 29 30 31 NOTICE D’INSTALLATION, D’EMPLOI ET D’ENTRETIEN TABLE DES MATIERES AVERTISSEMENTS GENERAUX RECEPTION INSTRUCTIONS DE MONTAGE PANNEAU DE COMMANDE MISE EN SERVICE NETTOYAGE ET ENTRETIEN RECHERCHE DES PANNES F 33 35 36 38 39 40 41 14480110403 DATI MATRICOLARI SERIAL NUMBER DATA MATRIKELANGABEN DONNÉES MATRICULAIRES DATOS DE MATRÍCULA CODICE CODE CODE CODE CÓDIGO MODELLO MODEL TYP MODELE MODELO TENSIONE VOLTAGE SPANNUNG VOLTAGE VOLTAJE ce XXXX XXXXXXXX XXXXXXXX POTENZA POWER LEISTLING PUISSANCE POTENCIA XXXXXXXX XXXXXXXX ANNO DI FABBRICAZIONE MANUFACT YEAR HERSTELLUNGSJAHR ANNE’ DE FABRICATION AÑO DE FABRICACIÓN POTENZA ASSORBITA POWER ABSORBITION NENNAUFNHAME PUISSANCE ABSORBEE POTENCIA CONSUMIDA XXXXXXXX XXXXXXXX XXXXXXXX XXXXXXXX XXXX XXXXXXXX XXXXXXXX PRESSIONE MASSIMA MAX PRESSURE MAX DRUCK PRESSION MAX PRESIÓN MÁXIMA CAPACITA’ NETTA NET CAPACITY NETTO INH CAP. NETTE CAPACIDAD NETA MATRICOLA SERIAL NO. SERIEN NR. NO. DE SERIE MATRÍCULA RESISTENZA DI SBRINAMENTO DEFROSTING HEATING RESISTANCE TAUHEIZWIEDERSTAND RESISTANCE DE DEGIVRAGE RESISTENCIA DE DESCARCHE REFRIGERANTE REFRIGERANT KAELTEMITTEL GAZ REFRIGERANT REFRIGERANTE I dati contenuti nel presente manuale non sono impegnativi e possono essere cambiati dal costruttore senza obblighi di preavviso. Riproduzione anche parziale vietata All specifications and data are subject to change without notice. © Copyright Die Daten des vorliegenden Handbuchs sind nicht bindend und können vom Erbauer ohne Vorankündigungspflicht geändert werden. Unerlaubte Abdrücke verboten. Des modifications aux prodiuts peuvent être apportées sans préavis du constructeur Reproduction même partielle interdite Los datos contenidos en el presente manual no constituyen una obligación para el fabricante, que puede modificarlos sin previo aviso. Queda prohibida la reproducción total o parcial. 2 AVVERTENZE GENERALI Il presente manuale è stato realizzato per permettere una corretta installazione, messa a punto e manutenzione dell’apparecchio; è quindi di fondamentale importanza che : v v Le avvertenze contenute nel presente libretto siano lette v chiodi, ecc.) in quanto potenziale fonte di pericolo deve essere tenuto sicurezza di installazione, d’uso e di manutenzione. fuori dalla portata dei bambini e correttamente riciclato secondo le Il presente manuale e lo schema elettrico siano conservati con cura e norme locali in vigore. messi a disposizione dell’operatore per ogni ulteriore consultazione. v v v prodotti alimentari dovrà pertanto essere destinato solo all’uso per il qualificato in possesso dei requisiti di legge. quale è stato espressamente concepito. Qualsiasi impiego diverso da Viene declinata ogni responsabilità del produttore con decadimento quello specificato non comporta per il costruttore impegno o vincolo della garanzia in caso di modifiche elettriche e/o meccaniche. di alcun genere. v rispettino quanto riportato nel presente manuale, fanno decadere la Disattivare l’apparecchiatura in caso di guasto o di cattivo funzionamento. garanzia. v L’apparecchio e’ stato progettato e realizzato per la conservazione di L’apparecchio sia installato, collaudato e assistito da personale Manomissioni in genere non espressamente autorizzate e che non v Il materiale di imballaggio (sacchetti in plastica, polistirolo espanso, attentamente in quanto forniscono importanti indicazioni circa la v Per l’eventuale riparazione rivolgersi esclusivamente ad un centro di Osservare le norme di sicurezza locali vigenti al momento assistenza tecnica autorizzato dal costruttore e richiedere l’utilizzo di dell’installazione. ricambi originali. Verificare che le caratteristiche della rete elettrica siano conformi ai v dati riportati sulla targhetta matricolare. In caso di dubbio non utilizzare l’apparecchio e rivolgersi a personale professionalmente qualificato. Il mancato rispetto di quanto sopra può compromettere la sicurezza dell’apparecchiatura. DATI TECNICI GENERALI MODELLI 1P 1PV ROLL-IN TN 1PP 1PPM 1PPV 2P 2PV 2PP 2PPM 2PPV ROLL-IN BT 1P 1PP DIMENSIONI E CAPACITÀ Dimensioni esterne Larghezza Profondità Altezza Capacità totale A (mm) B (mm) C (mm) Lt 880 1053 1760 1046 1053 880 1053 1046 2290 1200 1046 2250 1200 2400 DATI TECNICI Tensione standard Versione Sistema refrigerante Potenza frigorifera compressore Temperatura esercizio Corrente assorbita Potenza assorbita Tipo di sbrinamento Sbrinamento n° / durata max min Tipo refrigerante V 230/1/50 Capillare Valvola Ventilato W °C A W 302 ¬ 2.3 520 3.1 570 2.3 520 2.4 560 +2 / +10 2.6 5.8 6.2 600 1327 1427 Pausa 4 / 30 R134a 994 ¬ 5.8 1327 6.2 1427 6.5 1487 522 -15 / -20 5.2 1198 Elettrico R404A PESO E VOLUME Peso totale Volume imballo Kg mc 270 290 2.3 470 500 4.5 ¬ In condizioni CECOMAF -10 evaporazione +55 condensazione. 270 290 2.3 In condizioni CECOMAF -30 evaporazione +55 condensazione. Nel caso di apparecchi con unità condensatrice remota posta ad una distanza non superiore a 10 m, si consiglia di maggiorare la potenza del compressore del 20%. Consultare la targhetta matricolare per altre caratteristiche dell’apparecchiatura 3 ACCESSORI Spazio operativo Spazio funzionale L’apparecchio può essere dotato dei seguenti accessori ( a richiesta) : - tensioni di alimentazione diverse dallo standard; - kit applicazione ruote 100 mm; POSIZIONAMENTO Gli apparecchi sono progettati per l’installazione all’interno. - Verificare che il piano d’appoggio sia adatto a sopportare il peso dell’apparecchio e sia in piano. - Rispettare gli spazi funzionali. SPAZI FUNZIONALI La scelta della dislocazione dell’apparecchio è di fondamentale importanza per il suo buon funzionamento. Gli apparecchi necessitano di spazi minimi per il funzionamento e per la manutenzione. Assicurarsi che venga installato il più lontano possibile da fonti di calore. Assicurarsi che tra il soffitto od altra copertura superiore e la parte superiore dell’apparecchio vi sia una luce di almeno 50 cm. per garantire una soddisfacente circolazione d’aria. Nota : Le misure delle figure sono espresse in mm. DIMENSIONI Tipo 1 ROLL-IN 1P Tipo 2 ROLL-IN 1PP ROLL-IN 2P ROLL-IN 2PP Legenda : 1 - Pannello comandi 2 - Gruppo compressore 3 - Ingresso linea elettrica 4 - Bacinella autoevaporante 3 Posizione targhetta dati matricolari 4 RICEVIMENTO 1 2 3 CONTROLLO AL RICEVIMENTO MOVIMENTAZIONE RIMOZIONE IMBALLO 1 CONTROLLO AL RICEVIMENTO AVVERTENZE Gli armadi sono spediti in appositi imballi di protezione. Controllare all’arrivo che l’apparecchio non abbia subito danneggiamenti durante il trasporto e che lo stesso sia completo nelle sue parti come da ordine. Nel caso di danni visibili annotare immediatamente sul documento relativo al trasporto il danno riscontrato riportando la dicitura : “RITIRO CON RISERVA PER EVIDENTI DANNI A IMBALLO” in quanto la resa franco stabilimento comporta il risarcimento dei danni a carico dell’assicurazione. IL RISPETTO DELLE RACCOMANDAZIONI RIPORTATE SUL LATO ESTERNO DELL’IMBALLO È GARANTE DI UNA INTEGRITÀ FISICA E FUNZIONALE DELL’APPARECCHIO A TUTTO VANTAGGIO DELL’UTILIZZATORE FINALE. VIENE RACCOMANDATO QUINDI DI : - MOVIMENTARE CON CURA - TENERE ALL’ASCIUTTO - EVITARE NEL MODO PIÙ ASSOLUTO DI SOVRAPPORRE ALL’APPARECCHIO ALTRI OGGETTI. 3 IMPORTANTE 3.1 - Togliere le protezioni degli angoli (in legno). 3.2 - Togliere la protezione della parte superiore (in legno). 3.3 - Sollevare il cartone di imballo. 3.4 - Sollevare l’apparecchio in modo da separarlo dalla pedana. 3.5 - Appoggiare l’apparecchio a terra in corrispondenza del punto predestinato. 3.6 - Verificare la presenza di danni visibili. 3.7 - Tenere fuori dalla portata di mano dei bambini il materiale di imballo in quanto potenziale fonte di pericolo. 3.8 - Smaltire i prodotti di imballo facendoli confluire ai centri di raccolta o di riciclaggio specializzati (attenersi alle norme vigenti). 3.9 - Verificare la rispondenza del numero di matricola con quanto riportato nel documento di accompagnamento. TUTTE LE OPERAZIONI DI SEGUITO CITATE DEBBONO ESSERE ESEGUITE IN CONFORMITÀ ALLE NORME DI SICUREZZA VIGENTI, SIA PER QUANTO RELATIVO ALL’ATTREZZATURA USATA SIA PER QUANTO RELATIVO ALLE MODALITÀ OPERATIVE. ATTENZIONE PRIMA DI DAR CORSO A OPERAZIONI DI MOVIMENTAZIONE ASSICURARSI CHE LA CAPACITA’ DI SOLLEVAMENTO SIA ADEGUATA AL PESO DELL’APPARECCHIO IN QUESTIONE. 2 RIMOZIONE IMBALLO MOVIMENTAZIONE 2.1 - MOVIMENTAZIONE con CARRELLO ELEVATORE o SIMILARE 2.1.1 - Inserire le forche sul lato anteriore o posteriore della pedana in legno a corredo dell’apparecchio. 2.1.2 - Dar corso al sollevamento assicurandosi che l’apparecchio sia in equilibrio stabile. ATTENZIONE NEL CORSO DELLA MOVIMENTAZIONE NON CAPOVOLGERE O ROVESCIARE. 5 ISTRUZIONI PER IL MONTAGGIO QUANTO RELATIVO ALL’ATTREZZATURA USATA SIA PER QUANTO RELATIVO ALLE MODALITÀ OPERATIVE. Il presente capitolo è stato realizzato per permettere una corretta installazione dell'apparecchio consegnato in kit di montaggio; è quindi di fondamentale importanza che : - Le avvertenze contenute nel presente libretto siano lette attentamente in quanto forniscono importanti indicazioni circa la sicurezza d'installazione. - Viene declinata ogni responsabilità del produttore con decadimento della garanzia in caso di modifiche elettriche e/o meccaniche non espressamente autorizzate e che non rispettino quanto riportato nel presente manuale. - Il materiale di imballaggio (sacchetti in plastica, polistirolo espanso, chiodi, ecc.) in quanto potenziale fonte di pericolo deve essere tenuto fuori dalla portata dei bambini e correttamente riciclato secondo le norme locali in vigore. Al momento della consegna l'apparecchio smontato è contenuto in due imballi. 1) v -Ç N°1 Assieme cielo (completo di unità condensatrice, assieme elettrico e gruppo evaporatore. v  N°1 Assieme fondo v Æ N°1 Cruscotto (2 nel caso del ROLL-INP 2P e ROLL-IN 1PP) v N°2 Batticarrelli (4 nel caso del ROLL-IN 2PP e ROLL-IN 2P) v N°1 Carenatura aria v Libretto d’istruzioni, viti di montaggio e chiave in dotazione 2) Cassa in legno aperta v Á N°2 Assiemi fianchi v Ä N°1 Porta completa di cerniere e viti di montaggio (2 nel caso del ROLL-IN 1PP,ROLL-IN 2P – 4 nel caso del ROLL-IN 2PP) v Å N°1 Montante (2 nel caso del ROLL-IN 2PP - Assente nel ROLLIN 1P e ROLL-INP 1P) v È N°1 Prolunga schiena (presente solo nel ROLL-IN 2P) v À N°2 Schiene (1 nel caso del ROLL-IN 1P - Assente nel ROLL-IN 1PP e ROLL-IN 2PP) Verificare che tutti i particolari siano presenti e che siano integri. IMPORTANTE L’INSTALLAZIONE DEVE ESSERE EFFETTUATA SECONDO LE ISTRUZIONI RIPORTATE ALLA PRESENTE SEZIONE DA PERSONALE PROFESSIONALMENTE QUALIFICATO ED ESEGUITA IN CONFORMITÀ ALLE NORME DI SICUREZZA VIGENTI, SIA PER ROLL-IN 1P Cassa in legno chiusa ROLL-IN 1PP ROLL-IN 2P ROLL-IN 2PP FASI DI MONTAGGIO Fase 1) Solo per ROLL-IN 1P e ROLL-IN 2P Posizionare la schiena À in orizzontale ed unire i fianchi Á utilizzando la chiave in dotazione girando in senso orario come foto.(*) N.B. Nel caso del ROLL-IN 2P fissare anche la prolunga della schiena È alle schiene laterali À Fissare l'assieme fondo ® ai fianchi Á e schiena À. (vedi foto fase 2). (*) Fase 2) Solo per ROLL-IN 1PP e ROLL-IN 2PP Posizionare i due fianchi Á ed avvitare il fondo ® con viti M5x40 (vedi foto). 6 Fase 3) Solo per ROLL-IN 2P e ROLL-IN 2PP Fase 9) Regolazione chiusura Avvitare i montante/i Å dal fondo con viti M5x40 come indicato nella foto Montare e regolare il/i perno/i di chiusura della/e porta/e verificando il corretto aggancio con il/i riscontro/i posto sui fianchi e/o sui montanti Fase 10) Fissaggio carenatura Fase 4) Fissare la carenatura alla parte inferiore del cielo Ç.(*) Utilizzare viti autofilettanti 4.8x16 Portare l'apparecchio in posizione verticale Fase 5) Posizionamento e fissaggio del cielo Inserire l'assieme cielo Ç dal lato anteriore, tra i fianchi Á come indicato nella foto (*). Fase 11) Ancoraggio apparecchio Fissare a pavimento l'ap-parecchio (vedi foto) utiliz-zando tutte le viti M6x60 ed i tasselli forniti in dotazione. N.B.: La mancata esecu-zione di questa operazione compromette la sicurezza e la stabilità dello stesso N.B.: Nell'esecuzione di questa operazione tenere presente che il peso dell'assieme cielo può superare i … Kg Avvitare con la chiave in dotazione in senso orario i ganci posizionati sui fianchi Á per fissarli con il cielo Ç come foto Fase 12) Fissaggio batticarrello Fissare all’interno delle celle/a i profili batticarrello nella posizione indicata nella foto utilizzando viti autofilettanti 4,8x16. Fase 6) Solo per ROLL-IN 2P e ROLL-IN 2PP Avvitare il montante/i Å al cielo Ç con bulloni M6x20 come evidenziato nella foto. Fase 13) Installazione illuminazione (presente solo su apparecchi con porte vetro) Fase 7) Fissaggio cerniere porte Fissare sui fianchi i deflettori metallici ed i ganci in dotazione. Assemblare il tubo fluore-scente, la protezione in materiale plastico ed i relativi cablaggi e posizionare il tutto fissandolo ai ganci. Eseguire i collegamenti elettrici se-guendo lo schema elettrico. N.B.: Questa operazione deve essere eseguita da personale qualificato Togliere le coperture delle cerniere (vedi foto) ed avvitare le cerniere della porta/e Ä ai fianchi Á con viti M5x40; ad operazione eseguita rimontare i copri cerniera. N.B. Assicurarsi che le guarnizioni aderiscano uni-formemente ai fianchi senza un'eccessiva compressione. Fase 14) Chiusura fori Tappare i fori dei ganci con i tappi forniti in dotazione Fase 8) Fissaggio cruscotto e quadro elettrico Avvitare il/i cruscotto/i Æ ai fianchi Á e fissare il quadro elettrico al cielo prestando attenzione al corretto posizionamento rispetto al foro presente sul cruscotto.(*) Nei ROLL-IN 1PP e 2PP fissare le due traverse superiori ai fianchi. Utilizzare viti M6x14. (*) 7 Le dimensioni dei particolari variano in funzione del modello dell'apparecchio. PANNELLO DI COMANDO 1 TERMOREGOLAZIONE 2 FUNZIONAMENTO COMPRESSORE 3 SBRINAMENTI SUPPLEMENTARI 4 VARIAZIONE DEL SET-POINT 5 STATO DI FUNZIONAMENTO DELL'APPARECCHIO 6 SONDA GUASTA Il pannello di comando si compone di: A INTERRUTORE LUMINOSO VERDE ON-OFF: serve per accendere e spegnere il frigorifero; nella posizione ON l'impianto elettrico è in tensione; B INTERRUTORE LUMINOSO BIANCO LUCI: (se presente) serve per accendere e spegnere le luci nell'apparecchio; C TERMOSTATO ELETTRONICO: regola e controlla il frigorifero. 1 TERMOREGOLAZIONE 5 Il parametro "dif" definisce la variazione della temperatura della cella rispetto al Set point. Esempio: definiti Set point = -2°C, "dif" = 2°C si avrà: Avviamento del compressore quando la temperatura della cella è superiore a: -2°C +(2°C)=+0°C Fermata compressore quando la temperatura della cella è uguale a: -2°C Il Set point può essere variato entro un range predefinito in fabbrica. 2 Per conoscere lo stato di funzionamento dell'apparecchio basta guardare i led del termostato. La tabella seguente riporta il suo significato: Led Stato Significato al L1 Spento Allarme non attivo FUNZIONAMENTO COMPRESSORE al L1 Acceso Allarme attivo Il funzionamento del compressore è segnalato dall'accensione del led (L3) presente sul frontale del termostato in corrispondenza del def L2 Spento Sbrinamento non attivo def L2 Acceso Sbrinamento in corso def L2 Lampeggiante Sbrinamento manuale comp L3 Spento Compressore fermo comp L3 Lampeggiante Per ritardo, protezione o attivazione bloccata comp L3 Acceso Compressore in funzione vent L4 (ID 974) Spento Ventole non in funzione vent L4 (ID 974) Acceso Ventole in funzione simbolo N. 3 SBRINAMENTI SUPPLEMENTARI Lo sbrinamento serve a sciogliere la brina o il ghiaccio che si fermano sulla superficie dell'evaporatore; brina e ghiaccio si formano in seguito ad aperture porte e introduzione cibi caldi. Qualora se ne presentasse la necessità è possibile attivare uno sbrinamento manuale, tenendo premuto il tasto P1 per più di 5 secondi; il led associato L2 si accenderà lampeggiando. 4 STATO DI FUNZIONAMENTO DELL'APPARECCHIO VARIAZIONE DEL SET-POINT 6 - Premere e rilasciare istantanemente il tast "set" (P4) per entrare nel menu "Stato macchina". Appare la label della cartella "set". Per visualizzare il valore Setpoint premere nuovamente il tasto "set". Il valore del Setpoint appare sul display. - Per variare il valore del Setpoint agire, entro 15 secondi, sui tasti P1 e P2. SONDA GUASTA In caso di guasto sonda il led L1 lampeggia ed il termostato visualizza uno dei seguenti codici: E1 guasto sonda cella E2 guasto sonda evaporatore (ID 974) 8 MESSA IN FUNZIONE 1 CONTROLLI PRELIMINARI 2 FISSAGGIO A PAVIMENTO 3 MESSA IN FUNZIONE - VERIFICHE IMPORTANTE PRIMA DI COLLEGARE L’APPARECCHIO ACCERTARSI CHE I DATI DI TARGA SIANO RISPONDENTI A QUELLI DELLA RETE ELETTRICA. LA TARGHETTA MATRICOLARE RECANTE I DATI ELETTRICI NECESSARI ALL’INSTALLAZIONE È POSIZIONATA ALL’INTERNO DELL’APPARECCHIO IN CORRISPONDENZA DEL LATO SUPERIORE DESTRO. L’INSTALLAZIONE DEVE ESSERE EFFETTUATA SECONDO LE ISTRUZIONI RIPORTATE ALLA PRESENTE SEZIONE DA PERSONALE PROFESSIONALMENTE QUALIFICATO. LA SICUREZZA ELETTRICA DI QUESTA APPARECCHIATURA È ASSICURATA SOLTANTO QUANDO LA STESSA È CORRETTAMENTE COLLEGATA AD UN EFFICACE IMPIANTO DI MESSA A TERRA COME PREVISTO DALLE VIGENTI NORME DI SICUREZZA ELETTRICA. È NECESSARIO VERIFICARE QUESTO FONDAMENTALE REQUISITO DI SICUREZZA E, IN CASO DI DUBBIO, RICHIEDERE UN CONTROLLO ACCURATO DELL’IMPIANTO DA PARTE DI PERSONALE PROFESSIONALMENTE QUALIFICATO. IL COSTRUTTORE DECLINA OGNI RESPONSABILITÀ PER EVENTUALI DANNI CAUSATI DALLA MANCANZA DI MESSA A TERRA DELL’IMPIANTO. L’APPARECCHIO DEVE ESSERE INOLTRE INCLUSO IN UN SISTEMA EQUIPOTENZIALE LA CUI EFFICIENZA DEVE ESSERE VERIFICATA SECONDO LE NORME IN VIGORE. È VIETATO L’USO DI ADATTATORI, PRESE MULTIPLE, E/O PROLUNGHE. 1 cavi della presa sia idonea alla potenza assorbita dall’apparecchiatura. Verificare che la spina sia inserita nella presa. 2 FISSAGGIO A PAVIMENTO 2.1 - Praticare 6 fori a pavimento diametro 12 mm in base ai fori situati sul fondo dell’apparecchiatura 2.2 - Fissare l’apparecchio utilizzando i tasselli, i bulloni M6 e le rondelle fornite in dotazione. CONTROLLI PRELIMINARI 1.1 - CONTROLLI GENERICI 1.1.1 - Controllare che l’apparecchio sia stato posizionato in bolla. Agire eventualmente sulla parte mobile dei piedini regolabili fino ad ottenere un perfetto allineamento. 1.1.2 - Controllare che sia stata tolta la plastica a protezione delle superfici esterne. 1.1.3 - Controllare che sia stato lavato all’interno con acqua tiepida e sapone neutro. 1.1.4 - Controllare che sia stato posizionato il più’ lontano possibile da fonti di calore. 1.1.5 - Controllare che non sia impedito il libero circolare dell’aria del vano motore. 1.1.6 - Controllare che le chiavi di chiusura non siano a portata di mano dei bambini. 1.2 - CONTROLLI ALLA PARTE ELETTRICA 1.2.1 - Controllare il valore della tensione e della frequenza di rete : DEVONO RIENTRARE NEI VALORI RIPORTATI 230 ± 10% 50Hz 1.2.2 - Controllare il corretto serraggio delle viti che fissano i conduttori ai componenti elettrici presenti nel quadro (durante la movimentazione ed il trasporto le vibrazioni potrebbero aver prodotto degli allentamenti). 1.2.3 -Accertarsi che sia stato installato a monte della presa un interruttore onnipolare con distanza di apertura dei contatti uguale o superiore a 3 mm. 1.2.4 - Portare l’interruttore generale a cui andrà collegata la spina del cavo di alimentazione nella posizione OFF. 1.2.5 -Verificare la compatibilità’ della presa con la spina dell’apparecchio. Nel caso si rendesse necessario fare sostituire la presa con altra di tipo adatto da personale professionalmente qualificato. Quest’ultimo dovrà anche accertare che la sezione dei IMPORTANTE IL FISSAGGIO A PAVIMENTO DELL’APPARECCHIO È CONDIZIONE INDISPENSABILE PER IL CORRETTO FUNZIONAMENTO DELLO STESSO. L’APPARECCHIO DEVE ESSERE POSIZIONATO IN PIANO. 3 MESSA IN FUNZIONE - verifiche Dopo aver effettuato scrupolosamente quanto sopra esposto è possibile avviare l'apparecchio : 3.1.1 - Portare l’interruttore generale a cui è collegata la spina del cavo di alimentazione nella posizione ON. 3.1.2 - Portare l’interruttore dell’apparecchio in posizione ON. 3.1.3 - Visualizzare il SET POINT. 3.1.3.1 - Premere il pulsante SET  del termostato elettronico verificando che il led set à lampeggi; 3.1.3.2 - Impostare il valore desiderato in base alla tipologia di prodotto conservato. Per le modalità operative relative alla variazione del valore predeterminato in fabbrica consultare la sezione PANNELLO DI COMANDO. IMPORTANTE PRIMA DI INSERIRE GLI ALIMENTI PORTARE L’APPARECCHIO A REGIME. 9 PULIZIA E MANUTENZIONE 1 PULIZIA SETTIMANALE 2 MANUTENZIONE ORDINARIA 3 FERMATE PROLUNGATE Questa sezione è dedicata all'utilizzatore finale ed è estremamente importante per il regolare funzionamento nel tempo dell'apparecchio. Poche operazioni eseguite con scrupolo e periodicamente possono evitare di dover ricorrere a interventi di personale specializzato. Le operazioni da effettuare non richiedono conoscenze tecniche particolari e si riassumono in semplici controlli ai componenti dell'apparecchio. 2.2.2 - Verificare, per quanto possibile, eventuali sbilanciamenti degli elettroventilatore evidenziati da condizioni di rumore e vibrazioni anomale. 2.3 - CAVO DI ALIMENTAZIONE 2.3.1 - Verificare che il cavo di alimentazione che collega l'apparecchio alla presa non presenti lacerazioni, screpolature o alterazioni tali da comprometterne l’isolamento. Contattare un centro di assistenza autorizzato nel caso si renda necessaria della manutenzione. IMPORTANTE 3 PRIMA DI DAR CORSO A QUALSIASI OPERAZIONE DI MANUTENZIONE O DI PULIZIA DELL'APPARECCHIO DISINSERIRE LO STESSO DALLA RETE DI ALIMENTAZIONE ELETTRICA. In caso di prolungata inattività procedere come di seguito specificato: 3.1 - Portare l’interruttore di rete in posizione OFF. 3.2 - Togliere la spina dalla presa. 3.3 - Vuotare l’apparecchio e procedere alla sua pulizia come descritto al punto 1.0. 3.4 - Lasciare le porte socchiuse onde evitare la formazione di cattivi odori. 3.5 - Proteggere dalla polvere il gruppo compressore. ATTENZIONE NON LAVARE L’APPARECCHIO CON GETTI D’ACQUA DIRETTI E AD ALTA PRESSIONE. EVITARE DI INDIRIZZARE L’ACQUA SULLE PARTI ELETTRICHE. 1 PULIZIA SETTIMANALE IMPORTANTE 1.1 - STRUTTURA 1.1.1 - Verificare lo stato di pulizia delle parti costituenti la struttura. Particolare attenzione va posta alle parti in acciaio. 1.1.2 - Pulire le superfici interne ed esterne usando solo acqua e sapone o detergente neutro. 1.1.3 - Risciacquare abbondantemente con acqua ed asciugare con cura. 1.2 - SISTEMA RACCOLTA ACQUA DI SBRINAMENTO 1.2.1 - Verificare che il tubo di scarico dell’acqua di condensa non sia ostruito. Procedere alla sua pulizia se necessario. GLI APPARECCHI SONO REALIZZATI IN ACCIAIO AISI 304 E ABS DEL TIPO ALIMENTARE RESISTENTE ALLA CORROSIONE DERIVANTE DA NORMALE UTILIZZO. EVITARE L’USO DI SOSTANZE DETERGENTI O SISTEMI DI PULIZIA CHE NE POSSANO COMPROMETTERE L’INTEGRITÀ. ATTENZIONE UN NUMERO DI APERTURE PORTA SUPERIORE ALLA O UTILIZZI IMPROPRI POSSONO DETERMINARE LA NECESSITÀ DI FREQUENTI VERIFICHE DELLO STATO DI RIEMPIMENTO DELLA BACINELLA 2 FERMATE PROLUNGATE MANUTENZIONE ORDINARIA 2.1 - BATTERIA CONDENSANTE E' importante che la batteria sia in grado di offrire il massimo scambio termico. E' importante quindi che la sua superficie sia sempre libera da sporco o polveri che possono essersi depositate per effetto dell'azione degli elettroventilatori. 2.1.1 - Rimuovere con l'ausilio di un aspirapolvere e di un pennello o di una spazzola non metallica tutte le impurità tipo carta e polveri che possono essersi depositate sulla superficie della batteria. 2.1.2 - Verificare che le alette in alluminio non abbiano subito danneggiamenti o piegature, nel caso si riscontrino situazioni del genere "pettinare" con apposito attrezzo la batteria fino a ripristinare la situazione iniziale per un ottimale flusso d'aria. 2.2 - ELETTROVENTILATORI 2.2.1 - Verificare lo stato del fissaggio dell’elettroventilatore al supporto. 10 RICERCA GUASTI 1 ALTA PRESSIONE ANOMALA 2 BASSA PRESSIONE ANOMALA 3 PROTEZIONI COMPRESSORE 4 GUASTO SONDE 5 COMPRESSORE NON PARTE 6 EVAPORATORE CON ECCESSIVA QUANTITÀ DI BRINA / GHIACCIO 7 IL COMPRESSORE SI ARRESTA RARAMENTE 8 APPARECCHIO RUMOROSO 9 TRACIMAZIONI DALLA BACINELLA AUTOEVAPORANTE Togliere tutto il refrigerante presente nel circuito, produrre un vuoto di valore pari o inferiore a 100Pa, immettere nel circuito una quantità di refrigerante pari a quella riportata in targhetta matricolare. causa 1.4 SCARSA AERAZIONE DELLA ZONA ADIACENTE AL VANO TECNICO. intervento Togliere eventuali ostruzioni al corretto circolare dell’aria in ingresso / uscita dal condensatore. causa 1.5 APPARECCHIO APPENA MESSO IN FUNZIONE. Se l’apparecchio e’ stato messo in funzione da poco o se si sono introdotte di recente derrate alimentari si può riscontrare l’inconveniente descritto. intervento Il manifestarsi e’ transitorio e si risolve con il raggiungimento della temperatura di set. Nessun intervento da eseguirsi. Ciò che segue vuole essere un aiuto nella ricerca della possibile soluzione ad alcune anomalie che si poterebbero manifestare sull'apparecchio, resta inteso che quanto riportato non copre totalmente la casistica delle possibilità. L'intervento di un dispositivo di sicurezza indica anomalia di funzionamento; prima di ripristinare verificare ed eliminarne la causa. Riportiamo di seguito un elenco dei possibili problemi e le relative cause con i rimedi (in grassetto). ATTENZIONE LE OPERAZIONI RIPORTATE SONO A TOTALE RESPONSABILITÀ DI CHI LE ESEGUE, È OBBLIGATORIO RIVOLGERSI AD UN CENTRO DI ASSISTENZA AUTORIZZATO IN POSSESSO DEI REQUISITI NECESSARI PER LE OPERA-ZIONI FINALIZZATE AL RIPRISTINO DELLA FUNZIONALITÀ. IMPORTANTE PRIMA DI DAR CORSO A QUALSIASI OPERAZIONE DI MANUTENZIONE ALL'APPARECCHIO DISINSERIRE LO STESSO DALLA RETE DI ALIMENTAZIONE ELETTRICA. 2 causa 2.1 inconveniente 1 BASSA PRESSIONE ANOMALA. CAPILLARE PARZIALMENTE OSTRUITO. intervento ALTA PRESSIONE ANOMALA. Sostituire il capillare con altro di identiche caratteristiche dimensionali. causa 1.1 BATTERIA CONDENSANTE SPORCA. A compressore funzionante misurare con un manometro il valore della pressione di condensazione . Con temperatura aria ingresso condensatore pari a +32C la differenza tra il valore saturo della pressione di condensazione e la temperatura aria deve assumere valori prossimi a 10 °C. intervento Se la differenza riscontrata supera questo valore eseguire la pulizia in conformità a quanto riportato alla sezione “ PULIZIA E MANUTENZIONE “ al punto 2.1. causa 1.2 VENTILATORE CONDENSATORE NON FUNZIONANTE. A compressore funzionante deve essere in funzione. intervento Prima di dar corso alla eventuale sostituzione togliere tensione all'apparecchio e verificare l'integrità delle connessioni elettriche. causa 1.3 PRESENZA DI INCONDENSABILI NEL CIRCUITO. In presenza di incondensabili la differenza tra il valore saturo della pressione di condensazione e la temperatura aria esterna assume valori superiori a 10 °C. intervento causa 2.2 FILTRO DISIDRATATORE SPORCO. Con un termometro provvisto di sonda a contatto misurare la temperatura del refrigerante a monte ed a valle del filtro, differenze di temperatura superiori a 1 °C sono sinonimo di filtro non efficiente e quindi da sostituire. intervento Sostituire. causa 2.3 CARICA REFRIGERANTE SCARSA. intervento Eliminare eventuali punti di perdita, se necessario mettere in pressione il circuito per evidenziarle, eseguire operazioni di vuoto e carica. 3 INTERVENTO PROTEZIONI COMPRESSORE. causa 3.1 Il termostato non conteggia i tempi di ritardo. Partenze ravvicinate non consentono il riequilibrarsi delle pressioni. 11 intervento Verificare parametro relativo ed eventualmente riportare ai valori di fabbrica. causa 3.2 TEMPERATURA GAS ASPIRATO SUPERIORE AI VALORI OTTIMALI. intervento -Verificare funzionalità dell’organo di laminazione. -Verificare carica refrigerante e l’eventuale presenza di punti di perdita, se necessario mettere in pressione il circuito per evidenziarli, eseguire operazioni di vuoto e carica. 4 causa 6.2 SISTEMA DI CHIUSURA PORTE NON FUNZIONALE. intervento Verificare la funzionalità ed eventualmente sostituire la cerniera. causa 6.3 SBRINAMENTO NON OTTIMALE. intervento Verificare che frequenza, durata, modalità degli sbrinamenti siano conformi alle specifiche del costrut-tore, eventualmente modificare dopo aver contattato l’ufficio tecnico di fabbrica. causa 6.4 SCARICO ACQUA DI SBRINAMENTO NON SIFONATO. intervento Verificare la presenza di sifone sul tubo di scarico prima del raccordo con la parte fissa, eventualmente modificare. causa 6.5 MERCE INTRODOTTA CALDA E CON ALTO CONTENUTO DI ACQUA. intervento Curare le condizioni della merce introdotta. GUASTO SONDE. causa 4.1 INTERRUZIONI CONNESSIONI ELETTRICHE. intervento Verificare l’integrità delle connessioni ed eventualmente sostituire la sonda. causa 4.2 SONDA NON FUNZIONALE. intervento Verificare con un tester l’integrità della sonda ed eventualmente sostituire. 5 7 IL COMPRESSORE SI ARRESTA RARAMENTE. causa 7.1 CARICA REFRIGERANTE SCARSA. intervento -Verificare carica refrigerante e l’eventuale presenza di punti di perdita, se necessario mettere in pressione il circuito per evidenziarli, eseguire operazioni di vuoto e carica. causa 7.2 GUARNIZIONI PORTA POCO EFFICIENTI. intervento Verificare lo stato delle guarnizione ed eventualmente sostituire. causa 7.3 ROTTURA VALVOLA DI ASPIRAZIONE DEL COMPRESSORE. intervento Verificare con un manometro il valore della pressione di aspirazione ed il valore della temperatura della carcassa del compressore. Eventualmente sostituire. MANCATO AVVIO DEL COMPRESSORE. causa 5.1 I MORSETTI DEL MOTORE ELETTRICO NON RISULTANO ESSERE ALIMENTATI. intervento Verificare la continuità dei collegamenti elettrici del cavo di alimentazione del compressore. causa 5.2 IL VALORE DELLA TENSIONE DI ALIMENTAZIONE E’ FUORI RANGE AMMESSO. intervento Determinare la causa ed eliminarla. causa 5.3 IL MOTORE ELETTRICO HA UN AVVOLGIMENTO APERTO O IN CORTOCIRCUITO. intervento Sostituire il compressore. causa 5.4 IL COMPRESSORE HA DEFICIENZE MECCANICHE. intervento Sostituire il compressore causa 5.5 TERMOSTATO ELETTRONICO NON FUNZIONALE. intervento Verificare con l’ausilio di un tester la funzionalità del contatto del termostato a cui fa capo il cavo d’alimen-tazione del compressore. causa 5.6 MOTORE ELETTRICO BRUCIATO. intervento Verificare con l’ausilio di un tester la funzionalità del motore ed eventualmente sostituire il compressore. 6 8 APPARECCHIO RUMOROSO. causa 8.1 VITI DI FISSAGGIO COMPRESSORE AL BASAMENTO ALLENTATE. intervento Verificarne lo stato di serraggio ed eventualmente stringere. causa 8.2 TUBI DI COMPRESSIONE O ASPIRAZIONE CHE VIBRANO. intervento Verificarne lo stato di fissaggio ed eventualmente distanziare tubi adiacenti che si urtano. 9 TRACIMAZIONI DALLA BACINELLA AUTOEVAPORANTE causa 9.1 FREQUENTI INTRODUZIONE DI MERCE CALDA E CON ALTO CONTENUTO DI ACQUA. intervento Curare le condizioni della merce introdotta. causa 9.2 GUARNIZIONI PORTA POCO EFFICIENTI. intervento Verificare lo stato delle guarnizioni ed eventualmente sostituire. EVAORATORE CON ECCESSIVA QUANTITÀ DI BRINA / GHIACCIO. causa 6.1 GUARNIZIONI PORTA POCO EFFICIENTI. intervento Verificare lo stato delle guarnizioni ed eventualmente sostituire. 12 GENERAL NOTICES This manual has been prepared to enable a correct installation, regulation and maintenance of the appliance; it is therefore of fundamental importance that: v v v v v The warnings contained in this booklet are read carefully as they supply The packing materials (plastic bags, polystyrene, nails, etc.) as potential essential indications regarding the safety of the installation, use and hazards, must be kept out of the reach of children and properly recycled of maintenance. according to existing local regulations. v This manual and the wiring diagram must be stored with care and made The appliance has been designed and constructed for the conservation of available to the operator for any future consultation. foodstuffs and should therefore be destined to this sole purpose for which it The appliance must be installed, tested and serviced by qualified personnel in has been expressly conceived. Any use whatsoever other this specific possession of the legal qualifications. purpose does not commit the constructor in any way whatsoever. The constructor declines all responsibility with invalidity of the warranty in the v Shutdown the appliance in the event of breakdown or malfunctions. event of electrical and/or mechanical modifications. Any adjustment v For eventual repairs contact exclusively the service centres authorised by the whatsoever not expressly authorised and in disrespect of this manual constructor and request the use of original spare parts. v invalidate the warranty. v Observe all existing local regulations at the time of installation. v Verify that the mains line characteristics are conform to the data given on the If in doubt do not use the appliance and contact professionally qualified personnel. v The disrespect of the above conditions could risk the safety of the appliance. serial plate of the appliance. GENERAL TECHNICAL DATA MODEL 1P ROLL-IN TN 1PP 1PPM 1PPV 2P 1PV 2PV 2PP 2PPM 2PPV ROLL-IN BT 1P 1PP DIMENSIONS AND CAPACITY External dimensions Length Width Height Total capacity A (mm) B (mm) C (mm) Lt 880 1053 1760 1046 1053 880 1053 1046 2290 1200 1046 2250 1200 2400 GENERAL TECHNICAL DATA Standard voltage Version Cooling system Compr temperatures Worjing temperatures Absorbed current Absorbed power Type defrost Defrost ne / max duration min Type refrigerant V 230/1/50 Capillary With valve Ventilated W °C A W 302 ¬ 2.3 520 3.1 570 2.3 520 2.4 560 +2 / +10 2.6 5.8 6.2 600 1327 1427 Pause 4 / 30 R134a 994 ¬ 5.8 1327 6.2 1427 6.5 1487 522 -15 / -20 5.2 1198 Elettrical R404A WEIGHTS AND VOLUMES Gross weights Packaged volume Kg mc 270 290 2.3 470 500 4.5 ¬ Under CECOMAF conditions -10 evaporation +55 condensation. 270 290 2.3 Under CECOMAF conditions-30 evaporation +55 condensation. By remote appliances with cooling unit placed at a distance until 10 m, we suggest to increase of a 20% rating the compressor capacity. For other data, please check the tecnical label on the appliance. 13 ACCESSORIES Operating space Working space The appliance can be fitted with the following accessories (on request): - different voltages from the standard - 100 mm wheel kit POSITIONING The appliances are designed for indoor installation. - Check that the floor is capable of supporting the weight of the appliance and that it is level. - Respect the working spaces. WORKING SPACES The choice of the appliance’s position is of fundamental importance for it to work properly. The appliances require a minimum space to operate and serving. It must be installed as far as possible from any heat sources. Ensure that there is a clearance of at least 50 cm. between the ceiling or other overhead cover and the top of the appliance, to guarantee adequate air circulation. Note : The dimensions in the figure are expressed in mm. DIMENSIONS Type 1 ROLL-IN 1P ROLL-IN 1PP Type 2 ROLL-IN 2P ROLL-IN 2PP Legend : 1 - Control panel 2 - Compressor group 3 - Power line inlet 4 - Self-evaporating drainpain 3 - Position of serial number data 14 RECEPTION 1 2 3 CONTROLS AT RECEPTION HANDLING REMOVING THE PACKING 1 CONTROLS AT RECEPTION WARNING The refrigerators are shipped in appropriate protective packing. On arrival, check that the appliance has not incurred transport damage and that it is complete according to the order. In the event of visible damage immediately note the damage on the transport documents with the following wording: “RECEIVED WITH RESERVE FOR EVIDENT DAMAGE OF PACKING” since the delivery terms are ex factory this involves reimbursement of damages by the insurance company. THE RESPECT OF THE RECOMMENDATIONS PRINTED ON THE OUTSIDE OF THE PACKING IS A GUARANTEE OF A SOUND PHYSICAL AND OPERATING CONDITION OF THE APPLIANCE ALL TO THE ADVANTAGE OF THE END-USER. THEREFORE THE FOLLOWING IS RECOMMENDED : - HANDLE WITH CARE - KEEP DRY - STACKING OF OTHER OBJECTS ON THE APPLIANCE MUST BE ABSOLUTELY AVOIDED. IMPORTANT ALL THE OPERATIONS INDICATED BELOW MUST BE PERFORMED IN RESPECT OF EXISTING SAFETY REGULATIONS, BOTH FOR THE EQUIPMENT IN USE AND FOR THE OPERATING PROCEDURES. 3 UNPACKING 3.1 - Remove the corner protections (pieces of wood). 3.2 - Remove the protection on the top (piece of wood). 3.3 - Lift the carton. 3.4 - Lift the appliance to separate it from the pallet. 3.5 - Place the appliance on the ground in its chosen position. 3.6 - Check for visible damage. 3.7 - Keep the packing out of the reach of children as it could be a danger hazard. 3.8 - Dispose of the packing to the specialised collection or recycling points ( respect existing regulations ). 3.9 - Check that the serial number corresponds to the transport documents. WARNING BEFORE BEGINNING HANDLING OPERATIONS ENSURE THAT THE LIFTING CAPACITY IS SUFFICIENT FOR THE APPLIANCE IN QUESTION. 2 HANDLING 2.1 - HANDLING with FORK LIFT or SIMILAR 2.1.1 - Insert the forks into the side of back of the wooden pallet supplied with the appliance. 2.1.2 - Begin lifting checking that the appliance is in stable equilibrium. WARNING DURING HANDLING DO NOT TIP OR TURNOVER 15 ASSEMBLY INSTRUCTIONS The purpose of this section is to allow a trouble-free installation of the equipment supplied as an assembly kit; it is therefore extremely important that: You read the instructions contained in this booklet very carefully, as they will give you important information on installation safety. The Manufacturer declines all responsibility, and the warranty shall be null and void, if any electrical and/or mechanical alterations are made to the product, which are not expressly authorised and do not comply with the instructions given herein. Packing materials (plastic bags, polystyrene foam, nails, etc.) should be kept out of children's reach as they are potential sources of hazard, and they should be properly recycled in compliance with local regulations in force. Upon delivery, the disassembled equipment is contained in two packages. 1) v Ç 1 Ceiling assembly (including condensing unit, electrical equipment and evaporating unit) v  1 Bottom assembly v Æ 1 Instrument panel (2 for ROLL-INP 2P and ROLL-IN 1PP) v 2 Rack guides (4 for ROLL-IN 2PP and ROLL-IN 2P) v 1 Air flow guard v Standard-supplied user's manual, screws required for assembling and spanner. 2) Open wooden box v Á 2 Side panel assemblies v Ä 1 Door with hinges and screws required for assembling (2 for ROLL-IN 1PP and ROLL-IN 2P - 4 for ROLL-IN 2PP) v Å 1 Upright (2 for ROLL-IN 2PP - None for ROLL-IN 1P and ROLL-INP 1P) v È 1 Back panel extension (only for ROLL-IN 2P) v À 2 Back panels (1 for ROLL-IN 1P - None for ROLL-IN 1PP and ROLL-IN 2PP) IMPORTANT INSTALLATION MUST BE CARRIED OUT BY PROFESSIONALLY QUALIFIED PERSONNEL ACCORDING TO THE INSTRUCTIONS CONTAINED IN THIS SECTION AND IN COMPLIANCE WITH ALL APPLICABLE SAFETY REGULATIONS IN FORCE, AS REGARDS BOTH THE EQUIPMENT USED AND THE OPERATIONAL METHODS. ROLL-IN 1P ROLL-IN 1PP Closed wooden box Check that all components are present and not damaged. ROLL-IN 2P ROLL-IN 2PP ASSEMBLY STEPS Step 1) ROLL-IN 1P and ROLL-IN 2P only Place the back panel À horizontally and join the side Á panels by turning the standard-supplied spanner clockwise, as shown in the photo (*) Note: If you are assembling a ROLL-IN 2P, secure also the back panel extension È to the side back panels. À Secure the bottom assembly ® to the side Á and back panels À (see photo of Step 2) (*) Step 2) ROLL-IN 1PP and ROLL-IN 2PP only Place the two side panels Á and secure the bottom panel ® by using M5x40 screws (see photo). 16 Step 3) ROLL-IN 2P and ROLL-IN 2PP only Step 9) Closing regulation Screw the upright(s) Å from the bottom by using M5x40 screws, as shown. Assemble and adjust the closing pin(s) of the door(s), checking for proper hooking on the striker(s) located on the side panels and/or on the uprights. Step 10) Securing the air flow guard Step 4) Step 5) Positioning and securing the ceiling Secure the air flow guard to the lower part of the ceiling. Ç.(*) Use self-tapping screws, size 4.8x16 Insert the ceiling assembly Ç from the front side, between the side panels Á as shown in the photo(*). Step 11) Anchoring the unit Place the unit in vertical position. Fasten the unit to the floor (see photo) by using all the M6x60 screws and screw anchors supplied with it. NOTE: Failure to carry out this operation can jeopardise both the safety and stability of the equipment. Note: When carrying out this operation, bear in mind that the weight of the ceiling assembly may exceed ... Kg (... pounds). Use the standard-supplied spanner to screw the hooks placed on the side panels Á clockwise, so as to secure them to the ceiling Ç, as shown. Step 12) Fastening the rack guides Fasten the rack guides inside the cold room(s), in the position shown in the photo, by using self-tapping 4.8x16 screws. Step 6) ROLL-IN 2P and ROLL-IN 2PP only Screw the upright(s) Å to the ceiling Ç by using M6x20 bolts as shown in the photo. Step 13) Lighting system (available only on glass door units) Fasten the metal deflectors and the standard-supplied hooks on the side panels. Assemble the fluorescent tube, the plastic guard and the corresponding wires and put everything in place by fixing it to the hooks. Make all electrical connections according to the wiring diagram. Step 7) Fixing door hinges Remove the hinge's coverings (see photo) and screw the hinges of the door(s) Ä to the side panels Á by using M5x40 screws; after finishing such operation, replace the hinge covers. NOTE: Make sure that the gaskets adhere to the side panels evenly, without too much compression. NOTE: This operation must be carried out by qualified personnel Step 14) Plugging the holes Plug the holes of the hooks with the standard-supplied plugs. Step 8) Fixing the instrument panel and the electric switchboard Screw the instrument panel(s) Æ to the side panels Á and fasten the electric switchboard to the ceiling, being careful to position it properly, so as to match the hole found on the instrument panel. (*) In models ROLL-IN 1PP and 2PP, secure the two upper crosspieces to the side panels. To do so, use M6x14 screws. (*) 17 The size of the parts may change depending on the model of the unit. CONTROL PANEL 1 THERMOREGULATION 2 COMPRESSOR OPERATION 3 ADDITIONAL DEFROST CYCLES 4 CHANGING THE SET POINT 5 UNIT OPERATING STATUS 6 DAMAGED SENSOR The control panel is made up of the following: A BACKLIGHTED ON-OFF SWITCH: to turn the refrigerator on and off; when in ON, the electrical system is energised; B DEFROST LIGHT: yellow light referring to the unit defrost cycle. When ON, it segnals that the unit is in the defrost phase C ELECTRONIC THERMOSTAT: it governs and controls the refrigerator. 1 THERMOREGULATION The parameter called "dif" defines the variation of cold-storage room temperature in relation to the Set point. Example: having set a Set point = -2°C and a "dif" = 2°C, operation will be as follows: Compressor will start when cold-storage room temperature exceeds: -2°C +(2°C)=+0°C Compressor will stop when cold-storage room temperature drops to: -2°C Set point. can be changed within a factory-set range. 2 3 4 5 UNIT OPERATING STATUS To find out the unit operating status, you just have to look at the thermostat LED's. The table below shows their meaning: LED status meaning al L1 off The alarm isn't enabled al L1 on The alarm is enabled COMPRESSOR OPERATION def L2 off No defrost in progress When the compressor is on, LED (L3) found on the thermostat front def L2 on Defrost in progress close to the K symbol, lights up. def L2 blinking Manual defrost ADDITIONAL DEFROST CYCLES comp L3 off Compressor off The defrost cycle has the purpose of melting away any frost or ice formed on the evaporator surface; frost and ice form when you open the doors of your equipment and when you introduce hot foods in it. Should the need arise, it is possible to start a manual defrost cycle by pressing key P1 and holding it down for more than 5 seconds; the corresponding LED L2 will light up and blink. comp L3 blinking In case of delay, protection or blocked enabling comp L3 on Compressor on vent L4 (ID 974) off Fan off vent L4 (ID 974) on Fan on 6 CHANGING THE SET-POINT DAMAGED SENSOR Should the sensor break down, the thermostat will display the following message: E1 cold-storage room temperature sensor failure E2 Evap.temperature sensor failure (ID 974) - Access the "Machine Status" menu by pressing and quickly releasing the "set" (L4) key. The label of the "Set" folder appears. To display the Setpoint value press the "set" key again. The value appears on the display. - To change the Setpoint value, use the P1 and P2 keys within 15 seconds. 18 START-UP 1 2 3 PRELIMINARY CONTROLS START-UP - CHECKS DISPOSAL OF UNIT IMPORTANT BEFORE CONNECTING THE APPLIANCE CHECK THAT THE DATA ON THE SERIAL PLATE CORRESPOND TO THE ACTUAL ELECTRICAL SUPPLY. THE SERIAL PLATE GIVING THE ELECTRICAL DATA REQUIRED IN THE INSTALLATION IS FOUND INSIDE THE APPLIANCE ON THE TOP RIGHTHAND SIDE. THE INSTALLATION MUST BE MADE ACCORDING TO THE INSTRUCTIONS GIVEN IN THIS SECTION, BY PROFESSIONALLY QUALIFIED PERSONNEL. THE ELECTRICAL SAFETY OF THIS APPLIANCE IS ONLY GUARANTEED WHEN IT IS CONNECTED TO AN EFFICIENT EARTHING PLANT AS PRESCRIBED BY EXISTING ELECTRICAL SAFETY REGULATIONS. THIS FUNDAMENTAL SAFETY REQUIREMENT MUST BE VERIFIED AND, IF IN DOUBT, REQUEST A PRECISE CONTROL OF THE PLANT BY PROFESSIONALLY QUALIFIED PERSONNEL. THE CONSTRUCTOR DECLINES ALL RESPONSIBILITY FOR DAMAGES CAUSED BY THE DISRESPECT OF AN EFFICIENT EARTHING OF THE PLANT. THE APPLIANCE MUST ALSO BE FITTED WITH AN EQUIPOTENTIAL SYSTEM WHOSE EFFICIENCY MUST BE VERIFIED ACCORDING TO EXISTING REGULATIONS. THE USE OF ADAPTERS, MULTI-PLUGS, AND/OR EXTENSION LEADS IS STRICTLY PROHIBITED 1 2.1 – 6 holes of 12 mm diametre have to be drilled into the floor. Their position have to match that one of the holes already existing on the bottom of the appliance 2.2 - Fix the appliance using the M6 expansion bolts and the washers supplied with the unit. PRELIMINARY CONTROLS 1.1 - GENERAL CONTROLS 1.1.1 - Control the appliance is perfectly level. Regulate the adjustable feet if necessary. 1.1.2 - Control that the plastic protective coating is removed from all external surfaces. 1.1.3 - Control that the interior is washed with warm water and a neutral soap. 1.1.4 - Control that the appliance is positioned as far as possible from heat sources. 1.1.5 - Control that the free air circulation around the motor compartment is not obstructed. 1.1.6 - Control that the locking keys are beyond the reach of children. 1.2 - CONTROL OF THE ELECTRIC SYSTEM 1.2.1 - Control the voltage and frequency of the mains distribution : THEY MUST FALL WITHIN THE GIVEN VALUES 230 ± 10% 50Hz 1.2.2 - Tighten all the screws that fix the wires to the electrical components ( vibrations during handling and transport could have loosened them ). 1.2.3 -Check that there is a circuit breaker before the socket with an opening distance of the contacts equal to or over 3 mm. 1.2.4 - Turn the main switch to the OFF position where the power cable plug will be connected. 1.2.5 -Check the compatibility of the socket with the plug of the appliance. If necessary, have it changed by professionally qualified personnel. The technician should also check that the cable section to the socket is adequate for the absorbed power of the appliance. Check that the plug is in the socket. 2 IMPORTANT THE APPLIANCE MUST BE PROPERLY FIXED TO THE FLOOR TO OPERATE CORRECTLY. THE APPLIANCE MUST BE POSITIONED PERFECTLY LEVEL. 3 START-UP - CHECKS After the above controls have been thoroughly completed the appliance may be started-up : 3.1.1 - Turn the main switch, connected to the power cable plug, to the ON position. 3.1.2 - Turn the switch of the appliance to the ON position. 3.1.3 - Visualise the SET POINT. 3.1.3.1 - Press the SET  button on the electronic thermostat checking that the LED set à is flashing; 3.1.3.2 - Set the desired value, based on the type of product being stored. To modify the factory setting of this value consult the CONTROL PANEL section. IMPORTANT BEFORE INTRODUCING FOOD ALLOW THE APPLIANCE TO REACH STABLE OPERATING CONDITIONS. FLOOR FIXING 19 CLEANING AND MAINTENANCE 1 2 3 WEEKLY CLEANING ROUTINE MAINTENANCE LONG SHUTDOWNS This section has been dedicated to the end-user and is extremely important for the appliance to work correctly in the long-term. A few simple operations conscientiously carried out at set periods can avoid the need of servicing by specialised personnel. The operations to be made do not require any particular technical knowledge and can be summarised in simple controls of the appliances components. 2.3 - POWER CABLE 2.3.1 - Check that the power cable that connects the appliance to the mains socket is not cut, cracked or altered in such a way as to compromise the insulation. Contact your authorised service centre if this requires maintenance. 3 LONG SHUTDOWNS If the appliance is inactive for long periods of time proceed as follows: IMPORTANT 3.1 - Turn the main switch to the OFF position. 3.2 - Remove the plug from its socket. 3.3 - Empty the appliance and clean as in point 1.0. 3.4 - Leave the door ajar to avoid bad odours from forming. 3.5 - Protect the compressor group from dust. BEFORE BEGINNING ANY TYPE OF MAINTENANCE OR CLEANING WORK ON THE APPLIANCE DISCONNECT THE MAINS POWER SUPPLY. WARNING IMPORTANT DO NOT WASH THE APPLIANCE DIRECTLY WITH HIGH PRESSURE WATER JETS. AVOID SPRAYING WATER DIRECTLY ONTO ELECTRICAL PARTS. THE APPLIANCES ARE MADE OF AISI 304 STEEL WHICH IS CORROSION PROOF UNDER NORMAL USE. AVOID USING DETERGENTS OR SIMILAR CLEANERS THAT MAY BE DETRIMENTAL TO ITS PROTECTION. 1 WEEKLY CLEANING 1.1 - THE BODY WORK 1.1.1 - Check that the body work is clean. Pay particular attention to the sections in steel. 1.1.2 - Clean the inside and outside surfaces only with warm water and soap or a neutral detergent. 1.1.3 - Rinse with plenty of water and dry thoroughly. 1.2 - DEFROST WATER DRAIN SYSTEM 1.2.1 - Check that the condensate water drain pipe is not blocked. Clean if necessary. WARNING IF THE DOOR IS OPENED MORE THAN NORMAL OR IMPROPERLY USED, THIS CAN CREATE THE NEED OF FREQUENT CHECKS ON THE LEVEL OF THE DRAINPAN 2 ROUTINE MAINTENANCE 2.1 - CONDENSING COIL It is important that the coil is capable of offering the maximum possible heat exchange. It is therefore important that its surface be always free of dirt or dust that may be deposited by the effect of the fan’s operation. 2.1.1 - Use a vacuum cleaner and soft bristled brush to remove all the impurities such as paper or dust that may have deposited on the coil. 2.1.2 - Check that the aluminium fins have not been damaged or bent, if this is the case "comb" the coil with the appropriate tool until the original condition is regained to optimise the air flux. 2.2 - FANS 2.2.1 - Check that the fan is properly fixed to its frame 2.2.2 - Check, as best possible, for unbalancing of the fans, indicated by abnormal noises or vibrations. 20 FAULT FINDING 1 2 3 4 5 6 7 8 9 ABNORMALLY HIGH PRESSURE ABNORMALLY LOW PRESSURE COMPRESSOR PROTECTIONS SENSOR FAILURE THE COMPRESSOR DOES NOT START EVAPORATOR WITH EXCESSIVE FROST / ICE THE COMPRESSOR RARELY STOPS THE APPLIANCE IS NOISY OVERFLOW OF SELF-EVAPORATING DRAINPAN The following list has been prepared as a guideline to the search of possible remedies to some anomalies that could be found in the appliance, it should be understood that this list does not cover all possible cases. If a safety device trips, this signals an anomaly in operation; before resetting it, check and eliminate the cause. The list below gives some of the problems that may be found with their relevant cause and remedies (in bold print). cause 1.4 FEEBLE AERATION OF THE ZONE AROUND THE TECHNICAL COMPARTMENT. remedy Remove any obstructions to a correct circulation of the inlet /outlet air to the condenser. cause 1.5 APPLIANCE HAS JUST BEEN STARTED-UP. If the appliance has been recently started-up and the fridge compartment has just been filled food stuffs this inconvenience may be occur. remedy It is merely a temporary phase that will disappear the moment the set point temperature has been reached. No remedy needed. WARNING THE OPERATIONS GIVEN ARE THE SOLE RESPONSIBILITY OF THE PERSON WHO CARRIES THEM OUT, AN AUTHORISED SERVICE CENTRE MUST BE CONTACTED AS THEY HAVE THE NECESSARY REQUISITES TO CARRY OUT THE OPERATIONS NECESSARY TO RESTORE NORMAL OPERATION. 2 ABNORMALLY LOW PRESSURE. IMPORTANT cause 2.1 CAPILLARY PARTIALLY BLOCKED. remedy Replace the capillary with another of identical dimensional characteristics. cause 2.2 DIRTY FILTER DRYER. With a contact thermometer measure the refrigerant temperature before and after the filter, a temperature difference of more than 1 °C is a symptom that the filter has lost efficiency and should therefore be changed. remedy Replace. cause 2.3 FEEBLE REFRIGERANT CHARGE. remedy Eliminate any leaks, if necessary pressurise the circuit to emphasise them, carry out the vacuum and charging operations. BEFORE BEGINNING ANY MAINTENANCE WORK ON THE APPLIANCE DISCONNECT THE ELECTRIC MAINS SUPPLY. inconvenience 1 ABNORMALLY HIGH PRESSURE. cause 1.1 DIRTY CONDENSING COIL. With the compressor operating use a gauge to measure the condensing pressure. With a condenser inlet air temperature of +32C the difference between the saturated condensing pressure and the air temperature must be around 10 °C. remedy If the difference is found to be above this value clean according to the “ CLEANING AND MAINTENANCE “ section at point 2.1. cause 1.2 THE CONDENSER FAN DOES NOT WORK. With the compressor operating the fan must operate. remedy Before replacing the fan disconnect the supply voltage and check the electric connections are in good order. cause 1.3 IMPURITIES PRESENT IN THE CIRCUIT. If impurities are present the difference between the saturated condensing pressure and the ambient air temperature will be over 10 °C. remedy Remove all the refrigerant in the circuit, create a vacuum equal or below 100Pa, charge the circuit with the quantity of refrigerant given on the serial plate. 3 TRIPPED COMPRESSOR PROTECTION. cause 3.1 THE THERMOSTAT DOES NOT COUNT THE DELAY TIME. Adjacent start-ups don’t allow the pressures the equalise. remedy Check relevant parameter and restore to factory setting if necessary. cause 3.2 SUCTION GAS TEMPERATURE ABOVE THE OPTIMUM VALUES. remedy -Check that the expansion device is working correctly. -Check the refrigerant charge and eventually for any leaks, if necessary pressurise the circuit to emphasise them, carry out the vacuum and charging operations. 21 cause 6.5 HOT GOODS OR WITH A HIGH WATER CONTENT ARE INTRODUCED. remedy Control the conditions of the goods being introduced. 4 SENSOR FAILURE. cause 4.1 FAULTY ELECTRIC CONTACT. remedy Check the connections are in good order and eventually replace the sensor. cause 4.2 SENSOR NOT WORKING. remedy Use a tester to check the sensor is working and replace if necessary. 7 THE COMPRESSOR RARELY STOPS. cause 7.1 FEEBLE REFRIGERANT CHARGE. remedy Check the refrigerant charge and for any leaks, if necessary pressurise the circuit the emphasise them, carry out the vacuum and charging operations. cause 7.2 INEFFICIENT DOOR GASKET. remedy Check the state of the door gasket and replace if necessary. cause 7.3 BROKEN SUCTION VALVE ON THE COMPRESSOR. remedy Use a gauge to check the suction pressure and the temperature of the compressor’s crankcase. Replace if necessary. 5 THE COMPRESSOR DOES NOT START. cause 5.1 NO POWER IS REACHING THE TERMINALS OF THE ELECTRIC MOTOR. remedy Check the continuity of the electric connections of the supply cable to the compressor. cause 5.2 THE SUPPLY VOLTAGE IS OUT OF THE PERMITTED RANGE. remedy Determine the cause and eliminate it. cause 5.3 THE MOTOR HAS AN OPEN SHORT CIRCUITED WINDING. remedy Replace the compressor. cause 5.4 THE COMPRESSOR HAS A MECHANICAL FAULT. remedy Replace the compressor cause 5.5 THE ELECTRONIC THERMOSTAT DOESN’T WORK. remedy Use a tester to check the contacts of the thermostat which leads from the compressor supply cable. cause 5.6 BURNT ELECTRIC MOTOR. remedy Use a tester to check the motor and replace the compressor if necessary. 8 NOISY APPLIANCE. cause 8.1 THE FIXING BOLTS OF THE COMPRESSOR TO THE BASE ARE LOOSE. remedy Check the bolts and tighten if necessary. cause 8.2 COMPRESSION OR SUCTION LINES VIBRATE. remedy Check they are fixed properly and if necessary separate them from nearby pipes that are being knocked. 9 OVERFLOW OF THE SELF-EVAPORATING DRAINPAN cause 9.1 FREQUENT INTRODUCTION OF HOT GOODS OR WITH HIGH WATER CONTENT. remedy Control the conditions of the goods introduced. cause 9.2 INEFFICIENT DOOR GASKET. remedy Check the state of the gasket and replace if necessary. 6 EVAPORATOR WITH EXCESSIVE FROST / ICE. cause 6.1 THE DOOR GASKET DOES NOT MAKE A SEAL. remedy Check the gasket and change if necessary. cause 6.2 DOOR CLOSE SYSTEM FUNCTIONS BADLY. remedy Check the closure and replace the hinge if necessary. cause 6.3 DEFROST IS NOT COMPLETE. remedy Check that the frequency, duration, system conform to the construction spec’s, if necessary contact the factory and modify. cause 6.4 DEFROST WATER DRAIN HAS AN INEFFICIENT DRAIN TRAP. remedy Check that there is a drain trap on the drain pipe before coupling to the fixed section, modify if necessary. 22 ALLGEMEINE HINWEISE Das vorliegende Handbuch dient zur korrekten Installation, Einstellung und Wartung des Geräts; deshalb sollte man unbedingt darauf achten, dass: v v v Die folgenden Hinweise aufmerksam durchgelesen werden, da sie wichtige Anweisungen zur Sicheheit bei der Installation, dem usw) stellt eine mögliche Gefahrquelle dar und sollte deshalb ausser Gebrauch und der Wartung liefern. Reichweite von Kindernn gehalten und unter Befolgung der Das vorliegende Handbuch und das elektrische Schema an einem geltenden lokalen Normen beseitigt werden. v sicheren Ort aufbewahrt und dem Bediener zwecks Nachschlagen v v Das Gerät wurde für eine Konservierung von Lebensmitteln zur Verfügung gestellt werden. entworfen und hergestellt und sollte dshalb nur zu dem Zweck, zu Das Gerät nur vom Fachpersonal, das mit den gesetzlichen dem es gebaut wurde, verwendet werden. Der Erbauer lehnt jede Erfordernissen ausgestattet ist, installiert, geprüft und gewartet wird. Verantwortung im Falle von unsachgemässer Benutzung ab. Der Hertseller lehnt jede Verantwortung im Falle von elektrischen v Das Gerät bei Störungen oder bei schlechtem Betrieb ausschalten. und/oder mechanischen Abänderungen ab. Die Garantie erlischt im v Sich bei erforderlicher Reparatur ausschliesslich an einen vom allgemeinen, wenn unsachgemässe Eingriffe vorgenommen wurden Erbauer zugelassenen technischen Kundendienst wenden und die und wenn die Anweisungen des vorliegenden Handbuchs nicht Verwendung von Originalersatzteilen fordern. v befolgt werden. v Das Verpackungsmaterial (Plastiktüten, Polystyrolschaum, Nägel, Die bei der Installation geltenden lokalen Sicherheitsnormen qualifiziertes Fachpersonal wenden. v beachten. v Sich vergewissern, dass die Eigenschaften des elektrischen v Netzes den Daten des Geräteschildes entsprechen. Das Gerät im Zweifelsfalle nicht benutzen und sich an ein Die Nichtbefolgung der obengenannten Punkte kann die Sicherheit des Geräts beeinträchtigen. ALLGEMEINE TECHNISCHE DATEN MODELL 1P 1PV ROLL-IN TN 1PP 1PPM 1PPV 2P 2PV 2PP 2PPM 2PPV ROLL-IN BT 1P 1PP ABMESSUNGEN UND VERMÖGEN Ausenabm Breite Tiefe Höje Inhalt A (mm) B (mm) C (mm) Lt 880 1053 1760 1046 1053 880 1053 1046 2290 1200 1046 2250 1200 2400 TECHNISCHE DATEN Standard – Spannung Audführung Kühlsystem Nennleistung kompressor Betriebstemperatur Ges. Aufgenommener Strom Ges. Aufgenommene Leistung Typ Abtauvorgang Abtauvorgang nr / max. Dauer min Kühlmittel V 230/1/50 Mit kapillaren Mit Ecpansionventil Belüftet W °C A W 302 ¬ 2.3 520 3.1 570 2.3 520 2.4 560 +2 / +10 2.6 5.8 6.2 600 1327 1427 Pause 4 / 30 R134a 994 ¬ 5.8 1327 6.2 1427 6.5 1487 522 -15 / -20 5.2 1198 Elektrische R404A GEWICHT UND VOLUMEN Gesamt Gewicht Volumen Kg mc 270 290 2.3 470 500 270 4.5 ¬ Unter CECOMAF Voraussetzungen -10 Verdampfung +55 Kondensation. Kondensation. Unter CECOMAF Voraussetzungen -30 Verdampfung +55 Bei Geräten mit Zentralkühlung wo die Kühleinheit auf eine Entfernung bis 10 m gelegt ist, wird empfohlen, die Verdichterleistung um 20% zu erhöhen. Weitere Eigenschaften des Geräts sind aus dem Typenschild zu entnehmen. 23 290 2.3 ZUBEHÖRTEILE Arbeitsraum Funktionsraum Auf Anfrage kann das Gerät mit folgenden Zubehörteilen ausgestattet werden : - vom Standard abweichende Betriebsspannungen; - ein Satz Räder zum Anbringen 100 mm. POSITIONIERUNG Die Geräte müssen im Inneren installiert werden. - Sich vergewissern, dass die Auflageebene dem Gewicht des Geräts angemessenapparecchio - Die Funktionsräume einhalten. FUNKTIONSRÄUME Der optimal Betrieb der Einheit setzt eine gute Positionierung voraus. Um einen guten Betrieb zu garantieren und auf leichte Weise gewartet zu werden, benötigen die Geräte etwas Platz. Sich vergewissern, dass das Gerät möglichst nicht in unmittelbarer Nähe von Wärmequellen installiert wird. Sich vergewissern, dass zwischen Decke bzw. Sonstige obere Abdeckung ein Abstand von mindestens 50 cm besteht, um eine zufriedenstellende Luftzirkulation zu gestatten. BEMERKUNG: Abmessungen der Abbildungen in mm angegeben. ABMESSUNGEN Typ 1 ROLL-IN 1P ROLL-IN 1PP Typ 2 ROLL-IN 2P ROLL-IN 2PP Legende : 1 - Schalttafel 2 - Komporessorgruppe 3 - Eingang der elektrischen Linie 4 - Selbsverdunstungsbehälter 3 24 Position des Schilders mit Matrikel ERHALT DER WARE 1 2 3 KONTROLLE BEI ERHALT DER WARE HANDHABUNG BESEITIGUNG DER VERPACKUNG WICHTIGE HINWEISE 1 KONTROLLE BEI ERHALT DER WARE Die Kühlschränke werden in eigenes dazu bestimmten Schutzverpackungen zum Versand gebracht. Man sollte sich bei Erhalt der Ware vergewissern, ob diese eventuelle Transportschäden erlitten hat und ob sie mit allen Teilen gemäss Bestellung ausgestattet ist. Bei sichtbaren Beschädigungen muss der Schaden umgehend auf der Transportunterlage wie folgt vermerkt werden : “RÜCKNAHME MIT VORBEHALT WEGEN AUFFÜLLIGEN VERPACKUNGSSCHÄDEN“ DA DIE rüCKGABE AB Werk mit dem Schadenersatz zu Lasten der Versicherung verbunbden ist. DIE BEFOLGUNG DER AUF DER AUSSENSEITE DER VERPACKUNG AUFGEFÜHRTEN EMPFEHLUNGEN GARANTIERT DEM ENDBENUTZER DIE UNVERSEHRTHEIT UND DIE FUNKTIONSTÜCHTIGKEIT DES GERÄTS DESHALB ENTFIEHLT MAN: - VORSICHTIGE HANDHABUNG TROCKEN LAGERN AUF KEINEN FALL ANDERE GEGENSTÄNDE AUF DAS GERÄT STELLEN 3 BESEITIGUNG DER VERPACKUNG WICHTIG 3.1 – Holzkantenschütze beseitigen. 3.2 – Holzpalette der Oberseite entfernen. 3.3 - Den Verpackungskarton anheben. 3.4 – Das Gerät anheben und vor der Palette lösen. 3.5 – Das Gerät in übereinstimmung mit dem vorbestimmten Punkt auf den Boden legen. 3.6 – Das Gerät auf sichtbaren Beschädigungen prüfen. 3.7 – Das Verpackungsmaterial könnte eine mögliche Gefahrenquelle darstellen und sollte deshalb ausser Reichweite von Kindern gehalten werden. 3.8 – Die Verpackungsprodukte an spezialisierte Sammel-und Recyclingstellen weiterleiten (die geltenden Normen beachten). 3.9 – Die Kennummer mit den Angaben der Begleitpapiere vergleichen. ALLE IM FOLGENDEN AUFGEFÜHRTEN ARBEITSGÄNGE MÜSSEN DEN GELTEN SICHERHEITSNORMEN GEMÄSS DURCHGEFÜHRT WERDEN. DIES GILT SOWOHL FÜR DIE VERWENDETE AUSRÜSTUNG ALS AUCH FÜR DIE BEDIENUNGSWEISE ACHTUNG SICH VOR DER HANDHABUNG VERGEWISSERN, OB DAS ANHEBUNGSVERMÖGEN DEM GEWICHT DER BETREFFENDEN EINHEIT ANGEMESSEN IST. 2 HANDHABUNG 2.1 – HANDHABUNG MIT GABELSTAPLER O.Ä 2.1.1 – Die Gabeln in die Längsseite der mitgelieferten Holzpalette des Geräts einführen. 2.1.2 – Die Einheit anheben und sich dabei vergewissern, dass sich diese im stabilen Gleichgewicht befindet. ACHTUNG WÄHRENDE DER HANDHABUNG NICHT UMDREHEN BZW. UMKIPPEN. 25 MONTAGEANLEITUNG AUCH AUF DIE JEWEILIGEN VERFAHRENSWEISEN VORGENOMMEN WERDEN. Das vorliegende Kapitel wurde erstellt, um eine korrekte Installation des als Montageset gelieferten Geräts zu ermöglichen; daher ist es von grundlegender Wichtigkeit, daß: - die im folgenden Handbuch enthaltenen Anweisungen gründlich durchgelesen werden, da sie wichtige Hinweise in Bezug auf die Montagesicherheit liefern. - der Hersteller keine Verantwortung mit gleichzeitigem Garantieverfall bei nicht ausdrücklich genehmigten und die vom folgenden Handbuch vorgeschriebenen Angaben nicht beachtenden elektrischen und/oder mechanischen Änderungen übernimmt. - das Verpackungsmaterial (Plastiktüten, Polystyrolschaum, Nägel, usw.) aufgrund der Tatsache, daß es eine potentielle Gefahrenquelle darstellt, von Kindern ferngehalten und gemäß den geltenden lokalen Bestimmungen recycled werden muß. Bei der Auslieferung ist das zerlegte Gerät in zwei Packungen enthalten. 3) v Ç Nr. 1 Deckeneinheit (mit Kondensationseinheit, Elektroeinheit und Verdampfergruppe. v  Nr. 1 Bodeneinheit v Æ Nr. 1 Armaturenbrett (2 bei ROLL-INP 2P und ROLL-IN 1PP) v Nr. 2 Hordenwagenführungen (4 bei ROLL-IN 2PP und ROLL-IN 2P) v Nr. 1 Luftflußverkleidung v Betriebsanleitung, Montageschrauben und Schlüssel als Zubehör 2) Offener Holzkasten v Á Nr. 2 Seitenwände v Ä Nr. 1 Tür mit Scharnieren und Montageschrauben (2 bei ROLL-IN 1PP,ROLL-IN 2P – 4 bei ROLL-IN 2PP) v Å Nr. 1 Pfosten (2 bei ROLL-IN 2PP – Nicht vorhanden bei ROLL-IN 1P und ROLL-INP 1P) v È Nr. 1 Rückwandverlängerung (nur beim ROLL-IN 2P vorhanden) v À Nr. 2 Rückwanden (1 bei ROLL-IN 1P – Nicht vorhanden bei ROLL-IN 1PP und ROLL-IN 2PP) WICHTIG DIE INSTALLATION MUSS NACH DEN IM VORLIEGENDEN KAPITEL AUFGEFÜHRTEN ANLEITUNGEN VON QUALIFIZIERTEM PERSONAL UND GEMÄSS DEN GELTENDEN SICHERHEITSBESTIMMUNGEN SOWOHL IN BEZUG AUF DIE VERWENDETE AUSRÜSTUNG ALS ROLL-IN 1P ROLL-IN 1PP Geschlossener Holzkasten Überprüfen, daß sämtliche Teile vorhanden und unversehrt sind. ROLL-IN 2P ROLL-IN 2PP MONTAGEPHASEN Phase 1) Nur für ROLL-IN 1P und ROLL-IN 2P Die Rückwand À horizontal positionieren und durch Drehen im Uhrzeigersinn des mitgelieferten Schlüssels mit den Seitenwänden Á verbinden (siehe Foto).(*) HINWEIS: Beim ROLL-IN 2P ist auch die Rückwandverlängerung È an den seitlichen Rückwänden À festzumachen. Die Bodeneinheit ® mit den Seitenwänden Á und der Rückwand À verbinden. (siehe Foto Phase 2). (*) Phase 2) Nur für ROLL-IN 1PP und ROLL-IN 2PP Die zwei Seitenwände Á positionieren und den Boden ® mit den Schrauben M5x40 festschrauben (siehe Foto). 26 Phase 3) Nur für ROLL-IN 2P und ROLL-IN 2PP Phase 9) Verschlußeinstellung Den/die Pfosten Å vom Boden aus mit den Schrauben M5x40 festschrauben, siehe Foto Den/die Verschlußzapfen der Tür/en montieren und einstellen, wobei das korrekte Einhaken mit dem/den sich auf den Seitenwänden und/oder auf den Pfosten positionierten Anschlag/Anschlägen zu überprüfen ist Phase 4) Phase 10) Befestigung der Luftflußverkleidung Das Gerät in vertikale Position bringen Die Verkleidung am unteren Deckenteil Ç. befestigen (*) Selbstschneidende Schrauben 4.8x16 verwenden Phase 5) Positionierung und Befestigung der Decke Die Deckeneinheit Ç von vorne zwischen die Seitenwände Á einfügen, siehe Foto (*). Phase 11) Geräteverankerung HINWEIS: Bei der Durchführung dieses Vorgangs ist zu berücksichtigen, daß die Deckeneinheit mehr als… Kg wiegen kann Das Gerät am Boden befestigen (siehe Foto), wobei alle Schrauben M6x60 und die mitgelieferten Dübel zu verwenden sind. HINWEIS: Die Nichtdurchführung dieses Vorgangs beeinträchtigt die Sicherheit und die Stabilität desselben Phase 12) Befestigung der Hordenwagenführung Mittels des mitgelieferten Schlüssels die sich auf den Seitenwänden Á befindenden Haken im Uhrzeigersinn eindrehen, um sie an der Decke Ç zu befestigen, siehe Foto In der/den Zelle/n die Hordenwagenführungsprofile mittels der selbstschneidenden Schrauben 4,8x16 in der im Foto angegebenen Position festmachen. Phase 6) Nur für ROLL-IN 2P und ROLL-IN 2PP Den/die Pfosten Å mittels der Bolzen M6x20 mit der Decke Ç verschrauben, siehe Foto. Phase 7) Befestigung der Türscharniere Phase 13) Beleuchtungsinstallation (nur auf Geräten mit Glastüren vorhanden) Die Scharnierabdeckungen entfernen (siehe Foto) und die Türscharniere Ä mittels Schrauben M5x40 mit den Seitenwänden Á verschrauben. Nach diesem Vorgang die Scharnierabdeckungen erneut einsetzen. HINWEIS: Sicherstellen, daß die Dichtungen gleichmäßig, ohne übermäßigen Druck, an den Seitenwänden anliegen. Die mitgelieferten Metallabweiser und Haken an den Seitenwänden festmachen. Die Leuchtstoffröhre, die Kunststoffschutzvorrichtung und die jeweiligen Verkabelungen zusammenbauen und dann das Ganze durch Befestigung an den Haken positionieren. Die elektrischen Anschlüsse gemäß Schaltplan durchführen. HINWEIS: Dieser Vorgang muß von qualifiziertem Personal vorgenommen werden Phase 14) Verschließen der Löcher Phase 8) Befestigung des Armaturenbretts und der Schalttafel Das/die Armaturenbrett/er Æ mit den Seitenwänden Á verschrauben und die Schalttafel an der Decke befestigen, wobei auf die korrekte Positionierung in Bezug auf das sich auf dem Armaturenbrett befindende Loch achtzugeben ist.(*) Bei den ROLL-IN 1PP und 2PP sind die zwei oberen Querbalken an den Seitenwänden zu befestigen. Die Schrauben M6x14 verwenden. Die Hakenlöcher mit den mitgelieferten Stöpseln zustöpseln. (*) 27 Die Größen der Einzelteile sind je nach Gerätemodell verschieden. SCHALTTAFEL 1 TEMPERATURREGLUNG 2 KOMPRESSORBETRIEB 3 ZUSÄTZLICHE ABTAUVORGÄNGE 4 SOLLWERT ÄNDERUNG 5 BETRIEBSZUSTAND DES GERÄTS 6 DEFEKTE FÜHLER Die Schalttafel ist folgendermaßen zusammengesetzt: A ABTAUKONTROLLEUCHTE: Gelbe Kontrolleuchte;das Aufleuchten zeigt an daß sich das Gerät in der Abtauphase befindet; B LEUCHTSCHALTER ON-OFF: dient zum Ein- und Ausschalten des Kühlschranks; auf ON steht die elektrische Anlage unter Spannung; C ELEKTRONISCHER THERMOSTAT: reguliert und kontrolliert den Kühlschrank. 1 2 TEMPERATURREGLUNG 5 Der difparameter bestimmt die Temperatur des Kühlraumes bezüglich des Sollwerts. Beispiel: bestimmte Sollwert = -2°C und "dif" = 2°C: Der Kompressor schaltet sich ein, wenn die Temperatur des Kühlraumes -2°C +(2°C)=0°C übersteigt. Kompressor steht still, wenn die Temperatur des Kühlraumes -2°C entspricht. Der Sollwert kann innerhalb des in der Fabrik voreingestellten Bereichs verändert werden. Um den Betriebszustand des Geräts zu erkennen, ist es ausreichend auf die LED des Thermostats zu achten. Die folgende Tabelle enthält ihre Bedeutungen: KOMPRESSORBETRIEB Der Kompressorbetrieb wird durch das Einschalten der LED L3 an der Thermostatvorderseite, in Übereinstimmung des Zeichens angezeigt. 3 BETRIEBSZUSTAND DES GERÄTS ZUSÄTZLICHE ABTAUVORGÄNGE Die Abtauung dient zum Schmelzen des sich an der Verdampferoberfläche festgesetzten Reifs oder Eises; Reif und Eis bilden sich durch das Öffnen der Türen und durch das Hereinstellen heißer Speisen. Bei Bedarf ist es möglich, einen Abtauvorgang manuell zu aktivieren, indem die Taste P1 für mehr als 5 Sekunden gedrückt gehalten wird; die entsprechende LED L2 wird einschalten und blinken. 4 SOLLWERT ÄNDERUNG: - Den "Maschinenstatus" durch Drücken und sofortiges Wiederloslassen der Taste "set" (P4) aufrufen. Es erscheint die Bezeichnung der Registerkarte "SEt". Zum Anzeigen des Sollwerts erneut die Taste "set" drücken. Der Sollwert erscheint auf dem Display. - Zum Ändern des Sollwerts innerhalb von 15 Sekunden die Tasten P1 und P2 betätigen. 6 LED Zustand Bedeutung al L1 Ausgeschaltet Alarm nicht aktiv al L1 Eingeschaltet Alarm aktiv def L2 Ausgeschaltet Abtauvorgang nicht aktiv def L2 Eingeschaltet Abtauvorgang aktiv def L2 Blinkend Abtauung Manuell comp L3 Ausgeschaltet Kompressor steht still comp L3 Blinkend Verzögerung, Schutz oder Aktivierung blockiert comp L3 Eingeschaltet Kompressor eingeschaltet Vent L4 (ID 974) Ausgeschaltet Gebläse nicht aktiv Vent L4 (ID 974) Eingeschaltet Gebläse in Betrieb DEFEKTE FÜHLER Bei Fühlerdefekt zeigt das Thermostat folgendes an : E1 Störung des Temperatur-fühlerr der zelle E2 Störung des Temperatur-fühler des Verdampfers (ID 974) 28 INBETRIEBNAHME 1 EINLEITENDE KONTROLLE 2 INBETRIEBNAHME – PRÜFUNGEN 3 BESEITIGUNG WICHTIG BEVOR MAN DAS GERÄT ANSCHLIESST, SOLLTE MAN SICH VERGEWISSERN, DASS DIE DATEN DES LEISTUNGSSCHILDES DENEN DES STROMNETZES ENTSPRECHEN. DAS GERÄTESCHILD, AUF DEM DIE FÜR DIE INSTALLATION ERFORDERLICHEN ELEKTRISCHEN DATEN ANGEGEBEN SIND, IST IN DER ZELLE AUF DER RECHTEN OBERSEITE POSITIONIERT. DIE INSTALLATION MUSS GEMÄSS DEN ANGABEN DES VORLIEGENDEN ABSCHNITTS VOM QUALIFIZIERTEN FACHPERSONAL DURCHGEFÜHRT WERDEN. DIE ELEKTRISCHE SICHERHEIT DIESES GERÄTS IST NUR DANN GARANTIERT WANN DAS GERÄT DEN GELTENDEN ELEKTRISCHEN SICHERHEITSNORMEN GEMÄSS AN EINE LEISTUNGSFÄHIGE ERDUNGSANLAGE ANGESCHLOSSEN IST. MAN MUSS DIESE NOTWENDIGE SICHERHEITSANFORDERUNG PRÜFEN UND IM ZWEIFELSFALL EINE SORGFÄLTIGE KONTROLLE DER ANLAGE VON SEITEN DES QUALIFIZIERTEN FACHPERSONALS FORDERN. DER ERBAUER LEHNT JEDE VERANTWORTUNG FÜR EVENTUELLE SCHÄDEN AB, DIE AUF EINE FEHLENDE ERDUNG DER ANLAGE ZURÜCKZUFÜHREN SIND. DAS GERÄT MUSS AUSSERDEM IN EIN ÄQUIPOTENTIALSYSTEM EINGESCHLOSSEN WERDEN, DESSEN LEISTUNGSFÄHIGKEIT DEN GELTENDEN NORMEN GEMÄSS GEPRÜFT WERDEN MUSS. AUF KEINEN FALL ADAPTER, MEHRFACHSTECKDOSEN UND/ODER VERLÄNGERUNGSKABEL BENUTZEN. 1 EINLEITENDE KONTROLLEN 1.1 – ALLGEMEINE KONTROLLEN 1.1.1 – Sich vergewissern, dass das Gerät wwagrecht positioniert wurde. Um eine perfekte Ausrichtung zu erhalten, eventuell den beweglichen Teil der verstellbaren Füsschen betätigen. 1.1.2 – Sich vergewissern, dass die Kunststoffschutzschicht der äusseren Fächen entfernt wurde. 1.1.3 – Sich vergewissewrn, dass die Innenseite mit lauwarmem Wasser und neutraler Seife gereignigt wurde. 1.1.4 – Sich vergewissern, dass das Gerät nicht in unmittelberer Nähe von Wärmequellen positioniert wurde. 1.1.5 – Sich vergewissern, dass die freie Luftzirkulation im Motorbereich nicht behindert wird. 1.1.6 – Sich vergewissern, dass sich die Verriegelungs-Schlüssel ausser Reichweite von Kindern befinden. 1.2 – KONTROLLEN DES ELEKTRISCHEN TEILS 1.2.1 – Den Spannungs- und Netzfrequenzwert prüfen: MUSS ZWISCHEN FOLGENDEN WERTEN SCHWANKEN 230 ± 10% 50Hz 1.2.2 – Sich vergewwissern, dass die Schrauben, welche die Leitungen an die elektrischen Komponenten der Schalttafel befestigen, fast angezogen sind (während der Handhabung und des Transports könnten eventuelle Vibrationen Lockerungen verursacht haben). 1.2.3 –Sich vergewissern, dass am Anfang der Steckdose ein allpoliger Schalter mit einer Entfernungsöffnung der Kontaktstücke, die grösser oder gleich 3 mm ist, installiert wurde. 1.2.4 – Den Hauptschalter, an den man den Stecker des Versorgungskabels anschliessen will, in die OFF-Position bringen. 1.2.5 –Sich vergewissern, dass der Stecker zur Steckdose des Geräts passt. Sich an das qualifizierte Fachpersonal wenden, falls der Stecker mit einer geeigneteren Ausführung ersetzt werden muss. Das Fachpersonal wird sich auch vergewissern müssen, dass der Durchschnitt des Steckkabels der aufgenommenen Leistung des Geräts angemessen ist. Sich vergewissern, dass der Stecker in die Steckdose eingeführt wurde. 2 BEFESTIGUNG AM BODEN 2.1 6 Bohrungen 12 mm Durchm. in den Boden durchführen. Die Position der einzelnen Bohrungen soll mit jener der ensprechenden Löchern auf dem Boden des Geräts übereinstimmen. 2.2 - Das Gerät durch Benutzung der mitgelieferten Dübel, Mutterschrauben M6 und Unterlegscheiben befestigen. WICHTIG DIE BEFESTIGUNG DES GERÄTES AM BODEN IST EINE ERFORDERLICHE BEDINGUNG FÜR DEN KORREKTEN BETRIEB DESSELBEN. DAS GERÄT MUSS WAAGRECHT POSITIONIERT WERDEN. 3 INBETRIEBNAHME- PRÜFUNGEN Nachdem die obengenannten Anweisungen sorgfältig durchgeführt wurde, kann das Gerät in Betrieb gesetzt werden 3.1.1 – Den Hauptschalter, an den der Stecker des Verrsorgungskabels angeschlossen ist, in Pos. ON bringen. 3.1.2 – Den Schalter des Geräts in Pos. ON bringen. 3.1.3 – Den Set-Point veraunschaulichen. 3.1.3.1 – Auf den SETÂ-Knopf des elektronischen Thermostats drücken und sich dabei vergewissern, dass die set¯- LED blinkt; 3.1.3.2 – Den gewünschten Wert je nach Art des konservierten Produkts einstellen. Für die Verfahren, die sich auf die Änderung des in der Fabrik eingestellten Werts beziehen, den Abschnitt SCHALTTAFEL durchlesen. WICHTIG BEVOR MAN DIE LEBENSMITTEL EINFÜHRT, DAS GERÄT IN BETRIEBSZUSTAND BRINGEN . 29 REINIGUNG UND WARTUNG 1 WÖCHENTLICHE REINIGUNG 2 ALLGEMEINE WARTUNGARIA 3 LÄNGERE STILLSTANDSZEITEN Dieser Abschnitt betrifft den Endverbraucher und ist für den dauerhaften und vorschriftmässigen Betrieb des Geräts von äusserster Wichtigkeit. Die sorgfältige und regelmässige Durchführung einiger Arbeitsgänge beugt dem Eingriff des Fachpersonals vor Die durchzuführenden Massnahmen setzen keine besonderen technischen Kenntnisse voraus. Es handelt sich dabei um einfache Kontrollen der Gerätekomponenten. 2.2.1 – Die Befestigung des Elektroventilators and die Halterung prüfen. 2.2.2 – Im Falle von störenden Geräuschen und Vibrationen prüfen, ob die Elektroventilatoren ausgeglichen sind. 2.3 – ANSCHLUSSKABEL 2.3.1 – Sich vergewissern, ob das Anschlusskabel Beschädigungen, Rissbildungen bzw. andere veränderungen aufweist, die die Isolierung beeinträchtigen könnten. Sich bei erforderlicher Wartung an einen zugelassenen Kundendienst wenden. WICHTIG 3 LÄNGERE STILLSTANDZEITEN BEVOR MAN DIE WARTUNG BZW. REINIGUNG VORNIMMT, DIE STROMVERSORGUNG DES GERÄTS AUSSCHALTEN Bei längeren Stillstandzeiten wie folgt vorgehen: 3.1 - Den Netzschalter in die Position OFF bringen. 3.2 - Den Stecker aus der Steckdose ziehen. 3.3 - Das Gerät entleeren und den Angaben von Punkt 1.0 gemäss vorgehen. 3.4 - Die Türen nicht vollständig schliessen, um das Entstehen von üblen Gerüchen zu vermeiden. 3.5 - Die Kompressorengruppe von Staub schützen. ACHTUNG DAS GERÄT NICHT MIT DIREKTEN HOCHDRUCKWASSERSTRAHLEN REINIGEN. AUF KEINEN FALL WASSERSTRAHLEN AUF DIE ELEKTRISCHEN TEILE RICHTEN. 1 WÖCHENTLICHE REINIGUNG WICHTIG 1.1 – STRUKTUR 1.1.1 – Den Sauberkeitszustand der Strukturteile prüfen. Dabei besonderen Wert auf die Stahlteile legen. 1.1.2 – Die inneren und äusseren Flächen nur mit Wasser und Seife bzw. einen neutralen Reinigungsmittel reinigen. 1.1.3 – Mit viel Wasser auswaschen und gut abtrocknen. 1.2 – SYSTEM FÜR DIE ABTAUWASSERSAMMLUNG 1.2.1 – Sich vergewissern, dass das Abflussrohr ds Kondenswassers nicht verstopft ist. Falls erforderlich, eine Reinigung vornehmen. DIE GERÄTE SIND AUS AISI 304 EDELSTAHL UND LEBENSMITTELFREUNDLICHEM ABS HERGESTELLT, DAS WIEDERSTANDSFÄHIG GEGEN KORROSIONEN IST, DIE DURCH DEN NORMALEN GEBRAUCH ENTSTEHEN KÖNNEN. AUF KEINEN FALL REINIGUNGSMITTEL BZW. REINIGUNGSSYSTEME ANWENDEN, DIE DIE MASCHINE BESCHÄDIGEN KÖNNTEN. ACHTUNG FALLS DIE ÖFFNUNG DER TÜR ÜBER DEM GEWÖHNLICHEN DURCHSCHNITTSWERT LIEGT BZW. UNSACHGEMÄSSEN BENUTZ WIRD, MUSS DEN FÜLLUNGSZUSTAND DES SAMMELBECKENS DES ABTAUWASSERS ÖFTERS KONTROLLIERT WERDEN. 2 ALLGEMEINE WARTUNG 2.1 - KONDENSATIONSBATTERIE Die Batterie muss unbedingt in der Lage sein, maximalen Wärmeaustausch zu bieten. Deshalb ist es äusserst wichtig, dass die Oberfläche stets frei von Staub- bzw. Schmutzpartikeln ist, die sich infolge der Elektroventilatorentätigkeit abgelagert haben. 2.1.1 – Mit Hilfe eines Staubsaugers und eines Pinselns bzw. einer Metallfreien Bürste alle Verschmutzungen (z.B. Papier, Staub), die sich eventuell auf der Batterieoberfläche abgelagert haben, entfernen. 2.1.2 – Die Aluminiumrippen auf Beschädigungen bzw. Biegungen prüfen. Falls derartige Beschädigungen vorliegen sollten, die Batterie mit Hilfe eines dazu bestimmten Geräts “kämmen”, um den optimalen Luftdurchstrom wiederherzustellen. 2.2 - ELEKTROVENTILATOREN 30 STÖRUNGSSUCHE 1 2 3 4 5 6 7 8 9 UNGEWÖHNLICHER HOCHDRUCK UNGEWÖHNLICHER TIEFDRUCK SCHUTZVORRICHTUNGEN DES KOMPRESSORS FÜHLERDEFEKT DER KOMPRESSOR LÄUFT NICHT AN VERDAMPFER MIT AUSSERGEWÖHNLICHER REIF/-EISBILDUNG DER KOMPRESSOR SETZT SEHR SELTEN SEINEN BETRIEB AUS GERÄUCHVOLLES GERÄT ÜBERLAUFEN DES SELBSTVERDUNSTUNGSBEHÄLTER Die ganze Kühlmittelfüllung aus dem Kreislauf entfernen, einen Wertvakuum, der kleiner bzw. Gleich 100Pa ist, erzeugen und anschliessend eine Kühlmittelmenge einlassen, die den Angaben des Geräteschildes entspricht. Ursache 1.4 MANGELHAFTE BELÜFTUNG DER ZONE, DIE AN DEN TECHNISCHEN BEREICH ANGRENZT. Eingriff Eventulelle Verstopfungen, welche die korrekte Luftzirkulation am Eingang/Ausgang des Kompressors behindern, beseitigen. Ursache 1.5 DAS GERÄT WURDE GERADE IN BETRIEB GESETZT. Falls das Gerät erst seit kurzem in Betrieb gesetzt worden ist, bzw. Falls erst seit kursem Lebensmittel eingeführt wurden, kann man die obengenannte Störung feststellen. Eingriff Es handelt sich nur um eine vorübergehende Störung, die bei Erreichen der Set-Temperatur verschwindet. Kein Eingriff erforderlich. Die im folgenden aufgeführten Punkte sollen bei der Lösung einiger das Gerät betreffenden Störungen behilflich sein. In diesem Handbuch sind selbstverständlich nicht alle Möglichkeiten aufgeführt. Die Einschaltung einer Sicherheitsvorrichtung ist Anzeichen einer Betriebsstörung; vor Wiederinbetriebnahme muss die Ursache festgestellt und beseitigt werden. Im folgenden führen wir eine Liste der möglichen Probleme, der entsprechenden Ursache und Lösungen auf (halbfett gedruckt) ACHTUNG DIE VERANTWORTUNG FÜR DIE AUFGEFÜHRTEN ARBEITSGÄNGE LIEGT BEI DER PERSON, DIE DIESE DURCHFÜHRT.MAN MUSS SICH AUF JEDEN FALL AN EINEN ZUGELASSENEN KUNDENDIENST WENDEN. DIESER KUNDENDIENST MUSS DIE NOTWENDIGEN ERFORDERNISSE FÜR DIE ARBEITSGÄNGE, WELCHE DIE FUNKTIONSTÜCHTIGKEIT WIEDERHERSTELLEN BESITZEN. WICHTIG 2 UNGEWÖHNLICHER TIEFDRUCK BEVOR MAN DIE WARTUNG VORNIMMT, DIE STROMVERSORGUNG DES GERÄTS AUSSCHALTEN. Störung Ursache 2.1 KAPILLARE TEILWEISE VERSTOPFT . Eingriff Die Kapillare mit einer anderen, die die gleichen Abmessungen aufweist, ersetzen. Ursache 2.2 DEHYDRATATIONSFILTER VERSCHMUTZT Mit einem Kontaktthermometer die temperatur am Anfang und am Ende des Filters messen, ein Temperaturunterschied von mehr als 1°C ist Anzeichen eines nicht leistungsfähigen Filters, der ersetzt werden muss. Eingriff Ersetzen. Ursache 2.3 MANGELHAFTE KÜHLMITTELFÜLLUNG Eingriff Eventuelle Leckstellen beseitigen, falls erforderlich, den Kreislauf unter Druck setzen, um diese sichtbar zu machen, Entleerung und Füllung vornehmen. 1 UNGEWÖHNLICHER HOCHDRUCK Ursache 1.1 VERSCHMUTZTE KONDENSATIONSBATTERIE. Bei eingeschaltenem Kompressor den Wert des Kondensationsdrucks mit einem Druckmesser messen. Bei einer Lufttemperatur am Kompressoreneingang von +32°C muss der Unterschied zwischen dem Sättigungswert des Kondensationsdrucks und der Lufttemperatur bai ca. 10°C liegen. Eingriff Falls der festgestellte Unterschied diesen Wert übertreffen sollte, die Reinigung den Anweisungen des Abschnitts “REINIGUNG UND WARTUNG” / Punkt 2.1 gemäss vornehmen. Ursache 1.2 KONDENSATIONGSGEBLÄSE FUNKTIONIERT NICHT. Muss bei funktionierendem Kompressor in Betrieb sein. Eingriff Bevor man die eventuelle Ersetzung vornimmt, die Spannung des Geräts ausschalten und die elektrischen Anschlüsse auf Unversehrtheit prüfen. Ursache 1.3 VORHANDENSEIN VON NICHT KONDENSIERBAREN DÄMPFEN IM KREISLAUF. Bei Vorhandensein von nicht kondensierbaren Dämpfen wird der Unterschied dem Sättigungswert des Kondesationsdrucks und der Aussenlufttemperatur über 10°C betragen. Eingriff 3 EINGRIFF DER SCHUTZVORRICHNTUNGEN DES KOMPRESSORS. Ursache 3.1 DER THERMOSTAT ZÄLT DIE VERZÖGERUNGSZEITEN NICHT. Zu schnell aufeinenderfolgende Anläufe gestatten keinen Druckausgleich. Eingriff Den entsprechenden Parameter prüfen und eventuell auf die Fabrikwerte bringen. Ursache 3.2 31 DIE TEMPERATUR DES ANGESAUGTEN GASES LIEGT OBERHALB DER OPTIMALEN WERTE. Eingriff Die Funktionstüchtigkeit der Laminardrossel prüfen. Die Kühlmittelfüllung und das eventuelle Vorhandensein von Leckstellen prüfen, falls erforderlich, den Kreislauf unter Druck setzen, um diese sichtbar zu machen. Entleerung und Füllung vornehmen. Ursache 6.3 MANGELHAFTER ABTAUVORGANG Eingriff Sich vergewissern, dass die Anzahl, Dauer, Arbeitsweise des Abtauvorgänge den Angaben des Erbauers entsprechen, nach vorausgehender Benachrichtigung der technischen Fabrikabteilung eventuell ändern. Ursache 6.4 ABTAUWASSERABFLUSS NICHT MIT SISPHON VERSEHEN. Eingriff Prüfen ob das Abflussrohr einen Siphon vor dem Anschluss mit dem festen teil aufweist, eventuell ändern. Ursache 6.5 EINFÜHRUNG VON WARMER WARE MIT HOHEM WASSERGEHALT. Eingriff Solche Waren sollten nicht eingeführt werden. 4 FÜHLERDEFEKT. Ursache 4.1 UNTERBRECHUNGEN DER ELEKTRISCHEN ANSCHLÜSSE. Eingriff Die Anschlüsse auf Unversehrtheit prüfen und eventuell den Fühler ersetzen. Ursache 4.2 FÜHLER NICHT FUNKTIONSFÄHIG Eingriff Mit einem Vilefachmessgerät die Funktionstüchtigkeit des Fühlers prüfen und diesen eventuell ersetzen. 7 DER KOMPRESSOR SETZT SEHR SELTEN SEINEN BETRIEB AUS. Ursache 7.1 MANGELHAFTER KÜHLMITTELFÜLLUNG. Eingriff Die Kühlmittelfüllung und das eventuelle Vorhandensein von Leckstellen prüfen, falls erforderlich, den Kreislauf unter Druck setzen, um diese sichtbar zu machen, Entleerung und Füllung vornehmen. Ursache 7.2 TÜRDICHTUNGEN MIT MANGELHAFTER LEISTUNGSFÄHIGKEIT. Eingriff Den Zustand der Dichtungen prüfen und eventuell ersetzen. Ursache 7.3 BESCHÄDIGUNG DES SAUGVENTILS DES KOMPRESSORS Eingriff Mit Hilfe eines Druckmessers den Wert des Saugdruckes und den Wert des Kompressorsgehäuses prüfen, eventuell ersetzen. 5 KOMPRESSOR LÄUFT NICHT AN. Ursache 5.1 DIE KLEMMEN DES ELEKTRISCHEN MOTORS WERDEN NICHT VERSORGT. Eingriff Die elektrischen Anschlüsse des Versorgungskabels des Kompressors auf Unversehrtheit prüfen. Ursache 5.2 DER WERT DER VERSORGUNGSSPANNUNG BEFINDET SICH AUSSERHALB DES ZULÄSSIGEN BEREICHS. Eingriff Die Ursache feststellen und beseitigen. Ursache 5.3 DIE WICKLUNG DES ELEKTRISCHEN MOTORS IST OFFEN, BZW. ES LIEGT EIN KURZSCHLUSS VOR. Eingriff Den Kompressor ersetzen. Ursache 5.4 DER KOMPRESSOR WEIST MECHANISCHE DEFEKTE AUF. Eingriff Den Kompressor ersetzen. Ursache 5.5 DER ELEKTRONISCHE THERMOSTAT IST NICHT FUNKTIONSTÜCHTIG. Eingriff Mit Hilfe eines Vielfachmessgeräts die Funktionstüchtigkeit des Kontaktthermostats, der vom Versorgungskabel des Kompressors abhängt, prüfen. Ursache 5.6 DER ELEKTRISCHE MOTOR IST DURCHGEBRANNT. Eingriff Mit Hilfe eines Vielfachmessgeräts die Funktionstüchtigkeit des Motors prüfen und eventuell den Kompressor ersetzen. 8 GERÄUSCHVOLLES GERÄT. Ursache 8.1 DIE SCHRAUBEN, DURCH DIE DER KOMPRESSOR AN DAS MASCHINENGESTELL BEFESTIGT WIRD, SIND LOCKER. Eingriff Den Anzugszustand prüfen und eventuell die Schrauben anziehen. Ursache 8.2 KOMPRESSIONS-BZW. SAUGRIHRE VIBRIEREN. Eingriff Den Befestigungszustand prüfen und eventuell angrenzende, sich berührende Rohre voneinander trennen. 9 ÜBERLAUFEN DES SELBSTVERDUNSTUNGSBEHÄLTER Ursache 9.1 ES WIRD OFT WARME WARE MIT HOHEM WASSERGEHALT EINGEFÜHRT. Eingriff Solche Waren sollten nicht eingeführt werden. Ursache 9.2 TÜRDICHTUNGEN MIT MANGELHAFTER LEISTUNGSFÄHIGKEIT Eingriff Den Zustand der Dichtungen prüfen und eventuell ersetzen. 6 VERDAMPFER MIT AUSSERGEWÖHNLICHER REIF-/EISBILDUNG. Ursache 6.1 TÜRDICHTUNGEN MIT MANGELHAFTER LEISTUNGSFÄHIGKEIT. Eingriff Den Zustand der Dichtungen prüfen und eventuell das Scharnier ersetzen. Ursache 6.2 DAS TÜRSCHLIESSSYSTEM IST NICHT FUNKTIONSTÜCHTIG. Eingriff Auf Funktionstüchtigkeit prüfen und eventuell das Scharnier ersetzen. 32 AVERTISSEMENTS GENERAUX Ce manuel a été réalisé pour fournir des conseils en vue d’installer correctement, de mettre en service et d’entretenir l’appareil; il est donc vivement conseillé de: v v v Lire attentivement les recommandations car elles fournissent des indications importantes en ce qui concerne la sécurité pour l’installation, la mise en expansé, clous, etc...) peuvent représenter un risque et ne doivent donc pas service et les opérations d’entretien. être laissés à la portée des enfants. Les recycler correctement conformément Conserver soigneusement ce manuel ainsi que le schéma électrique aux normes locales en vigueur. v et les mettre à disposition de l’opérateur afin qu’il puisse les v v v L’appareil a été conçu et réalisé pour la conservation de produits consulter à tout moment. alimentaires; ne l’utiliser que pour cette fonction. Le fabricant n’engage pas L’appareil devra être installé, testé et réparé par des techniciens sa responsabilité au cas où l’appareil serait utilisé pour des fonctions qualifiés autorisés. auxquelles il n’est pas adapté. Le fabricant décline toute responsabilité et fait déchoir la garantie en v Eteindre l’appareil en cas de panne ou de mauvais fonctionnement. cas de modifications électriques et/ou mécaniques. Toute altération v En cas de panne, s’adresser exclusivement à un centre d’assistance qui n’aurait pas été expressément autorisée et qui ne respecterait technique autorisé par le fabricant et demander d’utiliser des pièces pas les indications de ce manuel, fait déchoir la garantie. détachées d’origine. v Observer les règles de sécurité locales en vigueur au moment de l’installation. v Les matériaux utilisés pour l’emballage (sacs en plastique, polystyrène En cas de doute, ne pas utiliser l’appareil et s’adresser à des techniciens qualifiés. v Vérifier que les caractéristiques du réseau électrique soient conformes aux données mentionnées sur la plaquette portant le Le non respect de ces recommandations peut compromettre la sécurité de l’appareil. numéro de série. DONNEES TECHNIQUES GENERALES MODÈLE 1P ROLL-IN TN 1PP 1PPM 1PPV 2P 1PV 2PV 2PP 2PPM 2PPV ROLL-IN BT 1P 1PP DIMENSIONS ET CAPACITE Dimensions Largeur Profondeur Hauteur Capacite total A (mm) B (mm) C (mm) Lt 880 1053 1760 1046 1053 880 1053 1046 2290 1200 1046 2250 1200 2400 DONNEES TECHNIQUES Tension standard Version Système réfrigérant Puissance nominale du compresseur Température de fonctionnement Courant absorbèe Puissance absorbèe Type de dégivrage Dégivrage n° / durée max min Type fluide frigorigène V 230/1/50 Par capillaire Par soupape Ventilé W °C A W 302 ¬ 2.3 520 3.1 570 2.3 520 2.4 560 +2 / +10 2.6 5.8 6.2 600 1327 1427 Par arrêt 4 / 30 R134a 994 ¬ 5.8 1327 6.2 1427 6.5 1487 522 -15 / -20 5.2 1198 Èletrique R404A POIDS ET VOLUMES Poid brute Volume de l’imballage Kg mc 270 290 2.3 470 500 270 4.5 ¬ En conditions CECOMAF -10 évaporation +55 condensation. 290 2.3 En conditions CECOMAF -30 évaporation +55 condensation. Pour les appareils avec groupe à distance ou le groupe est logé à une distance jusq'à 10 m on suggére d'augmenter de 20% la puissance du compresseur. Pour les outre donnèes , voire la plaque tecnique sur l'appareil. 33 Espace indispensable pour l’entretien ACCESSOIRES L’appareil peut être muni des accessoires suivants (sur demande) : - tensions d’alimentation autres que version standard; - kit d’application pour roues 100 mm. Espace indispensable pour le fonctionnement de l’appareil EMPLACEMENT Les appareils sont conçus pour être installés à l’intérieur. - Vérifier que le plan d’appui puisse supporter le poids de l’appareil et qu’il soit de niveau. - Respecter les distances utiles. DISTANCES UTILES Le choix de l’emplacement de l’appareil sera déterminant pour son bon fonctionnement. Les appareils ont besoin d’un espace minimum pour fonctionner correctement. Cet espace sera également utile pour intervenir librement sur un appareil en cas d’entretien. S’assurer que l’appareil soit installé loin de toute source de chaleur. S’assurer aussi qu’entre le plafond ou la couverture supérieure il y ait un espace minimum de 50 cm afin que l’air puisse circuler librement. Nota : Les dimensions des figures sont exprimées en mm. DIMENSIONS Version 1 ROLL-IN 1P ROLL-IN 1PP Version 2 ROLL-IN 2P ROLL-IN 2PP Légende : 1 - Panneau de commande 2 - Groupe compresseur 3 - Entrée ligne électrique 4 - Cuve d’autoévaporation 3 - Position des données matriculaires 34 RECEPTION 1 CONTROLE A LA RECEPTION 2 MANUTENTION 3 DEBALLAGE 1 CONTROLE A LA RECEPTION RECOMMANDATIONS Les armoires sont expédiées dans des emballages de protection spéciaux. Contrôler à l’arrivée que l’appareil n’ait pas été endommagé pendant le transport et qu’il présente toutes les parties mentionnées dans la commande. En cas de dommages visibles, indiquer immédiatement sur le document de transport le défaut en ajoutant le commentaire : “RETRAIT SOUS RESERVE POUR DOMMAGES VISIBLES SUR L’EMBALLAGE” car le retour franco l’établissement comporte le dédommagement à la charge de l’assurance. RESPECTER LES RECOMMANDATIONS MENTIONNEES SUR L’EMBALLAGE POUR GARANTIR L’INTEGRITE PHYSIQUE ET FONCTIONNELLE DE L’APPAREIL EN VUE D’EN TIRER LE MEILLEUR PROFIT; IL EST DONC RECOMMANDE DE : - MANUTENTIONNER L’APPAREIL AVEC LE PLUS GRAND SOIN - L’INSTALLER DANS UN ENDROIT SEC - EVITER ABSOLUMENT D’INSTALLER D’AUTRES OBJETS AUDESSUS DE L’APPAREIL. IMPORTANT 3 DEBALLAGE TOUTES LES OPERATIONS CITEES CI-APRES CONCERNANT LES EQUIPEMENTS ET LES MODALITES OPERATIONNELLES DOIVENT ETRE EFFECTUEES CONFORMEMENT AUX REGLES DE SECURITE EN VIGUEUR. 3.1 - Enlever le carton. 3.2 - Enlever les protections aux coins. 3.2 - Enlever la protection superior en bois. 3.3 - Lever le carton. 3.4 - Soulever l’apparail pour le dagager. 3.5 - Poser l’appareil au sol en correspondance du point prévu pour l’installation. 3.6 - Vérifier s’il y a des dommages visibles. 3.7 - Ne pas laisser les éléments de l’emballage à la portée des enfants car ils représentent un danger évident. 3.8 - Eliminer les éléments d’emballage en les amenant dans des centres spécialisés pour le recyclage ( s’en tenir aux normes en vigueur ). 3.9 - Vérifier que le numéro de série correspond au numéro mentionné sur le document d’accompagnement. ATTENTION AVANT DE DEPLACER OU SOULEVER UN APPAREIL, S’ASSURER QUE LA CAPACITE DE LEVAGE CONVIENT AU POIDS DE L’APPAREIL. 2 MANUTENTION 2.1 - MANUTENTION avec CHARIOT ELEVATEUR ou SIMILAIRE 2.1.1 - Introduire les fourches à l’avant ou à l’arrière du socle en bois de l’appareil. 2.1.2 - Soulever le tout en s’assurant que l’appareil est en équilibre parfait. ATTENTION PENDANT LES OPERATIONS DE MANUTENTION, NE PAS RETOURNER NI RENVERSER L’APPAREIL. 35 INSTRUCTIONS DE MONTAGE Au moment de la livraison l'appareil démonté est contenu dans deux emballages. Ce chapitre a été réalisé pour permettre une correcte mise en place de l'appareil livré en kit de montage ; il est donc d'une importance fondamentale que : - Les instructions contenues dans le présent livret soient lues avec attention car elles fournissent d'importantes indications concernant la sécurité de mise en place. - Toute modification électrique et/ou mécanique non expressément autorisée et ne respectant pas l'intégralité de ce qui est mentionné dans ce manuel provoquera la déchéance immédiate de la garantie et libérera de même le producteur de toute responsabilité de quelque genre que ce soit. - Le matériel d'emballage (sachets en plastique, polystyrène expansé, clous, etc.) représente une potentielle source de dangers ; de ce fait, ce matériel devra être conservé loin de la portée des enfants et être correctement recyclé selon les normes locales en vigueur. 1) Caisse en bois, fermée v Ç N°1 Ensemble ciel (complet d'une unité de condensation, d'un ensemble électrique et d'un groupe évaporateur). v  N°1 Ensemble fond v Æ N°1 Pupitre de commande (2 dans le cas du ROLL-INP 2P et ROLL-IN 1PP) v N°2 Heurtoirs de chariot (4 dans le cas du ROLL-IN 2PP et ROLL-IN 2P) v N°1 Carénage pour l'air v Livret d’instructions, vis de montage et clef fournis en standard 2) Caisse en bois ouverte v Á N°2 Ensembles panneau latéral v Ä N°1 Porte complète de charnières et de vis de montage (2 dans le cas du ROLL-IN 1PP,ROLL-IN 2P – 4 dans le cas du ROLL-IN 2PP) v Å N°1 Montant (2 dans le cas du ROLL-IN 2PP - Absent sur le ROLL-IN 1P et ROLL-INP 1P) v È N°1 Rallonge du panneau arrière (présente uniquement sur le ROLL-IN 2P) v À N°2 Panneaux arrières (1 dans le cas du ROLL-IN 1P - Absent sur le ROLL-IN 1PP et ROLL-IN 2PP) IMPORTANT LES OPERATIONS DE MISE EN PLACE ET DE MONTAGE DOIVENT ETRE EFFECTUEES, EN SUIVANT SCRUPULEUSEMENT LES INSTRUCTIONS FOURNIES DANS CETTE SECTION, PAR UN PERSONNEL PROFESSIONNEL QUALIFIE QUI DEVRA RESPECTER TOUTES LES NORMES DE SECURITE EN VIGUEUR, AUSSI BIEN EN CE QUI CONCERNE LES EQUIPEMENTS UTILISES QU'EN CE QUI CONCERNE LES MODALITES OPERATIONNELLES. ROLL-IN 1P ROLL-IN 1PP Vérifier que tous les accessoires soient présents et qu'ils soient intacts. ROLL-IN 2P ROLL-IN 2PP PHASES DE MONTAGE Phase 2) Uniquement pour ROLL-IN 1PP et ROLL-IN 2PP Phase 1) Uniquement pour ROLL-IN 1P et ROLL-IN 2P Positionner le panneau arrière À horizontalement et unir les panneaux latéraux Á en utilisant la clef fournie, en tournant dans le sens des aiguilles d'une montre comme sur la photo.(*) ATTENTION : Dans le cas du ROLL-IN 2P fixer également la rallonge du panneau arrière È aux panneaux arrières latéraux À Fixer l'ensemble fond ® aux panneaux latéraux Á et au panneau arrière À (voir la photo phase 2). (*) Positionner les deux panneaux latéraux Á et visser le fond ® avec des vis M5x40 (voir la photo). 36 Phase 3) Uniquement pour ROLL-IN 2P et ROLL-IN 2PP Phase 9) Réglage de la fermeture Visser les montant/s Å en commençant par le fond avec des vis M5x40 comme indiqué sur la photo Monter et régler le/les axe/s de fermeture de la/des porte/s en vérifiant le parfait accrochage avec le/les buttées placées sur les panneaux latéraux et/ou sur les montants Phase 10) Fixation du carénage Phase 4) Fixer le carénage à la partie inférieure du ciel Ç.(*) Utiliser des vis autotaraudeuses 4.8x16 Mettre l'appareil en position verticale Phase 5) Positionnement et fixation du ciel Introduire l'ensemble ciel Ç par le côté antérieur, entre les panneaux latéraux Á comme indiqué sur la photo (*). Phase 11) Ancrage de l'appareil Fixer soigneusement l'appareil sur le sol (voir la photo) en utilisant toutes les vis M6x60 et les tasseaux fournis en standard pour cela. ATTENTION : La non-exécution de cette opération compromet la sécurité et la stabilité de l'appareil. Attention : Avant d'effectuer cette opération, pensez au fait que le poids de l'ensemble ciel peut dépasser … Kg A l'aide de la clef fournie en standard , visser dans le sens des aiguilles d'une montre les crochets situés sur les panneaux latéraux Á afin de les fixer avec le ciel Ç comme sur la photo Phase 12) Fixation du heurtoir de chariot Fixer les profilés heurtoirs de chariot à l'intérieur des chambres froides dans la position indiquée sur la photo, en utilisant des vis autotaraudeuses 4,8x16. Phase 6) Uniquement pour ROLL-IN 2P et ROLL-IN 2PP Visser le/s montant/s Å sur le ciel Ç avec des boulons M6x20 comme mis en évidence sur la photo. Phase 13) Installation de l'éclairage (présent uniquement sur les appareils équipés de porte vitrée) Phase 7) Fixation des charnières de porte Fixer sur les panneaux latéraux les déflecteurs métalliques et les crochets fournis. Assembler le tube fluorescent, la protection en matière plastique et les câblages correspondants, puis, positionner le tout en le fixant aux crochets. Effectuer les connexions électriques en suivant le schéma électrique. ATTENTION : cette opération devra obligatoirement être effectuée par un professionnel qualifié autorisé. Phase 14) Rebouchage des perçages Retirer les protections des charnières (voir la photo) et visser les charnières de la/des porte/s Ä sur les panneaux latéraux Á avec des vis M5x40 ; lorsque cette opération est terminée, remonter les protège-charnière. ATTENTION : Assurez-vous que les joints adhèrent uniformément sur les panneaux latéraux et sans provoquer de compression excessive. Boucher les trous des crochets à l'aide des bouchons fournis en standard. Phase 8) Fixation du pupitre de commande et du tableau électrique Visser le/les pupitre/s de commande Æ sur les panneaux latéraux Á et fixer le tableau électrique au ciel en faisant très attention au parfait positionnement par rapport au perçage présent sur le pupitre de commande.(*) Sur les ROLL-IN 1PP et 2PP fixer les deux traverses supérieures aux panneaux latéraux. Utiliser des vis M6x14. (*) 37 Les dimensions des accessoires varient selon le modèle de l'appareil. PANNEAU DE COMMANDE 1 THERMOREGLAGE 2 FONCTIONNEMENT DU COMPRESSEUR 3 DEGIVRAGES SUPPLEMENTAIRES 4 VARIATION DU POINT DE CONSIGNE 5 ETAT DE FONCTIONNEMENT DE L'APPAREIL 6 SONDE EN PANNE Le panneau de commande se compose de: A LAMPE TÉMOIN DE DEGIVRAGE: la lampe témoin jaune allumée indique que le dégivrage de l'appareil est en cours; B INTERRUPTEUR LUMINEUX ON-OFF: qui a la fonction de mettre le réfrigérateur sous/hors tension; dans la position ON, le système électrique est sous tension; C THERMOSTAT ELECTRONIQUE: qui effectue le réglage et le contrôle du réfrigérateur. 1 THERMOREGLAGE 5 Le paramètre "dif" définit la variation de la température de la chambre froide par rapport au Point de Consigne. Exemple : ayant défini le Point de Consigne = -2°C et "dif" = 2°C, on obtiendra le fonctionnement suivant: Démarrage du compresseur dès que la température de la chambre froide est au-dessus de: -2°C +(2°C)=0°C Arrêt du compresseur dès que la température de la chambre froide est égale à: -2°C Le Point de Consigne peut être modifié à l'intérieur d'une certaine plage fixée à l'usine. 2 Pour connaître l’état de fonctionnement de l'appareil, il suffit de regarder les LED du thermostat Le tableau fourni ci-après définit sa signification: FONCTIONNEMENT DU COMPRESSEUR Le fonctionnement du compresseur est signalé par l'allumage de la Led (L3) présente dans la face avant du thermostat et positionnée en regard du symbole J 3 DEGIVRAGES SUPPLEMENTAIRES Le dégivrage a la fonction de fondre la givre ou la glace qui se forment sur la surface de l'évaporateur ; la givre et la glace se forment quand on ouvre les portes de l'appareil et à cause de l'introduction d'aliments chauds. Si besoin en est, il est possible d'activer manuellement un cycle de dégivrage, en appuyant durant plus de 5 secondes sur la toucheP1; la Led associée L2 s'allumera en clignotant. 4 ETAT DE FONCTIONNEMENT DE L'APPAREIL 6 LED état signification al L1 éteinte Alarme non activé al L1 allumée Alarme activé def L2 éteinte Dégivrage non activé def L2 allumée Dégivrage en cours def L2 clignotante Dégivrage manuel comp L3 éteinte Compresseur arrêté comp L3 clignotante Activation manuelle ou à partir de l’entrée numérique comp L3 allumée Compresseur en marche vent L4 (ID 974) éteinte Ventilateur non activé vent L4 (ID 974) allumée Ventilateur en fonction SONDE EN PANNE En cas de panne de la sonde, le thermostat affiche le message suivant: VARIATION DU POINT DE CONSIGNE E1 panne de la sonde de température de la chambre froide E2 panne de la sonde de température de l'évaporateur (ID 974) - Entrer dans le menu "Etat machine", appuyer, en la relâchant instantanément, sur la touche "set" (P4). L’étiquette du répertoire "Set" apparaît. Pour visualiser la valeur du Setpoint, appuyer à nouveau sur la touche “set”. La valeur du Setpoint apparaît sur l’afficheur. - Pour faire varier la valeur du Setpoint, il faut agir, dans les 15 secondes qui suivent, sur les touches P1 et P2. 38 MISE EN SERVICE 1 CONTROLES PRELIMINAIRES 2 MISE EN SERVICE - VERIFICATIONS 3 ELIMINATION IMPORTANT AVANT DE BRANCHER L’APPAREIL, S’ASSURER QUE LES DONNEES DE LA PLAQUETTE SIGNALETIQUE CORRESPONDENT A CELLES DU RESEAU ELECTRIQUE. LA PLAQUETTE SIGNALETIQUE MENTIONNANT LES DONNEES ELECTRIQUES NECESSAIRES A L’INSTALLATION EST PLACEE A L’INTERIEUR EN CORRESPONDANCE DU COTEE SUPERIEURE DROITE. L’INSTALLATION DOIT ETRE EFFECTUEE SELON LES INSTRUCTIONS MENTIONNEES DANS CE CHAPITRE DE LA PART DE TECHNICIENS QUALIFIES. LA SECURITE ELECTRIQUE DE CET APPAREIL EST ASSUREE UNIQUEMENT SI L’APPAREIL EST RELIE A UNE PRISE DE TERRE EFFICACE CONFORMEMENT AUX NORMES DE SECURITE ELECTRIQUE EN VIGUEUR. IL EST NECESSAIRE DE VERIFIER CETTE CONDITION FONDAMENTALE DE SECURITE ET, EN CAS DE DOUTE, S’ADRESSER A DES TECHNICIENS QUALIFIES POUR FAIRE CONTROLER SOIGNEUSEMENT L’INSTALLATION. LE FABRICANT DECLINE TOUTE RESPONSABILITE POUR LES EVENTUELS DOMMAGES DUS A L’ABSENCE DE LA PRISE DE TERRE. L’APPAREIL DOIT ETRE EGALEMENT INSERE A L’INTERIEUR D’UN SYSTEME EQUIPOTENTIEL DONT L’EFFICACITE DEVRA ETRE CONFORME AUX NORMES EN VIGUEUR. IL EST INTERDIT D’UTILISER DES ADAPTATEURS, DES PRISES MULTIPLES, ET/OU DES RALLONGES. convient à la puissance absorbée par l’appareil. Vérifier que la fiche soit introduite dans la prise. 2 FIXAGE AU SOL 2.1 – Pratiquer dans le sol 6 tous, diamétre 12 mm, la position des quelles sera la même des trous deja existants sur le fond de l’appareil. 2.2 - Fixer l’appareil moyennant les goujons, les boulons M6 et les rondelles fournis avec l’appareil. 1 CONTROLES PRELIMINAIRES 1.1 - CONTROLES GENERIQUES 1.1.1 - Contrôler que l’appareil ait été installé parfaitement droit et calé correctement. Eventuellement, agir sur la partie mobile des pieds réglables pour le mettre parfaitement de niveau. 1.1.2 - Contrôler que le plastique de protection des surfaces externes ait été retiré. 1.1.3 - Contrôler que l’intérieur de l’appareil ait été lavé à l’eau et au savon neutre. 1.1.4 - Contrôler que l’appareil ait été installé le plus loin possible des sources de chaleur. 1.1.5 - Contrôler que l’air dans le compartiment du moteur puisse circuler sans aucun problème. 1.1.6 - Contrôler que les clefs de fermeture ne soient pas à la portée des enfants. 1.2 - CONTROLES SUR LA PARTIE ELECTRIQUE 1.2.1 - Contrôler la valeur de la tension et de la fréquence du réseau : IMPORTANT POUR FONCTIONNER CORRECTEMENT L’APPAREIL DOIT ETRE FIXE AU SOL. L’APPAREIL DOIT ETRE PLACE SUR UN PLAN DE NIVEAU. 3 MISE EN SERVICE - VERIFICATIONS Après avoir effectué soigneusement toutes ces opérations, mettre l’appareil en marche: 3.1.1 - Amener l’interrupteur général auquel est reliée la fiche du câble d’alimentation sur la position ON. 3.1.2 - Amener l’interrupteur de l’appareil sur la position ON. 3.1.3 - Visualiser le POINT DE CONSIGNE 3.1.3.1 - Appuyer sur la bouton SET  du thermostat électronique et vérifier que la Led set à clignote; 3.1.3.2 - Sélectionner la valeur souhaitée en fonction du type de produit conservé. Pour les modalités opérationnelles concernant la modification de la valeur présélectionnée à l’usine, voir chapitre PANNEAU DE COMMANDE. ELLES DOIVENT RENTRER DANS LES LIMITES DES VALEURS INDIQUEES 230 ± 10% 50Hz 1.2.2 - Contrôler que les vis de fixation des conducteurs sur les composants électriques présents sur le tableau soient serrées correctement (pendant la manutention et le transport, les vibrations pourraient les avoir desserrées ). 1.2.3 -S’assurer qu’un interrupteur multipolaire avec distance d’ouverture des contacts égale ou supérieure à 3 mm ait été installé en amont de la prise. 1.2.4 - Amener l’interrupteur général auquel sera reliée la fiche du câble d’alimentation sur la position OFF. 1.2.5 -Vérifier la compatibilité de la prise avec la fiche de l’appareil. Si nécessaire, faire appel à des techniciens qualifiés pour remplacer la prise par une autre de type conforme. Les techniciens devront également s’assurer que la section des câbles de la prise IMPORTANT AVANT D’INTRODUIRE LES ALIMENTS, AMENER L’APPAREIL A LA BONNE TEMPERATURE. 39 NETTOYAGE ET ENTRETIEN 1 NETTOYAGE HEBDOMADAIRE 2 ENTRETIEN HABITUEL 3 ARRETS PROLONGES Ce chapitre s’adresse à l'utilisateur final et est extrêmement important pour le fonctionnement régulier et la durée de vie de l'appareil. Quelques opérations effectuées soigneusement et régulièrement permettent d’éviter de faire appel à des techniciens spécialisés. Les opérations à effectuer ne nécessitent aucune connaissance technique spéciale et se résument en de simples contrôles des composants de l'appareil. 2.3 - CABLE D’ALIMENTATION 2.3.1 - Vérifier que le câble qui relie l'appareil à la prise ne soit pas déchiré, crevassé ou endommagé au point de compromettre son isolation. S’adresser à un centre d’assistance autorisé au cas où il faudrait intervenir sur le câble. 3 ARRETS PROLONGES IMPORTANT En cas d’arrêt prolongé de l’appareil, procéder de la façon suivante: 3.1 - Amener l’interrupteur de réseau sur la position OFF. 3.2 - Débrancher l’appareil. 3.3 - Vider l’appareil et le nettoyer en suivant les conseils du point 1.0. 3.4 - Laisser les portes entr’ouvertes pour éviter la formation de mauvaises odeurs. 3.5 - Protéger le groupe compresseur contre la poussière. AVANT TOUTE OPERATION D’ENTRETIEN OU DE NETTOYAGE DE L'APPAREIL, NE PAS OUBLIER DE LE DEBRANCHER. ATTENTION NE PAS LAVER L’APPAREIL DIRECTEMENT AU JET D’EAU A HAUTE PRESSION . FAIRE ATTENTION A NE PAS MOUILLER LES PARTIES ELECTRIQUES. IMPORTANT LES APPAREILS SONT REALISES EN ACIER AISI 304 RESISTANT A LA CORROSION DUE A L’UTILISATION NORMALE. EVITER D’UTILISER DES PRODUITS DETERGENTS OU DES SYSTEMES DE NETTOYAGE QUI POURRAIENT COMPROMETTRE SON INTEGRITE. 1 NETTOYAGE HEBDOMADAIRE 1.1 - STRUCTURE 1.1.1 - Vérifier si les parties qui constituent la structure sont propres. Contrôler tout particulièrement les parties en acier. 1.1.2 - Nettoyer les surfaces internes et externes seulement avec de l’eau savon ou un produit détergent neutre. 1.1.3 - Rincer abondamment à l’eau et essuyer soigneusement. 1.2 - SYSTEME DE COLLECTE DE L’EAU DE DEGIVRAGE 1.2.1 - Vérifier que le tuyau d’évacuation de l’eau de condensation ne soit pas bouché. Le nettoyer si nécessaire. ATTENTION OUVRIR TROP SOUVENT LA PORTE OU UTILISER IMPROPREMENT L’APPAREIL IMPLIQUE DE DEVOIR CONTROLER FREQUEMMENT L’ETAT DE REMPLISSAGE DE LA CUVE 2 ENTRETIEN HABITUEL 2.1 - BATTERIE DE CONDENSATION Il est important que la batterie puisse offrir le plus grand échange thermique possible. Il faut donc pour cela que sa surface soit parfaitement propre: retirer la poussière qui aurait pu se déposer sous l’effet de l'action des ventilateurs. 2.1.1 - Passer l’aspirateur et un pinceau ou une brosse non métallique pour retirer toutes les impuretés (papier et poussière) qui auraient pu se déposer sur la surface de la batterie. 2.1.2 - Vérifier que les ailettes en aluminium n’aient pas été endommagées ni pliées, le cas échéant, les "redresser" à l’aide de l’outil prévu à cet effet pour rétablir la situation initiale et obtenir un flux d'air optimal. 2.2 - VENTILATEURS 2.2.1 - Vérifier si le ventilateur est fixé correctement au support. 2.2.2 - Vérifier, si possible, si les ventilateurs sont déséquilibrés; situation qui se reconnaît au bruit et aux vibrations anormales. 40 RECHERCHE DES PANNES 1 2 3 4 5 6 7 8 9 HAUTE PRESSION ANORMALE BASSE PRESSION ANORMALE PROTECTIONS DU COMPRESSEUR SONDES EN PANNE LE COMPRESSEUR NE DEMARRE PAS EVAPORATEUR AVEC QUANTITE DE GIVRE/GLACE EXCESSIVE LE COMPRESSEUR S’ARRETE RAREMENT APPAREIL BRUYANT LES CUVES AUTOEVAPORANTES DEBORDENT Retirer tout le fluide réfrigérant du circuit, réaliser un vide de valeur égal ou inférieur à 100Pa, introduire dans le circuit la quantité de fluide réfrigérant indiquée sur la plaquette signalétique. cause 1.4 MAUVAISE AERATION DE LA ZONE ADJACENTE LE LOGEMENT TECHNIQUE. intervention Libérer éventuellement les entrée/sortie du condenseur pour laisser l’air circuler correctement. cause 1.5 APPAREIL MIS EN SERVICE DEPUIS PEU. Si l’appareil a été mis en service depuis peu ou si l’on y a installé récemment des aliments, il est possible de se trouver face à ce problème. intervention Ce problème est temporaire et se résout lorsque l’appareil atteint la température du point de consigne. Aucune opération à effectuer. Ce chapitre représente une aide dans la recherche de solutions possibles face à certaines anomalies qui pourraient se déclencher sur l'appareil; nous n’avons évidemment pas pu considérer la totalité des possibilités. Si un dispositif de sécurité intervient, cela indique qu’il y a une anomalie de fonctionnement; avant de rétablir la situation initiale, vérifier et éliminer la cause. Nous fournissons ci-dessous une liste des problèmes qui pourraient se déclencher avec leurs causes et leurs remèdes (en gras). ATTENTION L’OPERATEUR EST SEUL RESPONSABLE LORSQU’IL EFFECTUE LES OPERATIONS INDIQUEES CI-DESSOUS - POUR RETABLIR LES FONCTIONS DE L’APPAREIL, S’ADRESSER A UN CENTRE D’ASSISTANCE AUTORISE ET EQUIPE POUR CE TYPE D’OPERATION. IMPORTANT AVANT TOUTE OPERATION D’ENTRETIEN, NE PAS OUBLIER DE DEBRANCHER L’APPAREIL. 2 BASSE PRESSION ANORMALE. cause 2.1 CAPILLAIRE PARTIELLEMENT BOUCHE. intervention Remplacer le capillaire par un neuf présentant les mêmes caractérisques dimensionnelles. cause 2.2 FILTRE DESHYDRATEUR COLMATE. Mesurer la température du fluide réfrigérant en amont et en aval du filtre à l’aide d’un thermomètre muni d’une sonde de contact. Des différences de température supérieures à 1 °C signifient que le filtre n’est pas efficace et qu’il faut le remplacer. intervention Remplacer le filtre. cause 2.3 CHARGE DU FLUIDE REFRIGERANT FAIBLE. intervention Eliminer les fuites éventuelles; si nécessaire, mettre le circuit sous pression pour identifer plus facilement ces fuites; vider et recharger le circuit. inconvénient 1 HAUTE PRESSION ANORMALE. cause 1.1 BATTERIE DE CONDENSATION SALE. Mesurer, compresseur en marche, la valeur de la pression de condensation à l’aide d’un manomètre . Si la température de l’air arrivant dans le condenseur correspond à +32C, la différence entre la valeur saturée de la pression de condensation et la température de l’air doit assumer des valeurs proches de 10 °C. intervention Si la différence mesurée dépasse cette valeur nettoyer la batterie en suivant les recommandations du chapitre “ NETTOYAGE ET ENTRETIEN “ au point 2.1. cause 1.2 LE VENTILATEUR DU CONDENSEUR NE FONCTIONNE PAS. Doit fonctionner si le compresseur fonctionne. intervention Avant de remplacer éventuellement le ventilateur, débrancher l'appareil et vérifier que les connexions électriques soient efficaces. cause 1.3 PRESENCE DE SUBSTANCES INCONDENSABLES DANS LE CIRCUIT. S’il y a des substances incondensables dans le circuit, la différence entre la valeur saturée de la pression de condensation et la température de l’air extérieur assume des valeurs supérieures à 10 °C. intervention 3 DECLENCHEMENT DES PROTECTIONS DU COMPRESSEUR. cause 3.1 LE THERMOSTAT NE CALCULE PAS LES TEMPS DE RETARD. Des démarrages rapprochés ne permettent pas aux pressions.de se rééquilibrer. intervention Vérifier le paramètre en question et éventuellement le ramener aux valeurs fixées en usine. 41 cause 3.2 TEMPERATURE DU GAZ ASPIRE SUPERIEURE AUX VALEURS OPTIMALES .intervention -Vérifier que l’organe de laminage fonctionne correctement. -Vérifier la charge du fluide réfrigérant et l’éventuelle présence de fuites; si nécessaire, mettre le circuit sous pression pour identifier plus facilement ces fuites; vider et recharger le circuit. cause 6.2 LE SYSTEME DE FERMETURE DES PORTES NE FONCTIONNE PAS. intervention Vérifier l’état de fonctionnement et éventuellement remplacer la charnière. cause 6.3DEGIVRAGE NON OPTIMAL. intervention Vérifier que fréquence, durée, modalité des dégivrages soient conformes aux caractéristiques du fabricant; éventuellement modifier après avoir contacté le service technique de l’usine. cause 6.4 ABSENCE DU SIPHON SUR LECONDUIT DE SORTIE DE L’EAU DE DEGIVRAGE. intervention Vérifier s’il y a un siphon sur le conduit d’évacuation devant le raccord avec la partie fixe; éventuellement, faire les modifications nécessaires. cause 6.5 INTRODUCTION DE MARCHANDISE CHAUDE ET A HAUTE TENEUR EN EAU. intervention Contrôler le type de marchandise introduite. 4 SONDES EN PANNE. cause 4.1 CONNEXIONS ELECTRIQUES.INTERROMPUES intervention Vérifier que les connexions soient intègres et éventuellement remplacer la sonde. cause 4.2 LA SONDE NE FONCTIONNE PAS. intervention Vérifier à l’aide d’un testeur l’intégrité de la sonde et éventuellement la remplacer. 5 LE COMPRESSEUR N’A PAS DEMARRE. 7 LE COMPRESSEUR S’ARRETE RAREMENT. cause 5.1 LES BORNES DU MOTEUR ELECTRIQUE NE SONT PAS ALIMENTEES. intervention Vérifier la continuité des connexions électriques du câble d’alimentation du compresseur. cause 5.2 LA VALEUR DE LA TENSION D’ ALIMENTATION DEPASSE LES VALEURS ADMISES intervention Déterminer la cause et l’éliminer. cause 5.3 LE MOTEUR ELECTRIQUE A UN ENROULEMENT DECLENCHE OU COURTCIRCUITE. intervention Remplacer le compresseur. cause 5.4 LE COMPRESSEUR PRESENTE DES PROBLEMES MECANIQUES. intervention Remplacer le compresseur cause 5.5 LE THERMOSTAT ELECTRONIQUE NE FONCTIONNE PAS. intervention Vérifier à l’aide d’un testeur la fonctionnalité du contact du thermostat dont dépend le câble d’alimen-tation du compresseur. cause 5.6 MOTEUR ELECTRIQUE BRULE. intervention Vérifier à l’aide d’un testeur la fonctionnalité du moteur et éventuellement remplacer le compresseur. cause 7.1 CHARGE DU FLUIDE REFRIGERANT FAIBLE. intervention -Vérifier la charge du fluide réfrigérant et la présence éventuelle de fuites; si nécessaire, mettre le circuit sous pression pour identifier plus facilement ces fuites; vider et recharger le circuit. cause 7.2 JOINTS DE LA PORTE PEU EFFICACES. intervention Vérifier l’état des joints et éventuellement les remplacer. cause 7.3 SOUPAPE DE REPRISE DU COMPRESSEUR DEFECTUEUSE. intervention Vérifier à l’aide d’un manomètre la valeur de la pression de reprise et la valeur de la température de la carcasse du compresseur. Eventuellement remplacer. 8 APPAREIL BRUYANT. cause 8.1 VIS DE FIXATION DU COMPRESSEUR AU SOCLE DESSERREES. intervention Vérifier le serrage et éventuellement serrer les vis. cause 8.2 LES TUYAUX DE COMPRESSION OU DE REPRISE VIBRENT. intervention Vérifier la fixation et éventuellement éloigner les tuyaux adjacents qui se touchent. 9 LA CUVE D’ AUTOEVAPORATION DEBORDE. cause 9.1 INTRODUCTIONS FREQUENTES DE MARCHANDISE CHAUDE ET A HAUTE TENEUR EN EAU. intervention Contrôler le type de marchandise introduite. cause 9.2 JOINTS DE LA PORTE PEU EFFICACES. intervention Vérifier l’état des joints et éventuellement les remplacer. 6 EVAPORATEUR PRESENTANT UNE QUANTITE EXCESSIVE DE GIVRE / GLACE. cause 6.1 JOINTS DE LA PORTE PEU EFFICACES. intervention Vérifier l’état des joints et éventuellement les remplacer. 42 NOTE / NOTE / ANMERKUNG / NOTE 43 NOTE / NOTE / ANMERKUNG / NOTE 44