1
6,2” TFT-LCD - TOUCH SCREEN
2 DIN NAVIGATION
DVD RECEIVER
ITALIANO
ENGLISH
FRANÇAIS
DEUTSCH
ESPAÑOL
MANUALE ISTRUZIONI • INSTRUCTIONS MANUAL
NOTICE DE MONTAGE ET D’EMPLOI • GEBRAUCHSANWEISUNGEN
MANUAL DE INSTRUCCIONES
VM 007
INDICE - INDEX - INHALTSVERZEICHNIS
IT-GB
Connessioni / Connections................................................................... 3-6
Funzioni / Functions.............................................................................. 7
Note importanti / Important notice........................................................ 8-9
Menù / Menu......................................................................................... 10
Impostazioni di sistema / System setup................................................ 11-14
Radio - Equalizzatore / Equalizer.......................................................... 15
Riproduzione / Reproduction AUDIO ................................................... 16-17
Riproduzione / Reproduction DVD ....................................................... 17
Riproduzione / Reproduction VIDEO ................................................... 18
Funzioni Bluetooth / Bluetooth functions.............................................. 19
Comandi al Volante / Steering wheel command................................... 20
Caratteristiche tecniche / Specifications............................................... 54
FR-D
Connexions / Kabel-Verbindungen....................................................... 21-24
Fonctions / Funktionen.......................................................................... 25
Note importantes / Wichtige Hinweise.................................................. 26-27
Menu / Menü......................................................................................... 28
Reglages de systeme / System-Einstellungen...................................... 29-32
Radio - Egaliseur / Equalizer................................................................. 33
Reproduction / Wiedergabe AUDIO...................................................... 34-35
Reproduction / Wiedergabe DVD.......................................................... 35
Reproduction / Wiedergabe VIDEO....................................................... 36
Fonctions bluetooth / Bluetooth-funktionen......................................... 37
Commandes au Volant / Lenkrad-Steuerungen.................................... 38
Caracteristiques techniques / Technische daten.................................. 54
E
Conexiones........................................................................................... 39-42
Funciones ............................................................................................. 43
Notas importantes . .............................................................................. 44
Menu .................................................................................................... 45
Adjuste del sistema............................................................................... 46-49
Radio - Equalizador............................................................................... 49-50
Reproduccion AUDIO............................................................................ 50-51
Reproduccion DVD................................................................................ 52
Funciones bluetooth.............................................................................. 53
Mandos de volante................................................................................ 53
Caracteristicas tecnicas........................................................................ 54
CONNESSIONI • CONNECTIONS
IT/GB
10 9
8
4
6
PORTA/ PORT USB WI-FI/3G
ANTENNA FM / FM AERIAL
1
2
3
5
7
La porta USB posteriore è dedicata esclusivamente alla chiavetta per il WI-FI o il 3G che deve essere inserita prima dell’accensione del dispositivo.
Non utilizzare per la riproduzione di file AUDIO/VIDEO.
The rear USB-port is exclusively dedicated for the WI-FI-3G-key which has to be inserted before switching-on the VM007.
Do NOT use for AUDIO/VIDEO-reproduction.
3
CONNESSIONI • CONNECTIONS
1
IT/GB
INGRESSO TV DIGITALE TERRESTRE / DIGITAL TV INPUT
DTV
CAVO E SINTONIZZATORE OPZIONALE VM210
CABLE AND TUNER OPTIONAL VM210
2
INGRESSO ANTENNA GPS / GPS-ANTENNA INPUT
3
USCITE CANALI AUDIO PREAMPLIFICATE / PRE-AMPLIFIED AUDIO-CHANNELS OUTPUTS
GPS
BLU/BLUE
GRIGIO/GREY
ROSSO/RED
BIANCO/WHITE
ROSSO/RED
BIANCO/WHITE
4
Sub woofer
Sub woofer
Posteriore destro
Posteriore sinistro
Anteriore destro
Anteriore sinistro
Subwoofer
Subwoofer
Rear Right
Rear Left
Front Right
Front Left
INGRESSO IPOD / I-POD INPUT
TUTTI I MODELLI SOLO FUNZIONI AUDIO
ALL MODELS, FOR AUDIO-FUNCTIONS ONLY
iPod
5
LINE OUT SUB WOOFER
LINE OUT SUB WOOFER
LINE OUT REAR R
LINE OUT REAR L
LINE OUT FRONT R
LINE OUT FRONT L
INGRESSO AUDIO VIDEO / AUDIO-VIDEO INPUT
RED/ROSSO
BIANCO/WHITE
GIALLO/YELLOW
AUX IN RCH
AUX IN LCH
AUX IN VIDEO
4
Canale audio destro
Canale audio sinistro
Canale video
Right Audio-Channel
Left Audio-Channel
Video-Channel
CONNESSIONI • CONNECTIONS
6
IT/GB
INGRESSO RETROCAMERA E USCITA AUDIO VIDEO 1 / AUDIO-VIDEO 1 OUTPUT
REAR RCH 1
REAR LCH 1
CAMERA 1
VIDEO OUT 1
7
ALIMENTAZIONE E USCITE ALTOPARLANTI
POWER-SUPPLY AND SPEAKERS OUTPUT
Uscita audio destra
Uscita audio sinistra
Ingresso retrocamera
Uscita video
Right Audio-Output
Left Audio-Output
Input for Rear-Camera
Video-Output
USCITE ALTOPARLANTI / SPEAKERS OUTPUT
GRIGIO/GRAY
GRIGIO-NERO/GRAY-BLACK
BIANCO/WHITE
MARRONE
BROWN
BIANCO-NERO/WHITE-BLACK
VIOLA/PURPLE
VIOLA-NERO/PURPLE-BLACK
FUSIBILE
FUSE
VERDE/GREEN
VERDE-NERO/GREEN-BLACK
TEMPORIZZATORE
DI ACCENSIONE
IGNITION-TIMER
NERO
BLACK
FRONT R +
FRONT R FRONT L +
FRONT L REAR R +
REAR R REAR L +
REAR L -
ANTERIORE DESTRO
FRONT RIGHT
ANTERIORE SINISTRO
FRONT LEFT
POSTERIORE DESTRO
REAR RIGHT
POSTERIORE SINISTRO
REAR LEFT
ALIMENTAZIONE / POWER-SUPPLY
GIALLO/YELLOW
+12V Positivo batteria
BATT
ROSSO/RED
+12V Sottochiave
ACC
NERO/BLACK
Massa
GND
ARANCIONE/ORANGE
ILLUMI IIlluminazione / Dimmer
MARRONE/BROWN
MUTE Silenzia audio
+12V Battery-Positive
+12V Injection key
Ground
Illumination / Dimmer
Mute
Amplifier remote
P CNTR Remote amplificatore
Antenna elettrica
Aerial electrical activation
P ANT
REVERSE Attivazione retrocamera Rear camera activation
5
CONNESSIONI • CONNECTIONS
8
IT/GB
COMANDI AL VOLANTE RESISITIVI E FRENO A MANO / RESISTIVE STEERING WHEEL COMMANDS AND HAND-BRAKE
VERDE/GREEN
VIOLA/PURPLE
ROSA/PINK
NERO/BLACK
Corrispondenza colore cavi / Combination of Cable-colours:
WHEEL KEY 1
WHEEL KEY 2
BRAKE
GND
VM007 NERO / BLACK .................... ➡....................... VERDE / GREEN
VERDE / GREEN................... ➡............................. ROSA / PINK
VIOLA / PURPLE................... ➡......................... GRIGIO / GREY
Per i collegamenti al connettore auto originale utilizzare gli schemi presenti sul manuale istruzioni dell’interfaccia 4/085.
When connecting to the original car-connector, please refer to the connection-schemes shown in the Instructions Manual of Interface 4/085.
Per gli schemi che utilizzano un solo cavo è necessario collegare il cavo NERO a massa.
When the connection-scheme involves one only cable, the BLACK cable has to be connected to the GROUND.
COMANDI AL VOLANTE CAN-BUS / CAN-BUS STEERING-WHEEL COMMANDS
VERDE/GREEN
VIOLA/PURPLE
NERO/BLACK
9
NERO/BLACK
USCITA AUDIO VIDEO 2 / AUDIO VIDEO 2 OUTPUT
BIANCO/WHITE
ROSSO/RED
GIALLO/YELLOW
10
ENTRATA MICROFONO / MICROPHONE-INPUT
MIC
6
4/085
FUNZIONI • FUNCTIONS
IT/GB
18
2
17
16
1
15
3
4
5
6
13
12
11
10
7
9
14
8
1. Micro-SD-port for System UPGRADE
2. Microphone
3. Main home desktop
4. Go back
5. Applications and Menus settings
6. Radio
7. Switch On/Off - Volume
8. Micro-USB-port
9. Manual Radio-Tuner – Display Brightness
10. Change Source
11. Setting
12. Applications
13. Navigation
14. Reset Factory-Default
15. Micro-SD-port for Audio/Video
16. Eject Disc
17.Disc slot
18. DVD
1. Slot micro SD CARD per aggiornamento sistema
2. Microfono
3. Schermata principale
4. Torna indietro
5. Menu applicazioni
6. Radio
7. Accende/Spegne - Volume
8. Porta micro USB audio/video
9. Ricerca stazioni radio manuale - Luminosità display
10. Cambio sorgente
11. Impostazioni
12. Applicazioni
13. Navigazione
14. Reset impostazioni di fabbrica
15. Slot micro SD CARD audio/video
16. Tasto espulsione disco
17.Feritoia inserimento disco
18.DVD
7
NOTE IMPORTANTI
IT/GB
Queste istruzioni sono relative all’installazione e configurazione del sistema. In TUTORIAL (Schermata HOME) sono presenti i video per l’utilizzo
delle applicazioni e della navigazione internet.
INSTALLAZIONE E PRIMO AVVIO
Il VM007 deve essere installato da installatori CAPACI E COMPETENTI.
• Terminati i collegamenti, impostare orario e data per il corretto funzionamento di alcune applicazioni e la zona di appartenenza per la ricezione delle informazioni meteo (Wi-Fi e 3G).
• Non installare software che potrebbe rallentare o bloccare il sistema operativo.
• La garanzia non coprirà blocchi di sistema a causa di software non autorizzato.
• È possibile la connessione alla rete internet tramite WI-FI integrato oppure chiave USB 3G (opzionale).
• Il VM007 può collegarsi alla rete internet tramite alcuni smartphone dotati di funzione TETHERING* utilizzando la connessione dati del cellulare. (Accertarsi degli eventuali costi aggiuntivi dal proprio gestore telefonico).
• HOME è il punto di partenza di ANDROID dove si può accedere a tutte le applicazioni del sistema operativo.
• TOUCH SCREEN l’utilizzo può essere effettuato tramite un dito o per una maggiore precisione, con il pennino fornito nella dotazione.
APPLICAZIONI DI TERZI PRESENTI SUL VM007
Le seguenti applicazioni sono precaricate di fabbrica. È possibile installare applicazioni anche se scaricate da altri siti web (vedi pag 12).
Opera Mobile
Skype
Youtube
Office Suite Viewer
Lookout
Browser di navigazione internet
Software di messaggistica istantanea e di Voip
Applicazione web per condivisione video
Software per la visualizzazione documenti in formato word, excel e power point.
Software anti malware/spyware e localizzatore GPS
LOOKOUT
Questo software protegge il sistema da malware e spyware, permette anche di rintracciare il dispositivo in caso di furto tramite il sito web www.mylookout.
com. Attivarlo inserendo la propria email e password seguendo le schermate per la versione FREE (gratuita) oppure la versione PREMIUM gratuita solo per
14 giorni. (É necessario il collegamento WI-FI o 3G per la localizzazione)
*HOTSPOT su iPHONE con iOS5 o superiore, TETHERING ANDROID su smartphone con OS ANDROID 2.2 o superiore.
8
IMPORTANT NOTICE
IT/GB
The present instructions refer to the installation and configuration of the system. Under
TUTORIAL (HOME-functions) you will find videos explaining all applications and internet-navigation.
INSTALLATION AND PUTTING INTO SERVICE
The VM007 needs to be installed by trained and specialized Installers.
• Once the connections are completed, set Time and Date, the correct sequence of certain applications, related Zone-type and the reception of weatherreports (Wi-Fi and 3G).
• Do NOT install softwares that could slow-down or block the operative system.
• Our Warranty will consequently NOT cover system-blockades caused by non-authorized softwares.
• Possibility of getting Internet-connection through integrated WI-FI or 3G-key (Optional).
• The VM007 establishes internet-connections through certain smart-phones fitted with HOTSPOT-function (iPHONE with iOS5 or more), by making use of
the phone connection-data. (Check with your phone-operator for possible additional charges)
• HOME is ANDROID’s starting point, from where all Applications of the operation-system can be reached.
• TOUCH SCREEN: can simply be operated with a finger or, for a major precision, with the help of the supplied pen.
FACTORY-APPLICATIONS AVAILABLE ON THE VM007
The following Applications are pre-loaded by the producer. It is possible, however, to install Applications downloaded from other sites (see page 12).
Mobile-operator
Skype
Youtube
Office Suite Viewer
Lookout
Internet navigation-Browser
Software for instant-massages and Voip
Web-application for video-co-participation
Software visualizing documents in Word, Excel and Power Point.
Software protecting against malware/spyware and providing GPS-localization.
LOOKOUT
This software protects the system against malware and spyware, and traces the unit, in case of theft, through the web www.mylookout.com. Activate the
software by inserting your e-mail-address and related Password. Follow the various menu-indications leading to the FREE-version (Free-of-charge) or the
PREMIUM-version (free-of-charge for 14 days only).
* HOTSPOT on iPHONE with iOS5 or higher, Android tethering on Android smartphones with OS 2.2 or higher.
9
MENÙ • MENU
IT/GB
Le impostazioni di fabbrica prevedono quattro
menù HOME e uno libero per la configurazione di scorciatoie per le applicazioni.
The factory-settings offer 4 HOME-menus
and an additional one for the configuration of
application short-cuts.
10
IMPOSTAZIONI DI SISTEMA • SYSTEM SETUP
WIRELESS - RETI 3G - SCHERMO
WIRELESS - NETWORK 3G - DISPLAY
WIRELESS
• Prima dell’accensione inserire la chiavetta USB
WI-FI, in caso contrario non verrà riconosciuta.
• Per attivare la chiavetta selezionare
“Wireless e reti” e “Impostazioni W LAN” che
permette di connettersi ad una rete presente nel
raggio di azione del VM007.
• Selezionando “Notifica rete” verrà visualizzato
un messaggio di presenza di una rete WI-FI.
Per connettersi selezionarla ed inserire la password di rete.
RETI 3G
Utilizzare il modem USB 3G VM310.(optional)
• Prima dell’accensione inserire il modem nella
porta USB, in caso contrario non verrà riconosciuto.
Il VM007 è configurato con le impostazioni APN
dei maggiori provider europei, basterà inserire
la SIM card nel modem senza PIN code e il
dispositivo si collegherà automaticamente alla
rete 3G.
IT/GB
• “Reti mobili” per impostare le opzioni di
connessione.
• “Dati attivati” permette la trasmissione dati
sulla rete cellulare.
• “Roaming dati” permette la trasmissione dati in
roaming su gestori differenti dal proprio.
ATTENZIONE: i costi di trasmissione dati su rete
in roaming possono essere molto elevati, riferirsi
al proprio operatore mobile per i dettagli.
• “Nomi punti di accesso” funzione non disponibile, i maggiori APN europei sono riconosciuti
automaticamente.
DISPLAY
• “Luminosità” permette di regolare la luminosità
del display oppure di impostare il sistema in
automatico.
In automatico la luminosità della schermo varierà
in base all’orario e all’accensione delle luci.
• “Animazione” permette l’attivazione delle animazioni di Android.
GB - WIRELESS
• The USB WI-FI-key must be inserted BEFORE
switching-on, otherwise it will NOT be recognized.
• To activate the key, select “Wireless and
Networks” and “W LAN-Settings ”, allowing to
connect to Networks available within the VM007
operation-circle.
• Selecting “Network Notification” a message will
be visualized signaling the presence of a certain
Network.
To get connected, select the Network and intro11
duce the network password.
3G-NETWORKS
Use the 3G-USB-modem VM310.(Optional)
• Introduce the 3G-modem BEFORE switchingon the unit, otherwise it will NOT be recognized.
The VM007 is based on the APN-settings of the
most important European providers. It will be
sufficient to insert your SIM-card into the 3Gmodem, without PIN-code, and the device will
automatically connect to the 3G-Network.
• “Mobile Networks” to set the Connectionoptions.
• “Activated Data” to effect data-transmission
through the mobile-phone network.
• “Roaming Data” to effect data-transmission in
roaming, with other phone-operators (not yours).
ATTENTION: the costs for data-transmission
on Roaming-network can be very high, so that
you better ask your phone-operator for further
details.
• “Names of access-points”: this function is not
available. The main European APNs will automatically be recognized.
DISPLAY
• “Brightness”: to regulate the Display-brightness
or automatic system-selection. The automatic
system-selection foresees that the displaybrightness changes in due relation of the Time
and the Lights.
• “Animation” will activate Android’s animations.
IMPOSTAZIONI DI SISTEMA • SYSTEM SETUP
APPLICAZIONI / APPLICATIONS
In questa sezione vengono gestite le applicazioni
operative di Android.
Il Market di Android è disabilitato ma è possibile
installare applicazioni se scaricate da altri siti
web spuntando l’opzione “Origini sconosciute”.
INSTALLAZIONE
• Caricare su una micro SD-card i file APK ed
inserirla nello slot “MEDIA”.
• Premere “Install application” e lanciare il file
APK desiderato e seguire le istruzioni sul display.
GESTIONE E RIMOZIONE (APPLICAZIONI)
Nel sistema Android alcune applicazioni rimangono residenti nella memoria anche quando
vengono chiuse, se il sistema rallenta o diventa
instabile, è necessario terminarle manualmente
per liberare memoria RAM.
• Premendo “Gestisci applicazioni” verranno
visualizzate le applicazioni installate su Android
suddivise in: “Scaricate” - “In esecuzione”
“Tutte” - “Scheda SD”.
• Selezionare l’applicazione desiderata.
• “Termina” l’applicazione verrà chiusa e la
memoria liberata.
IT/GB
• “Disinstalla” l’applicazione verrà eliminata
definitivamente dal sistema.
• “Cancella dati” elimina i dati operativi dell’applicazione dalla memoria ROM, ad esempio
impostazioni o preferenze.
L’applicazione dopo la cancellazione dei dati
riparte dalle impostazioni di default.
• “Sposta su scheda SD” sposta l’applicazione
sulla micro SD-card, che dovrà essere sempre
inserita per poterla avviare.
SERVIZI IN ESECUZIONE
Visualizza e controlla i servizi attualmente in
esecuzione indicando la quantità di memoria
utilizzata.
SVILUPPO
Menù di debug e opzioni per il controllo delle
applicazioni da sviluppatori di software Android.
GB - In this section, Android’s operative applications will be handled.
The Android-Market is disabled, but it is possible to install applications downloaded from
other web-sites, by ticking the option “Unknown
Origin”.
INSTALLATION
• Load the APK-files onto a Micro-SD-card and
insert it into the “MEDIA”-port.
• Press “Install application” and launch the
requested APK-file. Follow the instructions appearing on the display.
MANAGING AND DELETING (APPLICATIONS)
The Android system foresees that some applications remain in memory even after having
been closed. Whenever the system slows-down
12
or becomes unstable, the applications need to
be manually closed, in order to set the RAMmemory free.
• By selecting “Manage Applications”, the
Android-installed applications will be visualized,
divided into the sections: “Downloaded” - “In
execution”
“All” - “SD-card”.
• Select the requested application.
• “Terminate”: the application will be closed and
memory will be set free.
• “Disinstall”: the application will definitely be
cancelled from the system.
• “Cancel Data”: cancels the operative application-data from the ROM-memory (example:
settings and preferences).
After having cancelled the application-data, the
application will restart from the Factory-defaults.
• “Move to SD-card”: carries the application to
the micro-SD-card which must remain inserted,
in order to be operated.
FUNCTIONS UNDER EXECUTION
Visualizes and controls the functions currently
being executed, with indication of the occupied
memory.
DEVELOPMENT
Debug-Menu and Application-control-Options
for Android-software-developers.
IMPOSTAZIONI DI SISTEMA • SYSTEM SETUP
IMPOSTAZIONI GENERALI
GENERAL SETTINGS
COMANDI VOLANTE vedi pag. 20
CALIBRAZIONE SCHERMO
Seguire le indicazioni a video premendo con il
pennino in dotazione dove indicato.
INTERRUTTORE BEEP
Attiva/Disattiva il segnale acustico che segnala
la pressione sullo schermo tattile.
CANALE DELLA NAVIGAZIONE
Seleziona gli altoparlanti per gli avvisi di svolta.
IMPOSTAZIONE AREA RADIO
Seleziona l’area di appartenenza per la ricezione
delle corrette frequenze radiofoniche.
SCELTA NAVIGAZIONE
Imposta l’applicazione per la navigazione GPS.
Una volta selezionata si potrà avviare la navigazione col tasto “NAV”.
BLUETOOTH
Premere sull’icona a destra per attivare.
Per configurare vedi pag. 19
IMPOSTAZIONI POGGIATESTA
Il VM007 è provvisto di 2 uscite audio/video per
IT/GB
il collegamento di monitor supplementari dove è
possibile selezionare la sorgente indipendentemente dalla riproduzione sullo schermo principale. Non è possibile riprodurre dalle 2 uscite
i file presenti su SD-CARD / USB o memoria
interna.
Esempio: Su VM007 visione navigazione, sui
poggiatesta posteriori TV Digitale e DVD.
IMPOSTAZIONI DI FABBRICA
Ripristina completamente il sistema Android.
ATTENZIONE: dopo questa operazione andranno installate nuovamente le applicazioni di
terze parti, come ad esempio OPERA, GOOGLE
MAPS e altro. Effettuare questa operazione solo
se si è in possesso dei file APK per il ripristino.
GB
STEERING-WHEEL COMMANDS see page 20.
SCREEN-CALIBRATION
Follow the indications appearing on the screen,
by pointing the included pen, as per instructions.
BEEP-SWITCH
Activates/De-actives the acoustical signal when
the touch-screen is pointed.
NAVIGATION-CHANNEL
Selects the speakers for the information.
SETTING THE RADIO-AREA
Selects the Radio-Area in relation to the best
possible radio-reception frequencies.
SELECT NAVIGATION
Set application on GPS-navigation. After that,
you can start navigation by pressing the “NAV”key.
13
BLUETOOTH
Press the icon on the right, to activate.
To configurate, see page 19.
SETTING THE HEAD-RESTS
The VM007 is fitted with 2 Audio/Video-Outputs
for the connection of additional monitors, from
where you can select the source, independently
from what is being reproduced on the main
screen. From those 2 Outputs, it is NOT possible to reproduce the files contained on the
SD-CARD / USB or internal memory.
Example: on the VM007, navigation-view; on the
rear head-rests, Digital TV and DVD.
FACTORY SETTINGS
Completely re-establishes the Android-system.
ATTENTION: after having carried out this operation, the third-party applications need to be reinstalled: example OPERA, GOOGLE MAPS and
others. That is why you should select “Factory
Settings” ONLY if you are in possession of the
APK-files required for re-establishment.
IMPOSTAZIONI DI SISTEMA • SYSTEM SETUP
IT/GB
USE 24-HOURS-FORMAT When activated,
visualization will take place in 24-hours format.
SELECT DATE-FORMAT Selects Date-visualization in the requested format.
INFO ON PHONE Visualizes the software/hardware-information of the VM007.
SD - MEMORIA - LINGUA E TASTIERA
SD - STORAGE - LANGUAGE - KEYBOARD
Visualizza la quantità di memoria ROM utilizzata.
L’indicazione “Scheda SD” si riferisce alla
memoria ROM interna e non alla micro SD-card
esterna.
“Archiviazione interna” indica la quantità di spazio disponibile nella memoria interna riservata al
sistema Android.
LINGUA E TASTIERA
Seleziona la lingua del sistema e la tipologia di
layout della tastiera.
IMPOSTAZIONI VOCALI - Non disponibile.
GB
Visualizes the occupied ROM-memory. The
“SD-card”-indication states the internal ROMmemory, NOT the external micro-SD-memory.
“Internal Folder” states the available internal
memory-space reserved for the Android-system.
LANGUAGE AND KEY-PANEL
Selects the System-Language and the Lay-out of
the key-panel.
VOCAL SETTINGS - Not available.
DATA-ORA / DATE-TIME
IMPOSTA DATA Regola la data del sistema.
Per il funzionamento di alcune applicazioni (ad
esempio YOUTUBE) è necessario impostare la
data corretta prima dell’avvio, in caso contrario
potrebbero rendere il sistema instabile.
FUSO ORARIO Imposta corretto fuso orario.
IMPOSTA ORA Regola l’ora del sistema.
USA FORMATO 24 ORE Se attivo permette la
visualizzazione del formato in 24 ore.
SELEZIONA FORMATO DATA Imposta la visualizzazione della data nel formato voluto.
INFO SUL TELEFONO Visualizza le informazioni
software e hardware del VM007.
GB
SET DATE Regulates the system-date.
To make certain applications run (example
YOUTUBE), it is necessary to set the correct
Date before the switching-on, in order to avoid
possible system instability.
TIME-ZONES Select your applicable Time-Zone
TIME-SETTING Regulates the system-time.
14
RADIO / EQUALIZZATORE
RICERCA E MEMORIZZAZIONE STAZIONI
STATIONS RESEARCH AND MEMORIZATION
Ricerca automatica.
Ricerca passo-passo.
Per la ricerca manuale far scorrere l’indicatore di
frequenza fino a quella desiderata.
MEMORIZZAZIONE
Dopo aver selezionato la stazione desiderata,
tenere premuto uno dei sei tasti presenti sul
lato sinistro del display fino alla comparsa della
frequenza o del nome della stazione radio (RDS).
GB
Automatic Research.
Step-by-Step Research.
During Manual Research, scroll the frequencyindicator until the requested frequency is found.
MEMORIZATION
After having selected the requested Station,
keep one of the six keys, situated on the left of
the Display, pressed, until the Frequency or the
name of the radio-station appears (RDS).
IT/GB
FUNZIONI RADIO / RADIO FUNCTIONS
GB
Torna al menù principale.
DX-LOC Cambia la sensibilità di ricezione
Memorizza automaticamente le stazioni radio
Premere 2 secondi per scansione stazioni
Per le impostazioni dell’equalizzatore
Informazioni sul traffico ON/OFF
Frequenza alternativa RDS ON/OFF
Attiva/disattiva ricerca programma radiofonico
Torna al menù precedente
Seleziona bande radio FM/AM
Scansiona e memorizza automaticamente
le stazioni radio sulla banda selezionata
Return to the Main Menu
DX-LOC Changes the Reception-Sensitivity Automatic Memorization of the radio-stations
Press 2 seconds for scrolling stations
For the Equalizer-Settings
Traffic-Information ON/OFF
Alternative Frequencies RDS ON/OFF
Activate/deactivate radio-progr.-research
Return to previous Menu
Select radio-band FM/AM
Automatically Scroll and Memorize the radio
stations on the selected frequency-band
15
EQUALIZZATORE / EQUALIZER
Selezionare una modalità tra quelle preimpostate: Classical, Pop, Rock, Jazz o Normal.
E’ possibile personalizzare una modalità su User.
Premendo su “Sound Set” si accede alle regolazioni di bilanciamento, fader, livello uscita
subwoofer e livello loudness.
GB
Select one of the following modes: Pop, Rock,
Jazz or Normal.
It is possible to personalize one mode on User.
Pressing “Sound Set” you will get the settings
for: Balance, Fader, Subwoofer Output-level,
Loudness-level.
RIPRODUZIONE AUDIO / AUDIO PLAYBACK
USB-SD CARD-MEMORIA INTERNA
USB-SD – INTERNAL MEMORY
Il VM007 organizza automaticamente tutti i file
audio secondo le informazioni ID3-TAG.
Per entrare nell’interfaccia di riproduzione.
• Selezionare la modalità di organizzazione della
lista (Artista, Album, Brano musicale, Playlist).
Per visualizzare la traccia in riproduzione.
Per creare o modificare playlist.
GB
The VM007 automatically organizes all Audiofiles, in accordance with the ID3-TAG-information.
To enter the Reproduction-Menu.
• Select organization-mode of the lists: Artist,
Album, Track, Playlist.
To visualize the track being reproduced.
To create or modify playlist.
IT/GB
Avvia/Interrompe Riproduzione
Traccia successiva
Traccia precedente
Ripetizione traccia/album/tutto
Riproduzione casuale
Elenco di riproduzione
Equalizzatore
Start/Interrupt Reproduction
Track after
Track before
Repeat Track/Album/All
Random Reproduction
List of Reproduction
Equalizer
GB
16
IPOD-IPHONE
È possibile il collegamento tramite il cavo in
dotazione controllando tutte le funzioni AUDIO
direttamente dal touch screen.
Elenco di riproduzione alfabetico degli artisti.
Elenco di riproduzione alfabetico degli album.
Elenco di riproduzione alfabetico dei brani.
Elenco delle playlist create.
Avvia/Interrompe Riproduzione.
Salta a traccia successiva.
Salta a traccia precedente.
Ripetizione traccia/album/tutto.
Riproduzione casuale.
Elenco di riproduzione.
Equalizzatore.
ATTENZIONE:
• Le cover degli album non vengono visualizzate
e non è possibile riprodurre file VIDEO.
• Per il corretto funzionamento dell’ I-PHONE
disattivare la connessione A2DP nella funzione
BLUETOOTH.
RIPRODUZIONE DVD / DVD PLAYBACK
IPOD-IPHONE
Possibility of connecting an iPod-iPhone, by means of
the supplied cable. All Audio-functions directly control- led on the touch-screen.
Reproduction-List in alphabetical order of Artists.
Reproduction-List in alphabetical order of Albums.
Reproduction-List in alphabetical order of Tracks.
List of created Playlists
Start/Interrupt Reproduction
Go to Track after
GB
Go to Track before
Repeat Track/Album/All
Random Reproduction
List of Reproduction
Equalizer
ATTENTION:
• The Album-covers are not shown. VIDEO-files cannot be reproduced.
• To make sure that your I-PHONE can work
correctly, de-activate the A2DP-connection of the
BLUETOOTH-function.
Torna al menù principale
Torna al menù precedente
Menù 1
Avvia/interrompe riproduzione
Traccia successiva
Traccia precedente
Riproduzione veloce 2x/4x/8x/16x/32x
Avvolgimento veloce 2x/4x/8x/16x/32x
Interrompe riproduzione
Passa a Menù 2
Back to Main Menu
Back to Menu before
Menù 1
Start/Interrupt reproduction
Track after
Track before
Fast reproduction 2x/4x/8x/16x/32x
Fast Rewind 2x/4x/8x/16x/32x
Interrupt reproduction
Skip to Menù 2
17
GB
IT/GB
Menù 2
Passa al menù titoli del disco
Ripetizione traccia/capitolo/disco
Modifica modalità visione (se supportata
dal DVD)
Cambio lingua disco
Sottotitoli
Menù equalizzatore audio
Passa a Menù 1
Menù 2
Skip to menu titles on the disc
Repeat Track/Chapter/Disk
Change view mode (if supported from the DVD)
Change disc language
Subtitles
Audio menù equalizer
Skip to Menù 1
RIPRODUZIONE VIDEO - IMMAGINI / VIDEO-PICTURES PLAYBACK
IT/GB
USB-SD CARD-MEMORIA INTERNA
USB-SD – INTERNAL MEMORY
Per accedere alla sezione video.
Avvia/Interrompe Riproduzione.
Traccia successiva.
Traccia precedente.
Torna al menù HOME
Torna alla schermata precedente
GB
To enter the Video-section
Start/Interrupt Reproduction
Track after
Track before
Back to HOME-Menu
Back to Menu before
USB-SD CARD-MEMORIA INTERNA
USB-SD CARD-INTERNAL MEMORY
Per accedere alla sezione immagini.
Le immagini vengono disposte sullo schermo in
sequenza ed è possibile scorrere le icone.
Organizza le immagini in album e data.
Scorre le immagini passo passo.
• Selezionare prima l’album e poi l’immagine.
GB
To enter the Picture-section.
The Pictures will appear in a row on the screen.
You can scroll the various icons.
Organize the Pictures per Album or per Date.
Scroll the Pictures one by one.
• Select Album first. Then select the Picture.
18
Tutte le immagini in sequenza ogni 3 sec.
Menu immagini.
“DELETE” cancella il file.
Menu di modifica immagine.
Visualizza dettagli del file.
Modifica visualizzazione immagine.
Ritaglia immagine.
Ruota immagine di 90°.
Ingrandisce e rimpicciolisce l’immagine.
GB
All Pictures in a row, every 3 seconds.
Pictures-Menu.
“DELETE” cancels the file.
Menu for Picture-modification.
Visualize File-details.
Modify Picture-visualization.
Cut-out Picture.
Rotate Picture by 90°.
Enlarge / Reduce Picture-size.
FUNZIONI BLUETOOTH • BLUETOOTH-FUNCTIONS
BLUETOOTH
Permette la conversazione in vivavoce nell’impianto della vettura. Si può riprodurre la musica
se il telefono è provvisto di protocollo A2DP.
Accesso all’interfaccia bluetooth.
•
Per inserire il nominativo (es.VM007).
• Per cambiare il PIN di accoppiamento, utilizzare il PIN PASSWORD (default 0000).
• Verificare che la modalità di scansione sia:
RAGGIUNGIBILE E CONNESSIONE.
• Tornare alla schermata iniziale bluetooth e
selezionare ACCOPPIAMENTO .
• Ricercare nuovi dispositivi dal telefono cellulare riferendosi al proprio manuale istruzioni.
• Una volta visualizzato il nome scelto (ad esempio VM007) selezionarlo, inserire il PIN (default
0000) ed accettare che si connetta automaticamente. Il dispositivo è pronto
Elenco dei telefoni accoppiati.
Ricerca un dispositivo accoppiato.
Disconnette il telefono cellulare.
Elimina tutti i dispositivi accoppiati.
Per poter scaricare la rubrica telefonica del
IT/GB
dopo aver
cellulare, selezionare CONTATTI
effettuato la connessione e premere IMPORTA .
Il tempo dell’operazione dipende dalla quantità
di contatti.
Effettua la ricerca di un contatto nella
rubrica scaricata.
Elimina i contatti.
Risponde / Invia chiamata.
Interrompe/rifiuta una chiamata.
Sposta la conversazione dagli altoparlanti
dell’auto al telefono e viceversa.
Disattiva/Attiva il microfono.
Riproduce i brani musicali presenti sul telefono cellulare.
Avvia riproduzione.
Brano successivo.
Brano precedente.
GB
Bluetooth provides for the telephone-function.
Music-reproduction is also possible, if the
mobile-phone is fitted with the A2DP-protocol.
Enter the Bluetooth-interface.
•
To insert the name (example:VM007).
• To change the coupling-PIN, use the PIN
PASSWORD (default 0000).
• Check and make sure that the scrolling-mode
is: REACHABLE / CONNECTION.
• Back to Bluetooth first Menu. Select COUPLING
.
• On your mobile-phone, research other devices
as per mobile-phone Instruction.
19
• Once the selected name is visualized (example
VM007), select this name and enter the PIN (default 0000). Confirm automatic connection. The
unit is now ready.
List of coupled mobile-phones.
Research a coupled unit.
Disconnect the mobile-phone.
Cancel all coupled units.
To download the phone-list of your mobilephone, establish the connection, select CONTACTS
and press IMPORT
.
The time required for this operation depends on
the number of contacts contained on the phonelist.
Research a certain number from the downloaded phone-list.
Cancel the contacts.
Answer / Start a phone-call.
Interrupt/refuse a phone-call.
Shift conversation from car-speakers to
mobile-phone, or vice-versa.
De-activate/Activate the microphone.
Reproduce musical tracks contained on your
mobile-phone.
Start reproduction.
Track after.
Track before.
COMANDI AL VOLANTE / STEERING WHEEL COMMANDS
Nel VM007 è integrata la centralina per i comandi al volante resistivi. Per i collegamenti sull’auto
utilizzare il manuale istruzioni dell’interfaccia
Phonocar 4/085.
Per auto con protocollo CAN-BUS è indispensabile l’utilizzo della centralina 4/070 (opzionale).
Per i collegamenti vedi schema elettrico. (vedipag.6)
of central-unit 4/070 (Optional) is indispensable.
For the connections, please follow the related
connection-scheme. (see page 6)
Possibility of memorizing up to 14 functions.
1 Press “Start recognition”.
2 Press the function to be memorized.
3 Press related key on the steering-wheel commands.
4 Repeat same procedure for all commands.
To end, press “Recognition completed”.
To cancel a certain data recognized by mistake,
press CANCEL COMMAND-DATA and repeat
operations from 1 to 3.
E’ possibile memorizzare fino a 14 funzioni.
1 Premere “Inizia acquisizione”.
2 Premere la funzione che si vuole memorizzare.
3 Premere il relativo tasto sui comandi al volante.
4 Ripetere la sequenza per tutti i comandi.
Al termine premere “Acquisizione completata”.
Per cancellare un dato acquisito erroneamente,
premere CANCELLA DATO DEL COMANDO e
ripetere le operazioni da 1 a 3.
GB
The VM007 has an integrated central-unit for
the resistive Steering-wheel commands. For the
connections, refer to the Instructions Manual of
Phonocar-interface 4/085.
For cars having a CAN-BUS-protocol, the use
20
IT/GB
CONNEXIONS • ANSCHLÜSSE
FR/D
10 9
8
4
6
USB WI-FI/3G
FM AERIAL
1
2
3
5
7
L’arrière port USB est dédiée exclusivement à la clé pour le WI-FI 3G; celle-ci doit être insérée avant l’allumage de l’appareil.
Ne pas utiliser pour la reproduction des fichiers AUDIO/VIDEO.
Der hintere USB-Port ist ausschließlich für den WI-FI bzw.3G-Stift bestimmt, den Sie bitte immer VOR dem Einschalten des Geräts einstecken müssen.
Bitte NICHT für die Wiedergabe von AUDIO/VIDEO-Dateien verwenden.
21
CONNEXIONS • ANSCHLÜSSE
1
FR/D
ENTRÉE TV NUMÉRIQUE TERRESTRE / EINGANG FÜR DVB-T TUNER
DTV
CÂBLE ET SYNTONISEUR OPTIONNEL VM210
KABEL UND TUNER ALS OPTIONAL: VM210.
2
ENTRÉE ANTENNE GPS / EINGANG FÜR GPS-ANTENNE
3
SORTIES CANAUX AUDIO PRÉ AMPLIFIÉES / VORVERSTÄRKTE AUSGÄNGE FÜR AUDIO-KANÄLE
GPS
LINE OUT SUB WOOFER
LINE OUT SUB WOOFER
ROUGE/ROT
LINE OUT REAR R
BLANCHE/WEISS LINE OUT REAR L
ROUGE/ROT
LINE OUT FRONT R
BLANCHE/WEISS LINE OUT FRONT L
BLUE/BLAU
GRIS/GRAU
4
Subwoofer
Subwoofer
Hinten Rechts
Hinten Links
Vorne Rechts
Vorne Links
ENTRÉE IPOD / EINGANG FÜR I-POD (nur Audio-Funktionen)
TOUS LES MODÈLES, SEULEMENT FONCTIONS AUDIO
FÜR ALLE MODELLE
iPod
5
Subwoofer
Subwoofer
Postérieur droit
Postérieur gauche
Antérieur droit
Antérieur gauche
ENTRÉE AUDIO VIDEO / AUDIO/VIDEO-EINGANG
ROUGE/ROT
BLANCHE/WEISS
JAUNE/GELB
AUX IN RCH
AUX IN LCH
AUX IN VIDEO
22
Canal audio droit
Canal audio gauche
Canal vidéo
Audio-Kanal Rechts
Audio-Kanal Links
Video-Kanal
CONNEXIONS • ANSCHLÜSSE
6
FR/D
ENTRÉE CAMÉRA DE RECUL ET SORTIE AUDIO/ VIDÉO 1/ EINGANG RÜCKFAHR-KAMERA u. AUSGANG AUDIO/VIDEO 1.
REAR RCH 1
REAR LCH 1
CAMERA 1
VIDEO OUT 1
7
ALIMENTATION ET SORTIES HAUT-PARLEURS
STROM-ZUFUHR u. LAUTSPRECHER-AUSGÄNGE
Sortie audio droite
Sortie audio gauche
Entrée caméra de recul
Sortie vidéo
Audio-Ausgang Rechts
Audio-Ausgang Links
Eingang Rückfahr-Kamera
Video-Ausgang
SORTIES HAUT-PARLEURS / LAUTSPRECHER-AUSGÄNGE
GRIS/GRAU
FRONT R +
FRONT R BLANCHE/WEISS
FRONT L +
BLANCHE-NOIR/WEISS-SCHWARZ
FRONT L VIOLET/PURPLE
REAR R +
VIOLET-NOIRE/PURPLE-SCHWARZ
REAR R VERT/GRUN
REAR L +
VERT-NOIR/GRUN-SCHWARZ
REAR L GRIS-NOIRE/GRAU-SCHWARZ
BROWN
FUSE
IGNITION-TIMER
SCHWARZ
FRONT RIGHT
FRONT LEFT
REAR RIGHT
REAR LEFT
ALIMENTATION / STROM-ZUFUHR
JAUNE/GELB
+12V Positif batterie
BATT
ROUGE/ROT
+12V Après contact
ACC
NOIR/SCHWARZ
Masse
GND
ORANGE/ORANGE
ILLUMI Illumination / Dimmer
MARON/BROWN
MUTE Mute
P CNTR
P ANT
REVERSE
23
+12V Dauerplus
+12V Zündplus
Masse
Beleuchtung / Dimmer
Mute-Funktion
Remote amplificateur
Verstärker-Remote
Antenne électrique
Elektro-Antenne
Activation caméra de recul Aktivierung der Rückfahr-Kamera
FONCTIONS • FUNKTIONEN
8
FR/D
COMMANDES AU VOLANT RÉSISTIVES ET FREIN DE STATIONNEMENT / RESISTIV-LENKRAD-STEUERUNGEN u. HANDBREMSE
VERT/GRUN
VIOLET/PURPLE
ROSA/PINK
NOIR/SCHWARZ
Correspondance couleur des câbles / Farb-Kombinationen
WHEEL KEY 1
WHEEL KEY 2
BRAKE
GND
VM007 NOIR / SCHWARZ ............... ➡............................ VERT / GRÜN
VERT / GRÜN........................ ➡............................ROSE / ROSA
VIOLET / PURPLE................. ➡.............................GRIS / GRAU
Pour les branchements au connecteur original de la voiture, se servir des schémas présents sur la notice de l’interface 4/085.
Beim Anschließen an den Original-Stecker des Wagens, bitte den Anschluss-Plan in der Gebrauchsanweisung der Interface 4/085, befolgen.
Pour les schémas qui n’utilisent qu’un seul câble, brancher le câble NOIR à Masse.
Bei den Verbindungs-Beispielen, die nur 1 Kabel vorsehen, muss das SCHWARZ Kabel immer an die Masse angeschlossen werden.
COMMANDES AU VOLANT CAN-BUS / CAN-BUS-LENKRAD-STEUERUNGEN
9
VERT/GRUN
VIOLET/PURPLE
NOIR/SCHWARZ
NOIR/SCHWARZ
SORTIE AUDIO VIDEO 2 / AUSGANG AUDIO VIDEO 2
BLANCHE/WEISS
ROSSO/ROT
JAUNE/GELB
10
ENTRÉE MICROPHONE / MIKROFON-EINGANG
MIC
24
4/085
FONCTIONS • FUNKTIONEN
FR/D
18
2
17
16
1
15
3
4
5
6
13
12
11
10
7
9
14
8
1. Slot micro Carte SD pour mise à jour du système
2. Microphone
3. Page-écran principale
4. Revient
5. Menu applications et pages-écrans
6. Radio
7. Allume / Eteint - Volume
8. Porte micro USB audio/vidéo
9. Recherche manuelle stations radio - Luminosité afficheur
10. Change de source
11. Réglages
12. Applications
13. Navigation
14. Restaure les réglages d’origine
15. Slot micro Carte SD audio/vidéo
16. Touche expulsion CD
17.Fente d’insertion CD
18. DVD
25
1. Micro-SD-Öffnung für System-Aktualisierung
2. Mikrofon
3. Haupt-Menü
4. Zurück
5. Liste der Apps- u. Menüfunktionen
6. Radio
7. Einschalten / Ausschalten - Lautstärke
8. Mini-USB-Öffnung audio/video
9. Manuelle Radio-Sendersuche – Display-Helligkeit
10. Quelle wählen
11. Einstellungen
12. Apps
13. Navigation
14. Reset zurücksetzen der Fabrik-Einstellungen
15. Micro-SD-Öffnung Audio/Video
16. CD-Auswurf
17. CD-Einschub
18. DVD
NOTE IMPORTANTES
FR/D
Ces instructions sont relatives à l’installation et configuration du système. Dans TUTORIAL (page-écran HOME) sont présents les vidéos pour
l’utilisation des applications et la navigation sur internet.
Installation et première mise en marche
Le VM007 doit être monté par des installateurs capables et compétents.
• Achevés les branchements, régler l’heure et la date, pour le fonctionnement correct de certaines applications et zone d’appartenance, pour la réception
des informations météo (Wi-Fi et 3G).
• Ne pas installer des logiciels qui pourrait ralentir ou bloquer le système d’exploitation.
• La garantie ne couvrira pas les systèmes bloqués à cause de logiciel non autorisé.
• La connexion au réseau Internet est possible à travers le WI-FI intégré ou la clé 3G (optionnelle).
• Le VM007 peut se brancher au réseau Internet à travers certains smartphone incorporés de la fonction HOTSPOT (iPHONE avec iOS5 ou supérieur) en
utilisant la connexion données du portable. (S’assurer des éventuels coût supplémentaires de son opérateur téléphonique).
• HOME est le point de départ de ANDROID où on peut accéder à toutes les applications du système d’exploitation.
• Ecran tactile: l’utilisation peut être effectué moyennant un doigt ou pour plus de précision, avec la plume offerte dans la confection.
Applications de tierces présentes sur le VM007
Les applications suivantes sont pré chargées d’origine. Les applications, même si téléchargées dans d’autres sites web peuvent être installer (voir pag. 30).
Opera Mobile
Skype
Youtube
Office Suite Viewer
Lookout
Browser de navigation Internet
Software de messagerie immédiate ou instantanée et de Voip
Application web pour partager les vidéos
Logiciel pour la visualisation des documents sous format Word, Excel et power point.
Logiciel anti malware/spyware et localisateur GPS
LOOKOUT
Ce logiciel protège le système des malware et spyware, et permet aussi de retrouver le dispositif en cas de vol grâce au site web www.mylookout.com.
L’activer en introduisant votre adresse email et mot de passe; ensuite, suivre les pages-écrans pour activer la version FREE (gratuite) ou la version PREMIUM gratuite seulement pendant 14 jours.
HOTSPOT * sur l’iPhone avec iOS5 ou plus, tethering Android sur les smartphones Android avec l’OS 2.2 ou supérieur.
26
WICHTIGE HINWEISE
FR/D
Die vorliegenden Betriebsanleitungen beschränken sich auf die Montage und die System-Konfiguration. Unter dem Kennwort TUTORIAL (Menü
HOME) stehen Videos zur Verfügung, die nähere Auskünfte erteilen über die Anwendung der Apps und der Internet-Suche.
MONTAGE UND INBETRIEBNAHME
Die Montage des Geräts VM007 unbedingt einem zuverlässigen Fachhändler überlassen.
• Sobald die Anschlüsse hergestellt sind, folgende Einstellungen vornehmen: Uhrzeit und Datum, die Abwicklung einiger Funktionen, die betreffende Empfangs-Zone, die Wetterverhältnisse (Wi-Fi und 3G).
• Bitte KEINE Softwares installieren, die das Betriebs-System verlangsamen oder sogar blockieren könnten.
• Die Garantie verliert, bei System-Blockierung infolge unzulässiger Softwares, ihre Gültigkeit.
• Internet-Anschluss durch integriertes WI-FI oder 3G-USB-Stift (Optional).
• Der VM007 kann am Internet angeschlossen werden, durch bestimmte Smartphone-Modelle, soweit diese mit der Funktion HOTSPOT ausgestattet sind
(z.B. i-PHONE ab iOS5 aufwärts ), über den Daten-Anschluss des Mobiltelefons. (Beim Telefon-Dienstleister nachfragen, ob Zusatz-Tarif anfällt).
• HOME ist der Ausgangspunkt für ANDROID. Von hier aus lassen sich alle Apps des Betriebssystems betreten.
• TOUCH SCREEN-Bildschirm: Bedienung durch Fingerdruck oder durch den beigelegten Präzisionsstift.
DRITT-APPLIKATIONEN AUF DEM VM007
Das Gerät ist fabrikmäßig bereits mit folgenden Apps ausgestattet. Es allerdings besteht die Möglichkeit, Apps anderer Web-Seiten herunterzuladen bzw. zu
installieren (siehe Seite 30).
Opera Mobile
Skype
Youtube
Office Suite Viewer
Lookout
Browser für die Internet-Navigation
Software für die Real-Kommunikation bzw. Voip
Web-Apps für die Video-Gemeinschaft
Software für die Dokumenten-Ansicht in Word, Excel bzw. Power-Point.
Software zum Schutz gegen malware/spyware und GPS-Ortung.
LOOKOUT
Diese Software schützt das System gegen malware und spyware, und sorgt, bei Diebstahl, für die Ortung des Geräts durch die Web-Seite www.mylookout.
com. Die Software aktiviert sich wie folgt: für e-Mail-Adresse und Passwort eingeben und Bildschirm-Anweisungen befolgen. Dann FREE-Ausgabe (gratis),
oder PREMIUM-Ausgabe (gratis für 14 Tage) wählen.
* Hotspot auf dem iPhone mit iOS5 oder höher, Android Tethering auf Android-Smartphones mit OS 2.2 oder höher.
27
REGLAGES DE SYSTEME • SYSTEM-EINSTELLUNGEN
FR/D
Les réglages d’origines prévoient quatre
menus HOME et un libre pour la configuration des raccourcis pour les applications.
Die Fabrik-Einstellungen bieten vier HOMEMenüs und ein zusätzliches für die Konfiguration von Applikations-Abkürzungen.
28
REGLAGES DE SYSTEME • SYSTEM-EINSTELLUNGEN
WIRELESS - RESEAUX 3G - ECRAN
WIRELESS - 3G-NETZWERKE - BILDSCHIRM
WIRELESS
• Avant l’allumage, insérer la clé USB WI-FI,
autrement, elle ne sera pas reconnue.
• Pour activer la clé, sélectionner
“Wireless et réseaux” et “Réglages W LAN”
qui permettent de se connecter à un réseau
présent dans le rayon d’action du VM007.
• En sélectionnant “Notification réseau” un message de présence d’un réseau sera visualisé.
Pour se connecter, le sélectionner et insérer le
mot de passe de réseau.
RESEAUX 3G
Utiliser le modem USB 3G VM310. (Optionnel)
• Avant l’allumage, insérer le modem; autrement,
il ne sera pas reconnu.
Le VM007 est configuré avec les réglages APN
des plus importants provider européens, il suffira
d’insérer la carte SIM dans le modem sans le
code PIN et le dispositif se branchera automatiquement au réseau 3G.
• “Réseaux mobiles” pour régler les options de
connexion.
FR/D
• “Données activées” permet la transmission
des données sur le réseau portable.
• “Roaming données” permet la transmission
des données en roaming sur les opérateurs
différents du sien.
ATTENTION: les coûts de transmission des données sur réseau en roaming peuvent être très
élevés, contacter son opérateur pour les détails.
• “Noms points d’accès” fonction pas disponible, les plus importants APN européens sont
reconnus automatiquement.
AFFICHEUR
• “Luminosité” permet de régler la luminosité de
l’afficheur ou de régler le système automatiquement.
La luminosité de l’écran changera automatiquement en fonction de l’heure et à l’allumage des
lumières.
• “Animation” permet l’activation des animations
de Android.
D - WIRELESS
• USB-WI-FI-Stift bei AUSGESCHALTETEM Gerät
eingeben, sonst wird der Stift nicht erkannt.
• Um den Stift zu aktivieren, “Wireless und
Netze” und “W LAN-Einstellungen” wählen, dadurch wird der Anschluss an ein Navigationsnetz
ermöglicht, das sich im Betriebsfeld des VM007
befindet.
• Wählt man “Netz-Präsenz”, so wird die NetzAnwesenheit durch eine Nachricht signalisiert.
Der Anschluss an das vorhandene Netz erfolgt
durch Anklicken und Eingabe des Passwortes.
3G-NETZWERKE
Das USB-3G-Modem verwenden, d.h. Art.
29
VM310.(Optional)
• Modem-Stift bei AUSGESCHALTETEM Gerät eingeben,sonst wird der Modem-Stift nicht
erkannt.
Der VM007 arbeitet nach der APN-Konfiguration
der wichtigsten europäischen Provider. Es genügt,
die SIM-Karte in das Modem einzugeben, OHNE
PIN, und das Gerät nimmt automatisch Verbindung auf mit dem 3G-Netz.
• “Mobile Netzwerke” Wahl der Netz-Möglichkeiten.
• “Aktivierte Daten” Daten-Übermittlung durch
das Netz des Mobil-Telefons.
• “Daten-Roaming” Daten-Übermittlung durch
“Roaming”, d.h. NICHT durch den eigenen
Telefon-Dienstleister, SONDERN einem anderweitigen.
WICHTIG: die Daten-Übermittlung durch “Roaming” könnte mit sehr hohen Kosten verbunden
sein, deshalb besser, sich VORHER bei Ihrem
Telefon-Dienstleister erkundigen.
• “Name der Zugangs-Punkte” diese Funktion ist
nicht aktiviert. Die wichtigsten europäischen APNKonfigurationen werden jedenfalls automatisch
erkannt.
DISPLAY
• “Helligkeit” Einstellung der Display-Helligkeit
bzw. Wahl der System-Automatik. Aktiviert man
die System-Automatik, so verändert sich die
Display-Helligkeit je nach Uhrzeit und eingeschalteten Auto-Scheinwerfern.
• “Animation” für die Aktivierung der AndroidAnimation.
REGLAGES DE SYSTEME • SYSTEM-EINSTELLUNGEN
APPLICATIONS / APPS
Les applications opératives de Android sont
gérées dans cette section.
Le Market de Android est désactivé, mais l’installation des applications est possible si celles-ci
sont téléchargées dans d’autres sites web en
choisissant l’option « origines inconnues ».
INSTALLATION
• Mettre les fichiers APK sur une micro Carte SD
et l’insérer dans la slot “MEDIA”.
• Appuyer “Install application” et lancer le fichier
APK désiré, suivre ensuite les instructions sur
l’afficheur.
GESTION ET ELIMINATION (APPLICATIONS)
Dans le système Android, certaines applications
restent dans la mémoire même lorsqu’elles sont
closes. Si le système devient lent ou instable, il
est nécessaire de les terminer manuellement afin
de libérer la mémoire RAM.
• En appuyant “Gestion applications” les applications installées sur Android seront visualiser
en: “Téléchargées” - “En exécution”
“Toutes” - “Carte SD”.
• Sélectionner l’application désirée.
FR/D
• “Termine” l’application sera close et la mémoire libérée.
• “Désinstalle” l’application sera définitivement
éliminée du système.
• “Efface données” élimine les données opératives de l’application de la mémoire ROM, par
exemple réglages ou préférences.
Après l’annulation des données, l’application
repart avec les réglages d’origine.
• “Transfert sur Carte SD” Transfert l’application
sur la micro Carte SD qui devra toujours être
insérée afin de pouvoir être lancer.
SERVICES EN EXECUTION
Visualise et contrôle les services actuellement en
exécution en indiquant la quantité de mémoire
utilisée.
DEVELOPPEMENT
Menù de debug et options pour le contrôle des
applications par des développeurs de logiciel
Android.
D - Diese Funktion beschäftigt sich mit der
Handhabung der betrieblichen Android-Apps.
Der Android-Markt ist NICHT zugänglich, jedoch
besteht die Möglichkeit, Apps zu installieren, die
von anderen Web-Seiten heruntergeladen wurden. In diesem Fall, auf die Option „unbestimmte
Herkunft” klicken.
INSTALLATION
• Die APK-Dateien auf eine Micro-SD-Karte
speichern. Micro-SD-Karte dann in die MEDIAÖffnung eingeben.
• “Apps installieren” wählen und gewünschte
APK-Datei starten. Dabei die erscheinenden
Display-Anweisungen befolgen.
30
HANDHABUNG und Löschung (der Apps)
Mit dem Android-System bleiben einige Apps,
auch nachdem man sie verlassen hat, im Datenspeicher ansässig. Falls das System langwierig
oder instabil wird, muss man die Apps manuell
verlassen, um, im RAM-Speicher, genügend
Raum freizumachen.
• Wählt man “Apps-Handhabung” so erscheinen
alle installierten Apps, aufgeteilt in: “Heruntergeladen” - “In Bearbeitung” - “Alle” - “SD-Karte”.
• Die gewünschte App wählen.
• “Beenden” die App wird beendet und Speicher-Raum freigemacht.
• “De-Installieren” die App wird unwiderruflich
vom System gelöscht.
• “Daten Löschen” löscht die betrieblichen AppDaten vom ROM-Speicher, z.B. Einstellungen
oder Präferenzen.
Nach dem Löschen der Daten startet die App
erneut mit den Fabrik-Einstellungen (Default).
• “Auf SD-Karte versetzen” versetzt die App
auf die Micro-SD-Karte, weshalb diese immer
eingesteckt bleiben muss, um prompt starten zu
können.
FUNKTIONEN UNTER BEARBEITUNG
Ausweisung und Überwachung der unter Bearbeitung befindlichen Funktionen, mit Angabe des
beanspruchten Speicher-Raums.
ENTWICKLUNG
DEBUG-Menü mit Funktionen zur Überwachung
der Apps seitens der Android-Software-Entwickler.
REGLAGES DE SYSTEME • SYSTEM-EINSTELLUNGEN
REGLAGES GENERALES
ALLGEMEINE EINSTELLUNGEN
COMMANDES AU VOLANT voir pag. 38
CALIBRAGE ECRAN
Suivre les indications sur la vidéo en appuyant
avec la plume offert où c’est indiqué.
INTERRUPTEUR BEEP
Active/Désactive le signal acoustique qui indique
la pression sur l’écran tactile.
AUDIO DE LA NAVIGATION
Sélectionne les haut-parleurs pour les informations.
REGLAGE ZONE RADIO
Sélectionne la zone d’appartenance pour la
réception des fréquences radiophoniques correctes.
CHOIX NAVIGATION
Règle l’application pour la navigation GPS. Une
fois sélectionnée la navigation pourra être lancée
moyennant la touche «NAV»
BLUETOOTH
Appuyer sur l’icône à droite pour activer.
Pour configurer voir pag. 19
FR/D
REGLAGES APPUIE-TETE
Le VM007 est intégré de 2 sorties audio/vidéo
pour le branchement des écrans supplémentaires où il est possible sélectionner la source
indépendamment de la reproduction sur l’écran
principal. Il est impossible reproduire sur les 2
sorties les fichiers présents su Carte SD / USB
ou mémoire interne.
Exemple: Sur le VM007 vision de la navigation,
sur les appuies têtes postérieurs, la TV Numérique et DVD.
REGLAGES D’ORIGINE
Restaure complètement le système Android.
ATTENTION: après cette opération toutes
les applications de tierces parties comme par
exemple OPERA, GOOGLE MAPS et autres doivent être de nouveau installées. Effectuer cette
opération uniquement si vous avez le fichier APK
pour la restauration.
D
LENKRAD-STEUERUNGEN siehe Seite 38
BILDSCHIRM-KALIBRIERUNG
Die am Bildschirm erscheinenden Anweisungen
befolgen, inklusives Antasten mit dem beigelegten Präzisionsstift.
SCHALTER (mit Piep-Ton)
Aktiviert/Deaktiviert das akustische Signal, in Verbindung mit dem Antasten des Touch-Screens.
NAVIGATIONS-AUDIO
Wahl der Lautsprecher für die NavigationsHinweise.
31
EINSTELLUNGEN DES RADIO-BEREICHES
Wahl der betreffenden Radio-Zone, um die korrekten Radio-Frequenzen empfangen zu können.
NAVIGATION WÄHLEN
Applikation auf GPS-Navigation einstellen. Dann
mit Taste „NAV“ die Navigation starten.
BLUETOOTH
Um die Funktion zu aktivieren, auf die rechte
Ikone drücken.
Die Konfiguration wird auf Seite 19 erläutert.
EINSTELLUNG DER KOPF-STÜTZEN
Der VM007 besitzt 2 Audio/Video-Ausgänge, für
den Anschluss von zwei Zusatz-Bildschirmen.
Ganz unabhängig vom Haupt-Monitor, lässt sich,
für die beiden Zusatz-Bildschirme, die einzeln
gewünschte Quelle frei wählen. Auf diesen
beiden Ausgängen lassen sich die auf SD/USB/
Festplatte enthaltenen Dateien leider NICHT
abspielen.
Beispiel: Auf dem VM007 Navigation; auf den
hinteren Kopfstützen Digital-TV und DVD.
FABRIK-EINSTELLUNGEN
Das Android-System wird vollständig wiederhergestellt.
WICHTIG: Nach diesem Vorgang müssen die
Dritt-Apps erneut installiert werden, z.B. OPERA,
GOOGLE MAPS u.s.w. Diese Funktion daher
NUR dann durchführen, wenn man die APKDateien für die Wiederherstellung effektiv vorliegen hat.
REGLAGES DE SYSTEME • SYSTEM-EINSTELLUNGEN
FR/D
UHRZEIT-EINSTELLUNG Einstellung der System-Uhrzeit.
24-STUNDEN-FORMAT Bei Aktivierung, wird
das 24-Stunden-Format ersichtlich.
WAHL DES DATUM-FORMATS Datum wird im
gewählten Format ausgewiesen.
INFOS auf dem MOBIL-TELEFON Ausweisung
der Software- und Hardware-Infos zum VM007.
SD-MEMOIRE-LANGUE ET CLAVIER
SD-SPEICHER-SPRACHE UND TASTATUR
Visualise la quantité de mémoire ROM utilisée.
L’indication “Carte SD” indique la mémoire ROM
interne et pas la micro Carte SD externe.
“Classement interne” inique la quantité d’espace
disponible dans la mémoire interne réservée au
système Android.
LANGUE ET CLAVIER
Sélectionne la langue du système et la typologie
de layout du clavier.
REGLAGES (VOCALES) – Pas disponible.
D - Ausweisung des besetzten ROM-Speicherraums.
Der Hinweis “SD-Karte” bezieht sich auf den
internen ROM-Speicherraum, NICHT auf die
externe Micro-SD-Karte.
“Interne Ablage” gibt den internen, noch verfügbaren Speicherraum bekannt, der für das Android-System reserviert ist.
SPRACHE und TASTATUR
Wahl der System-Sprache und Tasten-Auslegung.
VOKAL-EINSTELLUNGEN – Nicht verfügbar.
DATE-HEURE / DATUM-UHRZEIT
REGLE DATE Règle la date du système.
Pour le fonctionnement de certaines applications
(Exemple YOUTUBE) il est nécessaire de régler
la date avant la mise en marche, autrement, elles
pourraient rendre le système instable.
FUSEAU HORAIRE Règle le correct fuseau
horaire.
REGLE HEURE Règle l’heure du système.
UTILISE FORMAT 24 HEURES Si activé, permet la visualisation du format en 24 heures.
SELECTIONNE FORMAT DATE Règle la visualisation de la date dans le format désiré.
INFO SUR LE TELEPHONE Visualise les informations software et hardware du VM007.
D - DATUM-EINSTELLUNG Einstellung des
System-Datums.
Bei einigen Apps (z.B. bei YOUTUBE) muss das
aktuelle Datum eingegeben werden, noch bevor
man das Programm startet, sonst könnte das
System unstabil werden.
ZEIT-ZONE Betreffende Zeit-Zone eingeben.
32
RADIO / EGALISEUR • RADIO / EQUALIZER
FR/D
RECHERCHE ET MEMORISATION STATIONS FONCTIONS RADIO / RADIO-FUNKTIONEN
SENDER-SUCHE UND EINSPEICHERUNG
Retourne au menu principal
Recherche automatique.
Recherche pas à pas.
Pour la recherche manuelle faire parcourir l’indicateur de fréquence jusqu’à celle désirée.
MEMORISATION
Après avoir sélectionné la station désirée, faire
pression sur une des touches présentes sur le
coté gauche de l’afficheur jusqu’à l’apparition de
la fréquence ou du nom de la station radio (RDS).
DX-LOC Change la sensibilité de réception
Recherche et mémorise les stations radio
Appuyer 2 secondes pour effectuer un scanning
Pour les réglages de l’égaliseur.
Informations sur la circulation ON / OFF
Fréquence alternative RDS ON / OFF
Active / désactive recherche programme
Retourne au menu précédent.
Sélectionne la bande radio FM/AM.
Scanning et mémorisation automatique
des stations radio sur la bande sélectionnée
D
D
Zurück zum Haupt-Menü.
DX-LOC Einstellung der Empfangs-Sensibilität. Für Lokal-Sender (LOC) bzw. National-Sender (DX).
2 Sek. drücken, um die Sender su scrollen.
Einstellungen des Equalizers.
Verkehrs-Hinweise ON/OFF
Alternative RDS-Frequenz ON/OFF
Aktivierung/Deaktivierung der Radiosender-Suche
Zurück zum vorausgehenden Menü.
Wahl der Radio-Frequenzbänder FM/AM.
Autom. Scrolling sowie Einspeicherung aller
Radio-Sender des gewählten Frequenz-Bandes.
Automatische Sender-Suche.
Manuelle Sender-Suche Schritt für
Schritt. Bei der manuellen Sender-Suche, Frequenz-Zeiger auf den gewünschten Wert stellen.
EINSPEICHERUNG
Sobald der gewünschte Sender gewählt ist, eine
der sechs Tasten, links auf dem Display, so lange
gedrückt halten, bis die Frequenz oder der Name
des Radio-Senders erscheint(RDS).
33
EGALISEUR / EQUALIZER
Sélectionner une modalité parmi celles préréglées: Classical, Pop, Rock, Jazz ou Normales.
Il est possible personnaliser une modalité sur
User. En appuyant sur “Sound Set” on accède
aux réglages d’équilibrage, fader, niveau sortie
subwoofer et niveau loudness.
D - Modalität wählen: Pop, Rock, Jazz oder Normal.
Auf User läßt sich eine dieser Modalitäten personalisieren.
Drückt man auf “Sound Set”, so lassen sich folgende
Einstellungen durchführen: Balance, Fader, Niveau
Subwoofer-Ausgang, Niveau Loudness.
REPRODUCTION AUDIO • AUDIO-WIEDERGABE
USB- CARTE SD -MEMOIRE INTERNE
USB-SD-FESTPLATTE
Le VM007 organise automatiquement tous les
fichiers audio selon les informations ID3-TAG.
Pour entrer dans l’interface de reproduction.
• Sélectionner la modalité d’organisation de la liste (Artiste, Album, Chanson,
Playlist).
Pour visualiser la trace en reproduction.
Pour créer ou modifier playlist.
D
Der VM007 organisiert automatisch alle AudioDateien entsprechend den ID3-TAG-Infos.
Betreten des Wiedergabe-Menüs.
• Wahl der Sortierung der gewünschten Liste (Artist, Album, Musik-Stück, Playliste).
Ausweisung des abgespielten
Musik-Stücks.
Playliste aufstellen oder modifizieren.
FR/D
Commence/Interrompt Reproduction
Trace successive
Trace précédente
Répétition trace/album/tout
Reproduction casuelle
Liste de reproduction
Egaliseur
D
Wiedergabe Starten/Unterbrechen
Titel vor
Titel zurück
Wiederholung von Musiktitel/Album
Insgesamt
Random-Wiedergabe
Wiedergabe-Liste
Equalizer
34
IPOD-IPHONE
Le branchement d’un iPod-iPhone est possible
moyennant le câble offert et permet le contrôle toutes
les fonctions AUDIO directement à partir de l’écran
tactile.
Liste de reproduction alphabétique des artistes.
Liste de reproduction alphabétique des albums.
Liste de reproduction alphabétique des morceaux.
Liste des playlist crées.
Lance/Interrompt la reproduction.
Va à la trace successive.
Va à la trace précédente.
Répétition trace/album/tout.
Reproduction casuelle.
Liste de reproduction.
Egaliseur.
ATTENTION: • Les couvertures des albums ne sont
pas visualisées et il est impossible reproduire les
fichiers VIDEO.
• Pour le fonctionnement correct de l’I-PHONE, désactiver la connexion A2DP dans la fonction BLUETOOTH.
REPRODUCTION DVD / DVD-WIEDERGABE
IPOD-IPHONE
Mit dem beigelegten Kabel lassen sich I-Pod bzw.
I-Phone anschließen und alle AUDIO-Funktionen direkt
auf dem Touch-Screen durchführen.
Wiedergabe-Liste in alphabetischer Reihenfolge
der Artisten.
Wiedergabe-Liste in alphabetischer Album-Reihenfolge.
Wiedergabe-Liste in alphabetischer Reihenfolge
der Musikstücke.
Zusammenfassung der eingerichteten Playlisten.
Wiedergabe Starten/Unterbrechen.
Sprung zum nächsten Titel
Sprung zum vorherigen Titel
Wiederholung von Musiktitel/Album/Insgesamt
Random-Wiedergabe.
Wiedergabe-Liste.
Equalizer.
WICHTIG: • Das Album-Cover wird nicht gezeigt.
VIDEO-Dateien lassen sich nicht abspielen.
• Um die korrekte Betriebsfähigkeit Ihres I-PHONEs sicherzustellen, bitte die A2DP-Verbindung
der BLUETOOTH-Funktion deaktivieren.
Retourne au menu principal
Retourne au menu précédent
Menù 1
Lance/interrompt la reproduction
Trace successive
Trace précédente
Reproduction rapide 2x/4x/8x/16x/32x
Enroulement rapide 2x/4x/8x/16x/32x
Interrompt la reproduction
Va au Menu 2
D
D
Zurück zum Haupt-Menü
Zurück zum vorhergehenden Menü
Menü 1
Wiedergabe Starten/Unterbrechen
Musiktitel vor
Musiktitel zurück
Schnell Vorspulen 2x/4x/8x/16x/32x
Schnell Zurückspulen 2x/4x/8x/16x/32x
Wiedergabe unterbrechen
Zum Menü 2
35
FR/D
Menu 2
Va au Menu titres du disque
Répétition trace / chapitre / disque
Modifie la modalité de vision (si supporté par le DVD)
Change langue disque
Sous-titres
Menu égaliseur audio
Va au Menu 1
Menü 2
Zum CD-Titel-Menü
Wiederholung Titel/Kapitel/CD
Wahl Besichtigungs-Modus
(soweit auf DVD vorgesehen)
DVD-Sprache wählen
Untertitel
Audio-Tuner-Menü
Zum Menü 1
REPRODUCTION VIDEO - IMAGES / VIDEO-WIEDERGABE
FR/D
USB-CARTE SD-MEMOIRE INTERNE
USB-SD-FESTPLATTE
Pour accéder à la section vidéo.
Lance/Interrompt la reproduction.
Trace successive.
Trace précédente.
Retourne au menu HOME.
Retourne à la page-écran précédente.
D
Zugang zum Video-Teil.
Wiedergabe Starten/Unterbrechen.
Musiktitel vor.
Musiktitel zurück.
Zurück zum HOME-Menü.
Zurück zum vorhergehenden Menü.
USB- CARTE SD -MEMOIRE INTERNE
USB-SD-FESTPLATTE
Toutes les images en séquence chaque 3 sec.
Menu images.
“DELETE” efface le fichier.
Menu de modification image.
Visualise les détails du fichier.
Modifie la visualisation de l’image.
Retaille l’image.
Tourne l’image de 90°.
Agrandit et réduit l’image.
Pour accéder à la section images.
Les images sont positionnées sur l’écran en séquence
et il est possible parcourir les icônes.
Organise les images en album et date.
D
Parcourt les images pas à pas.
• Sélectionner tout d’abord l’album et ensuite l’image.
Alle Bilder der Reihe nach, alle 3 Sekunden.
D
Bilder-Menü.
Zugang zum Bilder-Teil.
“DELETE” Datei Löschen.
Die Bilder erscheinen sequenzmäßig auf dem Bildschirm.
Menü der Bild-Modifizierung
Es besteht die Möglichkeit, die Ikonen per Scrolling zu
Datei-Einzelheiten ausweisen.
besichtigen.
Bild-Ausweisung modifizieren.
Bilder nach Album bzw. Datum sortieren/
Bild ausschneiden.
organisieren.
Bild um 90° drehen.
Bilder erscheinen schrittweise, nach und nach.
• Zuerst Album, dann Bild wählen.
Bild vergrößern bzw. verkleinern.
36
FONCTIONS / FUNKTIONEN BLUETOOTH
BLUETOOTH
Avec la fonction bluetooth, il est possible téléphoner. La musique peut aussi être reproduite si
le téléphone est intégré de la fonction A2DP.
Accès à l’interface bluetooth.
•
Pour insérer le nominatif (exp.VM007).
• Pour changer le PIN de paramétrage, utiliser le
PIN MOT DE PASSE (default 0000).
• Vérifier que la modalité de scanning soit: joignable et connectable.
• Retourner à la page-écran initiale bluetooth et
sélectionner PARAMETRAGE. .
• Rechercher les nouveaux dispositifs à partir du
téléphone portable en se référant à son propre
Manuel d’instructions.
• Une fois visualisé le nom choisi (exemple.
VM007) le sélectionner, insérer le PIN (default
0000) et accepter la connexion automatique.
Le dispositif est prêt.
Liste des téléphones paramétrés.
Recherche un dispositif paramétré.
Déconnecte le téléphone portable.
Elimine tous les dispositifs paramétrés.
IT/GB
Afin de pouvoir télécharger le répertoire téléphonique du portable, sélectionner CONTACTS
après avoir effectué la connexion et appuyer
IMPORTE.
.
La durée de l’opération dépend de la quantité de
contacts.
Effectue la recherche d’un contact dans le
répertoire téléchargé.
Elimine les contacts.
Répond / Effectue l’appel.
Interrompt/Refuse l’appel.
Transfert la conversation des haut-parleurs de la voiture au téléphone et vice-versa.
Désactive/Active le microphone
Reproduit les chansons du téléphone
portable.
Lance la reproduction.
Chanson suivante.
Chanson précédente.
D
Zugang zum Bluetooth-Menü.
•
Namen eingeben (z.B.VM007).
• Um den Koppelungs-PIN zu modifizieren,
PASSWORT-PIN verwenden (fabrikmäßig 0000).
• Sicherstellen, dass Scrolling-Modus wie folgt
lautet: ERREICHBAR und VERBINDUNG.
• Zurück zum Bluetooth-Anfangsmenü. KOPPELUNG wählen
.
• Vom Mobil-Telefon aus, weitere Geräte suchen
und dabei lt. Telefon-Handbuch vorgehen.
• Sobald der gewünschte Name ausgewiesen
37
wird (z.B. VM007), Wahl vornehmen und PIN
(fabrikmäßig 0000) eingeben. Dann die automatische Koppelung bestätigen. Das Gerät ist nun
betriebsbereit.
Liste der gekoppelten Mobil-Telefone.
Suche nach einem gekoppelten Gerät.
Mobil-Telefon entkoppeln.
Alle gekoppelten Geräte löschen.
Um das Telefonregister des Mobil-Telefons herunterladen zu können, erst Verbindung herstellen, dann KONTAKTE
wählen und IMPORT
drücken
.
Die hierfür notwendige Zeit richtet sich nach der
Anzahl der Kontakte.
Suche nach einer Kontakt-Person innerhalb des übernommenen Telefonregisters.
Kontakte löschen.
Anruf annehmen / Starten.
Anruf unterbrechen / Abweisen.
Telefonat von den Auto-Lautsprechern zum
Mobil-Telefon verlagern, und umgekehrt.
Mikrofon De-aktivieren / Aktivieren
Wiedergabe der auf dem Mobil-Telefon
befindlichen Musiktitel.
Wiedergabe starten.
Musiktitel vor.
Musiktitel zurück.
COMMANDES AU VOLANT / LENKRAD-STEUERUNGEN
D
Der VM007 besitzt eine integrierte Zentral-Einheit
für Resistiv-Lenkradsteuerungen. Die Anschlüsse
bitte lt. Betriebsanleitung der Phonocar-Interface
4/085 vornehmen. Für Autos, die mit CAN-BUSProtokoll ausgestattet sind, ist die Zentraleinheit
4/070 (Optional) erforderlich.
Elektro-Anschlüsse lt. Schaltbild vornehmen
(siehe Seite 30).
Dans le VM007 est intégré le boîtier pour les
commandes au volant résistives. Pour les
branchements, utiliser la notice de l’interface
Phonocar 4/085.
Pour les voitures ayant le protocole CAN-BUS,
il est indispensable l’usage du boîtier 4/070
(optionnel).
Pour les branchements, voir schéma électrique
(voir pag. 24).
Il est possible mémoriser jusqu’à 14 fonctions.
1 Appuyer “Commence acquisition”.
2 Appuyer la fonction à mémoriser.
3 Appuyer la touche correspondante sur les
commandes au volant.
4 Répéter la séquence pour toutes les commandes.
A la fin, appuyer “Acquisition complétée”.
Pour effacer une donnée acquise par erreur,
appuyer EFFACE DONNEE DE LA COMMANDE
et répéter les opérations de 1 à 3.
ATTENTION: pendant la conduite, l’utilisation de
la fonction VIDEO est strictement interdite par la
loi.
Es lassen sich bis zu 14 Funktionen einspeichern.
1 Taste “Erkennungsphase Starten” drücken.
2 Auf die einzuspeichernde Funktion drücken.
3 Auf die diesbezügliche Lenkrad-Steuerungstaste drücken.
4 Diesen Arbeitsvorgang jeweils für alle LenkradSteuerungsfunktionen vornehmen.
Zum Schluss, Taste “Erkennungsphase abgeschlossen” drücken.
Um einen fälschlich aufgenommenen Wert wieder
zu löschen, Taste „LENKRAD-STEUERUNGSWERT LÖSCHEN“ drücken und dann die Phase
1 bis 3 nochmals vornehmen.
ACHTUNG: Die Verwendung der Videofunktion
während der Fahrt ist gesetzlich verboten.
38
FR/D
CONEXIONES
E
10 9
8
4
6
PORT USB WI-FI/3G
FM AERIAL
1
2
3
5
7
El puerto USB trasero está dedicado exclusivamente para el modem WI-FI 3G que tiene que ser introducida antes de encender el aparato.
No utilizar para la reproducción de archivos de AUDIO/VIDEO.
39
CONEXIONES
1
E
ENTRADA TV DIGITAL TERRESTRE
DTV
2
ENTRADA ANTENA GPS
3
SALIDAS AUDIO PREAMPLIFICADAS
CABLE Y SINTONIZADOR OPCIÓNAL VM210
GPS
AZUL
GRIS
ROJO
BLANCO
ROJO
BLANCO
4
Sub woofer
Sub woofer
Posterior derecho
Posterior izquierdo
Anterior derecho
Anterior izquierdo
ENTRADA IPOD
iPod
5
LINE OUT SUB WOOFER
LINE OUT SUB WOOFER
LINE OUT REAR R
LINE OUT REAR L
LINE OUT FRONT R
LINE OUT FRONT L
TODOS LOS MODELOS, SOLO FUNCIONES DE AUDIO
ENTRADA AUDIO VIDEO
ROJO
BLANCO
AMARILLO
AUX IN RCH
AUX IN LCH
AUX IN VIDEO
40
Canal audio derecho
Canal audio izquierdo
Canal video
CONEXIONES
6
E
ENTRADA RETRO-CAMARA Y SALIDA AUDIO VIDEO 1
REAR RCH 1
REAR LCH 1
CAMERA 1
VIDEO OUT 1
7
ALIMENTACION Y SALIDAS ALTAVOCES
Salida audio derecha
Salida audio izquierda
Entrada retro-cámara
Salida video
SALIDAS ALTAVOCES
GRIS
GRIS-NEGRO
BLANCO
MARRONE
BROWN
BLANCO-NEGRO
VIOLA/PURPLE
PURPURA-NEGRO
FUSE
VERDE/GREEN
VERDE-NEGRO
FRONT R +
FRONT R FRONT L +
FRONT L REAR R +
REAR R REAR L +
REAR L -
ANTERIOR DERECHO
ANTERIOR IZQUIERDO
POSTERIOR DERECHO
POSTERIOR IZQUIERDO
ALIMENTACIÒN
IGNITION-TIMER
AMARILLO
ROJO
NERO
BLACK
NEGRO
NARANJA
MARRON
BATT
ACC
GND
ILLUMI
MUTE
+12V Positivo batería
+12V Bajo llave
Masa
Brillo / Dimmer
Mute audio
P CNTR Remoto amplificador
Antena eléctrica
P ANT
REVERSE Activación retro-cámara
41
CONEXIONES
8
E
MANDOS DE VOLANTE RESISTIVOS Y FRENO DE MANO
VERDE
PURPURA
ROSA
NEGRO
Combinaciónes de los colores de los cables:
WHEEL KEY 1
WHEEL KEY 2
BRAKE
GND
VM007 NEGRO ................................. ➡....................................... VERDE
VERDE................................... ➡......................................... ROSA
PURPURA............................. ➡...........................................GRIS
Para la conexión al conector original del coche utilizar los esquemas presentes en el manual de instrucción del interfaz 4/085 de Phonocar.
Cuando la conexión al sistema se realiza con un único cable, el cable NEGRO tiene que ser conectado a la tierra.
MANDOS DE VOLANTE CAN-BUS
9
VERDE
PURPURA
NEGRO
NEGRO
SALIDA AUDIO VIDEO 2
BLANCO
ROJO
AMARILLO
10
ENTRADA MICROFONO
MIC
42
4/085
FUNCIONES
E
18
2
17
16
1
15
3
4
5
6
13
12
11
10
7
9
8
1. Ranura micro SD CARD para la actualización del sistema
2. Micrófono
3. Ventana principal
4. Vuelve atrás
5. Menú aplicación y ventanas
6. Radio
7. Enciende / Apaga - Volumen
8. Puerto Mini USB audio/video
9. Búsqueda emisoras de radio manual - Luminosidad display
10. Cambio fuente
11. Ajustes
12. Aplicaciones
13. Navegación
14. Reset ajustes de fábrica
15. Ranura micro SD CARD audio/video
16. Tecla de expulsión disco
17. Ranura disco
18. DVD
43
14
NOTAS IMPORTANTES
E
Estas instrucciones son relativas a la instalación y configuración del sistema. En TUTORIAL (Ventana HOME) están presentes los videos para la
utilización de las aplicaciones y de la navegación internet.
INSTALACION Y PRIMER INICIO
El VM007 tiene que ser instalado por profesionales de la instalación y con experiencia en este sector.
• Terminadas las conexiones, ajustar la hora y la fecha para el correcto funcionamiento de algunas funciones y zona de pertenencia, para la recepción de las
informaciones del meteos (Wi-Fi y 3G).
• No instalar software que podría ralentizar o bloquear el sistema operativo.
• La garantía no cubrirá bloqueos del sistema debido a la instalación de software no autorizado.
• Es posible la conexión a la red internet mediante WI-FI integrado o bien modem 3G (opcional).
• El VM007 puede conectarse a la red de internet mediante algunos Smartphone dotados de función HOTSPOT (iPHONE con iOS5 o superior) utilizando la
conexión de datos del teléfono movil. (Verificar eventuales costes añadidos que podría cobrarle su gestor de telefonía movil).
• HOME es el punto de inicio de ANDROID donde se puede acceder a todas las aplicaciones del sistema operativo.
• TOUCH SCREEN la utilización puede ser efectuada mediante un dedo o para una mayor precisión con el especial lápiz que se suministra en dotación.
APLICACIONES DE TERCEROS PRESENTES EN EL VM007
Las siguientes aplicaciones están pre-cargadas de fábrica. Es posible instalar aplicaciones también si descargados desde otros sitios Web (ver pág. 47).
Opera Mobile
Skype
Youtube
Office Suite Viewer
Lookout
Browser de navegación internet
Software di mensajería instantánea y de Voip
Aplicación web para compartir video
Software para la visualización de documentos en formato Word, Excel y Power point.
Software anti malware/spyware y localizador GPS
LOOKOUT
Este software protege el sistema de los malware y spyware, permite además la localización del dispositivo en caso de robo mediante el sitio web www.
mylookout.com. Activarlo introduciendo la propia email y password, seguir las ventanas que van apareciendo para activar la versión FREE (gratuita) o bien
la versión PREMIUM gratuita solo durante 14 días.
* HOTSPOT en el iPHONE con iOS5 o superior, TETHERING ANDROID en los smartphones con OS ANDROID 2.2 o superior.
44
MENU
E
Los ajustes de fábrica disponen de
cuatro menús HOME y uno libre para la
configuración de atajos para las aplicaciones.
45
AJUSTES DEL SISTEMA
WIRELESS - REDES 3G - PANTALLA
WIRELESS
• Antes de encender el aparato, introducir el
modem USB WI-FI, en caso contrario no será
reconocido.
• Para activar el modem USB seleccionar
“Wireless y redes” y “Ajustes W LAN” que
permite conectarse a una red presente al
alcance del VM007.
• Seleccionando “Notifica red” será visualizado
un mensaje informando de la presencia de una
red inalámbrica.
Para conectarse seleccionarla e introducir red
password.
REDES 3G
Utilizar el modem USB 3G VM310. (Opcional)
• Antes de encender el VM007 introducir el
modem, en caso contrario no será reconocido.
El VM007 esta configurado con los ajustes APN
de los mayores proveedores europeos, será
suficiente introducir la SIM card en el modem
sin PIN code y el dispositivo se conectará
automáticamente a la red 3G.
E
• “Redes móviles” para ajustar las opciones de
conexión.
• “Datos activados” permite la trasmisión de
datos en la red Movil.
• “Roaming datos” permite la trasmisión de
datos en roaming con proveedores diferentes
del propio.
ATENCION: estando en roaming los costes
para la trasmisión de datos pueden ser muy
elevados, contactar con el propio gestor para
informarse sobre este asunto.
• “Nombre puntos de acceso” función no
disponible, los mayores APN europeos serán
reconocidos automáticamente.
DISPLAY
• “Brillo” permite de ajustar la luminosidad
del display o bien de ajustar el sistema en
automático.
En automático el brillo de la pantalla se ajustara
en base a la hora y al encendido de las luces.
• “Animación” permite la activación de las
animaciones de Android.
46
AJUSTES DEL SISTEMA
APLICACION
En esta sección se gestionan las aplicaciones
operativas de Android.
El Market de Android esta deshabilitado, pero es
posible instalar las aplicaciones si se descargan
desde otros sitios web seleccionando la opción
“Orígenes desconocidos”.
INSTALACION
• Cargar en una micro SD-card los archivos APK
e introducirla en la ranura “MEDIA”.
• Presionar “Install application” y seleccionar el
archivo APK deseado y seguir las instrucciones
en el display.
GESTION Y REMOCIÓN (APLICACIÓN)
En el sistema Android algunas aplicaciones
quedan residentes en la memoria también
cuando vienen cerradas, si el sistema ralentiza
o se pone inestable, es necesario terminarlos
manualmente para liberar memoria RAM.
• Presionando “Gestiona aplicaciones” serán
visualizadas las aplicaciones instaladas en el
Android subdivididas en: “Descargar” - “En
ejecución”
“Todas” - “Tarjeta SD”.
E
• Seleccionar la aplicación deseada.
• “Termina” la aplicación será cerrada y la
memoria será liberada.
• “Desinstala” la aplicación será eliminada
definitivamente del sistema.
• “Cancela datos” elimina los datos operativos
del aplicación de la memoria ROM, por ejemplo
ajustes o preferencias.
La aplicación después de la cancelación de los
datos reinicia desde los ajustes de default (por
defecto).
• “Desplaza en la tarjeta SD” mueve la
aplicación en la micro SD-card, que deberá
siempre estar introducida para poderla iniciar.
SERVICIOS EN EJECUCION
Visualiza y controla los servicios actualmente
en ejecución indicando la cantidad de memoria
utilizada.
DESAROLLO
Menú de debug y opción para el control de
las aplicaciones desde los desarrolladores del
software Android.
47
AJUSTES DEL SISTEMA
AJUSTES GENERALES
MANDOS DE VOLANTE ver pág. 53
CALIBRACION PANTALLA
Seguir las indicaciones como se indican en la
pantalla, presionando con el lápiz en dotación.
INTERRUPTOR BEEP
Activa/Desactiva la señal acústica que señala la
presión en la pantalla táctil.
AUDIO DE LA NAVEGACIÓN
Selecciona los altavoces para las informaciones.
AJUSTES AREA RADIO
Selecciona el área de pertenencia para
la recepción correcta de las frecuencias
radiofónicas.
BLUETOOTH
Presionar en el icono a la derecha para activar.
Para configurar ver pág. 19.
OPCIÓN NAVEGACIÓN
Ajusta la aplicación para la navegación GPS. Una
vez seleccionada se podrá iniciar la navegación
con la tecla “NAV”.
E
AJUSTES MONITOR REPOSACABEZA
El VM007 esta dotado de 2 salidas audio/video
para la conexión de monitores suplementares
donde es posible seleccionar la fuente
independientemente de la reproducción de la
pantalla principal. No es posible reproducir
desde las 2 salidas los archivos presentes en
la SD-CARD / USB o memoria interna.
Ejemplo: en la pantalla del VM007 visión
de la navegación, en los monitores de los
reposacabezas TV digital y DVD.
AJUSTES DE FÁBRICA
Reinicia completamente el sistema Android con
los ajustes de fábrica.
ATENCION: después de esta operación
deberán ser instaladas nuevamente las
aplicaciones de terceros como por ejemplo
OPERA, GOOGLE MAPS y más. Efectuar esta
operación solo si disponemos de los archivos
APK para restablecer.
SD CARD-MEMORIA-IDIOMA Y TECLADO
Visualiza la cantidad de memoria ROM utilizada.
La indicación “Tarjeta SD” se refiere a la
memoria ROM interna y no a la micro SD-card
exterior.
“Activación interna” indica la cantidad de
espacio disponible en la memoria interna
reservada al sistema Android.
IDIOMA y TECLADO
Selecciona el idioma del sistema y la tipología
de layout del teclado.
CONFIGURACION VOCAL - No disponible.
48
AJUSTES DEL SISTEMA
FECHA-HORA
AJUSTE FECHA Ajusta la fecha del sistema.
Para el funcionamiento de algunas aplicaciones
(por ejemplo YOUTUBE) es necesario ajustar la
fecha exacta antes del inicio, en caso contrario
el sistema puede resultar instable.
FUSO HORARIO Ajusta el correcto fuso horario.
AJUSTE HORARIO Ajusta la hora del sistema.
USA FORMATO 24 HORAS Si está activo
permite la visualización del formato 24 horas.
SELECIONA FORMATO FECHA Ajusta la
visualización de la fecha en el formato deseado.
RADIO
E
BUSQUEDA Y MEMORIZACION EMISORAS
Búsqueda automática.
Búsqueda paso-paso.
Para la búsqueda manual hacer correr el indicador de frecuencias hasta encontrar la emisora
deseada.
MEMORIZACION
Después de haber seleccionado la emisora
deseada, tener presionada una de las 6 teclas
presentes en el lado izquierdo del display hasta
que aparezca la frecuencia o bien el nombre de
la emisora de radio (RDS).
INFO EN EL MOVIL Visualiza las informaciones
software y hardware del VM007.
49
FUNCIONES RADIO
Vuelve al menú principal.
DX-LOC Cambia la sensibilidad de
recepción para emisoras locales (LOC)
o nacionales (DX).
Busca y memoriza automáticamente
las emisoras radio de todas las bandas.
Presionar durante 2 segundos para efectuar la exploración de las emisoras memorizadas.
Para los ajustes del ecualizador.
Informaciones sobre el trafico ON/OFF.
Frecuencia alternativa RDS ON/OFF.
Activa/desactiva búsqueda programa radiofónico.
Vuelve al menú precedente.
Selecciona bandas de radio FM/AM.
Explora y memoriza automáticamente las
emisoras de radio en la banda seleccionada.
EQUALIZADOR
REPRODUCCION AUDIO
USB-SD CARD-MEMORIA INTERNA
ECUALIZADOR / EQUALIZER
Seleccionar un modo entre aquellos preconfigurado de fabrica: Pop, Rock, Jazz o
Normal.
Es posible personalizar un modo con la opción
User.
Presionando en “Sound Set” se accede a
los ajustes de balance, fader, nivel de salida
subwoofer y nivel del loudness.
El VM007 organiza automáticamente todos los
archivos de audio según las informaciones ID3TAG.
Para entrar en el interfaz de
reproducción.
• Seleccionar el modo de organización de la lista
(Artista, Álbum, Canción, Playlist).
Para visualizar la canción en
reproducción.
Para crear o modificar la playlist.
50
E
Inicia/Interrumpe Reproducción
Canción siguiente
Canción anterior
Repetición canción/álbum/todo
Reproducción casual
Listado de reproducción
Ecualizador
REPRODUCION DVD
IPOD-IPHONE
Es posible la conexión de un iPod-iPhone mediante
el cable en dotación que controla todas las funciones
de AUDIO directamente desde la pantalla táctil.
Elenco de reproducción alfabético de los artistas.
Elenco de reproducción alfabético de los álbumes.
Elenco de reproducción alfabético de las
canciones.
Elenco de las playlist creadas.
Inicia/Interrumpe Reproducción.
Avanza a la canción siguiente.
Vuelve a la canción precedente.
Repetición canción/álbum/todo.
Reproducción casual.
Elenco de reproducción.
Ecualizador.
ATENCION:
• Las portadas (cover) de los álbum no se visualizan y
no es posible reproducir el archivo de VIDEO.
• Para el correcto funcionamiento del I-PHONE
desactivar la conexión A2DP en la función
BLUETOOTH.
Vuelve al menú principal
Vuelve al menú precedente
Menú 1
Inicia/interrumpe reproducción
Canción siguiente
Canción precedente
Reproducción rápida 2x/4x/8x/16x/32x
Avance rápido 2x/4x/8x/16x/32x
Interrumpe la reproducción
Pasa al Menú 2
51
E
Menú 2
Pasa al menú títulos del disco
Repetición canción/capitulo/disco
Modifica modo visión (si soportada
por el DVD)
Cambio idioma disco
Subtitulos
Ecualizador audio
Pasa al Menú 1
REPRODUCION VIDEO
E
USB-SD CARD-MEMORIA INTERNA
Para acceder a la sección video.
Inicia/Interrumpe Reproducción.
Canción siguiente.
Canción precedente.
Vuelve al menú HOME
Vuelve a la ventana precedente
USB-SD CARD-MEMORIA INTERNA
Para acceder a la sección imágenes.
Las imágenes se muestran en secuencia en la
pantalla y es posible correr los iconos.
Organiza las imágenes en álbum y
fecha.
Pasa las imágenes paso a paso.
• Seleccionar antes el álbum y después la imagen.
52
Todas las imagen en secuencia cada 3 seg.
Menú imágenes.
“DELETE” cancela el archivo.
Menú de modifica imagen.
Visualiza detalles del archivo.
Modifica visualización imagen.
Recorta imagen.
Gira la imagen de 90°.
Acercar y alejar la imagen.
FUNCIONES BLUETOOTH
BLUETOOTH
Con la función bluetooth es posible llamar por
teléfono. Se puede reproducir también la música
si el teléfono esta dotado del protocolo A2DP.
Acceso al interfaz bluetooth.
•
Para introducir el nombre (ejem.VM007).
• Para cambiar el PIN de emparejamiento, utilizar
el PIN PASSWORD (default 0000).
• Verificar que el modo de escansión sea:
ALCANZABLE Y CONEXION.
• Volver a la ventana inicial bluetooth y
seleccionar EMPAREJAMIENTO .
• Buscar los nuevos dispositivos desde el
teléfono movil haciendo referencia al manual de
instrucciones del mismo.
• Una vez visualizado el nombre elegido (por
ejemplo VM007) seleccionarlo, introducir el
PIN (default 0000) y aceptar que se conecte
automáticamente, el dispositivo esta listo
Elenco de los móviles acoplados.
Búsqueda de un dispositivo acoplado.
Desconecta el movil.
Elimina todos los dispositivos acoplados.
MANDOS DE VOLANTE
Para poder descargar la agenda del teléfono,
seleccionar CONTACTOS
después de haber
efectuado la conexión y presionar IMPORTA .
El tiempo necesario para esta operación
depende de la cantidad de contactos que hay
por descargar.
Efectúa la búsqueda de un contacto en la
agenda descargada.
Elimina los contactos.
Contestar / Llamar.
Interrumpe/ Rechaza llamada.
Desplaza la conversación desde los
altavoces del coche al movil y al revés.
Desactiva/Activa el micrófono.
Reproduce las canciones presentes en el
teléfono.
Inicia reproducción.
Canción sucesiva.
Canción precedente
53
E
El VM007 dispone de una centralita para los
mandos de volante del tipo resistivo. Para
las conexiones hacer referencia al manual de
instrucciones del interfaz Phonocar 4/085.
Para los coches con protocolo CAN-BUS es
indispensable utilizar el interfaz 4/070 (opcional).
Para las conexiones ver el esquema eléctrico
(ver pág. 42).
Es posible memorizar hasta 14 funciones.
1 Presionar “Inicia adquisición”.
2 Presionar la función que se desea memorizar.
3 Presionar la correspondiente tecla puesta en
los mandos del volante.
4 Repetir la misma secuencia para las demás
funciones de los mandos de volante.
Una vez terminada presionar “Adquisición
completa”.
Para cancelar un dato tomado erróneamente,
presionar CANCELA DATO DEL MANDO y repetir
las operaciones de 1 a 3.
CARATTERISTICHE TECNICHE • TECHNICAL FEATURES • CARACTERISTIQUES TECHNIQUES
CARACTERISTICAS TECNICAS TECHNISCHE DATEN
•Processore / Processor FREESCALE CORTEX A8 256 MB RAM - 8 GB ROM
•Sistema operativo / OS ANDROID 2.2
•Incluso / Included WI-FI Dongle 802.11
•Predisposizione Modem / Modem ready 3G HSPA
•Risoluzione schermo / Screen resolution 800x480
•THREE ZONE video e navigazione GPS / Video and navigation GPS THREE ZONE
•Navigazione GPS integrata (mappa esclusa) / GPS navigation built in (map excluded)
•Navigazione internet WI-FI e 3G (Modem 3G escluso) / Internet WI-FI and 3G surfing (3G Modem excluded)
•Controllo ipod-iphone con gestione playlist / ipod-iphone control with playlist management
•Ingresso DVB-T (vm210 optional) / DVB-T ready (optional vm210)
•Ingresso retrocamera con attivazione automatica / Automatic rear camera input
•Controllo volume e scansione rotativi / Rotary volume and scanning controls
•Importa immagini sfondo / Customizable background
• Presentazione immagini con sottofondo musicale / Pictures slideshow with background music
• Interfaccia grafica dinamica a trascinamento / Dynamic graphic interface with scrolling screen
•Mini usb - micro sd card multimediali su frontale / Front mini usb port and micro sd card
•Id3 tag - visione copertina album / Id3 tag - cover album
•Gestione playlist musicali / Music playlist management
•Equalizzatore 5 bande con preset / 5 Bands equalizer with presets
•Loudness regolabile / Adjustable loudness
•Bluetooth (supporto i-phone, A2DP, gestione rubrica) / Bluetooth (i-phone support - phonebook download)
•Streaming audio A2DP • Microfono esterno / External microphone
•Comandi volante resistivi integrati / Resistive steering wheel control built in
•Predisposizione comandi volante can bus / Can-bus steering wheel control ready
•Sintonizzatore radio RDS / RDS radio tuner 36fm-12am
•Memoria ultima posizione / Last position memory
•Protezione elettronica antiurto / Electronic shock protection
•1 Ingresso / input audio/video
• 2 Uscite / output audio/video THREE ZONE video
•4+2 Uscite preamplificate / Preamplifier output (front-rear-2Subwoofer)
•Potenza / Power 4x50 watt max
•Riproduzione file / Playback avi-wmv-mp4-mpg-m4v codec mpeg4 - h264 - jpeg-xvid
S.p.A. - Via F.lli Cervi, 167/C • 42124 Reggio Emilia (Italy) • Tel. ++39 0522 941621 • Fax ++39 0522 942452 • www.phonocar.com • e-mail:[email protected]


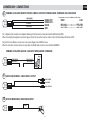


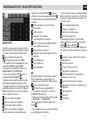

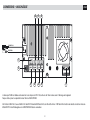
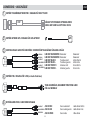


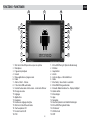

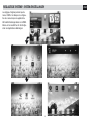


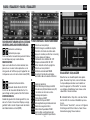
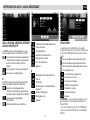
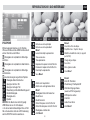
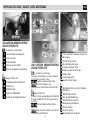
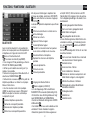
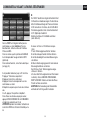
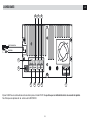


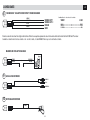
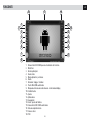
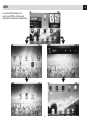


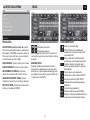


![Avoir Un Androphone Samsung, [Presque] Parfait !](http://vs1.manualzilla.com/store/data/006489743_1-76e9273a20736a9d4f6ee1c8e33b3e57-150x150.png)