1
1611 Type/Tipo/Typ: 701 Before operating, please read the Operating Manual! Before operating, please read the Operating Instructions! Veuillez lire le mode d’emploi avant la mise en service! Leer las instrucciones de uso antes de la puesta en servicio! Vor der Inbetriebnahme die Betriebsanleitung durchlesen! Operating Manual Operating Instructions Instructions d’opération Instrucciones de uso Betriebsanleitung (page 2-5) USA (page 6-9) GB (page 10-13) F (página 14-17) E (Seite 18-21) D USA 1611 IMPORTANT SAFETY NOTES << The machine may not be operated by more than one person at any given time! The machine was designed for safe operation by “one person only”. << During the folding process no other work may be performed on the machine (for example cleaning, etc.)! << Danger of injury! Keep all loose articles of clothing, ties, jewelery, long hair or other loose objects away from rotating shafts, rollers and moving belts! << Danger of injury! Never touch with fingers onto rotating shafts, rollers and moving belts! << The machine is notatoy, and is notsuitable forusebychildren! The overall technical safety concept of this machine (dimensions, feed openings, emergency shutdown devices etc.) does not provide for any guarantee regarding hazardfree operation by children. << Danger of injury! Do not spray and flammable liquids or gases into the inlet opening! << Repairs may only be performed by trained personnel! << << In case of danger switch the machine off with the mains switch, or with the emergency switch, or unplug the machine! Always unplug the machine from the mains power supply before opening the machine! DESCRIPTION 1 Description 1.1 Nomenclature 1. Paper Support 2. Feed Table 3. Top Cover 4. First Fold Table 5. Exit Conveyor 6. Exit Ramp 7. Stack Wheels 8. Dejamming Port 9. Button Panel 10. Skew Adjustment Knob 11. Multi-Sheet Bypass 12. Retarder Adjustment Port 13. Second Fold Table 14. Power Cord 15. Power Switch 16. Feed Wheel 17. Retarder 18. Feed Pressure Adjustment Fig. 1 Fig. 2 Fig. 3 Fig. 4 2 USA 1611 INSTALLATION 2 Installation 2.1 Unpacking Carefully unpack the Model 1611 folder and accessories. Place the Model 1611 on a flat, level surface where it is to be used. It is necessary to have a clear area at the exit end of the folder to place the exit ramp. Place all of the packing material back in the shipping box and store the box for any future shipment of the Model 1611. Inspect the Model 1611 and all accessories for shipping damage. If any damage is found, contact the carrier immediately. 2.2 Feed Table The Model 1611 is equipped with a variableposition, non-removable feed table. Locate the Feed Table Extension in the accessory package. Install by lining its 2 protrusions with the corresponding slots on the feed table and inserting the protrusions into the slots. When it is correctly installed in position, it will lay flat on the feed table (See Figure 4). The Feed Table Extension must be installed for proper operation. 2.3 Feed Table Align the tabs on the exit ramp with the corresponding slots on the conveyor and drop the exit ramp into place (See Figure 4). 2.4 Fold Tables Step #1: Slide the front slot opening of the fold table onto the inner set of pins (closest to the folding rollers). Step #2: lower the fold table onto the outer set of pins. Repeat Steps 1 & 2 for the 2nd Fold Table installation (See Figure 5). 2.5 Paper Guides The Paper Guides are self-centering. To adjust the Paper Guides, loosen both thumbscrews slightly and slide the Paper Guides to the desired position. For best results, load a stack of paper and adjust the Paper Guides up to the paper. Once the Paper Guides are in the correct position, snug the thumbscrews down to hold the paper Guides from moving. DO NOT over tighten the thumbscrews (See Figure 6). The paper stack should be able to slide between the Paper Guides without binding, and at the same time, there should be very little play between the Paper Guides and the paper stack. 2.6 Loading Paper Depress down and hold the Feed Table by pushing down on the top of one of the Paper Guides. Place a maximum of 150 sheets of 20# paper between the Paper Guides, and push the stack of paper under the Feed Wheel. The paper stack must rest straight and square against the Feed Bridge (See Figure 7). Once the paper stack is correctly positioned, release the Feed Table and allow Feed Table to lift the paper stack up against the Feed Wheel. Fig. 5 Fig. 6 Fig. 7 2.7 Skew Adjustment The Skew Adjustment controls the angle at which the paper is fed into the rollers. Skew adjustment is factory set to be square with the rollers and should not need adjusting. Skew adjustment is only necessary when the paper is not cut squarely or has irregular edges. If the paper is not folded square (corners of the paper stick out once folded), rotate the Skew Adjustment knob a small amount clockwise or counter-clockwise. The direction the knob is rotated is dependent on the skew direction. See Figure 1 for the location of the Skew Adjustment Knob. 2.8 Setting Fold Styles Before attempting to set-up a fold, you should familiarize yourself with the six designated fold style icons provided on the rulers located on each fold table (Figure 10). These icons are arranged in columns on the feed table rulers that represent the three most common paper sizes (Figure 8 and Figure 9). The icons in each column are color coded for clarity. NOTE: LTR=8 1/2 X 11” (Green), LGL=8 1/2 X 14” (Purple), and A4=210mm X 297mm (Gold). 2.9 Moving the Fold Table Paper Stops In order to successfully set the fold tables, you must know both the size of the paper being folded and the type of fold desired. After you’ve determined the type of fold desired, identify its icon on each fold table (Figure 8 and Figure 9). Loosen the fold stop thumbscrew on either fold table, and using the rulers to gauge the fold length, move the fold stop until it aligns with the desired fold style icon or measurement, and then retighten the thumbscrew. Repeat the process for the other fold table. Make sure the proper colored icon is used for the appropriate paper size. Special Notes - The second fold table is always in the same location for the half fold, regardless of the size of paper being folded. Also note the blanked area in the second fold table ruler. DO NOT place the 2nd paper stop in the blanked area of the fold ruler or a paper jam will result. Fig. 10 Fig. 9 Fig. 8 3 USA 1611 INSTALLATION / OPERATION / MAINTENANCE 2 Installation (Continuance) 2.10 Custom Folds To make custom folds, simply use the rulers to gauge the fold length measured from the paper stop edge to the fold. 2.11 Stacking Wheels The Model 1611 is equipped with an Exit Conveyor and Stacking Wheels for trouble free document stacking. The Stacking Wheels must be set to the correct position for the paper type and fold style in order for the paper to stack correctly. A chart with correct stacking wheel placement for various paper sizes and folds is located on the Exit Conveyor. The Stacking Wheels are held in-place by friction. To move the Stacking Wheels, simply slide the Stacking Wheels along the shaft to the desired position. To determine the correct stacking wheel position for custom folds, begin with the Stacking Wheels set in a position equal to the second fold table paper stop location. For example, if the Second paper Stop is set for 5 ½ inches, then set the Stacking Wheels to 5 ½ Inches. If stacking problems are encountered, adjust the position of the Stacking Wheels so that the folded paper drops completely onto the Exit Conveyor just before the paper makes contact with the Stacking Wheels. 3 Operation 3.1 Automatic Feed Operation 1. Set up the folder as described in section 2 of these instructions. 2. Turn the power On by depressing the “I” portion of the Off/On power switch. The green “Power” LED, located near the Run/Stop button, will be illuminated. 3. Square the stack of paper to be folded by using a Martin Yale Model 400 Jogger or by tapping 2 sides of the paper stack against a table or other hard object. 4. Load paper as specified in Section 2.6. 5. Adjust the Paper Guides as necessary per section 2.5. 6. Press and release the Run button to initiate folding. The folder will now start running and process the stack of paper. The folder will automatically turn off when the paper runs out. The Run button is located in the lower-right corner of the Button Panel (See Figure 11). 7. Folder may be stopped at anytime during folding by pressing the Run/Stop button. NOTE: You may find it easier to run only a few sheets before running an entire stack. This way, adjustments can be made before running a large quantity of paper. 3.2 Feed Adjustments If the edges of the folded paper do not line up, adjust the skew by turning the Skew Adjustment Knob slightly. Retest with a few sheets and adjust as necessary to square up the fold. If hesitation occurs when automatically feeding paper, double check the position of the Paper Guides as described in section 2.5 of this manual. However, if hesitation continues, the problem could be the type of paper you are folding, or that the Retarder is adjusted too tight. If you are attempting to fold coated or gloss stock, it may be necessary to increase the pressure of the paper stack against the Feed Wheel. The Feed Table lift-spring tension is factory set to give the best overall performance. However, this spring tension is user adjustable. The Feed Table pressure adjustment lever is located on the inside frame of the 1611, below the Feed Table and above the Second Fold table (See Figure 3). Raising the adjustment lever will increase the feeding force. 3.3 Manual Feed Operation The Model 1611 is capable of folding single sheets or sets of sheets up to 5 pages of #20 Bond manually (one at a time). To do so, set up the machine as described earlier in section 2. With the Feed Table empty of paper, insert the paper all the way into the Multi Sheet Bypass until the paper stops. Press and release the Run/Stop button. 3.4 Folding Stapled Multiple Sets The Model 1611 is capable of folding stapled sets of paper up to 5 sheets of #20 Bond in the manual method described in section 3.3. Warning: To prevent jams or roller damage, always attach the staple parallel to the fold rollers, always feed the paper stapled edge first, and avoid using loose fitting staples or inserting them too close to the edge (less than 5/16”, 8mm). 4 Maintenance 4.1 Fold Roller Cleaning During normal operation, the fold rollers will become contaminated with paper dust, ink, copy toner and other performance inhibiting materials. At some point this will cause problems such as wrinkling or marking the paper and even miss-folds or paper jams. At which time, cleaning the rollers will be necessary. Follow these steps to gain access to the rollers: Fig. 11 4 1. Disconnect the power cord from the outlet 2. Remove both Fold Tables 3. Remove 2 Phillips screws from the Top Cover, and remove the Top Cover. Clean the exposed rollers by spraying Martin Yale Roller Cleaner and Rejuvenator onto a clean cloth and wiping until all contaminates are removed. While wiping the rollers, rotate the rollers to insure that the entire surface of the roller is cleaned. Mild soap and water solution may also be used. Avoid getting cleaning solutions into the bearing surfaces. If the fold rollers become glazed or shiny, it may be necessary to return them to a dull luster by using a lightly abrasive non-metallic scouring pad. Never use metal pads such as steel wool or sand paper, as the shavings or grit will damage the roller and bearing surfaces. 4.2 Clearing Paper Jams Use the following steps to clear a paper jam: 1. Disconnect power to the folder 2. Remove the First and Second Fold Tables 3. Pull the jammed paper out from any area where it is accessible. The paper may be pulled from either Fold Table or Exit Conveyor If the jam cannot be cleared using the above steps, perform the following: 1. With a large flat bladed screwdriver, insert and engage the rollers through the Dejamming Port located in the Front Cover. 2. While pulling on any exposed paper, rotate the screwdriver in either direction to clear the paper jam. 4.3 Feed Wheel Cleaning As with the Fold Rollers, contamination of the Feed Wheel will result in poor performance. When feeding becomes inconsistent, clean only the outer surface of the Feed Wheel with a clean dry cloth and alcohol or a mild soap and water solution. Avoid getting cleaning solutions into the bearing surfaces. DO NOT use Martin Yale Roller Cleaner and Rejuvenator or other solvent-based cleaner on the Feed Wheel, as damage to the rubber will result. 4.4 Oiling The Model 1611 has 10 oil impregnated, bronze bearings; 2 for each of the four rubber fold rollers, and 2 for the feed shaft. Generally, these bronze bearings DO NOT require oiling, except in cases of extreme use. If needed, apply a single drop of light machine oil to each end of the above mentioned shafts, where the bronze bearing and shaft meet. DO NOT over oil the bronze bearings as the oil will eventually transfer to your paper. To gain access to all 10 bronze bearings, remove both Fold Tables and the Top Cover per the steps in section 4.2 - Clearing Paper Jams. USA 1611 TROUBLESHOOTING 5 Troubleshooting 5.1 Folder will not turn on 5.2 5.3 5.4 5.5 Paper will not feed Crooked Folds Ink smudges on paper Wrinkled paper Circuit breaker has tripped If the folder has jammed while folding, turn it off for about 10 minutes to allow the thermal breaker to cool and reset. WARNING! Motor will start automatically once it cools. Always turn machine off to allow cooling so as to avoid automatic starts. Dead receptacle Try folder in known good receptacle. Electrical Malfunction Have the folder serviced by a qualified technician. Paper Guides are too tight Adjust the paper guides so that the paper slides freely between them. Review section 2.5. Feed Wheel is contaminated Clean the feed wheel as specified in section 4.3. Static electricity buildup Fan or jog the paper to loosen the stack. Martin Yale Static Eliminator Spray may be used. Liberally spray over paper edges, feed tables, fold tables, and exit ramp. Retarder is worn Replace retarder. Paper has a curl in it Paper will sometimes develop a curl that makes automatic feeding difficult. This is especially common in paper just printed from a laser jet printer. Stacking it and placing a large heavy object such as a large book on it for a couple hours can straighten paper. Excessive paper guide side play Readjust the Paper Guides to eliminate excessive side play of the paper between the guides. Review section 2.5. Paper guide skew adjustment off Adjust skew as outlined in section 2.7. Paper must enter the rollers straight, or a crooked fold will result. Ink not dry Allow additional ink drying time before folding. Some inks do not dry, they only set (dry to the touch). Because of the physical nature of friction feeding, you may notice a mark on the leading edge of the paper. Excessive toner on photocopied stock Check copy machine. Skew out of adjustment Adjust skew as outlined in section 2.7. Paper must enter the rollers straight, or a crooked fold will result. Paper Guides too tight Readjust the Paper Guides so that sheets slide freely down between the guides without excessive side play. Review section 2.5. Dirty Rollers Clean the rollers as described in section 4.1. SPECIFICATIONS DISPOSING Specifications Functional Paper Weight Form Width Form Length Feed Table Capacity Speed Fold Styles Stapled Documents 16# to 28# Bond Stock (60g-105g) 4.75” (121 mm) min. to 8.5” (216 mm) max. 5” (127 mm) min. to 14” (356 mm) max. 150 Sheets of 20# 9000 sheets per hour 8.5” X 11” (216 mm x 280 mm) Letter, Half, Z, Double, Parallel, Gate Fold, and Church Five sheets 20# max, hand fed Physical Dimensions Machine Weight Shipping Weight 20.6” (523 mm) Wide X 14.2” (361 mm) Deep X 17.2” (437) High 38 lbs. (17,2 kg) 43 lbs. (19,5 kg) Electrical Power 115 V.A.C., 1.3 Amp, Thermal Overload Protected 230 V.A.C., 0.7 Amp, Thermal Overload Protected 5 DISPOSING OF THE MACHINE: Dispose of the machine in an environmentally sound fashion at the end of its useful service life. Do not dispose of any of the parts included in the machine or its packaging with household trash. GB 1611 IMPORTANT SAFETY NOTES << The machine may not be operated by more than one person at any given time! The machine was designed for safe operation by “one person only”. << During the folding process no other work may be performed on the machine (for example cleaning, etc.)! << Danger of injury! Keep all loose articles of clothing, ties, jewelery, long hair or other loose objects away from rotating shafts, rollers and moving belts! << Danger of injury! Never touch with fingers onto rotating shafts, rollers and moving belts! << The machine is notatoy, and is notsuitable forusebychildren! The overall technical safety concept of this machine (dimensions, feed openings, emergency shutdown devices etc.) does not provide for any guarantee regarding hazardfree operation by children. << Danger of injury! Do not spray and flammable liquids or gases into the inlet opening! << Repairs may only be performed by trained personnel! << << In case of danger switch the machine off with the mains switch, or with the emergency switch, or unplug the machine! Always unplug the machine from the mains power supply before opening the machine! DESCRIPTION 1 Description 1.1 Nomenclature 1. Paper Support 2. Feed Table 3. Top Cover 4. First Fold Table 5. Exit Conveyor 6. Exit Ramp 7. Stack Wheels 8. Dejamming Port 9. Button Panel 10. Skew Adjustment Knob 11. Multi-Sheet Bypass 12. Retarder Adjustment Port 13. Second Fold Table 14. Power Cord 15. Power Switch 16. Feed Wheel 17. Retarder 18. Feed Pressure Adjustment Fig. 1 Fig. 2 Fig. 3 Fig. 4 6 GB 1611 INSTALLATION 2 Installation 2.1 Unpacking Carefully unpack the Model 1611 folder and accessories. Place the Model 1611 on a flat, level surface where it is to be used. It is necessary to have a clear area at the exit end of the folder to place the exit ramp. Place all of the packing material back in the shipping box and store the box for any future shipment of the Model 1611. Inspect the Model 1611 and all accessories for shipping damage. If any damage is found, contact the carrier immediately. 2.2 Feed Table The Model 1611 is equipped with a variableposition, non-removable feed table. Locate the Feed Table Extension in the accessory package. Install by lining its 2 protrusions with the corresponding slots on the feed table and inserting the protrusions into the slots. When it is correctly installed in position, it will lay flat on the feed table (See Figure 4). The Feed Table Extension must be installed for proper operation. 2.3 Feed Table Align the tabs on the exit ramp with the corresponding slots on the conveyor and drop the exit ramp into place (See Figure 4). 2.4 Fold Tables Step #1: Slide the front slot opening of the fold table onto the inner set of pins (closest to the folding rollers). Step #2: lower the fold table onto the outer set of pins. Repeat Steps 1 & 2 for the 2nd Fold Table installation (See Figure 5). 2.5 Paper Guides The Paper Guides are self-centering. To adjust the Paper Guides, loosen both thumbscrews slightly and slide the Paper Guides to the desired position. For best results, load a stack of paper and adjust the Paper Guides up to the paper. Once the Paper Guides are in the correct position, snug the thumbscrews down to hold the paper Guides from moving. DO NOT over tighten the thumbscrews (See Figure 6). The paper stack should be able to slide between the Paper Guides without binding, and at the same time, there should be very little play between the Paper Guides and the paper stack. 2.6 Loading Paper Depress down and hold the Feed Table by pushing down on the top of one of the Paper Guides. Place a maximum of 150 sheets of 20# paper between the Paper Guides, and push the stack of paper under the Feed Wheel. The paper stack must rest straight and square against the Feed Bridge (See Figure 7). Once the paper stack is correctly positioned, release the Feed Table and allow Feed Table to lift the paper stack up against the Feed Wheel. Fig. 5 Fig. 6 2.7 Skew Adjustment The Skew Adjustment controls the angle at which the paper is fed into the rollers. Skew adjustment is factory set to be square with the rollers and should not need adjusting. Skew adjustment is only necessary when the paper is not cut squarely or has irregular edges. If the paper is not folded square (corners of the paper stick out once folded), rotate the Skew Adjustment knob a small amount clockwise or counter-clockwise. The direction the knob is rotated is dependent on the skew direction. See Figure 1 for the location of the Skew Adjustment Knob. 2.8 Setting Fold Styles Before attempting to set-up a fold, you should familiarize yourself with the six designated fold style icons provided on the rulers located on each fold table (Figure 10). These icons are arranged in columns on the feed table rulers that represent the three most common paper sizes (Figure 8 and Figure 9). The icons in each column are color coded for clarity. NOTE: LTR=8 1/2 X 11” (Green), LGL=8 1/2 X 14” (Purple), and A4=210mm X 297mm (Gold). 2.9 Moving the Fold Table Paper Stops In order to successfully set the fold tables, you must know both the size of the paper being folded and the type of fold desired. After you’ve determined the type of fold desired, identify its icon on each fold table (Figure 8 and Figure 9). Loosen the fold stop thumbscrew on either fold table, move the fold stop until its red arrow aligns with the arrow of the desired fold style icon, and then retighten the thumbscrew. Repeat the process for the other fold table. Make sure the proper colored icon is used for the appropriate paper size. Special Notes - The second fold table is always in the same location for the half fold, regardless of the size of paper being folded. Also note the blanked area in the second fold table ruler. DO NOT place the 2nd paper stop in the blanked area of the fold ruler or a paper will jam will result. Fig. 7 Fig. 8 Fig. 10 Fig. 9 7 GB 1611 INSTALLATION / OPERATION / MAINTENANCE 2 Installation (Continuance) 2.10 Custom Folds To make custom folds, simply use the rulers to gauge the fold length measured from the paper stop edge to the fold. 2.11 Stacking Wheels The Model 1611 is equipped with an Exit Conveyor and Stacking Wheels for trouble free document stacking. The Stacking Wheels must be set to the correct position for the paper type and fold style in order for the paper to stack correctly. A chart with correct stacking wheel placement for various paper sizes and folds is located on the Exit Conveyor. The Stacking Wheels are held in-place by friction. To move the Stacking Wheels, simply slide the Stacking Wheels along the shaft to the desired position. To determine the correct stacking wheel position for custom folds, begin with the Stacking Wheels set in a position equal to the second fold table paper stop location. For example, if the Second paper Stop is set for 5 ½ inches, then set the Stacking Wheels to 5 ½ Inches. If stacking problems are encountered, adjust the position of the Stacking Wheels so that the folded paper drops completely onto the Exit Conveyor just before the paper makes contact with the Stacking Wheels. 3 Operation 3.1 Automatic Feed Operation 1. Set up the folder as described in section 2 of these instructions. 2. Turn the power On by depressing the “I” portion of the Off/On power switch. The green “Power” LED, located near the Run/Stop button, will be illuminated. 3. Square the stack of paper to be folded by using a Martin Yale Model 400 Jogger or by tapping 2 sides of the paper stack against a table or other hard object. 4. Load paper as specified in Section 2.6. 5. Adjust the Paper Guides as necessary per section 2.5. 6. Press and release the Run button to initiate folding. The folder will now start running and process the stack of paper. The folder will automatically turn off when the paper runs out. The Run button is located in the lower-right corner of the Button Panel (See Figure 11). 7. Folder may be stopped at anytime during folding by pressing the Run/Stop button. NOTE: You may find it easier to run only a few sheets before running an entire stack. This way, adjustments can be made before running a large quantity of paper. 3.2 Feed Adjustments If the edges of the folded paper do not line up, adjust the skew by turning the Skew Adjustment Knob slightly. Retest with a few sheets and adjust as necessary to square up the fold. If hesitation occurs when automatically feeding paper, double check the position of the Paper Guides as described in section 2.5 of this manual. However, if hesitation continues, the problem could be the type of paper you are folding, or that the Retarder is adjusted too tight. If you are attempting to fold coated or gloss stock, it may be necessary to increase the pressure of the paper stack against the Feed Wheel. The Feed Table lift-spring tension is factory set to give the best overall performance. However, this spring tension is user adjustable. The Feed Table pressure adjustment lever is located on the inside frame of the 1611, below the Feed Table and above the Second Fold table (See Figure 3). Raising the adjustment lever will increase the feeding force. 3.3 Manual Feed Operation The Model 1611 is capable of folding single sheets or sets of sheets up to 5 pages of #20 Bond manually (one at a time). To do so, set up the machine as described earlier in section 2. With the Feed Table empty of paper, insert the paper all the way into the Multi Sheet Bypass until the paper stops. Press and release the Run/Stop button. 3.4 Folding Stapled Multiple Sets The Model 1611 is capable of folding stapled sets of paper up to 5 sheets of #20 Bond in the manual method described in section 3.3. Warning: To prevent jams or roller damage, always attach the staple parallel to the fold rollers, always feed the paper stapled edge first, and avoid using loose fitting staples or inserting them too close to the edge (less than 5/16”, 8mm). 4 Maintenance 4.1 Fold Roller Cleaning During normal operation, the fold rollers will become contaminated with paper dust, ink, copy toner and other performance inhibiting materials. At some point this will cause problems such as wrinkling or marking the paper and even miss-folds or paper jams. At which time, cleaning the rollers will be necessary. Follow these steps to gain access to the rollers: Fig. 11 8 1. Disconnect the power cord from the outlet 2. Remove both Fold Tables 3. Remove 2 Phillips screws from the Top Cover, and remove the Top Cover. Clean the exposed rollers by spraying Martin Yale Roller Cleaner and Rejuvenator onto a clean cloth and wiping until all contaminates are removed. While wiping the rollers, rotate the rollers to insure that the entire surface of the roller is cleaned. Mild soap and water solution may also be used. Avoid getting cleaning solutions into the bearing surfaces. If the fold rollers become glazed or shiny, it may be necessary to return them to a dull luster by using a lightly abrasive non-metallic scouring pad. Never use metal pads such as steel wool or sand paper, as the shavings or grit will damage the roller and bearing surfaces. 4.2 Clearing Paper Jams Use the following steps to clear a paper jam: 1. Disconnect power to the folder 2. Remove the First and Second Fold Tables 3. Pull the jammed paper out from any area where it is accessible. The paper may be pulled from either Fold Table or Exit Conveyor If the jam cannot be cleared using the above steps, perform the following: 1. With a large flat bladed screwdriver, insert and engage the rollers through the Dejamming Port located in the Front Cover. 2. While pulling on any exposed paper, rotate the screwdriver in either direction to clear the paper jam. 4.3 Feed Wheel Cleaning As with the Fold Rollers, contamination of the Feed Wheel will result in poor performance. When feeding becomes inconsistent, clean only the outer surface of the Feed Wheel with a clean dry cloth and alcohol or a mild soap and water solution. Avoid getting cleaning solutions into the bearing surfaces. DO NOT use Martin Yale Roller Cleaner and Rejuvenator or other solvent-based cleaner on the Feed Wheel, as damage to the rubber will result. 4.4 Oiling The Model 1611 has 10 oil impregnated, bronze bearings; 2 for each of the four rubber fold rollers, and 2 for the feed shaft. Generally, these bronze bearings DO NOT require oiling, except in cases of extreme use. If needed, apply a single drop of light machine oil to each end of the above mentioned shafts, where the bronze bearing and shaft meet. DO NOT over oil the bronze bearings as the oil will eventually transfer to your paper. To gain access to all 10 bronze bearings, remove both Fold Tables and the Top Cover per the steps in section 4.2 - Clearing Paper Jams. GB 1611 TROUBLESHOOTING 5 Troubleshooting 5.1 Folder will not turn on 5.2 5.3 5.4 5.5 Paper will not feed Crooked Folds Ink smudges on paper Wrinkled paper Circuit breaker has tripped If the folder has jammed while folding, turn it off for about 10 minutes to allow the thermal breaker to cool and reset. WARNING! Motor will start automatically once it cools. Always turn machine off to allow cooling so as to avoid automatic starts. Dead receptacle Try folder in known good receptacle. Electrical Malfunction Have the folder serviced by a qualified technician. Paper Guides are too tight Adjust the paper guides so that the paper slides freely between them. Review section 2.5. Feed Wheel is contaminated Clean the feed wheel as specified in section 4.3. Static electricity buildup Fan or jog the paper to loosen the stack. Martin Yale Static Eliminator Spray may be used. Liberally spray over paper edges, feed tables, fold tables, and exit ramp. Retarder is worn Replace retarder. Paper has a curl in it Paper will sometimes develop a curl that makes automatic feeding difficult. This is especially common in paper just printed from a laser jet printer. Stacking it and placing a large heavy object such as a large book on it for a couple hours can straighten paper. Excessive paper guide side play Readjust the Paper Guides to eliminate excessive side play of the paper between the guides. Review section 2.5. Paper guide skew adjustment off Adjust skew as outlined in section 2.7. Paper must enter the rollers straight, or a crooked fold will result. Ink not dry Allow additional ink drying time before folding. Some inks do not dry, they only set (dry to the touch). Because of the physical nature of friction feeding, you may notice a mark on the leading edge of the paper. Excessive toner on photocopied stock Check copy machine. Skew out of adjustment Adjust skew as outlined in section 2.7. Paper must enter the rollers straight, or a crooked fold will result. Paper Guides too tight Readjust the Paper Guides so that sheets slide freely down between the guides without excessive side play. Review section 2.5. Dirty Rollers Clean the rollers as described in section 4.1. SPECIFICATIONS DISPOSING Specifications Functional Paper Weight Form Width Form Length Feed Table Capacity Speed Fold Styles Stapled Documents 16# to 28# Bond Stock (60g-105g) 121 mm (4.75”) min. to 216 mm (8.5”) max. 127 mm (5”) min. to 356 mm (14”) max. 150 Sheets of 20# 9000 sheets per hour 216 mm x 280 mm (8.5” X 11”) Letter, Half, Z, Double, Parallel, Gate Fold, and Church Five sheets 20# max, hand fed Physical Dimensions Machine Weight Shipping Weight 523 mm (20.6”) Wide X 361 mm (14.2”) Deep X 437 mm (17.2”) High 17,2 kg (38 lbs.) 19,5 kg (43 lbs.) Electrical Power 115 V.A.C., 1.3 Amp, Thermal Overload Protected 230 V.A.C., 0.7 Amp, Thermal Overload Protected 9 DISPOSING OF THE MACHINE: Dispose of the machine in an environmentally sound fashion at the end of its useful service life. Do not dispose of any of the parts included in the machine or its packaging with household trash. F 1611 RECOMMANDATIONS IMPORTANTES DE SÉCURITÉ << La machine ne doit pas être utilisée par plusieurs personnes en même temps! La conception des éléments de sécurité repose sur une mise en service sans danger pour “L’utilisation de la machine par une seule personne”. << Risquedeblessure!N’approchez jamais des rouleaux et roues en rotation, les vêtements amples, colliers, cheveux longs, cravates etc! << Risque de blessure! N’introduisez jamais les doigts dans les rouleaux et roues en rotation! << Risque de blessure! Ne pas asperger de liquides ou de gaz inflammables dans l’orifice d’alimentation! << Ne pas effectuer d’autres activités sur la machine (par ex. nettoyage...) durant le procédé de pliage! << La machine n’est pas un jouet et ne convient pas pour être utilisée par desenfants! Le concept global de sécurité (dimensions, orifices d‘alimentation, mises hors circuit de sécurité, etc.) de cette machine ne fournit aucune garantie pour une manipulation sans danger par les enfants. << Les travaux de réparation doivent être effectués uniquement par un spécialiste! << En cas de danger, arrêter la machine par l’interrupteur principal, ou par l’interrupteur d’urgence, ou débranchez la machine! << Débrancher le raccordement réseau avant d’ouvrir l’installation! DESCRIPTION 1 Description 1.1 Désignations 1. Tablette d’extension 2. Table d’alimentation 3. Recouvrement supérieur 4. Première table de pliage 5. Bande de sortie 6. Rampe de sortie 7. Roues d’empileur 8. Ouverture pour supprimer le bourrage 9. Clavier 10 Vis de réglage du désalignement 11. Alimentation manuelle 12. Ouverture de réglage du ralentisseur 13. Deuxième table de pliage 14. Câble réseau 15. Interrupteur de réseau 16. Roue d’alimentation 17. Ralentisseur 18. Levier de réglage de la pression d’alimentation Fig. 1 Fig. 2 Fig. 3 Fig. 4 10 F 1611 MISE EN PLACE 2 Mise en place 2.1 Déballer Déballer prudemment la plieuse 1611 ainsi que les accessoires. Au lieu d’utilisation, placer la plieuse 1611 sur un support plat et plan. A l’extrémité de la sortie de la plieuse, il faut prévoir suffisamment de place pour le montage de la rampe de sortie. Ranger l’ensemble du matériel d’emballage dans le carton d’expédition. Garder ensuite le carton d’expédition pour un transport ultérieur éventuel de la plieuse 1611. Contrôler la plieuse 1611 et tous les accessoires quant à des dégâts de transport. Adressez-vous à l’entreprise de transport en cas de constat de dégâts éventuels. 2.2 Table d’alimentation La plieuse 1611 est équipée d’une table d’alimentation à réglage variable et non amovible. Les fournitures contiennent une rallonge de la table d’alimentation entre autres comme accessoire. Pour le montage de cette rallonge, aligner d’abord les deux parties saillantes de la rallonge avec les évidements respectifs dans la table d’alimentation et ensuite la placer dans les évidements. Lorsque la rallonge n’est pas mise en place correctement, elle est à plat sur la table d’alimentation (voir figure 4). Pour garantir une exploitation impeccable de la plieuse, il faut que la rallonge de la table d’alimentation soit montée. 2.3 Table d’alimentation Aligner les parties saillantes de la rampe de sortie avec les évidements respectifs à la bande de sortie et mettre en place la rampe de sortie (voir figure 4). 2.4 Tables de pliage 1ère étape : Faites glisser la fente avant de la table de pliage sur les tenons intérieurs (qui sont les plus proches des rouleaux de pliage). 2ème étape : Abaisser la table de pliage sur les tenons extérieurs. Répétez les étapes 1 et 2 pour le montage de la deuxième table de pliage (voir figure 5). 2.5 Guides-papier Les guides-papier sont auto-centreur. Pour le réglage des guides-papier, desserrez les deux vis moletées et glissez les guides-papier dans la position désirée. Pour obtenir le réglage optimal, mettez en place une pile de papier et alignez les guides-papier en conséquence. Une fois que les guides-papier se trouvent dans la position correcte, resserrez les vis moletées pour bloquer les guides-papier. Vous ne pouvez EN AUCUN CAS fausser les vis moletées (voir figure 6). La pile de papier doit encore être mobile entre les guides-papier; il est interdit de la bloquer. Le jeu entre les guides-papier et la pile de papier doit être minimal. 2.6 Mise en place du papier Poussez la table d’alimentation vers le bas en appuyant sur un des guides-papier en haut. Placez au maximum 150 feuilles 20# de papier entre les guides-papier et poussez la pile de papier sous la roue d’alimentation. La pile de papier doit être en contact droit et en angle droit avec le pont d’alimentation (voir figure 7). Lâchez la table d’alimentation après avoir positionné la pile de papier correctement et attendez que la table d’alimentation ait soulevé la pile de papier jusqu’à la roue d’alimentation. Fig. 5 Fig. 6 2.7 Réglage du désalignement Le réglage du désalignement détermine l’angle dans lequel le papier est alimenté aux rouleaux. Le désalignement a été réglé en usine en angle droit avec les rouleaux et ne doit donc pas être réajusté. Le réglage du désalignement est uniquement nécessaire lorsque le papier est coupé en angle droit ou a des bords irréguliers. Lorsque le papier n’est pas plié en angle droit (les coins du papier dépassent après le pliage), tournez la vis de réglage du désalignement légèrement vers la droite ou vers la gauche. Le sens de rotation dépend de la direction du désalignement. La figure 1 représente la position de la vis de réglage du désalignement. 2.8 Réglage des types de pliage Avant le réglage d’un type de pliage déterminé, il faut se familiariser avec les symboles des six types de pliage spécifiés et représentés sur les règles des tables de pliage (figure 10). Ces symboles sont disposés en colonnes, représentant les trois formats de papier les plus courants (figure 8 et figure 9). Pour une meilleure orientation, les symboles ont des codes-couleurs dans chaque colonne. REMARQUE : LTR = 8 ½“ x 11“ (vert), LGL = 8 ½“ x 14“ (violet) et A4 = 210 mm x 297 mm (doré). 2.9 Déplacement des arrêts de papier de la table de pliage Pour le réglage correct des tables de pliage, il faut connaître le format du papier à plier ainsi que le type de pliage désiré. Une fois que vous avez opté pour un type de pliage déterminé, cherchez le symbole respectif sur les tables de pliage (figure 8 et figure 9). Desserrez la vis moletée de l’arrêt de pliage à une des tables de pliage. Glissez ensuite l’arrêt de pliage jusqu’à ce que la flèche rouge coïncide avec la flèche du type de pliage désiré. Ensuite, serrez de nouveau la vis moletée. Répétez ces étapes pour l’autre table de pliage. Vérifiez si vous avez sélectionné le symbole couleur correct pour le format de papier respectif. Notes particulières : Indépendamment du format du papier à plier, la deuxième table de pliage se trouve toujours à la même position pour le pli simple. Veuillez noter la zone vide sur la règle de la deuxième table de pliage. NE PAS positionner le deuxième arrêt de papier dans la zone vide de la règle de pliage, vu que ceci entraîne le bourrage. Fig. 7 Fig. 8 Fig. 10 Fig. 9 11 F 1611 MISE EN PLACE / EXPLOITATION / ENTRETIEN 2 3.2 Mise en place (suite) 2.10 Pliages individuels Pour les pliages individuels, mesurez à l’aide des règles, la longueur de pliage depuis le bord de l’arrêt de papier jusqu’au pli. 2.11 Roues d’empileur La plieuse 1611 est dotée d’une bande de sortie et de roues d’empileur pour permettre un empilage facile des documents. Afin que le papier soit empilé correctement, il faut régler les roues d’empileur sur la position correcte pour le type de papier et le type de pliage. Le positionnement correct des roues d’empileur pour les différents formats de papier et les types de pliage est indiqué sur la bande de sortie. Les roues d’empileur sont maintenues dans leur position grâce à la friction. Pour déplacer les roues d’empileur, glissez-les tout simplement sur la position désirée. Pour déterminer la position correcte des roues d’empileur, commencez par une position correspondant au premier arrêt de papier de la deuxième table de pliage. Exemple : lorsque le deuxième arrêt de papier est réglé sur 5 ½ pouces, réglez également les roues d’empileur sur 5 ½ pouces. Au cas où des problèmes d’empilage surgiraient, adaptez la position des roues d’empileur de sorte que le papier plié tombe complètement sur la bande de sortie tout juste avant de n’entrer en contact avec les roues d’empileur. 3 Exploitation 3.1 Alimentation automatique 1. Régler la plieuse conformément aux instructions au chapitre 2. 2. Enclencher la machine en appuyant sur la zone «I» de l’interrupteur réseau. La DEL d’exploitation verte à côté de la touche Marche/Arrêt (« Run/Stop ») luit. 3. Alignez la pile de papier à plier à angle droit. Pour ce faire, ayez recours à un dispositif d’alignement des feuilles 400 Martin Yale ou poussez deux bords de la pile de papier contre une table ou un autre objet solide. 4. Mettez en place le papier comme décrit au chapitre 2.6. 5. S’il y a lieu, réglez les guides-papier (voir chapitre 2.5). 6. Appuyez sur la touche « Run » et relâchez-là de nouveau pour démarrer le processus de pliage. La plieuse traite maintenant la pile de papier. Elle se coupe automatiquement une fois que toutes les feuilles sont pliées. La touche « Run » se trouve en bas à droite sur le clavier (voir figure 11). 7. La plieuse peut être arrêtée à tout moment pendant le processus de pliage en appuyant sur la touche « Run/Stop ». NOTE: Il est recommandé de d’abord ne laisser passer que quelques feuilles, avant de traiter toute la pile de papier. Ainsi, on peut aisément procéder à des adaptations éventuelles requises après quelques pliages. Réglage de l’alimentation Si les bords du papier plié ne sont méticuleusement les uns sur les autres, ajustez le désalignement à l’aide de la vis de réglage prévue à cet effet. Testez le nouveau réglage en faisant passer quelques feuilles. Procédez éventuellement à une adaptation jusqu’à obtention d’un pli à angle droit. Si lors de l’alimentation automatique de papier, des temporisations surgissent, contrôlez la position des guides-papier (voir description au chapitre 2.5 de ces instructions de service). Si l’alimentation en papier se poursuit avec temporisation, le problème pourrait être provoqué par le type de papier à plier. Un ralentisseur réglé trop serré peut également être envisagé comme cause. Lors du pliage de papier enduit ou de papier glacé, il faut éventuellement augmenter la pression de la pile de papier contre la roue d’alimentation. La tension du ressort de levage de la table d’alimentation a été réglé en usine sur la puissance optimale. Il peut toutefois être réglé par l’utilisateur en fonction des exigences respectives. Le levier de réglage de la pression de la table d’alimentation se trouve sur la paroi intérieure du boîtier 1611 sous la table d’alimentation et au-dessus de la deuxième table de pliage (voir figure 3). Si vous glissez le levier vers le haut, la pression d’alimentation augmente. 3.3 Alimentation manuelle La plieuse 1611 peut plier manuellement des feuilles isolées ou des liasses multiples jusqu’à 5 feuilles #20 Bond (les unes après les autres). A cette fin, alignez la machine comme décrit au chapitre 2. Lorsque la table d’alimentation est vide, placez le papier dans le dispositif d’alimentation manuel jusqu’à ce que le papier soit en contact. Ensuite appuyez sur la touche « Run/Stop » et relâchez-la de nouveau. 3.4 Pliage de liasses multiples agrafées La plieuse 1611 peut plier manuellement des liasses multiples agrafées jusqu’à 5 feuilles #20 Bond (voir description au chapitre 3.3). Attention : Pour éviter tout bourrage ou un endommagement des rouleaux, toujours appliquer l’agrafe parallèlement aux rouleaux de pliage et introduire le papier avec le bord agrafé en premier. De surcroît, veillez à ce qu’il n’y ait pas d’agrafes mobiles et ne pas placer les agrafes trop près du bord de la feuille (moins de 8 mm). 4 Entretien 4.1 Nettoyage des rouleaux de pliage En service normal, de la poussière, de l’encre, du toner et d’autres impuretés se déposent sur les rouleaux de pliage. Ceux-ci entravent le rendement de la machine. A un certain moment, ces dépôts causent des problèmes qui se traduisent sous forme de papier chiffonné ou encrassé, des plis non effectués correctement ou du bourrage. Alors il est temps de nettoyer les rouleaux. Pour avoir accès aux rouleaux, procédez comme suit: Fig. 11 12 1. Tirez le câble de réseau hors de la prise. 2. Démontez les deux tables de pliage. 3. Enlevez les deux vis Phillips dans le recouvrement supérieur et enlevez le recouvrement supérieur. Nettoyer les rouleaux en appliquant un nettoyant de rouleaux et un produit d’entretien - Martin Yale sur un chiffon propre et nettoyez les rouleaux jusqu’à ce que toute la saleté ait disparue. Pendant le nettoyage, tournez les rouleaux en veillant à bien nettoyer l’ensemble de la surface des rouleaux. Pour le nettoyage, vous pouvez également utiliser une solution douce d’eau savonnée. Veuillez à ce qu’aucune solution de nettoyage ne pénètre dans les surfaces des corps de palier. Lorsque les rouleaux sont devenus vitreux ou luisants, il faut leur attribuer un aspect mat en les frottant légèrement avec du papier émeri non-métallique. Ne pas utiliser de papier émeri en métal, laine minérale ou papier sablé, car les copeaux et l’abrasion granuleuse pourraient endommager les rouleaux et les surfaces des corps de palier. 4.2 Intervenir sur un bourrage Pour intervenir sur un bourrage, procédez comme suit: 1. Coupez l’alimentation électrique de la plieuse. 2. Enlevez la première et la deuxième table de pliage. 3. Enlevez le papier coincé à tous les endroits accessibles. Vous pouvez soit le tirer en dehors par le tiroir de la table de pliage ou par la bande de sortie. Lorsque le bourrage ne peut pas être supprimé comme décrit plus haut, réalisez les étapes suivantes : 1. Introduisez un grand tournevis pour vis à tête fendue dans la fente pour supprimer le bourrage dans le recouvrement avant et tournez les rouleaux. 2. Déplacez le tournevis dans toutes les directions pour essayer de retirer le papier et de supprimer le bourrage. 4.3 Nettoyage de la roue d’alimentation Tout comme l’encrassement des rouleaux de pliage entraîne l’encrassement de la roue d’alimentation, l’encrassement de cette dernière entraînera une détérioration du bon fonctionnement de l’appareil. En cas d’alimentation irrégulière, nettoyez uniquement la face extérieure de la roue d’alimentation avec un chiffon sec et propre et de l’alcool ou une solution douce d’eau savonnée. Veuillez à ce qu’aucune solution de nettoyage ne pénètre dans les surfaces des corps de palier. Pour le nettoyage de la roue d’alimentation NE PAS utiliser le nettoyant et produit d’entretien pour rouleaux - ou un autre produit à base de solution, car ils risquent d’endommager le caoutchouc. 4.4 Huilage La plieuse 1611 est équipée de 10 coussinets en bronze imprégnés d’huile : 2 pour chacun des quatre rouleaux de pliage en caoutchouc et 2 pour l’arbre d’alimentation. Sauf en cas de contrainte extrême, il n’est en général PAS nécessaire de graisser ces coussinets en bronze. S’il y a lieu, appliquez une seule goutte d’huile de machine légère sur chaque extrémité des arbres cités ci-avant où le palier en bronze et l’arbre se rencontrent. Ne JAMAIS appliquer trop d’huile sur les coussinets en bronze, sinon il y a risque que l’huile soit transférée sur le papier. Pour rendre accessibles les 10 coussinets en bronze, enlevez les deux tables de pliage et le recouvrement supérieur comme décrit au chapitre 4.2 «Suppression du bourrage». F 1611 DÉPANNAGE 5 Dépannage 5.1 La machine ne se laisse pas enclencher Le fusible a réagi 5.2 5.3 5.4 5.5 Le papier n’est pas alimenté Plis de travers Taches d’encre sur le papier Papier froissé Si pendant le processus de pliage, un bourrage surgit, coupez la machine pendant 10 minutes environ pour laisser refroidir le thermorupteur afin que celui-ci puisse de nouveau fermer le circuit électrique. AVERTISSEMENT ! Après le refroidissement, le moteur redémarre automatiquement. Pour laisser refroidir la machine, il faut toujours la couper pour empêcher un démarrage automatique. Prise hors tension Branchez la machine à une prise qui fonctionne. Dysfonctionnement électrique Faites contrôler et vérifier la machine par un technicien qualifié. Les guides-papier sont réglés trop serrés Réglez les guides-papier de sorte que le papier puisse bouger sans problème. Pour plus d’infos à ce sujet, voir chapitre 2.5. La roue d’alimentation est encrassée Nettoyez la roue d’alimentation comme décrit au chapitre 4.3. Présence d’électricité statique Etalez le papier en éventail ou taquez-le pour desserrer la pile. Vous pouvez également utiliser le Static Eliminator spray de Martin Yale. Pulvérisez-en généreusement sur les bords du papier, les tables d’alimentation, les tables de pliage et la rampe de sortie. Le ralentisseur est usé Remplacez le ralentisseur. Le papier ondule Parfois le papier ondule ce qui rend l’alimentation automatique difficile. C’est avant tout le cas des feuilles qui viennent d’être imprimées sur une imprimante laser. Il est possible d’aplatir le papier en l’empilant et en posant un objet lourd de grande taille tel qu’un grand livre dessus. Jeu latéral du papier trop grand Réglez de nouveau les guides-papier pour supprimer un trop grand jeu latéral du papier entre les glissières. Pour plus d’infos à ce sujet, voir chapitre 2.5. Pas de réglage du désalignement des guides-papier Réglez le désalignement comme expliqué au chapitre 2.7 . Le papier doit être alimenté droit aux rouleaux, sinon des plis de travers surgissent. L’encre n’est pas sèche Laisser l’encre sécher plus longtemps avant de plier le papier. Certaines encres ne sèchent pas, elles deviennent uniquement dures (sont sèches au toucher). En raison de la friction lors de l’alimentation, vous constatez éventuellement une tache sur le bord-guide du papier. Trop de toner sur les photocopies Contrôlez la photocopieuse. Le désalignement n’est pas réglé Réglez le désalignement comme décrit au chapitre 2.7 Le papier doit être alimenté droit aux rouleaux, sinon des plis de travers surgissent. Les guides-papier sont trop serrés Réglez les guides-papier de sorte que les feuilles puissent bouger librement entre les glissières, sans que le jeu latéral ne soit trop grand. Pour plus d’infos à ce sujet, voir chapitre 2.5. Rouleaux encrassés Nettoyez les rouleaux comme décrit au chapitre 4.1. SPÉCIFICATIONS ELIMINATION Spécifications Fonctionnel Poids du papier Largeur du papier Longueur du papier Capacité de la table d’alimentation Vitesse Types de pliage Documents agrafés papier Bond 16# à 28# (60 g à 105 g) min. 121 mm (4.75") à max. 216 mm (8.5") min. 127 mm (5") à max. 356 mm (14")» 150 feuilles 20# 9.000 feuilles par heure 216 mm x 280 mm (8,5» x 11») lettres, pli simple, en Z, double, parallèle, brochure et church max. cinq feuilles 20#, alimentation manuelle Physique Dimensions Poids de la machine Poids à l’expédition largeur 523 mm (20.6") x profondeur 361 mm (14.2") x hauteur 437 mm (7.2") 17,2 kg (38 livres) 19,5 kg (43 livres) Système électrique Alimentation électrique 115 V AC, 1,3 A, avec protection contre la surchauffe 230 V AC, 0,7 A, avec protection contre la surchauffe 13 ELIMINATION DE LA MACHINE: En fin de vie, éliminez toujours la machine de façon conforme à l‘environnement. Ne jetez aucun composant de la machine ou de son emballage dans les ordures ménagères. E 1611 INDICACIONES DE SEGURIDAD IMPORTANTES << ¡El aparato no debe ser operado por varias personas al mismo tiempo! La concepción de los elementos de seguridad se basa en un manejo sin peligro en un „servicio por una sola persona“. << ¡Peligro de lesión! No acercarse a los cilindros y rodillos en rotación con piezas sueltas de ropa, corbatas, bisutería, cabello largo u otros objetos sueltos! << ¡Durante el proceso de plegado no se deben efectuar otros trabajos en la máquina (p. ej. limpieza etc.)! << ¡Peligro de lesión! No coger con los dedos en los cilindros y rodillos en rotación! << ¡La máquina no es un juguete y no es apropiada para el empleo y uso por partedeniños! El concepto global en razón de la seguridad (dimensiones, orificios de alimentación, desconexiones de seguridad, etc.) de esta máquina no incluye ningún tipo de garantía en cuanto a un manejo inofensivo por parte de niños. << ¡Peligro de lesión! ¡No rociar líquidos de fácil combustión ni gases en el orificio de alimentación! << ¡Las reparaciones solamente debe efectuarlas un técnico especialista! << ¡En caso de emergencia desconectar el aparato usando el interruptor principal o el interruptor de emergencia, o extraer la clavija de red! << Antes de abrir el aparato hay que extraer la clavija de red! DESCRIPCIÓN 1 Descripción 1.1 Designaciones 1. Base para papel 2. Mesa de alimentación 3. Cubierta superior 4. Primera mesa de plegado 5. Cinta de descarga 6. Rampa de emisión 7. Ruedas apiladoras 8. Orificio para eliminación de papel atascado 9. Teclado 10. Tornillo de ajuste para marcha oblicua 11. Alimentación manual 12. Orificio de ajuste para retardador 13. Segunda mesa de plegado 14. Cable de alimentación a la red 15. Conmutador de alimentación 16. Rueda de alimentación 17. Retardador 18. Palanca de ajuste para presión de alimentación Fig. 1 Fig. 2 Fig. 3 Fig. 4 14 E 1611 INSTALACIÓN 2 Instalación 2.1 Desembalaje Desempaquete con sumo cuidado la plegadora modelo 1611 y los elementos accesorios. Coloque la máquina en su lugar de empleo futuro sobre una base lisa y plana. En el lado de salida de la plegadora deberá haber espacio suficiente para colocar la rampa de salida. Guarde todo el material de embalaje en la caja de transporte. Hecho esto, guarde la caja de transporte por si la necesitara en el futuro para transportar la plegadora. Compruebe la posible presencia de daños causados durante el transporte en el modelo 1611 y todos los elementos accesorios. Si se constataran daños del tipo que fuera, diríjase sin demora al transportista. 2.2 2.3 Mesa de alimentación Los salientes de la rampa de salida se deberán alinear con las entalladuras correspondientes, situadas en la cinta de descarga. A continuación, se deberá montar la rampa de salida (véase ilustración 4). 2.4 Mesas de plegado 1. etapa: Deje deslizar el orificio ranurado delantero de la mesa de plegado en los pasadores interiores (aquellos que están más próximos a los rodillos de plegado). 2. etapa: Descienda la mesa de plegado sobre los pasadores exteriores. Repita las etapas 1 y 2 para montar la segunda mesa de plegado (véase ilustración 5). 2.5 Guías de papel Las guías de papel son autocentrantes. Afloje los dos tornillos moleteados para ajustar las guías de papel y desplace las guías de papel a la posición deseada. El ajuste óptimo se facilita introduciendo una pila de papel y alineando las guías de papel a la misma. En cuanto las guías de papel estén en la posición correcta, apriete de nuevo los tornillos moleteados para bloquear las guías de papel. NO fuerce el apriete EN NINGÚN CASO de los tornillos moleteados (véase ilustración 6). La pila de papel se deberá poder seguir moviendo aún entre las guías de papel; no deberá estar enganchada entre las mismas. Al mismo tiempo, el juego entre las guías de papel y la pila de papel deberá ser mínimo. Mesa de alimentación El modelo 1611 dispone de una mesa de alimentación de ajuste variable y no desmontable. En el volumen de entrega se incluye una prolongación de la mesa de alimentación como accesorio. Para colocar esta prolongación se deberán alinear primero los dos salientes de la prolongación con las entalladuras correspondientes en la mesa de alimentación y, a continuación, meter en las entalladuras. Si la prolongación se ha colocado correctamente, estará montada en posición plana sobre la mesa de alimentación (véase ilustración 4). Para garantizar el funcionamiento perfecto de la plegadora se deberá haber montado la prolongación de la mesa de alimentación. 2.6 Cómo introducir el papel Presione la mesa de alimentación hacia abajo comprimiendo desde arriba una de las guías de papel. Coloque como máximo 150 hojas de papel de 20# entre las guías de papel y presione la pila de papel para ponerla debajo de la rueda de alimentación. La pila tiene que estar colocada en posición recta y en ángulo recto a nivel del puente de alimentación (véase ilustración 7). Suelte la mesa de alimentación, después de haber posicionado la pila de papel correctamente, y espere a que la mesa de alimentación haya elevado la pila de papel hasta la rueda de alimentación. Fig. 5 Fig. 6 2.7 Ajuste de la marcha oblicua La posición de la marcha oblicua determina el ángulo en el que el papel se conduce a los rodillos. La marcha oblicua se ha ajustado en fábrica en ángulo recto en relación con los rodillos y por regla general no requiere reajuste alguno. El ajuste de la marcha oblicua sólo es necesario si el papel no está cortado en ángulo recto o bien si tiene bordes irregulares. En caso de que el papel no se doble en ángulo recto (las esquinas del papel sobresalen después del proceso de plegado), gire algo hacia la derecha o izquierda el tornillo de ajuste para la marcha oblicua. El sentido de giro depende del sentido de la marcha oblicua. En la ilustración 1 se ha representado la posición del tornillo de ajuste para la marcha oblicua. 2.8 Cómo ajustar los tipos de plegado Antes de ajustar un tipo de plegado determinado habrá que familiarizarse con los símbolos de los seis tipos de plegados especificados, que están ilustrados sobre las reglas de las mesas de plegado (ilustración 10). Los símbolos se han dispuesto en columnas que representan los formatos de papel más frecuentes (ilustración 8 e ilustración 9). Para facilitar la orientación se han codificado en color los símbolos en cada una de las columnas. NOTA: LTR = 8 ½“ x 11“ (verde), LGL = 8 ½“ x 14“ (lila) y A4 = 210 mm x 297 mm (dorado). 2.9 Desplazamiento del tope de papel en la mesa de plegado Para poder ajustar correctamente las mesas de plegado se deberá conocer el formato del papel que se desea plegar, así como el tipo de plegado deseado. Una vez se haya decidido un tipo determinado de plegado, se deberá buscar el símbolo correspondiente en las mesas de plegado (ilustración 8 e ilustración 9). Afloje el tornillo moleteado del tope de plegado en una de las mesas de plegado. Hecho esto, desplace el tope de plegado hasta que la flecha roja coincida con el símbolo de flecha para el tipo de plegado deseado. A continuación, vuelva a apretar el tornillo moleteado. Repita estas etapas para la otra mesa de plegado. Asegúrese de que se ha seleccionado el símbolo de color correcto para el formato correspondiente de papel. Notas especiales: La segunda mesa de plegado se encuentra siempre en la misma posición para el semiplegado, independientemente del formato de papel que se va a plegar. Considere también el área vacía sobre la regla de la segunda mesa de plegado. NO posicione el segundo tope de papel en el área vacía de la regla de plegado porque se puede producir un atasco de papel. Fig. 7 Fig. 8 Fig. 10 Fig. 9 15 E 1611 INSTALACIÓN / FUNCIONAMIENTO / MANTENIMIENTO 2 3.2 Instalación (continuación) 2.10 Plegados individuales Para los plegados individuales bastará con medir la longitud de plegado desde el borde del tope de papel hasta el pliegue, tomando como ayuda las reglas. 2.11 Ruedas apiladoras El modelo 1611 dispone de una cinta de descarga y ruedas apiladoras que facilitan el apilado cómodo de los documentos. Las ruedas apiladoras tienen que ajustarse en la posición correcta para el tipo de papel y el tipo de plegado para poder apilar así correctamente el papel. La posición correcta de las ruedas apiladoras para los diversos formatos de papel y tipos de plegado se indica sobre la cinta de descarga. Las ruedas apiladoras se retienen en su posición por fricción. Para mover las ruedas apiladoras desplácelas simplemente a la posición deseada. A fin de determinar la posición correcta de las ruedas apiladoras, comience con una posición que corresponda al tope de papel de la segunda mesa de plegado. Ejemplo: Si el segundo tope de papel se ha ajustado a 5 ½ “, entonces se deberán ajustar las ruedas apiladoras también a 5 1/2 “. De surgir problemas en el apilado, habrá que ajustar la posición de las ruedas apiladoras de tal modo que el papel plegado coincida por completo con la cinta de descarga, poco antes de que toque las ruedas apiladoras. 3 Funcionamiento 3.1 Alimentación automática 1. Ajuste la plegadora según las instrucciones en apartado 2. 2. Conecte la máquina pulsando el conmutador de alimentación en el área “I”. El indicador piloto verde de funcionamiento, situado al lado de la tecla de Marcha/ Parada „Run/Stop“ está encendido. 3. Ajuste la pila de papel que se desea plegar en ángulo recto. Utilice para este fin un aparato vibrador de papel Martin Yale modelo 400 o bien empuje dos bordes de la pila de papel a una mesa o otro objeto fijo. 4. Introduzca el papel como se describe en el apartado 2.6. 5. Ajuste las guías de papel si fuera necesario (véase ilustración 2.5). 6. Pulse la tecla de marcha „Run“ y vuelva a soltarla para iniciar el proceso de plegado. Hecho esto, la plegadora tratará la pila de papel. Y se desconectará automáticamente cuando todas las hojas estén plegadas. La tecla „Run“ se encuentra abajo a la derecha en el teclado (véase ilustración 11). 7. La plegadora se puede detener en todo momento durante el proceso de plegado pulsando la tecla „Run/ Stop“. NOTA: Es recomendable dejar pasar primero algunas hojas antes de tratar toda la pila de papel. De este modo es posible adaptar, en caso necesario, tras haber realizado unas pocas pasadas de plegado. Cómo ajustar la alimentación Si los bordes del papel plegado no se encuentran exactamente uno encima de otro, significa que habrá que ajustar la marcha oblicua por medio del tornillo moleteado previsto para este fin. Ensaye el ajuste nuevo dejando pasar algunas hojas. Dado el caso, realice una adaptación más, hasta haber alcanzado un plegado rectangular. Si la alimentación automática de papel se retrasara, significa que se deberá comprobar la posición de las guías de papel (véase descripción en apartado 2.5 de este manual). De seguir retrasándose la alimentación de papel, es posible que la causa del problema sea el tipo de papel por plegar. Un retardador regulado demasiado ajustado podría ser igualmente la causa. Al plegar papel revestido o papel de alto brillo es posible que se tenga que aumentar la presión de la pila de papel contra la rueda de alimentación. La tensión del resorte elevador para la mesa de alimentación se ha ajustado en fábrica para obtener el máximo rendimiento. No obstante, el usuario la puede regular según sea necesario en cada caso particular. La palanca de ajuste para la presión de la mesa de alimentación se encuentra en el lado interior de la carcasa del modelo 1611 debajo de la mesa de alimentación y por encima de la segunda mesa de plegado (véase ilustración 3). Empuje la palanca hacia arriba para aumentar la presión de alimentación. 3.3 Alimentación manual El modelo 1611 puede plegar manualmente hojas sueltas o composiciones múltiples de hasta 5 hojas de 20# de papel bond (sueltas consecutivamente una detrás de otra). Para este fin, se deberá alinear la máquina como se describe en apartado 2. Introduzca el papel estando la mesa de alimentación vacía en la alimentación manual hasta que el papel haga tope. Pulse luego la tecla „Run/ Stop“ y vuelva a soltarla. 3.4 Plegado de composiciones múltiples grapadas El modelo 1611 puede plegar manualmente composiciones múltiples grapadas con hasta 5 hojas de 20# de papel bond (véase descripción en apartado 3.3). Atención: A fin de evitar atascos de papel o daños en los rodillos, las grapas deberán colocarse siempre en posición paralela respecto a los rodillos de plegado y el papel se deberá introducir primero con el borde grapado. Además, preste una atención especial a que no haya grapas sueltas, así como no coloque las grapas demasiado cerca del borde de la hoja (menos de 8 mm). 4 Mantenimiento 4.1 Limpieza de los rodillos de plegado Durante el funcionamiento normal se depositan sobre los rodillos de plegado polvo de papel, tinta, tóner y otros materiales que pueden mermar el rendimiento de la máquina. Estos depósitos de materiales pueden causar problemas con el transcurso del tiempo, que se manifiestan en forma de papel arrugado o ensuciado, procesos de plegado no realizados o atascos de papel. En este caso quiere decir que es hora de limpiar los rodillos. Proceda como sigue para dejar libres los rodillos: Fig. 11 16 1. Desenchufe el cable de alimentación del tomacorriente. 2. Desmonte las dos mesas de plegado. 3. Retire los dos tornillos de cabeza en cruz en la cubierta superior y quite la cubierta superior. Limpie los rodillos descubiertos aplicando el producto de limpieza y cuidado de rodillos Martin Yale en un paño limpio y frotando con el mismo por encima de los rodillos hasta eliminar toda la suciedad. Vaya girando los rodillos mientras limpia para garantizar que se limpia toda la superficie de los rodillos. También se puede utilizar para limpiar una solución suave de agua y jabón. Preste atención a que no penetre producto de limpieza en las superficies de los cojinetes. Al volverse los rodillos vítreos o cuando brillen, habrá que devolverles, bajo determinadas circunstancias, su aspecto apagado, empleando un paño abrasivo, ligeramente esmerilante y no metálico. No utilice nunca paños abrasivos de metal, lana minera o de papel de lija porque las virutas y el producto granuloso producido por fricción pueden dañar los rodillos y las superficies de los cojinetes. 4.2 Cómo eliminar atascos de papel Proceda como sigue para eliminar un atasco de papel: 1. Interrumpa el suministro de corriente para la plegadora. 2. Desmonte la primera y la segunda mesa de plegado. 3. Retire el papel enganchado en todos los lugares accesibles. Se puede sacar a través del intercalado de la mesa de plegado o bien de la cinta de descarga. Si el atasco de papel no se puede eliminar como se describe más arriba, realice los pasos siguientes: 1. Introduzca un destornillador grande de cabeza ranurada en la apertura u orificio para eliminar el atasco de papel en la cubierta delantera y gire los rodillos. 2. Mueva el destornillador en cada dirección, mientras intenta sacar el papel descubierto y eliminar así el atasco de papel. 4.3 Cómo limpiar la rueda de alimentación Del mismo modo que la acumulación de suciedad sobre los rodillos de plegado empeora el rendimiento del aparato, la acumulación de suciedad sobre la rueda de alimentación puede causar igualmente problemas. En caso de constatar una alimentación irregular, limpie sólo la superficie exterior de la rueda de alimentación, empleando un paño limpio y seco y alcohol o bien una solución suave de agua y jabón. Preste atención a que no penetre producto de limpieza en las superficies de los cojinetes. NO utilice para limpiar la rueda de alimentación el producto de limpieza y cuidado de rodillos Martin Yale ni otros productos de limpieza a base de disolventes porque dañan la goma. 4.4 Aplicación de aceite El modelo 1611 está dotado de 10 cojinetes de bronce impregnados con aceite. 2 para cada uno de los cuatro rodillos de plegado de goma y 2 para el eje de alimentación. Con excepción de un uso extremo, por regla general NO es necesario aplicar aceite en estos cojinetes de bronce. Si, no obstante, fuera necesario, aplique una única gota de aceite ligero para máquinas en cada extremo de los ejes indicados anteriormente, en el que se encuentran el cojinete de bronce y el eje. NO aplique EN NINGÚN CASO demasiado aceite sobre los cojinetes de bronce, porque sino se corre el peligro de que el aceite se transfiera al papel. Para descubrir los 10 cojinetes de bronce, retire las dos mesas de plegado y la cubierta superior como se describe en apartado 4.2 „Cómo eliminar atascos de papel”. E 1611 ELIMINACIÓN DE ERRORES 5 Eliminación de errores 5.1 La máquina no se puede conectar Se ha disparado el seguro 5.2 No se alimenta papel Si durante el proceso de plegado ha surgido un atasco de papel, desconecte la máquina por aprox. 10 minutos para que el interruptor termoprotector pueda enfriarse y el circuito de corriente pueda volverse a cerrar. ¡AVISO! El motor se pone en marcha automáticamente después del proceso de enfriado. Desconecte la máquina para el enfriamiento a fin de evitar una puesta en marcha automática. Tomacorriente muerto Conecte la máquina a un tomacorriente que funciona. Función errónea en el sistema eléctrico Ponga en manos de un técnico cualificado la revisión y reparación de la máquina. Las guías de papel se han regulado demasiado justas Ajuste las guías de papel de tal modo que el papel se pueda mover sin impedimentos. Consulte el apartado 2.5. La rueda de alimentación está sucia Limpie la rueda de alimentación como se describe en apartado 4.3. Se ha formado electricidad estática Despliegue el papel para airearlo o agítelo para aligerar la pila. También se puede utilizar el spray antiestático Martin Yale. Rocíe el spray extensamente sobre los bordes de papel, las mesas de alimentación, las mesas de plegado y la rampa de salida. El retardador se ha desgastado El papel se ondula 5.3 5.4 5.5 Plegado torcido Manchas de tinta sobre el papel Papel arrugado Sustituya el retardador. A veces el papel se ondula, lo que dificulta la alimentación automática. Este es el caso sobre todo frecuente si el papel procede directamente de una impresora láser. Apile el papel y coloque por varias horas un objeto grande y pesado, por ejemplo, un libro grande, sobre la pila de papel para alisar de nuevo las hojas onduladas. Demasiado juego lateral del papel Vuelva a ajustar las guías de papel para reducir el juego lateral excesivo que hay entre el papel y las guías. Consulte el apartado 2.5. Sin ajuste oblicuo de las guías de papel Ajuste la marcha oblicua como se ha descrito en apartado 2.7. El papel se debe llevar en posición recta hacia los rodillos porque sino se produce un plegado torcido. La tinta no está seca Deje secar por más tiempo la tinta antes del proceso de plegado. Algunas tintas no se secan, sino que se vuelven sólidas (al tacto son secas). Bajo determinadas circunstancias es posible que se constate una mancha sobre el borde guía del papel, que se debe a la alimentación por fricción. Demasiado tóner sobre fotocopias Compruebe la copiadora. La marcha oblicua no está ajustada Ajuste la marcha oblicua como se describe en apartado 2.7. El papel se debe llevar en posición recta hacia los rodillos porque sino se produce un plegado torcido. Las guías de papel están demasiado justas Ajuste las guías de papel de tal modo que las hojas puedan moverse sin impedimentos entre las guías, no obstante, sin que el juego lateral entre las mismas sea demasiado grande. Consulte el apartado 2.5. Los rodillos están sucios Limpie los rodillos como se describe en apartado 4.1. ESPECIFICACIONES ELIMINACIÓN Especificaciones Funcionales Peso de papel Ancho de papel Longitud de papel Capacidad de la mesa de alimentación Velocidad Tipos de plegado Documentos grapados 16# a 28# de papel bond (60 g a 105 g) mín. 121 mm (4.75“) a máx. 216 mm (8.5“) mín. 127 mm (5“) a máx. 356 mm (14“) 150 hojas de 20# de papel 9.000 hojas por hora 216 mm x 280 mm (8,5“ x 11“) carta, simple, acordeón, doble, paralelo, tipo folleto y baronial máx. cinco hojas 20#, alimentación manual Físicas Dimensiones Peso de la máquina Peso envío 523 mm (20.6“) ancho x 361 mm (14.2“) profundo x 437 mm (17.2“) alto 17,2 kg (38 lbs.) 19,5 kg (43 lbs.) Eléctricas Suministro de corriente 115 V AC, 1,3 A, con protección al sobrecalentamiento 230 V AC, 0,7 A, con protección al sobrecalentamiento 17 ELIMINACIÓN DE LOS RESIDUOS DE LA MÁQUINA: Elimine los residuos de la máquina al final de su vida útil respetando siempre las normas medioambientales. No tire partes de la máquina ni el embalaje junto con la basura doméstica. D 1611 WICHTIGE SICHERHEITSHINWEISE << Das Gerät darf nichtvonmehrerenPersonen gleichzeitig bedient werden! Die Auslegung der Sicherheitselemente beruhen auf einer gefahrlosen Bedienung im “Einmannbetrieb“. << Während des Falzvorganges dürfen keine andereArbeiten (z. B. Reinigung etc.) an der Maschine getätigt werden! << Verletzungsgefahr! Lose Teile von Bekleidung, Krawatten, Schmuck, langes Haar, oder andere lose Gegenstände von den rotierenden Walzen und Rollen fernhalten! << Verletzungsgefahr! Nicht mit den Fingern auf die rotierenden Walzen und Rollen fassen! << Die Maschine ist kein Spielzeug und für Einsatz und Benutzung durch Kindernicht geeignet! Die sicherheitstechnische Gesamtkonzeption (Abmessungen, Zuführöffnungen, Sicherheitsabschaltungen etc.) dieser Maschine beinhaltet keinerlei Garantien einer gefahrlosen Handhabung durch Kinder. << Im Gefahrenfalle die Maschine am Hauptschalter, oder Not-Aus-Schalter ausschalten, oder den Netzsteckerziehen! << Reparaturen dürfen nur von einem Fachmann durchgeführt werden! << Vor dem Öffnen der Maschine ist der Netzsteckerzuziehen! << Verletzungsgefahr! Keine leicht entzündbare Flüssigkeiten oder Gase in die Zuführöffnung sprühen! BESCHREIBUNG 1 Beschreibung 1.1 Bezeichnungen 1. Papierauflage 2. Zuführungstisch 3. Obere Abdeckung 4. Erster Falztisch 5. Austragsband 6. Ausgaberampe 7. Stapelräder 8. Papierstau-Beseitigungsöffnung 9. Tastenfeld 10. Schräglauf-Einstellschraube 11. Manuelle Zuführung 12. Retarder-Einstellöffnung 13. Zweiter Falztisch 14. Netzkabel 15. Netzschalter 16. Zuführungsrad 17. Retarder 18. Zuführungsdruck-Einstellhebel Abb. 1 Abb. 2 Abb. 3 Abb. 4 18 D 1611 AUFSTELLUNG 2 Aufstellung 2.1 Auspacken Packen Sie die Falzmaschine Modell 1611 und die Zubehörteile vorsichtig aus. Stellen Sie die Maschine an ihrem künftigen Einsatzort auf eine flache, ebene Unterlage. Am Ausgabeende der Falzmaschine muss ausreichend Platz für die Anbringung der Ausgaberampe vorhanden sein. Verstauen Sie das gesamte Verpackungsmaterial im Versandkarton. Bewahren Sie dann den Versandkarton für einen eventuellen zukünftigen Transport der Falzmaschine auf. Überprüfen Sie das Modell 1611 und alle Zubehörteile auf etwaige Transportschäden. Wenden Sie sich umgehend an den Spediteur, falls Sie irgendwelche Beschädigungen feststellen. 2.2 2.3 Zuführungstisch Richten Sie die Vorsprünge der Ausgaberampe mit den zugehörigen Aussparungen am Austragsband aus und setzen Sie die Ausgaberampe ein (siehe Abbildung 4). 2.4 Falztische 1. Schritt: Lassen Sie die vordere Schlitzöffnung des Falztisches auf die inneren Stifte (die den Falzrollen am nächsten sind) gleiten. 2. Schritt: Senken Sie den Falztisch auf die äußeren Stifte ab. Wiederholen Sie die Schritte 1 und 2 für den Einbau des zweiten Falztisches (siehe Abbildung 5). 2.5 Papierführungen Die Papierführungen sind selbstzentrierend. Lösen Sie zum Einstellen der Papierführungen die beiden Rändelschrauben und schieben Sie die Papierführungen in die gewünschte Position. Die optimale Einstellung erreichen Sie, wenn Sie einen Stapel Papier einlegen und die Papierführungen daran ausrichten. Nachdem sich die Papierführungen in der richtigen Position befinden, ziehen Sie die Rändelschrauben wieder fest, um die Papierführungen zu arretieren. Sie dürfen die Rändelschrauben KEINESFALLS überdrehen (siehe Abbildung 6). Der Papierstapel sollte sich noch zwischen den Papierführungen bewegen können; er darf nicht eingeklemmt sein. Gleichzeitig sollte der Spielraum zwischen Papierführungen und Papierstapel nur minimal sein. Zuführungstisch Das Modell 1611 verfügt über einen variabel einstellbaren, nicht abnehmbaren Zuführungstisch. Im Lieferumfang ist als Zubehör eine Zuführungstischverlängerung enthalten. Zum Anbringen dieser Verlängerung richten Sie zunächst die beiden Vorsprünge der Verlängerung mit den zugehörigen Aussparungen im Zuführungstisch aus und setzen Sie sie dann in die Aussparungen ein. Wenn die Verlängerung richtig angebracht ist, liegt sie flach auf dem Zuführungstisch (siehe Abbildung 4). Für den einwandfreien Betrieb der Falzmaschine muss die Zuführungstischverlängerung montiert sein. 2.6 Abb. 5 Abb. 6 Einlegen von Papier Drücken Sie den Zuführungstisch nach unten, indem Sie oben auf eine der Papierführungen drücken. Legen Sie maximal 150 Blatt 20# Papier zwischen die Papierführungen ein und drücken Sie den Papierstapel unter das Zuführungsrad. Der Papierstapel muss gerade und rechtwinklig an der Zuführungsbrücke anliegen (siehe Abbildung 7). Lassen Sie den Zuführungstisch los, nachdem der Papierstapel richtig positioniert ist, und warten Sie, bis der Zuführungstisch den Papierstapel bis zum Zuführungsrad angehoben hat. 2.7 Einstellen des Schräglaufs Die Schräglaufeinstellung bestimmt den Winkel, in dem das Papier den Rollen zugeführt wird. Der Schräglauf ist werksseitig rechtwinklig zu den Rollen eingestellt und sollte keine Nachjustierung erfordern. Das Einstellen des Schräglaufs ist nur notwendig, wenn das Papier nicht rechtwinklig geschnitten ist oder unregelmäßige Kanten besitzt. Wenn das Papier nicht rechtwinklig gefalzt wird (die Ecken des Papiers stehen nach dem Falzen über), drehen Sie die Schräglauf-Einstellschraube etwas nach rechts oder links. Die Drehrichtung hängt von der Richtung des Schräglaufs ab. In Abbildung 1 ist die Position der Schräglauf-Einstellschraube dargestellt. 2.8 Einstellen der Falzarten Vor dem Einstellen einer bestimmten Falzart sollten Sie sich mit den Symbolen der sechs vorgegebenen Falzarten vertraut machen, die auf den Linealen der Falztische abgebildet sind (Abbildung 10). Diese Symbole sind in Spalten angeordnet, die die drei häufigsten Papierformate darstellen (Abbildung 8 und Abbildung 9). Zur besseren Orientierung sind die Symbole in jeder Spalte farbcodiert. HINWEIS: LTR = 8 ½“ x 11“ (grün), LGL = 8 ½“ x 14“ (lila) und A4 = 210 mm x 297 mm (goldfarben). 2.9 Verschieben der Falztisch-Papierstopps Für die richtige Einstellung der Falztische müssen Sie das Format des zu falzenden Papiers sowie die gewünschte Falzart kennen. Nachdem Sie sich für eine bestimmte Falzart entschieden haben, suchen Sie das entsprechende Symbol auf den Falztischen (Abbildung 8 und Abbildung 9). Lösen Sie die Falzstopp-Rändelschraube an einem der Falztische. Verschieben Sie dann den Falzstopp, bis der rote Pfeil mit dem Pfeilsymbol für die gewünschte Falzart übereinstimmt. Ziehen Sie anschließend die Rändelschraube wieder fest. Wiederholen Sie diese Schritte für den anderen Falztisch. Vergewissern Sie sich, dass Sie das richtige Farbsymbol für das jeweilige Papierformat gewählt haben. Besondere Hinweise: Der zweite Falztisch befindet sich unabhängig vom Format des zu falzenden Papiers immer an derselben Position für den Halbfalz. Beachten Sie auch den Leerbereich auf dem Lineal des zweiten Falztisches. Positionieren Sie den zweiten Papierstopp NICHT im Leerbereich des Falzlineals, da dies zu einem Papierstau führt. Abb. 7 Abb. 10 Abb. 9 Abb. 8 19 D 1611 AUFSTELLUNG / BETRIEB / WARTUNG 2 3.2 Aufstellung (Fortsetzung) 2.10 Individuelle Falzungen Für individuelle Falzungen messen Sie einfach mithilfe der Lineale die Falzlänge von der Kante des Papierstopps bis zum Falz. 2.11 Stapelräder Das Modell 1611 besitzt ein Austragsband und Stapelräder zum bequemen Stapeln von Dokumenten. Die Stapelräder müssen auf die richtige Position für die Papierart und die Falzart eingestellt werden, damit das Papier korrekt gestapelt wird. Auf dem Austragsband ist die richtige Positionierung der Stapelräder für die verschiedenen Papierformate und Falzarten angegeben. Die Stapelräder werden durch Reibung an ihrer Position gehalten. Zum Bewegen der Stapelräder schieben Sie sie einfach an die gewünschte Position. Um die richtige Position der Stapelräder zu bestimmen, beginnen Sie mit einer Position, die dem Papierstopp des zweiten Falztisches entspricht. Beispiel: Wenn der zweite Papierstopp auf 5 ½ Zoll eingestellt ist, dann stellen Sie die Stapelräder ebenfalls auf 5 ½ Zoll ein. Falls Stapelprobleme auftreten, passen Sie die Position der Stapelräder so an, dass das gefalzte Papier vollständig auf das Austragsband fällt, kurz bevor es die Stapelräder berührt. 3 Betrieb 3.1 Automatische Zuführung 1. Richten Sie die Falzmaschine entsprechend der Anleitung unter Abschnitt 2 ein. 2. Schalten Sie die Maschine ein, indem Sie auf den „I“-Bereich des Netzschalters drücken. Die grüne Betriebs-LED neben der Verarbeitungs-/Stopp-Taste „Run/Stop“ leuchtet. 3. Richten Sie den zu falzenden Papierstapel rechtwinklig aus. Verwenden Sie dazu einen Martin Yale Papierrüttler Modell 400 oder stoßen Sie zwei Kanten des Papierstapels an einem Tisch oder einem anderen festen Gegenstand auf. 4. Legen Sie das Papier wie in Abschnitt 2.6 beschrieben ein. 5. Stellen Sie die Papierführungen bei Bedarf ein (siehe Abschnitt 2.5). 6. Drücken Sie die Verarbeitungstaste „Run“ und lassen Sie sie wieder los, um den Falzvorgang zu starten. Die Falzmaschine verarbeitet nun den Papierstapel. Sie schaltet sich automatisch aus, wenn alle Blätter gefalzt sind. Die Taste „Run“ befindet sich unten rechts auf dem Tastenfeld (siehe Abbildung 11). 7. Die Falzmaschine kann jederzeit während des Falzvorgangs durch Drücken der Taste „Run/Stop“ angehalten werden. HINWEIS: Es empfiehlt sich, zunächst nur einige Blätter durchlaufen zu lassen, bevor der gesamte Papierstapel verarbeitet wird. Auf diese Weise lassen sich bereits nach wenigen Falzdurchgängen eventuell erforderliche Anpassungen vornehmen. Einstellen der Zuführung Wenn die Kanten des gefalzten Papiers nicht akkurat aufeinander liegen, justieren Sie den Schräglauf mithilfe der dafür vorgesehenen Einstellschraube. Testen Sie die neue Einstellung, indem Sie einige Blätter durchlaufen lassen. Nehmen Sie gegebenenfalls eine weitere Anpassung vor, bis ein rechtwinkliger Falz erreicht ist. Wenn es bei der automatischen Papierzuführung zu Verzögerungen kommt, überprüfen Sie die Position der Papierführungen (siehe Beschreibung in Abschnitt 2.5 der vorliegenden Betriebsanleitung). Sollte die Papierzuführung weiterhin verzögert erfolgen, könnte das Problem durch die zu falzende Papierart verursacht werden. Ein zu eng eingestellter Retarder wäre ebenfalls als Ursache denkbar. Beim Falzen von beschichtetem Papier oder von Hochglanzpapier muss unter Umständen der Druck des Papierstapels gegen das Zuführungsrad erhöht werden. Die Spannung der Zuführungstisch-Hebefeder ist werksseitig auf optimale Leistung eingestellt. Sie kann jedoch vom Benutzer entsprechend den jeweiligen Anforderungen eingestellt werden. Der Einstellungshebel für den Druck des Zuführungstisches befindet sich an der Gehäuseinnenseite des 1611 unter dem Zuführungstisch und über dem zweiten Falztisch (siehe Abbildung 3). Wenn Sie den Hebel nach oben schieben, erhöht sich der Zuführungsdruck. 3.3 Manuelle Zuführung Das Modell 1611 kann einzelne Blätter oder Mehrfachsätze mit bis zu 5 Blättern #20 Bond (einzeln nacheinander) manuell falzen. Richten Sie zu diesem Zweck die Maschine wie in Abschnitt 2 beschrieben ein. Legen Sie das Papier bei leerem Zuführungstisch in die manuelle Zuführung ein, bis das Papier anstößt. Drücken Sie dann die Taste „Run/Stop“ und lassen Sie sie wieder los. 3.4 Falzen von gehefteten Mehrfachsätzen Das Modell 1611 kann geheftete Mehrfachsätze mit bis zu 5 Blättern #20 Bond manuell falzen (siehe Beschreibung in Abschnitt 3.3). Achtung: Um Papierstaus oder die Beschädigung der Rollen zu vermeiden, sollten Sie die Heftklammer immer parallel zu den Falzrollen anbringen und das Papier mit der gehefteten Kante zuerst einführen. Achten Sie außerdem darauf, dass keine losen Heftklammern vorhanden sind, und platzieren Sie die Heftklammern nicht zu dicht am Blattrand (weniger als 8 mm). 4 Wartung 4.1 Reinigen der Falzrollen Im normalen Betrieb lagern sich auf den Falzrollen Papierstaub, Tinte, Toner und andere Materialien, die die Leistung der Maschine beeinträchtigen, ab. Irgendwann führen diese Ablagerungen zu Problemen, die sich in Form von zerknittertem oder verschmutztem Papier, nicht durchgeführten Falzungen oder Papierstaus äußern. Dann ist es an der Zeit, die Rollen zu reinigen. Gehen Sie folgendermaßen vor, um die Rollen freizulegen: Abb. 11 20 1. Ziehen Sie das Netzkabel aus der Steckdose. 2. Bauen Sie die beiden Falztische ab. 3. Entfernen Sie die zwei Kreuzschlitzschrauben in der oberen Abdeckung und nehmen Sie die obere Abdeckung ab. Reinigen Sie die freigelegten Rollen, indem Sie Martin Yale Rollenreinigungs- und -pflegemittel auf ein sauberes Tuch geben und damit über die Rollen wischen, bis sämtliche Verschmutzungen beseitigt sind. Drehen Sie die Rollen beim Abwischen, um sicherzustellen, dass die gesamte Rollenoberfläche gereinigt wird. Sie können zum Reinigen auch eine milde Lösung aus Wasser und Seife verwenden. Achten Sie darauf, dass keine Reinigungslösung in die Lagerflächen gelangt. Wenn die Rollen glasig oder glänzend werden, muss ihnen unter Umständen mit einem leicht schmirgelnden, nicht-metallischen Scheuerpad wieder ein stumpfes Aussehen verliehen werden. Verwenden Sie keinesfalls Scheuerpads aus Metall, Steinwolle oder Sandpapier, da die Späne und der körnige Abrieb die Rollen und die Lagerflächen beschädigen. 4.2 Beseitigen von Papierstaus Gehen Sie folgendermaßen vor, um einen Papierstau zu beseitigen: 1. Unterbrechen Sie die Stromzufuhr zur Falzmaschine. 2. Nehmen Sie den ersten und den zweiten Falztisch ab. 3. Entfernen Sie das eingeklemmte Papier an allen zugänglichen Stellen. Es kann entweder über den Falztischeinschub oder das Austragsband herausgezogen werden. Wenn sich der Papierstau nicht wie oben beschrieben beseitigen lässt, führen Sie die nachstehenden Schritte durch: 1. Führen Sie einen großen Schlitzschraubendreher in die Papierstau-Beseitigungsöffnung in der vorderen Abdeckung ein und drehen Sie die Rollen. 2. Bewegen Sie den Schraubendreher in jede Richtung, während Sie versuchen, das freigelegte Papier herauszuziehen, um den Papierstau zu beseitigen. 4.3 Reinigen des Zuführungsrads Ebenso wie die Verschmutzung der Falzrollen führt auch die Verschmutzung des Zuführungsrads zu einer Verschlechterung der Geräteleistung. Reinigen Sie bei ungleichmäßiger Zuführung nur die äußere Oberfläche des Zuführungsrads mit einem sauberen, trockenen Tuch und Alkohol oder einer milden Lösung aus Wasser und Seife. Achten Sie darauf, dass keine Reinigungslösung in die Lagerflächen gelangt. Verwenden Sie zur Reinigung des Zuführungsrads NICHT das Martin Yale Rollenreinigungs- und -pflegemittel oder andere Reiniger auf Lösungsmittelbasis, da sie den Gummi beschädigen. 4.4 Ölen Das Modell 1611 besitzt 10 ölimprägnierte Bronzelager: 2 für jede der vier Gummifalzrollen und 2 für die Zuführungswelle. Außer bei extremer Beanspruchung ist das Ölen dieser Bronzelager im Allgemeinen NICHT erforderlich. Tragen Sie im Bedarfsfall einen einzigen Tropfen leichtes Maschinenöl auf jedes Ende der vorstehend genannten Wellen auf, an dem das Bronzelager und die Welle zusammentreffen. Geben Sie KEINESFALLS zu viel Öl auf die Bronzelager, da ansonsten die Gefahr besteht, dass das Öl auf das Papier übertragen wird. Um alle 10 Bronzelager freizulegen, entfernen Sie die beiden Falztische und die obere Abdeckung wie in Abschnitt 4.2 „Beseitigen von Papierstaus“ beschrieben. D 1611 FEHLERBEHEBUNG 5 Fehlerbehebung 5.1 Maschine lässt sich nicht einschalten 5.2 5.3 5.4 5.5 Papier wird nicht zugeführt Schiefe Falze Tintenflecken auf dem Papier Zerknittertes Papier Sicherung wurde ausgelöst Wenn während des Falzvorgangs ein Papierstau aufgetreten ist, schalten Sie die Maschine für ca. 10 Minuten aus, damit der Thermoschutzschalter abkühlen und den Stromkreis wieder schließen kann. WARNUNG! Nach dem Abkühlen startet der Motor automatisch. Schalten Sie die Maschine zum Abkühlen immer aus, um einen automatischen Start zu verhindern. Tote Steckdose Schließen Sie die Maschine an eine funktionierende Steckdose an. Fehlfunktion in der Elektrik Lassen Sie die Maschine von einem qualifizierten Techniker nachsehen und reparieren. Papierführungen sind zu eng eingestellt Stellen Sie die Papierführungen so ein, dass sich das Papier ungehindert bewegen kann. Lesen Sie in Abschnitt 2.5 nach. Zuführungsrad ist verschmutzt Reinigen Sie das Zuführungsrad wie in Abschnitt 4.3 beschrieben. Statische Elektrizität hat sich aufgebaut Fächern Sie das Papier auf oder rütteln Sie es, um den Stapel aufzulockern. Sie können auch Martin Yale Antistatikspray verwenden. Sprühen Sie das Spray großzügig auf Papierkanten, Zuführungstische, Falztische und Ausgaberampe. Retarder ist verschlissen Ersetzen Sie den Retarder. Papier wellt sich Manchmal wellt sich das Papier, wodurch die automatische Zuführung erschwert wird. Dies ist besonders häufig bei Papier der Fall, das gerade aus einem Laserdrucker kommt. Stapeln Sie das Papier und legen Sie für mehrere Stunden einen großen, schweren Gegenstand, z. B. ein großes Buch, auf den Papierstapel, damit die gewellten Blätter wieder glatt werden. Zu viel seitliches Spiel des Papiers Stellen Sie die Papierführungen neu ein, um ein zu großes seitliches Spiel des Papiers zwischen den Führungen zu beseitigen. Lesen Sie in Abschnitt 2.5 nach. Keine Schräglaufeinstellung der Papierführungen Stellen Sie den Schräglauf wie in Abschnitt 2.7 beschrieben ein. Das Papier muss den Rollen gerade zugeführt werden, da ansonsten schiefe Falze entstehen. Tinte ist nicht trocken Lassen Sie die Tinte vor dem Falzen länger trocknen. Einige Tinten trocknen nicht, sondern werden nur fest (fühlen sich trocken an). Aufgrund der Reibungszuführung stellen Sie unter Umständen einen Fleck auf der führenden Kante des Papiers fest. Zu viel Toner auf Fotokopien Überprüfen Sie das Kopiergerät. Schräglauf ist nicht eingestellt Stellen Sie den Schräglauf wie in Abschnitt 2.7 beschrieben ein. Das Papier muss den Rollen gerade zugeführt werden, da ansonsten schiefe Falze entstehen. Papierführungen zu eng Stellen Sie die Papierführungen so ein, dass sich die Blätter ungehindert zwischen den Führungen bewegen können, ohne dass jedoch das seitliche Spiel zu groß ist. Lesen Sie in Abschnitt 2.5 nach. Verschmutzte Rollen Reinigen Sie die Rollen wie in Abschnitt 4.1 beschrieben. SPEZIFIKATIONEN ENTSORGUNG Spezifikationen Funktionell Papiergewicht Papierbreite Papierlänge Aufnahmekapazität Zuführungstisch Geschwindigkeit Falzarten Geheftete Dokumente 16# bis 28# Bond-Papier (60 g bis 105 g) mind. 121 mm (4.75“) bis max. 216 mm (8.5“) mind. 127 mm (5“) bis max. 356 mm (14“) 150 Blatt 20# 9.000 Blätter pro Stunde 216 mm x 280 mm (8,5“ x 11“) Brief, Halb, Z, Doppelt, Parallel, Broschüre und Church max. fünf Blätter 20#, manuelle Zuführung Physisch Abmessungen Gewicht der Maschine Versandgewicht 523 mm (20.6“) breit x 361 mm (14.2“) tief x 437 mm (17.2“) hoch 17,2 kg (38 lbs.) 19,5 kg (43 lbs.) Elektrisch Stromversorgung 115 V AC, 1,3 A, mit Überhitzungsschutz 230 V AC, 0,7 A, mit Überhitzungsschutz 21 ENTSORGUNG DER MASCHINE: Entsorgen Sie die Maschine am Ende ihrer Lebensdauer stets umweltgerecht. Geben Sie keine Teile der Maschine oder der Verpackung in den Hausmüll. 1611 22 1611 Konformitätserklärung Certi c a t e o f C o n fo r m it y Attestation de Conformité Certi c a d o d e C o n fo r m id a d Tischfalzmaschine Bezeichnung der Maschine: Type of machine: Description de la machine: Descripcion de la máquina: Desktop Folder Plieuse pour Buraux Plegadora de Sobremesa Modell / Model / Modèle / Modelo: martin yale 1611 Typ / Type / Type / Tipo: 701 Artikel-Nr. / item number / numéro d‘article / número de la pieza: 701101-701199 Baujahr / year of manufacture / année de production / año de producción: siehe Typenschild / see name plate / voir plaque d‘identi c / mirar a tio nla placa de identi c a c ió n Hiermit wird bestätigt, dass vorgenanntes Produkt den Anforderungen der Niederspannungs-Richtlinie 2006/95/EG sowie der EMV-Richtlinie 2004/108/EG einschließlich allen bis heute veröffentlichten Änderungen bzw. Nachträgen entspricht. Das vorgenannte Produkt entspricht folgenden Normen bzw. Richtlinien: We do hereby certify that the above mentioned product meets the requirements set forth in EEC-Low-Voltage-Directive 2006/95 and EMC 2004/108/EEC including all changes and addendums to date thereto. The above mentioned product meets the following standards and guidelines: Nous Vous Con rm que ons le produit cité ci-dessus correspond aux directives de basse tension 2006/95/CEE ainsi qu’ à la directive CEM 2004/108/CEE, ci-inclus toutes les modi ca ainsi tions que tous les suppléments publiés jusqu’à ce jour. Le produit mentionné correspond aux normes citées ci-après: Con rm quea los m osproductos arriba citados cumplen las exigencias de las directivas de baja tensión 2006/95/CEE y CEM 2004/108/CEE, incluidas todas las modi ca publicadas cione s hasta la fecha. Los productos citados corresponden con las siguientes normas: EN EN EN EN EN EN EN 60950-1:2006+A11:2009 61000-3-2:2006+A1:2009+A2:2009 61000-3-3:2008 55014-1:2006+A1:2009 55014-2:1997+A1:2001+A2:2008 55022:2006+A1:2007 55024:1998+A1:2001+A2:2003 CE-Bevollmächtigter / authorized person of CE / personne autorisée de la CE / persona autorizada por CE: Udo Lang; Bergheimer Straße 6-12; D-88672 Markdorf / Germany 2010/10 ppa. K. Grundmann Leiter Technik Head of Technical Dpt. Responsable Dép. Technique Jefe del Departamento Técnico Postfach / p.o.box 1420 D-88672 Markdorf / Germany 23 International Network Headquarters USA MARTIN YALE Industries 251 Wedcor Avenue Wabash, IN 46992 www.martinyale.com ☏ +1 / 260 563-0641 fax +1 / 260 563-4575 [email protected] Germany MARTIN YALE INTERNATIONAL GmbH Bergheimer Straße 6-12 88677 Markdorf / Bodensee www.martinyale.de, www.intimus.com ☏ +49 / (0) 7544 60-0 fax +49 / (0) 7544 60-248 [email protected] MARTIN YALE Africa S & B House, 7 Loveday Street Marshall Town, Johannesburg P. O. BOX 1291, Houghton 2041 www.martinyale.co.za ☏ +27 / (0) 11 838 72 81 MARTIN YALE International Unit C 2 The Fleming Centre, Fleming Way Crawley, West Sussex, RH10 9NN www.intimus.co.uk ☏ +44 / (0) 1293 44 1900 MARTIN YALE International S.A.R.L. 40 Avenue Lingenfeld 77200 Torcy www.martinyale.fr ☏ +33 / (1) 70 00 69 00 MARTIN YALE Ibérica S.L. C/Maestrat, n° 26 Pol. Indus. Les Salines 08880 Cubelles (Barcelona) www.martinyale.es ☏ +34 / 9 02 22 31 31 Martin Yale Italia srl Via A. Manzoni, 37 20052 Monza (MI) www.martinyale.it ☏ +39 / 335 618 4924 Sweden MARTIN YALE Nordic Rotebergsvägen 1 S-192 78 Sollentuna www.martinyale.se ☏ +46 / 8 556 165 20 fax +46 / 8 748 02 85 [email protected] P.R. China MARTIN YALE Beijing Room 2003 D Building Guojiang No 2 Dong Sanhuan Bei Lu Chaoyang District, Beijing 100027 www.martinyale.com.cn ☏ +86 / (0) 10 84 47 10 70 Branch Offices United Kingdom France Spain Italy fax +27 / (0) 11 838 73 22 [email protected] fax +44 / (0) 1293 61 11 55 [email protected] fax +33 / (1) 70 00 69 24 [email protected] fax +34 / 9 02 22 31 32 [email protected] fax +39 / 039 689 3124 [email protected] fax +86 / (0) 10 84 47 10 75 [email protected] Dieses Papier ist aus 100 % Altpapier ohne optische Aufheller hergestellt This paper made from 100 % unbleached recycled paper Papier recyclable à 100 % M-S027921-1 2 1/28/11 South Africa


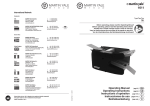
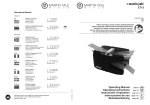


![SlideMate Operator Manual - B813310009 [DE]](http://vs1.manualzilla.com/store/data/006728225_1-1dca18d1ab5fcf359a11b8955c394b6d-150x150.png)