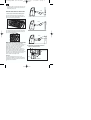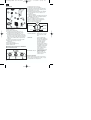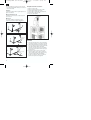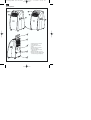
1
MKA 2000 M Artikel-Nr.: 2360020 Portable Air Conditioner Ident-Nr.: 01014 Komponenten / Ersatzteile Position Artikel-Nr. Beschreibung Position Artikel-Nr. Beschreibung 14 236002001014 KNOB FOR TIMER 40 236002001040 EXHAUST PIPE Ø125mm 17 236002001017 UP FAN BLADE 41 236002001041 WATER PIPE FOR PUMP 20 236002001020 FAN BLADE FOR H-D 43 236002001043 DRAINAGE PIPE 29 236002001029 WATER TRAY 51 236002001051 PUMP MOTOR 30 236002001030 RUBBER PLUG 52 236002001052 UP MOTOR 31 236002001031 WATER STOPPER 62 236002001062 POWER CORD 38 236002001038 ROUND WINDOW CONNECTOR 89 236002001089 ACTIVE CARBON FILTER 39 236002001039 COVER 90 236002001090 CASTER Komponenten / Ersatzteile Position Artikel-Nr. Beschreibung 901 236002001901 Lüftungsgitter 902 236002001902 control unit 903 236002001903 foam Anleitung MKA 3501 E SPK 1 18.02.2005 7:18 Uhr Seite 1 ® Bedienungsanleitung Klimagerät Operating Instructions Air Conditioner Mode d’emploi Climatiseur Gebruiksaanwijzing Klimatiseringstoestel Istruzioni per l’uso Climatizzatore Instrukcja obsługi Klimatyzator Art.-Nr.: 23.600.20 I.-Nr.: 01014 MKA 2000M Art.-Nr.: 23.601.75 I.-Nr.: 01012 MKA 3000M Art.-Nr.: 23.600.50 I.-Nr.: 01014 MKA 3501E Anleitung MKA 3501 E SPK 1 18.02.2005 7:18 Uhr Seite 2 D Gerätebeschreibung MKA 2000M - MKA 3000 M MKA 3501E ST RT LO HI AUTO COOL FAN HEAT TIMER POWER TEMP. UP TEMP. DOWN SPEED MODE TIMER ON/OFF 5 6 7 8 9 2 1 Luftaustrittsgitter 2 Bedienteil 3 Tragegriff 4 Laufrollen 5 Luftansaugfilter 6 Lufteinlass 7 Öffnung für Anschlussstutzen Abluftschlauch 8 Netzkabelaufhängung 9 Gummistöpsel für Kondenswasserablauf (im Gerät) Anleitung MKA 3501 E SPK 1 18.02.2005 7:18 Uhr Seite 3 D * Bitte lesen die Anleitung sorgfältig vor Inbetriebnahme des Geräts und bewahren Sie diese Unterlagen gut auf. Mit dem Kauf dieses transportablen Klimagerätes haben Sie einen guten Kauf getätigt. Das Gerät ist sehr professionell konstruiert und bietet ein Maximum an Komfort für viele Jahre, vorausgesetzt es wird gemäß der Betriebsanleitung verwendet. Lesen Sie also die Anleitung sorgfältig durch und bewahren Sie diese für späteres Nachschlagen gut auf. Entfeuchtungsleistung Ventilatorgeschwindigkeit Zeitschaltuhr Thermostat Maße (BxTxH) Nettogewicht 31,2 l/Tag 2 1-12 Std. 18 - 32°C 40 x 37,7 x 75 cm 31 kg Hinweis: Verbrauchswerte wurden bei 27°C Raumtemperatur und 60% Luftfeuchtigkeit ermittelt. Wichtige Sicherheitshinweise Vor dem Gebrauch Vermeidung von Unfällen 1. Stellen Sie das transportable Gerät stets auf einen stabilen Untergrund. 2. Schließen Sie das Gerät an der richtigen Steckdose an. 3. Schließen Sie den Abluftschlauch am Klimagerät an. Technische Daten MKA 2000 M Menge Kühlmittel Kühlleistung Netzspannung Leistungsaufnahme/Strom 440 g 6.000 BTU/h 1510 Kcal/Std 1758 Watt 230 V ~ 50 Hz 530 W/2,38 A Luftdurchsatz max. Raumgröße Entfeuchtungsleistung Ventilatorgeschwindigkeit Zeitschaltuhr 440 cbm/Std. 55 m3 21,6 l/Tag 2 1-8 Std. Thermostat Maße (BxTxH) Nettogewicht MKA 3501 E Menge Kühlmittel Kühlleistung Netzspannung Leistungsaufnahme/Strom Luftdurchsatz max. Raumgröße 18 - 32°C 40 x 37,7 x 75 cm 27 kg 480 g 12.000 BTU/h 3024 Kcal/Std 3529 Watt 230 V ~ 50 Hz 850 W/4,2 A 520 cbm/Std. 110 m3 Vergewissern Sie sich, dass der elektrische Anschluss richtig ist. Vergewissern Sie sich, dass das Gerät gemäß der Betriebsanleitung richtig installiert ist. Junge, ältere und behinderte Menschen sind sich oft nicht der möglichen Gefahren bewusst, die bei der Benützung elektrischer Geräte auftreten können. Deshalb sollte das Gerät niemals ohne Aufsicht dieser Personen betrieben werden. Verwenden Sie dieses Gerät niemals in der Nähe von Badewannen, Duschen oder Waschbecken. Keine Gegenstände auf die Luftschlitze legen. Mindestabstand zur Wand beträgt 50 cm. Ziehen Sie Vorhänge oder Gardinen an den Fenstern während der grössten Sonneneinstrahlung zu oder stellen Sie die Jallousien entsprechend ein. Halten Sie den Luftfilter sauber. Unter normalen Bedingungen sollte der Filter jeden Monat gereinigt werden. Da der Luftfilter auch kleine Staubteilchen zurückhält, kann es unter Umständen notwendig sein, den Filter auch öfters zu reinigen. Das Gerät darf auf keinen Fall ohne Filter betrieben werden. Bei Beginn stellen Sie die Ventilatorgeschwindigkeit auf hohe Stufe und das Thermostat auf die größte Kühlung ein. Später dann auf NIEDRIGE KÜHLUNG stellen und das THERMOSTAT auf die gewünschte Temperatur einstellen. Weitere Hinweise: Verwenden Sie kein Verlängerungskabel oder einen Zusatzstecker, an dem noch ein anderes Gerät mit diesem Klimagerät angesteckt ist. Bei Kühlfunktion muss die warme Abluft über den Schlauch nach aussen geleitet werden. Eine Öffnung in der Wand oder im Fenster ist für das mitgelieferte Abluft-Set erforderlich. Ziehen Sie immer nach Gebrauch oder bei In3 Anleitung MKA 3501 E SPK 1 18.02.2005 7:18 Uhr Seite 4 D standhaltungsarbeiten den Netzstecker. Vermeiden Sie den Kontakt des Gerätes mit Chemikalien. Wartungs- und Instandhaltungsarbeiten dürfen nur durch einen Elektro-bzw. Kältefachbetrieb durchgeführt werden. Zubehör 15 11 Low Fan; High Fan; Low Cool; High Cool und Off-Funktion 7. Timer-Regler 1-8 Stunden einstellbar; Mit dem Timer-Regler kann die Anlage Ein/Aus geschaltet werden. Off = Anlage ausgeschaltet Low Fan = Ventilator läuft langsam High Fan = Ventilator läuft schnell Low Cool = weniger Kühlung High Cool = mehr Kühlung 3 4 1 2 12 14 THERMOSTAT TIMER SPEED OFF ON OFF 1 2 8 13 3 7 6 16 18 5 6 11 Abluft-Anschlussstutzen 12 Durchführungsring 13 Abluftschlauch 14 Schaumstoff (wird bei Abluftaustritt durch das offene Fenster eingesetzt) 15 Schaumstoff (wird bei Abluftaustritt durch das offene Fenster in den noch offenen Bereich des Fensters eingesetzt. Es soll wenn möglich keine zusätzliche warme Luft von aussen in den Raum gelangen). 16 Abdeckkappe für Fenster - Mauerdurchführung 17 Auffangbehälter für Kondenswasser 18 Wasserablaufschlauch 19 Fernbedienung (MKA 3501 E) 20 Aktivkohlefilter Beschreibung der Betriebselemente MKA 2000 M / MKA 3000 M 7 OFF LOWFan FAN Low Cool HIGHHigh COOL 20 4 SPEED Off 19 17 5 Cool LOWLow COOL High HIGHFan FAN Inbetriebnahme des Gerätes NETZSTECKER Netzstecker in die Netzsteckdose stecken STARTEN Timer-Regler auf ON stellen. Das Gerät startet dann automatisch. Wenn die Temperatur über 23°C ist, beginnt die Kühlfunktion automatisch. Wenn jedoch die Temperatur unter 23°C liegt, läuft nur der Ventilator. Das Gerät läuft bis es abgeschaltet wird. Drehen Sie den Timer-Regler auf “OFF” und das Gerät schaltet sich sofort aus. ABSCHALTEN 1. Netzspannungsanzeige 2. Ventilator-Betriebsanzeige 3. Kühlen-Betriebsanzeige 4. Kondenswassertank “Voll” - Anzeige 5. Thermostat (+18°C bis +32°C) 6. Kühl- und Ventilatorschalter 4 Temperatur einstellen Stellen Sie das Thermostat nach Ihren Bedürfnissen ein. Im Uhrzeigersinn wird eine niedrigere Solltemperatur eingestellt. Anleitung MKA 3501 E SPK 1 18.02.2005 7:18 Uhr Seite 5 D Zeitschaltuhr (Timer) einstellen Stellen Sie die Zeitschaltuhr nach Ihren Bedürfnissen (1-8h) ein. Nach Ablauf der eingestellten Zeit schaltet das Gerät automatisch ab. Beschreibung der Betriebselemente MKA 3501 E 1. 2. 3. 4. 5. 6. 7. 8. 9. 10. 11. 12. 13. 14. 15. 16. 17. LED „Temperatur Einstellung“ LED „Raumtemperatur“ LED „Ventilator langsam“ LED „Ventilator schnell“ LED „Automatikfunktion eingestellt“ LED „Kühlfunktion eingestellt“ LED „Lüfterfunktion eingestellt“ nicht belegt LED „Zeitschaltuhr betätigt“ LED „Kompressor läuft“ Wahlschalter „Wärmer“ Wahlschalter „Kühler“ Wahlschalter „Ventilatorgeschwindigkeit“ Wahlschalter „Funktion“ Schalter für „Zeitschaltuhr“ Ein-/Ausschalter LCD Anzeigefeld 1 ST 2 3 4 RT LO HI 5 6 7 8 9 10 AUTO COOL FAN HEAT TIMER COMP. 17 TEMP. UP TEMP. DOWN SPEED MODE TIMER ON/OFF 13 14 15 16 11 12 Gerät Ein- und Ausschalten Drücken Sie den Ein-/Ausschalter (ON/OFF). Das Gerät startet automatisch. Ist die Umgebungstemperatur: Höher als 23°C arbeitet das Gerät in der Kühlfunktion Zwischen 20°C und 23°C arbeitet das Gerät in der Lüfterfunktion. Entsprechend der Funktion in der das Gerät arbeitet, leuchten die LED´s (s. Bedienfeld). Hinweis: Die LED „Kompressor läuft“ (COMP.) leuchtet nur wenn der Kompressor auch tatsächlich läuft. Das LCD Anzeigefeld zeigt die aktuelle Raumtemperatur an. Um das Gerät auszuschalten, drücken Sie nochmals den Ein-/Ausschalter. Funktion auswählen Drücken Sie den Wahlschalter „Funktion“ (MODE) in der Reihenfolge „Automatik“, „Kühlen“, „Lüfter“. Die der gewählten Funktion entsprechende LED leuchtet (s. Bedienfeld). Soll-Temperatur einstellen Drücken Sie den Wahlschalter „Wärmer“ (TEMP.UP) oder „Kühler“ (TEMP.DOWN) um die von Ihnen gewünschte Solltemperatur einzustellen. Beim Drücken des Wahlschalters „Wärmer“ oder „Kühler“ wird im LCD Anzeigefeld die von Ihnen gewünschte Solltemperatur angezeigt. Ansonsten zeigt das LCD Anzeigefeld immer die aktuelle Raumtemperatur an. Das Gerät ist in der Kühlfunktion auf 24°C eingestellt. Ventilatorgeschwindigkeit auswählen Drücken Sie den Wahlschalter „Ventilatorgeschwindigkeit“ (SPEED) um die gewünschte Ventilatorgeschwindigkeit einzustellen. Die der gewählten Funktion entsprechende LED leuchtet (s. Bedienfeld). Ist das Gerät in „Automatikfunktion“ (AUTO) wird die Ventilatorgeschwindigkeit abhängig von der Raumtemperatur automatisch vom Gerät ausgewählt. Die entsprechende LED leuchtet. Der Wahlschalter „Ventilatorgeschwindigkeit“ (SPEED) ist deaktiviert. Zeitschaltuhr einstellen Drücken Sie den Schalter für „Zeitschaltuhr“ (TIMER) um die gewünschte Betriebsdauer (1 – 12 h) festzulegen. Die LED „Zeitschaltuhr betätigt“ (TIMER) leuchtet. Ist die Zeitschaltuhr eingestellt, schaltet das Gerät automatisch ab. Beim Drücken des Schalters „Zeitschaltuhr“ wird im LCD Anzeigefeld die von Ihnen eingestellte Zeit angezeigt. Ist die Zeitschaltuhr nicht eingeschaltet, läuft das Gerät ständig. Drücken Sie den Schalter für „Zeitschaltuhr“ (TIMER) ohne dass eine der anderen Funktionen eingeschaltet ist, können Sie die Einschaltzeit des Geräts festlegen. Steht z.B. die Zeitschaltuhr auf „2“ schaltet das Gerät nach Ablauf von 2 Stunden automatisch ein. Alle Funktionen können auch mit der mitgelieferten Fernbedienung eingestellt werden. Die Fernbedienung benötigt 2 Stück MICRO (AAA) Batterien. Um den Kompressor zu schonen, läuft er erst nach 3 Minuten nach dem Anschalten an. Das gleiche gilt beim Ausschalten. Das Kühlsystem schaltet sich aus, wenn die Zimmertemperatur niedriger als der eingestellte Wert am Thermostat ist. Die Luftumwälzung 5 Anleitung MKA 3501 E SPK 1 18.02.2005 7:18 Uhr Seite 6 D Ventilation läuft wie eingestellt weiter. Wenn die Raumtemperatur wieder ansteigt, schaltet sich die Kühlung wieder ein. richtig EINSTELLUNG DER LUFTRICHTUNG 1. Justierung der horizontalen Lüftungsgitter: Die horizontale Richtung der Luftströmung wird durch die horizontalen Lüftungsgitter bestimmt. Sie müssen per Hand eingestellt werden. richtig 2. Justierung der vertikalen Lüftungsgitter: Die vertikale Richtung der Luftströmung wird durch die vertikalen Lüftungsgitter bestimmt. Sie müssen per Hand eingestellt werden. falsch MONTAGE DES ABLUFTSCHLAUCHES Verwenden Sie nur den mitgelieferten Abluftschlauch. Die Länge des Abluftschlauches kann von 300 mm bis 1500 mm variiert werden. Die beste Kühlleistung erhalten Sie mit der kürzesten Abluftschlauchlänge. Knicke oder starke Krümmungen des Abluft-schlauches sollten vermieden werden, damit die Abluft ungehindert nach aussen strömen kann. Wenn dies nicht beachtet wird, kann es zu Überhitzungen des ganzen Gerätes kommen und das Gerät abschalten. Das Gerät könnte dadurch beschädigt werden. Warnung! Die Länge des Abluftschlauches ist auf die technische Spezifikation des Gerätes abgestimmt. Verlängern Sie nicht den Schlauch, dies könnte zu Störungen am Gerät führen. 6 A) Montage des Abluftschlauches durchs offene Fenster Schaumstoff (15) Schaumstoff (14) 50 cm Anleitung MKA 3501 E SPK 1 18.02.2005 7:18 Uhr Seite 7 D Verwenden Sie die Schaumstoffteile und kürzen Sie sie wenn nötig. Führen Sie den Abluftschlauch durch die Schaumstofföffnung ins Freie. Sichern Sie das Fenster, sodass der Schaumstoff zuverlässig hält. Hinweis: Treffen Sie Vorkehrungen gegen unbefugtes Eindringen durch das Fenster. unterbrochen. B) Montage des Abluftschlauches durch die Fensterscheibe oder Wand In diesem Fall entleeren Sie den Behälter wie unten beschrieben: 50 cm Hinweis MKA 3501 E Wenn der Kondenswasserbehälter voll ist, schalten Kompressor und Ventilatormotor ab. Die LED „COMP.” blinkt. 1. Ziehen Sie den Netzstecker. 2. Schieben Sie den Behälter (1) unter die Ablaßschraube (2) 3. Schrauben Sie die Ablaßschraube (2) ab 4. Entfernen Sie den Stopsel (3) 5. Das Kondenswasser läuft in die Auffangschale. 6. Nachdem der Kondenswasserbehälter komplett entleert ist, montieren Sie Stopfen (3) und Ablassschraube (2) wieder. 7. Das Gerät kann wieder in Betrieb genommen werden. Wand oder Fensterscheibe Durchführungsring Kondenswasserloch ca. 130 mm Ø Loch in die Scheibe oder Wand schneiden bzw. bohren. Durchführungsring von aussen nach innen stecken und befestigen. Abluftschlauch in den Durchführungsring stecken. Bei Nichtbetrieb der Anlage die Abdeckkappe von aussen auf den Durchführungsring stecken. C) Ablassen des Kondenswassers mit Wassertank D) Ablassen des Kondenswassers mit Kondenswasserschlauch DAS GESAMTE KONDENSWASSER MUSS VOR AUSSERBETRIEBNAHME ODER UMSTELLUNG ABGELASSEN WERDEN: 1. Ziehen Sie den Netzstecker. 2. Ablaufschraube (2) abschrauben 3. Entfernen Sie den Stopfen (3) 4. Kondenswasserschlauch aufstecken und mit Schelle sichern 5. Der Ablaufschlauch kann mit einem ø18mm Schlauch verlängert werden. Verwenden Sie dazu ein passendes Verbindungsstück. Ablassen des Kondenswassers mit Tank. Hinweis MKA 2000 M / MKA 3000 M Wenn der Kondenswasserbehälter voll ist, leuchtet die „Kondenswasserbehälter voll“ Anzeige auf und der Kompressor schaltet sich automatisch ab, nur der Ventilatormotor läuft weiter. Die Kühlfunktion wird 7 Anleitung MKA 3501 E SPK 1 18.02.2005 7:18 Uhr Seite 8 D Hinweis: Der Ablaufschlauch muss leicht abfallend nach außen verlaufen. MKA 2000 M / MKA 3000 M Die „Kondenswasserbehälter voll“ Anzeige ist außer Betrieb. MKA 3501 E Die LED „COMP.“ Blinkt nicht, da der Behälter nicht mehr voll werden kann. Kohlefilter erneuern 1. Filterrahmen entnehmen 2. Filterhalter von Filterrahmen entfernen 3. Kohlefilter aus der Tüte nehmen 4. Kohlefilter in Filterrahmen legen 5. Filter mit Filterhalter befestigen 6. Filterrahmen einschieben Kondenswasserschlauch Instandhaltung Kondenswasserschlauch reduzierter Wasserschlauch Ø 18 mm 8 1. Ziehen Sie zuerst den Netzstecker, um einen Stromschlag oder Feuergefahren zu vermeiden. 2. Verwenden Sie nur milde Reinigungsmittel und ein weiches Tuch, um den Filter und das Gehäuse zu reinigen. Verwenden Sie niemals aggressive Mittel, Benzin, Alkohol oder Verdünnung zur Reinigung. Setzen Sie den Filter erst wieder ein, wenn er trocken ist. 3. Am Ende der Saison bitte den Wasserbehälter entleeren, rollen Sie das Netzkabel auf, reinigen den Filter und das Gehäuse, setzen den Filter, wenn trocken, wieder ein und packen das Gerät am besten in den Originalkarton zur Lagerung. Legen Sie keine schweren Gegenstände auf das Gerät. Anleitung MKA 3501 E SPK 1 18.02.2005 7:18 Uhr Seite 9 D Technische Daten MKA 3000 M Menge Kühlmittel Kühlleistung Netzspannung Leistungsaufnahme/Strom Luftdurchsatz max. Raumgröße Entfeuchtungsleistung Ventilatorgeschwindigkeit Zeitschaltuhr Thermostat Maße (BxTxH) Nettogewicht 470 g 10.000 BTU/h 2520 Kcal/Std 2930 Watt 230 V ~ 50 Hz 790 W/3,9 A 470 cbm/Std. 85 m3 26,4 l/Tag 2 1-8 Std. 18 - 32°C 40 x 37,7 x 75 cm 29 kg PROBLEMLÖSUNG Wenn das Gerät richtig betrieben wird, dürften keine Störungen auftreten. Bei Störungen prüfen Sie die folgenden Möglichkeiten, bevor Sie den Kundendienst verständigen. Problem Möglicher Grund Gerät arbeitet nicht Ist der Netzstecker richtig eingesteckt? Ist Spannung an der Netzsteckdose? Ist die Raumtemperatur unter der eingestellten Temperatur? Ist der Kondenswasserbehälter voll? Gerät kühlt nicht zufriedenstellend Ist direkte Sonneneinstrahlung im Raum? Sind Türen und Fenster geöffnet? Sind sehr viele Menschen im Raum? Entsteht durch ein Gerät viel Wärme im Raum? Schwache Lüftungsleistung Ist der Luftschlauch verstopft? Ist der Filter verschmutzt? Ist der Lufteinlass bzw. Luftauslass blockiert? Gerät ist zu laut Ist das Gerät uneben/schräg aufgestellt? Kompressor läuft nicht Ist der Kondenswasserbehälter voll? Ist der Kompressor überhitzt und der Überhitzungsschutz hat den Kompressor abgeschaltet, warten Sie bis der Kompressor wieder abgekühlt ist. Nach längerem Gebrauch sollte das Gerät durch eine Fachfirma überprüft werden. 9 Anleitung MKA 3501 E SPK 1 18.02.2005 7:18 Uhr Seite 10 GB Description of device MKA 2000M - MKS 3000M MKA 3501E ST RT LO HI AUTO COOL FAN HEAT TIMER POWER TEMP. UP TEMP. DOWN SPEED MODE TIMER ON/OFF 5 6 7 8 9 10 1 Air outlet grille 2 Control device 3 Handle 4 Castors 5 Air inlet filter 6 Air inlet 7 Opening for connection fittings for the exhaust air hose 8 Mains cable wraparound brackets 9 Rubber bung for condensation water drain (in the device) Anleitung MKA 3501 E SPK 1 18.02.2005 7:18 Uhr Seite 11 GB * Please read the Operating Instructions thoroughly before using the device for the first time and then keep them in a safe place. Important note: Consumption values were measured at a room temperature of 27°C humidity of 60%. In purchasing this portable air conditioner you have chosen a high quality product. The device is of a highly professional design and will offer you maximum comfort for many years, as long as you use it in accordance with the Operating Instructions. You should therefore read the Instructions thoroughly and keep them in a safe place for future reference. Important safety instructions Prevention of accidents Before using 1. Always place the portable device on a firm footing. 2. Connect the device to the correct socket outlet. 3. Connect the exhaust air hose to the air conditioner. Technical data MKA 2000 M Quantity of coolant Cooling capacity Voltage Power rating/current Max. air throughput Room size Dehumidifying capacity Fan speed Timer Thermostat Dimensions (WxDxH) Net weight MKA 3501 E Quantity of coolant Cooling capacity Voltage Power rating/current Max. air throughput Room size Dehumidifying capacity Fan speed Timer Thermostat Dimensions (WxDxH) Net weight 440 g 6000 BTU/h 1510 Kcal/h 1758 Watt 230 V ~ 50 Hz 530 W/2.38 A 440 cbm/h 55 m3 21.6 l/day 2 1 - 8 hours 18 – 32°C 40 x 37.7 x 75 cm 27 kg 480 g 12000 BTU/h 3024 Kcal/h 3529 Watt 230 V ~ 50 Hz 850 W/4.2 A 520 cbm/h 110 m3 31.2 l/day 2 1 - 12 hours 18 – 32°C 40 x 37.7 x 75 cm 31 kg Check that the electrical connection is correct. Check that the device is installed correctly in accordance with the Operating Instructions. Keep all children and any persons under the influence of medication or alcohol well away from the device. Never use the device in the vicinity of bath tubs, showers or wash basins. Never place any objects on the air vents. Never place closer than 50 cm to the wall. Close the window curtains whenever there is strong sunlight or adjust the venetian blinds accordingly. Keep the air filter clean. Under normal conditions the filter requires cleaning once a month. Since the air filter also catches very small particles of dust, it may be necessary to clean it more frequently. Never operate the device without the air filter. When you start the device, set the fan to a high speed and the thermostat to the highest cooling setting. Reduce to LOW COOLING later and set the THERMOSTAT to the desired temperature. Additional instructions: Never use an extension cable or an auxiliary plug to which another device is connected in addition to the air conditioner. In the cooling function the warm exhaust air must be transferred outside by the hose. An opening in the wall or window is therefore essential for the exhaust air set included in delivery. Always pull out the mains plug after use or before starting any maintenance work. Ensure that the device never comes into contact with any chemicals. All work of maintenance or repair must be performed by an electrician or cooling system specialist only. 11 Anleitung MKA 3501 E SPK 1 18.02.2005 7:18 Uhr Seite 12 GB Accessories 15 11 12 14 13 16 18 1. Voltage display 2. Fan status indicator 3. Cooling status indicator 4. Condensation water tank “Full” indicator 5. Thermostat (+18°C to +32°C) 6. Cooling and fan switch Low Fan; High Fan; Low Cool; High Cool and Off function 7. Timer controller 1 - 8 hours can be set. The timer controller can be used to switch the system on/off. Off = System switched off Low Fan = Fan runs at slow speed High Fan = Fan runs at high speed Low Cool = Low cooling High Cool = High cooling SPEED Off 19 17 20 11 Exhaust air connection fittings 12 Bushing ring 13 Exhaust air hose 14 Foam material (Used for exhaust air outlet through the window.) 15 Foam material (Used for exhaust air outlet through the open window and placed in the open section of the window. As far as possible, no additional warm air should come into the room from outside.) 16 Cap for the hole in the window/wall 17 Collection tank for the condensation water 18 Drainage water hose 19 Remote control (MKA 3501 E) 20 Activated carbon filter Description of the control elements MKA 2000 M / MKA 3000 M 3 4 1 2 THERMOSTAT TIMER SPEED OFF ON OFF 2 3 12 6 5 High Fan HIGH FAN Using the device for the first time MAINS PLUG Plug the mains plug into the mains socket outlet. START Set the timer controller to ON. The device starts up automatically. Whenever the temperature exceeds 23°C the cooling function starts automatically. Whenever the temperature is below 23°C, only the fan will run. The device keeps running until it is switched off. SWITCHING OFF Turn the timer controller to “OFF” and the device switches off immediately. 1 7 6 Cool LOWLow COOL LOWFan FAN Low Setting the temperature Set the thermostat according to your requirements. Turning in a clockwise direction reduces the set-point temperature. 8 5 OFF Cool HIGHHigh COOL 4 7 Setting the timer Set the timer according to your requirements (1 – 8 hours). The device switches off automatically once the set time has elapsed. Anleitung MKA 3501 E SPK 1 18.02.2005 7:18 Uhr Seite 13 GB Description of the control elements MKA 3501 E 1 ST 2 3 4 RT LO HI 5 6 7 8 9 10 AUTO COOL FAN HEAT TIMER COMP. 17 TEMP. UP TEMP. DOWN SPEED MODE TIMER ON/OFF 13 14 15 16 11 12 (TEMP.DOWN) to set your desired set-point temperature. If you press the “Warmer” or “Cooler” selector, the LCD indicator panel will show your desired set-point temperature. Otherwise the LCD indicator panel always shows the current room temperature. The device’s cooling mode is set to 24°C. 1. LED “Set temperature” 2. LED “Room temperature” 3. LED “Fan: Slow” 4. LED “Fan: Fast” 5. LED “Automatic mode set” 6. LED “Cool mode set” 7. LED “Fan mode set” 8. Not assigned 9. LED “Timer actuated” 10. LED “Compressor on” 11. “Warmer” selector 12. “Cooler” selector 13. “Fan speed” selector 14. “Mode” selector 15. “Timer” switch 16. On/off switch 17. LCD indicator panel Switching the device on and off Press the On/Off switch. The device starts up automatically. If the ambient temperature: is higher than 23°C the device will run in cooling mode; if it is between 20°C and 23°C the device will run in fan mode. The status of the device, or mode in which it is running, will be shown by the corresponding LEDs (see indicator panel). Note: The “Compressor on” LED (COMP) only lights up when the compressor is actually running. The LCD indicator panel shows the current room temperature. To switch the device off, press the On/Off switch again. Selecting the fan speed Press the “Fan speed” selector (SPEED) to set the desired fan speed. The LED for the mode lights up (see indicator panel). If the device is in “Automatic mode” (AUTO) the fan speed will be selected automatically by the device in dependency on the room temperature. The corresponding LED lights up. The “Fan speed” (SPEED) is deactivated. Setting the timer Press the switch for the “Timer” (TIMER) to set the desired operating time (1 - 12 h). The “Timer” (TIMER) LED lights up. If the timer is set, the device starts automatically. If you press the “Timer” switch, the time you have set will be shown in the LCD indicator panel. If the timer has not been switched on, the device will run continuously. If you press the switch for the “Timer” (TIMER) without any of the other modes being switched on you can set the time that the device is to start up. If, for example, the timer shows “2”, this means that the device will start up automatically in 2 hours time. All modes and functions can be set using the supplied remote control. The remote control requires two MICRO (AAA) batteries. In order to protect the compressor, it only starts up 3 minutes after the device starts up. The same applies when the device is switched off. The cooling system switches itself off whenever the room temperature is below the value set on the thermostat. The air circulation/ventilation fan continues to run as set. If the room temperature increases again, the cooling system switches on again. Selecting the mode Press the “Mode” selector (MODE) in the sequence “Automatic”, “Cool”, “Fan”. The LED for the selected mode lights up (see indicator panel). Setting the set-point temperature Press the “Warmer” selector (TEMP.UP) or “Cooler” 13 Anleitung MKA 3501 E SPK 1 18.02.2005 7:18 Uhr Seite 14 GB SETTING THE AIR FLOW DIRECTION 1. Adjusting the horizontal ventilation grille: The horizontal direction of the air flow is determined by the horizontal ventilation grille. It has to be adjusted by hand. Right Right 2. Adjusting the vertical ventilation grille: The vertical direction of the air flow is determined by the vertical ventilation grille. It has to be adjusted by hand. Wrong INSTALLING THE EXHAUST AIR HOSE Use only the supplied exhaust air hose. The length of the exhaust air hose can be varied from between 300 mm to 1500 mm. For the most effective cooling the hose should be as short as possible. Avoid kinks are excessive bends in the hose so that the exhaust air can be transferred out without hindrance. If you ignore this advice, the device as a whole may overheat and shut down. This could result in damage to the device. A) Installing the exhaust air hose through an open window Warning! The length of the exhaust air hose is matched to the technical specifications of the device. Never extend the hose as this could lead to malfunctions or faults on the device. Foam material (15) Foam material (14) 50 14 cm Anleitung MKA 3501 E SPK 1 18.02.2005 7:18 Uhr Seite 15 GB Use the foam parts and shorten them if required. Guide the exhaust air hose through the opening in the foam to the outside. Secure the window so that the foam is kept firmly in place. Note: Take appropriate precautions to prevent unauthorized entry through the window. B) Installation of the exhaust air hose through the window pane or the wall 50 cm the compressor switches off automatically. Only the fan motor continues to run. The cooling function stops. Note on MKA 3501 E When the condensation water tank is full the compressor and the fan motor shut down. The “COMP” LED flashes. Empty the tank as described below: 1. Pull out the mains plug. 2. Slide the tank (1) under the drainage screw (2). 3. Unscrew the drainage screw (2). 4. Remove the bung (3). 5. The condensation water drains out into the drip bowl. 6. Once the condensation water has been completely emptied, fit the bung (3) and the drainage screw (2) back on again. 7. The device is then ready to be used again. Wall or window pane Condensation water hole Bushing ring Cut or drill a hole of approx. 130 mm diameter though the window pane or the wall. Insert the bushing ring from the outside to the inside and fasten. Feed the exhaust air hose through the bushing ring. When the system is not being used, fit the cap on the bushing ring on the outside. C) Draining off the condensation water with the water tank ALL OF THE CONDENSATION WATER MUST BE DRAINED OFF BEFORE YOU EVER RELOCATE OR STOP USING THE DEVICE: Draining off the condensation water with the tank. Note on MKA 2000 M / MKA 3000 M When the condensation water tank is full the “Condensation water tank full” indicator lights up and D) Draining off the condensation water with the condensation water hose 1. Pull out the mains plug. 2. Unscrew the drainage screw (2). 3. Remove the bung (3). 4. Fit the condensation water hose and secure with the clamp. 5. The drainage hose can be extended with a hose with a diameter of 18mm. If you do so, make sure you use a suitable connector. Note: The drainage hose must run to the outside with a 15 Anleitung MKA 3501 E SPK 1 18.02.2005 7:18 Uhr Seite 16 GB slight fall. MKA 2000 M / MKA 3000 M The “Condensation water tank full” is defective. MKA 3501 E The LED “COMP.” Does not flash because the tank cannot become full any more. Condensation water hose Condensation water hose Reduced water hose with a diameter of 18 mm Replacing the carbon filter 1. Take out the filter frame 2. Remove the filter fastener from the filter frame 3. Take the carbon filter out of the bag 4. Place the carbon filter in the filter frame 5. Fasten the filter with the filter fastener 6. Slide in the filter frame 16 Maintenance 1. Always pull out the mains plug first to avoid an electric shock or risk of fire. 2. Use only gentle cleaner and a soft cloth to clean the filter and the housing. Never use aggressive media, petrol, alcohol or thinner. Only fit the filter back in place when thoroughly dry. 3. At the end of the season, please empty the water tank, roll up the power cable, clean the filter and the housing, then fit the filter back in place when dry, and pack the device back in the original box for storage. Never place any heavy objects on the device. Anleitung MKA 3501 E SPK 1 18.02.2005 7:18 Uhr Seite 17 GB Technical data MKA 3000 M Quantity of coolant Cooling capacity Voltage Power rating/current Max. air throughput Room size Dehumidifying capacity Fan speed Timer Thermostat Dimensions (WxDxH) Net weight 470 g 10000 BTU/h 2520 Kcal/h 2930 Watt 230 V ~ 50 Hz 790 W/3,9 A 470 cbm/h 85 m3 26,4 l/day 2 1 - 8 hours 18 – 32°C 40 x 37.7 x 75 cm 29 kg TROUBLESHOOTING If the device is operated properly you should experience no problems with malfunctions or faults. In the event of any malfunctions or faults, please check the following before you contact your customer services. Problem Possible cause Device does not work Is the mains plug properly connected? Is there a voltage supply at the mains socket outlet? Is the room temperature below the set-point temperature? Is the condensation water tank full? Is the room exposed to direct sunlight? Are any doors and windows open? Are there a lot of people in the room? Is a device in the room generating a lot of heat? Is the air hose blocked? Is the filter soiled? Is the air inlet or air outlet blocked? Has the device been set up on an uneven surface/at an angle? Is the condensation water tank full? Is the compressor overheated and the overheating cutout has switched the compressor off? Wait until the compressor cools down. The device does not provide satisfactory cooling Weak ventilation performance The device is too loud The compressor does not work Have the device inspected by a specialist firm when you have used it for some time. 17 Anleitung MKA 3501 E SPK 1 18.02.2005 7:18 Uhr Seite 18 F Description de l’appareil MKA 2000M - MKA 3000M MKA 3501E ST RT LO HI AUTO COOL FAN HEAT TIMER POWER TEMP. UP TEMP. DOWN SPEED MODE TIMER ON/OFF 5 6 7 8 9 18 1 Grille d’échappement d’air 2 Module de commande 3 Poignée 4 Galets de roulement 5 Filtre d’aspiration d’air 6 Entrée d’air 7 Ouverture pour les tubulures de raccordement du tuyau d’air d’échappement 8 Suspension du câble réseau 9 Capuchon en caoutchouc de la sortie de l’eau de condensation (dans l’appareil) Anleitung MKA 3501 E SPK 1 18.02.2005 7:18 Uhr Seite 19 F * Veuillez lire ces instructions minutieusement avant la mise en service de l’appareil et bien conserver cette documentation. Remarque : Les valeurs de consommation ont été mesurées à une température ambiante de 27°C et avec 60% d’humidité de l’air. En achetant ce climatiseur transportable, vous avez fait un bon choix. Cet appareil est très professionnel et offre un maximum de confort pour de nombreuses années, à condition qu’il soit employé conformément à ce mode d’emploi. Veuillez donc lire minutieusement ces instructions et gardez-les bien afin de pouvoir les utiliser plus tard. Eviter les accidents Consignes de sécurité importantes Avant l’utilisation 1. Positionnez toujours l’appareil transportable sur une base stable. 2. Connectez l’appareil à une prise correcte. 3. Raccordez le tuyau d’air d’échappement au climatiseur. Caractéristiques techniques MKA 2000 M Quantité de réfrigérant Puissance de refroidissement Tension du secteur Puissance absorbée/électricité Débit d’air maxi. Taille de la pièce Puissance de déshydratation Vitesse du ventilateur Minuterie Thermostat Dimensions (LaxPrxH) Poids net MKA 3501 E Quantité de réfrigérant Puissance de refroidissement Tension du secteur Puissance absorbée/électricité Débit d’air maxi. Taille de la pièce Puissance de déshydratation Vitesse du ventilateur Minuterie Thermostat Dimensions (LaxPrxH) Poids net 440 g 6.000 BTU/h 1510 Kcal/h 1758 Watts 230 V ~ 50 Hz 530 W/2,38 A 440 cbm/h 55 m3 21,6 l/jour 2 1-8 h. 18 – 32°C 40 x 37,7 x 75 cm 27 kg 480 g 12.000 BTU/h 3024 Kcal/h 3529 Watts 230 V ~ 50 Hz 850 W/4,2 A 520 cbm/h. 110 m3 31,2 l/jour 2 1-12 h. 18 – 32°C 40 x 37,7 x 75 cm 31 kg Assurez-vous que le raccordement électrique est correct. Assurez-vous que l’appareil est installé conformément au mode d’emploi. Les enfants et personnes sous prise de médicaments ou sous l’effet de l’alcool doivent être maintenues à l’écart de l’appareil. N’utilisez jamais cet appareil à proximité de baignoires, douches ou lavabos. Ne placez aucun objet sur les canaux de ventilation. Distance minimale par rapport au mir : 50 cm. Fermez les rideaux des fenêtres pendant les plus forts rayons de soleil ou régler les stores en fonction. Maintenez le filtre d’air propre. A des conditions normales, le filtre doit être nettoyé chaque mois. Puisque le filtre d’air bloque également les petites particules de poussière, il peut être, le cas échéant, nécessaire de le nettoyer également plus souvent. L’appareil ne doit en aucun cas être mis en service sans filtre. Au début, réglez la vitesse du ventilateur en position haute et le thermostat sur le plus fort refroidissement. Ensuite mettez-le REFROIDISSEMENT LEGER et réglez le THERMOSTAT à la température désirée. Autres consignes : N’utilisez aucun câble de rallonge ni aucune prise supplémentaire à laquelle un autre appareil serait connecté en sus de ce climatiseur. Lors de la fonction de refroidissement, l’air d’échappement chaud doit être dirigé vers l’extérieur via le tuyau flexible. Une ouverture dans le mur ou la fenêtre est nécessaire pour le kit d’air d’échappement livré avec la fourniture. Tirez toujours la fiche de contact après utilisation ou pendant les travaux de réparation. Evitez le contact de l’appareil avec des produits chimiques. Seul une entreprise spécialisée en électricité ou en technique du froid est autorisée à réaliser les travaux de maintenance et d’entretien. 19 Anleitung MKA 3501 E SPK 1 18.02.2005 7:18 Uhr Seite 20 F Accessoires 15 11 12 14 13 16 18 1. Affichage de la tension réseau 2. Affichage de service du ventilateur 3. Témoin de fonctionnement de refroidissement 4. Affichage du réservoir d’eau condensée „plein“ 5. Thermostat (+18°C à +32°C) 6. Interrupteur de refroidissement et du ventilateur Low Fan; High Fan; Low Cool; High Cool et fonction Off 7. Régulateur du timer 1-8 heures réglables ; L’installation peut être mise EN/HORS circuit à l’aide du régulateur du timer. OFF = installation hors circuit Low Fan = ventilateur fonctionne lentement High Fan = ventilateur fonctionne rapidement Low Cool = moins de refroidissement High Cool = plus de refroidissement SPEED Off 19 17 OFF 20 11 Tubulures de raccordement de l’air d’échappement 12 Bague de traversée 13 Tuyau d’air d’échappement 14 Caoutchouc mousse (est employé en cas d’échappement d’air par la fenêtre ouverte) 15 Caoutchouc mousse (est employé en cas d’échappement d’air par la fenêtre ouverte dans la zone encore ouverte de la fenêtre). Il faut éviter dans la mesure du possible que de l’air chaud ne s’immisce en sus dans la salle en provenant de l’extérieur. 16 Capuchon pour la fenêtre - le passage de mur 17 Réservoir de réception pour l’eau de condensation 18 Tuyau de sortie d’eau 19 Télécommande (MKA 3501 E) 20 Filtre à charbon actif Cool LOWLow COOL FICHE DE CONTACT Mettez la fiche de contact dans la prise de courant fixer DEMARRER régler le régulateur du timer sur ON. L’appareil se met alors automatiquement en marche. Lorsque la température dépasse 23°C, la fonction de refroidissement commence automatiquement. Lorsque cependant, la température reste inférieure à 23°C, seul le ventilateur est en circuit. L’appareil fonctionne jusqu’à ce qu’il soit mis hors circuit. Tournez le régulateur du timer sur « OFF » et l’appareil se met tout de suite hors circuit. MKA 2000 M / MKA 3000 M 3 4 MISE HORS CIRCUIT THERMOSTAT TIMER SPEED OFF ON OFF 1 2 8 3 7 6 5 20 6 5 High Fan HIGH FAN Mise en service de l’appareil Description des organes de commande 1 2 LOWFan FAN Low Cool HIGHHigh COOL 4 7 Régler la température Réglez le thermostat en fonction de vos besoins. Dans le sens des aiguilles d’une montre, on règle une température de consigne basse. Anleitung MKA 3501 E SPK 1 18.02.2005 7:18 Uhr Seite 21 F Régler la minuterie (timer) Réglez la minuterie en fonction de vos besoins (1 à 8 h). Après écoulement du temps réglé, l’appareil se détecte automatiquement. Sélectionner la fonction Appuyez sur le sélecteur „fonction“ (MODE) dans l’ordre suivant : „automatique“, „refroidir“, „ventilateur“. Le voyant correspondant à la fonction sélectionnée s’allume (cf. tableau de commande). Description des organes de commande MKA 3501 E 1 ST 2 3 4 RT LO HI 5 6 7 8 9 10 AUTO COOL FAN HEAT TIMER COMP. 17 TEMP. UP TEMP. DOWN SPEED MODE TIMER ON/OFF 13 14 15 16 11 12 1. Voyant „réglage de la température“ 2. Voyant „température ambiante“ 3. Voyant „ventilateur lentement“ 4. Voyant „ventilateur rapidement“ 5. Voyant „fonctionnement automatique réglé“ 6. Voyant „fonction de refroidissement réglé“ 7. Voyant „fonction de ventilateur réglé“ 8. non affecté 9. Voyant „minuterie actionnée“ 10. Voyant „compresseur fonctionne“ 11. Sélecteur „plus chaud“ 12. Sélecteur „plus froid“ 13. Sélecteur „vitesse du ventilateur“ 14. Sélecteur „fonction“ 15. Interrupteur de la „minuterie“ 16. Interrupteur Marche/Arrêt 17. Champ d’affichage à cristaux liquides Mettre l’appareil en et hors service Appuyez sur l’interrupteur Marche / Arrêt (ON/OFF) L’appareil démarre automatiquement Si la température ambiante : est supérieure à 23°C, l’appareil fonctionne en mode de refroidissement se trouve entre 20°C et 23°C, l’appareil fonctionne en mode ventilateur. Conformément au mode dans lequel l’appareil fonctionne, les voyants s’allument (cf. tableau de commande). Remarque : le voyant „compresseur fonctionne” (COMP.) s’allume uniquement lorsque le compresseur fonctionne aussi. Le champ d’affichage à cristaux liquides indique la température ambiante actuelle. Pour mettre l’appareil hors circuit, appuyez encore une fois sur l’interrupteur Marche / Arrêt. Régler la température de consigne Appuyez sur le sélecteur „plus chaud“ (TEMP.UP) ou „plus froid“ (TEMP.DOWN)afin de régler la température de consigne désirée. En appuyant sur le sélecteur „plus chaud“ ou „plus froid“, la température de consigne désirée s’affiche dans le champ d’affichage à cristaux liquides. Sinon, le champ d’affichage à cristaux liquides indique toujours la température ambiante actuelle. L’appareil est réglé sur 24°C en mode de refroidissement. Sélectionner la vitesse du ventilateur Appuyez sur le sélecteur „vitesse du ventilateur“ (SPEED) afin de régler la vitesse de ventilateur désirée. Le voyant correspondant à la fonction sélectionnée s’allume (cf. tableau de commande). Si l’appareil est en „fonctionnement automatique“ (AUTO), la vitesse du ventilateur est sélectionnée automatiquement par l’appareil en fonction de la température ambiante. Le voyant correspondant s’allume. Le sélecteur „vitesse du ventilateur” (SPEED) est désactivé. Régler la minuterie Appuyez sur l’interrupteur de la „minuterie“ (TIMER) afin de déterminer la durée de service désirée (1 - 12 h). Le voyant „minuterie actionnée“ (TIMER) s’allume. Lorsque la minuterie est réglée, l’appareil se met automatiquement hors circuit. En appuyant sur l’interrupteur „minuterie“, le temps que vous avez réglé s’affiche dans le champ d’affichage à cristaux liquides. Si la minuterie n’est pas en circuit, l’appareil fonctionne constamment. Appuyez sur l’interrupteur de la „minuterie“ (TIMER) sans qu’une autre fonction ne soit en circuit et vous pourrez déterminer le moment de mise en circuit de l’appareil. Si p. ex. la minuterie est sur „2“, l’appareil se met automatiquement en circuit au bout de 2 heures. Toutes les fonctions peuvent également se régler via la télécommande fournie. La télécommande a besoin de 2 piles MICRO (AAA). Afin de ménager le compresseur, il se met en circuit que 3 minutes après la mise en circuit de l’appareil. Même chose à la mise hors service. Le système de refroidissement se met hors circuit lorsque la température ambiante est inférieure à celle réglé au thermostat. La circulation de l’air (ventilation) continue à fonctionner comme elle est 21 Anleitung MKA 3501 E SPK 1 18.02.2005 7:18 Uhr Seite 22 F réglée. Lorsque la température ambiante remonte, le système de refroidissement se met à nouveau en marche. des dérangements de l’appareil. REGLAGE DU SENS DE L’AIR Correct 1. Ajustement des grilles de ventilation horizontale : Correct le sens horizontal du courant d’air est déterminé par les grilles de ventilation horizontales. Elles doivent être réglées à la main. 2. Ajustage des grilles de ventilation verticales : Incorrect le sens vertical du courant de l’air est déterminé par les grilles de ventilation verticales. Elles doivent être réglées à la main. MONTAGE DU TUYAU D’AIR D’ECHAPPEMENT Utilisez exclusivement le tuyau d’air d’échappement fourni. La longueur du tuyau d’air d’échappement peut varier de 300 mm à 1500 mm. Le tuyau le plus court est celui qui donne la meilleure puissance de refroidissement. Des plis ou courbes prononcées du tuyau d’air d’échappement doivent être évités afin que l’air d’échappement puisse sortir sans obstacle vers l’extérieur. Si ce point n’est pas respecté, cela peut entraîner une surchauffe de l’appareil complet et mettre l’appareil hors circuit. Ce qui pourrait endommager l’appareil. Avertissement ! La longueur du tuyau d’air d’échappement est adaptée à la spécification technique de l’appareil. Ne rallongez pas le tuyau flexible, cela peut entraîner 22 A) Montage du tuyau d’air d’échappement par la fenêtre ouverte Caoutchouc mousse (15) Caoutchouc mousse (14) 50 cm Anleitung MKA 3501 E SPK 1 18.02.2005 7:18 Uhr Seite 23 F Utilisez les pièces de matière plastique et raccourcissez-les en cas de besoin. Dirigez le tuyau d’air d’échappement jusqu’à l’air libre en le passant dans l’ouverture en mousse. Bloquez la fenêtre pour que le caoutchouc mousse tienne bien. Remarque : Prenez des mesures pour éviter que personne ne pénètre sans autorisation par la fenêtre. B) Montage du tuyau d’air d’échappement par la vitre ouverte ou le mur 50 cm Remarque MKA 2000 M / MKA 3000 M Lorsque le réservoir d’eau de condensation est plein, l’affichage „réservoir d’eau de condensation plein“ s’allume et le compresseur se met automatiquement hors circuit, seul le moteur du ventilateur continue à tourner. La fonction de refroidissement s’interrompt. Remarque MKA 3501 E Lorsque le réservoir d’eau de condensation est plein, le compresseur et le moteur du ventilateur se mettent hors circuit. Le voyant „COMP“ clignote. Dans ce cas, les réservoirs se vident comme décrit plus bas : 1. Tirez la fiche de contact. 2. Poussez le réservoir (1) sous le bouchon de vidange (2) 3. Dévissez le bouchon de vidange (2) 4. Retirer le bouchon (3) 5. L’eau de condensation coule dans la poche de vidange. 6. Une fois le réservoir d’eau de condensation complètement vidé, remontez le bouchon (3) et le bouchon fileté de décharge (2). 7. On peut remettre l’appareil en service. Mur ou vitre Bague de traversée Trou d’eau de condensation Découpez ou percez un trou d’env. 130 mm de Ø dans la vitre ou le mur. Placez la bague de traversée de l’extérieur vers l’intérieur et fixez-la. Enfichez le tuyau d’air d’échappement dans la bague de traversée. Lorsque l’installation n’est pas en service, enfichez le capot de recouvrement de l’extérieur sur la bague de traversée. C) Vidange de l’eau de condensation avec le réservoir d’eau D) Vidange de l’eau de condensation avec le tuyau d’eau de condensation TOUTE L’EAU CONDENSEE DOIT ETRE DEGAGEE AVANT LA MISE HORS CIRCUIT OU LE DEPLACEMENT DE L’APPAREIL : 1. Tirez la fiche de contact. 2. Dévisser le bouchon fileté d’écoulement (2) 3. Retirer le bouchon (3) 4. Enfichez le tuyau d’eau de condensation et bloquez à l’aide de la bride de fixation Vidange de l’eau de condensation avec réservoir. 23 Anleitung MKA 3501 E SPK 1 18.02.2005 7:18 Uhr Seite 24 F 5. Le tuyau flexible d’écoulement peut être rallongé avec un tuyau de Ø18mm. Utilisez pour ce faire un raccord convenable. Remarque : Le tuyau d’écoulement doit être guidé légèrement en pente vers l’extérieur. MKA 2000 M / MKA 3000 M L’affichage “réservoir d’eau de condensation plein“ est hors circuit. Remplacez le filtre à charbon 1. Retirez le cadre de filtre 2. Retirez le support de filtre du cadre de filtre 3. Prenez le filtre à charbon de la poche 4. Placez le filtre à charbon dans le cadre du filtre 5. Fixez le filtre au support de filtre 6. Poussez le cadre de filtre MKA 3501 E Les voyants “COMP.” ne clignotent pas car le récipient ne peut plus se remplir complètement. Tuyau d’eau de condensation Entretien Tuyau d’eau de condensation Tuyau d’eau réduit Ø 18 mm 24 1. Tirez tout d’abord la fiche de contact afin d’éviter une décharge électrique ou tout risque d’incendie. 2. Utilisez exclusivement des produits de nettoyage doux et un chiffon doux pour le nettoyage du filtre et du carter. N’utilisez jamais de produits agressifs, ni d’essence, d’alcools ou de diluants pour le nettoyage. Remettez le filtre en place que lorsqu’il est sec. 3. A la fin de la saison, videz le réservoir d’eau, enroulez le câble secteur, nettoyez le filtre et le carter, remettez le filtre en place lorsqu’il est sec, et remettez l’appareil dans don emballage d’origine, de préférence, afin de le stocker. Ne placez aucun objet lourd sur l’appareil. Anleitung MKA 3501 E SPK 1 18.02.2005 7:18 Uhr Seite 25 F Caractéristiques techniques MKA 3000 M Quantité de réfrigérant Puissance de refroidissement Tension du secteur Puissance absorbée/électricité Débit d’air maxi. Taille de la pièce Puissance de déshydratation Vitesse du ventilateur Minuterie Thermostat Dimensions (LaxPrxH) Poids net 470 g 10.000 BTU/h 2520 Kcal/h 2930 Watts 230 V ~ 50 Hz 790 W/3,9 A 470 cbm/h 85 m3 26,4 l/jour 2 1-8 h. 18 – 32°C 40 x 37,7 x 75 cm 29 kg RÉSOLUTION DE PROBLÈMES Lorsque l’appareil est correctement exploité, aucun dérangement ne devrait se produire. En cas de dérangement, vérifiez les possibilités suivantes avant d’appeler le service après-vente. Problème Raison probable L'appareil ne fonctionne pas La fiche de contact est-elle correctement enfichée ? La prise de courant est-elle sous tension ? La température ambiante est-elle inférieure à celle réglée ? Le réservoir d'eau de condensation est-il plein ? La salle est-elle exposée directement au soleil ? Les portes et fenêtres sont-elles ouvertes ? Y-a-t-il beaucoup de personnes dans la salle ? Un appareil peut générer de la chaleur dans la pièce. Le tuyau flexible à air est-il bouché ? Le filtre est-il encrassé ? L'entrée ou la sortie d’air est-elle bloquée ? L'appareil est-il placé sur une surface accidentée/penchée ? Le réservoir d'eau de condensation est-il plein ? Si le compresseur surchauffe et que la protection contre la surchauffe met le compresseur hors circuit, attendez jusqu'à ce que compresseur soit à nouveau refroidi. L'appareil ne refroidit pas suffisamment Puissance d'aération faible L'appareil est trop fort Le compresseur ne marche pas Après une longue période d'utilisation, l'appareil doit être contrôlé par une entreprise spécialisée. 25 Anleitung MKA 3501 E SPK 1 18.02.2005 7:18 Uhr Seite 26 NL Beschrijving van het toestel MKA 2000M - MKA 3000M MKA 3501E ST RT LO HI AUTO COOL FAN HEAT TIMER POWER TEMP. UP TEMP. DOWN SPEED MODE TIMER ON/OFF 5 6 7 8 9 26 1 Rooster voor verwijdering van lucht 2 Bedieningspaneel 3 Handvat 4 Loopwiel 5 Filter voor aanzuigen van de lucht 6 Luchtingang 7 Opening voor aansluitingsbuis gebruikte lucht 8 Ophanging voor netkabel 9 Rubberen stop voor afvoer van condenswater (in het toestel) Anleitung MKA 3501 E SPK 1 18.02.2005 7:18 Uhr Seite 27 NL * Lees de gebruiksaanwijzing zorgvuldig alvorens het toestel te gebruiken en bewaar dit document goed. Opmerking: Verbruikswaarden werden genoteerd bij een kamertemperatuur van 27°C en een luchtvochtigheid van 60%. U heeft verstandig gekocht met deze draagbare airconditioninginstallatie. Het toestel is zeer professioneel gebouwd en biedt u jarenlang maximaal comfort, op voorwaarde dat u het toestel volgens de gebruiksaanwijzing gebruikt. Lees deze gebruiksaanwijzing dus zorgvuldig en bewaar ze om later nog iets op te kunnen zoeken. Vermijden van ongevallen Belangrijke veiligheidsbepalingen Voor het gebruik 1. Zet het draagbare toestel altijd op een stabiele ondergrond. 2. Sluit het toestel op het juiste stopcontact aan. 3. Sluit de buis voor gebruikte lucht aan op het toestel. Technische gegevens MKA 2000 M Hoeveelheid koelmiddel Vermogen Netspanning Vermogensopname/Stroom Gebruik van lucht max. Grootte van de kamer Vermogen tot vochtonttrekking Snelheid van de ventilator Schakelklok Thermostaat Omvang (BxDxH) Netto gewicht MKA 3501 E Hoeveelheid koelmiddel Vermogen Netspanning Vermogensopname/Stroom Gebruik van lucht max. Grootte van de kamer Vermogen tot vochtonttrekking Snelheid van de ventilator Schakelklok Thermostaat Omvang (BxDxH) Netto gewicht 440 g 6.000 BTU/h 1510 Kcal/Sh 1758 Watt 230 V ~ 50 Hz 530 W/2,38 A 440 cbm/h 55 m3 21,6 l/dag 2 1-8 uur 18 – 32°C 40 x 37,7 x 75 cm 27 kg Verdere opmerkingen: 480 g 12.000 BTU/h 3024 Kcal/Std 3529 Watt 230 V ~ 50 Hz 850 W/4,2 A 520 cbm/Std. 110 m3 31,2 l/Tag 2 1-12 Std. 18 – 32°C 40 x 37,7 x 75 cm 31 kg Zorg ervoor dat de elektrische aansluiting de juiste is. Zorg ervoor dat het toestel geïnstalleerd is volgens de gebruiksaanwijzing. Kinderen en personen die onder invloed van geneesmiddelen of alcohol zijn moeten van het toestel verwijderd blijven. Gebruik dit toestel nooit in de buurt van badkuipen, douches of wastafels. Leg geen voorwerpen op de luchtspleten. De afstand tot de muur moet minstens 50 cm bedragen. Doe de gordijnen voor het raam dicht bij grote zonnestraling of doe de zonnewering dicht. Houd de luchtfilter schoon. In normale omstandigheden moet de filter elke maand schoongemaakt worden. De luchtfilter houdt echter ook kleine stofdeeltjes vast, dus het kan in bepaalde omstandigheden nodig zijn de filter vaker schoon te maken. Het toestel mag in geen geval gebruik worden zonder filter. Bij het begin zet u de snelheid van de ventilator op de hoogste stand en geeft de thermostaat de grootste koeling. Later kan u de stand op LAGE KOELING zetten en bij de THERMOSTAAT de temperatuur regelen. Gebruik geen verlengsnoer of stopcontact dat ook voor andere toestellen dan de airconditioninginstallatie gebruikt wordt. Bij de koelfunctie moet de warme gebruikte lucht via de buis naar buiten geleid worden. Voor de bijgeleverde set voor de gebruikte lucht is een opening in de muur of het raam nodig. Trek altijd de stekker uit het stopcontact na het gebruik of bij onderhoudswerkzaamheden. Vermijd contact tussen het toestel en chemische stoffen. Onderhoudswerkzaamheden mogen enkel uitgevoerd worden door een professioneel elektro- en koelingsinstallatiebedrijf. 27 Anleitung MKA 3501 E SPK 1 18.02.2005 7:18 Uhr Seite 28 NL Onderdelen 15 11 12 14 13 16 18 1. Aanduiding van de netspanning 2. Aanduiding van gebruik van ventilator 3. Aanduiding koelfunctie 4. Aanduiding „vol“ van de bak voor condenswater 5. Thermostaat (+18°C bis +32°C) 6. Koel- en ventilatorschakelaar Low Fan; High Fan; Low Cool; High Cool en Offfunctie 7. Timer-regeling 1-8 uur in te stellen, met de timer-regeling kan de installatie aan- en uitgeschakeld worden. Off = installatie uitgeschakeld Low Fan = ventilator draait traag High Fan = ventilator draait snel Low Cool = minder koeling High Cool = meer koeling SPEED Off 19 17 Beschrijving van de werkingselementen 3 4 1 2 Ingebruikname van het toestel NETSTEKKER Steek de stekker in het stopcontact. STARTEN Zet de timer-regeling op ON. Het toestel begint automatisch te werken. Wanneer de temperatuur boven 23°C komt, begint automatisch de koelfunctie te werken. Wanneer de temperatuur onder 23°C komt, draait enkel nog de ventilator. Het toestel werkt tot het uitgeschakeld wordt. TIMER OFF ON OFF 1 2 8 3 7 6 28 High Fan HIGH FAN Temperatuur instellen Stel de thermostaat in volgens uw behoeften. In wijzerszin stelt u een lagere temperatuur in. SPEED 6 Cool LOWLow COOL UITSCHAKELEN Zet de timer-regeling op OFF en het toestel wordt onmiddellijk uitgeschakeld. MKA 2000 M / MKA 3000 M 5 LOWFan FAN Low 20 11 Aansluitingspunt voor gebruikte lucht 12 Leidingsring 13 Buis voor gebruikte lucht 14 Schuimstof (wordt gebruikt bij verwijdering van de lucht door het open raam) 15 Schuimstof (wordt gebruikt bij verwijdering van de lucht door het open raam in het open gebied van het raam. Indien mogelijk mag er geen bijkomende warme lucht van buiten naar binnen in de ruimte komen.) 16 Afdekklep voor opening via het raam of de muur 17 Opvangbak voor condenswater 18 Buis voor waterafvoer 19 Afstandsbediening (MKA 3501 E) 20 Actieve koolfilter THERMOSTAT OFF Cool HIGHHigh COOL 5 4 7 Tijdschakelaar (Timer) instellen Stel de tijdschakelaar in volgens uw behoeften (1-8 uur). Na afloop van de ingestelde tijd, schakelt het toestel zichzelf automatisch uit. Anleitung MKA 3501 E SPK 1 18.02.2005 7:18 Uhr Seite 29 NL bedieningspaneel). Beschrijving van de werkingselementen MKA 3501 E 1 ST 2 3 4 RT LO HI 5 6 7 8 9 10 AUTO COOL FAN HEAT TIMER COMP. 17 TEMP. UP TEMP. DOWN SPEED MODE TIMER ON/OFF 13 14 15 16 11 12 1. LED „Temperatuur instelling“ 2. LED „Kamertemperatuur “ 3. LED „Ventilator traag“ 4. LED „Ventilator snel“ 5. LED „Automatische functie ingeschakeld“ 6. LED „Koelfunctie ingesteld“ 7. LED „Ventilatorfunctie ingesteld“ 8. geen informatie 9. LED „Tijdschakelaar in gebruik“ 10. LED „Compressor werkt“ 11. Keuzeschakelaar „Warmer“ 12. Keuzeschakelaar „Kouder“ 13. Keuzeschakelaar „Snelheid van de ventilator“ 14. Keuzeschakelaar „Functie“ 15. Schakelaar voor „Tijdschakelaar“ 16. Aan-/Uit-schakelaar 17. LCD aanduidingen Toestel in- en uitschakelen Druk op de Aan-/Uit-schakelaar (ON/OFF). Het toestel start automatisch. Is de omgevingstemperatuur Hoger dan 23°C, dan werkt het toestel in de koelfunctie. Tussen 20°C en 23°C, dan werkt het toestel in de ventilatorfunctie. De LED’s (zie bedieningspaneel) lichten op volgens de functie waarin het toestel werkt. Opmerking: De LED „Compressor werkt“ (COMP.) licht enkel op wanneer de compressor ook daadwerkelijk werkt. Het LCD-bedieningspaneel geeft de huidige temperatuur weer. Om het toestel uit te schakelen, drukt u nogmaals op de Aan-/Uit-schakelaar. Functie kiezen Druk op de keuzeschakelaar „Functie“ (MODE) in de volgorde „automatisch“, „koeling“ en „ventilator“. De LED van de gekozen functie licht op (zie Gewenste temperatuur instellen Druk op de keuzeschakelaar „warmer“(TEMP.UP) of „kouder“ (TEMP.DOWN) om de door u gewenste temperatuur in te stellen. Bij het drukken op de keuzeschakelaars “warmer” of “kouder” wordt de door u gekozen temperatuur weergegeven op het LCD-scherm. Anders geeft het scherm de huidige temperatuur in de kamer weer. Het toestel staat in de koelfunctie ingesteld op 24°C. Snelheid van de ventilator kiezen Druk op de keuzeschakelaar „snelheid van de ventilator“ (SPEED) om de gewenste snelheid in te stellen. De LED volgens de gekozen functie licht op (zie bedieningspaneel). Indien het toestel in de functie „automatisch“ (AUTO) staat, wordt de snelheid van de ventilator automatisch door het toestel geregeld volgens de temperatuur in de kamer. De overeenkomstige LED licht op. De keuzeschakelaar “snelheid van de ventilator” (SPEED) is gedeactiveerd. Tijdschakelaar instellen Druk op de schakelaar „tijdschakelaar“ (TIMER) om de gewenste duur (1-12 uur) in te stellen. Wanneer de tijdschakelaar ingesteld is, schakelt het toestel zichzelf automatisch uit. Wanneer u op de schakelaar “tijdschakelaar” drukt, wordt de door u gekozen tijd weergegeven op het LCD-scherm. Wanneer de tijdschakelaar niet ingeschakeld is, werkt het toestel de hele tijd. Wanneer u op de schakelaar „tijdschakelaar“ (TIMER) drukt zonder dat er een andere functie gekozen is, kunt u het begintijdstip van werking van het toestel instellen. Wanneer bijvoorbeeld de tijdschakelaar op “2” staat, begint het toestel automatisch te werken na 2 uur. Alle functies kunnen ook ingesteld worden met de bijgeleverde afstandsbediening. Voor de afstandsbediening heeft u 2 MICRO (AAA)batterijen nodig. Om de compressor te ontzien, begint deze pas 3 minuten na het inschakelen te werken. Hetzelfde geldt voor het uitzetten. Het koelsysteem schakelt zichzelf uit wanneer de kamertemperatuur lager ligt dan de ingestelde waarde op de thermostaat. De luchtcirculatie- en ventilatie loopt verder zoals ingesteld. Wanneer de kamertemperatuur opnieuw stijgt, begint de koeling weer te werken. 29 Anleitung MKA 3501 E SPK 1 18.02.2005 7:18 Uhr Seite 30 NL INSTELLING VAN DE LUCHTRICHTING 1. Ijken van de horizontale ventilatieroosters: Goed De horizontale richting van de luchtstroom wordt bepaald door de horizontale ventilatieroosters. Deze moeten met de hand ingesteld worden. Goed 2. Ijken van de verticale ventilatieroosters: De verticale richting van de luchtstroom wordt bepaald door de verticale ventilatieroosters. Deze moeten met de hand ingesteld worden. MONTAGE VAN DE BUIS VOOR GEBRUIKTE LUCHT Gebruik enkel de bijgeleverde buis voor gebruikte lucht. De lengte van de buis ligt tussen 300 mm en 1500 mm. U krijgt de beste koelprestatie met een zo kort mogelijke buis voor gebruikte lucht. Knikken of grote krommingen in de buis moeten vermeden worden, zodat de lucht ongehinderd naar buiten kan stromen. Wanneer u hier niet op let, kan het hele toestel oververhit raken en uitgeschakeld worden. Het toestel kan daardoor beschadigd worden. Fout A) Montage van de buis voor gebruikte lucht door het open raam Waarschuwing! De lengte van de buis voor gebruikte lucht is bepaald op de technische specificatie van het toestel. Verleng de buis niet, dat kan tot storingen van het toestel leiden. Schuimstof (15) Schuimstof (14) 50 30 cm Anleitung MKA 3501 E SPK 1 18.02.2005 7:18 Uhr Seite 31 NL Gebruik de schuimstofstukken en kort deze in als dat nodig is. Leid de buis voor gebruikte lucht door de schuimstofopening naar de open lucht. Beveilig het raam zodat het schuimstof goed vast zit. Tip: Neem voorzorgsmaatregelen tegen inbraak door het raam. B) Montage van de buis voor gebruikte lucht door het venster of de muur 50 cm is, licht de aanduiding „Opvangbak vol“ op en schakelt de compressor zichzelf automatisch uit, enkel de ventilator draait nog verder. De koelfunctie wordt onderbroken. Tip MKA 3501 E Wanneer de opvangbak voor het condenswater vol is, schakelen de compressor en de motor van de ventilator zichzelf uit. De LED“ COMP“ knippert. In dit geval maakt u de bak leeg zoals hier onder beschreven wordt: 1. Trek de stekker uit het stopcontact. 2. Schuif de bak (1) onder de schroef (2). 3. Schroef deze los (2). 4. Verwijder de stop (3). 5. Het condenswater loopt in een opvangschaal. 6. Nadat al het condenswater weggelopen is, monteert u de stop (3) en de schroef (2) opnieuw. 7. Het toestel kan weer gebruikt worden. Muur of venster Opening voor condenswater Leidingsring snijd of boor een gat van ca. 130 mm Ø in het venster of de muur stop de leidingsring van buiten naar binnen en maak deze vast stop de buis voor gebruikte lucht door de leidingsring Wanneer het toestel niet gebruikt wordt, dient u de afdekklep bovenaan op de leidingsring te draaien. C) Weglopen van condenswater met opvangbak AL HET CONDENSWATER MOET VOOR HET STOPZETTEN VAN HET TOESTEL OF VOOR EEN VERPLAATSING WEGGEVLOEID ZIJN: Weglopen van het condenswater met een opvangbak. D) Weglopen van condenswater met condenswaterbuis 1. Trek de stekker uit het stopcontact. 2. Schroef de schroef (2) los. 3. Verwijder de stop (3). 4. Bevestig de condenswaterbuis en maak deze vast met een klem. 5. De afvoerbuis kan ook met een Ø18mm buis verlengd worden. Daarvoor moet u het juiste verbindingsstuk gebruiken. Tip MKA 2000 M / MKA 3000 M Wanneer de opvangbak voor het condenswater vol 31 Anleitung MKA 3501 E SPK 1 18.02.2005 7:18 Uhr Seite 32 NL Tip: De afvoerbuis moet lichtjes naar beneden hellend geplaatst worden. 5. Maak de filter vast met de filterhouder. 6. Schuif de filterlijst op zijn plaats. MKA 2000 M / MKA 3000 M De aanduiding „bak voor condenswater vol“ is buiten werking. MKA 3501 E De LED „COMP.” knippert niet, aangezien de bak niet meer vol kan geraken. Condenswaterbuis Onderhoud Condenswaterbuis verkorte waterbuis Ø 18 mm Koolfilter vervangen 1. Verwijder de filterlijst. 2. Verwijder de filterhouder van de filterlijst. 3. Neem de koolfilter uit de zak. 4. Plaats de koolfilter in de filterlijst. 32 1. Trek eerst de stekker uit het stopcontact om stroomstoten of brandgevaar te vermijden. 2. Gebruik enkel zachte schoonmaakmiddelen en een zachte doek om de filter en het omhulsel schoon te maken. Gebruik nooit agressieve middelen, benzine, alcohol of een verdunning voor het schoonmaken. Plaats de filter pas terug op zijn plaats wanneer hij droog is. 3. Aan het einde van het seizoen moet u de waterbak leeg maken, de netkabel oprollen, de filter en het omhulsel schoonmaken, de filter wanneer hij droog is opnieuw plaatsen en het toestel best in de oorspronkelijke verpakking opbergen. Leg geen zware voorwerpen op het toestel. Anleitung MKA 3501 E SPK 1 18.02.2005 7:18 Uhr Seite 33 NL Technische gegevens MKA 3000 M Hoeveelheid koelmiddel Vermogen Netspanning Vermogensopname/Stroom Gebruik van lucht max. Grootte van de kamer Vermogen tot vochtonttrekking Snelheid van de ventilator Schakelklok Thermostaat Omvang (BxDxH) Netto gewicht 470 g 10.000 BTU/h 2520 Kcal/Sh 2930 Watt 230 V ~ 50 Hz 790 W/3,9 A 470 cbm/h 85 m3 26,4 l/dag 2 1-8 uur 18 – 32°C 40 x 37,7 x 75 cm 29 kg PROBLEEMOPLOSSING Wanneer het toestel juist gebruikt wordt, mogen er zich geen problemen voordoen. Bij storingen kunt u de volgende mogelijkheden nagaan, alvorens u de klantendienst contacteert. Probleem Mogelijke reden Toestel werkt niet Zit de stekker in het stopcontact? Werkt het stopcontact? Ligt de kamertemperatuur onder de ingestelde temperatuur? Is de bak voor condenswater vol? Is er direct zonlicht in de kamer? Zijn de ramen en deuren open? Zijn er heel veel personen in de kamer? Ontstaat er veel warmte in de kamer door een toestel? Is de buis verstopt? Is de filter vuil? Zijn de plaatsen waar de lucht binnen komt of buiten gaat geblokkeerd? Is het toestel schuin geïnstalleerd? Is de bak voor condenswater vol? Is de compressor oververhit en heeft de oververhittingsbescherming de compressor uitgeschakeld, wacht dan tot de compressor afgekoeld is. Toestel koelt niet voldoende Zwakke ventilatie Toestel is te luid Compressor werkt niet Na langdurig gebruik moet het toestel door een professioneel bedrijf nagekeken worden. 33 Anleitung MKA 3501 E SPK 1 18.02.2005 7:18 Uhr Seite 34 I Descrizione dell’apparecchio MKA 2000M - MKA 3000M MKA 3501E ST RT LO HI AUTO COOL FAN HEAT TIMER POWER TEMP. UP TEMP. DOWN SPEED MODE TIMER ON/OFF 5 6 7 8 9 34 1 Griglia di uscita aria 2 Elemento di regolazione 3 Maniglia 4 Rulli 5 Filtro di aspirazione dell’aria 6 Entrata dell’aria 7 Apertura per bocchettone di raccordo del tubo per l’aria estratta 8 Ganci per il cavo di alimentazione 9 Tappo in gomma per scarico di condensa (nell’apparecchio) Anleitung MKA 3501 E SPK 1 18.02.2005 7:18 Uhr Seite 35 I *Leggete attentamente le istruzioni prima di mettere in esercizio l’apparecchio e conservatele in luogo sicuro. Peso netto Con l’acquisto di questo climatizzatore mobile avete fatto una buona scelta Si tratta di un apparecchio progettato in modo professionale che offre a lungo un massimo di confort a condizione che venga usato secondo le istruzioni. Leggete attentamente le istruzioni e conservatele in un luogo sicuro per consultarle anche in seguito. Importanti avvertenze di sicurezza Prima dell’uso 1. Mettete sempre l’apparecchio trasportabile su una superficie stabile. 2. Collegate l’apparecchio alla giusta presa di corrente. 3. Collegate il tubo dell’aria di scarico al climatizzatore. Nota I valori di consumo sono stati accertati a temperatura ambiente di 27°C ed umidità dell’aria del 60%. Per evitare incidenti Caratteristiche tecniche MKA 2000 M Quantità di refrigerante Capacità di raffreddamento Tensione di rete Potenza assorbita/corrente Portata aria max. Dimensioni ambiente Capacità di deumidificazione Velocità del ventilatore Timer Termostato Dimensioni (larg.xprof.xalt.) Peso netto MKA 3501 E Quantità di refrigerante Capacità di raffreddamento Tensione di rete Potenza assorbita/corrente Portata aria max. Dimensioni ambiente Capacità di deumidificazione Velocità del ventilatore Timer Termostato Dimensioni (larg.xprof.xalt.) 440 g 6.000 BTU/h 1510 kcal/ora 1758 Watt 230 V ~ 50 Hz 530 W/2,38 A 440 cbm/ora 55 m3 21,6 l/giorno 2 1-8 ore 18 – 32°C 40 x 37,7 x 75 cm 27 kg 480 g 12.000 BTU/h 3024 kcal/ora 3529 Watt 230 V ~ 50 Hz 850 W/4,2 A 520 cbm/ora 110 m3 31.2 l/giorno 2 1-12 ore 18 – 32°C 40 x 37,7 x 75 cm 31 kg Assicuratevi che il collegamento elettrico sia corretto. Accertatevi che l’apparecchio sia installato correttamente secondo le istruzioni per l’uso. I bambini e le persone sotto l’influsso di medicinali o alcol devono essere tenuti lontani dall’apparecchio. Non utilizzate mai questo apparecchio vicino alla vasca da bagno, alla doccia o al lavandino. Non appoggiate oggetti sulle fessure di ventilazione. Distanza minima dalla parete 50 cm. Durante le ore di maggiore insolazione chiudete le tende davanti alle finestre oppure regolate le tapparelle in modo corrispondente. Tenete pulito il filtro dell’aria. In condizioni normali il filtro dovrebbe venire pulito ogni mese. Dato che il filtro dell’aria capta anche piccole particelle di polvere, può darsi che in determinate situazioni sia necessario pulire il filtro anche più spesso. L’apparecchio non deve essere usato in nessun caso senza filtro. All’inizio mettete la velocità del ventilatore ad un livello alto ed il termostato al massimo grado di raffreddamento. Impostate poi RAFFREDDAMENTO BASSO posizionate il termostato sulla temperatura desiderata. Ulteriori avvertenze Non usate un cavo di prolunga o una presa multipla alla quale sia collegato un altro apparecchio insieme a questo climatizzatore. Durante la funzione di raffreddamento l’aria calda di scarico deve essere convogliata verso l’esterno tramite il tubo flessibile. Per il kit fornito per l’aria di scarico è necessaria un’apertura nella parete o nella finestra. Dopo l’uso o in caso di lavori di manutenzione staccate sempre la spina dalla presa di corrente. Evitate il contatto dell’apparecchio con prodotti chimici. I lavori di manutenzione e di riparazione devono venire eseguiti soltanto da una ditta specializzata in impianti elettrici e climatizzatori. 35 Anleitung MKA 3501 E SPK 1 18.02.2005 7:18 Uhr Seite 36 I Accessori 15 11 12 14 13 16 18 19 1. Indicatore della tensione di rete 2. Indicatore operativo del ventilatore 3. Indicatore operativo di raffreddamento 4. Indicatore “pieno” per serbatoio condensa 5. Termostato (da +18°C a +32°C) 6. Selettore per raffreddamento e ventilazione Funzioni: Low Fan; High Fan; Low Cool; High Cool e Off 7. Regolatore timer È possibile impostare da 1 a 8 ore; con il regolatore timer l’apparecchio può essere regolato su ON/OFF (acceso/spento). Off = apparecchio spento Low Fan = il ventilatore gira lentamente High Fan = il ventilatore gira velocemente Low Cool = raffredda poco High Cool = raffredda molto SPEED Off OFF 17 11 12 13 14 15 16 17 18 19 20 20 Bocchettone di raccordo dello sfiato Anello passante Tubo dell’aria estratta Gommapiuma (si usa in caso di fuoriuscita dell’aria di scarico dalla finestra aperta) Gommapiuma (si usa in caso di fuoriuscita dell’aria di scarico dalla finestra aperta nell’area ancora aperta della finestra). Se è possibile evitare che ulteriore aria calda entri nell’ambiente da fuori. Copertura per passaggio attraverso finestra parete Serbatoio di raccolta della condensa tubo di scarico dell’acqua Telecomando (MKA 3501 E) Filtro a carbone attivo Descrizione degli elementi di regolazione MKA 2000 M / MKA 3000 M THERMOSTAT OFF ON OFF 2 3 6 36 Messa in esercizio dell’apparecchio SPINA Inserite la spina nella presa di corrente AVVIO Impostare il regolatore timer su ON. Ora l’apparecchio si avvia automaticamente. Quando la temperatura supera i 23°C, la funzione di raffreddamento inizia automaticamente. Se però la temperatura è inferiore a 23°C gira solo il ventilatore. L’apparecchio funziona finché viene spento. ARRESTO Ruotate il regolatore timer su “OFF” e l’apparecchio si spegne subito. 1 7 6 High Fan HIGH FAN TIMER SPEED 8 5 Cool LOWLow COOL Impostazione della temperatura Impostate il termostato secondo le vostre necessità. Girando in senso orario si imposta una temperatura nominale più bassa. 3 4 1 2 LOWFan FAN Low Cool HIGHHigh COOL 5 4 7 Impostazione del timer Impostate il timer secondo le vostre necessità (1-8 h). Al termine dell’intervallo impostato l’apparecchio si disinserisce automaticamente. Anleitung MKA 3501 E SPK 1 18.02.2005 7:18 Uhr Seite 37 I illumina (si veda il pannello di comando). Descrizione degli elementi di regolazione MKA 3501 E 1 ST 2 3 4 RT LO HI 5 6 7 8 9 10 AUTO COOL FAN HEAT TIMER COMP. 17 TEMP. UP TEMP. DOWN SPEED MODE 13 14 11 12 TIMER 15 Impostazione della temperatura nominale Premete il selettore „Più caldo“ (TEMP.UP) o „Più freddo“ (TEMP.DOWN) per impostare la temperatura nominale da voi desiderata. Premendo il selettore „Più caldo“ o „Più freddo“ il display LCD segnala la temperatura nominale da voi desiderata. Altrimenti il display LCD segnala sempre la temperatura ambiente attuale. L’apparecchio è impostato nella funzione di raffreddamento su 24°C. ON/OFF 16 1. Spia „Impostazione temperatura“ 2. Spia „Temperatura ambiente“ 3. Spia „Ventilatore lento“ 4. Spia „Ventilatore veloce“ 5. Spia „Impostata funzione automatica“ 6. Spia „Impostata funzione raffreddamento“ 7. Spia „Impostata funzione ventilatore“ 8. Non assegnato 9. Spia „Timer attivato“ 10. Spia „Compressore attivo“ 11. Selettore „Più caldo“ 12. Selettore „Più freddo“ 13. Selettore „Velocità ventilatore“ 14. Selettore „Funzione“ 15. Interruttore per „Timer“ 16. Interruttore ON/OFF 17. Display LCD Accensione e spegnimento dell’apparecchio Premete l’interruttore ON/OFF L’apparecchio si avvia automaticamente. Se la temperatura ambiente è: maggiore di 23°C, l’apparecchio funziona nella funzione raffreddamento tra 20°C e 23°C, l’apparecchio funziona nella funzione ventilatore. Le spie si illuminano a seconda della funzione nella quale funziona l’apparecchio (si veda il pannello di comando). #Nota La spia „Compressore attivo“ (COMP.) si illumina soltanto se il compressore è effettivamente in funzione. Il display LCD segnala la temperatura ambiente attuale. Per disinserire l’apparecchio, premete di nuovo l’interruttore ON/OFF. Selezione della funzione Premete il selettore „Funzione>“ (MODE) nell’ordine „Automatico“, „Raffreddamento“, „Ventilatore“. La spia corrispondente alla funzione selezionata si Selezione della velocità del ventilatore Premete il selettore “Velocità del ventilatore” (SPEED) per impostare la velocità del ventilatore desiderata. La spia corrispondente alla funzione selezionata si illumina (si veda il pannello di comando). Se l’apparecchio si trova in „Funzione automatica“ (AUTO) la velocità del ventilatore viene selezionata automaticamente dall’apparecchio a seconda della temperatura ambiente. La spia relativa è illuminata. Il selettore „Velocità ventilatore“ (SPEED) è disattivato. Impostazione del timer Premete l’interruttore per “Timer” (TIMER) per fissare la durata di esercizio desiderata (1 - 12 h). La spia “Timer attivato” (TIMER) è illuminata. Se il timer è impostato l’apparecchio si disinserisce automaticamente. Premendo l’interruttore „Timer“ il display LCD segnala il tempo da voi impostato. Se il timer non è impostato, l’apparecchio funziona continuamente. Se premete l’interruttore per “Timer” (TIMER) senza che sia attivata una delle altre funzioni, potete fissare il momento di attivazione dell’apparecchio. Se per es. il timer è posto su “2” l’apparecchio si attiva automaticamente dopo 2 ore. Tutte le funzioni si possono impostare anche con il telecomando fornito. Per il telecomando sono necessarie 2 batterie MICRO (AAA). Il compressore si avvia solo dopo 3 minuti dopo l’accensione per evitare di essere sottoposto a sforzi eccessivi. Lo stesso vale per lo spegnimento. Il sistema di raffreddamento si disattiva se la temperatura del locale è inferiore del valore impostato sul termostato. La ventilazione - il ricircolo dell’aria continuano come impostate. Quando la temperatura del locale aumenta di nuovo, il raffreddamento si riattiva. 37 Anleitung MKA 3501 E SPK 1 18.02.2005 7:18 Uhr Seite 38 I IMPOSTAZIONE DELLA DIREZIONE DELL’ARIA 1. Regolazione delle griglie di areazione orizzontali La direzione orizzontale della corrente d’aria viene determinata dalle griglie d’areazione orizzontali. Esse devono venire impostate manualmente. Giusto Giusto 2. Regolazione delle griglie di areazione verticali La direzione verticale della corrente d’aria viene determinata dalle griglie d’areazione verticali. Esse devono venire impostate manualmente. Sbagliato MONTAGGIO DEL TUBO DELL’ARIA ESTRATTA Usate solamente il tubo fornito per l’aria estratta. La lunghezza del tubo per l’aria estratta può variare da 300 mm a 1500 mm. Le migliori prestazioni di raffreddamento si ottengono con un tubo corto per l’aria estratta. Si deve evitare che il tubo flessibile sia piegato o faccia curve di raggio molto stretto in modo che l’aria possa fluire liberamente verso l’esterno. Se non si tiene conto di questo tutto l’apparecchio si può surriscaldare e disattivarsi. Ciò potrebbe causare danni all’apparecchio. A) Montaggio del tubo dell’aria estratta attraverso finestra aperta Gommapiuma (15) Gommapiuma (14) Avvertimento! La lunghezza del tubo dell’aria estratta è adeguato alle specifiche tecniche dell’apparecchio. Non prolungate il tubo flessibile perché ciò potrebbe causare dei malfunzionamenti dell’apparecchio. 38 50 cm Anleitung MKA 3501 E SPK 1 18.02.2005 7:18 Uhr Seite 39 I Usate i pezzi di gommapiuma e accorciateli se necessario. Portate il tubo dell’aria estratta verso l’esterno attraverso l’apertura nella gommapiuma. Fissate la finestra in modo che la gommapiuma sia ben ferma. Nota Prendete le misure adatte in modo non sia possibile entrare in casa dalla finestra. B) Montaggio del tubo dell’aria estratta attraverso il vetro della finestra o la parete 50 cm Quando il contenitore della condensa è pieno, l’indicatore del “Recipiente della condensa pieno” si illumina e il compressore si spegne automaticamente, solo il motore del ventilatore continua a girare. La funzione di raffreddamento viene interrotta. Avvertenza MKA 3501 E Quando il recipiente dell’acqua di condensa è pieno il compressore ed il motore del ventilatore si spengono. La spia “COMP” lampeggia. In questo caso svuotate il recipiente come descritto qui di seguito. 1. Staccate la spina dalla presa. 2. Spostate il recipiente (1) sotto l’apertura dello scarico (2) 3. Svitate il tappo a vite dello scarico (2). 4. Togliete il tappo (3). 5. La condensa scorre nella bacinella di raccolta. 6. Dopo che il recipiente dell’acqua di condensa è completamente vuoto, rimontate il tappo (3) e il tappo a vite (2). 7. L’apparecchio può essere rimesso in esercizio. Parete o vetro della finestra Foro della condensa Anello passante Eseguire un foro di ca. 130 mm di Ø nel vetro o nella parete. Infilare l’anello passante dall’esterno verso l’interno e fissarlo. Infilare il tubo dell’aria estratta nell’anello passante. In caso di mancato funzionamento dell’apparecchio infilare la copertura dall’esterno sull’anello passante. C) Scarico della condensa con il recipiente dell’acqua TUTTA L’ACQUA DI CONDENSA DEVE ESSERE SCARICATA PRIMA DELLA MESSA FUORI ESERCIZIO O DI UNO SPOSTAMENTO Scarica dell’acqua di condensa con recipiente Avvertenza MKA 2000 M / MKA 3000 M D) Scarico della condensa con il tubo flessibile 1. 2. 3. 4. Staccate la spina dalla presa. Svitate il tappo a vite (2). Togliete il tappo (3). Collegate il tubo flessibile e fissatelo con la fascetta 5. Il tubo di scarico può venire prolungato con un tubo da Ø18mm. A questo scopo usate un 39 Anleitung MKA 3501 E SPK 1 18.02.2005 7:18 Uhr Seite 40 I raccordo adatto. Sostituzione filtro a carbone Nota Il tubo flessibile deve andare all’esterno con una leggera inclinazione. MKA 2000 M / MKA 3000 M L’indicazione “Recipiente dell’acqua di condensa” è fuori esercizio. 1. Togliere il telaio del filtro. 2. Togliere il supporto del filtro dal telaio 3. Estrarre il filtro a carbone dal sacchetto 4. Mettere il filtro a carbone nel telaio del filtro. 5. Fissare il filtro con il supporto del filtro. 6. Inserire il telaio del filtro. MKA 3501 E Il LED “COMP” non lampeggia dato che il recipiente non si può riempire più. Tubo per l’acqua di condensa Manutenzione Tubo per l’acqua di condensa Tubo flessibile dell’acqua ridotto Ø 18 mm 40 1. Staccate prima la spina dalla presa di corrente per evitare una scossa o il pericolo di incendio. 2. Usate solo detergenti non aggressivi ed un panno morbido per pulire il filtro ed il rivestimento esterno. Per la pulizia non usate mai mezzi aggressivi, benzina, alcol o diluenti. Rimettete il filtro quando è asciutto. 3. Alla fine della stagione svuotate il recipiente dell’acqua, avvolgete il cavo di alimentazione, pulite il filtro ed il rivestimento esterno, rimettete il filtro se asciutto e rimettete l’apparecchio nella confezione originale per l’inverno Non appoggiate oggetti pesanti sull’apparecchio. Anleitung MKA 3501 E SPK 1 18.02.2005 7:18 Uhr Seite 41 I Caratteristiche tecniche MKA 3000 M Quantità di refrigerante Capacità di raffreddamento Tensione di rete Potenza assorbita/corrente Portata aria max. Dimensioni ambiente Capacità di deumidificazione Velocità del ventilatore Timer Termostato Dimensioni (larg.xprof.xalt.) Peso netto 470 g 10.000 BTU/h 2520 kcal/ora 2930 Watt 230 V ~ 50 Hz 790 W/3,9 A 470 cbm/ora 85 m3 26,4 l/giorno 2 1-8 ore 18 – 32°C 40 x 37,7 x 75 cm 29 kg ELIMINAZIONE DELLA ANOMALIE Se l’apparecchio viene fatto funzionare correttamente non si dovrebbero verificare anomalie. In caso di anomalie verificate le seguenti possibilità prima di rivolgervi al servizio assistenza. Problema Possibile causa L'apparecchio non funziona La spina è inserita correttamente nella presa di corrente? C'è tensione sulla presa di corrente? La temperatura ambiente è inferiore alla temperatura impostata? Il recipiente della condensa è pieno? I raggi del sole entrano direttamente nel locale? Le porte e le finestre sono aperte? Ci sono molte persone nella stanza? Nella stanza c'è un apparecchio che sviluppa molto calore? Il tubo dell'aria è ostruito? Il filtro è sporco? L'entrata o l'uscita dell'aria sono bloccate? L'apparecchio è installato su un piano inclinato? Il recipiente della condensa è pieno? Se i compressore è surriscaldato e la protezione lo ha disattivato, attendete fino a quando il compressore si è di nuovo raffreddato. L'apparecchio non raffredda in modo soddisfacente Poca ventilazione L'apparecchio fa troppo rumore Il compressore non funziona Dopo un uso prolungato l'apparecchio dovrebbe essere controllato da una ditta specializzata. 41 Anleitung MKA 3501 E SPK 1 18.02.2005 7:18 Uhr Seite 42 PL Opis urządzenia MKA 2000M - MKA 3000M MKA 3501E ST RT LO HI AUTO COOL FAN HEAT TIMER POWER TEMP. UP TEMP. DOWN SPEED MODE TIMER ON/OFF 5 6 7 8 9 42 1 Kratka wyjściowa powietrza 2 Panel sterowania 3 Uchwyt do przenoszenia 4 Kółka 5 Filtr zasysanego powietrza 6 Wejście powietrza 7 Otwór do podłączenia węża odpływowego 8 Zawieszenie kabla sieciowego 9 Zatyczka gumowa odpływu wody kondensowanej (w urządzeniu) Anleitung MKA 3501 E SPK 1 18.02.2005 7:18 Uhr Seite 43 PL * Dokładnie przeczytać instrukcję obsługi przed uruchomieniem urządzenia i zachować. Kupując przenośny klimatyzator dokonaliście Państwo dobrego wyboru. Urządzenie jest profesjonalnie skonstruowane i zapewnia maksymalny komfort na wiele lat, jeśli będzie użytkowane zgodnie z instrukcją. Dokładnie przeczytać instrukcję obsługi i zachować w celu uzyskania późniejszych dodatkowych informacji. Wskazówka: Wartość zużycia zostały wyznaczone w temperaturze pokojowej 27°C i wilgotności powietrza 60%. Ważne wskazówki bezpieczeństwa Unikanie wypadków Przed użyciem 1. Stawiać urządzenie przenośne zawsze na stabilnym podłożu. 2. Podłączyć urządzenie do właściwego gniazdka. 3. Podłączyć przewód odpowietrzający do klimatyzatora. Dane techniczne MKA 2000 M Ilość środka chłodzącego Moc chłodzenia Napięcie sieciowe Pobór mocy/prądu Przepływ powietrza Objętość pomieszczenia Wydajność osuszania Prędkość wentylatora Zegar Termostat Wymiary (szer. x gł. x wys.) Waga netto 440g 6000 BTU/h 1510 Kcal/h 1758 Wat 230 V~50 Hz 530 W/2,38 A 440 m3/h 55 m3 21,6 l/dzień 2 1-8 godzin 18-32°C 40 x 37,7 x 75 cm 27 kg Dalsze wskazówki MKA 3501 E Ilość środka chłodzącego Moc chłodzenia Napięcie sieciowe Pobór mocy/prądu Przepływ powietrza Objętość pomieszczenia Wydajność osuszania Prędkość wentylatora Zegar Termostat Wymiary (szer. x gł. x wys.) Waga netto 480g 12000 BTU/h 3024 Kcal/h 3529 Wat 230 V~50 Hz 850 W/4,2 A 520 m3/h 110 m3 31,2 l/dzień 2 1-12 godzin 18-32°C 40 x 37,7 x 75 cm 31 kg Upewnić się, że podłączenie do źródła prądu jest prawidłowe Upewnić się, że urządzenie zostało zainstalowane poprawnie i zgodnie z instrukcją Osoby niepełnoletnie, osoby starsze i niepełnosprawni mogą być nieświadomi zagrożeń, które mogą wystąpić podczas użytkowania urządzeń elektrycznych. Dlatego też osoby te mogą używać urządzenie wyłącznie pod nadzorem. Nie używać urządzenia w pobliżu zbiorników z wodą, wanny i prysznica. Nie kłaść żadnych przedmiotów na szczeliny powietrzne. Zachować minimalny odstęp od ścian 50 cm. Podczas dużego nasłonecznienia zasłonić okna żaluzjami lub roletami. Utrzymywać filtr powietrza w czystości. W normalnych warunkach filtr powinien być czyszczony raz w miesiącu. Ponieważ filtr wychwytuje również małe cząstki kurzu, może powstać potrzeba częstszego czyszczenia filtra. Urządzenie w żadnym wypadku nie może być używane bez filtra. Przy rozpoczęciu pracy ustawić wentylator na najwyższy poziom prędkości i termostat na najwyższe chłodzenie. Później ustawić na niskie chłodzenie i termostat na wybraną temperaturę. Nie stosować przedłużacza lub rozgałęźnika, do którego jest podłączone inne urządzenie. Podczas funkcji chłodzenia ciepłe powietrze, które jest oddawane przez urządzenie, musi zostać poprowadzone za pomocą węża na zewnątrz. Do poprowadzenia zawartego w dostawie zestawu odprowadzającego konieczny jest otwór w ścianie lub oknie. Wyciągnąć wtyczkę zawsze po wyłączeniu urządzenia lub podczas naprawy. Unikać kontaktu urządzenia z chemikaliami. Prace konserwacyjne i naprawcze mogą zostać przeprowadzone wyłącznie przez autoryzowany serwis lub autoryzowanego partnera producenta. 43 Anleitung MKA 3501 E SPK 1 18.02.2005 7:18 Uhr Seite 44 PL Wyposażenie 15 11 12 14 13 16 18 19 17 1. Wskaźnik napięcia sieciowego 2. Wskaźnik pracy wentylatora 3. Wskaźnik pracy chłodzenia 4. Wskaźnik zapełnienia zbiornika na wodę kondensowaną 5. Termostat (+18°C do +32°C) 6. Włącznik chłodzenia i wentylatora niskie obroty, wysokie obroty, niskie chłodzenie, wysokie chłodzenie i funkcja wyłączenia 7. Regulator zegara Możliwość ustawienia czasu 1-8 godzin. Za pomocą regulatora czasu, urządzenie może zostać włączone/wyłączone. Off = urządzenie wyłączone Low Fan = niski poziom wentylacji High Fan = wysoki poziom wentylacji Low Cool = niski poziom chłodzenia High Cool= wysoki poziom chłodzenia SPEED Off 20 OFF 11 Króciec podłączeniowy 12 Kółko przepustowe 13 Wąż odpowietrzający 14 Tworzywo piankowe (zostanie włożone przy ujściu powietrza odprowadzanego przez okno) 15 Tworzywo piankowe (zostanie włożone przy ujściu powietrza odprowadzanego przez okno w jego wolnym obszarze. Do pomieszczenia nie powinno docierać ciepłe powietrze z zewnątrz.) 16 Pokrywa osłaniająca do przepustu w murze lub oknie 17 Pojemnik zbierający na wodę kondensowaną 18 Przewód odprowadzający wodę 19 Pilot (MKA 3501 E) 20 Filtr węglowy Cool LOWLow COOL Wtyczka Włożyć wtyczkę do gniazdka sieciowego Włączenie Regulator czasu ustawić w pozycji ON. Urządzenie włącza się automatycznie. Gdy temperatura przekroczy 23°C włącza się automatycznie funkcja chłodzenia. Gdy temperatura jest poniżej 23°C działa tylko wentylator. Urządzenie działa aż do momentu, gdy zostanie wyłączone. Wyłączenie Ustawić regulator czasowy w pozycji OFF. Urządzenie wyłącza się natychmiast. MKA 2000 M/MKA 3000M THERMOSTAT 3 4 TIMER SPEED OFF ON OFF 1 2 8 3 7 6 5 44 6 High Fan HIGH FAN Uruchomienie urządzenia Opis elementów urządzenia 1 2 LOWFan FAN Low Cool HIGHHigh COOL 5 4 7 Ustawienie temperatury Ustawić termostat w zależności od potrzeb. W kierunku zgodnym z ruchem wskazówek zegara może zostać ustawiona temperatura pożądana. Anleitung MKA 3501 E SPK 1 18.02.2005 7:18 Uhr Seite 45 PL Ustawienie zegara Ustawić zegar sterujący w zależności od potrzeb na 1-8 godzin. Po minięciu ustawionego czasu urządzenie wyłącza się automatycznie. Wybranie funkcji Przycisnąć przełącznik funkcji „MODE” w kolejności automat-chłodzenie-wentylacja. Świeci się dioda odpowiadająca wybranej funkcji (patrz panel sterowania). Opis panelu sterowania MKA 3501 E 1 ST 2 3 4 RT LO HI 5 6 7 8 9 10 AUTO COOL FAN HEAT TIMER COMP. 17 TEMP. UP TEMP. DOWN SPEED MODE TIMER ON/OFF 13 14 15 16 11 12 1. Dioda „Ustawienie temperatury” 2. Dioda „Temperatura pomieszczenia” 3. Dioda „Wolna wentylacja” 4. Dioda „Szybka wentylacja” 5. Dioda „Ustawiona funkcja automatyczna” 6. Dioda „Ustawiona funkcja chłodzenia” 7. Dioda „Ustawiona funkcja wentylacji” 8. Nie zajęty 9. Dioda „Włączony zegar sterujący” 10. Dioda „Kompresor działa” 11. Przełącznik - cieplej 12. Przełącznik – chłodniej 13. Przełącznik – prędkości wentylatora 14. Przełącznik – funkcje 15. Przełącznik zegara sterującego 16. Włącznik / wyłącznik 17. Wyświetlacz Włączenie/wyłączenie urządzenia Przycisnąć włącznik / wyłącznik (ON/OFF). Urządzenie włącza się automatycznie. Gdy temperatura otoczenia: jest wyższa niż 23°C urządzenie pracuje w funkcji chłodzenia pomiędzy 20-23°C urządzenie pracuje w funkcji wentylacji W zależności od funkcji w jakiej pracuje urządzenie, świecą się odpowiednie diody (patrz panel sterowania). Ustawienie wymaganej temperatury Przycisnąć przełącznik „cieplej” (TEMP UP) lub „chłodniej” (TEMP DOWN) w celu ustawienia pożądanej temperatury. Podczas przyciśnięcia przełącznika „cieplej” lub „chłodniej” na wyświetlaczu pojawi się ustawiana temperatura. Poza tym wskaźnik wskazuje zawsze aktualną temperaturę pomieszczenia. Urządzenie w funkcji chłodzenia jest ustawione na temperaturę 24°C. Wybór prędkości wentylatora Przycisnąć przełącznik prędkości wentylatora (SPEED) w celu ustawienia wybranej prędkości wentylatora. Świeci się dioda odpowiadająca wybranej funkcji (patrz panel sterowania). Gdy urządzenie jest ustawione w funkcji automatycznej (AUTO), prędkoła przełącznik prędkości wentylatora (SPEED). Ustawienie zegara sterującego Przycisnąć przycisk zegara sterującego (TIMER), aby ustawić czas pracy (1-12 godzin). Świeci się dioda „Włączony zegar sterujący” (TIMER). Gdy zegar sterujący jest włączony, urządzenie wyłącza się automatycznie. Przez przyciśnięcie przełącznika zegara sterującego można odczytać ustawienie czasu, które zostanie pokazane na wyświetlaczu. Gdy zegar sterujący nie jest włączony, urządzenie działa ciągle. Przyciskając przełącznik zegara sterującego (TIMER) bez uruchamiania żadnej innej funkcji, można ustawić czas włączenia urządzenia. Gdy zegar sterujący jest ustawiony na „2”, urządzenie włączy się automatycznie po upływie dwóch godzin. Wszystkie funkcje mogą zostać nastawione za pomocą dołączonego pilota. Pilot wymaga dwóch baterii typu AAA. Wskazówka: Dioda COMP „kompresor działa” świeci się tylko wtedy, gdy kompresor faktycznie działa. Wyświetlacz wskazuje aktualną temperaturę pomieszczenia. Aby wyłączyć urządzenie przycisnąć ponownie włącznik / wyłącznik. Aby oszczędzać kompresor, działa on dopiero 3 minuty po włączeniu. To samo dotyczy wyłączenia. Układ chłodniczy wyłącza się, gdy temperatura w pomieszczeniu jest niższa niż ta, na którą został ustawiony termostat. Cyrkulacja powietrza-wentylacja działa dalej tak, jak została ustawiona. Gdy temperatura pomieszczenia wzrośnie ponownie, chłodzenie włącza się ponownie. 45 Anleitung MKA 3501 E SPK 1 18.02.2005 7:18 Uhr Seite 46 PL Ustawienie kierunku nadmuchu 1. Ustawienie poziomych kratek wywietrznika Prawidłowo Poziomy kierunek prądu powietrza jest ustawiany za pomocą poziomych kratek wywietrznika. Kratki wywietrznika ustawia się ręcznie. Prawidłowo 2. Ustawienie pionowych kratek wywietrznika Pionowy kierunek prądu powietrza jest ustawiany za pomocą pionowych kratek. Kratki wywietrznika ustawia się ręcznie. Nieprawidłowo Montaż przewodu odprowadzającego powietrze Zastosować dołączony przewód odprowadzający powietrze. Długość przewodu odprowadzającego powietrze może się wahać 300-1500 mm. Najlepszą moc chłodzenia uzyskuje się przy zastosowaniu najkrótszego przewodu odpowietrzającego. Należy unikać załamywania i silnych zakoli przewodu, aby powietrze mogło zostać bez przeszkód odprowadzone. W przeciwnym razie może dojść do przegrzania całego urządzenia i jego wyłączenia. Może dojść do uszkodzenia urządzenia. A) Montaż przewodu odprowadzającego powietrze przez otwarte okno Tworzywo piankowe (15) Tworzywo piankowe (14) UWAGA! Długość węża odprowadzającego powietrze jest uzależniona od parametrów technicznych urządzenia. Przedłużanie węża może prowadzić do usterek urządzenia. 46 50 cm Anleitung MKA 3501 E SPK 1 18.02.2005 7:18 Uhr Seite 47 PL Zastosować tworzywo piankowe i skrócić jeśli to niezbędne. Poprowadzić wąż odprowadzający powietrze przez otwór w tworzywie na zewnątrz. Zabezpieczyć okno tak, żeby tworzywo piankowe pewnie trzymało. Wskazówka: Podjąć środki zaradcze przeciw niedozwolonemu wejściu przez okno. B) Montaż węża odprowadzającego przez szybę okienną lub ścianę 50 wentylatora działa nadal. Funkcja chłodzenia zostaje przerwana. Model MKA 3501 E Jeśli pojemnik na wodę kondensowaną jest pełny, kompresor i wentylator wyłączają się. Świeci się dioda „COMP”. W takim przypadku opróżnić pojemnik wg poniższych wskazówek: 1. Wyciągnąć wtyczkę z gniazdka. 2. Wsunąć pojemnik (1) pod śrubę spustową (2). 3. Odkręcić śrubę spustową (2) 4. Usunąć zatyczkę (3) 5. Woda spływa do rynienki. 6. Po całkowitym opróżnieniu zbiornika na wodę włożyć zatyczkę (3) i przykręcić śrubę spustową (2). 7. Można ponownie włączyć urządzenie. cm Otwór odpływowy wody kondensowanej ściana lub szyba obręcz przepustowa Wyciąć otwór o średnicy 130 mm w szybie lub ścianie Włożyć obręcz przepustową od wewnątrz na zewnątrz i zamocować. Włożyć wąż odprowadzający w obręcz przepustową. Gdy urządzenie nie jest używane, nałożyć od zewnątrz pokrywę na pierścień. D) Usuwanie wody kondensowanej za pomocą węża C) Usuwanie wody z pojemnikiem Cała zebrana woda kondensowana musi zostać spuszczona przed okresem nieużywania lub przed przestawieniem urządzenia. Usuwanie wody kondensowanej z pojemnikiem Model MKA 2000 M / MKA 3000 M Jeśli pojemnik na wodę kondensowaną jest pełny, świeci się wskaźnik zapełnienia zbiornika na wodę i kompresor wyłącza się automatycznie, tylko napęd 1. 2. 3. 4. Wyciągnąć wtyczkę z gniazdka. Odkręcić śrubę spustową (2) Usunąć zatyczkę (3) Zamontować wąż do wody kondensowanej i zabezpieczyć za pomocą zacisku. 5. Wąż odpływowy może zostać przedłużony za pomocą węża o średnicy 18 mm. Użyć do tego pasujący łącznik. 47 Anleitung MKA 3501 E SPK 1 18.02.2005 7:18 Uhr Seite 48 PL Wskazówka: Wąż odprowadzający musi przebiegać na zewnątrz w dół. MKA 2000 M / MKA 3000 M Wskaźnik zapełnienia zbiornika nie działa. MKA 3501 E Nie świeci się dioda COMP, ponieważ zbiornik na wodę nie może zostać bardziej napełniony. Wymiana filtra węglowego 1. Wyjąć obudowę filtra. 2. Uchwyt filtra wyjąć z obudowy. 3. Wyjąć filtr węglowy z opakowania. 4. Filtr węglowy włożyć do obudowy filtra. 5. Filtr zamocować w uchwycie filtra. 6. Wsunąć obudowę filtra. Wąż odpływowy wody kondensowanej Dbanie o urządzenie Wąż odpływowy wody kondensowanej Ograniczony wąż odprowadzający wodę o średnicy 18 mm 48 1. Wyciągnąć wtyczkę z gniazdka, aby uniknąć porażenia prądem lub powstania ognia. 2. W celu oczyszczenia filtra i obudowy stosować tylko delikatne środki czyszczące i miękką ściereczkę. Nie stosować do czyszczenia środków żrących, benzyny, alkoholu lub rozpuszczalników. Osadzić filtr dopiero, gdy jest on całkiem suchy. 3. Na koniec sezonu opróżnić zbiornik na wodę, zwinąć kabel, wyczyścić filtr i obudowę, włożyć filtr, gdy będzie suchy i przechowywać najlepiej w oryginalnym kartonie. Nie kłaść żadnych ciężkich przedmiotów na urządzeniu. Anleitung MKA 3501 E SPK 1 18.02.2005 7:18 Uhr Seite 49 PL Dane techniczne MKA 3000 M Ilość środka chłodzącego Moc chłodzenia Napięcie sieciowe Pobór mocy/prądu Przepływ powietrza Objętość pomieszczenia Wydajność osuszania Prędkość wentylatora Zegar Termostat Wymiary (szer. x gł. x wys.) Waga netto 470g 10000 BTU/h 2520 Kcal/h 2930 Wat 230 V~50 Hz 790 W/3,9 A 470 m3/h 85 m3 26,4 l/dzień 2 1-8 godzin 18-32°C 40 x 37,7 x 75 cm 29 kg Rozwiązywanie problemów Jeśli urządzenie będzie właściwie eksploatowane, nie dojdzie do usterek. W przypadku wystąpienia usterki sprawdzić następujące możliwości przed skontaktowaniem się z autoryzowanym serwisem. Problem Możliwa przyczyna Urządzenie nie działa Czy wtyczka jest poprawnie włożona do kontaktu? Czy w gniazdku jest napięcie? Czy temperatura pomieszczenia jest poniżej temperatury ustawionej? Czy zbiornik na wodę nie jest zapełniony? Urządzenie nie chłodzi wystarczająco Czy na pomieszczenie działają bezpośrednio promienie słońca? Czy otwarte są drzwi i okna? Czy w pomieszczeniu przebywa wiele osób? Czy w pomieszczeniu znajduje się urządzenie wytwarzające dużą ilość ciepła? Słaba moc wentylacji Czy wąż powietrza jest zatkany? Czy filtr jest zabrudzony? Czy zablokowane jest wejściu lub ujście powietrza? Urządzenie działa za głośno Urządzenie jest krzywo ustawione? Kompresor nie działa Zbiornik wody kondensowanej jest pełny? Jeśli kompresor jest przegrzany i zadziałała ochrona przed przegrzaniem i wyłączyła urządzenie, należy poczekać do ponownego schłodzenia kompresora. Po dłuższym użytkowaniu urządzenie powinno zostać sprawdzone przez specjalistę. 49 Anleitung MKA 3501 E SPK 1 ISC GmbH Eschenstraße 6 D-94405 Landau/Isar 18.02.2005 erklärt folgende Konformität gemäß EU-Richtlinie und Normen für Artikel F declares conformity with the EU Directive and standards marked below for the article déclare la conformité suivante selon la directive CE et les normes concernant l’article verklaart de volgende conformiteit in overeenstemming met de EU-richtlijn en normen voor het artikel declara la siguiente conformidad a tenor de la directiva y normas de la UE para el artículo declara a seguinte conformidade de acordo com a directiva CE e normas para o artigo förklarar följande överensstämmelse enl. EUdirektiv och standarder för artikeln ilmoittaa seuraavaa Euroopan unionin direktiivien ja normien mukaista yhdenmukaisuutta tuotteelle erklærer herved følgende samsvar med EUdirektiv og standarder for artikkel заявляет о соответствии товара следующим директивам и нормам EC izjavljuje sljedeću uskladjenost s odredbama i normama EU za artikl. declarå urmåtoarea conformitate cu linia directoare CE µi normele valabile pentru articolul. E P S Seite 50 Konformitätserklärung D 7:18 Uhr I H ürün ile ilgili olarak AB Yönetmelikleri ve Normlar∂ gere©ince aµa©∂daki uygunluk aç∂kla mas∂n∂ sunar. ‰ËÏÒÓÂÈ ÙËÓ ·ÎfiÏÔ˘ıË Û˘Ìʈӛ· Û‡Ìʈӷ Ì ÙËÓ √‰ËÁ›· ∂∂ Î·È Ù· ÚfiÙ˘Ô ÁÈ· ÙÔ ÚÔ˚fiÓ dichiara la seguente conformità secondo la direttiva UE e le norme per l’articolo attesterer følgende overensstemmelse i henhold til EU-direktiv og standarder for produkt prohlašuje následující shodu podle směrnice EU a norem pro výrobek. a következő konformitást jelenti ki a termékekre vonatkozó EU-irányvonalak és normák szerint pojasnjuje sledečo skladnost po smernici EU in normah za artikel. deklaruje zgodność wymienionego poniżej artykułu z następującymi normami na podstawie dyrektywy WE. vydáva nasledujúce prehlásenie o zhode podľa smernice EÚ a noriem pre výrobok. деклаpиpа следното съответствие съгласно диpективите и ноpмите на ЕС за пpодукта. Mobile Klimaanlage MKA 2000 M / MKA 3000 M 87/404/EWG 98/37/EG x 73/23/EWG_93/68/EEC R&TTED 1999/5/EG 2000/14/EG: 97/23/EG x 89/336/EWG_93/68/EEC 95/54/EG: 97/68/EG: 90/396/EWG 89/686/EWG EN 55014-1/A2; EN 55014-2/A1; En 61000-3-2; EN 61000-3-3/A1: EN 60335-2-40/A1; En 60335-1/A15 Landau/Isar, den 01.12.2004 Brunhölzl Leiter Produkt-Management Subject to change without notice 50 Landauer Produkt-Management Art.-Nr.: 23.600.20 I.-Nr.: 01014 Archivierung: 2360020-07-4164350-E Art.-Nr.: 23.601.75 I.-Nr.: 01012 Archivierung: MKA-0694-28-4164350-E Anleitung MKA 3501 E SPK 1 ISC GmbH Eschenstraße 6 D-94405 Landau/Isar 18.02.2005 erklärt folgende Konformität gemäß EU-Richtlinie und Normen für Artikel F declares conformity with the EU Directive and standards marked below for the article déclare la conformité suivante selon la directive CE et les normes concernant l’article verklaart de volgende conformiteit in overeenstemming met de EU-richtlijn en normen voor het artikel declara la siguiente conformidad a tenor de la directiva y normas de la UE para el artículo declara a seguinte conformidade de acordo com a directiva CE e normas para o artigo förklarar följande överensstämmelse enl. EUdirektiv och standarder för artikeln ilmoittaa seuraavaa Euroopan unionin direktiivien ja normien mukaista yhdenmukaisuutta tuotteelle erklærer herved følgende samsvar med EUdirektiv og standarder for artikkel заявляет о соответствии товара следующим директивам и нормам EC izjavljuje sljedeću uskladjenost s odredbama i normama EU za artikl. declarå urmåtoarea conformitate cu linia directoare CE µi normele valabile pentru articolul. E P S Seite 51 Konformitätserklärung D 7:18 Uhr I H ürün ile ilgili olarak AB Yönetmelikleri ve Normlar∂ gere©ince aµa©∂daki uygunluk aç∂kla mas∂n∂ sunar. ‰ËÏÒÓÂÈ ÙËÓ ·ÎfiÏÔ˘ıË Û˘Ìʈӛ· Û‡Ìʈӷ Ì ÙËÓ √‰ËÁ›· ∂∂ Î·È Ù· ÚfiÙ˘Ô ÁÈ· ÙÔ ÚÔ˚fiÓ dichiara la seguente conformità secondo la direttiva UE e le norme per l’articolo attesterer følgende overensstemmelse i henhold til EU-direktiv og standarder for produkt prohlašuje následující shodu podle směrnice EU a norem pro výrobek. a következő konformitást jelenti ki a termékekre vonatkozó EU-irányvonalak és normák szerint pojasnjuje sledečo skladnost po smernici EU in normah za artikel. deklaruje zgodność wymienionego poniżej artykułu z następującymi normami na podstawie dyrektywy WE. vydáva nasledujúce prehlásenie o zhode podľa smernice EÚ a noriem pre výrobok. деклаpиpа следното съответствие съгласно диpективите и ноpмите на ЕС за пpодукта. Mobile Klimaanlage MKA 3501 E 98/37/EG x 73/23/EWG_93/68/EEC 97/23/EG x 89/336/EWG_93/68/EEC 90/396/EWG 87/404/EWG R&TTED 1999/5/EG 2000/14/EG: 95/54/EG: 97/68/EG: 89/686/EWG EN 55014-1/A2; EN 55014-2/A1; En 61000-3-2; EN 61000-3-3/A1: EN 60335-2-40/A1; En 60335-1/A15 Landau/Isar, den 01.12.2004 Brunhölzl Leiter Produkt-Management Art.-Nr.: 23.600.50 I.-Nr.: 01014 Subject to change without notice Landauer Produkt-Management Archivierung: 2360050-07-4164350-E 51 Anleitung MKA 3501 E SPK 1 18.02.2005 WARRANTY CERTIFICATE The product described in these instructions comes with a 2 year warranty covering defects. This 2-year warranty period begins with the passing of risk or when the customer receives the product. For warranty claims to be accepted, the product has to receive the correct maintenance and be put to the proper use as described in the operating instructions. Your statutory rights of warranty are naturally unaffected during these 2 years. This warranty applies in Germany, or in the respective country of the manufacturer’s main regional sales partner, as a supplement to local regulations. Please note the details for contacting the customer service center responsible for your region or the service address listed below. GARANTIE Op het in de handleiding genoemde toestel geven wij 2 jaar garantie voor het geval dat ons product gebreken mocht vertonen. De periode van 2 jaar gaat in met de gevaarovergang of de overname van het toestel door de klant. De garantie kan enkel worden geclaimd op voorwaarde dat het toestel naar behoren is onderhouden en gebruikt conform de handleiding. Vanzelfsprekend blijven u de wettelijke garantierechten binnen deze 2 jaar behouden. De garantie geldt voor het grondgebied van de Bondsrepubliek Duitsland of van de respectievelijke landen van de regionale hoofdverdeler als aanvulling van de ter plaatse geldende wettelijke voorschriften. Gelieve zich tot uw contactpersoon van de regionaal bevoegde klantendienst of tot het hieronder vermelde serviceadres te wenden. CERTYFIKAT GWARANCJI Na opisywane w instrukcji obsługi urządzenie udzielamy 2-letniej gwarancji, na wypadek wadliwości naszego produktu. 2-letni okres gwarancyjny zaczyna obowiązywać w momencie przejścia ryzyka lub przejęcia urządzenia przez klienta. Warunkiem skorzystania z uprawnień gwarancyjnych jest prawidłowa konserwacja urządzenia, zgodnie z instrukcją obsługi oraz użytkowanie zgodne z przeznaczeniem. Oczywiście w okresie tych 2 lat przysługują Państwu również uprawnienia gwarancyjne w ramach ustawowej rękojmi. Gwarancja obowiązuje na terenie Republiki Federalnej Niemiec lub w kraju generalnego przedstawiciela handlowego, jako uzupełnienie obowiązujących lokalnie przepisów ustawowych. Prosimy zwrócić się do odpowiedzialnego pracownika w regionalnym dziale obsługi klienta lub pod podany poniżej adres serwisu technicznego. 52 7:18 Uhr Seite 52 GARANTIE Nous fournissons une garantie de 2 ans pour l’appareil décrit dans le mode d’emploi, en cas de vice de notre produit. Le délai de 2 ans commence avec la transmission du risque ou la prise en charge de l’appareil par le client. La condition de base pour le faire valoir de la garantie est un entretien en bonne et due forme, conformément au mode d’emploi, tout comme une utilisation de notre appareil selon l’application prévue. Vous conservez bien entendu les droits de garantie légaux pendant ces 2 ans. La garantie est valable pour l’ensemble de la République Fédérale d’Allemagne ou des pays respectifs du partenaire commercial principal en complément des prescriptions légales locales. Veuillez noter l’interlocuteur du service aprèsvente compétent pour votre région ou l’adresse mentionnée ci-dessous. CERTIFICATO DI GARANZIA Per l’apparecchio indicato nelle istruzioni concediamo una garanzia di 2 anni, nel caso il nostro prodotto dovesse risultare difettoso. Questo periodo di 2 anni inizia con il trapasso del rischio o la presa in consegna dell’apparecchio da parte del cliente. Le condizioni per la validità della garanzia sono una corretta manutenzione secondo le istruzioni per l’uso così come un utilizzo appropriato del nostro apparecchio. Naturalmente in questo periodo di 2 anni continuiamo ad assumerci gli obblighi di responsabilità previsti dalla legge. La garanzia vale per il territorio della Repubblica Federale Tedesca o dei rispettivi paesi del principale partner di distribuzione di zona a completamento delle norme di legge in vigore sul posto. Rivolgersi all’addetto del servizio assistenza clienti incaricato della rispettiva zona o all’indirizzo di assistenza clienti riportato in basso. Anleitung MKA 3501 E SPK 1 18.02.2005 7:18 Uhr Seite 53 GARANTIEURKUNDE Auf das in der Anleitung bezeichnete Gerät geben wir 2 Jahre Garantie, für den Fall, dass unser Produkt mangelhaft sein sollte. Die 2-Jahres-Frist beginnt mit dem Gefahrenübergang oder der Übernahme des Gerätes durch den Kunden. Voraussetzung für die Geltendmachung der Garantie ist eine ordnungsgemäße Wartung entsprechend der Bedienungsanleitung sowie die bestimmungsgemäße Benutzung unseres Gerätes. Selbstverständlich bleiben Ihnen die gesetzlichen Gewährleistungsrechte innerhalb dieser 2 Jahre erhalten. Die Garantie gilt für den Bereich der Bundesrepublik Deutschland oder der jeweiligen Länder des regionalen Hauptvertriebspartners als Ergänzung der lokal gültigen gesetzlichen Vorschriften. Bitte beachten Sie Ihren Ansprechpartner des regional zuständigen Kundendienstes oder die unten aufgeführte Serviceadresse. ISC GmbH · International Service Center Eschenstraße 6 · D-94405 Landau/Isar (Germany) Info-Tel. 0180-5 120 509 • Telefax 0180-5 835 830 Service- und Infoserver: http://www.isc-gmbh.info Technische Änderungen vorbehalten Technical changes subject to change Sous réserve de modifications Technische wijzigingen voorbehouden Con riserva di apportare modifiche tecniche Zastrzega się wprowadzanie zmian technicznych 53 Anleitung MKA 3501 E SPK 1 18.02.2005 7:18 Uhr Seite 54 Recycling-Alternative zur Rücksendeaufforderung: Recycling alternative to the demand to return Der Eigentümer des Elektrogerätes ist alternativ anstelle Zubehörteile und Hilfsmittel ohne Elektrobestandteile. electrical devices: As an alternative to returning the electrical device, the owner is obliged to cooperate in ensuring that the device is properly recycled if ownership is relinquished. This can also be done by handing over the used device to a returns center, which will dispose of it in accordance with national commercial and industrial waste management legislation. This does not apply to the accessories and auxiliary equipment without any electrical components which are included with the used device. Possibilité de recyclage en alternative à la demande Recyclagealternatief i.p.v. het verzoek het toestel Rücksendung zur Mitwirkung bei der sachgerechten Verwertung im Falle der Eigentumsaufgabe verpflichtet. Das Altgerät kann hierfür auch einer Rücknahmestelle überlassen werden, die eine Beseitigung im Sinne der nationalen Kreislaufwirtschafts- und Abfallgesetze durchführt. Nicht betroffen sind den Altgeräten beigefügte de renvoi : Le propriétaire de l’appareil électrique est obligé, en guise d’alternative à un envoi en retour, à contribuer à un recyclage effectué dans les règles de l’art en cas de cessation de la propriété. L’ancien appareil peut être remis à un point de collecte dans ce but. Cet organisme devra l’éliminer dans le sens de la Loi sur le cycle des matières et les déchets. Ne sont pas concernés les accessoires et ressources fournies sans composants électroniques. terug te sturen: In plaats van het elektrische toestel terug te sturen is alternatief de eigenaar van het toestel gehouden mee te werken aan de adequate recyclage als het eigendom wordt opgegeven. Hiervoor kan het afgedankte toestel eveneens bij een inzamelplaats worden afgegeven waar het toestel wordt verwijderd als bedoeld in de wetgeving in zake afvalverwerking en recyclage. Dit geldt niet voor toebehoorstukken en hulpmiddelen zonder elektrische componenten die bij de afgedankte toestellen zijn bijgevoegd. Alternativa di riciclaggio alla richiesta di restituzione Recykling jako alternatywa wobec obowiązku zwrotu Il proprietario dell’apparecchio elettrico è tenuto in alternativa, invece della restituzione, a collaborare in modo che lo smaltimento venga eseguito correttamente in caso ceda l’apparecchio. L’apparecchio vecchio può anche venire consegnato ad un centro di raccolta che provvede poi allo smaltimento secondo le norme nazionali sul riciclaggio e sui rifiuti. Non ne sono interessati gli accessori e i mezzi ausiliari senza elementi elettrici forniti insieme ai vecchi apparecchi. urządzenia: Alternatywnie do obowiązku zwrotu urządzenia elektrycznego po zakończeniu jego użytkowania, właściciel jest zobowiązany do współuczestnictwa w jego prawidłowej utylizacji. Wycofane z eksploatacji urządzenie można oddać również do punktu zbiórki surowców wtórnych, który przeprowadzi utylizację zgodnie z krajowymi przepisami o odpadach i wykorzystaniu surowców wtórnych. Nie dotyczy to osprzętu należącego do wyposażenia urządzenia i rodków pomocniczych nie zawierających elementów elektrycznych. 54 Anleitung MKA 3501 E SPK 1 18.02.2005 7:18 Uhr Seite 55 D Nur für EU-Länder Werfen Sie Elektrowerkzeuge nicht in den Hausmüll! Gemäß europäischer Richtlinie 2002/96/EG über Elektro- und Elektronik-Altgeräte und Umsetzung in nationales Recht müssen verbrauchte Elektrowerkzeuge getrennt gesammelt werden und einer umweltgerechten Wiederverwertung zugeführt werden. For EU countries only Never place any electric tools in your household refuse. To comply with European Directive 2002/96/EC concerning old electric and electronic equipment and its implementation in national laws, old electric tools have to be separated from other waste and disposed of in an environment-friendly fashion, e.g. by taking to a recycling depot. F Uniquement pour les pays de l'Union Européenne Ne jetez pas les outils électriques dans les ordures ménagères. Selon la norme européenne 2002/96/CE relative aux appareils électriques et systèmes électroniques usés et selon son application dans le droit national, les outils électriques usés doivent être récoltés à part et apportés à un recyclage respectueux de l'environnement. Enkel voor EU-landen Elektrisch gereedschap hoort niet bij het huisvuil thuis. Volgens de Europese richtlijn 2002/96/EG op afgedankte elektrische en elektronische toestellen en omzetting in nationaal recht dienen afgedankte elektrische gereedschappen afzonderlijk te worden verzameld en milieuvriendelijk te worden gerecycleerd. I Solo per paesi membri dell'UE Non gettate gli utensili elettrici nei rifiuti domestici. Secondo la Direttiva europea 2002/96/CE sui rifiuti di apparecchiature elettriche ed elettroniche e l'applicazione nel diritto nazionale gli elettroutensili usati devono venire raccolti separatamente e smaltiti in modo ecologico. Tylko dla krajów UE Zabrania się wyrzucania elektronarzędzi na śmieci. Zgodnie z Europejską Dyrektywą 2002/96/WE o przeznaczonych na złomowanie elektronarzędziach i sprzęcie elektronicznym oraz jej konwersji na prawo krajowe, elektronarzędzia należy zbierać osobno i oddać do punktu zbiórki surowców wtórnych. 55 Anleitung MKA 3501 E SPK 1 18.02.2005 7:18 Uhr Seite 56 Der Nachdruck oder sonstige Vervielfältigung von Dokumentation und Begleitpapieren der Produkte, auch auszugsweise ist nur mit ausdrücklicher Zustimmung der ISC GmbH zulässig. Eftertryk eller anden form for mangfoldiggørelse af skriftligt materiale, ledsagepapirer indbefattet, som omhandler produkter, er kun tilladt efter udtrykkelig tilladelse fra ISC GmbH. The reprinting or reproduction by any other means, in whole or in part, of documentation and papers accompanying products is permitted only with the express consent of ISC GmbH. La réimpression ou une autre reproduction de la documentation et des documents d’accompagnement des produits, même incomplète, n’est autorisée qu’avec l’agrément exprès de l’entreprise ISC GmbH. Eftertryck eller annan duplicering av dokumentation och medföljande underlag för produkter, även utdrag, är endast tillåtet med uttryckligt tillstånd från ISC GmbH. Przedruk lub innego rodzaju powielanie dokumentacji wyrobów oraz dokumentów towarzyszących, nawet we fragmentach dopuszczalne jest tylko za wyraźną zgodą firmy ISC GmbH. A reprodução ou duplicação, mesmo que parcial, da documentação e dos anexos dos produtos, carece da autorização expressa da ISC GmbH. Naknadno tiskanje ili slična umnožavanja dokumentacije i pratećih papira ovih proizvoda, čak i djelomično kopiranje, moguće je samo uz izričito dopuštenje tvrtke ISC GmbH. La ristampa o l’ulteriore riproduzione, anche parziale, della documentazione o dei documenti d’accompagnamento dei prodotti è consentita solo con l’esplicita autorizzazione da parte della ISC GmbH. Перепечатывание или прочие виды размножения документации и сопроводительных листов продукции фирмы, полностью или частично, разрешено производить только с однозначного разрешения ISC GmbH. EH 12/2004