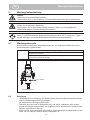
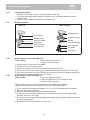
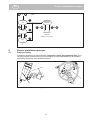
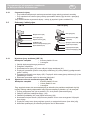
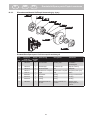
1
Betriebsanleitung
Operating Manual
Instrukcja obsługi
Schmelzklebstoff-Auftragsgerät
Hot Melt Applicator/Pistolet ręczny
HB 710/HB 710 Spray
Inhaltsverzeichnis
1
1.1
1.2
2
2.1
2.2
3
3.1
3.1.1
3.1.2
3.2
3.3
3.3.1
3.3.2
4
4.1
4.2
4.3
4.4
4.5
4.6
5
5.1
5.2
6
6.1
6.2
6.2.1
6.3
6.3.1
6.3.2
6.3.3
6.4
6.5
6.6
6.7
7
8
9
10
10.1
10.1.1
10.1.2
10.1.3
10.2
10.2.1
10.2.2
10.2.3
10.3
10.4
10.5
11
11.1
11.2
Allgemeines
Einsatzbereich
Technische Daten
Sicherheitshinweise
Mögliche Gefährdungen
Hinweise zum sicheren Betrieb
Inbetriebnahme
Anschließen
Anschließen
(Betrieb ohne Arbeitskonsole/Workstation)
Anschließen
(Betrieb mit Arbeitskonsole/Workstation)
Einschalten
Einstellungen am Temperaturregler
Einstellen der Arbeitstemperatur
Auslesen und Einstellen der Regel-Parameter
Betrieb
Betriebslage
Befüllen
Schmelzgut austragen und dosieren
Sprühbild einstellen (nur HB 710 Spray)
Temperatur-Reduzierautomatik (ACE)
Ausschalten
Was ist, wenn…
Status- und Fehlermeldungen im Display
Fehlersuche und -behebung
Wartung/Instandhaltung
Wartungsintervalle
Reinigung
Reinigung der Düse
Düsensysteme
Austausch der Kegeldüse (HB 710)
Austausch des Düsenfußes (HB 710)
Austausch von Dralldüse, Druckfeder
und Kugel (HB 710 Spray)
Einstellen der Deckelpressung
Austausch der Deckeldichtung
Austausch der Ventilbaugruppe
Austausch der Verschlußbaugruppe
(komplett)
Reparatur
Gewährleistung
Entsorgung
Ersatzteile
HB 710
Basisgerät
Schmelztank
Düsenbausatz
HB 710 Spray
Basisgerät
Schmelztank
Düsenbausatz
Verschluß
Arbeitskonsole
Bausatz Workstation
Anschlußpläne
Elektr. Schaltplan
Pneumatikplan
Table of Contents
1
1.1
1.2
2
2.1
2.2
3
3.1
5
5
5
6
6
6
7
7
3.1.1
7
3.1.2
7
7
8
3.2
3.3
8
8
3.3.1
3.3.2
9
9
10
10
11
11
11
11
11
12
13
13
13
4
4.1
4.2
4.3
4.4
14
4.5
4.6
5
5.1
5.2
6
6.1
6.2
14
6.2.1
14
14
6.3
6.3.1
6.3.2
6.3.3
15
15
16
17
General
Scope of use
Technical data
Safety instructions
Potential hazards
Instructions for safe operation
Starting
Connecting up
Connecting up
(operation without working bracket/workstation)
Connecting up
(operation with working bracket/workstation)
Switching on
Settings on the temperature regulator
Setting the working temperature
Reading out and setting the control parameters
Operation
Operating position
Charging
Discharging and metering melt
Adjusting the spray pattern
(HB 710 Spray only)
Automatic temperature reduction (ACE)
Switching off
What if...
Status and error messages in the display
Troubleshooting
Servicing/maintenance
Service intervals
Cleaning
Cleaning the nozzle
Nozzle systems
Replacing the cone nozzle (HB 710)
Replacing the nozzle end (HB 710)
Replacing the swirl nozzle, pressure spring
& ball (HB 710 Spray)
23
23
23
24
24
24
25
25
26
26
27
27
27
27
27
28
29
29
29
30
30
30
30
31
18
19
19
19
52
52
6.4
6.5
6.6
6.7
7
8
9
10
10.1
52
53
54
10.1.1
10.1.2
10.1.3
Base Unit
Melt Tank
Nozzle Kit
52
53
54
55
10.2
HB 710 Spray
55
55
56
57
10.2.1
10.2.2
10.2.3
Base Unit
Melttank
Nozzle Kit
55
56
57
58
59
60
61
61
62
10.3
10.4
10.5
11
11.1
11.2
2
Adjusting the cover pressure
Replacing the cover gasket
Replacing the valve assembly
Replacing the (complete) cover
Repairs
Warranty
Disposal
Spare parts
HB 710
21
21
21
22
22
22
23
23
Closure
Working Bracket
Workstation Kit
Diagrams
Wiring diagram
Pneumatic diagram
31
32
33
34
35
35
35
52
52
58
59
60
61
61
62
Spis treści
1
1.1
1.2
2
2.1
2.2
3
3.1
3.1.1
3.1.2
3.2
3.3
3.3.1
3.3.2
4
4.1
4.2
4.3
4.4
4.5
4.6
5
5.1
5.2
6
6.1
6.2
6.2.1
6.3
6.3.1
6.3.2
6.3.3
6.4
6.5
6.6
6.7
7
8
9
10
10.1
10.1.1
10.1.2
10.1.3
10.2
10.2.1
10.2.2
10.2.3
10.3
10.4
10.5
11
11.1
11.2
Informacja ogólna
Zakres stosowania
Dane techniczne
Przepisy bezpieczeństwa
Możliwe zagrożenia
Wskazania odnośnie bezpiecznej pracy
Uruchomienie
Podłączenie do prądu
Podłączenie do prądu
(praca bez konsoli roboczej)
Podłączenie do prądu
(praca z konsolą roboczą/ statywem roboczym)
Podłączenie do prądu
Nastawienia na regulatorze temperatury
Nastawienie temperatury roboczej
Wybieranie oraz nastawianie
parametrów regulatora
Praca z pistoletem ręcznym
Pozycja w pracy
Napełnianie
Nakładanie kleju termotopliwego
Regulowanie obrazu nakładania
(tylko HB 710 Spray)
System automatycznej redukcji temperatury
(ACE)
Wyłączanie
Co się dzieje, gdy…
Komunikaty stanu oraz błędów
na wyświetlaczu
Wyszukiwanie oraz usuwanie błędów
Konserwacja/ utrzymanie urządzenia
w dobrym stanie technicznym
Harmonogram konserwacji
Czyszczenie
Czyszczenie dyszy
Schematy i układy dysz
37
37
37
38
38
38
39
39
39
39
39
40
40
40
41
41
42
42
43
43
43
43
43
44
45
45
45
46
46
Wymiana dyszy stożkowej (HB 710)
46
Wymiana trzonu do mocowania dyszy (HB 710) 46
Wymiana dyszy skręconej, sprężyny
ciśnieniowej i kulki (HB 710 Spray)
47
Nastawienie nacisku pokrywy
47
Wymiana uszczelki z pokrywy
zbiornika pistoletu
48
Wymiana elementów zaworu
49
Wymiana elementów zamknięcia (kompletna) 50
Naprawa
51
Gwarancja
51
Usuwanie odpadów
51
Części zamienne
52
HB 710
52
Urządzenie podstawowe
Zbiornik kleju termotopliwego
Zespół konstrukcyjny dysz
HB 710 Spray
Urządzenie podstawowe
Zbiornik kleju termotopliwego
Zespół konstrukcyjny dyszy
Zamknięcie
Konsola robocza
Zespół konstrukcyjny statywu roboczego
Schematy montażowe
Schemat połączeń elektrycznych
Schemat połączeń pneumatycznych
52
53
54
55
55
56
57
58
59
60
61
61
62
3
Bedienelemente
Arbeitskonsole
Working brackeet
Handauftragsgerät
Pos.
Bezeichnung
Pos.
Bezeichnung
1
Druckluftanschluß
10
Hebel
2
Wasserabscheider
11
Verschlußkappe
3
Druckregler
12
Aufhängeöse
4
Manometer
13
Schutzmantel
5
Digitalanzeige
14
Sprühluftdrossel
6
Ein-/Aus-Taste
15
Schutzkappe
7
Set-Taste
16
Auslöser
8
Ab-Taste
17
Handgriff
9
Auf-Taste
18
Stellbügel
4
D
1
Allgemeines
Allgemeines
Bitte lesen Sie diese Betriebsanleitung sorgfältig und vollständig vor der ersten Inbetriebnahme des Handauftragsgerätes. Beachten Sie besonders die Sicherheitshinweise in
Kapitel 2.
Diese Betriebsanleitung muß für jeden Anwender stets griffbereit sein.
1.1
Einsatzbereich
Das Handauftragsgerät HB 710/HB 710 Spray dient dem Aufschmelzen und dosierten
Austragen von Schmelzgütern (thermoplastische Stoffe wie Schmelzklebstoffe, Wachse,
etc.) als Raupe (HB 710) oder Sprühauftrag (HB 710 Spray) mit wechselbaren Applikationswerkzeugen (bestimmungsgemäße Verwendung).
1.2
Technische Daten
Modell
Teile-Nummer
Lieferumfang
HB 710
HB 710 Spray
H217100
H217500
Auftragsgerät, Werkzeugsatz, Arbeitskonsole/Workstation (optional)
Gewicht [kg]
~1,35
Stromanschluß
~1,50
230 VAC/50 Hz/Schuko-Stecker
Leistungsaufnahme [W]
600
Stromaufnahme [A]
2,6
Schutzart (nach DIN IEC 34 T5)
IP30
Schutzklasse
(nach DIN VDE 0720)
I (Schutzleiter-Anschluß)
Temperaturregelung
elektronisch
Temperaturbegrenzung [°C]
Schutztemperaturregler (260 ±11)
Betriebstemperatur [°C]
40…210
Temperaturkonstanz [°C]
±2
Werkseitige Voreinstellung [°C]
180
Temperaturanzeige
Temperatur-Reduzierautomatik
(ACE)
digital über LED-Display
Werksseitig voreingestellt auf eine Temperaturabsenkung um 40 °C
nach einer Betriebsunterbrechung von 30 min
Anheizzeit [min]
~3,0…4,0
Schmelzleistung
(abhängig vom Schmelzgut) [kg/h]
bei Patronen: 3,2
bei Granulat: 1,3
Fassungsvermögen Schmelzbehälter [ml]
200
Fördersystem
Druckluftanschluß [bar]
Druckluft
max. 10 (Wartungseinheit mit Schnellkupplung)
Die Druckluft muß kondensat- und säurefrei sein.
Betriebsdruck [bar]
1,5…6,0
Überdruckschutz
Luftverbrauch
(bei 5 bar Betriebsdruck)
Düsen (Standard)
durch Reduzierventil begrenzt auf 6 bar
1 l pro Auslösung
max. 1 l/s
Kegeldüse Ø 1,5 mm
Drallsprühkopf Ø 1,5 mm
Länge der Versorgungsleitung mit
elektrischem und pneumatischen
Anschluß [m]
Empfohlene Schmelzgüter
3,0
BÜHNEN-Schmelzklebstoffe als Patrone oder Granulat
5
D
Sicherheitshinweise
2
Sicherheitshinweise
2.1
Mögliche Gefährdungen
Gefahr!
Richten Sie das betriebsbereite Gerät niemals auf Personen.
Gefahr durch hohen Druck!
Verbrennungsgefahr!
Düse (1) und geschmolzener Schmelzklebstoff können über 200 °C heiss sein. Tragen
Sie Wärmeschutzhandschuhe, wenn eine Berührung unvermeidlich ist.
Explosionsgefahr!
Bei Betrieb mit Sauerstoff oder brennbaren Gasen besteht Explosionsgefahr!
Geruchsbelästigung!
Schmelzklebstoffe geben Dämpfe ab, die geruchsbelästigend wirken können. Sorgen Sie
deshalb für ausreichende Lüftung.
Bei unsachgemässer Verarbeitung können vereinzelt Reizungen der Schleimhäute auftreten. Suchen Sie in diesem Fall sofort einen Arzt auf!
2.2
Hinweise zum sicheren Betrieb
Halten Sie zum Schutz vor Funktionsstörungen und Fehlbedienungen stets die folgenden
Hinweise genau ein:
• Der maximal zulässige Betriebsdruck (6 bar) darf in keinem Fall überschritten werden.
• Entfernen Sie brennbare oder wärmeempfindliche Gegenstände aus dem Bereich der
Düse (1).
• Das aufgeheizte Gerät muß auf dem Standbügel (18) oder der Arbeitskonsole abgestellt werden. Es darf nicht auf die Seite gelegt werden.
Andernfalls kann Schmelzgut unkontrolliert durch Belüftungsöffnungen auslaufen, Verbrennungsgefahr hervorrufen und einen Schaden am Gerät verursachen.
• Betätigen Sie den Auslöser (16) niemals gewaltsam.
• Schützen Sie das Gerät vor Feuchtigkeit und Nässe (Schutz vor elektrischem Schlag).
• Beachten Sie das Verarbeitungsmerkblatt des Schmelzklebstoffes (Schutz vor Verarbeitungsfehlern).
• Betreiben Sie das Gerät ausschließlich mit nach unten gerichteter Düse. Ein Betrieb
über Kopf ist nicht zulässig!
• Ziehen Sie vor jedem Eingriff am Gerät (Instandhaltung, Reinigung) den Netzstecker.
• Das Gerät darf nur an Steckdosen mit Schutzleiter betrieben werden.
• Ein evtl. verwendetes Verlängerungskabel muß über einen Schutzleiter verfügen. Prüfen Sie vor der Verwendung die Unversehrtheit des Verlängerungskabels.
• Ziehen Sie nach jeder Benutzung den Netzstecker. Lassen Sie das Gerät vor der Lagerung vollständig abkühlen.
• Sollte Ihnen eine Beschädigung am Gerät oder an den Zuleitungen auffallen, ziehen
Sie sofort den Netzstecker. Lassen Sie das Gerät umgehend von einer Fachkraft
überprüfen. Es darf erst nach einer ordnungsgemäßen Reparatur (siehe Kap. 6 und 7)
wieder in Betrieb genommen werden.
6
D
Inbetriebnahme
3
Inbetriebnahme
3.1
Anschließen
3.1.1
Anschließen (Betrieb ohne Arbeitskonsole/Workstation)
Führen Sie zum Anschluß des Gerätes folgende Arbeitsschritte durch:
1. Montieren Sie den Standfuß:
• Führen Sie dazu Stift (B) des Ablagefußes (1)
in Bohrung (A) des Gehäuses ein.
• Bewegen Sie den Ablagefuß (1) in Richtung
(C), bis er gerade am Gehäuse anliegt.
• Die Demontage des Ablagefußes erfolgt in umgekehrter Reihenfolge.
3.1.2
2. Stellen Sie das Gerät auf Ablagefuß und Stellbügel ab.
3. Montieren Sie den mitgelieferten Druckminderer an einer Schnellkupplung der Druckluftversorgung. Der Wasserabscheider muß dabei nach unten zeigen.
Beachten Sie die Anforderungen an die Druckluftversorgung (Kap. 1.2, „Technische
Daten“).
4. Stellen Sie den Betriebsdruck mit dem Druckregler (3) auf 4 bar ein.
5. Verbinden Sie den Netzstecker mit einer Schuko-Steckdose.
6. Schalten Sie das Gerät ein.
Das Gerät ist damit betriebsbereit.
Anschließen (Betrieb mit Arbeitskonsole/Workstation)
Führen Sie zum Anschluß des Gerätes folgende Arbeitsschritte durch:
1. Stellen Sie das Gerät in der Arbeitskonsole ab.
2. Verbinden Sie den Druckluftanschluß (1) der Arbeitskonsole (siehe Abb. auf S. 3) mit
der Druckluftversorgung).
Beachten Sie die Anforderungen an die Druckluftversorgung (Kap. 1.2, „Technische
Daten“).
3. Stellen Sie den Betriebsdruck mit dem Druckregler (3) auf 4 bar ein.
4. Verbinden Sie den Netzstecker mit einer Schuko-Steckdose.
5. Schalten Sie das Gerät ein.
Das Gerät ist damit betriebsbereit.
Info
Nach dem Einstecken des Netzsteckers und nach einem Netzspannungsausfall wird zur
Kontrolle kurz (ca. 1 s) das Display eingeschaltet:
.
Anschließend schaltet das Gerät aus Sicherheitsgründen ab.
3.2
Einschalten
Betätigen Sie zum Einschalten die Ein-/Aus-Taste (6) für mindestens 1 s.
Die Digitalanzeige leuchtet auf und zeigt den aktuellen Temperaturwert an. Das Gerät
heizt sofort auf die voreingestellte Temperatur (Solltemperatur) auf. Der linke Dezimalpunkt blinkt, bis die Solltemperatur erreicht ist.
Durch Drücken der Set-Taste (7) kann die eingestellte Solltemperatur angezeigt werden.
7
D
Inbetriebnahme
3.3
Einstellungen am Temperaturregler
3.3.1
Einstellen der Arbeitstemperatur
1. Drücken Sie zum Einstellen der Arbeitstemperatur die Set-Taste. Die aktuelle Arbeitstemperatur wird angezeigt.
2. Halten Sie die Set-Taste gedrückt. Wählen Sie mit der Auf- bzw. Ab-Taste die gewünschte Arbeitstemperatur.
Ein kurzer Druck auf die Auf- bzw. Ab-Taste verändert die Arbeitstemperatur in Schritten von 1 °C pro Tastendruck. Ein längerer Tastendruck verändert die Arbeitstemperatur kontinuierlich.
Nach dem Loslassen der Tasten wird der neue Wert automatisch gespeichert.
Auslesen und Einstellen der Regel-Parameter
Durch gleichzeitiges Drücken der Auf- und der Ab-Taste für min. 4 s gelangen Sie zu einer
Parameterliste. Einige Parameter sind einstellbar, andere nur auslesbar. Die folgende
Tabelle gibt einen Überblick über die Parameter:
3.3.2
Parameter
Funktion
Einstellbar
Einstellbereich
Standardwert
P1
Sollwertabsenkung
Wird das Gerät längere Zeit nicht benutzt,
schaltet die Temperaturregelung automatisch auf
Betrieb mit Temperaturabsenkung um. Es wird
auf eine Temperatur geregelt, die um den hier angegebenen Wert unter der eingestellten Arbeitstemperatur liegt.
✓
1…100 °C
40 °C
P2
Wartezeit bis Sollwertabsenkung
Wird das Gerät länger als die hier eingestellte
Zeit nicht benutzt, setzt die Temperaturabsenkung
ein.
✓
1…999 min
30 min
P11
Betriebsstundenzähler
Angezeigt werden die Hunderter-, Zehner- und
Einer-Stellen
-
P12
Betriebsstundenzähler
Angezeigt werden die Tausender-Stellen
-
P13
Anzahl der Auslösungen
Angezeigt werden die Hunderter-, Zehner- und
Einer-Stellen
-
P14
Anzahl der Auslösungen
Angezeigt werden die Tausender-Stellen
-
P19
Tastaturverriegelung
Hier kann die Verstellung der Arbeitstemperatur
durch die Auf-/Ab-Tasten gesperrt werden.
Beim Versuch, die Arbeitstemperatur trotz Tastaturverriegelung zu verstellen, zeigt das Display
„---“.
✓
0 oder 1
0
Kundenwert
0: nicht verriegelt
1: verriegelt
Mit der Auf-Taste können Sie die Parameterliste nach oben, mit der Ab-Taste nach unten
durchblättern. Drücken Sie die „Set“-Taste, um den zu einem Parameter gehörenden Wert
anzuzeigen. Bei den einstellbaren Parametern können Sie durch zusätzliches Drücken
der Auf-/Ab-Tasten den jeweiligen Wert verändern.
Die folgende Grafik zeigt den Bedienablauf schematisch:
8
D
Betrieb
+
>4 s
SET
Wert
anzeigen
P1
SET
+
SET
+
SET
P2
+
-
Wert
einstellen
(nur P1, P2, P19)
SET
…
P11
Bild 3.3.2/1: Einstellen der Parameter
4
Betrieb
4.1
Betriebslage
Das Gerät darf ausschließlich mit nach unten gerichteter Düse betrieben werden. Bei
anderen Betriebslagen kann Schmelzgut in die Druckluftkanäle geraten und das Gerät
beschädigen.
Bild 4.1/1: Zulässige Betriebslage
9
D
Betrieb
4.2
Befüllen
Verbrennungsgefahr!
Düse und geschmolzener Klebstoff können über 200 °C heiss sein. Tragen Sie bei den
nachfolgend beschriebenen Arbeitsschritten stets Wärmeschutzhandschuhe.
max. Level
4.3
Klebstoff kann nachgefüllt werden, sobald der Füllstand unterhalb des Absatzes im Tank
bzw. der außen am Gehäuse angebrachten Markierung gefallen ist.
1. Stellen Sie das Gerät in der Arbeitskonsole oder auf dem Ablagefuß ab.
2. Schalten Sie das Gerät ein (siehe Kap. 3.2). Warten Sie, bis die Arbeitstemperatur
erreicht ist.
3. Fassen Sie das Gerät mit einer Hand am Handgriff (17). Drehen Sie mit der anderen
Hand den Hebel (10) um 180° im Uhrzeigersinn und schwenken Sie die Verschlußkappe auf.
4. Füllen Sie den Tank bis max. 2 cm unterhalb des Randes. Der maximale Füllstand ist
durch einen Aufkleber am Gerät (siehe Bild links) markiert. Befüllen Sie das Gerät nicht
höher, da sich das Schmelzgut bei Erwärmung ausdehnt.
5. Schwenken Sie die Verschlußkappe zurück. Drehen Sie den Hebel (10) gegen den
Uhrzeigersinn bis zum Anschlag, um die Verschlußkappe zu verriegeln.
Schmelzgut austragen und dosieren
1. Stellen Sie das Gerät in der Arbeitskonsole oder auf dem Ablagefuß ab.
2. Schalten Sie das Gerät ein. Warten Sie, bis die Arbeitstemperatur erreicht ist.
3. Prüfen Sie, ob sich genügend Schmelzgut im Tank befindet.
Verbrennungsgefahr!
Beim „Leerfahren“ können Schmelzguttropfen unkontrolliert austreten und den Bediener
und umstehende Personen gefährden.
Führen Sie deshalb vor jedem Betätigen des Auslösers den vorstehenden Arbeitsschritt
(3.) durch.
4. Betätigen Sie den Auslöser (16)
Die Austragsmenge können Sie durch Verändern des Druckes (max. 6 bar) am Druckregler (3) und/oder die Auswahl einer entsprechenden Düse dosieren.
5. Nach dem Lösen des Auslösers (16) wird sofort die Druckluftzufuhr unterbrochen und
der Tank entlüftet.
10
D
4.4
Was ist, wenn…
Sprühbild einstellen (nur HB 710 Spray)
Das Sprühbild wird durch Regulierung der Sprühluft verändert.
Stellen Sie das optimale Sprühbild durch Verdrehen der Sprühluftdrossel (14) im Schutzmantel (13) ein:
• Verstellen im Uhrzeigersinn verringert den Sprühluftdruck.
• Verstellen gegen den Uhrzeigersinn erhöht den Sprühluftdruck.
4.5
Temperatur-Reduzierautomatik (ACE)
Unnötige thermische Belastung des Schmelzgutes sollte vermieden werden. Das Gerät
schaltet daher nach längerem Nichtbetätigen des Auslösers (Betriebsunterbrechung) in
einen Bereitschaftsbetrieb mit verringerter Temperatur um.
Im Lieferzustand wird die Temperatur nach 30 min Betriebsunterbrechung um 40 °C gesenkt. Die Programmierung der entsprechenden Parameter ist in Kap. 3.3.2 beschrieben.
Betätigen Sie kurz den Auslöser oder die Auf- bzw. Ab-Taste, um den Bereitschaftsbetrieb
zu beenden. Das Gerät heizt sofort wieder auf die Arbeitstemperatur auf.
4.6
Ausschalten
1. Betätigen Sie die Ein-/Aus-Taste (6) für ca. 1 s, bis das Display erlischt.
2. Regeln Sie den Betriebsdruck mit dem Druckregler (3) auf „0“ herunter oder unterbrechen Sie die Druckluftzufuhr.
5
Was ist, wenn…
Dieses Kapitel gibt Ihnen eine Übersicht über mögliche Status- und Fehlermeldungen und
bietet Hilfe zur Fehlerbeseitigung.
Bei auftretenden Funktionsstörungen prüfen Sie bitte zunächst
• die Stromversorgung und die
• Druckluftversorgung auf einwandfreie Funktion, sowie
• ob das Gerät oder die Zuleitungen (Stromversorgung, Druckluft) mechanische Schäden aufweisen.
Stellen Sie mechanische Schäden fest, darf das Gerät keinesfalls wieder in Betrieb genommen werden. Lassen Sie es durch einen qualifizierten Service überprüfen und instandsetzen.
5.1
Status- und Fehlermeldungen im Display
Anzeige
Ursache
Maßnahme
Dezimalpunkt links blinkt
Aufheizphase aktiv
Die Aufheizphase wird beendet, wenn die
eingestellte Arbeitstemperatur bis auf 2 °C
erreicht wurde.
Dezimalpunkt rechts leuchtet
Sollwertabsenkung aktiv
Siehe Parameter P1 und P2 (Kap. 3.3.2)
ERR
Überschreiten der zulässigen Abkühlen lassen
Höchsttemperatur von 260 °C
F1L
Fühlerfehler, Kurzschluß
Lassen Sie das Gerät durch einen qualifizierten Service prüfen.
F1H
Fühlerfehler, Fühlerbruch
Lassen Sie das Gerät durch einen qualifizierten Service prüfen.
--
Tastaturverriegelung aktiv
Siehe Parameter P19
(Kap. 3.3.2)
EP
Datenverlust im Parameterspeicher
Der Regler muß durch einen qualifizierten
Service ausgetauscht werden.
11
D
Was ist, wenn…
5.2
Fehlersuche und -behebung
Störung
Mögliche Ursache
Abhilfe
Regler läßt sich nicht ein- Mikro-Schalter am Auslöbzw. ausschalten
ser ständig betätigt oder
defekt
Verklemmung am MikroSchalter (Blechzunge)
beseitigen oder MikroSchalter austauschen
Düse tropft nach
Entleeren Sie das Gerät.
Betätigen Sie für ca. 5 s
den Auslöser, um die
Düse freizublasen.
Düsenventil verschmutzt
oder beschädigt
siehe Kap.
6.2
HB 710:
Düsenfuß reinigen oder
austauschen
HB 710 Spray:
Dralldüse, Druckfeder
und Kugel reinigen oder
austauschen
Es wird zu wenig oder
kein Schmelzgut ausgetragen
Betriebsdruck zu niedrig
Betriebsdruck erhöhen
(max. 6 bar)
Druckluftzufuhr unterbrochen
Druckluftzuleitung prüfen
Düsensystem verstopft
HB 710:
Kegeldüse und ggf.
Düsenfuß reinigen oder
austauschen
4.3
6.2, 6.3
HB 710 Spray:
Dralldüse, Druckfeder
und Kugel reinigen oder
austauschen
Druckluft entweicht aus
Verschlußkappe (11)
Druckluft entweicht aus
der Wartungseinheit
Verarbeitungstemperatur
zu niedrig
Temperatur erhöhen
3.3.1
Deckelpressung zu
gering
Deckelpressung erhöhen
6.4
Verunreinigung der Deckeldichtung
Dichtflächen reinigen
Anschlüsse undicht
Festziehen oder Austausch der Dichtungen
Schauglas vom Wasserabscheider (2) gesprungen
Schauglas austauschen
nur HB 710 Spray
Sprühbild nicht optimal
Sprühbild falsch eingestellt
Einstellen der Sprühluft
4.4
Düsensystem verstopft
oder beschädigt
Dralldüse, Druckfeder
und Kugel reinigen oder
austauschen
6.3.4
12
D
6
Wartung/Instandhaltung
Wartung/Instandhaltung
Gefahr!
Gefahr durch versehentliches Auslösen.
Unterbrechen Sie vor allen Wartung- und Instandhaltungsarbeiten die Druckluftzufuhr.
Gefahr!
Gefahr durch elektrische Spannung.
Alle Arbeiten, die ein Öffnen des Gerätes erfordern, dürfen nur von qualifiziertem,
elektrofachkundigem Personal durchgeführt werden.
Verbrennungsgefahr!
Düse (1) und geschmolzener Schmelzklebstoff können über 200 °C heiss sein. Tragen
Sie bei Wartungs- und Instandhaltungsarbeiten Wärmeschutzhandschuhe.
6.1
Wartungsintervalle
Halten Sie die aufgeführten Wartungsintervalle ein, um einen stets fehlerfreien und sicheren Betrieb zu gewährleisten:
Wöchentlich:
Wasserabscheider der Wartungseinheit überprüfen, ggf. entleeren (siehe Bild 6.1/1)
Prüfen auf Dichtheit, Beschädigung, Vorhandensein aller Teile und festen Sitz aller
Schrauben und Leitungen
Entfernung von Resten des Applikationsmittels und sonstigen Verschmutzungen, besonders auf der Innenseite des Deckels
MAX
max. Füllstand
zum Entleeren drücken
Bild 6.1/1: Entleeren des Wasserabscheiders
6.2
Reinigung
• Verwenden Sie zur Reinigung des Gerätes keine agressiven Reinigungsmittel. Diese
können Gerätekomponenten beschädigen.
Wir empfehlen zur Reinigung Petroleum.
• Tauschen Sie nicht mehr zu reinigende Teile (z.B. durch verbranntes oder ausreagiertes Schmelzgut) komplett aus. Wir empfehlen, diese Arbeiten beim Hersteller oder
Händler durchführen zu lassen.
• Entfernen Sie Schmelzgutreste und sonstige Verschmutzungen ausschließlich mechanisch, z.B. mit Lappen, weicher Bürste, Holzspatel o.Ä.
13
D
Wartung/Instandhaltung
6.2.1
Reinigung der Düse
• Wischen Sie die Düse bei leichten äußeren Verschmutzungen mit einem Lappen ab.
• Führen Sie bei Verstopfungen einen Bohrer, eine Nadel oder einen Draht passenden
Durchmessers in die Düsenbohrung ein.
Tauschen Sie in hartnäckigen Fällen die Düse aus (siehe Kap. 6.3).
6.3
Düsensysteme
HB 710
HB 710 Spray
Düsenblock (B7)
Ventilsitz (A6)
Düsenfuß (A5)
Schutzkappe (B6)
Schutzkappe (A4)
Kugel (B5)
Scheibe (A3)
Sicherungsring (A2)
Kegeldüse (A1)
Druckfeder (B4)
Dralldüse (B3)
Luftkappe (B2)
Überwurfring (B1)
Bild 6.3/1: Düsensysteme im Detail
6.3.1
6.3.2
Austausch der Kegeldüse (HB 710)
Erforderliches Werkzeug
• 2 Gabelschlüssel SW 19
• 1 Seegerringzange
1. Unterbrechen Sie die Druckluftzufuhr.
2. Lassen Sie das Gerät durchheizen.
3. Kontern Sie den Düsenfuß (A5) und schrauben Sie die Kegeldüse (A1) ab.
4. Schrauben Sie die neue Kegeldüse (A1) zunächst handfest auf und lassen Sie sie
2 Minuten aufheizen.
5. Kontern Sie den Düsenfuß (A5) erneut. Schrauben Sie die neue Kegeldüse (A1) ohne
Gewaltanwendung fest.
6. Montieren Sie die übrigen Teile in umgekehrter Reihenfolge.
Austausch des Düsenfußes (HB 710)
Erforderliches Werkzeug
• 2 Gabelschlüssel SW 19
• 1 Gabelschlüssel SW 36 oder Rohrzange
• 1 Seegerringzange
Beim Austausch des Düsenfußes darf sich keinerlei Schmelzgut mehr im Tank befinden.
Tragen Sie deshalb das Schmelzgut komplett aus, z.B. in ein Auffanggefäß.
1. Verfahren Sie zunächst wie in Kap. 6.3.1 bis Punkt 4 beschrieben
(Demontage der Düse).
2. Entfernen Sie den Sicherungsring (A2).
3. Entfernen Sie die Scheibe (A3) und die Schutzkappe (A4).
4. Kontern Sie den Ventilsitz (A6) mit Gabelschlüssel SW 36 oder Rohrzange. Schrauben
Sie den Düsenfuß (A5) heraus.
5. Schrauben Sie den neuen Düsenfuß zunächst handfest auf. Ziehen Sie ihn dann leicht
(ohne Gewaltanwendung) mit dem Gabelschlüssel an.
6. Montieren Sie die übrigen Teile in umgekehrter Reihenfolge.
14
D
Wartung/Instandhaltung
6.3.3
Austausch von Dralldüse, Druckfeder und Kugel (HB 710 Spray)
Erforderliches Werkzeug
• 1 Hakenschlüssel
• 1 Gabelschlüssel SW 11
• 1 Gabelschlüssel SW 32 oder Rohrzange
Beim Austausch des Düsenfußes darf sich keinerlei Schmelzgut mehr im Tank befinden.
Tragen Sie deshalb das Schmelzgut komplett aus, z.B. in ein Auffanggefäß).
1. Unterbrechen Sie die Druckluftzufuhr.
2. Drehen Sie den Überwurfring (B1) ohne Gewaltanwendung im warmen Zustand los.
3. Nehmen Sie die Schutzkappe (B6) und die Luftkappe (B2) ab.
4. Lösen Sie die Dralldüse (B3) mit dem Gabelschlüssel SW 11. Kontern Sie dabei mit
dem Gabelschlüssel SW 32 oder der Rohrzange.
5. Entnehmen Sie die hinter der Dralldüse liegende Druckfeder (B4) und Kugel (B5).
6. Montieren Sie die neuen Komponenten in umgekehrter Reihenfolge.
6.4
Einstellen der Deckelpressung
Erforderliches Werkzeug
• 1 Inbus-Schlüssel SW 1,5
• 1 Inbus-Schlüssel SW 2,5
• 1 Inbus-Schlüssel SW 3
C4
C3
C2
C1
Bild 6.4/1: Einstellen der Deckelpressung
1. Drehen Sie den Hebel (C3) im Uhrzeigersinn und schwenken Sie den Deckel, bis er
vollständig geöffnet ist.
2. Lösen Sie die Befestigungsschraube (C4) des Hebels mit dem Inbus-Schlüssel SW 3.
Nehmen Sie die Schraube heraus.
3. Lösen Sie die Klemmschraube (C1) mit dem Inbus-Schlüssel SW 1,5
(ca. 1,5 Umdrehungen).
4. Stecken Sie den Inbus-Schlüssel SW 2,5 durch die Schraubenöffnung des Hebels in
die Justierschraube. Drehen Sie die Justierschraube zunächst ca. 90° im Uhrzeigersinn.
5. Schließen und verriegeln Sie den Deckel.
Sollte der Deckel sich nicht schließen lassen, drehen Sie die Justierschraube so oft um
ca. 15° zurück (im Uhrzeigersinn), bis er sich leicht schließen läßt.
6. Betätigen Sie den Auslöser.
• Schließt der Deckel jetzt einwandfrei, fahren Sie mit Schritt 7. fort.
• Schließt der Deckel noch nicht einwandfrei, wiederholen Sie die Einstellung ab Punkt 4.
7. Öffnen Sie den Deckel erneut.
8. Ziehen Sie die Klemmschraube (C1) fest.
9. Montieren Sie die Befestigungsschraube (C4) des Hebels.
15
D
Wartung/Instandhaltung
6.5
Austausch der Deckeldichtung
Erforderliches Werkzeug
• 1 Kreuzschlitzschraubendreher Gr. 1
D6
D5
D4
D3
D2
D1
Bild 6.5/1: Austausch der Deckeldichtung
Beim Austausch der Deckeldichtung darf sich keinerlei Schmelzgut mehr im Tank befinden. Tragen Sie deshalb das Schmelzgut komplett aus, z.B. in ein Auffanggefäß).
1. Lassen Sie das Gerät aufheizen. Betätigen Sie den Auslöser, bis der Tank vollständig
entleert ist.
2. Unterbrechen Sie die Druckluftzufuhr.
3. Demontieren Sie die komplette Verschlußbaugruppe (siehe Kap. 6.7).
4. Lösen Sie die Befestigungsschrauben (D1) der Dichtungsplatte (D2) mit dem Kreuzschlitzschraubendreher. Nehmen Sie die Dichtungsplatte vorsichtig ab.
5. Nehmen Sie die Dichtung (D5) vorsichtig von der Druckplatte (D6) ab.
6. Setzen Sie die neue Dichtung so in die Druckplatte ein, daß sie überall gleichmäßig
anliegt.
7. Montieren Sie die Dichtungsplatte. Beachten Sie dabei die Lage der Scheibe (D3) und
des O-Ringes (D4) der Belüftungsöffnung. Ziehen Sie die Befestigungsschrauben (D1)
wechselweise fest.
16
D
6.6
Wartung/Instandhaltung
Austausch der Ventilbaugruppe
Erforderliches Werkzeug
• 1 Inbus-Schlüssel 2,5 mm
• 1 Inbus-Schlüssel 3 mm
• 1 Hilfsschraube M4
E1
E2
E3
E4
E5
E6
E10 E9
E11
E8 E7
Bild 6.6/1: Austausch der Ventilbaugruppe
1. Lassen Sie das Gerät aufheizen. Betätigen Sie den Auslöser, bis der Tank vollständig
entleert ist.
2. Lösen Sie bei geschlossenem Deckel die Befestigungsschraube (E1) des Hebels (E2)
mit dem Inbus-Schlüssel 3 mm. Nehmen Sie den Hebel und den Mitnehmer (E3) ab.
3. Lösen Sie die Schrauben E4 mit dem Inbus-Schlüssel 2,5 mm. Nehmen Sie die
Deckelverkleidung (E5) ab.
4. Drehen Sie die Hilfsschraube M4 in das Klemmstück (E7). Lösen Sie die Klemmschraube (E6) mit Unterlegscheibe mit dem Inbus-Schlüssel 2,5 mm. Ziehen Sie das
Klemmstück mit der Hilfsschraube M4 vorsichtig aus dem Ventilgehäuse heraus. Entnehmen Sie ebenfalls die Feder (E8) und den Konus (E9).
5. Verringern Sie den Druck auf 1…2 bar. Betätigen Sie kurz den Auslöser. Durch den
Druckstoß werden das Ventil (E10) und die Feder (E11) aus dem Ventilgehäuse herausgedrückt. Halten Sie dabei ein Tuch vor die Öffnung, um diese (heißen!) Teile
aufzufangen.
6. Montieren Sie die neuen Komponenten, die Deckelverkleidung und den Hebel in umgekehrter Reihenfolge.
17
D
Wartung/Instandhaltung
6.7
Austausch der Verschlußbaugruppe (komplett)
Erforderliches Werkzeug
• 1 Inbus-Schlüssel 2,5 mm
• 1 Inbus-Schlüssel 3 mm
• 1 Gabelschlüssel SW13
F1
F2
F3
F4
F6
F5
F8
F7
F9
F10
Bild 6.7/1: Austausch der Verschlußbaugruppe
1. Lassen Sie das Gerät aufheizen. Betätigen Sie den Auslöser, bis der Tank vollständig
entleert ist.
2. Lösen Sie bei geöffnetem Deckel die Befestigungsschraube (F1) des Hebels (F2) mit
dem Inbus-Schlüssel 3 mm. Nehmen Sie den Hebel incl. Mitnehmer (F3) ab.
3. Lösen Sie die Schrauben (F4) mit dem Inbus-Schlüssel 2,5 mm. Nehmen Sie die
Deckelverkleidung (F5) ab.
4. Lösen und entfernen Sie den Seegerring (F6).
5. Ziehen Sie die gesamte Verschlußbaugruppe (F7) von der Achse (F8) ab. Setzen Sie
die neue Verschlußbaugruppe vorsichtig auf die Achse auf.
6. Montieren Sie den Seegerring (F6).
7. Lösen Sie die Kontermutter (F9) mit dem Gabelschlüssel SW 13.
8. Justieren Sie die Zugspindel durch Verdrehen so, daß ihr Fuß beim Schließen des
Deckels sauber in die Aussparung im Gehäuse gleitet. Ziehen Sie anschließend die
Kontermutter wieder fest. Prüfen Sie erneut, ob der Deckel sich sauber schließen läßt.
Justieren Sie die Zugspindel ggf. nach.
9. Montieren Sie die Deckelverkleidung und den Hebel.
18
D
7
Reparatur
Reparatur
Andere Reparaturen als die in dieser Betriebsanleitung beschriebenen dürfen ausschließlich durch vom Hersteller beauftragte oder andere sachkundige Personen unter Verwendung von Original-BÜHNEN-Ersatzteilen ausgeführt werden.
8
Gewährleistung
Das Gerät wurde nach dem neuesten Stand der Technik entwickelt und hergestellt. Wir
bieten dem Erstkäufer auf Funktion, Material und Verarbeitung eine Gewährleistung entsprechend den gesetzlichen Vorschriften. Ausgenommen ist normaler Verschleiß.
Die Gewährleistung erlischt, wenn unsachgemäße Behandlung, Anwendung von Gewalt,
Reparatur durch Dritte und Einbau anderer als Original-Ersatzteile feststellbar ist.
Die Gewährleistung erstreckt sich auf Instandsetzung oder Umtausch nach unserer Wahl.
Eine über unseren Lieferumfang hinausgehende Gewährleistung ist ausgeschlossen, da
wir auf den sach- und fachgerechten Einsatz des Gerätes keinen Einfluß haben.
Bitte beachten Sie unsere Geschäftsbedingungen!
9
Entsorgung
Führen Sie Gerät, Verpackung und Zubehör einer umweltgerechten Wiederverwertung
(gemäß der Richtlinie 2002/96/EG des Europäischen Parlamentes und des Rates vom
27. Januar 2003) zu.
19
Arrangement
Working bracket
Working brackeet
Applicator
Pos.
Description
Pos.
Description
1
Compressed air
connection
10
Lever
2
Water separator
11
Closure cap
3
Pressure regulator
12
Suspension point
4
Pressure gauge
13
Protection cap
5
Digital display
14
Spray air choke
6
Start/Stop button
15
Protection cap
7
Set button
16
Trigger
8
Down button
17
Handle
9
Up button
18
Stand hoop
20
GB
1
General
General
Please read this Operating Manual through carefully and completely before first using the
Applicator. Pay particular attention to the safety instructions in Section 2.
This Operating Manual must always be within easy reach for any user.
1.1
Scope of use
The HB 710/HB 710 Spray Applicator is for the melting and metered discharge of melts
(thermoplastic substances such as hot-melt adhesives, waxes, etc.) as a bead (HB 710)
or spray-on coating (HB 710 Spray) using interchangeable application tools (use as intended).
1.2
Technical data
Model
Part No.
Kit includes
HB 710
HB 710 Spray
H217100
H217500
Applicator, toolset, working bracket / workstation (optional)
Weight [kg]
~1.35
Power connection
~1.50
230V AC / 50 Hz / earthing-pin plug
Power requirement [W]
600
Power consumption [A]
2.6
Protection (as per DIN IEC 34 T5)
IP30
Safety class
(as per DIN VDE 0720)
I (safety earth terminal)
Temperature control
electronic
Temperature limitation [°C]
thermal cut-out (260 ±11)
Operating temperature [°C]
40…210
Temperature constancy [°C]
±2
Factory presetting [°C]
180
Temperature indication
digital via LED display
Automatic temperature reduction
(ACE)
Factory preset to reduce temperature by 40 °C after 30 min non-use
Warm-up time [min]
~3.0…4.0
Hot-melting capacity (dependent
on melt) [kg/h]
with cartridges: 3.2
with granulate: 1.3
Capacity of melt reservoir [ml]
200
Conveyor system
Compressed-air connection [bar]
compressed air
max. 10 (service unit with quick-action coupling)
The compressed air must be condensate- and acid-free
Operating pressure [bar]
1.5…6.0
Protection against overpressure
limited by reducing valve to 6 bar
Air consumption
(at 5 bar operating pressure)
1 l per trigger actuation
max. 1 l/s
Nozzles (standard)
cone nozzle Ø 1.5 mm
swirl spray head Ø 1.5 mm
Length of supply line with
electrical and pneumatic connections [m]
Recommended melting stock
3.0
BÜHNEN hot-melt adhesives in cartridge or granular form
21
GB
Safety instructions
2
Safety instructions
2.1
Potential hazards
Danger!
Never point the operation-ready device at people.
Danger from high pressure!
Burn Hazard
Nozzle (1) and molten adhesive can be over 200 °C hot.
Wear heat-resistant gloves if contact is unavoidable.
Risk of Explosion!
When working with oxygen or combustible gases there is risk of explosion!
Odor nuisance!
Hot-melt adhesives give off fumes which can cause odour nuisance – so ensure adequate ventilation.
Improper use may in isolated cases lead to irritation of the mucous membrane. In this
case seek immediate medical advice!
2.2
Instructions for safe operation
Guard against malfunctions and operating errors by always following these instructions
precisely:
• In no circumstances may the maximum permitted operating pressure (6 bar) be exceeded.
• Remove combustible or heat-sensitive objects from the area of the nozzle (1).
• When warm the device must be put down on the support hoop (18) or working console.
It must not be laid on its side.
Otherwise melt may escape uncontrolled through the vent holes and present a burn
hazard.
• Never operate the trigger (16) forcibly.
• Protect the device from moisture and damp (protection against electric shock).
• Observe the instruction leaflet for the hot-melt adhesive (protection against processing
errors).
• Operate the device only with the nozzle pointing downwards. It must not be operated
above head height!
• Unplug from the mains before performing any operation on the device (servicing, cleaning).
• The device must be powered only from sockets with a protective conductor.
• Any extension cable used must have a protective conductor. Check that the protective
conductor is undamaged before use.
• Unplug from the mains after each use. Allow the device to cool down completely before
putting it away.
• If you notice any damage to the device or leads, unplug from the mains immediately.
Have the device promptly checked over by an expert. It must not be used again until it
has been properly repaired (see Sections 6 and 7).
22
GB
Starting
3
Starting
3.1
Connecting up
3.1.1
Connecting up (operation without working bracket/workstation)
To connect up the device proceed as follows:
1. Fit the stand:
• To do this insert pin (B) of the base (1) into hole
(A) in the casing.
• Move the base (1) in direction (C) until it is just
in contact with the casing.
• To dismantle the base do the above in reverse
order.
3.1.2
2. Place the device on the base and stand hoop.
3. Fit the supplied pressure-reducing valve to a quick-action coupling in the compressedair supply. The water separator must be facing downwards when you do this.
Observe the requirements made of the compressed-air supply (Section 1.2, “Technical
data“).
4. Set the operating pressure to 4 bar with the pressure regulator (3).
5. Connect the mains plug to a socket outlet with earthing contact.
6. Switch on the device.
The device is now ready for use.
Connecting up (operation with working bracket/workstation)
To connect up the device proceed as follows:
1. Place the device in the working bracket.
2. Attach the working bracket’s compressed-air connection (1) (see illustration on p. 3) to
the compressed-air supply.
Observe the requirements made of the compressed-air supply (Section 1.2, “Technical
data“).
3. Set the operating pressure to 4 bar with the pressure regulator (3).
4. Connect the mains plug to a socket outlet with earthing contact.
5. Switch on the device.
The device is now ready for use.
Info
The display is switched on briefly (approx. 1 sec) as a check after the power plug is
inserted and after a mains voltage failure:
.
The device then switches off for safety reasons
3.2
Switching on
To switch the device on press and hold the Start/Stop button (6) for at least 1 s.
The digital display lights up and indicates the current temperature. The device heats up
immediately to the preset temperature (target temperature). The decimal point on the left
flashes until the target temperature has been reached.
The target temperature can be displayed by pressing the Set button (7).
23
GB
Starting
3.3
Settings on the temperature regulator
3.3.1
Setting the working temperature
1. To set the working temperature press the Set button. The current working temperature
is displayed.
2. Hold the Set button down. Select the required working temperature using the Up/Down
buttons.
Briefly pressing the Up or Down button changes the working temperature in steps of
1°C per button-press. Pressing the button for longer changes the working temperature
continuously.
The new setting is saved automatically when the buttons are released.
Reading out and setting the control parameters
Pressing the Up and Down buttons simultaneously for at least 4 s brings up a parameter
list. Some parameters can be set, others only read out. The table below summarises the
parameters:
3.3.2
Parameter
Function
Settable
Setting
range
Standard
value
P1
Setpoint lowering
If the device is not used for some time, the
temperature regulator automatically switches to
operation at lowered temperature. A temperature
is adjusted to which is below the set working
temperature by the value set here.
✓
1…100 °C
40 °C
P2
Waiting time before setpoint lowering
If the device is not used for longer than the time
set here, temperature lowering starts.
✓
1…999 min
30 min
P11
Hours-run counter
The hundreds, tens and units digits are displayed.
-
P12
Hours-run counter
The thousands digits are displayed.
-
P13
Number of actuations
The hundreds, tens and units digits are displayed.
-
P14
Number of actuations
The thousands digits are displayed.
-
P19
Keylock
Adjustment of working temperature with the Up/
Down buttons can be locked here.
If an attempt is made to adjust the working temperature despite the keylock, the display shows
“--”
✓
0 or 1
0
Customer
value
0: not locked
1: locked
You can browse upwards through the parameter list with the Up button and downwards
with the Down button. Press the “Set” button to display the value assigned to a parameter.
You can adjust the value assigned to a settable parameter by additionally pressing the
Up/Down buttons.
The diagram below shows the procedure schematically:
24
GB
Operation
+
>4 s
SET
Display
value
P1
SET
+
SET
+
SET
P2
-
+
Set
value
(only P1, P2, P19)
SET
…
P11
Fig. 3.3.2/1: Setting parameters
4
Operation
4.1
Operating position
The device may be operated only with the nozzle pointing downwards. In other positions melt may get into the compressed-air ducts and damage the device.
Fig. 4.1/1: Permitted operating position
25
GB
Operation
4.2
Charging
Burn hazard!
Nozzle and molten adhesive can be over 200 °C hot. Always wear heat-resistant gloves
when performing the steps described below.
max. Level
4.3
1. Place the device in the working bracket or on the base.
2. Switch the device on (see Section 3.2). Wait until the working temperature has been
reached.
3. Take hold of the device by the handle with one hand (17). With the other hand turn the
lever (10) clockwise through 180º and swivel the closure cap open.
4. Fill the tank to a level not less than 2 cm below the rim. The maximum level is marked
on the device with a sticker (see illustration left). Do not charge the device above this
level since the melt expands when heated.
5. Swivel the closure cap back. Turn the lever (10) anticlockwise as far as it will go, in
order to lock the cap.
Discharging and metering melt
1. Place the device in the working bracket or on the base.
2. Switch the device on. Wait until working temperature has been reached.
3. Check that there is enough melt in the tank.
Burn hazard!
If the device is “run dry” drops of melt may escape uncontrolled and endanger the operator and persons in the vicinity.
Every time you actuate the trigger, therefore, first carry out step (3.) above.
4. Actuate the trigger (16)
You can meter the quantity discharged by altering the pressure (max. 6 bar) at the
pressure regulator (3) and/or selecting an appropriate nozzle.
5. After the trigger (16) has been released the compressed-air supply is cut off immediately and the tank vented.
26
GB
4.4
What, if…
Adjusting the spray pattern (HB 710 Spray only)
The spray pattern is altered by adjusting the spray air.
Set the optimum spray pattern by turning the spray-air choke (14) in the protective sleeve
(13):
• Turning it clockwise decreases the spray-air pressure.
• Turning it anticlockwise increases the spray-air pressure.
4.5
Automatic temperature reduction (ACE)
Unnecessary thermal loading of the melt should be avoided. The device therefore switches to standby mode at reduced temperature when the trigger has not been actuated for
a considerable time (paused operation).
In the condition as supplied the temperature is reduced by 40 °C after 30 minutes’ paused
operation. The programming of the relevant parameters is described in Section 3.3.2.
Briefly actuate the trigger or the Up or Down button to quit standby mode. The device
immediately reheats to working temperature.
4.6
Switching off
1. Press the Start/Stop button (6) for approx. 1 s until the display goes out.
2. Adjust the operating pressure down to “0” with the pressure regulator (3) or disconnect
the compressed-air supply.
5
What if...
This Section summarises the status and error messages and provides help in eliminating
errors.
If malfunctions occur please check first
• hat the power supply and
• compressed-air supply are functioning correctly, and
• whether there is mechanical damage to the device or supply lines (power supply, compressed air).
If you find any mechanical damage, the device may in no circumstances be started up
again. Have it checked and repaired by a qualified service agent.
5.1
Status and error messages in the display
Indication
Cause
Action
Decimal point on left flashes
Warm-up phase active
The warm-up phase is ended when a
temperature 2°C short of the set working
temperature has been reached.
Decimal point on right is lit
Setpoint lowering active
See parameters P1 and P2 (Section 3.3.2)
ERR
Permitted maximum temperature of 260 °C exceeded
Allow to cool down
F1L
Sensor fault, short circuit
Have the device checked by a qualified
service agent.
F1H
Sensor fault, sensor breakage
Have the device checked by a qualified
service agent.
--
Keylock active
See parameter P19 (Section 3.3.2)
EP
Data loss in parameter memory The regulator must be replaced by a qualified service agent.
27
GB
What, if…
5.2
Troubleshooting
Fault
Possible cause
Remedy
Controller cannot be switched
on or off
Micro switch at trigger
continuously activated or
defective
Eliminate deadlock at micro
switch (sheet metal tongue)
or replace micro switch
Nozzle goes on dripping
Nozzle valve partially obstructed or damaged
Drain the device. Actuate
the trigger for approx. 5 s to
clear the nozzle.
See Section
6.2
HB710:
Clean or replace nozzle end
HB 710 Spray:
Clean or replace swirl nozzle, pressure spring and ball
Too little or no melt is discharged
Operating pressure too low Increase operating pressure
(max. 6 bar)
Compressed-air supply
disconnected
Check compressed-air
supply
Nozzle system clogged
HB710:
Clean or replace cone nozzle and if necessary nozzle
end
4.3
6.2, 6.3
HB 710 Spray:
Clean or replace swirl nozzle, pressure spring and ball
Stock temperature too low
Raise temperature
3.3.1
Compressed air escapes from
closure cap (11)
Insufficient cover pressure
Increase cover pressure
6.4
Gasket dirty
Clean sealing faces
Compressed air escapes from
service unit
Connections not airtight
Tighten or replace gaskets
Sight glass of water separator (2) cracked
Replace sight glass
Spray pattern not ideal
Spray pattern wrongly set
Adjust spray air
4.4
Nozzle system clogged or
damaged
Clean or replace swirl nozzle, pressure spring and ball
6.3.4
HB 710 Spray only
28
GB
6
Servicing/maintenance
Servicing/maintenance
Danger!
Danger due to inadvertent triggering.
Disconnect the compressed air supply before all maintenance and service work.
Danger!
Voltage hazard.
All operations which necessitate opening the device may be performed only by qualified
electricians.
Burn hazard!
Nozzle (1) and molten adhesive can be over 200 °C hot. Wear heat-resistant gloves
when performing servicing and maintenance operations.
6.1
Service intervals
Observe the stated service intervals to ensure always correct and reliable operation:
Weekly:
Inspect and if necessary drain the service-unit water separator (see Fig. 6.1/1)
Check that all parts are present, leak-free and undamaged and all screws and lines securely
seated
Remove adhesive residues and other contaminants, especially on the inside of the cover
MAX
max. level
press to drain
Fig. 6.1/1: Draining the water separator
6.2
Cleaning
• Do not use aggressive cleaning agents for cleaning the device. These may damage
device components.
We recommend cleaning with paraffin oil.
• Replace completely parts which are no longer cleanable (e.g. because of burnt-on or
reacted hot-melt adhesive). We recommend having this work done by the manufacturer
or distributor.
• Remove residues of hot-melt adhesive and other contaminants by mechanical means
only, e.g. with a cloth, soft brush, wooden spatula or similar.
29
GB
Servicing/maintenance
6.2.1
Cleaning the nozzle
• Wipe the nozzle with a cloth to remove slight external dirt.
• To remove blockages insert a drill bit, needle or wire of suitable diameter into the
nozzle orifice.
In stubborn cases replace the nozzle (see Section 6.3).
6.3
Nozzle systems
HB 710
HB 710 Spray
Nozzle block (B7)
Valve seat (A6)
Nozzle foot (A5)
Protection cap (B6)
Protection cap (A4)
Ball (B5)
Washer (A3)
Locking ring (A2)
Cone nozzle (A1)
Pressure spring (B4)
Swirl nozzle (B3)
Air cap (B2)
Cap ring (B1)
Fig 6.3/1: Nozzle systems in detail
6.3.1
6.3.2
Replacing the cone nozzle (HB 710)
Tools needed
• 2 open-end spanners size 19
• 1 Seeger circlip ring pliers
1. Disconnect the compressed air supply.
2. Let the device heat up thoroughly.
3. Secure the nozzle foot (A5) and unscrew the cone nozzle (A1).
4. Screw on the new cone nozzle (A1) by hand first and allow to heat up for 2 minutes.
5. Re-secure the nozzle foot (A5). Tighten the new cone nozzle (A1) without using force.
6. Assemble the remaining parts in reverse order.
Replacing the nozzle end (HB 710)
Tools needed
• 2 open-end spanners size 19
• 1 open-end spanner size 36 or pipe wrench
• 1 Seeger circlip ring pliers
There must be no melt at all in the tank when the nozzle end is replaced.
Therefore discharge the melt completely, e.g. into a collecting vessel.
1. First, proceed as described in chapter 6.3.1 up to Point 3 (dismantling the nozzle).
2. Remove the locking ring (A2).
3. Remove the washer (A3) and the protection cap (A4).
4. Secure the valve seat (A6) with the open-end spanner size 36 or the pipe wrench.
Unscrew the nozzle foot (A5).
5. Screw on the new nozzle foot handtight. Now tighten lightly (without using force) with
the open-end spanner.
6. Assemble the remaining parts in reverse order.
30
GB
Servicing/maintenance
6.3.3
Replacing the swirl nozzle, pressure spring & ball (HB 710 Spray)
Tools needed
• 1 hook spanner
• 1 open-end spanner size 11
• 1 open-end spanner size 32 or pipe wrench
There must be no melt at all left in the tank when the nozzle end is replaced. Therefore
discharge the melt completely, e.g. into a collecting vessel.
1. Disconnect the compressed-air supply.
2. Release the cap ring (B1) by turning it when warm without using force.
3. Remove the protection cap (B6) and air cap (B2).
4. Loosen the swirl nozzle (B3) with the open-end spanner size 11. Fix it by locknut with
the open-end spanner SW32 or pipe wrench.
5. Remove the pressure spring (B4) behind the swirl nozzle and the ball (B5).
6. Fit the new components in reverse order.
6.4
Adjusting the cover pressure
Tools needed
• 1 hexagon socket spanner size 1.5
• 1 hexagon socket spanner size 2,5
• 1 hexagon socket spanner size 3
C4
C3
C2
C1
Fig. 6.4/1: Adjusting the cover pressure
1. Rotate the lever (C3) clockwise and swivel the cover until fully open.
2. Loosen the lever fixing screw (C4) with the hexagon socket spanner SW3.
Withdraw the screw.
3. Loosen the clamping screw (C1) with the hexagon socket spanner size 1.5 (approx. 1,5
turns).
4. Insert the hexagon socket spanner size 2.5 into the adjusting screw through the lever
screw-hole. Turn the adjusting screw clockwise initially by approx. 90°.
5. Close and lock the cover.
If the cover will not close, keep turning the adjusting screw back (clockwise) by approx.
15° until the cover closes easily.
6. Actuate the trigger.
• If the cover now closes correctly, proceed at step 7.
• If the cover still does not close correctly, repeat the adjustment from section 4.
7. Open the cover again.
8. Tighten the clamping screw (C1).
9. Fit the lever fixing screw (C4).
31
GB
Servicing/maintenance
6.5
Replacing the cover gasket
Tools needed
• 1 Phillips-type screwdriver size 1
D6
D5
D4
D3
D2
D1
Position carefully when assembling
Fig. 6.5/1: Replacing the cover gasket
There must be no melt at all left in the tank when the cover gasket is replaced. Therefore
discharge the melt completely, e.g. into a collecting vessel.
1. Let the device heat up.
Continue activating the trigger until the tank is completely empty.
2. Disconnect the compressed air supply.
3. Disassemble the entire closure unit (see Chapter 6.7).
4. Release the fastening screws (D1) of the sealing plate (D2) with the Phillips screwdriver. Carefully remove the sealing plate.
5. Carefully remove the gasket (D5) from the pressure plate (D6).
6. Set the new gasket in the pressure plate in such a way that it fits evenly all over.
7. Mount the sealing plate. Observe the position of the washer (D3) and the O-ring (D4) of
the ventilation opening. Tighten the counter nuts (D1) alternately.
32
GB
6.6
Servicing/maintenance
Replacing the valve assembly
Tools needed
•
•
•
•
1 hexagon socket spanner size 1
1 hexagon socket spanner size 2.5
1 hexagon socket spanner size 3
1 auxiliary screw M4
E1
E2
E3
E4
E5
E6
E10 E9
E11
E8 E7
Fig 6.6/1: Replacing the valve assembly
1. Let the device heat up. Continue activating the trigger until the tank is completely empty.
2. With the cover closed undo the fixing screw (E1) of the lever (E2) with the hexagon
socket spanner size 3. Remove the lever and carrier (E3).
3. Undo the screws (E4) with the hexagon socket spanner size 2.5. Remove the cover
casing (E5).
4. Screw the auxiliary screw M4 in to the clamping piece (E7). Release the clamping
screw (E6) with washer with a 2.5 mm Allen key. Carefully remove the clamping piece
with auxiliary screw M4 from the valve housing. Also remove the spring (E8) and the
cone (E9).
5. Decrease the pressure to 1....2 bar. Briefly actuate the trigger. The burst of pressure
ejects the valve (E9) and spring (E10) from the valve housing. Hold a cloth in front of
the opening to catch these (hot!) parts.
6. Fit the new components, cover casing and lever in reverse order.
33
GB
Servicing/maintenance
6.7
Replacing the (complete) cover
Tools needed
• 1 hexagon socket spanner size 2.5
• 1 hexagon socket spanner size 3
• 1 open-end spanner size 13
F1
F2
F3
F4
F6
F5
F8
F7
F9
F10
Fig. 6.7/1: Replacing the cover
1. Let the device heat up. Continue activating the trigger until the tank is completely empty.
2. With the cover open undo the fixing screw (F1) of the lever (F2) with the hexagon socket
spanner size 3. Remove the lever and carrier (F3).
3. Undo the screws (F4) with the hexagon socket spanner size 2.5. Remove the cover
casing (F5).
4. Release and remove the Seeger circlip ring (F6).
5. Pull the entire closure unit (F7) off from the axle (F8). Carefully set the new closure unit
on the axle.
6. Mount the Seeger circlip ring (F6).
7. Release the counter nut (F9) with the SW 13 open-end wrench.
8. Adjust the tie bolt by twisting it so that its foot slides cleanly into the recess in the
housing when the lid closes. Then retighten the counter nuts. Check again to see if the
cover closes cleanly. If necessary, readjust the tie bolt.
9. Mount the cover casing and the lever.
34
GB
7
Repairs
Repairs
Repairs other than those described in this Operating Manual may be undertaken only
by persons appointed by the manufacturer or other technically competent persons using
BÜHNEN original replacement parts.
8
Warranty
The device has been developed and manufactured in accordance with the most up-todate technical knowledge. We provide the initial purchaser with a warranty according to
statutory requirements for function, materials and processing. Normal wear and tear is
excepted.
The warranty ends if improper treatment, use of force, repairs by third parties or the fitting
of non-original replacement parts is evident.
The warranty covers repair or replacement at our discretion. A warranty extending beyond
the kit supplied by us is precluded, since proper and expert use of the device is outside
our control.
Please note our terms of business!
9
Disposal
Pass the device, packing and fittings for environmentally correct recycling/reuse (in accordance with European Parliament and Council Directive 2002/96/EC of 27th January
2003).
35
PL
Elementy obsługowe
Konsola robocza
Working brackeet
Pistolet ręczny do nanoszenia kleju topliwego
Poz.
Określenie
Poz.
Określenie
1
Przyłącze sprężonego powietrza
10
Dźwignia
2
Oddzielacz wody
11
Kołpak zamykający
3
Regulator ciśnienia
12
Ucho do zawieszenia
4
Manometr
13
Płaszcz ochronny
5
Wyświetlacz cyfrowy
14
Przepustnica sprężonego powietrza
6
Przycisk włącz/wyłącz
15
Kołpak ochronny
7
Przycisk SET
16
Spust
8
Przycisk wyłączenia dół
17
Uchwyt
9
Przycisk włączenia góra
18
Stojak
36
PL
1
Informacja ogólna
Informacja ogólna
Przed pierwszym uruchomieniem pistoletu ręcznego proszę przeczytać starannie całą
instrukcję obsługi. W szczególności należy przestrzegać przepisy bezpieczeństwa zawarte w rozdziale 2.
Instrukcja obsługi musi być stale dostępna dla każdego użytkownika.
1.1
Zakres stosowania
Pistolet ręczny HB 710/HB 710 Spray służy do dozowanego rozprowadzania kleju termotopliwego (tworzyw termoplastycznych jak kleje termotopliwe, woski itp.) w formie aplikacji
liniowej (HB 710) lub Spray (HB 710 Spray) z wymiennymi narzędziami do nanoszenia
(zastosowanie zgodne z przeznaczeniem).
1.2
Dane techniczne
Model
Numer części
Zakres dostawy
Ciężar [kg]
HB 710
HB 710 Spray
H217100
H217500
Pistolet ręczny, zestaw narzędzi, konsola robocza/stanowisko robocze
(opcjonalnie)
~1,35
~1,50
Przyłącze prądowe
Wtyczka z bolcem ochronnym 230 VAC/50Hz
Maksymalny pobór mocy [W]
600
Maksymalny. pobór prądu
elektrycznego [A]
Rodzaj ochrony
(wg DIN IEC 34 T5)
Klasa ochrony (wg DIN VDE
0720)
Regulacja temperatury
2,6
IP30
I (Przyłącze z przewodem ochronnym)
Elektroniczna
Ograniczenie temperatury [°C]
Ochronny regulator temperatury (260+11)
Temperatura robocza [°C]
40...210
Tolerancja temperatury [°C]
±2
Ustawienie fabryczne temp [°C]
180
Wskaźnik temperatury
System automatycznej redukcji
temperatury (ACE)
Czas nagrzewania [min]
Cyfrowy za pomocą wyświetlacza LED
Nastawiona fabrycznie na spadek temperatury o 40°C po przerwie w
pracy o czasie 30 minut
~3,0…4,0
Wydajność topnienia (zależna od
rodzaju kleju) [kg/h]
Przy patronach: 3,2
Przy granulacie: 1,3
200
Użytkowa pojemność zbiornika
kleju topliwego [ml]
System tłoczenia
Sprężone powietrze
Przyłącze sprężonego powietrza
[bar]
Ciśnienie robocze [bar]
Maksimum 10 (zespół konserwacyjny z szybko złączką). Powietrze
sprężone musi być wolne od kondensatu oraz kwasów
1,5...6,0
Zabezpieczenie przed przekroczeniem ciśnienia
Zużycie powietrza
(przy ciśnieniu roboczym 5 bar)
Dusze (standard)
Za pomocą zaworu zwrotnego ograniczone do 6 bar
Długość przewodu zasilającego
z przyłączem elektrycznym oraz
pneumatycznym [m]
Zalecane kleje termotopliwe
1 l na 1 rozłączenie
max.1 l/s
Dysza stożkowa Ø 1,5 mm
Dysza skręcona Ø 1,5 mm
3,0
Kleje topliwe BÜHNEN w formie patronów lub granulatu
37
PL
Przepisy bezpieczeństwa
2
Przepisy bezpieczeństwa
2.1
Możliwe zagrożenia
Zagrożenie!
Przygotowanego do pracy pistoletu ręcznego nie należy nigdy kierować na siebie lub w
kierunku innych osób.
Związane z wysokim ciśnieniem!
Niebezpieczeństwo poparzenia!
Dysza oraz roztopiony klej termotopliwy mogą być rozgrzane do temperatury
przekraczającej 200°C. W celu uniknięcia poparzeń podczas pracy należy stale nosić
rękawice chroniące przed wysoką temperaturą.
Niebezpieczeństwo eksplozji!
Podczas eksploatacji urządzenia z użyciem tlenu lub gazami palnymi istnieje
niebezpieczeństwo eksplozji!
Niebezpieczeństwo podrażnienia błon śluzowych przez opary!
Kleje termotopliwe wydzielają przy przepisowym przetwarzaniu opary, które mogą
wydzielać nieprzyjemną woń. Dlatego należy eksploatować aplikator zbiornikowy w
pomieszczeniach dobrze wentylowanych. Należy przestrzegać danych zawartych w karcie technicznej oraz na karcie bezpieczeństwa kleju termotopliwego wytwórcy.
2.2
Wskazania odnośnie bezpiecznej pracy
W celu eliminacji zakłóceń w funkcjonowaniu urządzenia oraz w celu ochrony przed szkodliwymi warunkami pracy należy zawsze przestrzegać poniższych przepisów:
• W żadnym przypadku nie powinno być przekraczane maksymalnie dopuszczalne
ciśnienie robocze (6 bar).
• Z obszaru nanoszenia dyszy należy usuwać przedmioty palne lub wrażliwe na wysoką
temperaturę.
• Rozgrzany pistolet ręczny musi być po pracy zabezpieczany przez składany stojak (18)
lub odkładany na konsolę roboczą. Nie powinno się go nigdy układać na boku. W takim
wypadku klej termotopliwy może wypływać w sposób niekontrolowany przez otwory
odpowietrzające oraz spowodować niebezpieczeństwo poparzenia
• Nie należy nigdy bardzo gwałtownie wciskać spustu (16).
• Urządzenie należy ochraniać przed wilgocią oraz zamoczeniem (ochrona przed
porażeniem elektrycznym)
• Należy przestrzegać zapisów w karcie bezpieczeństwa kleju termotopliwego
(zabezpieczenie przed błędami aplikacji).
• Urządzenie należy eksploatować wyłącznie z dyszami skierowanymi w dół.
Niedopuszczalna jest praca nad głową!
• Przed każdą ingerencją w urządzeniu (konserwacja, czyszczenie) należy wyciągnąć z
gniazdka prądu wtyczkę.
• Urządzenie powinno być podłączane wyłącznie do gniazd elektrycznych zaopatrzonych
w bolec ochronny.
• Stosowany ewentualnie kabel przedłużający musi być zaopatrzony w bolec
ochronny. Przed użyciem tego kabla należy go dokładnie sprawdzić odnośnie jego
niezawodności.
• Po każdym użyciu pistoletu ręcznego należy wyciągnąć wtyczkę sieciową z gniazdka.
Przed składowaniem urządzenia należy je całkowicie schłodzić.
• Jeżeli dojdzie do uszkodzenia urządzenia lub przewodów, należy natychmiast
wyciągnąć wtyczkę sieciową. W takiej sytuacji pistolet ręczny należy poddać
specjalistycznej kontroli. Dopiero po dokonaniu naprawy (patrz rozdział 6 oraz 7)
urządzenie może być uruchomione.
38
PL
Uruchomienie
3
Uruchomienie
3.1
Podłączenie do prądu
3.1.1
Podłączenie do prądu (praca bez konsoli roboczej)
W celu przyłączenia urządzenia należy wykonać następujące czynności:
1. Montowanie podstawy do osadzenia pistoletu:
• W tym celu wprowadzić trzpień (B) podstawy
do osadzenia pistoletu (1) do otworu (A) obudowy pistoletu.
• Podstawę do osadzenia pistoletu (1) obracać w
kierunku (C), aż ułoży się ona prosto w obudowie.
• Demontaż podstawy do osadzenia pistoletu
odbywa się w kolejności odwrotnej.
3.1.2
2. Ustawienie urządzenia na podstawie do osadzenia pistoletu oraz wyciągnięcie stojaka.
3. Zamontowanie dostarczonego zaworu zwrotnego za pomocą szybkozłącza na zasilaniu sprężonego powietrza. Oddzielacz wody musi być przy tym skierowany do dołu.
Należy przy tym zwracać uwagę na wymagania dotyczące sprężonego powietrza
(rozdział 1.2, „Dane techniczne”).
4. Za pomocą regulatora ciśnienia (3) ciśnienie robocze nastawić na 4 bar.
5. Włożyć wtyczkę sieciową do gniazda z bolcem ochronnym.
6. Włączyć urządzenie.
Urządzenie jest teraz gotowe do pracy.
Podłączenie do prądu (praca z konsolą roboczą/ statywem roboczym)
W celu podłączenia urządzenia należy wykonać następujące czynności:
1. Włożenie urządzenia do konsoli roboczej.
2. Połączenie przyłącza sprężonego powietrza (1) konsoli roboczej (patrz rysunek na
stronie 3) z zasilaniem sprężonego powietrza. Należy przy tym zwracać uwagę na
wymagania dotyczące sprężonego powietrza (rozdział 1.2, „Dane techniczne”).
3. Za pomocą regulatora ciśnienia (3) nastawić ciśnienie robocze na 4 bary.
4. Połączyć wtyczkę sieciową z gniazdem elektrycznym z bolcem ochronnym
5. Włączyć urządzenie.
Urządzenie jest teraz gotowe do pracy.
Informacja
Po podłączeniu wtyczki sieciowej i w razie spadku napięcia na wyświetlaczu pokazuje się
(ok. 1 sekundy):
.
Następnie urządzenie wyłącza się ze względów bezpieczeństwa.
3.2
Podłączenie do prądu
by włączyć pistolet ręczny należy przytrzymać wciśnięty włącznik urządzenia (6) na co
najmniej 1 sekundę.
Zapala się wyświetlacz cyfrowy oraz wskazywana jest aktualna wartość temperatury.
Pistolet nagrzewa się natychmiast do nastawionej wcześniej temperatury (temperatura
zadana). Miga lewa kropka oddzielająca części dziesiętne, dopóki nie osiągnięta zostanie
zadana temperatura.
Przez wciśnięcie przycisku Set (7) może być wyświetlona zadana temperatura pracy.
39
PL
Uruchomienie
3.3
Nastawienia na regulatorze temperatury
3.3.1
Nastawienie temperatury roboczej
1. W celu nastawienia temperatury roboczej wcisnąć przycisk Set. Wskazywana jest aktualna temperatura robocza.
2. Trzymać wciśnięty przycisk Set. Za pomocą przycisków: Góra/Dół (Inaczej włączenia/
wyłączenia) wybrać pożądaną temperaturę roboczą.
Krótkie wciśnięcie przycisków: Góra/Dół powoduje skokową zmianę temperatury roboczej w przedziałach o 1°C . Skok o 1°C odpowiada jednemu wciśnięciu przycisku
Góra/Dół. Dłuższe wciśnięcie przycisków: Góra/Dół powoduje ciągłą zmianę temperatury roboczej.
Po zwolnieniu przycisku zapisywana jest automatycznie nowa wartość.
Wybieranie oraz nastawianie parametrów regulatora
Przez równoczesne wciśnięcie przycisków Góra/Dół za minimum 4 sekundy wchodzi się
do menu listy parametrów. Niektóre parametry można samemu nastawić, inne da się
tylko odczytać. Poniższa tabela podaje zestawienie parametrów:
3.3.2
Parametr
Funkcja
Nastawiane
Zakres
Wartość
Wartość
nastawienia standardowa klienta
P1
Spadek wartości zadanej
Gdy pistolet nie jest używany przez dłuższy
czas, układ regulacji temperatury powoduje
automatyczne przełączenie na pracę ze spadkiem temperatury. Temperatura jest obniżana do
wartości, która leży poniżej nastawionej temperatury roboczej o podaną tutaj wartość.
TAK
1…100°C
40°C
P2
Czas oczekiwania do spadku wartości zadanej
Gdy pistolet nie jest używany dłużej, niż ustawiony tutaj czas, następuje spadek temperatury.
TAK
1…999 min
30 min
P11
Licznik godzin pracy
Wyświetlane są tutaj cyfry określające setki,
dziesiątki i jednostki roboczogodzin
-
P12
Licznik godzin pracy
Wyświetlane są tutaj cyfry określające tysiące
roboczogodzin
-
P13
Liczba wcisków spustu
Wyświetlane są tutaj cyfry określające setki,
dziesiątki i jednostki wciśnięć spustu.
-
P14
Liczba wcisków spustu
Wyświetlane są tutaj cyfry określające tysiące
wciśnięć spustu.
-
P19
Zablokowanie klawiatury
Tutaj może być zablokowane przestawianie
temperatury roboczej za pomocą przycisków
Góra / Dół. Podczas próby zmian temperatury
roboczej, przy nastawionej blokadzie klawiatury,
pokazuje się komunikat
TAK
0 lub 1
0
„---„.
0: nie zablokowane
1: zablokowane
Za pomocą przycisków Góra/Dół listę parametrów można przewijać do góry, lub
do dołu. Aby wskazać wartość przynależną do danego z parametrów, należy wcisnąć
przycisk „Set”. Przy parametrach nastawialnych można zmieniać odnośną wartość przez
dodatkowe wciśnięcie przycisku Góra/Dół .
Poniższa grafika pokazuje schemat przebieg procesu sterowania urządzeniem.
40
PL
Praca z pistoletem ręcznym
+
>4 s
SET
Wskazanie
wartości
P1
SET
+
SET
+
SET
P2
-
+
Nastawienie
wartości
(tylko P1, P2, P19)
SET
…
P11
Rysunek 3.3.2/1: Nastawienie parametrów pracy
4
Praca z pistoletem ręcznym
4.1
Pozycja w pracy
Urządzenie powinno być eksploatowane wyłącznie z dyszą skierowaną do dołu. Przy
innych pozycjach podczas pracy klej termotopliwy może przedostawać się do kanałów
sprężonego powietrza oraz uszkodzić pistolet.
Rysunek 4.1/1: Dopuszczalna pozycja pracy
41
PL
Praca z pistoletem ręcznym
4.2
Napełnianie
Niebezpieczeństwo poparzenia!
Dysza pistoletu oraz roztopiony klej termotopliwy mogą być rozgrzane do temperatury
przekraczającej 200°C. W celu uniknięcia poparzeń podczas pracy należy stale nosić
rękawice chroniące przed wysoką temperaturą.
max. Level
4.3
Klej może zostać uzupełniony jak tylko jego poziom w zbiorniku spadnie poniżej
wewnętrznego lub zewnętrznego oznaczenia.
1. Urządzenie należy ulokować w konsoli roboczej lub na podstawie.
2. Włączyć urządzenie (patrz rozdział 3.2). Odczekać, aż zostanie osiągnięta temperatura
robocza.
3. Złapać urządzenie za uchwyt (17), a drugą ręką obrócić dźwignię (10) o 180° w kierunku ruchu wskazówek zegara oraz otworzyć pokrywę zamykającą zbiornik.
4. Napełnić zbiornik do poziomu maksimum 2 cm poniżej krawędzi zbiornika. Maksymalny
poziom napełnienia zaznaczony jest za pomocą naklejki na urządzeniu (patrz rysunek
lewy). Urządzenia nie napełniać powyżej, ponieważ klej termotopliwy po rozgrzewaniu
zwiększą swoją objętość.
5. Z powrotem zamknąć pokrywę zamykającą zbiornik . Obrócić dźwignię (10) w kierunku przeciwnym do ruchu wskazówek zegara aż do oporu, aby zablokować pokrywę
zamykającą zbiornik.
Nakładanie kleju termotopliwego
1. Pistolet ręczny należy umieścić w konsoli roboczej lub na postawie.
2. Włączyć urządzenie. Odczekać, aż zostanie osiągnięta temperatura robocza.
3. Skontrolować, czy w zbiorniku znajduje się wystarczająca ilość kleju.
Niebezpieczeństwo poparzenia!
Przy „pracy jałowej” mogą występować niekontrolowane wycieki kropli kleju termo topliwego, co może stanowić zagrożenie dla użytkownika oraz osób przebywających w
pobliżu.
4. Nacisnąć spust (16).
Ilość kleju można dozować przez zmianę ciśnienia (maksimum 6 bar) na regulatorze
ciśnienia (3) oraz/lub wybór odpowiedniej dyszy.
5. Po wyciśnięciu spustu (16) przerywane jest natychmiast doprowadzenie sprężonego
powietrza a zbiornik jest odpowietrzany.
42
PL
4.4
Co się dzieje, gdy...
Regulowanie obrazu nakładania (tylko HB 710 Spray)
Obraz nakładania ustawia się poprzez regulację sprężonego powietrza. Proszę nastawić
optymalny obraz nakładania poprzez przekręcenie przepustnicy sprężonego powietrza
(14) w płaszczu ochronnym (13):
• przekręcenie zgodne z ruchem wskazówek zegara zmniejsza ciśnienie powietrza
• przekręcenie przeciwne z ruchem wskazówek zegara zwiększa ciśnienie powietrza.
4.5
System automatycznej redukcji temperatury (ACE)
Należy unikać nadmiernego ogrzewania kleju topliwego. Po dłuższej przerwie w pracy
pistolet przechodzi na tryb pracy czuwania ze zmniejszoną temperaturą roboczą.
W przypadku niezmienionych ustawień fabrycznych, po 30 minutowej przerwie w pracy
temperatura spada o 40°C. Programowanie odpowiednich parametrów opisane jest w
rozdziale 3.3.2.
Aby zakończyć tryb pracy czuwania , należy wcisnąć na krótko spust lub przycisk Góra/
Dół. Pistolet rozgrzewa się natychmiast ponownie do temperatury roboczej.
4.6
Wyłączanie
1. Wcisnąć przycisk Góra/Dół/ (6) na około 1 sekundę, aż zgaśnie wyświetlacz.
2. Zmniejszyć ciśnienie robocze za pomocą regulatora ciśnienia (3) na „0” lub przerwać
doprowadzenie sprężonego powietrza.
5
Co się dzieje, gdy…
Rozdział ten podaje użytkownikowi przegląd możliwych komunikatów błędów i statusu
oraz oferuje pomoc przy usuwaniu błędów.
Przy występujących błędach oraz zakłóceniach w funkcjonowaniu urządzenia
skontrolować przede wszystkim:
• doprowadzenie prądu elektrycznego
• zasilanie sprężonego powietrza pod kątem poprawności funkcjonowania
• czy pistolet lub przewody doprowadzające (zasilanie prądowe, sprężone powietrze)
nie wykazują uszkodzeń mechanicznych.
Gdy stwierdzone zostaną uszkodzenia mechaniczne, pistolet w żadnym wypadku nie
powinien być uruchamiany. Należy go skontrolować w specjalistycznym serwisie oraz
naprawić.
5.1
Komunikaty stanu oraz błędów na wyświetlaczu
Wskazanie
Możliwa przyczyna
Środek zaradczy
Miga lewa kropka
oddzielająca części
dziesiętne
Aktywna faza nagrzewania
Faza nagrzewania jest zakończona, gdy
osiągnięta temperatura robocza osiągnęła
temp. zadaną (± 2°C).
Miga prawa kropka
oddzielająca części
dziesiętne
Aktywny spadek wartości
zadanej
Patrz parametr P1 oraz P2 (rozdział 3.3.2).
ERR
Überschreiten der zulässigen
Höchsttemperatur von 260°C
Abkühlen lassen
Przekroczenie dopuszczalnej
maksymalnej temperatury
260°C
Dokonać schłodzenia.
F1L
Błąd czujnika, zwarcie
Pistolet należy skontrolować w specjalistycznym serwisie.
F1H
Błąd czujnika, brak tłoczenia
kleju
Pistolet należy skontrolować w specjalistycznym serwisie.
--
Aktywna blokada klawiatury
Patrz parametr P19 (rozdział 3.3.2).
EP
Utrata danych w pamięci
parametrów
Regulator musi być wymieniony przez specjalistycznym serwis.
43
PL
Co się dzieje, gdy...
5.2
Wyszukiwanie oraz usuwanie błędów
Zakłócenie
Możliwa przyczyna
Pomoc zaradcza
Nie można włączyć ani
wyłączyć regulatora
Mikro- włącznik na
spuście ciągle uruchomiony lub uszkodzony
Usunąć blokadę na
mikro-włączniku (blaszany języczek) lub go
wymienić.
Z dyszy kapie klej
Zawór dyszy zanieczyszczony albo uszkodzony
Opróżnić urządzenie.
Wcisnąć spust na ok. 5s,
aby przedmuchać dyszę.
Patrz rozdział
6.2
HB 710:
trzon dyszy oczyścić lub
wymienić.
HB 710 Spray:
Wyczyścić albo wymienić
dyszę skręconą,
sprężynę ciśnieniową i
kulkę.
Nie jest podawana
wystarczająca ilość kleju
termotopliwego
Ciśnienie robocze za
niskie
Podwyższyć ciśnienie
robocze
(maksimum 6 bar).
Przerwane doprowadzenie sprężonego powietrza
Skontrolować doprowadzenie sprężonego
powietrza.
Układ dysz jest zatkany
HB 710:
dyszę stożkową i
ewentualnie trzon dyszy
oczyścić lub wymienić.
4.3
6.2, 6.3
HB 710 Spray:
dyszę skręconą i
ewentualnie trzon dyszy
oczyścić lub wymienić.
Za niska temperatura
robocza
Podwyższyć temperaturę
3.3.1
Zbyt mały docisk pokrywy
Podwyższyć docisk
pokrywy
6.4
Zanieczyszczenie uszczelki pokrywy
Oczyścić powierzchnię
uszczelki
Powietrze sprężone
ulatnia się z zespołu
konserwacyjnego
Nieszczelne przyłącza
Mocne dokręcenie lub
wymiana uszczelek
Nieoptymalny obraz
nakładania
Obraz nakładania
nieprawidłowo ustawiony
Nastawić obraz
nakładania
4.4
System dyszowy zatkany
lub uszkodzona
Wyczyścić lub wymienić
dyszę skręconą,
sprężynę ciśnieniową
oraz kulkę.
6.3.4
Sprężone powietrze
ulatnia się spod pokrywy
zamykającej (11).
Pęknięte szkło wzierniko- Szkło wziernikowe
we na oddzielaczu (2)
wymienić
Tylko HB 710 Spray
44
Konserwacja/ utrzymanie urządzenia
w dobrym stanie technicznym
PL
6
Konserwacja/ utrzymanie urządzenia w dobrym stanie
technicznym
Zagrożenie!
Niebezpieczeństwo nieumyślnego przyciśnięcia spustu. Odciąć dopływ sprężonego powietrza przed wszystkimi działaniami konserwatorskimi.
Zagrożenie!
Zagrożenie od napięcia elektrycznego.
Wszystkie prace, które wymagają otwarcia urządzenia, powinny być wykonywane
wyłącznie przez wykwalifikowany personel z uprawnieniami elektrycznymi.
Zagrożenie poparzeniem!
Dysza pistoletu oraz roztopiony klej termotopliwy mogą być rozgrzane do temperatury
przekraczającej 200°C. W celu uniknięcia poparzeń podczas pracy należy stale nosić
rękawice chroniące przed wysoką temperaturą
6.1
Harmonogram konserwacji
Należy dotrzymywać przedstawionych czasów konserwacji, aby zagwarantować stale
niezawodną oraz bezpieczną eksploatację:
Cotygodniowo:
Sprawdzić oddzielacz wody, ewentualnie opróżnić (zob. obrazek 6.1/1)
Proszę sprawdzić szczelność, uszkodzenia, obecność wszystkich części oraz śrubek i
przewodów.
Opróżnienie resztek kleju ze zbiornika oraz innych zanieczyszczeń, szczególnie po stronie
wewnętrznej pokrywy.
MAX
Maksymalny
stan napełnienia
W celu opróżnienia docisnąć
Rysunek 6.1/1: Opróżnianie oddzielacza wody
6.2
Czyszczenie
• Do czyszczenia pistoletu oraz jego podzespołów nie należy używać żadnych środków
agresywnych, zawierających rozpuszczalniki lub palnych. Takie substancje mogą
skutkować uszkodzeniami systemu.
• W celu czyszczenia części nie należy stosować np. przepalonego lub używanego kleju
topliwego. My zalecamy zlecenie przeprowadzenia tych prac wytwórcy lub dystrybutorowi.
• Pozostałości kleju termotopliwego oraz inne zanieczyszczenia należy usuwać wyłącznie
mechanicznie, np. za pomocą szmat, miękkiej szczotki, łopatki drewnianej itp.
45
Konserwacja/ utrzymanie urządzenia
w dobrym stanie technicznym
PL
6.2.1
Czyszczenie dyszy
• Przy lekkich zewnętrznych zanieczyszczeniach dyszę należy przetrzeć szmatką.
• Przy zapchaniu do otworu dyszy należy wprowadzić wiertło, igłę lub drut o pasującej
średnicy.
Przy braku efektów czyszczenia dyszy - należy ją wymienić (patrz rozdział 6.3).
6.3
Schematy i układy dysz
HB 710
HB 710 Spray
Blok dyszy (B7)
Miejsce zaworu (A6)
Trzon dyszy (A5)
Kołpak ochronny (B6)
Kołpak ochronny (A4)
Kulka (B5)
Podkładka (A3)
Pierścień zabezpieczający (A2)
Dysza stożkowa (A1)
Sprężyna ciśnieniowa (B4)
Dysza skręcona (B3)
Kołpak powietrza (B2)
Pierścień zamykający (B1)
Rysunek 6.3/1: szczegółowy schemat dyszy
6.3.1
6.3.2
Wymiana dyszy stożkowej (HB 710)
Niezbędne narzędzie
• 2 klucze płaskie 19 mm
• 1 szczypce
1. Odciąć dopływ sprężonego powietrza
2. Podgrzać urządzenie.
3. Kontrować trzon dyszy (A5) oraz odkręcić dyszę stożkową (A1).
4. Przykręcić ponownie ręcznie nową dyszę stożkową (A1) oraz poddać ją podgrzewaniu
przez 2 minuty.
5. Ponownie kontrować trzon dyszy (A5). Przykręcić silnie nową dyszę stożkową (A1) bez
gwałtownych ruchów.
6. Montować pozostałe części w odwrotnej kolejności.
Wymiana trzonu do mocowania dyszy (HB 710)
Niezbędne narzędzie
• 2 klucze płaskie 19 mm
• 1 klucz płaski 12 mm
• 1 szczypce
Przy wymianie trzonu do mocowania dyszy w zbiorniku nie powinien znajdować się klej
topliwy. Dlatego należy odprowadzić cały klej termotopliwy z pistoletu, np. do naczynia.
1. Proszę postępować tak, jak w punkcie 6.3.1 do 4 punktu (demontaż dyszy)
2. Odkręcić pierścień zabezpieczający (A2)
3. Oddzielić podkładkę (A3) oraz kołpak ochronny (A4)
4. Kontrować miejsce zaworu (A6) kluczem płaskim 36 mm oraz szczypcami. Wykręcić
trzon dyszy.
5. Przykręcić nowy trzon dyszy najpierw ręcznie, a następnie kluczem (bez dużej siły)
6. Montować podzespoły w odwrotnej kolejności do ich demontażu.
46
Konserwacja/ utrzymanie urządzenia
w dobrym stanie technicznym
PL
6.3.3
Wymiana dyszy skręconej, sprężyny ciśnieniowej i kulki (HB 710 Spray)
Niezbędne narzędzia
• Klucz hakowy
• Klucz płaski 11 mm
• Klucz płaski 32 mm oraz szczypce
Przy wymianie trzonu do mocowania dyszy w zbiorniku nie powinien znajdować się klej
topliwy. Dlatego należy odprowadzić cały klej termotopliwy z pistoletu, np. do naczynia.
1. Odciąć dopływ sprężonego powietrza.
2. Odkręcić pierścień zamykający (B1) bez użycia dużej siły, wtedy, kiedy jest on ciepły.
3. Zdjąć kołpak ochronny (B6) i kołpak powietrza (B2).
4. Odkręcić dyszę skręconą kluczem 11 mm. Kontrować przy tym kluczem 32 mm lub
szczypcami.
5. Oddzielić sprężynę ciśnieniową (B4) oraz kulkę (B5) umiejscowione za dyszą
skręconą.
6. Montować podzespoły w odwrotnej kolejności do ich demontażu.
6.4
Nastawienie nacisku pokrywy
Niezbędne narzędzia
• 1 klucz imbusowy 1,5 mm
• 1 klucz imbusowy 2,5 mm
• 1 klucz imbusowy 3 mm
C4
C3
C2
C1
Rysunek 6.4/1: Nastawienie nacisku pokrywy
1. Obracać dźwignię (C3) w kierunku ruchu wskazówek zegara oraz odchylić pokrywę, aż
zostanie całkowicie otwarta.
2. Odkręcić wkręt mocujący (C4) dźwigni za pomocą klucza imbusowego 3 mm.
Wyciągnąć śrubę.
3. Odkręcić śrubę zaciskową (C1) za pomocą klucza imbusowego 1,5 mm
(ok. 1,5 obrotu).
4. Klucz imbusowy 2,5 mm włożyć przez otwór śrubowy dźwigni do śruby regulacyjnej.
Śrubę regulacyjną obracać początkowo około 90° w kierunku ruchu wskazówek
zegara.
5. Zamknąć oraz zablokować pokrywę. Gdy nie da się jej zamknąć, obracać śrubę
regulacyjną tak często o około 15° do tyłu, aż pozwoli się on lekko zamknąć.
6. Wcisnąć spust.
• Gdy pokrywa zamyka się teraz w sposób niezawodny, należy kontynuować etap 7.
• Gdy pokrywa jeszcze nie zamyka się sposób niezawodny, należy powtórzyć
nastawienie od punktu 4.
7. Otworzyć ponownie pokrywę.
8. Dokręcić silnie śrubę zaciskową (C1).
9. Montować śrubę mocującą (C4) dźwigni.
47
Konserwacja/ utrzymanie urządzenia
w dobrym stanie technicznym
6.5
PL
Wymiana uszczelki z pokrywy zbiornika pistoletu
Niezbędne narzędzie
• 1 wkrętak krzyżowy Gr. 1
D6
D5
D4
D3
D2
D1
Przy montażu zwracać uwagę na pozycjonowanie
Rysunek 6.5/1: Wymiana uszczelki z pokrywy zbiornika pistoletu
Przy wymianie uszczelki z pokrywy zbiornika pistoletu w zbiorniku nie powinien znajdować
się klej topliwy. Dlatego należy odprowadzić cały klej z pistoletu, np. do naczynia.
1. Podgrzać urządzenie. Przyciskać spust tak długo, aż zbiornik zostanie opróżniony z
kleju.
2. Odciąć dopływ sprężonego powietrza.
3. Zdemontować wszystkie elementy zamknięcia (zob. rozdział 6.7).
4. Odkręcić śrubki (D1) mocujące płytkę uszczelniającą (D2) za pomocą wkrętaka
krzyżowego. Odchylić delikatnie płytkę.
5. Proszę usunąć delikatnie uszczelkę (D5) z płytki uszczelniającej.
6. Proszę przyłożyć nową uszczelkę (D5), tak, by równomiernie przylegała do
płytki.
7. Zamontować płytkę uszczelniającą zwracając uwagę na położenie podkładki
(D3) oraz pierścienia–O (D4) otworu napowietrzania. Przykręcić śrubki mocujące.
48
Konserwacja/ utrzymanie urządzenia
w dobrym stanie technicznym
PL
6.6
Wymiana elementów zaworu
Niezbędne narzędzia
• Klucz imbusowy 2,5 mm
• Klucz imbusowy 3 mm
• Śrubka pomocnicza M4
E1
E2
E3
E4
E5
E6
E10 E9
E11
E8 E7
Obrazek 6.6/1: Wymiana elementów zaworu
1. Proszę podgrzać urządzenie. Poprzez naciskanie spustu opróżnić zbiornik z kleju.
2. Przy zamkniętej pokrywie odkręcić śrubkę (E1) mocującą dźwignię (E2) za pomocą
klucza imbusowego 3mm. Zdjąć dźwignie oraz zabierak (E3).
3. Odkręcić śrubki E4 kluczem imbusowym 2,5 mm. Zdjąć obudowę pokrywy (E5).
4. Śrubę pomocniczą M4 wkręcić w zaciskacz E7. Odkręcić śrubę zaciskową E6 od
podkładki za pomocą klucza nimbusowego 2,5 mm. Wyciągnąć delikatnie zaciskacz ze
śrubą pomocniczą M4 z obudowy zaworu. Usunąć sprężynę (E8) oraz stożek (E9).
5. Zmniejszyć ciśnienie na 1…2 bary. Krótko nacisnąć spust. Pod wpływem ciśnienia
zawór (E10) oraz sprężyna (E11) zostaną wypchnięte z obudowy. Należy przytrzymać
szmatkę przy otworze, żeby przechwycić (gorące!) części.
6. Zamontować nowe części, obudowę pokrywy oraz dźwignie w odwrotnej
kolejności.
49
Konserwacja/ utrzymanie urządzenia
w dobrym stanie technicznym
6.7
PL
Wymiana elementów zamknięcia (kompletna)
Niezbędne narzędzia:
• Klucz imbusowy 2,5 mm
• Klucz imbusowy 3 mm
• Klucz płaski 13 mm
F1
F2
F3
F4
F6
F5
F8
F7
F9
F10
Obrazek 6.7/1: Wymiana elementów zamknięcia
1. Proszę podgrzać urządzenie. Poprzez naciskanie spustu opróżnić zbiornik z kleju.
2. Przy otwartej pokrywie odkręcić śrubkę (F1) mocującą dźwignię (F2) za pomocą klucza
imbusowego 3 mm. Zdjąć dźwignię oraz zabierak (F3).
3. Odkręcić śrubki (F4) kluczem imbusowym 2,5 mm. Zdjąć obudowę pokrywy (F5).
4. Zdjąć pierścień zabezpieczający (F6)
5. Zdjąć wszystkie elementy (F7) zamknięcia z osi (F8). Ostrożnie nałożyć nowe elementy
zamknięcia na oś.
6. Zamontować pierścień zabezpieczający (F6).
7. Odkręcić nakrętki (F9) kluczem 13 mm.
8. Dostosować wrzeciono poprzez kręcenie w taki sposób, aby jego stopa podczas zamykania pokrywy czysto i gładko wchodziła do wpustu w obudowie. Zakręcić nakrętkę.
Sprawdzić, czy pokrywa pozwala się czysto otwierać. W razie potrzeby bardziej
dopasować wrzeciono.
9. Zamontować obudowę pokrywy i dźwignię.
50
PL
7
Naprawa
Naprawa
Inne naprawy niż opisane w tej instrukcji obsługi powinny być wykonywane wyłącznie
przez osoby autoryzowane przez wytwórcę lub inne osoby przeszkolone, z zastosowaniem wyłącznie oryginalnych części zamiennych BÜHNEN.
8
Gwarancja
Urządzenie zostało zaprojektowane oraz wykonane według najnowszego stanu techniki.
Udzielamy pierwszemu kupującemu gwarancji na funkcjonowanie, materiał oraz przetwarzanie - odpowiednio do obowiązujących przepisów. Wyjątek stanowi zużycie normalne
urządzenia. Gwarancja wygasa, gdy stwierdzone zostanie nieprawidłowe obsługiwanie,
uszkodzenie mechaniczne, naprawa przez osoby trzecie oraz użycie części zamiennych
innych niż oryginalne.
Zastrzegamy sobie możliwość doprowadzenia urządzenia do stanu sprawności lub jego
wymianę według naszego wyboru. Gwarancja wybiegająca poza nasz zakres dostawy jest
wykluczona, ponieważ my nie mamy wówczas żadnego wpływu na fachowe zastosowanie
urządzenia zgodnie z przeznaczeniem.
Prosimy przestrzegać naszych ogólnych warunków sprzedaży!
9
Usuwanie odpadów
Otrzymujecie Państwo urządzenie, opakowanie oraz osprzęt zdatny do recyklingu w
świetle praw o ochronie środowiska (według Dyrektywy 2002/96/EG Parlamentu Europejskiego oraz Rady Europy z dnia 27 stycznia 2003 roku).
51
D
Ersatzteile/Spare parts/Części zamienne
10
Ersatzteile/Spare parts/Części zamienne
10.1
HB 710
10.1.1
Basisgerät/Base Unit/ Urządzenie podstawowe
GB
PL
H217143
Ersatzteilliste/Spare parts list/Lista części zamiennych
Pos.
Bestell-Nr.
Anzahl Bezeichnung
Order no.
Quantity
Poz. Numer produktu Ilość
H105703
1
1
Warnaufkleber
H206030
2
1
Griffschalensatz
Designation
Określenie
Warning label
Naklejka ostrzegawcza
Grip shell kit
Uchwyt
3
H206033
1
Abzug
Trigger
Spust
4
H206134
1
Tankisolierung kurz
Tank insulation
Izolacja zbiornika
5
H206039
1
Stellbügel
Stand hoop
Stojak
6
H206041
1
Versorgungskabel 3 m
Supply cable 3 m
Kabel zasilający 3 m
7
H217143
1
Temp.-Regler komplett
Thermostat complete
Kompletny regulator
temperatury
8
H206048
1
Mikroschalter
Micro switch
Mikroprzełącznik
9
H206102
1
Stösselventil Spray
Valve complete
Zawór Spray
10
H206104
1
Ablagefuß
Foot
Podstawa do
odkładania pistoletu
11
H206135
1
Schutzkappe
Protection cap
Kołpak ochronny
12
H212002
1
Warnschild
Warning label
Tabliczka ostrzegawcza
13
KD0400
1
Zylinderstift
Dowel pin
Kołek cylindryczny
14
KD0495
11
Plastiteschraube
Screw
Śruba
15
KDN0726
2
Scheibe
Washer
Podstawka
16
KDN1078
2
Zylinderstift
Dowel pin
Kołek cylindryczny
17
MD0060
1
Schlüsselring
Suspension ring
Pierścień zamka
18
MDM0201
2
Schelle
Clamp
Pierścień zaciskowy
19
MDM0202
1
Schelle
Clamp
Pierścień zaciskowy
52
D
10.1.2
GB
PL
Ersatzteile/Spare parts/Części zamienne
Schmelztank/Melt Tank/Zbiornik kleju termotopliwego
Oś oraz pierścienie-O posmarować przed montażem (Fa. Klüber: Barrierta L55/2)
Krzyżaka używa się tylko przy granulacie
/ Uwaga:
Poz. 5 włącznie: poz. 7/12/14
/ Uwaga:
Poz. 6 włącznie: poz. 7/12/15
Ersatzteilliste/Spare parts list/Lista części zamiennych
Pos.
Bestell-Nr.
Anzahl Bezeichnung
Order no.
Quantity
Poz. Numer produktu Ilość
Designation
Określenie
1
H206004
1
Temperaturfühler
kompl.
Temperature
tracer
Kompletny czujnik temperatury
2
H206018
1
Schlauch
Hose
Wąż
3
H206020
1
Kreuzrippe
Rib
Krzyżak
4
H206079
1
Heizpatrone dreifach
Heater
Potrójny element grzewczy
5
H217195
1
Baugruppe Tank
Tank unit
Elementy budowy zbiornika
6
H217196
1
Baugruppe Vorsatz
Raupe
front kit unit bead
Zestaw przedni
7
KDN0517
2
Schraube
Screw
Śruba
8
KDN0529
1
Zahnscheibe
Toothed washer
Podkładka zębata
9
KDN0681
2
Schraube
Screw
Śruba
10
KDN0704
1
Schraube
Screw
Śruba
11
KDN0726
1
Scheibe
Washer
Podkładka
12
LD0074
3
O-Ring
O-ring
O-Ring
13
LDF0019
2
Dichtring
Sealing ring
Pierścień uszczelniający
14
LDH0143
2
O-Ring
O-ring
O-Ring
15
LDN0131
1
O-Ring
O-ring
O-Ring
16
MC0094
1
Schlauchverschraubung
Hose connector
Złącze węża
17
NC0093
1
Temperatur-Regler
Thermostat
Regulator temperatury
53
Ersatzteile/Spare parts/Części zamienne
10.1.3
D
GB
PL
Düsenbausatz/Nozzle Kit/Zespół konstrukcyjny dysz
Ersatzteilliste/Spare parts list/Lista części zamiennych
Pos.
Bestell-Nr.
Anzahl Bezeichnung
Order no.
Quantity
Poz. Numer produktu Ilość
Designation
Określenie
1
FD0044
1
Düsenkegel standard
Nozzle
Dysza stożkowa standard
2
H206015
1
Trennscheibe
Dividing wall
Podkładka rozdzielająca
3
H206076
1
Düsenfuß
Adaptor for nozzle
Trzon dyszy
4
H206135
1
Schutzkappe
Protection cap
Kołpak ochronny
5
H210071
1
Ventilsitz
Valve seat
Miejsce zaworu
6
H210072
1
Scheibe
Washer
Podkładka
7
KD0167
1
Sicherungsring
Locking ring
Pierścień zabezpieczający
8
LDF0019
1
Dichtring
Sealing ring
Pierścień uszczelniający
9
LDH0130
1
O-Ring
O-ring
O-Ring
10
LDN0158
1
O-Ring
O-ring
O-Ring
11
MC0057
1
Blindstopfen M5
Blind plug M5
Zaślepka M
54
D
GB
PL
Ersatzteile/Spare parts/Części zamienne
10.2
HB 710 Spray
10.2.1
Basisgerät /Base Unit/Urządzenie podstawowe
Ersatzteilliste/Spare parts list/ Lista części zamiennych
Bestell-Nr.
Anzahl Bezeichnung
Order no.
Quantity
Poz. Numer produktu Ilość
Pos.
Designation
Określenie
1
H105703
1
Warnaufkleber
Warning label
Naklejka ostrzegawcza
2
H206030
1
Griffschalensatz
Grip shell kit
Uchwyt
3
H206033
1
Abzug
Trigger
Spust
4
H206134
1
Tankisolierung kurz
Tank insulation
Izolacja zbiornika
5
H206039
1
Stellbügel
Stand hoop
Stojak
6
H206041
1
Versorgungskabel 3 m Supply cable 3 m
Kabel zasilający 3m
7
H206043
1
Temp.-Regler kompl.
Thermostat
Kompletny regulator
temperatury
8
H206048
1
Mikroschalter
Micro switch
Mikroprzełącznik
9
H206102
1
Stösselventil Spray
Valve complete spray Zawór Spray
10
H206104
1
Ablagefuß
Foot
Podstawa do odkładania
pistoletu
11
H206135
1
Schutzkappe
Protection cap
Kołpak ochronny
12
H212002
1
Warnschild
Warning label
Tabliczka ostrzegawcza
13
KD0400
1
Zylinderstift
Dowel pin
Kołek cylindryczny
14
KD0495
11
Plastiteschraube
Screw
Śruba
15
KDN0726
2
Scheibe
Washer
Podstawka
16
KDN1078
2
Zylinderstift
Dowel pin
Kołek cylindryczny
17
MD0060
1
Schlüsselring
Suspension ring
Pierścień zamka
18
MDM0201
2
Schelle
Clamp
Pierścień zaciskowy
19
MDM0202
1
Schelle
Clamp
Pierścień zaciskowy
55
Ersatzteile/Spare parts/Części zamienne
10.2.2
D
GB
PL
Schmelztank/Melttank/Zbiornik kleju termotopliwego
Krzyżaka używa się
tylko przy granulacie
7
Poz. 7 włącznie: poz. 10/15/17
Oś oraz pierścienie-O posmarować
przed montażem (Fa. Klüber: Barrierta L55/2)
/ Uwaga:
Poz. 8 włącznie: poz. 10/15/18
Ersatzteilliste/Spare parts list/Lista części zamiennych
Pos.
Bestell-Nr.
Order no.
Poz. Numer produktu
1
CCN0231
Anzahl Bezeichnung
Designation
Określenie
Quantity
Ilość
1
Drosselventil
Reduction valve
2
3
CCN0275
H206004
1
1
4
5
6
7
8
9
10
11
12
13
14
15
16
17
18
19
20
21
22
H206018
H206020
H206079
H217195
H217596
KD0269
KDN0517
KDN0529
KDN0681
KDN0704
KDN0726
LD0074
LDF0019
LDH0143
LDN0131
MC0094
MC0095
MD0088
MDM0292
1
1
1
1
1
1
2
1
2
1
1
3
5
2
1
1
2
1
1
Rückschlagventil
Valve
Temperaturfühler kompl. Temperature tracer
compl.
Schlauch
Hose
Kreuzrippe
Rib
Heizpatrone Dreifach
Heater
Baugruppe Tank
Tank unit
Baugruppe Vorsatz Spray Front kit unit spray
Schraube
Screw
Schraube
Screw
Zahnscheibe
Toothed washer
Schraube
Screw
Schraube
Screw
Scheibe
Washer
O-Ring
O-ring
Dichtring
Sealing ring
O-Ring
O-ring
O-Ring
O-ring
Schlauchverschraubung Hose connector
Schwenkverschraubung Swivel joint
Schlauch
Hose
Schelle D= 8 mm
Clamp D = 8 mm
23
NC0093
1
Temperatur-Regler
56
Thermostat
Dysza skręcona
Zawór
Kompletny czujnik
temperatury
Wąż
Krzyżak
Potrójny element grzewczy
Elementy budowy zbiornika
Zespół przedni Spray
Śruba
Śruba
Podkładka zębata
Śruba
Śruba
Podkładka
O-Ring
Pierścień uszczelniający
O-Ring
O-Ring
Złącze obrotowe
Złącze obrotowe
Wąż
Pierścień zamykający
D =8 mm
Regulator temperatury
D
10.2.3
GB
PL
Ersatzteile/Spare parts/Części zamienne
Düsenbausatz/Nozzle Kit/Zespół konstrukcyjny dyszy
Ersatzteilliste/Spare parts list/Lista części zamiennych
Pos.
Bestell-Nr.
Order no.
Poz. Numer produktu
Anzahl Bezeichnung
Designation
Określenie
Quantity
Ilość
1
H206015
1
Trennscheibe
Dividing wall
Podkładka
rozdzielająca
2
H206135
1
Schutzkappe
Protection cap
Kołpak ochronny
3
H206172
1
Überwurfmutter
Nut
Nakrętka
4
H206177
1
Düsenblock L komplett
Nozzle block complete
Kompletny blok dyszy
5
FD0113
1
Kugel
Ball
Kulka
6
KDF0004
1
Druckfeder
Spring
Sprężyna ciśnieniowa
7
LDH0130
1
O-Ring
O-ring
O-Ring
8
LDN0158
1
O-Ring
O-ring
O-Ring
9
H206183
1
Sprühdüsensatz 37°
1,5 mm
Spray nozzle kit, 37°
1.5 mm
Zestaw dyszy
sprayowych 37°
1,5mm
57
Ersatzteile/Spare parts/Części zamienne
10.3
D
GB
PL
Verschluß/Closure/Zamknięcie
/ Uwaga
Poz. 10 włącznie;
Poz.1/2/7/9/11/17/18/22
Zwracać uwagę na pozycjonowanie
podczas montażu
Ersatzteilliste/Spare parts list/Lista części zamiennych
Pos.
Bestell-Nr.
Anzahl Bezeichnung
Order no.
Quantity
Poz. Numer produktu Ilość
1
H206054
1
Dichtungsplatte
Designation
Określenie
Sealing plate
Płytka uszczelniająca
2
H206056
1
Deckeldichtung
Cover sealing
Uszczelnienie wieka
3
H206059
1
Zugspindel
Tie bolt
Wrzeciono
4
H212001
1
Mitnehmer
Carrier
Zabieracz
5
H212036
1
Verschlußkappe
Closure cap
Kołpak zamykający
6
H212037
1
Hebel
Lever
Dźwignia
7
H212061
1
Scheibe
Washer
Podkładka
8
H212062
1
Deckel
Cover
Wieko
9
H212097
1
Ventil Baugruppe
Valve compl.
Elementy budowy zaworu
10
H217193
1
Verschlußbaugruppe
Closure unit
Elementy budowy zamknięcia
11
KD0464
1
Schraube
Screw
Śruba
12
KDN0583
2
Schraube
Screw
Śruba
13
KDN0625
1
U-Scheibe
Washer
Śruba-U
14
KDN0661
2
Schraube
Screw
Śruba
15
KDN0720
1
Zylinderstift
Cylinder pin
Kołek cylindryczny
16
KDN0805
1
Mutter
Nut
Nakrętka
17
KDN0910
1
U-Scheibe
Spacer
Śruba-U
18
KDN1347
2
Schraube
Screw
Śruba
19
KDN1362
1
Sicherungsscheibe
Locking washer Podkładka zabezpieczająca
20
KDN1452
1
Schraube
Screw
Śruba
21
LD0028
1
O-Ring
O-ring
O-Ring
22
LDN0160
1
O-Ring
O-ring
O-Ring
58
D
10.4
GB
PL
Ersatzteile/Spare parts/Części zamienne
Arbeitskonsole/Working Bracket/Konsola robocza
Ersatzteilliste/Spare parts list/Lista części zamiennych
Pos.
Bestell-Nr.
Bezeichnung
Order no.
Poz. Numer produktu
Designation
Określenie
Uchwyt pistoletu
1
H206402
Pistolenaufnahme
Holding fixture
2
H206403
Kantenschutz 300 mm
Edge protection 300 mm Ochrona krawędzi 300 mm
3
H206425
Wartungseinheit
D = 33 komplett
Air kit D = 33, complete
Zespół zasilania sprężonym
powietrzem D = 33 komplet
4
H206481
Konsole EU/US
Console EU/US
Konsola EU/US
5
H206508
Druckluftschlauch
Hose
Wąż sprężonego powietrza
6
HC0007
Schlauchklemme
Hose clamp
Zacisk węża
7
KD0383
Sechskantmutter
Hexagon nut
Nakrętka sześciokątna
8
KDN0524
Scheibe
Washer
Podkładka
9
KDN0642
Hutmutter
Cap nut
Nakrętka kołpakowa
10
KDN0726
Scheibe
Washer
Podkładka
11
KDN0906
Schraube
Screw
Wkręt
12
KD0762
Sechskantmutter
Hexagon nut
Nakrętka sześciokątna
13
MD0007
Stecktülle
Male coupling
Tulejka nasadowa
14
MDM0241
Gehäusefuß schwarz
Housing base, black
Podstawa obudowy czarna
15
MDM0289
Zugentlastung gerade
Cord grip
Uchwyt kabla
16
MDM0290
Zugentlastung gerade
Cord grip
Uchwyt kabla
17
NCN0459
Kabelbinder 3,6 x 284
Clamp 3.6 x 284
Łącznik kablowy 3,6x284
18
H206073
Zuleitung Konsole
3 m Euro
Cable 3 m Euro
Przewód doprowadzający
konsoli 3 m Euro
19
ZDN0148
Hinweisschild
Indication plate
Tabliczka informacyjna
20
KDN0910
U-Scheibe
Spacer
Podkładka U
59
Ersatzteile/Spare parts/Części zamienne
10.5
D
GB
PL
Bausatz Workstation/Workstation Kit/
Zespół konstrukcyjny statywu roboczego
P an Wartungseinheit
P to air kit
P do zespołu
konstrukcyjnego
nur anschließen, wenn P
direkt an Hauptluftversorgung
use only if P to air supply
Podłączać tylko wówczas, gdy P bezpośrednio
do zasilania głównego sprężonego powietrza
A an Zylinder
A to cylinder
A do siłownika
Ersatzteilliste/Spare parts list/ Lista części zamiennych
Pos.
Bestell-Nr.
Anzahl Bezeichnung
Order no.
Quantity
Poz. Numer produktu Ilość
1
H206501
1
Aufnahme
Designation
Określenie
Holding fixture Uchwyt
2
H206502
1
Aufnahmeblech
Recaptacle
Blacha uchwytu
3
H206518
1
Winkel
Elbow
Kątownik
4
H206504
1
Schlauch PUN-4 SILB
Hose
Wąż PUN-4 SILB
5
H206507
1
Schlauch
Hose
Wąż
6
BCN0249
1
Zylinder
Cylinder
Siłownik
7
KDN0523
2
Scheibe
Washer
Podkładka
8
KDN0841
1
Zylinderschraube
Screw
Śruba z łbem walcowym
9
KDN0906
4
Senkschraube
Slotted screw
Śruba z łbem stożkowym
płaskim
10
KDN1038
2
Sechskantmutter
Nut
Nakrętka sześciokątna
11
LDF0021
1
Dichtring 1/4 Alu
Sealing ring
Pierścień uszczelniający ¼ Alu
12
MCM0245
1
5/2 Fußventil
Foot valve
Zawór stopowy 5/2
13
MCN0248
2
Stecknippel Verschr.
Nipple
Złączka wtykowa gwintowana
14
MDN0205
1
Stecknippel Verschr.
Nipple
Złączka wtykowa gwintowana
15
MDN0273
1
Verschlußschraube
Screw plug
Korek gwintowany
18
H206515
1
Schlauch PUN-4 Silb.
Hose
Wąż PUN-4 Silb.
19
H206516
1
Schlauch
Hose
Wąż
22
H206521
1
Anschlußoption
Option of
connection
Opcja przyłącza
60
D
GB
Anschlußpläne/Diagrams/
Schematy montażowe
PL
11
Anschlußpläne/Diagrams/Schematy montażowe
11.1
Elektr. Schaltplan/Wiring diagram/Schemat połączeń elektrycznych
Zbiornik kleju
topliwego
Elementy grzewcze
Czujnik temperaturowy
Mikroschalter
Micro switch
Ogranicznik temperatury
Mikroprzełącznik
Regulator temperatury
Kabel zasilający
61
Anschlußpläne/Diagrams/
Schematy montażowe
11.2
D
GB
PL
Pneumatikplan/Pneumatic diagram/Schemat połączeń pneumatycznych
Opcja
Reduktor ciśnienia
Tylko dla wersji spray
Regulator
powietrza
Zawór trzonu
Zawór zwrotny
Zamknięcie
Zbiornik
Odpowietrzanie
Dysza
62
Konformitätserklärung
Wir
BÜHNEN GmbH & Co. KG,
D-28277 Bremen
erklären in alleiniger Verantwortung, dass das Produkt
Schmelzklebepistole HB 710
auf das sich diese Erklärung bezieht, im Lieferzustand mit den folgenden Normen oder normativen Dokumenten übereinstimmt:
Geräte- und Produktsicherheitsgesetz (GPSG)
DIN EN 60204-1
DIN EN 60335-1
DIN EN 60335-2-45
gemäß den Bestimmungen der Richtlinien
98/37/EG
2001/95/EG
Bremen, August 2008
Hermann Kruse
(Leiter Technik)
Declaration of Conformity
We,
BÜHNEN GmbH & Co. KG,
D-28277 Bremen
declare in sole responsibility that the product
Hot melt applicator HB 710
to which this declaration refers, conforms to the following standards or normative documents in its delivery state:
Geräte- und Produktsicherheitsgesetz (GPSG)
DIN EN 60204-1
DIN EN 60335-1
DIN EN 60335-2-45
in accordance with the provisions of the directives
98/37/EG
2001/95/EG
Bremen, August 2008
Hermann Kruse
(Technical Director)
63
Deklaracja zgodności
BÜHNEN GmbH & Co. KG,
D-28277 Bremen
My deklarujemy z całą odpowiedzialnością, że produkt
Pistolet do kleju topliwego HB 710
do którego odnosi się niniejsza deklaracja, w momencie dostarczenia do odbiorcy jest zgodny
się z poniższymi normami lub dokumentami normatywnymi:
Geräte- und Produktsicherheitsgesetz (GPSG)
/Ustawa o Bezpieczeństwie Urządzeń i Produktów/
DIN EN 60204-1
DIN EN 60335-1
DIN EN 60335-2-45
według postanowień Dyrektywy
98/37/EG
2001/95/EG
Bremen, sierpień 2008
Hermann Kruse
BÜHNEN GmbH & Co. KG
Hinterm Sielhof 25
Buehnen Polska Sp. z o.o.
28277 Bremen • Germany
51-502 Wrocław, ul. Mydlana 1
Tel.:
+49 (0) 421 51 20 - 125
Telefon:
Fax:
+49 (0) 421 51 20 - 260
Telefaks: +48-71-3450082
+48-71-3450081,
[email protected]
[email protected]
www.buehnen.de
www.buehnen.pl
Änderungen vorbehalten © BÜHNEN GmbH & Co. KG/H2171XM_#A_D/GB/PL/080825/H&F
(Kierownik działu konstrukcyjnego oraz rozwoju)