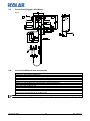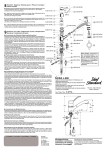
1
Betriebsanleitung Operating Instruction DG 1-II Art. Nr. / Art. no.: 1024 (Silikon) 102410 (EPDM) Stationäres Dosiergerät für Desinfektionsmittel Stationary Metering Unit for Disinfectants Deutsch 417101158_DG1 English Rev. 05-03.13 Inhaltsverzeichnis 1 Allgemeines ....................................................................................................................... 3 2 Sicherheit ........................................................................................................................... 5 2.5.1 2.5.2 Unterwiesene Person ........................................................................................................................................... 7 Fachkraft .............................................................................................................................................................. 7 1.1 1.2 1.3 1.4 2.1 2.2 2.3 2.4 2.5 2.6 2.7 2.8 2.9 2.10 EBS Nummernreihe .............................................................................................................................. 3 Transportschäden / Auspacken ............................................................................................................ 3 Gewährleistungsumfang ....................................................................................................................... 4 Kontaktadresse / Hersteller ................................................................................................................... 4 Bestimmungsgemäße Verwendung ...................................................................................................... 5 Mikrobiologische Überprüfung von dezentralen Desinfektionsmittel-Dosiergeräten ............................ 5 Allgemeine Hinweise zur Sicherheit ...................................................................................................... 6 Wartung und Reparatur ......................................................................................................................... 6 Sicherheitsmaßnahmen (vom Betreiber durchzuführen) ...................................................................... 6 Pflichten des Betreibers ........................................................................................................................ 7 Systemtrennung .................................................................................................................................... 7 Hervorhebungen / Aufzählungen .......................................................................................................... 8 Sicherheitssymbole ............................................................................................................................... 8 Gerätekennzeichnung ........................................................................................................................... 8 3 4 Aufbau................................................................................................................................ 9 Funktionsbeschreibung und Bedienung ....................................................................... 10 5 Montage und Anschluss ................................................................................................. 11 6 Einstellung und Inbetriebnahme .................................................................................... 13 6.2.1 6.2.2 6.2.3 6.2.4 6.2.5 Überprüfung der Konzentrationseinstellung ........................................................................................................15 Überprüfung der Sicherheitseinrichtungen ..........................................................................................................15 Funktionsprüfung der Niveausauglanze ..............................................................................................................15 Funktionsprüfung des Strömungswächters .........................................................................................................16 Umstellung auf ein neues Produkt.......................................................................................................................16 4.1 5.1 5.2 5.3 5.4 6.1 6.2 Beschreibung der Anzeigen und Bedienelemente .............................................................................. 10 Wandmontage ..................................................................................................................................... 11 Wasseranschluss ................................................................................................................................ 12 Elektrischer Anschluss ........................................................................................................................ 12 Verlegung Sauglanze und Netzleitung an die linke Gehäuseseite ..................................................... 12 Inbetriebnahme ................................................................................................................................... 13 Einstellung der Konzentration ............................................................................................................. 14 7 8 Störungsüberprüfung und -beseitigung ........................................................................ 17 Wartungs- und Reparaturhinweise ................................................................................ 18 8.2.1 Wartungstabelle ..................................................................................................................................................19 8.1 8.2 8.3 8.4 Mikrobiologische Überprüfung von dezentralen Desinfektionsmittel-Dosiergeräten .......................... 18 Generelle Wartungsarbeiten ............................................................................................................... 18 Empfehlungen zum Austausch von Verschleißteilen .......................................................................... 19 Reparaturhinweise .............................................................................................................................. 19 9 Technische Daten............................................................................................................ 20 10 11 Demontage / Entsorgung ................................................................................................ 23 Konformitätserklärung .................................................................................................... 24 9.1 9.2 9.3 9.4 Allgemeine Daten ................................................................................................................................ 20 Anschlussschema „Kaltwasser“ .......................................................................................................... 21 Anschlussschema „Warmwasser“ ....................................................................................................... 22 Anschlussmaterial und Zubehör .......................................................................................................... 22 417101158_DG1 2 Rev. 05-03.13 1 Allgemeines Diese Betriebsanleitung enthält alle Anweisungen zur Installation, Einstellung, Inbetriebnahme, Wartung und Reparatur des Desinfektionsmittel-Dosiergerätes DG 1-II. Vor der Installation, der Inbetriebnahme und vor allen Wartungs- bzw. Reparaturarbeiten müssen die einschlägigen Kapitel des Handbuches gelesen und beachtet werden. Das DG 1-II ist ein Zumischgerät für Desinfektionsmittel. Es dient zur Herstellung einer gebrauchsfertigen Desinfektionsmittellösung. DG1- II / EPDM, Artikel Nr. 102410: Dosierpumpe, Strömungswächter und Schwenksauglanze mit EPDM-O-Ringen bestückt. Empfohlene Verwendung in Verbindung mit glukoprotaminhaltigen Produkten. DG1- II / SILIKON, Artikel Nr. 1024: Dosierpumpe, Strömungswächter und Schwenksauglanze mit Silikon-O-Ringen bestückt. Empfohlene Verwendung in Verbindung mit glukoprotamin-freien Produkten. HINWEIS 1.1 Diese Betriebsanleitung ist Bestandteil der Anlage und muss für das Bedien- und Wartungspersonal jederzeit zur Verfügung stehen. Die darin enthaltenen Sicherheitshinweise sind zu beachten. Bei einem Weiterverkauf der Anlage ist die Betriebsanleitung immer mitzuliefern. Bei den deutschsprachigen Kapiteln dieser Anleitung handelt es sich um die ORIGINALBETRIEBSANLEITUNG, die rechtlich relevant ist. Alle anderen Sprachen sind Übersetzungen der ORIGINALBETRIEBSANLEITUNG. Bitte diese Anleitung sorgfältig lesen und als Referenz für Bedienung und Service aufbewahren. Bei Fragen kontaktieren Sie uns bitte wie in Kapitel 1.4 „Kontaktadresse“ angegeben. EBS Nummernreihe Innerhalb dieser Betriebsanleitung werden sowohl Artikelnummern, als auch EBS Nummern dargestellt. EBS Nummern sind Ecolab interne Artikelnummern und werden „konzernintern“ verwendet. 1.2 Transportschäden / Auspacken Beim Herausnehmen des DG1-II aus dem Karton ist unbedingt darauf zu achten, dass das Gerät nicht auf der Unterseite abgestellt wird, da sonst das Dosierrohr, welches aus dem Anschluss für den Schwenkauslauf herausragt, beschädigt wird. Wird beim Auspacken ein Transportschaden festgestellt, darf das DG1-II nicht installiert VORSICHT werden! Das jeweilige Transportunternehmen ist unverzüglich zu verständigen und eine Schadensbestätigung zu beantragen. Eine Kopie der Schadensbestätigung ist umgehend ACHTUNG an die Firma Ecolab Engineering GmbH zu senden. 417101158_DG1 3 Rev. 05-03.13 1.3 Gewährleistungsumfang Gewährleistung in Bezug auf Betriebssicherheit, Zuverlässigkeit und Leistung des DG1-II wird vom Hersteller nur unter folgenden Bedingungen übernommen: • Montage, Anschluss, Einstellung, Wartung und Reparaturen werden von autorisiertem Fachpersonal durchgeführt. • Das Dosiergerät wird entsprechend dieser Betriebsanleitung verwendet. • Bei Reparaturen werden nur Original-Ersatzteile verwendet. • Es werden nur „validierte Ecolab-Produkte“ eingesetzt. Für den Fall, dass andere als Ecolab-Produkte eingesetzt werden, wird empfohlen, das Produkt gemäß BAM 2004- 47; 67 bis 72, mit dem Dosiergerät zu validieren. Im Übrigen gelten die allgemeinen Garantie- und Leistungsbedingungen der Firma Ecolab Engineering GmbH. 1.4 Kontaktadresse / Hersteller Ecolab Engineering GmbH Raiffeisenstraße 7 D-83313 Siegsdorf Telefon (+49) 86 62 / 61 0 Telefax (+49) 86 62 / 61 2 35 eMail: [email protected] 417101158_DG1 4 Rev. 05-03.13 2 Sicherheit Das DG1-II darf nur mit validierten Produkten verwendet werden. ACHTUNG Bei Verwendung unvalidierter Produkte kann keine Gewährleistung übernommen werden! VORSICHT ACHTUNG 2.1 Die Sicherheitshinweise und Hervorhebungen sind in jedem Fall zu beachten! Bestimmungsgemäße Verwendung Das DG 1-II ist ein Zumischgerät für Desinfektionsmittel. Es dient zur Herstellung einer gebrauchsfertigen Desinfektionsmittellösung und wurde ausschließlich für die industrielle und gewerbliche Nutzung entwickelt, konstruiert und gebaut. Eine private Nutzung der Anlage wird ausgeschlossen. Zur bestimmungsgemäßen Verwendung gehören auch die Einhaltung der vom Hersteller vorgeschriebenen Bedienungs- und Betriebsanweisungen sowie die Wartungs- und Instandhaltungsbedingungen. Die Lebensdauer des Dosiergerätes beträgt in Abhängigkeit zu den ordnungsgemäß durchgeführten Wartungen ca. 10 Jahre. Anschließend ist eine Revision (ggf. anschließende Generalüberholung) durch die Herstellerfirma oder eine Fachfirma notwendig. 2.2 Mikrobiologische Überprüfung von dezentralen DesinfektionsmittelDosiergeräten Der Betreiber ist für den ordnungsgemäßen Betrieb des Dosiergerätes nach RKIRichtlinie „Anforderungen an Gestaltung, Eigenschaften und Betrieb von dezentralen Desinfektionsmittel-Dosiergeräten“ (Bundesgesundheitsblatt 2004 . 47: 67-72) verantwortlich. Die jährlich geforderten hygienisch-technischen Überprüfungen sind in der Betriebs- und Montageanleitung der Dosiergeräte im Punkt Wartung beschrieben. Sofern der Betreiber eine situationsbezogene hygienisch-mikrobiologische Überprüfung des Dosiergerätes nach RKI-Empfehlung „Anforderung an die Hygiene bei der Reinigung und Desinfektion von Flächen“ (Bundesgesundheitsblatt 2004-47: 51-61, Punkt 4.5) durchführt, sollte dies wie in Kapitel 8.1 „Mikrobiologische Überprüfung von dezentralen Desinfektionsmittel-Dosiergeräten“ Wartung beschrieben erfolgen. 417101158_DG1 5 Rev. 05-03.13 2.3 Allgemeine Hinweise zur Sicherheit • Anschluss- und Reparaturarbeiten am DG1-II dürfen nur von autorisiertem und geschultem Fachpersonal ausgeführt werden. • Das DG1-II darf nur mit einer Versorgungsspannung von 230 V AC betrieben werden. • Vor allen Arbeiten an elektrischen Teilen unbedingt den Netzstecker ziehen. • Beim Wechseln des Desinfektionsmittelkanisters sind unbedingt die Gefahren- und Sicherheitshinweise auf dem Original-Desinfektionsmittelkanister zu beachten. • Die Sicherheitsbestimmungen im Umgang mit Chemikalien sind stets zu beachten. ACHTUNG 2.4 Bei Gerät mit der Artikel Nr. 1024: Bei Einsatz von Produkten MIT Glukoprotamin (z.B.INCIDIN PLUS), sind die O-Ringe auf dem Kolben und Kolbenstange der Dosierpumpe, sowie die O-Ringe des Strömungswächters auf EPDM umzurüsten. (Umrüstsatz EPDM auf Anfrage). Bei Gerät mit der Artikel Nr. 102410: Bei Einsatz von Produkten OHNE Glukoprotamin, ist zu empfehlen die O-Ringe auf dem Kolben und Kolbenstange der Dosierpumpe, sowie die O-Ringe des Strömungswächters auf Silikon umzurüsten. (Umrüstsatz Silikon auf Anfrage) Bei Verwendung des Umrüstsatzes ist der beiliegende Aufkleber sichtbar am Dosiergerät anzubringen! Wartung und Reparatur Reparatur- und Wartungsarbeiten dürfen grundsätzlich nur von autorisiertem Fachpersonal durchgeführt werden. VORSICHT Bei allen Wartungs- und Reparaturarbeiten ist geeignete Schutzausrüstung (PSA) zu tragen. Elektroreparaturen dürfen nur durch Elektrofachkräfte ausgeführt werden! Beim Öffnen von Abdeckungen oder Entfernen von Teilen, außer wenn dies ohne Werkzeug möglich ist, können spannungsführende Teile freigelegt werden. Auch können Anschlussstellen spannungsführend sein. WICHTIG Bei Reparaturen dürfen nur Original-Ersatzteile verwendet werden. 2.5 Sicherheitsmaßnahmen (vom Betreiber durchzuführen) Es wird darauf hingewiesen, dass der Betreiber sein Bedien- und Wartungspersonal: • über die Schutzeinrichtungen des Gerätes unterweist; • bezüglich der Einhaltung der Sicherheitsmaßnahmen überwacht; Diese Betriebsanleitung ist für die zukünftige Verwendung aufzubewahren. Die Häufigkeit von Inspektionen und Kontrollmaßnahmen muss eingehalten werden. Die hier beschriebenen Arbeiten sind so aufgeführt, dass sie: • in den Kapiteln Bedienung von einer unterwiesenen Person • in den Kapiteln Transport, Aufstellung und Montage, Wartung, Störung / Ursache / Behebung von einer Fachkraft verstanden werden. Die Kapitel Transport, Aufstellung und Montage, Wartung, Störung / Ursache / Behebung sind nur für Fachkräfte vorgesehen. Arbeiten, die in diesen Kapiteln beschrieben sind, sind nur von Fachkräften auszuführen. 417101158_DG1 6 Rev. 05-03.13 2.5.1 Unterwiesene Person Eine Person, die durch eine Fachkraft über die ihr übertragenen Aufgaben und die möglichen Gefahren bei unsachgemäßem Verhalten unterrichtet und erforderlichenfalls angelernt sowie über die notwendigen Schutzeinrichtungen und Schutzmaßnahmen belehrt wurde. 2.5.2 Fachkraft Eine Person mit geeignetem Training, geeigneter Ausbildung und Erfahrungen die sie in die Lage versetzt Risiken zu erkennen und Gefährdungen zu vermeiden. In der Definition angelehnt an die EN 60204-1:2007. 2.6 Pflichten des Betreibers Der Betreiber muss: • die Sicherheit des Personals (BG- und Unfallverhütungsvorschriften, ArbeitsstättenRichtlinien), z.B. Betriebsanweisungen, auch nach §20 GefStoffV, persönliche Schutzausrüstung (PSA), Vorsorgeuntersuchungen; • die Sicherheit der Arbeitsmittel (Schutzausrüstung, Arbeitsanweisungen, Verfahrensrisiken und Wartung); • die Produktbeschaffung (Sicherheitsdatenblätter, Gefahrstoffverzeichnis); • die Produktentsorgung (Abfallgesetz); • die Materialentsorgung (Außerbetriebnahme, Abfallgesetz); • die Reinigung (Reinigungsmittel und Entsorgung) einhalten, • sowie die aktuellen Umweltschutzauflagen beachten. Außerdem ist betreiberseitig: • die persönliche Schutzausrüstung (PSA) zur Verfügung zu stellen: Sicherheitsschuhe, Schutzhandschuhe, Schutzbrille, Schutzmaske, Schutzanzug. • die Ausbildung des Bedienpersonals zu gewährleisten; • es sind Arbeitsanweisungen zu erstellen; Anschlüsse: 2.7 Vor dem Betreiben der Anlage ist vom Betreiber sicherzustellen, dass bei der Montage und Inbetriebnahme, wenn diese vom Betreiber selbst durchgeführt werden, örtliche Vorschriften (z.B. für Elektro-Anschluss) beachtet werden. Systemtrennung Durch die integrierte Systemtrennung gemäß DIN EN 1717 ist bei eventuell auftretendem Unterdruck in der Wasserzuleitung ein Eindringen von Desinfektionsmittel in das Trinkwasserleitungsnetz zuverlässig ausgeschlossen. 417101158_DG1 7 Rev. 05-03.13 2.8 Hervorhebungen / Aufzählungen Die hier dargestellten Hervorhebungen folgende Bedeutung: wird benutzt, wenn ungenaues Befolgen oder Nichtbefolgen von Bedienungsanweisungen, VORSICHT Arbeitsanweisungen, vorgeschriebenen Arbeitsabläufen und dergleichen zu Verletzungen oder Unfällen führen kann. wird benutzt, wenn ungenaues Befolgen oder Nichtbefolgen von Bedienungsanweisungen, ACHTUNG Arbeitsanweisungen, vorgeschriebenen Arbeitsabläufen und dergleichen zur Beschädigung des Gerätes führen kann. WICHTIG wird benutzt, wenn auf eine besondere Aufmerksamkeit im Umgang mit dem Gerät geachtet werden muss. HINWEIS wird benutzt, wenn auf eine Besonderheit aufmerksam gemacht werden soll. Aufzählungen, die mit diesem Vorzeichen () markiert sind, beschreiben eine Tätigkeit, die durch den Monteur / Anwender durchgeführt werden muss. 2.9 Sicherheitssymbole GEFAHR Gefahren durch elektrischen Strom sind mit nebenstehendem Symbol gekennzeichnet. GEFAHR Vor den Pausen und am Arbeitsschluss unbedingt Hände waschen. Die beim Umgang mit Chemikalien üblichen Vorsichtsmaßnahmen sind zu beachten. Das jeweilige Sicherheitsdatenblatt ist zu beachten. Bei Arbeiten in Bereichen, die mit nebenstehendem Symbol gekennzeichnet sind, WARNUNG ist eine Schutzbrille zu tragen. Bei Arbeiten in Bereichen, die mit nebenstehendem Symbol gekennzeichnet sind, WARNUNG ist ein Gesichtsschutz zu tragen. Bei Arbeiten in Bereichen, die mit nebenstehendem Symbol gekennzeichnet sind, WARNUNG ist entsprechende Schutzkleidung zu tragen. Bei Arbeiten in Bereichen, die mit nebenstehendem Symbol gekennzeichnet sind, WARNUNG sind entsprechende Schutzhandschuhe zu tragen. Bei Arbeiten in Bereichen, die mit nebenstehendem Symbol gekennzeichnet sind, WARNUNG sind entsprechende Sicherheitsschuhe zu tragen. HINWEIS 2.10 Umweltzeichen kennzeichnet Maßnahmen des Umweltschutzes. Gerätekennzeichnung Wichtig für alle Rückfragen ist die richtige Angabe: HINWEIS 417101158_DG1 • der Benennung • des Types • der fortlaufenden Gerätenummer Nur so ist eine einwandfreie und schnelle Bearbeitung möglich. Für die englische Ausführung der DG1-II ist ein entsprechender Frontaufkleber (auf Anfrage) erhältlich! 8 Rev. 05-03.13 3 Aufbau Pos. 1 2 3 4 5 6 7 8 Bezeichnung Haube Netzleitung mit Stecker Betriebsanzeige (grüne LED) Produktmangel- und Störungsanzeige (rote LED) EIN/AUS-Taste (I/0) Konsole Schwenkauslauf Schraube (2 x) Abb. 3.1 Abb. 3.2 Pos. 1 2 3 4 5 6 7 8 9 10 11 12 13 14 15 16 17 18 19 20 21 22 417101158_DG1 9 Bezeichnung Haube Netzleitung mit Stecker Betriebsanzeige (grüne LED) Produktmangel- und Störungsanzeige (rote LED) EIN/AUS-Taste (I/0) Konsole Schwenkauslauf Schraube (2 x) Gehäuserückwand Überwurfmutter Steuerung Sauglanze Wassermotor Exenter “Einstellung Konzentration“ Mischkammer Verschlussstopfen Befestigungsschraube Strömungswächter Dübel Magnetventil Dosierpumpe Rohrunterbrecher Rev. 05-03.13 4 Funktionsbeschreibung und Bedienung Das DG1-II ist ein Zumischgerät für Desinfektionsmittel. Es dient zur Herstellung einer gebrauchsfertigen Desinfektionsmittellösung. Das DG1-II arbeitet mit einer doppelwirkenden Kolbendosierpumpe, die von einem Wassermotor angetrieben wird. Das Desinfektionsmittel wird mengenproportional in das durchfließende Wasser dosiert. Die Konzentration der Desinfektionsmittellösung kann am Exzenter des Wassermotors zwischen 0,25 und 3 % eingestellt werden. 4.1 WICHTIG Zur Gewährleistung der Einhaltung der Konzentration muss die minimale Entnahmemenge 1 Liter betragen. Beschreibung der Anzeigen und Bedienelemente An der Frontseite des DG1-II befindet sich das Bedienfeld der Steuerung mit einer Folientastatur sowie einer Betriebsanzeige (grüne LED) und einer Störungsanzeige (rote LED). Über die Folientastur erfolgt die Bedienung des Gerätes. Die Entnahme wird gestartet bzw. unterbrochen, wenn die Taste EIN/AUS (I/0) gedrückt wird. Bei Wassermangel oder bei Störung im Gerät (Defekt der Dosierpumpe, Defekt des Strömungswächters etc.) wird die Dosierung sofort unterbrochen. Nach Beseitigung der Störungsursache muss die Taste (I/0) zur Entstörung (RESET) des Gerätes gedrückt werden. Anzeigen: Grüne LED: Betriebs-/Betriebsbereitschaftsanzeige (Abb. 3.1, Pos. 3) Dauerlicht bei Betriebsbereitschaft Blinklicht bei Dosierbetrieb Rote LED: Produktmangel- und Störungsanzeige (Abb. 3.1, Pos. 4) Dauerlicht bei Betriebsstörung Blinklicht bei Produktmangel Das DG 1-II verfügt über folgende Sicherheitseinrichtungen: Wassermangelsicherung: Die Elektronik überwacht durch intelligente Auswertung der Strömungswächterimpulse indirekt den Eingangsfließdruck. Durchflussmengenbegrenzung: Zur Begrenzung der max. zufließenden Wassermenge befindet sich im Magnetventil ein Mengenregler. Produktmangelsicherung: Der vor der Eindosierstelle eingebaute Strömungswächter mit Druckhalteventil überwacht den Desinfektionsmittelfluss. Bei Produktmangel infolge eines Defektes der Dosierpumpe, der Saugleitung, des Antriebs oder der Niveausauglanze sowie bei Verwendung eines falschen Produktes geht das Gerät auf Störung. Die Störungs-LED leuchtet auf (Dauerlicht). Sauglanze / Niveauelektroden: Bei leerem Kanister schaltet das Gerät ab, die rote Störungs-LED blinkt. Systemtrennung: 417101158_DG1 Vor der Desinfektionsmitteleinspeisung befindet sich eine Systemtrennung gemäß DIN EN 1717. Hierdurch ist sichergestellt, dass kein Desinfektionsmittel in das Wasserleitungsnetz eindringen kann. 10 Rev. 05-03.13 5 Montage und Anschluss Das DG1-II ist für eine rechtsseitige Plazierung des Produktvorratsbehälters vorbereitet. Bei Bedarf kann der Produktvorratsbehälter auch an der linken Gehäuseseite plaziert werden. Dazu muss die Sauglanze und der Ausgang für das Netzkabel an die linke Gehäuseseite verlegt werden. HINWEIS Nachfolgende Anschluss- und Montageanweisungen werden als bevorzugte Methode empfohlen. Die Umgebungsbedingungen bestimmen jedoch die tatsächlich anzuwendende Montage- und Installationsmethode. Die örtlichen Bestimmungen sind in jedem Fall zu berücksichtigen. Gehäuseabmessungen und Anschlussmaße: siehe Kapitel 9.2 „Anschlussschema „Kaltwasser““ bzw. Kapitel 9.3 „Anschlussschema Warmwasser“. Das DG1-II ist zur Wandmontage vorgesehen, vorzugsweise über bzw. in unmittelbarer Nähe eines Ablaufbeckens. Die Wasserzulauftemperatur darf max. 30° C betragen. Bei höheren Wassertemperaturen muss eine Mischbatterie vorgeschaltet werden. Der Wasserfließdruck muss min. 0,16 MPa (1,6 bar) betragen und darf 0,7 MPa (7 bar) nicht überschreiten. Beträgt der Wasserfließdruck > 0,4 MPa (4 bar) wird der Einbau eines Druckminderers in die Wasserzuleitung empfohlen! Die Spannungsversorgung beträgt AC 230 V. HINWEIS Vom Werk wird das Gerät mit rechtsseitig angeschlossener Sauglanze und Netzleitung ausgeliefert. Falls erforderlich, können die Sauglanze und Netzleitung an die linke Gehäuseseite verlegt werden (siehe Kapitel 5.4). Dies sollte vor der Wandmontage des Gerätes vorgenommen werden. Lieferumfang: 5.1 • • • • • 1 St. Schwenkauslauf (Länge: 250 mm) 1 St. Eckventil 1 Satz Befestigungsmaterial 1 St. Bohrschablone 1 St. Technisches Handbuch Wandmontage ACHTUNG Je nach Wandbeschaffenheit sind spezielle Befestigungselemente zu verwenden. HINWEIS Die Montagehöhe ist so zu bemessen, dass ein Entnahmegefäß ohne Probleme unter den Schwenkauslauf gestellt werden kann. Die Einbauhöhe von ca. 130 cm Unterkante Gerät sollte dabei nicht überschritten werden (Unfallgefahr beim Wechseln des Kanisters ). Die Montage des DG 1-II ist wie folgt vorzunehmen: Mittels Bohrschablone (Beipack) Bohrlöcher für Gerät und Konsole markieren. Angezeichnete Löcher bohren. Haube (siehe Abb. 3.1, Pos. 1) abnehmen. Dazu müssen die zwei Deckelschrauben (siehe Abb. 3.1, Pos. 8) entfernt werden. Haube zum abnehmen anheben. Gerät und Konsole an der Wand befestigen. 417101158_DG1 11 Rev. 05-03.13 5.2 Wasseranschluss Eckventil mit integriertem Schmutzsieb ggf. unter Verwendung eines T-Stückes an den bauseitigen Wasseranschluss anschließen. Verbindungsleitung (geeignet: Cu-Rohr, verchromt, ∅ 10 x 1) zwischen das Eckventil und den Wasseranschluss an der Geräteunterseite verlegen. Schwenkauslauf [im Beipack] an der Geräteunterseite befestigen. 5.3 Elektrischer Anschluss Das Dosiergerät darf nur an 230 V Wechselspannung, 50/60 Hz, angeschlossen werden. Beim elektrischen Anschluss des DG1-II ist auf die Einhaltung der geltenden nationalen Vorschriften (VDE 0100) und örtlichen Vorschriften zu achten. Der im DG1-II integrierte Netztrafo versorgt das gesamte Gerät mit Spannung. Die Absicherung des Gerätes erfolgt durch eine Schmelzsicherung auf der Platine (630 mA, träge) und mittels einer Thermosicherung im Trafo. Zum Anschluss an die Stromversorung ist das DG1-II mit einer 2,4 m langen Netzleitung mit Stecker ausgerüstet. Die Netzleitung kann bei Bedarf in das Gehäuse zurückgezogen werden. HINWEIS 5.4 Falls erforderlich, kann die Netzleitung an die linke Gehäuseseite verlegt werden (siehe Kapitel 5.4 „Verlegung Sauglanze und Netzleitung an die linke Gehäuseseite“). Verlegung Sauglanze und Netzleitung an die linke Gehäuseseite Sauglanze und Netzleitung wie folgt an die linke Gehäuseseite verlegen: Die Haube (siehe Abb. 3.1, Pos. 1) abnehmen. Dazu müssen die zwei Deckelschrauben (siehe Abb. 3.1, Pos. 8) entfernt werden. Haube zum abnehmen anheben. Die Schlauchschelle lösen, die Überwurfmutter (siehe Abb. 3.2, Pos. 10) von der Sauglanze abschrauben und die Sauglanze zusammen mit der Saugleitung und dem Anschlusskabel aus dem Gehäuse ziehen. Die Netzkabeldurchführung aus der Halterung ziehen und gemeinsam mit der Netzleitung in das Gehäuse zurückziehen. Die Abdeckplatte an der linken Gehäuseseite entfernen. Die Durchführung an der rechten Gehäuseseite mit der Abdeckplatte verschließen. Die Netzleitung durch die linksseitige Gehäuseöffnung ziehen und die Kabeldurchführung fixieren. Darauf achten, dass das Kabel nicht verletzt wird und keine scharfkantigen Teile berühren kann (Belassen der internen Netzleitungsfixierungen). Die Sauglanze an die linke Gehäuseseite montieren. 417101158_DG1 12 Rev. 05-03.13 6 Einstellung und Inbetriebnahme 6.1 Inbetriebnahme HINWEIS Die in diesem Kapitel aufgeführten Positionsnummern beziehen sich auf die Explosionszeichnung soweit kein anderweitiger Verweis/Bezug vorgegeben wird. Bei Einsatz von Produkten die Glucoprotamin enthalten (z.B. INCIDIN PLUS ) sind die ACHTUNG O-Ringe auf dem Kolben und auf der Kolbenstange gegen EPDM umzurüsten Nach Abschluss der Anschluss- und Montagearbeiten: Das Eckventil (G ½) ganz öffnen und auf Dichtheit prüfen. Desinfektionsmittelkanister anschließen: die Sauglanze nach vorne schwenken und in die Kanisteröffnung einführen, den Kanister auf der Konsole absetzen. Die Dosierpumpe wie folgt entlüften: den Strömungswächter (siehe Abb. 3.2, Pos. 18) abschrauben (schwarze Überwurfmutter) und in ein Gefäß führen, den Verschlussstopfen (siehe Abb. 3.2, Pos. 16) in die Öffnung der Mischkammer (siehe Abb. 3.2, Pos. 15) einsetzen, die Rändelmutter (Abb. 6.1, Pos. 3) abschrauben und den Exzenter (siehe Abb. 6.1, Pos. 1) von der Exzenteraufnahme des Wassermotors (siehe Abb. 6.1, Pos. 6) abziehen, das Pleuel mit der Kolbenstange (siehe Abb. 6.1 Pos. 7) so lange vor- und zurückbewegen, bis Desinfektionsmittel aus dem Strömungswächter austritt und keine Luftblasen in den Schlauchleitungen sichtbar sind, den Stopfen entfernen und Strömungswächter (VA-Stifte unten) wieder einschrauben, den Exzenter aufstecken und die Rändelmutter wieder aufschrauben. Die gewünschte Konzentration gemäß Kapitel 6.2 „Einstellung der Konzentration“ einstellen und gemäß Kapitel 6.2.1 „Überprüfung der Konzentrationseinstellung“ überprüfen. Die Sicherheitseinrichtungen gemäß Kapitel 6.2.2 „Überprüfung der Sicherheitseinrichtungen“ überprüfen. Alle Wasser- und Desinfektionsmittelführenden Leitungen und Bauteile auf Dichtheit überprüfen. 417101158_DG1 13 Rev. 05-03.13 6.2 Einstellung der Konzentration Es lassen sich zwei Konzentrationsbereiche einstellen: Konzentrationsbereich 1: Konzentrationsbereich 2: 0,25 - 1 % (weisser Exzenter) 1,5 - 3 % (blauer Exzenter) Das Gerät ist werksseitig auf 0,5 % Konzentration eingestellt. HINWEIS Für den Konzentrationsbereich 2 muss der weisse Exzenter gegen den blauen Exzenter (im Beipack) ausgetauscht werden. Dazu muss die Rändelmutter (siehe Abb. 6.1, Pos. 3) und die Skalenscheibe (siehe Abb. 6.1, Pos. 4) entfernt werden. ACHTUNG Die Konzentration ist mit einem Sicherheitsfaktor von + 10 % einzustellen. Pos. 1 2 3 4 5 6 7 Bezeichnung Exzenter Rote Markierung Rändelmutter Skalenscheibe Dosierpumpe Antrieb (Wassermotor) Kolbenstange Abb. 6.1 Die Einstellung der Sollkonzentration ist wie folgt vorzunehmen: Rändelmutter (siehe Pos. 3) vom Exzenterrad (siehe Pos. 1) ca. 5 mm abschrauben. Skalenscheibe (siehe Pos. 4) aus der Verzahnung des Exzenters ziehen und festhalten. Konzentration voreinstellen: dazu das Exzenterrad mit der roten Markierung auf den gewünschten Konzentrationswert der Skalenscheibe drehen. Skalenscheibe in die Verzahnung des Exzenters stecken und die Rändelmutter festziehen. Konzentration gemäß Kapitel 6.2.1 „Überprüfung der Konzentrationseinstellung“ überprüfen. Bei Abweichung vom Sollwert die Konzentrationseinstellung wiederholen. Pfeil der roten Markierung des Exzenterrads auf den entsprechenden Konzentrationswert der Skalenscheibe nachführen. Dazu die Arretierungsschraube am Exzenter lösen. 417101158_DG1 14 Rev. 05-03.13 6.2.1 Überprüfung der Konzentrationseinstellung Benötigte Hilfsmittel: Eimer mit min. 10 l Fassungsvermögen zum Auffangen des Wassers Messmensuren zum Auffangen des Desinfektionsmittels: bis 100 ml bei Anwendungen bis 1 % bis 300 ml bei Anwendungen ab 1 % bis 3 %. Im nachfolgenden Beispiel zur Ermittlung der Sollkonzentration bezieht sich die MilliliterMengeneinstellung auf eine Wasserentnahme von exakt 8 Liter. Formeln für die Konzentrationseinstellung: Legende: K VD VW Formel: = Konzentration (%) = Volumen Desinfektionsmittel (ml) = Volumen Wasser (ml) Beispiel: K= VD x 100 VW + VD VD = K x VW 100 − K Gewünschte Konzentration = 0,5 %, plus Sicherheitsfaktor 10 % = 0,55 % Einzustellende Desinfektionsmittelmenge: VD = K x VW 100−K = Die Konzentrationseinstellung ist wie folgt zu überprüfen: 0,55 x 8.000 100−0,55 = 𝟒𝟒, 𝟐𝟒 𝐦𝐥 Strömungswächter aus der Mischkammer herausschrauben und Öffnung der Mischkammer mit dem beiliegenden Verschlussstopfen abdichten. Strömungswächter in die bereitgestellte Messmensur führen und einen Eimer unter den Schwenkauslauf stellen. Taste EIN/AUS (I/0) drücken und ca. 2-3 Liter Wasser zapfen. Eimer und Messmensur entleeren. Strömungswächter wieder in die Messmensur führen und Eimer unter den Schwenkauslauf stellen. Gerät einschalten (Taste EIN/AUS (I/0) drücken). Genau 8 Liter Wasser zapfen. Gerät abschalten (Taste EIN/AUS (I/0) drücken). Desinfektionsmittelmenge in Messmensur ablesen. Konzentration gemäß Formel (siehe oben) errechnen. Bei Abweichungen zur gewünschten Konzentration (plus Sicherheitsfaktor) ist die Einstellung gemäß Kapitel 6.2 „Einstellung der Konzentration“ zu korrigieren. Stopfen aus Öffnung der Mischkammer entfernen und Strömungswächter einschrauben. 6.2.2 Überprüfung der Sicherheitseinrichtungen Folgende Funktionen müssen überprüft werden: Funktion der Niveausauglanze Funktion des Strömungswächter 6.2.3 Funktionsprüfung der Niveausauglanze Funktionsprüfung wie folgt durchführen: Sauglanze aus dem Produktvorratsbehälter entfernen. Nach ca. 3 Sekunden muss das Gerät auf Störung gehen (rote Störungsanzeige blinkt). 417101158_DG1 15 Rev. 05-03.13 6.2.4 Funktionsprüfung des Strömungswächters Funktionsprüfung wie folgt durchführen: Haube abnehmen. Rändelmutter (siehe Abb. 6.1, Pos. 3) am Exzenter entfernen und den kompletten Exzenter von der Exzenteraufnahme des Wassermotors abziehen. Taste EIN/AUS (I/0) drücken. Das Gerät muss ca. 10 Sekunden nach dem Einschalten auf Störung gehen (rote LED Dauerlicht). Exzenter wieder installieren. Taste EIN/AUS (I/0) zur Entstörung (RESET) drücken. Taste EIN/AUS (I/0) erneut drücken (Gerät dosiert). Frischwasserzulauf langsam gegen 0 MPa (0 bar) drosseln. Das Gerät löst bei Unterschreitung von ca. 0,14 MPa (1,4 bar) Störung aus (rote LED Dauerlicht). Frischwasserzulauf wieder öffnen. Taste EIN/AUS (I/0) zur Entstörung (RESET) drücken. Haube aufsetzen. 6.2.5 Umstellung auf ein neues Produkt ACHTUNG Bei Produktwechsel müssen vor Anschluss des neuen Kanisters die Sauglanze, die Pumpe und alle produktführenden Leitungen gründlich mit Wasser durchgespült werden. Bei Einsatz von Produkten die Glucoprotamin enthalten (z.B. INCIDIN PLUS) sind die O-Ringe auf dem Kolben und auf der Kolbenstange auf EPDM umzurüsten. Bei Einsatz von Produkten die KEIN Glucoprotamin enthalten sind die O-Ringe auf dem Kolben und auf der Kolbenstange auf SILIKON umzurüsten (siehe Kapitel 2.3 „Allgemeine Hinweise zur Sicherheit“). Umstellung wie folgt durchführen: Geeigneten Behälter mit Wasser füllen und die Sauglanze eintauchen. Sauglanze, Dosierpumpe und produktführenden Leitungen wie folgt durchspülen: Strömungswächter (siehe Abb. 3.2, Pos. 12) abschrauben, Stopfen einsetzen und Strömungswächter in ein geeignetes Gefäß führen. Rändelmutter (siehe Abb. 6.1, Pos. 3) vom Exzenter abschrauben und den Exzenter von der Exzenteraufnahme des Wassermotors abziehen. Kolbenstange (siehe Abb. 6.1, Pos. 7) der Dosierpumpe manuell so lange vor- und zurückbewegen, bis klares Wasser ohne Produktrückstände aus dem Strömungswächter austritt Sauglanze in den neuen Kanister einsetzen. Dosierpumpe entlüften, bis Produkt blasenfrei aus dem Strömungswächter austritt. (siehe Kapitel 6.1 „Inbetriebnahme“) Exzenter aufstecken und Rändelmutter festziehen. Stopfen entfernen und Strömungswächter wieder einschrauben. Gerät auf Dichtheit und Funktion prüfen. Konzentrationseinstellung gemäß Kapitel 6.2 „Einstellung der Konzentration“ durchführen oder nach Kapitel 6.2.1 „Überprüfung der Konzentrationseinstellung“ überprüfen. 417101158_DG1 16 Rev. 05-03.13 7 Störungsüberprüfung und -beseitigung HINWEIS Nach jedem Abschalten und nach jeder behobenen Störung muss das Gerät durch Drücken der Taste EIN/AUS (I/0) (RESET) entstört werden. Störung Steuerung ohne Funktion (keine Lampe leuchtet, keine Reaktion auf Tastendruck Die Taste EIN/AUS (I/0) gedrückt; keine Funktion; Störungsanzeige blinkt Störungsanzeige Dauerlicht Gerät ausgeschaltet; Wasseraustritt am Schwenkauslauf Eingestellte Konzentration wird nicht erreicht Produktmangelsicherung schaltet bei leerem Produktvorratsbehälter nicht ab Gerät lässt sich nicht entstören 417101158_DG1 Ursache Versorgungsspannung fehlt Sicherung der Steuereinheit defekt Steuerplatine defekt Temperatursicherung des Trafos spricht an Trafo defekt Desinfektionsmittelkanister leer Sauglanze verschmutzt, Sauglanze defekt Anschlusskabel der Sauglanze defekt Dosierpumpe undicht oder defekt Saug- und Dosierleitung: Schlauchanschlüsse undicht; Schlauch defekt Eckventil geschlossen Wasserfließdruck: < 0,16 MPa (1,6 bar) Schmutzfänger verstopft Durchflussbegrenzer verkalkt oder verstopft Wassermotor undicht Wassermotor blockiert Spule des Magnetventils defekt Magnetventil verschmutzt oder defekt Dosierpumpe: Saug- und Druckventile verschmutzt bzw. defekt Sauglanze: Fußventil verschmutzt bzw. defekt Verschmutzung im Wasserzulauf Wassermotor defekt Fehlerbehebung Versorgungsspannung sicherstellen Sicherung erneuern Steuerplatine austauschen Gerät abkühlen lassen Trafo austauschen Neuen Kanister anschließen Fußventil der Sauglanze reinigen Sauglanze austauschen Dosierpumpe austauschen Schlauchschellen anziehen, ggf. Schlauch austauschen; Eckventil öffnen Wasserfließdruck sicherstellen: > 0,16 MPa (1,6 bar) Schmutzfänger reinigen, ggf. austauschen Durchflussbegrenzer reinigen oder austauschen Gleitringdichtung austauschen Wassermotor austauschen Spule austauschen Magnetventil reinigen, defekte Teile austauschen Ventile reinigen, ggf. austauschen Fußventil reinigen, ggf. austauschen Schmutzfänger im Ventil und im Frischwasserzulauf reinigen, ggf. austauschen Wassermotor austauschen Elektroden der Sauglanze verschmutzt bzw. defekt, ggf. Anschlusskabel Sauglanze austauschen beschädigt Steuerplatine defekt 17 Platine austauschen Rev. 05-03.13 8 Wartungs- und Reparaturhinweise Bei Wartungsarbeiten an Teilen, die mit Desinfektionsmittel in Berührung kommen, ist VORSICHT geeignete Schutzausrüstung zu tragen. Die Sicherheitsbestimmungen im Umgang mit Chemikalien sind stets zu beachten. ACHTUNG 8.1 Um die Betriebssicherheit und Funktionstüchtigkeit des DG 1 zu gewährleisten, müssen die vorgeschriebenen Wartungsintervalle eingehalten werden. Der Zeitraum zwischen Installation und der ersten Wartung oder zweier aufeinanderfolgenden Wartungen darf 12 Monate nicht überschreiten. Mikrobiologische Überprüfung von dezentralen DesinfektionsmittelDosiergeräten Entfernung des Perlators am Schwenkauslauf des Gerätes Der Auslauf ist äußerlich mit einem alkoholischen Desinfektionsmittel zu desinfizieren (Incidin Liquid, Incides N) bzw. abzuflammen. Nach einem Vorlauf von ca. 1 Liter ist mindestens 1 Liter Desinfektionslösung in einem sterilen Gefäß aufzufangen (Achtung: 1 Liter ist die Mindestentnahmemenge, siehe auch Hinweis auf dem Gerät). Neutralisationsmittel (sogenannte "Enthemmer") sind erst nach Ablauf der Einwirkzeit des betreffenden Desinfektionsmittels in der entnommenen Konzentration für bakterizide und levurozide Wirksamkeit zuzusetzen (siehe Produktetikett). Geeignete Neutralisationsmittel (chemische Zusammensetzung und Konzentration) können gemäß den Vorgaben der EN 13727 oder der Standardmethoden DGHM/VAH ausgewählt und validiert oder beim Hersteller erfragt werden. Neutralisationsmittel müssen steril sein. Die Probe soll in einem mikrobiologischen Fachlabor durch Filtration auf ihre aerobe Gesamtkoloniezahl untersucht werden. Idealerweise wird dieser Wert pro 1 ml, pro 10 ml und pro 100 ml ermittelt. Ein gekühlter Transport (4°C) in lichtundurchlässigen Behältern ist wünschenswert, dies ist bei Transporten > 3h vorgeschrieben. Die Bearbeitung der Probe sollte 2 bis 3 Stunden nach Entnahme erfolgt sein. Neben der Anzahl der gefundenen Mikroben ist zur Bewertung auch die gefundene Art der Mikroorganismen zu berücksichtigen. Z.B. kann das Vorkommen von Sporen bei nicht sporiziden Mitteln nicht als Qualitätsmangel betrachtet werden. 8.2 Generelle Wartungsarbeiten Nach Abschluss der Wartungsarbeiten sind folgende Arbeiten durchzuführen: Innenpflege des Gerätes: Geräteboden reinigen und Kalkrückstände entfernen. Aussenpflege des Gerätes: Haube feucht reinigen, trockenreiben und anschließend mit Edelstahlpfleger (z.B.: Chromol) behandeln. Konsole: Kanister - Standfläche reinigen Die Wartung des DG1-II ist gemäß der nachfolgenden Wartungstabelle (siehe Kapitel 8.2.1 „Wartungstabelle“) durchzuführen. 417101158_DG1 18 Rev. 05-03.13 8.2.1 Wartungstabelle Geräteteil/Wartungsart; Prüfkriterium Strömungswächter: − Funktionsprüfung − Dichtheit des Druckhalteventils Überprüfung der Konzentrationseinstellung: Exzenter: Funktionskontrolle Dosierpumpe: Dichtheitsprüfung Wassermotor: Leistungskontrolle Systemtrennung: Rohrunterbrecher DB auf Dichtheit prüfen Sauglanze: Funktionsprüfung Sauglanze: Dichtheitsprüfung Schmutzfänger: (Abb. 3.3, Pos. 7) Betroffene Schmutzfänger verschmutzt Magnetventilschmutzfänger 8.3 Ausführungshinweise/Verweise Siehe Kapitel 6.2.4 „Funktionsprüfung des Strömungswächters“ Strömungswächter aus Verschraubung lösen, wenn Desinfektionsmittelaustritt am Strömungswächter ⇒ Strömungswächter austauschen Siehe Kapitel 6.2.1 „Überprüfung der Konzentrationseinstellung“ Zur Kontrolle der einwandfreien Funktion des Exzenters die Konzentation auf drei verschiedene Werte einstellen und mittels Auslitern überprüfen. Bei Abweichung Exzenter, Pleuel und ggf. komplette Dosierpumpe austauschen. Bei eingeschaltetem Gerät auf Konzentrataustritt an Kolbenstange achten. Wenn Konzentrat austritt ⇒ Kolben O-Ringe austauschen, ggf. Dosierpumpe austauschen Bei eingeschaltetem Gerät Exzenter umfassen. Wenn der Wassermotor mit geringem Kraftaufwand angehalten werden kann: Wassermotor defekt ⇒ Wassermotor austauschen Gummimembrane ggf. Rohrunterbrecher austauschen Siehe Kapitel 6.2.3 „Funktionsprüfung der Niveausauglanze“ Becher mit Desinfektionsmittel bis unter die Elektroden der Sauglanze eintauchen; wenn die Dosierpumpe Luft ansaugt, ist der Schlauch in der Sauglanze defekt ⇒ Sauglanze bzw. Schlauch austauschen Siebe der entsprechenden Schmutzfänger ausbauen und reinigen Überwurfmutter des Schrägsitzfilters lösen Empfehlungen zum Austausch von Verschleißteilen Bauteil Magnetventil: Verbindungsschlauch/Wasser-Trennung & Ausgang Systemtrennung (Rohrunterbrecher DB) 8.4 Arbeitsschritt Wechsel des Schmutzfilters Membrantausch Wartungsintervall Jährlich Jährlich alle 3 Jahre Reparaturhinweise Reparaturhinweise mit Ersatzteillisten und Explosionszeichnungen sind auf Anfrage erhältlich. VORSICHT Bei Arbeiten an Teilen, die mit dem Produkt in Berührung kommen, sind die entsprechenden Gefahren- und Sicherheitshinweise unbedingt zu beachten. Es ist geeignete Schutzausrüstung zu tragen. Vor jeglichen Reparaturarbeiten ist das Gerät vom Stromnetz zu trennen. Dazu ist der Netzstecker zu ziehen. Vor Reparturarbeiten an Produkt- und Wasserführenden Bauteilen (z.B. Magnetventil) muss das Eckventil geschlossen und der Wasserdruck im Gerät abgebaut werden. Dazu ist die Taste EIN/AUS (I/0) zweimal zu drücken. Es dürfen nur Original-Ersatzteile verwendet werden! ACHTUNG (siehe Kapitel 1.3 „Gewährleistungsumfang“). 417101158_DG1 19 Rev. 05-03.13 9 Technische Daten 9.1 Allgemeine Daten Versorgungsspannung: Leistungsaufnahme: Schutzart Gerät / Steuerung: Schutzklasse: Vorsicherung: Betriebsspannung: Interne Absicherung: Wasseranschluss: Wassereingangstemperatur: Fließdruck: Dosierleistung: Konzentrationseinstellung: Dosiertoleranz: Systemtrennung: Einbaumaße: Gewicht: HINWEIS 417101158_DG1 AC 230 V 15 W IP 24 / IP 65 II nach EN 60335-1 max. 16 A AC 24 V Feinsicherung 5 x 20, 630 mA Träge Konusquetschverschraubung NW 10 (für Cu-Rohr, D. 10 x 1 ) max. 30°C min. 0,16 MPa (1,6 bar) - max. 0,7 MPa (7 bar) ca. 850 l/h (Gebrauchsverdünnung) Exzenter weiß: 0,25 % - 1 %, Exzenter blau: 1,5 % - 3 % Max. + 6 % DIN EN 1717 (Typ DB) Breite = 500 mm (mit Konsole), Höhe=425 mm, Tiefe=200 mm 13,5 kg Technische Änderungen müssen wir uns vorbehalten, da unsere Produkte einer ständigen Weiterentwicklung unterliegen! 20 Rev. 05-03.13 9.2 Anschlussschema „Kaltwasser“ Abb. 9.1 417101158_DG1 21 Rev. 05-03.13 9.3 Anschlussschema „Warmwasser“ Abb. 9.2 9.4 Anschlussmaterial und Zubehör Anschlussmaterial - Bezeichnung T-Stück G ½ , MS verchromt T-Stück R ¾/ R ½ / R ¾, MS verchromt Kupferrohr 10x1 verchromt Eckventil G ½ a x D 10 MS verchromt [ im Beipack] Zubehör - Bezeichnung Adapter 3/4 “ Innengewinde R1/2 Aussengewinde, MS verchromt Schwenkauslauf, 150 mm lang Schwenkauslauf, 200 mm lang Schwenkauslauf, 300 mm lang Thermomischbatterie mit Anschlussverschraubung Rückbausatz auf Freistrecke (nur Verwendung bei zu niedrigem Wasserdruck, bis 0,1 MPa (1 bar) Konsole für 10L-Behälter mit Ablagefach HINWEIS 417101158_DG1 Artikelnummern bitte gegebenenfalls separat mit der Ersatzteilzeichnung anfordern! 22 Rev. 05-03.13 10 Demontage / Entsorgung Demontage Die Demontage darf nur vom Fachpersonal durchgeführt werden. Achten Sie darauf, dass vor Beginn der Demontagearbeiten das DG1-II komplett von der Stromversorgung getrennt wurde. Das DG1-II muss sorgfältig durchgespült werden, um Chemiereste zu beseitigen. Entsorgung Das DG1-II ist überwiegend aus Stahl (in bestimmtem Umfang auch aus Aluminium) hergestellt (außer der Elektroausrüstung) und ist entsprechend den dann gültigen örtlichen Umweltvorschriften zu entsorgen. Entsorgen Sie je nach Beschaffenheit, existierenden Vorschriften und unter Beachtung aktueller Bestimmungen z.B. als: Elektroschrott (Leiterplatten), Kunststoffe (Gehäuse), Blech, Stahl, Kupfer, Aluminium (nach Sorten trennen). Vor dem Entsorgen sind alle medienberührten Teile zu dekontaminieren. Öle, Lösungsund Reinigungsmittel und kontaminierte Reinigungswerkzeuge (Pinsel, Lappen usw.) müssen den örtlichen Bestimmungen entsprechend, gemäß dem geltenden Abfall- Schlüssel und unter Beachtung der Hinweise in den Sicherheitsdatenblättern der Hersteller entsorgt werden. 417101158_DG1 23 Rev. 05-03.13 11 Konformitätserklärung HINWEIS Diese Konformitätserklärung entspricht dem Stand der Erstellung dieser Betriebsanleitung. Sollte sich in der Zwischenzeit eine hier benannte Norm geändert haben, können Sie die aktuellste Konformitätserklärung hier herunterladen: http://www.ecolab-engineering.de/uploads/media/CE_1024ff_DG1.pdf 417101158_DG1 24 Rev. 05-03.13 CONTENTS 1 General............................................................................................................................. 26 2 Safety ............................................................................................................................... 28 2.5.1 2.5.2 Trained person ....................................................................................................................................................30 Qualified person ..................................................................................................................................................30 1.1 1.2 1.3 1.4 2.1 2.2 2.3 2.4 2.5 2.6 2.7 2.8 2.9 2.10 EBS Article numbers ........................................................................................................................... 26 Transport damage / Unpacking the Device ......................................................................................... 26 Scope of guarantee ............................................................................................................................. 27 Contact Address / Manufacturer ......................................................................................................... 27 Intended use ........................................................................................................................................ 28 Microbiological examination of decentralized disinfectant dispensers ................................................ 28 General Safety Information ................................................................................................................. 29 Maintenance and Repair ..................................................................................................................... 29 Safety measures (to be performed by the owner/operator) ................................................................ 29 Responsibilities of the Owner .............................................................................................................. 30 System Separation .............................................................................................................................. 30 Emphases / Numberings ..................................................................................................................... 31 Safety symbols .................................................................................................................................... 31 Machine identification .......................................................................................................................... 31 3 4 Design .............................................................................................................................. 32 Functional Description and Operation........................................................................... 33 5 Connection and Installation ........................................................................................... 34 6 Settings and Start-Up...................................................................................................... 36 6.2.1 6.2.2 6.2.3 6.2.4 6.2.5 Checking the Concentration Setting ....................................................................................................................38 Checking the Safety Equipment ..........................................................................................................................38 Functional Check of the Level Suction Pipe ........................................................................................................38 Functional Check of the Flow Control Device......................................................................................................39 Changing over to a New Product.........................................................................................................................39 4.1 5.1 5.2 5.3 5.4 6.1 6.2 Description of Display Screen and Operating Controls ....................................................................... 33 Wall Mounting ...................................................................................................................................... 34 Water connection ................................................................................................................................ 35 Electrical Connection........................................................................................................................... 35 Shifting Suction Pipe and Mains Cable to Left-Hand Side of Housing ............................................... 35 Start-Up ............................................................................................................................................... 36 Setting the Concentration .................................................................................................................... 37 7 8 Troubleshooting .............................................................................................................. 40 Maintenance and Repair Information ............................................................................. 41 8.2.1 Maintenance Table ..............................................................................................................................................42 8.1 8.2 8.3 8.4 Microbiological examination of decentralized disinfectant dispensers ................................................ 41 General maintenance work ................................................................................................................. 41 Recommendations for the replacement of wearing parts ................................................................... 42 Repair Instructions .............................................................................................................................. 42 9 Technische Daten............................................................................................................ 43 10 11 Dismantling / Disposal .................................................................................................... 46 Declaration of Conformity .............................................................................................. 47 9.1 9.2 9.3 9.4 Allgemeine Daten ................................................................................................................................ 43 Connection Diagram „Cold Water“ ...................................................................................................... 44 Connection Diagram „Hot Water“ ........................................................................................................ 45 Connection Material and Accessories ................................................................................................. 45 417101158_DG1 25 Rev. 05-03.13 1 General This Operating Manual contains all the information required for the installation, start-up, and maintenance of the DG 1-II disinfectant metering unit. The relevant chapters of this manual must be read and noted before installing the device, using it for the first time, and before carrying out any maintenance or repair work. The DG 1-II is a metering unit for adding disinfectant in order to prepare a ready-to-use disinfecting solution. DG1- II / EPDM, Article No. 102410: Metering pump, Flow control and Suction pipe with EPDM O-Rings. Recommended use in connection with products without glucoprotamine. DG1- II / SILICONE, Article No. 1024: Metering pump, Flow control and Suction pipe with SILOCONE O-Rings. Recommended use in connection with products containing glucoprotamine. NOTE 1.1 This Operating Manual is a component of the equipment and must be available at all times to the operating and maintenance staff. The safety information contained therein must be observed. In the event the equipment is resold, the Operating Manual must always be supplied with it. The German chapters of this manual constitute the ORIGINAL OPERATING INSTRUCTIONS and take legal precedence. All other languages are translations of the ORIGINAL OPERATING INSTRUCTIONS. If you have questions, please contact us as outlined in chapter 1.4 “Contact address / manufacturer”. EBS Article numbers Within this operating instruction article numbers, and EBS numbers are represented. EBS numbers are Ecolab internal article numbers and used only “concern internal”. 1.2 Transport damage / Unpacking the Device When removing the DG 1-II from its box, make sure that you do not rest the device on its lower side, since this can damage the dosing pipe that protrudes from the connection for the swivel spout. CAUTION ATTENTION 417101158_DG1 If transport damage is discovered at the time of unpacking, the DG1-II unit may not be installed! The carrier in question must be notified immediately and a damage confirmation slip must be requested. A copy of the damage confirmation slip must be sent to Ecolab Engineering GmbH immediately. 26 Rev. 05-03.13 1.3 Scope of guarantee The manufacturer only guarantees the operational safety, reliability, and performance of the DG1-II under the following conditions: • The installation, connection, setting, maintenance, and repair work is carried out by qualified and authorised specialists. • The metering unit must be used in accordance with the specifications as given in the technical manual. • Only original equipment spare parts are used for repairs. • Only “validated” Ecolab-disinfectants are used. If other than Ecolab products are used, it is recommended that the disinfectant is validated for the dosing unit, according to BAM 2004-47;67-72. For the remainder the general warranty and service terms of Ecolab Engineering GmbH shall apply. 1.4 Contact Address / Manufacturer Ecolab Engineering GmbH Raiffeisenstraße 7 D-83313 Siegsdorf Telephone (+49) 86 62 / 61 0 Fax (+49) 86 62 / 61 2 35 eMail: [email protected] 417101158_DG1 27 Rev. 05-03.13 2 Safety The DG1-II system must be used with validated products ATTENTION No warranty for the unit function when using unvalidated products. CAUTION ATTENTION 2.1 Safety warnings and emphases must be observed in all cases! Intended use The DG 1-II is a mixing equipment for disinfectants. It is used for the production of a ready-to-use disinfectant solution and has been developed, designed and built exclusively for the industrial and commercial use. A private use of the equipment is excluded. It is part of the intended use of dosing system to follow the manufacturer´s instructions for maintenance, service, repair and disposal. The service life of the equipment according to the properly conducted maintenance work is approximately 10 years . An audit (potentially followed by a general overhaul) is required subsequently by the manufacturer or a specialist company. 2.2 Microbiological examination of decentralized disinfectant dispensers The end user is responsible for the proper operation of the dosing device according to the recommended process from the RKI "requirements for design, features and operation of decentralized disinfectant dispensers "(Federal Health Bulletin 2004 47: 67-72.). In the device manual the annual required hygiene-technical checks are described in section related to maintenance. If the end user requires to test for a situation-related hygienic-microbiological verification of the dosing device Ecolab suggests the process described in RKI recommendation "requirement on hygiene in cleaning and disinfection of surfaces" (Federal Health Bulletin 2004-47: 51-61, Item 4.5). Kindly follow the following process as described in chapter 8.1 “Microbiological examination of decentralized disinfectant dispensers “. 417101158_DG1 28 Rev. 05-03.13 2.3 General Safety Information • Any connection and repair work on the DG 1-II may only be undertaken by authorised and trained experts. • The DG 1-II may only be operated with a supply voltage of 230 V AC. • Work on electrical equipment must, above all, be undertaken with the mains plug unplugged. • When changing the disinfectant canister, the warning and safety information on the original disinfectant canister must be observed. • Safety regulations covering the handling of chemicals must always be observed. ATTENTION 2.4 At units with Article no. 1024: If using products that contain glucoprotamin (such as INCIDIN PLUS) the O-rings of the metering pump piston and piston rods and the O-rings of the flow monitor must be converted for EPDM. (conversion kit EPDM on request). At units with Article no. 102410: If using products that do not contain glucoprotamin, we recommend that you convert the O-rings of the metering pump piston and piston rod and the O-rings of the flow monitor for silicone (conversion kit Silicone on request). When using the conversion kit, the provided sticker must be attached to the metering unit in a visible position. Maintenance and Repair Repair and maintenance work must be carried out only by authorized, trained service technicians. CAUTION For maintenance and repair work suitable protective equipment (PSA) hast to be worn. Opening covers or removing parts, even if possible without tools, may expose hot wires. Connecting points may also carry an electrical current. IMPORTANT Only original spare and replacement parts may be used for repairs. 2.5 Safety measures (to be performed by the owner/operator) Attention is drawn to the fact that the owner/operator has the following responsibilities towards his operating and maintenance personnel: • To provide briefing on the protective devices on the equipment; • Monitor observance of the safety measures; This operating manual must be retained for future use. The frequency of inspections and control measures must be observed. The tasks described in this Operating Manual are explained in such a way that: • any tasks outlined in the chapters Operation and Operating Modes are carried out by a trained person, • the tasks explained in the chapters Transportation, Setup and Assembly, Errors / Causes / Remedies are understood by a qualified person. The chapters Transportation, Setup and Assembly, Errors / Causes / Remedies are only intended for qualified personnel. Tasks that are described in these chapters may only be performed by qualified personnel. 417101158_DG1 29 Rev. 05-03.13 2.5.1 Trained person A person, who has been trained in the tasks assigned to him/her by a skilled person in the possible dangers that improper handling can cause and has been taught about the necessary protective equipment and safety measures. 2.5.2 Qualified person A person with suitable training, and having suitable education and experience, who is in the position of being able to recognize the risks and knows how to avoid hazards. The definition is based on EN 60204-1:2007. 2.6 Responsibilities of the Owner The owner must observe that: • Personnel safety (Ordinance on Industrial Safety and Health and Accident Prevention Guidelines, Workplace Directives), e.g. operating manuals, also pursuant to §20 GefStoffV, personal protective equipment (PPE)), preventive examinations; • the safety of the work equipment (protective equipment, instructions for work, process risks and maintenance); • the product condition (Safety Data Sheets, Register of Hazardous Substances); • product disposal (the Waste Act); • material disposal (de-commissioning, Waste Act); • cleaning (cleaning agents and disposal), • as well as the latest environmental protection requirements. In addition, the owner must: • provide the personal protective equipment (PPE): Safety footwear, safety gloves, safety eyewear, protective mask, protective clothing. • guarantee the training of the operating personnel; • prepare work procedures; Connections: Before operating the equipment, the owner/operator must ensure that local regulations (e.g. for the electrical connection) were observed during the assembly and commissioning, if this work was carried out by the owner/operator himself. 2.7 System Separation The integrated system separation according to DIN EN 1717 prevents the intruding of disinfection fluids into the drinking water pipeline in the case of a vacuum in the water supply line. 417101158_DG1 30 Rev. 05-03.13 2.8 Emphases / Numberings The emphases indicated here have the following meanings: This heading is used where imprecise or non-adherence to the operating instructions, prescribed work processes or similar could lead to injuries or accidents. CAUTION This heading is used where imprecise or non-adherence to the operating instructions, ATTENTION prescribed work processes or similar could lead to damage to the equipment. IMPORTANT Is used when special attention is required when for handling the equipment. NOTE This heading is used to indicate an aspect of particular importance. Numberings marked with this sign () describe an activity which must only be performed by the installer / user. 2.9 Safety symbols DANGER Dangers due to electrical power are identified with the symbol shown here. DANGER Always wash hands before breaks or at the end of work. Observe the precautionary measures that are usual when handling chemicals. Observe the respective Safety Data Sheet. WARNING When working in areas that are identified by the symbol shown here, it is necessary to wear safety eyewear. WARNING When working in areas that are identified by the symbol shown here, it is necessary to wear safety face protection shield. WARNING When working in areas that are identified by the symbol shown here, it is necessary to wear protective clothing. WARNING When working in areas that are identified by the symbol shown here, it is necessary to wear protective gloves. WARNING When working in areas that are identified by the symbol shown here, it is necessary to wear safety footwear. NOTE 2.10 Environment symbol identifies environmental safety measures. Machine identification The correct information is important for all queries: NOTE 417101158_DG1 • the name • the type • the consecutive serial number of the unit All of this information is required for specific and fast processing. For the English version of DG1-II a corresponding front label can be obtained on request! 31 Rev. 05-03.13 3 Design Pos. 1 2 3 4 5 6 7 8 Description Cover Mains cable with plug Operation indicator (green LED) Product shortage and fault indicator (red LED) ON/OFF switch (I/0) Bracket Swivel drain outlet Screw (2 x) Fig. 3.1 Fig. 3.2 Pos. 1 2 3 4 5 6 7 8 9 10 11 12 13 14 15 16 17 18 19 20 21 22 417101158_DG1 32 Description Cover Mains cable with plug Operation indicator (green LED) Product shortage and fault indicator (red LED) ON/OFF switch (I/0) Bracket Swivel drain outlet Screw (2 x) Rear housing cover Coupling nut Control unit Suction pipe Hydraulic motor Eccentric (concentration setting) Mixing chamber Sealing plug Fixing screw Flow control device Dowel Pin Solenoid valve Metering pump Flow interrupter Rev. 05-03.13 4 Functional Description and Operation The DG1-II is a mixing equipment for disinfectants. It is used for the production of a readyto-use disinfectant solution. The DG1-II metering unit includes a double-action piston metering pump driven by a hydraulic motor. The disinfectant is metered proportionally to the water flow rate. By means of an eccentric located at the hydraulic motor, you can set the concentration of the disinfecting solution to a value between 0.25 and 3 %. 4.1 To make sure that the concentration is maintained at its correct value, the minimum IMPORTANT tapping quantity must be 1 liter. Description of Display Screen and Operating Controls On the front of the DG 1-II is a control panel. It has a membrane keypad and an error indicator (red LED). You use the membrane keypad to operate the unit. To start or stop the tapping process, press the ON/OFF (I/0) switch. In case of water shortage or a failure in the unit (metering pump defective, flow control device defective, etc.), the metering process is stopped immediately. After eliminating the cause of the trouble, press the (I/0) switch to reset the unit. Indicator: Green LED: Operation/standby indicator (Fig. 3.1, pos. 3) Permanent light indicates standby mode Flashing light indicates metering mode Red LED: Product shortage and fault indicator (Fig. 3.1, pos. 4) Permanent light indicates a fault Flashing light indicates product shortage The DG 1-II is equipped with the following safety devices: Water shortage monitoring: The electronic system indirectly monitors the water flow pressure through intelligent evaluation of the pulses emitted by the flow control device. Flow rate limitation: The maximum quantity of water supplied is controlled by a quantity regulator located inside the solenoid valve. Product shortage monitoring: The flow control device with its integrated pressure control valve which is fitted upstream from the metering point monitors the flow of the disinfectant product. If a failure of the metering pump, suction line, drive, or level suction pipe causes a product shortage, or if an unsuitable disinfection product is used, the metering unit changes to fault mode. The red fault LED lights up (permanent light). Suction pipe with integrated level electrodes: If the supply container is empty, the metering unit stops operating and the red fault LED flashes. Backflow preventer: 417101158_DG1 Upstream from the disinfection metering point, a backflow preventer according to DIN EN 1717 is fitted. This is a safeguard against disinfectant penetrating into the water supply network in case of a backflow. 33 Rev. 05-03.13 5 Connection and Installation The DG1-II is designed for the connection of the product reservoir on the right-hand side. If required, the product reservoir can be placed on the left-hand side of the housing. This involves moving the suction lance and the outlet for the power cable to the left-hand side of the housing. NOTE The following connection and installation instructions reflect the recommended method. The connection and installation method to be used, however, depends on the actual environmental conditions. All local regulations must be adhered to at all times. Housing measurements and connection diagram: see chapter 9.2 „Connection Diagram „Cold Water“ eg. chapter 9.3 „ Connection Diagram „Hot Water“. The DG1-II is designed to be mounted on a wall, preferably above or close to a sink. The water supply temperature must not exceed 30°C. In case of higher water temperatures, a thermal mixer valve must be fitted upstream. The water flow pressure should be at least 0.16 MPa (1.6 bar) and must not exceed 0.7 MPa (7 bar). If the water flow pressure is > 0.4 MPa (4 bar), we urgently recommend to fit a pressure governor in the water supply line! The supply voltage is 230 V AC NOTE Ex works, the unit is shipped with the suction pipe and mains cable fitted on the righthand side. If required, the suction pipe and the mains cable can be shifted to the lefthand side of the unit (see chapter 5.4). This operation should be carried out before the unit is mounted to the wall. Delivery: 5.1 • • • • • 1 pce. swivel drain outlet (length: 250 mm) 1 pce. angled valve 1 set of attachment parts 1 pce. drilling jig 1 pce. I & O Manual Wall Mounting ATTENTION Depending on the wall condition, the use of special attachment parts may be necessary. NOTE Be sure to mount the unit at a location high enough to be able to place a drain pan below the swivel drain outlet. The installation height of approx. 130 cm bottom line DG 1, should not overstep (risk of accident when changing the can). To mount the DG 1-II proceed as follows: Mark drilling holes for metering unit and bracket using the supplied drilling jig. Drill marked holes.. Remove cover (see Fig. 3.1, pos. 1) for this purpose, unscrew the two cover screws (Fig. 3.1, pos. 8) Lift the cover to remove it. Mount unit and bracket on the wall. 417101158_DG1 34 Rev. 05-03.13 5.2 Water connection Connect angled valve with its built-in strainer to the wall water supply using a T-union, if necessary. Route the connecting line (suitable type: chromium plated copper pipe, ∅ 10 X 1) between the angled valve and the water connector at the bottom of the unit. Attach the supplied swivel drain outlet to the bottom of the unit. 5.3 Electrical Connection The metering unit may only be connected to a supply voltage of 230 V AC with 50/60 Hz. For the electrical connection of the DG 1-II, all valid national and local regulations must be complied with. The integrated power transformer of the DG 1-II supplies the entire unit with electric power. The unit is protected by a fuse which is located on the PCB (630 mA, slow blow) and by a thermal fuse inside the power transformer. For the connection to the power supply, the DG 1-II is equipped with a mains cable (length: 2.4 m) with an integrated plug. If necessary, the mains cable can be retracted into the housing. NOTE 5.4 If required, the mains cable can be shifted to the left-hand side of the housing (see chapter 5.4 „Shifting Suction Pipe and Mains Cable to Left-Hand Side of Housing“). Shifting Suction Pipe and Mains Cable to Left-Hand Side of Housing To shift suction pipe and mains cable to the left-hand side of the housing, proceed as follows: Remove the cover (Fig. 3.1, pos. 1). For this purpose, unscrew the two cover screws (Fig. 3.1, pos. 8). Lift the cover to remove it. Detach the hose clamp, unscrew the coupling nut (Fig. 3.2, pos. 10) from the suction pipe, and pull the suction pipe, along with the suction line and the connecting cable, out of the housing. Pull the mains cable bushing out of its holder and retract it into the housing, together with the mains cable. Remove the cover plate at the left-hand side of the housing. Use the cover plate to close the cable opening at the right-hand side of the housing. Pull the mains cable through the left-hand opening of the housing and attach the cable bushing. Make sure that the cable is not damaged and cannot get in touch with any sharp-edged parts (leave the internal mains cable attachments in place). Fit the suction pipe to the left-hand side of the housing 417101158_DG1 35 Rev. 05-03.13 6 Settings and Start-Up 6.1 Start-Up NOTE All item numbers in this section refer to the exploded view unless otherwise stated. If products are used which contain glucoprotamine (e.g. INCIDIN PLUS), the O-rings on ATTENTION the piston and on the piston rod need to be replaced by EPDM O-rings. After connection and installation work proceed as follows: Open the angled valve (G ½) to its full open position, and check it for tightness. Connect the disinfectant supply container as follows: swivel suction pipe to front position and insert it into opening of supply container, place the supply container onto the bracket. Bleed the metering pump as follows: unscrew the flow control device (see Fig. 3.2, pos. 18) (black coupling nut) and place it in a suitable jar, Close the opening of the mixing chamber (see Fig. 3.2, pos. 16) by inserting the sealing plug (see Fig. 3.2, pos. 15), unscrew the knurled nut (see Fig. 6.1, pos. 3) and withdraw the eccentric (see Fig. 6.1, pos. 1) from its holder located on the hydraulic motor (see Fig. 6.1, pos. 6), move the connecting rod including the piston rod (see Fig. 6.1, pos. 7) forth and back until disinfectant runs out from the flow control device and no more bubbles are visible in the hoses, remove the sealing plug and screw in the flow control device again with the VA pins pointing downwards, plug in the eccentric back in and tighten the knurled nut. Set the desired concentration as described in chapter 6.2 „Setting the Concentration“ and check it as described in chapter 6.2.1 „Checking the Concentration Setting“. Check the safety equipment as described in chapter 6.2.2 „Checking the Safety Equipment“. Check all lines and components which come in contact with water and/or disinfectant for tightness. 417101158_DG1 36 Rev. 05-03.13 6.2 Setting the Concentration Two concentration ranges can be set: Concentration range 1: Concentration range 2: 0,25 - 1 % (white eccentric) 1,5 - 3 % (blue eccentric) Ex works, the unit is set to a concentration of 0.5 %. NOTE If you plan to use concentration range 2, the white eccentric must be replaced by the supplied blue eccentric. For this purpose, remove the knurled nut (see Fig. 6.1, pos. 3) and the graduated dial (see Fig. 6.1, pos. 4). ATTENTION When setting the concentration, allow for a safety margin of + 10 %. Pos. 1 2 3 4 5 6 7 Description Eccentric Red mark Knurled nut Graduated dial Metering pump Drive unit (hydraulic motor) Piston rod Fig. 6.1 To set the nominal concentration, proceed as follows: Unscrew knurled nut (see pos. 3) from eccentric (see pos. 1) by approx. 5 mm. Pull graduated dial (see pos. 4) from indented part of eccentric and hold it in place. Preset the concentration: for this purpose, turn the eccentric so that the red mark aligns with the desired concentration value on the graduated dial. Insert the graduated dial back into the indented part of the eccentric and tighten the knurled nut. Check the concentration as described in chapter 6.2.1 „Checking the Concentration Setting“. If it deviates from the nominal value, repeat the setting procedure. Align the arrow of the red mark on the eccentric with the appropriate concentration value on the graduated dial. For this purpose, loosen the locking screw on the eccentric. 417101158_DG1 37 Rev. 05-03.13 6.2.1 Checking the Concentration Setting Required auxiliaries: Bucket with a minimum capacity of 10 l to collect the water Measuring jars to collect the disinfectant: up to 100 ml for concentrations of 1 % max. up to 300 ml for concentrations of 1 % to 3 % In the following example which shows how to determine the nominal concentration, the quantity settings given in millimeters refer to a tapped water quantity of exactly 8 liters. Formulas for setting the concentration: Explanantion: K VD VW Formula: = Concentration (%) = Volume of disinfectant (ml) = Volume of water (ml) Example: K= VD x 100 VW + VD Desired concentration = 0.5 %, plus 10 % buffer = 0.55 % Disinfectant quantity to be set according to the above formula: K x VW 0,55 x 8.000 VD = = = 𝟒𝟒, 𝟐𝟒 𝐦𝐥 100 − K 100 − 0,55 VD = K x VW 100 − K To check the concentration setting, proceed as follows: Unscrew the flow control unit from the mixing chamber and seal the mixing chamber opening with the supplied sealing plug. Insert the flow control unit into the provided measuring jar and place a bucket below the swivel drain outlet. Press the ON/OFF (I/0) switch and tap approx. 2-3 liters of water. Empty the bucket and the measuring jar. Insert the flow control unit back into the measuring jar and place the bucket below the swivel drain outlet again. Start the unit by pressing the ON/OFF (I/0) switch. Tap exactly 8 liters of water. Switch off the unit (press the ON/OFF (I/0) switch). Read the disinfectant quantity collected in the measuring jar. Calculate the concentration according to the above formula. If it deviates from the desired concentration (plus buffer), adjust the setting as described in chapter 6.2 „Setting the Concentration“. Remove sealing plug from mixing chamber opening and screw flow control device in again. 6.2.2 Checking the Safety Equipment A check of the safety equipment obligatory includes the following test procedures: functional test of the level suction pipe functional test of the flow control device 6.2.3 Functional Check of the Level Suction Pipe For the functional test of the suction pipe "empty" signal device, proceed as follows: Pull suction pipe out of product supply container. After approx. 3 seconds, unit should change to fault mode (red fault indicator flashes). 417101158_DG1 38 Rev. 05-03.13 6.2.4 Functional Check of the Flow Control Device For the functional check proceed as follows: Remove the cover. Unscrew the knurled nut (see Fig. 6.1, pos. 3) from the eccentric and remove the complete eccentric from its holder on the hydraulic motor. Press the ON/OFF (I/0) switch. Approx. 10 seconds after the unit has been started, it should change to fault mode (the red LED is permanently ON). Refit the eccentric. Press the ON/OFF (I/0) switch to reset the unit. Press the ON/OFF (I/0) switch again (unit starts metering). Slowly reduce the supply of fresh water to reach 0 MPa (0 bar) of pressure. When the pressure falls below 1.4 MPa (1.4 bar) the unit changes to fault mode (red LED is permanently ON). Reopen the fresh water supply. Press the ON/OFF (I/0) switch to reset the unit. Reposition the cover. 6.2.5 Changing over to a New Product ATTENTION When changing over to a new product, make sure to thoroughly flush the suction pipe, the metering pump, and all lines in contact with the product before you connect the new supply container. If products are used which contain glucoprotamine (e.g. INCIDIN PLUS), the O-rings on the piston and on the piston rod need to be replaced by EPDM O-rings. If products are used which dont contain glucoprotamine, the O-rings on the piston and on the piston rod need to be replaced by SILICONE O-rings (see chapter 2.3 „General Safety Information“). To change over to a new product, proceed as follows: Fill an appropriate vessel with water and immerse the suction pipe Flush suction pipe, metering pump, and the lines in contact with the product as follows: unscrew the flow control device (see Fig. 3.2, pos 12), insert the sealing plug, and place the flow control device in an appropriate vessel, unscrew the knurled nut (see Fig. 6.1, pos 3) from the eccentric and pull the eccentric from its holder on the hydraulic motor, manually move the piston rod (see Fig. 6.1, pos 7) forth and back until clear water without product residues is running from the flow control device. Insert the suction pipe into the new supply container. Bleed metering pump until product running out of flow control device is bubble-free (see chapter 6.1 „Start-Up“) Push the eccentric back onto its holder and tighten the knurled nut. Remove the sealing plug and screw the flow control device in again. Check the unit for leaks and malfunctions. Set the concentration as described in chapter 6.2 „Setting the Concentration“ or check it as described in chapter 6.2.1 „Checking the Concentration Setting“. 417101158_DG1 39 Rev. 05-03.13 7 Troubleshooting NOTE Each time you stop the unit and/or take corrective action to eliminate a fault, make sure to reset the unit by pressing the ON/OFF (I/0) switch. Failure Control unit does not work (no LED lights up, pressing a button has no effect) Pressing the ON/OFF (I/0) switch does not start the unit; fault indicator is flashing Fault indicator permanently ON Cause No supply voltage available Fuse of control unit defective Control PCB defective Thermal fuse of power transformer blown Power transformer defective Disinfectant container empty Suction pipe soiled, suction pipe defective Connecting cable of suction pipe defective Metering pump leaks or defective Suction and metering line: Hose clamps leak; hose defective; angled valve closed Water flow pressure < 0.16 MPa bar (1.6 bar) Strainer clogged Flow limiter encrusted with lime or clogged Hydraulic motor leaks Hydraulic motor blocked Coil of solenoid valve defective Unit switched OFF; swivel Solenoid valve soiled or defective drain outlet leaks Metering pump: Suction and pressure valves soiled or defective Suction pipe: Concentration does not Bottom valve soiled or defective reach the set value Water feed pipe soiled Product shortage monitoring device does not switch the unit off when the product container is empty Unit cannot be reset 417101158_DG1 Hydraulic motor defective Corrective Action Restore power supply Replace fuse Replace control PCB Let metering unit cool down Replace power transformer Connect new supply container Clean bottom valve of suction pipe Replace suction pipe Replace metering pump Tighten hose clamps, replace hose, if necessary open angled valve Ensure that water flow pressure is > 0.16 MPa (1.6 bar) Clean strainer, replace it, if necessary Clean flow limiter, replace it, if necessary Replace axial face seal Replace hydraulic motor Replace coil Clean solenoid valve, replace defective parts Clean valves, replace, if necessary Clean bottom valve, replace, if necessary Clean strainers in valve and in fresh water supply pipe, replace, if necessary Replace hydraulic motor Suction pipe electrodes soiled or defective, connecting cable damaged Replace suction pipe Control PCB defective Replace control PCB 40 Rev. 05-03.13 8 Maintenance and Repair Information CAUTION ATTENTION 8.1 Suitable protective equipment must be worn when servicing or repairing parts which come into contact with disinfectant. The safety regulations which apply for handling chemicals must always be observed. To ensure operational safety and correct operation of the DG 1-II, the specified maintenance intervals must be respected. The interval between the installation and the first maintenance session or the period between two consecutive maintenance sessions must not exceed 12 months. Microbiological examination of decentralized disinfectant dispensers Unscrew nut from S- spout of unit and remove aerator. The outside of outlet has to be to disinfected with an alcoholic surface disinfectant (Incidin Liquid, Incides N) or to treated with a flame After flow of approx. 1 liter collect at least minimum 1 liter of disinfectant solution from the device in a sterile sampling container (Note: 1L is the minimum amount to be drawn, see also note on the device). Neutralizing agents must only be added after recommended contact time for the relevant use concentration of disinfectant against bacteria and yeast (see product label). Appropriate neutralizers (chemical composition and concentration) can be selected and validated according to EN 13727 ort the Standard Methods of DGHM/VAH or be asked from the disinfectant manufacturer Neutralizing agent must be sterile Sample has to be investigated in a microbiological laboratory by filtration method for total microbial count. Ideally, this value is determined per 1 ml, per 10ml and per 100 ml A refrigerated transport (4 ° C) in lightproof containers is desirable; it is mandatory to transport the samples within 3 hours of sample collection. The treatment of the sample should be completed 2 to 3 hours after taking out. During the assessment process of the results, identification of the micro-organism is also recommended and not only the microbial count to allow assessment of results with regard to the efficacy spectrum of the disinfectant dosed. 8.2 General maintenance work After completion of the maintenance work, perform the following tasks: Care of internal parts: clean bottom plate of unit and remove any lime residues. Care of external parts: Clean the cover with a damp cloth, rub it dry, and then treat it with product for stainless steel care (e.g. Chromol). Bracket:: Clean surface where you place supply container To perform maintenance work on the DG 1-II, proceed as specified in the following Maintenance Table (see chapter 8.2.1 „Maintenance Table“). 417101158_DG1 41 Rev. 05-03.13 8.2.1 Maintenance Table Component/Maintenance Task - Check CriterionFlow control device: − Functional test − Tightness of pressure control valve Checking the concentration setting: Eccentric: Functional test Metering pump: Leak test Hydraulic motor: Performance test Backflow preventer: Leak test of DB-type flow interrupter Suction pipe: Functional test Suction pipe: Leak test Strainer: (Fig. 3.3, pos. 7) One or more strainers soiled Solenoid valve strainer 8.3 Work Instructions/References See chapter 6.2.4 „Functional Check of the Flow Control Device“ If disinfectant is running from the flow control device, unscrew it from the threaded union ⇒ replace flow control device See chapter 6.2.1 „Checking the Concentration Setting“ To check the eccentric for correct operation, set the concentration to three different values and gauge them by liters. In case of deviation, replace eccentric, connecting rod, and – if necessary – complete metering pump With the unit running, watch for concentrate escaping at the piston rod. If yes ⇒ replace piston and O-rings or replace the complete metering pump, if necessary With the unit switched on, grasp the eccentric. If it is possible to block the hydraulic motor without applying force: Hydraulic motor defective ⇒ replace hydraulic motor Replace rubber diaphragm or flow interrupter, if necessary See chapter 6.2.3 „Functional Check of the Level Suction Pipe“ Immerse suction pipe end and electrodes in a beaker filled with disinfectant; if the metering pump sucks air, the suction pipe hose is defective ⇒ replace hose or suction pipe, if necessary Remove insets from the affected strainers and clean them. Remove the coupling nut from the slanted-seat filter. Recommendations for the replacement of wearing parts Component Solenoid valve: Connectinghose/Water -separation & outlet System separation (pipe interrupter DB) 8.4 Work step Exchange of the filter Exchange of the diaphragm Maintenance interval annual annual every 3 years Repair Instructions Repair instructions including spare parts lists and exploded views you can get on request. CAUTION For any work on parts which come in contact with the product, the corresponding hazard information and safety instructions must be observed at all times. Always wear suitable protective equipment. Before carrying out any repair work, make sure to disconnect the metering unit from the mains. To do so, pull the mains plug out of the wall outlet. Before performing any repair work on parts which come in contact with the product and/or with water (e.g. solenoid valve), make sure that the angled valve is closed and that the water pressure inside the unit is down. To do so, press the ON/OFF (I/0) switch twice. Only original spare parts may be used! ATTENTION (see chapter 1.3 „Scope of guarantee“). 417101158_DG1 42 Rev. 05-03.13 9 Technische Daten 9.1 Allgemeine Daten Supply voltage: Power consumption: Protection of metering unit/control unit: Protection class: Superposed fuse: Operating voltage: Internal fuse protection: Water connection: Water supply temperature: Flow pressure:: Metering capacity: Concentration setting: Metering tolerance: Backflow preventer: Mounting dimensions: Weight: NOTE 417101158_DG1 AC 230 V 15 W IP 24 / IP 65 II according to EN 60335-1 max. 16 A AC 24 V Microfuse 5 x 20, 630 mA, slow blow Conical coupling NW 10 (for copper pipe, D. 10x1 ) max. 30°C min. 0.16 MPa (1.6 bar) - max. 0.7 MPa (7 bar) approx. 850 l/h (dilution for normal operation) White eccentric: 0.25 % - 1 %, Blue eccentric: 1.5 % - 3 % Max. + 6 % DIN EN 1717 (Typ DB) Width = 500 mm (with bracket), High =425 mm, Depth=200 mm 13,5 kg Due to the company’s policy of continuous improvements to its products, the specifications may be changed without notice! 43 Rev. 05-03.13 9.2 Connection Diagram „Cold Water“ Fig. 9.1 417101158_DG1 44 Rev. 05-03.13 9.3 Connection Diagram „Hot Water“ Fig. 9.2 9.4 Connection Material and Accessories Connection Material - Designation T-Union G ½ , MS chromium-plated brass T-Union R ¾/ R ½ / R ¾, MS chromium-plated brass Copper pipe 10 x 1 chromium-plated brass Angled valve G ½ a x D 10 MS chromium-plated brass [supplied] Accessories - Designation Adapter 3/4 “ internal thread R1/2 external thread, chromium-plated brass Swivel drain outlet, length 150 mm Swivel drain outlet, length 200 mm Swivel drain outlet, length 300 mm Thermal mixer valve unit including screw coupling Conversion kit for restoring the unit to a clearance pipe segment configuration (only for to low water pressure up to 0,1 MPa (1 bar) Bracket for 10L-Can NOTE 417101158_DG1 If necessary please ask for part numbers together with the spare part drawing separately! 45 Rev. 05-03.13 10 Dismantling / Disposal Dismantling The DG1-II may only be dismantled by specialist personnel. Before commencing dismantling, ensure that the DG1-II has been fully isolated from the power supply. The device must be flushed through with care in order to get rid of any residual chemicals. Disposal The DG1-II is predominantly made of steel (and also of aluminium to a certain extent) (apart from the electrical equipment) and is to be disposed of in accordance with the local environmental regulations prevailing at that time. Depending on the condition, existing regulations and with due regard for current requirements, dispose of it, for example, as electrical waste (printed circuit boards), plastics (housing), metal plates, steel, copper, aluminium (separate after sorting). Prior to disposal, all parts which are in contact with media must be decontaminated. Oils, solvents, detergents and contaminated cleaning tools (brushes, cloths, etc.) must be disposed of in compliance with local requirements, in accordance with the prevailing waste code and with due attention to the notes contained in the manufacturers' safety data sheets. 417101158_DG1 46 Rev. 05-03.13 11 Declaration of Conformity NOTE 417101158_DG1 This declaration of conformity corresponds to the status of this operating instruction. Should in the meantime one of those standards be subject of change, you can download the latest version here under: http://www.ecolab-engineering.de/uploads/media/CE_1024ff_DG1.pdf 47 Rev. 05-03.13 Dokumenten Nr.: document no.: 417101158 Version / Revision: version / review: 5 Erstelldatum: date of issue: 2008 Letzte Änderung: last changing: 07.03.2013 © Copyright Ecolab Engineering GmbH, 2013 Alle Rechte vorbehalten. All rights reserved Nachdruck, auch auszugsweise, nur mit Genehmigung der Firma Ecolab Engineering GmbH gestattet. Reproduction, also in part, only with permission of Ecolab Engineering GmbH.