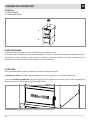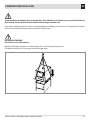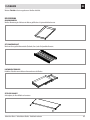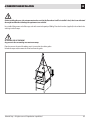
1
MANUALE DI INSTALLAZIONE E UTILIZZO
IT
MANUEL D’INSTALLATION ET D’UTILISATION
FR
INSTALLATIONS- UND BEDIENUNGSANLEITUNG
DE
INSTALLATION GUIDE
EN
EASY
8901223100
MANUALE DI INSTALLAZIONE E UTILIZZO
IT
INDICE
INTRODUZIONE............................................................................................................. 3
1-AVVERTENZE E CONDIZIONI DI GARANZIA...................................................................... 4
2-INFORMAZIONI INTRODUTTIVE.................................................................................... 7
3-CARATTERISTICHE TECNICHE.......................................................................................10
4-TRASPORTO E INSTALLAZIONE.....................................................................................11
5-FUNZIONAMENTO......................................................................................................14
6-LE SICUREZZE............................................................................................................15
7-PULIZIA....................................................................................................................16
8-MANUTENZIONE A CURA DELL’UTENTE..........................................................................17
9-ARRESTI...................................................................................................................19
10-ANOMALIE E RIMEDI.................................................................................................20
11-ACCESSORI..............................................................................................................21
12-CONSIGLI PER LA COTTURA........................................................................................22
13-SCHEMA ELETTRICO..................................................................................................25
INTRODUZIONE
IT
Gentile Cliente,
vogliamo ringraziarla per la preferenza che ha voluto accordare ai nostri prodotti. Il nostro obiettivo è coniugare la tecnologia con la
semplicità di utilizzo e, soprattutto, con la sicurezza.
Per un funzionamento ottimale, Le consigliamo di leggere con attenzione il presente libretto prima di effettuare la prima accensione.
Nell’eventualità dovessero sorgere dubbi oppure problemi, La invitiamo a rivolgersi al rivenditore che le assicurerà la massima collaborazione.
REVISIONI DELLA PUBBLICAZIONE
Il contenuto del presente manuale è di natura strettamente tecnica e di proprietà della MCZ Group Spa.
Nessuna parte di questo manuale può essere tradotta in altra lingua e/o adattata e/o riprodotto anche parzialmente in altra forma e/o
mezzo meccanico, elettronico, per fotocopie, registrazioni o altro, senza una precedente autorizzazione scritta da parte di MCZ Group
Spa.
L’azienda si riserva il diritto di effettuare eventuali modifiche al prodotto in qualsiasi momento senza darne preavviso. La società proprietaria tutela i propri diritti a rigore di legge.
CURA DEL MANUALE E COME CONSULTARLO
• Abbiate cura di questo manuale e conservatelo in un luogo di facile e rapido accesso, per tutta la vita del libretto.
• Nel caso in cui questo manuale venisse smarrito o distrutto o fosse comunque in cattive condizioni richiedetene una copia al vostro
rivenditore oppure direttamente al Costruttore specificando i dati di identificazione del prodotto.
• Una voce fondamentale o che richiede un’attenzione particolare viene riportata con il “testo in grassetto”.
• “Il testo in corsivo” si utilizza per richiamare la Vostra attenzione su altri paragrafi del presente manuale o per eventuali chiarimenti
supplementari.
• La “NOTA” fornisce al lettore informazioni aggiuntive sull’argomento.
SIMBOLOGIA PRESENTE SUL MANUALE
ATTENZIONE PERICOLO DI FOLGORAZIONE:
Segnala al personale interessato che l’operazione descritta presenta se non effettuata nel rispetto delle normative di sicurezza, il rischio di subire uno shock elettrico.
INTERVENTI STRAORDINARI:
Eventuali interventi di manutenzione evidenziati dal simbolo qui sopra, sono da richiedere al Rivenditore
Autorizzato.
ATTENZIONE:
Questo simbolo di avvertenza indica di leggere attentamente e comprendere il messaggio a cui è riferito poiché
la non osservanza di quanto scritto, può provocare seri danni al forno e mettere a rischio l’incolumità di chi la utilizza.
INFORMAZIONI:
Con questo simbolo si intende evidenziare quelle informazioni importanti per il buon funzionamento del
prodotto. Una mancata osservanza di quanto prescritto comprometterà l’utilizzo del prodotto e il funzionamento
risulterà insoddisfacente.
Servizio Tecnico - Diritti riservati - Riproduzione vietata
3
1-AVVERTENZE E CONDIZIONI DI GARANZIA
IT
• L’installazione, la verifica del funzionamento e la manutenzione vanno eseguite esclusivamente da personale qualificato o autorizzato.
• Installare il prodotto secondo tutte le leggi locali, nazionali e le Norme vigenti nel luogo, regione o stato.
• Questo apparecchio non è utilizzabile da persone (inclusi bambini) con ridotte capacità fisiche, sensoriali, mentali o
con scarsa esperienza e conoscenza a meno che non siano sorvegliati od istruiti sull’uso dell’apparecchio dalla persona
che ne è responsabile per la sicurezza.
• Per il corretto uso del prodotto e delle apparecchiature elettroniche ad essa collegate e per prevenire incidenti si devono sempre
osservare le indicazioni riportate nel presente libretto.
• L’apparecchio non deve essere utilizzato come inceneritore. Tassativamente vietato l’utilizzo di combustibili liquidi
per l’accensione del fuoco.
• Prima di iniziare qualsiasi operazione, l’utente o chiunque si appresti ad operare sul prodotto dovrà aver letto e compreso l’intero
contenuto del presente libretto di istruzioni.
• Il prodotto deve essere destinato solamente all’uso per il quale è prevista. Ogni altro uso è da considerarsi improprio e quindi
pericoloso.
• Non utilizzare il prodotto come scala o struttura di appoggio.
• Non mettere ad asciugare biancheria sul prodotto.
• Ogni responsabilità per un uso improprio del prodotto è totalmente a carico dell’utente e solleva il produttore da ogni responsabilità
civile e penale.
• Qualsiasi tipo di manomissione o di sostituzione non autorizzata di particolari non originali del prodotto può essere pericoloso per
l’incolumità dell’operatore e sollevano il produttore da ogni responsabilità civile e penale.
• Gran parte delle superfici del prodotto sono molto calde (porta, maniglia, vetro, tubi uscita fumi, ecc.). Occorre quindi evitare di
entrare in contatto con queste parti senza adeguati indumenti di protezione o appositi mezzi, come ad esempio guanti a protezione
termica.
• E vietato far funzionare il prodotto con la porta aperta.
• Non toccare il prodotto con le mani umide, trattandosi di un apparecchio elettrico. Togliere sempre il cavo prima di intervenire
sull’unità (se previsto).
• Il prodotto deve essere connesso elettricamente ad un impianto munito di efficace conduttore di terra.
• L’impianto deve essere dimensionato adeguatamente alla potenza elettrica dichiarata del prodotto.
4
1-AVVERTENZE E CONDIZIONI DI GARANZIA
IT
AVVERTENZE OPERATIVE
• Spegnere il prodotto in caso di guasto o cattivo funzionamento.
• Installare il prodotto in luoghi aperti adeguatamente protetti contro l’incendio e predisposti di tutti i servizi quali alimentazioni (aria
ed elettriche) e scarichi per i fumi.
• Non usare sostanze volatili e/o infiammabili (benzina, alcool, ecc) per l’accensione del fuoco.
INFORMAZIONI
• Per qualsiasi problema rivolgersi al rivenditore o a personale qualificato ed autorizzato dal produttore ed in caso di riparazione
esigere parti di ricambio originali.
• Controllare e pulire periodicamente il condotto di scarico dei fumi secondo quanto prevede la normativa vigente nel paese d’installazione.
CONDIZIONI DI GARANZIA
Il produttore garantisce il prodotto, ad esclusione degli elementi soggetti a normale usura (riportati nel paragrafo “LIMITI”), per
la durata di due anni dalla data di acquisto che viene comprovata da un documento probante che riporti il nominativo del venditore e
la data in cui è stata effettuata la vendita, l’inoltro del certificato di garanzia compilato entro 8 gg. e se il prodotto è stato installato e
collaudato da installatore specializzato e secondo le dettagliate istruzioni indicate nel libretto di istruzioni in dotazione al prodotto. Per
garanzia si intende la sostituzione o riparazione gratuita delle parti riconosciute difettose all’origine per vizi di fabbricazione.
LIMITI
Non rientrano in garanzia le parti soggette a normale usura quali: guarnizioni, i particolari asportabili, le manopole, le lampade, le parti
in vetro, la piana refrattaria e gli eventuali accessori e materiali usurabili come griglie del fuoco, flaps per fiamma, cassetti della cenere.
Le parti sostituite saranno garantite per il rimanente periodo di garanzia decorrente dalla data di acquisto del prodotto. In particolare
i vetri sono garantiti fin quando, l’installatore autorizzato, ne attesta la perfetta integrità nel momento in cui la posa in
opera è ultimata.
ESCLUSIONI
Non sono coperte dalla garanzia tutte le parti che dovessero risultare difettose a causa di negligenza o trascuratezza
nell’uso, di errata manutenzione, di installazione non conforme con quanto specificato dal produttore (vedi capitoli relativi in questo manuale d’uso). In caso di inefficienza del prodotto rivolgersi al rivenditore e/o all’importatore di zona.
Il produttore declina ogni responsabilità per eventuali danni che possono, direttamente o indirettamente, derivare a persone, cose o
animali in conseguenza della mancata osservanza di tutte le prescrizioni indicate nel libretto istruzioni e concernenti, specialmente le
avvertenze in tema di installazione, uso e manutenzione dell’apparecchio. La garanzia decade in caso di danni recati per manomissioni
all’apparecchio, agenti atmosferici, calamità naturali, scariche elettriche, incendi, difettosità dell’ impianto elettrico ed idraulico e da
assenza o non corretta manutenzione secondo istruzioni del costruttore.
RICHIESTA DI INTERVENTO
La richiesta di intervento deve essere inoltrata al rivenditore il quale provvederà ad inoltrare la chiamata al servizio assistenza tecnica del
produttore.
Servizio Tecnico - Diritti riservati - Riproduzione vietata
5
1-AVVERTENZE E CONDIZIONI DI GARANZIA
IT
AVVERTENZE PER IL CORRETTO SMALTIMENTO DEL PRODOTTO AI SENSI DELLA DIRETTIVA EUROPEA
2002/96/EC E SUCCESSIVE MODIFICHE 2003/108 /CE.
Alla fine della sua vita utile il prodotto non deve esser smaltito insieme ai rifiuti urbani. Può essere consegnato presso gli appositi centri
di raccolta differenziata predisposti dalle amministrazioni comunali, oppure presso i rivenditori che forniscono questo servizio. Smaltire
separatamente l’apparecchio consente di evitare possibili conseguenze negative per l’ambiente e per la salute derivanti da un suo smaltimento inadeguato e permette di recuperare i materiali di cui è composto al fine di ottenere un importante risparmio di energia e di
risorse. Per rimarcare l’obbligo di smaltire separatamente gli apparecchi, sul prodotto è riportato il marchio del contenitore di spazzatura
mobile barrato.
6
2-INFORMAZIONI INTRODUTTIVE
IT
I Forni della linea EASY sono stati realizzati in conformità alla Direttiva CEE 98/37 (ex 89/392 e sue modifiche)e la norma EN60335-1.
IDENTIFICAZIONE FORNO
MODEL :
LOT :
VOLTAGE : 230V --- 50HZ
POWER : 100W
IPX2
Made in Italy
Per qualsiasi comunicazione con il Costruttore o Rivenditore di zona, citare sempre il MODELLO e il N° di LOTTO scritte sull’etichetta posta
dietro il forno.
NOTE GENERALI ALLA CONSEGNA
Al ricevimento controllare che:
1) Gli imballi siano integri.
2) La fornitura corrisponda alle specifiche dell’ordine.
3) Non vi siano danni al forno e agli accessori.
Servizio Tecnico - Diritti riservati - Riproduzione vietata
7
A
2-INFORMAZIONI INTRODUTTIVE
IT
DESCRIZIONE:
A = FORNO DA ESTERNO
B = CARRELLO PORTALEGNA
A
B
DESCRIZIONE FORNO
Il forno della Linea EASY, è un forno a legna, a fuoco indiretto e cottura continua ventilata.
Questa caratteristica lo distingue dagli altri forni tradizionali - a fuoco diretto - in quanto, la camera di combustione è completamente
separata dalla camera di cottura, permettendo di cuocere i cibi evitando il contatto con fumo o cenere. La ventilazione nella camera di
cottura distribuisce il calore in maniera uniforme su tutto il volume interno.
LA STRUTTURA
Tutta la struttura del forno, compresi i mantelli, sono realizzati in lamiera alluminata verniciata.
Il carrello portalegna è dotato di un ampio vano con ruote e manici, per facilitarne lo spostamento.
Lo sportello della camera di combustione, con griglia di regolazione dell’aria. Muovendo la leva a destra la griglia si apre, questo
permette all’aria di entrare. Viceversa muovento la leva a sinitra la griglia si chiude.
La luce interna al forno permette di vedere i cibi ed il loro grado di cottura.
8
2-INFORMAZIONI INTRODUTTIVE
IT
La camera di cottura in ACCIAIO INOX AISI 430 ha la possibilità di essere completamente smontata e lavata, per garantire la massima
igiene.
Un termometro esterno, posto sopra lo sportello della camera di cottura ne indica la temperatura interna.
Il consumo medio per portare il forno a 300 °C è di circa 1,5-2 Kg di legna all’ora, pari a 40-60 minuti di cottura. La temperatura massima che il forno può raggiungere, è di 300 °C, oltre questa temperatura si possono creare danni alla struttura.
Il forno EASY è stato progettato per funzionare con legna naturale e stagionata. Ogni altro utilizzo, diverso da quanto riportato in questo
manuale, è da considerarsi uso improprio.
Servizio Tecnico - Diritti riservati - Riproduzione vietata
9
3-CARATTERISTICHE TECNICHE
166
230
IT
74
87
Peso:
210 kg
Tensione di alimentazione:
230V 50Hz
Potenza:
100W
Forno alimentato a legna consumo orario: 1,5-2kg/h
10
155
4-TRASPORTO E INSTALLAZIONE
IT
Prima dell’installazione del forno, il cliente deve assicurarsi che il pavimento dove verrà installato, sia livellato, che ne possa
sopportare il peso e che vi siano le predisposizioni tecnologiche richieste.
Munirsi di un mezzo di sollevamento adeguato e di funi in fibra con portata nominale 500 Kg cadauna. Posizionare le 4 aste di ferro (in
dotazione) negli appositi fori e imbracare con le funi.
ATTENZIONE PERICOLO DI SCHIACCIAMENTO!
Allontanare qualsiasi persona dalle vicinanze.
Posizionare il forno sopra il carrello, facendo attenzione d’inserirlo nelle apposite guide.
Sganciare le funi e/o togliere le 4 aste di ferro dalle guide.
Servizio Tecnico - Diritti riservati - Riproduzione vietata
11
4-TRASPORTO E INSTALLAZIONE
IT
Per montare il tetto nell’alloggiamento sopra il forno, inserire il pannello anteriore e posteriore fissandoli con le 4 viti in dotazione.
Appoggiare sopra le 2 lamiere per il tetto sormontandole leggermente e fissarle con 6 viti come indicato in figura. Inserire il comignolo e
, per una maggiore tenuta, fissare le alette laterali al tetto con 2 viti.
Per eventuali piccoli spostamenti tirare il forno per i manici e mai spingerlo (operazione da farsi esclusivamente a forno freddo e spento).
ATTENZIONE PERICOLO DI RIBALTAMENTO!
Alzare il forno Max. 6 cm. circa da terra, salvo ostacoli per evitare ribaltamenti.
12
4-TRASPORTO E INSTALLAZIONE
IT
PANNELLO COMANDI E PARTI DEL FORNO
1
3
2
4
A
5
B
6
C
1 - SCARICO FUMO
Si collega alla canna fumaria e permette l’uscita dei fumi di scarico
2 - CAVO DI ALIMENTAZIONE
Permette di allacciare il forno alla presa di rete, ed avere i servizi desiderati (luce,
ventilazione ecc.).
3 - TERMOMETRO
Indica la Temperatura interna nella Camera di Cottura.
4 - INTERRUTTORE LUCE
Permette di accendere e spegnere la luce interna alla Camera di Cottura.
5 - INTERRUTTORE VENTILAZIONE
Permette di accendere e spegnere la ventola all’interno della Camera di Cottura.
6 - COMANDO ARIA COMBUSTIONE
Si utilizza per controllare la combustione della legna, all’interno della Camera stessa.
A - SPORTELLO CAMERA COTTURA
Si accede alla Camera di Cottura per porre, prendere o controllare i cibi.
B - SPORTELLO CAMERA COMBUSTIONE
Si accede alla Camera di Combustione per il caricamento della legna, per il controllo
del fuoco.
C - SPORTELLO CARRELLO
Si accede al Carrello per porre o prendere legname o altro.
Servizio Tecnico - Diritti riservati - Riproduzione vietata
13
5-FUNZIONAMENTO
IT
PRIMA ACCENSIONE
ATTENZIONE!
Leggere attentamente le prescrizioni di sicurezza
La prima accensione deve essere eseguita da un installatore.
Rimuovere la eventuale plastica posta sul vetro dello sportello camera di cottura (A).
Effettuare una verifica generale sugli allacciamenti, nonchè sul funzionamento di tutti i comandi.
NOTA!
PRIMA DI CUCINARE NEL FORNO EASY, È NECESSARIO ACCENDERLO SENZA CIBI ALL’INTERNO, PER 2 VOLTE, COSÍ DA PERMETTERE L’USCITA
DI ODORI SGRADEVOLI PRODOTTI DAI COMPONENTI NUOVI.
Assicurarsi che tutte le protezioni ed accessori interni ed esterni, siano montati. Aprire lo SPORTELLO della CAMERA DI COMBUSTIONE (B);
alloggiare al centro o in fondo della stessa poca legna asciutta e di piccolo taglio, ed accendere il fuoco.
Chiudere lo sportello e assicurarsi che il COMANDO ARIA COMBUSTIONE (6), sia su “aperto” cioè verso destra.
Far arrivare la temperatura del forno a 200 °C., visibile sul TERMOMETRO (3).
Aprire di tanto in tanto, lo SPORTELLO CAMERA DI COTTURA (A), così da permettere l’uscita dei fumi e degli odori sgradevoli, prodotti dal
materiale nuovo.
Mantenere il fuoco acceso per 2 ore ed assicurarsi che non superi MAI i 300°C.
Lasciare spegnere il fuoco e lasciare raffreddare il forno completamente.
Ripetere i punti sopra citati, quindi scaldare il forno a 300 °C per 1 ora.
Lasciare spegnere il fuoco e lasciare raffreddare il forno completamente.
A questo punto il forno EASY è pronto, ed è possibile cucinare.
14
6-LE SICUREZZE
IT
Prima di qualsiasi intervento di manutenzione, riparazione o pulizia, staccare la spina di alimentazione dalla presa di rete ed
attendere che il forno abbia raggiunto la temperatura ambiente.
• È fatto obbligo al cliente di verificare che l’impianto elettrico di rete, dove il forno verrà installato, sia fornito di una buona messa a
terra e di un impianto a norme provvisto d’interruttore differenziale (salvavita).
• In caso contrario adeguare l’impianto.
• Non manomettere o deteriorare i dispositivi di sicurezza, ne rimuovere o nascondere le etichette di avvertimento, né modificare le
caratteristiche del forno.
• Ogni 250 ore di funzionamento o quando la Camera di Combustione fa fumo, pulire la canna fumaria, la camera di combustione, il
tubo e lo scarico fumo con valvola.
• Posizionare la legna sempre al centro o in fondo alla Camera di Combustione e mai frontalmente.
• Il forno EASY non deve MAI superare la temperatura maggiore di 300° C.
• In caso si debbano sostituire pezzi usurati e/o rotti, richiedere sempre ricambi originali al Rivenditore Autorizzato.
• Non spegnere MAI il fuoco con acqua, si potrebbero deformare parti importanti della struttura.
• Mantenere tutti i dispositivi efficienti e in sicurezza, fino alla fine della vita del forno.
Servizio Tecnico - Diritti riservati - Riproduzione vietata
15
7-PULIZIA
IT
ATTENZIONE!
Prima di qualsiasi intervento di manutenzione, riparazione o pulizia spegnere tutti gli interruttori.
Staccare la spina di alimentazione dalla presa di rete ed attendere che il forno abbia raggiunto la temperatura ambiente.
Munirsi di un aspiratore.
PULIZIA CAMERA DI COTTURA
Quando si presenta la necessità, pulire la camera di cottura nel seguente modo:
Togliere i piani intermedi e la piana inferiore.
Togliere i supporti piani di cottura.
Lavare con prodotti detergenti adatti alla pulizia dei forni o dell’acciaio inox.
Pulire con un aspiratore i residui della cottura che si formano sotto la piana inferiore.
Per la pulizia, non usare sostanze abrasive, pagliette metalliche o altro di simile.
PULIZIA CAMERA DI COMBUSTIONE
ATTENZIONE!
Questa operazione va eseguita solamente quando il forno è completamente freddo.
Ad ogni accensione pulire la camera di combustione nel seguente modo:
Sfilare parzialmente il cassetto della cenere.
Sfilare parzialmente la griglia del fuoco.
Far cadere con l’attizzafuoco la cenere residua della griglia del fuoco nel cassetto della cenere e reinserire la griglia del fuoco fino in
fondo.
Sfilare completamente il cassetto della cenere, assicurandosi che non ci siano tizzoni accesi.
Svuotare il cassetto della cenere, pulire il vano, e reinserirlo nell’alloggiamento fino in fondo.
PULIZIE ESTERNE
Pulire le pareti esterne verniciate con una spugna (non abrasiva) imbevuta di detergente non agressivo. Questa operazione può essere
fatta ogni qual volta si presenti necessità.
16
8-MANUTENZIONE A CURA DELL'UTENTE
IT
ATTENZIONE!
Prima di qualsiasi intervento di manutenzione, riparazione o pulizia, portare gli interuttori del forno in posizione “0” (Zero).
Disinserire la spina di alimentazione dalla presa di rete ed attendere che il forno abbia raggiunto la temperatura ambiente.
LUBRIFICAZIONE
Oliare periodicamente le cerniere degli Sportelli A, B, C
Per lunghi periodi di inutilizzo, pulire la camera di combustione (B) come descritto nella parte “PULIZIA DELLA CAMERA DI COMBUSTIOINE”.
Servizio Tecnico - Diritti riservati - Riproduzione vietata
17
8-MANUTENZIONE A CURA DELL'UTENTE
IT
SOSTITUZIONE DELLA LAMPADA ILLUMINAZIONE INTERNA
Prima di effettuare qualsiasi operazione staccare la spina dalla presa di corrente.
Svitare il vetro protettivo della lampada.
Estrarre la lampada rotta.
Munirsi di lampada dello stesso tipo di quelle istallate, LAMPADA ALOGENA TIPO G9 230V-25W facendo attenzione a non toccarla a
mani nude, inserirla nell’alloggiamento.
Avvitare il vetro protettivo.
Inserire la spina del CAVO DI ALIMENTAZIONE (2) nella presa di rete.
CONTROLLO CIELO DELLA CAMERA DI COMBUSTIONE
Questa operazione deve essere effettuata ogni mese.
Aprire lo SPORTELLO CAMERA COMBUSTIONE (B).
Con una torcia o quando il fuoco è acceso, verificare lo stato della lamiera nel cielo della CAMERA DI COMBUSTIONE (B).
• Se s’intravedono dei fori sulla lamiera chiamare il Vostro Rivenditore Autorizzato per la sostituzione.
Per qualsiasi altra MANUTENZIONE STRAORDINARIA, rivolgersi al Vostro Rivenditore Autorizzato.
18
9-ARRESTI
IT
ARRESTO
Spegnere gli interruttori.
Staccare la spina del cavo di alimentazione dalla presa di rete.
Verificare che all’interno della camera di cottura “A” non ci sia rimasto del cibo.
Verificare che all’interno della camera combustione “B”, non sia presente fuoco e che la brace sia spenta.
AVVERTENZA!
Per non deteriorare la struttura, NON spegnere MAI il fuoco con acqua.
Attendere che il forno abbia raggiunto la temperatura ambiente.
Pulire il Cassetto dai residui della combustione. (Vedere parte “7- PULIZIA”).
ARRESTO PER MANCANZA DI TENSIONE
NOTA!
In caso di mancanza di Tensione si può continuare ad utilizzare il forno.
La tensione di rete nel forno EASY, alimenta la luce interna e la ventilazione interna.
Servizio Tecnico - Diritti riservati - Riproduzione vietata
19
10-ANOMALIE E RIMEDI
ANOMALIA:
Il forno fà fumo.
RIMEDIO:
Pulire lo scarico fumi ed il relativo tubo (Vedere parte “7-PULIZIA”).
Per qualsiasi altro tipo d’anomalie di funzionamento del forno EASY, RIVOLGERSI AL RIVENDITORE AUTORIZZATO.
20
IT
11-ACCESSORI
IT
Ulteriori accessori si possono richiedere al Rivenditore Autorizzato.
DESCRIZIONE
TEGLIA ALLUMINIO
Si utilizza per contenere acqua quando si usa la Griglia Cottura o come contenitore dei cibi.
KIT GRIGLIA PORCHETTA
Si utilizza per cuocere grandi arrosti (tacchini, oca) o per cuocere la porchetta.
CARRELLO PER TEGLIA
Utile accessorio per estrarre la teglia senza far fatica.
MENSOLA LATERALE
Piano di lavoro da utilizzare come appoggio.
Servizio Tecnico - Diritti riservati - Riproduzione vietata
21
12-CONSIGLI PER LA COTTURA
IT
AVVIAMENTO
Assicurarsi che tutte le protezioni ed accessori interni/esterni, siano montati.
Aprire lo sportello della camera di combustione (B); posizionare in fondo legna asciutta e di piccolo taglio.
Chiudere lo sportello e assicurarsi che il comando aria comburente (6), sia aperto.
Raggiungere la temperatura d’esercizio desiderata consultando la “Tabella di Cottura indicativa” (a seguire), mantenere a quella temperatura per circa 30 minuti, dopodichè il forno EASY è pronto per cuocere.
COME UTILIZZARE IL FORNO PER CUOCERE I CIBI
Quì di seguito vengono descritti alcuni esempi di come cuocere PIZZA - LASAGNE - ARROSTO - CROSTATA. In seguito sarà l’esperienza e la
professionalità del (Cuoca/o) a far sì che i risultati siano eccellenti.
NOTA!
Direttamente nelle piane refrattarie si cuoce solamente la pizza ed il pane.
Per gli altri cibi usare sempre delle teglie da posizionare sempre sopra la griglia.
I tempi di cottura sono determinati dal volume dei cibi stessi.
Esempio:
Per cuocere un TACCHINO ci vogliono due ore a 200/240°C.
Per cuocere un POLLO ci vuole un’ora a 200/240°C.
Per cuocere una QUAGLIA ci vogliono quindici/venti minuti a 200/240°C.
Per cuocere delle LASAGNE ci vogliono venti/trenta minuti a 220/250°C.
NOTA!
L’umidità all’interno della Camera di Cottura, può essere aumentata inserendo una ciotola con acqua.
L’umidità serve a migliorare la cottura e dare al cibo una doratura migliore.
22
12-CONSIGLI PER LA COTTURA
IT
TABELLA DI COTTURA INDICATIVA
ALIMENTO
°C
TEMPERATURA IN MINUTI
TORTE
180 - 220 °C
15 - 30
PANE
220 - 250 °C
40 - 60
PESCE
200 - 240 °C
30 - 40
ARROSTO
200 - 240 °C
70 - 110
PIZZA AL TRANCIO
250 - 280 °C
15 - 20
PIZZA AL PIATTO
270 - 300 °C
2-3
PIZZA AL PIATTO
• Portare il forno a 270-300°C, accendere la ventilazione con l’INTERRUTTORE VENTILAZIONE (5) e mantenerlo per un’ora a questa
temperatura.
• Inumidire la piana refrattaria con uno straccio.
• Introdurre nella CAMERA DI COTTURA, una ciotola di metallo o vetro con dell’acqua per aumentare l’umidità nel forno 10 minuti
prima di infornare.
• Introdurre la pizza, posizionarla sopra la piana refrattaria e chiudere lo SPORTELLO CAMERA COTTURA (A).
• Dopo due/tre minuti (dipende dalla farcitura) togliere la pizza.
Servizio Tecnico - Diritti riservati - Riproduzione vietata
23
12-CONSIGLI PER LA COTTURA
PASTA AL FORNO E POLLO ARROSTO
•
•
•
•
•
•
•
•
•
Portare la temperatura del forno a 200/240 °C.
Accendere la ventilazione.
Raggiunta la temperatura, adeguare l’alimentazione della legna con poca quantità per mantenere la temperatura costante.
Assicurarsi che non manchi l’acqua nella ciotola per l’umiditá
Posizionare la GRIGLIA nel piano desiderato.
Posizionare la teglia sopra la GRIGLIA.
Chiudere lo sportello della CAMERA COTTURA (A).
Controllare che la temperatura non scenda e alimentare il forno secondo necessità.
Attendere la cottura dei cibi senza muoverli ripetutamente.
CROSTATA
•
•
•
•
•
•
•
•
•
•
•
24
Portare il forno a 180/220°C.
Mantenere la ventilazione accesa.
Introdurre nella CAMERA DI COTTURA, una ciotola di metallo o vetro con dell’acqua per aumentare l’umidità nel forno.
Attendere che la temperatura del forno arrivi a 180/220°C.
Raggiunta la temperatura, spegnere la ventilazione con l’INTERRUTTORE (5), adeguare l’alimentazione.
Togliere la ciotola con l’acqua.
Posizionare la GRIGLIA nel piano desiderato.
Posizionare la teglia con la CROSTATA sopra la GRIGLIA.
Chiudere lo sportello della CAMERA COTTURA (A).
Controllare che la temperatura della CAMERA DI COTTURA non scenda e alimentare il forno secondo necessità.
Attendere la cottura della CROSTATA.
IT
13-SCHEMA ELETTRICO
IT
E
2
1
2
D
C
2
1
1
3
B
1
F
3
2
A
DESCRIZIONE
A Spina 230V-10A
B
Morsetti connessioni
C
Interruttore ventola
Camera cottura 230V-16A
D Interruttore luci 230V-16A
E
Modulo portalampade
Lampada 230V-25W
F
Motore ventilazione
Camera cottura 230V-32W
1Blu
2Marrone
3Giallo-verde
Servizio Tecnico - Diritti riservati - Riproduzione vietata
25
MANUEL D’INSTALLATION ET D’UTILISATION
FR
INDEX
INTRODUCTION............................................................................................................27
1-RECOMMANDATIONS ET CONDITIONS DE GARANTIE........................................................28
2-INFORMATIONS INTRODUCTIVES.................................................................................31
3-CARACTÉRISTIQUES TECHNIQUES.................................................................................34
4-TRANSPORT ET INSTALLATION.....................................................................................35
5-FONCTIONNEMENT.....................................................................................................38
6-LES SÉCURITÉS..........................................................................................................39
7-NETTOYAGE...............................................................................................................40
8-ENTRETIEN À LA CHARGE DE L’UTILISATEUR..................................................................41
9-ARRÊTS.....................................................................................................................43
10-ANOMALIES ET REMÈDES..........................................................................................44
11-ACCESSOIRES...........................................................................................................45
12-CONSEILS POUR LA CUISSON......................................................................................46
13-SCHÉMA ÉLECTRIQUE................................................................................................49
Traduction des instructions en langue originale
INTRODUCTION
FR
Cher client,
nous souhaitons vous remercier pour la préférence que vous avez accordée à nos produits. Notre objectif est de conjuguer la technologie
avec la simplicité d’utilisation et, surtout, avec la sécurité.
Pour un fonctionnement optimal, nous vous conseillons de lire avec attention ce manuel avant d’effectuer la première mise en marche.
Si d’éventuels doutes ou problèmes venaient à être soulevés, nous vous invitons à vous adresser au revendeur qui garantira pour vous la
meilleure collaboration.
RÉVISIONS DE LA PUBLICATION
Le contenu de ce manuel est de nature strictement technique et appartient à MCZ Group Spa.
Aucune partie de ce manuel ne peut être traduite en une autre langue et/ou adaptée et/ou reproduite même partiellement sous une autre
forme et/ou moyen mécanique, électronique, pour des photocopies, enregistrements ou autre, sans une autorisation préalable et écrite
de la part de MCZ Group Spa.
L’entreprise se réserve le droit d’effectuer d’éventuelles modifications au produit à tout moment sans en donner de préavis. La société
propriétaire protège ses propres droits aux termes de la loi.
SOIN DU MANUEL ET COMMENT LE CONSULTER
• Prenez soin de ce manuel et conservez-le dans un lieu d’accès facile et rapide, durant toute la durée de vie du mode d’emploi.
• Au cas où ce manuel serait perdu ou détruit, ou serait dans de mauvaises conditions, demandez-en une copie à votre revendeur ou bien
directement au Fabricant en indiquant les données d’identification du produit.
• Un texte fondamental ou qui demande une attention particulière est indiquée avec le “texte en gras”.
• “Le texte en italique” est utilisé pour attirer votre attention sur d’autres paragraphes de ce manuel ou pour d’éventuelles explications
supplémentaires.
• La “REMARQUE” fournit au lecteur des informations supplémentaires sur le sujet.
SYMBOLES PRÉSENTS DANS LE MANUEL
ATTENTION, RISQUE D’ÉLECTROCUTION :
Signale au personnel concerné que l’opération décrite présente, si elle n’est pas effectuée dans le respect des
normes de sécurité, le risque de subir une décharge électrique.
INTERVENTIONS EXTRAORDINAIRES :
Les éventuelles interventions d’entretien, mises en évidence par le symbole ci-contre, doivent être demandées au
Revendeur Agréé.
ATTENTION :
Ce symbole de recommandation indique qu’il faut lire attentivement et comprendre le message auquel il se réfère
puisque le non observation des prescriptions peut provoquer de sérieux dommages au produit et
mettre en danger la sécurité de la personne qui l’utilise.
INFORMATIONS :
Ce symbole sert à mettre en évidence les informations importantes pour le bon fonctionnement du produit. La
non observation des prescriptions compromettra l’utilisation du produit et le fonctionnement sera insatisfaisant.
Service technique - Droits réservés - Reproduction interdite
27
1-RECOMMANDATIONS ET CONDITIONS DE GARANTIE
FR
• L’installation, la vérification du fonctionnement et l’entretien doivent être effectués exclusivement par du personnel
qualifié ou agréé.
• Installer le produit selon toutes les lois locales, nationales et les Normes en vigueur dans le lieu, région ou état.
• Ce produit ne peut pas être utilisé par des personnes (y compris les enfants) ayant des capacités physiques, sensorielles,
mentales ou ayant une expérience et une connaissance insuffisantes, à moins qu’elles ne soient surveillées ou formées
sur l’utilisation du produit par la personne qui en est responsable pour sa sécurité.
• Pour l’utilisation correcte du produit et des appareils électroniques connectés à celui-ci, et pour prévenir les accidents, il faut toujours
respecter les indications présentes dans ce mode d’emploi.
• Le produit ne doit pas être utilisé comme incinérateur. Interdiction absolue d’utiliser des combustibles liquides pour
allumer le feu.
• Avant de commencer toute opération, l’utilisateur ou qui que ce soit qui s’apprête à utiliser le produit devra avoir lu et compris tout le
contenu de ce mode d’emploi.
• Le produit doit être destiné uniquement à l’usage pour lequel il est prévu. Toute autre utilisation est à considérer comme impropre et
donc dangereuse.
• Ne pas utiliser le produit comme une échelle ou une structure d’appui.
• Ne pas mettre du linge à sécher sur le produit.
• Toute responsabilité pour un usage impropre du produit est totalement à la charge de l’utilisateur et décharge le fabricant de toute
responsabilité civile et pénale.
• Tout type de manipulation ou de remplacement non autorisé de parties non originales du produit peut être dangereux pour la sécurité
de l’opérateur et dégagent le fabricant de toute responsabilité civile et pénale.
• La plupart des surfaces du produit sont très chaudes (porte, poignée, vitre, tuyaux de sortie des fumées, etc.). Il faut donc éviter d’entrer
en contact avec ces parties sans porter de vêtements de protection ou sans les moyens adéquats, comme par exemple les gants de
protection thermique.
• Il est interdit de faire fonctionner le produit avec la porte ouverte.
• Ne pas toucher le produit avec les mains humides, puisqu’il s’agit d’un appareil électrique. Toujours enlever le câble avant d’intervenir
sur l’unité (si prévu).
• Le produit doit être connecté électriquement à une installation munie d’un efficace conducteur de terre.
• L’installation doit être dimensionnée de façon adéquate à la puissance électrique déclarée du produit.
28
1-RECOMMANDATIONS ET CONDITIONS DE GARANTIE
FR
RECOMMANDATIONS OPÉRATIVES
• Éteindre le produit en cas de panne ou de mauvais fonctionnement.
• Installer le produit dans des lieux ouverts, protégés correctement contre l’incendie, et munis de tous les services comme les alimentations (air et électriques) et les évacuations pour les fumées.
• Ne pas utiliser de substances volatiles et/ou inflammables (essence, alcool, etc) pour allumer le feu.
INFORMATIONS
• Pour tout problème, s’adresser au revendeur ou à du personnel qualifié et agréé par le fabricant et en cas de réparation, exiger des
pièces de rechange originales.
• Contrôler et nettoyer périodiquement le conduit d’évacuation des fumées selon les prescriptions des normes en vigueur dans le pays
d’installation.
CONDITIONS DE GARANTIE
Le producteur garantit le produit, sauf les éléments sujets à l’usure normale (indiqués dans le paragraphe “LIMITES”), pour la durée
de deux ans à partir de la date d’achat prouvée par un document probant reportant le nom du revendeur et la date à laquelle la vente a été
effectuée, le transfert du certificat de garantie rempli sous 8 jours et si le produit a été installé et testé par un installateur spécialisé et selon
les instructions détaillées indiquées dans le mode d’emploi fourni avec le produit. Par le terme de garantie, on entend le remplacement ou
la réparation, gratuitement, des pièces reconnues comme défectueuses à l’origine pour des vices de fabrication.
LIMITES
Les parties sujettes à l’usure normale ne rentrent pas dans la garantie, comme : les joints, les pièces amovibles, les poignées, les lampes,
les parties en verre, le plan réfractaire et les éventuels accessoires et matériaux d’usure comme les grilles de feu, les flaps pour flamme,
les tiroirs à cendre. Les parties remplacées seront garanties pour la période de garantie démarrant à partir de la date d’achat du produit.
En particulier, les vitres sont garanties si l’installateur agréé en atteste l’intégrité parfaite au moment où la pose est
terminée.
EXCLUSIONS
Toutes les parties qui peuvent être défectueuses à cause de négligence dans l’utilisation, d’entretien erroné, d’installation non conforme aux prescriptions du fabricant (voir chapitres à ce sujet dans ce manuel d’utilisation) ne sont pas
couvertes par la garantie. En cas de non efficacité du produit, contacter le revendeur et/ou l’importateur local.
Le fabricant décline toute responsabilité pour d’éventuels dommages pouvant, directement ou indirectement, avoir lieu sur des personnes, objets ou animaux, résultant d’une non observation de toutes les prescriptions indiquées dans le mode d’emploi et concernant
l’utilisation et l’entretien de l’appareil, notamment les recommandations au moment de l’installation. La garantie déchoit en cas de dommages causés par les manipulations de l’appareil, les agents atmosphériques, les catastrophes naturelles, les décharges électriques, les
incendies, les défauts de l’installation électrique et hydraulique et par un entretien incorrect ne suivant pas les instructions du fabricant.
DEMANDE D’INTERVENTION
La demande d’intervention doit être envoyée au revendeur, qui s’occupera d’envoyer la demande au service assistance technique du fabricant.
Service technique - Droits réservés - Reproduction interdite
29
1-RECOMMANDATIONS ET CONDITIONS DE GARANTIE
FR
RECOMMANDATIONS POUR LA CORRECTE ÉLIMINATION DU PRODUIT AUX TERMES DE LA DIRECTIVE
EUROPÉENNE 2002/96/CE ET MODIFICATIONS SUIVANTES 2003/108/CE.
À la fin de sa vie utile, le produit ne doit pas être éliminé avec les déchets urbains. Il peut être remis aux centres de tri sélectif mis à disposition par les administrations communales, ou bien aux revendeurs qui fournissent ce service. Éliminer séparément l’appareil permet
d’éviter de possibles conséquences négatives pour l’environnement et pour la santé, dérivants d’une élimination inadaptée. Cela permet
de récupérer les matériaux dont il est composé, afin d’obtenir une importante économie d’énergie et de ressources. Pour rappeler l’obligation d’éliminer séparément les appareils, sur le produit se trouve le symbole de la poubelle mobile barrée.
30
2-INFORMATIONS INTRODUCTIVES
FR
Les fours de la ligne EASY ont été réalisés conformément à la Directive CEE 98/37 (ex 89/392 et ses modifications) et la norme EN60335-1.
IDENTIFICATION DU FOUR
MODEL :
LOT :
VOLTAGE : 230V --- 50HZ
POWER : 100W
IPX2
Made in Italy
Pour toute communication avec le Fabricant ou le Revendeur de zone, citer toujours le MODÈLE et le N° de LOT écrits sur l’étiquette placée
derrière le four.
REMARQUES GÉNÉRALES À LA LIVRAISON
Au moment de la réception, contrôler que :
1) Les emballages soient intègres.
2) La fourniture corresponde à la commande.
3) Le produit et les accessoires ne soient pas endommagés.
Service technique - Droits réservés - Reproduction interdite
31
A
2-INFORMATIONS INTRODUCTIVES
FR
DESCRIPTION :
A= FOUR D’EXTÉRIEUR
B= CHARIOT PORTE-BÛCHES
A
B
DESCRIPTION DU FOUR
Le produit de la Ligne EASY est un four à bois, à feu indirect et cuisson continue ventilée.
Ces caractéristiques le distinguent des autres produits traditionnels - à feu direct - car la chambre de combustion, complètement séparée
de la chambre de cuisson, qui permet de cuire les aliments en évitant le contact avec les fumées ou la cendre. La ventilation dans la
chambre de cuisson distribue la chaleur de façon uniforme sur tout le volume interne.
LA STRUCTURE
Toute la structure du produit, y compris les manteaux, est réalisée en alliage aluminé peint.
Le chariot porte-bûches est équipé d’un grand compartiment avec roues et poignées, pour en faciliter le déplacement.
La porte de la chambre de combustion, avec grille de réglage de l’air. En déplaçant le levier à droite, la grille s’ouvre, ceci permet à l’air
d’entrer. Inversement, en délaçant le levier à gauche, la grille se ferme.
La lumière interne du produit permet de voir les aliments et leur degré de cuisson.
32
2-INFORMATIONS INTRODUCTIVES
FR
La chambre de cuisson en ACIER INOX AISI 430 a la possibilité d’être complètement démontée et lavée, pour garantir une meilleure
hygiène.
Un thermomètre externe, placé au-dessus de la porte de la chambre de cuisson, en indique la température interne.
La consommation moyenne pour porter le produit à 300°C est d’environ 1,5-2 Kg de bois par heure, ce qui équivaut à 40-60 minutes de
cuisson. La température maximale que le produit peut atteindre est de 300°C, au-delà de cette température, des dommages à la structure
peuvent être engendrés.
Le four EASY a été conçu pour fonctionner avec du bois naturel et sec. Toute autre utilisation, différente de celles qui sont reportées dans
ce mode d’emploi, est considérée comme un usage inapproprié.
Service technique - Droits réservés - Reproduction interdite
33
3-CARACTÉRISTIQUES TECHNIQUES
166
230
FR
74
87
Poids :
210 kg.
Tension d’alimentation :
230V 50 Hz.
Puissance :
100 W.
Produit alimenté à bois consommation horaire : 1,5-2 kg/h.
34
155
4-TRANSPORT ET INSTALLATION
FR
Avant l’installation du produit, le client doit s’assurer que le sol, où il sera installé, soit suffisamment nivelé, qu’il puisse en
supporter le poids et qu’il y ait les prédispositions technologiques requises.
Utiliser un moyen de levage approprié et des câbles en fibre de portée nominale de 500 Kg chacun. Placer les 4 barres de fer (fournies) dans
les orifices prévus à cet effet et élinguer avec les câbles.
ATTENTION RISQUE D’ÉCRASEMENT !
Éloigner toute personne.
Placer le produit sur le chariot, en faisant attention de l’insérer dans les glissières prévues à cet effet.
Décrocher les câbles et/ou enlever les 4 barres de fer des glissières.
Service technique - Droits réservés - Reproduction interdite
35
4-TRANSPORT ET INSTALLATION
FR
Pour monter le toit dans le logement au-dessus du produit, insérer le panneau avant et arrière en les fixant avec les 4 vis fournies.
Appuyer au-dessus les 2 tôles pour le toit, en les surmontant légèrement, et les fixer avec 6 vis, comme l’indique la figure. Insérer la sortie
de toit et, pour une tenue meilleure, fixer les ailettes latérales au toit avec 2 vis.
Pour d’éventuels petits déplacements, tirer le four par les poignées et ne jamais le pousser (opération à faire exclusivement lorsque le
produit est froid et éteint).
ATTENTION RISQUE DE RENVERSEMENT !
Monter le produit Max. 6 cm. environ du sol, sauf obstacles, pour éviter les renversements.
36
4-TRANSPORT ET INSTALLATION
FR
TABLEAU DE COMMANDE ET PARTIES DU FOUR
1
3
2
4
A
5
B
6
C
1 - ÉVACUATION DES FUMÉES
Elle est raccordée au conduit de fumées et permet la sortie des fumées d’évacuation.
2 - CÂBLE D’ALIMENTATION
Il permet de brancher le produit à la prise de courant pour avoir les services souhaités (éclairage,
ventilation, etc.).
3 - THERMOMÈTRE
Il indique la température interne dans la Chambre de Cuisson.
4 - INTERRUPTEUR D'ÉCLAIRAGE
Il permet d’allumer et d’éteindre l’éclairage interne de la Chambre de Cuisson.
5 - INTERRUPTEUR DE VENTILATION
Il permet d’allumer et d’éteindre le ventilateur à l’intérieur de la Chambre de Cuisson.
6 - COMMANDE AIR DE COMBUSTION
Elle est utilisée pour contrôler la combustion du bois, à l’intérieur de la Chambre.
A - PORTE CHAMBRE DE CUISSON
Elle permet d’accéder à la Chambre de Cuisson pour mettre, prendre ou contrôler les aliments.
B - PORTE DE LA CHAMBRE DE COMBUSTION Elle permet d’accéder à la Chambre de Combustion pour charger le bois, pour contrôler le feu.
C - PORTE CHARIOT
Elle permet d’accéder au Chariot pour mettre ou prendre le bois, ou autre.
Service technique - Droits réservés - Reproduction interdite
37
5-FONCTIONNEMENT
FR
PREMIÈRE MISE EN MARCHE
ATTENTION !
Lire attentivement les prescriptions de sécurité.
La première mise en marche doit être effectuée par un installateur.
Enlever le plastique éventuel placé sur la vitre de la porte de la chambre de cuisson (A).
Effectuer une vérification générale des raccordements, ainsi que du fonctionnement de toutes les commandes.
REMARQUE !
AVANT DE CUISINER DANS LE PRODUIT EASY, IL FAUT L’ALLUMER SANS ALIMENTS A L’INTÉRIEUR, 2 FOIS, AFIN DE PERMETTRE L’ÉLIMINATION
DES MAUVAISES ODEURS PRODUITES PAR LES COMPOSANTS NEUFS.
S’assurer que toutes les protections et les accessoires internes et externes, soient montés. Ouvrir la PORTE de la CHAMBRE DE COMBUSTION
(B); placer au centre ou au fond de celle-ci, un peu de bois sec et de petite taille, et allumer le feu.
Fermer la porte et s’assurer que la COMMANDE AIR COMBUSTION (6) soit sur “ouvert”, c’est-à-dire vers la droite.
Faire monter la température du produit à 200°C, visible sur le THERMOMÈTRE (3).
Ouvrir de temps en temps la PORTE DE LA CHAMBRE DE CUISSON (A), afin de permettre la sortie des fumées et des odeurs désagréables,
produites par le matériel neuf.
Maintenir le feu allumé pendant 2 heures et s’assurer qu’il ne dépasse JAMAIS 300°C.
Laisser éteindre le feu et laisser refroidir le produit complètement.
Répéter les points cités ci-dessus, puis réchauffer le produit à 300°C pendant 1 heure.
Laisser éteindre le feu et laisser refroidir le produit complètement.
Maintenant, le produit EASY est prêt et il est possible de cuisiner.
38
6-LES SÉCURITÉS
FR
Avant toute intervention d’entretien, de réparation ou de nettoyage, débrancher la fiche d’alimentation de la prise de courant
et attendre que le produit ait atteint la température ambiante.
• Le client a l’obligation de vérifier que l’installation électrique de secteur, où le produit sera installé, est fournie d’une bonne mise à terre
et d’une installation aux normes, équipée d’un disjoncteur différentiel.
• Dans le cas contraire, mettre aux normes l’installation.
• Ne pas altérer ou détériorer volontairement les dispositifs de sécurité, ne pas enlever ou cacher les étiquettes de recommandation et
ne pas modifier les caractéristiques du produit.
• Toutes les 250 heures de fonctionnement ou quand la Chambre de Combustion produit de la fumée, nettoyer le conduit de fumée, la
chambre de combustion, le tuyau et l’évacuation des fumées avec clapet.
• Placer toujours le bois au centre ou au fond de la Chambre de Combustion et jamais à l’avant.
• Le four EASY ne doit JAMAIS dépasser la température de plus de 300° C.
• Si l’on doit remplacer des pièces usées et/ou cassées, demander toujours des pièces de rechange originales au Revendeur Agréé.
• Ne JAMAIS éteindre le feu avec de l’eau : des parties importantes de la structure pourraient se déformer.
• Maintenir tous les dispositifs efficaces et en sécurité pendant toute la durée de vie du produit.
Service technique - Droits réservés - Reproduction interdite
39
7-NETTOYAGE
FR
ATTENTION !
Avant toute intervention d’entretien, de réparation ou de nettoyage, éteindre tous les interrupteurs.
Détacher la fiche d’alimentation de la prise de courant et attendre que le produit ait atteint la température ambiante.
Utiliser un aspirateur.
NETTOYAGE CHAMBRE DE CUISSON
Quand cela est nécessaire, nettoyer la chambre de cuisson de la manière suivante :
Enlever les plans intermédiaires et le plan inférieur.
Enlever les supports des plans de cuisson.
Laver avec des produits détergents adaptés au nettoyage des fours ou de l’acier inox.
Nettoyer avec un aspirateur les résidus de cuisson qui se forment sous le plan inférieur.
Pour le nettoyage, ne pas utiliser de substances abrasives, de pailles de fer ou similaires.
NETTOYAGE CHAMBRE DE COMBUSTION
ATTENTION !
Cette opération doit être effectuée uniquement quand le produit est complètement froid.
A chaque mise en marche, nettoyer la chambre de combustion de la manière suivante :
Extraire partiellement le tiroir à cendres.
Extraire partiellement la grille du feu.
Faire tomber, à l’aide du tisonnier, la cendre restante de la grille dans le tiroir à cendres et remettre en place la grille jusqu’au fond.
Extraire complètement le tiroir à cendres, en s’assurant qu’il n’y ait pas de tisons allumés.
Vider le tiroir à cendres, nettoyer le compartiment, et le réintroduire dans le logement jusqu’au fond.
NETTOYAGES EXTERNES
Nettoyer les parois externes peintes avec une éponge (non abrasive) imprégnée de détergent non agressif. Cette opération peut être faite
chaque fois que cela est nécessaire.
40
8-ENTRETIEN À LA CHARGE DE L'UTILISATEUR
FR
ATTENTION !
Avant toute intervention d’entretien, de réparation ou de nettoyage, mettre les interrupteurs du produit en position “0” (Zéro).
Détacher la fiche d’alimentation de la prise de courant et attendre que le produit ait atteint la température ambiante.
LUBRIFICATION
Lubrifier périodiquement les charnières des portes A, B, C.
Pour les longues périodes de non-utilisation, nettoyer la chambre de combustion (B) comme décrit dans la partie “NETTOYAGE CHAMBRE
DE COMBUSTION”.
Service technique - Droits réservés - Reproduction interdite
41
8-ENTRETIEN À LA CHARGE DE L'UTILISATEUR
FR
REMPLACEMENT DE LA LAMPE D’ÉCLAIRAGE INTERNE
Avant d’effectuer toute opération, débrancher la fiche de la prise de courant.
Dévisser le verre de protection de la lampe.
Extraire la lampe cassée.
Se munir d’une lampe de même type que celle installée, LAMPE HALOGÈNE TYPE G9 230 V - 25 W en faisant attention de ne pas la
toucher à mains nues, et l’insérer dans le logement.
Visser le verre de protection.
Brancher la fiche du CÂBLE D’ALIMENTATION (2) de la prise de courant.
CONTRÔLE DE LA VOÛTE DE LA CHAMBRE DE COMBUSTION
Cette opération doit être effectuée chaque mois.
Ouvrir la PORTE DE LA CHAMBRE DE COMBUSTION (B).
Avec une torche ou quand le feu est allumé, vérifier l’état de la tôle dans la voûte de la CHAMBRE DE COMBUSTION (B).
• Si l’on aperçoit qu’il y a des trous dans la tôle, appeler le Revendeur Agréé pour le remplacement.
Pour tout autre ENTRETIEN EXTRAORDINAIRE, s’adresser à votre Revendeur Agréé.
42
9-ARRÊTS
FR
ARRÊT
Éteindre les interrupteurs.
Débrancher la fiche du câble d’alimentation de la prise de courant.
Vérifier qu’à l’intérieur de la chambre de cuisson “A” il n’y ait plus d’aliments.
Vérifier qu’à l’intérieur de la chambre de combustion “B”, il n’y ait plus de feu et que les braises soient éteintes.
RECOMMANDATION !
Pour ne pas détériorer le matériau, NE JAMAIS éteindre le feu avec de l’eau.
Attendre que le produit ait atteint la température ambiante.
Nettoyer le tiroir à cendres des restes de la combustion (Voir partie “7- NETTOYAGE”).
ARRÊT POUR ABSENCE DE TENSION
REMARQUE !
En cas d’absence de tension, on peut continuer à utiliser le produit.
La tension de secteur dans le produit EASY alimente l’éclairage interne et la ventilation.
Service technique - Droits réservés - Reproduction interdite
43
10-ANOMALIES ET REMÈDES
ANOMALIE :
Le produit fait de la fumée.
SOLUTION :
Nettoyer l’évacuation fumées et tuyau relatif (Voir partie “7-NETTOYAGE”).
Pour tout autre type d’anomalie de fonctionnement du produit EASY, S’ADRESSER AU REVENDEUR AGRÉÉ.
44
FR
11-ACCESSOIRES
FR
Vous pouvez demander d’autres accessoires au Revendeur Agréé.
DESCRIPTION
PLAT EN ALUMINIUM
On l’utilise pour contenir l’eau quand on utilise la Grille de Cuisson ou comme récipient pour les aliments.
KIT GRILLE PORCHETTA
On l’utilise pour cuire de grands rôtis (dindes, oie) ou pour cuire la “porchetta”.
CHARIOT POUR PLAT
Accessoire utile pour extraire le plat sans effort.
ÉTAGÈRE LATÉRALE
Plan de travail à utiliser comme appui.
Service technique - Droits réservés - Reproduction interdite
45
12-CONSEILS POUR LA CUISSON
FR
MISE EN MARCHE
S’assurer que toutes les protections et les accessoires internes et externes, soient montés.
Ouvrir la porte de la chambre de combustion (B); placer au fond le bois sec et de petite taille.
Fermer la porte et s’assurer que la commande air combustion (6) soit sur ouvert.
Atteindre la température de fonctionnement souhaitée en consultant le “Tableau Indicatif de Cuisson“ (à suivre), maintenir cette température pendant environ 30 minutes, ensuite, le produit EASY est prêt pour cuire.
COMMENT UTILISER LE FOUR POUR CUIRE LES ALIMENTS
Ci-dessous, nous décrivons quelques exemples de cuisson de PIZZA - LASAGNES - RÔTI - TARTE. Puis, ce seront l’expérience et la professionnalité de l’opérateur (Cuisinier) qui permettront de créer des plats excellents.
REMARQUE !
Sur les plans réfractaires, on cuit seulement la pizza et le pain.
Pour les autres aliments, utiliser toujours des plats et les placer toujours au-dessus de la grille.
Les temps de cuisson sont déterminés par le volume des aliments.
Exemple :
Pour cuire une DINDE, il faut deux heures à 200/240°C.
Pour cuire un POULET, il faut une heure à 200/240°C.
Pour cuire une CAILLE, il faut quinze/vingt minutes à 200/240°C.
Pour cuire des LASAGNES, il faut vingt/trente minutes à 220/250°C.
REMARQUE !
L’humidité à l’intérieur de la Chambre de Cuisson peut être augmentée en y plaçant un bol avec de l’eau.
Cela sert à augmenter la cuisson et à donner aux aliments une dorure meilleure.
46
12-CONSEILS POUR LA CUISSON
FR
TABLEAU INDICATIF DE CUISSON
ALIMENT
°C
TEMPS DE CUISSON
EN MINUTES
QUICHE
180 - 220°C
15 - 30
PAIN
220 - 250°C
40 - 60
POISSON
200 - 240°C
30 - 40
RÔTI
200 - 240°C
70 - 110
PIZZA EN TRANCHES
250 - 280°C
15 - 20
PIZZA AU PLAT
270 - 300°C
2-3
PIZZA AU PLAT
• Porter le produit à 270-300°C, allumer le ventilation avec l’INTERRUPTEUR VENTILATION (5) et le maintenir pendant une heure à cette
température.
• Humidifier le plan réfractaire avec un chiffon.
• Introduire dans la CHAMBRE DE CUISSON un bol en métal ou en verre, plein d’eau, pour augmenter l’humidité dans le produit, 10
minutes avant de mettre au four.
• Introduire la pizza, la mettre sur le plan réfractaire et fermer la PORTE DE LA CHAMBRE DE CUISSON (A).
• Après deux/trois minutes (cela dépend de l’assaisonnement), enlever la pizza.
Service technique - Droits réservés - Reproduction interdite
47
12-CONSEILS POUR LA CUISSON
FR
PÂTES AU FOUR ET POULET RÔTI
•
•
•
•
•
•
•
•
•
Mettre la température du produit à 200/240°C.
Allumer la ventilation.
Une fois la température atteinte, adapter l’alimentation du bois avec une petite quantité, pour maintenir la température constante.
S’assurer qu’il y ait l’eau dans le bol, pour l’humidité.
Positionner la GRILLE au niveau souhaité.
Positionner le plat au-dessus de la GRILLE.
Fermer la porte de la CHAMBRE DE CUISSON (A).
Contrôler que la température de la ne diminue pas et alimenter le produit selon les nécessités.
Attendre la cuisson des aliments sans les agiter de manière répétée.
TARTE
•
•
•
•
•
•
•
•
•
•
•
48
Mettre le produit à 180/220°C.
Maintenir la ventilation allumée.
Introduire dans la CHAMBRE DE CUISSON un bol en métal ou en verre, plein d’eau, pour augmenter l’humidité dans le produit.
Attendre que la température du produit arrive à 180/220°C.
Une fois la température atteinte, éteindre la ventilation avec l’INTERRUPTEUR (5), adapter l’alimentation.
Enlever le bol avec l’eau.
Positionner la GRILLE au niveau souhaité.
Positionner le plat avec la TARTE sur la GRILLE.
Fermer la porte de la CHAMBRE DE CUISSON (A).
Contrôler que la température de la CHAMBRE DE CUISSON ne diminue pas et alimenter le produit selon les nécessités.
Attendre la cuisson de la TARTE.
13-SCHÉMA ÉLECTRIQUE
FR
E
2
1
2
D
C
2
1
1
3
B
1
F
3
2
A
DESCRIPTION
A Prise 230 V - 10 A.
B
Bornes connexions.
C
Interrupteur ventilateur.
Chambre de cuisson 230 V - 16 A.
D Interrupteur éclairage 230 V - 16 A.
E
Module porte-lampes.
Lampe 230 V - 25 W.
F
Moteur ventilation.
Chambre de cuisson 230 V - 32 W.
1Bleu.
2Marron.
3Jaune-vert.
Service technique - Droits réservés - Reproduction interdite
49
INSTALLATIONS- UND BEDIENUNGSANLEITUNG
DE
INHALTSVERZEICHNIS
EINLEITUNG.................................................................................................................51
1-HINWEISE UND GARANTIEBEDINGUNGEN.....................................................................52
2-EINFÜHRUNG............................................................................................................55
3-TECHNISCHE DATEN....................................................................................................58
4-TRANSPORT UND INSTALLATION..................................................................................59
5-BETRIEB...................................................................................................................62
6-SICHERHEIT...............................................................................................................63
7-REINIGUNG...............................................................................................................64
8-WARTUNG DURCH DEN BENUTZER...............................................................................65
9-ARTEN DER AUSSCHALTUNG........................................................................................67
10-STÖRUNGEN UND ABHILFEN......................................................................................68
11-ZUBEHÖR................................................................................................................69
12-TIPPS ZUM GAREN....................................................................................................70
13-SCHALTPLAN...........................................................................................................71
Übersetzung der Originalanleitung
EINLEITUNG
DE
Sehr geehrter Kunde,
vielen Dank, dass Sie sich für eines unserer Produkte entschieden haben. Unser Ziel ist es, Technik mit einfachem Gebrauch und vor allem
mit Sicherheit zu verbinden.
Für einen optimalen Betrieb empfehlen wir Ihnen, vor der ersten Inbetriebsetzung das vorliegende Handbuch aufmerksam durchzulesen.
Sollten Zweifel oder Schwierigkeiten auftreten, bitten wir Sie, sich an Ihren Händler zu wenden, der Ihnen mit Rat und Tat zur Seite stehen
wird.
ÜBERARBEITUNGEN DES HANDBUCHS
Der Inhalt des vorliegenden Handbuchs ist rein technischer Natur und Eigentum von MCZ Group Spa.
Kein Teil dieses Handbuchs darf ohne vorherige schriftliche Genehmigung von MCZ Group Spa ganz oder auszugsweise in andere Sprachen
übersetzt und/oder in anderer Form bzw. durch mechanische oder elektronische Mittel adaptiert und/oder reproduziert werden, weder
durch Fotokopie noch durch Aufzeichnungen oder anderes.
Wir behalten uns vor, jederzeit unangekündigt Änderungen am Produkt vorzunehmen. Jede Rechtsverletzung wird gerichtlich verfolgt.
UMGANG MIT DEM HANDBUCH UND DAS NACHSCHLAGEN
• Wir empfehlen Ihnen, dieses Handbuch über die ganze Lebensdauer des Geräts an einem leicht und schnell zugänglichen Ort sorgfältig
zu verwahren.
• Sollte dieses Handbuch verloren gehen oder zerstört werden, oder sollte es sich in schlechtem Zustand befinden, empfehlen wir Ihnen,
bei Ihrem Händler oder direkt beim Hersteller eine Kopie davon anzufordern, geben Sie dabei bitte die Kenndaten des Produkts an.
• Wichtige Punkte oder Angaben, die besonderer Aufmerksamkeit bedürfen, sind “fett gedruckt”.
• “Der Text in kursiv” wird verwendet, um Ihre Aufmerksamkeit auf andere Abschnitte dieses Handbuchs zu lenken, bzw. für zusätzliche
Erklärungen.
• Der “HINWEIS” erteilt dem Leser weitere Informationen zum Thema.
SYMBOLE IN DIESEM HANDBUCH
ACHTUNG - STROMSCHLAGGEFAHR:
Weist das Personal darauf hin, dass der beschriebene Vorgang unter Beachtung der Sicherheitsvorschriften auszuführen ist, da andernfalls die Gefahr eines elektrischen Schlages besteht.
AUSSERGEWÖHNLICHE EINGRIFFE:
Wartungseingriffe, die mit dem obigen Symbol gekennzeichnet sind, müssen beim zugelassenen Händler
angefragt werden.
ACHTUNG:
Dieses Warnsymbol, das an verschiedenen Stellen in diesem Handbuch zu finden ist, weist darauf hin, dass die Informationen,
auf die es sich bezieht, genau durchgelesen und verstanden werden müssen, da es bei Nichtbeachtung derselben zu
schweren Schäden am Gerät kommen und die Unversehrtheit des Bedieners gefährdet werden kann.
INFORMATIONEN:
Dieses Symbol stellt jene Informationen in den Vordergrund, die für den korrekten Betrieb des Produkts erforderlich
sind. Die Nichtbeachtung der angegebenen Informationen wird den Gebrauch und die Funktionstüchtigkeit des
Produkts negativ beeinflussen.
Technischer Dienst - Vorbehaltene Rechte - Nachdruck verboten
51
1-HINWEISE UND GARANTIEBEDINGUNGEN
DE
• Die Installation, die Überprüfung der Funktionstüchtigkeit und die Wartung dürfen ausschließlich von qualifiziertem
und autorisiertem Personal durchgeführt werden.
• Das Gerät ist unter Beachtung aller lokalen, nationalen und europäischen Bestimmungen zu installieren, die am Ort,
in der Region oder im Staat gültig sind.
• Dieses Gerät darf nicht von Personen (einschließlich Kindern) mit eingeschränkten körperlichen, sensorischen oder
geistigen Fähigkeiten oder mit unzureichender Kenntnis und Erfahrung benutzt werden, es sei denn unter Aufsicht
und nach eingehender Unterrichtung über den Gebrauch des Gerätes durch die Person, die für dessen Sicherheit
verantwortlich ist.
• Die in diesem Handbuch angeführten Hinweise müssen immer beachtet werden, damit das Produkt und die daran angeschlossenen
elektronischen Geräte korrekt funktionieren und Unfälle vermieden werden können.
• Das Gerät darf nicht zur Müllverbrennung missbraucht werden. Die Verwendung flüssiger Brennstoffe zum Anzünden
ist strengstens verboten.
• Vor Beginn der Benutzung muss der Benutzer - oder wer auch immer das Gerät zu bedienen beabsichtigt - zunächst den gesamten
Inhalt der vorliegenden Bedienungsanleitung gelesen und verstanden haben.
• Das Gerät darf nur für den vorgesehenen Bestimmungszweck eingesetzt werden. Jeder anderweitige Gebrauch versteht sich als
unsachgemäß und ist daher gefährlich.
• Nicht auf das Gerät steigen oder Gegenstände darauf ablegen.
• Keine Wäsche zum Trocknen auf das Gerät legen.
• Der Benutzer trägt die alleinige Verantwortung bei unsachgemäßem Gebrauch des Geräts und enthebt somit den Hersteller von jeder
zivil- und strafrechtlichen Verantwortung.
• Jede Art der Manipulierung oder des ungenehmigten Ersatzes mit nicht originalen Bauteilen des Geräts kann die Gesundheit des
Benutzers gefährden und enthebt den Hersteller von jeder zivil- und strafrechtlichen Verantwortung.
• Viele Oberflächen des Geräts sind sehr heiß (Tür, Griff, Glasscheibe, Rauchabzugsrohre usw.). Ohne geeignete Schutzkleidung oder
entsprechende Schutzmittel, wie zum Beispiel hitzebeständige Handschuhe, muss der Kontakt mit diesen Flächen unbedingt
vermieden werden.
• Es ist untersagt, das Gerät mit offener Tür zu betreiben.
• Das Gerät keinesfalls mit feuchten Händen anfassen, da es sich um ein Elektrogerät handelt. Vor Eingriffen am Gerät stets den
Netzstecker ziehen (wenn vorhanden).
• Das Gerät muss an eine elektrische Anlage mit wirksamem Erdleiter angeschlossen werden.
• Die Anlage muss entsprechend der elektrischen Leistung des Geräts ausgelegt sein.
52
1-HINWEISE UND GARANTIEBEDINGUNGEN
DE
HINWEISE ZUR BEDIENUNG
• Bei Auftreten von Defekten oder bei unkorrektem Betrieb empfiehlt es sich, das Gerät abzuschalten.
• Das Gerät ist im Freien an vor Brand geschützten Orten zu installieren, die mit allen erforderlichen Versorgungseinrichtungen (Luft und
elektrischer Strom) sowie Rauchabzügen ausgerüstet sind.
• Keine flüchtigen und/oder entflammbaren Substanzen (Benzin, Alkohol usw.) zum Anzünden des Feuers verwenden.
INFORMATIONENI
• Für etwaige Probleme wenden Sie sich bitte an den Händler oder an qualifiziertes, vom Hersteller autorisiertes Personal. Bei
Reparaturarbeiten den Einsatz von Originalersatzteilen verlangen.
• Im Einklang mit den im Bestimmungsland geltenden Vorschriften den Rauchabzug in regelmäßigen Abständen überprüfen lassen.
GARANTIEBEDINGUNGEN
Mit Ausnahme der Bauteile, die normalem Verschleiß unterliegen (und im Abschnitt “EINSCHRÄNKUNGEN” aufgeführt sind), gibt
der Hersteller ab dem Verkaufsdatum eine Garantie von zwei Jahren auf das Produkt, welche durch einen Garantieschein bestätigt wird,
auf dem der Name des Händlers und das Datum angeführt sind, an dem der Kauf getätigt worden ist. Der ausgefüllte Garantieschein muss
dem Hersteller innerhalb von 8 Tagen zugestellt werden. Der Hersteller garantiert für das Produkt, wenn es von einem sachkundigen
Installateur entsprechend der detaillierten Anweisungen, die in dieser dem Produkt beiliegenden Installationsanleitung angeführt
sind, installiert und geprüft worden ist. Unter Garantie versteht man den Austausch oder die kostenlose Reparatur der aufgrund von
Fabrikationsfehlern als defekt anerkannten Bauteile.
EINSCHRÄNKUNGEN
Nicht unter die Garantie fallen Bauteile, die dem normalen Verschleiß unterliegen, wie: Dichtungen, herausnehmbare Teile, Bedienhebel,
Beleuchtung, Glasteile, die feuerfeste Fläche und das gegebenenfalls vorhandene Zubehör sowie leicht verschleißendes Material wie
Feuerroste, Flammenklappen, Aschenkästen. Die ausgetauschten Bauteile werden für die Restlaufzeit der Garantie, ab dem Kaufdatum
des Produkts, garantiert. Bis zur fertigen Montage durch einen autorisierten Installateur und zur Bestätigung ihrer perfekten
Integrität gehören auch die Glasscheiben zu den von der Garantie gedeckten Bauteilen.
AUSSCHLÜSSE
Alle Bauteile, die sich aufgrund von Fahrlässigkeit oder Nachlässigkeit im Gebrauch, falscher Wartung, nicht mit den
Angaben des Herstellers übereinstimmender Installation (siehe hierfür die entsprechenden Kapitel in diesem Handbuch)
als defekt herausstellen sollten, sind nicht von der Garantie gedeckt. Wenden Sie sich an Ihren Händler und/oder an den
Importeur Ihres Gebiets, sollte das Produkt nicht funktionsfähig sein.
Der Hersteller lehnt jede Verantwortung für etwaige Schäden ab, die Personen, Tiere oder Gegenstände direkt oder indirekt erfahren
könnten und auf die Nichtbeachtung der in diesem Handbuch angeführten Anweisungen und vor allem der Hinweise in Sachen
Installation, Gebrauch und Wartung des Geräts zurückzuführen sind. Die Garantie verfällt im Falle von Schäden, die auf unsachgemäße
Eingriffe am Gerät, Witterungseinflüsse, Naturkatastrophen, Stromschlag, Brände, Defekte in der Strom- und Wasserversorgungsanlage
zurückzuführen oder durch fehlende oder mangelhafte Wartung nicht nach den Vorgaben des Herstellers verursacht worden sind.
KUNDENDIENSTANFORDERUNG
Die Anforderung eines Kundendiensteinsatzes muss dem Händler übermittelt werden, der den technischen Kundendienst des Herstellers
verständigen wird.
Technischer Dienst - Vorbehaltene Rechte - Nachdruck verboten
53
1-HINWEISE UND GARANTIEBEDINGUNGEN
DE
WICHTIGER HINWEIS FÜR DIE KORREKTE ENTSORGUNG DES PRODUKTS GEMÄSS EG-RICHTLINIE
2002/96/EG UND SPÄTERE ÄNDERUNG IN 2003/108/EG.
Am Ende seiner Nutzzeit darf das Produkt nicht zusammen mit dem Siedlungsabfall beseitigt werden. Es kann zu den eigens von den
städtischen Behörden eingerichteten Sammelstellen oder zu den Fachhändlern, die einen Rücknahmeservice anbieten, gebracht werden.
Die getrennte Entsorgung des Gerätes vermeidet mögliche negative Auswirkungen auf die Umwelt und die menschliche Gesundheit, die
durch eine nicht vorschriftsmäßige Entsorgung bedingt sind. Zudem ermöglicht wird die Wiederverwertung der Materialien, aus denen
sich das Gerät zusammensetzt, was wiederum eine bedeutende Einsparung an Energie und Ressourcen mit sich bringt. Zur Erinnerung
an die Verpflichtung, die Geräte getrennt zu beseitigen, ist das Produkt mit einer Mülltonne, die durchgestrichen ist, gekennzeichnet.
54
2-EINFÜHRUNG
DE
Die Backöfen der Serie EASY wurden in Übereinstimmung mit der EG-Richtlinie 98/37 (ehemals 89/392 und nachfolgende Änderungen),
sowie der Norm EN60335-1 hergestellt.
BACKOFEN-KENNDATEN
MODEL :
LOT :
VOLTAGE : 230V --- 50HZ
POWER : 100W
IPX2
Made in Italy
Bei jeder Mitteilung an den Hersteller oder Gebietshändler, immer das MODELL und die LOSNUMMER der Herstellung angeben, die auf den
Schildern auf der Rückseite des Backofens zu finden sind.
ALLGEMEINE LIEFERHINWEISE
Bei Erhalt prüfen, ob:
1) die Verpackungen unversehrt sind.
2) die Lieferung den Angaben auf der Bestellung entspricht.
3) am Ofen oder am Zubehör Beschädigungen zu sehen sind.
Technischer Dienst - Vorbehaltene Rechte - Nachdruck verboten
55
A
2-EINFÜHRUNG
DE
BESCHREIBUNG:
A= BACKOFEN FÜR AUSSENBEREICHE
B= BRENNHOLZWAGEN
A
B
BESCHREIBUNG DES BACKOFENS
Der Backofen der Serie EASY ist ein Holzbackofen mit indirekter Befeuerung und kontinuierlichem Umluftgaren.
Dieses Merkmal unterscheidet ihn von anderen herkömmlichen Backöfen - mit direkter Befeuerung - da die Brennkammer ganz vom
Garraum getrennt ist, werden die Speisen gegart, ohne mit Rauch oder Asche in Berührung zu kommen. Die Ventilation des Garraums
sorgt bei jeder Temperatur für eine gleichmäßige Verteilung im gesamten Innenraum.
DER AUFBAU
Der gesamte Aufbau des Backofens, einschließlich der Abdeckungen, ist aus aluminiertem Blech mit Lackierung.
Der Brennholzwagen hat für einen leichteren Standortwechsel Räder und Griffe, sowie ein großes Fach für Holz oder andere Gegenstände.
Tür der Brennkammer mit Gitter zur Regelung der Verbrennungsluft. Wird der Hebel nach rechts bewegt, öffnet sich das Gitter, so dass
die Luft einströmen kann. Wird er nach links bewegt, schließt sich das Gitter.
Innenbeleuchtung des Backofens zur Beobachtung der Speisen und ihres Garzustandes.
56
2-EINFÜHRUNG
DE
Garraum aus EDELSTAHL AISI 430 kann vollständig abmontiert und gereinigt werden, um maximale Hygiene zu bieten.
Ein Thermometer oberhalb der Garraumtür zeigt die Innentemperatur an.
Um den Ofen auf 300°C zu bringen, werden etwa 1,5-2 kg Brennholz pro Stunde verbraucht, entsprechend einer Garzeit von 40-60
Minuten. Die maximal vom Backofen erreichbare Temperatur ist 300°C, oberhalb dieser Temperatur kann es zu Schäden an tragenden
Bauteilen kommen.
Der EASY Backofen ist für die Befeuerung mit natürlichem, abgelagertem Brennholz bestimmt. Jeder andere Gebrauch, der von dem in
diesem Handbuch beschriebenen abweicht, gilt als unsachgemäß.
Technischer Dienst - Vorbehaltene Rechte - Nachdruck verboten
57
3-TECHNISCHE DATEN
166
230
DE
74
87
Gewicht:
210 kg.
Versorgungsspannung:
230 V 50 Hz.
Leistung:
100 W.
Mit Holz betriebener Backofen, stündlicher Verbrauch: 1,5-2 kg/h.
58
155
4-TRANSPORT UND INSTALLATION
DE
Vor der Installation des Backofens muss der Kunde prüfen, ob der Fußboden des Installationsraums ausreichend nivelliert ist,
das Gewicht des Gerätes aushält und ob die technischen Vorrüstungen vorhanden sind.
Ein geeignetes Hubfahrzeug und Faserseile mit einer Nenntragfähigkeit von 500 kg pro Seil verwenden. Die 4 (mitgelieferten) Eisenstangen in die entsprechenden Bohrungen schieben und mit den Seilen festzurren.
ACHTUNG QUETSCHGEFAHR!
Alle Personen aus der Nähe entfernen.
Backofen auf dem Wagen positionieren und darauf achten, dass er in die Führungen eingesetzt wird.
Seile abnehmen und/oder die 4 Eisenstangen aus den Führungen ziehen.
Technischer Dienst - Vorbehaltene Rechte - Nachdruck verboten
59
4-TRANSPORT UND INSTALLATION
DE
Zum Montieren des Dachs auf die Halterung auf dem Ofen, vordere und hintere Giebelplatte einsetzen und mit den 4 mitgelieferten
Schrauben befestigen.
Darauf die beiden Bleche für das Dach legen, leicht überstehen lassen und mit 6 Schrauben wie abgebildet befestigen. Schornstein einsetzen und, zum besseren Halt, die seitlichen Flügel am Dach mit 2 Schrauben befestigen.
Um den Ofen leicht zu verschieben, stets an den Griffen ziehen und niemals schieben (dies darf ausschließlich bei kaltem und abgestelltem Ofen erfolgen).
ACHTUNG KIPPGEFAHR!
Ofen max. 6 cm vom Boden abheben, außer bei Hindernissen, um das Umkippen zu vermeiden.
60
4-TRANSPORT UND INSTALLATION
DE
BEDIENBLENDE UND BACKOFENTEILE
1
3
2
4
A
5
B
6
C
1- RAUCHABZUG
Wird an den Schornstein angeschlossen und ermöglicht den Austritt der Rauchabgase.
2- VERSORGUNGSKABEL
Zum Anschluss des Backofens an die Netzsteckdose, um die gewünschten Funktionen
(Licht, Ventilation usw.) nutzen zu können.
3- THERMOMETER
Zeigt die Temperatur im Garraum an.
4- LICHTSCHALTER
Zum Ein- und Ausschalten der Innenbeleuchtung des Garraums.
5- VENTILATIONSSCHALTER
Zum Ein- und Ausschalten des Gebläses im Garraum.
6- VERBRENNUNGSLUFTREGELUNG
Zum Kontrollieren der Holzverbrennung in der Brennkammer.
A- GARRAUMTÜR
Zum Hineinstellen, Herausnehmen und Kontrollieren der Speisen im Garraum.
B - BRENNKAMMERTÜR
Zum Einlegen des Holzes und zur Regelung des Feuers in der Brennkammer.
C- LAUFWAGEN-TÜR
Zugriff auf den Wagen zum Einlegen oder Entnehmen von Brennholz oder anderem.
Technischer Dienst - Vorbehaltene Rechte - Nachdruck verboten
61
5-BETRIEB
DE
ERSTMALIGES ANZÜNDEN
ACHTUNG!
Sicherheitsvorschriften aufmerksam lesen!
Das erstmalige Anzünden muss durch einen Installateur erfolgen.
Gegebenenfalls Schutzfolie von der Glasscheibe der Garraumtür (A) abziehen.
Eine allgemeine Überprüfung der Verbindungen, Anschlüsse sowie der Funktion aller Bedienelemente durchführen.
HINWEIS!
BEVOR DER BACKOFEN EASY ZUM GAREN BENUTZT WERDEN KANN, MUSS ER OHNE SPEISEN IM GARRAUM ZWEIMAL ANGEZÜNDET WERDEN, DAMIT DIE UNANGENEHMEN GERÜCHE DER NEUEN BAUTEILE SICH VERFLÜCHTIGEN.
Sicherstellen, dass alle inneren und äußeren Schutzvorrichtungen und Zubehörteile montiert wurden. Die TÜR der BRENNKAMMER (B)
öffnen; in der Mitte oder hinten wenige trockene kleine Holzscheite einlegen und das Feuer anzünden.
Die Tür schließen und nachsehen, ob die VERBRENNUNGSLUFTREGELUNG (6) auf “offen” steht, also nach rechts.
Warten, bis die Backofentemperatur 200°C erreicht, dies ist am THERMOMETER (3) zu sehen.
Ab und zu die GARRAUMTÜR (A) öffnen, damit Rauch und unangenehme Gerüche aus dem neuen Material austreten können.
Das Feuer 2 Stunden lang brennen lassen und sicherstellen, dass die Temperatur NIE 300°C übersteigt.
Feuer ausgehen lassen und den Ofen komplett abkühlen lassen.
Oben genannte Punkte wiederholen, dann den Backofen 1 Stunde lang auf 300°C aufheizen.
Feuer ausgehen lassen und den Ofen komplett abkühlen lassen.
Jetzt ist der EASY Backofen bereit für den ersten Garvorgang.
62
6-SICHERHEIT
DE
Vor jeder Wartung, Reparatur oder Reinigung den Netzstecker aus der Steckdose ziehen und abwarten, dass der Backofen
Raumtemperatur erreicht hat.
• Der Kunde muss prüfen, ob die Netzstromanlage, an die der Backofen angeschlossen wird, über eine geeignete Erdung verfügt und
vorschriftsmäßig mit einem Fehlerstrom-Schutzschalter ausgerüstet ist.
• Ist das nicht der Fall, muss die Anlage angepasst werden.
• Die Sicherheitsvorrichtungen dürfen nicht vorsätzlich verändert oder beschädigt, die Warnschilder dürfen weder entfernt noch versteckt und die Eigenschaften des Backofens nicht verändert werden.
• Alle 250 Betriebsstunden, oder wenn in der Brennkammer Rauch entsteht, den Schornstein, die Brennkammer, das Rohr und den
Rauchabzug mit Ventil reinigen.
• Die Holzscheite immer in die Mitte oder hinten in die Brennkammer und nie vorn einlegen.
• Der Backofen EASY darf NIEMALS die Temperatur von 300°C überschreiten.
• Für den Austausch abgenutzter und/oder defekter Teile beim zugelassenen Händler immer Original-Ersatzteile verlangen.
• Das Feuer NIEMALS mit Wasser löschen, dadurch können sich tragende Teile des Geräts verformen.
• Bis zum Ende der Lebensdauer des Ofens müssen alle Vorrichtungen funktionstüchtig und sicher gehalten werden.
Technischer Dienst - Vorbehaltene Rechte - Nachdruck verboten
63
7-REINIGUNG
DE
ACHTUNG!
Vor jeder Wartung, Reparatur oder Reinigung alle Schalter ausschalten.
Netzstecker aus der Steckdose ziehen und abwarten, dass der Backofen Raumtemperatur erreicht hat.
Einen Staubsauger benutzen.
REINIGUNG DES GARRAUMS
Wenn notwendig, den GARRAUM wie folgt reinigen:
Zwischenböden und Bodenplatte entfernen.
Halterungen der Garböden entfernen.
Mit Reinigungsmitteln, die sich für Backöfen oder Edelstahl eignen, abwaschen.
Mit einem Sauggerät die Garrückstände beseitigen, die sich unter der Bodenplatte bilden.
Keine Scheuermittel, Stahlwolle oder ähnliches für die Reinigung verwenden.
REINIGUNG DER BRENNKAMMER
ACHTUNG!
Diese Arbeit darf nur bei vollständig kaltem Ofen erfolgen.
Bei jeder Zündung die Brennkammer wie folgt reinigen:
Aschenkasten teilweise herausziehen.
Feuerrost teilweise herausziehen.
Mit dem Kaminbesteck die restliche Asche vom Feuerrost in den Aschenkasten fallen lassen und den Feuerrost wieder ganz einschieben.
Aschenkasten ganz herausziehen, sicherstellen, dass keine Glut mehr vorhanden ist.
Den Aschenkasten leeren, das Fach reinigen und den Aschenkasten wieder vollständig einschieben.
REINIGUNG VON AUSSEN
Die lackierten Außenwände mit einem (nicht scheuernden) Schwamm, der mit einem milden Reiniger getränkt ist, abwischen. Dies kann
immer dann erfolgen, wenn es nötig ist.
64
8-WARTUNG DURCH DEN BENUTZER
DE
ACHTUNG!
Vor jeder Wartung, Reparatur oder Reinigung alle Schalter des Backofen auf “0” (Null) stellen.
Netzstecker aus der Steckdose ziehen und abwarten, dass der Backofen Raumtemperatur erreicht hat.
ÖLUNG
Scharniere der Türen A, B, C regelmäßig ölen.
Bei längerer Nichtbenutzung die Brennkammer (B) wie im Abschnitt “REINIGUNG DER BRENNKAMMER” beschrieben reinigen.
Technischer Dienst - Vorbehaltene Rechte - Nachdruck verboten
65
8-WARTUNG DURCH DEN BENUTZER
DE
AUSTAUSCH DER LAMPE DER INNENBELEUCHTUNG
Vor jeder Arbeit Stecker des Versorgungskabels aus der Netzsteckdose ziehen.
Schutzglas der Lampe abschrauben.
Defekte Lampe entfernen.
Eine Lampe des gleichen Typs wie die alte Lampe benutzen, HALOGENLEUCHTE TYP G9 230 V-25 W, Lampe nicht mit bloßen Händen
anfassen und in ihre Fassung einsetzen.
Schutzglas aufschrauben.
Stecker des VERSORGUNGSKABELS (2) in die Netzsteckdose stecken.
KONTROLLE DER DECKE IN DER BRENNKAMMER
Dieser Vorgang muss monatlich durchgeführt werden.
GARRAUMTÜR (B) öffnen.
Mit einer Taschenlampe oder bei brennendem Feuer den Zustand des Bleches der DECKE der BRENNKAMMER (B) prüfen.
• Wenn am Blech Löcher zu sehen sind, den zugelassenen Händler für den Austausch verständigen.
Für alle AUSSERORDENTLICHEN WARTUNGSARBEITEN wenden Sie sich bitte an den zugelassenen Händler.
66
9-ARTEN DER AUSSCHALTUNG
DE
AUSSCHALTUNG
Die Schalter ausschalten.
Stecker des Versorgungskabels aus der Netzsteckdose ziehen.
Nachsehen, ob im Garraum “A” Speisen zurückgeblieben sind.
Sicherstellen, dass in der Brennkammer “B” kein Feuer mehr brennt und die Glut erloschen ist.
WARNUNG!
Um den Ofen nicht zu beschädigen, das Feuer in der Brennkammer NIE mit Wasser löschen.
Warten bis der Backofen Raumtemperatur erreicht hat.
Aschenkasten von Verbrennungsrückständen säubern (siehe Abschnitt “7- REINIGUNG”).
AUSSCHALTUNG WEGEN SPANNUNGSAUSFALL
HINWEIS!
Bei Spannungsausfall kann der Backofen weiter benutzt werden.
Die Netzspannung versorgt im Backofen EASY die Innenbeleuchtung und die interne Ventilation.
Technischer Dienst - Vorbehaltene Rechte - Nachdruck verboten
67
10-STÖRUNGEN UND ABHILFEN
STÖRUNG:
Der Backofen entwickelt Rauch.
ABHILFE:
Rauchabzug und entsprechendes Rohr reinigen (siehe Abschnitt “7- REINIGUNG”).
Für jede andere Art von Betriebsstörungen des EASY Backofens bitte AN DEN ZUGELASSENEN HÄNDLER WENDEN.
68
DE
11-ZUBEHÖR
DE
Weiteres Zubehör ist beim zugelassenen Händler erhältlich.
BESCHREIBUNG
ALUMINIUMBLECH
Wird bei Benutzung des Grillrosts mit Wasser gefüllt oder als Speisenbehälter benutzt.
SET SPANFERKELROST
Wird zum Garen großer Bratenstücke (Truthahn, Gans) oder für Spanferkel benutzt.
LAUFWAGEN FÜR BLECH
Nützliches Zubehör zum mühelosen Herausnehmen des Bleches.
SEITLICHE ABLAGEE
Arbeitsplatte, als Abstellfläche zu benutzen.
Technischer Dienst - Vorbehaltene Rechte - Nachdruck verboten
69
12-TIPPS ZUM GAREN
DE
START
Sicherstellen, dass alle inneren/äußeren Schutzvorrichtungen und Zubehörteile montiert wurden.
Tür der Brennkammer (B) öffnen, hinten trockene kleine Holzscheite einlegen.
Tür schließen und nachsehen, ob die Verbrennungsluftregelung (6) auf offen steht.
In der “Gartabelle” (weiter unten) nachsehen und den Backofen auf die entsprechend erforderliche Betriebstemperatur bringen, diese
Temperatur etwa 30 Minuten beibehalten, danach ist der EASY Backofen zum Garen bereit.
WIE SIE DEN BACKOFEN ZUM GAREN VON SPEISEN BENUTZEN
Es folgen einige Beispiele, wie PIZZA, LASAGNE, BRATEN, KUCHEN gebacken bzw. gegart werden können. Danach liegt es an Erfahrung
und Geschick von Köchin/Koch, die Ergebnisse zu perfektionieren.
HINWEIS!
Direkt auf den feuerfesten Platten werden nur Pizza und Brot gebacken.
Für alle anderen Speisen sind immer Bleche zu benutzen, die stets in die Blechroste eingeschoben werden.
Die Garzeiten sind vom Volumen der Speisen abhängig.
Beispiel:
Das Braten eines TRUTHAHNS dauert zwei Stunden bei 200/240°C.
Das Braten eines HÄHNCHENS dauert eine Stunde bei 200/240°C.
Das Braten einer WACHTEL dauert fünfzehn bis zwanzig Minuten bei 200/240°C.
Das Garen von LASAGNE dauert zwanzig bis dreißig Minuten bei 220/250°C.
HINWEIS!
Die Feuchtigkeit im Garraum kann erhöht werden, indem eine Schüssel mit Wasser hinein gestellt wird.
Durch die Feuchtigkeit wird der Garvorgang und die Bräunung verbessert.
70
12-TIPPS ZUM GAREN
DE
GARTABELLE
SPEISE
°C
GARZEIT IN MINUTEN
KUCHEN
180 - 220°C
15 - 30
BROT
220 - 250°C
40 - 60
FISCH
200 - 240°C
30 - 40
BRATEN
200 - 240°C
70 - 110
PIZZA VOM BLECH
250 - 280°C
15 - 20
PIZZA RUNDE FORM
270 - 300 °C
2-3
PIZZA RUNDE FORM
• Den Backofen auf 270-300°C bringen, die Ventilation mit dem VENTILATIONSSCHALTER (5) einschalten und diese Temperatur für eine
Stunde beibehalten.
• Die feuerfeste Platte mit einem Tuch anfeuchten.
• Zum Erhöhen der Feuchtigkeit im Backofen 10 Minuten vor dem Eingeben der Speisen eine mit Wasser gefüllte Glas- oder Metallschüssel in den GARRAUM stellen.
• Die Pizza auf die feuerfeste Platte legen und die GARRAUMTÜR (A) schließen.
• Nach zwei bis drei Minuten (vom Belag abhängig) die Pizza herausnehmen.
Technischer Dienst - Vorbehaltene Rechte - Nachdruck verboten
71
12-TIPPS ZUM GAREN
NUDELAUFLAUF UND BRATHÄHNCHEN
•
•
•
•
•
•
•
•
•
Temperatur des Backofens auf 200-240°C bringen.
Ventilation einschalten.
Ist die Temperatur erreicht, die Brennholzbefeuerung mit geringen Mengen anpassen, um die Temperatur konstant zu halten.
Prüfen, dass Wasser in der Schüssel für die Befeuchtung ist.
ROST in der gewünschten Höhe einschieben.
Das Blech auf den ROST stellen.
Die GARRAUMTÜR (A) schließen.
Kontrollieren, dass die Temperatur des GARRAUMS nicht sinkt, und den Backofen nach Bedarf befeuern.
Das Garen der Speisen abwarten, ohne sie wiederholt zu wenden.
KUCHEN
•
•
•
•
•
•
•
•
•
•
•
72
Backofen auf 180/220°C bringen.
Die Ventilation eingeschaltet lassen.
Eine Metall- oder Glasschale mit Wasser in den GARRAUM stellen, um die Feuchtigkeit im Backofen zu erhöhen.
Abwarten, dass der Backofen die Temperatur von 180/220°C erreicht.
Ist die Temperatur erreicht, die Ventilation mit dem SCHALTER (5) ausschalten und die Befeuerung anpassen.
Wasserschüssel herausnehmen.
ROST in der gewünschten Höhe einschieben.
Blech mit dem KUCHEN auf den BLECHROST stellen.
Die GARRAUMTÜR (A) schließen.
Kontrollieren, dass die Temperatur des GARRAUMS nicht sinkt und den Backofen nach Bedarf befeuern.
Das Ausbacken des KUCHENS abwarten.
DE
13-SCHALTPLAN
DE
E
2
1
2
D
C
2
1
1
3
B
1
F
3
2
A
BESCHREIBUNG
A Stecker 230 V-10 A.
BVerbindungsklemmen.
CGebläseschalter.
Garraum 230 V-16 A.
D Lichtschalter 230 V-16 A.
ELampenhaltermodul.
Lampe 230 V-25 W.
FVentilationsmotor.
Garraum 230 V-32 W.
1Blau.
2Braun.
3Gelb-grün.
Technischer Dienst - Vorbehaltene Rechte - Nachdruck verboten
73
INSTALLATION GUIDE
EN
TABLE OF CONTENTS
INTRODUCTION............................................................................................................75
1-WARNINGS AND WARRANTY CONDITIONS.....................................................................76
2-INTRODUCTORY INFORMATION....................................................................................79
3-TECHNICAL CHARACTERISTICS.....................................................................................82
4-TRANSPORT AND INSTALLATION..................................................................................83
5-OPERATION...............................................................................................................86
6-SAFETY DEVICES........................................................................................................87
7-CLEANING.................................................................................................................88
8-MAINTENANCE PERFORMED BY THE USER.....................................................................89
9-SHUTDOWN...............................................................................................................91
10-ANOMALIES AND SOLUTIONS.....................................................................................92
11-ACCESSORIES...........................................................................................................93
12-COOKING RECOMMENDATIONS...................................................................................94
13-WIRING DIAGRAM....................................................................................................97
Translation of the original instructions
INTRODUCTION
EN
Dear customer,
Thank you for having chosen our product. Our aim is to combine technology with simple use and, first and foremost, safety.
To allow for optimal operation, we advise you to read this manual carefully before starting up the product for the first time. In the event
of a fault or if in doubt, please contact your retailer, who will provide all the necessary assistance.
REVISIONS TO THE PUBLICATION
The content of this manual is strictly technical and property of the MCZ Group Spa.
No part of this manual can be translated into another language and/or altered and/or reproduced, even partially, in another form, by
mechanical or electronic means, photocopied, recorded or similar, without prior written approval from MCZ Group Spa.
The company reserves the right to make changes to the product at any time without prior notice. The proprietary company reserves its
rights according to the law.
CARE OF THE MANUAL AND HOW TO CONSULT IT
• Take care of this manual and keep it in an easily accessible place, throughout the product life.
• Should the manual be misplaced or ruined, request a copy from your Retailer or directly from the Manufacturer, specifying the product
identification data.
• Any important note or information that requires particular attention is printed in “bold text”.
• Text in “italics” is used to draw your attention to other paragraphs in this manual or any additional explanation.
• “NOTE” provides the reader with additional information.
SYMBOLS USED IN THE MANUAL
ATTENTION DANGER OF ELECTROCUTION:
Informs the relative personnel that the described operation poses the risk of electric shock if not carried out in
accordance with the safety regulations.
SPECIAL INTERVENTIONS:
The Authorised Retailer must be contacted for any maintenance operations highlighted by this symbol.
ATTENTION:
This warning sign indicates that the relative message must be carefully read and understood because failure to
comply with that which is written can cause serious damage to the oven and put the user’s safety.
INFORMATION:
This symbol is used to highlight important information for correct product operation.
Failure to comply with these provisions will compromise the use of the product and will result in unsatisfactory
operation.
Technical Dept. - All rights reserved - Reproduction is prohibited
75
1-WARNINGS AND WARRANTY CONDITIONS
EN
• Installation, functional verification and maintenance must only be performed by qualified or authorised personnel.
• Install the product in accordance with all the local and national laws and Standards applicable in the relative place,
region or country.
• This product is not intended for use by persons (including children) with reduced physical, sensory or mental
capabilities, or lack of experience and knowledge, unless they have been given supervision or instruction concerning
use of the product by a person responsible for their safety.
• The instructions provided in this manual must always be complied with to ensure the product and any electronic appliances connected
to it are used correctly and accidents are prevented.
• The product must not be used as an incinerator. It is strictly forbidden to use liquid fuel to ignite the fire.
• The user, or whoever is operating the product, must read and fully understand the contents of this instruction manual before
performing any operation.
• The product must only be used for its intended purpose. Any other use is to be considered improper and therefore dangerous.
• Do not use the product as a ladder or supporting structure.
• Do not place laundry on the product to dry.
• All liability for improper use of the product is entirely borne by the user and relieves the Manufacturer from any civil and criminal
liability.
• Any type of tampering or unauthorised replacement with non-original spare parts could be hazardous for the operator’s safety and
relieves the Manufacturer from any civil and criminal liability.
• Most of the surfaces of the product can get very hot (door, handle, glass, smoke outlet pipes, etc.). Therefore, avoid contact with these
parts unless adequate protective clothing is worn or appropriate means are used, such as heat protective gloves.
• It is forbidden to operate the product with the door open.
• Do not touch the product with wet hands as it is an electrical appliance. Always disconnect the power cable before intervening (if
required).
• The product must be powered by a system that is equipped with an effective earth conductor.
• The system must be of adequate rated capacity for the declared electrical power of the product.
76
1-WARNINGS AND WARRANTY CONDITIONS
EN
WARNINGS REGARDING OPERATION
• Turn off the product in the event of a fault or malfunctioning.
• Install the product in an open space that is adequately protected against fire and equipped with all the utilities such as supplies (air
and electricity) and smoke outlets.
• Do not use volatile and/or flammable substances (petrol, alcohol, etc.) to ignite the fire.
INFORMATION
• Please contact your retailer or qualified personnel who is authorised by the Manufacturer for any issues, and demand that original
spare parts are used if repairs are required.
• Check and clean the smoke outlet pipe regularly in accordance with the regulations in force in the country of installation.
WARRANTY CONDITIONS
The Manufacturer provides a product warranty, excluding the parts subject to normal wear (stipulated in the “RESTRICTIONS”
paragraph), for a period of two years from the date of purchase, which is proven by a supporting document that contains the name of the
seller and the date when the sale took place. Warranty cover is valid if the completed warranty is returned within 8 days and the product
is installed and tested by a qualified installer, according to the detailed instructions provided in the instruction manual supplied with
the product. The term ‘warranty’ refers to the (free-of-charge) replacement or repairs of parts acknowledged to be faulty due to
manufacturing defects.
RESTRICTIONS
The warranty does not cover parts subject to normal wear, such as: gaskets, removable parts, handles, lamps, glass parts, the refractory
surface and any accessories and materials such as grilles, flame flaps, ash pans. Replaced parts will be covered by the warranty for the
remaining period of the warranty in force as from the date of purchase of the product. The glass is covered by the warranty until an
authorised installer certifies that it is perfectly intact once the installation is complete.
EXCLUSION
The warranty does not cover any parts that may are faulty as a result of negligence or careless use, incorrect maintenance
or installation that does not comply with the Manufacturer’s instructions (see the relative chapters in this user manual).
If the product does not work correctly, contact your local retailer and/or importer.
The Manufacturer declines all liability for any damage which may be caused, directly or indirectly, to persons, animals or objects as a
consequence of non compliance with all the prescriptions specified in the instruction manual, especially warnings regarding installation,
use and maintenance of the appliance. The warranty will be rendered null and void in the event of damage caused by tampering,
atmospheric agents, natural disasters, electrical discharges, fire, defects in the electrical and plumbing system, and maintenance not
being performed at all or as indicated by the manufacturer.
INTERVENTION REQUEST
The request must be sent to the retailer who will forward it to the Manufacturer’s Technical Assistance Department.
Technical Dept. - All rights reserved - Reproduction is prohibited
77
1-WARNINGS AND WARRANTY CONDITIONS
EN
PRECAUTIONS FOR CORRECT DISPOSAL OF THE PRODUCT IN ACCORDANCE WITH THE EUROPEAN
DIRECTIVE 2002/96/EC AND SUBSEQUENT AMENDMENTS 2003/108/EC.
At the end of its working life, the product must not be disposed of as urban waste. It must be taken to a special differentiated waste
collection centre set up by the local authorities or to a retailer that provides this service. Disposing of the appliance separately prevents
possible negative consequences for the environment and health deriving from inappropriate disposal and allows its materials to be
recovered in order to obtain significant savings in energy and resources. As a reminder of the need to dispose of appliances separately, the
product is marked with a crossed-out wheeled dustbin.
78
2-INTRODUCTORY INFORMATION
EN
EASY ovens comply with EEC Directive 98/37 (former 89/392 and relevant amendments) and Standard EN60335-1.
OVEN IDENTIFICATION
MODEL :
LOT :
VOLTAGE : 230V --- 50HZ
POWER : 100W
IPX2
Made in Italy
Always quote the MODEL and LOT No. found on the label on the rear side of the oven, when contacting the Manufacturer or Local Retailer.
GENERAL NOTES REGARDING DELIVERY
Upon receipt check that:
1) The packaging is intact.
2) The supply corresponds to the order specifications.
3) The oven and accessories have not been damaged.
Technical Dept. - All rights reserved - Reproduction is prohibited
79
A
2-INTRODUCTORY INFORMATION
EN
DESCRIPTION:
A= OUTDOOR OVEN
B= WOOD CART
A
B
OVEN DESCRIPTION
The EASY oven is a wood-burning oven with indirect heat and continuous, ventilated cooking.
This feature distinguishes it from other traditional direct heat ovens as the furnace is completely separate from the cooking chamber,
thereby allowing food to be cooked without coming in contact with the smoke or ashes. The ventilation in the cooking chamber distributes
the heat evenly on the entire products within.
STRUCTURE
The entire oven structure, including the casings, is made of painted aluminised sheet metal.
The wood cart is equipped with a large compartment and has wheels and handles to be moved easily.
The door of the furnace with the air flow grid. The air enters by moving the lever to the right to open the grid. Vice versa, the grid is closed
by moving the lever to the left.
The food and degree of cooking can be monitored thanks to the light inside the oven.
80
2-INTRODUCTORY INFORMATION
EN
The cooking chamber is made of AISI 430 STAINLESS STEEL it can be completely disassembled and washed for maximum hygiene to
be maintained.
An external thermometer, placed above the door of the cooking chamber, indicates the internal temperature.
Average consumption to reach 300°C is 1.5-2 kg of wood per hour, equal to 40 to 60 minutes of cooking. The maximum temperature that
the oven can reach is 300°C; the structure can be damaged if this temperature is exceeded.
The EASY oven has been designed to be used with natural and aged wood. Any use other than that stipulated in this manual is to be
considered improper.
Technical Dept. - All rights reserved - Reproduction is prohibited
81
3-TECHNICAL CHARACTERISTICS
166
230
EN
74
87
Weight:
210 kg.
Supply voltage:
230 V 50 Hz.
Power:
100 W.
Wood fired oven hourly consumption: 1.5-2 kg/h.
82
155
4-TRANSPORT AND INSTALLATION
EN
Before installing the oven, the customer must make sure that the floor where it will be installed is level, that it can withstand
the weight and that the technological requirements are satisfied.
Use suitable lifting means and a fibre rope, each with a nominal capacity of 500 kg. Place the 4 iron bars (supplied) in the relative holes
and sling it with the ropes.
ATTENTION: RISK OF CRUSHING!
Any person in the surrounding area must move away.
Place the oven on the cart while making sure it is inserted in the relative guides.
Unhook the ropes and/or remove the 4 iron bars from the guides.
Technical Dept. - All rights reserved - Reproduction is prohibited
83
4-TRANSPORT AND INSTALLATION
EN
Fit the top part in the housing on top of the oven by inserting the front and rear panels and fastening them with the 4 screws supplied.
Place the 2 sheets of the top part on top by overlapping them slightly and fasten them with 6 screws, as shown in the figure. Insert the
chimney and fasten the side flaps to the top part with 2 screws, for enhanced tightness.
Move the oven a short distance by pulling the handles - d not push the oven (this must only be done when the oven is off and cold).
ATTENTION RISK OF OVERTURNING!
Lift the oven a maximum of 6 cm off the ground, making sure there are no obstacles that could cause it to overturn.
84
4-TRANSPORT AND INSTALLATION
EN
OVEN CONTROL PANEL AND PARTS
1
3
2
4
A
5
B
6
C
1- SMOKE EXHAUST
This is connected to the flue and allows the exhaust smoke to be expelled.
2- POWER CABLE
Allows the oven to be connected to the mains and the desired utilities to be used
(light, ventilation, etc.).
3- THERMOMETER
Indicates the Temperature inside the Cooking Chamber.
4- LIGHT SWITCH
Allows the light inside the Cooking Chamber to be switched on and off.
5- FAN SWITCH
Allows the fan inside the Cooking Chamber to be switched on and off.
6- COMBUSTION AIR CONTROL
This is used to control the combustion of the wood inside the Furnace.
A- COOKING CHAMBER DOOR
Provides access to the Cooking Chamber to insert, remove or check the food.
B - FURNACE DOOR
Provides access to the Furnace to load wood and check the fire.
C- CART DOOR
Provides access to the Cart insert or remove wood, etc.
Technical Dept. - All rights reserved - Reproduction is prohibited
85
5-OPERATION
EN
FIRST IGNITION
ATTENTION!
Read the safety regulations carefully.
The oven must be ignited for the first time by an installer.
Remove any plastic from the glass door of the cooking chamber (A).
Perform a general inspection of the connections and operation of all of the controls.
NOTE!
THE EASY OVEN MUST BE SWITCHED ON AT LEAST TWICE WITH NO FOOD INSIDE BEFORE COOKING FOR UNPLEASANT ODOURS PRODUCED BY
THE NEW COMPONENTS TO BE ELIMINATED.
Make sure that all the internal and external guards and accessories are mounted. Open the DOOR of the FURNACE (B), place a few small
pieces of dry wood in the middle or at the back of the furnace and ignite the fire.
Close the door and make sure that the COMBUSTION AIR CONTROL (6) is in the open position, i.e. turned to the right.
Wait for the oven temperature to reach 200°C - seen on the THERMOMETER (3).
Every now and then open the DOOR of the COOKING CHAMBER (A) in order to eliminate the smoke and unpleasant odours produced by
the new material.
Keep the fire lit for 2 hours and make sure that it NEVER exceeds 300°C.
Let the oven go off and let it cool completely.
Repeat the above-mentioned steps and then warm up the oven to 300°C for 1 hour.
Let the oven go off and let it cool completely.
The EASY oven is then ready and can be used to cook.
86
6-SAFETY DEVICES
EN
Disconnect the plug from the socket and wait for the oven to reach room temperature before performing any maintenance,
repairs or cleaning.
• The customer is obliged to verify that the mains system where the oven will be installed has a good earth system and is up to standard,
equipped with a differential switch (residual current device).
• Otherwise, the system must be adapted.
• Do not tamper with or damage the safety devices, remove or hide the warning labels, or modify the characteristics of the oven.
• The flue, furnace, smoke pipe and smoke exhaust with valve must be cleaned every 250 hours of operation or when the Furnace emits
smoke.
• Always place the wood in the middle or at the back of the Furnace and never towards the front.
• The EASY oven must NEVER exceed 300°C.
• Always request original spare parts from the Authorised Retailer if worn and/or broken parts must be replaced.
• NEVER put out the fire with water as this could deform important parts of the structure.
• All the devices must be kept efficient and safe throughout the working life of the oven.
Technical Dept. - All rights reserved - Reproduction is prohibited
87
7-CLEANING
ATTENTION!
Turn off all the switches before performing any maintenance, repairs or cleaning.
Disconnect the plug from the socket and wait for the oven to reach room temperature.
Use a vacuum cleaner.
CLEANING THE COOKING CHAMBER
When necessary, clean the cooking chamber as follows:
Remove the intermediate shelves and the lower shelf.
Remove the shelf supports.
Wash with detergent that is suitable for ovens or stainless steel.
Clean the cooking residue that has accumulated under the lower shelf with a vacuum cleaner.
Do not clean with abrasive substances, steel wool pads or similar items.
CLEANING THE FURNACE
ATTENTION!
This operation should only be carried out when the oven is completely cold.
Each time the oven is used, clean the furnace as follows:
Pull the ash pan out partially.
Pull the grille out partially.
Use a fire poker to drop the residual ash of the grille into the ash pan and then reinsert the grille completely.
Remove the ash pan completely, making sure there are no embers burning.
Empty the ash pan, clean the compartment and reinsert it into the housing completely.
CLEANING THE EXTERNAL PART
Clean the external painted walls with a sponge (non-abrasive) soaked in mild detergent. This can be done whenever required.
88
EN
8-MAINTENANCE PERFORMED BY THE USER
EN
ATTENTION!
Bring all the oven switches to “0” before performing any maintenance, repairs or cleaning.
Disconnect the plug from the socket and wait for the oven to reach room temperature.
LUBRICATION
Periodically oil the hinges of Doors A, B and C.
When the oven is not used for a long period of time, clean the furnace (B) as described in “CLEANING THE FURNACE”.
Technical Dept. - All rights reserved - Reproduction is prohibited
89
8-MAINTENANCE PERFORMED BY THE USER
REPLACING THE INTERNAL LAMP
Disconnect the plug from the socket before performing any operation.
Loosen the protective glass of the lamp.
Remove the burnt lamp.
Replace the HALOGEN LAMP G9 230 V-25 W with the same type of lamp, making sure not to touch it with bare hands.
Tighten the protective glass.
Insert the POWER CABLE (2) plug into the socket.
CHECKING THE CEILING OF THE FURNACE
This must be done every month.
Open the FURNACE DOOR (B).
Use a torch or the fire when the oven is on to check the condition of the ceiling sheet of the FURNACE (B).
• If there are holes on the sheet, contact your Authorised Retailer in order to replace it.
Contact your Authorised Retailer for any SPECIAL MAINTENANCE.
90
EN
9-SHUTDOWN
EN
SHUTDOWN
Turn off the switches.
Disconnect the power cable plug from the socket.
Make sure there is no food inside cooking chamber “A”.
Make sure there is no fire and no embers are burning inside furnace “B”.
WARNING!
NEVER put out the fire with water as this could damage the structure.
Wait for the oven to reach room temperature.
Clean the combustion residue in the Ash pan (See “7 - CLEANING”).
SHUTDOWN DUE TO A POWER CUT
NOTE!
The oven can still be used if there is a power cut.
The supply voltage in the EASY oven powers the internal light and ventilation.
Technical Dept. - All rights reserved - Reproduction is prohibited
91
10-TROUBLESHOOTING
ANOMALY:
The oven emits smoke.
SOLUTION:
Clean the smoke exhaust and the relative pipe (See “7 - CLEANING”).
For any other type of operating anomaly of the EASY oven CONTACT THE AUTHORISED RETAILER.
92
EN
11-ACCESSORIES
EN
Additional accessories may be requested from the Authorised Retailer.
DESCRIPTION
ALUMINIUM TRAY
This is filled with water when the Cooking Rack is used as a container for food.
ROASTING RACK KIT
Used for large roasts (turkey, goose) or pork roasts.
TRAY CART
A useful accessory to easily remove the tray.
SIDE SHELF
Surface used as a worktop.
Technical Dept. - All rights reserved - Reproduction is prohibited
93
12-COOKING RECOMMENDATIONS
EN
START-UP
Make sure that all the internal and external guards and accessories are mounted.
Open the door of the furnace (B) and place small dry pieces of wood at the back.
Close the door and make sure the combustion air control (6) is open.
Bring the oven to the desired cooking temperature by referring to the “Recommended Cooking Table” (below), keep the oven at that
temperature for approx. 30 minutes and the EASY oven is then ready to cook.
USING THE OVEN TO COOK FOOD
A few examples of how to cook PIZZA - LASAGNE – ROAST - TARTS are described below. The cook’s experience and expertise will eventually
lead to successful dishes.
NOTE!
Only pizza and bread must be cooked on the refractory surfaces.
Always cook other food in trays placed above the grille.
The cooking time depends on the volume of the food.
Example:
A TURKEY must be cooked for two hours at 200/240°C.
A CHICKEN must be cooked for one hour at 200/240°C.
A QUAIL must be cooked for 15-20 minutes at 200/240°C.
LASAGNE must be cooked for 20-30 minutes at 220/250°C.
NOTE!
Place a bowl of water in the Cooking Chamber to increase the moisture.
Moisture improves the cooking process and browns the food.
94
12-COOKING RECOMMENDATIONS
EN
RECOMMENDED COOKING TABLE
FOOD
°C
COOKING TIME IN MINUTES
TARTS
180 - 220°C
15 - 30
BREAD
220 - 250°C
40 - 60
FISH
200 - 240°C
30 - 40
ROAST
200 - 240°C
70 - 110
A SLICE OF PIZZA
250 - 280°C
15 - 20
A WHOLE PIZZA
270 - 300°C
2-3
A WHOLE PIZZA
•
•
•
•
•
Bring the oven to 270-300°C, switch the fan on via the FAN SWITCH (5) and keep it at this temperature for an hour.
Dampen the refractory surface with a cloth.
Place a metal or glass bowl with water in the COOKING CHAMBER 10 minutes before entering the food to increase the moisture.
Place the pizza on the refractory surface and close the COOKING CHAMBER DOOR (A).
Remove the pizza after two or three minutes (depending on the topping).
Technical Dept. - All rights reserved - Reproduction is prohibited
95
12-COOKING RECOMMENDATIONS
BAKED PASTA AND ROASTED CHICKEN
•
•
•
•
•
•
•
•
•
Bring the oven temperature to 200/240°C.
Switch the fan on.
Once the temperature is reached, there must be enough wood to maintain the temperature constant.
Make sure there is water in the bowl.
Place the RACK at the desired level.
Place the tray on the RACK.
Close the COOKING CHAMBER door (A).
Make sure the temperature does not decrease and adjust the wood in the oven accordingly.
Wait for the food to cook without moving it constantly.
TART
•
•
•
•
•
•
•
•
•
•
•
96
Bring the oven temperature to 180/220°C.
Keep the fan on.
Place a metal or glass bowl with water in the COOKING CHAMBER to increase the moisture.
Bring the oven temperature to 180/220°C.
Once the temperature is reached, switch the fan off via the SWITCH (5) and adjust the wood.
Remove the bowl of water.
Place the RACK at the desired level.
Place the tray with the TART on the RACK.
Close the COOKING CHAMBER door (A).
Make sure the temperature in the COOKING CHAMBER does not decrease and adjust the wood in the oven accordingly.
Wait for the TART to cook.
EN
13-WIRING DIAGRAM
EN
E
2
1
2
D
C
2
1
1
3
B
1
F
3
2
A
DESCRIPTION
A 230 V - 10 A plug.
B
Connection terminals.
C
Fan switch.
230 V - 16 A cooking chamber.
D 230 V - 16 A light switch.
E
Lamp holder.
230 V - 25 W lamp.
F
Fan motor.
230 V - 32 W cooking chamber.
1Blue.
2Brown.
3Yellow-green.
Technical Dept. - All rights reserved - Reproduction is prohibited
97
MCZ GROUP S.p.A.
Via La Croce n°8
33074 Vigonovo di Fontanafredda (PN) – ITALY
Telefono: 0434/599599 r.a.
Fax: 0434/599598
Internet: www.mcz.it
e-mail: [email protected]
Per maggiori informazioni tecniche,
di installazione o di funzionamento è operativo il
SERVIZIO DI ASSISTENZA TECNICA – POST VENDITA
Dal lunedì al venerdì
Dalle ore 8.00 alle 12 e dalle 14.00 alle 18.00
8901223100
REV.0
08/03/12