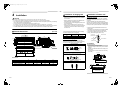
1
+00EH99884801-2_01EN.book Page 1 Monday, January 28, 2013 7:54 PM 1115465001 AIR CONDITIONER (SPLIT TYPE) Installation Manual Indoor Unit For commercial use Model name: Concealed Duct Type RAV-SM406BTP-E RAV-SM456BTP-E RAV-SM566BTP-E RAV-SM806BTP-E RAV-SM1106BTP-E RAV-SM1406BTP-E RAV-SM1606BTP-E English +00EH99884801-2_01EN.book Page 1 Monday, January 28, 2013 7:54 PM –1– Original instruction Please read this Installation Manual carefully before installing the Air Conditioner. • This Manual describes the installation method of the indoor unit. • For installation of the outdoor unit, follow the Installation Manual attached to the outdoor unit. ADOPTION OF NEW REFRIGERANT This Air Conditioner uses R410A an environmentally friendly refrigerant. Contents 1 Precautions for safety . . . . . . . . . . . . . . . . . . . . . . . . . . . . . . . . . . . . . . . . . . . . . . . . . . 3 1 Précautions de sécurité. . . . . . . . . . . . . . . . . . . . . . . . . . . . . . . . . . . . . . . . . . . . . . . . . 6 1 Vorsichtsmaßnahmen für die Sicherheit . . . . . . . . . . . . . . . . . . . . . . . . . . . . . . . . . . . 9 1 Precauzioni per la sicurezza . . . . . . . . . . . . . . . . . . . . . . . . . . . . . . . . . . . . . . . . . . . . 12 1 Precauciones de seguridad. . . . . . . . . . . . . . . . . . . . . . . . . . . . . . . . . . . . . . . . . . . . . 15 1 Precauções de segurança . . . . . . . . . . . . . . . . . . . . . . . . . . . . . . . . . . . . . . . . . . . . . . 18 1 Voorzorgen voor de veiligheid . . . . . . . . . . . . . . . . . . . . . . . . . . . . . . . . . . . . . . . . . . 21 1 Προφυλάξεις για ασφάλεια . . . . . . . . . . . . . . . . . . . . . . . . . . . . . . . . . . . . . . . . . . . . . 24 1 Меры предосторожности . . . . . . . . . . . . . . . . . . . . . . . . . . . . . . . . . . . . . . . . . . . . . 27 2 Accessory parts . . . . . . . . . . . . . . . . . . . . . . . . . . . . . . . . . . . . . . . . . . . . . . . . . . . . . . 29 3 Selection of installation place. . . . . . . . . . . . . . . . . . . . . . . . . . . . . . . . . . . . . . . . . . . 29 4 Installation . . . . . . . . . . . . . . . . . . . . . . . . . . . . . . . . . . . . . . . . . . . . . . . . . . . . . . . . . . 31 5 Drain piping . . . . . . . . . . . . . . . . . . . . . . . . . . . . . . . . . . . . . . . . . . . . . . . . . . . . . . . . . 32 6 Duct design. . . . . . . . . . . . . . . . . . . . . . . . . . . . . . . . . . . . . . . . . . . . . . . . . . . . . . . . . . 35 7 Refrigerant piping . . . . . . . . . . . . . . . . . . . . . . . . . . . . . . . . . . . . . . . . . . . . . . . . . . . . 36 8 Electrical connection . . . . . . . . . . . . . . . . . . . . . . . . . . . . . . . . . . . . . . . . . . . . . . . . . . 37 9 Applicable controls . . . . . . . . . . . . . . . . . . . . . . . . . . . . . . . . . . . . . . . . . . . . . . . . . . . 39 10 Test run . . . . . . . . . . . . . . . . . . . . . . . . . . . . . . . . . . . . . . . . . . . . . . . . . . . . . . . . . . . . . 44 11 Maintenance . . . . . . . . . . . . . . . . . . . . . . . . . . . . . . . . . . . . . . . . . . . . . . . . . . . . . . . . . 45 12 Troubleshooting . . . . . . . . . . . . . . . . . . . . . . . . . . . . . . . . . . . . . . . . . . . . . . . . . . . . . . 46 1-EN 2-EN +00EH99884801-2_01EN.book Page 2 Monday, January 28, 2013 7:54 PM Thank you for purchasing this Toshiba air conditioner. Please read carefully through these instructions that contain important information which complies with the “Machinery” Directive (Directive 2006/42/EC), and ensure that you understand them. After completing the installation work, hand over this Installation Manual as well as the Owner’s Manual provided to the user, and ask the user to keep them in a safe place for future reference. Definition of Protective Gear When the air conditioner is to be transported, installed, maintained, repaired or removed, wear protective gloves and ‘safety’ work clothing. In addition to such normal protective gear, wear the protective gear described below when undertaking the special work detailed in the following table. Failure to wear the proper protective gear is dangerous because you will be more susceptible to injury, burns, electric shocks and other injuries. Generic Denomination: Air Conditioner Work undertaken Definition of Qualified Installer or Qualified Service Person The air conditioner must be installed, maintained, repaired and removed by a qualified installer or qualified service person. When any of these jobs is to be done, ask a qualified installer or qualified service person to do them for you. A qualified installer or qualified service person is an agent who has the qualifications and knowledge described in the following table. Agent 3-EN Qualifications and knowledge which the agent must have Qualified installer • The qualified installer is a person who installs, maintains, relocates and removes the air conditioners made by Toshiba Carrier Corporation. He or she has been trained to install, maintain, relocate and remove the air conditioners made by Toshiba Carrier Corporation or, alternatively, he or she has been instructed in such operations by an individual or individuals who have been trained and is thus thoroughly acquainted with the knowledge related to these operations. • The qualified installer who is allowed to do the electrical work involved in installation, relocation and removal has the qualifications pertaining to this electrical work as stipulated by the local laws and regulations, and he or she is a person who has been trained in matters relating to electrical work on the air conditioners made by Toshiba Carrier Corporation or, alternatively, he or she has been instructed in such matters by an individual or individuals who have been trained and is thus thoroughly acquainted with the knowledge related to this work. • The qualified installer who is allowed to do the refrigerant handling and piping work involved in installation, relocation and removal has the qualifications pertaining to this refrigerant handling and piping work as stipulated by the local laws and regulations, and he or she is a person who has been trained in matters relating to refrigerant handling and piping work on the air conditioners made by Toshiba Carrier Corporation or, alternatively, he or she has been instructed in such matters by an individual or individuals who have been trained and is thus thoroughly acquainted with the knowledge related to this work. • The qualified installer who is allowed to work at heights has been trained in matters relating to working at heights with the air conditioners made by Toshiba Carrier Corporation or, alternatively, he or she has been instructed in such matters by an individual or individuals who have been trained and is thus thoroughly acquainted with the knowledge related to this work. Qualified service person • The qualified service person is a person who installs, repairs, maintains, relocates and removes the air conditioners made by Toshiba Carrier Corporation. He or she has been trained to install, repair, maintain, relocate and remove the air conditioners made by Toshiba Carrier Corporation or, alternatively, he or she has been instructed in such operations by an individual or individuals who have been trained and is thus thoroughly acquainted with the knowledge related to these operations. • The qualified service person who is allowed to do the electrical work involved in installation, repair, relocation and removal has the qualifications pertaining to this electrical work as stipulated by the local laws and regulations, and he or she is a person who has been trained in matters relating to electrical work on the air conditioners made by Toshiba Carrier Corporation or, alternatively, he or she has been instructed in such matters by an individual or individuals who have been trained and is thus thoroughly acquainted with the knowledge related to this work. • The qualified service person who is allowed to do the refrigerant handling and piping work involved in installation, repair, relocation and removal has the qualifications pertaining to this refrigerant handling and piping work as stipulated by the local laws and regulations, and he or she is a person who has been trained in matters relating to refrigerant handling and piping work on the air conditioners made by Toshiba Carrier Corporation or, alternatively, he or she has been instructed in such matters by an individual or individuals who have been trained and is thus thoroughly acquainted with the knowledge related to this work. • The qualified service person who is allowed to work at heights has been trained in matters relating to working at heights with the air conditioners made by Toshiba Carrier Corporation or, alternatively, he or she has been instructed in such matters by an individual or individuals who have been trained and is thus thoroughly acquainted with the knowledge related to this work. –2– Protective gear worn All types of work Protective gloves ‘Safety’ working clothing Electrical-related work Gloves to provide protection for electricians and from heat Insulating shoes Clothing to provide protection from electric shock Work done at heights (50 cm or more) Helmets for use in industry Transportation of heavy objects Shoes with additional protective toe cap Repair of outdoor unit Gloves to provide protection for electricians and from heat 4-EN +00EH99884801-2_01EN.book Page 3 Monday, January 28, 2013 7:54 PM –3– Warning indications on the air conditioner unit Warning indication WARNING ELECTRICAL SHOCK HAZARD Disconnect all remote electric power supplies before servicing. WARNING Moving parts. Do not operate unit with grille removed. Stop the unit before the servicing. CAUTION High temperature parts. You might get burned when removing this panel. CAUTION Do not touch the aluminum fins of the unit. Doing so may result in injury. CAUTION BURST HAZARD Open the service valves before the operation, otherwise there might be the burst. 5-EN Description WARNING ELECTRICAL SHOCK HAZARD Disconnect all remote electric power supplies before servicing. WARNING Moving parts. Do not operate unit with grille removed. Stop the unit before the servicing. CAUTION High temperature parts. You might get burned when removing this panel. CAUTION Do not touch the aluminium fins of the unit. Doing so may result in injury. CAUTION BURST HAZARD Open the service valves before the operation, otherwise there might be the burst. 1 Precautions for safety The manufacturer shall not assume any liability for the damage caused by not observing the description of this manual. WARNING General • Before starting to install the air conditioner, read through the Installation Manual carefully, and follow its instructions to install the air conditioner. • Only a qualified installer or service person is allowed to do installation work. Inappropriate installation may result in water leakage, electric shock or fire. • Do not use any refrigerant different from the one specified for complement or replacement. Otherwise, abnormally high pressure may be generated in the refrigeration cycle, which may result in a failure or explosion of the product or an injury to your body. • Before opening the electrical control box cover of the indoor unit or service panel of the outdoor unit, set the circuit breaker to the OFF position. Failure to set the circuit breaker to the OFF position may result in electric shocks through contact with the interior parts. Only a qualified installer(*1) or qualified service person(*1) is allowed to remove the electrical control box cover of the indoor unit or service panel of the outdoor unit and do the work required. • Before carrying out the installation, maintenance, repair or removal work, be sure to set the circuit breaker to the OFF position. Otherwise, electric shocks may result. • Place a “Work in progress” sign near the circuit breaker while the installation, maintenance, repair or removal work is being carried out. There is a danger of electric shocks if the circuit breaker is set to ON by mistake. • Only a qualified installer(*1) or qualified service person(*1) is allowed to undertake work at heights using a stand of 50 cm or more or to remove the intake grille of the indoor unit to undertake work. • Wear protective gloves and safety work clothing during installation, servicing and removal. • Do not touch the aluminium fin of the unit. You may injure yourself if you do so. If the fin must be touched for some reason, first put on protective gloves and safety work clothing, and then proceed. • Before opening the suction board cover, set the circuit breaker to the OFF position. Failure to set the circuit breaker to the OFF position may result in injury through contact with the rotation parts. Only a qualified installer (*1) or qualified service person (*1) is allowed to remove the suction board cover and do the work required. • When work is performed at heights, use a ladder which complies with the ISO 14122 standard, and follow the procedure in the ladder’s instructions. Also wear a helmet for use in industry as protective gear to undertake the work. • Before cleaning the filter or other parts of the outdoor unit, set the circuit breaker to OFF without fail, and place a “Work in progress” sign near the circuit breaker before proceeding with the work. • Before working at heights, put a sign in place so that no-one will approach the work location, before proceeding with the work. Parts and other objects may fall from above, possibly injuring a person below. While carrying out the work, wear a helmet for protection from falling objects. • The refrigerant used by this air conditioner is the R410A. • The air conditioner must be transported in stable condition. If any part of the product is broken, contact the dealer. • When the air conditioner must be transported by hand, carry it by two or more people. • Do not move or repair any unit by yourself. There is high voltage inside the unit. You may get electric shock when removing the cover and main unit. Selection of installation location • When the air conditioner is installed in a small room, provide appropriate measures to ensure that the concentration of refrigerant leakage occur in the room does not exceed the critical level. • Do not install in a location where flammable gas leaks are possible. If the gas leak and accumulate around the unit, it may ignite and cause a fire. • To transport the air conditioner, wear shoes with additional protective toe caps. • To transport the air conditioner, do not take hold of the bands around the packing carton. You may injure yourself if the bands should break. • Install the indoor unit at least 2.5 m above the floor level since otherwise the users may injure themselves or receive electric shocks if they poke their fingers or other objects into the indoor unit while the air conditioner is running. • Do not place any combustion appliance in a place where it is directly exposed to the wind of air conditioner, otherwise it may cause imperfect combustion. 6-EN +00EH99884801-2_01EN.book Page 4 Monday, January 28, 2013 7:54 PM Installation Test run • When the indoor unit is to be suspended, the designated hanging bolts (M10 or W3/8) and nuts (M10 or W3/8) must be used. • Install the air conditioner securely in a location where the base can sustain the weight adequately. If the strength is not enough, the unit may fall down resulting in injury. • Follow the instructions in the Installation Manual to install the air conditioner. Failure to follow these instructions may cause the product to fall down or topple over or give rise to noise, vibration, water leakage or other trouble. • Carry out the specified installation work to guard against the possibility of high winds and earthquake. If the air conditioner is not installed appropriately, a unit may topple over or fall down, causing an accident. • If refrigerant gas has leaked during the installation work, ventilate the room immediately. If the leaked refrigerant gas comes in contact with fire, noxious gas may generate. • Use forklift to carry in the air conditioner units and use winch or hoist at installation of them. • Suction duct length must be longer than 850 mm. • Helmet must be worn to protect your head from falling objects. Especially, when you work under an inspection opening, helmet must be worn to protect your head from falling objects from the opening. • Before operating the air conditioner after having completed the work, check that the electrical control box cover of the indoor unit and service panel of the outdoor unit are closed, and set the circuit breaker to the ON position. You may receive an electric shock if the power is turned on without first conducting these checks. • If there is any kind of trouble (such as an error display has appeared, smell of burning, abnormal sounds, the air conditioner fails to cool or heat or water is leaking) has occurred in the air conditioner, do not touch the air conditioner yourself but set the circuit breaker to the OFF position, and contact a qualified service person. Take steps to ensure that the power will not be turned on (by marking “out of service” near the circuit breaker, for instance) until qualified service person arrives. Continuing to use the air conditioner in the trouble status may cause mechanical problems to escalate or result in electric shocks or other trouble. • After the work has finished, use an insulation tester set (500 V Megger) to check the resistance is 1 MΩ or more between the charge section and the non-charge metal section (Earth section). If the resistance value is low, a disaster such as a leak or electric shock is caused at user’s side. • Upon completion of the installation work, check for refrigerant leaks and check the insulation resistance and water drainage. Then conduct a test run to check that the air conditioner is operating properly. Explanations given to user Refrigerant piping • Upon completion of the installation work, tell the user where the circuit breaker is located. If the user does not know where the circuit breaker is, he or she will not be able to turn it off in the event that trouble has occurred in the air conditioner. • After the installation work, follow the Owner’s Manual to explain to the customer how to use and maintain the unit. • Install the refrigerant pipe securely during the installation work before operating the air conditioner. If the compressor is operated with the valve open and without refrigerant pipe, the compressor sucks air and the refrigeration cycles is over pressurized, which may cause a injury. • Tighten the flare nut with a torque wrench in the specified manner. Excessive tighten of the flare nut may cause a crack in the flare nut after a long period, which may result in refrigerant leakage. • After the installation work, confirm that refrigerant gas does not leak. If refrigerant gas leaks into the room and flows near a fire source, such as a cooking range, noxious gas may be generated. • When the air conditioner has been installed or relocated, follow the instructions in the Installation Manual and purge the air completely so that no gases other than the refrigerant will be mixed in the refrigerating cycle. Failure to purge the air completely may cause the air conditioner to malfunction. • Nitrogen gas must be used for the airtight test. • The charge hose must be connected in such a way that it is not slack. Relocation • Only a qualified installer(*1) or qualified service person(*1) is allowed to relocate the air conditioner. It is dangerous for the air conditioner to be relocated by an unqualified individual since a fire, electric shocks, injury, water leakage, noise and/or vibration may result. • When carrying out the pump-down work shut down the compressor before disconnecting the refrigerant pipe. Disconnecting the refrigerant pipe with the service valve left open and the compressor still operating will cause air or other gas to be sucked in, raising the pressure inside the refrigeration cycle to an abnormally high level, and possibly resulting in rupture, injury or other trouble. Electrical wiring • Only a qualified installer(*1) or qualified service person(*1) is allowed to carry out the electrical work of the air conditioner. Under no circumstances must this work be done by an unqualified individual since failure to carry out the work properly may result in electric shocks and/or electrical leaks. • To connect the electrical wires, repair the electrical parts or undertake other electrical jobs, wear gloves to provide protection for electricians, insulating shoes and clothing to provide protection from electric shocks. Failure to wear this protective gear may result in electric shocks. • Use wiring that meets the specifications in the Installation Manual and the stipulations in the local regulations and laws. Use of wiring which does not meet the specifications may give rise to electric shocks, electrical leakage, smoking and/or a fire. • Connect earth wire. (Grounding work) Incomplete grounding causes an electric shock. • Do not connect earth wires to gas pipes, water pipes, and lightning conductor or telephone earth wires. • After completing the repair or relocation work, check that the earth wires are connected properly. • Install a circuit breaker that meets the specifications in the installation manual and the stipulations in the local regulations and laws. • Install the circuit breaker where it can be easily accessed by the agent. • When installing the circuit breaker outdoors, install one which is designed to be used outdoors. • Under no circumstances the power wire must not be extended. Connection trouble in the places where the wire is extended may give rise to smoking and/or a fire. • Electrical wiring work shall be conducted according to law and regulation in the community and installation manual. Failure to do so may result in electrocution or short circuit. 7-EN CAUTION New refrigerant air conditioner installation • This air conditioner adopts the new HFC refrigerant (R410A) which does not destroy ozone layer. • The characteristics of R410A refrigerant are; easy to absorb water, oxidizing membrane or oil, and its pressure is approx. 1.6 times higher than that of refrigerant R22. Accompanied with the new refrigerant, refrigerating oil has also been changed. Therefore, during installation work, be sure that water, dust, former refrigerant, or refrigerating oil does not enter the refrigerating cycle. • To prevent charging an incorrect refrigerant and refrigerating oil, the sizes of connecting sections of charging port of the main unit and installation tools are changed from those for the conventional refrigerant. • Accordingly the exclusive tools are required for the new refrigerant (R410A). • For connecting pipes, use new and clean piping designed for R410A, and please care so that water or dust does not enter. To disconnect the appliance from main power supply. • This appliance must be connected to the main power supply by means of a switch with a contact separation of at least 3 mm. The installation fuse (all types can be used) must be used for the power supply line of this conditioner. (*1) Refer to the “Definition of Qualified Installer or Qualified Service Person.” –4– 8-EN +00EH99884801-2_01EN.book Page 5 Monday, January 28, 2013 7:54 PM –5– Merci d’avoir acheté ce climatiseur Toshiba. Veuillez lire attentivement ces instructions qui contiennent des informations importantes qui sont conformes à la directive “Machines” (Directive 2006/42/EC), et assurez-vous de bien les comprendre. Une fois l’installation terminée, confiez à l’utilisateur le présent manuel d’installation et le manuel du propriétaire et demandez-lui de les ranger, afin qu’il les ait à disposition en cas de besoin. Dénomination générique: Climatiseur Définition d’un Installateur qualifié ou Technicien d’entretien qualifié Le climatiseur doit être installé, entretenu, réparé et enlevé par un installateur qualifié ou une personne d’entretien qualifiée. Lorsqu’une de ces opérations doit être effectuée, demandez à un installateur qualifié ou un technicien d’entretien qualifié de les exécuter pour vous. Un installateur qualifié ou technicien d’entretien qualifié est un agent qui a les qualifications et connaissances décrites dans le tableau suivant. Agent 9-FR Qualifications et connaissances que cet agent doit posséder Installateur qualifié • L’installateur qualifié est une personne qui installe, entretient, déplace et enlève les climatiseurs fabriqués par Toshiba Carrier Corporation. Il ou elle a été formé pour installer, entretenir, déplacer et enlever les climatiseurs fabriqués par Toshiba Carrier Corporation ou, alternativement, il ou elle a reçu des consignes concernant de telles opérations par une ou des personnes qui ont été formés et a, par conséquent, acquis toutes les connaissances associées à ces opérations. • L’installateur qualifié qui est autorisé à effectuer un travail électrique compris dans l’installation, le déplacement et l’enlèvement possède les qualifications nécessaires à ce travail électrique conformément aux réglementations et à la législation locales, et il ou elle est une personne qui a été formée pour les problèmes relatifs au travail électrique sur les climatiseurs fabriqués par Toshiba Carrier Corporation ou, alternativement, il ou elle a reçu des consignes dans de tels domaines par une ou des personnes qui ont été formées et possèdent, par conséquent, les connaissances relatives à ce travail. • L’installateur qualifié qui est autorisé à manipuler du fluide frigorigène et à réaliser un travail de raccordement compris dans l’installation, le déplacement et l’enlèvement possède les qualifications nécessaires à cette manipulation de fluide frigorigène et de ce travail de raccordement conformément aux réglementations et à la législation locales, et il ou elle est une personne qui a été formée pour les problèmes relatifs à la manipulation de fluide frigorigène et de travail de raccordement sur les climatiseurs fabriqués par Toshiba Carrier Corporation ou, alternativement, il ou elle a reçu des consignes dans de tels domaines par une ou des personnes qui ont été formées et possèdent, par conséquent, les connaissances relatives à ce travail. • L’installateur qualifié qui est autorisé à travailler en hauteur a été formé aux domaines relatifs au travail en hauteur avec les climatiseurs fabriqués par Toshiba Carrier Corporation ou, alternativement, il ou elle a reçu des consignes dans de tels domaines par une ou des personnes qui ont été formées et possèdent, par conséquent, toutes les connaissances requises pour ce travail. Technicien d’entretien qualifié • La personne d’entretien qualifiée est une personne qui installe, répare, entretient, déplace et enlève les climatiseurs fabriqués par Toshiba Carrier Corporation. Il ou elle a été formé pour installer, réparer, entretenir, déplacer et enlever les climatiseurs fabriqués par Toshiba Carrier Corporation ou, alternativement, il ou elle a reçu des consignes pour de telles opérations par une ou des personnes qui ont été formées et a, par conséquent, acquis toutes les connaissances associées à ces opérations. • La personne d’entretien qualifiée qui est autorisée à effectuer un travail électrique compris dans l’installation, la réparation, le déplacement et l’enlèvement possède les qualifications nécessaires à ce travail électrique conformément aux réglementations et à la législation locales, et il ou elle est une personne qui a été formée pour les problèmes relatifs au travail électrique sur les climatiseurs fabriqués par Toshiba Carrier Corporation ou, alternativement, il ou elle a reçu des consignes dans de tels domaines par une ou des personnes qui ont été formées et possèdent, par conséquent, les connaissances relatives à ce travail. • La personne d’entretien qualifiée qui est autorisée à manipuler du fluide frigorigène et à réaliser un travail de raccordement compris dans l’installation, la réparation, le déplacement et l’enlèvement possède les qualifications nécessaires à cette manipulation de fluide frigorigène et de ce travail de raccordement conformément aux réglementations et à la législation locales, et il ou elle est une personne qui a été formée pour les problèmes relatifs à la manipulation de fluide frigorigène et de travail de raccordement sur les climatiseurs fabriqués par Toshiba Carrier Corporation ou, alternativement, il ou elle a reçu des consignes dans de tels domaines par une ou des personnes qui ont été formées et possèdent, par conséquent, les connaissances relatives à ce travail. • La personne d’entretien qualifiée qui est autorisée à travailler en hauteur a été formé aux domaines relatifs au travail en hauteur avec les climatiseurs fabriqués par Toshiba Carrier Corporation ou, alternativement, il ou elle a reçu des consignes dans de tels domaines par un ou des personnes qui ont été formées et possèdent, par conséquent, toutes les connaissances requises pour ce travail. Définition de l’équipement de protection Lorsque le climatiseur doit être transporté, installé, entretenu, réparé ou enlevé, portez des gants de protection et des vêtements de travail de “sécurité”. En plus de cette tenue de protection normale, portez la tenue de protection décrite ci-dessous lorsque vous entreprenez les travaux spéciaux détaillés dans le tableau suivant. Ne pas porter la tenue de protection adéquate est dangereux car vous serez plus susceptible d’être blessé, brûlé, de subir un choc électrique ou d’autres blessures. Travaux entrepris Equipement de protection porté Tous types de travaux Gants de protection Vêtement de travail de “Sécurité” Travaux liés à l’électricité Gants pour fournir une protection contre les décharges électriques et la chaleur Chaussures isolantes Vêtement protégeant d’un choc électrique Travail effectué en hauteur (50 cm minimum) Casques utilisés dans l’industrie Transport d’objets lourds Chaussures avec des bouts renforcés de protection Réparation de l’unité extérieure Gants pour fournir une protection contre les décharges électriques et la chaleur 10-FR +00EH99884801-2_01EN.book Page 6 Monday, January 28, 2013 7:54 PM 1 Indications d’avertissement relatives au climatiseur Indication d’avertissement WARNING ELECTRICAL SHOCK HAZARD Disconnect all remote electric power supplies before servicing. WARNING Moving parts. Do not operate unit with grille removed. Stop the unit before the servicing. CAUTION High temperature parts. You might get burned when removing this panel. CAUTION Do not touch the aluminum fins of the unit. Doing so may result in injury. CAUTION BURST HAZARD Open the service valves before the operation, otherwise there might be the burst. Précautions de sécurité Le fabricant ne peut être tenu responsable pour tout dommage causé par le non respect des instructions et descriptions de ce manuel. Description AVERTISSEMENT AVERTISSEMENT Généralités RISQUE DE DECHARGE ELECTRIQUE Débranchez toutes les alimentations électriques distantes avant l’entretien. • Avant d’installer le climatiseur, lisez attentivement le Manuel d’installation et suivez les instructions pour installer le climatiseur. • Seul un installateur qualifié ou une personne d’entretien est autorisé à procéder à l’installation. Une installation inadéquate peut se solder par une fuite d’eau, une électrocution ou un incendie. • N’utilisez aucun autre réfrigérant que celui spécifié pour tout rajout ou remplacement. Sinon, une haute pression anormale pourrait être générée dans le circuit de réfrigération, qui pourrait entraîner une panne ou une explosion du produit ou même des blessures corporelles. • Avant d’ouvrir la grille d’entrée d’air de l’unité intérieure ou du panneau de service de l’unité extérieure, réglez le disjoncteur sur la position OFF. Ne pas régler le disjoncteur sur la position OFF peut donner lieu à des chocs électriques par le biais d’un contact avec les pièces intérieures. Seul un installateur qualifié(*1) ou une personne d’entretien qualifiée(*1) est autorisé à enlever la grille d’entrée d’air de l’unité intérieure ou le panneau de service de l’unité extérieure et à effectuer le travail requis. • Avant de procéder à l’installation, à l’entretien, à la réparation ou à la dépose, veuillez régler le coupe-circuit en position OFF. Dans le cas contraire, cela peut entraîner des chocs électriques. • Placez un panneau indicateur “Travail en cours” à proximité du coupe-circuit pendant l’installation, l’entretien, la réparation ou la dépose. Un danger de choc électrique est possible si le coupe-circuit est réglé sur ON par erreur. • Seul un installateur qualifié(*1) ou une personne d’entretien qualifiée(*1) est autorisé à entreprendre un travail en hauteur à l’aide d’un pied de 50 cm minimum pour déposer la grille d’entrée d’air de l’unité intérieure pour entreprendre le travail. • Portez des gants de protection ainsi que des vêtements de travail de sécurité pendant l’installation, l’entretien et la dépose. • Ne touchez pas la palme en aluminium de l’unité. Vous risquez de vous blesser dans le cas contraire. Si vous devez toucher la palme pour une raison ou une autre, mettez d’abord des gants de protection et des vêtements de travail de sécurité, ensuite, procédez à l’opération. • Ne grimpez pas ou ne placez pas d’objets sur le dessus de l’unité extérieure. Vous ou les objets pourraient tomber de l’unité extérieure et ainsi vous blesser. • Lors de la réalisation d’un travail en hauteur, utilisez une échelle conforme à la norme ISO 14122 et suivez la procédure associée aux instructions de l’échelle. Portez également un casque de protection pour une utilisation dans l’industrie comme tenue de protection pour entreprendre le travail. • Avant le nettoyage du filtre ou d’autres pièces de l’unité extérieure, réglez le coupe-circuit sur OFF sans faute, et placez un panneau indicateur “Travail en cours” à proximité du coupe-circuit avec de commencer le travail. • Avant de travailler en hauteur et d’exécuter la tâche demandée, signalez votre présence pour que personne n’approche de la zone concernée. Des pièces et d’autres objets risquent de tomber du haut, pouvant blesser une personne se trouvant en dessous. Durant votre intervention, portez un casque pour vous protéger des éventuelles chutes d’objets. • Le fluide frigorigène utilisé par ce climatiseur est le R410A. • Le climatiseur doit être transporté dans des conditions stables. Si une pièce était endommagée, contactez le revendeur. • Lorsque le climatiseur doit être déplacé manuellement, prévoyez deux personnes ou plus pour son transport. • Ne déplacez ni ne réparez l’unité vous-même. L’intérieur de l’unité est sous haute tension. Vous risqueriez un choc électrique en enlevant le couvercle et l’unité principale. AVERTISSEMENT Pièces mobiles. Ne faites pas fonctionner l’unité avec la grille déposée. Arrêtez l’unité avant l’entretien. PRÉCAUTION Pièces à haute température. Vous pourriez vous brûler en déposant ce panneau. PRÉCAUTION Ne touchez pas les palmes en aluminium de l’unité. Vous pourriez vous blesser. Sélection du lieu d’installation PRÉCAUTION • Si le climatiseur est installé dans une petite pièce, prenez les mesures qui s’imposent pour que, en cas de fuite, la teneur en réfrigérant ne dépasse pas le seuil critique. • N’installez pas cet appareil dans un endroit où des fuites de gaz inflammable sont possibles. En cas de fuite du gaz et d’accumulation à proximité du climatiseur, un incendie peut se déclarer. • Lors du transport du climatiseur, portez des chaussures à coquilles de protection supplémentaires. • Lors du transport du climatiseur, n’agrippez pas les bandes du carton d’emballage. Vous risquez de vous blesser si les bandes se brisent. • Installez l’unité intérieure à au moins 2,5 m au dessus du niveau du sol, dans le cas contraire, les utilisateurs peuvent se blesser ou recevoir des chocs électriques s’ils frappent de leurs doigts ou d’autres objets dans l’unité intérieure alors que le climatiseur fonctionne. • Ne placez aucun appareil à combustion dans un endroit exposé directement au souffle du climatiseur, faute de quoi sa combustion risquerait d’être défectueuse. RISQUE D’EXPLOSION Ouvrez les soupapes de service avant l’opération, sinon un éclatement pourrait se produire. Installation • Lorsque l’unité intérieure doit être suspendue, les boulons (M10 ou W3/8) et les écrous (M10 ou W3/8) de suspension désignés doivent être utilisés. • Installez soigneusement le climatiseur sur une base capable de le supporter. Si l’endroit n’est pas assez résistant, l’unité peut tomber et provoquer des blessures. • Suivez les instructions du Manuel d’installation pour installer le climatiseur. Tout manquement à ces instructions peut entraîner une chute ou un basculement du produit ou encore générer des bruits, vibrations, fuites d’eau ou autres problèmes. 11-FR –6– 12-FR +00EH99884801-2_01EN.book Page 7 Monday, January 28, 2013 7:54 PM –7– • Procédez à l’installation indiquée en mettant l’équipement à l’abri d’un éventuel tremblement de terre et des vents forts. Si le climatiseur n’est pas correctement installé, l’unité peut basculer ou tomber et ainsi provoquer un accident. • Si le gaz réfrigérant a fui durant l’installation, aérez immédiatement la pièce. Si le gaz réfrigérant qui a fui entre en contact avec le feu, un gaz nocif peut se dégager. • Utilisez un chariot élévateur pour porter le climatiseur. Pour le monter, utilisez un treuil ou un monte-charge. • La gaine d’aspiration doit mesurer plus de 850 mm. • Le port du casque est obligatoire pour protéger votre tête des éventuelles chutes d’objets. Tout particulièrement, lorsque vous travaillez sous un regard, le port du casque est obligatoire pour protéger votre tête des éventuelles chutes d’objets à l’ouverture. • L’unité est accessible depuis le panneau de service indiqué sur le schéma. Tuyaux de réfrigérant • Fixez solidement le tuyau de réfrigérant pendant l’installation, avant de faire fonctionner le climatiseur. Si le compresseur est utilisé avec la vanne ouverte et sans que le tuyau de réfrigérant ne soit connecté, le compresseur aspire l’air et le circuit de réfrigération est alors en surpression. Dans ce cas, les tuyaux risquent de blesser quelqu’un. • Serrez l’écrou évasé avec une clé dynamométrique de la manière spécifiée. Si vous appliquez un couple excessif, l’écrou risque, après un certain temps, de se casser et de provoquer une fuite de réfrigérant. • Après l’installation, assurez-vous que le gaz réfrigérant ne fuit pas. Si le gaz réfrigérant fuit dans la pièce et s’écoule à proximité d’une source inflammable, telle qu’une cuisinière, un gaz nocif peut se dégager. • Lorsque le climatiseur a été installé ou déplacé, suivez les instructions du Manuel d’installation et purgez la totalité de l’air de sorte qu’aucun gaz autre que le fluide frigorigène ne soit mélangé dans le circuit de réfrigération. Ne pas purger complètement l’air peut entraîner un dysfonctionnement du climatiseur. • De l’azote gazeux doit être utilisé pour le test d’étanchéité à l’air. • Le tuyau de remplissage doit être raccordé de telle manière qu’il ne soit pas lâche. Raccordement électrique • Seul un installateur qualifié(*1) ou une personne d’entretien qualifiée(*1) est autorisé à réaliser le travail électrique sur le climatiseur. En aucun cas, ce travail doit être effectué par une personne non qualifiée étant donné que si le travail n’est pas correctement effectué, des chocs électriques et/ou des fuites électriques peuvent survenir. • Pour raccorder les fils électriques, réparer un dispositif électrique ou entreprendre d’autres tâches du même type, portez des gants de protection pour électriciens qui protégeront vos mains contre les brûlures, des chaussures isolantes et des vêtements de protection contre les chocs électriques. Ne pas porter cette tenue de protection peut entraîner des chocs électriques. • Utilisez un câblage respectant les spécifications du Manuel d’installation et les dispositions des réglementations et de la législation locales. L’utilisation d’un câblage n’étant pas conforme aux spécifications peut donner lieu à des chocs électriques, une dispersion électrique, de la fumée et/ou un incendie. • Branchez le fil de mise à la terre. (Mise à la terre) Toute mise à la terre incomplète provoque une électrocution. • Ne raccordez pas les fils de mise à la terre aux tuyaux de gaz, aux canalisations d’eau, au paratonnerre ou à la prise de terre du téléphone. • Après avoir terminé le travail de réparation ou de déplacement, assurez-vous que le fil de terre est correctement raccordé. • Installez un coupe-circuit respectant les spécifications du manuel d’installation et les dispositions des réglementations et de la législation locales. • Installez le coupe-circuit là où il peut facilement être accessible par l’agent. • Lors de l’installation du coupe-circuit à l’extérieur, installez-en un qui soit conçu pour être utilisé à l’extérieur. • Le câble d’alimentation ne doit en aucun cas être prolongé. Des problèmes de raccordement dans des endroits où le câble présente une rallonge peuvent entraîner de la fumée et/ou un incendie. • Le travail de câblage électrique doit être conduit conformément à la législation et à la réglementation locales et au manuel d’installation. Dans le cas contraire, une électrocution ou un court-circuit peut survenir. Essai de fonctionnement • Avant de faire fonctionner le climatiseur après avoir terminé le travail, assurez-vous que le couvercle du boîtier des pièces électriques de l’unité intérieure et du panneau de service de l’unité extérieure sont fermés, ensuite, réglez le coupe-circuit sur la position ON. Vous pouvez recevoir un choc électrique si l’alimentation est activée sans avoir d’abord effectuer ces vérifications. • En cas de soucis (affichage d’une erreur, odeur de brûlé, bruits anormaux, incapacité du climatiseur à générer de l’air chaud ou froid ou fuite d’eau), ne touchez pas le climatiseur. Mettez le disjoncteur en position OFF et contactez un réparateur agréé. Prenez des mesures pour garantir que l’alimentation ne sera pas branchée (en indiquant “hors service” près du disjoncteur, par exemple) jusqu’à ce que la personne d’entretien qualifiée arrive. Continuer à utiliser le climatiseur alors qu’il présente un problème peut entraîner des problèmes mécaniques ou donner lieu à des chocs électriques et autres pannes. • Une fois le travail terminé, utilisez un contrôleur d’isolement (mégohmmètre de 500V) afin de vérifier que la résistance est de 1 MΩ minimum entre la section de charge et la section métallique sans charge (Section terre). Si la valeur de résistance est faible, une catastrophe telle qu’une fuite ou un choc électrique se produit sur le côté utilisateur. • A l’issue du travail d’installation, vérifiez qu’il n’y a pas de fuites de fluide frigorigène et vérifiez la résistance d’isolation ainsi que l’évacuation d’eau. Ensuite, effectuez un essai de fonctionnement afin de vous assurer que le climatiseur fonctionne correctement. 13-FR Explications données à l’utilisateur • A l’issue du travail d’installation, dites à l’utilisateur où se trouve le coupe-circuit. Si l’utilisateur ne sait pas où se trouve le coupe-circuit, il ou elle ne sera pas capable de le désactiver au cas où un problème surviendrait au niveau du climatiseur. • Si la grille du ventilateur est endommagée, n’approchez pas de l’unité extérieure et réglez le disjoncteur sur la position OFF, ensuite contactez une personne d’entretien qualifiée(*1) pour effectuer les réparations. Ne réglez pas le disjoncteur en position ON jusqu’à ce que les réparations soient terminées. • Après le travail d’installation, reportez-vous au Mode d’emploi pour expliquer au client comment utiliser l’unité et effectuer son entretien. Réinstallation • Seul un installateur qualifié(*1) ou une personne d’entretien qualifiée(*1) est autorisé à déplacer le climatiseur. Déplacer le climatiseur par une personne non-qualifiée représente un danger étant donné qu’un incendie, un choc électrique, des blessures, des fuites d’eau, des parasites et/ou des vibrations peuvent en résulter. • Lors de la réalisation du travail de pompage, coupez le compresseur avant de débrancher le tuyau de réfrigérant. Débrancher le tuyau de réfrigérant alors que la vanne d’entretien est restée ouverte et que le compresseur fonctionne encore peut entraîner une aspiration de l’air ou d’autre gaz, faisant augmenter la pression à l’intérieure du circuit de réfrigération à un niveau anormalement élevé, et pouvant donner lieu à un éclatement, un dommage ou d’autres problèmes. PRÉCAUTION Installation du climatiseur utilisant le nouveau réfrigérant • CE CLIMATISEUR UTILISE LE NOUVEAU REFRIGERANT HFC (R410A) QUI NE DETRUIT PAS LA COUCHE D’OZONE. • Le réfrigérant R410A se distingue par son absorption aisée de l’eau, de la membrane oxydante ou de l’huile ainsi que par sa pression, qui est d’environ 1,6 fois celle du réfrigérant R22. Outre l’utilisation du nouveau réfrigérant, l’huile réfrigérante a elle aussi été remplacée. Par conséquent, durant l’installation, assurez-vous que l’eau, la poussière, le réfrigérant précédent ou l’huile réfrigérante n’entrent pas dans le circuit de réfrigération. • Pour éviter de remplir du réfrigérant et de l’huile réfrigérante inappropriés, la taille des sections de raccordement de l’orifice de remplissage de l’unité principale et les outils d’installation sont différents de ceux qui sont utilisés pour le réfrigérant traditionnel. • En conséquence, les outils exclusifs sont requis pour le nouveau réfrigérant (R410A). • Quant aux tuyaux de raccordement, utilisez des tuyaux neufs et propres conçus pour le R410A et veillez à ce que l’eau ou la poussière n’y entrent pas. Pour déconnecter l’appareil du secteur. • Cet appareil doit être connecté au secteur via un interrupteur ayant une séparation de contact d’au moins 3 mm. Vous devez utiliser un fusible d’installation (tous les types de fusible peuvent être utilisés) pour la ligne d’alimentation de ce climatiseur. (*1) Reportez-vous à “Définition d’un Installateur qualifié ou Technicien d’entretien qualifié”. 14-FR +00EH99884801-2_01EN.book Page 8 Monday, January 28, 2013 7:54 PM Vielen Dank, dass Sie sich für ein Klimagerät von Toshiba entschieden haben. Bitte lesen Sie diese Anleitung, die wichtige Informationen gemäß der „Maschinenrichtlinie“ (Richtlinie 2006/42/ EG) enthält, aufmerksam und klären Sie eventuelle Fragen. Geben Sie nach Abschluss der Installation dieses Installationshandbuch und die Bedienungsanleitung dem Benutzer und bitten Sie ihn, diese zu Informationszwecken an einem sicheren Ort aufzubewahren. Definitionen zur Schutzkleidung Bei Transport, Einbau, Wartung, Reparatur und Ausbau des Klimageräts sind Schutzhandschuhe und Sicherheitsarbeitskleidung zu tragen. Neben dieser normalen Schutzausrüstung wird für die in der folgenden Tabelle aufgeführten Spezialarbeiten die jeweils genannte Schutzausrüstung benötigt. Wer auf Schutzausrüstung verzichtet, geht ein hohes Risiko ein, denn die Ausrüstung schützt vor Verletzungen, Verbrennungen, Stromschlag und anderen Gefahren. Allgemeine Bezeichnung: Klimaanlage Arbeitsaufgabe Definition der Bezeichnungen „Qualifizierter Installateur“ oder „Qualifizierter Servicetechniker“ Die Klimaanlage muss von einem qualifizierten Installateur oder einem qualifizierten Servicetechniker installiert, gewartet, repariert und entsorgt werden. Wenn eine dieser Aufgaben erledigt werden muss, bitten Sie einen qualifizierten Installateur oder einen qualifizierten Servicetechniker, diese für Sie auszuführen. Ein qualifizierter Installateur oder ein qualifizierter Servicetechniker ist ein Auftragnehmer, der über die Qualifikationen und das Fachwissen verfügt, die in der folgenden Tabelle genannt sind. Auftragnehmer 15-DE Qualifikationen und Fachwissen, über welche der Auftragnehmer verfügen muss Qualifizierter Installateur • Der Installationsfachmann ist eine Person, die Klimageräte der Toshiba Carrier Corporation einbaut, wartet, umzieht und ausbaut. Die Person ist im Einbau und in der Wartung sowie im Umzug und Ausbau von Klimageräten der Toshiba Carrier Corporation geschult oder wurde von einer geschulten Person oder geschulten Personen unterwiesen und verfügt aufgrund dessen über gründliche Kenntnisse, die sie zur Ausführung dieser Arbeiten befähigen. • Der Installationsfachmann, dem es erlaubt ist, Elektroarbeiten im Zuge des Einbaus, Umzugs oder Ausbaus auszuführen, verfügt über die jeweils gesetzlich vorgeschriebene Qualifikation zur Ausführung von Elektroarbeiten und ist eine Person, die im Zusammenhang mit Elektroarbeiten an Klimageräten der Toshiba Carrier Corporation geschult ist oder in diesem Zusammenhang von einer geschulten Person oder geschulten Personen unterwiesen wurde, so dass sie über gründliche Kenntnisse verfügt, die sie zur Ausführung dieser Arbeiten befähigen. • Der Installationsfachmann, dem es erlaubt ist, kältemittel- oder rohrtechnische Arbeiten im Zuge des Einbaus, Umzugs oder Ausbaus auszuführen, verfügt über die jeweils gesetzlich vorgeschriebene Qualifikation zur Ausführung von kältemittel- und rohrtechnischen Arbeiten und ist eine Person, die im Zusammenhang mit kältemittel- und rohrtechnischen Arbeiten an Klimageräten der Toshiba Carrier Corporation geschult ist oder in diesem Zusammenhang von einer geschulten Person oder geschulten Personen unterwiesen wurde, so dass sie über gründliche Kenntnisse verfügt, die sie zur Ausführung dieser Arbeiten befähigen. • Der Installationsfachmann, dem es erlaubt ist, Arbeiten in der Höhe auszuführen, ist im Zusammenhang mit Arbeiten in der Höhe an Klimageräten der Toshiba Carrier Corporation geschult oder wurde in diesem Zusammenhang von einer geschulten Person oder geschulten Personen unterwiesen und verfügt aufgrund dessen über gründliche Kenntnisse, die ihn zur Ausführung dieser Arbeiten befähigen. Qualifizierter Servicetechniker • Der Kundendienstfachmann ist eine Person, die Klimageräte der Toshiba Carrier Corporation einbaut, repariert, wartet, umzieht und ausbaut. Die Person ist im Einbau, in der Reparatur und in der Wartung sowie im Umzug und Ausbau von Klimageräten der Toshiba Carrier Corporation geschult oder wurde von einer geschulten Person oder geschulten Personen unterwiesen und verfügt aufgrund dessen über gründliche Kenntnisse, die sie zur Ausführung dieser Arbeiten befähigen. • Der Kundendienstfachmann, dem es erlaubt ist, Elektroarbeiten im Zuge des Einbaus, der Reparatur, des Umzugs oder Ausbaus auszuführen, verfügt über die jeweils gesetzlich vorgeschriebene Qualifikation zur Ausführung von Elektroarbeiten und ist eine Person, die im Zusammenhang mit Elektroarbeiten an Klimageräten der Toshiba Carrier Corporation geschult ist oder in diesem Zusammenhang von einer geschulten Person oder geschulten Personen unterwiesen wurde, so dass sie über gründliche Kenntnisse verfügt, die sie zur Ausführung dieser Arbeiten befähigen. • Der Kundendienstfachmann, dem es erlaubt ist, kältemittel- oder rohrtechnische Arbeiten im Zuge des Einbaus, der Reparatur, des Umzugs oder Ausbaus auszuführen, verfügt über die jeweils gesetzlich vorgeschriebene Qualifikation zur Ausführung von kältemittel- und rohrtechnischen Arbeiten und ist eine Person, die im Zusammenhang mit kältemittel- und rohrtechnischen Arbeiten an Klimageräten der Toshiba Carrier Corporation geschult ist oder in diesem Zusammenhang von einer geschulten Person oder geschulten Personen unterwiesen wurde, so dass sie über gründliche Kenntnisse verfügt, die sie zur Ausführung dieser Arbeiten befähigen. • Der Kundendienstfachmann, dem es erlaubt ist, Arbeiten in der Höhe auszuführen, ist im Zusammenhang mit Arbeiten in der Höhe an Klimageräten der Toshiba Carrier Corporation geschult oder wurde in diesem Zusammenhang von einer geschulten Person oder geschulten Personen unterwiesen und verfügt aufgrund dessen über gründliche Kenntnisse, die ihn zur Ausführung dieser Arbeiten befähigen. –8– Zu tragende Schutzkleidung Alle Arten von Arbeiten Schutzhandschuhe Sicherheitsarbeitskleidung Elektroarbeiten Isolierhandschuhe zum Schutz vor Stromschlägen und hohen Temperaturen Isolierschuhe Arbeitskleidung, die Schutz vor Elektroschock bietet Arbeiten in der Höhe (50 cm und höher) Industrie-Schutzhelme Transport schwerer Gegenstände Schuhe mit Zehenschutzkappen Reparatur des Außengeräts Isolierhandschuhe zum Schutz vor Stromschlägen und hohen Temperaturen 16-DE +00EH99884801-2_01EN.book Page 9 Monday, January 28, 2013 7:54 PM –9– 1 Warnanzeigen an der Klimaanlage Warnanzeige WARNING ELECTRICAL SHOCK HAZARD Disconnect all remote electric power supplies before servicing. WARNING Moving parts. Do not operate unit with grille removed. Stop the unit before the servicing. CAUTION High temperature parts. You might get burned when removing this panel. CAUTION Do not touch the aluminum fins of the unit. Doing so may result in injury. CAUTION BURST HAZARD Open the service valves before the operation, otherwise there might be the burst. Beschreibung WARNUNG GEFAHR EINES ELEKTRISCHEN SCHLAGS Trennen Sie alle fernen Stromversorgungsquellen vom Netz, bevor Sie Wartungsarbeiten ausführen. WARNUNG Bewegliche Teile. Bedienen Sie nicht das Gerät, wenn das Gitter entfernt wurde. Stoppen Sie das Gerät, bevor Sie es warten. VORSICHT Teile mit hohen Temperaturen. Es besteht die Gefahr, dass Sie sich verbrennen, wenn Sie diese Abdeckung entfernen. VORSICHT Die Aluminiumlamellen des Geräts nicht berühren. Dies kann zu Verletzungen führen. VORSICHT EXPLOSIONSGEFAHR! Öffnen Sie vor dem Arbeitsgang die Versorgungsventile, da es anderenfalls zu einer Explosion kommen kann. Vorsichtsmaßnahmen für die Sicherheit Der Hersteller haftet nicht für Schäden, die durch ein Missachten der in diesem Handbuch enthaltenen Hinweise verursacht werden. WARNUNG Allgemeines • Bevor Sie mit der Installation des Klimageräts beginnen, lesen Sie das Installationshandbuch sorgfältig durch und befolgen Sie die darin enthaltenen Anweisungen zum Installieren des Klimageräts. • Die Installationsarbeiten dürfen ausschließlich von qualifiziertem Installations- oder Servicepersonal durchgeführt werden. Durch eine nicht fachgerechte Installation kann es zu Wasserschäden, Stromschlägen oder sogar zu Bränden kommen. • Verwenden Sie zum Auffüllen oder Austauschen des Kühlmittels ausschließlich das für dieses Gerät spezifizierte Kühlmittel. Bei Missachtung dieses Hinweises können im Kühlkreislauf ungewöhnlich hohe Drücke entstehen, was zum Ausfall oder zur Explosion des Geräts sowie zu Personenschäden führen kann. • Bevor Sie das Einlassgitter des Innengerätes oder das Wartungspaneel des Außengeräts öffnen, stellen Sie den Schutzschalter auf die Position OFF (aus). Sollten Sie diesen Hinweis nicht beachten, kann es durch Kontakt mit den Innenteilen zu einem Stromschlag kommen. Nur ein qualifizierter Installateur(*1) oder ein qualifizierter Servicetechniker(*1) darf das Einlassgitter des Innengeräts oder das Wartungspaneel des Außengeräts entfernen und die erforderlichen Arbeiten ausführen. • Bevor Installations-, Wartungs-, Reparatur- oder Entsorgungsarbeiten ausgeführt werden, stellen Sie unbedingt den Schutzschalter auf die Position OFF (aus). Anderenfalls kann es zu elektrischen Schlägen kommen. • Befestigen Sie ein Schild „Arbeiten in Ausführung“ neben dem Schutzschalter, während die Installations-, Wartungs-, Reparaturoder Entsorgungsarbeiten ausgeführt werden. Es besteht die Gefahr von Stromschlägen, wenn der Schutzschalter aus Versehen auf ON (ein) gestellt wird. • Nur ein qualifizierter Installateur(*1) oder ein qualifizierter Servicetechniker(*1) darf Höhenarbeiten unter Verwendung eines 50 cm hohen oder noch höheren Ständers ausführen oder das Einlassgitter des Innengeräts entfernen und die erforderlichen Arbeiten ausführen. • Tragen Sie bei Installation, Wartung und Entsorgung Schutzhandschuhe und Arbeitsschutzbekleidung. • Berühren Sie nicht die Aluminiumrippen am Gerät. Anderenfalls können Sie sich verletzen. Wenn die Rippen aus einem bestimmten Grund berührt werden muss, ziehen Sie zuerst Schutzhandschuhe und Arbeitsschutzbekleidung an, bevor Sie diese Arbeiten ausführen. • Klettern Sie nicht auf das Außengerät, und stellen Sie keine Gegenstände darauf ab. Anderenfalls können Sie abstürzen, oder Gegenstände können herunterfallen. In beiden Fällen besteht Verletzungsgefahr. • Benutzen Sie bei Arbeiten in der Höhe eine der Norm ISO 14122 entsprechende Leiter und befolgen Sie die Anweisungen in der Bedienungsanleitung zur Leiter. Tragen Sie als Schutzkleidung beim Ausführen der Arbeiten außerdem einen IndustrieSchutzhelm. • Schalten Sie den Hauptschalter in die Stellung OFF (aus) und vergewissern Sie sich, dass das Ausschalten fehlerfrei funktioniert hat. Platzieren Sie in der Nähe des Hauptschalters ein Schild mit der Aufschrift „Arbeiten in Ausführung“, bevor Sie mit der Arbeit beginnen. • Stellen Sie vor Beginn der Arbeiten in der Höhe ein Schild so auf, dass niemand den Arbeitsbereich betritt. Teile und andere Gegenstände können von oben herunterfallen und u. U. unten befindliche Personen verletzen. Tragen Sie während der Arbeit einen Helm zum Schutz vor herabfallenden Objekten. • Diese Klimaanlage verwendet das Kühlmittel R410A. • Das Klimagerät muss gut gesichert transportiert werden. Wenn das Produkt oder Teile des Produkts beschädigt sind, setzen Sie sich mit Ihrem Fachhändler in Verbindung. • Wenn das Klimagerät per Hand transportiert werden muss, tragen Sie es mindestens zu zweit oder mit mehr Personen. • Versuchen Sie unter keinen Umständen, eines der Geräte selbst auszubauen bzw. instand zu setzen. Im Geräteinneren liegt Hochspannung an. Beim Ausbau von Abdeckung und Hauptgerät besteht elektrische Berührungsgefahr. Auswahl des Installationsortes • Wenn Sie das Klimagerät in einem kleinen Raum installieren, treffen Sie entsprechende Vorkehrungen, damit es in dem Raum bei einem Leck nicht zu einer übermäßigen Konzentration von Kühlmitteldämpfen kommt. • Installieren Sie das Klimagerät nicht an einem Ort, an dem entzündliche Gase auftreten können. Wenn entzündliche Gase austreten und sich im Bereich des Klimageräts ansammeln, kann es zum Entzünden der Gase und folglich zu einem Brand kommen. • Tragen Sie zum Transportieren des Klimageräts Arbeitsschutzschuhe mit Stahlkappen. • Benutzen Sie zum Tragen des Klimageräts nicht die um den Verpackungskarton verlaufenden Bänder. Anderenfalls können Sie sich verletzen, wenn die Bänder reißen. • Installieren Sie das Innengerät mindestens 2,5 m über dem Boden, da sich Personen anderenfalls verletzen oder Stromschläge erleiden können, falls sie ihre Finger oder andere Gegenstände in das Innengerät stecken, während die Klimaanlage läuft. • Stellen Sie keine Verbrennungsvorrichtung an Orten auf, wo sie direkt dem Wind der Klimaanlage ausgesetzt ist, da anderenfalls eine unvollständige Verbrennung die Folge ist. Installation • Wenn das Innengerät aufgehängt werden soll, müssen die angegebenen Hängeschrauben (M10 oder W3/8) und Muttern (M10 oder W3/8) verwendet werden. • Installieren Sie das Klimagerät nur an einem Ort, der stabil genug ist, um das Gewicht des Gerätes aufzunehmen. Ist der Boden nicht widerstandsfähig genug, kann das Gerät umkippen und Verletzungen verursachen. 17-DE 18-DE +00EH99884801-2_01EN.book Page 10 Monday, January 28, 2013 7:54 PM Dem Benutzer mitzuteilende Informationen • Installieren Sie die Klimaanlage entsprechend den Anweisungen im Installationshandbuch. Ein Missachten dieser Anweisung kann zum Herabfallen oder Umkippen des Geräts oder zu erhöhter Geräuschentwicklung, Vibration, Wasserleckage und anderen Problemen führen. • Falls Sie in einem erdbeben- oder sturmgefährdeten Gebiet leben, achten Sie bei der Installation auf eine entsprechende Auslegung der Befestigung. Ist das Klimagerät nicht ordnungsgemäß installiert, kann es umkippen oder herabstürzen und so Verletzungen verursachen. • Ist während der Installation Kühlmittel ausgetreten, lüften Sie den Raum umgehend. Wenn austretende Kühlmitteldämpfe mit Feuer in Berührung kommen, können giftige Gase entstehen. • Transportieren Sie die Klimageräte mit einem Gabelstapler zum Installationsort und verwenden Sie zum Installieren eine Seilwinde oder eine Hebevorrichtung. • Der Ansaugkanal muss länger als 850 mm sein. • Tragen Sie einen Helm, um Ihren Kopf vor herabfallenden Objekten zu schützen. Tragen Sie insbesondere einen Helm, wenn Sie unter einer Wartungsöffnung arbeiten, um Ihren Kopf vor herabfallenden Objekten aus der Öffnung zu schützen. • Der Zugang zum Klimagerät wird über die in der Abbildung dargestellte Wartungsöffnung ermöglicht. • Teilen Sie dem Benutzer nach Abschluss der Installationsarbeiten mit, wo sich der Schutzschalter befindet. Sollte der Benutzer nicht wissen, wo sich der Schutzschalter befindet, kann er diesen nicht ausschalten, falls Probleme mit der Klimaanlage auftreten. • Wenn das Lüftergitter beschädigt ist, halten Sie sich von der Außeneinheit fern, schalten Sie den Hauptschalter in die Position OFF (aus) und wenden Sie sich an einen qualifizierten Installateur(*1), der die Reparaturarbeiten ausführt. Stellen Sie den Schutzschalter erst wieder auf die Position ON (ein), nachdem die Reparaturen abgeschlossen wurden. • Nach Abschluss der Installationsarbeiten erläutern Sie dem Kunden die Verwendung und Wartung des Geräts entsprechend dem Benutzerhandbuch. Umsetzung • Nur ein qualifizierter Installateur(*1) oder ein qualifizierter Servicetechniker(*1) darf die Klimaanlage umsetzen. Es ist gefährlich, wenn die Klimaanlage durch einen nicht qualifizierten Benutzer umgesetzt wird, da es zu Bränden, elektrischen Schlägen, Verletzungen, Wasseraustritten, Geräuschen und/oder Vibrationen kommen kann. • Schließen Sie beim Durchführen der Abpumparbeiten zuerst den Kompressor, bevor Sie das Kühlmittelrohr trennen. Wenn die Kältemittelleitung bei offenem Wartungsventil abgetrennt wird und der Kompressor noch läuft, werden Luft oder andere Gase angesaugt. Der Druck im Kältemittelkreislauf steigt, und es besteht die Gefahr eines Leitungsbruchs und dementsprechend die Gefahr von Verletzungen und anderen Störungen. Kühlmittelleitungen • Überprüfen Sie die sichere Installation der Kühlmittelleitung, bevor Sie das Klimagerät in Betrieb nehmen. Falls der Kompressor bei geöffnetem Ventil und ohne Kühlmittelrohr betrieben wird, saugt er Luft ein, und der Gasdruck im Kühlkreislauf wird extrem hoch, was zu Verletzungen führen kann. • Ziehen Sie die Bördelmutter mit einem Drehmomentschlüssel wie angegeben fest. Übermäßiges Festziehen der Bördelmutter kann nach längerer Zeit zu Rissen in der Bördelmutter führen, wodurch Kühlmittel auslaufen kann. • Vergewissern Sie sich daher nach der Installation noch einmal, dass kein Kühlmittel austreten kann. Wenn Kühlmittelgase austreten und in einen Raum mit einem Herd oder Ofen gelangen, kann es bei einer offenen Flamme zur Bildung von gesundheitsschädlichen Gasen kommen. • Wenn die Klimaanlage installiert oder umgesetzt wurde, führen Sie gemäß den Anweisungen im Installationshandbuch eine vollständige Luftspülung aus, so dass lediglich das Kühlmittel im Kühlkreislauf gemischt wird. Wird keine vollständige Luftspülung ausgeführt, können Fehlfunktionen der Klimaanlage auftreten. • Für die Luftdichteprüfung muss Stickstoff verwendet werden. • Der Zuleitungsschlauch muss so angeschlossen werden, dass er nicht durchhängt. VORSICHT Installation von Klimageräten mit modernen Kühlmitteln • DIESES KLIMAGERÄT ARBEITET MIT DEM NEUEN HFC KÄLTEMITTEL (R410A) WELCHES DIE OZONSCHICHT NICHT ANGREIFT. Elektrische Verdrahtung • R410A-Kühlmittel absorbiert Wasser sehr schnell, kann Membrane oxidieren und ist empfindlich gegen Öl. Der Druck von R410A liegt etwa 1,6-mal höher als der von R22-Kühlmittel. Gleichzeitig mit dem Einsatz des neuen Kühlmittels wurde auch das bisher verwendete Kühlmaschinenöl gewechselt. Stellen Sie daher sicher, dass bei den Installationsarbeiten kein Wasser oder Staub und kein altes Kühlmittel oder Kühlmaschinenöl in den Kühlmittelkreislauf gelangt. • Nur ein qualifizierter Installateur(*1) oder ein qualifizierter Servicetechniker(*1) darf Elektroarbeiten an der Klimaanlage ausführen. Unter keinen Umständen dürfen diese Arbeiten von unqualifizierten Mitarbeitern ausgeführt werden, da eine nicht sachgemäße Ausführung der Arbeit zu elektrischen Schlägen und/oder Kriechströmen führen kann. • Tragen Sie zum Anschließen der elektrischen Leitungen, zum Reparieren von elektrischen Teilen oder bei anderen Elektroarbeiten spezielle Elektriker-Schutzhandschuhe mit Wärmeschutz sowie isolierende Schuhe und Kleidung, um sich vor Stromschlägen zu schützen. Falls keine Schutzkleidung getragen wird, kann es zu elektrischen Schlägen kommen. • Beachten Sie beim Legen von elektrischen Leitungen die Spezifikationen im Installationshandbuch sowie die Bestimmungen der lokalen Gesetze und die Rechtsvorschriften. Bei Verwendung von Kabeln, die die Spezifikationen nicht erfüllen, kann es zu Stromschlägen, Kriechströmen, Rauchentwicklungen und/oder Bränden kommen. • Schließen Sie die Erdungsleitung an. (Erdungsarbeiten) Ohne vorschriftsmäßige Erdung besteht Stromschlaggefahr. • Schließen Sie Erdungsleitungen nicht an Gasrohre, Wasserrohre, Blitzableiter oder Telefon-Erdungsleitungen an. • Prüfen Sie nach Beendigung der Reparatur- oder Umplatzierungsarbeiten, ob die Erdungsleitungen ordnungsgemäß angeschlossen sind. • Installieren Sie einen Schutzschalter, der die Spezifikationen im Installationshandbuch sowie die Bestimmungen der lokalen Gesetze und die Rechtsvorschriften erfüllt. • Bringen Sie den Schutzschalter an einem Ort an, wo er vom Bediener problemlos erreicht werden kann. • Wenn der Schutzschalter im Freien installiert werden soll, verwenden Sie einen Outdoor-Schutzschalter. • Das Netzkabel darf unter keinen Umständen verlängert werden. Bei Problemen an der Verbindungsstelle zur Verlängerung kann Rauch und/oder Feuer entstehen. • Alle elektrischen Arbeiten sind nach geltender Vorschrift und unter Beachtung der Installationsanleitung auszuführen. Es besteht Stromschlag- und Kurzschlussgefahr. • Um zu verhindern, dass falsches Kühlmittel und Kühlmaschinenöl eingefüllt wird, wurde, verglichen mit Systemen, die mit konventionellen Kühlmitteln arbeiten, die Größe der Anschlüsse zur Befüllung der Haupteinheit geändert und komplett neue Installationswerkzeuge konzipiert. • Daher sind für das neue Kühlmittel (R410A) die entsprechenden Spezialwerkzeuge erforderlich. • Verwenden Sie für die Anschlussleitungen ausschließlich neue, saubere Rohre, die eigens für R410A gefertigt wurden, und achten Sie darauf, dass kein Wasser oder Staub eindringt. Trennen des Gerätes von der Hauptstromversorgung. • Das Gerät muss an die Hauptstromversorgung über einen Schalter angeschlossen werden, dessen Kontakte einen Schaltabstand von mind. 3 mm aufweisen. Für die Spannungsversorgungsleitung des Klimageräts muss eine Installationssicherung verwendet werden (alle Typen sind zulässig). Testlauf (*1) Siehe „Definition der Bezeichnungen „Qualifizierter Installateur“ oder „Qualifizierter Servicetechniker““. • Bevor Sie die Klimaanlage nach Abschluss der Arbeiten betreiben, stellen Sie sicher, dass die Abdeckung des Elektrokastens am Innengerät und das Wartungspaneel des Außengeräts geschlossen sind, und stellen Sie den Schutzschalter auf die Position ON (ein). Sie können einen elektrischen Schlag erleiden, falls der Strom eingeschaltet wird, ohne dass Sie vorher diese Prüfungen durchgeführt haben. • Wenn bei dem Klimagerät ein Problem aufgetreten ist (wie eine Fehleranzeige, Brandgeruch, ungewöhnliche Geräusche, Ausfall der Kühl- oder Heizfunktion oder austretendes Wasser), berühren Sie das Klimagerät nicht, schalten Sie den Hauptschalter in die Position OFF (aus)und wenden Sie sich an einen qualifizierten Installateur. Stellen Sie sicher, dass der Strom nicht wieder eingeschaltet wird (indem Sie beispielsweise den Schutzschalter durch „außer Betrieb“ kennzeichnen), bis ein qualifizierter Servicetechniker eintrifft. Wenn Sie das Klimagerät trotz fehlerhaftem Zustand nicht ausschalten, können sich mechanische Probleme verschlimmern bzw. können Stromschläge und andere Schäden auftreten. • Nachdem die Arbeiten abgeschlossen wurden, stellen Sie mit einem Isolationsprüfgerät (500 V-Multimeter) sicher, dass der Widerstand zwischen dem geladenen Teil und dem nichtgeladenen Metallteil (Erdungsbereich) 1 MΩ oder mehr beträgt. Falls der Widerstandswert zu niedrig ist, können an der Benutzerseite Kriechströme oder Stromschläge verursacht werden. • Stellen Sie nach Abschluss der Installationsarbeiten sicher, dass kein Kühlmittel ausläuft, und prüfen Sie Isolierwiderstand sowie Wasserableitung. Führen Sie danach einen Testlauf durch, um sicherzustellen, dass die Klimaanlage ordnungsgemäß funktioniert. 19-DE – 10 – 20-DE +00EH99884801-2_01EN.book Page 11 Monday, January 28, 2013 7:54 PM – 11 – Grazie per aver acquistato questo Toshiba condizionatore d’aria. Si prega di leggere attentamente queste istruzioni perché contengono informazioni importanti sulla conformità alla direttiva “Macchinari” (direttiva 2006/42/CE). Al completamento dell’installazione, consegnare all’utente il presente Manuale d’installazione e il Manuale d’uso e chiedere all’utente di conservarli in un luogo sicuro per eventuali consultazioni future. Denominazione generica: Condizionatore d’aria Definizione di installatore qualificato o tecnico dell’assistenza qualificato Il condizionatore d’aria deve essere installato, sottoposto a manutenzione, riparato e rimosso da un installatore qualificato o da un tecnico dell’assistenza qualificato. Quando deve essere eseguito uno di questi lavori, rivolgersi a un installatore qualificato o a un tecnico dell’assistenza qualificato per svolgerli in propria vece. Un installatore qualificato o un tecnico dell’assistenza qualificato è un agente che dispone delle qualifiche e dell’esperienza descritti nella tabella seguente. Agente Qualifiche ed esperienza di cui deve disporre l’agente • L’installatore qualificato è una persona che installa, effettua la manutenzione, sposta e rimuove i condizionatori d’aria costruiti da Toshiba Carrier Corporation. Ha ricevuto la formazione necessaria per installare, manutenere, spostare e rimuovere i condizionatori d’aria costruiti da Toshiba Carrier Corporation o, in alternativa, è stato addestrato da uno o più individui in possesso della necessaria formazione, ed è pertanto idoneo a svolgere tali operazioni. • L’installatore qualificato autorizzato a eseguire i lavori elettrici richiesti per l’installazione, il trasferimento e la rimozione del condizionatore d’aria possiede le qualifiche necessarie per svolgere tali compiti, come stabilito dalle leggi e dai regolamenti locali; è stato addestrato a lavorare sui condizionatori d’aria direttamente da Toshiba Carrier Corporation o da uno o più individui in possesso della necessaria formazione ed è pertanto idoneo a svolgere tale lavoro. Installatore qualificato • L’installatore qualificato autorizzato a eseguire i lavori di gestione del refrigerante e di posa dei tubi richiesti per l’installazione, il trasferimento e la rimozione del condizionatore d’aria possiede le qualifiche necessarie per svolgere tali compiti, come stabilito dalle leggi e dai regolamenti locali; è stato addestrato a lavorare a svolgere i lavori di gestione del refrigerante e di posa dei tubi direttamente da Toshiba Carrier Corporation o da uno o più individui in possesso della necessaria formazione ed è pertanto idoneo a svolgere tale lavoro. • L’installatore qualificato autorizzato a svolgere lavori in altezza ha ricevuto la formazione necessaria per effettuare tali lavori con i condizionatori d’aria costruiti da Toshiba Carrier Corporation o, in alternativa, è stato addestrato da uno o più individui in possesso della necessaria formazione, ed è pertanto idoneo a svolgere tali operazioni. Tecnico dell’assistenza qualificato 21-IT Definizione di attrezzatura protettiva Prima di procedere alle operazioni di trasporto, installazione, manutenzione, riparazione o rimozione del condizionatore d’aria è necessario indossare sempre guanti e abbigliamento protettivi. In aggiunta ai normali dispositivi di protezione, indossare i dispositivi di protezione descritti di seguito, prima di procedere all’esecuzione dei lavori speciali elencati nella tabella sottostante. La mancata osservanza di questa indicazione espone l’operatore al rischio di lesioni, ustioni, elettrocuzione, ecc. Lavoro intrapreso Attrezzatura protettiva indossata Tutti i tipi di lavori Guanti protettivi Abbigliamento protettivo da lavoro Lavoro su impianti elettrici Guanti di protezione per elettricisti e resistenti al calore Scarpe isolanti Abbigliamento per la protezione da elettrocuzione Lavori in altezza (50 cm o più) Elmetti per uso industriale Trasporto di oggetti pesanti Scarpe con calotte protettive aggiuntive per le dita Riparazione dell’unità esterna Guanti di protezione per elettricisti e resistenti al calore • Il personale di assistenza qualificato è una persona che installa, ripara, effettua la manutenzione, sposta e rimuove i condizionatori d’aria costruiti da Toshiba Carrier Corporation. Ha ricevuto la formazione necessaria per installare, riparare, manutenere, spostare e rimuovere i condizionatori d’aria costruiti da Toshiba Carrier Corporation o, in alternativa, è stato addestrato da uno o più individui in possesso della necessaria formazione, ed è pertanto idoneo a svolgere tali operazioni. • Il personale di assistenza qualificato autorizzato a eseguire i lavori elettrici richiesti per l’installazione, il trasferimento e la rimozione del condizionatore d’aria possiede le qualifiche necessarie per svolgere tali compiti, come stabilito dalle leggi e dai regolamenti locali; è stato addestrato a lavorare sui condizionatori d’aria direttamente da Toshiba Carrier Corporation o da uno o più individui in possesso della necessaria formazione ed è pertanto idoneo a svolgere tale lavoro. • Il personale di assistenza qualificato autorizzato a eseguire i lavori di gestione del refrigerante e di posa dei tubi richiesti per l’installazione, la riparazione, il trasferimento e la rimozione del condizionatore d’aria possiede le qualifiche necessarie per svolgere tali compiti, come stabilito dalle leggi e dai regolamenti locali; è stato addestrato a lavorare a svolgere i lavori di gestione del refrigerante e di posa dei tubi direttamente da Toshiba Carrier Corporation o da uno o più individui in possesso della necessaria formazione ed è pertanto idoneo a svolgere tale lavoro. • Il personale di assistenza qualificato autorizzato a svolgere lavori in altezza ha ricevuto la formazione necessaria per effettuare tali lavori con i condizionatori d’aria costruiti da Toshiba Carrier Corporation o, in alternativa, è stato addestrato da uno o più individui in possesso della necessaria formazione, ed è pertanto idoneo a svolgere tali operazioni. 22-IT +00EH99884801-2_01EN.book Page 12 Monday, January 28, 2013 7:54 PM 1 Indicazioni di avvertimento sul condizionatore d’aria Indicazione di avvertimento WARNING ELECTRICAL SHOCK HAZARD Disconnect all remote electric power supplies before servicing. WARNING Moving parts. Do not operate unit with grille removed. Stop the unit before the servicing. CAUTION High temperature parts. You might get burned when removing this panel. CAUTION Do not touch the aluminum fins of the unit. Doing so may result in injury. Precauzioni per la sicurezza Il produttore non si assume alcuna responsabilità per i danni causati dalla mancata osservazione delle descrizioni del presente manuale. Descrizione AVVERTENZA AVVERTENZA Generali PERICOLO DI SCOSSA ELETTRICA Scollegare tutte le fonti di alimentazione elettrica remote, prima di sottoporre a interventi di assistenza. • Prima d’iniziare l’installazione del condizionatore si raccomanda di leggere con attenzione il manuale d’installazione e di osservarne scrupolosamente ogni istruzione ivi fornita. • Solo un installatore qualificato o un tecnico dell’assistenza qualificato sono autorizzati a installare l’unità. Se l’installazione non è stata eseguita correttamente si possono infatti verificare perdite d’acqua, scosse elettriche o un incendio. • Per rabbocchi o sostituzioni, non utilizzare refrigeranti diversi da quello indicato. In caso contrario nel ciclo di refrigerazione si può generare una pressione eccessiva, che può generare guasti, esplosione del prodotto o lesioni personali. • Prima di aprire la griglia della presa d’aria dell’unità interna o il pannello di servizio dell’unità esterna, impostare l’interruttore automatico sulla posizione OFF (spento). La mancata impostazione dell’interruttore automatico sulla posizione OFF (spento) potrebbe provocare scosse elettriche attraverso il contatto con le parti interne. Solo un installatore qualificato(*1) o un tecnico dell’assistenza qualificato(*1) sono autorizzati a rimuovere la griglia della presa d’aria o il pannello di servizio dell’unità esterna e a svolgere il lavoro richiesto. • Prima di eseguire lavori di installazione, manutenzione, riparazione o rimozione, assicurarsi di impostare l’interruttore automatico sulla posizione OFF (spento). In caso contrario, si potrebbero causare scosse elettriche. • Sistemare un cartello con l’indicazione “Lavori in corso” in prossimità dell’interruttore automatico durante l’esecuzione di lavori di installazione, manutenzione, riparazione o rimozione. Qualora l’interruttore automatico sia impostato su ON (acceso) per errore, sussiste il pericolo di scosse elettriche. • Solo un installatore qualificato(*1) o un tecnico dell’assistenza qualificato(*1) sono autorizzati a svolgere lavori in altezza utilizzando un supporto di altezza pari o superiore a 50 cm per rimuovere la griglia della presa d’aria dell’unità interna al fine dello svolgimento dei lavori. • Durante l’installazione, la manutenzione e la rimozione, indossare guanti di protezione e indumenti da lavoro di sicurezza. • Non toccare l'aletta in alluminio dell'unità. In caso contrario, si potrebbero provocare lesioni personali. Qualora sia necessario toccare l’aletta per qualche motivo, indossare prima guanti di protezione e indumenti da lavoro di sicurezza, quindi procedere. • Non salire né collocare oggetti sull’unità esterna. Si potrebbe cadere o gli oggetti potrebbero cadere dall’unità esterna e provocare lesioni personali. • Quando si lavora in altezza, utilizzare una scala conforme allo standard ISO 14122, e attenersi alla procedura indicata nelle sue istruzioni. Inoltre, indossare un elmetto per uso industriale come attrezzatura di protezione per intraprendere il lavoro. • Prima di pulire il filtro o altre parti dell’unità esterna, impostare l’interruttore sulla posizione OFF (spento) e sistemare un cartello con l’indicazione “Lavori in corso” in prossimità dell’interruttore, prima di iniziare il lavoro. • Prima di lavorare in altezza, sistemare un cartello in modo che nessuno si avvicini alla sede dei lavori, prima di procedere con i lavori. Parti e altri oggetti potrebbero cadere dall’alto, con la possibilità di provocare lesioni personali a chi si trovi sotto. Mentre si effettuano i lavori, indossare un casco per proteggersi dalla caduta di oggetti. • Il refrigerante utilizzato da questo condizionatore d’aria è l’R410A. • Il condizionatore deve essere trasportato in condizioni stabili. Qualora una parte qualsiasi non sia integra, contattare il rivenditore. • Se il condizionatore deve essere trasportato manualmente, l’operazione deve essere effettuata da due o più persone. • Non tentare di spostare o riparare l’unità da soli. L’unità contiene componenti ad alta tensione. La rimozione del coperchio e dell’unità centrale potrebbe esporre al rischio di elettrocuzione. AVVERTENZA Parti mobili. Non far funzionare l’unità con la griglia rimossa. Arrestare l’unità prima di sottoporla ad assistenza. ATTENZIONE Parti ad alta temperatura. Quando si rimuove questo pannello sussiste il pericolo di ustione. ATTENZIONE Non toccare le alette in alluminio dell’unità. In caso contrario, si potrebbero provocare lesioni personali. Selezione della sede di installazione CAUTION BURST HAZARD Open the service valves before the operation, otherwise there might be the burst. • Se il condizionatore deve essere installato in un locale piccolo ,è necessario evitare che in caso di perdite il gas refrigerante raggiunga una concentrazione critica. • Non installare l’unità in un luogo soggetto a possibili fughe di gas infiammabili. Qualora dovessero raggiungere una concentrazione elevata attorno ad essa potrebbero infatti causare un incendio. • Per trasportare il condizionatore d’aria, indossare scarpe con calotte protettive aggiuntive per le dita. • Quando si trasporta il condizionatore d’aria, non afferrare le fascette che circondano la scatola di imballaggio. Qualora le fascette si rompano, si potrebbero subire lesioni personali. • Installare l’unità interna ad almeno 2,5 metri di altezza dal pavimento, poiché, in caso contrario, gli utenti potrebbero subire lesioni personali o scosse elettriche qualora urtino con le dita o altri oggetti l’unità interna mentre il condizionatore d’aria è in funzione. • Non collocare apparecchi a combustione di alcun genere in luoghi che siano direttamente esposti al flusso d’aria prodotto dal condizionatore d’aria; in caso contrario, il condizionatore potrebbe provocare una combustione imperfetta. ATTENZIONE PERICOLO DI SCOPPIO Aprire le valvole di servizio prima dell’operazione; in caso contrario, si potrebbe verificare uno scoppio. Installazione • Quando si deve montare in sospensione l’unità interna, è necessario utilizzare i bulloni di sospensione (M10 o W3/8) e i relativi dadi (M10 o W3/8) specificati. • Il condizionatore deve essere installato in un punto in grado di sostenerne adeguatamente il peso. Qualora la resistenza non sia sufficiente, l’unità potrebbe cadere e provocare lesioni personali. • Attenersi alle istruzioni nel Manuale d’installazione per installare il condizionatore d’aria. La mancata osservanza di queste istruzioni potrebbe infatti causare la caduta o il ribaltamento delle unità, nonché divenire causa di rumore, vibrazioni, fuoriuscite d'acqua o altri problemi. 23-IT – 12 – 24-IT +00EH99884801-2_01EN.book Page 13 Monday, January 28, 2013 7:54 PM – 13 – • Effettuare l’installazione considerando l’eventuale possibilità di vento forte o di terremoti. Se il condizionatore non è installato correttamente, può ribaltarsi o cadere, causando un incidente. • Se durante l’installazione si verifica una fuga del gas refrigerante occorre ventilare subito l’ambiente. A contatto con fiamme libere il gas refrigerante s’incendia generando sostanze nocive. • Utilizzare un carrello elevatore per trasportare il condizionatore e utilizzare un argano o un paranco per la sua installazione. • La lunghezza del condotto di aspirazione deve essere maggiore di 850 mm. • Indossare un casco per proteggere il capo dalla caduta di oggetti. In particolare, quando si lavora sotto una botola di ispezione, indossare un casco per proteggere il capo dalla caduta di oggetti dall'apertura. • È possibile accedere all'unità dal pannello di servizio mostrato nella figura. Spiegazioni fornite all’utente • Installare il tubo del refrigerante stabilmente durante i lavori di installazione, prima di mettere in funzione il condizionatore d’aria. Se il compressore venisse messo in funzione con la valvola aperta e senza il tubo del refrigerante, il compressore aspirerebbe aria e il circuito di refrigerazione raggiungerebbe una pressione eccessiva, con la possibilità di causare lesioni personali. • Serrare il dado svasato con una chiave torsiometrica come illustrato. Un serraggio eccessivo del dado svasato potrebbe causare delle spaccature nel lungo periodo, il che potrebbe provocare perdite di refrigerante. • Una volta completata l’installazione è quindi di estrema importanza verificare che non vi siano perdite. Qualora si verifichi una perdita di gas refrigerante in una stanza e il gas entri in contatto con delle fiamme, ad esempio in una cucina, si potrebbero generare gas tossici. • Quando il condizionatore d’aria è stato installato o trasferito, attenersi alle istruzioni nel Manuale d’installazione e spurgare completamente l’aria in modo che nessun altro gas si mescoli al refrigerante nel circuito di refrigerazione. Qualora non si effettui lo spurgo completo dell’aria, si potrebbe provocare un malfunzionamento del condizionatore d’aria. • Per la prova di tenuta dell’aria è necessario utilizzare gas di azoto. • Il tubo flessibile di carico deve essere collegato in modo tale da non essere lasco. Trasferimento • Solo un installatore qualificato(*1) o un tecnico dell’assistenza qualificato(*1) sono autorizzati a eseguire i lavori sull’impianto elettrico per il condizionatore d’aria. In nessuna circostanza tali lavori devono essere effettuati da una persona non qualificata, poiché un’esecuzione non appropriata dei lavori potrebbe provocare scosse elettriche e/o dispersioni di corrente. • Per collegare i cavi elettrici, riparare parti elettriche o iniziare altri tipi di lavori sull’impianto elettrico, indossare guanti di protezione per elettricisti e resistenti al calore, scarpe e indumenti isolanti in modo da essere protetti contro le scosse elettriche. Qualora non si indossino queste attrezzature protettive, si potrebbero provocare scosse elettriche. • Utilizzare cablaggi che soddisfino le specifiche nel Manuale d’installazione e le direttive delle norme e nelle leggi locali. L’uso di cablaggi che non soddisfino le specifiche potrebbe provocare scosse elettriche, dispersioni di corrente, fumo e/o un incendio. • Collegare il cavo di terra. (cablaggio di messa a terra) Una messa a terra incompleta può causare elettrocuzione. • Non collegare i cavi di terra a tubi del gas, tubi dell'acqua, conduttori dei parafulmini o a cavi di messa a terra per impianti telefonici. • Dopo aver completato i lavori di riparazione o di trasferimento, verificare che i cavi di terra siano collegati correttamente. • Installare un interruttore automatico che soddisfi le specifiche nel Manuale d’installazione e le direttive delle norme e delle leggi locali. • Installare l’interruttore automatico in una sede che sia facilmente accessibile dall’agente. • Quando si installa l’interruttore automatico all’aperto, installarne uno progettato per l’uso per esterno. • Non utilizzare in alcuna circostanza prolunghe del cavo elettrico di alimentazione. Problemi di collegamento nelle sedi in cui si trovino prolunghe del cavo elettrico possono provocare fumo e/o un incendio. • I lavori di cablaggio elettrico devono essere effettuati in conformità alle normative vigenti e al Manuale d’installazione. La mancata osservanza di questa indicazione espone al rischio di elettrocuzione o cortocircuito. Installazione del condizionatore d’aria che impiega il nuovo refrigerante Tubi del liquido refrigerante Cavi elettrici Prova di funzionamento • Prima di far funzionare il condizionatore d’aria, dopo aver completato il lavoro, verificare che il coperchio della cassetta dei componenti elettrici dell’unità interna e il pannello di servizio dell’unità esterna siano chiusi, e che l’interruttore automatico sia impostato sulla posizione ON (acceso). Qualora si accenda l’unità senza aver prima eseguito questi controlli, si potrebbe subire una scossa elettrica. • Se si nota il verificarsi di un problema di qualche tipo con il condizionatore d’aria (ad esempio visualizzazione di un'indicazione di errore, odore di bruciato, suoni anomali, mancato raffreddamento o riscaldamento del condizionatore oppure perdite d'acqua), non toccare da soli il condizionatore d'aria, ma impostare l’interruttore sulla posizione OFF (spento) e contattare un tecnico dell'assistenza qualificato. Adottare delle misure per assicurare che l’unità non venga accesa (ad esempio scrivendo “fuori servizio” in prossimità dell’interruttore automatico) fino all’arrivo di un tecnico dell’assistenza qualificato. L'uso continuato del condizionatore in questa condizione anomala potrebbe divenire causa di problemi meccanici, generare scosse elettriche o causare altri problemi. • Al termine del lavoro di riparazione, utilizzare un tester di isolamento (megaohmmetro tipo Megger da 500V) per verificare che la resistenza tra la sezione di carica e la sezione metallica di non carica (sezione di terra) sia pari o superiore a 1 MΩ. Qualora il valore di resistenza sia basso, potrebbe verificarsi un grave problema, quale una dispersione o una scossa elettrica, dal lato dell’utente. • Al completamento del lavoro di installazione, controllare eventuali perdite di refrigerante e controllare la resistenza di isolamento e lo scarico dell’acqua. Quindi, eseguire un funzionamento di prova per controllare che il condizionatore d’aria funzioni correttamente. 25-IT • Al completamento del lavoro di installazione, comunicare all’utente dove sia situato l’interruttore automatico. Qualora l’utente non sappia dove si trovi l’interruttore automatico, non sarà in grado di disattivarlo, nell’eventualità che si verifichi un problema con il condizionatore d’aria. • Se la griglia della ventola è danneggiata, non avvicinarsi all’unità esterna, ma portare l’interruttore in posizione OFF (spento) e rivolgersi al personale di assistenza qualificato (*1) affinché provveda a effettuare le necessarie riparazioni. Non impostare l’interruttore automatico sulla posizione ON (acceso) finché non siano state completate le riparazioni. • Al termine del lavoro di installazione, seguire il Manuale del proprietario per spiegare al cliente come utilizzare e sottoporre a manutenzione l’unità. • Solo un installatore qualificato(*1) o un tecnico dell’assistenza qualificato(*1) sono autorizzati a trasferire il condizionatore d’aria. È pericoloso far trasferire il condizionatore d’aria da una persona non qualificata, in quanto si potrebbero provocare incendi, scosse elettriche, lesioni personali, perdite d’acqua, rumori e/o vibrazioni. • Quando si eseguono lavori di svuotamento del refrigerante (Pump-down), spegnere il compressore prima di scollegare il tubo del refrigerante. Eseguendo questo scollegamento con la valvola di servizio aperta e il compressore in funzione si causerebbe l’aspirazione dell’aria o di altri gas eventualmente presenti nell’atmosfera, elevando in tal modo la pressione interna al circuito refrigerante a un livello eccessivamente alto con possibili rotture, lesioni personali o problemi di funzionamento. ATTENZIONE • QUESTO CONDIZIONATORE D’ARIA UTILIZZA IL NUOVO REFRIGERANTE HFC (R410A) CHE NON DISTRUGGE LO STRATO DI OZONO. • Le caratteristiche dell’R410A sono: facilità di assorbimento dell’acqua, membrana od olio ossidante, pressione circa 1,6 superiore a quella dell’R22. Insieme al nuovo refrigerante è stato altresì adottato un nuovo tipo di olio refrigerante. Durante i lavori d’installazione è pertanto indispensabile evitare che nel relativo circuito non penetrino acqua, polvere o refrigerante di tipo diverso. • Per impedire la carica accidentale di liquido e olio refrigerante di tipo non corretto le bocche di collegamento dell’unità principale e degli attrezzi d’installazione presentano differenze rispetto a quelle usate con il refrigerante di tipo convenzionale. • Di conseguenza, per la carica del refrigerante R410A è possibile usare soltanto questi attrezzi. • Per i collegamenti si devono usare tubi nuovi e puliti appositamente concepiti per il refrigerante R410A, impedendo quindi all’acqua e alla polvere di penetrarvi. Per scollegare l’apparecchio dalla fonte di alimentazione principale. • Questo apparecchio deve essere collegato alla fonte di alimentazione principale per mezzo di un interruttore con una separazione di contatti di almeno 3 mm. La linea di alimentazione elettrica del condizionatore deve essere protetta con un fusibile (di qualsiasi tipo). (*1) Consultare la “Definizione di installatore qualificato o tecnico dell’assistenza qualificato”. 26-IT +00EH99884801-2_01EN.book Page 14 Monday, January 28, 2013 7:54 PM Gracias por haber adquirido este aparato de aire acondicionado Toshiba. Lea atentamente estas instrucciones que contienen información importante de conformidad con la Directiva relativa a “Máquinas” (Directiva 2006/42/EC) y asegúrese de que las entiende. Tras completar el trabajo de instalación, entregue al usuario este Manual de instalación así como el Manual del propietario que se proporcionan, y pida al usuario que los guarde en un lugar seguro para que le sirvan de referencia en el futuro. Definición del equipo de protección Cuando vaya a proceder al traslado, instalación, mantenimiento, reparación o retirada del aparato de aire acondicionado, utilice guantes protectores y ropa de trabajo de “seguridad”. Además de este equipo protector habitual, utilice el equipo protector que se describe a continuación cuando emprenda las operaciones especiales que se detallan en la tabla siguiente. De no utilizar el equipo protector adecuado, incurrirá en cierto riesgo personal ya que estará más expuesto a sufrir heridas, quemaduras, descargas eléctricas y demás lesiones. Denominación genérica: Aire acondicionador Trabajo realizado Definición de instalador cualificado o persona de servicio cualificada El aparato de aire acondicionado deberá ser instalado, mantenido, reparado y desechado por un instalador cualificado o por una persona de servicio cualificada. Cuando se tenga que hacer uno cualquiera de estos trabajos, solicite a un instalador cualificado o a una persona de servicio cualificada que le haga el trabajo solicitado. Un instalador cualificado o una persona de servicio cualificada es un agente con las cualificaciones y conocimientos descritos en la siguiente tabla. Agente 27-ES Cualificaciones y conocimientos que debe tener el agente Instalador cualificado • El instalador cualificado es una persona que se dedica a la instalación, mantenimiento, traslado y retirada de los aparatos de aire acondicionado fabricados por Toshiba Carrier Corporation. Dicha persona habrá recibido formación relativa a la instalación, mantenimiento, traslado y retirada de aparatos de aire acondicionado fabricados por Toshiba Carrier Corporation, o, de otro modo, habrá sido instruida en dichas operaciones por otra u otras personas que hayan recibido formación en la materia y que por tanto posean amplios conocimientos relativos a dichas operaciones. • El instalador cualificado que esté autorizado para realizar los trabajos eléctricos propios de la instalación, traslado y retirada poseerá las cualificaciones relativas a dichos trabajos eléctricos, de conformidad con la legislación local vigente, y habrá recibido formación relativa a las tareas eléctricas a realizar en los aparatos de aire acondicionado fabricados por Toshiba Carrier Corporation, o, de otro modo, habrá sido instruido en dichas tareas por otra u otras personas que hayan recibido formación en la materia y que por tanto posean amplios conocimientos relativos a dichas operaciones. • El instalador cualificado que esté autorizado para realizar los trabajos de canalización y manejo del refrigerante propios de la instalación, traslado y retirada poseerá las cualificaciones relativas a dichos trabajos de canalización y manejo del refrigerante, de conformidad con la legislación local vigente, y habrá recibido formación relativa a las tareas de canalización y uso del refrigerante a realizar en los aparatos de aire acondicionado fabricados por Toshiba Carrier Corporation, o, de otro modo, habrá sido instruido en dichas tareas por otra u otras personas que hayan recibido formación en la materia y que por tanto posean amplios conocimientos relativos a dichas operaciones. • El instalador cualificado que esté autorizado para trabajar en alturas habrá recibido formación relativa a la realización de trabajos en altura con los aparatos de aire acondicionado fabricados por Toshiba Carrier Corporation, o, de otro modo, habrá sido instruido en dichas tareas por otra u otras personas que hayan recibido formación en la materia y que por tanto posean amplios conocimientos relativos a dichos trabajos. Persona de servicio cualificada • La persona de servicio cualificado es una persona que se dedica a la instalación, reparación, mantenimiento, traslado y retirada de los aparatos de aire acondicionado fabricados por Toshiba Carrier Corporation. Dicha persona habrá recibido formación relativa a la instalación, reparación, mantenimiento, traslado y retirada de aparatos de aire acondicionado fabricados por Toshiba Carrier Corporation, o, de otro modo, habrá sido instruida en dichas operaciones por otra u otras personas que hayan recibido formación en la materia y que por tanto posean amplios conocimientos relativos a dichas operaciones. • La persona de servicio cualificada que esté autorizada para realizar los trabajos eléctricos propios de la instalación, reparación, traslado y retirada poseerá las cualificaciones relativas a dichos trabajos eléctricos, de conformidad con la legislación local vigente, y habrá recibido formación relativa a las tareas eléctricas a realizar en los aparatos de aire acondicionado fabricados por Toshiba Carrier Corporation, o, de otro modo, habrá sido instruida en dichas tareas por otra u otras personas que hayan recibido formación en la materia y que por tanto posean amplios conocimientos relativos a dichas operaciones. • La persona de servicio cualificada que esté autorizada para realizar los trabajos de canalización y manejo del refrigerante propios de la instalación, reparación, traslado y retirada poseerá las cualificaciones relativas a dichos trabajos de canalización y manejo del refrigerante, de conformidad con la legislación local vigente, y habrá recibido formación relativa a las tareas de canalización y uso del refrigerante a realizar en los aparatos de aire acondicionado fabricados por Toshiba Carrier Corporation, o, de otro modo, habrá sido instruida en dichas tareas por otra u otras personas que hayan recibido formación en la materia y que por tanto posean amplios conocimientos relativos a dichas operaciones. • La persona de servicio cualificada que esté autorizada para trabajar en alturas habrá recibido formación relativa a la realización de trabajos en altura con los aparatos de aire acondicionado fabricados por Toshiba Carrier Corporation, o, de otro modo, habrá sido instruida en dichas tareas por otra u otras personas que hayan recibido formación en la materia y que por tanto posean amplios conocimientos relativos a dichos trabajos. – 14 – Equipo de protección usado Todo tipo de trabajos Guantes de protección Ropa de trabajo de “seguridad” Trabajo relacionado con equipos eléctricos Guantes para protegerse de las descargas eléctricas y de las altas temperaturas Calzado aislante Ropa que ofrezca protección contra descargas eléctricas Trabajos en altura (50 cm o más) Cascos de seguridad de uso industrial Transporte de objetos pesados Zapatos con protección adicional en las punteras Reparación de la unidad exterior Guantes para protegerse de las descargas eléctricas y de las altas temperaturas 28-ES +00EH99884801-2_01EN.book Page 15 Monday, January 28, 2013 7:54 PM – 15 – Indicaciones de advertencia en la unidad de aire acondicionado Indicación de advertencia Descripción 1 Precauciones de seguridad El fabricante no se hará responsable de ningún daño producido por no seguir las descripciones de este manual. ADVERTENCIAS WARNING ELECTRICAL SHOCK HAZARD Disconnect all remote electric power supplies before servicing. WARNING Moving parts. Do not operate unit with grille removed. Stop the unit before the servicing. CAUTION High temperature parts. You might get burned when removing this panel. CAUTION Do not touch the aluminum fins of the unit. Doing so may result in injury. ADVERTENCIAS PELIGRO DE DESCARGA ELÉCTRICA Desconecte todos los suministros eléctricos remotos antes de hacer reparaciones. ADVERTENCIAS Piezas móviles. No utilice la unidad con la rejilla retirada. Pare la unidad antes de hacer reparaciones. PRECAUCIÓN Piezas de alta temperatura. Al retirar este panel podría quemarse. PRECAUCIÓN No toque las aletas de aluminio del aparato. De lo contrario, podrían producirse lesiones personales. Generalidades • Antes de empezar a instalar el acondicionador de aire, lea atentamente el manual de instalación y siga sus instrucciones para instalarlo. • Sólo un instalador cualificado o una persona de servicio cualificada tiene permiso para realizar los trabajos de instalación. La instalación incorrecta puede provocar fugas de agua, descargas eléctricas o incendios. • No utilice ningún refrigerante distinto del especificado como complemento o sustituto. Si lo hace, se podría generar una presión extremadamente alta en el ciclo de refrigeración, lo que podría causar un fallo en el producto, la explosión de este o daños físicos. • Antes de abrir la rejilla de admisión de la unidad interior o el panel de servicio de la unidad exterior, ponga el disyuntor en la posición OFF. Si no se pone el disyuntor en la posición OFF se puede producir una descarga eléctrica al tomar las piezas interiores. Sólo un instalador cualificado(*1) o una persona de servicio cualificada(*1) tiene permitido retirar la rejilla de admisión de unidad interior o el panel de servicio de la unidad exterior y hacer el trabajo necesario. • Antes de realizar el trabajo instalación, de mantenimiento, reparación o desecho, asegúrese de poner el disyuntor en la posición OFF. De lo contrario se pueden producir descargas eléctricas. • Ponga un aviso que diga “trabajo en curso” cerca del disyuntor mientras se realiza el trabajo de instalación, mantenimiento, reparación o desecho. Si el disyuntor se pone en ON por error existe el peligro de que se produzcan descargas eléctricas. • Sólo un instalador cualificado(*1) o una persona de servicio cualificada(*1) tiene permiso para realizar trabajos en lugares altos usando una base de 50 cm o más o para quitar la rejilla de admisión de la unidad interior para realizar otros trabajos. • Póngase guantes de protección y ropa de trabajo segura durante la instalación, reparación y desecho. • No toque la aleta de aluminio de la unidad. Si lo hace puede lesionarse usted mismo. Si la aleta tiene que tocarse por alguna razón, póngase primero guantes de protección y ropa de trabajo segura, y luego empiece a trabajar. • No se suba encima ni coloque objetos encima de la unidad exterior. Usted o los objetos pueden caerse de la unidad exterior y provocar lesiones. • Cuando trabaje en alturas, utilice una escalera que cumpla la norma ISO 14122 y siga los procedimientos indicados en las instrucciones de la escalera. Póngase también un casco de uso industrial como equipo de protección para hacer el trabajo. • Cuando vaya a limpiar el filtro u otra parte de la unidad exterior coloque el disyuntor en la posición de apagado (OFF), asegúrese de que queda en dicha posición y coloque un cartel que indique que se están realizando tareas de mantenimiento antes de comenzar. • Cuando vaya a trabajar en alturas, coloque un cartel en el lugar adecuado antes de comenzar para que nadie se aproxime a la zona de trabajo. Desde la parte superior podrían caer piezas y otros objetos que causarían lesiones a las personas situadas debajo. Cuando esté realizando un trabajo. utilice casco para protegerse de los objetos que pudieran caer. • El refrigerante usado por este aparato de aire acondicionado es el R410A. • La unidad de aire acondicionado se debe transportar en condiciones de estabilidad adecuadas. Si alguna pieza del producto está rota, póngase en contacto con el proveedor. • Cuando la unidad de aire acondicionado se deba transportar con las manos, deberán hacerlo dos o más personas. • No mueva ni repare ninguna unidad usted mismo. La unidad contiene alto voltaje en su interior. Podría recibir una descarga eléctrica al retirar la cubierta y la unidad principal. Selección del lugar de instalación CAUTION BURST HAZARD Open the service valves before the operation, otherwise there might be the burst. PRECAUCIÓN PELIGRO DE ROTURA Abra las válvulas de servicio antes de la operación, de lo contrario podrían producirse roturas. • Cuando la unidad de aire acondicionado se instale en una habitación pequeña, asegúrese de que las medidas son adecuadas para garantizar que la concentración de refrigerante que se produce por la fuga de este en la habitación no sobrepase el nivel crítico. • No instale el producto en una ubicación donde puedan darse fugas de gas. Si se produjera una fuga de gas y este se acumulara alrededor de la unidad, podría prender y provocarse un incendio. • Utilice calzado con protección adicional para el extremo del pie cuando transporte la unidad de aire acondicionado. • No agarre las bandas que rodean la caja del embalaje para transportar la unidad de aire acondicionado. Usted podría lesionarse si se rompieran las bandas. • Instale la unidad interior a 2,5 m como mínimo por encima del nivel del suelo, ya que de lo contrario los usuarios podrían lesionarse o recibir descargas eléctricas si meten sus dedos u otros objetos en la unidad interior mientras funciona el aparato de aire acondicionado. • No ponga ningún aparato de combustión en un lugar expuesto directamente al aire procedente del aparato de aire acondicionado, de lo contrario, la combustión no sería perfecta. Instalación • Cuando la unidad interior vaya a instalarse suspendida deberán usarse los pernos para colgar (M10 ó W3/8) y las tuercas (M10 ó W3/8) que han sido designados. • Instale la unidad de aire acondicionado asegurándose de que queda bien sujeta en una ubicación cuya base pueda soportar el peso adecuadamente. Si la resistencia no es suficiente, la unidad puede caerse y causar lesiones. • Siga las instrucciones del manual de instalación para instalar el aparato de aire acondicionado. De no seguir esta instrucción, el producto podría caer o volcarse, así como generar más ruido, vibraciones, fugas de agua y otros problemas. 29-ES 30-ES +00EH99884801-2_01EN.book Page 16 Monday, January 28, 2013 7:54 PM Explicaciones para dar al usuario • Lleve a cabo el procedimiento de instalación especificado para proteger la unidad contra posibles vientos fuertes y terremotos. Si no se instala la unidad de aire acondicionado correctamente, podría caer o volcarse y causar un accidente. • Si se producen fugas de gas refrigerante durante la instalación, ventile inmediatamente la habitación. Si la fuga de refrigerante entra en contacto con fuego, se podrían generar gases tóxicos. • Utilice una carretilla elevadora para transportar las unidades de aire acondicionado y cabestrantes o montacargas para la instalación. • La longitud del conducto de succión debe ser mayor de 850 mm. • Debe utilizar casco para proteger su cabeza de los objetos que pudieran caer. Particularmente, cuando trabaje bajo una apertura de inspección, debe utilizar casco para proteger su cabeza de los objetos que pudieran caer de la apertura. • Se puede acceder a la unidad a través del panel de servicio que se muestra en la ilustración. • Al finalizar el trabajo de instalación dígale al usuario dónde esta situado el disyuntor. Si el usuario no sabe dónde está el disyuntor, él o ella no podrán desconectar la alimentación en el caso de que se produzca un fallo en el aparato de aire acondicionado. • Si la rejilla del ventilador se encuentra dañada, no se acerque a la unidad exterior; coloque el disyuntor en la posición de apagado (OFF) y póngase en contacto con personal de servicio cualificado(*1) para que realice la reparación. No ponga el disyuntor en la posición ON hasta después de terminar las reparaciones. • Después de hacer el trabajo de instalación, siga las indicaciones del manual del propietario para explicar al cliente cómo usar y mantener la unidad. Recolocación Tubería del refrigerante • Sólo un instalador cualificado(*1) o una persona de servicio cualificada(*1) tiene permiso para recolocar el aparato de aire acondicionado. Es peligroso para el aparato de aire acondicionado que sea recolocado por un individuo no cualificado, porque se puede producir un incendio, descargas eléctricas, lesiones, fugas de agua, ruido y/o vibración. • Cuando realice trabajos de bombeo de vacío, cierre el compresor antes de desconectar el tubo del refrigerante. Si se desconecta el tubo de refrigerante con la válvula de mantenimiento abierta y el compresor aún en marcha, se aspirará aire u otro gas, elevando la presión dentro del ciclo de refrigeración a niveles anómalamente altos, lo que podrá provocar roturas, lesiones u otros problemas. • Instale firmemente el tubo del refrigerante durante los trabajos de instalación antes de poner en funcionamiento el aparato de aire acondicionado. Si el compresor funciona con su válvula abierta y sin tubo de refrigerante, el compresor succionará aire y los ciclos de refrigeración tendrán una presión excesiva, lo que puede causar lesiones. • Apriete la tuerca abocinada con una llave de ajuste dinamométrica como se indica. Un apriete excesivo de tuerca abocinada puede causar grietas en la misma después de pasar mucho tiempo, lo que podría causar fugas de refrigerante. • Tras la instalación, asegúrese de que no existen fugas de gas refrigerante. Si se produce una fuga de gas refrigerante en la habitación y hay una fuente de fuego próxima, como una cocina, podría generarse gas nocivo. • Cuando el aparato de aire acondicionado haya sido instalado o recolocado, siga del manual de instalación de instalación y purgue completamente el aire para que no se mezclen otros gases que no sean el refrigerante en el ciclo de refrigeración. Si el aire no se purga completamente puede que el aparato de aire acondicionado funcione mal. • Para la prueba de hermeticidad al aire deberá usarse nitrógeno. • La manguera de carga deberá conectarse de forma que no esté floja. PRECAUCIÓN Instalación del aparato de aire acondicionado con nuevo refrigerante • ESTE APARATO DE AIRE ACONDICIONADO INCORPORA EL NUEVO REFRIGERANTE HFC (R410A) RESPETUOSO CON LA CAPA DE OZONO. Cableado eléctrico • Sólo un instalador cualificado(*1) o una persona de servicio cualificada(*1) tiene permitido realizar el trabajo eléctrico del aparato de aire acondicionado. Este trabajo no deberá hacerlo, bajo ninguna circunstancia, un individuo que no esté cualificado, porque si el trabajo se hace mal, existe el peligro de que se produzcan descargas eléctricas y/o fugas eléctricas. • Cuando conecte cables eléctricos, repare piezas eléctricas o lleve a cabo otros trabajos eléctricos, utilice guantes de protección contra la electricidad y el calor así como calzado y ropa aislante para protegerse de las descargas eléctricas. Si no se pone este equipo de protección puede recibir descargas eléctricas. • Use cables que cumplan con las especificaciones del manual de instalación y las estipulaciones de las normas y leyes locales. El uso de cables que no cumplen con las especificaciones puede dar origen a descargas eléctricas, fugas eléctricas, humo y/o incendios. • Conecte la toma de tierra. (Masa) Si la unidad no está totalmente conectada al cable de tierra, podría producir descargas eléctricas. • No conecte la toma de tierra a tuberías de gas o agua, a un pararrayos ni a una toma de tierra de teléfono. • Cuando haya finalizado un trabajo de reparación o reubicación, compruebe que la toma de tierra esté conectada adecuadamente. • Instale un disyuntor que cumpla con las especificaciones del manual de instalación y con las estipulaciones de las normas y las leyes locales. • Instale el disyuntor donde el agente pueda tener acceso a él fácilmente. • Cuando instale el disyuntor en el exterior, instale uno diseñado para ser usado en exteriores. • No se debe utilizar una extensión para el cable de alimentación bajo ninguna circunstancia. Los problemas de conexión en el lugar donde se utiliza la extensión para el cable podrían generar humo y fuego. • El cableado eléctrico deberá realizarse de conformidad con la legislación local vigente y el manual de instalación. No se ser así, podría producirse una electrocución o un cortocircuito. • Las características del refrigerante R410A son: fácil absorción de agua, oxidación de membrana o aceite; con una presión de aproximadamente 1,6 veces mayor que la del R22. Junto con el nuevo refrigerante, se ha cambiado también el aceite refrigerante. Por consiguiente, asegúrese de que no entren en el ciclo de refrigeración agua, polvo, refrigerante antiguo o aceite refrigerante durante la instalación. • Para evitar errores en la carga del refrigerante y el aceite refrigerante, se han cambiado los tamaños de las secciones de conexión del orificio de carga de la unidad principal y las herramientas de instalación para diferenciarlos del refrigerante convencional. • Por lo tanto, es necesario emplear herramientas exclusivas para el nuevo refrigerante (R410A). • Para conectar los tubos, utilice tubería nueva y limpia diseñada para R410A, y tenga la precaución de evitar la entrada de agua o polvo. Para desconectar el dispositivo de la fuente de alimentación. • Este dispositivo debe conectarse a la fuente de alimentación mediante un interruptor cuya separación de contacto sea como mínimo de 3 mm. Se debe utilizar un fusible de instalación (de cualquier tipo) para la línea de alimentación eléctrica de esta unidad. Prueba de funcionamiento • Antes de utilizar el aparato de aire acondicionado después de completar el trabajo de instalación, verifique que la cubierta de la caja de componentes eléctricos de la unidad interior y del panel de servicio de la unidad exterior esté cerrada, y ponga el disyuntor en la posición ON. Si conecta la alimentación sin realizar primero estas verificaciones puede recibir una descarga eléctrica. • Si surge cualquier problema (por ejemplo, si aparece un error en la pantalla, huele a quemado, se producen sonidos anormales, la unidad no enfría o no calienta o se produce una fuga de agua) con la unidad de aire acondicionado, no la toque usted mismo; coloque el disyuntor en la posición de apagado (OFF) y póngase en contacto con personal de servicio cualificado. Tome medidas (poniendo un aviso de “fuera de servicio” cerca del disyuntor, por ejemplo) para asegurar que la alimentación no se conecte antes de que llegue la persona de servicio cualificada. Si se continúa utilizando la unidad de aire acondicionado con la anomalía, los problemas mecánicos podrían generar otras complicaciones o provocar descargas eléctricas u otro tipo de problemas. • Cuando haya finalizado el trabajo, compruebe mediante un medidor de aislamiento (Megger de 500V) que la resistencia entre el elemento de carga y el elemento metálico neutro (de tierra) sea de 1 MΩ o más. Si el valor de la resistencia es bajo, esto se debe a un fallo como, por ejemplo, una fuga o una descarga eléctrica en el lado del usuario. • Al completar el trabajo de instalación, verifique que no haya fugas de refrigerante, y también la resistencia del aislamiento y el drenaje de agua. Luego haga una prueba de funcionamiento para verificar si el aparato de aire acondicionado funciona correctamente. 31-ES (*1) Consulte la “Definición de instalador cualificado o persona de servicio cualificada”. – 16 – 32-ES +00EH99884801-2_01EN.book Page 17 Monday, January 28, 2013 7:54 PM – 17 – Obrigado por ter adquirido este ar condicionado Toshiba. Leia estas instruções com cuidado, pois contêm informação importante que cumpre a Directiva “Máquinas” (Directiva 2006/42/CE), e assegure-se de que as entende. Depois de concluir o trabalho de instalação, entregue este Manual de Instalação e o Manual do Proprietário fornecido ao utilizador, e peça ao utilizador para guardá-los num lugar seguro para futuras consultas. Denominação Genérica: Ar Condicionado Definição de Instalador Qualificado ou de Técnico de Assistência Qualificado O ar condicionado deve ser instalado, mantido, reparado e eliminado por um instalador qualificado ou um técnico de assistência qualificado. Quando for necessário efectuar qualquer um destes trabalhos, peça a um instalador qualificado ou a um técnico de assistência qualificado para efectuar estes trabalhos. Um instalador qualificado ou um técnico de assistência qualificado é um agente com as qualificações e os conhecimentos descritos na seguinte tabela. 33-PT Agente Qualificações e conhecimentos necessários do agente Instalador qualificado • O instalador qualificado é uma pessoa que instala, dá manutenção a, muda de lugar e remove os ares condicionados fabricados pela Toshiba Carrier Corporation. Esta pessoa deve ter formação para instalar, dar manutenção a, mudar de lugar e remover ares condicionados fabricados pela Toshiba Carrier Corporation ou, como alternativa, deve ter sido instruída nessas operações por parte de indivíduos com a formação devida e, portanto, que adquiriram todo o conhecimento relacionado com estas operações. • O instalador qualificado que tem permissão para levar a cabo as ligações eléctricas envolvidas na instalação, deslocação e remoção tem as qualificações necessárias para realizar essas tarefas conforme estipulado pelas leis e regulamentos locais, sendo uma pessoa que fez formação nas matérias relacionadas com trabalho eléctrico nos ares condicionados fabricados pela Toshiba Carrier Corporation ou, como alternativa, que foi instruída nessas matérias por parte de indivíduos com a formação devida e, portanto, que adquiriram todo o conhecimento relacionado com este trabalho. • O instalador qualificado que tem permissão para realizar as tarefas de manuseamento do refrigerante e de instalação das tubagens envolvidas na instalação, deslocação e remoção dos aparelhos tem as qualificações necessárias para o manuseamento do refrigerante e a instalação das tubagens conforme estipulado pelas leis e regulamentos locais, sendo uma pessoa que fez formação nas matérias relacionadas com o manuseamento de refrigerante e a instalação de tubagens nos ares condicionados fabricados pela Toshiba Carrier Corporation ou, como alternativa, que foi instruída nessas matérias por parte de indivíduos com a formação devida e, portanto, que adquiriram todo o conhecimento relacionado com estas tarefas. • O instalador qualificado, a quem é permitido trabalhar em altura, foi formado em matérias relacionadas com o trabalho em altura com ares condicionados fabricados pela Toshiba Carrier Corporation ou, como alternativa, foi instruído nessas matérias por indivíduos com a formação devida e, portanto, que adquiriram todo o conhecimento relacionado com este trabalho. Técnico de assistência qualificado • O técnico de assistência qualificado é uma pessoa que instala, repara, dá manutenção a, muda de lugar e remove os ares condicionados fabricados pela Toshiba Carrier Corporation. Esta pessoa deve ter formação para instalar, reparar, dar manutenção a, mudar de lugar e remover ares condicionados fabricados pela Toshiba Carrier Corporation ou, como alternativa, deve ter sido instruído nessas operações por parte de indivíduos com a formação devida e, portanto, que adquiriram todo o conhecimento relacionado com estas operações. • O técnico de assistência qualificado que tem permissão para levar a cabo as ligações eléctricas envolvidas na instalação, reparação, deslocação e remoção tem as qualificações necessárias para realizar essas tarefas conforme estipulado pelas leis e regulamentos locais, sendo uma pessoa que fez formação nas matérias relacionadas com trabalho eléctrico nos ares condicionados fabricados pela Toshiba Carrier Corporation ou, como alternativa, que foi instruída nessas matérias por parte de indivíduos com a formação devida e, portanto, que adquiriram todo o conhecimento relacionado com este trabalho. • O técnico de assistência qualificado que tem permissão para realizar as tarefas de manuseamento do refrigerante e de instalação das tubagens envolvidas na instalação, reparação, deslocação e remoção dos aparelhos tem as qualificações necessárias para o manuseamento do refrigerante e a instalação das tubagens conforme estipulado pelas leis e regulamentos locais, sendo uma pessoa que fez formação nas matérias relacionadas com o manuseamento de refrigerante e a instalação de tubagens nos ares condicionados fabricados pela Toshiba Carrier Corporation ou, como alternativa, que foi instruída nessas matérias por parte de indivíduos com a formação devida e, portanto, que adquiriram todo o conhecimento relacionado com estas tarefas. • O técnico de assistência qualificado, a quem é permitido trabalhar em altura, foi formado em matérias relacionadas com o trabalho em altura com ares condicionados fabricados pela Toshiba Carrier Corporation ou, como alternativa, foi instruído nessas matérias por indivíduos com a formação devida e, portanto, que adquiriram todo o conhecimento relacionado com este trabalho. Definição do Equipamento de Protecção Aquando do transporte, instalação, manutenção, reparação ou remoção do ar condicionado, use luvas e vestuário de protecção. Além do equipamento de protecção normal, use o equipamento de protecção descrito abaixo, se levar a cabo os trabalhos especiais detalhados na seguinte tabela. É perigoso não usar o equipamento de protecção adequado porque fica mais susceptível a sofrer lesões, queimaduras, choques eléctricos e outros ferimentos. Trabalho efectuado Equipamento de protecção usado Todos os tipos de trabalhos Luvas de protecção Vestuário de protecção Trabalho eléctrico Luvas para proteger electricistas e calor Sapatos isoladores Vestuário que proteja contra choques eléctricos Trabalhos em altura (50 cm ou mais) Capacetes industriais Transporte de objectos pesados Sapatos com protecção adicional para os dedos dos pés Reparação da unidade exterior Luvas para proteger electricistas e calor 34-PT +00EH99884801-2_01EN.book Page 18 Monday, January 28, 2013 7:54 PM 1 Indicações de Aviso sobre o Ar Condicionado Indicação de aviso WARNING ELECTRICAL SHOCK HAZARD Disconnect all remote electric power supplies before servicing. WARNING Moving parts. Do not operate unit with grille removed. Stop the unit before the servicing. CAUTION High temperature parts. You might get burned when removing this panel. CAUTION Do not touch the aluminum fins of the unit. Doing so may result in injury. CAUTION BURST HAZARD Open the service valves before the operation, otherwise there might be the burst. Precauções de segurança O fabricante não assumirá nenhuma responsabilidade por danos causados pela não observação das descrições dadas neste manual. Descrição ADVERTÊNCIAS ADVERTÊNCIAS Geral PERIGO DE CHOQUE ELÉCTRICO Desligue todas as fontes de alimentação eléctrica remotas antes de uma operação de assistência. • Antes de instalar o ar condicionado, leia cuidadosamente o Manual de Instalação e siga as instruções fornecidas para instalar o ar condicionado. • Apenas um instalador qualificado ou um técnico de assistência qualificado pode efectuar o trabalho de instalação. A instalação incorrecta pode provocar fugas de água, choques eléctricos ou incêndio. • Não utilize um refrigerante diferente do especificado para complementação ou substituição. Caso contrário, uma pressão anormalmente alta pode ser gerada no ciclo de refrigeração, o que pode resultar numa falha ou explosão do produto ou em ferimentos pessoais. • Antes de abrir a grelha de entrada da unidade interior ou painel de serviço da unidade exterior, coloque o disjuntor eléctrico na posição OFF. A não colocação do disjuntor eléctrico na posição OFF pode provocar choques eléctricos devido ao contacto com as peças internas. Apenas um instalador qualificado(*1) ou um técnico de assistência qualificado(*1) pode retirar a grelha de entrada da unidade interior ou o painel de serviço da unidade exterior e efectuar os trabalhos necessários. • Antes de efectuar o trabalho de instalação, manutenção, reparação ou de eliminação, certifique-se de que coloca o disjuntor eléctrico na posição OFF. Caso contrário, podem ocorrer choques eléctricos. • Coloque um sinal “Trabalho em progresso” junto ao disjuntor eléctrico durante a realização de trabalhos de instalação, manutenção, reparação ou eliminação. Existe um perigo de choques eléctricos se colocar o disjuntor eléctrico na posição ON por engano. • Apenas um instalador qualificado(*1) ou um técnico de assistência qualificado(*1) pode efectuar o trabalho em altura com um suporte de 50 cm ou mais, ou retirar a grelha de entrada da unidade interior para efectuar o trabalho. • Use luvas de protecção e vestuário de trabalho de segurança durante a instalação, a assistência e a eliminação. • Não toque na barbatana de alumínio da unidade. Pode ferir-se, se o fizer. Se for necessário tocar na palheta por algum motivo, coloque primeiro as luvas de protecção e o vestuário de trabalho de segurança e, em seguida, prossiga. • Não suba para nem coloque objectos sobre a unidade exterior. Pode cair ou os objectos podem cair da unidade exterior e provocar ferimentos. • Quando trabalhar em altura, utilize uma escada em conformidade com a norma ISO 14122 e efectue o procedimento descrito nas instruções da escada. Use também um capacete industrial como equipamento de protecção para efectuar o trabalho. • Antes de limpar o filtro ou outras peças da unidade exterior, não se esqueça de colocar o disjuntor eléctrico na posição OFF e um sinal “Trabalho em progresso” junto ao disjuntor eléctrico antes de continuar o trabalho. • Antes de trabalhar em altura, coloque um sinal no local para que ninguém se aproxime do local de trabalho antes de continuar com o trabalho. As peças e outros objectos podem cair da parte superior, ferindo possivelmente uma pessoa que esteja por baixo. Enquanto realiza o trabalho, utilize um capacete para protecção contra a queda de objectos. • O refrigerante utilizado por este ar condicionado é o R410A. • O aparelho de ar condicionado deve ser transportado numa condição estável. Se encontrar qualquer parte do produto quebrada, contacte o seu revendedor. • Se o aparelho de ar condicionado tiver que ser transportado manualmente, duas ou mais pessoas devem carregá-lo. • Não mova ou repare qualquer unidade. Há tensão alta no interior da unidade. Pode sofrer um choque eléctrico quando retirar a tampa e a unidade principal. ADVERTÊNCIAS Peças rotativas. Não utilize a unidade com a grelha retirada. Pare a unidade antes de uma operação de assistência. PRECAUÇÃO Peças com elevadas temperaturas. Pode queimar-se quando retirar este painel. PRECAUÇÃO Não toque nas barbatanas de alumínio da unidade. Caso contrário, poderá ferir-se. Selecção do local de instalação • Quando o aparelho de ar condicionado for instalado em um ambiente pequeno, providencie medidas apropriadas para assegurar que a concentração de fuga do refrigerante que possa ocorrer no ambiente não exceda o nível crítico. • Não instale num local onde gases inflamáveis possam vazar. Se algum gás vazar e acumular-se ao redor da unidade, o mesmo pode inflamar e causar um incêndio. • Para transportar o ar condicionado, use sapatos com protecções adicionais para os dedos dos pés. • Para transportar o ar condicionado, não segure nas faixas existentes à volta da embalagem de cartão. Pode ferir-se, se as faixas se partirem. • Instale a unidade interior a pelo menos 2,5 m acima do nível do chão, caso contrário, os utilizadores podem ferir-se ou sofrerem choques eléctricos se tocarem com os dedos ou outros objectos na unidade interior com o ar condicionado em funcionamento. • Não coloque nenhum aparelho de combustão num local exposto directamente ao vento do ar condicionado, caso contrário, pode provocar uma combustão imperfeita. PRECAUÇÃO PERIGO DE EXPLOSÃO Abra as válvulas de serviço antes de utilizar o equipamento, caso contrário, pode ocorrer uma explosão. Instalação • Quando suspender a unidade interior, tem de utilizar as porcas (M10 ou W3/8) e os parafusos de fixação (M10 ou W3/8). • Instale o aparelho de ar condicionado firmemente num lugar onde a base possa suportar o peso adequadamente. Se a força não for suficiente, a unidade pode cair e provocar lesões. • Siga as instruções fornecidas no Manual de Instalação para instalar o ar condicionado. O incumprimento destas instruções pode provocar a queda do produto ou produzir ruído, vibração, vazamento de água ou outros problemas. 35-PT – 18 – 36-PT +00EH99884801-2_01EN.book Page 19 Monday, January 28, 2013 7:54 PM – 19 – • Realize o trabalho de instalação especificado para a protecção adequada contra a possibilidade de ventos fortes e terramotos. Se o aparelho de ar condicionado não for instalado adequadamente, uma unidade pode tombar ou cair, provocando um acidente. • Se o gás refrigerante vazar durante o trabalho de instalação, ventile o ambiente imediatamente. Se o gás refrigerante vazado entrar em contacto com fogo, poderá ser gerado um gás nocivo. • Utilize uma empilhadora para transportar as unidades do aparelho de ar condicionado e utilize um guincho ou guindaste para sua instalação. • O comprimento da conduta de aspiração deve ser mais longo do que 850 mm. • Certifique-se de utilizar um capacete para proteger a sua cabeça contra a queda de objectos. Especialmente, quando trabalhar sob uma abertura de inspecção, certifique-se de utilizar o capacete para proteger a sua cabeça contra a queda de objectos da abertura. • A unidade pode ser acedida desde o painel de serviço mostrado na figura. Tubagem do refrigerante • Instale correctamente o tubo de refrigeração durante a instalação antes de colocar o ar condicionado em funcionamento. Se operar o compressor com a válvula aberta e sem o tubo de refrigerante, o compressor suga o ar e os ciclos de refrigeração ficam sobrepressurizados, esta situação pode provocar uma lesão. • Aperte a porca de alargamento com uma chave dinamométrica e da forma especificada. O aperto excessivo da porca de alargamento pode provocar uma racha na porca de alargamento após um longo período, que pode resultar na fuga de refrigerante. • Após o trabalho de instalação, confirme que não haja nenhuma fuga do gás refrigerante. Se houver uma fuga de gás refrigerante para o compartimento que entre em contacto com uma chama, por exemplo, no caso de um fogão, poderá gerar gás tóxico. • Quando instalar ou mudar o ar condicionado, siga as instruções fornecidas no Manual de Instalação e elimine o ar completamente para que nenhum gás para além do refrigerante seja misturado no ciclo de refrigeração. A não eliminação completa do ar pode provocar uma avaria no ar condicionado. • Tem de utilizar gás de nitrogénio para o teste de impermeabilidade. • Tem de ligar o tubo de carga para que não exista nenhuma folga. Cablagem eléctrica • Apenas um instalador qualificado(*1) ou um técnico de assistência qualificado(*1) pode efectuar o trabalho eléctrico do ar condicionado. Este trabalho não deve ser efectuado por uma pessoa não qualificada em nenhuma circunstância porque um trabalho executado incorrectamente pode resultar em choques eléctricos e/ou fugas eléctricas. • Para conectar os cabos eléctricos, reparar peças eléctricas ou efectuar outros trabalhos eléctricos, utilize luvas para protecção de electricistas e calor, sapatos isoladores e vestuário para a protecção contra choques eléctricos. A não utilização deste equipamento de protecção pode resultar em choques eléctricos. • Utilize cablagens que cumpram as especificações fornecidas no Manual de Instalação e as condições nas leis e regulamentos locais. A utilização de cablagens que não cumpram as especificações pode originar choques eléctricos, fugas eléctricas, fumo e/ou um incêndio. • Conecte o cabo de terra. (fio de terra) Se a ligação à terra ficar incompleta, podem ocorrer choques eléctricos. • Não conecte os cabos de terra a tubos de gás, tubos de água, pára-raios ou fios de terra de telefone. • Depois de concluir o trabalho de reparação ou mudança, verifique se os fios de terra estão ligados correctamente. • Instale um disjuntor eléctrico que cumpra as especificações fornecidas no manual de instalação e as condições nas leis e regulamentos locais. • Instale o disjuntor eléctrico num local de fácil acesso ao agente. • Quando instalar um disjuntor eléctrico no exterior, instale um disjuntor concebido para utilizar no exterior. • Não deve estender o cabo de alimentação em nenhuma circunstância. O problema da ligação em locais em que o cabo é ampliado pode originar fumo e/ou um incêndio. • O trabalho de ligação de cabos e fios eléctricos deve ser feito em conformidade com as leis e regulamentos da comunidade em questão e com o manual de instalação. Se assim não for, o resultado pode ser electrocussão ou curto-circuito. Teste de funcionamento • Antes de utilizar o ar condicionado após a conclusão do trabalho, verifique se a tampa da caixa do equipamento eléctrico da unidade interior e o painel de serviço da unidade exterior estão fechados e coloque o disjuntor eléctrico na posição ON. Pode sofrer um choque eléctrico se ligar a corrente eléctrica sem efectuar primeiro estas verificações. • Quando detectar algum tipo de problema (como, por exemplo, quando aparecer uma indicação de erro, cheiro a queimado, sons anormais, o ar condicionado não arrefecer ou aquecer, ou existir uma fuga de água) no aparelho de ar condicionado, não toque no ar condicionado, mas coloque o disjuntor eléctrico na posição desligada (OFF) e contacte um técnico de assistência qualificado. Tome as medidas necessárias para garantir que a corrente eléctrica não será ligada (através da colocação do aviso “fora de serviço” junto ao disjuntor de serviço, por exemplo) até chegar o técnico de assistência qualificado. Se continuar a utilizar o ar condicionado com problemas, pode aumentar a ocorrência de problemas mecânicos e provocar choques eléctricos ou outros problemas. • Terminados os trabalhos, utilize um aparelho de testes de isolamento (megaohmímetro de 500V) para assegurar que a resistência é de 1 MΩ ou mais entre a secção de carga e a secção metálica sem carga (secção de terra). Se o valor da resistência for baixo, ocorre uma fuga ou um choque eléctrico no lado do utilizador. • Depois de concluir o trabalho de instalação, verifique se existem fugas de refrigerante, a resistência do isolamento e a drenagem de água. Realize um teste para verificar se o ar condicionado está a funcionar correctamente. 37-PT Explicações fornecidas ao utilizador • Depois de concluir o trabalho de instalação, indique o local de instalação do disjuntor eléctrico ao utilizador. Se o utilizador não souber a localização do disjuntor eléctrico, não será capaz de o desligar no caso de ocorrer um problema no ar condicionado. • Se a grelha da ventoinha estiver danificada, não se aproxime da unidade exterior, mas coloque o disjuntor na posição desligada (OFF) e contacte um técnico de assistência qualificado(*1) para proceder à reparação. Não coloque o disjuntor eléctrico na posição ON até ao fim das reparações. • Depois de concluir o trabalho de instalação, utilize o Manual do Proprietário para explicar ao cliente como utilizar e manter a unidade. Mudança • Apenas um instalador qualificado(*1) ou um técnico de assistência qualificado(*1) pode mudar o ar condicionado. É perigoso o ar condicionado ser mudado por uma pessoa não qualificada porque pode ocorrer um incêndio, choques eléctricos, lesões, fugas de água, ruídos e/ou vibrações. • Quando efectuar o trabalho de bombagem, encerre o compressor antes de desligar o tubo de refrigerante. Se desconectar o tubo do refrigerante com a válvula de serviço ainda aberta e o compressor ainda em funcionamento, faz com que o ar ou outros gaes sejam aspirados, aumentando a pressão interna do ciclo de refrigeração para um nível anormalmente elevado, podendo causar a ruptura, lesões ou outros problemas. PRECAUÇÃO Instalação do ar condicionado de novo refrigerante • ESTE APARELHO DE AR CONDICIONADO UTILIZA O NOVO REFRIGERANTE HFC (R410A) QUE NÃO DESTRÓI A CAMADA DE OZONO. • As características do refrigerante R410A são: absorve com facilidade a água, membrana oxidante ou óleo, e a sua pressão é aproximadamente 1,6 vez mais alta do que a do refrigerante R22. O óleo de refrigeração também foi modificado em conformidade com o novo refrigerante. Portanto, durante o trabalho de instalação, certifique-se de impedir a entrada de água, poeira, refrigerante anterior ou óleo de refrigeração anterior no ciclo de refrigeração. • Para prevenir o carregamento dum refrigerante ou óleo de refrigeração incorrecto, os tamanhos das secções de conexão do orifício de carga da unidade principal e das ferramentas de instalação foram modificados dos tamanhos utilizados para o refrigerante convencional. • Portanto, é preciso utilizar ferramentas especiais para o novo refrigerante (R410A). • Para a conexão da tubagem, utilize uma tubagem nova e limpa projectada para o refrigerante R410A, e tome cuidado para evitar a entrada de água ou poeira. Para desligar o aparelho da alimentação eléctrica principal. • Este aparelho tem de ser ligado à alimentação eléctrica principal através de um interruptor com uma distância de contacto de, pelo menos, 3 mm. Deve utilizar um fusível de instalação (qualquer tipo pode ser utilizado) para a linha de fornecimento de energia deste ar condicionado. (*1) Consulte a “Definição de Instalador Qualificado ou de Técnico de Assistência Qualificado”. 38-PT +00EH99884801-2_01EN.book Page 20 Monday, January 28, 2013 7:54 PM Hartelijk dank voor uw aankoop van deze Toshiba-airconditioner. Lees deze instructies zorgvuldig. Ze bevatten informatie die voldoet aan de richtlijn voor “Machines” (richtlijn 2006/ 42/EC). Zorg dat u de instructies begrijpt. Geef na het installeren deze Installatiehandleiding en tevens de bijgeleverde Gebruiksaanwijzing aan de klant/ gebruiker en vraag hem/haar de documentatie ter referentie op een veilige plaats te bewaren. Definitie van beschermende kleding Wanneer de airconditioner wordt vervoerd, geïnstalleerd, onderhouden, gerepareerd of verwijderd, draag beschermende handschoenen en veiligheidswerkkleding. Draag naast dergelijke normale beschermende kleding de hieronder beschreven beschermende uitrusting bij het uitvoeren van speciale taken zoals aangegeven in de volgende tabel. Niet dragen van de juiste beschermende uitrusting is gevaarlijk omdat u dan meer blootstaat aan letsel, brandwonden, elektrische schokken en andere verwondingen. Algemene beschrijving: Airconditioner Te verrichten werkzaamheden Definitie van bevoegd installateur of bevoegd onderhoudsmonteur De airconditioner moet worden geïnstalleerd, onderhouden, gerepareerd en uiteindelijk weggedaan door een bevoegd installateur of bevoegd onderhoudsmonteur. Wanneer een van deze taken verricht moet worden, verzoekt u dan een bevoegd installateur of bevoegd onderhoudsmonteur om dit voor u te doen. Een bevoegd installateur of bevoegd onderhoudsmonteur is een persoon die beschikt over de kennis en bevoegdheden die staan vermeld in de volgende tabel. 39-NL Persoon Kennis en bevoegdheden waarover de persoon moet beschikken Bevoegd installateur • De bevoegde installateur is een persoon die door Toshiba Carrier Corporation gemaakte airconditioners installeert, onderhoudt, verplaatst en verwijderd. Hij of zij is opgeleid om door Toshiba Carrier Corporation gemaakte airconditioners te installeren, onderhouden, verplaatsen en te verwijderen. Deze persoon kan ook iemand zijn die in dergelijke taken is geïnstrueerd door een persoon of personen die zijn opgeleid en is dus goed op de hoogte van de kennis voor deze taken. • De bevoegde installateur die bevoegd is om het elektrische gedeelte van de installatie, verplaatsing en verwijdering op zich te nemen beschikt over de kwalificaties voor deze elektrische werkzaamheden zoals voorzien in plaatselijke wetten en regelgeving. Deze persoon is opgeleid voor werkzaamheden aan het elektrische systeem van de airconditioners gemaakt door Toshiba Carrier Corporation. Deze persoon kan ook iemand zijn die in dergelijke taken is geïnstrueerd door een persoon of personen die zijn opgeleid en is dus goed op de hoogte van de kennis voor dit soort werk. • De bevoegde installateur die bevoegd is om het koel- en leidingenwerk van de installatie, verplaatsing en verwijdering op zich te nemen beschikt over de kwalificaties voor deze koel- en leidingenwerkzaamheden zoals voorzien in plaatselijke wetten en regelgeving. Deze persoon is opgeleid voor koel- en leidingenwerkzaamheden aan de airconditioners gemaakt door Toshiba Carrier Corporation. Deze persoon kan ook iemand zijn die in dergelijke taken is geïnstrueerd door een persoon of personen die zijn opgeleid en is dus goed op de hoogte van de kennis voor dit soort werk. • De bevoegde installateur die bevoegd is om op hoogte te werken is opgeleid om op hoogten te werken met airconditioners gemaakt door Toshiba Carrier Corporation. Deze persoon kan ook iemand zijn die in dergelijke taken is geïnstrueerd door een persoon of personen die zijn opgeleid en is dus goed op de hoogte van de kennis voor dit soort werk. Bevoegd onderhouds-monteur • De bevoegde onderhoudspersoon is een persoon die door Toshiba Carrier Corporation gemaakte airconditioners installeert, repareert, onderhoudt, verplaatst en verwijderd. Hij of zij is opgeleid om door Toshiba Carrier Corporation gemaakte airconditioners te installeren, repareren, onderhouden, verplaatsen en te verwijderen. Deze persoon kan ook iemand zijn die in dergelijke taken is geïnstrueerd door een persoon of personen die zijn opgeleid en is dus goed op de hoogte van de kennis voor deze taken. • De bevoegde onderhoudspersoon die bevoegd is om het elektrische gedeelte van de installatie, reparatie, verplaatsing en verwijdering op zich te nemen beschikt over de kwalificaties voor deze elektrische werkzaamheden zoals voorzien in plaatselijke wetten en regelgeving. Deze persoon is opgeleid voor werkzaamheden aan het elektrische systeem van de airconditioners gemaakt door Toshiba Carrier Corporation. Deze persoon kan ook iemand zijn die in dergelijke taken is geïnstrueerd door een persoon of personen die zijn opgeleid en is dus goed op de hoogte van de kennis voor dit soort werk. • De bevoegde installateur die bevoegd is om het koel- en leidingenwerk van de installatie, reparatie, verplaatsing en verwijdering op zich te nemen beschikt over de kwalificaties voor deze koel- en leidingenwerkzaamheden zoals voorzien in plaatselijke wetten en regelgeving. Deze persoon is opgeleid voor koel- en leidingenwerkzaamheden aan de airconditioners gemaakt door Toshiba Carrier Corporation. Deze persoon kan ook iemand zijn die in dergelijke taken is geïnstrueerd door een persoon of personen die zijn opgeleid en is dus goed op de hoogte van de kennis voor dit soort werk. • De bevoegde onderhoudspersoon die bevoegd is om op hoogte te werken is opgeleid om op hoogten te werken met airconditioners gemaakt door Toshiba Carrier Corporation. Deze persoon kan ook iemand zijn die in dergelijke taken is geïnstrueerd door een persoon of personen die zijn opgeleid en is dus goed op de hoogte van de kennis voor dit soort werk. – 20 – Beschermende kleding Alle soorten werk Werkhandschoenen Veiligheidswerkkleding Elektrische werkzaamheden Handschoenen die bescherming bieden tegen hitte en elektriciteit Isolerende schoenen Beschermende kleding tegen elektrische schokken Werk uitgevoerd op hoogte (50 cm of meer) Veiligheidshelm voor industrieel gebruik Vervoer van zware voorwerpen Schoenen met verstevigde neuzen Reparatie van buiteneenheden Handschoenen die bescherming bieden tegen hitte en elektriciteit 40-NL +00EH99884801-2_01EN.book Page 21 Monday, January 28, 2013 7:54 PM – 21 – Waarschuwingsaanduidingen op de airconditioner Waarschuwingsaanduiding WARNING ELECTRICAL SHOCK HAZARD Disconnect all remote electric power supplies before servicing. WARNING Moving parts. Do not operate unit with grille removed. Stop the unit before the servicing. CAUTION High temperature parts. You might get burned when removing this panel. CAUTION Do not touch the aluminum fins of the unit. Doing so may result in injury. Beschrijving WAARSCHUWING GEVAAR VOOR ELEKTRISCHE SCHOK Verbreek alle externe stroomvoorzieningsaansluitingen alvorens enig onderhoud te verrichten. WAARSCHUWING Bewegende delen. Schakel het apparaat niet in wanneer het voorrooster is verwijderd. Stop de werking van het apparaat alvorens enig onderhoud te verrichten. VOORZICHTIG Delen met hoge temperaturen. Bij het verwijderen van dit paneel is bestaan de kans dat u zich brandt. VOORZICHTIG De aluminium vinnen van de unit niet aanraken. Dat zou tot ernstige verwondingen kunnen leiden. 1 Voorzorgen voor de veiligheid De fabrikant is niet aansprakelijk voor schade ten gevolge van het niet opvolgen van aanwijzingen in deze handleiding. WAARSCHUWING Algemeen • Alvorens u begint met het installeren van de airconditioner, moet u de installatiehandleiding aandachtig doorlezen. Volg beslist alle gegeven aanwijzingen voor het installeren van de airconditioner op. • Het installeren mag alleen door een gekwalificeerde installateur of onderhoudsmonteur worden uitgevoerd. Een foute installatie resulteert mogelijk in waterlekkage, elektrische schokken of brand. • Gebruik voor het bijvullen of vervangen geen ander koelmiddel dan het gespecificeerde middel. Er wordt anders namelijk mogelijk abnormale hoge druk in de koelcyclus opgebouwd met een onjuiste werking, ontploffing of lichamelijk letsel als gevolg. • Voordat u het inlaatrooster van de binneneenheid of het onderhoudspaneel van de buiteneenheid opent, zet u eerst de stroomonderbreker in de OFF-stand. Als u verzuimt de stroomonderbreker in de OFF-stand te zetten, loopt u de kans op een elektrische schok bij aanraken van de inwendige onderdelen. Alleen een bevoegd installateur(*1) of een bevoegd onderhoudsmonteur(*1) mag het inlaatrooster van de binneneenheid of het onderhoudspaneel van de buiteneenheid verwijderen en het vereiste werk verrichten. • Alvorens u begint met installeren, onderhoud, reparaties of werk voor afdanken van het apparaat, zet u eerst de stroomonderbreker in de OFF-stand. Anders loopt u de kans een elektrische schok te krijgen. • Plaats een bordje “werk in uitvoering” bij de stroomonderbreker tijdens het installeren, onderhoud, reparatiewerk of werk voor afdanken van het apparaat. Als iemand per vergissing de stroomonderbreker in de ON-stand zet, loopt u de kans een elektrische schok te krijgen. • Alleen een bevoegd installateur(*1) of een bevoegd onderhoudsmonteur(*1) mag werkzaamheden op hoogte verrichten met een trapje van 50 cm of meer, of het inlaatrooster van de binneneenheid verwijderen om daarbinnen werk te verrichten. • Draag tijdens het installeren, onderhoud en afdanken van het apparaat altijd werkhandschoenen en veiligheidskleding. • De aluminium vin van de unit niet aanraken. Anders zou u zich er aan kunnen verwonden. Als het nodig is de koelvin aan te raken, trekt u eerst werkhandschoenen en beschermende kleding aan en begint u dan pas met het werk. • Plaats nooit voorwerpen op de buiteneenheid en klim er niet bovenop. U zou er af kunnen vallen of een voorwerp kan van de buiteneenheid af vallen en letsel veroorzaken. • Gebruik voor het werken op hoogte een ladder die voldoet aan de ISO 14122-norm en volg de aanwijzingen in de handleiding van de ladder. Draag tevens een helm voor industrieel gebruik ter bescherming voordat u aan het werk gaat. • Voor schoonmaken van het filter of andere onderdelen van de buiteneenheid zet u altijd eerst de stroomonderbreker in de OFF-stand en plaatst u een bordje “werk in uitvoering” bij de stroomonderbreker voordat u aan het werk gaat. • Bij het werken op hoogte dient u voordat u start een waarschuwingsbord te plaatsen zodat niemand uw werkplek te dicht nadert. Anders zouden voorbijgangers gewond kunnen raken door vallende onderdelen en andere voorwerpen. Draag tijdens het uitvoeren een helm ter bescherming tegen mogelijk vallende onderdelen. • Het koelmiddel dat is toegepast in deze airconditioner is R410A. • De airconditioner moet stabiel worden getransporteerd. Neem direct contact op met de plaats van aankoop indien onderdelen beschadigd zijn. • Draag de airconditioner altijd met minimaal 2 personen indien deze met de hand moet worden verplaatst. • Verplaats of herstel het apparaat niet zelf. De binnenkant van de unit staat onder hoge spanning. U kunt bij het verwijderen van het deksel en de hoofdunit een elektrische schok krijgen. Keuze van de installatieplaats CAUTION BURST HAZARD Open the service valves before the operation, otherwise there might be the burst. VOORZICHTIG GEVAAR VOOR UITBARSTING Open voor enige ingreep eerst de veiligheidskleppen, anders kan er een uitbarsting volgen. • Indien de airconditioner in een kleine ruimte wordt geplaatst, neem dan maatregelen om te verzekeren dat lekkend koelmiddel in de ruimte niet de limiet kan overschrijden. • Installeer niet op plaatsen waar ontvlambaar gas kan lekken. Lekkend gas zou namelijk rond de unit op kunnen hopen, worden ontstoken en brand veroorzaken. • Bij het vervoeren van de airconditioner dient u schoeisel met verstevigde neuzen te dragen. • Bij het vervoeren van de airconditioner mag u die niet optillen aan de banden rond de verpakkingsdoos. Als de banden zouden breken, loopt u de kans op verwondingen. • Installeer de binneneenheid tenminste 2,5 m boven de vloer, anders zouden gebruikers letsel of een elektrische schok kunnen oplopen als ze hun vingers of iets anders in de binneneenheid steken terwijl de airconditioner werkt. • Zet geen verbrandingsapparaat op een plaats waar het in de directe luchtstroom van de airconditioner staat, anders kan er onvolledige verbranding plaatsvinden. Installatie • Wanneer de binneneenheid moet worden opgehangen, gebruikt u de daarvoor bestemde ophangbouten (M10 of W3/8) en moeren (M10 of W3/8). • Installeer de airconditioner goed op een plaats die stevig genoeg voor het gewicht van de unit is. Als het ophangpunt niet stevig genoeg is, kan het apparaat vallen, hetgeen letsel kan veroorzaken. • Bij het installeren van de airconditioner volgt u de aanwijzingen in de installatiehandleiding. De unit zou kunnen vallen, kantelen of extra ruis, trillingen, waterlekkage en andere problemen veroorzaken indien u deze aanwijzingen niet opvolgt. • Voer de vereiste installatie-werkzaamheden uit ter bescherming tegen wind, storm en aardbevingen. De airconditioner kan vallen en ernstige ongelukken veroorzaken indien deze fout is geïnstalleerd. 41-NL 42-NL +00EH99884801-2_01EN.book Page 22 Monday, January 28, 2013 7:54 PM • Ventileer de ruimte direct indien er tijdens het installeren koelmiddel lekt. Indien lekkend koelmiddel in contact met vuur komt, komt mogelijk giftig gas vrij. • Gebruik een vorkheftruck voor het verplaatsen van de airconditioner-units en een takel of dergelijk geschikt voorwerp voor het installeren. • De lengte van het zuigkanaal moet langer dan 850 mm zijn. • Draag een helm om uw hoofd tegen vallende onderdelen te beschermen. Het dragen van een helm ter bescherming tegen vallende onderdelen is vooral belangrijk wanneer u onder inspectieopeningen werkt. • Toegang tot de unit is mogelijk via het onderhoudspaneel zoals in de afbeelding wordt getoond. Uitleg aan de gebruiker • Monteer tijdens de installatiewerkzaamheden de koelmiddelleiding nauwkeurig voordat de airconditioner wordt bediend. Als de compressor wordt bediend met de klep open en zonder koelmiddelbuis, zuigt de compressor lucht aan en ontstaat er overdruk in het koelsysteem, hetgeen kan leiden tot verwondingen. • Draai de flensmoer met een momentsleutel aan op de voorgeschreven manier. Als de flensmoer al te krachtig wordt aangedraaid, kan de moer een tijd later barsten, waardoor koelmiddel kan gaan lekken. • Controleer na het installeren dat er geen koelmiddel lekt. Wanneer ontsnapt gasvormig koelmiddel in de buurt of in contact komt met open vuur, zoals bij een gasfornuis, kunnen giftige gassen worden gevormd. • Na het installeren of verplaatsen van de airconditioner volgt u de aanwijzingen in de installatiehandleiding voor het volledig ontluchten van de leidingen, zodat er in het koelsysteem geen ander gas overblijft dan alleen het koelmiddel. Bij onvolledig ontluchten kan de airconditioner niet goed functioneren. • Gebruik stikstofgas voor de test op luchtdichtheid. • De oplaadslang moet zo worden aangesloten dat deze niet slap hangt. Elders opstellen • Na voltooiing van het installatiewerk vertelt u de gebruiker waar de stroomonderbreker zich bevindt. Als de gebruiker niet weet waar de stroomonderbreker zit, kan hij of zij de airconditioner niet uitschakelen wanneer er zich een storing voordoet in de werking. • Indien het ventilatorrooster is beschadigd, raak dan de buitenunit niet aan maar zet de circuitonderbreker in de OFFstand en verzoek een bevoegd onderhoudsmonteur (*1) om reparatie. Zet de stroomonderbreker niet terug in de ONstand totdat alle vereiste reparaties zijn voltooid. • Na voltooiing van het installatiewerk vertelt u aan de hand van de eigenaarshandleiding de gebruiker hoe het apparaat te bedienen en te onderhouden. Koelmiddelleiding • Alleen een bevoegd installateur(*1) of een bevoegd onderhoudsmonteur(*1) mag de airconditioner verplaatsen. Het is gevaarlijk als een onbevoegde de airconditioner verplaatst, aangezien dat kan leiden tot gevaar voor brand, elektrische schokken, verwondingen, waterlekkage, bijgeluiden en/of trillingen. • Bij uitvoeren van werkzaamheden wanneer de pomp gestopt is, schakelt u eerst de compressor uit voordat u de koelmiddelbuis losmaakt. Wanneer u de koelmiddelleiding loskoppelt met de onderhoudsklep open en de compressor in bedrijf, wordt lucht en gas opgezogen waardoor de druk binnen de koelcyclus te hoog oploopt, wat mogelijk kan leiden tot barsten, letsel of andere problemen. VOORZICHTIG Elektrische bedrading • Alleen een bevoegd installateur(*1) of een bevoegd onderhoudsmonteur(*1) mag elektrische werkzaamheden aan de airconditioner verrichten. Onder geen voorwaarde mag dit werk worden verricht door een onbevoegde, aangezien fouten of vergissingen kunnen leiden tot elektrische schokken en/of kortsluiting of lekstroom. • Bij het aansluiten van de stroomdraden, het repareren van elektrische onderdelen of het verrichten van andere elektrische werkzaamheden dient u handschoenen ter bescherming tegen hitte en isolerend schoeisel en beschermende kleding ter bescherming tegen elektrische schokken te dragen. Als u dergelijke beschermende kleding niet draagt, loopt u de kans op elektrische schokken. • Gebruik bedrading die voldoet aan de specificaties in de installatiehandleiding en de ter plaatse geldende voorschriften en wetten. Het gebruik van bedrading die niet voldoet aan de specificaties kan resulteren in elektrische schokken, kortsluiting en lekstroom, rookontwikkeling en/of brandgevaar. • Verbind een aardedraad. (aardaansluitingen) Onvolledige aarding kan elektrische schokken veroorzaken. • Sluit aardedraden niet aan op gasleidingen, waterleidingen, bliksemafleiders of aardkabels voor telefoons. • Na het voltooien van de verplaatsing of het reparatiewerk dient u te controleren of de aardleidingen naar behoren zijn aangesloten. • Installeer een stroomonderbreker die voldoet aan de specificaties in de installatiehandleiding en de ter plaatse geldende voorschriften en wetten. • Installeer de stroomonderbreker op een plaats waar die goed toegankelijk is voor de gebruiker. • Als u de stroomonderbreker buitenshuis aanbrengt, let dan goed op dat het een specifiek voor buitengebruik geschikt type is. • Onder geen voorwaarde mag het netsnoer worden verlengd. Aansluitproblemen op een plaats waar het netsnoer is verlengd kunnen leiden tot rookontwikkeling en/of brandgevaar. • Werkzaamheden met elektrische bedrading moeten altijd worden uitgevoerd in overeenstemming met de plaatselijke regelgeving, wetten en de installatiehandleiding. Doet u dit niet, dan kan dat leiden tot elektrocutie of kortsluiting. Installeren van een airconditioner met een nieuw koelmiddel • DEZE AIRCONDITIONER WERKT MET HET NIEUWE HFC-KOELMIDDEL (R410A) DAT DE OZONLAAG NIET AANTAST. • Het R410A koelmiddel heeft de volgende karakteristieken: het absorbeert gemakkelijk water, oxidatiemiddel of olie en de druk is ongeveer 1,6 keer hoger dan de druk van R22 koelmiddel. Behalve het nieuwe koelmiddel is ook de koelolie veranderd. Zorg derhalve dat er tijdens het installeren geen water, stof, ander koelmiddel of olie in de koelcyclus komt. • Om te voorkomen dat een onjuist koelmiddel en koelolie wordt bijgevuld, is het formaat van de verbindingen en bijvulpoort op de unit en het te gebruiken gereedschap voor het installeren anders dan in geval van het conventionele koelmiddel. • U heeft derhalve het speciale gereedschap voor het nieuwe koelmiddel (R410A) nodig. • Gebruik voor het verbinden nieuwe en schone leidingen die voor R410A zijn gefabriceerd zodat er geen water of stof in het systeem kan komen. Het toestel loskoppelen van de netvoeding. • Dit toestel moet aangesloten worden op de netvoeding via een schakelaar met een contactafstand van ten minste 3 mm. De stroomtoevoer van de airconditioner moet voorzien zijn van een installatiezekering (alle types zekeringen kunnen gebruikt worden). Testen • Nadat u de werkzaamheden hebt voltooid dient u voor het inschakelen van de airconditioner eerst te controleren of het deksel van de elektriciteitskast van de binneneenheid en het onderhoudspaneel van de buiteneenheid zijn gesloten, om vervolgens de stroomonderbreker in de ON-stand te zetten. Als u de stroom inschakelt zonder eerst deze punten te controleren, kunt u een elektrische schok krijgen. • Indien er iets mis is met de airconditioner (wanneer u een foutmelding ziet of een brandlucht ruikt, vreemde geluiden hoort of wanneer de airconditioner niet koelt of verwarmt, of wanneer er water uit lekt), raak dan de airconditioner niet aan maar zet de circuitonderbreker in de OFF-stand en neem contact op met een bevoegd onderhoudsmonteur. Neem de nodige maatregelen om te voorkomen dat het apparaat wordt ingeschakeld (schrijf bijvoorbeeld “defect” dichtbij de stroomonderbreker e.d.) totdat de bevoegde onderhoudsmonteur arriveert. Het voortzetten van het gebruik van de airconditioner terwijl er iets mis mee is, kan leiden tot ernstige mechanische defecten, elektrische schokken en andere problemen. • Gebruik na beëindiging van het werk een isolatietester (500V Megger) om te controleren of de weerstand 1 MΩ of meer is tussen het stroomgedeelte en het metalen niet-stroomgedeelte (aardingsgedeelte). Als de weerstandswaarde te gering is, kan er kortsluiting, lekstroom of een elektrische schok optreden aan de gebruikerskant. • Na voltooiing van het installatiewerk controleert u of er geen koelmiddel lekt, of de waterafvoer in orde is en controleert u de weerstand van de isolatie. Vervolgens laat u de airconditioner proefdraaien, om te zien of het apparaat goed werkt. 43-NL (*1) Zie de “Definitie van bevoegd installateur of bevoegd onderhoudsmonteur”. – 22 – 44-NL +00EH99884801-2_01EN.book Page 23 Monday, January 28, 2013 7:54 PM – 23 – Σας ευχαριστούμε για την αγορά αυτού του κλιματιστικού Toshiba. ∆ιαβάστε προσεκτικά αυτές τις οδηγίες που περιλαμβάνουν σημαντικές πληροφορίες που συμμορφώνονται με την Οδηγία σχετικά με τα μηχανήματα (Οδηγία 2006/42/ΕΚ) και βεβαιωθείτε ότι τις κατανοείτε. Μετά την ολοκλήρωση της εργασίας εγκατάστασης, παραδώστε το παρόν Εγχειρίδιο Εγκατάστασης καθώς και το παρεχόμενο Εγχειρίδιο Κατόχου στο χρήστη, και υποδείξτε στο χρήστη να το διατηρεί σε ασφαλές σημείο για μελλοντική παραπομπή. Γενικός χαρακτηρισμός: Κλιματιστική μονάδα Ορισμός Εξειδικευμένου Εγκαταστάτη ή Εξειδικευμένου Τεχνικού Σέρβις Απαιτείται εγκατάσταση, συντήρηση, επισκευή και απόρριψη του κλιματιστικού από εξειδικευμένο εγκαταστάτη ή εξειδικευμένο τεχνικό σέρβις. Όταν απαιτείται εκτέλεση οποιασδήποτε από τις συγκεκριμένες εργασίες, αναθέστε την εκτέλεσή της σε εξειδικευμένο εγκαταστάτη ή εξειδικευμένο τεχνικό σέρβις. Ο εξειδικευμένος εγκαταστάτης ή εξειδικευμένος τεχνικός είναι εκπρόσωπος ο οποίος διαθέτει τα προσόντα και τις γνώσεις που περιγράφονται στον παρακάτω πίνακα. Αντιπρόσωπος 45-GR Προσόντα και γνώσεις τα οποία απαιτείται να διαθέτει ο αντιπρόσωπος Εξειδικευμένος εγκαταστάτης • Ο εξειδικευμένος εγκαταστάτης είναι ένα άτομο που πραγματοποιεί εργασίες εγκατάστασης, συντήρησης, αλλαγής θέσης και αφαίρεσης των κλιματιστικών που κατασκευάζει η Toshiba Carrier Corporation. Το άτομο αυτό έχει εκπαιδευτεί στην εγκατάσταση, συντήρηση, αλλαγή θέσης και αφαίρεση των κλιματιστικών που κατασκευάζει η Toshiba Carrier Corporation ή, εναλλακτικά, έχει διδαχθεί αυτές τις εργασίες από άτομα που έχουν εκπαιδευτεί και είναι επομένως πλήρως εξοικειωμένος με τις γνώσεις που σχετίζονται με αυτές τις εργασίες. • Ο εξειδικευμένος εγκαταστάτης που επιτρέπεται να κάνει τις ηλεκτρικές εργασίες που σχετίζονται με την εγκατάσταση, αλλαγή θέσης και αφαίρεση, διαθέτει τα προσόντα που σχετίζονται με αυτές τις ηλεκτρικές εργασίες όπως ορίζεται από τους τοπικούς νόμους και κανονισμούς, και είναι άτομο που έχει εκπαιδευτεί σε θέματα που σχετίζονται με τις ηλεκτρικές εργασίες σε κλιματιστικά που κατασκευάζονται από την Toshiba Carrier Corporation ή, εναλλακτικά, έχει διδαχθεί αυτές τις εργασίες από άτομα που έχουν εκπαιδευτεί και, επομένως, είναι πλήρως εξοικειωμένος με τις γνώσεις που σχετίζονται με αυτές τις εργασίες. • Ο εξειδικευμένος εγκαταστάτης που επιτρέπεται να χειρίζεται το ψυκτικό και να εκτελεί τις εργασίες σωλήνωσης που σχετίζονται με την εγκατάσταση, αλλαγή θέσης και αφαίρεση, διαθέτει τα προσόντα που σχετίζονται με αυτές τις εργασίες χειρισμού του ψυκτικού και τις εργασίες σωλήνωσης όπως ορίζεται από τους τοπικούς νόμους και κανονισμούς, και είναι άτομο που έχει εκπαιδευτεί σε θέματα που σχετίζονται με τις εργασίες χειρισμού του ψυκτικού και τις εργασίες σωλήνωσης σε κλιματιστικά που κατασκευάζονται από την Toshiba Carrier Corporation ή, εναλλακτικά, έχει διδαχθεί αυτές τις εργασίες από άτομα που έχουν εκπαιδευτεί και, επομένως, είναι πλήρως εξοικειωμένος με τις γνώσεις που σχετίζονται με αυτές τις εργασίες. • Ο εξειδικευμένος εγκαταστάτης που επιτρέπεται να εργάζεται σε ύψη έχει εκπαιδευτεί σε θέματα που σχετίζονται με τις εργασίες σε ύψη με κλιματιστικά που κατασκευάζονται από την Toshiba Carrier Corporation ή, εναλλακτικά, έχει διδαχθεί αυτές τις εργασίες από άτομα που έχουν εκπαιδευτεί και, επομένως, είναι πλήρως εξοικειωμένος με τις γνώσεις που σχετίζονται με αυτές τις εργασίες. Εξειδικευμένος τεχνικός σέρβις • Ο εξειδικευμένος τεχνικός επισκευών είναι ένα άτομο που πραγματοποιεί εργασίες εγκατάστασης, επισκευής, συντήρησης, αλλαγής θέσης και αφαίρεσης των κλιματιστικών που κατασκευάζει η Toshiba Carrier Corporation. Το άτομο αυτό έχει εκπαιδευτεί στην εγκατάσταση, επισκευή, συντήρηση, αλλαγή θέσης και αφαίρεση των κλιματιστικών που κατασκευάζει η Toshiba Carrier Corporation ή, εναλλακτικά, έχει διδαχθεί αυτές τις εργασίες από άτομα που έχουν εκπαιδευτεί και είναι επομένως πλήρως εξοικειωμένος με τις γνώσεις που σχετίζονται με αυτές τις εργασίες. • Ο εξειδικευμένος τεχνικός επισκευών που επιτρέπεται να κάνει τις ηλεκτρικές εργασίες που σχετίζονται με την εγκατάσταση, επισκευή, αλλαγή θέσης και αφαίρεση, διαθέτει τα προσόντα που σχετίζονται με αυτές τις ηλεκτρικές εργασίες όπως ορίζεται από τους τοπικούς νόμους και κανονισμούς, και είναι άτομο που έχει εκπαιδευτεί σε θέματα που σχετίζονται με τις ηλεκτρικές εργασίες σε κλιματιστικά που κατασκευάζονται από την Toshiba Carrier Corporation ή, εναλλακτικά, έχει διδαχθεί αυτές τις εργασίες από άτομα που έχουν εκπαιδευτεί και, επομένως, είναι πλήρως εξοικειωμένος με τις γνώσεις που σχετίζονται με αυτές τις εργασίες. • Ο εξειδικευμένος τεχνικός επισκευών που επιτρέπεται να χειρίζεται το ψυκτικό και να εκτελεί τις εργασίες σωλήνωσης που σχετίζονται με την εγκατάσταση, επισκευή, αλλαγή θέσης και αφαίρεση, διαθέτει τα προσόντα που σχετίζονται με αυτές τις εργασίες χειρισμού του ψυκτικού και τις εργασίες σωλήνωσης όπως ορίζεται από τους τοπικούς νόμους και κανονισμούς, και είναι άτομο που έχει εκπαιδευτεί σε θέματα που σχετίζονται με τις εργασίες χειρισμού του ψυκτικού και τις εργασίες σωλήνωσης σε κλιματιστικά που κατασκευάζονται από την Toshiba Carrier Corporation ή, εναλλακτικά, έχει διδαχθεί αυτές τις εργασίες από άτομα που έχουν εκπαιδευτεί και, επομένως, είναι πλήρως εξοικειωμένος με τις γνώσεις που σχετίζονται με αυτές τις εργασίες. • Ο εξειδικευμένος τεχνικός επισκευών που επιτρέπεται να εργάζεται σε ύψη έχει εκπαιδευτεί σε θέματα που σχετίζονται με τις εργασίες σε ύψη με κλιματιστικά που κατασκευάζονται από την Toshiba Carrier Corporation ή, εναλλακτικά, έχει διδαχθεί αυτές τις εργασίες από άτομα που έχουν εκπαιδευτεί και, επομένως, είναι πλήρως εξοικειωμένος με τις γνώσεις που σχετίζονται με αυτές τις εργασίες. Ορισμός εξοπλισμού προστασίας Όταν πραγματοποιείται μεταφορά, εγκατάσταση, συντήρηση, επισκευή ή αφαίρεση του κλιματιστικού, να φοράτε προστατευτικά γάντια και ρουχισμό εργασίας ‘ασφαλείας’. Επιπλέον του συνήθους εξοπλισμού προστασίας, να φοράτε τον εξοπλισμό προστασίας που περιγράφεται παρακάτω κατά την ανάληψη των ειδικών εργασιών που αναφέρονται αναλυτικά στον παρακάτω πίνακα. Αν παραλείψετε να φορέσετε το σωστό προστατευτικό εξοπλισμό, θέτετε τον εαυτό σας σε κίνδυνο καθώς θα είστε πιο ευάλωτοι σε τραυματισμούς, εγκαύματα, ηλεκτροπληξίες και άλλους τραυματισμούς. Εκτελούμενη εργασία Χρήση εξοπλισμού προστασίας Κάθε τύπος εργασίας Γάντια προστασίας Ρουχισμός εργασίας ‘ασφαλείας’ Ηλεκτρολογικές εργασίες Γάντια προστασίας από ηλεκτροπληξία και θερμότητα Μονωμένα παπούτσια Ρουχισμός που παρέχει προστασία από ηλεκτροπληξία Εργασία σε ύψη (50 cm ή περισσότερο) Κράνη βιομηχανικής χρήσης Μεταφορά βαρέων αντικειμένων Υποδήματα με πρόσθετη προστασία των άκρων των ποδιών Επισκευή εξωτερικής μονάδας Γάντια προστασίας από ηλεκτροπληξία και θερμότητα 46-GR +00EH99884801-2_01EN.book Page 24 Monday, January 28, 2013 7:54 PM 1 Προειδοποιητικές ενδείξεις πάνω στην κλιματιστική μονάδα Προειδοποιητική ένδειξη WARNING ELECTRICAL SHOCK HAZARD Disconnect all remote electric power supplies before servicing. WARNING Moving parts. Do not operate unit with grille removed. Stop the unit before the servicing. CAUTION High temperature parts. You might get burned when removing this panel. CAUTION Do not touch the aluminum fins of the unit. Doing so may result in injury. CAUTION BURST HAZARD Open the service valves before the operation, otherwise there might be the burst. Προφυλάξεις για ασφάλεια Ο κατασκευαστής δεν αναλαμβάνει ευθύνη για τυχόν βλάβες ήθελε προκληθούν από αμέλεια συμμόρφωσης με τα όσα περιγράφονται στο παρόν εγχειρίδιο. Περιγραφή ΠΡΟΕΙ∆ΟΠΟΙΗΣΗ ΠΡΟΕΙ∆ΟΠΟΙΗΣΗ Γενικά ΚΙΝ∆ΥΝΟΣ ΗΛΕΚΤΡΟΠΛΗΞΙΑΣ Αποσυνδέστε όλες τις απομακρυσμένες παροχές ηλεκτρικής τροφοδοσίας πριν από τη διενέργεια σέρβις. • Πριν ξεκινήσετε με την εγκατάσταση του κλιματιστικού, διαβάστε με προσοχή το Εγχειρίδιο εγκατάστασης και ακολουθήστε τις οδηγίες για την εγκατάσταση του κλιματιστικού. • Οι εργασίες εγκατάστασης επιτρέπεται να πραγματοποιηθούν μόνο από εξειδικευμένο εγκαταστάτη ή εξειδικευμένο τεχνικό σέρβις. Η λανθασμένη εγκατάσταση μπορεί να οδηγήσει σε διαρροές νερού, ηλεκτροπληξία ή πυρκαγιά. • Μην χρησιμοποιείτε ψυκτικό άλλο από το προβλεπόμενο, για συμπλήρωση ή αντικατάσταση. ∆ιαφορετικά, ενδέχεται να αναπτυχθεί αντικανονικά υψηλή πίεση στον ψυκτικό κύκλο, κάτι που ενδέχεται να επιφέρει βλάβη του προϊόντος ή έκρηξη ή σωματικό τραυματισμό σας. • Πριν ανοίξετε τη γρίλια εισαγωγής της εσωτερικής μονάδας ή του πίνακα σέρβις της εξωτερικής μονάδας, θέστε τον αυτόματο διακόπτη κυκλώματος στη θέση OFF. Εάν δεν θέσετε τον αυτόματο διακόπτη κυκλώματος στη θέση OFF ενδέχεται να προκληθεί ηλεκτροπληξία λόγω τυχαίας επαφής με τα εξαρτήματα στο εσωτερικό της μονάδας. Η αφαίρεση της γρίλιας εισαγωγής της εσωτερικής μονάδας ή του πίνακα σέρβις της εξωτερικής μονάδας και η εκτέλεση των απαιτούμενων εργασιών, επιτρέπεται μόνον από εξειδικευμένο εγκαταστάτη(*1) ή εξειδικευμένο τεχνικό σέρβις(*1). • Πριν από την εκτέλεση εργασιών εγκατάστασης, συντήρησης, επισκευής ή απόρριψης, φροντίστε να θέσετε τον αυτόματο διακόπτη κυκλώματος στη θέση OFF. ∆ιαφορετικά, ενδέχεται να προκληθεί ηλεκτροπληξία. • Αναρτήστε πινακίδα με την ένδειξη "Εκτελούνται εργασίες" κοντά στον αυτόματο διακόπτη κυκλώματος ενόσω εκτελούνται εργασίες εγκατάστασης, συντήρησης, επισκευής ή απόρριψης. Υπάρχει κίνδυνος πρόκλησης ηλεκτροπληξίας, εάν ο αυτόματος διακόπτης κυκλώματος τεθεί στη θέση ON τυχαία. • Μόνον εξειδικευμένος εγκαταστάτης(*1) ή εξειδικευμένος τεχνικός σέρβις(*1) επιτρέπεται να αναλαμβάνει την εκτέλεση εργασιών σε υψηλά σημεία χρησιμοποιώντας βάση ύψους 50 cm ή υψηλότερη ή να αφαιρεί τη γρίλια εισαγωγής της εσωτερικής μονάδας για την εκτέλεση εργασιών. • Να φοράτε γάντια προστασίας και ρουχισμό για την ασφάλεια κατά την εργασία, όταν εκτελείτε εργασίες εγκατάστασης, σέρβις και απόρριψης. • Μην αγγίζετε τα αλουμινένια πτερύγια της μονάδας. Ενδέχεται να τραυματιστείτε εάν το πράξετε. Εάν απαιτείται να αγγίξετε το πτερύγιο για οποιοδήποτε λόγο, φορέστε πρώτα γάντια προστασίας και ρουχισμό για την ασφάλεια κατά την εργασία και τότε μόνον προχωρήστε. • Μην ανεβαίνετε πάνω στην εξωτερική μονάδα και μην τοποθετείτε αντικείμενα πάνω σε αυτήν. Ενδέχεται να πέσετε εσείς ή τα αντικείμενα και να προκληθεί τραυματισμός. • Όταν εκτελείται εργασία σε ύψος, χρησιμοποιείστε σκάλα σύμφωνη με το πρότυπο ISO 14122, και ακολουθήστε τη διαδικασία η οποία αναφέρεται στις οδηγίες της σκάλας. Να φοράτε επίσης, κράνος βιομηχανικής χρήσης ως εξοπλισμό προστασίας πριν από την εκτέλεση της εργασίας. • Πριν από τον καθαρισμό του φίλτρου ή άλλων μερών της εξωτερικής μονάδας, τοποθετήστε οπωσδήποτε τον αυτόματο διακόπτη στο OFF, και τοποθετήστε μία πινακίδα “Εκτελούνται εργασίες” κοντά στον αυτόματο διακόπτη προτού προχωρήσετε με την εργασία. • Πριν από εργασία σε μεγάλο ύψος, τοποθετήστε μία πινακίδα έτσι ώστε κανείς να μην πλησιάσει το χώρο εργασίας, προτού προχωρήσετε με την εργασία σας. Εξαρτήματα και άλλα αντικείμενα ενδέχεται να υποστούν πτώση, τραυματίζοντας ενδεχομένως κάποιο άτομο το οποίο βρίσκεται από κάτω. Κατά την εκτέλεση των εργασιών, να φοράτε κράνος για την προστασία σας έναντι πτώσης αντικειμένων. • Το ψυκτικό υγρό το οποίο χρησιμοποιείται στο συγκεκριμένο κλιματιστικό είναι τύπου R410A. • Το κλιματιστικό μηχάνημα θα πρέπει να μεταφέρεται σε συνθήκες ευστάθειας. Εάν οποιοδήποτε κομμάτι του προϊόντος είναι σπασμένο, επικοινωνήστε με τον αντιπρόσωπο. • Όταν είναι απαραίτητο το κλιματιστικό να μεταφερθεί με τα χέρια, θα πρέπει να το μεταφέρουν δύο ή περισσότερα άτομα. • Μη μετακινείτε ή επισκευάζετε οποιαδήποτε μονάδα μόνοι σας. Υπάρχει υψηλή τάση στο εσωτερικό της μονάδας. Μπορεί να σας προκαλέσει ηλεκτροπληξία όταν αφαιρέσετε το κάλυμμα και την κεντρική μονάδα. ΠΡΟΕΙ∆ΟΠΟΙΗΣΗ Κινούμενα μέρη. Μην θέσετε τη μονάδα σε λειτουργία, εάν έχετε αφαιρέσει τη γρίλια. ∆ιακόψτε τη λειτουργία της μονάδας πριν από τη διενέργεια σέρβις. ΠΡΟΣΟΧΗ Μέρη με υψηλή θερμοκρασία. Ενδέχεται να υποστείτε έγκαυμα κατά την αφαίρεση αυτού του πίνακα. ΠΡΟΣΟΧΗ Μην ακουμπάτε τα πτερύγια αλουμινίου της μονάδας. Η μη συμμόρφωση ενδέχεται να προκαλέσει τραυματισμό. ΠΡΟΣΟΧΗ Επιλογή θέσης εγκατάστασης • Όταν το κλιματιστικό είναι τοποθετημένο σε μικρό δωμάτιο, λάβετε τα κατάλληλα μέτρα προκειμένου να εξασφαλιστεί ότι η συγκέντρωση διαρροής ψυκτικού στο δωμάτιο δεν υπερβαίνει το κρίσιμο επίπεδο. • Μην τοποθετείτε το κλιματιστικό σε χώρο όπου υπάρχει πιθανότητα διαρροών εύφλεκτων αερίων. Εάν διαρρέει αέριο το οποίο και συσσωρεύεται γύρω από τη μονάδα, υπάρχει κίνδυνος να αναφλεγεί και να προκληθεί πυρκαγιά. • Για να μεταφέρετε το κλιματιστικό, να φοράτε υποδήματα με μεταλλικά καλύμματα στις μύτες. • Για να μεταφέρετε το κλιματιστικό, μην το κρατάτε από τα τσέρκια που υπάρχουν γύρω από το χαρτοκιβώτιο της συσκευασίας του. Ενδέχεται να τραυματιστείτε, εάν οι ταινίες σπάσουν. • Εγκαταστήστε την εσωτερική μονάδα σε ύψος 2,5 m τουλάχιστον πάνω από το δάπεδο, διότι διαφορετικά οι χρήστες ενδέχεται να τραυματιστούν ή να υποστούν ηλεκτροπληξία σε περίπτωση που εισάγουν τα δάκτυλά τους ή άλλα αντικείμενα στο εσωτερικό της εσωτερικής μονάδας ενώ το κλιματιστικό βρίσκεται σε λειτουργία. • Μην τοποθετείτε συσκευή καύσης σε σημείο το οποίο εκτίθεται απευθείας στη ροή αέρα του κλιματιστικού, ενδέχεται να προκληθεί ατελής καύση. ΚΙΝ∆ΥΝΟΣ ΕΚΡΗΞΗΣ Ανοίξτε τις βαλβίδες σέρβις πριν από τη λειτουργία, διαφορετικά ενδέχεται να προκληθεί έκρηξη. Εγκατάσταση • Όταν η εσωτερική μονάδα προορίζεται για ανάρτηση, απαιτείται η χρήση των κοχλιών ανάρτησης (M10 ή W3/8) και των περικοχλίων (M10 ή W3/8) αποκλειστικής χρήσης. • Εγκαταστήστε το κλιματιστικό με ασφάλεια, σε σημείο όπου η βάση του να μπορεί να στηρίξει επαρκώς το βάρος του. Εάν τα σημεία αυτά δεν διαθέτουν επαρκή αντοχή, η μονάδα ενδέχεται να υποστεί πτώση και να προκαλέσει τραυματισμό. • Ακολουθήστε τις οδηγίες που αναγράφονται στο Εγχειρίδιο Εγκατάστασης για να εγκαταστήσετε το κλιματιστικό. Αμέλεια συμμόρφωσης με αυτές τις οδηγίες μπορεί να προκαλέσει πτώση ή ανατροπή του προϊόντος ή να αναπτύσσονται θόρυβος, κραδασμοί, διαρροή νερού ή άλλα προβλήματα. 47-GR – 24 – 48-GR +00EH99884801-2_01EN.book Page 25 Monday, January 28, 2013 7:54 PM – 25 – • Πραγματοποιήστε την προβλεπόμενη εργασία εγκατάστασης έτσι ώστε ο εξοπλισμός να αντέχει σε πιθανούς ισχυρούς ανέμους ή σεισμό. Εάν το κλιματιστικό μηχάνημα δεν εγκατασταθεί σωστά, μπορεί κάποια μονάδα να ανατραπεί ή να πέσει από ύψος, με αποτέλεσμα την πρόκληση ατυχήματος. • Σε περίπτωση διαρροής του ψυκτικού αερίου κατά τη διάρκεια των εργασιών εγκατάστασης, αερίστε τον χώρο αμέσως. Εάν το ψυκτικό αέριο που διαρρέει έρθει σε επαφή με φωτιά, υπάρχει η πιθανότητα έκλυσης δύσοσμου αερίου. • Χρησιμοποιείστε περονοφόρο ανυψωτικό μηχάνημα για να μεταφέρετε τα τμήματα του κλιματιστικού και χρησιμοποιείστε βαρούλκο ή παλάγκο για την εγκατάστασή τους. • Το μήκος των αγωγών αναρρόφησης θα πρέπει να υπερβαίνει τα 850 mm. • Θα πρέπει να φοράτε κράνος για την προστασία της κεφαλής σας από τυχόν πτώση αντικειμένων. Ιδιαίτερα όταν εργάζεστε κάτω από άνοιγμα επιθεώρησης, πρέπει να φοράτε κράνος για την προστασία της κεφαλής σας από αντικείμενα που πιθανόν να πέσουν από το άνοιγμα. • Η πρόσβαση στη μονάδα είναι δυνατή από το πλαίσιο συντήρησης που απεικονίζεται στην εικόνα. Σωλήνωση ψυκτικού • Εγκαταστήστε το σωλήνα ψυκτικού με ασφάλεια στη διάρκεια της εργασίας εγκατάστασης πριν θέσετε σε λειτουργία το κλιματιστικό. Εάν ο συμπιεστής λειτουργήσει με τη βαλβίδα ανοιχτή και χωρίς σωλήνα ψυκτικού υγρού, ο συμπιεστής αναρροφά αέρα και ο κύκλος ψύξης υπερσυμπιέζεται, πράγμα το οποίο ενδέχεται να προκαλέσει τραυματισμό. • Σφίξτε το ρακόρ με ένα ροπόκλειδο ακολουθώντας τον καθορισμένο τρόπο. Τυχόν υπερβολικό σφίξιμο του ρακόρ ενδέχεται να προκαλέσει ράγισμα του ρακόρ μετά από μακρό χρονικό διάστημα, πράγμα το οποίο ενδέχεται να καταλήξει σε διαρροή ψυκτικού υγρού. • Μετά τις εργασίες εγκατάστασης, βεβαιωθείτε ότι δεν υπάρχει διαρροή του ψυκτικού αερίου. Τυχόν διαρροή του ψυκτικού αερίου στο χώρο και κίνησή του κοντά σε πηγή φωτιάς, όπως εστία κουζίνας, ενδέχεται να δημιουργήσει επιβλαβείς αναθυμιάσεις. • Μόλις ολοκληρωθεί η εγκατάσταση ή η αλλαγή θέσης του κλιματιστικού, ακολουθήστε τις οδηγίες που αναγράφονται στο Εγχειρίδιο Εγκατάστασης για πλήρη εξαέρωση, ώστε στον κύκλο ψύξης να μην αναμιγνύονται άλλα αέρια εκτός του ψυκτικού υγρού. Εάν δεν πραγματοποιήσετε πλήρη εξαέρωση, ενδέχεται να προκληθεί δυσλειτουργία του κλιματιστικού. • Απαιτείται η χρήση αερίου αζώτου για τη δοκιμή στεγανότητας. • Ο σωλήνας πλήρωσης πρέπει να συνδεθεί με τρόπο ώστε να μην παρουσιάζει χαλαρότητα. Ηλεκτρική καλωδίωση • Η εκτέλεση των ηλεκτρολογικών εργασιών στο κλιματιστικό επιτρέπεται μόνον από εξειδικευμένο εγκαταστάτη(*1) ή εξειδικευμένο τεχνικό σέρβις(*1). Σε καμία περίπτωση δεν επιτρέπεται η εκτέλεση των εν λόγω εργασιών από ανειδίκευτο άτομο, επειδή τυχόν μη κατάλληλη εκτέλεση των εργασιών ενδέχεται να καταλήξει σε ηλεκτροπληξία ή/ και διαρροές ρεύματος. • Για να συνδέσετε τα καλώδια ρεύματος, την επισκευή ηλεκτρολογικών μερών ή άλλες εργασίες ηλεκτρολογικής φύσης, να φοράτε μονωτικά γάντια (ηλεκτρολόγου) και προστασίας από τη θερμότητα, μονωτικά υποδήματα και ενδυμασία για προστασία έναντι ηλεκτροπληξίας. Η μη χρήση του συγκεκριμένου εξοπλισμού προστασίας ενδέχεται να καταλήξει σε ηλεκτροπληξία. • Να χρησιμοποιείτε καλωδιώσεις οι οποίες πληρούν τις προδιαγραφές του Εγχειριδίου Εγκατάστασης και τις απαιτήσεις των τοπικών κανονισμών και νομοθεσίας. Η χρήση καλωδιώσεων οι οποίες δεν πληρούν τις προδιαγραφές ενδέχεται να προκαλέσει ηλεκτροπληξία, διαρροές ρεύματος, καπνό ή/και πυρκαγιά. • Συνδέστε το καλώδιο γείωσης. (εργασία γείωσης) Η ελλιπής γείωση θα προκαλέσει ηλεκτροπληξία. • Μη συνδέετε τα καλώδια γείωσης με σωλήνες φυσικού αερίου, σωλήνες νερού και την κάθοδο του αντικεραυνικού συστήματος ή τους αγωγούς γείωσης του τηλεφώνου. • Μετά την ολοκλήρωση της εργασίας επισκευής ή μετεγκατάστασης, βεβαιωθείτε ότι οι αγωγοί γείωσης έχουν συνδεθεί σωστά. • Φροντίστε για την εγκατάσταση αυτόματου διακόπτη κυκλώματος ο οποίος πληροί τις προδιαγραφές του Εγχειριδίου Εγκατάστασης και τις απαιτήσεις των τοπικών κανονισμών και νομοθεσίας. • Εγκαταστήστε τον αυτόματο διακόπτη κυκλώματος σε σημείο όπου θα διευκολύνεται η πρόσβασή του από τον αντιπρόσωπο. • Όταν πραγματοποιείτε εγκατάσταση του αυτόματου διακόπτη κυκλώματος σε εξωτερικό χώρο, φροντίστε για την εγκατάσταση διακόπτη κατάλληλου τύπου για εξωτερική χρήση. • Σε καμία περίπτωση δεν πρέπει να κάνετε προέκταση του καλωδίου ρεύματος. Τυχόν ελαττωματική σύνδεση στα σημεία προέκτασης των αγωγών μπορεί να προκαλέσει καπνό και/ή πυρκαγιά. • Οι εργασίες ηλεκτρικής καλωδίωσης πρέπει να εκτελούνται σύμφωνα με τους νόμους και κανονισμούς της κοινότητας και το εγχειρίδιο εγκατάστασης. ∆ιαφορετικά μπορεί να προκληθεί ηλεκτροπληξία ή βραχυκύκλωμα. ∆οκιμαστική λειτουργία Επεξηγήσεις που παρέχονται στο χρήστη • Μόλις ολοκληρωθούν οι εργασίες εγκατάστασης, ενημερώστε το χρήστη για τη θέση του αυτόματου διακόπτη κυκλώματος. Εάν ο χρήστης δεν γνωρίζει που βρίσκεται ο αυτόματος διακόπτης κυκλώματος, δεν θα μπορεί να τον απενεργοποιήσει σε περίπτωση που παρουσιαστεί κάποιο πρόβλημα στο κλιματιστικό. • Εάν υπάρχει βλάβη στη σχάρα του ανεμιστήρα, μην πλησιάζετε στην εξωτερική μονάδα. Βάλτε τον αυτόματο διακόπτη στο OFF και επικοινωνήστε με εξειδικευμένο τεχνικό(*1) για την επισκευή του μηχανήματος. Μην θέσετε τον αυτόματο διακόπτη κυκλώματος στη θέση ON, εάν δεν ολοκληρωθούν οι επισκευές. • Μόλις ολοκληρωθούν οι εργασίες εγκατάστασης, ακολουθήστε τις οδηγίες που αναγράφονται στο Εγχειρίδιο Κατόχου, για να εξηγήσετε στον πελάτη τον τρόπο χρήσης και συντήρησης της μονάδας. Αλλαγή θέσης • Η μεταφορά του κλιματιστικού σε άλλη θέση επιτρέπεται μόνον από εξειδικευμένο εγκαταστάτη(*1) ή εξειδικευμένο τεχνικό σέρβις(*1). Σε περίπτωση εγκατάστασης του κλιματιστικού από ανειδίκευτο άτομο, υπάρχει μεγάλος κίνδυνος να προκληθεί πυρκαγιά, ηλεκτροπληξία, τραυματισμός, διαρροή νερού, θόρυβος ή/και κραδασμοί. • Κατά την εργασία περισυλλογής ψυκτικού υγρού, διακόψτε τη λειτουργία του συμπιεστή πριν από την αποσύνδεση του σωλήνα ψυκτικού υγρού. Η αποσύνδεση του σωλήνα ψυκτικού ενώ η βαλβίδα συντήρησης είναι ανοικτή και ο συμπιεστής λειτουργεί, θα προκαλέσει την αναρρόφηση αέρα ή άλλου αερίου, την αύξηση της πίεσης στο εσωτερικό του κύκλου ψύξης σε μη φυσιολογικά υψηλά επίπεδα και μπορεί πιθανώς να προκληθεί ρήξη, τραυματισμός ή άλλη βλάβη. ΠΡΟΣΟΧΗ Εγκατάσταση κλιματιστικού με νέο ψυκτικό • ΤΟ ΠΑΡΟΝ ΚΛΙΜΑΤΙΣΤΙΚΟ ΥΙΟΘΕΤΕΙ ΕΝΑ ΝΕΟΥ ΤΥΠΟΥ ΨΥΚΤΙΚΟ Υ∆ΡΟΦΘΟΡΙΟΑΝΘΡΑΚΑ (R410A) ΠΟΥ ∆ΕΝ ΚΑΤΑΣΤΡΕΦΕΙ ΤΗ ΣΤΙΒΑ∆Α ΤΟΥ ΟΖΟΝΤΟΣ. • Τα χαρακτηριστικά του ψυκτικού R410A είναι: ευκολία απορρόφησης νερού, οξειδωτικής μεμβράνης ή ελαίων και η πίεσή του είναι περίπου 1,6 φορές μεγαλύτερη από αυτήν του ψυκτικού R22. Όταν συνοδεύεται με το νέο ψυκτικό, το λάδι ψύξης έχει αλλάξει ήδη. Για το λόγο αυτό, κατά τη διάρκεια των εργασιών εγκατάστασης, φροντίστε ώστε να μην εισχωρήσει νερό, σκόνη, παλαιότερο ψυκτικό ή λάδι ψύξης στον κύκλο ψύξης. • Για την αποφυγή πλήρωσης εσφαλμένου ψυκτικού και λαδιού ψύξης, το μέγεθος του ανοίγματος σύνδεσης στη θύρα πλήρωσης της κύριας μονάδας και τα εργαλεία εγκατάστασης έχουν αλλάξει σε σύγκριση με το συμβατικό ψυκτικό. • Αντίστοιχα, απαιτούνται αποκλειστικά εργαλεία για το νέο ψυκτικό (R410A). • Για τους σωλήνες σύνδεσης, χρησιμοποιήστε καινούργια και καθαρή σωλήνωση σχεδιασμένη για R410A και φροντίστε ώστε να μην εισχωρήσει νερό ή σκόνη. Για να αποσυνδέσετε τη συσκευή από την κύρια παροχή ισχύος. • Η συσκευή αυτή πρέπει να συνδέεται με την κύρια παροχή ισχύος μέσω ενός διακόπτη με απόσταση μεταξύ επαφών τουλάχιστον 3 mm. Απαιτείται ασφάλεια για την εγκατάσταση (μπορεί να χρησιμοποιηθεί ασφάλεια οποιουδήποτε τύπου) για τη γραμμή τροφοδοσίας ρεύματος αυτού του κλιματιστικού. (*1) Ανατρέξτε στην ενότητα "Ορισμός Εξειδικευμένου Εγκαταστάτη ή Εξειδικευμένου Τεχνικού Σέρβις". • Μόλις ολοκληρωθούν οι εργασίες και πριν θέσετε το κλιματιστικό σε λειτουργία, βεβαιωθείτε ότι το κάλυμμα του κιβωτίου ηλεκτρικών εξαρτημάτων της εσωτερικής μονάδας και ο πίνακας σέρβις της εξωτερικής μονάδας είναι κλειστά και θέστε τον αυτόματο διακόπτη κυκλώματος στη θέση ON. Εάν δεν πραγματοποιήσετε αυτούς τους ελέγχους, ενδέχεται να υποστείτε ηλεκτροπληξία σε περίπτωση που ενεργοποιηθεί η τροφοδοσία. • Εάν παρουσιαστεί κάποιο πρόβλημα στο κλιματιστικό (όπως εμφάνιση ένδειξης σφάλματος, οσμή καμένου, ασυνήθιστοι θόρυβοι, το κλιματιστικό δεν ψύχει ή δε θερμαίνει ή υπάρχει διαρροή νερού), μην αγγίζετε το ίδιο το κλιματιστικό αλλά κλείστε τον αυτόματο διακόπτη κυκλώματος (στο OFF) και επικοινωνήστε με εξειδικευμένο τεχνικό. Λάβετε μέτρα, ώστε να μην είναι εφικτή η ενεργοποίηση της παροχής τροφοδοσίας (αναρτώντας πινακίδα με την ένδειξη "εκτός λειτουργίας" κοντά στον αυτόματο διακόπτη κυκλώματος, για παράδειγμα), έως ότου φθάσει ο εξειδικευμένος τεχνικός σέρβις. Εάν συνεχίζετε να χρησιμοποιείτε το κλιματιστικό παρόλο που παρουσιάζει πρόβλημα, ενδέχεται τα μηχανικά προβλήματά του να επιδεινωθούν ή να προκληθεί ηλεκτροπληξία κλπ. • Μετά την ολοκλήρωση της εργασίας, χρησιμοποιείστε δοκιμαστικό όργανο μόνωσης (500V Megger) για να βεβαιωθείτε ότι η αντίσταση είναι 1 MΩ ή περισσότερο μεταξύ του φορτισμένου τμήματος και του μεταλλικού τμήματος που δε βρίσκεται υπό φορτίο (του γειωμένου τμήματος). Εάν η τιμή της αντίστασης είναι χαμηλή, προκαλείται σοβαρή ζημία στην πλευρά του χρήστη, όπως διαρροή ρεύματος ή ηλεκτροπληξία. • Μόλις ολοκληρωθούν οι εργασίες εγκατάστασης, ελέγξτε για διαρροές ψυκτικού υγρού, την αντίσταση μόνωσης και την αποστράγγιση νερού. Στη συνέχεια, εκτελέστε δοκιμαστική λειτουργία ώστε να ελεγχθεί ότι το κλιματιστικό λειτουργεί κανονικά. 49-GR 50-GR +00EH99884801-2_01EN.book Page 26 Monday, January 28, 2013 7:54 PM Благодарим вас за то, что приобрели кондиционер Toshiba. Внимательно прочтите данные инструкции, так как в них содержится важная информация, соответствующая директиве “Оборудование” (Директива 2006/42/ЕС), и убедитесь, что они вам понятны. После завершения установки передайте пользователю это руководство по установке и входящее в комплект руководство по эксплуатации и попросите пользователя хранить эти материалы в надежном месте для использования в будущем. Определение средств индивидуальной защиты При перевозке, установке, техническом обслуживании, ремонте или демонтаже кондиционера следует носить защитные рукавицы и спецодежду. В дополнение к обычным средствам индивидуальной защиты нужно пользоваться средствами индивидуальной защиты, указанными ниже, при выполнении специальных работ, перечисленных в следующей таблице. Если не использовать надлежащие средства индивидуальной защиты, возрастает опасность получить травму, ожоги, удар электрическим током или другие повреждения. Общее Обозначение: Кондиционер Воздуха Определение квалифицированного монтажника или квалифицированного специалиста по обслуживанию Этот кондиционер должен устанавливаться, обслуживаться, ремонтироваться и демонтироваться квалифицированным монтажником или квалифицированным специалистом по обслуживанию. Каждый раз, когда вам нужно будет проделать какую-либо из этих операций, обращайтесь к квалифицированному монтажнику или специалисту по обслуживанию. Квалифицированный монтажник или квалифицированный специалист по обслуживанию — это лицо, имеющее квалификацию и знания, указанные в следующей таблице. Лицо Выполняемая работа Необходимые квалификация и знание • Квалифицированный монтажник — это лицо, которое устанавливает, обслуживает, перемещает и демонтирует кондиционеры производства компании Toshiba Carrier Corporation. Он или она прошел обучение по вопросам установки, технического обслуживания, переустановки и демонтажа кондиционеров производства компании Toshiba Carrier Corporation, или же был научен таким действиям лицом или лицами, получившими необходимое обучение, и поэтому детально знаком со всем, что относится к указанным действиям. • Квалифицированный монтажник, допущенный к выполнению необходимых электротехнических работ при установке, переустановке и демонтаже, имеет соответствующую этим работам квалификацию, предусмотренную местным законодательством и нормативами, и представляет собой лицо, обученное вопросам электротехнического характера, связанным с кондиционерами производства компании Toshiba Carrier Corporation, или же он был научен таким вопросам лицом или лицами, прошедшими Квалифицированный необходимую подготовку, и поэтому детально знаком со всем, что относится к такой работе. монтажник • Квалифицированный монтажник, допущенный к выполнению необходимых работ по прокладке трубок хладагента и обращению с хладагентом при установке, переустановке и демонтаже, имеет соответствующую этим работам квалификацию, предусмотренную местным законодательством и нормативами, и представляет собой лицо, обученное вопросам прокладки трубок хладагента и обращению с хладагентом, связанным с кондиционерами производства компании Toshiba Carrier Corporation, или же он был научен таким вопросам лицом или лицами, прошедшими необходимую подготовку, и поэтому детально знаком со всем, что относится к такой работе. • Квалифицированный монтажник, допущенный к выполнению высотных работ, был обучен по вопросам, связанным с работой на высоте с кондиционерами производства Toshiba Carrier Corporation, или же получил указания по данному вопросу от лица или лиц, которые были этому обучены, и поэтому детально знаком со всем, что относится к такой работе. Необходимые средства индивидуальной защиты Все типы работы Защитные рукавицы Защитная рабочая спецодежда Работы, связанные с электричеством Перчатки для электриков, теплозащитные рукавицы Изоляционные ботинки Одежда, обеспечивающая защиту от удара электрическим током Работы, выполняемые на высоте (50 см или выше) Промышленная каска Переноска тяжелых предметов Ботинки с дополнительным защитным носком Ремонт наружных блоков Перчатки для электриков, теплозащитные рукавицы • Квалифицированный специалист по обслуживанию — это лицо, которое устанавливает, ремонтирует, обслуживает, перемещает и демонтирует кондиционеры производства компании Toshiba Carrier Corporation. Он или она прошел обучение по вопросам установки, ремонта, технического обслуживания, переустановки и демонтажа кондиционеров производства компании Toshiba Carrier Corporation, или же был обучен таким действиям лицом или лицами, получившими необходимое обучение, и поэтому детально знаком со всем, что относится к указанным действиям. • Квалифицированный специалист по обслуживанию, допущенный к выполнению необходимых электротехнических работ при установке, ремонте, переустановке и демонтаже, имеет соответствующую этим работам квалификацию, предусмотренную местным законодательством и нормативами, и представляет собой лицо, обученное вопросам электротехнического характера, связанным с кондиционерами производства компании Toshiba Carrier Corporation, или же он был обучен таким вопросам лицом или лицами, прошедшими Квалифицированный необходимую подготовку, и поэтому детально знаком со всем, что относится к такой работе. специалист по обслуживанию • Квалифицированный специалист по обслуживанию, допущенный к выполнению необходимых работ по прокладке трубок хладагента и обращению с хладагентом при установке, ремонте, переустановке и демонтаже, имеет соответствующую этим работам квалификацию, предусмотренную местным законодательством и нормативами, и представляет собой лицо, обученное вопросам прокладки трубок хладагента и обращению с хладагентом, связанным с кондиционерами производства компании Toshiba Carrier Corporation, или же он был обучен таким вопросам лицом или лицами, прошедшими необходимую подготовку, и поэтому детально знаком со всем, что относится к такой работе. • Квалифицированный специалист по обслуживанию, допущенный к выполнению высотных работ, был обучен по вопросам, связанным с работой на высоте с кондиционерами производства Toshiba Carrier Corporation, или же получил указания по данному вопросу от лица или лиц, которые были этому обучены, и поэтому детально знаком со всем, что относится к такой работе. 51-RU – 26 – 52-RU +00EH99884801-2_01EN.book Page 27 Monday, January 28, 2013 7:54 PM – 27 – Предупреждающие символы на корпусе кондиционера Предупреждающий символ WARNING ELECTRICAL SHOCK HAZARD Disconnect all remote electric power supplies before servicing. WARNING Moving parts. Do not operate unit with grille removed. Stop the unit before the servicing. CAUTION High temperature parts. You might get burned when removing this panel. CAUTION Do not touch the aluminum fins of the unit. Doing so may result in injury. CAUTION BURST HAZARD Open the service valves before the operation, otherwise there might be the burst. Описание ПРЕДУПРЕЖДЕНИЯ ОПАСНОСТЬ ПОРАЖЕНИЯ ЭЛЕКТРИЧЕСКИМ ТОКОМ Перед выполнением обслуживания нужно отключить все внешние источники электроэнергии. ПРЕДУПРЕЖДЕНИЯ Движущиеся части. Запрещается работать на устройстве при движущейся решетке. Перед обслуживанием устройство нужно остановить. ПРЕДОСТЕРЕЖЕНИЕ Горячие детали. При снятии этой панели можно получить ожог. ПРЕДОСТЕРЕЖЕНИЕ Не касайтесь алюминиевого оребрения на устройстве. Это может привести к травме. ПРЕДОСТЕРЕЖЕНИЕ ОПАСНОСТЬ РАЗРЫВА Отсоедините все дистанционные устройства Перед обслуживанием нужно открыть вентили, иначе может произойти разрыв. 1 Меры предосторожности Производитель не несет ответственности за ущерб, вызванный несоблюдением инструкций, приведенных в данном руководстве. ПРЕДУПРЕЖДЕНИЯ Общие меры предосторожности • Прежде чем приступить к установке кондиционера, внимательно прочтите Руководство по установке и в процессе работы соблюдайте изложенные в нем инструкции. • Выполнение работы по установке разрешается только квалифицированному монтажнику или квалифицированному специалисту по обслуживанию. Неправильная установка может привести к утечке воды, поражению электрическим током или воспламенению. • Запрещается использовать для пополнения или замены хладагент, отличный от указанного. В противном случае в контуре охлаждения может образоваться аномально высокое давление, что может привести к поломке или взрыву изделия, а также вызвать травмы. • Прежде чем снимать решетку на воздухозаборнике внутреннего блока или на служебной панели наружного блока, установленного вне помещения, установите сетевой выключатель в положение OFF (ВЫКЛ). Если сетевой выключатель не установить в положение OFF (ВЫКЛ), можно получить удар электрическим током при контакте с внутренними узлами кондиционера. Снимать решетку воздухозаборника на устройствах, установленных в помещении и вне его, разрешается только квалифицированным монтажникам(*1) или квалифицированным специалистам по обслуживанию(*1). • Перед тем как проводить работы по установке, обслуживанию, ремонту или перемещению, убедитесь в том, что сетевой выключатель находится в положении OFF (ВЫКЛ). В противном случае может произойти поражение электрическим током. • На время выполнения работ по установке, обслуживанию, ремонту или перемещению кондиционера рядом с сетевым выключателем следует поместить знак “Ведутся работы”. Если кто-либо по ошибке установит выключатель в положение ON (ВКЛ), возможно поражение работающего электрическим током. • Только квалифицированному монтажнику(*1) или квалифицированному специалисту по обслуживанию(*1) разрешается производить работы на высоте с использованием подставки высотой 50 см или выше для того, чтобы снять решетку воздухозаборника внутреннего блока для выполнения работ. • При ремонте, обслуживании и перемещении следует пользоваться защитными рукавицами и спецодеждой. • Не прикасайтесь к алюминиевому оребрению на устройстве. В противном случае можно получить травму. Если нужно зачем-либо коснуться оребрения, сначала наденьте защитные рукавицы и спецодежду, а затем продолжайте работу. • Запрещается залезать или класть какие-либо предметы на верхнюю часть наружного блока. Вы можете упасть, или же эти предметы могут свалиться с наружного блока и причинить травму. • При работе на высоте необходимо пользоваться лестницей, отвечающей требованиям стандарта ISO 14122, и следовать указаниям, содержащимся в инструкции по работе с лестницами. При выполнении работ также нужно надевать каску принятого в промышленности образца. • Перед очисткой фильтров или других узлов наружного блока нужно надежно установить сетевой выключатель в положение OFF (ВЫКЛ) и до начала работ выставить рядом с ним знак "Ведутся работы". • До начала выполнения высотных работ нужно выставить предупреждающий знак, чтобы никто не приближался к зоне проведения работ. Сверху могут упасть детали или другие предметы, и нанести травму людям, находящимся внизу. Во время выполнения работы необходимо надеть каску для защиты головы от падающих предметов. • В данном кондиционере используется хладагент R410A. • При перевозке кондиционер должен находиться в устойчивом положении. В случае повреждения какой-либо части изделия обратитесь к дилеру. • Переноску кондиционера должны осуществлять не менее двух человек. • Не перемещайте и не выполняйте ремонт устройств самостоятельно. Внутри устройства находятся компоненты под высоким напряжением. Снятие крышки или основного устройства может привести к поражению электрическим током. Выбор места установки • При установке кондиционера в небольшом помещении необходимо принять надлежащие меры, чтобы не допустить превышения предельной концентрации хладагента даже в случае его утечки. • Запрещается устанавливать изделие в месте, где возможны утечки горючего газа. В случае утечки газа и концентрации его вокруг блока газ может воспламениться и стать причиной пожара. • При транспортировке кондиционера необходимо надевать ботинки с дополнительным защитным носком. • При транспортировке кондиционера не беритесь за обвязку вокруг картонной упаковки. Если обвязка лопнет, вы можете получить травму. • В помещении кондиционер следует устанавливать на высоте не менее 2,5 м от пола, так как в противном случае пользователи могут получить удар электрическим током или травмировать себя, если их пальцы или другие предметы попадут внутрь работающего кондиционера. • Нельзя устанавливать какие-либо отопительные приборы в местах, где на них будет непосредственно попадать воздушный поток от кондиционера, так как это может приводить к неполному сгоранию. Установка • Для подвешивания внутреннего блока нужно использовать специально предназначенные для этого подвесные болты (М10 или W3/8) и гайки (М10 или W3/8). • Кондиционер следует надежно устанавливать в месте, способном выдержать его вес. Если прочности недостаточно, то блок может упасть, нанеся травму. 53-RU 54-RU +00EH99884801-2_01EN.book Page 28 Monday, January 28, 2013 7:54 PM Пояснения для пользователя • При установке кондиционера следуйте указаниям руководства по установке. Несоблюдение этих инструкций может привести к падению или опрокидыванию изделия, появлению шума, вибрации, утечки воды и другим поломкам. • При установке примите меры для защиты от сильного ветра и землетрясений. В случае ненадлежащей установки кондиционера блок может упасть или опрокинуться и стать причиной несчастного случая. • В случае утечки хладагента во время монтажных работ, немедленно проветрите помещение. При контакте хладагента с огнем может образоваться токсичный газ. • Перевозить блоки кондиционера следует с помощью вилочного погрузчика, а поднимать на месте установки с помощью подъемника или лебедки. • Длина всасывающего воздуховода должна быть не менее 850 мм. • Для защиты головы от падающих предметов необходимо надеть каску. При работе под смотровым отверстием необходимо надеть каску для защиты головы от падающих предметов. • Доступ к блоку можно получить через служебную панель, показанную на рисунке. • По завершении установочных работ покажите пользователю, где находится сетевой выключатель. Если пользователь не знает расположения сетевого выключателя, он не сможет выключить его в случае проблем с кондиционером. • В случае повреждения решетки воздухозаборника не подходите к наружному блоку. Установите сетевой выключатель в положение OFF (ВЫКЛ) и вызовите квалифицированного специалиста по обслуживанию (*1) для ремонта. До окончания ремонта не возвращайте сетевой выключатель в положение ON (ВКЛ). • По окончании установочных работ объясните заказчику, как эксплуатировать устройство и ухаживать за ним с помощью руководством по эксплуатации. Переустановка на другое место • Переустанавливать кондиционер разрешается только квалифицированному монтажнику(*1) или квалифицированному специалисту по обслуживанию(*1). В результате переустановки кондиционера неквалифицированным лицом возможны пожар, поражение электрическим током, травмы, утечка воды, шум и/или вибрация. • При выполнении сливных работ нужно остановить компрессор до того, как отключать контур хладагента. Отсоединение трубы хладагента при открытом рабочем клапане и все еще работающем компрессоре приведет к подсосу воздуха или другого газа., в результате чего давление в холодильном цикле достигнет ненормально высокого уровня, что может привести к разрыву контура, травме и другим проблемам. Трубопровод хладагента • Перед началом эксплуатации кондиционера надежно смонтируйте и закрепите трубопровод. Если кондиционер работает с открытым клапаном и без трубопровода, компрессор засасывает воздух и в контуре охлаждения давление поднимается выше нормы, что может привести к его разрыву или травмированию окружающих. • Затягивайте конусную гайку динамометрическим ключом с заданным моментом. Чрезмерная затяжка конусной гайки может привести к тому, что со временем на ней образуется трещина, которая может привести к утечке хладагента. • По окончании монтажных работ убедитесь в отсутствии утечек хладагента. Утечка хладагента и формирование его потока в непосредственной близости от источников огня, например, кухонной плиты, может приводить к образованию токсичного газа. • При установке и переустановке кондиционера соблюдайте инструкции, приведенные в руководстве по установке, и выдувайте весь воздух из контура хладагента, чтобы в нем не могли смешиваться никакие другие газы, кроме хладагента. Если не удалить воздух полностью, это может привести к неисправностям в работе кондиционера. • Для проверки на герметичность пользуйтесь азотом. • Загрузочный шланг нужно подсоединять так, чтобы в нем нигде не было слабины. ПРЕДОСТЕРЕЖЕНИЕ Установка кондиционера с новым типом хладагента • ДАННЫЙ КОНДИЦИОНЕР РАБОТАЕТ С НОВЫМ ХЛАДАГЕНТОМ НА ОСНОВЕ ХФУ (R410A), НЕ РАЗРУШАЮЩИМ ОЗОНОВЫЙ СЛОЙ. • Характеристики хладагента R410A: легко абсорбирует воду, окисную пленку или масло, а его давление примерно в 1,6 раз выше давления хладагента R22. Одновременно с началом использования нового хладагента произошла замена компрессорного масла. Поэтому, при выполнении монтажа следите за тем, чтобы в контур охлаждения не попали вода, пыль, ранее использовавшийся хладагент или компрессорное масло. Электропроводка • Проводить электротехнические работы по установке кондиционера разрешается только квалифицированному монтажнику(*1) или квалифицированному специалисту по обслуживанию(*1). Ни при каких обстоятельствах эти работы нельзя поручать неквалифицированным лицам, иначе при неправильном выполнении работ возможны поражения электрическим током и/или утечка электроэнергии. • При подключении электропроводки, ремонте электрических узлов или выполнении других электротехнических работ нужно носить защитные перчатки для электриков, теплозащитные рукавицы, изолирующие ботинки и одежду для защиты от поражения электрическим током. Если этого не сделать, возможно поражение электрическим током. • Используйте электропроводку, которая отвечает техническим характеристикам, приведенным в данном руководстве по установке, а также местным нормативам и требованиям законодательства. Использование электропроводки, не отвечающей техническим требованиям, может привести к поражению электрическим током, утечкам электроэнергии, задымлению и/или пожару. • Подключите провод заземления. (Работы по заземлению) Неполное заземление может вызвать поражение электрическим током. • Не подсоединяйте провода заземления к газопроводным и водопроводным трубам, громоотводам и проводам заземления для телефонных проводов. • По окончании ремонтных работ или работ по переустановке кондиционера убедитесь, что провода заземления правильно подсоединены. • Пользуйтесь сетевыми выключателями, которые отвечают техническим характеристикам, приведенным в данном руководстве по установке, а также местным нормативам и требованиям законодательства. • Устанавливать сетевой выключатель нужно так, чтобы обслуживающее лицо могло легко до него добраться. • При установке наружных сетевых выключателей нужно использовать такие их типы, которые специально приспособлены для установки на открытом воздухе. • Ни в коем случае не допускается наращивать электрические кабели. Нарушение соединения в местах сращивания может привести к вызвать задымлению и пожару. • Работы по прокладке электропроводки должны выполняться в соответствии с законодательством и нормативами, принятыми в данной стране, и отвечать требованиям руководства по установке. В противном случае возможно поражение электрическим током или короткое замыкание. • Для предотвращения заправки хладагента и компрессорного масла неправильных типов, размеры заправочных соединений основного устройства и размеры приспособлений отличаются от размеров аналогичных элементов для заправки обычного хладагента. • Соответственно, для нового хладагента (R410A) требуются подходящие только для него приспособления. • Для соединительных труб используйте новые, чистые соединения, предназначенные для R410A, и не допускайте попадания в них воды или пыли. Для отключения устройства от источника питания. • Это устройство должно подключаться к источнику питания с помощью выключателя с зазором между разомкнутыми контактами не менее 3 мм. В цепи питания данного кондиционера при монтаже должен быть установлен предохранитель (могут использоваться предохранители любого типа). (*1) См. “Определение квалифицированного монтажника или квалифицированного специалиста по обслуживанию”. Пробный пуск • Перед тем как запускать кондиционер после окончания работ на нем, проверьте, что крышка электрического отделения внутреннего блока и служебная панель наружного блока закрыты, и переставьте сетевой выключатель в положение ON (ВКЛ). Если этого не проверить, можно получить удар электрическим током. • При обнаружении каких-либо неполадок в работе кондиционера (например, появилось сообщение об ошибке, запах гари, слышны странные звуки, кондиционер не охлаждает или не нагревает воздух, подтекает вода) не трогайте кондиционер, переведите его сетевой выключатель в положение OFF (ВЫКЛ) и вызовите квалифицированного специалиста по обслуживанию. До прибытия квалифицированного специалиста по обслуживанию позаботьтесь о том, чтобы электропитание кондиционера не могло быть случайно включено (например, поставьте знак “Не работает” рядом с сетевым выключателем). Продолжение эксплуатации неисправного кондиционера может привести к усугублению механических проблем и стать причиной поражения электрическим током и поломок. • По окончании работ проверьте при помощи устройства для проверки изоляции (мегомметр на 500 В), что сопротивление между участком под напряжением и участком без напряжения (заземлением) равно 1 МΩ или более. Если сопротивление мало, это значит, что на стороне пользователя произошла утечка электричества или пробой. • По завершении установочных работ проверьте, нет ли утечек хладагента, проверьте сопротивление изоляции и слив воды. Затем проведите рабочее испытание, чтобы удостовериться в правильной работе кондиционера. 55-RU – 28 – 56-RU +00EH99884801-2_01EN.book Page 29 Monday, January 28, 2013 7:54 PM – 29 – 2 3 Accessory parts Avoid installing in the following places Accessory parts Part name Shape Usage This manual (Hand over to customers) (For other languages that do not appear in this Installation Manual, please refer to the enclosed CD-R.) Installation Manual 1 Owner’s Manual 1 CD-ROM 1 Heat insulating pipe 2 For heat insulation of pipe connecting section Washer 8 For hanging-down unit Hose band 1 For connecting drain pipe Flexible hose 1 For adjusting center of drain pipe Heat insulator 1 For heat insulation of drain connecting section Filter stopper 1 For fixing the filter Part name 57-EN Q’ty Selection of installation place (Hand over to customers) (For other languages that do not appear in this Installation Manual, please refer to the enclosed CD-R.) — Owner’s Manual and Installation Manual Shape Q’ty SM40~56 SM80 SM110~160 Filter fixing rail 1 (700 L) 1 2 Filter fixing rail 2 (700 L) 1 2 Filter fixing rail 3 (490 L) 2 Filter fixing rail 4 (490 L) 2 Select a location for the indoor unit where the cool or warm air will circulate evenly. Avoid installation in the following kinds of locations. • Saline area (coastal area) • Locations with acidic or alkaline atmospheres (such as areas with hot springs, factories where chemicals or pharmaceuticals are made and places where the exhaust air from combustion appliances will be sucked into the unit). Doing so may cause the heat exchanger (its aluminum fins and copper pipes) and other parts to become corroded. • Locations with atmospheres with mist of cutting oil or other types of machine oil. Doing so may cause the heat exchanger to become corroded, mists caused by the blockage of the heat exchanger to be generated, the plastic parts to be damaged, the heat insulators to peel off, and other such problems to result. • Places where iron or other metal dust is present. If iron or other metal dust adheres to or collects on the interior of the air conditioner, it may spontaneously combust and start a fire. • Locations where vapors from food oils are formed (such as kitchens where food oils are used). Blocked filters may cause the air conditioner’s performance to deteriorate, condensation to form, the plastic parts to be damaged, and other such problems to result. • Locations near obstructions such as ventilation openings or lighting fixtures where the flow of the blown air will be disrupted (a disruption of the air flow may cause the air conditioner’s performance to deteriorate or the unit to shut down). • Locations where an in-house power generator is used for the power supply. The power line frequency and voltage may fluctuate, and the air conditioner may not work properly as a result. • On truck cranes, ships or other moving conveyances. • The air conditioner must not be used for special applications (such as for storing food, plants, precision instruments or art works). (The quality of the items stored may be degraded.) • Locations where high frequencies are generated (by inverter equipment, in-house power generators, medical equipment or communication equipment). (Malfunctioning or control trouble in the air conditioner or noise may adversely affect the equipment’s operation.) • Locations where there is anything under the unit installed that would be compromised by wetness. (If the drain has become blocked or when the humidity is over 80 %, condensation from the indoor unit will drip, possibly causing damage to anything underneath.) • In the case of the wireless type of system, rooms with the inverter type of fluorescent lighting or locations exposed to direct sunlight. (The signals from the wireless remote controller may not be sensed.) • Locations where organic solvents are being used. • The air conditioner cannot be used for liquefied carbonic acid cooling or in chemical plants. • Location near doors or windows where the air conditioner may come into contact with high-temperature, highhumidity outdoor air. (Condensation may occur as a result.) • Locations where special sprays are used frequently. 58-EN +00EH99884801-2_01EN.book Page 30 Monday, January 28, 2013 7:54 PM Installation under high-humidity atmosphere Installation space In some cases including the rainy season, especially inside of the ceiling may become high-humidity atmosphere (dew-point temperature: 23 °C or higher). 1. Installation to inside of the ceiling with tiles on the roof 2. Installation to inside of the ceiling with slated roof 3. Installation to a place where inside of the ceiling is used for pathway to intake the fresh air 4. Installation to a kitchen • In the above cases, additionally attach the heat insulator to all positions of the air conditioner, which come to contact with the high-humidity atmosphere. In this case, arrange the side plate (Check port) so that it is easily removed. • Apply also a sufficient heat insulation to the duct and connecting part of the duct. Reserve sufficient space required for installation or service work. 5 or more 100 or more 27 °C dry bulb temperature 24 °C wet bulb temperature Air volume: Low air volume, operation time 4 hours 25 A 70 or more 25 Condensation test conditions Indoor side: 275 Air discharge Ceiling B or more 2500 or more [Reference] (Unit: mm) Ceiling Air intake 25 50 or more 570 Service door (Ceiling opening) Service door (Ceiling opening) Floor surface Air discharge 100 or more Air intake Ceiling 120 Check port 450 570 25 Service door (Ceiling opening) B Service space (B for maintenance of air filter) Air intake A 300 or more B SM40, 45, 56 type 750 700 SM80 type 1050 500 SM110, 140, 160 type 1450 700 25 Ceiling 570 Service door (Ceiling opening) Filter cleaning sign term setting The lighting term setup of the filter sign (Notification of filter cleaning) of the remote controller can be changed according to the condition of installation. For setup method, refer to “Filter sign setting” in the Applicable controls of this Manual. 59-EN – 30 – 60-EN +01EN02BODY.fm Page 31 Thursday, January 31, 2013 10:37 AM – 31 – 4 Installation CAUTION Strictly comply with the following rules to prevent damage of the indoor units and human injury. • Do not put a heavy article on the indoor unit or let a person get on it. (Even units are packaged) • Carry in the indoor unit as it is packaged if possible. If carrying in the indoor unit unpacked by necessity, use buffering cloth or other material to not damage the unit. • To move the indoor unit, hold the hooking brackets (4 positions) only. Do not apply force to the other parts (such as refrigerant pipe, drain pan, foamed parts, or resin parts). • Carry the package by two or more persons, and do not bundle it with plastic band at positions other than specified. • To install vibration isolation material to hanging bolts, confirm that it does not increase the unit vibration. External dimensions (Unit: mm) • Consider the piping / wiring after the unit is hung to determine the location of the indoor unit installation and orientation. • After the location of the indoor unit installation has been determined, install hanging bolts. • For the dimensions of the hanging bolt pitches, refer to the external view. • When a ceiling already exists, lay the drain pipe, refrigerant pipe, control wires, and remote controller wires to their connection locations before hanging the indoor unit. Treatment of ceiling Procure hanging bolts washer and nuts for installing the indoor unit (these are not supplied). C L Hanging bolt M10 or W3/8 4 pieces Nut M10 or W3/8 12 pieces Washer M10 8 pieces 345 or more 70 or more D Drain pan / Drain pump check cover 50 187.5 355 415 570 The ceiling differs according to structure of building. For details, consult your constructor or interior finish contractor. In the process after the ceiling board has been removed, it is important to reinforce ceiling foundation (frame) and to keep horizontal level of installed ceiling correctly in order to prevent vibration of ceiling board. • Attach the nuts and the M10 flat washers to the hanging bolt. • Put washers at up and down of the hanging bracket of the indoor unit to hang down the indoor unit. • Check that four sides are horizontal with a level gauge. (Horizontal degree: Within 5 mm) Hanging bolt (W3/8 or M10) REQUIREMENT New concrete slab Install the bolts with insert brackets or anchor bolts. Electrical control box Rubber (Blade type bracket) (Slide type bracket) M10 flat washer Nut (W3/8 or M10) Use M10 hanging bolts (4 pcs, locally procured). Matching to the existing structure, set pitch according to size in the unit external view as shown below. 25 M10 flat washer Nut (W3/8 or M10) Installation of hanging bolt 43 750 Hanging bolt pitch 650 345 113.5 131 236 22 50 Main unit dimension A 275 Installation of indoor unit Hanging bolt pitch B External dimensions of flange C 1800 Installation of hanging bolt Anchor bolt (Pipe hanging anchor bolt) • Hang the unit in a horizontal position. When unit is hanged to slant, it may cause overflow of drainage. • Install the unit within the dimension according to the figure below. • Use level gauge to confirm whether the unit is hang horizontally. Steel flame structure Front view Use existing angles or install new support angles. 0 to 5 mm Hanging bolt ▼ Dimension B C D 700 765 640 750 SM80 type 1000 1065 940 1050 SM110, 140, 160 type 1400 1465 1340 1450 Hanging bolt Support angle Set the drain pipe connecting port side within 5 mm lower than opposite side. Existing concrete slab Use a hole-in anchors, hole-in plugs, or a hole-in bolts. Side view ±5 mm A SM40, 45, 56 type Set the air intake and air discharge sides are within 5 mm with each other. 61-EN 62-EN +00EH99884801-2_01EN.book Page 32 Monday, January 28, 2013 7:54 PM 5 Mounting filter rails and filters 1 2 Mount the filter rail so that the hooks fit into the corresponding holes. (Note that the upper and lower filter rails are not identical.) Mount the filter stopper. * When mounting the rails, push them until the 3 latches click. CAUTION Following the Installation Manual, perform the drain piping work so that water is properly drained. Apply a heat insulation so as not to cause a dew condensation. Inappropriate piping work may result in water leakage in the room and wet furniture. Square hole Upper filter rail Fit this hook into the square hole. • Provide the indoor drain piping with proper heat insulation. • Provide the area where the pipe connects to the indoor unit with proper heat insulation. Improper heat insulation will cause condensation to form. • The drain pipe must be sloping downward (at an angle of 1/100 or more), and do not run the pipe up and down (arched shape) or allow it to form traps. Doing so may cause abnormal sounds. • Restrict the length of the traversing drain pipe to 20 meters or less. For a long pipe, provide support brackets at intervals of 1.5 to 2 meters to prevent flapping. • Install the collective piping as shown in the following figure. • Do not provide any air vents. Otherwise, the drain water will spout, causing water to leak. • Do not allow any force to be applied to the connection area with the drain pipe. Filter stopper (accessory) Lower filter rail 3 Drain piping Slide and push the filters until it stop. * Insert the filters into the direction which the arrows, carved on the filters, show. (2 filters are identical) 1.5 m to 2 m Heat insulator Support bracket (Collective piping) Downward slope 1/100 or more As long as possible (Approx. 10 cm) Arched shape Downward slope 1/100 or more Trap VP30 Changing from back air intake to under air intake Pipe material, size and insulator 1 2 3 The following materials for piping work and insulating process are locally procured. Remove the filters on back of unit. Remove the suction board cover attached to the bottom, and screw it to the back of unit. Mount the supplied rail to the bottom, then set the filter. Suction board cover Suction board cover Incorrect Pipe material Hard vinyl chloride pipe VP25 (Nominal outer diameter Ø32 mm) Insulator Foamed polyethylene foam, thickness: 10 mm or more Connecting drain pipe Hook part Screw Insert flexible drain hose into upper drain pipe of main unit as far as it will go. Fix it with hose band. REQUIREMENT Mount the flexible drain hose using the hose band without using adhesive. 15 mm or less Flexible drain hose Hook part Screw Indoor unit Suction board cover 63-EN Hose band Flexible drain hose – 32 – 10 to 12 mm Suction board cover * The sizes of the left and right covers of SM80 class unit are not identical. As shown in the figure, re-mount the covers left-right reversed by facing the hook part upwards. Hose band 10 mm 64-EN +00EH99884801-2_01EN.book Page 33 Monday, January 28, 2013 7:54 PM – 33 – Gravitational drainage Check the draining 1 In the test run, check that water drain is properly performed and water does not leak from the connecting part of the pipes. When doing this, also check that no abnormal sounds are heard from the drain pump motor. Check draining also when installed in heating period. 2 3 Reattach the drain cap. * For gravitational drainage, remove the white connector (CN504) on the upper left of the circuit board in the electrical control box. Insert flexible drain hose into lower drain pipe and fix it with hose band. Upper pipe When the electrical and wiring work has been completed Lower pipe Pour some water by following the method shown in the following figure. Then, while performing a cooling operation, check that the water drains from the drain pipe connecting port (transparent) and that no water is leaking from the drain pipe. Move the drain cap from the lower pipe to the upper pipe. Remove drain pump connector CN504. CN504 Red Black Drain up 300 or less 618 or less For drain pipes that will be connected after setup, make a downward slope of 1/100 or more. • Disconnect the float switch connector (3P: red) from the connector (CN34: red) on the printed circuit board inside the electrical control box. (Before doing this, the power must be turned off.) • Connect a 220 V to 240 V supply voltage to (L) and (N) on the power supply terminal block. (Do not apply a 220 V to 240 V voltage to (A), (B) of the terminal block. Otherwise, the printed circuit board may be damaged.) • Pour the water by following the method shown in the following figure. (Amount of water poured: 1500 cc to 2000 cc) • When the power is turned on, the drain pump automatically starts running. Check whether the water is draining from the drain pipe connecting port, and check that no water is leaking from the drain pipe. • After checking that the water drains and there are no water leaks, turn off the power, connect the float switch connector to its original location (CN34) on the printed circuit board, and return the electrical control box to its original position. 850 or less When a down-gradient cannot be secured for the drain pipe, drain-up piping is possible. • The height of the drain pipe must be 850 mm or less from the underside of the indoor unit. • Take the drain pipe out of the drain pipe joint with the indoor unit in 300 mm or less, and bend up the pipe vertically. • Immediately after the pipe is bent up vertically, lay the pipe making a down-gradient. When the electrical and wiring work has not been completed Flexible drain hose (supplied) 220 V to 240 V White Black Supply water hose Red Drain up setup dimensions Black Pull out connector CN34 (Red) from P.C. board. 65-EN 66-EN +00EH99884801-2_01EN.book Page 34 Monday, January 28, 2013 7:54 PM Heat insulating process Fan characteristics • As shown in the figure, cover the flexible hose and hose band with the attached heat insulator up to the bottom of the indoor unit tightly. • Cover the drain pipe tightly with a heat insulator procured locally so that it overlaps with the attached heat insulator of the drain connecting section. SM40 SM45 SM56 SM80 Standard air volume: 800 m3/h 160 Heat insulator (locally procured) Indoor unit Connecting method of the duct High (120 Pa) High (100 Pa) 100 80 Lower limit of external static pressure (120 Pa) 140 Upper limit of external static pressure (120 Pa) 120 External static pressure (Pa) Heat insulator of the drain connecting section (accessory) Lower limit of external static pressure (120 Pa) 140 High (80 Pa) Low (120 Pa) High (65 Pa) 60 High (50 Pa) High (40 Pa) 40 Upper limit of external static pressure (120 Pa) 120 External static pressure (Pa) Wrap the attached heat insulator tightly from the surface of the indoor unit. Standard air volume: 1200 m3/h 160 High (100 Pa) 100 80 High (120 Pa) High (80 Pa) High (65 Pa) Low (120 Pa) High (50 Pa) 60 High (40 Pa) High (30 Pa) 40 High (30 Pa) 20 Duct: Insulation materia (locally procured) Connect a duct to the outside of the flange Standard filter pressure loss Standard filter pressure loss 0 380 Aluminum tape (locally procured) 480 580 680 780 Air Volume (m3/h) 880 980 0 570 670 770 870 970 1070 1170 1270 1370 1470 Air Volume (m3/h) SM110 SM140 SM160 Flange Indoor unit Air discharge side 20 Flange (locally procured) Air intake side Standard air volume: 2100 m3/h 160 Lower limit of external static pressure (120 Pa) 140 Aluminum tape (locally procured) Upper limit of external static pressure (120 Pa) High (120 Pa) 120 External static pressure (Pa) Under surface CAUTION Incomplete heat insulation of the supply air flange and sealing may occur dewing resulted in falling of water drop. High (100 Pa) 100 Low (120 Pa) 80 High (80 Pa) High (65 Pa) 60 High (50 Pa) 40 High (40 Pa) High (30 Pa) 20 Standard filter pressure loss 0 1000 1200 1400 1600 1800 2000 2200 2400 2600 Air Volume (m3/h) 67-EN – 34 – 68-EN +00EH99884801-2_01EN.book Page 35 Monday, January 28, 2013 7:54 PM – 35 – 6 Duct design Arrangement (Unit: mm) Referring to the following dimensions, manufacture duct at the local site. SM40, SM45, SM56 SM80 SM110, SM140, SM160 <Under air intake> <Under air intake> <Under air intake> 100 100 100 100 100 100 100 100 100 27 235.4 27 100 100 100 100 100 100 100 100 100 100 100 100 100 27 100 100 254 37.5 100 100 100 100 100 100 100 100 100 975 37.5 27 1360 27 235.2 254 100 100 87.5 37.5 <Back air intake> 27 69-EN 37.5 960 27 235.2 675 37.5 <Back air intake> 660 100 100 100 100 100 100 100 254 27 <Back air intake> 87.5 254 27 235.4 37.5 37.5 254 100 100 100 100 27 100 235.2 100 100 100 100 100 27 254 100 100 27 235.4 37.5 1359.4 959.4 659.4 37.5 100 100 100 100 100 100 100 100 100 100 100 100 100 1375 37.5 70-EN +00EH99884801-2_01EN.book Page 36 Monday, January 28, 2013 7:54 PM 7 Refrigerant piping • The sealed gas was sealed at the atmospheric pressure so when the flare nut is removed, there will no “whooshing” sound: This is normal and is not indicative of trouble. • Use two wrenches to connect the indoor unit pipe. Connecting refrigerant piping CAUTION When the refrigerant pipe is long, provide support brackets at intervals of 2.5 m to 3 m to clamp the refrigerant pipe. Otherwise, abnormal sound may be generated. Use the flare nut attached with the indoor unit or R410A flare nut. Permissible piping length and height difference They vary depending on the outdoor unit. For details, refer to the Installation Manual attached to the outdoor unit. Flaring 1. Cut the pipe with a pipe cutter. Remove burrs completely. (Remaining burrs may cause gas leakage.) 2. Insert a flare nut into the pipe, and flare the pipe. Use the flare nut provided with the unit or the one used for the R410A refrigerant. The flaring dimensions for R410A are different from the ones used for the conventional R22 refrigerant. A new flare tool manufactured for use with the R410A refrigerant is recommended, but the conventional tool can still be used if the projection margin of the copper pipe is adjusted to be as shown in the following table. Model: RAV- Outer dia. of copper pipe Pipe size (mm) Gas side Liquid side SM56 Ø12.7 Ø6.4 SM80, SM110, SM140 Ø15.9 Ø9.5 6.4, 9.5 12.7, 15.9 R410A tool used Conventional tool used 0 to 0.5 1.0 to 1.5 For the tools such as charge hose, use those manufactured exclusively for R410A. Work using double spanner • Use the tightening torque levels as listed in the following table. Outer dia. of connecting pipe (mm) Tightening torque (N•m) 6.4 14 to 18 9.5 34 to 42 12.7 49 to 61 15.9 63 to 77 • Tightening torque of flare pipe connections. Pressure of R410A is higher than that of R22. (Approx. 1.6 times) Therefore, using a torque wrench, tighten the flare pipe connecting sections which connect the indoor and outdoor units of the specified tightening torque. Incorrect connections may cause not only a gas leak, but also a trouble of the refrigeration cycle. CAUTION Flaring diameter size: A (Unit: mm) Outer dia. of copper pipe Tightening with an excessive torque may crack the nut depending on installation conditions. +0 A –0.4 6.4 9.1 9.5 13.2 12.7 16.6 15.9 19.7 Perform vacuuming from the charge port of valve of the outdoor unit by using a vacuum pump. For details, follow to the Installation Manual attached to the outdoor unit. • Do not use the refrigerant sealed in the outdoor unit for evacuation. REQUIREMENT Projection margin in flaring: B (Unit: mm) Pipe size Evacuation Refrigerant amount to be added For addition of the refrigerant, add refrigerant “R410A” referring to the attached Installation Manual of outdoor unit. Use a scale to charge the refrigerant of specified amount. REQUIREMENT • Charging an excessive or too little amount of refrigerant causes a trouble of the compressor. Charge the refrigerant of specified amount. • A personnel who charged the refrigerant should write down the pipe length and the added refrigerant amount in the F-GAS label of the outdoor unit. It is necessary to fix the compressor and refrigeration cycle malfunction. Open the valve fully Open the valve of the outdoor unit fully. A 4 mmhexagonal wrench is required for opening the valve. For details, refer to the Installation Manual attached to the outdoor unit. Gas leak check Check with a leak detector or soap water whether gas leaks or not, from the pipe connecting section or cap of the valve. REQUIREMENT Use a leak detector manufactured exclusively for HFC refrigerant (R410A, R134a). * In case of flaring for R410A with the conventional flare tool, pull it out approx. 0.5 mm more than that for R22 to adjust to the specified flare size. The copper pipe gauge is useful for adjusting projection margin size. 71-EN – 36 – 72-EN +00EH99884801-2_01EN.book Page 37 Monday, January 28, 2013 7:54 PM – 37 – Heat insulation process Apply heat insulation for the pipes separately at liquid side and gas side. • For the heat insulation to the pipes at gas side, be sure to use the material with heat-resisting temperature 120 °C or higher. • To use the attached heat insulation pipe, apply the heat insulation to the pipe connecting section of the indoor unit securely without gap. REQUIREMENT • Apply the heat insulation to the pipe connecting section of the indoor unit securely up to the root without exposure of the pipe. (The pipe exposed to the outside causes water leak.) • Wrap heat insulator with its slits facing up (ceiling side). 8 Electrical connection WARNING • Use the specified wires for wiring connect the terminals. Securely fix them to prevent external forces applied to the terminals from affecting the terminals. Incomplete connection or fixation may cause a fire or other trouble. • Connect earth wire. (grounding work) Incomplete grounding cause an electric shock. Do not connect earth wires to gas pipes, water pipes, lightning conductor or telephone earth wires. • Appliance shall be installed in accordance with national wiring regulations. Capacity shortage of power circuit or incomplete installation may cause an electric shock or a fire. Wrap the pipe with the attached heat insulator without any gap between the indoor unit. Indoor unit The seam must be faced upward (ceiling side). Flare nut CAUTION • For power supply specifications, follow the Installation Manual of outdoor unit. • Do not connect 220 – 240 V power to the terminal blocks ( A , B ) for control wiring. Otherwise, the system will fail. • Do not damage or scratch the conductive core and inner insulator of power and system interconnection wires when peeling them. • Perform the electric wiring so that it does not come to contact with the high-temperature part of the pipe. The coating may melt resulting in an accident. • Do not turn on the power of the indoor unit until vacuuming of the refrigerant pipes completes. Heat insulation Union pipe (Accessory) Banding band (locally procured) Heat insulator of the pipe System interconnection wires specifications System interconnection wires* 4 x 1.5 mm2 or more (H07 RN-F or 60245 IEC 66) Up to 70 m *Number of wire x wire size Remote controller wiring Remote controller wiring, remote controller inter-unit wiring Wire size: 2 × 0.5 to 2.0 mm2 Total wire length of remote controller wiring and remote controller inter-unit wiring = L + L1 + L2 + … Ln In case of wired type only Up to 500 m In case of wireless type included Up to 400 m Total wire length of remote controller inter-unit wiring = L1 + L2 + … Ln Up to 200 m CAUTION The remote controller wire and system interconnection wires cannot be parallel to contact each other and cannot be stored in the same conduits. If doing so, a trouble may be caused on the control system due to noise or other factor. Indoor unit Remote controller wiring 73-EN Indoor unit Indoor unit Indoor unit L L1 Remote controller L2 Remote controller inter-unit wiring Ln (Max. 8 units) 74-EN +00EH99884801-2_01EN.book Page 38 Monday, January 28, 2013 7:54 PM Wiring between indoor unit and outdoor unit Wire connection 1. Figure below shows the wiring connections between the indoor and outdoor units and between the indoor units and remote controller. The wires indicated by the broken lines or dot-and-dash lines are provided at the locally. 2. Refer to the both indoor and outdoor unit wiring diagrams. 3. The power of the indoor unit is supplied from the outdoor unit. REQUIREMENT • • • • Wiring diagram Single system Simultaneous twin system Remote controller • • Before performing wiring work in the electrical control box, remove the air filter and the cover of the box (fixed with 2 screws). • Remove screw A, and loosen screw B. • Pull up and open the electrical control box cover. • Tighten the screws of the terminal block firmly, and fix the wires with the cord clamps attached to the electrical control box. (Do not apply tension to the connecting section of the terminal block.) • Slide the electrical control box cover to install it. Do not pinch the wire and make the gap as small as possible when installing the cover. Remote controller inter-unit wiring Remote controller Remote controller wiring Remote controller wiring Indoor side A B 1 2 Indoor side System interconnection wires 3 System interconnection wires Outdoor side 1 2 3 Outdoor side Power supply Connect the wires matching the terminal numbers. Incorrect connection causes a trouble. Pass the wires through the bushing of wire connection holes of the indoor unit. Keep a margin (Approx. 100 mm) on a wire to hang down the electrical control box at servicing or other purpose. The low-voltage circuit is provided for the remote controller. (Do not connect the high-voltage circuit) A B 1 2 3 1 2 3 Indoor side A B 1 2 3 Indoor power inter-unit wiring Side D (Space: 8.5 mm) Remote controller inter-unit wiring Remote controller inter-unit wiring Indoor side System interconnection wires Outdoor side Remote controller wiring B 1 2 3 1 2 3 Indoor side A B 1 2 Indoor side 3 Indoor power inter-unit wiring A B 1 2 Indoor power inter-unit wiring Indoor side 3 Side C (Space: 4 mm) Cord clamp Remote controller inter-unit wiring Remote controller wiring A Loosen screw B. Remove screw A. Power supply Simultaneous triple and double twin system Remote controller Electrical control box cover A B 1 2 3 Earth screw Select side C or D for the power cable clamping position referring to the following table according to the cable type and diameter. * Cable clamp can be attached on either right or left side. When twin system are connected, clamp two cables with one cable clamp. Wire type Indoor power inter-unit wiring System interconnection wire Power supply Specification Cable clamping position Cabtyre cable 4-core stranded wire 2.5 mm² Side D Cabtyre cable 4-core stranded wire 1.5 mm² Side C Triple 1 2 3 2 mm or less 10 Double twin 10 * Use 2-core shield wire (MVVS 0.5 to 2.0 mm2 or more) for the remote controller wiring in the simultaneous triple and simultaneous double twin systems to prevent noise problems. Be sure to connect both ends of the shield wire to earth leads. * Connect earth wires for each indoor unit in the simultaneous twin, simultaneous triple and simultaneous double twin systems. 50 Earth wire See the figure on the left for system interconnection wires to the terminal block. 30 System interconnection wire System interconnection wire Remote controller wiring Strip off approx. 9 mm the wire to be connected. Wiring diagram Terminal block for remote controller wiring of indoor unit A B Terminal block A B Remote controller unit Remote controller wire (Locally procured) 75-EN – 38 – 76-EN +00EH99884801-2_01EN.book Page 39 Monday, January 28, 2013 7:54 PM – 39 – 9 2 Applicable controls REQUIREMENT • When you use this air conditioner for the first time, it takes approx. 5 minutes until the remote controller becomes available after power-on. This is normal. <When power is turned on for the first time after installation> It takes approx. 5 minutes until the remote controller becomes available. Approx. 5 minutes Power on “SETTING” flashes “SETTING” goes out Remote controller is available <When power is turned on for the second (or later) time> It takes approx. 1 minute until the remote controller becomes available. Basic procedure for changing settings Change the settings while the air conditioner is not working. (Stop the air conditioner before making settings.) CAUTION Set only the CODE No. shown in the following table: Do NOT set any other CODE No. If a CODE No. not listed is set, it may not be possible to operate the air conditioner or other trouble with the product may result. * The displays appearing during the setting process differ from the ones for previous remote controllers (AMT21E, AMT31E). (There are more CODE No.) Approx. 1 minutes Power on “SETTING” flashes “SETTING” goes out 3 4 5 1 3 Remote controller is available 4 • Normal settings were made when the indoor unit was shipped from factory. Change the indoor unit settings as required. • Use the wired remote controller to change the settings. * The settings cannot be changed using the wireless remote controller, sub remote controller, or remote-controller-less system (for central remote controller only). Therefore, install the wired remote controller to change the settings. Each time button is pushed, indoor unit numbers in the control group change cyclically. Select the indoor unit to change settings for. The fan of the selected unit runs and the louvers start swinging. The indoor unit for change settings can be confirmed. 6 6 1 1 5 2 Push and hold button and “TEMP.” button simultaneously for 4 seconds or more. After a while, the display flashes as shown in the figure. Confirm that the CODE No. is [01]. • If the CODE No. is not [01], push button to clear the display content, and repeat the procedure from the beginning. (No operation of the remote controller is accepted for a while after button is pushed.) (While air conditioners are operated under the group control, “ALL” is displayed first. When is pushed, the indoor unit number displayed following “ALL” is the header unit.) Specify CODE No. [ buttons. Select SET DATA [ buttons. ] with “TEMP.” ] with “TIME” / / Push button. When the display changes from flashing to lit, the setup is completed. • To change settings of another indoor unit, repeat from Procedure 2. • To change other settings of the selected indoor unit, repeat from Procedure 3. Use button to clear the settings. To make settings after button was pushed, repeat from Procedure 2. External static pressure settings Set up a tap change based upon the external static pressure of the duct to be connected. To set up a tap change, follow to the basic operation procedure (1 → 2 → 3 → 4 → 5 → 6). • Specify [5d] to the CODE No. in procedure 3. • For the SET DATA of procedure 4, select a SET DATA of the external static pressure to be set up from the following table. <Change on wired remote controller> SET DATA External static pressure 0000 40 Pa 0001 30 Pa 0002 65 Pa 0003 50 Pa 0004 80 Pa 0005 100 Pa 0006 120 Pa to 3 HP (Factory default) 4 to 6 HP (Factory default) The list above is when SW501-1 and SW501-2 is OFF. When settings have been completed, push button to determine the settings. When button is pushed, flashes and then the display content disappears and the air conditioner enters the normal stop mode. (While is flashing, no operation of the remote controller is accepted.) (* Display content varies with the indoor unit model.) 77-EN 78-EN +00EH99884801-2_01EN.book Page 40 Monday, January 28, 2013 7:54 PM External static pressure Filter sign setting Power saving mode When using the wireless remote controller To set up the external static pressure, use the DIP switch on the circuit board of the wireless reception part. For details, refer to the instruction manual of the wireless remote controller kit. Alternatively, use the switch on the indoor micro computer circuit board as shown in the following figure and table. * Once switched, the settings "0001", "0003", and "0006" can be changed, but to reset to "0000", you need to set the switch to the normal (default) position and use a separately-sold wired remote controller to overwrite the data with "0000". According to the installation condition, the filter sign term (Notification of filter cleaning) can be changed. Follow to the basic operation procedure (1 → 2 → 3 → 4 → 5 → 6). • For the CODE No. in Procedure 3, specify [01]. • For the [SET DATA] in Procedure 4, select the SET DATA of filter sign term from the following table. Performing settings of the power saving mode SET DATA SW501 Filter sign term SW501-1 OFF ON OFF ON 0000 None SW501-2 OFF OFF ON ON 0001 150 H SET DATA 0000 0001 0003 0006 0002 2500 H (Factory default) To reset to the factory default Switch off SW501-1 and SW501-2, connect a separately-sold wired remote controller, and then perform the procedure for installing a separately-sold filter on this page to set the [5d] data to "0000". * When RAV-SP***2AT / RAV-SM***3AT or older is used, the displayed setting changes, but the actual power level is always “75%”. 0003 5000 H 0004 10000 H To secure better effect of heating When it is difficult to obtain satisfactory heating due to installation place of the indoor unit or structure of the room, the detection temperature of heating can be raised. Also use a circulator or other device to circulate heat air near the ceiling. Follow to the basic operation procedure (1 → 2 → 3 → 4 → 5 → 6). • For the CODE No. in Procedure 3, specify [06]. • For the SET DATA in Procedure 4, select the SET DATA of shift value of detection temperature to be set up from the following table. SET DATA Detection temperature shift value 0000 No shift 0001 +1 °C 0002 +2 °C (Factory default) 0003 +3 °C 0004 +4 °C 0005 +5 °C 0006 +6 °C 1 1 2 5 43 2 Push button for at least 4 seconds or more when the air conditioner is not working. , symbol flashs. Push (left side of the button) to select an indoor unit to be set. • Each time the button is pushed, UNIT No. change as follows: UNIT No. 1-1 UNIT No. 1-2 UNIT No. 1-3 UNIT No. 1-4 The fan of the selected unit runs. 3 Push TIME buttons, to adjust the setting of power level. • Each push of the button changes the power level by 1% within the range from 100% to 50%. • The factory default is 75% Setting of power level in power saving mode 4 5 79-EN – 40 – Push button. Push button to complete the setting. 80-EN +00EH99884801-2_01EN.book Page 41 Monday, January 28, 2013 7:54 PM – 41 – Remote controller switch monitoring function This function is available to call the service monitor mode from the remote controller even during a test run to acquire temperatures of sensors of the remote controller, indoor unit, and outdoor unit. 4 Push button to return to the normal display. Indoor unit data CODE No. 01 Room temperature (remote controller) 02 Indoor unit intake air temperature (TA) 03 Indoor unit heat exchanger (coil) temperature (TCJ) 04 Indoor unit heat exchanger (coil) temperature (TC) F3 Filter sign time Outdoor unit data 4 2 3 81-EN Simultaneous twin, triple or double twin system A combination with an outdoor unit allows simultaneous ON/OFF operation of the indoor units. The following system patterns are available. - Two indoor units for the twin system - Three indoor units for the triple system - Four indoor units for the double-twin system ▼ Twin system Outdoor unit Indoor unit 2 1 Data name Group control 1 3 Push and buttons simultaneously for at least 4 seconds to call the service monitor mode. The service monitor indicator lights up and the header indoor unit number is displayed first. CODE No. is also displayed. Pushing TEMP. buttons, select the number of sensor, etc. (CODE No.) to be monitored. (See the following table.) Pushing (left side of the button), select an indoor unit to be monitored. The sensor temperatures of indoor units and their outdoor unit in the control group are displayed. CODE No. Data name 60 Outdoor unit heat exchanger (coil) temperature (TE) 61 Outside air temperature (TO) 62 Compressor discharge temperature (TD) 63 Compressor suction temperature (TS) 64 — 65 Heatsink temperature (THS) 6A Operating current (x1/10) F1 Compressor cumulative operating hours (x100 h) Indoor unit Remote controller Finish of address setup by power-ON ▼ Triple system Outdoor unit Indoor unit Indoor unit Indoor unit Remote controller Finish of address setup by power-ON ▼ Double twin Outdoor unit Indoor unit Indoor unit Indoor unit Indoor unit Remote controller Finish of address setup by power-ON • For wiring procedure and wiring method, follow to the “Electrical connection” in this manual. • When the power supply has been turned on, the automatic address setup starts and which indicates that address is being set up flashes on the display part. During setup of automatic address, the remote controller operation is not accepted. Required time up to the finish of automatic addressing is approx. 5 minutes. 82-EN +00EH99884801-2_01EN.book Page 42 Monday, January 28, 2013 7:54 PM 3 Group control for system of multiple units [Procedure example] One remote controller can control maximum 8 indoor units as a group. Manual address setup procedure While the operation stops, change the setup. (Stop the operation of the unit.) ▼ Group control in single system Outdoor unit Outdoor unit Outdoor unit Outdoor unit Outdoor unit Indoor unit Indoor unit Indoor unit Indoor unit Indoor unit Remote controller Finish of address setup by power-ON • For wiring procedure and wiring method of the individual line (Identical refrigerant line) system, follow to “Electrical connection”. • Wiring between lines is performed in the following procedure. Connect the terminal block (A/B) of the indoor unit connected with a remote controller to the terminal blocks (A/ B) of the indoor units of other indoor units by wiring the inter-unit wire of the remote controller. • When the power supply has been turned on, the automatic address setup starts and which indicates that address is being set up flashes on the display part in about 3 minutes. During setup of automatic address, the remote controller operation is not accepted. Required time up to the finish of automatic addressing is approx. 5 minutes. 7 1 1 NOTE In some cases, it is necessary to change the address manually after setup of the automatic address according to the system configuration of the group control. • The follow mentioned system configuration is a case when complex systems in which systems of the simultaneous twin and simultaneous triple unit is controlled as a group by a remote controller. (Example) Group control for complex system Line system Indoor No. <Single system> <Twin system> Outdoor unit Outdoor unit Indoor unit Indoor unit Procedure example 1 Line address Address: 2-1-2 Indoor unit Indoor unit Indoor unit (* Display changes according to the model No. of indoor unit.) Address: 3-3-1 Address: 3-1-2 Address: 2-2-2 Address: 1-2-2 Address: 2-2-2 Address: 3-1-2 Address: 3-2-2 Address: 3-3-2 2 (Example of address setup change) Address: 2-1-2 1. Specify CODE No. [13] with TEMP. / buttons. (CODE No. [13]: Indoor address) 2. Change the indoor address from [3] to [2] TIME / buttons. 3. Push button. In this time, the setup finishes when the display changes from flashing to lighting. Indoor unit Group address Address: 1-1-1 4 Indoor UNIT No. before setup change is displayed. Indoor address After setup change of manual address Push + + buttons simultaneously for 4 seconds or more. After a while, the display part flashes as shown below. Check the displayed CODE No. is [10]. When the CODE No. is other than [10], push button to clear the display and repeat procedure from the first step. button, operation of the remote (After pushing controller is not accepted for approx. 1 minute.) (For a group control, No. of the firstly displayed indoor unit becomes the header unit.) <Triple system> Remote controller Address: 1-1-2 2,6 Indoor UNIT No. before setup change is displayed. 3 -3, 4 -3, 5 -3, Outdoor unit (Example of random setup) After setup of automatic address 7 3 -1, 4 -1, 5 -1, 6 3 -2, 4 -2, 5 -2 (Max. 8 units) 1. Specify CODE No. [12] with TEMP. / buttons. (CODE No. [12]: Line address) 2. Change the line address from [3] to [2] with TIME / buttons. 3. Push button. In this time, the setup finishes when the display changes from flashing to lighting. Every time button is pushed, the indoor UNIT No. in the group control is displayed in order. Select the indoor unit of which setup is changed. In this time, the position of the indoor unit of which setup is changed can be confirmed because fan of the selected indoor unit operate. The above address is set by the automatic addressing when the power is turned on. However, line addresses and indoor addresses are set randomly. For this reason, change the setting to match line addresses with indoor addresses. 83-EN – 42 – 84-EN +00EH99884801-2_01EN.book Page 43 Monday, January 28, 2013 7:54 PM – 43 – 7 5 1. Specify CODE No. [14] TEMP. / buttons. (CODE No. [14]: Group address) 2. Change the SET DATA from [0001] to [0002] TIME / buttons. (SET DATA [Header unit: 0001] [Follower unit: 0002]) 3. Push button. In this time, the setup finishes when the display changes from flashing to lighting. Indoor UNIT No. before setup change is displayed. After check of the changed contents, push button. (Setup is determined.) When button is pushed, the display disappears and the status becomes the normal stopped state. (When button is pushed the operation from the remote controller is not accepted for approx. 1 minute.) • If the operation from the remote controller is not accepted even 1 minute or more passed after button, it is considered that the pushing address setup is incorrect. In this case, the automatic address must be again set up. Therefore repeat procedure of the setup change from the Procedure 1. To recognize the position of the corresponding indoor unit though the indoor UNIT No. is known Check the position during operation stop. (Stop operation of the unit.) 6 If there is other indoor unit to be changed, repeat procedure 2 to 5 to change the setup. When the above setup has finished, push to select the indoor UNIT No. before change of setup, specify CODE No. [12], [13], [14] in order with TEMP. / buttons, and then check the changed contents. Address change check Before change: [3-3-1] → After change: [2-2-2] Pushing button clears the contents of which setup was changed. (In this case, procedure from 2 is repeated.) After confirmation, push button to return to the normal mode. When button is pushed, the display disappears and the status becomes the normal stopped state. (When button is pushed the operation from the remote controller is not accepted for approx. 1 minute.) 1 1,3 1 3 2 Push + buttons simultaneously for 4 seconds or more. After a while, the display part flashes and the display appears as shown below. In this time, the position can be checked because fan of the indoor unit operate. • For the group control, the indoor UNIT No. is displayed as [ ] and fans of all the indoor units in the group control operate. Check the displayed CODE No. is [01]. • When the CODE No. is other than [01], push button to clear the display and repeat procedure from the first step. button, operation of the remote (After pushing controller is not accepted for approx. 1 minute.) Indoor UNIT No. before setup change is displayed. (* Display changes according to the model No. of indoor unit.) 2 85-EN In the group control, every time button is pushed, the indoor UNIT No. in the group control is displayed in order. In this time, the position of the indoor unit can be confirmed because only fan of the selected indoor unit operate. (For a group control, No. of the firstly displayed indoor unit becomes the header unit.) 86-EN +00EH99884801-2_01EN.book Page 44 Monday, January 28, 2013 7:54 PM 10 Test run 8 °C Operation (SDI series4 and DI series4, 3 only) Before test run Pre-heating operation can be set for cold regions where room temperature drops to below zero. 1 • Before turning on the power supply, carry out the following procedure. 1) By using 500 V-megger, check that resistance of 1 MΩ or more exists between the terminal block 1 to 3 and the earth (grounding). If resistance of less than 1 MΩ is detected, do not run the unit. 2) Check the valve of the outdoor unit being opened fully. • To protect the compressor at activation time, leave power-ON for 12 hours or more before operating. Push + + buttons simultaneously for 4 seconds or more when the air conditioner is not working. After a while, the display part flashes as shown below. Check the Displayed CODE No. is [10]. • When the CODE No. is other than [10], push button to erase the display and repeat procedure from the first step. (After pushing button, operation of the remote controller is not accepted for approx. 1 minute.) Wired remote controller 2, 4 3 1,5 1 Push button for 4 seconds or more. [TEST] is displayed on the display part and the selection of mode in the test mode is permitted. Execute a test run 2 3 4 5 6 87-EN Operate the unit with the wired remote controller as usual. For the procedure of the operation, refer to the attached Owner’s Manual. A forced test run can be executed in the following procedure even if the operation stops by thermostatOFF. In order to prevent a serial operation, the forced test run is released after 60 minutes have passed and returns to the usual operation. (* Display changes according to the model No. of indoor unit.) Every time button is pushed, the indoor unit No. in the group control is displayed in order. Select the indoor unit of which setup is changed. In this time, the position of the indoor unit of which setup is changed can be confirmed because fan of the selected indoor unit operate. Specify CODE No. [d1] TEMP. buttons. Select SET DATA [0001] TIME buttons. CAUTION / 8 °C Operation setting 0000 None (Factory default) 0001 8 °C Operation setting Push button. Select the operation mode with button, [ Cool] or [ Heat]. • Do not run the air conditioner in a mode other than [ Cool] or [ Heat]. • The temperature controlling function does not work during test run. • The detection of error is performed as usual. Do not use the forced test run for cases other than the test run because it applies an excessive load to the devices. / SET DATA 2 3 4 5 Push button. In this time, the setup finishes when the display changes from flashing to lighting. After the test run, push button to stop a test run. (Display part is same as procedure 1.) Push button to cancel (release from) the test run mode. ([TEST] disappears on the display and the status returns to a normal.) Push button.(Setup is determined.) When button is pushed, the display disappears and the status becomes the usual stop status. (When button is pushed the operation from the remote controller is not accepted for approx. 1 minute.) – 44 – 88-EN +00EH99884801-2_01EN.book Page 45 Monday, January 28, 2013 7:54 PM – 45 – Wireless remote controller 1 2 When TEMPORARY button is pushed for 10 seconds or more, “Pi!” sound is heard and the operation changes to test run. After approx. 3 minutes, a cooling operation starts forcedly. Check cool air starts blowing. If the operation does not start, check wiring again. To stop a test operation, push TEMPORARY button once again (Approx. 1 second). Check wiring / piping of the indoor and outdoor units in test run. When a test run is not performed properly • When a test run is not performed properly, refer to the error code and the part to be checked on “Troubleshooting”. • When a test run is executed before installing the external duct, a protection control may be activated and lets the unit stop and the code P12 may be displayed. (This is not due to a malfunction but to the current control function of the DC motor in this unit.) When a test run executed before installing the external duct, select “Low” for the fan speed level or cover the air discharge. • In addition, stop the operation before replacing the High-efficiency filter or opening the service panel. After the test run, reset the circuit breaker of the indoor unit. 11 Maintenance <Daily maintenance> ▼ Cleaning of air filter If is displayed on the remote controller, maintain the air filter. 1 Push the button to stop the operation, then turn off the circuit breaker. After the cooling or dry operation, the fan keeps running for self-cleaning. Push the button twice to stop the operation. 1,2 3 1. Take out the air filter. • Slide and remove the filter as shown in the following figure: TEMPORARY button WARNING When the first filter comes out without connected to the other one, insert it once more to connect the two filters together and pull out them as connected. Do not insert hands to take out the second filter. You may injure yourself. 2. Cleaning with water or vacuum cleaner • If dirt is heavy, clean the air filter by tepid water with neutral detergent or water. • After cleaning with water, dry the air filter sufficiently in a shade place. 3. Mount the air filter. * Insert the filters into the direction which the arrows, carved on the filters, show. (2 filters are identical) 2 3 Turn on the circuit breaker, then push the operation. After cleaning, push display disappears. button on the remote controller to start the . CAUTION • Do not start the air conditioner while leaving air filter removed. • Push the filter reset button. ( indication will be turn off.) 89-EN 90-EN +00EH99884801-2_01EN.book Page 46 Monday, January 28, 2013 7:54 PM 12 Troubleshooting ▼ Periodic Maintenance For environmental conservation, it is strongly recommended that the indoor and outdoor units of the air conditioner in use be cleaned and maintained regularly to ensure efficient operation of the air conditioner. When the air conditioner is operated for a long time, periodic maintenance (once a year) is recommended. Furthermore, regularly check the outdoor unit for rust and scratches, and remove them or apply rustproof treatment, if necessary. As a general rule, when an indoor unit is operated for 8 hours or more daily, clean the indoor unit and outdoor unit at least once every 3 months. Ask a professional for this cleaning / maintenance work. Such maintenance can extend the life of the product though it involves the owner’s expense. Failure to clean the indoor and outdoor units regularly will result in poor performance, freezing, water leakage, and even compressor failure. Inspection before maintenance Following inspection must be carried out by a qualified installer or qualified service person. Parts Confirmation and check Confirmation of error log When an error occurred in the air conditioner, an error code and indoor UNIT No. appear on the display part of the remote controller. The error code is only displayed during the operation. If the display disappears, operate the air conditioner according to the following “Confirmation of error log” for confirmation. When an error occurred on the air conditioner, the error log can be confirmed with the following procedure. (The error log is stored in memory up to 4 errors.) The log can be confirmed from both operating status and stop status. 2 Inspection method Heat exchanger Access from inspection opening and remove the access panel. Examine the heat exchanger if there is any clogging or damages. Fan motor Access from inspection opening and check if any abnormal noise can be heard. Fan Access from inspection opening and remove the access panel. Examine the fan if there are any waggles, damages or adhesive dust. Filter Go to installed location and check if there are any stains or breaks on the filter. Drain pan Access from inspection opening and remove the access panel. Check if there is any clogging or drain water is polluted. 3 Error code Indoor UNIT No. in which an error occurred 1 ▼ Maintenance List Part Check (visual / auditory) Maintenance Indoor / outdoor Dust / dirt clogging, scratches Wash the heat exchanger when it is clogged. Fan motor Indoor / outdoor Sound Take appropriate measures when abnormal sound is generated. Indoor Dust / dirt, breakage • Wash the filter with water when it is contaminated. • Replace it when it is damaged. Indoor • Vibration, balance • Dust / dirt, appearance Filter Fan Air intake / discharge grilles Drain pan Ornamental panel, louvres Exterior 91-EN Unit Heat exchanger Indoor / outdoor Indoor Indoor Outdoor 2 • Replace the fan when vibration or balance is terrible. • Brush or wash the fan when it is contaminated. Dust / dirt, scratches Fix or replace them when they are deformed or damaged. Dust / dirt clogging, drain contamination Clean the drain pan and check the downward slope for smooth drainage. Dust / dirt, scratches Wash them when they are contaminated or apply repair coating. • Rust, peeling of insulator • Peeling / lift of coat Apply repair coating. 1 When and buttons are pushed simultaneously for 4 seconds or more, the following display appears. If is displayed, the mode enters in the error log mode. • [01: Order of error log] is displayed in CODE No.. • [Error code] is displayed in CHECK. • [Indoor unit address in which an error occurred] is displayed in Unit No.. Every pushing of button used to set temperature, the error log stored in memory is displayed in order. The numbers in CODE No. indicate CODE No. [01] (latest) → [04] (oldest). REQUIREMENT Do not push button because all the error log of the indoor unit will be deleted. 3 – 46 – After confirmation, push to the usual display. button to return 92-EN +00EH99884801-2_01EN.book Page 47 Monday, January 28, 2013 7:54 PM – 47 – Error codes and parts to be checked Wired Wireless remote controller remote Sensor block display of controller receiving unit display Indication Operation Timer Ready GR GR OR Main defective parts Judging device Parts to be checked / error description Air conditioner status No header remote controller Remote controller communication error Remote controller Incorrect remote controller setting --- The header remote controller has not been set (including two remote controllers). Air conditioner status Flashing H01 Outdoor unit compressor breakdown Outdoor Current detect circuit, power voltage --- Minimum frequency was reached in the current releasing control or short-circuit current (Idc) after direct excitation was detected H02 Outdoor unit compressor lock Outdoor Compressor circuit --- Compressor lock was detected. Entire stop * H03 Outdoor unit current detect circuit error Outdoor Current detect circuit, outdoor unit P.C. board --Abnormal current was detected in AC-CT or a phase loss was detected. Entire stop Autoreset H04 Case thermostat operation Outdoor Malfunction of the case thermostat Entire stop H06 Outdoor unit lowOutdoor pressure system error Current, high-pressure switch circuit, outdoor P.C. board --- Pressure sensor error was detected or lowpressure protective operation was activated. Entire stop F31 SIM * No signal can be received from the indoor unit. Remote controller transmission error E03 Indoor unit-remote controller regular communication error Indoor Remote controller, network adapter, indoor P.C. board --- No data is received from the remote controller or network adapter. Indoor System interconnection wires, indoor P.C. board, outdoor P.C. board --- Serial communication error between indoor unit and outdoor unit Autoreset Indoor address setting error --- The same address as the self-address was detected. Autoreset IPDU-CDB communication error Parts to be checked / error description Outdoor P.C. board ---- In the case of EEPROM error. Entire stop E02 E04 Operation Timer Ready GR GR OR Judging device Outdoor System interconnection wires, indoor P.C. board, Remote remote controller controller --- No signal can be sent to the indoor unit. Indoor unit-outdoor unit serial communication error Indication Main defective parts Outdoor unit P.C. board Flashing E01 Entire stop L03 SIM Duplicated header indoor units Indoor Indoor address setting error --- There are two or more header units in the group. Entire stop L07 SIM Group line in individual indoor unit Indoor Indoor address setting error --- There is at least one group-connected indoor unit among individual indoor units. Entire stop L08 SIM Indoor group address Indoor not set Indoor address setting error --- Indoor address group has not been set. Entire stop L09 SIM Indoor unit capacity not set Indoor Indoor unit capacity has not been set. Entire stop E08 Duplicated indoor addresses Indoor E09 Duplicated header remote controllers Remote controller address setting error --- Two remote controllers are set as header in the doubleRemote remote controller control. controller (* The header indoor unit stops raising alarm and follower indoor units continue to operate.) E10 CPU-CPU communication error Indoor Indoor P.C. board --- Communication error between main MCU and motor microcomputer MCU Autoreset L10 SIM Outdoor unit P.C. board Outdoor In the case of outdoor P.C. board jumper wire (for service) setting error Entire stop E18 Header unit follower unit regular communication error Indoor Indoor P.C. board --- Regular communication is not possible between header and follower indoor units or between twin header (main) and follower (sub) units. Autoreset L20 SIM LAN communication error Network adapter central control Address setting, central control remote controller, network adapter --- Duplication of address in central control communication Autoreset E31 IPDU communication Outdoor error Communication error between IPDU and CDB Entire stop Other outdoor unit error Entire stop ALT Indoor unit heat exchanger sensor (TCJ) error Indoor Heat exchanger sensor (TCJ), indoor P.C. board --Open-circuit or short-circuit of the heat exchanger sensor (TCJ) was detected. Autoreset ALT Indoor unit heat exchanger sensor (TC) error Indoor Heat exchanger sensor (TC), indoor P.C. board --Open-circuit or short-circuit of the heat exchanger sensor (TC) was detected. Autoreset ALT Outdoor unit discharge temp. sensor (TD) error Outdoor Outdoor temp. sensor (TD), outdoor P.C. board --Open-circuit or short-circuit of the discharge temp. sensor was detected. Entire stop F06 ALT Outdoor unit temp. sensor (TE / TS) error Outdoor Outdoor temp. sensors (TE / TS), outdoor P.C. board --- Open-circuit or short-circuit of the heat exchanger temp. sensor was detected. Entire stop F07 ALT TL sensor error TL sensor may be displaced, disconnected or shortcircuited. Entire stop F08 ALT Outdoor unit outside Outdoor air temp. sensor error Outdoor temp. sensor (TO), outdoor P.C. board --Open-circuit or short-circuit of the outdoor air temp. sensor was detected. Operation continued F10 ALT Indoor unit room temp. sensor (TA) error Indoor Room temp. sensor (TA), indoor P.C. board --- Open- Autocircuit or short-circuit of the room temp. sensor (TA) reset was detected. F12 ALT TS sensor error Outdoor TS sensor may be displaced, disconnected or shortcircuited. Entire stop F13 ALT Heat sink sensor error Outdoor Abnormal temperature was detected by the temp. sensor of the IGBT heat sink. Entire stop F15 ALT Temp. sensor connection error Outdoor Entire Temp. sensor (TE / TS) may be connected incorrectly. stop F29 SIM Indoor unit, other P.C. Indoor board error F01 F02 F04 93-EN Wired Wireless remote controller remote Sensor block display of controller receiving unit display Outdoor Indoor P.C. board --- EEPROM error * L29 SIM Other outdoor unit error Outdoor 1) Communication error between IPDU MCU and CDB MCU 2) Abnormal temperature was detected by the heat sink temp. sensor in IGBT. Entire stop L30 SIM Abnormal external input into indoor unit (interlock) Indoor External devices, outdoor unit P.C. board --Abnormal stop due to incorrect external input into CN80 Entire stop L31 SIM Phase sequence error, etc. Outdoor Power supply phase sequence, outdoor unit P.C. board --- Abnormal phase sequence of the 3-phase power supply Operation continued (thermost at OFF) P01 ALT Indoor unit fan error Indoor Indoor fan motor, indoor P.C. board --- Indoor AC fan Entire error (fan motor thermal relay activated) was detected. stop P03 ALT Outdoor unit discharge temp. error Outdoor An error was detected in the discharge temp. releasing control. Entire stop P04 ALT Outdoor unit highpressure system error Outdoor High-pressure switch --- The IOL was activated or an error was detected in the high-pressure releasing control using the TE. Entire stop P05 ALT Open phase detected Outdoor The power wire may be connected incorrectly. Check open phase and voltages of the power supply. Entire stop P07 ALT Heat sink overheat Outdoor Abnormal temperature was detected by the temp. sensor of the IGBT heat sink. Entire stop P10 ALT Indoor unit water overflow detected Indoor Drain pipe, clogging of drainage, float switch circuit, indoor P.C. board --- Drainage is out of order or the float switch was activated. Entire stop Autoreset 94-EN +00EH99884801-2_01EN.book Page 48 Monday, January 28, 2013 7:54 PM Wired Wireless remote controller remote Sensor block display of controller receiving unit display Indication Operation Timer Ready GR GR OR Main defective parts Judging device Parts to be checked / error description Air conditioner status Flashing P12 ALT The fan error of the indoor unit Indoor Abnormal operation of the indoor fan motor, indoor P.C. board, or indoor DC fan (over current or lock, etc.) is detected. External static pressure setting error. Entire stop P15 ALT Gas leakage detected Outdoor There may be gas leakage from the pipe or connecting part. Check for gas leakage. Entire stop P19 ALT 4-way valve error Outdoor (Indoor) 4-way valve, indoor temp. sensors (TC / TCJ) --- An error was detected due to temperature drop of the indoor unit heat exchanger sensor when heating. Autoreset P20 ALT High-pressure protective operation Outdoor High-pressure protection Entire stop P22 ALT Outdoor unit fan error Outdoor Outdoor unit fan motor, outdoor unit P.C. board --- An Entire error (overcurrent, locking, etc.) was detected in the stop outdoor unit fan drive circuit. P26 ALT Outdoor unit inverter Idc activated Outdoor IGBT, outdoor unit P.C. board, inverter wiring, compressor --- Short-circuit protection for compressor Entire stop drive circuit devices (G-Tr / IGBT) was activated. P29 ALT Outdoor unit position error Outdoor Outdoor unit P.C. board, high-pressure switch --Compressor motor position error was detected. Entire stop ALT Other indoor unit error Another indoor unit in the group is raising an alarm. P31 Indoor Entire stop E03 / L07 / L03 / L08 alarm check locations and error description Autoreset : Lighting : Flashing : OFF : The air conditioner automatically enters the auto-address setting mode. ALT: When two LEDs are flashing, they flash alternately. SIM: When two LEDs are flashing, they flash in synchronization. Receiving unit display OR: Orange GR: Green 95-EN – 48 – 96-EN +00EH99884801-2_01EN.book Page 49 Monday, January 28, 2013 7:54 PM – 49 – MEMO ................................................................................................... ................................................................................................... ................................................................................................... ................................................................................................... ................................................................................................... ................................................................................................... ................................................................................................... ................................................................................................... ................................................................................................... ................................................................................................... ................................................................................................... ................................................................................................... ................................................................................................... ................................................................................................... ................................................................................................... ................................................................................................... ................................................................................................... ................................................................................................... ................................................................................................... ................................................................................................... ................................................................................................... ................................................................................................... ................................................................................................... ................................................................................................... ................................................................................................... ................................................................................................... ................................................................................................... ................................................................................................... ................................................................................................... ................................................................................................... ................................................................................................... .................................................................................................. .................................................................................................. .................................................................................................. .................................................................................................. .................................................................................................. .................................................................................................. .................................................................................................. .................................................................................................. .................................................................................................. .................................................................................................. .................................................................................................. .................................................................................................. .................................................................................................. .................................................................................................. .................................................................................................. .................................................................................................. .................................................................................................. .................................................................................................. .................................................................................................. .................................................................................................. .................................................................................................. .................................................................................................. .................................................................................................. .................................................................................................. .................................................................................................. .................................................................................................. .................................................................................................. .................................................................................................. .................................................................................................. .................................................................................................. .................................................................................................. .................................................................................................. +00EH99884801-2_01EN.book Page 50 Monday, January 28, 2013 7:54 PM MEMO ................................................................................................... ................................................................................................... ................................................................................................... ................................................................................................... ................................................................................................... ................................................................................................... ................................................................................................... ................................................................................................... ................................................................................................... ................................................................................................... ................................................................................................... ................................................................................................... ................................................................................................... ................................................................................................... ................................................................................................... ................................................................................................... ................................................................................................... ................................................................................................... ................................................................................................... ................................................................................................... ................................................................................................... ................................................................................................... ................................................................................................... ................................................................................................... ................................................................................................... ................................................................................................... ................................................................................................... ................................................................................................... ................................................................................................... ................................................................................................... ................................................................................................... .................................................................................................. .................................................................................................. .................................................................................................. .................................................................................................. .................................................................................................. .................................................................................................. .................................................................................................. .................................................................................................. .................................................................................................. .................................................................................................. .................................................................................................. .................................................................................................. .................................................................................................. .................................................................................................. .................................................................................................. .................................................................................................. .................................................................................................. .................................................................................................. .................................................................................................. .................................................................................................. .................................................................................................. .................................................................................................. .................................................................................................. .................................................................................................. .................................................................................................. .................................................................................................. .................................................................................................. .................................................................................................. .................................................................................................. .................................................................................................. .................................................................................................. .................................................................................................. – 50 – +00EH99884801-2_01EN.book Page 51 Monday, January 28, 2013 7:54 PM TOSHIBA CARRIER (THAILAND) CO.,LTD. 144/9 MOO 5, BANGKADI INDUSTRIAL PARK, TIVANON ROAD, TAMBOL BANGKADI, AMPHUR MUANG, PATHUMTHANI 12000, THAILAND. 1115465001