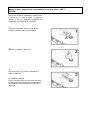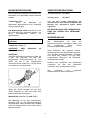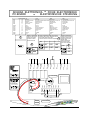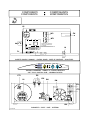
1
LAVASTOVIGLIE LAVE-VAISSELLE DISHWASHING MACHINE GESCHIRRSPÜLMASCHINE 050F-ek 050F-ek-add REV.23-set/2015 ISTRUZIONI D'USO INSTRUCTIONS D'EMPLOI INSTRUCTIONS MANUAL INSTALLATION-BEDIENUNG DICHIARAZIONE DI CONFORMITA' - DECLARATION OF CONFORMITY DECLARATION DE CONFORMITE' - KONFORMITÄTS ERKLÄRUNG Noi - The following - Nous soussignés - Die Unterzeichnete Fa: LAMBER snc di Affaba F. e C. – Via Italia 6 – 26855 Lodi Vecchio (LO) ITALY Dichiariamo sotto la nostra responsabilità che - Declare under our responsibility that: Attestons sous notre responsabilité que - Erklärt auf eigene Verantwortung dass: Apparecchio – Apparatus - Appareil - Apparat: - LAVASTOVIGLIE - DISHWASHING MACHINE - LAVE-VAISSELLE - GESCHIRRSPÜLMASCHINE Marca - Trademark - Marque - Marke: LAMBER Fabbricante - Manufacturer - Fabricant - Fabrikant: LAMBER Tipo/Modello - Type / Model – Type / Modéle – Typ / Modell: 050F-ek / 050F-ek-add matr................ al quale questa dichiarazione si riferisce è conforme alle seguenti norme: for which this declaration refers to the conformity of the following standards: auquel se réfère cette déclaration, est conforme aux normes suivantes: auf welche sich diese Erklärung bezieht, folgendem Standard entsprechen: Sicurezza degli apparecchi elettrici d’uso domestico e similare - Norme generali EN60335-1(2012) Safety of household and electrical appliances - General requirements EN60335-1(2012) Sicurezza degli apparecchi elettrici d’uso domestico e similare - Norme particolari per lavastoviglie per uso collettivo EN60335-2-58 (2005) + A1 (2008) + A11 (2010). Safety of household and electrical appliances - Part 2^ Particular requirements for commercial electric dishwashing machines EN60335-2-58 (2005) + A1 (2008) + A11 (2010). Apparecchi elettrici per uso domestico e similare – Campi elettromagnetici – Metodi di misurazione dei campi elettromagnetici di elettrodomestici e apparecchi simili per quanto riguarda l'esposizione umana. EN 62233 (2008) Household and similar electrical appliances – Electromagnetic fields – Measurement methods for electromagnetic fields of household appliances and similar apparatus with regard to human exposure EN 62233 (2008) Limiti e metodi di misura delle caratteristiche di radiodisturbo degli apparecchi elettrodomestici, e similari a motore o termici, degli utensili e degli apparecchi elettrici similari. EN 55014–1 (2006) + A1 (2009) + A2 (2011) Limits and methods of measurement of radio disturbance characteristics of electrical motor-operated and thermal appliances for households and similar purposes, electric tools and similar electric apparatus - EN 55014-1 (2006) + A1 (2009) + A2 (2011) Limiti per le emissioni di corrente armonica (apparecchiature con corrente di ingresso 16 A per fase) - EN 61000-3-2 (2006) + A1 (2009) + A2 (2009) o >16A e 75A EN 61000-3-12 (2011) Limits for harmonic current emissions (equipment input current 16 A per phase) - EN 61000-3-2 (2006) + A1 (2009) + A2 (2009) or >16A and 75A EN 61000-3-12 (2011) Limitazione delle fluttuazioni di tensione e dei flicker in sistemi di alimentazione in bassa tensione per apparecchiature con corrente nominale 16 A. EN 61000-3-3 (2013) o >16A e 75A EN 61000-3-11 (2000) Limitation of voltage fluctuations and flicker in low-voltage supply systems for equipment with rated current 16 A. EN 61000-3-3 (2013) o >16A e 75A EN 61000-3-11 (2000) Requisiti di immunità per apparecchi elettrodomestici, utensili e degli apparecchi elettrici similari EN 55014-2 (1997)+ A1 (2001) + A2 (2008) Immunity requirements for household appliances, tools and similar apparatus. Product family standard EN 55014-2 (1997) + A1 (2001) + A2 (2008) Sicurezza del macchinario, Concetti fondamentali, principi generali di progettazione - Terminologia di base, metodologia – EN ISO 12100-1 (2009). Safety of machinery Basic concepts, general principles for design - Basic terminology, methodology-ISO 12100-1 (2009). Sicurezza del macchinario, Concetti fondamentali, principi generali di progettazione - Specifiche e principi tecnici – ISO 12100-2 (2009). Safety of machinery - Basic concepts, general principles for design - Technical principles-ISO 12100-2 (2009). in base a quanto previsto dalle Direttive - selon ce qui est prévu par les Directives: on the basis of what is foreseen by the Directives - aufgrund der vorgesehenen Richtilinien: 2004/108/CE, 2006/42/CE. 2004/108/EC, 2006/42/EC. Decliniamo ogni responsabilità per sinistri a persone o a cose derivanti da manomissioni da parte di terzi o da carenze di manutenzione o riparazione. Nous déclinons toute responsabilité pour sinistres à personnes ou à objets qui derivent de l'intervention de la part de tiers non specialistes ou de carences de manutention ou reparation. We decline any responsability for injuries or damage derived from machine misuse, abuse by others or improper machine maintenance or repairs. Wir Iehnen jegliche Verantwortung für Schäden an Personen oder Dingen ab, die auf fehlerhaftes Eingreifen Dritter oder auf mängelhafte Wartung oder Reparation zurückzuführen. (data/date/Datum) li 01/01/2015 il socio amministratore/The administrator responsabile costituzione fascicolo tecnico/technical file case manager : Ing Roberto Affaba indirizzo/address : via italia 6 – 26855 – Lodi Vecchio (LO) Italy ITA L’apparecchio non è destinato a essere usato da persone (bambini compresi) le cui capacità fisiche, sensoriali o mentali siano ridotte, oppure con mancanza di esperienza o di conoscenza, a meno che esse abbiano potuto beneficiare, attraverso l’intermediazione di una persona responsabile della loro sicurezza, di una sorveglianza o di istruzioni riguardanti l’uso dell’apparecchio. I bambini devono essere sorvegliati per sincerarsi che non giochino con l’apparecchio . FRA Cet appareil n’est pas prévu pour être utilisé par des enfants ou par des personnes aux capacités physiques ou sensorielles réduites, ou par des personnes sans expérience ou connaissance à moins qu’elles ne soient contrôlées et formées pour l’utilisation de l’appareil par des personnes se portant garantes de leur sécurité. Les enfants doivent rester sous la surveillance de personnes responsables qui s’assureront qu’ils ne jouent pas avec l’appareil (EN 60335-2-102/7.12). ENG This appliance in not intended for use by persons (including children) with reduced physical, sensory or mental capabilities, or lack of experience and knowledge, unless they have been given supervision or instruction concerning use of the appliance by a person responsible for their safety. Children should be supervised to ensure that they do not play with the appliance (EN 60335-2-102/7.12). DEU Dieses Gerät ist nicht für den Gebrauch von unerfahrenen Personen(einschließlich Kindern) mit physischen, sensorischen und geistigen Fähigkeiten geeignet, außer wenn sie über den Gebrauch des Gerätes von einer für Ihre Sicherheit verantwortlichen Person kontrolliert und unterrichtet werden sein. Man darf die Kindern kontrollieren, um sicher zu sein, dass sie nicht mit dem Gerät spielen werden.(EN 60335-2102/7.12). ITA DIRETTIVA “RAEE” 2002/96/CE E SUCCESSIVA MODIFICA 2003/108/CE SUI RIFIUTI DI APPARECCHIATURE ELETTRICHE ED ELETTRONICHE Il simbolo riportato sul prodotto indica che non deve essere considerato come un normale rifiuto assimilabile all’urbano , ma dev’essere smaltito come rifiuto speciale, consegnato ad un centro di raccolta e trattamento RAEE, in conformità al D.Lgs. 151/05, al fine di garantire il reimpiego dei materiali elementari di cui è composto. Il riciclaggio di questo prodotto aiuta a conservare le risorse naturali. Per informazioni più dettagliate circa il riciclaggio di questo prodotto potete contattare il rivenditore di zona. Lamber garantisce una percentuale di recupero pari almeno all'90% in peso medio per apparecchio. Del materiale recuperato, almeno il 80% - sempre rispetto al peso medio per apparecchio - viene reimpiegato o riciclato. LAMBER , costruttore della presente apparecchiatura è iscritta al Registro Nazionale dei produttori di AEE (Apparecchiature Elettriche ede Elettroniche) dal 18/02/2008 col numero IT08020000000617 FRA DIRECTIVE “RAEE” 2002/96/CE ET MODIFICATIONS SUCCESSIVE 2003/108/CE CONCERNANT LES REBUTS D’APPAREILLAGES ÉLECTRIQUES ET ÉLECTRONIQUES Le symbole ci-dessous indique que le produit ne peut pas être éliminé comme un normal déchet urbain. Les appareillages électriques et électroniques (AEE) peuvent contenir des matériaux nocifs pour l’envirronnement et la santé et doivent donc être objet de collecte différenciée : éliminés donc auprès de dècharges prévues à cet effet ou rendus au distributeur pour l’achat d’un nouveau, de type équivalent ou ayant les mêmes fonctions. La réglementation susmentionnée, à laquelle nous vous renvoyons pour les détails et les approfondissements ultérieurs, prévoit des sanctions pour la mise en décharge abusive des dits rebuts. Lamber garantie une pourcentage de récupération au moins du 90% du poids moyen pour appareillage. Le 80% toujours par rapport au poids moyen pour appareillage – du matériel récupéré est recyclé ou remployé. LAMBER, constructeur du présent appareillage, est inscrit dans le Bureau National des producteurs de AEE (Appareillages Electriques et Electroniques) à partir du 18/02/2008 avec le numéro IT08020000000617 ENG WASTE OF ELECTRICAL AND ELECTRONIC EQUIPMENT DIRECTIVE (WEEE,RAEE in Italy) 2002/96/EC AND SUBSEQUENT 2003/108/EC The marking shown below indicates that the product cannot be disposed of as part of normal household waste. Electrical and Electronic Equipment (EEE) can contain materials harmful to health and the environment, and therefore is subject to separate waste collection: it must be disposed of at appropriate waste collection points or returned to the distributor against purchase of new equipment of similar type or having the same functions. The directive mentioned above, to which make reference for further details, provides for punitive actions in case of illegal disposal of such waste. Lamber guarantees a percentage of recovery at least of 90% in medium weight for each equipment. The 80% - always as regards the medium weight- of recovered material is recycled or reused. LAMBER, manufacturer of this equipment, is enrolled in the Italian WEEE Register – the Register of Producers of Electrical and Electronic Equipment- from the 18th /02/2008 with the number IT08020000000617. DEU (DE) RICHTLINIE (RAEE IN ITALIEN) 2002/96/EG UND FOLGENDE ABÄNDERUNG 2003/108/EG ÜBER ABFÄLLE DER ELEKTRO- UND ELEKTRONIK-ALTGERÄTE. Das unten berichtete Symbol besagt, dass dieses Gerät nicht mit dem normalen Haushaltmüll entsorgt werfen darf. Elektro- und Elektronik- Altgeräte (EEA) können gefährliche Bestanteile für Umwelt und Gesundheit enthalten, so müssen sie bei besonderen Mülldeponien entsorgt werden oder zu dem Großhändler entsprechend dem Einkauf von einen neuen gleichwertigen oder mit den gleichen Funktionen Gerät zurückgegeben werden. Die genante Richtlinie sieht Sanktionen für die rechtswidrige Entsorgung der genanten Abfälle vor. Lamber garantiert eine Prozentsatz von mindestens 90% des durchschnittlichen Gewichts je Gerät. Materialien wiederverwertet, mindestens 80% - mehr als die durchschnittlichen Gewichts je Gerät - wird wiederverwendet oder recycelt. LAMBER, Hersteller von diesem Gerät, ist beim Italienischen Elektro-Altgeräte-Register (EAR) von 18/02/2008 mit dem Nummer IT08020000000617 registriert. INDICE Note generali Introduzione e norme di sicurezza Fate conoscenza con l’apparecchio Parte prima - NORME PER L'UTILIZZATORE Pannello Comandi Funzionamento ed uso, detersivi, manutenzione, inconvenienti possibili Parte seconda - NORME PER L'INSTALLATORE Schema allacciamenti Collegamento elettrico, scarico, alimentazione idrica Programmazione cicli di rigenerazione, sostituzione detersivo Schema collegamenti Schema regolazioni Schema elettrico Componenti Dati tecnici ITALIANO pag 05 pag. 06 pag. 10 pag. 11 pag. 12 pag. 13 pag. 37 pag. 38 pag. 39 pag. 41 pag. 63 pag. 64 pag. 65 pag. 67 pag. 68 SOMMAIRE Remarques générales Introduction et normes de securité Faites connaissance avec l’appareil Première partie - INSTRUCTIONS POUR L'UTILISATEUR Emploi contrôles Fonctionnement et emploi, detersifs, entretien, inconvenients Deuxième partie - Instructions pour l'installateur: Installation Branchement hydraulique, vidange, branchement électrique Programmation cycles de régéneration Schéma branchements Schéma régulations Schéma électrique Composants Données techniques FRANÇAIS pag. 05 pag. 07 pag. 10 pag. 11 pag. 12 pag. 19 pag. 37 pag. 38 pag. 45 pag. 47 pag. 63 pag. 64 pag. 65 pag. 67 pag. 68 CONTENTS General norms Introduction and safety norms Learn to use the appliance First section - FOR THE USER Control panel Working and use, cleansing agents, maintenance, possible troubles Second section - FOR THE INSTALLER Installation Water drain, water connections, electrical connections Setting of regeneration cycles Connections scheme Regulations scheme Wiring diagram Components Specifications ENGLISH pag. 05 pag. 08 pag. 10 pag. 11 pag. 12 pag. 25 pag. 37 pag. 38 pag. 51 pag. 53 pag. 63 pag. 64 pag. 65 pag. 67 pag. 68 INDEX Allgemeines Einführung und Sichereitsnormen Wollen Sie den Apparat kennenlernen Teil 1 - FÜR DEN BENUTZER Steuertafel Arbeitsweise und Anwendung, Reinigungsmittel, Wartung, Mögliche Störungen Teil 2 - FÜR DEN INSTALLATEUR Installationsblatt Wasserablauf, Wasserversorgung,Elektrischer Anschluß Zyklus Regenerierung Programmierung Anschlussschema Eichung Schaltschema Komponenten Technische Daten DEUTSCH pag. 05 pag. 09 pag. 10 pag. 11 pag. 12 pag. 31 pag. 37 pag. 38 pag. 57 pag. 59 pag. 63 pag. 64 pag. 65 pag. 67 pag. 68 4 NOTE GENERALI ITALIANO Vi ringraziamo per la scelta da Voi fatta nell'acquisto della Vostra LAVASTOVIGLIE. Il perfetto funzionamento della macchina e risultati di lavaggio ottimali sotto il profilo igienico sanitario potranno essere garantiti solo se tutte le avvertenze del presente Manuale verranno rispettate. Ci auguriamo che le informazioni contenute nel presente manuale Vi siano di aiuto. Esse sono basate sui dati e sulla nostra attuale migliore conoscenza. Leggete attentamente quanto riportato nel manuale, comprese le raccomandazioni ed i suggerimenti. Leggete anche le condizioni di garanzia. REMARQUES GENERALES FRANÇAIS Nous Vous remercions de Votre choix lors de l'achat de votre LAVE-VAISSELLE. Le fonctionnement parfait de l'appareil et les résultats de lavage optimaux sous le profil hygiénique sanitaire, peuvent seulement être garantis si tous les avertissements dans ce manuel-ci sont respectés. Nous souhaitons que les renseignements contenus dans ce manuel vous soient utiles. Ils sont basés sur les donneés et sur notre meilleure connaissance actuelle. Lisez attentivement ce qui est énoncé dans le manuel, y compris les recommandations et les suggestions. Lisez aussi les conditions de vente, y compris celles qui limitent la garantie. GENERAL NORMS ENGLISH Thank You for purchasing our Dishwashing Machine. Perfect washing-up results as far as hygiene concerns and a correct operation of the dishwashing machine can be assured only in case the instructions reported in the present manual are carefully followed. We hope the information reported in the present manual will be helpful to You. They are based on data and on our best updated knowledge. Carefully read the Instructions reported in the manual, recommendations and suggestions included. Carefully read the terms of sale too, even the ones limiting warranty. ALLGEMEINES DEUTSCH Wir danken Ihnen sich für unsere Geschirrspülmaschine entschieden zu haben. Der perfekte Betrieb und die optimalen Reinigungsergebnisse können nur garantiert werden, wenn alle Anweisungen beachtet werden. Wir hoffen, dass die in vorliegendem Gebrauchshandbuch enthaltenen Informationen Ihnen hilfreich sein werden. Die Angaben beruhen auf unserem aktuellen Kenntnissen. Lesen Sie bitte aufmerksam das vorliegende Gebrauchshandbuch sowie die darin enthaltenen Empfehlungen und Hinweise. Lesen Sie bitte ebenfalls die Verkaufsbedingungen sowie die Konditionen, die die Garantieleistungen regeln. 5 INTRODUZIONE E NORME DI SICUREZZA ITALIANO La macchina è una lavastoviglie a caricamento frontale di tipo industriale. - Rumorosità della macchina, misurata a 1m di distanza ed a 1,6m di altezza, inferiore a 56dB(A). (Norme EN ISO 4871 ed EN ISO 11204) OSSERVAZIONI PRELIMINARI Leggere attentamente le avvertenze contenute nel presente libretto di istruzioni, in quanto forniscono importanti indicazioni riguardanti la sicurezza d'installazione, d'uso e di manutenzione: Conservare con cura questo libretto per ogni ulteriore consultazione dei vari operatori; Le illustrazioni e i disegni che mostrano la macchina sono da intendersi solamente come riferimenti generici e non sono necessariamente accurati in ogni particolare; Le dimensioni e le caratteristiche riportate in questo manuale non sono vincolanti e possono essere modificate senza preavviso; Dopo aver tolto l'imballaggio, assicurarsi dell'integrità dell'apparecchiatura. In caso di dubbio, non utilizzarla e rivolgersi a personale qualificato. Gli elementi dell'imballaggio (sacchetti di plastica, cartone etc.) non devono essere lasciati alla portata dei bambini in quanto potenziali fonti di pericolo. NORME GENERALI DI SICUREZZA Questo elenco di norme è stato compilato nel vostro interesse. Il rispetto di tali norme ridurrà i rischi di infortunio per Voi stessi e gli altri. Il personale che opera sulla macchina deve rispettare rigorosamente tutte le norme generali di sicurezza e le norme specifiche di seguito elencate. La mancata osservanza di tali norme può essere causa di lesioni personali e danneggiamento della macchina. Non tentare di spostare, installare, mettere a punto o azionare la macchina senza prima avere letto e pienamente compreso quanto contenuto nel manuale. In caso di dubbi, rivolgersi al proprio superiore; Non lasciare mai utensili, oggetti o altro materiale sulla macchina o al suo interno; Prima di collegare l'apparecchiatura accertarsi che i dati di targa siano rispondenti a quelli della rete di distribuzione elettrica ed idrica; Ricordarsi che anche quando l'interruttore generale è posto in posizione di "0", i cavi di alimentazione sono sotto tensione; PRIMA di azionare la macchina o di riavviare il ciclo produttivo in seguito ad operazioni di manutenzione o riparazione, assicurarsi che tutti i ripari e le coperture protettive siano correttamente installate; L'installazione deve essere effettuata secondo le indicazioni del costruttore da personale qualificato; Questa macchina dovrà essere destinata solo all'uso per la quale è stata concepita. Ogni altro uso è da considerarsi improprio e quindi pericoloso; La macchina deve essere utilizzata solo da persone addestrate all'uso della stessa; NORME SPECIALI DI SICUREZZA - - Regolazioni e riparazioni vanno effettuate unicamente da personale addestrato e competente. Eventuali riparazioni effettuate da personale non qualificato possono essere pericolose; La sicurezza di qualsiasi apparecchiatura supplementare non fornita direttamente dalla casa costruttrice ed utilizzata unitamente alla macchina è sotto la responsabilità dell'utente; Perfetti risultati di lavaggio sotto il profilo igienico ed il funzionamento corretto della macchina potranno essere garantiti solo se tutte le avvertenze del presente manuale verranno rispettate; Il personale addetto all'uso della macchina deve rispettare le norme igieniche; Non lasciare la macchina in ambienti con temperatura inferiore a 0°C; Il grado di protezione della macchina è IP21 e quindi non deve essere lavata con getti d'acqua diretti ad alta pressione; Se il cavo di alimentazione è danneggiato, esso deve essere sostituito dal costruttore o dal suo servizio assistenza tecnica o comunque da una persona con qualifica similare, in modo da prevenire ogni rischio. RISCHI RESIDUI Nonostante la macchina sia dotata dei sopracitati dispositivi di sicurezza, rimangono rischi di scottature agli arti superiori. Evitare di immergere le mani nude nell'acqua detersivata e calda delle vasche. Questo potrebbe causare scottature ed irritazioni cutanee. Se ciò dovesse accadere, risciacquarle subito ed abbondantemente con acqua fresca. Quando la macchina é in funzione, non aprire troppo rapidamente le porte di ispezione. 6 INTRODUCTION ET NORMES DE SECURITE' FRANÇAIS L’appareille est une lave-vaisselle industrielle à ouverture frontale. - Bruit de la machine, inférieur à 56dB(A) - (Normes EN ISO 4871 et EN ISO 11204). REMARQUES PRELIMINAIRES - Lisez attentivement les notices contenues dans ce mode d'emploi, car elles fournissent d'importantes indications concernant la sécurité d'installation, d'emploi et d'entretien. Gardez avec soin ce livret pour toute consultation ultérieure des divers opérateurs. Les illustrations et les dessins qui montrent l'appareil ne sont à considérer que comme des points de repère génériques et ne sont pas nécessairement soignés dans tous les détails. Les dimensions et les caractéristiques signalées dans ce manuel ne sont pas contraignantes et peuvent être modifiées sans announce préalable. Après avoir enlevé l'emballage, il faut s'assurer de l'état de l'appareil. En cas de doute, ne l’utilisez pas et adressez-Vous à Votre revendeur. Les éléments de l'emballage (sachets en plastique, polystyrène expansé, clous, etc.), ne doivent pas être laissés à la portée des enfants. NORMES GÉNÉRALES DE SÉCURITÉ Cette liste de normes a été établie dans votre intérêt. Le respect de ces normes réduira les risques d'accidents pour vous-mêmes et pour les autres. Le personnel opérant sur cette machine doit rigoureusement respecter toutes les normes générales de sécurité et les normes spécifiques décrites ci-dessous. Le non respect de ces normes peut être cause des lésions personnelles et d’endommagements sur la machine. N’essayez pas de déplacer, installer, mettre au point ou actionner la machine avant d'avoir lu et avoir pleinement compris le contenu du manuel. En cas de doutes, s'adresser à son supérieur. Ne laissez jamais ustensiles, objets ou autre matériel sur la machine ou à l'intérieur de cette dernière. Avant de brancher l'appareil, s'assurer que les données de la plaque correspondent à celles du réseau d'alimentation électrique et hydraulique. Se souvenir que même lorsque l'interrupteur général est sur la position "0", les câbles d'alimentation sont sous tension. AVANT d'actionner la machine ou de réactiver le cycle de production à la suite d'opérations d'entretien ou de réparation, s'assurer que tous les abris et couvertures de protection soient correctement installés. L'installation doit être effectuée selon les indications du constructeur par l'intermédiaire d'un personnel qualifié. Cette machine devra être destinée uniquement à l'utilisation pour laquelle elle a été conçue. Tout autre usage est considéré impropre et donc dangereux; Cette machine doit être utilisée uniquement par des personnes qui ont appris à l'utiliser. NORMES SPÉCIALES DE SÉCURITÉ - Les réglages et les réparations ne doivent être effectués que par des personnes compétentes. Les éventuelles réparations effectuées par des personnes non qualifiées peuvent être dangéreuses. La sécurité de tout appareillage supplémentaire non directement fourni par la maison constructrice et utilisé en même temps que la machine est sous la responsabilité de l'utilisateur. Les résultats parfaits de lavage sous l'aspect hygiénique et le fonctionnement correct de la machine pourront être garantis si tous les conseils contenus dans le manuel présent seront respectés. Le personnel préposé à la manipulation de la vaisselle après le lavage doit respecter rigoureusement les normes d'hygiène en vigueur. Ne pas utiliser la machine dans un endroit où la température est inférieure à 0°C. L'indice de protection de la machine est IP21. Elle ne doit pas être lavée au jet d'eau direct à haute pression. Si le câble d'alimentation est défectueux, procéder à son remplacement par le fabricant ou par le service d'assistance technique ou bien par un technicien qualifié afin de prévenir tout risque. AUTRES RISQUES Même si la machine est munie des dispositifs de sécurité cités plus haut, le risque de brûlures aux membres supérieurs est néanmoins présent. Eviter de plonger les mains nues dans l'eau savonneuse et chaude des cuves. Ceci pourrait provoquer des brûlures et des irritations cutanées. Si cela devait arriver les rincer immédiatement et abondamment sous l'eau froide. Quand la machine est en fonction n’ouvrir pas trop rapidement les portes d’inspection; 7 INTRODUCTION AND SAFETY NORMS ENGLISH INTRODUCTION - The machine is an industrial dish-washing machine . Noise level of the machine, less than 56 dB(A), (Norms EN ISO 4871 and EN ISO 11204). PRELIMINARY OBSERVATION Carefully read the instructions reported in the present user manual, as it gives important indications about safety of installation, operation and maintenance: carefully keep the present manual for further consultations; the illustrations and drawings showing the machine are intended for general reference only and are not necessarily accurate in every instance; the dimensions and characteristics of the machine, given in this Manual, are not to be considered binding and may be changed without prior notice; once removed the packing material, check that all the equipment is present. If there is any doubt, do not use it and contact qualified personnel. The packing elements (plastic bags, nails, etc.) should be kept away from children, because they are dangerous. GENERAL SAFETY REGULATIONS THIS SAFETY CODE HAS BEEN COMPILED IN YOUR INTEREST. Strict adherence to these rules will reduce the risks of injury both to yourself and to others; Personnel working with this machine must adhere strictly to all statutory safety regulations as well as the specific rules listed below. Failure to do so may result in personal injury and damage to the machine; DO NOT attempt to move, install, set up or operate this machine until you have read and fully understood this Manual. If doubt persists, ask your supervisor; never leave tools, parts or other loose material on or in the machine; Before switching the equipment on, make sure that the model plate data conform to those of the electrical and water distribution network; remember that even with the mains indicator in the “OFF” position, the incoming cables are still live; BEFORE starting the machine or the cycle, after any maintenance or repair work, make sure all protective are correctly installed; be vigilant at all times, remember that your safety and that of your fellow workers depends on you; when moving or lifting the machine, care must be taken to comply with all the relevant regulations governing such operations; installation should be carried out by qualified personnel according to the manufacturer's instructions. this equipment should be destined to the use which it has been conceived for. Any other application should be considered improper and consequently dangerous; the equipment should only be used by personnel trained for its use; SPECIAL SAFETY REGULATIONS - adjustement and repairs must be carried out only by qualified personnel. Repair carried out by unskilled personnel may be dangerous; perfect washing-up results as regards hygiene and a correct operation of the washing machine can be assured only in case the instructions reported in the present handbook are carefully followed; the machine must be used only by authorized personnel who must comply with sanitary measures; do not leave the machine in an environment with temperatures lower than 0°C; the machine protection degree is IP21, therefore it should not be washed with direct high pressure jets of water. If the power cable is defective, it must be replaced by your manufacturer or by a technical assistance service or by a qualified technician in order to avoid risks. RESIDUAL RISKS Although the appliance is equipped with the above-mentioned safety devices, danger of burns to upper limbs persists. Avoid dipping your naked hands into the soapy hot water present in the tanks. This can cause burns and skin irritations. In this case, immediately rinse them with plenty of water. When the machine is working, do not open the inspection doors too quickly. 8 EINFÜHRUNG UND SICHEREITSNORMEN DEUTSCH EINFÜHRUNG Die maschine ist ein industrieller Frontlade-Geschirrspüler . - Die Geräuschentwicklung der Maschine ist bei einem Abstand von 1 m und einer Höhe von 1,6 im gemessen worden und liegt unter 56 dB(A) - (Norms EN ISO 4871 and EN ISO 11204). VORANMERKUNGEN Lesen Sie bitte aufmerksam die in vorliegendem Gebrauchshandbuch enthaltenen Anmerkungen, die Ihnen wichtige Hinweise zur Installationssicherheit, Bedienung und Wartung geben: Bewahren Sie das Gebrauchshandbuch gut auf, zum eventuellen Nachschlagen für weitere Bediener; die Abbildungen und Zeichnungen der Maschine sind nur als allgemeiner Bezug zu verstehen und nicht in jeder Einzelheit genau; die in vorliegendem Gebrauchshandbuch angegebenen Maße und Eigenschaften sind nicht verbindlich und können ohne Vorankündigung geändert werden; Nach Entfernung der Verpackung sich vergewissern, daß die Maschine einwandfrei ist. In Zweifelsfällen die Maschine nicht benutzen und sich an das Fachpersonal wenden. Das Verpackungsmaterial (Plastiksäcke, Karton, etc.) darf Kindern nicht zugänglich gemacht werden, weil es sich dabei um eine mögliche Gefahrenquelle handelt. ALLGEMEINE SICHERHEITSNORMEN Diese Normliste ist in Ihrem Interesse angefertigt worden. Die Berücksichtigung dieser Normen vermindert die Unfallgefahr für Sie und andere. Niemals versuchen die Maschine zu versetzen, zu installieren, einzustellen oder in Betrieb zu nehmen, bevor man nicht das Handbuch gelesen und den Inhalt voliständig verstanden hat. In Zweifelsfällen sich an seinen Vorgesetzten wenden; Niemals Werkzeuge, Gegenstände oder sonstige Materialien auf oder in der Maschine lassen; Nicht vergessen, auch wenn der Hauptschalter auf "0FF"-Position steht, daß die Netzkabel unter Spannung stehen; BEVOR man die Maschine in Betrieb nimmt oder Arbeitszyklus nach Wartungs-oder Reparaturarbelten einschaltet, sich vergewissern, daß alle Schutzvorrichtungen und Schutzabdeckungen richtig installiert sind; Die Maschine ist nur für den vorgesehenen Gebrauch geeignet. Jede andere Nutzung ist ungeeignet und deshalb gefährlich; Die Maschine darf nur von Personen benutzt werden, die an dieser geschult wurden. BESONDERE SICHERHEITSNORMEN - Einstellungen und Reparaturen dürfen nur von ausgebildetem Fachpersonal durchgeführt werden. Die Sicherheit irgendeines Zusatzgerätes, das nicht direkt von der Herstellerfirma geliefert und zusammen mit der Maschine benutzt wird, fällt unter die Verantwortung des Betreibers; Hygienisch gute Waschergebnisse sowie die korrekte Funktion der Maschine können nur garantiert werden, wenn alle Hinweise des vorliegenden Gebrauchshandbuchs befolgt werden; Die richtige Anordnung der zu waschenden Gegenstände, ist die Grundvoraussetzung für gute Waschergebnisse; Das zur Bedienung vorgesehene Personal muß die Hygienenormen beachten; Die Maschine niemals in Räumen mit Temperaturen unter 0°C belassen; IP21 ist der Schutzgrad der Maschine, deshalb darf die Maschine niemals mit einem direkten Hochdruckwasserstrahl gereinigt werden. „Wenn das Stromkabel beschädigt ist, muss es vom Hersteller oder vom technischen Kundendienst oder von einer Person mit ähnlicher Qualifizierung ersetzt werden, um jegliches Risiko zu vermeiden“. RESTLICHE GEFAHREN Trotzdem die Maschine mit den obigen Sicherheitsvorrichtungen ausgerüstet ist, verbleibt das Risiko, Verbrühungen der Oberglieder zu erleiden. Die nackten Hände in das Warmwasser mit Spülmittel nicht tauchen. Das könnte Brandwunden und Hautentzündungen verursachen. Falls es passieren sollte, sie dauernd mit Frischwasser waschen. Wenn die Maschine in Betrieb ist, die Inspektionstüren nicht zu schnell öffnen. 9 Fate conoscenza con l'apparecchio Faites connaissance avec l'appareil Learn to use the appliance Wollen Sie den Apparat kennenlernen Lavaggiosuperiorerotanteinacciaioinox Lavagesupérieur rotatifenacier inoxydable StainlesssteelUpper rotatingwashing Oberer Wascharmrotierender ausCNS Pannellaturadoppiaparete Doubleparoi Doubleskin Doppelwandig Risciacquosuperiorerotanteinacciaioinox(cono90°) Rinçagesupérieur rotatifenacier inoxydable(cône90°) StainlesssteelUpper rotatingrinsing(90°) OberesSpülsystemrotierendesausCNS(Konus90°) Risciacquoinferiorerotanteinacciaioinox(cono90°) Rinçageinférieur rotatifenacier inoxydable(cône90°) StainlesssteelLower rotatingrinsing(90°) UnteresSpülsystemrotierendausInox(Konus90°) Lavaggioinferiorerotanteinacciaioinox Lavageinférieur rotatifenacier inoxydable StainlesssteelLower rotatingwashing Unterer Wascharmrotierender ausCNS Resistenzavasca Résistancecuve TankHeatingelement Tankheizung Boiler coibentatoinacciaioinox Surchauffeur isoléenacier inox StainlesssteelBoiler withinsulation Isolierter Boiler ausCNS ElettrovalvolaRisciacquo ElectrovanneRinçage Rinsingsolenoidvalve ElektrischesSpülventil ElettrovalvolaEntrataacqua ElectrovanneEntréed'eau Water inletsolenoidvalve ElektrischesWassereinlaufventil descr050F-ek-2015 Pannellodicomando Panneaudecontrôle Controlpanel Steuertafel Troppopieno Trop-plein Overflow Uberlaufstutzen Filtrivascainacciaioinox Filtrescuveenacier inoxydable StainlesssteelTankfilters (OPTION) HerausnehmbareSchmutzauffangfilter über demWaschtank Filtroaspirazionepompainacciaioinox Filtreaspirationpompeenacier inoxydable StainlesssteelSuctionpumpfilter Pumpenansaugfilter ausCNS Dosatoreadditivodirisciacquo Doseur deproduitpour rinçage Rinseaiddispenser Nachspülmitteldosiergerät Scaricovasca Vidangecuve Tankdrain Wannenablauf Telaio,vascaecapotinacciaioinossidabile Châssis,cuveetcapotenacier inoxydable Body,tankandTopinStainlesssteelconstruction GehäuserahmenundVerblendungenausCNS PompaLavaggio PompeLavage Washingpump Pumpenmotor NORME PER L'UTENTE INSTRUCTIONS POUR L'UTILISATEUR INSTRUCTIONS FOR THE USER BEDIENUNGSANLEITUNG PANNELLO COMANDI CONTROL PANEL .. EMPLOI CONTROLES KONTROLL PANEL A B C Interruttore generale Interrupteur général Main switch Hauptschalter Pulsante selezione tempo lavaggio Bouton sélecteur temps de lavage Wash time selection pushbutton Programmwahlschalter Pulsante ciclo Bouton cycle Cycle pushbutton Programmdrucktaste Lampada ciclo Lampe indicatrice de cycle Cycle lamp Programmkontrollampe D E F G Lampada temperatura Lampe température Température lampe Temperaturlampe Lampada sportello aperto/sale/pompa scarico Lampe indicatrice de porte ouverte/sel/pompe de vidange Door opening/salt/drain pump lamp Tür-Salz-Ablaufpumpekontrollampe Pulsante Pompa scarico Bouton Pompe de vidange Drain pump pushbutton Taste für Ablaufpumpe Termometri temperatura di lavaggio e risciacquo Thermomètre témperature de lavage et rinçage Wash and rinse thermometer Wasch-und Nachspültemperaturthermometer OPTIONAL Dis.1 12 ITALIANO Parte prima - NORME PER L'UTILIZZATORE FUNZIONAMENTO ED USO La macchina lavastoviglie assicura una produzione oraria di 600 piatti. Il grado di protezione della macchina è IP21 e quindi non deve essere lavata con getti di acqua diretti ad alta pressione. La disposizione corretta degli oggetti da lavare è condizione essenziale per un buon risultato di lavaggio. Non utilizzate stoviglie vecchie, consunte o screpolate in quanto la rugosità e le rigature offrono maggiori appigli allo sporco e riparo alla flora batterica. E' consigliato procedere di tanto in tanto, in funzione dei depositi calcarei e/o amidacei, alla disincrostazione delle stoviglie mediante ammollo in opportune soluzioni consigliate dal Fornitore del detersivo. Nel caso di acquisto di nuove stoviglie è bene tener presente le seguenti indicazioni: Per Piatti e Tazzine dare la preferenza a quelle in Porcellana o Ceramica non porosa, con superfici lisce. Per Bicchieri e Coppe scegliere un tipo di Vetro idoneo al lavaggio in Lavastoviglie. Le superfici devono essere lisce e il piede di appoggio il meno concavo possibile. N.B. : Nel caso in cui la macchina è dotata di addolcitore con rigenera automatica, ogni 90 secondi di durata del carico vasca, la macchina si arresta per circa 2 minuti per effettuare la rigenera. AVVERTENZE PRIMA DEL LAVAGGIO PRIMA DI INIZIARE LE OPERAZIONI DI LAVAGGIO ASSICURARSI CHE: - Il Rubinetto dell’alimentazione idrica sia aperto e non manchi l'acqua in rete. - I filtri ed il Troppopieno siano nelle relative sedi. - I mulinelli di lavaggio siano liberi di ruotare. - Il contenitore del dosatore di brillantante sia carico. A riempimento vasca avvenuto si accende la lampada ciclo (l’ultimo selezionato!) D - ATTENZIONE: Rispettare le note di sicurezza indicate e i dati di dosaggio per l’impiego di sostanze chimiche. Durante l’uso di sostanza chimiche indossare abbigliamento di sicurezza, guanti e occhiali protettivi. Non mischiare prodotti detergenti diversi. PROCEDERE OPERAZIONI: QUINDI ALLE Aprire la porta della lavastoviglie ed introdurre il cestello . Prestare attenzione al movimento di apertura e chiusura dello sportello. Non indossare durante l’uso della Lavastoviglie indumenti/oggetti che potrebbero impigliarsi nei componenti della macchina, limitando la normale capacità di movimento! SUCCESSIVE N.b. La lampada “E” lampeggia quando lo sportello della lavastoviglie è aperto. A - Se inserito manualmente , versare in vasca sul Filtro aspirazione Pompa, 54 grammi di detersivo. Aggiungere poi successivamente 40 grammi di detersivo ogni 10 cicli di lavaggio. Se la macchina è dotata di apparecchiature automatiche per il dosaggio di liquido additivo, controllare la presenza di prodotto nei contenitori. Prima di avviare il ciclo assicurarsi che la lampada "D" sia accesa. Cio' indica che l'acqua di lavaggio e quella di risciacquo hanno raggiunto la temperatura ideale d'esercizio. E - Scegliere la durata del ciclo di lavaggio premendo in sequenza il pulsante “B” secondo il seguente criterio: - lampada 1 accesa : ciclo breve 2 minuti, - lampada 2 accesa: ciclo intermedio. 3 minuti - lampade 1 e 2 accese contemporaneamente: ciclo lungo 4 minuti. La durata del ciclo deve essere scelta in funzione del tipo di sporco da rimuovere dalle stoviglie. B - Introdurre le stoviglie negli appositi cestelli avendo cura di rimuovere preventivamente tutti i residui solidi e i grassi. Fare un Ammollo preventivo alle posate ed eventualmente anche ai Piatti se questi vengono lavati dopo lungo tempo dall'uso. Non sovraccaricare i Cestelli, le Stoviglie non devono sovrapporsi, l'acqua deve aver modo di poterle investire direttamente in ogni loro parte. Per un corretto posizionamento delle stoviglie vedere il paragrafo specifico. F - Chiudere la porta della Lavastoviglie. Premere il pulsante ciclo "C". Inizierà a questo punto il ciclo di lavaggio della durata scelta comprendente oltre al lavaggio una pausa di riposo di 5 secondi e una fase di risciacquo della durata di 18 secondi (23 secondi per macchine con depuratore) con acqua pulita a 85°÷90°C. C - Dare tensione tramite l'interruttore a muro e Chiudere l'interruttore "A"(premere) posto sul pannello comandi (DIS.1). A questo punto si accendono i display dei termometri ed avviene il riempimento della vasca. 13 In funzione della durezza dell’acqua è tuttavia possibile modificare la programmazione della Rigenerazione. Si veda la tabella relativa nella sezione dedicata all’installatore. Le lampade ciclo lampeggiano fino al completamento delle fasi di lavaggio .Alla fine del ciclo le lampade smettono di lampeggiare. E’ possibile in qualsiasi momento interrompere il ciclo di lavaggio semplicemente ripremendo il tasto selezione ciclo “B”. N.B. ogni 90 secondi di durata del carico vasca, la macchina si arresta per circa 2 minuti per effettuare la rigenera. L'accensione della lampada "D" indica il raggiungimento della temperatura di regime (85÷90°C). Il risciacquo inizia solamente a temperatura di regime raggiunta. La durata del tempo di lavaggio scelto verrà quindi prolungata sino al raggiungimento della temperatura stabilita (thermocontrol). G - Estrarre il Cestello ed inclinandolo, scuoterlo leggermente in modo da far cadere le gocce residue. Lasciare asciugare per evaporazione le Stoviglie, quindi toglierle dal Cestello avendo cura di non toccare le parti interne dei bordi delle stesse. Riporle successivamente su ripiani sicuramente igienici. Per proseguire il lavaggio caricare un altro cestello, chiudere la porta e premere il pulsante "C". CONTROLLO SALE La macchina segnala quando è necessario ripristinare il sale nella boccetta, con il lampeggiare della lampada led “E”. Svitare il tappo del contenitore del sale alloggiato nel fondo vasca e mettere 1 Kg di sale grosso in pastiglie. Pulire la guarnizione e avvitare il tappo. Attenzione!: La mancanza di sale nel contenitore provoca danni alla macchina causati dal calcare, oltre ad un lavaggio non perfetto dei bicchieri e delle stoviglie. POSIZIONAMENTO DELLE STOVIGLIE - Ciclo infinito (massimo 15 minuti): con sportello chiuso e ciclo inserito (uno qualsiasi) tenere premuto il pulsante selezione tempi “B” per 3 secondi : le lampade 1 e 2 lampeggieranno contemporaneamente (in questa fase il Thermocontrol è escluso); Il ciclo puo’ essere interrotto in qualsiasi momento premendo nuovamente il pulsante ciclo “C” che darà il via alla sequenze finali di pausa-risciacquo. Per un ottimale lavaggio delle stoviglie è opportuno prestare molta attenzione al corretto posizionamento delle stesse. I piatti vanno sistemati con la parte concava verso l'alto nei cestelli in plastica; mentre le posate vanno sistemate negli appositi cestellini con i manici rivolti verso il basso, come mostrato nella figura sottostante. - Ciclo Autolavaggio: con macchina accesa effettuare le seguenti operazioni: - Togliere il troppopieno della vasca e attendere lo svuotamento della stessa; (per macchine dotate di pompa scarico vedere le istruzioni al paragrafo specifico) - Chiudere la porta della lavastoviglie ; - Tenere premuto il pulsante ciclo “C” per 3 secondi: la lampada “2” lampeggia per tutta la durata del ciclo di 5 o 10 minuti in funzione del tempo di risciacquo impostato per default . ISTRUZIONI POMPA SCARICO (solo per macchine con pompa scarico) RISULTATI OTTIMALI Il funzionamento della pompa di scarico è automatico solo durante il ciclo di lavaggio per scaricare l'acqua in eccesso che entra durante la fase di risciacquo. Una eventuale deficienza nel lavaggio delle stoviglie può essere causata da un risciacquo insufficiente. In tal caso controllare che gli ugelli di risciacquo siano puliti e che vi sia pressione sufficiente nella rete idrica (ideale fra 2÷4 bar). Al termine della giornata lavorativa, per scaricare la vasca completamente, occorre effettuare invece le seguenti operazioni. Nel caso risultino sulle stoviglie tracce di sporco controllare che: • gli ugelli di lavaggio siano puliti • vi sia detersivo nella giusta concentrazione • i filtri siano puliti • la posizione delle stoviglie nel cestello sia corretta -1 Aprire lo sportello della lavastoviglie; -2 Togliere il TROPPOPIENO dalla vasca; -3 Premere successivamente il pulsante “F” per 3 secondi Lampeggiano alternativamente la lampada “E” e la lampada del ciclo (l’ultimo selezionato) RIGENERAZIONE Lo scarico si interrompe automaticamente dopo circa 5 minuti. Le lampade smettono di lampeggiare. N.b.: se lo sportello è aperto la lampada “E” continuerà a lampeggiare. Riposizionare il troppopieno nella sua sede e richiudere lo sportello. Lo scarico può essere interrotto manualmente ripremendo il tasto “F”. (per macchine dotate di Addolcitore) Nel caso in cui la macchina è dotata di Addolcitore l’operazione di Rigenerazione viene effettuata automaticamente secondo parametri impostati dalla casa costruttrice. 14 PULIZIA E PREVENTIVA MANUTENZIONE GIORNALIERA MANUTENZIONE - IMPORTANTE: Prima di eseguire qualsiasi operazione di manutenzione, pulizia o riparazione disinserire l'apparecchiatura dalla rete di alimentazione mediante l'interruttore a muro; Osservare le indicazioni relativa manutenzione presenti in questa guida; Spegnere la Macchina premendo l'interruttore "A" e scaricare l'acqua della Vasca togliendo il Troppopieno; (si veda anche il paragrafo specifico a pagina precedente) Prestare attenzione al movimento di apertura e chiusura dello sportello. Non indossare durante l’uso della Lavastoviglie indumenti/oggetti che potrebbero impigliarsi nei componenti della macchina, limitando la normale capacità di movimento! alla Indossare abbigliamento e guanti protettivi prima di impugnare elementi impregnati di soluzione di lavaggio; - All'interno della macchina sono raggiunte temperature elevate (90°C). Dopo aver tolto l'alimentazione elettrica, attendere che la macchina si porti a temperatura ambiente, prima di operare su di essa; Non lasciare mai utensili, oggetti o altro materiale sulla macchina o al suo interno; Controllare che non vi siano corpi estranei arrugginiti, a causa del quale il meteriale “acciaio inossidabile” potrebbe cominciare ad arrugginirsi. Le particelle di ruggine possono provenire da stoviglie non inossidabili o cestelli in filo danneggiati, - Non lavare la macchina e l’area circostante ad essa con idranti, getti di vapore o pulitori ad alta pressione; Durante la pulizia del pavimento fare attenzione a non bagnare troppo il basamento della macchina, per evitare un ristagno prolungato di acqua, - Attendere che tutta l'acqua sia defluita e non vi siano detriti sul fondo della vasca; Al termine della fase di scarico il pulsante “C” si spegnerà automaticamente dopo circa 15” secondi. Disinserire l'apparecchiatura dalla rete di alimentazione mediante l'interruttore a muro; Togliere dall'interno della Macchina i Filtri a cassetto ed il Filtro in vasca e lavarli con acqua corrente calda; Controllare che gli ugelli di Lavaggio e di Risciacquo non siano otturati; Rimettere i componenti tolti nelle loro rispettive sedi; Pulire l'esterno della macchina con una spugna umida, non usare getti d'acqua perchè potrebbero danneggiare le parti elettriche; Per evitare il formarsi di cattivi odori è consigliabile lasciare la porta aperta; In previsione di un fermo prolungato della macchina è bene procedere alle operazioni di Disincrostazione e di Sanificazione. Per la pulizia interna della macchina utilizzare una spazzola o uno panno morbido, Attenzione. Prima di effettuare la pulizia dell’interno della macchina, assicurarsi che non siano presenti oggetti estranei arrugginiti che potrebbero danneggiare l’acciaio inossidabile all’interno della vasca. Le eventuali particelle di ruggine presente potrebbero provenire da stoviglie non inossidabili, da cestelli danneggiati o condutture dell’acqua non a prova di ruggine. Per la pulizia della macchina non utilizzare detersivi abrasivi; Prima di riavviare il ciclo produttivo in seguito ad operazioni di manutenzione o riparazione, assicurarsi che tutti i ripari e le coperture protettive siano correttamente installate. EVITARE ASSOLUTAMENTE PULIRE LA MACCHINA CON GETTO D'ACQUA. DI UN 15 DETERSIVI e BRILLANTANTE Attenzione. Durante l’uso di sostanze chimiche è consigliabile indossare abbigliamento appropriato, come guanti e occhiali protettivi. La scelta del detersivo appropriato è una condizione indispensabile per ottenere ottimali risultati di lavaggio sotto il profilo igienico. E' quindi importante tenere in considerazione alcuni fattori. Innanzi tutto è necessario usare solo Prodotti Antischiumogeni fortemente Alcalini e Cloroattivi specifici per Lavastoviglie industriali, fabbricati da Ditte di riconosciuta serietà. A titolo indicativo ne elenchiamo alcune: Ecolab-Soilax; Henkel; Lever; Diversey; Relativ. Brillantante Per garantire un perfetto Risciacquo ed una veloce Asciugatura ed evitare depositi calcarei sulle stoviglie è necessario addittivare l'acqua con un Tensioattivo (Brillantante). La macchina è dotata di dosatore brillantante. Il brillantante è dosato automaticamente e il suo dosaggio è impostato dal tecnico dell’assistenza autorizzato. La concentrazione media d'uso è di 0,15 g/litro. Il fornitore del detersivo sarà in grado di consigliare il prodotto più opportuno. Controllare periodicamente la presenza di prodotto nelle taniche esterne! Detersivo Il detersivo è necessario per rimuovere residui di sporco e cibo dalle stoviglie. Il detersivo può essere dosato in vari modi: - Manualmente se in polvere - Automaticamente da un contenitore esterno alla macchina tramite un apposito dosatore incorporato o esterno. Il dosatore di detersivo non è di serie su tutte le macchine. Controllare quindi la presenza della stesso nei dati dell’ordine. La concentrazione media dei detersivi in polvere deve essere di 1,5÷2,5 g/litro. Per il dosaggio riferirsi alle istruzioni iniziali nelle avvertenze prima del lavaggio. Se automatici controllare sempre la presenza di liquido nelle taniche e far impostare i dosaggi dal tecnico installatore. La concentrazione media dei detersivi liquidi deve essere di 2÷4 g/litro. Al fine di evitare incrostazioni e corrosioni, l'immissione del Detersivo deve essere fatta sopra il livello dell'acqua nella zona più vicina possibile al filtro di aspirazione pompa, in modo che entri immediatamente in soluzione e non si depositi sul fondo della vasca . L’immissione del DETERSIVO LIQUIDO DI LAVAGGIO deve essere effettuata utilizzando il foro predisposto sul lato anteriore della vasca di lavaggio . Controllare periodicamente la presenza di prodotto nelle taniche esterne! ATTENZIONE: Rispettare le note di sicurezza indicate e i dati di dosaggio per l’impiego di sostanze chimiche. Durante l’uso di sostanza chimiche indossare abbigliamento di sicurezza, guanti e occhiali protettivi. Non mischiare prodotti detergenti diversi. INCONVENIENTI - POSSIBILI CAUSE - RIMEDI ANOMALIA Non si macchina accende la La macchina non carica acqua Lavaggio insufficiente POSSIBILE CAUSA RIMEDIO Interruttore a muro disinserito Spina di alimentazione non inserita Rubinetto dell'acqua chiuso; Inserire l'interruttore a muro Inserire la spina di alimentazione Il troppopieno non è nella sua sede Riporre il troppopieno nella sua sede Il tubo di carico è ostruito Errato dosaggio di detersivo, Cambiare il tubo di carico Impostare il dosaggio in base alle indicazioni del produttore Usare un detersivo non schiumoso e mai in acqua fredda; Detersivo non appropriato Temperatura in vasca bassa Risciacquo insufficiente La lavastoviglie scarica acqua non Filtro di lavaggio sporco; Lasciare riscaldare l’acqua e attendere il raggiungimento della temperatura ideale fino a quando la spia temperatura non smette di lampeggiare Pulire accuratamente il Filtro; I bracci di lavaggio non sono liberi di ruotare Gli ugelli di risciacquo sono otturati Controllare la presenza di ostacoli o il corretto posizionamento delle stoviglie Pulire gli Ugelli in acqua corrente utilizzando una spatola; Scarsa pressione idrica di rete meno di 1 bar - 100 kPa; Attendere il ripristino della pressione o dotare la macchina di una pompa di pressione; Tubo di scarico ostruito Controllare e rimuovere l’eventuale ostruzione Pulire il filtro aspirazione pompa si Il filtro della pompa di scarico (se inclusa) è ostruito Non è stato utilizzato il brillantante o solo in quantità ridotte Sulle stoviglie si forma una patina Se presente patina di calcare, l’acqua è troppo dura Le stoviglie asciugano non Aprire il rubinetto In caso di patina di amido, temperature troppo elevate durante il prelavaggio manuale Impostare il dosaggio in base alle indicazioni dl produttore Verificare che i tubi di dosaggio non siano ostruiti Pulire i filtri aspirazione detersivo inseriti nelle taniche Verificare anche l’immissione di acqua dalla rete e pulire il filtro eventualmente intasato Verificare la presenza o il funzionamento di un sistema trattamento acqua esterno o incorporato. Non effettuare prelavaggi manuali con temperature superiori a 30°C ATTENZIONE! PER OGNI ALTRO INCONVENIENTE RIVOLGERSI AL SERVIZIO D’ASSISTENZA TECNICA 17 DISINCROSTAZIONE In presenza di acque dure si formano all'interno della macchina e talvolta anche sulle stoviglie, depositi calcarei che per ragioni igieniche e di funzionamento devono essere rimossi con un'operazione di Disincrostazione. Le procedure operative e la frequenza di questo intervento vengono consigliate dal fornitore del Detersivo il quale dispone di opportuni prodotti, generalmente a base di acido Fosforico. Al fine di non danneggiare la Macchina è bene non eccedere nei dosaggi e ultimate le operazioni risciacquare abbondantemente. SANIFICAZIONE Almeno ogni 30 giorni è bene procedere a questa operazione che garantisce la completa igiene della Macchina Lavastoviglie. Per le procedure operative è bene rivolgersi al Fornitore del Detersivo che consiglierà le dosi e il prodotto più opportuno, che è generalmente una polvere generatrice di Cloro attivo (100÷200 ppm). Al fine di non danneggiare la Macchina è bene non eccedere nei dosaggi e ultimate le operazioni risciacquare abbondantemente. ATTENZIONE: Rispettare le note di sicurezza indicate e i dati di dosaggio per l’impiego di sostanze chimiche. Durante l’uso di sostanza chimiche indossare abbigliamento di sicurezza, guanti e occhiali protettivi. Non mischiare prodotti detergenti diversi. CONSIGLI UTILI PER LA MANUTENZIONE DELL'ACCIAIO INOSSIDABILE L'acciaio inossidabile è così chiamato perché non subisce l'azione aggressiva dell'ossigeno dell'aria; esso deve la sua resistenza ad un sottile strato molecolare di ossigeno che si forma sulla sua superficie e che lo protegge da ulteriore ossidazione. Ci sono però delle sostanze che possono modificare o distruggere questo strato, dando così origine a fenomeni di corrosione provocando danni irrimediabili. Occorre perciò prestare molta attenzione nella scelta di prodotti adatti per la pulizia, sia attenendosi ai consigli qui riportati, sia nella scelta di prodotti adatti per la pulizia: occorre infatti ricordare che regola essenziale è quella di garantire la non tossicità e la massima igiene dei prodotti trattati. Prima di usare qualsiasi tipo di detergente, informatevi sempre presso il vostro abituale fornitore qual è il tipo più adatto di detergente che non provochi corrosione sull'acciaio. Se l'acciaio si corrode, ben raramente ciò dipende dallo stesso, ma di solito da materiale non adatto usato per la pulizia (detergenti fortemente acidi a base clorata) o da inadeguata manutenzione. Le nostre apparecchiature sono costruite in acciaio inossidabile AISI 304 (tipo 18/10) per i rivestimenti esterni, la carrozzeria e per le tubazioni di lavaggio e risciacquo. PULIZIA GIORNALIERA Occorre pulire accuratamente le superfici usando uno straccio umido; si può usare acqua e sapone o i comuni detersivi purché non contengano abrasivi o sostanze a base di cloro, come ad esempio l'ipoclorito di sodio (candeggina), l'acido cloridrico (acido muriatico), o altre soluzioni: questi prodotti corrodono in breve tempo e in modo irreversibile l'acciaio inox. Per la pulizia dei pavimenti posti sotto le apparecchiature non usare i prodotti sopra elencati, per evitare che i vapori o eventuali gocce possano produrre sull'acciaio analoghi effetti distruttivi. Strofinare unicamente seguendo il senso della satinatura. Sciacquare quindi abbondantemente con acqua pulita ed asciugare con cura. Non usare mai getti d'acqua per non provocare infiltrazioni nelle parti interne. Macchie di ruggine: le tubazioni degli impianti d’erogazione dell'acqua che alimentano l’apparecchio cedono inevitabilmente della ruggine disciolta nell'acqua, soprattutto negli impianti di nuova installazione o aprendo i rubinetti dopo un certo periodo di inattività. Bisogna evitare assolutamente che questi depositi ferrosi rimangano stagnanti sull'acciaio inossidabile, perché producono fenomeni di corrosione per contaminazione. E' sempre quindi consigliabile che gli impianti stessi siano costruiti con tubazioni accuratamente zincate e che ad ogni inizio delle operazioni si lasci scorrere a lungo l'acqua, finche esce limpida. Per togliere le macchie di ruggine che eventualmente si fossero formate, usare prodotti adatti allo scopo interpellando le ditte che producono detergenti per uso industriale. Dopo l'applicazione sciacquare abbondantemente con acqua pura, neutralizzando poi la sua azione con un detergente alcalino, normalmente usato per la pulizia delle attrezzature, o con un prodotto specifico idoneo allo scopo. NON UTILIZZARE PAGLIETTE ABRASIVE PER LA PULIZIA DELL’ACCIAIO INOSSIDABILE 18 FRANÇAIS Première partie - INSTRUCTIONS POUR L'UTILISATEUR FONCTIONNEMENT ET EMPLOI L'appareil Lave-vaisselle assure une production horaire de 600 assiettes. L'indice de protection de la machine est IP21. Elle ne doit pas être lavée au jet d'eau directe et à haute pression. La disposition correcte de la vaisselle est condition essentielle pour obtenir les meilleures résultats de lavage. Ne pas utiliser de la vaisselle vieille, usée ou crevassée vu que la rugosité et la réglure retiennent plus facilement la crasse et offrent un abri aux bactéries. Il est à conseiller de procéder de temps à autre à la désincrustation en utilisant un détersif approprié, afin de faire décoller les dépôts calcaires et/ou amylacées. Lors d'un achat de vaisselle nouvelle il convient d'observer les indications suivantes: pour les assiettes donner la préférence à celles en porcelaine ou céramique non poreuse à surface lisse. Pour les verres et les coupes: choisir une sorte de verre propre au lavage en Lave-vaisselle. Les surfaces doivent être lisses et les pieds le moins concaves possible. Dans ce moment s’allumeront les lampes de contrôles des thermomètres et le bac se va remplir. AVANT LE LAVAGE AVANT DE COMMENCER LAVAGE, S'ASSURER QUE: - - LES OPERATIONS DE N.B. : Dans le cas où la machine serait équipée d’Adoucisseur avec régénération automatique, chaque 90 seconds de durée du remplissage de la cuve, la machine s’arrête pour environ 2 minutes pour effectuer la régénération. le Robinet de l'alimentation hydrique soit ouvert et que l'eau ne manque pas dans le réseau; les Filtres et le Trop-plein soient dans leurs emplacements; le Tourniquet de lavage soit libre de sorte qu'il puisse tourner; les récipients de l'appareil doseur de produit pour le rinçage et de détersif pour le lavage soient remplis. A remplissage terminé la lampe indicatrice de cycle s’allumerà. La lampe de contrôle "E" clignote quand la porte de la machine est ouverte. D- ATTENTION: Respecter le notes de sécurité indiquées et les donnés de dosage pour l’utilisation de produits chimiques. Lors de l’utilisation de la substance chimique porter de vetêmentsde protection, des gants et de lunettes de protection, Ne pas mélanger APRES CELA, SUIVANTES: PROCEDER AUX Faites attention au mouvement de ouverture et fermeture de la porte. Pendant l’utilisation du lave-vaisselle/lave-verres ne portez pas des vêtements/accessoires qui puissent s’accrocher aux composants de la machine, en limitant la normale capacité de mouvement ! OPERATIONS Quand la porte est ouverte la lampe de contrôle "E" continue à clignoter. Avant de faire démarrer la machine contrôler que la lampe "D" sera fonctionnant. Cette lampe vous informe que la température de l’eau de lavage et de rinçage est idéal. A - Si le détersif est inséré manuellement, verser, 54 grammes de détersif dans la cuve sur le filtre aspiration pompe. Ajouter après, tous les dix cycles de lavage, 40 grammes de détersif dans la cuve. Si la machine est dotée d'appareils automatiques pour le dosage du détersif, contrôler la présence de ce détersif dans les récipients. E – Choisir la durée du lavage en poussant le bouton “B” selon les critères suivants : Lampe 1 allumée : cycle court 2 minutes Lampe 2 allumée : cycle intermède 3 minutes Lampes 1 et 2 allumées contemporairement cycle long 4 minutes La durée du cycle doit être choisie en fonction du genre de vaisselle à laver et du degré de la crasse à enlever. B- Introduire la vaisselle dans les paniers appropriés après avoir enlevé tous les restes solides et les graisses. Mettre dans l'eau les couverts, et éventuellement aussi les assiettes si celles-ci sont lavées longtemps après l'usage, afin de faire décoller les restes de la nourriture. Ne pas entasser les paniers, la vaisselle ne peut pas être superposée, l'eau doit avoir la possibilité de recouvrir la vaisselle directement de tous les côtés. C- Ouvrir la porte et introduire le panier avec la vaisselle dans la machine. F- Fermer la porte et pousser le bouton "C". Commençera le cycle de lavage que vous avez choisi. En plus il y aura une pause de 5 secondes et une phase de rinçage de 18 secondes (23 pour machines avec adoucisseur) utilisant de l’eau propre entre 85° ÷ 90° C. Mettre la tension à l'interrupteur mural et pousser l'interrupteur "A" (DIS.1) 19 Les lampes de contrôle clignotent jusqu’à la fin du lavage. A la fin du lavage les lampes ferment de clignoter. En fonction de la dureté de l’eau, il est toutefois possible de modifier la programmation de l’opération de Régénération. Voir le tableau correspondant dans la section dédiée à l’installateur. Il est possible d’interrompre le cycle de lavage à n’importe quel moment, simplement en poussant de nouveau le bouton “B”. N.B. chaque 90 seconds de durée du remplissage de la cuve, la machine s’arrête pour environ 2 minutes pour effectuer la régénération. La lampe "D" allumée indique la température idéale pour le lavage et rinçage (85°÷90°) Le rinçage commençera qu’au moment de la température idéale. La durée de période de lavage sera prolongée jusqu’à la stabilisation de la température (thermocontrôle). CONTROLE DU SEL A chaque fois qu’il est nécessaire de rajouter du sel dans le récipient, la lampe “E” clignote. Dévisser le bouchon du récipient du sel placé sur le fond de la cuve et y mettre 1 Kg de gros sel en pastilles. Nettoyer le joint et visser le bouchon. Attention ! : L'absence de sel dans le récipient est cause de dommage à la machine pour la présence du calcaire; en plus on pourrait avoir un mauvais lavage de la vaisselle: ces dommages ne concernent pas la garantie. G - Enlever le panier, incliner le et secouer légèrement afin de faire tomber les gouttes restantes. Laisser sécher par évaporation la vaisselle. Ensuite enlever la vaisselle du panier, en veillant à ne pas toucher les parties internes ni les bords. Remettre la vaisselle sur des rayons hygiéniques. Pour continuer le lavage charger la machine encore une fois avec un panier, fermer la porte et pousser l’interrupteur "C". POSITIONNEMENT VAISSELLE DE LA Pour un lavage optimal des pièces de vaisselle, il est opportun de prêter attention au positionnement correct de celles-ci. Les assiettes doivent être placées avec le côté concave vers le haut dans les paniers de plastique, tandis que les couverts doivent être placés dans les petits paniers spéciaux avec les manches retournés vers le bas, comme indiqué dans la figure au-dessus. - Cycle infini (maximum 15 minutes) : avec la porte fermée et cycle inséré (n’importe quel), pousser pour 3 secondes le bouton “B” : les lampes 1 et 2 clignoterons en même temps (thermocontrôle exclu). Le cycle peut être interropu à quelque moment que ce soit en poussant de nouveau le bouton “C”, que fera commencer les séquences finales de pause-rinçage. Cycle Auto-lavage: avec machine allumée, effectuer les opérations suivantes : Enlever le trop-plein de la cuve et attendre que la même soit vide (pour machines équipées de pompe de vidange, voir les instructions au paragraphe spécifique), Fermer la porte du lave-verres, Maintenir pressé le poussoir du cycle ‘’C’’ pendant 3 seconds : la lampe ‘’2’’ clignote pour toute la durée du cycle de 5 ou 10 minutes en fonction du temps de rinçage fixé par default. FONCTIONNEMENT POMPE DE VIDANGE (seulement pour machines avec pompe de vidange) RESULTATS OPTIMAUX Le fonctionnement de la pompe de vidange est automatique seulement pendant le cycle afin de vider l’eau de trop qui rentre pendant la phase de rinçage. À la fin de la journée de travail, pour vidanger complètement la cuve, il faudra par ailleurs effectuer les suivantes opérations: Une insuffisance éventuelle du lavage est visible lorsqu’ils restent des traces de saleté. Elles peuvent être causées par un rinçage insuffisant. Dans ce cas, contrôler que les jets de rinçage sont propres et qu'il y ait une pression suffisante dans le réseau de distribution de l'eau (idéale entre 2~4 bar). En cas des traces de saleté, vérifier que: • les gicleurs de lavage sont propres • le détergent est approprié en qualité et quantité • les filtres de la cuve sont propres • la position des objets dans la machine est correcte. -1 Ouvrir la porte de la lave-vaisselle -2 Enlever le TROP-PLEIN de la cuve; -3 Pousser le bouton « F » pour 3 secondes Clignotent alternativement la lampe « E » et la lampe de cycle (dernière selles.) REGENERATION Le vidange s’arrête automatiquement après 5 minutes. Les lampes s’arrêtent à clignotées Le vidange peut être interrompu à n’importe quel moment en pressant de nouveau le bouton ‘’F’’. Quand la porte de la machine est ouverte la lampe de contrôle « E » clignote. Remonter le trop-plein dans sa position correcte. (pour machines dotées d’Adoucisseur) Dans le cas où la machine serait équipée d’Adoucisseur la Régénération des résines est automatique selon des paramètres etablis par le producteur. 20 NETTOYAGE PREVENTIFS ET ENTRETIEN JOURNALIER ENTRETIEN - IMPORTANT: Avant d'effectuer toute opération de nettoyage et d'entretien, débrancher l'appareil du réseau électrique; Suivez les instructions sur l’entretien de ce guide; Mettre hors tension l'interrupteur mural et la machine en poussant l'interrupteur "A" et faire écouler l'eau de la cuve en enlevant le trop-plein; Faites attention au mouvement de ouverture et fermeture de la porte. Pendant l’utilisation du lave-vaisselle/lave-verres ne portez pas des vêtements/accessoires qui puissent s’accrocher aux composants de la machine, en limitant la normale capacité de mouvement ! Porter de vêtements de protection et des gants protectifs avant de traiter des éléments imprégnes de solution de nettoyage; A l'intérieur de la machine on a des températures élevées (90°C). Débrancher l'appareil du réseau électrique et attendre que la machine soit à température idéale avant d'opérer dans la même; - - Ne pas laisser d’ustensiles ou d’autres objects dans la machine, Vérifiez qu’il n’y a pas de corps étrangers rouillés, en raison de lequel le « acier inoxydable » pourrait commencer à se rouiller. Les particules de rouille peuvent provenir de la vaisselle en acier non inoxydable ou de panier métalliques endommagés, - Ne pas laver la machine et la zone environnante avec des bouches d’incendie, de la vapeur ou de nettoyeurs à haute pression, - - Lors du nettoyage de la chaussée faire attention à ne pas saturer la base de la machine, afin d’éviter una stagnation prolongée de l’eau, Pour nettoyer l’intérieur de la machine, utiliser une brosse ou un chiffon doux, Attendre jusqu'à ce que toute l'eau se soit écoulée et qu'il ne reste pas d'ordures sur le fond de la cuve; Enlever les tourniquets de lavage et de rinçage, et le filtre de l'intérieur de la machine et les laver à l'eau courante chaude; Contrôler que les gicleurs de rinçage ne soient pas bouchées; Remettre les pièces enlevées dans leurs emplacements; Nettoyer l'extérieur de la machine au moyen d'une éponge humide; ne pas utiliser de jets d'eau car, en autre d'être dangereux, il pourraient endommager les composants électriques; Afin d'éviter la formation de mauvaises odeurs, il est à conseiller de laisser la porte du lave-vaisselle ouverte; En prévision d'une inactivité prolongée de la machine il est bien de procéder aux opérations de désincrustation et d'assainissement. Attention. Avant d’effectuer le nettoyage de l’intérieurde la machine, assurez-vous qu’il n y a pas de corps étrangers qui pourraient endommager l’acier inoxydable à l’intérieur de la cuve. Toute particule de rouille présente, pourrait venir de quelque assiette en acier non inoxydable, du panier ou des conduites d’eau endommagés qui ne sont pas anti-rouille. Pour nettoyer la machine n’utilisez pas de produits nettoyants abrasifs;; AVANT d'actionner la machine ou de réactiver le cycle de production à la suite d'opérations d'entretien ou de réparation, s'assurer que tous les abris et couvertures de protection soient correctement installés. EVITER ABSOLUMENT DE NETTOYER L'APPAREIL PAR UN JET D'EAU 21 DETERGENT et PRODUIT DE RINCAGE Attention. Lors de l’utilisation de produits chimiques est conseillé de porter des vêtements appropriés, tells que des gants et des lunettes de protection. Le choix d'un détersif approprié est une condition indispensable pour obtenir des résultats optimaux de lavage sous le profil hygiénique. Il est donc important de tenir compte de quelques facteurs. C’est donc important de tenir compte de certains facteurs. Tout d’abord, il est nécessaire d’utiliser seulement de Produits Anti-moussants fortement Alcalins et Chloreactifs, spécifiques pour Lave-vaisselle Industriel, fabriqué par des enterprises reconnues comme très sérieuses. A titre indicatif, nous en énumérons quelques-unes: Ecolab-Soilax; Henkel; Lever; Diversey; Relativ. Produit de rinçage Pour assurer un Rinçage parfait et un Séchage rapide et éviter les dépôts de calcaire sur la vaisselle, il faut ajouter à l’eau un agent tensioactif (Produit de rinçage) Le produit de rinçage est dosé automatiquement et son dosage est réglé par le technicien de service agréé. La concentration moyenne d’utilisation est de 0,5 g/litre. Le fournisseur du détergent sera en mesure de recommander le produit le plus adapté. La machine est équipée de doseur de produit de rinçage. . Vérifier périodiquement la présence du produit dans les réservoirs externes! Détergent Le détergent est nécessaire pour enlever la saleté et de la nourriture de la vaisselle. Le détergent peut être déterminé de différentes manières: - Manuellement si en poudre - Automatiquement , à l’aide d’un dispositif de dosage intégré ou externe, à partir d’un récipient à l’extérieur de la machine. Le doseur de détergent n’est pas standard sur toutes le machines Vérifiez donc la presence du même dans le données de la commande. La concentration moyenne des détergents en poudre doit être de 1,5 à 2,5 g/litre. Pour le dosage veuillez vous référer aux instructions données dans les avertissements avant le lavage. Si automatiques, vérifier toujours la présence de liquide dans le réservoirs et régler les dosages par l’installateur technique. La concentration moyenne de detergent liquide devrait être de 2 à 4 g/litre. Afin d’éviter les incrustations et les corrosions, la mise en place du Détergent doit être effectuée audessus du niveau d’eau dans la zone la plus proche du filtre d’aspiration de la pompe, de sorte qu’il pénètre immédiatement dans la solution et il ne se dépose pas sur le fond de la cuve. L’entrée du DETERGENT LIQUIDE DE LAVAGE doit être effectuée en utilisant le trou prévu à l’avant de la cuve de lavage. Vérifier périodiquement la présence du produit dans les réservoirs externes! ATTENTION: Respecter les conseils de sécurité indiqueées et les données de dosage pour l’utilisation de produits chimiques. Lors de l’utilisation de substances chimiques, porter un vêtement de protection, des gants et des lunettes. Ne pas mélanger différents produits de nettoyage. INCONVENIENTS POSSIBLES - CAUSES - REMEDES PROBLEMES CAUSES REMEDES La machine ne démarre pas La machine ne charge pas l'eau Interrupteur général débranché; Fiche d’alimentation pas insérée Robinet à l'eau fermé; Insérer l'interrupteur Insérer la fiche d’alimentation Ouvrir le Robinet Le Trop-plein n'est pas à sa place ; Remettre place ; Le tuyau d’arrivée d’eau est bouché Mauvais dosage du détergent ; Changer le tuyau d’arrivée d’eau Lavage insuffisant ne La vaisselle ne séche pas Sur la vaisselle se forme une patine dans sa cuve Filtre de lavage sale; Les bras de lavage ne sont pas libres de tourner Les buses de rinçage sont obstrués Vérifier la présence d’obstacles ou le positionnement correct de la vaisselle Nettoyer les buses dans l’eaus à l’aide d’une spatule; Faible pression d’eau de réseau , moins de 1 bar – 100 kPa;; Attendre la récupération de la pression ou equipe la machine d’une pompe de pression; Tuyau d’échappement obstrué Vérifier et enlever toute obstruction Le filtre de la pompe de vidange (s’il est inclus) obstrué On n’a pas utilisé le produit de rinçage ou il a été utilisé en petites quantités seulement; Nettoyer le filtre aspiration de la pompe Régler le dosage selon les indications du producteur Vérifier que les tuyaux de dosage ne sont pas bloqués Nettoyer les filtres d’aspiration de détergent placés dans le boîtes Vèrifier également l’entrée de l’eau du réseau et nettoyer le filtre qui peut être obstrué; Vérifier la présence ou le fonctionnement d’un système de traitement de l’eau externe ou intégré. N’effectuer pas de prélavages avec des temperatures supérieures à 30°C Température insuffisante; Le lave-vaisselle vidange pas l’eau Trop-plein Régler le dosage suivant les instructions du fabricant Employer détergent antiécume avec dosage correct et jamais Chauffer l’eau et attendre la réalisation de la température idéale jusqu’à ce que le voyant de température arrête de clignoter Nettoyer le filtre; Faux dosage du détergent, Rinçage insuffisant le dans la S’il y a une patine de calcaire, l’eau est trop dure. Dans le cas d’une patine d’amidon, les températures sont trop élevées pendant le prélavage manuel. ATTENTION! POUR TOUT AUTRE INCONVENIENT S'ADRESSER AU SERVICE APRES-VENTE 23 DESINCRUSTATION A cause des eaux dures, il se forment à l'intérieur de la cuve, parfois aussi sur la vaisselle, des dépôts calcaires qui, pour des raisons d'hygiène et de fonctionnement, doivent être enlevés par désincrustation. Le procès et la fréquence de cette intervention sont conseillés par le fournisseur du détersif qui dispose de produits appropriés en général à base d'acide phosphorique. Pour ne pas endommager la machine, ne pas exagérer dans les dosages et rincer abondamment après les opérations. ASSAINISSEMENT Il est bien de procéder au moins tous les 30 jours à cette opération qui garantit un état hygiénique parfait de la machine. Pour les procédés il convient de s'adresser au fournisseur de détersif , qui conseillera les doses et le produit le plus approprié. Ce dernier consiste en général d'une poudre à base de chlore-actif (100÷200 ppm). Pour ne pas endommager la machine, ne pas exagérer dans les dosages et rincer abondamment après les opérations. ATTENTION: Respecter les conseils de sécurité indiqueées et les données de dosage pour l’utilisation de produits chimiques. Lors de l’utilisation de substances chimiques, porter un vêtement de protection, des gants et des lunettes. Ne pas mélanger différents produits de nettoyage. CONSEILS UTILES POUR L'ENTRETIEN DE L'ACIER INOXYDABLE L'acier inoxydable est ainsi appelé parce qu'il ne subit pas l'action agressive de l'oxygène contenu dans l'air. Sa résistance est due à une mince couche moléculaire d'oxyde qui se forme à la surface et le protège contre l'oxydation. Toutefois il y a des substances qui peuvent modifier ou détruire cette couche et entraîner donc des phénomènes de corrosion; ces substances non seulement empêchent la formation d'une nouvelle pellicule d'oxyde mais corrodent aussi l'acier inoxydable en provoquant ainsi des dégâts irrémédiables. Pour que cela ne se produise pas il faudra donc faire attention au choix des produits spéciaux pour le nettoyage et respecter simplement les conseils ci-après: ne jamais oublier que la première règle fondamentale pour l'emploi de ces appareils est de garantir l'absence de toxicité et l'hygiéne maximale des produits traités. Avant d'utiliser un produit détergent pour le nettoyage de l'acier inoxydable ou du carrelage qui se trouve au dessous des appareils ou bien tout à côté, demandez toujours à votre revendeur quel est le type de détergent le plus indiqué et qui ne provoque pas de corrosion sur l'acier: si l'acier se corrode (il rouille), cela est dû dans la plupart des cas au produit utilisé pour le nettoyage qui n'est pas approprié (détergents fortement acides à base chloratée) ou bien à un mauvais entretien. Nos appareillages sont réalisés en acier inox AISI 304 (type 18-10) pour revêtements extérieurs, tuyautages et cuves. Nettoyage ordinaire journalier Nettoyer souvent et soigneusement les surfaces avec un chiffon humide; on pourra utiliser de l'eau avec du savon ou bien les détergents ordinaires pourvu qu'ils ne contiennent pas de substances abrasives ou à base de chlore comme l'hypochlorite de sodium (eau de Javel), l'acide chlorydrique (acide muriatique), ou d'autres solutions de cet acide: ces produits corrodent l'acier inox de façon irréversible et en très peu de temps. Pour nettoyer le carrelage qui se trouve en dessous ou tout à côté, ne jamais utiliser les produits ci-dessus car les vapeurs ou les gouttes pourraient produire sur l'acier des effets destructifs analogues. Frotter doucement exclusivement dans le sens du satinage.Rincer abondamment à l'eau pure et bien essuyer. Ne pas utiliser des jets d'eau qui pourraient provoquer des infiltrations. Taches de rouille :les tuyauteries des installations d'alimentation en eau des éviers, casseroles et cuisinières débitent inévitablement de la rouille dissoute dans l'eau, notamment dans les installations toutes neuves ou si on ouvre les robinets après une longue période d'inactivité. Eviter donc de laisser des dépôts ferreux stagner sur l'acier inoxydable car ils provoqueraient des phénomênes de corrosion par contamination. Il est conseillé de faire construire les installations avec des tuyauteries galvanisées et laisser couler l'eau longtemps jusqu'à ce qu'elle soit claire. Pour éliminer les taches de rouille éventuelles,utiliser des produits spéciaux recommandés par les maisons qui produisent des détergents à usage industriel: après l’usage, rincer avec beaucoup d'eau pure et neutraliser l'action du produit avec un détergent alcalin normalement utilisé pour le nettoyage de l'acier ou avec un produit spécial. EVITER DE NETTOYER L’ACIER INOXYDABLE AVEC PAILLETTES ABRASIVES ! 24 ENGLISH First Section - FOR THE USER WORKING AND USE The dishwashing machine can wash up to 600 dishes per hour. The machine protection degree is IP21, therefore it should not be washed with direct high-pressure jet water. The objects to be washed should be correctly arranged for a good washing-up result. We suggest rescaling dishes, from time to time, in order to remove calcareous and/or starchy sediments by soaking it in suitable solutions suggested by your cleansing agent supplier. If you need to buy new dishes remember the following: Dishes and cups: preference must be given to china or nonporous pottery articles, with smooth surface. Glasses: choose a glass suitable to be washed in dishwashing machines. Surfaces must be smooth and bottoms the least concave possible. OPERATION BEFORE WASHING BEFORE STARTING SURE THAT: - THE WORKING OPERATION BE the cock is open; the filters and the overflow are in their housings; the wash arm and the rinse arm are free to pivot; brightener and washing powder dispenser containers are loaded. CAUTION: Observe the safety notes and dosage data for the use of chemicals. During the use of the chemical substance wear protective clothing, gloves and protective glasses. Do not mix different cleaning products. THEN PROCEED: A- Open the door and put into the tank, possibly over the pump filter, about 54 gr. of non-lathering detergent in powder. Every 10 cycles add about 40 gr. of detergent. If the machine is provided with an automatic dosing device, control that the detergent is in its container. Before you start the cycle be sure that the control lamp “D” is flashing. This means that the water for the washing cycle and the rinsing water temperature reached the ideal temperature for working. N.B.: If the machine is equipped with a watersoftener with automatic regeneration, each 90 seconds of tank filling duration, the machine stops for about 2 minutes to carry out the regeneration. E – Choose the washing period cycle and push the button “B” between the following items: - lamp 1 flashing – short cycle of 2 minutes - lamp 2 flashing – medium cycle 3 minutes - lamps 1 and 2 lightening at the same time long cycle of 4 minutes. The washing period cycle has to be chosen regarding the dirt that has to be removed. Please pay attention to the opening and closing of the door of the Dish/Glass-washers. Do not use the machine if you are wearing clothes/items that could get entangles in the dishwasher parts. As they can limit personnel’s regular moving ability! F – Close the door of the dishwasher. Push the button cycle “C” B- Place the dishes in the basket minding to previously remove all solid waste and fat. Do not overload baskets, dishes must not be placed one upon the other, water must have the way to run on each part of the same. C - Turn the machines on by wall switch and push the switch “A” situated in Dis.1. The dishwasher starts the washing with the period you chosen. Additional to this period will be a pause of 5 seconds and a rinsing period of 18 seconds (23 seconds for machines with Water softener) with clean water about 85° to 90°C. The control cycle lamp is flashing up to the end of the complete washing period. Finished the washing period the control lamps will stop lightening. At this moment the thermometer display lights up And the tank fills up. When the tank is full the control lamp for cycle lights up. It is possible to interrupt the washing cycle at any time simply pushing again button “B”. D – Introduce the basket in the dishwasher. The lighting of the control lamp “D” means that the water reached the needed temperature of 85° to 90°C. The control lamp “E” will flash in case the door of the dishwasher is open. The rinsing will start working of by the reached temperature need. That means the period of the washing cycle you chosed will be extended up to having reached the exact temperature (thermocontrol). REGENERATING (for machines with Water softener) G – Extracting the basket inclines and shakes it carefully. So the rest of the water drops will be eliminated. If the glass-washer is equipped with a Water softener the regeneration of resins is automatic according to parameters fixed by the producer. According to the water hardness, it is possibile to modify the programming of the regeneration. See the corresponding table in the installer section. Leave the dishes in the basket until its will be dry by evaporation. Take the dishes away from the basket and pay attention not to touch the dishes on its border and put the on clean shelves. To continue carry a new basket, introduce it in the machine, close the door and press button “C”. N.B. each 90 seconds of tank filling duration, the machine stops for about 2 minutes to carry out the regeneration. - Endless cycle (maximum 15 minutes) : the door being closed and the cycle put on (any cycle), keep the button “B” pressed for 3 seconds: lamps 1 and 2 will flash at the same time (thermocontrol excluded); the cycle can be interrupted at any time pressing again button “C” that will let final sequences start. SALT CONTROL Self-washing cycle: with machine on, carry out the following operations: Remove the overflow from the tank and wait for the tank’s emptying (for machines with drain pump, look at the instructions in the specific paragraph), Close the door of the glasswasher, Keep pressed the cycle button ‘’C’’ during 3 seconds: lamp ‘’2’’ flashes during all the length of the 5 or 10 minutes cycle, according to the rinse’s duration fixed by default. Attention! The lack of salt in the container damages the machine because of limestone, besides a defective washing of glasses and dishes. These damages are not covered by the warranty. When it is necessary to add salt in the container, the green lamp "E" is flashing. Unscrew the plug of the salt container at the bottom of the tank and put 1 kg coarse salt tablets in it. Clean the gasket and screw the plug. DRAIN PUMP INSTRUCTION (only for machines with drain pump) The drain pump starts up automatically just during the washing cycle to discharge the exceeding water coming from the rinsing cycle. At the end of the working day, in order to completely discharge the tank, it is necessary to perform the following operations: ACHIEVEMENTS Any deficiency in the washing process is apparent when dirty residuals are visible. An insufficient rinsing might cause any halos: in this case, check that the rinsing jets are clean and there is a sufficient pressure in the water distribution network. In the case that residuals are present, check that: • the washing jets are clean • there is detergent • the pump suction filter is clean • the positions of the objects in the rack are correct. 1. Open the door of the dishwasher 2. Remove the overflow pipe from the tank; 3 .Afterwards push button “F” for 3 seconds. Alternatively are flashing the control lamp “E” and the cycle lamp (chosen before) The discharge will stop automatically after 5 minutes. The control lamps will stop flashing. The drain can be stopped at any time by pressing again button ‘’F’’ . DISHES POSITIONING It is suitable to place dishes, inside the plastic basket with the concave side facing upwards. Place mixed cutlery in a vertical position into the suitable container minding not to cram them and with handgrips towards the bottom (see drawing). Please note: in case the door is open the control lamp “E” will continue flashing. Reinstall the flow over and shut the door. 26 CLEANING AND MAINTENANCE PRECAUTION INSTRUCTIONS - AND DAILY MAINTENANCE PREVENTIVE - CLEANING - IMPORTANT : Before carrying out the cleaning and maintenance operations, disconnect the equipment from the mains power supply: Please pay attention to the opening and closing of the door of the Dish/Glass-washers. Do not use the machine if you are wearing clothes/items that could get entangles in the dishwasher parts. As they can limit personnel’s regular moving ability! Follow the directions on the maitenance in this guide; Wear protective clothing and gloves when challenged elements are impregned with clearing solution; - High temperatures can be reached inside the machine (90°C). After power supply has been removed, wait until the machine has reached room temperature, before working on it. - - Disconnect the machine by wall switch and with pushbutton "A"; Lift the overflow pipe and let the water drain out of the tank; - - Never leave tools, parts or other loose material in or on the machine; Chek that there are no rusting foreign bodies, because of the material “stainless steel” could begin to rust. Rust particles can come from non- stainless steel dishes or damaged wire baskets. Do not wash the machine and the area surrounding it with fire hydrants, steam jets of high-pressure cleaners; - Wash thoroughly the tank and the filter housing to remove all the impurities; Take the filters and clean them under running water; Re-assemble the overflow pipe and the filters in their housings; Check and clean the washing and the rinsing jets; Clean the outer surface of the machine by using a wet sponge; don't use water jets because, besides being dangerous they could damage the electrical parts; don't use abrasive detergents; When the machine is to remain idle for a long time, drain all the water from the boiler and from the electropump. Also leave the wash tank open. To clean the inside of the machine, use a brush or a soft cloth; Attention. Before carrying out cleaning the inside of the machine, make sure that there are no foreign objects that could damage the rusty steel inside the tank. The eventual rust particles could come from non-stainless steel dishes, from baskets or damaged water pipes not rust-proof. To clean the machine do not use abrasive cleaners; NEVER WASH THE EXTERNAL PART THE MACHINE WITH A WATER JET When clearing the floor be careful not to saturate the base of the machine, in order to avoid a prolonged stagnation of water; - BEFORE starting machine or cycle, after any maintenance or repair work, make sure all protectives are correctly installed; 27 OF DETERGENT and RINSE-AID Attention. During the use of chemicals is advisable to wear appropriate clothing, such as gloves and protectives glasses. The choice of a suitable cleansing agent is an essential condition if you want to obtain extremely good washing results as regards hygienic results. It’s therefore important to consider some factors. Firsf of all, it is necessary to use only strongly anti-foaming Alkali and Chlore Products specific for industrial dishwasher, manufactured by Companies recognized as seriousness. By way of illustration, we list a few: Ecolab-Soilax; Henkel; Lever; Diversey; Relativ. Rinse-aid To ensure proper rinsing and fast drying and prevent scale deposits on the dishes, you need to add to the water an additive such as a surfactant (Rinse-Aid) The machine is equipped with rinse-aid dispenser. The rinse-aid is dosed automatically and its dosage is set by the authorized service technician. The average concentration of use is of 0.15 g/liter. The supplier of detergent will be able to recommend the most suitable product. Periodically check the presence of the products in the external tanks! Detergent The detergent s needed to remove dirt and food from the dishes. The detergent may by determined in various ways: - Manually if powder - Automatically from one external box via a dosing device embedded or external. The detergent dispenser is not standard on all the machines. Then check the presence of it in the order data. The mean concentration of powder detergents should be of 1,5÷2,5 g/liters For dosing instructions refer to the initial notices before washing. If automatic, always check the presence of liquid in the tanks and set the dosages by the installer. . The mean concentration of liquid detergents should be of 2÷4 g/liters. In order to avoid corrosion and scalling, the placing of the detergent must be made above the water level in the area closest to the pump suction filter, so that it enters immediately in solution and does not deposit on the tank bottom. Entering DETERGENT WASHING LIQUID must be carried out using the hole provided on the front of the washing tank. Periodically check the presence of product in external tanks! ATTENTION: Observe the safety notes and dosage data for the use of chemicals. During the use of the chemical substance wear protective clothing, gloves and glasses. Do not mix different cleaning products. PROBLEMS - CAUSES - SOLUTIONS PROBLEMS CAUSES SOLUTIONS The machine doesn't catch Main switch is switched off; Power plug is not inserted Water cock closed; Turn ON the main switch; Insert the power plug Open water cock; The Overflow is not in place; Reassemble the Overflow in place The water inlet hose is blocked Wrong detergent or dosage Change the water inlet hose Use anti-foam detergent in the right dosage and never with cold water; Use a non-foaming detergent and never in cold water; The water doesn't go in Insufficient Washing Detergent is inappropriate Low temperature in the tank; Dirty wash filter; The washing arms are not free to rotate Rinsing nozzles blocked; Insufficient Rinsing The dishwasher will not drain Hydraulic pressure lower than 1 bar - 100 kPa; Drain hose obstructed The dishes are not dry The filter of the drain pump (if included) is obstructed Rinse-aid has not been used or it has been used only in small quantity On the dishes it forms a layer If there is a layer of limestone, the water is too hard In the case of a film of starch, high temperatures during the prewashing Wait until the water gets hot and wait for the achievement of the ideal temperature indicator light stop blilnking Clean filter; Check the presence of obstacles or the correct positioning of the dishes Unscrew and clean nozzles under running water; Wait until the pressure is on or buy a booster pump; Check and remove any obstruction Clean the filter of pump suction Set the dosage according to the manufacture directions Check that the dosing tubes are not blocked Clean the detergent suction filters placed in the tanks Also check the entry of the water from the mains and clean the filter may be clogged Check for the presence of operation of water treatment system external or embedded Not perform manual pre-washing with temperatures above 30°C CAUTION! FOR ANY OTHER TROUBLE, CALL SERVICE 29 DESCALING When hard water is used you can find inside the machine and also on dishes calcareous sediments which must be removed both for hygienic and operating reasons by a descaling operation. Operating process and frequency of this intervention are suggested by your cleansing agent supplier who has suitable products, generally containing phosphoric acid. In order to avoid damage to the machine do not increase the quantities and once operations end rinse abundantly. SANIFICATION At least each 30 days it would be useful to do this operation which guarantees the complete hygienic conditions of the machine. We suggest to contact your cleansing agent supplier who will give you quantity and name of the most suitable product you can use and that is generally an active chloride powder (100÷200 ppm). In order to avoid damage to the machine do not increase the quantities and once operations end rinse abundantly. ATTENTION: Observe the safety notes and dosage data for the use of chemicals. During the use of the chemical substance wear protective clothing, gloves and glasses. Do not mix different cleaning products. USEFUL HINTS FOR STAINLESS STEEL MAINTENANCE Stainless steel is so called because it is not affected by oxidation; this dues its resistance to a thin molecular layer of oxide on the surface which protects againts further oxidation. There are, however, substances which can modify or destroy this layer, giving rise to corrosion: besides preventing the protective film of oxide from reforming, these substances corrode the stainless steel itself and can cause irreparable damage. It is therefore necessary to prevent this by choosing correct cleaning products and by complying with the following simple recommendations: never forget that when using these appliances, the first and fundamental rule is to guarantee that the cleaning products are both non-toxic and hygienic. Before using any detergent to clean either the stainless steel or the immediate and sorrounding floor area, always ask your supplier for the most suitable product which does not cause corrosion on the steel itself; the onset of rust is most commonly caused by the use of unsuitable cleaning materials (strongly acid chlorate based detergents) or on inadequate maintenance. Our appliances are made of stainless steel AISI 304 (18-10 type) for exterior panelling,upper tops, tanks etc. Comply with the following instructions when cleaning and servicing parts in stainless steel. Ordinary daily maintenance Carefully and frequently clean the surfaces using a damp cloth; use soap and water or normal detergents,so long as these do not contain abrasives or chlorine based substances such as sodium hypochlorite (bleech) ,hydrochloric acid or other such solutions:These products quickly and irreparably corrode stainless steel. When cleaning floors underneath or near the appliances, never use the above mentioned products as vapours or splashes could subject the steel to similar destructive effects. Only ever rub in the direction of the satining, then thoroughly rinse with clean water and carefully dry. Rust : water supply pipes, inevitably convey particles of rust dissolved in the water especially in new installation plants or when taps are opened after a period of inactivity. These iron deposits must not be allowed to remain on the stainless steel since they produce rust by contamination. Use suitable products to remove any rust marks,from companies which produce detergents for industrial use. After application, thoroughly rinse with clean water, neutralizing the action of the product with an alkaline detergent normally used to clean such appliances or with another specific product. DO NOT USE METAL MATS TO CLEAN THE STAINLESS STEEL 30 DEUTSCH Teil 1 - FÜR DEN BENUTZER ARBEITSWEISE UND ANWENDUNG Die Geschirrspülmaschine erlaubt eine Reinigung von 600 Tellern pro Stunde. Keine alten oder rissigen Geschirrteile verwenden, hier besteht die Gefahr von Bakterienbildung. Bei kalkartiger Ablagerung sollte man von Zeit zu Zeit die Geschirrteile in einer Lösung, die vom Lieferant empfohlen wird, entkalken. Bei Anschaffung neuer Geschirrteile ist das Folgende zu beachten: Porzellan oder nicht poröse Keramikteller, Tassen mit glatter Oberfläche bevorzugen. Die richtige Anordnung der zu waschenden Gegenstände ist die Grundvoraussetzung für gute Waschergebnisse. HINWEISE VOR DEM WASCHGANG Tankfüllungsdauer hält die Maschine für etwa 2 Minuten um die Regeneration auszuführen. BEVOR MAN DIE MASCHINE IN BETRIEB NIMMT, MUSS DASS FOLGENDE KONTROLLIERT WERDEN: D– - Den Korb in die Spülmaschine einsetzen. Bitte beachten : Die Kontroll-Lampe „E“ blinkt, wenn die Tür der Spülmaschine offen steht. der Wasserhahn muss geöffnet sein; Sieb und Überlauf müssen an der richtigen Stelle sein; die Sprüharme müssen sich frei drehen können; Nachspülmittelbehälter und Waschspülmittelbehälter gefüllt sein sollen. ACHTEN SIE AUF DIE ÖFFNUNGS -UND SCHLIESSUNGSBEWEGUNG DER TÜR DER GESCHIRRSPÜLMASCHINE. BENUTZEN SIE DIE GESCHIRRSPÜLMASCHINE NICHT, WENN SIE KLEIDER/GEGENSTÄNDE TRAGEN, DIE SICH IN DEN BESTANDTEILE DER GESCHIRRSPÜLMASCHINE VERFANGEN UND DIE NORMALE BEWEGUNGSFÄHIGKEIT BEGRENZEN KÖNNTEN. Achtung: Die Sicherheitshinweise beachten als auch Dosierdaten der chemischen Substanzen. Während des Gebrauchs von chemischen Substanzen entsprechende Sicherheitskleidung tragen, wie Handschuhe und Schutzbrille. Niemals unterschiedliche Vor Beginn des Waschvorganges sollten Sie sich vergewissern, dass die Lampe „D“ aufleuchtet. Das bedeutet, dass das Wasch- und Spülwasser die richtige Arbeitstemperatur erreicht hat. DANACH GEHT MAN WIE FOLGT VOR: E - Wählen Sie das Waschprogramm aus indem Sie den Knopf „B“ drücken. Sie haben folgende Wahl : - Lampe 1 leuchtet auf – Kurzwaschgang 2 Min. - Lampe 2 leuchtet auf – Mittelwaschgang 3 Min. - Lampen 1+2 leuchten auf Vollwaschgang 4 Min Wählen Sie den Waschvorgang je nach Verschmutzung aus. A- Bei manueller Reinigungsmitteldosierung : 54 g auf Pumpensaugfilter in Tank füllen. Später 40 g je 10 Spülgänge hinzufügen. Bei automatischer Dosierung von Flüssigreiniger: kontrollieren, dass der Vorratsbehälter gefüllt ist. B- Grobe Speisereste und Fette entfernen und die Geschirrteile in die Körbe einordnen. Das Spülgut eventuell vorher einweichen wenn es erst längere Zeit nach Gebrauch gespült werden soll. Die Körbe nicht überlasten, die Geschirrteile dürfen sich nicht überlagern, damit der Sprühstrahl sie erreichen kann. F - Schliessen Sie die Tür der Spülmaschine. Drücken Sie den Programmknopf „C“. Somit beginnt der Waschvorgang in der vorab gewählten Länge. Zu diesem von Ihnen gewählten Waschvorgang kommen auch noch außer dem eigentlichen Waschvorgang eine Pause von 5 Sekunden und eine Spülphase mit einer Dauer von 18 Sekunden (23 Sekunden für Maschinen mit Reinigungsapparat) mit sauberem Wasser mit einer Temperatur zwischen 85° - 90° C hinzu. C Stromzufuhr durch Einschalten des Wandschalters und Drücken der Taste „A“ der Schalttafel (DIS1) einleiten. Jetzt leuchten die Kontroll-Lampen des Thermometer Displays auf, das Wasser läuft ein und das Becken wird gefüllt. Ist der Tank gefüllt leuchtet die KontrollLampe auf. Die Lampe des Waschvorganges Blinken bis zum Ende des Waschvorganges. Am Ende des Waschvorganges hören sie auf zu Blinken. Man kann den Waschvorgang zu jeder Zeit unterbrechen, indem Sie einfach den Knopf „B“ noch einmal drücken. ACHTUNG! Im fall die Maschine mit einem Wasserentkalker ausgerüstet ist, jede 90 Sekunden von 31 Das Aufleuchten der Lame „D“ zeigt die erreichte Wassertemperatur von (85°°90°C) an. Der Spülvorgang beginnt erst beim Erreichen der richtigen Wassertemperatur. Die Dauer des Waschvorganges wird deshalb solange verlängert bis das Wasser die nötige Temperatur erreicht hat (Thermocontrol). Automatisch, nach den eingebenen Parameter die von Fabrikant Eingestellt wurden. G- SALZKONTROLLE N.B. jede 90 Sekunden von Tankfüllungsdauer hält die Maschine für etwa 2 Minuten um die Regeneration auszuführen. Korb aus der Maschine nehmen indem Sie ihn leicht neigen und schütteln, damit das restliche Wasser abtropfen kann. Lassen Sie durch Verdampfung das Geschirr trocknen, d.h. bei Herausnehmen des Korbes achten Sie bitte darauf das Geschirr nicht zu berühren. Dach dem Trocknen stellen Sie es in die vorgesehen, sicherlich hygienischen, Regale. Die Maschine zeigt wenn Salz im Salzbehälter fehlt durch die Einschaltung der Lampe „E“ . Bitte abschrauben Sie den Deckel des Salzbehälters am Boden der Spülwanne und 1 kg Salz in Tablettenform einfüllen. Nach der Reinigung der Dichtung, schließen Sie den Deckel. Der Salzmangel im Behälter verursacht Maschinenschäden wegen Kalkablagerung und das kann die schlechte Reinigung von Gläsern und Geschirr zur Folge haben. Um weitere Waschvorgänge vorzunehmen bestücken Sie den Korb wieder, schliessen die Tür und drücken den Knopf „C“. - Unendlicher Waschvorgang (Maximum 15 Minuten) : das Tür geschlossen und der Waschvorgang angelassen (irgendeiner), den Knopf „B“ 3 Sekunden lang drücken : Lampen 1 und 2 leuchten gleichzeitig auf (außer Thermocontrol); der Waschvorgang kann zu jeder Zeit untergebrochen werden, indem Sie einfach den Knopf „C“ noch einmal drücken. Der Knopf „C“ wird die Endfolgen von Pause und Nachspülung beginnen machen. GESCHIRRANORDNUNG Für eine optimale Geschirrsäuberung ist dessen richtige Anordnung wichtig: Teller werden in die Plastikkörbe mit dem Konkavteil nach oben, Besteck wird mit dem Griff nach unten in die Körbe eingestellt, wie in nachstehender Abbildung angezeigt. Selbstwaschungsvorgang: mit eingeschalteter Maschine, die folgenden Schritte durchführen: das Überlaufrohr vom Tank wegnehmen und auf die Tankentleerung warten (für Maschinen mit Ablaufpumpe, den entsprechenden Abschnitt sehen), dieTür von der Maschine schließen, drücken Sie die Programmdrucktaste ’’C’’ 3 Sekunden lang : die Lampe ’’2’’ blinkt während aller von 5 oder 10 Minuten Vorgangsdauer, auf Grund von der als Default eingestellten Nachspülungszeit. ABLAUFPUMPE (nur für Maschinen mit Ablaufpumpe) Der Betrieb der Waschpumpe ist nur während des Waschzyklus automatisch, um den Überschuss an Wasser abzulassen, der während des Nachspülzyklus eintritt. OPTIMALE ERGEBNISSE Eine mögliche ungenügende Geschirrsäuberung kann durch schlechte Spülung verursacht werden. In diesem Fall kontrollieren, dass die Spüldüsen sauber sind und ausreichender Druck in der Wasserleitung vorhanden ist (Idealwert zwischen 2 ÷ 4 bar). Im Fall, dass sich Schmutz auf dem Geschirr befindet, kontrollieren, dass: die Waschdüsen sauber sind das Spülmittel in der richtigen Menge vorhanden ist die Filter sauber sind das Geschirr im Korb richtig angeordnet ist (siehe entsprechendes Kapitel) Am Ende des Arbeitstages sollen die folgenden Schritte durchgeführt werden, um den Tank völlig zu entleeren: 1Die Tür der Maschine öffnen 2Das Überlaufrohr aus der Wanne nehmen; 3Drücken Sie die Knopf „F“ für 3 Sekunden Es leuchten abwechselnd die Kontrollleuchte “E” und die Leuchte des Waschvorganges (letzt gewählter) auf Der Abpumpvorgang wird nach ca. 5 Minuten automatisch abgebrochen. Die Kontroll Lampen hören auf zu leuchten. Zusatz: Falls die Tür offen sein sollte wird die Kontroll-Lampe „E“ weiterhin aufleuchten. REGENERIERUNG (Für Maschinen mit Wasserentkalker) Im fall die Maschine mit einem Wasserentkalker ausgerüstet ist, die Regenerierung Arbeitsgang ist Automatisch, nach den eingebenen Parameter die von Fabrikant Eingestellt wurden. Im fall die Maschine mit einem Wasserentkalker ausgerüstet ist, die Regenerierung Arbeitsgang ist Um einen Manuelle Wasserablauf unterbrechen Knopf „F“ nochmals drucken. Das Überlaufrohr wieder positionieren und die Tür schliessen. 32 REINIGUNG WARTUNG UND TÄGLICHE REINIGUNG GESCHIRRSPÜLMASCHINE INNEREN RECHZEITIGE WICHTIG: Bevor man jegliche Wartungsarbeit, Reinigung oder Reparatur vornimmt, muss man die Maschine von der Elektroleitung mit dem Hauptschalter trennen. - DER IM Die Maschine mit dem Hauptschalter "A" abschalten und das Tankwasser durch Entfernung des Überlaufrohres ablassen (siehe entsprechendes Kapitel) Die Hinweise in diesem Leitfaden zur Wartung beachten; ACHTEN SIE AUF DIE ÖFFNUNGS -UND SCHLIESSUNGSBEWEGUNG DER TÜR DER GESCHIRRSPÜLMASCHINE. BENUTZEN SIE DIE GESCHIRRSPÜLMASCHINE NICHT, WENN SIE KLEIDER/GEGENSTÄNDE TRAGEN, DIE SICH IN DEN BESTANDTEILE DER GESCHIRRSPÜLMASCHINE VERFANGEN UND DIE NORMALE BEWEGUNGSFÄHIGKEIT BEGRENZEN KÖNNTEN. Schutzkleidung und Schutzhandschuhe tragen, bevor man Elemente berührt, die mit Waschlösung benetzt sein könnten; Im Inneren der Maschine befinden sich sehr hohe Temperaturen (90°C). Nachdem man den Strom abgeschaltet hat, einen kurzen Moment warten, bis die Maschine Raumtemperaturen erreicht hat, bevor man an dieser selber arbeitet. - Niemals Werkzeuge, Objekte oder andere Materialien auf der Maschine oder im Inneren belassen; - Kontrollieren, dass keine verrosteten Fremdkörper an der Maschine liegen, da dadurch das Material “nichtrostender Stahl” anfangen könnte zu rosten. Kleine Rostpartikel können von rostendem Geschirr oder von beschädigten Drahtkörben kommen. - Die Maschine nicht mit Dauerluft oder Wasserstrahl, Dampfstrahl oder Hochdruckstrahl säubern; - Bei Reinigung des Fußbodens, darauf achten, den Maschinensockel nicht zu stark zu wässern, damit kein stehendes Wasser übrig bleibt. Abwarten, dass das Wasser vollständig Beckenboden entfernen. Am Ende des Wasser ablauf die Taste “C” schaltet aus Automatisch nach 15” Sekunden. die Maschine vom Versorgungsnetz über den Wandhauptschalter abschalten. Das Sieb und das Überlaufrohr aus dem Maschine herausziehen und unter fließendem warmem Wasser mit einer Bürste reinigen. Kontrollieren, dass die Düsen der Wascharme nicht verstopft sind. Die herausgenommenen Teile an die richtige Stellung wiedersetzen. Um die Entstehung von üblem Geruch zu vermeiden, ist es ratsam, die Gerätetür geöffnet zu lassen. Wenn die Maschine voraussichtlich für längere Zeit nicht benutzt wird, ist eine Entkalkung durchzuführen. Achtung. Bevor man das Maschineninnere reinigt, sich vergewissern, dass keine rostenden Fremdteile vorhanden sind, die den Inoxstahl im Wanneninneren beschädigen könnten. Eventuelle Rostpartikel können von nicht rostfreiem Geschirr, von beschädigten Körben oder von Wasserleitungen kommen, die nicht rostfrei sind. Zur internen Reinigung der Maschine benutzen Sie bitte eine Bürste oder einen weichen Lappen. Zur Reinigung der Maschine von Innen keine angreifenden Reinigungsmittel benutzen. DIE MASCHINE DARF NIE MIT WASSERSTRAHL GEREINIGT WERDEN Bevor man den Produktionszyklus nach Wartungsarbeiten oder Reparaturarbeiten wieder aufnimmt, sich vergewissern, dass alle Abteilungen und Schutzabdeckungen korrekt installiert worden sind. 33 EINEM SPÜLMITTEL und KLARSPÜLER Achtung. Während des Gebrauchs von chemischen Substanzen wird der empfohlen entsprechende Kleidung zu tragen, wie Handschuhe oder Schutzbrille. Die richtige Wahl des Reinigungsmittels ist Voraussetzung, um optimale hygienische Ergebnisse zu erreichen. Weiter ist es notwendig weitere Faktoren in Betracht zu ziehen. Es ist auf alle Fälle notwendig nicht schaumbildende Produkte stark alkalisch und Chloraktiv speziell für Industriegeschirrspülmaschinen zu benutzen, die von bekannten Firmen hergestellt werden. Als Information nennen wir hier einige: Ecolab-Soilax; Henkel; Lever; Diversey; Relativ. Klarspülmittel Um ein perfektes Abspülen und ein schnelles Trocknen zu gewährleisten und auch Kalkablagerungen auf dem Geschirr zu vermeiden, muss man mit einen Wasseradditiv Tensid (Klarspüler) arbeiten. Der Klarspüler wird automatisch dosiert und das Dosiergerät wird von einem autorisiertem Servicetechniker eingestellt. Die mittlere Konzentration beträgt 0,15 g/l. Der Lieferant des Spülmittels wird Ihnen das entsprechende empfehlen. Die Maschine ist mit einem Klarspülmitteldosierer ausgestattet. Periodisch kontrollieren, dass genügen Produkt sich in den externen Behältern befindet! Spülmittel Für das Spülmittel ist es notwendig, dass die Essensreste und Schmutz allgemein vom Geschirr entfernt werden. Das Spülmittel kann in verschiedenen Arten dosiert werden: - Per Hand, wenn in Pulverform - Automatisch von einem externen Behälter an der Maschine und einem entsprechendem Dosiergerät, entweder in der Maschine oder extern. Das Dosiergerät ist nicht bei allen Maschinen in Serie geliefert. Somit dies bitte bei der Bestellung kontrollieren. Die mittlere Konzentration der Pulverspülmittel muss zirka 1,5÷2,5 g/Liter betragen. Für die Dosierung sich bitte an die Anweisungen bevor die Waschphase beginnt halten. Wenn automatisch, immer darauf achten, dass ausreichend Flüssigkeit in den Behältern ist und die Dosierung von Installationstechniker einstellen lassen. Die mittlere Konzentration der Flüssigspülmittel muss zirka 2÷4 g/Liter betragen. Um am Ende Verkrustungen und Korrosionen zu vermeiden, muss das Spülmittel über dem Wasserspiegel im Bereich so nah wie möglich dem Pumpenansaugfilter eingegeben werden, damit es sich sofort löst und sich nicht am Wannenboden absetzt. Einführung von FLÜSSIGEM WASCHSPÜLMITTEL muss über den Einfüllstutzen auf der hinteren Seite der Waschwanne durchgeführt werden Periodisch kontrollieren, dass genügen Produkt sich in den externen Behältern befindet! ACHTUNG: Die angegebenen Sicherheitsnormen und Dosierungshinweise von chemischen Substanzen beachten. Während des Gebrauchs von chemischen Substanzen wird der empfohlen entsprechende Kleidung zu tragen, wie Handschuhe oder Schutzbrille. Unterschiedliche Reinigungsmittel niemals vermischen. STÖRUNGEN - MÖGLICHE URSACHEN - LÖSUNGEN STÖRUNGEN MÖGLICHE URSACHEN LÖSUNGEN Die Maschine schaltet sich nicht an Der Schalter an der Mauer ist nicht eingeschaltet Der Netzstecker ist nicht reingesteckt Der Wasserhahn ist zu; Diesen einschalten Die Maschine nimmt kein Wasser auf Waschung ausreichend nicht Das Überlaufrohr ist nicht reingesteckt Das Ablaufrohr ist verstopft Falsche Dosierung des Spülmittels Spülmittel nicht geeignet Die Temperatur in der Wann ist zu niedrig Der Waschfilter ist verschmutzt; Spülen ausreichend nicht Die Geschirrspülmaschine pumpt das Wasser nicht ab Das Geschirr trocknet nicht Auf dem Geschirr bleibt ein leichter Film zurück Diesen reinstecken Wasserhahn öffnen Das Überlaufrohr reinstecken Ablaufrohr auswechseln Den Dosierer nach den Herstelleranweisungen einstellen Kein schaumbildendes Spülmittel benutzten und niemals mit kalten Wasser; Das Wasser aufheizen lassen und darauf warten, dass es die ideale Temperatur erreicht hat, bis die Temperaturlampe aufhört zu blinken den Filter gut reinigen; Die Wascharme können nicht frei drehen Die Spüldüsen sind verstopft Kontrollieren ob Behinderungen vorliegen oder das Geschirr korrekt eingesetzt werden muss Die Spüldüsen unter laufendem Wasser mit einer Bürste reinigen; Zu wenig Druck auf der Wasserleitung; mindestens 1 bar 100 kPa; Warten das der Wasserdruck wiederkommt oder die Maschine mit einer Druckpumpe ausrüsten; Das Ablaufrohr ist verstopft Kontrollieren entfernen Der Ablaufpumpenfilter ist verstopft (wenn vorhanden) Es wurde keine Klarspüler benutzt oder in zu kleiner Menge Den Pumpenansaugfilter reinigen Ein leichter Kalkfilm ist sichtbar; das Wasser ist zu hart Im Fall von einem leichten Stärkerückstandsfilm sin die Temperaturen während des manuellen Vorwaschgangs zu hoch und eventuelle Verstopfungen Den Dosierer nach Herstellerhinweisen einstellen Prüfen, dass die Dosierrohre nicht verstopft sind Die Spülmittelansaugfilter in den Behältern reinigen Auch die Leistungswasserzufuhr überprüfen und den eventuell verstopften Filter reinigen Prüfen, ob ein externe oder eingebaute Wasseraufbereitungsanlage vorhanden ist Niemals manuelle Vorwaschgänge mit Temperaturen die höher als 30 °C liegen vornehmen ACHTUNG! FÜR ALLE ANDEREN DEFEKTE SICH AN DAS TECHNISCHE SERVICEPERSONAL WENDEN 35 ENTFERNUNG VON VERKRUSTUNGEN Bei hartem Wasser können sich im Inneren der Maschine und auch manchmal auf dem Geschirr Kalkablagerungen bilden, die aus hygienischen Gründen mit einer Verkrustungsentfernung weggenommen werden müssen. Die Durchführung und die Frequenz dieser Arbeit werden vom Geschirrspüllieferanten vorgeschlagen, der entsprechende Produkte zur Verfügung hat, die meistens auf einer Phosphorsäurebasis liegen. Um am Ende die Maschine nicht zu beschädigen sollte man nicht zu viel Produkt benutzen und bei Beenden die Maschine gründlich Ausspülen. SANIFIKATION Mindestens alle 30 Tage diesen Arbeitsgang durchführen, weil er eine komplette Hygiene der Geschirrspülmaschine garantiert. Zur Durchführung ist es besser sich an den Geschirrspüllieferanten zu wenden, da der die geeigneten Dosen berät; meistens handelt es sich um ein Pulver aus aktiven Chlor (100÷200 ppm). Um am Ende die Maschine nicht zu beschädigen sollte man nicht zu viel Produkt benutzen und bei Beenden die Maschine gründlich Ausspülen. ACHTUNG: Die angegebenen Sicherheitsnormen und Dosierungshinweise von chemischen Substanzen beachten. Während des Gebrauchs von chemischen Substanzen wird der empfohlen entsprechende Kleidung zu tragen, wie Handschuhe oder Schutzbrille. Unterschiedliche Reinigungsmittel niemals vermischen. NÜTZLICHE RATSCHLÄGE ZUR WARTUNG VON INOXSTAHL Nicht rostender Stahl wird so genannt, weil er keine aggressiven Angriffe vom Sauerstoff der Luft bekommt; diese Resistenz kommt durch eine kleine Molekularschicht aus Sauerstoff, der sich auf der Oberfläche bildet und weiter von jeglicher Oxidation schützt. Es gibt jedoch Substanzen, die diese Schicht verändern oder beschädigen können und somit nicht gut wiedermachende Schäden verursachen können, wie z.Bsp. Phänomene der Korrosion. Es ist deshalb notwendig die entsprechenden Reinigungsprodukte mit Sorgfalt zu wählen und die hier aufgeführten Ratschläge zu befolgen als auch die korrekte Wahl des Reinigungsmittels zu treffen: die Hauptregel ist, kein giftiges Produkt zu wählen und die maximale Hygiene zu garantieren. Bevor Sie irgendein Reinigungsmittel verwenden, informieren Sie sich bitte immer bei Ihrem Lieferanten, welches Reinigungsmittel besser angewendet werden kann, das auch keine Korrosionsschäden am Inoxstahl verursacht. Wenn der Inoxstahl anfängt zu korrodieren, ist dies meistens nicht auf den Inoxstahl selbst zurückzuführen, sondern oft auf das nicht richtige Reinigungsmaterial (Reinigungsmittel mit einem hohen Säureanteil auf Chloridbasis) oder durch nicht korrekt durchgeführte Wartung. Unsere Geräte sind aus AISI 304 (Typ 18/10) Inoxstahl bezüglich der Aussenverkleidung, das Gestell und die Rohre zum Waschen und Spülen. TÄGLICHE REINIGUNG Die Maschinenoberflächen müssen sehr gründlich mit einem feuchten Lappen sauber gemacht werden; man kann Wasser und Seife oder normale Reinigungsmittel benutzen, die keine abtragenden Substanzen oder Substanzen auf Chlorbasis enthalten, wie z. Bsp. Natriumhypochlorid (Bleichmittel), Salzsäure, oder andere Substanzen: diese Produkte greifen in kurzer Zeit die Oberflächen an und zerstören den Inoxstahl. Zur Reinigung der Böden unterhalb der Maschinen, nicht die oben aufgeführten Mittel benutzen, da eventuelle Dämpfe oder Tropfen gleiche Schäden am Inoxstahl verursachen können. Zur Reinigung mit einem Lappen nur in Richtung der Satinierung wischen. Danach mit reichlich sauberem Wasser spülen und mit Vorsicht abtrocknen. Niemals einen Wasserstrahl verwenden, um ein Eindringen ins Innere der Maschine zu vermeiden. Flecken und Rost: Die Wasserleitungen, die die Anlage versorgen führen automatisch Rost mit; dies vor allem bei Anlagen neuer Installationen oder bei Öffnung von Wasserhähnen, die für eine längere Zeit nicht benutzt worden sind. Man muss auf alle Fälle vermeiden, dass diese Eisenrückstände über längere Zeit mit dem Inoxstahl in Kontakt kommen, da sich sonst Korrosionsphänomene durch Kontamination bilden. Aus diesem Grund wird empfohlen, dass die Anlagen mit Zinkrohren gebaut werden, man jedoch auf alle Fälle bei jedem Arbeitsbeginn man das Wasser lange laufen lässt, bis es klar aus der Leitung kommt. Um eventuelle Rostflecken, die sich gebildet haben zu entfernen, sollte man entsprechende Produkte benutzen, die Sie bei spezialisierten Herstellern erfragen können, die solche Mittel zum Industriegebrauch herstellen. Nach Anwendung mit reichlich Wasser abspülen und mit einem alkalischen Reinigungsmittel die Stelle zu neutralisieren; normalerweise werden diese Mittel zur Reinigung von Geräten oder entsprechende Mittel für diesen Gebrauch eingesetzt. NIEMALS KRAZENDE SCHWÄMME ZUR REINIGUNG VON INOXSTAHL BENUTZEN 36 NORME PER L’INSTALLATORE Le istruzioni che seguono sono rivolte a personale qualificato, il solo autorizzato ad attuare le verifiche e le eventuali riparazioni. La Ditta declina ogni responsabilità nel caso di interventi effettuati da personale non qualificato e/o utilizzo di ricambi non originali. INSTRUCTIONS POUR L'INSTALLATEUR Les instructions suivantes sont adressées à un personnel qualifié, qui est le seul autorisé à effectuer les vérifications et les réparations éventuelles. Le constructeur décline toute responsabilité en cas d'interventions effectuées par du personnel non qualifié. INSTRUCTIONS FOR THE INSTALLER The following instructions are addressed to a qualified personnel, the only one authorised to carry out checks and repair, if any. The Manufacturer declines any responsibility in the case of interventions made by a non qualified personnel. AUFSTELLUNGSANLEITUNG FÜR DEN INSTALLATEUR Die folgenden Hinweise sind an das Fachpersonal gerichtet; nur das Fachpersonal darf Prüfungen und eventuelle Reparaturen durchführen. Unsere Firma ist von jeglicher Verantwortung befreit, wenn unqualifiziertes Personal Eingriffe vornehmen und/oder keine Originalsatzteile verwenden sollte. 37 INSTALLATION INSTALLATIONSBLATT SCHEMA ALLACCIAMENTI INSTALLATION 050F-ek 650 350 380 260 200 650 S S E 50 L 370 65 82 0 32 0 600 E A L S 35 E Dis.2 A Altezza massima per scarico a muro - Hauteur maximale pour vidange à mur Maximum height for drain to wall - Maximale Bodenhöhe für Wandwasserablauf E Elettrovalvola carico - Electrovanne chargement Water inlet - Wasseranschluß L Linea elettrica - Branchement eléctrique Electric input - Einführungsrohr S Scarico acqua - Evacuation Eau Drain - Ablauf 3/4" G 230 V 50Hz 32 mm - 1"1/4 G ITALIANO Parte seconda - NORME PER L'INSTALLATORE Posizionare la macchina in prossimità degli attacchi. In fase di installazione, effettuare un buon livellamento della macchina al fine di consentire un corretto funzionamento della stessa. La Ditta declina ogni responsabilità per gli eventuali danni derivanti dalla mancata osservanza delle norme sotto citate. Per il corretto posizionamento ed allacciamento della macchina fare riferimento allo schema riportato a pagina 38. COLLEGAMENTO ELETTRICO Area mm² ATTENZIONE: Pericolo di morte dovuto ai componenti sotto tensione! Durante tutte le operazioni elettriche, scollegare la macchina dalla rete e verificare l’assenza di alimentazione. La macchina e i relativi accessori devono essere allacciati in conformità alle norme locali vigenti, da un’azienda specializzata in elettroinstallazioni, autorizzata dalle autorità competenti. Verificare che il voltaggio per cui è predisposta la macchina, e che è riportato sulla targhetta dell'apparecchio, corrisponda a quello di alimentazione. Verificare inoltre che il contatore, la linea di alimentazione e la presa di corrente siano dimensionati per sopportare il carico massimo richiesto. Il collegamento elettrico dovrà essere effettuato installando, a monte della macchina, un interruttore onnipolare con apertura minima dei contatti pari a 3 mm. Detto Interruttore dovrà essere conforme alle norme EN 60204 (VDE 113) ed avere le caratteristiche adeguate all'uso con l'apparecchio. Il fusibile dell'Interruttore generale deve essere di 16 A . Per l'allacciamento alla rete di alimentazione si dovrà usare un cavo di alimentazione del tipo H07RN-F avente una sezione nominale adeguata. Per una corretta scelta della sezione nominale del cavo fare riferimento alla seguente tabella: Assorbimento A 0,75 1 1,5 2,5 <6 6 ÷ 10 10 ÷ 16 16 ÷ 25 La sicurezza elettrica di questa apparecchiatura è assicurata soltanto quando la stessa è collegata come segue. E' necessario collegare la macchina ad un efficace impianto di messa a terra come previsto dalle vigenti norme di sicurezza elettrica. Verificare questo requisito, e in caso di dubbio richiedere un controllo accurato dell'impianto da parte di personale qualificato. L'apparecchiatura deve essere inclusa inoltre in un sistema equipotenziale, la cui efficacia deve essere verificata secondo le norme vigenti. Il collegamento viene effettuato mediante una vite contrassegnata dall'apposita targhetta posta sul retro dell'apparecchiatura. ( ). LA MACCHINA DOVRA' ESSERE COLLEGATA AD UNA EFFICIENTE PRESA DI TERRA Il costruttore declina ogni responsabilità per gli eventuali danni causati dalla mancanza di un'efficiente impianto di messa a terra. E' consigliabile utilizzare solo Addolcitori a "Scambio Ionico" o ad "Osmosi Inversa". I procedimenti basati su campi magnetici o radiazioni elettromagnetiche sono del tutto inutili per l'uso specifico in Lavastoviglie. ALIMENTAZIONE IDRICA Rispettare rigorosamente le Normative Nazionali e Regionali esistenti in materia. L'impianto idrico deve avere le seguenti caratteristiche: CONDOTTO: Provvedere a portare in prossimità della macchina una condotta d'acqua con le suddette caratteristiche, terminante con una saracinesca e con un attacco filettato maschio da 3/4" Gas. Temperatura: 45°-55°C. In caso di alimentazione ad acqua fredda, la capacità produttiva della macchina si riduce proporzionalmente alla temperatura stessa poiché si deve attendere la rimessa a regime. TEMPERATURE DI LAVORO Pressione Dinamica: 2÷4 bar (200÷400 kPa); Acqua di lavaggio 55°÷60°C Acqua di risciacquo 80°÷85°C - per macchine dotate di Addolcitore incorporato: Pressione Dinamica: 3÷4 bar (300÷400 kPa). Temperatura : 10÷12 °C. ATTENZIONE!: NON collegare ad acqua addolcita. n.b. Per un corretto funzionamento del thermocontrol non regolare il termostato durante il funzionamento del ciclo di lavaggio. ATTENZIONE! In caso di pressione dell’acqua di rete superiore ai 4 bar, utilizzare il riduttore di pressione “A” in dotazione inserendolo nell’elettrovalvola come mostrato nel disegno sottostante. SCARICO IDRICO NON MANOMETTERE LA TARATURA DEI TERMOSTATI Raggiungibile dal fronte della macchina aprendo il pannello anteriore (svitare le due viti frontali); Lo scarico deve essere sistemato possibilmente a pavimento ed avere un diametro minimo di 1"1/4 (42 mm), essere munito di sifone ed avere un'adeguata pendenza. Se tale impianto esistesse già, ma fosse posizionato diversamente, è possibile collegare lo scarico tramite il tubo flessibile del diametro interno di 32 mm e il raccordo a gomito in dotazione. Evitare piegamenti o strozzature del tubo che potrebbero impedire o rallentare il flusso dell'acqua. Se inferiore ai valori di targa installare una Pompa aumento pressione. Durezza compresa fra 7,2÷12,5 °f Rispettare rigorosamente le Normative Nazionali o Regionali concernenti gli scarichi idrici. In caso di durezze superiori è necessario l'Addolcitore; in mancanza di ciò si dovrà procedere spesso alle operazioni di disincrostazione ed aumentare la concentrazione di detersivo. 40 Settaggio cicli di rigenerazione Per default la Rigenerazione è programmata ad ogni 3 cicli di lavaggio. E’ tuttavia possibile programmare la Rigenerazione in funzione della durezza dell’acqua. Stabilito il numero di cicli idonei alla durezza dell’acqua del vostro impianto configurare il dip-switch sulla scheda elettronica contenuta nella cassetta quadro comandi. Seguire le istruzioni di seguito riportate e programmare la scheda elettronica. PROGRAMMAZIONE SETTAGGIO RIGENERAZIONE (cod. 0300834) 1- A macchina spenta controllare la posizione dei dip-switch sulla scheda elettronica e memorizzarla; ON 1 2 3 4 OFF 050F-ek-add 2- Impostare poi il dip-switch secondo la tabella seguente in funzione del numero di cicli di lavaggio che si vogliono impostare per avviare la segnalazione dell’operazione di rigenerazione; ON 1 2 3 4 OF F ON Conteggio disabilitato Compte inactif Count-off Nachzahlung nicht Akt iviert 1 2 3 4 OF F ON 1 2 3 4 OF F ON 1 2 3 4 OF F ON 1 2 3 4 OF F ON OF F 1 2 3 4 3 CIC LI CYCLES CYCLES ZYKLUS 6 CIC LI CYCLES CYCLES ZYKLUS 9 CIC LI CYCLES CYCLES ZYKLUS 12 CIC LI CYCLES CYCLES ZYKLUS 15 CIC LI CYCLES CYCLES ZYKLUS ON 1 2 3 4 OF F ON 1 2 3 4 OF F ON 1 2 3 4 OF F ON 1 2 3 4 OF F ON 1 2 3 4 OF F 1 CIC LI CYCLES CYCLES ZYKLUS 4 CIC LI CYCLES CYCLES ZYKLUS 7 CIC LI CYCLES CYCLES ZYKLUS 10 CIC LI CYCLES CYCLES ZYKLUS 13 CIC LI CYCLES CYCLES ZYKLUS ON 1 2 3 4 2 CIC LI CYCLES CYCLES ZYKLUS 1 2 3 4 5 CIC LI CYCLES CYCLES ZYKLUS 1 2 3 4 8 CIC LI CYCLES CYCLES ZYKLUS 1 2 3 4 11 CIC LI CYCLES CYCLES ZYKLUS 1 2 3 4 14 CIC LI CYCLES CYCLES ZYKLUS OF F ON OF F ON OF F ON OF F ON OF F 3- Aprire la porta della macchina; 4- Premere il tasto START; 5- Tenendo sempre premuto il tasto START accendere la macchina agendo sull’interruttore “A” ; 6- Attendere l’accensione del led “E”; 7- Spegnere la macchina agendo sull’interruttore “A”; 8- Riconfigurare i dip-switch secondo la posizione originale di programmazione dei tempi di lavaggio; ON OFF 1 2 3 4 050F-ek-add Disabilitazione-abilitazione SOFT-START (0300834) Per default la macchina è dotata di partenza ciclo con sistema SOFT-START a partenza progressiva della pompa di lavaggio. E’ possibile disabilitare tale funzione seguendo le istruzioni di seguito riportate. 1 - Dare tensione tramite l'interruttore a muro e Chiudere l'interruttore "A"(premere) posto sul pannello comandi. A questo punto si accendono i display dei termometri ed avviene il riempimento della vasca. A riempimento vasca avvenuto si accende la lampada ciclo . 2 - Aprire la porta della macchina; 3 - Spegnere la macchina agendo sull’interruttore “A”; 4 - Premere il tasto Pompa Scarico “F”; 5 - Tenendo sempre premuto il tasto Pompa Scarico “F” accendere la macchina agendo sull’interruttore “A”; 6 - Tenere premuto il tasto “F” per 7 secondi. 7 - Rilasciare il tasto e spegnere la macchina agendo sull’interruttore “A”; Alla successiva riaccensione la macchina sarà impostata sulla nuova funzione. Per abilitare nuovamente la funzione SOFT-START eseguire la stessa procedura. Disabilitazione-abilitazione PARTENZA AUTOMATICA Per default la macchina è dotata di partenza MANUALE con il pulsante ciclo “C”. E’ possibile impostare la partenza Automatica del ciclo alla chiusura dello sportello seguendo le istruzioni sotto riportate. 1 - Dare tensione tramite l'interruttore a muro e Chiudere l'interruttore "A"(premere) posto sul pannello comandi. A questo punto si accendono i display dei termometri ed avviene il riempimento della vasca. A riempimento vasca avvenuto si accende la lampada ciclo . 2 - Aprire la porta della macchina; 3 - Spegnere la macchina agendo sull’interruttore “A”; 4 - Premere il tasto Selezione tempo lavaggio “B”; 5 - Tenendo sempre premuto il tasto “B” accendere la macchina agendo sull’interruttore “A”; 6 - Tenere premuto il tasto “B” per 7 secondi. 7 - Rilasciare il tasto e spegnere la macchina agendo sull’interruttore “A”; Alla successiva riaccensione la macchina sarà impostata sulla nuova funzione. Per abilitare nuovamente la funzione partenza MANUALE eseguire la stessa procedura. SOSTITUZIONE DEL DETERSIVO E LAVAGGIO TUBI DOSATORE DI LAVAGGIO Quando si sostituisce il detersivo, occorre tenere contro del fatto che: - Lasciando la macchina senza detersivo si creano bolle d’aria che provocano cristallizzazioni - Un nuovo detersivo richiede solitamente una nuova impostazione del dosatore. - L’intero sistema composto da contenitore, tubi di dosaggio e dosatore del detersivo deve essere pulito con acqua prima di utilizzare un nuovo detersivo. - Affidare ad un tecnico dell’assistenza autorizzato le operazioni necessarie per ottenere un buon risultato di lavaggio. - Si consiglia di procedere in ogni caso una volta al mese al lavaggio dei tubi di dosaggio e del dosatore con acqua. Se non si rispetta questa indicazione, la garanzia decade e Lamber declina ogni responsabilità sul prodotto. E’ possibile pulire da soli i tubi di dosaggio e il dosatore con dell’acqua. Seguire le istruzioni seguenti: A- B- Estrarre il tubo di aspirazione contenitore del detersivo . dal Inserire il tubo di aspirazione in un nuovo contenitore pieno d’acqua. D – Al termine della fase di autolavaggio inserire il tubo di aspirazione contenitore del detersivo . nel ATTENZIONE: Rispettare le note di sicurezza indicate e i dati di dosaggio per l’impiego di sostanze chimiche. Durante l’uso di sostanza chimiche indossare abbigliamento di sicurezza, guanti e occhiali protettivi. Non mischiare prodotti detergenti diversi. Attenzione ! : Sostituire il tubetto aspirazione “T” della pompa peristaltica ogni 6 mesi! C- Azionare il ciclo di “Autolavaggio” : (vedere le istruzioni a pagina 14). PRIMA INSTALLAZIONE ! Per MACCHINE CON ADDOLCITORE INCORPORATO (serie ADD) (OPTIONAL) In fase di prima installazione riempire d’acqua il contenitore “A” in figura 1, prima di inserire il sale specifico in pastiglioni seguendo le istruzioni seguenti: -1 – Svitare il coperchio del contenitore sale alloggiato all’interno della lavastoviglie. -2 – Versare acqua nel contenitore del sale. -3 – Aggiungere circa 1 kg di sale in pastiglioni, e avvitare il tappo. La macchina è pronta. Seguire le istruzioni riportate sul manuale d’installazione per le operazioni di funzionamento ed uso della vostra lavastoviglie. FRANÇAIS Deuxième partie - INSTRUCTIONS POUR L'INSTALLATEUR Positionner la machine près des attaches. Pendant l'installation, effectuer la mise à niveau de la machine et contrôler à l'aide d'un niveau que la machine soit parfaitement en équilibre. La Maison décline toute responsabilité pour les éventuels dommages dérivants du manque d'observation des normes citées. Pour le positionnement correcte voir le dessin à la page 38. BRANCHEMENT ELECTRIQUE ATTENTION: Danger de mort dû à des éléments sous tension! Pendant toutes les opérations électriques, débrancher la machine du réseau et vérifier l’absence d’alimentation. La machine et ses accessoires doivent être raccordés en conformité avec les réglementations locales, par une entreprise spécialisée dans l’installation électrique autorisée par les autorités compétentes. Avant d'utiliser l'appareil, vérifier que la tension de réseau soit la même que celle qui est indiquée sur la plaque de l'appareil. Le branchement électrique doit être réalisé en interposant, en amont de la machine, un interrupteur onnipolaire à contacts pairs d'une ouverture minimale de 3 mm. Cet interrupteur doit être conforme aux normes EN 60204 (VDE 113). Le fusible de l'interrupteur général doit être de 16 A. Pour le branchement au réseau d'alimentation il faut utiliser un câble d'alimentation du type H07RN-F qui en plus a une section nominale adéquate. Pour un choix correct de la section nominale du câble, conseiller le tableau suivant: Surface mm² 0,75 1 1,5 2,5 Absorption A <6 6 ÷ 10 10 ÷ 16 16 ÷ 25 La sécurité électrique de cet équipement n'est assurée que lorsque l'équipement est raccordé comme suit. Il est nécessaire de connecter l'équipement à une installation de mise à la terre efficace, comme prévu par les règles de sécurité électrique en vigueur. Vérifier cette exigence fondamentale et, en cas de doute, demander un contrôle soigneux de l'installation par du personnel qualifié. En outre, l'équipement doit être installé dans un système équipotentiel, dont l'efficacité doit être vérifiée suivant les règles en vigueur. La connexion à ce système-ci doit être effectuée à travers la vis marquée par l'étiquette placée sur le derrière de l'équipement ( ). LA MACHINE DOIT ETRE BRANCHEE A UNE PRISE DE TERRE QUI FONCTIONNE BIEN Le constructeur décline toute responsabilité pour tout endommagement éventuellement provoqué par l'absence d'une installation efficace de mise à la terre. désincrustation et augmenter la concentration de détersif. Il est conseillé d'utiliser seulement des adoucisseurs à "échange ionique" à "Osmose inverse": les procédés basés aux champs électriques ou aux radiations électromagnétiques sont tout à fait inutiles pour l'usage en lave-vaisselle. BRANCHEMENT HYDRAULIQUE Respecter rigoureusement les normes Nationales et Régionales concernantes la matière. L'installation doit avoir les caractéristiques suivantes: CONDUIT: Disposer près de la machine un robinet d'arrêt d'eau avec filetage taraudé de 3/4" Gas. La machine est dotée d'un tuyau flexible et d'un filtre pour le branchement au réseau hydraulique. Température : 55°C En cas d'alimentation à eau froide la capacité productive de la machine se réduit proportionnellement à la température même, puisqu'il faut attendre la remise au régime. Pression Dynamique (200÷400 kPa), TEMPERATURES DE TRAVAIL 2÷4 bar - pour machine dotée d’Adoucisseur incorporé: - Pression Dynamique: 3 ÷ 4 bar (300 ÷ 400 kPa) Température : 10÷12 °C. ATTENTION!: NE pas raccorder à l’eau adoucie. Eau de lavage 55°÷60°C Eau de rinçage 80°÷85°C NE PAS VIOLER LE TARAGE DES THERMOSTATS n.b. Pour un correct fonctionnement du dispositif “Thermocontrôle ne pas violer le tarage des thermostats pendant le fonctionnement du cycle de lavage ! ATTENTION! Si la pression d’eau est supérieur au 4 Bar, utiliser le reducteur de pression “A” en dotation a mettre dans l’electrovanne d’entrée selon le dessin. VIDANGE On peut l'atteindre par la façade de la machine en enlevant le panneau antérieur. Le Vidange doit être disposé si possible au sol et avoir un diamètre de 1"¼ (42 mm) au minimum, muni d'un siphon et avoir une inclinaison adéquate. S'il y a déjà une telle installation, mais autrement disposée, il est possible de brancher le vidange par le tuyau flexible de 32 mm de diamètre et le coude en dotation. S'assurer qu'il n'y ait pas d'étranglements le long de celui-ci. Si elle est inférieure à celle indiquée sur la plaque de l’appareil, il faut installer une pompe augmentation pression. Respecter rigoureusement les normes Nationales et Régionales concernantes la matière. Duréte : de 7,2 à 12,5 °f . Si les valeurs de dureté sont supérieures à celles citées il est à conseiller d'utiliser un adoucisseur d'eau; à défaut de celui-ci il faudra souvent procéder aux opérations de 46 Programmation cycles de régénération D’usine la régéneration est prevue tous les 3 cycles de lavage. Il est toutefois possible de programmer la Régénération en fonction de la dureté de l’eau. Après avoir établi la quantité des cycles appropriés à la dureté de l’eau de votre installation, configurer le dip-switch sur la carte éléctronique qui se trouve dans la boîte du panneau de contrôle. Suivre les instructions suivantes et programmer la carte éléctronique. PROGRAMMATION REGLAGE REGENERATION (cod. 0300834) 1 - Avec la machine arrêtée, contrôler la position des dip-switch sur la fiche électronique et la mémoriser; ON 1 2 3 4 OFF 050F-ek-add 2 - Régler ensuite le dip-switch selon le tableau suivant en fonction du numéro des cycles de lavage désirés pour entamer la signalation de l’opération de régénération; ON 1 2 3 4 OF F ON 1 2 3 4 OF F ON 1 2 3 4 OF F ON 1 2 3 4 OF F ON 1 2 3 4 OF F ON OF F 1 2 3 4 Conteggio disabilitato Compte inactif Count-off Nachzahlung nicht Akt iviert 3 CIC LI CYCLES CYCLES ZYKLUS 6 CIC LI CYCLES CYCLES ZYKLUS 9 CIC LI CYCLES CYCLES ZYKLUS 12 CIC LI CYCLES CYCLES ZYKLUS 15 CIC LI CYCLES CYCLES ZYKLUS 1 2 3 4 ON 1 OF F 1 2 3 4 ON OF F 1 2 3 4 ON OF F 1 2 3 4 ON OF F 1 2 3 4 ON OF F CIC LI CYCLES CYCLES ZYKLUS 4 CIC LI CYCLES CYCLES ZYKLUS 7 CIC LI CYCLES CYCLES ZYKLUS 10 CIC LI CYCLES CYCLES ZYKLUS 13 CIC LI CYCLES CYCLES ZYKLUS ON 1 2 3 4 2 CIC LI CYCLES CYCLES ZYKLUS 1 2 3 4 5 CIC LI CYCLES CYCLES ZYKLUS 1 2 3 4 8 CIC LI CYCLES CYCLES ZYKLUS 1 2 3 4 11 CIC LI CYCLES CYCLES ZYKLUS 1 2 3 4 14 CIC LI CYCLES CYCLES ZYKLUS OF F ON OF F ON OF F ON OF F ON OF F 3 - Ouvrir la porte de la machine; 4 - Presser le bouton START; 5 - En tenant appuyé le bouton START, démarrer la machine en utilisant l’interrupteur “A”; 6 - Attendre que la lampe “E” s’allume; 7 - Arrêter la machine en utilisant l’interrupteur “A”; 8 - Configurer à nouveau les dip-switch selon la position initiale de programmation des temps de lavage; ON OFF 1 2 3 4 050F-ek-add Désactivation-activation du SOFT START (démarrage progressif) (0300834) La machine est équipée d’usine du démarrage cycle avec système SOFT START à démarrage progressif de la pompe de lavage. Il est possible de désactiver cette fonction en procédant selon les instructions suivantes. 1. Donner tension à la machine par l’interrupteur à mur et presser l’interrupteur « A » qui se trouve sur le panneau des contrôles. En ce moment les afficheurs des thermomètres s’allument et le remplissage cuve commence. Quand le remplissage cuve est terminé, la lampe du cycle s’allume ; 2. Ouvrir la porte de la machine; 3. Eteindre le lave-vaisselle en pressant l’interrupteur « A » ; 4. Presser le bouton Pompe de Vidange « F » ; 5. Toujours en pressant le bouton Pompe de Vidange « F », mettre en marche la machine par l’interrupteur « A » ; 6. Continuer à presser le bouton « F » pour 7 secondes ; 7. Relâcher le bouton et éteindre le lave-vaisselle en pressant l’interrupteur « A ». Pour activer de nouveau la fonction SOFT START suivre la même procédure. Désactivation-activation du DÉMARRAGE AUTOMATIQUE La machine est prévue d’usine avec le démarrage MANUEL par le bouton cycle « C ». Il est possible de activer le démarrage AUTOMATIQUE du cycle au moment de la fermeture de la porte en procédant selon les instructions suivantes. 1. Donner tension à la machine par l’interrupteur à mur et presser l’interrupteur « A » qui se trouve sur le panneau des contrôles. En ce moment les afficheurs des thermomètres s’allument et le remplissage cuve commence. Quand le remplissage cuve est terminé, la lampe du cycle s’allume ; 2. Ouvrir la porte de la machine; 3. Eteindre le lave-vaisselle en pressant l’interrupteur « A » ; 4. Presser le bouton qui sélectionne le temps de lavage « B » ; 5. Toujours en pressant le bouton « B », mettre en marche la machine par l’interrupteur « A » ; 6. Continuer à presser le bouton « B » pour 7 secondes ; 7. Relâcher le bouton et éteindre le lave-vaisselle en pressant l’interrupteur « A ». Pour activer de nouveau le démarrage MANUEL suivre la même procédure. SUBSTITUTION DU PRODUIT LESSIVIEL ET NETTOYAGE DES TUYAUX DU DOSEUR DE LAVAGE Lors de la substitution du liquide lessiviel nous vous recommandons de suivre les consignes suivantes : - En laissant la machine sans produit lessiviel des bulles d’air se forment et produisent des cristallisations. - Á chaque emploi d’un nouveau produit lessiviel, il est nécessaire de procéder au réglage du doseur - Un nettoyage soigné avec de l’eau de l’ensemble du système composé d’un bac, de tuyaux de dosage et du doseur de produit lessiviel doit être effectué avant toute utilisation de nouveau liquide lessiviel. - Confier les opérations nécessaires à l’obtention d’un résultat d’un lavage optimal au technicien du service d’assistance technique autorisé. - La fréquence avec laquelle, nous vous conseillons de procéder au lavage avec de l’eau des tuyaux de dosage et du doseur est une fois par mois. Les conditions de garantie ne s’appliquent pas en cas de non respect des instructions telles que décrites ci-dessus. Lamber décline toute responsabilité sur le produit dans le cas où vous ne vous conformeriez pas à celles-ci. Il est possibile de nettoyer vous-même les tuyaux de dosage et le doseur avec de l’eau. Veuillez suivre les instructions ci-après: A- B- Extraire le tuyau d’aspiration du bac contenant le liquide lessiviel . Immerger le tuyau d’aspiration dans un nouveau récipient plein d’eau. D – Une fois la phase d’auto-lavage terminée, connecter le tuyau d’aspiration au bac contenant le produit lessiviel . ATTENTION: Suivre les consignes de sécurité ainsi que les indications de dosage concernant l’emploi de produits chimiques. Porter l’équipement de protection individuelle, gants et lunettes de protection pendant le maniement de substances chimiques. Ne pas mélanger des produits détergents différents. Attention ! : Remplacer chaque 6 mois le tube d’aspiration “T” des pompes péristaltiques ! C - Actionner le cycle d’ “Autolavage” (voir paragraphe spécifique page 20) Première installation Machines avec adoucisseur automatique incorporé (série “add”) OPTION Lors d’une première installation, remplir d’eau le bac à sel “A” (voir la figure 1) ,avant de mettre le sel en pastilles spécifique en respectant les instructions suivantes : -1 – Dèvisser le bouchon du bac à sel qui se trouve à l’interieur de la lave-vaisselle. -2 – Verser l’eau dans le bac à sel. -3 – Ajouter environ 1 kg de sel en pastilles et visser le bouchon. La machine est prête. Suivre les instructions qui vous trouvez dans les instructions d’emploi pour les opérations de fonctionnement et emploi de votre lavevaisselle. ENGLISH Second Section - FOR THE INSTALLER During installation carry out a good machine levelling, which is a prerequisite for a correct operation thereof. The Manufacturer cannot assume any responsability for any damage to persons or property deriving from the non-observance of the above specified norms. For a correct installation see the drawing on page 38. ELECTRICAL CONNECTION WARNING:: Danger to life due to live components! During all electric operation, disconnect the machine from the network and verify the absence of power. The machine and its accessories must be connected in accordance with local regulations, by a Company specialized in electrical installations and authorized by competent authorities. Before connecting the machine, make sure the voltage outlet of the mains is the same as the voltage specified on the data plate of the machine. A main switch must be installed between the mains and the machine. This safety measure also requires that the minimum distance between the switch contacts is at least 3 mm and the disconnection on all poles according to EN 60204 (VDE 113). Fuses on the main switch must be 16 A. The mains must be wired to be able to handle the current drawn by the machine.The system must also be provided with a proper ground lead in accordance with the existings norms. The electric cable must be of the following type: H07RN-F. For the right choice of the cross section area refer to the following table: Cross Section area mm² 0,75 1 1,5 2,5 Total loading A <6 6 ÷ 10 10 ÷ 16 16 ÷ 25 The electrical safety of this equipment is only assured if it is connected as follows. It is necessary to connect the equipment to an effective ground installation, as specified by the electrical safety regulations in force. Check that this basic requirement is complied with and, in case of doubt, ask for a careful check of the installation by a qualified personal. In addition, the equipment shall be part of an equipotential system, the effectiveness of which should be checked according to the regulations in force. The connection should be made at the screw marked by the respective label located on the equipment back side ( ). THE MACHINE SHALL BE CONNECTED WITH AN EFFECTIVE GROUND CLAMP. The manufacturer declines any responsibility for any damages caused by lack of an effective ground installation. WATER CONNECTIONS WORKS TEMPERATURES Carefully comply with any national or regional regulations in force. Water temperature 55°÷60°C Rinse temperature 80°÷85°C Water installation must have the following characteristics: n.b.: To help a correct working of the thermocontrol system, do NOT adjust the thermostat during the washing cycle. Temperature: 55°C DO NOT TAMPER WITH THE THERMOSTAT CALIBRATION Dynamic Pressure : - 2 ÷ 4 bar (200÷400 kPa); WATER DRAIN -for machines with incorporated Watersoftener: Dynamic Pressure: 3 ÷ 4 bar (300 ÷ 400 kPa). Temperature: 10÷12 °C. ATTENTION!: do NOT connect to softened water. According to the dimensions of the drawing; water drain and feeding pipe should have the same diameter as the water inlet of the machine. It must be furnished with a siphon and have a right slope. WARNING! If the water pressure is higher than 4 bar, fit the pressure reducer “A” supplied into the solenoid valve as shown in the drawing. The machine is provided with a flexible pipe for the connection with the water-work. Make sure there are no throttlings along the pipe. Carefully comply with any national or regional regulations in force. If the dynamic pressure is lower than specified on the data plate of the machine, it is advisable to install a Booster Pump. Hardness: between 7,2 and 12,5 °French. If the hardness values are higher than those mentioned above, it is advisable to install a water-softener. 52 Setting of regeneration cycles By default the regeneration is planned every 3 washing cycles. However, it is possible to plan the Regeneration on the basis of water hardness. When the number of cycles suitable for the water hardness of your system has been established, it is possibile to configure the dip-switch on the electronic card placed in the control box. Follow the instructions to programme the electronic board. REGENERATION SETTING PROGRAMMING (cod. 0300834) 1 - With the machine stopped, check the position of the dip-switches on the electronic board and memorise it; ON 1 2 3 4 OFF 050F-ek-add 2 - Then set the dip-switch in accordance with the following table, according to the number of washing cycles you wish to set to start the regeneration operation signaling; ON 1 2 3 4 OF F ON 1 2 3 4 OF F ON 1 2 3 4 OF F ON 1 2 3 4 OF F ON 1 2 3 4 OF F ON OF F 1 2 3 4 Conteggio disabilitato Compte inactif Count-off Nachzahlung nicht Akt iviert 3 CIC LI CYCLES CYCLES ZYKLUS 6 CIC LI CYCLES CYCLES ZYKLUS 9 CIC LI CYCLES CYCLES ZYKLUS 12 CIC LI CYCLES CYCLES ZYKLUS 15 CIC LI CYCLES CYCLES ZYKLUS ON 1 2 3 4 OF F ON 1 2 3 4 OF F ON 1 2 3 4 OF F ON 1 2 3 4 OF F ON 1 2 3 4 OF F 1 CIC LI CYCLES CYCLES ZYKLUS 4 CIC LI CYCLES CYCLES ZYKLUS 7 CIC LI CYCLES CYCLES ZYKLUS 10 CIC LI CYCLES CYCLES ZYKLUS 13 CIC LI CYCLES CYCLES ZYKLUS ON 1 2 3 4 2 CIC LI CYCLES CYCLES ZYKLUS 1 2 3 4 5 CIC LI CYCLES CYCLES ZYKLUS 1 2 3 4 8 CIC LI CYCLES CYCLES ZYKLUS 1 2 3 4 11 CIC LI CYCLES CYCLES ZYKLUS 1 2 3 4 14 CIC LI CYCLES CYCLES ZYKLUS OF F ON OF F ON OF F ON OF F ON OF F 3 - Open the door of the machine; 4 - Press the START button; 5 - Keep the START button pressed and turn the machine ON by using the “A” switch; 6 - Wait for the lighting of the “E” lamp; 7 - Turn the machine OFF by using the “A” switch; 8 - Reset the dip-switches according to the original position of the washing period programming; ON OFF 1 2 3 4 050F-ek-add How to disable-enable the SOFT-START (0300834) By default the machine is provided with SOFT START system with gradual start of the wash pump. It’s possible to disable this function by following the instructions below. 1. Turn on the machine by wall switch and press switch ‘A’ that you can find on the control panel. At this moment the thermometers’ displays light up and the tank fills up. When the tank is full, the cycle lamp lights up, 2. Open the door of the machine, 3. Turn the machine off by pressing pushbutton ‘A’, 4. Press the pushbutton of the Drain Pump ‘F’, 5. Always keeping pressed the Drain Pump pushbutton ‘F’, turn the machine on by pressing switch ‘A’, 6. Keep the pushbutton ‘F’ pressed for 7 seconds, 7. Release the pushbutton and turn the machine off by pressing switch ‘A’. To enable again the SOFT-START function, follow the same steps. How to disable-enable the AUTOMATIC START By default the machine is provided with MANUAL start by cycle pushbutton ‘C’. It’s possible to set (enable) the AUTOMATIC start of the cycle at the door closing by following the instructions below: 1. Turn on the machine by wall switch and press switch ‘A’ that you can find on the control panel. At this moment the thermometers’ displays light up and the tank fills up. When the tank is full, the cycle lamp lights up, 2. Open the door of the machine, 3. Turn the machine off by pressing pushbutton ‘A’, 4. Press the Wash time selection pushbutton ‘B’, 5. Always keeping pressed the pushbutton ‘B’, turn the machine on by pressing switch ‘A’, 6. Keep the pushbutton ‘B’ pressed for 7 seconds, 7. Release the pushbutton and turn the machine off by pressing switch ‘A’. To enable again the MANUAL start function, follow the same steps. DETERGENT REPLACEMENT AND CLEANING OF THE DETERGENT PUMP HOSES Guidelines to be followed when replacing detergent : - If you leave the machine without detergent, crystallization arises due to the formation of air bubbles - Set up again detergent pump hose anytime you use a new detergent - The whole system consists of a container, dosage hoses and detergent pump hoses and must be cleaned before using a new detergent. - Call on your authorized technical assistance to fulfil the necessary operations to obtain a good cleaning result. - You are recommended to proceed with the cleaning of the dosage hoses and the detergent pump with water once a month. Failure to comply with these guidelines will render this guarantee invalid. Lamber disclaims any liability for consequential damage on the product. You can clean yourself the dosage hoses and the detergent pump with water. Guidelines: A- Disconnect the suction hose from the detergent can. B- Connect the suction hose to a new water recipient. D – Once self-cleaning is finished, connect the suction hose to the detergent can. WARNING: Respect security and chemical dosage guidelines. When using chemical products you must wear personnal protection equipment, gloves and protection glasses. Do not mix different detergents together. Attention ! Replace every 6 months the peristaltic pumps suction pipe ! C- Switch the Self-cleaning cycle on (see paragraph page 26) FIRST INSTALLATION ! Machines with incorporated and automatic water-softener (series “add”). OPTION In case of first installation, fill with water the salt jar “A” (picture 1) , before putting the specific salt tablets in it, according to the following instructions : -1 – Unscrew the plug of salt jar that is inside the dishwashers. . -2 – Pour water in the salt jar. -3 – Put nearly 1 kg salt tablets in it and screw the plug. The machine is ready. Follow the instructions of the installation manual for the operations of functioning and use of your dishwasher. DEUTSCH Teil 2 - FÜR DEN INSTALLATEUR Die Maschine in der Nähe der Anschlüsse aufstellen. Während der Installation die Maschine gut ausrichten, um die gute Funktion der Maschine zu gewährleisten. Unsere Firma ist von jeglicher Verantwortung für eventuelle Schäden befreit, die auf Nichtbeachtung nachstehend aufgeführter Normen zurückzuführen sind. Zum korrekten Aufstellen und Anschluß der Maschine, sich an das Schema auf Seite 30 halten. ELEKTRISCHER ANSCHLUß DAS GERÄT MUß ORDNUNGSGEMÄß GEERDET WERDEN. ACHTUNG: Todesgefahr aufgrund von Komponenten die unter Spannung stehen! Während elektrischer Arbeiten, die Maschine vom Stromnetz trennen und prüfen das kein Strom mehr in der Maschine ist. Die Maschine und die relativen Zubehörteile müssen nach den Vorort gültigen Normen konform sein; außerdem muss die Maschine von einer autorisierten Elektroinstallationsfirma installiert werden. " DAS GERÄT IST IN EIN POTENTIONALAUSGLEICHSSYSTEM EINZUBEZIEHEN. DER ANSCHLUßBOLZEN BEFINDET SICH AUF DER GERÄTERÜCKSEITE. DIE WIRKSAMKEIT DES POTENTIONALAUSGLEICHES MUß, WIE IN VDE 0190 ANGEGEBEN, GEPRÜFT WERDEN ". Prüfen, daß die auf dem Typenschild angegebene Maschinenspannung dem der Netzversorgung entspricht. Die elektrische Sicherheit der Maschine ist nur gewährleistet, wenn sie wie folgt angeschlossen wird. Außerdem prüfen, daß der Schutz, die Netzversorgung und der Stecker richtig bemessen sind, um die geforderte Maximallast zu tragen. Es ist notwendig, die Maschine an ein funktionierendes Erdungsnetz, wie von den gültigen elektrischen Sicherheitsnormen vorgesehen, anzuschließen. Diese Eigenschaft prüfen, und im Zweifelsfall eine Netzüberprüfung von qualifiziertem Personal durchführen lassen. Dem Gerät muß bauseitig ein allpoliger Schalter mit mindestens 3 mm Kontaktöffnungsweite vorgeschaltet werden. Die Absicherung des Gerätes muß 16 A betragen. Die Anschlußleitung muß mindestens vom Typ H07RN-F sein und der Nennquerschnitt muß der Tabelle entsprechen: Querschnitt mm² 0,75 1 1,5 2,5 Nennstrom A <6 6 ÷ 10 10 ÷ 16 16 ÷ 25 Außerdem muß die Maschine in ein Äquipotenzialsystem eingeschlossen sein, dessen Funktion nach den gültigen Normen geprüft werden muß. Die Verbindung wird über eine Schraube vorgenommen, die durch ein Schild an der Maschinenrückseite gekennzeichnet ist ( ). DIE MASCHINE MUSS AN EINEN FUNKTIONIERENDEN ERDSTECKER ANGESCHLOSSEN SEIN Der Hersteller ist von jeglicher Verantwortung für eventuelle Schäden befreit, die auf das Fehlen eines Erdungsnetzes zurückzuführen sind. WASSERVERSORGUNG ARBEITSTEMPERATUREN Hier müssen die jeweiligen Vorschriften der nationalen und regionalen Länder beachtet werden. Wassertemperatur 55°÷60°C Temperatur 55°C Wenn die Maschine an Kaltwasser angeschlossen wird, verlängert sich der Spülvorgang. n.b.: Für eine richtige Arbeitsweise des Thermocontrols, den Thermostat während des Betriebs des Hauptwasch Zyklus NICHT regulieren! Der Wasserdruck sollte zwischen 2 und 4 bar (200÷400 kPa) eingestellt werden, um einen störungsfreien Ablauf zu gewährleisten. DIE EINSTELLUNG DER THERMOSTATE DARF AUF KEINEN FALL VERÄNDERT WERDEN Spültemperatur 80°÷85°C WASSERABLAUF Für Maschinen mit eingebautem Enthhärter: Wasserdruck:3 ÷ 4 bar (300 ÷ 400 kPa). Temperatur 10÷12 °C. ACHTUNG!: KEIN enthärtetes Wasser. Anschluss Der Wasserabfluß ist über die Maschinenfrontseite zugänglich, indem man die Vorderplatte öffnet (beide Frontalschrauben abschrauben); an Nach Entfernen der vorderen unteren Abdeckung kann der Wasserablaufschlauch (min 32 mm Innendurchmesser) befestigt und durch den unteren Teil der dafür vorgesehenen Öffnung in der Rückwand herausgeführt werden. ACHTUNG! Sollte der bauseitige wasserdruck höher als 4 Bar sein benutzen Sie bitte das ausgerüstete Druckminderventil “A” und führen Sie das in den vorgeschenen wasseranschluss-stutzen ein, um den Druck zu reduzieren, wie gezeichnet. Knicken oder Quetschen des Schlauches vermeiden, da dies den Wasserfluß verhindern oder verlangsamen könnte. Alle nationalen und regionalen Abwassernormen absolut beachten. Wenn der Druck niedriger als wie aufs Schild empfehlt ist, raten wir Ihnen eine Überdruckpumpe einzubauen. Wasserhärte zwischen 7,2 und 12,5 °f Die Maschine ist mit dem mitgelieferten Schlauch 3/4" an die Wasserversorgung anzuschließen. Beim Stillstand des Gerätes sollte die Wasserzufuhr durch einen Hahn gesperrt werden. 58 Zyklus Regenerierung Programmierung Die Regenerierung wurde schon von Fabrikant auf jeder 3 Waschzyklus programmiert. Troztdem es ist möglich die Regenerierung nach des Wasserhärte programmieren können. Wenn Sie des geignetes Zyklus entschieden hatten nach Ihr Anlage Wasserhärtung, Programmieren Sie den dip-switch in die Elektronische Karte der im Steuertafel eingebaut ist. Um die Elektronische Karte Programmieren können, folgen Sie folgenden Anweisungen an: PROGRAMMIERUNG DER REGENERIERUNG (cod. 0300834) 1 - Wenn die Maschine ausgeschaltet ist, Kontrollieren Sie die position der dip-switch in Elektronische Tafeln und speichern Sie die . ON 1 2 3 4 OFF 050F-ek-add 2 - Programmieren Sie den dip-swicht nach folgende Tafeln angaben und nach Waschungzyklus Anzahl die Sie Programmieren möchten damit das Signal des Aufbereitung bearbeitung starten kann. ON 1 2 3 4 OF F ON 1 2 3 4 OF F ON 1 2 3 4 OF F ON 1 2 3 4 OF F ON 1 2 3 4 OF F ON 1 2 3 4 OF F Conteggio disabilitato Compte inactif Count-off Nachzahlung nicht Akt iviert 3 CIC LI CYCLES CYCLES ZYKLUS 6 CIC LI CYCLES CYCLES ZYKLUS 9 CIC LI CYCLES CYCLES ZYKLUS 12 CIC LI CYCLES CYCLES ZYKLUS 15 CIC LI CYCLES CYCLES ZYKLUS ON 1 2 3 4 OF F ON 1 2 3 4 OF F ON 1 2 3 4 OF F ON 1 2 3 4 OF F ON 1 2 3 4 OF F 1 CIC LI CYCLES CYCLES ZYKLUS 4 CIC LI CYCLES CYCLES ZYKLUS 7 CIC LI CYCLES CYCLES ZYKLUS 10 CIC LI CYCLES CYCLES ZYKLUS 13 CIC LI CYCLES CYCLES ZYKLUS ON 1 2 3 4 2 CIC LI CYCLES CYCLES ZYKLUS 1 2 3 4 5 CIC LI CYCLES CYCLES ZYKLUS 1 2 3 4 8 CIC LI CYCLES CYCLES ZYKLUS 1 2 3 4 11 CIC LI CYCLES CYCLES ZYKLUS 1 2 3 4 14 CIC LI CYCLES CYCLES ZYKLUS OF F ON OF F ON OF F ON OF F ON OF F 3 - Maschine Tür aufmachen 4 - Taste START drücken 5 - Whären Sie Taste START fest drücken lassen, Maschine anschalten mit Schalter “A“. 6 - Warten Sie auf die anschaltung von led “E” 7 - Maschine ausschalten mit schalter “A” 8 - Die dip-switch wieder Programmieren nach original Position programmierung von Waschungzeit. O5OF-add-PS F85-add-ps ON 1 2 3 4 SOFT-START aktivieren-inaktivieren Standardmäßig ist die Geschirrspülmaschine mit Programmstart (Progressivstart der Waschpumpe) ausgestattet. Um die Soft-Start zu inaktivieren, folgen Sie die folgenden Anweisungen. (0300834) durch SOFT-START-System 1. Stromzufuhr durch Einschalten des Wandschalters einleiten und Hauptschalter “A“ der Schalttafel drücken. Jetzt erleuchten die Thermometerdisplays, läuft das Wasser ein und wird der Tank gefüllt. Wenn der Tank gefüllt ist, erleuchtet die Programmkontrolllampe. 2. Maschine Tür aufmachen 3. Den Geschirrspüler durch Hauptschalter „A“ abschalten , 4. Die Ablaufpumpetaste „F“ drücken, 5. Während Sie Ablaufpumpetaste „F“ gedrückt halten, den Geschirrspüler durch Hauptschalter „A“ einschalten, 6. Die Knopf „F“ für 7 Sekunden gedrückt halten, 7. Die Knopf loslassen und den Geschirrspüler durch Hauptschalter „A“ abschalten , Um die Soft-Start von neuem zu aktivieren, folgen Sie das gleiche Verfahren. AUTOMATISCHER START aktivieren-inaktivieren Standardmäßig ist die Geschirrspülmaschine mit Handstart durch Drückknopf „C“ ausgestattet. Um den automatischen Start des Waschungsprogramms bei dem Türschließen zu aktivieren, folgen Sie die folgenden Anweisungen. 1. Stromzufuhr durch Einschalten des Wandschalters einleiten und Hauptschalter “A“ der Schalttafel drücken. Jetzt erleuchten die Thermometerdisplays, läuft das Wasser ein und wird der Tank gefüllt. Wenn der Tank gefüllt ist, erleuchtet die Programmkontrolllampe. 2. Maschine Tür aufmachen 3. Den Geschirrspüler durch Hauptschalter „A“ abschalten , 4. Den Programmwahlschalter „B“ drücken, 5. Während Sie Programmwahlschalter „B“ gedrückt halten, den Geschirrspüler durch Hauptschalter „A“ einschalten, 6. Die Knopf „B für 7 Sekunden gedrückt halten, 7. Die Knopf loslassen und den Geschirrspüler durch Hauptschalter „A“ abschalten , Um den Handstart von neuem zu aktivieren, folgen Sie das gleiche Verfahren. AUSTAUSCH DES SPÜLMITTELS DOSIERWASCHSCHLAUCHES UND REINIGUNG DES Wenn man das Spülmittel austausch, muss man auf folgende Sachen achten: - Wenn man die Maschine ohne Spülmittel läßt, bilden sich Luftblasen, die eine Kristallisierung auslösen - Ein neues Spülmittel verlang normalerweise eine neue Einstellung des Dosiergerätes. - Das gesamte System, welches sich aus Behälter, Dosierschläuchen und Dosiergerät zusammensetzt muss vor dem Einsatz eines neuen Spülmittels mit Wasser gereinigt werden. - Einem befigten Techniker die notwendigen Arbeitsgänge anvertrauen, damit ein gutes Wasch- und Spülergebnis erreicht werden kann. - Es wird jedoch in jedem Fall angeraten einmal im Monat die Dosierungsschläuche und das Dosiergerät selbst mit Wasser zu säubern. Wenn man diese Hinweise nicht beachten sollte, verfällt die Garantie und di Fa. Lamber übernimmt keine Produkthaftung. Es ist auch möglich alleine die Dosierungsschläuche und das Dosiergerät mit Wasser zu reinigen. Bitte folgende Hinweise beachten: A- Den Ansaugschlauch aus Spülmittelbehälter herausziehen. B- Den Ansaugschlauch in einen neuen mit Wasser gefüllten Behälter einstecken. dem D – Am Ende der Selbstspülung den Ansaugschlauch in den Spülmittelbehälter einführen. ACHTUNG: Die Sciherheitshinweise und die Dosierungsdaten zum Einsatz von chemischen Substanzen beachten. Während des Umganges mit chemischen Substanzen Sicherheitskleidung, wie Handschuhe und Schutzbrille tragen. Keine unterschiedlichen Lösungsmittelprodukte miteinander vermischen. Attention ! Jefer 6 Monate des Saugrohr Peristaltischepumpe wechseln ! C - Den Zyklus “manuellem Selbstspül” (sehen Paragraph pag.32) von ERSTEN AUFSTELLUNG ! Maschinen mit eingebauten automatischen Wasserentkalker (Serie “add”). OPTION ! In der ersten Installationsphase den Behälter „A“, wie in Figur 1 mit Wasser füllen; bevor man das spezielle Salz in Tablettenform einführt, folgende Hinweise befolgen: -1 – Den Schraubverschluss des Salzbehälters aufschrauben, der sich im Inneren der Spülmaschine befindet. -2 – Wasser in den Salzbehälter füllen. -3 – Zirka 1 kg Salz in Tablettenform einfüllen und den Schraubverschluss wieder aufschrauben. Die Maschine ist jetzt fertig. Befolgen Sie jetzt bitte die Hinweise, wie im Installationshandbuch zum Gebrauch und Funktionsarbeitsgänge Ihrer Spülmaschine angegeben. SCHEMA COLLEGAMENTI CONNECTIONS SCHEME SCHEMA BRANCHEMENTS ANSCHLUßSCHEMA 4 Resistenza BOILER - Résistance SURCHAUFFEUR BOILER Elements - BOILERHEIZUNG 1 2 1 3 2 3 4 Marrone - Marron Braun - Braun Nero - Noir Black - Schwarz Nero - Noir Black - Schwarz Ponticelli - Ponts Staples - Brücke Resistenza VASCA - Résistance CUVE TANK Elements - TANKHEIZUNG Marrone - Marron Brown - Braun Blu - Bleu Blue - Blau Vis de regulation Regelschroef Regulation screw Einstellschraube REGOLAZIONE DOSATORE DI LAVAGGIO REGULATION DOSEUR THE LAVAGE DETERGENT PUMP REGULATION WASCHMITTELDOSIERPUMPE + Cod.0500060 Portata pompa dosatrice Portée pompe doseur de lavage Detergent pump delivery Wassermenge 1 cc/sec=3,6 Lit/h Colle-F92-ek-2005 - Per aumentare la dose di detergente ruotare in senso orario la vite di regolazione. - Tourner dans le sens des aiguilles d'une montre la vis de régulation . - To increase the detergent dose turn CW the regulation screw . - Um die Reinigungsmittelsmenge zu erhöhen, drehen Sie den Schraubenzieher im Uhrzeigersinn. SCHEMA REGOLAZIONI - SCHEMA REGULATION REGULATION SCHEME - EICHUNG Entrata additivo per risciacquo Entrée du produit de rinçage Rinse aid inlet Nachspülmitteldosiergerät Termostati Lavaggio e Risciacquo Thermostat Lavage et rinçage Wash and rinse thermostat Tankthermostat und Boilerthermostat A B A- Termostati Lavaggio e Risciacquo Thermostats Lavage et rinçage Wash and rinse thermostats Tankthermostat und Boilerthermostat GIO UR AG AT AVAGE L ER O AV P U L SH EM CQ T WASCH CI A GE RISINÇAE WA R INS R LEN Ü SP + Termostati Risciacquo Thermostat rinçage Rinse thermostat Boilerthermostat 80÷85 °C Termostati Lavaggio Thermostat Lavage Wash thermostat Tankthermostat 55÷60 °C SCDOSF92ek B- Dosatore risciacquo Doseur de proudit pour rinçage Rinse-aid dispenser Nachspülmitteldosiergerät Dosatore additivo di risciacquo Doseur de produit pour rinçage Rinse aid dispenser Nachspülmitteldosiergerät - Per aumentare la dose di ADDITIVO ruotare in senso ANTIORARIO la vite di regolazione - Tourner la vis de regulation en sens anti-horaire pour augmenter la dose du produit - To increase the detergent turn Anti-CW the regulation screw - Um die Dosierung zu vergrössern im Gegenuhrzeigersinn drehen + SCHEMA ELECTRIQUE SCHALTSCHEMA SCHEMA ELETTRICO WIRING DIAGRAM 400 V3N (marrone) MT3 (nero) (rosso) (azzurro) (marrone) R (nero) S (nero) T (azzurro) N L N 230 V 2 T Ad1 4 P Fa6 Dos 11 EV1 5 3 CP 6 P MT3 9 CT3 v Fa12 Fa15 Fa20 v 8 v 13 Fa19 Liv 1/alto 14 LV4 21 Fa3 R2 10 CT2 Fc 12 MT1 7 CT1 Fa14 31 32 R1 3 Fa7-Fa8 MT1 30 50Hz 1 Fa11 50Hz EV5 15 Fa10 F-ek-add-SRS--elett-060608 Fa2 Fa1 Ev6 19 16 22 Fa5 IN Fc R1 R2 MT1 MT3 MT4 CP CT1 CT2 CT3 PM Ad Dos EV1 EV5 PS EV6 Lv4 LV1/a-b P Interruttore generale Finecorsa Resistenza boiler Resistenza vasca Contattore resisten za boiler Contattore di sicurezza Contattore finecorsa Pressostato Termostato boiler Termostato vasca Termostato di sicu rezza Pompa lavaggio Filtro an tidisturbo Dosatore di lavaggio Elettrovalvola risciacquo Elettrovalvola depuratore Pompa scarico Elettrovalvola deviatrice/SRS Contatto livello sale Livello SRS Pompa au mento pressione PS Interrupteur général Microinterrupteu r Résistan ce Su rchauffeur Résistan ce Cuve Contacteu r rés. surchauffeur Contacteu r de sureté Contacteu r Microinterrupteur Pressostat Th ermostat Surch au ffeur Th ermostat Cuve Th ermostat de sureté Pompe de lavage Filtre an te-en nui Doseur de produ it lessiviel Electrovanne rincage Electrovanne adou cisseur Pompe de vidange Electrovanne détournan te/SRS Contact niveau se Niveau SRSl Pompe augmentation de pression PM Main switch Limit switch Boiler elements Tank elements Boiler elements contactor Limit Security contactor Switch con tactor Pressure switch Boiler th ermostat Tank thermostat Security th ermostat Electric pump Su ppressor Detergent pump Rinsin g solen oid valve Water-softener valve Drain pu mp Switching valve/SRS Salt contact level SR S Level Booster pump Hauptschalter Endschalter Boilerheizun g Tankheizu ng Schütz fü r Boilerheizun g Schütz fü r Sichereit Schaltrelais Fc Druckwächter Boilerth ermostat Tankthermostat Schützth ermostat Pumpe Entstörfilter Wasch spülmitteldosiergerät Elektrisches Reinigungsventil Wasserentklaker Reinigungsventil Ablaufpumpe Ven tilablenkung ven til/SR S Salz niveau kon takt Kon takt SRS Überdru ckpumpe IN Fc R1 R2 MT1 MT3 MT4 CP CT1 CT2 CT3 PM Ad Dos EV2 T PS EV6 Lv4 LV1/a-b P . . SCHEDA ELETTRONICA FICHE ELECTRONIQUE P.C.BOARD ELEKTRONISCHE STEURUNG FA1 FA2 FA3 FA5 FA6 FA7-8 FA10 FA11 FA12 FA14 FA15 FA19 FA20 filo/fil/wire/draht ITA 16 SCARICO 19 ETV DEVIATRICE/SRS 15 RIGENERA 22 POMPA LAVAGGIO 5 RISCIACQUO 3 FASE 4 NEUTRO 11 PRESSOSTATO 8 THERMOCONTROL 12 MICRO PORTA 14 LIV1/a 13 COMUNE 21 SALE FRA ENG DEU VIDANGE DRAIN PUMP ABLAUFPUMPE ELECTROVANNE DETOURNANTE/SRS SWITCHING VALVE/SRS-BT VENTILABLENKUNG VENTIL/SRS REGENERATION REGENERATIN ENTKALKUNG POMPE LAVAGE WASHING PUMP WASCHPUMPE RINÇAGE RINSING SPÜLUNG PHASE' PHASE PHASE NEUTRE NEUTRAL UNGELADEN NIVEAU PRESSOSTAT PRESSOSTAT LEVEL DRUCKWÄCHTER THERMOCONTROL THERMOCONTROL THERMOCONTROL MICRO PORTE DOOR MICRO-SWITCH ENDSCHALTER LIV1/a LIV1/a LIV1/a COMMUN COMMON COMMON SEL SALT - TABELLA SELEZIONE - TABLEAU SELECTION - SELECTION TABLE - AUSWAHLSTAFEL 1 Standard-SRS/add DIP 2 standard SRS 1 2 3 4 add - TABELLA SELEZIONE TEMPI DI RISCIACQUO - TABLEAU SELECTION TEMPS DE RINÇAGE - RINSE TIME SELECTION TABLE - AUSWAHLSTAFEL FÜR SPÜLUNGSZEIT 3 LED1=ON LED2=ON LED1+2=ON 1 2 3 4 60” 120” 180” 1 2 3 4 120” 180” 240” 1 2 3 4 1 2 3 4 SALZ - TABELLA SELEZIONE TEMPI DI LAVAGGIO - TABLEAU SELECTION TEMPS DE LAVAGE - WASH TIME SELECTION TABLE - AUSWAHLSTAFEL FÜR SPÜLUNGSZEIT DIP 4 1 2 3 4 18” 23” 1 2 3 4 3 REL2 REL3 REL4 ON Cod.0300834 ON 1 2 3 4 Liv2/b AVEC ADOUC ISSEU R MET WATER VERZACH TER WITH WATER -SOFTENER CON D ESCONC ENTRAD OR AB B 12 porta door B 21 Liv1/a (green-blue) Cod.0502000 FA20 FA19 14 13 A FA18 FA17 FA16 FA15 1 2 3 4 FA13 A ON FA14 (red-yellow) sale salt FA12 FA11 FA10 FA9 FA8 FA7 REL5 1 2 3 4 8 11 4 5 FA5 FA4 FA2 FA1 REL1 22 FA6 15 19 FA3 16 COMPOSANTS KOMPONENTEN COMPONENTI COMPONENTS 3 1 2 CP Cd MT1 MT3 Ad1 SCHEDA ELETTRONICA FICHE ELECTRONIQUE P.C.BOARD ELECTRONISCHE STEURUNG Fc IN T CASSETTA QUADRO COMANDO - CONTROL BOARD - BOITE DE CONTROLE - SCHALTTAFEL TASTIERA A MEMBRANA - PANNEAU A TOUCHES SENSITIVES SOFT TOUCH CONTROL PANEL - MEMBRAN-TASTATUR R2 CT3 R1 EV5 EV1 PM CT2 CT1 EV6 Cnp-f92ek-08 BASAMENTO - SOCLE - BASE - UNTERBAU DIMENSIONS l x p x h DEBIT/H DEBIT/H DUREE DU CYCLE DIMENSIONS CASIER NUM.ASSIETTES NUM ASSIETTES POUR CASIER HAUTEUR DU PLAN DE TRAVAIL OUVERTURE DE CHARGEMENT TENSION D'ALIMENTATION ELECTROPOMPE RESISTANCE CUVE RESISTANCE SURCHAUFFEUR PUISSANCE NOMINALE INTENSITE MAXIMALE CAPACITE DE LA CUVE CAPACITE DU SURCHAUFFEUR Ç DOSEUR DE PRODUIT DE RINÇAGE ALIMENTATION EAU DEBIT EAU MOTEUR CONSOMMATION EAU PAR CYCLE CONSOMMATION EAU ORAIRE PRESSION EAU DURETE DE L'EAU L EAU TEMPERATURE EAU RINCAGE RACCORDEMENT EAU EVACUATION EAU POIDS NET POIDS LOURD DIMENSIONS EMBALLAGE NIVEAU DU BRUIT ACCESSOIRES ADOUCISSEUR POMPE DE VIDANGE DOSEUR DE PRODUIT DE LAVAGE DIMENSIONI l x p x h CAPACITA' ORARIA piatti/ora CAPACITA CAPACITA' ORARIA cestelli/ora DURATA CICLO DIMENSIONI CESTELLO NUM.PIATTI NUM PIATTI /CESTELLO ALTEZZA PIANO DI LAVORO LUCE DI CARICO TENSIONE D'ALIMENTAZIONE ELETTROPOMPA RESISTENZA VASCA RESISTENZA BOILER POTENZA NOMINALE INTENSITA' DI CORR.MAX CAPACITA ' VASCA CAPACITA' BOILER DOSATORE RISCIACQUO ALLACCIAMENTO ACQUA PORTATA ACQUA POMPA CONSUMO ACQUA PER CICLO CONSUMO ACQUA PER ORA PRESSIONE ACQUA DUREZZA CONSIGLIATA DELL DELL'ACQUA ACQUA TEMPERATURA ACQUA RISCIACQUO RACCORDO ENTRATA ACQUA RACCORDO SCARICO ACQUA PESO NETTO PESO LORDO DIMENSIONI IMBALLO RUMOROSITA' DOTAZIONI OPTIONAL ADDOLCITORE POMPA DI SCARICO DOSATORE DI LAVAGGIO casiers/H assiettes/H F DONNEES TECHNIQUES I DATI TECNICI MOD. 050F-ek WATER SOFTENER DRAIN PUMP WASH AID DISPENSER OPTIONAL WASH CYCLE BASKET SIZE PLATES PER BASKETS WORK HEIGHT CLEARANCE VOLTAGE ELECTRIC PUMP WASH TANK ELEMENTS RINSE TANK ELEMENTS TOTAL RATING MAX CURRENT INTENSITY TANK CAPACITY BOILER CAPACITY RINSE AID DISPENSER WATER CONNECTION PUMP DELIVERY CYCLE WATER CONSUMPTION HOUR WATER CONSUMPTION WATER PRESSURE WATER HARDNESS RINSING WATER TEMPERATURE WATER INLET WATER OUTLET NET WEIGHT GROSS WEIGHT PACKING DIMENSIONS NOISE WASHING CAPACITY baskets/H WASHING CAPACITY dishes/H DIMENSIONS l x w x h GB SPECIFICATIONS Körbe/Stunde Teller/Stunde ENTHÄRTER ABLAUFPUMPE WASCHMITTELDOSIERANLAGE OPTIONAL PROGRAMMDAUER SEL. KORBAMAßE N°.TELLER N° TELLER PRO KORB ARBEITSOBERFLÄCHENHÖHE DURCHGANGSHÖHE VERSORGUNGSPANNUNG PUMPENMOTOR TANKHEIZUNG BOILERHEIZUNG GESAMTVERBRAUCH MAXIMALE STROMAUFNAHME TANKFÜLLUNG BOILERINHALT NACHSPÜLMITTELDOSIERANLAGE WASSERANSCHLUß UMWALZUNG WASCHPUMPE WASSERVERBRAUCH - ZYKLUS WASSERVERBRAUCH - STUNDE WASSERDRUCK EMPFOHLENE WASSERHÄRTE SPÜLWASSERTEMPERATUR WASSEREINLAUFROHRWEITE WASSERABLAUFROHRWEITE NETTOGEWICHT BRUTTOGEWICHT VERPACKUNGABMESSUNGEN GERÄUSCH STUNDENLEISTUNG STUNDENLEISTUNG ABMESSUNGEN LxTxH D TECHNISCHE DATEN 60/30/20 OPTION 30 OPTION 2÷3÷4 1÷2÷3 50 x 50 12÷18 370 320 230 V1N~50Hz 650 2000 3000 3650 20 18 5 y j si-oui-yes-ja 45 ÷ 55 300 2.60 52 2÷4 5 ÷ 10 80 ÷ 90 3/4" 32 mm - 1"1/4 68 78 640 740 1000 640x740x1000 <56 30/20/15 600x650x820 540/360/270 1080/540/360 050F-ek W °C l./min l l Bar °F F °C "G "G kg kg mm dB(A) MIN. cm Nr. Nr mm mm V W W W W A Lt Lt Nr. Nr. mm