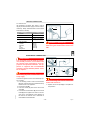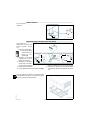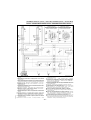
1
CUOCIPASTA
PASTA COOKER
NUDELKOCHER
CUISEUR À PÂTES
COCEDOR DE PASTA
04WCP1EM
MANUALE D’USO E INSTALLAZIONE
USE AND INSTALLATION MANUAL
BEDIEN- UND INSTALLATIONSHANDBUCH
MANUEL D’UTILISATION ET D’INSTALLATION
MANUAL DE USO E INSTALACIÓN
C139612000.fm
Ed. 0
Italiano
IT
English
GB
Deutsch
DE
Français
FR
Español
ES
09/2007
3033721
INDICE
rif. capitoli
pag.
1 INFORMAZIONI GENERALI .............................................. 2
2 INFORMAZIONI TECNICHE.............................................. 3
a
1 PARTE
3 SICUREZZA ....................................................................... 5
4 USO E FUNZIONAMENTO................................................ 6
5 MANUTENZIONI .............................................................. 10
6 GUASTI ............................................................................ 11
7 MOVIMENTAZIONE E INSTALLAZIONE ........................ 11
2a PARTE
8 REGOLAZIONI................................................................. 16
9 SOSTITUZIONE PARTI ................................................... 16
ALLEGATI .................................................................... I÷III
INDICE ANALITICO
A Accensione e spegnimento
apparecchiatura, 7
Accessori a richiesta, 5
Accessori, installazione, 13
Acqua, allacciamento, 15
Allacciamento acqua, 15
Allacciamento elettrico, 15
Apparecchiatura e costruttore,
identificazione, 2
Apparecchiatura, accensione e
spegnimento, 7
Apparecchiatura, collaudo, 16
Apparecchiatura, descrizione
generale, 3
Apparecchiatura, dismissione, 16
Apparecchiatura, inattività prolungata, 9
Apparecchiatura, installazione, 13
Apparecchiatura, pulizia, 10
Apparecchiatura, ripristino, 9
Apparecchiature in batteria,
montaggio, 14
Assistenza, modalità di richiesta, 3
C Collaudo apparecchiatura, 16
Comandi, descrizione, 7
Consigli per l’uso, 9
Costruttore e apparecchiatura,
identificazione, 2
D Dati tecnici, 3
C139612000.fm
Descrizione comandi, 7
Descrizione generale
apparecchiatura, 3
Disimballo e imballo, 12
Dismissione apparecchiatura, 16
Dispositivi di sicurezza, 4
E Elettrico, allacciamento, 15
G Guasti, ricerca, 11
I Identificazione costruttore e
apparecchiatura, 2
Imballo e disimballo, 12
Inattività prolungata
dell’apparecchiatura, 9
Installazione accessori, 13
Installazione apparecchiatura, 13
Installazione e movimentazione,
raccomandazioni per la, 11
L Livellamento, 14
M Manutenzione, raccomandazioni
per la, 10
Modalità di richiesta assistenza, 3
Modalità per le regolazioni, 16
Modalità per le sostituzioni, 16
Montaggio apparecchiature in
batteria, 14
Movimentazione e installazione,
raccomandazioni per la, 11
Movimentazione e sollevamento, 12
N Norme per la sicurezza, 5
P Pulizia apparecchiatura, 10
R Raccomandazioni per il lettore, 2
Raccomandazioni per l’uso, 6
Raccomandazioni per la
manutenzione, 10
Raccomandazioni per la
movimentazione e installazione, 11
Ricerca guasti, 11
Riempimento e svuotamento vasca, 8
Ripristino apparecchiatura, 9
S Scopo del manuale, 2
Segnali di sicurezza e informazione, 4
Sicurezza e informazione, segnali di, 4
Sicurezza, dispositivi di, 4
Sicurezza, norme per la, 5
Sollevamento e movimentazione, 12
Spegnimento e accensione
apparecchiatura, 7
Svuotamento vasca e riempimento, 8
GB
DE
FR
T Trasporto, 12
U Uso, consigli per, 9
Uso, raccomandazioni per, 6
ES
V Ventilazione locale, 13
È vietata la riproduzione, anche parziale, di questo documento senza il consenso del costruttore.
Egli è impegnato in una politica di continuo miglioramento e si riserva il diritto di modificare questa documentazione senza l’obbligo di preavviso purché ciò non costituisca rischi per la sicurezza.
© 2002 - Autori dei testi, illustrazioni ed impaginazione: IDM esperti in comunicazione tecnica - Forlì - I testi possono essere riprodotti, integralmente o parzialmente dal costruttore, purché venga citato l’autore.
-1-
IT
Italiano
INFORMAZIONI GENERALI
1
RACCOMANDAZIONI PER IL LETTORE
2a parte: contiene tutte le informazioni necessarie ai destinatari omogenei, cioè tutti gli operatori
esperti e autorizzati a movimentare, trasportare,
installare, mantenere, riparare e demolire l’apparecchiatura.
Per rintracciare facilmente gli argomenti specifici di
interesse, consultare l’indice analitico posto all’inizio del manuale.
Questo manuale è suddiviso in due parti.
1a parte: contiene tutte le informazioni necessarie ai destinatari eterogenei, cioè gli utilizzatori dell’apparecchiatura.
Mentre gli utilizzatori devono consultare solo la 1a parte, agli operatori esperti è dedicata la 2a parte. Essi
possono leggere anche la 1a parte per avere, se necessario, una visione più completa delle informazioni.
SCOPO DEL MANUALE
Questo manuale, che è parte integrante dell'apparecchiatura, è stato realizzato dal costruttore per
fornire le informazioni necessarie a coloro che sono
autorizzati ad interagire con essa nell'arco della sua
vita prevista.
Oltre ad adottare una buona tecnica di utilizzo,
i destinatari delle informazioni devono leggerle
attentamente ed applicarle in modo rigoroso.
Queste informazioni sono fornite dal costruttore
nella propria lingua originale (italiano) e possono essere tradotte in altre lingue per soddisfare
le esigenze legislative e/o commerciali.
Un po' di tempo dedicato alla lettura di tali informazioni permetterà di evitare rischi alla salute e
alla sicurezza delle persone e danni economici.
Conservare questo manuale per tutta la durata di
ITIT vita dell'apparecchiatura in un luogo noto e facilmente accessibile, per averlo sempre a disposizioGB ne nel momento in cui è necessario consultarlo.
GB
Il costruttore si riserva il diritto di apportare modifiche senza l'obbligo di fornire preventivamente alcuna comunicazione.
Per evidenziare alcune parti di testo di rilevante importanza o per indicare alcune specifiche importanti, sono stati adottati alcuni simboli il cui significato
viene di seguito descritto.
Cautela - Avvertenza
Indica che è necessario adottare comportamenti adeguati per non mettere a rischio la
salute e la sicurezza delle persone e non provocare danni economici.
Importante
Indica informazioni tecniche di particolare
importanza da non trascurare.
IDENTIFICAZIONE COSTRUTTORE E APPARECCHIATURA
DE
DE La targhetta di identificazione raffigurata, è applicata direttamente sull'apparecchiatura. In essa sono
FR
FR riportati i riferimenti e tutte le indicazioni indispensabili alla sicurezza di esercizio.
A)Modello apparecchiatura.
B)Tipo di personalizzazione.
C)Identificazione costruttore.
D)Classe di isolamento.
ES
ES
A
B
C
D
E
F
G
H
C139612000.fm
Q
L M N
P
IDM-39603606200.tif
Italiano
-2-
E)Anno di costruzione.
F) Numero di matricola.
G)Grado di protezione.
H)Paese di destinazione.
L) Tensione (V).
M)Assorbimento (A).
N)Frequenza (Hz).
P)Potenza dichiarata (Kw).
Q)Indicatore tensione di collaudo.
MODALITÀ DI RICHIESTA ASSISTENZA
Per qualsiasi esigenza rivolgersi ad uno dei centri
autorizzati.
Per ogni richiesta di assistenza tecnica, indicare i
dati riportati sulla targhetta di identificazione ed il
tipo di difetto riscontrato.
INFORMAZIONI TECNICHE
2
DESCRIZIONE GENERALE APPARECCHIATURA
Il cuocipasta, d'ora innanzi definito apparecchiatura, è stato progettato e costruito per la cottura in acqua di pasta alimentare nell'ambito della
ristorazione professionale.
L'apparecchiatura è dotata di una linea bifronte per
permetterne l'installazione al centro del locale.
Organi principali
A)Vasca di cottura: è realizzata in acciaio inox.
B)Erogatore acqua: per direzionare il flusso dell'acqua.
C)Manopola comando acqua: per regolare il flusso
dell'acqua.
D)Manopola comando resistenze: per regolare la
potenza di riscaldamento.
E)Spia resistenze: per segnalare l'attivazione delle resistenze dopo il riempimento della vasca.
F) Spia rete: per segnalare l'attivazione dell'alimentazione elettrica.
G)Portelli: per accedere alla zona interna dei vani.
A
B
C
D
G
F
IT
GB
E
G
DE
IDM-39612000100.tif
FR
ES
DATI TECNICI
C139612000.fm
Vedi tabelle e “Scheda allacciamenti” in fondo al
manuale.
-3-
Italiano
DISPOSITIVI DI SICUREZZA
Anche se l'apparecchiatura è completa di tutti i dispositivi di sicurezza, in fase di installazione e allacciamento essi dovranno, se necessario, essere
integrati con altri in modo da rispettare le leggi vigenti in materia.
L'illustrazione indica la posizione dei dispositivi.
A)Termostato di sicurezza: per bloccare l'alimentazione elettrica in caso di surriscaldamento.
A
Importante
L'intervento del termostato non è segnalato
da alcun dispositivo di segnalazione
IDM-39612000200.tif
Cautela - Avvertenza
Verificare quotidianamente che i dispositivi
di sicurezza siano perfettamente installati ed
efficienti.
SEGNALI DI SICUREZZA E INFORMAZIONE
C139612000.fm
L'illustrazione indica la posizione dei segnali applicati.
ITIT A)Targa identificazione costruttore e apparecchiatura.
B)Pericolo di scottatura: fare attenzione alle suGB perfici calde.
GB
C)Pericolo generico: prima di effettuare qualsiasi
DE
DE tipo di intervento, leggere attentamente il manuale.
FR
FR D)Pericolo generico: durante il lavaggio dell'apparecchiatura non dirigere getti d'acqua in pressione sulle parti interne.
ES E)Pericolo generico: è vietato il funzionamento a
ES
secco.
F) Pericolo generico: richiama l'attenzione sul rispetto delle norme. "Installare conformemente
alle normative in vigore ed utilizzare solo in ambienti bene areati".
G)Pericolo generico: richiama l'attenzione sul rispetto delle norme. "Si declina ogni responsabilità per il mancato rispetto delle norme di
installazione e messa in funzione".
Italiano
-4-
D
C
E
A
B
G
F
IDM-39612000300.tif
ACCESSORI A RICHIESTA
A richiesta l'apparecchiatura può essere corredata
dei seguenti accessori.
A)"Kit" cestelli (KCPW40)
B)Cestello (C0909)
C)Cestello (CW2715)
D)Cestello (CW0930)
E)Cestello (CW1830)
F) Cestello (CW2830)
G)Cestello (CW4627)
H)Cestello (CW2327)
L) Piedi di appoggio
M)Kit di completamento per apparecchiature in batteria
H
L
G
F
E
D
C
B
A
IDM-39610900400.tif
SICUREZZA
3
NORME PER LA SICUREZZA
C139612000.fm
Il costruttore, in fase di progettazione e costruzione,
ha posto particolare attenzione agli aspetti che possono provocare rischi alla sicurezza e alla salute
delle persone che interagiscono con l'apparecchiatura. Oltre al rispetto delle leggi vigenti in materia,
egli ha adottato tutte le "regole della buona tecnica
di costruzione". Scopo di queste informazioni è
quello di sensibilizzare gli utenti a porre particolare
attenzione per prevenire qualsiasi rischio. La prudenza è comunque insostituibile. La sicurezza è anche nelle mani di tutti gli operatori che interagiscono
con l'apparecchiatura.
Leggere attentamente le istruzioni riportate nel manuale in dotazione e quelle applicate direttamente,
in particolare rispettare quelle riguardanti la sicurezza. Un po' di tempo dedicato alla lettura risparmierà spiacevoli incidenti; è sempre troppo tardi
ricordarsi di quello che si sarebbe dovuto fare quando ciò è già accaduto.
IT
Non manomettere, non eludere, non eliminare o
bypassare i dispositivi di sicurezza installati. Il mancato rispetto di questo requisito può recare rischi GB
gravi per la sicurezza e la salute delle persone.
Anche dopo essersi documentati opportunamente,
al primo uso, se necessario, simulare alcune manovre di prova per individuare i comandi e le loro funzioni principali, in particolare quelle relative
all'accensione ed allo spegnimento.
Utilizzare l'apparecchiatura solo per gli usi previsti
dal fabbricante. L'impiego dell'apparecchiatura per
usi impropri può recare rischi per la sicurezza e la
salute delle persone e danni economici.
Tutti gli interventi di manutenzione che richiedono
una precisa competenza tecnica o particolari capacità devono essere eseguiti esclusivamente da personale qualificato, con esperienza riconosciuta e
acquisita nel settore specifico di intervento.
-5-
Italiano
DE
FR
ES
Per mantenere l'igiene e proteggere gli alimenti lavorati da tutti i fenomeni di contaminazione, è necessario pulire accuratamente gli elementi che
vengono a contatto direttamente o indirettamente
con gli alimenti e tutte le zone limitrofe. Effettuare
queste operazioni usando esclusivamente prodotti
detergenti per uso alimentare, evitando nel modo
più assoluto quelli infiammabili o che contengono
sostanze nocive alla salute delle persone. Tali operazioni vanno eseguite quando si riscontra una ragionevole necessità e alla fine di ogni utilizzo.
Alla fine di ogni utilizzo, assicurarsi che le manopole di comando siano disattivate e le linee di alimentazione scollegate.
In caso di inattività prolungata, oltre a scollegare
tutte le linee di alimentazione, è necessario effettuare una pulizia accurata di tutte le parti interne ed
esterne dell'apparecchiatura e dell'ambiente circostante, secondo le indicazioni fornite dal costruttore
e dalle leggi vigenti in materia.
Nell'uso quotidiano dell'apparecchiatura è richiesta
la presenza costante dell'Operatore.
Durante il lavaggio dell'apparecchiatura non dirigere getti d'acqua in pressione sulle parti interne
dell'apparecchiatura.
Non lasciare oggetti o materiale infiammabile all'interno del vano o in prossimità dell'apparecchiatura.
USO E FUNZIONAMENTO
4
RACCOMANDAZIONI PER L’USO
Importante
C139612000.fm
ITIT L'incidenza degli infortuni derivanti
dall'uso di apparecchiature dipende da
molti fattori che non sempre si riescono a
GB prevenire e controllare. Alcuni incidenti
GB
possono dipendere da fattori ambientali
DE
DE non prevedibili, altri dipendono soprattutto
dai comportamenti degli utilizzatori. Essi,
FR
FR oltre ad essere autorizzati ed opportunamente documentati, se necessario, al primo
uso, dovranno simulare alcune manovre
ES
ES
per individuare i comandi e le funzioni principali.
Italiano
Attuare solo gli usi previsti dal costruttore
e non manomettere nessun dispositivo per
ottenere prestazioni diverse da quelle previste. Prima dell'uso verificare che i dispositivi di sicurezza siano perfettamente
installati ed efficienti. Gli utilizzatori, oltre
ad impegnarsi a soddisfare questi requisiti,
devono applicare tutte le norme di sicurezza e leggere con attenzione la descrizione
dei comandi e la messa in servizio.
-6-
DESCRIZIONE COMANDI
Sull'apparecchiatura sono disposti i comandi per attivare le funzioni principali.
A)Manopola comando resistenze: per attivare,
disattivare e regolare le resistenze di riscaldamento.
B)Manopola comando acqua: per riempire la vasca
nelle diverse modalità
C)Spia rete: per segnalare l'attivazione dell'alimentazione elettrica.
D)Spia resistenze: per segnalare l'attivazione delle resistenze dopo il riempimento della vasca.
Indice riempimento
manuale
Indice
spegnimento
Indice
spegnimento
Indice potenza
minima
B
C
C
D
D
Indice
riempimento
lento automatico
B
Indice riempimento
rapido automatico
A
Indice potenza
massima
Indice potenza
ridotta
A
IDM-39612000400.tif
ACCENSIONE E SPEGNIMENTO APPARECCHIATURA
Accensione
1 - Agire sull'interruttore automatico sezionatore
per attivare l'allacciamento alla linea elettrica
principale.
2 - Eseguire il riempimento della vasca (vedi pag. 8).
3 - Ruotare la manopola (A) in posizione 1, per attivare le resistenze di riscaldamento alla potenza massima e accelerare i tempi di ebollizione.
La spia di rete (C) si accende.
4 - Ruotare la manopola (A) in una delle altre posizioni, per regolare la potenza delle resistenze a
valori inferiori.
C139612000.fm
Spegnimento
1 - Arrestare l'erogazione dell'acqua (vedi pag. 8).
2 - Ruotare la manopola (A) in posizione 3 per disattivare le resistenze di riscaldamento.
3 - Agire sull'interruttore automatico sezionatore
per disattivare l'allacciamento alla linea elettrica principale.
A C
GB
1
DE
A
FR
2
ES
3
IDM-39612000500.tif
-7-
IT
Italiano
RIEMPIMENTO E SVUOTAMENTO VASCA
Riempimento
Il riempimento può essere effettuato in modi diversi.
B
Riempimento rapido libero
– Ruotare la manopola (B) in posizione 1 per riempire la vasca almeno fino al livello minimo indicato dalla tacca di riferimento.
Una volta raggiunto il livello desiderato è possibile
attivare le resistenze.
1
2
B
Importante
Dopo aver effettuato il riempimento, è necessario portare la manopola (B) in un'altra
posizione, per non causare la tracimazione
dell'acqua dalla vasca.
3
4
Rabbocco rapido automatico
– Ruotare la manopola (B) in posizione 2, per
riempire automaticamente la vasca fino al livello massimo quando l'acqua scende al di
sotto del livello minimo.
IDM-39612000600.tif
Nota: il livello massimo e minimo si riferisce all’intervallo di funzionamento del pressostato.
ITIT
GB
GB
Rabbocco lento automatico
– Ruotare la manopola (B) in posizione 3, per effettuare un'erogazione lenta e continua che mantiene costante il livello dell'acqua all'interno della
vasca.
Importante
DE
DE Se l'acqua scende al di sotto del livello mi-
C
nimo si attiva automaticamente la modalità
FR
FR "rabbocco rapido automatico".
Svuotamento
ES
ES 1 - Ruotare la manopola (B) in posizione 4 per fer-
C139612000.fm
mare l'erogazione dell'acqua.
2 - Aprire il rubinetto (C) per svuotare la vasca.
Italiano
IDM-39612000700.tif
-8-
RIPRISTINO APPARECCHIATURA
Importante
L'intervento del termostato non è segnalato
da alcun dispositivo di segnalazione.
In caso di intervento del termostato di sicurezza è
necessario ripristinare le condizioni iniziali di funzionamento dell'apparecchiatura nel modo indicato.
1 - Lasciare raffreddare l'acqua di 30-40 °C
2 - Aprire il portello (A).
3 - Premere il pulsante (B) del termostato di sicurezza per riattivare l'alimentazione elettrica.
4 - Richiudere il portello (A) ad operazione ultimata.
B
A
IDM-39612001700.tif
INATTIVITÀ PROLUNGATA DELL’APPARECCHIATURA
Se l'apparecchiatura rimane inattiva per un lungo
tempo, procedere nel modo indicato.
1 - Agire sull'interruttore sezionatore dell'apparecchiatura per disattivare l'allacciamento alla linea elettrica principale.
2 - Pulire accuratamente l'apparecchiatura e le
zone limitrofe.
3 - Cospargere con un velo d'olio alimentare le superfici in acciaio inox.
4 - Eseguire tutte le operazioni di manutenzione.
5 - Lasciare l'apparecchiatura scoperta e le
camere di cottura aperte.
C139612000.fm
CONSIGLI PER L’USO
Al fine di garantire un corretto uso dell'apparecchiatura, è bene applicare i seguenti consigli.
– Utilizzare esclusivamente gli accessori indicati
dal costruttore.
– Mantenere costantemente pulita l'apparecchiatura e le zone limitrofe.
– Per la pulizia utilizzare esclusivamente prodotti
detergenti per uso alimentare.
– Immergere i cestelli lentamente per evitare la formazione di schiuma.
– Per scolare i cestelli, appenderli all'apposito supporto.
– Riempire i cestelli con il giusto quantitativo di pasta in funzione della qualità e del suo aumento di
volume durante la cottura.
– Attendere sempre che l'acqua sia in ebollizione
prima di immergere i cestelli.
– Prima di riempire la vasca, verificare che il rubinetto di scarico (A) sia chiuso.
– Verificare che il livello dell'acqua non scenda mai
al di sotto del minimo indicato (B).
– Mantenere costante l'ebollizione dell'acqua e il
corretto scarico degli amidi.
– Alimentare l'apparecchiatura con acqua a 55°C.
IT
GB
B
DE
FR
A
ES
IDM-39612000800.tif
– Svuotare completamente la vasca dopo l'uso.
Cautela - Avvertenza
Non utilizzare l'apparecchiatura senza acqua
all'interno della vasca, per non provocare danni
alla struttura dell'apparecchiatura stessa.
-9-
Italiano
MANUTENZIONI
5
RACCOMANDAZIONI PER LA MANUTENZIONE
Mantenere l'apparecchiatura in condizioni di massima
efficienza effettuando le operazioni di manutenzione
programmata previste dal costruttore. Una buona manutenzione consentirà di ottenere le migliori prestazioni, una più lunga durata di esercizio e un
mantenimento costante dei requisiti di sicurezza.
Cautela - Avvertenza
Prima di effettuare qualsiasi intervento di manutenzione, attivare tutti i dispositivi di sicurezza previsti e valutare se sia necessario
informare adeguatamente il personale che
opera e quello nelle vicinanze. In particolare
disattivare l'alimentazione elettrica tramite
l'interruttore sezionatore ed impedire l'accesso a tutti i dispositivi che potrebbero, se
attivati, provocare condizioni di pericolo
inatteso causando danni alla sicurezza e
alla salute delle persone.
Ad ogni fine esercizio e ogni volta che se ne riscontra la necessità, pulire:
– La vasca di cottura (vedi pag. 10)
– Gli accessori (vedi pag. 5)
– L'apparecchiatura e l'ambiente circostante (vedi
pag. 10)
Ogni 100 ore di esercizio fare eseguire, da operatori esperti e autorizzati, le seguenti operazioni.
– Verificare efficienza termostato di sicurezza
– Verificare efficienza impianto elettrico
PULIZIA APPARECCHIATURA
Se si considera che l'apparecchiatura è utilizzata
per la preparazione di prodotti alimentari per l'uomo, è necessario prestare particolare cura a tutto
ITIT ciò che riguarda l'igiene e mantenere costantemente pulita l'apparecchiatura e tutto l'ambiente circoGB stante.
GB
Importante
DE
DE
Prima di iniziare qualsiasi intervento di pulizia, disattivare l'alimentazione elettrica
FR
FR tramite l'interruttore sezionatore e lasciare
raffreddare l'apparecchiatura.
C139612000.fm
ES
ES
Si raccomanda di applicare anche gli accorgimenti
di seguito indicati.
1 - Per pulire le parti dell'apparecchiatura usare
solo acqua tiepida, prodotti detergenti per uso
alimentare e materiale non abrasivo.
2 - Pulire accuratamente gli elementi che vengono
a contatto direttamente o indirettamente con gli
alimenti e tutte le zone limitrofe.
3 - Pulire gli accessori dopo l'uso, con uno sgrassante idoneo. Si consiglia il lavaggio in lavastoviglie.
Italiano
Cautela - Avvertenza
Non usare prodotti che contengono sostanze
dannose e pericolose per la salute delle persone (solventi, benzine, ecc.).
4 - Risciacquare le superfici con acqua potabile e
asciugarle.
5 - Utilizzare getti d'acqua in pressione solo sulle
parti esterne.
6 - Prestare attenzione alle superfici in acciaio inox
per non danneggiarle. In particolare, evitare
l'uso di prodotti corrosivi e non utilizzare materiale abrasivo o utensili taglienti.
7 - Pulire tempestivamente i residui di cibo per evitare che induriscano.
8 - Pulire i depositi calcarei che possono formarsi
in alcune superfici dell'apparecchiatura.
- 10 -
GUASTI
6
RICERCA GUASTI
L'apparecchiatura, prima della messa in servizio, è
stata preventivamente collaudata.
Le informazioni di seguito riportate hanno lo scopo
di aiutare l'identificazione e correzione di eventuali
anomalie e disfunzioni che potrebbero presentarsi
in fase d'uso.
Inconveniente
Le resistenze per il riscaldamento
non si attivano
Alcuni di questi problemi possono essere risolti
dall'utilizzatore, per tutti gli altri è richiesta una precisa competenza tecnica o particolari capacità e
quindi devono essere eseguiti esclusivamente da
personale qualificato con esperienza riconosciuta e
acquisita nel settore specifico di intervento.
Causa
Rimedio
Allacciamento elettrico non
eseguito correttamente
Controllare il collegamento dei
cavi elettrici
Intervento del termostato di
sicurezza
Eseguire il ripristino
apparecchiatura (vedi pag. 13)
Commutatore guasto
Importante
Contattare il servizio assistenza.
Sostituire il commutatore
In posizione 2 del commutatore a
4 posizioni l'erogazione dell'acqua
è continua fino a tracimazione.
In posizione 2 del commutatore a
4 posizioni l'acqua non fuoriesce
dal rubinetto.
Circuito del pressostato ostruito.
Pressostato guasto.
Elettrovalvola riempimento
guasta.
Collegamento al pressostato non
eseguito correttamente.
Importante
Contattare il servizio
assistenza.
Importante
Contattare il servizio assistenza.
Verificare il collegamento
del pressostato.
Allacciamento idrico non eseguito
correttamente.
IT
Importante
Contattare il servizio assistenza.
Verificare il collegamento idrico.
In posizione 3 del commutatore a
4 posizioni il rabbocco lento
automatico non avviene.
Collegamento all'elettrovalvola
mantenimento acqua non
eseguito correttamente.
Elettrovalvola mantenimento acqua guasta.
DE
Importante
Contattare il servizio assistenza.
Verificare il collegamento e
funzionalità dell'elettrovalvola
mantenimento acqua.
MOVIMENTAZIONE E INSTALLAZIONE
7
RACCOMANDAZIONI PER LA MOVIMENTAZIONE E INSTALLAZIONE
C139612000.fm
Importante
Eseguire la movimentazione e l'installazione nel rispetto delle informazioni fornite dal
costruttore e riportate direttamente sull'imballo, sull'apparecchiatura e nelle istruzioni
per l'uso. Chi è autorizzato ad eseguire que-
ste operazioni dovrà, se necessario, organizzare un "piano di sicurezza" per
salvaguardare l'incolumità delle persone
direttamente coinvolte.
- 11 -
GB
Italiano
FR
ES
IMBALLO E DISIMBALLO
L'imballo è realizzato, limitando gli ingombri, anche
in funzione del tipo di trasporto adottato.
Per facilitare il trasporto, la spedizione può essere
eseguita con alcuni componenti smontati ed opportunamente protetti e imballati.
Sull'imballo sono riportate tutte le informazioni necessarie ad effettuare il carico e lo scarico.
In fase di disimballo, controllare l'integrità e l'esatta
quantità dei componenti.
Il materiale di imballo va opportunamente smaltito
nel rispetto delle leggi vigenti.
IDM-39603300800.tif
TRASPORTO
Il trasporto, anche in funzione del luogo di destinazione, può essere effettuato con mezzi diversi.
Lo schema raffigura le soluzioni più utilizzate.
In fase di trasporto, al fine di evitare spostamenti intempestivi, ancorare al mezzo di trasporto in modo adeguato.
Mezzi di
sollevamento
Mezzi di trasporto
IDM-3960200180.tif
IT
MOVIMENTAZIONE E SOLLEVAMENTO
GB
DE
FR
ES
L'apparecchiatura può essere movimentata con un
dispositivo di sollevamento a forche o a gancio di
portata adeguata. Prima di effettuare questa operazione, controllare la posizione del baricentro del carico.
Importante
Nell'inserire il dispositivo di sollevamento,
fare attenzione ai tubi di alimentazione e
scarico.
C139612000.fm
IDM-39612000900.tif
Italiano
- 12 -
INSTALLAZIONE APPARECCHIATURA
Tutte le fasi di installazione devono essere considerate sin dalla realizzazione del progetto generale.
Prima di iniziare tali fasi, oltre alla definizione della
zona di installazione, chi è autorizzato ad eseguire
queste operazioni dovrà, se necessario, attuare un
"piano di sicurezza" per salvaguardare l'incolumità
delle persone direttamente coinvolte ed applicare in
modo rigoroso tutte le leggi, con particolare riferimento a quelle sui cantieri mobili.
La zona di installazione deve essere provvista di
tutti gli allacciamenti di alimentazione e di scarico
dei residui di lavorazione. Deve essere adeguatamente illuminata ed avere tutti i requisiti igienici e
sanitari rispondenti alle leggi vigenti, per evitare che
gli alimenti vengano contaminati.
Se necessario, individuare l'esatta posizione di ogni
singola apparecchiatura o sottoinsieme e tracciare
le coordinate per posizionarli correttamente.
Effettuare l'installazione a una distanza dalla parete
non inferiore a 50 mm se essa non resiste a una
temperatura di almeno 150°C.
IDM-39612001000.tif
Eseguire l'installazione secondo le leggi, le norme e le
specifiche vigenti nel paese di utilizzo.
VENTILAZIONE LOCALE
Nel locale dove è installata l'apparecchiatura, devono essere presenti delle prese d'aria per garantire il
corretto funzionamento dell'apparecchiatura e per il
ricambio d'aria del locale stesso.
Le prese d'aria devono avere dimensioni adeguate,
devono essere protette da griglie e collocate in
modo da non poter essere ostruite.
IT
GB
DE
FR
IDM-39612001100.tif
ES
INSTALLAZIONE ACCESSORI
C139612000.fm
Avvitare i piedi di appoggio (A) in corrispondenza
dei punti di attacco sulla struttura.
A
IDM-39612001200.tif
- 13 -
Italiano
LIVELLAMENTO
Agire sui piedi di appoggio (A) per livellare l'apparecchiatura.
A
IDM-39612001300.tif
MONTAGGIO APPARECCHIATURE IN BATTERIA
Per montare le apparecchiature in batteria (fianco a fianco) procedere nel modo
indicato.
1 - Sfilare le manopole (A).
2 - Svitare le viti (C) e
smontare i cruC
scotti (B).
3 - Applicare, sui bordi
da accostare, del nastro
adesivo di protezione.
4 - Applicare, sui lati da acA
C B
costare, del sigillante
per uso alimentare.
IT 5 - Accostare le apparecchiature.
6 - Collegare le apparecchiature con le viti e i dadi
(D-E).
GB
D
E
IDM-39612001400.tif
7 - Asportare il sigillante eccedente ed il nastro
adesivo.
8 - Rimontare i cruscotti (B) e le manopole (A) ad
operazione ultimata.
DE
Per le apparecchiature in batteria è disponibile, a ri-
FR chiesta, un kit di allestimento che comprende il telaio di appoggio e alcuni profili di finitura.
C139612000.fm
ES
IDM-39610801100.tif
Italiano
- 14 -
ALLACCIAMENTO ACQUA
Per effettuare l’allacciamento, collegare il tubo di
rete con il tubo di attacco dell’apparecchiatura, interponendo un rubinetto di intercettazione (C), per
interrompere, quando necessario, l’alimentazione
dell’acqua. A valle di esso installare dei filtri facilmente raggiungibili.
Descrizione
Valore
Pressione
200÷450 kPa (2÷ 4,5 bar)
pH
7÷7.5
Conduttività
< 200 mS/cm
Durezza
9÷13°f (5÷7°d, 6.3÷8.8°e,
90÷125 ppm)
Contenuto di sali e ioni
metallici
Cloruri
Solfati
Ferro
Rame
Manganese
C
IDM-39612001500.tif
< 30 mg/l
< 40 mg/l
< 0,1 mg/l
< 0.05 mg/l
< 0,05 mg/l
Cautela - Avvertenza
L’apparecchiatura deve essere alimentata
con acqua potabile con le caratteristiche indicate in tabella.
ALLACCIAMENTO ELETTRICO
Importante
L'allacciamento deve essere effettuato da
personale autorizzato e qualificato, nel rispetto delle leggi vigenti in materia e con
l'utilizzo di materiale appropriato e prescritto. L'apparecchiatura viene fornita con tensione di funzionamento a 400V/3N, oppure
su richiesta a 230V/3.
A
B
IT
C
GB
E
C139612001.fm
Cautela - Avvertenza
Prima di eseguire qualsiasi intervento disattivare l'alimentazione elettrica generale.
Effettuare l'allacciamento dell'apparecchiatura alla
rete di alimentazione nel modo indicato.
1 - Installare, se non è presente, un interruttore sezionatore (A) vicino all'apparecchiatura con
sganciatore magnetotermico e blocco differenziale.
2 - Sfilare le manopole (B).
3 - Svitare le viti (C) e smontare il cruscotto (D).
4 - Collegare l'interruttore sezionatore (A) alla
morsettiera (E) dell'apparecchiatura come indicato in figura e nello schema elettrico in fondo
al manuale. Utilizzare un cavo con caratteristiche non inferiori al tipo H05RN-F.
DE
C D
IDM-39612001600.tif
FR
Importante
In fase di allacciamento fare attenzione al
collegamento dei cavi di neutro e di terra.
5 - Rimontare il cruscotto (D) ad operazione ultimata.
- 15 -
Italiano
ES
COLLAUDO APPARECCHIATURA
Importante
Prima della messa in servizio, deve essere
eseguito il collaudo dell'impianto, al fine di
valutare le condizioni operative di ogni singolo componente ed individuare le eventuali
anomalie. In questa fase, è importante verificare che tutte le condizioni di sicurezza e di
igiene siano rigorosamente rispettate.
Per effettuare il collaudo, eseguire le seguenti verifiche.
1 - Aprire il rubinetto di alimentazione acqua e verificare la tenuta del collegamento.
2 - Verificare che la tensione di rete sia conforme a
quella dell'apparecchiatura.
3 - Agire sull'interruttore sezionatore automatico
per verificare il collegamento elettrico.
4 - Verificare il corretto funzionamento dei dispositivi di sicurezza.
Effettuato il collaudo, se necessario, addestrare opportunamente l'utilizzatore, affinché acquisisca tutte le competenze necessarie alla messa in servizio
dell'apparecchiatura in condizioni di sicurezza,
come previsto dalle leggi vigenti.
REGOLAZIONI
8
MODALITÀ PER LE REGOLAZIONI
Le funzioni principali dell’apparecchiatura non
prevedono particolari interventi di regolazione
da parte di personale specializzato se non le regolazioni eseguite in fase d’uso dall’utente.
SOSTITUZIONE PARTI
MODALITÀ PER LE SOSTITUZIONI
IT
GB
9
L’apparecchiatura non prevede la sostituzione di
parti funzionali che richiedano l’intervento di perso-
nale specializzato se non la sostituzione di elementi
di servizio che può essere eseguita dall’utente.
DE
DISMISSIONE APPARECCHIATURA
FR
C139612000.fm
ES
Importante
Tale operazione deve essere eseguita da
operatori esperti, nel rispetto delle leggi vigenti in materia di sicurezza sul lavoro. Non
disperdere nell'ambiente prodotti non bio-
Italiano
degradabili, oli lubrificanti e componenti
non ferrosi (gomma, PVC, resine, ecc.). Effettuare il loro smaltimento nel rispetto delle leggi vigenti in materia.
- 16 -
CONTENTS
ref. chapters
page
1 GENERAL INFORMATION ................................................. 2
2 TECHNICAL INFORMATION.............................................. 3
st
1 PART
3 SAFETY .............................................................................. 5
4 USE AND OPERATION ...................................................... 6
5 SERVICING ...................................................................... 10
6 FAULT ............................................................................... 11
7 HANDLING AND INSTALLATION .................................... 11
2nd PART
8 ADJUSTMENTS................................................................ 16
9 REPLACING PARTS ........................................................ 16
ANNEXES .................................................................... I÷III
INDEX
A Adjustments procedure, 16
Appliance and constructor, identification, 2
Appliance, decommissioning, 16
Appliance, general description, 3
Appliance, installation, 13
Appliance, lengthy downtimes, 9
Appliance, testing, 16
Appliances in banks, assembly, 14
Assembly appliances in banks, 14
C Cleaning instructions, 10
Constructor and appliance, identification, 2
Controls, description, 7
I Identification of constructor and appliance, 2
Information for the reader, 2
Installation and handling, recommendations for, 11
Installation of the appliance, 13
Installing accessories, 13
Instructions, cleaning, 10
L Lengthy downtimes of appliance, 9
Levelling, 14
Lifting and handling, 12
O Optional accessories, 5
P Packaging and unpacking, 12
D Decommissioning the appliance, 16
Procedure for requesting service, 3
Purpose of the manual, 2
E Electrical connection, 15
F Faults, troubleshooting, 11
R Recommendations for handling
and installation, 11
Recommendations for servicing, 10
Recommendations for use, 6
Replace procedure, 16
Resetting the appliance, 9
Room ventilation, 13
Description of controls, 7
Filling and emptying the well, 8
G General description of appliance, 3
H Handling and installation, recom-
S Safety and information signs, 4
Safety and information, signs relating
to, 4
Safety devices, 4
Safety regulations, 5
Safety, devices for, 4
Safety, regulations for, 5
Service, procedure for requesting, 3
Servicing, recommendations for, 10
Switching the appliance on and off, 7
T Technical data, 3
Testing of the appliance, 16
Transport, 12
Troubleshooting, 11
U Unpacking and packaging, 12
Use, recommendations for, 6
Use, useful advice for, 9
Useful advice for use, 9
IT
GB
WWater connection, 15
DE
FR
mendations for, 11
Handling and lifting, 12
C139612000.fm
ES
Even partial reproduction of this document without the constructor's consent is forbidden.
The constructor is committed to a policy of continuous improvement, and reserves the right to update this documentation without notice provided this does not involve safety risks.
© 2002 - Authors of texts, illustrations and paging: IDM esperti in comunicazione tecnica – Forlì (Italy) - The constructor is authorised to reproduce the texts in whole or in part, provided the author is identified.
-1-
English
GENERAL INFORMATION
1
INFORMATION FOR THE READER
To find the specific topics of interest to you quickly,
refer to the index at the start of the manual.
This manual is subdivided into two parts.
1st part: contains all information necessary
for general readers, i.e. for users of the appliance.
2nd part: contains all the information necessary
for special categories of reader, i.e. all skilled operators authorised to handle, transport, install,
service, repair and scrap the appliance.
While users are instructed to refer to the 1st part only,
the 2nd part is addressed to skilled operators. They
may also read the 1st part for a more complete picture
of the information provided if necessary.
PURPOSE OF THE ANUAL
The constructor has produced this manual, which
forms an integral part of the appliance, to provide
the necessary information for those authorised to
interact with it during its working life.
As well as adopting good practices for use, the
manual's intended readers must read it thoroughly and apply its instructions to the letter.
The constructor supplies this information in its
own language (Italian), but it may be translated into other languages to meet legal and/or
commercial requirements.
A little time taken to read this information will
allow the prevention of risks to health and safety,
and the risk of economic losses.
ITIT Keep this manual in a clearly identified safe place
throughout the working life of the appliance, so that
it will always be available when required for consulGB tation.
GB
The constructor reserves the right to make changes
without any obligation to provide any prior notice.
A number of symbols have been used to highlight
particularly important parts of the text or important
specifications. Their meaning is as defined below.
Caution - warning
Indicates that suitable procedures must be
adopted to avoid putting people's health and
safety at risk or causing economic losses.
Important
Indicates particularly important technical
information which must not be overlooked.
IDENTIFICATION OF CONSTRUCTOR AND APPLIANCE
DE
DE
The nameplate shown here is fitted directly to the
It contains references and all essential
information for operating safety.
FR
FR appliance.
ES
ES
A
B
C
A)Appliance model
B)Type of customisation
C)Constructor identification
D)Insulation class
D
E
F
G
H
C139612000.fm
Q
L M N
P
IDM-39603606200.tif
English
-2-
E)Year of construction
F) Serial number
G)Protection rating
H)Country of destination
L) Voltage (V)
M)Absorption (A)
N)Frequency (Hz)
P)Rated power (kW)
Q)Test voltage indicator
PROCEDURE FOR REQUESTING SERVICE
Contact one of the authorised service centres for all
requirements.
When requesting service, state the data provide on
the nameplate and provide a description of the fault.
TECHNICAL INFORMATION
2
GENERAL DESCRIPTION OF APPLIANCE
The pasta cooker (referred to below as the appliance) is designed and constructed to cook pasta for
human consumption in water, in the professional
catering sector.
The appliance has two working sides, allowing
room-centre installation.
Main Parts
A)Cooking well: in stainless steel.
B)Adjustable water spout: directs the flow of water
C)Water control knob: for regulating the water
flow.
D)Heating element control knob: for setting the
heating power.
E)Heating element pilot light: indicates that the
heating elements have switched on after the well
has filled
F) Mains light: indicates that the appliance is receiving electrical power.
G)Hatches: for accessing the inside of the appliance.
A
B
C
D
G
F
IT
GB
E
G
DE
IDM-39612000100.tif
FR
ES
TECHNICAL DATA
C139612000.fm
See tables and "Connection chart" at the back of
the manual.
-3-
English
SAFETY DEVICES
Although the appliance is complete with all safety
devices, during installation and connection additional devices must be added if necessary to comply with the relevant legal requirements.
The illustration shows the position of the devices.
A)Safety thermostat: to cut off the electricity supply in case of overheating.
A
Important
There are no indicator devices to signal
that the thermostat has been tripped
Caution - warning
Make a daily check that the safety devices are
properly installed and in good working order.
IDM-39612000200.tif
SAFETY AND INFORMATION SIGNS
C139612000.fm
The illustration shows the position of the signs provided.
ITIT A)Nameplate with manufacturer and appliance
data.
B)Burn hazard: watch out for hot surfaces.
GB C)General hazard: read the manual carefully beGB
fore carrying out any procedure.
DE
DE D)General hazard: when washing the appliance do
not point pressurised water jets at internal parts.
FR
FR E)General hazard: dry operation is forbidden.
F) General hazard: all relevant regulations must be
complied with. "Install in compliance with the relES
ES
evant regulations and use in well ventilated
premises only".
G)General hazard: all relevant regulations must be
complied with. "No liability is accepted in case of
failure to compy with the installation and commissioning instructions".
English
-4-
D
C
E
A
B
G
F
IDM-39612000300.tif
OPTIONAL ACCESSORIES
The appliance can be equipped with the following
accessories on request.
A)Set of baskets (KCPW40)
B)Basket (C0909)
C)Basket (CW2715)
D)Basket (CW0930)
E)Basket (CW1830)
F) Basket (CW2830)
G)Basket (CW4627)
H)Basket (CW2327)
L) Feet
M)Complete kit for appliances installed in banks
H
L
G
F
E
D
C
B
A
IDM-39610900400.tif
SAFETY
3
SAFETY REGULATIONS
IT
During design and construction, the constructor has
paid special attention to factors which may cause
risks to the health and safety of the people interacting with the appliance. As well as complying with
the relative legal requirements, he has adopted all
the "rules of good construction practice”. This information is provided to encourage users to take special care in order to prevent all risks. However, there
is no replacement for care and attention. Safety
also depends on all the operators who interact with
the appliance.
C139612000.fm
Read the instructions provided in the manual supplied and those applied to the appliance itself with
care, paying special attention to those relating to
safety. Taking a little time to read them will prevent
unpleasant accidents; it is always too late to remember what should have been done after an accident has happened.
Never tamper with, elude, eliminate or bypass the
safety devices installed. Failure to comply with this
GB
rule may cause serious risks to health and safety.
Even after you have read all the appropriate documentation, if necessary on first use carry out a few
trial operations to get to know the controls, especially those used for switching on and off.
DE
Use the appliance only for the functions intended by
the manufacturer. Improper use of the appliance
may involve health and safety risks and economic
losses.
ES
All servicing operations requiring specific technical
knowledge or skills must only be carried out by
qualified staff with recognised experience in the
specific sector.
-5-
English
FR
To maintain hygiene and protect the food processed from all forms of contamination, all elements
in direct or indirect contact with foodstuffs and all
surrounding zones must be cleaned thoroughly. For
these operations, use only food-approved detergents, and never use flammable products or products which contain substances harmful to health.
Clean only when reasonably necessary and at the
end of each session of use.
After each session of use, make sure that the control knobs have been turned off and the power supply lines disconnected.
In case of lengthy downtimes, as well as disconnecting all supply lines it is also essential to clean
all internal and external parts of the appliance and
the surrounding environment thoroughly, complying
with the constructor's instructions and the relevant
legal requirements.
During routine use of the appliance, the Operator's
constant presence is required.
When washing the appliance do not point pressurised water jets at internal parts.
Do not leave flammable objects or materials inside
or close to the appliance.
USE AND OPERATION
4
RECOMMENDATIONS FOR USE
Important
ITIT
C139612000.fm
The rate of accidents deriving from the use
of appliances depends on many factors
GB which cannot always be foreseen and conGB
trolled. Some accidents may be caused by
unpredictable environmental factors, while
DE
DE others are due above all to the behaviour of
users. As well as receiving authorisation
FR
FR and appropriate instruction, if necessary,
the first time they use the appliance, users
ES must carry out a few simulated practice opES
erations in order to get to know the controls
English
and the main functions. Use only as intended by the constructor and never tamper
with any device to obtain performance levels outside the rated specifications.Before
use, check that the safety devices are properly installed and in good working order. As
well as taking care to meet these requirements, users must also implement all safety regulations and read the description of
the controls and the start-up procedure
carefully.
-6-
DESCRIPTION OF CONTROLS
The appliance is fitted with the controls for use of its
main functions.
A)Heating element control knob: for turning the
heating elements off and on and setting their level.
B)Water control knob: for filling the well in the various
ways available.
C)Mains light: indicates that the appliance is receiving electrical power.
D)Heating element pilot light: indicates that the
heating elements have switched on after the well
has filled
Manual filling mark
Off marker
Off marker
Minimum power
marker
B
C
C
D
D
Slow automatic
filling mark
B
Quick automatic filling
mark
A
Full power
marker
Low power marker
A
IDM-39612000400.tif
SWITCHING THE APPLIANCE ON AND OFF
Lighting
1 - Turn on the appliance's circuit breaker to connect it to the electrical mains.
2 - Fill the well (see page 8).
3 - Turn the knob (A) to setting 1 to turn on the
heating elements at the maximum power and
bring liquids to the boil more quickly. The mains
light (C) comes on.
4 - Turn the knob (A) to one of the other settings,
to reduce the heating element power to a lower
level.
C139612000.fm
Turning off
1 - Turn off the water supply (see page 8).
2 - Turn the knob (A) to setting 3 to switch off the
heating elements.
3 - Turn off the appliance's circuit breaker to disconnect it from the electrical mains.
A C
GB
1
DE
A
FR
2
ES
3
IDM-39612000500.tif
-7-
IT
English
FILLING AND EMPTYING THE WELL
Filling
The well can be filled in a number of different ways.
B
Quick no-limits filling.
– Turn the knob (B) to 1 to fill the well at least to
1
the minimum level shown by the mark.
When the water reaches the level required, the heating elements can be turned on.
2
B
Important
After filling, the knob (B) must be turned to
another position as otherwise water may
overflow from the well.
3
Quick automatic top-up.
– Turn the knob (B) to 2 to fill the well to the maximum level automatically when the water
level drops below the minimum threshold.
4
N.B.: the maximum and minimum levels refer to the
operating range of the pressure switch.
IDM-39612000600.tif
Slow automatic top-up.
ITIT – Turn the knob (B) to 3 for a slow, continuous flow
GB
GB
of water that keeps the water level inside the well
constant.
Important
If the water drops below the minimum level,
the "quick automatic top-up" mode is autoFR
FR matically triggered.
DE
DE
C
Emptying
ES
ES 1 - Turn the knob (B) to 4 to shut off the water supply.
2 - Turn on the tap (C) to empty the well.
C139612000.fm
IDM-39612000700.tif
English
-8-
RESETTING THE APPLIANCE
Important
There are no indicator devices to signal
that the thermostat has been tripped
If the safety thermostat is tripped, the appliance has
to be restored to the initial working conditions as follows.
1 - Allow the water to cool by 30-40°C.
2 - Open the hatch (A).
3 - Press the button (B) of the safety thermostat to
restore the electricity supply.
4 - Close the door (A) when the operation is complete.
B
A
IDM-39612001700.tif
LENGTHY DOWNTIMES OF APPLIANCE
If the appliance is to be out of use for a lengthy period, proceed as follows.
1 - Cut off the mains electricity supply using the appliance's master switch.
2 - Clean the appliance and the surrounding areas
thoroughly.
3 - Spread a film of edible oil over the stainless
steel surfaces.
4 - Carry out all the servicing procedures.
5 - Leave the appliance uncovered and the
cooking chambers open.
C139612000.fm
USEFUL ADVICE FOR USE
To ensure correct use of the appliance, the following rules should be adopted.
– Use only the accessories recommended by the
constructor.
– Always keep the appliance and the surrounding
areas clean.
– When cleaning, use only food-approved detergents.
– Immerse the baskets in the boiling water very
slowly to avoid the formation of foam.
– To drain the baskets, suspend them on the hanger provided
– Fill the baskets with the right quantity of pasta
taking into account the type of pasta and the expected increase in volume during cooking
– Always wait until the water is boiling before immersing the baskets
– Before filling the well, check that the drain tap (A)
is turned off.
– Check that the water level never drops below the
minimum level marked (B).
– Keep the water boiling constantly and ensure
correct starch overflow drain.
– Supply the appliance with water at 55°C.
IT
GB
B
DE
FR
A
ES
IDM-39612000800.tif
– Drain the well completely after use.
Caution - warning
Never use the appliance with no water in the
well, as this may damage its structure.
-9-
English
SERVICING
5
RECOMMENDATIONS FOR SERVICING
Keep the appliance at peak efficiency by carrying
out the scheduled servicing procedures recommended by the constructor. Proper servicing will allow the best performance, a longer working life and
constant maintenance of safety requirements.
Caution - warning
Before carrying out any servicing procedure,
activate all the safety devices provided and
decide whether staff at work and those in the
vicinity should be informed. In particular, turn
off the electricity supply using the circuitbreaker and prevent access to all devices
which might people's health and safety at risk
if activated.
At the end of each session of use and whenever
necessary, clean:
– The well (see page 10)
– The accessories (see page 5)
– The appliance and the surrounding environment
(see page 10)
Every 100 working hours have skilled, authorised
personnel carry out the following operations.
– Check that the safety thermostat is working correctly
– check that the electrical system is in good working order
CLEANING INSTRUCTIONS
ITIT
Since the appliance is used for preparing foods for
human consumption, special care must be paid to
everything relating to hygiene, and the appliance
and the entire surrounding environment must constantly be kept clea
GB
GB
Important
Before starting any cleaning procedure,
disconnect the electricity supply using the
circuit-breaker and allow the appliance to
FR
FR cool.
DE
DE
C139612000.fm
ES
ES
The precautions which follow are also important.
1 - Clean all parts of the appliance with warm water, food-approved detergents and non-abrasive materials only.
2 - Thoroughly clean all parts which come into direct or indirect contact with foods and all surrounding areas.
3 - After use, clean the accessories with a suitable
grease-remover product. If possible, wash in
the dishwasher.
English
Caution - warning
Never use products containing substances
harmful or hazardous for health (solvents, petroleum spirits, etc.).
4 - Rinse surfaces with drinking water and dry.
5 - Pressurised water jets may only be used on external parts.
6 - Take special care not to damage stainless steel
surfaces. In particular, avoid the use of corrosive products and do not use abrasive materials
or sharp tools.
7 - Remove food residues immediately before they
set.
8 - Remove the limescale deposits which may form
on some of the appliance's surfaces.
- 10 -
FAULT
6
TROUBLESHOOTING
The appliance has been tested before being put
into service.
The information provided below is intended to assist
in the identification and correction of any anomalies
and malfunctions which might occur during use.
Fault
The heating elements do not
come on.
The user can solve some of these problems himself, but for others specific technical knowledge or
skill is required, and so they must only be carried
out by qualified staff with recognised experience acquired in the specific sector of operation.
Cause
Electrical connection not made
correctly.
Safety thermostat tripped.
Switch faulty.
Remedy
Check the connection of the
electrical wires.
Carry out the appliance
reset (see page 13).
Important
Contact the after-sales service
Replace the switch.
When the 4-setting switch is
turned to 2, water is supplied
continuously, until it overflows.
Blockage in pressure switch
circuit.
Pressure switch faulty
Filler solenoid valve faulty
Contact the after-sales
service
Pressure switch connection not
made correctly.
Contact the after-sales
service
Important
Important
When the 4-setting switch is
turned to 2, no water comes out of
the tap.
Check the pressure switch
connection.
IT
Water connection not made
correctly.
Important
Contact the after-sales service
Check the water connection.
Water level maintenance solenoid
valve connection not made
Important
When the 4-setting switch is
correctly.
Contact the after-sales service
turned to 3, automatic top-up does
Check the connection and
not take place.
Water level maintenance solenoid
operation of the water level
valve faulty.
maintenance solenoid valve.
HANDLING AND INSTALLATION
7
C139612000.fm
RECOMMENDATIONS FOR HANDLING AND INSTALLATION
Important
When handling and installing the appliance
comply with the information provided by
the constructor directly on the packaging,
on the appliance and in the instructions for
use. If necessary, the person authorised to
carry out these operations must organise a
"safety plan" to protect the people directly
involved.
- 11 -
English
GB
DE
FR
ES
PACKAGING AND UNPACKING
The packaging is designed to reduce space and as
appropriate to the type of transport used.
To simplify transport, some components may be removed and suitably protected and packed for transport.
The packaging carries all information necessary for
loading and unloading.
When unpacking, check that all components are
present in the correct quantities and are undamaged.
The packaging material must be properly disposed
of in accordance with legal requirements.
IDM-39603300800.tif
TRANSPORT
Different means of transport may be used, depending partly on the destination.
The chart shows the most commonly used alternatives.
During transport, fix the packaging to the
means of transport securely to prevent undesirable shifting.
Lifting
equipment
Means of transport
IDM-3960200180.tif
IT
GB
DE
FR
ES
HANDLING AND LIFTING
The appliance can be handled using fork-lift or hook
equipment of suitable load-carrying capacity. Before lifting, check the position of the load's centre of
gravity.
Important
When engaging with the lifting equipment,
watch out for the intake and outlet pipes.
C139612000.fm
IDM-39612000900.tif
English
- 12 -
INSTALLATION OF THE APPLIANCE
All installation stages must be considered right
from production of the general layout. Before starting these stages, as well as deciding the place of
installation, if necessary, the person authorised to
carry out these operations must organise a "safety
plan" to protect the people directly involved, and
he must also ensure strict compliance with all legal
requirements, especially those relating to mobile
work-sites.
The place of installation must have all the connections needed to supply the appliance and dispose of
the production residues, must be suitably lit and
must meet all legal health and hygiene requirements to prevent the contamination of the foods.
If necessary, fix the exact position of each individual
appliance or subassembly by mark coordinates to
locate them correctly.
Appliances must be at some distance from the wall
at least 50 mm if the wall is not designed to be resistant to a temperature of at least 150°C.
IDM-39612001000.tif
Install in accordance with the relevant legislation,
regulations and specifications in the country of
use.
ROOM VENTILATION
The room where the appliance is installed must
have air inlets to ensure that the appliance can operate correctly and provide the necessary air exchange in the room itself.
The air inlets must be of appropriate size and must
be protected by gratings and placed so that they
cannot be obstructed.
IT
GB
DE
FR
IDM-39612001100.tif
ES
INSTALLING ACCESSORIES
C139612000.fm
Screw the feet (A) onto the structure in the connection points.
A
IDM-39612001200.tif
- 13 -
English
LEVELLING
Adjust the floor-mounted feet (A) to level the appliance.
A
IDM-39612001300.tif
ASSEMBLY APPLIANCES IN BANKS
IT
GB
To assemble appliances in
banks (side by side) proceed
as described below.
1 - Pull off the knob (A).
2 - Undo the screws (C) and
remove the control
panels (B).
C
3 - Apply masking tape
to the edges to be
placed side by side.
4 - Apply
food-approved
sealant to the edges to
A
C B
be placed side by side.
5 - Place the appliances
side by side.
6 - Connect the appliance using the screws and
nuts (D-E).
D
E
IDM-39612001400.tif
7 - Remove the excess sealant and the masking
tape.
8 - Replace the control panels (B) and the knobs
(A) on completion of the operation.
DE
For appliances installed in banks, an optional kit is
FR available with the supporting frame and some trims.
C139612000.fm
ES
IDM-39610801100.tif
English
- 14 -
WATER CONNECTION
To make the connection, connect the mains line to
the appliance's connection pipe, fitting a shut-off
tap (C), to allow the water supply to be cut off when
necessary. Easily accessible filters must be fitted
downstream of the tap.
Description
Value
Pressure
200÷450 kPa (2÷ 4,5 bar)
pH
7÷7.5
Conductivity
< 200 mS/cm
Hardness
9÷13°f (5÷7°d, 6.3÷8.8°e,
90÷125 ppm)
Salt and metallic
ion content
Chlorides
Sulphates
Iron
Copper
Manganese
C
IDM-39612001500.tif
Caution - warning
The appliance must be supplied with drinking
water having the characteristics shown in the
table.
< 30 mg/l
< 40 mg/l
< 0,1 mg/l
< 0.05 mg/l
< 0,05 mg/l
ELECTRICAL CONNECTION
Important
The connection must be made by authorised, skilled personnel, in accordance with
the relevant legal requirements, using appropriate and specified materials. The appliance is supplied with non-modifiable
operating voltage 400V/3N (230V/3 available on request.
A
B
C139612001.fm
GB
E
Caution - warning
Before doing any work, cut off the mains electricity supply.
Connect the appliance to the mains electricity supply as follows.
1 - If not already present, install a circuit-breaker
(A) with overload cutout and differential safety
breaker close to the appliance.
2 - Pull off the knob (B).
3 - Undo the screws (C) and remove the control
panel (D).
4 - Connect the circuit-breaker (A) to the terminal
board (E) of the appliance as shown in the diagram and in the electrical system diagram at
the back of the manual. Use a cable with at
least H05RN-F characteristics.
IT
C
DE
C D
IDM-39612001600.tif
FR
Important
When connecting, take care to connect the
neutral and earth lines.
5 - Replace the control panel (D) on completion of
the operation.
- 15 -
English
ES
TESTING OF THE APPLIANCE
Important
Before it is put into service, the system
must be tested to check the operating conditions of every single component and
identify any malfunctions. In this stage, it is
important to check that all health and safety
requirements have been complied with in
full.
To test the system, make the following checks.
1 - Turn on the water supply tap and make sure
that the connection is watertight.
2 - Check that the mains voltage is the same as
that of the appliance.
3 - Operate the appliance's circuit-breaker to
check the electrical connection.
4 - Check that the safety device is operating correctly.
After testing, if necessary instruct the user in all the
skills necessary for putting the appliance into operation in conditions of safety, in accordance with legal requirements.
ADJUSTMENTS
8
ADJUSTMENTS PROCEDURE
The appliance's main functions do not require
any special adjustments by specialist staff ex-
cept the settings made during use by the user.
REPLACING PARTS
IT
9
REPLACE PROCEDURE
GB The appliance does not require the replacement of
operating components by specialist staff except the
replacement of standard parts which can be carried
out by the user.
DE
FR
C139612000.fm
ES
DECOMMISSIONING THE APPLIANCE
Important
This operation must be carried out by
skilled operatives in compliance with the legal requirements with regard to safety at
work. Never dump non-biodegradable materials, lubricating oils and non-metallic
English
components (rubber, PVC, resins, etc.) in
the environment. Dispose of them in accordance with the relevant legal requirements.
- 16 -
INHALTSVERZEICHNIS
Ref. Kapitel
Seite
1 ALLGEMEINES ................................................................... 2
2 TECHNISCHE INFORMATIONEN...................................... 3
3 SICHERHEIT ...................................................................... 5
1. TEIL
4 GEBRAUCH UND BETRIEB............................................... 6
5 WARTUNG........................................................................ 10
6 DEFEKTE.......................................................................... 11
7 HANDHABUNG UND INSTALLATION ............................. 11
8 EINSTELLUNGEN ............................................................ 16
2. TEIL
9 AUSTAUSCH VON BAUTEILE ......................................... 16
ANLAGEN ..................................................................... I÷III
SACHREGISTER
A Allgemeine Beschreibung des
Ge-
räts, 3
Anfordern, Kundendienst, 3
Auspacken und Verpackung, 12
Austauschverfahren, 16
B Bedienelemente, Beschreibung, 7
Beschreibung der Bedienelemente, 7
E Ein- und Ausschalten des Geräts, 7
Einstellungsverfahren, 16
Empfehlungen für den Gebrauch, 6
Empfehlungen für die Installation und
Handhabung, 11
Empfehlungen für die Wartung, 10
Entsorgung des Geräts, 16
F Fehlersue, 11
Füllen und Entleeren des Beckens, 8
G Gebrauch, Empfehlungen für den, 6
Gebrauch, Tipps für den, 9
Gerät, allgemeine Beschreibung, 3
Gerät, Entsorgung, 16
Gerät, Installation, 13
Gerät, längerer Stillstand, 9
Gerät, Reinigung, 10
Gerät, Testlauf, 16
Geräte in Reihenaufstellung, Montage, 14
H Handhabung und Hub, 12
Handhabung und Installation, Empfehlungen für die, 11
Hersteller und Gerät, Kennzeichnung, 2
Hinweisschilder, Sicherheit und Informationen, 4
Hub und Handhabung, 12
O Optionales Zubehör, 5
R Raumbelüftung, 13
Reinigung des Geräts, 10
Rücksetzen des Geräts, 9
S Sicherheitshinweise
und Informationen, 4
Sicherheitsvorrichtungen, 4
Sicherheitsvorschriften, 5
Stromanschluss, 15
I Informationen für den leser, 2
Installation des Geräts, 13
Installation des Zubehörs, 13
Installation und Handhabung, Empfehlungen für die, 11
T Technische Daten, 3
K Kennzeichnung, Hersteller und Gerät, 2
Kundendienst anfordern, 3
V Verpackung und Auspacken, 12
WWartung, Empfehlungen für die, 10 GB
L Längerer Stillstand des Geräts, 9
M Montage bei Reihenaufstellung, 14
N Nivellieren, 14
Z Zweck des Handbuchs, 2
Testlauf zur Abnahme des Geräts, 16
Tipps für den Gebrauch, 9
Transport, 12
Typenschild für Hersteller und Gerät, 2
IT
Wasseranschluss, 15
DE
FR
C139612000.fm
ES
Die vollständige oder teilweise Reproduktion dieses Dokuments ohne die Zustimmung des Herstellers ist verboten.
Der Hersteller behält sich im Rahmen seiner Politik der kontinuierlichen Verbesserung das Recht zu Änderungen an dieser Dokumentation
vor, ohne zu einer Benachrichtigung verpflichtet zu sein, sofern hierdurch die Sicherheit nicht beeinträchtigt wird.
© 2002 - Texte, Illustrationen und Layout erstellt von: IDM esperti in comunicazione tecnica - Forlì (Italien) - Die Texte dürfen vom Hersteller ganz oder teilweise reproduziert werden, sofern der Autor genannt wird.
-1-
Deutsch
ALLGEMEINES
1
INFORMATIONEN FÜR DEN LESER
Konsultieren Sie das Sachregister, das am Anfang des
Handbuchs zu finden ist, um leichter unter bestimmten
Themen von besonderem Interesse nachschlagen zu können.
Vorliegendes Handbuch ist in zwei Teile gegliedert.
1. Teil: Die hier enthaltenen Informationen sind
nicht für eine spezifische Zielgruppe bestimmt, sondern enthalten sämtliche zum Gebrauch der Geräte
erforderlichen Hinweise.
2. Teil: Diese Informationen wenden sich an eine bestimmte Zielgruppe. Sie sind für erfahrene Bediener bestimmt, die für Handhabung, Transport, Installation,
Wartung, Reparatur und Entsorgung des Gerätes autorisiert sind und enthalten sämtliche hierzu erforderlichen Hinweise.
Benutzern wird daher nur die Konsultation des 1. Teils empfohlen, während der 2. Teil erfahrenen Bedienern gewidmet ist.
Für die zweite Gruppe kann die Lektüre des 1. Teils bei Bedarf
ebenfalls nützlich sein, um sich einen Gesamtüberblick zu verschaffen.
ZWECK DES HANDBUCHS
ITIT
GB
GB
Vorliegendes Handbuch ist integraler Bestandteil des Gerätes. Es wurde vom Hersteller konzipiert, um Personen, die zu
dessen Handhabung autorisiert sind, während der gesamten
vorgesehenen Lebensdauer des Produktes die erforderlichen
Informationen zur Verfügung zu stellen.
Neben dem fachgerechten Umgang mit dem Produkt
sind die Zielpersonen für vorliegende Anweisungen
dazu aufgefordert, diese aufmerksam durchzulesen
und rigoros anzuwenden.
Der Hersteller stellt diese Informationen im Original
in der Landessprache (Italienisch) zur Verfügung. Sie
können übersetzt werden, um gesetzlichen Anforderungen zu genügen oder kommerziellen Erfordernissen zu entsprechen.
Es lohnt sich, ein wenig Zeit zum Lesen des Handbuchs zu
investieren, um Gefahren für die Gesundheit und Sicherheit
von Personen sowie finanzielle Schäden zu vermeiden.
Bewahren Sie dieses Handbuch für die gesamte Lebensdauer des Gerätes an einem bekannten und leicht zugänglichen Ort auf, damit es immer griffbereit zur Verfügung
steht, wenn etwas nachgeschlagen werden muss.
DE
DE
FR
FR
Der Hersteller behält sich das Recht vor, ohne jegliche
Pflicht einer vorherigen Mitteilung, Änderungen vorzunehmen.
Um bestimmte Textstellen von besonderer Bedeutung hervorzuheben oder auf wichtige Spezifikationen hinzuweisen, sind einige Symbole verwendet worden, die im
Folgenden erläutert werden.
Vorsicht - Achtung
Weist darauf hin, dass bestimmte Vorsichtmaßnahmen erforderlich sind, um die Gefährdung von Gesundheit und Sicherheit der Personen zu vermeiden
und um keine Sachschäden zu verursachen.
Wichtig
Weist auf besonders wichtige technische Informationen hin, die nicht vernachlässigt werden
dürfen.
TYPENSCHILD FÜR HERSTELLER UND GERÄT
Das abgebildete Typenschild wird direkt auf dem Gerät
aufgebracht. Es enthält sämtliche Angaben und Hinweise,
die für den sicheren Betrieb unerlässlich sind.
A) Gerätemodell
B) Art der Anpassung
C) Angabe des Herstellers
D) Isolierstoffklasse
ES
ES
A
B
C
D
E
F
G
H
C139612000.fm
Q
L M N
P
IDM-39603606200.tif
Deutsch
-2-
E)Baujahr
F) Seriennummer
G)Schutzart
H)Bestimmungsland
L) Spannung (V)
M)Stromaufnahme (A)
N)Frequenz (Hz)
P)Angabe der Leistung (Kw)
Q)Abnahmespannungsanzeige
KUNDENDIENST ANFORDERN
Wenden Sie sich für sämtliche anfallenden Bedarfsfälle
an eines der autorisierten Kundenzentren.
Geben Sie bei jedem Kontakt mit dem Kunden-
dienstzentrum nicht nur den aufgetretenen Schaden, sondern auch die Daten an, die auf dem
Typenschild angeführt sind.
TECHNISCHE INFORMATIONEN
2
ALLGEMEINE BESCHREIBUNG DES GERÄTS
Der Nudelkocher, der im Folgenden als das Gerät
bezeichnet wird, wurde für Gaststättenzwecke konzipiert und gefertigt und dient dazu, Teigwaren in
Wasser zu kochen.
Das Gerät hat zwei Arbeitsfronten und kann daher
in der Raummitte aufgestellt werden.
Hauptorgane
A)Nudelkocher-Becken: aus Edelstahl.
B)Wasserdüse: um den Wasserstrahl auszurichten
C)Schalter Wasser: zum Regulieren der Wasserdurchflussmenge
D)Schalter Heizwiderstände: zum Einstellen der
Heizleistung
E)Kontrollleuchte Heizwiderstände: Sie signalisiert die Einschaltung der Heizwiderstände nach
dem Füllen des Beckens.
F) Kontrollleuchte Stromzufuhr: zur Anzeige der
Stromzufuhr
G)Türen: für den Zugang zum Innenbereich der
Schränke.
A
B
C
D
G
F
GB
E
G
DE
IDM-39612000100.tif
TECHNISCHE DATEN
C139612000.fm
FR
ES
Siehe Tabellen und "Anschlussschema" am Ende
des Handbuchs.
-3-
IT
Deutsch
SICHERHEITSVORRICHTUNGEN
Das Gerät wird zwar mit sämtlichen planmäßigen
Sicherheitsvorrichtungen geliefert, es kann jedoch
notwendig sein, während Installation und Anschluss ggf. weitere ergänzende Maßnahmen zu
ergreifen, um den Anforderungen der einschlägigen geltenden Gesetze zu entsprechen.
Die Abbildung zeigt die Anordnung der Sicherheitsvorrichtungen.
A)Sicherheitsthermostat: zum unterbrechen die
Stromzufuhr bei Überhitzung.
A
Wichtig
Die Auslösung des Thermostaten wird von
keiner Anzeigeeinrichtung signalisiert.
IDM-39612000200.tif
Vorsicht - Achtung
Stellen Sie jeden Tag durch Kontrollen sicher,
dass die Sicherheitsvorrichtungen fachgerecht installiert sind und einwandfrei
funktionieren.
SICHERHEITSHINWEISE UND INFORMATIONEN
C139612000.fm
Die Abbildung zeigt die Anordnung der aufgeklebten Sicherheitshinweise.
ITIT A)Typenschild mit Angabe des Herstellers und
der Gerätekenndaten.
B)Verbrennungsgefahr:
Vorsicht vor heißen FläGB
GB
chen.
C)Allgemeine Gefahr: Vor Ausführung irgendeiDE
DE
nes Eingriffs zuerst das Handbuch aufmerksam
lesen.
FR
FR D)Allgemeine Gefahr: Beim Waschen des Geräts
den Wasserstrahl nicht direkt auf die inneren TeiES le richten.
ES
E)Allgemeine Gefahr: Der Trockenbetrieb ist verboten.
F) Allgemeine Gefahr: Fordert zur Beachtung der
Vorschriften auf. "Im Falle der Missachtung der
Vorschriften für die Installation und Inbetriebnahme wird keine Haftung übernommen."
G)Allgemeine Gefahr: Fordert zur Beachtung der
Vorschriften auf. "Gemäß den geltenden Bestimmungen installieren und nur in gut belüfteten
Räumen betreiben."
Deutsch
-4-
D
C
E
A
B
G
F
IDM-39612000300.tif
OPTIONALES ZUBEHÖR
Auf Wunsch kann das Gerät mit folgenden Zubehörteilen ausgestattet werden.
A)Satz Körbe (KCPW40)
B)Korb (C0909)
C)Korb (CW2715)
D)Korb (CW0930)
E)Korb (CW1830)
F) Korb (CW2830)
G)Korb (CW4627)
H)Korb (CW2327)
L) Stützfüße
M)Ergänzungssatz für Geräte für Reihenaufstellung
H
L
G
F
E
D
C
B
A
IDM-39610900400.tif
SICHERHEIT
3
SICHERHEITSVORSCHRIFTEN
C139612000.fm
Der Hersteller hat bei Entwicklung und Fertigung dieses Produkts besondere Sorgfalt auf Aspekte verwendet, die eine Gefahr für die Sicherheit und die
Gesundheit der Personen, die dieses Gerät handhaben, hervorrufen können. Dabei wurden nicht nur die
einschlägigen geltenden Gesetzesanforderungen
berücksichtigt, sondern auch die "Regeln der guten
Bautechnik" befolgt. Das Ziel vorliegender Informationen besteht darin, die Benutzer aufzuklären, damit
diese der Vermeidung jeglicher Gefahren besondere
Aufmerksamkeit widmen. Umsicht ist nach wie vor
unersetzlich. Die Sicherheit ist auch in den Händen
aller Bedienpersonen, die das Gerät handhaben.
Lesen Sie die Anweisungen des mitgelieferten
Handbuchs und der Hinweisaufkleber aufmerksam
durch und halten Sie sich insbesondere an die Sicherheitshinweise. Es lohnt sich, ein wenig Zeit
zum Lesen zu opfern, um unerfreuliche Unfälle zu
vermeiden. Behalten Sie die richtige Vorgehensweise im Auge, bevor es zu spät ist, sich daran zu
erinnern, wie man es hätte machen sollen.
IT
Die installierten Sicherheitsvorrichtungen dürfen weder
um- bzw. ausgebaut, noch deaktiviert oder anderweitig
umgangen werden. Die Nichtbeachtung oben stehen- GB
der Forderung kann schwerwiegende Gefahren für Sicherheit und Gesundheit von Personen hervorrufen. DE
Auch nach angemessener Aufarbeitung der Dokumentation kann es bei der ersten Verwendung erforderlich sein, einige Probemanöver zu simulieren, um
sich mit den Bedienelementen, insbesondere Zündung und Abschaltung, sowie den wichtigsten Funktionen vertraut zu machen.
Setzen Sie das Gerät nur für die vom Hersteller vorgesehenen
Verwendungszwecke
ein.
Der
missbräuchliche Einsatz des Geräts kann schwerwiegende Gefahren für Sicherheit und Gesundheit
von Personen und finanzielle Verluste hervorrufen.
Sämtliche Wartungsarbeiten, die präzise Fachkenntnisse oder besondere Fähigkeiten erfordern, dürfen
ausschließlich von qualifiziertem Personal mit nachweislicher Erfahrung in diesem speziellen Gebiet
des Eingriffs durchgeführt werden.
-5-
Deutsch
FR
ES
Aus hygienischen Gründen und zum Schutz vor
jeglicher Form der Kontamination der Nahrungsmittel müssen die Elemente, die direkt oder indirekt mit
den Nahrungsmitteln in Berührung kommen sowie
die angrenzenden Zonen, akkurat gereinigt werden. Dabei dürfen ausschließlich Reinigungsmittel
für Lebensmittelzwecke eingesetzt werden. Entflammbare Mittel oder Produkte, die gesundheitsschädliche Stoffe enthalten, sind absolut zu
vermeiden. Die betreffenden Reinigungsarbeiten
müssen jedes Mal dann ausgeführt werden, wenn
ein nachweislicher Bedarf festgestellt wird und
nach Abschluss jeder Verwendung.
Im Falle einer längeren Stilllegung des Geräts ist
neben der Trennung von sämtlichen Anschlussleitungen eine akkurate Reinigung sämtlicher inneren
und äußeren Geräteteile sowie des angrenzenden
Umfeldes erforderlich, wobei die Hinweise des Herstellers und die einschlägigen geltenden Gesetzesvorschriften zu beachten sind.
Nach jeder Benutzung sicherstellen, dass die
Schalter auf Null stehen und die Stromzufuhr ausgeschaltet ist.
Keine entzündlichen Gegenstände oder Materialien
im Schrank oder in der Nähe des Geräts aufbewahren.
Beim täglichen Gebrauch des Geräts ist die ständige Anwesenheit des Bedienungspersonals erforderlich.
Beim Waschen des Geräts den Wasserstrahl nicht
direkt auf die inneren Teile des Geräts richten.
GEBRAUCH UND BETRIEB
4
EMPFEHLUNGEN FÜR DEN GEBRAUCH
C139612000.fm
Wichtig
Das Auftreten von Unfällen bei der VerwenITIT dung von Geräten hängt von vielen Faktoren
ab, die nicht immer zu vermeiden und zu
GB steuern sind. Einige Unfälle können von unGB
vorhersehbaren Raumbedingungen abhänDE
DE gen, andere sind vor allem benutzerbedingt.
Der Gebrauch des Gerätes ist Benutzern
vorbehalten, die autorisiert sind und sich
FR
FR angemessen informiert haben. Darüber hinaus kann es bei der ersten Verwendung erES forderlich sein, einige Vorgänge zu
ES
simulieren, um sich mit den Bedienelementen und den wichtigsten Funktionen vertraut
Deutsch
zu machen. Beschränken Sie sich auf die
vom Hersteller vorgesehenen Verwendungszwecke, ohne Änderungen an den
Vorrichtungen vorzunehmen, um nicht vorgesehene Leistungen herbeizuführen. Überprüfen Sie vor dem Gebrauch, ob die
Sicherheitsvorrichtungen installiert sind
und einwandfrei funktionieren. Neben Beachtung oben stehender Anforderungen
müssen die Benutzer sämtliche Sicherheitsnormen befolgen und die Beschreibung der
Bedienelemente sowie der Inbetriebnahme
aufmerksam durchlesen.
-6-
BESCHREIBUNG DER BEDIENELEMENTE
Das Gerät ist mit Bedienelementen zur Aktivierung
der wichtigsten Funktionen ausgestattet.
A)Schalter Widerstände: Zum Ein-/Ausschalten
und Einstellen der Heizwiderstände.
B)Schalter Wasser: zum Füllen des Wasserbeckens
mit den verschiedenen Modalitäten.
C)Kontrollleuchte Stromzufuhr: zur Anzeige der
Stromzufuhr.
D)Kontrollleuchte Heizwiderstände: Sie signalisiert
die Einschaltung der Heizwiderstände nach dem
Füllen des Beckens.
Anzeige Manuelles
Füllen
Anzeige
Ausschaltung
Anzeige
Ausschaltung
Anzeige min.
Leistung
B
C
C
D
D
Anzeige
Langsames automatisches Füllen
B
Anzeige Schnelles automatisches Füllen
A
Anzeige max.
Leistung
Anzeige der rudezierten
Leistung
A
IDM-39612000400.tif
EIN- UND AUSSCHALTEN DES GERÄTS
Zündung
1 - Mit dem Trennschalter den Anschluss an das
Stromnetz herstellen.
2 - Das Wasserbecken füllen (siehe S. 8)
3 - Den Schalter (A) in die Stellung 1 drehen, um
die Heizwiderstände auf die maximale Leistung
einzuschalten und das Wasser möglichst rasch
zum Kochen zu bringen. Die Kontrollleuchte
Gaszufuhr (C) schaltet sich ein.
4 - Den Schalter (A) in eine der anderen Stellungen drehen, um die Leistung der Heizwiderstände auf niedrigere Werte einzustellen.
C139612000.fm
Abschaltung
1 - Die Wasserzufuhr stoppen (siehe S. 8)
2 - Den Schalter (A) in die Stellung 3 drehen, um
die Heizwiderstände auszuschalten.
3 - Mit dem Trennschalter den Anschluss an das
Hauptstromnetz herstellen.
A C
GB
1
DE
A
FR
2
ES
3
IDM-39612000500.tif
-7-
IT
Deutsch
FÜLLEN UND ENTLEEREN DES BECKENS
Füllen
Das Füllen kann auf unterschiedliche Weisen erfolgen.
Schnelles freies Füllen
– Den Schalter (B) auf Position 1 drehen, um das
Becken zumindest bis zum Mindestfüllstand zu
befüllen, der durch die Bezugsmarkierung gekennzeichnet wird. Nach Erreichen des gewünschten
Füllstands
können
die
Heizwiderstände eingeschaltet werden.
B
1
2
B
Wichtig
Nach dem Füllen muss man den Schalter
(B) in eine andere Schaltstellung drehen,
damit das Bekken nicht überläuft.
3
Schnelles automatisches Nachfüllen
– Den Schalter (B) in die Schaltstellung 2 drehen, um das Becken automatisch bis zum
maximalen Füllstand zu füllen, wenn der
Wasserpegel unter das Minimum sinkt.
4
Hinweis: Höchst- und Mindestfüllstand beziehen
sich auf das Funktionsintervall des Druckschalters.
ITIT
IDM-39612000600.tif
Langsames automatisches Nachfüllen
– Den Schalter (B) für den langsamen und kontinuierlichen Wasserzulauf, der den Wasserpegel im
Becken konstant hält, in Schaltstellung 3 drehen.
GB
GB
Wichtig
Wenn der Wasserpegel unter das Minimum
DE
DE
sinkt, wird automatisch die Modalität
"Schnelles automatisches Nachfüllen" aktiFR
FR viert.
C
Entleeren
ES
ES 4 - Den Schalter (B) in Schaltstellung 4 drehen, um
C139612000.fm
den Wasserzulauf zu stoppen.
5 - Den Hahn (C) aufdrehen, um das Becken zu
leeren.
Deutsch
-8-
IDM-39612000700.tif
RÜCKSETZEN DES GERÄTS
Wichtig
Die Auslösung des Thermostaten wird von
keiner Anzeigeeinrichtung signalisiert.
Wenn der Sicherheitsthermostat anspricht, muss
das Gerät in der angegebenen Weise wieder in den
normalen Betriebszustand versetzt werden.
1 - Das Wasser um 30-40 °C abkühlen lassen
2 - Öffnen Sie die Klappe (A).
3 - Mit Taste (B) des Sicherheitsthermostats die
Stromzufuhr wieder einschalten.
4 - Abschließend die Tür (A) wieder schließen.
B
A
IDM-39612001700.tif
LÄNGERER STILLSTAND DES GERÄTS
Verfahren Sie folgendermaßen, falls das Gerät längere Zeit nicht eingesetzt werden soll:
1 - Das Gerät mit seinem Trennschalter vom
Hauptstromnetz trennen.
2 - Reinigen Sie das Gerät und die angrenzenden
Zonen akkurat.
3 - Tragen Sie eine hauchdünne Schicht Lebensmittelöl auf die Edelstahlflächen auf.
4 - Führen Sie sämtliche Wartungsarbeiten
aus.
5 - Lassen Sie das Gerät unbedeckt stehen,
wobei die Garräume offen bleiben.
C139612000.fm
TIPPS FÜR DEN GEBRAUCH
Um eine korrekte Anwendung des Gerätes zu gewährleisten, sollten folgende Ratschläge befolgt werden:
– Verwenden Sie ausschließlich das vom Hersteller angegebene Zubehör.
– Das Gerät und den umliegenden Bereich stets
sauber halten.
– Zum Reinigen nur lebensmitteltaugliche Reiniger
verwenden.
– Gehen Sie beim Eintauchen der Körbe behutsam
vor, um Schaumbildung zu vermeiden.
– Hängen Sie die Körbe zum Ablaufen an die vorgesehene Halterung.
– Füllen Sie die Körbe mit der richtigen Menge an
Nudeln, wobei Sie die Sorte und das Quellvolumen berücksichtigen sollen
– Warten Sie mit dem Eintauchen der Körbe, bis
das Wasser kocht
– Vor dem Füllen des Beckens sicherstellen, dass
der Ablasshahn (A) geschlossen ist.
– Achten Sie darauf, dass der Wasserstand nie unter den angegebenen Tiefststand (B) sinkt.
– Dafür sorgen, dass das Wasser mit konstanter
Temperatur kocht und dass die Stärke ordnungsgemäß abläuft.
– Das Gerät mit Wasser mit einer Temperatur von
55°C speisen.
IT
GB
B
DE
FR
A
ES
IDM-39612000800.tif
– Das Becken nach Gebrauch vollständig entleeren.
Vorsicht - Achtung
Das Gerät nicht verwenden, wenn sich kein
Wasser im Behälter befindet, um Schäden am
Gerät zu vermeiden.
-9-
Deutsch
WARTUNG
5
EMPFEHLUNGEN FÜR DIE WARTUNG
Sorgen Sie dafür, dass das Gerät im Zustand maximaler Leistungsfähigkeit bleibt, indem Sie die vom Hersteller vorgesehenen planmäßigen Wartungsarbeiten
ausführen. Gute Wartung zahlt sich durch optimale Leistungen, längere Betriebsdauer und eine konstante
Wahrung der Sicherheitsanforderungen aus.
Vorsicht - Achtung
Vor jedem Wartungseingriff müssen sämtliche
vorgesehenen Sicherheitsvorrichtungen aktiviert werden. Überlegen Sie, ob es notwendig
ist, das arbeitende Personal und die in der
Nähe befindlichen Personen auf angemessene Weise zu informieren. Insbesondere mit
dem Trennschalter die Stromzufuhr unterbrechen und den Zugang zu allen Vorrichtungen
verhindern,
die
bei
Einschaltung zu Situationen mit unerwarteter Gefährdung der Sicherheit und Gesundheit von Personen führen können.
Folgende Elemente sind nach jedem Einsatz und
bei Bedarf zu reinigen:
– Das Becken (siehe S. 10)
– die Zubehörteile (siehe S. 5)
– Das Gerät und die angrenzenden Zonen (siehe
S. 10)
Nach jeweils 100 Betriebsstunden müssen folgende Arbeiten von erfahrenen und autorisierten
Bedienern ausgeführt werden:
– Kontrollieren, ob der Sicherheitsthermostat einwandfrei funktioniert.
– Funktionstüchtigkeit der Stromanlage prüfen
REINIGUNG DES GERÄTS
Da das Gerät zur Zubereitung von Speisen für den
Menschen eingesetzt wird, ist besondere Sorgfalt
ITIT
auf die Hygiene geboten. Das Gerät und dessen
näheres Umfeld müssen konstant sauber gehalten
GB werden.
GB
Wichtig
Vor Beginn von Reinigungsarbeiten die
Stromzufuhr mit dem Trennschalter unterFR
FR
brechen und das Gerät abkühlen lassen.
DE
DE
C139612000.fm
ES Achten Sie auch auf folgende Empfehlungen:
ES
1 - Verwenden Sie zur Reinigung der Geräteteile
ausschließlich lauwarmes Wasser, Reinigungsmittel für Lebensmittelzwecke und keine
Scheuermittel.
2 - Die Elemente, die in direkten oder indirekten
Kontakt mit den Lebensmitteln kommen, und
die angrenzenden Bereiche sorgfältig reinigen.
3 - Die Zubehörteile nach dem Gebrauch mit einem geeigneten Fettlöser reinigen. Wir empfehlen die Reinigung im Geschirrspüler.
Deutsch
Vorsicht - Achtung
Verwenden Sie keine Produkte, die Stoffe enthalten, welche für die menschliche Gesundheit
schädlich
und
gefährlich
sind
(Lösemittel, Benzin, usw.).
4 - Spülen Sie die Oberflächen mit Trinkwasser
nach und trocknen Sie sie ab.
5 - Nur die äußeren Teile dürfen mit einem Wasserstrahl gereinigt werden.
6 - Behandeln Sie die Edelstahlflächen vorsichtig,
um sie nicht zu beschädigen. Insbesondere
sollte der Gebrauch von ätzenden Produkten,
Scheuermitteln und spitzen Gegenständen vermieden werden.
7 - Essensreste müssen so schnell wie möglich
entfernt werden, bevor sie eintrocknen und hart
werden.
8 - Entfernen Sie die Kalkablagerung, die sich auf
einigen Geräteflächen bilden können.
- 10 -
DEFEKTE
6
FEHLERSUCHE
Vor der Inbetriebnahme wurde das Gerät einem
vorläufigen Testlauf unterzogen.
Die im Folgenden aufgeführten Informationen sollen Ihnen dabei helfen, eventuelle Anomalien oder
Funktionsstörungen, die während des Betriebs auftreten können, aufzufinden und zu beheben.
Störung
Die Heizwiderstände schalten
sich nicht ein
Einige dieser Probleme können vom Benutzer selbst
behoben werden; alle anderen erfordern präzise
Fachkenntnisse oder besondere Fähigkeiten und
dürfen daher ausschließlich von qualifiziertem Personal mit nachweislicher Erfahrung in diesem speziellen Gebiet des Eingriffs durchgeführt werden.
Ursache
Lösung
Stromanschluss nicht korrekt ausgeführt
Den Anschluss der Stromkabel
prüfen
Auslösung des Sicherheitsthermostats
Gerät rücksetzen (siehe S. 13)
Taktschalter defekt
Wichtig
Kontaktieren Sie den Kundendienst
Taktschalter auswechseln
In Position 2 des Vier-Taktschalters erfolgt die Wasserförderung
kontinuierlich bis zum Überlaufen.
Druckschalterkreis verstopft.
Druckschalter defekt.
Wichtig
Magnetventil für Befüllung defekt.
Kontaktieren Sie
den Kundendienst
Anschluss an Druckschalter nicht
korrekt ausgeführt.
Kontaktieren Sie den Kundendienst
In Position 2 des Vier-Taktschalters läuft kein Wasser aus dem
Hahn.
Wasseranschluss nicht korrekt
ausgeführt.
Wichtig
Anschluss des Druckschalters
überprüfen.
IT
Wichtig
Kontaktieren Sie den Kundendienst
GB
Wasseranschluss überprüfen.
In Position 3 des Vier-Taktschalters erfolgt kein langsames automatisches Nachfüllen.
Anschluss an Magnetventil für
Konstanthalten des Wasserstands
nicht korrekt ausgeführt.
Magnetventil für Konstanthalten des
Wasserstands defekt.
Wichtig
Kontaktieren Sie den Kundendienst
Anschluss und Funktionstüchtigkeit
des Magnetventils für Konstanthalten
des Wasserstands überprüfen.
DE
FR
ES
HANDHABUNG UND INSTALLATION
7
C139612000.fm
EMPFEHLUNGEN FÜR DIE INSTALLATION UND HANDHABUNG
Wichtig
Beachten Sie die Hinweise des Herstellers,
die direkt auf der Verpackung, auf dem Gerät selbst oder in der Gebrauchsanweisung
zu finden sind, wenn Sie das Gerät handhaben und installieren. Die für diese Operatio-
nen autorisierte Person wird bei Bedarf
einen "Sicherheitsplan" aufstellen müssen,
um die Unversehrtheit der direkt an dem
Vorgang beteiligten Personen zu gewährleisten.
- 11 -
Deutsch
VERPACKUNG UND AUSPACKEN
Die Verpackung wird möglichst platzsparend und
unter Berücksichtigung des eingesetzten Transportmittels realisiert.
Zur Vereinfachung des Transports können einige
Komponenten für die Spedition ausgebaut und mit einer geeigneten Schutzverpackung versehen werden.
Auf der Verpackung sind sämtliche erforderlichen
Angaben zur Be- und Entladung angegeben.
Kontrollieren Sie beim Auspacken die Unversehrtheit und die exakte Übereinstimmung der Stückmengen.
Das Verpackungsmaterial muss fachgerecht und
unter Beachtung der einschlägigen geltenden Gesetzesbestimmungen entsorgt werden.
IDM-39603300800.tif
TRANSPORT
Der Transport kann auch in Abhängigkeit vom Bestimmungsort anhand verschiedener Transportmittel
erfolgen.
Folgendes Schema zeigt die gängigsten Lösungen.
Für die Dauer des Transportes muss das Liefergut fachgerecht an das Transportmittel vertaut werden, um unerwünschte Bewegungen zu vermeiden.
Hubmittel
Transportmittel
IDM-3960200180.tif
IT
GB
HANDHABUNG UND HUB
DE
Das Gerät kann mit einem Hubmittel bewegt werden, das mit Gabeln oder Haken ausgestattet ist
und die geeignete Traglast besitzt. Vor diesem Vorgang ist der Schwerpunkt der Last zu überprüfen.
FR
Wichtig
Einführen der Lastaufnahmevorrichtung auf die Speise- und Ablassleitungen
achten.
ES Beim
C139612000.fm
IDM-39612000900.tif
Deutsch
- 12 -
INSTALLATION DES GERÄTS
Es müssen sämtliche Phasen der Installation, schon
von der Umsetzung des allgemeinen Projekts an, berücksichtigt werden. Die für diese Operationen autorisierte Person wird vor Einleitung dieser Phasen den
Installationsstandort bestimmen und bei Bedarf einen
"Sicherheitsplan" aufstellen, um die Unversehrtheit der
direkt am Vorgang beteiligten Personen zu gewährleisten und die gesetzlichen Bestimmungen zu befolgen.
Dies betrifft insbesondere die Vorschriften für nicht ortsfeste Arbeitsräume.
Der Installationsort muss folgenden Anforderungen
entsprechen: Anschlüsse für die verschiedenen Versorgungsleitungen, Abführungsvorrichtungen für Produktionsrückstände, angemessene Beleuchtung.
Darüber hinaus müssen sämtliche hygienischen und
gesundheitsrechtlichen Anforderungen erfüllt sein, um
eine Kontamination der Nahrungsmittel zu vermeiden.
Bestimmen Sie, falls notwendig, die exakte Position für
jedes Gerät bzw. jede Gerätekomponente. Für eine
korrekte Positionierung können die Koordinaten aufgezeichnet werden.
Installieren Sie das Gerät in einem Abstand von minde-
IDM-39612001000.tif
stens 50 mm zur Wand, falls diese nicht für Temperaturen von mindestens 150°C ausgelegt ist.
Die Installation in Einklang mit den im Installationsland geltenden gesetzlichen Bestimmungen,
Normen und Spezifikationen ausführen.
RAUMBELÜFTUNG
Der Raum, in dem das Gerät installiert wird, muss
über Zuluftöffnungen verfügen, um den einwandfreien Betrieb des Geräts und den Luftaustausch im
Raum selbst zu gewährleisten.
Die Zuluftöffnungen müssen ausreichend groß bemessen und durch Gitter geschützt und so positioniert sein, dass sie nicht verdeckt werden können.
IT
GB
DE
FR
IDM-39612001100.tif
ES
INSTALLATION DES ZUBEHÖRS
C139612000.fm
Die Stützfüße (A) an den Befestigungspunkten des
Gestells einschrauben.
A
IDM-39612001200.tif
- 13 -
Deutsch
NIVELLIEREN
Regulieren Sie die Füße (A), um das Gerät wasserwaagengerecht aufzustellen.
A
IDM-39612001300.tif
MONTAGE BEI REIHENAUFSTELLUNG
Verfahren Sie folgendermaßen, um Geräte (nebeneinander) in einer Reihe
aufzustellen.
1 - Den Schalter (A) abziehen.
2 - Die Schrauben (C)
ausschrauben und
C
die Blenden (B)
ausbauen.
3 - Bekleben Sie die Gerätekanten, die nebeneinander angeordnet
A
C B
werden sollen, mit einem Schutzband.
4 - Beschichten Sie die Seitenwände, die nebenIT
einander aufgestellt werden sollen, mit einer
Dichtungsmasse für Lebensmittelzwecke.
5
Die
Geräte aneinander reihen.
GB
6 - Das Gerät mit den Schrauben und Muttern (D-
D
E
IDM-39612001400.tif
E) anschließen.
7 - Entfernen Sie überflüssige Dichtungsmasse
und Klebeband.
8 - Die Blenden (B) und die Schalter (A) nach Abschluss der Arbeit wieder anbringen.
DE
Für die in Reihe aufgestellten Geräte ist auf
ein Ausstattungssatz lieferbar, der aus
dem Untergestell und einigen Abschlussprofilen
besteht.
FR Wunsch
C139612000.fm
ES
IDM-39610801100.tif
Deutsch
- 14 -
WASSERANSCHLUSS
Schließen Sie den Zufuhrschlauch der Wasserleitung an das Anschlussrohr des Gerätes an. Bringen
Sie hierbei einen Absperrhahn (C) an, um die Wasserzufuhr bei Bedarf absperren zu können. Hinter
diesen Absperrhahn müssen leicht zugängliche Filter eingebaut werden.
Beschreibung
Wert
Druck
200÷450 kPa (2÷ 4,5 bar)
pH
7÷7.5
Leitfähigkeit
< 200 mS/cm
Härte
9÷13°f (5÷7°d, 6.3÷8.8°e,
90÷125 ppm)
Gehalt an Salzen und
Metallionen
Chlorid
Sulfate
Eisen
Kupfer
Mangan
C
IDM-39612001500.tif
< 30 mg/l
< 40 mg/l
< 0,1 mg/l
< 0.05 mg/l
< 0,05 mg/l
Vorsicht - Achtung
Das Gerät muss mit Trinkwasser gespeist
werden, dass die in der Tabelle angegebenen
Eigenschaften hat.
STROMANSCHLUSS
Wichtig
Der Anschluss muss von autorisiertem Fachpersonal in Einklang mit den einschlägigen
gesetzlichen Bestimmungen und unter Verwendung von geeignetem und vorschriftsmäßigem Material ausgeführt werden. Das
Gerät wird mit einer nicht unschaltbaren Betriebsspannung von 400V/3N, bzw. auf Anfrage von 230V/3 geliefert.
A
B
C139612001.fm
GB
E
Vorsicht - Achtung
Vor Ausführung irgendeines Eingriffs die
Hauptstromversorgung unterbrechen.
Den Anschluss des Geräts an das Stromnetz in der
angegebenen Weise ausführen.
1 - Falls nicht schon vorhanden, einen Trennschalter (A) mit thermomagnetischem Auslöser und
FI-Block in der Nähe des Geräts installieren.
2 - Den Schalter (B) abziehen.
3 - Drehen Sie die Schrauben (C) heraus und
montieren Sie die Blende (D) ab.
4 - Den Trennschalter (A) nach den Angaben in
der Abbildung und im Schaltplan am Ende des
Handbuchs an die Klemmenleiste (E) des Geräts anschließen. Ein Kabel verwenden, dessen Eigenschaften mindestens die vom Typ
H05RN-F erfüllen müssen.
IT
C
DE
C D
IDM-39612001600.tif
FR
Wichtig
Bei der Ausführung des Anschlusses besonders auf den Neutral- und Schutzleiter
achten.
5 - Nach beendetem Vorgang die Blende(D) wieder anbringen.
- 15 -
Deutsch
ES
TESTLAUF ZUR ABNAHME DES GERÄTS
Wichtig
Vor der Inbetriebnahme muss ein Testlauf
der Anlage durchgeführt werden, um den
Betriebszustand jeder einzelnen Komponente zu überprüfen und eventuelle Anomalien zur ermitteln. In dieser Phase ist es
besonders wichtig, dass sämtliche Sicherheits- und Hygienemaßnahmen vorschriftsmäßig eingehalten werden.
Für den Testlauf der Abnahme sind folgende Kontrollen durchzuführen:
1 - Den Wasserhahn öffnen und die Verbindung
auf Dichtheit prüfen.
2 - Sicherstellen, dass die Netzspannung der
Nennspannung des Geräts entspricht.
3 - Den Trennschalter betätigen, um den Stromanschluss zu überprüfen.
4 - Eine Funktionsprüfung der Sicherheitseinrichtungen vornehmen.
Nach Abschluss des Testlaufs ist der Benutzer gegebenenfalls auf angemessene Weise in den Gebrauch des Gerätes einzuweisen, um sämtliche
Kenntnisse zu erwerben, die zur Inbetriebnahme
des Gerätes unter Sicherheitsbedingungen gemäß
geltender Gesetzesvorschriften erforderlich sind.
EINSTELLUNGEN
8
EINSTELLUNGSVERFAHREN
Die wichtigsten Funktionen des Geräts erfordern keine besonderen Einstellungen durch
Fachpersonal, sondern können während des Gebrauchs vom Benutzer geregelt werden.
AUSTAUSCH VON BAUTEILE
IT
9
AUSTAUSCHVERFAHREN
Das Auswechseln von Betriebsteilen kann der BedieGB ner selbst, ohne Erfordernis von Fachpersonal vornehmen.
DE
ENTSORGUNG DES GERÄTS
FR
C139612000.fm
ES
Wichtig
Die Entsorgung ist erfahrenen Bedienern
vorbehalten und muss in Übereinstimmung
mit den geltenden arbeitsrechtlichen Bestimmungen zur Sicherheit am Arbeitsplatz
erfolgen. Schmieröl oder Komponenten
aus Nichteisen (Gummi, PVC, Harze, usw.)
Deutsch
bzw. alle Produkte, die nicht biologisch abgebaut werden, dürfen nicht in die Umwelt
eingeleitet werden. Die Entsorgung muss
unter Beachtung der einschlägigen geltenden Gesetzesbestimmungen erfolgen.
- 16 -
INDEX
réf. chapitres
page
1 INFORMATIONS GÉNÉRALES.......................................... 2
2 INFORMATIONS TECHNIQUES ........................................ 3
e
1 PARTIE
3 SÉCURITÉ .......................................................................... 5
4 UTILISATION ET FONCTIONNEMENT ............................. 6
5 ENTRETIEN ...................................................................... 10
6 PANNES ........................................................................... 11
7 MANUTENTION ET INSTALLATION................................ 11
2e PARTIE
8 RÉGLAGES ...................................................................... 16
9 REMPLACEMENT DE PIÈCES ........................................ 16
ANNEXES ..................................................................... I÷III
INDEX ANALYTIQUE
E Elimination de l’appareil, 16
N Nettoyage de l’appareil, 10
A Accessoires sur demande, 5
Allumage et extinction de l’appareil, 7
Appareil et fabricant, identification, 2
Appareil, description générale, 3
Appareil, élimination, 16
Appareil, essai, 16
Appareil, inutilisation prolongée, 9
Appareil, mise en place, 13
Appareil, nettoyage, 10
Appareils en batterie, montage, 14
Assistance, demande, 3
B Branchement électrique, 15
But du manuel, 2
C Commandes, description, 7
Conseils d’utilisation, 9
D Déballage et emballage, 12
Demande d'assistance, 3
Dépannage, 11
Description des commandes, 7
Description générale de l'appareil, 3
Dispositifs de sécurité, 4
Données techniques, 3
Emballage et déballage, 12
Entretien, recommandations pour l’, 10
Essai de l’appareil, 16
F Fabricant et appareil, identification, 2
I Identification du fabricant et de l’ap-
pareil, 2
Informations pour le lecteur, 2
Installation des accessoires, 13
Installation et manutention, recommandations pour la, 11
Inutilisation prolongée de l’appareil, 9
L Levage et manutention, 12
M Manutention et installation, recom-
mandations pour la, 11
Manutention et levage, 12
Mise à niveau, 14
Mise en place de l’appareil, 13
Modes de réglages, 16
Modes de remplacements, 16
Montage des appareils en batterie, 14
Normes de sécurité, 5
P Pannes, dépannage, 11
R Raccordement de l'eau, 15
Recommandations pour l'utilisation, 6
Recommandations pour l’entretien, 10
Recommandations pour la manutention et l’installation, 11
Remplissage et vidange de la cuve, 8
Rétablissement des fonctions de l’appareil, 9
S Sécurité et information, signaux de, 4
Sécurité, dispositifs de, 4
Sécurité, normes de, 5
Signaux de sécurité et information, 4
T Transport, 12
U Utilisation, conseils d’, 9
IT
GB
Utilisation, recommandations pour l', 6
V Ventilation de la pièce, 13
DE
FR
C139612000.fm
ES
La reproduction, même partielle, de ce document est interdite sans le consentement du constructeur. Dans le but d’améliorer son produit, le
constructeur se réserve le droit de modifier cette documentation, sans préavis, pourvu que cela ne constitue pas de risques pour la sécurité.
© 2002 – Auteurs des textes, illustrations et mise en page : IDM esperti in comunicazione tecnica – Forlì (Italie)– Les textes peuvent être reproduits, intégralement ou partiellement, par le constructeur à la condition
que l’auteur soit cité.
-1-
Français
INFORMATIONS GÉNÉRALES
1
INFORMATIONS POUR LE LECTEUR
Pour retrouver facilement les sujets qui vous intéressent, consulter l’index analytique au début du
manuel.
Ce manuel est divisé en deux parties.
1e partie: elle contient toutes les informations
nécessaires aux destinataires hétérogènes,
c’est-à-dire les utilisateurs de l’appareil.
2e partie: elle contient toutes les informations nécessaires aux destinataires homogènes, c’est-à-dire tous les opérateurs experts
et autorisés à manutentionner, transporter,
installer, vérifier, réparer et démolir l’appareil.
Les utilisateurs doivent consulter uniquement la 1e
partie, les opérateurs experts la 2e partie. Ceux-ci
peuvent lire aussi la 1e partie pour avoir, si nécessaire, une vision plus complète des informations.
BUT DU MANUEL
Ce manuel, qui fait partie intégrante de l'appareil, a
été rédigé par le fabricant pour fournir les informations nécessaires à ceux qui sont autorisés à interagir avec celui-ci pendant sa vie.
Les destinataires des informations doivent non seulement adopter une bonne technique d’utilisation,
mais ils doivent aussi lire attentivement les indications et les appliquer de façon rigoureuse.
Ces informations sont fournies par le fabricant
dans sa langue d'origine (italien) et peuvent être
traduites dans d'autres langues pour satisfaire
les exigences législatives et/ou commerciales.
Un peu de temps consacré à la lecture de ces
informations, permettra d’éviter des risques à la
santé et à la sécurité des personnes et des dommaIT ges économiques.
Conserver ce manuel pour toute la durée de vie de
l’appareil, dans un lieu connu et facilement accessiGB ble, pour l’avoir toujours à disposition au moment
où l’on doit le consulter.
DE
Le fabricant se réserve le droit d’apporter des modifications sans l’obligation de fournir préalablement une communication.
Pour mettre en évidence certaines parties de texte
très importantes ou pour indiquer certaines caractéristiques, des symboles ont été utilisés dont le sens
est décrit ci-après.
Attention
Indique qu’il faut adopter des comportements
appropriés pour ne pas mettre en péril la santé et la sécurité des personnes et ne pas provoquer de dommages économiques.
Important
Indique des informations techniques d’une
grande importance à ne pas négliger.
IDENTIFICATION DU FABRICANT ET DE L’APPAREIL
La plaque d’identification représentée, est appliquée
FR directement sur l'appareil. Elle reporte les références
et les indications indispensables à la sécurité.
ES
A
B
C
A)Modèle de l’appareil
B)Type de personnalisation
C)Identification du fabricant
D)Classe d'isolation
D
E
F
G
H
C139612000.fm
Q
L M N
P
IDM-39603606200.tif
Français
-2-
E)Année de fabrication
F) Numéro de série
G)Degré de protection
H)Pays de destination
L) Tension (V)
M)Absorption (A)
N)Fréquence (Hz)
P)Puissance déclarée (kW)
Q)Indicateur de tension d'essai
DEMANDE D'ASSISTANCE
Pour toute exigence, s’adresser à l’un des centres
autorisés.
Pour toute demande d’assistance technique, indi-
quer les données reportées sur la plaque d’identification et le type de défaut relevé.
INFORMATIONS TECHNIQUES
2
DESCRIPTION GÉNÉRALE DE L'APPAREIL
Le cuiseur à pâtes, que l’on appellera appareil, a
été conçu et fabriqué pour la cuisson dans l’eau de
pâtes alimentaires, dans le domaine de la restauration professionnelle.
L'appareil peut être utilisé sur deux façades ce qui
permet de pouvoir l’installer au centre de la pièce.
Organes principaux
A)Cuve de cuisson: en acier inox.
B)Erogateur d’eau: pour diriger le flux de l’eau
C)Manette de commande de l’eau: pour régler le débit de l'eau
D)Manette de commande des résistances: pour régler la puissance de chauffe.
E)Voyant des résistances: pour signaler l’activation
des résistances après le remplissage de la cuve
F) Voyant de réseau: pour signaler l'activation de l'alimentation électrique.
G)Portes: pour accéder à l’intérieur des compartiments.
A
B
C
D
G
F
IT
GB
E
G
DE
IDM-39612000100.tif
FR
ES
DONNÉES TECHNIQUES
C139612000.fm
Voir tableaux et "Fiche des raccordements" à la fin
du manuel.
-3-
Français
DISPOSITIFS DE SÉCURITÉ
Même si l’appareil est complet de tous les dispositifs de sécurité, lors de l’installation et du raccordement, ils devront, si nécessaire, être intégrés avec
d’autres pour respecter les lois en vigueur.
L’illustration indique la position des dispositifs.
A)Thermostat de sécurité: pour bloquer l'alimentation électrique dans le cas de surchauffe.
A
Important
L'intervention du thermostat n’est signalé
par aucun dispositif de signalisation
Attention
Vérifier quotidiennement que les dispositifs
de sécurité soient parfaitement installés et efficaces.
IDM-39612000200.tif
SIGNAUX DE SÉCURITÉ ET INFORMATION
C139612000.fm
L’illustration indique la position des signaux appliqués.
IT A)Plaque d'identification du fabricant et de l'appareil.
B)Risque de brûlure: attention aux surfaces chauGB
des.
C)Danger générique: avant tout type d’intervenDE tion, lire attentivement ce manuel.
D)Risque générique: pendant le lavage de l’appaFR reil ne pas diriger de jets d’eau sous pression sur
les pièces intérieures.
E)Risque générique: le fonctionnement à sec est
ES
interdit.
F) Risque générique: rappelle l’attention sur le respect des normes. "Installer conformément aux
normes en vigueur et n’utiliser que dans des pièces bien aérées".
G)Risque générique: rappelle l’attention sur le respect des normes. "Nous déclinons toute responsabilité pour le non-respect des normes
d’installation et de mise en service".
Français
-4-
D
C
E
A
B
G
F
IDM-39612000300.tif
ACCESSOIRES SUR DEMANDE
Sur demande l'appareil peut être équipé des accessoires suivants.
A)"Kit" paniers (KCPW40)
B)Panier (C0909)
C)Panier (CW2715)
D)Panier (CW0930)
E)Panier (CW1830)
F) Panier (CW2830)
G)Panier (CW4627)
H)Panier (CW2327)
L) Pieds d’appui
M)Kit de complètement pour appareils en batterie
H
L
G
F
E
D
C
B
A
IDM-39610900400.tif
SÉCURITÉ
3
NORMES DE SÉCURITÉ
IT
C139612000.fm
Le fabricant, lors de la conception et de la fabrication, a fait très attention aux aspects qui peuvent
provoquer des risques à la sécurité et à la santé des
personnes qui interagissent avec l’appareil. Non
seulement il a respecté les lois en vigueur à ce sujet, mais il a adopté toutes les “règles de la bonne
technique de fabrication”. Le but de ces informations est de sensibiliser les utilisateurs à faire très
attention pour prévenir tout risque. Mais la prudence est irremplaçable. La sécurité est aussi dans les
mains de tous les opérateurs qui interagissent avec
l’appareil.
Lire attentivement les instructions reportées dans
ce manuel et celles appliquées directement, en particulier respecter celles concernant la sécurité. Un
peu de temps consacré à la lecture pour ne pas
avoir d’accidents désagréables; il est toujours trop
tard de se rappeler ce qu’il aurait fallu faire quand
cela est arrivé.
Ne pas modifier, ne pas éluder, ne pas éliminer ou bypasser les dispositifs de sécurité installés. Le non-resGB
pect de cette condition peut entraîner des risques graves pour la sécurité et la santé des personnes.
Même après s’être documenté opportunément, à la
première utilisation, si nécessaire, simuler quelques manoeuvres d’essai pour localiser les commandes, en particulier celles relatives à l’allumage
et à l’extinction.
Utiliser l’appareil uniquement pour les usages prévus par le fabricant. L’utilisation de l’appareil pour
des usages impropres peut entraîner des risques
pour la sécurité et la santé des personnes ainsi que
des dommages économiques.
Tous les entretiens qui demandent une compétence technique précise ou des capacités particulières
ne peuvent être exécutés que par du personnel
qualifié, ayant une expérience reconnue et acquise
dans le secteur spécifique d’intervention.
-5-
Français
DE
FR
ES
Pour maintenir l’hygiène et protéger les aliments de
tous les phénomènes de contamination, il faut nettoyer soigneusement les éléments qui sont en contact directement ou indirectement avec les aliments
et toutes les zones limitrophes. Effectuer ces opérations avec des produits détergents pour usage
alimentaire, en évitant absolument ceux inflammables ou qui contiennent des substances nocives à
la santé des personnes. Ces opérations sont exécutées lorsqu’il y a nécessité et à la fin de chaque
utilisation.
En cas d’inutilisation prolongée, non seulement désactiver toutes les lignes d’alimentation, mais effectuer aussi un nettoyage soigné de l’intérieur et de
l’extérieur de l’appareil et de ce qui l’entoure, selon
les indications fournies par le fabricant et par les
lois en vigueur en la matière.
A la fin de chaque utilisation, s'assurer que les manettes de commande sont désactivées et les lignes
d'alimentation débranchées.
Ne pas laisser d’objets ou de matériau inflammable
à l’intérieur du compartiment ou à proximité de l’appareil.
Un opérateur doit être constamment présent pendant l’utilisation quotidienne de l’appareil.
Pendant le lavage de l’appareil ne pas diriger de
jets d’eau sous pression sur les pièces intérieures.
UTILISATION ET FONCTIONNEMENT
4
RECOMMANDATIONS POUR L'UTILISATION
C139612000.fm
Important
L’incidence
des accidents dérivant de l’utiIT
lisation d’appareils dépend de beaucoup de
facteurs que l’on ne peut pas toujours préGB venir et contrôler. Certains accidents peuvent dépendre de facteurs ambiants non
DE prévisibles, d’autres dépendent surtout des
comportements des utilisateurs. Ceux-ci,
FR non seulement devront être autorisés et opportunément documentés, si nécessaire, à
la première utilisation, mais ils devront siES
muler quelques manoeuvres pour localiser
les commandes et les fonctions principa-
Français
les. Utiliser seulement comme prévu par le
fabricant et ne modifier aucun dispositif
pour obtenir des performances différentes
de celles prévues.Avant l’utilisation, vérifier si les dispositifs de sécurité sont parfaitement
installés
et
efficaces.
Les
utilisateurs doivent s’engager à satisfaire
ces conditions, doivent appliquer toutes
les normes de sécurité et lire attentivement
la description des commandes et la mise en
marche.
-6-
DESCRIPTION DES COMMANDES
Sur l’appareil sont disposées les commandes pour
activer les fonctions principales.
A)Manette de commande des résistances: pour activer, désactiver et régler les résistances de chauffe.
B)Manette de commande de l’eau: pour remplir la
cuve dans les différents modes
C)Voyant de réseau: pour signaler l'activation de l'alimentation électrique.
D)Voyant des résistances:pour signaler l’activation
des résistances après le remplissage de la cuve
Symbole remplissage
manuel
Index
extinction
Index
extinction
Index puissance
minimum
B
C
C
D
D
Symbole
remplissage lent
automatique
B
Symbole remplissage
rapide automatique
A
Index puissance
maximum
Symbole puissance
réduite
A
IDM-39612000400.tif
ALLUMAGE ET EXTINCTION DE L’APPAREIL
Allumage
1 - Agir sur l'interrupteur sectionneur automatique
pour activer le branchement à la ligne électrique principale.
2 - Remplir la cuve (voir page 8).
3 - Tourner la manette (A) sur 1 pour activer les résistances de chauffe à la puissance maximum
et accélérer les temps d’ébullition. Le voyant de
réseau (C) s’allume.
4 - Tourner la manette (A) sur l’une des autres positions pour régler la puissance des résistances
à des valeurs inférieures.
C139612000.fm
Extinction
1 - Arrêter l’arrivée de l’eau (voir page 8)
2 - Tourner la manette (A) sur 3 pour désactiver
les résistances de chauffe.
3 - Agir sur l'interrupteur sectionneur automatique
pour désactiver le branchement à la ligne électrique principale.
A C
GB
1
DE
A
FR
2
ES
3
IDM-39612000500.tif
-7-
IT
Français
REMPLISSAGE ET VIDANGE DE LA CUVE
Remplissage
Le remplissage peut être effectué en modes différents
B
Remplissage rapide libre
– Tourner la manette (B) sur 1 pour remplir la cuve
au moins jusqu'au repère de niveau minimum. Le
niveau désiré étant atteint, activer les résistances.
Important
Après remplissage, tourner la manette (B)
sur une autre position pour ne pas provoquer le débordement de l’eau de la cuve.
1
2
B
3
Remplissage rapide automatique
– Tourner la manette (B) en position 2, pour remplir
automatiquement la cuve jusqu’au niveau
maximum lorsque l’eau descend au-dessous du niveau minimum.
4
Remarque : les niveaux maximum et minimum se
réfèrent à l'intervalle de fonctionnement du pressostat.
IT
IDM-39612000600.tif
Remplissage lent automatique
– Tourner la manette (B) en position 3, pour effectuer une arrivée lente et continue qui maintient
constant le niveau de l’eau à l’intérieur de la cuve.
GB
Important
Si l’eau descend au-dessous du niveau miDE
nimum, le mode « remplissage rapide
automatique » s’active automatiquement.
FR
ES
C
Vidange
1 - Tourner la manette (B) en position 4 pour arrêter l’arrivée de l’eau.
2 - Ouvrir le robinet (C) pour vider la cuve.
C139612000.fm
IDM-39612000700.tif
Français
-8-
RÉTABLISSEMENT DES FONCTIONS DE L’APPAREIL
Important
L'intervention du thermostat n’est signalé
par aucun dispositif de signalisation
Dans le cas d'intervention du thermostat de sécurité, il faut rétablir les conditions initiales de fonctionnement de l’appareil dans le mode indiqué.
1 - Laisser refroidir l'eau de 30-40° C.
2 - Ouvrir la porte (A).
3 - Appuyer sur le bouton (B) du thermostat de sécurité pour réactiver l'alimentation électrique.
4 - Refermer la porte (A) lorsque l'opération est
terminée.
B
A
IDM-39612001700.tif
INUTILISATION PROLONGÉE DE L’APPAREIL
3 - Étaler un voile d’huile alimentaire sur les surfaces en acier inox.
4 - Exécuter toutes les opérations d’entretien.
5 - Laisser l'appareil découvert et les chambres de cuisson ouvertes.
Si l'appareil reste inactif pendant longtemps, procéder comme suit.
1 - Agir sur l'interrupteur sectionneur de l’appareil
pour désactiver le branchement à la ligne électrique principale.
2 - Nettoyer soigneusement l'appareil et les zones
limitrophes
C139612000.fm
CONSEILS D’UTILISATION
Afin de garantir une utilisation correcte de l’appareil, suivre ces conseils.
– Utiliser exclusivement les accessoires indiqués
par le fabricant.
– L’appareil et les zones environnantes doivent
être constamment propres.
– Pour le nettoyage, utiliser exclusivement des produits détergents pour usage alimentaire.
– Plonger les paniers lentment pour éviter la formation de mousse.
– Pour égoutter les paniers, les accrocher au support prévu à cet effet.
– Remplir les paniers avec la quantité de pâtes
conseillée, en fonction de la qualité et de l’augmentation de leur volume pedant la cuisson.
– Toujours attendre que l'eau bouille avant de
plonger les paniers.
– Avant de remplir la cuve, vérifier que le robinet de
vidange (A) soit fermé.
– Vérifier que le niveau de l’eau ne descende jamais au-dessous du minimum indiqué (B).
– Maintenir constante l’ébullition de l'eau et l'évacuation correcte des amidons.
– Alimenter l'appareil avec de l’eau à 55°C.
IT
GB
B
DE
FR
A
ES
IDM-39612000800.tif
– Vider complètement la cuve après emploi.
Attention
Ne pas utiliser l’appareil sans eau à l'intérieur
du récipient pour ne pas provoquer d'endommagements à la structure de l’appareil.
-9-
Français
ENTRETIEN
5
RECOMMANDATIONS POUR L’ENTRETIEN
Maintenir l’appareil en parfait état de fonctionnement en effectuant les opérations d’entretien programmé prévues par le fabricant. Un bon entretien
permettra d’obtenir les meilleures performances,
une plus longue durée et un maintien constant des
conditions de sécurité requises.
Attention
Avant toute intervention d’entretien, activer
tous les dispositifs de sécurité prévus et évaluer s'il faut voir informer les opérateurs travaillant sur l'appareil et ceux à proximité. En
particulier couper l’alimentation électrique à
l’aide de l’interrupteur sectionneur et empêcher l’accès à tous les dispositifs qui pourraient, s’ils sont activés, provoquer des
conditions de danger inattendu pour la
sécurité et la santé des personnes.
Après chaque utilisation et lorsque cela s’avère
nécessaire, nettoyer:
– La cuve de cuisson (voir p. 10)
– Les accessoires (voir page 5)
– L’appareil et ce qui l’entoure (voir p. 10)
Tous les 100 heures de fonctionnement faire faire, par des opérateurs experts et autorisés, les opérations suivantes:
– Vérifier l'efficacité du thermostat de sécurité
– Vérifier l'efficacité de l'installation électrique
NETTOYAGE DE L’APPAREIL
IT
Etant donné que l'appareil est utilisé pour la préparation de produits alimentaires pour l'homme, il faut
faire attention à tout ce qui concerne l'hygiène; l'appareil et tout ce qui l'entoure doivent toujours être
très propres.
GB
Important
Avant
de commencer toute opération de
DE
nettoyage, couper l’alimentation électrique
par l’interrupteur sectionneur et laisser reFR froidir l’appareil.
ES Il est également recommandé.
C139612000.fm
1 - De n’utiliser que de l’eau tiède, des produits détergents pour usage alimentaire, du matériau non
abrasif pour nettoyer les parties de l’appareil.
2 - Nettoyer soigneusement les éléments qui sont
en contact direct ou indirect avec les aliments
et toutes les zones avoisinantes.
3 - Nettoyer les accessoires après leur utilisation
avec un dégraissant approprié. Le lavage en
lave-vaisselle est conseillé.
Français
Attention
Ne pas utiliser de produits qui contiennent
des substances dangereuses pour la santé
des personnes (solvants, essences, etc.).
4 - De rincer les surfaces avec de l’eau potable et
les essuyer.
5 - Utiliser des jets d’eau sous pression uniquement sur les parties extérieures.
6 - De faire attention aux surfaces en acier inox
pour ne pas les endommager. En particulier, éviter l’utilisation de produits corrosifs, ne pas utiliser de matériau abrasif ou d’outils tranchants.
7 - De nettoyer rapidement les résidus d’aliment
pour éviter qu’ils durcissent.
8 - De nettoyer les dépôts calcaires qui peuvent se
former sur certaines surfaces de l’appareil.
- 10 -
PANNES
6
DÉPANNAGE
Avant sa mise en service, l’appareil a été essayé.
Les informations reportées ci-après ont pour but
d’aider à l'identification et à la correction d’éventuels pannes et dysfonctionnements qui pourraient
se présenter en cours d’utilisation.
Certains de ces problèmes peuvent être résolus par
Inconvénient
Les résistances pour la chauffe ne
s'activent pas
l’utilisateur, pour tous les autres il faut une compétence technique précise ou des capacités particulières; ils doivent donc être exécutés exclusivement
par du personnel qualifié ayant une expérience reconnue et acquise dans le secteur spécifique d’intervention.
Cause
Solution
Branchement électrique qui n'est
pas exécuté correctement
Contrôler la connexion des câbles électriques
Intervention du thermostat
de sécurité
Effectuer le rétablissement des
fonctions de l'appareil
(voir page 13)
Commutateur endommagé
Important
Contacter le serviceassistance
Remplacer le commutateur
En position 2 du commutateur à 4
positions, l'arrivée de l'eau est
continue jusqu'au débordement.
Circuit du pressostat obstrué
Pressostat endommagé
Électrovalve du remplissage
endommagée
Important
Contacter le service
assistanc
Important
Le raccordement au pressostat
Contacter le serviceassistance
n'a pas été effectué correctement.
Vérifier le raccordement du presEn position 2 du commutateur à 4
sostat.
positions, l'eau ne sort pas du robinet.
Important
Le raccordement hydrique n'a pas
été effectué correctement.
Contacter le serviceassistance
Vérifier le raccordement hydrique.
En position 3 du commutateur à 4
positions, le remplissage lent automatique ne se fait pas.
Le raccordement à l'électrovalve
de maintien du niveau de l'eau
Important
n'est pas effectué correctement. Contacter le serviceassistance
Vérifier le raccordement et le fonÉlectrovalve de maintien du
ctionnement de l'électrovalve de
niveau de l'eau endommagée.
maintien du niveau de l'eau.
MANUTENTION ET INSTALLATION
7
C139612000.fm
RECOMMANDATIONS POUR LA MANUTENTION ET L’INSTALLATION
Important
Effectuer la manutention et l’installation en
respectant les informations fournies par le fabricant, reportées directement sur l’emballage, sur l’appareil et dans les instructions
d’utilisation.Celui qui est autorisé à effectuer
ces opérations devra, si nécessaire, organiser
un “plan de sécurité” pour sauvegarder la sécurité des personnes directement impliquées.
- 11 -
Français
IT
GB
DE
FR
ES
EMBALLAGE ET DÉBALLAGE
L’emballage est réalisé, en limitant les encombrements, même en fonction du type de transport
adopté.
Pour faciliter le transport, l’expédition peut être faite
avec certains composants démontés et opportunément protégés et emballés.
Sur l’emballage sont reportées toutes les informations
nécessaires au chargement et au déchargement.
Lors du déballage, contrôler le bon état et la quantité exacte de composants.
Le matériau d’emballage doit être éliminé conformément aux lois en vigueur.
IDM-39603300800.tif
TRANSPORT
Le transport, en fonction aussi du lieu de destination, peut être effectué avec des moyens différents.
Le schéma représente les solutions les plus
courantes.
Pendant le transport, afin d’éviter des déplacement intempestifs, fixer au moyen de transport de façon appropriée.
Moyens de
levage
Moyens de transport
IDM-3960200180.tif
IT
MANUTENTION ET LEVAGE
GB
DE
FR
ES
L'appareil peut être manutentionné avec un dispositif de levage à fourches ou à crochet d’une capacité de charge appropriée. Avant d’effectuer cette
opération, contrôler la position du centre de gravité
de la charge.
Important
Pour l’introduction du dispositif de levage,
faire attention aux tuyaux d’alimentation et
d’évacuation.
C139612000.fm
IDM-39612000900.tif
Français
- 12 -
MISE EN PLACE DE L’APPAREIL
Toutes les phases de mise en place doivent être
prises en considération, dès la réalisation du projet
général. Avant de commencer ces phases, outre la
définition de la zone de mise en place, celui qui est
autorisé à effectuer ces opérations devra, si nécessaire, faire un “plan de sécurité” pour sauvegarder
l’intégrité des personnes directement impliquées et
appliquer de façon rigoureuse toutes les lois, avec
une attention toute particulière à celles sur les
chantiers mobiles.
La zone d’installation doit être équipée de tous les
raccordements d’alimentation, d’évacuation des résidus de production; elle doit être suffisamment
éclairée et avoir toutes les conditions hygiéniques
et sanitaires requises par les lois en vigueur, pour
éviter la contamination des aliments.
Si nécessaire, repérer la position exacte de chaque
appareil ou sous-ensemble en traçant les coordonnées pour les positionner correctement.
La mise en place doit être faite à une distance de la
paroi non inférieure à 50 mm si celle-ci ne résiste
pas à une température d’au moins 150°C.
IDM-39612001000.tif
Effectuer l'installation conformément aux lois, aux
normes et aux spécifications en vigueur dans
le pays.
VENTILATION DE LA PIÈCE
Dans la pièce où l’appareil est installé, il doit y avoir
des prises d’air pour garantir le fonctionnement correct de l’appareil et pour le changement d’air dans
la pièce même.
Les prises d’air doivent avoir des dimensions adéquates, être protégées par des grilles et placées de
façon à ne pas être obstruées.
IT
GB
DE
FR
IDM-39612001100.tif
ES
INSTALLATION DES ACCESSOIRES
C139612000.fm
Visser les pieds d’appui (A) en correspondance des
points de fixation sur la structure.
A
IDM-39612001200.tif
- 13 -
Français
MISE À NIVEAU
Agir sur les pieds d’appui (A) pour mettre de niveau
l’appareil.
A
IDM-39612001300.tif
MONTAGE DES APPAREILS EN BATTERIE
IT
GB
Pour monter les appareils en
batterie (les uns à côté des
autres), procéder comme
suit.
1 - Enlever la manette (A).
2 - Dévisser les vis (C)
et démonter les taC
bleaux de commandes (B).
3 - Appliquer, sur les bords
à rapprocher, du ruban
adhésif de protection.
A
C B
4 - Appliquer, sur les côtés
à rapprocher, de l’adhésif pour usage alimentaire.
5 - Rapprocher les appareils.
6 - Unir les appareils avec les vis et les écrous (D-E).
D
E
IDM-39612001400.tif
7 - Enlever l’adhésif en surplus et le ruban adhésif.
8 - Remonter les tableaux de commandes (B) et
les manettes (A) lorsque l’opération est terminée.
DE
Pour les appareils en batterie un kit d’équipement
FR est disponible sur demande ; il comprend le châssis
d’appui et quelques profils de finition.
C139612000.fm
ES
IDM-39610801100.tif
Français
- 14 -
RACCORDEMENT DE L'EAU
Pour effectuer le raccordement, raccorder le tuyau
de réseau et le tuyau de raccord de l’appareil, en interposant un robinet d’arrêt (C), pour interrompre, si
nécessaire, l’alimentation de l’eau. En aval de celuici, installer des filtres facilement accessibles.
Description
Valeur
Pression
200÷450 kPa (2÷ 4,5 bar)
pH
7÷7.5
Conductivité
< 200 mS/cm
Dureté
9÷13°f (5÷7°d, 6.3÷8.8°e,
90÷125 ppm)
Contenu de sels et d'ions
métalliques
Chlorures
Sulfates
Fer
Cuivre
Manganèse
C
IDM-39612001500.tif
Attention
L’appareil doit être alimenté avec de l’eau potable dont les caractéristiques sont indiquées
sur le tableau.
< 30 mg/l
< 40 mg/l
< 0,1 mg/l
< 0.05 mg/l
< 0,05 mg/l
BRANCHEMENT ÉLECTRIQUE
Important
Le branchement doit être fait par du personnel autorisé et qualifié, conformément
aux lois en vigueur à ce sujet en utilisant le
matériel approprié et prescrit. L’appareil
est fourni avec tension de fonctionnement
non commutable à 400V/3N, ou sur demande à 230V/3.
A
B
C139612001.fm
GB
E
Attention
Avant toute intervention, couper l’alimentation électrique générale.
Effectuer le branchement de l'appareil au réseau
électrique d'alimentation comme suit.
1 - Installer, s’il n’est pas présent, un interrupteur
sectionneur (A) près de l’appareil avec déclencheur magnétothermique et bloc différentiel.
2 - Enlever la manette (B).
3 - Dévisser les vis (C) et démonter le tableau de
commandes (D).
4 - Connecter l'interrupteur sectionneur (A) au bornier (E) de l'appareil comme indiqué sur la figure et dans le schéma électrique à la fin du
manuel. Utiliser un câble avec des caractéristiques similaires au type H05RN-F.
IT
C
DE
C D
IDM-39612001600.tif
FR
Important
Au moment du branchement, faire attention
au branchement des câbles de neutre et de
terre.
5 - Remonter le tableau de commandes (D) à la fin
de l'opération.
- 15 -
Français
ES
ESSAI DE L’APPAREIL
Important
Avant la mise en service, l’essai de l’installation doit être fait pour évaluer les conditions
opérationnelles
de
chaque
composant et trouver les éventuelles anomalies. Au cours de cette opération, vérifier
si toutes les conditions de sécurité et d’hygiène ont été rigoureusement respectées.
Pour l’essai, effectuer les vérifications suivantes
1 - Ouvrir le robinet d’alimentation de l’eau et vérifier l’étanchéité du raccordement.
2 - Vérifier que la tension de réseau corresponde à
celle de l’appareil.
3 - Agir sur l’interrupteur sectionneur automatique
pour vérifier le branchement électrique.
4 - Vérifier le fonctionnement correct des dispositifs de sécurité.
L’essai étant terminé, si nécessaire, instruire opportunément l’utilisateur, pour qu’il acquiert toutes les
compétences nécessaires à la mise en service de
l’appareil en toute sécurité, comme prévu par les
lois en vigueur.
RÉGLAGES
8
MODES DE RÉGLAGES
Les fonctions principales de l’appareil ne prévoient pas d'interventions particulières de ré-
glage par du personnel spécialisé sauf les réglages
effectués lors de l'utilisation par l'usager.
REMPLACEMENT DE PIÈCES
IT
9
MODES DE REMPLACEMENTS
L'appareil ne prévoit pas le remplacement de parGB ties fonctionnelles par du personnel spécialisé, sauf
le remplacement d'éléments de service qui peut
être effectué par l'usager.
DE
ELIMINATION DE L’APPAREIL
FR
C139612000.fm
ES
Important
Cette opération doit être effectuée par des
opérateurs experts, dans le respect des lois
en vigueur sur la sécurité du lieu de travail.
Ne pas disperser dans l’atmosphère des
Français
produits non biodégradables, huiles lubrifiantes et composants non ferreux (caoutchouc, PVC, résines, etc.). Les éliminer en
respectant les lois en vigueur.
- 16 -
ÍNDICE
ref. capítulos
pág
1 INFORMACIONES DE CARÁCTER GENERAL ................. 2
2 INFORMACIONES DE CARÁCTER TÉCNICO .................. 3
a
1 PARTE
3 SEGURIDAD ....................................................................... 5
4 USO Y FUNCIONAMIENTO ............................................... 6
5 MANTENIMIENTO ............................................................ 10
6 AVERÍAS........................................................................... 11
7 DESPLAZAMIENTO E INSTALACIÓN ............................. 11
2a PARTE
8 REGULACIONES.............................................................. 16
9 SOSTITUCIÓN DE PIEZAS .............................................. 16
ANEXOS ....................................................................... I÷III
ÍNDICE ANALÍTICO
A Accesorios bajo pedido, 5
Aire primario quemador de plano, regulación, 4
Aparato, limpieza, 10
Asistencia, modalidad para requerir, 3
Averías, localización, 11
B Búsqueda de averías, 11
C Conexión eléctrica, 15
Consejos para el uso, 9
D Datos técnicos, 3
Descripción de los mandos, 7
Descripción general del equipo, 3
Desembalaje y embalaje, 12
Desguace del equipo, 16
Desplazamiento e instalación, recomendaciones para el, 11
Desplazamiento y elevación, 12
Dispositivos de seguridad, 4
E Elevación y desplazamiento, 12
C139612000.fm
Embalaje y desembalaje, 12
Encendido y apagado del aparato, 7
Enlace agua, 15
Equipo y fabricante, identificación, 2
Equipo, descripción general, 3
Equipo, desguace, 16
Equipo, instalación del, 13
Equipo, período prolongado de inactividad del, 9
Equipo, prueba de funcionamiento, 16
Equipos en batería, montaje, 14
P Período prolongado de inactividad
F Fabricante y equipo, identificación, 2
I Identificación fabricante y equipo, 2
aire primario, 4
Informaciones previas, 2
Instalación de accesorios, 13
Instalación del equipo, 13
Instalación y desplazamiento, recomendaciones para el, 11
del equipo, 9
Prueba de funcionamiento del equipo, 16
Q Quemador
de plano, regulación
R Reactivación aparato, 9
Recomendaciones de uso, 6
Recomendaciones para efectuar el
mantenimiento, 10
Recomendaciones para el desplazamiento y la instalación, 11
L Limpieza aparato, 10
Llenado y vaciado de la cuba, 8
S Seguridad, dispositivos de, 4
M Mandos, descripción, 7
Mantenimiento,
recomendaciones
para efectuar el, 10
Modalidad para requerir asistencia, 3
Modalidades de regulación, 16
Modalidades de sostitución, 16
Montaje de equipos en batería, 14
T Transporte, 12
U Uso, consejos para el, 9
N Nivelación, 14
Seguridad, normas de, 5
Señalizaciones de seguridad e información, 4
IT
GB
DE
Uso, recomendaciones de, 6
V Ventilación del ambiente, 13
FR
Normas de seguridad, 5
O Objetivo del manual, 2
ES
Está prohibida la reproducción, incluso parcial, del presente documento sin la autorización expresa del constructor. El constructor, en la óptica
de mejorar continuamente sus productos, se reserva el derecho a modificar esta documentación sin que por ello esté obligado a dar previo
aviso y siempre que las modificaciones no representen una fuente de potencial peligro para la seguridad del usuario.
© 2002 – Autores de los textos, ilustraciones y compaginación: IDM esperti in comunicazione tecnica – Forlí (Italia)– El constructor tendrá derecho a reproducir, de forma total o parcial, los textos del presente documento siempre y cuando cite al autor.
-1-
Español
INFORMACIONES DE CARÁCTER GENERAL
1
INFORMACIONES PREVIAS
Para ubicar fácilmente los temas específicos de interés, consúltese el índice analítico que se encuentra al
inicio del manual.
Este manual comprende dos partes.
1a parte: contiene todas las informaciones útiles para destinatarios heterogéneos, esto es, los
usuarios del equipo.
2a parte: contiene todas las informaciones necesarias para destinatarios homogéneos, esto
es, todos los operadores expertos y autorizados
para realizar las operaciones de desplazamiento, transporte, instalación, mantenimiento, reparación y desguace del equipo.
Los usuarios deben consultar sólo la 1a parte; en cambio, la 2a parte está destinada a los operadores expertos. En caso de ser necesario, estos últimos pueden leer
también la 1a parte, a fin de obtener una visión más
completa de todas las informaciones.
OBJETIVO DEL MANUAL
El presente manual, que es parte integrante del equipo, ha sido confeccionado por el fabricante para suministrar las informaciones necesarias al personal
autorizado, a fin de interactuar con el equipo durante el arco de vida previsto para éste.
Además de adoptar una buena técnica de uso,
los destinatarios de las informaciones deben leerlas atentamente y aplicarlas de manera rigurosa.
Estas informaciones son suministradas por el fabricante en su propio idioma (italiano) pero pueden ser
traducidas a otros idiomas, a fin de satisfacer requerimientos de carácter legislativo y/o comercial.
Dedicarle breve tiempo a la lectura de estas informaciones permitirá evitar riesgos a la salud y a la seguriITIT dad de las personas, además de daños económicos.
Conservar este manual durante toda la vida útil del equipo en un lugar conocido y fácilmente accesible, a fin de
GB tenerlo a disposición cuando sea necesario consultarlo.
GB
DE
DE
FR
FR
El fabricante se reserva el derecho de aportar modificaciones al equipo sin la obligación de comunicarlo
previamente.
Para destacar determinadas partes relevantes del texto o para indicar algunas especificaciones importantes,
se han empleado algunos símbolos, cuyo significado
se ilustrará a continuación.
Precaución - advertencia
Indica que es necesario adoptar comportamientos adecuados, a fin de no crear situaciones de
riesgo para la salud y/o la seguridad de las personas ni provocar daños económicos.
Importante
Indicación de informaciones técnicas de particular importancia que no deben olvidarse.
IDENTIFICACIÓN FABRICANTE Y EQUIPO
La placa de identificación fijada directamente en el
equipo reproduce todas las referencias e indicaciones
indispensables para la seguridad de servicio.
A)Modelo del aparato
B)Tipo de personalización
C)Identificación fabricante
D)Clase de aislamiento
ES
ES
A
B
C
D
E
F
G
H
C139612000.fm
Q
L M N
P
IDM-39603606200.tif
Español
-2-
E)Año de fabricación
F) Número de matrícula
G)Grado de protección
H)País de destino
L) Tensión (V)
M)Consumo (A)
N)Frecuencia (Hz)
P)Potencia declarada (kW)
Q)Indicador tensión de prueba
MODALIDAD PARA REQUERIR ASISTENCIA
En caso de ser necesario, dirigirse a uno de los
centros autorizados.
Para solicitar asistencia técnica deberán indicarse
los datos reproducidos en la placa de identificación
y el tipo de desperfecto que se ha verificado.
INFORMACIONES DE CARÁCTER TÉCNICO
2
DESCRIPCIÓN GENERAL DEL EQUIPO
El cocedor de pasta, en adelante denominado equipo, ha sido diseñado y fabricado para efectuar la
cocción en agua de la pasta alimenticia en el ámbito de la restauración profesional.
El aparato está equipado con una línea de dos frentes para permitir su instalación en el centro del local.
Órganos principales
A)Cuba de cocción: fabricada en acero inoxidable
B)Grifo de agua: para orientar el flujo del agua
C)Mando del agua: para regular el flujo del agua
D)Mando de las resistencias: para regular la potencia de calentamiento.
E)Testigo resistencias: para señalar la activación
de las resistencias una vez efectuado el llenado
de la cuba.
F) Testigo red: para señalar la activación de la alimentación eléctrica.
G)Portezuelas: para obtener acceso a los compartimientos
A
B
C
D
G
F
IT
GB
E
G
DE
IDM-39612000100.tif
FR
ES
DATOS TÉCNICOS
C139612000.fm
Véase tablas y "Ficha de enlaces" al final del manual.
-3-
Español
DISPOSITIVOS DE SEGURIDAD
Aunque el equipo cuente con todos los dispositivos
de seguridad, en los casos en que así lo determinen las leyes vigentes en materia, se deberá complementar con otros dispositivos en las fases de
instalación y enlace.
La ilustración indica la posición de los dispositivos.
A)Termostato de seguridad: para interrumpir la alimentación eléctrica en caso de recalentamiento.
A
Importante
La intervención del termostato no es indicada por ningún dispositivo de señalización.
Precaución - advertencia
Controlar periódicamente que los equipos de
seguridad se encuentren en perfecto estado y
estén correctamente instalados.
IDM-39612000200.tif
SEÑALIZACIONES DE SEGURIDAD E INFORMACIÓN
C139612000.fm
La ilustración indica la posición de las señalizaciones fijadas en el equipo.
ITIT A)Placa de identificación fabricante y aparato.
B)Peligro de quemaduras: prestar atención a las
GB superficies calientes.
GB
C)Peligro genérico: antes de efectuar cualquier
tipo de intervención leer atentamente el manual.
DE
DE
D)Peligro genérico: durante el lavado del aparato
no dirigir chorros de agua a presión hacia sus
FR
FR partes internas.
E)Peligro genérico: está prohibido el funcionaES miento en seco.
ES
F) Peligro genérico: tiene por objeto recordar la
necesidad de respetar las normas. “Instalar en
conformidad con lo dispuesto por la normativa vigente y utilizar sólo en ambientes adecuadamente aireados”.
G)Peligro genérico: tiene por objeto recordar la
necesidad de respetar las normas. “Se declina
toda responsabilidad en caso de inobservancia
de las normas de instalación y puesta en funcionamiento”.
Español
-4-
D
C
E
A
B
G
F
IDM-39612000300.tif
ACCESORIOS BAJO PEDIDO
Bajo pedido, el equipo puede ser suministrado con
los accesorios que a continuación se indican.
A)"Kit" cestos (KCPW40)
B)Cesto (C0909)
C)Cesto (CW2715)
D)Cesto (CW0930)
E)Cesto (CW1830)
F) Cesto (CW2830)
G)Cesto (CW4627)
H)Cesto (CW2327)
L) Pies de apoyo
M)Kit de integración para aparatos en batería
H
L
G
F
E
D
C
B
A
IDM-39610900400.tif
SEGURIDAD
3
NORMAS DE SEGURIDAD
C139612000.fm
Durante las fases de diseño y producción el fabricante ha prestado especial atención a los factores
que pueden provocar riesgos en cuanto a seguridad y salud de las personas que interactúan con el
equipo. Además del respeto de las leyes vigentes
en materia, se han adoptado todas las "reglas de la
buena técnica de fabricación". El objetivo de estas
informaciones es sensibilizar a los usuarios para
que presten especial atención, a fin de prevenir
todo tipo de riesgos. La prudencia es de todas maneras insustituible. La seguridad está también en
manos de todos los operadores que interactúan
con el equipo.
Leer atentamente las instrucciones contenidas en
este manual suministrado adjunto y aquellas que
están expuestas directamente; en especial observar aquellas relativas al dispositivo de seguridad.
Un mínimo de tiempo dedicado a la lectura ahorrará incidentes desagradables; siempre es demasiado tarde para recordar lo que habría debido
hacerse, una vez que éstos han ocurrido.
IT
Está absolutamente prohibido alterar, eludir, eliminar y soslayar los dispositivos de seguridad instala- GB
dos. La inobservancia de esta norma puede
determinar graves riesgos para la seguridad y la
DE
salud de las personas.
En el primer uso, incluso después de haberse documentado adecuadamente, es conveniente simular algunas maniobras de prueba, a fin de identificar
los mandos, especialmente los relativos al encendido y apagado y sus principales funciones.
Utilizar el equipo sólo para los usos previstos por el
fabricante. Usos impropios del mismo pueden causar riesgos en cuanto a seguridad y salud de las
personas, además de daños económicos.
Todas las intervenciones de mantenimiento que requieren de una competencia técnica precisa o de
una capacidad especial, deben ser efectuadas exclusivamente por personal calificado y con experiencia reconocida y adquirida en el sector
específico de la intervención.
-5-
Español
FR
ES
Para mantener la higiene y proteger los alimentos
trabajados respecto de cualquier fenómeno de contaminación, es necesario limpiar prolijamente los
elementos que entran en contacto directa o indirectamente con los alimentos y las zonas aledañas.
Efectuar estas operaciones utilizando exclusivamente productos detergentes para uso alimenticio,
evitando absolutamente el uso de productos inflamables o que contengan sustancias nocivas para la
salud de las personas. Dichas operaciones deberán efectuarse cada vez que se estime oportuno y
al final de cada utilización.
En caso de períodos prolongados de inactividad,
además de desconectar todas las líneas de alimentación, es necesario limpiar prolijamente todas las
partes internas y externas del equipo y del ambiente circunstante, de conformidad con las indicaciones suministradas por el fabricante y con las leyes
vigentes en materia.
Al concluir cada uso, controlar que los mandos queden en posición de desactivación y las líneas de alimentación desconectadas.
No dejar objetos o material inflamable en el interior
del compartimiento ni en proximidad del aparato.
Durante el uso cotidiano del aparato se requiere la
presencia constante del operador.
Durante el lavado del aparato no dirigir chorros de
agua a presión hacia sus partes internas.
USO Y FUNCIONAMIENTO
4
RECOMENDACIONES DE USO
Importante
El porcentaje de accidentes derivados del
uso de equipos depende de muchos factores que no siempre se logran prevenir y
GB
GB
controlar. Algunos accidentes pueden depender de factores ambientales no previsiDE
DE bles, otros dependen sobre todo de los
comportamientos de los usuarios. Éstos,
FR
FR además de hallarse autorizados y adecuadamente documentados, cuando sea necesario, a propósito del primer uso, deberán
ES
ES
simular algunas maniobras a fin de identificar los mandos y las funciones principales.
C139612000.fm
ITIT
Español
Se deben ejecutar sólo operaciones propias de los usos previstos por el fabricante.
No alterar los equipos con el fin de obtener
prestaciones diferentes de las previstas.
Antes del uso, controlar que los dispositivos de seguridad estén instalados de forma
correcta y eficaz. Los usuarios, además de
obligarse a cumplir estos requisitos, deben
aplicar todas las normas de seguridad y
leer con atención la descripción de los
mandos y de la puesta en servicio.
-6-
DESCRIPCIÓN DE LOS MANDOS
Para activar las funciones principales, en el equipo
se han instalado los siguientes mandos.
A)Mando de las resistencias: para activar, desactivar y regular las resistencias de calentamiento.
B)Mando del agua: para llenar la cuba en las diferentes modalidades
C)Testigo red: para señalar la activación de la alimentación eléctrica.
D)Testigo resistencias: para señalar la activación
de las resistencias una vez efectuado el llenado
de la cuba.
Índice de llenado
manual
Índice
apagado
Índice
apagado
Índice potencia
minima
B
C
C
D
D
Índice de llenado
lento automático
B
Índice de llenado
rápido automático
A
Índice potencia
máxima
Índice de potencia
reducida
A
IDM-39612000400.tif
ENCENDIDO Y APAGADO DEL APARATO
Encendido
1 - Operar con el interruptor automático aislador
para activar la conexión a la línea eléctrica principal.
2 - Efectuar el llenado de la cuba (véase pág. 8).
3 - Situar el mando (A) en posición 1 para activar
las resistencias de calentamiento a la potencia
máxima y acelerar el proceso de ebullición. Se
enciende el testigo de red (C).
4 - Situar el mando (A) en una de las otras posiciones a fin de disponer la potencia de las resistencias en valores inferiores.
C139612000.fm
Apagado
1 - Interrumpir el suministro de agua (véase pág. 8).
2 - Situar el mando (A) en posición 3 para desactivar las resistencias de calentamiento.
3 - Operar con el interruptor automático aislador
para desactivar la conexión a la línea eléctrica
principal.
A C
GB
1
DE
A
FR
2
ES
3
IDM-39612000500.tif
-7-
IT
Español
LLENADO Y VACIADO DE LA CUBA
Llenado
El llenado puede efectuarse de diferentes maneras.
Llenado rápido libre
– Disponer el mando (B) en posición 1 para llenar
la cuba hasta al menos el nivel mínimo indicado
mediante la muesca de referencia. Una vez alcanzado el nivel requerido es posible activar las
resistencias..
B
1
2
B
Importante
Una vez efectuado el llenado se debe situar
el mando (B) en otra posición para no provocar el desbordamiento del agua en la cuba.
3
Rellenado rápido automático
– Al descender el agua por debajo del nivel
mínimo se deberá situar el mando (B) en
posición 2 para llenar automáticamente la
cuba hasta alcanzar el nivel máximo.
4
Nota. Los niveles máximo y mínimo se refieren al
intervalo de funcionamiento del presostato.
ITIT
IDM-39612000600.tif
Rellenado lento automático
– Situar el mando (B) en posición 3 para obtener
un suministro lento y continuo que mantiene
constante el nivel del agua en el interior de la cuba.
GB
GB
Importante
Al descender el agua por debajo del nivel
DE
DE
mínimo se activa automáticamente la modalidad de "rellenado rápido automático".
FR
FR
ES
ES
C
Vaciado
1 - Situar el mando (B) en posición 4 para interrumpir el suministro de agua.
2 - Abrir el grifo (C) para vaciar la cuba.
C139612000.fm
IDM-39612000700.tif
Español
-8-
REACTIVACIÓN APARATO
Importante
La intervención del termostato no es indicada por ningún dispositivo de señalización.
En caso de intervención del termostato de seguridad
será necesario restablecer las condiciones iniciales
de funcionamiento del aparato, procediendo para
ello de la manera que a continuación se indica.
1 - Dejar enfriar el agua en la medida de 30-40°C
2 - Abrir la portezuela (A).
3 - Presionar el botón (B) del termostato de seguridad para restablecer la alimentación eléctrica.
4 - Cerrar la portezuela (A) una vez terminada la
operación.
B
A
IDM-39612001700.tif
PERÍODO PROLONGADO DE INACTIVIDAD DEL EQUIPO
3 - Esparcir sobre las superficies de acero inoxidable una capa delgada de aceite comestible.
4 - Efectuar todas las operaciones de mantenimiento.
5 - Dejar el equipo descubierto y las cámaras
de cocción abiertas.
En caso de que el equipo deba permanecer inactivo durante un período prolongado de tiempo, se
deberán efectuar las siguientes operaciones.
1 - Con el interruptor aislador del aparato desactivar la conexión a la línea eléctrica principal.
2 - Limpiar prolijamente el equipo y las zonas adyacentes.
C139612000.fm
CONSEJOS PARA EL USO
A fin de garantizar un uso correcto del equipo, aplicar las siguientes recomendaciones.
– Utilizar exclusivamente los accesorios indicados
por el fabricante.
– Mantener constantemente limpio el aparato y las
zonas a él próximas.
– La limpieza deberá efectuarse utilizando únicamente productos detergentes previstos para uso
alimentario.
– Sumergir los cestos lentamente para evitar la formación de espuma.
– Para escurrir la pasta colgar los cestos de la barra
– Llenar los cestos con la cantidad adecuada de
pasta, en función de la calidad y de su aumento
de volumen durante la cocción
– Esperar que el agua entre en ebullición para sumergir los cestos
– Antes de llenar la cuba, controlar que el grifo de
descarga (A) esté cerrado.
– Controlar que el nivel de agua no descienda jamás a un nivel inferior respecto del mínimo indicado (B).
– Mantener constante la ebullición del agua y la correcta descarga de los almidones.
IT
GB
B
DE
FR
A
ES
IDM-39612000800.tif
– Alimentar el aparato con agua a 55 °C
– Después del uso la cuba deberá ser vaciada por
completo.
Precaución - advertencia
No utilizar el aparato sin agua en el interior
del recipiente para no provocar daños a la estructura del aparato mismo.
-9-
Español
MANTENIMIENTO
5
RECOMENDACIONES PARA EFECTUAR EL MANTENIMIENTO
Mantener el equipo en condiciones de máximo rendimiento, efectuando las operaciones de mantenimiento programado previstas por el fabricante. Un
buen mantenimiento permitirá obtener mejores
prestaciones, mayor duración de servicio y un mantenimiento constante de los requisitos de seguridad.
Precaución - advertencia
Antes de efectuar cualquier operación de
mantenimiento, activar todos los dispositivos de seguridad previstos y evaluar la conveniencia de informar oportunamente tanto al
personal operativo como al que se encuentra
en zona próxima. En especial, desconectar la
alimentación eléctrica mediante el interruptor aislador e impedir el acceso a to-
dos los dispositivos que, de ser activados,
podrían provocar situaciones de peligro, con
reducción de la seguridad y riesgo para la salud de las personas.
Siempre al final del servicio y cada vez que sea
necesario, limpiar:
– La cuba de cocción (véase pág. 10)
– Los accesorios (véase pág. 5)
– El equipo y el medio ambiente (véase pág. 10)
Cada 100 horas de servicio, operadores expertos
y autorizados deben efectuar las siguientes operaciones.
– Controlar la eficiencia del termostato de seguridad
– Controlar de la eficiencia del sistema eléctrico
LIMPIEZA APARATO
Atendida la circunstancia de que el equipo es utilizado para la preparación de productos alimenticios
ITIT para el consumo humano, es necesario prestar especial atención a todo lo referente a la higiene,
manteniendo siempre limpio tanto el equipo como
GB el ambiente que lo rodea.
GB
DE
DE
Importante
Antes de realizar cualquier operación de
FR
FR limpieza desconectar la alimentación eléctrica mediante el interruptor aislador y esperar que el aparato se enfríe.
C139612000.fm
ES
ES
Se recomienda observar las siguientes precauciones.
1 - Para limpiar las piezas del equipo usar sólo
agua tibia, productos detergentes para uso alimenticio y material no abrasivo.
2 - Limpiar cuidadosamente los elementos que entran en contacto directa o indirectamente con los
alimentos así como todas las zonas vecinas.
3 - Limpiar los accesorios después del uso utilizando un desengrasante adecuado. Se aconseja efectuar el lavado en lavavajillas.
Español
Precaución - advertencia
No usar productos que contengan sustancias
nocivas y/o peligrosas para la salud de las
personas (disolventes, bencinas, etc.).
4 - Enjuagar las superficies con agua potable y secarlas.
5 - Utilizar chorros de agua a presión sólo en las
partes externas.
6 - Prestar atención a las superficies de acero
inoxidable, a fin de no dañarlas y, en especial,
evitar el uso de productos corrosivos; no utilizar
material abrasivo ni utensilios cortantes.
7 - Limpiar oportunamente los residuos de comida,
a fin de evitar que se endurezcan.
8 - Limpiar los depósitos calcáreos que pueden
formarse en algunas superficies del equipo.
- 10 -
AVERÍAS
6
BÚSQUEDA DE AVERÍAS
Antes de la puesta en servicio, el equipo ha sido sometido a prueba de funcionamiento.
Las siguientes informaciones tienen por objeto facilitar la identificación y corrección de eventuales
anomalías y disfunciones que podrían presentarse
durante el uso.
Algunos de estos problemas pueden ser resueltos
Inconveniente
Las resistencias de calentamiento
no se activan
por el usuario, pero otros requieren una competencia técnica precisa o determinadas capacidades,
razón por la cual deben ser resueltos exclusivamente por personal calificado con experiencia reconocida y adquirida en el sector específico de
intervención.
Causa
Remedio
Conexión eléctrica no efectuada
de modo correcto
Controlar el enlace de los cables
eléctricos
Intervención del termostato
de seguridad
Reactivar el aparato
(véase pág.13)
Conmutador averiado
Importante
Contactar el servicio de asistencia
Sustituir el conmutador
Con el conmutador de 4 posiciones dispuesto en posición 2, se
verifica un suministro continuo del
agua hasta rebosamiento.
Con el conmutador de 4 posiciones dispuesto en posición 2 no
sale agua a través del grifo.
Con el conmutador de 4 posiciones
dispuesto en posición 3 no se verifica el llenado automático lento.
Circuito del presostato obstruido
Avería en el presostato
Avería en la electroválvula de
llenado
Conexión al presostato efectuada
de modo incorrecto.
Importante
Contactar el servicio
de asistencia
Importante
Contactar el servicio de asistencia
Controlar la conexión del presostato.
Conexión hídrica efectuada de
modo incorrecto.
Conexión a la electroválvula de
mantenimiento agua efectuada
de modo incorrecto.
Avería en la electroválvula de
mantenimiento agua.
IT
Importante
Contactar el servicio de asistencia
Controlar la conexión hídrica.
GB
Importante
DE
Contactar el servicio de asistencia
Controlar conexión y eficaz funcionamiento de la electroválvula
de mantenimiento agua.
FR
ES
DESPLAZAMIENTO E INSTALACIÓN
7
C139612000.fm
RECOMENDACIONES PARA EL DESPLAZAMIENTO Y LA INSTALACIÓN
Importante
Efectuar el desplazamiento e instalación
respetando las indicaciones proporcionadas por el fabricante, reproducidas directamente sobre el embalaje, en el equipo y en
las instrucciones de uso. La persona auto-
rizada para efectuar estas operaciones deberá, si fuera necesario, organizar un "plan
de seguridad", a fin de salvaguardar la incolumidad de las personas directamente
involucradas.
- 11 -
Español
EMBALAJE Y DESEMBALAJE
El embalaje se realiza, limitando sus dimensiones,
según el tipo de transporte adoptado.
A fin de facilitar el transporte, la expedición puede ser
efectuada con algunos de sus componentes desmontados y adecuadamente protegidos y embalados.
Sobre el embalaje están reproducidas todas las informaciones necesarias para efectuar la carga y
descarga del equipo.
En fase de desembalaje, controlar su integridad y la
cantidad exacta de sus componentes.
El material de embalaje debe ser eliminado adecuadamente, de conformidad con lo dispuesto por
las normas vigentes.
IDM-39603300800.tif
TRANSPORTE
El transporte, en función también del lugar de destinación, puede ser efectuado mediante diversos medios.
El esquema representa las soluciones más
utilizadas.
A fin de evitar desplazamientos intempestivos, durante el transporte, es importante anclar
adecuadamente el equipo al medio utilizado.
Medios de
elevación
Medios de transporte
IDM-3960200180.tif
IT
DESPLAZAMIENTO Y ELEVACIÓN
GB
DE
FR
ES
El equipo puede ser desplazado con un equipo de
elevación de horquillas o de gancho, de capacidad
adecuada. Para ejecutar esta operación se debe
controlar atentamente el centro de gravedad de la
carga.
Importante
Al introducir la carretilla elevadora, prestar
atención en los tubos de alimentación y
descarga.
C139612000.fm
IDM-39612000900.tif
Español
- 12 -
INSTALACIÓN DEL EQUIPO
Durante la realización del proyecto general, deben
ser consideradas todas las fases de la instalación.
Antes de comenzar dichas fases, además de establecer la zona de instalación, la persona autorizada
a efectuar estas operaciones deberá, si fuera necesario, aplicar un "plan de seguridad" a fin de salvaguardar la incolumidad de las personas
directamente involucradas, aplicando rigurosamente todas las normas vigentes, especialmente aquellas relativas a las obras móviles de construcción.
La zona de instalación debe estar provista de todos
los enlaces de alimentación y de descarga de los
residuos de producción; también debe estar adecuadamente iluminada. Además, debe reunir todos
los requisitos higiénicos y sanitarios contemplados
por las normas vigentes a fin de evitar la contaminación de los alimentos.
Si fuera necesario, identificar la posición exacta de
cada equipo o subconjunto, trazando las coordenadas de correcto posicionamiento.
Si la pared no resiste temperaturas de 150°C se deberá instalar el equipo a una distancia igual o supe-
IDM-39612001000.tif
rior a 50 mm de la misma.
Llevar a cabo la instalación de conformidad
con lo establecido por las leyes, normas y especificaciones vigentes en el país de uso.
VENTILACIÓN DEL AMBIENTE
El ambiente destinado a la instalación, deberá disponer de tomas de aire adecuadas como para garantizar el correcto funcionamiento del aparato y
deberá ventilarse oportunamente para que cambie
el aire dentro del mismo.
Las tomas de aire deberán ser de tamaño adecuado, estar protegidas por rejillas y colocadas de manera que no se puedan tapar.
IT
GB
DE
FR
IDM-39612001100.tif
ES
INSTALACIÓN DE ACCESORIOS
C139612000.fm
Enroscar los pies de apoyo (A) en los puntos de conexión de la estructura.
A
IDM-39612001200.tif
- 13 -
Español
NIVELACIÓN
Operar con las patas de apoyo (A) para nivelar el
equipo.
A
IDM-39612001300.tif
MONTAJE DE EQUIPOS EN BATERÍA
Para montar los equipos en
batería (uno al lado del otro)
aplicar las siguientes instrucciones.
1 - Retirar el mando (A).
2 - Desenroscar
los
tornillos (C) y desC
montar los paneles
de mando (B).
3 - Poner cinta adhesiva de
protección sobre los bordes a juntar.
A
C B
4 - Poner material sellador
para uso alimenticio sobre los lados a juntar.
IT
5 - Aproximar los aparatos.
6 - Conectar los aparatos mediante los tornillos y
GB
las tuercas (D-E).
D
E
IDM-39612001400.tif
7 - Extraer el exceso de material sellador y la cinta
adhesiva.
8 - Una vez concluida la operación, reinstalar los
paneles de mando (B) y los mandos (A).
DE
Para los aparatos en batería se encuentra disponibajo pedido, un kit de preparación que comprende el bastidor de apoyo y algunos perfiles de
acabado.
FR ble,
C139612000.fm
ES
IDM-39610801100.tif
Español
- 14 -
ENLACE AGUA
Para efectuar el enlace, conectar el tubo de red con
el tubo de conexión del equipo, instalando un grifo
de interceptación (A) a fin de poder interrumpir,
cuando sea necesario, la alimentación del agua. En
posición sucesiva al grifo se deben instalar filtros
de fácil acceso.
Descripción
Valor
Presión
200÷450 kPa (2÷ 4,5 bar)
pH
7÷7.5
Conductividad
< 200 mS/cm
Dureza
9÷13°f (5÷7°d, 6.3÷8.8°e,
90÷125 ppm)
Contenido de sales e
iones metálicos
Cloruros
Sulfatos
Hierro
Cobre
Manganeso
C
IDM-39612001500.tif
< 30 mg/l
< 40 mg/l
< 0,1 mg/l
< 0.05 mg/l
< 0,05 mg/l
Precaución - advertencia
El aparato deberá alimentarse con agua potable que presente las características mencionadas en la tabla, que deberán ser respetadas
para que el aparato no se deteriore.
CONEXIÓN ELÉCTRICA
Importante
La conexión deberá asignarse al personal
autorizado y experto, que deberá respetar las
leyes vigentes en materia y utilizar siempre
materiales adecuados y previstos por el
constructor. El aparato se suministra con
tensión de funcionamiento no conmutable
de 400V/3N o bien, bajo pedido, de 230V/3.
A
B
IT
C
GB
E
C139612001.fm
Precaución - advertencia
Antes de realizar cualquier operación se deberá desconectar la alimentación eléctrica
general.
Conectar el aparato a la red eléctrica de alimentación respetando las siguientes instrucciones.
1 - En caso de no estar presente, instalar un interruptor seccionador (A) en proximidad del aparato con desconectador magnetotérmico y
bloqueo diferencial.
2 - Retirar el mando (B).
3 - Desenroscar los tornillos (C) y desmontar el tablero de instrumentos (D).
4 - Conectar el interruptor seccionador (A) a la
bornera (E) del aparato de la manera ilustrada
en la figura y en el esquema eléctrico al final del
manual. Utilizar un cable con características no
inferiores a aquél de tipo H05RN-F.
DE
C D
IDM-39612001600.tif
FR
Importante
Al efectuar el enlace prestar particular atención al conectar los cables de neutro y de
tierra.
5 - Para concluir, reinstalar el panel de mandos
(D).
- 15 -
Español
ES
PRUEBA DE FUNCIONAMIENTO DEL EQUIPO
Importante
Antes de la puesta en servicio debe efectuarse la prueba de funcionamiento del sistema, a fin de evaluar las condiciones
operativas de cada uno de sus componentes e identificar eventuales anomalías. Durante esta fase es importante controlar que
todos los requisitos en cuanto a seguridad
e higiene sean respetados rigurosamente.
Para efectuar la prueba de funcionamiento, aplicar
las siguientes instrucciones.
1 - Abrir la llave de alimentación del agua y contro-
lar la estanqueidad de la conexión.
2 - Verificar que la tensión de red sea aquélla requerida para el aparato.
3 - Accionar el interruptor automático aislador para
controlar la eficiencia de la conexión eléctrica.
4 - Controlar el correcto funcionamiento de los dispositivos de seguridad.
Una vez efectuada la prueba de funcionamiento, si
fuera necesario, capacitar adecuadamente al usuario, a fin de que pueda poner en servicio el equipo
en condiciones de seguridad, de conformidad con
lo establecido por las leyes vigentes.
REGULACIONES
8
MODALIDADES DE REGULACIÓN
Las regulaciones relativas a las funciones
principales del aparato pueden ser ejecuta-
das por el usuario, sin necesidad de intervención
de personal especializado.
SOSTITUCIÓN DE PIEZAS
IT
MODALIDADES DE SOSTITUCIÓN
El aparato no necesita sostituciones de componenGB tes funcionales realizadas por técnicos especializa-
DE
DESGUACE DEL EQUIPO
FR
Importante
Esta operación debe ser efectuada por operadores expertos, los que deberán proceder respetando las normas vigentes en
materia de seguridad del trabajo. No abandonar en el ambiente productos no biodegradables,
aceites
lubricantes
ni
C139612000.fm
ES
9
Español
dos sino la sostitución de elementos de servicio
que puede llevar a cabo el usuario.
componentes no ferrosos (goma, PVC, resinas, etc.). Estos productos deben ser eliminados de conformidad con lo dispuesto
por las respectivas normas vigentes sobre
la materia.
- 16 -
ALLEGATI - ANNEXES - ANLAGEN - ANNEXES - ANEXOS
Modello
Model
Modelle
Modèle
Modelo
Vasca
Well
Becken
Cuve
Cuba
Potenza
Power
Leistung
Puissance
Potencia
04WCP1EM
N.1 (40 l)
12kW
Dati elettrici - Electrical data - Daten zur Elektrik
Données électriques - Datos eléctricos
Tensione - Voltage
Frequenza - Frequency
Corrente - Current
Spannung - Tension
Frequenz - Fréquence
Strom - Courant
Tensión
Frecuencia
Corriente
400V3~N
17A (400V)
50-60Hz
230V3~
30 A (230V)
SCHEDA ALLACCIAMENTI - CONNECTION CARD - ANSCHLUSSSCHEMA
FICHE DES RACCORDEMENTS - FICHA DE ENLACES
CT39612001.fm
IDM-39612001801.tif
-I-
SCHEMA ELETTRICO (400V3N) - ELECTRIC DIAGRAM (400V3N) - SCHALTBILD
(400V3N) - SCHÉMA ÈLECTRIQUE (400V3N) - ESQUEMA ELÉCTRICO (400V3N)
Collegamento resistenza sx
Left heating connection
Anschluss der Linker Widerstand
Branchement de résistance gauche
Conexión resistencia izquierda
Collegamento resistenza dx
Right heating connection
Anschluss der Rechter Widerstand
Branchement de résistance droite
Conexión resistencia derecha
CT39612001.fm
IDM-39612001900.tif
1) Morsettiera - Terminal board - Klemmenbrett - Plaque à bornes - Regleta de
conexión.
2) Commutatore regolazione acqua - Water regulator switch - Schalter
Wassereinstellung - Commutateur de réglage de l'eau - Conmutador de
regulación agua
3) Commutatore selettore potenza resistenze - Heating element power selector
switch - Wahlschalter Leistung Heizwiderstände - Commutateur sélecteur de
la puissance des résistances - Conmutador selector de potencia resistencias
4) Lampada spia verde - Green light - Grüne Kontrollleuchte - Voyant vert Lámpara testigo verde.
5) Lampada spia rossa - Red light - Rote Kontrollleuchte - Voyant rouge Lámpara testigo rojo.
6) Elettrovalvola mantenimento acqua - Water level maintenance solenoid valve
- Magnetventil Konstanthalten Wasser - Électrovalve maintien de l'eau Electroválvula mantenimiento agua
7) Elettrovalvola riempimento - Filler solenoid valve - Magnetventil Füllen Électrovalve de remplissage - Electroválvula de llenado
8) Connettore a 12 poli - 12-pin connector - 12-poliger Steckverbinder Connecteur à 12 pôles - Conector de 12 polos
9) Morsettiera taglio potenza - Power cut-off terminal board - Klemmenleiste
Leistungsunterbrechung - Bornier de coupure puissance - Bornera de corte
potencia
10) Contattore resistenza dx - Rh heating element contactor - Schütz rechter
Heizwiderstand - Contacteur résistance droite - Contactor resistencia der.
11) Contattore resistenza sx - Lh heating element contactor - Schütz linker
Heizwiderstand - Contacteur résistance gauche - Contactor resistencia izq.
12) Termostato di sicurezza di destra - Right safety thermostat - Rechtes
Sicherheitsthermostat - Thermostat de sécurité de droite - Termostato de
seguridad lado derecho.
13) Termostato di sicurezza di sinistra - Left safety thermostat - Linkes
Sicherheitsthermostat - Thermostat de sécurité de gauche - Termostato de
seguridad lado izquierdo.
14) Termorestringente nero
- Black heat-shrink tubing - Schwarzes
Schrumpfschlauch - Gaine thermorétractable noir - Termorrestringente negro.
15) Resistenza destra 6000W-400V - Right heating element 6000W-400V Rechter Widerstand 6000W-400V - Résistance droite 6000W-400V Resistencia derecha 6000 W-400 V.
16) Resistenza sinistra 6000W-400V - Left heating element 6000W-400V - Linker
Widerstand 6000W-400V - Résistance gauche 6000W-400V - Resistencia
izquierda 6000 W-400 V.
17) Pressostato - Pressure switch - Druckschalter - Pressostat - Presostato
18) Massa resistenza sx - Lh heating element ground - Erde linker Heizwiderstand
- Masse résistance gauche - Masa resistencia izq. 19) Massa resistenza dx - Rh heating element ground - Erde rechter
Heizwiderstand - Masse résistance droite - Masa resistencia der.
20) Cavo bianco - White wire - Weißes Kabel - Câble blanc - Cable blanco.
21) Cavo nero - Black wire - Schwarzes Kabel - Câble noir - Cable negro.
22) Cavo giallo/verde - Yellow/green wire - Gelb-grünes Kabel - Câble jaune/vert Cable amarillo/verde.
23) Cavo rosso - Red wire - Rotes Kabel - Câble rouge - Cable rojo.
24) Cavo bianco con termorestringente nero - White wire with black heat-shrink
tubing - Weißes Kabel mit schwarzes Schrumpfschlauch - Câble blanc avec
gaine thermorétractable noir - Cable blanco con termorrestringente negro.
25) Foro per inserimento bulbo - Bulb fitting hole - Loch für Kugeleinsatz - Trou
pour l'introduction de la boule - Agujero para inserción bulbo.
26)Cavo rosso con termorestringente nero - Red wire with black heat-shrink tubing Rotes Kabel mit schwarzes Schrumpfschlauch - Câble rouge avec gaine thermorétractable noir - Cable rojo con termorrestringente negro.
- II -
SCHEMA ELETTRICO (230V3) - ELECTRIC DIAGRAM (230V3) - SCHALTBILD
(230V3) - SCHÉMA ÈLECTRIQUE (230V3) - ESQUEMA ELÉCTRICO (230V3)
Collegamento resistenza sx
Left heating connection
Anschluss der Linker Widerstand
Branchement de résistance gauche
Conexión resistencia izquierda
Collegamento resistenza dx
Right heating connection
Anschluss der Rechter Widerstand
Branchement de résistance droite
Conexión resistencia derecha
CT39612001.fm
IDM-39612001900_230V3.tif
1) Morsettiera - Terminal board - Klemmenbrett - Plaque à bornes - Regleta de
conexión.
2) Commutatore regolazione acqua - Water regulator switch - Schalter
Wassereinstellung - Commutateur de réglage de l'eau - Conmutador de
regulación agua
3) Commutatore selettore potenza resistenze - Heating element power selector
switch - Wahlschalter Leistung Heizwiderstände - Commutateur sélecteur de
la puissance des résistances - Conmutador selector de potencia resistencias
4) Lampada spia verde - Green light - Grüne Kontrollleuchte - Voyant vert Lámpara testigo verde.
5) Lampada spia rossa - Red light - Rote Kontrollleuchte - Voyant rouge Lámpara testigo rojo.
6) Elettrovalvola mantenimento acqua - Water level maintenance solenoid valve
- Magnetventil Konstanthalten Wasser - Électrovalve maintien de l'eau Electroválvula mantenimiento agua
7) Elettrovalvola riempimento - Filler solenoid valve - Magnetventil Füllen Électrovalve de remplissage - Electroválvula de llenado
8) Connettore a 12 poli - 12-pin connector - 12-poliger Steckverbinder Connecteur à 12 pôles - Conector de 12 polos
9) Morsettiera taglio potenza - Power cut-off terminal board - Klemmenleiste
Leistungsunterbrechung - Bornier de coupure puissance - Bornera de corte
potencia
10) Contattore resistenza dx - Rh heating element contactor - Schütz rechter
Heizwiderstand - Contacteur résistance droite - Contactor resistencia der.
11) Contattore resistenza sx - Lh heating element contactor - Schütz linker
Heizwiderstand - Contacteur résistance gauche - Contactor resistencia izq.
12) Termostato di sicurezza di destra - Right safety thermostat - Rechtes
Sicherheitsthermostat - Thermostat de sécurité de droite - Termostato de
seguridad lado derecho.
13) Termostato di sicurezza di sinistra - Left safety thermostat - Linkes
Sicherheitsthermostat - Thermostat de sécurité de gauche - Termostato de
seguridad lado izquierdo.
14) Termorestringente nero
- Black heat-shrink tubing - Schwarzes
Schrumpfschlauch - Gaine thermorétractable noir - Termorrestringente negro.
15) Resistenza destra 6000W-230V - Right heating element 6000W-230V Rechter Widerstand 6000W-230V - Résistance droite 6000W-230V Resistencia derecha 6000 W-230V.
16) Resistenza sinistra 6000W-230V - Left heating element 6000W-230V - Linker
Widerstand 6000W-230V - Résistance gauche 6000W-230V - Resistencia
izquierda 6000 W-230V.
17) Pressostato - Pressure switch - Druckschalter - Pressostat - Presostato
18) Massa resistenza sx - Lh heating element ground - Erde linker Heizwiderstand
- Masse résistance gauche - Masa resistencia izq. 19) Massa resistenza dx - Rh heating element ground - Erde rechter
Heizwiderstand - Masse résistance droite - Masa resistencia der.
20) Cavo bianco - White wire - Weißes Kabel - Câble blanc - Cable blanco.
21) Cavo nero - Black wire - Schwarzes Kabel - Câble noir - Cable negro.
22) Cavo giallo/verde - Yellow/green wire - Gelb-grünes Kabel - Câble jaune/vert Cable amarillo/verde.
23) Cavo rosso - Red wire - Rotes Kabel - Câble rouge - Cable rojo.
24) Cavo bianco con termorestringente nero - White wire with black heat-shrink
tubing - Weißes Kabel mit schwarzes Schrumpfschlauch - Câble blanc avec
gaine thermorétractable noir - Cable blanco con termorrestringente negro.
25) Foro per inserimento bulbo - Bulb fitting hole - Loch für Kugeleinsatz - Trou
pour l'introduction de la boule - Agujero para inserción bulbo.
26)Cavo rosso con termorestringente nero - Red wire with black heat-shrink tubing Rotes Kabel mit schwarzes Schrumpfschlauch - Câble rouge avec gaine thermorétractable noir - Cable rojo con termorrestringente negro.
- III -