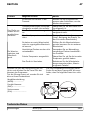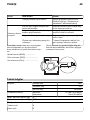
1
RENLIG
IWM60
GB
DE
RENLIG
IWM60
PL
TR
ENGLISH
4
Contents
Safety information
Safety instructions
Product description
Control panel
First use
Daily use
Hints and tips
4
5
7
8
10
10
13
Washing programmes
Consumption values
Care and cleaning
Troubleshooting
Technical information
Environment concerns
IKEA GUARANTEE
14
17
17
20
22
23
24
Subject to change without notice.
Safety information
Before the installation and use of the appliance, carefully read
the supplied instructions. The manufacturer is not responsible if
an incorrect installation and use causes injuries and damages.
Always keep the instructions with the appliance for future reference.
Children and vulnerable people safety
Warning! Risk of suffocation, injury or permanent disability.
• Do not let persons, children included, with reduced physical
sensory, reduced mental functions or lack of experience and
knowledge use the appliance. They must have supervision or
instruction for the operation of the appliance by a person
who is responsible for their safety.
• Do not let children play with the appliance.
• Keep all packaging away from children.
• Keep all detergents away from children.
• Keep children and pets away from the appliance door when
it is open.
• If the appliance has a child safety device, we recommend
you activate it.
General Safety
• Before maintenance, deactivate the appliance and disconnect the mains plug from the mains socket.
• Do not change the specification of this appliance.
ENGLISH
5
• Obey the maximum load volume of 6 kg (refer to the “Programme chart” chapter).
• If the supply cord is damaged, it must be replaced by the
manufacturer, its service agent or similarly qualified persons
in order to avoid a hazard.
• The operating water pressure (minimum and maximum) must
be between 0,5 bar (0,05 MPa) and 8 bar (0,8 MPa)
• The ventilation openings in the base (if applicable) must not
be obstructed by a carpet.
• The appliance is to be connected to the water mains using
the new supplied hose-sets. Old hose sets must not be
reused.
Safety instructions
Installation
• Remove all the packaging and the transit
bolts.
• Keep the transit bolts. When you move
the appliance again you must block the
drum.
• Do not install or use a damaged appliance.
• Do not install or use the appliance where
the temperature is less than 0 °C or
where it is exposed to the weather.
• Obey the installation instruction supplied
with the appliance.
• Make sure that the floor where you install
the appliance is flat, stable, heat resistant
and clean.
• Do not install the appliance where the
appliance door can not be fully opened.
• Always be careful when you move the
appliance because it is heavy. Always
wear safety gloves.
• Make sure that there is air circulation between the appliance and the floor.
• Adjust the feet to have the necessary
space between the appliance and the
carpet.
Electrical connection
Warning! Risk of fire and electrical
shock.
• The appliance must be earthed.
• Make sure that the electrical information
on the rating plate agrees with the power
supply. If not, contact an electrician.
• Always use a correctly installed shockproof socket.
• Do not use multi-plug adapters and extension cables.
• Make sure not to cause damage to the
mains plug and to the mains cable. Contact the Service or an electrician to
change a damaged mains cable.
• Connect the mains plug to the mains
socket only at the end of the installation.
Make sure that there is access to the
mains plug after the installation.
• Do not pull the mains cable to disconnect
the appliance. Always pull the mains
plug.
• Do not touch the mains cable or the
mains plug with wet hands.
• This appliance complies with the E.E.C.
Directives.
ENGLISH
Water connection
• Make sure not to cause damage to the
water hoses.
• The appliance is to be connected to the
water mains using the new supplied
hose-sets. Old hose sets must not be
reused.
• Before you connect the appliance to new
pipes or pipes not used for a long time,
let the water flow until it is clean.
• The first time you use the appliance,
make sure that there is no leakage.
Use
Warning! Risk of injury, electrical
shock, fire, burns or damage to the
appliance.
• Use this appliance in a household environment.
• Obey the safety instructions on the detergent packaging.
• Do not put flammable products or items
that are wet with flammable products in,
near or on the appliance.
• Do not touch the glass of the door while a
programme operates. The glass can be
hot.
• Make sure that you remove all metal objects from the laundry.
6
• Do not put a container to collect possible
water leakage under the appliance. Contact the Service to ensure which accessories can be used.
Care and Cleaning
Warning! Risk of injury or damage to
the appliance.
• Do not use water spray and steam to
clean the appliance.
• Clean the appliance with a moist soft
cloth. Only use neutral detergents. Do not
use abrasive products, abrasive cleaning
pads, solvents or metal objects.
Disposal
Warning! Risk of injury or suffocation.
• Disconnect the appliance from the mains
supply.
• Cut off the mains cable and discard it.
• Remove the door catch to prevent children and pets to get closed in the appliance.
Service
• Contact the Service to repair the appliance. We recommend only the use of
original spare parts.
ENGLISH
7
Product description
1
2
1
2
3
4
5
6
Detergent dispenser drawer
Control panel
Door opening handle
Rating Plate
Drain pump
Adjustable feet
3
4
5
6
Detergent dispenser drawer
Compartment for detergent used for
prewash and soak phase or for stain remover used during the stain action phase (if
available). The prewash and soak detergent is added at the beginning of the wash
programme. The stain remover is added
during the stain action phase.
Compartment for powder or liquid detergent used for main wash. If using liquid
detergent pour it just before starting the
programme.
Compartment for liquid additives (fabric
softener, starch).
Follow the product manufacturer’s recommendations on quantities to use
and do not ever exceed the «MAX» mark in
the detergent dispenser drawer. Any fabric
softener or starching additives must be
poured into the compartment before starting the wash programme.
Child safety device
Make sure that children or pets do not climb
into the drum. Please check into the drum
before using it.
This appliance incorporates a special feature to prevent children and pets becoming
trapped inside the drum.
ENGLISH
8
To activate this device, rotate the button clockwise (without pressing it) inside the door until
the groove is horizontal. If necessary
use a coin.
To disable this device and restore the
possibility of closing
the door, rotate the
button anticlockwise
until the groove is
vertical.
Control panel
Below is a picture of the control panel. It shows the programme selector dial as well as
the buttons and the indicator lights. These are presented by relevant numbers on the
following pages.
1
2
90°
60°
3h
1200
6h
3
9h
900
700
40°
30°
500
30°
30°
40°
40°
30°
40°
60°
7
1
2
3
4
Programme selector dial
Delay Start button
Programme Indicator lights
Start/Pause button
6
5
4
5 Extra Rinse button
6 Multi-Functions button
7 Spin reduction button
Programme selector dial
It allows you to switch the appliance On/Off and/or to select
a programme.
Delay Start button
This button allows you to delay the start of the programme
by 3, 6 or 9 hours.
ENGLISH
9
Programme Indicator lights When selecting a washing programme both lights 3.1 and
3.2 illuminate.
When you have pressed the button 4 the only light corre3.1
sponding to the running phase stays on.
The appliance starts working and the door is locked.
3.2
The light 3.3 illuminates at the end of the washing cycle. After a few minutes the door can be opened.
3.3
If the draining programme is selected any light will illuminate.
Start/Pause button
This button allows you to start or to interrupt the selected
washing programme.
Spin reduction button
By pressing this button you can change the spin speed of the
selected programme.
•
Rinse Hold
By selecting this option the water of the last rinse is not
emptied out to prevent the fabrics from creasing. Before
opening the door it will be necessary to empty out the water. To empty out the water, please read the paragraph
«At the end of the programme».
Multi-Functions button:
By pressing this button, you can select only one of the options. The relevant light will light up.
•
Prewash
By selecting this option the appliance performs a prewash
cycle before the main wash phase. The washing time will
be prolonged. This option is recommended for heavily
soiled laundry.
•
Super Quick
By selecting this option the appliance performs a very
short cycle for slightly soiled items that have been worn for
a short time.
Extra Rinse button
This appliance is designed for saving energy. If it necessary
to rinse the laundry using an extra quantity of water (extra
rinse), select this option. Some additional rinses will be performed. This option is recommended for people who are allergic to detergents, and in areas where the water is very
soft.
Table of symbols
= On/Off - Reset
= Cottons
= Cottons economy at 60° C
= Rinses
= Drain
= Spin
ENGLISH
10
Table of symbols
= Cottons economy at 40° C
= Rinse Hold
= Cold wash
= Prewash
= Synthetics
= Super Quick
= Easy Iron
= Extra Rinse
= Delicates
= Delay Start
20° = Mix 20°
= Main Wash
= Wool
= End Cycle
= Handwash
= Start/Pause
First use
1.
2.
3.
Ensure that the electrical and water
connections comply with the installation
instructions.
Remove any material from the drum.
Pour 2 liters of water into the main
of the detergent
wash compartment
drawer in order to activate the ECO
valve.
Select a cotton cycle at the highest temperature without any laundry in the appliance, to remove any manufacturing
residue from the drum and tub.
Pour 1/2 a measure of detergent into
the main wash compartment and start
the appliance.
Daily use
Open the door
Open the door by carefully pulling the door
handle outwards.
Load the laundry
Place the laundry in
the drum, one item
at a time, shaking
them out as much
as possible.
By pushing the
porthole frame,
close firmly the
door.
Measure out detergent and fabric
softener
1
Pour the detergent
into the main wash
or
compartment
in the appropriate
compartment if the
selected programme/option it
requires (see more
details in "Detergent dispenser
drawer").
To pour the right
quantity of the detergent, see more
ENGLISH
11
details in "Degrees
of water hardness".
1
Pour fabric softener
into the compartment marked
(must not exceed
the «MAX» mark in
the drawer).
Close the drawer gently
Select the required programme by turning
the programme selector dial (1)
The appliance is now switched on. The indicator light of button 4 starts to blink.
At the end of the programme the selector
dial must be turned to position O, to switch
the appliance off.
For the description of each wash cycle,
the compatibility among the washing
programmes and the options, consult the
chapter «Washing Programmes».
Caution! If you turn the programme
selector dial to another programme
when the appliance is working, the red
indicator light of button 4 will blink 3 times
to indicate a wrong selection. The
appliance will not perform the new selected
programme.
Reduce the spin speed by pressing button
7
By selecting a programme, the appliance
proposes automatically the maximum spin
speed provided for that programme.
Press button 7 repeatedly to change the
spin speed, if you want your laundry to be
spun at a different speed. The relevant indicator light illuminates.
Select the available options by pressing
buttons 7, 6 and 5
Depending on the programme, different
functions can be combined. These must be
selected after choosing the desired programme and before starting the programme.
When these buttons are pressed, the corresponding indicator lights illuminate. When
they are pressed again, the indicator lights
go out. If an incorrect option is selected, the
integrated red indicator light of the button 4
flashes for 3 times.
For the compatibility among the washing programmes and the options see
chapter «Washing Programmes».
Select the Delay Start by pressing button
2
Before you start the programme, if you wish
to delay the start, press the button 2 repeatedly, to select the desired delay. The
relevant light illuminates.
You must select this option after you have
set the programme and before you start the
programme.
You can cancel or modify the delay time at
any moment, before you press button 4.
Selecting the delayed start:
1. Select the programme and the required
options.
2. Select the delay start by pressing the
button 2.
3. Press button 4:
– the appliance starts its countdown.
– The programme will start after the
selected delay has expired.
Cancelling the delayed start after having
started the programme:
1. Set the washing appliance to PAUSE by
pressing button 4.
2. Press button 2 once, the light relevant
to the selected delay goes off
3. Press button 4 again to start the programme.
The Delay Start can not be selected with
DRAIN programme.
ENGLISH
Important! The selected delay can be
changed only after selecting the washing
programme again.
The door will be locked throughout the delay time. If you need to open the door, you
must set the appliance to PAUSE (by pressing the button 4) and then wait a few minutes. After you have closed the door, press
the button 4 again.
Start the programme by pressing button 4
To start the selected programme, press the
button 4, the corresponding green indicator
light stops blinking. The indicator light corresponding to the running phase illuminates. The appliance starts operating and
the door is locked.
To interrupt a programme which is running,
press the button 4: the corresponding green
indicator light starts blinking.
To restart the programme from the point at
which it was interrupted, press the button 4
again. If you have chosen a delayed start,
the appliance will begin the countdown.
If an incorrect option is selected, the red indicator light of the button 4 blinks 3 times.
Altering an option or a running
programme
It is possible to change some options before
the programme carries them out.
Before you make any change, you must
PAUSE the appliance by pressing the button
4.
Changing a running programme is possible
only by resetting it. Turn the programme selector dial to O and then to the new programme position. Start the new programme
by pressing the button 4 again. The washing water in the tub will be not emptied out.
Interrupting a programme
Press the button 4 to interrupt a programme
which is running, the corresponding green
indicator light starts blinking.
Press the button again to restart the programme.
Cancelling a programme
Turn the selector dial to O to cancel a programme which is running.
12
You can select now a new programme.
Opening the door
After the programme has started the door is
locked. If, for any reason, you need to open
it, set firstly the appliance to PAUSE by
pressing the button 4. After a few minutes it
will be possible to open the door.
If the door remains locked, this means that
the appliance is already heating or that the
water level is too high. In any case, do not
try to force the door!
If you cannot open the door but you need
to open it you have to switch the appliance
off by turning the selector dial to O. After a
few minutes the door can be opened (pay
attention to the water level and temperature!).
After closing the door, it is necessary to select the programme and options again and
to press button 4.
At the end of the programme
The appliance stops automatically. The indicator light of button 4 and the indicator
light corresponding to the just finished
washing phase goes off. The light 3.3 illuminates. After a few minutes the door can be
opened.
If a programme or an option that ends with
water left in the tub has been selected, the
light 3.3 illuminates but the door remains
locked to indicate that the water must be
emptied out before opening the door.
During this time the drum continues to turn
at regular intervals until water draining.
Follow the below instructions to empty out
the water:
1. Turn the programme selector dial to O.
2. Select the draining or spinning programme.
3. Reduce the spin speed if needed, by
pressing the button 7.
4. Press button 4.
At the end of the programme, the door can
be now opened. Turn the programme selector dial to O to switch the appliance off.
ENGLISH
13
Remove the laundry from the drum and
carefully check that the drum is empty. If
you do not intend to carry out another
wash, close the water tap. Leave the door
open to prevent any mildew and unpleasant smells.
Stand by: once the programme has
finished the energy saving system is
enabled with the pilot lights switched on. By
pressing any button the appliance will come
out of the energy saving status.
Hints and tips
Sorting out the laundry
Follow the wash code symbols on each garment label and the manufacturer’s washing
instructions. Sort the laundry as follows:
whites, coloureds, synthetics, delicates,
woollens.
Grass: soap lightly and treat with bleach
(white cottons and fast coloureds only).
Ball point pen and glue: moisten with acetone1), lay the garment on a soft cloth and
dab the stain.
Lipstick: moisten with acetone as above,
then treat stains with methylated spirits.
Treat any residual marks with bleach.
Red wine: soak in water and detergent,
rinse and treat with acetic or citric acid,
then rinse. Treat any residual marks with
bleach.
Ink: depending on the type of ink, moisten
the fabric first with acetone1), then with acetic acid; treat any residual marks on white
fabrics with bleach and then rinse thoroughly.
Tar stains: first treat with stain remover, methylated spirits or benzine, then rub with
detergent paste.
Removing stains
Stubborn stains may not be removed by just
water and detergent. It is therefore advisable to treat them prior to washing.
Blood: treat fresh stains with cold water. For
dried stains, soak overnight in water with a
stain remover product then rub in the soap
and water.
Oil based paint: moisten with benzine stain
remover, lay the garment on a soft cloth
and dab the stain; treat several times.
Dried grease stains: moisten with turpentine, lay the garment on a soft surface and
dab the stain with the fingertips and a cotton cloth.
Rust: oxalic acid dissolved in hot water or a
rust removing product used cold. Be careful
with rust stains which are not recent since
the cellulose structure will already have
been damaged and the fabric tends to
hole.
Mould stains: treat with bleach, rinse well
(white cottons and fast coloureds only).
Characteristic
Soft
Degrees of water hardness
Water hardness is classified in so-called
“degrees” of hardness. Information on
hardness of the water in your area can be
obtained from the relevant water supply
company, or from your local authority.
Degrees of water hardness
German °dH
French °T.H.
0-7
0-15
Medium
8-14
16-25
Hard
15-21
26-37
Very hard
> 21
> 37
1) do not use acetone on artificial silk
ENGLISH
14
A water softener must be added when water has a medium-high degree of hardness.
Follow the manufacturer’s instructions. The quantity of detergent can then always be
adjusted (reduced) to degree of hardness soft.
Washing programmes
3)
COTTONS
ECONOMY
60°-40°
COTTONS
40°-30°(Cold)
SYNTHETICS
60°-40°-30°(Cold)
White and fast coloured cotton economy, lightly-heavy
soiled items, shirts,
underwear.
Main wash
Rinses
Max. final
spin at
1200 rpm
Coloured cotton
(normally-lightly
soiled items).
Main wash
Rinses
Max. final
spin at
1200 rpm
Synthetic or mixed
fabrics: underwear,
coloured garments,
non-shrink shirts,
blouses.
Main wash
Rinses
Max. final
spin at 900
rpm
6 kg
3 kg1)
Spin
Rinse Hold
Prewash
Super
Quick
Extra Rinse
6 kg
Spin
Rinse Hold
Prewash
Extra Rinse
6 kg
3 kg1)
Spin
Rinse Hold
Prewash
Super
Quick
Extra Rinse
3 kg
1.5 kg1)
Spin
Rinse Hold
Prewash
Super
Quick
Extra Rinse
Detergent
Compartment
Available
Options
Cycle
Description
White cotton (heavy- Main wash
normally soiled
Rinses
items).
Max. final
spin at
1200 rpm
Max. Load
Red. Load1)
COTTONS
90°-60°
Type of
laundry
Programme/
Temperature
Please always refer to the care label symbol of your garment and select the washing
programme based on what it says.
2)
2)
2)
2)
EASY IRON
40°
DELICATES
40°-30°
4)
20°
MIX 20°
20°
WOOLHANDWASH
30°(Cold)
Synthetic fabrics: selecting this programme the laundry
is gently washed and
spun to avoid any
creasing. In this way
ironing is easier. Furthermore the appliance will perform
additional rinses.
Main wash
Rinses
Max. final
spin at 900
rpm
Delicate fabrics: for
example curtains.
Main wash
Rinses
Max. final
spin at 700
rpm
Special programme
for cotton, synthetic
and mixed fabrics
with light soil.
Set this programme
to decrease the energy consumption.
Main wash
Rinses
Max. final
spin at 900
rpm
Special programme
for wool garments
and delicate fabrics
bearing the «Pure
new wool, nonshrink, appliance
washable» and
«hand washing» labels.
Main wash
Rinses
Max. final
spin at 900
rpm
Spin
Rinse Hold
Prewash
Extra Rinse
Detergent
Compartment
Available
Options
Max. Load
Red. Load1)
Cycle
Description
15
Type of
laundry
Programme/
Temperature
ENGLISH
2)
1.5 kg
3 kg
1.5 kg1)
3 kg
Spin
Rinse Hold
Prewash
Super
Quick
Extra Rinse
Spin
Rinse Hold
Extra Rinse
Spin
Rinse Hold
2 kg
2)
RINSES
DRAIN
SPIN
With this programme
it is possible to rinse
and spin cotton garments which have
been washed by
hand. The appliance
performs some rinses, followed by a final long spin. The
spin speed can be
reduced.
Rinses
Max. final
spin at
1200 rpm
For emptying out the
water of the last
rinse in programmes
with the Rinse Hold
option selected.
Draining of
water
Separate spin for
hand washed garments and after programmes with the
Rinse Hold option
selected. You can
choose the spin
speed by pressing
the relevant button
to adapt it to the
fabrics to be spun.
Max. final
spin at
1200 rpm
Detergent
Compartment
Available
Options
Max. Load
Red. Load1)
Cycle
Description
16
Type of
laundry
Programme/
Temperature
ENGLISH
Spin
Rinse Hold
Extra Rinse
6 kg
6 kg
Spin
6 kg
1) If you select the SUPER QUICK option, we recommend you, to reduce the maximum load as indicated. (Red. load =
reduced load). Full loading is possible however with somewhat reduced cleaning results.
2) If using liquid detergents, a programme without PREWASH must be selected.
3) STANDARD PROGRAMMES for the Energy Label consumption values. According to regulation 1061/2010, these
programmes are respectively the «standard 60° C cotton programme» and the «standard 40° C cotton
programme». They are the most efficient programmes in terms of combined energy and water consumption for
washing normally soiled cotton laundry.
Set this programme to have a good washing results and decrease the energy consumption. The time of the washing
programme is extended.
The water temperature of the washing phase may differ from the temperature declared for the selected programme.
4) Make sure that the detergent is for low temperature in order to have good washing results.
ENGLISH
17
Consumption values
The data of this table are approximate. Different causes can change the data: the
quantity and type of laundry, the water and ambient temperature.
Programmes
Load
(kg)
Energy consumption
(kWh)
Water consumption (litre)
Approximate
programme
duration (minutes)
Remaining
moisture
(%)1)
Cottons 60 °C
6
1.35
59
150
53
Cottons 40 °C
6
0.85
59
140
53
Synthetics 40
°C
3
0.55
42
90
35
Delicates 40 °C
3
0.55
57
65
35
Wool/Hand
wash 30 °C
2
0.25
55
60
30
Standard cotton programmes
Standard 60
°C cotton
6
1.03
46
159
53
Standard 60
°C cotton
3
0.77
38
135
53
Standard 40
°C cotton
3
0.64
38
129
53
1) At the end of spin phase.
Off Mode (W)
Left On Mode (W)
0.10
0.98
The information given in the charts above are in compliance with the EU Commission regulation 1015/2010 implementing directive 2009/125/EC.
Care and cleaning
Warning! Switch the appliance off
before you carry out any cleaning or
maintenance work.
Maintenance Wash
With the use of low temperature washes it is
possible to get a build up of residues inside
the drum.
We recommend that a maintenance wash
be performed on a regular basis.
To run a maintenance wash:
• The drum should be empty of laundry.
• Select the hottest cotton wash programme.
• Use a normal measure of detergent, must
be a powder with biological properties.
ENGLISH
18
Cleaning the dispenser drawer and the
drawer recess
1
To remove the
drawer, press the
catch downwards
and pull it out.
2
To aid cleaning, remove also the top
part of the additive
compartment.
Use the previous
brush to clean the
recess, ensuring
that upper and lower part of it is well
cleaned.
After having
cleaned the dispenser and the
drawer recess, replace it and run a
rinse programme
without any laundry
in the drum to flush
away any residue.
5
Cleaning the pump
Proceed as follows:
1
3
4
A B
Use a stiff brush to
clean and remove
all washing powder
residue.
Flush out all the removed parts of the
dispenser drawer
under a tap to remove any traces of
accumulated powder.
Place a container
close to the pump
(A), to collect any
spillage.
2
Pull out the emergency emptying
hose (B), place it in
the container and
remove its cover
cap.
3
When no more water comes out, unscrew the pump
cover (A) and remove it. Always
keep a rag nearby
to dry up spillage of
water when removing the pump.
ENGLISH
19
4
Remove any objects
from the pump impeller by rotating it.
5
Use a pencil to
check whether the
pump wheel right at
the back of the
pump housing can
turn. (It is normal for
the pumping wheel
to turn jerkily.) If the
pumping wheel
cannot be turned,
please contact the
After Sales Service.
6
Put the cap back on
the emergency
emptying hose and
place the latter
back in its seat.
Screw the pump
fully in.
• Turn off the water
tap.
• Unscrew the hose
from the tap.
• Clean the filter in
the hose with a
stiff brush.
• Screw firmly the
inlet hose back
onto the tap.
1
2
• Unscrew the hose from the appliance.
Keep a rag nearby because some water may flow.
• Clean the filter in the valve with a stiff
brush or with the piece of cloth.
3
35°
Cleaning the water inlet filters
If the appliance takes long to fill with water
or doesn't fill, the starting button indicator
light blinks in red. Check if the water inlet filters are blocked (see chapter "What to do
if..." for more details).
Proceed as follows:
45°
• Screw the hose
back to the appliance turning it to
the left or the
right to suit the
installation. Tight
the locknut correctly to prevent
water leaks.
• Turn on the water
tap.
The dangers of freezing
If the appliance is exposed to temperatures
below 0°C, certain precautions should be
taken.
• Turn off the water tap.
• Unscrew the inlet hose.
• Place the end of the emergency emptying
hose and that of the inlet hose in a bowl
placed on the floor and let water drain
out.
ENGLISH
20
• Screw the water inlet hose back on and
reposition the emergency emptying hose
after having put the cap on again.
• When you intend to start the appliance
up again, make sure that the room temperature is above 0°C.
Important! Every time you drain the water
through the emergency emptying hose you
must pour 2 litres of water into the main
wash compartment of the detergent drawer
and then run the drain programme. This will
activate the ECO VALVE device avoiding
that part of the detergent remains unused
at next washing.
Emergency emptying out
If the water is not discharged, proceed as
follows to empty out the appliance:
• pull out the plug from the power socket;
• close the water tap;
• if necessary, wait until the water has
cooled down;
• open the pump door;
• place a bowl on the floor and place the
end of the emergency emptying hose into
the bowl. Remove its cap. The water
should drain by gravity into the bowl.
When the bowl is full, put the cap back
on the hose. Empty the bowl. Repeat the
procedure until water stops flowing out;
• clean the pump if necessary as previously
described;
• replace the emergency emptying hose in
its seat after having plugged it;
• screw the pump cover again and close
the door.
Troubleshooting
The appliance does not start or stops during
operation. It is possible that the red indicator light of button 4 blinks to indicate that
the appliance is not working.
Problem
The appliance
does not start:
Before contacting your local Service Centre,
please carry out the checks listed below.
Possible cause
Solution
The door has not been closed (The
red indicator light of button 4
blinks).
Close the door firmly.
The plug is not properly inserted in
the power socket.
Insert the plug into the power
socket.
There is no power at the socket.
Please check your domestic electrical installation.
The main fuse has blown.
Replace the fuse.
The programme selector dial is not Please turn the selector dial and
correctly positioned and the button press the button 4 again.
4 has not been pressed.
The appliance
does not fill:
The delay start has been selected.
If the laundry are to be washed
immediately, cancel the delay
start.
The water tap is closed The red indicator light of button 4 blinks).
Open the water tap.
The inlet hose is squashed or
kinked (The red indicator light of
button 4 blinks).
Check the inlet hose connection.
ENGLISH
Problem
21
Possible cause
Solution
The filter in the inlet hose or the in- Clean the water inlet filters. (See
let valve filter are blocked (The red "Cleaning the water inlet filters"
indicator light of button 4 blinks).
for more details).
The appliance
does not empty:
The appliance
spinning phase
starts late or
does not start:
The door is not properly closed
(The red indicator light of button 4
blinks).
Close the door firmly.
The drain hose is squashed or
kinked (The red indicator light of
button 4 blinks).
Check the drain hose connection.
The drain filter is clogged (The red
indicator light of button 4 blinks).
Clean the drain filter.
An option or a programme that
Select the draining or spinning
ends with the water still in the tub
programme.
or a that eliminates all the spinning
phases has been selected.
The electronic unbalance detection Redistribute the load manually or
device has cut in because the laun- load more laundry and select the
dry is not evenly distributed in the spin programme.
drum. The laundry is redistributed
by reverse rotation of the drum.
This may happen several times before the unbalance disappears
and normal spinning can resume.
If, after 10 minutes, the laundry is
still not evenly distributed in the
drum, the appliance will not spin.
Too much detergent or unsuitable
detergent (creates too much foam)
has been used.
There is water
on the floor:
Reduce the detergent quantity or
use another one.
Check whether there are any leaks Check the water inlet hose connecfrom one of the inlet hose fittings. It tion.
is not always easy to see this as
the water runs down the hose;
check to see if it is damp.
The drain or inlet hose is damaged.
Replace it with a new one (check
with the After Sales Service the
right spare part number).
The cap on the emergency emptying hose has not been replaced or
the filter has not been properly
screwed in after cleaning action.
Refit the cap on the emergency
emptying hose or screw the filter
fully in.
ENGLISH
Problem
The door will
not open:
The appliance
produces an
unusual noise
22
Possible cause
Solution
The programme is still running.
Wait the end of washing cycle.
The door lock has not been released.
Wait a few minutes before opening the door.
There is water in the drum.
Select drain or spin programme to
empty out the water.
The transit bolts and packing have
not been removed.
Check the correct installation of the
appliance.
The support feet have not been
adjusted
Check the correct levelling of the
appliance.
The drain pump could be blocked.
Check the drain pump. (See
"Cleaning the pump" for more details).
Too little detergent or unsuitable
detergent has been used.
Increase the detergent quantity or
use another one.
Stubborn stains have not been
treated prior to washing.
Use commercial products to treat
the stubborn stains.
Unsatisfactory
washing results: The correct temperature was not
selected.
Excessive laundry load.
After the check, switch on the appliance
and press the button 4 to restart the programme.
If the malfunction shows again, contact your
After Sales Service.
Check if you have selected the correct temperature.
Reduce the laundry load in according to the "Washing Programmes table".
The necessary data for the service centre is
on the rating plate. We recommend that
you write the data here:
Model description
(MOD): .....................
Product number (PNC): ...........................
Serial number (S.N.): ...............................
Made In Italy
© Inter IKEA Systems B.V. 1999
501.514.59
21552
Technical information
Dimensions
Width (cm)
59,6
Height (cm)
82
ENGLISH
23
Depth (cm)
Water supply
pressure1)
Minimum
Maximum
Cotton max. load (kg)
6
Max. spin speed (rpm)
1200
Energy class
A+
Washing class
A
Spinning class
B
Washing noise (dB(A))
56
Spinning noise (db(A))
72
Average annual energy
consumption (kWh)2)
192
Average annual water consumption (litres)2)
8699
54 max.
0,5 bar (0,05 MPa)
8 bar (0,8 MPa)
1) If the pressure in your area is lower or higher, please contact your After Sales Service.
2) The data is based on the Standard Cotton programmes for test institutes assuming 200 cycles per a year.
Information on the electrical connection, voltage and overall power is given on the rating plate, on the inner edge of the appliance door.
Environment concerns
Recycle the materials with the symbol .
Put the packaging in applicable containers
to recycle it.
Help protect the environment and human
health and to recycle waste of electrical
and electronic appliances. Do not dispose
appliances marked with the symbol with
the household waste. Return the product to
your local recycling facility or contact your
municipal office.
Packaging materials
are recyThe materials with the symbol
clable. Dispose the packaging in a suitable
collection containers to recycle it.
Disposal of the appliance
• To prevent the risk of physical injury or
damage:
– Disconnect the mains plug from the
mains socket.
– Cut off the mains cable and discard it.
– Discard the door catch. This prevents
children or small animals from being
closed inside of the appliance. There is
a risk of suffocation.
ENGLISH
24
IKEA GUARANTEE
How long is the IKEA guarantee valid?
This guarantee is valid for five (5) years
from the original date of purchase of Your
appliance at IKEA, unless the appliance is
named LAGAN in which case two (2) years
of guarantee apply. The original sales receipt is required as proof of purchase. If
service work is carried out under guarantee,
this will not extend the guarantee period for
the appliance,
Which appliances are not covered by the
IKEA five (5) years guarantee?
The range of appliances named LAGAN
and all appliances purchased in IKEA before 1st of August 2007
Who will execute the service?
IKEA service provider will provide the service through its own service operations or
authorized service partner network.
What does this guarantee cover?
The guarantee covers faults of the appliance, which have been caused by faulty
construction or material faults from the date
of purchase from IKEA. This guarantee applies to domestic use only. The exceptions
are specified under the headline “What is
not covered under this guarantee?” Within
the guarantee period, the costs to remedy
the fault e.g. repairs, parts, labour and travel will be covered, provided that the appliance is accessible for repair without special
expenditure. On these conditions the EU
guidelines (Nr. 99/44/EG) and the respective local regulations are applicable. Replaced parts become the property of IKEA.
What will IKEA do to correct the problem?
IKEA appointed service provider will examine the product and decide, at its sole discretion, if it is covered under this guarantee.
If considered covered, IKEA service provider
or its authorized service partner through its
own service operations, will then, at its sole
discretion, either repair the defective product or replace it with the same or a comparable product.
What is not covered under this
guarantee?
• Normal wear and tear.
• Deliberate or negligent damage, damage caused by failure to observe operating instructions, incorrect installation or by
connection to the wrong voltage, damage caused by chemical or electro-chemical reaction, rust, corrosion or water
damage including but not limited to damage caused by excessive lime in the water supply, damage caused by abnormal
environmental conditions.
• Consumable parts including batteries
and lamps.
• Non-functional and decorative parts
which do not affect normal use of the appliance, including any scratches and possible color differences.
• Accidental damage caused by foreign
objects or substances and cleaning or unblocking of filters, drainage systems or
soap drawers.
• Damage to the following parts: ceramic
glass, accessories, crockery and cutlery
baskets, feed and drainage pipes, seals,
lamps and lamp covers, screens, knobs,
casings and parts of casings. Unless such
damages can be proved to have been
caused by production faults.
• Cases where no fault could be found during a technician’s visit.
• Repairs not carried out by our appointed
service providers and/or an authorized
service contractual partner or where nonoriginal parts have been used.
• Repairs caused by installation which is
faulty or not according to specification.
• The use of the appliance in a non-domestic environment i.e. professional use.
ENGLISH
• Transportation damages. If a customer
transports the product to their home or
other address, IKEA is not liable for any
damage that may occur during transport.
However, if IKEA delivers the product to
the customer's delivery address, then
damage to the product that occurs during
this delivery will be covered by this guarantee.
• Cost for carrying out the initial installation
of the IKEA appliance. However, if an
IKEA service provider or its authorized
service partner repairs or replaces the
appliance under the terms of this guarantee, the service provider or its authorized
service partner will re-install the repaired
appliance or install the replacement, if
necessary.
This restriction do not apply to fault-free
work carried out by a qualified specialist
using our original parts in order to adapt
the appliance to the technical safety specifications of another EU country.
How country law applies
The IKEA guarantee gives You specific legal
rights, which covers or exceed local demands. However these conditions do not
limit in any way consumer rights described
in the local legislation
Area of validity
For appliances which are purchased in one
EU country and taken to another EU country, the services will be provided in the
framework of the guarantee conditions normal in the new country. An obligation to
carry out services in the framework of the
guarantee exists only if the appliance complies and is installed in accordance with:
• the technical specifications of the country
in which the guarantee claim is made;
• the Assembly Instructions and User Manual Safety Information;
The dedicated After Sales Service for
IKEA appliances:
Please do not hesitate to contact IKEA After
Sales Service to:
1. make a service request under this guarantee;
25
2.
ask for clarification on installation of the
IKEA appliance in the dedicated IKEA
kitchen furniture. The service won’t provide clarifications related to:
– the overall IKEA kitchen installation;
– connections to electricity (if machine
comes without plug and cable), to
water and to gas since they have to
be executed by an authorized service engineer.
3. ask for clarification on user manual contents and specifications of the IKEA appliance.
To ensure that we provide you with the best
assistance, please read carefully the Assembly Instructions and/or the User Manual
section of this booklet before contacting us.
How to reach us if You need our service
Please refer to the last page of this manual
for the full list of IKEA appointed contacts
and relative national phone numbers.
Important! In order to provide You with a
quicker service, we recommend that You
use the specific phone numbers listed at the
end of this manual. Always refer to the
numbers listed in the booklet of the specific
appliance You need an assistance for.
Before calling us, assure that You have to
hand the IKEA article number (8 digit code)
for the appliance of which you need our
assistance.
Important! SAVE THE SALES RECEIPT! It is
Your proof of purchase and required for the
guarantee to apply. Note that the receipt
reports also the IKEA article name and
number (8 digit code) for each of the
appliances you have purchased.
ENGLISH
Do You need extra help?
For any additional questions not related to
After Sales of your appliances, please con-
26
tact our nearest IKEA store call centre. We
recommend you read the appliance documentation carefully before contacting us.
DEUTSCH
27
Inhalt
Sicherheitsinformationen
Sicherheitshinweise
Gerätebeschreibung
Bedienfeld
Erste Inbetriebnahme
Täglicher Gebrauch
Tipps und Hinweise
27
28
30
31
33
33
36
Waschprogramme
Verbrauchswerte
Reinigung und Pflege
Fehlersuche
Technische Daten
Umwelttipps
IKEA Garantie
38
41
42
45
47
48
49
Änderungen vorbehalten.
Sicherheitsinformationen
Lesen Sie vor der Montage und dem Gebrauch des Geräts zuerst die Gebrauchsanleitung. Der Hersteller übernimmt keine
Verantwortung für Verletzungen und Beschädigungen durch
unsachgemäße Montage. Bewahren Sie die Gebrauchsanleitung griffbereit auf.
Sicherheit von Kindern und schutzbedürftigen Personen
Warnung! Es besteht Erstickungsgefahr. Risiko von
Verletzungen oder permanenten Behinderungen.
• Lassen Sie keine Personen (einschließlich Kinder) mit eingeschränkten physischen, sensorischen oder geistigen Fähigkeiten, mangelnder Erfahrung oder mangelndem Wissen dieses
Gerät benutzen. Solche Personen müssen von einer Person,
die für ihre Sicherheit verantwortlich ist, beaufsichtigt oder
bei der Bedienung des Geräts angeleitet werden.
• Kinder dürfen nicht mit dem Gerät spielen.
• Alle Verpackungsmaterialien von Kindern fernhalten.
• Halten Sie alle Reinigungsmittel von Kindern fern.
• Halten Sie Kinder und Haustiere vom geöffneten Gerät fern.
• Falls Ihr Gerät mit einer Kindersicherung ausgestattet ist,
empfehlen wir, diese einzuschalten.
DEUTSCH
28
Allgemeine Sicherheit
• Schalten Sie vor Reinigungsarbeiten immer das Gerät aus
und ziehen Sie den Netzstecker aus der Steckdose.
• Nehmen Sie keine technischen Änderungen am Gerät vor.
• Beachten Sie die maximale Beladungsmenge von 6 kg (siehe
Kapitel „Programmtabelle“).
• Wenn das Netzkabel beschädigt ist, muss es vom Hersteller,
seinem Kundenservice oder einer gleichermaßen qualifizierten Person ausgetauscht werden, um Gefahrenquellen zu
vermeiden.
• Der Betriebswasserdruck (Mindest- und Höchstdruck) muss
zwischen 0,5 bar (0,05 MPa) und 8 bar (0,8 MPa) liegen.
• Die Lüftungsöffnungen im Gerätesockel (falls vorhanden)
dürfen nicht von einem Teppichboden blockiert werden.
• Das Gerät muss mit den mitgelieferten neuen Schläuchen an
den Wasseranschluss angeschlossen werden. Alte Schläuche
dürfen nicht wieder verwendet werden.
Sicherheitshinweise
Montage
• Entfernen Sie die Verpackungsmaterialien und die Transportschrauben.
• Bewahren Sie die Transportschrauben
auf. Wenn Sie das Gerät umsetzen, müssen Sie die Trommel blockieren.
• Stellen Sie ein beschädigtes Gerät nicht
auf und benutzen Sie es nicht.
• Stellen Sie das Gerät nicht an einem Ort
auf, an dem die Temperatur unter 0 °C
absinken kann oder an dem es Witterungseinflüssen frei ausgesetzt ist.
• Halten Sie sich an die mitgelieferte Montageanleitung.
• Stellen Sie sicher, dass der Boden, auf
dem das Gerät aufgestellt wird, eben,
hitzebeständig und sauber ist.
• Stellen Sie das Gerät nicht an einem Ort
auf, an dem die Tür nicht vollständig geöffnet werden kann.
• Seien Sie beim Umsetzen des Geräts vorsichtig, denn es ist schwer. Tragen Sie
stets Sicherheitshandschuhe.
• Stellen Sie sicher, dass die Luft zwischen
Gerät und Boden zirkulieren kann.
• Stellen Sie die Füße so ein, dass der dazu
erforderliche Abstand zwischen Gerät
und Boden vorhanden ist.
Elektrischer Anschluss
Warnung! Brand- und
Stromschlaggefahr.
• Das Gerät muss geerdet sein.
• Stellen Sie sicher, dass die elektrischen
Daten auf dem Typenschild den Daten
Ihrer Stromversorgung entsprechen.
Wenden Sie sich andernfalls an eine
Elektrofachkraft.
• Das Gerät darf ausschließlich an eine
ordnungsgemäß installierte Schutzkontaktsteckdose angeschlossen werden.
DEUTSCH
• Verwenden Sie keine Mehrfachsteckdosen oder Verlängerungskabel.
• Achten Sie darauf, Netzstecker und Netzkabel nicht zu beschädigen. Wenden Sie
sich zum Austausch des beschädigten
Netzkabels an den Kundendienst oder
einen Elektriker.
• Stecken Sie den Netzstecker erst nach
Abschluss der Montage in die Steckdose.
Stellen Sie sicher, dass der Netzstecker
nach der Montage noch zugänglich ist.
• Ziehen Sie nicht am Netzkabel, um das
Gerät von der Spannungsversorgung zu
trennen. Ziehen Sie dazu immer direkt am
Netzstecker.
• Fassen Sie das Netzkabel oder den Netzstecker nicht mit nassen Händen an.
• Das Gerät entspricht den EC-Richtlinien.
Wasseranschluss
• Achten Sie darauf, die Wasserschläuche
nicht zu beschädigen.
• Das Gerät muss mit den mitgelieferten
neuen Schläuchen an den Wasseranschluss angeschlossen werden. Alte
Schläuche dürfen nicht wieder verwendet
werden.
• Bevor Sie neue oder lange Zeit nicht benutzte Schläuche an das Gerät anschließen, lassen Sie Wasser durch die Schläuche fließen, bis es sauber austritt.
• Achten Sie darauf, dass beim ersten Gebrauch des Geräts keine Undichtheiten
vorhanden sind.
Gebrauch
Warnung! Verletzungs- Stromschlag-,
Brand-, Verbrennungsgefahr sowie
Risiko von Schäden am Gerät.
• Das Gerät ist für die Verwendung im
Haushalt vorgesehen.
• Beachten Sie die Sicherheitsanweisungen
auf der Waschmittelverpackung.
• Platzieren Sie keine entflammbaren Produkte oder Gegenstände, die mit entflammbaren Produkten benetzt sind, im
Gerät, auf dem Gerät oder in der Nähe
des Geräts.
29
• Berühren Sie während des Betriebs nicht
das Türglas. Das Glas kann sehr heiß
sein.
• Achten Sie darauf, dass alle Metallobjekte aus der Wäsche entfernt wurden.
• Stellen Sie keinen Behälter zum Auffangen möglicher Wasserlecks unter das Gerät. Wenden Sie sich an den Kundendienst, wenn Sie Fragen zur Verwendung
möglicher Zubehörteile haben.
Reinigung und Pflege
Warnung! Andernfalls besteht
Verletzungsgefahr und das Gerät
könnte beschädigt werden.
• Reinigen Sie das Gerät nicht mit einem
Wasser- oder Dampfstrahl.
• Reinigen Sie das Gerät mit einem weichen, feuchten Tuch. Verwenden Sie ausschließlich Neutralreiniger. Benutzen Sie
keine Scheuermittel, scheuernde Reinigungsschwämmchen, Lösungsmittel oder
Metallgegenstände.
Entsorgung
Warnung! Verletzungs- und
Erstickungsgefahr.
• Trennen Sie das Gerät von der Stromversorgung.
• Schneiden Sie das Netzkabel ab, und
entsorgen Sie es.
• Entfernen Sie das Türschloss, um zu verhindern, dass sich Kinder oder Haustiere
in dem Gerät einschließen.
Service
• Wenden Sie sich zur Reparatur des Geräts an den Kundendienst. Wir empfehlen
nur Originalersatzteile zu verwenden.
DEUTSCH
30
Gerätebeschreibung
1
2
3
4
5
6
Waschmittelschublade
Fach für Waschmittel für die Vorwäsche
und Einweichphase oder für Fleckenentferner während der Flecken-Behandlungsphase (falls verfügbar). Vorwasch- und Einweichmittel werden zu Beginn des Waschprogramms eingespült. Der Fleckentferner
wird während der Flecken-Behandlungsphase zugegeben.
Fach für Pulver- oder flüssige Waschmittel, die für die Hauptwäsche verwendet
werden. Wenn Sie flüssiges Waschmittel
verwenden, füllen Sie es kurz vor dem
Waschprogramm ein.
Fach für flüssige Pflegemittel (Weichspüler, Stärke).
Befolgen Sie die Mengenempfehlungen des Waschmittelherstellers und
überschreiten Sie nicht die „MAX“-Markierung in der Waschmittelschublade. Weichspüler oder Stärkezusätze müssen in das
Fach gefüllt werden, bevor das Waschprogramm gestartet wird.
1
2
3
4
5
6
Waschmittelschublade
Bedienblende
Türgriff
Typenschild
Ablaufpumpe
Einstellbare Füße
DEUTSCH
31
Kindersicherung
Stellen Sie sicher, dass Kinder oder Kleintiere nicht in die Trommel klettern. Bitte überprüfen Sie das Innere der Trommel, bevor
Sie diese verwenden.
Dieses Gerät hat eine spezielle Funktion,
um zu vermeiden, dass Kinder oder Kleintiere in der Trommel eingeschlossen werden.
Zum Einschalten der
Kindersicherung
drehen Sie den
Knopf in der Tür
(ohne Druck) nach
rechts, bis sich die
Kerbe in horizontaler Position befindet. Falls nötig, benutzen Sie hierzu
eine Münze.
Um diese Funktion
auszuschalten und
die Tür wieder
schließen zu können, drehen Sie den
Knopf gegen den
Uhrzeigersinn, bis
die Kerbe wieder in
vertikaler Position
ist.
Bedienfeld
Nachstehend ist die Bedienblende abgebildet. Sie zeigt den Programm-Wahlschalter
und die verschiedenen Tasten und Kontrolllampen. Auf diese wird auf den folgenden
Seiten durch die entsprechenden Nummern Bezug genommen.
1
2
90°
60°
3h
1200
6h
3
9h
900
700
40°
30°
500
30°
30°
40°
40°
30°
40°
60°
7
1
2
3
4
Programmwahlschalter
Taste „Zeitvorwahl“
Programmkontrolllampen
Taste „Start/Pause“
Programmwahlschalter
6
5
4
5 Taste „Extra Spülen“
6 Multifunktionstaste
7 Drehzahlreduzierungstaste
Er ermöglicht die Wahl eines Programms und/oder das Einund Ausschalten des Geräts.
DEUTSCH
32
Taste „Zeitvorwahl“
Mit dieser Taste kann der Programmstart um 3, 6 oder 9
Stunden verzögert werden.
Programmkontrolllampen
Bei der Auswahl eines Waschprogramms leuchten beide
Kontrolllampen 3.1 und 3.2 auf.
Wenn Sie die Taste 4 drücken, leuchtet nur die zum Waschgang gehörige Kontrolllampe.
Das Gerät beginnt mit dem Betrieb, und die Tür ist verriegelt.
Die Kontrolllampe 3.3 leuchtet nach dem Ende des Waschgangs auf. Nach einigen Minuten kann die Tür geöffnet werden.
3.1
3.2
3.3
Wenn das Programm Abpumpen ausgewählt wurde,
leuchtet eine beliebige Kontrolllampe.
Taste „Start/Pause“
Mit dieser Taste starten oder unterbrechen Sie das gewünschte Waschprogramm.
Drehzahlreduzierungstaste Durch Drücken dieser Taste können Sie die Schleuderdrehzahl des ausgewählten Programms ändern.
•
Spülstopp
Mit der Option „Spülstopp“ wird das Wasser des letzten
Spülgangs nicht abgepumpt, sodass die Wäschestücke
möglichst wenig knittern. Vor dem Öffnen der Tür muss
das Wasser abgepumpt werden. Informationen zum Abpumpen des Wassers finden Sie im Abschnitt „Am Programmende“.
Multifunktionstaste:
Mit dieser Taste können Sie jeweils eine der folgenden Optionen auswählen. Die zugehörige Kontrolllampe leuchtet auf.
•
Vorwäsche
Wird diese Option ausgewählt, führt das Gerät eine Vorwäsche vor dem Hauptwaschgang aus. Die Waschdauer
verlängert sich dabei. Diese Option wird für stark verschmutzte Wäsche empfohlen.
•
Extra Kurz
Bei Auswahl dieser Option führt das Gerät einen sehr kurzen Waschgang aus, anzuwenden bei leicht verschmutzter
Wäsche, die nur kurze Zeit getragen wurde.
Taste „Extra Spülen“
Dieses Gerät ist so konstruiert, dass es Energie spart. Sollte
es erforderlich sein, die Wäsche mit einer zusätzlichen Wassermenge zu spülen (Extra Spülen), wählen Sie bitte diese
Option. Bei Auswahl dieser Funktion werden einige zusätzliche Spülgänge durchgeführt. Dies ist zu empfehlen in Gebieten mit besonders weichem Wasser und für Menschen mit allergischen Reaktionen auf Waschmittel.
DEUTSCH
33
Symboltabelle
= Ein/Aus - Stopp
= Baumwolle
60 °C
40 °C
= Spülgänge
= Abpumpen
= Baumwolle Energiesparen
= Schleudern
= Baumwolle Energiesparen
= Spülstopp
= Kaltwäsche
= Vorwäsche
= Pflegeleicht
= Extra Kurz
= Leichtbügeln
= Feinwäsche
20° = Mix 20°
= Wolle
= Handwäsche
= Extra Spülen
= Zeitvorwahl
= Hauptwäsche
= Programmende
= Start/Pause
Erste Inbetriebnahme
1.
2.
3.
Achten Sie darauf, dass der elektrische
Anschluss und der Wasseranschluss der
Installationsanweisung entsprechen.
Nehmen Sie alle Gegenstände aus der
Trommel.
Gießen Sie 2 Liter Wasser in das Fach
der
für den Hauptwaschgang
Waschmittelschublade, um das ÖKOVentil zu aktivieren.
Täglicher Gebrauch
Öffnen Sie die Tür.
Öffnen Sie die Tür, indem Sie den Türgriff
behutsam nach außen ziehen.
Wählen Sie dann ein Programm für
Koch-/Buntwäsche mit der höchsten
Temperatur ohne eingelegte Wäsche,
um alle fertigungsbedingten Rückstände aus der Trommel und der Wanne zu
entfernen.
Füllen Sie einen halben Messbecher
Waschmittel in das Hauptfach der
Waschmittelschublade und starten Sie
das Gerät.
DEUTSCH
34
Wäsche einfüllen
Legen Sie die Wäsche Stück für Stück
lose in die Trommel
und schütteln Sie sie
weitgehendst aus.
Schließen Sie durch
Drücken auf den
Türrahmen vollständig die Tür.
Messen Sie das Waschmittel und den
Weichspüler ab.
1
1
Schütten Sie das
Waschmittel in das
Fach für den Hauptwaschgang
oder in das entsprechende Fach,
das das ausgewählte Programm
bzw. die Option
fordert (weitere Details finden Sie unter
„Waschmittelschublade“).
Um die richtige
Waschmittelmenge
einzufüllen, beachten Sie die Details
unter „Wasserhärtegrade“.
Füllen Sie den
Weichspüler in das
Fach mit der Mar(die
kierung
Markierung „MAX“
in der Schublade
darf nicht überschritten werden).
Schließen Sie vorsichtig die Schublade.
Wählen Sie das gewünschte Programm
mit dem Programmwahlschalter (1).
Das Gerät ist nun eingeschaltet. Die Kontrolllampe der Taste 4 beginnt zu blinken.
Nach Ablauf des Programms muss der
Wahlschalter wieder in Stellung O gedreht
werden, um das Gerät abzuschalten.
Die Beschreibung eines jeden Waschzyklus und der Kompatibilität unter
den Waschprogrammen und den Optionen
finden Sie im Kapitel „Waschprogramme“.
Vorsicht! Wenn Sie den
Programmwahlschalter während des
Gerätebetriebs auf ein anderes Programm
drehen, blinkt die rote Kontrolllampe der
Taste 4 3 Mal, um auf eine falsche Auswahl
hinzuweisen. Das Gerät führt das neu
gewählte Programm nicht aus.
Verringern Sie die Schleuderdrehzahl
durch Drücken der Taste 7
Wurde das gewünschte Programm gewählt,
dann schlägt Ihr Gerät automatisch die maximale Schleuderdrehzahl für dieses Programm vor.
Drücken Sie mehrmals die Taste 7, um die
Schleuderdrehzahl zu ändern, wenn Sie eine andere Schleuderdrehzahl verwenden
möchten. Die entsprechende Kontrolllampe
leuchtet auf.
Wählen Sie die gewünschten Optionen
durch Drücken der Tasten 7, 6 und 5 aus.
Je nach Programm lassen sich mehrere Optionen kombinieren. Wählen Sie zuerst das
gewünschte Programm aus, dann die Optionen, und starten Sie erst dann das Programm.
Wenn diese Tasten gedrückt werden, leuchten die entsprechenden Kontrolllampen auf.
Werden die Tasten erneut gedrückt, erlöschen die Kontrolllampen. Wird eine unzulässige Zusatzfunktion ausgewählt, blinkt
die integrierte rote Kontrolllampe der Taste
4 3 Mal.
Für die Kombinierbarkeit der Waschprogramme mit den Optionen siehe
Abschnitt „Waschprogramme“.
DEUTSCH
Wählen Sie die Zeitvorwahl mit der Taste
2.
Wenn Sie den Waschgang später starten
möchten, drücken Sie vor dem Start des
Programms wiederholt die Taste 2, um die
gewünschte Verzögerung auszuwählen. Die
entsprechende Kontrolllampe leuchtet auf.
Wählen Sie diese Option, nachdem Sie das
Programm eingestellt haben, aber vor dem
Programmstart.
Sie können die Zeitvorwahl jederzeit vor
dem Drücken der Taste 4 abbrechen oder
ändern.
Auswahl der Zeitvorwahl:
1. Wählen Sie das Programm und die gewünschten Optionen.
2. Wählen Sie die Zeitvorwahl mit der
Taste 2.
3. Drücken Sie die Taste 4:
– Das Gerät zählt die Zeit stundenweise herunter.
– Das Programm startet, nachdem die
eingestellte Zeitvorwahl abgelaufen
ist.
Abbrechen der Zeitvorwahl nach dem Programmstart:
1. Stellen Sie die Waschmaschine durch
Drücken der Taste 4 auf PAUSE.
2. Drücken Sie einmal die Taste 2 und die
Kontrolllampe der eingestellten Zeitvorwahl erlischt.
3. Drücken Sie die Taste 4 erneut, um das
Programm zu starten.
Die Zeitvorwahl kann im Programm ABPUMPEN nicht angewählt werden.
Wichtig! Die eingestellte Startzeitvorwahl
kann nur nach erneutem Einstellen des
betreffenden Waschprogramms geändert
werden.
Während der gesamten Zeit bis zum Start
des gewählten Programms bleibt die Tür
verriegelt. Falls Sie die Tür öffnen müssen,
versetzen Sie das Gerät in den Zustand
PAUSE (durch Drücken der Taste 4) und
warten Sie dann einige Minuten. Drücken
Sie nach dem Schließen der Tür erneut die
Taste 4.
35
Starten des Programms durch Drücken
der Taste 4
Zum Starten des ausgewählten Programms
drücken Sie die Taste 4, die entsprechende
grüne Kontrolllampe blinkt nicht mehr. Die
zur Programmphase gehörige Kontrolllampe leuchtet auf. Das Gerät beginnt mit dem
Betrieb und die Tür ist verriegelt.
Drücken Sie zur Unterbrechung eines laufenden Programms die Taste 4: Die entsprechende grüne Kontrolllampe beginnt zu
blinken.
Um das Programm an der Stelle fortzusetzen, an der es unterbrochen wurde, drücken
Sie die Taste 4 erneut. Wenn Sie eine Zeitvorwahl ausgewählt haben, beginnt das
Gerät jetzt mit dem Herunterzählen.
Wird eine unzulässige Zusatzfunktion ausgewählt, blinkt die rote Kontrolllampe der
Taste 4 3 Mal.
Ändern einer Option oder eines
laufenden Programms
Es ist möglich, einige Optionen zu ändern,
bevor das Programm sie ausführt.
Bevor Sie Änderungen vornehmen können,
müssen Sie das Gerät durch Drücken der
Taste 4 in den Zustand PAUSE versetzen.
Ein laufendes Programm können Sie nur ändern, indem Sie es zurücksetzen. Drehen Sie
den Programmwahlschalter auf O und anschließend auf die neue Programmposition.
Starten Sie das neue Programm, indem Sie
die Taste 4 erneut drücken. Das Wasser in
der Trommel wird dabei nicht abgepumpt.
Programm-Unterbrechung
Drücken Sie die Taste 4, um ein laufendes
Programm zu unterbrechen, und die entsprechende grüne Kontrolllampe beginnt zu
blinken.
Um das Programm fortzusetzen, drücken Sie
die Taste erneut.
Programm löschen
Drehen Sie den Programm-Wahlschalter
auf O, um ein laufendes Programm zu unterbrechen.
DEUTSCH
Anschließend können Sie ein neues Programm wählen.
Einfülltür öffnen
Nach dem Start des Programms ist die Tür
verriegelt. Wenn Sie die Tür aus einem beliebigen Grund öffnen müssen, versetzen Sie
das Gerät zuvor durch Drücken der Taste 4
in den Zustand PAUSE. Nach einigen Minuten kann die Tür geöffnet werden.
Wenn die Tür nicht geöffnet werden kann,
bedeutet dies, dass das Gerät bereits aufheizt oder dass der Wasserstand zu hoch
ist. Öffnen Sie die Tür auf keinen Fall mit
Gewalt!
Wenn Sie die Tür trotzdem öffnen müssen,
müssen Sie das Gerät ausschalten, indem
Sie den Programm-Wahlschalter auf O drehen. Nach ein paar Minuten kann die Tür
geöffnet werden. (Achten Sie auf Wasserstand und Temperatur!)
Wählen Sie nach dem Schließen der Tür erneut das Programm und die Optionen und
drücken Sie zum Start die Taste 4.
Am Programmende
In diesem Fall wird das Gerät automatisch
ausgeschaltet. Die Kontrolllampe der Taste
4 und die Kontrolllampe des Waschgangs,
der gerade beendet wurde, erlöschen. Die
Kontrolllampe 3.3 leuchtet auf. Nach einigen Minuten kann die Tür geöffnet werden.
Wenn ein Programm oder eine Option damit endet, dass noch Wasser in der Trommel steht, dann leuchtet die Kontrolllampe
3.3, aber die Tür bleibt verriegelt, um anzuzeigen, dass zuerst das Wasser abgepumpt
werden muss, bevor die Tür geöffnet werden kann.
36
Während dieser Zeit dreht sich die Trommel
in regelmäßigen Zeitabständen, bis das
Wasser abgepumpt wird.
Zum Abpumpen des Wassers gehen Sie bitte wie folgt vor:
1. Drehen Sie den Programm-Wahlschalter auf O.
2. Wählen Sie ein Abpump- oder Schleuderprogramm.
3. Verringern Sie bei Bedarf die Schleuderdrehzahl durch Drücken der Taste 7.
4. Drücken Sie die Taste 4.
Am Ende des Programms kann die Tür geöffnet werden. Drehen Sie den ProgrammWahlschalter auf O, um das Gerät abzuschalten.
Nehmen Sie die Wäsche heraus und prüfen
Sie sorgfältig, ob die Trommel leer ist. Wenn
Sie keinen weiteren Waschgang starten
möchten, schließen Sie den Wasserhahn.
Lassen Sie die Tür offen, damit sich kein
Schimmel und keine unangenehmen Gerüche bilden.
Standby: Nach Beendigung des Programms wird das Energiesparsystem
mit eingeschalteten Kontrolllampen aktiviert. Nach dem Drücken einer beliebigen
Taste am Gerät wird das Energiesparsystem deaktiviert.
Tipps und Hinweise
Sortieren der Wäsche
Beachten Sie die Textilpflegesymbole auf
jedem Kleidungsetikett und die Waschhinweise des Herstellers. Sortieren Sie die Wäsche nach Kochwäsche, Buntwäsche, Pflegeleicht, Schonwäsche, Wolle.
Entfernen von Flecken
Hartnäckige Flecken lassen sich möglicherweise nicht allein mit Wasser und Waschmittel entfernen. Sie sollten daher vor dem
Waschen vorbehandelt werden.
DEUTSCH
37
Blut: Behandeln Sie frische Flecken mit kaltem Wasser. Bereits getrocknete Flecken
lassen Sie über Nacht in Wasser mit einem
Spezialwaschmittel einweichen, und reiben
Sie die Seife und das Wasser hinein.
Farben auf Ölbasis: Befeuchten Sie die Flecken mit Benzin-Fleckentferner, legen Sie
das Kleidungsstück auf ein weiches Tuch
und tupfen Sie den Fleck ab; behandeln Sie
den Fleck mehrere Male.
Getrocknete Fettflecken: Feuchten Sie den
Fleck mit Terpentin an, legen Sie das Kleidungsstück auf eine weiche Oberfläche und
tupfen Sie den Fleck mit einem Baumwolltuch ab.
Rost: Verwenden Sie in heißem Wasser gelöste Oxalsäure oder einen Rostentferner im
kalten Zustand. Bei älteren Rostflecken wurde wahrscheinlich bereits die Gewebestruktur beschädigt und es können sich leicht Löcher bilden.
Schimmelflecken: Behandeln Sie Schimmelflecken mit Bleichmittel und spülen Sie das
Gewebe gründlich aus (nur weiße Kochwäsche und farbechte Buntwäsche).
Gras: Behandeln Sie Grasflecken leicht mit
Seife und Bleichmittel (nur weiße Kochwäsche und farbechte Buntwäsche).
Kugelschreiber und Klebstoff: Befeuchten
Sie den Fleck mit Aceton 2) legen Sie das
Kleidungsstück auf ein weiches Tuch und
tupfen Sie den Fleck ab.
Eigenschaft
Lippenstift: Befeuchten Sie den Fleck wie
oben beschrieben mit Aceton und behandeln Sie ihn dann mit Brennspiritus. Behandeln Sie Rückstände mit Bleichmittel.
Rotwein: Weichen Sie das Wäschestück in
Wasser und Waschmittel ein, spülen und
behandeln Sie es mit Essig- oder Zitronensäure und spülen Sie es dann erneut. Behandeln Sie Rückstände mit Bleichmittel.
Tinte: Feuchten Sie das Gewebe je nach Art
der Tinte zuerst mit Aceton an 2) und dann
mit Essigsäure. Behandeln Sie Rückstände in
weißer Wäsche mit Bleichmittel und spülen
Sie anschließend gründlich aus.
Teerflecken: Behandeln Sie die Flecken zunächst mit Fleckentferner, Brennspiritus oder
Benzin und reiben Sie dann mit Waschmittelpaste.
Wasserhärte
Die Wasserhärte ist in sogenannte Wasserhärtegrade eingeteilt. Informationen zur
Wasserhärte an Ihrem Wohnort erhalten
Sie beim Wasserwerk oder bei Ihrer Gemeindeverwaltung.
Wasserhärtegrade
Deutsch °dH
Französisch °T.H.
Weich
0-7
0-15
Mittel
8-14
16-25
Hart
15-21
26-37
Sehr hart
> 21
> 37
Ein Wasserenthärter muss hinzugefügt werden, wenn das Wasser einen mittelgroßen
Härtegrad hat. Befolgen Sie die Anweisungen des Herstellers. Das Waschmittel kann
dann immer auf den Härtegrad „weich“ entsprechend reduziert werden.
2) (verwenden Sie Aceton aber nicht für Kunstseide),
DEUTSCH
38
Waschprogramme
BAUMWOLLE
90°-60°
3)
BAUMWOLLE
ECO
60°-40°
BAUMWOLLE
40°-30°(Kalt)
PFLEGELEICHT
60°-40°-30°(Kalt)
Für weiße Koch-/
Buntwäsche (stark
verschmutzte Wäsche).
Hauptwaschgang
Spülgänge
Max. AbschlussSchleuderdrehzahl
1200 U/
min
Energiesparwaschgang für weiße und
farbechte Baumwolle, leicht verschmutzte Wäsche, Hemden,
Blusen und Unterwäsche.
Hauptwaschgang
Spülgänge
Max. AbschlussSchleuderdrehzahl
1200 U/
min
Buntwäsche (normal,
leicht verschmutzt).
Hauptwaschgang
Spülgänge
Max. AbschlussSchleuderdrehzahl
1200 U/
min
Pflegeleichte Wäsche oder Mischgewebe: Unterwäsche,
farbige Textilien,
nicht einlaufende
Hemden, Blusen.
Hauptwaschgang
Spülgänge
Max. AbschlussSchleuderdrehzahl
900 U/min
Waschmittelfach
Verfügbare
Optionen
Max. Beladung
Ver. Beladung1)
Programmbeschreibung
Art der
Wäsche
Programm/
Temperatur
Beachten Sie immer die Pflegesymbole Ihres Wäschestücks und wählen Sie das entsprechende Waschprogramm.
6 kg
3 kg1)
Schleudern
Spülstopp
Vorwäsche
Extra Kurz
Extra Spülen
6 kg
Schleudern
Spülstopp
Vorwäsche
Extra Spülen
6 kg
3 kg1)
Schleudern
Spülstopp
Vorwäsche
Extra Kurz
Extra Spülen
2)
Schleudern
Spülstopp
Vorwäsche
Extra Kurz
Extra Spülen
2)
3 kg
1.5 kg1)
2)
2)
LEICHTBÜGELN
40°
FEINWÄSCHE
40°-30°
Pflegeleichte Wäsche: Mit diesem
Programm wird die
Wäsche sanft gewaschen und schonend
geschleudert, um
Knitterfalten zu vermeiden. Somit wird
das Bügeln einfacher. Das Gerät führt
darüber hinaus zusätzliche Spülgänge
durch.
Hauptwaschgang
Spülgänge
Max. AbschlussSchleuderdrehzahl
900 U/min
Feinwäsche: zum
Beispiel Vorhänge.
Hauptwaschgang
Spülgänge
Max. AbschlussSchleuderdrehzahl
700 U/min
MIX 20°
20°
Spezialprogramm für
leicht verschmutzte
Baumwollwäsche,
Synthetik- oder
Mischgewebe.
Dieses Programm
hilft den Energieverbrauch zu senken.
Hauptwaschgang
Spülgänge
Max. AbschlussSchleuderdrehzahl
900 U/min
WOLLE/
HANDWÄSCHE
(Kalt)
30°-
Sonderprogramm für
Wolltextilien und
Feinwäsche mit Pflegekennzeichen „Reine Schurwolle, nicht
einlaufend, waschmaschinenfest“ und
„Handwäsche“.
Hauptwaschgang
Spülgänge
Max. AbschlussSchleuderdrehzahl
900 U/min
4)
20°
Schleudern
Spülstopp
Vorwäsche
Extra Spülen
Waschmittelfach
Verfügbare
Optionen
Max. Beladung
Ver. Beladung1)
Programmbeschreibung
39
Art der
Wäsche
Programm/
Temperatur
DEUTSCH
2)
1.5 kg
3 kg
1.5 kg1)
3 kg
Schleudern
Spülstopp
Vorwäsche
Extra Kurz
Extra Spülen
Schleudern
Spülstopp
Extra Spülen
Extra Spülen
Schleudern
Spülstopp
2 kg
2)
SPÜLEN
ABPUMPEN
SCHLEUDERN
Mit diesem Programm lassen sich
mit der Hand gewaschene Wäschestücke aus Baumwolle
spülen und schleudern. Das Gerät
führt einige Spülgänge durch und anschließend erfolgt
ein langer AbschlussSchleudergang. Die
Schleuderdrehzahl
kann reduziert werden.
Spülgänge
Max. AbschlussSchleuderdrehzahl
1200 U/
min
Zum Abpumpen des
letzten Spülwassers
bei Programmen mit
der Option „Spülstopp“.
Wasser abpumpen
Separater Schleudergang für handgewaschene Kleidungsstücke und
nach Programmen
mit ausgewählter
Option „Spülstopp“.
Sie können die
Schleuderdrehzahl
mit der entsprechenden Taste passend
zu der zu schleudernden Wäsche einstellen.
Max. AbschlussSchleuderdrehzahl
1200 U/
min
Waschmittelfach
Verfügbare
Optionen
Max. Beladung
Ver. Beladung1)
Programmbeschreibung
40
Art der
Wäsche
Programm/
Temperatur
DEUTSCH
Schleudern
Spülstopp
Extra Spülen
6 kg
6 kg
Schleudern
6 kg
1) Wenn Sie die Zusatzfunktion EXTRA KURZ wählen, empfehlen wir Ihnen die Reduzierung der maximalen Beladung
wie angegeben: (Ver. Beladung = verringerte Beladung). Die maximale Beladung ist hier ebenfalls möglich,
allerdings mit geringfügig schlechterem Reinigungsergebnis.
2) Bei der Verwendung von Flüssigwaschmittel muss ein Programm ohne VORWÄSCHE ausgewählt werden.
3) STANDARDPROGRAMME für die auf dem Energie-Label angegebenen Verbrauchswerte. Diese Programme
sind gemäß Verordnung 1061/2010 die Standardprogramme „Baumwolle 60 °C“ bzw. „Baumwolle 40 °C“.
Hinsichtlich des Energie- und Wasserverbrauchs für das Waschen normal verschmutzter Baumwollwäsche sind dies
die effizientesten Programme.
DEUTSCH
41
Stellen Sie dieses Programm ein, wenn Sie gute Waschergebnisse erzielen und den Energieverbrauch senken
möchten. Die Dauer des Waschprogramms wird dadurch verlängert.
Die Wassertemperatur in der Waschphase kann von der für das ausgewählte Programm angegebenen Temperatur abweichen.
4) Verwenden Sie ein Waschmittel für niedrige Temperaturen, um ein gutes Waschergebnis zu erzielen.
Verbrauchswerte
Die Werte dieser Tabelle sind Richtwerte. Folgende Faktoren können diese Werte verändern: Die Wäscheart und -menge, die Wasser- und Raumtemperatur.
Programme
Beladung
(kg)
Energieverbrauch (kWh)
Wasserverbrauch (Liter)
Ungefähre
Programmdauer (in Minuten)
Restfeuchte
(%)1)
Koch-/Buntwäsche 60 °C
6
1.35
59
150
53
Koch-/Buntwäsche 40 °C
6
0.85
59
140
53
Pflegeleicht 40
°C
3
0.55
42
90
35
Feinwäsche 40
°C
3
0.55
57
65
35
Wolle/Handwäsche 30 °C
2
0.25
55
60
30
Standardprogramme Bauwolle
Standardprogramm Baumwolle 60 °C
6
1.03
46
159
53
Standardprogramm Baumwolle 60 °C
3
0.77
38
135
53
Standardprogramm Baumwolle 40 °C
3
0.64
38
129
53
1) Am Ende der Schleuderphase.
Aus-Zustand (W)
Ein-Zustand (W)
0.10
0.98
Die in den Tabellen oben enthaltenen Informationen erfüllen die Verordnung (EG) der
Kommission 1015/2010 zur Anwendung der Richtlinie 2009/125/EC.
DEUTSCH
42
Reinigung und Pflege
Warnung! Schalten Sie das Gerät aus,
bevor Sie irgendwelche Reinigungsoder Wartungsarbeiten durchführen.
Waschgang zur Pflege der Maschine
Wenn Sie beim Waschen überwiegend
niedrige Temperaturen benutzen, können
sich Rückstände in der Trommel ansammeln.
Wir empfehlen daher die regelmäßige
Durchführung eines Waschgangs zum Reinigen der Maschine.
Gehen Sie dabei wie folgt vor:
• In der Trommel darf sich keine Wäsche
befinden.
• Wählen Sie das heißeste Waschprogramm für Koch-/Buntwäsche.
• Verwenden Sie eine normale Menge
Waschmittel; es muss ein Pulverwaschmittel mit biologischen Eigenschaften sein.
Reinigung der Waschmittelschublade und
Schubladenaufnahme
1
Entnehmen Sie die
Schublade, indem
Sie die Arretierung
herunterdrücken
und die Schublade
herausziehen.
2
Um die Reinigung
zu unterstützen,
entfernen Sie auch
das Oberteil des
Pflegemittelfachs.
3
Verwenden Sie zur
Reinigung eine harte Bürste und entfernen Sie alle
Waschmittelreste.
4
Spülen Sie alle entfernten Teile der
Waschmittelschublade unter fließendem Wasser, um alle Spuren von angesammeltem Pulver zu entfernen.
5
Verwenden Sie die
gleiche Bürste zur
Reinigung der
Schubladenaufnahme und stellen Sie
sicher, dass die Unter- und Oberseite
gut gereinigt sind.
Nach der Reinigung
der Waschmittelschublade und der
Schubladenaufnahme setzen Sie die
Schublade wieder
ein und lassen Sie
ohne eingelegte
Wäsche ein Spülprogramm laufen,
um alle Reste wegzuspülen.
Reinigung der Pumpe
Gehen Sie hierzu folgendermaßen vor:
DEUTSCH
1
A B
2
3
4
43
Stellen Sie einen
geeigneten Behälter neben der Pumpe (A) bereit, um
das Restwasser aus
der Pumpe aufzufangen.
Ziehen Sie den Notentleerungsschlauch
heraus (B), halten
Sie das Ende in den
Behälter und entfernen Sie die Abdeckkappe des
Schlauchs.
Wenn kein Wasser
mehr abläuft,
schrauben Sie den
Deckel der Pumpe
heraus (A) und nehmen Sie ihn ab.
Halten Sie stets einen Lappen bereit,
um austretendes
Wasser beim Abnehmen des Deckels aufzuwischen.
Drehen Sie den
Pumpenflügel und
entfernen Sie dabei
vorhandene Fremdkörper.
5
Prüfen Sie mit einem
Bleistift, ob sich das
Pumpenrad auf der
Rückseite des Pumpengehäuses drehen lässt. (Es ist normal, dass sich das
Pumpenrad ruckartig dreht.) Wenn
sich das Pumpenrad
nicht drehen lässt,
wenden Sie sich an
den Kundendienst.
6
Stecken Sie die Verschlusskappe wieder auf den Notentleerungsschlauch
und schieben Sie
den Schlauch in das
Gerät zurück.
Schrauben Sie den
Deckel der Pumpe
wieder fest ein.
Reinigung des Wasserzulauffilters
Wenn das Wasser zu lange in das Gerät
einläuft oder nicht füllt, blinkt die Anzeigelampe der Starttaste rot. Prüfen Sie dann,
ob die Einlassfilter blockiert sind (weitere
Details finden Sie im Kapitel „Was tun,
wenn...“).
Gehen Sie hierzu folgendermaßen vor:
1
• Schließen Sie den
Wasserhahn.
• Schrauben Sie
den Schlauch
vom Hahn ab.
• Reinigen Sie den
Filter im Schlauch
mit einer harten
Bürste.
• Schrauben Sie
den Schlauch
wieder an den
Hahn an.
DEUTSCH
44
• Wenn Sie das Gerät wieder einschalten
wollen, stellen Sie sicher, dass die Raumtemperatur über 0 °C ist.
2
• Schrauben Sie den Schlauch am Gerät
ab. Halten Sie ein Tuch bereit, da möglicherweise etwas Wasser herausfließt.
• Reinigen Sie den Filter im Ventil mit einer harten Bürste oder einem Stück
Stoff.
3
35°
45°
• Schrauben Sie
den Schlauch
wieder am Gerät
an und drehen
Sie den Anschluss
zur Anpassung
an die Installation
nach links oder
rechts. Achten Sie
darauf, dass die
Ringmutter richtig
angezogen ist,
damit kein Wasser austreten
kann.
• Drehen Sie den
Wasserhahn auf.
Gefahren durch Frost
Wird die Maschine Temperaturen unter 0
°C ausgesetzt, müssen bestimmte Vorsichtsmaßnahmen getroffen werden.
• Schließen Sie den Wasserhahn.
• Schrauben Sie den Zulaufschlauch ab.
• Stellen Sie einen flachen Behälter auf den
Fußboden und lassen Sie das Wasser
über den Notentleerungsschlauch in den
Behälter laufen.
• Schrauben Sie den Wasserzulaufschlauch
wieder fest auf und schieben Sie den
Notentleerungsschlauch nach dem Aufstecken der Verschlusskappe wieder in
die Maschine zurück.
Wichtig! Jedes Mal, wenn Sie das Wasser
mit dem Notentleerungsschlauch ablassen,
müssen Sie vor der Wiederinbetriebnahme
2 Liter Wasser in das Fach für die
Hauptwäsche der Waschmittelschublade
gießen und dann das Abpumpprogramm
ausführen. Dadurch wird das ÖKO-VENTIL
aktiviert und vermieden, dass beim
nächsten Waschgang ein Teil des
Waschmittels unbenutzt zurückbleibt.
Notentleerung
Wenn das Wasser nicht abgepumpt wird,
lassen Sie es wie folgt aus dem Gerät ab:
• Ziehen Sie den Netzstecker aus der Netzsteckdose.
• Schließen Sie den Wasserhahn.
• Falls nötig, warten Sie, bis das Wasser
abgekühlt ist.
• Öffnen Sie die Pumpenklappe.
• Stellen Sie einen Behälter auf den Fußboden und halten Sie das Ende des Notentleerungsschlauchs in den Behälter. Entfernen Sie die Verschlusskappe vom
Schlauch. Das Wasser sollte in den Behälter abfließen. Wenn der Behälter voll ist,
verschließen Sie den Schlauch wieder mit
der Verschlusskappe. Entleeren Sie den
Behälter. Wiederholen Sie den Vorgang,
bis kein Wasser mehr herausfließt.
• Falls nötig, reinigen Sie die Pumpe wie
zuvor beschrieben.
• Verschließen Sie den Notentleerungsschlauch und schieben Sie ihn in das Gerät zurück.
• Schrauben Sie die Pumpenabdeckung
fest auf und schließen Sie die Klappe.
DEUTSCH
45
Fehlersuche
Das Gerät startet nicht oder bleibt während
des Betriebs stehen. Es ist möglich, dass die
rote Anzeigelampe der Taste 4 blinkt, um
anzuzeigen, dass das Gerät nicht arbeitet.
Problem
Bevor Sie den Kundendienst rufen, sollten
Sie die nachstehenden Punkte überprüfen.
Mögliche Ursache
Abhilfe
Die Tür wurde nicht geschlossen
Drücken Sie die Tür fest zu.
(die rote Kontrolllampe der Taste 4
blinkt).
Der Stecker ist nicht richtig in die
Steckdose eingesteckt.
Stecken Sie den Stecker in die
Steckdose.
Die Steckdose wird nicht mit Strom
versorgt.
Überprüfen Sie bitte die Elektroinstallation in Ihrem Haus.
Das Gerät starDie Hauptsicherung ist durchgetet nicht:
brannt.
Wechseln Sie die Sicherung aus.
Der Programmwahlschalter ist
nicht richtig eingestellt, und die
Taste 4 wurde nicht gedrückt.
Stellen Sie den Programmwahlschalter richtig ein, und drücken
Sie erneut die Taste 4.
Die Zeitvorwahl wurde gewählt.
Falls der Waschgang sofort gestartet werden soll, brechen Sie die
Startzeitvorwahl ab.
Der Wasserhahn ist geschlossen
Drehen Sie den Wasserhahn auf.
(die rote Kontrolllampe der Taste 4
blinkt).
Es läuft kein
Wasser ein:
Der Wasserzulaufschlauch ist geknickt oder eingeklemmt (die rote
Kontrolllampe der Taste 4 blinkt).
Überprüfen Sie den Anschluss des
Zulaufschlauchs.
Der Filter im Zulaufschlauch oder
im Zulaufventil ist verstopft (die rote Kontrolllampe der Taste 4
blinkt).
Reinigen Sie die Wasserzulauffilter. (Unter „Reinigung des Wasserzulauffilters“ finden Sie weitere
Einzelheiten.)
Die Tür wurde nicht richtig geschlossen (die rote Kontrolllampe
der Taste 4 blinkt).
Drücken Sie die Tür fest zu.
Der Wasserablaufschlauch ist geknickt oder eingeklemmt (die rote
Kontrolllampe der Taste 4 blinkt).
Überprüfen Sie den Anschluss des
Ablaufschlauchs.
Das Gerät
pumpt nicht ab: Der Ablauffilter ist verstopft (die
rote Kontrolllampe der Taste 4
blinkt).
Reinigen Sie den Ablauffilter.
DEUTSCH
Problem
46
Mögliche Ursache
Abhilfe
Es wurde eine Option oder ein
Programm gewählt, das damit endet, dass noch Wasser in der
Trommel steht, oder das auf alle
Schleudergänge verzichtet.
Wählen Sie das Abpump- oder
das Schleuderprogramm.
Die elektronische Unwuchterkennung hat eingegriffen, weil die
Wäsche nicht gleichmäßig in der
Trommel verteilt ist. Die Wäsche
wird neu verteilt, indem die Trommel in die entgegengesetzte RichDer Schleudertung gedreht wird. Dieser Vorgang
gang der Makann sich einige Male wiederhoschine startet
len, bevor die Unwucht verschwunspät oder nicht:
den ist und das Schleudern fortgesetzt werden kann. Falls die Wäsche nach 10 Minuten immer noch
nicht gleichmäßig in der Trommel
verteilt ist, bricht die Maschine den
Schleudergang ab.
Es befindet sich
Wasser auf
dem Boden:
Verteilen Sie die Beladung manuell
oder laden Sie mit mehr Wäsche
und wählen Sie das Schleuderprogramm.
Sie haben zu viel Waschmittel
oder ein ungeeignetes Waschmittel verwendet (zu starke Schaumbildung).
Reduzieren Sie die Waschmittelmenge oder benutzen Sie ein anderes Waschmittel.
Überprüfen Sie die Anschlüsse des
Zulaufschlauchs auf Dichtheit. Undichtigkeiten sind nicht immer
leicht zu erkennen, da das Wasser
den Schlauch hinabläuft; prüfen
Sie, ob er feucht ist.
Kontrollieren Sie den Anschluss des
Zulaufschlauchs.
Der Ablauf- oder Zulaufschlauch
ist beschädigt.
Ersetzen Sie diesen durch einen
neuen (wenden Sie sich an unseren
Kundendienst zwecks Abklärung
der Ersatzteilnummer).
Der Verschlussstopfen des Noten- Verschließen Sie den Notentleetleerungsschlauchs wurde nach der rungsschlauch und schrauben Sie
Pumpenreinigung nicht wieder auf- den Filter vollständig ein.
gesteckt oder der Filter nicht korrekt eingeschraubt.
Die Tür lässt
sich nicht öffnen:
Das Programm läuft noch.
Warten Sie das Ende des Waschprogramms ab.
Die Tür wurde noch nicht entriegelt.
Bitte warten Sie in diesem Fall einige Minuten, bis Sie das Gerät wieder öffnen.
DEUTSCH
Problem
Das Gerät verursacht ein ungewöhnliches
Geräusch.
Die Waschergebnisse sind
unbefriedigend:
47
Mögliche Ursache
Abhilfe
Es befindet sich Wasser in der
Trommel.
Wählen Sie das Programm Abpumpen oder Schleudern, um das
Wasser abzupumpen.
Transportsicherungen und Verpackungsteile wurden nicht entfernt.
Überprüfen Sie, ob das Gerät richtig aufgestellt ist.
Das Gerät wurde nicht ausgerichtet.
Überprüfen Sie, ob das Gerät
waagerecht steht.
Die Ablaufpumpe ist eventuell blockiert.
Reinigen Sie die Ablaufpumpe.
(Unter „Reinigung des Pumpe“ finden Sie weitere Einzelheiten.)
Sie haben zu wenig Waschmittel
oder ein ungeeignetes Waschmittel benutzt.
Erhöhen Sie die Waschmittelmenge oder benutzen Sie ein anderes
Waschmittel.
Hartnäckige Flecken wurden nicht
vorbehandelt.
Verwenden Sie zur Behandlung
hartnäckiger Flecken handelsübliche Produkte.
Falsche Temperatur ausgewählt.
Überprüfen Sie, ob Sie die korrekte
Temperatur gewählt haben.
Das Gerät ist überladen.
Reduzieren Sie die Wäschebeladung entsprechend der „Waschprogramm-Tabelle“.
Schalten Sie nach der Überprüfung das Gerät ein und drücken Sie die Taste 4 für den
Neustart des Programms.
Tritt die Störung erneut auf, wenden Sie sich
bitte an Ihren Kundendienst.
Die vom Kundendienst benötigten Daten
finden Sie auf dem Typenschild. Wir empfehlen, dass Sie folgende Daten hier notieren:
Modellbeschreibung
(MOD): .....................
Produkt-Nummer
(PNC): ...........................
Made In Italy
© Inter IKEA Systems B.V. 1999
Seriennummer
(S.N.): ...............................
501.514.59
21552
Technische Daten
Abmessungen
Breite (cm)
59,6
DEUTSCH
48
Höhe (cm)
Tiefe (cm)
Wasserdruck1)
Min.
Max.
Max. Beladung von Koch-/
Buntwäsche (kg)
6
82
54 max.
0,5 bar (0,05 MPa)
8 bar (0,8 MPa)
Max. Schleuderdrehzahl (U/ 1200
min)
Energieeffizienzklasse
A+
Waschwirkungsklasse
A
Schleuderwirkungsklasse
B
Waschgeräusch (dB(A))
56
Schleudergeräusch (dB(A))
72
Durchschnittlicher Energieverbrauch/Jahr (kWh)2)
192
Durchschnittlicher Wasserverbrauch/Jahr (Liter)2)
8699
1) Wenn der Wasserdruck in Ihrem Gebiet niedriger oder höher ist, wenden Sie sich an Ihren Kundendienst.
2) Die Daten basieren auf den standardmäßigen Koch-/Buntwäsche-Programmen für Prüfinstitute mit angenommenen
200 Waschgängen pro Jahr.
Die Daten der elektrischen Anschlusswerte, Spannung und Gesamtleistung befinden
sich auf dem Typenschild innen an der Gerätetür.
Umwelttipps
Recyceln Sie Materialien mit dem Symbol
. Entsorgen Sie die Verpackung in den
entsprechenden Recyclingbehältern.
Recyceln Sie zum Umwelt- und
Gesundheitsschutz elektrische und
elektronische Geräte. Entsorgen Sie Geräte
mit diesem Symbol nicht mit dem
Hausmüll. Bringen Sie das Gerät zu Ihrer
örtlichen Sammelstelle oder wenden Sie sich
an Ihr Gemeindeamt.
Verpackungsmaterialien
gekennzeichneten
Die mit dem Symbol
Materialien sind recyclingfähig. Bitte entsorgen Sie das Verpackungsmaterial in geeigneten Recycling-Sammelbehältern.
Entsorgung des Geräts
• Um das Risiko von Verletzungen oder
Sachschäden zu vermeiden:
– Ziehen Sie den Netzstecker aus der
Netzsteckdose.
– Schneiden Sie das Netzkabel ab und
entsorgen Sie es.
– Entsorgen Sie die Türverriegelung. Damit wird verhindert, dass Kinder oder
kleine Tiere im Gerät eingeschlossen
werden können. Andernfalls besteht
Erstickungsgefahr.
DEUTSCH
49
IKEA Garantie
Wie lang ist die IKEA Garantie gültig?
Diese Garantie ist für (5) fünf Jahre gültig
ab dem Originalkaufdatum Ihres Gerätes
bei IKEA; sollte das Gerät die Bezeichnung
"LAGAN" tragen, gilt die Garantie in diesem Fall nur (2) zwei Jahre. Als Kaufnachweis ist der Originalkassenbon oder die
Originalrechnung erforderlich. Werden im
Rahmen der Garantie Arbeiten ausgeführt,
so verlängert sich dadurch die Garantiezeit
weder für das Gerät noch für die neuen Teile.
Welche Geräte sind nicht durch die IKEA
(5) Fünfjahresgarantie abgedeckt?
Die Geräte-Serie LAGAN und alle Geräte,
die vor dem 1. August 2007 bei IKEA gekauft wurden.
Wer übernimmt den Kundendienst?
Der IKEA Kundendienst wird diesen Service
über seinen eigenen Kundendienst oder
über ein autorisiertes Partner-Netzwerk
durchführen lassen.
Was deckt die Garantie ab?
Die Garantie deckt Material- und Produktionfehler ab. Sie gilt ab dem Datum, an dem
das Elektrogerät bei IKEA gekauft wurde.
Diese Garantie gilt nur für private Haushalte. Die Ausnahmen sind unter der Rubrik “
Was ist nicht durch diese Garantie abgedeckt?” beschrieben. Innerhalb des Garantiezeitraums werden die Kosten zur Behebung eines Fehlers wie Reparaturen, Ersatzteile, Arbeitszeit und Fahrtkosten abgedeckt, vorausgesetzt, dass das Gerät ohne
besonderen Kostenaufwand für die Reparatur zugänglich ist und dass der Fehler direkt auf einen Konstruktionsfehler oder einen Materialfehler zurückgeht, der durch
die Garantie abgedeckt ist. Bei diesen Bedingungen gelten die EU-Richtlinien (Nr.
99/44/EG) und die entsprechenden gesetzlichen Vorschriften. Teile, die ersetzt
wurden, gehen in das Eigentum von IKEA
über.
Was wird IKEA zur Lösung des Problems
tun?
IKEA hat Kundendienste, die das Produkt
untersuchen und eigenständig entscheiden,
ob das Problem durch die Garantie abgedeckt ist oder nicht. Wenn entschieden wird,
dass der Fall unter die Garantie fällt, repariert der IKEA Kundendienst oder ein autorisierter Service-Partner über seinen eigenen
Service eigenständig das defekte Produkt,
oder sie ersetzen es durch ein gleiches oder
durch ein gleichwertiges Produkt.
Was ist nicht durch diese Garantie
abgedeckt?
• Der normale Verschleiß.
• Bewusste oder durch Fahrlässigkeit entstandene Schäden, die durch eine Missachtung der Bedienungsanweisung, eine
unsachgemäße Installation oder durch
den Anschluss an eine falsche Spannung,
sowie Schäden, die durch eine chemische
oder elektrochemische Reaktion (Rost,
Korrosion oder Wasserschäden eingeschlossen - aber nicht darauf beschränkt)
- Schäden, die durch übermäßigen Kalk
in der Wasserzuleitung entstanden sind,
und Schäden, die durch ungewöhnliche
Umweltbedingungen entstanden sind.
• Verbrauchsgüter wie Batterien und Lampen.
• Nicht-funktionale und dekorative Teile,
die den normalen Betrieb des Gerätes
nicht beeinträchtigen, einschließlich Kratzer und möglicher Farbunterschiede.
• Versehentliche Beschädigung durch
Fremdobjekte der Substanzen und Reinigung oder Loslösen von Filtern, Drainagesystemen oder ReinigungsmittelSchubladen.
DEUTSCH
• Beschädigung folgender Teile: Glaskeramik, Zubehör, Geschirr und Besteckkörbe,
Zuleitungen und Drainageschläuche-/
rohre, Lampen und Lampenabdeckungen, Knöpfe/Wählschalter, Gehäuse und
Teile des Gehäuses; es sei denn, es kann
nachgewiesen werden, dass diese Schäden durch Produktionsfehler verursacht
wurden.
• Fälle, in denen bei einem Besuch des
Kundendienstes kein Fehler gefunden
werden konnte.
• Reparaturen, die nicht durch unser autorisiertes Kundendienstpersonal und/oder
das autorisierte Kundendienstpersonal
unserer Vertragspartner ausgeführt wurden, oder Fälle, in denen keine Originalteile verwendet wurden.
• Reparaturen, die durch fehlerhafte und
nicht gemäß der Anleitung durchgeführte
Installation verursacht wurden.
• Die Nutzung des Gerätes in einer professionellen Art und Weise, d.h. nicht im privaten Haushalt.
• Transportschäden. Wenn ein Kunde das
Produkt nach Hause oder an eine andere
Adresse transportiert, haftet IKEA nicht
für Schäden, die während dieses Transports entstehen. Liefert IKEA das Produkt
an die Lieferadresse des Kunden aus,
dann sind Schäden, die während der
Auslieferung des Produktes entstehen,
von der Garantie abgedeckt.
• Die Kosten zur Durchführung der Erstinstallation des IKEA Gerätes. Falls der
IKEA Kundendienst oder sein autorisierter
Service-Partner das Gerät als Garantiefall instandsetzt oder ersetzt, installiert
der Kundendienst oder sein autorisierter
Service-Partner bei Bedarf das Gerät
auch wieder oder er installiert das Ersatzgerät.
Diese Einschränkung gilt nicht für fehlerfreie
Arbeiten, die von qualifiziertem Fachpersonal durchgeführt wurden, um das Gerät an
den technischen Sicherheitsstandard eines
anderen EU-Landes anzupassen.
50
Wie gilt die geltende Gesetzgebung des
Landes
Die IKEA Garantie gibt Ihnen spezielle gesetzliche Rechte, die alle lokalen gesetzlichen Anforderungen abdecken oder übertreffen, die einer Änderung von Land zu
Land unterworfen sind.
Gültigkeitsbereich
Für Geräte, die in einem EU-Land gekauft
und in ein anderes EU-Land mitgenommen
werden, stehen die Kundendienstleistungen
im Rahmen der Garantiebedingungen bereit, die im neuen Land gültig sind. Eine
Verpflichtung, Dienstleistungen im Rahmen
der Garantie auszuführen, besteht nur
dann, wenn:
• das Gerät den technischen Spezifikationen des Landes, in dem der Garantieanspruch gemacht wird, entspricht, und es in
Übereinstimmung mit diesen technischen
Spezifikationen des Landes installiert
wurde;
• das Gerät in Übereinstimmung mit den
Montageanleitungen und den Sicherheitsinformationen im Benutzerhandbuch
installiert wurde und diesen Anleitungen
und Informationen entspricht.
Der spezielle Kundendienst (Service) für
IKEA Geräte:
Bitte zögern Sie nicht, den speziellen IKEA
Kundendienst (Service) zu kontaktieren für:
1. einen Anspruch unter dieser Garantie;
2. die Bitte um Klärung von Fragen zur Installation des IKEA Gerätes im speziellen IKEA Küchenmöbel. Der Kundendienst kann keine Fragen beantworten
zu:
– der gesamten IKEA Kücheninstallation;
– Anschlüsse an die Elektrik (falls das
Gerät ohne Netzkabel und Stecker
kommt), Anschlüsse an Wasser und
Gas, da diese Arbeiten von einem
autorisierten Kundendiensttechniker
ausgeführt werden müssen.
3. die Bitte um Klärung von Fragen zu Inhalten des Benutzerhandbuchs und zu
Spezifikationen des IKEA Geräts.
DEUTSCH
Um sicherzustellen, dass wir Sie stets optimal unterstützen, lesen Sie bitte die Montageanleitung und/oder den Bedienungsanleitungsabschnitt dieser Broschüre durch,
bevor Sie sich an uns wenden.
Wie können Sie uns erreichen, wenn Sie
uns benötigen?
Auf der letzten Seite dieser Broschüre finden Sie eine vollständige Liste mit offiziellen
IKEA Kundendienststellen und den jeweiligen nationalen Telefonnummern.
Wichtig! Damit Sie bei Fragen rasch die
zuständige Stelle erreichen, empfehlen wir
Ihnen, die am Ende dieser Broschüre
aufgelisteten speziellen Telefonnummern zu
benutzen. Beziehen Sie sich bitte stets auf
die Telefonnummern, die in der Broschüre
51
zu dem jeweiligen Gerät aufgelistet sind, zu
dem Sie Fragen haben. Bevor Sie uns
anrufen, sollten Sie die IKEA-Artikelnummer
(den 8-stelligen Zifferncode) Ihres Gerätes
zur Hand haben.
Wichtig! BITTE BEWAHREN SIE DEN
KAUFBELEG AUF! Er ist Ihr Kaufnachweis
und für einen Garantieanspruch
unerlässlich. Bitte beachten Sie, dass auf
diesem Kaufbeleg auch die IKEA
Artikelbezeichnung und die Nummer (der 8stellige Zifferncode) für jedes der Geräte,
die Sie gekauft haben, vermerkt sind.
Benötigen Sie zusätzlich Hilfe?
Für alle weiteren Fragen, die sich nicht auf
den Kundendienst Ihres Gerätes beziehen,
wenden Sie sich bitte an das Call Center
der nächsten IKEA-Einrichtung. Wir empfehlen Ihnen, die Dokumentation des Geräts
sorgfältig durchzulesen, bevor Sie uns kontaktieren.
52
Country
België
Belgique
Phone number
070 246016
Call Fee
Opening time
Binnenlandse gesprekskosten
8 tot 20 Weekdagen
Tarif des appels nationaux
8 à 20. En semaine
България
00359 888 16 0 8
Такса за повикване от страната
От 9 до 18 ч в работни дни
Česká republika
246 019721
Cena za místní hovor
8 až 20 v pracovních dnech
Danmark
70 15 09 09
Landstakst
man.-fre. 09.00-20.00
lør. 09.00-16.00
1 søndag pr. måned, normalt første
søndag i måneden
Deutschland
+49 1806 33 45 32*
* 0,20 € / Verbindung aus dem Festnetz max. 0,60 € / Verbindung aus
dem Mobilfunknetz
8 bis 20 Werktage
Ελλάδα
211 176 8276
Υπεραστική κλήση
8 έως 20 κατά τις εργάσιμες ημέρες
España
91 1875537
Tarifa de llamadas nacionales
De 8 a 20 en días laborables
France
0170 36 02 05
Tarif des appels nationaux
9 à 21. En semaine
Hrvatska
01 63 23 338
Lokalna cijena poziva
pon. - pet. 8:00 - 16:00
Ireland
0 14845915
National call rate
8 till 20 Weekdays
Ísland
5880503
Innanlandsgjald fyrir síma
9 til 18. Virka daga
Italia
02 00620818
Tariffa applicata
alle chiamate nazionali
dalle 8 alle 20 nei giorni feriali
Κυπρος
22 030 529
Υπεραστική κλήση
8 έως 20 κατά τις εργάσιμες ημέρες
5 230 06 99
Nacionalinių pokalbių tarifai
Pr. - Ketv.: 8:00 - 12:00, 12:45 - 17:00
Pnkt.: 8:00 - 12:00, 12:45 - 15:45
Magyarország
061 998 0549
Belföldi díjszabás
Hétköznap 8 és 10 óra között
Nederland
0900 235 45 32
and/or
0900 BEL IKEA
0,10 EUR/min (niet lokaal)Incl. BTW
ma-vr 9.00-21.00
zat 9.00-20.00
zon 9.00-18.00
Lietuva
Norge
815 22052
Takst innland
8 til 20 ukedager
Österreich
0810 300486
zum Ortstarif
8 bis 20 Werktage
Polska
012 297 8787
Stawka wg taryfy krajowej
Od 8 do 20 w dni robocze
Portugal
211557985
Chamada Nacional
9 às 21. Dias de Semana
*excepto feriados
România
021 211 08 88
Tarif apel naţional
8 - 20 în zilele lucrătoare
Россия
8 495 6662929
Действующие телефонные тарифы
с 8 до 20 по рабочим дням
Время московское
Schweiz
Tarif für Anrufe im Bundesgebiet
8 bis 20 Werktage
Suisse
Tarif des appels nationaux
8 à 20. En semaine
Tariffa applicata
alle chiamate nazionali
dalle 8 alle 20 nei giorni feriali
(02) 3300 2554
Cena vnútroštátneho hovoru
8 až 20 v pracovných dňoch
Suomi
030 6005203
Lankapuhelinverkosta
0,0835€/puhelu+0,032€/min
Matkapuhelinverkosta 0,192€/min
arkipäivisin 8.00-20.00
Sverige
0775 700 500
lokalsamtal (lokal taxa)
mån-fre 8.30-20.00
lör-sön 9.30-18.00
031 5500 324
Svizzera
Slovensko
Türkiye
212 244 0769
Ulusal arama ücreti
Hafta içi saat 09:00’dan 18:00’a kadar
Україна
044 586 2078
Міжміськи дзвінки платні
9 - 21 В робочі дні
United Kingdom
020 3347 0044
National call rate
9 till 21. Weekdays
POLSKI
4
Spis tre ci
Informacje dotycz ce bezpiecze stwa
Wskazówki dotycz ce bezpiecze stwa
Opis urz dzenia
Panel sterowania
Pierwsze u ycie
Codzienna eksploatacja
Wskazówki i porady
Producent zastrzega sobie mo liwo
powiadomienia.
4
5
7
9
11
11
14
Programy prania
Parametry eksploatacyjne
Konserwacja i czyszczenie
Rozwi zywanie problemów
Dane techniczne
Ochrona rodowiska
GWARANCJA IKEA
15
18
19
22
25
26
26
wprowadzenia zmian bez wcze niejszego
Informacje dotycz ce bezpiecze stwa
Przed instalacj i rozpocz ciem eksploatacji urz dzenia nale y
dok adnie przeczyta do czon instrukcj obs ugi. Producent
nie odpowiada za uszkodzenia i obra enia cia a spowodowane nieprawid ow instalacj i eksploatacj . Nale y zachowa
instrukcj wraz z urz dzeniem do wykorzystania w przysz o ci.
Bezpiecze stwo dzieci i osób o ograniczonych
zdolno ciach ruchowych, sensorycznych lub umys owych
Ostrze enie! Wyst puje zagro enie uduszeniem lub
odniesieniem obra e mog cych skutkowa trwa ym
kalectwem.
• Nie wolno pozwala obs ugiwa tego urz dzenia osobom, w
tym równie dzieciom, o ograniczonych zdolno ciach ruchowych, sensorycznych lub umys owych b d osobom bez odpowiedniego do wiadczenia lub wiedzy. Osoby te mog obs ugiwa urz dzenie wy cznie pod nadzorem lub po odpowiednim poinstruowaniu przez osob odpowiedzialn za ich
bezpiecze stwo.
• Nie nale y pozwala , aby dzieci bawi y si urz dzeniem.
• Wszystkie opakowania nale y przechowywa poza zasi giem dzieci.
• Wszystkie detergenty nale y przechowywa poza zasi giem
dzieci.
POLSKI
5
• Dzieci i zwierz ta domowe nie powinny znajdowa si w pobli u urz dzenia, gdy jego drzwi s otwarte.
• Je li urz dzenie jest wyposa one w blokad uruchomienia,
zaleca si jej w czenie.
Ogólne zasady bezpiecze stwa
• Przed przyst pieniem do konserwacji nale y wy czy urz dzenie i wyj wtyczk przewodu zasilaj cego z gniazda
elektrycznego.
• Nie zmienia parametrów technicznych urz dzenia.
• Nie nale y przekracza maksymalnego ci aru adunku, który wynosi 6 kg (patrz „Tabela programów”).
• Je li przewód zasilaj cy jest uszkodzony, ze wzgl dów bezpiecze stwa musi go wymieni producent, autoryzowany
serwis lub inna wykwalifikowana osoba.
• Robocze ci nienie wody (minimalne i maksymalne) musi
mie ci si w granicach od 0,5 bara (0,05 MPa) do 8 barów
(0,8 MPa).
• Wyk adzina pod ogowa nie mo e zas ania otworów wentylacyjnych w podstawie (je li dotyczy).
• Urz dzenie nale y pod czy do instalacji wodoci gowej za
pomoc nowego zestawu w y dostarczonych w komplecie
z urz dzeniem. Nie wolno u ywa starego zestawu w y.
Wskazówki dotycz ce bezpiecze stwa
Instalacja
• Usun wszystkie elementy opakowania i
blokady transportowe.
• Zachowa blokady transportowe. W razie konieczno ci ponownego transportu
urz dzenia nale y unieruchomi b ben.
• Nie instalowa ani nie u ywa uszkodzonego urz dzenia.
• Nie instalowa ani nie u ywa urz dzenia w miejscach, w których temperatura
wynosi poni ej 0°C, lub w których by oby
ono nara one na dzia anie czynników atmosferycznych.
• Post powa zgodnie z instrukcj instalacji dostarczon wraz z urz dzeniem.
• Upewni si , e pod oga w miejscu instalacji urz dzenia jest p aska, stabilna, odporna na dzia anie wysokiej temperatury
i czysta.
• Nie instalowa urz dzenia w miejscach,
które uniemo liwiaj ca kowite otwarcie
drzwi urz dzenia.
• Zachowa ostro no podczas przenoszenia urz dzenia, poniewa jest ono
ci kie. Zawsze u ywa r kawic ochronnych.
POLSKI
• Zapewni odpowiedni obieg powietrza
mi dzy urz dzeniem a pod og .
• Wyregulowa nó ki, aby zapewni odpowiedni przestrze mi dzy urz dzeniem a dywanem.
Pod czenie do sieci elektrycznej
Ostrze enie! Wyst puje zagro enie
po arem i pora eniem pr dem
elektrycznym.
• Urz dzenie musi by uziemione.
• Nale y upewni si , e informacje o podczeniu elektrycznym podane na tabliczce znamionowej s zgodne z parametrami instalacji zasilaj cej. W przeciwnym
razie nale y skontaktowa si z elektrykiem.
• Nale y zawsze u ywa prawid owo zamontowanych gniazd sieciowych z uziemieniem.
• Nie stosowa rozga ników ani przed uaczy.
• Nale y zwróci uwag , aby nie uszkodzi
wtyczki ani przewodu zasilaj cego. Wymian uszkodzonego przewodu zasilaj cego nale y zleci przedstawicielowi serwisu lub wykwalifikowanemu elektrykowi.
• Pod czy wtyczk do gniazda elektrycznego dopiero po zako czeniu instalacji.
Nale y zadba o to, aby po zako czeniu
instalacji urz dzenia wtyczka przewodu
zasilaj cego by a atwo dost pna.
• Od czaj c urz dzenie nie ci gn za
przewód zasilaj cy. Nale y zawsze ci gn za wtyczk sieciow .
• Nie dotyka przewodu zasilaj cego ani
wtyczki mokrymi r koma.
• Urz dzenie spe nia wymogi dyrektyw
EWG.
Pod czenie do sieci wodoci gowej
• Nale y zwróci uwag , aby nie uszkodzi
w y wodnych.
• Urz dzenie nale y pod czy do instalacji wodoci gowej za pomoc nowego
zestawu w y w komplecie. Nie wolno
u ywa starego zestawu w y.
6
• Przed pod czeniem urz dzenia do nowych rur lub do rur, których nie u ywano
przez d u szy czas, nale y zapewni
przep yw wody i odczeka , a b dzie
ona czysta.
• Przy pierwszym uruchomieniu urz dzenia
nale y sprawdzi , czy nie ma wycieków.
Zastosowanie
Ostrze enie! Wyst puje zagro enie
odniesienia obra e , pora enia
pr dem, wzniecenia po aru lub
uszkodzenia urz dzenia.
• Urz dzenie nale y u ywa w warunkach
domowych.
• Nale y przestrzega instrukcji bezpiecze stwa podanych na opakowaniu detergentu.
• Nie umieszcza atwopalnych produktów
lub przedmiotów nas czonych atwopalnymi produktami w urz dzeniu, na nim
lub w jego pobli u.
• Nie dotyka szyby drzwi podczas trwania programu. Szyba mo e by gor ca.
• Nale y usun wszystkie metalowe
przedmioty z prania.
• Nie umieszcza pod urz dzeniem adnych pojemników na wypadek ewentualnego wycieku wody. Skontaktowa z serwisem w celu uzyskania informacji, jakich
mo na u ywa akcesoriów.
Konserwacja i czyszczenie
Ostrze enie! Wyst puje zagro enie
odniesieniem obra e i uszkodzeniem
urz dzenia.
• Do czyszczenia urz dzenia nie wolno
u ywa wody pod ci nieniem ani pary
wodnej.
• Czy ci urz dzenie za pomoc wilgotnej
szmatki. U ywa wy cznie neutralnych
detergentów. Nie stosowa produktów
ciernych, myjek do szorowania, rozpuszczalników ani metalowych przedmiotów.
Utylizacja
Ostrze enie! Wyst puje zagro enie
odniesieniem obra e cia a lub
uduszeniem.
POLSKI
7
• Od czy urz dzenie od ród a zasilania.
• Odci i wyrzuci przewód zasilaj cy.
• Wymontowa zatrzask drzwi, aby uniemo liwi zamkni cie si dzieci lub zwierz t w urz dzeniu.
Serwis
• Aby zleci napraw urz dzenia, nale y
skontaktowa si z serwisem. Zaleca si
stosowanie wy cznie oryginalnych cz ci
zamiennych.
Opis urz dzenia
1
2
3
4
5
6
1
2
3
4
5
6
Szuflada dozownika detergentu
Panel sterowania
Uchwyt otwierania drzwi
Tabliczka znamionowa
Pompa opró niaj ca
Regulowane nó ki
POLSKI
8
Szuflada dozownika detergentu
Przegródka na detergent u ywany do
prania wst pnego lub namaczania albo na
odplamiacz u ywany w fazie odplamiania
(je li dotyczy). Detergent do prania wst pnego i namaczania jest dozowany na pocz tku programu prania. Odplamiacz jest
dozowany podczas fazy odplamiania.
Komora na detergent w proszku lub p ynie u ywany do prania zasadniczego. Stosuj c detergent w p ynie nale y doda go
bezpo rednio przed uruchomieniem programu.
Przegródka na dodatkowe rodki w p ynie (p yn zmi kczaj cy do tkanin, krochmal).
Nale y przestrzega zalece producenta detergentu dotycz cych jego
dozowania i nie przekracza poziomu
„MAX” zaznaczonego na szufladzie na detergenty. P yn zmi kczaj cy do tkanin lub
krochmal nale y dodawa do przegródki
przed rozpocz ciem programu.
Blokada uruchomienia
Nale y upewni si , e do b bna nie weszy dzieci ani zwierz ta domowe. Nale y
sprawdzi zawarto b bna przed u yciem
urz dzenia.
Urz dzenie posiada specjalne zabezpieczenie przed zamkni ciem si dzieci lub
zwierz t w b bnie.
Aby uruchomi to
zabezpieczenie,
nale y obróci (bez
naciskania) trzpie
znajduj cy si
wewn trz drzwi w
prawo, a naci cie
znajdzie si w po oeniu poziomym.
Mo na w tym celu
pos u y si monet .
Aby wy czy zabezpieczenie oraz
przywróci mo liwo zamkni cia
drzwi, nale y obróci trzpie w lewo,
a naci cie znajdzie si w po o eniu pionowym.
POLSKI
9
Panel sterowania
Poni ej znajduje si rysunek panelu sterowania. Rysunek przedstawia pokr t o wyboru
programów oraz przyciski i kontrolki. Zosta y one oznaczone odpowiednimi cyframi na
kolejnych stronach.
1
2
90°
3h
1200
60°
6h
3
9h
900
700
500
40°
30°
30°
30°
40°
40°
30°
40°
60°
7
1 Pokr t o wyboru programów
2 Przycisk opó nienia rozpocz cia programu
3 Kontrolki programów
4 Przycisk Start/Pauza
6
5
4
5 Przycisk dodatkowego p ukania
6 Przycisk wielofunkcyjny
7 Przycisk zmniejszenia pr dko ci wirowania
Pokr t o wyboru programów
S u y do w czania/wy czania urz dzenia i/lub do wybierania programów.
Przycisk opó nienia rozpocz cia programu
Ten przycisk umo liwia opó nienie rozpocz cia programu o
3, 6 lub 9 godzin.
Kontrolki programów
Podczas wybierania programu prania zapal si dwie kontrolki: 3.1 i 3.2.
Po naci ni ciu przycisku 4 b dzie wieci si jedynie kontrolka odpowiadaj ca bie cej fazie programu.
Urz dzenie rozpocznie prac i drzwi zostan zablokowane.
Po zako czeniu cyklu prania zapali si kontrolka 3.3. Po
up ywie kilku minut mo na otworzy drzwi.
3.1
3.2
3.3
Przycisk Start/Pauza
Je li zostanie wybrany program odpompowania wody,
za wieci si odpowiednia kontrolka.
Ten przycisk umo liwia uruchomienie lub przerwanie wybranego programu prania.
POLSKI
10
Przycisk zmniejszenia
pr dko ci wirowania
Naci ni cie tego przycisku spowoduje zmian pr dko ci wirowania dla wybranego programu.
•
Stop z wod
Po wybraniu tej opcji urz dzenie nie odpompuje wody z
ostatniego p ukania, aby zapobiec powstaniu zagniece
na praniu. Przed otwarciem drzwi nale y odpompowa
wod . W celu odpompowania wody nale y przeczyta informacje zawarte w rozdziale „Po zako czeniu programu”.
Przycisk wielofunkcyjny:
Za pomoc tego przycisku mo na wybra wy cznie jedn z
nast puj cych opcji. Za wieci si odpowiednia kontrolka.
•
Pranie wst pne
Wybranie tej opcji spowoduje, e urz dzenie wykona cykl
prania wst pnego przed rozpocz ciem prania zasadniczego. Czas prania zostanie wyd u ony. Ta opcja jest zalecana dla mocno zabrudzonych rzeczy.
•
Super szybki
Ta opcja umo liwia wybór bardzo krótkiego cyklu prania
przeznaczonego do lekko zabrudzonych ubra , które by y
noszone przez krótki czas.
Przycisk dodatkowego
p ukania
Urz dzenie zaprojektowano z my l o oszcz dzaniu energii.
T opcj nale y wybra , je li konieczne jest p ukanie prania
w wi kszej ilo ci wody (dodatkowe p ukanie). Urz dzenie
wykona dodatkowe cykle p ukania. Ta opcja jest szczególnie
polecana dla osób uczulonych na detergenty oraz do prania
w bardzo mi kkiej wodzie.
Tabela symboli
= W ./Wy . – Anulowanie
= Bawe niane
= Bawe na eko 60°C
= Bawe na eko 40°C
= P ukania
= Odpompowanie
= Wirowanie
= Stop z wod
= Pranie w zimnej wodzie
= Pranie wst pne
= Syntetyczne
= Superszybkie
= atwe prasowanie
= Delikatne
20° = Mieszane 20°
= Dodatkowe p ukanie
= Opó nienie rozpocz cia programu
= Pranie zasadnicze
POLSKI
11
Tabela symboli
= We niane
= Koniec programu
= Pranie r czne
= Start/Pauza
Pierwsze u ycie
1.
2.
3.
Wybra program do prania tkanin bawe nianych w najwy szej temperaturze
bez wk adania ubra do pralki. Pozwala to usun z b bna kurz lub inne zabrudzenia pochodz ce z procesu produkcji.
Wsypa 1/2 dawki detergentu do komory prania zasadniczego i w czy
urz dzenie.
Upewni si , e pod czenia elektryczne i wodne zosta y wykonane zgodne z
instrukcj instalacji.
Wyj ca zawarto b bna.
Wla 2 litry wody do komory prania
szuflady dozownika
zasadniczego
detergentów, aby uruchomi zawór
EKO.
Codzienna eksploatacja
Otworzy drzwi
Ostro nie otworzy drzwi, delikatnie poci gaj c za uchwyt.
W o y pranie
Pranie nale y wk ada do b bna pojedynczo, wytrz saj c dok adnie ka d sztuk .
Dok adnie zamkn
drzwi, mocno dociskaj c ich obrze e.
Odmierzy odpowiedni ilo detergentu
i p ynu zmi kczaj cego do tkanin
1
Wla detergent do
komory prania zalub
sadniczego
do odpowiedniej
komory, je li wymaga tego wybrany
program/opcja
(szczegó owe informacje mo na znale w rozdziale
„Szuflada na detergenty").
Wi cej informacji
na temat dozowania detergentu
mo na znale w
rozdziale „Stopnie
twardo ci wody”.
POLSKI
1
Delikatnie zamkn
12
Wla p yn zmi kczaj cy lub inne
dodatki do komory
(nie
oznaczonej
mo na przekracza
oznaczenia „MAX”
na szufladce).
szuflad
Wybra
dany program za pomoc
pokr t a wyboru programów (1).
Urz dzenie zosta o w czone. Zacznie miga kontrolka przycisku 4.
Po zako czeniu programu pokr t o wyboru
programów nale y ustawi z powrotem w
po o eniu O, aby wy czy urz dzenie.
Opisy poszczególnych cykli prania
oraz informacje na temat zgodno ci
poszczególnych programów prania i opcji
mo na znale w rozdziale „Programy prania”.
Uwaga! Je li podczas pracy
urz dzenia pokr t o wyboru
programów zostanie ustawione na inny
program, czerwona kontrolna przycisku 4
mignie 3 razy, sygnalizuj c niew a ciwe
ustawienie. Urz dzenie nie rozpocznie
nowego programu.
Zmniejszy pr dko wirowania za
pomoc przycisku 7
Podczas wybierania programu urz dzenie
automatycznie sugeruje maksymaln pr dko wirowania dla danego programu.
Nacisn kilkakrotnie przycisk 7, aby zmieni pr dko wirowania, je li pranie ma
zosta odwirowane z inn pr dko ci . Zawieci si odpowiednia kontrolka.
Wybór dost pnych opcji za pomoc
przycisków 7, 6 i 5
W zale no ci od wybranego programu
mo na ustawia jednocze nie ró ne funkcje. Funkcje nale y wybiera po ustawieniu
wybranego programu prania, ale przed jego uruchomieniem.
Po naci ni ciu tych przycisków za wiec si
odpowiadaj ce im kontrolki. Po ich ponownym naci ni ciu kontrolki zgasn . W razie
wybrania niew a ciwej opcji wbudowana
czerwona kontrolka przycisku 4 mignie 3
razy.
Informacje dotycz ce mo liwo ci uruchomienia poszczególnych opcji z programami prania podano w rozdziale „Programy prania”.
Wybra funkcj opó nienia rozpocz cia
programu za pomoc przycisku 2.
Je li program ma si rozpocz z opó nieniem, przed uruchomieniem programu naley kilka razy nacisn przycisk 2, aby ustawi odpowiednie opó nienie. Za wieci si
odpowiednia kontrolka.
T opcj nale y wybra po ustawieniu programu, ale przed jego uruchomieniem.
Czas opó nienia mo na zmieni lub anulowa w dowolnym momencie przed naci ni ciem przycisku 4.
Wybór opó nienia rozpocz cia programu:
1. Wybra program i dane opcje.
2. Wybra funkcj opó nienia rozpocz cia programu za pomoc przycisku 2.
3. Nacisn przycisk 4:
– urz dzenie rozpocznie odliczanie.
– Program rozpocznie si po up ywie
ustawionego czasu opó nienia.
Anulowanie opó nienia rozpocz cia programu po jego uruchomieniu:
1. W czy tryb PAUZA, naciskaj c w tym
celu przycisk 4.
2. Nacisn jednokrotnie przycisk 2 –
zga nie kontrolka odpowiadaj ca wybranemu opó nieniu.
3. Nacisn ponownie przycisk 4, aby
uruchomi program.
Opó nienia rozpocz cia programu nie
mo na wybra z programem ODPOMPOWANIE.
POLSKI
Wa ne! Wybrane opó nienie mo na
zmieni jedynie po ponownym wybraniu
programu prania.
Drzwi urz dzenia b d zablokowane przez
ca y czas opó nienia. Aby otworzy drzwi,
nale y w czy tryb PAUZA (naciskaj c
przycisk 4), a nast pnie odczeka kilka minut. Po zamkni ciu drzwi ponownie nacisn przycisk 4.
Uruchomi program za pomoc przycisku
4
Aby uruchomi wybrany program, nale y
nacisn przycisk 4 – przestanie miga odpowiednia zielona kontrolka. Za wieci si
kontrolka odpowiadaj ca uruchomionej fazie programu. Urz dzenie rozpocznie prac i drzwi zostan zablokowane.
Aby przerwa wykonywany program, naley nacisn przycisk 4: zacznie miga odpowiednia zielona kontrolka.
Aby wznowi program od miejsca, w którym zosta przerwany, nale y ponownie nacisn przycisk 4. Je li wybrano opó nienie
rozpocz cia programu, urz dzenie rozpocznie odliczanie czasu.
W przypadku wybrania niew a ciwej opcji,
czerwona kontrolka przycisku 4 mignie 3
razy.
Zmiana funkcji lub w czonego programu
Istnieje mo liwo zmiany niektórych funkcji,
zanim zostan one wykonane przez program.
Przed dokonaniem zmiany nale y w czy
tryb PAUZA, naciskaj c w tym celu przycisk
4.
Zmiany ju rozpocz tego programu mo na
dokona tylko poprzez jego anulowanie.
Nale y obróci pokr t o wyboru programów do po o enia „O”, a nast pnie wybra nowe ustawienie. Uruchomi nowy
program ponownie naciskaj c przycisk 4.
Woda znajduj ca si w zbiorniku nie zostanie odpompowana.
Przerwanie trwaj cego programu
Aby przerwa wykonywany program, naley nacisn przycisk 4. Zacznie miga odpowiednia zielona kontrolka.
13
Aby wznowi program, nale y ponownie
nacisn ten sam przycisk.
Anulowanie programu
Ustawi pokr t o wyboru programów w poo eniu O, aby anulowa wykonywany program.
Nast pnie mo na wybra nowy program.
Otwieranie drzwi
Po uruchomieniu programu drzwi zostan
zablokowane. Je li z jakiegokolwiek powodu konieczne b dzie otwarcie drzwi, nale y
w czy tryb PAUZA, naciskaj c przycisk 4.
Po up ywie kilku minut b dzie mo na otworzy drzwi.
Je li nie mo na otworzy drzwi, oznacza to,
e urz dzenie zacz o ju podgrzewa wod lub jej poziom jest zbyt wysoki. W adnym przypadku nie wolno próbowa otwiera drzwi na si !
Je li zachodzi konieczno otwarcia drzwi,
nale y wy czy pralk , ustawiaj c pokr t o
w po o eniu O. Po up ywie kilku minut mo na otworzy drzwi (nale y zwróci uwag
na poziom i temperatur wody!).
Po zamkni ciu drzwi nale y ponownie ustawi program oraz opcje, a nast pnie nacisn przycisk 4.
Po zako czeniu programu
Urz dzenie zatrzymuje si automatycznie.
Zga nie kontrolka przycisku 4 oraz kontrolka odpowiadaj ca w a nie zako czonej fazie prania. Zapali si kontrolka 3.3. Po
up ywie kilku minut mo na otworzy drzwi.
Je li wybrano program lub opcj z funkcj
zatrzymania wody, za wieci si kontrolka
3.3, ale drzwi pozostan zablokowane, aby
przypomnie o potrzebie odpompowania
wody przed ich otwarciem.
B ben b dzie nadal obraca si w regularnych odst pach czasu do chwili odpompowania wody.
W celu odpompowania wody nale y post powa zgodnie z poni szymi wskazówkami:
1. Ustawi pokr t o wyboru programów w
po o eniu O.
2. Wybra program odpompowania lub
wirowania.
POLSKI
3.
W razie potrzeby zmniejszy pr dko
wirowania za pomoc przycisku 7.
4. Nacisn przycisk 4.
Po zako czeniu programu drzwi b dzie
mo na otworzy . Ustawi pokr t o wyboru
programów w po o eniu O, aby wy czy
urz dzenie.
Wyj pranie z b bna i dok adnie sprawdzi , czy b ben jest pusty. Je li by o to ostatnie pranie, nale y zamkn zawór wody.
Zostawi drzwi otwarte, aby zapobiec powstawaniu ple ni i nieprzyjemnych zapachów.
14
Tryb czuwania: po zako czeniu programu urz dzenie uruchamia tryb
energooszcz dny i kontrolki zostaj wy czone. Naci ni cie dowolnego przycisku
urz dzenia powoduje wy czenie trybu
energooszcz dnego.
Wskazówki i porady
Sortowanie prania
Nale y przestrzega umieszczonych na
metkach zalece producenta odzie y dotycz cych prania. Posortowa ubrania w nast puj cy sposób: bia e, kolorowe, syntetyczne, delikatne, we niane.
Usuwanie plam:
Do usuni cia niektórych plam nie wystarczy
tylko woda i detergent. W zwi zku z tym
zaleca si spranie ich przed przyst pieniem
do prania.
Plamy z krwi: wie e plamy zapra zimn
wod . Stare plamy namoczy przez noc w
zimnej wodzie z odplamiaczem, a nast pnie zapra w wodzie z myd em.
Plamy z farb olejnych: zwil y rodkiem do
wywabiania plam na bazie benzyny, po oy tkanin na mi kkiej szmatce i usun
plam poprzez poklepywanie tkaniny; powtórzy czynno wielokrotnie.
Plamy z zaschni tego smaru: nas czy terpentyn , po o y tkanin na mi kkiej powierzchni i usun plam , poklepuj c tkanin opuszkami palców przy u yciu bawe nianej ciereczki.
Plamy z rdzy: zastosowa kwas szczawiowy
rozpuszczony w gor cej wodzie lub rodek
do usuwania rdzy na zimno. Nale y uwaa na stare plamy z rdzy, poniewa powoduj one uszkodzenie struktury celulozy
oraz maj tendencj do dziurawienia tkaniny.
Plamy z ple ni: czy ci wybielaczem, dobrze wyp uka (tylko tkaniny bia e i kolorowe o trwa ych kolorach).
Plamy z trawy: lekko namydli , a nast pnie
czy ci wybielaczem (tylko tkaniny bia e i
kolorowe o trwa ych kolorach).
Plamy z atramentu i kleju: zwil y acetonem
1), po o y tkanin na mi kkiej szmatce i
usun plam poprzez poklepywanie tkaniny.
Plamy ze szminki: przetrze acetonem, a
nast pnie u y spirytusu ska onego. Pozosta o ci plam nale y usun za pomoc wybielacza.
Plamy z czerwonego wina: zamoczy w wodzie z dodatkiem detergentu, wyp uka lub
przetrze kwasem octowym lub cytrynowym
i sp uka . Pozosta o ci plam nale y usun
za pomoc wybielacza.
Plamy z tuszu: w zale no ci od rodzaju tuszu, zwil y tkanin acetonem 1), a nast pnie kwasem octowym; pozosta o ci plam na
bia ych tkaninach nale y usun za pomoc
wybielacza, a nast pnie dobrze wyp uka .
Plamy ze smo y: najpierw czy ci odplamiaczem, spirytusem ska onym lub benzyn , a
nast pnie wyczy ci past do prania.
1) nie u ywa acetonu do tkanin zawieraj cych sztuczny jedwab
POLSKI
15
Stopnie twardo ci wody
Twardo wody jest klasyfikowana w tzw.
„stopniach” twardo ci. Informacje o twar-
do ci wody w danym rejonie mo na uzyska w miejscowym zak adzie wodoci gowym lub od w a ciwych w adz lokalnych.
Stopnie twardo ci wody
Cecha
Stopnie niemieckie °dH
Stopnie francuskie °T.H.
0-7
0-15
Mi kka
rednio twarda
8-14
16-25
Twarda
15-21
26-37
Bardzo twarda
> 21
> 37
W zakresie od wody rednio twardej do bardzo twardej, nale y stosowa zmi kczacz
wody. Przestrzega instrukcji producenta. Ilo detergentu b dzie mo na wówczas dostosowa (ograniczy ) do stopnia twardo ci wody mi kkiej.
Programy prania
Pranie zasadnicze
P ukania
Maks.
pr dko
wirowania
ko cowego
1200 obr./
min
Tkaniny bawe niane
bia e i o trwa ych kolorach prane w trybie ekonomicznym,
od lekko do mocno
zabrudzonych, koszule, bielizna.
Pranie zasadnicze
P ukania
Maks.
pr dko
wirowania
ko cowego
1200 obr./
min
3)
BAWE NA
EKO
60°-40°
6 kg
3 kg1)
Wirowanie
Stop z wod
Zmywanie
wst pne
Superszybkie
Dodatkowe
p ukanie
6 kg
Wirowanie
Stop z wod
Zmywanie
wst pne
Dodatkowe
p ukanie
Przegródka
na detergent
Dost pne
opcje
Bia a bawe na (bardzo lub umiarkowaBAWE NIANE nie zabrudzone rze90°-60°
czy bawe niane).
Maks. wsad
Zmniejsz. wsad1)
Opis
cyklu
Rodzaj
prania
Program/
temperatura
Zawsze nale y sprawdza metk odzie y i dostosowa program prania do zalece
producenta.
2)
2)
Pranie zasadnicze
P ukania
Maks.
pr dko
wirowania
ko cowego
1200 obr./
min
Tkaniny syntetyczne
lub mieszane: bielizna, ubrania kolorowe, niezbiegaj ce
si koszule, bluzki.
Pranie zasadnicze
P ukania
Maks.
pr dko
wirowania
ko cowego
900 obr./
min
Tkaniny syntetyczne:
w tym programie
cykl prania i wirowania jest agodny, aby
nie dopu ci do pogniecenia pranych
rzeczy. U atwia to
pó niejsze prasowanie. Urz dzenie wykonuje równie dodatkowe cykle p ukania.
Pranie zasadnicze
P ukania
Maks.
pr dko
wirowania
ko cowego
900 obr./
min
Tkaniny delikatne:
np. firanki.
Pranie zasadnicze
P ukania
Maks.
pr dko
wirowania
ko cowego
700 obr./
min
SYNTETYCZNE
60°-40°-30°(pranie w
zimnej wodzie)
ATWE PRASOWANIE
40°
DELIKATNE
40°-30°
6 kg
3 kg1)
Wirowanie
Stop z wod
Zmywanie
wst pne
Superszybkie
Dodatkowe
p ukanie
3 kg
1.5 kg1)
Wirowanie
Stop z wod
Zmywanie
wst pne
Superszybkie
Dodatkowe
p ukanie
1.5 kg
3 kg
1.5 kg1)
Wirowanie
Stop z wod
Zmywanie
wst pne
Dodatkowe
p ukanie
Wirowanie
Stop z wod
Zmywanie
wst pne
Superszybkie
Dodatkowe
p ukanie
Przegródka
na detergent
Dost pne
opcje
Bawe na kolorowa
(umiarkowanie zaBAWE NIANE brudzone rzeczy ba40°-30°we niane).
(pranie w zimnej wodzie)
Maks. wsad
Zmniejsz. wsad1)
Opis
cyklu
16
Rodzaj
prania
Program/
temperatura
POLSKI
2)
2)
2)
2)
Specjalny program
do prania odzie y
WE NIANE – we nianej i delikatPRANIE R CZ- nych tkanin z metkaNE
mi: „Czysta, nowa
30°(pra- we na, nie kurczy si
nie w zimnej
w praniu, mo na
wodzie)
pra w pralce” oraz
„Pra r cznie”.
Pranie zasadnicze
P ukania
Maks.
pr dko
wirowania
ko cowego
900 obr./
min
Ten program s u y
do p ukania i wirowania rzeczy bawe nianych uprzednio
wypranych r cznie.
Urz dzenie wykona
kilka cykli p ukania,
a nast pnie d ugie
wirowanie ko cowe.
Pr dko wirowania
mo na zmniejszy .
P ukania
Maks.
pr dko
wirowania
ko cowego
1200 obr./
min
4)
MIESZANE
20°
20°
P UKANIA
ODPOMPOWANIE
Ta funkcja s u y do
Odpompoodpompowania wo- wanie wody z b bna po ostat- dy
nim p ukaniu, gdy
wybrana zosta a opcja „Stop z wod ”.
3 kg
Wirowanie
Stop z wod
Dodatkowe
p ukanie
Wirowanie
Stop z wod
2 kg
6 kg
6 kg
Wirowanie
Stop z wod
Dodatkowe
p ukanie
Przegródka
na detergent
Pranie zasadnicze
P ukania
Maks.
pr dko
wirowania
ko cowego
900 obr./
min
Dost pne
opcje
Specjalny program
do tkanin bawe nianych, syntetycznych
oraz mieszanych,
lekko zabrudzonych.
Wybranie tego programu pozwala
zmniejszy zu ycie
energii.
20°
Maks. wsad
Zmniejsz. wsad1)
Opis
cyklu
17
Rodzaj
prania
Program/
temperatura
POLSKI
Maks.
pr dko
wirowania
ko cowego
1200 obr./
min
Przegródka
na detergent
Opis
cyklu
Osobne wirowanie
dla tkanin pranych
r cznie i po programach z opcj Stop z
wod . Pr dko wirowania mo na ustawi za pomoc
odpowiedniego
przycisku, aby dostosowa j do tkanin, które maj by
odwirowane.
Dost pne
opcje
Rodzaj
prania
WIROWANIE
Maks. wsad
Zmniejsz. wsad1)
18
Program/
temperatura
POLSKI
Wirowanie
6 kg
1) Po wybraniu opcji SUPERSZYBKIE zaleca si zmniejszy maksymalny wsad zgodnie ze wskazówkami. (Zmniejsz.
wsad = zmniejszony wsad). Pe ny wsad jest mo liwy, jednak efekty prania b d nieco mniej zadowalaj ce.
2) Stosuj c detergenty w p ynie, nale y wybiera programy bez PRANIA WST PNEGO.
3) STANDARDOWE PROGRAMY do okre lenia parametrów eksploatacyjnych dla klasy energetycznej. Zgodnie z
rozporz dzeniem 1061/2010 programy te s odpowiednikami programów „standardowy program prania tkanin
bawe nianych w 60°C” i „standardowy program prania tkanin bawe nianych w 40°C”. S one najbardziej
wydajnymi programami pod wzgl dem cznego zu ycia wody i energii do prania rednio zabrudzonych tkanin
bawe nianych.
Program ten nale y wybra , aby uzyska dobry efekt prania i obni y zu ycie energii. Czas trwania programu
prania jest wyd u ony.
Temperatura wody w fazie prania mo e ró ni si od temperatury podanej dla wybranego programu.
4) Aby zapewni zadowalaj ce efekty prania, nale y upewni si , e detergent jest przeznaczony do prania w
niskiej temperaturze.
Parametry eksploatacyjne
Dane zawarte w tej tabeli s warto ciami przybli onymi. Ró ne czynniki, takie jak ilo
i rodzaj prania oraz temperatura wody i otoczenia, mog wp ywa na zmian tych
warto ci.
adunek
(kg)
Zu ycie energii (kWh)
Zu ycie wody
(litry)
Przybli ony
czas trwania
programu
(minuty)
Bawe niane
60°C
6
1.35
59
150
53
Bawe niane
40°C
6
0.85
59
140
53
Programy
Wilgotno
(%)1)
POLSKI
19
Programy
adunek
(kg)
Zu ycie energii (kWh)
Zu ycie wody
(litry)
Przybli ony
czas trwania
programu
(minuty)
Syntetyczne
40°C
3
0.55
42
90
35
Delikatne 40°C
3
0.55
57
65
35
We niane/Pranie r czne
30°C
2
0.25
55
60
30
Wilgotno
(%)1)
Standardowe programy do prania tkanin bawe nianych
Bawe niane
60°C – program standardowy
6
1.03
46
159
53
Bawe niane
60°C – program standardowy
3
0.77
38
135
53
Bawe niane
40°C – program standardowy
3
0.64
38
129
53
1) Po zako czeniu fazy wirowania.
Tryb wy czenia (W)
Tryb w czenia (W)
0.10
0.98
Podane wy ej informacje s zgodne z rozporz dzeniem 1015/2010 Komisji UE, wdra aj cym dyrektyw 2009/125/EC.
Konserwacja i czyszczenie
Ostrze enie! Przed rozpocz ciem
jakichkolwiek czynno ci czyszcz cych
lub konserwacyjnych nale y wy czy
urz dzenie.
Pranie konserwacyjne
Pranie w niskiej temperaturze mo e spowodowa gromadzenie si osadów wewn trz
b bna.
Zaleca si regularne przeprowadzanie
prania konserwacyjnego.
Aby przeprowadzi pranie konserwacyjne:
• B ben powinien by pusty.
• Nale y wybra program prania tkanin
bawe nianych w najwy szej temperaturze.
• U y zwyk ej ilo ci detergentu w formie
proszku o w a ciwo ciach biologicznych.
POLSKI
20
Czyszczenie szuflady dozownika oraz
wn ki szuflady
1
Wyj szuflad , naciskaj c w dó blokad i poci gaj c
j na zewn trz.
2
Aby u atwi czyszczenie, nale y
wyj górn cz
przegródki na dodatki.
Wyczy ci wn k
wcze niej u ywan
szczotk , dbaj c o
to by górna i dolna
jej cz
by a dok adnie oczyszczona.
Po wyczyszczeniu
dozownika oraz
wn ki szuflady, nale y zamontowa te
elementy na miejsce i wykona program p ukania bez
rzeczy do prania w
b bnie, aby usun
wszelkie pozostao ci.
5
Czyszczenie pompy
Nale y post powa w nast puj cy sposób:
3
4
Za pomoc twardej
szczotki wyczy ci i
usun wszelkie pozosta o ci proszku
do prania.
Przep uka pod
kranem wszystkie
wymontowane
cz ci szuflady dozownika, aby usun pozosta o ci
proszku.
1
A B
2
Podstawi pod pomp (A) odpowiednie naczynie, do
którego sp ynie woda.
Wyci gn awaryjny w spustowy
(B), umie ci go w
pojemniku i zdj
zatyczk .
POLSKI
3
21
Gdy woda przestanie wycieka , odkr ci os on pompy (A) i wyj j .
Dobrze jest mie w
pobli u szmatk do
wycierania wody
wyciekaj cej podczas odkr cania
pokrywy.
4
Obracaj c wirnikiem pompy, wyj
ewentualne obce
przedmioty.
5
Sprawdzi za pomoc o ówka, czy
wirnik pompy, znajduj cy si na tylnej
ciance komory pompy, mo e si obraca . Normalnym
zjawiskiem jest nierównomierne obracanie si wirnika
pompy. Je li nie
mo na obróci wirnika pompy, nale y
skontaktowa si z
serwisem.
6
Za o y zatyczk
awaryjnego w a
spustowego i
umie ci go z powrotem w miejscu, z
którego zosta wyj ty. Mocno dokr ci pokryw pompy.
Czyszczenie filtrów dop ywu wody
Je eli urz dzenie nie nape nia si wod lub
nape nia si zbyt d ugo, kontrolka przycisku
uruchamiania miga na czerwono. Nale y
sprawdzi , czy filtry dop ywu wody nie s
zatkane (wi cej informacji mo na znale w
rozdziale „Co zrobi , gdy...”).
Nale y post powa w nast puj cy sposób:
• Zamkn zawór
wody.
• Odkr ci w od
zaworu.
• Oczy ci filtr w
w u szczotk o
twardym w osiu.
• Przykr ci mocno
w z powrotem
do zaworu.
1
2
• Odkr ci w od urz dzenia. Dobrze
jest mie w pobli u szmatk do wycierania wyciekaj cej wody.
• Wyczy ci filtr w zaworze szczotk o
twardym w osiu lub szmatk .
3
35°
45°
• Przykr ci w
do urz dzenia,
skierowuj c go w
lewo lub w prawo, zale nie od
danej instalacji.
Szczelnie dokr ci nakr tk zabezpieczaj c ,
aby zapobiec
wyciekom wody.
• Otworzy zawór
wody.
POLSKI
22
Niebezpiecze stwo zamarzni cia wody
Je li urz dzenie jest nara one na dzia anie
temperatur poni ej 0°C, nale y podj okre lone rodki ostro no ci.
• Zamkn zawór wody.
• Odkr ci w dop ywowy.
• Umie ci ko cówk awaryjnego w a
spustowego oraz ko cówk w a dop ywowego w naczyniu ustawionym na pododze i odczeka , a sp ynie do niego
woda z urz dzenia.
• Dokr ci w dop ywowy i umie ci we
wn ce pompy awaryjny w spustowy,
pami taj c o tym, aby zabezpieczy jego ko cówk specjaln zatyczk .
• Je li urz dzenie ma by ponownie uruchomione, nale y sprawdzi , czy temperatura w pomieszczeniu jest wy sza ni
0°C.
Wa ne! Za ka dym razem, gdy woda jest
usuwana przez awaryjny w spustowy,
nale y wla 2 litry wody do komory prania
zasadniczego w szufladzie na detergenty i
uruchomi program odpompowania wody.
Spowoduje to uruchomienie zaworu EKO,
co zapobiegnie niewykorzystaniu cz ci
detergentu podczas nast pnego prania.
Awaryjne odprowadzanie wody
Je li woda nie zostanie odpompowana, nale y post powa zgodnie z poni szymi
wskazówkami:
• wyj wtyczk przewodu zasilaj cego z
gniazdka elektrycznego;
• zamkn zawór wody;
• w razie potrzeby odczeka , a woda ostygnie;
• otworzy klapk pompy;
• ustawi na pod odze pod pomp naczynie na wod i umie ci w nim ko cówk
awaryjnego w a spustowego. Wyj
zatyczk z w a. Woda powinna sama
sp yn do naczynia. Po nape nieniu naczynia zabezpieczy ko cówk w a zatyczk . Wyla wod z naczynia. Powtarza te czynno ci, a ca a woda zostanie
odprowadzona;
• w razie potrzeby wyczy ci pomp zgodnie z uprzednio podanymi instrukcjami;
• w o y zatyczk do awaryjnego w a
spustowego i umie ci go we wn ce;
• dokr ci os on pompy i zamkn klapk .
Rozwi zywanie problemów
Urz dzenie nie daje si uruchomi lub przestaje dzia a podczas pracy. Mo liwe, e
miga czerwona kontrolka przycisku 4, sygnalizuj c, e urz dzenie nie pracuje.
Problem
Urz dzenie nie
rozpoczyna
pracy:
Przed skontaktowaniem si z lokalnym serwisem nale y wykona poni sze czynno ci
kontrolne.
Prawdopodobna przyczyna
Rozwi zanie
Nie zamkni to drzwi (miga czerwona kontrolka przycisku 4).
Dok adnie zamkn
Wtyczki przewodu zasilaj cego
w o ono prawid owo do gniazda
elektrycznego.
W o y wtyczk do gniazda elektrycznego.
Brak napi cia w gnie dzie elektrycznym.
Sprawdzi domow instalacj
elektryczn .
Przepali si g ówny bezpiecznik.
Wymieni bezpiecznik.
drzwi.
Obróci pokr t o wyboru prograNie ustawiono pokr t a wyboru
programów we w a ciwym po o e- mów i ponownie nacisn przycisk
niu i nie naci ni to przycisku 4.
4.
POLSKI
Problem
Urz dzenie nie
nape nia si
wod :
23
Prawdopodobna przyczyna
Rozwi zanie
Wybrano funkcj opó nionego
rozpocz cia programu.
Je li pranie ma si rozpocz od
razu, wy czy funkcj opó nienia
rozpocz cia programu.
Zawór wody jest zamkni ty (miga
czerwona kontrolka przycisku 4).
Otworzy zawór wody.
W dop ywowy jest przygnieciony lub zagi ty (miga czerwona
kontrolka przycisku 4).
Sprawdzi pod czenie w a dop ywowego.
Zatkany filtr w w u dop ywowym
lub filtr w zaworze dop ywu wody
w urz dzeniu (miga czerwona
kontrolka przycisku 4).
Wyczy ci filtry dop ywu wody.
(Wi cej informacji mo na znale
w rozdziale „Czyszczenie filtrów
dop ywu wody”).
Drzwi nie s prawid owo zamkni - Dok adnie zamkn
te (miga czerwona kontrolka przycisku 4).
Urz dzenie nie
wypompowuje
wody:
drzwi.
W spustowy jest przyci ni ty lub
zgi ty (miga czerwona kontrolka
przycisku 4).
Sprawdzi pod czenie w a
spustowego.
Filtr spustowy jest zablokowany
(miga czerwona kontrolka przycisku 4).
Oczy ci filtr spustowy.
Wybrano opcj lub program, który Wybra program odpompowania
ko czy si pozostawieniem wody
lub wirowania.
w zbiorniku lub który nie obejmuje
wirowania.
Faza wirowania rozpoczyna
si pó no lub
nie rozpoczyna
si w ogóle:
Elektroniczna kontrola wywa enia Nale y r cznie roz o y pranie lub
w o y wi cej rzeczy i wybra proanulowa a wirowanie, poniewa
gram wirowania.
pranie jest nierównomiernie rozmieszczone w b bnie. Zmiana rozmieszczenia prania nast puje poprzez obrót b bna w przeciwnym
kierunku. Czynno ta mo e zosta
powtórzona kilka razy, dopóki b ben nie uzyska równowagi i nie
rozpocznie normalnego wirowania. Je li po up ywie 10 minut pranie nadal nie jest równomiernie
roz o one w b bnie, urz dzenie
nie b dzie wirowa .
Wyciek wody
na pod odze:
U yto za du o detergentu lub jego Zmniejszy ilo
niew a ciwy rodzaj (tworzy si
detergentu.
nadmierna ilo piany).
lub u y innego
POLSKI
Problem
24
Prawdopodobna przyczyna
Rozwi zanie
Upewni si , e nie ma wycieków
w okolicy jednego z mocowa
w a dop ywowego. Nie zawsze
mo na to atwo sprawdzi , gdy
woda cieka po w u; sprawdzi ,
czy w nie jest wilgotny.
Sprawdzi pod czenie w a doprowadzaj cego wod .
W spustowy lub dop ywowy jest
uszkodzony.
Wymieni w na nowy (sprawdzi w serwisie prawid owy numer
cz ci zamiennej).
Zatyczka na awaryjnym w u
Za o y z powrotem zatyczk na
spustowym nie zosta a ponownie
awaryjny w spustowy lub doza o ona lub filtr nie zosta prak adnie przykr ci filtr.
wid owo przykr cony po czyszczeniu.
Nie mo na otworzy drzwi:
Urz dzenie
wydaje nietypowe d wi ki
Niezadowalaj ce efekty
prania:
Program nie dobieg ko ca.
Odczeka do ko ca programu
prania.
Blokada drzwi nie zosta a zwolniona.
Odczeka kilka minut przed otwarciem drzwi.
W b bnie pozosta a woda.
Wybra program odpompowania
lub wirowania, aby usun wod .
Nie usuni to blokad transportowych i elementów opakowania.
Sprawdzi , czy urz dzenie zosta o
prawid owo zainstalowane.
Nie wyregulowano w a ciwie nóek.
Sprawdzi , czy urz dzenie jest
prawid owo wypoziomowane.
Pompa opró niaj ca mo e by
zablokowana.
Sprawdzi pomp opró niaj c .
(Wi cej informacji mo na znale
w punkcie „Czyszczenie pompy”).
U yto zbyt ma o lub niew a ciwy
rodzaj detergentu.
U y innego lub wi cej detergentu.
Nie zaprano uporczywych plam
przed praniem.
Do wywabiania trudnych do usuni cia plam nale y stosowa produkty dost pne na rynku.
Nie wybrano odpowiedniej temperatury.
Sprawdzi , czy wybrano odpowiedni temperatur .
W o ono zbyt du
Zmniejszy ilo prania zgodnie z
„Tabel programów prania”.
ilo
Po przeprowadzeniu kontroli w czy urz dzenie i nacisn przycisk 4, aby ponownie
uruchomi dany program.
Je eli problem wyst pi ponownie, skontaktowa si z serwisem.
prania.
Dane niezb dne dla serwisu znajduj si
na tabliczce znamionowej. W tym miejscu
mo na zapisa niezb dne dane:
POLSKI
25
Opis modelu (MOD): .....................
Numer produktu
(PNC): ...........................
Numer seryjny
(S.N.): ...............................
Made In Italy
© Inter IKEA Systems B.V. 1999
501.514.59
21552
Dane techniczne
Wymiary
Szeroko
(cm)
59,6
Wysoko
(cm)
82
G boko
(cm)
Ci nienie doprowadzanej
wody1)
Warto minimalna
Maksymalna
Maksymalny wsad bawe ny
(kg)
6
Maksymalna pr dko
wania (obr/min)
maks. 54
0,5 bar (0,05 MPa)
8 bar (0,8 MPa)
wiro- 1200
Klasa energetyczna
A+
Efektywno
prania
A
Efektywno
wirowania
B
Poziom ha asu podczas pra- 56
nia (dB(A))
Poziom ha asu podczas wirowania (dB(A))
72
rednie roczne zu ycie
energii (kWh)2)
192
rednie roczne zu ycie wody (w litrach)2)
8699
1) Je li ci nienie wody, która mo e by doprowadzona do urz dzenia, jest ni sze lub wy sze, nale y skontaktowa
si z serwisem.
2) Dane wyliczono na podstawie parametrów standardowych programów do prania tkanin bawe nianych, przy
za o eniu 200 cykli prania rocznie.
nia.
Informacje dotycz ce pod czenia elektrycznego, napi cia i ca kowitej mocy znajduj
si na tabliczce znamionowej umieszczonej na wewn trznej kraw dzi drzwi urz dze-
POLSKI
26
Ochrona rodowiska
Materia y oznaczone symbolem nale y
podda utylizacji. Opakowanie urz dzenia
w o y do odpowiedniego pojemnika w
celu przeprowadzenia recyklingu.
Nale y zadba o ponowne przetwarzanie
odpadów urz dze elektrycznych i
elektronicznych, aby chroni rodowisko
naturalne oraz ludzkie zdrowie. Nie wolno
wyrzuca urz dze oznaczonych symbolem
razem z odpadami domowymi. Nale y
zwróci produkt do miejscowego punktu
ponownego przetwarzania lub
skontaktowa si z odpowiednimi w adzami
miejskimi.
Utylizacja starego urz dzenia
• Aby unikn ryzyka odniesienia obra e
lub uszkodze :
– Wyj wtyczk z gniazdka.
– Odci przewód zasilaj cy i wyrzuci
go.
– Usun zamek w drzwiach. Zapobiega
to zatrza ni ciu si wewn trz urz dzenia dziecka lub ma ego zwierz cia. Istnieje ryzyko uduszenia.
Opakowanie
podleMateria y oznaczone symbolem
gaj recyklingowi. Elementy opakowania
nale y wyrzuci do specjalnych kontenerów, aby mie pewno , e zostan one
poddane recyklingowi.
GWARANCJA IKEA
Ile trwa gwarancja IKEA?
Niniejsza gwarancja obowi zuje przez okres pi ciu (5) lat od daty pierwszego zakupu urz dzenia w sklepie IKEA, przy czym w
przypadku urz dze oznaczonych mark
LAGAN okres ten wynosi dwa (2) lata. W
celu potwierdzenia zakupu nale y przed oy orygina rachunku. Wykonywanie prac
gwarancyjnych nie powoduje przed u enia
okresu gwarancji urz dzenia ani nowych
cz ci.
Jakich urz dze nie obejmuje pi cioletnia
(5-letnia) gwarancja IKEA?
Urz dze oznaczonych mark LAGAN oraz
wszystkich urz dze zakupionych w sklepach IKEA przed dniem 1 sierpnia 2007 r.
Kto wykonuje us ugi serwisowe?
Serwis IKEA, wykonuj cy us ugi gwarancyjne za po rednictwem sieci w asnych punktów lub sieci autoryzowanych partnerów
serwisowych.
Co obejmuje gwarancja?
Niniejsza gwarancja obejmuje usterki spowodowane wadliwo ci konstrukcji lub materia ów wykorzystanych do produkcji urz dzenia od dnia jego zakupu w sklepie IKEA.
Niniejsza gwarancja obejmuje wy cznie
urz dzenia u ywane w warunkach gospodarstwa domowego. Wyj tki od powy szej
zasady okre lone s w rozdziale zatytu owanym "Czego nie obejmuje gwarancja?".
W okresie gwarancji pokrywane b d
koszty usuni cia usterek, np. napraw, wymiany cz ci, robocizny oraz koszty dojazdu, pod warunkiem dost pno ci urz dzenia
dla potrzeb wykonania naprawy bez konieczno ci ponoszenia szczególnych kosztów o ile powsta a usterka jest zwi zana z
wad konstrukcyjn lub materia ow obj t gwarancj . Przy uwzgl dnieniu powy szych warunków zastosowanie maj przepisy UE (Dyrektywa 99/44/WE) oraz odpowiednie przepisy prawa krajowego. Cz ci
wymienione staj si w asno ci IKEA.
POLSKI
Jakie dzia ania podejmuje IKEA w celu
rozwi zania problemu?
Wyznaczony przez IKEA serwis bada produkt i rozstrzyga, wed ug w asnego uznania, czy jest on obj ty niniejsz gwarancj .
W razie uznania, e produkt jest obj ty
gwarancj , serwis IKEA lub autoryzowany
partner serwisowy decyduje, wed ug w asnego uznania, czy naprawi wadliwy produkt czy wymieni go na taki sam lub porównywalny produkt. Ujawniona wada zostanie usuni ta na nieodp atnie w ci gu 14
dni od daty zg oszenia uszkodzenia do autoryzowanego serwisu.
Czego nie obejmuje gwarancja?
• Zwyk ego zu ycia.
• Uszkodzenia umy lnego lub wynikaj cego z niedbalstwa, uszkodzenia spowodowanego nieprzestrzeganiem instrukcji
obs ugi, nieprawid ow instalacj lub
pod czeniem do niew a ciwego ród a
napi cia, uszkodzenia spowodowanego
reakcj chemiczn lub elektrochemiczn ,
rdz , korozj lub uszkodzeniem w wyniku
dzia ania wody, w tym uszkodzenia spowodowanego nadmiarem wapnia w wodzie z instalacji wodoci gowych oraz
uszkodzenia spowodowanego anomaliami pogodowymi.
• Materia ów eksploatacyjnych, w tym baterii i arówek.
• Cz ci niefunkcjonalnych i dekoracyjnych,
nie maj cych wp ywu na normalne u ytkowanie urz dzenia, w tym rys oraz
ewentualnych przebarwie .
• Przypadkowych uszkodze spowodowanych przez obce cia a lub substancje,
czyszczenie lub przepychanie: filtrów,
systemów odprowadzania wody lub szuflad na proszek.
27
• Uszkodzenia nast puj cych cz ci: cz ci
ze szk a ceramicznego, akcesoriów, koszyków na naczynia i sztu ce, w y doprowadzaj cych wod i spustowych, uszczelek, arówek oraz ich pokryw, wywietlaczy, pokr te , obudów oraz cz ci
obudów, chyba e mo na wykaza , e
uszkodzenia takie zosta y spowodowane
wadami produkcyjnymi.
• Przypadków, w których nie stwierdzono
usterek w trakcie wizyty technika.
• Napraw niewykonanych przez wyznaczony przez IKEA serwis lub autoryzowanego partnera serwisowego b d przypadków niezastosowania cz ci oryginalnych.
• Napraw b d cych nast pstwem instalacji
wykonanych nieprawid owo lub w sposób niezgodny ze specyfikacj .
• Wykorzystania urz dzenia w rodowisku
innym ni domowe, tj. u ytku s u bowego.
• Uszkodzenia w trakcie transportu. Je li
klient sam transportuje urz dzenie do
domu lub pod inny adres, IKEA nie b dzie ponosi adnej odpowiedzialno ci
za uszkodzenia, jakie mog powsta
podczas transportu. Jednak e, je li IKEA
dostarcza urz dzenie na adres klienta,
niniejsza gwarancja b dzie obejmowa a
ewentualne uszkodzenia urz dzenia powsta e podczas takiej dostawy.
• Koszt przeprowadzenia pocz tkowej instalacji urz dzenia IKEA. Jednak e, je li
us ugodawca reprezentuj cy IKEA lub
autoryzowany serwisant IKEA naprawi
lub wymieni urz dzenie w ramach niniejszej gwarancji, taki us ugodawca lub
autoryzowany serwisant w razie potrzeby ponownie zainstaluje naprawione lub
wymienione urz dzenie.
Powy sze ograniczenia nie maj zastosowania do pracy prawid owo wykonanej
przez wykwalifikowanego specjalist , przy
zastosowaniu oryginalnych cz ci IKEA, w
celu dostosowania urz dzenia do wymaga bezpiecze stwa technicznego obowi zuj cych w innym pa stwie cz onkowskim
UE.
POLSKI
Zastosowanie przepisów prawa
krajowego
Udzielona przez IKEA gwarancja przyznaje
Pa stwu okre lone uprawnienia, które obejmuj b d wykraczaj poza wymogi przepisów prawa krajowego w poszczególnych
pa stwach. Gwarancja ta nie wy cza, nie
ogranicza ani nie zawiesza uprawnie kupuj cego wynikaj cych z tytu u niezgodno ci towaru z umow .
Obszar obowi zywania
Niniejsza gwarancja obowi zuje na terytorium Polski. W przypadku urz dze zakupionych w jednym pa stwie cz onkowskim
UE i przewiezionych do innego pa stwa
cz onkowskiego UE, us ugi serwisowe
wiadczone b d na standardowych warunkach gwarancyjnych obowi zuj cych w
nowym pa stwie. Obowi zek wiadczenia
us ug gwarancyjnych powstaje wy cznie
wówczas gdy:
• samo urz dzenie oraz jego instalacja odpowiadaj wymogom technicznym pa stwa, w którym zg aszana jest reklamacja
w ramach gwarancji;
• amo urz dzenie oraz jego instalacja odpowiadaj wymogom zawartym w Instrukcji Monta u oraz informacji dotycz cych bezpiecze stwa w Instrukcji Obs ugi.
SERWIS urz dze IKEA
Prosimy o kontakt z Serwisem IKEA w celu:
1. zg oszenia reklamacji w ramach niniejszej gwarancji;
2. uzyskania wyja nie dotycz cych instalacji urz dzenia w zestawach kuchennych IKEA. Serwis nie udziela wyja nie
dotycz cych:
– ogólnej instalacji zestawów kuchennych IKEA;
– pod czenia do instalacji elektrycznych (je eli urz dzenie nie jest wyposa one w przewód i wtyczk ),
wodnych i gazowych, które powinno
by wykonane przez autoryzowanego technika serwisowego.
28
3.
uzyskania wyja nie dotycz cych tre ci
instrukcji obs ugi lub specyfikacji urz dzenia IKEA.
Aby umo liwi nam wiadczenie jak najlepszych us ug, przed skontaktowaniem si z
nami prosimy o uwa ne przeczytanie Instrukcji Monta u lub Instrukcji Obs ugi zawartych w niniejszej broszurze.
Kontakt z IKEA w razie potrzeby
skorzystania z serwisu
Na ostatniej stronie niniejszej instrukcji znajduje si pe na lista danych kontaktowych
IKEA wraz z numerami telefonów.
Wa ne! W celu przyspieszenia obs ugi
serwisu zalecamy skorzystanie z numerów
telefonicznych wymienionych na ko cu
niniejszego dokumentu. Nale y zawsze
korzysta z numerów podanych w
broszurze przeznaczonej dla konkretnego
urz dzenia. Dzwoni c do IKEA nale y
pami ta o numerze artyku u
(o miocyfrowym kodzie) danego
urz dzenia IKEA.
Wa ne! PROSIMY O ZACHOWANIE
RACHUNKU!
Stanowi on dowód zakupu oraz warunek
skorzystania z gwarancji. Na rachunku podana jest równie nazwa oraz numer aurtyku u (o miocyfrowy kod) ka dego zakupionego przez Pa stwa urz dzenia.
Czy potrzebuj Pa stwo dodatkowej
pomocy?
Wszelkie dalsze pytania niezwi zane z serwisem Pa stwa urz dze prosz kierowa
do najbli szego telecentrum IKEA. Zalecamy uwa ne przeczytanie dokumentacji
urz dzenia przed skontaktowaniem si z
nami.
TÜRKÇE
29
çindekiler
Güvenlik bilgileri
Güvenlik talimatları
Ürün tanımı
Kontrol Paneli
lk kullanım
Günlük kullanım
puçlari ve yararli bilgiler
29
30
32
33
35
35
38
Yıkama programları
Tüketim de erleri
Bakım ve temizlik
Sorun giderme
Teknik bilgiler
Çevreyle ilgili bilgiler
IKEA GARANT S
39
42
43
45
48
49
50
Önceden haber verilmeksizin de i iklik yapma hakkı saklıdır.
Güvenlik bilgileri
Cihazın montaj ve kullanımından önce, verilen talimatları dikkatlice okuyun. Üretici, yanlı bir montajın ve kullanımın yaralanma ve hasara neden olması durumunda sorumluluk kabul
etmez. Talimatları daha sonra kullanmak için daima cihazın yakınında bulundurun.
Çocukların ve tehlikeye açık ki ilerin güvenli i
Uyarı Bo ulma, yaralanma ya da kalıcı sakatlık riski vardır.
• Çocuklar dahil olmak üzere, fiziksel ve mental kapasiteleri
dü ük veya cihazın kullanımına yönelik deneyimi ve bilgisi olmayan ki ilerin cihazı kullanmalarına izin vermeyin. Bu ki iler
cihazı, güvenliklerinden sorumlu olan bir ki inin denetimi altında veya cihazın kullanımı hakkında bu ki i tarafından bilgilendirilmek kaydıyla kullanabilir.
• Çocukların cihazla oynamalarına izin vermeyin.
• Tüm ambalaj malzemelerini çocuklardan uzak tutun.
• Tüm deterjanları çocuklardan uzak tutun.
• Kapak açıkken, çocukları ve evcil hayvanları cihazdan uzak
tutun.
• Cihazda çocuk güvenli i aygıtı varsa bu aygıtı etkinle tirmenizi tavsiye ederiz.
TÜRKÇE
30
Genel Güvenlik
• Bakım i leminden önce, cihazı devre dı ı bırakın ve elektrik fiini prizden çekin.
• Bu cihazın teknik özelliklerini de i tirmeyin.
• 6 kg maksimum yük hacmine uyun (“Program tablosu” bölümüne bakın).
• Elektrik kablosunun zarar görmesi durumunda, bir kazanın
meydana gelmesine engel olmak için, ilgili de i im üretici,
servis acentesi veya benzer nitelikteki kalifiye bir ki i tarafından de i tirilmelidir.
• Çalı tırma su basıncı (minimum ve maksimum) 0,5 bar (0,05
MPa) ve 8 bar (0,8 MPa) arasında olmalıdır
• Tabandaki havalandırma menfezleri (varsa) bir halıyla tıkanmamalıdır.
• Cihaz su ebekesine yeni tedarik edilen hortum seti ile
ba lanmak durumundadır. Eski hortum setleri tekrar kullanılmamalıdır.
Güvenlik talimatları
Montaj
• Ambalajı ve nakliye cıvatalarının tamamını sökün.
• Nakliye cıvatalarını saklayın. Cihazı tekrar ta ırken tamburu bloke etmeniz gerekir.
• Hasarlı bir cihazı monte etmeyin ya da
kullanmayın.
• Cihazı, sıcaklı ın 0°C'den daha az oldu u ya da hava durumundan etkilenebilece i yerlere monte etmeyin veya buralarda kullanmayın.
• Cihazla birlikte verilen montaj talimatlarına uyun.
• Cihazı kuraca ınız zeminin düz, sa lam,
ısıya dayanıklı ve temiz oldu una emin
olun.
• Cihazı, kapa ın tamamen açılmasını engelleyecek bir yere kurmayın.
• A ır oldu undan, cihazı ta ırken daima
dikkat edin. Her zaman güvenlik eldivenleri kullanın.
• Cihaz çevresinde ve zeminde hava sirkülasyonu oldu undan emin olun.
• Cihaz ve halı arasında gerekli bo luk kalacak ekilde cihazın ayaklarını ayarlayın.
Elektrik ba lantısı
Uyarı Yangın ve elektrik çarpması riski
vardır.
• Cihaz topraklanmalıdır.
• Bilgi etiketindeki elektriksel verilerin elektrik beslemesine uygun oldu undan emin
olun. Aksi durumda, bir elektrik teknisyenini arayın.
• Her zaman do ru monte edilmi , darbelere dayanıklı bir priz kullanın.
• Priz ço altıcıları ve uzatma kabloları kullanmayın.
• Elektrik fi ine ve kablosuna zarar vermemeye özen gösterin. Hasarlı bir kabloyu
de i tirmek için yetkili servise ya da bir
elektrikçiye ba vurun.
TÜRKÇE
• Fi i prize sadece montaj tamamlandıktan
sonra takın. Montajdan sonra elektrik fi ine eri ilebildi inden emin olun.
• Cihazın fi ini prizden çıkarmak için elektrik kablosunu çekmeyin. Her zaman fi ten tutarak çekin.
• Islak eller ile elektrik kablosuna ya da fi ine dokunmayın.
• Bu cihaz, E.E.C. yönergeleri ile uyumludur.
Su ba lantısı
• Su hortumlarına zarar vermemeye özen
gösterin.
• Cihaz su ebekesine verilen yeni hortum
seti ile ba lanmak durumundadır. Eski
hortum setleri tekrar kullanılmamalıdır.
• Cihazı yeni borulara veya uzun süre kullanılmamı olan borulara ba lamadan
önce, temiz su gelene dek suyu akıtın.
• Cihazı ilk kez kullanırken, kaçak olmadı ından emin olun.
Kullanım
Uyarı Yaralanma, elektrik çarpması,
yangın, yanma veya cihazın zarar
görme riski söz konusudur.
• Bu cihazı ev ortamında kullanın.
• Deterjan ambalajının üzerindeki güvenlik
talimatlarına uyun.
• Cihazın içine, üzerine veya yakınına yanıcı ürünler ya da yanıcı ürünlerle ıslanmı
e yalar koymayın.
• Program çalı ırken kapak camına dokunmayın. Cam sıcak olabilir.
31
• Tüm metal nesneleri çama ırlarınızdan çıkardı ınızdan emin olun.
• Cihazın altına su kaça ını toplamak için
bir kap koymayın. Hangi aksesuarların
kullanılabilece ini belirlemek için yetkili
servis ile temasa geçin.
Bakım ve Temizlik
Uyarı Yaralanma veya cihazın zarar
görme riski söz konusudur.
• Cihazı temizlemek için su spreyi ve buhar
kullanmayın.
• Cihazı yumu ak nemli bir bezle temizleyin. Sadece nötr deterjanlar kullanın.
A ındırıcı ürünleri, a ındırıcı temizleme
bezlerini, çözücüleri veya metal cisimleri
kullanmayın.
Elden çıkarma
Uyarı Yaralanma ya da bo ulma riski.
• Cihazın fi ini prizden çekin.
• Elektrik kablosunu kesin ve atın.
• Çocukların ve hayvanların cihazda kapalı
kalmasını önlemek için kapak kilit dilini çıkarın.
Servis
• Cihazı onarmak için yetkili servis ile temasa geçin. Sadece orijinal yedek parça
kullanılmasını tavsiye ederiz.
TÜRKÇE
32
Ürün tanımı
1
2
3
4
5
6
Deterjan çekmecesi
Ön yıkama veya ıslatma a amasında
kullanılan deterjan ya da leke çıkarma a amasında (varsa) kullanılan leke çıkarıcı bölmesi. Ön yıkama ve ıslatma deterjanı, yıkama programı ba lamadan önce konulur. Leke çıkarıcı, leke çıkarma a amasında konulur.
Ana yıkama için kullanılan toz veya sıvı
deterjan bölmesi. E er sıvı deterjan kullanıyorsanız, bunu program ba lamadan hemen önce dökünüz.
Sıvı katkı maddeleri (çama ır yumu atıcı,
kola) bölmesi.
Kullanılacak miktarlarla ilgili üretici
önerilerine riayet edin ve deterjan çekmecesindeki «MAX» i aretini asla geçmeyin. Herhangi bir çama ır yumu atıcı veya
kola katkı maddesi, yıkama programı ba latılmadan önce bölmeye konmalıdır.
Çocuk güvenlik aygıtı
Çocukların veya evcil hayvanların tamburun
içine girmemesine dikkat edin. Lütfen kullanmadan önce tamburun içini kontrol edin.
Bu cihazda, çocukların veya hayvanların
tambur içine hapsolmasını önlemek için özel
bir i lev bulunmaktadır.
1
2
3
4
5
6
Deterjan çekmecesi
Kontrol paneli
Kapak açma kolu
Bilgi Etiketi
Tahliye pompası
Ayarlanabilir ayaklar
TÜRKÇE
33
Bu cihazı etkinle tirmek için kapa ın
içindeki tu u yarık
kısmı yatay pozisyona gelinceye kadar saat yönünde
döndürün (basmadan). Gerekirse bir
bozuk para kullanın.
Bu aygıtı devre dı ı
bırakmak ve yeniden kapa ın kapanmasını sa lamak için yarık kısım
dikey pozisyona
gelinceye kadar
dü meyi saat yönünün tersine döndürün.
Kontrol Paneli
A a ıda kontrol panelinin bir resmi verilmi tir. Resimde, program seçme dü mesinin
yanı sıra tu lar ve gösterge ı ıkları da gösterilmektedir. Bunlar, ilerleyen sayfalardaki
ilgili sayılarla belirtilmektedir.
1
2
90°
3h
1200
60°
6h
3
9h
900
700
40°
30°
500
30°
30°
40°
40°
30°
40°
60°
7
1
2
3
4
Program seçme dü mesi
Gecikmeli Ba latma tu u
Program Gösterge ı ıkları
Ba lat/Duraklat tu u
6
5
4
5 Ekstra Durulama tu u
6 Çok Amaçlı tu
7 Devir dü ürme tu u
Program seçme dü mesi
Cihazı Açıp/Kapatmanızı ve/veya bir program seçmenizi
sa lar.
Gecikmeli Ba latma tu u
Bu tu la programın ba lamasını 3, 6 veya 9 saat geciktirebilirsiniz.
TÜRKÇE
34
Program Gösterge ı ıkları
3.1
3.2
3.3
Bir yıkama programı seçildi inde 3.1 ve 3.2 lambalarının her
ikisi de yanar.
4 tu una bastı ınızda, yalnızca çalı ma a amasına kar ılık
gelen lamba açık kalır.
Cihaz çalı maya ba lar ve kapak kilitlenir.
3.3 ı ı ı, yıkama programı sona erdi inde yanar. Birkaç dakika sonra kapak açılabilir.
Bo altma programı seçilirse, herhangi bir lamba yanar.
Ba lat/Duraklat tu u
Bu tu , seçilen yıkama programını ba latmanızı veya durdurmanızı sa lar.
Devir dü ürme tu u
Bu tu a basarak, seçilen programın sıkma hızını de i tirebilirsiniz.
•
Suda Bekletme
Bu seçene i seçti inizde, çama ırların kırı masını önlemek
için son durulama suyu bo altılmaz. Kapa ı açmadan önce suyu bo altmak gerekir. Suyu bo altmak için, lütfen
«Programın sonunda» bölümünü okuyun.
Çok Amaçlı dü me:
Bu tu a basarak, seçeneklerden sadece bir tanesini seçebilirsiniz. Kar ılık gelen ı ık yanacaktır.
•
Ön yıkama
Bu seçenek ile cihaz, ana yıkama öncesinde bir ön yıkama
devri gerçekle tirir. Yıkama süresi uzayacaktır. Bu seçenek,
çok kirli çama ırlar için önerilir.
•
Süper Hızlı Yıkama
Bu seçenek kullanıldı ında cihaz kısa süreli giyilmi olan
hafif kirli çama ırlar için çok kısa bir program uygular.
Ekstra Durulama tu u
Bu cihaz, enerjiden tasarruf sa layacak ekilde tasarlanmı tır. Çama ırların ekstra su kullanılarak durulanması gerekiyorsa (ekstra durulama), bu seçene i seçin. Bazı ek durulama i lemleri uygulanır. Bu seçenek, deterjanlara kar ı alerjisi
olan ki iler ve suyun çok yumu ak oldu u bölgeler için önerilir.
Semboller tablosu
= Açma/Kapama - Sıfırlama
= Pamuklular
misi
misi
= 60° C'de pamuklular ekono= 40° C'de pamuklular ekono-
= Durulamalar
= Bo altma
= Sıkma
= Suda Bekletme
TÜRKÇE
35
Semboller tablosu
= So uk yıkama
= Ön yıkama
= Sentetik
= Süper Hızlı Yıkama
= Kolay Ütü
= Ekstra Durulama
= Narinler
= Gecikmeli Ba latma
20° = Karı ık 20°
= Ana Yıkama
= Yünlüler
= Program Sonu
= Elde yıkama
= Ba lat/Duraklat
lk kullanım
1.
2.
3.
Daha sonra, tambur ve kazandaki olası
üretim kalıntılarını temizlemek için makineye çama ır koymadan en yüksek sıcaklıkta bir pamuklu yıkama programını
ba latınız.
Ana yıkama bölmesine 1/2 ölçek deterjan koyunuz ve cihazı çalı tırınız.
Elektrik ve su ba lantılarının montaj talimatlarına uygun yapıldı ından emin
olunuz.
Herhangi bir madde varsa tamburdan
çıkartınız.
ECO valfı aktive etmek için deterjan
çekmecesinin ana yıkama bölmesine
2 litre su koyunuz.
Günlük kullanım
Kapa ı açınız
Kapa ın kolunu dikkatlice dı a do ru çekerek kapa ı açınız.
Çama ırları yerle tiriniz
Çama ırları tambura teker teker ve
mümkün oldu unca
silkeleyerek koyunuz.
Kapak çerçevesini
iterek kapa ı sıkıca
kapatınız.
Deterjan ve kuma yumu atıcıyı ölçünüz.
1
Deterjanı ve ana yıkama bölmesine
veya gerekti inde
seçili programa/seçene e uygun bölmeye koyun (daha
fazla bilgi için "Deterjan çekmecesi"
bölümüne bakınız).
Do ru miktarda deterjan koymak için
"Su sertli i derecesi"nde daha fazla
bilgi bulabilirsiniz.
TÜRKÇE
1
36
Çama ır yumu atıcıyı
ile i aretli
bölmeye koyun (kullanılan miktar çekmecedeki «MAX»
i aretini geçmemelidir).
Çekmeceyi yava ça kapatınız
Program seçme dü mesini kullanarak
istenilen programın seçilmesi (1)
Cihaz artık açıktır. 4 tu unun gösterge ı ı ı
yanıp sönmeye ba lar.
Programın sonunda program seçme
dü mesini O pozisyonuna getirerek cihazı
kapatabilirsiniz.
Her bir yıkama devri, yıkama programları arasındaki uyumluluk ve seçenekler hakkında bilgi için «Yıkama Programları» bölümüne bakınız.
Dikkat Cihaz çalı ır haldeyken
program seçme dü mesini ba ka bir
programa getirirseniz, yanlı bir seçim
yapıldı ını bildirmek üzere 4 tu unun kırmızı
gösterge ı ı ı 3 defa yanıp söner. Cihaz,
yeni seçilen programı uygulamayacaktır.
7 tu una basarak sıkma hızının
azaltılması
stedi iniz programı seçtikten sonra, cihazınız bu program için öngörülen maksimum
sıkma hızını otomatik olarak uygulayacaktır.
E er çama ırlarınızı farklı bir hızda sıkmak
istiyorsanız, sıkma hızını de i tirmek için 7
tu una arka arkaya basın. lgili gösterge
ı ı ı yanacaktır.
Kullanılabilir seçeneklerin 7, 6 ve 5
tu larına basılarak seçilmesi
Programa ba lı olarak, farklı fonksiyonlar
birle tirilebilir. Bunlar, istenilen program seçildikten sonra ve program ba latılmadan
önce seçilmelidir.
Bu tu lara basıldı ında, kar ılık gelen gösterge ı ıkları yanacaktır. Bu tu lara tekrar
basıldı ında, gösterge ı ıkları sönecektir.
Yanlı seçenek seçilirse, 4 tu unun kırmızı
gösterge lambası 3 kez yanıp söner.
Yıkama programları arasındaki uyumluluk ve seçenekler hakkında bilgi için
«Yıkama Programları» bölümüne bakınız.
2 tu una basarak Gecikmeli Ba latma
fonksiyonunun seçilmesi
Programı ba latmadan önce e er ba latma
i leminin ertelenmesini isterseniz, istedi iniz
gecikme süresini seçmek için 2 tu una devamlı basınız. lgili ı ık yanacaktır.
Bu seçene i, programı ayarladıktan sonra
ve programı ba latmadan önce seçmelisiniz.
Gecikmeli ba latmayı, 4 tu una basmadan
önce istedi iniz zaman iptal edebilir veya
de i tirebilirsiniz.
Gecikmeli ba latmanın seçilmesi:
1. Programı ve istedi iniz di er seçenekleri seçin.
2. 2 tu una basarak Gecikmeli Ba latma
fonksiyonunu seçin.
3. 4 tu una basın:
– cihaz geri sayımı ba latır.
– Program, seçilen gecikme süresi sona
erdi i anda ba lar.
Program ba latıldıktan sonra gecikmeli ba latmanın iptal edilmesi:
1. 4 tu una basarak cihazı BEKLEME durumuna ayarlayın.
2. 2 tu una bir kez bastı ınızda, seçilen
gecikme süresinin ilgili ı ı ı söner
3. Programı ba latmak için 4 tu una tekrar
basın.
Gecikmeli Ba latma seçene i, BO ALTMA
programında kullanılamaz.
Önemli Seçilen gecikme süresi sadece
yıkama programı tekrar seçildikten sonra
de i tirilebilir.
Kapak, gecikme süresi boyunca kilitli olacaktır. E er kapa ı açmanız gerekiyorsa,
makineyi BEKLEME konumuna ayarlayıp (4
tu una basarak) birkaç dakika beklemelisiniz. Kapa ı kapattıktan sonra, 4 tu una tekrar basın.
TÜRKÇE
4 tu una basarak programı ba latın
Seçilen programı ba latmak için 4 tu una
basın, kar ılık gelen ye il gösterge ı ı ı yanıp sönmeyi kesecektir. Çalı ma a amasına
kar ılık gelen gösterge ı ı ı yanar. Cihaz
çalı maya ba lar ve kapak kilitlenir.
Çalı an bir programı duraklatmak için 4 tuuna basın: kar ılık gelen ye il gösterge ı ı ı
yanıp sönmeye ba lar.
Programı kesintiye u radı ı yerden devam
ettirmek için 4 tu una tekrar basın. E er bir
gecikmeli ba latma seçene ini tercih ettiyseniz, cihaz geri sayıma ba layacaktır.
Yanlı seçenek seçilirse, 4 tu unun kırmızı
gösterge ı ı ı 3 kez yanıp söner.
Bir seçene in veya çalı an bir programın
de i tirilmesi
Program ba lamadan önce herhangi bir seçene in de i tirilmesi mümkündür.
Herhangi bir de i iklik yapmadan önce, 4
tu una basarak cihazı BEKLEMEYE almalısınız.
Çalı an bir programın de i tirilmesi sadece
sıfırlamak (resetlemek) suretiyle mümkündür.
Program seçme dü mesini O pozisyonuna
getirin ve sonra seçmek istedi iniz yeni
program pozisyonuna getirin. 4 tu una tekrar basarak yeni programı ba latın. Tamburdaki yıkama suyu bo altılmayacaktır.
Bir programın duraklatılması
Çalı an bir programı duraklatmak için 4 tuuna basın, kar ılık gelen ye il gösterge ı ı ı
yanıp sönmeye ba lar.
Programı yeniden ba latmak için aynı tu a
tekrar basınız.
Bir programın iptal edilmesi
Çalı makta olan bir programı iptal etmek
için, seçme dü mesini O konumuna getiriniz.
Artık yeni bir program seçebilirsiniz.
Kapa ın açılması
Program çalı maya ba ladıktan sonra kapak kilitlenir. E er herhangi bir nedenle kapa ı açmanız gerekirse, öncelikle 4 tu una
basarak makineyi BEKLEME konumuna
ayarlayın. Birkaç dakika sonra kapak açılabilir.
37
E er kapak açılmazsa, bu durum makinenin
halen ısıtma i lemi uyguladı ı veya su seviyesinin çok yüksek oldu u anlamına gelir.
Hiçbir durumda kapa ı zorla açmaya çalı mayınız!
E er kapa ı açamıyor ancak açmanız gerekiyorsa, program seçme dü mesini O pozisyonuna getirerek cihazı kapatmanız gerekmektedir. Birkaç dakika sonra kapak açılabilir (su seviyesine ve sıcaklı ına dikkat ediniz!).
Kapa ı kapattıktan sonra, program ve seçenekleri tekrar seçmek ve 4 tu una basmak
gereklidir.
Programın sonunda
Cihaz otomatik olarak durdu unda. 4 tu unun gösterge ı ı ı ve az önce biten yıkama
a amasına kar ılık gelen gösterge ı ı ı söner. 3.3 ı ı ı yanar. Birkaç dakika sonra kapak açılabilir.
E er tamburda su bırakarak sona eren bir
program veya seçenek seçilirse, 3.3 ı ı ı yanar ancak kapa ı açmadan önce suyun boaltılması gerekti ini belirtmek üzere kapak
kilitli durumda kalır.
Bu süre içerisinde, su bo altılıncaya kadar
tambur düzenli aralıklarla dönmeye devam
eder.
Suyu bo altmak için a a ıdaki talimatları
takip ediniz:
1. Program seçme dü mesini O pozisyonuna getiriniz.
2. Bo altma veya sıkma programını seçiniz.
3. Gerekiyorsa 7 tu una basarak sıkma hızını azaltın.
4. 4 tu una basın.
Programın sonunda, kapak açılabilir. Cihazı
kapatmak için program seçme dü mesini O
pozisyonuna getiriniz.
Çama ırları tamburdan çıkarın ve tamburun
bo oldu undan emin olmak için dikkatlice
kontrol edin. Ba ka bir yıkama daha yapmayacaksanız, su muslu unu kapatın. Küf
ve ho olmayan kokuların olu masını önlemek için kapa ı açık bırakın.
TÜRKÇE
38
Bekletme modu: program sona erdikten sonra, pilot ı ıkları yanar ve enerji
tasarrufu sistemi devreye girer. Herhangi
bir tu a basıldı ında cihaz enerji tasarrufu
modundan çıkar.
puçlari ve yararli bilgiler
Çama ırların sınıflandırılması
Her bir giysinin üzerindeki yıkama kodu
sembolüne ve üreticinin yıkama talimatlarına riayet ediniz. Çama ırları u ekilde sınıflandırınız: beyazlar, renkliler, sentetikler,
hassaslar, yünlüler.
Lekelerin çıkartılması
natçı lekeler sadece su ve deterjanla çıkmayabilir. Dolayısıyla, bunların yıkanmadan
önce ön i lemden geçirilmesi önerilir.
Kan: Taze lekelere so uk su uygulayınız.
Kurumu lekelerde, özel bir deterjanla geceden suya bastırınız ve sonra sabunlu suyla ovalayınız.
Ya lı boyalar: Leke çıkarıcı benzinle ıslatınız, çama ırı yumu ak bir bez üzerine seriniz ve lekeyi çitileyiniz; birkaç kez i lemi tekrarlayınız.
Kurumu ya lekeleri: Neftya ı ile ıslatınız,
çama ırı yumu ak bir zemin üzerine seriniz
ve lekeyi parmaklarınızla ve pamuklu bir
bezle ovunuz.
Pas: Sıcak suda çözülmü oksalik asit veya
bir pas giderici ürün so uk halde uygulanır.
Yakın tarihte meydana gelmemi eski pas
lekelerine dikkat edin, çünkü kuma ın selüloz yapısı delik olu umuna neden olacak ekilde daha önceden zarar görmü olabilir.
Küf lekeleri: A artıcı uygulayınız, iyice durulayınız (sadece beyaz pamuklular ve solmaz renkliler).
Özellik
Çimen: Hafifçe sabunlayınız ve a artıcı uygulayınız (sadece beyazlar ve solmaz renkliler).
Tükenmez kalem ve tutkal: Asetonla ıslatınız. 2), giysiyi yumu ak bir bez üzerine seriniz ve lekeyi ovalayınız.
Ruj: Yukarıda anlatıldı ı gibi asetonla ıslatın, ardından metil alkol uygulayınız. Kalmı
olabilecek izleri a artıcı ile çıkartınız.
Kırmızı arap: Su ve deterjana bastırınız,
durulayıp asetik veya sitrik asit uygulayınız,
daha sonra tekrar durulayınız. Kalmı olabilecek izleri a artıcı ile çıkartınız.
Mürekkep: Mürekkebin tipine göre, kuma ı
önce asetonla 2), sonra asetik asitle ıslatınız;
beyaz kuma üzerinde kalan izleri a artıcı
ile çıkarttıktan sonra iyice durulayınız.
Zift lekeleri: Önce leke çıkarıcı, metil alkol
(mavi ispirto) veya benzinle ön i lemden
geçiriniz, ardından macun deterjanla ovalayınız.
Su sertli i dereceleri
Su sertli i, sertlik "derecesi" cinsinden belirtilir. Bölgenizdeki suyun sertli i hakkında
bilgiyi ilgili su i leri idaresinden veya yerel
yetkilinizden elde edebilirsiniz.
Su sertli i dereceleri
Alman °dH
Fransız °T.H
Yumu ak
0-7
0-15
Orta
8-14
16-25
Sert
15-21
26-37
Çok sert
> 21
> 37
2) Suni ipekler üzerinde aseton uygulamayınız.
TÜRKÇE
39
Su sertlik derecesinin orta-yüksek olması halinde bir su yumu atıcısı ilave edilmelidir.
Üretici talimatlarına riayet ediniz. Kullanılacak deterjan miktarı, her zaman sertlik derecesine göre ayarlanabilir (azaltılabilir).
Yıkama programları
3)
PAMUKLULAR EKONOM
60°-40°
PAMUKLU
40°-30°(So uk)
Beyaz ve solmaz
renkli pamuklular için
ekonomi, hafif-a ır
kirli çama ırlar, gömlekler, iç çama ırları.
Ana Yıkama
Durulama
Maks. 1200
dev./
dak.'da son
sıkma
Renkli pamuklular
Ana Yıka(normal-hafif kirli ça- ma
ma ırlar).
Durulama
Maks. 1200
dev./
dak.'da son
sıkma
6 kg
3 kg1)
Sıkma
Suda Bekletme
Ön yıkama
Süper Hızlı
Yıkama
Ekstra Durulama
6 kg
6 kg
3 kg1)
Sıkma
Suda Bekletme
Ön yıkama
Ekstra Durulama
Sıkma
Suda Bekletme
Ön yıkama
Süper Hızlı
Yıkama
Ekstra Durulama
Deterjan
Bölmesi
Mevcut
Seçenekler
Program
Açıklama
Beyaz pamuklular
Ana Yıka(a ır-normal kirli pa- ma
muklu çama ırlar).
Durulama
Maks. 1200
dev./
dak.'da son
sıkma
Maks. Çama ır Miktarı
Az. Çama ır Miktarı1)
PAMUKLU
90°-60°
Çama ır
türü
Program/
Sıcaklık
Lütfen her zaman giysinizin bakım etiketi sembolüne bakın ve burada belirtilenlere uygun bir yıkama programı seçin.
2)
2)
2)
Sentetik kuma lar:
bu seçenek seçildi inde, çama ır nazikçe yıkanır ve kırııklık yaratmayacak
ekilde sıkılır. Böylece ütüleme daha kolay hale gelir. Ayrıca,
cihaz bazı ek durulamalar uygular.
Ana Yıkama
Durulama
Maks. 900
dev./
dak.'da son
sıkma
Narin kuma lar: örne in perdeler.
Ana Yıkama
Durulama
Maks. 700
dev./
dak.'da son
sıkma
KOLAY ÜTÜ
40°
NAR NLER
40°-30°
4)
20°
KARI IK 20°
20°
Hafif kirli pamuklu,
sentetik ve karı ık
kuma lar için özel
program.
Enerji tüketimini
azaltmak için bu
programı ayarlayın.
Ana Yıkama
Durulama
Maks. 900
dev./
dak.'da son
sıkma
3 kg
1.5 kg1)
Sıkma
Suda Bekletme
Ön yıkama
Süper Hızlı
Yıkama
Ekstra Durulama
1.5 kg
3 kg
1.5 kg1)
3 kg
Sıkma
Suda Bekletme
Ön yıkama
Ekstra Durulama
Sıkma
Suda Bekletme
Ön yıkama
Süper Hızlı
Yıkama
Ekstra Durulama
Sıkma
Suda Bekletme
Ekstra Durulama
Deterjan
Bölmesi
Ana Yıkama
Durulama
Maks. 900
dev./
dak.'da son
sıkma
Mevcut
Seçenekler
Program
Açıklama
SENTET K
60°-40°-30°(So uk)
Sentetik veya karı ık
kuma lar: iç çama ırı, renkli giysiler, çekmez gömlekler, bluzlar.
Maks. Çama ır Miktarı
Az. Çama ır Miktarı1)
Çama ır
türü
40
Program/
Sıcaklık
TÜRKÇE
2)
2)
2)
«Saf yün, çekmez,
makinede yıkanabiYÜNLÜLERlir» ve «elde yıkama»
ELDE YIKAMA etiketli yünlü giysiler
30°ve narin kuma lar
(So uk)
için özel program.
Ana Yıkama
Durulama
Maks. 900
dev./
dak.'da son
sıkma
Bu program ile elde
yıkanmı olan pamuklu giysilerin durulanması ve sıkılması mümkündür. Cihaz
durulama i lemlerini
uyguladıktan sonra
uzun bir son sıkma
i lemi uygulanır. Sıkma hızı azaltılabilir.
Durulama
Maks. 1200
dev./
dak.'da son
sıkma
DURULAMALAR
BO ALTMA
SIKMA
Suda Bekletme seçe- Su bo altne i seçili olan prog- ma
ramlarda son durulama suyunu bo altmak için.
Elde yıkanan giysiler
için ve Suda Bekletme seçene i seçili
olan programlardan
sonra uygulanabilen
ayrı sıkma i lemi. Sıkılacak olan çamaırlara uygun hale
getirmek üzere ilgili
tu a basarak sıkma
hızını seçebilirsiniz.
2 kg
6 kg
Deterjan
Bölmesi
Mevcut
Seçenekler
Maks. Çama ır Miktarı
Az. Çama ır Miktarı1)
Program
Açıklama
41
Çama ır
türü
Program/
Sıcaklık
TÜRKÇE
Sıkma
Suda Bekletme
Sıkma
Suda Bekletme
Ekstra Durulama
6 kg
Maks. 1200
dev./
dak.'da son
sıkma
Sıkma
6 kg
1) SÜPER HIZLI YIKAMA seçene ini seçerseniz, maksimum çama ır miktarını, belirtildi i ekilde azaltmanızı öneririz.
(Az. çama ır miktarı = azaltılmı çama ır miktarı). Tam yükleme mümkün olmakla birlikte, temizleme sonuçlarında
kötüle me olabilir.
2) Sıvı deterjan kullanılıyorsa, ÖN YIKAMA a aması bulunmayan bir program seçilmelidir.
TÜRKÇE
42
3) Enerji Etiketi tüketim de erleri için STANDART PROGRAMLAR. 1061/2010 sayılı düzenleme uyarınca, bu
programlar "standart 60° C pamuklu programı" ve "standart 40° C pamuklu programı" olarak belirlenmi tir. Bu
programlar, normal ekilde kirlenmi pamuklu çama ırların temizlenmesi için karma enerji ve su tüketimi yönünden
en verimli olanlarıdır.
yi yıkama sonuçları almak ve enerji tüketimini azaltmak için bu programı ayarlayın. Yıkama programının süresi
uzatılır.
Yıkama a amasındaki su sıcaklık seviyesi, seçilen program için belirtilen sıcaklıktan farklı olabilir.
4) yi yıkama sonuçları alabilmek için dü ük sıcaklı a uygun deterjan kullandı ınızdan emin olun.
Tüketim de erleri
Bu tablodaki veriler yakla ık de erlerdir. Farklı nedenler verileri de i tirebilir: çama ırın miktarı ve türü, su ve ortam sıcaklı ı.
Programlar
Çamaır
miktarı
(kg)
Enerji tüketimi (kWs)
Su tüketimi (litre)
Yakla ık
program süresi (dakika)
Kalan nem
(%)1)
Pamuklular
60°C
6
1.35
59
150
53
Pamuklular
40°C
6
0.85
59
140
53
Sentetikler
40°C
3
0.55
42
90
35
Narin Çama ırlar 40°C
3
0.55
57
65
35
Yünlü/Elde yıkama 30°C
2
0.25
55
60
30
Standart pamuklu programları
Standart 60°C
pamuklu
6
1.03
46
159
53
Standart 60°C
pamuklu
3
0.77
38
135
53
Standart 40°C
pamuklu
3
0.64
38
129
53
1) Sıkma a amasının sonunda.
Kapalı Modu (W)
Açık Bırakma Modu (W)
0.10
0.98
Yukarıdaki tablolarda yer alan bilgiler AB Düzenlemelerinin 1015/2010 ilgili yönergelerine 2009/125/EC uygundur.
TÜRKÇE
43
Bakım ve temizlik
Uyarı Temizlik ya da bakım çalı maları
yapmadan önce cihazı kapatınız.
Koruyucu Yıkama
Dü ük sıcaklıktaki yıkama i lemlerinin kullanımı, tambur içinde kalıntıların olu masına
neden olabilir.
Düzenli aralıklarla bir koruyucu yıkama i lemi uygulanmasını öneririz.
Bir koruyucu yıkama i lemi için:
• Tamburda çama ır olmamalıdır.
• En sıcak pamuklu yıkama programını seçiniz.
• Biyolojik özellikleri olan bir toz deterjandan normal ölçekte kullanınız.
3
Sert bir fırça kullanarak tüm deterjan
kalıntılarını temizleyiniz ve uzakla tırınız.
4
Birikmi toz kalıntılarını temizlemek
için deterjan çekmecesinin çıkartılan
bölümlerini muslu un altında yıkayınız.
5
Yine fırçayı kullanarak çekmece gözünü temizleyiniz ve
tüm üst ve alt bölümlerinin iyice temizlendi inden
emin olunuz.
Deterjan çekmecesini ve gözünü temizledikten sonra
yerine takınız ve her
türlü kalıntının temizlenmesi için tambura çama ır koymadan bir durulama programını çalı tırınız.
Deterjan çekmecesinin ve çekmece
gözünün temizlenmesi
1
2
Çekmeceyi çıkartmak için dili a a ı
do ru bastırınız ve
dı arı çekiniz.
Temizli i rahat
yapmak için katkı
maddesi bölmesinin
üst tarafını da çıkartınız.
Pompanın temizlenmesi
A a ıdaki i lemleri yapınız:
TÜRKÇE
1
A B
2
3
4
44
Dökülen sıvıları toplamak için pompanın (A) yakınına bir
kap koyunuz.
Acil durum tahliye
hortumunu (B) çekiniz, bir kabın içine
koyunuz ve kapa ını çıkartınız.
Bo alan su bitti inde pompa kapa ını
(A) söküp çıkartınız.
Pompayı çıkarırken
dökülen suyu silmek
için daima yakınınızda bir bez bulundurunuz.
Pompa pervanesini
döndürerek sıkı mı
bir nesne varsa çıkartınız.
5
Bir kalem kullanarak pompa muhafazasının arkasındaki
pompa diskinin dönebildi ini kontrol
ediniz. (Pompa diskinin takılarak dönmesi normaldir.)
Pompa diski döndürülemiyorsa, lütfen
Yetkili Servis ile görü ünüz.
6
Acil durum tahliye
hortumunun kapa ını geri takınız
ve arka kısmını yuvasına yerle tiriniz.
Pompayı tam olarak sıkınız.
Su giri filtrelerinin temizlenmesi
Cihazın su dolması uzun sürüyorsa ya da su
dolmuyorsa, ba lama dü mesi göstergesi
ı ı ı kırmızı yanıp söner. Su giri filtrelerinin
tıkalı olup olmadı ını kontrol ediniz (daha
fazla bilgi için "Servisi aramadan önce..."
bölümüne bakınız).
A a ıdaki i lemleri yapınız:
1
• Su muslu unu kapatınız.
• Hortumu musluktan çıkartınız.
• Hortumun içerisindeki filtreyi sert
bir fırça ile temizleyiniz.
• Giri hortumunu
tekrar muslu a sıkıca takınız.
TÜRKÇE
45
• Su giri hortumunu geri takınız ve acil durum tahliye hortumunu kapa ını geri takıp yuvasına yerle tiriniz.
• Cihazı tekrar çalı tırmak istedi inizde, ortam sıcaklı ının 0°C'nin üzerinde oldu undan emin olunuz.
2
• Hortumu cihazdan gev eterek çıkartınız. Su dökülebilece inden, yakınınızda
bir silme bezi bulundurunuz.
• Valfın içindeki filtreyi, sert bir fırçayla
veya bir bez parçasıyla temizleyiniz.
3
35°
45°
• Cihazın arkasındaki hortumu,
montaja uygun
olarak sola veya
sa a döndürerek
takınız. Su kaça ı
olmaması için kilit
somununu do ru
bir ekilde takınız.
• Su muslu unu
açınız.
Donma tehlikesi
Cihaz 0°C'nin altındaki sıcaklıklara maruz
kalırsa, belirli önlemlerin alınması gerekir.
• Su muslu unu kapatınız.
• Giri hortumunu çıkartınız.
• Acil durum tahliye hortumunun ve giri
hortumunun ucunu yere koydu unuz bir
kabın içine yerle tiriniz ve suyun bo almasını sa layınız.
Önemli Acil durum bo altma hortumunu
kullanarak suyu her bo alttı ınızda,
deterjan çekmecesinin ana yıkama
bölmesine 2 litre su koymanız ve sonra
bo altma programını ba latmanız gerekir.
Bu durum, deterjanın bir kısmının bir sonraki
yıkamada kullanılmadan kalmasını önleyen
EKO VALF aygıtını aktive edecektir.
Acil durum bo altması
E er su tahliye olmuyorsa, cihazı bo altmak
için a a ıdaki prosedürü uygulayınız:
• Cihazın fi ini prizden çekiniz;
• su muslu unu kapatınız;
• gerekirse, su so uyana kadar bekleyiniz;
• pompanın kapa ını açınız;
• yere bir kap koyunuz ve acil durum tahliye hortumunun ucunu kabın içine yerle tiriniz. Kapa ını çıkartınız. Su, yer çekimi
gücüyle kaba bo almalıdır. Kap doldu u
zaman, hortumun kapa ını geri takınız.
Kabı bo altınız. Suyun akması durana kadar prosedürü tekrarlayınız;
• gerekirse pompayı yukarıda anlatıldı ı
gibi temizleyiniz;
• acil durum tahliye hortumunu kapa ını
taktıktan sonra yuvasına yerle tiriniz;
• pompa kapa ını geri takınız ve kapa ını
kapatınız.
Sorun giderme
Cihaz çalı mıyor veya çalı ırken bir anda
duruyor. Cihazın çalı madı ını belirtmek
üzere 4 tu unun kırmızı gösterge ı ı ı yanıp
sönebilir.
Yetkili servisinizi aramadan önce lütfen
a a ıdaki kontrol listesini uygulayınız.
TÜRKÇE
Sorun
Cihaz çalı mıyor:
46
Olası neden
Çözüm
Kapak kapatılmamı tır (4 tu unun
kırmızı gösterge ı ı ı yanıp söner).
Kapa ı sıkıca kapatın.
Cihazın fi i prize tam olarak takılmamı tır.
Fi i prize takın.
Prizde güç yok.
Lütfen evinizin elektrik tesisatını
kontrol edin.
Ana sigorta atmı tır.
Sigortayı de i tirin.
Program seçme dü mesi do ru ko- Lütfen program seçme dü mesini
çevirin ve 4 tu una tekrar basın.
numlandırılmamı tır ve 4 tu una
basılmamı tır.
Gecikmeli ba latma fonksiyonu seçilmi tir.
Çama ırlar hemen yıkanacaksa,
gecikmeli ba latmayı iptal edin.
Musluk kapalıdır (4 tu unun kırmızı
gösterge ı ı ı yanıp söner).
Su muslu unu açın.
Giri hortumu ezilmi ya da katlan- Giri hortumunun ba lantısını konmı tır (4 tu unun kırmızı gösterge
trol edin.
ı ı ı yanıp söner).
Cihaz su almıyor:
Giri hortumundaki filtre veya giri
valfı filtresi tıkanmı tır (4 tu unun
kırmızı gösterge ı ı ı yanıp söner).
Su giri filtrelerini temizleyin. (Daha
detaylı bilgi için "Su giri filtrelerinin temizlenmesi" bölümüne bakın).
Kapak düzgün kapatılmamı tır (4
Kapa ı sıkıca kapatın.
tu unun kırmızı gösterge ı ı ı yanıp
söner).
Tahliye hortumu ezilmi ya da katlanmı tır (4 tu unun kırmızı gösterge ı ı ı yanıp söner).
Cihaz bo almıyor:
Tahliye hortumunun ba lantısını
kontrol edin.
Bo altma filtresi tıkanmı tır (4 tu u- Tahliye filtresini temizleyin.
nun kırmızı gösterge tu u yanıp söner).
Tamburda su bırakarak sona eren
ya da tüm sıkma a amalarını atlayan bir program veya seçenek seçilmi tir.
Bo altma veya sıkma programını
seçin.
TÜRKÇE
47
Sorun
Olası neden
Cihaz sıkma
a aması geç
ba lıyor ya da
ba lamıyor:
Çama ırlar tambur içinde e it
Çama ırları kendiniz yeniden
oranda da ılmadı ından, elektro- da ıtın ya da daha fazla çama ır
nik dengesizlik tespit aygıtı devre- koyup sıkma programını seçin.
ye girmi tir. Tamburun ters yönde
dönme hareketiyle çama ırlar yeniden da ıtılır. Bu durum, dengesizlik ortadan kalkıncaya kadar
birkaç defa daha meydana gelebilir ve normal sıkma i lemi devam
eder. 10 dakika sonra, çama ırlar
tamburda hala e it oranda da ılmamı sa, cihaz sıkma i lemini yapmayacaktır.
Çok fazla deterjan veya uygun olmayan (çok fazla köpük olu umuna neden olan) deterjan kullanılmı tır.
Zeminde su
var:
Kapak açılmıyor:
Cihaz normal
olmayan sesler
çıkarıyor
Çözüm
Deterjan miktarını azaltın veya
ba ka bir deterjan kullanın.
Giri hortumu ba lantılarından bi- Su giri hortumunun ba lantısını
rinde kaçak olup olmadı ını konkontrol edin.
trol edin. Hortumun içinden su geçti i için bunu anlamak her zaman
kolay de ildir; nemli olup olmadı ına bakın.
Tahliye ya da giri hortumu hasar
görmü tür.
Yenisiyle de i tirin (Yetkili Servis'e
do ru yedek parça numarasını sorun).
Temizlik i lemlerinden sonra, acil
durum bo altma hortumu üzerindeki kapak yerle tirilmemi tir veya
filtre uygun ekilde sıkılmamı tır.
Kapa ı acil durum bo altma hortumuna tekrar takın veya filtreyi tam
olarak yerine oturtun.
Program hala çalı maktadır.
Yıkama programının sona ermesini
bekleyin.
Elektronik kapak kilidi henüz açılmamı tır.
Kapa ı açmadan önce birkaç dakika bekleyin.
Tamburda su var.
Suyu bo altmak için bo altma veya
sıkma programını seçin.
Nakliye cıvataları ve ambalaj malzemeleri çıkarılmamı tır.
Cihazın montajının do ru bir ekilde yapıldı ından emin olun.
Destek ayakları ayarlanmamı tır
Cihazın düzlemselli ini kontrol
edin.
TÜRKÇE
Sorun
48
Olası neden
Çözüm
Tahliye pompası tıkalı olabilir.
Tahliye pompasını kontrol edin.
(Detaylı bilgi için "Pompanın temizlenmesi" bölümüne bakın).
Çok az veya uygun olmayan deterjan kullanılmı tır.
Deterjan miktarını artırın veya ba ka bir deterjan kullanın.
natçı lekeler, yıkamadan önce i natçı lekeleri çıkarmak için ticari
temizlik ürünlerini kullanın.
Yetersiz yıkama lemden geçirilmemi tir.
sonuçları:
Do ru sıcaklık de eri seçilmemi tir. Do ru sıcaklı ı seçip seçmedi inizi
kontrol edin.
Cihaza a ırı miktarda çama ır konulmu tur.
Kontrolden sonra cihazı açın ve programı
tekrar ba latmak için 4 tu una basın.
Arıza tekrarlanırsa yetkili servisinizi arayınız.
"Yıkama Programları tablosu"na
göre çama ır miktarını azaltın.
Servis merkezi için gerekli bilgiler bilgi etiketinde bulunmaktadır. Bu verileri a a ıya
yazmanızı öneriyoruz:
Model tanımı (MOD): .....................
Ürün numarası (PNC): ...........................
Seri numarası (S.N.): ...............................
Made In Italy
© Inter IKEA Systems B.V. 1999
501.514.59
21552
Teknik bilgiler
Boyutlar
Geni lik (cm)
Yükseklik (cm)
Derinlik (cm)
Su besleme basıncı1)
Minimum
Maksimum
Maks. pamuklu miktarı (kg)
6
Maks. sıkma hızı (dev./dk.)
1200
Enerji sınıfı
A+
Yıkama sınıfı
A
Sıkma sınıfı
B
59,6
82
54 maks.
0,5 bar (0,05 MPa)
8 bar (0,8 MPa)
TÜRKÇE
49
Yıkama sırasında gürültü
(dB(A))
56
Sıkma sırasında gürültü
(db(A))
72
Ortalama yıllık enerji tüketimi (kWs) 2)
192
Ortalama yıllık su tüketimi
(litre)2)
8699
1) Bölgenizdeki basınç daha dü ük veya daha yüksekse, lütfen yetkili servisinizle görü ün.
2) Veriler, test enstitüleri için Standart Pamuklu programları esas alınarak ve yılda 200 yıkama yapıldı ı dü ünülerek
hesaplanmı tır.
Elektrik ba lantısı, voltaj ve toplam güç ile ilgili bilgiler, cihazın kapa ının iç kenarındaki bilgi etiketinde yazılıdır.
Çevreyle ilgili bilgiler
u sembole sahip malzemeler geri
dönü türülebilir . Ambalajı geri dönü üm
için uygun konteynerlere koyun.
Elektrikli ve elektronik cihaz atıklarının geri
dönü ümüne ve çevre ve insan sa lı ının
korunmasına yardımcı olun. Ev atı ı
sembolü bulunan cihazları atmayın. Ürünü
yerel geri dönü üm tesislerinize gönderin ya
da belediye ile irtibata geçin.
AEEE Yönetmeli ine Uygundur.
Ambalaj malzemeleri
u simgeye sahip malzemeler geri dönü tü. Geri dönü türülebilmeleri için,
rülebilir:
ambalaj malzemelerini uygun toplama konteynırlarına atınız.
Cihazın atılması
• Fiziksel yaralanma veya hasar riskini ortadan kaldırmak için:
– Elektrik fi ini prizden çekiniz.
– Elektrik kablosunu kesiniz ve atınız.
– Kapak kilit dilini çıkartıp atınız. Bu sayede çocukların veya küçük hayvanların cihazın içinde kapalı kalması önlenmi olur. Bo ulma riski söz konusudur.
TÜRKÇE
50
IKEA GARANT S
IKEA garantisi ne kadar süre ile
geçerlidir?
Bu garanti, cihazın sadece iki (2) yıl garanti
geçerlili i olan LAGAN ismini ta ımaması
halinde, cihazınızın IKEA'dan orijinal satın
alınma tarihinden itibaren be (5) yıl süre ile
geçerlidir. Satın alma i leminin kanıtı olarak
orijinal satı makbuzu gerekmektedir. Servis
i lemlerinin garanti kapsamında gerçekle tirilmesi halinde, bu durum cihazın veya yeni parçaların garanti süresini uzatmayacaktır.
Hangi cihazlar be (5) yıllık IKEA garantisi
kapsamında de ildir?
LAGAN isimli cihaz serileri ve IKEA 'dan 1
A ustos 2007 tarihinden önce satın alınan
tüm cihazlar.
Servisi kim yapacak?
IKEA servis sa layıcısı, kendi servis i lemleri
veya yetkili servis partner a ı vasıtasıyla
servis sa layacaktır.
Bu garanti neleri kapsar?
Bu garanti, IKEA'dan satın alınma tarihinden itibaren, cihazın hatalı imalatı veya
malzeme hataları nedeniyle meydana gelen arızaları kapsar. Bu garanti sadece eviçi kullanım için geçerlidir. stisnalar, “Bu garantinin altında neler kapsanmaktadır?”
ba lı ının altında belirtilmektedir. Cihazın
özel harcama yapılmaksızın tamir için eri ilebilir durumda olması ve hatanın garanti
kapsamındaki hatalı imalat veya malzeme
hatası ile ilgili olması ko uluyla, garanti süresi içerisinde arızayı gidermek için yapılan
masraflar örn. tamirler, parçalar, i çilik ve
seyahat kapsanacaktır. Bu ko ullarda, AB
yönetmelikleri (No. 99/44/EG) ve ilgili yerel
düzenlemeler geçerlidir. De i tirilen parçalar IKEA'nın malı olacaktır.
IKEA sorunu çözmek için ne yapacak?
IKEA tarafından tayin edilen servis sa layıcısı ürünü kontrol edecek ve kendi takdirine
göre, garanti kapsamında olup olmadı ına
karar verecektir. Garanti kapsamında oldu una kanaat getirilmesi halinde, IKEA
servis sa layıcısı veya yetkili servis partneri
kendi servis i lemleri vasıtasıyla, kendi takdirine göre, özürlü ürünü tamir edecek veya
aynısıyla ya da benzeri bir ürünle de i tirecektir.
Bu garantinin altında neler
kapsanmamaktadır?
• Normal yıpranma ve a ınma.
• Kasti veya ihmale dayalı hasarlar, çalı tırma talimatlarına uyulmaması, yanlı kurulum veya yanlı voltaja ba lantısından
kaynaklanan hasarlar, kimyasal veya
elektro-kimyasal tepkime, pas, korozyon
veya su kayna ında bulunan kireçten
kaynaklanan hasarlar da dahil olmak
üzere fakat bununla sınırlı olmamak kaydıyla su hasarları, anormal çevre ko ullarının neden oldu u hasarlar.
• Aküler ve lambalar dahil olmak üzere
sarf malzemeleri.
• Çizikler ve olası renk de i iklikleri de dahil olmak üzere, cihazın normal kullanımını etkilemeyen, fonksiyonel olmayan parçalar ve dekoratif parçalar.
• Yabancı nesnelerden veya maddelerden
ve temizlik veya filtrelerin kilidinin açılması, tahliye sistemleri veya sabun çekmecelerinden kaynaklanan hasarlar.
• u parçalardaki hasarlar: Seramik cam,
aksesuarlar, çanak çömlek ve çatal-bıçak
sepetleri, besleme ve tahliye boruları,
contalar, lambalar ve lamba kapakları,
ekranlar, dü meler, çerçeveler ve çerçeve
parçaları. Bu hasarların üretim hatalarından kaynaklandı ının ispatlanamaması
halinde.
• Teknisyen vizitesi esnasında herhangi bir
hatanın bulunamadı ı durumlar.
TÜRKÇE
• Tayin edilen servis sa layıcılarımız ve/
veya yetkili bir servis sözle meli partner
tarafından yapılmayan veya orijinal parçaların kullanılmadı ı tamir i lemleri.
• Hatalı veya teknik özelliklere uygun olmayan kurulumun sebep oldu u tamirler.
• Cihazın ev-içi olmayan ortamlarda kullanılması, örn. profesyonel kullanım.
• Nakliyeden kaynaklanan hasarlar. E er
bir mü teri, ürünü evine veya ba ka bir
adrese kendisi naklederse, nakliye esnasında meydana gelecek hasarlardan
IKEA sorumlu de ildir. Ancak ürünü mü terinin teslimat adresine IKEA teslim ediyorsa, nakliye esnasında ürünün görece i
hasarlar bu garanti kapsamında olacaktır.
• IKEA cihazının ilk kurulum ücreti. Ancak
bir IKEA servis sa layıcısı veya yetkili servisi, ürünü bu garanti ko ulları kapsamında tamir eder veya de i tirirse, servis
sa layıcı veya yetkili servis tamir edilen
veya de i tirilen cihazı gerekirse yeniden
kuracaktır / monte edecektir.
Bu kısıtlama, kalifiye uzman tarafından, cihazı AB üye ülkelerinin güvenlik spesifikasyonlarına adapte etmek için orijinal parçalar kullanılarak yapılan hatasız çalı malar
için geçerli de ildir.
Ülke kanunları nasıl i ler
IKEA garantisi size ülkeden ülkeye de i iklik
göstermekle birlikte yerel kanuni taleplerin
tümünü kapsayan veya a an özel kanuni
haklar sa lar.
Geçerlilik alanı
Bir AB üyesi ülkede satın alınan ve ba ka
bir AB üyesi ülkeye götürülen cihazlar için,
servisler yeni ülkedeki garanti ko ulları çerçevesinde sa lanacaktır. Servisleri garanti
çerçevesinde yürütme zorunlulu u sadece
a a ıdaki durumlarda mevcuttur:
• Cihaz, garanti talebinin yapıldı ı ülkenin
teknik spesifikasyonlarına uygunsa ve uygun ekilde kurulmu sa;
• Cihaz, Montaj Talimatlarına ve Kullanıcı
Kılavuzu Güvenlik Bilgilerine uygunsa ve
uygun ekilde kurulmu sa.
51
IKEA cihazları için belirlenmi yetkili
servisler:
A a ıdaki konularda IKEA yetkili servisini
aramaktan lütfen çekinmeyiniz:
1. Bu garanti altında bir talepte bulunmak
için;
2. IKEA cihazının özel IKEA mutfa ına kurulumu hakkında açıklama istemek için.
Servis a a ıdaki konularda açıklama
yapmayacaktır:
– genel IKEA mutfak kurulumu,
– elektrik ba lantısı (e er makine fi siz
ve kablosuz gelmi ise), su ve gaz
ba lantısı, bu i lemler yetkili servis
mühendisi tarafından yapılmalıdır.
3. Kullanıcı kılavuzunun içerikleri ve IKEA
cihazının spesifikasyonları hakkında istenilen açıklamalar.
Size en iyi teknik deste i sa layabilmemiz
için, bizi aramadan önce lütfen bu kitapçı ın Montaj Talimatları ve/veya Kullanıcı
Kılavuzu bölümünü dikkatlice okuyunuz.
Servis ihtiyacı duydu unuzda bize nasıl
ula abilirsiniz
IKEA ileti im noktaları ve ulusal yerel telefon
numaraları için lütfen bu kitapçı ın son sayfasına bakınız.
Önemli Size daha hızlı bir servis
sa layabilmemiz için, bu kılavuzun sonunda
listelenen özel telefon numaralarını
kullanmanızı önermekteyiz. Daima, teknik
deste e ihtiyaç duydu unuz özel cihazın
kitapçı ında listelenen numaralara bakınız.
Bizi aramadan önce, teknik deste e ihtiyaç
duydu unuz cihazın IKEA ürün numarasının
(8 rakamlı kod) yanınızda oldu undan emin
olunuz.
TÜRKÇE
Önemli SATI MAKBUZUNU SAKLAYINIZ!
Bu sizin satın alma i leminizin kanıtıdır ve
garantinin uygulanması için gereklidir. Makbuzda, satın aldı ınız her cihazın IKEA ürün
adı ve numarası da (8 rakamlı kod) belirtilmi olmalıdır.
52
Daha fazla yardım istiyor musunuz?
Cihazınızın satı sonrası hizmetleriyle ilgili
olmayan konulardaki di er sorularınız için,
lütfen size en yakın olan IKEA ma azamızı
arayınız. Bizimle temasa geçmeden önce cihazınızın belgelerini tam olarak okumanızı
öneririz.
53
Country
België
Belgique
Phone number
070 246016
Call Fee
Opening time
Binnenlandse gesprekskosten
8 tot 20 Weekdagen
Tarif des appels nationaux
8 à 20. En semaine
България
00359 888 16 0 8
Такса за повикване от страната
От 9 до 18 ч в работни дни
Česká republika
246 019721
Cena za místní hovor
8 až 20 v pracovních dnech
Danmark
70 15 09 09
Landstakst
man.-fre. 09.00-20.00
lør. 09.00-16.00
1 søndag pr. måned, normalt første
søndag i måneden
Deutschland
+49 1806 33 45 32*
* 0,20 € / Verbindung aus dem Festnetz max. 0,60 € / Verbindung aus
dem Mobilfunknetz
8 bis 20 Werktage
Ελλάδα
211 176 8276
Υπεραστική κλήση
8 έως 20 κατά τις εργάσιμες ημέρες
España
91 1875537
Tarifa de llamadas nacionales
De 8 a 20 en días laborables
France
0170 36 02 05
Tarif des appels nationaux
9 à 21. En semaine
Hrvatska
01 63 23 338
Lokalna cijena poziva
pon. - pet. 8:00 - 16:00
Ireland
0 14845915
National call rate
8 till 20 Weekdays
Ísland
5880503
Innanlandsgjald fyrir síma
9 til 18. Virka daga
Italia
02 00620818
Tariffa applicata
alle chiamate nazionali
dalle 8 alle 20 nei giorni feriali
Κυπρος
22 030 529
Υπεραστική κλήση
8 έως 20 κατά τις εργάσιμες ημέρες
5 230 06 99
Nacionalinių pokalbių tarifai
Pr. - Ketv.: 8:00 - 12:00, 12:45 - 17:00
Pnkt.: 8:00 - 12:00, 12:45 - 15:45
Magyarország
061 998 0549
Belföldi díjszabás
Hétköznap 8 és 10 óra között
Nederland
0900 235 45 32
and/or
0900 BEL IKEA
0,10 EUR/min (niet lokaal)Incl. BTW
ma-vr 9.00-21.00
zat 9.00-20.00
zon 9.00-18.00
Lietuva
Norge
815 22052
Takst innland
8 til 20 ukedager
Österreich
0810 300486
zum Ortstarif
8 bis 20 Werktage
Polska
012 297 8787
Stawka wg taryfy krajowej
Od 8 do 20 w dni robocze
Portugal
211557985
Chamada Nacional
9 às 21. Dias de Semana
*excepto feriados
România
021 211 08 88
Tarif apel naţional
8 - 20 în zilele lucrătoare
Россия
8 495 6662929
Действующие телефонные тарифы
с 8 до 20 по рабочим дням
Время московское
Schweiz
Tarif für Anrufe im Bundesgebiet
8 bis 20 Werktage
Suisse
Tarif des appels nationaux
8 à 20. En semaine
Tariffa applicata
alle chiamate nazionali
dalle 8 alle 20 nei giorni feriali
(02) 3300 2554
Cena vnútroštátneho hovoru
8 až 20 v pracovných dňoch
Suomi
030 6005203
Lankapuhelinverkosta
0,0835€/puhelu+0,032€/min
Matkapuhelinverkosta 0,192€/min
arkipäivisin 8.00-20.00
Sverige
0775 700 500
lokalsamtal (lokal taxa)
mån-fre 8.30-20.00
lör-sön 9.30-18.00
031 5500 324
Svizzera
Slovensko
Türkiye
212 244 0769
Ulusal arama ücreti
Hafta içi saat 09:00’dan 18:00’a kadar
Україна
044 586 2078
Міжміськи дзвінки платні
9 - 21 В робочі дні
United Kingdom
020 3347 0044
National call rate
9 till 21. Weekdays