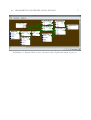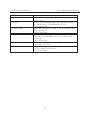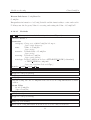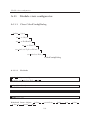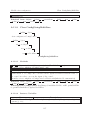
1
Technische Universit¨
at
Mu
¨ nchen
Fakult¨
at fu
¨ r Informatik
M¨oglichkeiten plattformunabh¨angiger Klangsynthese
Interdisziplin¨ares Projekt
Matthias Thar
Sebastian Gutsfeld
2
Technische Universit¨
at
Mu
¨ nchen
Fakult¨
at fu
¨ r Informatik
M¨oglichkeiten plattformunabh¨angiger Klangsynthese
Interdisziplin¨ares Projekt
Matthias Thar
Sebastian Gutsfeld
Themensteller: Christian B¨ohm
Betreuer:
Christian B¨ohm
Abgabetermin: 7. Ma¨rz 2006
4
Inhaltsverzeichnis
Inhaltsverzeichnis
1
1 Einleitung
1.1 Cabel . . . . . . . . . . . . . . . . . . . . . . . .
1.1.1 Zielgruppe und Anspruch . . . . . . . . .
1.1.2 Erweiterbarkeit . . . . . . . . . . . . . . .
1.2 Arbeitsumgebung von Cabel . . . . . . . . . . . .
1.2.1 Was ist Csound5? - Eine kurze Einf¨
uhrung
1.2.2 Python . . . . . . . . . . . . . . . . . . . .
1.3 Neuigkeiten und Support . . . . . . . . . . . . . .
1.4 Kommentare von Cabel Anwendern . . . . . . . .
2 Installation
2.1 Windows Installationsanleitung . . . .
2.1.1 Python . . . . . . . . . . . . . .
2.1.2 Csound5 . . . . . . . . . . . . .
2.1.3 Cabel . . . . . . . . . . . . . .
2.1.4 Setzen von Umgebungsvariablen
2.2 Linux Installationsanleitung . . . . . .
2.2.1 Python . . . . . . . . . . . . . .
2.2.2 Csound5 . . . . . . . . . . . . .
2.2.3 Cabel . . . . . . . . . . . . . .
2.3 Starten von Cabel . . . . . . . . . . . .
.
.
.
.
.
.
.
.
.
.
.
.
.
.
.
.
.
.
.
.
.
.
.
.
.
.
.
.
.
.
.
.
.
.
.
.
.
.
.
.
.
.
.
.
.
.
.
.
.
.
.
.
.
.
.
.
.
.
.
.
.
.
.
.
.
.
.
.
.
.
.
.
.
.
.
.
.
.
.
.
.
.
.
.
.
.
.
.
.
.
.
.
.
.
.
.
.
.
.
.
.
.
.
.
6
6
7
7
8
8
9
9
10
.
.
.
.
.
.
.
.
.
.
.
.
.
.
.
.
.
.
.
.
.
.
.
.
.
.
.
.
.
.
.
.
.
.
.
.
.
.
.
.
.
.
.
.
.
.
.
.
.
.
.
.
.
.
.
.
.
.
.
.
.
.
.
.
.
.
.
.
.
.
.
.
.
.
.
.
.
.
.
.
.
.
.
.
.
.
.
.
.
.
.
.
.
.
.
.
.
.
.
.
.
.
.
.
.
.
.
.
.
.
.
.
.
.
.
.
.
.
.
.
.
.
.
.
.
.
.
.
.
.
.
.
.
.
.
.
.
.
.
.
.
.
.
.
.
.
.
.
.
.
.
.
.
.
.
.
.
.
.
.
.
.
.
.
.
.
.
.
.
.
.
.
.
.
.
.
.
.
.
.
11
11
11
12
12
13
13
13
14
14
14
3 Einstellungen im Options Menu
¨
3.1 Ein- und Ausblenden des unteren Fensters
3.2 Aktualisieren der Liste von Cabel Modulen
3.3 Cabel Konfigurator . . . . . . . . . . . . .
3.3.1 Csound Einstellungen . . . . . . . .
3.3.2 Anpassen der Benutzeroberfl¨ache .
3.3.3 Verzeichnisse . . . . . . . . . . . .
.
.
.
.
.
.
.
.
.
.
.
.
.
.
.
.
.
.
.
.
.
.
.
.
.
.
.
.
.
.
.
.
.
.
.
.
.
.
.
.
.
.
.
.
.
.
.
.
.
.
.
.
.
.
.
.
.
.
.
.
.
.
.
.
.
.
.
.
.
.
.
.
.
.
.
.
.
.
.
.
.
.
.
.
.
.
.
.
.
.
.
.
.
.
.
.
.
.
.
.
.
.
15
15
16
16
16
20
22
4 Benutzeroberfl¨
ache
4.1 Men¨
u. . . . . . . . . . . . . . . . . . . . . . . . . . . . . . . . . . . . . .
25
25
1
.
.
.
.
.
.
.
.
.
.
2
INHALTSVERZEICHNIS
4.2
4.3
4.1.1 File . . . . . .
4.1.2 Modules . . .
4.1.3 Options . . .
Arbeitsplatz . . . . .
4.2.1 Module . . .
4.2.2 Instrumente .
Statusleiste . . . . .
4.3.1 Zoomfaktor .
4.3.2 Autoplay . . .
4.3.3 Play und Stop
. . . .
. . . .
. . . .
. . . .
. . . .
. . . .
. . . .
. . . .
. . . .
Knopf
5 Module
5.1 Amps Mixers . . . . .
5.1.1 Amp . . . . . .
5.1.2 Mixer2 . . . . .
5.2 Control . . . . . . . .
5.2.1 MidiCtrlIn . . .
5.2.2 MidiNoteIn . .
5.2.3 NoteQuantizer .
5.2.4 SlewLimiter . .
5.3 Effects . . . . . . . . .
5.3.1 Delay . . . . .
5.4 Filters . . . . . . . . .
5.4.1 ButterHp . . .
5.4.2 MoogVcf . . . .
5.4.3 MoogVcf2 . . .
5.5 Input Output . . . . .
5.5.1 PcmMonoIn . .
5.5.2 PcmMonoOut .
5.5.3 PcmStereoIn . .
5.5.4 PcmStereoOut .
5.6 Maths . . . . . . . . .
5.6.1 AudioAdd . . .
5.6.2 AudioMultiply
5.6.3 ControlAdd . .
5.6.4 ControlLimit .
5.6.5 ControlMultiply
5.6.6 Midi2Frq . . . .
5.7 Modulators . . . . . .
5.7.1 AdsrLinMidi . .
5.7.2 AdsrLinTrigger
5.7.3 EnvFollower . .
5.7.4 PulseLfo . . . .
5.7.5 RampLfo . . .
.
.
.
.
.
.
.
.
.
.
.
.
.
.
.
.
.
.
.
.
.
.
.
.
.
.
.
.
.
.
.
.
.
.
.
.
.
.
.
.
.
.
.
.
.
.
.
.
.
.
.
.
.
.
.
.
.
.
.
.
.
.
.
.
.
.
.
.
.
.
.
.
.
.
.
.
.
.
.
.
.
.
.
.
.
.
.
.
.
.
.
.
.
.
.
.
.
.
.
.
.
.
.
.
.
.
.
.
.
.
.
.
.
.
.
.
.
.
.
.
.
.
.
.
.
.
.
.
.
.
.
.
.
.
.
.
.
.
.
.
.
.
.
.
.
.
.
.
.
.
.
.
.
.
.
.
.
.
.
.
.
.
.
.
.
.
.
.
.
.
.
.
.
.
.
.
.
.
.
.
.
.
.
.
.
.
.
.
.
.
.
.
.
.
.
.
.
.
.
.
.
.
.
.
.
.
.
.
.
.
.
.
.
.
.
.
.
.
.
.
.
.
.
.
.
.
.
.
.
.
.
.
.
.
.
.
.
.
.
.
.
.
.
.
.
.
.
.
.
.
.
.
.
.
.
.
.
.
.
.
.
.
.
.
.
.
.
.
.
.
.
.
.
.
.
.
.
.
.
.
.
.
.
.
.
.
.
.
.
.
.
.
.
.
.
.
.
.
.
.
.
.
.
.
.
.
.
.
.
.
.
.
.
.
.
.
.
.
.
.
.
.
.
.
.
.
.
.
.
.
.
.
.
.
.
.
.
.
.
.
.
.
.
.
.
.
25
26
26
27
27
29
30
30
30
30
.
.
.
.
.
.
.
.
.
.
.
.
.
.
.
.
.
.
.
.
.
.
.
.
.
.
.
.
.
.
.
.
.
.
.
.
.
.
.
.
.
.
.
.
.
.
.
.
.
.
.
.
.
.
.
.
.
.
.
.
.
.
.
.
.
.
.
.
.
.
.
.
.
.
.
.
.
.
.
.
.
.
.
.
.
.
.
.
.
.
.
.
.
.
.
.
.
.
.
.
.
.
.
.
.
.
.
.
.
.
.
.
.
.
.
.
.
.
.
.
.
.
.
.
.
.
.
.
.
.
.
.
.
.
.
.
.
.
.
.
.
.
.
.
.
.
.
.
.
.
.
.
.
.
.
.
.
.
.
.
.
.
.
.
.
.
.
.
.
.
.
.
.
.
.
.
.
.
.
.
.
.
.
.
.
.
.
.
.
.
.
.
.
.
.
.
.
.
.
.
.
.
.
.
.
.
.
.
.
.
.
.
.
.
.
.
.
.
.
.
.
.
.
.
.
.
.
.
.
.
.
.
.
.
.
.
.
.
.
.
.
.
.
.
.
.
.
.
.
.
.
.
.
.
.
.
.
.
.
.
.
.
.
.
.
.
.
.
.
.
.
.
.
.
.
.
.
.
.
.
.
.
.
.
.
.
.
.
.
.
.
.
.
.
.
.
.
.
.
.
.
.
.
.
.
.
.
.
.
.
.
.
.
.
.
.
.
.
.
.
.
.
.
.
.
.
.
.
.
.
.
.
.
.
.
.
.
.
.
.
.
.
.
.
.
.
.
.
.
.
.
.
.
.
.
.
.
.
.
.
.
.
.
.
.
.
.
.
.
.
.
.
.
.
.
.
.
.
.
.
.
.
.
.
.
.
.
.
.
.
.
.
.
.
.
.
.
.
.
.
.
.
.
.
.
.
.
.
.
.
.
.
.
.
.
.
.
.
.
.
.
.
.
.
.
.
.
.
.
.
.
.
.
.
.
.
.
.
.
.
.
.
.
.
.
.
.
.
.
.
.
.
.
.
.
.
.
.
.
.
.
.
.
.
.
.
.
.
.
.
.
.
.
.
.
.
.
.
.
.
.
.
.
.
.
.
.
.
.
.
.
.
.
.
.
.
.
.
.
.
.
.
.
.
.
.
.
.
.
.
.
.
.
.
.
.
.
.
.
.
.
.
.
.
.
.
.
.
.
.
.
.
.
.
.
.
.
.
.
.
.
.
.
.
.
.
.
.
.
.
.
.
.
.
.
.
.
.
.
.
.
.
.
.
.
.
.
.
.
.
.
.
.
.
.
.
.
.
.
.
.
.
.
.
.
.
.
.
.
.
.
.
.
.
.
.
.
.
.
.
.
.
.
.
.
.
.
.
.
.
.
.
.
.
.
.
.
.
.
.
.
.
.
.
.
.
.
.
.
.
.
.
.
.
.
.
.
.
.
.
.
.
.
.
.
.
.
.
.
.
.
.
.
.
.
.
.
.
.
.
.
.
.
.
.
.
.
.
.
.
.
.
.
.
.
.
.
.
.
.
.
.
.
.
.
.
.
.
.
.
.
.
.
.
.
.
.
.
.
.
.
.
.
.
.
.
.
.
.
.
.
.
.
.
.
.
.
.
.
.
.
.
.
.
.
.
.
.
.
.
.
.
.
.
.
.
.
.
.
.
.
.
.
.
.
.
.
.
.
.
.
.
.
.
.
.
.
.
.
.
.
.
.
.
.
.
.
.
.
.
.
.
.
.
.
.
.
.
.
.
.
.
.
.
.
.
.
.
.
.
.
.
.
.
.
.
.
.
.
.
32
32
32
32
33
33
33
34
35
35
35
36
36
36
37
37
37
37
38
38
38
38
39
39
39
40
40
40
40
41
41
41
42
3
INHALTSVERZEICHNIS
.
.
.
.
.
.
.
.
.
.
.
.
.
.
.
.
.
.
.
.
.
.
.
.
.
.
.
.
.
.
.
.
.
.
.
.
.
.
.
.
.
.
.
.
.
.
.
.
.
.
.
.
.
.
.
.
.
.
.
.
.
.
.
.
.
.
.
.
.
.
.
.
.
.
.
.
.
.
.
.
.
.
.
.
.
.
.
.
.
.
.
.
.
.
.
.
.
.
.
.
.
.
.
.
.
.
.
.
.
.
.
.
.
.
.
.
.
.
.
.
.
.
.
.
.
.
.
.
.
.
.
.
.
.
.
.
.
.
.
.
.
.
.
.
42
43
43
43
44
44
44
45
45
45
46
46
6 Beispiele
6.1 Einfacher subtraktiver Synthesizer . . . . . . . . . . .
6.1.1 Der S¨agezahn Oszillator . . . . . . . . . . . .
6.1.2 MIDIfizierung des Oszillators . . . . . . . . .
6.1.3 Lautst¨arkevariation durch eine H¨
ullkurve . . .
6.1.4 Subtraktive Klangsynthese . . . . . . . . . . .
6.1.5 Erweiterung unseres subtraktiven Synthesizers
6.2 Verwendung des Sequencers . . . . . . . . . . . . . .
6.3 Frequenzmodulation . . . . . . . . . . . . . . . . . .
6.4 Verarbeitung externer Audio Signale . . . . . . . . .
.
.
.
.
.
.
.
.
.
.
.
.
.
.
.
.
.
.
.
.
.
.
.
.
.
.
.
.
.
.
.
.
.
.
.
.
.
.
.
.
.
.
.
.
.
.
.
.
.
.
.
.
.
.
.
.
.
.
.
.
.
.
.
.
.
.
.
.
.
.
.
.
.
.
.
.
.
.
.
.
.
.
.
.
.
.
.
.
.
.
.
.
.
.
.
.
.
.
.
47
47
47
49
49
50
51
51
53
54
.
.
.
.
.
.
.
.
.
56
56
57
58
59
59
60
60
60
61
8 Automatisierung von Cabel
8.1 Generierung eines Instruments . . . . . . . . . . . . . . . . . . . . . . . .
8.2 Vereinfachung sich wiederholender Arbeitsschritte . . . . . . . . . . . . .
8.3 Einbindung externer Python Skripte . . . . . . . . . . . . . . . . . . . .
62
62
63
63
A Cabel API
A.1 Module model.connection . . . . . . . . . . . . . . . . . . . . . . . . . .
A.1.1 Class Connection . . . . . . . . . . . . . . . . . . . . . . . . . . .
A.2 Module model.csound . . . . . . . . . . . . . . . . . . . . . . . . . . . . .
65
66
66
67
5.8
5.9
5.7.6 SampleAndHold
5.7.7 SawLfo . . . . .
5.7.8 SineLfo . . . .
5.7.9 SquareLfo . . .
5.7.10 TriangleLfo . .
Sequencing . . . . . . .
5.8.1 Sequencer . . .
Sound Sources . . . . .
5.9.1 Noise . . . . . .
5.9.2 SawVco . . . .
5.9.3 SineVco . . . .
5.9.4 SquareVco . . .
.
.
.
.
.
.
.
.
.
.
.
.
.
.
.
.
.
.
.
.
.
.
.
.
.
.
.
.
.
.
.
.
.
.
.
.
.
.
.
.
.
.
.
.
.
.
.
.
.
.
.
.
.
.
.
.
.
.
.
.
.
.
.
.
.
.
.
.
.
.
.
.
.
.
.
.
.
.
.
.
.
.
.
.
.
.
.
.
.
.
.
.
.
.
.
.
.
.
.
.
.
.
.
.
.
.
.
.
.
.
.
.
.
.
.
.
.
.
.
.
.
.
.
.
.
.
.
.
.
.
.
.
.
.
.
.
.
.
.
.
.
.
.
.
7 Schreiben eigener Module
7.1 Kurze Einf¨
uhrung zu XML . . . . . . . . . .
7.2 Aufbau der Cabel Modul XML Dateien . . .
7.2.1 Der Modul Knoten . . . . . . . . . .
7.2.2 Eingabe Variablen . . . . . . . . . .
7.2.3 Ausgabe Variablen . . . . . . . . . .
7.2.4 Globale Variablen . . . . . . . . . . .
7.2.5 Opcode Knoten . . . . . . . . . . . .
7.3 Einbinden der XML Modul Dateien in Cabel
7.3.1 Skinning von Cabel Modulen . . . .
.
.
.
.
.
.
.
.
.
.
.
.
.
.
.
.
.
.
.
.
.
.
.
.
.
.
.
.
.
.
.
.
.
.
.
.
.
.
.
.
.
.
.
.
.
.
.
.
.
.
.
.
.
.
.
.
.
.
.
.
.
.
.
.
.
.
.
.
.
.
.
.
.
.
.
.
.
.
.
.
.
.
.
.
.
.
.
.
.
.
.
.
.
.
.
.
.
.
.
.
.
.
.
.
.
.
.
.
.
.
.
.
.
.
.
.
.
.
.
.
.
.
.
.
.
.
.
.
.
.
.
.
.
.
.
.
.
.
.
.
.
.
.
.
.
.
.
.
.
.
.
.
.
.
.
.
.
.
.
.
.
.
.
.
.
.
.
.
.
.
.
.
.
.
.
.
.
.
.
.
.
.
.
4
INHALTSVERZEICHNIS
A.2.1 Class CsoundGenerator . . . . . .
A.3 Module model.instrument . . . . . . . .
A.3.1 Class Instrument . . . . . . . . .
A.4 Module model.module . . . . . . . . . .
A.4.1 Class Module . . . . . . . . . . .
A.5 Module model.observer . . . . . . . . . .
A.5.1 Class Observable . . . . . . . . .
A.5.2 Class Observer . . . . . . . . . .
A.6 Module model.var . . . . . . . . . . . . .
A.6.1 Class InVar . . . . . . . . . . . .
A.6.2 Class OutVar . . . . . . . . . . .
A.6.3 Class Var . . . . . . . . . . . . .
A.6.4 Class VarValueOutOfRangeError
A.7 Module model.workspace . . . . . . . . .
A.7.1 Class ConnectionError . . . . . .
A.7.2 Class Workspace . . . . . . . . .
A.8 Module model.xmlGenerator . . . . . . .
A.8.1 Class XmlGenerator . . . . . . .
A.9 Module model.xmlReader . . . . . . . .
A.9.1 Class ModuleDefinitionError . . .
A.9.2 Class ModuleNotFoundError . . .
A.9.3 Class XmlModuleReader . . . . .
A.9.4 Class XmlWorkspaceReader . . .
A.10 Module tools.config . . . . . . . . . . . .
A.10.1 Class Category . . . . . . . . . .
A.10.2 Class Config . . . . . . . . . . . .
A.10.3 Class ConfigEnumVar . . . . . .
A.10.4 Class ConfigVar . . . . . . . . . .
A.10.5 Class Csound . . . . . . . . . . .
A.10.6 Class Directories . . . . . . . . .
A.10.7 Class ListVar . . . . . . . . . . .
A.10.8 Class Setting . . . . . . . . . . .
A.10.9 Class View . . . . . . . . . . . . .
A.11 Module view.configurator . . . . . . . . .
A.11.1 Class CabelConfigDialog . . . . .
A.11.2 Class ConfigBooleanCheck . . . .
A.11.3 Class ConfigColourSelect . . . . .
A.11.4 Class ConfigControl . . . . . . . .
A.11.5 Class ConfigFloat . . . . . . . . .
A.11.6 Class ConfigInt . . . . . . . . . .
A.11.7 Class ConfigParser . . . . . . . .
A.11.8 Class ConfigStringMultiLine . . .
A.11.9 Class ConfigStringSingleLine . . .
.
.
.
.
.
.
.
.
.
.
.
.
.
.
.
.
.
.
.
.
.
.
.
.
.
.
.
.
.
.
.
.
.
.
.
.
.
.
.
.
.
.
.
.
.
.
.
.
.
.
.
.
.
.
.
.
.
.
.
.
.
.
.
.
.
.
.
.
.
.
.
.
.
.
.
.
.
.
.
.
.
.
.
.
.
.
.
.
.
.
.
.
.
.
.
.
.
.
.
.
.
.
.
.
.
.
.
.
.
.
.
.
.
.
.
.
.
.
.
.
.
.
.
.
.
.
.
.
.
.
.
.
.
.
.
.
.
.
.
.
.
.
.
.
.
.
.
.
.
.
.
.
.
.
.
.
.
.
.
.
.
.
.
.
.
.
.
.
.
.
.
.
.
.
.
.
.
.
.
.
.
.
.
.
.
.
.
.
.
.
.
.
.
.
.
.
.
.
.
.
.
.
.
.
.
.
.
.
.
.
.
.
.
.
.
.
.
.
.
.
.
.
.
.
.
.
.
.
.
.
.
.
.
.
.
.
.
.
.
.
.
.
.
.
.
.
.
.
.
.
.
.
.
.
.
.
.
.
.
.
.
.
.
.
.
.
.
.
.
.
.
.
.
.
.
.
.
.
.
.
.
.
.
.
.
.
.
.
.
.
.
.
.
.
.
.
.
.
.
.
.
.
.
.
.
.
.
.
.
.
.
.
.
.
.
.
.
.
.
.
.
.
.
.
.
.
.
.
.
.
.
.
.
.
.
.
.
.
.
.
.
.
.
.
.
.
.
.
.
.
.
.
.
.
.
.
.
.
.
.
.
.
.
.
.
.
.
.
.
.
.
.
.
.
.
.
.
.
.
.
.
.
.
.
.
.
.
.
.
.
.
.
.
.
.
.
.
.
.
.
.
.
.
.
.
.
.
.
.
.
.
.
.
.
.
.
.
.
.
.
.
.
.
.
.
.
.
.
.
.
.
.
.
.
.
.
.
.
.
.
.
.
.
.
.
.
.
.
.
.
.
.
.
.
.
.
.
.
.
.
.
.
.
.
.
.
.
.
.
.
.
.
.
.
.
.
.
.
.
.
.
.
.
.
.
.
.
.
.
.
.
.
.
.
.
.
.
.
.
.
.
.
.
.
.
.
.
.
.
.
.
.
.
.
.
.
.
.
.
.
.
.
.
.
.
.
.
.
.
.
.
.
.
.
.
.
.
.
.
.
.
.
.
.
.
.
.
.
.
.
.
.
.
.
.
.
.
.
.
.
.
.
.
.
.
.
.
.
.
.
.
.
.
.
.
.
.
.
.
.
.
.
.
.
.
.
.
.
.
.
.
.
.
.
.
.
.
.
.
.
.
.
.
.
.
.
.
.
.
.
.
.
.
.
.
.
.
.
.
.
.
.
.
.
.
.
.
.
.
.
.
.
.
.
.
.
.
.
.
.
.
.
.
.
.
.
.
.
.
.
.
.
.
.
.
.
.
.
.
.
.
.
.
.
.
.
.
.
.
.
.
.
.
.
.
.
.
.
.
.
.
.
.
.
.
.
.
.
.
.
.
.
.
.
.
.
.
.
.
.
.
.
.
.
.
.
.
.
.
.
.
.
.
.
.
.
.
.
.
.
.
.
.
.
.
.
.
.
.
.
.
.
.
.
.
.
.
.
.
.
.
.
.
.
.
.
.
.
.
.
.
.
.
.
.
.
.
.
.
.
.
.
.
.
.
.
.
.
.
.
.
.
.
.
67
69
69
70
70
73
73
74
76
76
77
78
80
81
81
81
87
87
90
90
90
90
92
94
94
97
97
98
100
102
103
104
106
109
109
110
111
112
114
115
116
117
118
5
INHALTSVERZEICHNIS
A.12 Module view.connection . . . . . .
A.12.1 Class Connection . . . . . .
A.12.2 Class ModuleConnection . .
A.13 Module view.controller . . . . . . .
A.13.1 Class CabelController . . .
A.14 Module view.module . . . . . . . .
A.14.1 Class Module . . . . . . . .
A.15 Module view.valueframe . . . . . .
A.15.1 Class CabelSlider . . . . . .
A.15.2 Class CabelValueFrame . . .
A.16 Module view.workspace . . . . . . .
A.16.1 Class CabelBottomWindow
A.16.2 Class CabelFrame . . . . . .
A.16.3 Class CabelIOTextCtrl . . .
A.16.4 Class CabelScrolledWindow
A.16.5 Class CabelSplitterWindow
A.16.6 Class CabelStatusBar . . . .
.
.
.
.
.
.
.
.
.
.
.
.
.
.
.
.
.
.
.
.
.
.
.
.
.
.
.
.
.
.
.
.
.
.
.
.
.
.
.
.
.
.
.
.
.
.
.
.
.
.
.
.
.
.
.
.
.
.
.
.
.
.
.
.
.
.
.
.
.
.
.
.
.
.
.
.
.
.
.
.
.
.
.
.
.
.
.
.
.
.
.
.
.
.
.
.
.
.
.
.
.
.
.
.
.
.
.
.
.
.
.
.
.
.
.
.
.
.
.
.
.
.
.
.
.
.
.
.
.
.
.
.
.
.
.
.
.
.
.
.
.
.
.
.
.
.
.
.
.
.
.
.
.
.
.
.
.
.
.
.
.
.
.
.
.
.
.
.
.
.
.
.
.
.
.
.
.
.
.
.
.
.
.
.
.
.
.
.
.
.
.
.
.
.
.
.
.
.
.
.
.
.
.
.
.
.
.
.
.
.
.
.
.
.
.
.
.
.
.
.
.
.
.
.
.
.
.
.
.
.
.
.
.
.
.
.
.
.
.
.
.
.
.
.
.
.
.
.
.
.
.
.
.
.
.
.
.
.
.
.
.
.
.
.
.
.
.
.
.
.
.
.
.
.
.
.
.
.
.
.
.
.
.
.
.
.
.
.
.
.
.
.
.
.
.
.
.
.
.
.
.
.
.
.
.
.
.
.
.
.
.
.
.
.
.
.
.
.
.
.
.
.
.
.
.
.
.
.
.
.
.
.
.
.
.
.
.
.
.
.
.
.
.
.
.
.
.
.
.
.
.
.
.
.
.
.
.
119
119
121
124
124
130
130
134
134
135
137
137
138
142
144
145
147
B Weiterfu
¨hrende Links zu Csound
149
Literaturverzeichnis
150
Kapitel 1
Einleitung
1.1
Cabel
Cabel ist eine graphische Benutzeroberfl¨ache zum Entwerfen, Erstellen und Spielen
von Csound5-Instrumenten. Wie bei modularen Synthesizern entstehen Cabel/CsoundInstrumente durch das Verbinden von Modulen u
¨ber Patchkabel.
Abbildung 1.1: Analoger, modularer Synthesizer von Serge
Die Module, die Sie in Cabel verwenden, sind in XML1 Dateien definiert und kapseln
1
eXtensible Markup Language, ein Standard zur Erstellung von maschinen- und menschenlesbaren
Dokumenten.
6
1.1. CABEL
7
Csound Anweisungen zu kleinen Blackbox Einheiten, deren Ein- und Ausg¨ange untereinander verbunden werden k¨onnen.
Abbildung 1.2: Verschiedene miteinander verbundene Module in Cabel
1.1.1
Zielgruppe und Anspruch
Der urspr¨
ungliche Anspruch der Entwickler war, ein Werkzeug zu entwerfen, das sowohl
Csound Anf¨anger als auch erfahrene Csounder anspricht und unabh¨angig vom verwendeten Betriebssystem l¨auft. N¨ahere Informationen zu Csound in Kapitel 1.2.1 auf S. 8.
Cabel soll den Csound Einsteigern erm¨oglichen, die Grundlagen dieser wunderbaren Sprache auf m¨oglichst einfache und anschauliche Art und Weise kennenzulernen. Den anspruchsvolleren Anwendern soll Cabel als Werkzeug zum schnellen Testen von Ideen f¨
ur
neue Instrumente und Spielen mit deren Einstellungen anhand einer graphischen Benutzeroberfl¨ache dienen.
1.1.2
Erweiterbarkeit
Dadurch, daß die in Cabel verwendeten Module in XML Dateien definiert sind, in die
Csound Befehle eingebettet werden, ist die Erweiterbarkeit von Cabel nur durch die
M¨oglichkeiten von Csound beschr¨ankt und die sind wie in Abschnitt 1.2.1 kurz beschrieben fast grenzenlos.
8
KAPITEL 1. EINLEITUNG
N¨ahere Informationen zur Erweiterung von Cabel durch eigene Module entnehmen Sie
bitte Kapitel 7 auf S. 56.
1.2
1.2.1
Arbeitsumgebung von Cabel
Was ist Csound5? - Eine kurze Einfu
¨ hrung
Csound ist ein m¨achtiges und vielseitiges Software Synthesizer Programm, mit dem sich
sowohl Instrumente als auch Effekte programmieren lassen.
Es generiert Musik, indem textbasierte, sogenannte Orchester Dateien (*.orc) in Csound
Maschinencode u
¨bersetzt werden und an diesen Maschinencode einzelne Noten Events
geschickt werden.
Der Quelltext in Orchester Dateien beschreibt Csound-Instrumente und ist im wesentlichen in 2 Bl¨ocke, dem Header- und dem Instrument-Block, unterteilt.
Im Header werden die Sample Rate und Control Rate, in der die nachfolgenden Instrumente verarbeitet werden, definiert. Außerdem wird im Header die Anzahl der Ausgabe-Kan¨ale
angegeben.
Im Instrument-Block wird dann durch Csound Befehle, die Opcodes genannt werden, das
Instrument beschrieben. Diese Opcodes lassen sich u
¨ber ihre Ein- und Ausgabe-Variablen
miteinander verkn¨
upfen.
Csound5 liefert eine Menge an Opcodes zum Generieren, Modifizieren, Einlesen und Ausgeben von Signalen. Außerdem gibt es die M¨oglichkeit externe VST2 Effekte und Synthesizer einzubinden, Instrumente durch Skript Sprachen wie Python zu erweitern, etc.
Um die so programmierten Instrumente spielen zu k¨onnen, braucht der Soundprozessor
noch die Information, was er wann und wie spielen soll. Dies legt eine weitere Eingabequelle fest, die Noten Events und dazu geh¨orige Parameter an den Prozessor u
¨bermittelt.
Csound kann dabei folgende Noteneingabequellen verstehen:
• Echtzeit-MIDI3
• MIDI-Dateien
• OSC4 Nachrichten
• Score Dateien (von Csound vorgegebenes Format)
Weiterf¨
uhrende Links zu Csound finden Sie im Anhang B auf S. 149.
2
Erk¨arung zu VST unter http://de.wikipedia.org/wiki/Virtual Studio Technology
Erkl¨arung zu MIDI unter http://de.wikipedia.org/wiki/MIDI
4
Open Sound Control http://www.cnmat.berkeley.edu/OpenSoundControl/
3
1.3. NEUIGKEITEN UND SUPPORT
1.2.2
9
Python
Ein weiterer Aspekt, der Cabel sehr vielseitig einsetzbar und leicht erweiterbar macht,
ist die Programmiersprache Python, in der die Anwendung entwickelt wurde.
Python5 ist eine interpretierte, interaktive, objektorientierte Programmiersprache, die mit
dem Ziel entworfen wurde m¨oglichst einfach und u
¨ bersichtlich zu sein
Da Cabel nicht nur in Python programmiert wurde, sondern auch eine Python Shell
integriert hat (Abbildung 1.3), kann der fortgeschritten Anwender bestimmte Aufgaben
mit Hilfe kleiner Programme automatisieren. Wie man auf die Funktionalit¨at von Cabel
u
¨ber Python zugreifen kann wird in Kapitel 8 auf S. 62 genauer beschrieben.
Abbildung 1.3: Die in Cabel integrierte Python Shell
1.3
Neuigkeiten und Support
Auf der offiziellen Cabel Homepage unter http://cabel.sourceforge.net erhalten Sie
Updates und wichtige Neuigkeiten zu Cabel.
Auf
der
Sourceforge
Projekt
Seite
von
Cabel
unter
http://sourceforge.net/projects/cabel haben Sie, falls Sie Probleme mit Ihrer Cabel Installation haben sollten, Zugriff auf Benutzerforen und die M¨oglichkeit
Fehler zu melden oder Vorschl¨age f¨
ur die Weiterentwicklung von Cabel zu machen.
5
http://www.python.org
10
KAPITEL 1. EINLEITUNG
1.4
Kommentare von Cabel Anwendern
Congratulations! This is already a very neat program in it’s first release.
I am looking at Cabel very much as it is well done.
(Steven Yi - Entwickler der Csound Kompositionsumgebung blue6 )
Great job; well done.
I have played (a little) with Cabel and it seems easy and intuitive, with a nice interface.
It ran straight out of the box on windows, which has a lot to be said of.
(Victor Lazzarini - Leiter des Music Technology Laboratory der National University of
Ireland, Maynooth)
Excellent work! It is truly an amazing idea to have a dataflow version of the Csound
language.
I feel that we are at the dawn of a new age of accessibility with Csound because of tools
such as blue Composition Environment and Cabel modular patching system.
The line between any proprietary implementation and Csound is blurring more every day;
from a UI perspective, namely. Thanks to your contributions!
(David Akbari - Musiker)
it gives me the “tweakiness” of Reaktor or PD with the power of Csound.
(Michael Gogins - Csound Entwickler und Komponist)
I am thrilled to see that the program is written in cross-platform Python and look forward
to having an opportunity to see how well it works on MacOS 9.
Bravo!
(Anthony Kozar - Csound Entwickler und Komponist)
6
http://www.csounds.com/stevenyi/blue/index.html
Kapitel 2
Installation
Cabel basiert auf der Programmiersprache Python. Um Python Programme ausf¨
uhren zu
k¨onnen, ben¨otigt man die darin verwendeten Bibliotheken und einen Python Interpreter,
der das Programm ausf¨
uhrt.
Die graphische Benutzeroberfl¨ache f¨
ur Cabel wurde mit der wxWidgets Implementierung
f¨
ur Python entwickelt. wxWidgets ist ein GUI1 Toolkit, eine Sammlung von Bausteinen
zur Generierung von Benutzeroberfl¨achen.
Um Cabel ausf¨
uhren zu k¨onnen, muß also folgende Software installiert sein:
• Die Programmiersprache Python (http://www.python.org),
• Das GUI Toolkit wxPython (http://www.wxpython.org) und
• Csound5 (http://www.csounds.com).
Auf die Installation dieser f¨
ur ein funktionierendes Cabel essentiellen Programme wird
im Folgenden genauer eingegangen.
2.1
Windows Installationsanleitung
2.1.1
Python
2.1.1.1
Python 2.4
Unter http://www.python.org k¨onnen Sie das Installationsprogramm f¨
ur Python 2.4
(oder h¨oher) herunterladen. Starten Sie den Installer und folgen Sie den Anweisungen.
Hinweis zur ben¨
otigten Version von Python:
1
Graphical User Interface
11
12
KAPITEL 2. INSTALLATION
Um Cabel mit ¨alteren Versionen von Python zu verwenden, muß die Installation von
Csound5 angepaßt werden, da aktuelle Releases von Csound5 f¨
ur Windows mit Python 2.4
u
¨bersetzt wurden.
2.1.1.2
Python fu
¨r Windows Extensions
Um Cabel auch in Echtzeit verwenden zu k¨onnen, wird Csound5 aus Cabel heraus automatisch in einem extra Prozess gestartet. Damit dies in Windows reibungslos funktioniert,
wird eine Erweiterung der Standard Python Bibliotheken, die Python for Windows Extensions, ben¨otigt.
Unter http://sourceforge.net/projects/pywin32 k¨onnen Sie das f¨
ur Ihre Python
Version entsprechende Installationsprogramm f¨
ur die Extensions herunterladen. Starten
Sie den Installer und folgen Sie den Anweisungen.
2.1.1.3
wxPython
Unter http://www.wxpython.org/download.php#binaries k¨onnen Sie das f¨
ur Ihre Python Version entsprechende Installationsprogramm f¨
ur die wxWidgets (Version 2.5.0 oder
h¨oher) herunterladen. Starten Sie den Installer und folgen Sie den Anweisungen.
2.1.2
Csound5
Unter http://sourceforge.net/projects/csound k¨onnen Sie das Installationsprogramm des aktuellen Csound5 Releases f¨
ur Windows herunterladen. Starten Sie den
Installer und folgen Sie den Anweisungen der Installationsroutine.
2.1.3
Cabel
Jetzt fehlt nur noch Cabel.
Unter http://sourceforge.net/projects/cabel kann das aktuelle Cabel Release heruntergeladen werden. Dort findet man ein Zip-Archiv, das alle Cabel Dateien enth¨alt.
Dieses Archiv muß in ein Verzeichnis, wie z.B. C:\Cabel\, entpackt werden.
Hinweis zur Aktualit¨
at des Codes:
Cabel ist Open Source Software und wird weiterhin Ver¨anderungen unterliegen und weiterentwickelt werden. Da nicht jede dieser Ver¨anderungen unmittelbar einen Release zur
Folge haben wird, kann es durchaus interessant sein, sich anstatt des letzten Releases den
aktuellen Stand von Cabel aus dem ebenfalls auf Sourceforge gehosteten CVS zu holen.
2.2. LINUX INSTALLATIONSANLEITUNG
13
F¨
ur n¨ahere Informationen hierzu sei auf die Rubrik C VS auf der Homepage von Cabel
auf sourceforge.net2 verwiesen: http://sourceforge.net/projects/cabel.
2.1.4
Setzen von Umgebungsvariablen
Damit die Programme, die Cabel ben¨otigt, voneinander wissen, m¨
ussen noch die folgenden
Umgebungsvariablen gesetzt werden:
1. Der Umgebungsvariable PYTHONPATH das Unterverzeichnis bin ihres Csound5 Installationsverzeichnisses hinzuf¨
ugen.
Beispiel: Ist Csound5 im Verzeichnis C:\Csound5\ installiert, so muß die Umgebungsvariable PYTHONPATH in seiner durch Srichpunkte unterteilten Liste von Verzeichnissen, den Wert C:\Csound5\bin enthalten.
2. Die Umgebungsvariable PATH enth¨alt ebenfalls eine durch Strichpunkte unterteile
Liste von Verzeichnissen. Dieser Liste sollte noch der Pfad zum Python 2.4 Interpreter (Python.exe) hinzugef¨
ugt werden.
Beispiel: Ist Python 2.4 im Verzeichnis C:\Python24\ installiert, so muß genau
dieser Wert in der Umgebungsvariablen PATH aufgelistet sein.
Setzen von Umgebungsvariablen unter Windows:
Dazu mit der rechten Maustaste auf das Arbeitsplatz- Symbol auf dem Desktop oder im
Explorer gehen und E igenschaften ausw¨ahlen. Dann den Reiter E rweitert ausw¨ahlen und
den Button U mgebungsvariablen... bet¨atigen. Zum Bearbeiten einer vorhandenen Umgebungsvariable diese im Bereich S ystemvariablen ausw¨ahlen und den Button B earbeiten...
bet¨atigen, oder zur Neuanlage auf N eu....
2.2
Linux Installationsanleitung
2.2.1
Python
2.2.1.1
Python 2.4
Falls Sie eine aktuelle Linux Distribution verwenden, sollte Python 2.4 bereits als
fertiges Paket enthalten sein. Ansonsten m¨
ussen Sie die aktuelle Version unter
http://www.python.org herunterladen und der Anleitung zur Installation folgen.
2
siehe Kapitel 1.3, S. 9.
14
KAPITEL 2. INSTALLATION
2.2.1.2
wxPython
wxPython sollte ebenfalls in einer aktuellen Linux Distrubution enthalten sein. Ansonsten m¨
ussen sie wxPython selber kompilieren. Die entsprechenden Quellpakete inklusive Installationsanleitung finden Sie unter
http://www.wxpython.org/download.php#sources
2.2.2
Csound5
Unter http://csound.sourceforge.net kann man ein aktuelles Csound5 herunterladen.
Hier werden sowohl fertig kompilierte Versionen als RPM Paket als auch der Csound5
Quellcode zum Selberkompilieren angeboten. Dabei sei auf die in Csound5 enthaltene
Installationsanleitung verwiesen.
2.2.3
Cabel
Jetzt fehlt nur noch Cabel.
Unter http://sourceforge.net/projects/cabel kann das aktuelle Cabel Release heruntergeladen werden. Dort findet man ein Tar-Gz-Archiv, das alle Cabel Dateien enth¨alt.
Hinweis zur Aktualit¨
at des Codes:
Cabel ist Open Source Software und wird weiterhin Ver¨anderungen unterliegen und weiterentwickelt werden. Da nicht jede dieser Ver¨anderungen unmittelbar einen Release zur
Folge haben wird, kann es durchaus interessant sein, sich anstatt des letzten Releases den
aktuellen Stand von Cabel aus dem ebenfalls auf Sourceforge gehosteten CVS zu holen.
F¨
ur n¨ahere Informationen hierzu sei auf die Rubrik C VS auf der Homepage von Cabel
auf sourceforge.net3 verwiesen: http://sourceforge.net/projects/cabel.
2.3
Starten von Cabel
¨
Nach der Installation kann Cabel gestartet werden. Offnen
sie dazu unter Windows die
MS-DOS Eingabeaufforderung, wechseln in das Verzeichnis Ihrer Cabel Installation (z.B.
mit cd C:\Cabel) und starten Sie Cabel mit dem Befehl python cabel.py.
Standardm¨aßig werden Dateien mit der Endung .py mit Ihrem installierten Python Interpreter verkn¨
upft, sodaß es ausreicht Cabel mit einem Doppelklick auf cabel.py zu starten.
Das Starten von Cabel unter Linux erfolgt analog mit dem Befehl python cabel.py.
3
siehe Kapitel 1.3, S. 9.
Kapitel 3
Einstellungen im Options Menu
¨
Um Cabel sinnvoll einsetzen zu k¨onnen, m¨
ussen Sie die Einstellungen von Cabel an Ihr
System anpassen. Dazu erkl¨aren wir im folgenden Kapitel die Eintr¨age des Options Men¨
us
(Abbildung 3.1).
Abbildung 3.1: Das Options Men¨
u
3.1
Ein- und Ausblenden des unteren Fensters
Das untere Fenster kann u
u Options→Show Bottom Pane oder durch die
¨ber das Men¨
Tastenkombination ALT-X ein- bzw. ausgeblendet werden.
Es besteht aus den folgenden Reitern:
a) Python Shell
Das ist ein Python Interpreter, u
¨ber den Zugriff auf die gesamte API1 Cabels besteht. Was einem das bringt und wie diese Schnittstelle anzusprechen ist erfahren
Sie in Kapitel 8 ab Seite 62.
b) Messages
In diesem Reiter werden Fehlermeldungen und sonstige Meldungen, die Cabel auf
die Standardausgabe schreibt, ausgegeben.
1
Application Programming Interface
15
¨
KAPITEL 3. EINSTELLUNGEN IM OPTIONS MENU
16
3.2
Aktualisieren der Liste von Cabel Modulen
Haben Sie Cabel XML Module ver¨andert oder neu in das Modul Verzeichnis2 hinzugef¨
ugt3
und wollen diese in Cabel nutzen, so muß die Cabel-interne Liste an Modulen durch den
Aufruf von Options→Refresh Module List im Men¨
u oder durch die Tastenkombination
ALT-R aktualisiert werden.
3.3
Cabel Konfigurator
Der Cabel Konfigurationsdialog wird durch die Tastenkombination ALT-P oder u
¨ber das
Men¨
u Options→Preferences ge¨offnet.
3.3.1
Csound Einstellungen
Im Reiter Csound (Abbildung 3.2) l¨aßt sich Csound f¨
ur die Verwendung mit Cabel konfigurieren.
Der Reiter ist unterteilt in die 3 Bl¨ocke Instrument Header, Score und Csound Preferences:
1. Instrument Header
• Sample Rate
Samples, die pro Sekunde und Kanal berechnet werden. Dies sollte der internen
Sample Rate Ihrer Soundkarte entsprechen.
Voreingestellter Wert: 44100.
Csound Handbuch: http://www.csounds.com/manual/html/sr.html.
• Control Rate
Rate, wieviele Kontroll-Signale pro Sekunde verarbeitet werden.
Voreingestellter Wert: 4410.
Csound Handbuch: http://www.csounds.com/manual/html/kr.html.
• KSMPS
Anzahl der Samples in einer Kontroll-Zeitspanne. Der Wert dieses Parameters muß
SampleRate
dem Bruch ControlRate
entsprechen.
Voreingestellter Wert: 10.
Csound Handbuch: http://www.csounds.com/manual/html/ksmps.html.
2
3
Siehe Kapitel 3.3.3 auf Seite 22
Auf das Schreiben eigener Module wird in Kapitel 7 ab Seite 56 genauer eingegangen
3.3. CABEL KONFIGURATOR
17
Abbildung 3.2: Der Reiter Csound im Konfigurations Dialog
• Channels
Anzahl der Ausgabe Kan¨ale (1 = Mono, 2 = Stereo, 4 = Quadrophonisch).
Csound Handbuch: http://www.csounds.com/manual/html/OrchHeader.html.
2. Score
Hier wird die Score 4 f¨
ur Csound angegeben.
Um das Cabel Instrument5 mit der Nummer 1 von der Startzeit 0 an automatisch 60
4
5
engl.: Partitur
N¨ahere Informationenen zu Instrumenten in Kapitel 4.2.2, S. 29 und Kapitel 4.3, S. 30
¨
KAPITEL 3. EINSTELLUNGEN IM OPTIONS MENU
18
Sekunden lang spielen zu lassen, gen¨
ugt die Score Zeile
i1 0 60
Entsprechend ¨andern Sie den i1 Eintrag zu i2, wenn Sie Instrument 2 automatisch
triggern wollen.
Wollen Sie Ihr Instrument durch ein MIDI Ger¨at triggern und steuern, so erledigt das die
Score Zeile
f0 6000
Dieses f-statement 6 l¨aßt Csound im Hintergrund laufen, ohne ein Cabel Instrument zu
starten. Ein Cabel Instrument kann so durch ein MIDI Note-On Signal mit der KanalNummer, die der Instrumentnummer entspricht, getriggert werden.
Wie in Kapitel 1.2.1 (S.8) erw¨ahnt, kann als Noten Eingabe f¨
ur Csound– und damit auch
f¨
ur Cabel– auch eine Score Datei verwendet werden. Weitergehende Informationen u
¨ber
7
Csound Scores finden Sie im Csound Benutzerhandbuch .
3. Csound Preferences
• Csound Path
Pfadangabe des Csound Compilers csound.exe. Dieser ist normalerweise im Unterverzeichnis bin Ihrer Csound Installation zu finden.
• Csound Parameters
Mit den Csound Parametern kann man u.a. einstellen, woher Csound welche Eingaben, wie z.B. MIDI, oder Echtzeit Audio nimmt, und wie die daraus generierten
Sounds ausgegeben werden.
Windows Beispiele:
∗ F¨
ur MIDI Eingabe und Echtzeit Audio Ausgabe u
¨ ber den Audio-Treiber MME:
-d -b128 -B1536 -W -+rtmidi=mme -M0 -+rtaudio=mme -o dac1
∗ F¨
ur Echteit Audio Input aus dem MME Ger¨at 0 den Parametern -i adc0
hinzuf¨
ugen.
Linux Beispiele:
∗ F¨
ur Echtzeit Audio Ausgabe u
¨ ber den ALSA Treiber:
-d -W -o dac:plughw:0 -+rtaudio=alsa -b256 -B2048 -M0 -m0
6
7
Ein f-statement definiert eine Funktionstabelle, die eine Folge von Werten repr¨asentiert.
http://www.csounds.com/manual
3.3. CABEL KONFIGURATOR
19
∗ F¨
ur Echtzeit Audio Ausgabe u
¨ ber den JACK Soundserver:
-d -W -o dac -+rtaudio=jack -b256 -B2048 -M0
∗ F¨
ur Echtzeit Audio Input mit JACK den Parametern -i adc hinzuf¨
ugen, f¨
ur
ALSA -i adc:plughw:0.
Eine ausf¨
uhrliche Beschreibung aller m¨oglichen Csound Kommandozeilenparameter
gibt es unter http://www.csounds.com/manual/html/CommandFlags.html
• Compilation Feedback Timeout
Cabel startet den Csound Prozessor in einem separaten, asynchron zu Cabel laufenden Prozess. Bisher lassen sich der aufrufende Cabel- und der aufgerufene CsoundProzess nicht plattformunabh¨angig und performant synchronisieren. Der Parameter
Compilation Feedback Timeout ist Teil eines Workarounds, der versucht, das Synchronisierungsproblem zu l¨osen:
Damit Cabel weiß, ob ein abzuspielendes Instrument vom Csound Prozess erfolgreich u
¨bersetzt wurde, wartet es nach dem Starten die in Compilation Feedback
Timeout in Millisekunden angegebene Zeitspanne ab und u
uft erst dann, ob
¨berpr¨
der Csound Prozess noch l¨auft. Ist dies nicht der Fall bedeutet das, daß Csound
einen Fehler entdeckt hat und Cabel wechselt wieder zur¨
uck in den Zustand Gestoppt.
¨
Da die Zeit, die Csound zum Ubersetzen
der Cabel Instrumente ben¨otigt, von der
Gr¨oße des Cabel Instruments und der Geschwindigkeit Ihres Rechners abh¨angt,
k¨onnen Sie diesen Parameter hier selbst einstellen. Dabei gehen Sie wie folgt vor:
¨
1. Provozieren Sie f¨
ur ein zu u
¨bersetzendes Instrument einen Ubersetzungsfehler, indem Sie z.B. einen unsinnigen Channel Wert (z.B. 2 f¨
ur ein MonoInstrument) f¨
ur den Instrument Header einstellen.
2. Starten Sie den Csound Prozess durch Bet¨atigen des Start Csound Knopfs mit
dem Play Symbol rechts unten im Cabel Fenster8 .
3. Warten Sie, bis der Csound Prozess in der Console, aus der Sie Csound gestartet haben, das Abbrechen durch die Ausgabe einer Fehlermeldung best¨atigt.
a) Wenn der Start/Stop Csound Knopf rechts unten im Cabel Fenster jetzt
immer noch das Play Symbol anzeigt, so ist der Wert korrekt eingestellt,
da Cabel das Abbrechen des Csound Prozesses registriert hat und sich
nicht f¨alschlicherweise im Zustand Gestartet befindet.
b) Zeigt der Start/Stop Csound Knopf das Stop Symbol, so bet¨atigen Sie
ihn erneut, um Cabel in den Zustand Gestoppt zu bringen, erh¨ohen den
Compilation Feedback Timeout Wert und wiederholen den Vorgang ab
Punkt 2.
8
Das Starten, bzw. Stoppen des Csound Prozesses u
¨ber den Csound Start/Stop Knopf in der Statusleiste wird in Kapitel 4.3.3 auf Seite 30 genauer erl¨autert
¨
KAPITEL 3. EINSTELLUNGEN IM OPTIONS MENU
20
Autoplay
Zus¨atzlich zu diesen drei Bl¨ocken k¨onnen Sie die Autoplay Funktion von Cabel aktivieren. Ist Autoplay aktiv und l¨auft Csound im Hintergrund, wird jedesmal, wenn Sie
die Parameter eines Moduls ¨andern, der aktuelle Csound Prozess beendet und ein neuer
gestartet.
Deaktivieren Sie Autoplay, so m¨
ussen Sie nach jeder Parameter¨anderung an den Modulen
¨
Csound von Hand beenden und neu starten, um Ihre Anderungen
zu h¨oren.
3.3.2
Anpassen der Benutzeroberfl¨
ache
Der Reiter User Interface (Abbildung 3.3) erm¨oglicht es Ihnen, das Erscheinungbild, aber
auch das Verhalten der Benutzeroberfl¨ache von Cabel an Ihre Bed¨
urfnisse anzupassen.
1. Workspace
Der Workspace ist die eigentliche Arbeitsfl¨ache von Cabel, auf der Sie Module platzieren
und miteinander verkn¨
upfen.
In der Konfigurationsgruppe Workspace k¨onnen Sie:
• die Hintergrundfarbe (Workspace Colour ) der Cabel Arbeitsfl¨achein in einem Farbauswahldialog, wie in Abbildung 3.4 dargestellt, ver¨andern und
• die Gr¨oße (Workspace Width/Height) des scrollbaren Bereichs der Arbeitsfl¨ache
festlegen.
2. Full Module Names
Durch das Aktivieren des Kontrollk¨astchens Full Module Names wird in den Cabel Modulen der relative Pfad (ausgehend vom Modul Verzeichnis 9 ) der entsprechenden XML
Modul Datei angezeigt. Ansonsten ist nur der Modulname ohne relativen Pfad zu sehen.
3. Warning On Removing Modules
Das Kontrollk¨astchen aktiviert/deaktivert die Ausgabe von Warnungen beim L¨oschen
von Cabel Modulen von der Arbeitsfl¨ache.
9
siehe Kapitel 3.3.3.
3.3. CABEL KONFIGURATOR
21
Abbildung 3.3: Der Reiter User Interface im Konfigurations Dialog
4. Cable Connection
In der Konfigurationsgruppe Cable Connection lassen sich die Anzeige Eigenschaften der
Patchkabel ver¨andern:
• Die Farbe der Patchkabel (Cable Colour ) kann in einem Farbauswahldialog, wie in
Abbildung 3.4 dargestellt, ausgew¨ahlt werden.
• Der Grad, in dem die Patchkabel auf der Arbeitsfl¨ache “durchh¨angen”, wird durch
den Wert Cable Sagging eingestellt.
¨
KAPITEL 3. EINSTELLUNGEN IM OPTIONS MENU
22
Abbildung 3.4: Der Farbauswahldialog von Cabel
5. Save Bottom Pane Settings
Das Kontrollk¨astchen Save Bottom Pane Setting legt fest, ob Sichtbarkeit und ausgew¨ahlter Reiter des unteren Fensters10 (Python Shell und Messages) gespeichert werden.
6. Zoom
In der Konfigurationsgruppe Zoom kann das Zoomen von einzelnen Modulen aktiviert,
bzw. deaktiviert werden (Kontrollk¨astchen Module Zoom Enabled ) und der vorbelegte
Vergr¨oßerungs- bzw. Verkleinerungs-Faktor in Prozent (Default Zoom Factor ) angegeben
werden.
Ist diese Option aktiviert, so k¨onnen einzelne Module in deren Kontextmen¨
u11 vergr¨oßert,
bzw. verkleinert werden.
3.3.3
Verzeichnisse
Im Reiter Directories (Abbildung 3.5) werden die f¨
ur Cabel relevanten Verzeichnisse
angegeben.
10
11
siehe Kapitel 3.1.
siehe Kapitel 4.2, S. 27.
3.3. CABEL KONFIGURATOR
23
Abbildung 3.5: Der Reiter Directories im Konfigurations Dialog
1. Module Path
Hier wird das Verzeichnis, das die XML Modul Dateien enth¨alt, festgelegt.
Diese XML Dateien k¨onnen auch in Unterverzeichnissen organisiert werden. Cabel erzeugt
aus jedem Unterverzeichnis ein extra Untermen¨
u im Modules Men¨
u12 , sodaß Sie Ihre
Module nach eigenen Vorstellungen gruppieren k¨onnen.
12
siehe Abbildung 4.2, S. 26.
¨
KAPITEL 3. EINSTELLUNGEN IM OPTIONS MENU
24
2. Logging
Die Konfigurationsgruppe Logging legt fest, ob die Standardausgabe13 von Cabel in Dateien mitgelogged wird (Logging on? ), und wenn ja, in welchem Verzeichnis diese LogDateien abgelegt werden.
3. Editor
Hier kann der Texteditor angegeben werden, den Cabel ausf¨
uhren soll, wenn Sie z.B. u
¨ber
14
das Modul-Kontextmen¨
u den Quellcode eines Moduls angezeigt bekommen wollen.
13
14
siehe Kapitel 3.1.
siehe Kapitel 4.2, S. 27.
Kapitel 4
Benutzeroberfl¨
ache
Die Benutzeroberfl¨ache von Cabel ist in drei große Bereiche aufgeteilt, die im folgenden
Kapitel n¨aher beschrieben werden.
4.1
4.1.1
Menu
¨
File
Abbildung 4.1: Das File Men¨
u
Das File Men¨
u l¨aßt Sie Instrumente neu erzeugen, laden, speichern, starten, exportieren
und das Programm beenden.
New L¨oscht den Arbeitsplatz und l¨aßt Sie ein neues Instrument erzeugen.
Open L¨aßt Sie gespeicherte Instrumente ¨offnen.
25
¨
KAPITEL 4. BENUTZEROBERFLACHE
26
Open Recent Liste der zehn zuletzt ge¨offneten Cabel Instrumente.
Save Speichert die aktuellen Instrumente unter dem aktuellen Namen.
Save As Speichert die aktuellen Instrumente unter einem neuen Namen.
Start Csound Startet die aktuell auf Ihrem Arbeitsplatz befindlichen Instrumente mit
Csound. L¨auft bereits ein Csound Prozess, kann mit diesem Men¨
ueintrag Csound
gestoppt werden (siehe auch Kapitel 4.3.3 auf S. 30)
Export to CSD Exportiert Ihren Arbeitsplatz in eine Textdatei, die Sie ohne Cabel
direkt mit Csound starten k¨onnen1 .
Exit Beendet Cabel.
4.1.2
Modules
Abbildung 4.2: Das Modules Men¨
u
In diesem Men¨
u k¨onnen Sie die Module ausw¨ahlen, die Sie dem Arbeitsplatz hinzuf¨
ugen
wollen. Alternativ erreichen Sie dieses Men¨
u wenn Sie mit der rechten Maustaste auf
einen freien Bereich des Cabel Arbeitsplatzes klicken.
4.1.3
Options
Dieses Men¨
u wurde bereits in Kapitel 3 auf S. 15 n¨aher beschrieben.
1
Unified File Format von Csound: http://www.csounds.com/manual/html/CommandUnifile.html
4.2. ARBEITSPLATZ
4.2
27
Arbeitsplatz
Der Arbeitsplatz nimmt den gr¨oßten Teil der Benutzeroberfl¨ache in Anspruch. Auf ihm
befinden sich die Module und deren Verbindungen.
Um den sichtbaren Ausschnitt des Arbeitsplatzes zu verschieben, k¨onnen Sie entweder
die Scrollleisten verwenden oder den Arbeitsplatz mit gedr¨
uckter mittlerer Maustaste
verschieben.
4.2.1
Module
Um ein neues Modul zu erzeugen, w¨ahlen Sie das Gew¨
unschte aus dem Modulmen¨
u (Abbildung 4.2). Dieses Men¨
u erreichen Sie ebenfalls u
¨ ber einen Klick mit der rechten Maustaste auf einen freien Bereich des Arbeitsplatzes.
Um ein Modul wieder vom Arbeitsplatz zu entfernen, ¨offnen Sie das Kontextmen¨
u (Abbildung 4.3) des Moduls mit einem Klick der rechten Maustaste auf das entsprechende
Modul und w¨ahlen den Punkt Remove Module aus. Mit Show Module Xml k¨onnen Sie sich
den mit diesem Modul verkn¨
upften XML Quelltext in einem Editor Ihrer Wahl (Kapitel
3.3.3) anzeigen lassen.
Falls Sie wie in Kapitel 3.3.2 beschrieben Module Zoom Enabled aktiviert haben, k¨onnen
Sie im Modul Kontextmen¨
u das Modul in Default Zoom Factor Schritten vergr¨oßern und
verkleinern.
Wenn Sie die linke Maustaste u
uckt halten, k¨onnen Sie es auf der
¨ ber einem Modul gedr¨
Arbeitsfl¨ache platzieren.
Abbildung 4.3: Kontextmen¨
u eines Moduls
4.2.1.1
Aufbau
Wie in Abbildung 4.4 zu sehen besteht ein Modul aus seinem Namen, einer intern zugeordneten ID Nummer, Eing¨angen auf der linken Seite und Ausg¨angen auf der rechten
Seite.
¨
KAPITEL 4. BENUTZEROBERFLACHE
28
Abbildung 4.4: Miteinander verbundene Module
Die Farbe der Ein- und Ausg¨ange signalisiert, wie Csound die eingestellten oder verbundenen Werte intern verarbeitet.
rot Audio Signal, das zur eingestellten Audio Rate (Kapitel 3.3.1) aktualisiert wird.
gru
¨n Kontroll Signal, das zur eingestellten Control Rate (Kapitel 3.3.1) aktualisiert wird.
blau Instrument Signal, das nur aktualisiert wird, wenn das Instrument neu getriggert
wird.
Da Module keine internen Parameter besitzen, werden s¨amtliche Einstellungen u
¨ber die
Eing¨ange eingestellt, entweder direkt u
¨ber das Wertefenster (Kapitel 4.2.1.2) oder, indem
die Module untereinander verbunden werden (Kapitel 4.2.1.3).
4.2.1.2
Das Wertefenster
Mit einem Doppelklick auf ein Modul o¨ffnet sich das zugeh¨orige Wertefenster (Abbildung
4.5), in dem Sie s¨amtliche Parameter des Moduls einstellen k¨onnen. Die Wertzuweisung
kann sowohl u
¨ber den Schieberegler als auch u
¨ber die Texteingabe des entsprechenden
Parameters erfolgen. Bleiben Sie mit Ihrem Mauszeiger kurz u
¨ber dem Textfeld oder dem
Schieberegler eines Parameters, erscheint ein kurzer Hilfetext, der n¨ahere Informationen
und den erlaubten Wertebereich des Parameters auflistet.
¨
Uber
die Tastaturkombination CTRL-W k¨onnen Sie das Wertefenster wieder schließen.
Wie in Abbildung 4.5 bei Parameter in zu sehen, werden Schieberegler und Texteingabefeld eines Parameters im Wertefenster deaktiviert, wenn dieser verbunden ist und seinen
Wert u
¨ber den Ausgang eines anderen Moduls erh¨alt.
4.2. ARBEITSPLATZ
29
Abbildung 4.5: MoogVcf Wertefenster mit verbundenem in Eingang und Tool Tipp zu
dem Parameter res
4.2.1.3
Verbinden von Modulen
Damit ein Eingangsparameter den Wert eines Ausgangs eines anderen Moduls zugewiesen
bekommt, m¨
ussen Sie beide verbinden. Befindet sich Ihr Mauszeiger u
¨ ber einem Ausgang,
verwandelt er sich in eine Hand. Wenn Sie nun die linke Maustaste dr¨
ucken und bei
gedr¨
uckter Maustaste bewegen, entsteht zwischen dem ausgew¨ahlten Ausgang und Ihrem
Mauszeiger ein Kabel. Bewegen Sie den Mauszeiger mit dem Kabel u
¨ber den Eingang eines
anderen Moduls, verwandelt er sich wieder in eine Hand. Wenn Sie die linke Maustaste
jetzt wieder loslassen, einsteht eine Verbindung zwischen den beiden Modulen.
Ebenso k¨onnen sie die Verbindung zweier Module wieder “ausstecken”, indem sie die
Verbindung mit gedr¨
uckter linker Maustaste aus dem Eingang des zugeh¨origen Moduls
“ziehen”.
Wenn Sie zwei Ausg¨ange unterschiedlicher Art, also z.B. ein Audio Signal mit einem
Kontroll Signal, verbinden, wird das Signal auf die geringere Rate der beiden Signale
konvertiert.
4.2.2
Instrumente
Eine Gruppe von verbundenen Modulen nennt man Instrument. Jedem Instrument ist
eine eindeutige Nummer zugeordnet, die in der Statusleiste (siehe Kapitel 4.3 auf Seite
30) angezeigt wird.
Falls Sie Ihr Instrument u
¨ber MIDI spielen wollen, entspricht die Instrumentnummer dem
MIDI Kanal, u
¨ber den Sie Ihr Instrument ansprechen k¨onnen. N¨ahere Informationen
wie Instrumenten MIDI Kan¨ale zugewiesen werden entnehmen Sie bitte dem Csound
Benutzerhandbuch unter http://www.csounds.com/manual.
¨
KAPITEL 4. BENUTZEROBERFLACHE
30
4.3
Statusleiste
Die Statusleiste (Abbildung 4.6) zeigt zus¨atzliche Informationen zu Men¨
upunkten, Modulen, Moduleing¨angen und Modulausg¨angen, u
¨ ber denen sich der Mauszeiger gerade
befindet.
Abbildung 4.6: Die Statusleiste zeigt Informationen zu einem Amp Modul an
Weiterhin wird in der Statusleiste die Instrumentnummer des Moduls angezeigt (Kapitel
4.2.2), u
¨ber dem sich der Mauszeiger befindet.
4.3.1
Zoomfaktor
In dem Texteingabefeld der Statusleiste k¨onnen Sie den Zoomfaktor der Module auf Ihrem
Arbeitsplatz einstellen, um Modul- und Schriftgr¨oße innerhalb der Module gem¨aß Ihren
Vorstellungen anzupassen.
Mit der Tastenkombination CTRL-Z springen Sie direkt in die Zoomfaktor Texteingabe,
um den Wert zu ¨andern.
4.3.2
Autoplay
Mit diesem Schalter k¨onnen Sie die Autoplay Funktion an- und ausschalten. N¨ahere Informationen zur Autoplay Funktion erhalten Sie auf S. 20 in Kapitel 3.3.1.
4.3.3
Play und Stop Knopf
Zeigt dieser Knopf (zu sehen unten rechts in Abbildung 4.6) ein dreieckiges Play Zeichen, l¨auft momentan kein Csound Prozess, und Sie k¨onnen durch Bet¨atigen des Knopfes
Csound mit den Instrumenten auf Ihrem Arbeitsplatz starten.
Zeigt dieser Knopf ein rechteckiges Stop Zeichen, l¨auft aktuell ein Csound Prozess, den
Sie durch Bet¨atigen des Knopfes beenden k¨onnen.
Damit die Statusanzeige diese Knopfes richtig funktioniert, muß das Compilation Feedback
Timeout richtig eingestellt sein (Kapitel 3.3.1 auf S. 19).
4.3. STATUSLEISTE
31
Sollte es beim Start Ihrer Instrumente zu Fehlern kommen, erhalten Sie die Csound
Fehlermeldungen in dem Fenster der Eingabeaufforderung, in dem Sie Cabel gestartet
haben.
Der Knopf l¨aßt sich auch mit der Tastenkombination CTRL-Y bet¨atigen.
Kapitel 5
Module
¨
Dieses Kapitel gibt einen Uberblick
u
¨ber eine kleine Auswahl der mitgelieferten Standardmodule von Cabel.
5.1
5.1.1
Amps Mixers
Amp
Verst¨arker f¨
ur ein Audio Signal. Das Eingangssignal wird um den Gain Faktor1 verst¨arkt
bzw. abgeschw¨acht.
in
Eingang f¨
ur ein Audio Signal
gain Faktor der Verst¨arkung
out Audio Ausgang f¨
ur das verst¨arkte Signal
5.1.2
Mixer2
1
In Kapitel 6.1.1 auf Seite 47 wird n¨
aher auf den Verst¨arkungsfaktor bei Cabel Instrumenten eingegangen.
32
5.2. CONTROL
33
Mischer f¨
ur zwei Audio Signale. Die beiden Eingangssignale werden um den jeweiligen
Gain Faktor2 verst¨arkt bzw. abgeschw¨acht und aufsummiert, um das Ausgabesignal zu
erzeugen.
in1
gain1
in2
gain2
out
5.2
5.2.1
Eingang f¨
ur das erste Audio Signal
Faktor der Verst¨arkung des ersten Audio Signals
Eingang f¨
ur das zweite Audio Signal
Faktor der Verst¨arkung des zweiten Audio Signals
Audio Ausgang f¨
ur das gemischte Signal
Control
MidiCtrlIn
¨
Input f¨
ur MIDI Controller Anderungen.
Dieses Modul empf¨angt einkommende MIDI
¨
Controller Anderungen
und skaliert sie auf den mit min und max eingestellten Bereich.
chnl
ccnum
min
max
out
5.2.2
MIDI Kanal
MIDI CC Nummer
Minimaler Wert, auf den skaliert werden soll
Maximaler Wert, auf den skaliert werden soll
¨
Skalierter Wert der ankommenden MIDI Controller Anderung
MidiNoteIn
Input f¨
ur MIDI Note On, Note Off, Velocity On und Channel Aftertouch Events. F¨
ur
ankommende MIDI Note On Signale wird sowohl die entsprechende MIDI Notennummer
2
In Kapitel 6.1.1 auf Seite 47 wird n¨
aher auf den Verst¨arkungsfaktor bei Cabel Instrumenten eingegangen.
34
KAPITEL 5. MODULE
als auch die zugeh¨orige Frequenz ausgegeben. Der zugeh¨orige MIDI Kanal entspricht
dabei der Instrumentennummer, die in Cabels Statusleiste angezeigt wird. MIDI Velocity
On des ankommenden Events wird ebenfalls ausgewertet und auf den Bereich 0 bis velscale
skaliert. Ebenso werden Channel Aftertouch Events empfangen und skaliert ausgegeben.
velscale
minafttch
maxafttch
frq
note
vel
afttch
5.2.3
Maximaler Wert, auf den Velocity On Werte skaliert werden
Minimaler Wert, auf den Aftertouch skaliert werden soll
Maximaler Wert, auf den Aftertouch skaliert werden soll
Ausgabe der Frequenz eines MIDI Note On Events
Ausgabe der MIDI Notenummer eines MIDI Note On Events
Skalierter MIDI Velocity On Wert
Skalierter Channel Aftertouch Wert
NoteQuantizer
MIDI Noten Quantisierer. NoteQuantizer rundet das ankommende Kontroll Signal, sodaß nur MIDI Notenummern der eingestellten Noten ausgegeben werden. Die Augabe
von NoteQuantizer kann mit Hilfe des Midi2Frq Moduls in die entsprechende Frequenz
umgerechnet werden.
5.3. EFFECTS
in
c
cis
d
dis
e
f
fis
g
gis
a
ais
b
out
5.2.4
35
Eingang f¨
ur ein Kontroll Signal
Schalter f¨
ur die Note C
Schalter f¨
ur die Note C#
Schalter f¨
ur die Note D
Schalter f¨
ur die Note D#
Schalter f¨
ur die Note E
Schalter f¨
ur die Note F
Schalter f¨
ur die Note F#
Schalter f¨
ur die Note G
Schalter f¨
ur die Note G#
Schalter f¨
ur die Note A
Schalter f¨
ur die Note A#
Schalter f¨
ur die Note H
Quantisierte MIDI Notennummer
SlewLimiter
¨
Abstiegsbegrenzer / Portamento Controller. Mit SlewLimiter wird ein linearer Ubergang
zwischen zwei aufeinanderfolgenden Werten des Eingangssignals u
¨ber die eingestellte Zeitspanne erzeugt. Dadurch k¨onnen abrupte Parameterspr¨
unge gegl¨attet werden.
in
time
out
Eingang f¨
ur ein Kontroll Signal
Anstiegs-/Abstiegszeit in Sekunden
Begrenztes Kontroll Signal
5.3
Effects
5.3.1
Delay
Delay f¨
ur Audio Signale. Das ankommende Audio Signal wird um time Sekunden
verz¨ogert ausgegeben.
36
in
time
out
5.4
5.4.1
KAPITEL 5. MODULE
Eingang f¨
ur ein Audio Signal
Verz¨ogerungszeit in Sekunden
Verz¨ogertes Audio Signal
Filters
ButterHp
Butterworth Hochpass Filter. Dieses Filter ist eine Implementierung eines Butterworth
Hochpass Filters zweiter Ordnung mit einer Flankensteilheit von 12 dB pro Oktave. Die
Module ButterBp, ButterBr und ButterLp sind die entsprechenden Bandpass, Kerbfilter
und Tiefpass Versionen dieses Filters.
in
Eingang f¨
ur ein Audio Signal
fco Cutoff Frequenz
out Gefiltertes Audio Signal
5.4.2
MoogVcf
Emulation eines Moog Tiefpass Filters. Dieses Filter ist eine digitale Emulation der Moog
Diodenleiter Konfiguration. Das Filter ger¨at bei einer Resonanz von etwa 1 in Selbstoszillation. Wegen der zugrunde liegenden Csound Implementierung dieses Filters ist es
wichtig, daß das Eingangssignal eine maximale Amplitude von 1 hat, da es ansonsten zu
Clipping kommt.
in
fco
res
out
Eingang f¨
ur ein Audio Signal (mit maximaler Amplitude von 1)
Cutoff Frequenz
Resonanz
Gefiltertes Audio Signal
5.5. INPUT OUTPUT
5.4.3
37
MoogVcf2
Emulation eines Moog Tiefpass Filters. Im Gegensatz zu MoogVcf kann dieses Modul
auch Audio Signale mit einer gr¨oßeren Amplitude als 1 filtern. Daf¨
ur kann die Resonanz
nicht bis zur Selbstoszillation erh¨oht werden, da es ansonsten zu extremen Verzerrungen
kommt.
Eingang f¨
ur ein Audio Signal
Cutoff Frequenz
Resonanz
Gefiltertes Audio Signal
in
fco
res
out
5.5
Input Output
5.5.1
PcmMonoIn
Eingang f¨
ur ein Mono Signal von der Soundkarte.
out Ausgang f¨
ur das ankommende Audio Signal
5.5.2
PcmMonoOut
Ausgabe des ankommenden Mono Signals an die Soundkarte. Achten Sie darauf, daß
bei Verwendung dieses Moduls der Parameter Channels im Csound Options Dialog (zu
erreichen u
u Options→Preferences) auf 1 gesetzt ist.
¨ ber das Men¨
in
Eingang f¨
ur ein Audio Signal
38
5.5.3
KAPITEL 5. MODULE
PcmStereoIn
Eingang f¨
ur ein Stereo Signal von der Soundkarte.
left
Ausgang f¨
ur das ankommende Audio Signal des linken Kanals
right Ausgang f¨
ur das ankommende Audio Signal des rechten Kanals
5.5.4
PcmStereoOut
Ausgabe des ankommenden Stereo Signals an die Soundkarte. Achten Sie darauf, daß
bei Verwendung dieses Moduls der Parameter Channels im Csound Options Dialog (zu
erreichen u
u Options→Preferences) auf 2 gesetzt ist.
¨ ber das Men¨
in l Audio Signal f¨
ur linken Stereokanal der Soundkarte
in r Audio Signal f¨
ur rechten Stereokanal der Soundkarte
5.6
5.6.1
Maths
AudioAdd
Addiert die beiden ankommenden Audio Signale.
in1
Erstes Audio Signal
in2
Zweites Audio Signal
sum Summe der beiden ankommenden Audio Signale
5.6. MATHS
5.6.2
AudioMultiply
Multipliziert die beiden ankommenden Audio Signale.
in1
in2
pro
5.6.3
Erstes Audio Signal
Zweites Audio Signal
Produkt der beiden ankommenden Audio Signale
ControlAdd
Addiert die beiden ankommenden Kontroll Signale.
in1
Erstes Kontroll Signal
in2
Zweites Kontroll Signal
sum Summe der beiden ankommenden Kontroll Signale
5.6.4
ControlLimit
Beschr¨ankt das ankommende Kontroll Signal auf einen bestimmten Wertebereich.
in
min
max
out
Eingang f¨
ur Kontroll Signal
Untere Grenze des Wertebereichs, auf den in beschr¨ankt werden soll
Obere Grenze des Wertebereichs, auf den in beschr¨ankt werden soll
Auf den Wertebereich beschr¨anktes Kontroll Signal
39
40
5.6.5
KAPITEL 5. MODULE
ControlMultiply
Multipliziert die beiden ankommenden Kontroll Signale.
in1
in2
pro
5.6.6
Erstes Kontroll Signal
Zweites Kontroll Signal
Produkt der beiden ankommenden Kontroll Signale
Midi2Frq
Rechnet MIDI Notennummern in die entsprechende Frequenz um.
in
MIDI Notenummer
out Ausgabe der entsprechenden Frequenz
5.7
Modulators
5.7.1
AdsrLinMidi
MIDI getriggerter linearer ADSR H¨
ullkurvengenerator. Dieser H¨
ullkurvengenerator erzeugt eine klassische lineare ADSR H¨
ullkurve (Attack, Decay, Sustain, Release). AdsrLinMidi wird durch ein ankommendes MIDI Note On Signal getriggert.
amp
atk
del
slev
rel
env
Amplitude, auf die die normalisierte H¨
ullkurve skaliert werden soll
Attack Zeit in Sekunden
Delay Zeit in Sekunden
Normalisierter Sustain Level
Release Zeit in Sekunden
H¨
ullkurve als Kontroll Signal
5.7. MODULATORS
5.7.2
41
AdsrLinTrigger
Kontroll Signal getriggerter linearer ADSR H¨
ullkurvengenerator. Dieser H¨
ullkurvengenerator erzeugt eine klassische lineare ADSR H¨
ullkurve (Attack, Decay, Sustain, Release).
AdsrLinTrigger wird durch ein ankommendes Trigger Signal gestartet. Dieses Trigger Signal kann jedes Signal sein, das vom Wert 0 auf einen Wert gleich 1 oder h¨oher springt.
Als Trigger Signal bietet sich ein PulseLfo Modul an.
trigger
amp
atk
del
slev
stime
rel
env
5.7.3
Trigger Kontroll Signal
Amplitude, auf die die normalisierte H¨
ullkurve skaliert werden soll
Attack Zeit in Sekunden
Delay Zeit in Sekunden
Normalisierter Sustain Level
Sustain Zeit in Sekunden
Release Zeit in Sekunden
H¨
ullkurve als Kontroll Signal
EnvFollower
H¨
ullkurvenfolger. EnvFollower gibt die Amplitude des ankommenden Audio Signals als
Kontroll Signal aus.
in
Audio Signal Eingang
out Amplitude des ankommenden Audio Signals
5.7.4
PulseLfo
42
KAPITEL 5. MODULE
Pulswellen Niederfrequenz-Oszillator. Dieser Niederfrequenz-Oszillator erzeugt einen periodischen kurzen positiven Impuls mit der eingestellten Amplitude. Dadurch eignet sich
PulseLfo ideal als Trigger Signal f¨
ur andere Module.
frq
amp
phi
out
5.7.5
Frequenz
Amplitude
Startphase des Oszillator Signals
Ausgabe des Oszillator Signals als Kontroll Signal
RampLfo
Invertierter S¨agezahnwellen Niederfrequenz-Oszillator. Dieser Niederfrequenz-Oszillator
erzeugt eine periodische invertierte S¨agezahnwelle mit der eingestellten Amplitude.
frq
amp
phi
out
5.7.6
Frequenz
Amplitude
Startphase des Oszillator Signals
Ausgabe des Oszillator Signals als Kontroll Signal
SampleAndHold
Abtast- und Halte-Modul. SampleAndHold erzeugt aus dem ankommenden Signal ein
treppenf¨ormiges Kontroll Signal. Dabei wird das ankommende Kontroll Signal bei jedem
Trigger Impuls abgetastet (sample) und bis zum n¨achsten Trigger Signal am Ausgang
gehalten. Das Trigger Signal kann jedes Signal sein, das vom Wert 0 auf einen Wert
gleich 1 oder h¨oher springt. Als Trigger Signal bietet sich ein PulseLfo Modul an.
trigger Trigger Kontroll Signal
in
Ankommendes Kontroll Signal
out
Treppenf¨ormiges Kontroll Signal
5.7. MODULATORS
5.7.7
43
SawLfo
S¨agezahnwellen Niederfrequenz-Oszillator. Dieser Niederfrequenz-Oszillator erzeugt eine
periodische S¨agezahnwelle mit der eingestellten Amplitude.
frq
amp
phi
out
5.7.8
Frequenz
Amplitude
Startphase des Oszillator Signals
Ausgabe des Oszillator Signals als Kontroll Signal
SineLfo
Sinuswellen Niederfrequenz-Oszillator. Dieser Niederfrequenz-Oszillator erzeugt eine periodische Sinuswelle mit der eingestellten Amplitude.
frq
amp
phi
out
5.7.9
Frequenz
Amplitude
Startphase des Oszillator Signals
Ausgabe des Oszillator Signals als Kontroll Signal
SquareLfo
Rechteckwellen Niederfrequenz-Oszillator. Dieser Niederfrequenz-Oszillator erzeugt eine
periodische Rechteckwelle (symmetrische Pulswelle) mit der eingestellten Amplitude.
frq
amp
phi
out
Frequenz
Amplitude
Startphase des Oszillator Signals
Ausgabe des Oszillator Signals als Kontroll Signal
44
5.7.10
KAPITEL 5. MODULE
TriangleLfo
Dreieckwellen Niederfrequenz-Oszillator. Dieser Niederfrequenz-Oszillator erzeugt eine
periodische Dreieckwelle mit der eingestellten Amplitude.
frq
amp
phi
out
5.8
5.8.1
Frequenz
Amplitude
Startphase des Oszillator Signals
Ausgabe des Oszillator Signals als Kontroll Signal
Sequencing
Sequencer
Acht Schritt Sequencer. Bei jedem ankommenden Trigger Signal gibt Sequencer den
n¨achsten seiner Werte aus und springt beim letzten wieder zur¨
uck auf den ersten. Bei
einem ankommenden Reset Signal springt der Sequencer ebenfalls auf den ersten Wert
zur¨
uck. Zus¨atzlich wird ein Gate Signal ausgegeben, das 0 ist, falls der aktuell ausgegebene Wert 0 ist, und 1 f¨
ur alle anderen Werte. Das Trigger und Reset Signal kann jedes
Signal sein, das vom Wert 0 auf einen Wert gleich 1 oder h¨oher springt. Als Trigger Signal
bietet sich ein PulseLfo Modul an.
5.9. SOUND SOURCES
step
reset
steps
val1
val2
val3
val4
val5
val6
val7
val8
out
gate
5.9
5.9.1
45
Trigger Signal / Clock Signal
Reset Signal (springt auf den ersten Wert zur¨
uck)
Anzahl der Schritte bis ein automatischer Reset erfolgt
Erster Wert
Zweiter Wert
Dritter Wert
Vierter Wert
F¨
unfter Wert
Sechster Wert
Siebter Wert
Achter Wert
Ausgabe des aktuellen Werts
Gate Signal
Sound Sources
Noise
Rauschgenerator. Noise erzeugt weißes Rauschen, also einen Zufallswert zur Audio Rate
mit der eingestellten Amplitude.
amp
out
5.9.2
Amplitude des Rauschens
Weißes Rauschen
SawVco
S¨agezahn Oszillator. SawVco erzeugt eine periodische S¨agezahnschwingung mit normalisierter Amplitude (=1). Die Wellenform kann mit dem shape Parameter stufenlos von
invertierter S¨agezahnwelle u
¨ber Dreieckwelle bis hin zur “normalen” S¨agezahnwelle eingestellt werden.
frq
shape
out
Frequenz
Wellenform (invertierter S¨agezahn, Dreieck, S¨agezahn)
Audio Signal des S¨agezahn Oszillators
46
5.9.3
KAPITEL 5. MODULE
SineVco
Sinus Oszillator. SineVco erzeugt eine periodische Sinusschwingung mit normalisierter
Amplitude (=1).
frq Frequenz
out Audio Signal des Sinus Oszillators
5.9.4
SquareVco
Pulswellen Oszillator. SquareVco erzeugt eine periodische Pulswelle mit normalisierter
Amplitude (=1). Die Pulsbreite kann mit dem pw Parameter stufenlos eingestellt werden.
frq
shape
out
Frequenz
Pulsbreite
Audio Signal des Pulswellen Oszillators
Kapitel 6
Beispiele
Dieses Kapitel zeigt Ihnen Schritt f¨
ur Schritt, wie Sie ein eigenes Cabel Instrument erzeugen und nutzen k¨onnen.
6.1
Einfacher subtraktiver Synthesizer
Die einzelnen Arbeitsschritte dieses Beispielinstruments sind im examples Unterverzeichnis Ihrer Cabel Installation als durchnummerierte Dateien enthalten. Somit werden wir
¨
nur auf die wichtigsten Anderungen
der einzelnen Schritte eingehen und Sie k¨onnen sich
die genauen Einstellungen der Instrumente anhand der Beispieldateien ansehen.
6.1.1
Der S¨
agezahn Oszillator
Zun¨achst beginnen wir mit einem einfachen Instrument, das einen konstanten Ton mit
einem S¨agezahn Oszillator erzeugt.
Den S¨agezahn Oszillator erhalten Sie, indem sie entweder auf das Modules Men¨
u klicken
oder mit der rechten Maustaste auf einen freien Bereich des Cabel Arbeitsplatzes klicken,
um das Modules Kontextmen¨
u zu ¨offnen. W¨ahlen Sie im sound sources Unterverzeichnis
das SawVco Modul aus.
Um ein Audio Signal an die Soundkarte schicken zu k¨onnen, ben¨otigen Sie noch einen
Ausgang f¨
ur Ihr Instrument. W¨ahlen sie im Modulmen¨
u Unterverzeichnis input output
das Modul PcmMonoOut aus.
Wenn Sie jetzt den out Ausgang des Oszillators direkt per Drag&Drop mit dem in Eingang des Soundkartenmoduls verbinden und das Instrument mit dem Play Knopf in der
Statusleiste starten w¨
urden, w¨are kein Ton zu h¨oren, weil der Oszillator nur ein Signal
mit der Amplitude 1 erzeugt und damit viel zu leise ist.
47
48
KAPITEL 6. BEISPIELE
Diese Amplitude 1 ist ein Csound-internes Maß f¨
ur Lautst¨arke. Die maximal darstellbare Lautst¨arke von Csound betr¨agt 32768 und stellt eine programminterne Gr¨oße dar.
Merken Sie sich einfach, daß meist eine Lautst¨arke von 20000 ausreicht um Clipping1 zu
vermeiden.
Sie m¨
ussen also den Oszillator verst¨arken um ihn h¨oren zu k¨onnen. Dazu ben¨otigen Sie
das Amp Modul im amps mixers Unterverzeichnis.
Verbinden Sie den out Ausgang des SawVco mit dem in Eingang des Amp Moduls und
den out Ausgang des Amp Moduls mit dem in Eingang von PcmMonoOut.
Durch Doppelklicken auf das SawVco Modul ¨offnen Sie dessen Einstellungen. Setzen Sie
die Frequenz auf einen passenden Wert, z.B. 200 Hz. Im Amp Modul setzen Sie die
Verst¨arkung, also den gain Parameter, auf 25000.
Abbildung 6.1: Das erste S¨agezahn Oszillator Instrument
Bevor Sie das Instrument starten u
ufen Sie noch die Einstellungen im
¨berpr¨
Men¨
u Options→Preferences. Achten Sie darauf, daß Channels auf 1 gesetzt ist, da Sie
nur ein Mono Signal an die Soundkarte schicken. Falls Sie wollen, daß Ihr Instrument automatisch spielt, setzen Sie Score auf i1 0 6000, was so viel wie “spiele Instrument 1 von
Anfang an 6000 Sekunden lange” bedeutet. Alternativ k¨onnen Sie Score auch auf f0 6000
setzen, was Csound im Hintergrund 6000 Sekunden laufen l¨aßt ohne ein Instrument zu
starten. Um ihr Instrument zu triggern reicht ein mit einem MIDI Keyboard an Csound
gesendeter MIDI Note On Befehl, also ein einfacher Tastendruck (siehe Kapitel 3.3.1 auf
S. 17) aus. Mit welchen Csound Parametern Sie Ihre MIDI Ger¨ate mit Csound verbinden
k¨onnen erfahren Sie im Csound Benutzerhandbuch2 .
1
2
Verzerrung auf Grund zu hoher Lautst¨arke
http://www.csounds.com/manual
6.1. EINFACHER SUBTRAKTIVER SYNTHESIZER
49
Wenn Sie nun Ihr Instrument mit dem Play Knopf in der Statusleiste starten und falls
n¨otig zus¨atzlich triggern, sollten Sie einen konstanten obertonreichen Ton h¨oren.
6.1.2
MIDIfizierung des Oszillators
Nun wollen wir die Tonh¨ohe des Instruments mit unserem MIDI Keyboard steuern. Dazu ben¨otigen Sie ein MidiNoteIn Modul aus dem control Modulverzeichnis. Dessen frq
Ausgang verbinden Sie mit dem frq Eingang des SawVco.
Abbildung 6.2: Steuerung der Tonh¨ohe mit einem MIDI Keyboard
Stellen Sie sicher, daß das Instrument nicht automatisch getriggert wird, indem Sie den
Score Parameter im Preferences Dialog wie weiter oben beschrieben auf f0 6000 setzen.
Nun k¨onnen Sie das Instrument starten und mit Ihrem MIDI Keyboard spielen.
6.1.3
Lautst¨
arkevariation durch eine Hu
¨ llkurve
Damit der Ton bei einem Tastendruck nicht abrupt einsetzt und beim Loslassen ebenso
abrupt endet, modulieren wir die Lautst¨arke unseres Instruments mit einer H¨
ullkurve.
F¨
ugen Sie das Modul AdsrLinMidi aus modulators zu Ihrer Cabel Arbeitsfl¨ache hinzu
und verbinden Sie es wie in Abbildung 6.3 zu sehen.
50
KAPITEL 6. BEISPIELE
Abbildung 6.3: Modulation mit einem H¨
ullkurvengenerator
Die maximale Lautst¨arke unseres Instruments, also den amp Parameter des AdsrLinMidi
Moduls, erhalten Sie u
¨ ber die Anschlagst¨arke des MIDI Keyboards, indem Sie den vel
Ausgang von MidiNoteIn mit dem amp Eingang von AdsrLinMidi verbinden und den
velscale Parameter von MidiNoteIn auf etwa 20000 setzen.
6.1.4
Subtraktive Klangsynthese
Um aus diesem obertonreichen Instrument einen subtraktiven Synthesizer, also einen
Klangerzeuger, der unerw¨
unschte Frequenzen aus einem Klang subtrahiert, zu erzeugen,
ben¨otigen Sie noch ein Filter, das ungew¨
unschte Frequenzen herausfiltert. Dazu verwenden Sie das Moog Tiefpass Filter, mit dem die Frequenzen, die u
¨ berhalb der eingestellten
Cutoff Frequenz liegen, entfernt werden.
Damit der erzeugte Klang nicht zu statisch klingt, wird die Cutoff Frequenz des Filters
mit einer H¨
ullkurve moduliert. In Abbildung 6.4 sehen Sie das fertige Instrument.
6.2. VERWENDUNG DES SEQUENCERS
51
Abbildung 6.4: Einfacher subtraktiver Synthesizer
6.1.5
Erweiterung unseres subtraktiven Synthesizers
und
In
den
Beispieldateien
05 suboscillator mixer2.cw
06 detuned saw mixer4 analogecho.cw im examples Unterordner Ihrer Cabel Installation k¨onnen Sie m¨ogliche Erweiterungen Ihres Synthesizers studieren.
Im ersten Schritt wird dem S¨agezahn Signal ein um eine Oktave tiefer gestimmter Rechteckoszillator, ein sogenannter Suboszillator, beigemischt, um die Bassfrequenzen unseres
Instruments zu verst¨arken.
Im n¨achsten Schritt wird zus¨atzlich noch ein leicht verstimmter S¨agezahnoszillator
erg¨anzt, damit der Gesamtklang weniger statisch ist. Um den Klang noch weiter zu verfeinern wird zum Schluß noch alles durch einen Hall Effekt geschickt.
6.2
Verwendung des Sequencers
In diesem kurzen Beispiel wird gezeigt wie das Sequencer Modul verwendet wird. Ausgangspunkt ist dabei der minimale Klangerzeuger aus Kapitel 6.1.1 in der Datei examples/01 saw amp monoout.cw Ihrer Cabel Installation.
Zun¨achst f¨
ugen Sie zu diesem Instrument ein Sequencer Modul aus dem Modulmen¨
u Unterverzeichnis sequencer hinzu. Damit dieses Modul in regelm¨aßigen Zeitabschnitten seine
Werte ausgibt, ben¨otigen Sie noch ein Clock Signal. Dazu eignet sich das PulseLfo Modul
im modulators Unterverzeichnis.
52
KAPITEL 6. BEISPIELE
Verbinden Sie die Module wie in Abbildung 6.5 zu sehen.
Abbildung 6.5: Verwendung des Sequencer Moduls
Den Score Parameter in den Csound Options sollten Sie wie in Kapitel 6.1.1 beschrieben
auf i1 0 6000 setzen, damit das Instrument automatisch getriggert wird. Wenn Sie nun
das Instrument starten, h¨oren Sie eine schnell aufsteigende Tonfolge.
Da es schwierig ist eine Notenfolge aus Frequenzen zu konstruieren, k¨onnen Sie zwischen
dem Sequencer und dem SawVco Modul ein zus¨atzliches Midi2Frq Modul (maths Unterverzeichnis) verwenden, damit Sie die Sequenz als Folge von MIDI Notennummern3
programmieren k¨onnen und diese dann in die entsprechenden Frequenzen umgerechnet
werden.
Die Sequenz ¨andern Sie, indem Sie die Parameter val1 bis val8 im Sequencer Modul z.B.
auf 40, 52, 40, 55, 40, 57, 40, 52 (E, e, E, g, E, a, E, g) setzen. Die Geschwindigkeit, in
der die Sequenz abgespielt wird, stellen Sie u
¨ber den frq Parameter des PulseLfo Moduls
ein. Um f¨
unf T¨one pro Sekunde spielen zu lassen ¨andern Sie die Frequenz des PulseLfo
auf 5.
Ein fortgeschrittenes Beispiel f¨
ur die Verwendung von Sequencer Modulen k¨onnen Sie in
der Datei examples/sequencer notequantizer sampleandhold.cw studieren.
3
Tabelle zur Umrechnung von MIDI Notennummern: http://www.zem-college.de/midi/mc taben.htm
6.3. FREQUENZMODULATION
6.3
53
Frequenzmodulation
Abbildung 6.6: Frequenzmodulation mit Cabel
Abbildung 6.6 zeigt die einfachste M¨oglichkeit der Frequenzmodulation: Das verst¨arkte
Signal von SineVco 1 moduliert die Frequenz von SineVco2.
Das Instrument finden Sie unter examples/fm basic.cw. Wenn Sie es starten, h¨oren Sie
einen 300 Hz Ton mit einem ziemlich extremen Vibrato. Solange die Frequenz von SineVco 1 noch unterhalb des h¨orbaren Frequenzbereichs von 20 Hz liegt, nehmen wir
die Frequenzmodulation als Vibrato wahr. Wenn Sie nun mit dem frq Parameter von
SineVco 1 und dem gain Parameter von Amp 3 spielen, stellen Sie fest, daß die zwei
Sinusoszillatoren in der Lage sind komplexe Frequenzspektren zu erzeugen.
Der Cabel Patch examples/fm example.cw, zu sehen in Abbildung 6.7, ist ein Beispiel f¨
ur
ein FM Instrument. Dabei steuert SineVco 2 die Frequenz von SineVco 5. Die St¨arke der
Modulation, also die Verst¨arkung des Signals von SineVco 2, wird durch den H¨
ullkurvengenerator AdsrLinMidi 20 geregelt, sodaß sich das erzeugte Frequenzspektrum u
¨ber die
Zeit ¨andert.
54
KAPITEL 6. BEISPIELE
Abbildung 6.7: FM Instrument
6.4
Verarbeitung externer Audio Signale
Sie k¨onnen Cabel auch als Effektger¨at verwenden und externe Audio Signale weiterverarbeiten. Beachten Sie dazu, daß Sie wie in Kapitel 3.3.1 auf S. 18 beschrieben Csound
mit den richtigen Parametern starten, um Audio Signale in Echtzeit von der Soundkarte
lesen zu k¨onnen. Vergessen Sie auch nicht den Score Parameter wie in Kapitel 3.3.1 auf
S. 17 beschrieben so einzustellen, daß Ihr Instrument automatisch getriggert wird.
In Abbildung 6.8 sehen Sie ein Beispiel, in dem ein externes Stereo Audio Signal mit einer
Rechteckswelle multipliziert wird, also mit einem SquareVco ringmoduliert wird. Mit dem
MIDI Controller 1 (MidiCtrlIn 11 ) k¨onnen Sie den Anteil des ringmodulierten Signals
im Verh¨altnis zum Originalsignal steuern. MIDI Controller 2 (MidiCtrlIn 7 ) steuert die
Frequenz der Rechteckwelle, und MIDI Controller 3 (MidiCtrlIn 8 ) die Lautst¨arke von
SquareVco und damit die Intensit¨at der Ringmodulation.
Das Beispiel finden Sie in der Datei examples/external square ringmod.cw in Ihrer Cabel
Installation.
6.4. VERARBEITUNG EXTERNER AUDIO SIGNALE
Abbildung 6.8: Ringmodulation eines externen Audio Signals mit einem SquareVco
55
Kapitel 7
Schreiben eigener Module
Wie bereits in der Einleitung (siehe Kapitel 1.1.2 auf S. 7) erw¨ahnt, wird jedes in Cabel
verwendbare Modul in einer eigenen XML1 Datei definiert.
In folgendem Kapitel wird kurz auf den Aufbau dieser Cabel XML Module eingegangen.
7.1
Kurze Einfu
¨ hrung zu XML
Eine XML Datei ist ein hierarchisch in Form einer Baumstruktur organisiertes Dokument.
Die Elemente des Dokumentenbaums werden als XML-Nodes 2 bezeichnet. Ein XML Node
besteht entweder aus einem Start-Tag und einem zugeh¨origen Ende-Tag:
<TagName attributName="AttributWert">TagWert</TagName>
oder aus einem leeren Element-Tag:
<TagName attributName="Attribut Wert"/>
Auf diese Weise kann man Dokumente einfach gliedern und deren Inhalt in eine Struktur
bringen, die sowohl f¨
ur den Menschen auch als auch f¨
ur einen Computer lesbar und
verwertbar ist.
Der konkrete Aufbau von XML-Dateien kann durch sogenannte XML-Schema Dateien
festgelegt werden. Erf¨
ullt die XML Datei die im Schema festgelegte Syntax, so spricht
man von einem g¨ultigen oder auch validen XML-Dokument.
1
eXtensible Markup Language, ein Standard zur Erstellung von maschinen- und menschenlesbaren
Dokumenten.
2
engl. Knoten
56
7.2. AUFBAU DER CABEL MODUL XML DATEIEN
57
Diese Schema Datei wird in der XML-Datei nach der Definition des in der Datei verwendeten Encodings3 (Zeile 1 in Listing 7.1) im Dokumentroot Knoten4 (in Listing 7.1 in
Zeile 2 der <modul> Knoten) angegeben.
Auf diese Weise k¨onnen Programme, die XML Dateien verarbeiten, einfach u
ufen,
¨berpr¨
ob die u
ultig sind. Diesen Prozess nennt man auch Validieren
¨ bergebenen XML Dateien g¨
von XML Dateien.
Die meisten aktuellen XML Editoren5 verstehen XML-Schema und validieren XML Dokumente bereits beim Erstellen. Dadurch werden die f¨
ur den Menschen relativ schwer
lesbaren XML Schemas zu so etwas wie einer Vorlage und erleichtern das Anlegen eigener
XML Dateien.
Weitere Informationen rund um die eXtendable Markup Language finden Sie unter
• http://de.selfhtml.org/xml/intro.htm, oder
• http://de.wikipedia.org/wiki/XML.
7.2
Aufbau der Cabel Modul XML Dateien
Abbildung 7.1: Das in Listing 7.1 beschriebene PulseLFO Modul mit zugeh¨origem Wertefenster in der Cabel Arbeitsfl¨ache.
Listing 7.1: Die XML Datei f¨
ur das Cabel Modul PulseLFO
1 <?xml version=” 1 . 0 ” enco ding=”UTF−8” ?>
2 <modul
x m l n s : x s i=” h t t p : //www. w3 . o r g /2001/XMLSchema−i n s t a n c e ”
3
xsi:noNamespaceSchemaL ocatio n=”modul . xsd ”
4
name=” P u l s e L f o ”
5
d e s c r i p t i o n=” P u l s e low f r e q u e n c y o s c i l l a t o r ( c l o c k s i g n a l ) ”>
6
<i n p u t>
3
Encodings legen fest, welcher Zeichenvorrat in der Datei verwendet wird
Erster, alle weiteren XML Knoten umschliessender Knoten
5
Unter Windows z.B. XMLSpy von Altova (http://www.altova.com/de/)
4
58
7
8
9
10
11
12
13
14
15
16
17
18
19
20
21
22
23
24
25
KAPITEL 7. SCHREIBEN EIGENER MODULE
<v a r d e f name=” f r q ” csType=”k” v a l u e=” 10 ”
min=” 0” max=” 100 ” d e s c r i p t i o n=” Frequency o f LFO” />
<v a r d e f name=”amp” csType=”k” v a l u e=” 1”
min=” 0” d e s c r i p t i o n=” Amplitude o f LFO”/>
<v a r d e f name=” phi ” csType=” i ” v a l u e=” 0” min=” −0.001 ” max=” 1”
d i g i t s=”3 ” d e s c r i p t i o n=” I n i t i a l phase o f LFO ( n e g a t i v \\
t o s k i p i n i t i a l i s a t i o n ) ” />
</ i n p u t>
<output>
<v a r d e f name=” out ” csType=”k” d e s c r i p t i o n=” Output o f LFO”/>
</ output>
<g l o b a l>
<d e f d e s c r i p t i o n=” P u l s e t a b l e ”>
gipulselfo
f t g e n 0 , 0 , 1 2 8 , −7, 1 , 4 , 1 , 0 , 0 , 1 2 4 , 0
</ d e f>
</ g l o b a l>
<opcode>/∗ P u l s e low f r e q u e n c y o s c i l l a t o r ( c l o c k s i g n a l ) ∗/
opcode PulseL f o , k , k k i
k f r q , kamp , i p h i x i n
26
27
28
29
30
kfrq
kamp
iphi
kout
limit
limit
limit
oscil
kfrq ,
kamp ,
iphi ,
kamp ,
0 , 100
0 , 50000
−1, 1
kfrq , g i p u l s e l f o , i p h i
31
xout kout
33 endop
34
</ opcode>
35 </ modul>
32
7.2.1
Der Modul Knoten
Der Dokumentroot Knoten, der alle restlichen Elemente des Cabel XML Moduls umschließt, hat den Namen modul (in Listing 7.1 Zeile 2-5 und Zeile 35).
In diesem
Element
wird
in entsprechenden
Attributen
das Schema
(noNamespaceSchemaLocation), der Name des Moduls (name) und eine kurze von
Cabel dann in der Statusleiste6 angezeigte Beschreibung des Moduls (description)
angegeben.
Dabei ist es wichtig, daß der Wert des name Attributs sowohl dem Dateinamen des
Moduls als auch dem Namen des User-defined Opcodes, der im opcode Knoten (Kapitel
7.2.5) definiert wird, entspricht (siehe Zeile 24 in Listing 7.1).
6
Siehe Abbildung 4.6 auf Seite 30.
7.2. AUFBAU DER CABEL MODUL XML DATEIEN
7.2.2
59
Eingabe Variablen
Die Eingabe Variablen des Moduls werden im Knoten input (in Listing 7.1 Zeile 6-14)
definiert. Dieser enth¨alt f¨
ur jeden Eingabeparameter des Moduls einen Knoten vardef,
der folgende Attribute besitzt:
• name*7 Anzeige Name der Eingabe Variable auf dem Cabel Modul.
• csType* Wie in Kapitel 4.2.1.1 beschrieben, der Csound-Typ8 der Eingabe Variablen; einer der Werte a (f¨
ur Audio Signal), k (f¨
ur Kontroll Signal), oder i (f¨
ur
Instrument Signal).
• description Beschreibung der Eingabe Variable.
• value Standardwert, mit dem die Eingabe Variable initialisiert wird.
• min Untere Grenze des g¨
ultigen Wertebereichs der Eingabe Variable.
• max Obere Grenze des g¨
ultigen Wertebereichs der Eingabe Variable.
• digits Anzahl der Dezimalstellen, auf die der Wert der Eingabe Variable gerundet
werden soll.
Reihenfolge und Typ der einzelnen Eingabeparameter muß den Parametern des Userdefined Opcodes im Opcode Knoten (Kapitel 7.2.5) entsprechen.
7.2.3
Ausgabe Variablen
Die Ausgabe Variablen des Moduls werden im Knoten output (in Listing 7.1 Zeile 15-17)
definiert. Dieser enth¨alt f¨
ur jeden Ausgabeparameter des Moduls einen Knoten vardef,
der folgende Attribute besitzt:
• name* Anzeige Name der Ausgabe Variable auf dem Cabel Modul.
• csType* Wie in Kapitel 4.2.1.1 beschrieben, der Csound-Typ9 der Ausgangs Variablen; einer der Werte a (f¨
ur Audio Signal), k (f¨
ur Kontroll Signal), oder i (f¨
ur
Instrument Signal).
• description Beschreibung der Eingabe Variable.
Reihenfolge und Typ der einzelnen Ausgabeparameter muß den Parametern des Userdefined Opcodes im Opcode Knoten (Kapitel 7.2.5) entsprechen.
7
Attribute, die mit einem * versehen sind, sind verpflichtende Attribute, die f¨
ur ihren Knoten angegeben werden m¨
ussen, damit das XML Modul valide ist.
8
Rate, in der das Eingangssignal verarbeitet werden soll
9
Rate, in der das Ausgangssignal verarbeitet werden soll
60
KAPITEL 7. SCHREIBEN EIGENER MODULE
7.2.4
Globale Variablen
In Cabel Modulen k¨onnen auch so genannte globale Variablen definiert werden. Diese
werden in dem Cabel XML Knoten global (in Listing 7.1 Zeile 18-22) angegeben.
Globale Variablen dienen vor Allem dazu, Funktionstabellen10 einmalig global zu definieren. Dies spart Speicherplatz, da sie nicht von jeder Modul Instanz auf der Arbeitsfl¨ache
neu initialisiert werden m¨
ussen, sondern global f¨
ur das ganze Instrument g¨
ultig und ansprechbar sind.
Der Knoten global enth¨alt f¨
ur jede globale Variable einen Konten def.
Diese def Knoten sind Text-Nodes, deren einziges Attribut das optionale Attribut
description ist. Es dient nur der Dokumentation des Moduls und soll die globale Variable kurz beschreiben. Der eigentliche Inhalt des def Knotens ist ein Csound Opcode
als Text zwischen dem Start- und Ende-Tag des def Elements.
Als Beispiel f¨
ur die Definition einer globalen Variable siehe Zeile 18 in Listing 7.1.
F¨
ur n¨ahere Informationen zum darin verwendeten Csound Opcode ftgen siehe
http://www.csounds.com/manual/html/ftgen.html.
7.2.5
Opcode Knoten
Schließlich folgt der Knoten opcode (Listing 7.1 ab Zeile 23), in dem die eigentlichen
Csound Anweisungen als reiner Text definieren, was das Modul zu machen hat.
Die hier anzugebende Anweisung ist die Definition eines User-defined Opcodes11 . Die
Syntax dieses Codes hier zu erkl¨aren w¨
urde zu weit f¨
uhren; daf¨
ur sei auf die folgenden
Seiten im Internet verwiesen:
• Opcode Definition: http://www.csounds.com/manual/html/opcode.html und
• User-defined Opcode Bibliothek: http://www.csounds.com/udo.
7.3
Einbinden der XML Modul Dateien in Cabel
Um ein wie in den letzten Abschnitten beschriebenes eigenes Cabel XML Modul auch in
Cabel verwenden zu k¨onnen, muß eine entsprechende XML Datei im Modul Verzeichnis 12 ,
oder einem Unterverzeichnis davon angelegt werden. Zum Erstellen wird ein XML Editor
empfohlen, der, wie in Kapitel 7.1 auf Seite 56 beschrieben, das selbst geschriebene Modul
gegen das Schema modul.xsd (zu finden im Modul Verzeichnis) validieren kann.
10
F¨
ur n¨ahere Information siehe http://www.csounds.com/manual/html/f.html
engl. Benutzerdefinierter Opcode
12
siehe Kapitel 3.3.3 auf Seite 22
11
7.3. EINBINDEN DER XML MODUL DATEIEN IN CABEL
61
Haben sie ein valides Cabel XML Modul dort gespeichert, erscheint es in der Cabel Modul Liste, nachdem Sie unter Options→Refresh Module List die Liste der Cabel Module
aktualisiert haben (Beschrieben in Kapitel 3.2 auf Seite 16).
7.3.1
Skinning von Cabel Modulen
Sie k¨onnen f¨
ur jedes Cabel Modul ein Hintergrundbild festlegen und somit das Erscheinungsbild Ihrer Module gestalten.
Dazu legen Sie eine JPEG-Bilddatei13 mit demselben Namen des Moduls, das Sie skinnen
m¨ochten, in dessen Modul Verzeichnis ab, also z.B. modulators/PulseLfo.jpg f¨
ur modulators/PulseLfo.xml. Das Bild wird zentriert unter die Darstellung des Moduls gesetzt und,
falls das Bild gr¨oßer als das Modul ist, wird die Modulgr¨oße an die des Bildes angepaßt.
13
Joint Photographic Experts Group; Bilddatei mit der Endung JPG.
Kapitel 8
Automatisierung von Cabel
¨
Cabel kann mit Hilfe von Python1 automatisiert werden. Offnen
Sie u
u mit
¨ ber das Men¨
Options→Show Bottom Pane die Python Shell.
¨
Uber
die Variable w haben sie Zugriff auf die Funktionen der Klasse model.workspace
(siehe Anhang A.7, S. 81), die die Funktionalit¨at von Cabel implementiert. Weitere Information zu den Funktionen von model.workspace entnehmen Sie bitte der Cabel API2
in Anhang A.
8.1
Generierung eines Instruments
Wenn Sie Listing 8.1 in die Python Shell eingeben, sollten Sie nach dem Triggern des
Instruments einen Sinuston mit 440 Hz h¨oren.
1
2
3
4
5
6
7
8
Listing 8.1: Sinuston
s i n e = w. addXmlModule ( ” sound s o u r c e s / SineVco ” )
amp = w. addXmlModule ( ”amps mixer s /Amp” )
out = w. addXmlModule ( ” i n p u t output /PcmMonoOut” )
w. c o n n e c t ( s i n e . outVars [ 0 ] , amp . inVa r s [ 0 ] )
w. c o n n e c t (amp . outVars [ 0 ] , out . inVa r s [ 0 ] )
w. s e t V a l u e ( s i n e . inVa r s [ 0 ] , 4 4 0 )
w. s e t V a l u e (amp . inVa r s [ 1 ] , 2 0 0 0 0 )
w. p l a y ( )
Mit w.stop() k¨onnen Sie das Instrument wieder stoppen.
In Zeile 1 bis 3 werden die einzelnen Module erzeugt. In Zeile 4 wird der erste Ausgang
des SineVco Moduls (Index 0) mit dem ersten Eingang des Amp Moduls (Index 0) ver1
2
Falls Sie noch nie mit Python gearbeitet haben, empfehlen wir das Buch “Dive into Python” [Pil04]
Application Programming Interface
62
8.2. VEREINFACHUNG SICH WIEDERHOLENDER ARBEITSSCHRITTE
63
bunden. In Zeile 5 entsprechend der erste Ausgang von Amp mit dem ersten Ausgang von
PcmMonoOut. In den darauffolgenden Zeilen werden den nicht verbundenen Eing¨angen
Werte zugewiesen und das Instrument gestartet.
8.2
Vereinfachung
schritte
sich
wiederholender
Arbeits-
Falls Sie eine Folge von Arbeitsschritten f¨
ur Ihren Instrumententwurf mehrmals
durchf¨
uhren m¨
ussen, k¨onnen Sie diese ebenfalls automatisieren.
Dazu ein kleines Beispiel: Um drei durch TriangleLfo frequenzmodulierte Moog Filter zu
erzeugen, verwenden Sie den Code in Listing 8.2.
1
2
3
4
Listing 8.2: Drei durch TriangleLfo modulierte Moog Filter
for i in xr a ng e ( 3 ) :
l f o = w . addXmlModule ( ” mo dula t o r s / T r i a n g l e L f o ” )
moog = w. addXmlModule ( ” f i l t e r s /MoogVcf ” )
w. c o n n e c t ( l f o . outVars [ 0 ] , moog . inVa r s [ 1 ] )
8.3
Einbindung externer Python Skripte
Zuletzt wollen wir Cabel durch ein externes Skript automatisieren. Erzeugen Sie in ihrem
Cabel Verzeichnis eine Datei script.py mit dem Inhalt von Listing 8.3.
1
2
3
4
5
6
7
8
Listing 8.3: Ein externes Python Skript
def s i n e (w, f r q ) :
s i n e = w. addXmlModule ( ” sound s o u r c e s / SineVco ” )
amp = w . addXmlModule ( ”amps mixer s /Amp” )
out = w . addXmlModule ( ” i n p u t output /PcmMonoOut” )
w. c o n n e c t ( s i n e . outVars [ 0 ] , amp . inVa r s [ 0 ] )
w. c o n n e c t (amp . outVars [ 0 ] , out . inVa r s [ 0 ] )
w. s e t V a l u e ( s i n e . inVa r s [ 0 ] , f r q )
w. s e t V a l u e (amp . inVa r s [ 1 ] , 2 0 0 0 0 )
Diese Datei definiert eine Funktion, die ein Instrument ¨ahnlich Listing 8.1 erzeugt. Geben
Sie in der Python Shell Listing 8.4 ein um dieses Skript zu importieren und ein Sinus
Instrument mit einer Frequenz von 300 Hz zu erzeugen.
Listing 8.4: Ausf¨
uhren eines externen Skriptes
1
2
import s c r i p t
s c r i p t . s i n e (w, 3 0 0 )
64
KAPITEL 8. AUTOMATISIERUNG VON CABEL
Anhand dieser Beispiele und mit Hilfe der Cabel API in Anhang A sollten Sie in der Lage
sein, Cabel zu automatisieren.
Anhang A
Cabel API
65
Class Connection
A.1
Module model.connection
Module model.connection
A.1.1
Class Connection
builtin .object
Connection
Connection between two modules.
A Connection is defined by its start Var and its end Var.
A.1.1.1
Methods
init (self, fromVar, toVar )
Standard constructor.
Parameters
fromVar: Start Var of this connection.
(type=model.var.OutVar)
toVar:
End Var of this connection.
(type=model.var.InVar)
Overrides:
builtin .object. init
Inherited from object: delattr ,
reduce ex , repr , setattr , str
A.1.1.2
toVar
hash ,
Instance Variables
Name
fromVar
getattribute ,
Description
Start Var of this connection.
(type=model.var.OutVar)
End Var of this connection.
(type=model.var.InVar)
66
new ,
reduce ,
Module model.csound
A.2
A.2.1
Module model.csound
Class CsoundGenerator
builtin .object
model.observer.Observer
CsoundGenerator
CsoundGenerator.
Generates csound code from actual state of workspace.
A.2.1.1
Methods
init (self, workspace)
Standard constructor.
Parameters
workspace: Workspace on which the CsoundGenerator works.
(type=model.workspace.Workspace)
Overrides: model.observer.Observer. init
exportToCsd(self, filePath)
Export options, orchestra and score into CSD file.
Parameters
filePath: Path to CSD file (relative or absolute).
(type=str)
generate(self )
Generates the Csound Code out of the in the workspace bundled objects.
Return Value
CSound code.
(type=string)
67
Class CsoundGenerator
Module model.csound
play(self )
Starts CSD generation and csound in a seperate process. If csound’s already playing
stops it first.
Return Value
True if the csound process started successfully.
(type=boolean)
stop(self )
Stops running Csound process.
Return Value
True if there was a running csound process to be stopped, else False.
(type=boolean)
update(self, observable, arg)
This method is called whenever the observed object is changed. An application calls an
observable object’s notifyObservers method to have all the object’s observers notified of
the change.
Parameters
arg: An argument passed to the notifyObservers method.
(type=object)
Overrides: model.observer.Observer.update
Inherited from object: delattr ,
reduce ex , repr , setattr , str
A.2.1.2
getattribute ,
hash ,
new ,
Instance Variables
Name
config
csoundVars
workspace
Description
Defines and encapsulates user specified csound
relevant variables. (see config.xml)
(type=tools.config.Config)
Defines and encapsulates user specified csound
relevant variables. (see config.xml)
(type=tools.config.Csound)
Link to workspace object.
(type=model.workspace.Workspace)
68
reduce ,
Module model.instrument
A.3
Class Instrument
Module model.instrument
A.3.1
Class Instrument
builtin .object
Instrument
Instrument.
An Instrument contains a list of included modules and their connections.
A.3.1.1
Methods
init (self )
Standard constructor.
Overrides:
builtin .object. init
printConnections(self )
Print connections and their indices to standard output.
printModules(self )
Print contained modules and their indices to standard output.
Inherited from object: delattr ,
reduce ex , repr , setattr , str
A.3.1.2
hash ,
new ,
Instance Variables
Name
connections
modules
getattribute ,
Description
Connections between intrument modules.
(type=list)
Modules contained in intrument.
(type=list)
69
reduce ,
Module model.module
A.4
Module model.module
A.4.1
Class Module
builtin .object
Module
Module.
A Module contains its user-defined opcode text and lists of its In- and OutVars.
A.4.1.1
Methods
init (self, name, description=’’, opcode=’’, id =0)
Standard constructor.
Parameters
name:
Name of module/user-defined opcode
(type=string)
description: describes module.
(type=string)
opcode:
Text of user defined opcode for name
(type=string)
id:
Unique id for module.
(type=integer)
Overrides:
builtin .object. init
addGlobal(self, globus, description)
add globus (global is a fukin’ keyword) to the list of the module’s global-vars.
nice to save tables in, so that the csoundGenerator can extract them and doesn’t have
to generate one for every instance of the module.
Parameters
globus:
new global-var for the module as crude csound-code
(type=str)
description: description for the global-var
(type=str)
70
Module model.module
Class Module
addInVar(self, inVar )
add inVar to the list of the module’s input-vars.
Parameters
inVar: new input to the module
(type=model.var.inVar)
addOutVar(self, outVar )
add outVar to the list of the module’s output-vars.
Parameters
outVar: new output of the module
(type=model.var.outVar)
getGlobalAsCsoundCode(self, index )
Returns the GlobalVar definition as a crude csound-code string. If there is a description
stored it is appended as a comment.
Parameters
index: The index of the global.
(type=int)
Return Value
The global var definition as crude csound-code string with or without
comment.
(type=str)
printInputs(self )
Print input names, indices, their values and value ranges to standard output.
printOutputs(self )
Print output names and indices to standard output.
setInVarValues(self, values)
Set inVar values.
Parameters
values: List of tuples each describing a var by its id and value.
(type=list)
Inherited from object: delattr ,
reduce ex , repr , setattr , str
getattribute ,
71
hash ,
new ,
reduce ,
Class Module
A.4.1.2
Instance Variables
Name
description
fullName
globals
id
instrument
inVars
name
opcode
outVars
Module model.module
Description
describes module.
(type=string)
Name of module including relative path
(type=string)
List of Strings for global statements.
(type=list)
Unique id for module.
(type=integer)
Instrument containing this module.
(type=model.instrument.Instrument)
List of input variables.
(type=list)
Name of module/user-defined opcode
(type=string)
Text of user defined opcode for name
(type=string)
List of output variables.
(type=list)
72
Module model.observer
A.5
Module model.observer
A.5.1
Class Observable
builtin .object
Observable
Known Subclasses: Workspace
Observable.
This class represents an observable object, or ’data’ in the model-view paradigm. It can
be subclassed to represent an object that the application wants to have observed. An
observable object can have one or more observers. After an observable instance changes,
an application calling the Observable’s notifyObservers method causes all of its observers
to be notified of the change by a call to their update method.
A.5.1.1
Methods
init (self )
Standard constructor.
Overrides:
builtin .object. init
addObserver(self, observer )
Adds a new observer to the list of observers.
Parameters
observer: New observer to add.
(type=Observer)
clearChanged(self )
Indicates that this object has no longer changed, or that it has already notified all of its
observers of its most recent change. This method is called automatically by the
notifyObservers methods.
countObservers(self )
Returns the number of observers of this object.
@rtype : int
Return Value
Number of observers.
73
Class Observer
Module model.observer
deleteObservers(self )
Clears the observer list so that this object no longer has any observers.
hasChanged(self )
Tests if this object has changed.
@rtype : bool
Return Value
If this object has changed.
notifyObservers(self, arg=None)
If this object has changed, as indicated by the hasChanged method, then notify all of
its observers and then call the clearChanged method to indicate that this object has no
longer changed. Each observer has its update method called with two arguments: this
observable object and the arg argument.
Parameters
arg: Data representing the change in Observable.
(type=object)
removeObserver(self, observer )
Remove observer from list of observers.
Parameters
observer: Observer to remove.
(type=Observer)
resumeObservation(self )
setChanged(self )
Indicated that this object has changed.
suspendObservation(self )
Inherited from object: delattr ,
reduce ex , repr , setattr , str
A.5.2
getattribute ,
Class Observer
builtin .object
Observer
74
hash ,
new ,
reduce ,
Module model.observer
Class Observer
Known Subclasses: CabelController, CabelFrame, CabelIOTextCtrl, CabelStatusBar,
CabelValueFrame, CsoundGenerator
Observer.
A class can inherit from Observer interface when it wants to be informed of changes in
observable objects.
A.5.2.1
Methods
init (self )
Standard constructor.
Overrides:
builtin .object. init
update(self, observable, arg)
This method is called whenever the observed object is changed. An application calls an
observable object’s notifyObservers method to have all the object’s observers notified of
the change.
Parameters
observable: The observable object.
(type=Observable)
arg:
An argument passed to the notifyObservers method.
(type=object)
Inherited from object: delattr ,
reduce ex , repr , setattr , str
getattribute ,
75
hash ,
new ,
reduce ,
Module model.var
A.6
A.6.1
Module model.var
Class InVar
builtin .object
model.var.Var
InVar
Module input variable.
Special Var for input variables, which can set its actual value in the range min to max if
not connected.
A.6.1.1
Methods
init (self, module, name, type, description=’’, min=-32768, max =32767,
value=0, digits=3)
Standard constructor.
Parameters
module: Module to which this variable belongs.
(type=model.module.Module)
name:
Name of variable.
(type=string)
type: Type of variable.
(type=string)
min:
Minimal allowed value for value.
(type=float)
max:
Maximal allowed value for value.
(type=float)
value: Initial value of variable.
(type=float)
digits: Number of digits (or presicion) for the value.
(type=int)
Overrides: model.var.Var. init
Inherited from object: delattr ,
reduce ex , repr , setattr , str
A.6.1.2
getattribute ,
Properties
76
hash ,
new ,
reduce ,
Module model.var
Class OutVar
Name
Description
Value
A.6.1.3
Instance Variables
Name
connection
Description
Link to connection to this var.
(type=model.connection.Connection)
digits
Number of digits (or presicion) for the value.
(type=int)
max
Maximal allowed value for value.
(type=float)
min
Minimal allowed value for value.
(type=float)
value
Initial value of variable.
(type=float)
Inherited from Var: module (p. 78), name (p. 78), type (p. 78)
A.6.2
Class OutVar
builtin .object
model.var.Var
OutVar
Module output variable.
At the moment this is just a wrapper for Var with special name.
A.6.2.1
Methods
init (self, module, name, type, description=’’)
Standard constructor.
Parameters
module: Module to which this variable belongs.
(type=model.module.Module)
name:
Name of variable.
(type=string)
type: Type of variable.
(type=string)
Overrides: model.var.Var. init
77
Class Var
Module model.var
Inherited from object: delattr ,
reduce ex , repr , setattr , str
A.6.2.2
getattribute ,
hash ,
new ,
reduce ,
Instance Variables
Name
description
Description
describes the meaning of the input-var
(type=string)
Inherited from Var: module (p. 78), name (p. 78), type (p. 78)
A.6.3
Class Var
builtin .object
Var
Known Subclasses: InVar, OutVar
Module variable.
Var contains its corresponding module, variable name and variable type. This class serves
as interface for special variables.
A.6.3.1
Methods
init (self, module, name, type, description=’’)
Standard constructor.
Parameters
module:
Module to which this variable belongs.
(type=model.module.Module)
name:
Name of variable.
(type=string)
type:
Type of variable.
(type=string)
description: describes the meaning of variable.
(type=string)
Overrides:
builtin .object. init
Inherited from object: delattr ,
reduce ex , repr , setattr , str
getattribute ,
78
hash ,
new ,
reduce ,
Module model.var
A.6.3.2
Class Var
Instance Variables
79
Class VarValueOutOfRangeError
Name
Description
Module to which this variable belongs.
(type=Module)
Name of variable.
(type=string)
Type of variable.
(type=string)
module
name
type
A.6.4
Module model.var
Class VarValueOutOfRangeError
exceptions.Exception
VarValueOutOfRangeError
VarValueOutOfRangeError.
Exception if new value for InVar is out of rage.
A.6.4.1
Methods
Inherited from Exception:
init ,
getitem ,
80
str
Module model.workspace
A.7
A.7.1
Module model.workspace
Class ConnectionError
exceptions.Exception
ConnectionError
ConnectionError.
Exception if connection fails.
A.7.1.1
Methods
Inherited from Exception:
A.7.2
init ,
getitem ,
str
Class Workspace
builtin .object
model.observer.Observable
Workspace
Workspace.
Manages list of instruments and connections between modules and module-IDs.
A.7.2.1
Methods
init (self )
Standard constructor.
Overrides: model.observer.Observable. init
addModule(self, module)
Add module to workspace and create a new instrument which includes this module.
Adds entry in self. modulesDict dictionary.
Parameters
module: Module to be added.
(type=model.module.Module)
81
Class Workspace
Module model.workspace
addXmlModule(self, moduleName)
Reads an xml-module with an unique id and adds it to the workspace.
Parameters
moduleName: the name of the module which should be defined in a
moduleName.xml File in the searchPath of the moduleReader
(’modules/’ by default)
(type=str)
Return Value
Returns added module.
Raises
model.xmlReader.ModuleNotFoundError if the given moduleName-module
couldn’t be found in the searchpath
model.xmlReader.ModuleDefinitionError if the given
moduleName-xml-module wasn’t valid @rtype : model.module.Module
connect(self, fromVar, toVar )
Connect fromVar to toVar, add all modules of toVar-module-instrument to instrument
of fromVar-module and sort modules list in the correct order for csound code
generation.
Parameters
fromVar: Startpoint of connection.
(type=model.var.OutVar)
toVar:
Endpoint of connection.
(type=model.var.InVar)
Return Value
New connection.
Raises
ConnectionError If connection from module to itself. @rtype :
model.Connection.connection
82
Module model.workspace
Class Workspace
connect2(self, fromModuleId, fromVarId, toModuleId, toVarId )
Same implementation, different call than connect(fromVar, toVar).
Parameters
fromModuleId: Module id in the workspace.
(type=int)
fromVarId:
Output number of the fromModule.
(type=int)
toModuleId:
Module id in the workspace.
(type=int)
toVarId:
Input number of the fromModule.
(type=int)
createWorkspace(self, workspaceReader =None)
Create a Workspace from a workspaceReader object or a new, empty one. Informes
observers.
Parameters
workspaceReader: Reads a complete cabel workspace from .cw files.
(type=model.xmlReader.XmlWorkspaceReader)
disconnect(self, connection)
Delete connection. Test if we need to create a new instrument for the disconnected
modules.
Parameters
connection: Connection which should be deleted.
(type=model.connection.Connection)
getModuleById(self, id )
Returns module with this id.
Parameters
id: Id of wanted module. @rtype : model.module.Module
(type=int)
Return Value
Module with this id or None if not found.
83
Class Workspace
Module model.workspace
getModuleDescription(self, module)
Return description string of module.
Parameters
module: Module whose description we want. @rtype : str
(type=model.module.Module)
Return Value
Description of module.
getValue(self, var )
Return actual value of var.
Parameters
var: Variable whose value we want. @rtype : float
(type=model.var.InVar)
Return Value
Value of var.
getVarDescription(self, var )
Return description string of variable.
Parameters
var: Module whose description we want. @rtype : str
(type=model.module.Module)
Return Value
Description of module.
isPlaying(self )
Return wether cabel is in playing state or not.
play(self )
Starts csound in separate process.
printInstruments(self )
Print instruments with their contained modules and indices to standard output.
84
Module model.workspace
Class Workspace
removeModule(self, module)
Remove module and all its ingoing and outgoing connections from workspace. Removes
entry in self. modulesDict dictionary.
Parameters
module: Module which should be removed.
(type=model.module.Module)
setIoTextCtrl(self, control )
setValue(self, var, value)
Set var to value.
Parameters
var:
Variable which we want to change.
(type=model.var.InVar)
value: New value for variable.
(type=float)
Raises
VarValueOutOfRangeError If new value is out of range.
stop(self )
Stops csound process.
Inherited from object: delattr , getattribute , hash , new , reduce ,
reduce ex , repr , setattr , str
Inherited from Observable: addObserver, clearChanged, countObservers, deleteObservers, hasChanged, notifyObservers, removeObserver, resumeObservation, setChanged,
suspendObservation
A.7.2.2
Instance Variables
Name
instruments
A.7.2.3
Description
List of intruments.
(type=list)
Class Variables
85
Class Workspace
Name
config
Module model.workspace
Description
Interface to config categories.
Value: <tools.config.Config instance at 0x01879288>
(type=tools.config.Config)
86
Module model.xmlGenerator
A.8
Module model.xmlGenerator
A.8.1
Class XmlGenerator
builtin .object
XmlGenerator
XmlGenerator.
Generates Cabel Xml.
A.8.1.1
Methods
init (self, fileLocation)
Standardconstructor.
Parameters
fileLocation: Complete path to the save file.
(type=string)
Overrides:
builtin .object. init
getXml(self, workspace)
Returns a Xml node with reference-, instance- and connections-nodes.
Parameters
workspace: (type=view.workspace.CabelFrame)
Return Value
Xml node.
(type=xml.dom.Element)
getXmlAdditionalInfo(self, workspace)
Returns node with addiotional Information to be saved.
Parameters
workspace: (type=view.workspace.CabelFrame)
Return Value
Xml node.
(type=xml.dom.Element)
87
Class XmlGenerator
Module model.xmlGenerator
getXmlConnections(self, cons)
Returns Xml connection nodes
Parameters
cons: List of view connections.
(type=list)
Return Value
Xml connections node.
(type=xml.dom.Element)
getXmlModuleInstance(self, mod )
Returns a Xml module instance node
Parameters
mod: View module to create the instance node.
(type=view.module.Module)
Return Value
Xml module instance node.
(type=xml.dom.Element)
getXmlModuleReference(self, mod )
Returns a xml module reference node.
Parameters
mod: Model module to create the reference node.
(type=model.module.Module)
Return Value
Xml module reference node.
(type=xml.dom.Element)
writeWorkspace(self, workspace)
Writes the workspace to a xml File.
Parameters
workspace: The workspace to be saved.
(type=view.workspace.CabelFrame)
Return Value
[True, ”] if saved, [False, ’Message’] if error.
(type=[boolean,string])
Inherited from object: delattr ,
reduce ex , repr , setattr , str
getattribute ,
88
hash ,
new ,
reduce ,
Module model.xmlGenerator
A.8.1.2
Class XmlGenerator
Instance Variables
Name
doc
filePath
name
Description
Root Document.
(type=xml.dom.Document)
Path of the file to save.
(type=string)
Name of the File (without extension ’.cw’).
(type=string)
89
Module model.xmlReader
A.9
Module model.xmlReader
A.9.1
Class ModuleDefinitionError
exceptions.Exception
ModuleDefinitionError
ModuleDefinitionError.
Exception if there is any syntax error in the module xml-file.
A.9.1.1
Methods
Inherited from Exception:
A.9.2
init ,
getitem ,
str
Class ModuleNotFoundError
exceptions.Exception
ModuleNotFoundError
ModuleNotFoundError.
Exception if the searched Module wasn’t found.
A.9.2.1
Methods
Inherited from Exception:
A.9.3
init ,
getitem ,
Class XmlModuleReader
builtin .object
XmlModuleReader
XmlModuleReader.
Reads XML modules.
90
str
Module model.xmlReader
A.9.3.1
Class XmlModuleReader
Methods
init (self )
Standard Constructor.
Overrides:
builtin .object. init
getModule(self, name)
searches for the the xml-file name.xml in the searchpath directory and tries to
instanciate a module object from it.
Parameters
name: Name of the Module we want to instanciate.
(type=str)
Return Value
Returns new module object.
Raises
ModuleNotFoundError If the Xml-File name.xml doesn’t exist. @rtype :
model.module.Module
ModuleDefinitionError If the Xml-File isn’t valid
getModuleFromNode(self, moduleNode, name=’’)
getModules(self, tree=True)
Return list of modules with their names.
Parameters
tree: Build tree of modules (recursive list of tuples).
(type=bool)
getModulesObjects(self, tree=True)
Return list of modules with realtive paths as names.
Parameters
tree: Build tree of modules (recursive list of tuples).
(type=bool)
Inherited from object: delattr ,
reduce ex , repr , setattr , str
A.9.3.2
getattribute ,
Instance Variables
91
hash ,
new ,
reduce ,
Class XmlWorkspaceReader
Name
searchPath
A.9.4
Module model.xmlReader
Description
Path to directory with XML modules files.
(type=str)
Class XmlWorkspaceReader
builtin .object
XmlWorkspaceReader
XmlWorkspaceReader.
Reads Xml Workspace files (*.cw)
A.9.4.1
Methods
init (self, fileLocation, controller )
Standardconstructor.
Parameters
fileLocation: Path to a saved workspace file.
(type=string)
controller:
CabelController.
(type=view.controller.CabelController)
Overrides:
builtin .object. init
Inherited from object: delattr ,
reduce ex , repr , setattr , str
A.9.4.2
hash ,
new ,
reduce ,
Instance Variables
Name
additionalInfo
connections
fileName
getattribute ,
Description
A dictionary mapping additionalInfo Parameter names
to its values (string)
A list of dictionaries with the keys: ’fromModuleId’,
’fromVarId’, ’toModuleId’ and ’toVarId’ for the
connections saved in. Its value types are int.
(type=list)
Name of the saved workspace file without extension
.cw
(type=string)
continued on next page
92
Module model.xmlReader
Name
filePath
instances
modelModules
references
rootNode
viewModules
Class XmlWorkspaceReader
Description
Path to the saved workpace file.
(type=string)
A dictionary mapping tuples (moduleName [string],
moduleId [int]) to moduleInstance Nodes.
(type=dictionary.)
Dictionary mapping ids (int) to model modules in the
saved workspace.
(type=dictionary)
A dictionary mapping moduleNames to module Nodes
with the same xml syntax as used for the module
defintions.
(type=dictionary)
The root node of the saved workspace file.
(type=xml.dom.Node)
Dictionary mapping model modules to their
corresponding view modules.
(type=dictionary)
93
Module tools.config
A.10
Module tools.config
A.10.1
Class Category
builtin .object
Category
Known Subclasses: Csound, Directories, ListVar, View
Category.
Abstract superclass for all Config Categories. If you want a coherent config.xml File do
NOT use the Config Var objects of vars[] directly!!! setVal/getVal are the methods to
use!!
A.10.1.1
Methods
init (self, name, configDoc, configXmlLocation)
Standardconstructor.
Parameters
name:
Name of Category.
(type=string)
configDoc:
config.xml DOM.
(type=minidom.Document)
configXmlLocation: Path to config.xml.
(type=string)
Overrides:
builtin .object. init
fillWithDefaultVars(self )
Fills vars[] with its Config Var Objects. Has to be implemented by the non abstract
inherited classes.
94
Module tools.config
Class Category
getDefault(self, var )
Gets the default of the Config Var object in vars[var].
Parameters
var: index of Config Var object in vars[]. Get it from the
instance-constants of the implemented Category.
(type=int)
Return Value
Default value of var.
(type=object)
getEnumIndex(self, var )
Gets the enum index of the enumVar vars[var].
Parameters
var: index of Config Var object in vars[]. Get it from the
instance-constants of the implemented Category.
(type=int)
Raises
IndexError If the ConfigVar vars[var] isn’t a ConfigEnumVar.
getVal(self, var )
Gets the Value of the Config Var object in vars[var]. If it isn’t already in the config.xml
DOM, it is added and config.xml saved.
Parameters
var: index of Config Var object in vars[]. Get it from the static-constants
of the implemented Category.
(type=int)
Return Value
Value of var.
(type=object)
getVar(self, var )
95
Class Category
Module tools.config
insertVar(self, index, var )
Sets the ConfigVar var at the specified position in self.vars and fills the still unset vars
with its index number.
Parameters
index: 0 based index of the var to add.
(type=int)
var:
The ConfigVar to be added.
(type=config.ConfigVar)
setEnumIndex(self, var, index )
Sets the enum index of the enumVar vars[var] and saves it to the config.xml.
Parameters
var:
index of Config Var object in vars[]. Get it from the
instance-constants of the implemented Category.
(type=int)
index: Index to which it should be set.
(type=int)
Raises
IndexError If the ConfigVar vars[var] isn’t a ConfigEnumVar.
setVal(self, var, val )
Sets the Value of the Config Var object in vars[var] and saves the config.xml DOM.
Parameters
var: index of Config Var object in vars[]. Get it from the
instance-constants of the implemented Category.
(type=int)
val: Value to which it should be set.
(type=string)
Inherited from object: delattr ,
reduce ex , repr , setattr , str
A.10.1.2
hash ,
new ,
reduce ,
Instance Variables
Name
categoryNode
configDoc
getattribute ,
Description
Node of the Category in config.xml DOM.
(type=minidom.Element)
config.xml DOM.
(type=minidom.Document)
continued on next page
96
Module tools.config
Class ConfigEnumVar
Name
configXmlLocation
Description
Path to config.xml.
(type=string)
Name of Category.
(type=string)
List of ConfigVar objects. setVal/getVal are the
methods to use for access to its Values!!
(type=list)
name
vars
A.10.2
Class Config
Config.
Encapsulates all Categories in the config file.
A.10.2.1
Methods
init (self )
Standardconstructor.
A.10.2.2
Instance Variables
Name
configDoc
configXmlLocation
A.10.3
Description
config.xml DOM.
(type=minidom.Document)
Path to config.xml.
(type=string)
Class ConfigEnumVar
builtin .object
tools.config.ConfigVar
ConfigEnumVar
ConfigEnumVar.
Like ConfigVar, but with additional instance var enum. Saves as the value the index of
the value in the own enumeration list enum.
97
Class ConfigVar
A.10.3.1
Module tools.config
Methods
init (self, category, name, default, setting=None, enum=[])
Standardconstructor.
Like ConfigVar constructor, with additional param enum.
Parameters
default: Index in self.enum
(type=int)
enum:
List of predefined possible values to be selected.
(type=list)
Overrides: tools.config.ConfigVar. init
Inherited from object: delattr , getattribute ,
reduce ex , repr , setattr , str
Inherited from ConfigVar: getVal, read, setVal, write
A.10.3.2
new ,
reduce ,
Properties
Name
Default
Index
Value
Inherited from ConfigVar: setting (p. 98)
A.10.3.3
hash ,
Description
Instance Variables
Name
Description
Default
Default Value (value of self.enum[self. default]).
enum
List of predefined possible values to be selected.
(type=list)
Index
Actual index of ConfigEnumVar.
Value
Value of self.enum[self.Index]
Inherited from ConfigVar: category (p. 98), description (p. 98), name (p. 98), nodeFound (p. 98), nodeType (p. 98), valueType (p. 98)
A.10.4
Class ConfigVar
builtin .object
ConfigVar
98
Module tools.config
Class ConfigVar
Known Subclasses: ConfigEnumVar
ConfigVar.
Encapsulates information of a Config Variable and the functionality to write and read it.
!!! Always use the Property Value for accesing and setting the Value of ConfigVar!!!
A.10.4.1
Methods
init (self, category, name, default, setting=None, nodeType=2)
Standardconstructor.
Parameters
category: Category to which ConfigVar belongs to.
(type=config.Category)
name:
Name of ConfigVar.
(type=string)
default: Default-Value of ConfigVar.
(type=string)
setting: Describes ConfigVar.
(type=config.Setting)
nodeType: Is the ConfigVar stored as a ATTRIBUTE NODE (=Standard)
or TEXT NODE in config.xml.
(type=int (minidom.Node.nodeType))
Overrides:
builtin .object. init
getVal(self )
Wrapper for category.getVal()
read(self )
Reads the Config Var out of config.xml. If it’s var Node in config.xml DOM not exists,
it adds it.
Return Value
Stored ConfigVar.
(type=ConfigVar)
setVal(self, val )
Wrapper for category.setVal()
write(self, read =False)
Writes Var in config.xml DOM. If its var Node does not exist, it creates it.
99
Class Csound
Module tools.config
Inherited from object: delattr ,
reduce ex , repr , setattr , str
A.10.4.2
getattribute ,
hash ,
new ,
reduce ,
Properties
Name
Description
Default
setting
Value
A.10.4.3
Instance Variables
Name
category
description
name
nodeFound
nodeType
valueType
A.10.5
Description
Category to which ConfigVar belongs to.
(type=config.Category)
Describes ConfigVar.
(type=string)
Name of ConfigVar.
(type=string)
Set by read method. If it is set to None after read
method, the category in charge will save config.xml.
Else it stores the varNode.
(type=boolean)
Is the ConfigVar stored as a ATTRIBUTE NODE or
TEXT NODE in config.xml.
(type=int (minidom.Node.nodeType))
Type of Value; ’string’
(type=string)
Class Csound
builtin .object
tools.config.Category
Csound
config.Csound.
Category for Csound specific Information. (See documentation of superclass Category!)
100
Module tools.config
A.10.5.1
Class Csound
Methods
init (self, configDoc, configXmlLocation)
Standardconstructor.
Parameters
configDoc:
config.xml DOM.
(type=minidom.Document)
configXmlLocation: Path to config.xml.
(type=string)
Overrides: tools.config.Category. init
fillWithDefaultVars(self )
Fills classvar vars[] with its Config Var Objects.
Overrides: tools.config.Category.fillWithDefaultVars
Inherited from object: delattr , getattribute , hash , new , reduce ,
reduce ex , repr , setattr , str
Inherited from Category: getDefault, getEnumIndex, getVal, getVar, insertVar, setEnumIndex, setVal
A.10.5.2
Instance Variables
Name
Description
Inherited from Category: categoryNode (p. 94), configDoc (p. 94), configXmlLocation
(p. 94), name (p. 94), vars (p. 94)
A.10.5.3
Class Variables
Name
AUTOPLAY
CSOUNDPATH
FEEDBACK TIMEOUT
KONTROLRATE
KSMPS
NCHNLS
PARAMS
SAMPLERATE
SCORE
Value:
Value:
Value:
Value:
Value:
Value:
Value:
Value:
Value:
7
5
8
1
2
3
6
0
4
Description
(type=int)
(type=int)
(type=int)
(type=int)
(type=int)
(type=int)
(type=int)
(type=int)
(type=int)
101
Class Directories
A.10.6
Module tools.config
Class Directories
builtin .object
tools.config.Category
Directories
Directories.
Category for Directories. (See documentation of superclass Category!)
A.10.6.1
Methods
init (self, configDoc, configXmlLocation)
Standardconstructor.
Parameters
configDoc:
config.xml DOM.
(type=minidom.Document)
configXmlLocation: Path to config.xml.
(type=string)
Overrides: tools.config.Category. init
fillWithDefaultVars(self )
Fills classvar vars[] with its Config Var Objects.
Overrides: tools.config.Category.fillWithDefaultVars
Inherited from object: delattr , getattribute , hash , new , reduce ,
reduce ex , repr , setattr , str
Inherited from Category: getDefault, getEnumIndex, getVal, getVar, insertVar, setEnumIndex, setVal
A.10.6.2
Instance Variables
Name
Description
Inherited from Category: categoryNode (p. 94), configDoc (p. 94), configXmlLocation
(p. 94), name (p. 94), vars (p. 94)
A.10.6.3
Class Variables
102
Module tools.config
Class ListVar
Name
EDITOR
LOGGING DIR
LOGGING ON
MODULES
RECENTFILES
A.10.7
Value:
Value:
Value:
Value:
Value:
4
2
3
0
1
Description
(type=int)
(type=int)
(type=int)
(type=int)
(type=int)
Class ListVar
builtin .object
tools.config.Category
ListVar
List.
Helper category for internal use only. Serves as a meta category for list vars.
A.10.7.1
Methods
init (self, configVar, list=[], name=’’, parentNode=None,
setting=’take the 1 in configVar’, varNodeName=’var’)
Standardconstructor.
Parameters
configVar:
ConfigVar of ListVar.
(type=config.ConfigVar)
list:
The list of initial values.
(type=list)
name:
Name of the list var.
(type=string)
parentNode: Parent Node for the ListVar to save.
(type=xml.dom.Node)
setting:
Setting for the ListVar.
(type=config.Setting)
varNodeName: Name of the Node in which the ListVar is stored. ’var’ per
default!
(type=string)
Overrides: tools.config.Category. init
103
Class Setting
Module tools.config
fillWithDefaultVars(self )
Fills classvar vars[] with its Config Var Objects.
Overrides: tools.config.Category.fillWithDefaultVars
read(self )
Read the listVar from config.xml and return the obtained list.
Return Value
The listVar saved in config.xml
(type=list)
write(self, list=None)
Writes the as argument passed list to the config.xml. Therefore it deletes the actual
Nodes and creates it new from self. list.
Inherited from object: delattr , getattribute , hash , new , reduce ,
reduce ex , repr , setattr , str
Inherited from Category: getDefault, getEnumIndex, getVal, getVar, insertVar, setEnumIndex, setVal
A.10.7.2
Instance Variables
Name
Description
Inherited from Category: categoryNode (p. 94), configDoc (p. 94), configXmlLocation
(p. 94), name (p. 94), vars (p. 94)
A.10.8
Class Setting
builtin .object
Setting
Setting.
Encapsulates information which serve for the graphical representation of the config.xml.
104
Module tools.config
A.10.8.1
Class Setting
Methods
init (self, description, displayName)
Standardconstructor.
Parameters
description: Description of corresponding configVar. Used for Tooltip.
(type=string)
displayName: Display name of corresponding configVar.
(type=string)
Overrides:
builtin .object. init
readNode(self, settingNode)
Read settingNode of corresponding configVar node in config.xml
Parameters
settingNode: Node in which the setting params are stored.
(type=xml.dom.minidom.Node)
updateView(self, workSpace)
Calls the update methods of all observers in model.workspace.
Parameters
workSpace: The Cabel view workspace.
(type=view.workspace.CabelFrame)
writeNode(self, settingNode)
Write settingNode to corresponding configVar node in config.xml
Parameters
settingNode: Node in which the setting params are stored.
(type=xml.dom.minidom.Node)
Inherited from object: delattr ,
reduce ex , repr , setattr , str
A.10.8.2
getattribute ,
Properties
Name
ctrlLength
A.10.8.3
hash ,
Description
Instance Variables
105
new ,
reduce ,
Class View
Module tools.config
Name
Description
Specifies wether the configVar value can be choosen
out of a control. Possible values are: ’file’, ’path’, or
’None’
(type=string)
Number of lines for multiLine string configVar.
(type=int)
Description of corresponding configVar. Used for
Tooltip.
(type=string)
Show ConfigVar in the preferences dialog?
(type=boolean)
Display name of corresponding configVar.
(type=string)
Corr. ConfigVar belongs should be displayed grouped
in a box labeld with this string. ConfigVars with a
group setting ’None’ are displayed solemnly.
(type=string)
A link to a hint text fragment.
(type=string)
Must not be None the value.
(type=boolean)
If this is set, the configurator automatically notifies all
in model.module.Workspace registered observers. The
argument for the observers is the function name.
(type=string)
choose
ctrlHeight
description
dialog
displayName
group
hint
notNone
updateFunc
A.10.9
Class View
builtin .object
tools.config.Category
View
View.
Category for graphic representations. (See documentation of superclass Category!)
106
Module tools.config
A.10.9.1
Class View
Methods
init (self, configDoc, configXmlLocation)
Standardconstructor.
Parameters
configDoc:
config.xml DOM.
(type=minidom.Document)
configXmlLocation: Path to config.xml.
(type=string)
Overrides: tools.config.Category. init
fillWithDefaultVars(self )
Fills classvar vars[] with its Config Var Objects.
Overrides: tools.config.Category.fillWithDefaultVars
Inherited from object: delattr , getattribute , hash , new , reduce ,
reduce ex , repr , setattr , str
Inherited from Category: getDefault, getEnumIndex, getVal, getVar, insertVar, setEnumIndex, setVal
A.10.9.2
Instance Variables
Name
Description
Inherited from Category: categoryNode (p. 94), configDoc (p. 94), configXmlLocation
(p. 94), name (p. 94), vars (p. 94)
A.10.9.3
Class Variables
Name
BACKGROUNDCOLOUR
BOTTOMWINDOW ACTIVEPAGE
BOTTOMWINDOW HEIGHT
BOTTOMWINDOW REMEMBERPROPERTIES
BOTTOMWINDOW SHOW
Description
Value: 0 (type=int)
Value: 10 (type=int)
Value: 11 (type=int)
Value: 9 (type=int)
Value: 8 (type=int)
continued on next page
107
Class View
Name
CABLECOLOUR
CABLESAGGING
FRAME MAXIMIZED
FRAMEHEIGHT
FRAMEWIDTH
FULLMODULENAMES
MODULEDELETEWARNING
WORKSPACEHEIGHT
WORKSPACEWIDTH
ZOOM FACTOR DEFAULT
ZOOM INDIVIDUAL ACTIVE
ZOOM LASTVALUE
Module tools.config
Value:
Value:
Value:
Value:
Value:
Value:
Value:
Description
7 (type=int)
12 (type=int)
15 (type=int)
4 (type=int)
3 (type=int)
5 (type=int)
6 (type=int)
Value: 2 (type=int)
Value: 1 (type=int)
Value: 14 (type=int)
Value: 13 (type=int)
Value: 16 (type=int)
108
Module view.configurator
A.11
Module view.configurator
A.11.1
Class CabelConfigDialog
builtin .object
wx. core.Object
wx. core.EvtHandler
wx. core.Window
wx. windows.TopLevelWindow
wx. windows.Dialog
CabelConfigDialog
A.11.1.1
Methods
init (self, parent, cfg)
Overrides: wx. windows.Dialog. init
onApply(self, evt)
onCancel(self, evt)
onOK(self, evt)
Inherited from object: delattr ,
reduce ex , setattr , str
getattribute ,
109
hash ,
new ,
reduce ,
Class ConfigBooleanCheck
A.11.2
Module view.configurator
Class ConfigBooleanCheck
builtin .object
view.configurator.ConfigControl
builtin .object
wx. core.Object
wx. core.Sizer
wx. core.BoxSizer
ConfigBooleanCheck
A.11.2.1
Methods
init (self, parent, id, configParser, configBooleanVar, size)
Overrides: view.configurator.ConfigControl. init
callback(self, event)
Virtual method of ConfigControl. Should call the updateVarValDict with the value of
the control in order to process the input of the control.
Overrides: view.configurator.ConfigControl.callback extit(inherited documentation)
Inherited from object: delattr , getattribute , hash , new , reduce ,
reduce ex , setattr , str
Inherited from ConfigControl: hasChanged, invalidateVarVal, onOK, paintCtrlWhite, paintTheInvalidRed, updateVarValDict
A.11.2.2
Instance Variables
Name
Description
Inherited from ConfigControl: configParser (p. 112), configVar (p. 112), ctrl (p. 112),
parent (p. 112)
110
Module view.configurator
A.11.3
Class ConfigColourSelect
Class ConfigColourSelect
builtin .object
view.configurator.ConfigControl
builtin .object
wx. core.Object
wx. core.Sizer
wx. core.GridSizer
wx. core.FlexGridSizer
ConfigColourSelect
A.11.3.1
Methods
init (self, parent, id, configParser, configColourVar, size, label =’’,
pos=wx.Point(-1, -1), style=0)
Overrides: view.configurator.ConfigControl. init
callback(self, event)
Virtual method of ConfigControl. Should call the updateVarValDict with the value of
the control in order to process the input of the control.
Overrides: view.configurator.ConfigControl.callback extit(inherited documentation)
Inherited from object: delattr , getattribute , hash , new , reduce ,
reduce ex , setattr , str
Inherited from ConfigControl: hasChanged, invalidateVarVal, onOK, paintCtrlWhite, paintTheInvalidRed, updateVarValDict
A.11.3.2
Instance Variables
Name
Description
Inherited from ConfigControl: configParser (p. 112), configVar (p. 112), ctrl (p. 112),
parent (p. 112)
111
Class ConfigControl
A.11.4
Module view.configurator
Class ConfigControl
builtin .object
ConfigControl
Known Subclasses: ConfigBooleanCheck, ConfigColourSelect, ConfigFloat, ConfigInt,
ConfigStringMultiLine, ConfigStringSingleLine
ConfigControl.
Controller for the configurator input controlls.
It’s an ’abstract’ class. Inherited classes can implement ’abstract’ invalidateVarVal(self,
val) for validation of the input to the control.
A.11.4.1
Methods
init (self, parent, configParser, var )
Standardconstructor.
Parameters
parent:
The root panel of a wx.Notebook (category) page.
(type=wx.Panel)
configParser: ConfigParser in charge of this control.
(type=configurator.ConfigParser)
var:
ConfigVarrepresented through this control.
(type=config.ConfigVar)
Overrides:
builtin .object. init
callback(self, event)
Virtual method of ConfigControl. Should call the updateVarValDict with the value of
the control in order to process the input of the control.
hasChanged(self, val )
Checks if the value of the configVarhas changed.
Parameters
val: The value returned by the control.
(type=self.configVar.valueType)
112
Module view.configurator
Class ConfigControl
invalidateVarVal(self, val )
Method for invalidation of the configVar’s value.
Return Value
A warning message if the Value is invalid, else False.
(type=boolean/string)
onOK(self, event)
Calls the callback method of the CabelConfig control if the accelerator for the OK or
Apply Buttons (ALT-O or ALT-A) are pressed.
paintCtrlWhite(self, event)
Paints the control as it was originally.
paintTheInvalidRed(self )
Paints the control red.
updateVarValDict(self, val )
Checks if the value val for the ConfigVar has changed, if it is valid and caches the
configVar/value pair in the responsible configParser.
Parameters
val: The value returned by the control.
(type=self.configVar.valueType)
Inherited from object: delattr ,
reduce ex , repr , setattr , str
A.11.4.2
ctrl
parent
hash ,
new ,
reduce ,
Instance Variables
Name
configParser
configVar
getattribute ,
Description
ConfigParser in charge of this control.
(type=configurator.ConfigParser)
ConfigVarrepresented through this control.
(type=tools.config.ConfigVar)
The input control. has to be set in the constructor of
inherited class.
(type=wx.Control)
The root panel of a wx.Notebook (category) page.
(type=wx.Panel)
113
Class ConfigFloat
A.11.5
Module view.configurator
Class ConfigFloat
builtin .object
view.configurator.ConfigControl
builtin .object
wx. core.Object
wx. core.Sizer
wx. core.BoxSizer
ConfigFloat
A.11.5.1
Methods
init (self, parent, id, configParser, configFloatVar, size)
Overrides: view.configurator.ConfigControl. init
callback(self, event)
Virtual method of ConfigControl. Should call the updateVarValDict with the value of
the control in order to process the input of the control.
Overrides: view.configurator.ConfigControl.callback extit(inherited documentation)
invalidateVarVal(self, val )
Method for invalidation of the configVar’s value.
Return Value
A warning message if the Value is invalid, else False.
(type=boolean/string)
Overrides: view.configurator.ConfigControl.invalidateVarVal extit(inherited
documentation)
Inherited from object: delattr , getattribute , hash , new , reduce ,
reduce ex , setattr , str
Inherited from ConfigControl: hasChanged, onOK, paintCtrlWhite, paintTheInvalidRed, updateVarValDict
A.11.5.2
Instance Variables
114
Module view.configurator
Class ConfigInt
Name
Description
Inherited from ConfigControl: configParser (p. 112), configVar (p. 112), ctrl (p. 112),
parent (p. 112)
A.11.6
Class ConfigInt
builtin .object
view.configurator.ConfigControl
builtin .object
wx. core.Object
wx. core.Sizer
wx. core.BoxSizer
ConfigInt
A.11.6.1
Methods
init (self, parent, id, configParser, configIntVar, size)
Overrides: view.configurator.ConfigControl. init
callback(self, event)
Virtual method of ConfigControl. Should call the updateVarValDict with the value of
the control in order to process the input of the control.
Overrides: view.configurator.ConfigControl.callback extit(inherited documentation)
invalidateVarVal(self, val )
Method for invalidation of the configVar’s value.
Return Value
A warning message if the Value is invalid, else False.
(type=boolean/string)
Overrides: view.configurator.ConfigControl.invalidateVarVal extit(inherited
documentation)
Inherited from object: delattr , getattribute , hash , new , reduce ,
reduce ex , setattr , str
Inherited from ConfigControl: hasChanged, onOK, paintCtrlWhite, paintTheInvalidRed, updateVarValDict
115
Class ConfigParser
A.11.6.2
Module view.configurator
Instance Variables
Name
Description
Inherited from ConfigControl: configParser (p. 112), configVar (p. 112), ctrl (p. 112),
parent (p. 112)
A.11.7
Class ConfigParser
builtin .object
ConfigParser
A.11.7.1
Methods
init (self, config, parent, worksp)
Standardconstructor.
Parameters
config: The config model to be parsed.
(type=tools.config.Config)
Overrides:
builtin .object. init
fillCategoryNotebook(self )
getBooleanVarCtrl(self, parent, var, id =-1, size=wx.Size(-1, -1))
getCategoryPanel(self, category)
getColourVarCtrl(self, parent, var, id =-1, size=wx.Size(60, 20))
getControl(self, var, parent)
getEnumVarCtrl(self, parent, var )
getFloatVarCtrl(self, parent, var, id =-1, size=wx.Size(-1, -1))
getGroupPanel(self, vars, parent)
getIntVarCtrl(self, parent, var, id =-1, size=wx.Size(-1, -1))
getListVarCtrl(self, parent, var )
getStringVarMultiLineCtrl(self, parent, var, id =-1, size=wx.Size(-1, -1))
getStringVarSingleLineCtrl(self, parent, var, id =-1, size=wx.Size(-1, -1))
116
Module view.configurator
Class ConfigStringMultiLine
SaveVars(self )
Inherited from object: delattr ,
reduce ex , repr , setattr , str
A.11.8
getattribute ,
hash ,
new ,
reduce ,
Class ConfigStringMultiLine
builtin .object
view.configurator.ConfigControl
builtin .object
wx. core.Object
wx. core.Sizer
wx. core.BoxSizer
ConfigStringMultiLine
A.11.8.1
Methods
init (self, parent, id, configParser, configStringTextNodeVar, size)
Overrides: view.configurator.ConfigControl. init
callback(self, event)
Virtual method of ConfigControl. Should call the updateVarValDict with the value of
the control in order to process the input of the control.
Overrides: view.configurator.ConfigControl.callback extit(inherited documentation)
Inherited from object: delattr , getattribute , hash , new , reduce ,
reduce ex , setattr , str
Inherited from ConfigControl: hasChanged, invalidateVarVal, onOK, paintCtrlWhite, paintTheInvalidRed, updateVarValDict
A.11.8.2
Instance Variables
Name
Description
Inherited from ConfigControl: configParser (p. 112), configVar (p. 112), ctrl (p. 112),
parent (p. 112)
117
Class ConfigStringSingleLine
A.11.9
Module view.configurator
Class ConfigStringSingleLine
builtin .object
view.configurator.ConfigControl
builtin .object
wx. core.Object
wx. core.Sizer
wx. core.BoxSizer
ConfigStringSingleLine
A.11.9.1
Methods
init (self, parent, id, configParser, configStringTextNodeVar, size)
Overrides: view.configurator.ConfigControl. init
callback(self, event)
Virtual method of ConfigControl. Should call the updateVarValDict with the value of
the control in order to process the input of the control.
Overrides: view.configurator.ConfigControl.callback extit(inherited documentation)
Inherited from object: delattr , getattribute , hash , new , reduce ,
reduce ex , setattr , str
Inherited from ConfigControl: hasChanged, invalidateVarVal, onOK, paintCtrlWhite, paintTheInvalidRed, updateVarValDict
A.11.9.2
Instance Variables
Name
Description
Inherited from ConfigControl: configParser (p. 112), configVar (p. 112), ctrl (p. 112),
parent (p. 112)
118
Module view.connection
A.12
Module view.connection
A.12.1
Class Connection
builtin .object
Connection
Known Subclasses: ModuleConnection
Connection.
Graphic class for connection from start point to end point.
A.12.1.1
Methods
init (self, startPt, endPt)
Standard constructor.
Parameters
startPt: Start point of connection.
(type=wx.Point)
endPt:
End point of connection.
(type=wx.Point)
Overrides:
builtin .object. init
draw(self, dc, zoom=100)
Draw this connection in our workspace.
Parameters
dc:
Device conetext on which to draw.
(type=wx.DC)
zoom: Zoom of Connection; default = 100.
(type=int)
119
Class Connection
Module view.connection
drawRelative(self, dc, origin, zoom=100)
Draw this connection relative to origin in our workspace.
Parameters
dc:
Device context on which to draw.
(type=wx.DC)
origin: Actual orgin of workspace.
(type=wx.Point)
zoom:
Zoom of Connection; default = 100.
(type=int)
getColours(self )
Calculates the 3 colours of a cabel connection out of the basic value in config.xml
Return Value
A dictionary with the entries: ’shade’, ’midtone’ and ’highlight’
(type=dict of wx.colour)
getSagging(self )
Get the sagging of connection cables as saved in config.xml.
Return Value
Sagging of cable connections.
(type=int)
Inherited from object: delattr ,
reduce ex , repr , setattr , str
A.12.1.2
endPt
startPt
hash ,
Instance Variables
Name
config
getattribute ,
Description
View related config vars.
(type=tools.config.View)
End Point of connection.
(type=wx.Point)
Start point of connection.
(type=wx.Point)
120
new ,
reduce ,
Module view.connection
A.12.2
Class ModuleConnection
Class ModuleConnection
builtin .object
view.connection.Connection
ModuleConnection
Graphic class for module connections.
A.12.2.1
Methods
init (self, outModule, outputNum, inModule, inputNum)
Standard constructor.
Parameters
outModule: Start module of connection.
(type=view.module.Module)
outputNum: Output number of start plug on outModule.
(type=int)
inModule: End module of connection.
(type=view.module.Module)
inputNum: Input number of end plug on inModule.
(type=int)
Overrides: view.connection.Connection. init
eq (self, other )
Overwritten equal operator.
Parameters
other: the ModuleConnection to compare with
(type=view.connection.ModuleConnection)
ne (self, other )
Overwritten not equal operator.
Parameters
other: the ModuleConnection to compare with
(type=view.connection.ModuleConnection)
121
Class ModuleConnection
Module view.connection
draw(self, dc, zoom)
Draw this connection in our workspace.
Parameters
dc:
Device conetext on which to draw.
(type=wx.DC)
zoom: Zoom of Connection; default = 100.
(type=int)
Overrides: view.connection.Connection.draw
drawRelative(self, dc, origin, zoom)
Draw this connection relative to origin in our workspace.
Parameters
dc:
Device context on which to draw.
(type=wx.DC)
origin: Actual orgin of workspace.
(type=wx.Point)
zoom:
Zoom of Connection; default = 100.
(type=int)
Overrides: view.connection.Connection.drawRelative
getInModule(self )
Return input moduleof connection.
getInputNumber(self )
Return input number of inModule.
getOutModule(self )
Return output module of connection.
getOutputNumber(self )
Return output number of outModule.
Inherited from object: delattr , getattribute ,
reduce ex , repr , setattr , str
Inherited from Connection: getColours, getSagging
A.12.2.2
Instance Variables
122
hash ,
new ,
reduce ,
Module view.connection
Class ModuleConnection
Name
Description
inModule
End module of connection.
(type=view.module.Module)
inputNum
Input number of end plug on inModule.
(type=int)
outModule
Start module of connection.
(type=view.module.Module)
outputNum
Output number of start plug on outModule.
(type=int)
Inherited from Connection: config (p. 119), endPt (p. 119), startPt (p. 119)
123
Module view.controller
A.13
Module view.controller
A.13.1
Class CabelController
builtin .object
model.observer.Observer
CabelController
CabelController.
Controller and event handling for CabelFrame.
A.13.1.1
Methods
init (self, model, view )
Standard constructor.
Parameters
model: Corresponding model for this controller.
(type=model.workspace.Workspace)
view: Corresponding view for this controller.
(type=view.workspace.CabelFrame)
Overrides: model.observer.Observer. init
onClose(self, event)
Respond to the Frame close event.
Parameters
event: (type=)
onKey(self, event)
Respond to key events.
Parameters
event: Event associated with this function.
(type=wx.Event)
124
Module view.controller
Class CabelController
onMenuExit(self, event)
¨
Respond to the Exitmenu
command.
Parameters
event: Event associated with this function.
(type=wx.Event)
onMenuExportToCsd(self, event)
¨
Respond to Export
to CSDmenu command.
Parameters
event: Event associated with this function.
(type=wx.Event)
onModulesMenu(self, event)
Listener for the Module menu.
Parameters
event: Event associated with this function.
(type=wx.Event)
onMouseLeftDclick(self, event)
Respond to left mouse button double click on workspace.
Parameters
event: Event associated with this function.
(type=wx.Event)
onMouseLeftDown(self, event)
Respond to left mouse button down on workspace.
Parameters
event: Event associated with this function.
(type=wx.Event)
onMouseLeftUp(self, event)
Respond to left mouse button up on workspace.
Parameters
event: Event associated with this function.
(type=wx.Event)
125
Class CabelController
Module view.controller
onMouseMiddleDown(self, event)
Respond to middle mouse button down on workspace.
Parameters
event: Event associated with this function.
(type=wx.Event)
onMouseMotion(self, event)
Respond to mouse motion on workspace.
Parameters
event: Event associated with this function.
(type=wx.Event)
onMouseRightDown(self, event)
Respond to right mouse button down on workspace.
Parameters
event: Event associated with this function.
(type=wx.Event)
onNew(self, event)
Respond to the Newmenu command.
Parameters
event: Event associated with this function.
(type=wx.Event)
onOpen(self, event)
¨
Respond to the Openmenu
command.
Parameters
event: Event associated with this function.
(type=wx.Event)
onOptionsOpen(self, event)
Open the Options Dialog.
Parameters
event: Event.
(type=wx.Event)
126
Module view.controller
Class CabelController
onPlayStop(self, event)
EventHandler for start/stop csound process from the file menu or with shortcut ctrl-y
Parameters
event: Menu Event associated with this method in
view.workspace.CabelFrame. init
(type=wx.Event)
onRecent(self, event)
Open file from recent open files menu.
Parameters
event: Event associated with this function.
(type=wx.Event)
onRemoveActModule(self, event)
Remove a module. If VIEW MODULEDELETEWARNING is enabled ask before
removing.
Parameters
event: Event associated with this function.
(type=wx.Event)
onSave(self, event)
Respond to the SSavemenu command.
Parameters
event: Event associated with this function.
(type=wx.Event)
onSaveAs(self, event)
Respond to the SSave Asmenu command.
Parameters
event: Event associated with this function.
(type=wx.Event)
onScaleInActModule(self, event)
Scales into (Zoom In) the selected Module with default zoom from preferences.
Parameters
event: Menu Event associated with this method in
view.workspace.CabelFrame.getModuleMenu
(type=wx.Event)
127
Class CabelController
Module view.controller
onScaleOutActModule(self, event)
Scales out of (Zoom Out) the selected Module with default zoom from preferences.
Parameters
event: Menu Event associated with this method in
view.workspace.CabelFrame.getModuleMenu
(type=wx.Event)
onShowModuleXML(self, event)
Opens the Module Xml file in editor.
Parameters
event: Menu Event associated with this method in
view.workspace.CabelFrame.getModuleMenu
(type=wx.Event)
onSize(self, event)
Saves wether view.workspace.CabelFrame is maximized or not in the config.xml
Parameters
event: Menu Event associated with this method in
view.workspace.CabelFrame. init
(type=wx.Event)
onValueFrameClosed(self, valueframe)
Called when a value frame is closed.
Parameters
valueframe: Closed value frame.
(type=model.view.valueframe.CabelValueFrame)
setIoTextCtrl(self, control =None)
setModuleFocus(self, module)
Sets the actual Module, gives it a focus and removes the focus on the old actual module
if there was any.
Parameters
module: The new actual Module.
(type=view.module.Module)
128
Module view.controller
Class CabelController
update(self, observable, arg)
This method is called whenever the observed object is changed. An application calls an
observable object’s notifyObservers method to have all the object’s observers notified of
the change.
Parameters
arg: An argument passed to the notifyObservers method.
(type=object)
Overrides: model.observer.Observer.update
zoom(self, zoom)
Set Zoom percent-value on the workspace, scales every module on the workspace and
repaints the workspace.
Parameters
zoom: Percent value of the zoom
(type=int)
Inherited from object: delattr ,
reduce ex , repr , setattr , str
getattribute ,
129
hash ,
new ,
reduce ,
Module view.module
A.14
Module view.module
A.14.1
Class Module
builtin .object
Module
Module.
Graphic class for a module on the workspace.
A.14.1.1
Methods
init (self, x, y, module, controller )
Standard constructor.
Parameters
x:
X coordintate of module on workspace.
(type=wx.Point)
y:
Y coordintate of module on workspace.
(type=wx.Point)
module:
Corresponding model.module.Module.
(type=model.module.Module)
controller: CabelController.
(type=view.controller.CabelController)
Overrides:
builtin .object. init
draw(self, dc)
Draw this module on workspace.
Parameters
dc: Device context on which to draw the module bitmap.
(type=wx.DC)
drawRelative(self, dc, origin)
Draw this module relative to origin in our workspace.
Parameters
dc:
Device context on which to draw the module bitmap.
(type=wx.DC)
origin: Actual origin of workspace.
(type=wx.Point)
130
Module view.module
Class Module
getInput(self, num)
Returns point of input plug.
Parameters
num: Number of input. @rtype : wx.Point
(type=int)
Return Value
Point of input.
getInVar(self, num)
Returns inVar of input num.
Parameters
num: Number of output. @rtype : model.var.InVar
(type=int)
Return Value
InVar.
getName(self )
Return name of module.
Return Value
Name of module.
(type=string)
getOutput(self, num)
Returns point of output plug.
Parameters
num: Number of output. @rtype : wx.Point
(type=int)
Return Value
Point of output.
getOutVar(self, num)
Returns OutVar of output num.
Parameters
num: Number of output. @rtype : model.var.OutVar
(type=int)
Return Value
OutVar.
131
Class Module
Module view.module
isOnInput(self, pt)
If point is on an input returns the input number. Otherwise it returns -1.
Parameters
pt: Test if pf is on an input. @rtype : int
(type=wx.Point)
Return Value
Number of input on which pt is (0 indexed). Otherwise -1.
isOnModule(self, pt)
Returns True if this module contains given point.
Parameters
pt: Test if pt is included in module. @rtype : bool
(type=wx.Point)
Return Value
Is pt on module?
isOnOutput(self, pt)
If point is on an output returns the output number. Otherwise it returns -1.
Parameters
pt: Test if pf is on an output. @rtype : int
(type=wx.Point)
Return Value
Number of output on which pt is (0 indexed). Otherwise -1.
refresh(self )
scaleIt(self, scaleFactor )
setPosition(self, pt)
Set position of module.
Parameters
pt: New position of module.
(type=wx.Point)
setRelativePosition(self, vecPt)
Move module in vector direction.
Parameters
vecPt: Direction vector for movement of module.
(type=wx.Point)
132
Module view.module
Class Module
zoom(self )
Repaint module zoomed.
Inherited from object: delattr ,
reduce ex , repr , setattr , str
A.14.1.2
getattribute ,
hash ,
new ,
reduce ,
Properties
Name
Description
scale
A.14.1.3
Instance Variables
Name
config
controller
height
module
numInputs
numOutputs
scale
width
x
y
Description
Config for some vars.
(type=tools.config.Config)
CabelController.
(type=view.controller.CabelController)
Height in pixels.
(type=int)
Corresponding model.module.Module.
(type=model.module.Module)
Number of inputs.
(type=int)
Number of outputs.
(type=int)
Scale factor of module; Read-only property; considers
zoom.
Width in pixels.
(type=int)
X coordintate of module on workspace.
(type=wx.Coord)
Y coordintate of module on workspace.
(type=wx.Coord)
133
Module view.valueframe
A.15
Module view.valueframe
A.15.1
Class CabelSlider
builtin .object
CabelSlider
This is a combination of wx.Slider and wx.TextCtrl in one horizontal Sizer.
A.15.1.1
Methods
init (self, parent, inVar, model )
Standard constructor.
Parameters
inVar: Slider/SpinCtrl controls this inVar.
(type=model.var.InVar)
Overrides:
builtin .object. init
disable(self )
Disables slider and text ctrl.
enable(self )
Enables slider and text ctrl.
getSizer(self )
Return sizer for CabelSizer.
onSliderChange(self, event)
Called when slider is changed.
onTextChange(self, event)
Called when text ctrl is changed.
setSliderFocus(self )
Set focus to slider widget.
setTextFocus(self )
Set focus to text widget.
134
Module view.valueframe
Class CabelValueFrame
setToValue(self, value)
Sets slider and text ctrl to value.
Parameters
value: New value for slider and text ctrl.
(type=float)
Inherited from object: delattr ,
reduce ex , repr , setattr , str
A.15.1.2
hash ,
new ,
reduce ,
Instance Variables
Name
Description
Slider/SpinCtrl controls this inVar.
(type=model.var.InVar)
Parent window for CabelSlider.
(type=wx.Window)
inVar
parent
A.15.2
getattribute ,
Class CabelValueFrame
builtin .object
model.observer.Observer
builtin .object
wx. core.Object
wx. core.EvtHandler
wx. core.Window
wx. windows.TopLevelWindow
wx. windows.Frame
CabelValueFrame
CabelValueFrame.
Frame to show input values of a model module and sliders to change those values.
135
Class CabelValueFrame
A.15.2.1
Module view.valueframe
Methods
init (self, module, parent, model, controller, position=(0, 0))
Standard constructor.
Parameters
module:
This frame can change module’s inVars.
(type=model.module.Module)
parent:
Parent of CabelValueFrame (always on top of parent).
(type=wx.Window)
model:
Corresponding model for this frame.
(type=model.workspace.Workspace)
controller: (type=model.controller.CabelController)
position:
Initial position of frame.
(type=tuple)
Overrides: wx. windows.Frame. init
onClose(self, event)
Called when closing value frame.
onKey(self, event)
Called when getting a key event input.
update(self, observable, arg)
This method is called whenever the observed object is changed. An application calls an
observable object’s notifyObservers method to have all the object’s observers notified of
the change.
Parameters
arg: An argument passed to the notifyObservers method.
(type=object)
Overrides: model.observer.Observer.update
Inherited from object: delattr ,
reduce ex , setattr , str
getattribute ,
136
hash ,
new ,
reduce ,
Module view.workspace
A.16
Module view.workspace
A.16.1
Class CabelBottomWindow
builtin .object
wx. core.Object
wx. core.EvtHandler
wx. core.Window
wx. core.Control
wx. controls.BookCtrlBase
wx. controls.Notebook
CabelBottomWindow
Cabel’s bootom area.
A.16.1.1
Methods
init (self, parent, size)
Standardconstructor.
Parameters
parent: Parent frame.
(type=view.workspace.CabelSplitterWindow)
size:
The initial size of the bottom window pane
(type=wx.Size)
Overrides: wx. controls.Notebook. init
onPageChanged(self, event)
Save actual Page.
Inherited from object: delattr ,
reduce ex , setattr , str
getattribute ,
137
hash ,
new ,
reduce ,
Class CabelFrame
A.16.2
Module view.workspace
Class CabelFrame
builtin .object
model.observer.Observer
builtin .object
wx. core.Object
wx. core.EvtHandler
wx. core.Window
wx. windows.TopLevelWindow
wx. windows.Frame
CabelFrame
CabelFrame.
A frame showing the contents of a single Cabel session.
A.16.2.1
Methods
init (self, model )
Standard constructor.
Parameters
model: Corresponding model for this view.
(type=model.workspace.Workspace)
Overrides: wx. windows.Frame. init
addConnection(self, connection)
Add connection to view workspace.
Parameters
connection: Model connection to add to view workspace.
(type=model.connection.Connection)
138
Module view.workspace
Class CabelFrame
addModule(self, module, pt)
Adds module to view workspace.
Parameters
module: module to add to view workspace
(type=model.module.Module)
pt:
Position on the workspace of module to add
(type=wx.Point)
createDraggedCable(self, startPt, endPt)
Create connection between startPt and endPt as visual feedback for connection mode.
Parameters
startPt: Start point of dragged cable.
(type=wx.Point)
endPt:
End point of dragged cable.
(type=wx.Point)
createWorkspace(self, workspaceReader )
getConnections(self )
Return list of view connections.
Return Value
List of view connections.
(type=List)
getDraggedCable(self )
Return dragged cable object.
Return Value
Visual feedback when connection two modules.
(type=model.view.connection.Connection)
getModuleAt(self, pt)
Return the first module found at given point.
Parameters
pt: Point to test if on a module. @rtype : view.module.Module
(type=wx.Point)
Return Value
Module at point or None.
139
Class CabelFrame
Module view.workspace
getModuleMenu(self )
Return menu when right clicking on a module.
getModules(self )
Return list of view modules.
Return Value
List of view modules.
(type=List)
getModulesMenu(self, xmlModuleList)
Gets the Menu for all the defined Xml Modules.
Parameters
xmlModuleList: List of tuples which represents the structure of the
modules folder.
(type=list)
Return Value
Menu
(type=wx.Menu)
GetTitle(self )
Return Title string for the CabelFrame.
Return Value
Title string for the CabelFrame.
(type=string)
Overrides: wx. windows.TopLevelWindow.GetTitle
onToggleBottomPane(self, event)
Toggle bottom pane in the splitter window.
Parameters
event: Event associated with this function.
(type=wx.Event)
reloadRecentMenu(self )
removeConnection(self, connection)
Remove connection from view workspace.
Parameters
connection: Connection to remove from view workspace.
(type=model.connection.Connection)
140
Module view.workspace
Class CabelFrame
removeDraggedCable(self )
Remove dragged cable from workspace.
removeModule(self, module, connections)
Removes module from workspace.
Parameters
module:
module to be removed from view workspace.
(type=model.module.Module)
connections: list of model.connection.Connection to delete.
(type=list)
scrollWorkspaceOnBorder(self, pt)
If pt is on workspace border scrolls workspace.
Parameters
pt: Point to test if on worspace border.
(type=wx.Point)
update(self, observable, arg)
This method is called whenever the observed object is changed. An application calls an
observable object’s notifyObservers method to have all the object’s observers notified of
the change.
Parameters
arg: An argument passed to the notifyObservers method.
(type=object)
Overrides: model.observer.Observer.update
Inherited from object: delattr ,
reduce ex , setattr , str
A.16.2.2
getattribute ,
hash ,
new ,
reduce ,
Instance Variables
Name
config
fileName
filePath
ioTextCtrl
Description
relevant config Vars
(type=tools.config.Config.View)
Name of the workspace
(type=string)
Save-Path of the workspace.
(type=string)
Gets the stdout and stderr output of the app
(type=wx.TextCtrl)
continued on next page
141
Class CabelIOTextCtrl
Name
Description
Statusbar of CabelFrame
(type=wx.StatusBar)
Workspace for synth building.
(type=view.workspace.CabelScrolledWindow)
Zoom.
(type=int)
statusbar
workspace
zoom
A.16.3
Module view.workspace
Class CabelIOTextCtrl
builtin .object
model.observer.Observer
builtin .object
wx. core.Object
wx. core.EvtHandler
wx. core.Window
wx. core.Control
wx. controls.TextCtrl
CabelIOTextCtrl
CabelIOTextCtrl.
TextControl to which all the stderr/stdout messages will be written.
A.16.3.1
Methods
init (self, parent, controller )
Standardconstructor.
Parameters
parent:
Parent on which the textControl should be put on.
(type=wx.Panel)
controller: Cabel controller with link to the instances of
model/view.workspace.
(type=view.controller.CabelController)
Overrides: wx. controls.TextCtrl. init
142
Module view.workspace
Class CabelIOTextCtrl
update(self, observable, arg)
This method is called whenever the observed object is changed. An application calls an
observable object’s notifyObservers method to have all the object’s observers notified of
the change.
Parameters
arg: An argument passed to the notifyObservers method.
(type=object)
Overrides: model.observer.Observer.update
write(self, txt)
Write given text to the TextControl and to a logging file, if logging is set on.
Parameters
txt: Text to be written.
(type=string)
Overrides: wx. controls.TextCtrl.write
Inherited from object: delattr ,
reduce ex , setattr , str
A.16.3.2
getattribute ,
hash ,
new ,
reduce ,
Instance Variables
Name
controller
log
loggingConfig
loggingOn
Description
Cabel controller with link to the instances of
model/view.workspace.
(type=view.controller.CabelController)
The logging file to which the logging messages are
written or Null.
(type=File)
The directory category of config.xml in which the
logging properties are saved.
(type=tools.config.Directories)
State of logging.
(type=boolean)
143
Class CabelScrolledWindow
A.16.4
Module view.workspace
Class CabelScrolledWindow
builtin .object
wx. core.Object
wx. core.EvtHandler
wx. core.Window
wx. windows.Panel
wx. windows.ScrolledWindow
CabelScrolledWindow
CabelScrolledWindow.
Scrolled window to represent the Cabel GUI workspace for placing and connecting modules with double buffered painting.
A.16.4.1
Methods
init (self, parent, id, view )
Standard constuctor.
Parameters
parent: Parent of this scrolled window.
(type=wx.Object)
id:
ID of this scrolled window.
(type=int)
view:
Corresponding view.
(type=view.workspace.CabelFrame)
Overrides: wx. windows.ScrolledWindow. init
GetBackgroundColour(self )
Overwrites wx.ScrolledWindow.GetBackgroundColour() with the in config.xml defined
Colour.
Return Value
Background colour for workspace.
(type=wx.Colour)
Overrides: wx. core.Window.GetBackgroundColour
144
Module view.workspace
Class CabelSplitterWindow
Inherited from object: delattr ,
reduce ex , setattr , str
A.16.5
getattribute ,
hash ,
new ,
Class CabelSplitterWindow
builtin .object
wx. core.Object
wx. core.EvtHandler
wx. core.Window
wx. windows.SplitterWindow
CabelSplitterWindow
CabelSplitterWindow.
Horizontal splitter window which expands its top window when resized.
A.16.5.1
Methods
init (self, parent, id )
Standard constructor.
Parameters
parent: Parent of this splitter window.
(type=view.workspace.CabelFrame)
id:
ID of this splitter window.
(type=int)
Overrides: wx. windows.SplitterWindow. init
getBottomWindowHeight(self )
Return height of bottom window in pixels.
Return Value
Size of bottom window.
(type=int)
145
reduce ,
Class CabelSplitterWindow
Module view.workspace
initialize(self, topPane)
Inizialize Splitter. Decide wether to show both (top and bottom) panes, or only the first
one.
Parameters
topPane: The top pane.
(type=wx.Pane)
setBottomWindowHeight(self, height)
Set the height of the Bottom Window and unsplit if new bottomWindowHeight is <=
10
Parameters
height: Height of the bottom window.
(type=int)
split(self )
Split top and bottom pane of splitter window. Sets the config.xml Var and checks the
options-menubar entry
unSplit(self )
Unsplit. Only self. topPane visible. Sets the config.xml Var and unchecks the
options-menubar entry
Inherited from object: delattr ,
reduce ex , setattr , str
A.16.5.2
getattribute ,
hash ,
Class Variables
Name
MAX HEIGHT RELATIVE
Description
Value: 0.75 (type=float)
146
new ,
reduce ,
Module view.workspace
A.16.6
Class CabelStatusBar
Class CabelStatusBar
builtin .object
model.observer.Observer
builtin .object
wx. core.Object
wx. core.EvtHandler
wx. core.Window
wx. windows.StatusBar
CabelStatusBar
Cabel’s own StatusBar.
A.16.6.1
Methods
init (self, parent)
Standardconstructor.
Parameters
parent: Parent frame.
(type=view.workspace.CabelFrame)
Overrides: wx. windows.StatusBar. init
onAutoplayCheckBox(self, event)
onPlayStopButton(self, event)
onSize(self, event)
onZoomEntered(self, event)
147
Class CabelStatusBar
Module view.workspace
update(self, observable, arg)
This method is called whenever the observed object is changed. An application calls an
observable object’s notifyObservers method to have all the object’s observers notified of
the change.
Parameters
observable: The observable object.
(type=Observable)
arg:
An argument passed to the notifyObservers method.
(type=object)
Overrides: model.observer.Observer.update extit(inherited documentation)
Inherited from object: delattr ,
reduce ex , setattr , str
A.16.6.2
getattribute ,
hash ,
Instance Variables
Name
workspace
Description
View workspace.
(type=view.workspace.CabelFrame)
148
new ,
reduce ,
Anhang B
Weiterfu
¨ hrende Links zu Csound
• Offzielle Csound Homepage
http://csounds.com
• Csound Project bei Sourceforge.net
http://csound.sourceforge.net
• Csound Benutzerhandbuch und Befehlsreferenz
http://www.csounds.com/manual
• Csound Mailing Listen
http://www.csounds.com/list/index.html
• User-Defined Opcode Database (Basis f¨
ur Cabel Module)
http://www.csounds.com/udo
• Csound Journal (ein internetbasiertes Csound Magazin)
http://www.csounds.com/journal
• Csound Tutorials
∗ Das 1. Kapitel des Csound Buchs
http://www.csounds.com/chapter1/index.html
∗ TOOTorials by Dr. Richard Boulanger
http://www.csounds.com/toots/index.html
∗ Mastering Csound by Dr. Richard Boulanger
http://www.csounds.com/mastering/index.html
• Kompositionsumgebung blue
http://www.csounds.com/stevenyi/blue/index.html
149
Literaturverzeichnis
[Anw00] Florian Anwander. Synthesizer. PPV Presse Project Verlags GmbH, 2000.
[Bou00]
Dr. Richard Boulanger, editor. The Csound Book. The MIT Press, 2000.
[Pil04]
Mark Pilgrim. Dive into Python. APress, 2004. http://diveintopython.org.
[uTAJ97] Charles Dodge und Thomas A. Jerse. Computer Music – Synthesis, Composition, and Performance. Schirmer, Thomson Learning, second edition, 1997.
150