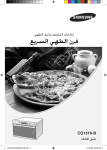
Download Samsung ME83DW دليل المستخدم
Transcript
ME83DW فرن امليكروويف دليل املستخدم مت إنتاج هذا الدليل باستخدام ورق ُمعاد تدويره بنسبة .% 100 إمكانيات هائلة العربية نشكرك على شرائك هذا املنتج من .Samsungللحصول على خدمة أكثر تكامالً ،الرجاء تسجيل املنتج اخلاص بك على www.samsung.com/register 2/2/2012 10:38:00 AM ME83DW_ZAM_DE68-03760F_AR.indd 1 إرشادات السالمة حتذير مالحظة احتياطات لتجنب التعرض احملتمل لقدر كبير من أشعة امليكروويف قد يؤدي عدم االلتزام باحتياطات السالمة التالية إلى التعرض ألشعة امليكروويف الضارة. أ. يجب عدم تشغيل الفرن حتت أي ظرف من الظروف عندما يكون باب الفرن مفتو ًحا أو العبث بقفلي األمان (قفلي الباب) أو وضع أي شيء في فتحتي قفلي األمان. املنظف على أسطح إحكام ب .ال تضع أي شيء بني باب الفرن والسطح األمامي وال تسمح بتراكم فضالت الطعام أو ِّ اإلغالق .وتأكد من نظافة الباب وأسطح إحكام اإلغالق بواسطة مسحها بعد االستعمال باستخدام قطعة قماش مبلَّلة ثم قطعة قماش جافة ناعمة. ج .ال تقم بتشغيل امليكروويف في حالة وجود تلف به حتى يتم إصالحه بواسطة فني صيانة أجهزة ميكروويف مؤ َّهل ومدرَّب لدى الشركة املصنعة .ويجب إغالق الباب بإحكام والتأكد من عدم وجود تلف في: .1الباب (تعرضه لالنثناء) مفصالت الباب (مكسورة أو غير مربوطة بإحكام) .2 َّ .3قفلي الباب وأسطح إحكام اإلغالق د. يجب عدم ضبط الفرن أو إصالحه من قبل أي شخص آخر غير فني صيانة أجهزة ميكروويف مؤ َّهل ومدرَّب لدى الشركة املصنِّعة. يُعد هذا املنتج أحد أجهزة اجملموعة 2الفئة Bاملزودة بتجهيزات ،ISMحيث تتميز اجملموعة 2باحتوائها على كافة جتهيزات ISMالتي ميكنها توليد طاقة تردد السلكية و/أو يتم استخدامها في شكل إشعاع كهرومغناطيسي ملعاجلة املواد وأجهزة تفريغ الشحن وأجهزة اللحام .أما أجهزة الفئة Bفهي أجهزة مناسبة لالستخدام باملؤسسات احمللية واملؤسسات التي تتصل مباشرة بشبكة إمداد الطاقة منخفضة الفولطية التي تقوم بتزويد املباني املستخدمة لألغراض احمللية. _2مالسلا تاداشرإ 2/2/2012 10:38:00 AM ME83DW_ZAM_DE68-03760F_AR.indd 2 إرشادات هامة تتعلق بالسالمة اقرأ اإلرشادات بعناية واحتفظ بها كمرجع في املستقبل. قبل طهي الطعام أو السوائل في فرن امليكروويف ،الرجاء التأكد من اتخاذ احتياطات السالمة التالية. السبب: • كهربائيا أو شرارة تؤدي إلى تلف الفرن. ماسا قد يحدث ً ً األواني املعدنية • أدوات املائدة ذات الزخارف الذهبية أو الفضية • والشوك ،وما إلى ذلك. املاسِ كات املعدنية ّ السبب: مالسلا تاداشرإ .1استخدم األواني املناسبة لالستخدام في أفران امليكروويف فقط؛ ال تستخدم األواني املعدنية أو أدوات املائدة ذات الزخارف الذهبية أو الفضية أو املاسكات املعدنية والشوك ،وما إلى ذلك. قم بإزالة األربطة السلكية من األكياس الورقية أو البالستيكية. كهربائيا أو شرارة تؤدي إلى تلف الفرن. ماسا قد يحدث ً ً .2عند تسخني األطعمة في أواني بالستيكية أو ورقية ،احرص على مراقبة الفرن نظرًا الحتمال حدوث حريق؛ وال تستخدم فرن امليكروويف لتجفيف الصحف أو املالبس. .3تتطلب كميات األطعمة القليلة وق ًتا وحرارة أقل للطهي. فإذا تركتها للوقت العادي ،فقد تسخن أكثر من الالزم وحتترق. .4في حالة مالحظة تصاعد دخان ،قم بإيقاف تشغيل الفرن أو فصله عن التيار الكهربي واجعل باب الفرن مغلقً ا إلخماد أي اشتعال؛ .5حتذير :قد ينتج عن تسخني املشروبات باستخدام فرن امليكروويف حدوث فوران شديد عند غليانها ،لذا يجب توخي احلذر عند التعامل مع األواني؛ ملنع حدوث مثل هذا املوقف .انتظر دائما بعض الوقت ملدة 20ثانية على األقل بعد إيقاف تشغيل الفرن للسماح مبعادلة درجة احلرارة. ً "دوما" بعد التسخني. قم بالتقليب أثناء التسخني ،إذا لزم األمر ،وقم بالتقليب ً في حالة التعرض لإلصابة بحروق ،اتبع إرشادات "اإلسعافات األولية" التالية: • اغمر اجلزء الذي تعرض للحرق باملاء البارد ملدة 10دقائق على األقل. • قم بتغطية مكان احلرق بقطعة جافة ونظيفة من الشاش الطبي. • ال تضع كرمي أو زيت أو غسول على احلرق. .6ال تقم أب ًدا مبلء اآلنية حتى أعالها ،اختر آنية يكون قطرها العلوي أوسع من قطرها السفلي ملنع فوران السائل .قد تنفجر الزجاجات ذات الفتحات الضيقة إذا مت تسخينها بدرجة عالية .ال تقم أب ًدا بتسخني زجاجة اللنب اخلاصة بالطفل مع وضع اجلزء املطاطي عليها ،حيث قد تنفجر الزجاجة إذا تعرضت للتسخني الزائد. .7حتذير :يجب رج محتويات زجاجات الرضاعة وبرطمانات غذاء األطفال أو تقليبها والتحقق من درجة حرارتها قبل استخدامها لتجنب حدوث أي حروق؛ .8يحظر سلق البيض ويحظر كذلك تسخني البيض املسلوق جي ًدا دون تقشيره ألنه قد يتفتق حتى بعد انتهاء عملية التسخني بامليكروويف؛ كذلك ال يجب تسخني الزجاجات والبرطمانات واألواني التي مت تفريغها من الهواء واملغلقة بإحكام والبندق غير املقشر والطماطم ،إلخ. .9يجب تنظيف الفرن بشكل منتظم وإزالة أي بقايا للطعام؛ .10يمُ كن أن يؤدي اإلهمال في تنظيف الفرن إلى تدهور حالة سطحه مما قد يؤثر بشكل سلبي على اجلهاز وقد ينتج عن ذلك خطورة عند االستخدام؛ مالسلا تاداشرإ _3 2/2/2012 10:38:00 AM ME83DW_ZAM_DE68-03760F_AR.indd 3 .11ال تقم بتغطية فتحات التهوية سواء بقطع من القماش أو الورق .قد تشتعل النيران في القماش أو الورق عند تفريغ الهواء الساخن من الفرن. تلقائيا .ويظل الفرن غير قابل لالستخدام حتى فقد ينتج عن ذلك ارتفاع درجة حرارة الفرن بشكل زائد وإيقاف تشغيله ً يبرد بالقدر الكافي. دوما قفازات عند إخراج طبق من الفرن لتجنب اإلصابة باحلروق. .12استخدم ً .13ال تلمس أجزاء تسخني الفرن أو اجلدران الداخلية له إال بعد برودتها. .14ال تقم بغمر كبل التيار الكهربي أو القابس في املاء ،واحرص على إبعاد كبل التيار عن األسطح الساخنة. وال تقم بتشغيل اجلهاز في حالة تلف كبل التيار الكهربي أو القابس. .15قف على مسافة ذراع من الفرن عند فتح الباب. السبب :قد يتسبب الهواء الساخن أو البخار في إصابتك باحلروق. .16قد تالحظ صوت "طقطقة" أثناء التشغيل (السيما عندما يقوم الفرن بإذابة جتميد الطعام). السبب :يصدر هذا الصوت عند تغيير مقدار الطاقة الكهربائية الناجتة ،وهو أمر طبيعي. تلقائيا لدواعي السالمة .ميكنك .17يحظر تشغيل فرن امليكروويف عندما يكون فارغاً .يتم فصل التيار الكهربي عن الفرن ً تشغيله بشكل عادي بعد تركه ملدة 30دقيقة أو أكثر بدون عمل. دائما داخل الفرن .وسوف ميتص املاء طاقة امليكروويف إذا مت تشغيل الفرن عن طريق اخلطأ. من األفضل ترك كوب من املاء ً .18ينبغي استخدام فرن امليكروويف أعلى املنضدة فقط وليس في خزانة. .19إذا تعرض سلك التيار الكهربي للتلف ،فيجب استبداله بواسطة الشركة املصنّعة أو مسؤول الصيانة التابع لها أو أشخاص مؤهلني بنفس الكفاءة لتجنب التعرض للمخاطر. .20يجب وضع هذه الفرن في االجتاه واالرتفاع الصحيحني بحيث ميكن الوصول إلى جتويف الفرن ومنطقة التحكم بها بسهولة. .21يجب تشغيل الفرن مع املاء ملدة 10دقائق قبل استخدامه ألول مرة. .22إذا أصدر الفرن ضجة غريبة أو رائحة حريق أو دخان ،افصل مأخذ الكهرباء على الفور واتصل بأقرب مركز خدمة. .23هذا اجلهاز غير مخصص لالستخدام داخل املركبات أو العربات املغطاة أو ما يشبهها. _4مالسلا تاداشرإ 2/2/2012 10:38:01 AM ME83DW_ZAM_DE68-03760F_AR.indd 4 هام .1يجبعدم السماح أبدا ً لألطفال باستخدام فرن امليكروويف أو العبث به .وينبغي عدم تركهم بالقرب منه دون مراقبة عند استخدامه .كذلك يجب عدم وضع األشياء التي تكون موضع اهتمام من األطفال أو إخفاؤها فوق الفرن مباشرة. .3يجب اإلشراف على األطفال لضمان عدم عبثهم باجلهاز. حتذير: في حالة تعرض الباب أو قفلي الباب للتلف ،يجب عدم تشغيل الفرن حتى يتم إصالح الفرن عن طريق شخص مؤ َّهل. مالسلا تاداشرإ .2هذا اجلهاز غير مخصص الستخدامه بواسطة أشخاص يعانون من إعاقات جسدية أو حسية أو ذهنية (مبا في ذلك األطفال) أو ممن لديهم نقص في اخلبرة واملعلومات إال إذا خضعوا لإلشراف أو مت تزويدهم بإرشادات تتعلق باستخدام اجلهاز من قبل شخص مسئول عن سالمتهم. حتذير: تعتبر مخاطرة ألي شخص غير الشخص املؤهل للقيام بالصيانة أو عملية إصالح تتضمن إزالة الغطاء الذي يقي من التعرُّض ألشعة امليكروويف. حتذير: يجب عدم تسخني األطعمة أو السوائل في حاويات مغلقة نظرًا ألنها قد تتعرض لالنفجار. حتذير: يجب عدم السماح لألطفال باستخدام الفرن دون مراقبة إال بعد إعطاء التعليمات املناسبة بحيث يتمكن الطفل من استخدام الفرن بطريقة آمنة ويتفهم جيدا ً اخملاطر التي قد يتعرض لها نتيجة االستخدام غير الصحيح. • يجب عدم وضع فرن امليكروويف في خزانة. الرجاء التخلص من مواد التغليف اخلاصة بهذا املنتج أو إعادة استخدامها باألسلوب املتبع بيئياً. الرجاء االتصال بالهيئات احمللية اخلاصة بك لالستفسار عن كيفية التخلص من هذا املنتج بأمان ومبا ال يضر البيئة. يتوافق املنتج والسلك اخلاص به مع معيار درجة احلرارة االستوائية .SASO/IECويتمثل االختالف الوحيد في متطلبات الرفع واملقطع العرضي وال يؤثر ذلك على السالمة ،في حني أنه ال يفضل من الناحية العملية تغيير سلك الكهرباء نظرًا لصغر حجم احليز اخملصص للسلك مثالً. مالسلا تاداشرإ _5 2/2/2012 10:38:01 AM ME83DW_ZAM_DE68-03760F_AR.indd 5 احملتويات فرن امليكروويف اجلديد 7 التشغيل 12 7تركيب فرن امليكروويف 8التحقق من وجود كافة األجزاء 8معلومات حول الضمان والصيانة 9إعداد فرن امليكروويف 10أزرار لوحة التحكم 12ضبط الساعة 12استخدام زر توفير الطاقة 12استخدام الزر توقف/إلغاء 13استخدام الزر 30+ثانية 13فك التجميد التلقائي 13استخدام الزرين أكثر/أقل 14استخدام أزرار طهي فوري 15ضبط أوقات الطهي ومستويات الطاقة 15الطهي على مرحلة واحدة 15وضع العرض 15ضبط التأمني حلماية األطفال 16الطهي على عدة مراحل 16التشغيل وحتديد الوزن إرشادات الطهي 17 17أواني الطهي 18اختبار أواني الطهي 20دليل الطهي 23وصفات الطهي 25أساليب الطهي 26تلميحات عامة دليل أواني الطهي 27 29 ملحق _6يوتحملا 2/2/2012 10:38:01 AM 29دليل استكشاف األخطاء وإصالحها 30العناية والتنظيف 31املواصفات ME83DW_ZAM_DE68-03760F_AR.indd 6 فرن امليكروويف اجلديد ضع الفرن على سطح مستو مسطح يرتفع عن األرض مبقدار 85سم. يجب أن يكون السطح قويًا بدرجة تكفي لتحمل وزن الفرن بأمان. .1عند تركيب الفرن ،تأكد من تهويته بشكل جيد بترك مسافة 10سم ( 4بوصة) على األقل من اخللف وعلى جانبي الفرن ومسافة 20سم ( 8بوصة) أعاله. 10سم من اخللف 20سم من أعلى دجلا فيووركيملا نرف تركيب فرن امليكروويف 10سم من اجلانب .2قم بإزالة كافة مواد التغليف بداخل الفرن. وقم بتركيب احللقة الدوارة والقرص الدوار. أيضا من أن القرص الدوار يدور بسالسة. وتأكد ً .3يجب وضع امليكروويف بحيث يكون قري ًبا من مأخذ التيار الكهربي بحيث يسهل توصيله. إذا تعرض سلك الطاقة للتلف ،يجب استبداله بسلك أو وحدة من نوع خاص متوفرة في الشركة املصنعة أو مركز اخلدمة. لسالمتك الشخصية قم بتوصيل الكبل في مقبس تيار متردد أرضي يتكون من ثالثة أطراف توصيل وبجهد قدره 220فولت وتردد 60/50هرتز .في حالة تلف كبل التيار الكهربي لهذا اجلهاز ،يجب استبداله بكبل خاص. يحظر تركيب فرن امليكروويف بجوار أشياء تنبعث منها حرارة أو رطوبة ،على سبيل املثال ،وضعه بجوار فرن تقليدي أو مدفئة .يجب االلتزام باملواصفات اخلاصة مبصدر الطاقة اخلاص بالفرن ،وأي كبل آخر يتم استخدامه يجب أن يكون بنفس مقاييس كبل الطاقة الذي يتم توفيره مع الفرن .امسح اجلدران الداخلية وقفل الباب بقطعة قماش مبللة قبل استخدام فرن امليكروويف للمرة األولى. دجلا فيووركيملا نرف _7 2/2/2012 10:38:01 AM ME83DW_ZAM_DE68-03760F_AR.indd 7 التحقق من وجود كافة األجزاء املبينة أدناه .في حالة عدم وجود أي جزء من األجزاء أو أخرج فرن امليكروويف من علبة التغليف وحتقق من وجود كافة احملتويات ّ تلفه ،اتصل بالبائع. فرن امليكروويف الصينية الزجاجية احللقة الدوارة معلومات حول الضمان والصيانة عند االتصال بشركة ،Samsungالرجاء توفير طراز الفرن والرقم التسلسلي اخلاص به املوجود عادةً على اجلزء اخللفي أو السفلي من املنتج .الرجاء تسجيل األرقام أدناه ،مع املعلومات املطلوبة األخرى .احتفظ بهذه املعلومات في مكان آمن كسجل دائم ملشترياتك ملساعدتك في التعرّف عليها في حالة سرقتها أو فقدها ،باإلضافة إلى نسخة من إيصال البيع كدليل على الشراء في حالة احلاجة إلى خدمة الضمان. رقم الطراز الرقم التسلسلي تاريخ الشراء مت الشراء من .1الرقم اجملاني 3232 1 9200 .2يجب على العميل تقدمي بطاقة الضمان مع الفاتورة األصلية (الرجاء الرجوع إلى الشروط والبنود املوجودة في بطاقة الضمان املرفقة) .3يتم ملء بطاقة الضمان وختمها بواسطة .Samsung ASC .4البريد اإللكتروني لـ CS: [email protected] .5مركز الدعم عبر اإلنترنت http://www.samsung-sa.com/ssc/: ميكن أن تقوم مراكز اخلدمة املر َّخصة والتابعة لشركة Samsungفقط بأداء خدمة الضمان .عند احلاجة إلى خدمة الضمان، قم بتقدمي املعلومات املوجودة أعاله مع نسخة من إيصال البيع إلى "مركز اخلدمة املرخص التابع لشركة ."Samsung _8دجلا فيووركيملا نرف 2/2/2012 10:38:02 AM ME83DW_ZAM_DE68-03760F_AR.indd 8 إعداد فرن امليكروويف .1ضع الفرن على سطح مستو وصلب وصل السلك مبصدر تيار كهربي ذي طرف أرضي. مبجرد توصيل التيار الكهربي ،تعرض شاشة الفرن ما يلي: تأكد من توفير تهوية جيدة للفرن بترك مسافة أربع بوصات على األقل خلف الفرن وفوقه وعند جانبيه. دجلا فيووركيملا نرف .2افتح باب الفرن بواسطة الضغط على الزر املوجود أسفل لوحة التحكم. .3امسح اجلزء الداخلي للفرن بقطعة قماش مبللة. اجملمعة مسبقً ا في منتصف الفرن. .4ضع احللقة َّ .5ضع الصينية الزجاجية فوق احللقة بحيث تتالءم النتوءات الثالثة املوجودة في وسط الصينية مع الفتحات املوجودة في أرضية الفرن. دجلا فيووركيملا نرف _9 2/2/2012 10:38:03 AM ME83DW_ZAM_DE68-03760F_AR.indd 9 أزرار لوحة التحكم • راجع الصفحة التالية ملزيد من املعلومات. 1 7 2 8 3 9 4 10 5 6 _10دجلا فيووركيملا نرف 2/2/2012 10:38:03 AM ME83DW_ZAM_DE68-03760F_AR.indd 10 1 أزرار الطبخ السريع صفحة 14 إعدادات فورية لطهي األطعمة الشائعة. 3 ( Power Levelمستوى الطاقة) اضغط هذه اللوحة لتحديد مستوى طاقة غير املستوى العالي. صفحة 15 4 ( Auto Defrostتذويب تلقائي) حتديد وزن الطعام املراد فك جتميده. صفحة 13 5 زر ( Pause/Cancelتوقّف/إلغاء) قم بضغطه لتوقيف الفرن مؤقتا ً أو لتصحيح خطأ. صفحة 12 6 توفير الطاقة صفحة 12 7 ( More/Lessأكثر/أقل) صفحة 13 8 (الساعة) ّ Clock 9 10 دجلا فيووركيملا نرف 2 أزرار األرقام حتديد مدة الطهي أو كمياته ومستويات طاقة غير املستوى العالي. صفحة 12 ضبط الوقت احلالي. ( +30 Sec. 30+ثانية) اضغط مرة واحدة لكل 30ثانية إضافية ترغب في إضافتها إلى وقت الطهي في مستوى طاقة عالي .بعد الضغط ،اضغط على الزر ( Startتشغيل) لتشغيل الفرن. صفحة 13 ( Startتشغيل) اضغط هذا الزر لبدء الطهي. دجلا فيووركيملا نرف _11 2/2/2012 10:38:03 AM ME83DW_ZAM_DE68-03760F_AR.indd 11 التشغيل ضبط الساعة (الساعة) .س ُتظهر شاشة العرض ما يلي: .1اضغط على زر ّ Clock .2استخدم أزرار األرقام إلدخال الوقت احلالي .يجب ضغط ثالثة أرقام على األقل لضبط الساعة .إذا كان الوقت احلالي 5:00أدخل األرقام .0 ،0 ،5 (الساعة) مرة أخرى .ستظهر عالمة " ":مشيرة إلى أنه قد مت ضبط الوقت. .3اضغط على الزر ّ Clock في حالة انقطاع التيار الكهربي ،ستحتاج إعادة ضبط الساعة. (الساعة). ميكنك التحقق من الوقت احلالي أثناء الطهي بواسطة الضغط على الزر ّ Clock استخدام زر توفير الطاقة معا. مبجرد ملس زر ( Power savingتوفير الطاقة) ( ) ،يتم إيقاف تشغيل "وضع توفير الطاقة" وشاشة العرض ً نظرًا ألن الساعة الداخلية تظل قيد التشغيل ،ففي حالة ملس هذا الرمز مرة أخرى ،سوف ترى الوقت احلقيقي. استخدام الزر توقف/إلغاء يسمح لك الزر ( Pause/Cancelتوقف/إلغاء) مبسح اإلرشادات التي قمت بإدخالها. كما يسمح لك بإيقاف دورة الطهي للفرن بشكل مؤقت للتحقق من درجة نضج الطعام. • إليقاف الفرن بشكل مؤقت أثناء الطهي :اضغط على الزر ( Pause/Cancelتوقّف/إلغاء) مرة واحدة .إلعادة البدء مرة أخرى ،اضغط على الزر ( Startتشغيل). • للتوقف عن الطهي ومسح اإلرشادات وإعادة شاشة الفرن لعرض الوقت :اضغط على الزر ( Pause/Cancelتوقّف/إلغاء) مرتني. • لتصحيح إرشادات األخطاء التي تقوم بإدخالها :اضغط على الزر ( Pause/Cancelتوقّف/إلغاء) مرة واحدة ،ثم أعد إدخال اإلرشادات. _12ليغشتلا 2/2/2012 10:38:04 AM ME83DW_ZAM_DE68-03760F_AR.indd 12 استخدام الزر 30+ثانية يوفر هذا الزر طريقة مالئمة لتسخني الطعام عن طريق زيادة مدة التسخني 30ثانية باستخدام أعلى مستوى لطاقة امليكروويف. .1اضغط على الزر( +30 Sec. 30+ثانية) مرة واحدة عندما ترغب في طهي الطعام ملدة 30ثانية .على سبيل املثال ،اضغط على هذا الزر مرتني إلضافة دقيقة واحدة .سيتم عرض الوقت. ليغشتلا .2اضغط على الزر ( startتشغيل). ( +30 30+ثانية) لكل 30ثانية ترغب في ميكنك إضافة وقت إلى برنامج قيد التشغيل بواسطة الضغط على الزر Sec. إضافتها. فك التجميد التلقائي تلقائيا بضبط وقت فك التجميد ومستوى الطاقة ووقت لفك جتميد األطعمة اجملمدة ،اضبط وزن الطعام فيقوم امليكروويف ً االنتظار. (علما بأنه يظهر 0.2إذا قمت بضبط الفرن .1اضغط على الزر ( Auto Defrostتذويب تلقائي) .يظهر " "0.5على الشاشة. ً على القياس املتري). .2لضبط وزن الطعام ،اضغط الزر ( Auto Defrostتذويب تلقائي) بشكل متكرر .يزيد ذلك الوزن مبقدار 0.5رطال ً حتى 6 أرطال (يزيد الزر ( Auto Defrostتذويب تلقائي) الوزن مبقدار 0.2كجم إذا كنت تستخدم نظام القياس املتري). أيضا استخدام أزرار األرقام إلدخال وزن الطعام مباشرةً. كما ميكنك ً يقوم الفرن بحساب وقت إزالة الثلج وبدء التشغيل تلقائياً. يصدر الفرن صوت تنبيه مرتني أثناء فك التجميد. .3اضغط على الزر ( Pause/Cancelتوقّف/إلغاء) ،وافتح باب الفرن واقلب الطعام. .4اضغط على الزر ( Startتشغيل) الستئناف فك التجميد. راجع صفحة 19لإلطالع على "دليل فك التجميد التلقائي". استخدام الزرين أكثر/أقل يسمح لك الزران ( More/Lessأكثر/أقل) بضبط أوقات طهي معينة مسبقاً .وهما يعمالن فقط في كل من الوضع ( Instantفوري) و ( Time Cookطهي مؤقت) .كما يستخدم الزران ( More/Lessأكثر/أقل) فقط بعد بدأ الطهي بالفعل باستخدام أحد هذه اإلجراءات. تلقائيا :اضغط على الزر )(9( Moreأكثر) .9 .1إلضافة املزيد من الوقت إلى إجراء الطهي ً .2لتقليل وقت إجراء الطهي التلقائي :اضغط على الزر )(1( Lessأقل).1 ثوان ،اضغط على الزر )(9( Moreأكثر) 9أو إذا كنت ترغب في الزيادة/التقليل في الوضع "مدة الطهي" مبقدار ِ 10 )(1( Lessأقل) .1 ليغشتلا _13 2/2/2012 10:38:04 AM ME83DW_ZAM_DE68-03760F_AR.indd 13 استخدام أزرار طهي فوري .1اضغط على الزر ( Instant Cookطهي فوري) املقابل للطعام الذي تقوم بطهيه (على سبيل املثال( Popcorn ،الفشار)) .تعرض شاشة العرض حجم للتقدمي األول: .2اضغط على الزر بشكل متكرر لتحديد حجم التقدمي الذي تريده. تعرض الشاشة كافة أحجام وجبات املتوفرة. .3اضغط على زر ( Startتشغيل). سوف يصدر الفرن صوت تنبيه مبجرد انتهاء وقت الطهي .ثم يصدر الفرن صوت تنبيه كل دقيقة. جدول الطهي الفوري نوع الطعام الوزن Popcorn (الفشار) 3.5أوقية Potato (البطاطس) Beverage (املشروبات) 3إلى 3.5أوقية • استخدم كيسا ً واحدا ً من أكياس الفشار اخملصصة للطهي في امليكروويف. • توخ احلذر عند إخراج الكيس الساخن من الفرن وفتحه. قطعة واحدة ،قطعتان • 3قطع 4 ،قطع نصف كوب كوب واحد كوبان Pizza Reheat (تسخني البيتزا) مالحظات شريحة واحدة شريحتان 3شرائح Fresh Vegetables طازجة) (خضراوات وجبتان وجبة واحدة اثقب كل ثمرة بطاطس عدة مرات بواسطة شوكة. • وضعها على القرص الدوار على شكل دائرة. • أخرجها من الفرن وغلفها بورق األملونيوم ثم اتركها ملدة من 3إلى 5 دقائق. • استخدم كوب آمن االستخدام مع امليكروويف في درجة حرارة الغرفة لعمل القهوة ،أو الشاي ،أو احلساء الفورية وما إلى ذلك. • قم بالتقليب قبل التقدمي. • ضع البيتزا في طبق مسموح باستخدامه في امليكروويف مع جعل األطراف العريضة لشرائح البيتزا جتاه حافة الطبق. • ال تضع الشرائح فوق بعضها .وال تغطيها. • اتركها ملدة من دقيقة إلى دقيقتني قبل تقدميها. • ضع اخلضراوات في طاجن وأضف كمية قليلة من املاء (ملعقتني إلى 4صغيرة) .قم بتغطية اإلناء أثناء الطهي وقلبه قبل مدة االنتظار. 3وجبات 4وجبات Frozen Dinner (عشاء مجمد) 8إلى 10أوقية 10إلى 12أوقية • انزع الغالف اخلارجي واتبع التعليمات املوضحة على العبوة اخلاصة بالتغطية واالنتظار .بعد انتهاء الطهي ،اترك اجلهاز من دقيقة إلى 3 دقائق. _14ليغشتلا 2/2/2012 10:38:05 AM ME83DW_ZAM_DE68-03760F_AR.indd 14 ضبط أوقات الطهي ومستويات الطاقة يسمح لك امليكروويف باإلعداد ملستويني مختلفني من الطهي ،كل منها مزود بفترة زمنية ومستوى طاقة خاص به .يتيح لك زر مستوى الطاقة التحكم في شدة احلرارة من )1( ( Warmدافئ) ( )1إلى )0( ( Highعالي) (.)0 لتنفيذ عملية طهي بسيطة من خطوة واحدة ،حتتاج فقط إلى ضبط وقت للطهي .يتم ضبط مستوى الطاقة إلى املستوى ( Highعالي) تلقائياً .إذا كنت ترغب في تعيني الطاقة إلى أي مستوى آخر ،يجب تعيينه باستخدام الزر ( Power Levelمستوى الطاقة). ليغشتلا الطهي على مرحلة واحدة .1استخدم أزرار األرقام لضبط وقت للطهي .ميكنك ضبط أي فترة زمنية بد ًءا من ثانية واحدة وحتى 99دقيقة و 99ثانية. أيضا .على سبيل املثال ،لضبط 20دقيقة، لضبط فترة زمنية تزيد على دقيقة واحدة ،أدخل الثواني ً أدخل األرقام 2و 0و 0و .0 .2إذا كنت ترغب في ضبط مستوى الطاقة إلى مستوى غير املستوى ( Highعالي) ،اضغط على الزر ( Power Levelمستوى الطاقة) ،ثم استخدم أزرار األرقام إلدخال مستوى الطاقة. مستويات الطاقة: =1 التدفئة =6 طهي =2 منخفض =7 عالي متوسط =3 فك التجميد =8 تسخني =4 منخفض متوسط =9 قلي =5 متوسط =0 عالي .3اضغط على الزر ( Startتشغيل) لبدء الطهي .إذا كنت ترغب في تغيير مستوى الطاقة ،اضغط على الزر ( Pause/Cancelتوقّف/إلغاء) قبل الضغط على الزر ( Startتشغيل) ،ثم قم بإعادة إدخال كافة التعليمات. النتيجة: يبدأ الطهي وينتهي في احلال. )1يصدر الفرن أربعة أصوات للتنبيه. )2يصدر صوت يدل على انتهاء العملية 3مرات( .مرة واحدة في الدقيقة) وضع العرض ميكن استخدام "وضع العرض" ملعرفة كيف يعمل فرن امليكروويف دون تسخينه. .1اضغط الزر " "0مع االستمرار في الضغط واضغط على الزر "."3 .2إليقاف تشغيل وضع العرض ،كرر اخلطوة 1أعاله. ضبط التأمني حلماية األطفال ميكنك تأمني فرن امليكروويف حتى ال يتمكن األطفال من استخدامه دون إشرافك. .1اضغط على الزر " "0مع االستمرار في الضغط ثم اضغط الزر " ."2بعد ذلك ،ال ميكن استخدام فرن امليكروويف حتى يتم إلغاء تأمينه .إللغاء تأمينه ،كرر اخلطوة 1املذكورة أعاله. ليغشتلا _15 2/2/2012 10:38:05 AM ME83DW_ZAM_DE68-03760F_AR.indd 15 الطهي على عدة مراحل تتطلب بعض وصفات الطهي مراحل مختلفة من الطهي حتت درجات حرارة مختلفة. ميكنك تعيني مراحل متعددة من الطهي بامليكروويف. .1اتبع اخلطوتني 1و 2من اجلزء "الطهي على مرحلة واحدة" في هذه الصفحة. عند إدخال أكثر من مرحلة طهي واحدة ،يجب الضغط على الزر ( Power Levelمستوى الطاقة) قبل أن تتمكن من الدخول إلى مرحلة الطهي الثانية. لضبط مستوى الطاقة على "عالي" ملرحلة طهي معينة ،اضغط على الزر ( Power Levelمستوى الطاقة) مرتني. .2استخدم أزرار األرقام لضبط وقت طهي آخر. .3اضغط على الزر ( Power Levelمستوى الطاقة) ،ثم استخدم أزرار األرقام لضبط مستوى الطاقة ملرحلة الطهي الثانية. .4اضغط على الزر ( Startتشغيل) لبدء عملية الطهي. ميكنك التحقق من "مستوى الطاقة" أثناء الطهي بالضغط على الزر ( Power Levelمستوى الطاقة). يتم تعيني أولوية الفرن بشكل مستقل عن حتديد املرحلة متعددة اخلطوات. التشغيل وحتديد الوزن في املرة األولى التي تقوم فيها بتوصيل سلك الفرن في مصدر التيار الكهربي أو بعد حدوث انقطاع في التيار الكهربي ،يتم " على الشاشة ،عند ذلك ميكنك حتديد نظام الوزن املطلوب عرضه على الشاشة .ميكنك االختيار من بني عرض " الرطل ( )LBSأو جرام ( .)GRللقيام بذلك، .1اضغط الزر 0مباشرةً بعد توصيل امليكروويف بالتيار الكهربي .س ُتظهر شاشة العرض ما يلي: إذا لم تعرض الشاشة "( "Grكجم) ،ستحتاج إلى فصل امليكروويف عن التيار الكهربي ثم إعادة توصيله مرة أخرى حتى يتم التغيير إلى حتديد الوزن. عند حتديد نظام الوزن الذي ترغب في استخدامه ،اضغط الزر ( PAUSE/CANCELتوقّف/إلغاء) إلنهاء هذا اإلجراء. .2اضغط 0بشكل متكرر لتحديد نظام الوزن الذي ترغب في استخدامه: _16ليغشتلا 2/2/2012 10:38:06 AM ME83DW_ZAM_DE68-03760F_AR.indd 16 إرشادات الطهي يهطلا تاداشرإ أواني الطهي األدوات املوصى باستخدامها • األواني واألطباق الزجاجية واخلزفية -تستخدم للتسخني أو للطهي. • طبق الشي اخلاص بامليكروويف -يُستخدم لشي األجزاء اخلارجية من األطعمة ذات احلجم الصغير مثل شرائح اللحم أو البانكيك .اتبع اإلرشادات املتوفرة مع طبق الشي. • ورق امليكروويف احلراري -يستخدم لالحتفاظ بالبخار .اترك فتحة صغيرة للسماح بخروج بعض البخار وجتنب وضعه مباشرةً على الطعام. • الورق الشمعي -يستخدم كغطاء ملنع تناثر الطعام. • الفوط الورقية وفوط املائدة -تستخدم للتسخني لفترات قصيرة وتغطية الطعام؛ وهي تعمل على امتصاص البخار الزائد ومتنع تناثر الطعام .يحظر استخدام املناشف الورقية املُعاد تصنيعها ،والتي قد حتتوي على معادن مما قد يؤدي إلى اشتعال النيران بها. • األطباق واألكواب الورقية -تُستخدم في تسخني الطعام ملدة قصيرة وحتت درجات حرارة منخفضة .ال تستخدم األطباق واألكواب الورقية املُعاد تصنيعها ،والتي قد حتتوي على معادن مما قد يؤدي إلى اشتعال النيران بها. مقياس احلرارة -استخدم مقياس احلرارة الذي يحمل عالمة ( Microwave Safeمسموح باستخدامها مع امليكروويف) واتبع كافة التعليمات .حتقق من نضج الطعام في مواضع متعددة .يمُ كن استخدام ميزان احلرارة التقليدي مبجرد خروج الطعام من الفرن. • االستخدام احملدود • ورق األملونيوم -استخدم شرائح رفيعة منه لتجنب النضج الزائد لألجزاء املكشوفة من الطعام .قد يؤدي استخدام كميات كبيرة من ورق األملونيوم إلى تعرض الفرن للتلف ،لذا يجب توخي احلذر. • أواني الطهي الصينية واخلزفية واحلجرية -ميكنك استخدامها إذا كانت حتمل عالمة "( "Microwave Safeمسموح باستخدامها مع امليكروويف) .إذا لم تكن حتمل هذه العالمة ،تأكد من إمكانية استخدامها مع امليكروويف بأمان .يحظر استخدام األطباق املزينة بالزخارف املعدنية. • األواني البالستيكية -ميكن استخدامها فقط إذا كانت حتمل عالمة "( "Microwave Safeمسموح باستخدامها مع امليكروويف) فقد تنصهر األواني البالستيكية األخرى. • األواني املصنوعة من القش واخلوص واخلشب -تستخدم للتسخني ملدد قصيرة فقط ،حيث أنها قابلة لالشتعال. يهطلا تاداشرإ _17 2/2/2012 10:38:06 AM ME83DW_ZAM_DE68-03760F_AR.indd 17 ال يوصى به • الزجاجات والبرطمانات الزجاجية -قد يؤدي استخدام الزجاج العادي ذو السمك الرفيع في امليكروويف إلى تعرضه للكسر. • خصيصا لالستخدام في األكياس الورقية -تؤدي إلى اشتعال النيران ،يستثنى من ذلك أكياس الذرة املُصممة ً امليكروويف. • األطباق واألكواب املصنوعة من مادة البولسترين -قد تنصهر أثناء استخدامها في امليكروويف وقد تترك مواد غير صحية على األطعمة. • األواني البالستيكية واحلاويات اخلاصة بتخزين الطعام -كحاويات السمن النباتي التي قد تنصهر في امليكروويف. • األواني املعدنية -قد تؤدي إلى إتالف الفرن .أخرج كافة األشياء املعدنية قبل بدء الطهي. اختبار أواني الطهي إذا لم تكن متأك ًدا من أن الطبق مسموح باستخدامه مع امليكروويف ،ميكنك إجراء هذا االختبار: .1قم مبلء كوب من املاء ،وضعه داخل الفرن إلى جانب الطبق املراد اختباره. .2اضغط على الزر( +30 Sec. 30+ثانية). .3اضغط على زر ( Startتشغيل). أيضاً .إذا أصبح مبجرد التسخني ملدة 30ثانية في مستوى الطاقة العالي .يجب أن تكون املياه دافئة والطبق املراد اختباره داف ًئا ً الطبق باردًا ،دل ذلك على أنه ال ميتص طاقة امليكروويف وال يصلح لالستخدام في امليكروويف. _18يهطلا تاداشرإ 2/2/2012 10:38:06 AM ME83DW_ZAM_DE68-03760F_AR.indd 18 دليل فك التجميد التلقائي • اتبع اإلرشادات املوجودة أدناه عند فك جتميد األنواع اخملتلفة من األطعمة. الطعام الكمية اإلجراء اللحم البقري املشوي، اللحم 1.13إلى 2.6كجم شرائح السمك ،شرائح اللحم ،األسماك الكاملة 0.23إلى 1.36كجم بعد كل مرحلة ،قم بإعادة ترتيب الطعام .في حالة وجود أية شرائح من الطعام دافئة أو مجمدة ،قم بلفها بشرائط رفيعة ومسطحة من ورق األملونيوم .قم بإزالة أية شرائح من الطعام مت فك جتميدها بشكل تقريبي .واتركها مغطاة ملدة تتراوح من 5إلى 10دقائق. اللحم املفروم 0.23إلى 1.36كجم بعد كل مرحلة ،قم بإزالة أي أجزاء من الطعام مت فك جتميدها بشكل تقريبي .واتركها مغطاة بورق األملونيوم ملدة تتراوح من 5إلى 10دقائق. ابدأ بوضع اجلزء السميك من الطعام إلى أسفل. دجاجة كاملة 1.13إلى 2.6كجم قطع الدجاج 0.23إلى 1.36كجم بعد كل مرحلة ،قم بإعادة ترتيب أو إزالة قطع الطعام التي مت فك جتميدها بشكل تقريبي .واتركها ملدة بني 10إلى 20دقيقة. يهطلا تاداشرإ بعد كل مرحلة ،قم بتقليب الطعام وقم بحماية أي أجزاء دافئة بواسطة لفها بشرائح رفيعة من ورق األملونيوم. قم بإزالة األحشاء قبل جتميد الدواجن. ابدأ عملية إذابة الثلج بوضع صدور الدجاج إلى أسفل .بعد املرحلة األولى ،قم بقلب الدجاجة وقم بحماية أي أجزاء دافئة بواسطة لفها بشرائط رفيعة من ورق األملونيوم .بعد املرحلة الثانية ،قم مرة أخرى بلف أي أجزاء دافئة بشرائح رفيعة من ورق األملونيوم .واتركها مغطاة ملدة تتراوح من 30إلى 60دقيقة في الثالجة. حتقق من مدى إذابة الثلج عن األطعمة عندما يصدر الفرن صوت تنبيه .بعد املرحلة األخيرة ،قد ال تزال بعض األجزاء الصغيرة مجمدة؛ اتركها إلكمال إذابة جتميدها .ال تقم بعملية فك التجميد حتى تتم إذابة الثلج بالكامل .يؤدي لف قطع اللحم واألسماك بشرائح صغيرة من ورق األملونيوم إلى منع نضج األطراف قبل فك التجميد عن الطعام من املنتصف. استخدم شرائح رفيعة ومسطحة وناعمة من ورق األملونيوم لتغطية األطراف واألجزاء الرفيعة من الطعام. يهطلا تاداشرإ _19 2/2/2012 10:38:06 AM ME83DW_ZAM_DE68-03760F_AR.indd 19 دليل الطهي دليل طهي اللحم في امليكروويف • ضع اللحم على احلامل اخلاص بالشي املسموح باستخدامه مع امليكروويف ،ثم ضع احلامل في طبق. • ضع اجلزء السمني من اللحم جهة أسفل .استخدم شرائح رفيعة من ورق األملونيوم حلماية أية أطراف أو قطع رفيعة من اللحم. • قم بقياس درجة احلرارة في مواضع متعددة من اللحم قبل ترك اللحم املدة املوصى بها. • درجات احلرارة التالية هي درجات احلرارة التي يتم عندها إخراج الطعام .الحظ أن درجات حرارة األطعمة ترتفع أثناء مدة االنتظار. الطعام مدة الطهي/مستوى الطاقة اللحم البقري املشوي بدون عظم حتى 1.8كجم الطريقة ضع اجلزء السمني من مدة الطهي: اللحم املجُهز للشي ألسفل 4إلى 7دقائق 454 ،جم في درجة حرارة 46درجة مئوية -غير على احلامل اخلاص بالشي. ناضج ثم قم بالتغطية بالورق 8إلى 10دقائق 454 /جم في درجة حرارة 49درجة مئوية -نضج الشمعي .اقلبه عند مرور متوسط نصف الوقت .واتركها ملدة جيد مئوية درجة 63 حرارة درجة في جم 454 دقيقة، 15 12إلى 10دقائق. الطهي مستوى الطاقة( High :عالي) ( )0للدقائق اخلمس األولى ،ثم ( Mediumمتوسط) (.)5 دليل طهي الدواجن في امليكروويف • ضع الدواجن على احلامل اخلاص بالشي املسموح باستخدامه مع امليكروويف ثم ضع احلامل في طبق. • قم بتغطية الدواجن بالورق الشمعي ملنع تناثر الطعام. • استخدم ورق األملونيوم حلماية أطراف العظام وقطع اللحم الرفيعة أو املناطق التي تبدأ في النضج الزائد. • قم بقياس درجة احلرارة في مواضع متعددة قبل ترك الدواجن مدة االنتظار املوصى بها. مدة الطهي/مستوى الطاقة الطريقة الطعام دجاجة كاملة مدة الطهي: حتى 1.8كجم. 7إلى 10دقائق 454 ،جم في درجة حرارة تتراوح بني 77و 82درجة مئوية ضع الدجاجة واجعل جزء الصدر ألسفل على حامل الشي. ثم قم بالتغطية بالورق الشمعي .قم بالقلب عند مرور نصف وقت الطهي .استمر في الطهي حتى يسيل املرق من الدجاجة وحتى يختفي اللون الوردي للحم القريب من العظام .اتركها ملدة 5إلى 10دقائق. مستوى الطاقة :عالي (ع) قطع الدجاج مدة الطهي: حتى 907جرام من 6إلى 9دقائق لكل 454جم 82درجة مئوية للحم األحمر 77درجة مئوية للحم األبيض مستوى الطاقة :عالي (ع) ضع عظم الدجاج ألسفل في الطبق ،مع وضع األجزاء السميكة على جوانب الطبق .ثم قم بالتغطية بالورق الشمعي .قم بالقلب عند مرور نصف وقت الطهي .استمر في الطهي حتى يسيل املرق من الدجاجة وحتى يختفي اللون الوردي للحم القريب من العظام .اتركها ملدة 5إلى 10دقائق. _20يهطلا تاداشرإ 2/2/2012 10:38:06 AM ME83DW_ZAM_DE68-03760F_AR.indd 20 دليل طهي املأكوالت البحرية في امليكروويف • استخدم غطاء ُمحكم اإلغالق ليتم طهي األسماك بالبخار .إذا استخدمت غطاء من الورق الشمعي أو ورق املائدة سيقل احتفاظ الغطاء بالبخار. • ال تدع األسماك تتعرض للنضج الزائد؛ وتأكد من درجة نضجها عند مرور احلد األدنى من مدة الطهي. • الطعام مدة الطهي/مستوى الطاقة شرائح اللحم مدة الطهي: حتى 680جرام. من 6إلى 10دقائق لكل 454جرام. الشرائح اخمللية مدة الطهي: حتى 680جرام. من 5إلى 7دقائق لكل 454جرام الطريقة ضع الشرائح على احلامل اخلاص بالشي مع وضع األجزاء السميكة جتاه اجلانب اخلارجي للحامل. يهطلا تاداشرإ • قم بطهي األسماك حتى تُصبح سهلة التقشير بواسطة الشوكة. ضع األسماك على احلامل اخلاص بالشي املسموح باستخدامه مع امليكروويف ،ثم ضع احلامل في طبق. مستوى الطاقة :متوسط إلى عالي ( .)7ثم قم بالتغطية بالورق الشمعي .عند مرور نصف وقت الطهي قم بقلب الشرائح وإعادة ترتيبها .قم بطهي األسماك حتى تُصبح سهلة التقشير بواسطة الشوكة. اتركها ملدة 3إلى 5دقائق مستوى الطاقة :عالي (ع) ضع الشرائح اخمللية في طبق طهي ،مع وضع الشرائح الرفيعة أسفل غطاء من الورق الشمعي. السمك أكثر من 1/2بوصة ،قم بتقليب الطعام إذا كان ُ وإعادة ترتيبه عند مرور منتصف مدة الطهي .قم بطهي األسماك حتى تُصبح سهلة التقشير بواسطة الشوكة. اتركها ملدة دقيقتني إلى 3دقائق. اجلمبري مدة الطهي: حتى 680جرام. من 4إلى 6دقائق إلى 454جرام. مستوى الطاقة :عالي (ع) ضع اجلمبري في طبق الطهي دون تداخل ودون وضعه فوق بعضه .ثم قم بالتغطية بالورق الشمعي .استمر في الطهي حتى يُصبح متماسكًا وغير شفاف ،ثم قم بالتقليب مرتني أو ثالث مرات. واتركها ملدة 5دقائق. يهطلا تاداشرإ _21 2/2/2012 10:38:07 AM ME83DW_ZAM_DE68-03760F_AR.indd 21 دليل طهي البيض في امليكروويف • أيضا بتسخني البيض الناضج جي ًدا دون تقشيره؛ ألنه قد يتفتق. يحظر طهي البيض دون تقشيره وال تقم ً • قم بطهي البيض للمدة احملددة له؛ حيث يصبح جافًا إذا زاد نضجه. • دوما بثقب البيض حتى ال يتفتق. قم ً دليل طهي اخلضراوات في امليكروويف • يجب غسل اخلضروات قبل الطهي مباشرةً .غالبا ً ال حتتاج إلى ماء إضافي .عند طهي اخلضراوات الكثيفة مثل، البطاطس واجلزر والفاصوليا اخلضراء ،أضف ربع كوب من املاء. • تنضج اخلضراوات صغيرة احلجم (اجلزر املُقطع شرائح والبازالء بأنواعها اخملتلفة ،إلخ) أسرع من اخلضراوات كبيرة احلجم. • يجب وضع اخلضروات الكاملة مثل البطاطس والقرع والذرة على شكل دائرة فوق القرص الدوار قبل بدء الطهي. متساو إذا مت قلبها بعد مرور نصف مدة الطهي. تنضج بشكل ٍ دوما األطراف النهائية للخضروات مثل ،الهليون والبروكللي ،باجتاه حافة الطبق مع وضع األطراف األمامية باجتاه ضع ً وسط الطبق. • دائما بتغطية الطبق بواسطة غطاء بالستيكي مسموح باستخدامه مع عند طهي اخلضروات املقطعة ،قم ً امليكروويف وبه فتحه. • يجب ثقب اخلضروات الكاملة التي لم يتم تقشيرها مثل البطاطس والقرع والباذجنان وغيرها عدة ثقوب قبل الطهي ملنع تعرضها للتفتق. • للطهي بشكل متساو ،قم بقلب اخلضروات الكاملة أو أعد ترتيبها عند مرور نصف مدة الطهي. • بشكل عام ،كلما زادت سمك الطعام ،يجب أن تزيد مدة االنتظار. (تشير مدة االنتظار إلى الوقت الالزم للخضراوات ذات الكثافة العالية واألطعمة كبيرة احلجم ليتم نضجها بعد خروجها من الفرن ).ميكن ترك البطاطس املشوية على املنضدة ملدة خمس دقائق حتى يكتمل طهيها ،بينما ميكن تقدمي طبق من البازالء مباشرةً. • _22يهطلا تاداشرإ 2/2/2012 10:38:07 AM ME83DW_ZAM_DE68-03760F_AR.indd 22 وصفات الطهي يخني اللحم البقري والشعير يهطلا تاداشرإ 700جرام من اللحم البقري ويقطع إلى مكعبات حجمها 1.8سم 1/2كوب من البصل املفروم 3مالعق كبيرة من الدقيق ملعقة واحدة كبيرة من صلصة ورسيسترشاير عدد 2ثمرة جزر متوسطة احلجم ومقطعة إلى شرائح طولها 2×5سم (حوالي 1كوب) 300مللي من قطع اللحم (محفوظة) نصف كوب من الشعير * ورقة من نبات اللوري 1/4ملعقة صغيرة فلفل 1ونصف كوب من البازالء اجملمدة (مذابة) عدد ملعقة صغيرة من مرقة الدجاج نصف ملعقة ملح صغيرة .1قم بخلط اللحم والبصل والدقيق وصلصة الورسترشاير جي ًدا في في طاجن سعة نصف جالون .وقم بوضع الغطاء. قم بالطهي لدقائق في املستوى "عالي" حتى يختفي اللون الوردي للحم وقم بالتقليب مرة. .2ثم قم بوضع مرق اللحم واجلزر والشعير وورقة نبات الشمعية والفلفل مع التقليب .وقم بوضع الغطاء .ثم قم بالطهي ملدة تتراوح بني ساعة وساعة ونصف في املستوى ( Mediumمتوسط) حتى ينضج اللحم واجلزر ،ثم قم بالتقليب مرتني إلى 3مرات. .3قم بإضافة البازالء وتقليبها .وقم بوضع الغطاء .قم بالطهي ملدة 10دقائق في مستوى الطاقة املتوسط .اتركه ملدة 10 دقائق .قم بإزالة ورق نبات الشمعية قبل التقدمي .تكفي 6أشخاص * ميكن استبدالها بشرائح املشروم املعلبة. طاجن البروكلي باجلنب ربع كوب من الزبد أو السمن النباتي 1/4كوب من البصل املُقطع ملعقة ونصف كبيرة من الدقيق 1/2ملعقة صغيرة من امللح 1/4ملعقة صغيرة من املستردة اجلافة 1/8ملعقة صغيرة من الفلفل كوب ونصف من اللنب 1/4كوب فلفل أحمر ُمقطع 8أوقية (عدد 2كوب) من اجلنب الشيدر املبشور كوبان من البروكلي املُقطع اجملمد (بعد فك جتميده) وعدد 4كوب من املكرونة املطهوة ذات الشكل احللزوني( 8أوقية جافة). .1قم بطهي الزبد والبصل ملدة من دقيقتني إلى 3دقائق في املستوى العالي في طاجن سعته نصف جالون حتى يُصبح البصل ليناً ،وقم بالتقليب مرة واحدة. .2أضف الدقيق وامللح واملستردة والفلفل مع التقليب اجليد .قم بالطهي ملدة من 60إلى 90ثانية في املستوى العالي حتى درجة الغليان .أضف اللنب مع التقليب حتى يتجانس املزيج. .3ثم أضف الفلفل األحمر مع التقليب .وقم بالطهي ملدة من 3إلى 5دقائق في املستوى العالي حتى درجة الغليان وحتى يُصبح سميكاً ،ثم قم بالتقليب مرتني .ثم أضف اجلنب واستمر في تقليبه إلى أن يذوب. .4أضف البروكلي واملكرونة ،وقلبها جي ًدا مع اخلليط .وقم بوضع الغطاء .وقم بالطهي ملدة من 4إلى 6دقائق في املستوى العالي حتى تتم عملية التسخني ،ثم قم بالتقليب مرة واحدة .قم بالتقليب قبل التقدمي .تكفي 6أشخاص. يهطلا تاداشرإ _23 2/2/2012 10:38:07 AM ME83DW_ZAM_DE68-03760F_AR.indd 23 سلطة البطاطس الدافئة بطاطس بالكزبرة 1كجم من البطاطس البيضاء أو احلمراء مقطعة إلى أنصاف ربع كوب من البصل املفروم فص ثوم 1ونصف كوب من الكزبرة ملعقة ونصف صغيرة من امللح 1/3كوب إضافي من زيت الزيتون فلفل أسود حسب الرغبة .1ضع البطاطس في إناء مقداره 2لتر وبه ربع كوب من املاء ،ثم قم بتغطيته وابدأ الطهي مبستوى طاقة عالي حتى ينضج ،ملدة من 10إلى 12دقيقة .اخلطها مرة واحدة. .2قم بتصفية نصف املاء وضع البطاطس جان ًبا. .3قم بفرم البصل والثوم والكزبرة وامللح وزيت الزيتون ثم أضفها إلى البطاطس وقم بتقليبها باستخدام ملعقة مسطحة. .4قم بتغطيتها وطهيها في مستوى طاقة عالي ملدة 3دقائق ،تُقدم دافئة مع الفلفل األسود املطحون. .5أضف 8/1كوب من اخلل إلى خليط الكزبرة أو كما تريد. * تكفي 6أشخاص حساء الفول األسود كوب من البصل املفروم فص ثوم مفروم جي ًدا كوب من الفول األسود احملمر أو املهروس كوب كامل من الفول األسود اجملفف كوب ونصف من صلصة الطماطم 3أكواب من حساء الدجاج ملعقة ملح صغيرة نصف كوب من حبوب الذرة حزمة كزبرة .1ضع البصل والثوم في إناء عميق سعة 3لتر ثم قم بتغطيته وطهيه على مستوى طاقة عالي ملدة من 3إلى 5دقائق حتى ينضج. .2أضف الفول والطماطم واحلساء وامللح وقلبهم جي ًدا. .3قم بالطهي مبستوى طاقة عالي بدون غطاء ملدة 10دقائق ،أضف حبوب الذرة وقلبها ،واتركها ملدة 7دقائق أو أكثر في مستوى طاقة عالي .قلب الطعام جي ًدا .وبذلك تكون أعددت 2لتر من احلساء تقري ًبا .نوصي بطهي نصف هذه الوصفه نظرًا للكمية الكبيرة التي حصلنا عليها. _24يهطلا تاداشرإ 2/2/2012 10:38:07 AM ME83DW_ZAM_DE68-03760F_AR.indd 24 أساليب الطهي التقليب ترتيب وضع الطعام قم بترتيب الطعام غير متساوي احلجم ،مثل قطع الدجاج واللحم ،بوضع األجزاء األكثر سمكًا جتاه اجلزء اخلارجي للقرص السمك في وسط القرص الدوار لتتلقي قدرًا أكبر من طاقة امليكروويف .ولتجنب النضج الزائد للطعام ،ضع األجزاء رفيعة ُ الدوار. يهطلا تاداشرإ قم بتقليب األطعمة مثل الطواجن واخلضراوات أثناء الطهي ليتم توزيع احلرارة بشكل منتظم .ميتص الطعام املوجود في جانب الطبق قدرًا أكبر من الطاقة ويتم تسخينه بسرعة أكبر ،لذلك قم بالتقليب من جوانب الطبق إلى وسطه .يتم إيقاف تشغيل الفرن عند فتح الباب لتقليب الطعام. لف الطعام قم بحماية الطعام بواسطة لفه بشرائح رفيعة من ورق األملونيوم لتجنب تعرضه للنضج الزائد .وتشمل األجزاء التي حتتاج إلى احلماية أطراف أرجل وأجنحة الدواجن وزوايا أطباق اخلبز مربعة الشكل .استخدم كميات قليلة من ورق األملونيوم. ألن الكميات الكبيرة قد تؤدي إلى تعرض الفرن للتلف. قلب الطعام قم بقلب الطعام في منتصف عملية الطهي لتتعرض كافة األجزاء لطاقة امليكروويف .وتُعتبر عملية قلب الطعام في غاية األهمية خاص ًة مع األطعمة ذات احلجم الكبير مثل قطع اللحم املجُهزة للشي. مدة االنتظار حتتفظ األطعمة املطهوة في امليكروويف بحرارة داخلية وتستمر عملية الطهي ملدة دقائق قليلة بعد إيقاف تشغيل الفرن. اترك الطعام مدة من الوقت ليكتمل نُضجه ،خاصة األطعمة مثل قطع اللحم كبيرة احلجم وثمرات اخلضراوات الكاملة. حتتاج قطع اللحم كبيرة احلجم إلى هذه املدة من الوقت ليكتمل نضجها من الوسط دون تعريض األجزاء اجلانبية للنضج الزائد .يجب رج أو تقليب كافة األطعمة السائلة مثل ،احلساء أو مشروب الشيكوالتة الساخنة ،عند اكتمال عملية الطهي. اترك املشروبات ملدة من الوقت قبل التقدمي .عند تسخني طعام األطفال ،قلب الطعام جي ًدا وتأكد من درجة حرارته قبل التقدمي. زيادة السوائل املوجودة بالطعام متساو أو تنجذب طاقة امليكروويف إلى ذرات املاء .لذا يجب تغطية األطعمة التي ال تكون السوائل موزعة داخلها بشكل ٍ متساو .أضف كمية قليلة من املاء لألطعمة اجلافة لتساعد في عملية تركها ملدة من الوقت ليتم توزيع احلرارة بشكل ٍ الطهي. يهطلا تاداشرإ _25 2/2/2012 10:38:07 AM ME83DW_ZAM_DE68-03760F_AR.indd 25 تلميحات عامة • تأخذ األطعمة الكثيفة مثل ،البطاطس ،مدة أطول من األطعمة األقل كثافة ليتم تسخينها .يجب تسخني األطعمة ذات النسيج الضعيف على مستوى طاقة منخفض حتى ال تصبح جافة. • قد يؤثر ارتفاع ونوعية أواني الطهي املُستخدمة في مدة الطهي .عند استخدام وصفة طهي جديدة ،استخدم أقل مدة للطهي واطمئن على الطعام من حني آلخر لتجنب تعرضه للنضج الزائد. • • والسجق ،ملنع انفجارها. يجب ثقب األطعمة ذات القشرة غير املسامية مثل ،البطاطس والبيض ُ ال يوصى بالقلي بواسطة تسخني الزيت أو الدهون .قد يؤدي الغليان املفاجئ للزيت أو للدهون إلى حدوث حروق شديدة. • بعض املكونات تسخن أسرع من غيرها .على سبيل املثال ،اجليلي املوجود داخل حلوى الدونتس سيكون أكثر سخونة من العجينة نفسها .ضع هذه اإلرشادات في اعتبارك لتجنب التعرض لإلصابة باحلروق. • ال يوصى بتخزين األطعمة في املنزل داخل امليكروويف حيث قد ال يتم التخلص من كافة البكتيريا الضارة بواسطة عملية التسخني اخلاصة بامليكروويف. على الرغم من أن أشعة امليكروويف ال تقوم بتسخني أواني الطهي ،إال أن احلرارة غالبا ً ما تنتقل إلى أدوات الطهي. استخدم دوما ً ماسكا ً لألواني عند إخراج الطعام من امليكروويف ووجه األطفال إلى القيام باملثل. • _26يهطلا تاداشرإ 2/2/2012 10:38:07 AM ME83DW_ZAM_DE68-03760F_AR.indd 26 دليل أواني الطهي أدوات الطهي ورق األملونيوم يهطلا يناوأ ليلد للطهي باستخدام فرن امليكروويف ،يجب أن تتمكن أشعة امليكروويف من اختراق الطعام دون أن تنعكس على األطباق أو متتصها األطباق املستخدمة. لذا يجب احلرص عند اختيار أدوات الطهي .إذا كانت أداة الطهي حتمل عالمة مسموح باستخدامها مع امليكروويف ،فال داعي للقلق. يبني اجلدول التالي األنواع اخملتلفة ألدوات الطهي ويشير إلى ما إذا كان ميكن استخدامها في فرن امليكروويف أم ال وإلى كيفية استخدامها. مسموح باستخدامها تعليقات مع امليكروويف ميكن استخدامه بكميات صغيرة حلماية أسطح األطعمة من النضج الزائد. قد يحدث ماس كهربائي إذا كان ورق األملونيوم قري ًبا ج ًدا من جدار الفرن أو إذا مت استخدام كميات كبيرة منه. طبق التحمير ال تقم بتسخينه مسبقً ا ألكثر من ثماني دقائق. األواني الصينية واخلزفية تكون األواني اخلزفية واألواني الفخارية واألواني اخلزفية املطلية واألواني الصينية عادة مناسبة ،ما لم تكن مزينة بزخارف معدنية. األطباق الكرتون املصنوعة من البوليستر التي تستخدم مرة واحدة يتم تغليف بعض األطعمة اجملمدة في هذه األطباق. تغليف األطعمة السريعة • األكواب املصنوعة من البولستير • األكياس الورقية أو الصحف قد حتترق. • الورق املعاد تصنيعه أو األدوات الزجاجية املزينة بزخارف معدنية قد يتسبب في حدوث ماس كهربائي. ميكن استخدامها في تدفئة الطعام. قد تتسبب احلرارة الزائدة في صهر األدوات املصنوعة من الفوم. يهطلا يناوأ ليلد _27 2/2/2012 10:38:07 AM ME83DW_ZAM_DE68-03760F_AR.indd 27 أدوات الطهي مسموح باستخدامها تعليقات مع امليكروويف األدوات الزجاجية • أدوات الفرن التي تستخدم على املائدة ميكن استخدامها ،ما لم تكن مزينة بزخارف معدنية. • األدوات الزجاجية الرقيقة ميكن استخدامها في تدفئة األطعمة والسوائل. قد يتعرض الزجاج الرقيق للكسر أو الشرخ بسبب التسخني املفاجئ. • البرطمانات الزجاجية يجب إزالة الغطاء .مناسب للتدفئة فقط. املعادن • األطباق • أربطة أكياس الفريزر قد تتسبب في حدوث ماس كهربائي أو نشوب حريق. الورق • األطباق واألكواب ومناديل املائدة وورق املطبخ تستخدم في طهي الطعام الذي يستغرق فترات أيضا قصيرة وفي تدفئة الطعام .وتستخدم ً المتصاص الرطوبة الزائدة. • الورق املعاد تصنيعه قد يتسبب في حدوث ماس كهربائي. البالستيك • األواني خاصة إذا كانت مقاومة للحرارة .قد يحدث التواء لبعض أنواع البالستيك األخرى أو يتغير لونها عند درجات احلرارة املرتفعة .ال تستخدم البالستيك املصنوع من امليالمني. • الورق احلراري ميكن استخدامه لالحتفاظ بالرطوبة .ال يجب أن يالمس الطعام .توخ احلذر عند إزالة طبقة الورق احلراري حيث ينبعث بخار ساخن. • أكياس الفريزر فقط إذا كانت حتتمل درجة الغليان أو إذا كانت صاحلة لالستخدام في الفرن .ال يجب أن تكون محكمة اإلغالق .عند الضرورة ،اثقبها بشوكة. الورق الشمعي أو الدهني ميكن استخدامه لالحتفاظ بالرطوبة ومنع تناثر الطعام. :موصى به :يستخدم بحذر :غير آمن _28يهطلا يناوأ ليلد 2/2/2012 10:38:07 AM ME83DW_ZAM_DE68-03760F_AR.indd 28 ملحق قحلم دليل استكشاف األخطاء وإصالحها قبل االتصال مبسئول الصيانة للفرن ،راجع هذه القائمة من املشكالت احملتملة وحلولها. ال تعمل شاشة الفرن وال الفرن ذاته. • صل القابس في مصدر للتيار الكهربي ذو طرف أرضي بشكل صحيح. • إذا كان مقبس التيار الكهربي يعمل من خالل مفتاح ،تأكد من تشغيل املفتاح. • قم بإخراج القابس من مصدر التيار ،وانتظر عشر ثوان ،ثم أدخله مرة أخرى. • أعد تشغيل قاطع الدائرة الكهربي أو قم باستبدال أي صمام كهربائي يحتاج للتبديل. • قم بتوصيل جهاز آخر مبقبس التيار ،إذا لم يعمل اجلهاز ،اطلب من فني كهربائي إصالح املقبس. • قم بتوصيل الفرن مبقبس آخر. شاشة الفرن تعمل ،ولكن الفرن ال يعمل. • تأكد من أن الباب مغلق بإحكام. • حتقق من عدم وجود أي مواد تغليف أو غيرها من املواد األخرى عالقة بقفل الباب. • حتقق من عدم تعرض الباب للتلف. • اضغط على الزر ( Cancelإلغاء) مرتني وأعد إدخال إرشادات الطهي. يتم فصل التيار الكهربي قبل مرور املدة الزمنية احملددة. • إذا لم يكن هناك طاقة ناجتة ،أخرج القابس من مصدر التيار وانتظر مدة عشر ثوان ،ثم قم بتوصيله مرة أخرى .في حالة " ،أعد ضبط الساعة وأي تعليمات للطهي. انقطاع التيار الكهربي ،سيعرض مؤشر الوقت " • أعد تشغيل قاطع الدائرة الكهربي أو قم باستبدال أي صمام كهربائي يحتاج للتبديل. يتم طهي الطعام ببطء شديد. • تأكد من أن الفرن يعمل من خالل دائرة خط 12أمبير اخلاصة به. قد يؤدي تشغيل جهاز آخر على نفس الدائرة الكهربائية إلى حدوث نقص في الفولطية .إذا اقتضت احلاجة ،انقل الفرن إلى دائرة مخصصة له. مشاهدة شرر أو ماس كهربي. • أخرج أي أدوات أو أواني طهي أو أربطة معدنية من الفرن .إذا كنت تستخدم ورق األملونيوم ،استخدم فقط شرائط صغيرة واترك مسافة بوصة واحدة على األقل بني ورق األملونيوم واجلدران الداخلية للفرن. قحلم _29 2/2/2012 10:38:07 AM ME83DW_ZAM_DE68-03760F_AR.indd 29 القرص الدوار ثابت أو يصدر ضجيج. • نظف القرص الدوار واحللقة الدوارة وأرضية الفرن. • تأكد من أن القرص الدوار واحللقة الدوارة موضوعان بشكل صحيح. يسبب استخدام امليكروويف حدوث تشويش بجهازي الراديو أو التليفزيون. • يشبه ذلك التشويش ما يحدث نتيجة استخدام األجهزة الصغيرة األخرى مثل مجففات الشعر .انقل امليكروويف بعي ًدا عن األجهزة األخرى ،مثل التليفزيون أو الراديو. في حالة ضبط الفرن ليعمل مبستوى طاقة بنسبة 80أو 90أو %100ملدة تزيد على 25دقيقة ،يقوم الفرن بضبط تلقائيا لتجنب النضج الزائد بعد أول 25دقيقة. مستوى الطاقة إلى % 70 ً العناية والتنظيف اتبع اإلرشادات التالية لتنظيف الفرن والعناية به. • حافظ على نظافة التجويف الداخلي للفرن .قد تلتصق بقايا الطعام والسوائل املسكوبة بجدران الفرن ،مما يؤثر في كفاءة عمل الفرن. • امسح السوائل املسكوبة مباشرةً .استخدم قطعة قماش مبللة مع الصابون .يحظر استخدام املواد املنظفة القاسية أو التي حتتوي على مواد كاشطة. • للمساعدة في إذابة أجزاء الطعام والسوائل امللتصقة بالفرن ،قم بتسخني مقدار فنجانني من املاء (أضف عصير ليمونة إلى املاء إذا كنت ترغب في االحتفاظ برائحة زكية للفرن) في كوب سعته 4فناجني بأعلى طاقة وملدة 5دقائق حتى يغلي .اترك املاء بالفرن ملدة دقيقة أو دقيقتني. • أخرج الصينية الزجاجية من الفرن عند تنظيف الفرن أو الصينية. تعامل مع الصينية بحرص لتجنب كسرها وال تضعها في املاء بعد الطهي مباشرةً .اغسل الصينية بحذر مباء دافئ وصابون أو اغسلها في غسالة األطباق. • نظف السطح اخلارجي للفرن بالصابون باستخدام قطعة قماش مبللة. ثم جففه بقطعة من القماش الناعم .لتجنب تعريض أجزاء تشغيل الفرن للتلف ،ال تدع املاء يسيل في الفتحات. • اغسل اجلزء الزجاجي للباب باملاء والصابون اللطيف .تأكد من استخدام قطعة قماش ناعمة لتجنب خدشه. • في حالة تراكم البخار فوق سطح باب الفرن من الداخل أو اخلارج ،امسحه بقطعة قماش ناعمة .قد يتراكم البخار عند تشغيل الفرن في مكان ترتفع به نسبة الرطوبة وال يدل ذلك بأي حال على حدوث تسريب في امليكروويف. • ال تقم أب ًدا بتشغيل الفرن دون وجود طعام بداخله ،فقد يعرض ذلك أنبوبة املاجنترون أو الصينية الزجاجية للتلف .قد ترغب في ترك فنجان من املاء داخل الفرن أثناء عدم استخدامه لتجنب التلف الذي قد يحدث في حالة تشغيل الفرن عن طريق اخلطأ. _30قحلم 2/2/2012 10:38:08 AM ME83DW_ZAM_DE68-03760F_AR.indd 30 املواصفات جتويف الفرن 23لترًا مستويات التحكم 10مستويات طاقة ،تتضمن فك التجميد املؤقت 99دقيقة و 99ثانية مصدر التيار الكهربي 220فولت تيار متردد 60 / 50 ،هرتز طاقة اخلرج 800واط األبعاد اخلارجية 489مم (عرض) × 275مم (ارتفاع) × 348مم (عمق) أبعاد جتويف الفرن 330مم (عرض) × 211مم (ارتفاع) × 324مم (عمق) الوزن الصافي/اإلجمالي 13.1 / 12.1كجم قحلم رقم الطراز ME83DW قحلم _31 2/2/2012 10:38:08 AM ME83DW_ZAM_DE68-03760F_AR.indd 31 www.samsung.com 800-SAMSUNG (726-7864) U.A.E 800-SAMSUNG(726-7864) OMAN 183-2255 KUWAIT 8000-4726 BAHRAIN 08000-726786 EGYPT 800-22273 JORDAN 080 100 2255 MOROCCO 9200-21230 SAUDO ARABIA 444 77 11 TURKEY 021-8255 IRAN 0800-726-7864 NIGERIA 0860-SAMSUNG(726-7864 SOUTH AFRICA DE68-03760F:رقم الكود ME83DW_ZAM_DE68-03760F_AR.indd 32 2/2/2012 10:38:08 AM ME83DW Microwave Oven user manual This manual is made with 100% recycled paper. imagine the possibilities ENGLISH Thank you for purchasing this Samsung product. To receive more complete service, please register your product at www.samsung.com/register ME83DW_ZAM_DE68-03760F_EN.indd 1 2012-02-01 �� 7:42:45 safety instructions WARNING NOTE Precautions to avoid possible exposure to excessive microwave energy Failure to observe the following safety precautions may result in harmful exposure to microwave energy. A. Under no circumstances should any attempt be made to operate the oven with the door open or to tamper with the safety interlocks (door latches) or to insert anything into the safety interlock holes. B. Do not place any object between the oven door and front face or allow food or cleaner residues to accumulate on sealing surfaces. Ensure that the door and door sealing surfaces are kept clean by wiping after use first with a damp cloth and then with a soft dry cloth. C. Do not operate the oven if it is damaged until it has been repaired by a qualified microwave service technician trained by the manufacturer. It is particularly important that the oven door closes properly and that there is no damage to the: 1. Door (bent) 2. Door hinges (broken or loose) 3. door seals and sealing surfaces D. The oven should not be adjusted or repaired by anyone other than a properly qualified microwave service technician trained by the manufacturer. This product is a Group 2 Class B ISM equipment. The definition of group 2 which contains all ISM equipment in which radio-frequency energy is intentionally generated and/or used in the form of electromagnetic radiation for the treatment of material, and EDM and arc welding equipment. For Class B equipment is equipment suitable for use in domestic establishments and in establishments directly connected to a low voltage power supply network which supplies buildings used for domestic purposes. 2_ safety instructions ME83DW_ZAM_DE68-03760F_EN.indd 2 2012-02-01 �� 7:42:45 Important safety instructions Reason: Electric arcing or sparking may occur and may damage the oven. • Metallic containers • Dinnerware with gold or silver trimmings • Skewers, forks, etc. Reason: Electric arcing or sparking may occur and may damage the oven. 2. When heating food in plastic or paper containers, keep an eye on the oven due to the possibility of ignition; Do not use your microwave oven to dry newspapers or clothes 3. Small amounts of food require shorter cooking or heating time. If normal times are allowed they may overheat and burn. 4. If smoke is observed, switch off or unplug the appliance and keep the door closed in order to stifle any flames; 5. WARNING : Microwave heating of beverages can result in delayed eruptive boiling, therefore care must be taken when handling the container; To prevent this situation. ALWAYS allow a standing time of at least 20 seconds after the oven has been switched off so that the temperature can equalize. Stir during heating, if necessary, and ALWAYS stir after heating. In the event of scalding, follow these FIRST AID instructions: • Immerse the scalded area in cold water for at least 10 minutes. • Cover with a clean, dry dressing. • Do not apply any creams, oils or lotions. 6. NEVER fill the container to the top and choose a container that is wider at the top than at the bottom to prevent the liquid from boiling over. Bottles with narrow necks may also explode if overheated. NEVER heat a babys bottle with the teat on, as the bottle may explode if overheated. 7. WARNING : The contents of feeding bottles and baby food jars shall be stirred or shaken and the temperature checked before consumption, in order to avoid burns; 8. Eggs in their shell and whole hard-boiled eggs should not be heated in microwave ovens since they may explode, even after microwave heating has ended; Also do not heat airtight or vacuum-sealed bottles, jars, containers, nuts in shells, tomatoes etc. 9. The oven should be cleaned regularly and any food deposits removed; 10.Failure to maintain the oven in a clean condition could lead to deterioration of the surface that could adversely affect the life of the appliance and possibly result in a hazardous situation; safety instructions READ CAREFULLY AND KEEP FOR FUTURE REFERENCE. Before cooking food or liquids in your microwave oven, please check that the following safety precautions are taken. 1. Only use utensils that are suitable for use in microwave ovens; DO NOT use any metallic containers, Dinnerware with gold or silver trimmings, Skewers, forks, etc. Remove wire twist ties from paper or plastic bags. safety instructions _3 ME83DW_ZAM_DE68-03760F_EN.indd 3 2012-02-01 �� 7:42:45 11.DO NOT cover the ventilation slots with cloths or paper. They may catch fire as hot air is evacuated from the oven. The oven may overheat and automatically switch itself off. It will remain inoperable until it has cooled sufficiently. 12.ALWAYS use oven gloves when removing a dish from the oven to avoid unintentional burn. 13.DO NOT touch heating elements or interior oven walls until the oven be cooled down. 14.Do not immerse the power cable or plug in water and keep the power cable away from heated surfaces. Do not operate this appliance if it has a damaged power cable or plug. 15.Stand at arms length from the oven when opening the door. Reason: The hot air or steam released may cause scalding. 16.You may notice a Clicking sound during operation(especially when the oven is defrosting). Reason: This sound is normal when the electrical power output is changing. 17.DO NOT operate the microwave oven when it is empty. The power will be cut off automatically for safety. You can operate normally after letting it stand for over 30 minutes. It is best to leave a glass of water inside the oven at all times.The water will absorb the microwaves energy if the oven accidently started. 18.The microwave oven is intended to be used on the counter or counter top use only, the microwave oven shall not be placed in a cabinet. 19.If the supply cord is damaged, it must be replaced by the manufacturer, its service agent or similarly qualified persons in order to avoid a hazard. 20.This oven should be positioned proper direction and height permitting easy access to cavity and control area. 21.Before using the your oven first time, oven should be operated with the water during 10 minute and then used. 22.If the oven generates a strange noise, a burning smell, or smoke is emitted, unplug the power plug immediately and contact your nearest service center. 23.The appliance is not intended for installing in road vehicles, caravans and similar vehicles etc. 4_ safety instructions ME83DW_ZAM_DE68-03760F_EN.indd 4 2012-02-01 �� 7:42:45 Important WARNING: If the door or door seals are damaged, the oven must not be operated until it has been repaired by a competent person. WARNING: It is hazardous for anyone other than a comperent person to carry out any service or repair operation which involves the removal of a cover which gives protection against exposure to microwave energy. safety instructions 1. Young children should NEVER be allowed to use or play with the microwave oven. Nor should they be left unattended near the microwave oven when it is in use. Items of interest to children should not be stored or hidden just above the oven. 2. This appliance is not intended for use by persons (including children) with reduced physical, sensory or mental capabilities, or lack of experience and knowledge, unless they have been given supervision or instruction concerning use of the appliance by a person responsible for their safety. 3. Children should be supervised to ensure that they do not play with the appliance. WARNING: Liquids and other foods must not be heated in sealed containers since they are liable to explode. WARNING: Only allow children to use the oven without supervision when adequate instructions have been given so that the child is able to use the oven in a safe way and understands the hazards of improper use. • The microwave oven shall not be placed in a cabinet. Please recycle or dispose of the packaging material for this product in an environmentally responsible manner. Please contact your local authorities in regard to the environmentally safe disposal of this product. Product and its cord in compliance with SASO/IEC tropical temp. rise requirements, and, cross section is the only discrepancy, and it won’t affect safety, meanwhile, it is not practical to change the power cord, e.g. too small chamber. safety instructions _5 ME83DW_ZAM_DE68-03760F_EN.indd 5 2012-02-01 �� 7:42:45 contents your new microwave oven 7 7 8 8 9 10 Installing the microwave oven Checking parts Warranty and service information Setting up your microwave oven Control panel buttons operation 12 12 12 13 13 13 14 15 Setting the clock Using the power saving button Using the pause/cancel button Using the +30 sec. button Defrosting automatically Using the more/less buttons Using the instant cook buttons Setting cooking times & power levels One-stage cooking Demonstration Mode Setting the child protection lock Multi-stage cooking Turning on the Power and Selecting a Weight 12 15 15 15 16 16 cooking instructions 17 17 18 20 23 25 26 Cooking utensils Testing utensils Cooking guide Recipes Cooking techniques General tips cookware guide 27 appendix 29 29 Troubleshooting guide 30 Care and cleaning 31 Specifications 6_ contents ME83DW_ZAM_DE68-03760F_EN.indd 6 2012-02-01 �� 7:42:45 your new microwave oven Place the oven on a flat level surface 85cm above the floor. The surface should be strong enough to safety bear the weight of the oven. 1. When you install your oven, make sure there is 20 cm 10 cm behind adequate ventilation for your oven by leaving at least 10 above cm (4 inches) of space behind and, on the sides of the oven and 20 cm (8 inches) of space above. 10 cm of the side your new microwave oven Installing the microwave oven 2. Remove all packing materials inside the oven. Install the roller ring and turntable. Check that the turntable rotates freely. 3. This microwave oven has to be positioned so that plug is accessible. If the supply cord is damaged, it must be replaced by a special cord or assembly available from the manufacturer or its service agent. For your personal safety, plug the cable into a 3-pin, 220 Volt, 50/60Hz, AC earthed socket. If the power cable of this appliance is damaged, it must be replaced by a special cable. Do not install the microwave oven in hot or damp surroundings like next to a traditional oven or radiator. The power supply specifications of the oven must be respected and any extension cable used must be of the same standard as the power cable supplied with the oven. Wipe the interior and the door seal with a damp cloth before using your microwave oven for the first time. your new microwave oven _7 ME83DW_ZAM_DE68-03760F_EN.indd 7 2012-02-01 �� 7:42:46 Checking parts Unpack your microwave oven and check to make sure that you have all the parts shown here. If any part is missing or broken, call your dealer. microwave oven glass tray roller guide ring Warranty and service information When contacting Samsung, please provide the specific model and serial number information which is usually located on the back or bottom of the product. Please record these numbers below, along with the other requested information. Keep this information in a safe place as a permnent record of your purchase to aid in identification in case of theft or loss, and a copy of your sales receipt as a proof of purchase if warranty service is needed. MODEL NUMBER SERIAL NUMBER DATE PURCHASED PURCHASED FROM 1. Toll Free # : 9200 1 3232 2. Customer should present warranty card with original invoice ( please refer to terms & conditions in enclosed war’ty card) 3. Warranty card to be filled & stamped by Samsung ASC. 4. CS e-mail: [email protected] 5. Online support Center : http://www.samsung-sa.com/ssc/ Warranty service can only be performed by a Samsung Authorized Service Center. If you should require warranty service, provide the above information with a copy of your sales receipt to the Samsung Authorized Service Center. 8_ your new microwave oven ME83DW_ZAM_DE68-03760F_EN.indd 8 2012-02-01 �� 7:42:46 Setting up your microwave oven 4. Place the pre-assembled ring in the indentation in the center of the oven. 5. Place the glass tray on top of the ring so that the three glass tabs in the center of the tray fit securely into the tabs on the floor of the oven. your new microwave oven 1. Place the oven on a flat, sturdy surface and plug the cord into a grounded outlet. Once plugged in, the display on your oven will show: Make sure there is adequate ventilation for your oven by leaving at least four inches of space behind, above, and to the side of the oven. 2. Open the oven door by pressing the button below the control panel. 3. Wipe the inside of the oven with a damp cloth. your new microwave oven _9 ME83DW_ZAM_DE68-03760F_EN.indd 9 2012-02-01 �� 7:42:46 Control panel buttons • See next page for more information. 1 7 2 3 8 4 9 5 10 6 10_ your new microwave oven ME83DW_ZAM_DE68-03760F_EN.indd 10 2012-02-01 �� 7:42:46 1 Instant Cook Buttons Instant settings to cook popular foods. 2 Number Buttons Set cooking times or amounts and power levels other than high. 3 Power Level Press this pad to set power level other than high. p.15 4 Auto Defrost Sets weight of food to be defrosted. p.13 5 Pause/Cancel Press to pause oven or corrent a mistake. p.12 6 Power Saving p.12 7 More/Less p.13 8 Clock Sets current time. p.12 9 +30 Sec. Press once for every 30 secs of cooking at high power. After that press Start button to operate the oven. p.13 10 Start Press to start cooking. p.14 your new microwave oven your new microwave oven _11 ME83DW_ZAM_DE68-03760F_EN.indd 11 2012-02-01 �� 7:42:46 operation Setting the clock 1. Press the Clock button. The display will show: 2. Use the Number buttons to enter the current time. You must press at least three numbers to set the clock. If the current time is 5:00 enter 5,0,0. 3. Press Clock again. A colon will appear, indicating that the time is set. If there is a power interruption, you will need to reset the clock. You can check the current time while cooking is in progress by pressing the Clock button. Using the power saving button Once you touch Power saving ( ) button, Energy Saving Mode is turned with display off. As internal clock keeps working, when you touch this icon again, you will see the correct time. Using the pause/cancel button The Pause/Cancel button allows you to clear instructions you have entered. It also allows you to pause the oven’s cooking cycle, so that you can check the food. • Pause the oven during cooking: press Pause/Cancel once. To restart, press Start. • Stop cooking, erase instructions, and return the oven display to the time of day: press Pause/Cancel twice. • Correct a mistake you have just entered: press Pause/Cancel once, then re-enter the instructions. 12_ operation ME83DW_ZAM_DE68-03760F_EN.indd 12 2012-02-01 �� 7:42:47 Using the +30 sec. button Defrosting automatically operation This button offers a convenient way to heat food in 30 seconds increments at the High power level. 1. Press the +30 Sec. button once for each 30 seconds you wish to cook the food. For example, press it twice for one minute. The time will display. 2. Press the start button. Add time to a program in progress by pressing the +30 Sec. button for each 30 seconds you want to add. To thaw frozen food, set the weight of the food and the microwave automatically sets the defrosting time, power level and standing time. 1. Press the Auto Defrost button. The display shows “0.5”. (0.2 if you have set your oven for metric measure) 2. To set the weight of your food, press the Auto Defrost button repeatedly. This increases the weight by 0.5 lb increments, up to 6.0 lbs (The Auto Defrost button will increase the weight by 0.2 Kg if you are using metric measurement). You can also use the number buttons to enter the weight of the food directly. The oven calculates the defrosting time and starts automatically. Twice during defrosting, the oven will beep. 3. Press the Pause/Cancel button, open the oven door, and turn the food over. 4. Press the Start button to resume defrosting. See page 19 for the Auto Defrosting Guide. Using the more/less buttons The More/Less buttons allow you to adjust pre-set cooking times. They only work in the Instant, Time Cook modes. Use the More/Less button only after you have already begun cooking with one of these procedures. 1. To ADD more time to an automatic cooking procedure: Press the More(9) button. 2. To REDUCE the time of an automatic cooking procedure: Press the Less(1) button. If you wish to increase/decrease in Time Cook mode by 10sec, press the More(9) or Less(1) button. operation _13 ME83DW_ZAM_DE68-03760F_EN.indd 13 2012-02-01 �� 7:42:47 Using the instant cook buttons 1. Press the Instant Cook button corresponding to the food you are cooking (Popcorn, for example). The display shows the first serving size: 2. Press the button repeatedly to select the serving size you want. The display will cycle through all available serving sizes.. 3. Press the Start button. When the cooking times is over, the oven will beep. The oven will then beep every minute. Instant cook chart Item Weight Remarks Popcorn 3.5 oz 3.0-3.5 oz • Use one microwave-only bag of popcorn. • Use caution when removing and opening hot bag from oven. Potato 1 ea, 2 ea 3 ea, 4 ea • Prick each potato several times with fork. • Place on turntable in spoke-like fashion. • Remove from oven, wrap in foil and let stand 3-5 min. Beverage ½ cup 1 cup 2 cups • Use a microwave-safe mug of room temperature coffee, tea, instant soup etc. • Stir before serving. Pizza Reheat 1 Slice 2 Slices 3 Slices • Put the pizza on a microwave-safe plate with wide end of slice towards the outside edge of the plate. • Do not let slices overlap. Do not cover. • Before serving, let stand 1-2 min. Fresh Vegetables 1 serv 2 serv 3 serv 4 serv • Place the vegetables into a casserole and add a small amount of water(2-4 Tbsp). Cover during cooking and stir before standing. Frozen Dinner 8-10 oz 10-12 oz • Remove package from outer wrapping and follow package instructions for covering and standing. After cooking, let stand 1-3 min. 14_ operation ME83DW_ZAM_DE68-03760F_EN.indd 14 2012-02-01 �� 7:42:47 Setting cooking times & power levels Your microwave allows you to set up to two different stages of cooking, each with its own time length and power level. The power level lets you control the heating intensity from Warm (1) to High (0). For simple one-stage cooking, you only need to set a cooking time. The power level is automatically set at High. If you want to set the power to any other level, you must set it using the Power Level button. 1. Use the number buttons to set a cooking time. You can set a time from one second to 99 minutes, 99 seconds. To set a time over one minute, enter the seconds too. For example, to set 20 minutes, enter 2, 0, 0, 0 . 2. If you want to set the power level to something other than High, press the Power Level button, then use the number buttons to enter a power level. Power Levels: 1= Warm 6= Simmer 2= Low 7= Medium High 3= Defrost 8= Reheat 4= Medium Low 9= Sauté 5= Medium 0= High operation One-stage cooking 3. Press the Start button to begin cooking. If you want to change the power level, press Pause/Cancel before you press Start, and re-enter all of the instructions. Result: Cooking starts and once finished. 1) Oven emits four beeps. 2) Sign of finishing process sounds 3 time. (One time in every minute) Demonstration mode You can use the Demonstration Mode to see how your microwave oven operates without the oven heating. 1. Hold the “0” button and press “3” button. 2. To turn demo mode off, repeat steps 1 above. Setting the child protection lock You can lock your microwave oven so it can’t be used by unsupervised children. 1. Hold the “0” button and then press the “2” button. At this point, the microwave oven cannot be used untill it is unlocked. To unlock it, repeat step 1 above. operation _15 ME83DW_ZAM_DE68-03760F_EN.indd 15 2012-02-01 �� 7:42:47 Multi-stage cooking Some recipes require different stages of cooking at different temperatures. You can set multiple stages of cooking with your microwave. 1. Follow steps 1 and 2 in the “One-Stage Cooking” section on this page. When entering more than one cooking stage, the Power Level button must be pressed before the second cooking stage can be entered. To set the power level at High for a stage of cooking, press the Power Level button twice. 2. Use the number buttons to set a second cooking time. 3. Press the Power Level button, then use the number buttons to set the power level of the second stage of cooking. 4. Press Start to begin cooking. You can check the Power Level while cooking is in progress by pressing the Power Level button. Microwave oven has priority independently from selection of Multi-phase. Turning on the Power and Selecting a Weight The first time you plug the power cord into an outlet, or after there has been an interruption in power, the display shows “ ” At this point, you can select the weight system for the display. You can choose between pounds (LBS) or kilograms (GR). To do so, 1. Press 0 immediately after plugging in your microwave. The display will show: If the display does not shows “Gr”, you will need to unplug the microwave and then plug it in again in order to change to the weight selection. 2. Press 0 repeatedly to select the weight system you wish to use: When you have selected the weight system you want to use, press the PAUSE/CANCEL button to end this procedure. 16_ operation ME83DW_ZAM_DE68-03760F_EN.indd 16 2012-02-01 �� 7:42:47 cooking instructions Cooking utensils • Glass and glass-ceramic bowls and dishes - Use for heating or cooking. •Microwave grilling dish - Use to grill the exterior of small items such as steaks, chops, or pancakes. Follow the directions provided with your grilling dish. •Microwavable plastic wrap - Use to retain steam. Leave a small opening for some steam to escape and avoid placing it directly on the food. • Wax paper - Use as a cover to prevent spattering. • Paper towels and napkins - Use for short-term heating and covering; they absorb excess moisture and prevent spattering. Do not use recycled paper towels, which may contain metal and can catch fire. • Paper plates and cups - Use for short-term heating at low temperatures. Do not use recycled paper, which may contain metal and can catch fire. • Thermometers - Use only those labeled “Microwave Safe” and follow all directions. Check the food in several places. Conventional thermometers may be used once the food has been removed from the oven. cooking Instructions Recommended use Limited use • Aluminum foil - Use narrow strips of foil to prevent overcooking of exposed areas. Using too much foil can damage your oven, so be careful. •Ceramic, porcelain, and stoneware - Use these if they are labeled “Microwave Safe” If they are not labeled, test them to make sure they can be used safely. Never use dishes with metallic trim. • Plastic - Use only if labeled “Microwave Safe” Other plastics can melt. •Straw, wicker, and wood - Use only for short-term heating, as they can be flammable. cooking Instructions _17 ME83DW_ZAM_DE68-03760F_EN.indd 17 2012-02-01 �� 7:42:47 Not recommended • Glass jars and bottles - Regular glass is too thin to be used in a microwave, and can shatter. • Paper bags - These are a fire hazard, except for popcorn bags that are designed for microwave use. •Styrofoam plates and cups - These can melt and leave an unhealthy residue on food. • Plastic storage and food containers - Containers such as margarine tubs can melt in the microwave. •Metal utensils - These can damage your oven. Remove all metal before cooking. Testing utensils If you are not sure whether a dish is microwave-safe or not, you can perform this test: 1. Fill a 1 cup glass measuring cup with water and put it inside your oven, next to the dish you want to test. 2. Press the +30 Sec. button. 3. Press the Start button. Once to heat them for 30 seconds at high power. The water should be warm and the dish you are testing should also be warm. If the dish is cold, then it is not absorbing microwave energy and is not acceptable for use in the microwave. 18_ cooking Instructions ME83DW_ZAM_DE68-03760F_EN.indd 18 2012-02-01 �� 7:42:48 Auto defrosting guide • Follow the instructions below when defrosting different types of food. Amount Procedure Roast Beef, Pork 1.13 - 2.6 kg Start with the food placed fat side down. After each stage, turn the food over and shield any warm portions with narrow strips of aluminum foil. Steaks, Chops, Fish 0.23 - 1.36 kg After each stage, rearrange the food. If there are any warm or thawed portions of food, shield them with narrow flat pieces of aluminum foil. Remove any pieces of food that are nearly defrosted. Let stand, covered, for 5-10 minutes. Ground Meat 0.23 - 1.36 kg After each stage, remove any pieces of food that are nearly defrosted. Let stand, covered with foil, for 5–10 minutes. Whole Chicken 1.13 - 2.6 kg Remove giblets before freezing poultry. Start defrosting with the breast side down. After the first stage, turn the chicken over and shield any warm portions with narrow strips of aluminum foil. After the second stage, again shield any warm portions with narrow strips of aluminum foil. Let stand, covered, for 30–60 minutes in the refrigerator. Chicken Pieces 0.23 - 1.36 kg After each stage, rearrange or remove any pieces of food that are nearly defrosted. Let stand for 10-20 minutes. cooking Instructions Food Check foods when the oven signals. After the final stage, small sections may still be icy; let them stand to continue thawing. Do not defrost until all ice crystals have thawed. Shielding roasts and steaks with small pieces of foil prevents the edges from cooking before the center of the food has defrosted. Use narrow, flat, smooth strips of aluminum foil to cover the edges and thinner sections of the food. cooking Instructions _19 ME83DW_ZAM_DE68-03760F_EN.indd 19 2012-02-01 �� 7:42:48 Cooking guide Guide for cooking meat in your microwave • Place meat on a microwave-safe roasting rack in a microwave-safe dish. • Start meat fat-side down. Use narrow strips of aluminum foil to shield any bone tips or thin meat areas. • Check the temperature in several places before letting the meat stand the recommended time. • The following temperatures are removal temperatures. The temperature of the food will rise during the standing time. Food Roast Beef Boneless Up to 1.8 kg Cook Time/Power Level Cooking Time: 4-7 min. 454 g. for 46 °C - Rare 8-10 min. 454 g. for 49 °C - Medium 12-15 min. 454 g. for 63 °C - Well Done Power Level: High(0) for first 5 min., then Medium(5). Directions Place roast fat-side down on roasting rack. Cover with wax paper. Turn over when cooking time is half up. Let stand 10 min. Guide for cooking poultry in your microwave • Place poultry on a microwave-safe roasting rack in a microwave-safe dish. • Cover poultry with wax paper to prevent spattering. • Use aluminum foil to shield bone tips, thin meat areas, or areas that start to overcook. • Check the temperature in several places before letting the poultry stand the recommended time. Food Cook Time/Power Level Directions Whole Chicken Up to 1.8 kg. Cooking Time: 7-10 min. 454 g. 77-82 °C Power Level: High (Hi) Place chicken breast-side down on roasting rack. Cover with wax paper. Turn over when the cooking time is half up. Cook until juices run clear and meat near the bone is no longer pink. Let stand 5-10 min. Chicken Pieces Up to 907 g Cooking Time: 6-9 min. 454 g 82 °C dark meat 77 °C light meat Power Level: High (Hi) Place chicken bone-side down on dish, with the thickest portions towards the outside of the dish. Cover with wax paper. Turn over when the cooking time is half up. Cook until juices run clear and meat near the bone is no longer pink. Let stand 5-10 min. 20_ cooking Instructions ME83DW_ZAM_DE68-03760F_EN.indd 20 2012-02-01 �� 7:42:48 Guide for cooking seafood in your microwave • Cook fish until it flakes easily with a fork. • Place fish on a microwave-safe roasting rack in a microwave-safe dish. • Use a tight cover to steam fish. A lighter cover of wax paper or paper towel provides less steaming. • Do not overcook fish; check it at minimum cooking time. Cook Time/Power Level Directions Arrange steaks on roasting rack with Cooking Time: meaty portions towards the outside 6-10 min. 454 g. Power Level: Medium-High(7). of rack. Cover with wax paper. Turn over and rearrange when cooking time is half up. Cook until fish flakes easily with a fork. Let stand 3-5 min. Fillets Up to 680 g. Cooking Time: 5-7 min. 454 g Power Level: High (Hi) Arrange fillets in a baking dish, turning any thin pieces under Cover with wax paper. If over ½ inch thick, turn over and rearrange when cooking time is half up. Cook until fish flakes easily with a fork. Let stand 2-3 min. Shrimp Up to 680 g. Cooking Time: 4-6 min. 454 g. Power Level: High (Hi) Arrange shrimp in a baking dish without overlapping or layering. Cover with wax paper. Cook until firm and opaque, stirring 2 or 3 times. Let stand 5 min. cooking Instructions Food Steaks Up to 680 g. cooking Instructions _21 ME83DW_ZAM_DE68-03760F_EN.indd 21 2012-02-01 �� 7:42:48 Guide for cooking eggs in your microwave • Never cook eggs in the shell, and never warm hard-cooked eggs in the shell; they can explode. • Always pierce whole eggs to keep them from bursting. • Cook eggs just until set; they become tough if overcooked. Guide for cooking vegetables in your microwave • Vegetables should be washed just before cooking. Often, no extra water is needed. If dense vegetables such as potatoes, carrots and green beans are being cooked, add about ¼ cup water. • Small vegetables (sliced carrots, peas, lima beans, etc.) will cook faster than larger ones. • Whole vegetables, such as potatoes, acorn squash or corn on the cob, should be arranged in a circle on the turntable before cooking. They will cook more evenly if turned over after half the cooking time. • Always place vegetables like asparagus and broccoli with the stem ends pointing towards the edge of the dish and the tips toward the center. • When cooking cut vegetables, always cover the dish with a lid or vented microwavable plastic wrap. • Whole, unpeeled vegetables such as potatoes, squash, eggplant, etc, should have their skin pricked in several spots before cooking to prevent them from bursting. • For more even cooking, stir or rearrange whole vegetables halfway through the cooking time. • Generally, the denser the food, the longer the standing time. (Standing time refers to the time necessary for dense, large foods and vegetables to finish cooking after they come out of the oven.) A baked potato can stand on the counter for five minutes before cooking is completed, while a dish of peas can be served immediately. 22_ cooking Instructions ME83DW_ZAM_DE68-03760F_EN.indd 22 2012-02-01 �� 7:42:48 Recipes Beef and barley stew cooking Instructions 700 g beef, cut in dices of 1.8 cm 1/2 cup minced onion 3 tablespoons flour 1 tablespoon Worcestershire sauce 2 medium carrots cut into sticks of about 5x2cm (approx 1 cup) 300 ml beef stock (canned) ½ cup barley * 1 bay leaf ¼ teaspoon pepper 1 ½ cups frozen peas (thawed) 1 teaspoon Maggi stock ½ teaspoon salt 1. In a 2-quart casserole, combine beef, onion, flour, and Worcestershire sauce; mix well. Cover with lid. Cook at High for minutes until beef is no longer pink, stirring once. 2. Stir in beef broth, carrots, barley, bay leaf, and pepper. Cover with lid. Cook at Medium for 1 to 1½ hours until carrots and beef are tender, stirring 2 to 3 times. 3. Stir in peas. Cover with lid. Cook at Medium for 10 minutes. Leave to stand for 10 minutes. Remove bay leaf before serving. Makes 6 servings * can be replaced with canned mushroom slices. Broccoli and cheese casserole ¼ cup butter or margarine ¼ cup chopped onion 1½ Tbs. flour ½ tsp. salt ¼ tsp. dry mustard 1/8 tsp. pepper 1½ cups milk ¼ cup chopped red pepper 8 oz. (2 cups) cheddar cheese, shredded 2 cups frozen chopped broccoli (thawed) 4 cups cooked spiral shaped pasta (8 oz. dry) 1. In a 2-quart casserole, cook butter and onion at High for 2-3 minutes until onion is soft, stirring once. 2. Add flour, salt, mustard, and pepper; mix well. Cook at High for 60-90 seconds until mixture boils. Stir in milk until smooth. 3. Stir in red pepper. Cook at High for 3-5 minutes until mixture boils and thickens slightly, stirring twice. Stir in cheese until melted. 4. Add broccoli and pasta, mix well. Cover with lid. Cook at High for 4 to 6 minutes until heated through, stirring once. Stir before serving. Makes 6 servings. cooking Instructions _23 ME83DW_ZAM_DE68-03760F_EN.indd 23 2012-02-01 �� 7:42:48 Warm potato salad Coriander potatoes 1 kg white or red potatoes, halved ¼ cup minced onion 1 garlic clove 1 ½ cups coriander 1 ½ teaspoons salt 1/3 cup extra pure olive oil Black pepper to taste 1. Place the potatoes in a 2-litre pot with ¼ cup water, cover with lid and cook on high power level until the potatoes are tender, from 10 to 12 minutes. Mix once. 2. Drain off half the water and put the potatoes aside. 3. Mince the onion, garlic, coriander, salt and olive oil and add to the potatoes, stirring with a spatula. 4. Cover and cook on high power level for 3 minutes, serve warm with a little ground black pepper. 5. If wished, add 1/8 cup of white wine to the coriander mixture. * Makes 6 servings Black bean soup 1 cup minced onion 1 garlic clove, finely chopped 1 cup fried or pureed black beans 1 cup whole black beans, drained 1 ½ cups fried crushed tomato 3 cups chicken stock 1 teaspoon salt ½ cup corn grains 1 sprig coriander 1. Place the onion and garlic in a deep pot with a capacity of 3 litres, cover with lid and cook on high power level for 3-5 minutes until tender. 2. Add the beans, tomato, stock and salt, mix well. 3. Cook on high power level without lid for 10 minutes, mix and add the corn grains, cook for 7 more minutes on high power level. Mix thoroughly. Makes approximately 2 litres. We recommend serving half the recipe due to the large quantity obtained. 24_ cooking Instructions ME83DW_ZAM_DE68-03760F_EN.indd 24 2012-02-01 �� 7:42:48 Cooking techniques Stirring Arrangement Arrange unevenly shaped foods, such as chicken pieces or chops, with the thicker, meatier parts toward the outside of the turntable where they receive more microwave energy. To prevent overcooking, place thin or delicate parts toward the center of the turntable. Shielding Shield food with narrow strips of aluminum foil to prevent overcooking. Areas that need shielding include poultry wing-tips, the ends of poultry legs, and corners of square baking dishes. Use only small amounts of aluminum foil. Larger amounts can damage your oven. cooking Instructions Stir foods such as casseroles and vegetables while cooking to distribute heat evenly. Food at the outside of the dish absorbs more energy and heats more quickly, so stir from the outside to the center. The oven will turn off when you open the door to stir your food. Turning Turn foods over midway through cooking to expose all parts to microwave energy. This is especially important with large items such as roasts. Standing Foods cooked in the microwave build up internal heat and continue to cook for a few minutes after the oven stops. Let foods stand to complete cooking, especially foods such as roasts and whole vegetables. Roasts need this time to complete cooking in the center without overcooking the outer areas. All liquids, such as soup or hot chocolate, should be shaken or stirred when cooking is complete. Let liquids stand a moment before serving. When heating baby food, stir well and test the temperature before serving. Adding Moisture Microwave energy is attracted to water molecules. Food that is uneven in moisture content should be covered or allowed to stand so that the heat disperses evenly. Add a small amount of water to dry food to help it cook. cooking Instructions _25 ME83DW_ZAM_DE68-03760F_EN.indd 25 2012-02-01 �� 7:42:48 General tips • Dense foods, such as potatoes, take longer to heat than lighter foods. Foods with a delicate texture should be heated at a low power level to avoid becoming tough. • Altitude and the type of cookware you are using can affect cooking time. When using a new recipe, use the minimum cooking time and check the food occasionally to prevent overcooking. • Foods with a non-porous skin or shell, such as potatoes, eggs, or hot dogs, should be pierced to prevent bursting. • Frying with heating oil or fat is not recommended. Fat and oil can suddenly boil over and cause severe burns. • Some ingredients heat faster than others. For example, the jelly inside a jelly doughnut will be hotter than the dough. Keep this in mind to avoid burns. • Home canning in the microwave oven is not recommended because all harmful bacteria may not be destroyed by the microwave heating process. • Although microwaves do not heat the cookware, the heat is often transferred to the cookware. Always use pot holders when removing food from the microwave and instruct children to do the same. 26_ cooking Instructions ME83DW_ZAM_DE68-03760F_EN.indd 26 2012-02-01 �� 7:42:48 cookware guide Cookware MicrowaveSafe Comments Aluminium foil Can be used in small quantities to protect areas against overcooking. Arcing can occur if the foil is too close to the oven wall or if too much foil is used. Browning plate Do not preheat for more than eight minutes. China and earthenware Porcelain, pottery, glazed earthenware and bone china are usually suitable, unless decorated with a metal trim. Disposable polyester cardboard dishes Some frozen foods are packaged in these dishes. cookware guide To cook food in the microwave oven, the microwaves must be able to penetrate the food, without being reflected or absorbed by the dish used. Care must therefore be taken when choosing the cookware. If the cookware is marked microwave-safe, you do not need to worry. The following table lists various types of cookware and indicates whether and how they should be used in a microwave oven. Fast-food packaging • Polystyrene cups containers Can be used to warm food. Overheating may cause the polystyrene to melt. • Paper bags or newspaper May catch fire. • Recycled paper or metal trims May cause arcing. Glassware • Oven-to-table ware Can be used, unless decorated with a metal trim. • Fine glassware Can be used to warm foods or liquids. Delicate glass may break or crack if heated suddenly. • Glass jars Must remove the lid. Suitable for warming only. cookware guide _27 ME83DW_ZAM_DE68-03760F_EN.indd 27 2012-02-01 �� 7:42:49 Cookware MicrowaveSafe Comments Metal • Dishes May cause arcing or fire. • Freezer bag twist ties Paper • Plates, cups, napkins and Kitchen paper For short cooking times and warming. Also to absorb excess moisture. • Recycled paper May cause arcing. Plastic • Containers Particularly if heat-resistant thermoplastic. Some other plastics may warp or discolour at high temperatures. Do not use Melamine plastic. • Cling film Can be used to retain moisture. Should not touch the food. Take care when removing the film as hot steam will escape. • Freezer bags Only if boilable or oven-proof. Should not be airtight. Prick with a fork, if necessary. Wax or grease-proof paper Can be used to retain moisture and prevent spattering. : Recommended : Use Caution : Unsafe 28_ cookware guide ME83DW_ZAM_DE68-03760F_EN.indd 28 2012-02-01 �� 7:42:49 appendix Troubleshooting guide Neither the oven’s display nor the oven operate. • • • • • Properly insert the plug into a grounded outlet. If the outlet is controlled by a wall switch, make sure the wall switch is turned on. Remove the plug from the outlet, wait ten seconds, then plug it in again. Reset the circuit breaker or replace any blown fuse. Plug another appliance into the outlet; if the other appliance doesn’t work, have a qualified electrician repair the outlet. • Plug the oven into a different outlet. Appendix Before you call a repair person for your oven, check this list of possible problems and solutions. The oven’s display works, but the power won’t come on. • • • • Make sure the door is closed securely. Check to see if packing material or other material is stuck to the door seal. Check for door damage. Press Cancel twice and re-enter all cooking instructions. The power goes off before the set time has elapsed. • If there has not been a power outage, remove the plug from the outlet, wait ten seconds, then plug it in again. If there was a power outage, the time indicator will display “ ” Reset the clock and any cooking instructions. • Reset the circuit breaker or replace any blown fuse. The food is cooking too slowly. • Make sure the oven is on its own 12 amp circuit line. Operating another appliance on the same circuit can cause a voltage drop. If necessary, move the oven to its own circuit. You see sparks or arcing. • Remove any metallic utensils, cookware, or metal ties. If using foil, use only narrow strips and allow at least one inch between the foil and interior oven walls. The turntable makes noises or sticks. • Clean the turntable, roller ring and oven floor. • Make sure the turntable and roller ring are positioned correctly. Appendix _29 ME83DW_ZAM_DE68-03760F_EN.indd 29 2012-02-01 �� 7:42:49 Using your microwave causes TV or radio interference. • This is similar to the interference caused by other small appliances, such as hair dryers. Move your microwave further away from other appliances, like your TV or radio. If the oven is set more than 25 minutes at 80, 90 or 100 percent power level, after the first 25 minutes the power level will automatically adjust itself to 70 percent power to avoid overcooking. Care and cleaning Follow these instructions to clean and care for your oven. • Keep the inside of the oven clean. Food particles and spilled liquids can stick to the oven walls, causing the oven to work less efficiently. • Wipe up spills immediately. Use a damp cloth and mild soap. Do not use harsh detergents or abrasives. • To help loosen baked on food particles or liquids, heat two cups of water (add the juice of one lemon if you desire to keep the oven fresh) in a four-cup measuring glass at High power for five minutes or until boiling. Let stand in the oven for one or two minutes. • Remove the glass tray from the oven when cleaning the oven or tray. To prevent the tray from breaking, handle it carefully and do not put it in water immediately after cooking. Wash the tray carefully in warm sudsy water or in the dishwasher. • Clean the outside surface of the oven with soap and a damp cloth. Dry with a soft cloth. To prevent damage to the operating parts of the oven, don’t let water seep into the openings. • Wash the door window with very mild soap and water. Be sure to use a soft cloth to avoid scratching. • If steam accumulates inside or outside the oven door, wipe with a soft cloth. Steam can accumulate when operating the oven in high humidity and in no way indicates microwave leakage. • Never operate the oven without food in it; this can damage the magnetron tube or glass tray. You may wish to leave a cup of water in the oven when it is not in use to prevent damage if the oven is accidentally turned on. 30_ Appendix ME83DW_ZAM_DE68-03760F_EN.indd 30 2012-02-01 �� 7:42:49 Specifications ME83DW Oven cavity 23 liter Controls 10 power levels, including defrost Timer 99 minutes, 99 seconds Power source 220 VAC, 50/60 Hz Power output 800 Watts Outside dimensions 489 mm(W) X 275 mm(H) X 348 mm(D) Oven cavity dimensions 330 mm(W) X 211 mm(H) X 324 mm(D) Net/gross weight 12.1 / 13.1 kg Appendix Model Number Appendix _31 ME83DW_ZAM_DE68-03760F_EN.indd 31 2012-02-01 �� 7:42:49 U.A.E 800-SAMSUNG (726-7864) OMAN 800-SAMSUNG (726-7864) KUWAIT 183-2255 BAHRAIN 8000-4726 EGYPT 08000-726786 JORDAN 800-22273 MOROCCO 080 100 2255 SAUDI ARABIA 9200-21230 TURKEY 444 77 11 IRAN 021-8255 NIGERIA 0800-726-7864 SOUTH AFRICA 0860-SAMSUNG(726-7864) www.samsung.com Code No.: DE68-03760F ME83DW_ZAM_DE68-03760F_EN.indd 32 2012-02-01 �� 7:42:49


