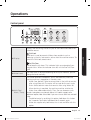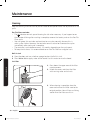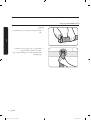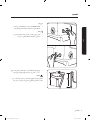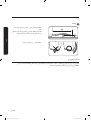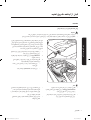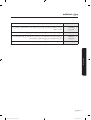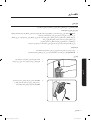
1
Washing Machine DC68-03517J-00 User manual WA16B WA5700JS(GOOD)-03517J-00_EN.indd 1 2015-05-28 3:46:58 Contents Contents Safety information 3 What you need to know about the safety instructions Important safety symbols Important safety precautions 3 3 4 Installation 10 What’s included Installation requirements 10 12 Before you start 20 The basics Laundry guidelines 20 22 Operations 25 Control panel Simple steps to start Auto cycles Manual cycles 25 27 28 29 Maintenance 30 Cleaning30 Troubleshooting 34 Checkpoints34 Information codes 38 Specifications 41 Specification sheet 41 2 English WA5700JS(GOOD)-03517J-00_EN.indd 2 2015-05-28 3:46:58 Safety information Safety information Congratulations on your new Samsung washing machine. This manual contains important information on the installation, use and care of your appliance. Please take some time to read this manual to take full advantage of your washing machine’s many benefits and features. What you need to know about the safety instructions Please read this manual thoroughly to ensure that you know how to safely and efficiently operate the extensive features and functions of your new appliance. Please store the manual in a safe location close to the appliance for future reference. Use this appliance only for its intended purpose as described in this instruction manual. Warnings and Important Safety Instructions in this manual do not cover all possible conditions and situations that may occur. It is your responsibility to use common sense, caution and care when installing, maintaining and operating your washing machine. Because the following operating instructions cover various models, the characteristics of your washing machine may differ slightly from those described in this manual and not all warning signs may be applicable. If you have any questions or concerns, contact your nearest service centre or find help and information online at www.samsung.com. Important safety symbols What the icons and signs in this user manual mean: WARNING Hazards or unsafe practices that may result in severe personal injury, death and/or property damage. CAUTION Hazards or unsafe practices that may result in personal injury and/or property damage. NOTE Indicates that a risk of personal injury or material damage exists. English 3 WA5700JS(GOOD)-03517J-00_EN.indd 3 2015-05-28 3:46:58 Safety information Safety information These warning signs are here to prevent injury to yourself and others. Please follow them explicitly. After reading this manual, store it in a safe place for future reference. Read all instructions before using the appliance. As with any equipment that uses electricity and moving parts, potential hazards exist. To safely operate this appliance, familiarize yourself with its operation and exercise care when using it. Important safety precautions WARNING To reduce the risk of fire, electric shock, or injury to persons when using your appliance, follow basic precautions, including the following: Do not let children (or pets) play in or on your washing machine. The washing machine door does not open easily from the inside and children may be seriously injured if trapped inside. This appliance is not to be used by persons (including children) with reduced physical, sensory or mental capabilities, or lack of experience and knowledge, unless they have been given supervision or instruction concerning use of the appliance by a person responsible for their safety. Children should be supervised to ensure that they do not play with the appliance. For use in Europe: This appliance can be used by children aged from 8 years and above and persons with reduced physical, sensory or mental capabilities or lack of experience and knowledge if they have been given supervision or instruction concerning use of the appliance in a safe way and understand the hazards involved. Children shall not play with the appliance. Cleaning and user maintenance shall not be made by children without supervision. 4 English WA5700JS(GOOD)-03517J-00_EN.indd 4 2015-05-28 3:46:58 Safety information If the supply cord is damaged, it must be replaced by the manufacturer, its service agent or similarly qualified persons in order to avoid a hazard. This appliance should be positioned so that the power plug, the water supply taps, and the drain pipes are accessible. For appliances with ventilation openings in the base, that a carpet must not obstruct the openings. The new hose-sets supplied with the appliance are to be used and that old hose-sets should not be reused. CAUTION In order to avoid a hazard due to inadvertent resetting of the thermal cut-out, this appliance must not be supplied through an external switching device, such as a timer, or connected to a circuit that is regularly switched on and off by the utility. CAUTION Do not use the water to exceed 50 °C when using the hot water in your washing machine. Plastic parts may be deformed or damaged, and this may result in electric shock or fire. Critical installation warnings WARNING The installation of this appliance must be performed by a qualified technician or service company. • Failure to do so may result in electric shock, fire, an explosion, problems with the product, or injury. English 5 WA5700JS(GOOD)-03517J-00_EN.indd 5 2015-05-28 3:46:58 Safety information Safety information Plug the power cord into a wall socket that meets local electrical specifications. Use the socket for this appliance only, and do not use an extension cord. • Sharing a wall socket with other appliances using a power strip or extending the power cord may result in electric shock or fire. • Ensure that the power voltage, frequency, and current are the same as those of the product specifications. Failure to do so may result in electric shock or fire. Plug the power plug into the wall socket firmly. Remove all foreign substances such as dust or water from the power plug terminals and contact points using a dry cloth on a regular basis. • Unplug the power plug and clean it with a dry cloth. • Failure to do so may result in electric shock or fire. • Plug the power plug into the wall socket so that the cord is running towards the floor. If you plug the power plug into the socket in the opposite direction, the electric wires within the cable may be damaged and this may result in electric shock or fire. This appliance must be properly grounded. Do not ground the appliance to a gas pipe, plastic water pipe, or telephone line. • This may result in electric shock, fire, an explosion, or problems with the product. • Never plug the power cord into a socket that is not grounded correctly and make sure that it is in accordance with local and national regulations. Do not install this appliance near a heater or any inflammable material. Do not install this appliance in a humid, oily or dusty location, or in a location exposed to direct sunlight or water (rain drops). Do not install this appliance in a location exposed to low temperatures. • Frost may cause the tubes to burst. Do not use an electric transformer. • This may result in electric shock or fire. Do not use a damaged power plug, damaged power cord, or loose wall socket. • This may result in electric shock or fire. Do not pull or excessively bend the power cord. Do not twist or tie the power cord. Do not hook the power cord over a metal object, place a heavy object on the power cord, insert the power cord between objects, or push the power cord into the space behind the appliance. • This may result in electric shock or fire. 6 English WA5700JS(GOOD)-03517J-00_EN.indd 6 2015-05-28 3:46:58 Safety information Installation cautions CAUTION This appliance should be positioned in such a way that the power plug is easily accessible. • Failure to do so may result in electric shock or fire due to electric leakage. Critical usage warnings WARNING If the appliance is flooded, turn off the water & power supplies immediately and contact your nearest service centre. • Do not touch the power plug with wet hands. • Failure to do so may result in electric shock. If the appliance generates a strange noise, a burning smell, or smoke, unplug the power plug immediately and contact your nearest Samsung Customer Service. • Failure to do so may result in electric shock or fire. In the event of a gas leak (such as propane gas, LP gas, etc.), ventilate immediately without touching the power plug. Do not touch the appliance or power cord. • Do not use a ventilating fan. • A spark may result in an explosion or fire. Do not let children play in or on the washing machine. In addition, when disposing of the appliance, remove the lid. • If trapped inside the product, children may suffocate to death. Do not wash items contaminated with gasoline, kerosene, benzene, paint thinner, alcohol or other inflammable or explosive substances. • This may result in electric shock, fire, or an explosion. Do not touch the power plug with wet hands. • This may result in electric shock. Do not insert your hand or a metal object under the washing machine while an operation is in progress. • This may result in injury. English 7 WA5700JS(GOOD)-03517J-00_EN.indd 7 2015-05-28 3:46:58 Safety information Safety information Do not attempt to repair, disassemble, or modify the appliance yourself. • Do not use a fuse (such as copper, steel wire, etc.) other than a standard fuse. • When the appliance needs to be repaired or reinstalled, contact your nearest service centre. • Failure to do so may result in electric shock, fire, problems with the product, or injury. • In this case, the product will not be covered by the standard warranty provided by Samsung and no responsibility can be attributed to Samsung for malfunctions or damages resulting from doing it. Unplug the power plug when the appliance is not being used for long periods of time or during a thunder or lightning storm. • Failure to do so may result in electric shock or fire. Do not put your hand into the spinning tub during the spin cycle. • This may result in injury. If the tub does not stop spinning within 15 seconds after you open the lid, contact your nearest Samsung Customer Service. Usage cautions CAUTION When the washing machine is contaminated by a foreign substance such as detergent, dirt, food waste, etc., unplug the power plug and clean the washing machine using a damp, soft cloth. • Failure to do so may result in discolouration, deformation, damage, or rust. The product you have purchased is designed for domestic use only. Using the product for business purposes qualifies as a product misuse. In this case, the product will not be covered by the standard warranty provided by Samsung and no responsibility can be attributed to Samsung for malfunctions or damages resulting from such misuse. Do not stand on the appliance or place objects (such as laundry, lighted candles, lighted cigarettes, dishes, chemicals, metal objects, etc.) on the appliance. • This may result in electric shock, fire, problems with the product, or injury. Do not press the buttons using sharp objects such as pins, knifes, fingernails, etc. • This may result in electric shock or injury. 8 English WA5700JS(GOOD)-03517J-00_EN.indd 8 2015-05-28 3:46:58 Safety information Critical cleaning warnings WARNING Do not clean the appliance by spraying water directly onto it. Do not use the strong acidic cleaning agent. Before cleaning or performing maintenance, unplug the appliance from the wall socket. • Failure to do so may result in electric shock or fire. English 9 WA5700JS(GOOD)-03517J-00_EN.indd 9 2015-05-28 3:46:59 Installation Follow these instructions carefully to ensure proper installation of the washing machine and to prevent accidents when doing laundry. What’s included Installation Make sure all the parts are included in the product package. If you have a problem with the washing machine or the parts, contact a local Samsung customer centre or the retailer. 01 02 03 08 09 04 05 06 10 11 12 13 14 07 10 English WA5700JS(GOOD)-03517J-00_EN.indd 10 2015-05-28 3:46:59 01 Built-in sink 02 Lint filter (Rear) 03 Lint filter (Front) 04 Tub 05 Water Jet 06 Levelling feet 07 Water hose (Cold) 08 Water hose (Hot) * 09 Control panel 10 Detergent drawer 11 Side handle * 12 Grounding lead * 13 Drain hose Installation 01 Door NOTE • • • • • Availability of parts with an asterisk (*) depends on the model. Door: Make sure to keep the door closed while the washing machine is operating. Lint filter: This collects lint that builds up from the laundry being washed. Grounding lead: Cover this lead if wired to a metal part for earth-grounding. Levelling feet: Adjust the feet to level the washing machine on a flat floor. English 11 WA5700JS(GOOD)-03517J-00_EN.indd 11 2015-05-28 3:46:59 Installation Installation requirements Electrical supply and grounding WARNING • Installation • • • • AC 220 V / 50 Hz fuse or circuit breaker is required. Use an individual branch circuit specific to the washing machine. Do NOT use an extension cord. Use only the power cord that comes with the washing machine. Do NOT connect the ground wire to plastic plumbing, gas lines, or hot water pipes. Drain • • Make sure the drain hose is not clogged. We recommend a standpipe in height of 90-100 cm. The drain hose must be connected through the hose clip to the standpipe, and the standpipe must fully cover the drain hose. The standpipe specifications mentioned here are only applicable to pump-type models. Levelling • • To prevent tumbling or noise, install the washing machine on a solid, flat floor without a platform or bricks. Keep the washing machine at 10 cm from each adjacent wall. Water supply • • • Make sure water taps are easily accessible. Turn off the taps when the washing machine is not in use. Check for any leaks at the water hose fittings on a regular basis. 12 English WA5700JS(GOOD)-03517J-00_EN.indd 12 2015-05-28 3:46:59 STEP 1 Select a location Installation Location requirements: • Solid, level surface without carpeting or flooring that may obstruct ventilation • Away from direct sunlight • Adequate room for ventilation and wiring • The ambient temperature is always higher than the freezing point (0 ˚C) • Away from a heat source Anti-rat panel The washing machine comes with the Antirat panel that protects small animals such as rats from entering the machine. Insert the panel into the bottom of the machine. To facilitate the work, slightly lift up the bottom front. NOTE • • Some models feature the Anti-rat panel that must be inserted from the rear bottom of the model. For this model, insert the Anti-rat panel before levelling the machine. To facilitate the work, slightly lift up the bottom rear. Availability of the Anti-rat panel depends on the model. STEP 2 Adjust the levelling feet Unpack the product package. 1. Gently slide the washing machine into position. Excessive force may damage the levelling feet (A). 2. Level the washing machine by manually adjusting the levelling feet. A English 13 WA5700JS(GOOD)-03517J-00_EN.indd 13 2015-05-28 3:46:59 Installation 3. When levelling is complete, tighten the nuts (B) if provided (some models may not have the nuts). Installation B WARNING Packaging materials can be dangerous to children. Dispose all packaging material (plastic bags, polystyrene, etc.) out of children’s reach. STEP 3 Connect the water hose Connect the water hose to the water tap. A 1. Remove the adaptor (A) from the water hose (B). B 2. Use a Philips screwdriver to loosen four screws on the adaptor. 14 English WA5700JS(GOOD)-03517J-00_EN.indd 14 2015-05-28 3:47:00 3. Hold the adaptor and turn part (C) in the arrow direction to loosen it by 5 mm (*). C Installation 4. Insert the adaptor into the water tap, and tighten the screws while lifting up the adaptor. 5. Turn part (C) in the arrow direction to tighten it. C 6. While holding down part (D), connect the water hose to the adaptor. Then, release part (D). The hose fits into the adaptor with a clicking sound. D 7. Connect the other end of the water hose to the inlet valve on the back of the washing machine. Turn the hose clockwise to tighten. English 15 WA5700JS(GOOD)-03517J-00_EN.indd 15 2015-05-28 3:47:00 Installation 8. Open the water tap and check if there are any leaks around the connection areas. • If there are water leaks, repeat the steps above. Installation • If using a screw type of water tap, connect the water hose to the water tap as shown. WARNING Stop using the washing machine if there is a water leak, and contact a local Samsung service centre. Otherwise, this may cause electric shock. CAUTION Do not stretch the water hose by force. If the hose is too short, replace the hose with a longer, high-pressure hose. NOTE • • After connecting the water hose to the adaptor, check if it is connected properly by pulling the water hose downwards. Use a standard type of water tap. If the tap is square-shaped or too big, remove the spacer ring before inserting the tap into the adaptor. 16 English WA5700JS(GOOD)-03517J-00_EN.indd 16 2015-05-28 3:47:00 STEP 4 Position the drain hose General type 1. Press and hold down the joint ring, and insert it into the drain hose. Installation 2. Insert the drain hose into the drain outlet. Make sure to connect them firmly using the joint ring. The drain hose is extensible. Adjust the length of the drain hose as needed. English 17 WA5700JS(GOOD)-03517J-00_EN.indd 17 2015-05-28 3:47:01 Installation Pump type A 1. Open the hose cap (A), and insert the drain hose. Tighten the drain hose using the joint ring. NOTE Installation • • The position (side or rear) of the drain outlet depends on the model. Availability of the hose cap depends on the model. 2. Connect the other end of the drain hose to a standpipe or basin that is positioned 90-100 cm (*) from the floor. WARNING Make sure the end of the drain hose is not submerged by water. Otherwise, the washing machine may suffer serious damage. 18 English WA5700JS(GOOD)-03517J-00_EN.indd 18 2015-05-28 3:47:01 CAUTION • • Installation • Do not exceed 3 m (*) for the total length of extended hoses. Do not let the drain hose run over doorsills that protrude 5 cm (**) or more from the floor. Do not run the drain hose under the bottom of the machine. STEP 5 Power on Plug the power cord into a wall socket featuring an AC 220 V / 50 Hz approved electrical outlet protected by a fuse or circuit breaker. Then, press Power to turn on the washing machine. English 19 WA5700JS(GOOD)-03517J-00_EN.indd 19 2015-05-28 3:47:01 Before you start The basics Prewash (Water Jet & Built-in sink) CAUTION • • Do not abuse Water Jet. Excessive use of Water Jet increases water consumption. When running water to the tub, do that gently. Otherwise, water may overflow the tub. Before you start Water Jet and Built-in sink help you handwash before the washing machine starts operation. Water Jet is available only when the door is open with the water level set to less than High. For prewashing, use the Built-in sink that is designed to facilitate the hand-wash. 1. With the door open, lower the Built-in sink, and put clothes to prewash on it. 2. Press Water Jet to supply water to the Built-in sink, and hand-wash. 3. When done, you can either reuse the water in the main cycle or simply drain. • To reuse the water, run the water down to the tub manually. • To drain the water, press Drain. NOTE • • If you want to hand-wash while the machine is operating, press Start/Pause to stop operation, and then follow steps 1-3 above. If you open both the door and the Builtin sink, lower the Built-in sink manually for prewashing. • • For the first-time use, Water Jet supplies water to the detergent drawer for 1 second to extract air from the water hose. After the first use, Water Jet stops automatically after 5 minutes of water supply. Do not use for other than prewashing, such as washing shoes or animals. 20 English WA5700JS(GOOD)-03517J-00_EN.indd 20 2015-05-28 3:47:01 Detergent drawer To add a laundry-specific detergent, follow these steps: Before you start 1. Open the door then the Built-in sink to reveal the tub. 2. Locate the detergent drawer, and slide it open. 3. Apply powder detergent as recommended by the manufacturer. Do not exceed the max line that is marked on the wing distributor. 4. If necessary, apply fabric softener as appropriate. Do not exceed the max line that is marked on the rinse cap. CAUTION Make sure to use detergent as appropriate. An excessive amount of detergent may not dissolve well. Child Lock Child Lock is designed to prevent accidents by children or infants, such as drowning. 1. Press Power. 2. To activate the Child Lock, hold down Rinse and Power Spin simultaneously for 3 seconds. The indicator blinks. 3. To deactivate the Child Lock, hold down Rinse and Power Spin simultaneously for 3 seconds. The indicator turns off. If the tub has contained water, simply restart the machine and hold down two buttons simultaneously for 3 seconds to deactivate the Child Lock. With the Child Lock enabled • • • • You can still manipulate on the control panel while the door is closed. If you open the door, an information code (CL, dC) appears with an alarm. Then, the machine starts forced draining after 30 seconds in order to prevent infant or child accidents such as drowning. Only when water supply is complete, the Child Lock becomes active. If the door leaves open for 30 seconds with the tub containing water, the machine drains the water with the “CL” code, which you cannot stop. To add detergent or more laundry in the tub, or to change the cycle settings, you must first deactivate the Child Lock. English 21 WA5700JS(GOOD)-03517J-00_EN.indd 21 2015-05-28 3:47:02 Before you start WARNING If you open the door with the Child Lock enabled, the machine starts forced draining to prevent accidents such as drowning. NOTE The Child Lock remains active after you power off the machine. You cannot deactivate the Child Lock as long as the “CL” code appears on the display. But, you can deactivate when the dC code appears by holding down two buttons simultaneously. Before you start Laundry guidelines Checkpoints • • • Check for stains or dirt. Apply a little detergent to a white towel. Rub the white towel and the dirty clothes together to transfer the dirt or colour to the white towel. Before washing, pre-treat the sleeves, collars, dress hems, and pockets by brushing with detergent. Wrinkle-processed clothes made of wool must be specially treated by tightening them with threads before washing. Remove the threads after washing and drying is complete. • • • Wrinkle-processed, embossed, or resin processed clothes easily deform merely by soaking in water. Clothes that are easily discoloured made from cotton, wool, wrinkled silk, leather wear and accessories, and leather ornamented clothes and accessories. Waterproof clothes (skiwear, diaper covers, footboards, etc) are likely to be ejected or cause abnormal noise or vibration, resulting in physical injury or property damage. CAUTION • • • Do not keep heavy clothes or objects in the tub. Do not put candles or a heat source in or on the washing machine. Do not wash these clothes: • Neckties, brassieres, jackets, suits, and coats can be easily deformed by shrinking or discolouring on the surface. These clothes are mostly made of rayon, polynosic, cuff, and/ or blended fabric. 22 English WA5700JS(GOOD)-03517J-00_EN.indd 22 2015-05-28 3:47:02 STEP 1 Sort Sort the laundry according to these criteria: • • • • • • NOTE Make sure to check the care label on the clothing, and sort them accordingly before starting the wash. STEP 4 Prewash (if necessary) • STEP 2 Empty pockets • Empty all the pockets of your laundry items, and remove dirt and/or soils from them. • • • • • Metal objects such as coins, pins, and buckles on clothing may damage other laundry items as well as the tub. Turn clothing with buttons and embroideries inside out. If pants or jacket zippers are open while washing, the tub may be damaged. Zippers should be closed and fixed with a string. Clothing with long strings may become entangled with other clothes. Make sure to tie the strings before washing. Brassieres (water washable) must be placed in a laundry net. Metal parts of the brassieres may break through and tear other laundry items. Cashmilon, large volume garments, and lightweight clothes (lace-decorated clothes, lingerie, nylon stocking, and synthetic fabrics) may float on water during washing and cause problems to the machine. Use the laundry net or wash them separately. Do not wash the laundry net by itself without other laundry. This may cause abnormal vibrations that could move the washing machine and result in injury. Before you start • Care Label: Sort the laundry into cottons, mixed fibres, synthetics, silks, wools, and rayon. Colour: Separate whites from colours. Size: Mixing different-sized items together in the tub improves the washing performance. Sensitivity: Follow the cloth-specific instructions on the care label of delicate items such as pure, new woollen items, curtains, and silk items. STEP 3 Use a laundry net • To remove stains and dirt on collars, sleeves, hems, and pockets, apply detergent lightly and brush off. Use powder or liquid detergents. Do not use soap, as this may remain on the tub after washing. Prewash white socks, sleeves, and collars with a little detergent and a brush. STEP 5 Determine the load capacity Do not overload the washing machine. Overloading may cause the washing machine to not wash properly. NOTE When washing bedding or bedding covers, the wash time may be lengthened or the spin efficiency may be reduced. For bedding or bedding covers, the recommended load capacity is 3.5 kg or less. English 23 WA5700JS(GOOD)-03517J-00_EN.indd 23 2015-05-28 3:47:02 Before you start CAUTION CAUTION If the laundry is unbalanced and the “Ub” information code is displayed, redistribute the load. Unbalanced laundry may reduce the spinning performance. • STEP 6 Apply a proper detergent type • Before you start The type of detergent depends on the type of fabric (cotton, synthetic, delicate items, wool), colour, wash temperature, and degree of soiling. Always use “low suds” laundry detergent, which is designed for automatic washing machines. • • • • Use an appropriate amount of detergent. Excess amounts of detergent do not produce much improvement in washing results but cause damage to the laundry due to deteriorated rinsing performance. Bleach is strong alkali in nature, causing damage to or discolouration of the laundry. Use a longer or added rinse cycle when using powder detergent that is very likely to remain on the laundry and cause bad odours after washing is complete. If an excessive amount of detergent is used especially in cold water, the detergent doesn’t dissolve well, ending up with contaminated laundry, hoses, and/or tub. In case of timed washing, do not apply detergent directly to laundry or the tub. The laundry may be discoloured. Use the detergent drawer. When washing wool using the Wool cycle, use only a neutral detergent to avoid discolouring the laundry. NOTE • • Follow the detergent manufacturer’s recommendations based on the weight of the laundry, the degree of soiling, and the hardness of the water in your local area. If you are not sure about the water hardness, contact a local water authority. Do not use detergent that tends to be hardened or solidified. This detergent may remain after the rinse process, blocking the drain outlet. 24 English WA5700JS(GOOD)-03517J-00_EN.indd 24 2015-05-28 3:47:02 Operations Control panel 01 07 09 08 02 03 04 05 06 Displays the remaining time of a cycle, or the information code when a problem occurs. Operations 01 Display Child Lock Child Lock is used to prevent children from accidents such as drowning in the tub, and remains active after the machine restarts. To cancel the Child Lock, deactivate it. Eco Tub Clean Use to keep the tub clean. This indicator lights up automatically on a regular basis. When the indicator turns on, run the Eco Tub Clean cycle. 02 Water Level The water level is adjusted according to the cycle. However, you can change the level manually. 03 Activ Dual Wash / *Temp. This button provides two options, and is available only when the washing machine is stopped or in Standby state. • Water Save (default): Select to reuse water in the tub that remains after using Water Jet. The water will be used for the main cycle. • Drain: Select to drain water that remains after using Water Jet. When draining is complete, the washing machine switches to Water Save mode automatically. Then, you can choose a cycle. Besides two options mentioned above, this model supports one additional option, Hot. Select Hot if you want to use both hot and cold water. • To add hot water by enabling this option, hold down this button for 3 seconds. To disable, hold down for 3 seconds again. • Water Jet supplies only cold water, thus is not available with this option. English 25 WA5700JS(GOOD)-03517J-00_EN.indd 25 2015-05-28 3:47:02 Operations 04 Wash Press to start washing, or adjust the wash time between 6 and 30 minutes. 05 Rinse Press to run the rinse cycle, or change the rinse count up to 5. 06 Power Spin Press to run the spin cycle, or change the spinning time in this sequence: 1-9 min (increase by 1 minute) > 15 min > 30 min. 07 Power Press once to turn the machine on, or twice to turn it off. 08 Start/Pause Press to stop or resume operation. To change the cycle sequence, press once to stop operation, and then change the sequence. To resume operation, press again. 09 Cycle Panel Choose one that best suits your needs. Operations 26 English WA5700JS(GOOD)-03517J-00_EN.indd 26 2015-05-28 3:47:02 Simple steps to start 1 4 2 5 3 1. 4. 5. 6. 7. Press Power to turn on the washing machine. Select a cycle in the cycle panel. Change the cycle settings (wash time, rinse count, and/or spinning time) as necessary. Optionally, you can enable Activ Dual Wash. Press Start/Pause. Operations To change the cycle during operation 1. Press Start/Pause to stop operation. 8. Select a different cycle, and repeat steps 2-3 above if necessary. 9. Press Start/Pause again to start the new cycle. English 27 WA5700JS(GOOD)-03517J-00_EN.indd 27 2015-05-28 3:47:02 Operations Auto cycles Cycle Fuzzy Quick Soak Jeans Blanket Delicates Operations * Eco Tub Clean Description • Select this for most fabrics including cottons, liners, and normally soiled garments. • Select this for less soiled clothes in reduced time. • With this selected, the washing machine adds a soaking process in advance of the main cycle. • Suitable for clothes that require a thorough wash. • Suitable for a large-sized laundry such as blankets and bed cover sheets. • Select this for delicate items such as sweaters, cardigans, or wool clothes. • Hold down Delicates for 3 seconds to select Eco Tub Clean. The powerful spinning force will remove impurities and bad odours from inside the tub. indicator blinking, this indicates that it If you see the is recommended to clean the tub using Eco Tub Clean. For details, see the Cleaning section in this manual. • 28 English WA5700JS(GOOD)-03517J-00_EN.indd 28 2015-05-28 3:47:03 Manual cycles You might want to use a single cycle to wash less soiled clothes. For example, you can run the Wash cycle once for nightwear. 1 4 2 Wash time Rinse count Power Spin time 6-30 minutes 1-5 times 1-9, 15, 30 minutes Operations 1. Press Power to turn on the washing machine. 2. Press Wash/Rinse/Power Spin to run the individual cycle to your needs. The duration or count of each cycle can be adjusted by pressing the applicable button as many times as needed. 3. If you want to run a combination of cycles, press applicable cycle buttons as below: Wash + Rinse Rinse + Spin Wash + Rinse + Power Spin Rinsing after washing Spinning after rinsing Washing, rinsing, and then spinning in sequence 4. Press Start/Pause. English 29 WA5700JS(GOOD)-03517J-00_EN.indd 29 2015-05-28 3:47:03 Maintenance Cleaning Keep the washing machine clean to prevent deteriorated performance and to preserve its life cycle. Eco Tub Clean reminder • • • • The indicator reminds you of cleaning the tub when necessary. If you happen to see the indicator blinking after washing is complete, remove the laundry and run the Eco Tub Clean cycle. You can ignore this reminder and continue to run cycles normally because this is not a system failure. However, the reminder remains active for 6 consecutive cycles immediately after each cycle is complete. The reminder is activated once every 1-3 months, depending on the cycle count. To keep the tub clean, it is recommended to run Eco Tub Clean on a regular basis. Built-in sink 1. Open the door, and use a cloth or sponge to clean the Built-in sink. 2. Press Water Jet to supply water to the board. Use this water to rinse the board. Lint filter Maintenance 1. Press down the upper area of the filter case to remove. 2. Unlock the cover, and clean the filter with running water and a brush. 3. When cleaning is complete, close the cover and reinsert the filter case to the original position. You will hear a clicking sound when the filter case fits in. 30 English WA5700JS(GOOD)-03517J-00_EN.indd 30 2015-05-28 3:47:03 Pump filter (applicable models only) 1. Put a floor-cloth or towel under the Pump filter. Turn the filter knob anticlockwise to remove. 2. Clean the filter with running water and a soft brush. Maintenance 3. Reinsert the filter, and turn clockwise until it locks into position. English 31 WA5700JS(GOOD)-03517J-00_EN.indd 31 2015-05-28 3:47:03 Maintenance Mesh filter 1. Use pliers to pull out the mesh filter from inside the water inlet as shown. 2. Use a soft brush to clean the filter with running water. 3. Reinsert the filter. Make sure it is tightened against water leaks. Maintenance 32 English WA5700JS(GOOD)-03517J-00_EN.indd 32 2015-05-28 3:47:03 Detergent drawer A B 1. Open the door and then the Built-in sink to reveal the detergent drawer. 2. Slightly lift up the front edge of the drawer, and then slide it open. 3. Remove the wing distributor (A) and rinse cap (B) from the drawer. 4. Clean the drawer as well as the distributor and rinse cap with running water and a soft brush. Maintenance 5. When complete, close the rinse cap and reinsert the distributor. Then, reinsert the detergent drawer. English 33 WA5700JS(GOOD)-03517J-00_EN.indd 33 2015-05-28 3:47:04 Troubleshooting Checkpoints If you encounter a problem with the washing machine, first check the table below and try the suggestions. Problem Does not turn on. Action • • • Make sure you use rated power for the product. Make sure the power cord is completely plugged in. Check the fuse or reset the circuit breaker. • • • Make sure the door is closed. Make sure the water taps are open. Make sure to press or tap Start/Pause to start the washing machine. Make sure Child Lock is not activated. Before the washing machine starts to fill, it will make a series of clicking noises to check the door open and does a quick drain. Was the door opened during the spinning cycle? Close the door, and press or tap Start/Pause to resume. The machine enters Standby or is in a soaking cycle. Please wait. Check the fuse or reset the circuit breaker. • • Does not start. • • • • • • Troubleshooting Water is not supplied. • • • • • After a cycle, detergent remains in the automatic dispenser. • • • Make sure you press or tap Start/Pause after selecting the water supply. Make sure the water taps are open. Is the filter net at the water supply hose connector clogged? Clean the filter net by brushing with a toothbrush. Is the water supply cut off? If the water supply is cut off, close the tap and power off. Straighten the water supply hoses. Open and close the door, then press or tap Start/Pause. If the water pressure is low, it takes longer to start washing. If the water level is not as high as necessary or lower than expected, use the level selector to adjust the water level. Make sure the washing machine is running with sufficient water pressure. Make sure the detergent drawer is properly inserted. Remove and clean the detergent drawer, and then try again. 34 English WA5700JS(GOOD)-03517J-00_EN.indd 34 2015-05-28 3:47:04 Problem Action • • Vibrates excessively or makes noise. • • • • • • • • • Stops. • • The Eco Tub Clean alarm does not turn off. • Plug the power cord into a live electrical outlet. Check the fuse or reset the circuit breaker. Close the door, and press or tap Start/Pause to start the washing machine. For your safety, the washing machine will not spin unless the door is closed. Before the washing machine starts to fill, it will make a series of clicking noises to check the door open and does a quick drain. There may be a pause or soak period in the cycle. Wait briefly and the washing machine may start. Make sure the inlet hose screens at the taps are not clogged. Periodically clean the screens. This problem occurs temporarily due to low voltages, and will be solved when power recovers. Troubleshooting • Make sure the washing machine is set on a level floor. If the floor is not level, use the levelling feet to adjust the washing machine. Make sure the washing machine is not contacting any other object. Make sure the laundry load is balanced. Make sure the laundry is spread evenly in the washing machine. Spread out the laundry evenly and start again. Make sure the space around the washing machine is free of objects. Humming is produced normally during operation. Objects such as coins can cause noise. Remove these objects from the washing machine after washing is complete. indicator When the machine is diagnosed to be cleaned, the blinks for an hour. This recurs 6 consecutive times until you run the Eco Tub Clean cycle. This is normal, and not a system failure. To keep the tub clean, it is recommended to run the cycle once every 1-3 months. English 35 WA5700JS(GOOD)-03517J-00_EN.indd 35 2015-05-28 3:47:04 Troubleshooting Problem Action • • • • Fills with the wrong temperature water. • • • • • • Does not drain and/ or spin. • • • • Troubleshooting • Load is wet at the end of the cycle. • • Fully open both water taps. Make sure the temperature selection is correct. Make sure the hoses are connected to the correct water taps. Flush water lines. Disconnect the hoses and clean the screens. The hose filter screens may be clogged. While the washing machine fills, the water temperature may change as the automatic temperature control feature checks incoming water temperature. This is normal. While the washing machine fills, you may notice just hot and/ or just cold water going through the dispenser when cold or warm temperatures are selected. This is a normal function of the automatic temperature control feature as the washing machine determines the water temperature. Check the fuse or reset the circuit breaker. Make sure the electrical voltage is normal. Make sure the washing machine is plugged in. Make sure the drain hose is pointed downward. (Natural drain models only) Make sure the drain hose is not clogged. Make sure the drain hose is not kinked. Straighten the drain hose. If there is a drain restriction, call for service. Close the door, and press or tap Start/Pause. For your safety, the washing machine will not spin unless the door is closed. Use the High or Extra High spin speed. (Applicable model only) Use high efficiency (HE) detergent to reduce oversudsing. Load is too small. Small loads (one or two items) may become unbalanced and not spin completely. 36 English WA5700JS(GOOD)-03517J-00_EN.indd 36 2015-05-28 3:47:04 Problem Action • • • Leaks water. • • • • • Excessive suds. • • • • The spin basket or drain/supply hose is frozen. • • • • • • Use high efficiency (HE) detergent to prevent oversudsing. Reduce the detergent amount for soft water, small loads, or lightly soiled loads. Non-HE detergent is not recommended. Use warm water to disconnect the water supply hose and drain hose. Soak them in warm water. Fill the spin basket with warm water, and then wait for about 10 minutes. Put a hot towel on the drain hose connector. Reconnect the water supply hose and drain hose, and check if water is supplied properly. Make sure the drain hose is not clogged, and is hung over the drain hose hook. Fill the spin basket halfway with water, and try spinning again. Lift the end of the drain hose to prevent water from draining. Fill the spin basket halfway with water, and then run spinning after releasing the drain hose. Make sure the drain hose is installed correctly. See the installation section of this user manual and adjust the position of the drain hose as instructed. Stains on clothes. • Clean the magic filter. Has odours. • • • Excessive suds collect in recesses and can cause foul odours. Run cleansing cycles to sanitize periodically. Dry the washing machine interior after a cycle has finished. Troubleshooting Water drains out immediately. Make sure all hose connections are tight. Make sure the water supply hose's rubber packing is in the correct position. Screw tightly again. Make sure the end of the drain hose is correctly inserted and secured to the drain system. Avoid overloading. Use high efficiency (HE) detergent to prevent oversudsing. Make sure the water supply hose is not kinked. If the water supply is too strong, water may leak. Close the water tap a little. Make sure water is not leaking from the water tap. If so, repair the water tap. If a problem persists, contact a local Samsung service centre. English 37 WA5700JS(GOOD)-03517J-00_EN.indd 37 2015-05-28 3:47:04 Troubleshooting Information codes If the washing machine fails to operate, you may see an information code on the display. Check the table below and try the suggestions. Code Action 1C The WaterLevel sensor is not working properly. • Check WaterLevel Sensor wire harness. • If the information code remains, contact a customer service centre. 3C Motor problem • Try restarting the cycle. • If the problem continues, call for service. 4C Water is not supplied. • Make sure the water taps are open. • Make sure the water hoses are not clogged. • Make sure the water taps are not frozen. • Make sure the washing machine is operating with sufficient water pressure. • Make sure that the cold water tap and the hot water tap are properly connected. • Clean the mesh filter as it may be clogged. • 4C2 Troubleshooting 5C Make sure the cold water supply hose is firmly connected to the cold water tap. If it is connected to the hot water tap, the laundry may be deformed with some cycles. Water is not draining. • Make sure the drain hose is not frozen or clogged. • Make sure the drain hose is positioned correctly, depending on the connection type. • Clean the debris filter as it may be clogged. • Make sure the drain hose is straightened all the way to the drain system. • If the information code remains, contact a customer service centre. 38 English WA5700JS(GOOD)-03517J-00_EN.indd 38 2015-05-28 3:47:04 Code Action 9C1 Electronic Control Problem (Over Voltage Error) • Check the PCB and wire harness. • Check if power is supplied properly. • If the information code remains, contact a customer service centre. 9C2 Low voltage detected • Check if the power cord is plugged in. • If the information code remains, contact a customer service centre. AC6 Inverter Communication problem • Check the Inverter PCB and wire harness. • If the information code remains, contact a customer service centre. Operating the washer with the door open. • Make sure the door is properly closed. • Make sure laundry is not caught in the door. HC Water temperature control problem (Heater control) • If the information code remains, contact a customer service centre. LC Check the drain hose. • Make sure the end of the drain hose is placed on the floor. • Make sure the drain hose is not clogged. • If the information code remains, contact a customer service centre. OC Water is overflowed. • Restart after spinning. • If the information code remains on the display, contact a local Samsung service centre. PC When position of the clutch can't be detected. • If the information code remains, contact a customer service centre. PC1 After position of the clutch is detected, if the signal of the clutch hall goes wrong. • If the information code remains, contact a customer service centre. Troubleshooting dC English 39 WA5700JS(GOOD)-03517J-00_EN.indd 39 2015-05-28 3:47:04 Troubleshooting Code Ub Action Spinning does not work. • Make sure laundry is spread out evenly. • Make sure the washing machine is on a flat, stable surface. • Redistribute the load. If only one item of clothing needs washing, such as a bathrobe or pair of jeans, the final spin result might be unsatisfactory, and an “Ub” check message will be shown in the display. If any information code keeps appearing on the screen, contact a local Samsung service centre. Troubleshooting 40 English WA5700JS(GOOD)-03517J-00_EN.indd 40 2015-05-28 3:47:04 Specifications Specification sheet Top loading washing machine Type Max load (kg) Power consumption (W) WA16B Washing 11.0 Washing 480 Spin 240 Dimensions (mm) W610 x D675 x H1075 Net weight (kg) 44.0 Water pressure (Mpa (kg·f/cm2)) 0.05 - 0.78 (0.5 - 8.0) Washing type Stirring type Water level (L) 5 92 4 70 3 57 2 47 1 39 Water usage (L) 154 Spin speed (rpm) 700 NOTE • • Asterisk (*) means variant model and can be varied (0-9) or (A-Z). The design and specifications are subject to change without notice for quality improvement purposes. Specification English 41 WA5700JS(GOOD)-03517J-00_EN.indd 41 2015-05-28 3:47:04 Memo WA5700JS(GOOD)-03517J-00_EN.indd 42 2015-05-28 3:47:04 Memo WA5700JS(GOOD)-03517J-00_EN.indd 43 2015-05-28 3:47:04 QUESTIONS OR COMMENTS? COUNTRY CALL OR VISIT US ONLINE AT IRAN 021-8255 [CE] 021-42132 [HHP] www.samsung.com/iran/support WA5700JS(GOOD)-03517J-00_EN.indd 44 2015-05-28 3:47:04 ماشین لباسشویی DC68-03517J-00 دفترچه راهنمای استفاده كننده WA16B 3:46:54 2015-05-28 WA5700JS(GOOD)-03517J-00_FA.indd 1 تاجردنم تسرهف فهرست مندرجات اطالعات امينی 3 در مورد دستورات ایمنی به چه اطالعاتی نیاز دارید عالئم مهم ایمنی احتیاط های مهم ایمنی 3 3 4 نصب 10 اقالم منظور شده شرایط نصب 10 12 قبل از اینکه شروع کنید 20 مقدمات رهنمودهای لباسشویی 20 22 موارد استفاده 25 صفحه کنترل مراحل ساده برای شروع سیکل های خودکار سیکل های دستی 25 27 28 29 نگه داری 30 متیز کردن 30 عیب یابی 34 نقاط مقابله 34 مشخصات 41 برگه مشخصات 41 2یسیلگنا 3:46:54 2015-05-28 WA5700JS(GOOD)-03517J-00_FA.indd 2 اطالعات امينی ميا تاعالطا ماشین لباسشویی Samsungجدید را به شما تبریک می گوییم .این دفترچه راهنما حاوی اطالعات مهمی در مورد نصب ،استفاده و مراقبت از ماشین لباسشویی شماست .لطفا ً برای مطالعه این دفترچه راهنما وقت صرف کنید تا از مزایا و ویژگی های بسیار زیاد ماشین لباسشویی خود کامال ً بهره مند شوید. در مورد دستورات ایمنی به چه اطالعاتی نیاز دارید لطفا ً این دفترچه راهنما را به طور کامل مطالعه کنید تا مطمئن شوید که با نحوه استفاده ایمن و مؤثر ویژگی ها و عملکردهای فراگیر ماشین جدید خود آشنایی دارید .لطفا ً این دفترچه راهنما را در محلی امن در نزدیکی ماشین برای مراجعه در آینده قرار دهید .از این ماشین صرفا ً به منظوری که در این دفترچه راهنما توصیف شده استفاده کنید. هشدارها و دستورات ایمنی مهم در این دفترچه راهنما همه شرایط و موقعیت هایی که ممکن است اتفاق بیافتند را پوشش منی دهند .شما مسئول هستید که در هنگام نصب ،نگه داری و استفاده از ماشین لباسشویی ،قضاوت صحیح ،احتیاط و مراقبت را مد نظر داشته باشید. چون دستورات استفاده زیر مربوط به مدل های گوناگون می شوند ،خصوصیات ماشین لباسشویی شما ممکن است قدری با ویژگی هایی که در این دفترچه راهنما توضیح داده شده متفاوت باشند و ممکن است همه عالئم هشدار به آن اطالق پذیر نباشند .اگر سؤال یا دغدغه ای دارید ،با نزدیک ترین مرکز تعمیراتی خود متاس گرفته یا راهنمایی و اطالعات آنالین را در www.samsung.comپیدا کنید. عالئم مهم ایمنی مناد ها و عالئم در این دفترچه راهنمای استفاده کننده چه معنی می دهند: هشدار خطرات ویا روال های خطرناک که ممکن است موجب صدمه شخصی شدید ،مرگ و/یا خسارت مالی شوند. احتیاط خطرات ویا روال های خطرناک که ممکن است موجب صدمه شخصی و/یا خسارت مالی شوند. تذکر نشانگر وجود خطر مصدومیت شخصی یا خسارت مالی می باشد. یسیلگنا 3 3:46:54 2015-05-28 WA5700JS(GOOD)-03517J-00_FA.indd 3 ميا تاعالطا ميا تاعالطا این عالئم هشدار برای جلوگیری از آسیب وارد شدن به خود شما و دیگران در اینجا آمده اند. لطفا ً اکیدا ً از آنها پیروی كنید. پس از مطالعه این دفترچه راهنما ،آنرا برای مراجعه در آینده در یك محل امن قرار دهید. همه دستورالعمل ها را قبل از استفاده از ماشین مطالعه كنید. مثل هر دستگاه دیگری كه از برق و قطعات متحرك استفاده می كند ،احتمال خطر وجود دارد .برای استفاده ایمن از این ماشین ،با طرز استفاده از آن آشنا شده و در هنگام استفاده مراقب باشید. احتیاط های مهم ایمنی هشدار برای کاهش خطر آتشسوزی ،انفجار ،برق گرفتگی ویا صدمه شخصی در هنگام استفاده از ماشین ،از احتیاط های ایمنی ساده پیروی کنید که شامل موارد زیر می شوند: نگذارید كودكان (یا حیوانات خانگی) در داخل ویا روی ماشین لباسشویی بازی كنند .دریچه ماشین لباسشویی به آسانی از داخل باز منی شود و اگر كودكان در آن حبس شوند ممكن است به طور جدی مصدوم شوند. این دستگاه برای استفاده توسط اشخاص (شامل كودكان) منی باشد كه توانایی های جسمی ،حسی ویا عقالنی محدود دارند ویا جتربه و دانش کافی ندارند ،مگر اینكه برای استفاده از این دستگاه ،توسط شخصی كه مسئول حفاظت از آنهاست نظارت ویا دستوراتی را دریافت كرده باشند. کودکان بایستی حتت نظارت باشند تا اطمینان حاصل شود که با ماشین بازی منی کنند. فقط برای استفاده در اروپا :کودکان به سن 8سال به باال و اشخاصی که معلولیت های جسمانی ،حسی و روانی دارند یا از جتربه و دانش کافی برخوردار نیستند در صورتی می توانند از این ماشین استفاده کنند که نظارت و دستورات الزم را در رابطه با استفاده ایمن از این ماشین دریافت کرده و از خطرات مربوطه آگاه باشند .کودکان نباید با این ماشین بازی کنند .متیز کردن و حفظ و نگهداری توسط استفاده کننده بدون نظارت کافی توسط کودکان اجنام نخواهد شد. اگر سیم برق صدمه دیده ،بایستی توسط سازنده ،تعمیرکار ویا شخص مجرب مشابه دیگری تعویض شود تا از خطر جلوگیری شود. این ماشین بایستی طوری قرار گیرد كه دوشاخه برق ،شیرهای آب و لوله های تخلیه قابل دسترسی باشند. برای دستگاه هایی که روزنه های هواگیرشان در زیر است ،زمین مفروش نبایستی این روزنه ها را مسدود کند. از مجموعه شیلنگ های جدیدی که به همراه دستگاه ارائه شده باید استفاده شود و نباید از مجموعه شیلنگ های قدیمی استفاده کرد. 4یسیلگنا 3:46:54 2015-05-28 WA5700JS(GOOD)-03517J-00_FA.indd 4 برای پرهیز از خطرات مربوط به تنظیم مجدد غیرعمدی فیوز گرمایی ،نباید از طریق سویچ خارجی از قبیل تایمر به این دستگاه برق رسانی کرد یا به مداری وصل شود که به طور مرتب توسط شرکت برق روشن و خاموش می شود. ميا تاعالطا احتیاط احتیاط هنگام استفاده از آب داغ در ماشین لباسشویی از آبی که به دمای باالی 50درجه سانتی گراد باشد خودداری کنید. قطعات پالستیکی ممکن است تغییر شکل داده و آسیب ببینند و این موضوع ممکن است منجر به برق گرفتگی یا آتشسوزی شود. یسیلگنا 5 3:46:55 2015-05-28 WA5700JS(GOOD)-03517J-00_FA.indd 5 ميا تاعالطا ميا تاعالطا هشدارهای بسیار مهم در مورد نصب هشدار نصب این ماشین بایستی توسط یک تکنیسین واجد شرایط یا شرکت خدماتی اجنام شود. •قصور در چنین کاری ممکن است موجب برق گرفتگی ،آتشسوزی ،انفجار ،مشکالتی برای محصول یا مصدومیت شود. سیم برق را به پریزی بزنید که مشخصات محلی برقی را برآورده می کند .از پریز تنها برای این محصول استفاده کنید و از سیم رابط استفاده نکنید. •استفاده همزمان از پریز با دستگاه های دیگر با استفاده از یک نوار برقی ویا امتداد دادن سیم برق ممکن است منجر به برق گرفتگی یا آتشسوزی شود. •مطمئن شوید که ولتاژ برق ،فرکانس و جریان برق با مشخصات محصول یکسان باشند .قصور در اجنام اینکار ممکن است منجر به برق گرفتگی یا آتشسوزی شود .دوشاخه را به طور محکم به پریز بزنید. همه مواد خارجی از قبیل گردوغبار یا آب را با استفاده از یک پارچه خشک به طور مرتب از خارها و نقاط متاس دوشاخه پاک کنید. •دوشاخه را از پریز کشیده و آنرا با یک پارچه خشک متیز کنید. •قصور در اجنام اینکار ممکن است منجر به برق گرفتگی یا آتشسوزی شود. •دوشاخه برق را طوری به پریز بزنید که سیم به سمت کف اتاق امتداد پیدا کند. اگر دوشاخه را در جهت مخالف به پریز بزنید ،سیم های برق در داخل کابل ممکن است صدمه دیده و این موضوع ممکن است منجر به برق گرفتگی یا آتشسوزی شود. ماشین لباسشویی بایستی به طور صحیح ارت شود. ماشین را برای ارت شدن به لوله گاز ،لوله پالستیکی آب یا سیم تلفن نزنید. •چنین کاری ممکن است منجر به برق گرفتگی ،آتشسوزی ،انفجار یا مشکالتی برای محصول شود. •هرگز سیم برق را به پریزی نزنید که به طور صحیح ارت نشده و مطمئن شوید که اینکار برطبق قوانین محلی و ملی اجنام شده باشد. این ماشین را در نزدیکی بخاری یا مواد قابل اشتعال نصب نکنید. این ماشین را در محل مرطوب ،روغنی یا پر گردوغبار یا محلی که در معرض نور مستقیم خورشید یا آب (قطرات باران) باشد نصب نکنید. این ماشین را در محلی نصب نکنید که در معرض دماهای پایین باشد. •برفک و یخ ممکن است منجر به ترکیدن لوله ها شود. از ترانسفورماتور برقی استفاده نکنید. •چنین کاری ممکن است موجب برق گرفتگی یا آتشسوزی شود. از دوشاخه آسیب دیده ،سیم برق آسیب دیده یا پریز شل و رها شده استفاده نکنید. •چنین کاری ممکن است موجب برق گرفتگی یا آتشسوزی شود. روی سیم برق فشار وارد نکنید یا آنرا بیش از حد خم نکنید. سیم برق را تاب ندهید یا گره نزنید. سیم برق را روی اشیاء فلزی قالب نکنید ،اشیاء سنگین را روی سیم برق قرار ندهید ،سیم برق را بین اشیاء وارد نکنید یا سیم برق را به فضای پشت ماشین ُهل ندهید. •چنین کاری ممکن است موجب برق گرفتگی یا آتشسوزی شود. 6یسیلگنا 3:46:55 2015-05-28 WA5700JS(GOOD)-03517J-00_FA.indd 6 ميا تاعالطا هشدارهای نصب احتیاط این ماشین بایستی طوری قرار داده شود که دوشاخه برق به راحتی قابل دسترسی باشد. •قصور در اجنام اینکار ممکن است به خاطر نشت برق منجر به برق گرفتگی یا آتشسوزی شود. هشدارهای بسیار مهم در مورد استفاده هشدار اگر ماشین پر از آب شده ،جریان آب و برق را فورا ً قطع کرده و با نزدیک ترین مرکز تعمیراتی خود متاس بگیرید. •با دست های خیس به دوشاخه دست نزنید. •قصور در اجنام اینکار ممکن است منجر به برق گرفتگی شود. اگر ماشین سروصداهای عجیب ،بوی سوختگی یا دود ایجاد می کند ،دوشاخه را فورا ً کشیده و با نزدیک ترین مرکز خدمات مشتریان Samsung متاس بگیرید. •قصور در اجنام اینکار ممکن است منجر به برق گرفتگی یا آتشسوزی شود. در مواردی که گاز نشت می کند (از قبیل گاز پروپان ،گاز LPو غیره) ،فورا ً بدون دست زدن به دوشاخه هواگیری کنید .به ماشین یا سیم برق دست نزنید. •از پنکه برای هواگیری استفاده نکنید. •یک جرقه ممکن است موجب انفجار یا آتشسوزی شود. به كودكان اجازه ندهید كه بر روی ماشین لباسشویی یا داخل آن بازی كنند .عالوه براین ،هنگامیکه ماشین را به دور می اندازید ،دریچه را جدا کنید. •اگر کودکان در داخل محصول حبس شوند ،ممکن است از خفگی تلف شوند. اقالمی که به بنزین ،نفت چراغ ،بنزن ،تینر رنگ ،الکل یا مواد قابل اشتعال یا منفجره دیگر آغشته شده اند را نشویید. •چنین کاری ممکن است موجب آتشسوزی ،برق گرفتگی یا انفجار شود. با دست های خیس به دوشاخه دست نزنید. •اینکار ممکن است منجر به برق گرفتگی شود. دست یا اشیاء فلزی را در حین کار کردن ماشین لباسشویی به زیر آن وارد نکنید. •این موضوع ممکن است منجر به مصدومیت شود. سعی نکنید که ماشین را خودتان تعمیر یا اوراق کرده یا در آن تغییراتی ایجاد کنید. •از فیوزی (از قبیل مسی ،سیم فوالدی و غیره) به غیر از فیور استاندارد استفاده نکنید. •هنگامیکه الزم است ماشین تعمیر یا دوباره نصب شود ،با نزدیک ترین مرکز خدماتی متاس بگیرید. •قصور در چنین کاری ممکن است موجب برق گرفتگی ،آتشسوزی ،مشکالتی برای محصول یا مصدومیت شود. •در این صورت محصول حتت پوشش گارانتی استانداردی که توسط Samsungارائه شده منی باشد و برای درست کار نکردن یا آسیب هائی که در نتیجه اجنام اینکار باشد مسئولیتی به Samsungنسبت داده منی شود. یسیلگنا 7 3:46:55 2015-05-28 WA5700JS(GOOD)-03517J-00_FA.indd 7 ميا تاعالطا ميا تاعالطا هنگامیکه برای مدت طوالنی از ماشین استفاده منی شود ویا در طول رعد و برق ،دوشاخه را بیرون بکشید. •قصور در اجنام اینکار ممکن است منجر به برق گرفتگی یا آتشسوزی شود. دست خود را در طول سیکل گردش داخل تشت گردنده نکنید. •این موضوع ممکن است منجر به مصدومیت شود .اگر تشت در ظرف 15ثانیه بعد از باز کردن دریچه متوقف نشود ،با نزدیکترین مرکز خدمات مشتریان Samsungمتاس بگیرید. احتیاط هایی در مورد استفاده احتیاط هنگامیکه ماشین لباسشویی به مواد خارجی از قبیل ماده شوینده ،کثافات ،ذرات غذا و غیره آغشته شده ،دوشاخه را بیرون کشیده و ماشین لباسشویی را با استفاده از یک پارچه مرطوب نرم متیز کنید. •قصور در اجنام اینکار ممکن است منجر به رنگ رفتگی ،تغییر شکل ،آسیب یا زنگ زدگی شود. محصولی که خریداری کردید فقط برای استفاده خانگی طراحی شده است. استفاده از محصول برای منظورات جتاری سوء استفاده از محصول تلقی می شود .در این صورت محصول حتت پوشش گارانتی استانداردی که توسط Samsungارائه شده منی باشد و برای درست کار نکردن یا آسیب هائی که در نتیجه چنین سوء استفاده باشد مسئولیتی به Samsung نسبت داده منی شود. بر روی ماشین نایستید یا اشیاء را بر روی آن نگذارید (از قبیل لباس ،شمع روشن ،سیگار روشن ،ظروف ،مواد شیمایی و فلزی و غیره). •چنین کاری ممکن است منجر به برق گرفتگی ،آتشسوزی ،مشکالتی برای محصول یا مصدومیت شود. دکمه ها را با استفاده از اشیاء تیز از قبیل سوزن ،کارد ،ناخن و غیره فشار ندهید. •چنین کاری ممکن است منجر به برق گرفتگی یا مصدومیت شود. 8یسیلگنا 3:46:55 2015-05-28 WA5700JS(GOOD)-03517J-00_FA.indd 8 ميا تاعالطا هشدارهای بسیار مهم در مورد متیز کردن هشدار ماشین را با پاشیدن آب به طور مستقیم بر روی آن متیز نکنید. از مواد متیز کننده ای که حاوی اسید قوی هستند استفاده نکنید. قبل ازمتیز کردن یا اجنام عملیات حفظ و نگهداری ،ماشین را از پریز بکشید. •قصور در اجنام اینکار ممکن است منجر به برق گرفتگی یا آتشسوزی شود. یسیلگنا 9 3:46:55 2015-05-28 WA5700JS(GOOD)-03517J-00_FA.indd 9 نصب این دستورالعمل ها را با دقت مراعات کنید تا نصب صحیح ماشین لباسشویی تضمین شده و از بروز سوانح در طول لباسشویی جلوگیری شود. اقالم منظور شده مطمئن شوید که همه قطعات در کارتن محصول منظور شده باشند .اگر در مورد ماشین لباسشویی یا قطعات با مشکلی روبرو شدید ،با مرکز محلی مشتریان Samsungیا فروشنده متاس بگیرید. بصن ٠١ ٠٢ ٠٣ ٠٨ ٠٩ ١٠ ٠۴ ١١ ٠۵ ١٢ ٠۶ ١٣ ١۴ ٠٧ 10یسیلگنا 3:46:55 2015-05-28 WA5700JS(GOOD)-03517J-00_FA.indd 10 0 04فیلتر پرز (جلو) 0 05تشت 0 06فواره آب 0 07پایه تراز کردن 0 08شیلنگ آب (سرد) 0 09شیلنگ آب (داغ) * 1 10صفحه کنترل 1 11كشوی ماده شوینده 1 12دستگیره جانبی * 1 13سیم زمینی * 1 14شیلنگ تخلیه بصن 0 01دریچه 0 02سینک توساز 0 03فیلتر پرز (عقب) تذکر •دسترسی به اقالمی که ستارک (*) دارند بستگی به مدل دارد. •دریچه :هنگام استفاده از ماشین لباسشویی حتما ً دریچه را ببندید. •فیلتر پرز :این فیلتر ،پرز تولید شده در طول شستشو را جمع می کند. •سیم زمینی :این سیم را در صورت اتصال به قطعه فلزی برای زمینی کردن بپوشانید. •پایه تراز کردن :پایه را طوری تراز کنید که ماشین لباسشویی بر روی یک سطح صاف تراز شود. یسیلگنا 11 3:46:55 2015-05-28 WA5700JS(GOOD)-03517J-00_FA.indd 11 بصن شرایط نصب جریان برق و گراند كردن هشدار بصن •فیوز یا مدارشکن 220ولت برق متناوب 50 /هرتز الزم است. •از یک شعبه مدار که مخصوص ماشین لباسشویی باشد استفاده کنید. •از سیم رابط استفاده نکنید. •فقط از سیم برقی استفاده کنید که به همراه ماشین لباسشویی عرضه می شود. •سیم زمینی را به لوله های پالستیكی آب ،لوله های گاز ویا لوله های آب گرم متصل نكنید. تخلیه •مطمئن شوید كه شلنگ تخلیه نگرفته باشد. •یک لوله قائم به ارتفاع 90تا 100سانتی متر را توصیه می کنیم .شلنگ تخلیه باید از طریق گیره شلنگ به لوله قائم وصل شده و لوله قائم باید کامال ً شلنگ تخلیه را پوشش دهد. مشخصات لوله قائم که در اینجا ذکر شده تنها به مدل های نوع پمپ مربوط می شوند. همتراز کردن •برای پیشگیری از افتادن یا سروصدا ،ماشین لباسشویی را روی یک سطح محکم و صاف و بدون سکو یا آجر نصب کنید. •فاصله 10سانتی متر را بین ماشین لباسشویی و هر دیوار مجاور حفظ کنید. جریان آب •مطمئن شوید که شیرهای آب به آسانی قابل دسترسی باشند. •شیر آب را هنگامیكه از ماشین لباسشویی استفاده منی شود ببندید. •هرگونه نشت را در اتصال های شلنگ آب به طور مرتب کنترل کنید. 12یسیلگنا 3:46:56 2015-05-28 WA5700JS(GOOD)-03517J-00_FA.indd 12 مرحله 1انتخاب محل نصب بصن شرایط محل نصب: •سطح محكم و هم تراز فاقد فرش ویا زمینی كه ممكن است هواگیری را مسدود كند •به دور از نور مستقیم خورشید •فضای کافی برای هواگیری و سیم کشی •دمای محیط همیشه باالتر از نقطه اجنماد ( 0درجه سانتی گراد) باشد •دور از منبع حرارتی پانل ضد موش این ماشین لباسشویی یک پانل ضد موش دارد که از ورود حیوانات کوچک از قبیل موش به داخل ماشین جلوگیری می کند. این پانل را به زیر ماشین وارد کنید .برای ایجاد تسهیل در اینکار ،قدری زیر جلو را بلند کنید. تذکر •برخی مدل ها پانل ضد موش دارند که باید از زیر پشت مدل وارد شود .برای این مدل ،پانل ضد موش را قبل از تراز کردن ماشین وارد کنید .برای ایجاد تسهیل در اینکار ،قدری زیر پشت را بلند کنید. •دسترسی به پانل ضد موش بستگی به مدل دارد. مرحله - 2پایه تراز کردن را تنظیم کنید کارتن محصول را باز کنید. 1 .1ماشین لباسشویی را با مالیمت به سر جایش بلغزانید .فشار زیاد ممکن است به پایه تراز کردن ( )Aآسیب وارد کند. 2 .2ماشین لباسشویی را توسط تنظیم کردن پایه تراز کردن با دست ،تراز کنید. A یسیلگنا 13 3:46:56 2015-05-28 WA5700JS(GOOD)-03517J-00_FA.indd 13 بصن 3 .3هنگامیکه تراز کردن متام شد ،مهره ها ( )Bرا در صورت ارائه محکم کنید (برخی مدل ما ممکن است مهره نداشته باشند). بصن B هشدار مواد بسته بندی ممکن است برای کودکان خطرناک باشند .همه مواد بسته بندی (کیسه های پالستیکی ،پلی استیرن و غیره) را از دسترس کودکان دور نگه دارید. مرحله 3شلنگ آب را وصل کنید شلنگ آب را به شیر آب وصل کنید. 1 .1آداپتور ( )Aرا از شلنگ آب ( )Bجدا کنید. A B 2 .2از یک پیچ گوشتی چهارسو برای شل کردن چهار یپچ روی آداپتور استفاده کنید. 14یسیلگنا 3:46:56 2015-05-28 WA5700JS(GOOD)-03517J-00_FA.indd 14 3 .3آداپتور را نگه داشته و بخش ( )Cرا در جهت عالمت بگردانید تا آنرا به اندازه 5میلی متر (*) شل کنید. 4 .4آداپتور را وارد شیر آب کرده و پیچ ها را در حال بلند کردن آداپتور محکم کنید. 5 .5بخش ( )Cرا در جهت عالمت بگردانید تا محکم شود. بصن C C 6 .6در حین پایین نگه داشنت بخش ( ،)Dشلنگ آب را به آداپتور وصل کنید .سپس بخش ( )Dرا رها کنید .شلنگ با یک صدای کلیک در آداپتور جا می افتد. D 7 .7انتهای دیگر شلنگ آب را به شیر تغذیه آب در پشت ماشین لباسشویی متصل کنید .شلنگ را در جهت عقربه ساعت بگردانید تا محکم شود. یسیلگنا 15 3:46:57 2015-05-28 WA5700JS(GOOD)-03517J-00_FA.indd 15 بصن بصن 8 .8شیر آب را باز کنید و کنترل کنید که نشتی در اطراف مناطق اتصال وجود نداشته باشد. •اگر آب نشت می کند ،مراحل فوق را تکرار کنید. •اگر از شیر آب نوع پیچی استفاده می شود ،شلنگ آب را به طوریکه نشان داده شده وصل کنید. هشدار اگر نشت آب وجود دارد ،استفاده از ماشین لباسشویی را متوقف کرده و با مرکز محلی خدمات Samsungمتاس بگیرید .در غیر اینصورت ممکن است موجب برق گرفتگی شود. احتیاط شلنگ آب را با زور نکشید .اگر شلنگ آب زیادی کوتاه است ،آنرا با لوله بلندتر و با فشار زیادتر تعویض کنید. تذکر •پس از اتصال شلنگ آب به آداپتور ،با کشیدن شلنگ آب به سمت پایین کنترل کنید که درست وصل شده باشد. •از نوع استاندارد شیر آب استفاده کنید .در صورتیکه شیر چهارگوش ویا زیادی بزرگ است ،حلقه جداکننده را قبل از وارد کردن شیر به داخل آداپتور جدا کنید. 16یسیلگنا 3:46:57 2015-05-28 WA5700JS(GOOD)-03517J-00_FA.indd 16 مرحله 4شلنگ تخلیه را قرار دهید نوع عمومی بصن 1 .1حلقه اتصال را فشار داده و نگه دارید و آنرا در شلنگ تخلیه وارد کنید. 2 .2شلنگ تخلیه را به خروجی تخلیه وارد کنید .حتما ً آنها را با استفاده از حلقه اتصال محکم متصل کنید. شلنگ تخلیه قابل امتداد است .طول شلنگ تخلیه را در صورت لزوم تنظیم کنید. یسیلگنا 17 3:46:57 2015-05-28 WA5700JS(GOOD)-03517J-00_FA.indd 17 بصن نوع پمپ A 1 .1کالهک شلنگ ( )Aرا باز کرده و شلنگ تخلیه را وارد کنید. شلنگ تخلیه را با استفاده از حلقه اتصال محکم کنید. تذکر بصن •محل خروجی تخلیه (در کنار یا پشت) بستگی به مدل دارد. •دسترسی به کالهک شلنگ بستگی به مدل دارد. 2 .2انتهای دیگر شلنگ تخلیه را به لوله قائم یا تشتی که در ارتفاع 90تا 100سانتی متر (*) از کف اتاق قرار گرفته وصل کنید. هشدار مطمئن شوید كه انتهای لوله تخیله در آب فرو نرفته باشد .در غیر اینصورت ،ماشین لباسشویی ممکن است دچار آسیب جدی شود. 18یسیلگنا 3:46:58 2015-05-28 WA5700JS(GOOD)-03517J-00_FA.indd 18 احتیاط •شلنگ تخلیه را در زیر ماشین قرار ندهید. بصن •شلنگ های تخلیه را بیش از 3متر (*) برای طول کامل امتداد ندهید. •نگذارید که شلنگ تخلیه روی درگاهی قرار گیرد که برجستگی دارد یا 5سانتی متر (**) یا بیشتر از کف اتاق قرار گیرد. مرحله 5روشن کردن سيم برق را به پريز بزنيد ،یک پریز برق متناوب 220ولت 50 /هرتز مجاز که توسط يک فيوز يا مدار شکن محافظت شده است .سپس ( Powerنیرو را برای روشن کردن ماشین لباسشویی فشار دهید. یسیلگنا 19 3:46:58 2015-05-28 WA5700JS(GOOD)-03517J-00_FA.indd 19 قبل از اینکه شروع کنید مقدمات پیش شستشو (فواره آب و سینک توساز) احتیاط •از فواره آب به طور صحیح استفاده کنید .استفاده بیش از حد از فواره آب مصرف آب را افزایش می دهد. •هنگام جاری کردن آب به تشت ،اینکار را با مالیمت اجنام دهید .در غیر اینصورت ممکن است که آب از تشت لبریز شود. دینک عورش هکنیا زا لبق فواره آب و سینک توساز به شما کمک می کنند تا لباسها را قبل از شروع کار ماشین لباسشویی با دست بشویید .فواره آب تنها زمانی موجود است که دریچه باز بوده و سطح آب کمتر از باال تنظیم شده باشد .برای پیش شستشو از سینک توساز استفاده کنید که برای تسهیل در شستشو با دست طراحی شده است. 1 .1در حالیکه دریچه باز است ،سینک توساز را پایین برده و لباسها را برای پیش شستشو در آن قرار دهید. ( Water Jet 2 .2فواره آب) را برای تغذیه آب به سینک توساز فشرده و با دست بشویید. 3 .3کارتان که متام شد ،می توانید از آب موجود در سیکل اصلی دوباره استفاده کرده یا صرفا ً تخلیه کنید. •برای استفاده مجدد از آب ،آب را به طور دستی در تشت جاری کنید. •برای تخلیه آب( Drain ،تخلیه) را فشار دهید. تذکر •اگر می خواهید در حین کار ماشین با دست بشویید، ( Start/Pauseشروع/مکث) را برای متوقف کردن ماشین فشرده و سپس از مراحل 1تا 3فوق پیروی کنید. •اگر دریچه و سینک توساز را با هم باز می کنید ،سینک توساز را برای پیش شستشو با دست پایین ببرید. •برای استفاده بار اول ،آب برای 1ثانیه توسط فواره آب به کشوی شوینده تغذیه شده تا هوا از شلنگ آب تخلیه شود .بعد از اولین استفاده ،فواره آب به طور خودکار بعد از 5دقیقه که آب را تغذیه کرد متوقف می شود. •به غیر از پیش شستسو استفاده نکنید ،از قبیل شستشوی کفش یا حیوانات. 20یسیلگنا 3:46:58 2015-05-28 WA5700JS(GOOD)-03517J-00_FA.indd 20 كشوی ماده شوینده .1 .2 .3 .4 1دریچه و سپس سینک توساز را باز کرده تا تشت پدیدار شود. 2کشوی ماده شوینده را پیدا کرده و آنرا باز کنید. 3پودر لباسشویی را به صورتیکه سازنده توصیه کرده اضافه کنید .از خط حداکثری که روی توزیع کننده عالمت زده شده جتاوز نکنید. 4در صورت لزوم ،نرم کننده پارچه را به مقدار الزم اضافه کنید. از خط حداکثری که روی کالهک آبکشی عالمت زده شده جتاوز نکنید. احتیاط حتما ً از شوینده به مقدار الزم استفاده کنید .مقدار بیش از حد شوینده ممکن است درست حل نشود. قفل كودك دینک عورش هکنیا زا لبق برای افزودن شوینده مخصوص لباسشویی ،از این مراحل پیروی کنید: قفل کودک برای پیشگیری از سوانحی از قبیل خفگی برای کودکان یا نوزادان طراحی شده است. ( Power1 .1نیرو) را فشار دهید. 2 .2برای فعال سازی قفل کودک( Rinse ،آبشکی) و ( Power Spinگردش پرتوان) را به طور همزمان برای 3ثانیه فشرده و نگه دارید .نشانگر چشمک می زند. 3 .3برای غیرفعال سازی قفل کودک( Rinse ،آبشکی) و ( Power Spinگردش پرتوان) را به طور همزمان برای 3ثانیه فشرده و نگه دارید .نشانگر خاموش می شود .اگر تشت حاوی آب است ،صرفا ً ماشین را دوباره راه انداخته و دو دکمه را برای غیرفعال سازی قفل کودک برای 3ثانیه به طور همزمان فشرده و نگه دارید در حالیکه قفل کودک فعال شده •هنوز می توانید از پانل کنترل در حالیکه دریچه بسته است استفاده کنید .اگر دریچه را باز کنید ،یک کد اطالعاتی ( )CL, dCبه همراه آالرم ظاهر می شود .سپس ماشین بعد از 30ثانیه با فشار تخلیه می کند تا از سوانحی از قبیل خفگی نوزاد یا کودک پیشگیری شود. •تنها زمانیکه تغذیه آب متام شد ،قفل کودک فعال می شود. •اگر دریچه در حالیکه تشت حاوی آب است برای 30ثانیه باز باقی مباند ،ماشین آب را با کد “ ”CLتخلیه می کند که شما منی توانید آنرا متوقف کنید. •برای افزودن شوینده یا لباس های بیشتر به تشت یا تغییر تنظیمات سیکل ،باید ابتدا قفل کودک را غیرفعال کنید. هشدار اگر دریچه را در حین اینکه قفل کودک فعال شده باز کنید ،ماشین تخلیه با فشار را برای پیشگیری سوانحی از قبیل خفگی شروع می کند. تذکر قفل کودک پس از اینکه ماشین را خاموش کردید فعال باقی می ماند .تا زمانیکه کد “ ”CLدر منایشگر ظاهر شود منی توانید قفل کودک را غیرفعال کنید .ولی هنگامیکه کد dCظاهر شود می توانید آنرا با پایین نگه داشنت دو دکمه به طور همزمان غیرفعال کنید. یسیلگنا 21 3:46:58 2015-05-28 WA5700JS(GOOD)-03517J-00_FA.indd 21 دینک عورش هکنیا زا لبق رهنمودهای لباسشویی نقاط مقابله دینک عورش هکنیا زا لبق •لکه ها یا کثافات را کنترل کنید .مقدار کمی شوینده را به یک حوله سفید بزنید .حوله سفید و لباس های کثیف را به هم مبالید تا کثافت یا رنگ به حوله سفید منتقل شود. •قبل از شستشو ،با برس به آستین ها ،یقه ،لبه لباس و جیب ها ماده شوینده مبالید. •لباس هایی كه به صورت چروكیده تولید شده و از پشم ساخته شده اند را باید مخصوصا ً قبل از شستشو با نخ بست .نخ ها را پس از امتام شستشو و خشک شدن باز کنید. احتیاط •لباس ها یا اشیاء سنگین را در تشت نگه ندارید. •شمع یا منابع حرارتی را در داخل ماشین لباسشویی یا روی آن قرار ندهید. •این لباس ها را نشویید: •کراوات ،سینه بند ،کت ،کت و شلوار و کت هایی که به واسطه شور رفنت یا رنگ رفتگی روی سطح آنها به راحتی بدشکل می شوند .این لباس ها بیشتر از جنس رایون ،پلی نوسیک ،سرآستین و/یا پارچه مخلوط می باشند. •لباس هایی که به طور چروکیده ،برجسته یا با رزین تولید شده باشند صرفا ً توسط خیساندن در آب بد ریخت می شوند. •لباس هایی که به آسانی دچار رنگ رفتگی می شوند از جنس پنبه ،پشم ،ابریشم چروک ،لباس و لوازم چریی و لباس ها و لوازمی که با چرم تزئیین داده شده اند می باشند. •لباس های ضد آب (لباس اسکی ،روکش پوشک ،توکفشی و غیره) احتمال دارد که پس زده شوند یا موجب سروصدا یا ارتعاش غیرعادی شوند که منجر به مصدومیت شخصی یا آسیب به دارایی می شود. 22یسیلگنا 3:46:59 2015-05-28 WA5700JS(GOOD)-03517J-00_FA.indd 22 لباس ها را براساس این ضوابط دسته بندی کنید: •برچسب مراقبت :لباس ها را بر طبق الیاف پنبه ای ،پارچه های مخلوط ،مصنوعی ،ابریشمی ،پشمی و رایون دسته بندی کنید. •رنگ :لباس های سفید را از رنگی جدا کنید. •اندازه :قاتی کردن اقالم به اندازه های مختلف با هم در تشت کارآیی شستشو را بهبود می دهد. •ظرافت :از دستورالعمل های مخصوص لباس بر روی برچسب مراقبت اقالم ظریف از قبیل اقالم ابریشمی خالص و نو ،پرده و اقالم ابریشمی پیروی کنید. تذکر حتما ً برچسب مراقبت روی لباس را کنترل کرده و آنها را بر این اساس قبل از شروع شستشو دسته بندی کنید. مرحله 4پیش شستشو (در صورت لزوم) مرحله 2جیب ها را خالی کنید همه جیب های اقالم شستشوی خود را خالی کرده و کثافت ویا خاک را از آنها پاک کنید. •اقالم فلزی از قبیل سکه ،سنجاق ،سوزن و سگک روی لباس ممکن است به سایر اقالم شستشو به اضافه تشت آسییب وارد کنند. •لباس هایی که دکمه و سوزن دوزی دارند را پشت و رو کنید. •اگر زیپ شلوار یا کت در حین شستشو باز باشد ،ممکن است به تشت آسیب وارد کند. •زیپ بایستی بسته شده و با یک ریسمان محکم شود. •لباس هایی كه بندهای دراز دارند ممكن است به لباس های دیگر پیچ بخورند .مطمئن شوید که ریسمان ها را قبل از شستشو گره بزنید. •سینه بند (قابل شستشو در آب) باید در تور لباسشویی قرار داده شود .قطعات فلزی سینه بند ممکن است شکسته شده و سایر اقالم شستشو را پاره کنند. •کشمیلون و لباس هایی که حجم زیاد دارند و سبک وزن هستند (لباس های توری تزیینی ،زیرپیراهنی زنانه ،جوراب نایلون ،پارچه های مصنوعی) ممکن است در طول شستشو روی آب شناور شده و موجب مشکالتی برای ماشین شوند .از تور لباسشویی استفاده کنید ویا آنها را جداگانه بشویید. •تور لباسشویی را به تنهایی بدون لباس های دیگر نشویید. اینکار ممكن است منجر به لرزش های غیرعادی شود كه ممکن است ماشین لباسشویی را حرکت داده و منجر به حادثه ای شود. •برای پاک کردن لکه و کثافت از یقه ،آستین ،لبه لباس و جیب ها ،شوینده را با مالیمت مالیده و با برس پاک کنید. •از پودر ویا مایع شوینده استفاده کنید .از صابون استفاده نکنید چون ممکن است پس از شستشو در تشت باقی مباند. •جوراب ،آستین و یقه سفید را با مقدار کمی شوینده و برس پیش شستشو کنید. دینک عورش هکنیا زا لبق مرحله 1دسته بندی مرحله 3از تور لباسشویی استفاده کنید مرحله 5حجم لباس ها را مشخص کنید ماشین لباسشویی را زیادی پر نکنید .زیادی پر کردن ممکن است موجب شود که ماشین لباسشویی درست نشوید. تذکر هنگام شستشوی مالفه یا روحلافی ،زمان شستشو ممكن است طوالنی تر شده ویا کارایی گردش تنزل پیدا كند .برای مالفه یا روحلافی، ظرفیت توده لباس توصیه شده 3.5کیلوگرم یا كمتر می باشد. احتیاط اگر توده لباس نامتوازن بوده و کد اطالعاتی “ ”Ubظاهر شود ،توده لباس را مجددا ً توزیع کنید .توده لباس نامتوازن ممکن است کارآیی گردش را کاهش دهد. یسیلگنا 23 3:46:59 2015-05-28 WA5700JS(GOOD)-03517J-00_FA.indd 23 دینک عورش هکنیا زا لبق مرحله 6از نوع مناسب شوینده استفاده کنید. نوع ماده شوینده بستگی به نوع پارچه (نخی ،مصنوعی ،اقالم ظریف ،پشمی) ،رنگ ،دمای شستشو و مقدار کثیفی دارد .همیشه از ماده لباسشویی «كم كف» استفاده كنید كه برای ماشین های لباسشویی خودكار طراحی شده است. احتیاط دینک عورش هکنیا زا لبق •از مقدار مناسبی شوینده استفاده كنید .مقدار بیش از حد شوینده بهبود بیشتری را در نتایج شستشو ایجاد منی کند ولی به واسطه تخریب در کارآیی شستشو موجب آسیب به لباس ها می شود. •ماهیت ماده سفید کننده بازی قوی می باشد که موجب آسیب یا رنگ رفتگی لباس ها می شود. •هنگام استفاده از پودر شوینده ای که احتمال دارد در لباس ها باقی مانده و موجب بوی متعفن بعد از امتام شستشو شود از سیکل طوالنی تر یا آبکشی بیشتر استفاده کنید. •اگر از مقدار زیادی شوینده و مخصوصا ً در آب سرد استفاده شود ،شوینده درست حل منی شود که منجر به آلودگی لباس ها ،شلنگ ها و/یا تشت می شود. •در صورت شستشوی زمان دار ،شوینده را به طور مستقیم به لباس یا تشت اضافه نکنید .ممکن است موجب رنگ رفتگی لباس ها شود .از کشوی شوینده استفاده کنید. •هنگام شستشوی الیاف پشمی با استفاده از سیکل پشمی، تنها از شوینده خنثی استفاده کنید تا از رنگ رفتگی لباس ها جلوگیری شود. تذکر •توصیه های سازنده ماده شوینده را براساس وزن لباس ها ،میزان کثیفی و سختی آب در منطقه محلی تان دنبال کنید .اگر در مورد سختی آب مطمئن نیستید ،با سازمان محلی آب متاس بگیرید. •از شوینده ای که ممکن است سفت یا جامد شود استفاده نکنید .این شوینده ممکن است بعد از روال آبکشی باقیمانده و خروجی تخلیه را مسدود کند. 24یسیلگنا 3:46:59 2015-05-28 WA5700JS(GOOD)-03517J-00_FA.indd 24 موارد استفاده صفحه کنترل ٠٩ ٠٧ ٠٨ ٠١ ٠۶ ٠۵ ٠۴ ٠٣ ٠٢ زمان باقیمانده سیکل یا کد اطالعاتی را در هنگام وقوع مشکالت منایش می دهد. هدافتسا دراوم 0 01منایشگر قفل كودك از قفل کودک برای پیشگیری بروز حوادث برای کودکان استفاده می شود ،از قبیل غرق شدن در تشت و بعد از راه اندازی مجدد ماشین فعال باقی می ماند .برای لغو قفل کودک ،آنرا غیرفعال کنید. ( Eco Tub Cleanمتیزی مقرون به صرفه تشت) برای متیز نگه داشنت تشت استفاده کنید .این نشانگر به طور مرتب و خودکار روشن می شود .هنگامیکه نشانگر روشن شد ،سیکل متیزی مقرون به صرفه تشت را اجرا کنید. Water Level0 02 (سطح آب) سطح آب براساس سیکل تنظیم می شود .ولی می توانید این سطح را به طور دستی تغییر دهید. Activ Dual Wash0 03 (شستشو دوگانه فعال) *( *Temp. /دما) این دکمه دو گزینه را ارائه می کند و تنها زمانی موجود است که ماشین لباسشویی متوقف شده یا در وضعیت آماده بکار است. •صرفه جویی در مصرف آب (پیش فرض) :برای استفاده مجدد از آبی که پس از استفاده از فواره آب در تشت باقی می ماند انتخاب کنید .از آب برای سیکل اصلی استفاده خواهد شد. •تخلیه :برای تخلیه آبی که پس از استفاده از فواره آب در تشت باقی می ماند انتخاب کنید. هنگامیکه تخلیه متام شد ،ماشین لباسشویی به طور خودکار به حالت صرفه جویی در آب تغییر می کند .سپس می توانید یک سیکل را انتخاب کنید. عالوه بر دو گزینه فوق الذکر ،این مدل از یک گزینه اضافی ( Hotداغ) پشتیبانی می کند. اگر می خواهید از آب داغ و سرد استفاده کنید( Hot ،داغ) را انتخاب کنید. •برای اضافه کردن آب داغ توسط فعال کردن این گزینه ،این دکمه را برای 3ثانیه فشرده و نگه دارید .برای غیرفعال سازی ،دوباره برای 3ثانیه فشرده و نگه دارید. •فواره آب فقط آب سرد را تغذیه می کند ،بنابراین با این گزینه موجود نیست. ( Wash0 04شستشو) برای شروع شستشو یا تنظیم زمان شستشو بین 6و 30دقیقه فشار دهید. یسیلگنا 25 3:46:59 2015-05-28 WA5700JS(GOOD)-03517J-00_FA.indd 25 هدافتسا دراوم Power Spin0 06 (گردش پرتوان) برای اجرای سیکل گردش یا تغییر زمان گردش بدین ترتیب فشار دهید 1 :تا 9دقیقه (افزایش 1دقیقه ای) > 15 دقیقه > 30دقیقه ( Power0 07نیرو) برای روشن کردن ماشین لباسشویی یک بار فشرده یا برای خاموش کردن آن دوبار فشار دهید. Start/Pause0 08 (شروع/توقف) برای توقف یا شروع مجدد کارکرد فشار دهید .برای تغییر ترتیب سیکل ،یکبار برای توقف کارکرد فشار داده و سپس ترتیب را تغییر دهید .برای شروع مجدد کارکرد ،دوباره فشار دهید. 0 09پانل سیکل سیکلی را انتخاب کنید که به بهترین وجه نیازهای شما را برآورده کند. هدافتسا دراوم ( Rinse0 05آبکشی) برای اجرای سیکل آبکشی یا تغییر شمارش آبکشی تا حداکثر 5سیکل فشار دهید. 26یسیلگنا 3:46:59 2015-05-28 WA5700JS(GOOD)-03517J-00_FA.indd 26 مراحل ساده برای شروع ٢ ١ ۵ ٣ ( Power1نیرو) را برای روشن کردن ماشین لباسشویی فشار دهید. 2یک سیکل را در پانل سیکل انتخاب کنید. 3تنظیمات سیکل را در صورت لزوم تغییر دهید (زمان شستشو ،شمارش آبکشی و/یا زمان آبکشی). 4روش دیگر اینستکه می توانید ( Activ Dual Washشستشوی فعال دوگانه) را فعال کنید. ( Start/Pause5شروع/مکث) را فشار دهید. هدافتسا دراوم .1 .2 .3 .4 .5 ۴ برای تغییر سیکل در حین کارکرد ( Start/Pause1 .1شروع/مکث) را برای توقف کارکرد فشار دهید. 2 .2یک سیکل متفاوت را انتخاب کرده و در صورت لزوم مراحل 2تا 3فوق را تکرار کنید. ( Start/Pause3 .3شروع/مکث) را برای شروع سیکل جدید دوباره فشار دهید. یسیلگنا 27 3:46:59 2015-05-28 WA5700JS(GOOD)-03517J-00_FA.indd 27 هدافتسا دراوم سیکل های خودکار سیکل •این سیکل را برای بیشتر انواع پارچه از جمله پنبه ای ،آستر و لباس هایی که به طور عادی کثیف شده اند انتخاب کنید. ( Quickسریع) •این سیکل را برای لباس هایی که کمتر کثیف شده اند در زمان کاهش یافته انتخاب کنید. ( Soakخیساندن) •با انتخاب این سیکل ،ماشین یک روال خیساندن را قبل از سیکل اصلی اضافه می کند. ( Jeansجین) •برای لباس هایی که الزم است کامال ً شسته شوند مناسب است. ( Blanketپتو) •برای اقالم به اندازه بزرگ از جمله پتو و روتختی مناسب است. ( Delicatesظریف) •این سیکل را برای اقالم ظریف از جمله ژاکت ،پیراهن پشمی یا لباس های پشمی انتخاب کنید. •( Delicatesظریف) را برای انتخاب متیزی تشت مقرون به صرفه برای 3ثانیه فشرده و نگه دارید. فشار گردشی پرقدرت ناپاکی و بوی متعفن را از داخل تشت پاک خواهد کرد. •اگر متوجه شدید که نشانگر چشمک می زند ،نشان می دهد که توصیه شده تشت را با استفاده از ( Eco Tub Cleanمتیزی مقرون به صرفه تشت) متیز کنید .برای جزئیات ،به بخش متیز کردن در این دفترچه راهنما مراجعه کنید. ( Fuzzyمبهم) * Eco Tub Clean (* متیزی تشت مقرون به صرفه) هدافتسا دراوم توصیف 28یسیلگنا 3:47:00 2015-05-28 WA5700JS(GOOD)-03517J-00_FA.indd 28 سیکل های دستی ممکن است بخواهید از یک سیکل به تنهایی برای شستشوی لباس های کثیف استفاده کنید .برای مثال می توانید سیکل شستشو را یکبار برای لباس شب اجرا کنید. ١ ۴ ٢ مدت شستشو شمارش آبکشی مدت گردش پرتوان 6تا 30دقیقه 1تا 5بار 30 ،15 ،9-1دقیقه هدافتسا دراوم ( Power1 .1نیرو) را برای روشن کردن ماشین لباسشویی فشار دهید. ( Wash2 .2شستشو) ( Rinse /آبکشی) ( Power Spin /گردش پرقدرت) را برای اجرای سیکل های جداگانه ای که نیاز دارید فشار دهید .طول مدت شمارش هر سیکل را می توان توسط فشردن دکمه مربوطه به دفعات الزم تنظیم کرد. 3 .3اگر می خواهید ترکیبی از سیکل ها را اجرا کنید ،دکمه سیکل مربوطه را به ترتیب زیر فشار دهید: ( Washشستشو) ( Rinse +آبکشی) ( Rinseآبکشی) ( Spin +گردش) ( Washشستشو) ( Rinse +آبکشی) + ( Power Spinگردش پرقدرت) آبکشی بعد از شستشو گردش بعد از آبکشی شستشو ،آبکشی و سپس گردش به ترتیب ( Start/Pause4 .4شروع/مکث) را فشار دهید. یسیلگنا 29 3:47:00 2015-05-28 WA5700JS(GOOD)-03517J-00_FA.indd 29 نگه داری متیز کردن ماشین لباسشویی را برای پیشگیری از حتلیل کارآیی و حفظ چرخه زندگی متیز نگه دارید. یادآور متیزی مقرون به صرفه تشت •نشانگر به شما یادآوری می کند که تشت را در هنگام لزوم متیز کنید .اگر متوجه شدید که این نشانگر بعد از امتام شستشو چشمک می زند ،لباس ها را خارج کرده و سیکل متیزی مقرون به صرفه تشت را اجرا کنید. •می توانید نشانگر را نادیده بگیرید و به اجرای سیکل به صورت عادی ادامه دهید چون این نشانگر خرابی سیستم نیست .ولی این نشانگر برای 6سیکل متداوم درست بعد از امتام هر سیکل فعال باقی می ماند. •این نشانگر هر 1تا 3ماه فعال می شود که بستگی به شمارش سیکل دارد. •برای متیز نگه داشنت تشت ،توصیه می شود که متیزی مقرون به صرفه تشت را به طور مرتب اجرا کنید. سینک توساز 1 .1دریچه را باز کرده و از یک پارچه یا اسفنج برای متیز کردن سینک توساز استفاده کنید. ( Water Jet2 .2فواره آب) را برای تغذیه آب به تخته فشار دهید .از این آب برای آبکشی تخته استفاده کنید. فیلتر پرز یراد هگن 1 .1قسمت باالی جلد فیلتر را فشار دهید تا برداشته شود. 2 .2قفل پوشش را باز کرده و فیلتر را با آب جاری و برس متیز کنید. 3 .3هنگامیکه متیز کردن متام شد ،پوشش را بسته و جلد فیلتر را به محل اصلی آن دوباره وارد کنید .یک صدای کلیک را هنگامیکه جلد فیلتر سرجایش افتاد خواهید شنید. 30یسیلگنا 3:47:00 2015-05-28 WA5700JS(GOOD)-03517J-00_FA.indd 30 فیلتر پمپ (فقط مدل های مربوطه) 1 .1یک پارچه یا حوله را زیر فیلتر پمپ قرار دهید .دسته فیلتر را برای برداشنت در جهت خالف عقربه ساعت بگردانید. 2 .2فیلتر را با آب جاری و برس نرم متیز کنید. یراد هگن 3 .3فیلتر را دوباره وارد کرده و در جهت عقربه ساعت بگردانید تا سرجایش قفل شود. یسیلگنا 31 3:47:00 2015-05-28 WA5700JS(GOOD)-03517J-00_FA.indd 31 یراد هگن فیلتر توری 1 .1از انبردست برای بیرون کشیدن فیلتر توری از داخل ورودی آب به طوریکه نشان داده شده استفاده کنید. 2 .2از یک برس نرم برای متیز کردن فیلتر با آب جاری استفاده کنید. یراد هگن 3 .3فیلتر را دوباره وارد کنید .مطمئن شوید که نشت آب نداشته باشد. 32یسیلگنا 3:47:01 2015-05-28 WA5700JS(GOOD)-03517J-00_FA.indd 32 كشوی ماده شوینده A B 1 .1دریچه و سپس سینک توساز را باز کرده تا کشوی شوینده پدیدار شود. 2 .2قدری لبه جلوی کشو را بلند کرده و سپس آنرا باز کنید. 3 .3توزیع کننده ( )Aو کالهک آبکشی ( )Bرا از کشو جدا کنید. یراد هگن 4 .4کشو و توزیع کننده و کالهک آبکشی را با آب جاری و برس نرم متیز کنید. 5 .5هنگامیکه متام شد ،کالهک آبکشی را ببندید و توزیع کننده را دوباره وارد کنید .سپس کشوی شوینده را دوباره وارد کنید. یسیلگنا 33 3:47:01 2015-05-28 WA5700JS(GOOD)-03517J-00_FA.indd 33 عیب یابی نقاط مقابله اگر در استفاده از ماشین لباسشویی با مشکلی مواجه شدید ،ابتدا جدول زیر را کنترل کرده و توصیه ها را امتحان کنید. مشكل روشن منی شود. شروع به کار منی کند. اقدام •مطمئن شوید که از توان اسمی برای محصول استفاده می کنید. •مطمئن شوید که سیم کامال ً به پریز برق زده شده است. •فیوز را کنترل کرده یا مدارشکن را مجددا ً تنظیم کنید. •مطمئن شوید که دریچه بسته شده باشد. •مطمئن شوید كه شیرهای آب باز باشند. •مطمئن شوید که ( Start/Pauseشروع/مکث) را برای راه اندازی ماشین لباسشویی فشرده یا روی آن ضربه مالیم زده باشید. •مطمئن شوید که قفل کودک فعال نشده باشد. •قبل از اینکه ماشین لباسشویی شروع به پرشدن کند ،یک سری صداهای کلیک برای کنترل قفل بودن دریچه ایجاد خواهد کرد و یک تخلیه سریع را اجنام می دهد. •آیا دریچه در حین سیکل گردش باز بود؟ دریچه را بسته و برای شروع مجدد ( Start/Pauseشروع/ مکث) را فشار دهید یا روی آن ضربه مالیم بزنید. •ماشین وارد آماده بکار می شود یا در سیکل خیساندن است .لطفا ً منتظر شوید. •فیوز را کنترل کرده یا مدارشکن را مجددا ً تنظیم کنید. یبای بیع آب جریان پیدا نكرده. •مطمئن شوید که ( Start/Pauseشروع/مکث) را بعد از انتخاب تغذیه آب فشرده یا روی آن ضربه مالیم بزنید. •مطمئن شوید كه شیرهای آب باز باشند. •آیا توری فیلتر در اتصالی شلنگ تغذیه آب گیر کرده است؟ توری فیلتر را با یک مسواک متیز کنید. •آیا تغذیه آب قطع شده است؟ اگر تغذیه آب قطع شده ،شیر را بسته و ماشین را خاموش کنید. •شیلنگ های جریان آب را راست کنید. •دریچه را باز و بسته کرده ،سپس ( Start/Pauseشروع/مکث) را فشرده یا روی آن ضربه مالیم بزنید. •اگر فشار آب پایین باشد ،شروع شستشو بیشتر طول می کشد. •اگر سطح آب به اندازه کافی نیست یا کمتر از میزان مورد نظر است ،از گزینشگر سطح برای تنظیم سطح آب استفاده کنید. 34یسیلگنا 3:47:01 2015-05-28 WA5700JS(GOOD)-03517J-00_FA.indd 34 زیادی لرزش دارد یا سر و صدا ایجاد می کند. •مطمئن شوید که ماشین لباسشویی با فشار آب کافی کار می کند. •مطمئن شوید که کشوی شوینده درست وارد شده باشد. •کشوی شوینده را خارج و متیز کرده و سپس دوباره امتحان کنید. •مطمئن شوید که ماشین لباسشویی بر روی یک سطح صاف گذاشته شده باشد .اگر کف اتاق صاف نیست ،از پایه های تراز کردن برای تراز ماشین لباسشویی استفاده کنید. •مطمئن شوید که ماشین لباسشویی با اشیاء دیگری متاس نداشته باشد. •مطمئن شوید که توده لباس ها توازن داشته باشند. •مطمئن شوید که لباس ها به طور هم سطح در ماشین لباسشویی توزیع شده باشند .لباس ها را به طور هم سطح قرار داده و دوباره شروع کنید. •مطمئن شوید که فضای اطراف ماشین لباسشویی عاری از اشیاء باشد. •صدای زمزمه به طور عادی در حین کارکرد ایجاد می شود. •اشیائی از قبیل سکه ممکن است سر و صدا ایجاد کنند .این اشیاء را بعد از امتام شستشو از ماشین لباسشویی خارج کنید. •سیم برق را به یک پریز برق جریان دار بزنید. •فیوز را کنترل کرده یا مدارشکن را مجددا ً تنظیم کنید. •دریچه را بسته و ( Start/Pauseشروع/مکث) را برای راه اندازی ماشین لباسشویی فشرده یا روی آن ضربه مالیم زده باشید .برای ایمنی شما ،ماشین لباسشویی شروع به گردش منی کند مگر اینکه دریچه بسته باشد. •قبل از اینکه ماشین لباسشویی شروع به پرشدن کند ،یک سری صداهای کلیک برای کنترل قفل بودن دریچه ایجاد خواهد کرد و یک تخلیه سریع را اجنام می دهد. •ممکن است در سیکل یک دوره مکث یا خیساندن وجود داشته باشد .قدری صبر کنید و ماشین لباسشویی ممکن است شروع به کار کند. •مطمئن شوید که توری های شلنگ ورودی آب در محل شیرها مسدود نشده باشند .به طور مرتب این توری ها را متیز کنید. •مشکل به طور موقت به واسطه ولتاژ پایین پیش می آید و هنگامیکه توان اعاده شد برطرف خواهد شد. متوقف می شود. یبای بیع مشكل بعد از سیکل شستشو ،شوینده در پخشگر خودکار باقی می ماند. اقدام یسیلگنا 35 3:47:01 2015-05-28 WA5700JS(GOOD)-03517J-00_FA.indd 35 یبای بیع مشكل آالرم متیزی مقرون به صرفه تشت خاموش منی شود. اقدام •هنگامیکه تشخیص داده شده که ماشین متیز است ،نشانگر برای یک ساعت چشمک می زند .این موضوع 6بار پیاپی پیش می آید تا اینکه سیکل متیزی تشت مقرون به صرفه را اجرا کنید. این موضوع عادی بوده و خرابی سیستم نیست .برای متیز نگه داشنت تشت ،توصیه می شود که این سیکل را یکبار در هر 1تا 3ماه اجرا کنید. •هر دو شیر آب را کامال ً باز کنید. •مطمئن شوید که گزینش دما درست است. •مطمئن شوید که شلنگ ها به شیرهای آب درست وصل شده باشند .لوله های آب را تخلیه کنید. •شلنگ ها را قطع کرده و توری ها را متیز کنید .توری های فیلتر شلنگ ممکن است مسدود شده باشند. •در حین پر شدن ماشین لباسشویی ،دمای آب ممکن است تغییر کند چون ویژگی کنترل دمای خودکار ،دمای آب ورودی را کنترل می کند .این موضوع عادیست. •در حین پر شدن ماشین لباسشویی ،ممکن است متوجه شوید که هنگام گزینش دمای سرد یا گرم ،فقط آب داغ و/یا سرد وارد پخشگر می شود. این یک عملکرد عادی ویژگی کنترل دمای خودکار می باشد چون ماشین لباسشویی دمای آب را مشخص می کند. با آب به دمای اشتباه پر می شود. یبای بیع دریچه قفل شده یا باز منی شود. تخلیه و/یا گردش منی کند •در حین کارکرد ماشین لباسشویی( Start/Pause ،شروع/مکث) را برای متوقف کردن ماشین لباسشویی فشرده یا روی آن ضربه مالیم بزنید. •ممکن است چند حلظه طول بکشد تا مکانیسم قفل دریچه خالص شود. •فیوز را کنترل کرده یا مدارشکن را مجددا ً تنظیم کنید. •مطمئن شوید كه ولتاژ برق عادی باشد. •مطمئن شوید که ماشین لباسشویی به پریز برق زده شده است. •مطمئن شوید كه شلنگ تخلیه به سمت پایین باشد( .فقط مدل های تخلیه طبیعی) •مطمئن شوید كه شلنگ تخلیه نگرفته باشد. •مطمئن شوید كه شلنگ تخلیه تاب نخورده باشد. •شیلنگ تخلیه را صاف کنید .اگر محدودیت تخلیه وجود دارد ،با مرکز خدماتی متاس بگیرید. •دریچه را بسته و ( Start/Pauseشروع/مکث) را فشار دهید یا روی آن ضربه مالیم بزنید .برای ایمنی شما ،ماشین لباسشویی شروع به گردش منی کند مگر اینکه دریچه بسته باشد. 36یسیلگنا 3:47:01 2015-05-28 WA5700JS(GOOD)-03517J-00_FA.indd 36 آب نشت می کند. کف بیش از حد. •از سرعت گردش زیاد یا بسیار زیاد استفاده کنید( .تنها مدل مربوطه) •از شوینده با کارآیی زیاد ( )HEبرای کاهش کف زیاد استفاده کنید. •توده لباس زیادی کوچک است .توده های کوچک لباس (یک یا دو فقره) ممکن است نامتوازن شده و به طور کامل گردش نکنند. •مطمئن شوید که همه اتصال های شلنگ محکم و سفت باشند. •مطمئن شوید که بسته الستیکی شلنگ تغذیه در محل درست باشد .دوباره محکم پیچ کنید. •مطمئن شوید که انتهای شلنگ تخلیه به طور صحیح به سیستم تخلیه وارد شده و محکم باشد. •از زیاد پر کردن پرهیز کنید. •از شوینده با کارآیی زیاد ( )HEبرای جلوگیری از کف زیاد استفاده کنید. •مطمئن شوید که شلنگ تغذیه آب تاب نخورده باشد. •اگر فشار آب زیاد باشد ،آب ممکن است نشت کند .شیر آب را قدری ببندید. •مطمئن شوید که آب از شیر آب نشت نکند .در این صورت ،شیر آب را تعمیر کنید. •از شوینده با کارآیی زیاد ( )HEبرای جلوگیری از کف زیاد استفاده کنید. •مقدار شوینده را برای آب نرم ،توده های کوچک لباس یا توده هایی که کمی کثیف شده اند کاهش دهید. •شوینده غیر HEتوصیه منی شود. سبد گردش یا شلنگ تخلیه/ تغذیه یخ زده است. آب فورا ً تخلیه می شود. •از آب گرم برای قطع شلنگ تغذیه آب استفاده کرده و شلنگ را تخلیه کنید .آنها را در آب گرم بخیسانید. •سبد گردش را با آب گرم پر کرده و سپس برای در حدود 10دقیقه منتظر شوید. •یک حوله داغ را بر روی اتصالی لوله تخلیه بگذارید. •شلنگ تغذیه آب و شلنگ تخلیه را وصل کرده و کنترل کنید که آب به طور صحیح تغذیه شود. •مطمئن شوید که شلنگ تخلیه مسود نشده و روی قالب شلنگ تخلیه آویزان باشد .سبد گردش را تا وسط با آب پر کرده و گردش را دوباره امتحان کنید. •انتهای شلنگ تخلیه را برای جلوگیری از تخلیه آب بلند کنید .سبد گردش را تا وسط با آب پر کرده و سپس گردش را پس از رها کردن شلنگ تخلیه اجرا کنید. •مطمئن شوید که شیلنگ تخلیه به طور صحیح نصب شده باشد .به بخش نصب این دفترچه راهنمای کاربر مراجعه کرده و محل شلنگ تخلیه را به طوریکه مشخص شده تنظیم کنید. یبای بیع مشكل لباس ها در خامته سیکل خیس هستند. اقدام یسیلگنا 37 3:47:01 2015-05-28 WA5700JS(GOOD)-03517J-00_FA.indd 37 یبای بیع اقدام مشكل لکه های روی لباس ها. •فيلتر جادويي را متيز کنيد. بوی متعفن دارد. •کف بیش از حد در فرورفتگی ها جمع شده و ممکن است موجب بوی متعفن شود. •سیکل های متیز کردن را به طور دوره ای برای ضدعفونی اجرا کنید. •داخل ماشین لباسشویی را بعد از امتام سیکل خشک کنید. یبای بیع اگر مشکل ادامه پیدا کرد ،با مرکز خدمات محلی Samsungمتاس بگیرید. 38یسیلگنا 3:47:01 2015-05-28 WA5700JS(GOOD)-03517J-00_FA.indd 38 کدهای اطالعاتی اگر ماشین لباسشویی درست کار منی کند ،ممکن است یک کد اطالعاتی را در منایشگر مشاهده کنید .جدول زیر را کنترل کرده و توصیه ها را امتحان کنید. اقدام 1C سنسور سطح آب درست کار منی کند. •افسار سیمی سنسور سطح آب را کنترل کنید. •اگر کد اطالعاتی باقی ماند ،با مرکز خدمات مشتریان متاس بگیرید. 3C مشکل موتور •سعی کنید که سیکل را دوباره شروع کنید. •اگر مشکل ادامه پیدا کرد ،برای تعمیر متاس بگیرید. 4C آب جریان پیدا نكرده. •مطمئن شوید كه شیرهای آب باز باشند. •مطمئن شوید كه شلنگ های آب نگرفته باشد. •مطمئن شوید كه شیرهای آب یخ نزده باشند. •مطمئن شوید که ماشین لباسشویی با فشار آب کافی کار می کند. •مطمئن شوید که شیر آب سرد و شیر آب داغ به طور صحیح وصل شده باشند. •فیلتر توری را متیز کنید چون ممکن است مسدود شده باشد. 4C2 •مطمئن شوید که شلنگ تغذیه آب سرد به طور محکم به شیر آب سرد وصل شده باشد. اگر به شیر آب داغ وصل شده باشد ،لباس ها ممکن است با برخی سیکل ها بدریخت شوند. 5C آب تخلیه منی شود. •مطمئن شوید كه شلنگ تخلیه یخ نزده یا نگرفته باشد. •مطمئن شوید که شلنگ تخلیه درست قرار گرفته باشد که بستگی به نوع اتصال دارد. •فیلتر کثافات را متیز کنید چون ممکن است مسدود شده باشد. •مطمئن شوید که شلنگ تخلیه تا سیستم تخلیه به طور مستقیم قرار گرفته باشد. •اگر کد اطالعاتی باقی ماند ،با مرکز خدمات مشتریان متاس بگیرید. 9C1 مشکل کنترل برقی (خطای ولتاژ زیاد) • PCBو افسار سیمی را کنترل کنید. •جریان تغذیه برق را کنترل کنید. •اگر کد اطالعاتی باقی ماند ،با مرکز خدمات مشتریان متاس بگیرید. 9C2 ولتاژ پایین شناسایی شد •کنترل کنید که سیم برق به پریز زده شده باشد. •اگر کد اطالعاتی باقی ماند ،با مرکز خدمات مشتریان متاس بگیرید. یبای بیع کد یسیلگنا 39 3:47:01 2015-05-28 WA5700JS(GOOD)-03517J-00_FA.indd 39 یبای بیع یبای بیع کد اقدام AC6 مشکل ارتباطی وارونگر • PCBوارونگر و افسار سیمی را کنترل کنید. •اگر کد اطالعاتی باقی ماند ،با مرکز خدمات مشتریان متاس بگیرید. dC استفاده از ماشین با دریچه باز. •مطمئن شوید که دریچه به طور صحیح بسته شده باشد. •مطمئن شوید که لباسی در دریچه گیر نکرده باشد. HC مشکل کنترل دمای آب (کنترل حرارتی). •اگر کد اطالعاتی باقی ماند ،با مرکز خدمات مشتریان متاس بگیرید. LC شیلنگ تخلیه را کنترل کنید. •مطمئن شوید که انتهای شیلنگ تخلیه روی کف اتاق گذاشته شده است. •مطمئن شوید كه شلنگ تخلیه نگرفته باشد. •اگر کد اطالعاتی باقی ماند ،با مرکز خدمات مشتریان متاس بگیرید. OC آب لبریز می شود. •بعد از گردش دوباره شروع کنید. •اگر کد اطالعاتی روی منایشگر باقی ماند ،با مرکز محلی خدمات Samsungمتاس بگیرید. PC هنگامیکه وضعیت کالچ را منی توان شناسایی کرد. •اگر کد اطالعاتی باقی ماند ،با مرکز خدمات مشتریان متاس بگیرید. PC1 بعد از شناسایی وضعیت کالچ ،اگر سیگنال کالچ اشتباه باشد. •اگر کد اطالعاتی باقی ماند ،با مرکز خدمات مشتریان متاس بگیرید. Ub گردش کار منی کند. •مطمئن شوید که لباس ها به طور یکدست توزیع شده باشند. •مطمئن شوید که ماشین لباسشویی بر روی یک سطح صاف و باثبات گذاشته شده باشد. •لباس ها را پخش کنید .اگر تنها الزم است که یک تکه لباس شسته شود ،از قبیل یک رب دشامبر ویا شلوار جین ،نتیجه چرخش نهایی ممکن است قابل قبول نبوده و یک پیغام کنترل “”Ub در منایشگر ظاهر خواهد شد. اگر کد اطالعاتی مرتب روی منایشگر ظاهر می شود ،با مرکز محلی خدمات Samsungمتاس بگیرید. 40یسیلگنا 3:47:01 2015-05-28 WA5700JS(GOOD)-03517J-00_FA.indd 40 مشخصات برگه مشخصات ماشین لباسشوئی با دریچه باال نوع حداكثر مقدار لباس (كیلوگرم) مصرف نیرو (وات) WA16B شستشو 11.0 شستشو 480 گردش 240 ابعاد (میلی متر) عرض 610در عمق 675در بلندی 1075 وزن خالص (کیلوگرم) 44.0 فشار آب ())Mpa (kg•f/cm2 )8.0 - 0.5( 0.78 - 0.05 نوع شستشو نوع همزدن سطح آب (لیتر) 5 92 4 70 3 57 2 47 1 39 مصرف آب (لیتر) 154 سرعت گردش (دور در دقیقه) 700 تذکر تاصخشم •ستارک (*) به معنی مدل گوناگون بوده و ممکن است از ( )0-9یا ( )A-Zمتفاوت باشد. •طراحی و مشخصات بدون اطالع قبلی و به منظور بهبود کیفیت منوط به تغییر می باشند. یسیلگنا 41 3:47:02 2015-05-28 WA5700JS(GOOD)-03517J-00_FA.indd 41 يادداشت WA5700JS(GOOD)-03517J-00_FA.indd 42 2015-05-28 3:47:02 يادداشت WA5700JS(GOOD)-03517J-00_FA.indd 43 2015-05-28 3:47:02 سوال ویا اظهار نظر؟ 3:47:02 2015-05-28 کشور متاس بگیرید ویا از ما به صورت آنالین دیدن کنید IRAN ]021-8255 [CE ]021-42132 [HHP www.samsung.com/iran/support WA5700JS(GOOD)-03517J-00_FA.indd 44