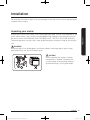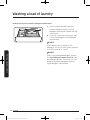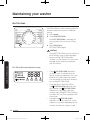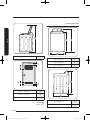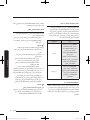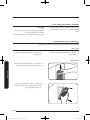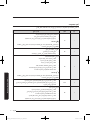
1
Washer User manual WA22J8700G* / WA18J8700G* SSEC SEC WA8700J_WA22J8700GP-03520L-02_SG_EN.indd 1 2015/7/27 16:55:33 Contents Contents Safety information 4 What you need to know about the safety instructions Important safety symbols Important safety precautions 4 4 5 Installation 11 Unpacking your washer Overview of your washer Basic location requirements Important note to installer Step-by-step installation 11 12 14 18 18 Operating instructions 26 Loading your washer Getting started 26 27 Washing a load of laundry 28 Control panel 28 Cycle overview 30 Options31 Washing clothes using the cycle selector 34 ATC (Auto Temperature Control) 35 The basics 36 Detergent use 38 Features39 Maintaining your washer 42 Cleaning the exterior Cleaning the interior Storing your washer Preserving the top cover and the front frame Cleaning the built-in sink and lint filter Cleaning the dispensers Eco Tub clean 42 42 42 43 43 44 46 Troubleshooting 47 Checkpoints47 Information codes 51 2 English WA8700J_WA22J8700GP-03520L-02_SG_EN.indd 2 2015/7/27 16:55:33 54 Fabric care chart Helping the environment Specification sheet Cycle chart 54 56 57 58 Contents Specifications English 3 WA8700J_WA22J8700GP-03520L-02_SG_EN.indd 3 2015/7/27 16:55:33 Safety information Safety information Congratulations on your new Samsung washer. This manual contains important information on the installation, use and care of your appliance. Please take some time to read this manual to take full advantage of your washer’s many benefits and features. What you need to know about the safety instructions Please read this manual thoroughly to ensure that you know how to safely and efficiently operate the extensive features and functions of your new appliance. Please store the manual in a safe location close to the appliance for future reference. Use this appliance only for its intended purpose as described in this instruction manual. Warnings and Important Safety Instructions in this manual do not cover all possible conditions and situations that may occur. It is your responsibility to use common sense, caution and care when installing, maintaining and operating your washing machine. Because the following operating instructions cover various models, the characteristics of your washing machine may differ slightly from those described in this manual and not all warning signs may be applicable. If you have any questions or concerns, contact your nearest service centre or find help and information online at www.samsung.com. Important safety symbols What the icons and signs in this user manual mean: WARNING Hazards or unsafe practices that may result in severe personal injury, death and/or property damage. CAUTION Hazards or unsafe practices that may result in personal injury and/or property damage. NOTE Indicates that a risk of personal injury or material damage exists. 4 English WA8700J_WA22J8700GP-03520L-02_SG_EN.indd 4 2015/7/27 16:55:33 Read all instructions before using the appliance. As with any equipment that uses electricity and moving parts, potential hazards exist. To safely operate this appliance, familiarize yourself with its operation and exercise care when using it. Safety information These warning signs are here to prevent injury to yourself and others. Please follow them explicitly. After reading this manual, store it in a safe place for future reference. Important safety precautions WARNING To reduce the risk of fire, electric shock, or injury to persons when using your appliance, follow basic precautions, including the following: Do not let children (or pets) play in or on your washing machine. The washing machine door does not open easily from the inside and children may be seriously injured if trapped inside. This appliance is not to be used by persons (including children) with reduced physical, sensory or mental capabilities, or lack of experience and knowledge, unless they have been given supervision or instruction concerning use of the appliance by a person responsible for their safety. Children should be supervised to ensure that they do not play with the appliance. For use in Europe: This appliance can be used by children aged from 8 years and above and persons with reduced physical, sensory or mental capabilities or lack of experience and knowledge if they have been given supervision or instruction concerning use of the appliance in a safe way and understand the hazards involved. Children shall not play with the appliance. Cleaning and user maintenance shall not be made by children without supervision. English 5 WA8700J_WA22J8700GP-03520L-02_SG_EN.indd 5 2015/7/27 16:55:33 Safety information Safety information If the supply cord is damaged, it must be replaced by the manufacturer, its service agent or similarly qualified persons in order to avoid a hazard. This appliance should be positioned so that the power plug, the water supply taps, and the drain pipes are accessible. For appliances with ventilation openings in the base, that a carpet must not obstruct the openings. The new hose-sets supplied with the appliance are to be used and that old hose-sets should not be reused. CAUTION In order to avoid a hazard due to inadvertent resetting of the thermal cut-out, this appliance must not be supplied through an external switching device, such as a timer, or connected to a circuit that is regularly switched on and off by the utility. CAUTION Do not use the water to exceed 50 °C when using the hot water in your washing machine. Plastic parts may be deformed or damaged, and this may result in electric shock or fire. Critical installation warnings WARNING The installation of this appliance must be performed by a qualified technician or service company. • Failure to do so may result in electric shock, fire, an explosion, problems with the product, or injury. 6 English WA8700J_WA22J8700GP-03520L-02_SG_EN.indd 6 2015/7/27 16:55:34 Safety information Plug the power cord into an AC 220-240 V / 50 Hz wall socket or higher and use the socket for this appliance only. Never use an extension cord. • Sharing a wall socket with other appliances using a power strip or extending the power cord may result in electric shock or fire. • Ensure that the power voltage, frequency, and current are the same as those of the product specifications. Failure to do so may result in electric shock or fire. Plug the power plug into the wall socket firmly. Remove all foreign substances such as dust or water from the power plug terminals and contact points using a dry cloth on a regular basis. • Unplug the power plug and clean it with a dry cloth. • Failure to do so may result in electric shock or fire. • Plug the power plug into the wall socket so that the cord is running towards the floor. If you plug the power plug into the socket in the opposite direction, the electric wires within the cable may be damaged and this may result in electric shock or fire. This appliance must be properly grounded. Do not ground the appliance to a gas pipe, plastic water pipe, or telephone line. • This may result in electric shock, fire, an explosion, or problems with the product. • Never plug the power cord into a socket that is not grounded correctly and make sure that it is in accordance with local and national regulations. Do not install this appliance near a heater or any inflammable material. Do not install this appliance in a humid, oily or dusty location, or in a location exposed to direct sunlight or water (rain drops). Do not install this appliance in a location exposed to low temperatures. • Frost may cause the tubes to burst. Do not use an electric transformer. • This may result in electric shock or fire. Do not use a damaged power plug, damaged power cord, or loose wall socket. • This may result in electric shock or fire. Do not pull or excessively bend the power cord. Do not twist or tie the power cord. Do not hook the power cord over a metal object, place a heavy object on the power cord, Insert the power cord between objects, or push the power cord into the space behind the appliance. • This may result in electric shock or fire. English 7 WA8700J_WA22J8700GP-03520L-02_SG_EN.indd 7 2015/7/27 16:55:34 Safety information Safety information Installation cautions CAUTION This appliance should be positioned in such a way that the power plug is easily accessible. • Failure to do so may result in electric shock or fire due to electric leakage. Critical usage warnings WARNING If the appliance is flooded, turn off the water & power supplies immediately and contact your nearest service centre. • Do not touch the power plug with wet hands. • Failure to do so may result in electric shock. If the appliance generates a strange noise, a burning smell, or smoke, unplug the power plug immediately and contact your nearest Samsung Customer Service. • Failure to do so may result in electric shock or fire. In the event of a gas leak (such as propane gas, LP gas, etc.), ventilate immediately without touching the power plug. Do not touch the appliance or power cord. • Do not use a ventilating fan. • A spark may result in an explosion or fire. Do not let children play in or on the washing machine. In addition, when disposing of the appliance, remove the lid. • If trapped inside the product, children may suffocate to death. Do not wash items contaminated with gasoline, kerosene, benzene, paint thinner, alcohol or other inflammable or explosive substances. • This may result in electric shock, fire, or an explosion. Do not touch the power plug with wet hands. • This may result in electric shock. Do not insert your hand or a metal object under the washing machine while an operation is in progress. • This may result in injury. 8 English WA8700J_WA22J8700GP-03520L-02_SG_EN.indd 8 2015/7/27 16:55:34 Safety information Do not attempt to repair, disassemble, or modify the appliance yourself. • Do not use a fuse (such as copper, steel wire, etc.) other than a standard fuse. • When the appliance needs to be repaired or reinstalled, contact your nearest service centre. • Failure to do so may result in electric shock, fire, problems with the product, or injury. • In this case, the product will not be covered by the standard warranty provided by Samsung and no responsibility can be attributed to Samsung for malfunctions or damages resulting from doing it. Unplug the power plug when the appliance is not being used for long periods of time or during a thunder or lightning storm. • Failure to do so may result in electric shock or fire. Do not put your hand into the spinning tub during the spin cycle. • This may result in injury. If the tub does not stop spinning within 15 seconds after you open the lid, contact your nearest Samsung Customer Service. Usage cautions CAUTION When the washing machine is contaminated by a foreign substance such as detergent, dirt, food waste, etc., unplug the power plug and clean the washing machine using a damp, soft cloth. • Failure to do so may result in discolouration, deformation, damage, or rust. The product you have purchased is designed for domestic use only. Using the product for business purposes qualifies as a product misuse. In this case, the product will not be covered by the standard warranty provided by Samsung and no responsibility can be attributed to Samsung for malfunctions or damages resulting from such misuse. Do not stand on the appliance or place objects (such as laundry, lighted candles, lighted cigarettes, dishes, chemicals, metal objects, etc.) on the appliance. • This may result in electric shock, fire, problems with the product, or injury. Do not press the buttons using sharp objects such as pins, knifes, fingernails, etc. • This may result in electric shock or injury. English 9 WA8700J_WA22J8700GP-03520L-02_SG_EN.indd 9 2015/7/27 16:55:34 Safety information Safety information Critical cleaning warnings WARNING Do not clean the appliance by spraying water directly onto it. Do not use the strong acid cleaning agent. Before cleaning or performing maintenance, unplug the appliance from the wall socket. • Failure to do so may result in electric shock or fire. 10 English WA8700J_WA22J8700GP-03520L-02_SG_EN.indd 10 2015/7/27 16:55:34 Installation Follow these instructions carefully to ensure proper installation of the washer and to prevent accidents when using it. Unpacking your washer Installation Unpack your washer and inspect it for shipping damage. Make sure you have received all the items shown below. If your washer was damaged during shipping, or you do not have all of the items, contact 800-SAMSUNG (800-7267864) (U.A.E), 183-CALL (183-2255) (KUWAIT). To prevent personal injury or strain, wear protective gloves whenever lifting or carrying the unit. WARNING Packing materials can be dangerous to children; Keep all packing material (plastic bags, polystyrene, etc.) well out of children’s reach. CAUTION When unpacking the washer, 2 person collaboration is needed. To remove the cushion bottom of the packing materials, forward dumping is strictly prohibited. English 11 WA8700J_WA22J8700GP-03520L-02_SG_EN.indd 11 2015/7/27 16:55:34 Installation Overview of your washer Make sure all the parts are included in the product package. If you have a problem with the washer or the parts, contact a local Samsung customer center or the retailer. 01 Installation 02 03 04 08 09 10 05 11 06 12 07 12 English WA8700J_WA22J8700GP-03520L-02_SG_EN.indd 12 2015/7/27 16:55:34 01 Drain hose 02 Hose guide 03 Lid 04 Built-in sink 05 Tub 06 Water Jet 07 Leveling feet 08 Water hose (Cold) 09 Water hose (Hot) 10 Control panel 11 Detergent drawer 12 Power cord Hose guide Installation Parts supplied User manual Plastic zip hose tie Water intake cap Water supply hoses Tools needed for installation Wrench Flat screwdriver Leveller NOTE • • • • If you lose an accessory and want to purchase a replacement, contact the Samsung service center 800-SAMSUNG (800-7267864) (U.A.E), 183-CALL (183-2255) (KUWAIT). The design of the parts and accessories may differ from the pictures above. Their design is subject to change without notice for product improvement. Do not reuse old hoses. Only use new water supply hoses when you install the washer. Old water supply hoses can leak or burst causing flooding and property damage. Confirm that there are rubber washers inside each coupling of the water supply hoses. English 13 WA8700J_WA22J8700GP-03520L-02_SG_EN.indd 13 2015/7/27 16:55:35 Installation Basic location requirements Electrical • • Installation • 220-240 Volt 50 Hz fuse or circuit breaker. Individual branch circuit serving only your Washer is recommended. Your washer is equipped with a power cord. CAUTION Never use an extension cord. WARNING An improperly connected equipmentgrounding conductor can increase the risk of electrical shock. Check with a qualified electrician or serviceman if you are not sure whether the appliance is properly grounded. Do not modify the plug provided with the appliance – if it does not fit the outlet, have a proper outlet installed by a qualified electrician. Grounding Important safety precautions Electrical grounding is required for this appliance. To prevent unnecessary risk of fire, electrical shock or personal injury, all wiring and grounding must be done in accordance with the National Electrical Code ANSI/ FNPA, No.70 Latest Revision and local codes and ordinances. It is the personal responsibility of the appliance owner to provide adequate electrical service for this appliance. This appliance must be grounded. In the event of malfunction or breakdown, grounding will reduce the risk of electric shock by providing a path of least resistance for electric current. This appliance is equipped with a power cord having a three-prong grounding plug for use in a properly installed and grounded outlet. The plug must be plugged into an appropriate outlet that is properly installed and grounded in accordance with all local codes and ordinances. CAUTION Never connect the ground wire to plastic plumbing lines, gas lines, or hot water pipes. Water To correctly fill your Washer in the proper amount of time, water pressure of 20 to 116psi (137 to 800kPa) is required. Water pressure less than 20 psi may cause water valve failure, or may not allow the water valve to shut off completely, or may extend the fill time beyond what your Washer controls allow, causing your Washer to turn off. A time limit is built into the controls to prevent flooding in your home if a hose becomes loose. 14 English WA8700J_WA22J8700GP-03520L-02_SG_EN.indd 14 2015/7/27 16:55:35 The water faucets must be within 4 feet (122 cm) to the back of your Washer to match the inlet hoses provided with your Washer. NOTE WARNING Check all connections at the water valve and faucet for leaks Drain facility The recommended height of the standpipe is 39 in (99 cm). The drain hose must be routed through the drain hose clip to the standpipe. The standpipe must be large enough to accept the outside diameter of the drain hose. The drain hose is attached to the washer at the factory. Location considerations Do not install your washer in areas where water may freeze, since your washer will always retain some water in its water valve, pump, and hose areas. Frozen water can damage the belts, the pump, hoses, and other components. Alcove or closet installation Installation Accessory inlet hoses are available in various lengths up to 10 feet (275 cm) for faucets that are further away from the back of your washer. To avoid the possibility of water damage: • Have water faucets easily accessible. • Turn off faucets when the washer is not in use. • Periodically check that there is no leakage from the water inlet hose fittings. Never install your washer on a platform or weakly supported structure. Minimum clearances for closet and alcove installations: Sides 1 in / 25 mm Closet front 2 in / 51 mm Rear 6 in / 152 mm Top 21 in / 533 mm If the washer and dryer are installed together, the closet front must have at least a 72 in² (465 cm²) unobstructed air opening. Your washer alone does not require a specific air opening. Flooring For best performance, you must install your washer on a solidly constructed floor. Wood floors may need to be reinforced to minimize vibration and/or unbalanced load situations. Carpeting and soft tile surfaces are contributing factors to vibration which can cause your washer to move slightly during the spin cycle. English 15 WA8700J_WA22J8700GP-03520L-02_SG_EN.indd 15 2015/7/27 16:55:35 Installation Recessed area Side view - closet or confined area A E A Installation A B B A 1 in (2.5 cm) B 27.0 in (68.6 cm) A B C D A 21 in (53.3 cm) B 2 in (5.1 cm) C 29.3 in (74.4 cm) D 6 in (15.2 cm) E Gap between end of water valve and the wall • Case 1. Assemble supply hose after installing : Over 3.9 in (10 cm). • Case 2. Assemble supply hose before installing : Over 2.8 in (7 cm). 16 English WA8700J_WA22J8700GP-03520L-02_SG_EN.indd 16 2015/7/27 16:55:35 Required dimensions for Installation A C Installation B A A 27.0 in (68.6 cm) B 39.2 in (99.5 cm) C 46.0 in (116.8 cm) 59.8 in (152.0 cm) A C A B B C A A 29.3 in (74.4 cm) B 46.0 in (116.8 cm) A* 48.0 in2 (310.0 cm2) B* 24.0 in2 (155.0 cm2) C 3.0 in (7.6 cm) NOTE * Required spacing English 17 WA8700J_WA22J8700GP-03520L-02_SG_EN.indd 17 2015/7/27 16:55:36 Installation Important note to installer Please read the following instructions carefully before installing your washer. These instructions should be retained for future reference. We recommend you hire a professional to install this washer. Installation flow chart Installation Selecting a location Removing the shipping bolts (Front loading washers only) Running a test cycle Run Rinse+Spin with small amount of laundry (about 4~5 towels) as a test cycle Connecting the water and drain Does your washer vibrate? NO Adjusting the leveling feet Powering your washing machine Running Calibration Mode Finishing the installation YES Check again before steps. Step-by-step installation STEP 1 Selecting a location NOTE Before you install the washer, make sure the location: • Has a hard, level surface without carpeting or flooring that may obstruct ventilation. • Is away from direct sunlight. • Has adequate ventilation. • Is not exposed to freezing temperatures (temperatures under 32 °F or 0 °C). • Is away from heat sources such as oil or gas. • Has enough space so that the washer doesn’t rest on its power cord. 18 English WA8700J_WA22J8700GP-03520L-02_SG_EN.indd 18 2015/7/27 16:55:36 STEP 2 Connecting the water supply hose CAUTION B A CAUTION Installation Before installing the water supply hoses, make sure there are rubber gaskets (B) inside the couplings (A) at both ends of each new water hose. Installing the water supply hoses without rubber gaskets can cause water leakage. When you initially install the washer, be sure to use new hoses. Failing to do so may result in a water leakage or overflow and may damage your property. CAUTION Do not connect multiple water supply hoses together to increase the length of the supply hose. Hoses connected this way can leak and the leakage can cause electrical shock. If a hose is too short, replace the hose with a longer, high pressure hose. English 19 WA8700J_WA22J8700GP-03520L-02_SG_EN.indd 19 2015/7/27 16:55:36 Installation A B 1. Connect the ends of the water supply hoses to the hot (B) and cold (A) faucets. 2. Tighten the fittings by hand until they are snug, and then tighten them an additional two-thirds of a turn with a wrench. Installation CAUTION When you fasten the fittings, do not fasten them too tightly or apply tape or sealant to the faucets or water supply intakes. This can damage the fittings. NOTE After you have connected the water supply hoses to the faucets, ensure that they are connected correctly by pulling the water supply hoses downwards. 3. Place the unconnected ends of the hoses into a bucket and open the faucets connected to the two water supply hoses for 10 or 15 seconds to remove any foreign substances from the hoses. Close the faucets before continuing. 20 English WA8700J_WA22J8700GP-03520L-02_SG_EN.indd 20 2015/7/27 16:55:37 4. Connect the ends of the water supply hoses to the water supply intake connections at the back of the washer. CAUTION 5. Tighten the fittings by hand until they are snug, and then tighten them an additional two-thirds of a turn with a wrench. Installation The water supply hose connected to the hot faucet must be connected to the hot water supply intake and the water hose connected to the cold faucet must be connected to the cold water supply intake. NOTE To ensure the correct water usage, connect both the hot and cold water faucets. If either or both are not connected, an “4C” (no fill) code can be displayed. NOTE If you do not want to use the hot water supply hose, insert the water intake cap into the hot water supply intake hole. In this case, you must select the Tap Cold for the water temperature. If you select the Tap Cold, all the lamps for the water temperature options are turned off. CAUTION Confirm that the water supply hoses are not twisted or bent. If the hoses are twisted or bent, the hoses can leak and cause electric shock due to the water leakage. 6. Turn on the hot and cold water supplies and check all the water supply intake connections and the faucets for water leaks. English 21 WA8700J_WA22J8700GP-03520L-02_SG_EN.indd 21 2015/7/27 16:55:37 Installation STEP 3 Connecting the drain hose The end of the drain hose can be positioned in three ways: Over the edge of a wash basin Installation Secure the hose guide (A) to the side of the basin wall with a hook or to the tap with a piece of string to prevent the drain hose from moving. A In a standpipe or laundry tub B C D * The standpipe (B) and laundry tub (C) must be no shorter than 39 in (99 cm)* and no longer than 96 in (245 cm)*. NOTE E • • Make sure that the connection between the drain hose and the standpipe is not airtight. D: Hose retainer, E: Tie strap 22 English WA8700J_WA22J8700GP-03520L-02_SG_EN.indd 22 2015/7/27 16:55:37 NOTE * NOTE The drain hose can be installed to a 96 in (245 cm) maximum, but the draining capability can be reduced at this height. It can cause the washer to have an odor because of remaining water in the drain system. Installation A Connect the hose guide (A) within 4 in (10 cm)* from the end of the drain hose. If the drain hose is extended more than 4 in (10 cm) beyond the end of the hose guide, mold or microorganisms could spread to the inside of the washer. NOTE If the drain hose is installed below 39 in (99 cm), water can be drained in cycles due to a siphon phenomenon. It causes the washer to display “4C”. STEP 4 Leveling your washer See if the washer is level by checking the position of the tub: 1. Slide the washer into position. 2. Open the lid of the washer, and pour the water into the tub to just below the pulsator level. A English 23 WA8700J_WA22J8700GP-03520L-02_SG_EN.indd 23 2015/7/27 16:55:38 Installation 3. If the washer is level, the pulsator (A) is positioned at the center of the water as shown in the figure. If not, level your washer by turning the front leveling feet clockwise or counterclockwise as necessary. Installation NOTE Turn the front leveling feet clockwise (B) to lower the washer, and counterclockwise (C) to raise the washer. B C STEP 5 Powering your washer Plug the power cord into a 3-prong, well grounded 220-240 volt 50 Hz approved electrical outlet protected by a fuse or comparable circuit breaker. Your washer is grounded through the third prong of the power cord when plugged into a three-prong grounded electrical outlet. Test run Make sure that you install your washer correctly by running the Rinse+Spin after the installation is complete. 24 English WA8700J_WA22J8700GP-03520L-02_SG_EN.indd 24 2015/7/27 16:55:38 STEP 6 Running a test cycle Run a test cycle as follows to check if your washer is properly installed. Load about 6 pounds of laundry into the tub. Press Power to turn on your washer. Select Rinse+Spin by turning the Cycle Selector. Press Start/Pause to start the test cycle. The washer should not rock or vibrate excessively when water is supplied or when washing or spinning, and should drain well during the spin cycle. NOTE If water leaks while water is being supplied or drained, check the water connections. Refer to the “STEP 2 Connecting the water supply hose” section on page 19 for instructions. Installation 1. 2. 3. 4. 5. NOTE If the washer rocks and vibrates excessively, level your washer again. Refer to the “STEP 4 Leveling your washer” section on page 23 for instructions. STEP 7 Calibration Mode Your Samsung washer detects the laundry weight automatically. For more accurate weight detection, please run Calibration Mode after the installation. To run Calibration Mode, follow these steps: 1. Remove laundry or any contents in the machine. 2. Press and hold Water Level and Delay End simultaneously for at least 3 seconds when the power is turned on. 3. Press Start/Pause to activate Calibration Mode. 4. The pulsator rotates clockwise and counterclockwise approximately 1 minute. 5. When Calibration Mode is finished, “End” appears on the display, and the washer automatically turns off. The washer is now ready for use. English 25 WA8700J_WA22J8700GP-03520L-02_SG_EN.indd 25 2015/7/27 16:55:38 Operating instructions WARNING To reduce the risk of fire, electric shock, or injury to persons when using your appliance, follow basic precautions, including the following: Loading your washer • Operating instructions • • • • Fill the tub with dry, unfolded clothes evenly around in order to enhance washing efficiency and prevent excess wear, or wrinkling of the load. For optimal washing performance, make sure the laundry is piled up evenly. Wash delicate items such as bras, hosiery, and other lingerie in the Delicates cycle with similar lightweight items. When washing big bulky items or a few smaller items that don’t fill the tub completely – a rug, a pillow, stuffed toys, or one or two sweaters, for example – add a few towels to improve spin performance. Do not insert bulky items except for Bedding in this cycle. NOTE During the spin cycle, the washer may add additional water to redistribute the clothes and correct an imbalance inside the drum. • When washing heavily soiled loads, do not overload your washer to ensure good cleaning results. To add a forgotten item: 1. Press Start/Pause to pause the washer. 2. Wait for the door to unlock automatically, and then open the door. 3. Add the item, close the door, and then press Start/Pause. The cycle will resume. 26 English WA8700J_WA22J8700GP-03520L-02_SG_EN.indd 26 2015/7/27 16:55:38 Getting started NOTE The actual time required for a cycle may differ from the estimated time in the display depending on the water pressure, water temperature, detergent, and laundry. 8. Before your washer starts to fill, it will make a series of clicking noises to check the door lock and do a quick drain. Operating instructions 1. Load your washer. 2. Add liquid (or powder) detergent and additives to the dispenser (see the "Detergent use" section on page 39). 3. Select the appropriate cycle and options for the load (see the "Washing a load of laundry" section page 28). 4. Close the lid. 5. Press Start/Pause. 6. The Wash Indicator illuminates. 7. The estimated cycle time will appear in the display. The time may fluctuate to indicate the time remaining in the cycle. NOTE • • • When the cycle is complete, the Door Lock indicator will go out and “End” will appear in the display. Pressing Power cancels the cycle and stops your washer. The Wash, Rinse, and Spin indicators will illuminate during those portions of the cycle. English 27 WA8700J_WA22J8700GP-03520L-02_SG_EN.indd 27 2015/7/27 16:55:39 Washing a load of laundry WARNING To reduce the risk of fire, electric shock, or injury to persons, read the IMPORTANT SAFETY INSTRUCTIONS before operating this appliance. Control panel 02 06 10 07 01 11 08 15 12 09 13 03 04 05 14 Washing a load of laundry 01 Cycle Selector Turn the Cycle Selector to select the desired cycle. The indicator by the cycle name lights up. 02 Display Provides instructions and diagnostics while keeping you updated on the cycle status and time remaining. 03 Water Level The water level is automatically adjusted. However, you can select the water level manually by pressing this button. According to the texture and humidity of clothes, water level and water consumption may differ. 04 Power Wash You can select the water stream type. Medium High Low Medium You can change the setting depending on the cycle. You cannot change the setting during a Spin cycle. 05 Temp. Press the button repeatedly to cycle through the different water temperature options. • Hot - Whites and heavily soiled, colorfast items. • Warm - Colorfast items. • Cold - Brightly colored, very lightly soiled items. 06 AquaJet™ Plus Improve washing performance through AquaJet spray action. 28 English WA8700J_WA22J8700GP-03520L-02_SG_EN.indd 28 2015/7/27 16:55:39 08 Last Setting Selects this cycle to load the settings for the last cycle. Perform a wash cycle using the last used settings without having to enter them manually again. Your choices are automatically saved when you press the Start/Pause button. To use a memorized cycle, press the Last Setting button and then press the Start/Pause button. 09 Pre Soak Remove stains more thoroughly by specifying additional time. 10 Delay End Delay the end of any cycle for up to 19 hours in one-hour increments. Displayed hour indicates the time the wash will be ended. 11 Wash Press this button to only perform a wash cycle or to adjust the wash time. 12 Rinse Press this button to only perform a rinse cycle or to adjust the rinse count. 13 Spin Press this button to perform a spin cycle only or to adjust the spin time. You can set the spin time from between 1 to 9 minutes. (except for WATER SAVING ) When only a spin is selected, the spin time will be different from the total remaining time. This is because the total remaining time includes the actual spin time and the times for water draining and stopping. 14 Start/Pause Press to pause and restart cycles. 15 Power Press once to turn your washer on. Press again to turn your washer off. If the washer is left on for more than 10 minutes without any buttons being pressed, the power automatically turns off. Washing a load of laundry 07 Activ Dual Wash Drain This button provides two options, and is available only when the washing machine is stopped or in Standby state. • Water Save (default): Reuse water in the tub that remains after using Water Jet. The water will be used for the main cycle. • Drain: Select to drain water that remains after using Water Jet. When draining is complete, the washing machine switches to Water Save mode automatically. Then, you can choose a cycle. English 29 WA8700J_WA22J8700GP-03520L-02_SG_EN.indd 29 2015/7/27 16:55:39 Washing a load of laundry Cycle overview Cycle Description Washing a load of laundry NORMAL For most fabrics including cottons, linens, and normally soiled garments. SILENT This cycle minimizes noise for night washes by decreasing the spinning power of the product. HEAVY DUTY For sturdy, colorfast fabrics and heavily soiled garments. 40℃ MAGIC CLEAN This cycle effectively removes dirt using a customized water temperature. 60℃ MAGIC CLEAN This cycle effectively removes dirt using a customized water temperature. TOWELS For bath towels, washcloths, and mats. ACTIVE WEAR Use this cycle to wash exercise wear such as sports jerseys, training pants, shirts/tops and other performance clothing. This cycle provides effective soil removal with gentle action for special fabric care. ECO TUB CLEAN Use this program to clean the tub. It will keep the tub clean and sanitary. WATER SAVING This is a specially designed cycle that enables you to wash laundry effectively with the minimum amount of water. BABY CARE This cycle washes frequently washed items such as baby clothes and underwear to prevent damage to the fabric and adds extra rinse cycles to ensure cleanness. QUICK WASH For lightly soiled garments needed quickly. DELICATES This cycle is for washing delicate clothes that are easily deformed or damaged and woollen sweaters and cardigans with a water wash sign. BEDDING For bulky items such as blankets and sheets. When you are washing comforters, use liquid detergent. SPIN Drains the water and spins at a high speed. RINSE + SPIN Use for loads that need rinsing only or to add rinse-added fabric softener to a load. 30 English WA8700J_WA22J8700GP-03520L-02_SG_EN.indd 30 2015/7/27 16:55:39 Options Child Lock • Child Lock prevents children from playing with your washer. Activating the Child Lock function Press and hold Water Level and Power Wash simultaneously for approximately 3 seconds. • When you activate the Child Lock function, the Child Lock indicator blinks. Using the Child Lock function • • Washing a load of laundry If the lid is opened when the Child Lock function is on, “dC” is displayed and an alarm sounds. • If the water level in the tub is above the safe water level, “dC” is displayed on the LED display and the washer starts to drain water by force after 30 seconds. The Power button is disabled while the washing machine drains water in Child Lock mode. • If the water level in the tub is above the safe water level and the Child Lock function is turned on while the door is open, “CL” is displayed on the LED display even if the power of the washer is turned off and the washer drains water by force. • Even if the power of the washer is turned off, if the lid is opened while the water level in the tub is above the Reset water level, “CL” is displayed on the LED display without the alarm sounding and the washer starts to drain water. When the draining operation finishes, the power is automatically turned off again. • Even if the Child Lock function is activated, every button works until the door opens. After the compulsory drain, the “CL” blinks at 1 second intervals and the product enters the “CL” mode. (When the product is in the “CL” mode, only the Power button works.) To cancel the “CL” mode, you need to turn the power off and then on again. To cancel the “dC” mode, deactivate the Child Lock function. To deactivate the Child Lock function, press and hold Water Level and Power Wash simultaneously for at least 3 seconds. English 31 WA8700J_WA22J8700GP-03520L-02_SG_EN.indd 31 2015/7/27 16:55:39 Washing a load of laundry NOTE Garment Plus Adding laundry when Child Lock is on To add laundry, deactivate the Child Lock function. To deactivate the Child Lock function, press and hold Water Level and Power Wash simultaneously for at least 3 seconds. See the “Pause Option” section on page 34 for additional details. You can add or take out laundry items even after the wash has started, as long as the Garment Plus indicator is on. Pressing Start/Pause unlocks the lid. If you open the lid and want to continue the wash cycle, close the lid, and then press Start/Pause. Deactivating the Child Lock function You can set the washer to start your wash automatically at a later time, by choosing a delay time. The hour displayed indicates the time at which the wash will be ended. Washing a load of laundry Press and hold both Water Level and Power Wash simultaneously for approximately 3 seconds. • When you deactivate the Child Lock function, the Child Lock indicator is turned off. • The Child Lock function prevents children or the infirm from accidently operating the washer and injuring themselves. WARNING If a child enters the washer, the child may become trapped and suffocate. CAUTION • • Once you have activated the Child Lock function, it continues working even if the power is turned off. Forcing the lid open can result in injury or damage to the product. NOTE To add laundry after you have activated the Child Lock function, you must first deactivate the Child Lock function. Sound The Sound Off function can be selected during all cycles. Delay End 1. Set your wash cycle. 2. Press Delay End repeatedly until the delay time is set. 3. Press Start/Pause. The “Delay End” indicator will be lit, and the clock will begin counting down until it reaches the set time. 4. To cancel a Delay End function, press the Power button and then turn the washer on again. Pre Soak Use this function when the laundry is heavily contaminated or stained. This function improves the wash performance by adding a Pre Soak cycle. • If you select this function, the total cycle time is increased by 10 or 20 minutes. • When the Pre Soak cycle starts, the washer repeats a wash cycle after supplying water and then performs a 10 or 20 minute soak cycle. • When the Pre Soak cycle is complete, the configured wash cycle starts without draining water. 32 English WA8700J_WA22J8700GP-03520L-02_SG_EN.indd 32 2015/7/27 16:55:39 AquaJet™ Plus After supplying additional water, the drum rotation creates a waterfall that dissolves the detergent thoroughly. This allows the detergent to penetrate more evenly into the clothes and remove stains effectively, even on big loads, giving you a better wash, during the rinse cycle, the waterfall passes through the fabric, removing detergent residue thoroughly. AquaJet™ NORMAL, SILENT, HEAVY DUTY, 40℃ MAGIC CLEAN, 60℃ MAGIC CLEAN, TOWELS, ACTIVE WEAR, WATER SAVING, BABY CARE Available BEDDING, ECO TUB CLEAN, QUICK WASH, DELICATES, RINSE+SPIN, SPIN Not available Mist Shower Mist Shower sprays water from a nozzle that is independent of the main water supply system. It states that is soaks the laundry with water from the beginning of the rinse cycle and ensures an effective wash, but it’s not part of the wash cycle, it’s part of the rinse cycle, so this needs to state that it ensures an effective rinse. (The Mist Shower function may not work if there is too large of a load in the machine.) Smart Check This function enables you to check the status of the washer using a smartphone. NOTE The error code history is deleted after you use this function. 2. The Smart Check indicator is lit on the display. 3. Run the Smart Check app on your smart phone. • Android: Galaxy S series, Galaxy Note series. (Other devices may not be normal operation). Supported OS : Android 2.2 or higher • iOS: iPhone series Supported OS : iOS 4.3 or higher 4. Focus your smart phone’s camera on the display panel of the washer. 5. If the smart phone’s camera is focused on the display panel of the washer, the panel and error message is automatically recognized and the error type and countermeasures are displayed on the smart phone. 6. If the smartphone fails to recognize the error code more than twice, please enter the error code displayed on the display panel of the washer manually into the Smart Check app. Washing a load of laundry Cycles 1. To enable the Smart Check function, press and hold Temp. for 3 seconds after turning the power on or when an error occurs. NOTE Downloading the Smart Check app • Download the Samsung Laundry App into your mobile phone from the Android market or Apple App store. (Search word : Samsung Smart Washer/ Dryer) English 33 WA8700J_WA22J8700GP-03520L-02_SG_EN.indd 33 2015/7/27 16:55:40 Washing a load of laundry NOTE Precautions when using Smart Check • If light from a light bulb, fluorescent bulb, or lamp is reflected on the display panel of the washer, the smartphone may not be able to recognize the panel or error message easily. • If you hold the smartphone at too large an angle relative to the front of the display panel, it may not be able to recognize the error code. For best results, hold the smartphone so that the front of the panel and the smartphone are parallel or nearly parallel. Washing clothes using the cycle selector Washing a load of laundry Your new washer makes washing clothes easy, using Samsung’s “Fuzzy Control” automatic control system. When you select a wash program, the machine will set the correct temperature, washing time, and washing speed. 1. Press Power. 2. Open the lid. 3. Load the articles of clothing one at a time loosely into the drum, without overfilling it. 4. Add liquid (or powder) detergent, softener, and/or bleach (if necessary) to the appropriate compartments. See the "Detergent use" section on page 39. 5. Close the lid. 6. Use the Cycle Selector to select the appropriate cycle according to the type of material: NORMAL, SILENT, HEAVY DUTY, 40℃ MAGIC CLEAN, 60℃ MAGIC CLEAN, TOWELS, ACTIVE WEAR, ECO TUB CLEAN, WATER SAVING, BABY CARE, QUICK WASH, DELICATES, BEDDING, SPIN, and RINSE+SPIN. The relevant indicators will illuminate on the control panel. 7. At this time, you can control the wash temperature, the number of rinse cycles, the spinning speed, and the delay time by pressing the appropriate option button. 8. Press Start/Pause and the wash will begin. The process indicator will light up and the remaining time for the cycle will appear in the display. Pause Option To remove or add laundry items, follow these steps: 1. Press Start/Pause to unlock the lid. NOTE The lid cannot be opened when the water is too HOT. 2. Remove or add laundry items. 3. Close the lid, and then press Start/Pause to restart the wash. NOTE If you have Child Lock on, you must deactivate it first. See page 31. 34 English WA8700J_WA22J8700GP-03520L-02_SG_EN.indd 34 2015/7/27 16:55:40 When the cycle is finished: After the total cycle has finished, the power will turn off automatically. 1. Open the lid. 2. Remove laundry. ATC (Auto Temperature Control) ATC is the control function that the washer controls water temperature with temperature sensor (thermistor). NOTE Washing a load of laundry Because there are numerous water temperatures depending on the customer’s environments (cold areas, warm areas, various water temperatures, settings of heater temperature, etc.), ATC function in our washer maintains the certain level of wash temperature to output the best washing performance at each cycle. NOTE If you select NORMAL, this cycle is the regulation and UL cycle. Since new washers must reduce the amount of energy usage as a first priority, customers will notice more cold water entering the washer. But, this is normal, not a problem. In those regulation cycles, Hot temperature is similar to acceptable adult bath-water temperature and warm temperature is similar to comfortable swimming-pool water temperature. NOTE If customers want to wash clothes in specific water temperatures, customers should choose a different cycle at each temperature (Hot/Warm). English 35 WA8700J_WA22J8700GP-03520L-02_SG_EN.indd 35 2015/7/27 16:55:40 Washing a load of laundry The basics Prewash (Water Jet & Built-in sink) Water Jet and Built-in sink help you handwash before the washing machine starts operation. Water Jet is available only when the door is open with the water level set to less than High. For prewashing, use the Built-in sink that is designed to facilitate the hand-wash. Washing a load of laundry 1. With the door open, lower the Built-in sink . To open only the door, press and release the front right corner of the door. To close and lock both the door and the Built-in sink, press down the door until you hear a clicking sound. 2. Put clothes to prewash in it. 3. Press Water Jet to supply water to the Built-in sink, and hand-wash. 4. When done, gently lift up the Built-in sink to drain water into the tub. NOTE • • If you want to hand-wash while the machine is operating, press Start/Pause to stop operation, and then follow steps 1-4 above. If you open both the door and the Builtin sink, lower the Built-in sink manually for prewashing. [Water Jet stops] • • Water Jet stops operation automatically when the washing machine detects the maximum water level. Water Jet stops operation automatically 5 minutes after it begins. To add more water, press Water Jet again to resupply water. 36 English WA8700J_WA22J8700GP-03520L-02_SG_EN.indd 36 2015/7/27 16:55:40 [Water Jet drains] • Select a cycle and press Start/Pause. Then the washing machine drains the water to be used during the prewash. NOTE • Water Jet extracts the water through the Mist Shower nozzle for 1 second and then through the Water Jet nozzle from then on when it is first activated after the washing machine turns on. CAUTION • • • • • • • Washing a load of laundry • Do not abuse Water Jet. Excessive use of Water Jet increases water consumption. When running water to the tub, do that gently. Otherwise, water may overflow the tub. Use caution when removing laundry from the tub. You may bump your head on the Built-in sink. Do not block the outlet of Water Jet with hands. Water may leak outside the tub, causing a system failure. Put only clothes to prewash in the Built-in sink. Other items such as shoes, food, or animals can not be used for prewash. Do not open the Built-in sink in a hurry. Remaining water in the sink may splash on the door or control panel. Due to a difference in air pressure, Water Jet may splash water from its outlet when it is first activated. This lid must be closed tightly to do the laundry. English 37 WA8700J_WA22J8700GP-03520L-02_SG_EN.indd 37 2015/7/27 16:55:40 Washing a load of laundry Detergent use • • The use a good quality top loader detergent is recommended. It is also important to: Pre–treat stains before washing. Sort clothes by color. Sort clothes by the amount of soiling. Avoid overloading. NOTE • Washing a load of laundry • • When using powdered detergent it is recommended that the powder be dissolved in warm water to ensure optimum cleaning results. The detergent/water mixture can be added to either the tub or to the detergent dispenser tray. Reducing the amount of detergent used may reduce the effectiveness of the cleaning action. 38 English WA8700J_WA22J8700GP-03520L-02_SG_EN.indd 38 2015/7/27 16:55:41 Features Automatic dispenser Your washer has separate compartments for dispensing detergent and color-safe bleach and fabric softener. Add all laundry additives to their respective compartments before starting your washer. The automatic dispenser must always be in place before you start your washer. DO NOT open the automatic dispenser when your washer is running. NOTE • • • To add detergent to the automatic dispenser: 1. Open the dispenser drawer. 2. Load the recommended amount of liquid (or powder) detergent into the detergent compartment before you start your wash. 3. Close the drawer slowly and smoothly to avoid spilling, splashing, or premature dispensing of the contents. Washing a load of laundry Never exceed the manufacturer’s recommendations when adding detergent. This compartment holds liquid detergent for the main wash cycle, which is added to the load at the beginning of the cycle. When using powdered detergent, remove the liquid detergent compartment from the detergent drawer. The washer will not dispense powdered detergent from the liquid detergent compartment. NOTE It is normal for a small amount of water to remain in the dispenser compartments at the end of the cycle. NOTE Do not put chlorine bleach in the dispenser drawer. English 39 WA8700J_WA22J8700GP-03520L-02_SG_EN.indd 39 2015/7/27 16:55:41 Washing a load of laundry Loading the Liquid (or Powder) detergent compartment A 1. Pour the recommended amount of laundry detergent directly into the detergent compartment before starting your washer. 2. If you are using color-safe bleach, add it with the detergent to the detergent compartment. NOTE When adding color-safe bleach with detergent, it is best if both laundry products are in the same form – liquid. NOTE Washing a load of laundry When using powdered detergent, remove the liquid detergent compartment (A) from the detergent drawer. The washer will not dispense powdered detergent from the liquid detergent compartment. 40 English WA8700J_WA22J8700GP-03520L-02_SG_EN.indd 40 2015/7/27 16:55:41 Loading the fabric softener compartment C 1. Pour the recommended amount of liquid fabric softener into the softener compartment (C). For smaller loads, use less than one capful. 2. Dilute the fabric softener with water until it reaches MAX FILL in the compartment. 3. The dispenser automatically releases liquid fabric softener at the proper time during the rinse cycle. NOTE • • Use the softener compartment ONLY for liquid fabric softeners. DO NOT use the Downy Ball* in the fabric softener compartment with this washer. It will not add fabric softener at the appropriate time. Use the detergent compartment. (* Brand names are trademarks of their respective manufacturers.) Do not use liquid fabric softener that is too sticky as it may not mix with the water sufficiently. Washing a load of laundry • English 41 WA8700J_WA22J8700GP-03520L-02_SG_EN.indd 41 2015/7/27 16:55:41 Maintaining your washer Cleaning the exterior 1. Turn off the water faucets after finishing the day’s washing. This will shut off the water supply to your washer and prevent the unlikely possibility of damage from escaping water. Leave the lid open to allow the inside of your washer to dry out. 2. Use a soft cloth to wipe up all detergent, bleach or other spills as they occur. 3. Clean the following as recommended: Control Panel – Clean with a soft, damp cloth. Do not use abrasive powders or cleaning pads. Do not spray cleaners directly on the panel. Cleaning the interior Clean the interior of your washer periodically to remove any dirt, soil, odor, mold, mildew, or bacterial residue that may remain in your washer as a result of washing clothes. Failure to follow these instructions may result in unpleasant conditions, including odors and/or permanent stains on your washer or laundry. Hard water deposits may be removed, if needed. Use cleaners labeled “Washer safe”. Maintaining your washer Storing your washer Washers can be damaged if water is not removed from hoses and internal components before storage. Prepare your washer for storage as follows: 1. Select the Quick Wash cycle and add bleach to the automatic dispenser. Run your washer through the cycle without a load. 2. Turn the water faucets off and disconnect the inlet hoses. 3. Unplug your washer from the electrical outlet and leave your washer lid open to let air circulate inside the drum. If your washer has been stored in below–freezing temperatures, allow time for any leftover water in your washer to thaw out before use. 42 English WA8700J_WA22J8700GP-03520L-02_SG_EN.indd 42 2015/7/27 16:55:41 Preserving the top cover and the front frame Do not place any heavy or sharp objects or a detergent box on the washer. They can scratch or damage the top cover of the unit. NOTE Since the entire washer has a high-gloss finish, the surface can be scratched or damaged. Avoid scratching or damaging the surface when using the washer. Cleaning the built-in sink and lint filter Keep the washing machine clean to prevent deteriorated performance and to preserve its life cycle. Built-in sink 1. Open the door, and use a cloth or sponge to clean the Built-in sink. 2. Press Water Jet to supply water to the board. Use this water to rinse the board. 1. Press down the upper area of the filter case to remove. 2. Unlock the cover, and clean the filter with running water and a brush. Maintaining your washer Lint filter 3. When cleaning is complete, close the cover and reinsert the filter case to the original position. You will hear a clicking sound when the filter case fits in. English 43 WA8700J_WA22J8700GP-03520L-02_SG_EN.indd 43 2015/7/27 16:55:41 Maintaining your washer Cleaning the dispensers The automatic dispenser may need to be cleaned periodically due to laundry additive buildup. 1. Pull the dispenser drawer straight back until it stops. 2. Push the ends of each side of the case at the same time. When you feel the ends push, pull out the dispenser drawer. Maintaining your washer 3. Remove the inserts from the 3 compartments. Rinse the inserts and the drawer with warm water to remove traces of accumulated laundry products. 44 English WA8700J_WA22J8700GP-03520L-02_SG_EN.indd 44 2015/7/27 16:55:42 4. To clean the drawer opening, use a small, non-metal brush to clean the recess. Remove all residue from the upper and lower parts of the recess. A B 5. Return the inserts to the proper compartments and replace the drawer by placing the dispenser drawer rail (B) on top of the compartment rail (A) (Tilt the dispenser drawer downward and insert it). Then push the drawer in firmly and slowly. Maintaining your washer English 45 WA8700J_WA22J8700GP-03520L-02_SG_EN.indd 45 2015/7/27 16:55:42 Maintaining your washer Eco Tub clean ECO TUB CLEAN is a self-cleaning cycle that removes mold that may occur inside the washer. 1. Press Power. 2. Select ECO TUB CLEAN. Once ECO TUB CLEAN is selected, the only function that can be set is Delay End. 3. Press Start/Pause. ECO TUB CLEAN begins. CAUTION • • Using ECO TUB CLEAN, you can clean the drum without using a cleansing agent. Never use ECO TUB CLEAN when laundry is in the washer. This may cause damage to the laundry or a problem with the washer. Maintaining your washer ECO TUB CLEAN Auto Indicator function • • • If the ECO TUB CLEAN indicator is lit after a wash, it indicates that tub (drum) cleaning is required. In this case, remove the laundry from the washer, turn the power on, and clean the drum by running ECO TUB CLEAN. If you do not run ECO TUB CLEAN, the ECO TUB CLEAN indicator turns off. However, the ECO TUB CLEAN indicator will light again after two washes. Not running ECO TUB CLEAN at this point will not cause a problem with the washer. Although the ECO TUB CLEAN indicator is lit once a month or so, the frequency may differ depending on the number of times the washer is used. 46 English WA8700J_WA22J8700GP-03520L-02_SG_EN.indd 46 2015/7/27 16:55:42 Troubleshooting Checkpoints If you encounter a problem with the washer, first check the table below and try the suggestions. Problem Does not turn on. Action • • • Make sure you use rated power for the product. Make sure the power cord is completely plugged in. Check the fuse or reset the circuit breaker. • • • Make sure the door is closed. Make sure the water taps are open. Make sure to press or tap Start/Pause to start the washing machine. Make sure Child Lock is not activated. Before the washing machine starts to fill, it will make a series of clicking noises to check the door lock and does a quick drain. Was the door opened during the spinning cycle? Close the door, and press or tap Start/Pause to resume. The machine enters Standby or is in a soaking cycle. Please wait. Check the fuse or reset the circuit breaker • • Does not start. • • • • • • • • • • • After a cycle, detergent remains in the automatic dispenser. • • • Troubleshooting Water is not supplied. Make sure you press or tap Start/Pause after selecting the water supply. Make sure the water taps are open. Is the filter net at the water supply hose connector clogged? Clean the filter net by brushing with a toothbrush. Is the water supply cut off? If the water supply is cut off, close the tap and power off. Straighten the water supply hoses. Open and close the door, then press or tap Start/Pause. If the water pressure is low, it takes longer to start washing. If the water level is not as high as necessary or lower than expected, use the level selector to adjust the water level. Make sure the washing machine is running with sufficient water pressure. Make sure the detergent drawer is properly inserted. Remove and clean the detergent drawer, and then try again. English 47 WA8700J_WA22J8700GP-03520L-02_SG_EN.indd 47 2015/7/27 16:55:42 Troubleshooting Problem Action • • Vibrates excessively or makes noise. • • • • • • • • • Stops. • • Troubleshooting • Make sure the washing machine is set on a level floor. If the floor is not level, use the levelling feet to adjust the washing machine. Make sure the washing machine is not contacting any other object. Make sure the laundry load is balanced. Make sure the laundry is spread evenly in the washing machine. Spread out the laundry evenly and start again. Make sure the space around the washing machine is free of objects. Humming is produced normally during operation. Objects such as coins can cause noise. Remove these objects from the washing machine after washing is complete. Plug the power cord into a live electrical outlet. Check the fuse or reset the circuit breaker. Close the door, and press or tap Start/Pause to start the washing machine. For your safety, the washing machine will not spin unless the door is closed. Before the washing machine starts to fill, it will make a series of clicking noises to check the door lock and does a quick drain. There may be a pause or soak period in the cycle. Wait briefly and the washing machine may start. Make sure the inlet hose screens at the taps are not clogged. Periodically clean the screens. This problem occurs temporarily due to low voltages, and will be solved when power recovers. 48 English WA8700J_WA22J8700GP-03520L-02_SG_EN.indd 48 2015/7/27 16:55:42 Problem Action • • • • Fills with the wrong temperature water. • • • Door (Lid) locked or will not open. • • • • • • • • • • Load is wet at the end of the cycle. • • While the washing machine is operating, press or tap Start/ Pause to stop the washing machine. It may take a few moments for the door lock mechanism to disengage. Check the fuse or reset the circuit breaker. Make sure the electrical voltage is normal. Make sure the washing machine is plugged in. Make sure the drain hose is pointed downward. (Natural drain models only) Make sure the drain hose is not clogged. Make sure the drain hose is not kinked. Straighten the drain hose. If there is a drain restriction, call for service. Close the door, and press or tap Start/Pause. For your safety, the washing machine will not spin unless the door is closed. Troubleshooting Does not drain and/ or spin. Fully open both water taps. Make sure the temperature selection is correct. Make sure the hoses are connected to the correct water taps. Flush water lines. Disconnect the hoses and clean the screens. The hose filter screens may be clogged. While the washing machine fills, the water temperature may change as the automatic temperature control feature checks incoming water temperature. This is normal. While the washing machine fills, you may notice just hot and/ or just cold water going through the dispenser when cold or warm temperatures are selected. This is a normal function of the automatic temperature control feature as the washing machine determines the water temperature. Use the High or Extra High spin speed. (Applicable model only) Use high efficiency (HE) detergent to reduce oversudsing. Load is too small. Small loads (one or two items) may become unbalanced and not spin completely. English 49 WA8700J_WA22J8700GP-03520L-02_SG_EN.indd 49 2015/7/27 16:55:43 Troubleshooting Problem Action • • • Leaks water. • • • • • Excessive suds. • • • • The spin basket or drain/supply hose is frozen. • • • • Troubleshooting Water drains out immediately. • • Make sure all hose connections are tight. Make sure the water supply hose's rubber packing is in the correct position. Screw tightly again. Make sure the end of the drain hose is correctly inserted and secured to the drain system. Avoid overloading. Use high efficiency (HE) detergent to prevent oversudsing. Make sure the water supply hose is not kinked. If the water supply is too strong, water may leak. Close the water tap a little. Make sure water is not leaking from the water tap. If so, repair the water tap. Use high efficiency (HE) detergent to prevent oversudsing. Reduce the detergent amount for soft water, small loads, or lightly soiled loads. Non-HE detergent is not recommended. Use warm water to disconnect the water supply hose and drain hose. Soak them in warm water. Fill the spin basket with warm water, and then wait for about 10 minutes. Put a hot towel on the drain hose connector. Reconnect the water supply hose and drain hose, and check if water is supplied properly. Make sure the drain hose is not clogged, and is hung over the drain hose hook. Fill the spin basket halfway with water, and try spinning again. Lift the end of the drain hose to prevent water from draining. Fill the spin basket halfway with water, and then run spinning after releasing the drain hose. Make sure the drain hose is installed correctly. See the installation section of this user manual and adjust the position of the drain hose as instructed. Stains on clothes. • Clean the magic filter. Has odours. • • • Excessive suds collect in recesses and can cause foul odours. Run cleansing cycles to sanitize periodically. Dry the washing machine interior after a cycle has finished. 50 English WA8700J_WA22J8700GP-03520L-02_SG_EN.indd 50 2015/7/27 16:55:43 If a problem persists, contact a local Samsung service center. Information codes The washer may display information codes to help you understand what is occurring with your washer better. No 1 Code 1C Action The WaterLevel sensor is not working properly. • Check WaterLevel Sensor wire harness. • If the information code remains, contact a customer service centre. NOTE When the washer displays “1C”, the washer do draining for 3 minutes. During this time, the Power button is inoperative. 2 3 3C 4C Check the motor for operation. • Try restarting the cycle. • If the problem continues, call for service. Troubleshooting Water is not supplied. • Make sure the water taps are open. • Make sure the water hoses are not clogged. • Make sure the water taps are not frozen. • Make sure the washing machine is operating with sufficient water pressure. • Make sure that the cold water tap and the hot water tap are properly connected. • Clean the mesh filter as it may be clogged. NOTE When the washer displays “4C”, the washer do draining for 3 minutes. During this time, the Power button is inoperative. 4 4C2 • Make sure the cold water supply hose is firmly connected to the cold water tap. If it is connected to the hot water tap, the laundry may be deformed with some cycles. English 51 WA8700J_WA22J8700GP-03520L-02_SG_EN.indd 51 2015/7/27 16:55:43 Troubleshooting No 5 6 7 8 Troubleshooting 9 10 Code 5C Action Water is not draining. • Make sure the drain hose is not frozen or clogged. • Make sure the drain hose is positioned correctly, depending on the connection type. • Clean the debris filter as it may be clogged. • Make sure the drain hose is straightened all the way to the drain system. • If the information code remains, contact a customer service centre. 9C1 The electronic control needs to be checked (Over Voltage Error). • Check the PCB and wire harness. • Check if power is supplied properly. • If the information code remains, contact a customer service centre. 9C2 Low voltage detected • Check if the power cord is plugged in. • If the information code remains, contact a customer service centre. AC6 Inverter Communication problem • Check the Inverter PCB and wire harness. • If the information code remains, contact a customer service centre. dC Operating the washer with the door open. • Make sure the door is properly closed. • Make sure laundry is not caught in the door. HC High temperature heating check • If the information code remains, contact a customer service centre. 52 English WA8700J_WA22J8700GP-03520L-02_SG_EN.indd 52 2015/7/27 16:55:43 No 11 Code LC Action Check the drain hose. • Make sure the end of the drain hose is placed on the floor. • Make sure the drain hose is not clogged. • If the information code remains, contact a customer service centre. NOTE When the washer displays “LC”, the washer do draining for 3 minutes. During this time, the Power button is inoperative. OC 13 PC When position of the clutch can't be detected. • If the information code remains, contact a customer service centre. PC1 After position of the clutch is detected, if the signal of the clutch hall goes wrong. • If the information code remains, contact a customer service centre. Ub Spinning does not work. • Make sure laundry is spread out evenly. • Make sure the washing machine is on a flat, stable surface. • Redistribute the load. If only one item of clothing needs washing, such as a bathrobe or pair of jeans, the final spin result might be unsatisfactory, and an “Ub” check message will be shown in the display. 14 15 For any codes not listed above, call 800-SAMSUNG (800-7267864) (U.A.E), 183-CALL (1832255) (KUWAIT). Troubleshooting 12 Water is overflowed. • Restart after spinning. • If the information code remains on the display, contact a local Samsung service centre. English 53 WA8700J_WA22J8700GP-03520L-02_SG_EN.indd 53 2015/7/27 16:55:43 Specifications Fabric care chart The following symbols provide garment care direction. The clothing care labels include symbols for drying, bleaching, drying and ironing, or dry cleaning when necessary. The use of symbols ensures consistency among garment manufacturers of domestic and imported items. Follow care label directions to optimize garment life and reduce laundering problems. Wash cycle Normal Permanent press/Wrinkle resistant/Wrinkle control The clothes washer can not ensure these temperatures because the actual temperature of the water entering your washer depends on water heater settings and regional water supply temperatures. For example, cold water entering the home in the northern states during winter may be 40 °F / 4 °C which is too cold for effective cleaning. In this situation, you will need to adjust the water temperature by selecting a warm setting, adding some hot water to the MAX FILL line, or using your Washer’s heating option, if available. Bleach Gentle/Delicates Any bleach (when needed) Hand wash Only non-chlorine (color-safe) bleach (when needed) Tumble dry Water temperature Hot Warm Cold NOTE Specification This represents appropriate wash water temperatures for various items. The temperature range for Hot is 105° - 125 °F / 41° - 52 °C, for Warm 85° - 105 °F / 29° - 41 °C and for Cold 60° - 85 °F / 16° - 29 °C. (Wash water temperature must be a minimum of 60 °F / 16 °C for detergent activation and effective cleaning.) Normal Permanent press/Wrinkle resistant/Wrinkle control Gentle/Delicates Special instructions Line dry/Hang to dry Drip dry Dry flat 54 English WA8700J_WA22J8700GP-03520L-02_SG_EN.indd 54 2015/7/27 16:55:44 Heat setting Dry-clean High Dry-clean Medium Do not dry-clean Low Line dry / Hang to dry Any heat Drip dry No heat / Air Dry flat Iron dry or steam temperatures High Medium Low Warning symbols for laundering Do not wash Do not wring Do not bleach Do not tumble dry No steam (added to iron) Specification Do not iron English 55 WA8700J_WA22J8700GP-03520L-02_SG_EN.indd 55 2015/7/27 16:55:46 Specification Helping the environment • • • • Your washer is manufactured from recyclable materials. If you decide to dispose of it, please observe local waste disposal regulations. Cut off the power cord so that the appliance cannot be connected to a power source. Remove the lid so that animals and small children cannot get trapped inside the appliance. Do not exceed the detergent quantities recommended in the detergent manufacturers’ instructions. Use stain removal products and bleaches before the wash cycle only when necessary. Save water and electricity by only washing full loads (the exact amount depends upon the program used). Specification 56 English WA8700J_WA22J8700GP-03520L-02_SG_EN.indd 56 2015/7/27 16:55:46 Specification sheet C A B Type Top loading washer Model name Dimensions (inches (cm)) D WA22J8700G* WA18J8700G* A. Height 46.0 (116.8) B. Width 27.0 (68.6) C. Height with lid open 59.8 (152.0) D. Depth 29.3 (74.4) Capacity (kg) 22.0 18.0 Water pressure (kPa) 137 - 800 NET weight (kg) 68 POWER CONSUMPTION SPIN REVOLUTION 220 V 1400 W 240 V 1650 W 800 rpm The design and specifications are subject to change without notice for quality improvement purposes. The energy label specifications have been determined by using the following program according to UAE.S 5010 2:2013.(Only for U.A.E models) • The program is Water saving + Water Lever 9. Specification NOTE English 57 WA8700J_WA22J8700GP-03520L-02_SG_EN.indd 57 2015/7/27 16:55:46 Specification Cycle chart Use this chart to set the best cycle and options for you laundry. NOTE Setting Water Level Power Wash Temp. : factory setting 1 6 H: High H: Hot : can be selected 2 7 M: Medium W: Warm 3 8 L: Low C: Cold 4 9 5 Water Level Power Wash Temp. Cycle 1 2 3 4 5 6 7 8 9 H M L H W C NORMAL SILENT HEAVY DUTY 40℃ MAGIC CLEAN 60℃ MAGIC CLEAN TOWELS ACTIVE WEAR ECO TUB CLEAN Specification WATER SAVING BABY CARE QUICK WASH DELICATES BEDDING SPIN RINSE+SPIN 58 English WA8700J_WA22J8700GP-03520L-02_SG_EN.indd 58 2015/7/27 16:55:46 Options AquaJet™ Plus Activ Dual Wash Drain Last Setting Pre Soak Delay End Wash Rinse Spin NORMAL SILENT HEAVY DUTY 40℃ MAGIC CLEAN 60℃ MAGIC CLEAN TOWELS ACTIVE WEAR Cycle ECO TUB CLEAN WATER SAVING BABY CARE QUICK WASH DELICATES BEDDING SPIN RINSE+SPIN Specification English 59 WA8700J_WA22J8700GP-03520L-02_SG_EN.indd 59 2015/7/27 16:55:46 QUESTIONS OR COMMENTS? COUNTRY CALL OR VISIT US ONLINE AT KUWAIT 183-CALL (183-2255) U.A.E 800-SAMSUNG (800-7267864) www.samsung.com/ae/support (English) www.samsung.com/ae_ar/support (Arabic) DC68-03520L-02 WA8700J_WA22J8700GP-03520L-02_SG_EN.indd 60 2015/7/27 16:55:46 الغسالة دليل املستخدم WA22J8700G* / WA18J8700G* SSEC SEC DC68-03520L-02 WA8700J_WA22J8700GP-03520L-02_SG_AR.indd 1 2015/7/27 17:04:12 احملتويات يوتحملا معلومات السالمة 4 ما يجب أن تعرفه حول إرشادات السالمة رموز السالمة الهامة احتياطات السالمة الهامة 4 4 5 التركيب 11 إخراج الغسالة من عبوتها نظرة عامة على الغسالة متطلبات املوقع األساسية مالحظة هامة جلهة التركيب التركيب خطوة بخطوة 11 12 14 18 18 تعليمات التشغيل 26 وضع املالبس بالغسالة بدء التشغيل 26 27 غسل املالبس 28 لوحة التحكم رؤية عامة للدورة خيارات غسل املالبس باستخدام قرص حتديد الدورة ( ATCالتحكم األوتوماتيكي بدرجة احلرارة) األساسيات استخدام املادة املنظفة امليزات 28 30 31 34 35 35 38 39 صيانة الغسالة 42 تنظيف األسطح اخلارجية تنظيف اجلزء الداخلي تخزين الغسالة احلفاظ على الغطاء العلوي واإلطار األمامي تنظيف احلوض املدمج ومصفاة اخمللفات تنظيف وحدات التوزيع ( Eco Tub Cleanتنظيف احلوض) 42 42 42 43 43 44 46 استكشاف األخطاء وإصالحها 47 نقاط التحقق والفحص أكواد املعلومات 47 51 2العربية 2015/7/27 17:04:12 WA8700J_WA22J8700GP-03520L-02_SG_AR.indd 2 جدول العناية باألقمشة حماية البيئة قائمة املواصفات الفنية جدول الدورات 54 56 57 58 يوتحملا املواصفات 54 العربية 3 2015/7/27 17:04:12 WA8700J_WA22J8700GP-03520L-02_SG_AR.indd 3 معلومات السالمة تهانينا على شرائك غسالة Samsungاجلديدة .يحتوى هذا الدليل على معلومات هامة حول عملية تركيب اجلهاز واستخدامه ورعايته .يرجى قراءة هذا الدليل بعناية لتتمكن من االستفادة الكاملة من امليزات والفوائد العديدة لغسالتك. مالسلا تامولعم ما يجب أن تعرفه حول إرشادات السالمة الرجاء قراءة هذا الدليل قراءة شاملة للتأكد من أنك تعرف كيفية تشغيل امليزات والوظائف املتنوعة في جهازك اجلديد بشكل آمن وفعال .الرجاء االحتفاظ بهذا الدليل في مكان آمن بالقرب من اجلهاز من أجل الرجوع إليه في املستقبل .يستخدم هذا اجلهاز للغرض اخملصص له فقط كما هو مذكور في دليل املالك هذا. ال تغطي التحذيرات والتنبيهات وإرشادات السالمة الهامة التالية كافة الظروف واملواقف احملتمل التعرض لها .لذا يجب التعامل بحذر وانتباه وعناية عند تركيب الغسالة وصيانتها وتشغيلها.نظرًا ألن إرشادات التشغيل التالية تنطبق على طرازات متعددة ،فإن خصائص الغسالة اخلاصة بك قد تختلف قليال ً عن تلك املوصوفة في هذا الدليل ،كما أن بعض عالمات التحذير املذكورة قد تكون غير قابلة للتطبيق .إذا كانت لديك أي أسئلة أو تساؤالت ،اتصل بأقرب مركز خدمة أو اعثر على التعليمات واملعلومات عبر اإلنترنت على موقع .www.samsung.com رموز السالمة الهامة تشير الرموز والعالمات املوجودة في دليل املستخدم هذا إلى ما يلي: حتذير املمارسات اخلطيرة أو غير اآلمنة التي قد تؤدي إلى إصابات خطيرة لألفراد أو املوت و/أو تلف الغسالة. تنبيه املمارسات اخلطيرة أو غير اآلمنة التي قد تؤدي إلى إصابات لألفراد و/أو تلف الغسالة. مالحظة حيث يُشير إلى خطوة التعرض إلصابة أو إحلاق ضرر بالغ باملعدة. 4العربية 2015/7/27 17:04:12 WA8700J_WA22J8700GP-03520L-02_SG_AR.indd 4 اقرأ كافة اإلرشادات أوال ً قبل استخدام اجلهاز. يوجد احتمال التعرض للمخاطر كما هو احلال مع كافة األجهزة الكهربائية وأجزائها املتحركة .تعرف بنفسك على تشغيل هذا اجلهاز وتوخّ احلذر عند استعماله حتى تتمكن من تشغيله بشكل آمن. مالسلا تامولعم تهدف عالمات التحذير هذه إلى منع حدوث إصابات لك ولآلخرين. لذا الرجاء اتباعها بعناية. احتفظ بهذا الدليل بعد قراءته في مكان آمن من أجل الرجوع إليه في املستقبل. احتياطات السالمة الهامة حتذير لتقليل إمكانية نشوب حريق أو صعقة كهربائية أو إصابة لألشخاص أثناء استخدام الغسالة ،قم باتباع احتياطات األمان األساسية مبا في ذلك ما يلي: ال تدع األطفال (أو احليوانات األليفة) يلعبون فوق الغسالة أو بداخلها .حيث ال ميكن فتح باب الغسالة بسهولة من الداخل ،وقد يصاب األطفال بإصابات بالغة في حالة احتباسهم بداخلها. لم يتم تصميم هذا اجلهاز لالستخدام من ِقبل أشخاص لديهم مشكالت جسدية وعقلية وحسية (مبا فيهم األطفال) أو نقص في املعرفة أو اخلبرة ،إال حتت إشراف أو تعليمات بخصوص استخدامه من ِقبل الشخص املسؤول عن سالمتهم. يجب مراقبة األطفال لضمان عدم عبثهم بالغسالة. بالنسبة لالستخدام في أوروبا :ميكن استخدام هذا اجلهاز بواسطة األطفال الذين يبلغون من العمر 8سنوات أو أكبر وكذلك بواسطة األشخاص الذين يعانون من قصور جسدي أو حسي أو عقلي أو نقص اخلبرة واملعرفة بشرط خضوعهم لإلشراف وتوعيتهم باإلرشادات اخلاصة باستخدام اجلهاز بطريقة آمنة وأن يتفهموا اخملاطر الكامنة .يجب منع األطفال من اللعب باجلهاز .ويجب أال يقوم األطفال بعملية التنظيف أو أعمال الصيانة التي ميكن للمستخدم القيام بها بدون إشراف. في حالة تلف كابل اجلهاز (سلك التيار الكهربائي) ،يجب تغييره من ِقبل الشركة املصنّعة أو وكيل الصيانة اخلاص بها أو أي فني مؤهل لتفادي التعرض ألي خطر. يجب وضع اجلهاز بالقرب من مأخذ التيار الكهربائي ،وصنابير توريد املاء وخراطيم تصريف املاء بحيث يسهل الوصول إليها. العربية 5 2015/7/27 17:04:12 WA8700J_WA22J8700GP-03520L-02_SG_AR.indd 5 مالسلا تامولعم بالنسبة لألجهزة ذات فتحات التهوية في قاعدتها ،يتعني عدم إعاقة أو سد هذه الفتحات بالسجادة. مالسلا تامولعم يجب استخدام مجموعات اخلراطيم اجلديدة ويجب عدم استخدام مجموعة احلراطيم القدمية. تنبيه ولتجنب اخملاطر الناجمة عن إعادة الضبط غير القصدي للفاصل احلراري ،فإنه يتعني عدم تزويد اجلهاز خالل جهاز تبديل خارجي مثل املؤقت أو االتصال بدائرة يجري تشغيلها وإيقاف تشغيلها بشكل منتظم بواسطة خاصية ما. تنبيه ال تستخدم ماء تتجاوز درجة حرارته 50درجة مئوية مع أوضاع استخدام املاء الساخن بالغسالة. قد تتعرض األجزاء البالستيكية للتشوه أو التلف ،وقد ينتج عن ذلك حدوث صدمة كهربائية أو نشوب حريق. 6العربية 2015/7/27 17:04:12 WA8700J_WA22J8700GP-03520L-02_SG_AR.indd 6 حتذيرات هامة عند التركيب مالسلا تامولعم حتذير يجب أن يتم تركيب هذا اجلهاز بواسطة فني مؤهل أو شركة صيانة متخصصة. •قد ينتج عن الفشل في اتباع هذه التعليمات حدوث صدمة كهربائية أو حريق أو انفجار أو مشاكل تتعلق باملنتج أو التعرض لإلصابة. قم بتوصيل سلك الطاقة مبقبس حائط من 240 - 220فولت 50 /هرتز أو أعلى من ذلك ،وال تستخدم املقبس إال لتشغيل هذا اجلهاز .ممنوع استخدام كبالت إضافية. •قد يؤدي مشاركة مقبس احلائط مع أجهزة أخرى باستخدام سلك طاقة أو مد سلك الطاقة إلى حدوث صدمة كهربائية أو حريق. •تأكد من أن اجلهد الكهربي للطاقة والتردد والتيار مطابقة للقياسات اخلاصة مبواصفات املنتج .يؤدي الفشل في االلتزام بهذا األمر إلى حدوث صدمة كهربية أو حريق .لذا ،تأكد من توصيل سلك الطاقة في مقبس احلائط بإحكام. قم بإزالة أي مواد خارجية مثل األتربة أو املاء من النهايات الطرفية لسلك الطاقة ونقاط االتصال باستخدام قطعة قماش جافة بشكل منتظم. •قم بإلغاء توصيل سلك الطاقة وتنظيفه باستخدام قطعة قماش جافة. •يؤدي الفشل في االلتزام بهذا األمر إلى حدوث صدمة كهربية أو حريق. •قم بتوصيل القابس الكهربي "الفيشة" في مقبس التيار الكهربي باحلائط بحيث يتم متديد سلك التيار الكهربي نحو األرضية. إذا قمت بتوصيل سلك الطاقة في املقبس في االجتاه املعاكس ،فقد تتلف األسالك الكهربائية املوجودة داخل الكبل وقد يؤدي هذا األمر إلى حدوث صدمة كهربية أو حريق. يجب بتثبيت هذا اجلهاز على األرض بشكل سليم. ال تقم بتثبيت اجلهاز على األرض بجانب أنبوب غاز أو أنبوب ماء بالستيكي أو خط تليفون. •قد ينتج عن هذا األمر حدوث صدمة كهربائية أو حريق أو انفجار أو مشاكل تتعلق باملنتج. •ال تقم بتوصيل سلك التيار الكهربي في مقبس غير مؤرض بشكل صحيح وتأكد من توافق هذا املقبس مع القوانني احمللية والوطنية. يجب عدم تركيب هذا اجلهاز بالقرب من سخان أو مواد قابلة لالشتعال. يجب عدم تركيب هذا اجلهاز في بيئة رطبة أو موقع به زيت أو أتربة أو في مكان يتعرض لضوء الشمس املباشر واملاء (قطرات املطر). يجب عدم تركيب هذا اجلهاز في موقع تكون درجة حرارته منخفضة. •قد يؤدي اجلليد إلى انفجار األنابيب. ال تستخدم محول كهربي. •قد ينتج عن هذا األمر حدوث صدمة كهربية أو حريق. ال تستخدم سلك طاقة تالف أو كبل طاقة تالف أو مقبس حائط غير محكم. •قد ينتج عن هذا األمر حدوث صدمة كهربية أو حريق. يجب عدم جذب سلك الطاقة أو ثنيه بقوة. يجب عدم لف سلك الطاقة أو طيه. يجب عدم تعليق سلك الطاقة فوق كائن معدني أو وضع كائن ثقيل فوق سلك الطاقة أو إدراج كائنات بني سلك الطاقة أو دفع سلك الطاقة في املساحة املوجودة خلف اجلهاز. •قد ينتج عن هذا األمر حدوث صدمة كهربية أو حريق. العربية 7 2015/7/27 17:04:13 WA8700J_WA22J8700GP-03520L-02_SG_AR.indd 7 مالسلا تامولعم تنبيهات خاصة بالتركيب مالسلا تامولعم تنبيه ينبغي وضع هذا اجلهاز بطريقة ميكن من خاللها الوصول بسهولة إلى قابس التيار الكهربي. •يؤدي الفشل في االلتزام بهذا األمر إلى حدوث صدمة كهربية أو حريق نتيجة لتسريب الكهرباء. حتذيرات هامة عند استعمال هذا اجلهاز حتذير في حالة تعرض اجلهاز لكمية زائدة من املاء ،قم بإيقاف تشغيل املياه وقطع اتصال الكهرباء بشكل فوري ،واتصل بأقرب مركز صيانة. •ال تلمس سلك التيار الكهربي بيدين مبتلتني. •قد ينتج عن هذا األمر وجود صدمة كهربية. إذا انبعث من اجلهاز صوت ضوضاء غربية أو رائحة حريق أو دخان ،فافصل قابس الطاقة على الفور ،واتصل بأقرب مركز خلدمة عمالء .Samsung •يؤدي الفشل في االلتزام بهذا األمر إلى حدوث صدمة كهربية أو حريق. في حالة وجود تسريب للغاز (كغاز البروبان ،والغاز النفطي املسال ،وما شابه ذلك) ،يجب تهوية املكان فورًا بدون ملس سلك الطاقة .ال تقم بلمس اجلهاز أو سلك الطاقة. •ال تستخدم مروحة تهوية. •قد ينتج عن الشرارة حدوث صدمة كهربية أو حريق. ال تدع األطفال يلعبون فوق الغسالة أو بداخلها .باإلضافة إلى ذلك ،عند التخلص من اجلهاز ،قم بإزالة الغطاء. •قد ميوت األطفال اختناقًا في حالة احتباسهم داخل هذه الغسالة. يجب عدم غسل العناصر العالق بها اجلاز أو الكيروسني أو البنزين أو تنر الطالء أو الكحول أو أي مواد أخرى قابلة لالشتعال أو االنفجار. •قد ينتج عن هذا األمر حدوث صدمة كهربية أو حريق أو انفجار. ال تلمس سلك التيار الكهربي بيدين مبتلتني. •قد ينتج عن هذا األمر وجود صدمة كهربية. ال تدخل يدك أو أي شيء معدني حتت الغسالة أثناء تشغيلها. •قد ينتج عن هذا األمر إصابات شخصية. ال حتاول إصالح اجلهاز أو فكه أو تعديله بنفسك. •يجب عدم استخدام أي منصهر (مثل النحاس أو سلك معدني وما إلى ذلك) خالف املنصهر القياسي. •اتصل بأقرب مركز خدمة لك عندما يكون من الضروري إصالح هذا اجلهاز أو إعادة تركيبه. •قد يؤدي عدم االلتزام بذلك إلى التعرض لصدمة كهربية أو نشوب حريق أو وقوع مشكالت متعلقة باملنتج أو وقوع إصابات. 8العربية 2015/7/27 17:04:13 WA8700J_WA22J8700GP-03520L-02_SG_AR.indd 8 قم بنزع قابس الطاقة في حال عدم استخدام اجلهاز لفترات زمنية طويلة أو أثناء الرعد /العاصفة البرقية. •يؤدي الفشل في االلتزام بهذا األمر إلى حدوث صدمة كهربية أو حريق. ال تضع يدك على حاوية العصر أثناء دورة العصر. •قد ينتج عن هذا األمر إصابات شخصية .إذا لم تتوقف حاوية العصر في غضون 15ثانية من فتح الغطاء ،فاتصل بأقرب مركز خلدمة عمالء .Samsung مالسلا تامولعم •وفي هذه احلالة ،ال يتم تغطية املنتج من قبل الضمان األساسي الذي تقدمه شركة ،Samsungكما أن شركة Samsungال تتحمل أية مسئولية عن األعطال أو اخلسائر التي تنجم عن سوء االستخدام. تنبيهات االستعمال تنبيه عندما يعلق بالغسالة مادة غريبة مثل املنظفات أو األتربة أو مخلفات الطعام وما إلى ذلك ،قم بإلغاء توصيل سلك الطاقة وتنظيف الغسالة باستخدام قطعة قماش مبللة وناعمة. •يؤدي الفشل في االلتزام بهذا األمر إلى وجود تغيير في األلوان أو التشويه أو التلف أو الصدأ. مت تصميم املنتج الذي قمت بشرائه لالستخدام املنزلي فقط. يُعد استخدام املنتج ألغراض العمل سوء استخدام له .وفي هذه احلالة ،ال يتم تغطية املنتج من قبل الضمان األساسي الذي تقدمه شركة ،Samsungكما أن شركة Samsungال تتحمل أية مسئولية عن األعطال أو اخلسائر التي تنجم عن سوء االستخدام. يجب عدم الوقوف فوق اجلهاز أو وضع أشياء فوقه (مثل الغسيل أو الشمعدان املشتعل أو السجائر املشتعلة أو األطباق أو املواد الكيماوية أو الكائنات املعدنية وما إلى ذلك). •قد ينتج عن هذا األمر حدوث صدمة كهربائية أو حريق أو مشاكل تتعلق باملنتج أو اإلصابة. يجب عدم الضغط على األزرار باستخدام كائنات حادة مثل املسامير أو السكاكني أو األظافر وما إلى ذلك. •قد ينتج عن هذا األمر حدوث صدمة كهربية أو إصابة. العربية 9 2015/7/27 17:04:13 WA8700J_WA22J8700GP-03520L-02_SG_AR.indd 9 مالسلا تامولعم حتذيرات هامة عند التنظيف مالسلا تامولعم حتذير يجب عدم تنظيف اجلهاز عن طريق رش املاء فوق اجلهاز مباشرةً. ال تقم باستخدام منظف يحتوي على حمض قوي. قم بفصل قابس اجلهاز من مقبس احلائط قبل تنظيفه أو صيانته. •يؤدي الفشل في االلتزام بهذا األمر إلى حدوث صدمة كهربية أو حريق. 10العربية 2015/7/27 17:04:13 WA8700J_WA22J8700GP-03520L-02_SG_AR.indd 10 التركيب اتبع هذه التعليمات بعناية لضمان تركيب الغسالة بشكل صحيح ومنع وقوع أية حوادث عند الغسيل. إخراج الغسالة من عبوتها بيكرتلا قم بإخراج الغسالة من عبوتها وافحصها للتحري عن أي تلف وقع بها أثناء الشحن .تأكد من استالمك كل األشياء املوضحة أدناه. إذا تلفت غسالتك أثناء الشحن ،أو لم تستلم كل األشياء ،فالرجاء االتصال على الرقم )( 800-SAMSUNG (800-7267864اإلمارات العربية املتحدة)( 183-CALL (183-2255) ،الكويت). ملنع حدوث إصابة شخصية أو إجهاد ،الرجاء ارتداء قفازات واقية عند رفع الوحدة أو حملها. حتذير قد تصبح مواد التغليف من األشياء اخلطيرة بالنسبة لألطفال ،الرجاء االحتفاظ بكل مواد التغليف (األكياس البالستيكية ،البوليسترين ،ما شابه ذلك) بعيدا ً عن أيدي األطفال. تنبيه يحتاج فك التغليف وإخراج الغسالة من عبوتها إلى تعاون شخصني نهائيا عند إزالة قاعدة الوسادة من مواد معا .يحظر اإلمالة لألمام ً ً التغليف والتعبئة. العربية 11 2015/7/27 17:04:13 WA8700J_WA22J8700GP-03520L-02_SG_AR.indd 11 بيكرتلا نظرة عامة على الغسالة تأكد أن كل األجزاء موجودة في علبة املنتج .إذا كانت تعاني مشكلة ما في الغسالة أو األجزاء ،اتصل باملركز احمللي خلدمة عمالء سامسوجن Samsungأو تاجر التجزئة. 01 بيكرتلا 02 03 04 08 09 10 11 05 06 12 07 12العربية 2015/7/27 17:04:13 WA8700J_WA22J8700GP-03520L-02_SG_AR.indd 12 0 01خرطوم التصريف 0 02حامل اخلرطوم 0 03الغطاء مضمن 0 04حوض ّ 0 05حوض الغسيل 0 06رشاش املاء 0 07استواء أرجل الغسالة 0 08خرطوم املاء (بارد) 0 09خرطوم املاء (حار) 1 10لوحة التحكم 1 11درج مسحوق الغسيل 1 12كابل الطاقة األجزاء الواردة بيكرتلا حامل اخلرطوم رباط اخلرطوم املنزلق البالستيكي دليل املستخدم غطاء سحب املاء خراطيم إمداد املاء األدوات الالزمة مفتاح الربط مفك مسطح أداة قياس اختالف املستوى مالحظة •إذا فقدت إحدى امللحقات وتود شراء بديال ً لها ،اتصل مبركز صيانة سامسوجن )( 800-SAMSUNG (800-7267864اإلمارات العربية املتحدة)، )( 183-CALL (183-2255الكويت). •قد يختلف تصميم األجزاء واحمللقات عن الصور أعاله. والتصميم عرضة للتغيير دون إخطار بإدخال حتسينات على املنتج. •يتعني عدم استعمال اخلراطيم القدمية .يتعني استخدام خراطيم إمداد باملاء جديدة ،وجديدة فقط ،عند تركيب الغسالة .يُرجى العلم أن خراطيم اإلمداد باملاء القدمية قد تسرب أو تنفجر مما يُسبب تدفق املاء وتلف املمتلكات. •يُرجى التحقق والتأكد من وجود حلقات مطاطية داخل كل موضع اقتران بخراطيم اإلمداد باملاء. العربية 13 2015/7/27 17:04:14 WA8700J_WA22J8700GP-03520L-02_SG_AR.indd 13 بيكرتلا متطلبات املوقع األساسية املتطلبات الكهربية بيكرتلا •قاطع دائرة كهربائية أو منصهر بقدرة 240 - 220فولط تيار متردد 50 /هرتز. •يوصى باستخدام دائرة فرعية مستقلة تخدم غسالتك فقط. •غسالتك مجهزة بكابل طاقة. تنبيه ممنوع استخدام كبالت إضافية. التوصيل األرضي التأريض الكهربائي الزم لهذا اجلهاز. يجب تأريض هذا اجلهاز .في حالة وجود عطل أو توقف ،فسيقوم التأريض بخفض خطر الصعقة الكهربائية عن طريق توفير مسار ملقاومة التيار الكهربائي على األقل. هذا اجلهاز مجهز بكابل طاقة به قابس تاريض ثالثي الشوكات لالستخدام في مصدر التيار الكهربائي املركب بطريقة مالئمة او املؤرض. يجب توصيل القابس في مصدر التيار الكهربائي املالئم الذي يكون مركبا ً ومؤرضا ً بطريقة مالئمة طبقا ً جلميع القوانني واللوائح احمللية. حتذير قد تؤدي وصلة تأريض اجلهاز املتصلة بطريقة غير مالئمة إلى زيادة خطر التعرض للصعقة الكهربائية .حتقق األمر مع فني كهرباء أو فني خدمة إذا كنت غير متأكدا ً من إذا كان اجلهاز مؤرضا ً بطريقة مالئمة أم ال .يحظر استخدام قابس آخر غير املرفق مع الغسالة-.وفي حالة عدم مالءمته مع مأخذ التيار ،استعن بفني كهربائي مؤهل لتركيب مأخذ مناسب. احتياطات السالمة الهامة ملنع حدوث خطر نشوب احلريق بدون داع ،أو صعقة كهربائية أو إصابة شخصية ،يجب إجراء جميع عمليات وضع األسالك والتأريض طبقا ً ألحدث نسخة من قانون الكهرباء الوطني ،ANSI/FNPAرقم 70 والقوانني واللوائح احمللية .تقع املسؤولية الشخصية على صاحب اجلهاز لتقدمي خدمة كهربائية مالئمة لهذا اجلهاز. تنبيه ال تقم بتوصيل السلك األرضي بخطوط مواسير السباكة البالستيكية ،أو خطوط الغاز ،أو مواسير املاء الساخن. متطلبات املياه مللء غسالتك باملاء بطريقة مالئمة في وقت مناسب ،يلزم أن يكون ضغط املاء ما بني 20إلى 116رطل للبوصة املربعة ( 137إلى 800 كيلو باسكال). قد يؤدي ضغط املاء األقل من 20رطل للبوصة املربعة إلى خلل بصمام املاء ،أو قد ال يتم السماح لصمام املاء باإليقاف متاماً ،أو زيادة وقت امللء مبا يتجاوز الوقت املسموح به للغسالة والتسبب في إيقاف تشغيل غسالتك .احلد الزمني مدمج في احملكمات ملنع الغمر باملاء في منزلك إذا كان اخلرطوم غير مثبت. يجب أن تكون حنفيات املياه ضمن مسافة 4قدم 122 /سم من اجلزء اخللفي لغسالتك مبا يتالءم مع اخلراطيم املدخلة الواردة مع غسالتك. مالحظة تتوافر اخلراطيم املدخلة امللحقة بأطوال متعددة تصل إلى 10قدم 275 /سم للوصول إلى احلنفيات التي تكون بعيدة عن اجلزء اخللفي لغسالتك. لتفادي إمكانية تلف املاء: •يجب أن تكون إمكانية الوصول إلى احلنفيات سهلة. •إيقاف احلنفيات عندما تكون الغسالة غير مستخدمة. •افحص بشكل دوري للتأكد من عدم وجود تسرب من جتهيزات خرطوم إدخال املاء. 14العربية 2015/7/27 17:04:14 WA8700J_WA22J8700GP-03520L-02_SG_AR.indd 14 حتذير افحص كل الوصالت املوجودة في صمام املاء واحلنفية للتحري عن التسربات في حالة تركيب الغسالة واجملفف سوياص ،يجب أن يكون اجلزء األمامي من احلجرة على مسافة ال تقل عن 72بوصة 465( ²سم )²به فتحة هواء غير معاقة .يجب أن ال حتتاج غسالتك إلى أي فتحة هواء معينة. أداة التصريف بيكرتلا االرتفاع املوصى به لألنبوب القياسي هو 39بوصة 99 /سم .يجب توجيه خرطوم التصريف باستخدام مشبك خرطوم التصريف إلى اجتاه املاسورة الرأسية .يجب أن تكون املاسورة الرأسية كبيرة بدرجة كافية إلدخال القطر اخلارجي خلرطوم التصريف .يجب توصيل خرطوم التصريف بالغسالة في املصنع. سطح األرضية للحصول على أفضل أداء ،يجب عليك تركيب غسالتك على أرضية صلبة .قد يلزم تقوية األرضيات اخلشبية مبا يقلل من االهتزاز ،و /أو حاالت التحميل غير املتوازن .األسطح املوضوع عليها السجاد والبالط الناعم تعد من العوامل املساهمة في حدوث االهتزاز مبا قد يؤدي إلى حترك الغسالة قليال ً أثناء دورة اللف. ال تقم دوما ً بتركيب غسالتك على أرضية أو مكان مدعوم بشكل ضعيف. االعتبارات اخلاصة باملوقع ال تركب غسالتك في أماكن قد تتعرض فيها املياه للتجمد ،لكون غسالتك ستحتفظ دوما ً ببعض املاء في أماكن صمام املاء ،املضخة، واخلرطوم .املاء املتجمد قد يؤدي إلى تلف السيور ،املضخة واخلراطيم واملكونات األخرى. تركيب القنطرة أو اخلزانة املسافات الدنيا بالنسبة لتركيب القنطرة أو احلجرة: اجلوانب 1بوصة 25 / ملم مقدمة احلجرة 2بوصة 51 / ملم اجلانب اخللفي 6بوصة / 152ملم اجلزء العلوي 21بوصة / 533ملم العربية 15 2015/7/27 17:04:14 WA8700J_WA22J8700GP-03520L-02_SG_AR.indd 15 بيكرتلا منظر جانبي -احلجرة أو املنطقة احملصورة منطقة مجوفة A E A بيكرتلا A B B A 1بوصة ( 2.5سم) B 27.0بوصة ( 68.6سم) A D C B A 21بوصة ( 53.3سم) B 2بوصة ( 5.1سم) C 29.3بوصة ( 74.4سم) D 6بوصة ( 15.2سم) E املسافة ما بني طرف صمام املاء واحلائط •احلالة .1جتميع خرطوم اإلمداد بعد التركيب :أكثر من 3.9بوصة ( 10سم). •احلالة .2جتميع خرطوم اإلمداد قبل التركيب :أكثر من 2.8بوصة ( 7سم). 16العربية 2015/7/27 17:04:14 WA8700J_WA22J8700GP-03520L-02_SG_AR.indd 16 األبعاد املطلوبة للتركيب A بيكرتلا C B A A A 27.0بوصة ( 68.6سم) B 39.2بوصة ( 99.5سم) C 46.0بوصة ( 116.8سم) 59.8بوصة ( 152.0سم) C A B B C A A 29.3بوصة ( 74.4سم) B 46.0بوصة ( 116.8سم) *A 48.0بوصة 310.0( 2سم)2 *B 24.0بوصة 155.0( 2سم)2 C 3.0بوصة ( 7.6سم) مالحظة * التباعد املطلوب العربية 17 2015/7/27 17:04:15 WA8700J_WA22J8700GP-03520L-02_SG_AR.indd 17 بيكرتلا مالحظة هامة جلهة التركيب الرجاء قراءة التعليمات التالية بدقة قبل تركيب غسالتك. يجب االحتفاظ بهذه التعليمات للرجوع إليها في املستقبل. نحن ننصحك بترك أمر تركيب هذه الغسالة لفني متخصص. الشكل التوضيحي املتبع لعملية التركيب بيكرتلا تشغيل الغسالة ضبط استواء أرجل الغسالة إمتام التركيب تشغيل Calibration Mode (وضع املعايرة) إزالة مسامير الشحن (في حالة الغساالت ذات فتحة تعبئة أمامية) توصيل املاء واخلرطوم ال هل تهتز غسالتك؟ اختيار مكان الغسالة تشغيل دورة اختبار قم بتشغيل دورة اختبار ( ( RINSE+SPINدوران+شطف )) مع كمية صغيرة من الغسيل (نحو 4 إلي 5مناشف) نعم يرجي التحقق ثانية من اخلطوات السابقة. التركيب خطوة بخطوة اخلطوة - 1اختيار مكان الغسالة مالحظة قبل تركيب الغسالة ،تأكد من توفر ما يلي في املكان الذي قمت باختياره: •سطح صلب ومستوي دون وجود سجاد أو بالط قد يعوق عملية التهوية. •مكان بعيد عن أشعة الشمس املباشرة. •تتوفر به تهوية كافية. •غير معرض لدرجات حرارة التجمد (درجات احلرارة األقل من 32ف أو 0مئوية). •يكون بعي ًدا عن مصادر احلرارة مثل البترول أو الغاز. •به مساحة كافية حتى ال ترتكز الغسالة على سلك الطاقة اخلاص بها. 18العربية 2015/7/27 17:04:15 WA8700J_WA22J8700GP-03520L-02_SG_AR.indd 18 اخلطوة - 2توصيل خرطوم توريد املاء تنبيه قبل تركيب خراطيم إمداد املاء ،تأكد من أن احلشيات املطاطية ()B داخل الوصالت اجملمعة توجد ( )Aاملوجودة في طرفي كل خرطوم ماء جديد .تركيب خراطيم إمداد املاء بدون احلشيات املطاطية قد يؤدي إلى تسرب املاء. عند قيامك بتركيب الغسالة للمرة األولى ،تأكد من استخدام خراطيم جديدة .عدم القيام بذلك قد يؤدي إلى تسرب املاء أو التدفق الزائد مبا قد يؤدي إلى تلف ممتلكاتك. B بيكرتلا تنبيه تنبيه A ال تقم بتوصيل خراطيم إمداد ماء متعددة سويا ً لزيادة طول خرطوم اإلمداد .قد تؤدي اخلراطيم املتصلة بهذه الطريقة إلى حدوث تسرب وقد يتسبب التسرب في حدوث صعقة كهربائية .إذا كان اخلرطوم قصيرا ً للغاية ،فقم باستبداله بخرطوم أكثر طوال ً وذو ضغط عالي. العربية 19 2015/7/27 17:04:15 WA8700J_WA22J8700GP-03520L-02_SG_AR.indd 19 بيكرتلا B A 1 .1صل طرفي خراطيم إمداد املاء بحنفيات املاء الساخن ()B والبارد(.)A 2 .2قم بإحكام ربط التجهيزات يدويا ً حتى تصبح مالئمة ،ثم قم بإحكام ربطها عن طريق لفها ثلثي مرتني بواسطة مفتاح ربط. تنبيه بيكرتلا عندما تقوم بإحكام ربط التجهيزات ،ال تقم بربطها بشكل محكم للغاية أو وضع شريط أو مانع تسرب على احلنفيات أو فتحات سحب إمداد املاء .قد يؤدي هذا إلى تلف التجهيزات. مالحظة بعد توصيل خرطوم توريد املاء باحملول ،تأكد من توصيله بشكل صحيح عن طريق سحب خرطوم توريد املاء ألسفل. 3 .3قم بوضع األطراف غير املتصلة للخراطيم في قادوس وافتح احلنفيات املتصلة بخرطومي إمداد املاء ملدة 10أو 15ثانية إلزالة أي مواد غريبة من اخلراطيم .قم بغلق احلنفيات قبل املواصلة. 20العربية 2015/7/27 17:04:15 WA8700J_WA22J8700GP-03520L-02_SG_AR.indd 20 4 .4قم بتوصيل أطراف خراطيم إمداد املاء بوصالت سحب إمداد املاء في اجلزء اخللفي من الغسالة. تنبيه يجب توصيل خرطوم إمداد املاء املتصل بحنفية املاء الساخن مبأخذ إمداد املاء الساخن ويجب توصيل خرطوم املاء بحنفية املاء البارد املتصلة مبأخذ إمداد املاء البارد. بيكرتلا 5 .5قم بإحكام ربط التجهيزات يدويا ً حتى تصبح مالئمة ،ثم قم بإحكام ربطها عن طريق لفها ثلثي مرتني بواسطة مفتاح ربط. مالحظة للتأكد من استخدام املاء املناسب ،قم بتوصيل حنفية املاء البارد وحنفية املاء الساخن .إذا لم يتم التوصيل بواحدة من احلنفيتني أو كالهما ،فسوف يظهر رسالة خطأ “( ”4Cعدم امللء). مالحظة إذا لم ترغب في استخدام خرطوم إمداد املاء الساخن ،فقم بإدخال غطاء مأخذ املاء في فتحة مأخد إمداد املاء الساخن .في هذه احلالة، يجب عليك حتديد خيار ( Tap Coldحنفية املاء البارد) اخلاصبة درجة حرارة املاء .إذا قمت بتحديد خيار ( Tap Coldحنفية املاء البارد)، فسيتم إيقاف تشغيل كل املصابيح اخلاصبة بخيارات درجة حرارة املاء. تنبيه تأكد من عدم التواء أو ثني خراطيم إمداد املاء .إذا كانت اخلراطيم ملتوية أو مثنية ،فقد يحدث تسرب باخلراطيم والتسبب في حدوث صعقة كهربائية بسبب تسرب املاء. 6 .6قم بفتح إمداد املاء البارد واملاء الساخن وحتقق من أن كل وصالت سحب إمداد املاء واحلنفيات للتحري عن وجود أي تسرب. العربية 21 2015/7/27 17:04:16 WA8700J_WA22J8700GP-03520L-02_SG_AR.indd 21 بيكرتلا اخلطوة - 3توصيل خرطوم التصريف ميكنك وضع نهاية خرطوم التصريف بثالث طرق: فوق حافة حوض الغسيل ثبت حامل اخلرطوم ( )Aإلى جدار احلوض بواسطة اخلطاف أو مستخدما قطعة سلك ملنع حترك خرطوم التصريف. بالصنبور ً A بيكرتلا C في األنبوب القياسي أو حوض الغسيل B يتعني أال يكون األنبوب القياسي ( )Bوحوض الغسيل ( )Cأقصر من 39بوصة ( 99سم)* وال أطول من 96بوصة ( 245سم)*. D E * مالحظة •تأكد من أن الوصلة ما بني خرطوم التصريف واألنبوب القياسي ليس بها أي عيوب أو مسدودة. • :Dماسك اخلرطوم :E،شريط الربط 22العربية 2015/7/27 17:04:16 WA8700J_WA22J8700GP-03520L-02_SG_AR.indd 22 مالحظة * A ثبت حامل اخلرطوم ( )Aعلى مسافة 4بوصة ( 10سم)* من نهاية خرطوم التصريف .في حال كانت املسافة بني حامل اخلرطوم ونهاية خرطوم التصريف أكبر من 4بوصة ( 10سم) فإن ذلك من شأنه نشر العفن أو البكتريا داخل الغسالة. مالحظة بيكرتلا أقصى ارتفاع لتركيب خرطوم التصريف هي 96بوصة ( 245سم) مع العلم أن هذا اإلرتفاع من شأنه التأثير سل ًبا على قدرة التصريف. وينجم عن ذلك وجود رائحة في الغسالة نظرا ً للماء املتبقي في نظام التصريف. مالحظة إن تثبيت خرطوم التصريف على ارتفاع أقل من 39بوصة ( 99سم) قد يُسبب ارتداد مياه التصريف إلي دورات الغسالة بسبب ظاهرة السيفون .وهنا تعرض الغسالة رمز "."4C اخلطوة - 4ضبط مستوى الغسالة الرجاء التحقق إذا كانت الغسالة مستوية عن طريق فحص وضع احلوض: 1 .1قم بزلق احللقة في موضعها. 2 .2قم بفتح غطاء الغسالة ،وضب املاء في احلوض حتى يصل مستوى املاء إلى أقل من مستوى املضخة النابضة. A العربية 23 2015/7/27 17:04:17 WA8700J_WA22J8700GP-03520L-02_SG_AR.indd 23 بيكرتلا 3 .3إذا كانت الغسالة على سطح مستو ،فإن مستوى املضخة النابضة ( )Aسيكون موضوع عند منتصف املاء كما هو موضح في الشكل. إذا لم يكن األمر كذلك ،فقم بضبط مستوى الغسالة عن طريق لف قدم ضبط املستوى األمامي باجتاه حركة عقارب الساعة أو عكس عقارب الساعة حسب الضرورة. مالحظة بيكرتلا أدر قدم ضبط املستوى األمامي في اجتاه حركة عقارب الساعة ( )Bخلفض الغسالة ،وعكس اجتاه حركة عقارب الساعة ( )Cلرفع الغسالة. C B اخلطوة - 5تزويد الغسالة بالطاقة صل سلك الطاقة مبصدر تيار كهربائي ثالثي الشوكات معتمد جيد التأريض 240-220فولت 50هرتز محمي بواسطة مصهر أو قاطع دائرة مماثل. غسالتك مؤرضة عبر سلك طاقة ثالثي الشوكات عندما يتم توصيلها في مصدر تيار كهربائي مؤرض ثالثي الشوكات. اختبار تشغيل تأكد من أنك قمت بتركيب الغسالة اخلاصة بك بطريقة صحيحة من خالل تشغيل دورة ( RINSE+SPINدوران+شطف ) بعد االنتهاء من التركيب. 24العربية 2015/7/27 17:04:17 WA8700J_WA22J8700GP-03520L-02_SG_AR.indd 24 اخلطوة - 6تشغيل دورة جتريبية قم بتشغيل الدورة التجريبية كما هو متبع للتحقق إذا كانت غسالتك مركبة بطريقة صحيحة أم ال. مالحظة بيكرتلا .1 .2 .3 .4 .5 1قم بوضع 6باوند تقريبا ً من املالبس في حوض الغسالة. 2اضغط على زر ( Powerتشغيل) لتشغيل غسالتك. 3حدد دورة ( RINSE+SPINدوران+شطف ) عن طريق إدارة قرص حتديد الدورة. 4اضغط على زر ( Start/Pauseبدء /إيقاف) لبدء الدورة التجريبية. 5يجب عدم اهتزاز الغسالة أو تعريضها للتذبذب بشكل مفرط عندما يتم تزويد املاء أو عند الغسيل أو العصر باللف ،ويجب أن يتم التصريف بشكل جيد كل دورة العصر. إذا حدث تسرب للماء في أثناء إمداده أو تصريفه ،فإن عليك فحص وصالت املاء .الرجاء االطالع على قسم "اخلطوة - 2توصيل خرطوم توريد املاء" في صفحة 19ملعرفة التعليمات. مالحظة في حالة اهتزاز الغسالة وتذبذبها بشكل مفرط ،فالرجاء ضبط مستوى غسالتك مرة أخرى .الرجاء االطالع على قسم "اخلطوة - 4ضبط مستوى الغسالة" في صفحة 23ملعرفة التعليمات. اخلطوة - 7وضع املعايرة تلقائيا. تكتشف غسالة Samsungوزن الغسيل ً الكتشاف الوزن بطريقة أفضل دقة ،الرجاء تشغيل "وضع املعايرة" بعد التركيب. لتشغيل ( Calibration Modeوضع املعايرة) ،الرجاء اتباع تلك اخلطوات: .1 .2 .3 .4 .5 1فرغ الغسالة من الغسيل أو أي محتويات أخري بداخلها. معا ملدة 3ثواني عند التشغيل. 2عليك بالضغط املستمر على( Water Levelمستوي املاء) و( Delay Endتأجيل التشغيل) ً 3اضغط على الزر ( Start/Pauseبدء /إيقاف) لتنشيط "وضع املعايرة". 4تدور املضخة النابضة باجتاه حركة عقارب الساعة وعكس اجتاه عقارب الساعة ملدة 1دقيقة تقريباً. تلقائيا .الغسالة جاهزة لالستخدام اآلن. 5عند االنتهاء من ضبط “وضع املعايرة” ،تظهر الرسالة “ ”Endويتم إيقاف تشغيل الغسالة ً العربية 25 2015/7/27 17:04:17 WA8700J_WA22J8700GP-03520L-02_SG_AR.indd 25 تعليمات التشغيل حتذير لتقليل إمكانية نشوب حريق أو صعقة كهربائية أو إصابة لألشخاص أثناء استخدام الغسالة ،قم باتباع احتياطات األمان األساسية مبا في ذلك ما يلي: وضع املالبس بالغسالة ليغشتلا تاميلعت •عليك ملء حوض الغسيل باملالبس اجلافة غير املثنية أو املطوية نتظما بغية زيادة كفاءة الغسيل واحليلولة وضعا ُم وذلك بوضعها ً ً دون زيادة البلى أو جتعد املالبس املراد غسلها. بسطا مستويًا. •تأكد من بسط الغسيل ً •غسيل املالبس احلساسة مثل حماالت الصدر واجلوارب واملالبس الداخلية للسيدات في دورة ( Delicatesناعم) مع األشياء األخرى املماثلة. •عند غسيل كمية كبيرة من األشياء واملالبس أو بعض األشياء األقل التي ال تؤدي المتالء حوض الغسيل متاما ً -على سبيل املثال السجاد ،الوسائد ،األلعاب احملشوة ،أو سترة واحدة أو سترتني -فقم بإضافة بعض املناشف لتحسني أداء العصر بالدوران. •ال تقم بإدخال أي أشياء كبيرة احلجم باستثناء الشراشف في هذه الدورة. مالحظة أثناء دورة العصر بالدوران ،قد تقوم الغسالة بإضافة كمية إضافية من املاء إلعادة توزيع املالبس وتصحيح عدم التوازن بداخل احللة. •عندما تكون حمولة الغسالة متسخة اتساخا ً شديداً ،فال تقم بزيادة حتميل غسالتك لضمان نتائج تنظيف جيدة. إلضافة أشياء منسية: 1 .1اضغط على زر ( Start/Pauseبدء /إيقاف) إليقاف الغسالة مؤقتاً. 2 .2انتظر حلني فك قفل الباب أوتوماتيكياً ،ثم افتح الباب. 3 .3قم بإضافة الشيء ،واغلق الباب ،ثم اضغط على زر ( Start/Pauseبدء /إيقاف) .ستواصل الدورة عملها. 26العربية 2015/7/27 17:04:17 WA8700J_WA22J8700GP-03520L-02_SG_AR.indd 26 بدء التشغيل .1 .2 .3 .4 .5 .6 .7 1وضع املالبس بالغسالة. 2إضافة مادة منظفة سائلة (أو مسحوق) واإلضافات في وحدة التوزيع (انظر قسم "استخدام املادة املنظفة" في صفحة .)39 3اختر دورة الغسيل وخيارات التحميل (انظر قسم "غسل املالبس" في صفحة .)28 4إغالق الغطاء. 5اضغط على ( Start/Pauseبدء /إيقاف). 6يضيء مصباح مؤشر ( Washغسيل). 7يظهر وقت الدورة املقدر في شاشة العرض. قد يتفاوت الوقت ليشير إلى الوقت املتبقي في الدورة. مالحظة ليغشتلا تاميلعت قد يتفاوت الوقت الفعلي للدورة عن الوقت املقدر في شاشة العرض استنادا ً إلى ضغط املاء ،ودرجة حرارة املاء واملادة املنظفة واملالبس املراد غسيلها. 8 .8قبل بدء الغسالة في االمتالء ،قد تقوم بإجراء سلسلة من الضوضاء على شكل طقطقة للتحقق من قفل الباب وإجراء دورة تصريف سريعة. مالحظة •عند انتهاء دورة الغسيل ،ينطفئ مصباح ( Door Lock قفل الباب) وتظهر كلمة "( "Endنهاية) على شاشة العرض. •الضغط على زر ( Powerتشغيل) سيؤدي إلى إلغاء الدورة وإيقاف الغسالة. •ستتم إضاءة مصابيح إشارة ( Washغسيل) ،و( Rinseشطف) ،و( Spinدوران) العصر أثناء أجزاء هذه الدورة. العربية 27 2015/7/27 17:04:17 WA8700J_WA22J8700GP-03520L-02_SG_AR.indd 27 غسل املالبس حتذير سعيا لتجنب مخاطر احلريق أو الصعق بالكهرباء أو تعرص املستخدمني لألذى أو اإلصابة ،يتعني قراءة تعليمات األمان والسالمة قبل مباشرة ً تشغيل هذا اجلهاز. لوحة التحكم 02 06 10 15 07 11 08 12 09 13 14 01 05 04 03 الملا لسغ ُ 0 01محدد الدورة موضحا اسم دورة الغسيل. أدر ُمحدد الدورة الختيار دورة التجفيف املناسبة .وهنا يضيء املؤشر ً 0 02شاشة العرض تقدمي املعلومات والعمليات التشخيصية في الوقت نفسه إطالعك باستمرار على حالة الدورة والوقت املتبقي. ( Water Level0 03مستوى املاء) يجري تعديل مستوي املاء بشكل أوتوماتيكي .ومع ذلك ميكنك انتقاء ( Water Levelمستوي املاء) يدويا ً بالضغط علي هذا الزر. ويختلف مستوى املاء واستهالك املاء وفق النسيج املغسول ومستوى رطوبة املالبس. ( Power Wash0 04غسيل قوي) يمُ كنك اختيار منط بخار املاء. ( Mediumوسط)( High >-عالي)( Low >-منخفض)( Medium >-وسط) يمُ كنك تغيير اإلعداد وفق دورة الغسيل. ال يمُ كنك تغيير اإلعداد في أثناء دورة العصر (.)Spin ( Temp.0 05درجة احلرارة) اضغط على الزر بشكل متكرر للتبديل بني خيارات درجة حرارة املاء اخملتلفة. •( Hotساخن) -املالبس البيضاء واملتسخة بأوساخ شديدة وامللونة. •( Warmدافئ) -األشياء امللونة. •( Coldبارد) -املالبس ذات األلوان الفاحتة واملتسخة بأوساخ بسيطة. AquaJet™ Plus0 06 (إضافة رذاذ املياه) يُحسن أداء الغسيل خالل رذاذ املياه. 28العربية 2015/7/27 17:04:18 WA8700J_WA22J8700GP-03520L-02_SG_AR.indd 28 ( Last Setting0 08األعداد األخير) يُفعل هذا اخليار إعدادات أخر دورة. وبهذا يجري تنفيذ دورة غسيل بناء على أخر إعدادات جرى استخدامها دون احلاجة إلعادة إدخالها يدويًا .ويجري تلقائيا عند الضغط على زر ( Start/Pauseبدء /إيقاف) .اضغط على زر ( Last Settingاألعداد حفظ اختياراتك ً األخير) ثم اضغط على زر ( Start/Pauseبدء /إيقاف) لتفعيل الدورة احملفوظة. ( Pre Soak0 09قبل النقع) إزالة البقع بشكل أكبر عن طريق تخصيص وقت إضافي. ( Delay End1 10تأجيل التشغيل) تأخير نهاية أي دورة ملدة تصل إلى 19ساعة مبقدار ساعة واحدة فاصلة .تشير الساعة املعروضة إلى الوقت الذي يجري عنده إنهاء عملية الغسيل. ( Wash1 11غسيل) اضغط على هذا الزر لتنفيذ دورة غسيل أو إعادة ضبط وقت الغسيل. ( Rinse1 12شطف) اضغط على هذا الزر فقط في حال أردت تنفيذ دورة شطف أو إعادة ضبط عدد مرات الشطف. ( Spin1 13دوران) اضغط على هذا الزر لتنفيذ دورة دوان فقط أو لتعديل وقت الدوران. يمُ كنك ضبط مدة التدوير من دقيقة واحدة ( )1حتى تسع ( )9دقائق( .باستثناء دورة ( WATER SAVINGتوفير املاء)) عند اختيار الدوران فقط ،سيكون وقت الدوران مختلف عن الوقت الكلي املتبقي .وسبب ذلك أن الوقت الكلي املتبقي يشمل وقت التدوير الفعلي وكذلك وقت لصرف املياه والتوقف عن العمل. ( Start/Pause1 14بدء/ إيقاف) اضغط إليقاف الدورة مؤقتا ً وإعادة تشغيلها. ( Power1 15تشغيل) اضغط مرة واحدة لتشغيل غسالتك .اضغط مرة أخرى إليقاف تشغيل غسالتك .في حال ترك الغسالة قيد التشغيل لفترة تزيد عن 10دقائق بدون ملس أي أزرار ،فسيتم إيقاف تشغيل الطاقة أوتوماتيكياً. الملا لسغ Activ Dual Wash0 07 ( Drainالغسيل املزدوج التصريف) يتيح هذا الزر خيارين وهو متوفر فقط في حالة إيقاف الغسالة أو وضع االستعداد .Standby •( Water Saveتوفير املاء) (الوضع االفتراضي) :يتيح اخليار ُ إعادة استخدام املاء املتبقي في احلوض بعد استخدام رشاش املاء .ويجري استخدام املاء ،في هذه احلالة ،للدورة الرئيسية. •( Drainتصريف) :اختر تصريف املاء املتبقي بعد استخدام رشاش املاء .وبإكتمال التصريف ،تتحول أوتوماتيكيا إلى وضع ( Water Saveتوفير املاء) .ثم عليك اختيار دورة غسيل. الغسالة ً العربية 29 2015/7/27 17:04:18 WA8700J_WA22J8700GP-03520L-02_SG_AR.indd 29 الملا لسغ رؤية عامة للدورة الوصف دورات الملا لسغ ( NORMALدورة عادية) تُناسب معظم األقمشة مبا في ذلك القطن والكتان وغير ذلك من املالبس عادية االتساخ. ( SILENTصامت) تقلل هذه الدورة الصوت الصادر عن الغسالة للحد األدنى وذلك بتقليل قوة العصر مبا يجعلها مناسبة لالستخدام ليالً. ( HEAVY DUTYأداء ثقيل) بالنسبة للمالبس امللونة والثابتة وامللوثة بأوساخ شديدة. ( 40°C MAGIC CLEANتنظيف سحري )40°C متتاز هذه الدورة بإزالة فعالة لألوساخ باالعتماد على درجة حرارة مخصصة. ( 60°C MAGIC CLEANتنظيف سحري )60°C متتاز هذه الدورة بإزالة فعالة لألوساخ باالعتماد على درجة حرارة مخصصة. ( TOWELSاملناشف) تٌخصص هذه الدورة ملناشف احلمام وأدوات االستحمام واملمسحات. ( ACTIVE WEARمالبس رياضية) تُخصص هذه الدورة لغسيل مالبس التمارين مثل البدل والرياضية وسراويل التدريب وغير ذلك من مالبس األداء احلركي .توفر هذه الدورة تنظيف فعال لألوساخ مع أداء ناعم رقيق لألقمشة ذات التركيب اخلاص. ( ECO TUB CLEANتنظيف احلوض) يُستخدم هذا اخليار لتنظيف احلوض .ويحافظ على نظافة احلوض ومالئمته الصحية. ( WATER SAVINGتوفير املاء) هذه البرنامج مصمم خصيصا ً مبا يتيح لك غسيل املالبس بشكل فعال مع تقليل مقدار املاء. ( BABY CAREمالبس الطفل) تُستخدم هذه الدورة مع األغراض التي يكثر غسلها مثل مالبس الطفل واملالبس الداخلية وذلك حلماية النسيج من التلف وكذلك إضافة دورات شطف إضافية لضمان النظافة. ( QUICK WASHالغسيل السريع) لغسيل املالبس امللوثة بأوساخ بسيطة الالزم تنظيفها بسرعة. ( DELICATESمالبس رقيقة) هذه الدورة مخصصة لغسيل املالبس الرقيقة التي يسهل تعرضها للتفسخ أو التلف وكذلك الكنزات الصوفية والسترات الصوفية املحُكمة. ( BEDDINGشراشف) لألشياء الثقيلة كالبطانيات والشراشف .عند قيامك بغسيل اللحاف ،استخدم مادة منظفة سائلة. ( SPINدوران) تصريف املاء والعصر على سرعة عالية. ( RINSE + SPINدوران +شطف) تُستخدم هذه الدورة للمالبس التي حتتاج إلى الشطف فقط أو إلضافة منعم األقمشة الذي يجري إضافته في أثناء الشطف فقط. 30العربية 2015/7/27 17:04:18 WA8700J_WA22J8700GP-03520L-02_SG_AR.indd 30 خيارات قفل األطفال قفل األطفال مينع األطفال من العبث بالغسالة. تنشيط وظيفة قفل األطفال اضغط مع االستمرار على زر ( Water Levelمستوي املاء) ،و Power ( Washغسيل قوي) في وقت واحد ملدة 3ثواني تقريباً. •عند قيامك بتنشيط وظيفة قفل األطفال ،يومض مصباح قفل األطفال. •إللغاء النمط “ ،”CLحتتاج إلى إيقاف تشغيل الطاقة ثم تعود لوضع التشغيل مرة أخرى. •إللغاء منط “ ،”dCقم بإلغاء تنشيط وظيفة قفل األطفال. إللغاء تنشيط وظيفة قفل األطفال ،اضغط باستمرار على ( Water Levelمستوي املاء) ،و( Power Washغسيل قوي) في وقت واحد ملدة 3ثواني على األقل. استخدام وظيفة قفل األطفال الملا لسغ إذا كان الغطاء مفتوحا ً عندما تكون وظيفة قفل األطفال قيد التشغيل ،فسيتم عرض “ ”dCوانطالق اإلنذار. •إذا كان مستوى املاء في احلوض أعلى من مستوى املاء اآلمن، فسيتم عرض “ ”dCعلى شاشة العرض LEDوتبدأ الغسالة الكهربائية في تصريف املاء دفعا ً بعد 30ثانية .يجري تعطيل زر التشغيل في أثناء تصريف الغسالة املاء في وضع قفل األطفال. •إذا كان مستوى املاء في احلوض أعلى من مستوى املاء اآلمن ووظيفة قفل األطفال قيد التشغيل عندما يكون الباب مفتوحاً ،فستعرض الكلمة “ ”CLعلى شاشة العرض LED حتى لو كانت طاقة الغسالة الكهربائية قيد إيقاف التشغيل وتصريف ماء الغسالة بقوة الدفع. •حتى لو كانت طاقة الغسالة الكهربائية قيد إيقاف التشغيل، وإذا كان الغطاء مفتوحا ً عندما يكون مستوى املاء في احلوض أعلى من مستوى املاء املضبوط ،ستعرض كلمة “ ”CLعلى شاشة العرض LEDبدون انطالق اإلنذار وبدء الغسالة في تصريف املاء .عند االنتهاء من عملية التصريف ،سيتم إيقاف تشغيل الطاقة مرة أخرى. •وحتى إذا جرى تنشيط خاصية قفل األطفال ،فإن جميع األزرار تعمل حتى ينفتح الباب. •بعد التصريف اإلجباري ،يومض الكود “ ”CLعلى شاشة العرض بفاصل مقداره 1ثانية ويدخل املنتج إلى النمط “( .”CLعندما يكون املنتج في منط “ ،”CLيعمل الزر ( Powerتشغيل) فقط). العربية 31 2015/7/27 17:04:18 WA8700J_WA22J8700GP-03520L-02_SG_AR.indd 31 الملا لسغ مالحظة إضافة املالبس عندما يكون قفل األطفال قيد التشغيل إلضافة مالبس ،قم بإلغاء تنشيط وظيفة قفل األطفال .إللغاء تنشيط وظيفة قفل األطفال ،اضغط باستمرار علىWater Level (مستوي املاء) ،و( Power Washغسيل قوي) في وقت واحد ملدة 3 ثواني على األقل .انظر قسم “خيار اإليقاف” في صفحة 34ملعرفة التفاصيل اإلضافية. إلغاء تنشيط وظيفة قفل األطفال اضغط مع االستمرار على زر ( Water Levelمستوي املاء) ،و Power ( Washغسيل قوي) في وقت واحد ملدة 3ثواني تقريباً. •عند قيام بإلغاء تنشيط وظيفة قفل األطفال ،يتم إيقاف مصباح قفل األطفال. •وظيفة قفل األطفال تقوم مبنع األطفال أو العاجزين من التشغيل العشوائي للغسالة وتعريض أنفسهم لإلصابة. حتذير الملا لسغ في حالة دخول الطفل للغسالة الكهربائية ،فقد يتعرض الطفل لالنحشار واالختناق. تنبيه •بعد قيامك بتنشيط وظيفة قفل األطفال ،فإنها تستمر في العمل حتى لو كانت الطاقة قيد إيقاف التشغيل. •استخدام القوة في فتح الغطاء قد يؤدي إلى اإلصابة أو تلف املنتج. مالحظة إلضافة املالبس املراد غسلها بعد قيامك بتنشيط وظيفة قفل األطفال ،يجب عليك أوال ً إيقاف تشغيل أو إلغاء تنشيط وظيفة قفل األطفال. الصوت ميكن حتديد وظيفة ( Sound Offإيقاف تشغيل الصوت) مع كافة الدورات. ( Garment Plusاملالبس)+ ميكنك إضافة أو إخراج املالبس حتى بعد الغسيل ،طاملا ظل مصباح ( Garment Plusاملالبس )+قيد اإلضاءة .بالضغط على زر Start/ ( Pauseبدء /إيقاف) ينفتح قفل الغطاء .إذا قمت بفتح الغطاء وترغب في مواصلة دورة الغسيل ،فقم بإغالق الغطاء ،ثم اضغط على زر ( Start/Pauseبدء /إيقاف). ( Delay Endتأجيل التشغيل) ميكنك ضبط الغسالة الكهربائية على البدء أوتوماتيكيا ً في وقت الحق عن طريق اختيار وقت متأخر. تشير الساعة املعروضة إلى الوقت الذي يتم االنتهاء فيه من عملية الغسل. .1 .2 .3 .4 1قم بضبط برنامج الغسيل. 2اضغط على الزر ( Delay Endتأجيل التشغيل) بشكل متكرر حتى تصل إلى وقت التأجيل املطلوب. 3اضغط على ( Start/Pauseبدء /إيقاف) .سيضيء مؤشر Delay ( Endتأجيل التشغيل) ،وتبدأ الساعة بالعد التنازلي حتى تصل إلى الوقت احملدد. 4إللغاء وظيفة ( Delay Endتأجيل التشغيل) ،اضغط على الزر ( Powerتشغيل) ثم قم بتشغيل الغسالة من جديد. ( Pre Soakقبل النقع) استخدم هذه الوظيفة عندما تكون املالبس املراد غسلها متسخة بأوساخ شديدة أو بقع شديدة .حتسن هذه الوظيفة من أداء الغسيل عن طريق إضافة دورة ( Pre Soakقبل النقع). •إذا قمت باختيار هذه الوظيفة ،سيجري زيادة وقت الدورة الكلي مبقدار من 10أو 20دقائق. •عندما تبدأ دورة ( Pre Soakقبل النقع) ،تكرر الغسالة دورة الغسيل بعد التزود باملاء ،ثم تنفذ دورة نقع ملدة من 10أو 20دقائق. •عند االنتهاء من دورة ( Pre Soakقبل النقع) ،تبدأ دورة الغسيل املكونة بدون تصريف املاء. 32العربية 2015/7/27 17:04:18 WA8700J_WA22J8700GP-03520L-02_SG_AR.indd 32 ( AquaJet™ Plusإضافة رذاذ املياه) فبعد إضافة املاء اإلضافي ،يؤدي دوران حلة الغسيل إلى إنشاء شالل من املاء يذيب املادة املنظفة بشكل أكبر للغاية .يتيح هذه للمادة املنظفة بالتغلل بشكل أكبر بالتساوي في املالبس وإزالة البقع بفعالية أكبر ،حتى لو كانت حمولة الغسيل كبيرة ،مبا يقدم دورة غسيل أفضل ،وأثناء دورة الشطف ،مير شالل املاء خالل املالبس واألقمشة مبا يزيل بقايا املادة املنظفة متاماً. دورات ™AquaJet ( NORMALدورة عادية)SILENT ، (صامت)( HEAVY DUTY ،أداء ثقيل)40°C MAGIC CLEAN ، (تنظيف سحري ،)40°C ( 60°C MAGIC CLEANتنظيف سحري )60°C ( TOWELS ،املناشف)ACTIVE ، ( WEARمالبس رياضية)WATER ، ( SAVINGتوفير املاء)BABY ، ( CAREمالبس الطفل) متوفرة ( BEDDINGشراشف)ECO ، ( TUB CLEANتنظيف احلوض)، ( QUICK WASHالغسيل السريع)، ( DELICATESمالبس رقيقة)، ( RINSE+SPINدوران+شطف )، ( SPINدوران) غير متوفرة (يُالحظ أن خاصية ( Mist Showerمغسلة رذاذ) قد ال تعمل في حالة وجود حمولة كبيرة ج ًدا في الغسالة). ( Smart Checkالفحص الذكي) تتيح هذه الوظيفة لك التحقق من حالة الغسالة الكهربائية باستخدام الهاتف الذكي. 1 .1لتمكني وظيفة االختيار الذكي ،اضغط باستمرار على مفتاح ( Temp.درجة احلرارة) ملدة 3ثواني بعد تشغيل الطاقة أو عند حدوث خطأ. مالحظة ترش ( Mist Showerمغسلة رذاذ) املاء من فوهة مستقلة عن النظام الرئيسي لإلمداد باملاء .ويُشار أنها تنقع الغسيل باملاء منذ بداية دورة الشطف وتضمن غسيال ً فعاال ً ومع ذلك فإنها ليست جز ًءا من دورة الغسل بل إنها جزء من دورة الشطف لذا فإنها بذلك تضمن شطفًا فعاال ً مميزًا. الملا لسغ ( Mist Showerمغسلة رذاذ) يتم حذف تاريخ كود اخلطأ بعد استخدامك لهذه الوظيفة. 2 .2تتم إضاءة مؤشر ( Smart Checkاالختيار الذكي) على شاشة العرض. 3 .3قم بتشغيل تطبيق ( Smart Checkالفحص الذكي) على هاتفك الذكي. •أندرويد :فئة Galaxy Sوفئة ( .Galaxy Noteقد تكون األجهزة األخرى خالف هذه الفئات غير مناسبة). أنظمة التشغيل OSاملدعومة 2.2 Android :أو أعلى • :iOSفئات iPhone أنظمة التشغيل OSاملرغوبة 4.3 iOS :أو أعلى 4 .4قم بتركيز كاميرا الهاتف الذكي على لوحة العرض بالغسالة. 5 .5إذا مت تركيز كاميرا الهاتف الذكي على لوحة العرض بالغسالة، فسيتم التعرف على رسائل اللوحة ورسائل اخلطأ أوتوماتيكيا ً ونوع اخلطأ وعرض اإلجراءات املضادة على الهاتف الذكي. 6 .6إذا فشل الهاتف الذكي في التعرف على كود اخلطأ أكثر من مرتني ،فالرجاء إدخال كود اخلطأ املعروض على لوحة العرض بالغسالة يدويا ً في تطبيق ( Smart Checkالفحص الذكي). مالحظة تنزيل تطبيق ( Smart Checkالفحص الذكي) •قم بتنزيل تطبيق ( Samsung Laundryاملالبس من سامسوجن) في هاتفك اجلوال من سوق Androidأو متجر تطبيقات آبل. (كلمة البحث) Samsung Smart Washer/Dryer : العربية 33 2015/7/27 17:04:18 WA8700J_WA22J8700GP-03520L-02_SG_AR.indd 33 الملا لسغ مالحظة االحتياطات عند استخدام ( Smart Checkالفحص الذكي) •إذا كان املصباح من بصيلة املصابيح ،أو بصيلة فلورسنت أو املصباح يتم عكسه على لوحة العرض بالغسالة ،فقد يتعذر على الهاتف الذكي التعرف على اللوحة أو رسالة اخلطأ بسهولة. •إذا قمت بإمساك الهاتف الذكي عند زاوية كبيرة للغاية نسبيا ً أمام مقدمة لوحة العرض ،فقد يتعذر عليه التعرف على كود اخلطأ .للحصول على أفضل النتائج ،قم بإمساك الهاتف الذكي بحيث يكون في مقدمة اللوحة والهاتف الذكي متوازي أو شبه متوازي. غسل املالبس باستخدام قرص حتديد الدورة تتيح الغسالة اجلديدة غسل املالبس بسهولة ،باستخدام نظام “التحكم الذكي” األوتوماتيكي من .Samsungعند اختيار أحد برامج الغسيل ،تقوم الغسالة بضبط درجة احلرارة ووقت الغسل وسرعات الغسل املناسبة. .1 .2 .3 الملا لسغ .4 .5 .6 .7 .8 1اضغط على ( Powerتشغيل). 2افتح الباب. 3قم بوضع كل املالبس مرة واحدة بشكل حر في احللة ،بدون ملئها عن آخرها. 4قم بإضافة مادة منظفة سائلة (أو مسحوق) ،مادة منعمة ،و/ أو مادة تبيض (إذا كان ذلك ضرورياً) في احلجيرات املناسبة .انظر قسم "استخدام املادة املنظفة" في صفحة .39 5إغالق الغطاء. 6استخدم قرص حتديد الدورة لتحديد الدورة املناسبة وفقا ً لنوع املادة( NORMAL :دورة عادية)( SILENT ،صامت)HEAVY DUTY ، (أداء ثقيل)( 40°C MAGIC CLEAN ،تنظيف سحري ،)40°C ( 60°C MAGIC CLEANتنظيف سحري ،)60°C ( TOWELSاملناشف)( ACTIVE WEAR ،مالبس رياضية)ECO ، ( TUB CLEANتنظيف احلوض)( WATER SAVING ،توفير املاء)، ( BABY CAREمالبس الطفل)( QUICK WASH ،الغسيل السريع)( DELICATES ،مالبس رقيقة)( BEDDING ،شراشف)، ( SPINدوران) ( RINSE+SPIN ،دوران+شطف ) .سيتم إضاءة املؤشرات املرتبطة بلوحة التحكم. 7في هذه املرة ،ميكنك التحكم في درجة حرارة الغسيل ،وعدد دورات الشطف ،وسرعة الدوران ،ووقت التأخير عن طريق الضغط على زر اخليار املالئم. 8اضغط على الزر ( Start/Pauseبدء /إيقاف) وعندها تبدأ الغسالة في العمل .يضيء مؤشر العملية ويظهر الوقت املتبقي للدورة على الشاشة. خيار اإليقاف إلضافة أو إزالة قطع من الغسالة ،اتبع اخلطوات التالية: 1 .1اضغط على زر ( Start/Pauseبدء /إيقاف) لفك قفل الغطاء. مالحظة ال ميكن فتح الغطاء عندما يكون املاء ساخن للغاية. 2 .2قم بإخراج املالبس أو وضعها. 3 .3قم بغلق الغطاء ،ثم اضغط على زر ( Start/Pauseبدء /إيقاف) لبدء الغسيل. مالحظة إذا قمت بتشغيل قفل األطفال ،فيجب عليك إلغاء تنشيطه أوالً. انظر صفحة .31 34العربية 2015/7/27 17:04:19 WA8700J_WA22J8700GP-03520L-02_SG_AR.indd 34 عند انتهاء الدورة: تلقائيا. بعد انتهاء دورة الغسل بالكامل ،يتم إيقاف الغسالة ً 1 .1افتح الباب. 2 .2أخرج املالبس. ( ATCالتحكم األوتوماتيكي بدرجة احلرارة) التحكم األوتوماتيكي بدرجة احلرارة ( )ATCهي خاصية تتيح للغسالة التحكم بدرجة احلرارة بواسطة حساس حراري (ترموستات). مالحظة نظرًا لوجود خيارات كثيرة لدرجة احلرارة بحسب بيئات العمالء (املناطق الباردة ،املناطق احلارة ،تنوع درجة حرارة املاء ،إعدادات ضبط درجة حرارة سخان الغسالة ،إلخ) ،فإن خاصية ATCفي الغسالة تحُ افظ على درجة حرارة ماء الغسيل في نطاق ُمحدد وذلك للحصول على أفضل أداء مع كل غسلة. مالحظة إذا اخترت اخليار ( NORMALدورة عادية) ،فإن هذه الدورة تكون حتما أولوية أساسية التنظيم ودورة .ULنظرًا ألن تقليل الطاقة هي ً للغساالت اجلديدة ،فإن العمالء سوف يالحظون دخول مزي ًدا من املاء البارد إلى الغسالة .ولكن هذا أمرًا عاديًا ال مشكلة به. ودرجة حرارة املاء الساخن في دورات التنظيم هذه متاثل درجة حرارة ماء استحمام البالغني ودرجة حرارة ماء حمام السباحة الدافئ. مالحظة الملا لسغ إذا كان العمالء يرغبون بغسيل املالبس وفق درجة حرارة ُمحددة، يجب على العمالء اختيار دورة غسيل ذات درجة حرارة مختلفة (Hot (ساخن) ( Warm /دافئ)). األساسيات املضمن) الغسل األولي (رشاش املاء واحلوض ّ العربية 35 2015/7/27 17:04:19 WA8700J_WA22J8700GP-03520L-02_SG_AR.indd 35 الملا لسغ املضمن على الغسل اليدوي قبل بدء يساعدك رشاش املاء واحلوض ّ تشغيل الغسالة .يتوفر رشاش املاء فقط عندما يكون الباب مفتو ًحا مع ضبط مستوى املاء على مستوى أقل من العالي .للغسل األولي، املضمن املصمم لتسهيل الغسل اليدوي. استخدم احلوض ّ .1 .2 .3 .4 1افتح الباب ثم أخفض احلوض املدمج .لفتح الباب فقط ،اضغط على اجلزء األمامي األمين من الباب ثم حرره .لغلق وتفعيل قفل معا ،اضغط ألسفل على الباب حتى الباب واحلوض املدمج ً تسمع صوت طقطقة. أوليا فيه. 2ضع املالبس يجري غسلها ً املضمن وإجراء احلوض في املاء لتزويد 3اضغط على رشاش املاء ّ الغسل اليدوي. 4عند انتهاء هذه اخلطوة ،ارفع احلوض املدمج برفق لتصريف املاء في احلوض. مالحظة الملا لسغ •إذا كنت تريد إجراء الغسل اليدوي أثناء تشغيل الغسالة، فاضغط على ( Start/Pauseبدء /إيقاف) إليقاف التشغيل ،ثم اتبع اخلطوات 4 -1املذكورة أعاله. معا ،فقم بخفض مستوى •إذا قمت بفتح الباب واحلوض املضمن ً ّ املضمن يدويًا قبل الغسل األولي. احلوض ّ [إيقاف رشاش املاء] أوتوماتيكيا عندما تستشعر •يتوقف رشاش املاء عن العمل ً الغسالة الوصول إلى أقصى مستوى للماء. أوتوماتيكيا عن العمل بعد 5دقائق .إلضافة •يتوقف رشاش املاء ً املزيد من املاء ،اضغط على Water Jetإلعادة التزود باملاء. 36العربية 2015/7/27 17:04:19 WA8700J_WA22J8700GP-03520L-02_SG_AR.indd 36 [تصريف رشاش املاء] •اختر دورة الغسيل ثم اضغط ( Start/Pauseبدء /إيقاف) .ثم تعمل الغسالة على تصريف املاء ليجري استخدامه في ( Prewashغسيل أولى). مالحظة •يدفع ( Water Jetرشاش املاء) باملاء خالل فوهة ( Mist Showerمغسلة رذاذ) ملدة ثانية واحدة ثم خالل فوهة رشاش املاء بعد ذلك ومتى جرى تنشيطه بعد تشغيل الغسالة. تنبيه الملا لسغ •ال تسيء استخدام رشاش املاء .يؤدي االستهالك املفرط ل رشاش املاء إلى زيادة استهالك املاء. •احرص على سريان هادئ رقيق للماء في احلوض .في حالة عدم االلتزام بذلك ،قد يفيض احلوض باملاء. •حتل باحلذر واالنتباه عند فك الغسالة من احلوض .عليك احلذر كيال املضمن. تصطدم رأسك باحلوص ّ •ال تسد فتحة رشاش املاء بيديك .قد يتسرب املاء من احلوض مسب ًبا تلف النظام. املضمن في الغسيل األولى إال مالبس فقط .لذا ال احلوص •ال تضع في ّ أغراضا مثل األحذية أو الطعام أو احليوانات في الغسيل ميكن وضع ً األولى. •ال تفتح احلوض املضمن بسرعة .فاملاء املتبق في احلوض قد يندفع على الباب أو لوحة التحكم. •نظرًا للفرق في ضغط الهواء ،قد يندفع املاء من فتحة رشاش املاء ( )Water Jetعند تنشيطه ألول مرة. محكما ملباشرة الغسيل. •يتعني غلق هذا الباب غلقً ا ً العربية 37 2015/7/27 17:04:19 WA8700J_WA22J8700GP-03520L-02_SG_AR.indd 37 الملا لسغ استخدام املادة املنظفة •يوصى باستخدام مادة منظفة ذات جودة عالية من الشركات الرائدة. •من الهام كذلك القيام: املعاجلة املسبقة للبقع قبل الغسيل. فرز املالبس بحسب اللون. فزر املالبس بحسب مقدار األوساخ. جتنب التحميل الزائد. مالحظة الملا لسغ •عند استخدام املادة املنظفة على شكل مسحوق ،من املوصى به أن تتم إذابتها في املاء الدافئ لضمان احلصول على أفضل نتائج التنظيف. •ميكن إضافة مزيج من املادة املنظفة /املاء إلى احلوض أو إلى درج توزيع املادة املنظفة. •خفض كمية املادة املنظفة املستخدمة قد يؤدي إلى تقليل فعالية قوة التنظيف. 38العربية 2015/7/27 17:04:19 WA8700J_WA22J8700GP-03520L-02_SG_AR.indd 38 امليزات وحدة التوزيع األوتوماتيكية يوجد بالغسالة اخلاصة بك حجيرات مستقلة لتوزيع املادة املنظفة ومادة التبييض اآلمنة على األلوان واملادة املنعمة للمالبس .قم بإضافة جميع إضافات الغسالة إلى حجيراتها اخلاصة قبل بدء تشغيل غسالتك. يجب أن تكون وحدة التوزيع األوتوماتيكية دوما ً في موضعها قبل بدء تشغيل غسالتك. ال تقم بفتح وحدة التوزيع األوتوماتيكية أثناء تشغيل غسالتك. مالحظة •ال تقم مطلقا ً بتجاوز توصيات اجلهة الصانعة عند إضافة املادة املنظفة. •تستوعب هذه احلجيرة مادة منظفة سائلة لدورة الغسيل الرئيسية ،وتتم إضافتها إلى املالبس املراد غسلها في بداية الدورة. •عند استخدام املادة املنظفة على شكل مسحوق ،قم بإزالة حجيرة املادة املنظفة السائلة من ساحب املادة املنظفة .لن تقوم الغسالة بتوزيع املادة املنظف على شكل مسحوق من حجيرة املادة املنظفة السائلة. إلضافة املادة املنظفة إلى وحدة التوزيع األوتوماتيكية: الملا لسغ 1 .1قم بفتح درج التوزيع. 2 .2قم بوضع املقدار املوصى به من املادة املنظفة السائلة (أو املسحوق) في حجيرة املادة املنظفة قبل بدء تشغيل غسالتك. 3 .3قم بغلق الدرج ببطء وبسالسة لتفادي أي انسكاب أو رذاذ أو توزيع سابق ألوانه من احملتويات. مالحظة من الطبيعي أن تظل كمية صغيرة من املاء في حجيرة التوزيع في نهاية الدورة. مالحظة ال تضع مادة تبيض حتتوي على الكلور في درج التوزيع. العربية 39 2015/7/27 17:04:20 WA8700J_WA22J8700GP-03520L-02_SG_AR.indd 39 الملا لسغ حتميل حجيرة املادة املنظفة السائلة (أو املسحوق) A 1 .1قم بصب املقدار املوصى به من املادة املنظفة للغسيل مباشرة في حجيرة املادة املنظفة قبل بدء تشغيل غسالتك. 2 .2إذا كنت تستخدم مادة تبييض آمنة على األلوان ،فقم بإضافتها مع املادة املنظفة في حجيرة املادة املنظفة. مالحظة عند إضافة مادة تبيض آمنة على األلوان مع املادة املنظفة ،فمن األفضل إذا كانت منتجات الغسيل من نفس التشكيلة -سائلة. مالحظة في حالة استخدام مسحوقًا منظفً ا ،أزل حجيرة املواد املنظفة السائلة ( )Aمن درج املواد املنظفة .لن تقوم الغسالة بتوزيع املادة املنظف على شكل مسحوق من حجيرة املادة املنظفة السائلة. الملا لسغ 40العربية 2015/7/27 17:04:20 WA8700J_WA22J8700GP-03520L-02_SG_AR.indd 40 حتميل حجيرة املادة املنعمة لألقمشة C 1 .1صب الكمية املوصى بها من املادة املنعمة لألقمشة السائلة في حجيرة املادة املنعمة (.)C بالنسبة للمالبس املوضوعة بالغسالة األصغر حجماً ،استخدم مقدار أقل. 2 .2قم بتخفيف املادة املنعمة لألقمشة باملاء حتى تصل إلى العالمة ( MAX FILLأقصى حد للملء) في احلجيرة. 3 .3حترر وحدة التوزيع املادة املنعمة لألقمشة السائلة أوتوماتيكيا ً في الوقت املناسب أثناء دورة الشطف. مالحظة الملا لسغ •استخدم حجيرة املادة املنعمة فقط لوضع املواد املنعمة لألقمشة السائلة فقط. •ال تستخدم مادة *Downy Ballفي حجيرة املادة املنظفة لألقشمة مع هذه الغسالة .لن يؤدي ذلك إضافة املادة املنعمة لألقمشة في الوقت املناسب. استخدم حجيرة املادة املنظفة. (* أسماء األصناف هي عالمات جتارية للجهات الصانعة ذات الصلة). •ال تستخدم املادة املنعمة لألقمشة السائلة التي تكون دبقة للغاية حيث قد ال تختلط مع املاء بشكل كافي. العربية 41 2015/7/27 17:04:20 WA8700J_WA22J8700GP-03520L-02_SG_AR.indd 41 صيانة الغسالة تنظيف األسطح اخلارجية 1 .1قم بإيقاف حنفيات املياه بعد االنتهاء من الغسيل اليومي. سيؤدي هذا إلى إيقاف إمداد املاء إلى غسالتك ومنع إمكانية التلف احملتمل الناجم عن تسرب املاء .قم بترك الغطاء مفتوحا ً مبا يتيح جتفيف اجلزء الداخلي من غسالتك. 2 .2استخدم قطعة قماش ناعمة ملسح كل املادة املنظفة ،أو مادة التبيض أو غيرها من القطرات املنسكبة عند وقوعها. 3 .3قم بالتنظيف حسبما هو موصى به: لوحة التحكم -نظف باستخدام قطعة قماش ناعمة رطبة. ال تستخدم مساحيق حاكة أو بطانات التنيظف .ال تقم برش املنظفات مباشرة على اللوحة. تنظيف اجلزء الداخلي قم بتنظيف اجلزء الداخلي من غسالتك بشكل دوري إلزالة أي أوساخ أو أتربة أو روائح كريهة أو طني ،أو عفن أو بقايا بكترية قد تظل بداخل غسالتك نتيجة لغسيل املالبس. عدم االلتزام باتباع هذه التعليمات قد يؤدي إلى حدوث حاالت غير سارة مبا في ذلك الروائح الكريهة ،و /أو البقع الدائمة في غسالتك أو مالبسك. يجوز إزالة رواسب املاء العسر إذا استدعت الضرورة القيام بذلك. استخدم املنظفات التي يوجد عليها عنوان "آمن للغساالت". تخزين الغسالة ةلاسغلا ةنايص قد تتلف الغسالة إذا لم تتم إزالة املاء من اخلراطيم واملكونات الداخلية قبل التخزين. قم بتحضير غسالتك من أجل تخزينها على النحو التالي: 1 .1حدد دورة ( Quick Washالغسيل السريع) وقم بإضافة مادة التبييض في وحدة التوزيع األوتوماتيكية .قم بتشغيل غسالتك من خالل دورة ال توجد بها حمولة مالبس. 2 .2قم بإيقاف حنفيات املياه وفصل اخلراطيم املدخلة. 3 .3قم بفصل غسالتك من مصدر التيار الكهربائي وترك غطاء غسالتك مفتوحاص مبا يتيح تدوير الهواء بداخل احللة. إذا مت تخزين غسالتك في درجة حرارة أقل من درجة حرارة التجمد ،فاترك وقت مير لتطاير أي ماء متبقي في غسالتك قبل االستخدام. 42العربية 2015/7/27 17:04:20 WA8700J_WA22J8700GP-03520L-02_SG_AR.indd 42 احلفاظ على الغطاء العلوي واإلطار األمامي ال تقم بوضع أي أشياء ثقيلة أو حادة أو صندوق املادة املنظفة على الغسالة .فقد تؤدي إلى حدوث خدوش أو تلف الغطاء العلوي من الوحدة. مالحظة ولكون الغسالة الكهربائية مزودة بطبقة طالء مصقولة بدرجة عالية ،فقد يصاب السطح بخدوش أو تلف. جتب اخلدوش أو التلف بالسطح عند استخدام الغسالة الكهربائية. تنظيف احلوض املدمج ومصفاة اخمللفات حافظ على الغسالة نظيفة حتى ال ينخفض مستوى األداء واحلفاظ على عمرها االفتراضي. مضمن حوض ّ 1 .1افتح الباب ،واستخدم قطعة قماش أو إسفنجة لتنظيف املضمن. احلوص ّ 2 .2اضغط على رشاش املاء لتزويد اللوحة باملاء .استخدم املاء في شطف اللوحة. مصفاة اخمللفات 1 .1اضغط ألسفل على املنطقة العليا بحاوية املصفاة إلزالتها. 2 .2قم بإزالة الغطاء وتنظيف املصفاة باملاء اجلاري والفرشاة. ةلاسغلا ةنايص 3 .3عند االنتهاء من التنظيف ،أغلق الغطاء وأعد إدخال حاوية املصفاة في موضعها األصلي .ستسمع صوت طقطقة عند إدخال حاوية املصفاة بشكل صحيح. العربية 43 2015/7/27 17:04:20 WA8700J_WA22J8700GP-03520L-02_SG_AR.indd 43 ةلاسغلا ةنايص تنظيف وحدات التوزيع قد حتتاج وحدة التوزيع األوتوماتيكية إلى التنظيف بشكل دوري بسبب تراكم املواد اإلضافية اخلاصة بالغسيل. 1 .1قم بسحب درج التوزيع بشكل مباشر للخلف حتى يتوقف عن احلركة. 2 .2اضغط على طرفي كل جانب للعلبة في وقت واحد. عندما تشعر بأن يتحركان ،اسحب درج املوزع للخارج. ةلاسغلا ةنايص 3 .3قم بإخراج املدرجات من احلجيرات البالغ عددها .3قم بشطف املدرجات والدرج باملاء الدافي إلزالة أي بقايا وآثار من منتجات الغسيل املتراكمة. 44العربية 2015/7/27 17:04:21 WA8700J_WA22J8700GP-03520L-02_SG_AR.indd 44 4 .4لتنظيف فتحة الدرج ،استخدم فرشاة صغيرة غير معدنية لتنظيف التجويف .قم بإزالة كل البقايا من األجزاء العلوية والسفلية من التجويف. A B 5 .5أعد األدراج إلى احلجيرات املناسبة واستبدل الدرج بوضع مجري درج التوزيع ( )Bأعلى مجرى احلجيرة (( )Aأمل درج املوزع ألسفل وأدخله). ثم أدفع الدرج للداخل بإحكام وببطء. ةلاسغلا ةنايص العربية 45 2015/7/27 17:04:21 WA8700J_WA22J8700GP-03520L-02_SG_AR.indd 45 ةلاسغلا ةنايص ( Eco Tub Cleanتنظيف احلوض) ( ECO TUB CLEANتنظيف احلوض) هي دورة تنظيف ذاتية تعمل على إزالة العفن واألتربة التي قد تتواجد بداخل الغسالة. 1 .1اضغط على ( Powerتشغيل). 2 .2حدد برنامج ( ECO TUB CLEANتنظيف احلوض). ما أن يجري اختيار ( ECO TUB CLEANتنظيف احلوض) ،فإن الوظيفة الوحيدة التي ميكن ضبطها هي ( Delay Endتأجيل التشغيل). 3 .3اضغط على ( Start/Pauseبدء /إيقاف). تبدأ عملية ( ECO TUB CLEANتنظيف احلوض). تنبيه •باستخدام خيار ( ECO TUB CLEANتنظيف احلوض) ،ميكنك القيام بتنظيف احلوض باستخدام مادة منظفة. •ال تستخدم مطلقا ً خيار ( ECO TUB CLEANتنظيف احلوض) عند وجود املالبس املراد غسلها في الغسالة .فقد يؤدي هذا إلى حدوث تلف باملالبس أو مشكلة في الغسالة. وظيفة املؤشر األوتوماتيكي خليار ( ECO TUB CLEANتنظيف احلوض) ةلاسغلا ةنايص •في حالة إضاءة مؤشر ( ECO TUB CLEAN تنظيف احلوض) بعد الغسيل ،فهذا يدل على أنه يلزم تنظيف احلوض (احللة) .في هذه احلالة ،قم بإخراج املالبس من الغسالة ،وتشغيل الطاقة، وتنظيف احلوض عن طريق تشغيل خيار تنظيف احلوض. •إذا لم تقم بتشغيل خيار ( ECO TUB CLEANتنظيف احلوض)، فسيتم إيقاف مؤشر ( ECO TUB CLEAN تنظيف احلوض). ومع ذلك ،فقد تتم إضاءة مؤشر ECO TUB CLEAN (تنظيف احلوض) مرة أخرى بعد دورتي غسيل .عدم تشغيل خيار ( ECO TUB CLEANتنظيف احلوض) في هذه املرحلة لن يؤدي إلى حدوث مشكلة في الغسالة. •على الرغم من أن مؤشر ( ECO TUB CLEAN تنظيف احلوض) يظهر مرة واحدة في الشهر أو ما شابه ذلك ،فقد يختلف عدد مرات الظهور بحسب عدد األوقات التي يتم خاللها استخدام الغسالة. 46العربية 2015/7/27 17:04:21 WA8700J_WA22J8700GP-03520L-02_SG_AR.indd 46 استكشاف األخطاء وإصالحها نقاط التحقق والفحص إذا واجهت مشكلة بالغسالة ،حتقق من اجلدول التالي وجرب ما به من اقتراحات. املشكلة عدم التشغيل. الغسالة ال تعمل. اإلجراء املتبع •تأكد من إغالق الباب بإحكام. •تأكد أن حنفيات مصدر املياه مفتوحة. •تأكد من الضغط على زر تشغيل/توقف لبدء عمل الغسالة. •تأكد من أن قفل األطفال غير نشط. •قبل بدء الغسالة في االمتالء ،قد تقوم بإجراء سلسلة من الضوضاء على شكل طقطقة للتحقق من قفل الباب وإجراء دورة تصريف سريعة. •هل باب الغسالة كان مفتوح في أثناء دورة العصر؟ أغلق الباب واضغط أو انقر على زر Start/ ( Pauseبدء /إيقاف) لالستكمال. •هنا تنتقل الغسالة إلى وضع االستعداد أو تكون في دورة نقع .يُرجى االنتظار. •افحص املصهر أو إعادة ضبط قاطع الدائرة •تأكد من الضغط أو النقر على زر ( Start/Pauseبدء /إيقاف) بعد اختيار التغذية باملاء. •تأكد أن حنفيات مصدر املياه مفتوحة. مستخدما الشوائب فلتر نظف ا؟ د مسدو باملاء التغذية خرطوم •هل مصفاة الشوائب في موصل ً ً فرشاة أسنان. •هل توقف اإلمداد باملاء؟ إذا توقف اإلمداد باملاء ،أغلق الصنبور وأوقف التشغيل. •فك ثنيات خراطيم توريد املاء. •أفتح الباب ثم أغلق الباب واضغط على الزر ( Start/Pauseبدء /إيقاف). منخفضا. •يستغرق بدء التشغيل وق ًتا أطول إذا كان ضغط املاء ً مرتفعا بالقدر الضروري أو دون املستوى املوقع ،استخدم ُمحدد املستوى •إذا كان مستوى املاء ليس ً لتعديل مستوى املاء. ال يجري تغذية الغسالة باملاء. يتبقى قدر ُ من املنظف في موزع املنظفات األوتوماتيكي بعد اكتمال دورة الغسيل. •تأكد من تشغيل الغسالة بضغط ماء كاف. سليما. وضعا •تأكد من وضع درج املنظف ً ً •أخرج درج املنظفات ونظفه ثم حاول مرة ثانية. حالصإو ءاطخألا فاشكتسا •تأكد وحتقق من توصيل القدرة الكهربية املناسبة. •تأكد من توصيل قابس الغسالة مبصدر التيار الكهربائي. •افحص املصهر أو إعادة ضبط قاطع الدائرة. العربية 47 2015/7/27 17:04:21 WA8700J_WA22J8700GP-03520L-02_SG_AR.indd 47 حالصإو ءاطخألا فاشكتسا اإلجراء املتبع املشكلة اهتزازات عنيفة في الغسالة أو ضوضاء عالية. يتوقف. •تأكد من تركيب الغسالة على سطح مستو .إذا لم تكن األرضية مستوية ،استعن بأرجل االستواء لضبط مستوى الغسالة. •تأكد من عدم مالمسة الغسالة ألي شيء آخر. •تأكد من توزيع وزن املالبس املوجودة في الغسالة. منتظما منتظما في الغسالة .انشر الغسيل داخل الغسالة نشرًا •تأكد من نشر الغسيل نشرًا ً ً ثم حاول مرة أخرى. •تأكد أن محيط الغسالة يخلو من األغراض. •وعادة ما يصاحب التشغيل العادي طنني. •كذلك تُسبب األغراض مثل العمالت املعدنية أصواتًا .أزل هذه األغراض من الغسالة بعد إمتام الغسيل. •ضع كابل الكهرباء في منفذ كهربي عامل. •افحص املصهر أو إعادة ضبط قاطع الدائرة. •أغلق الباب واضغط على زر ( Start/Pauseبدء /إيقاف) لبدء عمل الغسالة .لدواعي تتعلق بالسالمة ،ال تقوم غسالتك بالدوران ما لم يجري غلق الغطاء. •قبل بدء الغسالة في االمتالء ،قد تقوم بإجراء سلسلة من الضوضاء على شكل طقطقة للتحقق من قفل الباب وإجراء دورة تصريف سريعة. •قد يوجد إيقاف مؤقت أو فترة نقع في الدورة .انتظر فترةبسيطة ورمبا تواصل الغسالة العمل بعد قليل. •تأكد أن مصافى مدخل اخلرطوم عند احلنفيات غير مسدودة .نظف املصافي تنظيفً ا دوريًا. •حتدث هذه املشكلة مؤق ًتا بسبب انخفاض الفولطية وتحُ ل املشكلة من تلقاء نفسها عند بلوغ مستويات الكهرباء املناسبة. حالصإو ءاطخألا فاشكتسا امللء مباء ذو درجة حرارة خاطئة. فتحا كامالً. •افتح صنبوري املاء ً •تأكد من أن حتديد درجة احلرارة صحيح. •تأكد من أن اخلراطيم متصلة باحلنفيات املالئمة .قم بوضع خطوط املاء. •قم بفصل اخلراطيم وتنظيف احلواجز .قد تكون حواجز فلتر اخلرطوم بها انسداد. •عندما يتم ملء غسالتك باملاء ،فقد يحدث تغيير لدرجة حرارة املاء أثناء قيام ميزة التحكم بدرجة احلرارة أوتوماتيكيا ً بالتحقق من درجة حرارة املاء القادم .وهذا أمر طبيعي. •قد تالحظ في أثناء ملء غسالتك باملاء أن املاء الساخن فقط و /أو املاء البارد فقط ينطلق عبر وحدة التوزيع عند اختيار درجات حرارة الغسيل على املاء الساخن أو البارد. هذه هي الوظيفة الطبيعية خلاصية التحكم األوتوماتيكي بدرجة احلرارة بينما حتدد غسالتك درجة حرارة املاء. غطاء (الباب) مقفل أو لن يتم فتحه. •بينما الغسالة تعمل ،اضغط أو انقر على زر ( Start/Pauseبدء /إيقاف) إليقاف عمل الغسالة. •قد يستغرق األمر ثوان قليلة حتي يتحرر قفل الباب. 48العربية 2015/7/27 17:04:21 WA8700J_WA22J8700GP-03520L-02_SG_AR.indd 48 املشكلة عدم التصريف ،و /أو الدوران. الغسيل يظل رط ًبا مبلال ً في نهاية دورة الغسيل. تسرب املاء. •افحص املصهر أو إعادة ضبط قاطع الدائرة. •تأكد أن الفولطية الكهربية طبيعية وسليمة. •تأكد من توصيل قابس الغسالة مبصدر التيار الكهربائي. موجها ألسفل( .يسري ذلك في موديالت التصريف العادي فقط) •تأكد أن خرطوم التصريف ً •تأكد أن خرطوم التصريف ليس مجم ًدا أو مسدودًا. مثنيا أو ملتفًا. •تأكد أن خرطوم التصريف ليس ً •فك الثنيات املوجودة في خرطوم التصريف .إذا لم توجد أي إعاقة للتصريف ،فاتصل باخلدمة. •أغلق الباب واضغط على الزر ( Start/Pauseبدء /إيقاف) .لدواعي تتعلق بالسالمة ،ال تقوم غسالتك بالدوران ما لم يجري غلق الغطاء. •استخدم سرعة التجفيف العالية أو اإلضافية( .باملوديالت املزود بها فقط) •استخدم مادة منظفة عالية الفعالية ملنع زيادة تكون غُسالَة الصابون أو رَغْوته. •كمية الغسيل (كمية املالبس) صغيرة جداً .قد كمية الغسيل الصغيرة(غرض واحد أو غرضني) تؤدي إلى عدم التوازن وعدم التجفيف جتفيفًا كامالً. •تأكد من أن كل وصالت اخلرطوم محكمة الربط. •تأكد أن احللقة املطاطية خلرطوم اإلمداد في موضعها السليم .أحكم ربطها مرة ثانية إذا اقتضت احلاجة. •تأكد من إدخال طرف خرطوم التصريف بطريقة صحيحة وتثبيته في نظام التصريف. •جتنب التحميل الزائد. •استخدم مادة منظفة عالية الفعالية ملنع زيادة تكون غُسالَة الصابون أو رَغْوته. •تأكد أن خرطوم اإلمداد باملاء ليس متشابكًا. •إذا كان ضغط اإلمداد باملاء قويًا ،قد يُحدث تسربًا .أغلق صنبور املياه للحد من قوة املياه. •تأكد أن املاء ال يتسرب من صنبور املياه .وفي حالة وجدت تسرب ماء ،أصلح الصنبور. •استخدم مادة منظفة عالية الفعالية ملنع زيادة تكون غُسالَة الصابون أو رَغْوته. •خفض كمية املادة املنظفة للماء اليسر أو كميات الغسيل الصغيرة أو الغسيل خفيف االتساخ بأوساخ صغيرة أو بسيطة. •ال يوصى باستخدام مادة منظفة غير .HE •يجري استخدام املاء الدافىء لفصل خرطوم إمداد املاء وخرطوم التصريف .تنقع في ماء دافئ. •امأل سلة التجفيف باملاء الدافىء ثم انتظر نحو 10دقائق. •ضع منشفة ساخنة على موصل خرطوم التصريف. •أعد توصيل خرطوم اإلمداد باملاء وخرطوم التصريف وحتقق من سالمة توصيل املاء. قد تكون سلة التجفيف أو خرطوم اإلمداد /التصريف مجم ًدا. حالصإو ءاطخألا فاشكتسا زيادة الُغسالة وباقي املنظفات. اإلجراء املتبع العربية 49 2015/7/27 17:04:21 WA8700J_WA22J8700GP-03520L-02_SG_AR.indd 49 حالصإو ءاطخألا فاشكتسا اإلجراء املتبع املشكلة •تأكد أن خرطوم التصريف ليس مسدودًا ومعلق على حامل خرطوم التصريف .امأل سلة التجفيف حتى نصفها باملاء وحاول التدوير ثانية. •ارفع حافة خرطوم التصريف ملنع تصريف املاء .امأل سلة التجفيف حتى نصفها باملاء ،ثم شغل التجفيف بعد حترير خرطوم التصريف. •تأكد من تركيب خرطوم تصريف املاء بطريقة صحيحة .راجع قسم التركيب في دليل املستخدم وعدل وضع خرطوم التصريف وفق التعليمات املذكورة. بقع على األقمشة. • نظف مصفاة السحرية. ثمة روائح تصدر عن الغسالة. •جتمع غُسا َل ُة الصابون الزائدة في التجويفات وهو ما يُسبب روائح كريهة. •التشغيل الدوري الغسالة على دورات الغسيل املنظفة لتعقيمها. •نظف األجزاء الداخلية للغسالة بعد إمتام دورة الغسيل. ينصرف املاء فورًا. في حالة استمرار املشكلة ،اتصل مبركز خدمة عمالء Samsungاحمللي. حالصإو ءاطخألا فاشكتسا 50العربية 2015/7/27 17:04:21 WA8700J_WA22J8700GP-03520L-02_SG_AR.indd 50 أكواد املعلومات قد تعرض الغسالة أكواد املعلومات مبا يساعدك على فهم ما يحدث لغسالتك بشكل أفضل. رقم الكود 1 1C 2 3C 3 4C 4 4C2 5 5C اإلجراء املتبع مستشعر مستوى املاء ال يعمل بطريقة صحيحة. •حتقق من ضفيرة أسالك مستشعر مستوى املاء. •إذا ظل كود املعلومات ظاهرًا على اللوحة ،اتصل مبركز خدمة العمالء. مالحظة عندما تعرض الغسالة الكود " ،"1Cفإن الغسالة تصرف املاء ملدة 3دقائق .ويكون زر Power (تشغيل) غير مفعل طوال هذه املدة. حتقق من سالمة عمل املوتور. •حاول إعادة بدء دورة الغسيل. •إذا كانت املشكلة باقية دون حل ،فاتصل مبركز اخلدمة. ال يجري تغذية الغسالة باملاء. •تأكد أن حنفيات مصدر املياه مفتوحة. •تأكد أن خراطيم املاء غير مسدودة. •تأكد أن صنابير املياه غير مجمدة. •تأكد من تشغيل الغسالة بضغط ماء كاف. •تأكد من سالمة توصيل صنبور املياه الباردة واملياه الساخنة. •نظف املصفاة الشبكية فرمبا تعرضت لالنسداد. مالحظة •تأكد من سالمة توصيل خرطوم التغذية باملاء البارد بصنبور املاء البارد. إذا جرى توصيل خرطوم التغذية باملاء البارد بصنبور املاء الساخن فإن الغسيل قد يتعرض للتفسخ في بعض الدورات. ال يجري تصريف املاء. •تأكد أن خرطوم التغذية باملاء ليس مجم ًدا أو مسدودًا. •تأكد من سالمة موضع خرطوم التصريف بناء على نوع التوصيل. •نظف مصفاة اخمللفات فرمبا تعرضت لالنسداد. •تأكد من استقامة خرطوم الصرف على امتداد نظام الصرف. •إذا ظل كود املعلومات ظاهرًا على اللوحة ،اتصل مبركز خدمة العمالء. حالصإو ءاطخألا فاشكتسا عندما تعرض الغسالة الكود " ،"4Cفإن الغسالة تصرف املاء ملدة 3دقائق .ويكون زر Power (تشغيل) غير مفعل طوال هذه املدة. العربية 51 2015/7/27 17:04:22 WA8700J_WA22J8700GP-03520L-02_SG_AR.indd 51 حالصإو ءاطخألا فاشكتسا اإلجراء املتبع رقم الكود 6 9C1 ثمة حاجة لفحص التحكم االلكتروني (خطأ زيادة الفولطية). •حتقق من PCBوضفيرة األسالك. •حتقق من سالمة التوصيل مبصدر الطاقة الكهربية. •إذا ظل كود املعلومات ظاهرًا على اللوحة ،اتصل مبركز خدمة العمالء. 7 9C2 اكتشاف انخفاض في الفولطية •حتقق من تركيب كابل الطاقة. •إذا ظل كود املعلومات ظاهرًا على اللوحة ،اتصل مبركز خدمة العمالء. 8 AC6 خطأ في اتصاالت العاكس •حتقق من عاكس PCBوضفيرة األسالك. •إذا ظل كود املعلومات ظاهرًا على اللوحة ،اتصل مبركز خدمة العمالء. 9 dC تشغيل اجملفف بينما الباب مفتوح. •تأكد من إغالق الباب بإحكام. •تأكد أن املالبس غير عالقة بالباب. 10 HC التحقق من ارتفاع درجة احلرارة •إذا ظل كود املعلومات ظاهرًا على اللوحة ،اتصل مبركز خدمة العمالء. 11 LC 12 OC زيادة كمية املاء. •أعد التشغيل بعد التجفيف. •إذا ظل أحد األكواد ظاهرًا على الشاشة ،اتصل مبركز خدمة Samsungاحمللي. 13 PC عندما ال يسعك حتديد موضع القابض. •إذا ظل كود املعلومات ظاهرًا على اللوحة ،اتصل مبركز خدمة العمالء. 14 PC1 إذا ظلت اإلشارة موضع القابض تشير إلي وقوع خطأ رغم التعرف على موضع القابض. •إذا ظل كود املعلومات ظاهرًا على اللوحة ،اتصل مبركز خدمة العمالء. حتقق من خرطوم التصريف. •تأكد أن طرف خرطوم التصريف موضوع على األرضية. •تأكد أن خرطوم التصريف ليس مجم ًدا أو مسدودًا. •إذا ظل كود املعلومات ظاهرًا على اللوحة ،اتصل مبركز خدمة العمالء. مالحظة حالصإو ءاطخألا فاشكتسا عندما تعرض الغسالة الكود " ،"LCفإن الغسالة تصرف املاء ملدة 3دقائق .ويكون زر Power (تشغيل) غير مفعل طوال هذه املدة. 52العربية 2015/7/27 17:04:22 WA8700J_WA22J8700GP-03520L-02_SG_AR.indd 52 رقم الكود اإلجراء املتبع 15 Ub التجفيف ال يعمل. بسطا مستويًا. •تأكد من بسط الغسيل ً •تأكد من تركيب الغسالة على سطح مستو ثابت ومستقر. •قم بإعادة توزيع املالبس .وفي حالة غسيل قطعة واحدة من املالبس ،مثل بُرنس حمام أو جينز، قد ال تكون نتيجة التنشيف النهائي مرضية ،وتظهر رسالة التنبيه “ ”Ubفي على الشاشة. في حالة ظهور أكواد غير مذكورة أعاله ،اتصل على )( 800-SAMSUNG (800-7267864اإلمارات العربية املتحدة)( 183-CALL (183-2255) ،الكويت). حالصإو ءاطخألا فاشكتسا العربية 53 2015/7/27 17:04:22 WA8700J_WA22J8700GP-03520L-02_SG_AR.indd 53 املواصفات جدول العناية باألقمشة توضح الرموز التالية تعليمات العناية باملالبس .تتضمن ملصقات الرعاية باملالبس رموزا ً خاصة يجب مراعاتها عند الغسيل ،التبييض، التجفيف ،الكي أو التعرض للتجفيف حسب الضرورة .يضمن استخدام هذه الرموز التناسق بني الشركات املصنعة للمالبس احمللية واملستوردة .اتبع تعليمات بطاقة العناية لزيادة عمر املالبس وتقليل مشاكل الغسيل. دورة الغسيل عادي املالبس املقاومة للتجاعيد /منع الكرمشة / التحكم في الكرمشة غسالة املالبس ال ميكنها ضمان احلصول على درجات احلرارة هذه لكون درجة احلرارة الفعلية للماء الداخل إلى غسالتك يعتمد على إعدادات سخان املاء ودرجات حرارة إمداد املاء املوضعية .فعلى سبيل املثال ،املاء البارد الداخل للمنزل في الواليات الشمالية أثناء الشتاء قد تكون 40درجة فهرنهايتية 4 /درجة مئوية وهو ماء بارد للغاية لكي حتصل على تنظيف فعال .في هذه احلالة ،سوف حتتاج إلى ضبط درجة حرارة املاء عن طريق حتديد إعداد ساخن ،وإضافة بعض املاء الساخن إلى خط ( MAX FILLاحلد األقصى للملء) ،أو استخدام خيار التسخني بغسالتك ،إذا كان متوافراً. مادة تبييض أي مادة تبييض (عند احلاجة) املالبس الناعمة/الرقيقة خالي من الكلور فقط (لون آمن) مادة تبييض (عند احلاجة) غسل يدوي جتفيف بالتدوير درجة حرارة املياه ( Hotساخن) عادي املالبس املقاومة للتجاعيد /منع الكرمشة / التحكم في الكرمشة ( Warmدافئ) ( Coldبارد) املالبس الناعمة/الرقيقة مالحظة افصاوملا متثل درجات حرارة ماء الغسيل املالئمة بالنسبة لألشياء املتعددة. يتراوح نطاق درجة احلرارة اخلاص بإعداد ( Hotساخن) بني ٥٢ - ٤١درجة مئوية وبالنسبة إلعداد ( Warmدافئ) ٤١ - ٢٩درجة مئوية وبالنسبة ل ( Coldبارد) ٢٩ - ١٦درجة مئوية( .يتعني أن يكون احلد األدنى لدرجة حرارة مياه الغسيل ١٦درجة مئوية لتنشيط املسحوق والتنظيف الفعال). إرشادات خاصة جتفيف على احلبل /تعليق للتجفيف التجفيف بالتعليق جتفف وهي مفرودة 54العربية 2015/7/27 17:04:23 WA8700J_WA22J8700GP-03520L-02_SG_AR.indd 54 تنظيف جاف إعدادات التسخني ( Highعالي) تنظيف جاف ( Mediumوسط) يحظر استخدام التنظيف اجلاف ( Lowمنخفض) جتفيف على احلبل /تعليق للتجفيف أي درجة من السخونة التجفيف بالتعليق بدون تسخني/هواء جتفف وهي مفرودة التجفيف بالكي أو درجات حرارة البخار ( Highعالي) ( Mediumوسط) ( Lowمنخفض) رموز حتذيرية في عملية الغسيل ال تغسل ال تضغط يحظر استخدام مادة تبييض يحظر جتفيفها بالتدوير ال يوجد بخار (يُضاف للكي) يحظر الكي افصاوملا العربية 55 2015/7/27 17:04:25 WA8700J_WA22J8700GP-03520L-02_SG_AR.indd 55 افصاوملا حماية البيئة •هذا اجلهاز مصنوع من مواد قابلة إلعادة التدوير .إذا قررت التخلص من هذا اجلهاز ،يرجى مراعاة القوانني احمللية اخلاصة بالتخلص من النفايات .اقطع سلك التيار بحيث ال ميكن توصيل اجلهاز مبصدر طاقة .قم بإزالة الغطاء حتى ال تنحشر احليوانات واألطفال الصغار بداخل اجلهاز. •ال تضع مسحوق غسيل أكثر من الكمية املبينة في إرشادات الشركة املصنعة ملسحوق الغسيل. •استخدم مواد إزالة البقع ومواد التبييض قبل دورة الغسيل عند احلاجة فقط. •وفر املاء والكهرباء من خالل إجراء الغسيل بأوزان كاملة (تختلف الكمية وفقا ً للبرنامج املستخدم). افصاوملا 56العربية 2015/7/27 17:04:25 WA8700J_WA22J8700GP-03520L-02_SG_AR.indd 56 قائمة املواصفات الفنية C A D B غسالة علوية التحميل النوع اسم املوديل األبعاد (بوصة (سم)) *WA18J8700G *WA22J8700G .Aارتفاع )116.8( 46.0 .Bعرض )68.6( 27.0 .Cاالرتفاع عندما يكون الغطاء مفتوحا ً )152.0( 59.8 .Dعمق )74.4( 29.3 السعة (كجم) 18.0 22.0 ضغط املاء (كيلو باسكال) 800 - 137 الوزن الصافي (كجم) 68 استهالك الطاقة دورات التنشيف 220فولت 1400واط 240فولت 1650واط 800دورة في الدقيقة إن التصميم واملواصفات عرضة للتغيير دون إشعار وذلك بهدف حتقيق جودة أفضل. جرى حتديد املواصفات الواردة على ملصق الطاقة باستخدام البرنامج التالي وفق (. UAE.S 5010 2:2013يسري ذلك على موديالت اإلمارات العربية املتحدة فقط) •البرنامج هو "توفير املاء +مستوى املاء ."9 افصاوملا مالحظة العربية 57 2015/7/27 17:04:25 WA8700J_WA22J8700GP-03520L-02_SG_AR.indd 57 افصاوملا جدول الدورات .استخدم هذا اجلدول لضبط أفضل اخليارات والدورة األفضل بالنسبة ملالبسك املراد غسلها مالحظة ) (درجة احلرارةTemp. ) (غسيل قويPower Wash ) (مستوى املاءWater Level اإلعداد ) (ساخنH: Hot ) (عاليH: High 6 1 إعداد املصنع: ) (دافئW: Warm ) (وسطM: Medium 7 2 يمُ كن اختياره: ) (باردC : Cold ) (منخفضL: Low 8 3 9 4 5 (غسيلPower Wash )قوي ) (مستوى املاءWater Level دورات C W H L M H 9 8 7 6 5 4 3 2 1 ) (دورة عاديةNORMAL ) (صامتSILENT ) (أداء ثقيلHEAVY DUTY (تنظيف40°C MAGIC CLEAN )40°C سحري (تنظيف60°C MAGIC CLEAN )60°C سحري ) (املناشفTOWELS ) (مالبس رياضيةACTIVE WEAR ) (تنظيف احلوضECO TUB CLEAN ) (توفير املاءWATER SAVING ) (مالبس الطفلBABY CARE ) (الغسيل السريعQUICK WASH ) (مالبس رقيقةDELICATES ) (شراشفBEDDING افصاوملا ) (درجة احلرارةTemp. ) (دورانSPIN ) شطف+ ( دورانRINSE+SPIN العربية58 WA8700J_WA22J8700GP-03520L-02_SG_AR.indd 58 2015/7/27 17:04:25 خيارات Activ Dual Wash Drain AquaJet™ Plus (الغسيل (إضافة رذاذ املزدوج )املياه )التصريف ) (دورانSpin Rinse )(شطف Wash )(غسيل Delay End (تأجيل )التشغيل Pre Soak )(قبل النقع Last Setting (األعداد )األخير ) (دورة عاديةNORMAL ) (صامتSILENT ) (أداء ثقيلHEAVY DUTY (تنظيف40°C MAGIC CLEAN )40°C سحري (تنظيف60°C MAGIC CLEAN )60°C سحري ) (املناشفTOWELS ) (مالبس رياضيةACTIVE WEAR ) (توفير املاءWATER SAVING ) (مالبس الطفلBABY CARE ) (الغسيل السريعQUICK WASH ) (مالبس رقيقةDELICATES ) (شراشفBEDDING ) (دورانSPIN ) شطف+ ( دورانRINSE+SPIN افصاوملا ) (تنظيف احلوضECO TUB CLEAN دورات 59 العربية WA8700J_WA22J8700GP-03520L-02_SG_AR.indd 59 2015/7/27 17:04:25 هل لديك أسئلة أو تعليقات؟ أو قم بزيارة موقعنا على اإلنترنت على اتصل بـ البلد www.samsung.com/ae/support (English) www.samsung.com/ae_ar/support (Arabic) 183-CALL (183-2255) KUWAIT 800-SAMSUNG (800-7267864) U.A.E WA8700J_WA22J8700GP-03520L-02_SG_AR.indd 60 2015/7/27 17:04:25