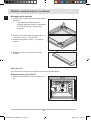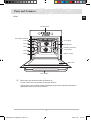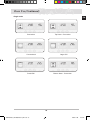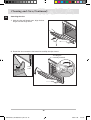
1
Istruzioni per l’installazione e l’uso
Forno a incasso
BT62CDBST
BT62CDBFST
Manuale dell’utente
BT62CDBST_XET-00047U-01_IT.indd 1
2009-11-04
9:46:06
BT62CDBST_XET-00047U-01_IT.indd 2
2009-11-04
9:46:06
Sommario
Uso del manuale . . . . . . . . . . . . . . . . . . . . . . . . . . . . . . . . . . . . . . . . 2
Istruzioni di sicurezza . . . . . . . . . . . . . . . . . . . . . . . . . . . . . . . . . . . . . 2
Sicurezza elettrica . . . . . . . . . . . . . . . . . . . . . . . . . . . . . . . . . . . . . . 2
Sicurezza durante il funzionamento . . . . . . . . . . . . . . . . . . . . . . . . . . . . . 3
Istruzioni per lo smaltimento . . . . . . . . . . . . . . . . . . . . . . . . . . . . . . . . . 3
Installazione del forno . . . . . . . . . . . . . . . . . . . . . . . . . . . . . . . . . . . . .
Istruzioni di sicurezza per l’installatore . . . . . . . . . . . . . . . . . . . . . . . . . . .
Installazione in un telaio basso . . . . . . . . . . . . . . . . . . . . . . . . . . . . . . .
Collegamento alla rete elettrica . . . . . . . . . . . . . . . . . . . . . . . . . . . . . . .
Installazione in un telaio alto . . . . . . . . . . . . . . . . . . . . . . . . . . . . . . . .
4
4
4
5
6
Parti e funzioni . . . . . . . . . . . . . . . . . . . . . . . . . . . . . . . . . . . . . . . . . 7
Forno . . . . . . . . . . . . . . . . . . . . . . . . . . . . . . . . . . . . . . . . . . . . 7
Comandi del forno . . . . . . . . . . . . . . . . . . . . . . . . . . . . . . . . . . . . . . 8
Funzioni speciali . . . . . . . . . . . . . . . . . . . . . . . . . . . . . . . . . . . . . . . 8
Accessori . . . . . . . . . . . . . . . . . . . . . . . . . . . . . . . . . . . . . . . . . . 9
Uso degli accessori . . . . . . . . . . . . . . . . . . . . . . . . . . . . . . . . . . . . 11
Arresto di sicurezza . . . . . . . . . . . . . . . . . . . . . . . . . . . . . . . . . . . . 11
Ventola di raffreddamento . . . . . . . . . . . . . . . . . . . . . . . . . . . . . . . . . 11
Prima dell’uso . . . . . . . . . . . . . . . . . . . . . . . . . . . . . . . . . . . . . . . .
Regolazione dell’orologio . . . . . . . . . . . . . . . . . . . . . . . . . . . . . . . . .
Pulizia iniziale . . . . . . . . . . . . . . . . . . . . . . . . . . . . . . . . . . . . . . .
Funzioni del forno . . . . . . . . . . . . . . . . . . . . . . . . . . . . . . . . . . . . .
Piatti di prova . . . . . . . . . . . . . . . . . . . . . . . . . . . . . . . . . . . . . . .
12
12
13
14
21
Uso del forno . . . . . . . . . . . . . . . . . . . . . . . . . . . . . . . . . . . . . . . . .
Impostazione della modalità divisore . . . . . . . . . . . . . . . . . . . . . . . . . . .
Impostazione della temperatura del forno . . . . . . . . . . . . . . . . . . . . . . . . .
Spegnimento del forno . . . . . . . . . . . . . . . . . . . . . . . . . . . . . . . . . .
Ora finale . . . . . . . . . . . . . . . . . . . . . . . . . . . . . . . . . . . . . . . . .
Tempo di cottura . . . . . . . . . . . . . . . . . . . . . . . . . . . . . . . . . . . . . .
Avvio ritardato . . . . . . . . . . . . . . . . . . . . . . . . . . . . . . . . . . . . . . .
Timer . . . . . . . . . . . . . . . . . . . . . . . . . . . . . . . . . . . . . . . . . . .
Accensione / spegnimento della lampadina del forno . . . . . . . . . . . . . . . . . . .
Funzione di sicurezza dei bambini . . . . . . . . . . . . . . . . . . . . . . . . . . . .
Disattivazione dei segnali acustici . . . . . . . . . . . . . . . . . . . . . . . . . . . . .
22
22
26
27
27
29
31
33
33
34
34
Pulizia e manutenzione . . . . . . . . . . . . . . . . . . . . . . . . . . . . . . . . . . .
Pulizia a vapore . . . . . . . . . . . . . . . . . . . . . . . . . . . . . . . . . . . . . .
Superficie con smalto catalitico . . . . . . . . . . . . . . . . . . . . . . . . . . . . . .
Pulizia dello sportello del forno . . . . . . . . . . . . . . . . . . . . . . . . . . . . . .
Guide laterali . . . . . . . . . . . . . . . . . . . . . . . . . . . . . . . . . . . . . . .
Sostituzione della lampadina . . . . . . . . . . . . . . . . . . . . . . . . . . . . . . .
35
35
38
39
42
45
Garanzia e assistenza . . . . . . . . . . . . . . . . . . . . . . . . . . . . . . . . . . . . 46
Domande frequenti e risoluzione dei problemi . . . . . . . . . . . . . . . . . . . . . . 46
Dati tecnici . . . . . . . . . . . . . . . . . . . . . . . . . . . . . . . . . . . . . . . . . . 48
1
BT62CDBST_XET-00047U-01_IT.indd 1
2009-11-04
9:46:06
Uso del manuale
IT
Grazie per aver scelto un forno SAMSUNG a incasso.
Il Manuale dell’utente contiene informazioni importanti sulla sicurezza e istruzioni utili per l’uso
e la manutenzione dell’apparecchio.
Leggere attentamente il Manuale dell’utente prima di utilizzare il forno e conservarlo come
riferimento futuro.
Nel testo vengono utilizzati i seguenti simboli.
*
)
Importante
Nota
Istruzioni di sicurezza
L’installazione del forno deve essere effettuata esclusivamente da un elettricista qualificato.
L’installatore è responsabile del collegamento dell’apparecchio alla rete elettrica in base alle
normative relative alla sicurezza.
Sicurezza elettrica
Se il forno ha subito danni durante il trasporto, non collegarlo.
● L’apparecchio deve essere collegato alla rete elettrica esclusivamente da un elettricista
qualificato.
● In caso di guasto o danno all’apparecchio, non tentare di metterlo in funzione.
● Le riparazioni devono essere effettuate esclusivamente da un tecnico qualificato. Una
riparazione errata può causare notevoli danni all’utente e ad altre persone. Se il forno
necessita di riparazione, contattare un centro assistenza SAMSUNG o il rivenditore.
● Se il cavo di alimentazione è difettoso, deve essere sostituito con un cavo o un gruppo
speciali disponibili presso il costruttore o un rivenditore autorizzato.
● I cavi elettrici non devono entrare in contatto con il forno.
● Il forno deve essere collegato alla rete elettrica mediante un fusibile o un interruttore di
sicurezza approvato. Non utilizzare mai prese multiple o prolunghe.
● La piastra riportante la tensione dell’apparecchio si trova a destra dello sportello.
● Prima di effettuare operazioni di riparazione o pulizia, scollegare l’alimentazione
dell’apparecchio.
● Fare attenzione quando si collegano apparecchiature elettriche alle prese vicino al forno.
ATTENZIONE
Prima di sostituire la lampadina del forno, disattivare l’alimentazione dell’apparecchio per
evitare il rischio di scosse elettriche. Durante il funzionamento del forno, le superfici interne
diventano roventi.
2
BT62CDBST_XET-00047U-01_IT.indd 2
2009-11-04
9:46:07
Istruzioni di sicurezza (continua)
Sicurezza durante il funzionamento
● Il forno è stato progettato esclusivamente per uso domestico.
● Durante l’uso, le superfici interne del forno diventano sufficientemente calde da provocare
ustioni. Non toccare gli elementi riscaldati o le superfici interne del forno finché non si sono
raffreddati.
● Non riporre materiali infiammabili nel forno.
● Se l’apparecchio viene fatto funzionare a una temperatura elevata per un lungo periodo di
tempo, le superfici del forno diventano calde.
● Fare attenzione quando si apre lo sportello del forno durante la cottura, poiché possono
fuoriuscire rapidamente aria calda e vapore.
● Se si cuociono piatti contenenti alcool, a causa delle alte temperature l’alcool può
trasformarsi in vapore e incendiarsi se viene a contatto con una parte rovente del forno.
● Per la sicurezza dell’utente si consiglia di non utilizzare per la pulizia del forno apparecchi
ad acqua ad alta pressione o a getto di vapore.
● Durante l’uso del forno, tenere i bambini a distanza di sicurezza.
● I cibi surgelati, per esempio le pizze, devono essere cucinati sulla griglia. Se si usa il
vassoio di cottura, potrebbe deformarsi a causa della grande variazione di temperatura.
● Non versare acqua sul fondo del forno quando è caldo. Si potrebbe danneggiare la
superficie smaltata.
● Durante la cottura lo sportello del forno deve rimanere chiuso.
● Fare attenzione se si apre lo sportello prima della fine della pulizia a vapore; l’acqua sul
fondo è bollente.
● Non coprire il fondo del forno con un foglio di alluminio e non appoggiarvi vassoi di cottura
o recipienti. Il foglio di alluminio blocca il calore, e ciò potrebbe danneggiare la superficie
smaltata del forno e causare una cottura non ottimale dei cibi.
● Sulla superficie smaltata del forno, i succhi di frutta lasciano macchie che potrebbero
risultare indelebili. Per cuocere torte molto umide, utilizzare la teglia profonda.
● Non appoggiare recipienti sullo sportello aperto del forno.
● L’apparecchio non deve essere utilizzato da bambini o disabili senza un’adeguata
supervisione da parte di un adulto responsabile, che garantisca l’uso dell’apparecchio in
sicurezza.
● Controllare che i bambini non giochino con questo apparecchio.
IT
Istruzioni per lo smaltimento
Smaltimento del materiale di imballaggio
● Il materiale usato per imballare l’apparecchio e riciclabile.
● Smaltire i materiali di imballaggio nei contenitori appropriati presso il locale impianto di
smaltimento rifiuti.
Smaltimento dei vecchi apparecchi
ATTENZIONE
Prima di smaltire i vecchi apparecchi, renderli inutilizzabili in modo che non possano diventare
fonte di pericolo.
Per farlo, scollegare l’apparecchio dall’alimentazione principale e rimuovere la spina.
Per la salvaguardia dell’ambiente, è importante che lo smaltimento dei vecchi apparecchi
avvenga in modo corretto.
● L’apparecchio non deve essere smaltito assieme ai rifiuti domestici.
● Presso il locale centro di raccolta rifiuti sono disponibili informazioni sulle date di ritiro e
sulle piattaforme aperte al pubblico per lo smaltimento dei rifiuti.
3
BT62CDBST_XET-00047U-01_IT.indd 3
2009-11-04
9:46:07
Installazione del forno
*
IT
L’installazione elettrica dell’apparecchio deve essere effettuata esclusivamente da
un elettricista qualificato.
Il forno deve essere installato in base alle istruzioni fornite.
Rimuovere dallo sportello la pellicola protettiva in vinile solo al termine
dell’installazione.
Rimuovere il nastro protettivo dalle superfici interne del forno solo al termine
dell’installazione.
Istruzioni di sicurezza per l’installatore
● L’installazione deve garantire la protezione contro l’esposizione a parti sotto tensione.
● La cucina in cui viene montato l’apparecchio deve soddisfare i requisiti di stabilità DIN
68930.
Installazione in un telaio basso
● Osservare i requisiti minimi di tolleranza.
● Fissare il forno in posizione mediante le viti su entrambi i lati.
1
2
560
595
595
572
545
21
3
4
min. 550
min. 50
min. 20
50
460
min. 560
min. 600
4
BT62CDBST_XET-00047U-01_IT.indd 4
2009-11-04
9:46:08
Installazione del forno (continua)
IT
5
Collegamento del forno all’alimentazione
elettrica (H05VV-F, H05RR-F, min. 1,5 m,
1,5~2,5 mm²)
Fase
Massa
Neutro
Collegamento alla rete elettrica
I collegamenti elettrici devono essere eseguiti da un elettricista in base alle indicazioni
riportate sulla piastra fissata sul retro dell’apparecchio; l’elettricista deve inoltre garantire che
l’apparecchio è stato collegato in base alle istruzioni di montaggio e alle normative locali.
Se l’apparecchio non è collegato alla rete elettrica mediante una spina, per soddisfare i
requisiti di sicurezza è necessario installare un interruttore onnipolare (con apertura tra i
contatti di almeno 3 mm) sul lato rete.
)
Quando si collega l’alimentazione, le parti elettroniche del forno vengono
inizializzate; questa procedura provoca l’interruzione dell’illuminazione per alcuni
secondi. Il cavo elettrico (H05 RR-F o H05 VV-F, min. 1,5 m, 1,5~2,5 mm²) deve
essere abbastanza lungo da poter essere collegato al forno incassato appoggiato
sul pavimento davanti al telaio.
Aprire il coperchio posteriore del forno sul fondo (usando un cacciavite piatto) e
svitare completamente la vite di connessione e il morsetto serrafilo prima di montare
i cavi di collegamento nei terminali appropriati.
Il cavo di collegamento a massa deve essere collegato al terminale ( ) del forno.
Se il forno è collegato alla rete elettrica mediante una spina, questa deve rimanere accessibile
anche dopo che il forno è stato montato.
La Società non si assume alcuna responsabilità in caso di incidente causato da una mancata
o errata messa a terra.
6
7
min. 5
5
BT62CDBST_XET-00047U-01_IT.indd 5
2009-11-04
9:46:09
Installazione del forno (continua)
IT
Installazione in un telaio alto
● Osservare i requisiti minimi di tolleranza.
● Il forno deve essere inserito in posizione con l’angolo di allineamento corretto.
1
2
560
595
595
572
545
21
3
4
min. 550
50
min. 590~ max. 600
min. 560
5
Collegamento del forno all’alimentazione
elettrica (H05VV-F, H05RR-F, min. 1,5 m,
1,5~2,5 mm²)
Fase
Massa
Neutro
6
BT62CDBST_XET-00047U-01_IT.indd 6
2009-11-04
9:46:09
Parti e funzioni
Forno
IT
Pannello di controllo
Elementi riscaldanti
superiori
Livello 5
Luce del forno
Livello 4
Guida laterale
Livello 3
Coperchio rivestito di
smalto catalitico
Livello 2
Interruttore divisore
Livello 1
Sportello in
vetro
Maniglia sportello
)
I livelli dei vassoi sono numerati dal basso verso l’alto.
I livelli 4 e 5 vengono utilizzati principalmente per la funzione grill.
Per determinare i livelli appropriati dei vassoi per le varie ricette, vedere le istruzioni
per la cottura fornite in questo manuale.
7
BT62CDBST_XET-00047U-01_IT.indd 7
2009-11-04
9:46:09
Parti e funzioni (continua)
IT
Comandi del forno
2
1
1.
2.
3.
4.
5.
6.
)
4
5
6
7
8
9
10
11
3
7. Tasto Orologio
8. Tasto Timer
9. Tasto Tempo cottura
10.Tasto Fine cottura
11.Tasto Temperatura
Manopola Selezione divisore
Display
Manopola Ora/temp
Tasto Forno
Tasto Lampadina
Tasto Pulizia a vapore
La manopola Selezione divisore e la manopola Ora/temp sono a comparsa. Per
attivarle è sufficiente premerle.
Funzioni speciali
Il forno offre le seguenti funzioni speciali.
● Modalità divisore: Inserendo il divisore è possibile effettuare la cottura indipendente in due
parti separate del forno, aumentando l’efficienza energetica e la comodità d’uso.
● Pulizia a vapore: La funzione di pulizia a vapore automatica del forno sfrutta la potenza del
vapore per eliminare in tutta sicurezza grasso e sporco dalle parti interne del forno.
8
BT62CDBST_XET-00047U-01_IT.indd 8
2009-11-04
9:46:10
Parti e funzioni (continua)
Accessori
IT
In dotazione sono forniti i seguenti accessori.
1
2
Griglia, per piatti, teglie e vassoi per
arrostire e grigliare.
Lato anteriore
Piastra , per arrostire.
Lato anteriore
3
Vassoio di cottura, per torte e
biscotti.
4
Vassoio profondo, per arrostire o
raccogliere i liquidi della carne o il
grasso.
5
Divisore, per cottura superiore,
inferiore e doppia. Da utilizzare
inserendolo al livello 3. Sul pannello
posteriore dello scomparto per la
cottura vi è un interruttore per il
rilevamento del divisore. Spingerlo
fino in fondo.
6
Girarrosto (BT62CDBFST)
comprende uno spiedo, 2 perni, una
maniglia rimovibile e un’intelaiatura
di sostegno che si infila nel terzo
livello vassoio partendo dal basso.
Per utilizzare il girarrosto, inserire lo
spiedo nel foro sul pannello posteriore
all’interno del forno. Quando si usa lo
spiedo, collocare il vassoio profondo
al livello 1.
9
BT62CDBST_XET-00047U-01_IT.indd 9
2009-11-04
9:46:11
Parti e funzioni (continua)
IT
7
Girarrosto e Shasilik
(BT62CDBFST)
PER L’USO:
● Per raccogliere i liquidi di cottura, collocare il vassoio profondo (senza poggiapentole) al
livello 1 o sul fondo del forno se il pezzo di carne da arrostire è troppo grosso.
● Fare scivolare una delle forchette sullo spiedo; infilare la carne da arrostire sullo spiedo;
● Per arrostire contemporaneamente patate e verdure cotte solo a metà, sistemarle lungo i
bordi del vassoio profondo.
● Collocare l’intelaiatura di sostegno al livello medio, con la sagoma a “v” rivolta in avanti.
● Per inserire più facilmente lo spiedo, avvitare la maniglia sull’estremità smussata.
● Appoggiare lo spiedo sull’intelaiatura di sostegno con l’estremità appuntita rivolta verso il
pannello posteriore del forno e premere delicatamente finché la punta dello spiedo entra
nel meccanismo rotante. L’estremità smussata dello spiedo deve appoggiare sulla sagoma
a “v”. (Sullo spiedo vi sono due sporgenze, che devono essere il più vicino possibile allo
sportello del forno per evitare che lo spiedo venga avanti; le sporgenze servono anche da
aggancio per la maniglia.)
● Prima della cottura, svitare la maniglia. Dopo la cottura, riavvitare la maniglia per togliere
con facilità lo spiedo dall’intelaiatura di sostegno.
10
BT62CDBST_XET-00047U-01_IT.indd 10
2009-11-04
9:46:11
Parti e funzioni (continua)
5
Vassoio di
cottura
4
3
Vassoio
profondo
2
1
Il vassoio di cottura, il vassoio profondo e la griglia
devono essere inseriti correttamente nelle guide
laterali.
Quando si tolgono i cibi dal forno, fare attenzione a
utensili e superfici roventi.
Esempio: Livello 1: Vassoio profondo
Livello 4: Vassoio di cottura
IT
spazio di
2 cm
)
Quando si usano il vassoio profondo o il vassoio di cottura per raccogliere i liquidi
dei cibi, verificare che siano infilati correttamente nelle guide laterali. Se questi
accessori vengono a contatto con il fondo del forno possono danneggiare lo smalto
della superficie. Tra vassoi e vassoi profondi collocati al livello 1 e la superficie del
fondo del forno devono esserci almeno 2 cm.
Uso degli accessori
Divisore, griglia, vassoio di cottura e vassoio profondo
Posizionamento del divisore
Inserire il divisore al livello 3 del forno.
Posizionamento della griglia
Inserire la griglia al livello desiderato.
Posizionamento del vassoio di cottura o del
vassoio profondo
Inserire il vassoio di cottura e/o il vassoio profondo al livello
desiderato.
ATTENZIONE
Per cuocere in modalità inferiore, superiore o
cottura doppia, è necessario inserire il divisore.
Arresto di sicurezza
● Se non viene immesso un tempo di cottura, il forno si spegne una volta trascorsi i seguenti
periodi di tempo.
Tempi di spegnimento per le varie impostazioni della temperatura
Inferiore a 105°C
16 ore
da 105°C a 240°C
8 ore
da 245°C a 300°C
4 ore
● Il circuito elettrico del forno è dotato di un sistema termico di spegnimento. Se il forno
raggiunge temperature troppo elevate, per un certo periodo di tempo il sistema interrompe
l’alimentazione elettrica agli elementi riscaldanti.
Ventola di raffreddamento
Durante la cottura, è normale che la ventola emetta aria calda dal lato anteriore del forno.
● La ventola di raffreddamento continua a funzionare anche dopo che il forno è stato spento.
Si arresta quando la temperatura del telaio interno è scesa a 60°C o dopo 22 minuti.
11
BT62CDBST_XET-00047U-01_IT.indd 11
2009-11-04
9:46:11
Prima dell’uso
IT
Regolazione dell’orologio
Quando si accende l’apparecchio per la prima volta, utilizzare il prodotto solo dopo aver
impostato l’orario.
1
Premere il tasto Orologio. “ ” e “12:
” lampeggiano.
2
Ruotare la manopola Ora/temp per
impostare l’ora.
Esempio: Per impostare 1:30
Attendere circa 10 secondi. L’orologio
smette di lampeggiare e visualizza
l’ora impostata.
3
Premere il tasto Orologio. “ ” e “
:00” lampeggiano.
4
Ruotare la manopola Ora/temp per
impostare i minuti. “ ” lampeggia.
5
Premere il tasto Orologio per terminare l’impostazione dell’orologio o attendere circa
10 secondi. “ ” scompare e “30” smette di lampeggiare. Il display mostra l’ora. Ora
l’apparecchio è pronto per l’uso.
12
BT62CDBST_XET-00047U-01_IT.indd 12
2009-11-04
9:46:13
Prima dell’uso (continua)
Pulizia iniziale
IT
Prima di utilizzarlo per la prima volta, pulire accuratamente il forno.
*
Non utilizzare materiali appuntiti o abrasivi. Potrebbero danneggiare la superficie
del forno. Per i forni con pannelli anteriori smaltati, usare i detergenti disponibili sul
mercato.
Per pulire il forno
1. Aprire lo sportello. La luce del forno si accende.
2. Pulire tutti i vassoi, gli accessori e le guide laterali con acqua calda o detergente liquido e
asciugarli con un panno morbido pulito.
3. Pulire l’interno del forno nello stesso modo.
4. Pulire il pannello anteriore del forno con un panno umido.
Controllare che l’orologio sia impostato correttamente. Prima di utilizzare il forno, togliere gli
accessori e lasciarlo acceso sull’impostazione convezione a 200°C per 1 ora. Si sentirà un
odore particolare; ciò è normale, ma durante tale periodo assicurarsi che in cucina vi sia una
buona ventilazione.
13
BT62CDBST_XET-00047U-01_IT.indd 13
2009-11-04
9:46:13
Prima dell’uso (continua)
IT
Funzioni del forno
Le caratteristiche del forno includono le seguenti funzioni
1.
Tradizionale
Temperatura consigliata: 200°C
La funzione tradizionale è ideale per cuocere e arrostire cibi disposti su un solo ripiano. Per
mantenere la temperatura del forno, funzionano sia gli elementi riscaldanti superiori che
quelli inferiori.
Nella modalità tradizionale, si consiglia di preriscaldare il forno.
Alimenti
Livello
vassoio
Accessorio
Temperatura
(°C)
Tempo
(min)
Lasagne surgelate (500-1000 g)
3
Griglia
180-200
40-50
Pesce intero (ad es. orata) (3001000 g)
3-4 incisioni su ciascun lato
VERSARE OLIO
3
Piastra + vassoio
profondo
240
15-20
Filetti di pesce (500-1000 g)
3-4 incisioni su ciascun lato
VERSARE OLIO
3
Vassoio di cottura
200
13-20
Cotolette surgelate (350-1000 g)
carne trita e con ripieno di prosciutto, formaggio o funghi
VERSARE OLIO
3
Vassoio di cottura
200
25-35
Hamburger di carne surgelati,
carote, barbabietole o patate (3501000 g)
VERSARE OLIO
3
Vassoio di cottura
200
20-30
Cotolette di maiale con osso (5001000 g)
CONDIRE CON OLIO, SALE E
PEPE
3/2
Piastra /
vassoio profondo
200
40-50
Patate al forno (tagliate a metà)
(500-1000 g)
3
Vassoio di cottura
180-200
30-45
Polpettone di carne surgelato con
ripieno di funghi (500-1000 g)
VERSARE OLIO
3
Vassoio di cottura
180-200
40-50
Pan di spagna (250-500 g)
2
Griglia
160-180
20-30
Torta marmorizzata (500-1000 g)
2
Griglia
170-190
40-50
Torta lievitata sul vassoio
con frutta e granella
(1000-1500 g)
2
Vassoio di cottura
160-180
25-35
Muffin
(500-800 g)
2
Griglia
190-200
25-30
14
BT62CDBST_XET-00047U-01_IT.indd 14
2009-11-04
9:46:13
Prima dell’uso (continua)
2.
Riscaldamento superiore + convezione
Temperatura consigliata: 190°C
L’elemento riscaldante superiore è in funzione e la ventola fa circolare continuamente l’aria
calda.
Si consiglia di preriscaldare il forno in modalità riscaldamento superiore + convezione
Alimenti
Livello
vassoio
Accessorio
Temperatura
(°C)
Tempo
(min)
Maiale con osso (1000 g)
SPENNELLARE CON OLIO E
SPEZIE
3
Piastra + vassoio
profondo
180-200
50-65
Spalla di maiale avvolta in foglio di
alluminio (1000-1500 g)
MARINARE
2
Vassoio di cottura
180-230
80-120
Pollo intero (800-1300 g)
SPENNELLARE CON OLIO E
SPEZIE
2
Piastra + vassoio
profondo
190-200
45-65
Bistecche di carne o tranci di
pesce (400-800 g)
CONDIRE CON OLIO, SALE E
PEPE
3
Piastra + vassoio
profondo
180-200
15-35
Pezzi di pollo (500-1000 g)
SPENNELLARE CON OLIO E
SPEZIE
4
Piastra + vassoio
profondo
200-220
25-35
Pesce arrosto (500-1000 g)
usare un recipiente adatto alla cottura in forno
SPENNELLARE CON OLIO
2
Griglia
180-200
30-40
Roast beef (800-1200 g)
SPENNELLARE CON OLIO E
SPEZIE
2
Piastra + vassoio
profondo
Aggiungere 1
tazza d’acqua
200-220
45-60
Petto d’anatra (300-500 g)
4
Piastra + vassoio
profondo
Aggiungere 1
tazza d’acqua
180-200
25-35
IT
15
BT62CDBST_XET-00047U-01_IT.indd 15
2009-11-04
9:46:13
Prima dell’uso (continua)
IT
3.
Convezione
Temperatura consigliata: 170°C
Questa funzione cuoce cibi collocati al massimo su tre livelli ed è adatta anche per
arrostire. La cottura viene raggiunta grazie all’elemento riscaldante sulla parete posteriore
e alla ventola che distribuisce il calore.
Nella modalità convezione, si consiglia di preriscaldare il forno.
Alimenti
Livello
vassoio
Accessorio
Temperatura
(°C)
Tempo
(min)
Costata d’agnello (350-700 g)
SPENNELLARE CON OLIO E
SPEZIE
3
Piastra + vassoio
profondo
190-200
40-50
Banane al forno (3-5 pezzi):
tagliare la parte superiore con un
coltello, aggiungere 10-15 g di
cioccolato, 5-10 g di noci sminuzzate, versarvi acqua zuccherata,
avvolgerle in un foglio di alluminio.
3
Griglia
220-240
15-25
Mele al forno 5-8 pezzi di 150-200
g cad.
Togliere il torsolo e farcire con
uvetta e marmellata. Utilizzare un
recipiente adatto alla cottura in
forno.
3
Griglia
200-220
15-25
Hamburger di carne trita (300-600
g)
VERSARE L’OLIO
3
Vassoio di cottura
190-200
18-25
Polpettone di carne trita con ripieno “alla russa” (500-1000 g)
SPENNELLARE CON OLIO
3
Vassoio di cottura
180-200
50-65
Crocchette surgelate (500-1000 g)
2
Vassoio di cottura
180-200
25-35
Patatine al forno surgelate (300700 g)
2
Vassoio di cottura
180-200
20-30
Pizza surgelata (300-1000 g)
2
Griglia
200-220
15-25
Torta di mele e mandorle (500-1000
g)
2
Griglia
170-190
35-45
Croissant freschi (200-400 g)
(pronti da cuocere)
3
Vassoio di cottura
180-200
15-25
16
BT62CDBST_XET-00047U-01_IT.indd 16
2009-11-04
9:46:14
Prima dell’uso (continua)
4.
Grill grande
Temperatura consigliata: 240°C
La funzione grill grande cuoce alla griglia grandi quantità di cibi piatti, come bistecche,
cotolette e pesce. E’ adatta anche per tostare. In questa modalità funzionano sia l’elemento
riscaldante superiore, sia il grill.
Nella modalità grill grande, si consiglia di preriscaldare il forno.
Alimenti
Livello
vassoio
Accessorio
Temperatura
(°C)
Tempo
(min)
Salsicce (sottili) 5-10 pezzi
4
Piastra + vassoio
profondo
220
5-8 girare
5-8
Salsicce (sottili) 8-12 pezzi
4
Piastra + vassoio
profondo
220
4-6 girare
4-6
Toast 5-10 pezzi
5
Griglia
240
1-2 girare
1-2
Toast al formaggio 4-6 pezzi
4
Piastra + vassoio
di cottura
200
4-8
Pancake surgelato con ripieno
“alla russa” (200- 500 g)
3
Vassoio di cottura
200
20-30
Bistecche (400-800 g)
4
Piastra + vassoio
profondo
240
8-10 girare 5-7
IT
17
BT62CDBST_XET-00047U-01_IT.indd 17
2009-11-04
9:46:14
Prima dell’uso (continua)
IT
5.
Grill piccolo
Temperatura consigliata: 240°C
Questa impostazione serve per cuocere alla griglia quantità più piccole di cibi piatti, come
bistecche, cotolette, pesce e toast, collocati al centro del vassoio. Funziona solo l’elemento
riscaldante superiore.
Nella modalità grill piccolo, si consiglia di preriscaldare il forno.
Collocare il cibo al centro dell’accessorio.
Livello
vassoio
Accessorio
Temperatura
(°C)
Tempo
(min)
Camembert al forno surgelato
(2-4 pezzi di 75 g cad.)
METTERE NEL FORNO FREDDO
(prima di preriscaldarlo)
3
Griglia
200
10-12
Baguette surgelate imbottite
(pomodoro-mozzarella o prosciutto-formaggio)
3
Piastra + vassoio
di cottura
200
15-20
Bastoncini di pesce surgelati
(300-700 g)
METTERE NEL FORNO FREDDO
(prima di preriscaldarlo)
VERSARE OLIO
3
Piastra + vassoio
di cottura
200
15-25
Hamburger di pesce surgelati
(300-600 g)
METTERE NEL FORNO FREDDO, VERSARE OLIO
3
Vassoio di cottura
180-200
20-35
Pizza surgelata (300-500 g)
METTERE NEL FORNO FREDDO
(prima di preriscaldarlo)
3
Piastra + vassoio
di cottura
180-200
23-30
Alimenti
18
BT62CDBST_XET-00047U-01_IT.indd 18
2009-11-04
9:46:14
Prima dell’uso (continua)
6.
Riscaldamento inferiore + convezione
Temperatura consigliata: 190°C
La modalità riscaldamento inferiore + convezione è adatta a ricette che richiedono un
ripieno morbido e una base croccante, ad esempio pizze, quiche lorraine, torte alla frutta
“alla tedesca” e torte al formaggio.
Nella modalità riscaldamento inferiore + convezione si consiglia di preriscaldare il forno.
Livello
vassoio
Accessorio
Temperatura
(°C)
Tempo
(min)
Torta di mele lievitata surgelata
(350-700 g)
3
Griglia
180-200
15-20
Tortine di pasta sfoglia farcite
surgelate (300-600 g)
SPENNELLARE CON TUORLO
D’UOVO E METTERE NEL FORNO
FREDDO (prima di preriscaldarlo)
3
Vassoio di cottura
180-200
20-25
Polpette di carne con salsa (250500 g)
usare un recipiente adatto alla cottura in forno
3
Griglia
180-200
25-35
Ventagli di pasta sfoglia (500-1000
g)
SPENNELLARE CON TUORLO
D’UOVO
3
Vassoio di cottura
180
15-23
Cannelloni con salsa (250-500 g)
usare un recipiente adatto alla cottura in forno
3
Griglia
180
22-30
Tortine farcite lievitate (600-1000 g)
SPENNELLARE CON TUORLO
D’UOVO
3
Vassoio di cottura
180-200
20-30
Pizza fatta in casa (500-1000 g)
2
Vassoio di cottura
200-220
15-25
Pane fatto in casa (700-900 g)
2
Griglia
170-180
45-55
Alimenti
IT
19
BT62CDBST_XET-00047U-01_IT.indd 19
2009-11-04
9:46:14
Prima dell’uso (continua)
IT
7.
Cottura doppia
Utilizzando questa modalità, si possono cuocere nel forno due cibi diversi. Quando si
esegue la cottura negli scomparti superiore e inferiore, si possono utilizzare temperature,
modalità e tempi di cottura diversi. Per esempio, è possibile grigliare bistecche e cuocere
contemporaneamente un gratin. Utilizzando il divisore, è possibile cuocere il gratin nella
parte inferiore del forno e le bistecche nella parte superiore.
Inserire sempre il divisore al livello vassoio 3 prima di iniziare la cottura.
Consiglio 1:
Cottura a diverse temperature
Scomparto
Alimenti
Livello
vassoio
Modalità di
cottura
Temperatura
(°C)
Accessorio
Tempo
(min)
SUPERIORE
Pizza surgelata
(300-400 g)
4
Convezione
200 - 220
Griglia
15 - 25
INFERIORE
Torta marmorizzata
(500-700 g)
1
Convezione
160 - 180
Vassoio di
cottura
50 - 60
Avvertenza:
Mettere il cibo nel forno freddo
Consiglio 2:
Cottura con diverse modalità
Scomparto
Alimenti
Livello
vassoio
Modalità di
cottura
Temperatura
(°C)
Accessorio
Tempo
(min)
SUPERIORE
Pezzi di pollo
(400-600 g)
4
Riscaldamento
superiore +
convezione
200 - 220
Piastra +
vassoio
profondo
25 - 35
INFERIORE
Gratin di patate
(500-1000 g)
1
Convezione
160 - 180
Griglia
30 - 40
Avvertenza:
Mettere il cibo nel forno freddo
20
BT62CDBST_XET-00047U-01_IT.indd 20
2009-11-04
9:46:15
Prima dell’uso (continua)
Piatti di prova
IT
In base allo standard EN 60350
1. Cottura
I consigli per la cottura si riferiscono al forno preriscaldato.
Livello
vassoio
Modalità di
cottura
Temp. °C
Tempo di
cottura min
3
Tradizionale
160-180
15-25
Vassoio profondo +
vassoio di cottura
1+4
Convezione
150-170
20-30
Pan di spagna
senza grassi
Recipiente da forno
sulla griglia (antiaderente, ø 26 cm)
2
Tradizionale
160-180
20-30
Torta di mele
Griglia + vassoio di
cottura + 2 teglie
apribili (antiaderenti,
ø 20 cm)
1+3
Convezione
170-190
80-100
Griglia + 2 teglie
apribili (antiaderenti,
ø 20 cm)
1 Posizionata
in diagonale
Tradizionale
170-190
70-80
Tipo di alimento
Torte piccole
Recipiente e note
Vassoio di cottura
2. Grigliatura
Preriscaldare il forno vuoto per 5 minuti con la funzione grill grande.
Utilizzare questa funzione impostando la temperatura massima di 300°C.
Tipo di alimento
Recipiente e note
Livello
vassoio
Modalità di
cottura
Temp. °C
Tempo di
cottura min
Toast di pane
bianco
Griglia
5
Grill grande
300
1° 1-2
2° 1-1 1/2
Hamburger di
manzo
Piastra + vassoio
profondo (per raccogliere eventuali
perdite)
4
Grill grande
300
1° 7-10
2° 6-9
21
BT62CDBST_XET-00047U-01_IT.indd 21
2009-11-04
9:46:15
Uso del forno
IT
Impostazione della modalità divisore
Per le modalità superiore, inferiore e cottura doppia, inserire il divisore con la manopola
Selezione divisore in posizione “OFF”. Per la modalità cottura singola, rimuovere il divisore
nella posizione “OFF”. Ruotare quindi la manopola Selezione divisore per selezionare la
modalità desiderata. Per maggiori dettagli, vedere la tabella che segue.
1
Ruotare la manopola Selezione
divisore per selezionare la partizione
desiderata.
3
Ruotare la manopola Ora/temp per selezionare la funzione del forno desiderata. Se
dopo 3 secondi non vi sono altre regolazioni, il forno si accende automaticamente
nella funzione e nella modalità selezionate.
Modalità
divisore
Simbolo
2
Funzioni del forno
Premere il tasto Forno.
Inserimento
divisore
Informazioni sull’uso
Spento
1. Convezione
2. Riscaldamento superiore
+ convezione
3. Grill grande
Funzione di partizione
superiore e inferiore
SI’
Modalità
inferiore
1. Convezione
2. Riscaldamento inferiore +
convezione
SI’
Cottura
singola
1. Convezione
2. Riscaldamento superiore
+ convezione
3. Tradizionale
4. Grill grande
5. Grill piccolo
6. Riscaldamento inferiore +
convezione
NO
Modalità
superiore
Cottura
doppia
SI’
Questa modalità consente
di risparmiare tempo ed
energia quando si cuociono
piccole quantità di cibo.
Si possono cuocere due
piatti contemporaneamente
a due diverse temperature.
Questa modalità consente
di risparmiare tempo ed
energia quando si cuociono
piccole quantità di cibo.
22
BT62CDBST_XET-00047U-01_IT.indd 22
2009-11-04
9:46:16
Uso del forno (continua)
Modalità superiore
IT
Funziona solo l’elemento riscaldante superiore. Inserire il divisore.
Convezione
Riscaldamento superiore + convezione
Grill grande
Modalità inferiore
Funziona solo l’elemento riscaldante inferiore. Inserire il divisore.
Convezione
Riscaldamento inferiore + convezione
23
BT62CDBST_XET-00047U-01_IT.indd 23
2009-11-04
9:46:17
Uso del forno (continua)
IT
Cottura doppia
Le modalità superiore e inferiore funzionano contemporaneamente. E’ possibile impostare
quale modalità deve attivarsi per prima. Quando è terminata la cottura di uno dei piatti nella
modalità cottura doppia e si desidera modificare il tempo di cottura o la temperatura dell’altra
partizione, ruotare la manopola Selezione divisore per selezionare la modalità (superiore o
inferiore) con cui si desidera continuare. Inserire il divisore.
Cottura doppia 1: La modalità superiore inizia a funzionare per prima. Se si preme il tasto
Forno o se sono passati 15 secondi da quando è stata impostata la modalità
superiore e non vi sono stati ulteriori cambiamenti, il forno avvia la modalità
inferiore.
Convezione
Riscaldamento superiore + convezione
Grill grande
Cottura doppia 2: Quando viene avviata la modalità superiore, se si preme il tasto Forno o
se sono passati 15 secondi e non vi sono stati ulteriori cambiamenti, il forno
passa alla modalità inferiore. Le modalità superiore e inferiore funzionano
contemporaneamente.
Convezione
Riscaldamento inferiore + convezione
24
BT62CDBST_XET-00047U-01_IT.indd 24
2009-11-04
9:46:17
Uso del forno (continua)
Cottura singola
IT
Convezione
Riscaldamento superiore + convezione
Tradizionale
Grill grande
Grill piccolo
Riscaldamento inferiore + convezione
25
BT62CDBST_XET-00047U-01_IT.indd 25
2009-11-04
9:46:18
Uso del forno (continua)
IT
Impostazione della temperatura del forno
In modalità cottura singola, superiore e inferiore
1
)
Premere il tasto Temperatura.
2
Ruotare la manopola Ora/temp
per regolare la temperatura con
incrementi di 5°C.
Cottura singola
(grill grande e piccolo)
40°C – 250°C
(40°C – 300°C)
Modalità superiore
40°C – 250°C
Modalità inferiore
40°C – 250°C
La temperatura può essere regolata durante la cottura.
Durante il processo di cottura, gli elementi riscaldanti superiori e inferiori vengono
attivati e disattivati, in modo da regolare e mantenere la temperatura.
Cottura doppia
1
)
Premere il tasto Temperatura
(modalità superiore).
Premere due volte il tasto
Temperatura (modalità inferiore).
2
Ruotare la manopola Ora/temp
per regolare la temperatura con
incrementi di 5°C.
Modalità superiore
(Grill grande)
160°C – 250°C
(200°C – 250°C)
Modalità inferiore
160°C – 250°C
La temperatura può essere regolata durante la cottura.
26
BT62CDBST_XET-00047U-01_IT.indd 26
2009-11-04
9:46:18
Uso del forno (continua)
Spegnimento del forno
IT
Per spegnere il forno, ruotare la manopola
Selezione divisore in posizione “Off”.
Ora finale
Si può impostare l’ora finale durante la cottura.
In modalità cottura singola, superiore e inferiore
1
Premere il tasto Ora finale.
Esempio: L’ora corrente è 12:00
3
Premere il tasto Ora finale.
Il forno funziona automaticamente con
l’ora finale selezionata, a meno che
non si prema entro 5 secondi il tasto
Ora finale.
)
2
Ruotare la manopola Ora/temp per
selezionare l’ora finale desiderata.
Durante la cottura, per ottenere un risultato migliore è possibile regolare l’ora finale
impostata in precedenza con la manopola Ora/temp.
27
BT62CDBST_XET-00047U-01_IT.indd 27
2009-11-04
9:46:19
Uso del forno (continua)
IT
Cottura doppia
E’ possibile selezionare l’ora finale per le modalità superiore e inferiore utilizzando il tasto Ora
finale e la manopola Ora/temp.
1
Premere due volte il tasto Ora finale
(modalità inferiore).
Esempio: L’ora corrente è 12:00
3
Premere il tasto Ora finale.
Il forno funziona con l’ora finale
selezionata, a meno che non si prema
entro 5 secondi il tasto Ora finale.
)
2
Ruotare la manopola Ora/temp per
selezionare l’ora finale desiderata.
Durante la cottura, per ottenere un risultato migliore è possibile regolare l’ora finale
impostata in precedenza con la manopola Ora/temp.
28
BT62CDBST_XET-00047U-01_IT.indd 28
2009-11-04
9:46:20
Uso del forno (continua)
Tempo di cottura
IT
Il tempo di cottura può essere impostato durante la cottura.
In modalità cottura singola, superiore e inferiore
1
Premere il tasto Tempo cottura.
3
Premere il tasto Tempo cottura.
Il forno funziona con il tempo di
cottura selezionato, a meno che non
si prema entro 5 secondi il tasto
Tempo cottura.
)
2
Ruotare la manopola Ora/temp
per impostare il tempo di cottura
desiderato.
Durante la cottura, per ottenere un risultato migliore è possibile regolare il tempo di
cottura impostato in precedenza con la manopola Ora/temp.
29
BT62CDBST_XET-00047U-01_IT.indd 29
2009-11-04
9:46:21
Uso del forno (continua)
IT
Cottura doppia
E’ possibile selezionare i tempi di cottura per le modalità superiore e inferiore utilizzando il
tasto Tempo cottura e la manopola Ora/temp.
1
Premere due volte il tasto Tempo
cottura (modalità inferiore).
3
Premere il tasto Tempo cottura.
Il forno funziona con il tempo di
cottura selezionato, a meno che non
si prema entro 5 secondi il tasto
Tempo cottura.
)
2
Ruotare la manopola Ora/temp
per impostare il tempo di cottura
desiderato.
Durante la cottura, per ottenere un risultato migliore è possibile regolare il tempo di
cottura impostato in precedenza con la manopola Ora/temp.
30
BT62CDBST_XET-00047U-01_IT.indd 30
2009-11-04
9:46:21
Uso del forno (continua)
Avvio ritardato
IT
Caso 1 - Il tempo di cottura viene immesso per primo
Se l’ora finale viene immessa dopo che è già stato impostato il tempo di cottura, il forno
calcola il tempo di cottura e l’ora finale e, se necessario, imposta un punto di avvio ritardato.
1
3
Premere il tasto Ora finale.
Esempio: L’ora corrente è 15:00
e il tempo di cottura
desiderato è 5 ore.
2
Ruotare la manopola Ora/temp per
impostare l’ora finale.
Esempio: Si vuole cucinare per 5
ore, finendo alle 20:30.
Premere il tasto Ora finale. Viene
visualizzato il simbolo “Pronto” fino al
punto di avvio ritardato.
31
BT62CDBST_XET-00047U-01_IT.indd 31
2009-11-04
9:46:22
Uso del forno (continua)
IT
Caso 2 - L’ora finale viene immessa per prima
Se il tempo di cottura viene immesso dopo che è già stata impostata l’ora finale, il forno
calcola il tempo di cottura e l’ora finale e, se necessario, imposta un punto di avvio ritardato.
1
Premere il tasto Tempo cottura.
Esempio: L’ora corrente è 15:00 e
l’ora finale desiderata è
17:00.
3
Premere il tasto Tempo cottura.
Viene visualizzato il simbolo “Pronto”
fino al punto di avvio ritardato.
2
Ruotare la manopola Ora/temp per
impostare il tempo di cottura.
Esempio: Si vuole cuocere per
1 ora e 30 minuti e
terminare alle 17:00.
32
BT62CDBST_XET-00047U-01_IT.indd 32
2009-11-04
9:46:23
Uso del forno (continua)
Timer
1
3
)
IT
Premere una volta il tasto Timer. “
lampeggia.
”
2
Ruotare la manopola Ora/temp per
impostare il tempo desiderato.
Esempio: 5 minuti
Premere il tasto Timer per avviare il
timer. Una volta trascorso il periodo
di tempo impostato, viene emesso un
segnale acustico.
Tenere premuto il tasto Timer per 2 secondi per annullare il timer.
Accensione / spegnimento della lampadina del forno
1
Premere il tasto Lampadina.
1°
2°
3°
4°
)
Superiore e inferiore
Superiore
Inferiore
Spento
La lampadina si accende e si
spegne nell’ordine indicato,
indipendentemente dal
funzionamento del forno.
33
BT62CDBST_XET-00047U-01_IT.indd 33
2009-11-04
9:46:24
Uso del forno (continua)
IT
Funzione di sicurezza dei bambini
1
)
Premere contemporaneamente i tasti
Tempo cottura e Ora finale e tenerli
premuti per 3 secondi. ( ) apparirà sul
display.
2
Premere contemporaneamente i tasti
Tempo cottura e Ora finale e tenerli
premuti per 3 secondi per sbloccarlo.
Quando il forno è bloccato, tutti i tasti e le manopole, ad eccezione della manopola
Selezione divisore e del tasto di sblocco, non funzionano. E’ possibile attivare il
blocco sia a forno acceso sia spento.
Disattivazione dei segnali acustici
1
Premere contemporaneamente i
tasti Orologio e Ora finale e tenerli
premuti per 3 secondi.
2
Per riattivare i segnali
acustici, premere di nuovo
contemporaneamente i tasti Orologio
e Ora finale e tenerli premuti per 3
secondi.
34
BT62CDBST_XET-00047U-01_IT.indd 34
2009-11-04
9:46:24
Pulizia e manutenzione
Pulizia a vapore
IT
1
2
3
Togliere tutti gli accessori dal forno.
Versare circa 400 ml d’acqua sul fondo del forno vuoto. Utilizzaresolo acqua normale,
non distillata.
Chiudere lo sportello del forno.
AvvertenzaIl sistema di pulizia a vapore può essere attivato solo se il forno si è
raffreddato completamente e ha raggiunto la temperatura ambiente. Se
non funziona, attendere che il forno si raffreddi completamente.
4
Ruotare la manopola Selezione
divisore sulla modalità cottura
singola.
5
Premere il tasto Pulizia a vapore.
6
Dopo un certo periodo di tempo,
l’elemento riscaldante smette di
funzionare e la lampadina rimane
accesa.
7
Al termine dell’operazione, il display
lampeggia e un segnale acustico
indica il completamento della pulizia.
8
Ruotare lamanopola Selezione
divisore su “Off” per terminare
l’operazione e pulire l’interno del
forno.
35
BT62CDBST_XET-00047U-01_IT.indd 35
2009-11-04
9:46:25
Pulizia e manutenzione (continua)
IT
Dopo aver disattivato la pulizia a vapore
Suggerimenti
● Fare attenzione quando si apre lo sportello prima della fine della pulizia a vapore; l’acqua
sul fondo è bollente.
● Non lasciare mai residui di acqua nel forno, per nessun periodo di tempo, per esempio per
tutta la notte.
● Aprire lo sportello del forno e rimuovere l’acqua residua con una spugna.
● Per pulire l’interno del forno, utilizzare una spugna imbevuta di detergente, una spazzola
morbida o una spazzola in nylon. Lo sporco ostinato può essere rimosso con una spazzola
in nylon.
● I depositi di calcare possono essere rimossi con un panno imbevuto di aceto.
● Sciacquare con acqua pulita e asciugare con un panno morbido (non dimenticare di
asciugare sotto la guarnizione dello sportello del forno).
● Se il forno è molto sporco, una volta raffreddato si può ripetere la procedura.
● Se il forno è molto sporco di grasso, ad esempio dopo aver arrostito o grigliato, è
consigliabile sfregare delicatamente il detergente sulla macchia ostinata prima di attivare la
funzione di pulizia del forno.
● Dopo la pulizia, lasciare aperto lo sportello del forno con una inclinazione di 15° per
consentire alla superficie interna smaltata di asciugare completamente.
36
BT62CDBST_XET-00047U-01_IT.indd 36
2009-11-04
9:46:25
Pulizia e manutenzione (continua)
Asciugatura rapida
1.
2.
3.
4.
5.
6.
IT
Lasciare aperto lo sportello del forno con una inclinazione di circa 30°.
Ruotare la manopola Selezione divisore sulla modalità cottura singola.
Premere il tasto Forno.
Ruotare la manopola Ora/temp su convezione.
Impostare il tempo di cottura su 5 minuti e la temperatura su 50°C.
Al termine di questo periodo di tempo spegnere il forno.
ATTENZIONE
Per la pulizia del forno non utilizzare apparecchi ad acqua ad alta pressione o a getto di
vapore.
Esterno del forno
● Per pulire il forno sia all’interno sia all’esterno, utilizzare un panno e un detergente delicato
o acqua saponata.
● Asciugare con carta da cucina o uno strofinaccio asciutto.
● Non usare pagliette saponate, detergenti corrosivi o prodotti abrasivi.
Pannello anteriore del forno in acciaio inossidabile
● Non utilizzare lana d’acciaio, pagliette saponate o prodotti abrasivi. Possono danneggiare
la finitura.
Pannello anteriore del forno in alluminio
● Pulire delicatamente la piastra con un panno morbido o un panno in microfibra e un
detergente delicato per vetri.
ATTENZIONE
Prima della pulizia, assicurarsi che il forno sia freddo.
Interno del forno
● Non pulire manualmente la guarnizione dello sportello.
● Non utilizzare pagliette saponate o spugnette abrasive.
● Per evitare di danneggiare le superfici smaltate del forno, usare i detergenti per forni
disponibili sul mercato.
● Per rimuovere lo sporco ostinato, utilizzare un detergente speciale per forni.
Accessori
Lavare i recipienti e gli accessori dopo l’uso e asciugarli con uno strofinaccio.
Per pulirli facilmente, immergerli in acqua calda per circa 30 minuti.
37
BT62CDBST_XET-00047U-01_IT.indd 37
2009-11-04
9:46:25
Pulizia e manutenzione (continua)
IT
Superficie con smalto catalitico
Il coperchio rimovibile è rivestito con uno smalto grigio scuro catalitico, che può ricoprirsi di
particelle di olio o grasso attraverso l’aria che circola durante il riscaldamento a convezione.
Questi depositi vengono dissipati a una temperatura del forno superiore a 200°C, ad esempio
quando si cuoce o si arrostisce.
Più alta è la temperatura e più veloce sarà la dissipazione.
Il forno e gli accessori dovrebbero essere puliti ogni volta che vengono utilizzati. In caso
contrario, cuocendo e arrostendo altri alimenti si producono nuovi depositi ancora più duri e la
pulizia può risultare difficile e, in casi estremi, impossibile.
Pulizia manuale
Prima della pulizia, assicurarsi che il forno sia freddo.
● Il coperchio rivestito di smalto catalitico deve essere pulito con una soluzione di acqua
calda e detergente liquido e una spazzola morbida in nylon.
Non utilizzare prodotti abrasivi, spazzole dure, pagliette saponate, lana d’acciaio, coltelli o
altri materiali abrasivi. Non applicare sullo smalto catalitico prodotti di pulizia per forni spray,
poiché le sostanze chimiche contenute nelle bombolette danneggiano lo smalto catalitico e lo
rendono inefficace.
Se per pulire le superfici interne del forno si usa un prodotto per forni spray, togliere prima il
coperchio catalitico.
Pulizia ad alta temperatura
Prima di pulire ad alta temperatura il coperchio con rivestimento catalitico, controllare
che tutte le superfici interne del forno siano state pulite nel modo descritto sopra.
Altrimenti, le alte temperature possono indurire i depositi sulle superfici interne del forno
e renderne impossibile la rimozione.
Se dopo la pulizia manuale il forno è ancora molto sporco, scaldarlo a una temperatura
elevata aiuterà a rimuovere lo sporco causato dagli schizzi di olio e di grasso.
I residui di spezie, sciroppo e sostanze simili non vengono rimossi da questa procedura.
Devono essere rimossi manualmente con una soluzione delicata di acqua calda e detergente
liquido applicata con una spazzola morbida.
● Togliere tutti gli accessori dal forno.
● Impostare il forno sulla funzione tradizionale.
● Impostare il calore su 250°C.
● Lasciare acceso il forno per circa 1 ora. Il periodo di tempo dipende dal livello di sporco.
E’ una buona idea impostare l’ora di fine processo utilizzando l’impostazione dell’ora finale,
per evitare di dimenticarsi di spegnere il forno.
I residui di sporco scompariranno gradualmente ad ogni uso successivo del forno con una
temperatura elevata.
38
BT62CDBST_XET-00047U-01_IT.indd 38
2009-11-04
9:46:26
Pulizia e manutenzione (continua)
Pulizia dello sportello del forno
IT
Per un utilizzo normale lo sportello del forno non dovrebbe essere rimosso, ma se è
necessaria la rimozione, ad esempio per la pulizia, attenersi alle seguenti indicazioni. Lo
sportello è pesante.
Rimozione dello sportello
1. Aprire, ruotandoli, i fermi su entrambi i cardini.
2. Con entrambe le mani, afferrare i lati dello
sportello a metà.
3. Ruotare lo sportello di circa 70°, finché è
possibile estrarre completamente i cardini dai fori.
2
70
1
39
BT62CDBST_XET-00047U-01_IT.indd 39
2009-11-04
9:46:26
Pulizia e manutenzione (continua)
IT
Fissaggio dello sportello
1. Con i fermi ancora aperti, infilare i cardini dello
sportello nei relativi fori.
70
2. Ruotare lo sportello in orizzontale e chiudere i fermi ruotandoli.
Il cardine è inserito correttamente.
Cardine
Foro per il
cardine
40
BT62CDBST_XET-00047U-01_IT.indd 40
2009-11-04
9:46:27
Pulizia e manutenzione (continua)
Vetro dello sportello del forno
Lo sportello del forno è costituito da tre lastre di vetro appoggiate una contro l’altra. La lastra
interna e quella centrale possono essere rimosse per la pulizia.
IT
ATTENZIONE
● Ogni volta che si toglie lo sportello dal forno, si devono aprire i fermi ruotandoli.
● Per pulire lo sportello del forno non utilizzare prodotti abrasivi o raschietti di metallo;
potrebbero graffiare la superficie e ciò potrebbe mandare in frantumi il vetro.
● Se lo sportello è montato, la rimozione di alcune parti (il vetro dello sportello o altro) può
comportare il rischio di lesioni.
Attenzione
Se si applica una forza eccessiva, specie sui bordi della lastra anteriore, il vetro può rompersi.
Smontaggio dello sportello
1. Rimuovere le due viti sul lato sinistro e destro dello sportello.
2. Rimuovere i due supporti, la mensola dello sportello e le due viti che fissano la maniglia.
Vetro n. 1
Staffa dello
sportello
Vetro n. 3
3. Separare la lastra interna,
vetro n.1, dallo sportello.
4. Sollevare il vetro n. 2 e rimuovere le due
mensole elastiche sopra la lastra di vetro.
Staffa dello sportello
Supporto del vetro
interno
Staffa elastica (destra
e sinistra)
Vetro n. 1
Vetro n. 2
Vetro n. 3
)
Vetro n. 2
Pulire i vetri con acqua calda o detergente liquido e asciugarli con un panno morbido
e pulito.
41
BT62CDBST_XET-00047U-01_IT.indd 41
2009-11-04
9:46:28
Pulizia e manutenzione (continua)
IT
Montaggio dello sportello
1. Pulire il vetro e le parti interne con acqua calda
saponata.
)
Non utilizzare prodotti abrasivi o
pagliette saponate. Usare una spugnetta
e detergente liquido o acqua calda
saponata.
2. Fissare le due staffe elastiche sopra il vetro n. 2
e rimettere il vetro n. 2 in posizione.
3. Fissare allo sportello il vetro n. 1, la staffa e i
supporti.
4. Stringere le due viti su entrambi i lati dello
sportello.
Guide laterali
Per pulire l’interno del forno è possibile rimuovere le due guide laterali.
Rimozione delle guide laterali
1. Ruotare in senso orario la vite sul fondo di 2-3
giri.
42
BT62CDBST_XET-00047U-01_IT.indd 42
2009-11-04
9:46:29
Pulizia e manutenzione (continua)
IT
2. Rimuovere la vite sul davanti ruotandola in senso
antiorario dopo aver bloccato la guida laterale.
3. Sollevare ed estrarre la guida laterale.
4. Rimuovere la vite sul fondo ruotandola in senso
antiorario.
43
BT62CDBST_XET-00047U-01_IT.indd 43
2009-11-04
9:46:29
Pulizia e manutenzione (continua)
IT
Fissaggio delle guide laterali
1. Inserire la vite sul fondo e ruotarla in senso orario
di 2-3 giri.
2. Inserire e premere la sagoma a U della guida
laterale contro la vite.
3. Inserire la vite sul davanti e stringere entrambe le
viti.
44
BT62CDBST_XET-00047U-01_IT.indd 44
2009-11-04
9:46:30
Pulizia e manutenzione (continua)
Sostituzione della lampadina
*
)
IT
Pericolo di scosse elettriche
Prima di sostituire la lampadina del forno, procedere come indicato di seguito.
● Spegnere il forno;
● Scollegare il forno dalla rete elettrica; e
● Proteggere la lampadina del forno e il coperchio di vetro stendendo un panno sul
fondo del forno.
La lampadina può essere acquistata presso un centro assistenza SAMSUNG.
Sostituzione della lampadina sul pannello posteriore del forno e pulizia del coperchio di
vetro
1.Rimuovere il coperchio ruotandolo in senso antiorario.
2.Rimuovere l’anello di metallo e la guarnizione e pulire il coperchio
di vetro.
3.Se necessario, sostituire la lampadina con una lampadina da forno
da 25 watt, 230 V e resistente a un calore di 300°C.
4.Rimettere l’anello di metallo e la guarnizione sul coperchio di vetro.
5.Rimontare il coperchio.
Sostituzione della lampadina sul pannello laterale del forno e pulizia del
coperchio di vetro
1. Per rimuovere il coperchio di vetro, afferrare il bordo inferiore con
una mano, inserire uno strumento piatto e affilato, ad esempio un
coltello, tra il vetro e il telaio e sollevare il coperchio.
2. Se necessario, sostituire la lampadina alogena con una lampadina
alogena da forno da 25 ~ 40 watt, 230 V e resistente a un calore di
300°C.
Suggerimento
● Per maneggiare la lampadina alogena utilizzare sempre un panno,
per evitare che l’unto delle dita si depositi sulla superficie della
lampadina.
3. Riposizionare il coperchio di vetro.
45
BT62CDBST_XET-00047U-01_IT.indd 45
2009-11-04
9:46:31
Garanzia e assistenza
IT
Domande frequenti e risoluzione dei problemi
Cosa faccio se il forno non si scalda?
Verificare se una delle seguenti azioni risolve il problema:
● Il forno non è acceso. Accendere il forno.
● L’orologio non è stato impostato. Impostare l’orologio (vedere la sezione “Regolazione
dell’orologio”).
● Verificare che siano state applicate le impostazioni desiderate.
● Può essersi bruciato un fusibile dell’impianto domestico o può essere scattato un
interruttore di sicurezza. Sostituire il fusibile o reimpostare il circuito. Se ciò accade
ripetutamente, chiamare un elettricista autorizzato.
Cosa faccio se anche dopo aver impostato la funzione e la temperatura il forno non si scalda?
Possono esservi dei problemi con i collegamenti elettrici interni. Contattare il centro assistenza
locale.
Cosa faccio se appare un codice di errore e il forno non si scalda?
C’è un guasto nel collegamento del circuito elettrico interno. Contattare il centro assistenza
locale.
Cosa faccio se il display dell’ora lampeggia?
Vi è stata un’interruzione di corrente. Impostare l’orologio (vedere la sezione “Regolazione
dell’orologio”).
Cosa faccio se la luce del forno non si accende?
La lampadina del forno è guasta. Sostituire la lampadina del forno (vedere la sezione
“Sostituzione della lampadina”).
Cosa faccio se la ventola del forno gira senza essere stata impostata?
Dopo l’uso, la ventola gira finché il forno si è raffreddato. Se la ventola continua a girare anche
dopo che il forno si è raffreddato, contattare il centro assistenza locale.
46
BT62CDBST_XET-00047U-01_IT.indd 46
2009-11-04
9:46:32
Garanzia e assistenza (continua)
Codici di errore e di sicurezza
Codici di
errore e di
sicurezza
IT
Funzioni generiche
Soluzione
ERRORE TEMP SENSORE
Contattare il centro assistenza
locale SAMSUNG.
ARRESTO DI SICUREZZA
Il forno ha continuato a funzionare
alla temperatura impostata per un
periodo di tempo prolungato.
Spegnere il forno e togliere i
cibi. Lasciare raffreddare il forno
prima di utilizzarlo nuovamente.
Un guasto del forno può
causare prestazioni scadenti e
problemi di sicurezza. Smettere
immediatamente di usare il forno.
Contattare il centro assistenza
locale Samsung
PARTIZIONE MANCANTE
L’uso del divisore non è corretto.
Vedere ‘Impostazione della
modalità del divisore’ (pag. 22).
Per la modalità superiore,
inferiore e a cottura doppia è
necessario inserire il divisore,
mentre per la modalità cottura
singola deve essere tolto.
47
BT62CDBST_XET-00047U-01_IT.indd 47
2009-11-04
9:46:34
Dati tecnici
IT
BT62CDBST / BT62CDBFST
Fonte di alimentazione
230V ~ 50Hz
Volume (capacità utilizzabile)
65 L
Potenza in uscita
MAX 3.650 W
Peso
Netto
42 kg circa
Spedizione
46 kg circa
Dimensioni (L x A x P)
Esterne
595 x 595 x 566 mm
Interno del forno
440 x 365 x 405 mm
Codice n. DG68-00047U-01
48
BT62CDBST_XET-00047U-01_IT.indd 48
2009-11-04
9:46:34
Installation and Operating Instructions
Built-In Oven
BT62CDBST
BT62CDBFST
Owner’s Manual
BT62CDBST_XET-00047U-01_EN.indd 1
2009-11-04
9:33:12
BT62CDBST_XET-00047U-01_EN.indd 2
2009-11-04
9:33:12
Contents
Using This Manual . . . . . . . . . . . . . . . . . . . . . . . . . . . . . . . . . . . . . . . . . . . . . . . . . . . 2
Safety Instructions . . . . . . . . . . . . . . . . . . . . . . . . . . . . . . . . . . . . . . . . . . . . . . . . . . . 2
Electrical safety . . . . . . . . . . . . . . . . . . . . . . . . . . . . . . . . . . . . . . . . . . . . . . . . . . . . . . . 2
Safety during operation . . . . . . . . . . . . . . . . . . . . . . . . . . . . . . . . . . . . . . . . . . . . . . . . . 3
Disposal Instructions . . . . . . . . . . . . . . . . . . . . . . . . . . . . . . . . . . . . . . . . . . . . . . . . . 3
Installing the Oven . . . . . . . . . . . . . . . . . . . . . . . . . . . . . . . . . . . . . . . . . . . . . . . . . . . 4
Safety instructions for the installer . . . . . . . . . . . . . . . . . . . . . . . . . . . . . . . . . . . . . . . . .
Installing into a low cabinet . . . . . . . . . . . . . . . . . . . . . . . . . . . . . . . . . . . . . . . . . . . . . .
Connecting to the mains power supply. . . . . . . . . . . . . . . . . . . . . . . . . . . . . . . . . . . . . .
Installing into a high cabinet . . . . . . . . . . . . . . . . . . . . . . . . . . . . . . . . . . . . . . . . . . . . .
4
4
5
6
Parts and Features. . . . . . . . . . . . . . . . . . . . . . . . . . . . . . . . . . . . . . . . . . . . . . . . . . . 7
Oven. . . . . . . . . . . . . . . . . . . . . . . . . . . . . . . . . . . . . . . . . . . . . . . . . . . . . . . . . . . . . . . .
Oven controls. . . . . . . . . . . . . . . . . . . . . . . . . . . . . . . . . . . . . . . . . . . . . . . . . . . . . . . . .
Special features. . . . . . . . . . . . . . . . . . . . . . . . . . . . . . . . . . . . . . . . . . . . . . . . . . . . . . .
Accessories . . . . . . . . . . . . . . . . . . . . . . . . . . . . . . . . . . . . . . . . . . . . . . . . . . . . . . . . . .
Using the accessories . . . . . . . . . . . . . . . . . . . . . . . . . . . . . . . . . . . . . . . . . . . . . . . . . .
Safety shutoff. . . . . . . . . . . . . . . . . . . . . . . . . . . . . . . . . . . . . . . . . . . . . . . . . . . . . . . . .
Cooling fan. . . . . . . . . . . . . . . . . . . . . . . . . . . . . . . . . . . . . . . . . . . . . . . . . . . . . . . . . . .
7
8
8
9
11
11
11
Before You Begin . . . . . . . . . . . . . . . . . . . . . . . . . . . . . . . . . . . . . . . . . . . . . . . . . . . 12
Setting the clock. . . . . . . . . . . . . . . . . . . . . . . . . . . . . . . . . . . . . . . . . . . . . . . . . . . . . .
Initial cleaning. . . . . . . . . . . . . . . . . . . . . . . . . . . . . . . . . . . . . . . . . . . . . . . . . . . . . . . .
Oven functions. . . . . . . . . . . . . . . . . . . . . . . . . . . . . . . . . . . . . . . . . . . . . . . . . . . . . . .
Test dishes. . . . . . . . . . . . . . . . . . . . . . . . . . . . . . . . . . . . . . . . . . . . . . . . . . . . . . . . . .
12
13
14
21
Oven Use. . . . . . . . . . . . . . . . . . . . . . . . . . . . . . . . . . . . . . . . . . . . . . . . . . . . . . . . . . 22
Setting the divider mode. . . . . . . . . . . . . . . . . . . . . . . . . . . . . . . . . . . . . . . . . . . . . . . .
Setting the oven temperature. . . . . . . . . . . . . . . . . . . . . . . . . . . . . . . . . . . . . . . . . . . .
Switching the oven off . . . . . . . . . . . . . . . . . . . . . . . . . . . . . . . . . . . . . . . . . . . . . . . . .
End time. . . . . . . . . . . . . . . . . . . . . . . . . . . . . . . . . . . . . . . . . . . . . . . . . . . . . . . . . . . .
Cook time. . . . . . . . . . . . . . . . . . . . . . . . . . . . . . . . . . . . . . . . . . . . . . . . . . . . . . . . . . .
Delayed start . . . . . . . . . . . . . . . . . . . . . . . . . . . . . . . . . . . . . . . . . . . . . . . . . . . . . . . .
Kitchen timer. . . . . . . . . . . . . . . . . . . . . . . . . . . . . . . . . . . . . . . . . . . . . . . . . . . . . . . . .
Oven lamp on / off. . . . . . . . . . . . . . . . . . . . . . . . . . . . . . . . . . . . . . . . . . . . . . . . . . . . .
Child safety function. . . . . . . . . . . . . . . . . . . . . . . . . . . . . . . . . . . . . . . . . . . . . . . . . . .
Switching the beeper off. . . . . . . . . . . . . . . . . . . . . . . . . . . . . . . . . . . . . . . . . . . . . . . .
22
26
27
27
29
31
33
33
34
34
Cleaning and Care. . . . . . . . . . . . . . . . . . . . . . . . . . . . . . . . . . . . . . . . . . . . . . . . . . 35
Steam cleaning . . . . . . . . . . . . . . . . . . . . . . . . . . . . . . . . . . . . . . . . . . . . . . . . . . . . . .
Catalytic enamel surface . . . . . . . . . . . . . . . . . . . . . . . . . . . . . . . . . . . . . . . . . . . . . . .
Cleaning the oven door . . . . . . . . . . . . . . . . . . . . . . . . . . . . . . . . . . . . . . . . . . . . . . . .
Side Runners. . . . . . . . . . . . . . . . . . . . . . . . . . . . . . . . . . . . . . . . . . . . . . . . . . . . . . . .
Changing the lamp. . . . . . . . . . . . . . . . . . . . . . . . . . . . . . . . . . . . . . . . . . . . . . . . . . . .
35
38
39
42
45
Warranty & Service. . . . . . . . . . . . . . . . . . . . . . . . . . . . . . . . . . . . . . . . . . . . . . . . . . 46
FAQs and Troubleshooting. . . . . . . . . . . . . . . . . . . . . . . . . . . . . . . . . . . . . . . . . . . . . . 46
Technical data. . . . . . . . . . . . . . . . . . . . . . . . . . . . . . . . . . . . . . . . . . . . . . . . . . . . . . 48
1
BT62CDBST_XET-00047U-01_EN.indd 1
2009-11-04
9:33:12
Using This Manual
EN
Thank you for choosing a SAMSUNG Built - In Oven.
This Owner’s Manual contains important information on safety and instructions intended to
assist you in the operation and maintenance of your appliance.
Please take the time to read this Owner’s Manual before using your oven and keep this book
for future reference.
The following symbols are used in the text of this Owner’s Manual.
*
)
Important Note
Safety Instructions
Installation of this oven must be performed only by a licensed electrician. The installer is
responsible for connecting the appliance to the mains power supply in observance of the
relevant safety recommendations.
Electrical safety
If the oven has been damaged in transport, do not connect it.
● This appliance must be connected to the mains power supply only by a specially licensed
electrician.
● In the event of a fault or damage to the appliance, do not attempt to operate it.
●Repairs should be performed by a licensed technician only. Improper repair may result
in considerable danger to you and others. If your oven needs repair, contact a SAMSUNG
Service Centre or your dealer.
●If the supply cord is defective, it must be replaced by a special cord or assembly available
from the manufacturer or an authorised service agent.
● Electrical leads and cables should not be allowed to touch the oven.
●The oven should be connected to the mains power supply by means of an approved circuit
breaker or fuse. Never use multiple plug adapters or extension leads.
● The rating plate is located on the right side of the door.
● The power supply of the appliance should be turned off when it is being repaired or
cleaned.
● Take care when connecting electrical appliances to sockets near the oven.
WARNING
The appliance should be powered down before replacing the lamp to avoid the possibility of
electric shock. During oven operation, the interior surfaces become very hot.
2
BT62CDBST_XET-00047U-01_EN.indd 2
2009-11-04
9:33:12
Safety Instructions (Continued)
Safety during operation
● This oven has been designed only for the cooking of household foods.
● During use, the oven interior surfaces become hot enough to cause burns. Do not touch
EN
heating elements or interior surfaces of the oven until they have had time to cool.
● Never store flammable materials in the oven.
● The oven surfaces become hot when the appliance is operated at a high temperature for
an extended period of time.
● When cooking, take care when opening the oven door as hot air and steam can escape rapidly.
● When cooking dishes that contain alcohol, the alcohol may evaporate due to the high tem-
peratures and the vapour can catch fire if it comes into contact with a hot part of the oven.
● For your safety, do not use high-pressure water cleaners or steam jet cleaners.
● Children should be kept at a safe distance when the oven is in use.
● Frozen foods such as pizzas should be cooked on the wire grill. If the baking tray is used, it
may become deformed due to the great variation in temperatures.
● Do not pour water into the oven bottom when it is hot. This could cause damage to the
enamel surface.
● The oven door must be closed during cooking.
● Take care when opening the door before the end of the steam cleaning procedure; the
water on the bottom is hot.
● Do not line the oven bottom with aluminium foil and do not place any baking trays or tins on
●
●
●
●
it. The aluminium foil blocks the heat, which may result in damage to the enamel surfaces
and cause poor cooking results.
Fruit juices will leave stains, which can become indelible on the enamel surfaces of the
oven. When cooking very moist cakes, use the deep pan.
Do not rest bakeware on the open oven door.
This appliance is not intended for use by young children or infirm persons without the adequate
supervision of a responsible person ensuring that they are using the appliance safely.
Young children should be supervised to ensure that they do not play with the appliance.
Disposal Instructions
Disposing of the packaging material
● The material used to package this appliance is recyclable.
● Dispose of the packaging materials in the appropriate container at your local waste disposal
facility.
Disposing of old appliances
WARNING
Before disposing of old appliances, make them inoperable so that they cannot be a source of danger.
To do this, disconnect the appliance from the mains supply and remove the mains lead.
To protect the environment, it is important that old appliances are disposed of in the correct manner.
● The appliance must not be disposed of with household rubbish.
● You can obtain information about collection dates and public refuse disposal sites from your
local refuse department or council.
3
BT62CDBST_XET-00047U-01_EN.indd 3
2009-11-04
9:33:12
Installing the Oven
*Electrical installation of this appliance must be performed only by a licensed electrician.
EN
The oven must be installed according to the instructions supplied.
Remove the protective vinyl from the door after installation.
Remove the protective tape from the interior surfaces of the oven after installation.
Safety instructions for the installer
● Installation must guarantee protection against exposure to electrically live parts.
● T
he unit in which the appliance is fitted must satisfy the requirements of DIN 68930 in
respect of stability.
Installing into a low cabinet
● Observe minimum clearance requirements.
● Secure oven into place with screws on either side of the oven.
1
2
560
595
595
572
545
21
3
4
min .550
min .50
min .20
min .560
50
460
min .600
4
BT62CDBST_XET-00047U-01_EN.indd 4
2009-11-04
9:33:13
Installing the Oven (Continued)
5
EN
Connecting the oven to the power supply
(H05VV-F, H05RR-F, Min. 1.5m, 1.5~2.5mm²)
Live
Earth
Neutral
Connecting to the mains power supply
Electrical connections must be made as per the connection plate fixed to the back of the appliance by an electrical fitter who must ensure that the appliance has been connected up in
accordance with fitting instructions and local regulations.
Where the appliance is not connected to the mains electricity supply by a plug, an omni polar
cutout device (with a contacts gap of at least 3 mm) must be fitted on the supply side of the
connection to meet safety requirements.
) When power is connected, the electronics of the oven are initialised; this neutral-
izes the lighting for a few seconds. The electric cable (H05 RR-F or H05 VV-F, Min.
1.5m, 1.5~2.5mm²) must be long enough for it to be connected to the built-in oven
standing on the floor in front of its unit.
Open the back cover of the oven at the bottom (using a flat-bladed screwdriver)
and completely unscrew the connection screw and the cable clamp before fitting
conducting wires into the appropriate terminals.
The earth wire must be connected to the (
) terminal of the oven.
If the oven is connected to the power supply by a plug, this must remain accessible once the
oven has been fitted.
We cannot accept any liability in the event of an accident resulting from non-existent or faulty
earthing.
6
7
min .5
5
BT62CDBST_XET-00047U-01_EN.indd 5
2009-11-04
9:33:15
Installing the Oven (Continued)
EN
Installing into a high cabinet
● Observe minimum clearance requirements.
● The oven should be slid into place at the proper angle of alignment.
1
2
560
595
595
572
545
21
3
4
min .550
50
min .590~max .600
min .560
5
Connecting the oven to the power supply
(H05VV-F, H05RR-F, Min. 1.5m, 1.5~2.5mm²)
Live
Earth
Neutral
6
BT62CDBST_XET-00047U-01_EN.indd 6
2009-11-04
9:33:15
Parts and Features
Oven
EN
Control panel
Top heating elements
Level 5
Oven lights
Level 4
Side Runner
Level 3
Catalytic enameled
cover casing
Level 2
Level 1
Switch divider
Glass door
Door handle
)
Shelf levels are numbered from the bottom up.
Levels 4 and 5 are used mainly for the grill function.
Please refer to the cooking guides provided throughout this manual to determine
appropriate shelf levels for your dishes.
7
BT62CDBST_XET-00047U-01_EN.indd 7
2009-11-04
9:33:16
Parts and Features (Continued)
EN
Oven controls
2
1
4
5
6
7
8
9
10
11
3
1. Divider Select Knob
7. Clock Button
2. Window Display
8. Kitchen Timer Button
3. Time / Temp Control Knob
9. Cook Time Button
4. Oven Button
10. End Time Button
5. Lamp Button
11. Temperature Button
6. Steam Cleaning Button
)
The Divider Select Knob and the Time / Temp Control Knob are pop - up knobs.
Simply push to turn.
Special features
The oven comes equipped with the following special features.
● Divider modes: When the divider inserted, the appliance’s divider facility enables independent cooking in two separated partitions, enhancing energy efficiency and convenience for
use.
● Steam cleaning: The oven’s self-cleaning function uses the power of steam to cut through
grease and grime to clean the oven interior safely.
8
BT62CDBST_XET-00047U-01_EN.indd 8
2009-11-04
9:33:16
Parts and Features (Continued)
Accessories
EN
The following accessories are provided with your oven.
grill, for dishes, cake tins, roast1 Wire
ing and grilling trays.
2 Wire roast, for roasting.
Front
Front
3 Baking tray, for cakes and biscuits.
pan, for roasting or collecting
4 Deep
meat juices or fat drippings.
ivider, for the upper, lower and twin
5 Dmodes.
Use inserted in level 3. There
spit
comprises
6 Ra otisserie
spit, 2 prongs, a removable handle
(BT62CDBFST)
is a divider-sensing switch on the
rear wall of the cooking compartment.
Insert into the back completely.
and a cradle, which fits into the 3rd shelf
from the bottom. To use the rotisserie, fit
the spit into the hole in the rear wall of
the oven’s interior. Place the deep pan
on level 1 when using the spit.
9
BT62CDBST_XET-00047U-01_EN.indd 9
2009-11-04
9:33:17
Parts and Features (Continued)
EN
7 Rotisserie spit and Shasilik.
(BT62CDBFST)
To USE IT :
● Place the deep pan (no trivet) at level 1 to collect the cooking juices or on the bottom of the oven if the
piece of meat to be roasted is too big.
● Slide one of the forks onto the spit; put the piece of meat to be roasted onto the spit;
● Parboiled potatoes and vegetables can be placed around the edge of the deep pan to roast at the
same time.
● Place the cradle on the middle shelf and position with the “v” shape at the front.
● To help insert the spit, the handle can be screwed onto the blunt end.
● Rest the spit onto the cradle with the pointed end towards the back and gently push until the tip of the
spit entres the turning mechanism at the back of the oven. The blunt end of the spit must rest on the
“v” shape. (The spit has two lugs which should be nearest to the oven door so to stop the spit going
forward, the lugs also act as a grip for the handle.)
● Before cooking unscrew the handle. After cooking screw the handle back on to help remove the spit
from the cradle.
10
BT62CDBST_XET-00047U-01_EN.indd 10
2009-11-04
9:33:18
Parts and Features (Continued)
The baking tray, deep pan and wire grill should
be inserted correctly into the side runners.
When taking out the cooked foods from the
oven, be careful of hot utensils and surfaces.
5
4
EN
ExampleLevel 1: Deep pan
Level 4: Baking tray
Baking tray
3
Deep pan
2
1
gap 2cm
) When using the deep pan or the baking tray to collect drippings from cooking foods,
ensure that the pan or tray is properly placed in the side runners. Allowing these
accessories to contact the bottom surface of the oven can damage the enamel of
the surface. Trays and pans placed on level 1 should clear the bottom surface of the
oven by at least 2 cm.
Using the accessories
Divider, wire grill, baking tray and deep pan
Positioning the divider
Insert the divider into level 3 of the oven.
Positioning the wire grill
Insert the wire grill at any desired level.
Positioning the baking tray or deep pan
Insert the baking tray and/or the deep pan at any desired level.
WARNING
To cook in the lower, upper or twin divider modes,
you must insert the divider.
Safety shutoff
● If a cooking time is not entered, the oven will shut itself off after the lengths of time indi-
cated below.
Shutoff times for various temperature settings
Under 105 °C
From 105 °C to 240 °C
From 245 °C to 300 °C
16 hours
8 hours
4 hours
● This oven’s electrical circuitry features a thermal shutoff system. If the oven heats to abnor-
mally high temperatures, the system will shut off the power supply to the heating elements
for a period of time.
Cooling fan
During cooking, it is normal for the vent to release hot air from the front of the oven.
● The cooling fan will also continue to operate after the oven has been in use. It will turn off
when the internal cabinet temperature has dropped to 60 °C or after 22 minutes.
11
BT62CDBST_XET-00047U-01_EN.indd 11
2009-11-04
9:33:20
Before You Begin
EN
Setting the clock
When connecting the power for the first time, please use the product after setting the time.
Button. The “
1 Pandress“12:the” Clock
will blink.
the Time / Temp Control Knob
2 Turn
to set the hour of the day.
”
Example
To set 1:30
Wait for about 10 seconds. The clock
stops blinking and shows the set hour.
the Clock Button. The “
3 Press
and “ :00” will blink.
/ Temp Control Knob
4 TtournsetthetheTime
minute of the time. “
” will
”
blink.
the Clock Button to finish setting the clock or wait for about 10 seconds. “
”
5 Pwillressdisappear
and “30” will stop blinking. The display shows the time of day. The appliance is now ready to use.
12
BT62CDBST_XET-00047U-01_EN.indd 12
2009-11-04
9:33:21
Before You Begin (Continued)
Initial cleaning
EN
Clean the oven thoroughly before using for the first time.
*
D
o not use sharp or abrasive cleaning materials. These could damage the oven
surface. For ovens with enamel fronts, use commercially available cleaning agents.
To clean the oven
1. Open the door. The oven light comes on.
2. C
lean all oven trays, accessories and side runners with warm water or washing - up liquid
and polish dry with a soft clean cloth.
3. Wash the oven interior in the same way.
4. Wipe the front of the appliance with a damp cloth.
Check that the clock is set correctly. Remove accessories and operate the oven at the convection setting at 200 °C for 1 hour before using. There will be a distinctive odor; this is normal,
but ensure your kitchen is well ventilated during this conditioning period.
13
BT62CDBST_XET-00047U-01_EN.indd 13
2009-11-04
9:33:21
Before You Begin (Continued)
EN
Oven functions
The features of this oven include the following functions
1.
Conventional
Suggested temperature: 200 °C
The conventional function is ideal for baking and roasting foods arranged on one rack. Both
the top and bottom heating elements operate to maintain the oven temperature.
We recommend to preheat the oven in conventional mode.
Shelf Level
Accessory
Temperature
(°C)
Time (min)
3
Wire grill
180 - 200
40-50
3
Wire roast +
Deep Pan
240
15-20
3
Baking tray
200
13-20
3
Baking tray
200
25-35
3
Baking tray
200
20-30
3/2
Wire roast /
Deep pan
200
40-50
3
Baking tray
180-200
30-45
3
Baking tray
180-200
40-50
Sponge Cake
(250-500g)
2
Wire grill
160 - 180
20 - 30
Marble Cake
(500-1000g)
2
Wire grill
170 - 190
40 - 50
2
Baking tray
160 - 180
25 - 35
2
Wire grill
190 - 200
25 - 30
Food Item
Frozen Lasagne
(500-1000g)
Whole Fish (e.g. Dorade)
(300-1000g)
3-4 cut on each side
DROP OIL
Fish filets
(500-1000g)
3-4 cut on each side
DROP OIL
Frozen cutlets
(350-1000g)
minced meat & with ham,
cheese or mushroom filing
DROP OIL
Frozen cutlets from minced,
carrot, beetroot or potato
(350-1000g)
DROP OIL
Pork on bone cutlets
(500-1000g)
DROP OIL, ADD SALT &
PEPPER
Baked potato
(cut in half)
(500-1000g)
Frozen Meat roll
with mushrooms filing
(500-1000g)
DROP OIL
Yeast Cake on Tray
with fruit & crumbles topping
(1000-1500g)
Muffins
(500-800 g)
14
BT62CDBST_XET-00047U-01_EN.indd 14
2009-11-04
9:33:22
Before You Begin (Continued)
2.
Top Heat + Convection
Suggested temperature: 190 °C
The top heating element is in operation and the fan operates to constantly circulate the hot
air.
EN
We recommend to preheat the oven with Top Heat + Convection mode.
Temperature
(°C)
Time
(min)
Wire roast +
Deep pan
180 - 200
50-65
2
Baking tray
180 - 230
80 - 120
Whole chicken
(800-1300g)
BRUSH WITH OIL & SPICES
2
Wire roast +
Deep Pan
190 - 200
45 - 65
Meat or fish steaks
(400-800g)
DROP OIL, ADD SALT & PEPPER
3
Wire roast +
Deep pan
180 - 200
15 - 35
Chicken Pieces
(500-1000g)
BRUSH WITH OIL&SPICES
4
Wire roast +
Deep pan
200 - 220
25 - 35
2
Wire grill
180 - 200
30 - 40
Wire roast +
Deep pan
Add 1 cup water
200 - 220
45 - 60
180 - 200
25 - 35
Food Item
Shelf Level
Accessory
Pork on bone
(1000g)
BRUSH WITH OIL&SPICES
3
Pork shoulder in foil
(1000-1500g)
MARINATE
Roast Fish
(500-1000g)
use ovenproof dish
BRUSH WITH OIL
Roast Beef
(800-1200g)
BRUSH WITH OIL&SPICES
2
Duck Breast
(300-500g)
4
Wire roast +
Deep pan
Add 1 cup water
15
BT62CDBST_XET-00047U-01_EN.indd 15
2009-11-04
9:33:22
Before You Begin (Continued)
EN
3.
Convection
Suggested temperature: 170 °C
This function bakes foods placed on up to three shelves and is also appropriate for roasting.
Cooking is achieved by the heating element on the rear wall and the fan distributes the heat.
We recommend to preheat the oven in convection mode.
Temperature
(°C)
Time
(min)
Wire roast +
Deep pan
190 - 200
40-50
3
Wire grill
220 - 240
15-25
Baked apples
5-8pcs each 150-200g
Take out the hearts, add raisins
and jam. Use ovenproof dish.
3
Wire grill
200-220
15-25
Cutlets from minced meat
(300-600g)
DROP OIL
3
Baking tray
190 - 200
18-25
Minced Meat roll with filling
,Russian style’
(500-1000g)
BRUSH WITH OIL
3
Baking tray
180-200
50-65
Frozen Croquettes
(500-1000g)
2
Baking tray
180 - 200
25 - 35
Frozen Oven Chips
(300-700g)
2
Baking tray
180 - 200
20 - 30
Frozen Pizza
(300-1000g)
2
Wire grill
200 - 220
15 - 25
Apple & Almond Cake
(500-1000 g)
2
Wire grill
170 - 190
35 - 45
3
Baking tray
180 - 200
15 - 25
Food Item
Shelf Level
Accessory
3
Baked Bananas
(3-5 pcs), cut with knife on top,
add10-15g chocolate, 5-10g nuts
into cuts, drop sugar water, wrap
in aluminium foil.
Lamb rack
(350-700g) ,
BRUSH WITH OIL & SPICES
Fresh Croissant
(200-400g)
(ready-dough)
16
BT62CDBST_XET-00047U-01_EN.indd 16
2009-11-04
9:33:22
Before You Begin (Continued)
4.
Large Grill
Suggested temperature: 240 °C
The large grill function grills large quantities of flat foods, such as steaks, schnitzels and
fish. It is also suitable for toasting. Both the top heating element and the grill are on in this
mode.
EN
We recommend to preheat the oven using Large Grill mode.
Food Item
Shelf Level
Accessory
Temperature (°C)
Time (min)
Sausages (thin)
5-10pcs
4
Wire roast +
Deep pan
220
5-8
turnover
5-8
Sausages (thin)
8-12pcs
4
Wire roast +
Deep pan
220
Toasts
5-10pcs
5
Wire grill
240
Cheese Toasts
4-6 pcs
4
Wire roast +
Baking tray
200
3
Baking tray
4
Wire roast +
Deep pan
Frozen Pancakes
with filling
,Russian Style’
(200- 500g)
Beef Steaks
(400-800 g)
4-6
turnover
4-6
1-2
turnover
1-2
4-8
200
20 - 30
240
8 - 10
turnover
5-7
17
BT62CDBST_XET-00047U-01_EN.indd 17
2009-11-04
9:33:22
Before You Begin (Continued)
EN
5.
Small Grill
Suggested temperature: 240 °C
This setting is for grilling smaller amounts of flat foods, such as steaks, schnitzels, fish and
toast, placed in the middle of the tray. Only the top element is in operation.
We recommend to preheat the oven using Small Grill mode.
Put food in the centre of accessory.
Food Item
Shelf Level
Accessory
Temperature (°C)
Time (min)
Frozen Oven Camembert
(2 – 4 each 75g)
PUT IN COLD OVEN
(before preheat)
3
Wire grill
200
10-12
Frozen Baguettes
with topping
(Tomato-Mozzarella or
Ham & Cheese)
3
Wire roast +
Baking tray
200
15-20
Frozen Fish fingers
(300-700g)
PUT IN COLD OVEN ,
(before preheat)
DROP OIL
3
Wire roast +
Baking tray
200
15-25
Frozen Fish burger
(300- 600g)
PUT IN COLD OVEN,
DROP OIL
3
Baking tray
180-200
20-35
Frozen Pizza
(300-500g)
PUT IN COLD OVEN
(before preheat)
3
Wire roast +
Baking tray
180-200
23-30
18
BT62CDBST_XET-00047U-01_EN.indd 18
2009-11-04
9:33:23
Before You Begin (Continued)
6.
Bottom Heat + Convection
Suggested temperature: 190 °C
The Bottom Heat + Convection mode is for recipes calling for a moist topping and a crisp
base, as with foods like pizzas, quiches lorraine, German-style open fruitcakes and cheesecakes.
EN
We recommend to preheat the oven in Bottom Heat + Convection mode.
Food Item
Shelf Level
Accessory
Temperature (°C)
Time
(min)
Yeast dough pie with apple frozen (350-700g)
3
Wire grill
180-200
15-20
Puff pastry small pies with filling
frozen (300-600g)
BRUSH EGG YOLK, PUT IN
COLD OVEN
(before preheat),
3
Baking tray
180-200
20 - 25
Meat balls in sauce
(250-500g)
use ovenproof dish
3
Wire grill
180-200
25-35
Puff pastry fans
(500-1000g)
BRUSH EGG YOLK
3
Baking tray
180
15-23
Cannelloni in sauce
(250-500g)
use ovenproof dish
3
Wire grill
180
22-30
Yeast dough pies with filling
(600-1000g)
BRUSH EGG YOLK
3
Baking tray
180-200
20-30
Homemade Pizza
(500-1000g)
2
Baking tray
200 - 220
15 - 25
Homemade Bread
(700-900g)
2
Wire grill
170 - 180
45 - 55
19
BT62CDBST_XET-00047U-01_EN.indd 19
2009-11-04
9:33:23
Before You Begin (Continued)
EN
7. Twin Mode
Using twin mode you can cook two different food items in your oven. When cooking in upper
and lower cavity you can use different temperatures, cooking modes and cooking times. For
example, you can grill steaks and bake gratin simultaneously. Using the divider, you can
cook gratin in the lower and steaks in the upper part of the oven.
Always insert divider into shelf level 3 before you start cooking.
Suggest 1: Cooking at different temperatures
Cavity
Food Item
Shelf
Level
Cooking
Mode
Temperature
(°C)
Accessory
Time
(min)
UPPER
Frozen Pizza
(300-400g)
4
Convection
200-220
Wire grill
15-25
LOWER
Marble Cake
(500-700g)
1
Convection
160 - 180
Baking Tray
50-60
Notice: Put food in cold oven
Suggest 2: Cooking at different cooking modes
Cavity
UPPER
LOWER
Food Item
Shelf
Level
Cooking
Mode
Temperature
(°C)
Accessory
Time
(min)
Chicken Pieces
(400-600g)
4
Top Heat +
Convection
200-220
Wire Roast +
Deep Pan
25-35
Potato Gratin
(500-1000g)
1
Convection
160-180
Wire Grill
30-40
Notice: Put food in cold oven
20
BT62CDBST_XET-00047U-01_EN.indd 20
2009-11-04
9:33:23
Before You Begin (Continued)
Test dishes
EN
According to standard EN 60350
1. Baking
The recommendations for baking refer to preheated oven.
Type of Food
Dish & Notes
Baking tray
Shelf level
Cooking
Mode
Temp. °C
Cooking
time min
3
Conventional
160-180
15-25
Convection
150-170
20-30
Conventional
160-180
20-30
Convection
170-190
80-100
Conventional
170-190
70-80
Cooking
time min
Small Cakes
Fatless Sponge
Cake
Apple Pie
Deep pan + Baking tray
1+4
Baking tin on Wire grill
(Dark coated, ø 26 cm)
2
Wire grill + Baking tray
+ 2 Springform cake tins
(Dark coated, ø 20 cm)
1+3
Wire grill + 2 Springform
cake tins
(Dark coated, ø 20 cm)
1
Placed
diagonally
2. Grilling
Preheat the empty oven for 5 minutes using Large Grill function.
Use this function with the maximum temperature setting of 300°C.
Shelf level
Cooking
Mode
Temp. °C
Wire grill
5
Large Grill
300
1st 1-2
2nd 1-1 1/2
Wire Roast +
Deep pan
(to catch drippings)
4
Large Grill
300
1st 7-10
2nd 6-9
Type of Food
White Bread
Toasts
Beef Burgers
Dish & Notes
21
BT62CDBST_XET-00047U-01_EN.indd 21
2009-11-04
9:33:23
Oven Use
EN
Setting the divider mode
For upper, twin and lower modes, insert the divider at the “OFF” position of Divider Select
Knob. For single mode, remove the divider at the “OFF” position. And then turn the Divider
Select Knob to select the mode you want. For further details, see the table below.
the Divider Select Knob to
1 Turn
select the desired partition.
2 Press the Oven Button.
the Time / Temp Control Knob to select the desired oven function.
3 TIfurn3 seconds
have elapsed and there are no further adjustments, the oven will begin
automatically in the selected mode and function.
Divider
Mode
Marking
Oven Function
Insert
Divider
Usage Information
Off
Upper
Mode
1. Convection
2. Top Heat + Convection
3. Large Grill
Yes
This mode saves energy
and time when cooking small
amounts of food.
Twin Mode
Both Upper and Lower
Partition Function
Yes
You can cook two dishes at
two different temperatures at
the same time.
Lower
Mode
1. Convection
2. Bottom Heat + Convection
Yes
This mode saves energy
and time when cooking small
amounts of food.
Single
Mode
1. Convection
2. Top Heat + Convection
3. Conventional
4. Large Grill
5. Small Grill
6. Bottom Heat + Convection
No
22
BT62CDBST_XET-00047U-01_EN.indd 22
2009-11-04
9:33:24
Oven Use (Continued)
Upper mode
EN
Only the upper heating element operates. The divider should be inserted.
Convection
Large Grill
Top Heat + Convection
Lower mode
Only the lower heating element operates. The divider should be inserted.
Convection
Bottom Heat + Convection
23
BT62CDBST_XET-00047U-01_EN.indd 23
2009-11-04
9:33:25
Oven Use (Continued)
EN
Twin mode
The upper and lower modes operate at the same time. It is possible to set which mode activates
first. When one of the dishes has finished cooking in twin mode and you would like to change
the cooking time or temperature of the other partition, turn the Divider Select Knob to select the
mode (upper or lower) that you would like to continue operating. Divider should be inserted.
Twin mode 1: T
he upper mode begins operating first. If the Oven Button is pressed or if
15 seconds elapse after the upper mode is set and there has been no further
adjustment, the oven begins the lower mode.
Convection
Large Grill
Top Heat + Convection
Twin mode 2: A
s the upper mode starts, if the Oven Button is pressed or if 15 seconds
elapse and there has been no further adjustment, the oven moves to the lower
mode. The upper and lower modes operate at the same time.
Convection
Bottom Heat + Convection
24
BT62CDBST_XET-00047U-01_EN.indd 24
2009-11-04
9:33:25
Oven Use (Continued)
Single mode
EN
Convection
Conventional
Small Grill
Top Heat + Convection
Large Grill
Bottom Heat + Convection
25
BT62CDBST_XET-00047U-01_EN.indd 25
2009-11-04
9:33:26
Oven Use (Continued)
EN
Setting the oven temperature
In single, upper and lower modes
1 Press the Temperature Button.
the Time / Temp Control Knob
2 Ttournadjust
the temperature in increments of 5 °C.
Single Mode
40 °C – 250 °C
(40 °C – 300 °C)
Upper Mode
40 °C – 250 °C
Lower Mode
40 °C – 250 °C
(Large & Small Grill)
)
The temperature may be adjusted during cooking.
In the oven mode settings, the top and bottom heating elements cycle on and off in
intervals through the cooking process to regulate and maintain the temperature.
In twin mode
the Temperature Button (up1 Pperressmode).
the Time / Temp Control Knob
2 toTurnadjust
the temperature in incre-
Press the Temperature Button twice
(lower mode).
)
ments of 5 °C.
Upper Mode
(Large Grill)
160 °C – 250 °C
(200 °C – 250 °C)
Lower Mode
160 °C – 250 °C
The temperature may be adjusted during cooking.
26
BT62CDBST_XET-00047U-01_EN.indd 26
2009-11-04
9:33:27
Oven Use (Continued)
Switching the oven off
EN
To switch the oven off, turn the Divider
Select Knob to the “Off” position.
End time
You can set the end time during cooking.
In single, upper and lower modes
the End Time Button.
1 Press
ExampleCurrent time is 12:00
the Time / Temp Control Knob
2 Turn
to set the desired end time.
the End Time Button.
3 PTheressoven
operates with the selected end time
automatically unless the End Time Button is
pressed within 5 seconds.
)
During cooking, you can adjust the previously set end time with the Time / Temp
Control Knob for better results.
27
BT62CDBST_XET-00047U-01_EN.indd 27
2009-11-04
9:33:28
Oven Use (Continued)
EN
In twin mode
End times for the upper and lower modes can be selected using the End Time Button and the
Time / Temp Control Knob.
the End Time Button twice
1 Press
(lower mode).
the Time / Temp Control Knob
2 Turn
to set the desired end time.
ExampleCurrent time is 12:00
the End Time Button.
3 PTheressoven
operates with the selected
end time unless the End Time Button
is pressed within 5 seconds.
)
During cooking, you can adjust the previously set end time with the Time / Temp
Control Knob for better results.
28
BT62CDBST_XET-00047U-01_EN.indd 28
2009-11-04
9:33:28
Oven Use (Continued)
Cook time
EN
You can set the cook time during cooking.
In single, upper and lower modes
1 Press the Cook Time Button.
the Time / Temp Control Knob
2 Turn
to set the desired cook time.
the Cook Time Button.
3 PTheressoven
operates with the selected
cook time unless the Cook Time Button is pressed within 5 seconds.
)
During cooking, you can adjust the previously set cook time with the Time / Temp
Control Knob for better results.
29
BT62CDBST_XET-00047U-01_EN.indd 29
2009-11-04
9:33:29
Oven Use (Continued)
EN
In twin mode
Cook times for the upper and lower modes can be selected by using the Cook Time Button
and the Time / Temp Control Knob.
the Cook Time Button twice
1 Press
(lower mode).
the Time / Temp Control Knob
2 Turn
to set the desired cook time.
the Cook Time Button.
3 PTheressoven
operates with the selected
cook time unless the Cook Time Button is pressed within 5 seconds.
) During cooking, you can adjust the previously set cook time with the Time / Temp
Control Knob for better results.
30
BT62CDBST_XET-00047U-01_EN.indd 30
2009-11-04
9:33:30
Oven Use (Continued)
Delayed start
EN
Case 1 - Cook time is entered first
If the end time is entered after the cook time has already been set, the cook time and the end
time are calculated and if necessary the oven sets a delayed start point.
the End Time Button.
1 Press
ExampleCurrent time is 15:00
the Time/Temp Control Knob to
2 Turn
set the end time.
and the desired cook
time is 5 hours.
ExampleYou want to cook for
5 hours and finish at
20:30.
ress the End Time Button. A
3 P“Ready”
symbol appears until the
delayed start point.
31
BT62CDBST_XET-00047U-01_EN.indd 31
2009-11-04
9:33:31
Oven Use (Continued)
EN
Case 2 - End time is entered first
If the cook time is entered after the end time has already been set, the cook time and the end
time are calculated and if necessary the oven sets a delayed start point.
the Cook Time Button.
1 Press
ExampleCurrent time is 15:00
/ Temp Control Knob
2 toTurnsetthetheTime
cook time.
and the desired end
time is 17:00.
ExampleYou want to cook for 1
hour and 30 minutes
and end by 17:00.
ress the Cook Time Button. A
3 P“Ready”
symbol appears until the
delayed start point.
32
BT62CDBST_XET-00047U-01_EN.indd 32
2009-11-04
9:33:31
Oven Use (Continued)
Kitchen timer
EN
ress the Kitchen Timer Button
1 Ponce.
“
the Time / Temp Control Knob
2 Turn
to set the desired time.
” flashes.
Example
5 minutes
ress the Kitchen Timer Button to
3 Pstart
the kitchen timer. When the set
time has elapsed, an audible signal
sounds.
) Press and hold the Kitchen Timer Button for 2 seconds to cancel the timer.
Oven lamp on / off
1 Press the Lamp Button.
1st
2nd
3rd
4th
) Lamp turns on and off in the indicated
order regardless of operation.
Upper and Lower
Upper
Lower
Off
33
BT62CDBST_XET-00047U-01_EN.indd 33
2009-11-04
9:33:32
Oven Use (Continued)
EN
Child safety function
ress the Cook Time and End Time
1 PButtons
at the same time and hold
for 3 seconds. (
display field.
ress the Cook Time and End Time
2 PButtons
at the same time and hold for
) will appear in the
3 seconds again to unlock.
) When locked, all buttons and knobs except the Divider Select Knob and the
unlock button will not operate. The lock is available whether or not the oven is in
operation.
Switching the beeper off
o turn the beeper off, press the
1 TClock
and End Time Buttons at the
the beeper back on, press
2 Ttheo turn
Clock and End Time Buttons
same time and hold for 3 seconds.
again at the same time and hold for 3
seconds.
34
BT62CDBST_XET-00047U-01_EN.indd 34
2009-11-04
9:33:33
Cleaning and Care
Steam cleaning
1
approximately 400 ml (3 / 4 pint) of water onto the bottom of the empty oven. Use
2 Pour
normal water only, no distilled water.
the oven door.
3 Close
CautionThe steam cleaning system can be switched on only when the oven
EN
Remove all accessories from the oven.
has cooled to room temperature completely. Allow the oven to cool
completely if it does not work.
the Divider Select Knob to
4 Turn
single mode.
5 Press the Steam Cleaning Button.
fter an amount of time, the heater
6 Acompletes
operating and its lamp
hen the operation is complete, the
7 Wdisplay
will blink and a beep indicates
remains on.
the end.
Select Knob to “Off”
8 TtournendthetheDivider
operation and clean the
interior.
35
BT62CDBST_XET-00047U-01_EN.indd 35
2009-11-04
9:33:34
Cleaning and Care (continued)
EN
After deactivating the Steam Cleaning
Tips
● Take care when opening the door before the end of the steam cleaning procedure; the
water on the bottom is hot.
● Never leave the residual water in the oven for any length of time, for example, overnight.
● Open the oven door and remove the remaining water with a sponge.
● Using a detergent - soaked sponge, a soft brush or a nylon scrubber, wipe the oven inte-
rior. Stubborn soil can be removed with a nylon scourer.
● Lime deposits may be removed with a cloth soaked in vinegar.
● Wipe clean with clear water and dry with a soft cloth (do not forget to wipe under the oven
door seal).
● If the oven is heavily soiled, the procedure may be repeated after the oven has cooled.
● If the oven is heavily soiled with grease, for example, after roasting or grilling, it is recom-
mend that you rub detergent into the stubborn soil before activating the oven cleaning
function.
● After cleaning, leave the oven door ajar at a 15 ° angle to allow the interior enamel surface
to dry thoroughly.
36
BT62CDBST_XET-00047U-01_EN.indd 36
2009-11-04
9:33:34
Cleaning and Care (continued)
Rapid drying
EN
1. Leave the oven door ajar at an angle of approximately 30°.
2. Turn the Divider Select Knob to single mode.
3. Press the Oven Button.
4. Turn the Time / Temp Control Knob to convection.
5. Set the cook time to about 5 minutes and the temperature to 50 °C.
6. Switch the oven off at the end of this period.
WARNING
Do not use high - pressure water cleaners or steam jet cleaners to clean the oven.
Oven exterior
● For cleaning both the interior and exterior of the oven, use a cloth and a mild cleaning
agent or warm soapy water.
● Dry with kitchen paper or a dry towel.
● Do not use scourers, caustic cleaners or abrasive products.
Stainless steel oven fronts
● Do not use steel wool, scouring pads or abrasives. They may damage the finish.
Aluminium oven fronts
● Wipe the plate gently with a soft cloth or microfiber cloth and a mild window cleaning deter-
gent.
WARNING
Make sure the oven is cool before cleaning.
Oven interior
● Do not hand - clean the door seal.
● Do not use coarse scouring pads or cleaning sponges.
●To avoid damaging the enameled oven surfaces, use commercially available oven clean-
ers.
● To remove stubborn soil, use a special oven cleaner.
Accessories
Wash all bakeware and accessories after each use and dry with a kitchen towel.
To clean easily, soak in warm soapy water for about 30 minutes.
37
BT62CDBST_XET-00047U-01_EN.indd 37
2009-11-04
9:33:34
Cleaning and Care (continued)
EN
Catalytic enamel surface
The removable cover casing is coated with a dark gray catalytic enamel that can become
coated with oil and fat distributed by circulating air during convection heating. These deposits
will burn off at oven temperatures of 200 °C and higher, for example, when baking or roasting.
Higher temperatures will result in faster burning.
The oven and accessories should be cleaned after each use. Otherwise further baking and
roasting will cause the deposits to bake on even harder and cleaning may become difficult and
in extreme cases impossible.
Cleaning by hand
Make sure the oven is cool before cleaning.
●The catalytic enameled cover casing should be cleaned using a solution of hot water and
washing-up liquid applied with a soft nylon brush.
Do not use abrasive cleaning agents, hard brushes, scouring pads or cloths, steel wool, knives
or other abrasive materials. Do not use oven spray on catalytic enamel as the chemicals used
in oven sprays will damage catalytic enamel and render it ineffective.
If using oven sprays on the interior oven surfaces, the catalytic cover casing must first be
removed from the oven.
Cleaning with high temperatures
Before cleaning the catalytic cover casing with high temperatures, make sure that all interior
oven surfaces have been cleaned as described above. Otherwise, the high temperatures
can bake deposits onto the interior oven surfaces and make them impossible to remove.
If, after manual cleaning, the oven is still heavily soiled, heating it to a high temperature will
help remove soiling caused by oil and grease splashes.
Note that deposits of spices, syrups and similar substances are not removed by this process.
These should be removed by hand with a mild solution of hot water and washing-up liquid applied with a soft brush.
● Remove all accessories from the oven.
● Set the oven to conventional function.
● Set the heat to 250 °C.
●Run the oven for approximately 1 hour. The length of time will depend on the degree of
soiling.
It is a good idea to set the finish time for the process using the end time setting, in case you
forget to switch the oven off at the end.
Any remaining soil will gradually disappear with each subsequent use of the oven at high
temperatures.
38
BT62CDBST_XET-00047U-01_EN.indd 38
2009-11-04
9:33:34
Cleaning and Care (Continued)
Cleaning the oven door
EN
For normal use, the oven door should not be removed but if removal is necessary, for example, for cleaning, follow these instructions. The oven door is heavy.
Removing the door
1. Flip open the clips at both hinges.
2. W
ith both hands, grasp the sides of the oven
door at its middle.
3. R
otate the door by approximately 70 ° until the
hinges can be taken out completely from the
hinge holes.
2
70
1
39
BT62CDBST_XET-00047U-01_EN.indd 39
2009-11-04
9:33:35
Cleaning and Care (Continued)
EN
Attaching the door
1. With the clips still flipped open, align the door
hinges into the hinge holes.
70
2. Rotate the door toward the horizontal line and flip the clips closed.
The hinge is
normally inserted.
Hinge
Hinge
hole
40
BT62CDBST_XET-00047U-01_EN.indd 40
2009-11-04
9:33:36
Cleaning and Care (Continued)
Oven door glass
The oven door is equipped with three sheets of glass placed against each other. The inner &
middle sheets can be removed for cleaning.
EN
WARNING
● Whenever the door is separated from the oven, the clips should be flipped open.
● Do not use harsh abrasive cleaners or metal scrapers to clean the oven door; they ca
scratch the surface, which may cause the glass to shatter.
● When the door is mounted, removing some of the parts (the door glass or some other part)
from the door may result in injury.
Attention
The glass may break if you use excessive force especially at the edges of the front sheet.
Disassembling the door
1. Remove the two screws on the left and right sides of the door.
2. Remove the two supports and the door bracket and remove the two screws attaching the handle.
Glass #1
Door bracket
Glass #3
3. Detach the inner sheet, glass #1,
from the door.
4. Lift glass #2 and remove the two
spring-brackets from the top of the sheet.
Door bracket
Holder glass inner
Spring bracket
(Right and Left)
Glass #1
Glass #2
Glass #3
Glass #2
) Clean the sheets with warm water or washing-up liquid and polish dry with a soft
clean cloth.
41
BT62CDBST_XET-00047U-01_EN.indd 41
2009-11-04
9:33:37
Cleaning and Care (Continued)
EN
Assembling the door
1. Clean the glass and interior parts with warm
soapy water.
) Do not use abrasive cleaners or pan
scourers. Use a sponge with liquid
detergent or warm soapy water.
2. Attach the two spring brackets at the top of
glass #2 and place glass #2 into position.
3. Attach glass #1, the door bracket and the
supports to the door.
4. Secure the two screws at both sides of the
door.
Side Runners
To clean the interior of the oven, the both side runners can be removed.
Detaching the Side Runners
1. Turn the screw at the back 2-3 times
anti-clockwise only.
42
BT62CDBST_XET-00047U-01_EN.indd 42
2009-11-04
9:33:38
Cleaning and Care (Continued)
2. Remove the screw at the front by turning it
anti-clockwise after latching the side runner.
EN
3. Pull and remove the side runner.
4. Remove the screw from the back by
turning it anti-clockwise.
43
BT62CDBST_XET-00047U-01_EN.indd 43
2009-11-04
9:33:39
Cleaning and Care (Continued)
EN
Attaching the Side Runners
1. Insert the screw at the back and turn it
clockwise 2-3 times only.
2. Insert and push the back U-form of the side
runner towards the screw.
3. Insert the screw at the front, and fasten
both screws.
44
BT62CDBST_XET-00047U-01_EN.indd 44
2009-11-04
9:33:40
Cleaning and Care (Continued)
Changing the lamp
*
EN
D
anger of electric shock!
Before replacing the oven light bulb, take the following steps:
● Switch off the oven;
● Disconnect the oven from the mains supply; and
● Protect the oven light bulb and the glass cap by laying a cloth on the bottom of the
oven.
) You can buy a lamp at SAMSUNG service centre.
Replacing the rear oven lamp and cleaning the glass cap
1. Take off the cap by turning counterclockwise.
2. Remove the metal ring and the sheet ring and clean the glass
cap.
3. If necessary, replace the bulb with a 25 watt, 230 V, 300 °C heat
- resistant oven light bulb.
4. Fit the metal and the sheet ring to the glass cap.
5. Replace the glass cap.
Replacing the oven side lamp and cleaning the glass cap
1. To remove the glass cover, hold the lower end with one hand,
insert a flat sharp implement such as a table knife between the
glass and the frame and pop out the cover.
2. If necessary, replace the halogen bulb with a 25 ~ 40 watt,
230 V, 300 °C heat - resistant halogen oven light bulb.
Tip
● Always use a cloth when handling a halogen bulb to avoid
depositing oils from your fingers on to the surface of the bulb.
3. Replace the glass cover.
45
BT62CDBST_XET-00047U-01_EN.indd 45
2009-11-04
9:33:41
Warranty & Service
EN
FAQs and Troubleshooting
What should I do if the oven doesn’t heat up?
Check to see if one of the following actions resolves the issue:
● The oven may not be switched on. Switch the oven on.
● The clock may not be set. Set the clock (see section “Setting the clock”).
● Check to see if the required settings have been applied.
●A household fuse may have blown or a circuit breaker may have tripped. Replace the fuses
or reset the circuit. If this happens repeatedly, call an authorised electrician.
What should I do if, even though the oven function and temperature have been set, the oven
does not heat up?
There may be problems with the internal electrical connections. Call your local service centre.
What should I do if an error code appears and the oven does not heat up?
There is a fault in the internal electrical circuit connection. Call your local service centre.
What should I do if the time display is blinking?
There was a power failure. Set the clock (see section “Setting the clock”).
What should I do if the oven light doesn’t illuminate?
The oven light is faulty. Replace the oven light bulb (see section “Changing the lamp”).
What should I do if the oven’s fan is running without having been set?
Following use, the oven’s fan runs until the oven has cooled down. Call your local service
centre if the fan continues to run after the oven has cooled down.
46
BT62CDBST_XET-00047U-01_EN.indd 46
2009-11-04
9:33:41
Warranty & Service (Continued)
Error and Safety codes
Error and
Safety codes
EN
General Functions
Solution
TEMP SENSOR ERROR
Call local SAMSUNG service
centre.
SAFETY SHUTOFF
Oven has continued operating at set
temperature for prolonged time.
Turn oven off and remove
food. Allow oven to cool
before using again.
An error of the oven may cause low performance and problems in safety. Stop
using the oven immediately.
Call local Samsung service
centre.
PARTITION MISSING
The usage of divider is not correct.
Refer to the ‘Setting the divider mode’
(22page).
For upper, twin and lower
mode, divider should be
inserted, and for single mode,
divider should be eliminated.
47
BT62CDBST_XET-00047U-01_EN.indd 47
2009-11-04
9:33:43
Technical data
EN
BT62CDBST / BT62CDBFST
Power Source
230V ~ 50Hz
Volume (usable capacity)
65 L
Output Power
MAX 3650 W
Weight
Net
Shipping
42 kg approx
46 kg approx
Dimensions (W x H x D)
Outside
Oven Cavity
595 x 595 x 566 mm
440 x 365 x 405 mm
Code No. DG68-00047U-01
48
BT62CDBST_XET-00047U-01_EN.indd 48
2009-11-04
9:33:43