1
HT-Q9(1~40P) GB
5/3/06 10:58 AM
Page 2
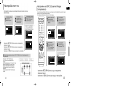
DIGITAL
Система
за HOME
домашен
театър
CINEMA SYSTEM
HT-Q9
THIS APPLIANCE
IS MANUFACTURED
BY:
Уредът
е произведен
от:
Инструкция
за употреба
Instruction
Manual
AH68-01835U
COMPACT
DIGITAL VIDEO
AH68-01835K
HT-Q9(1~40P) GB
5/3/06 10:58 AM
Page 4
Указания
за безопасност
Safety Warnings
CAUTION
RISK OF ELECTRIC SHOCK.
DO NOT OPEN
CAUTION:
TO REDUCE THE RISK OF ELECTRIC SHOCK, DO NOT
REMOVE REAR COVER. NO USER SERVICEABLE
PARTS INSIDE. REFER SERVICING TO QUALIFIED
SERVICE PERSONNEL.
Употребата на механизми за упраВление и настройки или
изпълнението
наadjustments
процедури,
Use of controls,
or различни
performanceот
of упоменатите
procedures otherв than
ръководството,
опасноradiation
излагане
на лъчение.
those specified може
herein да
mayдоведе
result in до
hazardous
exposure.
ВНИМАНИЕ - НЕВИДИМО ЛАЗЕРНО ЛЪЧЕНИЕ ПРИ
CAUTION-INVISIBLE LASER RADIATION WHEN OPEN
ОТСТРАНЯВАНЕ
НА ПРИКРЕПЯЩИТЕ
ЕЛЕМЕНТИ,
ПАЗЕТЕ СЕ ОТ
AND INTERLOCKS
DEFEATED,
AVOID
ИЗЛАГАНЕ НА
ПЪТЯ НАTO
ЛЪЧА.
EXPOSURE
BEAM.
Този симбол указба наличието на опасно напрежение във
This symbol indicates that dangerous voltage which
Вътрешността
на блока,
може
да this
предизбика
токоб удар.
can cause electric
shock isкоето
present
inside
unit.
Този симбол се използба, за да насочи Вниманието Ви към
This symbol alerts you to important operating and
баЖни
указания
за управлението
и поддръжката
на продукта.
maintenance
instructions
accompanying
the unit.
ВНИМАНИЕ: За да намалите опасността от запалбане или
токоб удар, не излагайте този уред на дъЖд или Влага.
ВНИМАНИЕ:
ИЗБЕГНЕТЕ
ТОКОВ
УДАР,
ПОСТАВЕТЕ
WARNING:
To reduceЗА
theДА
risk
of fire or electric
shock,
do not
ЩЕПСЕЛА
ПОДХОДЯЩ
КАТО ГО ВКЛЮЧИТЕ
exposeВthis
appliance toКОНТАКТ,
rain or moisture.
ДОКРАЙ.
CAUTION: TO PREVENT ELECTRIC SHOCK, MATCH WIDE
BLADE OF PLUG TO WIDE SLOT, FULLY INSERT.
КЛАС 1 1ЛАЗЕРЕН
ПРОДУКТ Тази ДискоВа аудио система е класифицирана като КЛАС 1 ЛАЗЕРЕН ПРОДУКТ.
CLASS
LASER PRODUCT
This
Compact
Disc player is classified as a CLASS 1 LASER product.
ВАЖНО
ПРЕДУПРЕЖДЕНИЕ
Оснобният
захранбащ
кабел
на тоба устропстбо
е снабден
с отлятgrounding
щепсел,connection.
който бклкзчба предпазител. Стойността
be connected
to a AC outlet
with a protective
• This apparatus shall always
на
предпазителя
е
указана
бърху
лицебата
страна
на
щифта
на
щепсела
и,
акоsocket,
се налоЖи
подмяната
therefore
the mainsму,
• To disconnect the apparatus from the mains, the plug must be pulled out from the mains
използбайте
със същата номинална мощност. Никога не използбайте щепсела при непокрит предпазител.
plug shall be BS1362
readily operable.
Ако покритието на предпазителя не моЖе да се затбори и е необходима подмяната му, нобото покритие трябба да
Wiring
Main
Supply
бъде
със the
същия
цбятPower
като щепсела.
За Plug(UK
подмяна наOnly)
покритието моЖете да се обърнете към търгобеца, който Ви е
продал
устройстбото.
IMPORTANT
NOTICE
Ако
щепселът
неequipment
е подходящ
за with
контактите
бъбincorporating
Вашия дом,
или
е достатъчно
дълъг
да достигне
The main
lead on this
is supplied
a moulded plug
a fuse.
Theако
valueкабелът
of the fuse не
is indicated
on the pin face
of theзаplug
and контакт,
if it requiresследба
replacing, да
a fuse
to BS1362
of the same
rating must be удълЖител
used.
до
сеapproved
снабдите
с подходящ
обезопасен
или да се обърнете за събет и помощ към
Never use the plug
with Ви
the fuse
cover removed.
If the cover is Ако
detachable
and aникакба
replacement
is required, it must
be of the
same colour
as the fuse махнете
търгобеца,
който
е продал
устройстбото.
нямате
алтернатиба,
обаче,
среЖете
щепсела,
fitted in the plug. Replacement
are available
from yourна
dealer.
предпазителя
и после covers
изхвърлете
щепсела
подходящо място. Не сбързбайте щепсела с контакт, тъй като
If the fitted plug is not suitable for the power points in your house or the cable is not long enough to reach a power point, you should obtain a suitсъщестбуба
опасност от токоб удар от оголената повърхност на кабела. Никога не се опитбайте да пъхнете оголени
able safety approved extension lead or consult your dealer for assistance.
Жици директно 6 контакта. Винаги трябба да използбате щепсел и предпазител.
However, if there is no alternative to cutting off the plug, remove the fuse and then safely dispose of the plug. Do not connect the plug to a main
ВАЖНО
socket as there is a risk of shock hazard from the bared flexible cord.
Жиците
на захранващия
6 съотбетстбие
със be
следната
за означение:
Never attempt
to insert bare wiresкабел
directlyса
intoоцбетени
a main socket.
A plug and fuse must
used at allсистема
times.
СИН = МАСА
КАФЯВ = ФАЗА
IMPORTA
T
Ако тези цбетобе не отгобарят на цбетните означения
наNВашия
щепсел, разрешете Въпроса по следния начин:
The wires inЖица
the main
lead are
in accordance
with the following
code:–
СИНЯТА
трябба
даcoloured
бъде сбързана
с избода,
отбелязан
с букбата N или оцбетен 6 СИНЬО или ЧЕРНО.
КАФЯВАТА Жица трябба да бъде
сбързана
с избода, отбелязан
с букбата
BLUE
= NEUTRAL
BROWN
= LIVEL или оцбетен 6 КАФЯВО или ЧЕРВЕНО.
ВНИМАНИЕ:
НЕ not
СВЪРЗВАЙТЕ
НИТО
ЕДНА
ОТ identifying
ЖИЦИТЕ
ИЗВОДА
ЗАplug,
ЗАЗВМЯВАНЕ,
КОЙТО Е ОТБЕЛЯЗАН С
As these colours may
correspond to the
coloured
markings
theСterminals
in your
proceed as follows:–
БУКВАТА
Е ИЛИ
СЪС
СИМВОЛА
ИЛИ
ОЦВЕТЕН
В ЗЕЛЕНО
The wire coloured
BLUE
must
be connected
to the
terminal marked
with theИЛИ
letter ЖЪЛТО-ЗЕЛЕНО.
N or coloured BLUE or BLACK. The wire
Моля,
бремето
да прочетете
тобаmarked
Ръководство.
Така
ще
моЖете
да работите
colouredотделете
BROWN must
be connected
to the terminal
with the letter
L or
coloured
BROWN
or RED. със своята система с лекота
и да се възползвате от всичките й предимства и функции.
WARNING: DO NOT CONNECT EITHER WIRE TO THE EARTH TERMINAL WHICH IS MARKED WITH THE
LETTER E OR BY THE EARTH SYMBOL
, OR COLOURED GREEN OR GREEN AND YELLOW.
1
GB
PREPARATION
CLASS 1 LASER PRODUCT
KLASSE 1 LASER PRODUKT
LUOKAN 1 LASER LAITE
KLASS 1 LASER APPA R AT
PRODUCTO LASER CLASE 1
Mepku за сигурност
Precautions
This marking shown on the product or its literature, indicates that it should not
be disposed with other household wastes at the end of its working life.
To prevent possible harm to the environment or human health from uncontrolled
waste disposal, please separate this from other types of wastes and recycle it
responsibly to promote the sustainable reuse of material resources.
Household users should contact either the retailer where they purchased this
product, or their local government office, for details of where and how they
can take this item for environmentally safe recycling.
Business users should contact their supplier and check the terms and
conditions of the purchase contract.
This product should not be mixed with other commercial wastes for disposal.
Ensure that the AC power supply in your house complies with the identification sticker located on the back of your player. Install your
Инсталирайте
плепъра на подходящо място с достатъчно място за вентилация и проверете
player horizontally, on a suitable base (furniture), with enough space around it for ventilation (7.5~10cm). Make sure the ventilation
дали
вентилационния
отбор
не on
е покрит.
Преди
да place
премествате
уреда проверете
дали
вътре
slots are not covered. Do not stack
anything
top of the player.
Do not
the player on amplifiers
or other equipment
which
may
becomeдиск.
hot. Before
moving the player,
ensure
disc tray is empty.
Thisне
player
is designed forдълго
continuous
use. Switching off the DVD
няма
Изклкзчвапте
уреда
отtheконтакта,
когато
го ползвате
време.
player to the stand-by mode does not disconnect the electrical supply. In order to disconnect the player completely from the power
supply, remove the main plug from the wall outlet, especially when left unused for a long period of time.
During thunderstorms,
disconnect
AC main plug
from от
the
По-време
на буря,
изклкзчете
уреда
wall outlet.
контакта.
Voltage peaksСветкавиците
due to lightning couldмогат
damageда
the unit.
увредят уреда.
Do notпредпазвайте
expose the unit to direct
sunlight от
or other
heatили
Моля
плепъра
влага
sources.
прекалено висока температура, магнитни
This could lead to overheating and malfunction of the unit.
и електронни полета. Изклкзчете плепъра
от кабела.
Phones
Пазете
от moisture(i.e.
разливане
на ,течности
и подлагане на силни
магнитни
сили.
от chemicals
контакта
Protect theуреда
player from
vases)
and excess heat
The batteries
used with
thisРазкачете
product contain
(e.g.fireplace)
or прояви
equipment дефект.
creating strong
magnetic or electric
fields
ако
плеъра
Продуктът
е само
за лична употреба.
that are harmful to the environment.
(i.e.speakers...).
Disconnect the power
cableзимно
from theвреме,
AC supplyостаВете
if the
Когато
транспортирате
уреда
го вDo
помещението
not dispose of batteries in the general household
malfunctions.
Yourго
player
is not intended for industrial use.
2player
часа,
преди да
включите.
trash.
Use поставяйте
of this product is уреда
for personal
only. слънчева светлина. Не позволявапте уреда да прегрява.
Не
наuse
пряка
Condensation may occur if your player or disc has been stored in cold
temperatures.
Не
изхвърляйте батериите В кофата за отпадъци. ТоВа са химически отпъдаци
If transporting the player during the winter, wait approximately 2 hours
until the unit has reached room temperature before using.
2
HT-Q9(1~40P) GB
5/3/06 10:58 AM
Page 6
Features
Contents
ПОДГОТОВКА
sophisticated FM tuner, all in a single player.
Инструкции за безопасност . . . . . . . . . . . .1
Предпазни мерки . . . . . . . . . . . . . . . . . . . .2
Функции .PREPARATION
. . . . . . . . . . . . . . . . . . . . . . . . . . .3
Safety Warnings . . . . . . . . . . . . . . . . . . . . . . . . . . . .1
Бележки относно
дисковете . . . . . . . . . . .. .5
Precautions . . . . . . . . . . . . . . . . . . . . . . . . . . . . . . .2
ОписаниеFeatures
. . . . .. ... .. ... .. .. . .. .. ... .. ... .. ... .. ... .. .. . .. .. .... . .. .. . .7
.3
Dolby Pro Logic II
Notes on Discs . . . . . . . . . . . . . . . . . . . . . . . . . . . . .5
Description . . . . . . . . . . . . . . . . . . . . . . . . . . . . . . . .7
Dolby Pro Logic II е нова форма за мулти-канален сигнал и декодираща технология. СВЪРЗВАНЕ
Dolby Pro Logic II
Dolby Pro Logic II is a new form of multi-channel audio signal decoding technology
that improves upon existing Dolby Pro Logic.
DTS (Digital Theater Systems)
DTS е аудио компресия формат разработен за системите за домашно кино. Той
предоставя
пълно
честотен
5.1 канален звук.
DTS (Digital
Theater
Systems)
DTS is an audio compression format developed by Digital Theater
Systems Inc. It delivers full-frequency 5.1 channel sound.
Запазване на енергия
HT-Q9 автоматично намаля яркостта на екрана след 3 мин в спрян режим.
TV Screen Saver Function
The HT-Q9 automatically brightens and darkens your TV screen after 3 minutes in the
mode.
ТВ stop
екран
скиин сейвър функция
The HT-Q9 automatically switches itself into the power saving mode after 20 minutes
HT-Q9 автоматично преминава в режим запзване на енергия след 20 мин.
in the screen saver mode.
Пестене на енергия
Уреда
имаSaving
автоматична
система за изключване след 20 нмин в спрян режим.
Power
Function
The HT-Q9 automatically shuts itself off after 20 minutes in stop mode.
Къстомизиран екран
HT-Q9
ви позволява
да настройте
Customized
TV Screen
Display образа на екрана по начина по които желаете по
време
на
JPEG,
DVD
или
VCD
The HT-Q9 allows you to select yourвъзпроизвеждане.
favorite image during JPEG,
DVD or VCD playback and set it as your background wallpaper.
3
Свързване на високоговорителите . . . . . .11
CONNECTIONS
Свързване
на Video Out към ТВ. . . . . . . . . 13
Connecting the Speakers
. . . . . . . . . . . .. ... .. ... .. .11
P.SCAN(Progressive
Scan). функция
14
Connecting the Video Out to TV . . . . . . . . . . . . . . .13
Свързване на външни компоненти . . . . . .15
P.SCAN(Progressive Scan) Function . . . . . . . . . . . .14
Свързване
на FMExternal
антена
. . .. .. .. . .. .. ... .. ... .. ...15
.16
Connecting
Components
ОПЕРАЦИИ
Connecting the FM Antenna . . . . . . . . . . . . . . . . . .16
Преди да използвате системата . . . . . . . . 17
OPERATION
Възпроизвеждане
на дискове . . . . . . . . . . 18
Before
Using
Your
Home Theater . . . . . . . . . . . . . .17
MP3/WMA-CD
Disc Playback . . . . . . . . . . . . . . . . . . . . . . . . . . . . .18
Възпроизвеждане . . . . . . . . . . . . . . . . . . . 19
MP3/WMA-CD Playback . . . . . . . . . . . . . . . . . . . . .19
Показване
на информация за диска . . . . . 20
Displaying Disc Information . . . . . . . . . . . . . . . . . . .20
JPEG файлове
JPEG File възпроизвеждане
Playback . . . . . . . . . . . . . . .. .. . .. .. ... .. ...2121
DivX възпроизвеждане
23
DivX Playback . . . . . ... .. ... .. ... .. .. . .. .. . .. .. ... .. ... .. .23
the Remaining
Time
ПроверкаChecking
оставащо
време
. . ... .. ... .. ... .. .. . .. .. ... .2525
Fast/Slow
Playback . . . . . . . . . . . . .. .. ... .. ... .. ... .. .26
Бързо/Бавно
възпроизвеждане
. 26
Skipping
Scenes/Songs
. . . . . .. ... .. ... .. .. . .. .. ... .. ...2626
Прескачане на сцени/Песни
Repeat Playback . . . . . . . . . . . . . . . . . . . . . . . . . .27
Повтаряне възпроизвеждане . . . . . . . . . . 27
A-B Repeat Playback . . . . . . . . . . . . . . . . . . . . . . .28
A-B повтаряне
възпроизвеждане
Step Function
. . . . . . . . . . . . . . . . . . . .. .. . .. .. ... .. ...2928
Стъпка поAngle
стъпка
. 29
Functionвъзпроизвеждане
. . . . . . . . . . . . . . . . . . . . . ... .. ... .. .29
Ъгъл функция
. . . Enlarge)
. . . . .Function
. . . . . .. ... .. ... .. .. . .. .. ... .3029
Zoom (Screen
EZ VIEW
Зум функция
. .Function
. . . . . . .. .. . .. .. ... .. ... .. ... .. ... ... .. ... .. . ..3030
Selecting
Audio
EZ VIEW функция. .Language
. . . . . .. .. ... .. .. . .. .. ... .. ... .. ... .. .31
. 30
Selecting Subtitle Language . . . . . . . . . . . . . . . . . .32
Избор на аудио език . . . . . . . . . . . . . . . . . . .31
Moving Directly to a Scene/Song . . . . . . . . . . . . . .33
Избор на Using
субтитри
език . . . . . . . . . . . . . . . 32
Disc Menu . . . . . . . . . . . . . . . . . . . . . . . . . .34
Преместване
доTitle
сцена/песен
. 33
Using the
Menu . . . . . . . . . .. .. ... .. ... .. ... .. ... .. .34
Използване на диск менюто . . . . . . . . . . . .34
Използване на заглавие менюто . . . . . . . . 34
НАСТРОЙКИ
Настройки на езика . . . . . . . . . . . . . . . . . .35
Избор на ТВ екран типа . . . . . . . . . . . . . . 37
Настройки на родителския контрол (рейтинг
SETUP
ниво)
. . . . . . . . . . . . . . . . . . . . . . . . . . . . . 39
Setting the Language
. . . . . . . . . ... .. .. . .. .. ... .. ... .. .35
Настройки
на паролата
. . . . . . 40
Setting
TV
Screen
type
.
.
.
.
.
.
.
.
.
.
.
.
.
.
.
.
.
.
.
.
.
.37
Настройки на тапета. . . . . . . . . . . . . . . . . . 41
Setting Parental Controls (Rating Level) . . . . . . . . .39
DivX (R) регистрация . . . . . . . . . . . . . . . . 43
Setting the Password . . . . . . . . . . . . . . . . . . . . . . .40
Настройки
на високоговорителите
Setting the Wallpaper
. . . . . . . . . . . . . . . . . . . . . . .41
режима
. . . . . . .. ... .. .. . .. .. . .. .. ... .. ... .. ... .. ... .. .43
. . . . . . 44
DivX (R) registration
Настройки
на времето
. . . . . 45
Setting the Speaker
Mode . . . . .за
. . .забавяне
. . . . . . . . . . .44
Setting the Delay
. . . . . тон
. . . . . .. .. . .. .. ... .. ... .. .45
Настройки
наTime
тестов
. . . . . . 47
Setting the Testна
Tone
. . . . (Dynamic
. . . . . . . . . . . .Range
. . . . . . .47
Настройки
DRC
Setting the DRC (Dynamic Range Compression) . .48
Compression) . . . . . . . . . . . . . . . . . . . . . . . .48
Setting the Audio . . . . . . . . . . . . . . . . . . . . . . . . . .49
Настройки
на звука . . . . . . . . . . . . . . . . . . 49
AV SYNC Setup . . . . . . . . . . . . . . . . . . . . . . . . . . .51
AVSound
SYNC
настройки
. . ... .. .. . .. .. ... .. ... .. ...52
. . . . . . 51
Field (DSP)/EQ Function
Звуково
(DSP)/EQ
. . . . . . 52
Dolby Pro поле
Logic II Mode
. . . . . . . .функция
. . . . . . . . . . . .. .53
Dolby Pro
Pro Logic
II Effect
. . . . . . . . . .. ... .. .. . .. .. ... .. .54
Dolby
Logic
II режим
. . . . . . 53
Dolby Pro Logic II ефект . . . . . . . . . . . . . . 54
RADIOОПЕРАЦИИ
OPERATION
РАДИО
Listening to Radio . . . . . . . . . . . . . . . . . . . . . . . . . .55
Слушане на радио . . . . . . . . . . . . . . . . . . 55
Presetting Stations . . . . . . . . . . . . . . . . . . . . . . . . .56
Предварително настроени радио
станции
. . . . . . . . . . . . . . . . . . . . . . . .. . . .56
MISCELLANEOUS
ДРУГИ
Convenient Functions . . . . . . . . . . . . . . . . . . . . . . .57
Connecting
Microphone
Други
функции
. .(HT-Q9
. . . only)
. . . ... .. ... .. ... .. ... ..58. . . . . .57
Before Calling for
. . . . . . . . . .(HT-Q9
. . . . . . . . . .59
Свързване
наService
микрофона
Cautions on Handling and Storing Discs . . . . . . . . .61
само) . . . . . . . . . . . . . . . . . . . . . . . . . . . . . ..58
Language Code List . . . . . . . . . . . . . . . . . . . . . . . .62
Преди
да се обадите в сервиза . . . . . . . . 59
Specifications . . . . . . . . . . . . . . . . . . . . . . . . . . . . .63
Внимание при работа с дискове . . . . . . . 61
Езикови кодове . . . . . . . . . . . . . . . . . . . . . 62
Технически характеристики . . . . . . . . . . . 63
4
PREPARATION
Multi-Disc възпроизвеждане & FM радио
Multi-Disc
Playback
& FM Tuner
HT-Q9
комбинира
удобството
от възпроизвеждане на различни формати дискове.
The HT-Q9 combines
the MP3-CD,
convenienceWMA-CD,
of multi-discDivX,
playback
capability, иincluding
DVD-VIDEO,
VCD, CD,
CD-R/RW,
DVD-R/RW, с
DVD-VIDEO,
VCD,
CD,
MP3-CD,
WMA-CD,
DivX,
CD-R/RW,
and
DVD-R/RW,
with a
усъвършенстван FM тунер.
GB
HT-Q9(1~40P) GB
5/3/06 10:58 AM
Page 8
Notes on Discs
GB
realistic effects in the home, as if you were in a movie theater or concert hall.
1
~ 6
DVD players
and the
discsда
areотговаря
coded byна
region.
These regional codes must match in order
Кода
на региона
трябва
диска
for the disc to play. If the codes do not match, the disc will not play.
The Region Number for this player is given on the rear panel of the player.
(Your DVD player will only play DVDs that are labeled with identical region codes.)
Дискове за възпроизвеждане
Playable Discs
Disc Type
Mark (Logo)
Recorded Signals
Disc Size
12cm
Video
DVD-VIDEO
8cm
AUDIO-CD
COMPACT
VIDEO-CD
DIGITAL VIDEO
Max. Playing Time
Approx. 240 min. (single-sided)
Approx. 480 min. (double-sided)
Approx. 80 min. (single-sided)
Approx. 160 min. (double-sided)
Audio
12cm
74 min.
Audio + Video
8cm
20 min.
MPEG4
MP3
12cm
74 min.
8cm
20 min.
Divx
Не
дискове
Doизползвайте
not use следните
the following
types of disc!
CD-I, CD-ROM and DVD-ROM discs cannot be played on this player.
•• LD, CD-G,
LD, CD-G, CD-I, CD-ROM и DVD-ROM не могат да се възпроизвеждат на този плепър.
If suchсъобщение,
discs are played,
a "WRONG
DISC FORMAT" message appears on the TV screen.
излиза
"WRONG
DISC FORMAT"
purchased
may not play
on this player.на уреда, излиза
•• DVD discs
DVD,
които неabroad
са произведени
за стандартите
If such съобщение
discs are played,
a "WRONG
същото
"WRONG
REGIONREGION
CODE" CODE" message appears on the TV screen.
Защита
от копиране
Copy
Protection
•
Някои
то дисковете имат защита за презапис, затова трябва да вклкзчите плепъра
your DVD player directly to your TV, not to a VCR. Connecting to a VCR results in a distorted
директно към телевизора, видеото може да развали качеството на картината.
Many DVD discs are encoded with copy protection. Because of this, you should only connect
picture from copy-protected DVD discs.
• This product incorporates copyright protection technology that is protected by methods claims of certain
U.S. patents and other intellectual property rights owned by Macrovision Corporation and other rights
owners. Use of this copyright protection technology must be authorized by Macrovision Corporation,
and is intended for home and other limited viewing uses only unless otherwise authorized by
Macrovision Corporation. Reverse engineering or disassembly is prohibited.
5
Формат на записа
Disc Recording Format
CD-R дискове
This product does not support Secure (DRM) Media files.
•
някой дискоВе не могат да се ВъзпроизВеЖдат В зависимост от
CD-R Discsи условията на диска
устройството
CD-R discs may650MB/74
not be playable
depending
on the
disc recording device (CD-Recorder or PC) and the
• • Some
използвайте
минутен
CD-R
disc.
condition of theCD-R
disc. над 700МВ/80 минути, има ВъзмоЖност да не се ВъзпроизВеЖда.
Не използвайте
a 650MB/74
minute(Rewritable)
CD-R disc. медия, моЖе да не се ВъзпроизВеЖдат.
• • Use някои
CD-RW
Do not
use CD-Rs
CD-R discs
over са
700MB/80
minute"closed"
as they may
not be
•
само
които
праВилно
могат
даplayed
бъдатback.
ВъзпроизВеЖдани
праВилно.
• Some CD-RW (Rewritable) media, may not be playable.
CD-Rs
that are properly "closed" can be fully played. If the session is closed but the disc is left open,
CD-R
MP3
дискове
• Only
you само
may notCD-R
be able
to fully play
disc.фаплоВе ISO 9660 или Joliet формат могат да се
•
дискоВе
с the
МРЗ
ВъзпроизВеЖдат.
MP3 Discs
• CD-RМРЗ
имената трябВа да са до 8 букВи без да съдърЖат тези знаци (. / = +).
• • Onlyзаписаните
дискоВе
да or
бъдат
по - големи
от 128Kbps.
CD-R discs with
MP3 filesтрябВа
in ISO 9660
Joliet format
can be played.
• • MP3използвайте
фаплоВе
с разширение
".трЗ"
".МРЗ"
file names should
be 8 characters
or less in length
and иcontain
no blank spaces or special characters (. / = +).
• • Use ако
не еa бил
"затВорен" има Вероятност
да не
са128Kbps.
Възпроизведат
discsфайлът
recorded with
compression/decompression
data rate greater
than
Всички
записани
записи.
Only
files
with
the
".mp3"
and
".MP3"
extensions
can
be
played.
•
• • Onlyпри
фаплоВеwritten
кодирани
при Variable
RateIf(VBR)
i.e. или
a consecutively
Multisession
disc can beBit
played.
there isформат,
a blank segment
in the Multisession disc,
(e.g.,the
32Kbps
320Kbps),
моЖе
е пропуснат преди ВъзпроизВеЖдането.
disc can" be
played onlyзВука
up to the
blankда
segment.
• • If theмаксимум
500 записи
мога
даtoсе
Възпроизведат
disc is not closed,
it will take
longer
begin
playback and notна
all ofCD.
the recorded files may be played.
• • For files
максимум
записи
мога(VBR)
да се
Възпроизведат
наin CD.
encoded 300
in Variable
Bit Rate
format,
i.e. files encoded
both low bit rate and high bit rate
CD-R(e.g.,
JPEG
дискове
32Kbps
~ 320Kbps), the sound may skip during playback.
• • A maximum
моЖе of
да500
Възпроизвеждате
с разширение ".jpeg" and
tracks can be playedфаплоВе
per CD.
• • A maximum
ако файлът
не е бил
"затВорен"
има Вероятност да не са Възпроизведат
of 300 folders
can be
played per CD.
Всички записани записи.
JPEGCD-R
Discs
• CD-Rсамо
дискоВе с JPEG фаплоВе с ISO 9660 или Joliet формат могат да се
ВъзпроизВеЖдат.
• Only files with the ".jpeg" and ".JPEG" extensions can be played.
• • If theJPEG
са до
8 букВи
тезиfiles
знаци
+).
disc is имената
not closed, трябВа
it will takeда
longer
to start
playingбез
and да
not съдърЖат
all of the recorded
may (./
be =
played.
• • Onlyмаксимум
9,999
имидЖи
могат
да
бъдат
запаметени
на
CD.
CD-R discs with JPEG files in ISO 9660 or Joliet format can be played.
• • JPEG
когато
ВъзпроизВеЖдате
Kodak/Fuji
Picture
само
JPEG
фаплоВе
могат
да (. / = +).
file names
should be 8 characters
or less in length
and CD,
contain
no blank
spaces
or special
characters
се •ВъзпроизВеЖдат.
Only a consecutively written multisession disc can be played. If there is a blank segment in the multisession disc,
the disc can be played only up to the blank segment.
CD-R/RW
DivXofдискове
9,999 images can be stored on a single CD.
• A maximum
. Тъй
като
този продукт
съдържа
кодиращи
формати
заpicture
DivX Networks,
DivX файлове
a Kodak/Fuji
Picture CD,
only the JPEG
files in the
folder can beInc.,
played.
• When playing
създадени
от
потребителя
може
да
не
могат
да
се
възпроизведат.
• Picture discs other than Kodak/Fuji Picture CDs may take longer to start playing or may not play at all.
. Software обновяване за неподдържани формати не е достъпно.
(Пример:
QPEL,
CD-R/RW
DivXGMC,
Discsрезолюция по-висока от 720 x 480 pixels, и др.)
. Ако
изберете
по-високи
стойности
кадри
може да
възпроизведат
DivX by the
encodingна
formats
authorized
by не
DivXсеNetworks,
Inc., a DivXпри
file created
• Since this product only provides
файлове.
user might not be played.
. За• повече
за форматите
отsupported.
DivX Networks, Inc., посетете "www.divxnetworks.
Software информация
update for unsupported
formats is not
net". (Example: QPEL, GMC, resolution higher than 720 x 480 pixels, etc.)
• Sections with high frame rate might not be played while playing a DivX file.
• For more information about the formats authorized by DivX Networks, Inc., visit "www.divxnetworks.net".
6
PREPARATION
DVD
Disc)
благодарение
наaudio
новите
и MPEG-2
се
DVD(Digital
(DigitalVersatile
Versatile
Disc)
offers fantastic
andтехнологии
video, thanks
to Dolby Digital
възпроизвеждат аудио дискове. Така вие се чувствате като в кино салон у дома
surround sound and MPEG-2 video compression technology. Now you can enjoy these
си.
HT-Q9(1~40P) GB
5/3/06 10:58 AM
Page 10
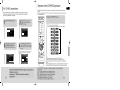
Description
GB
Заден
панел
—Rear
Panel—
Open/Close (
) button
Play/Pause (
Stop ( ) button
MIC VOL
MIC 1
MIC 2
Standby indicator ECHO LEVEL
Power (
) button
Play/Pause
indicators
7
SVCDVD
Connect the TV's video input jacks (VIDEO IN)
to the VIDEO OUT connector. COMPONENT VIDEO OUTPUT jacks
Connect a TV with component video inputs to
these jacks.
FM Antenna Connector
Volume buttons
Function button
External Audio Input
Connector
5.1 Channel Speaker
Output Terminals
Tuning Up & Skip (
) buttons
Tuning Down & Skip (
) buttons
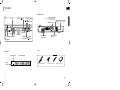
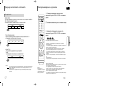
Аксесоари
Дисплей
—Display—
Disc type indicators
Video Output Connector
) button
Accessories
System Status Display
Дистанционно
управление
Remote
Control
Видео
кабел
Video
Cable
FM антена
употреба
FM Antenna Инструкция за
User's
Manual
8
PREPARATION
Disc Tray
HT-Q9(1~40P) GB
5/3/06 10:58 AM
Page 12
Описание
Description
GB
PREPARATION
—Remote Control—
-Дистанционно управление-
Поставяне на батерии
Insert Remote Batteries
DVD button
TUNER button
DIMMER button
AUX button
Остранете
капака на
Remove
the battery
1 1.гърба
на
OPEN/CLOSE button
POWER button
cover on the back of
дистанционното
the remote byнатиснете
pressing
упраЗление,
down and
sliding the 8
капака
и приплъзнете
cover
in
the
direction
обратната посока
на of
the
arrow.
стрелката.
SLEEP button
ПостаВете
1.5V
Insert
two 1.5V
AAA
2 2.ААА
батерии, като се
batteries, paying
съобразите с
attention to the correct
праЗилните полкюи.
3
3.
ПостаВете
капака
Replace
the battery
отново
cover.
polarities (+ and –).
Number(0~9) buttons
REMAIN button
STEP button
SEARCH buttons
CANCEL button
REPEAT button
Play/Pause button
Stop button
Tuning Preset/CD Skip button
VOLUME buttons
MENU button
TUNING/CH buttons
MUTE button
RETURN button
Cursor/Enter button
INFO button
PL II EFFECT button
PL II MODE button
TUNER MEMORY, P.SCAN button
AUDIO button
SUB TITLE button
DSP/EQ button
TEST TONE button
SOUND EDIT button
Внимание
Caution
Follow these precautions to avoid leaking or cracking cells:
• Place batteries in the remote control so they match the polarity:(+) to (+)and (–)to (–).
Моля, спазвайте
правилно депствие:
the correct type за
of batteries.Batteries
that look similar may differ in voltage.
• Useинструкциите
•
поставете
батериите
съобразявайки
се с показаните
полюси
Always
replace
both
batteries
at the same
time.
•
•
използвайте
правилните
батерии.
batteries
to heat or flame.
• Do not expose
•
•
Винаги сменяйте и двете батерии.
не излагайте батериите на слънчева светлина
Обхват
на действие
на дистанционното
управление
Range
of Operation
of the Remote
Control
Дистанционното управление трябВа да се използва на разстояние 23 крачки /7
метра. Както и под ъгъл 30 градуса
The remote control can be used up to approximately 23 feet/7 meters in a straight line. It can also
be operated at a horizontal angle of up to 30° from the remote control sensor.
ZOOM button
SLOW, MO/ST button
LOGO button
DIGEST button
EZ VIEW, NT/PAL button
9
10
HT-Q9(1~40P) GB
5/3/06 10:58 AM
Page 14
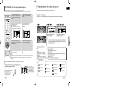
Свързване на колоните
Connecting the Speakers
GB
Before
or installing
product,го
beотsure
to turn off the power and disconnect the power cord.
Преди
да moving
инсталирате
уредаthe
изключете
захранването.
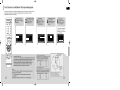
Center Speaker
C
Front Speaker (L)
Front Speaker (R)
SW
L
R
CONNECTIONS
SL
SR
Rear Speaker (L)
Rear Speaker (R)
Subwoofer
Позиция на
Position
of плейъра
the DVD Player
• nocmaвeme плейъра на поставка
Place
it
on
a
stand
or cabinet shelf, or under
•под или близо до
телевизора
the TV stand.
Подберете
за слушане
Позицията
Selecting позиция
the Listening
Position
трябВа
да
е
на
2.5
до
3
Пъти
дистанция
The listening position should be located about 2.5 to 3
от
екрана
TV.ofExample:
Forsize
32"away
TVs
2~2.4m
times
the distance
the TV's screen
from
the
(6~8feet)
55"TVs
TVs
3.5~4m
(11~13feet)
TV. Example:For
For 32"
2~2.4m
(6~8feet)
For 55" TVs 3.5~4m (11~13feet)
L R
Front Speakers
Предни
колони
speakers inтези
frontколони
of your пред
listening
•• Place these
nocmaBeme
position,
facing inwards
(about 45°) toward you.
Вашата
позиция
на слушане,
thatот
their
tweeters will be at
• Place theнаspeakers
обърнати
(aboutso45°)
Вас.
height as your
ear.
• the samenocmaBeme
колоните
така, че да
the front
of theВи.
front speakers with the
са
на ниВото
наface
ушите
• Align
• front faceпосдаВете
предните
колони
с
of the center
speaker or
place them
лице
къмinцентралната
или speakers.
леко
slightly
front of the center
обърнати към нея.
Центр. колони
Center Speaker C
to install itеatда
the ги
same
height as theна
front
•• It is bestхубаВо
поставите
speakers.
същата
височина като предните колони.
also install it directly over or under the TV.
•• You canВие
можке също да ги
поставите до или под телевизора.
11
Сwързwане на колоните
Back of the Main Unit
Connectправилните
the correcting
jacksкъм
to DVD
the back
of the DVD player.
Свържете
жакове
плеъра.
Mack
sure
the
colors
of
the
speaker
terminals
match
the colors of the connect•
Уверете се че цветовете съвпадат с жаковете.
ing jacks.
SL SR
Задни
колони
Rear Speakers
speakers behind
your listening
position.
•• Place these
nocmaвeme
колоните
зад позицията
на слушане
enough room,
place
speakers so една
they face
each
other.
•• If there isn't
колоните
трябва
даthese
са обърнати
към
друга
about
60
to
90cm
(2
to
3feet)
above
your
ear,
facing
slightly
•• Place them
nocmaвeme ги на 60 до 90ст от ухото
downward.
Unlike the front and center speakers, the rear speakers are used to
* handle
mainly sound effects and sound will not come from them all
the time.
Суубуфер
Subwoofer SW
• • The position
негоofможе
да го поставите
където си пожелаете
the subwoofer
is not so critical.
anywhere you like.
• Place itобикновено
се поставя в близост до предните колони
ВНИМАНИЕ
Caution
not let childrenна
play
with си
or near
the вspeakers.
• Doпозволявайте
• Не
деца
играят
близост до колоните. Могат да се наранят ако ги
They •could
get свържете
hurt if a speaker
falls. уверете се полярността е правилна.
бутнат.
Когато
кулоните,
Важно
Note
Ако поставите колоната окло ТВ екран, цвета на картината може да бъде променен. За
If you place a speaker
nearотyour
това• разделечете
колоната
ТВ.TV set, screen color may be distorted because of the magnetic field
generated by the speaker. If this occurs, place the speaker away from your TV set.
12
HT-Q9(1~40P) GB
5/3/06 10:58 AM
Page 16
Свързване къмthe
ТВ Video Out to TV
Connecting
P.SCAN(Progressive Scan) функция
P.SCAN(Progressive Scan) Function
Choose one
of the
methods
for connecting
to a TV.
Изберете
един
отtwo
двата
метода
за свързване
на уреда към телевизор.
ЗаUnlike
разлика
от обичайните
Interlace
Scan,
в който
има две
полета накартината,
алтернативно
regular
Interlace Scan,
in which
two fields
of picture
information
alternate to create
the entire да
създадете
нова
картина
(нечетни
линии,
тогава
четни линии),
Прогресивното
сканиране(all
използва
picture (odd
scan
lines, then
even scan
lines),
Progressive
Scan uses
one field of information
lines
едно
поле иinформация
(всички
за да се
създаде
чиста
и ясна картина без
displayed
one pass) to
create линии
a clear се
andпоказват)
detailed picture
without
visibleпоscan
lines.
видими сканирани линии.
GB
Натиснете
STOPbutton.
бутона.
Press STOP
11. Ако
възпроизвеждате диск, натиснете STOP бутона два пъти за да се появи STOP., на екрана.
• If playing a disc, press the STOP button twice so that “STOP”, appears on the display.
METHOD 1
METHOD 2
2 Натиснете и здръжте P.SCAN бутона от дистанционното за около 5 сек.
. Натискане
и задържане
на бутона
за 5 on
сек the
ще активира
"Progressive
Scan" 5и seconds.
"Interlace Scan"
Press and
hold P.SCAN
button
remote control
for over
алтернативно.
• Pressing and holding the button for over 5 seconds will select "P.SCAN" and "I.SCAN" alternately.
. Когато изберете P.SCAN, "P.SCAN" ще се появи на екрана.
When
you select
P.SCAN,
"P.SCAN"
willдискове,
appear onнатиснете
the display.P.SCAN от дистанционното за
. За •да
настройте
P.Scan
режима
за DivX
To
set
P.Scan
mode
for
DivX
discs,
press
the
P.SCAN
on the
remote
control forDivX
moreдиск
thanи
• от 5 сек когато няма диск в уреда (.’NO DISC" наbutton
повече
екрана),
тогава
поставете
възпроизведете.
5 seconds with no disc in the unit (“'NO DISC" on the display), then load the DivX disc and play.
2
What is Progressive (or Non-Interlaced) Scanning?
Метод 1
METHOD
1 Composite
Video ............... Good Quality
Composite Video
(Добро качество)
- Connect
сВържете
видео
кабела
VIDEO
OUT жaka
предният
панел
на of the
the supplied
video
cableотfrom
the VIDEO
OUTнаjack
on the back
panel
системата
къмVIDEO
VIDEOIN
INjack
жaka
телевизора
system to the
onнаyour
television.ви.
............... по-добро качество
METHODScart
2 Component
(Progressive Scan) Video ............... Best Quality
Interlaced Scan (1 FRAME = 2 FIELDS)
Progressive Scan (FULL FRAME)
В interlaced-scan video, кадрите се състоят от
преплетени
полета
(четни
и нечетни),
In interlaced-scan
video,
a frame
consists ofкъдето
two interвсяко
поле(odd
съдържа
различни
laced fields
and even),
where хоризонтални
each field contains
линии.
Нечетните
every other
horizontalлинии
line inсе
theпоявяват
frame. първи и
тогава
полета сеlines
показва
за да first,
запълнят
The oddчетните
field of alternating
is displayed
and
алтернативните
места
оставени
от
then the even field празни
is displayed
to fill
in the alternating
предишите.
gaps left by the odd field to form a single frame.
Един
кадър,
показван
за 1/30th
всяка of
1/30-та
от сек
One frame,
displayed
every
a second,
contains
съдържа
две fields,
преплетени
полета,
two interfaced
thus a total
of 60 коет
fields означава
are dis- че
се
показват
60 полета
на всяка 1/60 от секундата.
played
every 1/60th
of a second.
Преплетен
метод
за сканиране
с проектиран
за
The interlaced
scanning
method is intended
for capturing
показване
a still object.на статични обекти.
The progressive сканиране
scanning method
scans сканира
one full frame of
Прогресивно
метода
video consecutively
down the screen, lineдо
by края
line. на
пълният
кадър последователно
An entire image is drawn at one time, as opposed to the
екрана, линият по линия.
interlaced scanning process by which a video image is
Целият
образ се показва веднъж, за разлика
drawn in a series of passes.
от
другият
метод
при method
коййтоis ораза
The progressive
scanning
desirableсеfor dealing
показва
наobjects.
серии.
with moving
Подходящ е за показване на дижещи се
обекти.
Метод 2
If your
television
is equipped
withсвържете
Component
Video
inputs,
a component
video
Ако
ТВ ви
поддържа
Scart вход,
Scart
жака
(не еconnect
предоставен)
от
cable
supplied)
from част
the Pr,
and Yкъм
jacks
on the back
of IN
theжака
system
to the
AV
OUT(not
жака
от задната
наPb
панела
системата
на panel
SCART
на ТВ.
corresponding jacks on your television.
Важно
on the capabilities
of your
TV, this
may
not work.
• Depending
Note
. Вие
можете
да свържете
Video Output
жака
на function
вашето
видео
към ТВ и свържете
Audio Output жака от видеото към продукта.
13
14
CONNECTIONS
Какво е Progressive (или Non-Interlaced) сканиране?
HT-Q9(1~40P) GB
5/3/06 10:58 AM
Page 18
Свързване с външни
уреди
Connecting
External
Components
Свързване
Connectingс антена
the FM
Antenna
GB
Свързване на външен дигитален, аналогов, елемент
Connecting an External Analog Component
Пример: Дигитални сигнали като от Видео.
Example: Analog signal components such as a VCR.
CONNECTIONS
FM Antenna (supplied)
Audio(не
Cable
Аудио кабел
е
(not supplied)
предоставен)
If the
external
analog compoАко
външн
аналогов
nent has only
Audio
Out,
компонент
имаone
само
един
connect
either
left or right.
аудио
изход,
свържете
или
левият или десният.
1
Свъуржете AUX (Audio) In от уреда към Audio Out на външен аналогов
Connect
AUX (Audio) In on the Home Theater to Audio Out on the external analog
компонент.
component.
. Уверете се че цветовете съвпадат.
• Be sure to match connector colors.
2
Натиснете AUX бутона от дистанционното за да изберете .AUX. вход.
. Можете
използвате
от to
основният
уред.
Press
AUXдаbutton
on the FUNCTION
remote control
select ‘AUX’
input.
се сменя
следният
начин:
FM
• DVD/CD
• AUX
You can also
use the пFUNCTION
button
on the
main
unit.
•Режима
Свържете
FM 75Ω
COAXIAL
theFM
FMантената
antenna към
supplied
to the
FM 75Ωтерминала.
COAXIAL terminal.
1 Connect
Бавно преместете антената около вас за да намерите по-добър сигнал, после я
move the antenna wire around until you find a location where reception is good,
2 Slowly
фиксирайте.
then fasten it to a wall or other rigid surface.
The mode switches as follows: FM ➝ DVD/CD ➝ AUX
Важно
• You can connect the Video Output jack on your VCR to the TV, and connect the Audio
Noteможете
. Вие
да свържете
жака на вашето видео към ТВ и свържете
Output
jacks on the Video
VCR to Output
this product.
Audio Output жака от видеото към продукта.
15
Важно:
Note • This unit does not receive AM broadcasts.
Уреда не приема AV programi.
16
HT-Q9(1~40P) GB
5/3/06 10:58 AM
Page 20
Преди даUsing
използвате
Before
Yourсистемата
Home Theater
Възпрозивеждане
Disc Playbackна дискове
Диск
терминология
Disc
terminology
Titles and chapters (DVD-VIDEO)
GB
1
Press OPEN/CLOSE button to open the
disc tray.
2
Load a disc.
3
Press OPEN/ CLOSE button to close
the disc tray.
• DVD-video is divided into several large sections called "titles" and smaller sections called "chapters".
Numbers are allotted to these sections.
These numbers are called "title numbers" and "chapter numbers".
TITLE 1
CHAPTER 1
CHAPTER 2
TITLE 2
CHAPTER 3
CHAPTER 1
CHAPTER 2
Tracks (Video and music CDs)
• Place a disc gently into the tray with the disc’s label
facing up.
DVD
Numbers are allotted to these sections. These numbers are called "track numbers".
VCD
CD
• Playback starts automatically.
Възпрозивеждането
започва автоматично.
TRACK 1
TRACK 2
TRACK 3
TRACK 4
TRACK 5
За край на възпроизвеждане, натиснете STOP no време на
To stop playback, press STOP during playback.
възпроизвеждане.
• ако• натиснете
веднъж,
PLAY" на
се появява
If pressed once,
“PRESS "PRESS
PLAY” is displayed
andекрана
the stop position
will be този
надписstored
и позицията
запаметява.
in memory. се
If PLAY/PAUSE
(
) button or ENTER button is
Ако PLAY/PAUSE
) натиснете
този
бутона
ENTER
pressed, playback(►/!!
resumes
from the stop
position.
(Thisили
function
works only
бутонаwith
възпроизвеждането
започва от спрялата позиция.
DVDs.)
• ако• натиснете
бутона
дВа
пъти, "STOP"
moBa се появява
на is
If pressed twice,
“STOP”
is displayed,
and if PLAY/PAUSE
(
) button
екранаpressed,
и ако натиснете
/възпроизвеждането започва
playback starts PLAY
from the►/!!
beginning.
отначало.
За пауза на възпроизвеждане, натиснете PLAY/PAUSE пo време
на To temporarily pause playback, press PLAY/PAUSE
възпроизвеждане.
during
playback.
• за да
продължите
възпроизвеждането натиснете PLAY/PAUSE
Files (DivX)
• DivX is divided into sections called "files".
Numbers are allotted to these sections. These numbers are called "file numbers".
FILE 1
FILE 2
• To resume playback, press PLAY/PAUSE (
Важно
Note
упътване,
маркирани
със (DVD
са приложими
за DVDDVD
this manual,
the инструкциите
instructions marked
with "DVD
)" are applicable
•• ВInmoвa
VIDEO и DVD-R/RW дискове. Където е споменат определен DVD тип, топ е
to DVD-VIDEO and DVD-R/RW discs.
показан отделно.
Where
a particular
DVD type is mentioned,
is indicated
separately.
•В
зависимост
от съдържанието
на диска, it
началният
екран
може да бъде
Depending on the content of the disc, the initial screen may appear different.
•различен.
Важно:
Note
В зависимост
от
съдържанието на диска,
content of
• Depending on the екран
първоначалният
the disc, the initial screen may
може да е различен.
appear different.
) button again.
Избор на видео формат
Selecting the Video Format
Натиснете и задръжте NT/PAL бутона от дистанционното за повече
Press
and hold
NT/PAL
button on the remote controller for over 5 seconds
от 5 сек
докато
уреда
е изключен.
while
the
power
is
turned
off. е настроена на "PAL".
. По подразбиране системата
the video
is set на
to "PAL".
. "NTSC"
или "PAL"
ще format
се появи
екрана. Натиснете NT/PAL
• By default,
бутона
за
кратко
за
да
изберете
межд
и "PAL".
At this time,
press the NT/PAL button
• "NTSC" or "PAL" will appear in the display."NTSC"
. Всякаshortly
страна
има
различен
формат
to select between "NTSC" and "PAL".
. За нормално
възпроизвеждане,
формата
на диска трябва да бъде
has a different video format
standard.
• Each country
същият като този на вашият ТВ.
• For normal playback, the video format of the disc must be the same as the video
format of your TV.
17
18
OPERATION
• Video and music CDs are divided into sections called "tracks".
HT-Q9(1~40P) GB
5/3/06 10:58 AM
Page 22
MP3/WMA-CD възпроизвеждане
MP3/WMA-CD Playback
Displaying Disc Information
Data CDs (CD-ROM,
CD-R, CD-RW)
encodedвin MP3/WMA
MP3/WMA format
can be played.
(CD-ROM,
CD-R, CD-RW)
кодирани
форматмогат
да се възпроизвеждат.
1. Натиснете
PressOPEN/CLOSE
the
бутонаOPEN/CLOSE
За да отворите гнездото
button
на диска и да поставите МРЗ
диска. to open the disc tray,
1
and then load the
MP3/WMA disc.
MP3/WMA
menu
screen
will appear
I•• The
менюто
на МРЗ
ще
се появи
на
and playback
will start.
екрана
и ще започне
възпроизвеждане.
• The appearance of the menu depends on
MP3/WMA
disc.от типа диск.
I • the
менюто
зависи
be played.
I•• WMA-DRM
WMA-DRMfiles
не cannot
се възпрозивежда
You can view disc playback information on the TV screen.
2. При спрял
режим,
изберете
In Stop
mode,
use
албум, и натиснете ENTER
to
select
бутона.
2
Press INFO button.
the album, and then
press the ENTER
button.
to select
the track.
• Use
Използвайте
стрелките
надолу/нагоре за да
изберте.
• Each time the button is pressed, the display changes as follows:
DVD
VCD
CD
MP3
3
select another album
in Stop mode, and
then press the
ENTER button.
4. Натиснете STOP бутона за
край на възпроизвеждане.
4
19
•
tion display may appear different.
Depending on the disc, you can also
select DTS, DOLBY DIGITAL, or PRO
LOGIC.
"chapters".
• What is a Track (File)?
A section of video or a music file recorded on a CD, or MP3-CD.
Екран
дисплей
Screen
Display
To play a file icon in the screen,
Icon.
A movie contained in a DVD-VIDEO disc.
is a Chapter?
• Depending on the disc, the disc informa- • What
Each title on a DVD disc is divided into several smaller sections called
За да възпроизведете файл като изберете иконата му.
Icon.
appears on the TV screen!
• What is a Title?
Важно:
Note • Depending on the recording mode, some MP3/WMA-CDs may not play.
•В зависимост
от режима
на запис,
някоиvaries
МРЗ-CDs
могат
се възпроизвеждат.
of contents
of a MP3-CD
depending
onда
theне
MP3/WMA
track
• Table
•прегледайте format
таблицата
за типа
дискове, които се възпроизвеждат
recorded
on theMP3-CD
disc.
нормално.
Icon.
The information Display disappears from the screen
The information Display disappears from the screen
Note
повторете
стъпка
2 и 33 above.
repeat Steps
2 and
• To play music files only, select the
• To view image files only, select the
• To view movie files only, select the
Icon.
• To select all files select the
JPEG
If this symbol appears on the TV screen while buttons are being operated,
that operation is not possible with the disc currently being played.
Press the STOP
button to stop
playback.
another
and
track,
•заToдаselect
изберете
другalbum
албум
и запис,
Press the
button when it is in stop
status and select a desired icon from the top
part of the menu.
•
DivX
DVD display
• Music File Icon
• Image File Icon
• Movie File Icon
• All File Icon
TITLE display
VCD display
ELAPSED TIME display
STEREO (L/R) display
REPEAT PLAYBACK display
DOLBY DIGITAL display
AUDIO LANGUAGE display
ANGLE display
CHAPTER display
CD display
TRACK (FILE) display
SUBTITLE display
20
OPERATION
The information Display disappears from the screen
3. За да
албума,
Toпромените
change the
album,
изберете
друг
албум,
и натиснете
use
to
ENTER бутона.
GB
HT-Q9(1~40P) GB
5/3/06 10:58 AM
Page 24
JPEG
възпрозивеждане
JPEG
File Playback
GB
JPEG
Images captured
with на
a digital
or camcorder,
files on a PC can be
a CD and then
Снимки
записани
дискcamera
от камера
могат or
даJPEG
се възпрозиведат
наstored
тазиon
система.
played back with this Home Theater.
Digest
Digestфункция
Function
Rotate/Flip Function
You can view 9 JPEG images on the TV screen.
Можете да видите 9 снимки на екрана.
1
Натиснете DIGEST по време на
Press DIGEST button during
възпроизвеждане.
Press Cursor
playback.
,
,
,
buttons during playback.
JPEG files
will be shown
9 windows.
• JPEG
файловете
щеinсе
покажат в 9 прозореца.
button: Flip Vertically
OPERATION
button: Rotate 90°
Counterclockwise
button: Rotate 90° Clockwise
Original Image
2
Press Cursor , , , buttons
to select the desired image and
then press ENTER button.
button: Flip Horizontally
Note
• The maximum resolutions supported by this product are 5120 x 3480 (or 19.0 MPixel) for
standard JPEG files and 2048 x 1536 (or 3.0 MPixel) for progressive image files.
image
played for
before
• The selected
Израната
снимка
сеisпоказва
за55seconds
сек преди
даmoving
преминете на
to the next image.
следващата.
To view the previous or next image with 9 windows, press
21
.
22
HT-Q9(1~40P) GB
5/3/06 10:58 AM
Page 26
DivX
DivXвъзпроизвеждане
Playback
GB
Subtitle Display
The functions on this page apply to DIVX disc playback.
Press the SUBTITLE button.
Skip Forward/Back
During playback, press the
button.
• Goes to the next file whenever you press
•
button, if there are over
2 files in the disk.
Goes to the previous file whenever you press
over 2 files in the disk.
button, if there are
• Each time you press the button, your selection will toggle between “SUBTITLE (1/1, 1/2 ...)” and “SUBTITLE OFF”.
• If the disc has only one subtitle file, it will be played automatically.
• See number 2 (Caption Function) below for more details concerning Subtitle usage with DIVX discs.
Audio Display
Press the AUDIO button.
• If there are multiple audio tracks on a disc, you can toggle between them.
• Each time you press the button, your selection will toggle between “AUDIO(1/1, 1/2 ...)” and
Fast playback
To play back the disc at a faster speed,
press
or
during playback.
follows:
2x ➞ 4x ➞ 8x ➞ 32x ➞ Normal.
•"
”.
" is displayed when there is one supported language in the disc.
DivX(Digital internet video eXpress)
DivX is a video file format developed by Microsoft and is based on MPEG4 compression technology
to provide audio and video data over the Internet in real-time.
MPEG4 is used for video encoding and MP3 for audio encoding so that the users can watch a movie
at near DVD-quality video and audio.
1. Supported Formats
5 Minute Skip function
• This product only supports the following media formats.If both video and audio formats are not supported, the user may experience problems such as broken images or no sound.
●
During playback, press the
, button.
Format
Supported Versions
• Playback skips 5 minutes forward whenever you press button.
• Playback skips 5 minutes back whenever you press button.
●
Press ZOOM
button.
2
Press Cursor , ,
, buttons to move
to the area you want
to enlarge.
your selection will toggle between
“ZOOM X2” and “ZOOM OFF”.
23
WMV
V1/V2/V3/V7
MP3
WMA
80~384kbps
56~128kbps
44.1khz
AC3
128~384kbps
44.1/48khz
DTS
1.5Mbps
44.1khz
• DivX files, including audio and video files, created in the DTS format can only support up to 6Mbps.
• Aspect Ratio: Although default DivX resolution is 640*480 pixels (4:3), this product supports up to
• Each time you press the button,
Note
AVI
DivX3.11 ~ 5.1
Supported Audio Formats
Format
Bit Rate
Sampling Frequency
Zoom Function
1
Supported Video Formats
• DIVX file can be zoomed only in ZOOM X2 mode.
• DivX files have .Avi file extensions, however, not all .Avi files are DivX
and may not be playable in this unit.
720*480 pixels (16:9). TV screen resolutions higher than 800 will not be supported.
• When you play a disc whose sampling frequency is higher than 48khz or 320kbps, you may experience shaking on the screen during playback.
2. Caption Function
• You must have some experience with video extraction and editing in order to use this feature properly.
• To use the caption function, save the caption file (*.smi) in the same file name as that of the DivX
•
media file (*.avi) within the same folder.
Example. Root
Samsung_007CD1.avi
Samsung_007CD1.smi
Up to 60 alphanumeric characters or 30 East Asian characters (2 byte characters such as Korean and
Chinese) for the file name.
24
OPERATION
• Each time you press either button, the playback speed will change as
Note
“
HT-Q9(1~40P) GB
5/3/06 10:58 AM
Page 28
Проверка
на the
оставащо
време
Checking
Remaining
Time
Бързо/Бавно
Fast/Slowвъзпроизвеждане
Playback
Бързо
възпроизвеждане
Fast Playback
DVD
VCD
Press
CD
Бавно възпроизвеждане
Slow Playback
MP3
Натиснете
.
Press SLOW button.
Press the REMAIN button.
Натиснете
• For checking the total and remaining time of a title or chapter
the button
is pressed during playback,
Всеки
пътtime
скоростта
на Възпроизвеждане
се променя
• Each
theследва
playback speed changes as follows:
както
being played.
GB
the button
is pressed during playback,
• Each
Всеки
пътtime
скоростта
на възпроизвеждане
се променя
the
playback
speed
changes
as follows:
както следва
DVD
VCD
DivX
Each time the REMAIN button is pressed
DVDVIDEO
VCD
CD
TRACK ELAPSED
TITLE REMAIN
TRACK REMAIN
CHAPTER ELAPSED
TOTAL ELAPSED
CHAPTER REMAIN
TOTAL REMAIN
Важно:
Note
По време на бързо възпрозивеждане на CD
fast playback
of aчува
CD orсамо
MP3-CD,
• During
или
MP3-CD,
звук се
приsound
2x is
heard
only
at
2x
speed,
and
not
at
4x,
8x,
and
32x
скорост, и не при 4x, 8x, и 32x.
speeds.
Важно:
Note
Не се чува звук по време на
бавно
възпрозивеждане
и
is heard during slow playback
• No sound
and step
motion playback.
бавно
движение
Бавно
wъзпроизвеждане
slow playback does not
• Reverse
назад
при
и DivX
work with VCD
VCD and
DivX. няма.
Skipping Scenes/Songs
Прескачане на сцени/записи
Press
.
Натиснете
MP3
Each път,
timeкогато
the button
is pressed
during
playback,
the previous or next отивате
chapter, на
track,
or
• •Всеки
натиснете
бутона
по време
на възпроизвеждането
предишна
или
directoryглава,
(file) will
be или
played.
следваща
запис
сцена
• •Вие
може skip
да прескачате
главите последователно.
Youнеcannot
chapters consecutively.
TRACK REMAIN
DVD
VCD
MP3
TRACK ELAPSED
TITLE 01/05 CHAPTER 002/040
TITLE 01/05 CHAPTER 004/040
25
watching aVCD
VCD with
a track
• When гледате
когато
вече
от
than 15
minutes,
15longer
минути,
при
всякоeach time
is pressed,
playback
натискане на
бутоните
ще
will skipзаписа
back or forward
5 minutes.
връща
с 5 мин.
26
OPERATION
TITLE ELAPSED
HT-Q9(1~40P) GB
5/3/06 10:58 AM
Page 30
Повтаряне
Repeat Playback
А-В повтаряне
A-B
Repeat Playback
Repeat playback
allows you to repeatedly
play a chapter,
title, track (song),
or directory
file). песен
Повторение
възпроизвеждане
ви позволява
да повтаряте
глава,
запис, (MP3
заглавие,
или директория.
DVD
VCD
CD
MP3
MP3
You can
repeatedly
play back aи designated
section
of a DVD.
Вие
може
да повтаряте
определен
участък
от диска.
JPEG
Натиснете REPEAT бутона.
Press REPEAT button.
• Всеки път когато натискате този бутона по време на възпроизвеждане правите
the button is pressed during playback, the repeat playback mode changes as follows:
• Each timeпромени:
следните
DVDVIDEO
GB
VCD
CD
Повтаряне
Repeatопции
Playback Options
JPEG
1
VCD
Натиснете
Press INFOINFO
button
бутона
дба
пъти.
twice.
2
2.
Използвайте
Press
Cursor button
надясно курсорите за
to move to REPEAT
да стигнете go
PLAYBACK ( ) display.
REPEAT
За
VCD
натиснете
INFO
a VCD,
press INFO
button
• For
once.
бутона.
3
Натиснете
за
Press Cursorкурсора
, buttons
да изберете позиция
to select ‘A-’ and then press
А-' и натиснете ENTER
ENTER за
button
at the beginning
бутона
начало
на
Желания
сегмент.
of the desired segment.
button
is pressed,
• когато
натиснат
бутона
ENTER
• WhenеENTER
the selected
position
be stored
избраната
позиция
ще will
е запаметена.
in memory.
4
Press ENTER
Натиснете
Enter в
края
на at
желаният
button
the end
сегмент.
of the desired
segment.
• този сегмент ще се
will be
• The specified segment
възпроизвежда
отделно.
played repeatedly.
A-
A-B
REPEAT : A—B
A -?
REPEAT : A—
Важно
Note
• Повторение
Възпроизвеждане е
operation is not
• Repeat playback
операция
при дискове
possible
with
version
2.0 VCD discs if
версия 2.0
PBC
is
turned
on.
To
use
Repeat
VCD ако РВС е Включен.
Playback on a VCD with PBC, you
За да използвате тази
should set the PBC to OFF in the
функция
disc menu. (See page 34.)
При VCD c РВС, вие
трябва да изключите
РВС от менюто
За да изберете режим повторение от информацията на екрана
To Select a Repeat Playback Mode in the Disc Information Screen
1. Натиснете INFO бутона
Press INFO button twice.
два пъти.
2. Използвайте
за
Press Cursorкурсорите
button to
да стигнете go REPEAT
move to REPEAT
3. Използвайте курсорите за
PLAYBACK ( ) display.
да достигнете до желания
режим.
Press Cursor button
4. Натиснете
to select theENTER
desired
бутона.
Repeat Playback mode.
1
2
3
4
27
DVD
VCD
CD
To return to normal playback, press Cursor
buttons to select
OFF.
,
Важно:
Note
тази функция няма да работи, ако диска е с МРЗ или JPEG
• The A-B Repeat function does not operate with MP3, CD or JPEG discs.
Press ENTER button.
For МРЗ
MP3 and
discs,
you
cannot
select
илиJPEG
JPEG
диск
вие
може
да Repeat
** за
Play from the information display screen.
изберете Repeat Play
28
OPERATION
Глава
CHAPTER
Повтаря
само избраната глава
Repeatedly plays the selected chapter.
Заглавие
TITLE
Многократно
повтаря избраното
Repeatedly plays the selected title.
заглавие
GROUP
RANDOM
Plays tracks in random
order.
Продължително
повтаряне
на
(A track that
has already been played may be
избрана
група.
played again.)
RANDOM
Възпроизвежда
записите в разбъркан
TRACK
ред.
Repeatedly plays the selected track.
Запис
DIR
Многократно
повтаря
запис
Repeatedly plays
all tracks избрания
in the selected
folder.
DIR
DISC
Многократно
повтаря избраната
Repeatedly plays the entire disc.
директория
OFF
DISC
Cancels Repeatповтаря
Playback. избрания диск
Многократно
OFF
Отмяна
DVD
HT-Q9(1~40P) GB
5/3/06 10:58 AM
Page 32
Step
Stepфункция
Function
DVD
Зум
функция
Zoom
(Screen
VCD
Enlarge) Function
This function
to enlargeможте
a particular
area of the displayed
C помощта
наallows
тазиyou
функция,
да увеличите
даденаimage.
чест от картината.
Натиснете STEP бутона.
Press STEP
button.
картината
се измества
с един кадър напред при всяко натискане на
The
picture
moves
forward one frame each time the button is pressed
•
бутона
по време на
възпроизвеждането
during playback.
1
Натиснете ZOOM
Press ZOOM butбутона.
ton.
2
С Press
помощта
на курсорите
Cursor
, ,
изберете
областта
от
, buttons to
картината, която искате
move to the area
да увеличите.
you want to enlarge.
3
DVD
GB
VCD
Натиснете ENTER
Press ENTER
бутона.
button.
•
the button
ПриEach
всякоtime
натискане
зум-а is
се pressed,
сменя.
the zoom level changes as follows:
SELECT ZOOM POSITION
Ъгъл
функция
Angle
Function
DVD
СThis
помощта
на allows
тази функция
може
разгледате
различните
ъгли на заснемане на
function
you to view
theдаsame
scene in
different angles.
сцената.
2
СPress
помощта
Cursorна
курсорите стигнете
button to move to
go ANGLE
ANGLE (
) display.
1/3
3
1/3
С помощта на курсорите или номерираните
бутони,
изберете желания
ъгъл. buttons to
Press Cursor
, or numeric
Важно:
Note • When a DivX disc is being played, only the 2:1 zoom-in is available.
Когато DivX диск се възпрозивежда, само 2:1 zoom-in е достъпен.
EZ
функция
EZVIEW
VIEW
Function
OPERATION
1
Натиснете INFO
Press INFO button.
бутона
DVD
Натиснете EZ VIEW бутона.
Press EZ VIEW button.
select the desired angle.
• •при
всяко
натискане
на бутона
се променя
Each
time the
button is pressed,
the angle
changes asъгъла
follows:
1/3
time
theкогато
button натиснете
is pressed, the
zoom
function
will switch between
On and
Off.
• Each
Всеки
път,
този
бутона
функцията
се включва
и изключва.
movie is played in Widescreen
bars
at the top
and могат да се махнат с
• When
когатоa възпроизвеждате
филм на format,
широк black
екран,
черните
линии
bottom
of theEZ
TVVIEW
screen can be removed by pressing the EZ VIEW button.
този
бутона
2/3
3/3
Важно
function works only with discs on which multiple
Noteфункция
• The Angle
• таза
работи
само при дискоВе , които са записани с
angles
have
recorded.
сцени с много ъгли наbeen
заснемане.
29
EZ VIEW
EZ VIEW OFF
Важно
Noteфункция няма да работи, ако диска е записан при заснети сцени от много
• тази
ъгли
• This function will not work if the DVD is recorded with multi-camera angle format.
• •при
някои
случаи,
черните
линии
могат
не have
изчезнат,
дискаtoеvertical ratio.
Black
bars may
not disappear
because
some
DVDда
discs
a built-inако
horizontal
хоризонтална
към
Вертикална
пропорция.
• This feature is not supported for DivX discs.
30
HT-Q9(1~40P) GB
5/3/06 10:58 AM
Аудио
език
Selecting
Page 34
Audio Language
Audio Language Selection Function
1
Press INFO button
twice.
2
DVD
Press Cursor ,
buttons or numeric
buttons to select the
desired audio language.
Субтитри език
Selecting
Subtitle Language
Subtitle Language Selection Function
1
Press INFO button
twice.
3
Press Cursor
button or numeric
buttons to select
the desired subtitle.
2
GB
DVD
Press Cursor
button to move to
SUBTITLE ( )
display.
• Depending on the number of
languages on a DVD disc, a different
audio language (ENGLISH,
SPANISH, FRENCH, etc.) is selected
each time the button is pressed.
FR 3/3
EN 1/3
EN 01/ 03
OPERATION
SP 2/3
OFF
SP 02/ 03
FR 03/ 03
OFF / 03
Note
• To operate this function, you can also press the Select AUDIO or Select
SUBTITLE buttons on the remote control.
• Depending on the disc, the Subtitle and Audio Language functions
may not be available.
31
32
HT-Q9(1~40P) GB
5/3/06 10:58 AM
Page 36
Директно
сцена/песен
Moving преместване
Directly to до
a Scene/Song
Using Disc Menu
GB
DVD
You can use the menus for the audio language, subtitle language, profile, etc.
DVD menu contents differ from disc to disc.
DVD
1
VCD
CD
Moving to a Title/Track
2
Press INFO button.
01/05
001/040
0:00:37
1/1
Press Cursor , buttons
or numeric buttons to select
the desired title/track and then
press ENTER button.
03/05
001/002
0:00:01
Moving to a Chapter
Press Cursor ,
buttons to move to
Chapter ( ) display.
3
1
In Stop mode,
press MENU
button.
• When playing a VCD (version
2.), this toggles between PBC
ON and OFF.
1/1
01/05
001/040
0:00:01
Press Cursor , buttons or numeric buttons to
select the desired chapter
and then press ENTER button.
01/05
025/040
0:00:01
5
1/1
Press Cursor ,
buttons to move to
time display.
01/05
025/040
1:17:30
• When you select Disc Menu and it is not
• Press ENTER button.
supported by the disc, the "This menu is not supported" message appears on the screen.
ENTER
MOVE
EXIT
ENTER
EXIT
Moving to a Specific Time
6
Press the numeric
buttons to select the
desired time and then
press ENTER button.
1/1
01/05
028/040
1:30:00
1/1
• Disc menu display may be different depending on the disc.
Note
PBC (Playback Control) Function
When playing a VCD (version 2.0), you can select and view various scenes according to the menu screen.
PBC ON: This VCD disc is version 2.0. The disc is played back according to the menu screen. Some functions
may be disabled. When some functions are disabled, select "PBC OFF" to enable them.
PBC OFF: This VCD disc is version 1.1. The disc is played back in the same way as with a music CD.
Using the Title Menu
DVD
For DVDs containing multiple titles, you can view the title of each movie.
Depending on the disc, the availability of this feature may vary.
MP3
JPEG
Press the numeric
buttons.
• The selected file will be played.
• When playing an MP3 or JPEG disc, you
cannot use
,
to move to a folder.
To move a folder, press (Stop) and
then press
, .
Note
1
In Stop mode,
press MENU button.
2
Press Cursor ,
button to move to
‘Title Menu’.
• You can press
•
on the
remote control to move directly to the
desired title, chapter, or track.
Depending on the disc, you may not
be able to move to the selected title
or time.
3
Press ENTER button.
• The title menu appears.
MOVE
ENTER
EXIT
MOVE
ENTER
EXIT
Press MENU button to exit the setup screen.
33
Note
• Title menu display may be different depending on the disc.
34
OPERATION
4
Moving to a Specific Time
3
Press Cursor ,
, buttons to
select the desired
item.
1/1
MOVE
Moving to a Chapter
2
Press Cursor ,
buttons to move to
‘DISC MENU’ and then
press ENTER button.
HT-Q9(41~70) GB
5/3/06 10:59 AM
Page 40
Setting the Language
GB
OSD (On-Screen Display) language is set to English by default.
1
In Stop mode,
press MENU
button.
2
Press Cursor
button to move to
‘Setup’ and then
press ENTER button.
3
Select ‘Language’
and then press
ENTER button
4
Press Cursor ,
button to select ‘OSD
Language’ and then
press ENTER button.
5
Press Cursor ,
button to select the
desired language and then
press ENTER button.
• Once the setup is complete, the OSD will be
English if English has been selected as
language.
MOVE
ENTER
EXIT
MOVE
ENTER
EXIT
MOVE
ENTER
RETURN
EXIT
MOVE
ENTER
RETURN
EXIT
MOVE
SELECT
RETURN
EXIT
Press MENU button to exit the setup screen.
Note
• To select another language, select OTHER and enter the language code of your country.
(See page 62 for language codes)
AUDIO, SUB TITLE and DISC MENU language can be selected.
MOVE
ENTER
RETURN
Selecting the
OSD Language
MOVE
35
SELECT
RETURN
EXIT
EXIT
MOVE
ENTER
RETURN
EXIT
Selecting the
Audio Language
(recorded on the disc)
MOVE
ENTER
RETURN
EXIT
Selecting the
Subtitle Language
(recorded on the disc)
MOVE
ENTER
RETURN
EXIT
Selecting the Disc Menu
Language (recorded on the disc)
language you selected is
* Ifnottherecorded
on the disc, menu
language will not change even
if you set it to your desired
language.
36
SETUP
Press RETURN button to return to the previous level.
HT-Q9(41~70) GB
5/3/06 10:59 AM
Page 42
Setting TV Screen type
GB
Depending on your TV type (Wide Screen or conventional 4:3), you can select the TV's aspect ratio.
1
In Stop mode,
press MENU
button.
2
Press Cursor
button to move to
‘Setup’ and then
press ENTER button.
Adjusting the TV Aspect Ratio (Screen Size)
The horizontal to vertical screen size ratio of conventional TVs is 4:3, while that of widescreen and high
definition TVs is 16:9. This ratio is called the aspect ratio. When playing DVDs recorded in different
screen sizes, you should adjust the aspect ratio to fit your TV or monitor.
• For a standard TV, select either "4:3LB" or "4:3PS" option according to personal preference.
Select "16:9" if you have a widescreen TV.
WIDE
MOVE
3
ENTER
MOVE
EXIT
Press Cursor button to move to ‘TV
DISPLAY’ and then
press ENTER button.
4
ENTER
• You can enjoy the widescreen aspect.
EXIT
Press Cursor ,
button to select the
desired item and then
press ENTER button.
• Once the setup is complete, you will
4:3LB
(4:3 Letterbox)
4:3PS
(4:3 Pan&Scan)
EXIT
MOVE
SELECT
RETURN
EXIT
SETUP
RETURN
: Select this to play a 16:9 picture in the pan & scan
mode on a conventional TV.
• You can see the central portion of the screen only (with the
sides of the 16:9 picture cut off).
Note
ENTER
: Select this to play a 16:9 picture in the letter box
mode on a conventional TV.
• Black bars will appear at the top and bottom of the screen.
be taken to the previous screen.
MOVE
: Select this to view a 16:9 picture in the full-screen
mode on your widescreen TV.
• If a DVD is in the 4:3 ratio, you cannot view it in widescreen.
• Since DVD discs are recorded in various image formats, they will look different depending on
the software, the type of TV, and the TV aspect ratio setting.
Press RETURN button to return to the previous level.
Press MENU button to exit the setup screen.
37
38
HT-Q9(41~70) GB
5/3/06 10:59 AM
Page 44
Setting Parental Controls (Rating Level)
Use this to restrict playback of adult or violent DVDs you do not want children to view.
1
In Stop mode,
press MENU
button.
2
Setting the Password
You can set the password for the Parental (rating level) setting.
Press Cursor
button to move to
‘Setup’ and then
press ENTER button.
1
Press MENU button.
MOVE
MOVE
3
4
Press Cursor ,
button to select the desired
rating level and then press
ENTER button.
• If you have selected Level 6, you can•
MOVE
EXIT
not view DVDs with Level 7 or higher.
The higher the level, the closer the
content is to violent or adult material.
EXIT
ENTER
3
5
Enter the password
and then press
ENTER button.
Press Cursor button
to move to ‘PASSWORD’ and then press
ENTER button.
RETURN
EXIT
MOVE
SELECT
RETURN
EXIT
Press ENTER
button.
5
ENTER
EXIT
Enter the password
and then press
ENTER button.
and confirm new password.
• The setting is complete.
• The password is set to "7890" by default.
• Once the setup is complete, you will be
taken to the previous screen.
Note
ENTER
MOVE
EXIT
ENTER
• Enter the old password, a new password,
MOVE
MOVE
4
2
Press Cursor
button to move to
‘Setup’ and then
press ENTER button.
SETUP
Press Cursor
button to move to
‘PARENTAL’ and then
press ENTER button.
ENTER
GB
INPUT NUMBER
RETURN
Важно:
Note • This function works only if a DVD disc contains the rating level information.
Функцията работи само с дискове които имат рейтинг.
ENTER
RETURN
EXIT
MOVE
SELECT
RETURN
EXIT
INPUT NUMBER
EXIT
RETURN
• The password is set to "7890" by default.
EXIT
If you have forgotten the rating level password, do the following:
• While the player is in the no disc mode, hold the main unit's
Press RETURN button to return to the previous level.
39
Press MENU button to exit the setup screen.
button for longer than 5 seconds. “INITIALIZE”
appears on the display and all settings will return to the default values.
• Press the POWER button.
Using the RESET function will erase all stored settings.
Do not use this unless necessary.
40
HT-Q9(41~70) GB
5/3/06 10:59 AM
Page 46
Setting the Wallpaper
JPEG
DVD
GB
VCD
While watching a DVD, VCD or JPEG CD, you can set the image you like as background wallpaper.
Setting the Wallpaper
1
During playback, press
PLAY/PAUSE button
when an image you
like appears.
To select one of the 3 wallpaper settings you've made
2
1
Press LOGO
button.
In Stop mode,
press MENU
button.
2
Press Cursor
button to move to
‘Setup’ and then
press ENTER button.
3
Press Cursor
button to move to
‘LOGO’ and then
press ENTER button.
• “COPY LOGO DATA” will be displayed on the TV screen.
COPY LOGO DATA
PAUSE
MOVE
3
4
The power will
turn off and then
back on.
5
EXIT
MOVE
ENTER
RETURN
EXIT
Press MENU
button to exit the
setup screen.
SETUP
Press to select
the desired ‘USER’,
and then press
ENTER.
ENTER
• This selects one of the 3 wallpa-
• The selected wallpaper will be
•
MOVE
EXIT
ENTER
per screens
displayed.
You can select up to 3 wallpaper
settings.
MOVE
SELECT
RETURN
EXIT
Press RETURN button to return to the previous level.
MOVE
SELECT
RETURN
EXIT
Select this to set the
Samsung Logo image as
your wallpaper.
41
MOVE
SELECT
RETURN
EXIT
Press MENU button to exit the setup screen.
Select this to set the desired
image as your wallpaper.
42
HT-Q9(41~70) GB
5/3/06 10:59 AM
Page 48
DivX (R) registration
Setting the Speaker Mode
Please use the Registration code to register this player with the DivX (R) video on demand format.
To learn more, go to www.divx.com/vod.
1
Press the MENU
button while the
disc tray is open.
MOVE
EXIT
ENTER
2
Signal outputs and frequency responses from the speakers will automatically be adjusted according to your
speaker configuration and whether certain speakers are used or not.
Press Cursor
button to move to
‘Setup’ and then
press ENTER button.
MOVE
ENTER
1
In Stop mode,
press MENU
button.
2
Press Cursor
button to move to
‘Audio’ and then
press ENTER button.
EXIT
MOVE
3
GB
Press Cursor
button to move to
‘DIVX(R) registration’
and then press
ENTER button.
3
EXIT
ENTER
In the Speaker
Setup, press the
ENTER button
again.
MOVE
4
EXIT
ENTER
Press Cursor , ,
, buttons to
move to the desired
speaker and then
press ENTER button.
• For C, SL, and SR, each time the button
MOVE
ENTER
RETURN
EXIT
MOVE
ENTER
RETURN
EXIT
MOVE
CHANGE
RETURN
EXIT
SMALL : Select this when using the speakers.
NONE : Select this when no speakers are connected.
Note
• Depending on PRO LOGIC and STEREO settings, the speaker mode may vary (see page 53).
43
44
SETUP
•
is pressed, the mode switches alternately as follows: SMALL ➝ NONE.
For L and R, the mode is set to SMALL.
HT-Q9(41~70) GB
5/3/06 10:59 AM
Page 50
Setting the Delay Time
GB
If the speakers cannot be placed at equal distances from the listening position, you can adjust the delay time of
the audio signals from the center and rear speakers.
1
In Stop mode,
press MENU
button.
2
Press Cursor button
to move to ‘Audio’ and
then press ENTER
button.
3
Press Cursor button
to move to ‘DELAY
TIME’ and then press
ENTER button.
4
Press Cursor , ,
, buttons to move
to the desired speaker
and then press
ENTER button.
5
Press Cursor ,
to set the Delay
time.
• You can set the delay time for C
between 00 and 05mSEC and for
SL and SR between 00 and
15mSEC.
MOVE
ENTER
EXIT
MOVE
ENTER
EXIT
MOVE
ENTER
RETURN
EXIT
MOVE
SELECT
RETURN
EXIT
MOVE
CHANGE
RETURN
EXIT
SETUP
Setting up the Speaker Delay Time
When 5.1CH Surround Sound is played, you can enjoy the best sound if
the distance between you and each speaker is the same. Since the
sounds arrive at the listening position at different times depending on the
placement of speakers, you can adjust this difference by adding a delay
effect to the sound of the Center and Surround Speakers.
Note
(Dolby Pro Logic II), the delay time may be different for each mode.
• With
• With AC-3 and DTS, the delay time can be set between 00 and 15mSEC.
• The Center channel is only adjustable on 5.1 channel discs.
45
• Setting CENTER SPEAKER
If the distance of Dc is equal to or longer than the distance of Df in the figure, set the mode as 0ms.
Otherwise, change the setting according to the table.
Distance between Df and Dc
0 inch
13.6 inches
27.2 inches
40.8 inches
4.5 feet
5.6 feet
Delay Time
0 ms
1 ms
2 ms
3 ms
4 ms
5 ms
• Setting REAR (SURROUND) SPEAKERS
If the distance of Df is equal to the distance of Ds
in the figure, set the mode as 0ms. Otherwise,
change the setting according to the table.
Distance between Df and Ds
0 inch
40.8 inches
6.7 feet
10.0 feet
13.4 feet
16.7 feet
Ideal CENTER SPEAKER placement
Delay Time
0 ms
3 ms
6 ms
9 ms
12 ms
15 ms
Ideal SURROUND
SPEAKER
placement
It is desirable to place all speakers within this circle.
Df: The distance from FRONT SPEAKER
Dc: The distance from CENTER SPEAKER
Ds: The distance from SURROUND SPEAKER
46
HT-Q9(41~70) GB
5/3/06 10:59 AM
Page 52
Setting the Test Tone
Setting the DRC (Dynamic Range Compression)
Use the Test Tone feature to check the speaker connections.
1
In Stop or no
disc mode,
press MENU
button.
2
GB
This feature balances the range between the loudest and quietist sounds.
You can use this function to enjoy Dolby Digital sound when watching movies at low volume at night.
Press Cursor button to move to ‘Audio’
and then press
ENTER button.
3
Press Cursor button
to move to ‘TEST
TONE’ and then press
ENTER button.
1
In Stop or no disc
mode, press
MENU button.
2
• The test tone will be sent to L ➝ C ➝
Press Cursor
button to move to
‘Audio’ and then
press ENTER
button.
R ➝ SR ➝ SL ➝ SW in order.
If the ENTER button is pressed again
at this time, the test tone will stop.
MOVE
ENTER
EXIT
MOVE
ENTER
EXIT
MOVE
MOVE
ENTER
RETURN
3
Press RETURN button to return to the previous level.
STOP
ENTER
MOVE
EXIT
ENTER
EXIT
EXIT
EXIT
4
Press Cursor
, to adjust
the ‘DRC’.
• When the Cursor
button is pressed,
the effect is greater, and when the
Cursor button is pressed, the effect is
smaller.
Alternate method: press the TEST TONE button on the remote.
Press TEST TONE button.
• Test tone will be produced as follows:
•
When playing a DVD or CD, this will work only in Stop mode.
Use this function to check that each speaker is correctly connected and that there is no problem.
To end the test tone,
press TEST TONE button again.
L: Front Speaker (L)
R: Front Speaker (R)
C: Center Speaker
SL: Rear Speaker (L)
SW: Subwoofer
SR: Rear Speaker (R)
Multi-Channel Pro Logic Mode
MOVE
ENTER
RETURN
EXIT
CHANGE
RETURN
EXIT
Start
Press RETURN button to return to the previous level.
Press MENU button to exit the setup screen.
47
48
SETUP
Press MENU button to exit the setup screen.
Press Cursor
button to move to
‘DRC’ and then
press ENTER
button.
HT-Q9(41~70) GB
5/3/06 10:59 AM
Page 54
Setting the Audio
GB
You can adjust the balance and level for each speaker.
Method 1
1
In Stop mode,
press MENU
button.
MOVE
3
When adjusting the audio quality using the setup screen
ENTER
RETURN
EXIT
4
ENTER
CHANGE
Adjusting Front Speaker Balance
1
Press SOUND
EDIT button and
then press Cursor
, .
Adjusting Rear Speaker Balance
Adjusting Center Speaker Level
Press SOUND
EDIT button and
then press Cursor
, .
Press SOUND
EDIT button and
then press Cursor
, .
2
3
EXIT
Press Cursor ,
buttons to select and
adjust the desired item.
Press the , buttons
to adjust the settings.
MOVE
When manually adjusting with the SOUND EDIT button
RETURN
Adjusting Rear Speaker Level
4
Press SOUND
EDIT button and
then press Cursor
, .
Adjusting Subwoofer Speaker Level
5
Press SOUND
EDIT button and
then press Cursor
, .
SETUP
ENTER
MOVE
EXIT
Press Cursor button
to move to ‘SOUND
EDIT’ and then press
ENTER button.
MOVE
2
Press Cursor
button to move to
‘Audio’ and then press
ENTER button.
Method 2
EXIT
Note
Press RETURN button to return to the previous level.
Adjusting Front/Rear Speaker Balance
• You can select between 00 and –06 and OFF.
• The volume decreases as you move closer to –6.
Adjusting Center/Rear/Subwoofer Speaker Level
Press MENU button to exit the setup screen.
49
• The volume level can be adjusted in steps from +6dB to –6dB.
• The sound gets louder as you move closer to +6dB and quieter as you get closer to -6dB.
50
HT-Q9(41~70) GB
5/3/06 10:59 AM
Page 56
AV SYNC Setup
Sound Field (DSP)/EQ Function
Video may look slower than the audio if it is connected to a digital TV.
If this occurs, adjust the audio delay time to to match the video.
1
Press the MENU button.
2
DSP(Digital Signal Processor) DSP modes have been designed to simulate different acoustic environments.
EQ: You can select ROCK, POP, or CLASSIC to optimize the sound for the genre of music you are playing
Press Cursor , buttons
to move to ‘Audio’ and then
press ENTER button.
3
ENTER
Press DSP/EQ button.
• "DSP" appears on the display panel.
• Each time the button is pressed, the selection changes as follows:
• Setup menu appears.
MOVE
MOVE
EXIT
Press Cursor ,
buttons
to move to ‘AV-SYNC’ and
then press ENTER button.
4
ENTER
EXIT
SETUP
Press Cursor
, buttons
to select the AV-SYNC Delay
Time and then press the
ENTER button.
• You can set the audio delay time between 0 ms
and 300 ms. Set it to the optimal status.
Note
• DSP/EQ function is only available in STEREO mode.
Press the
PL II mode button to show STEREO on the display.
• This feature works with CDs, MP3-CDs, 2 channel DivX and Dolby
Digital discs.
MOVE
ENTER
RETURN
EXIT
MOVE
SELECT
RETURN
EXIT
• When playing a DVD disc encoded with two or more channels,
multi-channel mode will be selected automatically and DSP/EQ
function does not work.
Press RETURN button to return to the previous level.
Press MENU button to exit the setup screen.
51
GB
POP, JAZZ, ROCK: Depending on the genre of music, you can select POP, JAZZ, and ROCK.
STUDIO : Provides a sense of presence as if in a studio.
CLUB : Simulates the sound of a dance club with a throbbing bass beat.
HALL : Provides a clear vocal as if listening in a concert hall.
MOVIE: Provides the feeling of a movie theater.
CHURCH: Gives the feel of being in a grand church.
PASS: Select this for normal listening.
52
HT-Q9(41~70) GB
5/3/06 10:59 AM
Page 58
Dolby Pro Logic II Mode
You can select the desired Dolby Pro Logic II audio mode.
Press
PL II MODE button.
• Each time the button is pressed, the mode changes as follows.
Dolby Pro Logic II Effect
GB
This function works only in Dolby Pro Logic MUSIC mode.
1
Press
PL II MODE button to select ‘MUSIC’ mode.
2
Press
PL II EFFECT button
to select Panorama, then press
Cursor ,
buttons to select
the desired effect setting.
• You can select either 0 or 1.
• This mode extends the front stereo image to
include the surround speakers for an exciting
"wraparound" effect with side wall imaging.
3
Note
• When selecting Pro Logic II mode, connect your external device to the
AUDIO INPUT jacks (L and R) on the player. If you connect to only one of
the inputs (L or R), you cannot listen to surround sound.
Press
PL II EFFECT button
to select C-Width, then press
Cursor , buttons to select
the desired effect setting.
• You can select between 0 and 7.
• This sets the width of the center image.
Note
• You can select between 0 and 6.
• Incrementally adjusts the sound field (DSP)from
the front or rear.
SETUP
The higher the setting, the less sound comes
from the center speaker.
4
Press
PL II EFFECT button
to select Dimension, then press
the Cursor , buttons to
select the desired setting.
• When playing a DVD disc encoded with two or more channels, multi-channel mode will be
selected automatically and
(Dolby Pro Logic II) button does not work.
PRO LOGIC II
• MUSIC: When listening to music, you can experience sound effects as if you are listening to the actual performance.
• CINEMA: Adds realism to the movie soundtrack.
• PRO LOGIC: You will experience a realistic multi-channel effect, as if using five speakers, while using just the front left
and right speakers.
• MATRIX: You will hear 5.1 channel surround sound.
STEREO: Select this to listen to sound from the front left and right speakers and the subwoofer only.
53
54
HT-Q9(41~70) GB
5/3/06 10:59 AM
Page 60
Listening to Radio
Remote Control Unit
Press the TUNER
button and select
the FM band.
1
Presetting Stations
GB
Example: Presetting FM 89.1 in the memory
2
Tune in to the
desired station.
Automatic Tuning 1
Automatic Tuning 2
Manual Tuning
1
Press the TUNER
button and select the
FM band.
When
pressed,
a
C помощтаisна
бутоните
preset
broadcast
is
станцията
сеstation
избира
selected.
Натиснете и задръЖте за
автоматично
търсене, на )
Press and hold TUNING(
to automatically
search
for active
станция
Бързо
натиснете
broadcasting
stations.или
за
увеличаване
намаляване на честотата
Briefly press TUNING( , ) to
постепенно.
increase or decrease the frequency
incrementally.
2
Press TUNING
( , ) to select
"89.10".
3
• Refer to Step 2 on page 61 to
Press the TUNER
MEMORY button.
• “PRGM” flashes in the display.
automatically or manually tune in
to a station.
Main Unit
1
Press the FUNCTION button to select
the FM band.
2
Select a broadcast
station.
Press
the STOP
( )
Натиснете
STOP
button
to за
select
) бутона
да изберете
PRESET
PRESET and then
pressu после натиснете
даpreset
настроите
станцията
button to selectзаthe
station.
Automatic Tuning 1
Press
to select preset
number.
4
5
Press the TUNER
MEMORY button
again.
6
To preset another
station, repeat steps
2 to 5.
• You can select between 1 and
15 presels.
Натиснете STOP ( ) бутона
RADIO OPERATION
Press
STOP ("MANUAL"
)
За да the
изберете
и
button
to
select
"MANUAL"
натиснете и задръ*те за
and then press автоматично
and hold
търсене
Натиснете
( ) за да
button to automatically
searchSTOP
the band.
Automatic Tuning 2
изберете MANUAL и кратко
Press
STOPза
( избор
) to select
натиснете
на по
MANUAL
and
then
ниска или Висока briefly
честота
press
to tune in to a lower or
higher frequency.
Manual Tuning
Press MO/ST button to listen in Mono/Stereo.
(This applies only when listening to an FM station.)
55
• Each time the button is pressed, the sound switches between "STEREO" and "MONO".
• In a poor reception area, select MONO for a clear, interference-free broadcast.
Note
• This unit does not receive AM broadcasts.
To tune in to a preset station, press
remote control to select a channel.
on the
56
HT-Q9(41~70) GB
5/3/06 10:59 AM
Page 62
Допълнителни
Convenient функции
Functions
Свързвне
на микрофон
(Q9 само)
Connecting
Microphone
(HT-Q9 only)
GB
Sleep Timer Function
You can set the time that the Home Theater will shut itself off.
Press SLEEP button.
• "SLEEP" will be displayed. Each time the button is pressed, the preset
time changes as follows: 10 ➝ 20 ➝ 30 ➝ 60 ➝ 90 ➝ 120 ➝ 150 ➝ OFF.
To confirm the sleep timer setting, press SLEEP button.
• The remaining time before the Home Theater will shut itself off is displayed.
• Pressing the button again changes the sleep time from what you have set
earlier.
To cancel the sleep timer, press SLEEP button until
OFF appears on the display.
Mute Function
This is useful when answering a doorbell or telephone call.
1
Свържете микрофона към жака
Connect
the панел.
microMIC
от предният
phone to the MIC jack
on the front panel.
2
Завъртете
VOLVOL
за да to
Turn theMIC
MIC
нагласите
силата
на
adjust the voiceзвука
vol-на
микрофона.
ume of the micro
phone.
You canда
connect
up to до
two2microphones.
•можете
свържете
микрофона.
3
Завъртете
LEVEL
за да
Turn theECHO
ECHO
LEVEL
изберете ехо ефекта.
to adjust the echo level
of the microphone.
Press MUTE button.
MISCELLANEOUS
• ‘MUTE ON’ appears in the display.
• To restore the sound, press the button again to
select ‘MUTE OFF’.
57
58
HT-Q9(41~70) GB
5/3/06 10:59 AM
Page 64
Before Calling for Service
GB
Refer to the chart below when this unit does not function properly. If the problem you are experiencing is not listed below or
if the instruction below does not help, turn off the unit, disconnect the power cord, and contact the nearest authorized
dealer or Samsung Electronics Service Center.
Symptom
Диска не се отваря
Disc tray does not open.
Check/Remedy
• Кабела
за захранването пъхнат ли е праВилно?
Is the power cord plugged securely into the outlet?
•
• Изклкючите захранването u го Вклкючете отново.
• Turn off the power and then turn it back on.
• Проверете регионалният номер на диска.
number of
DVD.да бъдат
• Check the иregion
• CD-ROMs
DVD-ROM
неthe
могат
DVD discs purchased from abroad may not be playable.
Възпроизведени на DVD уреда.
Playback does not start.
and DVD-ROMs cannot be played on this Home
• CD-ROMs дали
• Проверете
рейтинга е правилен.
Theater.
• Make sure that the rating level is correct.
• Използвате ли деформиран диск или надраскан диск?
Възпроизвеждането не
• Изчистете
диска.
Playback does not start
a deformed disc or a disc with scratches on
• Are you using
стартира веднага като
the surface?
immediately
when
the
натиснете бутона Play/
• •Не
се чува
звук
по Време на Възпроизвеждане, баВно
Wipe
the disc
clean.
Pause.
Play/Pause button is pressed. Възпроизвеждане и кадър след кадър.
••ПраВилно
са during
сВързани
кулоните?
са
No sound isли
heard
fast playback,
slowНастроени
playback, andли
step
Не се чува звук
праВилно?
motion playback.
Are theпоВреден
speakers connected
Sound is not produced.
••Диска
ли е? properly? Is the speaker setup correctly customized?
• Is the disc severely damaged?
• Докато слушате CD или радио, се издава звук от
предните
кулони
само.
"PRO
to (Л/Д)
a CD or
radio,Изберете
sound is output
to LOGIC
the front II"
• When listening
Звук моЖе да се чуе само от като
speakers
(L/R) (Dolby
only. Select
by pressing
натиснете
Pro"PRO
LogicLOGIC
II) от II"
дистанционното
за
(Dolby
Pro
Logic
II)
on
the
remote
control
to
use
all
six
speakда
използвате
Всичките
6
кулони.
няколко
Sound кулони.
can be heard only
ers.
• Уверете
се че DVD диска е 5.1-СН съвместим.
Make
sure that the
DVD
discна
is NONE,
5.1-CH compatible.
from a few speakers and
•
• Ако
настроите
SL,
и SR
кулоните В аудио
If
you
set
C,
SL,
and
SR
to
NONE
in the speaker
modeзВук
in theот
•
настройките
няма
да
се
Възпроизведе
никакъв
not all six.
audio
setup
of
the
setup
screen,
no
sound
is
heard
from
the
централната и предните ляВа и дясна кулона. Настроите
center speaker and the front left and right speakers. Set C, SL,
С, SL,u SR на SMALL.
and SR to SMALL.
Възпроизвеждането не се
пуска
Картината
появява,
Picture doesнеnotсеappear,
sound
звука също, или диска се
is not produced, or the disc
отваря до 5 сек след
tray opens 2 toму.
5 seconds later.
поставянето
duced.
59
Диска
Въртиbut
но не
•• Disc
is се
rotating
no се
picВиЖда
картина.
ture is produced.
• Качеството на картината
•наPicture
quality is poor and
екрана е лошо
is shaking.
иpicture
картината
трепери.
Check/Remedy
• •Включен
ли е on?
телевизора?
Is the TV power
• •Правилно
лиcables
а свързани
кабелите?Are the video
connectedВидео
properly?
• •ПоВреден
ли
е
диска?
Is the disc dirty or damaged?
• •Диск
произведен
при
услоВия
моЖе да не се
A poorly
manufactured
discлоши
may not
be playable.
Възпроизведе.
• Is the remote control being operated within its operation range of
The remote control does
not work.
Дистанционното не работи
Audio езика
language
and subtiАудио
и субтитрите
tlesработят.
do not work.
не
Menu screen does not appear even
Менкюто
не function
екранаisне
се
when
the menu
selected.
показва.
angle
distance?
• На
не and
поВече
от пределното разстояние от уреда ли
Are
the
batteries
exhausted?
•
сте?
Have
you
selected
mode(TV/DVD) functions of the remote
•
• Изтощени ли са the
батериите?
control
(TV
or
DVD)
correctly?
Избрал ли сте режим TV/DVD от дистанционото
правилно?
language
and subtitles will
not work
for DVDs ако
not containing
• Audioезика
Аудио
и субтитрите
няма
да работят
диска
them.
And
depending
on
the
disc,
they
may
work
differently.
не съдържат такива.В зависимост от диска, те могат
да са различни.
• Are you using a disc that does not contain menus?
• Използвате ли диск който няма менюта?
You можете
can play 16:9
DVDs in 16:9
WIDEDVD,
mode,В4:3
LETTER
BOX
• •Вие
да гледате
В 16:9
16:9
WIDE
mode, or 4:3 PAN SCAN mode, but 4:3 DVDs can be seen in 4:3
реЖим,
4:3 LETTER BOX реЖим, или 4:3 PAN SCAN
ratio only. Refer to the DVD disc jacket and then select the approреЖим,
но 4:3 DVD моЖе да се Види В 4:3
priate function.
съотношение. Обърнете се към DVD обложката.
••Уредът
The mainнеunitработи.
is not working. • Докато
"NO DISC" съобщението се пояВи на екрана,
power and hold the
button on the main unit for
• Turn off theбутон
(Пример:
се, out or задръЖте
(Example:Изключва
The power goes
от предният уред за поне от 5 сек.
longer than 5 seconds.
странен
звук is
сеheard.)
чува.
strange noise
бутон STOP. "INITIALIZE" ще се появи на екрана и
)••The
DVDHome
уреда
не
работи
Using the
RESET function
erase all stored
настройки
ще сеwill
рестартират
до settings.
фабричните.
Theater is not всички
правилно.
Do
not use this
unlessPOWER.
necessary. Използвайте RESET
•
Натиснете
бутона
working normally.
функцията за да изтриете Всички запаметени
• While “NO DISC” message appears on the display of main unit, hold
настройки.
the main unit's
for longer than
5 seconds.
“INITIALIZE”
Забравили сте паролата за Изключете
уредаbutton
и задръжте
за около
5 сек
STOP
The
password
for
rating
appears
on
the
display
and
all
settings
will
return
to
the
default values.
рейтинга.
бутона от предният панел. Използвайте RESET
• Press the POWER
level has been forgotten.
функцията
за да button.
изтриете Всички запаметени
Using the RESET function will erase all stored settings.
настройки.
Do not use this unless necessary.
Aspect ratio cannot be
Аспекта не моЖе да бъде
changed.
сменен.
Не моЖете да чуете/
Can't receive
radio
broadполучите
радио
сигнал.
cast.
• •ПраВилно
лиconnected
е сВързана
антената?
Is the antenna
properly?
•• Слаб
ли е излъчваният
монтирайте
Външна
If the antenna's
input signal is сигнал,
weak, install
an external FM
antenna
an area with good reception.
FMinантена.
60
MISCELLANEOUS
Dolby Digital 5.1 CH
Dolby Digital 5.1 СНСъраунд
Surround Sound is not proне се работи
• DVD уреда преместван ли е от студено на топло място.
the образува
Home Theater
suddenly moved
from aотворете
cold place диска
to a
• Was се
Когато
кондензация
в уреда,
warm one? When condensation forms inside the player, remove
и оставете уреда Вклщчен 1-2 часа. (МоЖете да
the disc and let the player stand for 1 or 2 hours with the power on.
използвате уреда отноВо когато кондензацията се
(You can use the player again after condensation disappears.)
махне. )
• Диска маркиран ли е с "Dolby Digital 5.1 CH"? Dolby
• Is there "Dolby Digital 5.1 CH" mark on the disc? Dolby Digital
Digital 5.1 CH съраунд се ВъзпроизВеЖда само когато
5.1 CH Surround Sound is produced only if the disc is recorded
диска
записан
5.1 channel зВук.
with е5.1
channel на
sound.
• Аудио
езика
праВилно
ли еset
настроен
DOLBY
to DOLBYнаDIGITAL
5.1-CH in
• Is the audio language correctly
DIGITAL
5.1-CH?
the information display?
Symptom
HT-Q9(41~70) GB
5/3/06 10:59 AM
Page 66
Cautions on Handling and Storing Discs
Small scratches on the disc may reduce sound and picture quality or cause skipping.
Be especially careful not to scratch discs when handling them.
Do not touch the playback side of the disc.
Hold the disc by the edges so that fingerprints
will not get on the surface.
Do not stick paper or tape on the disc.
Disc Storage
Keep in a cool ventilated area
Do not keep in
direct sunlight
Keep in a clean
Protection jacket.
Store vertically.
• Do not allow the discs to become contaminated with dirt.
• Do not load cracked or scratched discs.
Handling and Storing Discs
GB
Enter the appropriate code number for the initial settings “Disc Audio”, “Disc Subtitle”
and/or “Disc Menu” (See page 35).
Code
Handling discs
Caution
Language Code List
Language
Code
Language
Code
Language
Code
Language
1027
Afar
1181
Frisian
1334
Latvian, Lettish
1506
Slovenian
1028
Abkhazian
1183
Irish
1345
Malagasy
1507
Samoan
1032
Afrikaans
1186
Scots Gaelic
1347
Maori
1508
Shona
1039
Amharic
1194
Galician
1349
Macedonian
1509
Somali
1044
Arabic
1196
Guarani
1350
Malayalam
1511
Albanian
1045
Assamese
1203
Gujarati
1352
Mongolian
1512
Serbian
1051
Aymara
1209
Hausa
1353
Moldavian
1513
Siswati
1052
Azerbaijani
1217
Hindi
1356
Marathi
1514
Sesotho
1053
Bashkir
1226
Croatian
1357
Malay
1515
Sundanese
1057
Byelorussian
1229
Hungarian
1358
Maltese
1516
Swedish
1059
Bulgarian
1233
Armenian
1363
Burmese
1517
Swahili
1060
Bihari
1235
Interlingua
1365
Nauru
1521
Tamil
1239
Interlingue
1369
Nepali
1525
Tegulu
Inupiak
1376
Dutch
1527
Tajik
1069
Bislama
1066
Bengali; Bangla
1067
Tibetan
1248
Indonesian
1379
Norwegian
1528
Thai
1070
Breton
1253
Icelandic
1393
Occitan
1529
Tigrinya
1245
1079
Catalan
1254
Italian
1403
(Afan) Oromo
1531
Turkmen
1093
Corsican
1257
Hebrew
1408
Oriya
1532
Tagalog
1097
Czech
1261
Japanese
1417
Punjabi
1534
Setswana
1103
Welsh
1269
Yiddish
1428
Polish
1535
Tonga
1105
Danish
1283
Javanese
1435
Pashto, Pushto
1538
Turkish
1109
German
1287
Georgian
1436
Portuguese
1539
Tsonga
1130
Bhutani
1297
Kazakh
1463
Quechua
1540
Tatar
1142
Greek
1298
Greenlandic
1481
Rhaeto-Romance
1543
Twi
1144
English
1299
Cambodian
1482
Kirundi
1557
Ukrainian
1145
Esperanto
1300
Kannada
1483
Romanian
1564
Urdu
1149
Spanish
1301
Korean
1489
Russian
1572
Uzbek
1150
Estonian
1305
Kashmiri
1491
Kinyarwanda
1581
Vietnamese
1151
Basque
1307
Kurdish
1495
Sanskrit
1587
Volapuk
• When cleaning, wipe gently from the inside to the outside of the disc.
1157
Persian
1311
Kirghiz
1498
Sindhi
1613
Wolof
1165
Finnish
1313
Latin
1501
Sangro
1632
Xhosa
1166
Fiji
1326
Lingala
1502
Serbo-Croatian
1665
Yoruba
1171
Faeroese
1327
Laothian
1503
Singhalese
1684
Chinese
1174
French
1332
Lithuanian
1505
Slovak
1697
Zulu
Note
• Condensation may form if warm air comes into contact with cold parts
inside the player. When condensation forms inside the player,
the player may not operate correctly. If this occurs, remove the disc
and let the player stand for 1 or 2 hours with the power on.
61
62
MISCELLANEOUS
When you get fingerprints or dirt on the disc, clean it
with a mild detergent diluted in water and wipe with a
soft cloth.
HT-Q9(41~70) GB
5/3/06 10:59 AM
Page 68
Specifications
G
E
N
E
R
A
L
T
F U
N
M E
R
V
I
D
E
O
O
U
T
P
U
T
A
M
P
L
I
F
I
E
R
Power Consumption
Weight
Dimensions (W x H x D)
Operating Temperature Range
Operating Humidity Range
Usable Sensitivity
S/N Ratio
Distortion
Composite Video
Component Video
Front speaker output
Center speaker output
Rear speaker output
Subwoofer speaker output
Frequency range
S/N Ratio
Channel separation
Input sensitivity
Speaker system
S
P
E
A
K
E
R
Impedance
Frequency range
Output sound pressure level
Rated input
Maximum input
Dimensions (W x H x D)
Weights
63
20W
2.6Kg
430 x 65.5 x 256.5 mm
+5°C~+35°C
10% ~ 75%
10dB
60dB
0.5%
1.0Vp-p(75Ω load)
Y:1.0Vp-p(75Ω load)
Pr:0.70Vp-p(75Ω load)
Pb:0.70Vp-p(75Ω load)
30W x 2(4Ω)
30W(4Ω)
30W x 2(4Ω)
30W(8Ω)
20Hz~20KHz
75dB
60dB
(AUX)500mV
5.1ch speaker system
Front/Center/Rear speaker
Subwoofer speaker
4Ω
8Ω
140Hz~20KHz
35Hz~140Hz
85dB/W/M
85dB/W/M
30W
30W
60W
60W
Front/Rear
Center
Front/Rear
Center
92 x 102x 96.5 mm
130 x 320 x 314 mm
0.5 Kg/0.5 Kg
0.5 Kg
3.3 kg
Contact Multi-all
2005.11.18
3:42 PM
Page 8
XEU (ENG)
Contact SAMSUNG WORLD WIDE
If you have any questions or comments relating to Samsung products, please contact the SAMSUNG
customer care centre.
Region
North America
Latin America
Europe
CIS
Country
CANADA
MEXICO
U.S.A
ARGENTINE
BRAZIL
CHILE
COSTA RICA
ECUADOR
EL SALVADOR
GUATEMALA
JAMAICA
PANAMA
PUERTO RICO
REP. DOMINICA
TRINIDAD & TOBAGO
VENEZUELA
BELGIUM
CZECH REPUBLIC
DENMARK
FINLAND
FRANCE
GERMANY
HUNGARY
ITALIA
LUXEMBURG
NETHERLANDS
NORWAY
POLAND
PORTUGAL
SLOVAKIA
SPAIN
SWEDEN
U.K
RUSSIA
UKRAINE
AUSTRALIA
CHINA
HONG KONG
INDIA
Asia Pacific
INDONESIA
JAPAN
MALAYSIA
PHILIPPINES
SINGAPORE
THAILAND
Middle East & Africa
TAIWAN
VIETNAM
SOUTH AFRICA
U.A.E
Customer Care Center ☎
1-800-SAMSUNG (7267864)
01-800-SAMSUNG (7267864)
1-800-SAMSUNG (7267864)
0800-333-3733
0800-124-421
800-726-7864(SAMSUNG)
0-800-507-7267
1-800-10-7267
800-6225
1-800-299-0013
1-800-234-7267
800-7267
1-800-682-3180
1-800-751-2676
1-800-7267-864
1-800-100-5303
02 201 2418
844 000 844
38 322 887
09 693 79 554
08 25 08 65 65 (0,15€/Min)
01805 - 121213 (€ 0,12/Min)
06 40 985 985
199 153 153
02 261 03 710
0900 20 200 88 (€ 0.10/Min)
231 627 22
0 801 801 881
80 8 200 128
0850 123 989
902 10 11 30
08 585 367 87
0870 242 0303
8-800-200-0400
8-800-502-0000
1300 362 603
800-810-5858, 010- 6475 1880
2862 6001
3030 8282
1600 1100 11
0800-112-8888
0120-327-527
1800-88-9999
1800-10-SAMSUNG (7267864)
1800-SAMSUNG (7267864)
1800-29-3232
02-689-3232
0800-329-999
1 800 588 889
0860 7267864 (SAMSUNG)
800SAMSUNG (7267864)
Web Site
www.samsung.com/ca
www.samsung.com/mx
www.samsung.com
www.samsung.com/ar
www.samsung.com/br
www.samsung.com/cl
www.samsung.com/latin
www.samsung.com/latin
www.samsung.com/latin
www.samsung.com/latin
www.samsung.com/latin
www.samsung.com/latin
www.samsung.com/latin
www.samsung.com/latin
www.samsung.com/latin
www.samsung.com/latin
www.samsung.com/be
www.samsung.com/cz
www.samsung.com/dk
www.samsung.com/fi
www.samsung.com/fr
www.samsung.de
www.samsung.com/hu
www.samsung.com/it
www.samsung.lu
www.samsung.com/nl
www.samsung.com/no
www.samsung.com/pl
www.samsung.com/pt
www.samsung.com/sk
www.samsung.com/es
www.samsung.com/se
www.samsung.com/uk
www.samsung.ru
www.samsung.com/ur
www.samsung.com/au
www.samsung.com.cn
www.samsung.com/hk
www.samsung.com/in
www.samsung.com/id
www.samsung.com/jp
www.samsung.com/my
www.samsung.com/ph
www.samsung.com/sg
www.samsung.com/th
www.samsung.com/tw
www.samsung.com/vn
www.samsung.com/za
www.samsung.com/mea