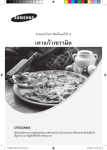
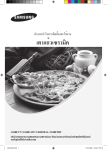
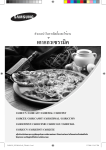
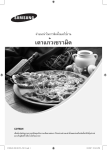
1
คู่มือการติดตั้งและใช้งาน
เตาแก้วเซรามิค
C61RAAST / C61RABAL / C61RACN / C61RADST / C61RAEE /
C61R1AAMST / C61R1ABMAL / C61R1ACMN / C61R1ADMST
/ C61R1AEME / C61R2AAST / C61R2ABAL / C61R2ACN /
C61R2ADST / C61R2AEE
เพื่อป้องกันอันตรายจากอุบัติเหตุหรือความเสียหายต่อเตา โปรดอ่านคำ�แนะนำ�ทั้งหมดก่อนที่จะติดตั้งหรือ
ใช้อุปกรณ์ และเก็ํบคู่มือนี้ ไว้เพื่ออ้างอิงในอนาคต
C61RAAST_XST-00146A-05_TH.indd 1
30/10/2555 15:27:16
TH
สารบัญ
การใช้คู่มือนี .้ . . . . . . . . . . . . . . . . . . . . . . . . . . . . . . . . . . . . . . . . . . . . . . 2
ข้อมูลเกี่ยวกับความปลอดภัย . . . . . . . . . . . . . . . . . . . . . . . . . . . . . . . . . . . . . . . . 3
ความปลอดภัยเกี่ยวกับไฟฟ้า . . . . . . . . . . . . . . . . . . . . . . . . . . . . . . . . . . . . . . . . . 3
ความปลอดภัยสำ�หรับเด็ก 3����������������������������������������������������������������������������������������������������������������������������� 3
ความปลอดภัยระหว่างการใช้งาน . . . . . . . . . . . . . . . . . . . . . . . . . . . . . . . . . . . . . . . 4
ความปลอดภัยขณะทำ�ความสะอาด 4����������������������������������������������������������������������������������������������������������������� 4
คำ�แนะนำ�ในการกำ�จัด ก������������������������������������������������������������������������������������������������������������������������������ 4
การติดตั้งเตา . . . . . . . . . . . . . . . . . . . . . . . . . . . . . . . . . . . . . . . . . . . . . . 5
ระเบียบและมาตรฐาน . . . . . . . . . . . . . . . . . . . . . . . . . . . . . . . . . . . . . . . . . . . 5
คำ�แนะนำ�เพื่อความปลอดภัยสำ�หรับผู้ติดตั้ง ก�������������������������������������������������������������������������������������������������������� 5
การต่อสายไฟฟ้า . . . . . . . . . . . . . . . . . . . . . . . . . . . . . . . . . . . . . . . . . . . . . 6
การติดตั้งบนเคาเตอร์ . . . . . . . . . . . . . . . . . . . . . . . . . . . . . . . . . . . . . . . . . . . . 7
ชิ้นส่วนและคุณสมบัติ . . . . . . . . . . . . . . . . . . . . . . . . . . . . . . . . . . . . . . . . . . . 9
โซนปรุงอาหารและแผงควบคุม . . . . . . . . . . . . . . . . . . . . . . . . . . . . . . . . . . . . . . . . 9
องค์ประกอบ . . . . . . . . . . . . . . . . . . . . . . . . . . . . . . . . . . . . . . . . . . . . . . . 10
คุณสมบัติหลักของอุปกรณ์ . . . . . . . . . . . . . . . . . . . . . . . . . . . . . . . . . . . . . . . . . 11
การปิดเพื่อความปลอดภัย . . . . . . . . . . . . . . . . . . . . . . . . . . . . . . . . . . . . . . . . . . 12
สัญลักษณ์แสดงความร้อนหลงเหลือ . . . . . . . . . . . . . . . . . . . . . . . . . . . . . . . . . . . . . . 12
ก่อนที่จะเริ่มต้น . . . . . . . . . . . . . . . . . . . . . . . . . . . . . . . . . . . . . . . . . . . . . 13
การทำ�ความสะอาดครั้งแรก 1��������������������������������������������������������������������������������������������������������������������������13
การใช้เตา . . . . . . . . . . . . . . . . . . . . . . . . . . . . . . . . . . . . . . . . . . . . . . . 13
การใช้ภาชนะที่เหมาะสม . . . . . . . . . . . . . . . . . . . . . . . . . . . . . . . . . . . . . . . . . . 13
การใช้เซนเซอร์ควบคุมแบบสัมผัส . . . . . . . . . . . . . . . . . . . . . . . . . . . . . . . . . . . . . . 14
การเปิดสวิตช์อุปกรณ์ . . . . . . . . . . . . . . . . . . . . . . . . . . . . . . . . . . . . . . . . . . . 15
การควบคุมอุณหภูมิ . . . . . . . . . . . . . . . . . . . . . . . . . . . . . . . . . . . . . . . . . . . . 15
การปิดอุปกรณ์ . . . . . . . . . . . . . . . . . . . . . . . . . . . . . . . . . . . . . . . . . . . . . . 16
การปิดโซนการปรุงอาหาร . . . . . . . . . . . . . . . . . . . . . . . . . . . . . . . . . . . . . . . . . . 16
การใช้ล็อคป้องกันเด็ก . . . . . . . . . . . . . . . . . . . . . . . . . . . . . . . . . . . . . . . . . . . 17
การล็อคและปลดล็อคแผงควบคุม . . . . . . . . . . . . . . . . . . . . . . . . . . . . . . . . . . . . . . 19
การตั้งค่าที่แนะนำ�สำ�หรับการปรุงอาหารชนิดต่างๆ9�������������������������������������������������������������������������������������������������19
การทำ�ความสะอาดและดูแลรักษา2���������������������������������������������������������������������������������������������������������������� 20
เตา . . . . . . . . . . . . . . . . . . . . . . . . . . . . . . . . . . . . . . . . . . . . . . . . . . . 20
กรอบของเตา . . . . . . . . . . . . . . . . . . . . . . . . . . . . . . . . . . . . . . . . . . . . . . . 21
เพื่อป้องกันความเสียหายต่ออุปกรณ์ของคุณ . . . . . . . . . . . . . . . . . . . . . . . . . . . . . . . . . . 21
เคล็ดลับในการทำ�ความสะอาด2�����������������������������������������������������������������������������������������������������������������������22
คำ�แนะนำ�ในการทำ�ความสะอาด����������������������������������������������������������������������������������������������������������������������23
การรับประกันและบริการ . . . . . . . . . . . . . . . . . . . . . . . . . . . . . . . . . . . . . . . . . 24
คำ�ถามที่พบบ่อยและการแก้ไขปัญหา2����������������������������������������������������������������������������������������������������������������24
บริการ . . . . . . . . . . . . . . . . . . . . . . . . . . . . . . . . . . . . . . . . . . . . . . . . . . 25
ข้อมูลทางเทคนิค . . . . . . . . . . . . . . . . . . . . . . . . . . . . . . . . . . . . . . . . . . . . 26
2
C61RAAST_XST-00146A-05_TH.indd 2
30/10/2555 15:27:16
การใช้คู่มือนี้
โปรดสละเวลาเพื่ออ่านคู่มือผู้ ใช้เล่มนี้ โดยเฉพาะในส่วนข้อมูลเพื่อความปลอดภัยที่อยู่ในหัวข้อถัดไป ก่อนที่จะใช้อุปกรณ์ โปรดเก็บคู่มือ
นี้ ไว้เพื่ออ้างอิงในอนาคต ถ้ามีการเปลี่ยนมือเจ้าของ โปรดมอบคู่มือนี้ให้กับเจ้าของใหม่
TH
คู่มือนี้จะใช้สัญลักษณ์ต่อไปนี้
นี่คือสัญลักษณ์เตือนเกี่ยวกับความปลอดภัย
คำ�เตือน แสดงข้อมูลที่เกี่ยวกับความปลอดภัยของคุณ
สำ�คัญ แสดงข้อมูลเกี่ยวกับการหลีกเลี่ยงความเสียหายที่จะเกิดกับอุปกรณ์
สัญลักษณ์นี้แสดงถึงข้อมูลที่เป็นประโยชน์และคำ�แนะนำ�สำ�หรับนำ�ไปปฏิบัติ
สัญลักษณ์นี้หมายถึงมาตรการที่สามารถดำ�เนินการเพื่อคุ้มครองสิ่งแวดล้อม
1. หมายเลขเช่นนี้หมายถึงคำ�แนะนำ�ทีละขั้นตอนสำ�หรับการใช้อุปกรณ์
2. ...
3. ...
คู่มือนี้มีข้อมูลเกี่ยวกับขั้นตอนที่คุณสามารถดำ�เนินการเพื่อวินิจฉัยและแก้ไขปัญหาต่างๆ ที่อาจเกิดขึ้น โปรดอ่านหัวข้อ “การแก้ไขปัญหา”
3
C61RAAST_XST-00146A-05_TH.indd 3
30/10/2555 15:27:16
ข้อมูลเกี่ยวกับความปลอดภัย
TH
ความปลอดภัยของอุปกรณ์นี้สอดคล้องกับมาตรฐานทางเทคนิคที่เป็นที่ยอมรับ และกฎหมาย German Appliance Safety Law
อย่างไรก็ตาม ในฐานะผู้ผลิต เราเชื่อว่าเรามีหน้าที่ให้ข้อมูลและทำ�ให้คุณคุ้นเคยกับคำ�แนะนำ�ด้านความปลอดภัยต่อไปนี้
ความปลอดภัยเกี่ยวกับไฟฟ้า
• โปรดตรวจสอบว่าอุปกรณ์ได้รับการติดตั้งและลงกราวด์อย่างถูกต้องโดยช่างเทคนิคที่มีความชำ�นาญ
• โปรดให้ช่างซ่อมบำ�รุงที่มีความชำ�นาญเป็นผู้ ให้บริการซ่อมบำ�รุงอุปกรณ์ การซ่อมบำ�รุงโดยบุคคลที่ไม่มีความชำ�นาญจะทำ�ให้เกิดการบาด
เจ็บหรือเกิดความเสียหายอย่างร้ายแรง ถ้าอุปกรณ์จำ�เป็นต้องมีการซ่อมบำ�รุง โปรดติดต่อศูนย์บริการใกล้บ้าน มิฉะนั้นอาจทำ�ให้เกิดความ
เสียหายและทำ�ให้การรับประกันเป็นโมฆะ
• อุปกรณ์ที่มีการฝังหรือติดตั้งภายใน จะต้องใช้งานหลังจากมีการติดตั้งในตู้และที่ติดตั้งซึ่งสอดคล้องกับมาตรฐานที่เกี่ยวข้อง เพื่อให้มีการ
ป้องกันอย่างเพียงพอมิให้มีัการสัมผัสส่วนที่เป็นไฟฟ้า ตามที่กำ�หนดโดย VDE [สมาคมวิศวกรไฟฟ้าของเยอรมนี]
• ถ้าอุปกรณ์ของคุณทำ�งานผิดปกติหรือแตกร้าว หรือมีรอยร้าวปรากฏ:
- ปิดโซนปรุงอาหารทั้งหมด
- ถอดสายไฟหลักออกจากเตา และ
- ติดต่อศูนย์บริการใกล้บ้าน
• ถ้าผิวหน้าที่ปรุงอาหารร้าว ให้ปิดอุปกรณ์เพื่อป้องกันไม่ให้เกิดไฟฟ้าช็อต ห้ามใช้เตาจนกว่าจะเปลี่ยนพื้นผิวแก้วก่อน
• ห้ามใช้เตาเพื่อให้ความร้อนฟอยล์อะลูมิเนียม ผลิตภัณฑ์ที่ห่อด้วยฟอยล์อะลูมิเนียมหรือบรรจุภัณฑ์อาหารแช่แข็งในภาชนะอะลูมิเนียม
ความปลอดภัยสำ�หรับเด็ก
อุปกรณ์นี้ ไม่เหมาะสำ�หรับใช้งานโดยเด็กเล็กหรือบุคคลที่ไม่แข็งแรง หากไม่มีการดูแลอย่างพอเพียงโดยผู้ ใหญ่
ควรดูแลเด็กเล็กมิให้เล่นกับอุปกรณ์นี้
โซนปรุงอาหารจะร้อนเมื่อคุณปรุงอาหาร โปรดอย่าให้เด็กเล็กเข้าใกล้อุปกรณ์นี้
4
C61RAAST_XST-00146A-05_TH.indd 4
30/10/2555 15:27:16
ความปลอดภัย (ต่อ)
TH
ความปลอดภั ยระหว่างการใช้งาน
• อุปกรณ์นี้ใช้สำ�หรับการปรุงและทอดอาหารในบ้านเท่านั้น ไม่เหมาะสำ�หรับการใช้งานในเชิงพาณิชย์หรืออุตสาหกรรม
• ห้ามใช้เตาเพื่อให้ความร้อนแก่ห้อง
• ใช้ความระมัดระวังขณะเสียบปลั๊กอุปกรณ์ไฟฟ้าเข้ากับเต้าเสียบไฟฟ้าใกล้เตา สายไฟฟ้าจะต้องไม่สัมผัสกับพื้นผิวการปรุง
• ไขมันและน้ำ�มันที่ร้อนจัดอาจติดไฟง่าย ห้ามทิ้งพื้นผิวการปรุงไว้ โดยไม่ดูแลขณะที่เตรียมอาหารโดยใช้น้ำ�มันหรือไขมัน เช่น เมื่อปรุงมันฝรั่ง
ทอด
• ปิดโซนปรุงอาหารหลังจากใช้งาน
• ดูแลแผงควบคุมให้สะอาดและแห้ง
• ห้ามวางวัตถุไวไฟไว้บนเตา เนื่องจากอาจติดไฟได้
ความปลอดภั ยขณะทำ�ความสะอาด
• ปิดอุปกรณ์เสมอก่อนที่จะทำ�ความสะอาด
• เพื่อความปลอดภัย โปรดอย่าทำ�ความสะอาดอุปกรณ์ด้วยเครื่องพ่นไอน้ำ�หรือเครื่องทำ�ความสะอาดที่มีแรงดันสูง
• ทำ�ความสะอาดเตาตามคำ�แนะนำ�ในการทำ�ความสะอาดและการดูแลรักษาที่มีอยู่ในคู่มือนี้
คำ�แนะนำ�ในการกำ�จัด
การกำ�จั ดวั สดุหีบห่อ
• วัสดุทั้งหมดที่ใช้เป็นบรรจุภัณฑ์ของอุปกรณ์นั้นสามารถรีไซเคิลได้ทั้งหมด โฟมแผ่นและโฟมแข็งจะมีเครื่องหมายที่เหมาะสม โปรดทิ้ง
บรรจุภัณฑ์และอุปกรณ์เก่าโดยคำ�นึงถึงความปลอดภัยและสิ่งแวดล้อม
การทิ้งอุปกรณ์เก่าอย่างเหมาะสม
คำ�เตือน: ก่อนที่จะทิ้งอุปกรณ์เก่า โปรดทำ�ให้ไม่สามารถใช้งานได้ เพื่อไม่ให้เป็นสาเหตุของอันตรายต่างๆ
โดยให้ช่างที่มีความชำ�นาญตัดสายไฟของอุปกรณ์ออกจากสายจ่ายไฟ และถอดสายไฟของอุปกรณ์ออก
• ห้ามทิ้งอุปกรณ์ ในที่ทิ้งขยะของครัวเรือน
• หน่วยงานเก็บขยะหรือเทศบาลจะมีข้อมูลเกี่ยวกับวันที่เก็บขยะและที่ทิ้งขยะสาธารณะ
5
C61RAAST_XST-00146A-05_TH.indd 5
30/10/2555 15:27:16
การติดตั้งเตา
TH
สำ�คัญ: โปรดตรวจสอบว่าอุปกรณ์ได้รับการติดตั้งและลงกราวด์ โดยช่างเทคนิคที่มีความชำ�นาญเท่านั้น
โปรดปฏิบัติตามคำ�แนะนำ� การรับประกันจะไม่ครอบคลุมถึงความเสียหายที่เกิดขึ้นจากการติดตั้งที่ไม่เหมาะสม
ข้อมูลทางเทคนิคมีอยู่ที่ท้ายคู่มือนี้
ระเบียบและมาตรฐาน
อุปกรณ์นี้สอดคล้องกับมาตรฐานต่อไปนี้:
• EN 60 335 - 1 และ EN 60 335 - 2 - 6 เกี่ยวกับความปลอดภัยของอุปกรณ์ไฟฟ้าสำ�หรับใช้งานในครัวเรือนและวัตถุประสงค์ที่คล้าย
กัน
• EN 60350 หรือ DIN 44546 / 44547 / 44548 เกี่ยวกับการใช้คุณสมบัติของเครื่องปรุงอาหาร เตา เตาอบ และเตาย่างไฟฟ้าสำ�หรับการ
ใช้งานในครัวเรือน
• EN 55014 - 2
• EN 55014
• EN 61000 - 3 - 2 และ
•
EN 61000 - 3 - 3 เกี่ยวกับข้อกำ�หนดเบื้องต้นสำ�หรับความเข้ากันได้ทางแม่เหล็กไฟฟ้า (EMC)
อุปกรณ์นี้สอดคล้องกับข้อบังคับของ EU ต่อไปนี้:
• 73 / 23 / EWG วันที่ 19.02.1973 (ข้อบังคับสำ�หรับแรงดันไฟฟ้าต่ำ�)
• 89 / 336 / EWG วันที่ 03.05.1989 (ข้อบังคับ EMC รวมถึงข้อบังคับฉบับแก้ไข 92 / 31 / EWG) และ
• 93 / 68 / EWG CE ข้อบังคับในการติดฉลาก
คำ�แนะนำ�เพื่อความปลอดภัยสำ�หรับผู้ติดตั้ง
• อุปกรณ์จะต้องมีการจัดเตรียมการติดตั้งด้านไฟฟ้าที่สามารถตัดการเชื่อมต่อของอุปกรณ์จากสายจ่ายไฟฟ้าหลักทุกขั้ว โดยหน้าสัมผัสต้อง
เปิดกว้างอย่างน้อย 3 มม. อุปกรณ์ตัดกระแสไฟฟ้ารวมถึงคัทเอาต์ ฟิวส์ (ชนิดไขสกรูจะต้องมีการถอดออกจากที่ยึด) ตัวตัดกระแสลงดิน
และตัวนำ�ไฟฟ้า
• สำ�หรับการป้องกันไฟ อุปกรณ์นี้สอดคล้องกับ EN 60 335 - 2 - 6 อุปกรณ์ชนิดนี้สามารถติดตั้งโดยมีตู้ด้านบนหรือผนังหนึ่งด้าน
• ห้ามติดตั้งลิ้นชักใต้เตา
• การติดตั้งต้องมีการป้องกันการสั่นสะเทือน
• ชุดครัวที่จะนำ�อุปกรณ์ไปติดตั้งจะต้องสอดคล้องกับข้อกำ�หนดด้านความมั่นคง DIN 68930
• สำ�หรับการป้องกันความชื้น พื้นผิวตัดทั้งหมดจะต้องมีการซีลด้วยวัสดุที่เหมาะสม
• บนพื้นผิวปูกระเบื้อง จุดที่เป็นร่องที่มีเตาติดตั้งอยู่จะต้องมีการอุดด้วยปูนยาแนวจนสนิท
• บนพื้นผิวที่เป็นหินธรรมชาติหรือหินสังเคราะห์ หรือพื้นผิวเซรามิค จะต้องเชื่อมสปริงดีดตัวด้วยเรซินสังเคราะห์หรือกาวผสมที่เหมาะสม
• ตรวจสอบว่าซีลอยู่ในตำ�แหน่งที่เหมาะสมบนพื้นผิวการทำ�งานโดยไม่มีช่องว่าง
ห้ามใช้วัสดุซิลิโคนซีลเพิ่มเติม เนื่องจากจะทำ�ให้การถอดออกยากขึ้นเมื่อต้องบำ�รุงรักษา
• การถอดเตาจะต้องมีการดันออกจากด้านล่าง
6
C61RAAST_XST-00146A-05_TH.indd 6
30/10/2555 15:27:17
การติดตั้งเตา (ต่อ)
TH
การต่อสายไฟฟ้า
ก่อนที่จะเชื่อมต่อ โปรดตรวจสอบแรงดันไฟฟ้าของอุปกรณ์ กล่าวคือ แรงดันไฟฟ้าที่ระบุบนแผ่นข้อมูล ว่าตรงกับแรงดันไฟฟ้าของไฟฟ้าที่
จ่าย แผ่นข้อมูลจะอยู่ที่โครงด้านล่างของเตา
ตัดกระแสไฟฟ้าในวงจรก่อนที่จะต่อสายไฟเข้าสู่วงจร
แรงดันไฟฟ้าของส่วนให้ความร้อนคือ AC230 V~ นอกจากนี้ อุปกรณ์ยังสามารถทำ�งานได้ตามปกติในระบบเก่าที่มีแรงดันไฟฟ้า AC220 V~
เตาจะต้องต่อเข้ากับสายไฟฟ้าหลักโดยใช้อุปกรณ์ที่สามารถตัดการเชื่อมต่อของอุปกรณ์จากสายจ่ายไฟฟ้าหลักทุกขั้ว โดยหน้าสัมผัสต้องเปิด
กว้างอย่างน้อย 3 มม. อุปกรณ์ตัดกระแสไฟฟ้า เช่น คัทเอาต์อัตโนมัติ ตัวตัดกระแสลงดิน หรือฟิวส์
ต้องใช้สายไฟชนิด A H05SS - F (180°C) หรือสูงกว่า เพื่อเป็นสายต่อกับสายไฟฟ้าหลัก
กระแสไฟฟ้าของอุปกรณ์ (A)
พื้นที่หน้าตัด (มม²)
1N~
> 25 และ ≤ 32
> 4 และ < 6
2N~
> 10 และ ≤ 16
> 1.5 และ < 2.5
การเชื่อมต่อจะต้องกระทำ�ตามที่แสดงในไดอะแกรม จุดที่เชื่อมต่อจะต้องต่อตามไดอะแกรมที่เหมาะสม
สายลงกราวด์เชื่อมต่ออยู่กับขั้ว สายลงกราวด์จะต้องยาวกว่าสายที่มีกระแสไฟฟ้าไหลผ่าน
การเชื่อมต่อสายไฟจะต้องกระทำ�ตามข้อบังคับและสกรูของขั้วจะต้องขันให้แน่น
สายที่เชื่อมต่อจะต้องยึดกับสายเมน และปิดฝาครอบด้วยการกดให้แน่น (ให้ล็อคเข้าที่) ก่อนที่จะเปิดใช้งานเป็นครั้งแรก จะต้องนำ�
ฟอยล์ป้องกันหรือสติ๊กเกอร์ออกจากพื้นผิวแก้วเซรามิค
เมื่อต่อเตาเข้ากับแหล่งจ่ายกระแสไฟฟ้าหลักแล้ว ให้ตรวจสอบว่าโซนปรุงอาหารทั้งหมดพร้อมใช้งาน โดยเปิดแต่ละส่วนไปที่
การตั้งค่าสูงสุดเป็นระยะเวลาสั้นๆ
เมื่อเปิดเตาเป็นครั้งแรก ไฟแสดงผลทั้งหมดและล็อคป้องกันเด็กจะเปิดใช้งาน
220 V ~
220 V ~
คำ�เตือน: โปรดคำ�นึงถึง (ปฏิบัติตาม) การจัดเฟสและสาย N ของการเชื่อมต่อของบ้านและอุปกรณ์ (รูปแบบการเชื่อมต่อ) มิ
ฉะนั้น องค์ประกอบต่างๆ อาจเสียหายได้
การรับประกันไม่ได้ครอบคลุมถึงความเสียหายที่เกิดจากการติดตั้งไม่เหมาะสม
7
C61RAAST_XST-00146A-05_TH.indd 7
30/10/2555 15:27:17
การติดตั้งเตา (ต่อ)
TH
การติดตั งบนเคาเตอร์
้
โปรดบันทึกหมายเลขผลิตภัณฑ์บนแผ่นข้อมูลของอุปกรณ์ก่อนที่จะติดตั้ง
หมายเลขนี้จำ�เป็นในกรณีที่ต้องการรับบริการ และจะไม่สามารถดูได้อีกหลังจากติดตั้ง เนื่องจากแผ่นข้อมูลนี้จะอยู่ใต้อุปกรณ์
โปรดคำ�นึงถึงระยะห่างต่ำ�สุดที่กำ�หนดไว้
ยึดโครงทั้งสองด้านด้วยสกรูที่มีให้ก่อนที่จะติดตั้งเตาบนโครง
ต่ำ�สุด 50 มม.
x4
R3
560
ต่ำ�สุด 20
+1
490+1
600
50
8
C61RAAST_XST-00146A-05_TH.indd 8
30/10/2555 15:27:17
การติดตั้งเตา (ต่อ)
TH
90 x4
2
=
490+1
100
100
=
9
C61RAAST_XST-00146A-05_TH.indd 9
30/10/2555 15:27:18
ชิ้นส่วนและคุณสมบัติ
TH
โซนปรุงอาหารและแผงควบคุม
โซนปรุงอาหารเดี่ยว 1100 วัตต์
14
8
โซนปรุงอาหารเดี่ยว 1650 วัตต์
3
18
m
83
m
m
m
14
8
m
m
m
m
1
แผงควบคุม โซนปรุงอาหารเดี่ยว 1100 วัตต์
โซนปรุงอาหารเดี่ยว 1650 วัตต์
สัญญาณสำ�หรับการตั้งค่าความร้อนและความ
ร้อนหลงเหลือ
เซนเซอร์ควบคุม “ล็อค”
ตัวเลือกการตั้งค่าความร้อน
เซนเซอร์ควบคุม “เปิด/ปิด”
10
C61RAAST_XST-00146A-05_TH.indd 10
30/10/2555 15:27:18
ชิ้นส่วนและคุณสมบัติ (ต่อ)
TH
องค์ ประกอบ
1
3
2
เตาแก้วเซรามิค
������������������
โครงสำ�หรับติดตั้ง
สกรู
11
C61RAAST_XST-00146A-05_TH.indd 11
30/10/2555 15:27:18
ชิ้นส่วนและคุณสมบัติ (ต่อ)
TH
คุณสมบัติหลั กของอุปกรณ์
• พื้นผิวปรุงอาหารแก้วเซรามิค: อุปกรณ์นี้มีพื้นผิวปรุงอาหารแก้วเซรามิคและโซนปรุงอาหารความเร็วสูงสี่ส่วน ส่วนให้ความร้อนที่มี
ประสิทธิภาพของเตานี้จะช่วยลดเวลาในการให้ความร้อนของโซนปรุงอาหารได้อย่างมาก
• เซนเซอร์ควบคุมแบบสัมผัส: อุปกรณ์ของคุณใช้งานผ่านเซนเซอร์ควบคุมแบบสัมผัส
• ทำ�ความสะอาดง่าย: ข้อดีของพื้นผิวการปรุงอาหารและเซนเซอร์ควบคุมที่เป็นแก้วเซรามิคก็คือการทำ�ความสะอาดง่าย พื้ืนผิวที่เรียบลื่น
ทำ�ให้ทำ�ความสะอาดได้ โดยสะดวก
• เซนเซอร์เปิด/ปิด: เซนเซอร์ควบคุม “เปิด/ปิด” จะเป็นสวิตช์หลักของอุปกรณ์ที่แยกต่างหาก การสัมผัสเซนเซอร์นี้จะเป็นการเปิดหรือปิด
อุปกรณ์อย่างสมบูรณ์
• สัญญาณควบคุมและฟังก์ชัน: จอแสดงผลดิจิตัลและไฟสัญญาณจะให้ข้อมูลเกี่ยวกับการตั้งค่าและฟังก์ชันที่ใช้งานอยู่ รวมถึงการมีความ
ร้อนหลงเหลือในโซนปรุงอาหารต่างๆ
• การปิดเพื่อความปลอดภัย: การปิดเตาเพื่อความปลอดภัยจะสร้างความมั่นใจว่าโซนปรุงอาหารทั้งหมดจะปิดลงโดยอัตโนมัติหลังจากผ่าน
ไประยะเวลาหนึ่ง ถ้าไม่มีการเปลี่ยนการตั้งค่า
• สัญญาณบอกความร้อนหลงเหลือ: ไอคอนแสดงความร้อนหลงเหลือจะปรากฏในจอแสดงผลถ้าโซนปรุงอาหารมีความร้อนที่อาจลวกได้
จอแสดงผลดิจิตัล: เขตการแสดงผลสี่ส่วนจะแสดงข้อมูลสำ�หรับโซนปรุงอาหารสี่โซน
โดยจะแสดงข้อมูลต่อไปนี้:
- อุปกรณ์กำ�ลังเปิดอยู่
- ถึง การตั้งค่าความร้อนที่เลือก
- ความร้อนหลงเหลือ
- ใช้ล็อคป้องกันเด็ก และ
-
ข้อความแสดงข้อผิดพลาด มีการสัมผัสเซนเซอร์นานเกินกว่า 10 วินาที
-
ข้อความแสดงข้อผิดพลาด เมื่อเตามีความร้อนสูงจัดเนื่องจากการใช้งานผิดปกติ
12
C61RAAST_XST-00146A-05_TH.indd 12
30/10/2555 15:27:19
ชิ้นส่วนและคุณสมบัติ (ต่อ)
TH
การปิ ดเพือความปลอดภั
่
ย
ถ้าโซนปรุงอาหารไม่ถูกปิดหรือการตั้งค่าความร้อนไม่มีการเปลี่ยนแปลงหลังจากระยะเวลาหนึ่ง โซนปรุงอาหารนั้นก็จะปิดลงโดยอัตโนมัติ
ความร้อนที่หลงเหลือจะมีสัญญาณ (หมายถึง “ร้อน”) ในจอแสดงผลดิจิตัลสำ�หรับโซนปรุงอาหารนั้น
โซนปรุงอาหารจะปิดเองหลังจากระยะเวลาต่อไปนี้
การตั้งค่าการปรุงอาหาร
1-2
หลังจาก 6 ชั่วโมง
การตั้งค่าการปรุงอาหาร
3-4
หลังจาก 5 ชั่วโมง
การตั้งค่าการปรุงอาหาร
5-6
หลังจาก 3 ชั่วโมง
การตั้งค่าการปรุงอาหาร
7-9
หลังจาก 1 ชั่วโมง
ถ้าเตามีความร้อนสูงเกินไปเนื่องจากการทำ�งานผิดปกติ เครื่องจะแสดง
และเตาจะปิดลงด้วยตนเอง
ขึ้น
ถ้าโซนปรุงอาหารปิดตัวลงก่อนที่จะถึงเวลาที่ระบุ โปรดดูที่หัวข้อ “การแก้ไขปัญหา”
สาเหตุอื่นๆ ที่โซนปรุงอาหารปิดตัวเอง
โซนปรุงอาหารทั้งหมดจะปิดตัวเองถ้ามีน้ำ�เดือดล้นลงไปสัมผัสกับแผงควบคุม
นอกจากนี้ การปิดตัวเองอัตโนมัติจะทำ�งานถ้าคุณวางผ้าหมาดไว้บนแผงควบคุม ในกรณีเหล่านี้ คุณจะต้องเปิดอุปกรณ์อีกครั้งโดย
ใช้เซนเซอร์เปิดปิดหลัก หลังจากเช็ดหรือนำ�ผ้าเปียกออกแล้ว
สัญลักษณ์แสดงความร้อนหลงเหลือ
เมื่อโซนปรุงอาหารหรือเตาถูกปิดลง ความร้อนที่หลงเหลืออยู่จะแสดงเป็นเครื่องหมาย (หมายถึง “ร้อน”) ในจอแสดงผลดิจิตัลของโซน
ปรุงอาหารนั้นๆ แม้ว่าจะปิดโซนปรุงอาหารแล้วก็ตาม สัญลักษณ์แสดงความร้อนหลงเหลือจะดับไปเฉพาะเมื่อโซนปรุงอาหารนั้นเย็นลง
แล้วเท่านั้น
คุณสามารถใช้ความร้อนที่หลงเหลือเพื่อละลายและอุ่นอาหารได้
สำ�คัญ: ขณะที่สัญญาณความร้อนหลงเหลือติดอยู่ จะมีอันตรายจากการลวกร้อนส่วนที่สัมผัส
สำ�คัญ: ถ้าไฟฟ้าขัดข้อง สัญลักษณ์ จะหายไป และจะไม่มีข้อมูลเกี่ยวกับความร้อนหลงเหลืออีก แต่อาจเป็นไปได้ที่จะ
มีอันตรายจากความร้อนที่เหลืออยู่ ซึ่งสามารถหลีกเลี่ยงได้ด้วยการใช้ความระมัดระวังเมื่ออยู่ใกล้เตา
13
C61RAAST_XST-00146A-05_TH.indd 13
30/10/2555 15:27:19
ก่อนที่จะเริ่มต้น
TH
การทำ�ความสะอาดครั งแรก
้
ทำ�ความสะอาดพื้นผิวแก้วเซรามิคด้วยผ้าหมาดและน้ำ�ยาทำ�ความสะอาดแก้วเซรามิค
สำ�คัญ: ห้ามใช้สารทำ�ความสะอาดที่มีฤทธิ์กัดกร่อนหรือขัดสี เนื่องจากพื้นผิวอาจเสียหายได้
การใช้เตา
การใช้ภาชนะทีเหมาะสม
่
กระทะที่ดี ให้ผลลัพธ์ที่ดี
• คุณสามารถดูกระทะที่ดีได้จากฐานของกระทะ ฐานกระทะควรหนาและแบนมากที่สุด
• เมื่อซื้อกระทะใหม่ ให้พิจารณาเส้นผ่าศูนย์กลางของฐาน ผู้ผลิตมักจะบอกเฉพาะเส้นผ่่าศูนย์กลางของขอบด้านบน
• หม้อที่มีฐานเป็นอะลูมิเนียมหรือทองแดงอาจทำ�ให้เกิดสีเปลี่ยนแปลงที่พื้นผิวแก้วเซรามิคเนื่องจากโลหะ การเปลี่ยนสีนี้เอาออกได้ยาก
หรือไม่ได้เลย
• ห้ามใช้กระทะที่ทำ�จากเหล็กหล่อหรือที่มีฐานเสียหาย มีขอบเป็นรอยหรือเป็นร่อง อาจเกิดการขูดขีดอย่างถาวรถ้ามีการเลื่อนกระทะ
บนพื้นผิว
• เมื่อเย็น ฐานของกระทะจะมีการโค้งงอเข้าสู่ด้านใน (concave) และไม่ควรจะโค้งงอออกด้านนอก (convex) เด็ดขาด
• ถ้าคุณต้องการใช้กระทะชนิดพิเศษ เช่น หม้อไอน้ำ�แรงดัน หม้อตุ๋น หรือกระทะก้นลึก โปรดปฏิบัติตามคำ�แนะนำ�ของผู้ผลิต
เคล็ดลับในการประหยัดพลังงาน และการป้องกันรอยขีดข่วนบนพื้นผิวเตาแก้วเซรามิค
คุณสามารถประหยัดพลังงานอันมีค่าได้ด้วยการปฏิบัติตามคำ�แนะนำ�ต่อไปนี้
ถูกต้อง! (ฐานของภาชนะที่พื้นผิวเรียบ)
ผิด!
(ฐานของภาชนะที่พื้นผิวขรุขระ)
ผิด!
(ฐานของภาชนะที่พื้นผิวโค้งงอ)
14
C61RAAST_XST-00146A-05_TH.indd 14
30/10/2555 15:27:19
การใช้เตา (ต่อ)
• วางหม้อและกระทะก่อนที่จะเปิดโซนปรุงอาหาร
• โซนปรุงอาหารและฐานกระทะที่สกปรกจะทำ�ให้ ใช้พลังงานเพิ่มมากขึ้น
• เมื่อเป็นไปได้ ให้ปิดฝาหม้อและกระทะให้สนิท
• ปิดโซนปรุงอาหารก่อนที่จะสิ้นสุดเวลาปรุง เพื่อใช้ความร้อนที่หลงเหลือเพื่ออุ่นหรือละลายอาหาร
TH
• ฐานของกระทะควรมีขนาดเดียวกับโซนปรุงอาหาร
• การใช้หม้อไอน้ำ�แรงดันจะช่วยลดเวลาในการปรุงอาหารได้ถึง 50%
การใช้เซนเซอร์ควบคุมแบบสั มผัส
ในการใช้เซนเซอร์ควบคุมแบบสัมผัส ให้แตะแผงที่ต้องการด้วยปลายนิ้วชี้ เพื่อให้การแสดงผลที่ต้องการสว่างขึ้นหรือดับลง หรือจนกว่า
ฟังก์ชันที่ต้องการจะเริ่มทำ�งาน
ตรวจสอบว่าคุณสัมผัสเฉพาะแผงเซนเซอร์เดียวเมื่อใช้อุปกรณ์ ถ้านิ้วของคุณวางบนแผงควบคุมมากเกินไป อาจมีการสัมผัส
เซนเซอร์ที่อยู่ใกล้กัน
15
C61RAAST_XST-00146A-05_TH.indd 15
30/10/2555 15:27:20
การใช้เตา (ต่อ)
TH
การเปิ ดสวิตช์อุปกรณ์
สัมผัสเซนเซอร์ “ล็อค ” เป็นเวลาประมาณ 3 วินาที
อุปกรณ์จะเปิดขึ้นได้ โดยใช้เซนเซอร์ควบคุม “เปิด/ปิด ”
สัมผัสเซนเซอร์ “เปิด/ปิด ”
จอแสดงผลจะแสดง
หลังจากเซนเซอร์ “เปิด/ปิด ” ถูกใช้งานเพื่อเปิดอุปกรณ์ คุณจะต้องตั้งค่าความร้อนภายในเวลาประมาณ 10 วินาที มิฉะนั้น
อุปกรณ์จะปิดตนเองเพื่อความปลอดภัย
การควบคุมอุณหภูมิ
สำ�หรับการตั้งและปรับ ( ถึง ) สำ�หรับการปรุงอาหาร สัมผัสปุ่ม
เมื่อกด
ครั้งแรก ระดับความร้อนจะถูกกำ�หนดเป็น
เมื่อกด
ครั้งแรก ระดับความร้อนจะถูกกำ�หนดเป็น
ใช้ปุ่ม
เพื่อเพิ่มการตั้งค่าความร้อน และกด
เพื่อลด
,
ของโซนปรุงอาหารที่ต้องการ
16
C61RAAST_XST-00146A-05_TH.indd 16
30/10/2555 15:27:20
การใช้เตา (ต่อ)
TH
การปิ ดอุปกรณ์
เมื่อต้องการปิดอุปกรณ์ ให้ ใช้เซนเซอร์ควบคุม “เปิด/ปิด
สัมผัสเซนเซอร์ “เปิด/ปิด ”
”
หลังจากปิดโซนปรุงอาหารหรือพื้นผิวการปรุงอาหารทั้งหมดแล้ว ระดับความร้อนที่หลงเหลือจะแสดงในจอแสดงผลของโซน
ปรุงอาหารแต่ละโซนเป็นสัญลักษณ์ (หมายถึง “ร้อน”)
ถ้าการตั้งค่าความร้อนอยู่ที่ และคุณต้องการปิด
คุณสามารถสัมผัสเซนเซอร์เพิ่มอีกครั้ง และการตั้งค่าความร้อนจะ
เป็นศูนย์
เมื่อต้องการปรับอย่างรวดเร็ว ให้สัมผัสเซนเซอร์
หรือ
ค้างไว้จนกระทั่งได้ค่าที่ต้องการ
ถ้ามีการกดเซนเซอร์มากกว่าหนึ่งจุดเป็นเวลานานกว่า 10 วินาที
จะปรากฏใน
จะแสดงผลการตั้งค่าความร้อน เมื่อต้องการตั้งค่าใหม่ ให้สัมผัสเซนเซอร์ “เปิด/ปิด ”
การปิดโซนการปรุงอาหาร
ในการปิดโซนการปรุงอาหาร ให้เปลี่ยนการตั้งค่ากลับเป็น
โดยใช้การตั้งค่าความร้อนของแผงควบคุม และเซนเซอร์แบบสัมผัส
หรือ
17
C61RAAST_XST-00146A-05_TH.indd 17
30/10/2555 15:27:21
การใช้เตา (ต่อ)
TH
การใช้ล็อคป้องกั นเด็ก
คุณสามารถใช้ล็อคป้องกันเด็กเพื่อป้องกันการเปิดโซนปรุงอาหารโดยไม่ได้ตั้งใจ และเปิดใช้พื้นผิวการปรุงอาหาร เซนเซอร์ควบคุมล็อค
จะสามารถใช้ได้เฉพาะเมื่อเปิดเตาอยู่
การเปิดล็อคป้องกันเด็ก
1. สัมผัสเซนเซอร์ควบคุม เป็นเวลาประมาณ 3 วินาที
สัญญาณเสียงจะดังขึ้นเพื่อยืนยัน
ประมาณ 3 วินาที
2. สัมผัสเซนเซอร์ควบคุมการตั้งค่าความร้อน
จะปรากฏในจอแสดงผล เพื่อระบุว่าล็อคป้องกันเด็กทำ�งาน
18
C61RAAST_XST-00146A-05_TH.indd 18
30/10/2555 15:27:21
การใช้เตา (ต่อ)
TH
การปิดล็อคป้องกันเด็ก
1. สัมผัสเซนเซอร์ควบคุมเป็นเวลาประมาณ 3 วินาที
สัญญาณเสียงจะดังขึ้นเพื่อยืนยัน
ประมาณ 3 วินาที
หลังจากปิดอุปกรณ์ ล็อคป้องกันเด็กจะทำ�งานโดยอัตโนมัติภายในช่วงระยะเวลาหนึ่ง เพื่อความปลอดภัย
19
C61RAAST_XST-00146A-05_TH.indd 19
30/10/2555 15:27:21
การใช้เตา (ต่อ)
TH
การล็อคและปลดล็อคแผงควบคุม
ในขั้นตอนใดก็ตามระหว่างการปรุงอาหาร คุณสามารถล็อคแผงควบคุม ยกเว้นเซนเซอร์ควบคุม “เปิด/ปิด ” เพื่อป้องกันมิให้มีการเปลี่ยน
การตั้งค่าโดยไม่ได้ตั้งใจ ตัวอย่างเช่น จากการใช้ผ้าเช็ดแผงควบคุม
1. สัมผัสเซนเซอร์ควบคุมล็อคเป็นเวลาประมาณ 3 วินาที
ไฟสัญญาณของเซนเซอร์ควบคุมล็อคจะสว่าง เซนเซอร์ควบคุมจะถูกล็อค
2. เมื่อต้องการปลดล็อคเซนเซอร์ควบคุม ให้สัมผัสเซนเซอร์ควบคุมล็อคอีกครั้งเป็นเวลาประมาณ 3 วินาที ไฟสัญญาณในเซนเซอร์ควบคุม
ล็อคจะดับไป
ประมาณ 3 วินาที
การตั งค่้ าทีแนะนำ
่ �สำ�หรั บการปรุงอาหารชนิดต่างๆ
ตัวเลขในตารางนี้ให้เป็นแนวทาง การตั้งค่าความร้อนที่ต้องการสำ�หรับวิธีการปรุงต่าง จะขึ้นกับตัวแปรหลายประการ รวมถึงคุณภาพของ
ภาชนะที่ใช้และชนิดและปริมาณของอาหารที่ปรุง
การตั้งค่าสวิตช์
วิธีปรุง
9
อุ่นอาหาร
ผัด
ทอด
8
7
การทอดปริมาณมากๆ
6
ตัวอย่างการใช้
อุ่นของเหลวปริมาณมากๆ ลวกเส้นก๋วยเตี๋ยว ย่างเนื้อ (การตุ๋นเนื้อ)
สเต็ค เซอร์ลอยน์ แฮชบราวน์ ไส้กรอก แพนเค้ก
ทอด
เนื้อชิ้น / ช็อปส์ ตับ ปลา เนื้อสับ ไข่ทอด
การต้ม
การปรุงของเหลวถึง 1.5 ลิตร มันฝรั่ง ผัก
2
การนึ่ง
การเคี่ยว
การต้ม
การนึ่งและการเคี่ยวผักปริมาณน้อยๆ การทำ�ข้าวต้มและอาหารนม
1
การละลาย
ละลายเนย เจลาติน ละลายช็อคโกแลต
5
4
3
หมายเหตุ
• การตั้งค่าความร้อนที่แสดงในตารางข้างต้นมีให้เป็นแนวทางสำ�หรับการอ้างอิงเท่านั้น
• คุณจะต้องปรับการตั้งค่าความร้อนตามชนิดของภาชนะและอาหาร
20
C61RAAST_XST-00146A-05_TH.indd 20
30/10/2555 15:27:21
การทำ�ความสะอาดและดูแลรักษา
TH
เตา
สำ�คัญ: สารทำ�ความสะอาดจะต้องไม่สัมผัสกับพื้นผิวแก้วเซรามิคที่มีความร้อน สารทำ�ความสะอาดทั้งหมดจะต้องถูกเช็ดออก
โดยใช้น้ำ�สะอาดปริมาณเพียงพอ หลังจากทำ�ความสะอาด เนื่องจากอาจมีฤทธิ์กัดกร่อนเมื่อพื้นผิวร้อน ห้ามใช้สารทำ�ความ
สะอาดที่รุนแรง เช่น สเปรย์สำ�หรับตะแกรงหรือเตาอบ แผ่นขัดหรือที่ขัดกระทะ
ทำ�ความสะอาดพื้นผิวแก้วเซรามิคหลังจากใช้งานแต่ละครั้งเมื่อยังมีความอุ่นเมื่อสัมผัส
ซึ่งจะป้องกันมิให้สิ่งที่กระเด็นหก
มีการไหม้อยู่บนพื้นผิว เอาคราบ รอยน้ำ� หยดน้ำ�มันและการเปลี่ยนสีเนื่องจากโลหะออกด้วยการใช้สารทำ�ความสะอาด
แก้วเซรามิคหรือสเตนเลสที่มีจำ�หน่ายโดยทั่วไป
สกปรกน้อย
1. เช็ดพื้นผิวของแก้วเซรามิคด้วยผ้าหมาด
2. ขัดให้แห้งด้วยผ้าแห้ง อย่าให้มีสารทำ�ความสะอาดหลงเหลืออยู่บนพื้นผิว
3. ทำ�ความสะอาดพื้นผิวการปรุงอาหารที่เป็นแก้วเซรามิคทั้งหมดสัปดาห์ละครั้งด้วยสารทำ�ความสะอาดแก้วเซรามิคหรือสเตนเลส
ที่มีจำ�หน่ายโดยทั่วไป
4. เช็ดพื้นผิวแก้วเซรามิคโดยใช้น้ำ�สะอาดปริมาณมากๆ และเช็ดให้แห้งด้วยผ้าที่สะอาดและไม่เป็นขุย
คราบสกปรกเกาะแน่น
1. เมื่อต้องการนำ�อาหารที่เดือนและล้นออกจากภาชนะ และรอยกระเด็นที่หลุดออกจาก ให้ ใช้ที่ขูดกระจก
2. วางที่ขูดกระจกทำ�มุมกับพื้นผิวของแก้วเซรามิค
3. นำ�สิ่งสกปรกออกด้วยการขูดด้วยด้านที่เรียบ
ที่ขูดกระจกและสารทำ�ความสะอาดแก้วเซรามิคมีจำ�หน่ายในร้านค้าเฉพาะด้าน
21
C61RAAST_XST-00146A-05_TH.indd 21
30/10/2555 15:27:21
การทำ�ความสะอาดและดูแลรักษา (ต่อ)
TH
สิ่งสกปรกที่เป็นปัญหา
1. ขจัดน้ำ�ตาลไหม้เกาะ พลาสติกละลาย ฟอยล์อะลูมิเนียม หรือวัสดุอื่นๆ ด้วยที่ขูดกระจกทันที ขณะที่ยังร้อน
สำ�คัญ: คุณอาจได้รับอันตรายจากการลวกมือ เมื่อใช้ที่ขูดกระจกกับโซนปรุงอาหารที่ร้อน:
2. ทำ�ความสะอาดเตาตามปกติเมื่อเย็นลง
ถ้าปล่อยให้ โซนปรุงอาหารที่มีของหกใส่เย็นลง ให้เปิดและให้ความร้อนอีก
ครั้งเพื่อทำ�ความสะอาด
รอยขูดหรือรอยเปื้อนบนพื้ืนผิวแก้วเซรามิค ซึ่งอาจเกิดจากกระทะที่มีขอบ
คม เป็นต้น จะไม่สามารถลบออกได้ แต่จะไม่มีผลกระทบต่อการทำ�งาน
ของเตา
กรอบของเตา
สำ�คัญ: ห้ามใช้น้ำ�ส้มสายชู น้ำ�มะนาว หรือสารขจัดคราบตะกรันกับกรอบของเตา มิฉะนั้นจะเกิดเป็นรอยด้านๆ
1. เช็ดกรอบด้วยผ้าหมาด
2. เช็ดเศษวัสดุตกค้างด้วยผ้าเปียก จากนั้นเช็ดออกด้วยผ้าแห้ง
เพือป้่ องกั นความเสียหายต่ออุปกรณ์ของคุณ
• ห้ามใช้พื้นผิวการปรุงอาหารเป็นที่เตรียมหรือวางอาหาร
• ห้ามใช้ โซนปรุงอาหารถ้าไม่มีกระทะบนพื้นที่ปรุงหรือถ้ากระทะว่างเปล่า
• แก้วเซรามิคนั้นมีความทนทานและทนต่ออุณหภูมิที่เปลี่ยนแปลงมากๆ ได้ แต่ไม่ใช่กระจกที่ไม่แตก แก้วนี้อาจเกิดความเสียหายถ้ามีของ
แหลมหรือหนักมากๆ หล่นใส่พื้นที่ปรุงอาหาร
• ห้ามใช้กระทะที่ทำ�จากเหล็กหล่อหรือมีฐานที่เสียหาย มีขอบคมหรือเป็นรอย เพราะอาจเกิดรอยขูดได้ ถ้ามีการเลื่อนกระทะ
• ห้ามวางกระทะไว้บนกรอบของเตา อาจเกิดรอยข่วนหรือความเสียหายต่อพื้นผิวได้
• หลีกเลี่ยงการทำ�สารที่เป็นกรดหกใส่กรอบของเตา เช่น น้ำ�ส้มสายชู น้ำ�มะนาว และสารขจัดคราบตะกรัน เนื่องจากจะทำ�ให้เกิดรอยด่างได้
• ถ้าน้ำ�ตาลหรืออาหารที่เตรียมไว้และมีน้ำ�ตาลสัมผัสกับโซนปรุงอาหารและละลาย ควรทำ�ความสะอาดทันที ด้วยที่ขูดขณะที่ยังร้อน ถ้าทิ้งไว้
ให้เย็น อาจทำ�ให้พื้นผิวเสียหายเมื่อขจัดออก
• ระวังอย่าให้สิ่งที่ละลายได้ เช่น พลาสติก ฟอยล์อะลูมิเนียม และฟอยล์สำ�หรับเตาอบ อยู่ใกล้กับพื้นผิวแก้วเซรามิค ถ้ามีวัสดุลักษณะ
นี้ละลายบนพื้นผิวปรุงอาหาร จะต้องใช้ที่ขูดเพื่อเอาออกทันที
22
C61RAAST_XST-00146A-05_TH.indd 22
30/10/2555 15:27:21
การทำ�ความสะอาดและดูแลรักษา (ต่อ)
TH
เคล็ดลั บในการทำ�ความสะอาด
พื้นผิวการปรุงนี้ทำ�จากวัสดุพิเศษ คือเซรามิคแก้ว
• มีความแข็งแกร่งยิ่งกว่าแก้วมาก แม้ว่าจะมีลักษณะเหมือนกัน แต่อย่างไรก็ตาม โปรดอย่าเหยียบบนพื้นผิวนี้ในการซ่อมแซมไฟ และ
ห้ามทำ�ของหนักหล่นใส่จากชุดครัวด้านบน
• พื้นผิวนี้ทนความร้อนและความเย็น และการเปลี่ยนแปลงอุณหภูมิอย่างรวดเร็ว คุณสามารถเทน้ำ�เย็นในโซนปรุงอาหารได้ โดย
ไม่ทำ�ให้เกิดความเสียหายใดๆ
• มีรูปลักษณ์สวยงามและทำ�ความสะอาดง่าย
และจะคงความสวยงามตลอดไปถ้าคุณปฏิบัติตามคำ�แนะนำ�และข้อควรระวังของเรา
ข้อควรระวังเมื่อใช้พื้นผิวการปรุง
•
•
•
•
ก่อนใช้พื้นผิวการปรุง โปรดตรวจสอบว่าก้นกระทะและโซนปรุงอาหารมีความสะอาดและแห้งสนิท
ยกกระทะขึ้นเสมอ การเลื่อนไปมาบนพื้นผิวการปรุงจะทำ�ให้ผิวหน้าเป็นรอย
หลีกเลี่ยงการปอกหรือหั่นผักบนพื้นผิวการปรุง เนื่องจากจะทำ�ให้พื้นผิวเป็นรอยได้
ใช้กระทะที่ใหญ่พอ เพื่อป้องกันการกระเด็นหกใส่พื้นผิวการปรุง โดยเฉพาะถ้ากระทะใส่น้ำ�ตาลไว้ เนื่องจากจะทำ�ให้เกิด
ความเสียหายแก่เซรามิคแก้วอย่างถาวร
• อย่าวางของบนพื้นผิวการปรุง โดยเฉพาะอย่างยิ่งอย่าวางบรรจุภัณฑ์เช่นถุงพลาสติกหรืออะลูมิเนียมซึ่งอาจละลายและ
ทำ�ความเสียหายให้กับพื้นผิวการปรุง
23
C61RAAST_XST-00146A-05_TH.indd 23
30/10/2555 15:27:21
การทำ�ความสะอาดและดูแลรักษา (ต่อ)
TH
คำ�แนะนำ�ในการทำ�ความสะอาด
ต้องทำ�ความสะอาดรอยเปื้อนแต่ละรอย หรือคราบสกปรกสะสมบนพื้นผิวการปรุงโดยเร็วเมื่อพื้นผิวการปรุงเย็นลง ก่อนที่จะใช้พื้นผิว
การปรุงในครั้งถัดไป
ข้อยกเว้น: ในกรณีของรอยคราบน้ำ�ตาล ให้ขจัดสิ่งสกปรกที่หลงเหลืออยู่ก่อนที่พื้นผิวการปรุงจะเย็นลง (ระวังอย่าให้ผิว
หนังถูกความร้อน)
สิ่งสำ�คัญ: ใช้ผลิตภัณฑ์ทำ�ความสะอาดที่
ออกแบบมาเพื่อใช้กับพื้นผิวการปรุง
เซรามิคแก้วเท่านั้น
ถ้ารอยเปื้อนมีเพียงเล็กน้อย ให้เช็ดออกด้วย
ผ้าแห้ง
ถ้ารอยเปื้อนมีมาก ให้ทำ�ความสะอาดด้วย
ฟองน้ำ�ชุบน้ำ�สบู่หมาดๆ และล้างออก
ถ้ารอยเปื้อนติดแน่น ให้ ใช้แผ่นขัดทำ�
ความสะอาดที่ไม่ทำ�ให้เกิดรอย และใช้
ผลิตภัณฑ์ทำ�ความสะอาดที่เหมาะกับ
เซรามิคแก้วโดยเฉพาะ
ถ้ารอยเปื้อนติดแน่น ให้ ใช้แผ่นขัดทำ�
ความสะอาดที่ไม่ทำ�ให้เกิดรอย และใช้
ผลิตภัณฑ์ทำ�ความสะอาดที่เหมาะกับ
เซรามิคแก้วโดยเฉพาะ
เมื่อทำ�ความสะอาดพื้นผิวการปรุงแล้ว ให้ ใช้
น้ำ�ยาปรับสภาพพื้นผิวการปรุง
เซรามิคแก้ว ซึ่งจะปกป้องพื้นผิวการปรุง
จากรอยเปื้อนในอนาคต โดยใช้ผ้าแห้ง
หรือวัสดุที่คล้ายกัน
24
C61RAAST_XST-00146A-05_TH.indd 24
30/10/2555 15:27:22
การรับประกันและบริการ
TH
คำ�ถามทีพบบ่
่ อยและการแก้ไขปัญหา
การทำ�งานผิดปกติอาจเกิดจากข้อผิดพลาดเล็กน้อยที่คุณสามารถแก้ไขได้ด้วยตนเอง โดยใช้คำ�แนะนำ�ต่อไปนี้ อย่าพยายามซ่อมแซมเพิ่มเติม
ถ้าการปฏิบัติตามคำ�แนะนำ�นี้ ไม่สามารถแก้ไขปัญหาในบางกรณีได้
คำ�เตือน: การซ่อมบำ�รุงอุปกรณ์จะต้องดำ�เนินการโดยช่างบำ�รุงรักษาที่มีความชำ�นาญเท่านั้น การซ่อมบำ�รุงที่ไม่ถูกต้องจะ
ทำ�ให้เกิดอันตรายอย่างมากต่อผู้ ใช้ ถ้าอุปกรณ์ของคุณต้องได้รับการซ่อมบำ�รุง โปรดติดต่อศูนย์บริการลูกค้าของคุณ
ฉันควรทำ�อย่างไรถ้าโซนปรุงอาหารไม่ทำ�งาน
ตรวจสอบสิ่งต่อไปนี้:
• ฟิวส์ ในระบบไฟฟ้าของบ้าน (กล่องฟิวส์) มีสภาพปกติหรือไม่ ถ้าฟิวส์ขาดหลายครั้ง โปรดติดต่อช่างไฟฟ้า
• อุปกรณ์เปิดอยู่อย่างเหมาะสม
• สัญญาณควบคุมในแผงควบคุมสว่างอยู่
• โซนปรุงอาหารมีการเปิดแล้ว
• โซนปรุงอาหารมีการกำ�หนดการตั้งค่าความร้อนที่ต้องการไว้
ฉันควรทำ�อย่างไรถ้าไม่สามารถเปิดโซนปรุงอาหารได้
ตรวจสอบสิ่งต่อไปนี้:
• เวลาผ่านไปเกิน 10 วินาทีระหว่างที่กดปุ่ม เปิด/ปิด โดยยังไม่ได้เปิดโซนปรุงอาหารที่ต้องการ (โปรดดูหัวข้อ “การเปิดสวิตช์อุปกรณ์)
• แผงควบคุมมีผ้าหมาดๆ หรือของเหลวปิดอยู่
ฉันควรทำ�อย่างไรถ้าสัญญาณในจอแสดงผลหายไป ยกเว้นสัญญาณความร้อนหลงเหลือ
อาการนี้อาจเกิดจากสาเหตุสองประการ:
• มีการสัมผัสเซนเซอร์ เปิด/ปิด โดยไม่ได้ตั้งใจ
• แผงควบคุมมีผ้าหมาดๆ หรือของเหลวปิดอยู่
ฉันควรทำ�อย่างไร หลังจากโซนปรุงอาหารถูกปิด ความร้อนที่หลงเหลือไม่ปรากฏในจอแสดงผล
ตรวจสอบสิ่งต่อไปนี้:
• โซนปรุงอาหารมีการใช้งานเพียงเล็กน้อย และไม่มีความร้อนเพียงพอ ถ้าโซนปรุงอาหารร้อน โปรดติดต่อศูนย์บริการลูกค้า
ฉันควรทำ�อย่างไรถ้าโซนปรุงอาหารไม่สามารถเปิดหรือปิดได้
ปัญหานี้อาจเกิดจากสิ่งต่อไปนี้:
• แผงควบคุมมีผ้าหมาดๆ หรือของเหลวปิดอยู่
• มีการใช้ล็อคป้องกันเด็ก
ฉันควรทำ�อย่างไรถ้าสัญญาณ
สว่าง
ตรวจสอบสิ่งต่อไปนี้:
• แผงควบคุมมีผ้าหมาดหรือของเหลวปิดอยู่บางส่วน ในการเริ่มต้นใหม่ ให้กดเซนเซอร์ควบคุม “เปิด/ปิด”
25
C61RAAST_XST-00146A-05_TH.indd 25
30/10/2555 15:27:22
การรับประกันและบริการ (ต่อ)
TH
ถ้าบริเวณเตาไม่เป็นแสงสีแดง หมายความว่าอย่างไร
• อุณหภูมิที่เลือกของโซนปรุงอาหารนั้นได้รับการจัดการโดยเซนเซอร์ที่เปิดและปิดโซนเป็นระยะ ดังนั้น พื้นที่ปรุงอาหารจะไม่เป็น
แสงสีแดงอยู่ตลอดเวลา ถ้าคุณเลือกการตั้งค่าความร้อนที่ต่ำ� ความร้อนจะหมุนเวียนเปิดและปิดบ่อยกว่าการตั้งค่าสูง นอกจากนี้ยังจะ
มีการเปิดและปิดเมื่อตั้งค่าความร้อนสูงสุด
ถ้าคุณขอรับบริการเนื่องจากข้อผิดพลาดที่เกิดขึ้นจากการใช้อุปกรณ์ การมาให้บริการของช่างเทคนิคบริการลูกค้าอาจมีค่าใช้จ่าย แม้ว่าจะ
อยู่ระหว่างการรับประกันก็ตาม
บริการ
ก่อนที่จะขอรับความช่วยเหลือหรือบริการ โปรดตรวจสอบในหัวข้อ “การแก้ไขปัญหา” ก่อน
หากคุณยังต้องการความช่วยเหลือ โปรดทำ�ตามคำ�แนะนำ�ต่อไปนี้
เป็นการทำ�งานผิดพลาดทางเทคนิคหรือไม่
ถ้าใช่ โปรดติดต่อศูนย์บริการลูกค้าของคุณ
โปรดเตรียมข้อมูลไว้ ให้พร้อมล่วงหน้า เพื่อให้การแก้ไขปัญหาสะดวกยิ่งขึ้น และทำ�ให้ตัดสินใจได้ง่ายขึ้นว่าจำ�เป็นต้องมีการให้บริการ ณ สถาน
ที่ติดตั้งหรือไม่
โปรดบันทึกข้อมูลต่อไปนี้
• ปัญหาเกิดขึ้นในรูปแบบใด
• ปัญาเกิดขึ้นในสถานการณ์แบบใด
เมื่อติดต่อ โปรดทราบรุ่นและหมายเลขผลิตภัณฑ์ (ซีเรียล) ของอุปกรณ์ ซึ่งข้อมูลนี้จะมีอยู่ในแผ่นข้อมูลดังนี้:
• คำ�อธิบายรุ่น
• รหัส S / N (10 หลัก)
เราขอแนะนำ�ให้คุณบันทึกข้อมูลนี้ ไว้ที่นี่เพื่ออ้างอิง
รุ่น:
เลยผลิตภัณฑ์ (ซีเรียล):
เมื่อใดจะมีค่าใช้จ่ายแม้จะอยู่ในระหว่างการรับประกัน
• ถ้าคุณสามารถแก้ไขปัญหาได้ด้วยตนเอง โดยใช้การแก้ไขปัญหาที่อธิบายไว้ ในส่วน “การแก้ไขปัญหา”
• ถ้าช่างเทคนิคบริการลูกค้าต้องติดต่อเพื่อให้บริการหลายครั้ง เนื่องจากไม่ได้รับข้อมูลที่จำ�เป็นทั้งหมดก่อนที่จะมาให้บริการ ตัวอย่างเช่น
จำ�เป็นต้องเดินทางหลายครั้งเพื่อรับอะไหล่ การเตรียมพร้อมสำ�หรับการติดต่อตามที่อธิบายข้างต้นจะช่วยลดค่าใช้จ่ายสำ�หรับการเดินทาง
เหล่านี้
26
C61RAAST_XST-00146A-05_TH.indd 26
30/10/2555 15:27:22
ข้อมูลทางเทคนิค
TH
ขนาดของอุปกรณ์
กว้าง
575 มม.
ลึก
505 มม.
สูง
55 มม.
ขนาดเจาะของพื้นผิวด้านบน
กว้าง
560 มม.
ลึก
490 มม.
รัศมีมุม
3 มม.
วงแหวนการปรุงอาหาร
ตำ�แหน่ง
เส้นผ่าศูนย์กลาง
กำ�ลังไฟ
หน้าซ้าย
183 มม.
1,650 วัตต์
หลังซ้าย
148 มม.
1,100 วัตต์
หลังขวา
183 มม.
1,650 วัตต์
หน้าขวา
148 มม.
1,100 วัตต์
แรงดันไฟฟ้าที่เชื่อมต่อ
220 V ~ 50 Hz
พลังไฟฟ้าที่เชื่อมต่อสูงสุด
5.5 kW
น้ำ�หนัก :
7.5 กก. สุทธิ
10.0 กก. รวม
27
C61RAAST_XST-00146A-05_TH.indd 27
30/10/2555 15:27:22
AUSTRALIA
NEW ZEALAND
CHINA
HONG KONG
INDIA
INDONESIA
1300 362 603
0800 SAMSUNG (0800 726 786)
www.samsung.com
400-810-5858
(852) 3698 4698
1800
3030
1800
1800
www.samsung.com/hk (Chinese)
www.samsung.com/hk_en (English)
1100 11
8282
3000 8282
266 8282
0800-112-8888
021-5699-7777
JAPAN
0120-327-527
MALAYSIA
1800-88-9999
PHILIPPINES
1-800-10-SAMSUNG(726-7864) for PLDT
1-800-3-SAMSUNG(726-7864) for Digitel
1-800-8-SAMSUNG(726-7864) for Globe
02-5805777
SINGAPORE
1800-SAMSUNG(726-7864)
THAILAND
1800-29-3232
02-689-3232
TAIWAN
0800-329-999
0266-026-066
VIETNAM
1 800 588 889
www.samsung.com
เลขรหัส.: DG68-00146A-05
C61RAAST_XST-00146A-05_TH.indd 28
30/10/2555 15:27:22
Installation and Operating Instructions
Ceramic Glass Hob
This manual is made with 100 % recycled paper.
C61RAAST / C61RABAL / C61RACN / C61RADST
C61RAEE / C61R1AAMST / C61R1ABMAL / C61R1ACMN
C61R1ADMST / C61R1AEME / C61R2AAST / C61R2ABAL
C61R2ACN /C61R2ADST / C61R2AEE
To avoid the risk of accidents or damage to the hob, read all instructions before installing or
using the appliance. Keep this manual for future reference.
C61RAAST_XST-00146A-05_EN.indd 1
30/10/2555 15:48:02
EN
Contents
Using This Manual . . . . . . . . . . . . . . . . . . . . . . . . . . . . . . . . . . . . . . . . . . . . . . . . . . . . . . . 2
Safety. . . . . . . . . . . . . . . . . . . . . . . . . . . . . . . . . . . . . . . . . . . . . . . . . . . . . . . . . . . . . . . . . .
Electrical safety. . . . . . . . . . . . . . . . . . . . . . . . . . . . . . . . . . . . . . . . . . . . . . . . . . . . . . . . .
Child safety. . . . . . . . . . . . . . . . . . . . . . . . . . . . . . . . . . . . . . . . . . . . . . . . . . . . . . . . . . . .
Safety during use . . . . . . . . . . . . . . . . . . . . . . . . . . . . . . . . . . . . . . . . . . . . . . . . . . . . . . .
Safety when cleaning . . . . . . . . . . . . . . . . . . . . . . . . . . . . . . . . . . . . . . . . . . . . . . . . . . . .
3
3
3
4
4
Disposal Instructions. . . . . . . . . . . . . . . . . . . . . . . . . . . . . . . . . . . . . . . . . . . . . . . . . . . . . 4
Installing the Hob. . . . . . . . . . . . . . . . . . . . . . . . . . . . . . . . . . . . . . . . . . . . . . . . . . . . . . . .
Regulations and compliance. . . . . . . . . . . . . . . . . . . . . . . . . . . . . . . . . . . . . . . . . . . . . . .
Safety instructions for the installer . . . . . . . . . . . . . . . . . . . . . . . . . . . . . . . . . . . . . . . . . .
Connecting to the mains power supply. . . . . . . . . . . . . . . . . . . . . . . . . . . . . . . . . . . . . . .
Installing into the countertop. . . . . . . . . . . . . . . . . . . . . . . . . . . . . . . . . . . . . . . . . . . . . . .
5
5
5
6
7
Parts and Features. . . . . . . . . . . . . . . . . . . . . . . . . . . . . . . . . . . . . . . . . . . . . . . . . . . . . . . 9
Cooking zones and control panel. . . . . . . . . . . . . . . . . . . . . . . . . . . . . . . . . . . . . . . . . . . 9
Components. . . . . . . . . . . . . . . . . . . . . . . . . . . . . . . . . . . . . . . . . . . . . . . . . . . . . . . . . . 10
The key features of your appliance. . . . . . . . . . . . . . . . . . . . . . . . . . . . . . . . . . . . . . . . . . 11
Safety shutoff . . . . . . . . . . . . . . . . . . . . . . . . . . . . . . . . . . . . . . . . . . . . . . . . . . . . . . . . . 12
Residual heat indicator. . . . . . . . . . . . . . . . . . . . . . . . . . . . . . . . . . . . . . . . . . . . . . . . . . 12
Before You Begin . . . . . . . . . . . . . . . . . . . . . . . . . . . . . . . . . . . . . . . . . . . . . . . . . . . . . . . 13
Initial cleaning. . . . . . . . . . . . . . . . . . . . . . . . . . . . . . . . . . . . . . . . . . . . . . . . . . . . . . . . . 13
Hob Use. . . . . . . . . . . . . . . . . . . . . . . . . . . . . . . . . . . . . . . . . . . . . . . . . . . . . . . . . . . . . . .
Using suitable cookware. . . . . . . . . . . . . . . . . . . . . . . . . . . . . . . . . . . . . . . . . . . . . . . . .
Using the touch control sensors. . . . . . . . . . . . . . . . . . . . . . . . . . . . . . . . . . . . . . . . . . .
Switching the appliance on. . . . . . . . . . . . . . . . . . . . . . . . . . . . . . . . . . . . . . . . . . . . . . .
Temperature control . . . . . . . . . . . . . . . . . . . . . . . . . . . . . . . . . . . . . . . . . . . . . . . . . . . .
Switching the appliance off. . . . . . . . . . . . . . . . . . . . . . . . . . . . . . . . . . . . . . . . . . . . . . .
Switching a cooking zone off. . . . . . . . . . . . . . . . . . . . . . . . . . . . . . . . . . . . . . . . . . . . . .
Using the child safety lock. . . . . . . . . . . . . . . . . . . . . . . . . . . . . . . . . . . . . . . . . . . . . . . .
Locking and unlocking the control panel. . . . . . . . . . . . . . . . . . . . . . . . . . . . . . . . . . . . .
Suggested settings for cooking specific foods . . . . . . . . . . . . . . . . . . . . . . . . . . . . . . . .
13
13
14
15
15
16
16
17
19
19
Cleaning and Care . . . . . . . . . . . . . . . . . . . . . . . . . . . . . . . . . . . . . . . . . . . . . . . . . . . . . .
Hob. . . . . . . . . . . . . . . . . . . . . . . . . . . . . . . . . . . . . . . . . . . . . . . . . . . . . . . . . . . . . . . . .
Hob Frame . . . . . . . . . . . . . . . . . . . . . . . . . . . . . . . . . . . . . . . . . . . . . . . . . . . . . . . . . . .
To avoid damaging your appliance. . . . . . . . . . . . . . . . . . . . . . . . . . . . . . . . . . . . . . . . .
Cleaning Hints. . . . . . . . . . . . . . . . . . . . . . . . . . . . . . . . . . . . . . . . . . . . . . . . . . . . . . . . .
20
20
21
21
22
Warranty and Service. . . . . . . . . . . . . . . . . . . . . . . . . . . . . . . . . . . . . . . . . . . . . . . . . . . . 24
FAQs and troubleshooting. . . . . . . . . . . . . . . . . . . . . . . . . . . . . . . . . . . . . . . . . . . . . . . . 24
Service . . . . . . . . . . . . . . . . . . . . . . . . . . . . . . . . . . . . . . . . . . . . . . . . . . . . . . . . . . . . . . 25
Technical Data . . . . . . . . . . . . . . . . . . . . . . . . . . . . . . . . . . . . . . . . . . . . . . . . . . . . . . . . . 26
2
C61RAAST_XST-00146A-05_EN.indd 2
30/10/2555 15:48:02
Using This Manual
Please take the time to read this owner’s manual, paying particular attention to the safety
information contained in the following section, before using your appliance. Keep this manual
for future reference. If transferring ownership of the appliance, please remember to pass the
manual on to the new owner.
EN
The following symbols are used in the text
This is the safety alert symbol.
Warning indicates information concerning your personal safety.
Important indicates information on avoiding damage to the appliance.
This symbol indicates useful information and practical tips.
This symbol refers to measures that can be taken to help protect the environment.
1. Numbers like these indicate step - by - step instructions for using the appliance.
2. ...
3. ...
This manual contains information on steps you can take yourself to diagnose and resolve
problems that may arise. Refer to the section “Troubleshooting.”
3
C61RAAST_XST-00146A-05_EN.indd 3
30/10/2555 15:48:02
Safety
EN
The safety aspects of this appliance comply with accepted technical standards and
the German Appliance Safety Law. However, as manufacturers we also believe it is
our responsibility to familiarise you with the following safety instructions.
Electrical safety
• Be sure the appliance is properly installed and grounded by a qualified technician.
• The appliance should be serviced only by qualified service personnel. Repairs carried out
by unqualified individuals may cause injury or serious malfunction. If your appliance is in
need of repair, contact your local service centre. Failure to follow these instructions may
result in damage and void the warranty.
• Flush - mounted appliances may be operated only after they have been installed in
cabinets and workplaces that conform to the relevant standards. This ensures sufficient
protection against contact for electrical units as required by the VDE [Association of German Electrical Engineers].
• If your appliance malfunctions or if fractures, cracks or splits appear:
- switch off all cooking zones;
- disconnect the hob from the mains supply; and
- contact your local service centre.
• If the cooktop cracks, turn the appliance off to avoid the possibility of electric shock. Do not
use your hob until the glass surface has been replaced.
• Do not use the hob to heat aluminium foil, products wrapped in aluminium foil or frozen
foods packaged in aluminium cookware.
Child safety
This appliance is not intended for use by young children or infirm persons without
the adequate supervision of a responsible adult.
Young children should be supervised to ensure that they do not play with the appliance.
The cooking zones will become hot when you cook. Always keep small children
away from the appliance.
4
C61RAAST_XST-00146A-05_EN.indd 4
30/10/2555 15:48:02
Safety (continued)
Safety during use
EN
• This appliance is to be used only for normal cooking and frying in the home. It is not designed for commercial or industrial use.
• Never use the hob for heating the room.
• Take care when plugging electrical appliances into mains sockets near the hob. Mains
leads must not come into contact with the cooktop.
• Overheated fat and oil can catch fire quickly. Never leave surface units unattended when
preparing foods in fat or oil, for example, when cooking chips.
• Turn the cooking zones off after use.
• Always keep the control panels clean and dry.
• Never place combustible items on the hob, it may cause fire.
Safety when cleaning
• Always turn the appliance off before cleaning.
• For safety reasons do not clean the appliance with a steam jet or high - pressure cleaner.
• Clean the hob in accordance with the cleaning and care instructions contained in this
manual.
Disposal Instructions
Disposing of the packaging material
• All materials used to package the appliance are fully recyclable. Sheet and hard foam
parts are appropriately marked. Please dispose of packaging materials and old appliances
with due regard to safety and the environment.
Proper disposal of your old appliance
arning: Before disposing of your old appliance, make it inoperable so that it canW
not be a source of danger.
To do this, have a qualified technician disconnect the appliance from the mains supply and remove the mains lead.
• The appliance may not be disposed of in the household rubbish.
• Information about collection dates and public refuse disposal sites is available from your
local refuse department or council.
5
C61RAAST_XST-00146A-05_EN.indd 5
30/10/2555 15:48:02
Installing the Hob
EN
Important: Be sure the new appliance is installed and grounded only by qualified
personnel.
Please observe this instruction. The warranty will not cover any damage that may
occur as a result of improper installation.
Technical data is provided at the end of this manual.
Regulations and compliance
This appliance meets the following standards:
• EN 60 335 - 1 and EN 60 335 - 2 - 6, relating to the safety of electrical appliances for household use and similar purposes;
• EN 60350, or DIN 44546 / 44547 / 44548, relating to the operating features of electric cookers, hobs, ovens, and grills for household use;
• EN 55014 - 2;
• EN 55014;
• EN 61000 - 3 - 2; and
• EN 61000 - 3 - 3, relating to basic requirements for electromagnetic compatibility (EMC).
This appliance complies with the following EU Directives:
• 73 / 23 / EWG dated 19.02.1973 (Low Voltage Directive);
• 89 / 336 / EWG dated 03.05.1989 (EMC Directive including Amending Directive 92
/ 31 / EWG); and
• 93 / 68 / EWG CE Labeling Directive.
Safety instructions for the installer
• A device must be provided in the electrical installation that allows the appliance to be disconnected from the mains at all poles with a contact opening width of at least 3 mm. Suitable
isolation devices include line protecting cut - outs, fuses (screw type fuses are to be removed
from the holder), earth leakage trips and contactors.
• With respect to fire protection, this appliance corresponds to EN 60 335 - 2 - 6. This type of
appliance may be installed with a high cupboard or wall on one side.
• Drawers may not be fitted underneath the hob.
• The installation must guarantee shock protection.
• The kitchen unit in which the appliance is fitted must satisfy the stability requirements of DIN
68930.
• For protection against moisture, all cut surfaces are to be sealed with a suitable sealant.
• On tiled work surfaces, the joints in the area where the hob sits must be completely filled with
grout.
• On natural, artificial stone, or ceramic tops, the snap action springs must be bonded in place
with a suitable artificial resin or mixed adhesive.
• Ensure that the seal is correctly seated against the work surface without any gaps. Additional
silicon sealant must not be applied; this would make removal more difficult when servicing.
• The hob must be pressed out from below when removed.
6
C61RAAST_XST-00146A-05_EN.indd 6
30/10/2555 15:48:02
Installing the Hob (Continued)
Connecting to the mains power supply
EN
Before connecting, check that the nominal voltage of the appliance, that is, the voltage stated on the rating
plate, corresponds to the available supply voltage. The rating plate is located on the lower casing of the
hob.
Shut off power to circuit before connecting wires to circuit.
The heating element voltage is AC230 V~. The appliance also works perfectly on older networks with
AC220 V~.
The hob is to be connected to the mains using a device that allows the appliance to be disconnected from
the mains at all poles with a contact opening width of at least 3 mm, eg. automatic line protecting cut - out,
earth leakage trips or fuse.
A type H05SS - F (180°C) cable or one of a higher grade must be used as the mains connecting cable.
2
Rated current of appliance (A)
Nominal cross-sectional area (mm )
1N~
> 25 and ≤ 32
> 4 and < 6
2N~
> 10 and ≤ 16
> 1.5 and < 2.5
The connection must be carried out as shown in the diagram. The connecting links should be fitted according to the appropriate connection diagram.
The earth lead is connected to terminal. The earth lead must be longer than leads carrying electric current.
The cable connections must be made in accordance with regulations and the terminal screws tightened
securely.
The connecting cable is to be secured with the mains cable cleat and the covering closed by pressing firmly
(locking into place). Before switching on for the first time, any protective foil or stickers must be removed
from the ceramic glass surface.
Once the hob is connected to the mains supply, check that all cooking zones are ready for use by briefly switching each on in turn at the maximum setting.
When the hob is powered on for the first time, all displays light and the child safety
lock is activated.
220 V ~
220 V ~
Warning: Pay attention (conformity) to phase and neutral allocation of house
connection and appliance (connection schemes); otherwise, components can be
damaged.
Warranty does not cover damage resulting from improper installation.
7
C61RAAST_XST-00146A-05_EN.indd 7
30/10/2555 15:48:02
Installing the Hob (Continued)
EN
Installing into the countertop
Make a note of the serial number on the appliance rating plate prior to installation.
This number will be required in the case of requests for service and is no longer accessible after installation, as it is on the original rating plate on the underside of the
appliance.
Pay special attention to the minimum space and clearance requirements.
Secure the brackets at both sides with the provided screws before mounting the hob
onto the brackets.
Min. 50mm
x4
R3
min. 20
560 +1
490+1
600
50
8
C61RAAST_XST-00146A-05_EN.indd 8
30/10/2555 15:48:03
Installing the Hob (Continued)
EN
90 x4
2
=
490+1
100
100
=
9
C61RAAST_XST-00146A-05_EN.indd 9
30/10/2555 15:48:03
Parts and Features
EN
Cooking zones and control panel
Single cooking zone 1100 W
14
8
3
18
m
m
3
18
Casserole cooking zone 1650 W
m
m
14
8
m
m
Control panel
Double cooking zone 1650 W
Indicators for heat settings and residual heat
Heat setting
selectors
m
m
Single cooking zone
1100 W
“Lock” control
sensor
“On/Off” control
sensor
10
C61RAAST_XST-00146A-05_EN.indd 10
30/10/2555 15:48:03
Parts and Features (Continued)
Components
EN
1 Ceramic Glass Hob
2 Installation Brackets
3 Screws
11
C61RAAST_XST-00146A-05_EN.indd 11
30/10/2555 15:48:03
Parts and Features (Continued)
EN
The key features of your appliance
• Ceramic glass cooking surface: The appliance has a ceramic glass cooking surface and
four rapid - response cooking zones. The hob’s powerful radiant heater elements significantly
shorten the amount of time required for the zones to heat up.
• Touch control sensors: Your appliance is operated using touch control sensors.
•E
asy cleaning: The advantage of the ceramic glass cooking surface and the control sensors
is their accessibility for cleaning. The smooth, flat surface is easy to clean.
•O
n / Off sensor: The “On / Off” control sensor provides the appliance with a separate mains
switch. Touching this sensor switches the power supply on or off completely.
•C
ontrol and function indicators: Digital displays and indicator lights provide information
about settings and activated functions, as well as the presence of residual heat in the various
cooking zones.
•S
afety shutoff: A safety shutoff ensures that all cooking zones switch off automatically after
a period of time if the setting has not been changed.
•R
esidual heat indicator: An icon for residual heat appears in the display if the cooking zone
is so hot that there is a risk of burning.
Digital displays: The four display fields are assigned to the four cooking zones.
They show the following information:
-
the appliance has been switched on,
to selected heat settings,
residual heat,
the child lock is activated; and
error message, the sensor has been touched for longer than 10 seconds.
error message, when the Hob is overheated because of abnormal operation.
12
C61RAAST_XST-00146A-05_EN.indd 12
30/10/2555 15:48:04
Parts and Features (Continued)
Safety shutoff
EN
If one of the cooking zones is not switched off or the heat setting is not adjusted after an extended period of time, that particular cooking zone will automatically switch itself off.
Any residual warmth will be indicated with (for “hot”) in the digital displays corresponding to
the particular cooking zones.
The cooking zones switch themselves off at the following times.
Cooking setting
1-2
After 6 hours
Cooking setting
3-4
After 5 hours
Cooking setting
5-6
After 3 hours
Cooking setting
7-9
After 1 hour
If the Hob is overheated because of abnormal operation,
And the Hob will be switched off.
will be displayed.
Should one or more of the cooking zones switch off before the indicated time has
elapsed, see the section “Troubleshooting.”
Other reasons why a cooking zone will switch itself off
All cooking zones will immediately switch themselves off if liquid boils over and lands on the
control panel.
The automatic shutoff will also be activated if you place a damp cloth on the control panel. In
both of these instances, the appliance will need to be switched on again using the main power
sensor after the liquid or the cloth has been removed .
Residual heat indicator
When an individual cooking zone or the hob is turned off, the presence of residual heat is
shown with an (for “hot”) in the digital display of the appropriate cooking zones. Even after
the cooking zone has been switched off, the residual heat indicator goes out only after the
cooking zone has cooled.
You can use the residual heat for thawing or keeping food warm.
Important: As long as the residual heat indicator is illuminated, there is a risk of
burns.
Important: If the power supply is interrupted, the symbol will go out and information about residual heat will no longer be available. However, it may still be possible
to burn yourself. This can be avoided by always taking care when near the hob.
13
C61RAAST_XST-00146A-05_EN.indd 13
30/10/2555 15:48:04
Before You Begin
EN
Initial cleaning
Wipe the ceramic glass surface with a damp cloth and ceramic cooktop glass cleaner.
Important: Do not use caustic or abrasive cleaners. The surface could be damaged.
Hob Use
Using suitable cookware
Better pans produce better results.
• You can recognise good pans by their bases. The base should be as thick and flat as possible.
• When buying new pans, pay particular attention to the diameter of the base. Manufacturers often give only the diameter of the upper rim.
• Pots with aluminium or copper bases can cause metallic discolouration on the ceramic
glass surface. The discolouration is very difficult or impossible to remove.
• Do not use pans made of cast iron or which have damaged bases with rough edges or
burrs. Permanent scratching can occur if these pan are slid across the surface.
• When cold, pan bases are normally bowed slightly inwards (concave). They should never
be bowed outwards (convex).
• If you wish to use a special type of pan, for example, a pressure cooker, a simmering pan,
or a wok, please observe the manufacturer’s instructions.
Energy saving tips and prevention of scratches on the ceramic glass surface
You can save valuable energy by observing the following points.
Right! (Surface of pan bottom is smooth.)
Wrong!
Wrong!
(Surface of pan bottom has rough
edges or burrs.)
(Surface of pan bottom is concave.)
14
C61RAAST_XST-00146A-05_EN.indd 14
30/10/2555 15:48:04
Hob Use (Continued)
• Always position pots and pans before switching on the cooking zone.
EN
• Dirty cooking zones and pan bases increase power consumption.
• When possible, position the lids firmly on the pots and pans to cover completely.
• Switch the cooking zones off before the end of the cooking time to use the residual heat
for keeping foods warm or for thawing.
• The base of the pan should be the same size as the cooking zone.
• Using a pressure cooker reduces cooking times by up to 50 %
Using the touch control sensors
To operate the touch control sensors, touch the desired panel with the tip of your pointed finger until the relevant displays illuminate or go out, or until the desired function is activated.
Ensure that you are touching only one sensor panel when operating the appliance. If your
finger is too flat on the panel, an adjacent sensor may be actuated as well.
15
C61RAAST_XST-00146A-05_EN.indd 15
30/10/2555 15:48:04
Hob Use (Continued)
EN
Switching the appliance on
Touch the “Lock ” sensor for approximately 3 seconds.
The appliance is switched on using the “On / Off ” control sensor.
Touch the “On / Off ” sensor.
The digital displays will show .
After the “On / Off ” sensor has been actuated to switch on your appliance, a heat
setting must be selected within approximately 10 seconds. Otherwise, the appliance
will switch itself off for safety reasons.
Temperature control
For setting and adjusting the power level ( to ) for cooking, touch the corresponding cooking zone’s
,
keys.
The first time
is pressed, the heat level is set to .
The first time
is pressed, the heat level is set to .
Use the
key to increase the heat setting and the
key to decrease.
16
C61RAAST_XST-00146A-05_EN.indd 16
30/10/2555 15:48:05
Hob Use (Continued)
Switching the appliance off
EN
To completely switch off the appliance, use the “On / Off
Touch the “On / Off ” sensor.
” control sensor.
After switching off a single cooking zone or the entire cooking surface, the presence of
residual heat will be indicated in the digital displays of the corresponding cooking zones
in the form of an (for “hot”).
If the heat setting is at and you want to turn the
burner off, the sensor can be
touched one additional time, and the heat setting will go to zero.
For faster adjustment, keep your finger on the
or
sensor until the required
value is obtained.
If more than one sensor is pressed for longer than 10 seconds,
will show in the
heat setting display. To reset, touch the “On / Off ” sensor.
Switching a cooking zone off
To switch off a cooking zone, return the setting to
and touch sensors
or
.
by using the control panel’s heat setting
17
C61RAAST_XST-00146A-05_EN.indd 17
30/10/2555 15:48:05
Hob Use (Continued)
EN
Using the child safety lock
You can use the child safety lock to safeguard against unintentionally turning on a cooking
zone and activating the cooking surface. The lock control sensor can be used only when the
power is on.
Switching the child safety lock on
1. Touch the
control sensor for approximately 3 seconds.
An acoustic signal will sound as confirmation.
approx. 3 sec.
2. Touch any heat setting control sensor .
will appear in the displays, indicating the child safety lock has been activated.
18
C61RAAST_XST-00146A-05_EN.indd 18
30/10/2555 15:48:05
Hob Use (Continued)
Switching the child safety lock off
EN
1. Touch the control sensor for approximately 3 seconds.
An acoustic signal will sound as confirmation.
approx. 3 sec.
After switching off the appliance, child safety lock will be activated automatically within
some minutes for safety reasons.
19
C61RAAST_XST-00146A-05_EN.indd 19
30/10/2555 15:48:06
Hob Use (Continued)
EN
Locking and unlocking the control panel
At any stage during the cooking process, the control panel, with the exception of the “On / Off
” control sensor, can be locked in order to prevent the settings from being changed unintentionally, for example, by wiping over the panel with a cloth.
1. Touch the lock control sensor for approximately 3 seconds.
The indicator light in the lock control sensor will illuminate. The control sensors are now
locked.
2. To unlock the control sensor, touch the lock control sensor again for approximately 3 seconds. The indicator light in the lock control sensor will extinguish.
approx. 3 sec.
Suggested settings for cooking specific foods
The figures in the table below are guidelines. The heat settings required for various cooking
methods depend on a number of variables, including the quality of the cookware being used
and the type and amount of food being cooked.
Switch Setting
Cookingmethod
9
Warming
Sautéing
Frying
Warming large amounts of liquid, boiling noodles,
searing meat, (browning goulash,braising meat)
7
Intensive
Frying
Steak, sirloin, hash browns, sausages, pancakes /
griddle cakes
6
Frying
8
5
4
3
Boiling
2
Steaming
Stewing
Boiling
1
Melting
Examples for Use
Schnitzel / chops, liver, fish, rissoles, fried eggs
Cooking up to 1.5 l liquid, potatoes, vegetables
Steaming and stewing of small amounts of vegetables, boiling rice and milk dishes
Melting butter, dissolving gelatine, melting chocolate
Note
• The heat settings indicated in the table above are provided only as guidelines for your reference.
• You will need to adjust the heat settings according to specific cookware and foods.
20
C61RAAST_XST-00146A-05_EN.indd 20
30/10/2555 15:48:06
Cleaning and Care
Hob
EN
Important: Cleaning agents must not come into contact with a heated ceramic glass surface: All cleaning agents must be removed with adequate amounts of clean water
after cleaning because they can have a caustic effect when the surface becomes
hot. Do not use any aggressive cleaners such as grill or oven sprays, scouring pads
or abrasive pan cleaners.
Clean the ceramic glass surface after each use when it is still warm to the touch.
This will prevent spillage from becoming burnt onto the surface. Remove scales,
watermarks, fat drippings and metallic discolouration with the use of a commercially
available ceramic glass or stainless steel cleaner.
Light Soiling
1. Wipe the ceramic glass surface with a damp cloth.
2. Rub dry with a clean cloth. Remnants of cleaning agent must not be left on the surface.
3. Thoroughly clean the entire ceramic glass cooking surface once a week with a commercially available ceramic glass or stainless steel cleaner.
4. Wipe the ceramic glass surface using adequate amounts of clean water and rub dry with a
clean lint - free cloth.
Stubborn Soiling
1. To remove food that has boiled over and stubborn splashes, use a glass scraper.
2. Place the glass scraper at an angle to the ceramic glass surface.
3. Remove soiling by scraping with the blade.
Glass scrapers and ceramic glass cleaners are available from specialty retailers.
21
C61RAAST_XST-00146A-05_EN.indd 21
30/10/2555 15:48:06
Cleaning and Care (Continued)
EN
Problem Dirt
1. Remove burnt-on sugar, melted plastic, aluminium foil or other materials with a glass
scraper immediately and while still hot.
Important: There is a risk of burning yourself when the glass scraper is used on a
hot cooking zone:
2. Clean the hob as normal when it has cooled down.
If the cooking zone on which something has
melted has been allowed to cool, warm it up
again for cleaning.
Scratches or dark blemishes on the ceramic glass
surface, caused, for example, by a pan with sharp
edges, cannot be removed. However, they do
not impair the function of the hob.
Hob Frame
Important: Do not use vinegar, lemon juice or scale remover on the hob frame;
otherwise dull blemishes will appear.
1. Wipe the frame with a damp cloth.
2. Moisten dried debris with a wet cloth. Wipe and rub dry.
To avoid damaging your appliance
• Do not use the cooktop as a work surface or for storage.
• Do not operate a cooking zone if there is no pan on the cooktop or if the pan is empty.
• Ceramic glass is very tough and resistant to temperature shock, but it is not unbreakable.
It can be damaged by a particularly sharp or hard object dropping onto the cooktop.
• Do not use pans made of cast iron or which have damaged bases with rough edges or
burrs. Scratching may occur if these pans are slid across the surface.
• Do not place pans on the hob frame. Scratching and damage to the finish may occur.
• Avoid spilling acidic liquids, for example, vinegar, lemon juice and descaling agents, onto
the hob frame, since such liquids can cause dull spots.
• If sugar or a preparation containing sugar comes into contact with a hot cooking zone and
melts, it should be cleaned off immediately with a kitchen scraper while it is still hot. If allowed to cool, it may damage the surface when removed.
• Keep all items and materials that could melt, for example, plastics, aluminium foil and
oven foils, away from the ceramic glass surface. If something of this nature melts onto the
cooktop, it must be removed immediately with a scraper.
22
C61RAAST_XST-00146A-05_EN.indd 22
30/10/2555 15:48:06
Cleaning and Care (Continued)
Cleaning Hints
EN
Your cook-top is made of an extraordinary material : glass ceramic.
• It is tough, much tougher than the glass it resembles. Nevertheless, do not stand on it
in order to repair a light and do not drop a heavy object from the top of the kitchen unit
above.
• It is resistant to heat and cold and even to extreme temperature changes, You can pour
cold water onto a cooking zone without causing any damage.
• It is attractive and easy to clean.
It will remain so if you take a few precautions and follow our advice.
Precautions to be taken when using your cook-top
• Before using your cook-top, check each time that the bottom of the saucepan and the
cooking zone are clean and dry.
• Lift up the saucepans ; sliding them across the cook-top can lead to superficial scratches.
• Avoid peeling vegetables over the cook-top as this could lead to grit on the surface and
subsequent scratching.
• Use saucepans which are large enough to avoid spillage onto the cook-top, especially if a
saucepan contains any sugar as this can cause irreparable damage to the glass ceramic.
• Keep the surface of the cook-top clear ; above all do not keep plastic or aluminium packing
on it which could melt and damage the cook-top.
23
C61RAAST_XST-00146A-05_EN.indd 23
30/10/2555 15:48:06
Cleaning and Care (Continued)
EN
Cleaning instructions
Each and every stain or deposit on the cook-top surface must be cleaned off quickly once the
cook-top has cooled down, before re-using the cook-top.
xception:In the case of sugar deposits, remove all residues before the cook-top
E
cools down (Be careful not to burn yourself).
Important: Only use cleaning
products that have been
specifically designed for
glass ceramic cook-tops.
If the deposit is minimal, simply wipe off with a dry cloth.
If the deposit is more important, clean off with a moist,
soapy sponge and rinse off.
If the deposit does not clean
off easily, use a non-abrasive
scratch pad and a specially adapted glass-ceramic
cleaning product.
If the deposit does not
clean off with any of the
above mentioned methods,
use a razor blade scraper,
specially designed for glassceramic cook-tops.
Having successfully cleaned
the cook-top, apply a glass
ceramic cook-top conditioner which will protect the
cook-top surface against any
future stains, with a dry cloth
or equivalent.
24
C61RAAST_XST-00146A-05_EN.indd 24
30/10/2555 15:48:07
Warranty and Service
FAQs and troubleshooting
EN
A fault may result from a minor error that you can correct yourself with the help of the following
instructions. Do not attempt any further repairs if the following instructions do not help in each
specific case.
Warning: Repairs to the appliance are to be performed only by a qualified service
technician. Improperly effected repairs may result in considerable risk to the user. If
your appliance needs repair, please contact your customer service centre.
What should I do if the cooking zones are not functioning?
Check for the following possibilities:
• The fuse in the house wiring (fuse box) is intact. If the fuses trip a number of times, call an
authorised electrician.
• The appliance is properly switched on.
• The control indicators in the control panel are illuminated.
• The cooking zone is switched on.
• The cooking zones are set at the desired heat settings.
What should I do if the cooking zones will not switch on?
Check for the following possibilities:
• A period of more than 10 seconds has elapsed between when the On / Off button was actuated and the desired cooking zone switches on (see the section “Switching the appliance
on”).
• The control panel is partially covered by a damp cloth or liquid.
What should I do if the display except for
denly disappears?
the residual warmth indicator sud-
This could be a result of one of two possibilities:
• The On / Off sensor was accidentally actuated.
• The control panel is partially covered by a damp cloth or liquid.
What should I do if, after the cooking zones have been switched off, residual
warmth is not indicated in the display?
Check for the following possibility:
• The cooking zone was only briefly used and therefore did not become hot enough. If the
cooking zone is hot, please call the customer service centre.
What should I do if the cooking zone will not switch on or off?
This could be due to one of the following possibilities:
• The control panel is partially covered by a damp cloth or liquid.
• The child safety lock is on.
What should I do if the
display is illuminated?
Check for the following:
• The control panel is partially covered by a damp cloth or liquid. To reset, press the “On / Off”
control sensor.
25
C61RAAST_XST-00146A-05_EN.indd 25
30/10/2555 15:48:07
Warranty and Service (Continued)
EN
What does it mean when the burner does not glow red?
• The selected temperature of the cooking zone is maintained by a sensor that cycles the zone
on and off, so the surface cooking area will not always glow red. If you select a low heat
setting, the heat will cycle on and off more frequently than at higher settings. The heat also
cycles on and off at the highest setting.
If you request a service call because of an error made in operating the appliance, the visit from
the customer service technician may incur a charge even during the warranty period.
Service
Before calling for assistance or service, please check the section “Troubleshooting.”
If you still need help, follow the instructions below.
Is it a technical fault?
If so, please contact your customer service centre.
Always prepare in advance for the discussion. This will ease the process of diagnosing the
problem and also make it easier to decide if a customer service visit is necessary.
Please take note of the following information.
• What form does the problem take?
• Under what circumstances does the problem occur?
When calling, please know the model and serial number of your appliance. This information is
provided on the rating plate as follows:
• Model description
• S / N code (10 digits)
We recommend that you record the information here for easy reference.
Model:
Serial number:
When do you incur costs even during the warranty period?
• if you could have remedied the problem yourself by applying one of the solutions provided in
the section “Troubleshooting,”
• if the customer service technician has to make several service calls because he was not
provided with all of the relevant information before his visit and as a result, for example, has
to make additional trips for parts. Preparing for your phone call as described above will save
you the cost of these trips.
26
C61RAAST_XST-00146A-05_EN.indd 26
30/10/2555 15:48:07
Technical Data
Appliance dimensions
Width
Depth
Height
EN
575 mm
505 mm
55 mm
Worktop cut - out dimensions
Width
Depth
Corner radius
560 mm
490 mm
3 mm
Cooking rings
Position
Diameter
Power
Front left
183 mm
1650 W
Rear left
148 mm
1100 W
Rear right
183 mm
1650 W
Front right
148 mm
1100 W
Connection voltage
220 V ~ 50 Hz
Maximum connected load power
5.5 kW
Weight:
Net
Gross
7.5 kg
10.0 kg
27
C61RAAST_XST-00146A-05_EN.indd 27
30/10/2555 15:48:07
QUESTIONS OR COMMENTS
COUNTRY
AUSTRALIA
NEW ZEALAND
CHINA
CALL
OR VISIT US ONLINE AT
1300 362 603
0800 SAMSUNG (0800 726 786)
www.samsung.com
400-810-5858
HONG KONG
(852) 3698 4698
INDIA
1800 1100 11
3030 8282
1800 3000 8282
1800 266 8282
INDONESIA
0800-112-8888
021-5699-7777
JAPAN
0120-327-527
MALAYSIA
1800-88-9999
PHILIPPINES
1-800-10-SAMSUNG(726-7864) for PLDT
1-800-3-SAMSUNG(726-7864) for Digitel
1-800-8-SAMSUNG(726-7864) for Globe
02-5805777
SINGAPORE
1800-SAMSUNG(726-7864)
THAILAND
1800-29-3232
02-689-3232
TAIWAN
0800-329-999
0266-026-066
VIETNAM
1 800 588 889
www.samsung.com/hk (Chinese)
www.samsung.com/hk_en (English)
www.samsung.com
Code No.:DG68-00146A-05
C61RAAST_XST-00146A-05_EN.indd 28
30/10/2555 15:48:07