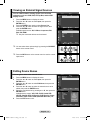
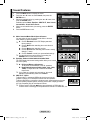
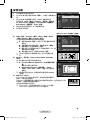
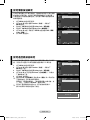
1
Professional PDP Display (PLASMA DISPLAY PANEL) PPM50M7F/PPM63M7F Owner’s Instructions Before operating the unit, please read this manual thoroughly, and retain it for future reference. ON-SCREEN MENUS Picture In Picture (PIP) Energy Saving SRS TruSurround XT Digital Natural Image engine Register your product at www.samsung.com/global/register Record your Model and Serial number here for future reference. ▪ Model _______________ ▪ Serial No. _______________ BN68-01364C-01Eng_1001.indd 1 2007-10-01 오후 5:49:16 User Instructions Screen Image retention Do not display a still image (such as on a video game or when hooking up a PC to this PDP Display) on the plasma PDP Display panel for more than 2 hours as it can cause screen image retention. This image retention is also known as “screen burn”. To avoid such image retention, reduce the degree of brightness and contrast of the screen when displaying a still image. Height The PDP Display can normally operate only under 2000m in height. It might abnormally function at a place over 2000m in height, so do not install and operate there. Heat on the top of the PDP Display The top side of the product may be hot after long periods of use as heat dissipates from the panel through the vent hole in the upper part of the product. This is normal and does not indicate any defect or operation failure of the product. However, children should be prevented from touching the upper part of the product. The product is making a ‘cracking’ noise. A ‘cracking’ noise may occur when the product contracts or expands due to a change of surrounding environment such as temperature or humidity. This is normal and not a defect of the unit. Cell Defects The PDP Display uses a panel consisting of 1,230,000(SD-level) to 3,150,000(HD-level) pixels which require sophisticated technology to produce. However, there may be a few bright or dark pixels on the screen. These pixels will have no impact on the performance of the product. Avoid operating the PDP Display at temperatures below 5°C(41°F) A still image displayed too long may cause permanent damage to the PDP Panel. Watching the PDP Display in 4:3 format for a long period of time may leave traces of borders displayed on the left, right and center of the screen caused by the difference of light emission on the screen. Playing a DVD or a game console may cause similar effect to the screen. Damage caused by the above effect are not covered by the Warranty. After image on the Screen. Displaying still images from Video games and PC for longer than a certain period of time may produce partial afterimages. To prevent this effect, reduce the ‘brightness’ and ‘contrast’ when displaying still images for a long time. Warranty - Warranty does not cover any damage caused by image retention. - Burn-in is not covered by the warranty. Installation Be sure to contact an authorized service center, when installing your PDP Display in a location with heavy dust, high or low temperatures, high humidity, chemical substance and where it operates for 24 hours such as the airport, the train station or etc. Failure to do so may cause a serious damage to your PDP Display. Installing the product in an airtight place may shorten the lifetime of the product. © 2007 Samsung Electronics Co., Ltd. All rights reserved. English - BN68-01364C-01Eng_1001.indd 2 2007-10-01 오후 5:49:16 Contents General Information PC Display User Instructions.............................................. 2 Checking Parts................................................. 4 Control Panel .................................................. 5 Connection Panel............................................. 6 Viewing the Remote Control ........................... 7 Setting up Your PC Software (Based on Windows XP)................................ 31 Display Modes............................................... 32 Setting the PC................................................ 33 Setting the Home Theatre PC........................ 34 Operation Appendix Switching Your PDP Display On and Off.......... 8 Installing the Display Vertically......................... 9 Before Using the Video Wall and the Multiple Display Control function...................... 9 Connecting Speakers..................................... 11 Viewing the Menus......................................... 12 Freezing the Current Picture.......................... 12 Displaying the Setting Information................. 12 Viewing an External Signal Sources.............. 13 Editing Device Names.................................... 13 Wall Mount Kit Specifications (VESA)............ 34 Using the Stand-Base.................................... 35 Troubleshooting............................................. 36 Specifications................................................. 37 Picture Control Changing the Picture Standard...................... 14 Customizing the Picture Settings................... 14 Configuring Detailed Settings on the Picture... 15 Selecting the Picture Size.............................. 16 Digital NR / Active Color / DNIe / Movie Plus.... 17 Sound Control Sound Features............................................. 18 Function Description Time Features................................................ 20 Language / Blue Screen / Melody / Energy Saving / HDMI Black Level................ 21 Setting the Panel Button Lock........................ 22 Setting the Remote Control Button Lock........ 22 Setting Up Your Personal ID Number............ 23 Setting the MDC (Multiple Display Control)... 24 Setting the Multiple Screen............................ 25 Selecting the Fan........................................... 26 Using the Game Mode................................... 27 Viewing the Picture in Picture (PIP)............... 28 Screen Burn Protection.................................. 29 Setting the Screen Burn Protection Timer...... 30 ☛ ➢ Important Note Symbols Press English - BN68-01364C-01Eng_1001.indd 3 2007-10-01 오후 5:49:17 Checking Parts Owner’s Instructions Remote Control/ AAA Batteries Power Cord Stand-Base (2EA) / Screws (4EA) (PPM50M7F) Ferrite Cores PC Cable Warranty Card/ Registration Card/ (Not available in all locations) Sold Separately S-Video Cable Component Cables Audio Cables HDMI/DVI Cable PC Audio Cable HDMI Cable Video Cable ➢ Ferrite Core (Speaker Wire, Power Cord) The ferrite cores are used to shield the cables from interference. When connecting a cable, open the ferrite core and clip it around the cable near the plug. Speaker Wire Power cord English - BN68-01364C-01Eng_1022.indd 4 2007-10-22 오전 9:17:02 Control Panel Front Panel ➢ The product color and shape may vary depending on the model. 1 SOURCE( ) Displays a menu of all of the available input sources (AV, S-Video, Component, PC1, PC2, DVI, and HDMI). In the on-screen menu, use this button as you would use the ENTER button on the remote control. ➢ 2 MENU Press to see the on-screen menu of your PDP Display’s features. 3 4 − VOL + Press to increase or decrease the volume. In the on-screen menu, use the − VOL + buttons as you use the + and − buttons on the remote control. SEL Control the cursor in the menu. 5 (Power) button Press to turn the PDP Display on and off. 6 Power Indicator Blinks and turns off when the power is on and lights up in stand-by mode. 7 Remote Control Sensor Aim the remote control towards this spot on the PDP Display. You can use the SEL buttons to switch on the PDP Display when it is in standby mode depending on the model. The − VOL + and SEL buttons have the same function as the ▲/▼/◄/► buttons on the remote control. If the remote control no longer works or you have misplaced it, you can use the controls on the panel of the PDP Display. ➢ ➢ ➢ English - BN68-01364C-01Eng_1002.indd 5 2007-10-02 오전 10:01:28 Connection Panel Rear Panel 2 3 4 5 6 7 8 9 0 ! 1 1 PPM50M7F PPM63M7F or or or ➢ The product color and shape may vary depending on the model. you connect an audio or video system to your set, ensure that all elements are ☛ Whenever switched off. When connecting an external device, match the color of the connection terminal to the cable. 1 POWER IN Connect the supplied power cord. 2 EXT SPEAKER (8Ω) Connect external speakers. 3 DVI/PC/HDMI AUDIO IN Connect to the audio output jack on your PC or DVI. AUDIO is an audio input jack for PC1 and PC2 modes. 4 DVI IN Connect to the video output jack for device with DVI output. 5 HDMI IN Connect to the HDMI jack of a device with HDMI output. -This input can also be used as a DVI connection with separate analog audio inputs. An optional HDMI/DVI cable will be necessary to make this connection. -When using an optional HDMI/DVI adapter, the DVI analog audio inputs on your PDP Display allow you to receive left and right audio from your DVI device. 6 PC IN1/PC OUT1 -P C IN1: Connect to the video output jack on your PC. - PC OUT1: Connect to the video input jack on external devices. ➢ 7 PC IN2 (BNC) Connect for RGB HV video signal input from the PC. “PC Mode” from this page onward means PC1/PC2 mode using RGB1(PC1) and RGB2(PC2). 8 RS-232C - IN: Used for the MDC function when connecting PC or RS-232C output of another PDP Display. - OUT: Used for the MDC function when connecting with RS-232C input of another PDP Display. For further details about connections, refer to Page 10. 9 COMPONENT IN Video (Y/PB/PR) and audio (L/R) inputs for component. 0 AV (VIDEO/AUDIO L/R) - IN: Video and audio inputs for external devices, such as a camcorder or VCR. - OUT: Outputs for external devices. ! S-VIDEO IN Video input for external devices with an S-Video output, such as a camcorder or VCR. ➢ ➢ English - BN68-01364C-01Eng_1001.indd 6 2007-10-01 오후 5:49:23 Viewing the Remote Control ➢ The performance of the remote control may be affected by bright light. 1 PDP display on 2 Direct channel selection 3 Not available 4 Volume increase 5 Temporary sound switch-off 6 Volume decrease 7 Returns to the previous menu 8 Menu display 9 Move to the required menu option/Adjust an option value respectively 0 Picture effect selection ! Auto adjustment in pc mode @ PIP functions: - PIP activation or deactivation (PIP) - Select a position of the sub-picture (POSITION) # PDP display off $ Picture still % Next channel ^ External input selection & Previous channel * Information display ( Exit from any display ) Confirm your choice (store or enter) a Sound effect selection b Picture size c Multiple display control d Screen effect selection (burning protection) Continued... English - BN68-01364C-01Eng_1001.indd 7 2007-10-01 오후 5:49:23 Installing Batteries in the Remote Control 1 2 3 Remove the cover on the rear of the remote control by pressing the symbol ( ) downwards and then pulling firmly to remove it. Install two AAA size batteries. Make sure to match the “+” and “–” ends of the batteries with the diagram inside the compartment. Do not mix battery types, i.e. alkaline and manganese. Replace the cover by aligning it with the base of the remote control and pressing it back into place. Remove the batteries and store them in a cool and dry place if you won’t be using the remote control for a long time. The remote control can be used up to about 23 feet from the PDP Display. (Assuming typical PDP Display usage, the batteries last for about one year.) ➢ ➢ remote control doesn’t work! Check the following: ➢If1.the Is the PDP Display power on? 2. Are the plus and minus ends of the batteries reversed? 3. Are the batteries drained? 4. Is there a power cut, or is the power cord unplugged? 5. Is there a special fluorescent light or a neon sign nearby? Switching Your PDP Display On and Off The mains lead is attached to the rear of the PDP Display. 1 2 3 Plug the mains lead into an appropriate socket. The main voltage is indicated on the rear of the PDP Display and the frequency is 50 or 60Hz. Press the (Power) button (On/Off) on the front of the PDP Display or press the ON button on the remote control to switch the PDP Display on. To switch the PDP Display off, press the (Power) button (On/Off) on the front of the PDP Display or press the OFF button on the remote control. ➢ English - BN68-01364C-01Eng_1001.indd 8 2007-10-01 오후 5:49:24 Installing the Display Vertically Samsung shall not be liable for damages caused by installing the product at the different direction from the figure below. You can install the PDP Display vertically. In this case, the fan automatically works. If you wish to stop the fan, position the PDP Display horizontally and then set Fan to Off in the Function menu. Please use the wall attachment panel exclusively when installing vertically. And you have to put the bottom of the PDP Display with menu buttons on the left when viewed from front. Before Using the Video Wall and the Multiple Display Control function 1 2 Please create ID for each PDP Display before installing them close together. It may be difficult to create IDs when operating the remote control for PDPs that are installed close to each other. For details about Video Wall configuration and operation, refer to “Setting the Multiple Screen” on page 25. Example for 2x2 Video Wall function Continued... English - BN68-01364C-01Eng_1001.indd 9 2007-10-01 오후 5:49:25 Example for 2x2 Video Wall connections Rear of the PDP Display Distributor Y/PB/PR 2 1 L/R DVD Rear of the PDP Display 1Connect the Component IN port of the distributor and the Component OUT port of the device that supports the Component interface such as a DVD player using the Component video and audio cables. 2Connect the Component IN port on the rear panel of each PDP and the Component OUT port of the distributor using the Component video and audio cables. (A distributor has multiple Component OUT ports.) Example for Multiple Display Control connections can connect a Composite (Video) without a ➢You distributor as you would connect a PC. Select ID input on the menu. Use the numeric buttons to enter the ID for PDP Display adjustment. You can operate the remote control only for the PDP Display that has been selected. For details about Multiple Display Control, refer to “Setting the MDC (Multiple Display Control)” on page 24. English - 10 BN68-01364C-01Eng_1001.indd 10 2007-10-01 오후 5:49:33 Connecting Speakers ➢Speakers are optional. You have to purchase the speakers additionally. 1 Remove the screws on the rear of the PDP Display. PPM50M7F 2 PPM63M7F Hang the two “T” shaped hangers on the square holes on the rear of the PDP Display. PPM50M7F 3 PPM63M7F Tighten the PDP Display and the speaker bracket using the screws removed from the PDP Display. PPM50M7F PPM63M7F moving your PDP Display, do NOT hold the speaker connected to your PDP Display. It may ➢When damage the bracket clamping the speaker and your PDP Display together and result in a drop of your PDP Display and a risk of personal damage and injury. English - 11 BN68-01364C-01Eng_1001.indd 11 2007-10-01 오후 5:49:36 Viewing the Menus 1 2 3 4 5 Press the MENU button. The main menu is displayed on the screen. Its left side has five icons: Picture, Sound, Function, Setup, and Input. Press the ▲ or ▼ button to select one of the icons. Press the ENTER button to access the icon’s sub-menu. Press the ▲ or ▼ button to move to items in the menu. Press the ENTER button to enter items in the menu. Press the ▲/▼/◄/► button to change the selected items. Press the RETURN button to return to the previous menu. Press the EXIT button to exit from the menu. Picture Mode :Dynamic Contrast Brightness Sharpness Color Tint G 50 R Color Tone :Cool1 Detailed Settings More Move Enter 100 45 75 55 50 Exit Freezing the Current Picture You can freeze the picture when watching a moving picture simply by pressing the “STILL” button. To return to normal viewing, press it again. PIP mode, Still function will be applied to the main and sub ➢Inpicture at the same time. Displaying the Setting Information can view the setting status you select by pressing the ➢You INFO button on the remote control. AV Picture Sound SRS TS XT −− : −− :Dynamic :Custom :Off English - 12 BN68-01364C-01Eng_1001.indd 12 2007-10-01 오후 5:49:37 Viewing an External Signal Sources You can switch between viewing signals from connected equipment, such as a VCR, DVD, Set-Top Box, and the PDP Display source. 1 2 3 4 Press the MENU button to display the menu. Press the ▲ or ▼ button to select Input, then press the ENTER button. Press the ENTER button again to select Source List. Press the ▲ or ▼ button to select the signal source, then press the ENTER button. Available signal sources: AV, S-Video, Component, PC1, PC2, DVI, HDMI Only the connected devices can be selected. Input Source List :AV Edit Name Move Enter Return Source List AV S-Video Component PC1 PC2 DVI HDMI ➢ Move :−−−− :−−−− :−−−− :−−−− :−−−− :−−−− :−−−− Enter Return can select these options simply by pressing the SOURCE ➢You button on the remote control. the INFO button on the remote control to see the current ➢Press input source. Editing Device Names You can give a name to the external source. 1 2 3 4 5 6 Press the MENU button to display the menu. Press the ▲ or ▼ button to select Input, then press the ENTER button. Press the ▲ or ▼ button to select Edit Name, then press the ENTER button. Press the ▲ or ▼ button to select the external source to be edited, then press the ENTER button. Select the required device by pressing ▲ or ▼, then press the ENTER button. Available device names: VCR, DVD, D-VHS, Cable STB, HD STB, Satellite STB, AV Receiver, DVD Receiver, Game, Camcorder, DVD Combo, DHR (DVD HDD Recorder), PC Press the EXIT button to exit. Input Source List :AV Edit Name Move Enter Return Edit Name AV S-Video Component PC1 PC2 DVI HDMI Move :−−−− −−−− :−−−− VCR :−−−− DVD :−−−−D-VHS :−−−− Cable STB :−−−−HD STB :−−−− Satellite STB ▼ Enter Return English - 13 BN68-01364C-01Eng_1001.indd 13 2007-10-01 오후 5:49:38 Changing the Picture Standard You can select the type of picture which best corresponds to your viewing requirements. 1 2 3 4 5 Picture Mode :Dynamic Contrast Brightness Sharpness Color Tint G 50 R Color Tone :Cool1 Detailed Settings More Press the MENU button to display the menu. Press the ENTER button to select Picture. Press the ENTER button again to select Mode. Select the required mode by pressing the ▲ or ▼ button, then press the ENTER button. Available modes: Dynamic, Standard, Movie The settings values may vary depending on the input source. (ex. Video, Component, PC, or HDMI) Press the EXIT button to exit. Move ➢ Enter 100 45 75 55 50 Return Picture Dynamic Mode :Dynamic Standard Contrast Movie Brightness Sharpness Color Tint G 50 R Color Tone :Cool1 Detailed Settings More Dynamic for viewing the PDP Display during the ➢ Choose day or when there is bright light in the room. Choose Standard for general PDP Display watching mode. Choose Movie when viewing the movie. Move Enter 100 45 75 55 50 Return can select these options simply by pressing the P.MODE ➢You button on the remote control. Customizing the Picture Settings Your PDP Display has several setting options that allow you to control the picture quality. 1 2 3 4 5 6 7 Press the MENU button to display the menu. Press the ENTER button to select Picture. Press the ENTER button again to select Mode. Select the required mode by pressing the ▲ or ▼ button, then press the ENTER button. Available modes: Dynamic, Standard, Movie Select the required option by pressing the ▲ or ▼ button, then press the ENTER button. When you are satisfied with your setting, press the ENTER button. Press the EXIT button to exit. Picture Mode :Dynamic Contrast Brightness Sharpness Color Tint G 50 R :Cool1 Color Tone Detailed Settings More Move Enter Contrast Contrast – Brightness – Sharpness – Color – Tint In AV, S-Video modes of the PAL system, you cannot use the Tint function. Contrast – Brightness – Color Tone : PC Mode Press the ◄ or ► button until you reach the optimal setting. Color Tone: Cool2/Cool1/Normal/Warm1/Warm2 When the picture mode is set to Dynamic or Standard, Warm1 and Warm2 cannot be selected. Reset: Cancel/OK Select OK. You can return to the factory defaults picture settings. The reset function is set for each picture mode and color tone. Move Return 100 Adjust Return Picture Mode :Dynamic Contrast Brightness Sharpness Color Tint G 50 Cool2 R Color Tone :Cool1 Cool1 Detailed Settings Normal Warm1 Warm2 More ➢ ➢ 100 45 75 55 50 Move Enter 100 45 75 55 50 Return ➢ English - 14 BN68-01364C-01Eng_1001.indd 14 2007-10-01 오후 5:49:39 Configuring Detailed Settings on the Picture You can set detail picture settings. 1 2 3 4 5 6 ➢ ➢ Picture Press the MENU button to display the menu. Press the ENTER button to select Picture. Press the ▲ or ▼ button to select Detailed Settings, then press the ENTER button. Select the required option by pressing the ▲ or ▼ button, then press the ENTER button. Available options: Black Adjust, Dynamic Contrast, Gamma, White Balance, My Color Control, Edge Enhancement, Color Space, xvYCC. When you are satisfied with your setting, press the ENTER button. Press the EXIT button to exit. When the picture mode is set to Movie or Standard, Detailed Settings can be selected. If DNIe is Off or Demo, the Detailed Settings cannot be selected when the Picture mode is in Standard mode. Mode :Movie Contrast80 Brightness 45 Sharpness 10 Color 53 Tint G 50 R 50 Color Tone :Warm2 Detailed Settings More Move Enter Return Detailed Settings Black Adjust :Off Dynamic Contrast :Off Gamma :0 White Balance My Color Control Edge Enhancement:Off Color Space :Auto xvYCC :Off Move Enter Return Black Adjust: Off/Low/Medium/High You can directly select the black level on the screen to adjust the screen depth. Dynamic Contrast: Off/Low/Medium/High You can adjust the screen contrast so that the optimal contrast is provided. Gamma: -3 ~ +3 You can adjust the middle brightness of pictures. Press the ◄ or ► button until you reach the optimal setting. White Balance: R-Offset/G-Offset/B-Offset/R-Gain/G-Gain/B-Gain/Reset You can adjust the color temperature for more natural picture colors. R-Offset/G-Offset/B-Offset/R-Gain/G-Gain/B-Gain: Changing the adjustment value will refresh the adjusted screen. Select the required option by pressing the ▲ or ▼ button, then press the ENTER button. Press the ◄ or ► button until you reach the optimal setting. Reset: The previously adjusted white balance will be reset to the factory defaults. My Color Control: Pink/Green/Blue/White/Reset This setting can be adjusted to suit your personal preferences. Pink/Green/Blue/White: Changing the adjustment value will refresh the adjusted screen. Select the required option by pressing the ▲ or ▼ button, then press the ENTER button. Press the ◄ or ► button until you reach the optimal setting. When running the My Color Control feature, the current picture is captured as a still image before being displayed on the screen. Reset: The previously adjusted colors will be reset to the factory defaults. Edge Enhancement: Off/On You can emphasize object boundaries. Color Space: Auto/Wide You can set the color reproduction space for the input signal to Auto or Wide. xvYCC: Off/On Setting the xvYCC mode to On increases detail and color space when watching movies from an external device (ie. DVD player) connected to the HDMI or Component IN jacks. You must set the Picture Mode to Movie to enjoy this feature. The xvYCC function works only in Component or HDMI mode. If xvYCC function is active, PIP cannot be selected. ➢ ➢ ➢ English - 15 BN68-01364C-01Eng_1001.indd 15 2007-10-01 오후 5:49:40 Selecting the Picture Size You can select the picture size which best corresponds to your viewing requirements. 1 2 3 4 Press the MENU button to display the menu. Press the ENTER button to select Picture. Press the ▲ or ▼ button to select Size, then press the ENTER button. Select the required option by pressing the ▲ or ▼ button, then press the ENTER button. Available options: 16 : 9, Wide Zoom, Zoom, 4 : 3, Just Scan 16 : 9: Sets the picture to 16:9 wide mode. Wide Zoom: Magnify the size of the picture more than 4:3. Move the screen up/down using the ▲ or ▼ button after selecting the by pressing the ► or ENTER button. Zoom: Magnify the size of the picture vertically on screen. 4 : 3: Sets the picture to 4:3 normal mode. Just Scan: Displays the input scenes as they are without any cutoff when HDMI 720p, 1080i, 1080p signals are input. With the HDMI Just Scan picture size, depending on the AV devices, the screen may be cut off or a specific appears on the screen. Press the EXIT button to exit. Picture More Size Digital NR Active Color DNIe Movie Plus Reset Move :4 : 3 :Off :On :On :On :OK Enter Return Size 16 : 9 Wide Zoom Zoom 4:3 Just Scan Move Enter Return ➢ 5 can change the picture size simply by pressing the P.SIZE button on the remote control. ➢You on the input source, the picture size options may vary. ➢Depending items available may differ depending on the selected mode. ➢The ➢PC and DVI modes, only 16:9, 4:3 modes can be selected. Positioning and Sizing the screen using Zoom Resizing the screen using the Zoom enables the positioning and sizing of the screen to up/down direction using the ▲ or ▼ button as well as the screen size. Move the screen up/down using the ▲ or ▼ button after selecting the by pressing the ◄ or ► button. Resize the screen vertically using the ▲ or ▼ button after selecting the by pressing the ◄ or ► button. English - 16 BN68-01364C-01Eng_1001.indd 16 2007-10-01 오후 5:49:41 Digital NR / Active Color / DNIe / Movie Plus 1 2 3 4 5 Press the MENU button to display the menu. Press the ENTER button to select Picture. Select the required option by pressing the ▲ or ▼ button, then press the ENTER button. Available options: Digital NR, Active Color, DNIe, Movie Plus When you are satisfied with your setting, press the ENTER button. Press the EXIT button to exit. Picture More Size Digital NR Active Color DNIe Movie Plus Reset Move :4 : 3 :Off :On :On :On :OK Enter Return Digital NR: Off/Low/Medium/High/Auto If the signal received by the PDP Display is weak, you can activate this feature to reduce any static and ghosting that may appear on the screen. Active Color: Off/On If you turn on this option, the colors of the sky and grass will be stronger and clearer for a more vivid on-screen picture. This function is not available in PC mode. This function is available in Dynamic mode. DNIe: Off/Demo/On This PDP Display includes the DNIe function so as to provide a high visual quality. If you set DNIe to on, you can view the screen with the DNIe feature activated. If you set the DNIe to Demo, you can view the applied DNIe and normal pictures on the screen, for demonstration purposes. Using this function, you can view the difference in the visual quality. DNIeTM (Digital Natural Image engine) This feature brings you more detailed image with 3D noise reduction, detail enhancement, contrast enhancement and white enhancement. New image compensation Algorithm gives brighter, clearer, more detailed image to you. DNIeTM technology will fit every signal into your eyes. This function is not available in PC mode. When the picture mode is set to Movie, DNIe cannot be selected. Movie Plus: Off/On You can view more natural skin and clear text even in fast moving scenes. This function is not supported in the Wide Zoom,Zoom and Just Scan mode. In Movie Plus, HDMI (1080p), PC, and DVI modes are deactivated. ➢ ➢ ➢ ➢ ➢ ➢ ➢ English - 17 BN68-01364C-01Eng_1001.indd 17 2007-10-01 오후 5:49:41 Sound Features 1 2 3 4 5 Press the MENU button to display the menu. Press the ▲ or ▼ button to select Sound, then press the ENTER button. Select the required option by pressing the ▲ or ▼ button, then press the ENTER button. Available options: Mode, Equalizer, SRS TS XT, Auto Volume, Internal Mute, Sound Select, Reset When you are satisfied with your setting, press the ENTER button. Press the EXIT button to exit. Sound Mode :Custom Equalizer SRS TS XT :Off Auto Volume :Off Internal Mute :Off Sound Select :Main Reset Move Enter Return < If Game Mode is On > Sound Mode: Standard/Music/Movie/Speech/Custom Mode :Custom You can select the type of special sound effect to be used Equalizer when watching a given broadcast. SRS TS XT :Off Auto Volume :Off Choose Standard for the PDP Display standard Internal Mute :Off factory settings. Sound Select :Main Choose Music when watching the music videos or Reset concerts. Choose Movie when watching movies. Move Enter Return Choose Speech when watching a show that is mostly dialog(i.e., news). Choose Custom to recall your personalized settings. You can select these options simply by pressing the S.MODE button on the remote control. Equalizer: Balance/100Hz/300Hz/1kHz/3kHz/10kHz The PDP Display has several settings which allow you to control Equalizer the sound quality. R/L Sound Balance Adjustment: To adjust the sound balance of the R/L speakers. R + + Bandwidth Adjustment(100Hz, 300Hz, 1kHz, 3kHz, 0 0 10kHz): To adjust the level of different bandwidth L frequencies. Balance 100Hz 300Hz 1kHz 3kHz 10kHz If you make any changes to these settings, the sound standard is automatically switched to Custom. Move Adjust Return SRS TS XT: Off/On TruSurround XT is a patented SRS technology that solves the problem of playing 5.1 multichannel content over two speakers. TruSurround delivers a compelling, virtual surround sound experience through any two-speaker playback system, including internal PDP Display speakers. It is fully compatible with all multichannel formats. TruSurround XT, SRS and Symbol are trademarks of SRS Labs, Inc. TruSurround XT technology is incorporated under license from SRS Labs, Inc. ➢ ➢ ➢ ➢ ➢ Continued... English - 18 BN68-01364C-01Eng_1001.indd 18 2007-10-01 오후 5:49:42 Auto Volume: Off/On Each broadcasting station has its own signal conditions, and so it is not easy to adjust the volume every time the channel is changed. This feature lets you automatically adjust the volume of the desired channel by lowering the sound output when the modulation signal is high or by raising the sound output when the modulation signal is low. Internal Mute: Off/On If you want to hear the sound through separate speakers, cancel the internal amplifier. The VOL +, VOL -, S.MODE, and MUTE buttons do not operate when the Internal Mute is set to On. Sound Select: Main/Sub When the PIP feature is activated, you can listen to the sound of the sub (PIP) picture. − Main: Used to listen to the sound of the main picture. − Sub: Used to listen to the sound of the sub picture. Reset If Game Mode is On (refer to page 27), the Reset Sound function is activated. Selecting the Reset function after setting the equalizer resets the equalizer setting to the factory defaults. ➢ English - 19 BN68-01364C-01Eng_1001.indd 19 2007-10-01 오후 5:49:42 Time Features 1 2 Press the MENU button to display the menu. Press the ▲ or ▼ button to select Setup, then press the ENTER button. Press the ▲ or ▼ button to select Time, then press the ENTER button. Select the required option by pressing the ▲ or ▼ button, then press the ENTER button. Available options: Clock Set, Sleep Timer, Timer1, Timer2, Timer3 When you are satisfied with your setting, press the ENTER button. Press the EXIT button to exit. 3 4 5 6 Setup Screen Burn Protection Language :English Time Game Mode :Off Blue Screen :Off Melody :Off PC Home Theatre PC :Off More Move Enter Return Time Clock Set Sleep Timer Timer1 Timer2 Timer3 :−− : −− :Off :Inactivated :Inactivated :Inactivated Clock Set You can set the PDP Display clock so that the current time is displayed when pressing the INFO button on the remote control. You must also set the time if you wish to use the automatic on or off timers. Move Enter Return − Press the ◄ or ► button to select Month, Day, Year, Hour, or Minute. Set these by pressing the ▲ or ▼ button. You can set the Month, Day, Year, Hour, and Minute directly by pressing the numeric buttons on the remote control. In the event of a power interruption or the set being turned off at the supply, the settings for the Clock will be lost. Sleep Timer You can select a time period of between 30 and 180 minutes after which the PDP Display automatically switches to standby mode. − Select the preset time interval (Off, 30, 60, 90, 120, 150, 180) for staying on by pressing the ▲ or ▼ button. Timer1 / Timer2 / Timer3 You can set the On/Off timers so that the PDP Display will switch on or off automatically at the time you select. You must set the clock first. − Press the ◄ or ► button to select the required item below. Press the ▲ or ▼ button to adjust to the setting satisfied. On Time : Select hour, minute, and No/Yes. (To activate timer with the setting satisfied, set to Yes.) Off Time : Select hour, minute, and No/Yes. (To activate timer with the setting satisfied, set to Yes.) Repeat : Select Once, Everyday, Mon - Fri, Mon - Sat, or Sat - Sun. Volume : Select the required volume level. Source : Select the required external device. You can set the hour, and minute directly by pressing the number buttons on the remote control. ➢ ➢ ☛ ➢ ☛ Auto Power Off When you set the timer “On”, the PDP Display will eventually turn off, if no controls are operated for 3 hours after the PDP Display was turned on by timer. This function is only available in timer “On” mode and prevents overheating, which may occur if a PDP Display is on for too long time. English - 20 BN68-01364C-01Eng_1001.indd 20 2007-10-01 오후 5:49:42 Language / Blue Screen / Melody / Energy Saving / HDMI Black Level 1 2 3 4 5 Press the MENU button to display the menu. Press the ▲ or ▼ button to select Setup, then press the ENTER button. Select the required option by pressing the ▲ or ▼ button, then press the ENTER button. When you are satisfied with your setting, press the ENTER button. Press the EXIT button to exit. Setup Screen Burn Protection Language :English Time Game Mode :Off Blue Screen :Off Melody :Off PC Home Theatre PC :Off More Move Enter Return Language It is variable depending on the model. When you start using the PDP Display for the first time, you must select the language which will be used for displaying menus and indications. Blue Screen: Off/On If no signal is being received or the signal is very weak, a blue screen automatically replaces the noisy picture background. If you wish to continue viewing the poor picture, you must set the Blue Screen to Off. Melody: Off/Low/Medium/High The PDP Display power on/off melody sound can be adjusted. Energy Saving: Off/Low/Medium/High This feature adjusts the screen brightness depending on the surrounding lighting conditions. - Off: Switches off the Energy Saving mode. - Low: Operates in standard mode regardless of the surrounding illumination. - Medium: Enters medium power saving mode regardless of the surrounding illumination. - High: Enters maximum power saving mode regardless of the surrounding illumination. HDMI Black Level: Normal/Low Using this function, you can adjust the image quality when the screen burn (appearance of black level, low contrast, low color, etc.) is encountered by the HDMI input for RGB limited range (16 to 235). This function is active only when the external input connects to HDMI(RGB signals). ➢ English - 21 BN68-01364C-01Eng_1001.indd 21 2007-10-01 오후 5:49:42 Setting the Panel Button Lock This feature allows you to lock the PDP Display panel buttons so that it cannot be operated via the PDP Display panel. It can, however, still be operated via the remote control. Only remote control can release the panel lock setting, so keep the remote control away from unauthorized users. 1 2 3 4 5 6 Press the MENU button to display the menu. Press the ▲ or ▼ button to select Function, then press the ENTER button. Press the ENTER button again to select Safety Lock. Press the ENTER button again to select Key Lock. Select Off or On by pressing the ▲ or ▼ button, then press the ENTER button. Press the EXIT button to exit. Function Safety Lock Multi Control Video Wall Fan :Off Move Enter Return Safety Lock Key Lock :Off IR Lock Change PIN Move Enter Return Setting the Remote Control Button Lock This feature allows you to lock the remote control so that it cannot be operated via the remote control. It can, however, still be operated via the PDP Display Panel buttons. 1 2 3 4 5 ➢ ➢ Press the MENU button to display the menu. Press the ▲ or ▼ button to select Function, then press the ENTER button. Press the ENTER button again to select Safety Lock. Press the ▲ or ▼ button to select IR Lock, then press the ENTER button. Press the EXIT button to exit. When IR Lock is set to On, you will not be able to use the remote control even if the remote control button is pressed. To cancel the Remote Control Button Lock, press “0000” using the numeric buttons on the remote control then, IR Lock : Off is display. If you press the remote control buttons too quickly, the inputs may not be recognized. Press the buttons at an interval of about 2 seconds. Function Safety Lock Multi Control Video Wall Fan :Off Move Enter Return Safety Lock Key Lock :Off IR Lock Change PIN Move Enter Return IR Lock : On English - 22 BN68-01364C-01Eng_1001.indd 22 2007-10-01 오후 5:49:43 Setting Up Your Personal ID Number This feature sets viewing restrictions and prevents unauthorized access to your PDP Display through the PIN (Personal Identification Number), which is a 4 digit number. 1 2 3 4 5 Press the MENU button to display the menu. Press the ▲ or ▼ button to select Function, then press the ENTER button. Press the ENTER button again to select Safety Lock. Press the ▲ or ▼ button to select Change PIN, then press the ENTER button. Press the number buttons to enter your current 4-digit pin number. The default pin number for a new PDP Display set is “0000”. Press the numeric buttons to enter your new 4-digit pin number. Re-enter your new pin number to confirm. Press the EXIT button to exit. If you forget the pin number, press the remote control buttons in the following sequence, which resets the pin to 0-0-0-0: MUTE, 1, 8, 6. Function Safety Lock Multi Control Video Wall Fan :Off 7 ➢ Enter Return Safety Lock Key Lock :Off IR Lock Change PIN ➢ 6 Move Move Enter Return Change PIN Enter PIN Enter New PIN 0..9 : Enter PIN Return Change PIN Enter PIN * Enter New PIN 0..9 : Enter PIN Return English - 23 BN68-01364C-01Eng_1001.indd 23 2007-10-01 오후 5:49:44 Setting the MDC (Multiple Display Control) This function enables you to easily control the connected PDP Displays on the PC by specifying IDs to connected PDP Displays. 1 2 3 4 5 6 ➢ ➢ ➢ Press the MENU button to display the menu. Press the ▲ or ▼ button to select Function, then press the ENTER button. Press the ▲ or ▼ button to select Multi Control, then press the ENTER button. Select the required option by pressing the ▲ or ▼ button, then press the ENTER button. Available options: ID Setup(00~99), ID Input When you are satisfied with your setting, press the ENTER button. Enter ID input number by using the numeric buttons. Select the ID setup number by using the numeric buttons. Press the EXIT button to exit. To operate the multi control function, PDP1 and PDP2 should be set in the ID Setup mode. When entering the ID Input number of PDP1 while the PDP Display is set in the ID Input mode, only PDP1 is switched to the Menu screen and you can operate the remote control. At this time, PDP2 doesn’t operate with the remote control and displays the standby mode of ID Input. For further details, refer to the MDC program guide. You can download the MDC program from the “www.samsung.com” download center. Function Safety Lock Multi Control Video Wall Fan :Off Move Enter Return Multi Control ID Setup ID Input :00 :-- Enter Return ➢ ➢ Move Multi Control ID Setup ID Input Move :00 00 :-- Enter Return Multi Control ID Setup ID Input :00 :-- -- 0..9 : Enter ID Input Number Return can select these options by simply pressing the MDC ➢You (Multiple Display Control) button on the remote control. English - 24 BN68-01364C-01Eng_1001.indd 24 2007-10-01 오후 5:49:44 Setting the Multiple Screen You can get various display effects with many PDPs. 1 2 3 4 5 6 Press the MENU button to display the menu. Press the ▲ or ▼ button to select Function, then press the ENTER button. Press the ▲ or ▼ button to select Video Wall, then press the ENTER button. Press the ENTER button again. Press the ▲ or ▼ button to select On, then press the ENTER button. Select the required option by pressing the ▲ or ▼ button, then press the ENTER button. Available options: Format(Full/Natural), Screen Divider Format: Full: This option displays divided images on multiple PDP Displays without missing parts as if only the viewable part of the separate PDP Displays were simply part of a large single PDP Display. Natural: This option displays divided images on multiple PDP Displays as if the separate PDP Displays were simply part of a large single PDP Display. Therefore there are missing parts on the edge of the PDP Displays. Screen Divider: 2x2, 3x3, 4x4, 5x1, or 1x5 7 Press the EXIT button to exit. The PIP function and Picture Size do not work during the Video Wall operation. The VESA Format input does not support the Video Wall function in DVI mode. ➢ ➢ Function Safety Lock Multi Control Video Wall Fan :Off Move Enter Return Video Wall Video Wall :Off Format :Full Screen Divider Move Enter Return Video Wall Video Wall :On Format :Full Full Screen Divider Natural Move Enter Return Screen Divider 2x2 3x3 4x4 5x1 1x5 Move 1 2 3 4 Enter Return English - 25 BN68-01364C-01Eng_1022.indd 25 2007-10-22 오전 9:17:03 Selecting the Fan Fans inside the PDP Display are used to lower the temperature of the tops and the front of the PDP Display. To reduce the noise of the fan, you may stop the fan by setting the Fan to “Off”. The temperature of the top and the front of the PDP Display may increase when you watch the PDP Display for a long period of time while the fan is stopped, but the PDP Display will operate normally. 1 2 3 4 5 ➢ ➢ ➢ Function Safety Lock Multi Control Video Wall Fan :Off Press the MENU button to display the menu. Move Press the ▲ or ▼ button to select Function, then press the ENTER button. Press the ▲ or ▼ button to select Fan, then press the ENTER button. Select Off or On by pressing the ▲ or ▼ button, then press the ENTER button. Press the EXIT button to exit. If your PDP Display is displayed vertically, the fan automatically works. The message Check Fan is displayed if there is a fan problem. Please use the fan when the temperature is over 35 degrees. Enter Return English - 26 BN68-01364C-01Eng_1001.indd 26 2007-10-01 오후 5:49:45 Using the Game Mode When connecting to a game console such as PlayStationTM or XboxTM, you can enjoy a more realistic gaming experience by selecting game menu. 1 2 3 4 5 Press the MENU button to display the menu. Press the ▲ or ▼ button to select Setup, then press the ENTER button. Press the ▲ or ▼ button to select Game Mode, then press the ENTER button. Select Off or On by pressing the ▲ or ▼ button, then press the ENTER button. Press the EXIT button to exit. on Game mode (Caution) ➢Restrictions To disconnect the game console and connect another ➢ Setup Screen Burn Protection Language :English Time Game Mode :Off Blue Screen :Off Melody :Off PC Home Theatre PC :Off More Move Enter Return AV Game Mode external device, set Game Mode to Off. If you display the PDP Display menu in Game Mode, the screen shakes slightly. The mark ( ) appears on the screen which means that Game Mode is On with the selected source. If Game Mode is On : Picture Mode is automatically changed to Standard and users cannot change the mode. Sound Mode in the Sound menu is deactivated. Adjust the sound using the equalizer. The Reset Sound function is activated. Selecting the Reset function after setting the equalizer resets the equalizer setting to the factory defaults. If the picture is poor when external device is connected to PDP Display, check if Game Mode is On. Set Game Mode to Off and connect external devices. ➢ English - 27 BN68-01364C-01Eng_1001.indd 27 2007-10-01 오후 5:49:45 Viewing the Picture in Picture (PIP) You can display a sub picture within the main picture of external A/V devices. In this way you can PDP Display the video input from any connected devices while monitoring other video inputs. 1 2 3 4 5 6 Press the MENU button to display the menu. Press the ▲ or ▼ button to select Setup, then press the ENTER button. Press the ▲ or ▼ button to select PIP, then press the ENTER button. Select the required option by pressing the ▲ or ▼ button, then press the ENTER button. Available options: PIP(Off/On), Position When you are satisfied with your setting, press the ENTER button. Press the EXIT button to exit. PIP: Off/On You can activate or deactivate the PIP function. Main picture Component HDMI PC DVI Setup More Energy Saving :Off HDMI Black Level:Low PIP Move Enter Return PIP PIP Position Move :On : Enter Return Sub picture AV can select these options simply by pressing the PIP ➢You button on the remote control. Position: / / / You can select a position of the sub-picture. English - 28 BN68-01364C-01Eng_1001.indd 28 2007-10-01 오후 5:49:46 Screen Burn Protection To reduce the possibility of screen burn, this unit is equipped with screen burn prevention technology. This technology enables you to set picture movement up/down (Vertical Line) and side to side (Horizontal Dot). The Time setting allows you to program the time between movement of the picture in minutes. 1 2 3 4 5 6 Press the MENU button to display the menu. Press the ▲ or ▼ button to select Setup, then press the ENTER button. Press the ENTER button again to select Screen Burn Protection. Select the required option by pressing the ▲ or ▼ button, then press the ENTER button. Available options: Pixel Shift, All White, Signal Pattern, Inverse, Timer, Side Gray When you are satisfied with your setting, press the ENTER button. Press the EXIT button to exit. Pixel Shift: Using this function, you can minutely move pixels on the PDP in horizontal or vertical direction to minimize after image on the screen. − Set Pixel Shift to On by pressing the ▲ or ▼ button, then press the ENTER button. − Select the required option by pressing the ▲ or ▼ button, then press the ENTER button. Available options: Horizontal Dot, Vertical Line, Time Optimum condition for pixel shift; ➢ PC Horizontal Dot Vertical Line Time (minute) 1 1 2 min Setup Screen Burn Protection Language :English Time Game Mode :Off Blue Screen :Off Melody :Off PC Home Theatre PC :Off More Move Enter Return Screen Burn Protection Pixel Shift All White Signal Pattern Inverse Timer Side Gray :Dark Move Enter Return Pixel Shift Pixel Shift Horizontal Dot Vertical Line Time Move :On :2 :2 :2 min Enter Return AV/S-Video/ Component/HDMI 2 2 2 min ➢The Pixel Shift value may differ depending on the monitor size (inches) and mode. All White: This function helps remove after images on the screen by changing the color of pixels to white. Use this function when there are remaining after images or symbols on the screen especially when you displayed a still image on the screen for a long time. Signal Pattern: This function helps remove after images on the screen by moving all the pixels on the PDP according to a pattern. Use this function when there are remaining after images or symbols on the screen especially when you displayed a still image on the screen for a long time. Inverse: This function removes after images on the screen when the PDP Display is remained on for proloned periods by converting RGB input signal into GBR. Compared to All White and Signal Pattern function, this function can reduce burn in when you watch PDP Display. Using the inverse function when you watch PDP Display can cause the color reversal on the screen. (ex. The colors in red line can be shown as the colors in green line on the screen.) Side Gray: When you watch PDP Display with the screen ratio of 4:3, the screen is prevented from any damage by adjusting the white balance on both extreme left and right sides. Dark: When you set the screen ratio to 4:3, it darkens the left and right sides. Light: When you set the screen ratio to 4:3, it brightens the left and right sides. Continued... English - 29 BN68-01364C-01Eng_1001.indd 29 2007-10-01 오후 5:49:46 remove after images on the screen, use either All White, Inverse or Signal Pattern function. ➢To Although both of the three functions remove after images on the screen, Signal Pattern is more effective. after image removal function has to be executed for a long time (approximately 1 hour) to ➢The effectively remove after images on the screen. If after image is not improved after the execution of the function, repeat the function again. ➢Press any button on the remote control to cancel this feature. Setting the Screen Burn Protection Timer You can set the timer for Screen Burn Protection (hours, minutes). If you start the operation to erase any residual image, the operation will be performed for the set period of time and then automatically finish. 1 2 3 4 5 6 7 Press the MENU button to display the menu. Press the ▲ or ▼ button to select Setup, then press the ENTER button. Press the ENTER button again to select Screen Burn Protection. Press the ▲ or ▼ button to select Timer, then press the ENTER button. Press the ENTER button again. Press the ▲ or ▼ button to select On, then press the ENTER button. Select the required option by pressing the ▲ or ▼ button, then press the ENTER button. Available options: Timer, Mode, Period, Time Setup Screen Burn Protection Language :English Time Game Mode :Off Blue Screen :Off Melody :Off PC Home Theatre PC :Off More Move Enter Return Screen Burn Protection Pixel Shift All White Signal Pattern Inverse Timer Side Gray :Dark Mode: All White, Signal Pattern, Inverse Period: Hour(1~24) Time: Min.(1~30) 8 Move Enter Return Timer Timer Mode Period Time Press the EXIT button to exit. Move :On :All White :1 Hour :30 min. Enter Return English - 30 BN68-01364C-01Eng_1001.indd 30 2007-10-01 오후 5:49:47 Setting up Your PC Software (Based on Windows XP) The Windows display-settings for a typical computer are shown below. But the actual screens on your PC will probably be different, depending upon your particular version of Windows and your particular video card. But even if your actual screens look different, the same, basic set-up information will apply in almost all cases. (If not, contact your computer manufacturer or Samsung Dealer.) 1 2 3 4 5 Right click the mouse on the Windows Desktop, then click on Properties. The Display Properties will be displayed. Click on Settings tab, then set the Display Mode with reference to the Display Modes Table. You do not need to change the colors settings. Click on Advanced. A new settings dialog box will be displayed. Click on the Monitor tab, then set the Screen refresh rate with reference to the Display Modes Table. Set the Vertical Frequency and Horizontal Frequency individually if you can do so instead of setting the Screen refresh rate. Click on OK to close the window, then Click on OK button to the Display Properties window. Automatic re-booting may commence at this moment. English - 31 BN68-01364C-01Eng_1001.indd 31 2007-10-01 오후 5:49:47 Display Modes Both screen position and size will vary depending on the type of PC monitor and its resolution. The resolutions in the table are recommended. (All resolutions between the supported limits are supported) D-Sub/DVI Input Resolution 640X350 720X400 640X480 640X480 640X480 640X480 800X600 800X600 800X600 800X600 1024X768 1024X768 1024x768 1024X768 1152X864 1280x960 1280x960 1280X1024 1280X1024 1280X1024 1280X1024 1600X1200 1920x1080P Horizontal Frequency (kHz) 31.5 31.5 31.5 37.9 37.5 43.3 37.9 48.1 46.9 53.7 48.4 56.5 60.0 68.7 67.5 60.0 75.1 64.0 74.6 78.0 91.1 75.0 67.5 Vertical Frequency (Hz) 70 70 60 72 75 85 60 72 75 85 60 70 75 85 75 60 75 60 70 75 85 60 60 PC DVI O O O O O O O O O O O O O O O O O O O O X O O O O O O O O O O O O O O O O X O X O X X O X O HDMI Input Resolution IBM 480p 576p 720p 1080i 1080p 640X480 720x480 720x576 1280x720 1280x720 1920x1080i 1920x1080i 1920x1080P 1920x1080P 1920x1080P 1920x1080P 1920x1080P Horizontal Frequency (kHz) 31.5 31.5 31.3 37.5 45.0 28.1 33.7 27.0 28.1 33.8 56.3 67.5 Vertical Frequency (Hz) 60 60 50 50 60 50 60 24 25 30 50 60 HDMI O O O O O O O O O O O O The interlace mode is not supported. The set might operate abnormally if a non-standard video format is selected. Separate and Composite modes are supported. SOG is not supported. HDMI is supported for DTV signals only. English - 32 BN68-01364C-01Eng_1022.indd 32 2007-10-22 오전 9:17:03 Setting the PC ➢ Preset to the PC mode by pressing the SOURCE button. 1 2 3 4 5 6 Press the MENU button to display the menu. Press the ▲ or ▼ button to select Setup, then press the ENTER button. Press the ▲ or ▼ button to select PC, then press the ENTER button. Select the required option by pressing the ▲ or ▼ button, then press the ENTER button. Available options: Image Lock, Position, Auto Adjustment, Image Reset, Zoom When you are satisfied with your setting, press the ENTER button. Press the EXIT button to exit. Setup Screen Burn Protection Language :English Time Game Mode :Off Blue Screen :Off Melody :Off PC Home Theatre PC :Off More Move Enter Return PC Image Lock Position Auto Adjustment Image Reset Zoom Image Lock: Coarse/Fine The purpose of picture quality adjustment is to remove or reduce picture noise. If the noise is not removed by Fine-tuning alone, then adjust Move Enter the frequency as best as possible (coarse) and Fine-tune Image Lock again. Coarse After the noise has been reduced, re-adjust the picture so that Fine it is aligned on the center of screen. 1 Press the ▲ or ▼ button to select Coarse or Fine, then press the ENTER button. 2 Press the ◄ or ► button to adjust the screen quality, vertical stripes may appear or the picture may be blurry. Press the ENTER button. Move Enter Position Adjust the PC’s screen positioning if it does not fit the PDP Position Display screen. 1 Adjust the position by pressing the ▲/▼/◄/► button. 2 Press the ENTER button. Auto Adjustment Auto adjustment allows the PC screen of set to self-adjust to the incoming PC video signal. The values of fine, coarse and position are adjusted automatically. Move Enter Image Reset You can replace all image settings with the factory default Auto Adjustment in Progress values. Please wait. Zoom: Zoom/Position/Reset - Zoom: 0 -1-2-3-4-5-6 Option 0 represents a normal screen. Image Reset is completed. The greater the number, the more magnified the Return screen. You can select the position and reset functions by selecting options 1 through 6. (If you select option 0, the position and reset functions are not selected.) If you have selected the Zoom function as between 1~6, you will not be able to select the Auto Adjustment function. - Position: You can adjust the position. - Reset: The previously adjusted settings will be reset to the factory defaults. Return 50 13 Return Return English - 33 BN68-01364C-01Eng_1001.indd 33 2007-10-01 오후 5:49:48 Setting the Home Theatre PC ➢ Preset to the PC mode by pressing the SOURCE button. Setup You can view higher quality pictures by configuring the screen settings in PC Mode. If you set the Home Theatre PC function to On, you can configure the Detailed Settings (when Picture Mode is set to Standard or Movie) as in PC Mode. Screen Burn Protection Language :English Time Game Mode :Off Blue Screen :Off Melody :Off PC Home Theatre PC :Off More 1 2 Press the MENU button to display the menu. Press the ▲ or ▼ button to select Setup, then press the Move ENTER button. 3 Press the ▲ or ▼ button to select Home Theatre PC, then press the ENTER button. 4 Select Off or On by pressing the ▲ or ▼ button, then press the ENTER button. 5 Press the EXIT button to exit. This function is available only in PC mode. Enter Return ➢ Wall Mount Kit Specifications (VESA) Install your wall mount on a solid wall perpendicular to the floor. When attaching to other building materials, please contact your nearest dealer. If installed on a ceiling or slanted wall, it may fall and result in severe personal injury. Product Family LCD-TV PDP-TV/MONITOR inch VESA Spec. (A * B) Standard Screw 23 ~ 26 200 * 100 M4 32 ~ 40 200 * 200 M6 46 ~ 52 600 * 400 57 700 * 400 (No VESA) 57 ~ 70 800 * 400 80 ~ 1400 * 800 42 ~ 58 600 * 400 70 800 * 400 63 No VESA 80 ~ 1400 * 800 Quantity 4 M8 4 M8 6 4 Continued... English - 34 BN68-01364C-01Eng_1001.indd 34 2007-10-01 오후 5:49:49 provided the standard dimensions for wall mount kits as shown in the table. ➢We purchasing our wall mount kit, a detailed installation manual and all parts necessary for ➢When assembly are provided. not use screws longer than the standard dimension, as they may cause damage to the inside of ➢Do the PDP Display set. wall mounts that do not comply with the VESA standard screw specifications, the length of the ➢For screws may differ depending on their specifications. not use screws that do not comply with the VESA standard screw specifications. ➢Do Do not use fasten the screws too strongly, this may damage the product or cause the product to fall, leading to personal injury. Samsung is not liable for these kinds of accidents. is not liable for product damage or personal injury when a non-VESA or non-specified wall ➢Samsung mount is used or the consumer fails to follow the product installation instructions. 57” and 63” models do not comply with VESA Specifications. Therefore, you should use our ➢Our dedicated wall mount kit for this model. ➢Do not exceed 15 degrees tilt when mounting this PDP Display. not install your Wall Mount Kit while your PDP Display is turned on. DIt omay result in personal injury due to electric shock. Using the Stand-Base or more people should carry the PDP. Never lay the ➢ Two PDP on the floor because of possible damage to the screen. Always keep the PDP upright. English - 35 BN68-01364C-01Eng_1001.indd 35 2007-10-01 오후 5:49:49 Troubleshooting Before contacting the Samsung after-sales service, perform the following simple checks. If you cannot solve the problem using the instructions below, note the model and serial number of the PDP Display and contact your local dealer. No sound or picture Check that the mains lead has been connected to a wall socket. Check that you have pressed the (Power) button (On/Off) on the front panel or press the ON button on the remote control. Check the picture contrast and brightness settings. Check the volume. Check if Internal Mute is set to On. Normal picture but no sound Check the volume. Check whether the volume MUTE button on the remote control has been pressed. No picture or black and white picture Adjust the Color settings. Sound and picture interference Try to identify the electrical appliance that is affecting the PDP Display, then move it further away. Plug the PDP Display into a different main socket. Remote control malfunctions Replace the remote control batteries. Clean the upper edge of the remote control (transmission window). Check that the “+” and “–” ends of the batteries are inserted correctly. Check that the batteries are drained. Screen is black and power indicator light blinks steadily On your computer check; Power, Signal Cable. The PDP Display is using its power management system. Move the computer’s mouse or press any key on the keyboard. On your equipment check (STB, DVD, etc) ; Power, Signal Cable. Press the Source button on the panel or remote control. Turn the PDP Display off and on. The damaged picture appears in the corner of the screen. If Just Scan is selected in some external devices, the damaged picture may appear in the corner of the screen. This symptom is caused by external devices, not PDP Display. English - 36 BN68-01364C-01Eng_1001.indd 36 2007-10-01 오후 5:49:49 Specifications Model Name Screen Size (Diagonal) PPM50M7F PPM63M7F 50 inch 63 inch PC Resolution 1920 x 1080 @ 60 Hz Sound (Output) 10 W + 10 W Dimension (WxHxD) Body With stand Weight Body With stand Environmental Considerations Operating Temperature Operating Humidity Storage Temperature Storage Humidity 1204.6 x 724.1 x 97.1 mm 1204.6 x 772.5 x 362.0 mm 1502.7 x 893.1 x 99.0 mm 1502.7 x 942.3 x 341.1 mm 43.5 kg 44.5 kg 63.9 kg 68.9 kg 10 °C to 40 °C (50 °F to 104 °F) 10% to 80%, non-condensing -20 °C to 45 °C (-4 °F to 113 °F) 5% to 95%, non-condensing ➢ This device is a Class B digital apparatus. Design and specifications are subject to change without prior notice. For the power supply and Power Consumption, refer to the label attached to the product. English - 37 BN68-01364C-01Eng_1001.indd 37 2007-10-01 오후 5:49:49 This page is intentionally left blank. BN68-01364C-01Eng_1001.indd 39 2007-10-01 오후 5:49:50 專業 PDP 顯示 (電漿顯示器) PPM50M7FB(CP50P7) PPM63M7FB(CP63P7) 使用手冊 在操作此機器前,請先徹底閱讀此手冊,並保留以供未來參考之用。 畫面選單 畫中畫 (PIP) 省電 SRS TruSurround XT 數位自然影像引擎 請前往 www.samsung.com/global/register 註冊您的產品 請在此記錄您的型號和序號,以供日後參考。 ˙機型 _______________ ˙序號 _______________ BN68-01364C-01TC_1016.indd 1 2007-10-16 오전 11:01:23 使用手冊 螢幕影像殘留 請勿在 PDP 電漿顯示器中顯示靜止影像(例如玩電視遊戲或將 PC 連接到此 PDP 顯示器時)超過 2 小 時,這可能導致畫面殘影現象。 影像殘留亦稱為「螢幕燒傷」。 要避免影像殘留,以降低螢幕在顯示靜止影像時的亮度與對比度。 高度 PDP 顯示器僅可在高度 2000 公尺下正常操作。 如果在超過 2000 公尺處操作,功能可能會不正常,因 此請勿在那樣的地方安裝與操作顯示器。 PDP 顯示器頂部高溫 電視機在長時間使用之後,頂部可能變得熱燙,這是由於電視機透過上部的通風孔從面板散熱所導致 的。 這是正常現象,並非表示產品有缺陷或操作失靈。 但是,應該避免讓兒童觸碰電視機的頂部。 產品發出「嗶剝」聲。 當產品因為周圍環境,如溫度和溼度的改變,而收縮或膨脹時,可能發出「嗶剝」的聲響。 這是正常 現象,並非品有缺陷。 圖格缺陷 PDP 顯示器使用包含了 1,230,000(SD 級)至 3,150,000(HD 級)像素的面板,該面板需要精密的技術 來生產。 但是,可能會有少許亮或暗的像素顯示在螢幕上。 這些像素對產品的效能並沒有影響。 避免在低於攝氏 5 度(華氏 41 度)的溫度下操作顯示器。 長時間顯示靜止影像可能造成 PDP 面板永久損壞。 長時間以 4 : 3 格式觀看 PDP 顯示器後,可能在畫面的左、右和中間留下邊框的痕 跡,這是由於畫面上的發光偏差所造成的。 播放 DVD 光碟或使用電視遊戲機也可能造成類似的結果。 由以上結果所造成的損壞均不包括在保固範圍之內。 畫面上的殘像。 當顯示電子遊戲和 PC 的靜止影像超過一段時間之後,畫面上可能生部分殘像。 若要避免這種情形發生,可在需要長時間顯示靜止影像時,調低畫面的「亮度」和「對比度」。 保固 - 因影像殘留而導致的所有損壞均不在保固範圍之內。 - 殘留影像不在保固範圍之內。 安裝 當要將 PDP 顯示器安裝於灰塵多、高溫或低溫、濕度高、有化學物質,以及要 24 小時操作的地方(例 如機場、火車站等處)時,請確實與授權服務中心聯繫。若不這麼做,可能會對您的 PDP 顯示器造成 嚴重損害。 在空氣不流通處安裝本產品,可能會縮短產品壽命。 © 2007 Samsung Electronics Co., Ltd. 保留所有權利。 中文 - BN68-01364C-00TC_1001.indd 2 2007-10-01 오후 5:52:10 目錄 一般資訊 PC 顯示器 使用手冊................................................................. 2 檢查部件................................................................. 4 控制面板 ................................................................ 5 連接面板................................................................. 6 檢視遙控器 ............................................................ 7 附錄 操作 設定您的 PC 軟體(在 Windows XP 下)........... 31 顯示器模式........................................................... 32 設定 PC.................................................................. 33 設定家庭劇院 PC.................................................. 34 開啟與關閉您的 PDP 顯示器................................ 8 垂直安裝顯示器..................................................... 9 使用電視牆與多顯示控制功能............................. 9 連接喇叭............................................................... 11 檢視選單............................................................... 12 使目前畫面靜止................................................... 12 顯示設定資訊....................................................... 12 檢視外部訊號來源............................................... 13 編輯裝置名稱....................................................... 13 壁掛套件規格 (VESA)........................................... 34 使用底座............................................................... 35 疑難排解............................................................... 36 規格....................................................................... 37 畫面控制 變更畫面標準....................................................... 14 自訂畫面設定值................................................... 14 設定畫面的詳細設定值....................................... 15 選擇畫面大小....................................................... 16 數位 NR/活動色彩/DNIe/Movie Plus..................... 17 聲音控制 聲音功能............................................................... 18 功能說明 時間功能............................................................... 20 語言/藍色畫面/旋律/省電/HDMI 黑色度............. 21 設定面板按鈕鎖定............................................... 22 設定遙控器按鈕鎖定........................................... 22 設定您的個人識別碼........................................... 23 設定 MDC(多顯示控制).................................. 24 設定多重畫面....................................................... 25 選擇風扇............................................................... 26 使用遊戲模式....................................................... 27 檢視畫中畫 (PIP).................................................. 28 畫面焦化保護....................................................... 29 設定畫面焦化保護定時器................................... 30 符號 按下 ☛ ➢ 重要 附註 中文 - BN68-01364C-00TC_1001.indd 3 2007-10-01 오후 5:52:10 檢查部件 使用手冊 遙控器/AAA 電池 電源線 底座 (2個) / 螺絲 (4個) PPM50M7FB 喇叭線磁鐵蕊 PC 連接線 保證卡/ 註冊卡/ (並非所有地區均有提供) 個別出售 S-Video 連接線 色差纜線 音訊纜線 HDMI/DVI 連接線 PC 音訊連接線 HDMI 連接線 視訊連接線 磁鐵蕊(電源線, 喇叭線) ➢ 磁鐵蕊用來防止纜線受到干擾。 連接纜線時,打開磁鐵蕊,並將它夾繞在纜線接近插頭處。 喇叭線 電源線 中文 - BN68-01364C-00TC_1001.indd 4 2007-10-01 오후 5:52:12 控制面板 前面板 ➢ 機型不同,產品顏色與形狀也可能不同。 SOURCE 顯示所有可用輸入來源的選單(AV、 S-Video、Component、PC1、PC2、DVI 與 HDMI)。 在畫面選單上,使用此按鈕就像使用遙控 器上的 ENTER 按鈕一樣。 ➢ MENU 按下此按鈕可查看顯示器功能的畫面選單。 - VOL + SEL 控制選單上的游標。 按下此按鈕可調高或調低音量。 在畫面選單上,使用 - VOL + 按鈕就像使用遙 控器上的 + 與 - 按鈕一樣。 (Power) 按鈕 按下此按鈕可開啟與關閉 PDP 顯示器電源。 電源指示燈 當電源開啟時會閃爍並熄滅,並於待機模式 時亮起。 遙控感應器 請將遙控器對準 PDP 顯示器上的此區域。 視機型而定,於待機模式時,您可使用 SEL 按鈕來開啟 PDP 顯示器。 - VOL + 與 SEL 按鈕的功能與 遙控器上的 ▲/▼/◄/►按鈕相同。 如果遙控器壞了,或您放在別處,可以 使用 PDP 顯示器面板上的控件。 ➢ ➢ ➢ 中文 - BN68-01364C-00TC_1002.indd 5 2007-10-02 오전 10:04:46 連接面板 背面板 2 3 4 5 6 7 8 9 10 11 1 1 PPM50M7FB PPM63M7FB 或 或 或 ➢ 機型不同,產品顏色與形狀也可能不同。 ☛ 當您將音訊或視訊系統連接至顯示器時,務必確認已將所有元件的電源關閉。 連接外部裝置時,請將連接端子與纜線同色處相接。 POWER IN 連接所提供的電源線。 EXT SPEAKER (8Ω) 連接外接式喇叭。 DVI/PC/HDMI AUDIO IN 將音訊輸出插孔連接至您的 PC, DVI 或 HDMI。 AUDIO 是用於 PC1 與 PC2 模式的音訊輸入 插孔。 ➢ DVI IN 連接至具有 DVI 輸出的裝置之視訊輸出插孔。 HDMI IN 連接到具有 HDMI 輸出的裝置之 HDMI 插孔。 - 此輸入亦可利用個別類比音訊輸入做為 DVI 連接。必須使用選用的 HDMI/DVI 纜線連接。 - 使用選用的 HDMI/DVI 轉接頭時,PDP 顯示器 上的 DVI 類比音訊輸入可讓您從 DVI 裝置接收 左右音訊。 PC IN1/PC OUT1 -P C IN1: 連接至 PC 上的視訊輸出插孔。 - PC OUT1: 連接至外部裝置上的視訊輸入插 孔。 PC IN2 (BNC) 連接 PC 的 RGB HV 視訊訊號輸入。 本頁以前的「PC 模式」表示使用 RGB1(PC1) 與 RGB2(PC2) 的 PC1/PC2 模 式。 ➢ RS-232C - IN: 用於連接其他 PDP 顯示器的 PC 或 RS-232C 輸出的 MDC 功能。 - OUT: 用 於連接其他 PDP 顯示器的 RS-232C 輸入的 MDC 功能。 如需有關連接的進一步詳情,請參閱第 10 頁。 ➢ COMPONENT IN 視訊(Y/PB/PR)和音訊(L/R)色差輸入。 AV (VIDEO/AUDIO L/R) - IN: 外接式裝置的視訊與音訊輸入,如攝錄放 影機或 VCR。 - OUT: 外接式裝置的輸出。 S-VIDEO IN 具有 S-Video 輸出的外接式裝置的視訊輸入, 如攝錄放影機或 VCR。 中文 - BN68-01364C-00TC_1001.indd 6 2007-10-01 오후 5:52:17 檢視遙控器 ➢ 遙控器的效能可能會受強光影響。 PDP 顯示器開啟 直接頻道選擇 不可用 調高音量 暫時靜音 降低音量 返回到上一選單 選單顯示 移至需要的選單選項/個別 調整選項值 畫面效果選擇 在 PC 模式中自動調整 PIP 功能: - PIP 啟用或停用 (PIP) - 選擇子畫面的位置 (POSITION) PDP 顯示關閉 畫面靜止 下一個頻道 外部輸入選擇 上一個頻道 資訊顯示 退出任何顯示 確認您的選擇(儲存或輸 入) 音效選擇 畫面大小 多顯示控制 畫面效果選擇(防止焦化) 續... 中文 - BN68-01364C-00TC_1001.indd 7 2007-10-01 오후 5:52:19 在遙控器中安裝電池 1 2 向下按下遙控器背面蓋上的符號 ( ) 然後用力推開來卸除。 安裝兩個 AAA 型號的電池。 請確定電池的「+」極與「-」極與電池座內的圖示相 符。 不要混用不同類型的電池,例如鹼性電池與錳電池。 3 對齊遙控器基部來裝回外蓋,並按下推回原來的位置。 如果您長時間不使用遙控器,請取出電池並將其存放在溫 度較低及乾燥的地方。 遙控器可在距離 PDP 顯示器大約 23 英呎的地方使用。 (PDP 顯示器正常使用下,電池可持續 使用大約一年。) 如果遙控器無法使用! 1. PDP 顯示器電源是否開啟? 2. 電池的陰陽極是否相反 3. 電池是否已沒電? 4. 是否有停電,或電源線已拔除? 5. 附近是否有特製的日光燈或霓虹燈? ➢ ➢ ➢ 開啟與關閉您的 PDP 顯示器 電源主線連接至 PDP 顯示器背面。 1 2 3 將電源主線插入適當的插孔。 ➢主電壓會標示於 PDP 顯示器背面,頻率是 50 或 60Hz。 按下 PDP 顯示器前面的 (電源)按鈕(開/關),或按下遙控器上的 ON 按鈕來開啟 PDP 顯示器。 若要關閉 PDP 顯示器,請按下 PDP 顯示器前面的 (電源)按鈕(開/關),或按下遙控器上的 OFF 按鈕。 中文 - BN68-01364C-00TC_1001.indd 8 2007-10-01 오후 5:52:19 垂直安裝顯示器 Samsung 對按照下圖所示之方向相反的方向來安裝之產品所造成的損壞不負責。 您可垂直安裝 PDP 顯示器。 在此例中,風扇會自動運轉。如果您想停止風扇,請水平放置 PDP 顯示器,然 後將 Function(功能)選單中的 Fan(風扇)設定為 Off(關閉)。 垂直安裝時,請單獨使用牆面安裝面板。且從前面觀賞時,必須使用左側的選單按鈕來放置 PDP 顯示器的 底座。 使用電視牆與多顯示控制功能 1 2 將 PDP 顯示器相近地放置在一起前,請先建立每個 PDP 顯示器的 ID。操作彼此安裝得太相近之 PDP 的 遙控器時,可能會很難建立 ID。. 2x2 電視牆功能範例 如需有關「電視牆」設定和操作的詳細資訊,請參閱 第 25 頁的「設定多畫面」。 續... 中文 - BN68-01364C-00TC_1001.indd 9 2007-10-01 오후 5:52:20 2x2 電視牆連接範例 PDP 顯示器背面 分配器 Y/PB/PR L/R DVD PDP 顯示器背面 使用色差視訊與音訊纜線將分配器的 Component IN 連接埠與裝置上的 Component OUT 連接埠連接起來,該裝置必須支援色差 介面 (例如 DVD 播放器)。 使用色差視訊與音訊纜線將每個 PDP 後面 板上的 Component IN 連接埠與分配器的 Component OUT 連接埠連接起來。 (一個分 配器有多個 Component OUT 連接埠。) 多顯示控制連接範例 Composite(視訊), ➢您可連接沒有分配器的 就像連接 PC 一樣。 選擇選單上的 ID 輸入。 使用數字按鈕來輸入 ID 以調整 PDP 顯示器。 您可使用遙控器來僅 操作所選的 PDP 顯示器。 如需有關「多顯示控制」的詳細資訊,請參閱 第 24 頁上的「設定 MDC(多顯示控制)」。 中文 - 10 BN68-01364C-00TC_1001.indd 10 2007-10-01 오후 5:52:29 連接喇叭 ➢喇叭是選用的。 您必須另外購買喇叭。 1 拆下 PDP 顯示器背面的螺絲。 PPM50M7FB 2 PPM63M7FB 將兩個「T」形掛鉤鉤在 PDP 顯示器背面的方形孔中。 PPM50M7FB 3 PPM63M7FB 使用從 PDP 顯示器拆下的螺絲扭緊 PDP 顯示器與喇叭扥架。 PPM50M7FB PPM63M7FB PDP 顯示器時,請勿握住連接到 PDP 顯示器的喇叭。 這可能會損壞將喇叭與 PDP 顯示器緊夾 ➢在移動 在一起的扥架,導致 PDP 顯示器掉落而造成人員受傷。 中文 - 11 BN68-01364C-00TC_1001.indd 11 2007-10-01 오후 5:52:32 檢視選單 1 2 3 4 5 按下 MENU 按鈕。 畫面上會顯示主選單。 在畫面的左側有五個圖示: Picture(畫面)、Sound(聲 音)、Function(功能)、Setup(設定)與 Input(輸 入)。 按下 或 按鈕來選取其中一個圖示。 按下 ENTER 按鈕以存取圖示的子選單。 按下 或 按鈕,以在選單項目中移動。 按下 ENTER 按鈕以進入選單中的項目。 按下 /// 按鈕來變更所選的項目。 按下 RETURN 按鈕返回上一個選單。 按下 EXIT 按鈕退出選單。 Picture Mode :Dynamic Contrast 100 Brightness 45 Sharpness 75 Color 55 Tint G 50 R 50 Color Tone :Cool1 Detailed Settings More Move Enter Exit 使目前畫面靜止 只要按下 STILL(靜止)按鈕,就可以在觀賞影片時使畫面靜止。 要恢復正常觀賞的狀態,請再按一下。 ➢在 PIP 模式中,可同時在主畫面和子畫面應用靜止功能。 顯示設定資訊 ➢您可按下遙控器上的 INFO(顯示)按鈕檢視所選的設定狀態。 AV Picture Sound SRS TS XT −− : −− :Dynamic :Custom :Off 中文 - 12 BN68-01364C-00TC_1001.indd 12 2007-10-01 오후 5:52:34 檢視外部訊號來源 您可切換已連接設備(例如 VCR、DVD、機上盒與 PDP 顯示來源) 的檢視訊號。 1 2 3 4 按下 MENU 按鈕以顯示選單。 按下 或 按鈕以選擇 Input(輸入),然後按下 ENTER 按 鈕。 再次按下 ENTER 按鈕以選擇 Source List(來源清單)。 按下 或 按鈕以選擇訊號來源,然後按下 ENTER 按鈕。 可用的訊號來源:AV, S-Video, Component, PC1, PC2, DVI, HDMI 僅可選擇已連接的裝置。 Input Source List Edit Name Enter Return Source List ➢ 只要按下遙控器上的 SOURCE(來源) 按鈕,就可以選擇這 ➢ 些選項。 Move :AV AV S-Video Component PC1 PC2 DVI HDMI Move :−−−− :−−−− :−−−− :−−−− :−−−− :−−−− :−−−− Enter Return ➢按下遙控器上的 INFO(顯示)按鈕,查看目前的輸入來源。 編輯裝置名稱 您可命名外部來源。 1 2 3 4 5 6 Input 按下 MENU 按鈕以顯示選單。 按下 或 按下鈕以選擇 Input(輸入),然後按下 ENTER 按鈕。 按下 或 按鈕以選擇 Edit Name(編輯名稱),然後按下 ENTER 按鈕。 按下 或 按鈕以選擇要編輯的外部來源,然後按下 ENTER 按鈕。 按下 或 來選擇需要的裝置,然後按下 ENTER 按鈕。 可用的裝置名稱: VCR, DVD, D-VHS, Cable STB, HD STB, Satellite STB, AV Receiver, DVD Receiver, Game, Camcorder, DVD Combo, DHR (DVD HDD Recorder), PC 按下 EXIT(結束)按鈕結束選單。 Source List Edit Name Move :AV Enter Return Edit Name AV S-Video Component PC1 PC2 DVI HDMI Move :−−−−−−−− :−−−−VCR :−−−−DVD :−−−− D-VHS :−−−− Cable STB :−−−− HD STB :−−−− Satellite STB ▼ Enter Return 中文 - 13 BN68-01364C-00TC_1001.indd 13 2007-10-01 오후 5:52:35 變更畫面標準 您可以選擇最符合觀賞需求的畫面類型。 1 2 3 4 Picture Mode :Dynamic Contrast 100 Brightness 45 Sharpness 75 Color 55 Tint G 50 R 50 Color Tone :Cool1 Detailed Settings More 按下 MENU 按鈕以顯示選單。 按下 ENTER 按鈕以選擇 Picture(畫面)。 再次按下 ENTER 按鈕以選擇 Mode(模式)。 按下 或 按鈕以選擇需要的模式,然後按下 ENTER 按 鈕。 可用的模式:Dynamic(動態), Standard(標準), Movie (電影) 視輸入來源而定,設定值會有所不同。 (例如:視訊、色 差、PC 或 HDMI) 按下 EXIT 按鈕退出。 5 Move ➢ Enter Return Picture Dynamic Mode :Dynamic Contrast Standard 100 Movie 45 Brightness Sharpness 75 Color 55 Tint G 50 R 50 Color Tone :Cool1 Detailed Settings More Dynamic(動態)來觀 ➢ 在白天或屋內燈光明亮時,請選擇 看 PDP 顯示器 。 選擇 Standard(標準)以使用一般 PDP 顯示器觀賞模式。 在觀賞電影時,選擇 Movie(電影)。 Move Enter Return ➢只要按下遙控器上的 P.MODE 按鈕,就可以選擇這些選項。 自訂畫面設定值 您的 PDP 顯示器有幾種可讓您控制畫面品質的設定選項。 1 2 3 4 5 6 7 按下 MENU 按鈕以顯示選單。 按下 ENTER 按鈕以選擇 Picture(畫面)。 再次按下 ENTER 按鈕以選擇 Mode(模式)。 按下 或 以選擇需要的模式,然後按下 ENTER 按鈕。 可用的模式:Dynamic(動態), Standard(標準), Movie (電影) 按下 或 按鈕來選擇需要的選項,然後按下 ENTER 按鈕。 當您對所選的設定滿意時,按下 ENTER 按鈕。 按下 EXIT 按鈕退出。 Contrast(對比度)–Brightness(亮度)–Sharpness(清 晰度)–Color(色彩)–Tint(色調) PAL 系統下, 在 AV 和 S-Video 模式無法選取 Tint(色調)。 Contrast(對比度)–Brightness(亮度)–Color Tone(色 調): PC 模式 按下 或 按鈕直到達到最佳設定為止。 Color Tone(色調): Cool2(冷色2)/Cool1(冷色1)/ Normal(正常)/Warm1(暖色1)/Warm2(暖色1) 影像模式設為 Dynamic(動態)或 Standard(標準)時, 無法選取 Warm1(暖色1)和 Warm2(暖色2)。 Reset(重設): Cancel/OK 選擇 OK(確定)。 您可恢復畫面的原廠設定值。 可在每個畫面模式與色調中,使用重設功能來設定。 Picture Mode :Dynamic Contrast 100 Brightness 45 Sharpness 75 Color 55 Tint G 50 R 50 :Cool1 Color Tone Detailed Settings More Enter Contrast Move Return 100 Adjust Return Picture Mode :Dynamic Contrast 100 Brightness 45 Sharpness 75 Color 55 Tint G 50 Cool2 R 50 Color Tone :Cool1 Cool1 Detailed Settings Normal Warm1 Warm2 More ➢ ➢ Move Move Enter Return ➢ 中文 - 14 BN68-01364C-00TC_1001.indd 14 2007-10-01 오후 5:52:36 設定畫面的詳細設定值 您可以調整詳細的畫面設定。 1 2 3 4 5 6 ➢ ➢ Picture 按下 MENU 按鈕以顯示選單。 按下 ENTER 按鈕以選擇 Picture(畫面)。 按下 或 按鈕以選擇 Detailed Settings(詳細設定), 然後按下 ENTER 按鈕。 按下 或 按鈕來選擇需要的選項,然後按下 ENTER 按 鈕。 可用的選項:Black Adjust, Dynamic Contrast, Gamma, White Balance, My Color Control, Edge Enhancement, Color Space, xvYCC. 當您對所選的設定滿意時,按下 ENTER 按鈕。 按下 EXIT 按鈕退出。. 影像模式設為 Movie(電影)或 Standard(標準)時,可以選 取 Detailed Settings(詳細設定)。 如果 DNIe 是 Off(關閉)或 Demo(示範),則當 Picture (畫面)模式是 Standard(標準)模式時,將無法選擇 Detailed Settings(詳細設定)。 Mode :Movie Contrast 80 Brightness 45 Sharpness 10 Color 53 Tint G 50 R 50 Color Tone :Warm2 Detailed Settings More Move Enter Return Detailed Settings Black Adjust :Off Dynamic Contrast :Off Gamma :0 White Balance My Color Control Edge Enhancement:Off Color Space :Auto xvYCC :Off Move Enter Return Black Adjust: Off/Low/Medium/High 您可以直接在螢幕上選取黑色度,藉以調整畫面深度。 Dynamic Contrast: Off/Low/Medium/High 您可以調整螢幕對比度,以獲得最佳對比度。 Gamma: -3 ~ +3 您可以調整畫面的中級亮度。 按下 或 按鈕直到達到最佳設定為止。 White Balance: R-Offset/G-Offset/B-Offset/R-Gain/G-Gain/B-Gain/Reset 您可以調整色溫,藉以獲得較自然的畫面色彩。 R-Offset/G-Offset/B-Offset/R-Gain/G-Gain/B-Gain: 變更調整值將會更新已調整的螢幕。 按下 或 按鈕來選擇需要的選項,然後按下 ENTER 按鈕。 按下 或 按鈕直到達到最佳設定為止。 Reset: 先前調整的白平衡將重設回出廠預設值。 My Color Control: Pink/Green/Blue/White/Reset 您可以調整此設定值以配合個人喜好。 Pink/Green/Blue/White: 變更調整值將會更新已調整的螢幕。 按下 或 來選擇需要的選項,然後按下 ENTER 按鈕。 按下 或 按鈕直到達到最佳設定為止。 執行 My Color Control(我的色彩控制)功能時,會擷取目前的畫面做為顯示於螢幕前的靜止影 像。 Reset: 先前調整的色彩將重設回出廠預設值。 Edge Enhancement: Off/On 您可強調物件邊緣。 Color Space: Auto/Wide 可將色彩再製空間的輸入訊號設定為 Auto(自動)或 Wide(寬)。 xvYCC: Off/On 當從連接至 HDMI 或 Component In 插孔的外部裝置(例如 DVD 播放器)觀賞電影時, 可將 xvYCC 模式 設定為 On(開啟)以增加細節與色彩空間。您必須將 Picture Mode(畫面模式)設定為 Movie(電 影)才能體驗此功能。 僅可在 Component(色差)或 HDMI 模式中使用 xvYCC 功能。 如果正在使用 xvYCC 功能,就無法選擇 PIP。 ➢ ➢ ➢ 中文 - 15 BN68-01364C-00TC_1001.indd 15 2007-10-01 오후 5:52:37 選擇畫面大小 您可以選擇最符合觀賞需求的畫面大小。 1 2 3 4 Picture 按下 MENU 按鈕以顯示選單。 按下 ENTER 按鈕以選擇 Picture(畫面)。 按下 或 按鈕以選擇 Size(大小),然後按下 ENTER 按 鈕。 按下 或 來選擇需要的選項,然後按下 ENTER 按鈕。 可用的選項:16 : 9, Wide Zoom, Zoom, 4 : 3, Just Scan (精確掃瞄) 16 : 9: 將畫面設定為 16:9 寬模式。 Wide Zoom: 將畫面大小放大至比 4:3 還大。在按下 或 ENTER 按鈕來選擇 後,使用 或 按鈕上下移動螢 幕。 Zoom(縮放): 垂直放大螢幕上畫面的大小。 4 : 3: 將畫面設定爲 4:3 的正常模式。 Just Scan(精確掃瞄): 輸入 HDMI 720p、1080i、1080p 訊號時,顯示原始輸入景象而沒有任何失真。 視 AV 裝置而定,使用 HDMI Just Scan(精確掃瞄)畫面大 小,可能會截斷畫面或螢幕上會顯示特定的畫面。 按下 EXIT 按鈕退出。 ➢ 5 More Size Digital NR Active Color DNIe Movie Plus Reset Move :4 : 3 :Off :On :On :On :OK Enter Return Size 16 : 9 Wide Zoom Zoom 4:3 Just Scan Move Enter Return P.SIZE 按鈕就可以變更畫面大小。 ➢只要按下遙控器上的 ➢視輸入來源而定,畫面大小選項可能會不同。 ➢視所選的模式而定,可用的項目可能會不同。 ➢在 PC 與 DVI 模式下,僅可選擇 16:9,4:3 模式。 利用 Zoom(縮放)調整畫面的位置或大小 利用 Zoom(縮放)來重新調整畫面大小,就可以使用 或 按鈕上下調整畫面的位置及大小。 按下 或 按鈕選擇 之後,再利用 或 按鈕來上下移動畫面。 按下 或 按鈕選擇 之後,再利用 或 按鈕來垂直調整畫面大小。 中文 - 16 BN68-01364C-00TC_1001.indd 16 2007-10-01 오후 5:52:38 Digital NR(數位 NR)/Active Color (活動色彩)/DNIe/Movie Plus 1 2 3 4 5 按下 MENU 按鈕以顯示選單。 按下 ENTER 按鈕以選擇 Picture(畫面)。 按下 或 來選擇需要的選項,然後按下 ENTER 按鈕。 可用的選項: Digital NR (數位 NR), Active Color (活動色彩), DNIe, Movie Plus 當您對所選的設定滿意時,按下 ENTER 按鈕。 按下 EXIT 按鈕退出。 Picture More Size Digital NR Active Color DNIe Movie Plus Reset :4 : 3 :Off :On :On :On :OK Move Enter Return Digital NR (數位 NR) : Off/Low/Medium/High/Auto 如果 PDP 顯示器所收到的訊號微弱,您可啟用此功能來降低可 能顯示於畫面中的任何靜電與疊影。 Active Color (活動色彩) : Off/On 開啟這個選項時,天空和草地的色彩就會比較強烈、比較鮮豔,使畫面影像更為生動。 在 PC 模式中無法使用此功能。 此功能適用於 Dynamic(動態)模式。 DNIe: Off/Demo/On 本 PDP 顯示器包含 DNIe 功能,因此能提供極高的視覺品質。如果您將 DNIe 設定為開啟,可啟用 DNIe 功能來檢視畫面。如果您將 DNIe 設定爲 Demo(示範),便可以示範為目的,在畫面上觀賞套用 DNIe 且正常的畫面。 利用此功能,您就可感受視覺品質的差異。 DNIeTM (Digital Natural Image engine) 此功能提供更詳細的 3D 影像,該影像雜訊降低,加強了細節、對比與白色部位。. 新的影像補償 演算法為您提供更明亮、清晰與詳細的影像。 DNIeTM 技術可讓您收看到每一個訊號所傳達的影 像。 在 PC 模式中無法使用此功能。 將畫面模式設定為 Movie(電影)時,無法選擇 DNIe。 Movie Plus: Off/On 即使是快動作的場景,您也可以收看到自然的膚色與清晰的文字。 在 Wide Zoom(橫向縮放)、Zoom(縮放)與 Just Scan(精確掃瞄)模式中,不支援此功能。 在 Movie Plus 中,HDMI (1080p)、PC 以及 DVI 模式都停用。 ➢ ➢ ➢ ➢ ➢ ➢ ➢ 中文 - 17 BN68-01364C-00TC_1001.indd 17 2007-10-01 오후 5:52:38 聲音功能 1 2 3 4 5 按下 MENU 按鈕以顯示選單。 按下 或 按鈕以選擇 Sound(聲音),然後按下 ENTER 按 鈕。 按下 或 來選擇需要的選項,然後按下 ENTER 按鈕。 可用的選項:Mode(模式), Equalizer( 等化器), SRS TS XT, Auto Volume(自動音量), Internal Mute(內部靜音), Sound Select(重設聲音), Reset(重設) 當您對所選的設定滿意時,按下 ENTER 按鈕。 按下 EXIT 按鈕退出。 Sound Mode Equalizer SRS TS XT Auto Volume Internal Mute Sound Select Reset Move :Custom :Off :Off :Off :Main Enter Return < 如果 Game Mode(遊戲模式)已開啟 > Sound Mode(模式): Standard(標準)/Music(音樂)/Movie Mode :Custom (電影)/Speech(演講)/Custom(自訂) Equalizer 您可選擇收看指定轉播時使用的特殊音效類型。 SRS TS XT :Off Auto Volume :Off 選擇 Standard(標準)以使用 PDP 顯示器標準的原廠 Internal Mute :Off 預設值。 Sound Select :Main 在觀看音樂影片或音樂會時,請選擇 Music(音樂)。 Reset 觀賞電影時,請選擇 Movie(電影)。 觀賞大部分內容為對話的節目(例如新聞節目)時, 請 Move Enter Return 選擇 Speech(演講)。 要恢復個人設定值,請選擇 Custom(自訂)。 只要按下遙控器上的 S.MODE 按鈕,就可以選擇這些選 項。 Equalizer( 等化器): Balance/100Hz/300Hz/1kHz/3kHz/ 10kHz PDP 顯示器有某些可讓您控制音質的設定。 Equalizer R/L Sound Balance Adjustment(左/右聲道平衡調 整): 調整右/左喇叭的聲音平衡。 R + + Bandwidth Adjustment(頻寬調整)(100Hz、 0 0 300Hz、1kHz、3kHz、10kHz): 調整不同等級的頻 L 寬頻率。 Balance 100Hz 300Hz 1kHz 3kHz 10kHz 如果您變更這些設定值,聲音標準將自動切換為 Custom (自訂)。 Adjust Return Move SRS TS XT: Off/On TruSurround XT 是一種 SRS 專利技術,能夠處理透過兩個喇叭 播放 5.1 多聲道內容的問題。 TruSurround(純真環繞音效)能透過所有的雙喇叭播放系統,包括內建的 PDP 顯 示器喇叭,傳遞超傳真虛擬環繞音效。 它與所有多聲道格式完全相容。 TruSurround XT、SRS 與 標誌是 SRS Labs, Inc 的商標。 TruSurround XT 技術係經 SRS Labs, Inc 授權採用。 ➢ ➢ ➢ ➢ ➢ 續... 中文 - 18 BN68-01364C-00TC_1001.indd 18 2007-10-01 오후 5:52:39 Auto Volume(自動音量): Off/On 每個廣播電台有其本身的訊號條件,因此,在每次變更頻道時,您無法輕易地調整音量。 當音量調節 訊號很高時,此功能可讓您降低輸出的音量;或是當音量調節訊號很低時,此功能可讓您提高輸出的 音量,來自動調整想收看之頻道的音量。 Internal Mute(內部靜音): Off/On 如果您想透過另外的喇叭來聽聲音,請取消使用內部放大器。 VOL+、VOL -、S.MODE 和 MUTE 按鈕在 Internal Mute(內部靜音)設定為 On(開啟)時無法 運作。 Sound Select(重設聲音): Main/Sub PIP (子母畫面) 功能啟動時,您可以聆聽子畫面的聲音 (PIP)。 - Main(主畫面): 您可以聆聽主畫面的聲音。 - Sub(子畫面): 用來聆聽子畫面的聲音。 Reset(重設) 如果將 Game Mode(遊戲模式)設定為 On(開啟)(請參閱第 27 頁),則會啟用 Reset Sound(重設 聲音)功能。 在設定完等化器後選擇 Reset(重設)功能,會將等化器設定值重設回原廠預設值。 ➢ 中文 - 19 BN68-01364C-00TC_1001.indd 19 2007-10-01 오후 5:52:39 時間功能 1 2 3 4 5 6 按下 MENU 按鈕以顯示選單。 按下 或 按鈕以選擇 Setup(設定),然後按下 ENTER 按鈕。 按下 或 按鈕以選擇 Time(時間),然後按下 ENTER 按 鈕。 按下 或 來選擇需要的選項,然後按下 ENTER 按鈕。 可用的選項: Clock Set(設定時鐘), Sleep Timer(休眠定 時器), Timer1(定時器1), Timer2(定時器2), Timer3 (定時器3) 當您對所選的設定滿意時,按下 ENTER 按鈕。 按下 EXIT 按鈕退出。 Setup Screen Burn Protection Language :English Time Game Mode :Off Blue Screen :Off Melody :Off PC Home Theatre PC :Off More Move Enter Return Time Clock Set Sleep Timer Timer1 Timer2 Timer3 :−− : −− :Off :Inactivated :Inactivated :Inactivated Clock Set(設定時鐘) 您可設定 PDP 顯示器時鐘,這樣當按下遙控器上的 INFO 按鈕 時,就會顯示目前時間。 如果您想使用自動開關定時器,則也 必須設定時間。 - 按下 或 按鈕來選擇 Month(月)、Day(日)、 Year(年)、Hour(小時)、Minute(分鐘)或 am/ Move Enter Return pm(上午/下午)。 按下 或 按鈕來設定這些內容。 您可以按遙控器上的數字按鈕,直接設定 Month(月)、Day(日)、Year(年)、Hour(小 時)和 Minute(分鐘)。 發生斷電情況,或有電源關閉設定,則會遺失 Clock(時鐘)的設定。 Sleep Timer(休眠定時器) 您可為 PDP 顯示器選擇自動切換為待機模式的時間間隔,可選擇的時間是 30 到 180 分鐘。 - 按下 或 按鈕,選擇保持開啟的預設時間間隔(Off(關閉)、30、60、90、120、150、 180)。 Timer1(定時器1)/ Timer2(定時器2)/ Timer3(定時器3) 您可設定 On/Off(開/關)定時器,這樣 PDP 顯示器就會在您所選的時間到時,自動開關。 您必須先設定時鐘。 - 按下 或 按鈕來選擇下列的必要項目。 按下 或 按鈕來調整至滿意的設定。 On Time : 選擇小時、分鐘 與 No/Yes(是/否)。 (若要啟用已調整至滿意設定的定時器,請設定 為 Yes(是)。) Off Time : 選擇小時、分鐘 與 No/Yes(是/否)。 (若要啟用已調整至滿意設定的定時器,請設定 為 Yes(是)。) Repeat : 選取 Once(一次)、Everyday(每日)、Mon-Sat(星期一 - 星期六)或 Sat-Sun (星期六 – 星期日)。 Volume : 選擇需要的音量高低。 Source : 選擇需要的外部裝置。 您可以按下遙控器上的數字按鈕來直接設定小時與分鐘。 ➢ ➢ ☛ ➢ Power Off(自動關閉電源) ☛Auto 當您將計時器設定爲「On」(開啟)時,在計時器開啟 PDP 顯示器電源後的 3 個小時內,若未做任何 操作,PDP 顯示器就會自動關閉。 僅有在定時器是「On」(開啟)模式時,才能使用此功能,且此功 能可防止過熱,如果 PDP 顯示器開啟時間過長就可能發生過熱。 中文 - 20 BN68-01364C-00TC_1001.indd 20 2007-10-01 오후 5:52:39 語言/藍色畫面/旋律/省電/HDMI 黑色度 1 2 3 4 5 按下 MENU 按鈕以顯示選單。 按下 或 按鈕以選擇 Setup(設定),然後按下 ENTER 按 鈕。 按下 或 來選擇需要的選項,然後按下 ENTER 按鈕。 當您對所選的設定滿意時,按下 ENTER 按鈕。 按下 EXIT 按鈕退出。 Language(語言) 視機型而定,設定方式可能不同。 當您初次開始使用 PDP 顯示 器時,必須選擇用於顯示選單與指示的語言。 Setup Screen Burn Protection Language :English Time Game Mode :Off Blue Screen :Off Melody :Off PC Home Theatre PC :Off More Move Enter Return Blue Screen(藍色畫面): Off/On 如果接收不到訊號或訊號非常微弱,藍色畫面將自動取代雜訊畫面背景。 如果您要繼續觀賞品質欠佳 的畫面,您必須將 Blue Screen(藍色畫面)設定為 Off(關閉)。 Melody(旋律): Off/Low/Medium/High 可以調整 PDP 顯示器的電源開關旋律音。 Energy Saving(省電): Off/Low/Medium/High 本功能可根據周圍的光線調整畫面亮度。 - Off: 關閉 Energy Saving(省電)模式。 - Low: 不論周圍照明情況,均以標準模式操作。 - Medium: 不論周圍照明情況,均進入中等的省電模式。 - High: 不論周圍照明的情況,均進入頂級的省電模式。 HDMI Black Level(HDMI 黑色度): Normal/Low 因為輸入有限的 HDMI RGB 範圍(16 至 235)而產生畫面焦化時(出現黑色度、對比低度、色彩暗 等),可使用此功能調整影像品質。 僅當外部輸入連接至 HDMI(RGB 訊號)時,才能啟用此功能。 ➢ 中文 - 21 BN68-01364C-00TC_1001.indd 21 2007-10-01 오후 5:52:40 設定面板按鈕鎖定 此功能可讓您鎖定 PDP 顯示器按鈕,這樣就無法透過 PDP 顯示器面 板來操作 PDP 顯示器。 但仍然可使用遙控器來操作 PDP 顯示器。 只有遙控器可以關閉面板鎖定設定,因此請不要讓未經授權的使用 者取得遙控器。 1 2 3 4 5 6 按下 MENU 按鈕以顯示選單。 按下 或 按鈕以選擇 Function(功能),然後按下 ENTER 按鈕。 再次按下 ENTER 按鈕來選擇 Safety Lock(安全鎖定)。 再次按下 ENTER 按鈕來選擇 Key Lock(按鍵鎖定)。 按下 或 按鈕,然後按下 ENTER 按鈕來選擇 Off(關閉) 或 On(開啟)。 按下 EXIT 按鈕退出。 Function Safety Lock Multi Control Video Wall Fan :Off Move Enter Return Safety Lock Key Lock IR Lock Change PIN Move :Off Enter Return 設定遙控器按鈕鎖定 此功能可讓您鎖定遙控器,這樣就無法透過遙控器來操作 PDP 顯示 器。 但仍然可以透過 PDP 顯示器面板按鈕來操作 PDP 顯示器。 1 2 3 4 5 ➢ ➢ 按下 MENU 按鈕以顯示選單。 按下 或 按鈕以選擇 Function(功能),然後按下 ENTER 按下鈕。 再次按下 ENTER 按鈕來選擇 Safety Lock(安全鎖定)。 按下 或 按下鈕以選擇 IR Lock(紅外線鎖定),然後按 下 ENTER 按下鈕。 按下 EXIT 按鈕退出。 當將 IR Lock(紅外線鎖定)設定為 On(開啟)時,即使已按 下遙控器按鈕,您仍無法使用遙控器。 若要取消「遙控器按鈕鎖定」,請使用遙控器上的數字鍵,按 下「0000」,然後按下 IR LOCK: 會顯示 OFF。 若您按下遙控器按鈕的速度太快,則可能無法識別輸入。 請以大約間隔 2 秒鐘的速度按下按鈕。 Function Safety Lock Multi Control Video Wall Fan :Off Move Enter Return Safety Lock Key Lock IR Lock Change PIN Move :Off Enter Return IR Lock : On 中文 - 22 BN68-01364C-00TC_1001.indd 22 2007-10-01 오후 5:52:40 設定您的個人識別碼 此功能會設定檢視限制,並使用 4 位數字的 PIN(個人識別碼)來 防止未經授權存取您的 PDP 顯示器。 1 2 3 4 5 6 7 ➢ 按下 MENU 按鈕以顯示選單。 按下 或 按下鈕以選擇 Function(功能),然後按下 ENTER 按下鈕。 再次按下 ENTER 按鈕來選擇 Safety Lock(安全鎖定)。 按下 或 按鈕以選擇 Change PIN(變更 PIN),然後按 下 ENTER 按鈕。 按下數字按鈕來輸入您目前的 4 位數字 PIN 碼。 新 PDP 顯示器的預設 PIN 碼設定為「0000」。 按下數字按鈕來輸入您的新 4 位數字 PIN 碼。 重新輸入您的新 PIN 碼以確認。 按下 EXIT 按鈕退出。 如果您忘記 PIN 號碼 ,請以以下順序按下遙控器按鈕,系統會 將 PIN 重設為 0-0-0-0: MUTE, 1, 8, 6. Function Safety Lock Multi Control Video Wall Fan :Off Move Enter Return Safety Lock ➢ Key Lock IR Lock Change PIN Move :Off Enter Return Change PIN Enter PIN Enter New PIN 0..9 : Enter PIN Return Change PIN Enter PIN * Enter New PIN 0..9 : Enter PIN Return 中文 - 23 BN68-01364C-00TC_1001.indd 23 2007-10-01 오후 5:52:41 設定 MDC(多顯示控制) 此功能可讓您指定已連接 PDP 顯示器的 ID,以輕易控制 PC 上連接 的 PDP 顯示器。 1 2 3 4 5 6 ➢ ➢ ➢ 按下 MENU 按鈕以顯示選單。 按下 或 按下鈕以選擇 Function(功能),然後按下 ENTER 按下鈕。 按下 或 按鈕以選擇 Multi Control(多重控制),然後按 下 ENTER 按鈕。 按下 或 來選擇需要的選項,然後按下 ENTER 按鈕。 可用的選項: ID Setup(00~99), ID Input 當您對所選的設定滿意時,按下 ENTER 按鈕。 使用數字按鈕來輸入 ID 輸入號碼。 使用數字按鈕選擇 ID 設定號碼。 按下 EXIT 按鈕退出。 若要操作多重控制功能,應在 ID Setup(ID 設定)模式中設 定 PDP1 與 PDP2。 當於 ID Input(ID 輸入)模式中設定 PDP 顯 示器,並輸入 PDP1 的 ID 輸入號碼時,僅會將 PDP1 切換至 Menu(選單)畫面,且您可使用遙控器。 此時,不可使用遙控 器來操作 PDP2,且會顯示 ID 輸入的待機模式。 如需詳細資訊,請參閱 MDC 程式指南。 您可以從 www.samsung.com 下載中心下載 MDC 程式。 Function Safety Lock Multi Control Video Wall Fan :Off Move Enter Return Multi Control ID Setup ID Input ➢ ➢ Move :00 :-- Enter Return Multi Control ID Setup ID Input Move :0000 :-- Enter Return Multi Control ID Setup ID Input MDC(多顯示控制)按鈕,就可以選擇這 ➢只要按下遙控器上的 些選項。 :00 :-- -- 0..9 : Enter ID Input Number Return 中文 - 24 BN68-01364C-00TC_1001.indd 24 2007-10-01 오후 5:52:41 設定多重畫面 您可在許多 PDP 上看到各種不同的顯示效果。. 1 2 3 4 5 Function 按下 MENU 按鈕以顯示選單。 按下 或 按鈕以選擇 Function(功能),然後按下 ENTER 按鈕。 按下 或 按鈕以選擇 Video Wall(電視牆),然後按下 ENTER 按鈕。 再次按下 ENTER 按鈕。 按下 或 按鈕以選擇 On(開啟),然後按下 ENTER 按 鈕。 可用的選項: Format(Full/Natural), Screen Divider Format: Full: 此選項會在多個 PDP 顯示器上顯示分開的影像,而不會遺 失任何部分的影像,彷彿個別 PDP 顯示器的可見影像,都屬於 一個單獨大型 PDP 顯示器影像的一部份。 Natural: 此選項也可在多個 PDP 顯示器上顯示分開的影像,彷 彿個別 PDP 顯示器就是一個單獨大型 PDP 顯示器的一部份。 因此 PDP 顯示器邊緣會遺失部分影像。 Safety Lock Multi Control Video Wall Fan :Off Move Enter Return Video Wall Video Wall : Off Format :Full Screen Divider Move Screen Divider: 2x2, 3x3, 4x4, 5x1, or 1x5 8 按下 EXIT 按鈕退出。 Video Wall(電視牆)運作時,不可調整 PIP 功能與 Picture Size (畫面大小)。 VESA Format(VESA 格式)輸入不支援 DVI 模式的 Video Wall (電視牆)功能。 Enter Return Video Wall Video Wall :On Format :Full Full Screen Divider Natural ➢ ➢ Move Enter Return Screen Divider 2x2 3x3 4x4 5x1 1x5 Move 1 2 3 4 Enter Return 中文 - 25 BN68-01364C-01TC_1022.indd 25 2007-10-22 오전 9:15:42 選擇風扇 PDP 顯示器內的風扇是用於降低 PDP 顯示器頂部與前面的溫度。 若 要降低風扇的噪音,您可能需要將「Fan」(風扇)設定為「Off」( 關閉)來停止風扇。 在風扇停止時,如果您長時間使用 PDP 顯示器 觀賞節目,可能會使 PDP 顯示器的頂部和前面的溫度提高,但 PDP 顯示器將會正常操作。 1 2 3 4 5 ➢ ➢ ➢ Function Safety Lock Multi Control Video Wall Fan 按下 MENU 按鈕以顯示選單。 按下 或 按鈕以選擇 Function(功能),然後按下 ENTER 按鈕。 Move 按下 或 按鈕以選擇 Fan(風扇),然後按下 ENTER 按 鈕。 按下 或 按鈕,然後按下 ENTER 按鈕來選擇 Off(關閉)或 On(開啟)。 按下 EXIT 按鈕退出。 如果您的 PDP 顯示器是垂直顯示,則風扇會自動運轉。 如果風扇有問題,會顯示 Check Fan(檢查風扇)訊息。 當溫度超過 35 度時,請使用風扇。 :Off Enter Return 中文 - 26 BN68-01364C-00TC_1001.indd 26 2007-10-01 오후 5:52:42 使用遊戲模式 連接至遊戲控制台,例如 PlayStationTM 或 XboxTM 時,您可選擇遊戲 選單來體驗更有臨場感的遊戲。 1 2 3 4 5 Setup Screen Burn Protection Language :English Time Game Mode :Off Blue Screen :Off Melody :Off PC Home Theatre PC :Off 按下 MENU 按鈕以顯示選單。 按下 或 按鈕以選擇 Setup(設定),然後按下 ENTER 按 鈕。 按下 或 按下鈕以選擇 Game Mode(遊戲模式),然後 按下 ENTER 按下鈕。 按下 或 按鈕,然後按下 ENTER 按鈕來選擇 Off(關閉) 或 On(開啟)。 按下 EXIT 按鈕退出。 Mode(遊戲模式)的限制(注意) ➢Game 若要卸除遊戲主控台並連接至其他外部裝置,請將 ➢ More Move Enter Return AV1 Game Mode Game Mode(遊戲模式)設定為 Off(關閉)。 如果在 Game Mode(遊戲模式)下顯示 PDP 顯示器, 畫面會稍微震動。 畫面上會顯示 ( ) 標記,這表示所選來源的 Game Mode(遊戲模式)為 On(開啟)。 如果 Game Mode(遊戲模式)已開啟: Picture Mode(畫面模式)會自動變更為 Standard(標準),且使用者無法變更模式。 會停用 Sound(聲音)選單中的 Sound Mode(聲音模式)。 使用等化器調整聲音。 會啟用 Reset Sound(重設聲音)功能。 在設定完等化器後選擇 Reset(重設)功能,會將等 化器設定值重設回原廠預設值。 如果已將外部裝置連接至 PDP 顯示器,且畫面不清晰,請檢查 Game Mode(遊戲模式)是否為 On(開啟)。 將 Game Mode(遊戲模式)設定為 Off(關閉),並連接至外部裝置。 ➢ 中文 - 27 BN68-01364C-00TC_1001.indd 27 2007-10-01 오후 5:52:43 檢視畫中畫 (PIP) 可在外部 A/V 裝置的主畫面內顯示子畫面。 如此,可一邊監視其他 視訊輸入,同時觀看任何連接至 PDP 顯示器之裝置的視訊輸入。 1 2 3 4 5 6 按下 MENU 按鈕以顯示選單。 按下 或 按鈕以選擇 Setup(設定),然後按下 ENTER 按 鈕。 按下 或 按鈕以選擇 PIP(畫中畫),然後按下 ENTER 按 鈕。 按下 或 來選擇需要的選項,然後按下 ENTER 按鈕。 可用的選項: PIP(畫中畫)(Off/On), Position(位置)。 當您對所選的設定滿意時,按下 ENTER 按鈕。 按下 EXIT 按鈕退出。 Setup More Energy Saving :Off HDMI Black Level:Low PIP Move Enter Return PIP PIP Position :On : PIP(畫中畫): Off/On 您可啟用或停用 PIP 功能。 主畫面 Component HDMI PC DVI 子畫面 AV Move Enter Return ➢ 只要按下遙控器上的 PIP 按鈕,就可以選擇這些選項。 Position(位置): / / / 您可選擇子畫面的位置。 中文 - 28 BN68-01364C-00TC_1001.indd 28 2007-10-01 오후 5:52:43 畫面焦化保護 爲了避免畫面焦化,本産品配備了防止畫面焦化的技術。 這項技 術可讓您將畫面設定為上下(垂直線)以及左右移動(水平點)。 Time(時間)設定可讓您以分鐘為單位來設定畫面移動的時間間 隔。 1 2 3 4 5 6 按下 MENU 按鈕以顯示選單。 按下 或 按鈕以選擇 Setup(設定),然後按下 ENTER 按鈕。 再次按下 ENTER 按鈕來選擇 Screen Burn Protection(畫面 焦化保護)。 按下 或 來選擇需要的選項,然後按下 ENTER 按鈕。 可用的選項: Pixel Shift(像素轉移), All White(全白), Signal Pattern(訊號模式), Inverse(反向), Timer(定時 器), Side Gray(两側灰色) 當您對所選的設定滿意時,按下 ENTER 按鈕。 按下 EXIT 按鈕退出。 Pixel Shift(像素轉移): 您可以使用此功能,以水平或垂直方 向持續移動 PDP 上的像素,來縮小畫面上的殘像。 - 按下 或 按鈕,然後按下 ENTER 按鈕來將 Pixel Shift(像素轉移)設定為 On(開啟)。 - 按下 或 來選擇需要的選項,然後按下 ENTER 按鈕。 可用的選項: Horizontal Dot(水平點), Vertical Line (垂直線), Time(時間) 像素轉移的最佳狀況; Setup Screen Burn Protection Language :English Time Game Mode :Off Blue Screen :Off Melody :Off PC Home Theatre PC :Off More Move Enter Return Screen Burn Protection Pixel Shift All White Signal Pattern Inverse Timer Side Gray Move :Dark Enter Return Pixel Shift Pixel Shift Horizontal Dot Vertical Line Time :On :2 :2 :2 min ➢ PC Horizontal Dot(水平點) 1 Vertical Line(垂直線) 1 Time (minute) 2 min(分鐘) ( 時間(分鐘)) AV/S-Video/ Component/HDMI 2 2 Move Enter Return 2 min(分鐘) ➢視監視器大小(以英吋為單位)與機型而定,Pixel Shift(像素轉移)值可能會不同。 All White(全白): 此功能可以藉著將像素色彩變更爲白色,來移除畫面上的殘像。 當畫面上出現殘 像或符號時,尤其是在長時間播放靜止影像後,請利用本功能來移除。 Signal Pattern(訊號模式): 這項功能可根據特定模式移動 PDP 上的所有像素,來移除畫面上的殘 像。 當畫面上出現殘像或符號時,尤其是在長時間播放靜止影像後,請利用本功能來移除。 Inverse(反向): 當 PDP 顯示器將 RGG 輸入訊號轉換為 GBR 而延長畫面靜止時間時,此功能會移除畫 面上的殘像。 與 All White(全白)和 Signal Pattern(訊號模式)功能相比,此功能可以降低您使用 PDP 顯示器觀賞時的焦化現象。 當您使用 PDP 顯示器觀賞時使用反向功能,可能導致畫面中的色彩對調。 (例如: 在畫面中,紅線中的色彩可能會顯示成綠線中的色彩。) Side Gray(两側灰色): 當您使用比例為 4:3 的 PDP 顯示器觀賞時,調整最左邊與最右邊的白平衡, 可避免畫面損壞。 Dark(深色): 當您將畫面比例設定為 4:3 時,左邊與右邊會變黑。 Light(亮色): 當您將畫面比例設定為 4:3 時,左邊與右邊會變亮。 續... 中文 - 29 BN68-01364C-00TC_1001.indd 29 2007-10-01 오후 5:52:44 All White(全白)、Inverse(反向)或 Signal Pattern(訊號模 ➢若要移除畫面上的殘像,請使用 式)功能。 雖然三個功能都能移除畫面上的殘像,但 Signal Pattern(訊號模式)效果更好。 1 小時),才能有效清除畫面上的殘像。如果執行本功能後還無 ➢必須長時間操作移除殘像功能(大約 法移除殘像,請再次重複本功能。 如果執行本功能後,還是未改善殘像,請再次重複操作本功能。 ➢請按下遙控器上的任意鍵以取消此功能。 設定畫面焦化保護定時器 您可設定「畫面焦化保護」的定時器(以小時與分鐘來計時)。 如果您開始操作以清除任何殘影,則會以設定的時間間隔來執行操 作然後自動完成。 1 2 3 4 5 6 7 按下 MENU 按鈕以顯示選單。 按下 或 按鈕以選擇 Setup(設定),然後按下 ENTER 按鈕。 再次按下 ENTER 按鈕來選擇 Screen Burn Protection(畫面 焦化保護)。 按下 或 按鈕以選擇 Timer(計時器),然後按下 ENTER 按鈕。 再次按下 ENTER 按鈕。 按下 或 按鈕以選擇 On(開啟),然後按下 ENTER 按 鈕。 按下 或 來選擇需要的選項,然後按下 ENTER 按鈕。 可用的選項: Timer(計時器), Mode(模式), Period(時 間), Time(時間) Mode(模式): All White(全白), Signal Pattern(訊號模 式), Inverse(反向) Period(時間): Hour(1~24) Time(時間): Min.(1~30) 8 Setup Screen Burn Protection Language :English Time Game Mode :Off Blue Screen :Off Melody :Off PC Home Theatre PC :Off More Move Enter Return Screen Burn Protection Pixel Shift All White Signal Pattern Inverse Timer Side Gray Move :Dark Enter Return Timer Timer Mode Period Time 按下 EXIT 按鈕退出。 Move :On :All White :1 Hour :30 min. Enter Return 中文 - 30 BN68-01364C-00TC_1001.indd 30 2007-10-01 오후 5:52:45 設定您的 PC 軟體(在 Windows XP 下) 一般準電腦的 Windows 顯示設定值如下圖所示。 但是,根據特定的 Windows 版本與視訊卡的不同,實際的 PC 畫面可能也會有所不同。 但是即使實際的畫面看起來有所不同,在大多數情況下相同的基本設定資訊仍 然適用。 (否則,請聯絡您的電腦製造商或三星經銷商)。 1 2 3 4 5 在 Windows 桌面上按一下滑鼠右鍵,然後按一下 Properties(內容)。 會顯示 Display Properties(顯示屬性)。 按一下 Settings tab(「設定」標籤),然後參考 Display Modes Table(顯示模式表)設定 Display Mode(顯示模式)。 您不需變更色彩設定值。 按一下 Advanced(進階)。 此時會顯示新的設定對話方塊。 按一下 Monitor(監視器)標籤,然後參考 Display Modes Table(顯示模式表)設定 Screen Refresh Rate(畫面更新頻 率)。 如果可以,請個別設定 Vertical Frequency(垂直頻率) 和 Horizontal Frequency(水平頻率),而非設定 Screen Refresh Rate(畫面更新頻率)。 按一下 OK(確定)來關閉視窗,然後按一下 OK(確定)按鈕 回到 Display Properties(顯示屬性)視窗。 此時電腦也許會 自動重新啓動。 中文 - 31 BN68-01364C-00TC_1001.indd 31 2007-10-01 오후 5:52:45 顯示器模式 根據 PC 顯示器的類型及其解析度的不同,畫面位置與大小也可能會有所不同。 表中為建議使用的解析度。(支援所有支援限制內的解析度) D-Sub/DVI 輸入 解析度 640 x 350 720 x 400 640 x 480 640 x 480 640 x 480 640 x 480 800 x 600 800 x 600 800 x 600 800 x 600 1024 x 768 1024 x 768 1024 x 768 1024 x 768 1152 x 864 1280 x 960 1280 x 960 1280 x 1024 1280 x 1024 1280 x 1024 1280 x 1024 1600 x 1200 1920 x 1080P 水平頻率 (kHz) 31.5 31.5 31.5 37.9 37.5 43.3 37.9 48.1 46.9 53.7 48.4 56.5 60.0 68.7 67.5 60.0 75.1 64.0 74.6 78.0 91.1 75.0 67.5 垂直頻率 (Hz) 70 70 60 72 75 85 60 72 75 85 60 70 75 85 75 60 75 60 70 75 85 60 60 PC O O O O O O O O O O O O O O O O O O O O X O O DVI O O O O O O O O O O O O O O X O X O X X O X O HDMI 輸入 解析度 IBM 480P 576P 720P 1080i 1080P 640 x 480 720x 480 720 x 576 1280x 720 1280 x 720 1920 x 1080i 1920 x 1080i 1920 x 1080P 1920 x 1080P 1920 x 1080P 1920 x 1080P 1920 x 1080P 水平頻率 (kHz) 31.5 31.5 31.3 37.5 45.0 28.1 33.7 27.0 28.1 33.8 56.3 67.5 垂直頻率 (Hz) 60 60 50 50 60 50 60 24 25 30 50 60 HDMI O O O O O O O O O O O O 不支援交錯模式。 如果選擇非標準視訊格式,PDP 顯示器可能無法正常操作。 可支援分離式模式和複合式模式。 不支援 SOG。 HDMI 僅支援 DTV 訊號。 中文 - 32 BN68-01364C-00TC_1001.indd 32 2007-10-01 오후 5:52:45 設定 PC ➢ 按下 SOURCE 按鈕可預設至 PC 模式。 1 2 3 4 5 6 Setup 按下 MENU 按鈕以顯示選單。 按下 或 按鈕以選擇 Setup(設定),然後按下 ENTER 按 鈕。 按下 或 按鈕以選擇 PC,然後按下 ENTER 按鈕。 按下 或 來選擇需要的選項,然後按下 ENTER 按鈕。 可用的選項: Image Lock(調整畫面), Position(位置), Auto Adjustment(自動調整), Image Reset(影像重設), Zoom(放大) 當您對所選的設定滿意時,按下 ENTER 按鈕。 按下 EXIT 按鈕退出。 Image Lock(調整畫面): Coarse(粗調)/Fine(微調) 調整畫面品質的目的在於消除或減少畫面雜訊。 如果單以 Fine-tuning(微調)還是無法移除雜訊,那麼請盡量調 整頻率(粗調)並再次使用 Fine-tune(微調)。 減少雜訊後,重新調整畫面以便與畫面的中心對齊。 1 按下 或 按下鈕以選擇 Coarse(粗調)或 Fine(微 調),然後按下 ENTER 按鈕。 2 按下 或 按鈕來調整畫面品質時,可能會出現垂直線 條,或畫面可能會模糊。 按下 ENTER 按鈕。 Position(位置) 如果 PC 畫面位置與 PDP 顯示器不符,請調整。 1 按下 // / 按鈕以調整位置。 2 按下 ENTER 按鈕。 Auto Adjustment(自動調整) 自動調整可讓設定的 PC 畫面自動調整對應接收的 PC 視訊訊 號。 會自動調整微調、粗調及位置的值。 Image Reset(影像重設) 您可以使用出廠預設值取代所有影像設定。 Zoom(縮放): Zoom(縮放)/Position(位置)/ Reset(重設) - Zoom: 0 - 1 - 2 - 3 - 4 - 5 - 6 選項 0 表示正常畫面。 數字越大表示畫面越放大。 您可以透過選擇選項 1 到 6 來選擇位置並重設功 能。(若選擇選項 0,則表示未選擇位置和重設功 能。) 若您已選擇 Zoom(縮放)功能(1 到 6 之間),就 無法選擇 Auto Adjustment(自動調整)功能。 - Position(位置): 您可以調整位置。 - Reset(重設): 先前調整的設定將重設回出廠預設值。 Screen Burn Protection Language :English Time Game Mode :Off Blue Screen :Off Melody :Off PC Home Theatre PC :Off More Move Enter Return PC Image Lock Position Auto Adjustment Image Reset Zoom Move Enter Return Image Lock Coarse Fine 50 13 Move Enter Return Position Move Enter Return Auto Adjustment in Progress Please wait. Image Reset is completed. Return 中文 - 33 BN68-01364C-00TC_1001.indd 33 2007-10-01 오후 5:52:46 設定家庭劇院 PC ➢ 按下 SOURCE 按鈕可預設至 PC 模式。 Setup 您可以在 PC 模式中調整螢幕設定,藉以檢視較高品質的畫面。 如果您將家庭劇院 PC 功能設定為開啟,就可以像在 PC 模式中一 樣地調整 Detailed Settings(詳細設定)(當將 Picture Mode (畫面模式)設定為 Standard(標準)或 Movie(電影)時)。 Screen Burn Protection Language :English Time Game Mode :Off Blue Screen :Off Melody :Off PC Home Theatre PC :Off 1 2 按下 MENU 按鈕以顯示選單。 按下 或 按鈕以選擇 Setup(設定),然後按下 ENTER 按鈕。 3 按下 或 按鈕以選擇 Home Theatre PC(家庭劇院 PC),然後按下 ENTER 按鈕。 4 按下 或 按鈕,然後按下 ENTER 按鈕來選擇 Off(關閉) 或 On(開啟)。 5 按下 EXIT 按鈕退出。 此功能僅適用於 PC 模式。 More Move Enter Return ➢ 壁掛套件規格 (VESA) 將壁掛套件安裝在堅固的牆面上,壁掛套件須與地板垂直。 若您要在其他建築材料上安裝,則請向附近的經銷商洽詢。 若安裝在天花板或傾斜的牆面上,壁掛套件可能會掉落,並對人員造成嚴重的傷害。 產品系列 液晶電視 PDP 電視/顯示器 英吋 VESA 規格 (A * B) 標準螺絲 23 ~ 26 200 * 100 M4 32 ~ 40 200 * 200 M6 46 ~ 52 600 * 400 57 700 * 400 (No VESA) 57 ~ 70 800 * 400 80 ~ 1400 * 800 42 ~ 58 600 * 400 70 800 * 400 63 No VESA 80 ~ 1400 * 800 數量 4 M8 4 M8 6 4 續... 中文 - 34 BN68-01364C-00TC_1001.indd 34 2007-10-01 오후 5:52:46 ➢我們提供的壁掛套件標準尺寸如上表所示。 ➢購買我們的壁掛套件時,我們也隨附了組裝壁掛套件所需的詳細安裝手冊和所有零件。 PDP 顯示器內部造成損傷。 ➢請勿使用比標準尺寸長的螺絲,因為這種螺絲可能會對 VESA 標準螺絲規格的壁掛套件,視其規格而定,其螺絲長度可能有所不同。 ➢至於不符合 VESA 標準螺絲規格的螺絲。 ➢請勿使用不符合 請勿大力旋緊螺絲,如此可能會損及產品或造成產品掉落,因而導致人員受傷。 三星公司不對此類意 外承擔任何法律責任。 VESA 或非指定的壁掛套件或消費者未能確實遵守產品安裝指示而導致產品受損或人員受 ➢若因使用非 傷,三星公司概不承擔任何法律責任。 57” 和 63” 機型不符合 VESA 規格。 因此,您應使用此機型專用的壁掛套件。 ➢三星的 ➢壁掛安裝此 PDP 顯示器時,請勿傾斜超過 15 度。 DP 顯示器開機時,請勿安裝您的「壁掛套件」。 P您可能會因為觸電而受傷。 使用底座 PDP。 切勿將 PDP 放置在地板 ➢ 應由兩位人員或以上共同抬起 上,以免對畫面造成可能的損壞。 需將 PDP 直立放置。 中文 - 35 BN68-01364C-00TC_1001.indd 35 2007-10-01 오후 5:52:47 疑難排解 與三星售後服務聯繫前,請執行下列的簡易檢查。 如果遵循下列指示仍無法解決問題,請記下 PDP 顯示器的機型與序號,並與您當地的零售商聯繫。 無聲音或畫面 檢查連接至牆壁插座的主電源線。 檢查是否已按下前面板的 (電源)按鈕(開/關),或按下遙控器的 ON 按鈕。 檢查畫面對比度與亮度設定。 檢查音量。 檢查 Internal Mute(內部靜音)是否設定為 On(開啟)。 畫面正常但沒有聲音 檢查音量。 檢查是否已按下遙控器上的 MUTE 按鈕。 沒有畫面或呈現黑白畫面 調整 Color(色彩)設定值。 聲音和畫面受到干擾 試著找出影響 PDP 顯示器的電子裝置,然後移走該裝置。 將 PDP 顯示器的插頭插入不同的電源插座。 遙控器無作用 更換遙控器的電池。 清潔遙控器上緣(傳輸窗口)。 查看裝入的電池是否「+」極與「–」極裝反了。 檢查電池是否沒電。 畫面一片漆黑,電源指示燈不斷閃爍。 檢查電腦上的電源和訊號連接線。 PDP 顯示器正在使用其電源管理系統。 移動電腦的滑鼠或按下鍵盤上的任意鍵。 檢查設備(STB、DVD 等)上的電源和訊號連接線。 按下面板或遙控器上的 Source(來源)按鈕。 將 PDP 顯示器的電源關閉後再開啟。 螢幕角落顯示受損的畫面。 如果在某些外部裝置中選擇 Just Scan(精確掃瞄),則螢幕角落可能會顯示受損的畫面。 這是外部 裝置而非 PDP 顯示器所引起的症狀。 中文 - 36 BN68-01364C-00TC_1001.indd 36 2007-10-01 오후 5:52:47 規格 機型名稱 畫面大小(對角) PPM50M7FB(CP50P7) PPM63M7FB(CP63P7) 50 英吋 63 英吋 PC 解析度 1920 x 1080 @ 60 Hz 聲音(輸出) 尺寸 (WxHxD) 主體 有底座 重量 主體 有底座 環境考量 操作溫度 操作濕度 存放溫度 存放濕度 10 W + 10 W 1204.6 x 724.1 x 97.1 公釐 1204.6 x 772.5 x 362.0 公釐 1502.7 x 893.1 x 99.0 公釐 1502.7 x 942.3 x 341.1 公釐 43.5 公斤 44.5 公斤 63.9 公斤 68.9 公斤 10 °C 至 40 °C (50 °F 至 104 °F) 10% 至 80%, 非冷凝 -20 °C 至 45 °C (-4 °F 至 113 °F) 5% 至 95%, 非冷凝 ➢ 本裝置屬於 B 級數位裝置。 設計與規格若有改變,恕不另行通知。 如需電源與電力消耗的相關資訊,請參閱產品隨附的標籤。 中文 - 37 BN68-01364C-01TC_1016.indd 37 2007-10-16 오전 11:02:04 此頁有意留空。 BN68-01364C-00TC_1001.indd 38 2007-10-01 오후 5:52:47 此頁有意留空。 BN68-01364C-00TC_1001.indd 39 2007-10-01 오후 5:52:47 Contact SAMSUNG WORLD-WIDE If you have any questions or comments relating to Samsung products, please contact the SAMSUNG customer care centre. 三星全球服務網 若您有任何與三星産品相關的問題或建議, 請聯絡三星客戶服務中心。 Country AUSTRALIA NEW ZEALAND CHINA HONG KONG INDIA INDONESIA JAPAN MALAYSIA PHILIPPINES SINGAPORE THAILAND TAIWAN VIETNAM Customer Care Center 1300 362 603 0800SAMSUNG(726-7864) 800-810-5858 010-6475 1880 3698-4698 3030 8282 1800 110011 0800-112-8888 0120-327-527 1800-88-9999 1800-10-SAMSUNG(726-7864) 1800-SAMSUNG(726-7864) 1800-29-3232 02-689-3232 0800-329-999 1 800 588 889 Web Site www.samsung.com/au www.samsung.com/nz www.samsung.com.cn www.samsung.com/hk www.samsung.com/in/ www.samsung.com/id www.samsung.com/jp www.samsung.com/my www.samsung.com/ph www.samsung.com/sg www.samsung.com/th www.samsung.com/tw www.samsung.com/vn BN68-01364C-01 BN68-01364C-01TC_1016.indd 40 2007-10-16 오전 11:01:41