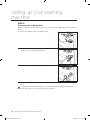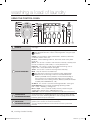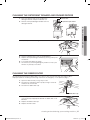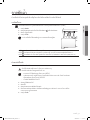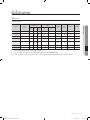
1
WD8122CVD WD8122CVB WD8122CVW WD8122CVC Washing Machine user manual imagine the possibilities Thank you for purchasing this Samsung product. To receive more complete service, please register your product at www.samsung.com/global/register WD8122CVB-02574B_EN.indd 1 2008-07-09 ø¿»ƒ 5:05:58 features of your new samsung washing machine Your new washing machine will change the way you feel about doing laundry. From its super-size capacity to its energy efficiency, the Samsung washing machine has all the features to turn a mundane chore into a pleasure. • Diamond Drum - A More Powerful Wash Performance while Protecting your Fabric Provides a much better wash performance than normal drum washers, by using the wash board effect created by the waves of the inside drum. • Ball Balance - Enjoy the Silence! No Noise, No Vibrations Reduced vibrations and noise through the use of a Ball Balance system which maintains near perfect drum balance. • Customizable Economic Function - Water, Time and Power Saving Detects the laundry weight in 7 steps and reduces water, time and power consumption. • Air Wash - Sterilization and Deodorization without Water! Refresh your favorite clothing simply by using air after you’ve been at a party or have gone out (food, cigarettes). Non-stained clothing no longer needs to be washed, simply refresh them using the 4 available cycles for different fabrics. • Silver Wash - Sterilization and Anti-bacteria Effect with Cold Water Only The winning combination! Samsung’s silver technology combines the sanitizing effect of silver with state-of-the-art science for the ultimate in clean. Two plates of pure silver are converted into silver ions through electrolysis. Even in cold, bleach-less water, the silver particles remove odor-causing bacteria for a “super clean” wash. So washing in cold water is energy efficient and better for your clothes. • Direct Drive Motor As the drum does not utilize belts or gears, vibrations are reduced significantly. This feature ensures that your washer machine is quieter and more durable. • Child Lock The Child Lock function ensures that curious little hands are kept out of your washing machine. This safety feature stops your children from playing with the washing machine, and alerts you when it is activated. 2_ features WD8122CVB-02574B_EN.indd 2 2008-07-09 ø¿»ƒ 5:05:59 • Delay End Delay a cycle for up to 19 hours in one-hour increments and increase the convenience of using your washing machine especially when you have to go out. • Wool Certified The machine has been tested and has passed the required Woolmark Company specifications for machine washable wool products. Fabrics should be washed according to the instructions on the garment label as specified by Woolmark and Samsung. • Digital Graphic Display The Digital Graphic Display (control panel) is clear and easy to use for minimum fuss and hassle. And while it is easy to use, the Digital Graphic Display enables you to make quick and accurate adjustments to your wash for excellent washing results. • Wide door Extra wide door aperture for convenient viewing! Easily add and remove laundry, especially for large sized laundry items such as bedding, towels etc. This manual contains important information on the installation, use, and care of your new Samsung washing machine. Refer to it for descriptions of the control panel, instructions on how to use the washing machine, and tips for making the most of its state-of-the-art features and functions. The Troubleshooting section on page 29 tells you what to do if something goes wrong with your new washing machine. features _3 WD8122CVB-02574B_EN.indd 3 2008-07-09 ø¿»ƒ 5:05:59 safety information Throughout this manual, you’ll see Warning and Caution notes. These warnings, cautions, and the important safety instructions that follow do not cover all possible conditions and situations that may occur. It’s your responsibility to use common sense, caution, and care when installing, maintaining, and operating your washing machine. Samsung is not liable for damages resulting from improper use. IMPORTANT SAFETY SYMBOLS AND PRECAUTIONS What the icons and signs in this user manual mean: WARNING Hazards or unsafe practices that may result in severe personal injury or death. CAUTION Hazards or unsafe practices that may result in minor personal injury or property damage. CAUTION To reduce the risk of fire, explosion, electric shock, or personal injury when using your washing machine, follow these basic safety precautions: Do NOT attempt. Do NOT disassemble. Do NOT touch. Follow directions explicitly. Unplug the power plug from the wall socket. Make sure the machine is grounded to prevent electric shock. Call the service center for help. Notice These warning signs are here to prevent injury to you and others. Please follow them explicitly. After reading this section, keep it in a safe place for future reference. Read all instructions before using the appliance. As with any equipment using electricity and moving parts, potential hazards exist. To safely operate this appliance, become familiar with its operation and exercise care when using it. Install and store your washing machine inside, away from exposure to weather. Install and level your washing machine on a floor that can support its weight. Your washing machine must be properly grounded. Never plug it into an ungrounded outlet. 4_ safety information WD8122CVB-02574B_EN.indd 4 2008-07-09 ø¿»ƒ 5:06:02 To reduce the risk of fire or explosion: CAUTION • Do not wash items that have been washed, soaked, or treated with gasoline, dry cleaning solvents, or other flammable or explosive substances. They give off vapors that could ignite or explode. Rinse by hand any material that has been exposed to cleaning solvent or other flammable liquids or solids before putting in your washing machine. Be sure that all traces of such liquids, solids, and fumes have been removed. Dangerous substances include acetone, denatured alcohol, gasoline, kerosene, certain liquid household cleaners and spot removers, turpentine, waxes, and wax removers. • Do not put gasoline, dry cleaning solvents, or other flammable or explosive substances into the washing machine. • Under certain conditions, hydrogen gas may be produced in a hot water system–such as your hot water heater -- that has not been used for two weeks or more. HYDROGEN GAS IS EXPLOSIVE. If your hot water system has not been used for two weeks or more, turn on all hot water taps in your home, and let the water flow for several minutes before using your washing machine. This will release any hydrogen gas build–up. Since hydrogen gas is flammable, do not smoke or light an open flame during this time. Ventilate immediately without touching the power plug if there is a gas leak. Unplug the power cord before servicing your washing machine. Before each wash, empty the pockets of your laundry. Small, irregularly shaped hard objects, such as coins, knives, pins, and paperclips could damage your washing machine. Do not wash clothing with large buckles, buttons, or other heavy metal metal. Do not open the door of the washing machine if you can still see water. Check that the water has drained before opening the door. Do not repair, replace, or service any part of your washing machine yourself unless you fully understand the recommended user–repair instructions and have the skills to carry them out. Work done by an unauthorized person may void your warranty. Connect the washing machine to the water mains using the new set of hoses. Do not reuse the old set of hoses. Water inlet hoses deteriorate over time. Check the hoses periodically for bulges, kinks, cuts, wear, and leaks, and replace them as needed and at least every five years. All packaging and shipping bolts must be removed before the appliance is used. Serious damage may occur if they are not removed. See “Removing the shipping bolts”. Before washing clothes for the first time, you must run a complete cycle without clothes. See “Washing for the first time”. safety information _5 WD8122CVB-02574B_EN.indd 5 2008-07-09 ø¿»ƒ 5:06:02 safety information The appliance is designed for home use only. WARNING Make sure that water and electrical connections are made by qualified technicians, observing the user manual (see “Installing your washing machine”) and local safety regulations. Before cleaning or carrying out maintenance, unplug the appliance from the electrical outlet. Always unplug the appliance and turn off the water after use. Make sure that the pockets of all clothing to be washed are empty. Hard, sharp objects, such as coins, safety pins, nails, screws, or stones can cause extensive damage to the appliance. Never allow pets and children to play on or in the appliance. It may cause injury or suffocate them. The glass door becomes very hot during the washing cycle. Never touch on the glass door while it is in use. Do not attempt to repair the appliance yourself. Repairs made by inexperienced or unqualified persons may cause injury and/or make more serious repairs to the appliance necessary. If the plug (power supply cord) is damaged, it must be replaced by the manufacturer or its service agent or a similarly qualified person in order to avoid a hazard. This appliance should only be serviced by our authorized service center, and only rated spare parts should be used. WARNING Do not let children (or pets) play on or in your washing machine. The washing machine door does not open easily from the inside, and children may be seriously injured if trapped inside. This appliance is not intended for use by young children or infirm persons unless they have been adequately supervised by a responsible person to ensure that they can use the appliance safely. Young children should be supervised to ensure that they do not play with the appliance. To use this appliance safely, the user should become familiar with the instructions for operation of the appliance and always take extra care when using it. This appliance should be positioned to be accessible to the power plug, the water supply tabs and the drain pipes. WARNING Packing materials can be dangerous to children; keep all packing material (plastic bags, polystyrene, etc.) well out of the reach of children. Do not use processed water containing oil, cream or lotion, which is usually found in skincare shops or massage clinics. • Otherwise this will cause the packing to be deformed, which causes a malfunction or water leak. 6_ safety information WD8122CVB-02574B_EN.indd 6 2008-07-09 ø¿»ƒ 5:06:02 A stainless washing tub does not usually rust. However if some metal such as a hair pin is left in the tub for an extended time, the tub could rust. • Do not leave water or bleach containing chlorine in the tub for an extended period of time. • Do not regularly use or leave water containing iron in the tub for an extended period of time. If rust starts appearing on the surface of the tub, apply a cleansing agent (neutral) to the surface and use a sponge or soft cloth to clean it. (Under no circumstances use a metal brush) For washing machines with ventilation openings in the base, ensure that the opening is not obstructed by carpet or any other obstacles. Use the new hose-sets and old hose-sets should not be reused. safety information _7 WD8122CVB-02574B_EN.indd 7 2008-07-09 ø¿»ƒ 5:06:02 contents SETTING UP YOUR WASHING MACHINE 9 10 10 10 11 11 11 11 11 Checking the parts and the control panel Meeting installation requirements Electrical supply and grounding Water Supply Drain Flooring Surrounding temperature Alcove or closet installation Installing your washing machine WASHING A LOAD OF LAUNDRY 17 17 18 20 20 20 21 22 23 25 25 25 Washing for the first time Basic instructions Using the control panel Child lock Delay end Stop&Add Air wash Washing clothes using cycle selector Washing clothes manually Detergent and additives information Which detergent to use Detergent drawer CLEANING AND MAINTAINING YOUR WASHING MACHINE 26 27 28 28 28 Draining the washing machine in an emergency Cleaning the exterior Cleaning the detergent drawer and drawer recess Cleaning the debris filter Cleaning the water hose mesh filter Repairing a frozen washing machine Storing your washing machine TROUBLESHOOTING AND INFORMATION CODES 29 30 Check these points if your washing machine... Information codes CYCLE CHART 31 Cycle chart APPENDIX 32 32 32 33 Fabric care chart Protecting the environment Declaration of conformity Specifications 9 17 26 29 31 32 26 27 8_ contents WD8122CVB-02574B_EN.indd 8 2008-07-09 ø¿»ƒ 5:06:02 setting up your washing machine CHECKING THE PARTS AND THE CONTROL PANEL Carefully unpack your washing machine, and make sure you’ve received all of the parts shown below. If your washing machine was damaged during shipping, or if you do not have all of the parts, contact Samsung Customer Service or your Samsung dealer. 01 SETTING UP Be sure to have your installer follow these instructions closely so that your new washing machine works properly and so that you’re not at risk of injury when doing laundry. Option Detergent drawer Control panel Plug Door Drain hose Adjustable feet Debris filter Emergency drain tube Filter Cover (use for the lower bolt hole) Spanner Bolt hole covers Water supply hose Hose guide Drain hose User manual setting up your new washing machine _9 WD8122CVB-02574B_EN.indd 9 2008-07-09 ø¿»ƒ 5:06:04 setting up your washing machine MEETING INSTALLATION REQUIREMENTS Electrical supply and grounding To prevent unnecessary risk of fire, electrical shock, or personal injury, all wiring and grounding must be done in accordance with the National Electrical Code ANSI/FNPA, No. 70 Latest Revision and local codes and ordinances. It is the personal responsibility of the appliance owner to provide adequate electrical service for this appliance. WARNING Never use an extension cord. Use only the power cord that comes with your washing machine. When preparing for installation, ensure that your power supply offers: • 220V~240V 50Hz 15 AMP fuse or circuit breaker • Individual branch circuit serving only your washing machine Your washing machine must be grounded. If your washing machine malfunctions or breaks down, grounding will reduce the risk of electric shock by providing a path of least resistance for the electric current. Your washing machine comes with a power cord having a three-prong grounding plug for use in a properly installed and grounded outlet. Never connect the ground wire to plastic plumbing lines, gas lines, or hot water pipes. Improperly connecting the equipment-grounding conductor can result electrical shock. Check with a qualified electrician or serviceman if you are unsure if the washing machine is properly grounded. Do not modify the plug provided with the washing machine. If it does not fit the outlet, have a proper outlet installed by a qualified electrician. Water Supply Your washing machine will fill properly when your water pressure is 50 kPa ~ 800 kPa. Water pressure less than 50 kPa may cause water valve failure, not allowing the water valve to shut off completely. Or, it may take the washing machine longer to fill than what the controls allow, resulting in your washing machine turning off. (A fill-time limit, designed to prevent overflows/ flooding if an internal hose becomes loose, is built into the controls.) The water taps must be within 4 feet (122cm) of the back of your washing machine for the provided inlet hoses provided to reach your washing machine. Most plumbing supply stores sell inlet hoses of various lengths up to 10 feet (305 cm) long. You can reduce the risk of leaks and water damage by: • Making water taps easily accessible. • Turning off taps when the washing machine is not in use. • Periodically checking for leaks at water inlet hose fittings. WARNING Before using your washing machine for the first time, check all connections at the water valve and taps for leaks. 10_ setting up your new washing machine WD8122CVB-02574B_EN.indd 10 2008-07-09 ø¿»ƒ 5:06:04 Drain Samsung recommends a standpipe height of 18 in (46 cm). The drain hose must be routed through the drain hose clip to the standpipe. The standpipe must be large enough to accept the outside diameter of the drain hose. The drain hose is attached at the factory. For best performance, your washing machine must be installed on a solidly constructed floor. Wood floors may need to be reinforced to minimize vibration and/or unbalanced loads. Carpeting and soft tile surfaces are contributing factors to vibrations and the tendency for your washing machine to move slightly during the spin cycle. Never install your washing machine on a platform or poorly supported structure. 01 SETTING UP Flooring Surrounding temperature Do not install your washing machine in areas where water may freeze, since your washing machine always retains some water in its water valve, pump, and hose areas. Frozen water in the lines can cause damage to belts, the pump, and other components. Alcove or closet installation To operate safely and properly, your new washing machine requires minimum clearances of: Sides – 25 mm Rear – 51 mm Top – 25 mm Front – 465 mm If both the washing machine and a dryer are installed together, the front of the alcove or closet must have at least 465 mm unobstructed air opening. Your washing machine alone does not require a specific air opening. INSTALLING YOUR WASHING MACHINE STEP 1 Selecting a location Before you install the washing machine, make sure the location: • • • • • • Has a hard, level surface without carpeting or flooring that may obstruct ventilation Is away from direct sunlight Has adequate ventilation Will not be freezing (below 32 ˚F or 0 ˚C) Is away from heat sources such as oil or gas Has enough space so that the washing machine doesn’t stand on its power cord setting up your new washing machine _11 WD8122CVB-02574B_EN.indd 11 2008-07-09 ø¿»ƒ 5:06:04 setting up your washing machine STEP 2 Removing the shipping bolts Before installing the washing machine, you must remove the five shipping bolts from the back of the unit. 1. Loosen all the bolts with the supplied wrench. Option 2. Hold the bolt with the spanner and pull it through the wide section of the hole. Repeat for each bolt. 3. Fill the holes with the supplied plastic covers. 4. Store the shipping bolts away safely in case you have to move the washing machine in the future. WARNING Packaging materials can be dangerous to children; keep all packaging material (plastic bags, polystyrene, etc.) well out of the reach of children. 12_ setting up your new washing machine WD8122CVB-02574B_EN.indd 12 2008-07-09 ø¿»ƒ 5:06:05 STEP 3 Adjusting the levelling feet When installing your washing machine, ensure that the power plug, the water supply and the drain are easily accessible. 01 SETTING UP 1. Slide the washing machine into position. 2. Level your washer by turning the adjustable nut, as shown in the figure. Locking nut Adjustable nut 3. When your washing machine is level, tighten the locking nut using the (-) screwdriver. STEP 4 Connecting the water and drain Connecting the water supply hose 1. Take the L-shaped arm fitting for the cold water supply hose and connect it to the cold water supply intake on the back of the machine. Tighten by hand. Option The water supply hose must be connected to the washing machine at one end and to the water tap at the other. Do not stretch the water supply hose. If the hose is too short, replace the hose with a longer, high pressure hose. 2. Connect the other end of the cold water supply hose to your sink’s cold water tap and tighten it by hand. If necessary, you can reposition the water supply hose at the washing machine end by loosening the fitting, rotating the hose, and retightening the fitting. For selected models with an additional hot water intake: 1. Take the red L-shaped arm fitting for the hot water supply hose and connect it to the hot water supply intake on the back of the machine. Tighten by hand. 2. Connect the other end of the hot water supply hose to your sink’s hot water tap and tighten it by hand. 3. Use a Y-piece if you only want to use cold water. setting up your new washing machine _13 WD8122CVB-02574B_EN.indd 13 2008-07-09 ø¿»ƒ 5:06:06 setting up your washing machine Connecting the water supply hose (selected models) 1. Remove the adaptor from the water supply hose. Adaptor Water supply hose 2. First, using a ‘+’ type screwdriver, loosen the four screws on the adaptor. Next, take the adaptor and turn part (2) following the arrow until there is a 5 mm gap. 1 5 mm 2 3. Connect the adaptor to the water tap by tightening the screws firmly while lifting the adaptor upwards. Turn part (2) following the arrow and connect (1) and (2). Water tap 1 2 4. Connect the water supply hose to the adaptor. When you release part (3), the hose automatically connects to the adaptor making a ‘click’ sound. After you have connected the water supply hose to the adaptor, ensure that it is connected correctly by pulling the water supply hose downwards. 5. Connect the other end of the water supply hose to the inlet water valve at the rear of the washing machine. Screw the hose clockwise all the way in. 3 Option 14_ setting up your new washing machine WD8122CVB-02574B_EN.indd 14 2008-07-09 ø¿»ƒ 5:06:08 6. Turn on the water supply and ensure that no water leaks from the water valve, tap or adaptor. If there is a water leaks, repeat the previous steps. • ✗ ✗ 01 SETTING UP WARNING Do not use your washing machine if there is a water leak. This may cause electrical shock or injury. If the water tap has a screw type tap, connect the water supply hose to the tap as shown. Use the most conventional type of tap for the water supply. In case the tap is square or too big, remove the spacing ring before inserting the tap into the adaptor. setting up your new washing machine _15 WD8122CVB-02574B_EN.indd 15 2008-07-09 ø¿»ƒ 5:06:09 setting up your washing machine Connecting the drain hose The end of the drain hose can be positioned in three ways: 1. Over the edge of a wash basin: The drain hose must be placed at a height of between 60 and 90 cm. To keep the drain hose spout bent, use the supplied plastic hose guide. Secure the guide to the wall with a hook or to the tap with a piece of string to prevent the drain hose from moving. 60 ~ 90 cm Drain hose Hose guide 2. ln a sink drain pipe branch: The drain pipe branch must be above the sink siphon so that the end of the hose is at least 60 cm above the ground. 3. ln a drain pipe: We recommend using a 65 cm high vertical pipe; it must be no shorter than 60 cm and no longer than 90 cm. STEP 5 Powering your washing machine Plug the power cord into a wall sockets, a 230 volt 50 Hz approved electrical outlet protected by a 15-amp fuse or comparable circuit breaker. (For more information on electrical and grounding requirements, see page 10.) 16_ setting up your new washing machine WD8122CVB-02574B_EN.indd 16 2008-07-09 ø¿»ƒ 5:06:10 washing a load of laundry With your new Samsung washing machine, the hardest part of doing laundry will be deciding which load to wash first. WASHING FOR THE FIRST TIME 1. Press the Power button. 2. Add a little detergent to the detergent compartment the detergent drawer. 3. Turn on the water supply to the washing machine. 4. Press the Start/Pause button. in This will remove any water that might be left over in the machine from the manufacturer’s test run. Compartment Compartment Compartment : Detergent for prewash, or starch. : Detergent for the main wash, water softener, pre-soaking agent, bleach and stain removal product. : Additives, e.g. fabric softener or former (fill no higher than lower edge (MAX) of “A”) 02 WASHING A LOAD OF LAUNDRY Before washing laundry for the first time, you must run a complete empty cycle (i.e. no laundry). BASIC INSTRUCTIONS 1. Load your laundry into the washing machine. WARNING Do not overload the washing machine. To determine the load capacity for each type of laundry, refer to the chart on page 24. • Make sure that laundry is not caught in the door, as this may cause a water leak. • Washing detergent may remain in the front rubber part of the washer after a wash cycle. Remove any remaining detergent, as they may cause a water leak. • Do not wash water-proofed items. 2. 3. 4. 5. Close the door until it latches. Turn the power on. Add detergent and additives to the dispenser drawer. Select the appropriate cycle and options for the load. The Wash Indicator light will illuminate and the estimated cycle time will appear in the display. 6. Press the Start/Pause button. washing a load of laundry _17 WD8122CVB-02574B_EN.indd 17 2008-07-09 ø¿»ƒ 5:06:11 washing a load of laundry USING THE CONTROL PANEL 1 1 2 DIGITAL GRAPHIC DISPLAY 3 4 1 5 6 7 8 9 10 11 12 Displays the remaining wash cycle time, all cycle information, and error messages. Select the tumble pattern and spinning speed for the cycle. For detailed information, refer to “Washing clothes using the cycle selector”. 2 CYCLE SELECTOR Cotton - For averagely or lightly soiled cottons, bed linen, table linen, underwear, towels, shirts, etc. Blanket - Cotton bedding, bed linen, bed sheet, duvet cover, pillow cover etc. Quick - This course is used for small amounts of laundry, relatively clean laundry, or frequently used laundry in a short period of time. Delicates - This course is used to wash delicate clothing, such as lingerie, that is easily deformed or damaged. Towel - This course is useful for washing towels effectively. Wool - Only for machine-washable wool. The wool wash cycle of this machine has been approved by Woolmark for the washing of machine-washable Woolmark products provided that the products are washed according to the instructions on the garment label and those issued by the manufacturer of this washing machine, M0509 (Certificate Number issued by IWS NOM INEE Co., Ltd.) Air Wash - This course is useful for removing bad odors. Turning the Cycle Selector cycles through the following operating modes. Knit → Coat → Bedding → Allergy Free Rinse + Spin - This is useful for laundry that only needs rinsing for adding fabric softener that is added during a rinse. Clean Tub - Use this function to maintain wash tub clean and sanitary. 3 SILVER NANO SELECTION BUTTON Silver Nano water is supplied during the wash cycle as well as during the last rinse cycle, removing bacteria as well as giving protection from bacterial growth for up to one month. 4 DELAY END SELECTION BUTTON Press this button repeatedly to cycle through the available Delay End options (max 19 hours in one hour increments). The hour displayed indicates the time when the wash cycle will be finished. 18_ washing a load of laundry WD8122CVB-02574B_EN.indd 18 2008-07-09 ø¿»ƒ 5:06:12 TEMPERATURE SELECTION BUTTON Press this button repeatedly to cycle through the available water temperature options: (Cold Water , 30 ˚C, 40 ˚C, 60 ˚C, 75 ˚C and 95 ˚C). 6 RINSE SELECTION BUTTON Press this button to add additional rinse cycles. The maximum number of rinse cycles is five. 7 SPIN SELECTION BUTTON Press the button repeatedly to cycle through the available speeds for the spin cycle. “No spin ” - The laundry remains in the drum and no spin cycle is performed after the final drain. 8 DRY SELECTION BUTTON Pressing the button cycles through the following options. Normal → Extra → Iron → Light → Time (30min → 1:00min → 1:30min → 2:00min → 2:30min) “Normal ” - Select to dry laundry automatically by detecting the amount and weight of the laundry. Select this to dry cotton clothing such as cotton trousers, T-shirts, and cotton underwear. “Extra ” - Select this to dry cotton clothing completely. (Thick clothes such as blue jeans, towels, sports clothes, etc.) “Iron ” - Finishes the dry cycle in a moist state appropriate for Ironing. “Light ” - Dry clothing which may become deformed at high temperatures at a low temperature. (Mixed fabrics and synthetic fibers such as polyester and nylon.) “Time ” - Dry the laundry for the specified period of time. 02 WASHING A LOAD OF LAUNDRY 5 • You must avoid washing laundry that may not be dried as it may be deformed even at low temperatures. • The Normal, Extra, Iron and Light Dry options detect the weight of the laundry in order to display an accurate drying time and dry them more completely. • The drying conditions may differ depending on the type and the amount of laundry. 9 STOP&ADD SELECTION BUTTON Select this to add the laundry amid the process (See “Stop&Add” on page 20). 10 PREWASH SELECTION BUTTON Press this button to select pre-wash. Pre-wash means a preliminary wash that is performed for 10 minutes before the main wash. Pre-wash is effective for highly soiled laundry. Pre-wash is only available for: Cotton, Blanket, and Towel. 11 START/PAUSE SELECTION BUTTON Press to pause and restart a cycle. POWER BUTTON Press it once to turn your washing machine on, press it again to turn your washing machine off. If the washing machine is left on for more than 10 minutes without any buttons being touched, the power automatically turns off. 12 washing a load of laundry _19 WD8122CVB-02574B_EN.indd 19 2008-07-09 ø¿»ƒ 5:06:14 washing a load of laundry Child lock The Child Lock function allows you to lock the buttons so that the wash cycle you’ve chosen can’t be changed. Activating/Deactivating If you want to activate or deactivate the Child Lock function, press the Temperature and Rinse buttons at the same time for 3 seconds. “Child Lock ” will be lit when this feature is activated. When the Child Lock function is activated, only the Power button works. The Child Lock function remains on even after the power is turned on and off or after the disconnecting and reconnecting the power cord. 3 SEC. Delay end You can set the washing machine to finish your wash automatically at a later time, choosing a delay of max 19 hours (in 1 hour increments). The hour displayed indicates the time at which the wash will be finished. 1. Manually or automatically set your washing machine according to the type of laundry you are washing. 2. Press the Delay End button repeatedly until the delay time is set. 3. Press the Start/Pause button. The “Delay End” indicator will be lit, and the clock will begin counting down until it reaches the set time. 4. To cancel a Delay End function, press the Power button and then turn the washing machine on again. Stop&Add When the washing machine is working, the door is locked, and the “Stop&Add” lamp is off, you will not be able to add laundry. You can only add laundry when the Stop&Add lamp is illuminated. 1. Press the Stop&Add button. The washing machine will automatically pause. 2. Wait about 30 seconds and check the state of “Stop&Add” lamp. • Blinking: The water in the washing machine is drained down to the safety level for the additional laundry to be added. • Off: Adding laundry is possible. 3. Add the laundry. 4. Press the Start/Pause button. • Avoid adding laundry when the machine has foamed up or is filled with water. Otherwise, the foam or water may leak from the door. Check before opening the door. • We recommend that you select the Stop&Add function 5 minutes before a cycle is performed. • If the internal temperature is higher than 55 ˚C during the wash cycle or 70 ˚C during the drying cycle, the Stop&Add function cannot be selected. • Do not open the door by force as it may result in injury or damage the washer. WARNING 20_ washing a load of laundry WD8122CVB-02574B_EN.indd 20 2008-07-09 ø¿»ƒ 5:06:16 Air wash MODE CYCLE TIME Knit 20 min Coat 26 min Bedding 40 min Allergy Free 1:18 min Allergy Free: Select this program to sterilize your laundry, for example against ticks. Since the temperature rises above 90 ˚C, clothes susceptable to heat may be deformed or damaged. • Bedding: This program includes cotton bedding. However, nylon laundry may become deformed or damaged. • You may experience heat when touching laundry after the Air wash course is complete. (Average 40 ˚C ~ 48 ˚C) • When one of these options has been selected, no other button can be selected and you can only select a maximum delay end time of 19 hours. 4. Close the door and press the Start/Pause button. • 02 WASHING A LOAD OF LAUNDRY Air wash can refresh laundry without using water owing to its powerful airing system. Clothing that can be refreshed includes woolen coats, cotton or down jumpers, sweaters and suits. (Two items or less (less then 1 kg)) 1. Open the door, place the laundry into the washer and close the door. 2. Press the Power button. 3. Select Air wash by turning the Cycle Selector. • Turn the Cycle Selector to cycle through the following programs: Knit, Coat, Bedding, Allergy Free, ... • When there is water in the tub, Air wash cannot be selected. Drain the water and select Air wash. • Press the Start/Pause or Power button to remove the laundry. • Fragrance or dryer sheets can be used with Air wash programs to add fragrance to your refreshed laundry (one sheet per one or two items). Avoid Air Washing the following clothes: • Sensitive clothes made of leather, mink, fur, silk, etc. • Underwear trimmed with lace, ‘glued’ doll cushions, and dress suits may have their decorations loosened. • Clothes trimmed with buttons can cause them to break. • Starchy clothes can become deformed. Avoid using the following clothes for the Allergy Free program: • Hard bedding such as a wooden pillows (neck-rest) - Pillows or blankets filled with plastic or starch rather than cotton - Electric blankets • Furry blankets • Bulky blankets washing a load of laundry _21 WD8122CVB-02574B_EN.indd 21 2008-07-09 ø¿»ƒ 5:06:17 washing a load of laundry Washing clothes using cycle selector Your new washing machine makes washing clothes easy, using Samsung’s “Fuzzy Control” automatic control system. When you select a wash program, the machine will set the correct temperature, washing time, and washing speed. 1. 2. 3. 4. 5. 6. Turn on your sink’s water tap. Press the Power button. Open the door. Load the articles one at a time loosely into the drum, without overfilling it. Close the door. Add detergent, softener, and pre-wash detergent (if necessary) into the appropriate compartments. Pre-wash is only available when selecting the Cotton, Towel, and Blanket cycles. It is only necessary if your clothing is heavily soiled. 7. Use the Cycle Selector to select the appropriate cycle according to the type of material: Cotton, Blanket, Quick, Delicates, Towel, Wool, Rinse+Spin, Clean Tub. The relevant indicators will illuminate on the control panel. 8. At this time, you can control the wash temperature, the amount of rinses, the spinning speed, and the delay time by pressing the appropriate option button. 9. Press the Start/Pause button and the wash will begin. The process indicator will light up and the remaining time for the cycle will appear in the display. Pause Option Within 5 minutes of starting a wash, it is possible to add/remove laundry items. 1. Press the Start/Pause button to unlock the door. The door cannot be opened when the water is too HOT or the water level is too HIGH. 2. After closing the door, press the Start/Pause button to restart the wash. When the cycle is finished: After the total cycle has finished, the power will turn off automatically. 1. Open the door. 2. Remove laundry. 22_ washing a load of laundry WD8122CVB-02574B_EN.indd 22 2008-07-09 ø¿»ƒ 5:06:17 Washing clothes manually 02 WASHING A LOAD OF LAUNDRY You can wash clothes manually without using the Cycle Selector. 1. Turn the water supply on. 2. Press the Power button on the washing machine. 3. Open the door. 4. Load the articles loosely into the drum one at a time, without overfilling it. 5. Close the door. 6. Add detergent and, if necessary, softener or prewash detergent, into the appropriate compartments. 7. Press the Temperature button to select the temperature. (Cold water, 30 ˚C, 40 ˚C, 60 ˚C, 75 ˚C, 95 ˚C) 8. Press the Rinse button to select the required number of rinse cycles. The maximum number of rinse cycles is five. The wash duration is increased accordingly. 9. Press the Spin button to select the spin speed. The rinse hold function allows you to remove items that are still wet from the washing machine. ( : Rinse hold, : No spin) 10. Press the Delay End button repeatedly to cycle through the available Delay End options (max 19 hours in one hour increments). The hour displayed indicates the time at which the wash will be finished. 11. Press the Start/Pause button and the machine will begin the cycle. washing a load of laundry _23 WD8122CVB-02574B_EN.indd 23 2008-07-09 ø¿»ƒ 5:06:18 washing a load of laundry LAUNDRY GUIDELINES Follow these simple guidelines for the cleanest laundry and the most efficient wash. Always check the Care label on clothing before washing. Sort and wash your laundry according to the following criteria: • Care Label: Sort laundry into cottons, mixed fibres, synthetics, silks, wools and rayons. • Colour: Divide whites and colours. Wash new colour items separately. • Size: Placing items of different sizes in the same load will improve the wash action. • Sensitivity: Wash delicate items separately, using the Wool cycle for pure, new woollen items, curtains and silk articles. Check the labels on the items you are washing or refer to the fabric care chart in the appendix. Emptying pockets Before each wash, empty all the pockets of your laundry. Small, irregularly shaped hard objects, such as coins, knives, pins, and paperclips could damage your washing machine. Do not wash clothing with large buckles, buttons, or other heavy metal objects. Metal on clothing may damage your clothing as well as the tub. Turn clothing with buttons and embroidered clothes inside out before washing them. If zips of pants and jackets are open while washing, the spin basket may be damaged. Zips should be closed and fixed with a string before washing. Clothing with long strings may become entangled with other clothes damaging them. Be sure to fix the strings before starting the wash. Prewashing cotton Your new washing machine, combined with modern detergents, will give perfect washing results, thus saving energy, time, water and detergent. However, if your cotton is particularly dirty, prewash with a protein-based detergent. Determining the load capacity Do not overload the washing machine or your laundry may not wash properly. Use the chart below to determine the load capacity for the type of laundry you are washing. Fabric Type Load Capacity Model WD8122CVC/ WD8122CVD/ WD8122CVB/ WD8122CVW Cotton 12.0 kg Delicates 3.0 kg Towel / Quick 5.0 kg Blanket 1 sheet [Within 3 kg] Wool 4.0 kg Dry 7.0 kg When the laundry is unbalanced (“UE” lights up on the display), redistribute the load. 24_ washing a load of laundry WD8122CVB-02574B_EN.indd 24 2008-07-09 ø¿»ƒ 5:06:18 DETERGENT AND ADDITIVES INFORMATION Which detergent to use Do not use detergent that has hardended or solidified as the detergent may remain in the rinse cycle. It may cause your washing machine to not rinse properly or result in the overflow becoming blocked. Detergent drawer Your washing machine has separate compartments for dispensing detergent and fabric softener. Add all laundry additives to the correct compartment before starting your washing machine. Do NOT open the detergent drawer when your washing machine is running. 1. Pull out the detergent drawer on the left side of the control panel. 2. Add the recommended amount of laundry detergent directly into the detergent compartment before starting your washing machine. 3. Add the recommended amount of fabric softener into the softener compartment if required. 4. When using the Prewash option, add the recommended amount of laundry detergent into the prewash compartment . 02 WASHING A LOAD OF LAUNDRY The type of detergent you should use is based on the type of fabric (Cottons, synthetic, delicate items, wool), colour, wash temperature, and degree of soiling. Always use “low suds” laundry detergent, which is designed for automatic washing machines. Follow the detergent manufacturer’s recommendations based on the weight of the laundry, the degree of soiling, and the hardness of the water in your area. If you do not know how hard your water is, enquire at your local water authority. When washing large items do NOT use the following detergent types. • Tablet and capsule type detergents • Detergents using a ball and net Concentrated or thick fabric softener and conditioner must be diluted with a little water before being poured into the dispenser (prevents the overflow from becoming blocked.) MAX washing a load of laundry _25 WD8122CVB-02574B_EN.indd 25 2008-07-09 ø¿»ƒ 5:06:19 cleaning and maintaining your washing machine Keeping your washing machine clean improves its performance, wards off unnecessary repairs, and lengthens its life. DRAINING THE WASHING MACHINE IN AN EMERGENCY 1. Unplug the washing machine from the power supply. 2. Open the filter cover using a coin or a key. Filter cover 3. Unscrew the emergency drain cap by turning it to the left. Emergency drain cap 4. Hold the cap on the end of the emergency drain tube and slowly pull it out about 15 cm. 5. Allow all the water to flow into a bowl. 6. Reinsert the drain tube and screw the cap back on. 7. Replace the filter-cover. Emergency drain tube CLEANING THE EXTERIOR 1. Wipe the washing machine surfaces, including the control panel, with a soft cloth using a nonabrasive household detergent. 2. Use a soft cloth to dry the surfaces. 3. Do not pour water onto the washing machine. 26_ cleaning and maintaining your washing machine WD8122CVB-02574B_EN.indd 26 2008-07-09 ø¿»ƒ 5:06:19 CLEANING THE DETERGENT DRAWER AND DRAWER RECESS 1. Press the release lever on the inside of the detergent drawer and pull the drawer out. 2. Remove the liquid detergent divider from the detergent drawer. Release lever Liquid detergent divider 03 CLEANING AND MAINTAINING 3. Wash all parts under running water. 4. Clean the drawer recess with an old toothbrush. 5. Replace the liquid detergent divider by pushing it firmly into the drawer. 6. Push the drawer back into place. 7. To remove any remaining detergent, perform a rinse cycle without any laundry in the drum. CLEANING THE DEBRIS FILTER We recommend cleaning the debris filter 5 or 6 times a year, or when the error message of “5E” is displayed. (Refer to “Draining the washing machine in an emergency” in the previous page.) 1. Open the filter cover by using a key or coin. 2. Unscrew the emergency drain cap by turning it to the left and drain off all the water. 3. Unscrew the debris filter cap. Debris filter cap 4. Wash any dirt or other material from the debris filter. Make sure the drain pump propeller behind the debris filter is not blocked. 5. Replace the debris filter cap. 6. Replace the filter cover. cleaning and maintaining your washing machine _27 WD8122CVB-02574B_EN.indd 27 2008-07-09 ø¿»ƒ 5:06:21 cleaning and maintaining your washing machine CLEANING THE WATER HOSE MESH FILTER You should clean the water hose mesh filter at least once a year, or when the error message of “4E” is displayed: 1. Turn off the water supply to the washing machine. 2. Unscrew the hose from the back of the washing machine. To prevent water from gushing out due to the air pressure in the hose, cover the hose with a cloth. 3. Gently pull out the mesh filter from the end of the hose using a pair of pliers and rinse it under water until clean. Also clean inside and outside the threaded connector. 4. Push the filter back into place. 5. Screw the hose back onto the washing machine. 6. Make sure the connections are watertight and turn on the tap. REPAIRING A FROZEN WASHING MACHINE If the temperature drops below freezing and your washing machine is frozen: 1. 2. 3. 4. 5. Unplug the washing machine. Pour warm water over the tap to loosen the water supply hose. Remove the water supply hose and soak it in warm water. Pour warm water into the washing machine drum and let it sit for 10 minutes. Reconnect the water supply hose to the water tap and check if the water supply and drain are operating normal. STORING YOUR WASHING MACHINE If you need to store your washing machine for an extended time, it’s better to drain and disconnect it. Washing machines can be damaged if water is left in the hoses and internal components before storage. 1. Select the Quick cycle and add bleach to the bleach compartment. Run your washing machine through the cycle without a load. 2. Turn the water taps off and disconnect the inlet hoses. 3. Unplug your washing machine from the electrical outlet, and leave your washing machine door open to allow air to circulate inside the tumbler. If your washing machine has been stored in below-freezing temperatures, allow time for any leftover water in your washing machine to thaw out before using it. 28_ cleaning and maintaining your washing machine WD8122CVB-02574B_EN.indd 28 2008-07-09 ø¿»ƒ 5:06:21 troubleshooting and information codes CHECK THESE POINTS IF YOUR WASHING MACHINE... 04 TROUBLESHOOTING PROBLEM SOLUTION Will not start • • • • Make sure your washing machine is plugged in. Make sure the door is firmly closed. Make sure the water source tap(s) are turned on. Make sure to press the Start/Pause button. Has no water or not enough water • • • • Turn the water tap on fully. Make sure the water source hose is not frozen. Straighten the water intake hoses. Clean the filter on the water intake hose. Has detergent remains in the detergent drawer after the wash cycle is complete • Make sure your washing machine is running with sufficient water pressure. Make sure the detergent is added to the center of the detergent drawer. Vibrates or is too noisy • • • • • Make sure your washing machine is on a level surface. If the surface is not level, adjust the washing machine feet to level the appliance. Make sure that the shipping bolts are removed. Make sure your washing machine is not touching any other object. Make sure the laundry load is balanced. The washing machine does not drain and/or spin • • Straighten the drain hose. Eliminate kinked hoses. Make sure the debris filter is not clogged. Door is locked shut or will not open. 1. 2. 3. 4. Disconnect the power plug from the power supply. Open the filter cover using a coin. Remove the water from the washing machine. Locate the orange plastic tab and pull it forward to open the door. If the problem persists, contact your local Samsung Customer Service. troubleshooting and information codes _29 WD8122CVB-02574B_EN.indd 29 2008-07-09 ø¿»ƒ 5:06:21 troubleshooting and information codes INFORMATION CODES When your washing machine malfunctions, you may see an information code on the display. If that happens, check this table and try the suggested solution before calling Customer Service. CODE SYMBOL SOLUTION dE • Close the door. 4E • • Make sure the source water tap is turned on. Check the water pressure. 5E • • Clean the debris filter. Make sure the drainage hose is installed correctly. • The laundry load is unbalanced. Redistribute the load. If only one item of clothing needs washing, such as a bathrobe or pair of jeans, the final spin result might be unsatisfactory and an “UE” error message will be shown in the display window. • Call the after-sales service. UE 3E PoF After the power is turned off and on again by the power failure of the moment, an “PoF” error message will blink: • If you press the Start/Pause button, the operation restarts from the cycle that was automatically stored due to the power failure. • If you turn off the washing machine, the stored cycle will be removed. For any codes not listed above, or if the suggested solution doesn’t fix the problem, call your Samsung Service Centre or local Samsung dealer. 30_ troubleshooting and information codes WD8122CVB-02574B_EN.indd 30 2008-07-09 ø¿»ƒ 5:06:21 cycle chart CYCLE CHART ( user option) Max load (kg) Prewash wash Softener Temperature (MAX) °C Default Max Spin rpm (max) Delay end Water (ℓ) Electricity (kWh) Cotton 12 yes 60 60 1200 106 2.37 Delicates 3 - yes cold 40 400 62 0.06 Quick 5 - yes 40 40 800 (1200) 70 0.68 Towel 5 yes 40 95 600 (800) 110 0.85 Blanket 1 sheet (Within 3 kg) yes 30 40 800 90 0.18 Wool 4 - yes 30 40 600 80 0.42 Clean Tub - - yes - 40 40 600 56 0.91 05 CYCLE CHART Programme DETERGENT AND ADDITIVES 1. A cycle with a prewash takes approx. 15 minutes longer. 2. The cycle duration data has been measured under the conditions specified in Standard IEC 60456/EN 60456. 3. Consumption in individual homes may differ from the values given in the table due to variations in the pressure and temperature of the water supply, the load and the type of laundry. cycle chart _31 WD8122CVB-02574B_EN.indd 31 2008-07-09 ø¿»ƒ 5:06:21 appendix FABRIC CARE CHART The following symbols provide garment care directions. The care labels include four symbols in this order: washing, bleaching, drying and ironing, and dry cleaning when necessary. The use of symbols ensures consistency among garment manufacturers of domestic and imported items. Follow the care label directions to maximize garment life and reduce laundering problems. Resistant material Can be ironed at 100 ˚C max Delicate fabric Do not iron Item may be washed at 95 ˚C Can be dry cleaned using any solvent Item may be washed at 60 ˚C Dry clean with perchloride, lighter fuel, pure alcohol or R113 only Item may be washed at 40 ˚C Dry clean with aviation fuel, pure alcohol or R113 only Item may be washed at 30 ˚C Do not dry clean Item may be hand washed Dry flat Dry clean only Can be hung to dry Can be bleached in cold water Dry on clothes hanger Do not bleach Tumble dry, normal heat Can be ironed at 200 ˚C max Tumble dry, reduced heat Can be ironed at 150 ˚C max Do not tumble dry PROTECTING THE ENVIRONMENT • • • • This appliance is manufactured from recyclable materials. If you decide to dispose of this appliance, please observe local waste disposal regulations. Cut off the power cord so that the appliance cannot be connected to a power source. Remove the door so that animals and small children cannot get trapped inside the appliance. Do not exceed the detergent quantities recommended in the detergent manu-facturers’ instructions. Use stain removal products and bleaches before the wash cycle only when strictly necessary. Save water and electricity by only washing full loads (the exact amount depends upon the program used). DECLARATION OF CONFORMITY This appliance complies with European safety standards, EC directive 93/68 and EN Standard 60335. 32_ appendix WD8122CVB-02574B_EN.indd 32 2008-07-09 ø¿»ƒ 5:06:27 SPECIFICATIONS TYPE FRONT LOADING WASHER W 650 mm X D 770 mm X H 940 mm DIMENSIONS 50 ~ 780 kPa WEIGHT 97 kg / 104 kg 12 kg [DRY LAUNDRY] WASH AND SPIN CAPACITY DRY CAPACITY POWER CONSUMPTION 7.0 kg WASHING 150 W WASHING AND HEATING 2200 W DRYING 2100 W 106 ℓ WATER VOLUME SPIN REVOLUTIONS 06 APPENDIX WATER PRESSURE MODEL WD8122CVC, WD8122CVD, WD8122CVB, WD8122CVW rpm 1200 rpm The appearance and specifications of the product are subject to change without prior notice for purposes of product enhancement. appendix _33 WD8122CVB-02574B_EN.indd 33 2008-07-09 ø¿»ƒ 5:06:27 memo WD8122CVB-02574B_EN.indd 34 2008-07-09 ø¿»ƒ 5:06:27 memo WD8122CVB-02574B_EN.indd 35 2008-07-09 ø¿»ƒ 5:06:27 QUESTIONS OR COMMENTS? Country CALL OR VISIT US ONLINE AT THAILAND 1800-29-3232 02-689-3232 www.samsung.com Code No. DC68-02574B_EN WD8122CVB-02574B_EN.indd 36 2008-07-09 ø¿»ƒ 5:06:27 WD8122CVD WD8122CVB WD8122CVW WD8122CVC เครื่องซักผ้า คู่มือผู้ใช้ imagine the possibilities ขอขอบคุณที่เลือกซื้อผลิตภัณฑ์ Samsung ในการรับบริการที่ครบครันยิ่งขึ้น โปรดลงทะเบียนผลิตภัณฑ์ได้ที่ www.samsung.com/global/register WD8122CVB-02574B_TH.indd 1 2008-07-10 �� 12:56:50 คุณสมบัติของเครื่องซักผ้า Samsung เครื่องใหม่ของคุณ เครื่องซักผ้าเครื่องใหม่ของคุณจะเปลี่ยนความรู้สึกในการซักผ้าของคุณอย่างสิ้นเชิง ตั้งแต่ความจุที่เหนือกว่าไปจนถึง ประสิทธิภาพในการใช้พลังงาน เครื่องซักผ้า Samsung มีคุณสมบัติเพียบพร้อมที่จะทำให้งานหนักกลายเป็นเรื่องง่าย สำหรับคุณ • ถังซักไดมอนด์ดรัม - สมรรถนะการซักที่ทรงพลัง พร้อมทั้งปกป้องผ้าของคุณ ให้สมรรถนะการซักที่ดีขึ้นกว่าถังซักทั่วไป ด้วยการทำงานแบบกระดาน ซักผ้าที่ได้จากกระแสน้ำภายในถังซัก • บอลบาลานซ์ - ประทับใจกับความเงียบ ไม่มีเสียงรบกวน ไม่มีการสั่นสะเทือน ลดการสั่นสะเทือนและเสียงรบกวนด้วยการใช้ระบบบอลบาลานซ์ที่ให้สมดุลของถังซักอย่างสมบูรณ์แบบ • ฟังก์ชันประหยัดที่คุณเลือกได้ - ประหยัดน้ำ เวลา และพลังงาน ตรวจจับน้ำหนักผ้าได้ 7 ระดับและลดการใช้น้ำ เวลา และพลังงาน • แอร์วอช - การฆ่าเชื้อและขจัดกลิ่นอับโดยไม่ต้องใช้น้ำ คืนความสดชื่นแก่ผ้าชิ้นโปรดของคุณด้วยการใช้อากาศหลังจากงานปาร์ตี้ (กลิ่นอาหาร บุหรี่) คุณไม่จำเป็นต้องซักผ้าที่ไม่เปื้อนอีกต่อไป เพียงเติมความสดชื่นให้กับผ้า ด้วย 4 โปรแกรมสำหรับเนื้อผ้าชนิดต่างๆ • โปรแกรมยับยั้งเชื้อโรค - การฆ่าเชื้อและต่อต้านแบคทีเรียด้วยน้ำเย็นเท่านั้น องค์ประกอบที่ลงตัว! เทคโนโลยียับยั้งเชื้อโรคของ Samsung ประกอบด้วยประสิทธิภาพการยับยั้งเชื้อโรค ของประจุเงินจากวิทยาการล้ำหน้า สำหรับการซักที่สะอาดหมดจด! เพลทเงินบริสุทธิ์สองเพลทจะถูกเปลี่ยน เป็นประจุเงินผ่านกระบวนการอิเล็กโตรไลสิส แม้ขณะที่ใช้น้ำเย็นที่ไม่มีสารฟอก อนุภาคของเงินจะช่วยขจัด แบคทีเรียที่ทำให้เกิดกลิ่นอับ ทำให้คุณได้การซักที่ "สุดสะอาด" ดังนั้น การซักผ้าในน้ำเย็นจึงช่วยประหยัด พลังงานและเป็นประโยชน์สำหรับผ้าของคุณในขณะเดียวกัน • มอเตอร์ไดเรคไดรฟ์ เนื่องจากถังซักไม่ได้ใช้สายพานหรือเฟือง ทำให้สามารถลดการสั่นสะเทือนได้อย่างมาก คุณสมบัตินี้จะช่วย ให้เครื่องซักผ้าของคุณเงียบและทนทานยิ่งขึ้น • ล็อคป้องกันเด็ก ฟังก์ชันล็อคป้องกันเด็กช่วยป้องกันมือไม่ให้มือน้อยๆ ที่ซุกซนสามารถเปิดเครื่องซักผ้าได้โดยไม่ตั้งใจ คุณลักษณะเพื่อความปลอดภัยนี้ช่วยป้องกันไม่ให้เด็กๆ เล่นกับการทำงานของเครื่องซักผ้า และยังเตือน ให้คุณทราบเมื่อมีการใช้งาน 2_ คุณสมบัติ WD8122CVB-02574B_TH.indd 2 2008-07-10 �� 12:56:55 • การตั้งเวลาสิ้นสุด ตั้งเวลาสิ้นสุดสำหรับโปรแกรมซักได้ถึง 19 ชั่วโมง โดยเพิ่มได้ครั้งละหนึ่งชั่วโมง เพิ่มความสะดวกในการ ใช้เครื่องซักผ้า โดยเฉพาะเมื่อคุณต้องออกจากบ้าน • ผ่านการรับรองสำหรับขนสัตว์ เครื่องซักผ้านี้ผ่านการทดสอบและผ่านข้อกำหนดของ Woolmark Company สำหรับผลิตภัณฑ์ขนสัตว์ที่ใช้ เครื่องซักผ้าได้ โปรดซักผ้าตามคำแนะนำที่ฉลากของผ้า ตามที่ระบุโดย Woolmark และ Samsung • จอแสดงผลดิจิตัล จอแสดงผลดิจิตัล (แผงควบคุม) มีความชัดเจนและใช้งานง่าย เพื่อความสะดวกในการใช้งาน นอกจากนี้ จอแสดงผลดิจิตัลนี้ยังให้ความสะดวกในการปรับค่าต่างๆ เพื่อให้การซักที่ดีเยี่ยม • ประตูแบบกว้าง ช่องประตูกว้างพิเศษเพื่อการดูที่สะดวก ใส่และนำผ้าออกได้ง่าย โดยเฉพาะสำหรับผ้าชิ้นใหญ่เช่นผ้าปูเตียง และผ้าขนหนู ฯลฯ คู่มือผู้ใช้นี้ประกอบด้วยข้อมูลอันเป็นประโยชน์เกี่ยวกับการติดตั้ง การใช้งาน และดูแลรักษาเครื่องซักผ้า Samsung ของคุณ โปรดอ่านคู่มือนี้เพื่อดูคำอธิบายแผงควบคุม คำแนะนำในการใช้เครื่องซักผ้า เคล็ดลับในการใช้ประโยชน์จาก คุณสมบัติและฟังก์ชันของวิทยาการล้ำหน้า หัวข้อ 'การแก้ไขปัญหา' ในหน้า 29 จะบอกให้คุณทราบถ้ามีสิ่งผิดปกติกับ เครื่องซักผ้าของคุณ คุณสมบัติ _3 WD8122CVB-02574B_TH.indd 3 2008-07-10 �� 12:56:55 ข้อมูลเกี่ยวกับความปลอดภัย ในคู่มือเล่มนี้ คุณจะพบกับคำเตือน และข้อควรระวัง ซึ่งข้อมูลเหล่านี้ตลอดจนข้อมูลสำคัญด้านความปลอดภัย ต่อไปนี้มิได้ครอบคลุมถึงเงื่อนไขและสถานการณ์ทั้งหมดที่อาจเกิดขึ้น คุณมีหน้าที่จะต้องใช้สามัญสำนึก ความระมัดระวัง และใส่ใจกับการติดตั้ง บำรุงรักษา และใช้งานเครื่องซักผ้า Samsung ไม่มีส่วนรับผิดต่อความเสียหายที่เกิดจากการใช้งาน อย่างไม่เหมาะสม สัญลักษณ์และคำเตือนเพื่อความปลอดภัยที่สำคัญ ความหมายของสัญลักษณ์และเครื่องหมายในคู่มือผู้ใช้นี้: คำเตือน ข้อควรระวัง ข้อควรระวัง อันตรายหรือการกระทำที่ไม่ปลอดภัยที่อาจทำให้เกิด การบาดเจ็บสาหัสหรือเสียชีวิต อันตรายหรือการกระทำที่ไม่ปลอดภัยที่อาจทำให้เกิด การบาดเจ็บหรือทรัพย์สินเสียหาย ในการลดความเสี่ยงจากไฟ การระเบิด ไฟฟ้าช็อต หรือการบาดเจ็บขณะใช้เครื่องซักผ้า โปรดปฏิบัติตามข้อควรระวังเพื่อความปลอดภัยต่อไปนี้: ห้ามทำ ห้ามถอดประกอบ ห้ามสัมผัส ทำตามคำแนะนำอย่างเคร่งครัด ถอดปลั๊กของเครื่องซักผ้าจากเต้าเสียบที่ผนัง ตรวจสอบว่าเครื่องมีการลงกราวด์เพื่อป้องกันไฟฟ้าดูด ติดต่อศูนย์บริการเพื่อขอรับความช่วยเหลือ บันทึก สัญลักษณ์คำเตือนเหล่านี้มีให้เพื่อป้องกันการบาดเจ็บของตัวคุณเองและบุคคลอื่น โปรดปฏิบัติตามอย่างเคร่งครัด หลังจากอ่านส่วนนี้แล้ว โปรดเก็บไว้เพื่อนำมาอ้างอิงในภายหลัง อ่านคำแนะนำทั้งหมดก่อนที่จะใช้อุปกรณ์ เช่นเดียวกับอุปกรณ์ทุกชนิดที่ใช้ไฟฟ้าและมีชิ้นส่วนที่เคลื่อนไหว อุปกรณ์นี้อาจมีอันตรายได้ ในการใช้ อุปกรณ์นี้อย่างปลอดภัย โปรดทำความเข้าใจกับการทำงานและใช้ความระมัดระวังขณะใช้งาน ติดตั้งและเก็บเครื่องซักผ้าไว้ภายในอาคาร ให้พ้นจากสภาพอากาศภายนอก ติดตั้งและปรับระดับเครื่องซักผ้าบนพื้นที่สามารถรับน้ำหนักได้ เครื่องซักผ้าต้องได้รับการลงกราวด์อย่างเหมาะสม ห้ามเสียบปลั๊กกับเต้าเสียบที่ไม่ได้ลงกราวด์ 4_ ข้อมูลเกี่ยวกับความปลอดภัย WD8122CVB-02574B_TH.indd 4 2008-07-10 �� 12:56:59 ข้อควรระวัง ในการลดความเสี่ยงที่จะเกิดไฟไหม้หรือระเบิด: • ห้ามซักผ้าที่มีการซัก แช่ หรือผ่านการใช้น้ำมันเบนซิน น้ำยาซักแห้ง หรือสารไวไฟอื่นๆ ซึ่งจะ ทำให้เกิดไอที่สามารถติดไฟหรือระเบิดได้ โปรดนำผ้าที่ผ่านการใช้สารทำละลายซักแห้งหรือสาร ไวไฟอื่นๆ มาล้างน้ำก่อนที่จะใส่ลงในเครื่องซักผ้า โปรดขจัดของเหลว ของแข็ง และไอของวัตถุ ไวไฟดังกล่าวออกจนหมด สารอันตรายดังกล่าวรวมถึงอะซีโทน แอลกอฮอล์ที่แปรรูป น้ำมันเบนซิน น้ำมันก๊าด สารทำความสะอาดในบ้านบางชนิด และน้ำยาลบคราบ ขี้ผึ้ง และสารขจัดขี้ผึ้ง • ห้ามใส่น้ำมันเบนซิน น้ำยาซักแห้ง หรือสารไวไฟอื่นๆ ในเครื่องซักผ้า • ในบางกรณีอาจมีก๊าซไฮโดรเจนเกิดขึ้นในระบบน้ำร้อน เช่น เครื่องทำน้ำร้อนของคุณ ซึ่งไม่ได้ใช้งาน เป็นเวลาสองสัปดาห์ขึ้นไป ก๊าซไฮโดรเจนนั้นสามารถระเบิดได้ ถ้าระบบน้ำร้อนของคุณไม่ได้มีการ ใช้งานเป็นเวลาสองสัปดาห์ขึ้นไป ให้เปิดก๊อกน้ำร้อนทั้งหมดในบ้าน ปล่อยให้น้ำไหลสักครู่ก่อนที่จะใช้ เครื่องซักผ้า ซึ่งจะเป็นการระบายก๊าซไฮโดรเจนสะสม เนื่องจากก๊าซไฮโดรเจนนั้นเป็นวัตถุไวไฟ โปรดอย่าสูบบุหรี่หรือจุดไฟในระหว่างนี้ ระบายอากาศทันที โดยไม่สัมผัสกับปลั๊กไฟ ถ้ามีก๊าซรั่ว ถอดปลั๊กไฟก่อนที่จะซ่อมบำรุงเครื่องซักผ้า ก่อนการซักแต่ละครั้ง ให้นำสิ่งของออกจากประเป๋าของผ้าก่อน ของแข็งขนาดเล็กที่มีรูปร่างต่างๆ เช่น เหรียญ มีด เข็มหมุด และคลิปหนีบกระดาษอาจทำให้เครื่องซักผ้าเสียหาย ห้ามซักผ้าที่มีหัวเข็มขัด กระดุม หรือโลหะขนาดใหญ่ติดอยู่ ห้ามเปิดประตูเครื่องซักผ้า ถ้าคุณยังเห็นน้ำภายใน ตรวจสอบว่าได้ระบายน้ำจนหมดแล้วก่อนที่จะเปิดประตู ห้ามซ่อมแซม เปลี่ยน หรือซ่อมบำรุงส่วนหนึ่งส่วนใดของเครื่องซักผ้าด้วยตนเอง ยกเว้นคุณจะเข้าใจ คำแนะนำในการซ่อมบำรุงด้วยตนเองที่แนะนำ และมีทักษะในการดำเนินการทั้งหมด การทำงานโดย บุคคลที่ไม่มีความชำนาญจะทำให้การรับประกันของคุณเป็นโมฆะ ต่อเครื่องซักผ้าเข้ากับท่อจ่ายน้ำหลักโดยใช้ท่อชุดใหม่ ห้ามใช้ท่อชุดเก่า ท่อจ่ายน้ำจะมีการเสื่อมสภาพเมื่อเวลาผ่านไป ตรวจสอบท่อเป็นประจำ เพื่อดูรอยปูด หัก งอ รอยแตก สึกหรอ หรือรั่วซึม และเปลี่ยนท่อใหม่ตามต้องการ หรืออย่างน้อยทุกห้าปี โปรดนำหมุดของบรรจุภัณฑ์ที่ใช้ในการขนส่งออกก่อนที่จะใช้อุปกรณ์ มิฉะนั้นอาจเกิดความเสียหายแก่ อุปกรณ์อย่างร้ายแรง โปรดดูที่ "การนำหมุดสำหรับการขนส่งออก" ก่อนที่จะซักผ้าเป็นครั้งแรก คุณต้องเปิดเครื่องให้ทำงานครบทุกขั้นตอนโดยไม่ใส่ผ้า โปรดดูที่หัวข้อ "การซักครั้งแรก" ข้อมูลเกี่ยวกับความปลอดภัย _5 WD8122CVB-02574B_TH.indd 5 2008-07-10 �� 12:57:00 ข้อมูลเกี่ยวกับความปลอดภัย อุปกรณ์นี้ได้รับการออกแบบสำหรับใช้ในบ้านพักอาศัยเท่านั้น คำเตือน โปรดให้ช่างผู้มีความชำนาญงานเป็นผู้ต่อท่อน้ำและสายไฟ โปรดปฏิบัติตามคู่มือผู้ใช้ (โปรดดูที่ “การติดตั้งเครื่องซักผ้า”) และระเบียบว่าด้วยความปลอดภัยของเขตพื้นที่ ก่อนที่จะทำความสะอาดหรือดูแลรักษาเครื่อง โปรดถอดปลั๊กของเครื่องออกจากแหล่งจ่ายไฟ ถอดปลั๊กของเครื่องและปิดน้ำทุกครั้งหลังจากใช้งาน ตรวจสอบว่าไม่มีสิ่งใดอยู่ในกระเป๋าเสื้อผ้าที่จะซัก ของแข็ง ของมีคม เช่น เหรียญ เข็มกลัด ตะปู ตะปูควง หรือก้อนหินอาจทำให้เกิดความเสียหายแก่อุปกรณ์ได้ อย่าให้สัตว์เลี้ยงหรือเด็กเล่นที่ด้านบนหรือภายในเครื่อง เนื่องจากจะทำให้บาดเจ็บหรือหายใจไม่ออก ประตูกระจกจะร้อนจัด ระหว่างกระบวนการซัก ห้ามสัมผัสประตูกระจกขณะที่เครื่องทำงาน โปรดอย่าซ่อมแซมเครื่องด้วยตนเอง การซ่อมแซมโดยผู้ที่ไม่ชำนาญอาจทำให้เกิดการบาดเจ็บ และ/หรือ ทำให้อุปกรณ์เกิดความเสียหายอย่างรุนแรง กรณีที่ปลั๊ก (สายไฟ) ของเครื่องใช้ไฟฟ้านี้เกิดเสียหาย ต้องให้ผู้ผลิต ตัวแทนให้บริการ หรือผู้ที่มีความชำนาญ เป็นผู้เปลี่ยนสายไฟ เพื่อไม่ให้เกิดอันตราย อุปกรณ์นี้ควรได้รับการซ่อมบำรุงโดยศูนย์บริการที่ได้รับอนุญาต และควรใช้เฉพาะอะไหล่ที่ได้มาตรฐานเท่านั้น คำเตือน ห้ามปล่อยให้เด็ก (หรือสัตว์เลี้ยง) เล่นหรืออยู่ในเครื่องซักผ้า ประตูเครื่องซักผ้านั้นไม่สามารถเปิดได้โดยง่ายจาก ภายใน และเด็กอาจได้รับบาดเจ็บร้ายแรงถ้าติดอยู่ภายใน อุปกรณ์นี้ไม่ได้มีให้ใช้โดยเด็กหรือบุคคลที่ไม่แข็งแรง ยกเว้นจะได้รับการดูแลอย่างใกล้ชิดจากบุคคลที่รับผิดชอบ เพื่อให้มั่นใจว่าสามารถใช้เครื่องได้อย่างปลอดภัย โปรดดูแลมิให้เด็กเล็กเล่นกับอุปกรณ์นี้ ในการใช้อุปกรณ์นี้อย่างปลอดภัย โปรดทำความเข้าใจกับการทำงานและใช้ความระมัดระวังขณะใช้งาน ควรจัดวางอุปกรณ์นี้เพื่อให้สามารถเข้าถึงปลั๊กไฟ ก๊อกน้ำและท่อระบายน้ำได้โดยง่าย คำเตือน บรรจุภัณฑ์อาจเป็นอันตรายต่อเด็ก โปรดเก็บบรรจุภัณฑ์ทั้งหมด (ถุงพลาสติก โฟม ฯลฯ) ให้พ้นมือเด็ก ห้ามใช้น้ำผ่านกระบวนการบำบัด ซึ่งประกอบด้วยน้ำมัน ครีม หรือโลชัน ซึ่งมักพบในร้านดูแลผิวพรรณหรือ ร้านนวด • มิฉะนั้นจะทำให้วัสดุเกิดความเสียหาย และทำให้เกิดการทำงานผิดพลาดหรือน้ำรั่ว 6_ ข้อมูลเกี่ยวกับความปลอดภัย WD8122CVB-02574B_TH.indd 6 2008-07-10 �� 12:57:00 ตามปกติ ถังซักสเตนเลสจะไม่ขึ้นสนิม แต่ถ้ามีโลหะ เช่น กิ๊บติดผมหลงเหลืออยู่ในถังซักเป็นเวลานาน ถังอาจเป็นสนิมได้ • ห้ามทิ้งให้น้ำหรือสารฟอกขาวที่มีคลอรีนเหลืออยู่ในถังซักเป็นเวลานาน • ห้ามใช้หรือปล่อยให้น้ำที่มีธาตุเหล็กอยู่ในถังเป็นเวลานาน หากถังซักเริ่มมีลักษณะเป็นสนิมที่ พื้นผิว ให้ใช้สารทำความสะอาด (ไม่เป็นกรดหรือด่าง) กับพื้นผิว และใช้ฟองน้ำหรือผ้านุ่ม ทำความสะอาด (ห้ามใช้แปรงขนลวดเด็ดขาด) สำหรับเครื่องซักผ้าที่มีช่องระบายอากาศที่ฐาน โปรดอย่าให้พรมหรือวัสดุชนิดอื่นปิดกั้นช่องนี้ ใช้ชุดท่อใหม่ ไม่ควรนำชุดท่อเดิมกลับมาใช้ใหม่ ข้อมูลเกี่ยวกับความปลอดภัย _7 WD8122CVB-02574B_TH.indd 7 2008-07-10 �� 12:57:01 สารบัญ การติดตั้งเครื่องซักผ้า 9 9 10 10 10 11 11 11 11 11 การตรวจสอบชิ้นส่วนและแผงควบคุม การปฏิบัติตามข้อกำหนดในการติดตั้ง คำเตือนเกี่ยวกับไฟฟ้าและการลงกราวด์ การจ่ายน้ำ การระบายน้ำ พื้น อุณหภูมิโดยรอบ การติดตั้งในซุ้มหรือตู้ การติดตั้งเครื่องซักผ้า การซักผ้า 17 17 17 18 20 20 20 21 22 23 25 25 25 การซักครั้งแรก คำแนะนำเบื้องต้น การใช้แผงควบคุม ล็อคป้องกันเด็ก ตั้งเวลาซักล่วงหน้า เพิ่มผ้า แอร์วอช การซักโดยใช้ปุ่มเลือกโปรแกรมซัก การซักด้วยตนเอง ข้อมูลผงซักฟอกและสารเพิ่มเติมต่างๆ ควรใช้ผงซักฟอกแบบใด ช่องใส่ผงซักฟอก การทำความสะอาดและดูแลรักษาเครื่องซักผ้า 26 26 26 27 27 28 28 28 29 30 การทิ้งน้ำเมื่อเกิดเหตุฉุกเฉิน การทำความสะอาดภายนอก การทำความสะอาดช่องใส่และที่พักผงซักฟอก การทำความสะอาดตัวกรองเศษผ้า การทำความสะอาดตัวกรองท่อจ่ายน้ำ การซ่อมแซมเครื่องซักผ้าหากน้ำแข็งตัว การจัดเก็บเครื่องซักผ้า ตรวจสอบสิ่งต่อไปนี้ถ้าเครื่องซักผ้าของคุณ… รหัสข้อมูล ผังโปรแกรม 31 31 ผังโปรแกรม ภาคผนวก 32 32 32 33 ผังการดูแลผ้า การปกป้องสิ่งแวดล้อม ประกาศเกี่ยวกับมาตรฐาน ข้อมูลจำเพาะ 32 8_ สารบัญ WD8122CVB-02574B_TH.indd 8 2008-07-10 �� 12:57:01 การติดตั้งเครื่องซักผ้า โปรดให้ผู้ติดตั้งปฏิบัติตามคำแนะนำนี้อย่างเคร่งครัด เพื่อให้เครื่องซักผ้าใหม่ของคุณทำงานอย่างถูกต้อง และไม่เสี่ยงต่อการ บาดเจ็บขณะซักผ้า การตรวจสอบชิ้นส่วนและแผงควบคุม 01 การตั้งค่า นำเครื่องซักผ้าออกจากบรรจุภัณฑ์ และตรวจสอบว่าคุณได้รับชิ้นส่วนทั้งหมดที่แสดงด้านล่างนี้ ถ้าเครื่องซักผ้าของคุณได้รับความ เสียหายระหว่างการขนส่ง หรือถ้าคุณไม่ได้รับชิ้นส่วนทั้งหมดครบถ้วน โปรดติดต่อฝ่ายบริการลูกค้าของ Samsung หรือตัวแทน จำหน่ายของ Samsung อุปกรณ์เสริม ช่องใส่ผงซักฟอก แผงควบคุม ปลั๊ก ประตู ท่อน้ำทิ้ง ขาตั้งปรับได้ ตัวกรอง ท่อทิ้งน้ำฉุกเฉิน ฝาครอบตัวกรอง (ใช้สำหรับ ช่องใส่หมุด) ประแจ ที่ปิดช่องใส่หมุด ท่อจ่ายน้ำ ตัวนำท่อ ท่อน้ำทิ้ง คู่มือผู้ใช้ การติดตั้งเครื่องซักผ้า _9 WD8122CVB-02574B_TH.indd 9 2008-07-10 �� 12:57:05 การติดตั้งเครื่องซักผ้า การปฏิบัติตามข้อกำหนดในการติดตั้ง คำเตือนเกี่ยวกับไฟฟ้าและการลงกราวด์ เพื่อป้องกันการเกิดเพลิงไหม้ ไฟฟ้าช็อต หรือการบาดเจ็บโดยไม่จำเป็น การเดินสายและสายกราวด์ทั้งหมดจะต้อง กระทำตามข้อกำหนด National Electrical Code ANSI/FNPA, No. 70 ฉบับล่าสุด และรหัสและข้อบังคับในพื้นที่ เจ้าของอุปกรณ์มีหน้าที่จัดหาบริการด้านไฟฟ้าที่เพียงพอสำหรับอุปกรณ์นี้ ห้ามใช้สายไฟสำหรับต่อ ใช้สายไฟที่มากับเครื่องซักผ้าเท่านั้น คำเตือน ขณะที่เตรียมพร้อมสำหรับการติดตั้ง โปรดตรวจสอบว่าแหล่งจ่ายไฟของคุณมีสิ่งต่อไปนี้: • ฟิวส์หรือเบรกเกอร์ 220V~240V 50Hz 15 แอมป์ • วงจรสาขาแยกสำหรับเครื่องซักผ้าโดยเฉพาะ เครื่องซักผ้าต้องได้รับการลงกราวด์ ถ้าเครื่องซักผ้าทำงานผิดปกติหรือเสียหาย การลงกราวด์จะช่วยลดความเสี่ยง ที่จะเกิดไฟฟ้าช็อต โดยจะเป็นทางระบายกระแสไฟฟ้าที่มีแรงต้านทานน้อยที่สุด เครื่องซักผ้าของคุณมาพร้อมกับสายไฟที่มีปลั๊กลงกราวด์สามขา สำหรับใช้กับเต้าเสียบไฟฟ้าที่ติดตั้งและลงกราวด์ อย่างเหมาะสม ห้ามต่อสายกราวด์เข้ากับท่อพลาสติก ท่อก๊าซ หรือท่อน้ำร้อน การเชื่อมต่อสายกราวด์อุปกรณ์อย่างไม่เหมาะสมจะทำให้เกิดไฟฟ้าช็อต ติดต่อช่างไฟฟ้าหรือช่างซ่อมบำรุงที่มีความชำนาญ ถ้าคุณไม่แน่ใจว่าเครื่องซักผ้ามีการลงกราวด์อย่างเหมาะสมหรือไม่ ห้ามดัดแปลงปลั๊กที่มากับเครื่องซักผ้า ถ้าไม่สามารถใช้ร่วมกับเต้าเสียบได้ โปรดให้ช่างที่มีความชำนาญเป็นผู้ติดตั้ง เต้าเสียบที่เหมาะสม การจ่ายน้ำ เครื่องซักผ้าของคุณจะเติมน้ำอย่างเหมาะสมเมื่อมีแรงดันน้ำ 50 kPa ~ 800 kPa แรงดันน้ำต่ำกว่า 50 kPa จะทำให้วาล์วน้ำ ทำงานผิดพลาด ทำให้วาล์วน้ำไม่สามารถปิดอย่างเหมาะสม หรือมิฉะนั้น อาจทำให้เครื่องซักผ้า ใช้เวลาในการเติมน้ำนานเกินกว่าที่ระบบควบคุมกำหนด ทำให้เครื่องซักผ้าปิดลง (ในระบบควบคุมมีขีดจำกัดเวลา การเติมน้ำ ได้รับการออกแบบเพื่อป้องกันน้ำล้น/ท่วมถ้าท่อน้ำหลวม) ก๊อกน้ำต้องห่างไม่เกิน 4 ฟุต (122 ซม.) จากด้านหลังของเครื่องซักผ้า เพื่อให้สามารถต่อท่อน้ำที่ให้มากับเครื่องซักผ้าได้ ร้านจำหน่ายอุปกรณ์เดินท่อจะมีท่อจ่ายน้ำความยาวต่างๆ ถึง 10 ฟุต (305 ซม.) คำเตือน คุณสามารถลดความเสี่ยงของน้ำรั่วและความเสียหายจากน้ำโดย: • ติดตั้งให้ท่อน้ำอยู่ในระยะที่เอื้อมถึงได้ง่าย • ปิดก๊อกเมื่อไม่ได้ใช้งานเครื่องซักผ้า • ตรวจสอบรอยรั่วที่ข้อต่อของท่อจ่ายน้ำเป็นประจำ ก่อนที่จะใช้เครื่องซักผ้าเป็นครั้งแรก โปรดตรวจสอบการต่อท่อ และวาล์วจ่ายน้ำเพื่อหารอยรั่ว 10_ การติดตั้งเครื่องซักผ้า WD8122CVB-02574B_TH.indd 10 2008-07-10 �� 12:57:06 การระบายน้ำ Samsung แนะนำให้ใช้ท่อตั้งมีความสูง 18 นิ้ว (46 ซม.) ท่อระบายน้ำต้องวางผ่านคลิปท่อระบายน้ำไปยังท่อตั้งดังกล่าว ท่อตั้งจะต้องมีขนาดใหญ่พอที่จะรับเส้นผ่าศูนย์กลางภายนอกของท่อระบายน้ำ ท่อระบายน้ำติดมาจากโรงงาน เพื่อสมรรถนะในการทำงานที่ดีที่สุด โปรดติดตั้งเครื่องซักผ้าบนพื้นที่ก่อสร้างอย่างแข็งแรง พื้นไม้อาจต้องได้รับการ เสริมแรงเพื่อลดการสั่นสะเทือน และ/หรือการรับน้ำหนักที่ขาดสมดุล พื้นผิวที่ปูพรมและวัสดุอ่อนนุ่มอาจทำให้เกิดการ สั่นสะเทือน และอาจทำให้เครื่องซักผ้าเคลื่อนตัวเล็กน้อยระหว่างรอบการปั่นหมาด 01 การตั้งค่า พื้น ห้ามติดตั้งเครื่องซักผ้าบนที่ยกพื้นหรือโครงสร้างที่ไม่แข็งแรง อุณหภูมิโดยรอบ ห้ามติดตั้งเครื่องซักผ้าในพื้นที่ซึ่งน้ำอาจแข็งตัวได้ เนื่องจากเครื่องซักผ้าของคุณจะมีน้ำอยู่ในวาล์ว ปั๊ม และท่อเสมอ น้ำที่แข็งตัวในท่ออาจทำให้สายพาน ปั๊ม และองค์ประกอบอื่นๆ เสียหาย การติดตั้งในซุ้มหรือตู้ ในการใช้งานอย่างปลอดภัยและเหมาะสม เครื่องซักผ้าต้องมีระยะห่าง: ด้านข้าง – 25 มม. ด้านหลัง – 51 มม. ด้านบน – 25 มม. ด้านหน้า – 465 มม. ถ้าติดตั้งทั้งเครื่องซักผ้าและเครื่องอบผ้าไว้ด้วยกัน ด้านหน้าของซุ้มหรือตู้จะต้องมีช่องเปิดที่ไม่มีสิ่งกีดขวางอย่างน้อย 465 มม. เครื่องซักผ้าเพียงอย่างเดียวจะไม่ต้องมีช่องเปิดสำหรับอากาศโดยเฉพาะ การติดตั้งเครื่องซักผ้า ขั้นตอนที่ 1 การเลือกที่ตั้ง ก่อนที่จะติดตั้งเครื่องซักผ้า โปรดตรวจสอบว่าสถานที่ตั้ง: • มีพื้นผิวแข็ง ได้ระดับ โดยไม่มีพรมหรือวัสดุปูพื้นที่อาจปิดกั้นการระบายอากาศ • พ้นจากแสงแดดโดยตรง • มีการระบายอากาศที่เพียงพอ • ไม่ทำให้น้ำแข็งตัว (ต่ำกว่า 32 °F หรือ 0 °C) • ห่างจากแหล่งความร้อน เช่น น้ำมันและก๊าซ • มีพื้นที่ว่างเพียงพอที่ไม่ทำให้เครื่องซักผ้าทับสายไฟ การติดตั้งเครื่องซักผ้า _11 WD8122CVB-02574B_TH.indd 11 2008-07-10 �� 12:57:06 การติดตั้งเครื่องซักผ้า ขั้นตอนที่ 2 การถอดหมุดสำหรับการขนส่ง ก่อนที่จะใช้เครื่องซักผ้า คุณต้องนำหมุดสำหรับการขนส่งห้าตัวออกจากด้านหลังของเครื่อง อุปกรณ์ 1. คลายหมุดด้วยประแจที่ให้มา อุปกรณ์เสริม 2. ดึงส่วนหัวของหมุดออกทางส่วนกว้างของช่อง สำหรับหมุดแต่ละตัว 3. นำฝาปิดพลาสติกที่ให้มาใส่ในช่อง 4. เก็บหมุดสำหรับขนส่งไว้ต่างหากในกรณีที่คุณต้องการย้ายเครื่องซักผ้าในอนาคต บรรจุภัณฑ์อาจเป็นอันตรายต่อเด็ก โปรดเก็บบรรจุภัณฑ์ทั้งหมด (ถุงพลาสติก โฟม ฯลฯ) ให้พ้นมือเด็ก คำเตือน 12_ การติดตั้งเครื่องซักผ้า WD8122CVB-02574B_TH.indd 12 2008-07-10 �� 12:57:08 ขั้นตอนที่ 3 การปรับขาตั้งปรับระดับ 01 การตั้งค่า เมื่อติดตั้งเครื่องซักผ้า ให้ตรวจสอบว่าปลั๊กไฟ ท่อจ่ายน้ำและท่อระบายน้ำ อยู่ในระยะที่เอื้อมถึงได้ง่าย 1. เลื่อนเครื่องซักผ้าเข้าสู่ที่ติดตั้ง 2. ปรับระดับของเครื่องซักผ้าด้วยการหมุนน็อตปรับ ดังที่แสดงในภาพ น็อตล็อค น็อตปรับ 3. เมื่อเครื่องซักผ้าได้ระดับแล้ว ให้ขันน็อตล็อคโดยใช้ไขควง (-) ขั้นตอนที่ 4 การต่อท่อจ่ายน้ำและท่อระบายน้ำ การต่อท่อจ่ายน้ำ 1. นำข้อต่อรูปตัว L สำหรับท่อจ่ายน้ำเย็นมาต่อเข้ากับ ท่อน้ำเย็นที่ด้านหลังของเครื่องซักผ้า ขันให้แน่น ด้วยมือ ท่อจ่ายน้ำจะต้องต่อเข้ากับเครื่องซักผ้าและต่อปลาย อีกด้านเข้ากับก๊อกน้ำ โปรดอย่าดึงท่อจ่ายน้ำจนตึง หากท่อสั้นเกินไป โปรดเปลี่ยนไปใช้ท่อแรงดันสูงที่ยาวขึ้น 2. ต่อปลายอีกด้านเข้ากับก๊อกน้ำเย็นที่อ่างซักล้าง และขันให้แน่นด้วยมือ หากจำเป็น คุณสามารถจัด ตำแหน่งของท่อจ่ายน้ำที่เครื่องซักผ้า โดยคลายข้อต่อ หมุนสาย และขันข้อต่อเข้าที่อีกครั้ง สำหรับบางรุ่นที่มีช่องรับน้ำร้อน: 1. นำข้อต่อรูปตัว L สีแดงสำหรับท่อจ่ายน้ำร้อนมาต่อเข้า กับท่อน้ำร้อนที่ด้านหลังของเครื่องซักผ้า ขันให้แน่น ด้วยมือ 2. ต่อปลายอีกด้านเข้ากับก๊อกน้ำร้อนที่อ่างซักล้าง และ ขันให้แน่นด้วยมือ 3. ใช้อุปกรณ์รูปตัว Y เฉพาะหากคุณต้องการใช้น้ำเย็น อุปกรณ์เสริม การติดตั้งเครื่องซักผ้า _13 WD8122CVB-02574B_TH.indd 13 2008-07-10 �� 12:57:10 การติดตั้งเครื่องซักผ้า การต่อท่อจ่ายน้ำ (เฉพาะบางรุ่น) 1. ถอดข้อต่อออกจากท่อจ่ายน้ำ ข้อต่อ ท่อจ่ายน้ำ 2. ขั้นแรก ให้ใช้ไขควงหัวแฉก '+' เพื่อคลายสกรูสี่ตัวที่ข้อต่อ จากนั้นจับตัว ข้อต่อและหมุนส่วน (2) ตามลูกศรจนมีช่องว่าง 5 มม. 1 5 มม. 2 3. ต่อตัวแปลงเข้ากับก๊อกน้ำโดยขันสกรูให้แน่น และยกตัวแปลงขึ้น หมุนส่วน (2) ตามลูกศร และต่อ (1) เข้ากับ (2) ก๊อกน้ำ 1 2 4. ต่อท่อจ่ายน้ำเข้ากับข้อต่อ เมื่อปล่อยส่วน (3) ท่อจะต่อเข้า กับข้อต่อโดยอัตโนมัติและมีเสียง 'คลิก' หลังจากต่อท่อจ่ายน้ำเข้ากับข้อต่อแล้ว ให้ตรวจสอบว่ามี การเชื่อมต่ออย่างถูกต้อง โดยดึงท่อจ่ายน้ำลง 3 5. ต่อปลายอีกด้านของท่อจ่ายน้ำเข้ากับวาล์วน้ำเข้าที่ด้านหลัง ของเครื่อง ขันท่อตามเข็มนาฬิกาจนสุด อุปกรณ์เสริม 14_ การติดตั้งเครื่องซักผ้า WD8122CVB-02574B_TH.indd 14 2008-07-10 �� 12:57:14 ✗ ✗ 01 การตั้งค่า 6. เปิดน้ำ และดูว่าไม่มีน้ำรั่วจากวาล์วน้ำ ก๊อก หรือข้อต่อ ถ้ามีน้ำรั่ว ให้ทำตามขั้นตอนก่อนหน้านี้ซ้ำ ห้ามใช้เครื่องซักผ้าถ้ามีน้ำรั่ว เนื่องจากอาจทำให้ไฟฟ้าช็อตหรือ เกิดการบาดเจ็บได้ คำเตือน • หากก๊อกน้ำมีปากเป็นเกลียว ให้ต่อท่อจ่ายน้ำเข้ากับก๊อกตามภาพ ใช้ก๊อกน้ำแบบทั่วไปสำหรับการจ่ายน้ำ ในกรณีที่ก๊อกเป็นแบบ เหลี่ยมหรือใหญ่เกินไป ให้ถอดวงแหวนออกก่อนที่จะใส่ก๊อกเข้า กับข้อต่อ การติดตั้งเครื่องซักผ้า _15 WD8122CVB-02574B_TH.indd 15 2008-07-10 �� 12:57:15 การติดตั้งเครื่องซักผ้า การต่อท่อน้ำทิ้ง ปลายของท่อน้ำทิ้งจะสามารถอยู่ในตำแหน่งต่อไปนี้: 1. เหนือขอบอ่างล้างจาน: ท่อน้ำทิ้งจะต้องมีความสูงระหว่าง 60 ถึง 90 ซม. ถ้าต้องการให้ส่วนของท่อ น้ำทิ้งงอ ให้ใช้ตัวนำท่อที่ให้มา ติดตัวนำท่อเข้ากับผนังด้วยตะขอ หรือเกี่ยวกับก๊อกน้ำด้วยเชือก เพื่อไม่ให้ท่อน้ำทิ้งขยับ 60 ~ 90 ซม. ท่อน้ำทิ้ง ตัวนำท่อ 2. ในท่อสาขาของท่อระบายอ่างซักล้าง: ท่อแยกน้ำทิ้งจะต้องอยู่เหนือท่อพักของอ่าง เพื่อให้ปลายท่ออยู่เหนือ พื้นดินอย่างน้อย 60 ซม. 3. ในท่อน้ำทิ้ง:Samsung ขอแนะนำให้คุณใช้ท่อแนวตั้งความสูง 65 ซม. ซึ่งจะต้องไม่สั้นกว่า 60 ซม. และไม่ยาวเกิน 90 ซม. ขั้นตอนที่ 5 การต่อสายไฟของเครื่องซักผ้า เสียบปลั๊กไฟเข้ากับเต้าเสียบที่ผนัง ซึ่งมีแรงดันไฟฟ้า 230 โวลต์ 50 เฮิรตซ์ ป้องกันด้วยฟิวส์ 15 แอมป์ หรือเบรกเกอร์ (สำหรับข้อมูลเพิ่มเติมเกี่ยวกับข้อกำหนดด้านไฟฟ้าและการลงกราวด์ โปรดดูที่หน้า 10) 16_ การติดตั้งเครื่องซักผ้า WD8122CVB-02574B_TH.indd 16 2008-07-10 �� 12:57:19 การซักผ้า ด้วยเครื่องซักผ้าใหม่ของคุณ สิ่งที่ยากที่สุดในการซักผ้าก็คือการตัดสินใจว่าจะซักผ้าชิ้นไหนดี การซักครั้งแรก 1. 2. 3. 4. 02 การซักผ้า ก่อนที่จะซักผ้าเป็นครั้งแรก คุณต้องเปิดเครื่องให้ทำงานครบทุกขั้นตอนโดยที่ถังซักว่าง (ไม่มีผ้า) กดปุ่ม เปิด/ปิด เติมผงซักฟอกปริมาณเล็กน้อยในช่องใส่ผงซักฟอก ในลิ้นชักผงซักฟอก เปิดน้ำเข้าสู่เครื่องซักผ้า กดปุ่ม เริ่ม/พัก การทำงานนี้จะทิ้งน้ำที่หลงเหลืออยู่จากการทดสอบเครื่องของผู้ผลิต ช่องใส่ : ผ งซักฟอกสำหรับการแช่หรือการลงแป้ง ช่องใส่ : ผ งซักฟอกสำหรับรอบการซักหลัก น้ำยาปรับสภาพน้ำ สารแช่ผ้า สารฟอกและผลิตภัณฑ์ขจัดคราบ ช่องใส่ : ส ารเพิ่มเติม เช่น น้ำยาปรับผ้านุ่มหรือน้ำยารักษาเนื้อผ้า (ห้ามเติมเกินกว่าขอบด้านล่าง (MAX) ของ “A”) คำแนะนำเบื้องต้น 1. ใส่ผ้าในเครื่องซักผ้า ห้ามใส่ผ้าเกินปริมาณที่กำหนด ถ้าต้องการทราบระดับความจุ สำหรับผ้าแต่ละชนิด โปรดดูแผนผังในหน้า 24 คำเตือน • ตรวจสอบว่าผ้าไม่ติดกับประตู เนื่องจากจะทำให้น้ำรั่ว • ผงซักฟอกอาจตกค้างอยู่ที่ส่วนของยางในเครื่องซักผ้าหลังจากรอบการซัก โปรดล้างผงซักฟอก ที่หลงเหลือออก เนื่องจากอาจทำให้น้ำรั่วได้ • ห้ามซักผ้าหรือสิ่งที่กันน้ำผ่านได้ 2. 3. 4. 5. ปิดประตูให้สลักล็อคเข้าที่ เปิดเครื่อง เติมผงซักฟอกและสารเพิ่มเติมในช่องเติม เลือกโปรแกรมซักและตัวเลือกการซักที่เหมาะสมไฟสัญญาณการซักจะสว่าง และเวลาในการซักโดย ประมาณจะปรากฏในจอแสดงผล 6. กดปุ่ม เริ่ม/พัก การซักผ้า _17 WD8122CVB-02574B_TH.indd 17 2008-07-10 �� 12:57:22 การซักผ้า การใช้แผงควบคุม 1 2 3 4 1 5 6 7 8 9 10 11 12 จอแสดง ผลดิจิตัล แสดงเวลาของรอบการซักที่เหลือ ข้อมูลการซัก และข้อความแสดงข้อผิดพลาด 2 ปุ่มเลือก โปรแกรมซัก เลือกรูปแบบการหมุนของถังซักและความเร็วการปั่นหมาดสำหรับรอบการซัก สำหรับข้อมูลโดยละเอียด โปรดดูที่ "การซักผ้าโดยใช้ปุ่มเลือกโปรแกรมซัก" ผ้าฝ้าย - สำหรับผ้าฝ้ายที่สกปรกปานกลางหรือน้อย ผ้าปูเตียง ผ้าปูโต๊ะ ชุดชั้นใน ผ้าขนหนู เชิ้ต ฯลฯ ผ้าห่ม - ผ้าปูที่นอนฝ้าย ผ้าปูที่นอน ผ้าคลุมเตียง ปลอกผ้านวม ปลอกหมอน ฯลฯ ซักเร็ว - โปรแกรมนี้ใช้สำหรับผ้าปริมาณน้อย สกปรกน้อย หรือผ้าที่ใช้งานบ่อย ในระยะเวลาสั้นๆ ถนอมผ้า - โปรแกรมนี้ใช้สำหรับซักผ้าที่บาง เช่น ชุดชั้นใน ซึ่งจะเปลี่ยนรูป หรือเสียหายได้ง่าย ผ้าขนหนู - โปรแกรมนี้เหมาะสำหรับการซักผ้าขนหนูอย่างมีประสิทธิภาพ ผ้าขนสัตว์ - เฉพาะสำหรับขนสัตว์ที่ซักด้วยเครื่องได้ รอบการซักผ้าขนสัตว์ของเครื่องนี้ได้รับการรับรองโดย Woolmark สำหรับ การซักผลิตภัณฑ์ Woolmark ที่ซักด้วยเครื่องได้ และมีการซักตามคำแนะนำ ที่ฉลากของผ้า และที่ผู้ผลิตเครื่องซักผ้าระบุ M0509 (หมายเลขใบรับรองจาก IWS NOM INEE Co., Ltd.) แอร์วอช - เหมาะสำหรับการขจัดกลิ่นอับ หมุน ปุ่มเลือกโปรแกรมซัก ตามโหมดการทำงานต่างๆ ต่อไปนี้: ไหมพรม โค้ท ผ้าปูที่นอน ป้องกันโรคภูมิแพ้ ล้างและปั่นหมาด - เหมาะสำหรับผ้าที่ต้องการเฉพาะการล้าง สำหรับเติมน้ำยาปรับผ้านุ่มที่สามารถเติมระหว่างการล้าง ล้างถังซัก - ใช้ฟังก์ชันนี้เพื่อดูแลถังซักให้สะอาดและถูกสุขอนามัย 3 ปุ่มเลือก ซิลเวอร์วอช เครื่องจะจ่ายน้ำ Silver Nano ระหว่างรอบการซัก ตลอดจน ในรอบการล้างครั้งสุดท้าย ซึ่งจะช่วยขจัดแบคทีเรียและป้องกัน การเติบโตของแบคทีเรียเป็นเวลาหนึ่งเดือน 1 18_ การซักผ้า WD8122CVB-02574B_TH.indd 18 2008-07-10 �� 12:57:24 ปุ่มเลือกตั้งเวลาซักล่วงหน้า กดปุ่มนี้ซ้ำๆ เพื่อเลือกตัวเลือกเวลาสิ้นสุดที่ใช้ได้ (ไม่เกิน 19 ชั่วโมง โดยเพิ่มได้ ครั้งละหนึ่งชั่วโมง) จำนวนชั่วโมงที่แสดงนั้นเป็นเวลาที่รอบการซักจะสิ้นสุดลง 5 ปุ่มเลือกอุณหภูมิ กดปุ่มนี้ซ้ำๆ เพื่อเลือกตัวเลือกอุณหภูมิของน้ำ: (น้ำเย็น , 30 °C, 40 °C, 60 °C, 75 °C และ 95 °C) 6 ปุ่มเลือกการล้าง กดปุ่มนี้เพื่อเพิ่มรอบการล้างน้ำ จำนวนสูงสุดของรอบ การล้างน้ำก็คือห้ารอบ 7 ปุ่มเลือกการปั่นหมาด กดปุ่มนี้ซ้ำๆ เพื่อเลือกตัวเลือกความเร็วในการปั่นหมาด “ไม่ปั่นหมาด ” - ผ้าจะอยู่ในถังและไม่มีการปั่นหมาดหลังจากการระบายน้ำครั้งสุดท้าย 8 ปุ่มเลือก การอบแห้ง กดปุ่มนี้เพื่อเลือกตัวเลือกดังต่อไปนี้ ปกติ พิเศษ รีดผ้า เบา เวลา (30 นาที 1:00 นาที 1:30 นาที 2:00 นาที 2:30 นาที) “ปกติ ” - เลือกเพื่อทำให้ผ้าแห้งโดยอัตโนมัติ โดยเครื่องจะตรวจสอบปริมาณและน้ำหนัก ผ้า เลือกตัวเลือกนี้เพื่อทำให้ผ้าฝ้ายแห้ง เช่น กางเกง เสื้อยืด และชุดชั้นในฝ้าย “พิเศษ ” - เลือกตัวเลือกนี้เพื่อทำให้ผ้าฝ้ายแห้งสนิท (ผ้าหนาเช่น กางเกงยีนส์ ผ้าขนหนู ชุดกีฬา ฯลฯ) “รีดผ้า ” - สิ้นสุดรอบการทำผ้าแห้งโดยที่ผ้ายังชื้นและเหมาะกับการรีด “เบา ” - ทำผ้าแห้งสำหรับผ้าที่อาจเสียรูปทรงเมื่อได้รับความร้อน (ผ้าเนื้อผสมและเส้นใย สังเคราะห์ เช่น โพลีเอสเตอร์และไนลอน) “เวลา ” - ทำผ้าแห้งตามเวลาที่ระบุ • โปรดหลีกเลี่ยงการซักผ้าที่ไม่สามารถอบแห้ง เนื่องจากอาจเสียรูปทรงแม้เมื่อ ใช้อุณหภูมิต่ำ • ตัวเลือก ปกติ พิเศษ รีดผ้า และเบา จะตรวจหาน้ำหนักของผ้าเพื่อแสดงเวลา ในการอบแห้งที่ถูกต้อง • สภาพการอบแห้งอาจแตกต่างกันไปตามประเภทและปริมาณของผ้า 9 ปุ่มเลือกเพิ่มผ้า เลือกตัวเลือกนี้เพื่อเพิ่มผ้าระหว่างกระบวนการซัก (โปรดดูที่ "เพิ่มผ้า" ในหน้า 20) 10 ปุ่มเลือกแช่ผ้า กดปุ่มนี้เพื่อเลือกการแช่ผ้า การแช่ผ้าก่อนซักหมายถึงขั้นตอนการซักขั้นต้นเป็นเวลา 10 นาทีก่อนที่จะซัก การแช่ก่อนซักจะมีประสิทธิภาพมากสำหรับผ้าที่สกปรกมาก สามารถใช้การแช่ผ้าก่อนซักได้เฉพาะ: ผ้าฝ้าย ผ้าห่ม และผ้าขนหนู 11 ปุ่มเริ่ม/พัก กดปุ่มนี้เพื่อเริ่มต้นและหยุดโปรแกรมต่างๆ 12 ปุ่มเปิด/ปิด กดปุ่มนี้หนึ่งครั้งเพื่อเปิดเครื่องซักผ้า และกดอีกครั้งเพื่อปิดเครื่อง ถ้าเปิดเครื่องซักผ้าค้างไว้มากกว่า 10 นาทีโดยไม่มี การกดปุ่มใดๆ เครื่องจะปิดลงโดยอัตโนมัติ 02 การซักผ้า 4 การซักผ้า _19 WD8122CVB-02574B_TH.indd 19 2008-07-10 �� 12:57:28 การซักผ้า ล็อคป้องกันเด็ก ฟังก์ชันล็อคป้องกันเด็กจะใช้ล็อคปุ่ม เพื่อป้องกันการเปลี่ยนรอบการซักที่ คุณเลือกไว้ การเปิดใช้/การปิด ถ้าคุณต้องการเปิดหรือปิดฟังก์ชันล็อคป้องกันเด็ก ให้กดปุ่ม อุณหภูมิ และ ล้าง พร้อมกันเป็นเวลา 3 วินาที “Child Lock ” จะสว่างขึ้น และเครื่องจะเปิดใช้ฟังก์ชันนี้ ขณะที่ใช้ฟังก์ชันล็อคป้องกันเด็ก จะมีเพียงปุ่มเปิด/ปิด เท่านั้น ที่ทำงาน ฟังก์ชันล็อคป้องกันเด็กจะทำงานแม้ว่าจะเปิดหรือปิดเครื่อง หรือหลังจากถอดปลั๊กและเสียบปลั๊กใหม่ 3 วินาที ตั้งเวลาซักล่วงหน้า คุณสามารถกำหนดให้เครื่องซักผ้าเสร็จในเวลาอื่นโดยอัตโนมัติ โดยเลือกได้ถึง 19 ชั่วโมง (เพิ่มได้ครั้งละ 1 ชั่วโมง) จำนวนชั่วโมงที่แสดงหมายถึงเวลาของรอบการซักที่เสร็จแล้ว 1. กำหนดเครื่องซักผ้าด้วยตนเองหรือซักอัตโนมัติตามประเภทของผ้าที่ซัก 2. กดปุ่ม ตั้งเวลาซักล่วงหน้า ซ้ำจนกว่าจะได้เวลาที่ต้องการ 3. กดปุ่ม เริ่ม/พัก สัญญาณ “ตั้งเวลาซักล่วงหน้า” จะสว่างขึ้น และนาฬิกาจะเริ่มจับเวลาจนกว่าจะถึงเวลาที่ตั้ง 4. ในการยกเลิก การตั้งเวลาซักล่วงหน้า ให้กดปุ่ม เปิด/ปิด จากนั้นเปิดเครื่องอีกครั้ง เพิ่มผ้า ขณะที่เครื่องซักผ้าทำงาน ประตูเครื่องจะถูกล็อค และไฟสัญญาณ “เพิ่มผ้า” จะดับ คุณจะไม่สามารถเพิ่มผ้าได้ คุณสามารถ เพิ่มผ้าได้เมื่อไฟสัญญาณ เพิ่มผ้า สว่างเท่านั้น 1. กดปุ่ม เพิ่มผ้า เครื่องซักผ้าจะหยุดการทำงานไว้ชั่วคราว 2. รอประมาณ 30 วินาที และตรวจสอบสถานะของไฟ “เพิ่มผ้า” • กะพริบ: เครื่องซักผ้าระบายน้ำจนถึงระดับที่ปลอดภัยสำหรับการเพิ่มผ้า • ดับ: สามารถเพิ่มผ้าได้ 3. เพิ่มผ้า 4. กดปุ่ม เริ่ม/พัก • โปรดอย่าเพิ่มผ้าเมื่อเครื่องมีฟองหรือมีน้ำอยู่ในถังซัก มิฉะนั้น ฟองหรือน้ำอาจรั่วออกจากประตู โปรดตรวจสอบ ก่อนที่จะเปิดประตู • ขอแนะนำให้คุณเลือกฟังก์ชัน เพิ่มผ้า ก่อนที่รอบการซักจะทำงานเป็นเวลา 5 นาที • ถ้าอุณหภูมิภายในสูงกว่า 55 °C ระหว่างรอบการซัก หรือ 70 °C ระหว่างรอบการอบแห้ง ฟังก์ชันเพิ่มผ้าจะใช้ไม่ได้ • ห้ามเปิดประตูเครื่องโดยใช้แรง เนื่องจากอาจทำให้เกิดการบาดเจ็บหรือทำให้เครื่องเสียหาย คำเตือน 20_ การซักผ้า WD8122CVB-02574B_TH.indd 20 2008-07-10 �� 12:57:31 แอร์วอช โหมด เวลาของรอบ ไหมพรม 20 นาที โค้ท 26 นาที ผ้าปูที่นอน 40 นาที ป้องกันโรคภูมิแพ้ 1:18 นาที 02 การซักผ้า ระบบแอร์วอชจะช่วยคืนความสดชื่นให้กับผ้าโดยไม่ต้องใช้น้ำ ด้วยระบบซักด้วยอากาศที่ทรงพลัง สามารถใช้กับผ้า ชนิดต่างๆ เช่น โค้ทขนสัตว์ ผ้าฝ้าย หรือเสื้อไหมพรมและสูท (ไม่เกินสองชิ้น (ต่ำกว่า 1 กก.)) 1. เปิดประตู ใส่ผ้าในเครื่อง และปิดประตู 2. กดปุ่ม เปิด/ปิด 3. เลือก แอร์วอช โดยหมุน ปุ่มเลือกโปรแกรมซัก • หมุน ปุ่มเลือกโปรแกรมซัก เพื่อเลือกโปรแกรมต่อไปนี้: ไหมพรม, โค้ท, ผ้าปูที่นอน, ป้องกันโรคภูมิแพ้, ... • ป้องกันโรคภูมิแพ้: เลือกโปรแกรมนี้เพื่อฆ่าเชื้อโรคในผ้า ตัวอย่างเช่น ไรฝุ่น เนื่องจากอุณหภูมิจะสูงกว่า 90 °C ผ้า ที่ได้รับความร้อนอาจเสียรูปทรงหรือเสียหายได้ • ผ้าปูที่นอน: โปรแกรมรวมถึงผ้าปูที่นอนที่เป็นฝ้าย แต่ผ้าไนลอนอาจเสียหายหรือเสียรูปทรงได้ • คุณอาจพบว่ามีความร้อนเมื่อโปรแกรม แอร์วอช สิ้นสุดลง (เฉลี่ย 40 °C ~ 48 °C) • เมื่อเลือกตัวเลือกเหล่านี้ จะไม่สามารถเลือกปุ่มอื่น และคุณสามารถเลือกตั้งเวลาสิ้นสุดได้ถึง 19 ชั่วโมง 4. ปิดประตูและกดปุ่ม เริ่ม/พัก • เมื่อมีน้ำในถังซัก จะไม่สามารถเลือก แอร์วอช ได้ โปรดระบายน้ำในถังและเลือก แอร์วอช • กดปุม่ เริ่ม/พัก หรือ เปิด/ปิด เพื่อนำผ้าออก • สามารถใช้แผ่นหอมร่วมกับโปรแกรมแอร์วอชเพื่อเพิ่มความหอมให้กับผ้า (หนึ่งแผ่นต่อผ้าหนึ่งหรือสองชิ้น) หลีกเลี่ยงการใช้แอร์วอชกับผ้าต่อไปนี้: • ผ้าที่มีความละเอียดอ่อน ทำจากหนัง มิงค์ ขนเฟอร์ ไหม ฯลฯ • ชุดชั้นในที่มีลูกไม้ การบุที่ใช้ 'กาว' และชุดที่อาจมีเครื่องประดับหลุดร่วงได้ • ผ้าที่มีกระดุมอาจเสี่ยงต่อปัญหากระดุมแตก • ผ้าที่ลงแป้งอาจเสียรูป หลีกเลี่ยงการใช้ผ้าชนิดต่อไปนี้สำหรับโปรแกรม Allergy Free (ป้องกันโรคภูมิแพ้): • ผ้าปูที่นอนที่แข็ง เช่น หมอนไม้ (ที่พักคอ) - หมอนหรือผ้าห่มที่มีพลาสติกหรือวัสดุอื่นที่ไม่ใช่ฝ้าย - ผ้าห่มไฟฟ้า • ผ้าห่มขนสัตว์ • ผ้าห่มนวม การซักผ้า _21 WD8122CVB-02574B_TH.indd 21 2008-07-10 �� 12:57:32 การซักผ้า การซักโดยใช้ปุ่มเลือกโปรแกรมซัก เครื่องซักผ้าของคุณทำให้งานซักกลายเป็นเรื่องง่าย ด้วยระบบควบคุมอัตโนมัติ "ฟัซซี่คอนโทรล" ของ Samsung เมื่อคุณเลือกโปรแกรมซัก เครื่องจะกำหนดอุณหภูมิ เวลาซัก และความเร็วในการซักให้ 1. เปิดก๊อกน้ำที่อ่างซักล้าง 2. กดปุ่ม เปิด/ปิด 3. เปิดประตู 4. ใส่ผ้าครั้งละชิ้น โดยอย่าให้ผ้าพันกัน และอย่าใส่ผ้ามากเกินไป 5. ปิดประตู 6. เติมผงซักฟอก น้ำยาปรับผ้านุ่ม และน้ำยาแช่ผ้า (ถ้าจำเป็น) ในช่องที่เหมาะสม การแช่ผ้าก่อนซักจะใช้ได้เฉพาะโปรแกรมซักผ้าฝ้าย, ผ้าขนหนู และผ้าเช็ดตัวเท่านั้น และจำเป็นเฉพาะ กรณีที่ผ้าเปื้อนมากเท่านั้น 7. ใช้ ปุ่มเลือกโปรแกรมซัก เพื่อเลือกโปรแกรมซักที่เหมาะกับชนิด ของผ้า: ผ้าฝ้าย, ผ้าห่ม, ซักเร็ว, ถนอมผ้า, ผ้าขนหนู, ผ้าขนสัตว์, ล้างและปั่นหมาด, ล้างถังซัก สัญญาณที่เหมาะสมจะสว่าง ในแผงควบคุม 8. ในขั้นตอนนี้ คุณจะสามารถควบคุมอุณหภูมิ ปริมาณการล้างน้ำ ความเร็วในการปั่น ตั้งเวลาซัก โดยกดปุ่มตัวเลือกที่ต้องการ 9. กดปุ่ม เริ่ม/พัก และรอบการซักจะเริ่มต้นขึ้น สัญลักษณ์ของขั้นตอน การซักจะสว่างขึ้น และเวลาที่เหลือของรอบการซักจะปรากฏ ในจอแสดงผล ตัวเลือกการหยุด ภายใน 5 นาทีนับจากเริ่มต้นการซัก คุณยังสามารถเพิ่มหรือนำผ้าออกได้ 1. กดปุ่ม เริ่ม/พัก เพื่อปลดล็อคประตู คุณจะไม่สามารถเปิดประตูได้อีก เมื่อน้ำร้อนเกินไป หรือระดับน้ำสูงเกินไป 2. หลังจากปิดประตู ให้กดปุ่ม เริ่ม/พัก เพื่อเริ่มต้นการซักอีกครั้ง เมื่อสิ้นสุดรอบการซัก: เมื่อสิ้นสุดรอบการซักทั้งหมด เครื่องจะปิดเองโดยอัตโนมัติ 1. เปิดประตู 2. นำผ้าออกจากเครื่อง 22_ การซักผ้า WD8122CVB-02574B_TH.indd 22 2008-07-10 �� 12:57:33 การซักด้วยตนเอง 02 การซักผ้า คุณสามารถซักผ้าด้วยตนเองโดยไม่ใช้ ปุ่มเลือกโปรแกรม ได้ 1. เปิดท่อจ่ายน้ำ 2. กดปุ่ม เปิด/ปิด ของเครื่อง 3. เปิดประตู 4. ใส่ผ้าครั้งละชิ้น โดยอย่าให้ผ้าพันกัน และอย่าใส่ผ้ามากเกินไป 5. ปิดประตู 6. ใส่ผงซักฟอก และถ้าจำเป็น ใส่น้ำยาปรับผ้านุ่ม น้ำยาแช่ผ้าก่อนซักในช่องที่เหมาะสม 7. กดปุ่ม อุณหภูมิ เพื่อเลือกอุณหภูมิ (น้ำเย็น, 30 °C, 40 °C, 60 °C, 75 °C, 95 °C) 8. กดปุ่ม ล้าง เพื่อเลือกจำนวนรอบการล้างที่ต้องการ จำนวนรอบการล้างสูงสุดคือห้ารอบ ระยะเวลาการซักจะเพิ่มขึ้นตามที่กำหนด 9. กดปุ่ม ปั่นหมาด เพื่อเลือกความเร็วในการปั่น โปรแกรมหยุดการล้างน้ำจะช่วยให้คุณนำผ้าที่ไม่แห้งหมาดออกจากเครื่องได้ ( : หยุดการล้างน้ำ : ไม่ปั่นหมาด 10. กดปุ่ม ตั้งเวลาซักล่วงหน้า ซ้ำๆ เพื่อเลือกตัวเลือกการตั้งเวลาสิ้นสุดที่ต้องการ (สูงสุด 19 ชั่วโมง โดยเพิ่มได้ครั้งละหนึ่งชั่วโมง) เวลาจะปรากฏเพื่อแสดงเวลาที่การซักสิ้นสุดลง 11. กดปุ่ม เริ่ม/พัก และเครื่องจะเริ่มต้นการซัก การซักผ้า _23 WD8122CVB-02574B_TH.indd 23 2008-07-10 �� 12:57:34 การซักผ้า คำแนะนำของผ้า ทำตามคำแนะนำง่ายๆ เพื่อให้ได้ผ้าสะอาด และการซักที่มีประสิทธิภาพ ตรวจสอบฉลากการดูแลผ้าเสมอก่อนที่จะซัก แยกผ้าตามประเภทของเนื้อผ้า ดังนี้: • ฉลากการดูแล: แยกผ้าเป็น ผ้าฝ้าย ผ้าเนื้อผสม ผ้าสังเคราะห์ ผ้าไหม ผ้าขนสัตว์ และเรยอน • ผ้าสี: แยกผ้าเป็นผ้าสีและผ้าขาว โปรดซักผ้าใหม่ที่เป็นผ้าสีแยกต่างหาก • ขนาด: การใส่ผ้าขนาดต่างๆ กันในการซักจะทำให้การซักมีประสิทธิภาพดีขึ้น • ความละเอียดอ่อน: ซักผ้าบางแยกต่างหาก ใช้โปรแกรมซักผ้าบางสำหรับผ้าขนสัตว์ใหม่ ผ้าม่าน และผ้าไหม ตรวจสอบป้ายของผ้าที่ซัก หรือดูผังการดูแลผ้าในภาคผนวก นำสิ่งของออกจากกระเป๋า ก่อนการซักแต่ละครั้ง ให้นำสิ่งของออกจากประเป๋าของผ้าก่อน ของแข็งขนาดเล็กที่มีรูปร่างต่างๆ เช่น เหรียญ มีด เข็มหมุด และคลิปหนีบกระดาษอาจทำให้เครื่องซักผ้าเสียหาย ห้ามซักผ้าที่มีหัวเข็มขัด กระดุม หรือโลหะหนักติดอยู่ โลหะที่อยู่บนผ้าอาจทำให้ผ้าและถังซักเสียหาย ให้กลับข้างผ้าที่มีกระดุมและลายปักก่อนที่จะซัก ถ้าซิปกางเกงหรือ แจ็คเก็ตเปิดอยู่ระหว่างการซัก อาจทำให้ถังปั่นหมาดเสียหาย โปรดรูปซิปและยึดด้วยเส้นด้ายก่อนการซัก เสื้อผ้าที่มีเชือกยาวอาจพันกับผ้าชิ้นอื่น และอาจทำให้ผ้าเสียหาย โปรดมัดเชือกไว้ก่อนที่จะซัก การแช่ผ้าฝ้าย เครื่องซักผ้าของคุณ เมื่อใช้ร่วมกับผงซักฟอกชนิดใหม่ๆ จะสามารถให้ผลการซักที่ดีเยี่ยม พร้อมทั้งประหยัดพลังงาน เวลา น้ำและผงซักฟอก แต่หากผ้าฝ้ายสกปรกมาก คุณสามารถใช้การแช่ผ้ากับผงซักฟอกชนิดโปรตีน การพิจารณาปริมาณผ้าที่จะซัก โปรดอย่าใส่ผ้ามากเกินไปในเครื่อง เนื่องจากจะทำให้ผ้าไม่สะอาด โปรดใช้ผังด้านล่างนี้เพื่อพิจารณาปริมาณผ้าที่จะซัก สำหรับประเภทของเนื้อผ้าที่ซัก ประเภทของผ้า ปริมาณผ้า รุ่น WD8122CVC/ WD8122CVD/ WD8122CVB/ WD8122CVW ผ้าฝ้าย 12.0 กก. ถนอมผ้า 3.0 กก. ผ้าขนหนู/ซักเร็ว 5.0 กก. ผ้าห่ม 1 ผืน [ไม่เกิน 3 กก.] ขนสัตว์ 4.0 กก. อบแห้ง 7.0 กก. เมื่อผ้าไม่สมดุล (“UE” สว่างในจอแสดงผล) ให้กระจายชิ้นผ้าให้เสมอกัน 24_ การซักผ้า WD8122CVB-02574B_TH.indd 24 2008-07-10 �� 12:57:35 ข้อมูลผงซักฟอกและสารเพิ่มเติมต่างๆ ควรใช้ผงซักฟอกแบบใด 02 การซักผ้า ประเภทของผงซักฟอกที่จะใช้นั้นขึ้นอยู่กับเนื้อผ้า (ผ้าฝ้าย ผ้าสังเคราะห์ ผ้าบาง ขนสัตว์) สี อุณหภูมิที่ซัก ระดับความสกปรก โปรดใช้ผงซักฟอกชนิด "ฟองน้อย" ที่ผลิตขึ้นสำหรับเครื่องซักผ้าโดยเฉพาะ ปฏิบัติตามคำแนะนำของผู้ผลิตผงซักฟอก ตามน้ำหนักของผ้า ความสกปรก และความกระด้างของน้ำ หากคุณไม่ทราบว่าน้ำที่ใช้กระด้างมากเพียงใด โปรดติดต่อผู้ให้บริการน้ำประปาในพื้นที่ ห้ามใช้ผงซักฟอกที่เกาะตัวหรือแข็ง เนื่องจากผงซักฟอกอาจค้างอยู่ในรอบการซัก และทำให้เครื่องซักผ้า ไม่สามารถล้างน้ำให้สะอาด และทำให้ช่องระบายน้ำล้นอุดตัน ช่องใส่ผงซักฟอก เครื่องซักผ้าของคุณมีช่องแยกสำหรับจ่ายผงซักฟอกและน้ำยาปรับผ้านุ่ม เติมสารเพิ่มเติมในช่องที่ถูกต้องก่อนที่จะ เริ่มต้นเครื่องซักผ้า ห้ามเปิดช่องใส่ผงซักฟอกขณะที่เครื่องทำงาน 1. ดึงช่องใส่ผงซักฟอกทางซ้ายของแผงควบคุมออก 2. เติมผงซักฟอกตามปริมาณที่แนะนำ ในช่องใส่ผงซักฟอก ก่อนที่จะเริ่มต้น เครื่องซักผ้า 3. เติมน้ำยาปรับผ้านุ่มตามปริมาณที่แนะนำในช่องสำหรับใส่น้ำยา ปรับผ้านุ่ม ถ้าต้องการ 4. เมื่อใช้ตัวเลือกการแช่ผ้า ให้เพิ่มผงซักฟอกในปริมาณที่แนะนำในช่อง สำหรับแช่ผ้า เมื่อซักผ้าชิ้นใหญ่ โปรดอย่าใช้ผงซักฟอกประเภทต่อไปนี้ • ผงซักฟอกชนิดเม็ดและแคปซูล • ผงซักฟอกที่ใช้บอลและตาข่าย น้ำยาปรับผ้านุ่มชนิดเข้มข้นจะต้องมีการเจือจางด้วยน้ำสะอาด ก่อนที่จะเทลงในช่องใส่ (เพื่อไม่ให้ช่องทางไหลอุดตัน) สูงสุด การซักผ้า _25 WD8122CVB-02574B_TH.indd 25 2008-07-10 �� 12:57:36 การทำความสะอาดและ ดูแลรักษาเครื่องซักผ้า การรักษาความสะอาดของเครื่องซักผ้าจะช่วยเพิ่มประสิทธิภาพของเครื่อง หลีกเลี่ยงการซ่อมบำรุงที่ไม่จำเป็น และยืดอายุการใช้งาน การทิ้งน้ำเมื่อเกิดเหตุฉุกเฉิน 1. ถอดปลั๊กของเครื่องซักผ้า 2. เปิดฝาตัวกรองโดยใช้เหรียญหรือกุญแจ ที่ปิดตัวกรอง 3. ไขสกรูของท่อน้ำทิ้งฉุกเฉิน โดยหมุนไปทางซ้าย ท่อทิ้งน้ำฉุกเฉิน 4. ยึดฝาที่ปลายของท่อน้ำทิ้งฉุกเฉิน และค่อยๆ ดึงออกมา ประมาณ 15 ซม. 5. ปล่อยให้น้ำไหลงในอ่าง 6. สอดท่อเข้าที่ และไขฝาปิดเข้าที่ 7. ปิดฝาครอบของตัวกรอง ท่อทิ้งน้ำฉุกเฉิน การทำความสะอาดภายนอก 1. เช็ดผิวด้านนอกของเครื่องซักผ้า รวมถึงแผงควบคุม ด้วยผ้านุ่ม และผงซักฟอกที่ไม่มีสารขัดถู 2. ใช้ผ้านุ่มเช็ดให้แห้ง 3. ห้ามเทน้ำบนเครื่องซักผ้า 26_ การทำความสะอาดและดูแลรักษาเครื่องซักผ้า WD8122CVB-02574B_TH.indd 26 2008-07-10 �� 12:57:38 การทำความสะอาดช่องใส่และที่พักผงซักฟอก 1. กดสลักคลายที่ด้านในของที่ใส่ผงซักฟอก และดึงออก 2. ถอดที่แบ่งน้ำยาซักผ้าชนิดเหลวออกจาก ช่องใส่ผงซักฟอก คันปลด ที่แบ่งน้ำยาซักผ้าชนิดเหลว 03 การทำความสะอาดและการดูแลรักษา 3. ล้างทุกส่วนด้วยน้ำสะอาดที่ไหล 4. 5. 6. 7. ล้างที่พักผงซักฟอกด้วยแปรงสีฟันเก่า ใส่ที่แบ่งน้ำยาซักฟ้าชนิดเหลวด้วยการดันเข้าที่ให้แน่น ดันช่องใส่เข้าที่ ถ้าต้องการขจัดผงซักฟอกที่หลงเหลือ ให้ใช้โปรแกรมล้างน้ำ โดยไม่ต้องมีผ้าในถัง การทำความสะอาดตัวกรองเศษผ้า เราขอแนะนำให้ทำความสะอาดตัวกรองเศษผ้า 5 หรือ 6 ครั้งต่อปี หรือเมื่อข้อความ “5E” ปรากฏ (โปรดดูที่ “การทิ้งน้ำเมื่อเกิดเหตุ ฉุกเฉิน” ในหน้าก่อน) 1. เปิดฝาตัวกรองโดยใช้เหรียญหรือกุญแจ 2. ไขสกรูของท่อน้ำทิ้งฉุกเฉิน โดยหมุนไปทางซ้าย เพื่อทิ้งน้ำให้หมด 3. ไขตัวกรองเศษผ้าออก ฝาปิดตัวกรองเศษผ้า 4. ล้างเศษฝุ่นละอองหรือวัสดุอื่นออกจากตัวกรอง ตรวจสอบว่าใบพัด ของปั๊มน้ำทิ้งที่ด้านหลังของตัวกรองไม่อุดตัน ปิดฝาของตัวกรอง 5. ไขตัวกรองเศษผ้าเข้าที่ 6. ปิดฝาครอบของตัวกรอง การทำความสะอาดและดูแลรักษาเครื่องซักผ้า _27 WD8122CVB-02574B_TH.indd 27 2008-07-10 �� 12:57:41 การทำความสะอาดและ ดูแลรักษาเครื่องซักผ้า การทำความสะอาดตัวกรองท่อจ่ายน้ำ คุณควรทำความสะอาดตัวกรองของท่อจ่ายน้ำอย่างน้อยปีละครั้ง หรือเมื่อมีข้อความ “4E” ปรากฏขึ้น: 1. ปิดน้ำที่จ่ายเข้าเครื่องซักผ้า 2. ไขท่อออกจากด้านหลังของเครื่อง เพื่อป้องกันไม่ให้น้ำไหลออกเนื่องจากแรงดันอากาศในท่อ ให้ใช้ผ้าปิดปลายท่อไว้ 3. ค่อยๆ ใช้คีมจับตะแกรงตัวกรองออกจากปลายของท่อ และล้างด้วยน้ำสะอาด นอกจากนี้ ให้ ทำความสะอาดด้านนอกและด้านในของข้อต่อที่เป็นเกลียวด้วย 4. ดันตัวกรองเข้าที่ 5. ไขท่อเข้ากับเครื่องซักผ้าดังเดิม 6. ตรวจสอบว่าไม่มีน้ำรั่วและเปิดก๊อก การซ่อมแซมเครื่องซักผ้าหากน้ำแข็งตัว หากอุณหภูมิต่ำกว่าจุดเยือกแข็ง และน้ำในเครื่องซักผ้ากลายเป็นน้ำแข็ง ให้ทำดังนี้ 1. 2. 3. 4. 5. ถอดปลั๊กของเครื่องซักผ้า เทน้ำอุ่นที่ก๊อกจ่ายน้ำ เพื่อให้ท่อจ่ายน้ำหลวม ถอดท่อจ่ายน้ำ และแช่ในน้ำอุ่น เทน้ำอุ่นในถังซักของเครื่องซักผ้า และทิ้งไว้ประมาณ 10 นาที ต่อท่อจ่ายน้ำเข้าที่ และตรวจสอบว่าการจ่ายน้ำและการทิ้งน้ำเป็นปกติ การจัดเก็บเครื่องซักผ้า ถ้าคุณจำเป็นต้องจัดเก็บเครื่องซักผ้าเป็นเวลานาน คุณควรระบายน้ำออกและถอดปลั๊กและท่อน้ำ เครื่องซักผ้าอาจได้รับความ เสียหายถ้ามีน้ำค้างอยู่ในท่อ และองค์ประกอบภายใน ในระหว่างที่จัดเก็บ 1. เลือกโปรแกรม ซักเร็ว และเติมสารฟอกในช่องสารฟอก เริ่มต้นเครื่องซักผ้าโดยไม่ต้องใส่ผ้า 2. ปิดก๊อกน้ำและถอดท่อจ่ายน้ำ 3. ถอดปลัก๊ เครื่องซักผ้าจากเต้าเสียบไฟฟ้า และเปิดประตูเครื่องทิ้งไว้เพื่อให้อากาศหมุนเวียน ถ้าเครื่องซักผ้าของคุณมีการจัดเก็บในอุณหภูมิต่ำกว่าจุดเยือกแข็ง โปรดรอให้น้ำที่ตกค้างในเครื่อง ละลายก่อนที่จะใช้งานอีกครั้ง 28_ การทำความสะอาดและดูแลรักษาเครื่องซักผ้า WD8122CVB-02574B_TH.indd 28 2008-07-10 �� 12:57:42 การแก้ไขปัญหาและรหัสข้อมูล ตรวจสอบสิ่งต่อไปนี้ถ้าเครื่องซักผ้าของคุณ… การแก้ไข ไม่เริ่มต้น • • • • ตรวจสอบว่าเสียบปลั๊กเรียบร้อย ตรวจสอบว่าประตูปิดสนิท ตรวจสอบว่าก๊อกจ่ายน้ำเปิดอยู่ ตรวจสอบว่าได้กดปุ่ม เริ่ม/พัก แล้ว ไม่มีน้ำหรือน้ำไม่เพียงพอ • • • • เปิดก๊อกน้ำจนสุด ตรวจสอบว่าท่อจ่ายน้ำไม่จับตัวเป็นน้ำแข็ง ยืดให้ท่อจ่ายน้ำตรง ทำความสะอาดตัวกรองที่ท่อจ่ายน้ำ มีผงซักฟอกหลงเหลือในช่องใส่ หลังจากการซัก • ตรวจสอบว่าเครื่องซักผ้าต่อกับแหล่งจ่ายน้ำที่มีแรงดันเพียงพอ • ตรวจสอบว่าได้เติมผงซักฟอกในช่องกลางของที่ใส่ สั่นสะเทือนหรือมีเสียงดัง • ตรวจสอบว่าเครื่องตั้งอยู่บนพื้นที่ซึ่งราบเสมอกัน หากพื้นที่ไม่ราบเสมอกัน ให้ปรับขาตั้งของเครื่องให้ได้ระดับ • ตรวจสอบว่านำหมุดสำหรับการขนส่งออกแล้ว • ตรวจสอบว่าเครื่องซักผ้าไม่ได้สัมผัสกับวัตถุอื่น • ตรวจสอบว่าปริมาณผ้าอยู่ในถังอย่างสมดุล เครื่องซักผ้าไม่ทิ้งน้ำ และ/หรือปั่นผ้า • การวางตำแหน่งของท่อน้ำทิ้ง อย่าให้ท่อบิดงอ • ตรวจสอบว่าตัวกรองเศษผ้าไม่อุดตัน ประตูล็อคและไม่สามารถเปิดได้ 1. 2. 3. 4. 04 การแก้ไขปัญหา ปัญหา ถอดปลั๊กของเครื่องซักผ้า เปิดฝาครอบตัวกรองโดยใช้เหรียญ ถ่ายน้ำออกจากเครื่องซักผ้า หาแท็บพลาสติกสีส้มและดึงไปข้างหน้าเพื่อเปิดประตู ถ้าปัญหาเหล่านี้ยังคงอยู่ โปรดติดต่อศูนย์บริการลูกค้าของ Samsung ใกล้บ้าน การแก้ไขปัญหาและรหัสข้อมูล _29 WD8122CVB-02574B_TH.indd 29 2008-07-10 �� 12:57:42 การแก้ไขปัญหาและรหัสข้อมูล รหัสข้อมูล เมื่อเครื่องซักผ้าทำงานผิดปกติ คุณอาจพบรหัสข้อมูลในจอแสดงผล ในกรณีนี้ ให้ตรวจสอบตารางต่อไปนี้และ ลองใช้วิธีแก้ไขที่แนะนำก่อนที่จะติดต่อฝ่ายบริการลูกค้า สัญลักษณ์ของรหัส การแก้ไข dE • ปิดประตู 4E • ตรวจสอบว่าก๊อกจ่ายน้ำเปิดอยู่ • ตรวจสอบแรงดันน้ำ 5E • ทำความสะอาดตัวกรอง • ตรวจสอบว่าได้ติดตั้งท่อน้ำทิ้งไว้อย่างถูกต้อง UE • ผ้าไม่สมดุล ให้คลายผ้าที่พันกันออก หากมีการซักผ้าเพียงชิ้นเดียว เช่น เสื้อคลุมอาบน้ำ หรือกางเกงยีนส์ การปั่นครั้งสุดท้ายอาจไม่ได้ผลดีเท่าที่ควร และข้อความแสดงข้อ ผิดพลาด "UE" จะปรากฏในจอแสดงผล 3E • ติดต่อฝ่ายบริการหลังการขาย PoF หลังจากปิดเครื่องและเปิดใหม่อีกครั้งเนื่องจากไฟดับ ข้อความ “PoF” จะกะพริบ: • ถ้าคุณกดปุ่ม เริ่ม/พัก การทำงานจะเริ่มต้นใหม่จาก รอบการซักที่บันทึกไว้โดยอัตโนมัติเนื่องจากไฟฟ้าดับ • ถ้าคุณปิดเครื่องซักผ้า รอบการซักที่บันทึกไว้จะถูกลบออก สำหรับรหัสที่ไม่ปรากฏข้างต้น หรือถ้าคำแนะนำใช้ไม่ได้ผล โปรดติดต่อศูนย์บริการของ Samsung หรือตัวแทนจำหน่าย Samsung ใกล้บ้าน 30_ การแก้ไขปัญหาและรหัสข้อมูล WD8122CVB-02574B_TH.indd 30 2008-07-10 �� 12:57:43 ผังโปรแกรม ผังโปรแกรม ( ตัวเลือกของผู้ใช้) ผ้าฝ้าย 12 ผงซักฟอกและ สารเพิ่มเติมต่างๆ อุณหภูมิ (สูงสุด) °C น้ำยาปรับ ผ้านุ่ม ปกติ สูงสุด 60 แช่ผ้า ซัก ใช่ 60 รอบการปั่นหมาด (สูงสุด) ตั้งเวลา สิ้นสุด น้ำ (ℓ) ไฟฟ้า (kWh) 1200 106 2.37 ถนอมผ้า 3 - ใช่ น้ำเย็น 40 400 62 0.06 ซักเร็ว 5 - ใช่ 40 40 800 (1200) 70 0.68 ผ้าขนหนู 5 ใช่ 40 95 600 (800) 110 0.85 ผ้าห่ม 1 ผืน (ไม่เกิน 3 กก.) ใช่ 30 40 800 90 0.18 ผ้าขนสัตว์ 4 - ใช่ 30 40 600 80 0.42 ล้างถังซัก - - ใช่ - 40 40 600 56 0.91 05 ผังโปรแกรม โปรแกรม น้ำหนัก สูงสุด (กก.) 1. โปรแกรมที่มีการแช่ผ้าจะใช้เวลานานขึ้นประมาณ 15 นาที 2. ระยะเวลาของโปรแกรมได้รับการวัดตามเงื่อนไขที่ระบุในมาตรฐาน IEC 60456/EN 60456 3. การใช้งานในแต่ละบ้านอาจต่างจากค่าที่ระบุในตาราง เนื่องจากแรงดันและอุณหภูมิของน้ำ ปริมาณผ้า และประเภทของผ้า ผังโปรแกรม1 _31 WD8122CVB-02574B_TH.indd 31 2008-07-10 �� 12:57:44 ภาคผนวก ผังการดูแลผ้า สัญลักษณ์ต่อไปนี้เป็นคำแนะนำในการดูแลผ้า ฉลากการดูแลผ้าประกอบด้วยสัญลักษณ์สี่อย่างตามลำดับ: การซัก การฟอกขาว การอบแห้ง และการรีด ตลอดจนการซักแห้ง ถ้าจำเป็น การใช้สัญลักษณ์ช่วยให้มีความสม่ำเสมอระหว่างผู้ผลิตเสื้อผ้าแต่ละรายทั้งสำหรับผ้าในประเทศและผ้าที่นำเข้า โปรดปฏิบัติตาม ฉลากการดูแลเพื่อยืดอายุการใช้งานของผ้าและลดปัญหาในการซัก ผ้าหนา สามารถรีดที่ความร้อนสูงสุด 100 °C ผ้าบาง ห้ามรีด ซักได้ที่ความร้อน 95 °C ซักแห้งด้วยสารทำละลายใดก็ได้ ซักได้ที่ความร้อน 60 °C ซักแห้งด้วยเปอร์คลอไรด์ น้ำมันไฟแช็ก แอลกอฮอล์ หรือ R113 เท่านั้น ซักได้ที่ความร้อน 40 °C ซักแห้งด้วยน้ำมันก๊าด แอลกอฮอล์ หรือ R113 เท่านั้น ซักได้ที่ความร้อน 30 °C ห้ามซักแห้ง ซักด้วยมือ ห้ามแขวน ซักแห้งเท่านั้น แขวนได้ ใช้สารฟอกในน้ำเย็น ตากด้วยไม้แขวนเสื้อ ห้ามใช้สารฟอก ใช้เครื่องอบ ความร้อนปกติ สามารถรีดที่ความร้อนสูงสุด 200 °C ใช้เครื่องอบ ความร้อนต่ำ สามารถรีดที่ความร้อนสูงสุด 150 °C ห้ามใช้เครื่องอบ การปกป้องสิ่งแวดล้อม • อุปกรณ์นี้ได้รับการผลิตจากวัสดุรีไซเคิล หากคุณต้องการทิ้งอุปกรณ์นี้ โปรดปฏิบัติตามระเบียบการทิ้งขยะของพื้นที่ ตัดสายไฟ เพื่อป้องกันไม่ให้มีการต่อสายไฟกับเครื่องใช้ไฟฟ้านี้อีก ถอดประตูออก เพื่อป้องกันไม่ให้สัตว์หรือเด็กติดอยู่ภายใน • อย่าใช้ผงซักฟอกเกินปริมาณที่แนะนำโดยผู้ผลิตผงซักฟอก • ใช้สารขจัดคราบและสารฟอกขาวก่อนการซักเฉพาะเมื่อจำเป็นเท่านั้น • ประหยัดน้ำและไฟฟ้าโดยซักเต็มถัง (ปริมาณผ้าขึ้นอยู่กับโปรแกรมที่ใช้) ประกาศเกี่ยวกับมาตรฐาน อุปกรณ์นี้เป็นไปตามมาตรฐานความปลอดภัยของยุโรป EC directive 93/68 และ EN Standard 60335 32_ ภาคผนวก WD8122CVB-02574B_TH.indd 32 2008-07-10 �� 12:57:54 ข้อมูลจำเพาะ ประเภท เครื่องซักผ้าฝาหน้า ขนาด ก 650 มม. X ล 770 มม. X ส 940 มม. 50 ~ 780 kPa น้ำหนัก 97 กก. / 104 กก. ความจุในการซักและการปั่นหมาด 12 กก. [ผ้าแห้ง] ความจุในการอบแห้ง การใช้พลังงานไฟฟ้า 7.0 กก. ขณะซัก 150 วัตต์ ขณะซักและให้ความร้อน 2200 วัตต์ การอบแห้ง 2100 วัตต์ 106 ℓ ปริมาณน้ำ การหมุนปั่นหมาด 06 ภาคผนวก แรงดันน้ำ รุ่น WD8122CVC, WD8122CVD, WD8122CVB, WD8122CVW รอบต่อนาที 1200 รอบต่อนาที ลักษณะและข้อมูลจำเพาะของผลิตภัณฑ์อาจมีการเปลี่ยนแปลงโดยไม่ได้แจ้งให้ทราบล่วงหน้า ภาคผนวก _33 WD8122CVB-02574B_TH.indd 33 2008-07-10 �� 12:57:55 บันทึก WD8122CVB-02574B_TH.indd 34 2008-07-10 �� 12:57:55 บันทึก WD8122CVB-02574B_TH.indd 35 2008-07-10 �� 12:57:55 ถ้าคุณมีคำถามหรือข้อคิดเห็น ประเทศ โทรศัพท์ หรือเยี่ยมชมเว็บไซต์ของเราที่ THAI 1800-29-3232 02-689-3232 www.samsung.com รหัส. DC68-02574B_TH WD8122CVB-02574B_TH.indd 36 2008-07-10 �� 12:57:55