Download Samsung MR-EH00 User Manual
Transcript
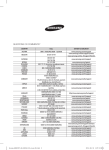
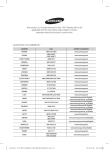
MR-EH00_IB_04667A-01_Cover_EN.indd 2 2014-10-22 오후 1:31:11 Wireless remote controller MR-EH00 MR-EH00U MR-EC00 Air conditioner user manual This manual is made with 100% recycled paper. imagine the possibilities Thank you for purchasing this Samsung product. EN ES FR IT PT DE EL NL PL HU RU AR DB68-04667A-01 MR-EH00_IB_04667A-01_Cover_EN.indd 3 2014-10-22 오후 1:31:11 Contents PREPARATION Safety precautions . . . . . . . . . . . . . . . . . . . . . . . . . . . . . . . . . . . . . . . . . . . . . . . . . . . . . . . . . . . . . . . . . . . . . . . . . . . . . . . . . . . . . . . . . . . . . . . . . . . . . . . 3 Checking before using the product . . . . . . . . . . . . . . . . . . . . . . . . . . . . . . . . . . . . . . . . . . . . . . . . . . . . . . . . . . . . . . . . . . . . . . . . . . . . . . . . . . . . . . . 6 BASIC OPERATION Using the remote controller . . . . . . . . . . . . . . . . . . . . . . . . . . . . . . . . . . . . . . . . . . . . . . . . . . . . . . . . . . . . . . . . . . . . . . . . . . . . . . . . . . . . . . . . . . . . . . 7 Basic operation . . . . . . . . . . . . . . . . . . . . . . . . . . . . . . . . . . . . . . . . . . . . . . . . . . . . . . . . . . . . . . . . . . . . . . . . . . . . . . . . . . . . . . . . . . . . . . . . . . . . . . . . . 10 TIMER Setting the On/Off timer . . . . . . . . . . . . . . . . . . . . . . . . . . . . . . . . . . . . . . . . . . . . . . . . . . . . . . . . . . . . . . . . . . . . . . . . . . . . . . . . . . . . . . . . . . . . . . . . 13 Setting the good’sleep mode . . . . . . . . . . . . . . . . . . . . . . . . . . . . . . . . . . . . . . . . . . . . . . . . . . . . . . . . . . . . . . . . . . . . . . . . . . . . . . . . . . . . . . . . . . . 15 OPTIONS Using the Turbo function . . . . . . . . . . . . . . . . . . . . . . . . . . . . . . . . . . . . . . . . . . . . . . . . . . . . . . . . . . . . . . . . . . . . . . . . . . . . . . . . . . . . . . . . . . . . . . . 17 Using the Purity function . . . . . . . . . . . . . . . . . . . . . . . . . . . . . . . . . . . . . . . . . . . . . . . . . . . . . . . . . . . . . . . . . . . . . . . . . . . . . . . . . . . . . . . . . . . . . . . 18 Using the Quiet function . . . . . . . . . . . . . . . . . . . . . . . . . . . . . . . . . . . . . . . . . . . . . . . . . . . . . . . . . . . . . . . . . . . . . . . . . . . . . . . . . . . . . . . . . . . . . . . 19 SETTINGS Selecting an indoor unit . . . . . . . . . . . . . . . . . . . . . . . . . . . . . . . . . . . . . . . . . . . . . . . . . . . . . . . . . . . . . . . . . . . . . . . . . . . . . . . . . . . . . . . . . . . . . . . . 20 Selecting a blade . . . . . . . . . . . . . . . . . . . . . . . . . . . . . . . . . . . . . . . . . . . . . . . . . . . . . . . . . . . . . . . . . . . . . . . . . . . . . . . . . . . . . . . . . . . . . . . . . . . . . . . 20 OTHERS Appendix . . . . . . . . . . . . . . . . . . . . . . . . . . . . . . . . . . . . . . . . . . . . . . . . . . . . . . . . . . . . . . . . . . . . . . . . . . . . . . . . . . . . . . . . . . . . . . . . . . . . . . . . . . . . . . 21 ENGLISH-2 MR-EH00_IB_04667A-01_EN.indd 2 2014-12-04 오전 10:29:02 Safety precautions This content is intended to protect the user’s safety and prevent property damage. Please read it carefully for correct use of the product. Hazards or unsafe practices that may result in severe personal injury or death. CAUTION Hazards or unsafe practices that may result in minor personal injury or property damage. 01PREPARATION WARNING Follow directions. Do NOT attempt. Make sure the machine is grounded to prevent electric shock. Unplug the appliance. Do NOT disassemble. FOR INSTALLATION WARNING The installation of this product must be performed by a qualified technician. XX Failure to do so may result in electric shock, fire, product malfuction, explosion, or injury. Do not install this product near a heater, or inflammable material. Do not install this product in a humid, oily or dusty location, in a location exposed to direct sunlight and water (rain drops). Do not install this product in a location where gas may leak. XX Otherwise, electric shock or fire may occur. ENGLISH-3 MR-EH00_IB_04667A-01_EN.indd 3 2014-12-04 오전 10:29:03 Safety precautions FOR INSTALLATION CAUTION Install the product on a hard and level place that can support its weight. XX If the place cannot support its weight, the product may fall down and it may cause product damage. FOR OPERATION WARNING If the product generates a strange noise, a burning smell or smoke, unplug the product immediately and contact your nearest service center. XX Otherwise, electric shock or fire may occur. Do not attempt to repair, disassemble, or modify the product yourself. XX Otherwise, electric shock, fire, product malfuction, or injury may occur. ENGLISH-4 MR-EH00_IB_04667A-01_EN.indd 4 2014-12-04 오전 10:29:03 FOR OPERATION CAUTION Do not allow water to enter the product. XX Otherwise, a fire or explosion may occur. 01PREPARATION Do not operate the product with wet hands. XX Otherwise, electric shock may occur. Do not spray volatile material such as insecticide onto the surface of the product. XX As well as being harmful to humans, it may also result in electric shock, fire or product malfunction. Do not give a strong impact to the product and do not disassemble the product. Do not use this product for other purposes. XX This product is designed to be used only for a system air conditioner. Do not press the buttons with any sharp objects. XX Otherwise, electric shock or part damage may occur. Do not clean the product by spraying water directly onto it. Do not use benzene, thinner, alcohol or acetone to clean the product. XX Otherwise, discoloration, deformation, damage, electric shock or fire may occur. ENGLISH-5 MR-EH00_IB_04667A-01_EN.indd 5 2014-12-04 오전 10:29:03 Checking before using the product Accessories Item Wireless remote controller Remote controller batteries M4XL16 screws Remote controller holder User manual Quantity 1 2 2 1 1 Shape NOTE Select the following places to install the remote controller holder. • Where there is no interference to the remote controller signal. • Not exposed to direct sunlight or heat source. • More than 1 m away from a television or stereo system. 1. Mark the spots with a pencil where you will install the remote controller holder. 2. Drill the marked holes(2EA) for screws on the wall. 3. Install the remote controller holder on the wall by using the screws. ENGLISH-6 MR-EH00_IB_04667A-01_EN.indd 6 2014-12-04 오전 10:29:03 BASIC OPERATION Using the remote controller ffPoint the remote controller towards the remote controller receiver of the indoor unit. ffWhen you press the button on the remote controller correctly, you will hear beep sound from the indoor unit and a transmit indicator( ) appears on the remote controller display. 02 BASIC OPERATION Remote controller buttons Air flow direction (Up and down) Adusts the air flow direction up and down (Not applicable to Duct type models). Power Turns the air conditioner on or off. Mode Selects operation mode. Temperature Fan speed Adjusts the temperature. Adjusts the fan speed. Options Air flow direction (Left and right) Selects options during operation. Adjusts the air flow direction left and right. Timer Settings Sets timer option. Selects settings. SET Selects or cancels an option. Direction Moves to select and set an option. NOTE • In case you wish to cancel the options or settings that you have just set, press the Options or Settings button again, then the most recently selected item will blink and you may simply cancel it by pressing the SET button while selected item is blinking. ENGLISH-7 MR-EH00_IB_04667A-01_EN.indd 7 2014-12-04 오전 10:29:04 Using the remote controller Remote controller display Operation mode *Heat mode is applicable to MR-EH00/MR-EH00U model only. Remote controller transmission Low battery Set temperature or on/off set time with the timer function Fan speed On/Off timer Air flow direction Options Settings NOTE • For MR-EH00U/MR-EC00U model, the temperature unit will be indicated by "°F" on the display. • When turning off and turning on the remote controller, the Timer, Options and Settings set before turning off the remote controller are cancelled. However, the fan direction does not change. Battery changing time When the battery is exhausted, ( ) will be displayed on the remote controller display. When the icon appears, change the batteries. The remote controller requires two 1.5V AAA type batteries. Storing the remote controller When you do not use the remote controller for a long time, remove the batteries from the remote controller and store it in the remote controller holder. ENGLISH-8 MR-EH00_IB_04667A-01_EN.indd 8 2014-12-04 오전 10:29:04 Inserting the batteries CAUTION NOTE 02 BASIC OPERATION 1. Open the battery cover of the remote controller. -- Press the ( ) part gently and lift it up in the arrow direction. 2. Insert the batteries. -- Check and match the (+)and (-) signs accordingly. 3. Close the battery cover. -- Match the cover and bottom part of the remote controller and press it until you hear click sound. • Make sure that water is not allowed to enter the remote controller. • There is a possibility that the air conditioner will not operate by remote controller near strong light such as a fluorescent lamp or neon sign. In this case, use the remote controller in front of the remote controller receiver of the indoor unit. • If other electrical products are operated by the remote controller, call your nearest service center. • Filter reset : When the filter reset indicator is turned on the indoor unit display, clean the filter and press the Settings <, > or Settings (Filter Reset) blinking SET button. • Beep off : To silence the beep sound, press the Settings <, > or Settings (Beep) blinking SET button. If you press the Settings <, > or Settings (Beep) blinking SET button again, the beep sound will ring again. Correct disposal of batteries in this product (Applicable in countries with separate collection systems) This marking on the battery, manual or packaging indicates that the batteries in this product should not be disposed of with other household waste at the end of their working life. Where marked, the chemical symbols Hg, Cd or Pb indicate that the battery contains mercury, cadmium or lead above the reference levels in EC Directive 2006/66. If batteries are not properly disposed of, these substances can cause harm to human health or the environment. To protect natural resources and to promote material reuse, please separate batteries from other types of waste and recycle them through your local, free battery return system. ENGLISH-9 MR-EH00_IB_04667A-01_EN.indd 9 2014-12-04 오전 10:29:04 Basic operation Basic operation is an operation mode that can be selected by pressing the Mode button. Auto In Auto mode, the air conditioner will automatically adjust the temperature and fan speed to maintain your fresh environment. ffWhen the indoor temperature is too high, the powerful cool breeze is generated and when the indoor room becomes cool enough, the soft breeze is generated. Cool Cool mode is frequently used and you can freely control the temperature, fan speed, and air flow direction in Cool mode. ffWhen you select the Heat mode while the Cool mode is on, the Cool mode is cancelled. Dry The air conditioner in Dry mode acts like a dehumidifier by removing moisture from the indoor air. The Dry mode will provide you with fresh air even on a rainy day. Fan Fan mode provides you with a breeze just like a fan to make fresh environment for you. Heat (MR-EH00/MR-EH00U) In Heat mode, you can warm your room even in the fall and winter. ffThe fan may not commence immediately to avoid generating a cold breeze. ffDuring the Heat mode, defrost operation may be performed to remove the frost formed on the outdoor unit. (When the frost is removed by the defrost operation in Heat mode, steam is generated from the outdoor unit.) ffIf you stop operating the air conditioner after heating operation, the fan will operate for some time to cool the indoor unit. ffWhen you select the Cool mode while the Heat mode is on, the Heat mode is cancelled. NOTE • When the outdoor temperature is low and humidity is high during the heat mode, the outdoor unit's heating capacity may decrease due to the frost formed on the outdoor heat exchanger. The defrost operation removes the frost formed on the heat exchanger of the outdoor unit for 5 ~ 12 minutes. During the defrost operation, the indoor unit does not generate breeze in order to prevent cold breeze blowing out. ❋❋ The interval between the defrost operation can decrease depending on the amount of the frost formed on the outdoor unit. ❋❋ The interval between defrost operation can also decrease by humidity level with rain or snow. ENGLISH-10 MR-EH00_IB_04667A-01_EN.indd 10 2014-12-04 오전 10:29:04 Turning the air conditioner on Press the button to operate the air conditioner. Selecting the operation mode button to select an operation mode. ❋❋ Heat mode operates with MR-EH00/MR-EH00U model only. 02 BASIC OPERATION Press the Adjusting the temperature Press the button to adjust the temperature. Auto Temperature can be adjusted by 1 °C(1 °F) within the range of 18 °C(65 °F)~30 °C(86 °F). Cool Temperature can be adjusted by 1 °C(1 °F) within the range of 18 °C(65 °F)~30 °C(86 °F). Dry Temperature can be adjusted by 1 °C(1 °F) within the range of 18 °C(65 °F)~30 °C(86 °F). Fan Temperature cannot be adjusted. Heat Temperature can be adjusted by 1 °C(1 °F) within the range of 16 °C(61 °F) ~30 °C(86 °F). Selecting the fan speed Press the Auto Cool Dry Fan Heat button to adjust the fan speed. (Auto) (Auto), (Low), (Med), (Low), (Med), (High) (Auto), (Low), (Med), (High) (Auto) (High) ENGLISH-11 MR-EH00_IB_04667A-01_EN.indd 11 2014-12-04 오전 10:29:05 Basic operation Selecting air flow direction This function allows you to shift the air flow direction up and down or left and right. Press the or button to move the air flow direction up and down or left and right while the air conditioner is turned on. ffWhen the blade reaches the desired position, press the or button one more time to set the air flow direction. The up/down and left/right tilting of the blade will stop. ❋❋ Duct type model cannot adjust air flow direction up and down. Remote controller display ENGLISH-12 MR-EH00_IB_04667A-01_EN.indd 12 2014-12-04 오전 10:29:06 TIMER Setting the On/Off timer You can set the air conditioner to be turned on or off automatically at desired time. 1. Press the Timer button to select (On). -- (On) indicator will keep blinking and you can set the time. 2. Press the < or > button to set the time. -- You can set the time in half hour unit from 30 minutes (0.5 on the display) ~ 3 hours and hour unit from 3 ~ 24 hours. -- Time can be set from minimum 30 minutes to maximum 24 hours. 3. Press the SET button to complete the On timer setting. -- (On) indicator and the set time of the timer will be displayed on the remote controller display. -- On timer setting will be cancelled if you don't press the SET button within 10 seconds after setting the time. Therefore, check for the (On) indicator on the remote controller display. Cancel 03TIMER Setting the On timer When the air conditioner is turned off. ffPress the Timer button select (On) press the < or > button set the timer to press the SET button. Remote controller display Additional options available in On timer Select the mode from (Auto) (Cool) (Dry) (Fan) and (Heat). ❇❇ Heat mode operates with MR-EH00/MR-EH00U model only. You can adjust the temperature after timer setting is completed. Temperature adjustment is only available in Auto/Cool/Dry/Heat mode. In Fan mode, temperature cannot be adjusted. ❇❇ Heat mode operates with MR-EH00/MR-EH00U model only. NOTE • When On timer setting is completed, the set status will be displayed for 3 seconds, and then only (On) indicator will remain on the remote controller display thereafter. • You cannot set the Fan speed when setting the On timer. ENGLISH-13 MR-EH00_IB_04667A-01_EN.indd 13 2014-12-04 오전 10:29:06 Setting the On/Off timer Setting the Off timer When the air conditioner is turned on 1. Press the Timer button to select (Off). -- (Off) indicator will keep blinking and you can set the time. 2. Press the < or > button to set the time. -- You can set the time in half hour unit from 30 minutes (0.5 on the display) ~ 3 hours and hour unit from 3 ~ 24 hours. -- Time can be set from minimum 30 minutes to maximum 24 hours. 3. Press the SET button to complete the Off timer setting. -- (Off) indicator and the set time of the timer will be displayed on the remote controller display. -- Off timer setting will be cancelled if you don't press the SET button within 10 seconds after setting the time. Therefore, check for the (Off) indicator on the remote controller display. ffPress the Timer button select (Off) press the < or > button set the timer to press the SET button. Cancel NOTE • Only the latest setting timer will be applied between the Off Timer and good’ sleep off timer functions. Remote controller display Combining On timer and Off timer When the air conditioner is turned off When the air conditioner is turned on When set time on On timer is shorter than Off timer e.g. On timer: 3 hours, Off timer: 5 hours • The air conditioner will be turned on after 3 hours from the moment you have set the timer and the air conditioner will remain on for 2 hours and then be turned off automatically. NOTE When set time on On timer is longer than Off timer e.g. On timer: 3 hours, Off timer: 1 hour • The air conditioner will be turned off after 1 hour from the moment you have set the timer and will be turned on after 2 hours from the moment it was turned off. • Set time for the On timer and the Off timer should be different from each other. • When the On timer or the Off timer is set, setting can be cancelled by pressing the Power button. ENGLISH-14 MR-EH00_IB_04667A-01_EN.indd 14 2014-12-04 오전 10:29:07 Setting the good’sleep mode For a comfortable sleep, the air conditioner will operate in 3 stages in order of ‘Fall asleep Sound sleep Wake up’ stages. When the air conditioner is operating in Cool mode; Cancel 03TIMER 1. Press the Timer button to select ( ). -- ( ) indicator will keep blinking and you can set the time. 2. Press the < or > button to set the time. -- You can set the time in half hour unit from 30 minutes (0.5 on the display) ~ 3 hours and hour unit from 3 ~ 12 hours. -- Time can be set from minimum 30 minutes to maximum 12 hours. -- Default time setting for the good'sleep mode is 8 hours. 3. Press the SET button to complete the good'sleep mode setting. -- ( ) indicator and the set time of the good'sleep mode will be displayed on the remote controller display. -- good'sleep mode will be cancelled if you don't press the SET button within 10 seconds after setting the time. Therefore, check for the ( ) indicator on the remote controller display. ffPress the Timer button select ( ) press the < or > button set the timer to press the SET button. Remote controller display Additional options available in good'sleep mode Temperature can be adjusted by 1 °C(1 °F) within the range of 18 °C(65 °F)~30 °C(86 °F). ENGLISH-15 MR-EH00_IB_04667A-01_EN.indd 15 2014-12-04 오전 10:29:07 Setting the good’sleep mode Temperature and Fan speed change in good’sleep mode 1. Fall asleep mode : Provides you with comfortable environment for a good sleep by rapid cooling and hypnagogue expedition breeze. 2. Sound sleep mode : The sound sleep mode adjusts temperature and air flow in waves to maintain healthy skin temperature while it aids deep sleep. According to the change of good’ sleep operation hours, the sound sleep hour can be longer or shorter. 3. Wake up from good’sleep mode : Provides you with the air flow that adjusts your body temperature to wake you up in a fresh status. NOTE • In good'sleep mode, the air conditioner will operate in Cool + ( ) mode for first 30 minutes. Fan speed and the air flow direction will be adjusted automatically in good'sleep mode. • Recommended set temperature is between 25 °C(77 °F) ~ 27 °C (81 °F) and 26 °C(79 °F) is the most ideal temperature. • If the set temperature is too low, you may feel cold during sleep or catch a cold. • Optimal operation hour of good'sleep mode is 8 hours. Therefore, if the time is set too short or long, you may not feel as comfortable as you would expect. • If the good'sleep mode is set over 5 hours, Wake up stage will begin when 1 hour is remaining in the operation time and the air conditioner will stop automatically. • When the On timer and the good'sleep mode are set simultaneously, the air conditioner will only apply the function that was set later. • While good'sleep mode is operating, mode can be set additionally by pressing the Options button. • If you press the Options button and select the Turbo/Quiet function, the good'sleep mode will be cancelled and the selected mode will begin operation. • If you press the Mode button, the good'sleep mode will be cancelled and the selected mode will begin operation. ENGLISH-16 MR-EH00_IB_04667A-01_EN.indd 16 2014-12-04 오전 10:29:07 OPTIONS Using the Turbo function You can set the Turbo function to provide fast and powerful cooling (heating). When the air conditioner is operating in Cool or Heat mode; Cancel NOTE 04OPTIONS 1. Press the Options button. 2. Press the <, > or Options button until (Turbo) indicator starts to blink. 3. Press the SET button to set the Turbo function. -- (Turbo) (Turbo) indicator will be displayed on the remote controller display and Turbo function will operate for 30 minutes. ffPress the Options button press the <, > or Options button to make the (Turbo) indicator blink and press the SET button. • Turbo function is only available in Cool/Heat mode. ❋❋ Heat mode operates with MR-EH00/MR-EH00U model only. • If the Turbo function is selected while Quiet function is on, the Quiet function will be cancelled. • Air flow direction can be adjusted with every direction. ❋❋ Duct type model cannot adjust air flow direction up and down. • Temperature and fan speed cannot be adjusted. Remote controller display ENGLISH-17 MR-EH00_IB_04667A-01_EN.indd 17 2014-12-04 오전 10:29:08 Using the Purity function Purity function will remove harmful materials in the air to provide you clean and healthy environment. You can select this function additionally while the air conditioner is in operation. When the air conditioner is turned on 1. Press the Options button. 2. Press the <, > or Options button until ( ) indicator starts to blink. 3. Press the SET button to set the Purity function. -- ( ) ( ) indicator will be displayed on the remote controller display and Virus Doctor function will begin. ffPress the Options button press the <, > or Options button to make the ( ) indicator blink and press the SET button. Cancel NOTE Remote controller display • You may select the purity function additionally during Auto/Cool/Dry/ Heat mode and you can adjust the temperature. ❋❋ Heat mode operates with MR-EH00/MR-EH00U model only. • If the purity function is selected additionally in fan mode, the temperature cannot be adjusted. • When the air conditioner and the purity function are turned on simultaneously and you press the Power button, both air conditioner and purity function will stop operation. • You can still use the purity function when the On timer is set with the air conditioner is turned off. • There will not be much difference on energy consumption and operating noise when the purity function is selected additionally while the air conditioner is turned on. When the air conditioner is turned off 1. Press the Options button. 2. Press the SET button when ( ) indicator blinks to begin purity function. -- ( ) ( ) indicator will be displayed on the remote controller display and Virus doctor function will begin. Cancel ffPress the Options button to make the ( the SET button. ) indicator blink and press Remote controller display ENGLISH-18 MR-EH00_IB_04667A-01_EN.indd 18 2014-12-04 오전 10:29:08 Using the Quiet function You can reduce the noise generated from the indoor unit during Cool/Heat mode. When the air conditioner is operating in Cool or Heat mode; Cancel 04OPTIONS 1. Press the Options button. 2. Press the <, > or Options button until (Quiet) indicator starts to blink. 3. Press the SET button to set the Quiet function. -- (Quiet) (Quiet) indicator will be displayed on the remote controller display and Quiet function will begin. ffPress the Options button press the <, > or Options button to make the (Quiet) indicator blink and press the SET button. Additional options available in Quiet function In Cool mode Temperature can be adjusted by 1 °C(1 °F) within the range of 18 °C(65 °F) ~ 30 °C(86 °F). In Heat mode Temperature can be adjusted by 1 °C(1 °F) within the range of 16 °C(61 °F) ~30 °C(86 °F). ❇❇ Heat mode operates with MR-EH00/MR-EH00U model only. Remote controller display Fan speed is set to (Auto). Air flow direction can be adjusted. NOTE • Quiet function can be set only in Cool/Heat mode and if the Quiet function is selected while Turbo function is on, the Turbo function will be cancelled. ❋❋ Heat mode operates with MR-EH00/MR-EH00U model only. ENGLISH-19 MR-EH00_IB_04667A-01_EN.indd 19 2014-12-04 오전 10:29:09 SETTINGS Selecting an indoor unit You can select and operate individual indoor units out of 4 indoor units. When the air conditioner is turned on 1. Press the Settings button. 2. Press the <, > or Settings button until (Zone) indicator starts to blink. 3. Press the SET button to select the indoor unit you want to operate. -- You can select individual units in order (1~4) or select all indoor units at one time. Remote controller display Selecting a blade You can select and operate individual blades out of 4 blades. When the air conditioner is turned on 1. Press the button. -- Blade 1234 will be displayed. 2. Press the Settings button. 3. Press the <, > or Settings button until (Blade) indicator starts to blink. 4. Press the SET button to select the blade you want to operate. -- You can select the individual blades in order (1~4) or select all blades at one time. NOTE • To cancel the selected blade, press the • When selecting the blade individually, button. button will not work. Remote controller display ENGLISH-20 MR-EH00_IB_04667A-01_EN.indd 20 2014-12-04 오전 10:29:09 OTHERS Appendix Detailed control specification of a remote controller by each indoor unit frame Console2 (SOC) EEV-RAC DVM Master N JSF2 Supported Supported Supported Supported Left and right swing Not supported Not supported Not supported Supported Quiet Not supported Not supported Not supported Not supported good' sleep Not supported Supported Supported Supported Turbo Not supported Supported Supported Supported Purity Supported Not supported Not supported Supported Individual blade control Not supported Not supported Not supported Not supported Multi channel (Indoor unit selection) Supported Supported Supported Supported Beep Supported Not supported Not supported Not supported Forced trial operation Not supported Not supported Not supported Not supported Refrigerant amount detection Not supported Not supported Not supported Not supported Classification Console [Inverter] Global_4way [Inverter] Slim_1way_SPI_Add [Inverter] G_Mini4way [Inverter] Up and down swing Supported Supported Supported Supported Left and right swing Not supported Not supported Not supported Not supported Quiet Not supported Not supported Not supported Not supported good' sleep Not supported Not supported Supported Not supported Turbo Not supported Not supported Not supported Not supported Purity Supported Supported Supported Supported Individual blade control Not supported Supported Not supported Supported Multi channel (Indoor unit selection) Supported Supported Supported Supported Beep Supported Supported Not supported Supported Forced trial operation Not supported Not supported Not supported Not supported Refrigerant amount detection Not supported Not supported Not supported Not supported 06OTHERS Classification Up and down swing ENGLISH-21 MR-EH00_IB_04667A-01_EN.indd 21 2014-12-04 오전 10:29:10 Appendix Detailed control specification of a remote controller by each indoor unit frame Classification Big Duct [Inverter] C-RAC [Inverter] Duct [Inverter] JSF2 [Inverter] Up and down swing Not supported Supported Not supported Supported Left and right swing Not supported Not supported Not supported Supported Quiet Not supported Not supported Not supported Supported good' sleep Not supported Supported Not supported Supported Turbo Not supported Not supported Not supported Supported Purity Not supported Not supported Not supported Supported Individual blade control Not supported Not supported Not supported Not supported Multi channel (Indoor unit selection) Supported Supported Supported Supported Beep Not supported Not supported Not supported Not supported Forced trial operation Not supported Not supported Not supported Not supported Refrigerant amount detection Not supported Not supported Not supported Not supported Slim_1way Cooling only constant velocity type 2way Classification Global_4way Cooling Ceiling BLDC [Inverter] only constant velocity type Up and down swing Supported Supported Supported Supported Left and right swing Not supported Not supported Not supported Not supported Quiet Not supported Not supported Not supported Not supported good' sleep Not supported Not supported Supported Not supported Turbo Not supported Not supported Not supported Not supported Purity Not supported Supported Supported Supported Individual blade control Not supported Supported Not supported Not supported Multi channel (Indoor unit selection) Supported Supported Supported Supported Beep Supported Supported Not supported Supported Forced trial operation Not supported Not supported Not supported Not supported Refrigerant amount detection Not supported Not supported Not supported Not supported ENGLISH-22 MR-EH00_IB_04667A-01_EN.indd 22 2014-12-04 오전 10:29:10 Ceiling Mini4way Slim1way Big Slim1way Up and down swing Supported Supported Supported Supported Left and right swing Not supported Not supported Not supported Supported Quiet Not supported Not supported Not supported Not supported good' sleep Not supported Not supported Supported Supported Turbo Not supported Not supported Not supported Supported Purity Not supported Not supported Supported Supported Individual blade control Not supported Not supported Not supported Not supported Multi channel (Indoor unit selection) Supported Supported Supported Supported Beep Supported Not supported Supported Supported Forced trial operation Not supported Not supported Not supported Not supported Refrigerant amount detection Not supported Not supported Not supported Not supported Classification Console NeoForte DVM Q Super Up and down swing Supported Supported Supported Not supported Left and right swing Not supported Not supported Supported Not supported Quiet Not supported Not supported Not supported Not supported good' sleep Not supported Supported Not supported Not supported Turbo Not supported Supported Not supported Supported Purity Supported Not supported Not supported Not supported Individual blade control Not supported Not supported Not supported Not supported Multi channel (Indoor unit selection) Supported Supported Supported Supported Beep Not supported Supported Supported Supported Forced trial operation Not supported Not supported Not supported Not supported Refrigerant amount detection Not supported Not supported Not supported Not supported 06OTHERS Classification ENGLISH-23 MR-EH00_IB_04667A-01_EN.indd 23 2014-12-04 오전 10:29:10


