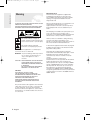
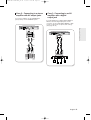
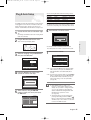
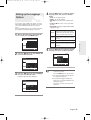
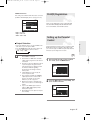
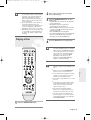
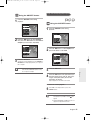
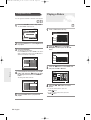
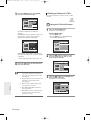
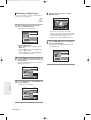
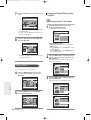
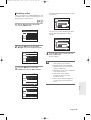
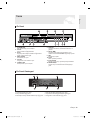
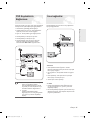
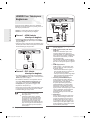
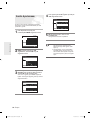
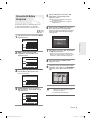
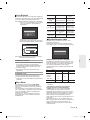
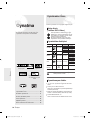
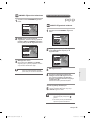
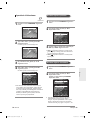
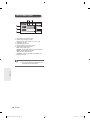
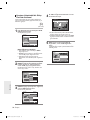
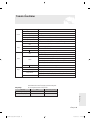
1
01094N-R135-AND-ENG-Cover 4/8/06 9:16 AM Page 1 Instruction Manual DVD-R135 www.samsung.com English Türkçe AK68-01094N-00 Getting Started 01094N-R135-AND-ENG_02~17 4/8/06 9:20 AM Page 2 Warning TO REDUCE THE RISK OF ELECTRIC SHOCK, DO NOT REMOVE THE COVER(OR BACK). NO USER-SERVICEABLE PARTS ARE INSIDE. REFER SERVICING TO QUALIFIED SERVICE PERSONNEL. IMPORTANT NOTE The mains lead on this equipment is supplied with a moulded plug incorporating a fuse. The value of the fuse is indicated on the pin face of the plug. If it requires replacing, a fuse approved to BS1362 of the same rating must be used. Never use the plug with the fuse cover omitted if the cover is detachable. If a replacement fuse cover is required, it must be of the same colour as the pin face of the plug. Replacement covers are available from your dealer. If the fitted plug is not suitable for the power points in your house or the cable is not long enough to reach a power point, you should obtain a suitable safety approved extension lead or consult your dealer for assistance. This symbol indicates “dangerous voltage” inside the product that presents a risk of electric shock or personal injury. However, if there is no alternative to cutting off the plug, remove the fuse and then safely dispose of the plug. Do not connect the plug to a mains jack, as there is a risk of shock hazard from the bared flexible cord. This symbol indicates important instructions accompanying the product. To disconnect the apparatus from the mains, the plug must be pulled out from the mains socket, therefore the mains plug shall be readily operable. Do not install this equipment in a confined space such as a bookcase or similar unit. WARNING : To prevent damage which may result in fire or electric shock hazard, do not expose this appliance to rain or moisture. CAUTION : DVD RECORDER USES AN INVISIBLE LASER BEAM WHICH CAN CAUSE HAZARDOUS RADIATION EXPOSURE IF DIRECTED. BE SURE TO OPERATE RECORDER CORRECTLY AS INSTRUCTED. CAUTION THIS PRODUCT UTILIZES A LASER. USE OF CONTROLS OR ADJUSTMENTS OR PERFORMANCE OF PROCEDURES OTHER THAN THOSE SPECIFIED HEREIN MAY RESULT IN HAZARDOUS RADIATION EXPOSURE. DO NOT OPEN COVERS AND DO NOT REPAIR YOURSELF. REFER SERVICING TO QUALIFIED PERSONNEL. This product satisfies CE regulations when shielded cables and connectors are used to connect the unit to other equipment. To prevent electromagnetic interference with electric appliances, such as radios and televisions, use shielded cables and connectors for connections. 2- English The product unit accompanying this user manual is licensed under certain intellectual property rights of certain third parties. This license is limited to private noncommercial use by end-user consumers for licensed contents. No rights are granted for commercial use. The license does not cover any product unit other than this product unit and the license does not extend to any unlicensed product unit or process conforming to ISO/IEC 11172-3 or ISO/IEC 13818-3 used or sold in combination with this product unit. The license only covers the use of this product unit to encode and/or decode audio files conforming to the ISO/IEC 11172-3 or ISO/IEC 13818-3. No rights are granted under this license for product features or functions that do not conform to the ISO/IEC 11172-3 or ISO/IEC 13818-3. 01094N-R135-AND-ENG_02~17 4/8/06 9:20 AM Page 3 Important Safety Instructions Read these operating instructions carefully before using the DVD Recorder. Follow all the safety instructions listed below. Keep these operating instructions handy for future reference. 1) Read these instructions. 2) Keep these instructions. 3) Heed all warnings. 4) Follow all instructions. 5) Do not use this apparatus near water. 6) Clean only with dry cloth. 7) Do not block any ventilation openings, Install in accordance with the manufacturer's instructions. 8) Do not install near any heat sources such as radiators, heat registers, stoves, or other apparatus (including amplifiers) that produce heat. 9) Do not defeat the safety purpose of the polarized or grounding- type plug. A polarized plug has two blades with one wider than the other. A groundingtype plug has two blades and a third grounding prong. The wide blade or the third prong are provided for your safety. if the provided plug does not fit into your outlet, consult an electrician for replacement of the obsolete outlet. 10) Protect the power cord from being walked on or pinched particularly at plugs, convenience receptacles, the point where they exit from the apparatus. 11) Only use attachments/accessories specified by the manufacturer. 12) Use only with the cart, stand, tripod, bracket, or table specified by the manufacturer, or sold with the apparatus. When a cart is used, use caution when moving the cart/apparatus combination to avoid injury from tip-over. 13) Unplug this apparatus during lightning storms or when unused for long periods of time. 14) Refer all servicing to qualified service personnel. Servicing is required when the apparatus has been damaged in any way, such as power-supply cord or plug is damaged, liquid has been spilled or objects have fallen into the apparatus, the apparatus has been exposed to rain or moisture, does not operate normally, or has been dropped. Handling Cautions ● ● ● ● ● Before connecting other components to this DVD Recorder, be sure to turn them all off. Do not move the DVD Recorder while a disc is being played, or the disc may be scratched or broken, the DVD Recorder's internal parts may be damaged. Do not put a flower vase filled with water or any small metal objects on the DVD Recorder. Be careful not to put your hand into the disc tray. Do not place anything other than the disc in the disc tray. ● ● ● ● Exterior interference such as lightning and static electricity can affect normal operation of this DVD Recorder. If this occurs, turn the DVD Recorder off and on again with the STANDBY/ON button, or disconnect and then reconnect the AC power cord to the AC power outlet. The DVD Recorder will operate normally. Be sure to remove the disc and turn off the DVD Recorder after use. Disconnect the AC power cord from the AC outlet when you don’t intend to use the DVD Recorder for long periods of time. Clean the disc by wiping in a straight line from the inside to the outside of the disc. Maintenance of Cabinet For safety reasons, be sure to disconnect the AC power cord from the AC outlet. ● Do not use benzene, thinner, or other solvents for cleaning. ● Wipe the cabinet with a soft cloth. Disc Handling ● Use discs with regular shapes. If an irregular disc (a disc with a special shape) is used, this DVD recorder may be damaged. Holding discs ● Avoid touching the surface of a disc where recording is performed. DVD-RW, DVD-R ● Clean with an optional DVDRAM/PD disc cleaner (LFK200DCA1 where available). Do not use cleaners or cloths for CDs to clean DVD-RW/ DVD-R discs. DVD-Video, Audio CD ● Wipe off dirt or contamination on the disc with a soft cloth. Cautions on handling discs ● ● ● ● ● ● Do not write on the printed side with a ball-point pen or pencil. Do not use record cleaning sprays or antistatic. Also, do not use volatile chemicals, such as benzene or thinner. Do not apply labels or stickers to discs. (Do not use discs fixed with exposed tape adhesive or leftover peeled-off stickers.) Do not use scratch-proof protectors or covers. Do not use discs printed with label printers available on the market. Do not load warped or cracked discs. English -3 Getting Started Precaution 01094N-R135-AND-ENG_02~17 4/8/06 9:20 AM Page 4 Getting Started Disc Storage Be careful not to harm the disc because the data on these discs is highly vulnerable to the environment. ● Do not keep under direct sunlight. ● Keep in a cool ventilated area. ● Store vertically. ● Keep in a clean protection jacket. ● If you move your DVD recorder suddenly from a cold place to a warm place, condensation may generate on the operating parts and lens and cause abnormal disc playback. If this occurs, do not connect the plug to the power outlet and wait for two hours. Then insert the disc and try to play back again. Using CD-R/-RW ● ● ● Using MPEG4 disc Disc Specifications ● ● DVD-Video ● ● ● A digital versatile disc (DVD) can contain up to 135-minutes of images, 8 audio languages and 32 subtitle languages. It is equipped with MPEG-2 picture compression and Dolby digital surrounding, allowing you to enjoy vivid and clear theatre quality images in the comfort of your own home. When switching from the first layer to the second layer of a dual-layered DVD Video disc, there may be momentary distortion in the image and sound. This is not a malfunction of the DVD Recorder. Once a DVD-R/-RW recorded in Video Mode is finalised, it becomes DVD-Video. ● ● ● ● ● ● ● ● ● An audio disc on which 44.1kHz PCM Audio is recorded Plays CD-DA format audio CD-R and CD-RW discs. The DVD Recorder may not be able to play some CD-R or CD-RW discs due to the condition of the recording. ● ● CD-R/-RW MP3 CD-R/-RW ● ● ● ● ● ● Only CD-R discs with MP3 files recorded with ISO9660 or JOLIET format can be played back Only MP3 files with the ".mp3", ".MP3" extension can be used. For MP3 files recorded with a VBR(Variable Bit Rates), from 32 Kbps to 320 Kbps, the sound may cut in out. Playable bitrate range is from 56Kbps to 320Kbps. This DVD Recorder can handle a maximum of 500 files and 100 folders. JPEG CD-R/-RW ● ● ● ● Only JPEG files with the ".jpg", ".JPG" extension can be used. This DVD Recorder can handle a maximum of 500 files and 100 folders. Maximum size of progressive JPEG is 3M pixels. MOTION JPEG is not supported. 4- English Disc : CD-R/-RW, DVD-R/-RW MPEG4 File with following extensions can be played. : .avi, .divx, .AVI, .DIVX MPEG4 Codec format : DivX 3.11 DivX 4.x DivX 5.x DivX-Pro Xvid Motion Compensation : QPEL, GMC four CC : MPG4, mpg4, DIV3, divX3, DIVX, divX, DX50, MP43, mp43, XVID, xvid Available Audio Format : “MP3”, “MPEG1 Audio Layer2”, “LPCM”, “AC3”, “DTS”, “MS ADPCM” Supported subtitle file formats: .smi, .srt, .sub, .psb, .txt, .ass DVD-R Disc Playback and Recording Audio CD ● Use a 700MB(80 minutes) CD-R/-RW disc. If possible, do not use a 800MB(90 minutes) or above disc, as the disc may not play back. If the CD-R/-RW disc was not recorded as a closed session, you may experience a delay in the early playback time, all recorded files may not play. Some CD-R/-RW discs may not be playable with this DVD Recorder, depending on the device which was used to burn them. For contents recorded on CD-R/RW media from CDs for your personal use, playability may vary depending on contents and discs. ● Once a DVD-R recorded in Video Mode is finalised, it becomes DVD-Video. You can record onto the available space on the disc and perform editing functions such as giving titles to discs and programmes and erasing programmes before finalising. When programming is erased from a DVD-R, that space does not become available. Once an area on a DVD-R is recorded on, that area is no longer available for recording, whether the recording is erased or not. It takes about 30 seconds for the DVD Recorder to complete recording management information after recording finishes. This DVD Recorder optimizes the DVD-R for each recording. Optimizing is carried out when you start recording after inserting the disc or turning on the DVD Recorder. Recording onto the disc may become impossible if optimizing is carried out too many times. Playback may be impossible in some cases due to the condition of recording. This DVD Recorder can play back DVD-R discs recorded and finalised with a Samsung DVD video recorder. It may not be able to play some DVD-R discs depending on the disc and the condition of the recording. DVD-RW Disc Playback and Recording ● ● ● ● Recording and playback can be performed on DVDRW discs in both the Video and VR Modes. Once a DVD-RW recorded in both the Video and VR Modes is finalised, you cannot perform addtional recording. Once a DVD-RW recorded in Video Mode is finalised, it becomes DVD-Video. In both modes, playback can be performed before and after finalisation, but additional recording, deleting and editing can not be performed after finalisation. 01094N-R135-AND-ENG_02~17 4/8/06 9:20 AM Page 5 ● ● ● DVD-RW (VR mode) - This is a format that is used for recording data on a DVD-RW disc. You can record multiple titles, edit, delete, partial delete, create a playlist, etc. - A disc that is recorded in this mode may not be played by existing DVD Recorder. DVD-RW (Video mode) - This is a format that is used for recording data on a DVD-RW or DVD-R disc. The disc can be played by existing DVD Recorder once it has been finalised. - If a disc that has been recorded in Video Mode by a different maker’s recorder but has not been finalised, it cannot be played or additionally be recorded by this DVD Recorder. Do not use the following discs! ● ● ● Disc Compatibility ● COPY PROTECTION ● ● ● Many DVD discs are encoded with copy protection. Because of this, you should only connect your DVD recorder directly to your TV, not to a VCR. Connecting to a VCR results in a distorted picture from copy-protected DVD discs. This DVD Recorder incorporates copyright protection technology that is protected by methods claims of certain U.S. patents and other intellectual property rights owned by Macrovision Corporation and other rights owners. Use of this copyright protection technology must be authorised by Macrovision Corporation, is intended for home and other limited viewing uses only unless otherwise authorised by Macrovision Corporation. Reverse engineering or disassembly is prohibited. LD, CD-G, CD-I, Video-CD, CD-ROM and DVD-ROM discs should not be used in this DVD Recorder. [Note] Disc types that can be played : CD/CD-R/CD-RW/ MP3/JPEG/MPEG4/DVD-Video/DVD-RW/DVD-R. For a DVD-R/DVD-RW disc, which has been recorded in Video Mode on another component, it can play only when finalised. Some commercial discs and DVD discs purchased outside your region may not be playable with this DVD Recorder. When these discs are played, either “No Disc” or "The disc cannot be played. Please check the regional code of the disc." will be displayed. If your DVD-RW disc is an illegal copy or is not in DVD video format, it may also not be playable. High Speed Recording discs can be used in this DVD Recorder. Not all brands of discs will be compatible with this DVD Recorder. Protection This DVD Recorder can allow you to protect the contents of your discs, as described below. ● Programme-protected: See page 71 “Locking(Protecting) a Title” ● Disc-protected: See page 83 “Disc Protection” ✻ DVD-RW/DVD-R discs that are incompatible with the DVD-VIDEO format cannot be played with this DVD Recorder. ✻ For more information on DVD recording compatibility, consult your DVD-RW/DVD-R manufacturer. ✻ Use of poor quality DVD-RW/DVD-R discs may cause following unexpected problems including, without limitation, recording failure, loss of recorded or edited materials or damage to the DVD Recorder. English -5 Getting Started ● If you want to record the disc in VR Mode and then record in V Mode, be sure to execute Format. Be careful when executing Format because all the recorded data may be lost. A DVD-RW blank disc is initialized to VR Mode when first initialized. Getting Started 01094N-R135-AND-ENG_02~17 4/8/06 9:20 AM Page 6 Contents Case 2 : Connecting to an S-Video output jack.............19 Case 3 : Component Video output jacks........................20 Other type of connecting the Audio output cable ..20 Case 1 : Connecting to your TV......................................20 Case 2 : Connecting to a stereo amplifier with AV Getting Started output jacks .....................................................21 Case 3: Connecting to an AV amplifier with a digital Warning........................................................................2 output jack ........................................................21 Precaution ...................................................................3 Connecting HDMI/DVI to a TV ...............................22 Important Safety Instructions.............................................3 Case 1 : Connecting to a TV with HDMI Jack ...............22 Handling Cautions..............................................................3 Case 2 : Connecting to a TV with DVI Jack ..................22 Maintenance of Cabinet.....................................................3 Connecting to AV3 IN, DV input jack....................23 Disc Handling .....................................................................3 Case 1 : Connecting a VCR, Set-Top Box(STB), DVD Disc Storage .......................................................................4 player or Camcorder to the AV3 IN jacks ......23 Disc Specifications .............................................................4 Case 2 : Connecting a Camcorder to the DV IN jack.....23 General Features........................................................8 Before reading the user’s manual...........................9 How to use the DVD Recorder.................................9 Unpacking .................................................................11 Accessories.......................................................................11 Preparing the Remote Control.........................................11 Setting the Remote Control .............................................11 Description................................................................13 Front Panel ......................................................................13 Front Panel Display .........................................................13 Rear Panel........................................................................14 Tour of the Remote Control .............................................15 System Setup On-Screen Menu Navigation..................................24 Plug & Auto Setup ...................................................25 Setting the Clock......................................................26 Presetting Channels with the Auto Setup function......................................................................27 Presetting Channels with the Manual Setup function......................................................................28 Setting up the Language Options.........................29 EP Mode Time Setting ............................................30 Automatic Chapter Creation ..................................31 Quick Recording Setting ........................................32 Connecting & Setting Up Setting up the Audio Options ................................32 Audio Options...................................................................33 Quick Overview ........................................................16 Setting up Video Output Options..........................34 Connecting the DVD Recorder..............................17 Setting up the Progressive scan...........................35 Additional connections...........................................17 Antenna + DVD Recorder + external decoder box + TV ....................................18 Other type of connecting the Video output cable............................................18 Case 1 : Connecting to a Video (Composite) output jack ........................................................19 6- English Canceling the Progressive scan ...........................35 Setting up the Display(Video) Options.................36 Display(Video) Options ....................................................36 Output selection ...............................................................37 DivX(R) Registration................................................37 Setting up the Parental Control.............................37 01094N-R135-AND-ENG_02~17 4/8/06 9:20 AM Page 7 Selecting the Audio language..........................................56 About the Rating Level ....................................................38 Changing the Camera Angle...........................................57 About the Change Password ..........................................39 Zooming-In........................................................................57 Using Bookmarks.............................................................58 Using Markers ..................................................................59 Recording Playing an Audio CD/MP3 .....................................60 Before Recording.....................................................40 Playing an Audio CD (CD-DA)/MP3 ...............................60 Recordable discs..............................................................40 Playing a Picture ......................................................64 Recording Formats ..........................................................41 Playing a MPEG4 .....................................................65 Recording Mode...............................................................41 Playing the Title List................................................66 Unrecordable video..........................................................41 About INFO Button...........................................................42 Checking the available disc space (Disc Information)...42 Editing Basic Editing (Title List) ...................................................70 Recording the current TV programme you are Renaming(Labeling) a Title..............................................70 watching ....................................................................42 Locking(Protecting) a Title ...............................................71 Recording from external equipment you are Deleting a Title..................................................................71 watching ....................................................................44 Deleting a Section of a Title.............................................72 Copying from a Camcorder ...................................44 Advanced Editing (Playlist) .............................................74 Making a One Touch Recording (OTR)................45 Creating a Playlist ............................................................74 Making a Timer Recording .....................................46 Playing Entries in the Playlist ..........................................75 Flexible Recording (for Timer recording only) ...47 Renaming a Playlist Entry ...............................................76 Editing the Scheduled Record List.......................48 Editing a Scene for the Playlist .......................................77 Deleting the Scheduled Record List.....................48 Copying a Playlist Entry to the Playlist ...........................80 Recording the Standard Timer List ......................49 Deleting a Playlist Entry from the Playlist.......................81 Disc Manager ..............................................................82 Playback Editing the Disc Name .....................................................82 Before Playing ..........................................................50 Disc Protection .................................................................83 Region code (DVD-Video only).......................................50 Formatting a Disc.............................................................83 Disc types that can be played .........................................50 Delete All Title Lists ..........................................................84 Discs that cannot be played ............................................50 Finalising a disc................................................................85 Playing a Disc...........................................................51 Unfinalising a disc (V/VR mode) .....................................86 Using the Disc Menu & Title Menu .................................52 Using the Search Functions ............................................52 Additional Information Slow Motion Play..............................................................53 Troubleshooting.......................................................87 Step Motion Play..............................................................53 Specifications...........................................................91 About ANYKEY ................................................................53 Using the Repeat Function..............................................54 Selecting the Subtitle .......................................................56 English -7 Getting Started If you forgot your password.............................................38 Getting Started 01094N-R135-AND-ENG_02~17 4/8/06 9:20 AM Page 8 General Features High quality progressive scan Progressive scanning provides high resolution and flicker free video. The 10-bit 54-MHz DAC and 2D Y/C Separating Circuitry provides the highest image playback and recording quality. (See pages 20, 35) The DVD Recorder allows you to record and play high quality digital video on DVD-RW/DVD-R discs. You can record and edit digital images on DVD-RW/DVD-R discs as if they were VCR tapes. A variety of functions with an easy-to-use user interface High quality digital audio and video recording and playback The integrated menu system and the messaging function allow you to perform desired operations both easily and conveniently. With a DVD-RW disc, you can edit recorded video, create a playlist, edit video in a specific sequence according to your requirements. Record up to 8-hours of images with a 4.7 GB DVD-RW/DVD-R disc, depending on the recording mode. MPEG4 playback This DVD Recorder can play MPEG4 formats within an avi file. Selectable Recording Mode You can set your recorder to one of four different recording speeds, each varying in recording quality and length. EP (6Hr or 8Hr) mode yields the most recording time, LP & SP modes provide less recording time with higher quality recording, XP mode gives you the highest quality recording. Automated Quality Adjustment for Timer Recording If FR mode is selected, the video quality is adjusted automatically so that all video for the scheduled time can be recorded onto the free disc space. (See page 47.) Creating a DVD video title using DVD-RW/DVD-R disc With the DVD Recorder, you can create your own DVD Video titles on 4.7 GB DVD-RW/DVD-R discs. Copying data from a digital camcorder using a DV input jack Record DV Device video onto DVD-RW, DVD-R discs using the DV input jack (IEEE 1394-4pin/4pin). (See pages 44-45.) 8- English DivX Certification DivX, DivX Certified, and associated logos are trademarks of DivXNetworks, Inc and are used under licence. HDMI (High Definition Multimedia Interface) HDMI reduces picture noise by allowing a pure digital video/audio signal path from the DVD recorder to your TV. 01094N-R135-AND-ENG_02~17 4/8/06 9:20 AM Page 9 Make sure to check the following terms before reading the user’s manual. Icons that will be used in manual Icon Term Definition DVD This involves a function available in DVD or DVD-R/DVD-RW discs that have been recorded and finalised in Video Mode. RW This involves a function available in DVD-RW. R This involves a function available in DVD-R. CD This involves a function available in a data CD (CD-R or CD-RW). JPEG This involves a function available in a data picture CD-R/-RW, DVD-R/-RW. MP3 This involves a function available in a data CD-R/-RW,DVD-R/-RW. MPEG4 This involves a function available in a data CD-R/-RW,DVD-R/-RW. Caution This involves a case where a function does not operate or settings may be cancelled. NOTE This involves tips or instructions on the page that help each function operate. One-Touch A function that can be operated button by using only one button. ANYKEY A function that can be operated button by using ANYKEY button. About the use of this user’s manual 1) Be sure to be familiar with Safety Instructions before using this DVD Recorder. (See pages 2-5) 2) If a problem occurs, check for Troubleshooting. (See pages 87-90.) Copyright ©2006 Samsung Electronics Co. All rights reserved; No part or whole of this user’s manual may be reproduced or copied without the prior written permission of Samsung Electronics Co. How to use the DVD Recorder Step 1 Getting Started Before reading the user’s manual Select the disc type This DVD Recorder can record on the following types of discs. If you want to repeatedly record on the same disc or you want to edit the disc after recording, select a rewritable DVD-RW type disc. If you want to save recording without any change, choose a non-rewritable DVD-R. Step 2 Format the disc to start recording Unlike a VCR, the DVD Recorder automatically starts formatting when an unused disc is inserted. This is required for the preparation of recording on a disc. Using a DVD-RW This type of disc can be formatted in either DVD-Video format (Video mode) or DVD-Video Recording format (VR mode). For an unused disc, a message that asks whether to format in VR Mode or not is displayed. You can play a Video mode disc on various DVD components. A VR mode disc allows more varied editing. Using a DVD-R Formatting a disc is unnecessary and only Video Mode Recording is supported. You can play this type of discs on various DVD components only when they have been finalised. ■ You can only use either the VR or Video mode on a DVD-RW, but not both at the same time. ■ You can change the DVD-RW format to another format by reinitializing. It should be noted that the disc's data will be lost when changing formats. NOTE English -9 01094N-R135-AND-ENG_02~17 4/8/06 9:20 AM Page 10 Getting Started Step 3 Recording There are two different recording methods, Direct Recording and Timer Recording. Timer recording is classified as a Date : Once, Daily, MO-SA, MO-FR, W-SA, etc. Recording mode : XP (high quality mode), SP (standard quality mode), LP (long recording mode), and EP (extended mode) according to the recording mode. When recording is set in the FR mode, the best quality picture is recorded with regards to the remaining time on the disc. Step 4 Playing You can select the title you want to play in a displayed menu and then immediately start playback. A DVD consists of sections called titles, and sub sections called chapters. During recording, a title is created between two points where you start and stop recording. Chapters will be created automatically when you finalise recording on DVD-R / DVD-RW discs in Video mode. The chapter’s length (interval between chapters) varies according to the recording mode. Step 5 Editing a recorded disc Editing on discs is easier than conventional video tapes. The DVD Recorder supports many different edit functions, possible only with DVDs. With a simple and easy edit menu, you can operate various edit functions, such as delete, copy, rename, lock, etc., on a recorded title. Creating a playlist (DVD-RW in VR mode) With this DVD Recorder, you can create a new playlist on the same disc and edit it without the change of the original recording. 10- English Step 6 Finalising & Playing on other DVD components To play your DVD on other DVD components, finalising may be necessary. First, finish all editing and recording operations, then finalise the disc. When using a DVD-RW disc in VR Mode Although finalising is generally unnecessary when playing the disc on a VR Mode compatible component, a finalised disc should be used for playback. When using a DVD-RW disc in Video Mode The disc should be finalised first to enable playback on anything other than this DVD Recorder. No more editing or recording can be made on the disc once it has been finalised. When using a DVD-R disc You should finalise the disc to play it on a component other than this DVD Recorder. You cannot edit or record on the disc once it has been finalised. 01094N-R135-AND-ENG_02~17 4/8/06 9:21 AM Page 11 Getting Started Unpacking Accessories Setting the Remote Control Check for the supplied accessories below. You can control certain functions of another manufacturer’s TV with this remote control. Control function buttons involve: STANDBY/ON, PROG / , VOL +/-, Direct Number buttons, TV MUTE, INPUT SEL. button. Video/Audio Cable RF Cable for TV HDMI Cable Remote Control Batteries for Remote Control (AAA Size) Instruction Manual Quick Guide Preparing the Remote Control Install Batteries in the Remote Control ● ● ● Open the battery cover on the back of the remote control. Insert two AAA batteries. Make sure that the polarities (+ and -) are aligned correctly. Replace the battery cover. If the remote does not operate properly: ● ● ● ● Check the polarity +/- of the batteries (Dry-Cell) Check if the batteries are drained. Check if remote sensor is blocked by obstacles. Check if there is any fluorescent lighting nearby. Dispose of batteries according to local environmental regulations. Do not put them in the household trash. English -11 01094N-R135-AND-ENG_02~17 4/8/06 9:21 AM Page 12 Getting Started To determine whether your television is compatible, follow the instructions below. 1. Switch your television on. 2. Point the remote control towards the television. 3. Press and hold the STANDBY/ON button and enter the two-figure code corresponding to the brand of your television, by pressing the appropriate number buttons. Controllable TV Codes BRAND SAMSUNG AIWA ANAM BANG & OLUFSEN BLAUPUNKT BRANDT BRIONVEGA CGE CONTINENTAL EDISON DAEWOO EMERSON FERGUSON FINLUX FORMENTI FUJITSU GRADIENTE GRUNDIG HITACHI IMPERIAL JVC LG LOEWE LOEWE OPTA MAGNAVOX METZ MITSUBISHI MIVAR NEC NEWSAN NOBLEX NOKIA NORDMENDE PANASONIC PHILIPS PHONOLA PIONEER RADIOLA RADIOMARELLI RCA REX SABA SALORA SANYO SCHNEIDER 12- English BUTTON 01, 02, 03, 04, 05, 06, 07, 08, 09 82 10, 11, 12, 13, 14, 15, 16, 17, 18 57 71 73 57 52 75 19, 20, 23, 24, 25, 26, 27, 28, 29, 30, 31, 32, 33, 34 64 73 06, 49, 57 57 84 70 49, 52, 71 60, 72, 73, 75 52 61, 79 06, 19, 20, 21, 22, 78 06, 69 06, 57 40 57 06, 48, 62, 65 52, 77 83 68 66 74 72, 73, 75 53, 54, 74, 75 06, 55, 56, 57 06, 56, 57 58, 59, 73, 74 06, 56 57 45, 46 74 57, 72, 73, 74, 75 74 41, 42, 43, 44, 48 06 BRAND SELECO SHARP SIEMENS SINGER SINUDYNE SONY TELEAVA TELEFUNKEN THOMSON THOMSON ASIA TOSHIBA WEGA YOKO ZENITH BUTTON 74 36, 37, 38, 39, 48 71 57 57 35, 48 73 67, 73, 75, 76 72, 73, 75 80, 81 47, 48, 49, 50, 51, 52 57 06 63 Result: If your television is compatible with the remote control, it will switch off. It is now programmed to operate with the remote control. ■ If several codes are indicated for your television brand, try each one in turn until you find one that works. ■ If you replace the remote control's batteries, you must set the brand code again. NOTE Then you can control the television using the following buttons after the TV button. Button Function STANDBY/ON Used to switch the television on and off. INPUT SEL. Used to select an external source. VOL (+ or -) Used to adjust the volume of the television. PROG ( or ) Used to select the desired channel. TV MUTE Used to toggle the sound on and off. 0~9 Used to input number directly. ■ NOTE The various functions will not necessarily work on all televisions. If you encounter problems, operate the television directly. 01094N-R135-AND-ENG_02~17 4/8/06 9:21 AM Page 13 Getting Started Description Front Panel 1. STANDBY/ON Turns the DVD Recorder on and off. 2. AV3 IN Connect external equipment. 3. DV-IN Connects extermal digital equipment with a DV jack. (such as a camcorder) 4. DISC TRAY Opens to accept a disc. 5. P.SCAN Selects the progressive scan mode. 6. OPEN/CLOSE Opens and closes the disc tray. 7. DISPLAY Displays the playing status, title/chapter/time, etc. 8. PROG ( ) Select TV preset Channels. Same as PROG button on the remote control. 9. REC Starts recording. 10. STOP Stops disc playback. 11. PLAY/PAUSE Plays a disc or pauses playback/recording. 12. SEARCH/SKIP Go to the next title/chapter/track or go back to the previous title/chapter/track. Front Panel Display 1. Lights when a disc is loaded. 2. Lights in the record mode. 3. Lights to indicate the timer record mode. 4. Lights when a DVD-R/-RW disc is loaded. 5. Playing time/clock/current status indicator. 6. Lights in the progressive scan mode. English - 13 01094N-R135-AND-ENG_02~17 4/8/06 9:21 AM Page 14 Getting Started Rear Panel 1. In from aerial connector 2. Out to TV connector 3. AV2(EXT) INPUT SCART Connector 4. AV1(TV) OUTPUT SCART Connector 5. HDMI OUT Connects the input of external equipment using a HDMI-HDMI cable or HDMI-DVI cable. 6. DIGITAL AUDIO OUT(OPTICAL) Connects to an amplifier having a digital optical audio input jack. 7. DIGITAL AUDIO OUT(COAXIAL) Connects to an amplifier having a digital coaxial audio input jack. 8. AUDIO OUT Connects to the audio input of external equipment using audio cables. 9. VIDEO OUT Connects the input of external equipment using a Video cable. 10. S-VIDEO OUT Connects the input of external equipment using an S-Video cable. 11. COMPONENT VIDEO OUT Connects to equipment having Component video output. ■ NOTE 14- English The Antenna connection does not pass output signal of DVD. To watch a DVD on your TV, you must connect audio/video cables. 01094N-R135-AND-ENG_02~17 4/8/06 9:21 AM Page 15 Tour of the Remote Control 28 29 1 16 17 2 3 4 5 6 7 8 18 19 20 9 10 21 11 12 13 14 15 22 23 24 25 1. 2. 3. 4. STANDBY/ON Button 0~9(Number) Buttons TV/DVD Button Reverse/Forward Skip Buttons Press to skip a disc backwards or forwards. 5. Reverse/Forward Step Buttons Press to play frame by frame. 6. Reverse/Forward Search Buttons Press to search a disc backwards or forwards. 7. STOP Button Press to stop a disc. 8. VOL Buttons Volume adjustments. 9. AUDIO/TV MUTE Button Use this to access various audio functions on a disc.(DVD mode) This operates as Sound Mute. (TV mode) 10. MENU Button Brings up the DVD recorder’s setup menu. 11. OK/DIRECTION (¥) Buttons 12. TITLE LIST/DISC MENU Button Use this to enter the View Recording list/Disc menu. English - 15 Getting Started 26 27 13. ANYKEY Button Use this to view the status of the disc that is being played. 14. REC Button Use to make a recording on DVD-RW/-R discs. 15. REC MODE Button This will display the recording status.(XP/SP/LP/EP) 16. REPEAT Button Allows you to repeat a title, chapter, track or disc. 17. OPEN/CLOSE Button To open and close the disc tray. 18. SUBTITLE Button Press this to switch the DVD’s subtitle language. 19. PLAY/PAUSE Button Press to play a disc or pause playback/recording. 20. PROG Buttons Select preset channels in a specific order. Same as PROG buttons in front panel. 21. RETURN Button Returns to a previous menu. 22. PLAY LIST/TITLE MENU Button Use this to return to the Title menu, or to view the recorded files list. 23. CANCEL Button 24. MARKER/TIMER Button Use this to bookmark a position while playing a disc. Press to directly enter the Timer Recording Mode menu while stopping a disc. 25. INFO Button This will display current settings or disc status. 26. TV Button Press this to operate TV. 27. DVD Button Press this when you use a DVD recorder. 28. INPUT SEL. Button Select line input signal in external input mode (PROG, AV input or DV INPUT) 29. ZOOM Button Press this to enlarge the screen. 01094N-R135-AND-ENG_02~17 4/8/06 9:21 AM Page 16 Connecting & Setting Up Quick Overview Connecting & Setting Up This section involves various methods of connecting the DVD Recorder to other external components and required initial setting modes. A Quick Overview presented in this guide will give you enough information to start using the DVD Recorder. Connecting the DVD Recoder † Additional connections † Antenna + DVD Recorder + external decoder box + TV † Other type of connecting the Video output cable † Other type of connecting the Audio output cable † Connecting HDMI/DVI to a TV † Connecting to AV3 IN, DV input jack Quick Overview.................................................16 Connecting the DVD Recorder........................17 Additional connections .....................................17 Antenna + DVD Recorder + external decoder box + TV ..........................18 Other type of connecting the Video output cable......................................18 Other type of connecting the Audio output cable......................................20 Connecting HDMI/DVI to a TV ........................22 Connecting to AV3 IN, DV input jack...............23 16- English 01094N-R135-AND-ENG_02~17 4/8/06 9:21 AM Page 17 Connecting the DVD Recorder You can connect your DVD Recorder to the television using the SCART cable if the appropriate input is available on the television. Additional connections You can connect your DVD Recorder to a satellite or digital tuner. 2. Connect one end of the SCART cable to the AV1 socket on the rear of the DVD Recorder. 3. Plug the other end into the appropriate connector on the television. 4. Plug in the DVD Recorder and TV external device (VCR/Satellite receiver) 5.Turn on the DVD Recorder and TV. 6. Press the INPUT SEL. button on your TV remote control until the Video signal from the DVD Recorder appears on the TV screen. To RF IN - DVD mode 1. Connect the AV2 connector of DVD Recorder and VCR/Satellite receiver or digital tuner using a SCART cable. To RF OUT 2. Connect the AV1 connector to the SCART AV connector on TV. RF Cable To ANT INPUT 3. Turn on the DVD Recorder, VCR/Satellite receiver or digital tuner and TV. 4. Set Input mode on AV2. - TV mode ■ NOTE ■ The RF cable connection of this DVD Recorder sends only signals of TV. You must connect SCART cable or Audio/Video cables to watch a signal from your DVD Recorder. TV mode Press the TV/DVD button on remote control, then “TV” appear on Front LED display (or turn off DVD Recorder). 1. Press the TV/DVD button on remote control,then “TV” appear on Front LED display. (or turn off DVD Recorder.) 2. You can watch programmes from a satellite or digital tuner connected to this DVD Recorder, even when the DVD Recorder is turned off. English - 17 Connecting & Setting Up 1. Connect the RF cable as shown. 01094N-R135-AND-ENG_18~41 4/8/06 9:22 AM Page 18 Connecting & Setting Up Antenna + DVD Recorder + external decoder box + TV If you connect external decoder box to DVD recorder, you can record scrambled channels (CANAL+or Premiere broadcasts) received through the built-in TV tuner in DVD Recorder. Other type of connecting the Video output cable There are several ways to output video signal not using scart cables. Select one of the following video connecting that best suits you below. Case 1 : Connecting to a Video (Composite) output jack ● Case 2 : Connecting to an S-Video output jack ● Case 3 : Component Video output jacks ● Wall S-Video, Component video and Progressive Output Modes ● DECODER ● ● 1. Connect RF antenna cables as shown. 2. Connect the AV1 connector on this recorder to the SCART AV connector on TV using a SCART cable. 3. Connect the AV2 connector to a SCART AV connector on decoder box. 4. To watch or record PAY-TV Canal Plus programmes, set your DVD Recorder to receive the channels using the on-screen display.(Refer to page 28) 18- English S-Video and Component video output are available only if your TV supports S-Video input or Component video input, respectively. If S-Video or Component video output does not work, check the TV connections and the TV input selection settings. Compared to standard interlaced video, progressive scan doubles the amount of video lines fed to your TV, resulting in a more stable, flicker-free, clear image than interlaced video. This is only available with TVs that support progressive scan. Progressive Scan Output (576p) Consumers should note that not all high definition television sets are fully compatible with this DVD Recorder and may cause artifacts to be displayed in the picture, in case of 576 progressive scan picture problems, It is recommended that the user switch the connection to the ‘standard definition’ output. If there are questions regarding our TV set compatibility with this model 576p DVD Recorder, please contact our customer service centre. 01094N-R135-AND-ENG_18~41 4/8/06 9:22 AM Page 19 Case 1 : Connecting to a Video (Composite) output jack 1. Connect a video(yellow) cable between the VIDEO (yellow) OUT jack on DVD Recorder and VIDEO (yellow) INPUT jack on your TV (or AV amplifier). ● You will enjoy regular quality images. 1. Connect an S-Video cable (not included) between the S-VIDEO OUT jack on DVD Recorder and S-VIDEO INPUT jack on your TV (or AV amplifier). 2. Connect audio cables (white and red) between the AUDIO OUT jacks on DVD Recorder and AUDIO IN jacks on TV (or AV amplifier). ● You will enjoy high quality images. (See pages 20-21) yellow Video/Audio Cable yellow English -19 Connecting & Setting Up 2. Connect audio cables (white and red) between the AUDIO OUT jacks on the DVD Recorder and AUDIO IN jacks on TV (or AV amplifier). Case 2 : Connecting to an S-Video output jack 01094N-R135-AND-ENG_18~41 4/8/06 9:22 AM Page 20 Case 3 : Component Video output jacks Other type of connecting the Audio output cable 1. Connect Component video cables(not supplied) between the COMPONENT OUT(Y,PB,PR) jacks on DVD Recorder and COMPONENT IN(Y,PB,PR) jacks Connecting & Setting Up on your TV. 2. Connect audio cables (white and red) between the AUDIO OUT jacks on the DVD Recorder and AUDIO IN jacks on TV (or AV amplifier). (See pages 20-21). 3. After connecting, refer to the page 34 to 35. ● You will enjoy high quality and accurate colour reproduction images. There are several ways to output audio signal not using scart cables. Select the audio connection that best suits you below. Case 1 : Connecting to your TV Case 2 : Connecting to a stereo amplifier with AV output jacks ● Case 3 : Connecting to an AV amplifier with a digital output jack ● ● Manufactured under licence from Dolby Laboratories. “Dolby” and the double-D symbol are trademarks of Dolby Laboratories. “DTS” and “DTS Digital Out” are trademarks of DTS, Inc. green blue red green blue Case 1 : Connecting to your TV If your TV has audio input jacks, use this connection. red ■ Make sure that the colour coded connections match. The Y, PB, PR component output jacks of your DVD Recorder must be connected to the exact corresponding component input jacks on your TV. ■ Progressive setting is only available when the Video Out is set to Component. (See page 34) white red yellow ■ yellow white 20- English The Component jacks will not output video resolutions above 576p. To view 720p and 1080i connect the DVD Recorder to your TV with the supplied HDMI cable. With HDMI connected, press the P.SCAN button to alternate between all available resolutions. (See page 37) red NOTE 01094N-R135-AND-ENG_18~41 4/8/06 9:22 AM Page 21 Case 2 : Connecting to a stereo amplifier with AV output jacks If your stereo amplifier only has AUDIO INPUT jacks(L and R), use the AUDIO OUT jacks. white red white If your AV amplifier has a Dolby Digital, MPEG2 or DTS decoder and a digital input jack, use this connection. To enjoy Dolby Digital, MPEG2 or DTS sound, you will need to set up the audio settings. (See pages 32-33) Connecting & Setting Up red Case 3: Connecting to an AV amplifier with a digital output jack or Front(L) speaker Front(R) speaker Rear(L) Rear(R) Front(L) Front(R) Subwoofer Centre English -21 01094N-R135-AND-ENG_18~41 4/8/06 9:22 AM Page 22 Connecting HDMI/DVI to a TV Connecting & Setting Up If your TV has a HDMI/DVI input, connect HDMI/DVI cable to a TV. You will enjoy the best quality images and sounds. ● ● Case 1 : Connecting to a TV with HDMI Jack Case 2 : Connecting to a TV with DVI Jack Case 1 : Connecting to a TV with HDMI Jack • Using the HDMI cable connect the HDMI OUT jack on the rear of the DVD Recorder to the HDMI IN jack of your TV. • Press the input selector on your TV remote control until the HDMI signal from the DVD Recorder appears on your TV screen. NOTE Case 2 : Connecting to a TV with DVI Jack • Using the DVI Adapter Cable, connect the HDMI OUT jack on the rear of the DVD Recorder to the DVI IN jack of your TV. • Using the audio cables, connect the AUDIO (red and white) OUT jacks on the rear of the DVD Recorder to the AUDIO (red and white) IN jacks of your TV. Turn on the DVD recorder and TV. • Press the input selector on your TV remote control until the DVI signal from the DVD Recorder appears on your TV screen. ■ CAUTION ■ 22- English To watch through the HDMI output, set the digital audio output to PCM. See page 32~33. Depending on the HDMI device (TV/HDMI Receiver) you use, audio may not be supported. If TV does not support Dolby digital/DTS, Audio output is not available when you set Digital output as Bitstream or select DTS On in Audio setup menu. In this case, set the digital audio output to PCM or DTS Off. To change HDMI output resolution, see page 37. HDMI (High Definition Multimedia Interface) HDMI is an interface to enable the digital transmission of video and audio data with just a single connector. Since HDMI is based on DVI, it is completely compatible with DVI. The only difference between HDMI and DVI is that HDMI supports multi-channel audio. Using HDMI, the DVD recorder transmits a digital video and audio signal and displays a vivid picture on a TV having an HDMI input jack. HDMI connection description HDMI connector - Both uncompressed video data and digital audio data (LPCM or Bit Stream data). - Though the DVD recorder uses a HDMI cable, the DVD recorder outputs only a pure digital signal to the TV. - If TV does not support HDCP (Highbandwidth Digital Content Protection), snow noise appears on the screen. Why does Samsung use HDMI? Analog TVs require an analog video/audio signal. However, when playing a DVD, the data transmitted to a TV is digital. Therefore either a digital-to-analog converter (in the DVD Recorder) or an analog-to-digital converter (in the TV) is required. During this conversion, the picture quality is degraded due to noise and signal loss. HDMI technology is superior because it requires no D/A conversion and is a pure digital signal from the DVD recorder to your TV. What is the HDCP? HDCP (High-bandwidth Digital Content Protection) is a system for protecting DVD content outputted via HDMI from being copied. It provides a secure digital link between a video source (PC, DVD. etc) and a display device (TV, projector. etc). Content is encrypted at the source device to prevent unauthorized copies from being made. 01094N-R135-AND-ENG_18~41 4/8/06 9:22 AM Page 23 Connecting to AV3 IN, DV input jack Case 2 : Connecting a Camcorder to the DV IN jack If your digital camcorder has a DV output jack, connect it to the DV input jack of your DVD Recorder. This allows you to connect your DVD Recorder to other external devices and view or record their outputs. ● Case 1 : Connecting a VCR, Set-Top Box(STB), DVD player or Camcorder to the AV3 IN jacks Case 2 : Connecting a Camcorder to the DV IN jack Connecting & Setting Up ● Camcorder Case 1 : Connecting a VCR, Set-Top Box(STB), DVD player or Camcorder to the AV3 IN jacks Connecting a VCR or external device to AV3 IN jacks of the DVD Recorder. You can record from connected equipment (VCR, STB, DVD player or Camcorder). ■ NOTE If the input is not selected automatically, use INPUT SEL. button to select proper input. Camcorder VCR red white yellow STB DVD yellow white red ■ AV 3 IN selection will be automatically done. If the input is not selected automatically, use INPUT SEL. button to select proper input. ■ Copy protected content cannot be recorded. NOTE English -23 01094N-R135-AND-ENG_18~41 4/8/06 9:22 AM Page 24 System Setup On-Screen Menu Navigation The on-screen menus allow you to enable or disable various functions on your DVD Recorder. Use the following buttons to open and navigate through the on-screen menus. DVD-Recorder Programme DVD-Recorder No Disc DVD-RW(VR) Programme Title List Scheduled Record List √ Title List Title List √ Playlist Setup Disc Manager Programme Setup System Setup MOVE OK RETURN EXIT MOVE OK RETURN 1 MENU Button Press this button on the remote control to open the on-screen MENU. Press again to exit the on-screen MENU. 2 … † , œ √ Buttons Press these buttons on remote control to move the selection bar … † , œ √ to cycle through the menu options. On-Screen Menu Navigation......................24 3 OK Button Press this button on the remote control to confirm any new settings. Plug & Auto Setup ......................................25 Setting the Clock ........................................26 Presetting Channels with the Auto Setup function ..............................27 Presetting Channels with the Manual Setup function .........................28 Setting up the Language Options ..............29 EP Mode Time Setting ...............................30 Automatic Chapter Creation.......................31 Quick Recording Setting ............................32 Setting up the Audio Options .....................32 Setting up Video Output Options................34 Setting up the Progressive scan ................35 Canceling the Progressive scan.................35 Setting up the Display(Video) Options .......36 DivX(R) Registration...................................37 Setting up the Parental Control..................37 24- English 4 RETURN Button Press this button on the remote control to return to the Previous MENU screen displayed or to exit the on-screen MENU. EXIT 01094N-R135-AND-ENG_18~41 4/8/06 9:22 AM Page 25 • Refer to following abbreviation table when selecting “Country”. Plug & Auto Setup A(Austria) NL(Netherlands) S(Sweden) PL(Poland) B(Belgium) DK(Denmark) I(Italy) N(Norway) CZ (Czech) Others CH(Swiss) TR(Turkey) FIN(Finland) P(Portugal) D(Deutschland) E(Spain) Your DVD Recorder will automatically set itself up when it is plugged in for the first time. TV stations and clock will be stored in memory. The process takes a few minutes. Your DVD Recorder will then be ready for use. 1 Connect the RF cable as indicated on page 17. GR(Greece) HU(Hungary) • The DVD Recorder searches for the stations according to a preset preference list corresponding to the country that you have selected. 6 Auto Channel scan will be started. (Connecting Your DVD Recorder to the TV Using the RF Cable and scart cable.) Auto channel memory 17% 2 Plug the DVD Recorder into the mains. Stop “Auto” in the front panel display flickers. 3 Select the language using the …† buttons, then press the OK button. 7 Check the date and time. DVD-Recorder Auto Setup No Disc DVD-Recorder Auto Setup No Disc Date Language Set JAN English Auto Clock Time 01 2006 12 00 On SUN Français Deutsch Español Italiano MOVE Nederlands MOVE OK RETURN the OK button or wait for a few 4 Press seconds to start the auto setup. DVD-Recorder Auto Setup No Disc OK RETURN • if it is : Correct, press the OK button then the date and time will be saved. If you don't press the OK button, the date and time will be saved automatically after 5 seconds. • if it is : Incorrect, input correct Time, Date, Year using …†œ √ buttons or number buttons. Press the OK button then the date and time will be saved. When you need to change clock setting, you can set up it manually. (see page 26.) Auto setup will be started. Check antenna and TV cable connection. OK ■ Now, DVD Recorder is ready for use. Function for “Plug & Auto Setup” is fixed already. So if you want to change this fixed one, you can change it by Presetting the Stations in OSD “Presetting Channels with the Manual set up function” menu. (see page 28) ■ Auto Setup function can be performed by pressing and holding down the PROG ( ) buttons on the front panel of the DVD Recorder simultaneously for more than 5 seconds with no disc in the DVD Recorder. RETURN NOTE “Country” using the …†œ √ 5 Select buttons to select your country then press the OK button. DVD-Recorder Auto Setup Country Selection A B DK Autom. NL Instal. S Handmatig Instal. I CH N TR FIN P GR D E HU MOVE OK RETURN PL CZ Others √ √ English -25 System Setup • The number of stations automatically stored by the DVD Recorder depends on the number of stations that it has found. 01094N-R135-AND-ENG_18~41 4/8/06 9:22 AM Page 26 the …† buttons to select On for the 4 Press Auto Clock. Setting the Clock DVD-Recorder Clock Set No Disc Programme Setup This menu is used to set the current time. You need to set the time to use timer recording. Time JAN MOVE 1 Date 01 2006 12 Auto Clock 00 On SUN OK RETURN EXIT With the DVD Recorder in Stop mode/No Disc mode, press the MENU button. DVD-Recorder Programme No Disc Programme Scheduled Record List the OK button, then the date and 5 Press time will be saved. If you don’t press the OK button, it will not be saved. √ System Setup Setup MOVE OK RETURN ■ You must have the RF cable connected to set the Auto Clock. (See page 17) ■ The DVD Recorder automatically sets the clock according to the time signal broadcast between the channels PR1 to PR5. If you do not need the Auto clock set function, select Off. EXIT NOTE the …† buttons to select Setup, then press the OK or √ button. 2 Press DVD-Recorder Setup No Disc Programme System √ Setup Clock Set √ Language √ Audio √ Video √ Parental Control √ Install MOVE √ OK RETURN EXIT the …† buttons to select Clock Set, then press the OK or √ button. 3 Press Use the …†œ √ buttons to input Time, Date or Year. Use number buttons to input clock data directly. DVD-Recorder Clock Set No Disc Programme Setup Date JAN Auto Clock Time 01 2006 12 00 On SUN MOVE 26- English OK RETURN EXIT 01094N-R135-AND-ENG_18~41 4/8/06 9:22 AM Page 27 Presetting Channels with the Auto Setup function Press the …† buttons to select Auto 4 Setup, then press the OK or √ button. The Country Seletion screen is displayed. DVD-Recorder No Disc Programm A This feature allows you to manually set the DVD Recorder tuner band to Antenna or Cable, whichever you connected to the Antenna In jack during initial setup. the DVD Recorder in Stop mode/No 1 With Disc mode, press the MENU button. DVD-Recorder Programme No Disc Programme Scheduled Record List √ e B Install Country Selection AutoNL Setup Manual Setup I S PL CH CZ Others Setup DK N TR FIN P GR D E HU MOVE OK RETURN √ √ EXIT Press the …†œ √ buttons to select your 5 “Country”, then press the OK button. • The DVD Recorder searches for the stations according to a preset preference list corresponding to the country that you have selected. Setup MOVE OK RETURN EXIT the …† buttons to select Setup, then 2 Press press the OK or √ button. DVD-Recorder Setup No Disc A(Austria) B(Belgium) DK(Denmark) FIN(Finland) D(Deutschland) NL(Netherlands) I(Italy) N(Norway) P(Portugal) E(Spain) S(Sweden) PL(Poland) CH(Swiss) CZ (Czech) TR(Turkey) Others GR(Greece) HU(Hungary) 6 Press the OK button to continue. If you want to exit, press the MENU button. Programme System √ Setup Clock Set √ Language √ Audio √ Video √ Parental Control √ No Disc Install √ Programme Auto Setup √ Setup Manual Setup √ MOVE OK RETURN EXIT DVD-Recorder Install Your data will be lost. Press [OK] to continue, [MENU] to exit. Press the …† buttons to select Install, then 3 press the OK or √ button. DVD-Recorder Install No Disc Programme Auto Setup √ Setup Manual Setup √ MOVE OK RETURN EXIT 7 Channel scan will be started. Press the OK button to stop the Auto Setup. Auto channel memory MOVE OK RETURN EXIT 17% Stop English -27 System Setup Refer to following table when selecting your country. 01094N-R135-AND-ENG_18~41 4/8/06 9:22 AM Page 28 Presetting Channels with the Manual Setup function You can add preset channel that Auto Channel Search missed. And you can delete a channel you wish to remove. You can programme the order of channels. the DVD Recorder in Stop mode/No 1 With Disc mode, press the MENU button. DVD-Recorder Programme Press the …† buttons to select Manual 4 Setup, then press the OK or √ button. PR CH 01 02 03 04 05 06 07 --------------MOVE Manual Setup Name Decoder ---------------------OK ---------------------RETURN Edit √ √ √ √ √ √ √ EXIT the …† buttons to select a PR 5 Press (programme) you wish to edit, delete, or swap, then press the OK or √ button. Select Edit, Delete or Swap using the …† buttons, then press the OK or √ button. No Disc Programme Scheduled Record List √ System Setup Setup MOVE OK RETURN EXIT PR CH 01 02 03 04 05 06 07 --------------MOVE the …† buttons to select Setup, then 2 Press press the OK or √ button. DVD-Recorder Setup Manual Setup Name Decoder ---------------------OK ----Edit ---Delete -------Swap ---------RETURN Edit √ √ √ √ √ √ √ EXIT • Edit : You can add or edit PR(programme). After change PR informations(CH, Name, Decoder, MFT), select Done, then press the OK button. No Disc Programme System √ Setup Clock Set √ Language √ Audio √ Video √ Parental Control √ Install MOVE OK √ RETURN Manual Setup 01 PR œ1√ CH ---Name Off Decoder MFT --- --Done EXIT MOVE Press the …† buttons to select Install, then 3 press the OK or √ button. DVD-Recorder Install No Disc Programme Auto Setup √ Setup Manual Setup √ MOVE OK RETURN EXIT OK - CH : Tune the channel using œ √ buttons. - Name : Display station name automatically detected in broadcasting signal. If not detected, you can edit name by using …†œ √ buttons. - Decoder : If you set on, you can record scrambled channels using external decoder box. Before setting on, refer to connecting external decoder box in the page 18. - MFT : You can tune up the channel frequency better using œ √ buttons. • Delete : the channel information of selected PR(programme) will be removed. • Swap : You can swap the channel information of two PR(programme). For example, if you wish to swap PR2 and PR5, select swap at PR2, then press the OK button at PR5. 28- English 01094N-R135-AND-ENG_18~41 4/8/06 9:22 AM Page 29 Setting up the Language Options the …† buttons to select the desired 4 Press language option, then press the OK or √ button. ● ● ● If you set the audio, subtitle, disc menu, on-screen menu, DivX subtitle language in advance, they will come up automatically every time you watch a movie. If the selected language is not recorded on the disc, the original pre-recorded language is selected. ● ● Audio : For the speaker sound. Subtitle : For the disc subtitles. Disc Menu : For the disc menu contained on the disc On-Screen Menu : For the screen of your DVD Recorder DivX Subtitle: Selecting a supported DivX subtitle language by region. Western Afrikaans, Basque, Catalan, Danish, Dutch, English, Faeroese, Finnish, French, German, Icelandic, Indonesian, Italian, Malay, Norwegian, Portuguese, Spanish, Swahili and Swedish Central English, Albanian, Croatian, Czech, Hungarian, Polish, Romanian, Serbian(Latin), Slovak and Slovenian Greek English and Greek Cyrillic English, Azeri, Belarusian, Bulgarian, Kazakh, Macedonian, Russian, Serbian, Tatar, Ukrainian and Uzbek the DVD Recorder in Stop mode/No 1 With Disc mode, press the MENU button. DVD-Recorder Programme No Disc Programme Scheduled Record List √ Setup OK RETURN EXIT the …† buttons to select the desired language, then press the OK or √ button. 5 Press the …† buttons to select Setup, then 2 Press press the OK or √ button. DVD-Recorder DVD-Recorder Programme Audio Setup Subtitle Setup No Disc Programme System √ Setup Clock Set √ Language √ Audio √ Video √ Parental Control √ Install MOVE OK : Deutsch English On-Screen Menu : Español English Italiano : Western Nederlands Korean OK RETURN … √ √ √ √ √ † EXIT EXIT Language setup menu will be displayed. DVD-Recorder Language No Disc Programme Audio : Original √ Setup Subtitle : Automatic √ Disc Menu : English √ On-Screen Menu : English √ DivX Subtitle √ OK Disc Menu DivX Subtitle MOVE : Original English : Automatic Français √ RETURN the …† buttons to select Language, 3 Press then press the OK or √ button. MOVE Language No Disc : Western RETURN ■ Press the RETURN or œ button to return to the previous menu. Press the MENU button to exit the menu. ■ The selected language will only appear if it is supported on the disc. ■ If the subtitle language is displayed in broken fonts, change DivX Subtitle to the appropriate region. If it still does not work, the format is not supported. NOTE EXIT English -29 System Setup MOVE 01094N-R135-AND-ENG_18~41 4/8/06 9:22 AM Page 30 EP Mode Time Setting Press the …† buttons to select EP Mode 4 Time, then press the OK or √ button. DVD-Recorder System No Disc You can select one of four recording modes by pressing the REC MODE button repeatedly. EP mode is one of four REC Mode (XP,SP,LP,EP). In EP(Extended Play) mode, you can set recording time to 6 or 8 hours by this setting. the DVD Recorder in Stop mode/No 1 With Disc mode, press the MENU button. DVD-Recorder Programme No Disc Programme Scheduled Record List √ System Setup Setup MOVE OK RETURN EXIT Press the …† buttons to select Setup, then 2 press the OK or √ button. DVD-Recorder Setup No Disc Programme System √ Setup Clock Set √ Language √ Audio √ Video √ Parental Control √ Install MOVE OK √ RETURN EXIT Press the …† buttons to select System, 3 then press the OK or √ button. System menu will be displayed. DVD-Recorder System No Disc Programme EP Mode Time : 6 Hours √ Setup Chapter Creator : Off √ Quick Recording : Off √ MOVE 30- English OK RETURN EXIT Programme EP Mode Time 6 Hours 6: Hours √ Setup Chapter Creator 8Off Hours √ Quick Recording : Off √ MOVE OK RETURN EXIT the …† buttons to select the desired 5 Press time, then press the OK or √ button. 01094N-R135-AND-ENG_18~41 4/8/06 9:22 AM Page 31 Press the …† buttons to select On or Off, 5 then press the OK or √ button. Automatic Chapter Creation • Off: Select this option when you do not want (Automatic Chapter Creation). • On: Select this option when you want (Automatic Chapter Creation). A DVD-Video consists of ‘Titles’ and ‘Chapters’. When you record one programme, it makes one Title. If you use this function, the Title will be divided into Chapters. the REC button to start recording. (See page 41 about how to set recording 6 Press mode) The message “Do you want to create the chapter menu after this recording?” is displayed. (V mode) the DVD Recorder in Stop mode, 1 With press the MENU button. DVD-Recorder Title List Do you want to create the chapter menu DVD-RW(V) Title List after this recording? Title List √ Disc Manager Yes No Programme MOVE 2 OK RETURN EXIT Press the …† buttons to select Setup, then press the OK or √ button. DVD-Recorder Press the œ √ buttons to select Yes and 7 press the OK button. • A new chapter is created according to the selected recording mode. A chapter will be about 5 minutes long in XP and SP, and about 15 minutes long in LP and EP mode. Setup DVD-RW(V) Title List System √ Disc Manager Clock Set √ Language √ Audio √ Video √ Parental Control √ Programme Setup Install MOVE OK 8 Press the STOP button to stop recording. √ RETURN EXIT the …† buttons to select System, 3 Press then press the OK or √ button. display the created chapters, finalise the (see page 85) and then press the 9 Todisc DISC MENU button. The chapter menu will be displayed. System menu will be displayed. 1/1 DVD-Recorder System DVD-RW(V) Title List EP Mode Time : 6 Hours √ : Off √ Programme Quick Recording : Off √ Disc Manager Chapter Creator 1 2 3 Setup Previous MOVE OK RETURN the …† buttons to select Chapter 4 Press Creator, then press the OK or √ button. The Automatic Chapter Creation function does not work during Timer Recording or when you turn the power off. ■ DVD-R discs cannot be unfinalised. System DVD-RW(V) Title List EP Mode Time : 6 Hours √ : Off Off √ Off Programme Quick Recording : On √ Disc Manager Chapter Creator Next ■ CAUTION DVD-Recorder Top EXIT Setup MOVE OK RETURN EXIT English -31 System Setup Setup 01094N-R135-AND-ENG_18~41 4/8/06 9:22 AM Page 32 Quick Recording Setting the …† buttons to select On, then 5 Press press the OK or √ button. If this function is set to on, both the DVD Recorder and the TV will power on at the same time, which enables you to immediiatedly record a desired channel. the DVD Recorder in Stop mode/No 1 With Disc mode, press the MENU button. DVD-Recorder Programme Setting up the Audio Options No Disc Programme Scheduled Record List √ System Setup Setup MOVE OK RETURN You can connect the DVD Recorder to an external amp or Home Theatre. Allow you to setup the Audio device and sound status depending on the audio system in use. EXIT the …† buttons to select Setup, then the DVD Recorder in Stop mode/No press the OK or √ button. 2 Press Disc mode, press the MENU button. 1 With DVD-Recorder Setup No Disc DVD-Recorder Programme No Disc Programme System √ Setup Clock Set √ Language √ Audio √ Video √ Parental Control √ Install MOVE OK Programme Scheduled Record List √ Setup √ RETURN EXIT MOVE the …† buttons to select System, 3 Press then press the OK or √ button. OK RETURN EXIT Press the …† buttons to select Setup, then 2 press the OK or √ button. System menu will be displayed. DVD-Recorder DVD-Recorder System No Disc Programme EP Mode Time : 6 Hours √ Setup Chapter Creator : Off √ Quick Recording : Off √ Setup No Disc Programme System √ Setup Clock Set √ Language √ Audio √ Video √ Parental Control √ Install MOVE MOVE 4 OK RETURN System No Disc Press the …† buttons to select Audio, then 3 press the OK or √ button. Audio setup menu will be displayed. EP Mode Time : 6 Hours √ DVD-Recorder Audio Setup Chapter Creator : Off √ Quick Recording : Off Off √ Programme Digital Output : PCM √ Setup DTS On 32- English EXIT No Disc Programme MOVE √ RETURN EXIT Press the …† buttons to select Quick Recording, then press the OK or √ button. DVD-Recorder OK OK RETURN EXIT MOVE : Off √ Dynamic Compression : On √ NICAM √ OK : On RETURN EXIT 01094N-R135-AND-ENG_18~41 4/8/06 9:22 AM Page 33 Press the …† buttons to select the desired 4 button. audio option, then press the OK or √ DVD-Recorder Audio No Disc Programme Digital Output : PCM √ Setup : Bitstream Off √ MOVE DTS Dynamic Compression : On √ NICAM √ OK : On RETURN Dynamic Compression This is only active when a Dolby Digital signal is detected. 1. Off : You can enjoy the movie with the standard Dynamic Range. 2. On : When Movie soundtracks are played at low volume or from smaller speakers, the system can apply appropriate compression to make low-level content more intelligible and prevent dramatic passages from getting too loud. EXIT NICAM 5 Press the …† buttons to select the desired item, then press the OK or √ button. ■ NOTE Audio Options 1. On : NICAM mode 2. Off : Only set at this position to record the standard mono sound during a NICAM broadcast if the stereo sound is distorted due to inferior reception conditions. Digital Output 1. PCM : Select this when you have no equipment that can decode Dolby Digital (or MPEG-2) signal. When you play Dolby Digital (or MPEG-2) sound track, the digital output are converted to PCM Stereo. 2. Bitstream : Output Dolby Digital (or MPEG-2) audio as bitstream. Select this when your AV receiver or AV amplifier have Dolby Digital (or MPEG-2) Decoder. ■ Digital output setting is equally applied to both Dolby Digital and MPEG-2 audio. LPCM sound track is always outputted as PCM. It has no relation with Digital Output setting. ■ Be sure to select the correct Digital Output or you will hear no sound or loud noise. NOTE DTS 1. Off : Doesn’t output DTS signal. Select this when your AV receiver or AV amplifier does not have DTS decoder. 2. On : Outputs DTS Bitstream via digital output when you play DTS track. Select this only when your AV receiver (or AV amplifier) have DTS decoder. ■ NOTE When DTS soundtrack is played, sound does not output from AV Audio Output. English -33 System Setup Press the RETURN or œ button to return to the previous menu. Press the MENU button to exit the menu. NICAM programmes are divided into 3 types. NICAM Stereo, NICAM Mono and Bilingual (transmission in another language). NICAM programmes are always accompanied by a standard mono sound broadcast and you can select the desired sound by setting NICAM on or off. 01094N-R135-AND-ENG_18~41 4/8/06 9:22 AM Page 34 Setting up Video Output Options Press the …† buttons to select Video 4 Output, then press the OK or √ button. DVD-Recorder Video No Disc Programme TV Aspect Setup 3D Noise Reduction: Off : Component RGB Video Output You can enjoy high quality image through RGB or Component video connections. MOVE 1 : 16:9 Wide √ √ √ 576p HDMI/DVI Resolution : RGB √ DivX(R) Registration √ OK RETURN EXIT With the DVD Recorder in Stop mode/No Disc mode, press the MENU button. Component DVD-Recorder Programme No Disc Programme Scheduled Record List Select this when the DVD Recorder is connected to a TV with Component jack. Select this when the DVD Recorder is connected to your TV using SCART cable. RGB √ Setup System Setup the …† buttons to select the desired item, then press the OK or √ button. 5 Press MOVE 2 OK RETURN EXIT Press the …† buttons to select Setup, then press the OK or √ button. DVD-Recorder Setup No Disc Programme System Setup √ Clock Set √ Language √ Audio √ Video √ Parental Control √ Install MOVE OK √ RETURN EXIT the …† buttons to select Video, then press the OK or √ button. 3 Press Video setup menu will be displayed. DVD-Recorder Video No Disc Programme TV Aspect Setup 3D Noise Reduction: Off √ Video Output √ MOVE 34- English : 16:9 Wide : Component √ HDMI/DVI Resolution : 576p √ DivX(R) Registration √ OK RETURN EXIT In Component mode, you can set video output to Progressive(P.SCAN) or Interlace, see page 35. When the HDMI cable is not connected, available video output jacks are as follow. Available Video Output Jack Component mode Setting mode RGB Mode Output jack P.SCAN off mode (Interlace mode) P.SCAN on mode Component Output O O X (Y, PB, PR) (TV in progressive mode) R, G, B X X O AV1 Scart Composite X O X Composite Video out X O O S-Video out X O O ■ NOTE When the HDMI cable is connected, other A/V output does not operate. 01094N-R135-AND-ENG_18~41 4/8/06 9:22 AM Page 35 Setting up the Progressive scan If the TV supports Progressive Scan, press the P.SCAN button on the front of the DVD Recorder to enjoy. 1 Canceling the Progressive scan the DVD Recorder in Stop mode, 1 With press the P.SCAN button on the front of the DVD Recorder. The message “Press [Yes] to confirm Interlace scan mode. Otherwise press [No]” will appear. With the DVD Recorder in Stop mode, press the P.SCAN button on the front of the DVD Recorder. The message “Press [Yes] to confirm Progressive scan mode. Otherwise press [No]” will appear. Press [Yes] to confirm Interlace scan mode. Otherwise press [No] Yes No Otherwise press [No] Yes No the œ √ buttons to select Yes, and 2 Press then press the OK button. the œ √ buttons to select Yes, and 2 Press then press the OK button. your TV to Interlace input (using the TV 3 Set remote control.) your TV to Progressive input (using the 3 Set TV remote control.) NOTE ■ When the HDMI cable is connected, this screen is not displayed. ■ Do not press the P.SCAN button if you are using a TV that does not support Progressive mode. Nothing will be displayed on the screen if pressed. ■ Progressive setting is only available when the Video Out is set to Component. ■ If the P.SCAN button on the DVD recorder’s front panel is pressed during playback, the prohibition mark( ) appears on the screen. ■ Progressive setting is only available when the DVD recorder is in stop mode. NOTE ■ If you press the P.SCAN button by mistake when your TV does not support Progressive mode, you need to release the Progressive mode. To release the Progressive mode, press the P.SCAN button on the front panel 2 times. The screen will recover after the PS LED on the front panel display turns off. English -35 System Setup Press [Yes] to confirm Progressive scan mode. 01094N-R135-AND-ENG_18~41 4/8/06 9:22 AM Page 36 Setting up the Display(Video) Options ■ NOTE This function allows you to setup the TV screen settings. the DVD Recorder in Stop mode/No Disc mode, press the MENU button. 1 With DVD-Recorder Press the RETURN or œ button to return to the previous menu. Press the MENU button to exit the menu. Display(Video) Options This function depends on disc type. It may not work for some disc types. Programme No Disc Programme Scheduled Record List √ TV Aspect Setup Depending on the type of television you have, you may want to adjust the screen setting. (aspect ratio) MOVE OK RETURN EXIT DVD-Recorder Video System Setup No Disc 2 Press the …† buttons to select Setup, then press the OK or √ button. DVD-Recorder :4:3 4:3LetterBox LetteBox √ 3D Noise Reduction :4:3 OffPan-Scan √ √ Clock Set √ Language √ Audio √ Video √ Parental Control √ Install √ OK RETURN EXIT the …† buttons to select Video, then 3 Press press the OK or √ button. Video setup menu will be displayed. DVD-Recorder Video No Disc √ DivX(R) Registration √ Programme TV Aspect Setup 3D Noise Reduction: Off √ Video Output √ : 16:9 Wide RETURN EXIT √ : Component HDMI/DVI Resolution : 576p √ DivX(R) Registration √ OK OK • 4:3 LetterBox : Select when you want to see the total 16:9 ratio screen DVD supplies, even though you have a TV with a 4:3 ratio screen. Black bars will appear at the top and bottom of the screen. • 4:3 Pan-Scan : Select this for conventional size TV when you want to see the central portion of the 16:9 screen. (Extreme left and right side of movie picture will be cut off.) • 16:9 Wide : You can view the full 16:9 picture on your widescreen TV. 3D Noise Reduction (motion adaptive noise reduction) RETURN EXIT DVD-Recorder Press the …† buttons to select the desired video option, then press the OK or √ button. DVD-Recorder Video No Disc Programme TV Aspect Setup : 16:9 Wide √ 3D Noise Reduction :Off Off √ :On RGB Video Output Video √ No Disc HDMI/DVI Resolution : 576p √ Programme TV Aspect DivX(R) Registration √ Setup 3D Noise Reduction :4:3 OffPan-Scan :4:3 4:3LetterBox Letter Box :16:9 RGBWide Video Output MOVE √ √ √ HDMI/DVI Resolution : 576p √ DivX(R) Registration √ OK RETURN EXIT Press the …† buttons to select the desired item, then press the OK or √ button. 36- English √ HDMI/DVI Resolution : 576p MOVE System Setup MOVE :16:9 RGBWide Setup Programme MOVE 5 TV Aspect Setup Video Output No Disc 4 Programme MOVE ● ● OK RETURN EXIT On : Provides a cleaner picture through noise reduction (for recording). Off : Normal 01094N-R135-AND-ENG_18~41 4/8/06 9:22 AM Page 37 HDMI/DVI Resolution This setting is used when the DVD Recorder is connected by HDMI or DVI with Display devices (TV, projector, etc). DVD-Recorder DivX(R) Registration Video No Disc Programme TV Aspect Setup : 16:9 Wide √ 3D Noise Reduction : Off √ Video Output √ : Component HDMI/DVI Resolution 576p √ DivX(R) Registration 720p 1080i MOVE OK RETURN √ Please use the Registration code to register this DVD Recorder with the DivX(R) Video On Demand format. For more information, visit www.divx.com/vod EXIT • 576p : 720 x 576 • 720p : 1280 x 720 • 1080i : 1920 x 1080 Setting up the Parental Control • Connect the DVD Recorder to your TV via HDMI or DVI cable. And set your TV's input to HDMI. • Press the P.SCAN button while the unit is in Stop mode to select the HDMI output resolution as follows: →576p → 720p → 1080i. ■ Progressive scan automatically activates when HDMI is connected. ■ There will be no HDMI video and audio outputs unless progressive scan function is activated. ■ Consult your TV User’s Manual to find out if your TV supports Progressive Scan. NOTE The Parental Control function works in conjunction with DVDs that have been assigned a rating which helps you control the types of DVDs that your family watches. There are up to 8 rating levels on a disc. the DVD Recorder in Stop mode/No Disc mode, press the MENU button. 1 With DVD-Recorder Programme No Disc If Progressive Scan is supported, follow the TV User’s Manual regarding Progressive Scan settings in the TV’s menu system. ■ If Video Output is set incorrectly, the screen may be blocked. ■ The resolutions available for HDMI/DVI output depend on the connected TV or projector. For details, see the user’s manual of your TV or projector. ■ When the resolution is changed it may take a few seconds for a normal image to appear. ■ If you set the HDMI output resolution 720p or 1080i, HDMI output provides better picture quality. ■ Programme Scheduled Record List √ Setup MOVE OK RETURN EXIT Press the …† buttons to select Setup, then 2 press the OK or √ button. DVD-Recorder Setup No Disc Programme System √ Setup Clock Set √ Language √ Audio √ Video √ Parental Control √ DivX playback screen output can only be done in 576p. Install MOVE OK √ RETURN EXIT English -37 System Setup Output Selection 01094N-R135-AND-ENG_18~41 4/8/06 9:22 AM Page 38 Press the …† buttons to select Parental 3 Control, then press the OK or √ button. If you forgot your password The ‘Create the password’ message will be displayed. DVD-Recorder Parental Control 1 Remove the disc. No Disc Programme Setup 0~9 Create the password NUMBER OK RETURN and hold down the PROG ( ) 2 Press buttons on the front panel of the DVD Recorder simultaneously for more than 5 seconds EXIT with no disc in the DVD Recorder. All setting including the password will revert to the factory setting. the 4-digit password using the 0 to 9 buttons on the remote control. 4 Enter The ‘Confirm the password’ message will be displayed. Enter your password again. System Setup DVD-Recorder About the Rating Level Parental Control No Disc Programme Setup Press the …† buttons to select Rating 1 Level. Confirm the password DVD-Recorder 0~9 NUMBER OK RETURN EXIT Parental Control No Disc Programme Password : On √ Setup Rating Level : Level 1 Kids √ Change Password √ the OK or √ button to select Password. 5 Press MOVE DVD-Recorder OK RETURN EXIT Parental Control No Disc Programme Password :Off Off √ On Setup 2 Press the OK or √ button. The rating level will be displayed. DVD-Recorder MOVE 6 OK RETURN EXIT Programme Password √ Setup Rating Level √ Press the …† buttons to select On or Off, then press the OK or √ button. MOVE ■ NOTE Press the RETURN or œ button to return to the previous menu. Press the MENU button to exit the menu. Parental Control No Disc :On Level 8 Adults :Level Level71 Kids Level 6 Change Password Level 5 Level 4 Level 3 Level 2 Level 1 Kids OK RETURN √ EXIT the …† buttons to select Rating 3 Press Level you want, then press the OK or √ button. For example, if you select up to Level 6, discs that contain Level 7, 8 will not play. A larger number indicates that the programme is intended for adult use only. 38- English 01094N-R135-AND-ENG_18~41 4/8/06 9:22 AM Page 39 About the Change Password the …† buttons to select Change Password. 1 Press DVD-Recorder Parental Control No Disc Programme Password : On √ Setup Rating Level : Level 1 Kids √ Change Password MOVE OK √ RETURN EXIT 2 Press the OK or √ button. The ‘Enter the password’ message will be displayed. System Setup DVD-Recorder Change Password No Disc Programme Setup 0~9 NUMBER Enter the password OK RETURN EXIT the 4-digit password using the 0 to 9 3 Enter buttons on the remote control. The ‘Confirm the password’ message will be displayed. Enter your password again. DVD-Recorder Change Password No Disc Programme Setup 0~9 ■ NUMBER Confirm the password OK RETURN EXIT See page 38 if you forgot your password. NOTE English -39 01094N-R135-AND-ENG_18~41 4/8/06 9:22 AM Page 40 Before Recording Recording This DVD Recorder can record on various types of discs. Before recording, read the following instructions and select the disc type according to your preference. Recordable discs This section shows various DVD recording methods. This DVD Recorder can record on the following discs. DVD-RW ● ● DVD-R DVD-RWs are rewritable. DVD-Rs are non-rewritable Compatibility between Samsung and Other Company’s Recorder Disc Types Recording format Recording Device Samsung Recording VR Mode Other Company DVD-RW Samsung V Mode Other Company Samsung DVD-R V Mode Other Company Before Recording ...........................................40 Recording the current TV programme you are watching ............................................42 Recording from external equipment you are watching ............................................44 Copying from a Camcorder ............................44 Making a One Touch Recording (OTR)..........45 Making a Timer Recording .............................46 Flexible Recording (for Timer recording only) ...............................47 Editing the Scheduled Record List.................48 Deleting the Scheduled Record List...............48 Recording the Standard Timer List ................49 40- English Finalising finalised not finalised finalised not finalised finalised not finalised finalised not finalised finalised not finalised finalised not finalised Additional Recording in Samsung Recorder Not recordable Recordable Not recordable Recordable Not recordable Recordable Not recordable Not recordable Not recordable Recordable Not recordable Not recordable ■ Finalise - This closes the DVD-R/-RW so no additional recording can be done. ■ Unfinalise - This allows additional recording on a DVD-RW disc originally recorded on the DVD Recorder. - A DVD-RW disc that has been recorded by DAO(Disc At Once) in a PC cannot be unfinalised. - A DVD-RW disc that has been recorded in Video Mode of a different maker’s recorder cannot be unfinalised. - A DVD-R disc cannot be unfinalised. NOTE 01094N-R135-AND-ENG_18~41 4/8/06 9:22 AM Page 41 Recording Formats Mode Since available functions differ depending on the disc type, select a disc that best fits your preferences; When you insert an unused disc, the following message appears DVD-RW: When a blank disc is first inserted, the message “Uninitialized Disc Do you want to initialize this disc?” will appear. When Yes is selected, the disc will be formatted in VR Mode. Select when the XP (high quality mode) video quality is important. Select to record in SP (standard quality mode) standard quality. Approx. 1 hour about 8 Mbps Select when a long LP (long recording mode) recording time is required. Approx. 4 hours about 2 Mbps EP (extended mode) Uninitialized Disc Approx. 2 hours about 4 Mbps Approx. 6 hours/ about 1,2 Mbps Approx. 8 hours/ about 0,8 Mbps Select when a longer recording time is required. for timer recording only Approx 60 to 480 Min FR Approx 0,8 to 8Mbps (Flexible Recording) see page 47. Do you want to initialize this disc? Yes Recording Times Data Rates Characteristic No Unrecordable video If you want to format in either VR Mode or Video Mode, refer to Formatting a Disc on pages 83~84. DVD-Recorder Disc Manager Video with copy protection cannot be recorded on this DVD Recorder. When the DVD Recorder receives a copy guard signal while recording, recording stops and the following message appears on the screen. DVD-RW(VR) Title List Playlist Disc Name : √ Clock Set √ Channal Disc Manager Choose the recording format for DVD-RW Langguage √ Programme √ Setup √ DVD-V You cannot record copy protected movie. OK RETURN EXIT Recording MOVE DVD-VR DVD-R: Formatting DVD is unnecessary and only Video Mode Recording is supported Concerning Copy Control Signals DVD-RW(Video mode)/-R ● ● Chapters will be created automatically when you finalise recording on DVD-R / DVD-RW discs in Video mode with the Chapter Creator has been set to On. The chapter’s length (interval between chapters) varies according to the recording mode. Simple editing (erasing titles/changing title name) TV broadcasts that contain copy control signals may have one of the following three signal types, Copy-Free, Copy-Once and Copy-Never. If you want to record a copy-once type programme, use DVD-RW with CPRM in VR Mode. Media DVD-RW Signal type Copy-Free Copy-Once Copy-Never O - - O* - DVD-RW DVD-RW(VR mode) ● ● This mode allows multiple editing functions (such as deletion of the whole title, partial deletion of a title, etc.) Various editing options using a created Playlist with CPRM VR mode O Video mode O - DVD-R O - Once “Copy Once” has been recorded, recording cannot be done anymore. Recording Mode Select one of four recording modes by pressing the REC MODE button repeatedly while the DVD Recorder is in Stop mode for the desired recording time and picture quality. In general, picture quality improves as the recording time decreases. In FR mode, the most suitable record mode is adjusted automatically, according to remaining time on the disc and length of the timer recording. This function is selected only one mode in XP, SP, LP and EP modes and you can use this mode for timer recording. - Content Protection for Recordable Media (CPRM) CPRM is a mechanism that ties a recording to the media on which it is recorded. It is supported by some DVD recorders, but not by many DVD players. Each blank recordable DVD has a unique 64-bit media ID etched in the BCA. When protected content is recorded onto the disc, it can be encrypted with a 56-bit C2 (Cryptomeria) cipher derived from the media ID. During playback, the ID is read from the BCA and used to generate a key to decrypt the contents of the disc. If the contents of the disc are copied to other media, the ID will be absent or wrong and the data will not be decryptable. English -41 01094N-R135-AND-ENG_42~49 4/8/06 9:24 AM Page 42 About INFO Button Recording the current TV programme you are watching The INFO function allows you to view the current status and progress of playback and recording. Depending on the disc type and status, the displayed screen may be different. Checking the available disc space (Disc Information) When recording on an used disc, make sure that there is enough disc space for recording. With DVD-RWs, you can free up disc space by erasing titles. Recording ● Before you start Check that the disc has enough available space for the recording. Adjust the recording mode. the OPEN/CLOSE button and place 1 Press a recordable disc on the disc tray. the OPEN/CLOSE button to close 2 Press the disc tray. Wait until “LOAD” disappears from the front panel display. If an unused DVD-RW disc is used, whether to initialize or not will be asked first. Make your selection, then press the OK button.(See page 41.) Press the INFO button. The display window of disc information appears. Items in the display differ depending on the disc type or recording format. ! # DVD-RW(VR) Disc Name Disc Info @ Disc Uninitialized Disc Do you want to initialize this disc? $ % ^ & Total Title 15 Total Playlist 1 Recordable Time 02:12 SP Protection Not Protected Screen PR 11 [DUAL L] JAN 01 2006 SUN 12:00 1. Disc Type 2. Current information display status 3. Disc Name 4. Total Title : Total number of titles 5. Total Playlist : Total number of Playlists 6. Recordable Time : The longest continuous recording time in each of the recording modes(approximate) 7. Date : Current date and time 42- English Yes 3 No Press the PROG ( / ) or number ( ~ ) buttons to select the current programme you want to record. 01094N-R135-AND-ENG_42~49 4/8/06 9:24 AM Page 43 the REC MODE button repeatedly, 4 Press (or press the REC MODE button, then press the …† button) to select the recording speed(quality). ➞ SP ➞ LP ➞ EP ➞ XP Record Mode To stop recording Press the STOP button to stop a recording in progress. ● When using DVD-RW/DVD-R discs, the message ‘Updating the disc information. Please wait for a moment.’ is displayed. SP (02:12) ■ You can not change the recording mode and the PROG while recording. ■ Recording will stop automatically if there is no free space left for recording. ■ Up to 99 titles can be recorded onto a disc. ■ Recording will stop automatically if a copy protected image is selected. ■ DVD-RW discs must be formatted before starting to record. Most new discs are sold unformatted. ■ Do not use DVD-R authoring discs with this DVD Recorder. NOTE 5 Press the REC button. Information concerning the channel is displayed on the screen, then recording begins. REC icon( ) is displayed on the front panel. Recording : PR 1 NICAM DUAL L Recording To view the current status of the disc and progress of recording : Press the INFO button, the information about the disc will appear. DVD-RW(VR) Disc Name Total Title Total Playlist Recordable Time Protection Screen JAN 01 2006 SUN Disc Info 16 1 02:12 SP Not Protected PR 1 [ DUAL L] 12:00 Press the INFO button once again to view information about the recording. DVD-RW(VR) Name Recording Info JAN/01/2006 12:00 PR1 Recording Title 16 Created Time JAN/01/2006 12:00 Recording Time 00:00:07 JAN 01 2006 SUN 12:00 English - 43 01094N-R135-AND-ENG_42~49 4/8/06 9:24 AM Page 44 Recording from external equipment you are watching 5 Press the REC button. To pause recording Press the PLAY/PAUSE( recording in progress. ● Before you start ● Check that the disc has enough available space for the recording. Adjust the recording mode. 1 Press the OPEN/CLOSE button, place a recordable disc on the disc tray. Press the PLAY/PAUSE( ) button again to resume recording. You can switch channels by pressing the PROG ( / ) buttons while recording pauses. To stop recording Press the STOP button to stop or finish a recording in progress. ● When using DVD-RW/DVD-R discs, the message ‘Updating the disc information. Please wait for a moment.’ is displayed. the OPEN/CLOSE button to close 2 Press the disc tray. Recording Wait until “LOAD” disappears from the front panel display. If an unused DVD-RW disc is used, whether to initialize or not will be asked first. (See page 41) Press the INPUT SEL. button to select the 3 input source according to the connection you made. The front panel display changes in the following sequence: ➞ PR Number ➞ AV1 ➞ AV2 ➞ AV3 ➞ DV If you connect a digital camcorder, press the INPUT SEL. button to select DV. (See pages 44-45) the REC MODE button repeatedly, 4 Press (or press the REC MODE button, then press the …† button) to select the recording speed(quality). ➞SP ➞ LP ➞ EP ➞ XP Record Mode ) button to pause a ■ You can not change the recording mode while recording or Pause. ■ Recording will stop automatically if there is no free space left for recording. ■ Up to 99 titles can be recorded onto a disc. ■ Recording will stop automatically if a copy protected image is selected. ■ DVD-RW discs must be formatted before starting to record. Most new discs are sold unformatted. ■ Do not use DVD-R authoring discs with this DVD Recorder. NOTE Copying from a Camcorder You may control the Camcorder using the IEEE1394 (DV) interface. SP (02:12) Before you start Check that the disc has enough available space for the recording. Adjust the recording mode. the OPEN/CLOSE button, place a 1 Press recordable disc on the disc tray. 44- English 01094N-R135-AND-ENG_42~49 4/8/06 9:24 AM Page 45 the OPEN/CLOSE button to close 2 Press the disc tray. ■ You can not change the recording mode and input source while recording. ■ Recording will stop automatically if there is no free space left for recording. ■ Up to 99 titles can be recorded onto a disc. ■ Recording will stop automatically if a copy protected image is selected. ■ DVD-RW discs must be formatted before starting to record. Most new discs are sold unformatted. recording speed(quality). ■ ➞ Do not use DVD-R authoring discs with this DVD Recorder. ■ If you connect a camcorder using DV jack, the related contol menu appears automatically. To access on the screen controls during recording, press œ or √ button. NOTE Wait until “LOAD” disappears from the front panel display. If an unused DVD-RW disc is used, whether to initialize or not will be asked first. (See page 41.) the REC MODE button repeatedly, 3 Press (or Press the REC MODE button, then press the …† button) to select the SP ➞ LP ➞ EP ➞ XP Record Mode SP (02:12) Making a One Touch Recording (OTR) 4 Press the INPUT SEL. button to select DV. If the input is set to DV, a playback/record menu that enables camcorder control appears on the top of the screen. you want to record a TV channel, press 1 Ifthe PROG ( / ) or number buttons to select a desired channel. The DV device is connected. MOVE OK RETURN If you want to record through a connected external component, press the INPUT SEL. button to select an appropriate external input (AV1, AV2, AV3 or DV). play the camcorder and find the starting to be copied, select the play icon( ) 5 Topoint on the top of the screen using the œ √ buttons and then press the OK button. start recording, select the record icon( 6 Toonbuttons the top of the screen using the œ √ and then press the OK button. ● ) You can also use the REC button on the remote control to start recording. (If your camcorder is in stop mode, the REC button doesn't work.) TV PROGRAMME: 1 to 99 2 Press the REC button to start recording. the REC button repeatedly to adjust 3 Press the desired recording time. ➞ 0:30 ➞ 1:00 ➞ ... 4:00 ➞ 5:00 ➞ ... 9:00 ➞normal To stop recording Press the STOP button to stop or finish a recording in progress. ● When using DVD-RW/DVD-R discs, the message ‘Updating the disc information. Please wait for a moment.’ is displayed ■ NOTE The timer counter decreases by the minute from 9:00 to 0:00, then the DVD Recorder stops recording and is powered off. English - 45 Recording You can set the DVD Recorder to record in preset increments by pressing the REC button repeatedly. DV 01094N-R135-AND-ENG_42~49 4/8/06 9:24 AM Page 46 To view the current status of the disc and progress of recording : Press the INFO button, and information about the disc will appear. DVD-RW(VR) Disc Name Disc Info Total Title 16 Total Playlist 1 Recordable Time 02:12 SP Protection Not Protected Screen PR 1 [ DUAL L] JAN 01 2006 SUN 12:00 Press the INFO button once again. Then you can check the information about the title being recorded. DVD-RW(VR) Name Making a Timer Recording Before you start 1. Check the antenna cable is connected. 2. Check the remaining time of the disc. 3. Check the date and time are correct. Make sure the Clock (Setup-Clock Set) must be set before you proceed with a timer recording. (See pages 25~26) Recording Info JAN/01/2006 12:00 PR1 Recording Title 16 Created Time JAN/01/2006 12:00 Recording Time 00:00:07 JAN 01 2006 SUN 12:00 the DVD Recorder in Stop mode, press the TIMER button. 1 With DVD-Recorder Programme DVD-RW(VR) Title List Scheduled Record List √ Playlist To stop recording Disc Manager Press the STOP button. The message “Press STOP button once more to cancel Timer Record.” is displayed. Setup Programme Recording MOVE OK RETURN EXIT Using the MENU button. Press STOP button once more ● to cancel Timer Record. ● Press the STOP buttons once more to stop recording. With the DVD Recorder in Stop mode, press the MENU button. Press the …† buttons to select Programme, then press the OK or √ button. 2 Press the OK or √ button twice. • The Timer Recording screen is displayed. DVD-Recorder Scheduled Record List DVD-RW(VR) Current Time 12:05 No. Source Day Start End Speed V/P Edit No. 01 Source Day Start End PR 01 01 SUN 12:05 14:05 Speed V/P SP Off Available Time 00:48 SP MOVE OK RETURN EXIT 3 Set timer recording option. • Fill the input items using the direction buttons and number buttons. œ √ : Moves to the previous/next item, …†, 0~9 : Sets a value. 46- English 01094N-R135-AND-ENG_42~49 4/8/06 9:24 AM Page 47 • Source : The video input source (“AV1”, “AV2”, “AV3”) or the broadcasting channel you want to make a timer recording from. 4 Press the OK button. 01 SUN 02 MON 03 TUE 04 WED Daily MO-SA MO-FR W-SA If the timer settings overlap The programmes are recorded in order of priority. If timer recording is set for the first programme and then again for the second programme and both programmes overlap, the following message will appear on the screen: “This setting is identical with 1”The message shows that the first programme has priority. After recording of the first programme is complete, the second programme starts being recorded. 31 TUE W-SU To exit without saving the current setting Press the MENU button. • Day : Timer Recording allows setting the recording time within one month period. Set the recording day. • Start/End Time : Start and end time of the timer recording. • V/P : VPS(Video Programme System) or PDC(Programme Delivery Control) function. - If you set this function on, you can control the starting and ending time of recording by special signal included in the broadcasting signal. If a TV programme is shortened or starts earlier or later than scheduled, this function synchronizes the starting and ending time of recording with the actual broadcasting time automatically. - Set up the start-time EXACTLY according to the published TV schedule. Otherwise the timer recording will not take place. - Do not select PDC or VPS unless you are sure the programme you wish to record is broadcast with PDC or VPS. ■ NOTE When you are recording at EP mode on a DVD-RW(V)/-R disc, it may not record the full 6 or 8 hours because the DVD Recorder uses the VBR(Variable Bit Rate) ENCODING system. For example, if you record a programme with a lot of action, it uses a higher bit rate which in turn consumes more disc memory. the power off to finish the Timer 5 Turn Recording setting. Timer Recording will not work when the power is on. ● ● will appear on the front panel. It means that a timer recording is registered. will blink if disc is not inserted. ■ The timer recording time may differ from the set time depending on disc status and overall timer recording status (for example, recording times overlapping, or when the previous recording ends within 2 minutes before the start time of the next recording.) ■ You can make the Timer Recording up to 12 programmes. NOTE Flexible Recording (for Timer recording only) In FR mode, the most suitable record mode is adjusted automatically, according to remaining time on the disc and length of the timer recording. This function is selected only one mode in XP, SP, LP and EP modes and you can use this mode for timer recording. The FR mode recording setup is the same as Timer Recording. When setting the mode in step 3, set FR Mode.(See pages 46~47.) English - 47 Recording • Speed (Recording Mode) : - FR (Flexible Recording) : Select when you want to set video quality automatically. In FR mode, the most suitable record mode is adjusted automatically, according to remaining time on the disc and length of the timer recording. This function is selected only one mode in XP, SP, LP and EP modes and you can use this mode for timer recording. - XP (high quality) : Select when video quality is important. (Approx. 1 hour) - SP (standard quality) : Select to record in standard quality. (Approx. 2 hours) - LP (low quality) : Select when a long recording time is required.(Approx. 4 hours) - EP (extended) : Select when a longer recording time is required. (Approx.6 hours or 8 hours) To return to the previous menu Press the RETURN button if you don’t want to set a timer recording. 01094N-R135-AND-ENG_42~49 4/8/06 9:24 AM Page 48 Editing the Scheduled Record List the …† buttons to select Edit, then 4 Press press the OK or √ button. ● Follow these directions to edit the timer record list. The Timer Record Input item is displayed. Edit the items you want to modify. See the “Making a Timer Recording” section for more information on Timer Recording Input items. DVD-Recorder Scheduled Record List DVD-RW(VR) Current Time 12:27 No. Source Day Start End Speed V/P Edit No. 01 Source PR 01 1 With the DVD Recorder in Stop mode, press the TIMER button. DVD-Recorder Day 01 SUN Available Time MOVE Start End 13:07 14:07 Speed V/P SP Off 00:48 SP OK RETURN EXIT Programme DVD-RW(VR) Title List Scheduled Record List √ Playlist Disc Manager the OK button to confirm the 5 Press edited setting. Programme Setup MOVE OK RETURN EXIT the MENU button after finishing the 6 Press operation. The menu screen will disappear. Using the MENU button. ● Recording ● With the DVD Recorder in Stop mode, press the MENU button. Press the …† buttons to select Programme, then press the OK or √ button. 2 Press the OK or √ button. the …† buttons to select the number 3 Press of the timer recording you want to edit, then press the OK or √ button. ● Deleting the Scheduled Record List The Edit and Delete items are displayed. DVD-Recorder Scheduled Record List DVD-RW(VR) Current Time 12:27 No. Source Day Start End Speed 01 02 03 13:07 12:08 14:07 14:08 SP SP PR 01 01 SUN PR 01 02 MON Follow these directions to delete an entry from the timer record list. V/P Edit Edit √ Off √ Off Delete √ MOVE OK RETURN EXIT the DVD Recorder in Stop mode, 1 With press the TIMER button. Using the MENU button. ● ● With the DVD Recorder in Stop mode, press the MENU button. Press the …† buttons to select Programme, then press the OK or √ button. 2 Press the OK or √ button. 48- English 01094N-R135-AND-ENG_42~49 4/8/06 9:24 AM Page 49 the …† buttons to select the number 3 Press of the timer recording you want to delete, then press the OK or √ button. ● The Edit and Delete items are displayed. Scheduled Record List DVD-Recorder Current Time 12:27 DVD-RW(VR) No. Source Day Start End Speed 01 02 13:07 12:08 14:07 14:08 SP SP PR 01 01 SUN PR 01 02 MON V/P Edit Edit √ Off √ Off Delete √ 03 MOVE OK RETURN When the start time in the Scheduled record list reaches while the set is in power off, the set will be powered on and start the recording automatically. EXIT the …† buttons to select Delete, 4 Press then press the OK or √ button. ● Recording the Standard Timer List the scheduled recording is operating, 1 When the programme being recorded will not display on TV. ● You will be prompted with the delete confirm message such as ‘Do you want to delete ‘No.01’?’. Scheduled Record List DVD-Recorder Current Time 12:27 DVD-RW(VR) No. Source Day 01 02 03 Start End Speed V/P Edit PR 01 SAT 01 15:07No. 01 14:07 SP CH PR 01 SUN 01 12:08 14:08 SP CH Do you want to delete ‘No.01’ ? / / : : Yes MOVE ● Press the TV/DVD button if you want to see the programmed being recorded on TV. Press the TV/DVD button again if you don’t want to see the programmed being recorded on TV. OK √ √ √ To stop Recording Press the STOP button. The message “Press STOP button once more to cancel Timer Record.” is displayed. No RETURN EXIT Press STOP button once more 6 Press the MENU button after finishing the operation. The menu screen will disappear. ● to cancel Timer Record. Recording 5 Press the œ √ buttons to select Yes, then press the OK button. The selected entry will be deleted from the list. Press the STOP buttons once more to stop recording. ■ NOTE If there is not enough disc space or a copy prevention signal is received during recording, recording will stop. You cannot record copy protected movie. ■ If there is no free disc space or the disc is not recordable, recording will not operate. (You can record after replacing the disc.) English - 49 01094N-R135-AND-ENG_50~69 4/8/06 9:24 AM Page 50 Before Playing Playback Read the following information before playing a disc. Region code (DVD-Video only) This section introduces basic functions of playback and playback by disc type. Both the DVD recorder and the discs are coded by region. These regional codes must match in order for the disc to play. If the codes do not match, the disc will not play. The Region Number for this DVD Recorder is described on the rear panel of the DVD Recorder. Disc types that can be played Disc Types Disc Logo Recorded content Disc Shape Max. Playing Time Single sided(12cm) 240 min Double sided(12cm) 480 min AUDIO + VIDEO Single sided(8cm) 80 min Double sided(8cm) 160 min Single sided(12cm) 74 min AUDIO Single sided(8cm) 20 min 1hr (XP: Excellent Quality) 2hr (SP: Standard Quality) AUDIO + VIDEO 12cm (4.7GB) 4hr (LP: Long Playback) 6hr or 8hr (EP:Extended) 1hr (XP: Excellent Quality) 2hr (SP: Standard Quality) AUDIO + VIDEO 12cm (4.7GB) 4hr (LP: Long Playback) 6hr or 8hr (EP:Extended) DVD-VIDEO AUDIO-CD DVD-RW Playback DVD-R D I G I TA L DIGITAL OUT Dolby Digital DTS Digital Audio JPEG MP3 MPEG4 CD-R/-RW DVD-R/-RW ■ Stereo PAL broadcast system in U.K, France, Germany, etc. NOTE - - Depending on the disc type, it may take up to one minute to load. Discs that cannot be played DivX MP3 Before Playing...................................................50 ● ● 3.9 GB DVD-R Disc for Authoring. ● DVD-RW(VR mode) not recorded following the Video Recording Standard ● Unfinalised DVD-R,unfinalised DVD-RW(V mode) recorded on other equipment. ● DVD-ROM/PD/MV-Disc, etc ● Video CD/SVCD/CVD/CD-ROM/CDV/CD-G/CD-I Playing a Disc ...................................................51 Playing an Audio CD/MP3 ..............................60 Playing a Picture...............................................64 Playing a MPEG4.............................................65 Playing the Title List..........................................66 50- English DVD-Video with a region number other than “2” or “ALL” 01094N-R135-AND-ENG_50~69 4/8/06 9:24 AM Page 51 ■ NOTE ■ ■ Playback and/or recording may not work for some types of discs, or when specific operations, such as angle change and aspect ratio adjustment, are being performed. Information about the discs is written in detail on the box. Please refer to this if necessary. Do not allow the disc to become dirty or scratched. Fingerprints, dirt, dust, scratches or deposits of cigarette smoke on the recording surface may make it impossible to use the disc for recording. DVD-RW/-R discs may not be able to play on some DVD Recorders, depending on the player, disc and the condition of the recording. Playing a Disc a disc gently into the tray with the 2 Place disc’s label facing up. the OPEN/CLOSE button to close 3 Press the disc tray. Your DVD Recorder closes the disc tray and plays the disc automatically. ● The DVD Recorder does not play discs automatically after the initial power on. ● When the DVD Recorder is powered on and a disc is in the tray, the DVD Recorder will be activated and wait in stop status. ● Press the PLAY button to start playback. ● If you want the DVD Recorder to play automatically when it is powered Off with a disc in the DVD Recorder, power on with the PLAY button. ● 4 Press the STOP button to stop playback. When you stop playing disc, the DVD Recorder remembers where you stopped. When you press the PLAY button again, it will pick up where you left off. (unless the disc is removed or the DVD Recorder is unplugged, or if you press the STOP button twice.) This function is only applicable to DVD-VIDEO, DVD-RW, DVD-R or audio CDs (CD-DA). ■ Do not move your DVD Recorder while playing, as this may cause damage to the disc. ■ Make sure to press the OPEN/CLOSE button to open or close the disc tray. ■ Do not push the disc tray while it is being opened or closed, as this may cause a malfunction of the DVD Recorder. ■ Do not place foreign materials on or in the disc tray. ■ Some functions may perform differently or be disabled depending on the disc type. If this occurs, refer to the instructions written on the disc case. ■ Be especially careful that children's fingers are not caught between the disc tray and the tray chassis when it closes. ■ You must only insert one DVD disc at a time. Inserting two or more discs will not allow playback and may cause damage to the DVD RECORDER. NOTE CAUTION 1 Press the OPEN/CLOSE button. English -51 Playback ■ 01094N-R135-AND-ENG_50~69 4/8/06 9:24 AM Page 52 Using the Search Functions Using the Disc Menu & Title Menu Some discs contain a dedicated menu system that allow you to select special functions for the title, such as chapters, audio tracks, subtitles, film previews, information on characters, etc. For DVD-VIDEO discs the DISC MENU button to enter the 1 Press disc menu of the disc. Searching through a Chapter or Track Move to the setup menu related to the playback operation. ● You can select the audio languages and the subtitles provided by the disc. ● Press the TITLE MENU button to move to 2 the title menu of the disc. ● Use this button if the disc contains more than one title. Some type of discs may not support the title menu function. playback, press the SEARCH ( 1 During button on the remote control. For DVD-RW/-R discs 1 Press the TITLE LIST button to move to the Title List. ■ Playback NOTE ■ 52- English Title List: Title List shows a list to help you select a title. Since the title list consists of the information on video that is actually recorded, if one title is deleted, that title cannot be played again. Playlist: This refers to a unit of playback, which is made by selecting a desired scene in the entire Title List. When one playlist is played, only the scene selected by the user will play and then stop. Since only the information necessary for playing a desired scene is included in a playlist, even if that playlist is deleted, the original recording will not be deleted. (only VR mode) DVD-VIDEO/ DVD-RW/DVD-R Fast 1 ➞ Fast 3 ➞ Fast 5 ➞ Fast 1 Fast 2 ➞ Fast 4 ➞ Fast 6 ➞ MPEG4 Fast 1 ➞ Fast 2 ➞ AUDIO CD (CD-DA) X2➞ X2 X4➞ ) Fast 3 X8➞ ● You can scan the programme in reverse. To return to normal speed playback, press the PLAY button. ● When you press and hold the SEARCH( ) button, playback is done at the default speed of Fast 2. If you release the SEARCH( ) button, playback is performed at a normal speed. ● The speed marked in this function may be different from the actual playback speed. ■ No sound is heard during Scan(Search) mode except Fast 1 mode. ■ You cannot also hear during scanning MPEG4 in all mode. ■ For CD(CD-DA), you can hear sound during Scan mode. NOTE English -52 01094N-R135-AND-ENG_50~69 4/8/06 9:24 AM Page 53 About ANYKEY Skipping Chapters or Tracks ● During playback, you can search quickly through a chapter or track. playback, press the SKIP ( 1 During button on the remote control. ● If you press the SKIP ( ) ) button, it moves to the beginning of the chapter or track or marker(DVD-RW(VR mode)). Pressing the button once again within 3 seconds returns to the beginning of the previous chapter or track or marker(DVD-RW(VR mode)). ● If you press the SKIP ( The ANYKEY function allows you to easily search for a desired scene by accessing title, chapter or time. You can also change the subtitle and audio settings and set some features including Repeat, Angle, Zoom. ) button, it moves to the next chapter or track or marker (DVD-RW(VR mode)). Slow Motion Play ● mode, press the SEARCH on the remote control. 1 In( pause) button ● If you press the SEARCH( Slow 1 ➞ Slow 2 ➞ Moving to a scene directly using the ANYKEY If you want to move to a title, a chapter to find a desired scene. Press the ANYKEY button during 1 playback. ) button, Slow 3 DVD-VIDEO Audio 1/2 1/28 00:00:01 Off ENG D 5.1CH Repeat Off Angle 1/3 Zoom Off Title ● If you press the SEARCH( Slow 1 ➞ ● Slow 2 ➞ ) button, Slow 3 To return to normal speed playback, press the PLAY button. Press and hold the SEARCH ( ) button during pause, the disc will play slowly at a Slow 1 speed. If the button is released, the pause operation will resume. The speed marked in this function may be different from the actual playback speed. ■ Slow motion operates only in the forward direction on MPEG 4 discs. NOTE Step Motion Play Time Subtitle MOVE CHANGE Press the …† buttons to select Title or 2 Chapter. DVD-VIDEO Title 1/2 Chapter 1/28 Time 00:00:01 Subtitle Off ENG Audio Angle Off 1/3 Zoom Off Repeat MOVE D 5.1CH CHANGE ‘ 1 Press the STEP( ) button on the remote control during playback or pause. ● Each time the button is pressed, a new frame will appear. When STEP( ) is pressed, the previous frame will be activated. When STEP( ) is pressed, the next frame will be activated. ● To return to normal speed playback, press the PLAY button. ■ NOTE the œ √ or number (0~9) buttons to select the desired scene. 3 Press Press the OK button. Step motion operates only in the forward direction on MPEG 4 discs. English -53 Playback ■ Chapter 01094N-R135-AND-ENG_50~69 4/8/06 9:25 AM Page 54 ● If you want to move to a desired time to help you find a scene. Using the Repeat Function Press the ANYKEY button during 1 playback. DVD-VIDEO Title 1/2 Chapter 1/28 Time 00:00:01 Subtitle Off Audio ENG Repeat Off Angle 1/3 Zoom Off MOVE D 5.1CH CHANGE 2 Press the …† buttons to select Time. Playing Repeatedly(Repeat Playback) Using the REPEAT button DVD-VIDEO Title 1/2 Chapter 1/28 Time 00:00:01 Subtitle Off ENG Audio Angle Off 1/3 Zoom Off Repeat MOVE 0~9 1 Press the REPEAT button during playback. D 5.1CH Repeat Off NUMBER the time in the sequence of hours, 3 Enter minutes, seconds using the number buttons, then press the OK button. ■ This may not work for some discs. When an audio CD(CD-DA) or an MP3 disc is inserted, according to a disc type, the information display may not be appear. ■ The Time Search function does not operate in some discs. ■ To make the screen disappear, press the ANYKEY again Playback NOTE the REPEAT or …† buttons to select Title or Chapter you want to play repeatedly. 2 Press Press the OK button. Repeat Title Title : Repeats the title that is playing. Chapter : Repeats the chapter that is playing. - To return to normal playback - Press the REPEAT buttons to select Off, 3 then press the …† or REPEAT button and press OK button. Press the CANCEL button to return to normal playback. 54- English 01094N-R135-AND-ENG_50~69 4/8/06 9:25 AM Page 55 Playing a Certain section Repeatedly(A-B Repeat Playback) Using the ANYKEY button Press the ANYKEY button during 1 playback. Using the ANYKEY button DVD-VIDEO Title 1/2 Chapter 1/28 Time 00:00:01 Subtitle Off Audio ENG Repeat Off Angle 1/3 Zoom Off MOVE D 5.1CH Press the ANYKEY button during 1 playback. CHANGE DVD-VIDEO 2 Press the …† buttons to select Repeat, then press the œ √ buttons to select Title or Chapter you want to play repeatedly. Title 1/2 Chapter 1/28 Time 00:00:01 Subtitle Off Audio ENG Repeat Angle Off 1/3 Zoom Off MOVE D 5.1CH CHANGE DVD-VIDEO Title 1/2 Chapter 1/28 Time 00:00:01 Subtitle Off ENG Audio Angle Title 1/3 Zoom Off Repeat MOVE D 5.1CH the …† buttons to select Repeat, then 2 Press press the √ button to select A-B. OK DVD-VIDEO 3 NOTE 1/28 Time 00:00:01 Subtitle Off ENG Angle A-B 1/3 Zoom Off Repeat To make the screen disappear, press the ANYKEY or RETURN button. Repeat play allows you to repeat a title or chapter. DVD-RW(VR mode), unfinalised DVD-R and unfinalised DVD-RW (Video mode) do not repeat a chapter. 1/2 Chapter Audio Press the OK button. ■ Title MOVE D 5.1CH OK 3 Press the OK button. repeat play to stop (B). Repeat playback of the A-B section starts. - To return to normal playback - 5 Select Off on the Repeat item or press the CANCEL button. ■ If you set point (B) before five seconds has lapsed, the prohibition mark ( ) will appear. ■ Audio CDs(CD-DA) and MP3 discs do not support the Repeat A-B function. NOTE English -55 Playback the OK button at the point where you want the repeat play to start (A), then press 4 Press it again at the point where you want the 01094N-R135-AND-ENG_50~69 4/8/06 9:25 AM Page 56 Selecting the Subtitle Subtitle languages may not work depending on the disc type. This is only available during playback. Selecting the Audio language Audio languages may not work depending on the disc type. This is only available during playback. Using the SUBTITLE button the SUBTITLE button during 1 Press playback. Subtitle Using the AUDIO button 1 Press the AUDIO button during playback. Off the SUBTITLE or …† buttons to 2 Press select the desired subtitle language. To make the screen disappear, press the CANCEL or RETURN button. Audio the AUDIO or …† buttons to select the desired audio language. 2 Press Using the ANYKEY button Using the ANYKEY button 1 Press the ANYKEY button during playback. ENG Dolby Digital 5.1CH the ANYKEY button during 1 Press playback. DVD-VIDEO 1/2 Chapter 1/28 Title 1/2 Time 00:00:01 Chapter 1/28 Subtitle Off ENG Time 00:00:01 Subtitle Off ENG Audio Playback DVD-VIDEO Title D 5.1CH Audio Angle Off 1/3 Zoom Off Angle Off 1/3 Zoom Off Repeat MOVE Repeat CHANGE MOVE Press the …† buttons to select Subtitle, 2 then press the œ √ buttons to select the desired subtitle language. D 5.1CH CHANGE Press the …† buttons to select Audio, then 2 press the œ √ buttons to select the desired audio language. DVD-VIDEO Title 1/2 Chapter 1/28 Time 00:00:01 Subtitle ENG ENG Audio DVD-VIDEO D 5.1CH Title 1/2 Chapter 1/28 Time 00:00:01 Subtitle Off ENG Angle Off 1/3 Zoom Off Audio Repeat MOVE Angle Off 1/3 Zoom Off Repeat CHANGE MOVE ■ The subtitle display may be different depending on the disc type. ■ If the subtitles overlap, disable the caption function on your TV. NOTE ■ 56- English Some discs allow you to select the language for the disc menu only. D 5.1CH CHANGE ■ Audio languages may be different depending on the disc type. ■ Some discs allow you to select the audio language for the disc menu only. NOTE 01094N-R135-AND-ENG_50~69 4/8/06 9:25 AM Page 57 Changing the Camera Angle When a DVD-VIDEO contains multiple angles of a particular scene, you can select the Angle function. This is only available during playback. If the disc contains multiple angles, the ANGLE mark appears on the screen. Zooming-In the ANYKEY button during playback 1 Press or pause. DVD-VIDEO 1 Press the ANYKEY button during playback. DVD-VIDEO 1/2 Chapter 1/28 Time 00:00:01 Subtitle Off ENG Angle Off 1/3 Zoom Off Repeat MOVE 1/2 Chapter 1/28 Time 00:00:01 Subtitle Audio Off ENG Repeat Off Angle 1/3 Zoom Off MOVE Title Audio Title D 5.1CH CHANGE D 5.1CH CHANGE the …† buttons to select Zoom, then 2 Press press the OK button. ( ) will be displayed. Press the …† buttons to select Angle, then 2 the press the œ √ or number buttons to select desired angle. DVD-VIDEO Title 1/2 Chapter 1/28 Time 00:00:01 Subtitle Off ENG Audio Angle Off 1/3 Zoom Off Repeat MOVE D 5.1CH the …† œ √ buttons to move to the 3 Press area you want to enlarge. CHANGE the OK button. The screen will be enlarged to twice the normal size. 4 Press This function is disc-dependent, may not work on all DVDs. ■ This function does not work when a DVD has not been recorded with a multicamera angle system. NOTE If you press the OK button again after the screen was enlarged to twice the normal size, the screen size will be enlarged to four times the normal size. normal size ➞ 2X ➞ 4X ➞ 2X ➞ normal size ■ NOTE You can also select Zoom function directly using ZOOM button on the remote control. English -57 Playback ■ 01094N-R135-AND-ENG_50~69 4/8/06 9:25 AM Page 58 Using Bookmarks Playing back a bookmark This feature lets you bookmark sections of a DVD-VIDEO or DVD-R/-RW(V mode), so you can quickly find them. (V mode) the MARKER button during 1 Press playback. Press the MARKER button during 1 playback. the œ √ buttons to select a bookmarked scene. 2 Press Bookmark Bookmark MOVE MOVE 2 1 2 - - - - - - - -- - - - - - - - - - -- OK PLAY CLEAR RETURN RETURN Press the OK button when the desired scene appears. the OK or PLAY button to start 3 Press playing from the selected scene. The number 1 is displayed and the scene is memorized. Clearing a bookmark Bookmark 1 - - - - - - - - -- Press the MARKER button during 1 playback. MOVE PLAY CLEAR RETURN Playback the œ √ button to move to the next 3 Press position. the OK button when the desired 4 Press scene appears. The number 2 is displayed and the scene is memorized. Bookmark 1 2 - - - - - - - -- the œ √ buttons to select a 2 Press bookmarked scene. Bookmark MOVE ● ● PLAY CLEAR ■ 58- English CLEAR RETURN 1 - - - - - - - - -- RETURN Repeat above to bookmark other positions. You can bookmark up to 10 scenes. NOTE PLAY Press the CANCEL button to delete the 3 selected bookmark. Bookmark MOVE 1 2 - - - - - - - -- When the disc tray is opened and then closed, bookmarks will disappear. MOVE OK RETURN 01094N-R135-AND-ENG_50~69 4/8/06 9:25 AM Page 59 Using Markers Playing back a Marker (VR mode) the MARKER button during 1 Press playback. Marker -- -- -- -- -- -- -- -- -- -- OK 2 the œ √ buttons to select a bookmarked scene. 2 Press N:0 Marker RETURN Press the OK button when the desired scene appears. The number 01 is displayed and the scene is memorized. Marker Press the MARKER button during 1 playback. 01 -- -- -- -- -- -- -- -- -- N:1 MOVE 01 02 -- -- -- -- -- -- -- -- PLAY CLEAR N:2 RETURN the OK or PLAY button to start 3 Press playing from the selected scene. ● ● If you press the SKIP( ) button, it moves to the beginning of the marker. Pressing the button once again within 3 seconds returns to the beginning of the previous marker. If you press the SKIP( ) button, it moves to the next marker. Clearing a Marker MOVE PLAY CLEAR RETURN 4 Press the OK button when the desired scene appears. the œ √ buttons to select a 2 Press bookmarked scene. Press the CANCEL button to delete the selected bookmark. The number 02 is displayed and the scene is memorized. Marker MOVE ● Press the MARKER button during 1 playback. 01 02 -- -- -- -- -- -- -- -- PLAY CLEAR Marker 01 02 03 04 05 06 07 08 09 10 N : 10 Marker 01 02 03 04 05 06 07 08 09 -- N:9 N:2 RETURN DVD-RW (VR Mode) discs have the Marker function instead of the Bookmark function. The Marker function allows you to mark up to 99 scenes. Since the scenes may be displayed as many different pages, numbering is necessary. If a disc in use is encoded with Disc Protection, Markers cannot be set or deleted. Only playback is available. MOVE ■ PLAY CLEAR RETURN When a marker is cleared while DVD-RW (VR mode) is playing, marker numbers will change. For example, if the 7th marker is cleared after ten markers are registered, the marker numbers after the eighth will automatically move ahead by one and the 8th marker becomes the 7th. English -59 Playback 3 Press the œ √ button to move to the next position. 01094N-R135-AND-ENG_50~69 4/8/06 9:25 AM Page 60 Playing an Audio CD/MP3 Buttons on the Remote Control used for Audio CD(CD-DA) playback Playing an Audio CD (CD-DA)/MP3 Each disc has a variety of menu functions available. Playing an Audio CD(CD-DA) 1 Insert an audio CD (CD-DA) into the disc tray. The audio CD menu appears and the tracks (songs) are played automatically. CD % $ ^ & ^ * Music List 01/15 TRACK 1 √ 0:00:01 TRACK 1 CDDA PLAY MODE No. Title Length 002 TRACK 1 TRACK 2 0:03:50 0:04:00 003 004 005 006 007 TRACK 3 TRACK 4 TRACK 5 TRACK 6 TRACK 7 0:03:49 0:03:47 0:04:29 0:03:44 0:03:44 MOVE OK RETURN ! @ ! EXIT the …† buttons to select the track 2 Press you want to hear, then press the OK or √ button. # ( Playback Audio CD(CD-DA) Screen Elements ! CD @ Music List 01/15 TRACK 1 $ √ 0:00:01 TRACK 1 CDDA PLAY MODE No. Title Length 002 TRACK 1 TRACK 2 0:03:50 0:04:00 003 004 005 006 007 TRACK 3 TRACK 4 TRACK 5 TRACK 6 TRACK 7 0:03:49 0:03:47 0:04:29 0:03:44 0:03:44 MOVE OK RETURN EXIT # % ^ 1. Play mode icon 2. Current track(song) 3. Displays the current play index and total track number. 4. Shows the operating state of a disc and a playback time corresponding to a portion that is currently played. 5. Displays the track list(song list) and the playing time of each track. 6. Button display. 60- English 1. …† : Selects a track (song). 2. √ : Plays the selected track (song). 3. OK button: Plays the selected track (song). 4. SKIP( ) button: Plays the next track. 5. SKIP( ) button: Returns to the beginning of the current track when pressed during playback. If pressed again, your DVD recorder moves to and plays the previous track. If you press the this button within three seconds after playback starts, the previous track will be played. If you press the this button after three seconds, the current track will be replayed from the beginning. 6. Press the SEARCH( / ) button: Fast Play (X2, X4, X8) 7. STOP button: Stops a track(song). 8. PLAY/PAUSE button: Plays a track(song) or pauses playback. 9. ANYKEY button: Selects the sub menu on screen display (Repeat or Play Option). 01094N-R135-AND-ENG_50~69 4/8/06 9:25 AM Page 61 Playing an MP3 Disc MP3 Screen Elements ! 1 Insert an MP3 Disc into the disc tray. DVD-Recorder CD Disc Navigation Disc Navigation DivX √ Programme Photo Music Setup MOVE √ SONG01 01/13 No. Title $ √ 0:00:15 002 ROOT SONG01 SONG02 # SONG01 4.0MB 01/26/2006 003 004 005 006 SONG03 SONG04 SONG05 SONG06 PLAY MODE MOVE % √ OK RETURN DVD-Recorder EXIT OK RETURN EXIT ^ 1. Play mode icon 2. Current track (song) 3. Displays the current track(song) information. 4. Shows the operating state of a disc and a playback time corresponding to a portion that is currently played. 5. Displays the information for the folder and its tracks. 6. Button display. Disc Navigation DivX √ Programme Photo Music Setup MOVE @ Music List MP3 Press the …† buttons to select Disc 2 Navigation, and then press the OK or √ button. CD Disc Navigation MP3 √ √ OK RETURN EXIT Press the …† buttons to select Music, then 3 press the OK or √ button. MP3 Music List SONG01 01/13 No. Title 002 SONG01 4.0MB 01/26/2006 003 004 005 006 SONG03 SONG04 SONG05 SONG06 PLAY MODE MOVE MP3 OK RETURN Playback √ 0:00:15 ROOT SONG01 SONG02 EXIT The MP3 menu appears and the tracks(songs) are played automatically. the …† buttons to select the track 4 Press (song) you want to hear, then press the OK or √ button. English -61 01094N-R135-AND-ENG_50~69 4/8/06 9:25 AM Page 62 Buttons on the Remote Control used for MP3 playback Playing Repeatedly(Repeat Playback) Using the REPEAT button 1 ^ Press the REPEAT button during playback. The Track repeat mode icon ( ) appears and the selected track is played repeatedly. CD % Music List TRACK 1 01/15 No. & √ 0:00:07 * TRACK 1 CDDA PLAY MODE ! 2 Playback 002 TRACK 1 TRACK 2 0:03:50 0:04:00 003 004 005 006 007 TRACK 3 TRACK 4 TRACK 5 TRACK 6 TRACK 7 0:03:49 0:03:47 0:04:29 0:03:44 0:03:44 MOVE OK RETURN EXIT 1. …† : Selects a track (song). 2. √ : Plays the selected track (song). 3. OK button: Plays back the selected track (song) or displays the files in the selected folder. 4. RETURN button: Moves to the folder to which the current song belongs. 5. SKIP( ) button: Plays the next track. 6. SKIP( ) button: Returns to the beginning of the current track when pressed while playing. If pressed again, your DVD recorder moves to and plays the previous track. If you press the this button within three seconds, the previous track will be played. If you press the this button after three seconds, the current track will be replayed from the beginning. 7. STOP button: Stops a track(song). 8. PLAY/PAUSE button: Plays a track(song) or pauses playback. 9. ANYKEY button: Selects the sub menu on screen display (Repeat or Play Option). Press the REPEAT button once more to play the disc repeatedly. The Disc repeat mode icon ( ) appears and the inserted disc is played repeatedly. For MP3 disc, the Folder repeat mode icon( ) appears and all tracks in the current folder are played repeatedly. Pressing the REPEAT button once more changes the mode to the Disc repeat mode. # ( 62- English Length $ @ ! Title CD Music List TRACK 1 01/15 No. √ 0:00:07 TRACK 1 CDDA PLAY MODE Title Length 002 TRACK 1 TRACK 2 0:03:50 0:04:00 003 004 005 006 007 TRACK 3 TRACK 4 TRACK 5 TRACK 6 TRACK 7 0:03:49 0:03:47 0:04:29 0:03:44 0:03:44 MOVE OK RETURN EXIT To return to normal playback 3 Press the REPEAT button repeatedly until the repeat mode icon disappears, or press the CANCEL button. 01094N-R135-AND-ENG_50~69 4/8/06 9:25 AM Page 63 Play Option Mode Using the ANYKEY button 1 Press the ANYKEY button during playback. The Play Option can be used with an audio CD or MP3 in Stop mode. The PLAY MODE window appears. CD Music List TRACK 1 01/15 No. √ 0:00:07 TRACK 1 CDDA PLAY MODE Title Length 001 TRACK 1 PLAY MODE 002 TRACK 2 Repeat 003 : Off TRACK 3 Play : Normal 004optionTRACK 4 005 TRACK 5 006 TRACK 6 007 TRACK 7 MOVE OK 0:03:50 0:04:00 1 Press the ANYKEY button in Stop mode. The PLAY MODE window appears. 0:03:49 0:03:47 0:04:29 0:03:44 0:03:44 RETURN CD Music List TRACK 1 EXIT 0:00:20 TRACK 1 CDDA 2 Select the desired repeat mode (Track or Disc) using œ √ buttons, and then press the OK button. For MP3 discs, you can select Track, Folder or Disc. PLAY MODE 3 Title Length 001 MODE TRACK 1 PLAY 002 TRACK 2 Repeat : Off 003 TRACK 3 Play 004 option : TRACK Normal4 005 TRACK 5 006 TRACK 6 007 TRACK 7 MOVE OK 0:03:50 0:04:00 0:03:49 0:03:47 0:04:29 0:03:44 0:03:44 RETURN EXIT Press the œ √ buttons to select the desired 2 item (Normal, Random, Intro or Playlist) in the Play option, then press the OK button. To return to normal playback Select Off in the PLAY MODE window using the œ √ buttons, and then press the OK button. 01/15 No. ● ● ● ● English -63 Playback Normal: Tracks on a disc are played in the order in which they were recorded on the disc. Intro: The first 10 seconds of each track will be played. If you want to listen to the music that you have selected, press the OK or PLAY button. The play option will be changed to Normal Play. When Intro Play is completed, Normal Play is performed. Playlist: The Playlist playback option allows you to select the order in which you want tracks to play. Random: The Random option plays a disc’s tracks in random order. After a random list is generated and played completely, another random list is generated and played. Random Play is continued until the play option is changed. 01094N-R135-AND-ENG_50~69 4/8/06 9:25 AM Page 64 To Programme Tracks Playing a Picture You can register a maximum of 30 tracks in the playlist. 1 Press the ANYKEY button in Stop mode. The PLAY MODE window appears. CD Music List TRACK 1 01/15 No. 0:00:20 TRACK 1 CDDA PLAY MODE 2 Title Length 001 MODE TRACK 1 PLAY 002 TRACK 2 Repeat : Off 003 TRACK 3 Play 004 option : TRACK Normal4 005 TRACK 5 006 TRACK 6 007 TRACK 7 MOVE OK 0:03:50 1 Insert a JPEG into the disc tray. DVD-Recorder 0:04:00 0:03:49 0:03:47 0:04:29 0:03:44 0:03:44 RETURN CD Disc Navigation Disc Navigation DivX √ Programme Photo Music Setup √ √ EXIT MOVE Press the œ √ buttons to select Playlist in the Play option. OK RETURN EXIT Press the …† buttons to select Disc 2 Navigation, and then press the OK or √ button. 3 Press the OK button. The Playlist screen will appear. Press the …† buttons to select Tracks in the order in which you want them to play. Press the OK button to add the selected track to the Playlist. DVD-Recorder CD Disc Navigation Disc Navigation DivX √ Programme Photo Music Setup CD √ √ Playlist 06/15 CDDA TRACK 1 001 TRACK 1 CDDA TRACK 2 002 TRACK 3 CDDA TRACK 3 003 TRACK 5 CDDA TRACK 4 004 TRACK 6 CDDA TRACK 5 CDDA TRACK 6 CDDA CDDA OK RETURN EXIT TRACK 7 TRACK 8 PLAY MODE Playback MOVE MOVE OK EXIT Press the …† buttons to select Photo, and 3 then press the OK or √ button. If you playlisted a wrong track, press the √ 4 the button, then press the …† buttons to select wrong track, then press the CANCEL JPEG Photo List JPEG01 button. 01/10 ROOT JPEG01 JPEG02 JPEG03 JPEG04 JPEG05 JPEG06 JPEG07 Slide Show MOVE The wrong track will be removed. CD Playlist 03/03 CDDA TRACK 1 001 TRACK 1 CDDA TRACK 2 002 TRACK 3 CDDA TRACK 3 003 TRACK 5 CDDA TRACK 4 CDDA TRACK 5 CDDA TRACK 6 CDDA TRACK 7 CDDA MOVE OK CLEAR EXIT ● To see the next 8 pictures, press the SKIP( ) button. ● To see the previous 8 pictures, press the SKIP( )button. EXIT Press the PLAY button to playback the 5 playlist. 64- English RETURN the …† œ √ buttons to select a 4 Press picture. TRACK 8 PLAY MODE OK 01094N-R135-AND-ENG_50~69 4/8/06 9:25 AM Page 65 If you press the PLAY button, the Slide 5-1 Show Speed screen will appear. Press the œ √ buttons to set the slide show speed, then press the OK button. Playing a MPEG4 DVD-RW(VR) MPEG4 File is used to contain the audio and video data. MPEG4 File with following extensions can be played. - .AVI, .DIVX, .avi, .divx Slide Show Speed Slow Normal Fast JPEG01 MOVE PHOTO OK RETURN the OK button with a picture 5-2 Press selected in the Album screen. And select a display mode (Album screen, Slide show, Rotation or Zoom) using the œ √ buttons, then press the OK button. 1 Insert a MPEG4 Disc into the disc tray. DVD-Recorder CD Disc Navigation DivX √ Programme Photo Music Setup MOVE DVD-RW(VR) √ √ OK RETURN PHOTO OK RETURN DVD-Recorder CD Disc Navigation Disc Navigation DivX √ Programme Photo Music Setup MOVE √ √ OK RETURN Press the …† buttons to select DivX, and press the OK or √ button. 3 then CD DivX List DIVX01 01/02 No. ● EXIT Press the ANYKEY button to display the menu bar. Press the RETURN button to clear the menu bar. 001 002 Title ROOT DIVX01 DIVX02 Size 70.8MB 73.6MB MPEG4 ROOT 2006/01/01 70.8MB MOVE OK RETURN EXIT the …† buttons to select the avi file 4 Press (DivX), then press the OK, √ or PLAY button. MPEG4 file is played, you can use 5 When following functions. Pressing the STOP button once during playback will display the file list, pressing the button again will exit the menu screen. English -65 Playback : Returns to the Album screen. : The DVD Recorder enters slide show mode. Before the slide show can begin, the picture interval (Slide show speed) must be set. : Each time the OK button is pressed, the picture rotates 90 degrees clockwise. : Each time the OK button is pressed, the picture is enlarged up to 4X(Four times the normal size). (Normal ➞ Zoom X2 ➞ Zoom X4 ➞ Zoom X2 ➞ Normal) ● EXIT Press the …† buttons to select Disc and then press the OK or √ 2 Navigation, button. JPEG01 MOVE Disc Navigation 01094N-R135-AND-ENG_50~69 4/8/06 9:25 AM Page 66 MPEG4 Function Description Function ( Skip or ) Search ( or ) Playing the Title List Description During playback, press the SKIP ( or it moves forward or backward 5 minutes. ) button, During playback, press the SEARCH ( or ) button and press again to search at a faster speed. (Fast 1, Fast 2, Fast 3) Slow Motion In pause or step mode, press the SEARCH ( ) button on the remote control. (Slow 1, Slow 2, Slow 3) Play Follow these instructions to play back a scene from the Title List. Step Motion Press the STEP( ) button on the remote control during playback or pause. Play ■ NOTE This DVD Recorder can play the following video compression formats. - MPEG4 Codec format : DivX 3.11 DivX 4.x DivX 5.x DivX-Pro Xvid - Motion Compensation : QPEL, GMC - Audio format : “MP3”, “MPEG1 Audio Layer2”, “WMA”, “LPCM”, “AC3”, “DTS”, “MS ADPCM” Using the TITLE LIST button 1 Press the TITLE LIST button. The Title List screen is displayed. DVD-RW(VR) Title List APR/19/2006 1/6 No. ■ ■ Supported subtitle file formats: .smi, .srt, .sub, .psb, .txt, .ass (The subtitle file should have exactly the same name to corresponding MPEG4 file name) Some MPEG4 files created on a personal computer may not be play back. That is why Codec Type, Version and Higher resolution over specification is not supported. APR/19/2006 12:00 PR12 APR/19/2006 SP MOVE OK Title 01 APR/19/2006 12:00 02 APR/19/2006 12:30 03 APR/20/2006 12:00 04 APR/20/2006 12:30 05 APR/21/2006 12:00 06 APR/21/2006 12:30 Length Edit 00:00:21 00:00:03 00:00:15 00:00:16 00:06:32 00:08:16 RETURN √ √ √ √ √ √ EXIT the …† buttons to select an entry you want to play from Title List, then press 2 Press the PLAY button. The selected entry (title) will be played back. 3 To stop title play, press the STOP button. Playback To return the title list screen, press the TITLE LIST button. Using the MENU button 1 Press the MENU button. DVD-Recorder Title List DVD-RW(VR) Title List Title List √ Playlist Disc Manager Programme Setup MOVE 66- English OK RETURN EXIT 01094N-R135-AND-ENG_50~69 4/8/06 9:25 AM Page 67 Press the INFO button once again. Then you can check the information about the title under playback. the …† buttons to select Title List, 2 Press then press the OK or √ button twice. The Title List screen is displayed. DVD-RW(VR) Name DVD-RW(VR) APR/19/2006 1/6 No. APR/19/2006 12:00 PR12 APR/19/2006 SP MOVE Playing Info APR/21/200612:00 PR1 Title List Title OK Title 5/6 Created Time APR/21/2006 12:00 Length 00:01:43 SP Playing Time 00:00:08 Title Protection Not Protected JAN 01 2006 SUN 12:00 Length Edit 01 APR/19/2006 12:00 02 APR/19/2006 12:30 03 APR/20/2006 12:00 04 APR/20/2006 12:30 05 APR/21/2006 12:00 06 APR/21/2006 12:30 00:00:21 00:00:03 00:00:15 00:00:16 00:06:32 00:08:16 RETURN √ √ √ √ √ √ EXIT the …† buttons to select an entry 3 Press you want to play from Title List, then press the OK or √ button. 5 To stop title play, press the STOP button. To return the title list screen, press the TITLE LIST button. The Edit menu is displayed on the right. ■ DVD-RW(VR) Title List APR/21/2006 5/6 No. APR/21/2006 12:00 PR12 APR/21/2006 SP MOVE OK Title NOTE Length Edit 01 APR/19/2006 12:00 00:00:21 02 APR/19/2006 12:30 00:00:03 Play 03 APR/20/2006 12:00 00:00:15 Rename 04 APR/20/2006 12:30 00:00:16 Delete00:06:32 05 APR/21/2006 12:00 Edit 00:08:16 06 APR/21/2006 12:30 Protection RETURN √ You can also play a recorded programme by pressing the ANYKEY button during playback. √ √ √ DVD-RW(VR) √ Title 5/6 √ Time 00: 00: 08 Subtitle EXIT *** Repeat Off Off Zoom MOVE (Rename, Delete, Edit, Protection : See pages 70-73) 4 Press the …† buttons to select Play to play the title list, then press the OK button. Off Audio D 1+1 L+R CHANGE ■ Press the …† buttons to select Title. ■ Press the œ √ buttons to select to play the title list, then press the OK button. The selected entry (title) will be played back. √ Play Playback To view the current status of the disc and progress of playback : Press the INFO button, the information about the disc will appear. DVD-RW(VR) Disc Name Disc Info Total Title 6 Total Playlist 2 Recordable Time 00:28 SP Protection Not Protected Screen Playback JAN 01 2006 SUN 12:00 English -67 01094N-R135-AND-ENG_50~69 4/8/06 9:25 AM Page 68 Title List Screen Elements 3 4 DVD-RW(VR) DVD-RW(VR) APR/21/2006 APR/21/2006 No. 1 2 APR/21/2006 12:00 PR12 APR/21/2006 SP 7 MOVE OK Title 5 Title List 5/6 Length No.EditTitle Title List 6 5/6 Length Edit √ 01 APR/19/2006 12:00 00:00:21 01 APR/19/2006 12:00 00:00:21 √ 02 APR/19/2006 12:30 00:00:03 02 APR/19/2006 12:30 00:00:03 Play √ 03 APR/20/2006 12:00 00:00:15 03 APR/20/2006 12:00 00:00:15 Rename √ 04 APR/20/2006 12:30 00:00:16 04 APR/20/2006 12:30 00:00:16 APR/21/2006 12:00 PR12 Delete √ 05 APR/21/2006 12:00 00:06:32 05 APR/21/2006 12:00 00:06:32 APR/21/2006 Edit 00:08:16 √ 06 APR/21/2006 12:30 00:08:16 06 APR/21/2006 12:30 SP Protection MOVE RETURN OKEXIT √ √ √ √ √ √ EXIT 1. Playback screen for recorded entries. 2. Information window for the selected entry: Title name, recording date, lock status, recording mode 3. Recorded entry No. 4. Recorded entry title 5. Recording length (i.e., the playing time) 6. Title list edit items Play: Plays the selected entry. Rename: Renames the title of a selected entry. Delete: Deletes the selected entry from the list. Edit: Deletes a section of titles. Protection: Locks or unlocks the selected entry. 7. Button display. Playback NOTE 68- English ■ This may depend on the the disc type. ■ DVD-R/DVD-RW(Video) discs have limited editing function. 01094N-R135-AND-ENG_50~69 4/8/06 9:25 AM Page 69 Editing This section introduces basic functions of DVD editing and explains both edit functions for the recording on a disc and edit functions for the entire disc. Title List A title is a section of recorded video and audio. Title List shows a list to help you select a title. Since the title list consists of the information on stream that is actually recorded, if one title is deleted, that title cannot be played again. ● Playlist This refers to a unit of playback, which is made by selecting a desired scene in the entire Title List. When one playlist is played, only the scene selected by the user will play and then stop. Since only the information necessary for playing a desired scene is included in a playlist, even if that playlist is deleted, the original stream will not be deleted. Recording or editing might not be completed if an error, such as a sudden power failure occurs. Basic Editing (Title List)......................................70 Advanced Editing (Playlist) ................................74 Please be aware that a material that has been damaged is unable to be retrieved to its original content. Disc Manager .....................................................82 English -69 Editing ● 01094N-R135-AND-ENG_70~86 4/8/06 9:30 AM Page 70 Basic Editing (Title List) Press the …† œ √ buttons to select the 4 desired characters, then press the OK button. DVD-Recorder Rename DVD-RW(VR) Sports(A1) Renaming(Labeling) a Title Follow these instructions to rename a title list entry, i.e., to edit the title of a recorded programme. Save Back Space MOVE Space OK Delete RETURN Clear EXIT Back Space: Deletes the character before the cursor. ● Space: Enters a blank and moves the cursor one forward (to the right). ● Delete: Deletes the character at the cursor position. ● Clear: Deletes all the character inputs. ● Save: Registers the character inputs. ● Using the TITLE LIST button 1 Press the TITLE LIST button. The Title List screen is displayed Using the MENU button ● ● Press the MENU button. Press the …† buttons to select Title List, then press the OK or √ button twice. DVD-RW(VR) the …† œ √ buttons to select Save, 5 Press then press the OK button. The changed title name is displayed on the title item of the selected entry. Title List APR/19/2006 1/6 No. APR/19/2006 12:00 PR12 APR/19/2006 SP Title 01 APR/19/2006 02 APR/19/2006 03 APR/20/2006 04 APR/20/2006 05 APR/21/2006 06 APR/21/2006 Length Edit 12:00 12:30 12:00 12:30 12:00 12:30 00:00:21 00:00:03 00:00:15 00:00:16 00:06:32 00:08:16 √ DVD-RW(VR) Title List Sports (A1) 5/6 No. √ 01 APR/19/2006 02 APR/19/2006 03 APR/20/2006 04 APR/20/2006 05 Sports (A1) 06 APR/21/2006 √ √ √ √ Sports (A1) APR/21/2006 MOVE OK RETURN EXIT SP MOVE the …† buttons to select an entry 2 Press you want to rename from the Title List, then press the OK or √ button. DVD-RW(VR) Title List APR/21/2006 5/6 No. APR/21/2006 12:00 PR12 APR/21/2006 SP Editing MOVE 01 APR/19/2006 02 APR/19/2006 03 APR/20/2006 04 APR/20/2006 05 APR/21/2006 06 APR/21/2006 OK Length Edit Title 12:00 12:30 12:00 12:30 12:00 12:30 00:00:21 √ 00:00:03 √ Play 00:00:15 √ Rename 00:00:16 √ Delete 00:06:32 √ Edit 00:08:16 √ Protection RETURN EXIT Press the …† buttons to select Rename, 3 then press the OK button. The Rename screen is displayed. Rename DVD-Recorder DVD-RW(VR) APR/21/2006 12:00 PR12 Save Back Space MOVE 70- English Space OK Delete RETURN Clear EXIT Title OK Length Edit 12:00 12:30 12:00 12:30 00:00:21 00:00:03 00:00:15 00:00:16 00:06:32 12:30 00:08:16 RETURN √ √ √ √ √ √ EXIT 01094N-R135-AND-ENG_70~86 4/8/06 9:30 AM Page 71 Locking(Protecting) a Title Follow these instructions to lock an entry to protect it from accidental deletion. the œ √ buttons to select On, then 4 Press press the OK button. The key icon on the information window for the selected entry changes to the locked status. ( ➝ ) DVD-RW(VR) 1 Title List Sports (A1) Using the TITLE LIST button 5/6 Sports(A1) Press the TITLE LIST button. APR/21/2006 The Title List screen is displayed No. Title Length Edit 01 02 03 04 05 06 Drama Music Sports Movie Sports(A1) Edu 1 00:00:21 00:00:03 00:00:15 00:00:16 00:06:32 00:08:16 √ √ √ √ √ √ SP MOVE OK RETURN EXIT Using the MENU button ● ● Press the MENU button. Press the …† buttons to select Title List, then press the OK or √ button twice. DVD-RW(VR) Title List Drama 1/6 No. Title Length Edit 01 02 03 04 05 06 Drama Music Sports Movie Sports(A1) Edu 1 00:00:21 00:00:03 00:00:15 00:00:16 00:06:32 00:08:16 Drama APR/19/2006 √ √ Deleting a Title Follow these instructions to delete an entry from the Title List. √ √ √ √ SP MOVE OK RETURN EXIT Using the TITLE LIST button 2 Press the …† buttons to select an entry you want to protect in the Title List, then press the OK or √ button. 1 Press the TITLE LIST button. The Title List screen is displayed DVD-RW(VR) Title List Sports (A1) 5/6 No. Title 01 02 03 04 05 06 Drama Music Sports Movie Sports(A1) Edu 1 Sports (A1) APR/21/2006 SP MOVE 3 OK Length Edit 00:00:21 00:00:03 Play 00:00:15 Rename 00:00:16 Delete 00:06:32 Edit 00:08:16 Protection RETURN √ √ √ √ Using the MENU button ● ● Press the MENU button. Press the …† buttons to select Title List, then press the OK or √ button twice. √ √ DVD-RW(VR) EXIT Press the …† buttons to select Protection, then press the OK or √ button. APR/19/2006 No. Title Length Edit 01 02 03 04 05 06 Drama Music Sports Movie Sports(A1) Edu 1 00:00:21 00:00:03 00:00:15 00:00:16 00:06:32 00:08:16 √ √ √ √ √ √ SP OK RETURN EXIT Title List Sports (A1) 5/6 Sports (A1) No. Title 01 02 03 04 05 06 Drama Music Sports Movie Sports(A1) Edu 1 SP OK Length Edit 00:00:21 00:00:03 Play 00:00:15 Rename 00:00:16 Delete 00:06:32 Edit 00:08:16 Protection RETURN √ √ √ √ √ the …† buttons to select an entry 2 Press you want to delete in the Title List, then press the OK or √ button. √ EXIT DVD-RW(VR) Title List Sports (A1) DVD-RW(VR) 5/6 Title List Sports (A1) 5/6 Sports (A1) APR/21/2006 Title Protection : Sports (A1) On APR/21/2006 Editing APR/21/2006 MOVE 1/6 Drama MOVE DVD-RW(VR) Title List Drama Title 01 02 03 04 05 06 Drama Music Sports Movie Sports(A1) Edu 1 SP MOVE Off No. OK RETURN Length Edit 00:00:21 00:00:03 Play 00:00:15 Rename 00:00:16 Delete 00:06:32 Edit 00:08:16 Protection √ √ √ √ √ √ EXIT SP MOVE OK RETURN EXIT English -71 01094N-R135-AND-ENG_70~86 4/8/06 9:30 AM Page 72 Press the …† buttons to select Delete, 3 then press the OK or √ button. DVD-RW(VR) Title List Sports (A1) 5/6 Sports (A1) APR/21/2006 No. Title 01 02 03 04 05 06 Drama Music Sports Movie Sports(A1) Edu 1 SP MOVE Deleting a Section of a Title Follow these instructions to delete a section of a Title List entry. OK Length Edit 00:00:21 00:00:03 Play 00:00:15 Rename 00:00:16 Delete 00:06:32 Edit 00:08:16 Protection RETURN (VR mode) √ √ √ √ Using the TITLE LIST button √ √ EXIT 1 Press the TITLE LIST button. The Title List screen is displayed You will be prompted with a confirmation message. DVD-RW(VR mode): Since Playlist is present, the message ‘Do you want to delete? (Related playlists may be deleted.)’ is displayed. DVD-RW(VR) Using the MENU button ● ● Press the MENU button. Press the …† buttons to select Title List, then press the OK or √ button twice. DVD-RW(VR) Title List Sports (A1) Title List Drama 5/6 1/6 No. Title Length Edit 01 02 03 04 05 06 Drama Music Sports Movie Sports(A1) Edu 1 00:00:21 00:00:03 00:00:15 00:00:16 00:06:32 00:08:16 Do you want to delete? (Related playlists may be deleted.) Drama Sports (A1) APR/21/2006 Yes APR/19/2006 No OK RETURN MOVE EXIT DVD-RW(Video mode), DVD-R: Since Playlist is not present, the message ‘Do you want to delete?’ is displayed. ● The message may depend on the type of disc. OK RETURN Title 01 02 03 04 05 06 Drama Music Sports Movie Sports(A1) Edu 1 APR/21/2006 SP MOVE Editing 72- English √ 5/6 No. Sports (A1) You cannot delete a protected entry. If you want to delete a protected entry, select “Off” in the Title Protection menu. (See page 71) ■ When the Disc Protection has been set to Protected, you cannot delete titles. (See page 83 ) ■ Once an entry is deleted from the Title List it cannot be recovered. ■ Once DVD-R, DVD-RW is finalised, it cannot be deleted. ■ √ Title List Press the œ √ buttons to select Yes, then press the OK button. NOTE √ the …† buttons to select an entry 2 Press you want to edit from the Title List, then press the OK or √ button. Sports (A1) ■ √ EXIT DVD-RW(VR) 4 √ SP SP MOVE √ With DVD-R, titles are only deleted from the menu however, the Title remains physically on the disc. OK Length Edit 00:00:21 00:00:03 Play 00:00:15 Rename 00:00:16 Delete 00:06:32 Edit 00:08:16 Protection RETURN √ √ √ √ √ √ EXIT the …† buttons to select Edit, then 3 Press press the OK or √ button. The Edit Title List screen is display DVD-RW(VR) Edit Title List Title List No. 05 Start End 00:00:00 00:00:00 00:00:00 √ Start End MOVE Delete OK Return RETURN EXIT 01094N-R135-AND-ENG_70~86 4/8/06 9:30 AM Page 73 4 Press the OK button at the starting point. The image and starting point time are displayed in the section deletion starting point window. 6 Press the OK button at the Delete. The message “Do you want to delete? (Deleted part will not be restored.)” is displayed. Edit Title List DVD-RW(VR) Edit Title List DVD-RW(VR) Title List No. 05 Start End Title List No. 05 Start End Do you want to delete? (Deleted part will not be restored.) 00:00:06 00:10:15 00:00:00 Yes 00:00:06 √ Start End MOVE Delete OK Start Return RETURN MOVE EXIT DVD-RW(VR) Delete OK 00:10:15 Return RETURN EXIT œ √ buttons to select Yes, then press 7 Press the OK button. Edit Title List Screen Elements The selected section has been deleted. To return to the Title List screen, press the œ √ buttons to select Return. ➃ ➂ End No Edit Title List Title List No. 05 Start End 00:00:06 ① 00:00:00 00:00:06 √ Start End MOVE Delete OK ■ The length of the section to be deleted must be at least 5 seconds long. ■ If the length of the section to be deleted is less than 5 seconds, you will be prompted with the message “The range is too short.”. ■ If the end time precedes the starting point, you will be prompted with the message “End point cannot be marked earlier than start point”. ■ The section cannot be deleted when it includes a still picture. ■ Press the MENU button after the operation has finished. The Edit Title List screen will disappear. NOTE ② Return RETURN EXIT 1. Playback bar 2. Playtime 3. Section deletion starting point window and time 4. Section deletion end point window and time ● Select the start and end points of the section you want to delete using the playback related buttons. ● Playback related buttons: ( , , , , ). 5 Press the OK button at the end point. The image and end point time are displayed in the Section deletion ending point window. Edit Title List DVD-RW(VR) Title List No. 05 Start End 00:00:06 00:10:15 00:10:15 Start End MOVE Delete OK Return RETURN EXIT Editing English -73 01094N-R135-AND-ENG_70~86 4/8/06 9:30 AM Page 74 5 Press the OK button at the end point. Advanced Editing (Playlist) DVD-Recorder Make Scene DVD-RW(VR) Scene No. 001 Start End Title List : 1/6 Creating a Playlist Start Follow these instructions to create a new playlist entry from a recorded title. ● the DVD Recorder in Stop mode, 1 With press the MENU button. Press the …† buttons to select Playlist, then 2 press the OK or √ button. Playlist ● Title List New Playlist √ Playlist Edit Playlist √ EXIT the …† buttons to select New 3 Press Playlist, then press the OK or √ button. The Make Scene screen is displayed. DVD-Recorder Make Scene EXIT A new Scene will be added to the current Playlist. A new Make Scene screen is displayed. ■ You can check and see all the scenes on Edit Playlist screen. ■ Repeat steps 1~6 if you want to make a new playlist. ■ Repeat steps 4~6 if you want to make scenes of the playlist. NOTE RETURN RETURN 6 Press the OK button at the Make item. Setup OK Return OK The image and end point time are displayed in the End window. The yellow-coloured selection bar moves to the Make item. Disc Manager Programme Make - To make a new playlist - DVD-RW(VR) MOVE 00:10:00 00:10:00 End MOVE (VR mode) DVD-Recorder 00:00:10 » - To return to Edit Playlist menu - the œ √ buttons to select Return, 7 Press then press the OK button. The Edit Playlist screen is displayed. DVD-RW(VR) Scene No. 001 Start End Edit Playlist DVD-RW(VR) APR/25/2006 Title List : 1/6 00:00:00 Start End MOVE Make OK Return RETURN EXIT APR/25/2006 12:00 1 Scene APR/25/2006 12:00 MOVE Press the OK button at the start point. DVD-Recorder Make Scene DVD-RW(VR) Scene No. 001 Start End Title 01 APR/23/2006 02 APR/23/2006 03 APR/24/2006 04 APR/24/2006 05 APR/25/2006 00:00:00 √ 4 5/5 No. 00:00:00 OK RETURN Length Edit 12:00 12:30 12:00 12:30 12:00 00:00:21 00:00:03 00:00:15 00:00:16 00:00:32 √ √ √ √ √ EXIT the MENU or PLAY LIST button after 8 Press the operation has finished. Editing The Edit Playlist screen will disappear. Title List : 1/6 00:00:10 00:00:10 √ Start End MOVE ● ● ● 00:00:00 Make OK RETURN EXIT The image and time at the start point are displayed on the Start window. The yellow-coloured selection bar moves to the End item. Select the starting point of the section from which you want to create a new scene using the playback related buttons ( , , , , , , ). 74- English ■ You can create up to 99 playlist entries. ■ Depending on the kind of disc, the displayed screen may have a slight difference. Return NOTE 01094N-R135-AND-ENG_70~86 4/8/06 9:30 AM Page 75 Playing Entries in the Playlist Follow these instructions to play the playlist entries. the …† buttons to select Play, then 3 Press press the OK button. √ Play (VR mode) the DVD Recorder in Stop mode, 1 With press the PLAY LIST button. The Edit Playlist screen is displayed. ● Edit Playlist DVD-RW(VR) APR/23/2006 1/5 No. APR/23/2006 12:00 1 Scene APR/23/2006 12:00 MOVE OK Length Edit Title 01 APR/23/2006 02 APR/23/2006 03 APR/24/2006 04 APR/24/2006 05 APR/25/2006 12:00 12:30 12:00 12:30 12:00 √ 00:00:21 00:00:03 00:00:15 00:00:16 00:00:32 RETURN √ √ DVD-RW(VR) Disc Name √ √ Total Title Total Playlist Recordable Time Protection Screen JAN 01 2006 SUN EXIT Using the MENU button ● ● ● With the DVD Recorder in Stop mode, press the MENU button. Press the …† buttons to select Playlist, then press the OK or √ button. Press the …† buttons to select Edit Playlist, then press the OK or √ button. DVD-Recorder ● Playlist DVD-RW(VR) Title Menu New Playlist √ Playlist Edit Playlist √ Disc Manager Programme Setup MOVE OK RETURN Disc Info 19 5 01:09 SP Not Protected Playback [ Playlist ] 13:00 Press the INFO button once again. Then you can check the information about the playlist currently playing back. DVD-RW(VR) Name Playing Info APR/24/2006 12:00 PR1 Playlist Created Time Length Playing Time Total scene JAN 01 2006 SUN 3/5 APR/24/2006 12:00 00: 01: 09 SP 00: 00: 08 1 13:00 EXIT ● the …† buttons to select the title you want to edit from the Playlist, then press the 2 Press OK or √ button. The Edit Playlist menu is displayed : Play, Rename, Edit Scene, Copy, Delete. The screen returns to the Edit Playlist screen when the playback has finished. 4 Press the STOP button to stop playing. The screen returns to the Edit Playlist screen. Edit Playlist DVD-RW(VR) APR/24/2006 3/5 No. Title 01 APR/23/2006 02 APR/23/2006 03 APR/24/2006 04 APR/24/2006 05 APR/25/2006 Length Edit 12:00 00:00:21 12:30 Play 00:00:03 12:00 00:00:15 Rename 12:30 00:00:16 Edit Scene 12:00 Copy 00:00:32 √ √ √ √ √ Editing APR/24/2006 12:00 1 Scene APR/24/2006 12:00 MOVE To view the current status of the disc and progress of playback : Press the INFO button, and the information about the disc will appear. Delete OK RETURN EXIT English -75 01094N-R135-AND-ENG_70~86 4/8/06 9:30 AM Page 76 Renaming a Playlist Entry Follow these instructions to rename a playlist entry, i.e. to edit the title of a playlist entry. the desired characters using the 4 Enter …† œ √ buttons. DVD-Recorder Rename DVD-RW(VR) Dolphin (VR mode) the DVD Recorder in Stop mode, 1 With press the PLAY LIST button. Save Back Space MOVE The Edit Playlist screen is displayed. Edit Playlist DVD-RW(VR) APR/23/2006 Title 01 APR/23/2006 02 APR/23/2006 03 APR/24/2006 04 APR/24/2006 05 APR/25/2006 APR/23/2006 12:00 1 Scene APR/23/2006 12:00 MOVE OK Length Edit 12:00 12:30 12:00 12:30 12:00 √ 00:00:21 00:00:03 00:00:15 00:00:16 00:00:32 RETURN √ √ √ √ EXIT ● ● 2 With the DVD Recorder in Stop mode, press the MENU button. Press the …† buttons to select Playlist, then press the OK or √ button. Press the …† buttons to select Edit Playlist, then press the OK or √ button. Press the …† buttons to select the title you want to edit from the Playlist, then press the OK or √ button. The Edit Playlist menu is displayed : Play, Rename, Edit Scene, Copy, Delete Edit Playlist DVD-RW(VR) APR/24/2006 3/5 No. APR/24/2006 12:00 1 Scene APR/24/2006 12:00 MOVE Title 01 APR/23/2006 02 APR/23/2006 03 APR/24/2006 04 APR/24/2006 05 APR/25/2006 Length Edit √ 12:00 00:00:21 12:30 Play 00:00:03 12:00 00:00:15 Rename 12:30 00:00:16 Edit Scene 12:00 Copy 00:00:32 √ √ √ √ Delete OK RETURN EXIT Press the …† buttons to select Rename, then 3 press the OK button. Editing The Rename screen is displayed. Edit Playlist DVD-RW(VR) APR/24/2006 3/5 No. 01 APR/23/2006 02 APR/23/2006 03 APR/24/2006 04 APR/24/2006 05 APR/25/2006 APR/24/2006 12:00 1 Scene APR/24/2006 12:00 MOVE 76- English Title Length Edit 12:00 00:00:21 √ Play 00:00:03 √ 12:30 12:00 00:00:15 √ Rename 12:30 00:00:16 √ Edit Scene 12:00 Copy 00:00:32 √ Delete OK RETURN EXIT ● OK Delete RETURN Clear EXIT This function is the same as the Rename function in renaming the title list. (See page 70.) The maximum number of characters that can be entered is 31. All 31 characters can be displayed by pressing the INFO button twice. the …† œ √ buttons to select Save, then press the OK button. 5 Press Using the MENU button ● ● 1/5 No. Space The changed title is displayed in the title field of the selected playlist entry. Edit Playlist DVD-RW(VR) Dolphin 3/5 No. 01 APR/23/2006 02 APR/23/2006 03 Dolphin 04 APR/24/2006 05 APR/25/2006 Dolphin 1 Scene APR/24/2006 12:00 MOVE Title OK RETURN Length Edit 12:00 00:00:21 √ 12:30 00:00:03 √ 00:00:15 √ 12:30 00:00:16 √ 12:00 00:00:32 √ EXIT 01094N-R135-AND-ENG_70~86 4/8/06 9:30 AM Page 77 Editing a Scene for the Playlist Playing a Selected Scene Follow these instructions to edit scenes for a playlist. (VR mode) 1 With the DVD Recorder in Stop mode, press the PLAY LIST button. the …† œ √ buttons to select the 4 Press scene you want to play, then press the OK button. The playlist entry to be played is selected. The Edit Playlist screen is displayed. DVD-Recorder DVD-RW(VR) Scene No. 2/7 Edit Playlist DVD-RW(VR) Science Play 1/4 No. Title 01 02 03 04 Science Sky Dolphin Natural Modify Length Edit 00:00:17 00:00:06 00:00:06 00:00:37 03 00:00:04 04 00:00:03 05 00:00:11 06 00:00:04 OK RETURN Move Add √ √ √ OK RETURN Delete EXIT EXIT Using the MENU button ● 02 00:00:07 MOVE MOVE ● 01 00:00:26 √ Science 1 Scene APR/24/2006 10:43 ● Edit Scene Playlist No. 3 With the DVD Recorder in Stop mode, press the MENU button. Press the …† buttons to select Playlist, then press the OK or √ button. Press the …† buttons to select Edit Playlist, then press the OK or √ button. 5 Press the OK button. The selected scene is played. √ Play the …† buttons to select the title you want to edit from the Playlist, then press the 2 Press OK or √ button. The Edit Playlist menu is displayed : Play, Rename, Edit Scene, Copy, Delete ● To stop scene play, press the STOP button. Edit Playlist DVD-RW(VR) Dolphin 3/4 No. 01 02 03 04 Dolphin 7 Scene APR/24/2006 12:00 MOVE Title Length Edit Science 00:00:17 Sky 00:00:06 Play Dolphin 00:00:06 Rename Natural 00:00:37 Edit Scene √ √ √ √ Copy Delete OK RETURN EXIT the …† buttons to select Edit Scene, 3 Press then press the OK button. The Edit Scene screen is displayed. Edit Playlist DVD-RW(VR) Dolphin 3/4 No. Dolphin 7 Scene APR/24/2006 12:00 MOVE Length Edit Science 00:00:17 Sky 00:00:06 Play Dolphin 00:00:06 Rename Natural 00:00:37 Edit Scene Editing 01 02 03 04 Title √ √ √ √ Copy Delete OK RETURN DVD-Recorder EXIT Edit Scene DVD-RW(VR) Scene No. 1/7 Playlist No. 3 Play Modify 01 00:00:26 02 00:00:07 03 00:00:04 04 00:00:03 05 00:00:11 06 00:00:04 Move Add MOVE OK RETURN Delete EXIT English -77 01094N-R135-AND-ENG_70~86 4/8/06 9:30 AM Page 78 Modifying a Scene (Replacing a Scene) the OK button at the end point of the 7 Press scene. To setup, follow steps 1 to 3 in page 77. DVD-Recorder Modify Scene DVD-RW(VR) the …† œ √ buttons to select the 4 Press scene you want to modify, then press the OK button. Scene No. 002 Start End Title List : 5/6 00:00:25 00:00:30 00:00:30 » Start DVD-Recorder DVD-RW(VR) Scene No. 2/7 Edit Scene End Change MOVE OK Cancel RETURN EXIT Playlist No. 3 Play Modify 01 00:00:26 02 00:00:07 03 00:00:04 04 00:00:03 05 00:00:11 06 00:00:04 ● Move The image and ending point time are displayed in the End window. Add MOVE 5 OK RETURN Delete EXIT Press the œ √ buttons to select Change, then 8 press the OK button. DVD-Recorder DVD-RW(VR) Scene No. 2/7 Press the …† buttons to select Modify, then press the OK button. Edit Scene Playlist No. 3 Play The Modify Scene screen is displayed. Modify 01 00:00:26 02 00:00:05 03 00:00:04 04 00:00:03 05 00:00:11 06 00:00:04 Move Add DVD-Recorder Modify Scene DVD-RW(VR) Scene No. 002 Start End Title List : 5/6 00:00:00 00:00:00 00:00:00 √ Start End MOVE Change OK Cancel RETURN EXIT the OK button at the start point of the 6 Press scene. DVD-Recorder Modify Scene DVD-RW(VR) Scene No. 002 Start End Title List : 5/6 00:00:25 Start End MOVE ● Editing ● 00:00:00 00:00:25 √ Change OK Cancel RETURN EXIT The image and starting point time are displayed on the Start window. Select the starting or ending point of the section you want to modify using the playback related buttons ( , , , , , , ). 78- English MOVE ● OK RETURN Delete EXIT The scene you want to modify is changed with the selected section. 01094N-R135-AND-ENG_70~86 4/8/06 9:30 AM Page 79 Moving a Scene (Changing the Position of a Scene) ■ You cannot move the selected scene to the position of the next scene, because the selected scene should be inserted before that position, which requires no action. ■ Depending on the kind of disc, the displayed screen may have a slight difference. NOTE To setup, follow steps 1 to 3 in page 77. 4 Press the …† œ √ buttons to select the scene you want to move (change the position), then press the OK button. Adding a Scene DVD-Recorder DVD-RW(VR) Scene No. 3/7 Edit Scene Playlist No. 3 To setup, follow steps 1 to 3 in page 77. Play Modify 01 00:00:26 02 00:00:07 03 00:00:04 04 00:00:03 05 00:00:11 06 00:00:04 the …† œ √ buttons to select the 4 Press scene that will have a new scene inserted before it, then press the OK button. Move Add MOVE OK RETURN Delete EXIT A yellow selection window is displayed on the scene to be added as the new scene. the …† buttons to select Move, then 5 Press press the OK button. DVD-Recorder DVD-RW(VR) Scene No. 4/7 Edit Scene Playlist No. 3 Play Modify DVD-Recorder DVD-RW(VR) Scene No. 3/7 Edit Scene 01 00:00:26 02 00:00:07 03 00:00:04 04 00:00:03 05 00:00:11 06 00:00:04 Move Add Playlist No. 3 Play Delete Modify 01 00:00:26 02 00:00:07 03 00:00:04 MOVE Move OK RETURN EXIT Add 04 00:00:03 05 00:00:11 MOVE ● OK 06 00:00:04 RETURN Delete Press the …† buttons to select Add, then 5 press the OK button. EXIT A yellow selection window is displayed on the scene to be moved. DVD-Recorder Add Scene DVD-RW(VR) Scene No. 004 Start End the …† œ √ buttons to select the 6 Press position to which you want to move the selected scene, then press the OK button. Title List : 4/6 00:00:00 00:00:00 Start End MOVE DVD-Recorder DVD-RW(VR) Scene No. 6/7 00:00:00 √ Add OK Cancel RETURN EXIT Edit Scene Playlist No. 3 Play Modify 01 00:00:26 02 00:00:07 03 00:00:04 the OK button at the starting point of 6 Press the scene. Move Add 04 00:00:03 05 00:00:11 MOVE OK 06 00:00:04 RETURN Delete EXIT DVD-Recorder Add Scene DVD-RW(VR) ● The selected scene is moved to the selected position. Title List : 4/6 00:00:15 Start Edit Scene Playlist No. 00:00:00 00:00:15 √ DVD-Recorder DVD-RW(VR) Scene No. 5/7 Editing Scene No. 004 Start End End MOVE Add OK Cancel RETURN EXIT 3 Play Modify 01 00:00:26 02 00:00:07 03 00:00:03 ● Move Add 04 00:00:11 MOVE 05 00:00:04 OK 06 00:00:04 RETURN Delete EXIT ● The image and starting point time are displayed in the Start window. Select the end point of the section where you want to add the new scene using the playback related buttons ( , , , , ). English -79 01094N-R135-AND-ENG_70~86 4/8/06 9:31 AM Page 80 the OK button at the end point of the 7 Press scene. DVD-Recorder Copying a Playlist Entry to the Playlist Add Scene DVD-RW(VR) Scene No. 004 Start End Title List : 4/6 00:00:15 Using the PLAY LIST button 00:00:35 00:00:35 Start End Add MOVE OK Cancel RETURN EXIT the DVD Recorder in Stop mode, 1 With press the PLAY LIST button. The Edit Playlist screen is displayed. ● ● The image and time of the end point are displayed in the End window. To cancel, press the œ √ buttons to select cancel, then press the OK button. Edit Playlist DVD-RW(VR) Science 1/4 No. Science 8 Edit Scene Playlist No. 3 Modify 02 00:00:07 03 00:00:04 MOVE 05 00:00:03 ● ● Move MOVE ● OK Delete 06 00:00:11 RETURN 00:00:17 √ 02 Sky 00:00:06 √ 03 Dolphin 00:00:06 √ 04 Natural 00:00:37 √ OK RETURN EXIT Using the MENU button Add 04 00:00:20 01 Science APR/23/2006 06:43 Play 01 00:00:26 Length Edit 1 Scene Press the œ √ buttons to select Add, then press the OK button. DVD-Recorder DVD-RW(VR) Scene No. 4/8 Title ● With the DVD Recorder in Stop mode, press the MENU button. Press the …† buttons to select Playlist, then press the OK or √ button. Press the …† buttons to select Edit Playlist, then press the OK or √ button. EXIT The section you want to add is inserted prior to the scene selected in step 4. the …† buttons to select the title you 2 Press want to copy to the Playlist, then press the OK or √ button. The Edit Playlist menu is displayed :Play, Rename, Edit Scene, Copy, Delete Edit Playlist DVD-RW(VR) Deleting a Scene Dolphin 3/4 No. Title 00:00:17 √ 02 Sky 00:00:06 Play 00:00:06 Rename 00:00:37 √ 03 Dolphin To setup, follow steps 1 to 3 in page 77. 04 Natural Dolphin 4 DVD-Recorder DVD-RW(VR) Scene No. 2/7 Edit Scene Playlist No. 3 Play √ Copy APR/23/2006 06:43 MOVE √ Edit Scene 7 Scene Press the …† œ √ buttons to select the scene you want to delete, then press the OK button. Length Edit 01 Science Delete OK RETURN EXIT Press the …† buttons to select Copy, then 3 press the OK button. Playlist that has been selected will be copied. Modify 01 00:00:26 02 00:00:07 03 00:00:04 Move Add Editing 04 00:00:03 05 00:00:11 MOVE OK 06 00:00:04 RETURN Edit Playlist DVD-RW(VR) Dolphin 3/4 No. Delete EXIT Title 01 Science 00:00:17 √ 02 Sky 00:00:06 Play 00:00:06 Rename 00:00:37 √ 03 Dolphin 04 Natural Dolphin DVD-Recorder DVD-RW(VR) Scene No. 2/6 Edit Scene Delete OK 02 00:00:04 03 00:00:03 5/5 No. Move Dolphin Add MOVE 80- English EXIT Edit Playlist DVD-RW(VR) Modify 04 00:00:11 RETURN Dolphin Playlist No. 3 Play 01 00:00:26 05 00:00:04 OK 06 00:00:05 RETURN Delete EXIT √ Copy APR/23/2006 06:43 MOVE √ Edit Scene 7 Scene Press the …† buttons to select Delete, 5 then press the OK button. Length Edit 7 Scene Title Length Edit 01 Science 00:00:17 √ 02 Sky 00:00:06 √ 03 Dolphin 00:00:06 √ 04 Natural 00:00:37 √ 05 Dolphin 00:00:06 √ APR/23/2006 06:43 MOVE OK RETURN EXIT 01094N-R135-AND-ENG_70~86 4/8/06 9:31 AM Page 81 ■ You can create up to 999 scenes on one disc. In some cases, this may be different from the actual numbers. ■ Press the MENU button after the operation has finished. The Edit Playlist screen will disappear. NOTE Press the …† buttons to select Delete, 3 then press the OK button. Edit Playlist DVD-RW(VR) Dolphin 5/5 No. 01 02 03 04 05 Dolphin 7 Scene Title Science Sky Dolphin Natural Dolphin Deleting a Playlist Entry from the Playlist Using the PLAYLIST button the DVD Recorder in Stop mode, 1 With press the PLAY LIST button. The Edit Playlist screen is displayed. ● 01 02 03 04 05 Science 1 Scene √ OK RETURN EXIT Edit Playlist DVD-RW(VR) Dolphin 5/5 Do you want to delete? Yes Dolphin 7 Scene No APR/23/2006 06:43 Title Science Sky Dolphin Natural Dolphin OK RETURN EXIT Length Edit 00:00:17 00:00:06 00:00:06 00:00:37 00:00:06 √ √ √ √ √ OK RETURN the œ √ buttons to select Yes, then 4 Press press the OK button. It automatically returned to the Edit Playlist screen after the delete operation has finished. APR/23/2006 06:43 EXIT Using the MENU button ● √ 1/5 No. ● √ √ You will be prompted with the delete confirmation message “Do you want to delete?”. MOVE ● √ 00:00:06 Rename 00:00:37 Edit Scene Copy00:00:06 Edit Playlist DVD-RW(VR) Science MOVE 00:00:17 Play 00:00:06 Delete APR/23/2006 06:43 MOVE Length Edit With the DVD Recorder in Stop mode, press the MENU button. Press the …† buttons to select Playlist, then press the OK or √ button. Press the …† buttons to select Edit Playlist, then press the OK or √ button. 5/5 Deleting... (Please wait) Dolphin 7 Scene APR/23/2006 06:43 MOVE the …† buttons to select the title you 2 Press want to delete from the Playlist, then press the OK or √ button. Edit Playlist DVD-RW(VR) Dolphin OK RETURN EXIT Edit Playlist DVD-RW(VR) Natural 4/4 No. 01 02 03 04 The Edit Playlist menu is displayed : Play, Rename, Edit Scene, Copy, Delete Title Science Sky Dolphin Natural Length Edit 00:00:17 00:00:06 00:00:06 00:00:37 √ √ √ √ Natural 1 Scene APR/23/2006 06:43 Edit Playlist DVD-RW(VR) Dolphin 5/5 01 02 03 04 05 Dolphin 7 Scene Title Science Sky Dolphin Natural Dolphin OK OK RETURN EXIT Length Edit 00:00:17 Play 00:00:06 00:00:06 Rename 00:00:37 Edit Scene Copy00:00:06 √ √ √ √ √ Delete APR/23/2006 06:43 MOVE MOVE Editing No. RETURN EXIT English -81 01094N-R135-AND-ENG_70~86 4/8/06 9:31 AM Page 82 the desired characters using the 4 Enter …† œ √ buttons. Disc Manager DVD-Recorder Rename DVD-RW(VR) Disc Editing the Disc Name Follow these instructions to give a name to a disc. Save Back Space MOVE ● the DVD Recorder in Stop mode, 1 With press the MENU button. DVD-Recorder ● Space OK Delete Clear RETURN EXIT This function is the same as the Rename function in renaming the title list. (See page 70.) The maximum number of characters that can be entered is 31. All 31 characters can be displayed by pressing the INFO button. Title List DVD-RW(VR) Title List Title List √ Playlist Disc Manager the …† œ √ buttons to select Save, 5 Press then press the OK button. A disc name is given to the disc. Programme Setup MOVE OK RETURN DVD-Recorder EXIT Disc Manager DVD-RW(VR) 2 Press the …† buttons to select Disc Manager, then press the OK or √ button. Title List Disc Name : Disc √ Playlist Disc Protection : Not Protected √ Disc Manager Disc Format √ Programme Setup MOVE DVD-Recorder : DVD-VR Disc Finalise √ Delete All Title Lists √ OK RETURN EXIT Disc Manager DVD-RW(VR) Title List Disc Name : Playlist Disc Protection : Not Protected √ Disc Manager Disc Format √ Programme Setup √ : DVD-VR Disc Finalise √ Delete All Title Lists √ MOVE OK RETURN EXIT the …† buttons to select Disc 3 Press Name, then press the OK or √ button. The Edit Name screen is displayed. DVD-Recorder Rename Editing DVD-RW(VR) Save Back Space MOVE 82- English Space OK Delete RETURN Clear EXIT ■ You may need to clear disc protect before beginning editing. ■ Depending on the kind of disc, the displayed screen may be different. NOTE 01094N-R135-AND-ENG_70~86 4/8/06 9:31 AM Page 83 Disc Protection Formatting a Disc Disc Protection allows you to protect your discs from being formatted or deleted due to unintended operations. 1 With the DVD Recorder in Stop mode, press the MENU button. Use these instructions to format a disc. The disc protect should also be cleared. the DVD Recorder in Stop mode, 1 With press the MENU button. DVD-Recorder Title List DVD-RW(VR) DVD-Recorder Title List DVD-RW(VR) Title List Title List Title List √ Playlist Title List √ Disc Manager Playlist Programme Disc Manager Setup Programme Setup MOVE MOVE OK RETURN OK RETURN EXIT EXIT the …† buttons to select Disc 2 Press Manager, then press the OK or √ button. Press the …† buttons to select Disc then press the OK or √ button. 2 Manager, DVD-Recorder Disc Manager DVD-RW(VR) DVD-Recorder Disc Manager DVD-RW(VR) Title List Disc Name : √ Playlist Disc Protection : Not Protected √ Disc Manager Disc Format √ Programme Disc Finalise √ Delete All Title Lists √ Setup MOVE OK : DVD-VR RETURN EXIT the …† buttons to select Disc 3 Press Protection, then press the OK or √ button. DVD-Recorder Disc Manager Title List Disc Name : Playlist Disc Protection : Not Protected √ Disc Manager Disc Format √ Programme Setup Playlist Disc Name : Disc Protection Protected DVD-VR √ Disc Manager Disc Format Programme Disc Finalise √ Delete All Title Lists √ Setup MOVE OK RETURN √ OK RETURN EXIT DVD-Recorder Disc Manager DVD-RW(VR) Title List Disc Name : Playlist Disc Protection : Not Protected √ Disc Manager Disc Format √ Programme Disc Finalise √ Delete All Title Lists √ Setup √ : DVD-VR √ MOVE OK RETURN EXIT EXIT the …† button to select Protected, 4 Press then Press the OK button. Disc Manager DVD-RW(VR) DVD-RW ● You will be prompted with the confirmation message “Choose the recording format for DVD-RW.”. DVD-Recorder Disc Manager DVD-RW(VR) Title List Disc Name : √ Title List Disc Name : √ Playlist Disc Protection : Protected √ Playlist Disc Protection : Not Protected √ Disc Manager Disc Format √ √ Programme Disc Finalise √ Delete All Title Lists √ Format : format DVD-VR ChooseDisc the recording for DVD-RW Disc Manager Disc Finalize Programme Delete All Title Lists DVD-VR DVD-V Setup Setup MOVE Editing DVD-Recorder √ Delete All Title Lists Press the …† buttons to select Disc then press the OK or √ button. 3 Format, √ Not Protected : DVD-VR Disc Finalise MOVE DVD-RW(VR) Title List √ OK : DVD-VR RETURN EXIT MOVE OK RETURN √ √ EXIT English -83 01094N-R135-AND-ENG_70~86 4/8/06 9:31 AM Page 84 the œ √ buttons to select desired 4 Press mode, then press the OK button. ● You will be prompted again with the message “All data will be deleted. Do you want to continue?”. DVD-Recorder Press the …† buttons to select Disc 2 Manager, then press the OK or √ button. DVD-Recorder DVD-RW(VR) √ Playlist Disc Protection : Not Protected √ Disc Manager All data will :be deleted. Disc Format DVD-VR Do you want to continue? Disc Finalize Setup Delete Yes All Title Lists No MOVE 5 Disc Name : Playlist Disc Protection : Not Protected Programme Disc Name : Programme Title List Disc Manager Disc Format Disc Manager Title List OK RETURN Setup √ : DVD-VR √ √ Disc Finalise √ Delete All Title Lists √ √ MOVE √ OK RETURN EXIT √ EXIT Press the …† button to select Delete All 3 Title Lists, then press the OK or √ button. DVD-Recorder Press the œ √ buttons to select Yes, then press the OK button. The disc is formatted. Title List Disc Name : Playlist Disc Protection : Not Protected √ Disc Manager Disc Format √ Setup DVD-VR DVD-V DVD-RW DVD-R DVD-RW Disc Manager DVD-RW(VR) Programme DISC Disc Manager DVD-RW(VR) ● : DVD-VR Disc Finalise √ Delete All Title Lists √ MOVE DVD-VR and DVD-V are defined according to their recording format. √ OK RETURN EXIT You will be prompted with the confirmation message “Do you want to delete all title lists?”. DVD-Recorder Disc Manager DVD-RW(VR) Title List Disc Name : √ Playlist Disc Protection : Not Protected √ Discwant Format : DVD-VR Do you to delete all title lists? Disc Manager Delete All Title Lists √ Setup Delete Yes All Title Lists No √ MOVE ● the DVD Recorder in Stop mode, press the MENU button. 1 With DVD-Recorder √ Programme Disc Finalize OK RETURN EXIT When Protected Entry exists: The Delete All Title List function will not operate. If there is a title containing a still picture, however, that function will not operate. If you want to delete a protected entry, disable Protect for it on the Lock item. Title List DVD-RW(VR) Title List Title List √ Playlist Disc Manager All title lists are deleted. Programme Setup Editing MOVE 84- English Press the œ √ buttons to select Yes, then 4 press the OK button. OK RETURN EXIT 01094N-R135-AND-ENG_70~86 4/8/06 9:31 AM Page 85 You will be prompted with the message “Do you want to finalise disc?”. Finalising a disc After you record titles onto a DVD-RW/DVD-R disc with your DVD recorder, it needs to be finalised before it can be played back on external devices. DVD-Recorder Disc Manager DVD-RW(VR) Title List Disc Name : √ Playlist Disc Protection : Not Protected √ Disc DVD-VR youFormat want to: finalise disc? Disc Manager Do 1 Programme With the DVD Recorder in Stop mode, press the MENU button. Setup √ Delete Yes All Title Lists No √ MOVE DVD-Recorder OK RETURN EXIT Title List DVD-RW(VR) Title List √ Disc Finalize Title List If you select Yes, you will be prompted again with the message “Disc will be finalised. Do you want to continue?”. √ Playlist Disc Manager Programme Setup DVD-Recorder MOVE 2 OK RETURN Title List Disc Name : √ Playlist Disc Protection : Not Protected √ Disc Manager Disc Format √ Setup : DVD-VR Disc Finalise √ Delete All Title Lists √ MOVE OK RETURN DVD-Recorder OK RETURN √ √ √ EXIT The disc is finalised. ■ Once a disc is finalised, you cannot delete entries from the record list. ■ After being finalised, the DVD-R/DVDRW(video mode) operates in the same manner as a DVD-Video. ■ Depending on the disc type, the displayed screen may be different. Disc Manager ■ Finalising time may be different depending on the amount of data recorded on the disc. ■ Data on the disc will be damaged if the recorder is powered off during finalise process. DVD-RW(VR) Title List Disc Name : Playlist Disc Protection : Not Protected √ Disc Manager Disc Format √ √ : DVD-VR Disc Finalise √ Delete All Title Lists √ MOVE √ the œ √ buttons to select Yes, then 4 Press press the OK button. EXIT the …† button to select Disc Finalise, then press the OK or √ button. 3 Press Setup √ Disc Protection : Not Protected MOVE NOTE Programme Disc Name : Playlist Disc Manager DVD-RW(VR) Programme Title List Disc will be: finalised. Format DVD-VR Disc Manager Disc Do you want to continue? Programme Disc Finalize Delete All Title Lists Yes No Setup Press the …† buttons to select Disc Manager, then press the OK or √ button. DVD-Recorder Disc Manager DVD-RW(VR) EXIT OK RETURN Editing DVD-Recorder EXIT Disc Manager DVD-R(V) Title List Disc Name : √ Disc Manager Disc Protection : Not Protected Programme Setup MOVE √ Disc Finalise √ Delete All Title Lists √ OK RETURN EXIT English -85 01094N-R135-AND-ENG_70~86 4/8/06 9:31 AM Page 86 Unfinalising a disc (V/VR mode) the œ √ buttons to select Yes, then 4 Press press the OK button. The disc is unfinalised. 1 With the DVD Recorder in Stop mode, press the MENU button. DVD-Recorder ■ NOTE Title List Mark DVD-RW(VR:F) Title List Title List A DVD-RW can be finalised or unfinalised in Video mode. Finalise Unfinalise DVD-Video(RW) DVD-RW(V) Additional recording, protection √ Operation Same as DVD-Video Playlist Disc Manager and deletion are possible. Programme Setup ■ MOVE OK RETURN EXIT Press the …† buttons to select Disc 2 Manager, then press the OK or √ button. DVD-Recorder Disc Manager DVD-RW(VR:F) Title List Disc Name : Disc √ Playlist Disc Format : DVD-VR √ Disc Manager Disc Unfinalise √ Programme Setup MOVE OK RETURN EXIT Press the …† button to select Disc then press the OK or √ button. 3 Unfinalise, You will be prompted with the message “Do you want to unfinalise disc?”. DVD-Recorder Disc Manager DVD-RW(VR:F) Title List Disc Name : Disc √ Playlist Disc Protection : Not Protected √ Format : DVD-VRdisc? you want to unfinalise Disc ManagerDoDisc Programme Yes Setup MOVE Editing √ Disc Finalize OK No RETURN EXIT If you select Yes, you will be prompted again with the message “Disc will be unfinalised. Do you want to continue?”. DVD-Recorder Disc Manager DVD-RW(VR:F) Title List Disc Name : Disc √ Playlist Disc Protection : Not Protected √ Disc Manager DiscFormat will be unfinalised. Disc : DVD-VR Do you want to continue? Disc Finalize Programme Setup MOVE 86- English Yes OK √ No RETURN EXIT A DVD-RW can be finalised or unfinalised in VR mode. Finalise Unfinalise Mark DVD-RW(VR:F) DVD-RW(VR) Operation Additional recording, deletion, editing, and protection are impossible. Additional recording, deletion, editing, and protection are possible. 01094N-R135-AND-ENG_87~93 4/8/06 9:32 AM Page 87 Troubleshooting Additional Information If your DVD Recorder malfunctions, go through the checkpoints below before contacting a Samsung authorised service centre. Power The input is displayed for a while when the power is turned on. Checkpoint 1 The DVD recorder requires some time to initialize and the input will be displayed for approx. 10 seconds after it is turned on. Recording Cannot record TV programmes. Checkpoint 1 Check whether the power cord is securely plugged into the power outlet. Checkpoint 2 Did you set the DVD recorder channel settings correctly? Checkpoint 3 Check the free space on your DVD-RW/DVD-R discs. I pressed the REC button but there is no response. Checkpoint 1 Recording is possible for DVD-RW/ DVD-R discs only. If a programme is copy protected, it cannot be recorded. Additional Information Troubleshooting ................................................87 Specifications....................................................91 English -87 01094N-R135-AND-ENG_87~93 4/8/06 9:32 AM Page 88 Playback The angle operation does not work while playing a DVD disc. Cannot play the disc. Checkpoint 1 Checkpoint 1 Check whether the disc is inserted correctly with the label facing up. Checkpoint 2 Check the regional code of the DVD disc. Checkpoint 3 This DVD recorder cannot play some types of discs. (See pages 5, 50.) icon appears on the screen. Checkpoint 1 You cannot use this operation or function due to one of the following reasons: (1) Your DVD disc restricts it. (2) Your DVD disc does not support this feature (for example: angles) (3) The feature is not available at the moment. (4) You've requested a title, chapter, or scan time that is out of range. Play mode settings are different from the settings configured in the Settings menu. Checkpoint 1 The disc does not support all selected functions. In this case, some settings configured in the settings menu may not work properly. Additional Information Cannot change the aspect ratio. Checkpoint 1 88- English The aspect ratio is fixed for DVD discs. (See page 36) The angle operation is available only when the disc contains images captured from different angles. The selected audio and/or subtitle language is not played. Checkpoint 1 Audio and subtitle languages are disc-specific. Only the sound and subtitle languages contained on the DVD disc are available and displayed in the disc menu. 01094N-R135-AND-ENG_87~93 4/8/06 9:32 AM Page 89 Video Timer Recording The disc revolves, but no image or bad quality images are displayed. Timer lamp flickers. Checkpoint 1 Be sure that the Video Setting is properly set. (See pages 34-37) Checkpoint 2 Check whether there is damage to or any foreign material on your disc. Checkpoint 3 Some low quality discs may not play properly. Checkpoint 4 If scenes change from dark to bright suddenly, the screen may shake vertically temporarily, but this is not a fault. Sound Checkpoint 1 Check there is enough space in the disc for recording. Checkpoint 2 Check whether the current disc is recordable or not. Make sure to check before the start time of recording. Timer recording does not work properly. Checkpoint 1 Re-check the recording time and the end time settings again. Checkpoint 2 Recording will be cancelled if the power is interrupted due to a power failure or another similar reason while recording. No sound. Checkpoint 1 Are you watching a programme in slow or skip mode? If you are playing a programme at a speed other than normal or fast 1 speed, sound will not be heard. Checkpoint 2 Check the connections and settings. (See pages 20-21, 32-33) Checkpoint 3 Check whether the disc is damaged. Clean the disc, if necessary. Checkpoint 4 Check whether the disc is inserted correctly with the label facing up. No audio output. Checkpoint 1 No HDMI output. Checkpoint 1 Check the Video output is HDMI enabled. Checkpoint 2 Check the connection between the TV and the HDMI jack of the DVD Recorder. Checkpoint 3 See if your TV supports this 576p/720p/1080i DVD Recorder. Abnormal HDMI output screen. Checkpoint 1 If snow noise appears on the screen, it means that TV does not support HDCP (High-bandwidth Digital Content Protection). English -89 Additional Information Check whether you have selected the correct digital output options in the Audio Output Options menu. (See page 33.) HDMI 01094N-R135-AND-ENG_87~93 4/8/06 9:32 AM Page 90 HDMI output Jitter Other I forgot my password for parental supervision. Checkpoint 1 Check your TV system setup correctly. Checkpoint 2 Screen Jitter may occur when the frame rate is converted from 50Hz to 60Hz for 720p/1080i HDMI (High Definition Multimedia Interface) Output. Checkpoint 3 Checkpoint 1 Please refer to the user’s manual of your TV. Remote Control Unit Press and hold down the PROG ( ) buttons on the front panel of the DVD Recorder simultaneously for more than 5 seconds with no disc in the DVD Recorder. All settings including the password will revert to the factory settings. Do not use this unless absolutely necessary. (Note that this function is possible only when no disc is inserted.) Is it possible to change a subtitle and an audio signal on a recorded disc? The remote control doesn't work. Checkpoint 1 Point the remote control at the remote control sensor on your DVD recorder. Allow for proper distance. Remove obstacles between your DVD recorder and the remote control. Checkpoint 2 Check whether the batteries are empty. Checkpoint 3 Check for the TV/DVD selection button. Additional Information Checkpoint 1 90- English A recorded disc is played with only the subtitle and the audio signal which were selected during recording. Other problems. Checkpoint 1 Read the table of contents and then find and read the section describing your problem, follow the instructions given. Checkpoint 2 Turn your DVD recorder off and on. Checkpoint 3 If the problem still persists, contact a nearby Samsung service centre. 01094N-R135-AND-ENG_87~93 4/8/06 9:32 AM Page 91 Specifications Power requirements AC 220-240V, 50Hz Power consumption 21 Watts Weight General 2,6 kg Dimensions 430mm(W) x 240mm(D) x 49mm(H) Operating temp. +5°C to +35°C Other conditions Keep level when operating. Less than 75% operating humidity Input Video Composite Video : 1,0 V p-p at 75Ω load, sync negative Audio Max.Audio Input Level : 2Vrms DV Input IEEE 1394(4p) compatible jack PAL B/G, D/K, I Receivable Channels Scart Jack AV2 (Scart Ext) Video : Composite, RGB Audio: analogue Analogue output jacks x 2 Audio Optical/Coaxial digital audio output Composite Video : Video output jack x 1 Output S-Video output x 1 (Y:1,0Vp-p, C:0,286Vp-p at 75Ω load) Video Component output x 1 (Y: 1,0Vp-p, Pb: 0,70Vp-p, Pr: 0,70Vp-p at 75Ω load) HDMI/DVI output x 1 (576p, 720p, 1080i) Scart Jack AV1 (Scart TV) Video : Composite, RGB Audio: analogue Picture Compression format MPEG-II Audio Compression format Dolby Digital 2ch/256Kbps, MPEG-II Recording XP (about 8 Mbps), SP (about 4 Mbps), LP (about 2 Mbps), Recording Quality EP (about 1,2 Mbps or about 0,8 Mbps) Audio Frequency Response 20 Hz ~ 20 kHz For DVD discs, audio signals recorded at 96kHz sampling Audio Output frequency are converted and output at 48kHz. DVD AUDIO CD(CD-DA) Analogue Audio Output 48 / 96kHz 44,1kHz Digital Audio Output 48kHz 44,1kHz Additional Information Disc Type English -91 01094N-R135-AND-ENG_87~93 4/8/06 9:32 AM Page 92 Contact SAMSUNG WORLD WIDE If you have any questions or comments relating to Samsung products, please contact the SAMSUNG customer care centre. Country Customer Care Centre ☎ CANADA MEXICO U.S.A ARGENTINE BRAZIL CHILE COSTA RICA ECUADOR EL SALVADOR GUATEMALA JAMAICA PANAMA PUERTO RICO REP. DOMINICA TRINIDAD & TOBAGO VENEZUELA BELGIUM CZECH REPUBLIC DENMARK FINLAND FRANCE GERMANY HUNGARY ITALIA LUXEMBURG NETHERLANDS NORWAY POLAND PORTUGAL SLOVAKIA SPAIN SWEDEN U.K RUSSIA UKRAINE AUSTRALIA CHINA HONG KONG 1-800-SAMSUNG (7267864) 01-800-SAMSUNG (7267864) 1-800-SAMSUNG (7267864) 0800-333-3733 0800-124-421 800-726-7864(SAMSUNG) 0-800-507-7267 1-800-10-7267 800-6225 1-800-299-0013 1-800-234-7267 800-7267 1-800-682-3180 1-800-751-2676 1-800-7267-864 1-800-100-5303 02 201 2418 844 000 844 38 322 887 09 693 79 554 08 25 08 65 65 (0,15€/Min) 01805 - 121213 (€ 0,12/Min) 06 40 985 985 199 153 153 02 261 03 710 0900 20 200 88 (€ 0.10/Min) 231 627 22 0 801 801 881 80 8 200 128 0850 123 989 902 10 11 30 08 585 367 87 0870 242 0303 8-800-200-0400 8-800-502-0000 1300 362 603 800-810-5858, 010- 6475 1880 2862 6001 3030 8282 1600 1100 11 0800-112-8888 0120-327-527 1800-88-9999 1800-10-SAMSUNG (7267864) 1800-SAMSUNG (7267864) 1800-29-3232 02-689-3232 0800-329-999 1 800 588 889 0860 7267864 (SAMSUNG) 800SAMSUNG (7267864) Region North America Latin America Europe CIS INDIA Asia Pacific INDONESIA JAPAN MALAYSIA PHILIPPINES SINGAPORE THAILAND Middle East & Africa TAIWAN VIETNAM SOUTH AFRICA U.A.E Web Site www.samsung.com/ca www.samsung.com/mx www.samsung.com www.samsung.com/ar www.samsung.com/br www.samsung.com/cl www.samsung.com/latin www.samsung.com/latin www.samsung.com/latin www.samsung.com/latin www.samsung.com/latin www.samsung.com/latin www.samsung.com/latin www.samsung.com/latin www.samsung.com/latin www.samsung.com/latin www.samsung.com/be www.samsung.com/cz www.samsung.com/dk www.samsung.com/fi www.samsung.com/fr www.samsung.de www.samsung.com/hu www.samsung.com/it www.samsung.lu www.samsung.com/nl www.samsung.com/no www.samsung.com/pl www.samsung.com/pt www.samsung.com/sk www.samsung.com/es www.samsung.com/se www.samsung.com/uk www.samsung.ru www.samsung.com/ur www.samsung.com/au www.samsung.com.cn www.samsung.com/hk www.samsung.com/in www.samsung.com/id www.samsung.com/jp www.samsung.com/my www.samsung.com/ph www.samsung.com/sg www.samsung.com/th www.samsung.com/tw www.samsung.com/vn www.samsung.com/za www.samsung.com/mea 01094N-R135-AND-ENG-Cover 4/8/06 9:16 AM Page 2 Correct Disposal of This Product (Waste Electrical & Electronic Equipment) (Applicable in the European Union and other European countries with separate collection systems) This marking shown on the product or its literature, indicates that it should not be disposed with other household wastes at the end of its working life. To prevent possible harm to the environment or human health from uncontrolled waste disposal, please separate this from other types of wastes and recycle it responsibly to promote the sustainable reuse of material resources. Household users should contact either the retailer where they purchased this product, or their local government office, for details of where and how they can take this item for environmentally safe recycling. Business users should contact their supplier and check the terms and conditions of the purchase contract. This product should not be mixed with other commercial wastes for disposal. English Türkçe AK68-01094N-00 Kullanım Kılavuzu DVD-R120/R121 DVD-R135 www.samsung.com English Türkçe 01094N-R135-AND-TUR.indb 91 AK68-01094N-00 2006-04-11 오후 4:19:00 ÖNEMLİ NOT Bu cihazın güç kablosu, içinde bir sigorta bulunan kalıp döküm fişe sahiptir. Sigorta değeri, fişin dişli yüzeyinde belirtilmiştir. Değiştirilmesi gerekirse, aynı değerdeki BS1262 için onaylanmış bir sigorta kullanılabilir. Başlarken Uyarı ELEKTRİK ÇARPMASI RİSKİNİ AZALTMAK İÇİN, KAPAĞI (VEYA CİHAZIN ARKASINI) AÇMAYIN. İÇiNDE, KULLANICI TARAFINDAN ONARILABİLECEK PARÇA BULUNMAMAKTADIR SERVİS İÇİN YETKİLİ SERVİS PERSONELİNE BAŞVURUN. DİKKAT ELEKTRİK ÇARPMASI RİSKİ AÇMAYI Bu sembol, cihazın içinde elektrik çarpması veya yaralanma riski teşkil eden “tehlikeli voltaj" bulunduğunu ifade eder. Bu sembol, ürünle birlikte verilen önemli talimatları belirtir. Bu cihazı, kitaplık veya benzeri kapalı yerlere kurmayın. UYARI : Yangına veya elektrik çarpmasına yol açabilecek bir hasarı önlemek için, bu cihazı yağmurlu veya ıslak ortamlardan uzak tutun. DİKKAT : DVD KAYDEDİCİ, YÖNELTİLDİĞİNDE TEHLİKELİ RADYASYON MARUZİYETİNE YOL AÇABİLECEK GÖRÜNMEZ BİR LAZER IŞINI KULLANIR. KAYDEDİCİYİ TALİMATLARA UYGUN ŞEKİLDE ÇALIŞTIRDIĞINIZDAN EMİN OLUN. DİKKAT: BU ÜRÜN LAZER KULLANIR. KUMANDALARIN, AYARLARIN VEYA İŞLEMLERİN BURADA BELİRTİLENLERİN DIŞINDA UYGULANMASI TEHLİKELİ RADYASYONA MARUZ KALMAYLA SONUÇLANABİLİR. KAPAKLARI AÇMAYIN VE KENDİNİZ TAMİR ETMEYİN. SERVİS İÇİN YETKİLİ SERVİS PERSONELİNE BAŞVURUN. Sigorta kapağı çıkartılabiliyorsa, fişi kapak çıkartılmış halde asla kullanmayın. Yedek bir sigorta kapağının kullanılması gerekiyorsa, bu, fişin pimlerin bulunduğu yüzüyle aynı renkte olmalıdır. Yedek kapakları bayiinizde bulabilirsiniz. Takılan fiş, evinizdeki elektrik prizlerine uygun değilse ya da kablo, prize ulaşabilecek uzunlukta değilse, güvenlik onaylı bir uzatma kablosu almalı veya yardım almak için bayiinize başvurmalısınız. Ancak, fişin kesilmesinden başka bir alternatif yoksa, sigortayı çıkartın ve fişi güvenli biçimde atın. Çıplak kablodan elektrik çarpma riski bulunduğundan fişi prize takmayın. Cihazın elektriğini kesmek için, fişi elektrik prizinden çıkarın, bu nedenle elektrik fişi her zaman kullanıma müsait olmalıdır. Bu kullanıcı kılavuzu ile birlikte verilen ürün, belirli üçüncü tarafların belirli telif hakları altında tescil edilmiştir. Bu ruhsat son kullanıcı niteliğindeki tüketiciler tarafından lisanslı içerikler için özel, ticari olmayan kullanım ile sınırlandırılmıştır. Ticari kullanım için hiçbir hak verilmemiştir. Bu ruhsat bu üründen başka bir ürünü kapsamaz; bu ruhsat bu ürünle birlikte satılan ya da kullanılan ISO/IEC 11172-3 ya da ISO/IEC 13818-3 standardına uygun lisanslı olmayan hiçbir ürün ya da süreç için geçerli değildir. Bu ruhsat bu ürünün, yalnızca ISO/IEC 11172-3 ya da ISO/IEC 13818-3 standardına uygun ses dosyalarının şifrelenmesi ya da şifrelerinin çözülmesi amacıyla kullanımını kapsar. Bu ruhsat altında, ISO/IEC 11172-3 ya da ISO/IEC 13818-3 standardına uymayan ürün özellikleri ya da işlevleri için hiç bir hak tanınmamaktadır. Başka cihazlara bağlamak için korumalı kablolar ve bağlantılar kullanıldığında bu ürün, CE yönetmeliklerine uygundur. Radyo ve televizyon gibi elektrikli gereçlerle elektromanyetik girişimi önlemek için bağlantılarda korumalı kablolar ve konektörler kullanın. 2- Türkçe 01094N-R135-AND-TUR.indb 2 2006-04-11 오후 4:14:48 Önlem DVD Kaydediciyi kullanmaya başlamadan önce bu çalıştırma talimatlarını dikkatle okuyun. Aşağıda listelenen güvenlik talimatlarının tümüne uyun. İleride de referans olabilmesi için bu çalıştırma talimatlarını el altında bulundurun. 1) Bu talimatları okuyun. 2) Bu talimatları saklayın. 3) Bütün uyarılara dikkat edin. 4) Bütün talimatlara uyun. 5) Bu cihazı suyun yakınında kullanmayın. 6) Yalnızca kuru bezle temizleyin. 7) Havalandırma açıklıklarını kapatmayın, üreticinin talimatları doğrultusunda kurun. 8) Radyatörler, ısı regülatörleri, sobalar veya ısı üreten diğer cihazlar (amplifikatörler dahil) gibi ısı kaynaklarının yakınında kurmayın. 9) Kutuplanmış veya topraklanmış bir fişin güvenlik amaçlı tasarımını iptal etmeyin. Kutuplanmış bir fişte birisi diğerinden daha geniş olan iki uç vardır. Topraklanmış bir fişin iki ucu ve üçüncü bir topraklama deliği vardır. Geniş uç veya üçüncü topraklama deliği güvenliğiniz için yapılmıştır. Verilen fiş, prizinize uymazsa, eskimiş prizinizin değiştirilmesi için bir elektrikçi çağırın. 10) Güç kablolarının, özellikle fişlerde, cihazların üzerinde bulunan prizlerde ve bunların çıkış noktalarında, üzerine basılmamasını veya sıkıştırılmamasını sağlayın. 11) Yalnızca üretici tarafından belirlenen ek parçaları/ aksesuarları kullanın. 12) Yalnızca üretici tarafından belirtilen veya cihazla birlikte satılan tekerlekli taşıma sehpası, kamera ayağı, üç ayaklı sehpa, dirsek veya masa kullanın. Tekerlekli taşıma sehpası kullanıldığında, devrilmeden kaynaklanabilecek yaralanmalardan kaçınmak için taşıma/cihaz kombinasyonunu dikkatli taşıyın. 13) Fırtına sırasında veya uzun süre kullanılmadan bırakıldığında bu cihazı prizden çıkartın. 14) Onarımla ilgili tüm hususları yetkili servis personeline bırakın. Cihaz herhangi bir şekilde hasar gördüğünde, örneğin güç kablosu veya fişi hasar gördüğünde, üzerine sıvı döküldüğünde veya içine bir cisim düştüğünde, cihaz yağmura veya neme maruz kaldığında, cihaz normal çalışmadığında veya düşürüldüğünde onarım gerekir. Kullanırken Dikkat Edilecekler DVD Kaydediciye başka bileşenler bağlamadan önce hepsini kapattığınızdan emin olun. DVD Kaydediciyi, bir disk oynatılırken ya da disk çizilmiş veya kırılmışsa hareket ettirmeyin, DVD Kaydedicinin dahili parçaları hasar görebilir. Suyla dolu bir vazoyu ya da küçük herhangi bir metal nesneyi DVD Kaydedicinin üzerine koymayın. Elinizi disk tepsisine koymayın. Disk tepsisine disk dışında herhangi bir şey yerleştirmeyin. Başlarken Önemli Güvenlik Talimatları Yıldırım ve statik elektrik gibi harici girişimler, DVD Kaydedicinin normal çalışmasını etkileyebilir. Bu meydana gelirse DVD kaydediciyi kapatın ve STANDBY/ON düğmesiyle tekrar açın, ya da AC güç kablosunu AC güç kaynağından çıkarıp tekrar takın. DVD Kaydedici normal olarak çalışacaktır. Kullandıktan sonra diski çıkarın ve DVD Kaydediciyi kapatın. DVD Kaydediciyi uzun süre kullanmayacaksanız AC güç kablosunu AC prizinden çıkarın. Diski, iç tarafından başlayıp dışa doğru düz bir hatta silerek temizleyebilirsiniz. Kabinin Bakımı Güvenlik nedenlerinden dolayı, AC güç kablosunu AC prizinden çıkarın. Temizleme için benzen, tiner veya başka çözücüler kullanmayın. Kabini yumuşak bir bezle silin. Diskin Kullanılması Normal şekillerdeki diskleri kullanın. Şekli normal olmayan bir disk (özel bir şekli olan disk) kullanılırsa, bu DVD kaydedici hasar görebilir. Disklerin Elle Tutulması Diskin kayıt yapılan yüzeyine dokunmaktan kaçının. DVD-RW, DVD-R İsteğe bağlı olarak temin edebileceğiniz bir DVD-RAM/PD disk temizleyiciyle temizleyin (varsa LF-K200DCA1). CD temizleyicilerini veya bezlerini DVD-RW/ DVD-R disklerinde kullanmayın. DVD-Video, Ses CD’si Diskteki kiri veya pisliği yumuşak bir bezle temizleyin. Disklerin kullanımıyla ilgili dikkat edilecekler Baskılı tarafa, tükenmez kalemle veya kurşun kalemle yazmaya çalışmayın. Kayıt temizleme spreyleri veya antistatik kullanmayın. Benzen veya tiner gibi uçucu kimyasallar kullanmayın. Disklere etiket veya çıkartma yapıştırmayın. (Yapışkan veya soyulmuş çıkartmalar taşıyan diskleri kullanmayın.) Çizilmeye dayanıklı korumalar veya kılıflar kullanmayın. Piyasada bulunan etiket yazıcılarıyla baskı yapılmış diskleri kullanmayın. Eğilmiş veya çatlamış diskler kullanmayın. Türkçe -3 01094N-R135-AND-TUR.indb 3 2006-04-11 오후 4:15:13 Başlarken Disklerin Saklanması Disklere zarar vermemeye özen gösterin, zira bu diskler çevre koşullarına karşı oldukça duyarlıdır. Doğrudan güneş ışığında bırakmayın. Serin, hava alan bir yerde muhafaza edin. Dik olarak saklayın. Temiz bir koruma kılıfında tutun. DVD kaydedicinizi soğuk bir yerden aniden sıcak bir yere geçirirseniz, çalışma parçalarında ve mercekte buğulanma olabilir ve diskin oynatılması normal olmayabilir. Bu olursa, fişi prize takmayın ve iki saat bekleyin. Sonra diski takın ve yeniden oynatmayı deneyin. Disk Özellikleri DVD-Video Dijital çok yönlü disk (DVD) 135 dakikaya kadar görüntü, 8 dil seçeneği ve 32 dilde altyazı seçeneği barındırabilir. MPEG-2 görüntü sıkıştırma ve Dolby dijital ses özellikleri ile canlı ve net, sinema kalitesinde görüntülerin keyfini kendi evinizin rahatlığında çıkartmanızı sağlar. Çift katmanlı bir DVD Video diskin ilk katmanından ikinci katmanına geçtiğinizde görüntüde ve seste anlık bir bozulma olabilir. Bu, DVD Kaydedicinin bir bozukluğu değildir. Video Modunda kaydedilen bir DVD-R/-RW sonlandırıldığında, DVD-Video halini alır. Ses CD’si 44.1kHz PCM ses kaydedilen bir ses diski CD-DA formatında ses CD-R ve CD-RW diskleri çalar. DVD Kaydedici bazı CD-R veya CD-RW disklerini, kayıt durumundan dolayı oynatamayabilir. CD-R/-RW MP3 CD-R/-RW Sadece ISO9660 ya da JOLIET formatında kaydedilen MP3 dosyalarını içeren CD-R diskleri oynatılabilir Sadece ".mp3", ".MP3" uzantıları olan MP3 dosyaları kullanabilir. VBR(Değişken Bit Oranları) ile kaydedilen MP3 dosyaları için, 32 Kbps’den 320 Kbps’e kadar, ses kesilebilir. Oynatılabilen bit oranı aralığı 56Kbps’den 320Kbps’e kadardır. Bu DVD Kaydedici maksimum 500 dosya ve 100 klasör kapasiteye sahiptir. JPEG CD-R/-RW Sadece ".jpg", ".JPG" uzantıları olan JPEG dosyaları kullanabilir. Bu DVD Kaydedici maksimum 500 dosya ve 100 klasör kapasiteye sahiptir. Maksimum aşamalı JPEG boyutu 3M pikseldir. MOTION JPEG desteklenmemektedir. CD-R/-RW kullanımı 700MB’lık (80 dakika) CD-R/-RW diskleri kullanın. Mümkünse, 800MB’lık (90 dakika) veya üzeri diskleri kullanmayın, bu tip diskler oynatılamayabilir. CD-R/-RW diski kapalı oturum olarak kaydedilmemişse ilk oynatma süresinde bir gecikme yaşayabilirsiniz, kaydedilen tüm dosyalar oynatılamayabilir. Bazı CD-R/-RW diskleri, oluşturuldukları cihaza bağlı olarak bu DVD Kaydedicide oynatılabilir. CD’lerden kendi özel kullanımınız için CD-R/-RW ortamına kaydedilen içeriklerin oynatılabilirliği, içeriğe ve disklere bağlı olarak değişebilir. MPEG4 disklerinin kullanımı Disk : CD-R/-RW, DVD-R/-RW Aşağıdaki uzantılara sahip MPEG4 Dosyaları oynatılabilir. : .avi, .divx, .AVI, .DIVX MPEG4 Codec formatı : DivX 3.11 DivX 4.x DivX 5.x DivX-Pro Xvid Hareket Dengeleme : QPEL, GMC dört CC : MPG4, mpg4, DIV3, divX3, DIVX, divX, DX50, MP43, mp43, XVID, xvid Geçerli Ses Formatı : “MP3”, “MPEG1 Audio Layer2”, “LPCM”, “AC3”, “DTS”, “MS ADPCM” Desteklenen altyazı biçimleri : .smi, .srt, .sub, .psb, .txt, .ass DVD-R Disk Oynatma ve Kayıt Video Modunda kaydedilen bir DVD-R sonlandırıldığında, DVD-Video halini alır. Sonlandırma yapmadan önce disk üzerindeki geçerli alana kayıt yapabilirsiniz ve disklere ve programlara başlık verme ve program silme gibi düzenleme işlemleri gerçekleştirebilirsiniz. DVD-R diskten program silindiği zaman, boşalan alan kullanılamaz. DVD-R üzerinde bir alana kayıt yapıldığı zaman, kayıt silinse de silinmese de o alana artık başka kayıt yapılamaz. Kayıt bittikten sonra DVD Kaydedicinin kayıt yönetim bilgisini tamamlaması yaklaşık 30 saniye sürer. Bu DVD Kaydedici her kayıt için DVD-R’yi optimize eder. Optimize etme işlemi diski taktıktan sonra veya DVD Kaydediciyi açtıktan sonra kayıt yapmaya başladığınızda gerçekleştirilir. Çok fazla optimizasyon yapılırsa, diske kayıt yapmak mümkün olmayabilir. Kaydın durumuna göre bazı durumlarda oynatma mümkün olmayabilir. Bu DVD Kaydedici, bir Samsung DVD video kaydediciyle kaydedilen ve sonlandırılan DVD-R disklerini oynatabilir. Diskin ve kaydın durumuna göre bazı DVD-R disklerini oynatamayabilir. DVD-RW Disk Oynatma ve Kayıt DVD-RW disklerinin kaydı ve oynatılması hem Video hem VR Modlarında gerçekleştirilebilir. Video veya VR Modunda kaydedilen bir DVD-RW sonlandırıldığında, üzerine ilave kayıt yapamazsınız. Video Modunda kaydedilen bir DVD-RW sonlandırıldığında, DVD-Video halini alır. Her iki modda da oynatma, sonlandırma işleminden önce ve sonra yapılabilir, fakat sonlandırdıktan sonra ilave kayıt, silme ve düzenleme işlemleri yapılamaz. Diske VR Modunda, sonra da V Modunda kayıt yapmak 4- Türkçe 01094N-R135-AND-TUR.indb 4 2006-04-11 오후 4:15:15 DVD-RW (VR modu) - Bu, DVD-RW disklerine veri kaydetmek için kullanılan bir biçimdir. Birden fazla film kaydedebilir, düzen leyebilir, silebilir, kısmen silebilir, çalma listesi oluşturabilirsiniz, vs. - Bu modda kaydedilen bir disk, mevcut DVD Kaydedici ile oynatılamaz. DVD-RW (Video modu) - Bu, DVD-RW veya DVD-R disklerine veri kaydetmek için kullanılan bir biçimdir. Disk sonlandırıldıktan sonra, mevcut DVD Kaydedici ile oynatılabilir. - Disk, farklı marka bir kaydedicide Video Modunda kaydedilmiş fakat sonlandırılmamışsa, bu DVD Kaydedicide oynatılamaz ve ilave kayıt yapılamaz. KOPYALAMAYA KARŞI KORUMA Aşağıdaki diskleri kullanmayın! LD, CD-G, CD-I, Video-CD, CD-ROM ve DVD-ROM diskleri bu DVD Kaydedicide kullanılmamalıdır. [Not] Oynatılabilen disk tipleri: CD/CD-R/CD-RW/MP3/JPEG/ MPEG4/DVD-Video/DVD-RW/DVD-R. Başka bir cihazda Video Modunda kaydedilen bir DVD-R/DVD-RW diski sadece sonlandırıldıktan sonra oynatılabilir. Bazı ticari diskler ve bölgeniz dışından satın alınan DVD diskleri, bu DVD Kaydedicide oynatılamayabilir. Bu diskler oynatıldığında, ya “No Disc” ya da “Disk oynatılamaz. Lütfen diskin bölge kodunu kontrol edin.” mesajı görüntülenir. DVD-RW diskiniz yasadışı bir kopyaysa veya DVD video formatında değilse de oynatılamayabilir. Başlarken isterseniz, Format işlemini gerçekleştirdiğinizden emin olun. Format işlemini uygularken dikkatli olun, kayıtlı tüm veriler kaybolabilir. Boş bir DVD-RW diski ilk başlatıldığında, VR Modunda başlatılır. Disk Uyumluluğu Yüksek Hızda Kayıt diskleri bu Kaydedicide kullanılabilir. Tüm disk markaları bu DVD Kaydediciyle uyumlu olmayabilir. Çoğu DVD diskleri kopyalamaya karşı şifrelenmiştir. Bu yüzden, DVD Kaydedicinizi sadece Televizyona doğrudan bağlamalı, VCR cihazına bağlamamalısınız. VCR’a bağlamak, kopyalamaya karşı korunan DVD disklerinde görüntü bozukluklarına neden olur. Bu DVD Kaydedici, Macrovision Corporation ve diğer hak sahiplerine ait belirli ABD patentlerin yöntemleri ve istemleri ve diğer entelektüel sermaye hakları ile korunan telif hakkı koruma teknolojisine sahiptir. Macrovision Corporation tarafından onaylanmış olan bu kopyalamaya karşı koruma teknolojisi, Macrovision Corporation tarafından aksi belirtilmedikçe, ev kullanımı ve diğer sınırlı gösterim kullanımları içindir. İçini açma ve sökme yasaktır. Koruma Bu DVD Kaydedici, aşağıda belirtildiği şekilde disklerinizin içeriğini korumanızı sağlayabilir. Program korumalı: “Bir Bölümü Kilitleme (Koruma)” için bkz. sayfa 71 Disk korumalı : “Disk Koruma” için bkz. Sayfa 83 DVD-VIDEO formatıyla uyumsuz olan DVD-RW/DVD-R diskleri bu DVD Kaydedicide oynatılamaz. DVD kayıt uyumluluğu hakkında daha fazla bilgi için DVD-RW/DVD-R üreticinize başvurun. Düşük kaliteli DVD-RW/DVD-R disklerinin kullanılması; kayıt yapamama, kaydedilen veya düzenlenen kısımların kaybolması, DVD Kaydedicinin hasar görmesi ve bunlar gibi beklenmedik sorunlara yol açabilir. Türkçe -5 01094N-R135-AND-TUR.indb 5 2006-04-11 오후 4:15:16 Başlarken İçindekiler Durum 2 : AV çıkış jakıyla stereo amplifikatöre bağlama........................................................21 Durum 3 : Dijital çıkış jakıyla AV amplifikatöre bağlama....................................................... 21 Başlarken HDMI/DVI’nın Televizyona Bağlanması ..............22 Durum 1 : HDMI Jakıyla televizyona bağlantı ...............22 Uyarı ............................................................................2 Önlem..........................................................................3 Önemli Güvenlik Talimatları .............................................3 Kullanırken Dikkat Edilecekler ..........................................3 Kabinin Bakımı ..................................................................3 Diskin Kullanılması ............................................................3 Disklerin Saklanması.........................................................4 Durum 2 : DVI Jakıyla televizyona bağlamak ...............22 AV3 IN, DV giriş jakına bağlama........................... 23 Durum 1 : AV3 IN jaklarına bir VCR, Set-Üstü Cihazı (STB), DVD oynatıcı veya Video Kameranın bağlanması .................................................... 23 Durum 2 : DV IN jakına bir Video Kameranın bağlanması ................................................23 Disk Özellikleri ...................................................................4 Genel Özellikler .........................................................8 Kullanım kılavuzunu okumadan önce ...................9 Sistem Ayarları DVD Kaydedicinin Kullanılması..............................9 Ekran Menüsünde Gezinti .....................................24 Ambalajın açılması..................................................11 Fişe Takma ve Otomatik Ayar...............................25 Aksesuarlar ......................................................................11 Saatin Ayarlanması.................................................26 Uzaktan Kumandanın Hazırlanması ..............................11 Auto Setup işleviyle Kanalların Önceden Uzaktan Kumandanın Ayarlanması ...............................11 Ayarlanması .............................................................27 Tanım ........................................................................13 Manual Setup işleviyle Kanalların Önceden Ön Panel ..........................................................................13 Ayaranması ..............................................................28 Ön Panel Göstergesi.......................................................14 Dil Seçeneklerinin Ayarlanması............................29 Arka Panel .......................................................................14 EP Modu Zaman Ayarı ..........................................30 Uzaktan Kumandanın Tanıtılması..................................15 Otomatik Alt Bölüm Oluşturma ............................31 Bağlama ve Kurulum Hızlı Kayıt Ayarı ......................................................32 Ses Seçeneklerinin Ayarlanması..........................32 Genel Bakış ..............................................................16 Ses Seçenekleri ..............................................................33 DVD Kaydedicinin Bağlanması.............................17 Video Çıkış Seçeneklerinin Ayarlanması ............34 İlave bağlantılar .......................................................17 Progressive scan özelliğinin Ayarlanması .........35 Anten + DVD Kaydedici + harici dekoder + TV ......18 Progressive scan özelliğinin iptali .......................35 Video çıkış kablosunu bağlamanın farklı yolları ....18 Görüntü (Video) Seçeneklerinin ayarlanması ....36 Durum 1 : Video (Kompozit) çıkış jakına bağlama ............. 19 Görüntü (Video) Seçenekleri ..........................................36 Durum 2 : S-Video çıkış jakına bağlama............................. 19 Çıkış seçimi .....................................................................37 Durum 3 : Ek Cihaz Video çıkış jaklarına bağlama ............ 20 Ses çıkış kablosunu bağlamanın farklı yolları ........20 Durum 1 : Televizyonunuza bağlama ............................20 DivX(R) Kayıt............................................................37 Ebeveyn Kontrolünün Ayarlanması..................... 37 Şifrenizi unuttuysanız ......................................................38 Sınıflandırma Düzeyi Hakkında......................................38 6- Türkçe 01094N-R135-AND-TUR.indb 6 2006-04-11 오후 4:15:17 Şifre Değiştirme Hakkında ..............................................39 Kamera Açısının Değiştirilmesi.......................................57 Yakınlaştırma...................................................................57 Yer İmlerinin Kullanılması ...............................................58 İşaretlerin Kullanılması ....................................................59 Kayda Başlamadan Önce ................................. 40 Bir Ses CD’si/MP3 Çalma ......................................60 Kayıt yapılabilen diskler..............................................40 Bir Ses CD’si (CD-DA)/MP3 Çalma.............................60 Kayıt Biçimleri .............................................................41 Resim Gösterme .....................................................64 Kayıt Modu..................................................................41 MPEG4 oynatma......................................................65 Kaydedilemeyen video ...............................................41 Bölüm Listesinin Görüntülenmesi .......................66 Başlarken Kayıt INFO Düğmesi Hakkında...........................................42 Boş disk alanının kontrol edilmesi (Disk Bilgileri) .....42 Seyretmekte olduğunuz TV programının kaydedilmesi ............................................................42 Seyretmekte olduğunuz harici cihazlardan kayıt yapılması .........................................................44 Video Kameradan Kopyalama ..............................44 Tek Tuşla Kayıt Yapma (OTR)...............................45 Zamanlayıcı ile Kayıt Yapma .................................46 Esnek Kayıt (sadece Zamanlayıcı kaydı için geçerlidir)..................................................................47 Programlanan Kayıt Listesinin Düzenlenmesi...48 Programlanan Kayıt Listesinin Silinmesi............48 Standart Zamanlayıcı Listesinin Kaydı................49 Oynatma Düzenleme Temel Düzenleme (Bölüm Listesi) ......................70 Bir Bölümün Yeniden Adlandırılması (Etiketlenmesi) ...............................................................70 Bir Bölümü Kilitleme (Koruma) .......................................71 Bir Bölümü Silme.............................................................71 Bölümün Bir Parçasını Silme..........................................72 Gelişmiş Düzenleme (Oynatma listesi) ..............74 Oynatma Listesi Oluşturma ............................................74 Oynatma Listesindeki Girişlerin Oynatılması .................75 Oynatma Listesindeki bir Girişe Yeni İsim Verilmesi.....76 Oynatma listesindeki bir Sahnenin Düzenlenmesi........77 Bir Girişin Oynatma Listesine Kopyalanması ...............80 Oynatma Listesinden bir Oynatma Listesi Girişinin Silinmesi...........................................................................81 Oynatmadan Önce .................................................50 Disk Yöneticisi .........................................................82 Bölge Kodu (Sadece DVD-Video)..................................50 Disk Adının Düzenlenmesi .............................................82 Oynatılabilen disk tipleri .................................................50 Disk Koruma ....................................................................83 Oynatılamayan diskler ....................................................50 Disk Biçimlendirme..........................................................83 Bir Diskin Oynatılması............................................51 Tüm Bölüm Listelerinin Silinmesi ...................................84 Disk Menüsünün ve Bölüm Menüsünün Kullanılması ..52 Diskin Sonlandırılması. ...................................................85 Arama İşlevlerinin Kullanılması ......................................52 Disk Sonlandırmanın geri alınması (V/VR Modu). ........86 Yavaş Çekim Oynatma ...................................................53 Adım Adım Oynatma ......................................................53 Ek Bilgiler ANYKEY Hakkında .........................................................53 Tekrar İşlevinin Kullanılması ...........................................54 Sorun Giderme ........................................................87 Altyazının Seçilmesi ........................................................56 Teknik Özellikler ......................................................91 Ses dilinin seçilmesi ........................................................56 Türkçe -7 01094N-R135-AND-TUR.indb 7 2006-04-11 오후 4:15:19 Başlarken Genel Özellikler Yüksek kalitede sürekli tarama Sürekli tarama, yüksek çözünürlükte ve titremesiz video sağlar. 10-bit’lik 54-MHz DAC ve 2D Y/C Ayırma Devreleri en yüksek görüntü oynatma ve kayıt kalitesini sunar. (Bkz. sayfa 20, 35) DVD Kaydedici, DVD-RW/DVD-R disklerine yüksek kaliteli dijital video kaydetmenizi ve oynatmanızı sağlar. DVD-RW/DVD-R disklerine, VCR kasetler gibi dijital görüntüler kaydedip düzenleyebilirsiniz. Kolay kullanımlı arayüzle gerçekleştirebilen birçok işlem Yüksek kalitede dijital ses ve video kaydı ve oynatma Entegre menü sistemi ve mesajlaşma işlevi, dilediğiniz işlemleri kolayca ve rahatça gerçekleştirmenizi sağlar. DVD-RW diski ile, kaydedilen videoları düzenleyebilir, oynatma listesi oluşturabilir, özel bir sıralamada video düzenleyebilirsiniz. 4.7 GB’lık bir DVD-RW/DVD-R diskine, kayıt moduna bağlı olarak 8 saate kadar görüntü kaydedebilirsiniz. MPEG4 oynatma Seçilebilen Kayıt Modu Kaydedicinizi, her biri kayıt kalitesi ve uzunluğu açısından değişiklik gösteren dört farklı kayıt hızından birine ayarlayabilirsiniz. EP (6 Sa veya 8 Sa) modu en fazla kayıt süresini sunar, LP ve SP modları daha az kayıt süresi ile daha yüksek kalitede kayıt sağlar, XP modu en yüksek kalitede kayıt sağlar. Zamanlayıcı ile Kayıt için Otomatik Kalite Ayarı FR modu seçilirse, planlanan zaman dilimindeki tüm videolar boş disk alanına kaydedilebilecek şekilde video kalitesi otomatik olarak ayarlanır. (Bkz. sayfa 47.) DVD-RW/DVD-R diski kullanarak DVD video bölümü oluşturulması Bu DVD Kaydedici, avi dosyası içindeki MPEG4 biçimlerini oynatabilir. DivX Sertifikası DivX, DivX Certified ve ilişkili logolar, DivXNetworks, Inc'in ticari markalarıdır ve lisans alınarak kullanılır. HDMI (Yüksek Tanımlı Çoklu Ortam Arabirimi ) HDMI, DVD Kaydedicisinden Televizyonunuza temiz bir dijital video/ses sinyali yolu sağlayarak görüntü parazitini azaltır. DVD Kaydedici ile, 4.7 GB’lık DVD-RW/DVD-R disklerinde kendi DVD Video bölümlerinizi oluşturabilirsiniz. DV giriş jakını kullanarak, dijital video kameradan veri kopyalanması DV giriş jakını (IEEE 1394-4pin/4pin) kullanarak DV Cihazından DVD-RW, DVD-R disklerine video kaydedebilirsiniz. (Bkz. sayfa 44-45.) 8- Türkçe 01094N-R135-AND-TUR.indb 8 2006-04-11 오후 4:15:20 Kullanım kılavuzunu okumadan önce aşağıdaki terimleri kontrol edin. DVD Kaydedicinin Kullanılması Başlarken Kullanım kılavuzunu okumadan önce 1. Adım Disk tipini seçin Kılavuzda kullanılacak olan simgeler Simge Terim Açıklama DVD Bu, Video Modunda kaydedilen ve sonlandırılan DVD veya DVD-R/ DVD-RW disklerinde geçerli olan bir işlevi içerir. RW Bu, DVD-RW disklerde geçerli olan bir işlevi içerir. R Bu, DVD-R disklerde geçerli olan bir işlevi içerir. CD Bu, bir veri CD’sinde (CD-R veya CD-RW) geçerli olan bir işlevi içerir. JPEG Bu, bir veri görüntü CD-R/-RW, DVD-R/ -RW diskinde geçerli olan bir işlevi içerir. MP3 Bu, bir veri diskinde; CD-R/-RW, DVD-R/-RW geçerli olan bir işlevi içerir. MPEG4 Bu, bir veri diskinde; CD-R/-RW, DVD-R/-RW geçerli olan bir işlevi içerir. Dikkat NOT Tek Tuş Bu, bir işlevin çalışmadığı veya ayarların iptal edilebileceği bir durumu içerir. Bu, her işlevin çalışmasıyla ilgili olarak o sayfada yer alan ipucu veya talimatları içerir. düğmesi Sadece tek düğme kullanılarak çalıştırılabilen bir işlevi belirtir. ANYKEY düğmesi ANYKEY düğmesi kullanılarak çalıştırılabilen bir işlevi belirtir. Bu kılavuzun kullanımı hakkında 1) Bu DVD Kaydediciyi kullanmadan önce Güvenlik Talimatlarına aşina olduğunuzdan emin olun. (Bkz. sayfa 2-5) 2) Sorun çıkarsa Sorun Giderme bölümüne bakın. (Bkz. sayfa 87-90.) Telif hakkı © 2006 Samsung Electronics Co. Tüm hakları saklıdır. Bu kullanım kılavuzunun hiçbir bölümü ya da tamamı, Samsung Electronics Co.nun önceden yazılı izni olmadan çoğaltılamaz ve kopyalanamaz. Bu DVD Kaydedici aşağıdaki disk tiplerine kayıt yapabilmektedir. Aynı diske tekrar kayıt yapmak veya kayıttan sonra diski düzenlemek isterseniz, yeniden yazılabilen tipteki DVD-RW disklerini kullanın. Değişiklik yapmadan kaydınızı saklamak isterseniz, yeniden yazılamayan DVD-R diski kullanabilirsiniz. 2. Adım Kayda başlamak için diski biçimlendirin Kullanılmamış bir disk takıldığında DVD Kaydedici, VCR cihazının aksine, otomatik olarak biçimlendirmeye başlar. Bu, diskin kayıt hazırlığı için gereklidir. DVD-RW Kullanılması Bu tür diskler DVD-Video biçiminde (Video modu) veya DVD-Video Kayıt biçiminde (VR modu) biçimlendirilebilir. Kullanılmış disklerde, VR modunda biçimlendirme yapıp yapmayacağınızı soran bir mesaj görüntülenir. Video modundaki bir diski çeşitli DVD cihazlarında oynatabilirsiniz. VR modlu disk, daha çeşitli düzenleme imkanı sunar. DVD-R Kullanma Diskin biçimlendirilmesi gerekmez ve sadece Video Modunda Kayıt desteklenir. Bu tipteki diskleri, ancak sonlandırdıktan sonra çeşitli DVD cihazlarında oynatabilirsiniz. NOT DVD-RW diskinde yalnız VR veya Video modunu kullanabilirsiniz, ikisini aynı anda kullanamazsınız. DVD-RW formatını, yeniden başlatarak başka bir formata değiştirebilirsiniz. Format değiştirilirken diskteki verilerin kaybolacağını unutmayın. Türkçe -9 01094N-R135-AND-TUR.indb 9 2006-04-11 오후 4:15:21 Başlarken 3. Adım Kayıt 6. Adım Adım Sonlandırma ve diğer DVD cihazlarında oynatma İki farklı kayıt yöntemi vardır, Doğrudan Kayıt ve Zamanlayıcı ile Kayıt. Zamanlayıcı ile kayıt Tarihe göre sınıflandırılır : Once, Daily, MO-SA, MO-FR, WSA, vs. Kayıt modu : XP (yüksek kalite modu), SP (standart kalite modu), LP (uzun kayıt modu) ve EP (uzatılmış mod). Kayıt FR moduna ayarlandığında, diskte kalan zamana göre en iyi görüntü kalitesi ile kayıt yapılır. DVD’nizi diğer DVD cihazlarında oynatabilmek için, sonlandırma gerekebilir. Önce tüm düzenleme ve kayıt işlemlerini bitirin sonra diski sonlandırın. VR Modunda DVD-RW disk kullanırken VR Moduna uyumlu bir cihazda disk oynatmak için sonlandırma genellikle gerekmese de, oynatma için sonlandırılmış bir disk kullanılmalıdır. Video Modunda DVD-RW disk kullanırken Bu DVD Kaydedici dışında herhangi bir yerde diskin oynatılabilmesi için disk sonlandırılmalıdır. Sonlandırdıktan sonra disk üzerinde başka bir kayıt ya da düzenleme işlemi yapılamaz. 4. Adım Oynatma DVD-R disk kullanırken Bu DVD Kaydedici dışında başka bir cihazda oynatılabilmesi için diski sonlandırmanız gerekir. Sonlandırdıktan sonra disk üzerinde başka bir kayıt ya da düzenleme işlemi yapılamaz. Ekrandaki menüden oynatmak istediğiniz bölümü seçip anında oynatmayı başlatabilirsiniz. DVD bölüm denilen parçalardan ve alt bölüm denilen alt parçalardan oluşur. Kayıt sırasında, kaydı başlattığınız ve durdurduğunuz iki nokta arasında bir bölüm oluşturulur. Alt bölümler ise, DVD-R / DVD-RW disklerine Video modunda yaptığınız kaydı sonlandırdığınızda otomatik olarak oluşturulur. Alt bölümün uzunluğu (alt bölümler arasındaki aralık) kayıt moduna göre değişir. 5. Adım Kaydedilmiş bir diskin düzenlenmesi Disklerin düzenlenmesi, geleneksel video kasetlerden daha kolaydır. DVD Kaydedici, sadece DVD’lerde geçerli olan birçok farklı düzenleme işlevlerini destekler. Yalın ve basit bir düzenleme menüsüyle, kaydedilen bir bölümde silme, kopyalama, yeniden adlandırma, kilitleme, vs. gibi çeşitli düzenleme işlevlerini uygulayabilirsiniz. Oynatma listesi oluşturulması (VR modunda DVD-RW) Bu DVD Kaydedici ile, aynı disk üzerinde yeni bir oynatma listesi oluşturabilir ve orijinal kaydı değiştirmeden düzenleyebilirsiniz. 10- Türkçe 01094N-R135-AND-TUR.indb 10 2006-04-11 오후 4:15:23 Ambalajın açılması Başlarken Aksesuarlar Aşağıdaki aksesuarların birlikte verildiğini kontrol edin. Video/Ses Kablosu TV için RF Kablosu HDMI Kablosu Uzaktan Kumanda Uzaktan Kumanda için Piller (AAA Tipi) Kullanım Kılavuzu Uzaktan Kumandanın Ayarlanması Başka marka televizyonların bazı işlevlerini bu uzaktan kumanda ile yönetebilirsiniz. Kumanda işlev düğmeleri şunlardır: STANDBY/ON, PROG / , VOL +/-, Doğrudan Rakam düğmeleri, TV MUTE, INPUT SEL. düğmesi. Hızlı Kullanma Kılavuzu Uzaktan Kumandanın Hazırlanması Uzaktan Kumandaya Pilleri Takın Uzaktan kumandanın arkasında bulunan pil kapağını açın. İki adet AAA pili takın. Kutupların (+ ve -) doğru hizalandığından emin olun. Pil kapağını kapatın. Uzaktan kumanda düzgün çalışmazsa: Pillerin kutuplarını +/- kontrol edin (Kuru Pil) Pillerin dolu olup olmadığını kontrol edin. Uzaktan kumanda sensörünün engeller yüzünden kapanmadığından emin olun. Yakınlarda flüoresan ışıklandırma olup olmadığını kontrol edin. Pilleri yerel çevre düzenlemelerine uygun şekilde atın. Ev çöpleriyle birlikte atmayın. Türkçe -11 01094N-R135-AND-TUR.indb 11 2006-04-11 오후 4:15:24 Başlarken Televizyonunuzun uyumluluğunu belirlemek için aşağıdaki talimatları takip edin. 1. Televizyonunuzu açın. 2. Uzaktan kumandayı televizyonunuza doğrultun. 3. STANDBY/ON düğmesini basılı tutun ve televizyonunuzun markasına karşılık gelen iki basamaklı kodu, rakam düğmelerini kullanarak girin. Kumanda Edilebilen Televizyonların Kodları MARKA SAMSUNG AIWA ANAM BANG & OLUFSEN BLAUPUNKT BRANDT BRIONVEGA CGE CONTINENTAL EDISON DAEWOO EMERSON FERGUSON FINLUX FORMENTI FUJITSU GRADIENTE GRUNDIG HITACHI IMPERIAL JVC LG LOEWE LOEWE OPTA MAGNAVOX METZ MITSUBISHI MIVAR NEC NEWSAN NOBLEX NOKIA NORDMENDE PANASONIC PHILIPS PHONOLA PIONEER RADIOLA RADIOMARELLI RCA REX SABA SALORA SANYO SCHNEIDER DÜĞME 01, 02, 03, 04, 05, 06, 07, 08, 09 82 10, 11, 12, 13, 14, 15, 16, 17, 18 57 71 73 57 52 75 19, 20, 23, 24, 25, 26, 27, 28, 29, 30, 31, 32, 33, 34 64 73 06, 49, 57 57 84 70 49, 52, 71 60, 72, 73, 75 52 61, 79 06, 19, 20, 21, 22, 78 06, 69 06, 57 40 57 06, 48, 62, 65 52, 77 83 68 66 74 72, 73, 75 53, 54, 74, 75 06, 55, 56, 57 06, 56, 57 58, 59, 73, 74 06, 56 57 45, 46 74 57, 72, 73, 74, 75 74 41, 42, 43, 44, 48 06 MARKA SELECO SHARP SIEMENS SINGER SINUDYNE SONY TELEAVA TELEFUNKEN THOMSON THOMSON ASIA TOSHIBA WEGA YOKO ZENITH DÜĞME 74 36, 37, 38, 39, 48 71 57 57 35, 48 73 67, 73, 75, 76 72, 73, 75 80, 81 47, 48, 49, 50, 51, 52 57 06 63 Sonuç: Televizyonunuz uzaktan kumanda ile uyumluysa kapanacaktır. Artık uzaktan kumanda ile çalışmak üzere programlanmıştır. NOT Televizyon markanız için birden fazla kod verilmişse, hangisinin geçerli olduğunu bulabilmek için her birini sırasıyla deneyin. Uzaktan kumandanın pillerini değiştirdiğinizde markanın kodunu tekrar ayarlamanız gerekir. Televizyonunuza, TV düğmesine bastıktan sonra aşağıdaki düğmeleri kullanarak kumanda edebilirsiniz. Düğme İşlev STANDBY/ON Televizyonu açmak ve kapatmak için kullanılır. INPUT SEL. Harici bir cihazı seçmek için kullanılır. VOL (+ veya -) Televizyonun ses seviyesini ayarlamak için kullanılır. PROG ( veya ) İstediğiniz kanalı seçmek için kullanılır. TV MUTE Sesi açmak ve kapatmak için kullanılır. 0~9 Rakamı doğrudan girmek için kullanılır. NOT Bazı işlevler her televizyonda çalışmayabilir. Sorun yaşarsanız, televizyonunuzu ayrıca kumanda edin. 12- Türkçe 01094N-R135-AND-TUR.indb 12 2006-04-11 오후 4:15:28 Tanım Başlarken Ön Panel 1. STANDBY/ON DVD Kaydediciyi açar ve kapatır. 2. AV3 IN Harici cihazları bağlayabilirsiniz. 3. DV IN DV jakıyla harici dijital cihazların bağlanmasını sağlar. (video kamera gibi) 4. DİSK TEPSİSİ Diski almak için açılır. 5. P.SCAN Progressive scan modunu seçer. 6. OPEN/CLOSE Disk tepsisini açar ve kapatır. 7. DISPLAY Oynatma durumunu, bölüm/alt bölüm/saat, vs. gösterir. ) 8. PROG ( Önceden ayarlı televizyon kanallarını seçer. Uzaktan kumandadaki PROG düğmesiyle aynıdır. 9. REC Kaydetmeye başlar. 10. STOP Diski oynatmayı durdurur. 11. PLAY/PAUSE Bir diski oynatır veya oynatmayı/kaydı duraklatır. 12. SEARCH/SKIP Sonraki veya önceki bölüm/alt bölüm/parçaya gider. Ön Panel Göstergesi 1. Disk takıldığında ışığı yanar. 2. Kayıt modunda ışığı yanar. 3. Zamanlayıcı ile kayıt modunu belirtmek için ışığı yanar. 4. DVD-R/-RW disk takıldığında ışığı yanar. 5. Oynatma süresi/saat/geçerli durum göstergesi. 6. Progressive scan modunda ışığı yanar. Türkçe -13 01094N-R135-AND-TUR.indb 13 2006-04-11 오후 4:15:29 Başlarken Arka Panel 1. Anten bağlantısı girişi 2. TV bağlantısı çıkışı 8. AUDIO OUT Ses kablolarıyla harici cihazın ses girişine bağlanır. 3. AV2(EXT) GİRİŞ SCART Bağlantısı 9. VIDEO OUT 4. AV1(TV) ÇIKIŞ SCART Bağlantısı 5. HDMI ÇIKIŞI 10. S-VIDEO OUT HDMI-HDMI kablosu veya HDMI-DVI kablosu ile harici cihazın girişini bağlar. 6. DIGITAL AUDIO OUT (OPTICAL) Harici cihazın girişine Video kablosu ile bağlanır. Harici cihazın girişine S-Video kablosu ile bağlanır. 11. COMPONENT VIDEO OUT Ek cihaz video çıkışı olan cihazlara bağlanır. Dijital optik ses giriş jakı olan bir amplifikatöre bağlanır. 7. DIGITAL AUDIO OUT (COAXIAL) Dijital koaksiyel ses giriş jakı olan bir amplifikatöre bağlanır. NOT Anten bağlantısı DVD sinyallerini geçirmez. Televizyonunuzda DVD seyretmek için ses/ video kablolarını bağlamalısınız. 14- Türkçe 01094N-R135-AND-TUR.indb 14 2006-04-11 오후 4:15:30 Uzaktan Kumandanın Tanıtılması 28 29 1 16 17 2 3 18 4 5 6 7 8 19 20 9 10 21 11 12 13 22 14 15 24 23 25 1. 2. 3. 4. STANDBY/ON Düğmesi 0-9 (Rakam) Düğmeleri TV/DVD Düğmesi Reverse/Forward Skip Düğmeleri Diskte ileriye ya da geriye doğru atlamak için kullanın. 5. Reverse/Forward Step Düğmeleri Kare kare oynatmak için basın. 6. Reverse/Forward Search Düğmeleri Diskte ileriye ya da geriye doğru arama yapmak için kullanın. 7. STOP Düğmesi Diski durdurmak için basın. 8. VOL Düğmeleri Ses ayarları. 9. AUDIO/TV MUTE Düğmesi Diskteki çeşitli ses işlevlerine erişmek için bunu kullanın (DVD modunda) Bu sesi kapatmak için kullanılır. (TV modu) 10. MENU Düğmesi DVD kaydedicinin ayarlar menüsünü gösterir. 11. OK/DIRECTION Başlarken 26 27 12. TITLE LIST/DISC MENU Düğmesi View Recording list/Disc menüsüne girmek için bu düğmeyi kullanın. 13. ANYKEY Düğmesi Oynatılan diskin durumunu görüntülemek için bunu kullanın. 14. REC Düğmesi DVD-RW/-R disklerine kayıt yapmak için kullanın. 15. REC MODE Düğmesi Bu, kayıt durumunu görüntüler.(XP/SP/LP/EP) 16. REPEAT Düğmesi Bir bölümü, alt bölümü, parçayı ya da diski tekrar etmenizi sağlar. 17. OPEN/CLOSE Düğmesi Disk tepsisini açar ve kapatır. 18. SUBTITLE Düğmesi DVD’nin altyazı dilini değiştirmek için buna basın. 19. PLAY/PAUSE Düğmesi Bir diski oynatmak veya oynatmayı/kaydı duraklatmak için basın. 20. PROG Düğmeleri Önceden belirli bir sırada ayarlı kanalları seçer. Ön paneldeki PROG düğmeleriyle aynıdır. 21. RETURN Düğmesi Bir önceki menüye döner. 22. PLAY LIST/TITLE MENU Düğmesi Bölüm menüsüne dönmek veya kayıtlı dosyaların listesini görüntülemek için kullanın. 23. CANCEL Düğmesi 24. MARKER/TIMER Düğmesi Diski oynatırken bir konumu işaretlemek için bunu kullanın. Diski durdurunca doğrudan Timer Recording Mode menüsüne geçmek için basın. 25. INFO Düğmesi Mevcut ayarları veya disk durumunu görüntüler. 26. TV Düğmesi TV’yi kumanda etmek için buna basın. 27. DVD Düğmesi DVD kaydedici kullanacağınız zaman buna basın. 28. INPUT SEL. Düğmesi Harici giriş modunda hat giriş sinyalini seçer (PROG, AV giriş veya DV INPUT) 29. ZOOM Düğmesi Ekranı büyütmek için buna basın. Düğmeleri Türkçe -15 01094N-R135-AND-TUR.indb 15 2006-04-11 오후 4:15:32 Bağlama ve Kurulum Genel Bakış Bağlama ve Kurulum Bu bölüm, DVD Kaydediciyi başka harici cihazlara bağlamanın çeşitli yöntemlerini ve gereken başlangıç ayar modlarını içerir. Bu kılavuzda yer alan Genel Bakış bölümü size, DVD Kaydediciyi kullanmaya başlamanıza yetecek bilgiyi verecektir. DVD Kaydedicinin Bağlanması İlave bağlantılar Anten + DVD Kaydedici + harici dekoder + TV Video çıkış kablosunu bağlamanın farklı yolları Ses çıkış kablosunu bağlamanın farklı yolları HDMI/DVI’nın Televizyona Bağlanması AV3 IN, DV giriş jakına bağlama Genel Bakış ............................................... 16 DVD Kaydedicinin Bağlanması ................. 17 İlave bağlantılar ......................................... 17 Anten + DVD Kaydedici + harici dekoder + TV .......................................................... 18 Video çıkış kablosunu bağlamanın farklı yolları ......................................................... 18 Ses çıkış kablosunu bağlamanın farklı yolları ......................................................... 20 HDMI/DVI’nın Televizyona Bağlanması .... 22 AV3 IN, DV giriş jakına bağlama............... 23 16- Türkçe 01094N-R135-AND-TUR.indb 16 2006-04-11 오후 4:15:34 DVD Kaydedicinin Bağlanması Televizyonunuzda uygun giriş varsa, DVD Kaydedicinizi televizyonunuza SCART kablosuyla bağlayabilirsiniz. İlave bağlantılar DVD Kaydedicinizi bir uydu alıcısına veya dijital kanal seçiciye bağlayabilirsiniz. Bağlama ve Kurulum 1. RF kablosunu gösterildiği şekilde bağlayın. 2. SCART kablosunun bir ucunu, DVD Kaydedicinin arkasında yer alan AV1 soketine bağlayın. 3. Diğer ucu, televizyondaki uygun bağlantıya takın. 4. DVD Kaydediciyi ve televizyonu fişe takın. 5. DVD Kaydediciyi ve televizyonu açın. harici cihaz (VCR/Uydu alıcısı) 6. DVD Kaydedicinin Video sinyali TV ekranında belirinceye kadar televizyonunuzun uzaktan kumandasındaki INPUT SEL. düğmesine basın. RF IN’e - DVD modu RF OUT’a 1. DVD Kaydedicinin AV2 bağlantısını, SCART kablosunu kullanarak VCR/Uydu alıcısına veya dijital kanal seçiciye bağlayın. 2. AV1 bağlantısını, televizyondaki SCART AV girişine takın. RF Kablosu ANT INPUT’a 3. DVD Kaydediciyi, VCR/Uydu alıcısını veya dijital kanal seçiciyi ve televizyonu açın. 4. AV2’de Input modunu ayarlayın. NOT Bu DVD Kaydedicinin RF kablo bağlantısı, sadece TV sinyallerini gönderir. DVD Kaydedicinizden gelen bir sinyali seyretmek için SCART kablosunu veya Ses/Video kablolarını bağlamalısınız. - TV modu TV modu Uzaktan kumandadaki TV/DVD düğmesine basın, ön LED göstergesinde “TV” görünür (ya da DVD Kaydediciyi kapatın). 2. Bu DVD Kaydediciye bağlanan uydu alıcısından veya dijital kanal seçiciden, DVD Kaydedici kapalı olsa bile program seyredebilirsiniz. 1. Uzaktan kumandadaki TV/DVD düğmesine basın, ön LED göstergesinde “TV” görünür. (ya da DVD Kaydediciyi kapatın.) Türkçe -17 01094N-R135-AND-TUR.indb 17 2006-04-11 오후 4:15:35 Bağlama ve Kurulum Anten + DVD Kaydedici + harici dekoder + TV DVD kaydediciye harici dekoder bağlarsanız, DVD Kaydedicinizdeki dahili TV kanal seçici sayesinde şifreli kanallardan kayıt yapabilirsiniz (CANAL+ ya da Premiere yayınları). Duvar DEKODER Video çıkış kablosunu bağlamanın farklı yolları Scart kablosu kullanmadan video sinyallerini aktarmanın birkaç farklı yolu vardır. Aşağıdaki video bağlama yöntemlerinden size en uygun olanını seçin. Durum 1 : Video (Kompozit) çıkış jakına bağlama Durum 2 : S-Video çıkış jakına bağlama Durum 3 : Ek cihaz Video çıkış jaklarına bağlama S-Video, Ek Cihaz video ve Sürekli Tarama Çıkış Modları S-Video ve Ek cihaz video çıkışları yalnızca, televizyonunuz S-Video girişini veya Ek cihaz video girişini destekliyorsa kullanılabilir. S-Video veya Ek cihaz video çıkışı çalışmıyorsa TV bağlantılarını ve TV giriş seçimi ayarlarını kontrol edin. Standart geçmeli-taramalı videoya oranla, progressive scan televizyonunuza gönderilen video satırı sayısını iki katına çıkarır, bu da geçmelitaramalı videoya oranla daha sabit, titremesiz, net görüntü sağlar. Bu sadece progressive scan özelliğini destekleyen televizyonlarda geçerlidir. Progressive Scan Çıkışı (576p) Tüketiciler tüm yüksek tanımlı televizyonların bu DVD Kaydediciyle tamamen uyumlu olmadığını ve görüntüde bazı işlem hataları olabileceğini göz önünde bulundurmalıdır. 576 progressive scan esnasında görüntüde problem yaşanırsa, kullanıcının bağlantıyı ‘standart tanımlı’ çıkışına geçirmesi tavsiye edilir. Televizyonunuzun bu model 576p DVD Kaydediciyle uyumluluğuna ilişkin sorularınız olursa, lütfen müşteri hizmetleri merkezimizle irtibata geçin. 1. RF anten kablolarını gösterildiği şekilde bağlayın. 2. DVD Kaydedicideki AV1 bağlantısını, SCART kablosunu kullanarak TV’deki SCART AV bağlantısına bağlayın. 3. AV2 bağlantısını, dekoderdeki SCART AV girişine takın. 4. PAY-TV Canal Plus programlarını seyretmek veya kaydetmek için, ekrandan görüntülemeyi kullanarak (sayfa 28’e bakın) DVD Kaydedicinizi kanalları alacak şekilde ayarlayın. 18- Türkçe 01094N-R135-AND-TUR.indb 18 2006-04-11 오후 4:15:37 Durum 1 : Video (Kompozit) çıkış jakına bağlama 1. Video (sarı) kablosunu, DVD Kaydedicideki VIDEO (sarı) OUT jakıyla, televizyonunuzdaki (veya AV amplifikatörünüzdeki) VIDEO (sarı) INPUT jakına bağlayın. Normal kalitede görüntüler elde edersiniz. 1. S-Video kablosunu (dahil değildir), DVD Kaydedicideki S-VIDEO OUT jakıyla, televizyonunuzdaki (veya AV amplifikatörünüzdeki) S-VIDEO INPUT jakına bağlayın. 2. Ses kablolarını (beyaz ve kırmızı), DVD Kaydedicideki AUDIO OUT jaklarıyla televizyonunuzdaki (veya AV amplifikatördeki) AUDIO IN jaklarına takın. Yüksek kalitede görüntüler elde edersiniz. Bağlama ve Kurulum 2. Ses kablolarını (beyaz ve kırmızı), DVD Kaydedicideki AUDIO OUT jaklarıyla televizyonunuzdaki (veya AV amplifikatördeki) AUDIO IN jaklarına takın. (Bkz. sayfa 20-21) Durum 2 : S-Video çıkış jakına bağlama Sarı Ses/Video Kablosu Sarı Türkçe -19 01094N-R135-AND-TUR.indb 19 2006-04-11 오후 4:15:39 Durum 3 : Ek cihaz Video çıkış jaklarına bağlama Bağlama ve Kurulum 1. Ek cihaz video kablosunu (dahil değildir) DVD Kaydedicinizdeki COMPONENT OUT (Y,PB,PR) jaklarıyla televizyonunuzdaki COMPONENT IN (Y,PB,PR) jaklarına takın. 2. Ses kablolarını (beyaz ve kırmızı), DVD Kaydedicideki AUDIO OUT jaklarıyla televizyonunuzdaki (veya AV amplifikatördeki) AUDIO IN jaklarına takın. (Bkz. sayfa 20-21). 3. Bağladıktan sonra sayfa 34 ve 35’e bakın. Yüksek kalitede ve doğru renklere sahip görüntüler elde edersiniz. Ses çıkış kablosunu bağlamanın farklı yolları Scart kabloları kullanmadan ses sinyallerini aktarmanın birkaç farklı yolu vardır. Aşağıdaki ses bağlantılarından size en çok uyanını seçin. Durum 1 : Televizyonunuza Bağlama Durum 2 : AV çıkış jakıyla stereo amplifikatöre bağlama Durum 3 : Dijital çıkış jakıyla AV amplifikatöre bağlama Dolby Laboratories lisansı altında üretilmiştir. “Dolby” ve çift D sembolü, Dolby Laboratories'in ticari markalarıdır. “DTS” ve “DTS Digital Out”, DTS, Inc’in ticari markalarıdır. yeşil mavi kırmızı yeşil mavi kırmızı Durum 1 : Televizyonunuza Bağlama Televizyonunuzun ses giriş jakları varsa bu bağlantıyı kullanın. NOT sarı beyaz sarı kırmızı Component jakları, 576p üzerindeki video çözünürlüklerini göndermez. 720p ve 1080i çözünürlüklerinde görüntü alabilmek için, DVD Kaydedici cihazınızı verilen HDMI kablosuyla televizyonunuza bağlayın. HDMI ile bağlantı yapıldığında, kullanılabilir tüm çözünürlükler arasında geçiş yapmak için P.SCAN düğmesine basın. (Bkz. sayfa 37) beyaz kırmızı Bağlantıların renk kodlarının birbirine uyduğundan emin olun. DVD Kaydedicinizdeki Y, PB, PR ek cihaz çıkış jakları, televizyonunuzdaki tam olarak aynı ek cihaz giriş jaklarına bağlanmalıdır. Progressive tarama ayarı yalnızca, Video Out seçeneği, Component olarak ayarlandığında geçerlidir. (Bkz. sayfa 34) 20- Türkçe 01094N-R135-AND-TUR.indb 20 2006-04-11 오후 4:15:41 Durum 2: AV çıkış jaklarıyla stereo amplifikatöre bağlama Stereo amplifikatörünüzün sadece AUDIO INPUT jakları (L ve R) varsa, AUDIO OUT jaklarını kullanın. AV amplifikatörünüzde Dolby Digital, MPEG2 veya DTS dekoderi ve dijital bir giriş jakı varsa, bu bağlantıyı kullanın. Dolby Digital, MPEG2 veya DTS sesin keyfini çıkarmak istiyorsanız, ses ayarlarını yapmanız gerekir. (Bkz. sayfa 32-33) Bağlama ve Kurulum kırmızı Durum 3: Dijital çıkış jakıyla AV amplifikatöre bağlama beyaz veya kırmızı Ön(L) hoparlör beyaz Ön(R) hoparlör Arka(L) Arka(R) Ön(L) Ön(R) Subwoofer Orta Türkçe -21 01094N-R135-AND-TUR.indb 21 2006-04-11 오후 4:15:43 HDMI/DVI’nın Televizyona Bağlanması Bağlama ve Kurulum Televizyonunuzun HDMI/DVI girişi varsa, HDMI/DVI kablosunu televizyona bağlayın. En iyi kalite görüntü ve sesin keyfini çıkaracaksınız. Durum 1 : HDMI Jakıyla televizyona bağlantı Durum 2 : DVI Jakıyla televizyona bağlantı Durum 1 : HDMI Jakıyla televizyona bağlantı kırmızı beyaz • HDMI kablosunu kullanarak DVD Kaydedici ve VCR cihazının arkasındaki HDMI OUT (Çıkış) jakını televizyonunuzun HDMI IN (Giriş) jakına bağlayın. • Televizyonunuzun ekranında DVD Kaydediciden gelen HDMI sinyali belirene kadar televizyonunuzun uzaktan kumandasındaki giriş seçiciye basın. NOT Durum 2 : DVI Jakıyla televizyona bağlantı • DVI Adaptör kablosunu kullanarak DVD KAYDEDİCİ arkasındaki HDMI OUT (Çıkış) jakını televizyonunuzun DVI IN (Giriş) jakına bağlayın. • Ses kablolarını kullanarak, DVD Kaydedici cihazının arkasındaki AUDIO (kırmızı ve beyaz) OUT (Ses çıkış) jaklarını televizyonunuzun AUDIO (kırmızı ve beyaz) IN (Ses giriş) jaklarına bağlayın. DVD Kaydedici ve televizyonu açın. • Televizyonunuzun ekranında DVD Kaydediciden gelen DVI sinyali belirene kadar televizyonunuzun uzaktan kumandasındaki giriş seçiciye basın. DİKKAT HDMI çıkışı üzerinden izlemek için, dijital ses çıkışını PCM olarak ayarlayın. Bkz. sayfa 32-33. Kullandığınız HDMI cihazına (TV/HDMI Alıcı) bağlı olarak ses desteklenmeyebilir. Televizyonunuz Dolby dijital/DTS biçimini desteklemiyorsa, Audio setup (Ses ayar) menüsünde Digital Output (Dijital Çıkış) öğesini Bitstream olarak ayarladığınızda Ses çıkışı mevcut değildir. Bu durumda dijital ses çıkışını PCM olarak veya DTS Off (kapalı) olarak ayarlayın. HDMI çıkış çözünürlüğünü değiştirmek için, bkz. sayfa 37. HDMI (Yüksek Tanımlı Çoklu Ortam Arabirimi) HDMI tek bir konektörle video ve ses verilerinin dijital iletimini sağlayan bir arabirimdir. HDMI, DVI temelli olduğundan, DVI ile bütünüyle uyumludur. HDMI ile DVI arasındaki tek fark HDMI’nin çok kanallı sesi desteklemesidir. DVD Kaydedici HDMI’yi kullanarak dijital görüntü ve ses sinyalini iletir ve HDMI giriş jakı olan bir televizyonda parlak bir görüntü verir. HDMI bağlantı tanımı HDMI konektörü – Sıkıştırılmamış video verileri ve dijital ses verileri (LPCM veya Bit Stream verileri) - HDMI kablosu kullanmasına rağmen DVD Kaydedici televizyona yalnızca tek bir temiz dijital sinyal gönderir. - Televizyon HDCP’yi (Yüksek Dalga Boylu Dijital İçerik Koruma) desteklemiyorsa ekranda karlı bir görüntü olur. Samsung neden HDMI kullanıyor? Analog televizyonlar analog video/ses sinyali gerektirir. Ancak, DVD oynatırken televizyona iletilen veriler dijitaldir. Bu yüzden dijital-analog dönüştürücü (DVD Kaydedicide) veya analog-dijital dönüştürücü (televizyonda) gerekir. Bu dönüştürme sırasında gürültü ve sinyal kaybı yüzünden resim kalitesi düşer. HDMI üstün bir teknolojidir, D/A dönüştürmesi gerektirmediği gibi, DVD Kaydedici cihazından televizyonunuza temiz dijital sinyal sağlar. HDCP Nedir? HDCP (Yüksek Dalga Boylu Dijital İçerik Koruma) HDMI aracılığıyla verilen DVD içeriğini kopyalamaya karşı koruyan bir sistemdir. Video kaynağı (PC, DVD vs.) ve görüntüleme cihazı (TV, projektör vs.) arasında güvenli bir dijital bağlantı sunar. İzinsiz kopyalamayı önlemek üzere içerik kaynak cihazda şifrelenmiştir. 22- Türkçe 01094N-R135-AND-TUR.indb 22 2006-04-11 오후 4:15:45 AV3 IN, DV giriş jakına bağlama Durum 2 : DV IN jakına bir Video Kameranın bağlanması Dijital video kameranızın bir DV çıkış jakı varsa, bunu DVD Kaydedicinizin DV giriş jakına bağlayın. Bu, DVD Kaydedicinizi diğer harici cihazlara bağlamanızı ve çıkışlarını görüntülemenizi veya kaydetmenizi sağlar. Bağlama ve Kurulum Durum 1 : AV3 IN jaklarına bir VCR, Set-Üstü Cihazı (STB), DVD oynatıcı veya Video Kameranın bağlanması Durum 2 : DV IN jakına bir Video Kameranın bağlanması Video Kamera Durum 1 : AV3 IN jaklarına bir VCR, Set-Üstü Cihazı (STB), DVD oynatıcı veya Video Kameranın bağlanması DVD Kaydedicinin AV3 IN jaklarına bir VCR veya harici cihazın bağlanması. Bağlı bir cihazdan (VCR, STB, DVD oynatıcı veya Video Kamera) kayıt yapabilirsiniz. NOT Giriş otomatik olarak seçilmezse, uygun girişi seçmek için INPUT SEL. düğmesini kullanın. Video Kamera VCR kırmız beyaz sarı STB DVD sarı beyaz kırmız NOT AV 3 IN seçimi otomatik olarak yapılacaktır. Giriş otomatik olarak seçilmezse, uygun girişi seçmek için INPUT SEL. düğmesini kullanın. Kopyalama koruması olan içerik kaydedilemez. Türkçe -23 01094N-R135-AND-TUR.indb 23 2006-04-11 오후 4:15:49 Ekran Menüsünde Gezinti Sistem Ayarları Ekran menüleri, DVD Kaydedicinizdeki birçok işlevi etkinleştirmenizi veya devre dışı bırakmanızı sağlar. Ekran menülerini açmak ve menülerde gezinmek için aşağıdaki düğmeleri kullanın. DVD-Recorder Programme No Disc Programme DVD-Recorder Title List DVD-RW(VR) Scheduled Record List ► Title List Title List ► Playlist Setup Disc Manager Programme Setup Sistem Ayarları MOVE OK RETURN EXIT MOVE OK RETURN EXIT 1 MENU Düğmesi MENU ekranını açmak için uzaktan kumandadaki bu tuşa basın. MENU ekranından çıkmak için tekrar basın. 2 ▲▼, ◄ ► Düğmeleri Seçme çubuğu ile menü seçenekleri arasında gezinmek için ▲▼, ◄ ► uzaktan kumanda üzerindeki bu Ekran Menüsünde Gezinti ......................... 24 Fişe Takma ve Otomatik Ayar ................... 25 Saatin Ayarlanması ................................... 26 Auto Setup işleviyle Kanalların Önceden Ayarlanması............................................... 27 Manual Setup işleviyle Kanalların Önceden Ayarlanması............................................... 28 Dil Seçeneklerinin Ayarlanması................. 29 düğmelere basın. 3 OK Düğmesi Herhangi bir yeni ayarı onaylamak için uzaktan kumanda üzerindeki bu düğmeye basın. 4 RETURN Düğmesi Görüntülenen Önceki MENU ekranına dönmek veya MENU ekranından çıkmak için uzaktan kumandadaki bu düğmeye basın. EP Modu Zaman Ayarı .............................. 30 Otomatik Alt Bölüm Oluşturma .................. 31 Hızlı Kayıt Ayarı......................................... 32 Ses Seçeneklerinin Ayarlanması............... 32 Video Çıkış Seçeneklerinin Ayarlanması .. 34 Progressive Scan özelliğinin Ayarlanması............................................... 35 Progressive Scan özelliğinin iptali ............. 35 Görüntü (Video) Seçeneklerinin Ayarlanması............................................... 36 DivX(R) Kayıt............................................. 37 Ebeveyn Kontrolünün Ayarlanması ........... 37 24- Türkçe 01094N-R135-AND-TUR.indb 24 2006-04-11 오후 4:15:51 Fişe Takma ve Otomatik Ayar DVD Kaydediciniz ilk kez fişe takıldığında otomatik olarak ayar yapacaktır. TV istasyonları ve saat bellekte saklanacaktır. İşlem birkaç dakika sürer. DVD Kaydediciniz bu işlemden sonra kullanıma hazırdır. 1 2 RF kablosunu sayfa 17’de belirtildiği şekilde bağlayın. • “Country” öğesini seçerken aşağıdaki kısaltma tablosuna bakın. A (Avusturya) NL (Hollanda) S (İsveç) B (Belçika) I (İtalya) DK (Danimarka) N (Norveç) CH (İsviçre) CZ (Çek Cumhuriyeti) TR (Türkiye) Diğer PL (Polonya) FIN (Finlandiya) P (Portekiz) D (Almanya) E (İspanya) GR (Yunanistan) HU (Macaristan) • DVD Kaydedici, seçtiğiniz ülkeye karşılık gelen, önceden ayarlı bir tercih listesine göre kanalları arar. 6 Auto Channel taraması başlar. (DVD Kaydedicinizin RF Kablosu ve scart kablosu ile televizyona bağlanması.) Auto channel memory 17% DVD Kaydedicinin fişini elektrik prizine takın. Stop Ön panelde “Auto” mesajı yanıp söner. Sistem Ayarları • DVD Kaydedici tarafından kaydedilen istasyonların sayısı, cihazın bulduğu istasyonların sayısına bağlıdır. 3 ▲▼ düğmelerini kullanarak dili seçin ve OK düğmesine basın. 7 Tarih ve saati kontrol edin. DVD-Recorder Auto Setup No Disc DVD-Recorder Auto Setup No Disc Date Language Set English JAN Français SUN Time 01 2006 12 Auto Clock 00 On Deutsch Español Italiano MOVE Nederlands MOVE OK RETURN ayarı başlatmak için OK 4 Otomatik düğmesine basın veya birkaç saniye bekleyin. DVD-Recorder Auto Setup OK RETURN • eğer : Doğruysa, OK düğmesine basın, tarih ve saat kaydedilecektir. OK düğmesine basmazsanız, tarih ve saat 5 saniye sonra otomatik olarak kaydedilecektir. • eğer : Yanlışsa, Time, Date, Year girişini, ▲▼◄ ► düğmelerini veya numara düğmelerini kullanarak düzeltin. OK düğmesine basın. Tarih ve saat kaydedilir. Saat ayarlarını değiştirmek isterseniz, elle ayarlama yapabilirsiniz. (bkz. sayfa 25.) No Disc Auto setup will be started. Check antenna and TV cable connection. NOT OK RETURN seçmek için ▲▼◄ ► 5 Ülkenizi düğmelerini kullanarak “Country” öğesini seçin ve OK düğmesine basın. DVD-Recorder A B Auto Setup işlevi, DVD Kaydedicinizin ön panelindeki PROG ( ) düğmelerini aynı anda, DVD Kaydedicinizde disk olmadan, 5 saniye boyunca basılı tutarak gerçekleştirilebilir. Auto Setup Country Selection Autom. Instal. NL S Handmatig Instal. I CH DK N TR FIN P GR D E HU OK RETURN MOVE DVD Kaydedici artık kullanıma hazırdır. “Plug & Auto Setup” işlevi önceden sabitlenmiştir. Bu yüzden, eğer değiştirmek isterseniz ekrandaki menüsünden, kanalları önceden ayarlayarak değiştirebilirsiniz (Elle Ayar fonksiyonuyla Kanalların önceden ayarlanması bölümüne bakınız). (bkz. sayfa 28) PL ► ► CZ Others Türkçe -25 01094N-R135-AND-TUR.indb 25 2006-04-11 오후 4:15:53 Clock ayarında On öğesini seçmek için 4 Auto ▲▼ düğmelerine basın. Saatin Ayarlanması DVD-Recorder Clock Set No Disc Programme Setup Bu menü, güncel zamanı ayarlamak için kullanılır. Zamanlayıcı ile kayıt işlevini kullanabilmek için saati ayarlamanız gerekir. Time JAN 01 2006 12 Auto Clock 00 On SUN MOVE 1 Date OK RETURN EXIT DVD Kaydedici, Stop/No Disc modundayken MENU düğmesine basın. DVD-Recorder Programme OK düğmesine basın, tarih ve saat 5 kaydedilecektir. OK düğmesine basmazsanız, kaydedilmez. No Disc Programme Scheduled Record List ► Sistem Ayarları Setup OK MOVE EXIT RETURN NOT 2 Setup öğesini seçmek için ▲▼ düğmelerine, ardından OK veya ► düğmesine basın. DVD-Recorder Auto Clock ayarını yapmak için RF kablonuzun bağlı olması gerekir. (Bkz. sayfa 17) DVD Kaydedici, PR1 ile PR5 kanalları arasındaki zaman sinyal yayınına göre saati otomatik olarak ayarlar. Auto clock set işlevine ihtiyacınız yoksa, Off öğesini seçin. Setup No Disc Programme System ► Setup Clock Set ► Language ► Audio ► Video ► Parental Control ► Install MOVE 3 ► OK RETURN EXIT Clock Set öğesini seçmek için ▲▼ düğmelerine, ardından OK veya ► düğmesine basın. Saat, Tarih, Yıl girmek için ▲▼◄ ► düğmelerini kullanın. Saat değerini doğrudan girmek için numara düğmelerini kullanın. DVD-Recorder Clock Set No Disc Programme Setup Date JAN Time 01 2006 12 Auto Clock 00 On SUN MOVE OK RETURN EXIT 26- Türkçe 01094N-R135-AND-TUR.indb 26 2006-04-11 오후 4:15:55 Auto Setup öğesini seçmek için ▲▼ 4 düğmelerine, ardından OK veya ► düğmesine basın. Auto Setup işleviyle Kanalların önceden ayarlanması Country Selection ekranı görüntülenir. DVD-Recorder Bu özellik, DVD Kaydedici kanal seçiciyi, Antenna In jakına ilk ayarda bağladığınız Anten veya Kabloya ayarlamanızı sağlar. 1 Install Country Selection No Disc AutoNL Setup Manual Setup I A B S PL CH CZ Others DK N TR FIN P GR D E HU MOVE OK RETURN ► ► EXIT DVD Kaydedici, Stop /No Disc modundayken MENU düğmesine basın. seçmek için düğmelerini kullanın ve OK düğmesine basın. 5 Ülkenizi ▲▼◄ ► DVD-Recorder Programme No Disc Programme Scheduled Record List ► Setup • DVD Kaydedici, seçtiğiniz ülkeye karşılık gelen, önceden ayarlı bir tercih listesine göre kanalları arar. MOVE OK RETURN EXIT Setup öğesini seçmek için ▲▼ 2 düğmelerine, ardından OK veya ► düğmesine basın. DVD-Recorder Setup S (İsveç) CH (İsviçre) DK (Danimarka) N (Norveç) FIN (Finlandiya) P (Portekiz) D (Almanya) E (İspanya) TR (Türkiye) Diğer GR (Yunanistan) HU (Macaristan) 6 Devam etmek için OK düğmesine basın. Programme System ► Setup Clock Set ► Language ► Audio ► Video ► No Disc Parental Control ► Programme Auto Setup ► Install ► Setup Manual Setup ► MOVE OK PL (Polonya) CZ (Çek Cumhuriyeti) Çıkmak için MENU düğmesine basın. No Disc 3 A (Avusturya) NL (Hollanda) B (Belçika) I (İtalya) Sistem Ayarları Ülkenizi seçerken aşağıdaki tabloya bakın. RETURN Install Your data will be lost. EXIT Press [OK] to continue, [MENU] to exit. Install öğesini seçmek için ▲▼ düğmelerine, ardından OK veya ► düğmesine basın. DVD-Recorder DVD-Recorder Install No Disc Programme Auto Setup ► Setup Manual Setup ► MOVE OK RETURN EXIT 7 Kanal taraması başlar. Auto Setup işlemini durdurmak için OK düğmesine basın. Auto channel memory MOVE OK RETURN EXIT 17% Stop Türkçe -27 01094N-R135-AND-TUR.indb 27 2006-04-11 오후 4:15:57 Elle Ayar fonksiyonuyla Kanalların önceden ayarlanması Manual Setup öğesini seçmek için ▲▼ 4 düğmelerine, ardından OK veya ► düğmesine basın. Otomatik Kanal Arama’nın atladığı önceden ayarlanmış kanalı ekleyebilirsiniz. Çıkarmak istediğiniz kanalı da silebilirsiniz. Kanalların sırasını programlayabilirsiniz. Kaydedici, Stop modunda/No Disc 1 DVD modundayken MENU düğmesine basın. PR CH 01 02 03 04 05 06 07 --------------MOVE Manual Setup Name Decoder ---------------------OK ---------------------RETURN Edit ► ► ► ► ► ► ► EXIT silmek veya değiştirmek 5 Düzenlemek, istediğiniz bir PR (program) seçmek için düğmelerine, ardından OK veya ► ▲▼ DVD-Recorder Programme No Disc Programme Scheduled Record List ► Sistem Ayarları Setup OK MOVE RETURN EXIT Setup öğesini seçmek için ▲▼ 2 düğmesine düğmelerine, ardından OK veya ► basın. DVD-Recorder Setup düğmesine basın. Edit, Delete veya Swap öğelerini seçmek için ▲▼ düğmelerini kullanın ve OK ya da ► düğmesine basın. PR CH 01 02 03 04 05 06 07 --------------MOVE Manual Setup Name Decoder ---------------------OK ----Edit -------Delete ----Swap ---------RETURN Edit ► ► ► ► ► ► ► EXIT • Edit : PR (program) ekleyebilir veya düzenleyebilirsiniz. PR bilgilerini değiştirdikten sonra (CH, Name, Decoder, MFT), Done öğesini seçin ve OK düğmesine basın. No Disc Programme System ► Setup Clock Set ► Language ► Audio ► Video ► Parental Control ► Install ► Manual Setup 01 PR CH ◄1► ---Name Off Decoder MFT --- --Done MOVE OK RETURN EXIT Install öğesini seçmek için ▲▼ 3 düğmelerine, ardından OK veya ► düğmesine basın. DVD-Recorder Install No Disc Programme Auto Setup ► Setup Manual Setup ► MOVE OK RETURN EXIT MOVE OK - CH : ◄ ► düğmelerini kullanarak kanalı ayarlayın. - Name : Yayın sinyalinde otomatik olarak belirlenen ekran istasyon adı. Algılanmazsa, ▲▼◄ ► düğmelerini kullanarak adı düzenleyebilirsiniz. - Decoder: Ayarlamayı yaparsanız, harici dekoder kutusunu kullanarak karışmış olan kanalları kaydedebilirsiniz. Ayarlamadan önce, sayfa 18’deki harici dekoder kutusunu bağlama kısmına bakın. - MFT: ◄ ► düğmelerini kullanarak kanal frekansını daha iyi ayarlayabilirsiniz. • Delete: Seçilen PR’nin (program) kanal bilgisi çıkarılır. • Swap: İki PR’nin (program) kanal bilgisini değiştirebilirsiniz. Örneğin, PR2 ve PR5’i değiştirmek istiyorsanız, PR2’de swap öğesini seçin ve PR5’te OK düğmesine basın. 28- Türkçe 01094N-R135-AND-TUR.indb 28 2006-04-11 오후 4:15:59 İstediğiniz dili seçmek için ▲▼ 4 düğmesine düğmelerine, ardından OK veya ► basın. Dil Seçeneklerinin Ayarlanması Audio : Hoparlör sesi için. Subtitle : Disk altyazıları için. Disc Menu : Diskte bulunan disk menüsü için. On-Screen Menu : DVD Kaydedicinizin ekranı için. • DivX Subtitle: Bölgeye göre desteklenen bir DivX altyazı dilinin seçilmesi. • • • • Ses, altyazı, disk menüsü, ekran menüsü ve DivX altyazı menüsünü önceden ayarlarsanız, her film izleyişinizde otomatik olarak çıkarlar. Seçilen dil disk üzerinde kayıtlı değilse, önceden kaydedilmiş orijinal dil seçilir. Kaydedici, Stop modunda/No Disc 1 DVD modundayken MENU düğmesine basın. DVD-Recorder Programme No Disc Programme Scheduled Record List Central İngilizce, Arnavutça, Hırvatça, Çekçe, Macarca, Lehçe, :Rumence, Sırpça(Latin), Slovakça ve Slovence Greek İngilizce ve Yunanca Cyrillic İngilizce, Azerice, Belarus dili, Bulgarca, Kazakça, Makedonca, Rusça, Sırpça, Tatarca, Ukrayna dili, Özbekçe EXIT RETURN Setup öğesini seçmek için ▲▼ 2 düğmelerine, ardından OK veya ► düğmesine basın. DVD-Recorder İstediğiniz dili seçmek için ▲▼ düğmelerine, 5 ardından OK veya ► düğmesine basın. DVD-Recorder Programme Audio Setup Subtitle Disc Menu ► Setup Clock Set ► Language ► Audio ► Video ► Parental Control ► Install MOVE OK OK RETURN ► ► : Deutsch English ► ► ► ▼ EXIT EXIT Dil ayar menüsü görünür. DVD-Recorder Language No Disc Programme Audio : Original ► Setup Subtitle : Automatic ► Disc Menu : English ► On-Screen Menu : English ► DivX Subtitle ► OK MOVE ▲ ► RETURN Language öğesini seçmek için ▲▼ 3 düğmelerine, sonra da OK veya ► düğmesine basın. MOVE : Original English : Automatic Français On-Screen Menu : Español English Italiano DivX Subtitle : Western Nederlands Korean No Disc System Language No Disc Setup Programme Sistem Ayarları OK Hollanda lehçesi, Bask dili, Katalanca, Danca, Felemenkçe, İngilizce, İskandinavya dilleri, Fince, Fransızca, Almanca, İzlandaca, Endonezya dili, İtalyanca, Malayca, Norveççe, Portekizce, İspanyolca, Swahili ve İsveççe ► Setup MOVE Western : Western RETURN NOT Önceki menüye dönmek için RETURN ya da oe ◄ düğmesine basın. Menüden çıkmak için MENU düğmesine basın. Seçilen dil sadece diskte destekleniyorsa çıkar. Altyazı dili kesik yazı karakterleriyle görüntüleniyorsa, DivX Altyazısını uygun bölgeye değiştirin. Hala düzelmiyorsa, format desteklenmiyordur. EXIT Türkçe -29 01094N-R135-AND-TUR.indb 29 2006-04-11 오후 4:16:01 EP Modu Zaman Ayarı EP Mode Time öğesini seçmek için 4 ▲▼ düğmelerine, ardından OK veya ► düğmesine basın. DVD-Recorder System No Disc REC MODE düğmesine peş peşe basarak dört kayıt modundan birini seçebilirsiniz. EP modu dört REC Modundan biridir (XP, SP, LP, EP).EP(Uzatılmış Oynatma) modunda bu ayar ile kayıt süresini 6 ila 8 saat arasında ayarlayabilirsiniz. Kaydedici, Stop modunda/No Disc 1 DVD modundayken MENU düğmesine basın. DVD-Recorder Programme EP Mode Time 6 Hours 6: Hours ► Setup Chapter Creator 8Off Hours ► Quick Recording : Off ► MOVE OK RETURN EXIT İstediğiniz saati seçmek için ▲▼ 5 düğmelerine, ardından OK veya ► düğmesine basın. Programme No Disc Programme Scheduled Record List ► Sistem Ayarları Setup MOVE OK RETURN EXIT Setup öğesini seçmek için ▲▼ 2 düğmelerine, ardından OK veya ► düğmesine basın. DVD-Recorder Setup No Disc Programme System ► Setup Clock Set ► Language ► Audio ► Video ► Parental Control ► Install MOVE OK ► RETURN EXIT öğesini seçmek için ▲▼ düğmelerine, 3 System ardından OK veya ► düğmesine basın. Sistem menüsü görünür. DVD-Recorder System No Disc Programme EP Mode Time : 6 Hours ► Setup Chapter Creator : Off ► Quick Recording : Off ► MOVE OK RETURN EXIT 30- Türkçe 01094N-R135-AND-TUR.indb 30 2006-04-11 오후 4:16:03 On veya Off öğesini seçmek için ▲▼ 5 düğmelerine, ardından OK veya ► düğmesine basın. Otomatik Alt Bölüm Oluşturma • Off : Bu seçeneği, Otomatik Bölüm Yaratılmasını istemediğinizde seçin. • On : Bu seçeneği, Otomatik Bölüm Yaratılmasını istediğinizde seçin. Bir DVD Video ‘Bölüm’ ve ‘Alt Bölümler’den oluşur. Bir program kaydettiğinizde, bu bir Bölümdür. Bu işlevi kullanırsanız Bölüm, Kısımlara bölünür. Kayda başlamak için REC (Kayıt) düğmesine 6 görmek basın. (Kayıt modunun nasıl ayarlandığını için sayfa 41’ye bakın) “Do you want to create the chapter menu after this recording?” mesajı görünür. (V modu) DVD Kaydedici Stop modundayken MENU 1 düğmesine basın. DVD-Recorder Title List Do you want to create the chapter menu DVD-RW(V) Title List after this recording? Title List ► Yes Disc Manager No Setup MOVE 2 OK RETURN EXIT Setup öğesini seçmek için ▲▼ düğmelerine, ardından OK veya ► düğmesine basın. DVD-Recorder seçmek için ◄ ► düğmelerine düğmesine basın. 7 veYesOKöğesini Sistem Ayarları Programme • Seçilen kayıt moduna göre yeni bir bölüm yaratılır. Bir bölüm, XP ve SP’de yaklaşık 5 dakika, LP ve EP modlarında da yaklaşık 15 dakika uzunluğundadır. Setup DVD-RW(V) Title List System ► Disc Manager Clock Set ► Language ► Audio ► Video ► Parental Control ► Programme Setup Install OK MOVE 3 ► RETURN EXIT System öğesini seçmek için ▲▼ düğmelerine, ardından OK veya ► düğmesine basın. durdurmak için STOP (Durdur) düğmesine basın. 8 Kaydı Yaratılan kısımları görüntülemek için diski sonlandırın (bkz. sayfa 85) ve DISC MENU 9 düğmesine basın. Bölüm menüsü ekrana gelir. Sistem menüsü görünür. 1/1 DVD-Recorder 1 System 2 3 DVD-RW(V) Title List EP Mode Time : 6 Hours ► : Off ► Programme Quick Recording : Off ► Disc Manager Chapter Creator Setup Previous MOVE OK RETURN Next EXIT Chapter Creator öğesini seçmek için düğmelerine, ardından OK veya ► 4 ▲▼ düğmesine basın. DVD-Recorder Top System DİKKAT Automatic Chapter Creation işlevi, Zamanlayıcı ile Kayıt sırasında veya gücü kapattığınızda çalışmaz. DVD-R diskleri sonlandırılamaz. DVD-RW(V) Title List EP Mode Time : 6 Hours ► : Off Off ► Off Programme Quick Recording : On ► Disc Manager Chapter Creator Setup MOVE OK RETURN EXIT Türkçe -31 01094N-R135-AND-TUR.indb 31 2006-04-11 오후 4:16:05 öğesini seçmek için ▲▼ düğmelerine, 5 On ardından OK veya ► düğmesine basın. Hızlı Kayıt Ayarı Bu işlev devredeyken, DVD Kaydedici ve televizyon aynı anda açılır ve istediğiniz kanaldan anında kayıt yapabilmeniz sağlanır. Kaydedici, Stop modunda/No Disc 1 DVD modundayken MENU düğmesine basın. DVD-Recorder Programme Ses Seçeneklerinin Ayarlanması No Disc Programme Scheduled Record List ► Sistem Ayarları Setup MOVE OK RETURN DVD Kaydediciyi harici bir amplifikatöre veya Ev Sineması sistemine bağlayabilirsiniz. Ses cihazını ve ses durumunu, kullanılan ses sistemine göre ayarlamanızı sağlar. EXIT Setup öğesini seçmek için ▲▼ ardından OK veya ► 2 düğmelerine, düğmesine basın. DVD-Recorder Setup No Disc System ► Setup Clock Set ► Language ► Audio ► Video ► Parental Control ► Install OK DVD-Recorder Programme No Disc Programme Programme MOVE Kaydedici, Stop modunda/No Disc modundayken MENU düğmesine basın. 1 DVD Scheduled Record List ► Setup ► RETURN MOVE EXIT öğesini seçmek için ▲▼ düğmelerine, 3 System ardından OK veya ► düğmesine basın. Sistem menüsü görünür. DVD-Recorder OK RETURN EXIT Setup öğesini seçmek için ▲▼ ardından OK veya ► 2 düğmelerine, düğmesine basın. System DVD-Recorder No Disc Programme EP Mode Time : 6 Hours ► Setup Chapter Creator : Off ► Quick Recording : Off ► Setup No Disc Programme System ► Setup Clock Set ► Language ► Audio ► Video ► Parental Control ► Install MOVE OK RETURN MOVE Quick Recording öğesini seçmek için 4 ▲▼ düğmelerine, ardından OK veya ► düğmesine basın. DVD-Recorder System No Disc Programme EP Mode Time : 6 Hours ► Setup Chapter Creator : Off ► Quick Recording : Off Off ► On MOVE OK RETURN ► EXIT OK RETURN EXIT Audio öğesini seçmek için ▲▼ 3 düğmesine düğmelerine, ardından OK veya ► basın. Ses ayar menüsü görünür. DVD-Recorder Audio No Disc Programme Digital Output : PCM ► Setup DTS : Off ► Dynamic Compression : On ► NICAM ► : On EXIT MOVE OK RETURN EXIT 32- Türkçe 01094N-R135-AND-TUR.indb 32 2006-04-11 오후 4:16:08 İstediğiniz sesi seçmek için ▲▼ 4 düğmesine düğmelerine, ardından OK veya ► basın. DVD-Recorder Audio No Disc Programme Digital Output Setup MOVE DTS : PCM ► : Bitstream Off ► Dynamic Compression : On ► NICAM ► OK : On RETURN DTS 1. Off : DTS sinyali göndermez. AV alıcınızın veya AV amplifikatörünüzün DTS dekoderi yoksa bunu seçin. 2. On : DTS parçası çaldığınızda, dijital çıkış üzerinden DTS Bitstream gönderir. AV alıcınızın (veya AV amplifikatörünüzün) DTS dekoderi varsa bunu seçin. EXIT NOT 5 İstediğiniz öğeyi seçmek için ▲▼ düğmelerine, ardından OK veya ► düğmesine basın. Bir DTS parçası çalınırken, ses AV Ses Çıkışından çıkmaz. Dinamik Sıkıştırma Bu sadece, bir Dolby Digital sinyali algılandığında aktif olur. Önceki menüye dönmek için RETURN ya da oe ◄ düğmesine basın. Menüden çıkmak için MENU düğmesine basın. 1. On : Film müzikleri düşük seste veya küçük hoparlörlerden çalınıyorsa, sistem düşük seviyeli içeriği daha anlaşılır hale getirmek ve dramatik sahnelerin çok gürültülü olmasını önlemek için uygun sıkıştırmayı uygulayabilir. 2. Off : Filminizin keyfini standart Dinamik Aralıkta çıkarabilirsiniz. Sistem Ayarları NOT Ses Seçenekleri Digital Output NICAM 1. PCM : Dolby Digital (veya MPEG-2) sinyalini çözecek bir aygıtınız yoksa bunu seçin. Dolby Digital (veya MPEG-2) parçası çaldığınızda, dijital çıkış PCM Stereo’ya çevrilir. 2. Bitstream : Dolby Digital (veya MPEG-2) ses çıkışını bitstream olarak ayarlar. AV alıcınızın veya AV amplifikatörünüzün Dolby Digital (veya MPEG-2) Dekoderi varsa bunu seçin. NICAM programları 3’e ayrılır. NICAM Stereo, NICAM Mono ve Bilingual (başka bir dilde iletim). NICAM programları her zaman standart bir tek ses yayınıyla birlikte verilir ve NICAM’ı açık veya kapalı olarak ayarlayarak istediğiniz sesi seçebilirsiniz. NOT Dijital çıkış ayarı, eşit şekilde hem Dolby Digital hem MPEG-2 sesi için uygulanır. LPCM parçaların çıkışları daima PCM olur. Bunun Digital Output ayarıyla ilgisi yoktur. 1. On : NICAM modu 2. Off : Bu konumu yalnızca, bir NICAM yayını esnasında düşük yayın sinyalleri yüzünden stereo ses bozuluyorsa, standard mono seste kayıt yapmak için kullanın. Doğru Digital Output ayarını seçtiğinizden emin olun yoksa ya hiç ses duymazsınız ya da yüksek bir gürültü duyarsınız. Türkçe -33 01094N-R135-AND-TUR.indb 33 2006-04-11 오후 4:16:10 Video Çıkış Seçeneklerinin Ayarlanması Video Output öğesini seçmek için ▲▼ 4 düğmelerine, ardından OK veya ► düğmesine basın. DVD-Recorder Video No Disc Programme TV Aspect Setup 3D Noise Reduction : Off Component : Component RGB HDMI/DVI Resolution : 576p Video Output RGB veya Komponent Video bağlantılarıyla yüksek kaliteli görüntülerin keyfini çıkarabilirsiniz. 1 DivX(R) Registration MOVE DVD Kaydedici, Stop/No Disc modundayken MENU düğmesine basın. DVD-Recorder Programme : 16:9 Wide OK RETURN ► ► ► ► ► EXIT Component DVD Kaydedici televizyona, Komponent jak ile bağlanmışsa bunu seçin. RGB DVD Kaydedici televizyona, SCART kablosu ile bağlanmışsa bunu seçin. No Disc Programme Scheduled Record List ► Sistem Ayarları Setup MOVE OK RETURN EXIT Setup öğesini seçmek için ▲▼ 2 düğmesine düğmelerine, ardından OK veya ► basın. DVD-Recorder Setup No Disc Programme System ► Setup Clock Set ► Language ► Audio ► Video ► Parental Control ► Install MOVE OK ► RETURN Component modunda, video çıkışını Progressive (P.SCAN) veya Interlace olarak ayarlayabilirsiniz, bkz. sayfa 35. HDMI kablosu bağlı değilse uygun video çıkış jakları şöyledir. Kullanılabilen Video Çıkış Jakları EXIT öğesini seçmek için ▲▼ düğmelerine, ardından OK veya ► 3 Video düğmesine basın. Video ayar menüsü görünür. DVD-Recorder öğeyi seçmek için ▲▼ 5 İstediğiniz düğmelerine, ardından OK veya ►düğmesine basın. Component modu Ayar modu RGB Modu Çıkış jakı P.SCAN kapalı (Interlace modu) P.SCAN açık Component Output O O X (TV, progressive modunda) (Y, PB, PR) R, G, B Composite Composite Video out S-Video out AV1 Scart X O O O X X X X O X O O Video No Disc Programme TV Aspect Setup 3D Noise Reduction : Off ► Video Output ► MOVE : 16:9 Wide : Component ► HDMI/DVI Resolution : 576p ► DivX(R) Registration ► OK RETURN NOT HDMI kablosu bağlıysa diğer A/V çıkışları çalışmaz. EXIT 34- Türkçe 01094N-R135-AND-TUR.indb 34 2006-04-11 오후 4:16:11 Progressive scan özelliğinin ayarlanması Televizyonunuz Progressive Scan özellliğini destekliyorsa, daha yüksek video kalitesinin keyfini çıkarmak için DVD Kaydedicinin önündeki P.SCAN düğmesine basın. Progressive scan özelliğinin iptali Kaydedici Stop modundayken, DVD 1 DVD Kaydedicinin önündeki P.SCAN düğmesine basın. “Press [Yes] to confirm Interlace scan mode. Otherwise press [No]” mesajı görünür. Kaydedici Stop modundayken, DVD 1 DVD Kaydedicinin önündeki P.SCAN düğmesine basın. “Press [Yes] to confirm Progressive scan mode. Otherwise press [No]” mesajı görünür. Press [Yes] to confirm Interlace scan mode. Otherwise press [No] Yes No Press [Yes] to confirm Progressive scan mode. Yes No seçmek için ◄► düğmelerine 2 veYesOKöğesini düğmesine basın. öğesini seçmek için ◄► düğmelerine 2 Yes ve OK düğmesine basın. Televizyonunuzu Progressive girişe 3 kumandasını ayarlayın (Televizyonunuzun uzaktan kullanarak.) Televizyonunuzu Interlace girişe ayarlayın 3 kullanarak.) (Televizyonunuzun uzaktan kumandasını NOT NOT HDMI kablosu bağlıysa ekranda görüntü yoktur ÄProgressive modunu desteklemeyen bir televizyon kullanıyorsanız P.SCAN düğmesine basmayın. Basılırsa ekranda hiçbir şey görüntülenmez. Sistem Ayarları Otherwise press [No] Televizyonunuz Progressive modu desteklemediği halde yanlışlıkla P.SCAN düğmesine basarsanız, Progressive moddan çıkmanız gerekir. Progressive moddan çıkmak için, ön paneldeki P.SCAN düğmesine 2 kez basın. Ön panel göstergesindeki PS LED'i söndükten sonra ekran düzelir. Progressive tarama ayarı yalnızca, Video Out seçeneği, Component olarak ayarlandığında geçerlidir. DVD Kaydedicinin ön panelindeki P.SCAN düğmesine oynatma sırasında basılırsa, ekranda yasak işareti ( ) belirir. Progressive ayarı yalnızca, DVD kaydedici stop modundayken geçerlidir. Türkçe -35 01094N-R135-AND-TUR.indb 35 2006-04-11 오후 4:16:13 Görüntü (Video) Seçeneklerinin Ayarlanması Bu işlev TV ekranı ayarlarını yapmanızı sağlar. Kaydedici, Stop /No Disc 1 DVD modundayken MENU düğmesine basın. DVD-Recorder Görüntü (Video) Seçenekleri Bu işlev, diskin tipine bağlıdır. Bazı disk tiplerinde çalışmayabilir. Programme No Disc Programme Önceki menüye dönmek için RETURN ya da oe ◄ düğmesine basın. Menüden çıkmak için MENU düğmesine basın. NOT Scheduled Record List ► TV Aspect Setup Televizyonunuzun tipine göre, ekran ayarını düzenlemek isteyebilirsiniz. (en-boy oranı) DVD-Recorder Sistem Ayarları MOVE 2 OK RETURN EXIT Programme TV Aspect Setup 3D Noise Reduction :4:3 OffPan-Scan 16:9 Wide Video Output : RGB Setup öğesini seçmek için ▲▼ düğmelerine, ardından OK veya ► düğmesine basın. DVD-Recorder Video No Disc ► ► ► HDMI/DVI Resolution : 576p ► DivX(R) Registration ► OK MOVE Setup :4:3 4:3LetterBox Letter Box RETURN EXIT No Disc Programme System ► Setup Clock Set ► Language ► Audio ► Video ► Parental Control ► Install MOVE OK ► RETURN EXIT Video öğesini seçmek için ▲▼düğmelerine, OK veya ► düğmesine basın. 3 ardından • 4:3 LetterBox : Televizyonunuzun ekran oranı 4:3 olsa bile DVD’nin sunduğu 16:9 oranında seyretmek istediğinizde bunu seçin. Ekranın üst ve alt kısmında siyah kısımlar oluşur. • 4:3 Pan-Scan : Geleneksel bir televizyonda, 16:9 ekranın merkez kısmını seyretmek istediğinizde bunu seçin. (En sondaki sol ve sağ uç kısımlar kesilir.) • 16:9 Wide : Geniş ekran televizyonunuzda tam 16:9 görüntüsüne sahip olursunuz. Video ayar menüsü görünür. DVD-Recorder Video No Disc Programme TV Aspect Setup 3D Noise Reduction : Off ► Video Output ► : 16:9 Wide ► : Component HDMI/DVI Resolution : 576p ► DivX(R) Registration ► 3D Noise Reduction (harekete uyarlı parazit indirgeme) DVD-Recorder Video No Disc Programme TV Aspect Setup MOVE OK RETURN EXIT Video No Disc Programme TV Aspect Setup 3D Noise Reduction :4:3 OffPan-Scan 16:9 Wide Video Output : RGB MOVE :4:3 4:3LetterBox Letter Box ► ► ► DivX(R) Registration ► RETURN ► ► HDMI/DVI Resolution : 576p ► DivX(R) Registration ► OK RETURN EXIT • On : Parazit indirgeme ile daha temiz bir görüntü sunar (kayıt için). • Off : Normal ► HDMI/DVI Resolution : 576p OK MOVE ► :On RGB Video Output İstediğiniz video seçeneğini belirlemek için ▲▼ 4 düğmelerine, ardından OK veya ► düğmesine basın. DVD-Recorder : 16:9 Wide 3D Noise Reduction :Off Off EXIT öğeyi seçmek için ▲▼ 5 İstediğiniz düğmelerine, ardından OK veya ► düğmesine basın. 36- Türkçe 01094N-R135-AND-TUR.indb 36 2006-04-11 오후 4:16:15 HDMI/DVI Çözünürlüğü Bu ayar, DVD Kaydedici Görüntüleme cihazlarına (televizyon, projektör, vs.) HDMI veya DVI ile bağlandığında kullanılır. DVD-Recorder DivX(R) Kayıt Video No Disc Programme TV Aspect Setup : 16:9 Wide ► 3D Noise Reduction : Off ► Video Output ► : Component HDMI/DVI Resolution 576p DivX(R) Registration 720p 1080i MOVE OK RETURN ► ► EXIT • 576p : 720 x 576 • 720p : 1280 x 720 • 1080i : 1920 x 1080 Çıkış Seçimi Sürekli tarama HDMI bağlandığında otomatik olarak etkinleşir. Sürekli tarama işlevi etkinleştirilmeden, HDMI video ve ses çıkışı yapılamaz. Televizyonunuzun Sürekli Taramayı destekleyip desteklemediğini öğrenmek için TV Kullanım Kılavuzunuza bakın. Sürekli Tarama destekleniyorsa, televizyonun menü sisteminde Sürekli Tarama ayarlarıyla ilgili TV Kullanım Kılavuzundaki komutları uygulayın. Video Output (Video Çıkışı) yanlış ayarlanırsa, ekran çalışmayabilir. HDMI/DVI çıkışında kullanılabilecek çözünürlükler bağlanan televizyona veya projektöre bağlıdır. Ayrıntılı bilgi için, televizyonunuzun veya projektörünüzün kullanım kılavuzuna bakın. Çözünürlük değiştirildiğinde, normal görüntünün ekrana gelmesi birkaç saniye alabilir. HDMI çıkış çözünürlüğünü 720p veya 1080i olarak ayarlarsanız, HDMI çıkışı daha iyi görüntü kalitesi sağlar. DivX oynatma ekran çıkışı yalnızca 576p çözünürlükte gerçekleştirilebilir. Ebeveyn Kontrolünün Ayarlanması Ebeveyn Kontrolü işlevi, ailenizin seyredeceği DVD’lerin türünü belirleyebilmeniz için sınıflandırılmış DVD’lerle birlikte çalışır. Bir diskte 8’e kadar sınıflandırma seviyesi bulunur. Sistem Ayarları • DVD Kaydedici cihazını televizyonunuza HDMI veya DVI kablosuyla bağlayın. Televizyonunuzun girişini HDMI olarak ayarlayın. • Aşağıdaki gibi HDMI çıkış çözünürlüğünü seçmek için, cihaz Stop (Durdurma ) modundayken P.SCAN düğmesine basın: 576p 720p 1080i NOT Bu DVD Kaydediciyi, DivX(R) Video On Demand formatında kaydettirmek için lütfen Kayıt kodunu kullanın. Daha fazla bilgi için www.divx.com/vod adresini ziyaret edin. Kaydedici, Stop /No Disc 1 DVD modundayken MENU düğmesine basın. DVD-Recorder Programme No Disc Programme Scheduled Record List ► Setup MOVE OK RETURN EXIT öğesini seçmek için ▲▼ 2 Setup düğmelerine, ardından OK veya ► düğmesine basın. DVD-Recorder Setup No Disc Programme System ► Setup Clock Set ► Language ► Audio ► Video ► Parental Control ► Install MOVE OK ► RETURN EXIT Türkçe -37 01094N-R135-AND-TUR.indb 37 2006-04-11 오후 4:16:17 Control öğesini seçmek için ▲▼ 3 Parental düğmelerine, ardından OK veya ► düğmesine basın. Şifrenizi unuttuysanız ‘Create the password’ mesajı görüntülenecektir. DVD-Recorder Parental Control No Disc Programme Setup 0 ~9 1 Diski çıkartın. Create the password NUMBER OK RETURN EXIT DVD Kaydedicinizin ön panelindeki PROG 2 Kaydedicinizde ) düğmelerini aynı anda, DVD ( disk olmadan, 5 saniye boyunca basılı tutun. Şifre de dahil tüm ayarlar fabrika ayarlarına geri dönecektir. kumanda üzerindeki 0 - 9 düğmelerini 4 Uzaktan kullanarak 4 basamaklı bir şifre girin. ‘Confirm the password’ mesajı görüntülenecektir. Şifrenizi tekrar girin. DVD-Recorder Parental Control Sınıflandırma Düzeyi Hakkında No Disc Sistem Ayarları Programme Setup Confirm the password Rating Level öğesini seçmek için ▲▼ 1 düğmelerine basın. 0~9 NUMBER OK RETURN EXIT DVD-Recorder Parental Control No Disc 5 Password öğesini seçmek için OK veya ► düğmesine basın. DVD-Recorder 6 ► : Level 1 Kids ► MOVE Password :Off Off ► OK RETURN EXIT ► On OK RETURN EXIT On veya Off öğesini seçmek için ▲▼ düğmelerine, ardından OK veya ► düğmesine basın. NOT : On Rating Level Parental Control Setup MOVE Password Setup Change Password No Disc Programme Programme Önceki menüye dönmek için RETURN ya da oe ◄ düğmesine basın. Menüden çıkmak için MENU düğmesine basın. 2 OK ya da ► düğmesine basın. Sınıflandırma düzeyi görünecektir. DVD-Recorder Parental Control No Disc Programme Password ► Setup Rating Level ► MOVE :On Level 8 Adults :Level Level71 Kids Level 6 Change Password Level 5 Level 4 Level 3 Level 2 Level 1 Kids OK RETURN ► EXIT İstediğiniz sınıflandırma düzeyini seçmek 3 için ▲▼ düğmelerine, ardından OK veya ► düğmesine basın. Örneğin, 6. Düzeye kadar seçerseniz, 7 ve 8. Düzeydeki diskler görüntülenmeyecektir. Daha büyük rakamlar programın sadece yetişkinlere yönelik olduğunu ifade eder. 38- Türkçe 01094N-R135-AND-TUR.indb 38 2006-04-11 오후 4:16:19 Şifre Değiştirme Hakkında Change Password öğesini seçmek için 1 ▲▼ düğmelerine basın. DVD-Recorder Parental Control No Disc Programme Password : On ► Setup Rating Level : Level 1 Kids ► Change Password MOVE OK ► RETURN EXIT 2 OK ya da ► düğmesine basın. ‘Enter the password’ mesajı görüntülenecektir. DVD-Recorder Sistem Ayarları Change Password No Disc Programme Setup 0 ~9 NUMBER Enter the password OK RETURN EXIT kumanda üzerindeki 0 - 9 3 Uzaktan düğmelerini kullanarak 4 basamaklı bir şifre girin. ‘Confirm the password’ mesajı görüntülenecektir.Şifrenizi tekrar girin. DVD-Recorder Change Password No Disc Programme Setup 0 ~9 NUMBER Confirm the password OK RETURN EXIT Şifrenizi unuttuysanız sayfa 38’ye bakın. NOT Türkçe -39 01094N-R135-AND-TUR.indb 39 2006-04-11 오후 4:16:21 Kayda Başlamadan Önce Kayıt Bu bölümde çeşitli DVD kayıt yöntemleri gösterilmektedir. Bu DVD Kaydedici çeşitli disk tiplerine kayıt yapabilmektedir. Kayıttan önce, aşağıdaki talimatları okuyun ve tercihinize uygun disk tipini seçin. Kayıt yapılabilen diskler Bu DVD Kaydedici aşağıdaki disk tiplerine kayıt yapabilmektedir. DVD-RW DVD-R DVD-RW’lere tekrar kayıt yapılabilir. DVD-R’lere tekrar kayıt yapılamaz. Samsung ve Diğer Kayıt Cihazı Markalarının Uyumluluğu Disk Tipleri Kayıt biçimi Kayıt Cihazı Samsung VR Modu Kayıt Diğer Marka DVD-RW Samsung V Modu Diğer Marka Samsung DVD-R V Modu Diğer Marka Sonlandırma Samsung Kaydedicide İlave Kayıt sonlandırılmış Kayıt yapılamaz sonlandırılmamış Kayıt yapılabilir sonlandırılmış Kayıt yapılamaz sonlandırılmamış Kayıt yapılabilir sonlandırılmış Kayıt yapılamaz sonlandırılmamış Kayıt yapılabilir sonlandırılmış Kayıt yapılamaz sonlandırılmamış Kayıt yapılamaz sonlandırılmış Kayıt yapılamaz sonlandırılmamış Kayıt yapılabilir sonlandırılmış Kayıt yapılamaz sonlandırılmamış Kayıt yapılamaz Kayda Başlamadan Önce.............................. 40 Seyretmekte olduğunuz TV programının kaydedilmesi .................................................. 42 Seyretmekte olduğunuz harici cihazlardan kayıt yapılması .............................................. 44 Video Kameradan Kopyalama....................... 44 Tek Tuşla Kayıt Yapma (OTR) ...................... 45 Zamanlayıcı ile Kayıt Yapma ........................ 46 Esnek Kayıt (sadece Zamanlayıcı kaydı için geçerlidir) ....................................................... 47 Programlanan Kayıt Listesinin Düzenlenmesi .. 48 NOT Sonlandırma - Bu işlem, DVD-RW/-R'i daha başka kayıt yapılamayacak şekilde kapatır. Sonlandırmayı Geri Alma - Bu, DVD Kaydedicide kaydedilen bir DVD-RW diskine ilave kayıtlar yapılabilmesini sağlar - Bilgisayarda DAO (Disc At Once) ile kaydedilen bir DVD-RW diskinde sonlandırma geri alınamaz. - Farklı bir marka kaydedicide Video Modunda kaydedilen bir DVD-RW diskinde sonlandırma geri alınamaz. - DVD-R diskinde sonlandırma geri alınamaz. Programlanan Kayıt Listesinin Silinmesi ....... 48 Standart Zamanlayıcı Listesinin Kaydı .......... 49 40- Türkçe 01094N-R135-AND-TUR.indb 40 2006-04-11 오후 4:16:23 Kayıt Biçimleri Mod Mevcut fonksiyonlar disk türüne bağlı olarak değiştiği için tercihinize en uygun diski seçin. Daha önce kullanılmamış yeni bir disk taktığınızda aşağıdaki mesajlar çıkar DVD-RW: Boş bir disk ilk kez takıldığında, “Uninitialized Disc Do you want to initialize this disc?” mesajı çıkar. Yes'i seçerseniz, disk VR Modunda biçimlendirilir. XP Video kalitesi önemli (yüksek kalite olduğu zaman seçin. modu) Standart kalitede kayıt SP (standart kalite modu) yapmak için seçin. LP (uzun kayıt modu) EP (uzatılmış mod) Uninitialized Disc Do you want to initialize this disc? Yes FR (Esnek Kayıt) No VR Modunda veya Video Modunda biçimlendirme yapmak istiyorsanız, sayfa 83 ve 84’teki Diskin Biçimlendirilmesi bölümüne bakın. DVD-Recorder Disc Manager DVD-RW(VR) Title List Disc Name : Playlist Clock Set Setup MOVE OK Yaklaşık 2 saat yaklaşık 4 Mbps Yaklaşık 4 saat yaklaşık 2 Mbps Uzun kayıt süresi gerektiğinde seçin. Yaklaşık 6 saat/ yaklaşık 1,2 Mbps Yaklaşık 8 saat/ yaklaşık 0,8 Mbps Sadece zamanlayıcı kaydı Yaklaşık 60 ila 480 Dak için geçerlidir, bkz. sayfa 47. Yaklaşık 0,8 ila 8 Mbps Daha da uzun kayıt süresi gerektiğinde seçin. Kaydedilemeyen video Kopyalamaya karşı koruması olan videolar bu DVD Kaydedicide kaydedilemez. DVD Kaydedici, kayıt esnasında bir kopyalama koruma sinyali alırsa kayıt durur ve ekranda aşağıdaki mesaj belirir. ► ► DVD-VR Yaklaşık 1 saat yaklaşık 8 Mbps ► Channal Disc Manager Choose the recording format for DVD-RW Langguage Programme Kayıt Süreleri Veri Oranları Özellik ► ► ► DVD-V RETURN You cannot record copy protected movie. EXIT DVD-R: DVD’nin biçimlendirilmesi gerekmez ve sadece Video Modunda Kayıt desteklenir. DVD-R / DVD-RW disklerine Video modunda yaptığınız kaydı, Chapter Creator işlevi On olarak ayarlıyken sonlandırdığınızda bölümler otomatik olarak oluşturulur. Kısımların uzunluğu (kısımlar arasındaki aralık) kayıt moduna göre değişir. Basit düzenleme (bölümlerin silinmesi/bölüm adının değiştirilmesi) DVD-RW(VR modu) Bu mod, çoklu düzenleme işlevlerini içerir (örneğin bölümün tamamının silinmesi, kısmen silinmesi, vb.) Oluşturulmuş bir çalma listesi kullanılan çeşitli düzenleme seçenekleri Kayıt Modu DVD Kaydedici Stop modundayken REC MODE düğmesine tekrar tekrar basarak dilediğiniz kayıt süresini ve görüntü kalitesi için dört kayıt modundan birini seçin. Genel olarak kayıt süresi azaldıkça görüntü kalitesi artar. FR modunda, en uygun kayıt modu, diskte kalan süreye ve zamanlayıcı kaydının uzunluğuna göre otomatik olarak ayarlanır. Bu işlev XP, SP, LP ve EP modlarında yalnız bir mod olarak seçilir ve bunu zamanlayıcı kaydı için kullanabilirsiniz. Kopyalama Karşı Koruma Sinyalleri Kopyalama kontrol sinyalleri içeren TV yayınları şu üç sinyal tipinden birini içerir: Copy-Free (Serbest), CopyOnce (Tek Seferlik) ve Copy-Never (Kopyalanamaz). Tek seferlik kopyalanabilen tipte bir programı kaydetmek istiyorsanız, CPRM ile VR modunda DVDRW kullanın. Ortam DVD-RW Sinyal tipi Serbest Kayıt DVD-RW(Video modu)/-R Tek Seferlik Kopyalanamaz O - - VR modu O O* - Video modu O - DVD-R O - DVD-RW CPRM ile “Copy Once” kayıt yapıldıktan sonra ilave kayıt yapılamaz. - Kaydedilebilen Ortamlarda İçerik Koruması (Content Protection for Recordable Media - CPRM) CPRM, bir kaydı, üzerine kaydedildiği ortama bağlayan bir mekanizmadır. Bazı DVD kaydediciler bunu desteklese de, çoğu DVD oynatıcısı desteklememektedir. Kayıt yapılabilen her boş DVD, BCA'ya işlenmiş özel bir 64-bit ortam ID'sine sahiptir. Diske, korumalı bir içerik kaydedildiği zaman bu, ortam ID'sinden alınan 56-bit C2 (Cryptomeria) şifre ile şifrelenebilir. Oynatma esnasında, ID, BCA tarafından okunur ve diskin içeriğini çözmek için bir anahtar olarak kullanılır. Diskin içeriği başka bir ortama kopyalanırsa, ID olmayacak ya da yanlış olacaktır ve verilerin şifresi çözülemeyecektir. Türkçe -41 01094N-R135-AND-TUR.indb 41 2006-04-11 오후 4:16:24 INFO Düğmesi Hakkında Seyretmekte olduğunuz TV programının kaydedilmesi Başlamadan önce INFO işlevi, oynatma ve kaydın geçerli durumunu ve ilerleyişini görmenizi sağlar. Disk tipine ve durumuna bağlı olarak görüntülenen ekran farklı olabilir. Boş disk alanının kontrol edilmesi (Disk Bilgileri) Kullanılmış bir disk üzerine kayıt yaparken, kayıt için yeterli alan bulunduğundan emin olun. DVD-RW disklerinde, bölümleri silerek disk alanını boşaltabilirsiniz. Kayıt INFO düğmesine basın. Disk bilgileri ekran penceresi gözükür. Ekrandaki öğeler disk tipine ve kayıt biçimine göre farklılık gösterir. c e DVD-RW(VR) Disc Name f g h Total Title 15 Total Playlist 1 Recordable Time 02:12 SP Protection Not Protected Screen PR 11 [DUAL L] JAN 01 2006 SUN 12:00 i Disc Info Disc Diskte kayıt için yeterli alan olup olmadığını kontrol edin. Kayıt modunu ayarlayın. düğmesine basın ve disk 1 OPEN/CLOSE tepsisine kaydedilebilir bir disk yerleştirin. tepsisini kapatmak için OPEN/CLOSE 2 Disk düğmesine basın. Ön panel ekranında “LOAD” mesajı kaybolana kadar bekleyin. Kullanılmamış bir DVD-RW kullanılıyorsa, önce diski başlatıp başlatmayacağınız sorulur. Seçiminizi yapın ve OK düğmesine basın.(Bkz. Sayfa 41) Uninitialized Disc d Do you want to initialize this disc? Yes 1. Disk Tipi 2. Geçerli bilgi ekranı durumu 3. Disk Adı 4. Toplam Bölüm : Bölümlerin toplam sayısı 5. Toplam Oynatma Listesi : Oynatma listelerinin toplam sayısı 6. Kayıt Süresi : Her kayıt modundaki (yaklaşık) en uzun kesintisiz kayıt süresi 7. Tarih : Geçerli tarih ve saat No istediğiniz mevcut programı 3 (Kaydetmek seçmek için PROG ( / ) veya number ~ ) düğmelerine basın. 42- Türkçe 01094N-R135-AND-TUR.indb 42 2006-04-11 오후 4:16:26 Kaydetme hızını (kalitesini) seçmek için 4 (veya REC MODE düğmesine üst üste basın REC MODE düğmesine, sonra da ▲▼ düğmesine basın). SP LP EP Record Mode Kaydı durdurmak için Devam eden bir kaydı durdurmak için STOP düğmesine basın. DVD-RW/DVD-R disklerini kullanırken ‘Updating the disc information. Please wait for a moment.’ mesajı görünür. XP SP (02:12) NOT Kayıt yaparken kayıt modunu ve PROG öğesini değiştiremezsiniz. Kayıt için yeterli alan yoksa kayıt otomatik olarak durur. Bir diske en fazla 99 bölüm kaydedilebilir. Kopya koruması olan bir görüntü seçilmişse kayıt otomatik olarak durur. 5 REC düğmesine basın. Kanalla ilgili bilgi ekranda görüntülenir, ardından kayıt başlar. Ön panelde REC simgesi ( ) görünür. Kayda başlamadan önce DVD-RW diskleri biçimlendirilmelidir. Yeni disklerin çoğu biçimlendirilmemiş olarak satılmaktadır. Bu DVD Kaydedicide DVD-R yazma disklerini kullanmayın. Recording : PR 1 NICAM DUAL L DVD-RW(VR) Disc Name Total Title Total Playlist Recordable Time Protection Screen JAN 01 2006 SUN Kayıt Diskin geçerli durumunu ve kaydın ilerleyişini görmek için : INFO düğmesine basın, diskle ilgili bilgiler görünecektir. Disc Info 16 1 02:12 SP Not Protected PR 1 [ DUAL L] 12:00 Kayıtla ilgili bilgileri görmek için INFO düğmesine tekrar basın. DVD-RW(VR) Name Recording Info JAN/01/2006 12:00 PR1 Recording Title 16 Created Time JAN/01/2006 12:00 Recording Time 00:00:07 JAN 01 2006 SUN 12:00 Türkçe -43 01094N-R135-AND-TUR.indb 43 2006-04-11 오후 4:16:29 Seyretmekte olduğunuz harici cihazlardan kayıt yapılması 5 REC düğmesine basın. Kaydı duraklatmak için Devam eden bir kaydı duraklatmak için PLAY/PAUSE ( düğmesine basın. Kayda kaldığı yerden devam etmek için PLAY/ PAUSE ( ) düğmesine tekrar basın. Kayıt işlemine ara verilmişken PROG ( / ) düğmelerine basarak kanalları değiştirebilirsiniz. Başlamadan önce Diskte kayıt için yeterli alan olup olmadığını kontrol edin. Kayıt modunu ayarlayın. OPEN/CLOSE düğmesine basın ve disk 1 tepsisine kaydedilebilir bir disk yerleştirin. Disk tepsisini kapatmak için OPEN/CLOSE 2 düğmesine basın. Ön panel ekranında “LOAD” mesajı kaybolana kadar bekleyin. Kullanılmamış bir DVD-RW kullanılıyorsa, önce diski başlatıp başlatmayacağınız sorulur. (Bkz. sayfa 41) Kayıt 3 Giriş kaynağını, kurduğunuz bağlantıya göre seçmek için INPUT SEL. düğmesine basın. Ön panel göstergesi aşağıdaki sırayla değişir: PR Numarası AV1 AV2 AV3 DV Dijital bir video kamera bağlıyorsanız, DV öğesini seçmek için INPUT SEL. düğmesine basın. (Bkz. sayfa 44-45) Kaydetme hızını (kalitesini) seçmek için 4 REC MODE düğmesine üst üste basın (veya REC MODE düğmesine, sonra da ▲▼ düğmesine basın). SP LP EP Record Mode ) XP SP (02:12) Kaydı durdurmak için Devam eden bir kaydı durdurmak veya bitirmek için STOP düğmesine basın. DVD-RW/DVD-R disklerini kullanırken ‘Updating the disc information. Please wait for a moment.’ mesajı görünür. NOT Kayıt veya Pause modu sırasında kayıt modunu değiştiremezsiniz. Kayıt için yeterli alan yoksa kayıt otomatik olarak durur. Bir diske en fazla 99 bölüm kaydedilebilir. Kopya koruması olan bir görüntü seçilmişse kayıt otomatik olarak durur. Kayda başlamadan önce DVD-RW diskleri biçimlendirilmelidir. Yeni disklerin çoğu biçimlendirilmemiş olarak satılmaktadır. Bu DVD Kaydedicide DVD-R yazma disklerini kullanmayın. Video Kameradan Kopyalama Video Kameranızı IEEE1394 (DV) arabirimini kullanarak kontrol edebilirsiniz. Başlamadan önce Diskte kayıt için yeterli alan olup olmadığını kontrol edin. Kayıt modunu ayarlayın. düğmesine basın ve disk 1 OPEN/CLOSE tepsisine kaydedilebilir bir disk yerleştirin. 44- Türkçe 01094N-R135-AND-TUR.indb 44 2006-04-11 오후 4:16:30 Disk tepsisini kapatmak için OPEN/CLOSE 2 düğmesine basın. Ön panel ekranında “LOAD” mesajı kaybolana kadar bekleyin. Kullanılmamış bir DVD-RW kullanılıyorsa, önce diski başlatıp başlatmayacağınız sorulur. (Bkz. sayfa 41.) NOT Kaydetme hızını (kalitesini) seçmek için 3 REC MODE düğmesine üst üste basın (veya REC MODE düğmesine, sonra da ▲▼ düğmesine basın). SP LP EP Record Mode XP SP (02:12) öğesini seçmek için INPUT SEL. 4 DV düğmesine basın. Kayıt yaparken kayıt modunu ve giriş kaynağını değiştiremezsiniz. Kayıt için yeterli alan yoksa kayıt otomatik olarak durur. Bir diske en fazla 99 bölüm kaydedilebilir. Kopya koruması olan bir görüntü seçilmişse kayıt otomatik olarak durur. Kayda başlamadan önce DVD-RW diskleri biçimlendirilmelidir. Yeni disklerin çoğu biçimlendirilmemiş olarak satılmaktadır. Bu DVD Kaydedicide DVD-R yazma disklerini kullanmayın. DV jakı kullanarak bir video kamera bağlarsanız ilgili kontrol menüsü otomatik olarak görünür. Kayıt sırasında ekran kontrol öğelerine erişim için ◄ veya ► düğmelerine basın. Tek Tuşla Kayıt Yapma (OTR) Giriş DV öğesine ayarlıysa, ekranın üst kısmında video kameranın kontrol edilmesini sağlayan bir oynatma/kayıt menüsü görünür. DV The DV device is connected. MOVE 5 OK RETURN Bir TV kanalından kayıt yapmak 1 PROG istiyorsanız, dilediğiniz kanalı seçmek için ( / ) veya numara düğmelerine basın. Bağlı bir harici cihazdan kayıt yapmak istiyorsanız uygun bir harici giriş seçmek için INPUT SEL. düğmesine basın (AV1, AV2, AV3 veya DV) Video kamerayı oynatmak ve kopyalanacak başlangıç noktasını bulmak için ◄► düğmelerini kullanarak ekranın üst kısmındaki oynatma simgesini ( ) seçin ve OK düğmesine basın. başlatmak için ◄► düğmelerini kul6 Kaydı lanarak ekranın üst kısmındaki kaydetme simgesini ( ) seçin ve OK düğmesine basın. Kaydı başlatmak için uzaktan kumanda üzerindeki REC düğmesini de kullanabilirsiniz. (Video kameranız Stop modundaysa REC düğmesi çalışmaz.) Kayıt REC düğmesine üst üste basarak DVD Kaydediciyi önceden ayarlanmış aralıklarla kaydetmeye ayarlayabilirsiniz. TV PROGRAMI : 1 ila 99 başlamak için REC düğmesine 2 Kayda basın. kayıt zamanını ayarlamak için 3 Dilediğiniz REC düğmesine üst üste basın. 0:30 1:00 ... 4:00 5:00 ... 9:00 normal Kaydı durdurmak için Devam eden bir kaydı durdurmak veya bitirmek için STOP düğmesine basın. DVD-RW/DVD-R disklerini kullanırken ‘Updating the disc information. Please wait for a moment.’ mesajı görünür NOT Zamanlayıcı sayacı 9:00 ila 0:00 dakika geriye gider ve DVD Kaydedici kaydetmeyi durdurarak kapanır. Türkçe -45 01094N-R135-AND-TUR.indb 45 2006-04-11 오후 4:16:33 Diskin geçerli durumunu ve kaydın ilerleyişini görmek için : INFO düğmesine basın, diskle ilgili bilgiler görünecektir. DVD-RW(VR) Disc Name Disc Info Total Title 16 Total Playlist 1 Recordable Time 02:12 SP Protection Not Protected Screen PR 1 [ DUAL L] JAN 01 2006 SUN 12:00 INFO düğmesine bir kez daha basın. Daha sonra, kaydedilen bölümle ilgili bilgileri kontrol edebilirsiniz. DVD-RW(VR) Name Zamanlayıcı ile Kayıt Yapma Başlamadan önce 1. Anten kablosunun bağlı olup olmadığını kontrol edin. 2. Diskin kalan süresini kontrol edin. 3. Tarih ve saatin doğru olup olmadığını kontrol edin. Bir zamanlayıcı ile kayda geçmeden önce Clock (SetupClock Set) öğesinin ayarlı olduğundan emin olun. (Bkz. sayfa 25~26) Recording Info JAN/01/2006 12:00 PR1 Recording Title 16 Created Time JAN/01/2006 12:00 Recording Time 00:00:07 JAN 01 2006 SUN 12:00 DVD Kaydedici Stop modundayken TIMER 1 düğmesine basın. DVD-Recorder Programme DVD-RW(VR) Title List Scheduled Record List ► Playlist Kaydı durdurmak için STOP düğmesine basın. “Press STOP button once more to cancel Timer Record.” mesajı görünür. Disc Manager Programme Setup MOVE OK RETURN EXIT Kayıt MENU düğmesinin kullanılması. Press STOP button once more to cancel Timer Record. Kaydı durdurmak için STOP düğmesine tekrar basın. DVD Kaydedici Stop modundayken MENU düğmesine basın. Programme öğesini seçmek için ▲▼ düğmelerine, sonra da OK veya ► düğmesine basın. 2 OK veya ► düğmesine iki defa basın. • Timer Recording ekranı görünür. DVD-Recorder Scheduled Record List DVD-RW(VR) Current Time 12:05 No. Source Day Start End Speed V/P Edit No. 01 Source Day Start End PR 01 01 SUN 12:05 14:05 Speed V/P SP Off Available Time 00:48 SP MOVE OK RETURN EXIT ile kayıt seçeneğini ayarlayın. 3 Zamanlayıcı • Yön ve numara düğmelerini kullanarak giriş öğelerini doldurun. ◄ ► : Önceki/sonraki öğeye geçer, ▲▼, 0~9 : Bir değer ayarlar. 46- Türkçe 01094N-R135-AND-TUR.indb 46 2006-04-11 오후 4:16:35 • Source : Bir zamanlayıcı ile kayıt yapmak istediğiniz video giriş kaynağı (“AV1”, “AV2”, “AV3”) veya yayın yapan kanal. • Day : Zamanlayıcı ile Kayıt, bir ay boyunca kayıt zamanının ayarlanabilmesini sağlar.Kayıt gününü ayarlayın. 01 SUN 02 MON 03 TUE 04 WED Daily MO-SA MO-FR W-SA 31 TUE W-SU 4 OK düğmesine basın. Zamanlayıcı ayarları çakışıyorsa Programlar öncelik sırasına göre kaydedilir. Zamanlayıcı ile kayıt önce ilk program için, sonra tekrar ikinci program için ayarlanmışsa ve iki program da çakışıyorsa, ekranda aşağıdaki mesaj görünür: “This setting is identical with 1” Bu mesaj, birinci programın öncelikli olduğunu gösterir. Birinci programın kaydı tamamlandıktan sonra ikinci program kaydedilmeye başlar. Geçerli ayarları kaydetmeden çıkmak için MENU düğmesine basın. • Start/End Time : Zamanlayıcı ile kaydın başlama ve bitiş zamanı. • Speed (Kayıt Modu) : - FR (Esnek Kayıt) : Video kalitesini otomatik olarak ayarlamak istediğinizde seçin. FR modunda en uygun kayıt modu, diskte kalan süreye ve zamanlayıcı ile kaydın uzunluğuna göre otomatik ayarlanır. Bu işlev, XP, SP, LP ve EP modlarının sadece birinde seçilir ve bu modu zamanlayıcı ile kayıt için kullanabilirsiniz. - XP (yüksek kalite): Video kalitesi önemliyse seçin. (Yaklaşık 1 saat) - SP (standart kalite): Standart kalitede kayıt yapmak için seçin. (Yaklaşık 2 saat) - LP (düşük kalite): Uzun bir kayıt süresi gerektiğinde seçin.(Yaklaşık 4 saat) - EP (uzatılmış): Daha uzun bir kayıt süresi gerektiğinde seçin. (Yaklaşık 6 veya 8 saat) NOT EP modunda bir DVD-RW(V)/-R diskine kayıt yaparken, DVD Kaydedici VBR (Değişken Bit Hızı) KODLAMA sistemini kullandığından, tam olarak 6 veya 8 saat kayıt yapamayabilir. Örneğin, çok hareket barındıran bir program kaydediyorsanız daha yüksek bir bit hızı, dolayısıyla da daha fazla disk belleği kullanır. Zamanlayıcı ile Kayıt ayarlarını bitirmek 5 güç için cihazı kapatın. Zamanlayıcı ile Kayıt, açıkken çalışmaz. ön panelde görünür. Bir zamanlayıcı ile kaydın kayıtlı olduğu anlamına gelir. disk yerleştirilmediğinde yanıp söner. NOT Zamanlayıcı ile kayıt süresi, disk durumuna ve genel zamanlayıcı kayıt durumuna bağlı olarak ayarlanan süreyle farklılık gösterebilir (örneğin, kayıt zamanları çakıştığında veya önceki kayıt, bir sonraki kaydın başlama zamanından 2 dakika önce bittiğinde). Kayıt • V/P : VPS (Video Program Sistemi) veya PDC (Program Dağıtım Kontrolü) işlevi. - Bu işlevi etkinleştirirseniz, yayın sinyalinde bulunan özel sinyal ile kaydın başlama ve bitiş zamanlarını kontrol edebilirsiniz. Bir TV programı kısaltılmışsa veya planlanandan daha erken veya geç başlıyorsa, bu işlev kaydın başlama ve bitiş zamanlarını gerçek yayın zamanlarıyla otomatik olarak eşitler. - Başlama zamanını, TAM OLARAK yayımlanan TV çizelgesine göre ayarlayın. Aksi takdirde zamanlayıcı ile kayıt yapılamaz. - Kaydetmek istediğiniz programın PCD veya VPS ile yayınlandığından emin olmadan PDC veya VPS öğelerini seçmeyin. Önceki menüye dönmek için Bir zamanlayıcı ile kayıt ayarlamak istemiyorsanız RETURN düğmesine basın. Zamanlayıcı ile Kayıtla en fazla 12 program yapabilirsiniz. Esnek Kayıt (sadece Zamanlayıcı kaydı için geçerlidir) FR modunda en uygun kayıt modu, diskte kalan süreye ve zamanlayıcı ile kaydın uzunluğuna göre otomatik ayarlanır. Bu işlev, XP, SP, LP ve EP modlarının sadece birinde seçilir ve bu modu zamanlayıcı ile kayıt için kullanabilirsiniz. FR modu kayıt kurulumu Zamanlayıcı ile Kayıtla aynıdır. Adım 3’te modu ayarlarken FR Modunu ayarlayın. (Bkz. sayfa 46-47.) Türkçe -47 01094N-R135-AND-TUR.indb 47 2006-04-11 오후 4:16:37 Programlanan Kayıt Listesinin Düzenlenmesi öğesini seçmek için ▲▼ düğmelerine, 4 Edit sonra da OK veya ► düğmesine basın. Zamanlayıcı ile Kayıt Girişi öğesi görünür. Değiştirmek istediğiniz öğeleri düzenleyin. Zamanlayıcı ile Kayıt Girişi öğeleri hakkında daha fazla bilgi için “Zamanlayıcı Kayıt Yapma” bölümüne bakın. DVD-Recorder Scheduled Record List DVD-RW(VR) Zamanlayıcı ile Kayıt listesini düzenlemek için şu talimatları uygulayın. No. 01 Source PR 01 Day 01 SUN Available Time DVD Kaydedici Stop modundayken TIMER 1 düğmesine basın. DVD-Recorder MOVE Start End 13:07 14:07 Speed V/P SP Off 00:48 SP OK RETURN EXIT Programme DVD-RW(VR) Title List Current Time 12:27 No. Source Day Start End Speed V/P Edit Scheduled Record List ► Playlist Disc Manager ayarları onaylamak için OK 5 Düzenlenen düğmesine basın. Programme Setup MOVE OK RETURN EXIT bitirdikten sonra MENU düğmesine 6 İşlemi basın. Menü ekranı kaybolur. MENU düğmesinin kullanılması. DVD Kaydedici Stop modundayken MENU düğmesine basın. Kayıt Programme öğesini seçmek için ▲▼ düğmelerine, sonra da OK veya ► düğmesine basın. 2 OK veya ► düğmesine basın. 3 Programlanan Kayıt Listesinin Silinmesi Düzenlemek istediğiniz zamanlayıcı ile kayıt numarasını seçmek için ▲▼ düğmelerine, sonra da OK veya ► düğmesine basın. Zamanlayıcı ile kayıt listesinden bir giriş silmek için şu talimatları uygulayın. Edit ve Delete öğeleri görünür. DVD-Recorder Scheduled Record List Current Time 12:27 DVD-RW(VR) No. Source Day 01 02 03 Start End Speed PR 01 01 SUN 13:07 PR 01 02 MON 12:08 : 14:07 14:08 : SP SP MOVE OK RETURN V/P Edit Edit√ Off √ Off Delete ► EXIT DVD Kaydedici Stop modundayken TIMER 1 düğmesine basın. MENU düğmesinin kullanılması. DVD Kaydedici Stop modundayken MENU düğmesine basın. Programme öğesini seçmek için ▲▼ düğmelerine, sonra da OK veya ► düğmesine basın. 2 OK veya ► düğmesine basın. 48- Türkçe 01094N-R135-AND-TUR.indb 48 2006-04-11 오후 4:16:38 3 Silmek istediğiniz zamanlayıcı ile kayıt numarasını seçmek için ▲▼ düğmelerine, sonra da OK veya ► düğmesine basın. Edit ve Delete öğeleri görünür. DVD-Recorder Scheduled Record List Current Time 12:27 DVD-RW(VR) No. Source Day Start End Speed 01 PR 01 01 SUN 13:07 14:07 SP 02 PR 01 02 MON 12:08 14:08 SP : : 03 MOVE 4 Standart Zamanlayıcı Listesinin Kaydı OK V/P Edit Edit Off ► ► Off Delete ► RETURN Scheduled Record List öğesindeki başlama zamanına, ayarın gücü kapalıyken gelinirse, ayar açılır ve otomatik olarak kayda başlanır. EXIT Delete öğesini seçmek için ▲▼ düğmelerine, sonra da OK veya ► düğmesine basın. Programlanan kayıt çalışırken, kaydedilen 1 program TV’de görünmez. TV’de kaydedilen programı görmek istiyorsanız TV/ DVD düğmesine basın. TV’de kaydedilen programı görmek istemiyorsanız TV/DVD düğmesine tekrar basın. ‘Do you want to delete ‘No.01’?’ şeklinde bir silme onay mesajıyla uyarılırsınız. DVD-Recorder Scheduled Record List Current Time 12:27 DVD-RW(VR) No. Source Day 01 02 03 Start End Speed V/P Edit PR 01 SAT 01 15:07No. 01 14:07 SP CH PR 01 SUN 01 12:08 14:08 SP CH / want / to delete : ‘No.01’ : ? Do you Yes MOVE OK ► ► ► Kaydı durdurmak için STOP düğmesine basın. “Press STOP button once more to cancel Timer Record.” mesajı görünür. No RETURN EXIT Press STOP button once more Kayıt 5 to cancel Timer Record. Yes öğesini seçmek için ◄ ► düğmelerine ve OK düğmesine basın. Seçilen giriş listeden silinecektir. Kaydı durdurmak için STOP düğmesine tekrar basın. 6 İşlemi bitirdikten sonra MENU düğmesine basın. Menü ekranı kaybolur. NOT Yeterince disk alanı yoksa veya kayıt sırasında bir kopya önleme sinyali alınmışsa kayıt durur. You cannot record copy protected movie. Boş disk alanı yoksa veya disk kaydedilebilir değilse, kayıt gerçekleşmez. (Diski değiştirdikten sonra kaydedebilirsiniz.) Türkçe -49 01094N-R135-AND-TUR.indb 49 2006-04-11 오후 4:16:41 Oynatmadan Önce Oynatma Bir disk oynatmadan önce aşağıdaki bilgileri okuyun. Bölge Kodu (Sadece DVD-Video) Bu bölümde oynatmanın ve disk tipine göre oynatmanın temel işlevleri tanıtılmaktadır. DVD kaydedicisi ve diskler bölgeye göre kodlanmıştır. Diskin oynatılabilmesi için bu bölge kodlarının eşleşmesi gerekir. Kodlar eşleşmezse disk oynatılamaz. Bu DVD Kaydedicinin bölge kodu DVD Kaydedicinin arka panelinde belirtilmiştir. Oynatılabilen disk tipleri Disk Tipleri Disk Logosu DVD-VIDEO AUDIO-CD DVD-RW DVD-R DIGITAL OUT Dolby Dijital DTS Oynatma D I G I TA L CD-R/-RW DVD-R/-RW Dijital Ses NOT Stereo Kayıtlı içerik Disk Şekli Maks. Oynatma Süresi Tek taraflı (12cm) 240 dk. Çift taraflı (12cm) 480 dk. AUDIO + VIDEO Tek taraflı (8cm) 80 dk. Çift taraflı (8cm) 160 dk. Tek taraflı (12cm) 74 dk. AUDIO Tek taraflı (8cm) 20 dk. 1 sa (XP: Kusursuz Kalite) 2 sa (SP: Standart Kalite) AUDIO + VIDEO 12” (4.7GB) 4 sa (LP: Uzun Oynatma) 6 sa veya 8 sa (EP:Uzatılmış) 1 sa (XP: Kusursuz Kalite) 2 sa (SP: Standart Kalite) AUDIO + VIDEO 12” (4.7GB) 4 sa (LP: Uzun Oynatma) 6 sa veya 8 sa (EP:Uzatılmış) JPEG MP3 MPEG4 - - Yükleme işlemi, disk tipine bağlı olarak bir dakikaya kadar sürebilir. İngiltere, Fransa, Almanya, vb. ülkelerdeki PAL yayın sistemi Oynatılamayan diskler DivX MP3 Oynatmadan Önce.......................................... 50 Bir Diskin Oynatılması..................................... 51 Bir Ses CD’si/MP3 Çalma .............................. 60 “2” veya “ALL” dışında bir bölge kodu olan DVD Video Yazma için 3.9 GB DVD-R Disk. Video Kayıt Standartlarına uyarak kaydedilmemiş DVD-RW (VR modu) Başka bir cihazda kaydedilmiş, sonlandırılmamış DVD-R ve sonlandırılmamış DVD-RW (V modu). DVD-ROM/PD/MV-Disk, vb Video CD/SVCD/CVD/CD-ROM/CDV/CD-G/CD-I Resim Gösterme ............................................. 64 MPEG4 öynatma............................................. 65 Bölüm Listesinin Görüntülenmesi................... 66 50- Türkçe 01094N-R135-AND-TUR.indb 50 2006-04-11 오후 4:16:42 NOT Açı değiştirme veya en-boy oranı ayarlaması gibi belli işlemler gerçekleştirilirken bazı disk tiplerinde oynatma ve/veya kaydetme yapılamaz. Diskler hakkında ayrıntılı bilgi, kutunun üzerinde yazılıdır. Lütfen gerektiğinde bu bilgilere bakın. Diskin kirlenmemesini veya çizilmemesini sağlayın. Kayıt yüzeyindeki parmak izleri, kir, toz, çizik veya sigara külleri, diskin kayıt için kullanılamamasına neden olabilir. 1 OPEN/CLOSE düğmesine basın. etiketi yukarı gelecek şekilde disk tepsisine dikkatle yerleştirin. 2 Diski, tepsisini kapatmak için OPEN/CLOSE 3 Disk düğmesine basın. DVD Kaydediciniz otomatik olarak disk tepsisini kapatır ve diski oynatır. DVD Kaydedici, ilk çalıştırıldıktan sonra diskleri otomatik olarak oynatmaz. DVD Kaydedici açıldığında ve disk tepsisinde bir disk olduğunda DVD Kaydedici etkinleşir ve durdurma durumunda bekler. Oynatmayı başlatmak için PLAY düğmesine basın. DVD Kaydedicisinin, içinde bir disk ile Kapalı durumdayken otomatik olarak oynatmasını istiyorsanız PLAY düğmesiyle gücü açın. DVD-RW/-R diskleri, oynatıcı, disk veya kayıt şartlarına bağlı olarak bazı DVD Kaydedicilerde oynatılamayabilir. Bir Diskin Oynatılması 4 NOT Diski oynatmayı durdurduğunuzda DVD Kaydedici nerede durdurduğunuzu hatırlar. PLAY düğmesine tekrar bastığınızda, durdurduğunuz yerden oynatmaya devam eder. (disk çıkarılmadığı veya DVD Kaydedicinin fişi çekilmediği sürece veya STOP düğmesine iki defa bastığınızda) Bu işlev yalnızca DVD-VIDEO, DVD-RW, DVD-R veya ses CD’leri (CD-DA) için geçerlidir. Diske zarar verebileceğinden, DVD Kaydedicinizi oynatma sırasında hareket ettirmeyin. Disk tepsisini açmak veya kapamak için OPEN/CLOSE düğmesine bastığınızdan emin olun. Oynatma DİKKAT Oynatmayı durdurmak için STOP düğmesine basın. DVD Kaydedicinin bozulmasına neden olabileceğinden, disk tepsisi açılırken veya kapanırken itmeyin. Disk tepsisinin üzerine veya içine yabancı maddeler yerleştirmeyin. Disk tipine bağlı olarak bazı işlevler farklı çalışabilir veya devre dışı kalabilir. Böyle bir durumda disk kabının üzerindeki talimatlara bakın. Disk tepsisi kapanırken çocukların parmaklarının disk tepsisiyle tepsi çerçevesi arasında sıkışmamasına özellikle dikkat edin. Her seferinde yalnızca bir DVD diski yerleştirmelisiniz. İki veya daha fazla diskin yerleştirilmesi oynatmaya engel olur ve DVD KAYDEDİCİYE zarar verir. Türkçe -51 01094N-R135-AND-TUR.indb 51 2006-04-11 오후 4:16:44 Disk Menüsünün ve Bölüm Menüsünün Kullanılması Arama İşlevlerinin Kullanılması Bazı disklerde, alt bölümler, ses parçaları, altyazılar film ön izlemeleri, karakterler hakkında bilgiler, vb. gibi özel bölümlerden seçim yapmanızı sağlayan atanmış bir menü sistemi bulunmaktadır. DVD-VIDEO diskleri için disk menüsüne girmek için DISC 1 Diskin MENU düğmesine basın. Oynatma işlemiyle ilgili ayar menüsüne gidin. Diskteki ses dillerinden ve altyazılardan seçim yapabilirsiniz. bölüm menüsüne gitmek için TITLE MENU düğmesine basın. 2 Diskin Diskte birden fazla bölüm bulunuyorsa bu düğmeyi kullanın. Bazı disk tipleri bölüm menüsü işlevini desteklemeyebilir. Bir Alt Bölüm veya Parça içinde Arama Oynatma sırasında, uzaktan kumanda 1 üzerindeki SEARCH ( ) düğmesine basın. DVD-VIDEO/ DVD-RW/DVD-R Fast 1 Fast 3 Fast 5 Fast 1 DVD-RW/-R diskleri için MPEG4 SES CD’si (CD-DA) Fast 1 Listesine gitmek için TITLE LIST 1 Bölüm düğmesine basın. Programı ters yönde tarayabilirsiniz. Normal hızda oynatmaya dönmek için PLAY düğmesine basın. Oynatma NOT Title List : Title List, bir bölüm seçmenize yardımcı olacak bir liste gösterir. Bölüm Listesinde, kaydedilen videoyla ilgili bilgiler bulunduğundan, bir bölüm silindiğinde o bölüm yeniden oynatılamaz. Playlist : Title List öğesinin tamamından arzu edilen bir sahne seçerek oluşturulan bir oynatma birimidir. Bir oynatma listesi oynatıldığında, yalnızca kullanıcının seçtiği sahne oynatılır ve durdurulur. Bir oynatma listesinde yalnızca arzu edilen sahneyi oynatmak için gerekli bilgiler bulunduğundan, o oynatma listesi silinse bile orijinal kayıt silinmiş olmaz. (yalnızca VR modu) X2 X2 Fast 2 Fast 4 Fast 6 Fast 2 X4 Fast 3 X8 SEARCH( ) düğmesini basılı tuttuğunuzda, oynatma varsayılan Fast 2 hızında gerçekleşir. SEARCH( ) düğmesini bıraktığınızda oynatma normal hızda gerçekleşir. Bu işlevde belirtilen hız gerçek oynatma hızından farklı olabilir. NOT Fast 1 modu hariç Scan (Search) modu sırasında hiç ses duyulmaz. Bütün modlarda MPEG4 taramasında ses duyamazsınız. CD(CD-DA) söz konusuysa, Scan modunda ses duyabilirsiniz. 52- Türkçe 01094N-R135-AND-TUR.indb 52 2006-04-11 오후 4:16:46 Alt Bölüm veya Parçaların Atlanması ANYKEY Hakkında Oynatma sırasında bir alt bölüm veya parça içinde hızlı arama yapabilirsiniz. Oynatma sırasında, uzaktan kumanda 1 üzerindeki ) düğmesine basın. SKIP ( SKIP ( ) düğmesine basarsanız, alt bölüm, parça veya işaretin başına gider (DVD-RW (VR modu)). Düğmeye 3 saniye içinde tekrar basıldığında önceki alt bölüm, parça veya işaretin başına gider (DVD-RW (VR modu)). SKIP ( ) düğmesine basarsanız, bir sonraki alt bölüm, parça veya işaretin başına gider (DVD-RW(VR modu)). Yavaş Çekim Oynatma 1 ANYKEY işlevi, arzu ettiğiniz bir sahneyi bölüm, alt bölüm veya zaman dilimine erişim sağlayarak kolayca aramanızı sağlar. Aynı zamanda altyazı ve ses ayarlarını değiştirebilir ve Repeat, Angle, Zoom gibi özellikleri ayarlayabilirsiniz. Pause modunda, uzaktan kumanda üzerindeki SEARCH ( ) düğmesine basın. SEARCH ( ) düğmesine basarsanız, Slow 1 Slow 2 Slow 2 Arzu ettiğiniz bir sahneyi bulmak için bir bölüme veya alt bölüme gitmek istiyorsanız. Oynatma sırasında ANYKEY düğmesine 1 basın. Slow 3 SEARCH ( ) düğmesine basarsanız, Slow 1 ANYKEY düğmesini kullanarak doğrudan bir sahneye gitme Slow 3 DVD-VIDEO Title Chapter Time Normal hızda oynatmaya dönmek için PLAY düğmesine basın. Duraklatma sırasında SEARCH( ) düğmesini basılı tutun, disk Slow 1 hızında yavaş oynatılacaktır. Düğme bırakıldığında duraklatma işlemi kaldığı yerden devam eder. Adım Adım Oynatma Repeat Angle Zoom MOVE DVD-VIDEO Title 1/2 Chapter 1/28 Time 00:00:01 Subtitle Off Audio ENG Off Angle 1 Düğmeye her basıldığında yeni bir kare görünür. STEP( ) düğmesine basıldığında önceki kare etkinleştirilir. STEP( ) düğmesine basıldığında sonraki kare etkinleştirilir. CHANGE veya Chapter öğelerinden birini seçmek için ▲▼ düğmelerine basın. 2 Title Repeat Oynatma veya duraklatma sırasında uzaktan kumanda üzerindeki STEP( ) düğmesine basın. Off 1/3 Off Oynatma NOT Bu işlevde belirtilen hız gerçek oynatma hızından farklı olabilir. Yavaş çekim MPEG 4 disklerinde yalnızca ileri yönde çalışır. Subtitle Audio 1/2 1/28 00:00:01 Off ENG D 5.1CH Zoom MOVE D 5.1CH 1/3 Off CHANGE Arzu ettiğiniz sahneyi seçmek için ◄ ► 3 OK veya numara (0-9) düğmelerine basın. düğmesine basın. Normal hızda oynatmaya dönmek için PLAY düğmesine basın. NOT Adım adım oynatma, MPEG 4 disklerinde yalnızca ileri yönde çalışır. Türkçe -53 01094N-R135-AND-TUR.indb 53 2006-04-11 오후 4:16:50 Bir sahneyi bulmak için istediğiniz bir zaman dilimine gitmek istiyorsanız. Tekrar İşlevinin Kullanılması Oynatma sırasında ANYKEY düğmesine 1 basın. DVD-VIDEO Title 1/2 Chapter 1/28 Time 00:00:01 Subtitle Off Audio ENG Repeat Off Angle 1/3 Zoom Off MOVE D 5.1CH CHANGE Üst Üste Oynatma (Oynatmayı Tekrarlama) Time öğesini seçmek için ▲▼ düğmelerine 2 basın. REPEAT düğmesinin kullanılması DVD-VIDEO Title 1/2 Chapter 1/28 Time 00:00:01 Subtitle Off Audio ENG Off Repeat Angle Zoom MOVE D 5.1CH 1/3 Off 0~9 sırasında REPEAT düğmesine 1 Oynatma basın. Repeat Off NUMBER numara düğmelerini kullanarak saat, dakika ve saniye sıralamasıyla girin 3 veZamanı, OK düğmesine basın. Oynatma NOT Bu özellik bazı disklerde çalışmayabilir. Bir ses CD’si (CD-DA) veya MP3 diski yerleştirildiğinde, disk türüne göre bilgi ekranı görünmeyebilir. Time Search işlevi bazı disklerde çalışmayabilir. üste oynatmak istediğiniz Title veya 2 Üst Chapter öğelerinden birini seçmek için REPEAT veya ▲▼ düğmelerine basın. OK düğmesine basın. Repeat Title Ekranı kaldırmak için ANYKEY düğmesine tekrar basın. Title : Oynatılan bölümü tekrarlar. Chapter : Oynatılan alt bölümü tekrarlar. - Normal oynatmaya dönmek için - öğesini seçmek için REPEAT 3 Off düğmesine, sonra da ▲▼ veya REPEAT düğmesine ve OK düğmesine basın. Normal oynatmaya dönmek için CANCEL düğmesine basın. 54- Türkçe 01094N-R135-AND-TUR.indb 54 2006-04-11 오후 4:16:56 ANYKEY düğmesinin kullanılması Belli bir kısmı Üst Üste Oynatma (A-B Oynatmayı Tekrarlama) sırasında ANYKEY düğmesine 1 Oynatma basın. DVD-VIDEO Title 1/2 ANYKEY düğmesinin kullanımı Chapter 1/28 Time 00:00:01 Subtitle Off Audio ENG Repeat Off Angle 1/3 Zoom Off MOVE D 5.1CH CHANGE Oynatma sırasında ANYKEY düğmesine 1 basın. DVD-VIDEO 2 Repeat öğesini seçmek için ▲▼ düğmelerine, sonra da üst üste oynatmak istediğiniz Title veya Chapter öğelerinden birini seçmek için ◄ ► düğmelerine basın. DVD-VIDEO Title 1/2 Chapter 1/28 Time 00:00:01 Subtitle Off Audio ENG Title 1/3 Off Repeat Angle Zoom MOVE D 5.1CH Title 1/2 Chapter 1/28 Time 00:00:01 Subtitle Off Audio ENG Off Repeat Angle Zoom D 5.1CH 1/3 Off MOVE CHANGE Repeat öğesini seçmek için ▲▼ düğmelerine, sonra da A-B öğelerini seçmek için ► 2 düğmesine basın. OK DVD-VIDEO 3 1/28 Time 00:00:01 Subtitle Off Audio ENG A-B Repeat Angle Ekranı kaldırmak için ANYKEY veya RETURN düğmesine basın. Oynatmayı tekrarlama, bir bölüm veya alt bölümü tekrarlamanızı sağlar. DVD-RW (VR modu), sonlandırılmamış DVD-R ve sonlandırılmamış DVD-RW (Video modu) bir alt bölümü tekrarlamaz. 1/2 Chapter Zoom MOVE D 5.1CH 1/3 Off OK 3 OK düğmesine basın. Oynatma NOT OK düğmesine basın. Title Oynatmayı tekrarlamanın başlamasını 4 istediğiniz noktada OK düğmesine basın (A), sonra da oynatmayı tekrarlamanın durmasını istediğiniz noktada bu düğmeye yeniden basın (B). A-B bölümünün tekrar oynatılmasına başlanır. - Normal oynatmaya dönmek için - 5 NOT Repeat öğesindeki Off öğesini seçin veya CANCEL düğmesine basın. Beş saniye geçmeden bir nokta seçerseniz (B) bir yasak işareti ( görünür. ) Ses CD’leri (CD-DA) ve MP3 diskleri Repeat A-B işlevini desteklemez. Türkçe -55 01094N-R135-AND-TUR.indb 55 2006-04-11 오후 4:16:59 Altyazının Seçilmesi Altyazı dilleri, disk tipine bağlı olarak çalışmayabilir. Bu işlev, sadece oynatma sırasında kullanılabilir. Ses dilinin seçilmesi Ses dilleri, disk tipine bağlı olarak çalışmayabilir. Bu işlev, sadece oynatma sırasında kullanılabilir. AUDIO düğmesinin kullanılması SUBTITLE düğmesinin kullanılması Oynatma sırasında SUBTITLE düğmesine 1 basın. Subtitle Oynatma sırasında AUDIO düğmesine 1 basın. Audio ENG Dolby Digital 5.1CH Off Arzu edilen altyazı dilini seçmek için 2 SUBTITLE veya ▲▼ düğmelerine basın. edilen ses dilini seçmek için AUDIO 2 Arzu veya ▲▼ düğmelerine basın. - Ekranı kaldırmak için CANCEL veya RETURN düğmesine basın. ANYKEY düğmesinin kullanımı ANYKEY düğmesinin kullanımı Oynatma sırasında ANYKEY düğmesine 1 basın. sırasında ANYKEY düğmesine 1 Oynatma basın. DVD-VIDEO Oynatma DVD-VIDEO 1/2 Chapter 1/28 Time 00:00:01 Title 1/2 Subtitle Off Chapter 1/28 Audio Time 00:00:01 Repeat ENG Off Subtitle Off Angle Audio ENG Off Repeat Angle Zoom D 5.1CH Zoom D 5.1CH 1/3 Off MOVE CHANGE 1/3 Off MOVE 2 Title CHANGE Subtitle öğesini seçmek için ▲▼ düğmelerine, sonra da arzu edilen altyazı dilini seçmek için ◄ ► düğmelerine basın. öğesini seçmek için ▲▼ 2 Audio düğmelerine, sonra da arzu edilen ses dilini seçmek için ◄ ► düğmelerine basın. - DVD-VIDEO Title 1/2 Title 1/2 Chapter 1/28 Chapter 1/28 Time 00:00:01 Time 00:00:01 Subtitle Off Subtitle ENG Audio Audio ENG Off ENG Off DVD-VIDEO Repeat Angle Zoom MOVE NOT Repeat D 5.1CH Angle Zoom 1/3 Off MOVE D 5.1CH 1/3 Off CHANGE CHANGE Altyazı ekranı, disk tipine bağlı olarak farklılık gösterebilir. Altyazılar çakışıyorsa TV’nizdeki altyazı işlevini devre dışı bırakın. Bazı disklerde sadece disk menüsünün dilini seçebilirsiniz. NOT Ses dilleri, disk tipine bağlı olarak farklılık gösterebilir. Bazı disklerde sadece disk menüsünün ses dilini seçebilirsiniz. 56- Türkçe 01094N-R135-AND-TUR.indb 56 2006-04-11 오후 4:17:01 Kamera Açısının Değiştirilmesi Bir DVD VIDEO’da belli bir sahnenin birden fazla açısı bulunuyorsa açı işlevini seçebilirsiniz. Bu işlev, sadece oynatma sırasında kullanılabilir. Diskte birden fazla açı bulunuyorsa ekranda ANGLE işareti görünür. 1 Yakınlaştırma Oynatma veya duraklatma sırasında 1 ANYKEY düğmesine basın. DVD-VIDEO Oynatma sırasında ANYKEY düğmesine basın. DVD-VIDEO Title 1/2 Chapter 1/28 00:00:01 Subtitle Off Audio ENG Off Angle Zoom 1/28 Time 00:00:01 Subtitle Off Audio ENG Repeat Off Angle 1/3 Zoom Off D 5.1CH CHANGE D 5.1CH 1/3 Off MOVE 1/2 Chapter MOVE Time Repeat Title CHANGE Zoom öğesini seçmek için ▲▼ 2 düğmelerine, sonra da OK düğmesine basın. ( ) görünecektir. öğesini seçmek için ▲▼ 2 Angle düğmelerine, sonra arzu edilen açıyı seçmek için ◄ ► veya numara düğmelerine basın. DVD-VIDEO Title 1/2 Chapter 1/28 Time 00:00:01 Subtitle Off Audio ENG Off Repeat Angle Zoom MOVE NOT D 5.1CH 1/3 Off CHANGE Bu işlev diske bağlıdır, bütün DVD’lerde çalışmayabilir. istediğiniz alana gitmek için ▲▼◄ ► düğmelerine basın. 3 Büyütmek OK düğmesine basın. Ekran, normal iki katı büyür. 4 boyutunun Bir DVD çoklu kamera açı sistemiyle kaydedilmemişse bu işlev çalışmaz. normal boyut normal boyut NOT 2X 4X 2X Oynatma Ekran, normal boyutunun iki katı büyütüldükten sonra tekrar OK düğmesine basarsanız, ekran boyutu, normal boyutunun dört katı büyür. Zoom işlevini, uzaktan kumanda üzerindeki ZOOM düğmesini kullanarak da seçebilirsiniz. Türkçe -57 01094N-R135-AND-TUR.indb 57 2006-04-11 오후 4:17:05 Yer İmlerinin Kullanılması Bu özellik bir DVD-VIDEO veya DVD-R/-RW’nin (V modu) bölümlerini imlemenizi, böylece onları kolayca bulmanızı sağlar. Yer iminin oynatılması Oynatma sırasında MARKER düğmesine 1 basın. (V modu) 1 Oynatma sırasında MARKER düğmesine basın. Bookmark - - - - - - - - - -- imli bir sahne seçmek için◄ ► 2 Yer düğmelerine basın. Bookmark MOVE MOVE 2 OK 1 2 - - - - - - - -- PLAY CLEAR RETURN RETURN Arzu edilen sahne göründüğünde OK düğmesine basın. Seçilen sahneyi oynatmaya başlamak için 3 OK veya PLAY düğmesine basın. 1 rakamı görünür ve sahne belleğe alınır. Bookmark 1 - - - - - - - - -- Yer iminin temizlenmesi Oynatma sırasında MARKER düğmesine 1 basın. MOVE 3 PLAY CLEAR RETURN Bir sonraki konuma gitmek için ◄ ► düğmesine basın. imli bir sahne seçmek için◄ ► düğmelerine basın. 2 Yer Oynatma Bookmark 1 2 - - - - - - - -- edilen sahne göründüğünde OK 4 Arzu düğmesine basın. 2 rakamı görünür ve sahne belleğe alınır. Bookmark 1 2 - - - - - - - -- MOVE PLAY CLEAR RETURN yer imini silmek için CANCEL 3 Seçilen düğmesine basın. MOVE PLAY CLEAR RETURN Bookmark 1 - - - - - - - - -- Diğer konumları imlemek için yukarıdakileri tekrarlayın. En fazla 10 sahne imleyebilirsiniz. NOT Disk tepsisi açılıp kapatıldığında yer imleri kaybolur. MOVE OK RETURN 58- Türkçe 01094N-R135-AND-TUR.indb 58 2006-04-11 오후 4:17:07 İşaretlerin Kullanılması Bir Marker öğesinin oynatılması (VR modu) 1 Oynatma sırasında MARKER düğmesine basın. Marker -- -- -- -- -- -- -- -- -- -- N:0 Oynatma sırasında MARKER düğmesine 1 basın. Yer imli bir sahne seçmek için ◄ ► 2 düğmelerine basın. Marker OK 01 02 -- -- -- -- -- -- -- -- N:2 RETURN edilen sahne göründüğünde OK 2 Arzu düğmesine basın. MOVE PLAY CLEAR RETURN 01 rakamı görünür ve sahne belleğe alınır. Marker MOVE 01 -- -- -- -- -- -- -- -- -- PLAY CLEAR N:1 RETURN sonraki konuma gitmek için ◄ ► 3 Birdüğmesine basın. edilen sahne göründüğünde OK düğmesine basın. 4 Arzu sahneyi oynatmaya başlamak için 3 Seçilen OK veya PLAY düğmesine basın. SKIP ( ) düğmesine basarsanız, işaretin başına gider. Düğmeye 3 saniye içinde tekrar basarsanız önceki işaretin başına dönersiniz. SKIP ( ) düğmesine basarsanız, sonraki işaretin başına gider. Bir Marker Öğesinin Temizlenmesi Oynatma sırasında MARKER düğmesine 1 basın. 02 rakamı görünür ve sahne belleğe alınır. 01 02 -- -- -- -- -- -- -- -- N:2 Oynatma Marker Yer imli bir sahne seçmek için ◄ ► düğmelerine basın. 2 Seçilen yer imini silmek için CANCEL düğmesine basın. MOVE PLAY CLEAR Marker 01 02 03 04 05 06 07 08 09 10 N : 10 Marker 01 02 03 04 05 06 07 08 09 -- N : 9 RETURN DVD-RW (VR Modu) disklerinde Bookmark işlevi yerine Marker işlevi bulunmaktadır. Marker işleviyle en fazla 99 sahne işaretlenebilir. Sahneler birçok farklı sayfa şeklinde gösterilebildiğinden numaralama gereklidir. Kullanımdaki disk Disk Koruması ile kodlanmışsa Marker öğeleri ayarlanıp silinemez. Yalnızca oynatma gerçekleştirilebilir. MOVE PLAY CLEAR RETURN DVD-RW (VR modu) oynatılırken bir işaret temizlendiğinde işaret numaraları değişir. Örneğin, on işaret kaydedildikten sonra 7. işaret silinirse, sekizinciden sonraki işaret numaraları otomatik olarak bir geriye gelir ve 8. işaret 7. olur. 59- Suomi 01094N-R135-AND-TUR.indb 59 Türkçe -59 2006-04-11 오후 4:17:11 Bir Ses CD’si/MP3 Çalma Ses CD’si (CD-DA) çalmak için kullanılan Uzaktan Kumanda düğmeleri Bir Ses CD’si (CD-DA)/MP3 Çalma Her diskin çeşitli menü işlevleri bulunmaktadır. Bir Ses CD’si (CD-DA) Çalma tepsisine bir ses CD’si (CD-DA) 1 Disk yerleştirin. Ses CD’si menüsü görünür ve parçalar (şarkılar) otomatik olarak çalar. CD g f h i h j Music List 01/15 TRACK 1 ► 0:00:01 TRACK 1 CDDA PLAY MODE No. Title Length 002 003 TRACK 1 TRACK 2 TRACK 3 0:03:50 0:04:00 0:03:49 004 005 006 007 TRACK 4 TRACK 5 TRACK 6 TRACK 7 0:03:47 0:04:29 0:03:44 0:03:44 MOVE OK RETURN c d c EXIT istediğiniz parçayı seçmek için ▲▼ düğmelerine, sonra da OK veya ► 2 Dinlemek düğmesine basın. e k Oynatma Ses CD’si (CD-DA) Ekran Öğeleri c d CD f Music List TRACK 1 ► 0:00:01 TRACK 1 CDDA PLAY MODE 01/15 No. Title Length 002 003 TRACK 1 TRACK 2 TRACK 3 0:03:50 0:04:00 0:03:49 004 005 006 007 TRACK 4 TRACK 5 TRACK 6 TRACK 7 0:03:47 0:04:29 0:03:44 0:03:44 MOVE OK RETURN EXIT e g h 1. Play modu simgesi 2. Geçerli parça (şarkı) 3. Geçerli çalma dizinini ve toplam parça sayısını gösterir. 4. Bir diskin çalışma durumunu ve o anda çalınan kısma karşılık gelen çalma süresini gösterir. 5. Parça listesini (şarkı listesi) ve her parçanın çalma süresini gösterir. 6. Düğme göstergesi. 1. ▲▼ : Parça (şarkı) seçer. 2. ► : Seçilen parçayı (şarkı) çalar. 3. OK düğmesi : Seçilen parçayı (şarkı) çalar. 4. SKIP ( ) düğmesi : Sonraki parçayı çalar. 5. SKIP ( ) düğmesi : Çalma sırasında basıldığında geçerli parçanın başına döner. Tekrar basılırsa DVD kaydediciniz önceki parçaya geçer ve onu çalar. Çalma başladıktan sonraki üç saniye içinde bu düğmeye basarsanız önceki parça çalar. Bu düğmeye üç saniye sonra basarsanız geçerli şarkı en baştan yeniden çalar. 6. SEARCH( / ) düğmesine basın. : Hızlı Çalma (X2, X4, X8) 7. STOP düğmesi : Parçayı (şarkı) durdurur. 8. PLAY/PAUSE düğmesi : Parçayı (şarkı) çalar veya çalmayı duraklatır. 9. ANYKEY düğmesi : Ekran göstergesindeki alt menüyü seçer (Repeat veya Play option). 60- Türkçe 01094N-R135-AND-TUR.indb 60 2006-04-11 오후 4:17:14 MP3 Diski Çalma MP3 Ekran Öğeleri c 1 Disk tepsisine bir MP3 Diski yerleştirin. DVD-Recorder CD Disc Navigation Programme Setup Disc Navigation DivX ► Photo ► Music ► MOVE OK RETURN EXIT Disc Navigation öğesini seçmek için 2 düğmesine ▲▼ düğmelerine, sonra da OK veya ► basın. DVD-Recorder CD Disc Navigation Programme Setup Music List 01/13 SONG01 f ► 0:00:15 e SONG01 4.0MB 01/26/2006 MP3 PLAY MODE No. Title 002 003 ROOT SONG01 SONG02 SONG03 004 005 006 SONG04 SONG05 SONG06 MOVE OK g RETURN EXIT h 1. Play modu simgesi 2. Geçerli parça (şarkı) 3. Geçerli parça (şarkı) bilgilerini gösterir. 4. Bir diskin çalışma durumu ve o anda çalınan kısma karşılık gelen çalma süresini gösterir. 5. Klasör ve içindeki parçalar hakkındaki bilgileri gösterir. 6. Düğme göstergesi. Disc Navigation DivX ► Photo ► Music ► MOVE d MP3 OK RETURN EXIT Music öğesini seçmek için ▲▼ 3 düğmesine düğmelerine, sonra da OK veya ► basın. MP3 Music List 01/13 SONG01 No. ► 0:00:15 PLAY MODE 002 003 ROOT SONG01 SONG02 SONG03 004 005 006 SONG04 SONG05 SONG06 MOVE OK RETURN Oynatma SONG01 4.0MB 01/26/2006 MP3 Title EXIT MP3 menüsü görünür ve parçalar (şarkılar) otomatik olarak çalar. istediğiniz parçayı (şarkı) seçmek için ▲▼ düğmelerine, sonra da OK veya 4 Dinlemek ► düğmesine basın. Türkçe -61 01094N-R135-AND-TUR.indb 61 2006-04-11 오후 4:17:18 MP3 oynatmada kullanılan Uzaktan Kumanda düğmeleri Üst Üste Çalma (Çalmayı Tekrarlama) REPEAT düğmesinin kullanılması 1 h g Çalma sırasında REPEAT düğmesine basın. Track repeat modu simgesi ( parça üst üste çalar. ) görünür ve seçilen CD i Music List j ► 0:00:07 TRACK 1 CDDA c f d c e PLAY MODE 2 Oynatma k 1. ▲▼ : Parça (şarkı) seçer. 2. ► : Seçilen parçayı (şarkı) çalar. 3. OK düğmesi : Seçilen parçayı (şarkı) çalar veya seçilen klasördeki dosyaları gösterir. 4. RETURN düğmesi : Geçerli şarkının bulunduğu dosyaya gider. 5. SKIP ( ) düğmesi : Sonraki parçayı çalar. 6. SKIP ( ) düğmesi : Çalma sırasında basıldığında geçerli parçanın başına döner. Tekrar basılırsa, DVD kaydediciniz önceki parçaya geçer ve onu çalar. Üç saniye içinde bu düğmeye basarsanız önceki parça çalar. Bu düğmeye üç saniye sonra basarsanız geçerli şarkı en baştan yeniden çalar. 7. STOP düğmesi : Parçayı (şarkı) durdurur. 8. PLAY/PAUSE düğmesi : Parçayı (şarkı) çalar veya çalmayı duraklatır. 9. ANYKEY düğmesi : Ekran göstergesindeki alt menüyü seçer (Repeat veya Play option). 01/15 TRACK 1 No. Title Length 002 003 TRACK 1 TRACK 2 TRACK 3 0:03:50 0:04:00 0:03:49 004 005 006 007 TRACK 4 TRACK 5 TRACK 6 TRACK 7 0:03:47 0:04:29 0:03:44 0:03:44 MOVE OK RETURN EXIT Diski üst üste çalmak için REPEAT düğmesine tekrar basın. Disc repeat modu simgesi ( ) görünür ve yerleştirilen disk üst üste çalar. MP3 diski için Folder repeat modu simgesi ( ) görünür ve geçerli klasördeki bütün parçalar üst üste çalar. REPEAT düğmesine tekrar basıldığında mod, Disc repeat moduna dönüşür. CD Music List TRACK 1 ► 0:00:07 TRACK 1 CDDA PLAY MODE 01/15 No. Title Length 002 003 TRACK 1 TRACK 2 TRACK 3 0:03:50 0:04:00 0:03:49 004 005 006 007 TRACK 4 TRACK 5 TRACK 6 TRACK 7 0:03:47 0:04:29 0:03:44 0:03:44 MOVE OK RETURN EXIT Normal oynatmaya dönmek için 3 Repeat modu simgesi kaybolana kadar REPEAT düğmesine üst üste basın veya CANCEL düğmesine basın. 62- Türkçe 01094N-R135-AND-TUR.indb 62 2006-04-11 오후 4:17:21 ANYKEY düğmesinin kullanımı 1 Oynatma sırasında ANYKEY düğmesine basın. Play Option Modu Play Option Modu, Stop modundaki ses CD’si veya MP3 ile kullanılabilir. PLAY MODE penceresi görünür. CD Music List 01/15 TRACK 1 No. ► 0:00:07 TRACK 1 CDDA PLAY MODE Title Length 001 TRACK 1 PLAY MODE 002 TRACK 2 Repeat : Off 003 TRACK 3 Play : Normal 004optionTRACK 4 005 006 007 MOVE TRACK 5 TRACK 6 TRACK 7 OK 0:03:50 0:04:00 0:03:49 0:03:47 0:04:29 0:03:44 0:03:44 RETURN 1 Stop modunda ANYKEY düğmesine basın. PLAY MODE penceresi görünür. CD Music List 0:00:20 EXIT TRACK 1 CDDA PLAY MODE 2 ◄ ► düğmelerini kullanarak arzu ettiğiniz tekrar modunu (Track veya Disc) seçin, sonra da OK düğmesine basın. MP3 diskleri için Track, Folder veya Disc modunu seçin. 01/15 TRACK 1 No. Title PLAY 001 MODE TRACK 1 Repeat 002 : OffTRACK 2 0:03:50 0:04:00 3 Play003 option TRACK : Normal 004 TRACK 4 005 TRACK 5 006 TRACK 6 007 TRACK 7 0:03:49 0:03:47 0:04:29 0:03:44 0:03:44 MOVE OK Length RETURN EXIT seçeneğindeki arzu edilen öğeyi (Normal, Random, Intro veya Playlist) 2 Play seçmek için ◄ ► düğmelerine, sonra da OK düğmesine basın. Normal oynatmaya dönmek için Normal : Diskteki parçalar diske kaydedildikleri sırayla çalar. 3 Intro : Her parçanın ilk 10 saniyesi çalar. Seçtiğiniz müziği dinlemek istiyorsanız OK veya PLAY düğmesine basın. Çalma seçeneği Normal Play haline gelir. Intro Play tamamlandığında Normal Play gerçekleşir. ◄ ► düğmelerini kullanarak PLAY MODE penceresindeki Off öğesini seçin, sonra da OK düğmesine basın. Playlist : Playlist çalma seçeneği, parçaların istediğiniz sırayla çalmasını sağlar. Oynatma Random : Random seçeneği bir diskteki parçaları rasgele sırayla çalar. Bir rasgele çalma listesi oluşturulup çalındıktan sonra, başka bir rasgele liste oluşturulur ve çalınır. Çalma seçeneği değiştirilene kadar Random Play devam eder. Türkçe -63 01094N-R135-AND-TUR.indb 63 2006-04-11 오후 4:17:24 Parçaların Programlanması Resim Gösterme Oynatma listesine en fazla 30 parça kaydedebilirsiniz. 1 Stop modunda ANYKEY düğmesine basın. PLAY MODE penceresi görünür. CD Music List TRACK 1 0:00:20 TRACK 1 CDDA PLAY MODE 01/15 No. Title 001 TRACK 1 PLAY MODE 002 TRACK 2 Repeat : Off 003 TRACK 3 Play : Normal 004optionTRACK 4 005 TRACK 5 006 TRACK 6 007 TRACK 7 MOVE OK 1 Disk tepsisine bir JPEG diski yerleştirin. Length 0:03:50 0:04:00 DVD-Recorder 0:03:49 0:03:47 0:04:29 0:03:44 0:03:44 Programme RETURN Setup Disc Navigation DivX ► Photo ► Music ► EXIT 2 Play seçeneğindeki Playlist öğesini seçmek için ◄ ► düğmelerine basın. 3 OK düğmesine basın. Playlist ekranı görünür. Parçaları çalmak istediğiniz sırayla Tracks öğesini seçmek için ▲▼ düğmelerine basın. Seçtiğiniz parçayı Playlist öğesine eklemek için OK düğmesine basın. CD CD Disc Navigation OK MOVE EXIT RETURN Disc Navigation öğesini seçmek için 2 düğmesine ▲▼ düğmelerine, sonra da OK veya ► basın. DVD-Recorder CD Disc Navigation Disc Navigation DivX ► Programme Photo Music Setup ► ► Playlist 06/15 CDDA TRACK 1 001 TRACK 1 CDDA TRACK 2 002 TRACK 3 CDDA TRACK 3 003 TRACK 5 CDDA TRACK 4 004 TRACK 6 CDDA TRACK 5 CDDA TRACK 6 CDDA CDDA TRACK 7 TRACK 8 PLAY MODE Oynatma MOVE MOVE OK EXIT OK RETURN Photo öğesini seçmek için ▲▼ düğmelerine, sonra da OK veya ► 3 düğmesine basın. JPEG 4 EXIT Photo List JPEG01 Oynatma listesine yanlış bir parça eklerseniz, yanlış parçayı seçmek için ► düğmesine, sonra da ▲▼ düğmelerine ve CANCEL düğmesine basın. Yanlış şarkı listeden çıkarılacaktır. CD Playlist 01/10 ROOT JPEG01 JPEG04 JPEG05 Slide Show MOVE JPEG02 JPEG03 JPEG06 JPEG07 OK RETURN EXIT 03/03 CDDA TRACK 1 001 TRACK 1 CDDA TRACK 2 002 TRACK 3 CDDA TRACK 3 003 TRACK 5 CDDA TRACK 4 CDDA TRACK 5 CDDA TRACK 6 CDDA TRACK 7 OK CLEAR CDDA Bir resim seçmek için ▲▼◄ ► 4 düğmelerine basın. TRACK 8 PLAY MODE MOVE EXIT Sonraki 8 resmi görmek için SKIP( basın. Önceki 8 resmi görmek için SKIP( basın. ) düğmesine ) düğmesine Oynatma listesindeki parçaları çalmak için 5 PLAY düğmesine basın. 64- Türkçe 01094N-R135-AND-TUR.indb 64 2006-04-11 오후 4:17:26 düğmesine basarsanız Slide Show 5-1 PLAY Speed ekranı görünür. Slayt gösterisi hızını ayarlamak için ◄ ► düğmesine, sonra da OK düğmesine basın. MPEG4 oynatma DVD-RW(VR) MPEG4 dosyasında ses ve görüntü verileri bulunur. Aşağıdaki uzantılara sahip MPEG4 dosyaları oynatılabilir. - .AVI, .DIVX, .avi, .divx Slide Show Speed Slow Normal Fast JPEG01 MOVE PHOTO OK RETURN Album ekranında seçilmiş bir resim ile OK 5-2 düğmesine basın. düğmelerini kullanarak bir görüntü ◄► modu (Album screen, Slide show, Rotation veya Zoom) seçin, sonra da OK düğmesine basın. 1 Disk tepsisine bir MPEG4 Diski yerleştirin. DVD-Recorder CD Disc Navigation Programme Setup ► Photo ► Music ► MOVE DVD-RW(VR) Disc Navigation DivX OK RETURN EXIT Disc Navigation öğesini seçmek için ▲▼ düğmelerine, sonra da OK veya ► 2 düğmesine basın. JPEG01 MOVE PHOTO OK RETURN DVD-Recorder CD Disc Navigation Disc Navigation DivX ► Programme Photo Music Setup MOVE OK RETURN EXIT DivX öğesini seçmek için ▲▼ düğmelerine, da OK veya ► düğmesine basın. 3 sonra CD DivX List DIVX01 01/02 No. Menü çubuğunu görüntülemek için ANYKEY düğmesine basın. Menü çubuğunu temizlemek için RETURN düğmesine basın. ► 001 002 Title ROOT DIVX01 DIVX02 Size Oynatma : Album ekranına döner. : DVD Kaydedici slide show moduna girer. Slayt gösterisi başlamadan önce resim aralığı (Slayt gösterisi hızı) ayarlanmalıdır. : OK düğmesine her basıldığında resim saat yönünde 90 derece döner. : OK düğmesine her basıldığında resim 4X (Normal boyutunun dört katı) kadar büyür. (Normal Zoom X2 Zoom X4 Zoom X2 Normal) ► 70.8MB 73.6MB MPEG4 ROOT 2006/01/01 70.8MB MOVE OK RETURN EXIT avi dosyasını (DivX) seçmek için ▲▼ 4 düğmesine düğmelerine, sonra da OK, ► veya PLAY basın. dosyası oynatılırken aşağıdaki 5 MPEG4 talimatları izleyebilirsiniz. Oynatma sırasında STOP düğmesine basılırsa dosya listesi görünür, düğmeye tekrar basıldığında da menü ekranından çıkar. Türkçe -65 01094N-R135-AND-TUR.indb 65 2006-04-11 오후 4:17:31 MPEG4 İşlev Tanımı İşlev Tanım ( Atla veya Oynatma sırasında SKIP( veya ) düğmesine ) basın, görüntü 5 dakika ileri veya geri gider. ( Ara veya Oynatma sırasında SEARCH ( veya ) ) düğmesine basın, daha hızlı arama için tekrar basın. (Fast 1, Fast 2, Fast 3) Yavaş Çekim Pause ve step modunda uzaktan kumanda üzerindeki Oynatma SEARCH ( ) düğmesine basın. (Slow 1, Slow 2, Slow 3) Adım Adım Oynatma Bölüm Listesinin Görüntülenmesi Title List öğesinden bir sahne oynatmak için aşağıdaki talimatları uygulayın. Oynatma veya duraklatma sırasında uzaktan kumanda üzerindeki STEP( ) düğmesine basın. TITLE LIST düğmesinin kullanılması NOT Bu DVD Kaydedici aşağıdaki video sıkıştırma biçimlerini oynatabilir. - MPEG4 Codec biçimi : DivX 3.11 DivX 4.x DivX 5.x DivX-Pro Xvid - Hareket Dengeleme : QPEL, GMC - Ses biçimi : “MP3”, “MPEG1 Audio Layer2”, “LPCM”, “AC3”, “DTS”, “MS ADPCM” Desteklenen altyazı dosya biçimleri: .smi, .srt, .sub, .psb, .txt, .ass (Altyazı dosyası, karşılık gelen MPEG4 dosya adıyla tamamen aynı ada sahip olmalıdır) Kişisel bir bilgisayarda oluşturulan bazı MPEG4 dosyaları oynatılamayabilir. Bu yüzden spesifikasyonun üzerindeki Codec Tipi, Sürümü ve Daha Yüksek çözünürlük özellikleri desteklenmez. 1 TITLE LIST düğmesine basın. Title List ekranı görünür. Title List DVD-RW(VR) 1/6 APR/19/2006 APR/19/2006 12:00 PR12 APR/19/2006 SP MOVE OK No. Title 01 APR/19/2006 02 APR/19/2006 03 APR/20/2006 04 APR/20/2006 05 APR/21/2006 06 APR/21/2006 Length Edit 12:00 00:00:21 ► 12:30 00:00:03 ► 12:00 00:00:15 ► 12:30 00:00:16 ► 12:00 00:06:32 ► 12:30 00:08:16 ► RETURN EXIT List öğesinden oynatmak istediğiniz bir girişi seçmek için ▲▼ düğmelerine, sonra 2 Title da PLAY düğmesine basın. Seçilen giriş (bölüm) oynatılır. Bölüm oynatmayı durdurmak için STOP 3 düğmesine basın. Oynatma Bölüm listesi ekranına dönmek için TITLE LIST düğmesine basın. MENU düğmesinin kullanılması 1 MENU düğmesine basın. DVD-Recorder Title List DVD-RW(VR) Title List Title List ► Playlist Disc Manager Programme Setup MOVE OK RETURN EXIT 66- Türkçe 01094N-R135-AND-TUR.indb 66 2006-04-11 오후 4:17:34 List öğesini seçmek için ▲▼ 2 Title düğmelerine, sonra da OK veya ► düğmesine iki defa basın. INFO düğmesine bir kez daha basın. Daha sonra, oynatılan bölümle ilgili bilgileri kontrol edebilirsiniz. Title List ekranı görünür. DVD-RW(VR) Name Title List DVD-RW(VR) No. APR/19/2006 12:00 PR12 APR/19/2006 SP MOVE Title 5/6 Created Time APR/21/2006 12:00 Length 00:01:43 SP Playing Time 00:00:08 Title Protection Not Protected JAN 01 2006 SUN 12:00 1/6 APR/19/2006 Title 01 APR/19/2006 02 APR/19/2006 03 APR/20/2006 04 APR/20/2006 05 APR/21/2006 06 APR/21/2006 OK Length Edit 12:00 12:30 12:00 12:30 12:00 12:30 00:00:21 00:00:03 00:00:15 00:00:16 00:06:32 00:08:16 RETURN Playing Info APR/21/200612:00 PR1 ► ► ► ► ► ► EXIT List öğesinden oynatmak istediğiniz bir 3 Title girişi seçmek için ▲▼ düğmelerine, sonra OK veya ► düğmesine basın. Bölüm oynatmayı durdurmak için STOP 5 düğmesine basın. Bölüm listesi ekranına dönmek için TITLE LIST düğmesine basın. Sağ tarafta Edit menüsü görünür. Title List DVD-RW(VR) 5/6 APR/21/2006 No. APR/21/2006 12:00 PR12 APR/21/2006 SP MOVE OK Title 01 APR/19/2006 02 APR/19/2006 03 APR/20/2006 04 APR/20/2006 05 APR/21/2006 06 APR/21/2006 Length Edit 12:00 00:00:21 12:30 00:00:03 Play 12:00 00:00:15 Rename 12:30 00:00:16 Delete00:06:32 12:00 Edit 00:08:16 12:30 Protection RETURN ► ► ► NOT Oynatma sırasında ANYKEY düğmesine basarak kayıtlı bir programı da oynatabilirsiniz. ► ► ► EXIT DVD-RW(VR) Title 5/6 Time 00: 00: 08 Subtitle Audio (Rename, Delete, Edit, Protection : Bkz. sayfa 70 - 73). Bölüm Listesini oynatacak Play öğesini için ▲▼ düğmelerine basın, daha 4 seçmek sonra OK düğmesine basın. Seçilen giriş (bölüm) oynatılır. ► Off *** Repeat Off Zoom Off MOVE D 1+1 L+R CHANGE Title öğesini seçmek için ▲▼ düğmelerine basın. Bölüm listesini oynatmayı seçmek için ◄ ► düğmelerine, sonra da OK düğmesine basın. Play Oynatma Diskin geçerli durumunu ve oynatmanın ilerleyişini görmek için: INFO düğmesine basın, diskle ilgili bilgiler görünür. DVD-RW(VR) Disc Name Disc Info Total Title 6 Total Playlist 2 Recordable Time 00:28 SP Protection Not Protected Screen Playback JAN 01 2006 SUN 12:00 Türkçe -67 01094N-R135-AND-TUR.indb 67 2006-04-11 오후 4:17:38 Title List Ekran Öğeleri 3 4 DVD-RW(VR) DVD-RW(VR) 1 APR/21/2006 12:00 PR12 APR/21/2006 MOVE 5/6 OK Title List 6 No. Title Length No. EditTitle 01 APR/19/2006 12:00 00:00:21 01 APR/19/2006 ► 02 APR/19/2006 12:30 00:00:03 02 APR/19/2006 ► 03 APR/20/2006 12:00 00:00:15 03 APR/20/2006 ► 04 APR/20/2006 12:30 04 APR/20/2006 ► APR/21/2006 12:00 PR1200:00:16 05 APR/21/2006 12:00 00:06:32 05 APR/21/2006 ► APR/21/2006 06 APR/21/2006 12:30 00:08:16 06 APR/21/2006 ► SP SP 7 Title List APR/21/2006 APR/21/2006 2 5 MOVE RETURN OK EXIT 5/6 Length Edit 12:00 00:00:21 ► 12:30 00:00:03 ► Play Play 00:00:15 ► 12:00 Rename Rename 12:30 00:00:16 ► Delete Delete00:06:32 ► 12:00 Edit Edit 00:08:16 ► 12:30 Protection Protection EXIT 1. Kayıtlı girişler için oynatma ekranı. 2. Seçilen giriş için bilgi penceresi: Bölüm adı, kayıt tarihi, kilit durumu, kayıt modu 3. Kaydedilen giriş No. 4. Kaydedilen giriş bölümü 5. Kayıt uzunluğu (yani oynatma süresi) 6. Bölüm listesi düzenleme öğeleri Play: Seçilen girişi oynatır. Rename : Seçilen giriş bölümünü yeniden adlandırır. Delete : Seçilen girişi listeden siler. Edit : Bir bölüm bölümünü siler. Protection : Seçilen girişi kilitler veya kilidini açar. 7. Düğme göstergesi. Disk tipine bağlı olabilir. DVD-R/DVD-RW(Video) disklerinde sınırlı düzenleme işlevi bulunmaktadır. Oynatma NOT 68- Türkçe 01094N-R135-AND-TUR.indb 68 2006-04-11 오후 4:17:41 Düzenleme Bu bölümde DVD düzenlemesinin temel işlevleri tanıtılmakta ve diske kayıt yapmanın düzenleme işlevleriyle bütün diskin düzenleme işlevleri açıklanmaktadır. Title List Bölüm, kaydedilmiş bir video ve ses bölümüdür. Title List, bir bölüm seçmenize yardımcı olacak bir liste gösterir. Bölüm listesinde, kaydedilen videoyla ilgili aktarımdaki bilgiler bulunduğundan, bir bölüm silindiğinde o bölüm yeniden oynatılamaz. Düzenleme Playlist Title List öğesinin tamamından arzu edilen bir sahne seçerek oluşturulan bir oynatma birimidir. Bir oynatma listesi oynatıldığında, yalnızca kullanıcının seçtiği sahne oynatılır ve durdurulur. Bir oynatma listesinde yalnızca arzu edilen sahneyi oynatmak için gerekli bilgiler bulunduğundan, o oynatma listesi silinse bile orijinal aktarım silinmiş olmaz. Ani güç kesintisi gibi bir hata meydana gelirse kayıt veya düzenleme tamamlanmayabilir. Temel Düzenleme (Bölüm Listesi) ................... 70 Gelişmiş Düzenleme (Oynatma listesi) ............. 74 Lütfen hasarlı bir malzemenin orijinal içeriğine geri alınamayacağını unutmayın. Disk Yöneticisi ................................................... 82 Türkçe -69 01094N-R135-AND-TUR.indb 69 2006-04-11 오후 4:17:42 edilen karakterleri seçmek için 4 Arzu ▲▼◄ ► düğmelerine, sonra da OK düğmesine basın. Temel Düzenleme (Bölüm Listesi) DVD-Recorder Rename DVD-RW(VR) Sports(A1) Bir Bölümün Yeniden Adlandırılması (Etiketlenmesi) Bir bölüm listesi girişini yeniden adlandırmak, yani kayıtlı bir programın bölümünü düzenlemek için şu talimatları uygulayın. TITLE LIST düğmesinin kullanılması 1 TITLE LIST düğmesine basın. Save Space Back Space MOVE OK Delete RETURN Clear EXIT Back Space: İmlecin önündeki karakteri siler. Space: Bir boşluk girip imleci (sağa doğru) bir ileri taşır. Delete: İmlecin konumundaki karakteri siler. Clear: Bütün karakter girişlerini siler. Save: Karakter girişlerini kaydeder. Save öğesini seçmek için ▲▼◄ ► sonra da OK düğmesine 5 düğmelerine, basın. Title List ekranı görünür. MENU düğmesinin kullanılması MENU düğmesine basın. Title List öğesini seçmek için ▲▼ düğmelerine, sonra da iki defa OK veya ► düğmesine basın. Değiştirilen bölüm adı seçilen girişin bölüm öğesinde görünür. Title List DVD-RW(VR) Sports (A1) No. 1/6 No. Title APR/19/2006 SP OK 12:00 12:30 12:00 12:30 12:00 12:30 RETURN 00:00:21 00:00:03 00:00:15 00:00:16 00:06:32 00:08:16 ► ► Sports (A1) ► APR/21/2006 ► Title 01 APR/19/2006 02 APR/19/2006 03 APR/20/2006 04 APR/20/2006 05 Sports (A1) 06 APR/21/2006 Length Edit 01 APR/19/2006 02 APR/19/2006 03 APR/20/2006 04 APR/20/2006 05 APR/21/2006 06 APR/21/2006 APR/19/2006 12:00 PR12 MOVE 5/6 Title List DVD-RW(VR) APR/19/2006 SP Length Edit 12:00 12:30 12:00 12:30 00:00:21 00:00:03 00:00:15 00:00:16 00:06:32 12:30 00:08:16 ► ► ► ► ► ► ► ► MOVE OK RETURN EXIT EXIT Title List öğesinden yeniden adlandırmak istediğiniz bir girişi seçmek için 2 düğmelerine, sonra da OK veya ▲▼ ► düğmesine basın. Title List DVD-RW(VR) APR/21/2006 5/6 No. APR/21/2006 12:00 PR12 APR/21/2006 SP Düzenleme MOVE Title Length Edit 01 APR/19/2006 02 APR/19/2006 03 APR/20/2006 04 APR/20/2006 05 APR/21/2006 06 APR/21/2006 OK 12:00 00:00:21 12:30 Play 00:00:03 12:00 Rename 00:00:15 12:30 00:00:16 Delete 12:00 00:06:32 Edit 12:30 00:08:16 Protection RETURN ► ► ► ► ► ► EXIT Rename öğesini seçmek için 3 düğmesine, sonra da OK düğmesine basın. ▲▼ Rename ekranı görüntülenir. DVD-Recorder Rename DVD-RW(VR) APR/21/2006 12:00 PR12 Save Back Space MOVE Space OK Delete RETURN Clear EXIT 70- Türkçe 01094N-R135-AND-TUR.indb 70 2006-04-11 오후 4:17:44 Bir Bölümü Kilitleme (Koruma) Bir girişi kazayla silinmekten korumak için kilitlerken aşağıdaki talimatları uygulayın. öğesini seçmek için ◄► düğmelerine, 4 On sonra da OK düğmesine basın. Seçilen girişin bilgi ekranındaki anahtar simgesi kilitli duruma getirir. ( ) DVD-RW(VR) Title List Sports (A1) 5/6 No. 01 02 03 04 05 06 TITLE LIST düğmesinin kullanılması Sports(A1) 1 APR/21/2006 TITLE LIST düğmesine basın. SP Title List ekranı görünür. MOVE Title Drama Music Sports Movie Sports(A1) Edu 1 OK RETURN Length Edit 00:00:21 ► 00:00:03 ► 00:00:15 ► 00:00:16 ► 00:06:32 ► 00:08:16 ► EXIT MENU düğmesinin kullanılması MENU düğmesine basın. Title List öğesini seçmek için ▲▼ düğmelerine, sonra da iki defa OK veya ► düğmesine basın. Drama 1/6 No. 01 02 03 04 05 06 Drama APR/19/2006 SP MOVE 2 OK Title Drama Music Sports Movie Sports(A1) Edu 1 Length Edit 00:00:21 ► 00:00:03 ► 00:00:15 ► 00:00:16 ► 00:06:32 ► 00:08:16 ► RETURN TITLE LIST düğmesinin kullanılması EXIT Title List öğesinden korumak istediğiniz bir girişi seçmek için ▲▼ düğmelerine, sonra da OK veya ► düğmesine basın. Title List DVD-RW(VR) 5/6 Sports (A1) No. 01 02 03 04 05 06 Sports (A1) APR/21/2006 SP MOVE OK Title Drama Music Sports Movie Sports(A1) Edu 1 Bir Bölümü Silme Title List öğesinden bir giriş silmek için şu talimatları uygulayın: Title List DVD-RW(VR) Length Edit 00:00:21 ► 00:00:03 ► Play 00:00:15 ► Rename 00:00:16 ► Delete 00:06:32 ► Edit 00:08:16 ► Protection RETURN 1 TITLE LIST düğmesine basın. Title List ekranı görünür. MENU düğmesinin kullanılması MENU düğmesine basın. Title List öğesini seçmek için ▲▼ düğmelerine, sonra da iki defa OK veya ► düğmesine basın. DVD-RW(VR) Title List Drama 1/6 No. 01 02 03 04 05 06 Drama EXIT APR/19/2006 SP MOVE Protection öğesini seçmek için 3 düğmelerine, sonra da OK veya düğmesine basın. ▲▼ ► DVD-RW(VR) Title List Sports (A1) RETURN Length Edit 00:00:21 ► 00:00:03 ► 00:00:15 ► 00:00:16 ► 00:06:32 ► 00:08:16 ► EXIT Title List öğesinden silmek istediğiniz bir 2 girişi seçmek için düğmelerine, sonra da OK veya ► düğmesine basın. ▲▼ 5/6 APR/21/2006 SP OK Title Drama Music Sports Movie Sports(A1) Edu 1 Length Edit 00:00:21 ► 00:00:03 ► Play 00:00:15 ► Rename 00:00:16 ► Delete 00:06:32 ► Edit 00:08:16 ► Protection RETURN EXIT DVD-RW(VR) Title List Sports (A1) 5/6 No. 01 02 03 04 05 06 Sports (A1) APR/21/2006 SP DVD-RW(VR) Title List MOVE OK Title Drama Music Sports Movie Sports(A1) Edu 1 RETURN Düzenleme No. 01 02 03 04 05 06 Sports (A1) MOVE OK Title Drama Music Sports Movie Sports(A1) Edu 1 Length Edit 00:00:21 ► 00:00:03 ► Play 00:00:15 ► Rename 00:00:16 ► Delete 00:06:32 ► Edit 00:08:16 ► Protection EXIT 5/6 Sports (A1) Title Protection : Sports (A1) On APR/21/2006 Off SP MOVE OK RETURN EXIT Türkçe -71 01094N-R135-AND-TUR.indb 71 2006-04-11 오후 4:17:47 Delete öğesini seçmek için ▲▼ 3 düğmelerine, sonra da OK düğmesine basın. DVD-RW(VR) Title List Sports (A1) 5/6 No. 01 02 03 04 05 06 Sports (A1) APR/21/2006 SP MOVE Bölümün Bir Parçasını Silme Bir Title List öğesi girişinin bir bölümünü silmek için şu talimatları uygulayın. OK Title Drama Music Sports Movie Sports(A1) Edu 1 Length Edit 00:00:21 ► 00:00:03 ► Play 00:00:15 ► Rename 00:00:16 ► Delete 00:06:32 ► Edit 00:08:16 ► Protection RETURN EXIT (VR modu) TITLE LIST düğmesinin kullanılması 1 TITLE LIST düğmesine basın. Title List ekranı görünür. Bir onay mesajıyla uyarılırsınız. DVD-RW(VR modu): Oynatma listesi bulunduğundan ‘Do you want to delete? (Related playlists may be deleted.)' mesajı görünür. MENU düğmesinin kullanılması MENU düğmesine basın. Title List öğesini seçmek için ▲▼ düğmelerine, sonra da OK veya ► düğmesine iki defa basın. DVD-RW(VR) DVD-RW(VR) Title List Drama Title List Sports (A1) 1/6 5/6 No. 01 02 03 04 05 06 Do you want to delete? (Related playlists Drama may be deleted.) APR/19/2006 Sports (A1) APR/21/2006 Yes SP No Title Drama Music Sports Movie Sports(A1) Edu 1 Length Edit 00:00:21 ► 00:00:03 ► 00:00:15 ► 00:00:16 ► 00:06:32 ► 00:08:16 ► SP MOVE MOVE OK RETURN OK RETURN EXIT EXIT DVD-RW(Video modu), DVD-R: Oynatma listesi bulunmadığından ‘Do you want to delete?' mesajı görünür. List öğesinden düzenlemek istediğiniz 2 birTitle girişi seçmek için ▲▼düğmelerine, sonra da OK veya ► düğmesine basın. Mesaj, disk tipine bağlı olabilir. DVD-RW(VR) Title List Sports (A1) öğesini seçmek için ◄► düğmelerine 4 Yes ve OK düğmesine basın. 5/6 No. 01 02 03 04 05 06 Sports (A1) APR/21/2006 SP MOVE NOT Korumalı bir girişi silemezsiniz. Korumalı bir girişi silmek istiyorsanız Title Protection menüsündeki “Off” öğesini seçin. (Bkz. sayfa 71) Disc Protection öğesi Protected konuma ayarlanmışsa bölümleri silemezsiniz. (Bkz. sayfa 83) OK Düzenleme DVD-R ile, bölümler yalnızca menüden silinir, ancak Title öğesi fiziksel olarak diskte kalır. Length Edit 00:00:21 ► 00:00:03 ► Play 00:00:15 ► Rename 00:00:16 ► Delete 00:06:32 ► Edit 00:08:16 ► Protection RETURN EXIT öğesini seçmek için ▲▼düğmelerine, 3 Edit sonra da OK veya ► düğmesine basın. Edit Title List ekranı görünür. DVD-RW(VR) Edit Title List Title List öğesinden bir giriş silindiğinde kurtarılamaz. DVD-R, DVD-RW sonlandırıldığında, silinemez. Title Drama Music Sports Movie Sports(A1) Edu 1 Title List No. 05 Start End 00:00:00 00:00:00 00:00:00 ► Start End MOVE Return Delete OK RETURN EXIT 72- Türkçe 01094N-R135-AND-TUR.indb 72 2006-04-11 오후 4:17:51 Başlangıç noktasında OK düğmesine 4 basın. Görüntü ve başlama noktası zamanı, bölüm silme başlangıç noktası penceresinde görünür. 6 Delete öğesindeki OK düğmesine basın. “Do you want to delete? (Deleted part will not be restored.)” mesajı görünür. DVD-RW(VR) DVD-RW(VR) Edit Title List Edit Title List Title List No. 05 Start End Title List No. 05 Start End Do you want to delete? (Deleted part will not be restored.) 00:00:05 00:10:15 00:00:06 00:00:00 Yes 00:00:06 ► Start End MOVE Delete OK Start Return RETURN MOVE Edit Title List 00:00:06 00:00:00 00:00:06 ► Delete OK Return RETURN EXIT Seçilen bölüm silinir. Title List ekranına dönmek için ◄ ► düğmeleriyle Return öğesini seçin. Title List No. 05 Start End MOVE OK 00:10:15 öğesini seçmek için ◄ ► düğmelerine 7 Yes ve OK düğmesine basın. DVD-RW(VR) End No Delete EXIT Title List Ekran Öğeleri Start End Return RETURN EXIT 1. Oynatma çubuğu 2. Oynatma süresi 3. Bölüm silme başlangıç noktası penceresi ve zamanı 4. Bölüm silme bitiş noktası penceresi ve zamanı Oynatmayla ilgili düğmeleri kullanarak silmek istediğiniz bölümün başlangıç ve bitiş noktalarını seçin. Oynatmayla ilgili düğmeler: ( , , , , ). NOT Silinecek bölümün uzunluğu en az 5 saniye olmalıdır. Silinecek bölümün uzunluğu 5 saniyeden daha az olursa “The range is too short.” mesajıyla uyarılırsınız. Bitiş zamanı, başlangıç noktasından önce ise, “End point cannot be marked earlier than start point” mesajıyla uyarılırsınız. Sabit bir resim içeren bölümler silinemez. İşlem bittiğinde MENU düğmesine basın. Edit Title List ekranı kaybolur. 5 Bitiş noktasında OK düğmesine basın. Görüntü ve bitiş noktası zamanı, bölüm silme bitiş noktası penceresinde görünür. DVD-RW(VR) Edit Title List Title List No. 05 End Start 00:00:06 00:10:15 00:10:15 Start End OK Return RETURN Düzenleme MOVE Delete EXIT Türkçe -73 01094N-R135-AND-TUR.indb 73 2006-04-11 오후 4:17:54 5 Bitiş noktasında OK düğmesine basın. Gelişmiş Düzenleme (Oynatma listesi) DVD-Recorder Make Scene DVD-RW(VR) Scene No. 001 Start End Title List : 1/6 Oynatma Listesi Oluşturma 00:10:00 00:10:00 Start Kayıtlı bir bölümden yeni bir oynatma listesi oluşturmak için şu talimatları uygulayın. End MOVE Make OK Return RETURN EXIT Görüntü ve bitiş noktası zamanı, End penceresinde görünür. Sarı renkli seçme çubuğu Make öğesine gider. (VR modu) DVD Kaydedici Stop modundayken MENU 1 düğmesine basın. 2 00:00:10 - Yeni bir oynatma listesi yapmak için - Playlist öğesini seçmek için ▲▼ düğmelerine, sonra da OK veya ► düğmesine basın. DVD-Recorder 6 Make öğesindeki OK düğmesine basın. Geçerli Playlist öğesine yeni bir Scene öğesi eklenir. Yeni bir Make Scene ekranı görünür. Playlist DVD-RW(VR) Title List New Playlist ► Playlist Edit Playlist ► NOT Disc Manager Programme Setup MOVE OK RETURN EXIT New Playlist öğesini seçmek için ▲▼ 3 düğmesine düğmelerine, sonra da OK veya ► basın. Make Scene ekranı görünür DVD-Recorder Make Scene DVD-RW(VR) Scene No. 001 End Start Title List : 1/6 00:00:00 - Edit Playlist menüsüne dönmek için - Return öğesini seçmek için ◄ ► sonra da OK düğmesine 7 düğmelerine, basın. Edit Playlist ekranı görünür. 00:00:00 DVD-RW(VR) 00:00:00 ► Start End MOVE Make OK Edit Playlist APR/25/2006 5/5 Return RETURN DVD-Recorder No. Title Length Edit 01 APR/23/2006 12:00 00:00:21 ► 02 APR/23/2006 12:30 00:00:03 ► 03 APR/24/2006 12:00 00:00:15 ► 04 APR/24/2006 12:30 00:00:16 ► 05 APR/25/2006 12:00 00:00:32 ► EXIT APR/25/2006 12:00 1 Scene APR/25/2006 12:00 noktasında OK düğmesine 4 Başlangıç basın. Düzenleme Edit Playlist ekranından bütün sahneleri kontrol edip izleyebilirsiniz. Yeni bir oynatma listesi yapmak istiyorsanız 1 ile 6 arasındaki adımları tekrarlayın. Oynatma listesinin sahnelerini oluşturmak istiyorsanız 4 ile 6 arasındaki adımları tekrarlayın. MOVE OK RETURN EXIT Make Scene DVD-RW(VR) Scene No. 001 End Start Title List : 1/6 00:00:10 bittiğinde MENU veya PLAY LIST 8 İşlem düğmesine basın. Edit Playlist ekranı kaybolur. 00:00:00 00:00:10 ► Start End MOVE Make OK Return RETURN EXIT NOT Start penceresinde başlangıç noktasındaki görüntü ve zaman görünür. Sarı renkli seçme çubuğu End öğesine gider. Oynatmayla ilgili düğmeleri ( , , , , , , )kullanarak,yeni bir sahne yapmak istediğiniz bölümün başlangıç noktasını seçin. En fazla 99 oynatma listesi girişi oluşturabilirsiniz. Disk türüne bağlı olarak gösterilen ekranın küçük bir farkı olabilir. 74- Türkçe 01094N-R135-AND-TUR.indb 74 2006-04-11 오후 4:17:59 Oynatma Listesindeki Girişlerin Oynatılması Play öğesini seçmek için düğmelerine, 3 sonra da OK düğmesine basın. ▲▼ Oynatma listesi girişlerini oynatmak için şu talimatları uygulayın. ► Play (VR modu) Kaydedici Stop modundayken PLAY 1 DVD LIST düğmesine basın. Edit Playlist ekranı görünür. DVD-RW(VR) Edit Playlist 1/5 APR/23/2006 No. Title Length Edit 01 APR/23/2006 12:00 00:00:21 ► 02 APR/23/2006 12:30 00:00:03 ► 03 APR/24/2006 12:00 00:00:15 ► 04 APR/24/2006 12:30 00:00:16 ► 05 APR/25/2006 12:00 00:00:32 ► APR/23/2006 12:00 1 Scene APR/23/2006 12:00 MOVE Diskin geçerli durumunu ve oynatmanın ilerleyişini görmek için : INFO düğmesine basın, diskle ilgili bilgiler görünür. OK RETURN DVD-RW(VR) Disc Name Total Title Total Playlist Recordable Time Protection Screen JAN 01 2006 SUN EXIT Disc Info 19 5 01:09 SP Not Protected Playback [ Playlist ] 13:00 MENU düğmesinin kullanılması DVD Kaydedici Stop modundayken MENU düğmesine basın. Playlist öğesini seçmek için ▲▼ düğmelerine, sonra da OK veya ► düğmesine basın. Edit Playlist öğesini seçmek için ▲▼ düğmelerine, sonra da OK veya ► düğmesine basın. DVD-Recorder INFO düğmesine bir kez daha basın. Daha sonra, oynatılan oynatma listesiyle ilgili bilgileri kontrol edebilirsiniz. Playlist DVD-RW(VR) Title Menu New Playlist ► Playlist Edit Playlist ► DVD-RW(VR) Name Playing Info APR/24/2006 12:00 PR1 Playlist Created Time Length Playing Time Total scene JAN 01 2006 SUN 3/5 APR/24/2006 12:00 00: 01: 09 SP 00: 00: 08 1 13:00 Disc Manager Programme Setup MOVE 2 OK RETURN Oynatma bittiğinde ekran Edit Playlist ekranına geri döner. EXIT Playlist öğesinden düzenlemek istediğiniz bölümü seçmek için ▲▼ düğmelerine, sonra da OK veya ► düğmesine basın. 4 Oynatmayı durdurmak için STOP düğmesine basın. Ekran Edit Playlist ekranına geri döner. Edit Playlist menüsü görünür : Play, Rename, Edit Scene, Copy, Delete. Edit Playlist 3/5 APR/24/2006 No. Title Length Edit 01 APR/23/2006 12:00 00:00:21 ► 02 APR/23/2006 12:3 Play 00:00:03 ► 03 APR/24/2006 12:0 00:00:15 ► Rename 04 APR/24/2006 12:3 00:00:16 ► Edit Scene 05 APR/25/2006 12:0 Copy 00:00:32 ► APR/24/2006 12:00 1 Scene APR/24/2006 12:00 MOVE Düzenleme DVD-RW(VR) Delete OK RETURN EXIT Türkçe -75 01094N-R135-AND-TUR.indb 75 2006-04-11 오후 4:18:04 Oynatma Listesindeki bir Girişe Yeni İsim Verilmesi Oynatma listesindeki bir girişi yeniden adlandırmak, yani oynatma listesindeki bir girişi düzenlemek için şu talimatları uygulayın. ► düğmelerini kullanarak arzu edi4 ▲▼◄ len karakterleri seçin. DVD-Recorder Rename DVD-RW(VR) Dolphin (VR modu) Save Back Space 1 MOVE DVD Kaydedici Stop modundayken PLAY LIST düğmesine basın. Edit Playlist ekranı görünür. DVD-RW(VR) Edit Playlist 1/5 APR/23/2006 No. Title Length Edit 01 APR/23/2006 12:00 00:00:21 ► 02 APR/23/2006 12:30 00:00:03 ► 03 APR/24/2006 12:00 00:00:15 ► 04 APR/24/2006 12:30 00:00:16 ► 05 APR/25/2006 12:00 00:00:32 ► APR/23/2006 12:00 1 Scene APR/23/2006 12:00 MOVE OK EXIT RETURN Space OK Delete RETURN Clear EXIT Bu işlev bölüm listesini yeniden adlandırmadaki Rename işleviyle aynıdır. (Bkz. Sayfa 70.) Girilebilen maksimum karakter sayısı 31’dir. INFO düğmesine iki defa basarak 31 karakterin tamamı görüntülenebilir. öğesini seçmek için ▲▼◄ ► 5 Save düğmelerine, sonra da OK düğmesine basın. Değiştirilen bölüm, seçilen oynatma listesinin bölüm alanında görünür. MENU düğmesinin kullanılması DVD Kaydedici Stop modundayken MENU düğmesine basın. Playlist öğesini seçmek için ▲▼ düğmelerine, sonra da OK veya ► düğmesine basın. Edit Playlist öğesini seçmek için ▲▼ düğmelerine, sonra da OK veya ► düğmesine basın. DVD-RW(VR) Edit Playlist Dolphin 3/5 No. Title Length Edit 01 APR/23/2006 12:00 00:00:21 ► 02 APR/23/2006 12:30 00:00:03 ► 03 Dolphin 00:00:15 ► 04 APR/24/2006 12:30 00:00:16 ► 05 APR/25/2006 12:00 00:00:32 ► Dolphin 1 Scene APR/24/2006 12:00 MOVE OK RETURN EXIT Playlist öğesinden düzenlemek istediğiniz 2 sonra bölümü seçmek için düğmelerine, da OK veya düğmesine basın. ▲▼ ► Edit Playlist menüsü görünür : Play, Rename, Edit Scene, Copy, Delete. DVD-RW(VR) Edit Playlist APR/24/2006 3/5 No. Title Length Edit 01 APR/23/2006 12:00 00:00:21 ► 02 APR/23/2006 12:30 Play 00:00:03 ► 03 APR/24/2006 12:00 Rename00:00:15 ► 04 APR/24/2006 12:30 00:00:16 ► Edit Scene ► 05 APR/25/2006 12:00 Copy 00:00:32 APR/24/2006 12:00 1 Scene APR/24/2006 12:00 Düzenleme MOVE Delete OK RETURN EXIT öğesini seçmek için 3 Rename sonra da OK düğmesine basın. ▲▼ düğmesine, Rename ekranı görüntülenir. DVD-RW(VR) Edit Playlist APR/24/2006 3/5 No. Title Length Edit 01 APR/23/2006 12:00 00:00:21 ► Play 00:00:03 ► 02 APR/23/2006 12:30 03 APR/24/2006 12:00 00:00:15 ► Rename 04 APR/24/2006 12:30 00:00:16 ► Edit Scene 05 APR/25/2006 12:00 Copy 00:00:32 ► APR/24/2006 12:00 1 Scene APR/24/2006 12:00 MOVE Delete OK RETURN EXIT 76- Türkçe 01094N-R135-AND-TUR.indb 76 2006-04-11 오후 4:18:06 Oynatma listesindeki bir Sahnenin Düzenlenmesi Seçilen bir Sahnenin Oynatılması Bir oynatma listesi için sahne düzenlerken şu talimatları uygulayın. (VR modu) DVD Kaydedici Stop modundayken PLAY düğmesine basın. 1 LIST Edit Playlist ekranı görünür. istediğiniz sahneyi seçmek 4 Oynatmak için ▲▼◄ ► düğmelerine, sonra da OK düğmesine basın. Oynatılacak oynatma listesi girişi seçilir. DVD-Recorder DVD-RW(VR) Scene No. Edit Scene 2/7 Playlist No. 3 Play Modify DVD-RW(VR) Edit Playlist Science 01 00:00:26 02 00:00:07 03 00:00:04 04 00:00:03 05 00:00:11 06 00:00:04 1/4 No. 01 02 03 04 Title Science Sky Dolphin Natural Length Edit 00:00:17 ► 00:00:06 ► 00:00:06 ► 00:00:37 ► Move Add MOVE OK RETURN Delete EXIT Science 1 Scene APR/24/2006 10:43 MOVE OK RETURN EXIT 5 OK düğmesine basın. Seçilen sahne oynatılır. MENU düğmesinin kullanılması DVD Kaydedici Stop modundayken MENU düğmesine basın. Playlist öğesini seçmek için ▲▼ düğmelerine, sonra da OK veya ► düğmesine basın. Edit Playlist öğesini seçmek için ▲▼ düğmelerine, sonra da OK veya ► düğmesine basın. Playlist öğesinden düzenlemek istediğiniz 2 bölümü seçmek için düğmelerine, sonra da OK veya ► düğmesine basın. ▲▼ ► Play Sahne oynatmayı durdurmak için STOP düğmesine basın. Edit Playlist menüsü görünür: Play, Rename, Edit Scene, Copy, Delete. DVD-RW(VR) Edit Playlist 3/4 Dolphin No. 01 02 03 04 Title Length Edit Science 00:00:17 ► Sky 00:00:06 ► Play Dolphin 00:00:06 ► Rename Natural 00:00:37 ► Edit Scene Dolphin 7 Scene APR/24/2006 12:00 MOVE Copy Delete OK RETURN EXIT Scene öğesini seçmek için 3 Edit düğmelerine, sonra da OK düğmesine basın. ▲▼ Edit Scene ekranı görünür. Düzenleme DVD-RW(VR) Edit Playlist Dolphin 3/4 No. 01 02 03 04 Dolphin 7 Scene APR/24/2006 12:00 MOVE Title Length Edit Science 00:00:17 ► Sky 00:00:06 ► Play Dolphin 00:00:06 ► Rename Natural 00:00:37 ► Edit Scene Copy Delete OK RETURN DVD-Recorder EXIT Edit Scene DVD-RW(VR) Scene No. 1/7 Playlist No. 3 Play Modify 01 00:00:26 02 00:00:07 03 00:00:04 04 00:00:03 05 00:00:11 06 00:00:04 Move Add MOVE OK RETURN Delete EXIT Türkçe -77 01094N-R135-AND-TUR.indb 77 2006-04-11 오후 4:18:09 Bir Sahneyi Değiştirme (Başka bir Sahneyle) Ayarlamak için sayfa 77’deki 1-3 adımlarını uygulayın. bitiş noktasında OK düğmesine 7 Sahnenin basın. DVD-Recorder Modify Scene DVD-RW(VR) Scene No. 002 Start End istediğiniz sahneyi seçmek 4 Değiştirmek için ▲▼◄ ► düğmelerine, sonra da OK düğmesine basın. Title List : 5/6 Scene No. 00:00:30 00:00:30 Start Change End MOVE DVD-Recorder DVD-RW(VR) 00:00:25 OK Cancel RETURN EXIT Edit Scene 2/7 Playlist No. 3 Play Görüntü ve bitiş noktası zamanı End penceresinde görünür. Modify 01 00:00:26 02 00:00:07 03 00:00:04 04 00:00:03 05 00:00:11 06 00:00:04 Move Add MOVE OK RETURN Delete EXIT öğesini seçmek için ◄ ► 8 Change düğmelerine, sonra da OK düğmesine basın. DVD-Recorder DVD-RW(VR) 5 Scene No. Modify öğesini seçmek için ▲▼ düğmelerine, sonra da OK düğmesine basın. Modify Scene ekranı görünür. Playlist No. 3 Play Modify 01 00:00:26 02 00:00:05 03 00:00:04 04 00:00:03 05 00:00:11 06 00:00:04 Move Add MOVE DVD-Recorder Edit Scene 2/7 OK RETURN Delete EXIT Modify Scene DVD-RW(VR) Scene No. 002 Start End Title List : 5/6 00:00:00 Değiştirmek istediğiniz sahne, seçilen bölümle değiştirildi. 00:00:00 00:00:00 ► Start End MOVE Change OK Cancel RETURN EXIT Sahnenin başlangıç noktasında OK 6 düğmesine basın. DVD-Recorder Modify Scene DVD-RW(VR) Scene No. 002 Start End Title List : 5/6 00:00:25 Start End MOVE Düzenleme 00:00:00 00:00:25 ► Change OK Cancel RETURN EXIT Görüntü ve başlangıç noktası zamanı, Start penceresinde görünür. Oynatmayla ilgili düğmeleri ( , , , , , , ) kullanarak, değiştirmek istediğiniz bölümün başlangıç veya bitiş noktasını seçin. 78- Türkçe 01094N-R135-AND-TUR.indb 78 2006-04-11 오후 4:18:14 Sahnenin Taşınması (Sahne Konumunun Değiştirilmesi) Seçilen sahneyi bir sonraki sahnenin konumuna taşıyamazsınız, çünkü seçilen sahne o konumun önüne yerleştirilmelidir, bu da herhangi bir eylem gerektirmez. NOT Ayarlamak için sayfa 77’deki 1-3 adımlarını uygulayın. 4 Taşımak (konumunu değiştirmek) istediğiniz sahneyi seçmek için ▲▼◄ ► düğmelerine, sonra da OK düğmesine basın. DVD-Recorder DVD-RW(VR) Scene No. 3/7 Disk türüne bağlı olarak gösterilen ekranın küçük bir farkı olabilir. Sahne Eklenmesi Edit Scene Playlist No. 3 Ayarlamak için sayfa 77’daki 1-3 adımlarını uygulayın. Play Modify 01 00:00:26 02 00:00:07 03 00:00:04 Move Add 04 00:00:03 05 00:00:11 OK MOVE 06 00:00:04 RETURN Delete EXIT yeni bir sahne yerleştirilecek 4 Önüne olan sahneyi seçmek için ▲▼◄ ► düğmelerine, sonra da OK düğmesine basın. Yeni sahne olarak eklenecek sahnenin üzerinde sarı bir seçme penceresi görünür. Move öğesini seçmek için ▲▼ 5 düğmelerine, sonra da OK düğmesine basın. DVD-Recorder DVD-RW(VR) Scene No. DVD-Recorder DVD-RW(VR) Scene No. Playlist No. 3 Play Modify Edit Scene 3/7 Edit Scene 4/7 01 00:00:26 02 00:00:07 03 00:00:04 04 00:00:00 05 00:00:11 06 00:00:04 Playlist No. 3 Add Play Modify 01 00:00:26 02 00:00:07 03 00:00:04 Move MOVE Move OK RETURN Delete EXIT Add 04 00:00:03 05 00:00:11 OK MOVE 06 00:00:04 RETURN Delete EXIT Taşınacak sahnede sarı bir seçme penceresi görünür. sahneyi taşımak istediğiniz konumu seçmek için ▲▼◄ ► düğmelerine, 6 Seçtiğiniz sonra da OK düğmesine basın. DVD-Recorder DVD-RW(VR) Scene No. Add öğesini seçmek için ▲▼ düğmelerine, da OK düğmesine basın. 5 sonra DVD-Recorder Add Scene DVD-RW(VR) Scene No. 004 Start End Title List : 4/6 00:00:00 00:00:00 00:00:00 ► Start End Add OK MOVE Cancel RETURN EXIT Edit Scene 6/7 Playlist No. 3 Play Modify 01 00:00:26 02 00:00:07 03 00:00:04 04 00:00:03 05 00:00:11 06 00:00:04 Move Sahnenin başlangıç noktasında OK 6 düğmesine basın. Add OK RETURN EXIT DVD-Recorder Add Scene DVD-RW(VR) Scene No. 004 Start End Seçilen sahne seçilen konuma taşınır. Title List : 4/6 00:00:15 Scene No. Edit Scene 5/7 Playlist No. 3 00:00:00 00:00:15 ► DVD-Recorder DVD-RW(VR) Düzenleme MOVE Delete Start End MOVE Add OK Cancel RETURN EXIT Play Modify 01 00:00:26 02 00:00:07 03 00:00:04 Move Add 04 00:00:03 MOVE 05 00:00:04 OK 06 00:00:04 RETURN Delete EXIT Görüntü ve başlangıç noktası zamanı, Start penceresinde görünür. Oynatmayla ilgili düğmeleri ( , , , , ) kullanarak, yeni sahneyi eklemek istediğiniz bölümün bitiş noktasını seçin.. Türkçe -79 01094N-R135-AND-TUR.indb 79 2006-04-11 오후 4:18:20 Sahnenin bitiş noktasında OK düğmesine 7 basın. DVD-Recorder Add Scene DVD-RW(VR) Scene No. 004 Start End Title List : 4/6 00:00:15 00:00:35 00:00:35 Start Bir Girişin Oynatma Listesine Kopyalanması End Add MOVE OK Cancel RETURN EXIT Görüntü ve bitiş noktası zamanı, End penceresinde görünür. İptal ederken Cancel öğesini seçmek için ◄ ► düğmelerine, sonra da OK düğmesine basın. PLAY LIST düğmesinin kullanılması Kaydedici Stop modundayken PLAY 1 DVD LIST düğmesine basın. Edit Playlist ekranı görünür. DVD-RW(VR) Edit Playlist Science 1/4 No. 01 Title Science 02 Sky 00:00:06 ► 03 Dolphin 00:00:06 ► 04 Natural 00:00:37 ► Science Length Edit 00:00:17 ► 1 Scene öğesini seçmek için ◄ ► 8 Add düğmelerine, sonra da OK düğmesine basın. DVD-Recorder DVD-RW(VR) Scene No. Edit Scene 4/8 Playlist No. 3 Play Modify 01 00:00:26 02 00:00:07 03 00:00:04 04 00:00:20 05 00:00:03 06 00:00:11 Move Add MOVE OK Delete RETURN APR/23/2006 06:43 MOVE OK RETURN MENU düğmesinin kullanılması DVD Kaydedici Stop modundayken MENU düğmesine basın. Playlist öğesini seçmek için ▲▼ düğmelerine, sonra da OK veya ► düğmesine basın. Edit Playlist öğesini seçmek için ▲▼ düğmelerine, sonra da OK veya ► düğmesine basın. EXIT Eklemek istediğiniz sahne, adım 4’te seçilen sahnenin önüne yerleştirilir. öğesine kopyalamak istediğiniz bölümü seçmek için ▲▼ düğmelerine, 2 Playlist sonra da OK veya ► düğmesine basın. Edit Playlist menüsü görünür: Play, Rename, Edit Scene, Copy, Delete. Sahnenin Silinmesi DVD-RW(VR) Ayarlamak için sayfa 77’deki 1-3 adımlarını uygulayın. 4 EXIT Silmek istediğiniz sahneyi seçmek için ▲▼◄ ► düğmelerine, sonra da OK düğmesine basın. 3/4 No. 01 Title Science Length Edit 00:00:17 ► 02 Sky 03 Dolphin 04 Natural 00:00:06 Play 00:00:06 Rename 00:00:37 Edit Scene Dolphin 7 Scene ► ► ► Copy APR/23/2006 06:43 MOVE DVD-Recorder Edit Playlist Dolphin Delete OK RETURN EXIT Edit Scene DVD-RW(VR) Scene No. 2/7 Playlist No. 3 Play Modify 01 00:00:26 02 00:00:07 03 00:00:04 04 00:00:03 05 00:00:11 06 00:00:04 Move Add Düzenleme MOVE OK RETURN Delete EXIT Copy öğesini seçmek için ▲▼ 3 düğmelerine, sonra da OK düğmesine basın. Seçilen oynatma listeleri kopyalanır. DVD-RW(VR) Edit Playlist Dolphin 5 Delete öğesini seçmek için ▲▼ düğmelerine, sonra da OK düğmesine basın. Dolphin Title Science Length Edit 00:00:17 ► 02 Sky 03 Dolphin 04 Natural 00:00:06 Play 00:00:06 Rename 00:00:37 7 Scene ► ► ► Edit Scene Copy APR/23/2006 06:43 Delete Edit Scene DVD-Recorder DVD-RW(VR) Scene No. 3/4 No. 01 MOVE 2/6 OK RETURN EXIT Playlist No. 3 Play Modify 01 00:00:26 02 00:00:04 03 00:00:03 DVD-RW(VR) Edit Playlist 5/5 Dolphin Move No. 01 02 03 04 05 Add 04 00:00:11 MOVE 05 00:00:04 OK 06 00:00:05 RETURN Delete EXIT Dolphin 7 Scene Title Science Sky Dolphin Natural Dolphin Length Edit 00:00:17 ► 00:00:06 ► 00:00:06 ► 00:00:37 ► 00:00:06 ► APR/23/2006 06:43 MOVE OK RETURN EXIT 80- Türkçe 01094N-R135-AND-TUR.indb 80 2006-04-11 오후 4:18:29 NOT Bir diskte en fazla 999 sahne oluşturabilirsiniz. Bazı durumlarda bu rakam, gerçek rakamlardan farklı olabilir. İşlem bittiğinde MENU düğmesine basın. Edit Playlist ekranı kaybolur. Oynatma Listesinden bir Oynatma Listesi Girişinin Silinmesi PLAYLIST düğmesinin kullanılması 1 Delete öğesini seçmek için 3 düğmelerine, sonra da OK düğmesine basın. ▲▼ DVD-RW(VR) Edit Playlist Dolphin 5/5 No. 01 02 03 04 05 Dolphin 7 Scene Title Science Sky Dolphin Natural Dolphin Delete APR/23/2006 06:43 MOVE OK RETURN Edit Playlist 5/5 Dolphin Edit Playlist ekranı görünür. DVD-RW(VR) Do you want to delete? Edit Playlist Science 1/5 No. 01 02 03 04 05 Science 1 Scene Title Science Sky Dolphin Natural Dolphin Length Edit 00:00:17 ► 00:00:06 ► 00:00:06 ► 00:00:37 ► 00:00:06 ► RETURN EXIT APR/23/2006 06:43 MOVE OK DVD Kaydedici Stop modundayken MENU düğmesine basın. Playlist öğesini seçmek için ▲▼ düğmelerine, sonra da OK veya ► düğmesine basın. Edit Playlist öğesini seçmek için ▲▼ düğmelerine, sonra da OK veya ► düğmesine basın. MOVE öğesinden silmek istediğiniz bölümü 2 Playlist seçmek için düğmelerine, sonra da OK veya düğmesine basın. ▲▼ ► Edit Playlist menüsü görünür : Play, Rename, Edit Scene, Copy, Delete. Edit Playlist 5/5 Dolphin 7 Scene Title Science Sky Dolphin Natural Dolphin OK RETURN EXIT DVD-RW(VR) Length Edit 00:00:17 ► Play00:00:06 ► 00:00:06 ► Rename Edit 00:00:37 Scene ► Copy00:00:06 ► Edit Playlist Dolphin 5/5 Deleting... (Please wait) Dolphin 7 Scene APR/23/2006 06:43 OK RETURN DVD-RW(VR) EXIT Edit Playlist 4/4 Natural No. 01 02 03 04 Title Science Sky Dolphin Natural Length Edit 00:00:17 ► 00:00:06 ► 00:00:06 ► 00:00:37 ► RETURN EXIT Natural 1 Scene APR/23/2006 06:43 MOVE OK Delete APR/23/2006 06:43 MOVE OK Düzenleme No. 01 02 03 04 05 No öğesini seçmek için ◄ ► düğmelerine 4 Yes ve OK düğmesine basın. MOVE Dolphin Yes Dolphin 7 Scene APR/23/2006 06:43 Silme işlemi bittikten sonra otomatik olarak Edit Playlist ekranına döner. MENU düğmesinin kullanılması DVD-RW(VR) EXIT "Do you want to delete?" şeklinde bir silme onay mesajıyla uyarılırsınız. DVD-RW(VR) DVD Kaydedici Stop modundayken PLAY LIST düğmesine basın. Length Edit 00:00:17 ► Play00:00:06 ► 00:00:06 ► Rename Edit 00:00:37 Scene ► Copy00:00:06 ► RETURN EXIT Türkçe -81 01094N-R135-AND-TUR.indb 81 2006-04-11 오후 4:18:37 ► düğmelerini kullanarak arzu edi4 ▲▼◄ len karakterleri seçin. Disk Yöneticisi DVD-Recorder Rename DVD-RW(VR) Disc Disk Adının Düzenlenmesi Save Diske ad vermek için şu talimatları uygulayın. Back Space MOVE Title List DVD-RW(VR) Title List Title List ► Playlist Disc Manager OK Delete Clear RETURN EXIT Bu işlev bölüm listesini yeniden adlandırmadaki Rename işleviyle aynıdır. (Bkz. Sayfa 70.) Girilebilen maksimum karakter sayısı 31’dir. INFO düğmesine basarak 31 karakterin tamamı görüntülenebilir. Kaydedici Stop modundayken MENU 1 DVD düğmesine basın. DVD-Recorder Space öğesini seçmek için ▲▼◄ ► 5 Save düğmelerine, sonra da OK düğmesine basın. Diske bir disk adı verilir. Programme Setup DVD-Recorder MOVE 2 OK RETURN ► Playlist Disc Protection : Not Protected ► Disc Manager Disc Format ► Programme Disc Finalise ► Delete All Title Lists ► OK : DVD-VR RETURN EXIT Disc Manager Title List Disc Name : ► Playlist Disc Protection : Not Protected ► Disc Manager Disc Format ► Programme Disc Finalise ► Delete All Title Lists ► MOVE Disc Name : Disc MOVE DVD-RW(VR) Setup Title List Setup Disc Manager öğesini seçmek için ▲▼ düğmelerine, sonra da OK veya ► düğmesine basın. DVD-Recorder Disc Manager DVD-RW(VR) EXIT OK : DVD-VR RETURN NOT Düzenlemeye başlamadan önce disk korumasını kaldırmanız gerekebilir. Disk türüne bağlı olarak gösterilen ekran farklı olabilir. EXIT Disc Name öğesini seçmek için ▲▼ 3 düğmesine düğmelerine, sonra da OK veya ► basın. Edit Name ekranı görünür. DVD-Recorder Rename Düzenleme DVD-RW(VR) Save Back Space MOVE Space OK Delete RETURN Clear EXIT 82- Türkçe 01094N-R135-AND-TUR.indb 82 2006-04-11 오후 4:18:40 Disk Koruma Disk Biçimlendirme Disk Koruma ile disklerinizi yanlışlıkla biçimlendirilmeden veya silinmekten koruyabilirsiniz. DVD Kaydedici Stop modundayken MENU 1 düğmesine basın. Disk biçimlendirmek için şu talimatları uygulayın. Disk koruma da temizlenmelidir. Kaydedici Stop modundayken MENU 1 DVD düğmesine basın. DVD-Recorder DVD-Recorder Title List DVD-RW(VR) Title List Title List Title List ► Playlist Title List DVD-RW(VR) Title List ► Playlist Disc Manager Disc Manager Programme Programme Setup Setup MOVE OK MOVE 2 RETURN Disc Manager öğesini seçmek için ▲▼ düğmelerine, sonra da OK veya ► düğmesine basın. DVD-Recorder Disc Manager DVD-RW(VR) Title List Disc Name : DVD-Recorder Disc Name : Playlist Disc Protection : Not Protected ► Disc Manager Disc Format ► Disc Finalise ► Delete All Title Lists ► ► Disc Manager Disc Format ► Programme Programme Disc Finalise ► Setup Delete All Title Lists ► : DVD-VR Disc Manager DVD-RW(VR) ► MOVE OK RETURN Disc Manager RETURN EXIT Format öğesini seçmek için ▲▼ 3 Disc düğmelerine, sonra da OK veya ► düğmesine basın. DVD-Recorder Disc Manager DVD-RW(VR) Title List Disc Name : Playlist Disc Protection : Not Protected ► Disc Manager Disc Format ► Programme Disc Finalise ► ► Disc Finalise Setup Delete All Title Lists ► ► Delete All Title Lists ► DVD-RW(VR) Title List Disc Name : Playlist Disc Protection Not Protected ► Disc Manager Disc Format Protected Programme Setup OK ► : DVD-VR EXIT Disc Protection öğesini seçmek için 3 ▲▼ düğmelerine, sonra da OK veya ► düğmesine basın. DVD-Recorder EXIT Title List Disc Protection : Not Protected MOVE RETURN Disc Manager öğesini seçmek için 2 ▲▼ düğmelerine, sonra da OK veya ► düğmesine basın. Playlist Setup OK EXIT ► OK MOVE MOVE OK RETURN ► : DVD-VR RETURN DVD-RW “Choose the recording format for DVD-RW.” onay mesajıyla uyarılırsınız. DVD-Recorder Disc Manager DVD-RW(VR) Disc Manager DVD-RW(VR) Title List Disc Name : ► ► Playlist Disc Protection : Not Protected ► Disc Protection : Protected ► Disc Format : DVD-VR Disc Manager Choose the recording format for DVD-RW Disc Manager Disc Format ► Programme Disc Finalise ► Delete All Title Lists ► Title List Disc Name : Playlist Setup : DVD-VR OK RETURN ► Programme Disc Finalize ► Setup Delete All Title Lists DVD-VR DVD-V ► MOVE MOVE Düzenleme öğesini seçmek için ▲▼ 4 Protected düğmelerine, sonra da OK düğmesine basın. DVD-Recorder EXIT EXIT OK RETURN EXIT EXIT Türkçe -83 01094N-R135-AND-TUR.indb 83 2006-04-11 오후 4:18:43 Arzu edilen modu seçmek için ◄ ► 4 düğmelerine, sonra da OK düğmesine basın. “All data will be deleted. Do you want to continue?” mesajıyla yeniden uyarılırsınız. Disc Manager öğesini seçmek için 2 ▲▼ düğmelerine, sonra da OK veya ► düğmesine basın. DVD-Recorder Disc Manager DVD-RW(VR) DVD-Recorder Disc Manager DVD-RW(VR) Title List Disc Name : ► Playlist Disc Protection : Not Protected ► All data will :be deleted. Format DVD-VR Disc Manager Disc Do you want to continue? Programme Disc Finalize Setup Delete Yes All Title Lists No MOVE 5 OK RETURN Title List Disc Name : Playlist Disc Protection : Not Protected ► Disc Manager Disc Format ► Programme Disc Finalise ► Delete All Title Lists ► Setup ► ► : DVD-VR ► MOVE ► OK RETURN EXIT EXIT Yes öğesini seçmek için ◄ ► düğmelerine ve OK düğmesine basın. Disk biçimlendirilmiştir. All Title Lists öğesini seçmek için 3 Delete ▲▼ düğmelerine, sonra da OK veya ► düğmesine basın. DVD-Recorder Disc Manager DVD-RW(VR) DVD-VR ile DVD-V, kendi kayıt biçimlerine göre tanımlanır. DVD-VR DVD-V DVD-RW DVD-R DVD-RW DISC Title List Disc Name : Playlist Disc Protection : Not Protected ► Disc Manager Disc Format ► Programme Setup ► : DVD-VR Disc Finalse ► Delete All Title Lists ► MOVE OK RETURN EXIT “Do you want to delete all title lists?” şeklinde bir onay mesajıyla uyarılırsınız. Tüm Bölüm Listelerinin Silinmesi DVD-Recorder Disc Manager DVD-RW(VR) Title List Disc Name : ► Playlist Disc Protection : Not Protected ► Disc Format : DVD-VR Disc Manager Do you want to delete all title lists? Programme Disc Finalize 1 DVD Kaydedici Stop modundayken MENU düğmesine basın. DVD-Recorder Title List DVD-RW(VR) Title List Title List ► Playlist Disc Manager Programme Setup MOVE OK RETURN EXIT Setup MOVE Delete Yes All Title Lists No OK RETURN ► ► ► EXIT Korumalı Giriş bulunuyorsa: Delete All Title List işlevi çalışmaz. Sabit bir resim içeren bir bölüm olsa da bu işlev çalışmaz. Korumalı bir giriş silmek istiyorsanız Lock öğesindeki Protect seçeneğini devre dışı bırakın. öğesini seçmek için ◄ ► düğmelerine 4 Yes ve OK düğmesine basın. Düzenleme Bütün bölüm listeleri silinir. 84- Türkçe 01094N-R135-AND-TUR.indb 84 2006-04-11 오후 4:18:45 Diskin Sonlandırılması “Do you want to finalise disc?” mesajıyla uyarılırsınız. DVD Kaydedicinizle bir DVD-RW/DVD-R disk üzerine bölümleri kaydettikten sonra, diskin harici cihazlarda oynatılmadan önce sonlandırılması gerekmektedir. 1 DVD-Recorder Disc Manager DVD-RW(VR) Title List Disc Name : ► Playlist Disc Protection : Not Protected ► Disc Format : DVD-VR Disc Manager Do you want to finalise disc? Disc Finalize Programme DVD Kaydedici Stop modundayken MENU düğmesine basın. Setup Delete Yes All Title Lists No OK MOVE DVD-Recorder ► ► RETURN EXIT Title List Yes seçeneğini seçerseniz yeniden “Disc will be finalised. Do you want to continue?” mesajıyla uyarılırsınız. DVD-RW(VR) Title List ► Title List ► Playlist Disc Manager Programme Setup DVD-Recorder Disc Manager DVD-RW(VR) MOVE 2 OK RETURN EXIT Disc Manager öğesini seçmek için ▲▼ düğmelerine, sonra da OK veya ► düğmesine basın. DVD-Recorder Title List Disc Name : ► Playlist Disc Protection : Not Protected ► Disc Manager Programme Disc will be: finalised. Disc Format DVD-VR Do you want to continue? Disc Finalize Setup Delete Yes All Title Lists No MOVE OK RETURN ► ► ► EXIT Disc Manager DVD-RW(VR) Title List Disc Name : Playlist Disc Protection : Not Protected ► Disc Manager Disc Format ► Programme Disc Finalise ► Delete All Title Lists ► Setup MOVE OK ► : DVD-VR RETURN seçmek için ◄ ► düğmelerine 4 veYesOKöğesini düğmesine basın. Disk sonlandırılmıştır. EXIT NOT 3 Disc Finalise öğesini seçmek için ▲▼ düğmelerine, sonra da OK veya ► düğmesine basın. DVD-Recorder Disc Manager DVD-RW(VR) Title List Disc Name : ► Playlist Disc Protection : Not Protected ► Disc Manager Disc Format ► Programme Disc Finalise ► Delete All Title Lists ► Setup MOVE OK : DVD-VR RETURN DVD-Recorder Disk sonlandırıldığında kayıt listesinden girişleri silemezsiniz. DVD-R/DVD-RW(video modu) sonlandırıldıktan sonra bir DVD-Video gibi çalışır. Disk tipine bağlı olarak görüntülenen ekran farklı olabilir. Diskte kayıtlı veri miktarına bağlı olarak sonlandırma süresi farklı olabilir. Sonlandırma işlemi sırasında kaydedici kapatılırsa diskteki veri zarar görecektir. EXIT Disc Manager DVD-R(V) Disc Name : ► Disc Manager Disc Protection : Not Protected ► Programme Disc Finalise ► Setup Delete All Title Lists ► MOVE OK RETURN Düzenleme Title List EXIT Türkçe -85 01094N-R135-AND-TUR.indb 85 2006-04-11 오후 4:18:47 Disk Sonlandırmanın geri alınması (V/VR Modu) Kaydedici Stop modundayken MENU 1 DVD düğmesine basın. DVD-Recorder Diskte sonlandırılma kaldırılır. NOT Bir DVD-RW diski Video modunda sonlandırılabilir veya sonlandırılması kaldırılabilir. Title List DVD-RW(VR:F) Title List öğesini seçmek için ◄ ► düğmelerine 4 Yes ve OK düğmesine basın. Title List ► Playlist Disc Manager Sonlandırma Sonlandırmayı Kaldırma İşaret DVD-Video(RW) İşlem DVD-Video ile aynı DVD-RW(V) Ek kayıt, silme, düzenleme ve koruma mümkün değildir. Programme Setup MOVE OK RETURN EXIT Disc Manager öğesini seçmek için 2 ▲▼ düğmelerine, sonra da OK veya ► düğmesine basın. DVD-Recorder Disc Manager DVD-RW(VR:F) Title List Disc Name : Disc ► Playlist Disc Format : DVD-VR ► Disc Manager Disc Unfinalise ► Bir DVD-RW diski Video modunda sonlandırılabilir veya sonlandırması kaldırılabilir. Sonlandırma Sonlandırmayı Kaldırma İşaret DVD-RW(VR:F) DVD-RW(VR) İşlem Ek kayıt, silme, düzenleme ve koruma mümkündür. Ek kayıt, silme, düzenleme ve koruma mümkün değildir. Programme Setup MOVE OK RETURN EXIT Disc Unfinalise öğesini seçmek için düğmelerine, sonra da OK veya ► 3 ▲▼ düğmesine basın. “Do you want to unfinalise disc?” mesajıyla uyarılırsınız. DVD-Recorder Disc Manager DVD-RW(VR:F) Title List Disc Name : Disc ► Playlist Disc Protection : Not Protected ► Format : DVD-VRdisc? you want to unfinalise Disc Manager DoDisc Programme Yes Setup OK MOVE Düzenleme ► Disc Finalize No RETURN EXIT Yes seçeneğini seçerseniz yeniden “Disc will be unfinalised. Do you want to continue?” mesajıyla uyarılırsınız. DVD-Recorder Disc Manager DVD-RW(VR:F) Title List Disc Name : Disc ► Playlist Disc Protection : Not Protected ► DiscFormat will be unfinalised. : DVD-VR Disc Manager Disc Do you want to continue? Programme Disc Finalize Setup MOVE Yes OK ► No RETURN EXIT 86- Türkçe 01094N-R135-AND-TUR.indb 86 2006-04-11 오후 4:18:50 Sorun Giderme Ek Bilgiler DVD Kaydediciniz arızalanırsa bir Samsung yetkili servis merkeziyle temas kurmadan önce denetim noktalarını gözden geçirin. Güç Güç açıkken giriş bir süre görünür. Denetim noktası 1 DVD Kaydediciyi başlatmak için bir süre beklemeniz gerekmektedir, giriş açıldıktan sonra yaklaşık 10 saniye boyunca görünür. Kayıt TV programlarını kaydedemiyor. Denetim noktası 1 Güç kablosunun prize tam olarak takılıp takılmadığını kontrol edin.. Denetim noktası 2 DVD kaydedici kanal ayarlarını doğru yaptınız mı? Denetim noktası 3 DVD-RW/DVD-R disklerinizdeki boş alanı kontrol edin. REC düğmesine bastım ama yanıt gelmedi. Denetim noktası 1 Kayıt yalnızca DVD-RW/DVD-R diskleri için geçerlidir. Bir program kopya korumalıysa kaydedilemez. Ek Bilgiler Sorun Giderme ................................................ 87 Teknik Özellikler .............................................. 91 Türkçe -87 01094N-R135-AND-TUR.indb 87 2006-04-11 오후 4:18:51 Oynatma Açı işlemi bir DVD diski oynatırken gerçekleşmez. Diski oynatamıyor. Denetim noktası 1 Denetim noktası 1 Diskin etiketi yukarı gelecek şekilde doğru olarak yerleştirilip yerleştirilmediğini kontrol edin. Denetim noktası 2 DVD diskinin bölge kodunu kontrol edin. Denetim noktası 3 Bu DVD kaydedici bazı disk tiplerini oynatamaz. (Bkz. sayfa 5, 50) Ekranda Denetim noktası 1 simgesi görünür. Açı işlemi yalnızca diskte farklı açılardan çekilmiş görüntüler bulunduğunda mevcuttur. Seçilen ses ve/veya altyazı dili oynatılmıyor. Denetim noktası 1 Ses ve altyazı dilleri diske özgüdür. Yalnızca DVD disklerindeki ses ve altyazı dilleri mevcuttur ve disk menüsünde görünür. Bu işlemi veya işlevi aşağıdaki nedenlerden biri yüzünden kullanamazsınız: (1) DVD diskiniz buna kısıtlama getirir. (2) DVD diskiniz bu özelliği desteklemiyor (örneğin: açılar) (3) Bu özellik şu anda mevcut değil. (4) Aralık dışında bir bölüm, alt bölüm veya tarama süresi talep ettiniz. Play modu ayarları, Settings menüsünde yapılandırılan ayarlardan farklıdır. Denetim noktası 1 Disk seçilen bütün işlevleri desteklemiyor. Bu durumda ayarlar menüsünde yapılandırılmış olan bazı ayarlar düzgün çalışmayabilir. En-boy oranını değiştiremiyor. En-boy oranı DVD disklerinde sabittir. (Bkz. sayfa 36) Ek Bilgiler Denetim noktası 1 88- Türkçe 01094N-R135-AND-TUR.indb 88 2006-04-11 오후 4:18:53 Video Zamanlayıcı ile Kayıt Disk dönüyor ama görüntü yok veya düşük kalitede görüntüler görünüyor. Zamanlayıcı lambası yanıp sönüyor. Denetim noktası 1 Video Ayarlarının düzgün ayarlandığından emin olun. (Bkz. sayfa 34-37) Denetim noktası 2 Disk üzerinde hasar veya herhangi bir yabancı madde olup olmadığını kontrol edin. Denetim noktası 3 Bazı düşük kaliteli diskler düzgün çalışmayabilir. Denetim noktası 4 Sahneler aniden karanlıktan aydınlığa dönüşüyorsa ekran geçici bir süre dikey olarak titreyebilir ancak bu bir arıza değildir. Denetim noktası 1 Denetim noktası 2 Geçerli diskin kaydedilebilir olup olmadığını kontrol edin. Kaydın başlama zamanından önce kontrol ettiğinizden emin olun. Zamanlayıcı ile kayıt düzgün çalışmıyor. Denetim noktası 1 Ses Diskte kayıt için yeterince alan olup olmadığını kontrol edin. Denetim noktası 2 Kayıt zamanı ve bitiş zamanı ayarlarını tekrar kontrol edin. Kayıt sırasında herhangi bir nedenden dolayı güç kesintiye uğramışsa kayıt iptal edilir. Ses yok. Denetim noktası 1 Denetim noktası 2 Denetim noktası 3 Denetim noktası 4 Yavaş veya atlama modunda bir program mı izliyorsunuz? Normal veya fast 1 hızından başka bir hızda program izliyorsanız ses duyulmaz. HDMI HDMI çıkışı yok. Bağlantıları ve ayarları kontrol edin. (Bkz. sayfa 20-21, 32-33) Diskte hasar olup olmadığını kontrol edin. Gerekiyorsa diski temizleyin. Diskin etiketi yukarı gelecek şekilde doğru olarak yerleştirilip yerleştirilmediğini kontrol edin. Kontrol noktası 1 Video çıkışının HDMI etkin olup olmadığını kontrol edin. Kontrol noktası 2 Televizyon ile DVD Kaydedici cihazının HDMI jakı arasındaki bağlantıyı kontrol edin. Kontrol noktası 3 Televizyonunuzun bu 576p/720p/1080i DVD Kaydedici cihazını destekleyip desteklemediğine bakın. Ses çıkışı yok. Anormal HDMI çıkış ekranı. Denetim noktası 1 Kontrol noktası 1 Ekranda karlı görüntü olursa televizyon HDCP’yi (Yüksek Dalga Boylu Dijital İçerik Koruma) desteklemiyor demektir. Ek Bilgiler Audio Output Options menüsündeki doğru dijital çıkış seçeneklerini seçip seçmediğinizi kontrol edin. (Bkz. sayfa 33.) Türkçe -89 01094N-R135-AND-TUR.indb 89 2006-04-11 오후 4:18:55 HDMI çıkış Titremesi Diğer Ebeveyn gözetim şifremi unuttum. Kontrol noktası 1 Televizyon sistem ayarlarınızı kontrol edin. Kontrol noktası 2 Ekran Titremesi, çerçeve hızı 720p/1080i HDMI (Yüksek Tanımlı Çoklu Ortam Arabirimi) Çıkış için 50Hz değerinden 60Hz'e dönüştürüldüğünde ortaya çıkabilir. Kontrol noktası 3 Lütfen televizyonunuzun kullanma kılavuzuna başvurun. Denetim noktası 1 DVD Kaydedicinin ön panelindeki PROG ( ) düğmelerine, DVD Kaydedicide disk yokken aynı anda basın ve en az 5 saniye basılı tutun. Şifre dahil bütün ayarlar, fabrika ayarlarına geri dönecektir. Bunu, gerekli olmadığı sürece kesinlikle kullanmayın. (Bu işlevin yalnızca disk yerleştirilmemişken mümkün olduğunu unutmayın.) Uzaktan Kumanda Birimi Uzaktan kumanda çalışmıyor. Denetim noktası 1 Uzaktan kumandayı, DVD kaydedicinizdeki uzaktan kumanda sensörüne doğru yöneltin. Arada uygun mesafe bırakın. DVD kaydediciniz ve uzaktan kumanda arasındaki engelleri kaldırın. Denetim noktası 2 Pillerin boş olup olmadığını kontrol edin. Denetim noktası 3 TV/DVD seçme düğmesini kontrol edin. Kayıtlı bir diskte altyazı ve ses sinyalini değiştirmek mümkün müdür? Denetim noktası 1 Kayıtlı bir disk yalnızca kayıt sırasında seçilen altyazı ve ses sinyalleriyle oynatılır. Diğer sorunlar. Denetim noktası 1 İçindekiler kısmını okuyun ve sorununuzu tanımlayan bölümü bulun ve okuyun, daha sonra da verilen talimatları uygulayın. DVD Kaydedicinizi kapatıp açın. Denetim noktası 3 Sorun devam ederse yakındaki bir Samsung servis merkeziyle temas kurun. Ek Bilgiler Denetim noktası 2 90- Türkçe 01094N-R135-AND-TUR.indb 90 2006-04-11 오후 4:18:56 Teknik Özellikler Güç gereksinimleri AC 220-240V, 50Hz Güç sarfiyatı 21 Watt Ağırlık Genel 2,6 kg Boyutlar 430mm(W) x 240mm(D) x 49mm(H) Çalışma sıcaklığı +5°C ile +35°C arası Diğer koşullar Çalıştırırken seviyeyi koruyun. %75’ten az çalışma nem oranı Kompozit Video : 75 Ω yüklü 1.0 V p-p, eşitleme negatif Video Maksimum Ses Giriş Seviyesi : 2Vrms Ses IEEE 1394(4p) uyumlu jak DV Girişi Giriş PAL B/G, D/K, I Alınabilir Kanallar Scart Jakı AV2 (Scart Ext) Video : Kompozit RGB Ses: analog Analog çıkış jakları x 2 Ses Optik/Koaksiyel dijital ses çıkışı Kompozit Video : Video çıkış jakı x 1 Çıkış S-Video çıkışı x 1 (Y:1.0Vp-p, C:75Ω yüklü 0.286Vp-p) Video Ek cihaz çıkışı x 1 (Y: 1.0Vp-p, Pb: 0.70Vp-p, Pr: 75Ω yüklü 0.70Vp-p ) HDMI/DVI çıkışı x 1 (576p, 720p, 1080i) Scart Jakı AV1 (Scart TV) Resim Sıkıştırma biçimi MPEG-II Ses Sıkıştırma biçimi Kayıt Video:Kompozit RGB Ses : analog Dolby Dijital 2ch/256Kbps, MPEG-II XP (yaklaşık 8 Mbps), SP (yaklaşık 4 Mbps), LP (yaklaşık 2 Mbps), Kayıt Kalitesi EP (yaklaşık 1.2 Mbps veya yaklaşık 0,8 Mbps) Ses Frekans Yanıtı Ses Çıkışı 20 Hz ~ 20 Hz DVD disklerinde 96 kHz örnekleme frekansında kaydedilen ses sinyalleri 48 kHz’e dönüştürülür. Disk Tipi DVD SES CD’si (CD-DA) Analog Ses Çıkışı 48 / 96kHz 44,1kHz Dijital Ses Çıkışı 48kHz 44,1kHz Ek Bilgiler Türkçe -91 01094N-R135-AND-TUR.indb 91 2006-04-11 오후 4:18:58 Contact SAMSUNG WORLD WIDE If you have any questions or comments relating to Samsung products, please contact the SAMSUNG customer care centre. Region North America Latin America Europe CIS Country CANADA MEXICO U.S.A ARGENTINE BRAZIL CHILE COSTA RICA ECUADOR EL SALVADOR GUATEMALA JAMAICA PANAMA PUERTO RICO REP. DOMINICA TRINIDAD & TOBAGO VENEZUELA BELGIUM CZECH REPUBLIC DENMARK FINLAND FRANCE GERMANY HUNGARY ITALIA LUXEMBURG NETHERLANDS NORWAY POLAND PORTUGAL SLOVAKIA SPAIN SWEDEN U.K RUSSIA UKRAINE AUSTRALIA CHINA HONG KONG INDIA Asia Pacific INDONESIA JAPAN MALAYSIA PHILIPPINES SINGAPORE THAILAND Middle East & Africa 01094N-R135-AND-TUR.indb 92 TAIWAN VIETNAM SOUTH AFRICA U.A.E Customer Care Centre 1-800-SAMSUNG (7267864) 01-800-SAMSUNG (7267864) 1-800-SAMSUNG (7267864) 0800-333-3733 0800-124-421 800-726-7864(SAMSUNG) 0-800-507-7267 1-800-10-7267 800-6225 1-800-299-0013 1-800-234-7267 800-7267 1-800-682-3180 1-800-751-2676 1-800-7267-864 1-800-100-5303 02 201 2418 844 000 844 38 322 887 09 693 79 554 08 25 08 65 65 (0,15€/Min) 01805 - 121213 (€ 0,12/Min) 06 40 985 985 199 153 153 02 261 03 710 0900 20 200 88 (€ 0.10/Min) 231 627 22 0 801 801 881 80 8 200 128 0850 123 989 902 10 11 30 08 585 367 87 0870 242 0303 8-800-200-0400 8-800-502-0000 1300 362 603 800-810-5858, 010- 6475 1880 2862 6001 3030 8282 1600 1100 11 0800-112-8888 0120-327-527 1800-88-9999 1800-10-SAMSUNG (7267864) 1800-SAMSUNG (7267864) 1800-29-3232 02-689-3232 0800-329-999 1 800 588 889 0860 7267864 (SAMSUNG) 800SAMSUNG (7267864) Web Site www.samsung.com/ca www.samsung.com/mx www.samsung.com www.samsung.com/ar www.samsung.com/br www.samsung.com/cl www.samsung.com/latin www.samsung.com/latin www.samsung.com/latin www.samsung.com/latin www.samsung.com/latin www.samsung.com/latin www.samsung.com/latin www.samsung.com/latin www.samsung.com/latin www.samsung.com/latin www.samsung.com/be www.samsung.com/cz www.samsung.com/dk www.samsung.com/fi www.samsung.com/fr www.samsung.de www.samsung.com/hu www.samsung.com/it www.samsung.lu www.samsung.com/nl www.samsung.com/no www.samsung.com/pl www.samsung.com/pt www.samsung.com/sk www.samsung.com/es www.samsung.com/se www.samsung.com/uk www.samsung.ru www.samsung.com/ur www.samsung.com/au www.samsung.com.cn www.samsung.com/hk www.samsung.com/in www.samsung.com/id www.samsung.com/jp www.samsung.com/my www.samsung.com/ph www.samsung.com/sg www.samsung.com/th www.samsung.com/tw www.samsung.com/vn www.samsung.com/za www.samsung.com/mea 2006-04-11 오후 4:18:59 Bu Ürünün Doğru Şekilde Atılması (Elektrik& Elektronik Cihaz Atığı) (Avrupa Birliği ve ayrı toplama gerektiren Avrupa ülkelerinde uygulanır) Ürünün, kutusunun ya da garantisinin üzerinde görünen bu sembol, bu ürünün genel belediye çöplüklerine atılmaması gerektiğini gösterir. Kontrolsüz çöp atımı sonucunda oluşabilecek çevre ve insan sağlığına yönelik olası olumsuz etkenleri azaltmak için bunu diğer çöplerden ayrı tutun. ve doğal kaynakları korumak için geri dönüştürün. Ev kullanıcıları için: Ulaşabileceğiniz dönüşüm ve toplama sistemleri hakkında detaylı bilgi için lütfen atıklarla ilgili kuruma ya da ürünü satın aldığınız yetkili firmaya başvurunuz. İş sahipleri için: Ürün sağlayıcınıza başvurun ve satın alma sözleşmesindeki şartları kontrol edin. Bu ürün diğer çöp ve atıklarla karıştırılmamalıdır. English Türkçe 01094N-R135-AND-TUR.indb 92 AK68-01094N-00 2006-04-11 오후 4:19:03